Sitecore CMS Modules Web Forms for Marketers 2 Rev: 2009-12-01 Sitecore® is a registered trademark. All other brand and product names are the property of their respective holders. The cont ents of this document are the property of Sitecore. Copyright © 2001-2009 Sitecore. All rights reserved. Sitecore CMS Modules Web Forms for Marketers 2 Reference Book

Welcome message from author
This document is posted to help you gain knowledge. Please leave a comment to let me know what you think about it! Share it to your friends and learn new things together.
Transcript

Sitecore CMS Modules Web Forms for Marketers 2 Rev: 2009-12-01
Sitecore® is a registered trademark. All other brand and product names are the property of their respective holders. The contents of this document are the property of Sitecore. Copyright © 2001-2009 Sitecore. All rights reserved.
Sitecore CMS Modules
Web Forms for Marketers 2 Reference Book

Sitecore CMS Modules Web Forms for Marketers 2
Sitecore® is a registered trademark. All other brand and product names are the property of their respective holders. The contents of this document are the property of Sitecore. Copyright © 2001-2009 Sitecore. All rights reserved.
Page 2 of 36
Table of Contents
Chapter 1 Introduction ................................................................................................................................ 3 Chapter 2 Using the Module ...................................................................................................................... 4
2.1 Understanding Web Form Storage ............................................................................................... 5 2.2 Creating a New Form .................................................................................................................... 6
2.2.1 Security ..................................................................................................................................... 6 2.3 Restricting Placeholders Shown in the Placeholder List ............................................................... 7 2.4 Form Field Types .......................................................................................................................... 8 2.5 Validations ................................................................................................................................... 13 2.6 Submit Actions ............................................................................................................................ 15
2.6.1 Form Verification ..................................................................................................................... 15 Creating a New Form Verification action ......................................................................................... 15 Changing the Form Verification Error Message ............................................................................... 16
2.6.2 Save Actions ........................................................................................................................... 16 2.6.3 Success ................................................................................................................................... 16 2.6.4 Form Dropout Tracking ........................................................................................................... 16
2.7 Reports ........................................................................................................................................ 17 2.7.1 Data ......................................................................................................................................... 17 2.7.2 Summary ................................................................................................................................. 17
2.8 Events and the Session Trail ...................................................................................................... 18 2.9 Multi-site Implementation ............................................................................................................ 19 2.10 Staging Environment ................................................................................................................... 20 2.11 Running Webforms in Live Mode ................................................................................................ 21
Chapter 3 Web Forms Developer’s Notes ............................................................................................... 22 3.1 How to Extend/Override Standard Functionality ......................................................................... 23 3.2 How to Add a New Field Type..................................................................................................... 25 3.3 How to Create a Save Action ...................................................................................................... 30 3.4 How to Use CSS Themes ........................................................................................................... 32 3.5 How to Load Items from the Content Tree to a List Control ....................................................... 33 3.6 How to Export to ASCX ............................................................................................................... 34 3.7 How to Add an ASCX Control to the Page .................................................................................. 35 3.8 How to Configure a Data Provider .............................................................................................. 36

Sitecore CMS Modules Web Forms for Marketers 2
Sitecore® is a registered trademark. All other brand and product names are the property of their respective holders. The contents of this document are the property of Sitecore. Copyright © 2001-2009 Sitecore. All rights reserved.
Page 3 of 36
Chapter 1
Introduction
This document is designed for Sitecore administrators and contains information on setting up the module. For more detailed end users instructions, please read the Web Form User Guide.
The Web Forms for Marketers module is designed to create simple forms in a blink of an eye and in a user-friendly manner. The Web Forms for Marketers module provides users with Web analytics and reporting capabilities. It also records and reports user information provided in forms in both failure and success scenarios. The module interacts with the Online Marketing Suite solution package installed on CMS 6.
The module can be configured so that forms have only a few adjustable parameters thus making the user interface as simple as possible. For instance, the basic options cover the most frequent needs of a regular Web site editor such as creating basic input fields (text boxes, checkboxes), basic actions (save to a database, send an email) and basic validators (RequiredField validator, Email address validator, and so on).
More complex forms can be developed based on a form generated by this module. There
is an option to convert the form into a sublayout (.ascx file), so that developers can edit
this sublayout using common development tools like Visual Studio. Assuming that most forms on a Website are simple and straightforward, creating and managing them should also be simple and straightforward.
Here is an example of a form created with this module:

Sitecore CMS Modules Web Forms for Marketers 2
Sitecore® is a registered trademark. All other brand and product names are the property of their respective holders. The contents of this document are the property of Sitecore. Copyright © 2001-2009 Sitecore. All rights reserved.
Page 4 of 36
Chapter 2
Using the Module
This chapter describes the functionality of the module.
This chapter contains the following sections:
Understanding Web Form Storage
Creating a New Form
Restricting Placeholders Shown in the Placeholder List
Form Field Types
Validations
Submit Actions
Reports
Events and the Session Trail
Multi-site Implementation
Staging Environment

Sitecore CMS Modules Web Forms for Marketers 2
Sitecore® is a registered trademark. All other brand and product names are the property of their respective holders. The contents of this document are the property of Sitecore. Copyright © 2001-2009 Sitecore. All rights reserved.
Page 5 of 36
2.1 Understanding Web Form Storage
The structure of the forms is defined in the Sitecore CMS content tree. User input, entered in the forms, is saved in the module’s own database, which is called Sitecore_WebForms (in the previous module version, this database was called Sitecore.WebForms). This database is located in the website/data folder.
The Web Forms for Marketers module has its own configuration file that is called forms.config. This
file is located in the website/app_config/include folder.
The module defines forms using items that are stored in appropriate folders under /sitecore/system/Modules/Web Forms for Marketers.
The location of forms for each site is defined in the web.config file: ―/sitecore/sites/site‖ nodes and the
―formsRoot‖ attributes. If the ―formsRoot‖ attribute is not defined for a site, new forms are created in the /sitecore/system/Modules/Web Forms for Marketers/Local Forms folder.
The form folders are based on the /sitecore/templates/Web Forms for Marketers/Forms Folder template.
Each form is based on the /sitecore/templates/Web Forms for Marketers/Form template and can contain any number of sections or fields, but not sections and fields on the same level.
Every form has a submit button and you can associate actions with this button. Actions are executed on the server.
The list of available actions is stored under the /sitecore/system/Modules/Web Forms for Marketers/Settings/Actions folder.

Sitecore CMS Modules Web Forms for Marketers 2
Sitecore® is a registered trademark. All other brand and product names are the property of their respective holders. The contents of this document are the property of Sitecore. Copyright © 2001-2009 Sitecore. All rights reserved.
Page 6 of 36
2.2 Creating a New Form
Users can create new forms with the Page Editor, Content Editor, and using Sitecore desktop.
When user clicks the Insert Form button, the wizard first checks whether the current item has a layout assigned. If this condition is not met, the wizard displays the following message:
Forms are renderings, so they should be attached to layouts. For more details on layouts for the Web Forms module, read the Restricting Placeholders Shown in the Placeholder List section.
The location of the form is determined by the ―formsRoot‖ parameter in the forms.config file or
web.config file.
2.2.1 Security
Users that inherit the sitecore\Sitecore Client Forms Author role can insert and edit forms.
Sitecore CMS Modules Web Forms for Marketers 2
Sitecore® is a registered trademark. All other brand and product names are the property of their respective holders. The contents of this document are the property of Sitecore. Copyright © 2001-2009 Sitecore. All rights reserved.
Page 7 of 36
2.3 Restricting Placeholders Shown in the Placeholder List
The ―Insert a New Form‖ wizard only allows you to add forms to placeholders that have ―Placeholder Settings‖ items. Users that add new forms must have write access to those items to see placeholders in the Placeholder list‖. This allows developers and Web site administrators to define which placeholders may contain a form.
The Restricting Placeholders application helps to restrict the list of placeholders shown in the Placeholder list of the Insert a New Form wizard.
The Selected field lists the placeholders where users can add a new form. When you click the OK all the changes are saved.
To add a placeholder to the Restricting Placeholders All list, you should create a new placeholder under the Sitecore/Layout/Placeholder Settings item. If you already have a placeholder, you would like to use, create a placeholder in with the same name under the Placeholder Settings item.
After installation, the module shows the Restricting Placeholders application and users can select the placeholders they want to use. This application is also called through the Sitecore \All Applications\Web Forms for Marketers\Restricting Placeholders command.
Sitecore CMS Modules Web Forms for Marketers 2
Sitecore® is a registered trademark. All other brand and product names are the property of their respective holders. The contents of this document are the property of Sitecore. Copyright © 2001-2009 Sitecore. All rights reserved.
Page 8 of 36
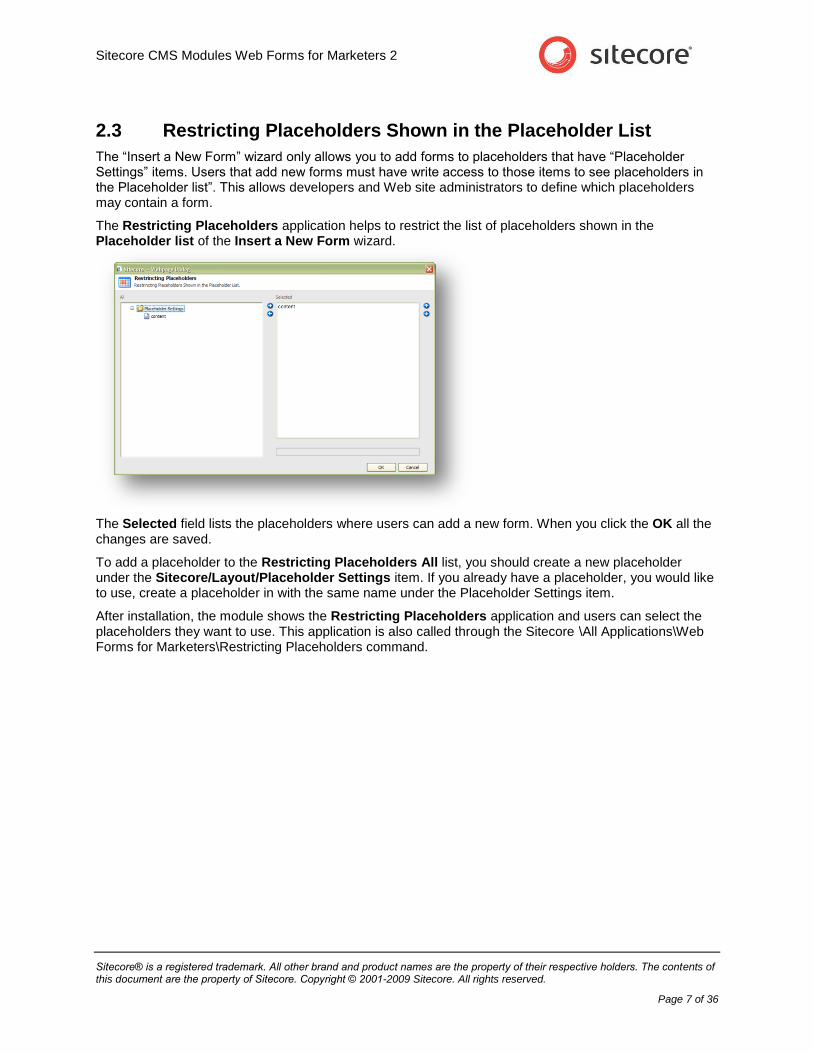
2.4 Form Field Types
The Web Forms for Marketers module provides a number of field types that you can use to build your form. All the form field types are stored under the /sitecore/system/Modules/Web Forms for Marketers/Settings/Field Types item and are based on the /sitecore/templates/Web Forms for Marketers/Field Type template.
The Field Type template contains the following fields:
Class — the full name of the class that renders the field on the front-end using settings from an item in the content tree.
Assembly — the name of the assembly that contains the class.
Required — the field which defines whether the ―required value‖ validator is applied to this type.
Validation — the list of validators which should be applied to the value entered in this field.
The Web Forms for Marketers module contains the following field types:
Single-Line Text
This is a one line text field. The length of the field is limited to 255 characters by default.
Multi-Line Text
Use a Multi-Line Text field to store multiple lines of text. The number of characters is limited to 512 by default.

Sitecore CMS Modules Web Forms for Marketers 2
Sitecore® is a registered trademark. All other brand and product names are the property of their respective holders. The contents of this document are the property of Sitecore. Copyright © 2001-2009 Sitecore. All rights reserved.
Page 9 of 36
The /sitecore/system/Modules/Web Forms for Marketers/Settings/Field Types/Simple Types/Multiple-Line Text item contains settings for this field type.
Password
Use a Password field to enter a password — all the characters you enter are masked. The Password field is a text field.
The /sitecore/system/Modules/Web Forms for Marketers/Settings/Field Types/Simple Types/Password item contains the settings for this field type.
Number
Use a Number field to enter data in numerical format.
The /sitecore/system/Modules/Web Forms for Marketers/Settings/Field Types/Simple Types/Number item contains the settings for this field type.
Use an E-mail field to enter e-mail addresses. The "@" and "." characters are validated, as well as the length of the e-mail server domain.
The /sitecore/system/Modules/Web Forms for Marketers/Settings/Field Types/Simple Types/E-mail item contains the settings for this field type.
Date
Use a Date field to enter dates.
The /sitecore/system/Modules/Web Forms for Marketers/Settings/Field Types/Simple Types/Date item contains the settings for this field type.
Sitecore CMS Modules Web Forms for Marketers 2
Sitecore® is a registered trademark. All other brand and product names are the property of their respective holders. The contents of this document are the property of Sitecore. Copyright © 2001-2009 Sitecore. All rights reserved.
Page 10 of 36
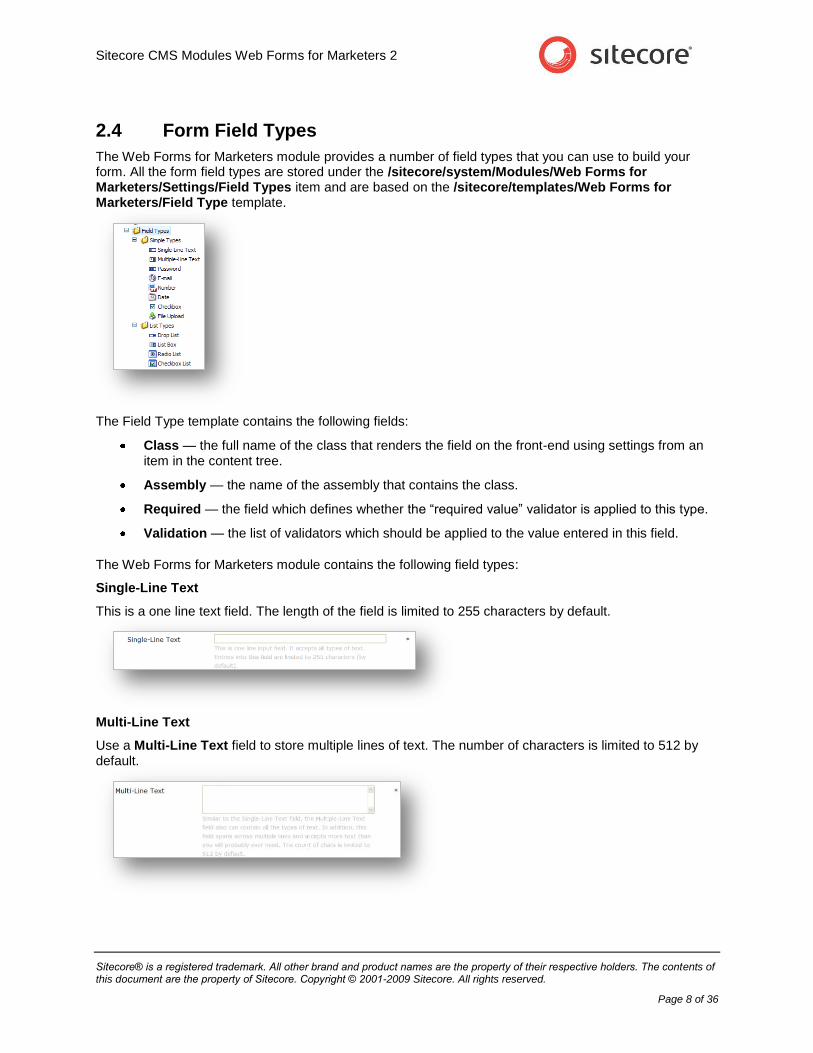
File Upload
Use a File Upload field to display a text box control and a browse button that you use to select a file to upload to the server.
The /sitecore/system/Modules/Web Forms for Marketers/Settings/Field Types/Simple Types/File Upload item contains the settings for this field type. This field works with the master database.
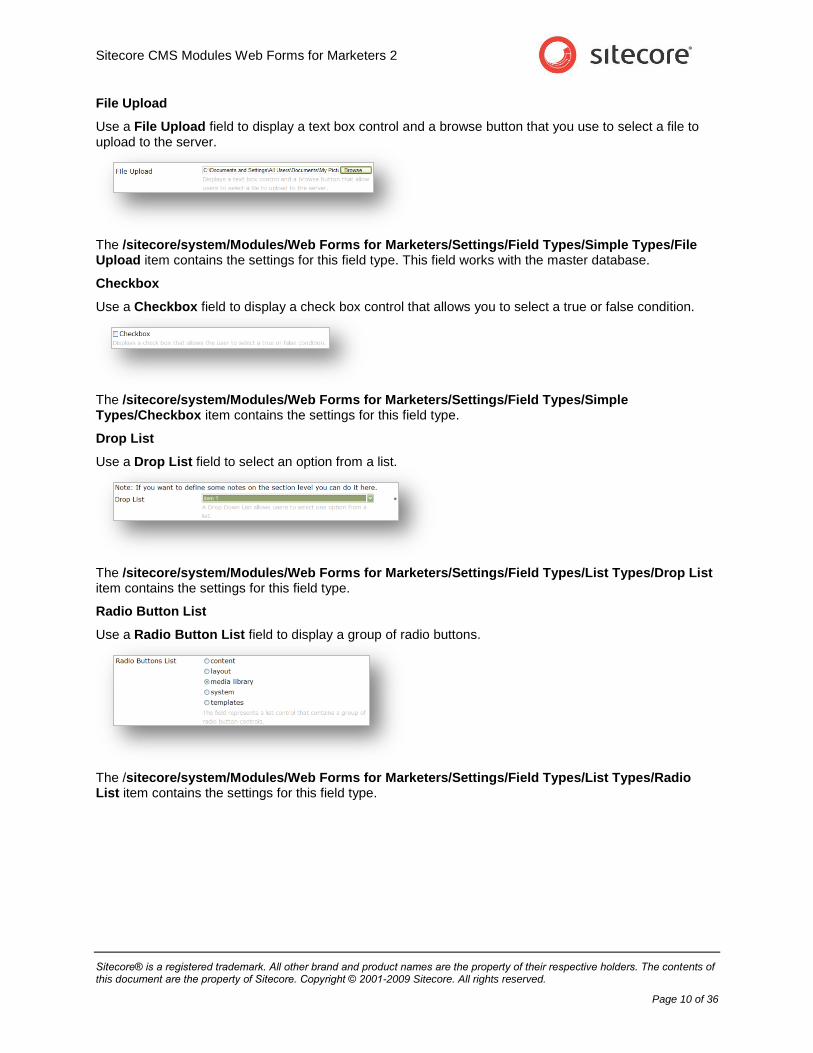
Checkbox
Use a Checkbox field to display a check box control that allows you to select a true or false condition.
The /sitecore/system/Modules/Web Forms for Marketers/Settings/Field Types/Simple Types/Checkbox item contains the settings for this field type.
Drop List
Use a Drop List field to select an option from a list.
The /sitecore/system/Modules/Web Forms for Marketers/Settings/Field Types/List Types/Drop List item contains the settings for this field type.
Radio Button List
Use a Radio Button List field to display a group of radio buttons.
The /sitecore/system/Modules/Web Forms for Marketers/Settings/Field Types/List Types/Radio List item contains the settings for this field type.
Sitecore CMS Modules Web Forms for Marketers 2
Sitecore® is a registered trademark. All other brand and product names are the property of their respective holders. The contents of this document are the property of Sitecore. Copyright © 2001-2009 Sitecore. All rights reserved.
Page 11 of 36
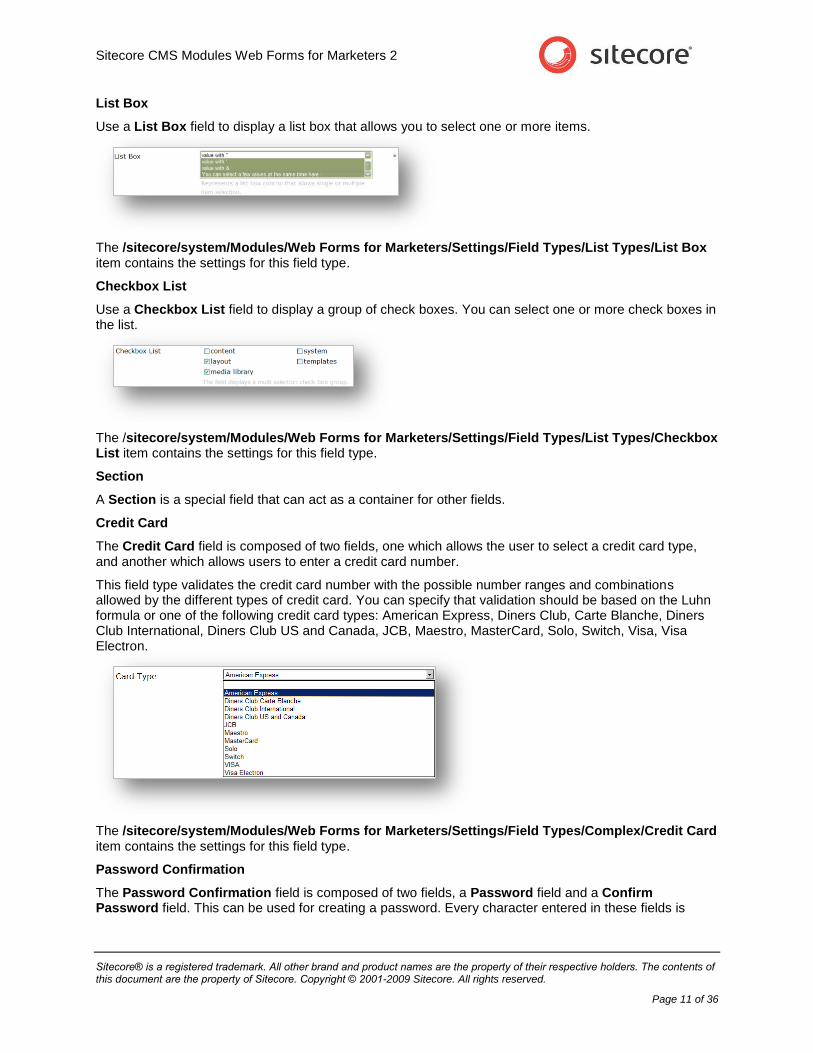
List Box
Use a List Box field to display a list box that allows you to select one or more items.
The /sitecore/system/Modules/Web Forms for Marketers/Settings/Field Types/List Types/List Box item contains the settings for this field type.
Checkbox List
Use a Checkbox List field to display a group of check boxes. You can select one or more check boxes in the list.
The /sitecore/system/Modules/Web Forms for Marketers/Settings/Field Types/List Types/Checkbox List item contains the settings for this field type.
Section
A Section is a special field that can act as a container for other fields.
Credit Card
The Credit Card field is composed of two fields, one which allows the user to select a credit card type, and another which allows users to enter a credit card number.
This field type validates the credit card number with the possible number ranges and combinations allowed by the different types of credit card. You can specify that validation should be based on the Luhn formula or one of the following credit card types: American Express, Diners Club, Carte Blanche, Diners Club International, Diners Club US and Canada, JCB, Maestro, MasterCard, Solo, Switch, Visa, Visa Electron.
The /sitecore/system/Modules/Web Forms for Marketers/Settings/Field Types/Complex/Credit Card item contains the settings for this field type.
Password Confirmation
The Password Confirmation field is composed of two fields, a Password field and a Confirm Password field. This can be used for creating a password. Every character entered in these fields is

Sitecore CMS Modules Web Forms for Marketers 2
Sitecore® is a registered trademark. All other brand and product names are the property of their respective holders. The contents of this document are the property of Sitecore. Copyright © 2001-2009 Sitecore. All rights reserved.
Page 12 of 36
masked.
The /sitecore/system/Modules/Web Forms for Marketers/Settings/Field Types/Complex/Password Confirmation item contains the settings for this field type.
Captcha
The Captcha field is composed of two fields: image and text confirmation field. The user should enter the text from an image to the text field. This is used to avoid robots registrations.
In the properties of the form field, you can set the line noise, background noise, and font warp:

Sitecore CMS Modules Web Forms for Marketers 2
Sitecore® is a registered trademark. All other brand and product names are the property of their respective holders. The contents of this document are the property of Sitecore. Copyright © 2001-2009 Sitecore. All rights reserved.
Page 13 of 36
2.5 Validations
The module provides predefined validations that allow users to add basic validations to fields, as well custom validations. These are explained in the Web Forms for Marketers User Guide.
The module also provides some built-in validations, which are used for some of the form field types provided by default in the module.
The default validations are located under the sitecore/system/modules/Web Forms for Marketers/settings/validation item.
The default validations are:
Count chars – checks the number of symbols in a string. Minimum and maximum number of symbols can be set.
Date — checks if the value entered is a date.
E-mail — checks if the value entered uses the format of an e-mail address.
Number — checks if the values entered are numbers (negative numbers and integers are allowed).
Number range — checks whether or not the values entered are within a specified range of numbers.
Regex pattern — checks whether or not the values entered conform to a rule you specify.
Credit card – checks the validity of a credit card number based on the type of credit card it is supposed to be.
Password-Confirmation — compares the values entered in the Password and Confirmation fields.
Captcha — compares the text displayed on an image with the value entered by the user.
The module installs two validator templates:
/sitecore/templates/Web Forms for Marketers/Validators/BaseValidator.
/sitecore/templates/Web Forms for Marketers/Validators/Regular Expression Validator.
The Regular Expression Validator contains one extra field: Validation Expression. Validations based on the Regular Expression Validator template use validation expression. Validations based on the BaseValidator template use validations defined in classes. The latter one inherits the fields of the former one and extends them.
The ―validator‖ item contains the following fields:
Class — the full name of the class which handles the validation.
Assembly — the name of the assembly that contains the class.
Error Message — the text for the error message displayed in a ValidationSummary control when validation fails.
Text — the text displayed in the validation control when validation fails.
Static Display — the display behavior of the error message in a validation control:
o None — the validation message is never displayed inline.
o Static — space for the validation message is allocated in the page layout.

Sitecore CMS Modules Web Forms for Marketers 2
Sitecore® is a registered trademark. All other brand and product names are the property of their respective holders. The contents of this document are the property of Sitecore. Copyright © 2001-2009 Sitecore. All rights reserved.
Page 14 of 36
o Dynamic — space for the validation message is dynamically added to the page if validation fails.
Enable Script Validation — value indicating whether client-side validation is enabled.
Parameters — the additional parameters for the validation control.
Inner Control — indicates the place where the validation control is added.
Validation Expression — sets the regular expression assigned to be the validation criteria (Only for validation items that use the Regular Expression Validator).

Sitecore CMS Modules Web Forms for Marketers 2
Sitecore® is a registered trademark. All other brand and product names are the property of their respective holders. The contents of this document are the property of Sitecore. Copyright © 2001-2009 Sitecore. All rights reserved.
Page 15 of 36
2.6 Submit Actions
When a Web site visitor clicks Submit, three types of actions are performed:
Form Verification
Save Actions
Success
All actions are stored under the /sitecore/system/Modules/Web Forms for Marketers/Settings/Actions item.
Note: If you upgrade from the previous version of the Web Forms for Marketers Module, your existing actions will be moved to the Save Actions folder.
You can configure the following fields of any action:
Class – the full name of the class that process the form data on the server side.
Assembly – the name of the assembly that contains the class referred to.
Parameters – sets the parameters for the action irrespective of the parameters of the form.
Editor – provides the application that you use to change the parameters of the action.
2.6.1 Form Verification
Form verification verifying the values that have been entered in one or more form fields. If form verification fails, the visitor is returned to the form and an error message is displayed. No other subsequent Form Verifications or Save Actions are performed.
Creating a New Form Verification action
To create a new Form Verification action, perform the following actions:
1. In the Content Editor, select sitecore/content/system/modules/web forms for marketers/settings/actions/form verification item.

Sitecore CMS Modules Web Forms for Marketers 2
Sitecore® is a registered trademark. All other brand and product names are the property of their respective holders. The contents of this document are the property of Sitecore. Copyright © 2001-2009 Sitecore. All rights reserved.
Page 16 of 36
2. Create a new Form Verification Action item and add the appropriate parameters.
Creating a new Form Verification Action is similar to the creating new Save Action, so read more in the How to Create a Save Action section.
Changing the Form Verification Error Message
1. In the Content Editor, select the Form Verification action
2. In the Parameters field, enter an error message in the <FailedMessage> tag.
2.6.2 Save Actions
Save Actions can be assigned to a form and will be executed when the user clicks Submit on a form. By default, there are 12 Save Actions in the Web Forms for Marketers module. They are stored under the sitecore/content/system/modules/web forms for marketers/settings/actions/save actions item. You can create a custom Save Action, for more details on this read the How to Create a Save Action section.
2.6.3 Success
This action allows you to select either a Sitecore item or a message which is presented to the user after a successful form submission. This is the final action performed in a form submission, the pipeline attached to this is called successAction pipeline.
2.6.4 Form Dropout Tracking
The Web Forms module supports the creation of the Form Dropout reports which contain information on users who did not successfully submit forms. The functionality is achieved using AJAX features by tracking each individual field and recording user input in the Analytics database.
System events are required dropout tracking (more information on system events. You can find in the Events and the Session Trail section).
Sitecore CMS Modules Web Forms for Marketers 2
Sitecore® is a registered trademark. All other brand and product names are the property of their respective holders. The contents of this document are the property of Sitecore. Copyright © 2001-2009 Sitecore. All rights reserved.
Page 17 of 36
2.7 Reports
Information about visitor activity on forms can be viewed in various reports provided by the module.
To open form reports, log in Sitecore desktop and click Sitecore – All Applications – Web Forms for Marketers – Form Reports and select the form for which you want to view reports. Alternatively, in the Content Editor, select the form under the /sitecore/system/Modules/Web Forms for Marketers/Website item and click Form Reports.
All reports display last 200 records by default. To change this number, you should open the report in the Windows Designer and change the value in the appropriate SQL query.
2.7.1 Data
By default the Data report request timeout is 180 seconds. You can modify this value by changing the WFM.CommandTimeout parameter in the \WebSite\App_Config\Include\ forms.config file.
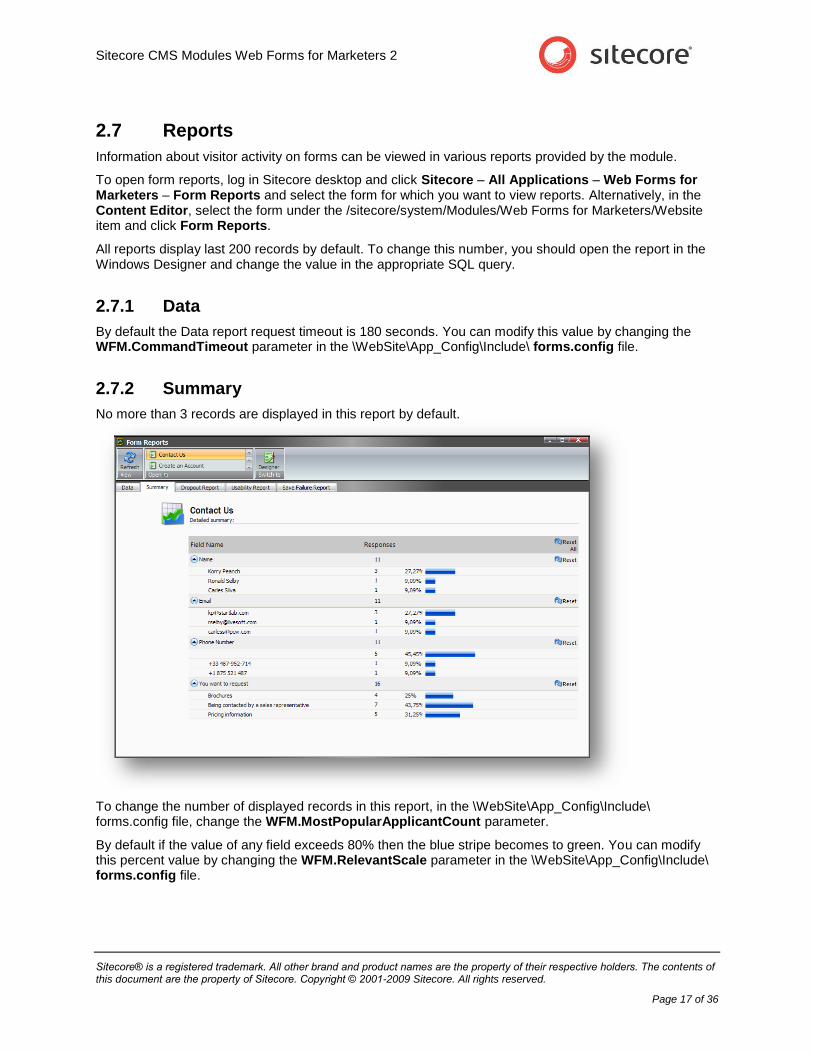
2.7.2 Summary
No more than 3 records are displayed in this report by default.
To change the number of displayed records in this report, in the \WebSite\App_Config\Include\ forms.config file, change the WFM.MostPopularApplicantCount parameter.
By default if the value of any field exceeds 80% then the blue stripe becomes to green. You can modify this percent value by changing the WFM.RelevantScale parameter in the \WebSite\App_Config\Include\ forms.config file.

Sitecore CMS Modules Web Forms for Marketers 2
Sitecore® is a registered trademark. All other brand and product names are the property of their respective holders. The contents of this document are the property of Sitecore. Copyright © 2001-2009 Sitecore. All rights reserved.
Page 18 of 36
2.8 Events and the Session Trail
The session trail is an OMS feature which records all the activities a user has performed on the Web site, including what pages they have visited and when.
The events may be in the Form reports are described in the following sections.
For all the events the Datakey field in the Analytics database equals the Form GUID, the exceptions are: Form check action error, Form submit and Form conversion events.
Field Completed
This event is triggered when a field on a form is completed and tabbed or clicked out of. This is facilitated by using AJAX. Several field events on the same field are possible in the same form submission attempt, as users may change the information in the fields.
Field Not Completed
This event is triggered when validation on a required field fails, due to that field not having been filled in by the visitor.
Field Out of Boundary
This event is triggered when validation in a field fails due to the value entered failing outside the allowed boundaries of the field. This event is used for Min and Max Length of Text and Password field types, and the Date and Number field type.
Form Check Action Error
This event is triggered when a Check Action fails. This is not a failure, but an event. If a Check Action fails, the visitor is returned to the form. No other Check Actions or Save Actions are initiated.
Form Save Action Failure
This event is triggered by the failure of a Save Action. Please note that this is a Failure and not an event (the property IsFailure is enabled).
Form Submit
This event is triggered when the ―Submit‖ button is clicked on by a user, either by clicking on it or using the return button. This indicates a form submission attempt.
Invalid Field Syntax
This event is triggered when validation on a field fails due to failing a particular syntax check. The event is used for the following field validations: Regular Expressions on Text and Password field types, and the Email field type.
Submit Success
This event is written when the Submit action does not return an error. The event is written in a pair with the Form Conversion event and primarily used in order to facilitate the SQL statements required for the Form Dropout, Form Usability, and Form Failures reports.
Form Conversion
The event is triggered by the successful form submission attempt and comes after the Form Submit event. It also indicates the successful completion of the Goal associated with the form.

Sitecore CMS Modules Web Forms for Marketers 2
Sitecore® is a registered trademark. All other brand and product names are the property of their respective holders. The contents of this document are the property of Sitecore. Copyright © 2001-2009 Sitecore. All rights reserved.
Page 19 of 36
2.9 Multi-site Implementation
The module supports multi-site environments. This means that administrators can define unique forms location and settings for different sites. This behavior is available through the formsRoot attribute in the
definition of any site in .config files. The value of this attribute is a Sitecore path which defines:
The folder that stores the forms of the current site.
The appearance and color theme settings for forms of the current site.
The access rights.
The formsRoot parameter must contain either an item path or the ID of the target item that is based on the /sitecore/templates/Web Forms for Marketers/Forms Folder template.
For example, this is how the formsRoot parameter is defined in web.config file:
<sites>
<site
name="samplesite"
virtualFolder="/"
physicalFolder="/"
rootPath="/sitecore/content"
startItem="/forms" database="web" domain="extranet"
formsRoot="/sitecore/system/modules/Web Forms for Marketers/local forms"
...
This can be defined in the forms.config file using the ID:
<site name="website">
<patch:attribute name="formsRoot">
{F1F7AAB6-C8CE-422F-A214-F610C109FA63}
</patch:attribute>
</site>
</sites>
We recommend that you define the formsRoot parameter in the /App_Config/forms.config file. This approach ensures the absence of duplicated values.
In cases where the formsRoot attribute is not defined for a site, new forms are stored in the /sitecore/system/Modules/Web Forms for Marketers/Local Forms folder.

Sitecore CMS Modules Web Forms for Marketers 2
Sitecore® is a registered trademark. All other brand and product names are the property of their respective holders. The contents of this document are the property of Sitecore. Copyright © 2001-2009 Sitecore. All rights reserved.
Page 20 of 36
2.10 Staging Environment
The module supports staging. Add a new connection string that points on your master server to the
connectionstrings.config file on the slave in order to configure this.
<add name="remoteWfmService"
connectionString="url=http://localhost/sitecore%20modules/shell/Web%20Forms%20for%20Marketers/Sta
ging/WfmService.asmx;user=[domain\username];password=[password];timeout=60000" />
Where
[domain\username] – Sitecore user (full name). The necessary access rights depend on the items the form is using.
[password] – A user’s password.
Sitecore CMS Modules Web Forms for Marketers 2
Sitecore® is a registered trademark. All other brand and product names are the property of their respective holders. The contents of this document are the property of Sitecore. Copyright © 2001-2009 Sitecore. All rights reserved.
Page 21 of 36
2.11 Running Webforms in Live Mode
Sitecore supports running a Web site directly from the master database, referred to as ― ―running in live mode‖. Running in live mode eliminates the need to publish content and is similar to viewing a site in the Preview client. A Web site configured to run live mode acts in most ways exactly in the same way as a default Web site. Live mode respects all publishing restrictions and workflows in the same way that a default Web site supports these features.
To run the Web Forms for Marketers module in Live Mode, perform the following actions in the web.config file:
1. Find the relevant <site> section and change database="web" to database="master".
2. Find the <modules_website> section and change database="web" to database="master".
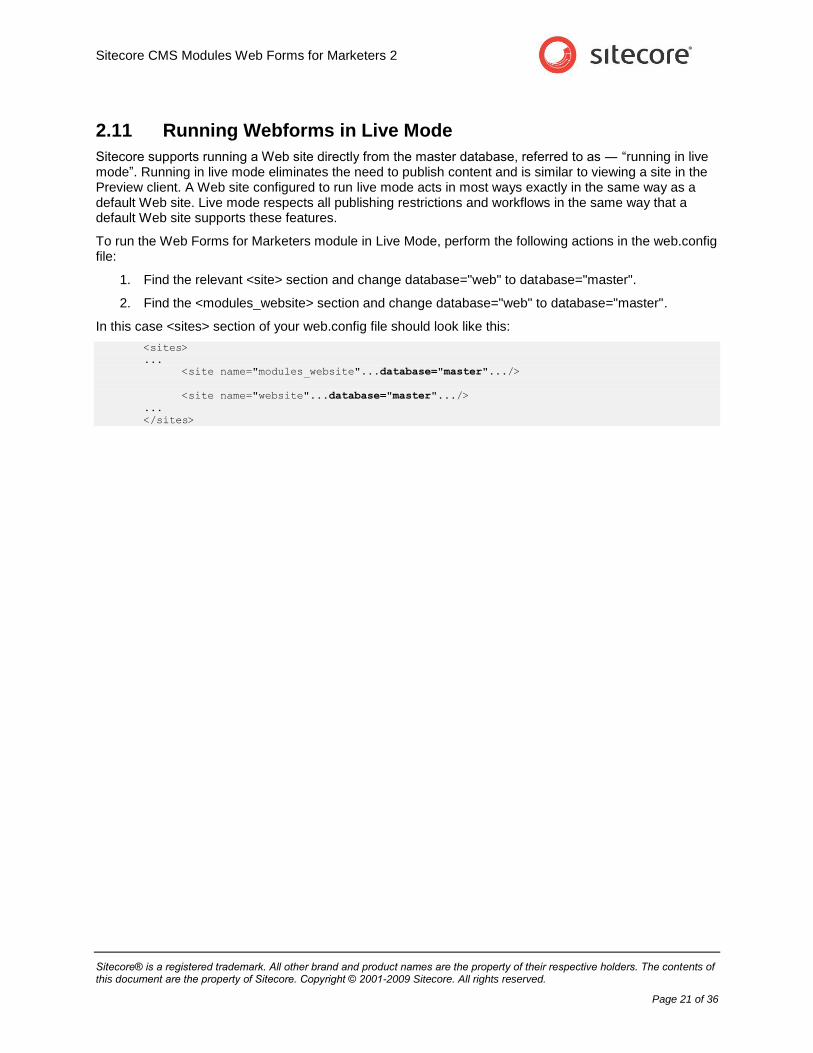
In this case <sites> section of your web.config file should look like this:
<sites>
...
<site name="modules_website"...database="master".../>
<site name="website"...database="master".../>
...
</sites>
Sitecore CMS Modules Web Forms for Marketers 2
Sitecore® is a registered trademark. All other brand and product names are the property of their respective holders. The contents of this document are the property of Sitecore. Copyright © 2001-2009 Sitecore. All rights reserved.
Page 22 of 36
Chapter 3
Web Forms Developer’s Notes
This chapter contains information for developers on how to customize the Web Forms for Marketers module.
This chapter contains the following sections:
How to Extend/Override Standard Functionality
How to Add a New Field Type
How to Create a Save Action
How to Use CSS Themes
How to Load Items from the Content Tree to a List Control
How to Export to ASCX
How to Add an ASCX Control to the Page
How to Configure a Data Provider
Sitecore CMS Modules Web Forms for Marketers 2
Sitecore® is a registered trademark. All other brand and product names are the property of their respective holders. The contents of this document are the property of Sitecore. Copyright © 2001-2009 Sitecore. All rights reserved.
Page 23 of 36
3.1 How to Extend/Override Standard Functionality
The Web Forms for Marketers module provides you with the opportunity to extend existing functionality. This can be done in the following ways:
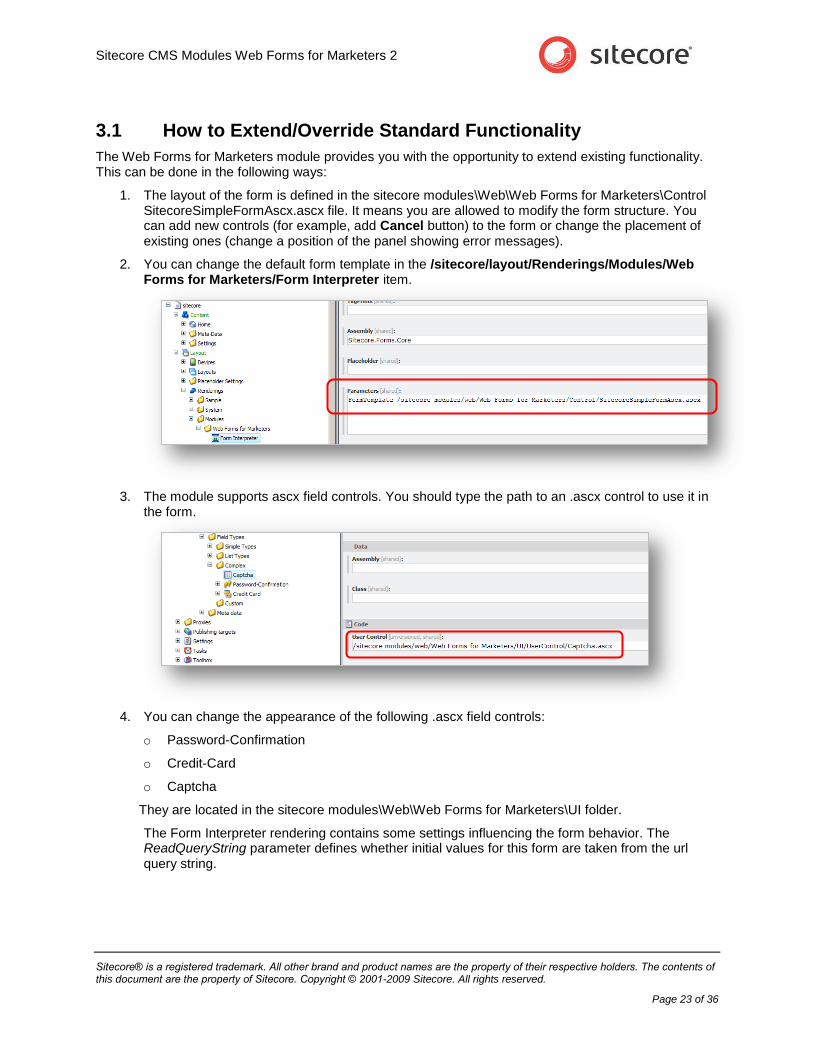
1. The layout of the form is defined in the sitecore modules\Web\Web Forms for Marketers\Control SitecoreSimpleFormAscx.ascx file. It means you are allowed to modify the form structure. You can add new controls (for example, add Cancel button) to the form or change the placement of existing ones (change a position of the panel showing error messages).
2. You can change the default form template in the /sitecore/layout/Renderings/Modules/Web Forms for Marketers/Form Interpreter item.
3. The module supports ascx field controls. You should type the path to an .ascx control to use it in the form.
4. You can change the appearance of the following .ascx field controls:
o Password-Confirmation
o Credit-Card
o Captcha
They are located in the sitecore modules\Web\Web Forms for Marketers\UI folder.
The Form Interpreter rendering contains some settings influencing the form behavior. The ReadQueryString parameter defines whether initial values for this form are taken from the url query string.

Sitecore CMS Modules Web Forms for Marketers 2
Sitecore® is a registered trademark. All other brand and product names are the property of their respective holders. The contents of this document are the property of Sitecore. Copyright © 2001-2009 Sitecore. All rights reserved.
Page 24 of 36
5. Select the item and click Details in the Presentation tab
6. Click Form Interpreter, and in the Control Properties window select the ReadQueryString check box.
Use the following format of the query string:
Field name1=field value1&Field Name2=field value2

Sitecore CMS Modules Web Forms for Marketers 2
Sitecore® is a registered trademark. All other brand and product names are the property of their respective holders. The contents of this document are the property of Sitecore. Copyright © 2001-2009 Sitecore. All rights reserved.
Page 25 of 36
3.2 How to Add a New Field Type
The list of field types can be extended by creating a class that renders the field and registers it as sitecore content.
After you created a new item using /sitecore/templates/Web Forms for Marketers/Field Type template in the /sitecore/system/Modules/Web Forms for Marketers/Settings/Field Types/Custom folder you should complete the associated fields.
For example, in the Custom.dll assembly you create a new control called Sitecore.Custom.Controls.Textbox:
namespace Sitecore.Custom.Controls
{
public class Textbox
{
…
}
}
Create a new item in the /sitecore/system/Modules/Web Forms for Marketers/Settings/Field Types/Custom folder and set its Class and Assembly fields.
Select the ―Required‖ checkbox if you want your control to use the ―Required Value‖ validator. Then you can select any other validations that you require here in the Validation section.
If your control must return a value to the server, the control should implement IResult interface:
namespace Sitecore.Form.Web.UI.Controls
{
public interface IResult
{
ControlResult Result { get; }
string ControlName { get; set; }
string FieldID { get; set; }
}
}

Sitecore CMS Modules Web Forms for Marketers 2
Sitecore® is a registered trademark. All other brand and product names are the property of their respective holders. The contents of this document are the property of Sitecore. Copyright © 2001-2009 Sitecore. All rights reserved.
Page 26 of 36
Result – returns the value of the field in the object of the ControlResult class. The
constructor of the ControlResult has the following signature:
public ControlResult(string fieldName, object value, string parameters)
where
fieldName —the name of the field, defined only for the custom customization.
value —the value of the field.
parameters — additional parameters.
If a returned value is not a string, you must set an adapter for it. You can do this before the class
definition using the Adapter attribute.
namespace Sitecore.Form.Web.UI.Controls
{
[Adapter(typeof (DateAdapter))]
[ValidationProperty("Value")]
public class DateSelector : ValidateControl, IHasTitle
The type from this attribute must inherit the Adapter abstract class.
using System.Collections.Generic;
namespace Sitecore.Form.Core.Client.Submit
{
public abstract class Adapter
{
// Convert object value to string
public virtual string AdaptResult(object value)
{
return value.ToString();
}
// Convert value from database to friendly value. Using in the Form Data Viewer
public virtual string AdaptToFrendlyValue(string value)
{
return value;
}
// Convert list value from database to friendly value. Using in the Form Data
Viewer
public virtual IEnumerable<string> AdaptToFrendlyListValues(string value)
{
return new List<string>(new[]{value});
}
}
}
ControlName — the name of the item that is corresponding this field is moved here
FieldID — inits by the id of the item that is corresponding this field
You can also use the abstract Sitecore.Form.Web.UI.Controls.BaseControl class that
implements the ControlName and FieldID properties of the IResult interfaces.
The control must implement the IHasTitle interface if you want the control to be iniatilized with title that
you define in the Form Designer.

Sitecore CMS Modules Web Forms for Marketers 2
Sitecore® is a registered trademark. All other brand and product names are the property of their respective holders. The contents of this document are the property of Sitecore. Copyright © 2001-2009 Sitecore. All rights reserved.
Page 27 of 36
namespace Sitecore.Form.Web.UI.Controls
{
public interface IHasTitle
{
string Title { set; }
}
}
If you would like properties from your control to be available in the Form Designer, you should use the following special attributes:
VisualProperty means that property is displayed in the Form Designer.
Constructors:
public VisualPropertyAttribute(string displayName)
public VisualPropertyAttribute(string displayName, int sortorder)
where
displayName — defines the name of property in the designer
sortorder — sets the position of the sorting in the designer
VisualCategory — sets a category name.
VisualFieldType — defines the type of the input control for the property. If the attribute
absents the property has the EditField input type.
DefaultValue — sets an initial value in the designer.
Localize — defines whether property suppors multiple languages or not.
For example, the definition of the following property:
[VisualProperty("Help:", 500)]
[VisualCategory("Appearance")]
[VisualFieldType(typeof(TextAreaField)), Localize]
public string Information
{
...
}
is shown:

Sitecore CMS Modules Web Forms for Marketers 2
Sitecore® is a registered trademark. All other brand and product names are the property of their respective holders. The contents of this document are the property of Sitecore. Copyright © 2001-2009 Sitecore. All rights reserved.
Page 28 of 36
The module provides following values of the VisualFieldType attribute:
EditField looks like usual a input control:
BooleanField always provides 2 values: Yes and No.
CssClassField allows you to choose one of the available css classes.
DateFormatField contains the permitted date formats.
DirectionField always contains 2 values: Vertical and Horizontal.
SelectionModeField contains 2 values: Single and Multiple.
ListField allows you to input items for list controls.
SelectDateField allows you to select a date
Sitecore CMS Modules Web Forms for Marketers 2
Sitecore® is a registered trademark. All other brand and product names are the property of their respective holders. The contents of this document are the property of Sitecore. Copyright © 2001-2009 Sitecore. All rights reserved.
Page 29 of 36
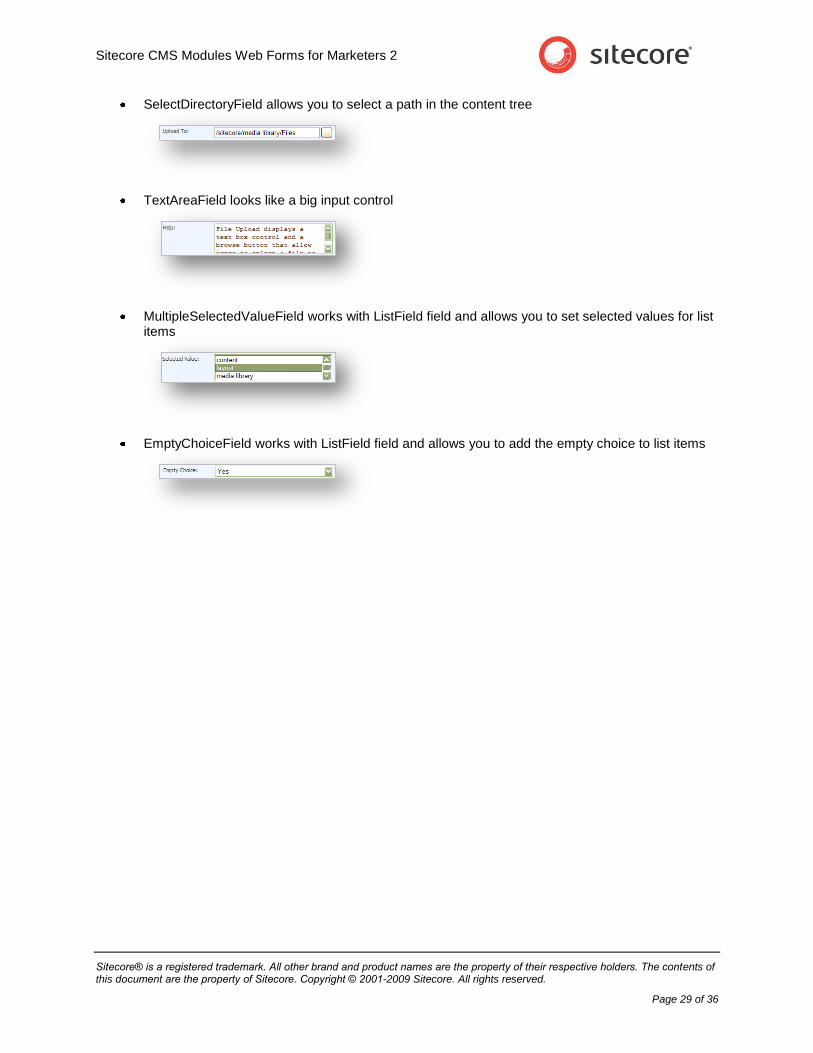
SelectDirectoryField allows you to select a path in the content tree
TextAreaField looks like a big input control
MultipleSelectedValueField works with ListField field and allows you to set selected values for list items
EmptyChoiceField works with ListField field and allows you to add the empty choice to list items

Sitecore CMS Modules Web Forms for Marketers 2
Sitecore® is a registered trademark. All other brand and product names are the property of their respective holders. The contents of this document are the property of Sitecore. Copyright © 2001-2009 Sitecore. All rights reserved.
Page 30 of 36
3.3 How to Create a Save Action
To create a save action, for instance, a login action:
1. Create a new project, for example ―Sitecore.Forms.Sample‖.
2. Add a new reference to the Sitecore.Forms.Core assembly.
3. Create a new class inheriting Sitecore.Form.Submit.ISaveAction interface. Action Code:
using Sitecore.Data;
using Sitecore.Diagnostics;
using Sitecore.Form.Core.Client.Data.Submit;
using Sitecore.Form.Core.Controls.Data;
using Sitecore.Form.Submit;
using Sitecore.Security.Authentication;
namespace Sitecore.Forms.Sample
{
/// <summary>
/// Login action
/// </summary>
public class LoginAction : ISaveAction
{
#region Methods
/// <summary>
/// Initializes a new instance of the <see cref="LoginAction"/> class.
/// </summary>
public LoginAction()
{
this.DefaultDomain = "sitecore";
}
/// <summary>
/// Executes the login action.
/// </summary>
/// <param name="formid">The form id.</param>
/// <param name="fields">The fields of the form.</param>
/// <param name="data">The custom data.</param>
public void Execute(ID formid, AdaptedResultList fields, params object[] data)
{
AdaptedControlResult login = fields.GetEntry(this.Login, "Login");
AdaptedControlResult password = fields.GetEntry(this.Password, "Password");
Assert.ArgumentNotNull(login, "You should point the login field.");
Assert.ArgumentNotNull(password, "You should point the password field.");
string userName = login.Value;
Assert.ArgumentNotNullOrEmpty(userName, "Login can't be empty");
if (!userName.Contains("\\"))
{
userName = string.Join("\\", new[] { this.DefaultDomain, userName });
}
AuthenticationManager.Login(userName, password.Value, true);
}
#endregion
#region Properties
/// <summary>
/// Gets or sets the default domain.

Sitecore CMS Modules Web Forms for Marketers 2
Sitecore® is a registered trademark. All other brand and product names are the property of their respective holders. The contents of this document are the property of Sitecore. Copyright © 2001-2009 Sitecore. All rights reserved.
Page 31 of 36
/// </summary>
/// <value>The default domain.</value>
public string DefaultDomain { get; set; }
/// <summary>
/// Gets or sets the login field.
/// </summary>
public string Login { get; set; }
/// <summary>
/// Gets or sets the password field.
/// </summary>
public string Password { get; set; }
#endregion
}
}
4. In the Content Editor, create a new item under /sitecore/system/Modules/Web Forms for Marketers/Settings/Actions/Save Actions and specify the following parameters:
o Assembly — the appropriate assembly.
o Class — the created class.
o Parameters — define the action’s parameters — these are common to all forms.
o Client Action — is used only in the staging environment. If this check box is clear, this Save Action is transferred from the Slave to the Master server and performed there. If this check box is selected, the Save Action is performed on the Slave server.
o Editor — specify the control that is presented to the Sitecore user when they edit the parameters for this action in the Form Designer. In this example, these are Login and Password.
o QueryString — additional settings for the editor.
Sitecore CMS Modules Web Forms for Marketers 2
Sitecore® is a registered trademark. All other brand and product names are the property of their respective holders. The contents of this document are the property of Sitecore. Copyright © 2001-2009 Sitecore. All rights reserved.
Page 32 of 36
3.4 How to Use CSS Themes
The module contains a few CSS themes that can be applied to forms. To change a theme, go to the forms folder. This item is based on the /sitecore/templates/Web Forms for Marketers/Forms Folder template.
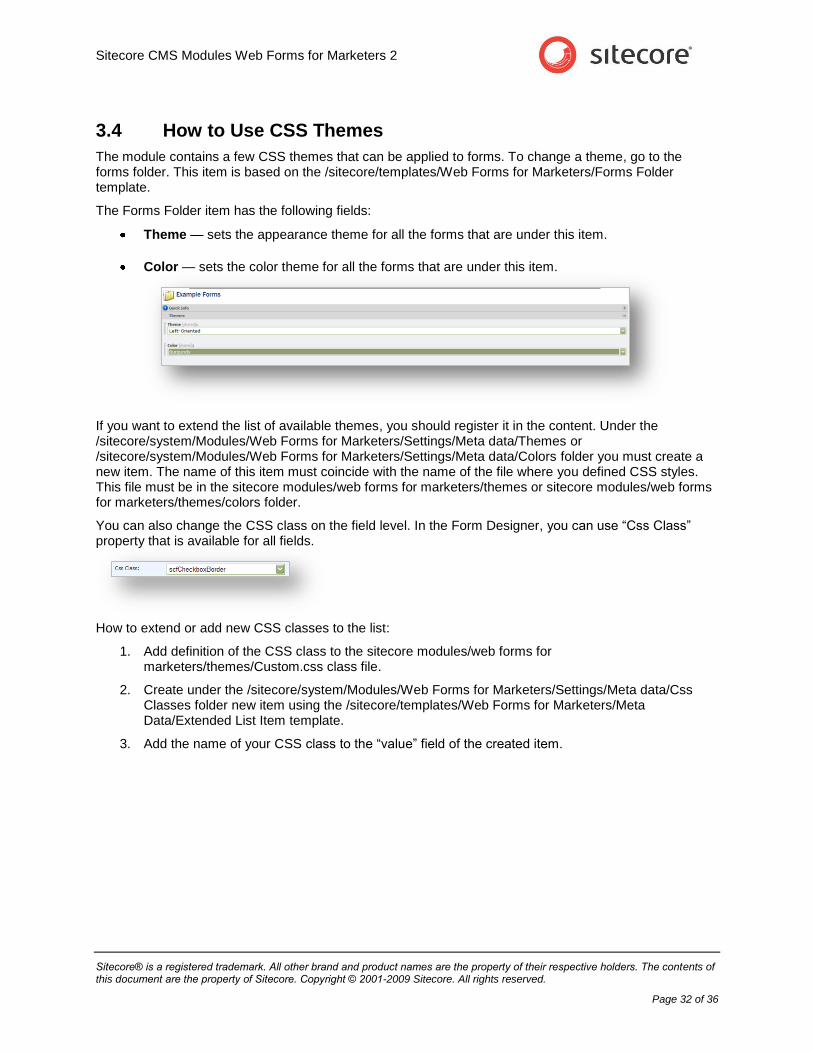
The Forms Folder item has the following fields:
Theme — sets the appearance theme for all the forms that are under this item.
Color — sets the color theme for all the forms that are under this item.
If you want to extend the list of available themes, you should register it in the content. Under the /sitecore/system/Modules/Web Forms for Marketers/Settings/Meta data/Themes or /sitecore/system/Modules/Web Forms for Marketers/Settings/Meta data/Colors folder you must create a new item. The name of this item must coincide with the name of the file where you defined CSS styles. This file must be in the sitecore modules/web forms for marketers/themes or sitecore modules/web forms for marketers/themes/colors folder.
You can also change the CSS class on the field level. In the Form Designer, you can use ―Css Class‖ property that is available for all fields.
How to extend or add new CSS classes to the list:
1. Add definition of the CSS class to the sitecore modules/web forms for marketers/themes/Custom.css class file.
2. Create under the /sitecore/system/Modules/Web Forms for Marketers/Settings/Meta data/Css Classes folder new item using the /sitecore/templates/Web Forms for Marketers/Meta Data/Extended List Item template.
3. Add the name of your CSS class to the ―value‖ field of the created item.

Sitecore CMS Modules Web Forms for Marketers 2
Sitecore® is a registered trademark. All other brand and product names are the property of their respective holders. The contents of this document are the property of Sitecore. Copyright © 2001-2009 Sitecore. All rights reserved.
Page 33 of 36
3.5 How to Load Items from the Content Tree to a List Control
Any list control used by the module can read its items from the content tree. To do this, set the source from which the control will take its items. Use the Items property in the Form Designer for this:
Click ―…‖ to open the List Items dialog box that you use to edit the list items:
The control can read either source or predefined list items. To select the source, you should click Source. To input the predefined list, you should input name of the item to Input items by hand textbox and click Add.
Sitecore CMS Modules Web Forms for Marketers 2
Sitecore® is a registered trademark. All other brand and product names are the property of their respective holders. The contents of this document are the property of Sitecore. Copyright © 2001-2009 Sitecore. All rights reserved.
Page 34 of 36
3.6 How to Export to ASCX
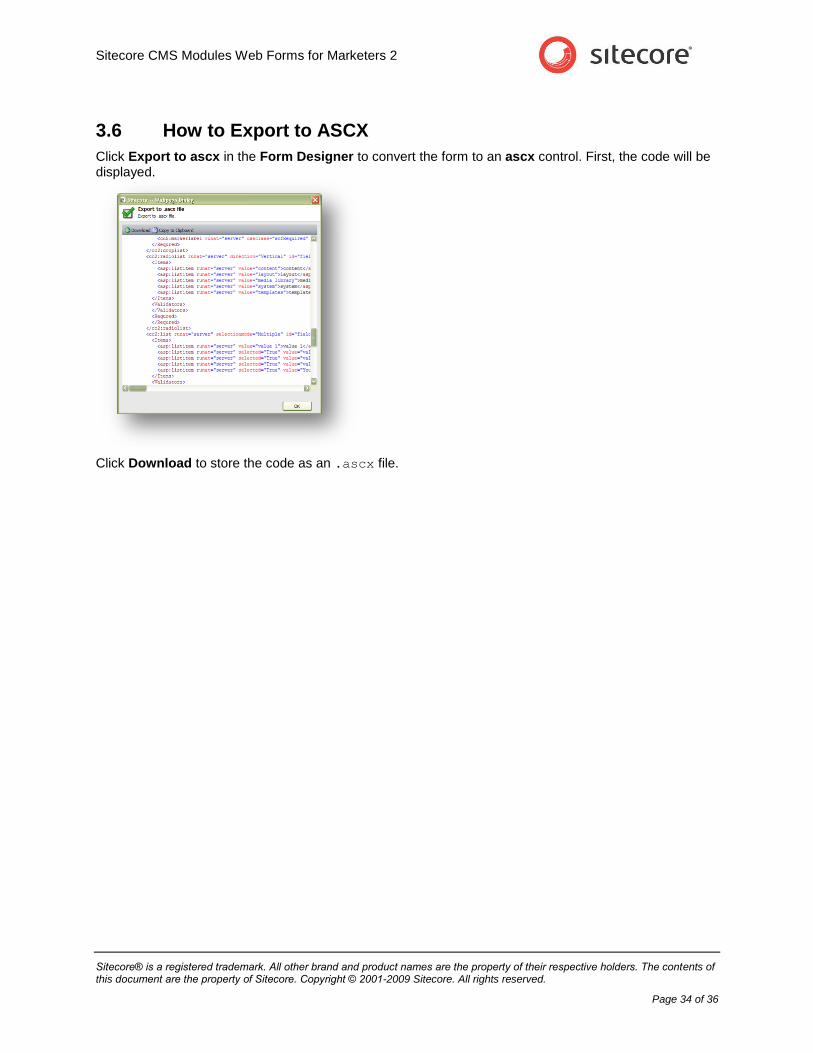
Click Export to ascx in the Form Designer to convert the form to an ascx control. First, the code will be displayed.
Click Download to store the code as an .ascx file.

Sitecore CMS Modules Web Forms for Marketers 2
Sitecore® is a registered trademark. All other brand and product names are the property of their respective holders. The contents of this document are the property of Sitecore. Copyright © 2001-2009 Sitecore. All rights reserved.
Page 35 of 36
3.7 How to Add an ASCX Control to the Page
1. Create a new ―default.aspx‖ page to the layouts\ folder.
<%@ Page Language="C#" AutoEventWireup="true" %>
<!DOCTYPE html PUBLIC "-//W3C//DTD XHTML 1.0 Transitional//EN"
"http://www.w3.org/TR/xhtml1/DTD/xhtml1-transitional.dtd">
<html xmlns="http://www.w3.org/1999/xhtml" >
<head runat="server">
<title>Untitled Page</title>
</head>
<body>
<form id="form1" runat="server">
</form>
</body>
</html>
2. Export the form you need to the layouts\ folder using ―Export to ascx‖ button. Use the ―forms.ascx‖ name.
3. Add to the default.aspx page the following changes
<%@ Page Language="C#" AutoEventWireup="true" %>
<%@ Register Src="form.ascx" TagName="SimpleForm" TagPrefix="uc1" %>
<!DOCTYPE html PUBLIC "-//W3C//DTD XHTML 1.0 Transitional//EN"
"http://www.w3.org/TR/xhtml1/DTD/xhtml1-transitional.dtd">
<html xmlns="http://www.w3.org/1999/xhtml" >
<head runat="server">
<title>Untitled Page</title>
</head>
<body>
<form id="form1" runat="server">
<div>
<uc1:SimpleForm ID="WebUserControl1" runat="server" />
</div>
</form>
</body>
</html>
Type http://localhost/layouts/default.aspx in the browser.
The module does not verify the form works correctly after you add changes into the .ascx file.

Sitecore CMS Modules Web Forms for Marketers 2
Sitecore® is a registered trademark. All other brand and product names are the property of their respective holders. The contents of this document are the property of Sitecore. Copyright © 2001-2009 Sitecore. All rights reserved.
Page 36 of 36
3.8 How to Configure a Data Provider
If your solution uses SQLite databases, no additional configurations are needed. If you use MSSQL databases, a connection between the module and the databases must be configured to make the Form Reports work correctly. The module supports MSSQL and SQLite databases.
In the forms.config file, select a data provider. Use the type attribute in the ―formsDataProvider‖ tag.
Among the possible values are:
Sitecore.Forms.Data.DataProviders.WFMDataProvider,Sitecore.Forms.Core –
the provider for the MSSQL databases.
<formsDataProvider
type="Sitecore.Forms.Data.DataProviders.WFMDataProvider,Sitecore.Forms.Core">
<param desc="connection string">Database=(database);Data Source=(server);user
id=(user);password=(password);Connect Timeout=30</param>
</formsDataProvider>
Sitecore.Forms.Data.DataProviders.SQLite.SQLiteWFMDataProvider,Sitecore
.Forms.Core – the provider for the SQLite database.
<formsDataProvider
type="Sitecore.Forms.Data.DataProviders.SQLite.SQLiteWFMDataProvider,Sitecore.Forms.Core">
<param desc="connection string">Data
Source=/data/sitecore_webforms.db;version=3;BinaryGUID=true</param>
</formsDataProvider>
Related Documents