March 2005 Copyright 2005 Three Springs Handworks. All rights reserved. 1 Weaving: The Complete Process From Thread to Cloth Sandra Rude, Textile Artist Three Springs Handworks www.3springshandworks.com People often ask me. “How long did it take to weave that?” The answer I usually give is that the actual weaving, that is, the act of throwing a shuttle back and forth across the loom, is about 10 percent of a complex process. This process includes a lot of planning and preparation before the weaving phase begins, and a number of finishing steps after the last thread is woven. My reason for writing this document is to make it easier for anyone who is not a weaver to understand the process and to visualize the steps that are necessary to the process.

Welcome message from author
This document is posted to help you gain knowledge. Please leave a comment to let me know what you think about it! Share it to your friends and learn new things together.
Transcript
March 2005
Copyright 2005 Three Springs Handworks. All rights reserved. 1
Weaving: The Complete ProcessFrom Thread to Cloth
Sandra Rude, Textile ArtistThree Springs Handworkswww.3springshandworks.com
People often ask me. “How long did it take to weave that?”
The answer I usually give is that the actual weaving, that is, the act of throwing a shuttle back and forth across the loom, is about 10 percent of a complex process. This process includes a lot of planning and preparation before the weaving phase begins, and a number of finishing steps after the last thread is woven.
My reason for writing this document is to make it easier for anyone who is not a weaver to understand the process and to visualize the steps that are necessary to the process.
2 Copyright 2005 Form Follows Function
Form Follows Function
The first step in any weaving project is to decide what the cloth’s purpose in life will be. The intended function of the cloth guides the weaver in choosing the appropriate thread or yarn. For example, the yarn I use to weave a rug needs to be thick and hard-wearing, and the cloth must be stiff and flat. It must not roll up at the edges and trip everyone who walks on it, or if it is to be hung as decorative art, it must lie flat against the wall. A scarf, on the other hand, or any cloth worn next to the skin, should be smooth, soft, and very drapey so it conforms to the body.
Because I weave primarily scarves and shawls, and my personal preference is for fine rather than bulky cloth, I choose very thin thread in natural fibers that are comfortable to wear next to the skin. Silk, lyocell, rayon, cotton, and fine soft wool such as Merino are good choices.
There is no set standard for the size of a scarf - some people prefer long and narrow, others prefer a shorter, wider shape. The size of the wearer makes a difference, too. At six feet tall, I am likely to wear a longer, wider shawl than a woman five feet tall. Some women like to do the Isadora Duncan fling, with a dramatically long scarf wrapped around the neck once or twice. Some scarves look best simply draped over the shoulders. Some scarves have long, twisted fringe, others have short, straight fringe or just a simple hem.
In any case, I must make decisions about length and width and end treatment before starting to weave, because these factors determine the amount of thread I’ll need. The design, or pattern, of the cloth also has an impact. What’s the scale of the pattern? Do I choose a nonrepeating pattern? Two repeats? Ten repeats? Fifty repeats?
Once I’ve decided what thread to use, I use two kinds of software to help in the planning and design phase:
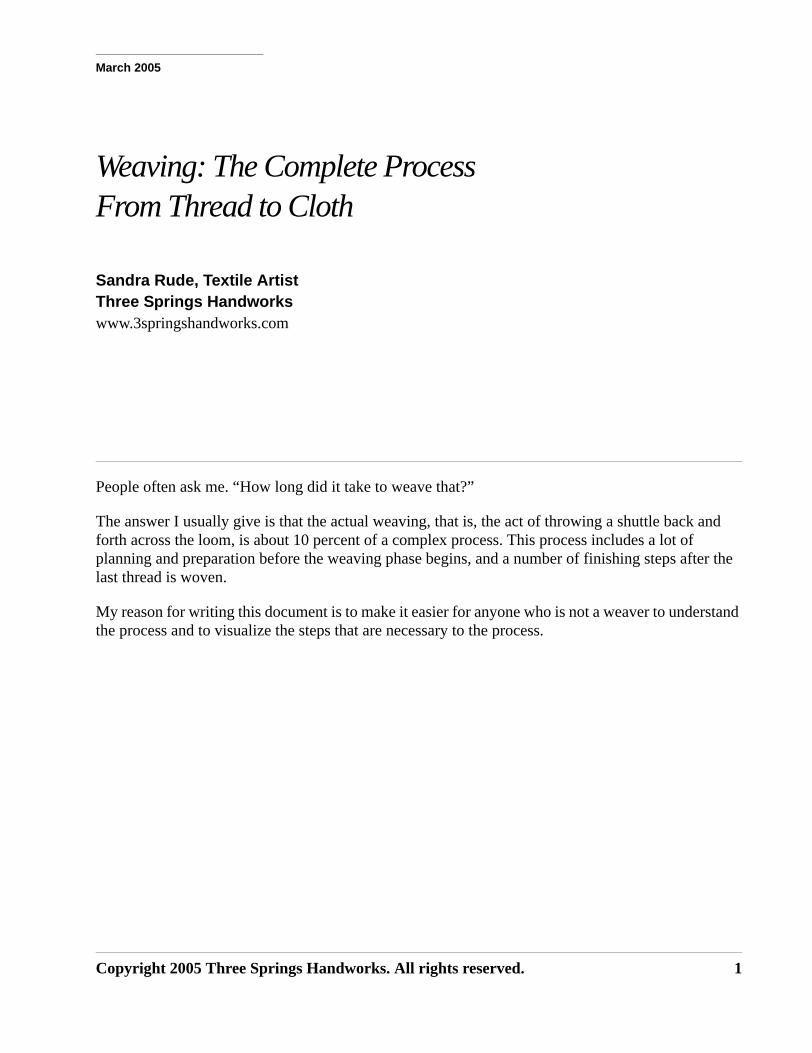
• A spreadsheet helps me calculate the amount of yarn I’ll need. You’ll see an example in Figure 1 on the facing page.
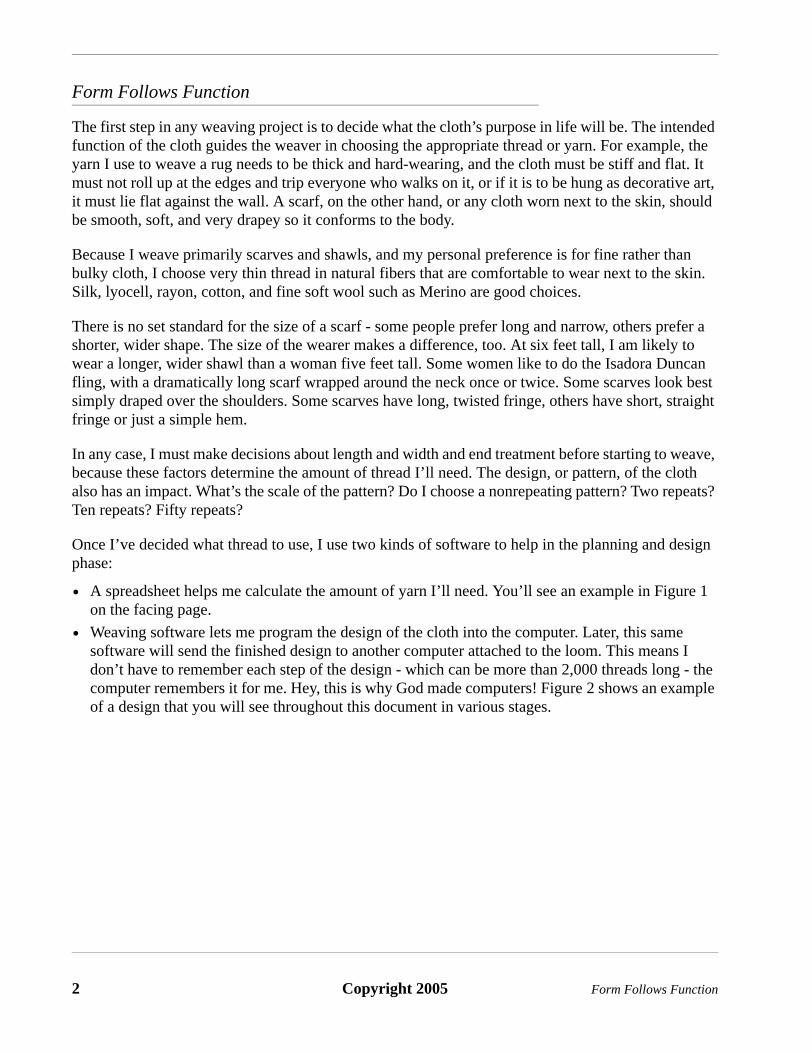
• Weaving software lets me program the design of the cloth into the computer. Later, this same software will send the finished design to another computer attached to the loom. This means I don’t have to remember each step of the design - which can be more than 2,000 threads long - the computer remembers it for me. Hey, this is why God made computers! Figure 2 shows an example of a design that you will see throughout this document in various stages.
Form Follows Function Copyright 2005 3
Figure 1. Spreadsheet for yarn calculation
Figure 2. Weaving design software
4 Copyright 2005 Dyeing the Thread
Dyeing the Thread
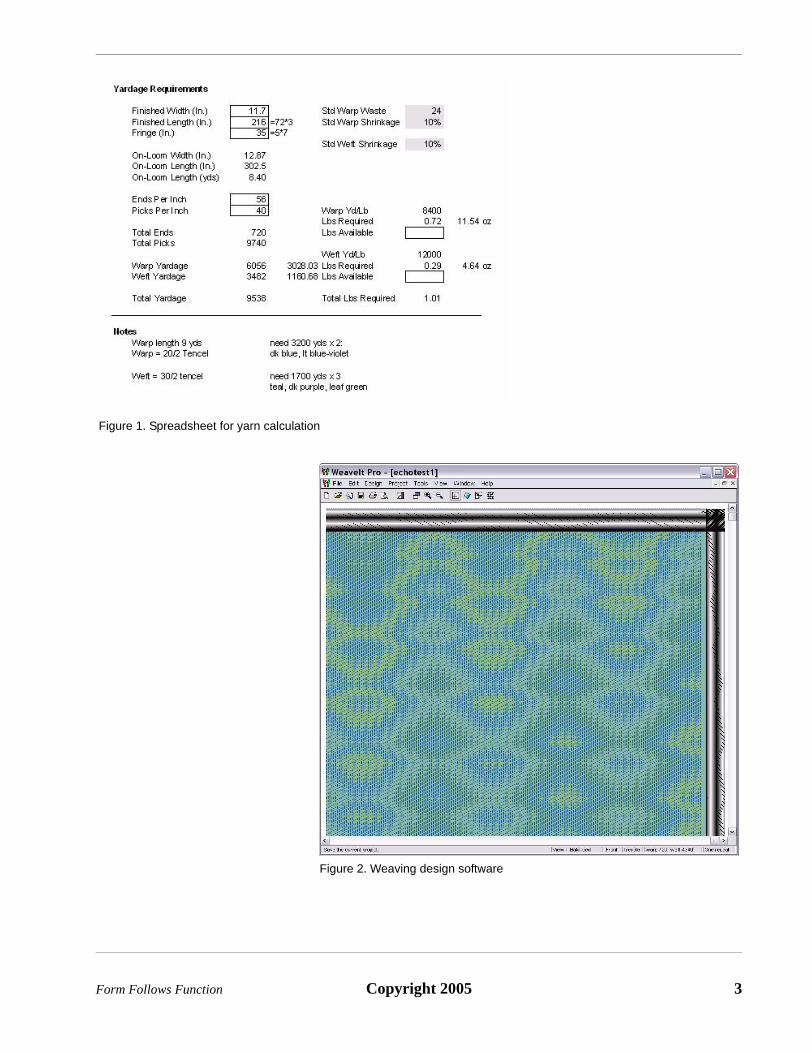
I usually buy undyed thread that is wound onto large cardboard cones. I must measure off the number of yards I’ll need, based on the spreadsheet (with a bit extra just in case) and make skeins for dyeing.
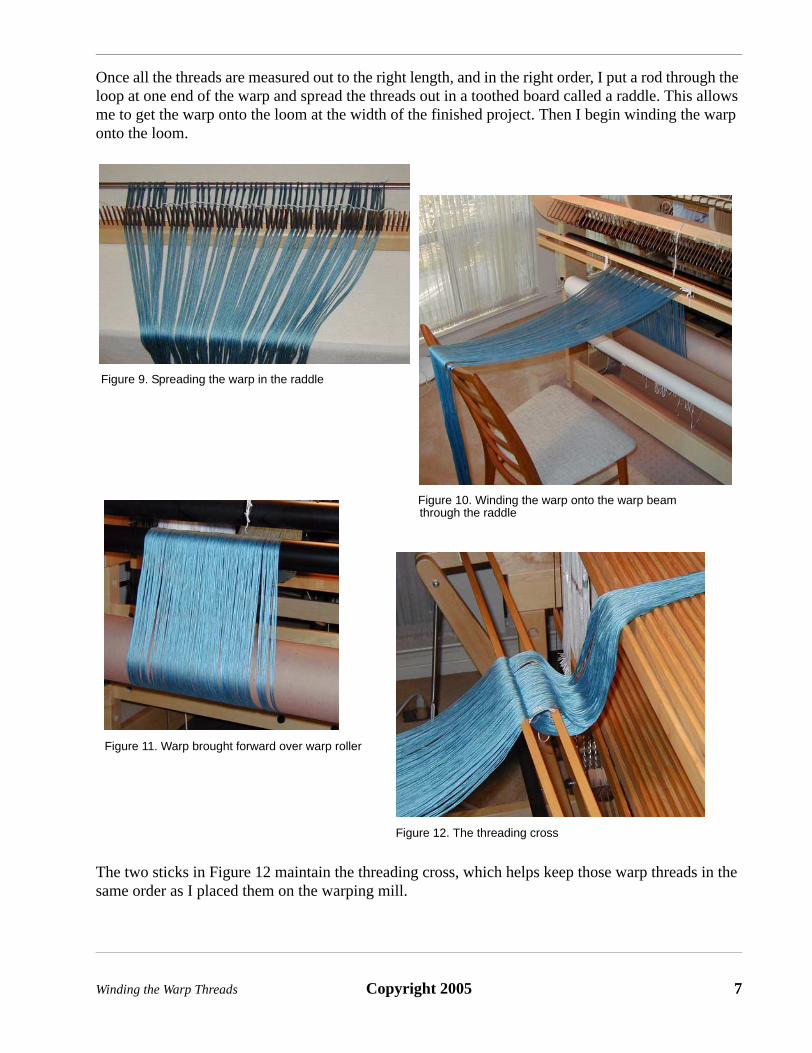
Then I get to play in the dye-pot! The pictures on the next page show the dye process at various stages. For the project I’m planning, there will be two colors of warp threads, alternating thread by thread, so I’ll dye half the warp yardage on one color, and half in the other. In this case, the colors are medium blue and deep blue-green.
Figure 3. Cone of white thread and a measured skein
Dyeing the Thread Copyright 2005 5
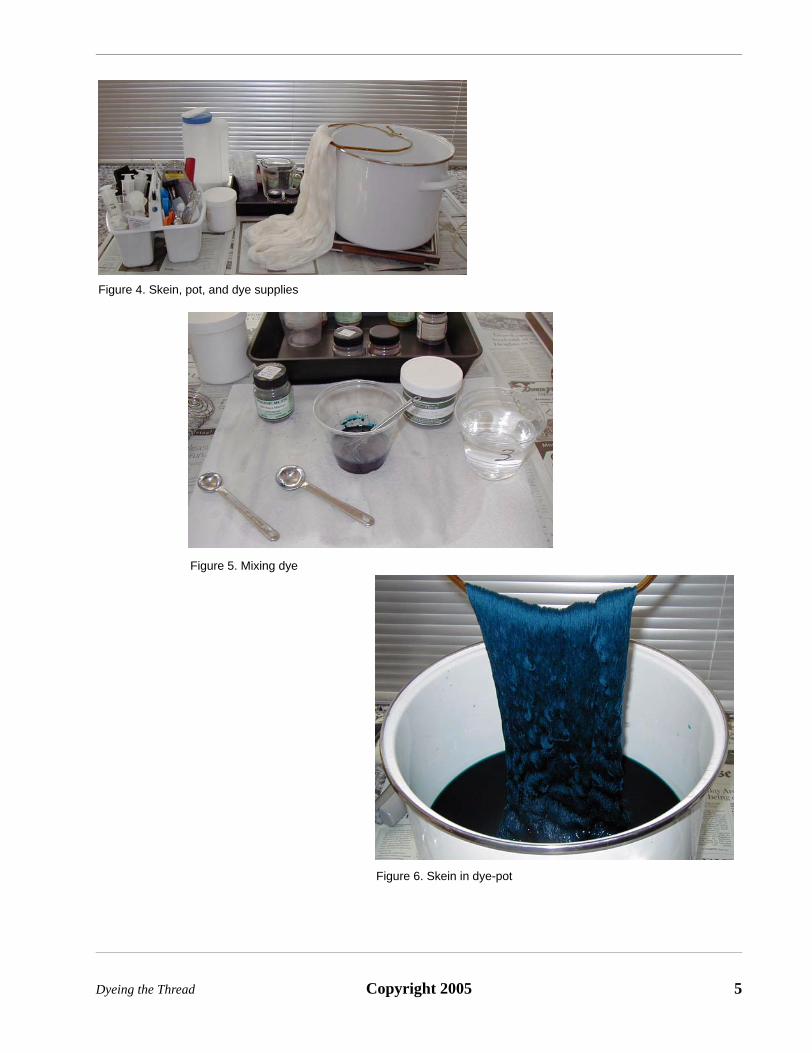
Figure 4. Skein, pot, and dye supplies
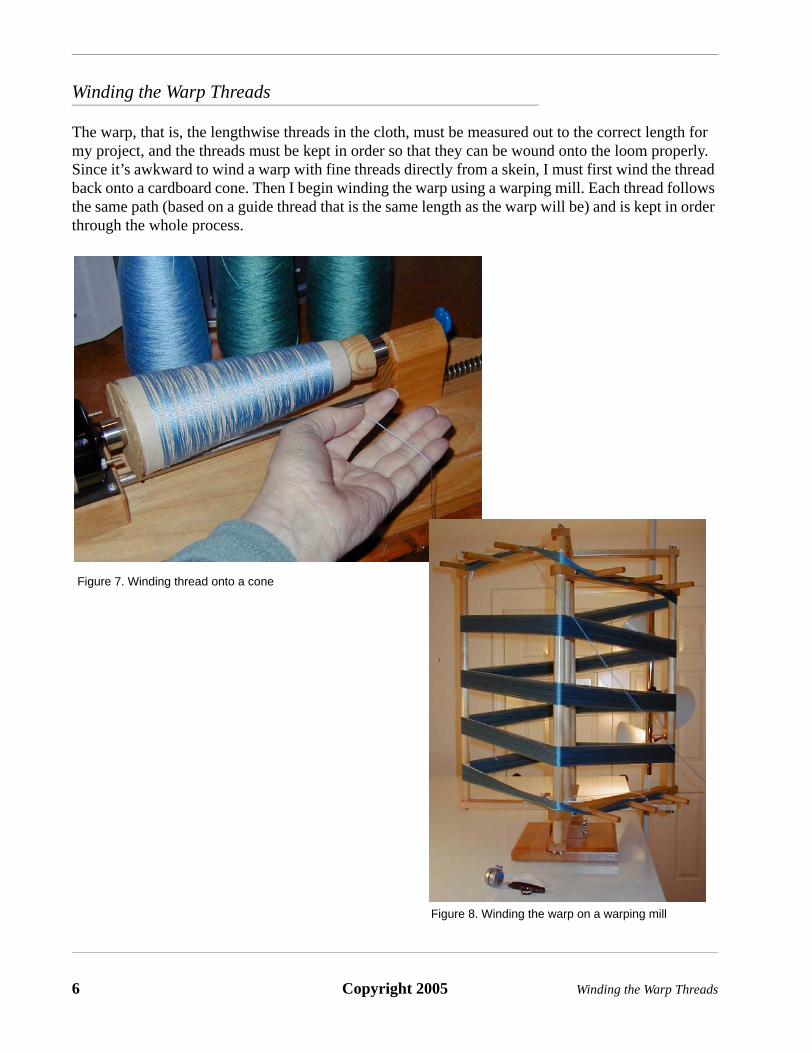
Figure 5. Mixing dye
Figure 6. Skein in dye-pot
6 Copyright 2005 Winding the Warp Threads
Winding the Warp Threads
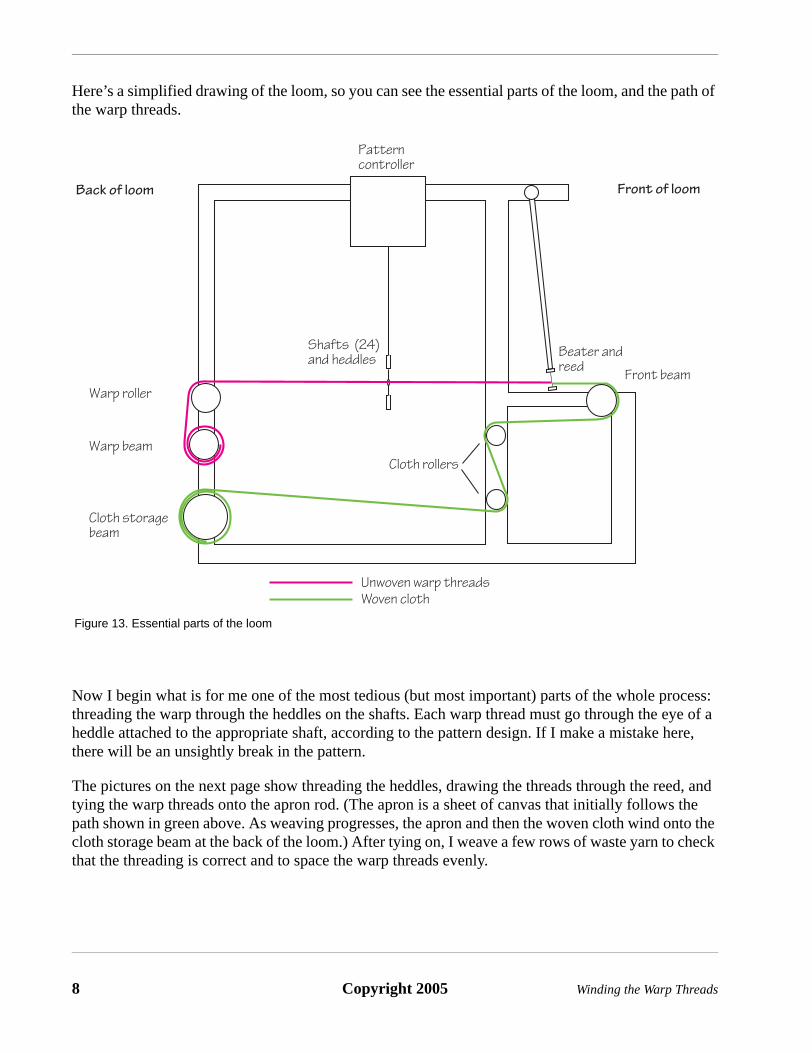
The warp, that is, the lengthwise threads in the cloth, must be measured out to the correct length for my project, and the threads must be kept in order so that they can be wound onto the loom properly. Since it’s awkward to wind a warp with fine threads directly from a skein, I must first wind the thread back onto a cardboard cone. Then I begin winding the warp using a warping mill. Each thread follows the same path (based on a guide thread that is the same length as the warp will be) and is kept in order through the whole process.
Figure 7. Winding thread onto a cone
Figure 8. Winding the warp on a warping mill
Winding the Warp Threads Copyright 2005 7
Once all the threads are measured out to the right length, and in the right order, I put a rod through the loop at one end of the warp and spread the threads out in a toothed board called a raddle. This allows me to get the warp onto the loom at the width of the finished project. Then I begin winding the warp onto the loom.
The two sticks in Figure 12 maintain the threading cross, which helps keep those warp threads in the same order as I placed them on the warping mill.
Figure 9. Spreading the warp in the raddle
Figure 10. Winding the warp onto the warp beam
Figure 11. Warp brought forward over warp roller
Figure 12. The threading cross
through the raddle
8 Copyright 2005 Winding the Warp Threads
Here’s a simplified drawing of the loom, so you can see the essential parts of the loom, and the path of the warp threads.
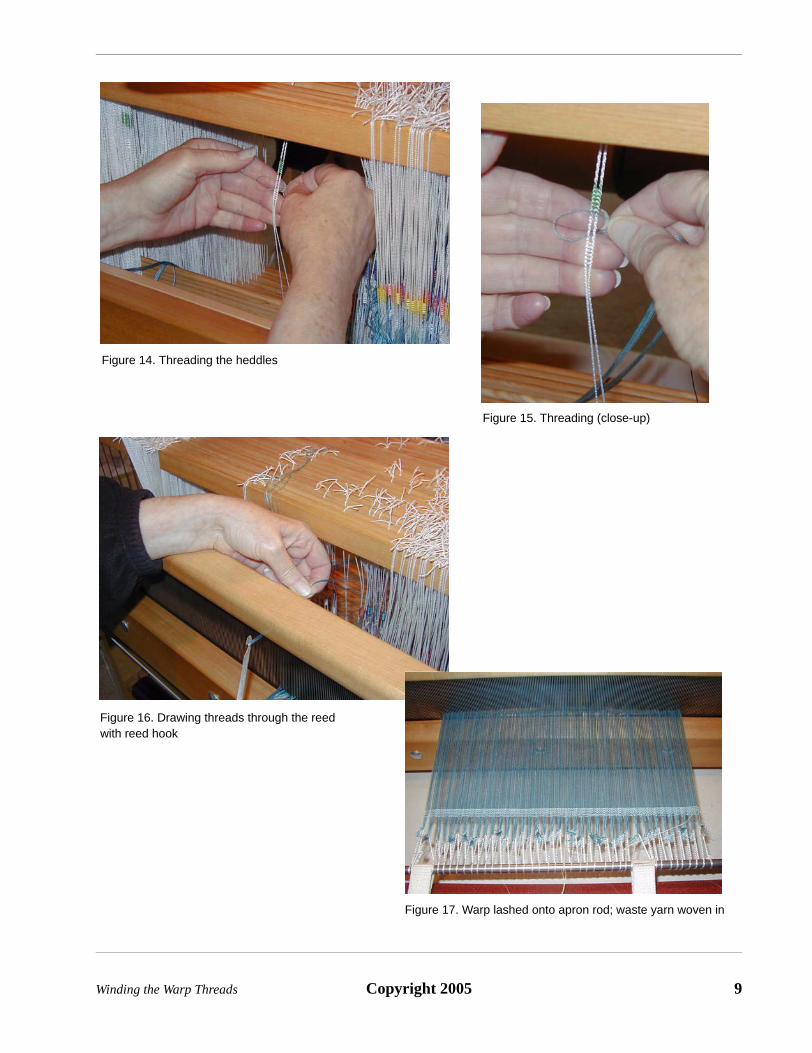
Now I begin what is for me one of the most tedious (but most important) parts of the whole process: threading the warp through the heddles on the shafts. Each warp thread must go through the eye of a heddle attached to the appropriate shaft, according to the pattern design. If I make a mistake here, there will be an unsightly break in the pattern.
The pictures on the next page show threading the heddles, drawing the threads through the reed, and tying the warp threads onto the apron rod. (The apron is a sheet of canvas that initially follows the path shown in green above. As weaving progresses, the apron and then the woven cloth wind onto the cloth storage beam at the back of the loom.) After tying on, I weave a few rows of waste yarn to check that the threading is correct and to space the warp threads evenly.
Unwoven warp threadsWoven cloth
Cloth storage beam
Warp roller
Warp beam
Pattern controller
Shafts (24) and heddles Beater and
reed Front beam
Front of loomBack of loom
Cloth rollers
Figure 13. Essential parts of the loom
Winding the Warp Threads Copyright 2005 9
Figure 14. Threading the heddles
Figure 15. Threading (close-up)
Figure 16. Drawing threads through the reed
Figure 17. Warp lashed onto apron rod; waste yarn woven in
with reed hook
10 Copyright 2005 Weaving
Weaving
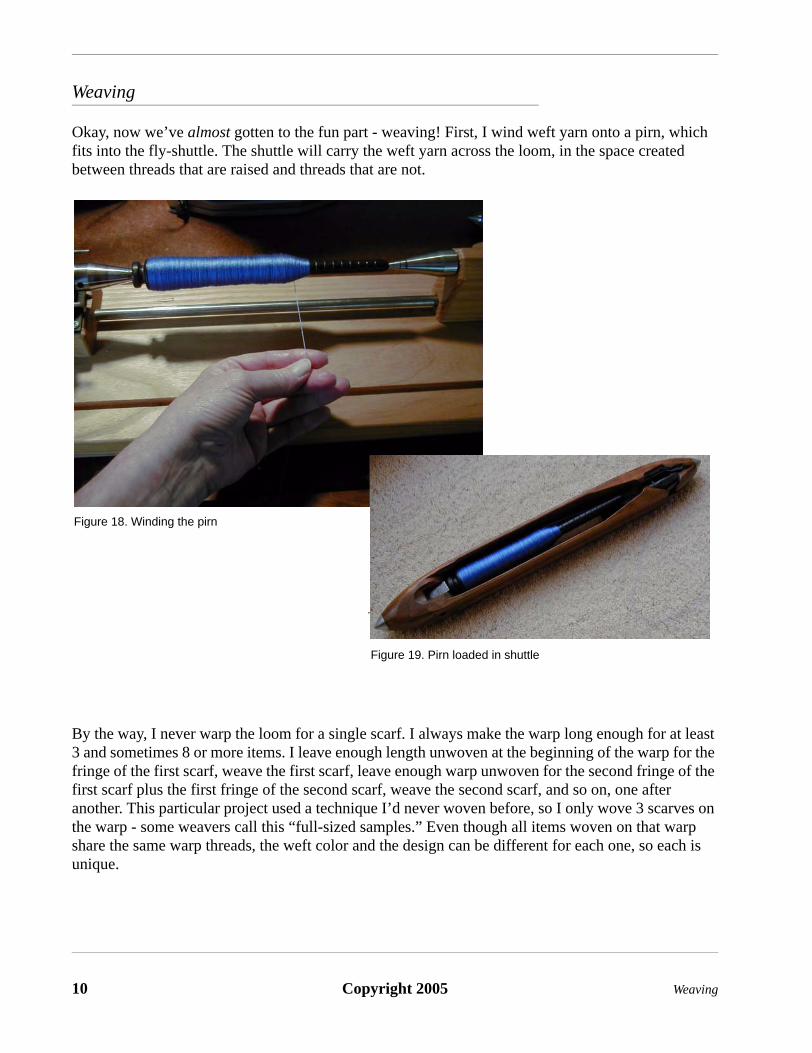
Okay, now we’ve almost gotten to the fun part - weaving! First, I wind weft yarn onto a pirn, which fits into the fly-shuttle. The shuttle will carry the weft yarn across the loom, in the space created between threads that are raised and threads that are not.
By the way, I never warp the loom for a single scarf. I always make the warp long enough for at least 3 and sometimes 8 or more items. I leave enough length unwoven at the beginning of the warp for the fringe of the first scarf, weave the first scarf, leave enough warp unwoven for the second fringe of the first scarf plus the first fringe of the second scarf, weave the second scarf, and so on, one after another. This particular project used a technique I’d never woven before, so I only wove 3 scarves on the warp - some weavers call this “full-sized samples.” Even though all items woven on that warp share the same warp threads, the weft color and the design can be different for each one, so each is unique.
Figure 18. Winding the pirn
Figure 19. Pirn loaded in shuttle
.
Weaving Copyright 2005 11
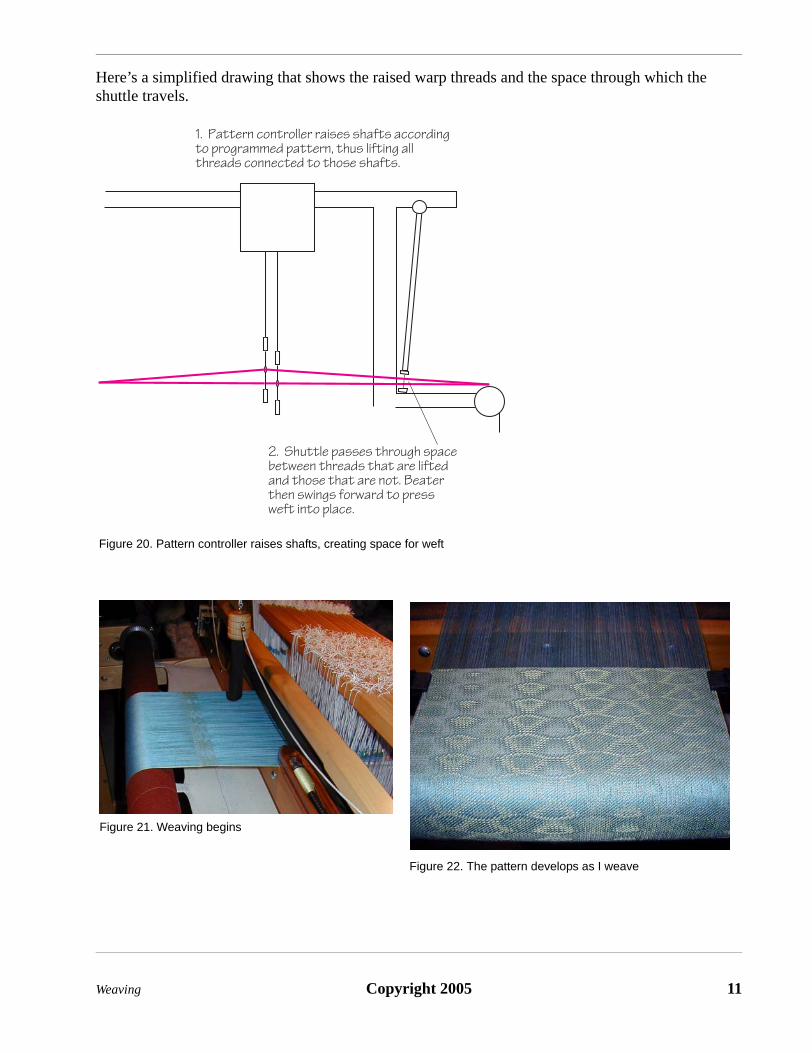
Here’s a simplified drawing that shows the raised warp threads and the space through which the shuttle travels.
1. Pattern controller raises shafts according to programmed pattern, thus lifting all threads connected to those shafts.
2. Shuttle passes through space between threads that are lifted and those that are not. Beater then swings forward to press weft into place.
Figure 20. Pattern controller raises shafts, creating space for weft
Figure 21. Weaving begins
Figure 22. The pattern develops as I weave
12 Copyright 2005 Finishing
Finishing
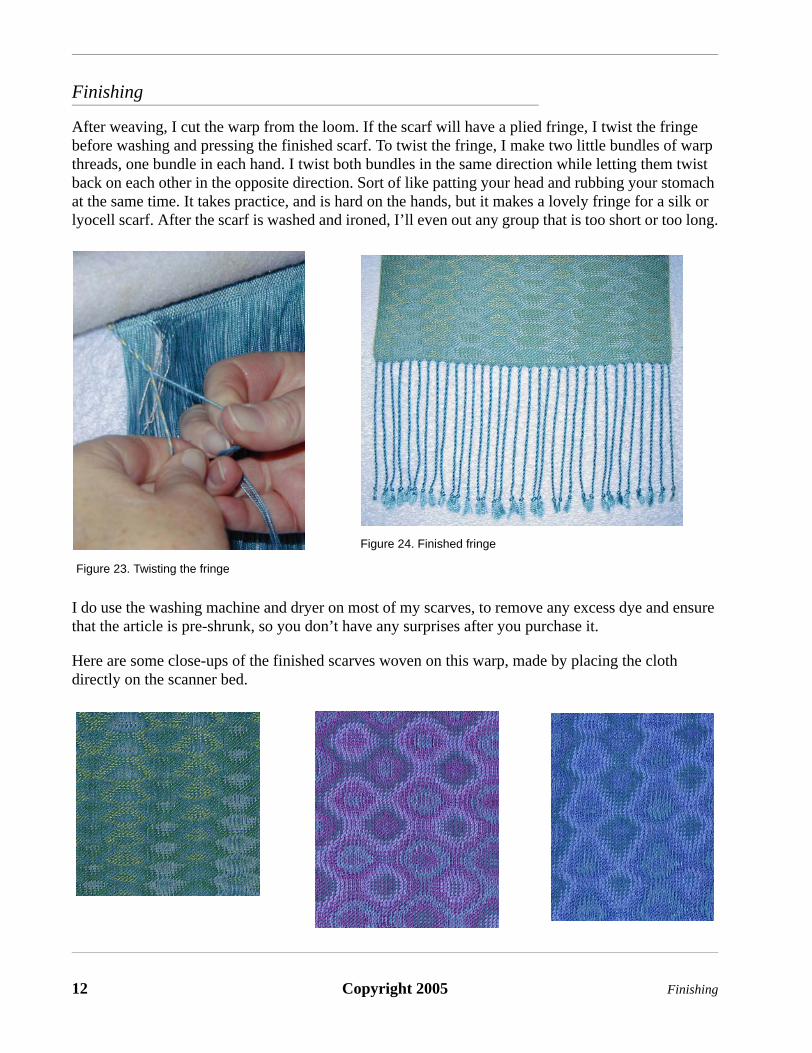
After weaving, I cut the warp from the loom. If the scarf will have a plied fringe, I twist the fringe before washing and pressing the finished scarf. To twist the fringe, I make two little bundles of warp threads, one bundle in each hand. I twist both bundles in the same direction while letting them twist back on each other in the opposite direction. Sort of like patting your head and rubbing your stomach at the same time. It takes practice, and is hard on the hands, but it makes a lovely fringe for a silk or lyocell scarf. After the scarf is washed and ironed, I’ll even out any group that is too short or too long.
I do use the washing machine and dryer on most of my scarves, to remove any excess dye and ensure that the article is pre-shrunk, so you don’t have any surprises after you purchase it.
Here are some close-ups of the finished scarves woven on this warp, made by placing the cloth directly on the scanner bed.
Figure 23. Twisting the fringe
Figure 24. Finished fringe
Related Documents