Warcraft has two manuals — one for humans and the other for orcs. To view either, simply click on the buttons below... HUMANS ORCS IM P OR TANT : There are some changes to these manuals that you should be aware of. First, the loading instructions within these documents are for an Apple Macintosh installation (don’t worry, the rules for the game are the same). Therefore, you should refer to the README document in the root directory of your CD-ROM for correct PC installation procedures and network functionality . Secondly , please contact us should you require any technical assistance .

Welcome message from author
This document is posted to help you gain knowledge. Please leave a comment to let me know what you think about it! Share it to your friends and learn new things together.
Transcript

8/7/2019 Warcraft 1 manual
http://slidepdf.com/reader/full/warcraft-1-manual 1/81
Warcraft has two manuals — one for humans and the other for orcs.
To view either, simply click on the buttons below...
HUMANS ORCS
IMPORTANT :
There are some changes to these manuals that you should be aware of.
First, the loading instructions within these documents are for an AppleMacintosh installation (don’t worry, the rules for the game are the
same). Therefore, you should refer to the README document in the
root directory of your CD-ROM for correct PC installation
procedures and network functionality.
Secondly, please contact us should you require any technical assistance.
8/7/2019 Warcraft 1 manual
http://slidepdf.com/reader/full/warcraft-1-manual 2/81
HUMANS
E N T E R T A I N M E N T
8/7/2019 Warcraft 1 manual
http://slidepdf.com/reader/full/warcraft-1-manual 3/81
HUMANS

8/7/2019 Warcraft 1 manual
http://slidepdf.com/reader/full/warcraft-1-manual 4/81
Warcraft: Orcs & Humans
Copyright © 1994-1995 by Blizzard Entertainment
The software and the manual are copyrighted. All rights reserved. They may not, inwhole or part, be copied, photocopied, reproduced, translated or reduced to any electronic
medium or machine-readable form without prior consent, in writing, from BlizzardEntertainment. The user of this product shall be entitled to use the product for his orher own use, but shall not be entitled to sell to transfer reproductions of the software or
manual to other parties in any way, nor to rent or lease the product to others withoutpermission of Blizzard Entertainment.
The trademarks Warcraft and Blizzard Entertainment are registered in the U.S. Patentand Trademark Office.
Blizzard Entertainment
P.O. Box 18077
Irvine, CA 92713
(714) 955-1380 Phone(714) 955-1381 Fax
(714) 955-1382 Technical Support(714) 955-1481 Blizzard Icenet(800) 953-SNOW Sales
E N T E R T A I N M E N T Distributed by
Interplay Productions
Harleyford Manor
Harleyford
Henley Rd, Marlow
Buckinghamshire, SL7 2DX
Tel:- 01628 423666 Fax:- 01628 423777E-mail: [email protected]:- http://www.interplay.com
8/7/2019 Warcraft 1 manual
http://slidepdf.com/reader/full/warcraft-1-manual 5/81
Blizzard Entertainment
Table of Contents
System Requirements ......................................................................... 1
Getting Started..................................................................................... 1
Installation ............................................................................................. 1
Troubleshooting ................................................................................... 2
Technical Support ................................................................................ 4
On-line Support Services................................................................... 4
Tutorial ................................................................................................... 5
Game Options/Hotkeys ................................................................... 15
Chronicles of Azeroth ...................................................................... 17
Unit Descriptions .............................................................................. 21
Cleric Spells ........................................................................................ 24
Conjurer Spells ................................................................................... 25
Building Descriptions ........................................................................ 27
Monster Descriptions ....................................................................... 31
Credits ................................................................................................. 35
Notice .................................................................................................. 36
Map of Azeroth................................................... Center of the Book
8/7/2019 Warcraft 1 manual
http://slidepdf.com/reader/full/warcraft-1-manual 6/81
Warcraft: Orcs & Humans
GETTING STARTED
SYSTEM REQUIREMENTS
Computer
Warcraft requires at least a Macintosh 68030 processor (68040 recommended)and at least 8 MB RAM. Warcraft is also accelerated for Power Macintosh.
Controls
You will need a Mouse and Keyboard to play Warcraft.
Display
Warcraft requires a 13" colour monitor with 256 colours and Quicktime 2.0 or greater.
Disk Drives
A CD-ROM drive and a Hard Disk are required for installation and play.
System
You must have System 7.0 or greater (7.1 or greater recommended).
Sound
Sound Manager 3.1 or greater.
Two-Player Support
Warcraft requires Communication Toolbox tools for 2-player mode.
GETTING STARTED
INSTALLATION
For Automatic Installation: Double-click on the Warcraft installer icon on the Warcraft CD-ROM. Select the Warcraft setup that you wish to install. Necessary system extensions will alsobe installed at this time.
For Manual Installation: Select and drag one of the prepared versions of Warcraft from theCD-ROM onto your hard disk. You may make an alias to original files on the Warcraft CD-
ROM as desired. For speed in launching games, the War Data file should be on the hard disk.
If you do not have Sound Manager 3.1, Quicktime 2.1 or Communications Toolbox toolsinstalled on your system, install them from the files supplied in the System Extras folder.
Copy Protection
Warcraft has a tiered copy protection format. The program requires that your CD-ROM be inthe disk drive. If you do not want to keep the CD-ROM in the drive, then you will be asked to
enter a specific word from a page in the Game Manual during the startup of each game. Thefinal option is to identify your copy as a “Spawned” version, and no copy protection will be
required (Spawned versions may only play in 2-player mode versus an opponent that has thecopy protected version on their machine). We regret that continuing software piracy requires
that this minimum form of copy protection be required.
1
8/7/2019 Warcraft 1 manual
http://slidepdf.com/reader/full/warcraft-1-manual 7/81
Blizzard Entertainment
SYSTEM EXTRAS
The following applications are found in the System Extras folder on the Warcraft CD-ROM.
Sound Manager 3.1 provides several important features for Warcraft. If you do not use theWarcraft Installer, you will need to install Sound Manager 3.1 by putting the Sound controlpanel in the Control Panels folder, and the Sound Manager extension in the Extensions folder.
You will need to reboot your system for Sound Manager 3.1 to become active.
Quicktime 2.1 is used to play the 3-D rendered sequences during the game. If Quicktime 2.0 orgreater is not present on your system, the game will still play, but the movies will not run. If you do not use the Warcraft Installer, you will need to install Quicktime 2.1 by putting theQuicktime, Quicktime Power Plug and Quicktime Musical Instruments files in the Extensions
folder. You will need to reboot your system for Quicktime 2.1 to become active.
Communications Toolbox Tools appropriate for two-player Warcraft are found in the System
Extras folder on the Warcraft CD-ROM. If you do not use the Warcraft Installer, you will needto install Communications Toolbox tools by placing them in the Extensions folder. You do notneed to reboot your system for Communications Toolbox tools to be recognised.
TROUBLESHOOTING
Q. Why can’t I install the game to my hard disk?You must check all System Requirements, especially any mention of hard disk space required,as mentioned in the installation program.
Q. The game says I don't have enough memory. What can I do?Warcraft is a very memory intensive game, and you may need to turn off a number of extensions
and/or control panels. Freeing up memory in this way is fairly simple:
If you are running System 7.5 or later, use the Extensions Manager control panel that shipped
with your system. It is suggested that you turn everything off that isn't vital and restart beforerunning Warcraft. To do this conveniently, first save your current configuration by choosingSave Set... from the pop-up menu above the list. Name this set “Standard”. Next, turn off everything in Extensions Manager except your CD-ROM driver, Sound Manager, Quicktime,
Quicktime Power Plug and Quicktime Musical Instruments and choose Save Set... again, namingthis set “Warcraft”. Now, before you run Warcraft, choose your “Warcraft” set from the pop-up menu in Extensions Manager, and restart your system. To return to your usual setup, choose“Standard” from the pop-up menu and restart again.
If you are running a System version prior to 7.5, Install the Extensions Manager providedwith your Warcraft CD-ROM in the System Extras folder. Then follow the above instructions.
Also, you may turn off Quicktime to conserve memory space, but movies will not play.
2
8/7/2019 Warcraft 1 manual
http://slidepdf.com/reader/full/warcraft-1-manual 8/81
Warcraft: Orcs & Humans
Q. Why doesn’t the sound work?
Go to the Sound Control Panel and make sure that output volume is not set on zero. Also makesure that the Warcraft Preferences do not have volume set to zero. If music during the gamedoes not work, make sure that the CD is in the drive and that your Input Source is set to Internal
CD and Playthrough is checked. This is set from the Sound Control Panel, under Sound InOptions.
Q. I can’t get the game to run correctly. What else can I do?
If you are experiencing problems with the game, try configuring for no sound. Try disablingextensions to see if there is a conflict. Make sure that you have the basic system requirements
as listed in the SYSTEM REQUIREMENTS section of this manual.
Q. Can I play against a human opponent?
Yes , Warcraft can be played via modem, direct link or network between two players. You mayconnect to either Macintosh or IBM Warcraft: Orcs & Humans opponents. Warcraft uses aunique “Spawning” technology that allows head-to-head play by installing multiple copies from
the origin al CD-ROM. To play a two player game, at least one of the players will need theoriginal copy of Warcraft. A detailed description for installing “spawned” copies of Warcraft
and playing head-to-head games is in the readme text file on the Warcraft CD-ROM.
Q. I have problems connecting for a 2-player game with AutoDoubler on - Why?
There is an incompatibility with Power Macintoshes, Auto-Doubler and two-player Warcraft
games usi ng the Communic ations Toolbox. To avoid this conflict, boot your system wi thoutAutoDoubler or connect with a method other than Communications Toolbox.
TWO-PLAYER WARCRAFT
Warcraft uses the Communicat ions Toolbox for most two-player connec tions. TheCommunications Toolbox provides a consistent interface, and it also allows for new types of connections by simply dropping Communcations Toolbox tools into the Extensions folder.
Warcraft comes with the AppleTalk Modem Tool, Direct Serial Tool and AppleTalk ADSPTool extensions. Adding new connection types (such as TCP/IP) are as simple as dropping thetool into the Extensions folder.
Warcraft uses a “wait for/connect to” method for establishing the connection for a two-playergame. One player must wait for a connection, and the other player must then connect to the first
player. The Communicati ons Toolbox has a Connection Settin gs dialog where players set upthe connection that will be used. Both players must of course use the same connection. Detaileddescriptions for each of the three types of connections included on the Warcraft CD-ROM are
located in the readme text file on the CD-ROM.
IPX CONNECTIONS
IPX connections use a slightly different setup that is fully detailed in the readme text file on theWarcraft CD-ROM. Please reference this text for more specific help.
There are many reasons why you may have difficulty in connecting with modems or hooking
up to your network. We have provided a list of connection techniques and command lines
for modem support in the readme text file found on your Warcraft CD-ROM. Also, check
all connections, and if you are sti l l experiencing difficulty, consult your modem and/or network manual for any other commands you may need to know to configure your modem
correctly. Running diagnostic software for nets is also recommended .
3
8/7/2019 Warcraft 1 manual
http://slidepdf.com/reader/full/warcraft-1-manual 9/81
Blizzard Entertainment
BEFORE YOU CALL FOR TECHNICAL SUPPORT
If you are having problems, please consult the “Troubleshooting” section of this book and thereadme file on the Warcraft CD-ROM before calling technical support. We receive many callsevery day and can deal with your inquiry more efficiently if you have the following informationavailable:
1. The correct name of the game
2. The type of computer you are running the game on3. Your Operating System (OS) version4. Know your free memory / largest unused block5. Exact error message reported (if any)
Our technical support number is +44 (0)1628 423666. Our hours are 9 A.M. to 7 P.M. PacificStandard Time, Monday through Friday, holidays excluded. Have a pen and paper handy whenyou call, and be near your computer if at all possible.
ON-LINE SUPPORT SERVICES
Blizzard Entertainment provides Upcoming News, Latest Versions, Updates, Product Demos,Reviews, Technical Support and more on the following On-line Services for Modem users.
Blizzard IceNet: Available 24 hours a day, 7 days a week USA (714) 955-1481, with settings of
8,N,1, and support of up to 14400 baud.
America Online: The Warcraft Discussion site can be found in the Computer Gaming Section
in the Strategy and Other Sims folder under Warcraft. We can also be contacted directly byE-Mail at Address: BlizzrdEnt.
CompuServe: The Blizzard Entertnmnt forum is located in Game Publishers Forum D(GO GAMEDPUB). We can also be contacted directly by E-Mail at Address: 74777,1115
Internet: Customer Support can be contacted by direct E-Mail at Address: [email protected]
ADDITIONAL SUPPORT SERVICES
You may also contact Blizzard Entertainment via fax and mail.
Fax: (714) 955-1381 • 24 hours every dayMail: Customer Support, Blizzard EntertainmentP.O. Box 18077 • Irvine, CA 92713 USA
CUSTOMER SUPPORT
Wrire to: Interplay ProductionsHarleyford Manor
HarleyfordHenley RoadMarlowBuckinghamshire
SL7 2DXTel:- 01628 423666 Fax:- 01628 423777E-mail: [email protected]:- http://www.interplay.com
4

8/7/2019 Warcraft 1 manual
http://slidepdf.com/reader/full/warcraft-1-manual 10/81
Warcraft: Orcs & Humans
TUTORIAL
INSTALLATION
1. To install the game, place your Warcraft: Orcs & Humans CD-ROM in your drive.
2. Double-click theWarcraft install Icon.
3. Follow the on-screen prompts to complete installation.
If you experience problems during installation, please refer to the Troubleshooting section
of this book. Additional information regarding memory, sound and video setup can be
found there as well.
STARTING THE GAME
1. Boot your system normally with System 7.0 or higher.
2. Double-click the Warcraft game Icon.
STARTING A NEW GAME
1. The game begins with a graphic introduction to the world of Warcraft. If you would like tobypass this introduction, press the space bar or click the mouse button. After the introduction,you will be taken to the Warcraft Main Menu.
2. Move the mouse over the Start a new game option and click on the mouse button, or type“S” to select. You will also notice that the letter S in the first word is of another colour thanthe rest of the message. This allows you to enter any selection by pressing the key that
corresponds to the different coloured letter - in this case “S”. You will now be taken to theRace Selection Screen.
3. Begin by selecting the Single Player option. Then choose to command the Humans byselecting Human Campaign and clicking on the Mouse Button to continue. There will bea short description of your first assignment, and then you will be taken to the main gamescreen, the Command Screen.
4. You may also open the New Game Window by moving the mouse to the top of the screento activate the menu bar and then selecting New Game under File. You may also hold
down the Apple key and press the N key. You will be given a set of boxes for selectingbetween campaign games and custom games. Choose to command the Humans by selectingthe Single Player and Human Campaign options and then clicking OK to continue. There
will be a short description of your first assignment, and then you will be taken to the maingame screen, the Command Screen.
5
8/7/2019 Warcraft 1 manual
http://slidepdf.com/reader/full/warcraft-1-manual 11/81
Blizzard Entertainment
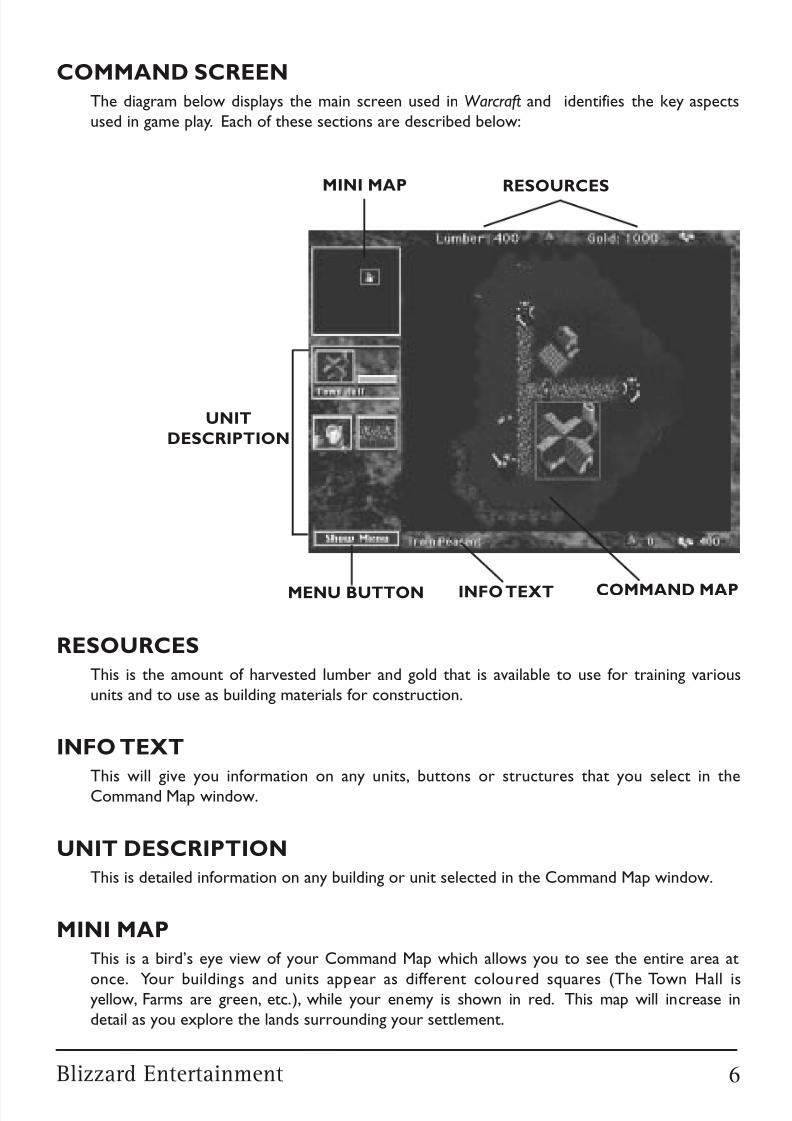
MINI MAP RESOURCES
INFO TEXT COMMAND MAPMENU BUTTON
RESOURCES
This is the amount of harvested lumber and gold that is available to use for training variousunits and to use as building materials for construction.
INFO TEXT
This will give you information on any units, buttons or structures that you select in theCommand Map window.
UNIT DESCRIPTION
This is detailed information on any building or unit selected in the Command Map window.
MINI MAP
This is a bird’s eye view of your Command Map which allows you to see the entire area at
once. Your buildings and units appear as different coloured squares (The Town Hall isyellow, Farms are green, etc.), while your enemy is shown in red. This map will increase indetail as you explore the lands surrounding your settlement.
UNIT
DESCRIPTION
COMMAND SCREEN
The diagram below displays the main screen used in Warcraft and identifies the key aspectsused in game play. Each of these sections are described below:
6
8/7/2019 Warcraft 1 manual
http://slidepdf.com/reader/full/warcraft-1-manual 12/81
Warcraft: Orcs & Humans
COMMAND MAP
This is the main field of play. Here you will be able to see, in great detail, the events thattranspire in the area around you. You may select units or buildings in this window by usingthe mouse to select them. When selected, a green box will surround the unit, indicating thatthey are now prepared to receive your orders.
SHOW MENU
This button calls up the Warcraft Options menu bar at the top of the screen. For descriptionsof these functions, see the GAME OPTIONS section after the tutorial.
File
Edit
Game
Lumber & Gold
Warcraft Icon
Clicking the Hide Menu Button removes the menu bar.
ESTABLISHING YOUR SETTLEMENT
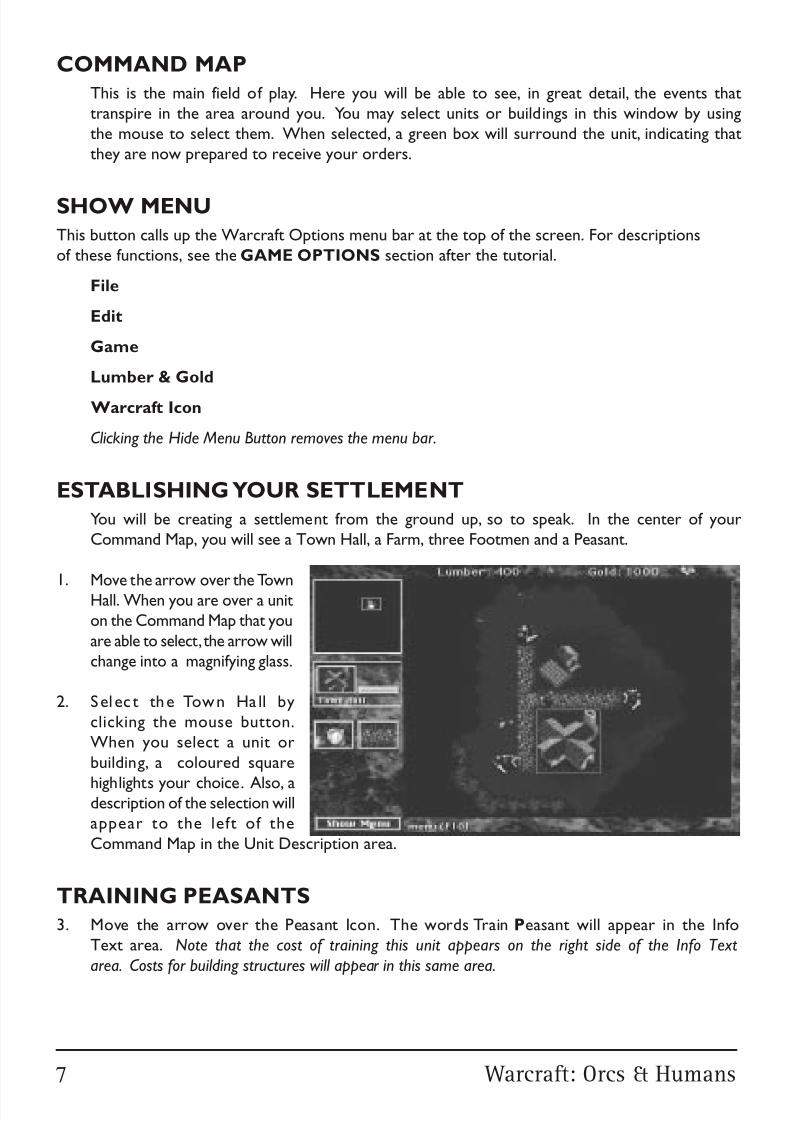
You will be creating a settlement from the ground up, so to speak. In the center of yourCommand Map, you will see a Town Hall, a Farm, three Footmen and a Peasant.
1. Move the arrow over the Town
Hall. When you are over a unit
on the Command Map that you
are able to select, the arrow will
change into a magnifying glass.
2. Sel ec t the Town Ha ll byclicking the mouse button.When you select a unit or
building, a coloured square
highlights your choice. Also, adescription of the selection willappear to the left of the
Command Map in the Unit Description area.
TRAINING PEASANTS
3. Move the arrow over the Peasant Icon. The words Train Peasant will appear in the InfoText area. Note that the cost of training this unit appears on the right side of the Info Text
area. Costs for building structures will appear in this same area.
7
8/7/2019 Warcraft 1 manual
http://slidepdf.com/reader/full/warcraft-1-manual 13/81
Blizzard Entertainment
4. Select the Peasant Icon by clicking the mouse button. This begins the process of trainingyour Peasant. Note that the rate of completion is shown in the Unit Description area.
5. After the Peasant is trained, he will appear on the Command Map.
6. Should you attempt to train another Peasant, you will receive the message Not Enough
Food . . . Build More Farms in the Info Text area.
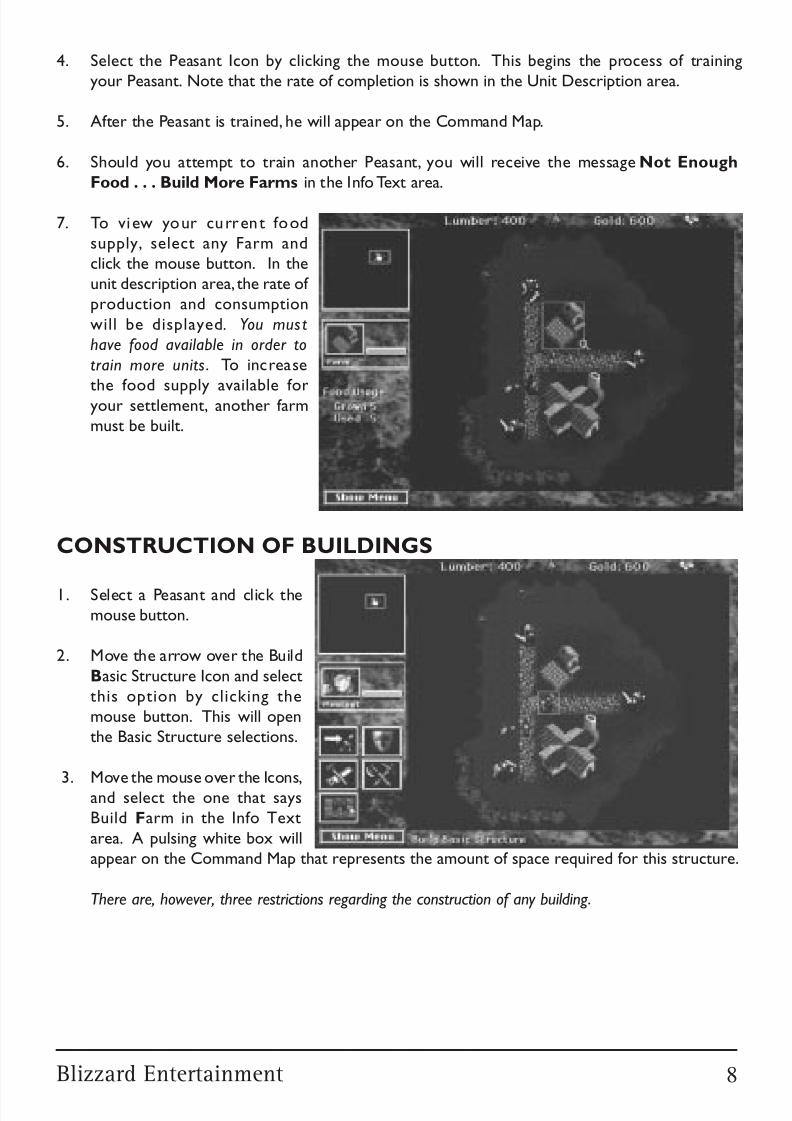
7. To view your current foodsupply, select any Farm andclick the mouse button. In theunit description area, the rate of production and consumption
will be displayed . You must
have food available in order to
train more units. To increase
the food supply available foryour settlement, another farmmust be built.
CONSTRUCTION OF BUILDINGS
1. Select a Peasant and click themouse button.
2. Move the arrow over the Build
Basic Structure Icon and selectthis option by clicking themouse button. This will openthe Basic Structure selections.
3. Move the mouse over the Icons,and select the one that saysBuild Farm in the Info Text
area. A pulsing white box willappear on the Command Map that represents the amount of space required for this structure.
There are, however, three restrictions regarding the construction of any building .
8
8/7/2019 Warcraft 1 manual
http://slidepdf.com/reader/full/warcraft-1-manual 14/81
Warcraft: Orcs & Humans
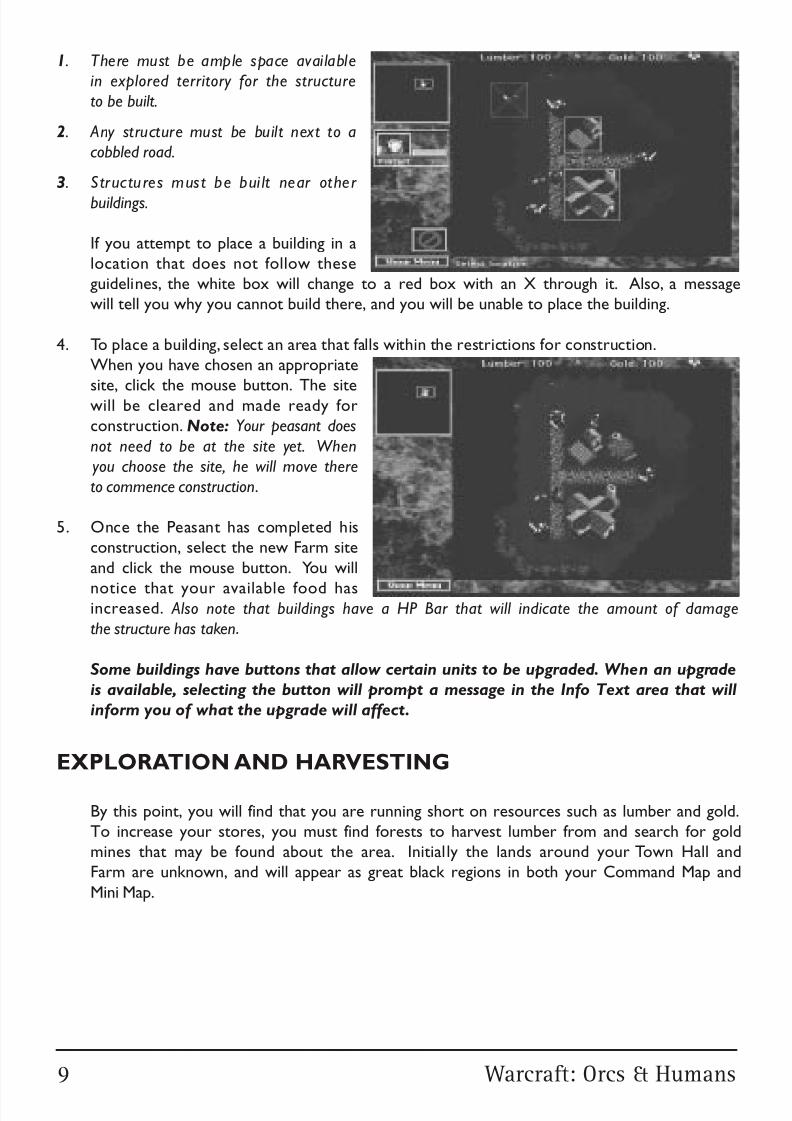
1. There must be ample space available
in explored territory for the structure
to be built.
2. Any structure must be built next to a
cobbled road.
3. S tructures must be bui lt near other
buildings.
If you attempt to place a building in alocation that does not follow theseguidelines, the white box will change to a red box with an X through it. Also, a messagewill tell you why you cannot build there, and you will be unable to place the building.
4. To place a building, select an area that falls within the restrictions for construction.When you have chosen an appropriate
site, click the mouse button. The sitewill be cleared and made ready forconstruction. Note: Your peasant does
not need to be at the site yet. When
you choose the site, he will move there
to commence construction.
5. Once the Peasant has completed hisconstruction, select the new Farm site
and click the mouse button. You will
notice that your available food hasincreased. Also note that buildings have a HP Bar that will indicate the amount of damage
the structure has taken.
Some buildings have buttons that allow certain units to be upgraded. When an upgrade
is available, selecting the button will prompt a message in the Info Text area that will
inform you of what the upgrade will affect.
EXPLORATION AND HARVESTING
By this point, you will find that you are running short on resources such as lumber and gold.To increase your stores, you must find forests to harvest lumber from and search for goldmines that may be found about the area. Initially the lands around your Town Hall andFarm are unknown, and will appear as great black regions in both your Command Map and
Mini Map.
9
8/7/2019 Warcraft 1 manual
http://slidepdf.com/reader/full/warcraft-1-manual 15/81
Blizzard Entertainment
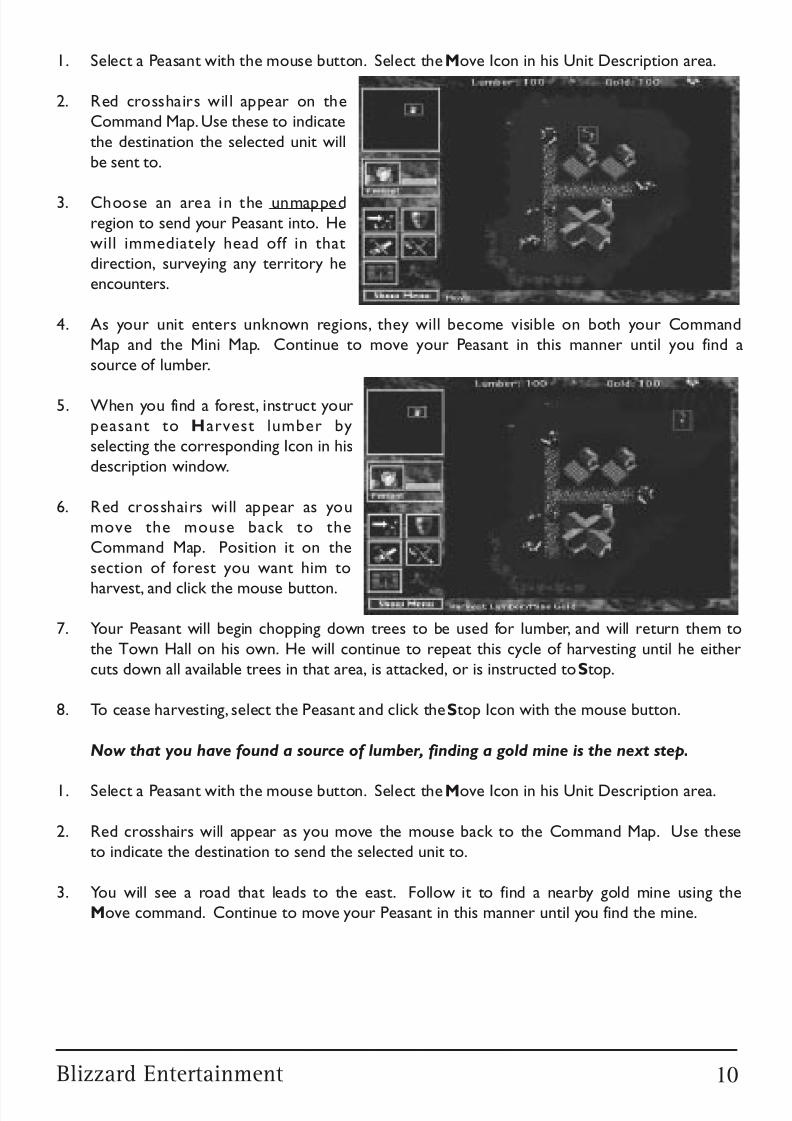
1. Select a Peasant with the mouse button. Select the Move Icon in his Unit Description area.
2. Red crosshairs will appear on theCommand Map. Use these to indicate
the destination the selected unit willbe sent to.
3. Choose an area in the unmappedregion to send your Peasant into. Hewill immediately head off in thatdirection, surveying any territory heencounters.
4. As your unit enters unknown regions, they will become visible on both your CommandMap and the Mini Map. Continue to move your Peasant in this manner until you find asource of lumber.
5. When you find a forest, instruct yourpeasant to Harvest lumber byselecting the corresponding Icon in hisdescription window.
6. Red crosshairs will appear as youmove the mouse back to theCommand Map. Position it on the
section of forest you want him to
harvest, and click the mouse button.
7. Your Peasant will begin chopping down trees to be used for lumber, and will return them to
the Town Hall on his own. He will continue to repeat this cycle of harvesting until he eithercuts down all available trees in that area, is attacked, or is instructed to Stop.
8. To cease harvesting, select the Peasant and click the Stop Icon with the mouse button.
Now that you have found a source of lumber, finding a gold mine is the next step.
1. Select a Peasant with the mouse button. Select the Move Icon in his Unit Description area.
2. Red crosshairs will appear as you move the mouse back to the Command Map. Use theseto indicate the destination to send the selected unit to.
3. You will see a road that leads to the east. Follow it to find a nearby gold mine using theMove command. Continue to move your Peasant in this manner until you find the mine.
10
8/7/2019 Warcraft 1 manual
http://slidepdf.com/reader/full/warcraft-1-manual 16/81
Warcraft: Orcs & Humans
4. As your unit enters unknown regions, they will become visible on both your CommandMap and the Mini Map.
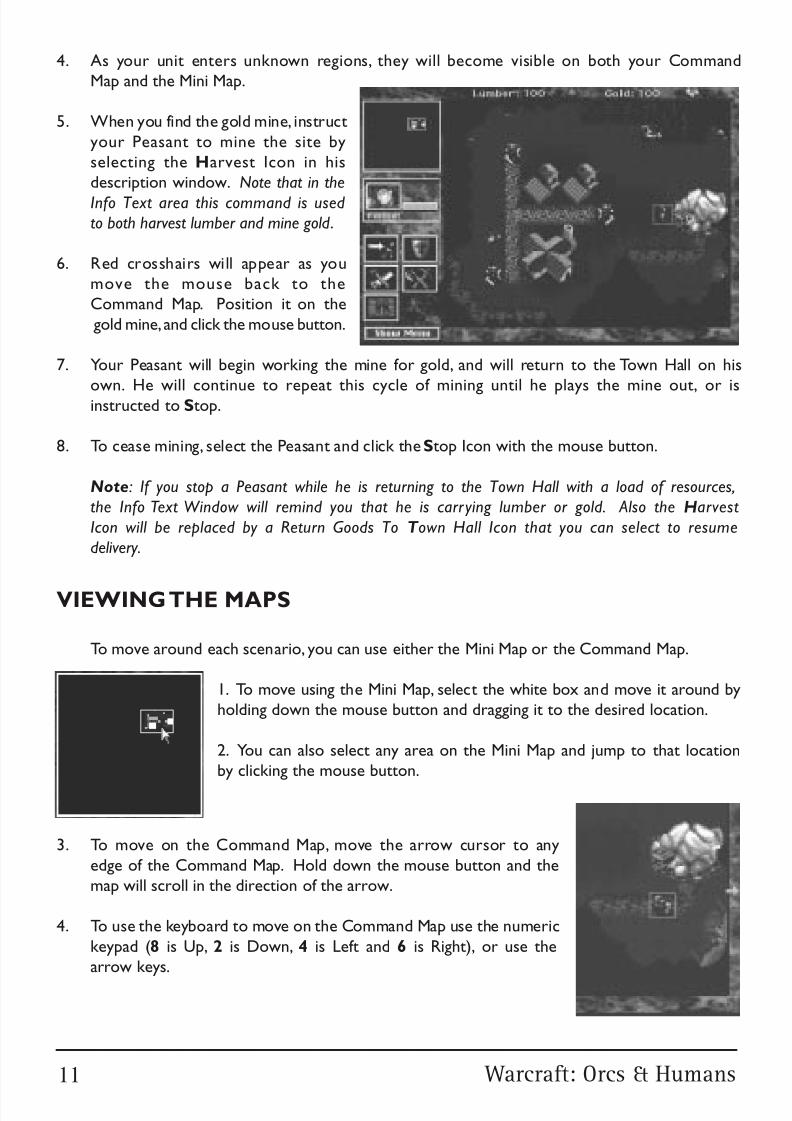
5. When you find the gold mine, instruct
your Peasant to mine the site byselecting the Harvest Icon in hisdescription window. Note that in the
Info Text area this command is used
to both harvest lumber and mine gold .
6. Red crosshairs will appear as youmove the mouse back to theCommand Map. Position it on the
gold mine, and click the mouse button.
7. Your Peasant will begin working the mine for gold, and will return to the Town Hall on his
own. He will continue to repeat this cycle of mining until he plays the mine out, or isinstructed to Stop.
8. To cease mining, select the Peasant and click the Stop Icon with the mouse button.
Note: If you stop a Peasant while he is returning to the Town Hall with a load of resources,
the Info Text Window will remind you that he is carr ying lumber or gold. Also the Harvest
Icon will be replaced by a Return Goods To T own Hall Icon that you can select to resume
delivery.
VIEWING THE MAPS
To move around each scenario, you can use either the Mini Map or the Command Map.
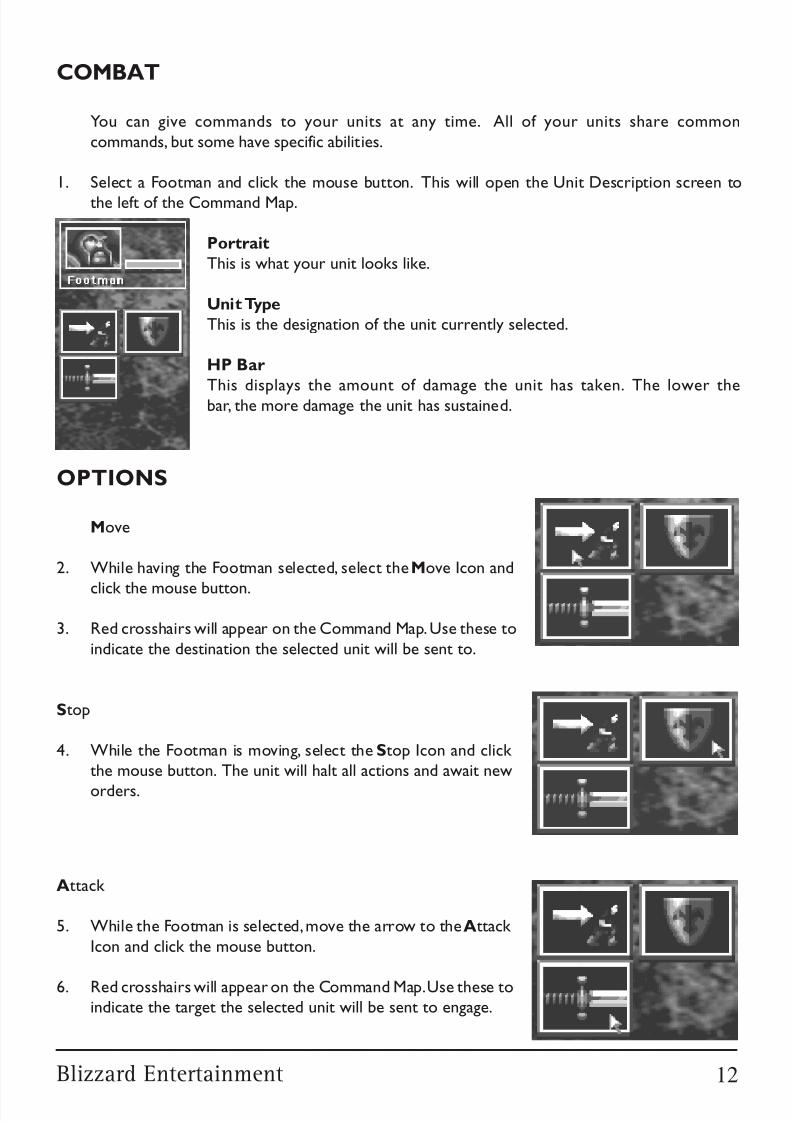
1. To move using the Mini Map, select the white box and move it around byholding down the mouse button and dragging it to the desired location.
2. You can also select any area on the Mini Map and jump to that locationby clicking the mouse button.
3. To move on the Command Map, move the arrow cursor to any
edge of the Command Map. Hold down the mouse button and themap will scroll in the direction of the arrow.
4. To use the keyboard to move on the Command Map use the numeric
keypad (8 is Up, 2 is Down, 4 is Left and 6 is Right), or use thearrow keys.
11
8/7/2019 Warcraft 1 manual
http://slidepdf.com/reader/full/warcraft-1-manual 17/81
Blizzard Entertainment
COMBAT
You can give commands to your units at any time. All of your units share common
commands, but some have specific abilities.
1. Select a Footman and click the mouse button. This will open the Unit Description screen to
the left of the Command Map.
Portrait
This is what your unit looks like.
Unit Type
This is the designation of the unit currently selected.
HP Bar
This displays the amount of damage the unit has taken. The lower thebar, the more damage the unit has sustained.
OPTIONS
Move
2. While having the Footman selected, select the Move Icon and
click the mouse button.
3. Red crosshairs will appear on the Command Map. Use these to
indicate the destination the selected unit will be sent to.
Stop
4. While the Footman is moving, select the Stop Icon and click the mouse button. The unit will halt all actions and await new
orders.
Attack
5. While the Footman is selected, move the arrow to the Attack
Icon and click the mouse button.
6. Red crosshairs will appear on the Command Map. Use these toindicate the target the selected unit will be sent to engage.
12
8/7/2019 Warcraft 1 manual
http://slidepdf.com/reader/full/warcraft-1-manual 18/81
Warcraft: Orcs & Humans
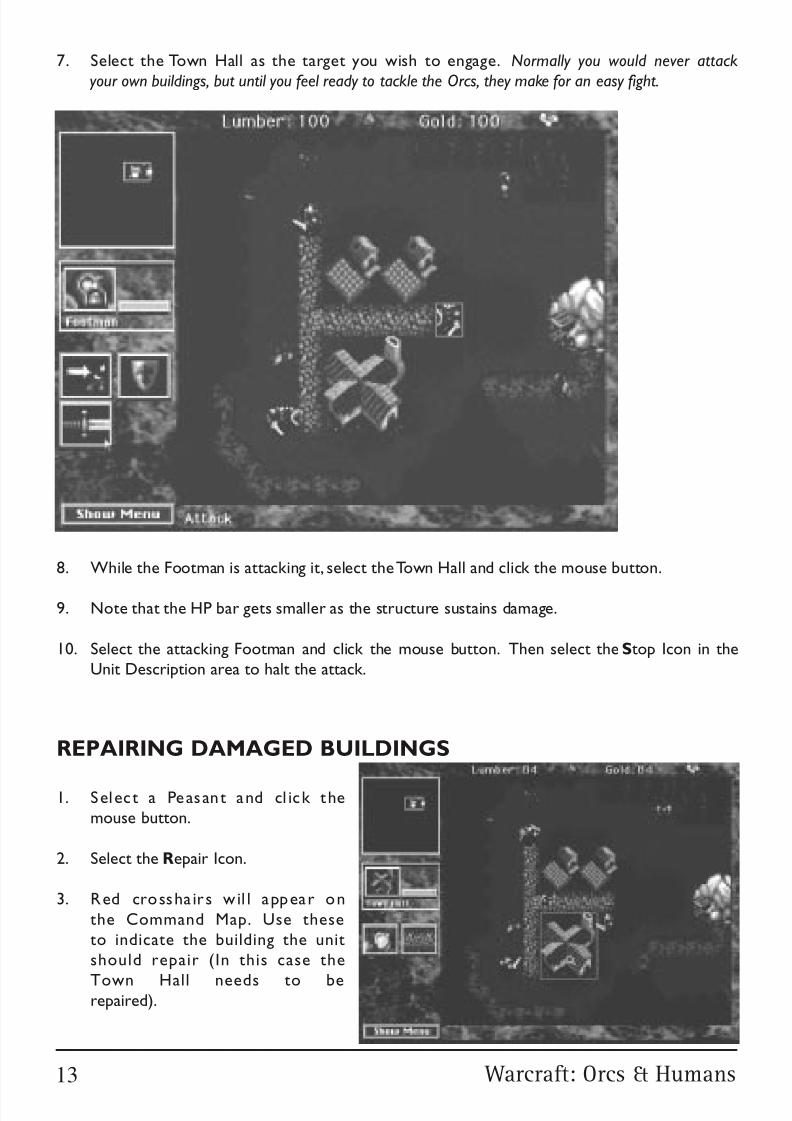
7. Select the Town Hall as the target you wish to engage. Normally you would never attack
your own buildings, but until you feel ready to tackle the Orcs, they make for an easy fight.
8. While the Footman is attacking it, select the Town Hall and click the mouse button.
9. Note that the HP bar gets smaller as the structure sustains damage.
10. Select the attacking Footman and click the mouse button. Then select the Stop Icon in theUnit Description area to halt the attack.
REPAIRING DAMAGED BUILDINGS
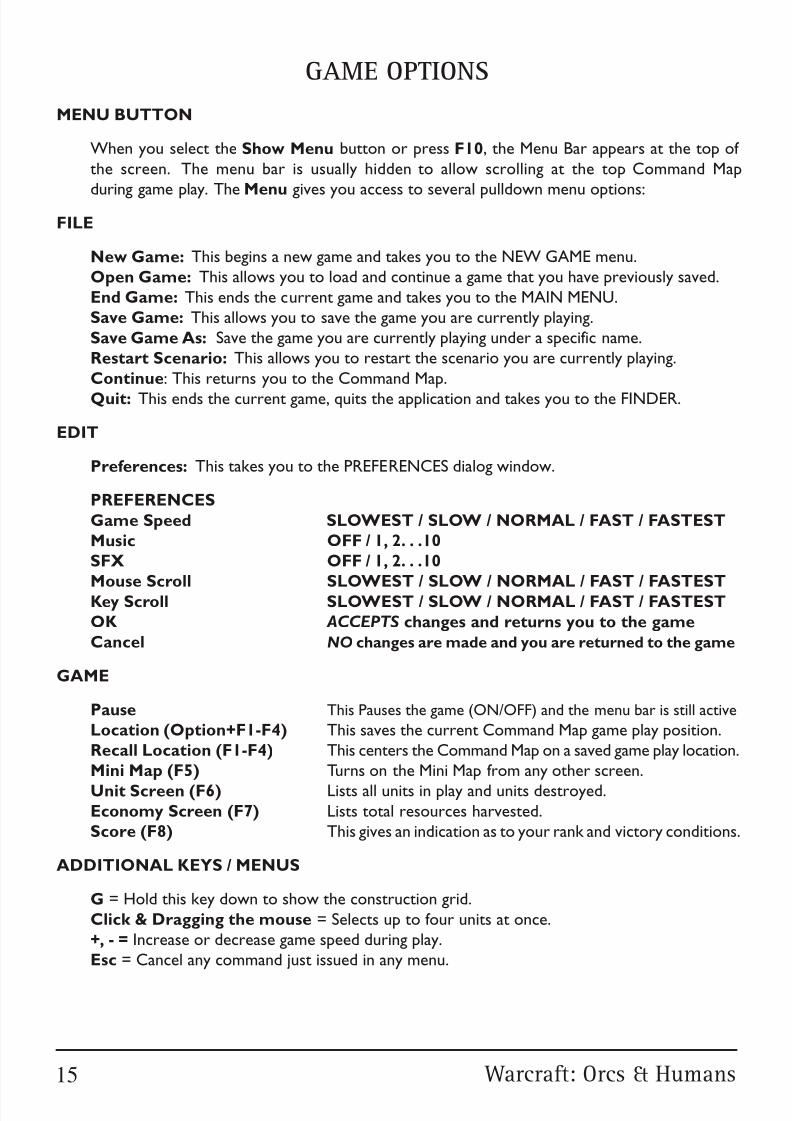
1. Select a Peasant and cl ick themouse button.
2. Select the Repair Icon.
3. Red crossha irs w il l appear on
the Command Map. Use theseto indicate the building the unitshould repair (In this case the
Town Hall needs to berepaired).
13

8/7/2019 Warcraft 1 manual
http://slidepdf.com/reader/full/warcraft-1-manual 19/81
Blizzard Entertainment
4. The Peasant will move to the Town Hall and begin the process of making repairs.
5. Select the Town Hall and click the mouse button. The repairs will be reflected in the risingHP bar in the Unit Description area. The cost to fully repair the structure is displayed in the
Info Text area.
6. When you have completed repairs on the structure, the Peasant will stop and await new
instructions. Should you wish to stop repairs before they are completed, select the StopIcon in the Peasant's Unit Description and click the mouse button.
Repairing uses both lumber and gold, but is cheaper than building a new structure.
GROUPING UNITS
It is sometimes desirable to give the same command to a number of units. These grouped
units do not have to be of the same type for grouping to take effect.
1. You can group any four unitsby selecting a unit and clickingthe mouse button.
2. Hold down the shift key andselect a second unit. Both unitsshould now have coloured boxes
around them, showing that they
are both selected.
3. Repeat th is process un ti l a
maximum of four units havebeen grouped.
4. You may also click the mouse on an empty area of the Command Map and, while holding
the mouse button down, drag it across a group of units (creating a box). The units that arewithin this box will be selected and grouped.
5. When additional units are selected, their displays will condense in the Unit Descriptionarea. Units gain no additional abilities while grouped, so a Peasant is still unable to attack,
and a Footman cannot harvest lumber.
Units may have other options (such as the Peasant who cannot Attack, but can Harvest and
Build), but grouped units may lose those abilities. Move and Stop will remain consistent
for each unit.
You are now well on your way to conquering the evil Orcish hordes and freeing Azerothfrom their tightening grip. Welcome to the World of Warcraft.
14
8/7/2019 Warcraft 1 manual
http://slidepdf.com/reader/full/warcraft-1-manual 20/81
Warcraft: Orcs & Humans
GAME OPTIONS
MENU BUTTON
When you select the Show Menu button or press F10, the Menu Bar appears at the top of
the screen. The menu bar is usually hidden to allow scrolling at the top Command Map
during game play. The Menu gives you access to several pulldown menu options:FILE
New Game: This begins a new game and takes you to the NEW GAME menu.
Open Game: This allows you to load and continue a game that you have previously saved.
End Game: This ends the current game and takes you to the MAIN MENU.Save Game: This allows you to save the game you are currently playing.
Save Game As: Save the game you are currently playing under a specific name.
Restart Scenario: This allows you to restart the scenario you are currently playing.
Continue: This returns you to the Command Map.
Quit: This ends the current game, quits the application and takes you to the FINDER.
EDIT
Preferences: This takes you to the PREFERENCES dialog window.
PREFERENCES
Game Speed SLOWEST / SLOW / NORMAL / FAST / FASTEST
Music OFF / 1, 2. . .10
SFX OFF / 1, 2. . .10
Mouse Scroll SLOWEST / SLOW / NORMAL / FAST / FASTESTKey Scroll SLOWEST / SLOW / NORMAL / FAST / FASTEST
OK ACCEPTS changes and returns you to the game
Cancel NO changes are made and you are returned to the game
GAME
Pause This Pauses the game (ON/OFF) and the menu bar is still active
Location (Option+F1-F4) This saves the current Command Map game play position.Recall Location (F1-F4) This centers the Command Map on a saved game play location.Mini Map (F5) Turns on the Mini Map from any other screen.
Unit Screen (F6) Lists all units in play and units destroyed.Economy Screen (F7) Lists total resources harvested.Score (F8) This gives an indication as to your rank and victory conditions.
ADDITIONAL KEYS / MENUS
G = Hold this key down to show the construction grid.
Click & Dragging the mouse = Selects up to four units at once.+, - = Increase or decrease game speed during play.Esc = Cancel any command just issued in any menu.
15
8/7/2019 Warcraft 1 manual
http://slidepdf.com/reader/full/warcraft-1-manual 21/81
Blizzard Entertainment
Chronicles
of the War
in AzerothA treatise of the events leading to the war
between Mankind and the Orcish Hordes
as related by
Sir Lothar, Knight of the Realm
16
8/7/2019 Warcraft 1 manual
http://slidepdf.com/reader/full/warcraft-1-manual 22/81
Warcraft: Orcs & Humans
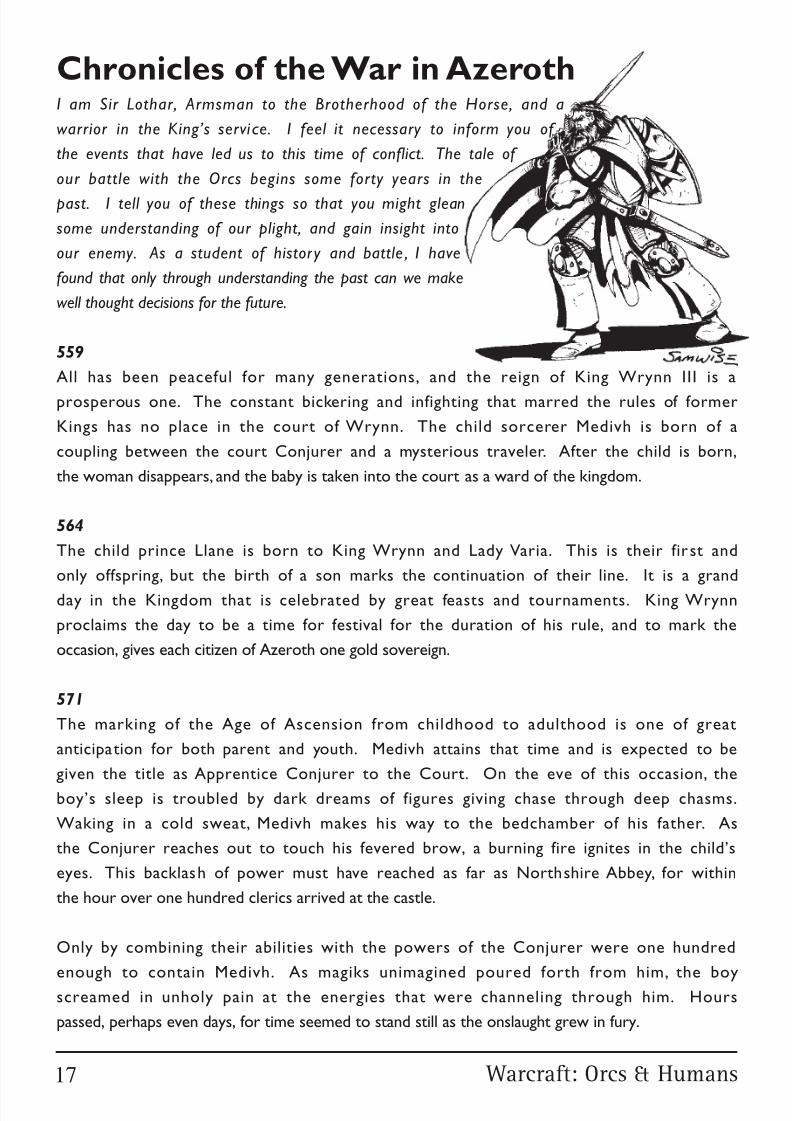
Chronicles of the War in AzerothI am Sir Lothar, Armsman to the Brotherhood of the Horse, and a
warrior in the King’s servi ce. I feel it necessary to inform you of
the events that have led us to this time of conflict. The tale of
our battle with the Orcs begins some forty years in the
past. I tell you of these things so that you might glean
some understanding of our plight, and gain insight into
our enemy. As a student of histor y and battle , I have
found that only through understanding the past can we make
well thought decisions for the future.
559
All has been peaceful for many generations, and the reign of King Wrynn III is a
prosperous one. The constant bickering and infighting that marred the rules of former
Kings has no place in the court of Wrynn. The child sorcerer Medivh is born of a
coupling between the court Conjurer and a mysterious traveler. After the child is born,
the woman disappears, and the baby is taken into the court as a ward of the kingdom.
564
The child prince Llane is born to King Wrynn and Lady Varia. This is their fir st and
only offspring, but the birth of a son marks the continuation of their line. It is a grand
day in the Kingdom that is celebrated by great feasts and tournaments. King Wrynn
proclaims the day to be a time for festival for the duration of his rule, and to mark the
occasion, gives each citizen of Azeroth one gold sovereign.
571
The marking of the Age of Ascension from childhood to adulthood is one of great
anticipation for both parent and youth. Medivh attains that time and is expected to be
given the title as Apprentice Conjurer to the Court. On the eve of this occasion, the
boy’s sleep is troubled by dark dreams of figures giving chase through deep chasms.
Waking in a cold sweat, Medivh makes his way to the bedchamber of his father. As
the Conjurer reaches out to touch his fevered brow, a burning fire ignites in the child’s
eyes. This backlash of power must have reached as far as Northshire Abbey, for within
the hour over one hundred clerics arrived at the castle.
Only by combining their abilities with the powers of the Conjurer were one hundred
enough to contain Medivh. As magiks unimagined poured forth from him, the boy
screamed in unholy pain at the energies that were channeling through him. Hours
passed, perhaps even days, for time seemed to stand still as the onslaught grew in fury.
17
8/7/2019 Warcraft 1 manual
http://slidepdf.com/reader/full/warcraft-1-manual 23/81
Blizzard Entertainment
Then, as simply as one snuffs a candle, both father and son crumpled into a heap. The
Conjurer lay dead, drained of all life, and Medivh fell into a deep sleep - his heart barely
beating, and only the faintest of breath escaping his lips. After long discussion, the King
and the Abbot of Northshire agree that Medivh should be taken to the Abbey for the
safety of both child and kingdom.
577
Llane reaches his Age of Ascension, and the full station of Prince of Azeroth is bestowed
upon him. At this ceremony, tens of thousands of devoted subjects come to offer their
wishes of support and long life. During the evening feast with family, and those close to
the crown, a cold wind began to chil l the air. A gentle breeze at firs t, it grew in
intensity, until the doors to the great hall were blown off of their hinges. As the guests
leaned into the wind, a figure entered, riding the winds like some great bird of prey.
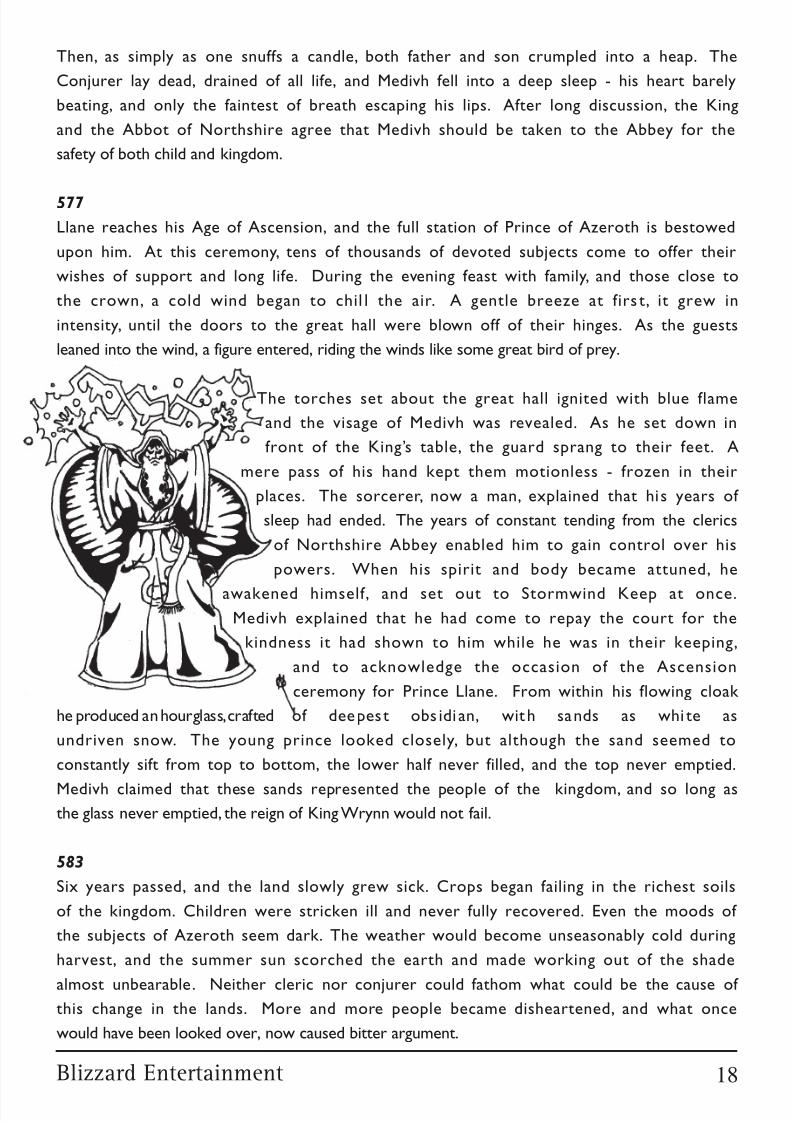
The torches set about the great hall ignited with blue flame
and the visage of Medivh was revealed. As he set down in
front of the King’s table, the guard sprang to their feet. A
mere pass of his hand kept them motionless - frozen in their
places. The sorcerer, now a man, explained that his years of
sleep had ended. The years of constant tending from the clerics
of Northshire Abbey enabled him to gain control over his
powers. When his spirit and body became attuned, he
awakened himself, and set out to Stormwind Keep at once.
Medivh explained that he had come to repay the court for the
kindness it had shown to him while he was in their keeping,
and to acknowledge the occasion of the Ascension
ceremony for Prince Llane. From within his flowing cloak
he produced an hourglass, crafted of deepest obs idi an, with sands as whi te as
undriven snow. The young prince looked closely, but although the sand seemed to
constantly sift from top to bottom, the lower half never filled, and the top never emptied.
Medivh claimed that these sands represented the people of the kingdom, and so long as
the glass never emptied, the reign of King Wrynn would not fail.
583
Six years passed, and the land slowly grew sick. Crops began failing in the richest soils
of the kingdom. Children were stricken ill and never fully recovered. Even the moods of
the subjects of Azeroth seem dark. The weather would become unseasonably cold during
harvest, and the summer sun scorched the earth and made working out of the shade
almost unbearable. Neither cleric nor conjurer could fathom what could be the cause of this change in the lands. More and more people became disheartened, and what once
would have been looked over, now caused bitter argument.
18

8/7/2019 Warcraft 1 manual
http://slidepdf.com/reader/full/warcraft-1-manual 24/81
Warcraft: Orcs & Humans
During a bleak morning, Prince Llane rushed to his father’s side, carrying the hourglass.
During the night, the sands had run down from the top, and it was near emptied. King
Wrynn took the glass into his hands, and a chill ran through the very core of his being.
As the last sands trickled to the bottom of the glass, a great crashing sound was heard
at the gates of Stormwind Keep. Suddenly, the grounds were filled with hideous
creatures. Gross deformities, a cruel reflection of humanity, they swarmed over theKing’s guard and tore them to shreds. King Wrynn sent Llane and Queen Varia with
an escort of knights to Northshire Abbey, promising to call for them when the foul
beasts had been destroyed. That day has not yet come.
584
At the age of twenty years, Llane is pronounced King of Azeroth. His task is clear - to
rid the lands of these creatures. The few that have survived battle refer to themselves
as Orcs. When questioned, they will tell little else, and prefer death to releasinginformation. They are cruel, sadistic and vile - making no distinctions between soldier
or child, warrior or woman. They will slay anyone who they encounter without a
second thought. The only humans who do not fall to the Orcish blade are those who are
taken to the swamps that have festered in the east, where the Orcs have made their
encampments. What they do with these people is unknown, though the worst is feared
for none have ever returned.
593Nearly ten years of skirmishes and raids along the Borderlands have kept the people of
Azeroth wary, but the Orcish hordes had been beaten back into their swamps. King
Llane has found that the Orcs, though incredibly strong and vicious, were seldom well
trained in combat, and always disorganized. This has been the key to holding them at
bay, and is the weakness he hopes to exploit in the future. The mystery that no Cleric
or Conjurer had found the answer to, though, is the origin of these creatures.
In the tenth year of his reign, King Llane is visited by the mysterious traveler. She hascome to the King with a warning that she hopes will aid him in his fight against this
nemesis to his land. The coupling between the King’s Conjurer and herself was intended
to create a child that she could pass her knowledge and power onto before leaving this
place. She did not count upon other forces in this, and other, worlds that would seek to
dominate the child. He has now become a beacon of mystic power.
She sought him out only a fortnight before, and found that the powers that course
through his veins have twisted him, making him insane. Realising the threat he now
posed, she was forced to attempt to destroy him. He all but slew her.
19

8/7/2019 Warcraft 1 manual
http://slidepdf.com/reader/full/warcraft-1-manual 25/81
Blizzard Entertainment
The battle left both combatants drained, but Medivh held enough power to banish her
from his sight, and command her never to return. His magiks were strong enough that
even she cannot break this bond, and so can offer no aid in his downfall. The traveler
also informs King Llane that it was Medivh who was responsible for the coming of the
Orcs to Azeroth. During the battle with his father, he inadvertently opened a gateway
to the domain that they, and many other foul creatures, call home. The Orcs are disciples
of chaos, however, and not even Medivh has the power to control them.
Although the battle has Medivh in a greatly weakened state, the traveler warns that
there will be a time when Azeroth will be forced to deal with him. Her parting words
to the King were of her hope that the sorcerer would not become so strong, by that
time, that the whole of this world would suffer.
Stirr ings of war now come from the swamps. The
attacks upon our settlements, once scattered and poorly
executed, have become more organised. The King has
found it necessary to send footmen and archers to protect
settlements along the Borderlands. Rumors of the rising
of a great Orcish War Chief have been heard about the
land. He is heard to be a harsh leader who has
gathered the feuding Orcs under one banner. King
Llane’s scouts and spies have found him to be as
cunning as he is bloodthirsty . This foul creature’s
name is Blackhand, and his control of the Orcish
hordes could spell doom for Azeroth. The King has
ordered me to seek out new recruits to train
in the rudiments of combat, for the time has
come to call upon the people of Azeroth and
prepare the kingdom for war.
King Llane - Lord of Azeroth
20
8/7/2019 Warcraft 1 manual
http://slidepdf.com/reader/full/warcraft-1-manual 26/81
Warcraft: Orcs & Humans
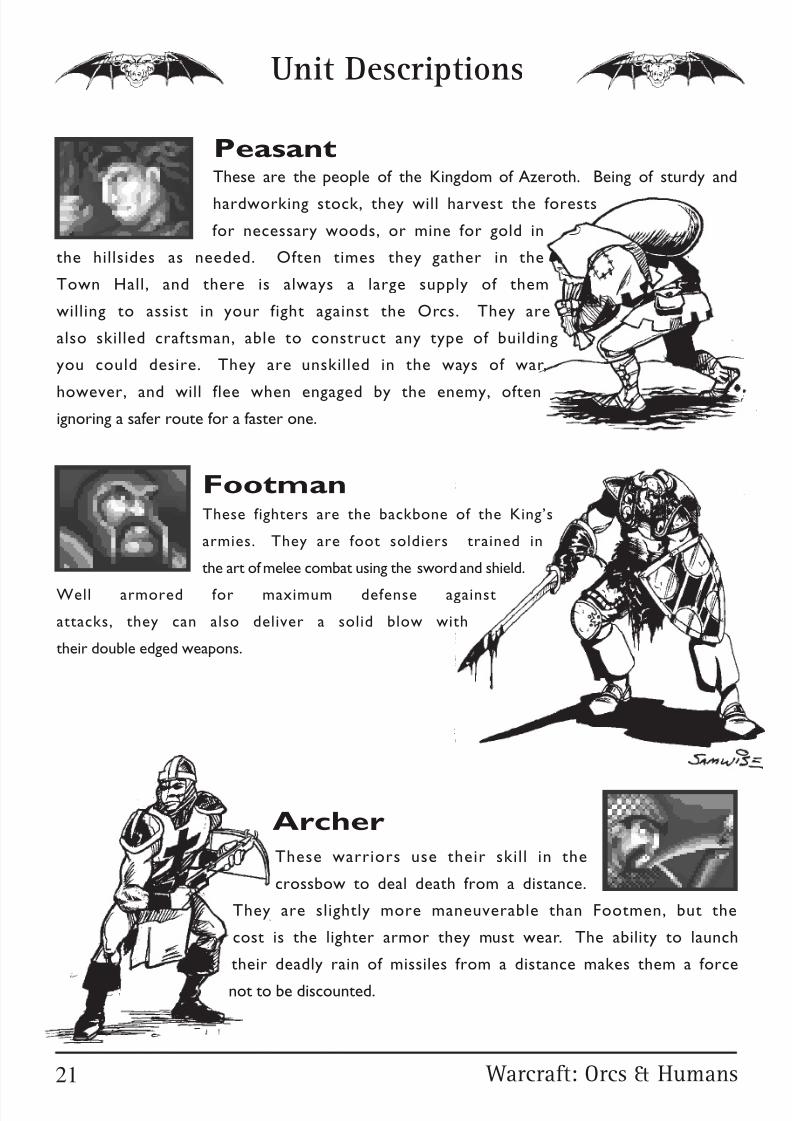
Archer
These warriors use their skill in the
crossbow to deal death from a distance.
They are slightly more maneuverable than Footmen, but the
cost is the lighter armor they must wear. The ability to launch
their deadly rain of missiles from a distance makes them a force
not to be discounted.
FootmanThese fighters are the backbone of the King’s
armies. They are foot soldiers trained in
the art of melee combat using the sword and shield.
Well armored for maximum defense against
attacks, they can also deliver a solid blow with
their double edged weapons.
These are the people of the Kingdom of Azeroth. Being of sturdy and
hardworking stock, they will harvest the forests
for necessary woods, or mine for gold in
the hillsides as needed. Often times they gather in the
Town Hall, and there is always a large supply of them
willing to assist in your fight against the Orcs. They are
also skilled craftsman, able to construct any type of building
you could desire. They are unskilled in the ways of war,
however, and will flee when engaged by the enemy, oftenignoring a safer route for a faster one.
Peasant
Unit Descriptions
21
8/7/2019 Warcraft 1 manual
http://slidepdf.com/reader/full/warcraft-1-manual 27/81
Blizzard Entertainment
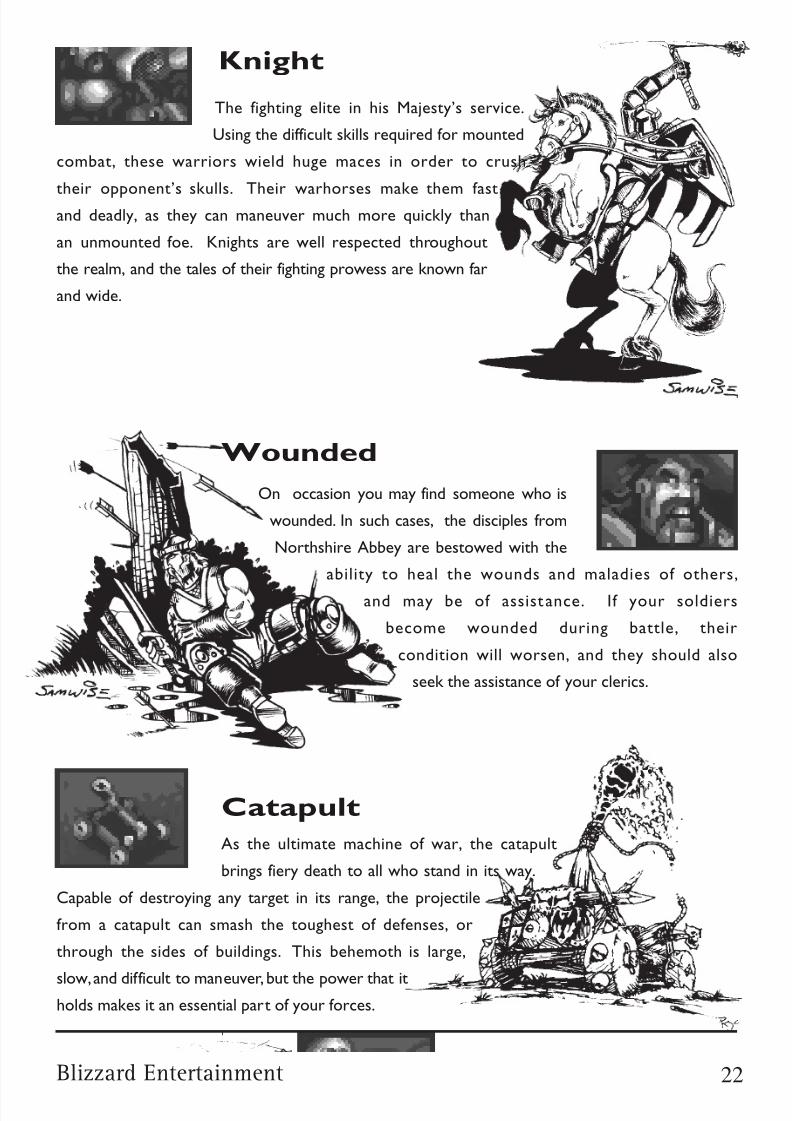
The fighting elite in his Majesty’s service.
Using the difficult skills required for mounted
combat, these warriors wield huge maces in order to crush
their opponent’s skulls. Their warhorses make them fastand deadly, as they can maneuver much more quickly than
an unmounted foe. Knights are well respected throughout
the realm, and the tales of their fighting prowess are known far
and wide.
As the ultimate machine of war, the catapult
brings fiery death to all who stand in its way.
Capable of destroying any target in its range, the projectile
from a catapult can smash the toughest of defenses, or
through the sides of buildings. This behemoth is large,
slow, and difficult to maneuver, but the power that itholds makes it an essential part of your forces.
Catapult
On occasion you may find someone who is
wounded. In such cases, the disciples from
Northshire Abbey are bestowed with the
ability to heal the wounds and maladies of others,
and may be of assist ance. If your soldiers
become wounded during battle, their
condition will worsen, and they should also
seek the assistance of your clerics.
Wounded
Knight
22
8/7/2019 Warcraft 1 manual
http://slidepdf.com/reader/full/warcraft-1-manual 28/81
Warcraft: Orcs & Humans
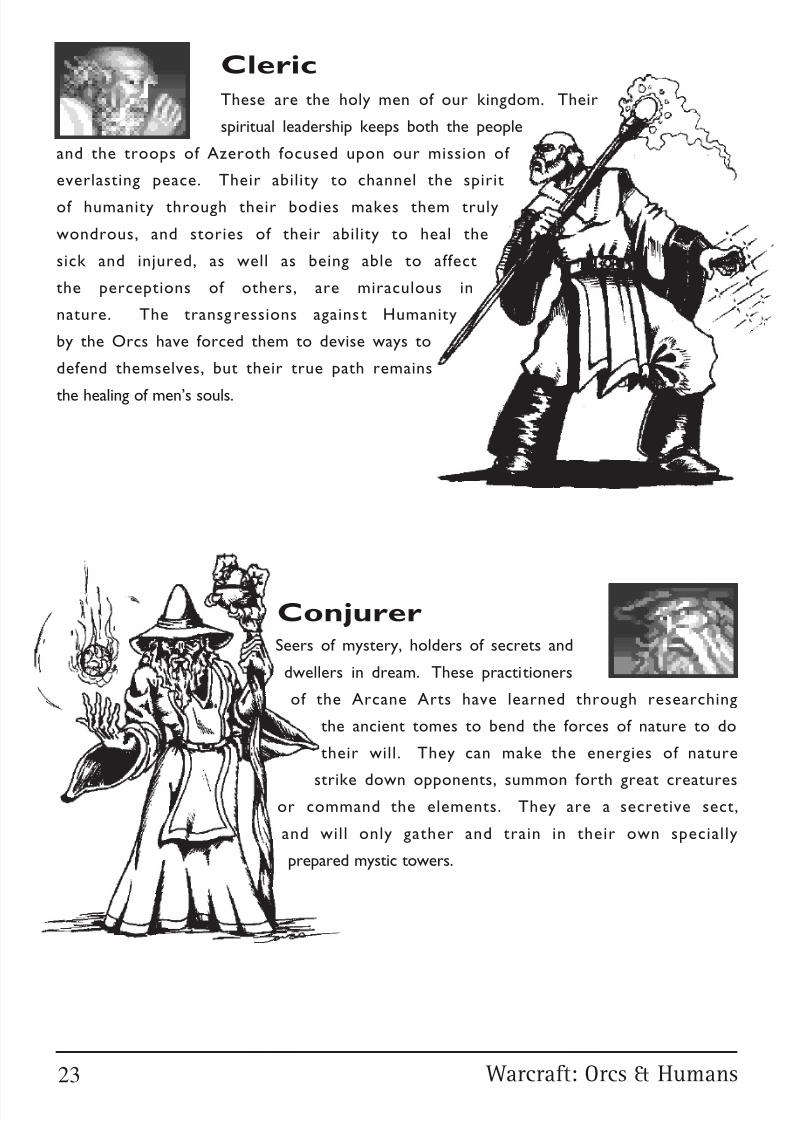
Seers of mystery, holders of secrets and
dwellers in dream. These practitioners
of the Arcane Arts have learned through researching
the ancient tomes to bend the forces of nature to do
their will. They can make the energies of nature
strike down opponents, summon forth great creaturesor command the elements. They are a secretive sect,
and will only gather and train in their own specially
prepared mystic towers.
Conjurer
Cleric
These are the holy men of our kingdom. Their
spiritual leadership keeps both the people
and the troops of Azeroth focused upon our mission of
everlasting peace. Their ability to channel the spirit
of humanity through their bodies makes them truly
wondrous, and stories of their ability to heal the
sick and injured, as well as being able to affect
the perceptions of others, are miraculous in
nature. The transgressions agains t Humanity
by the Orcs have forced them to devise ways to
defend themselves, but their true path remains
the healing of men’s souls.
23
8/7/2019 Warcraft 1 manual
http://slidepdf.com/reader/full/warcraft-1-manual 29/81
Blizzard Entertainment
Cleric Spells
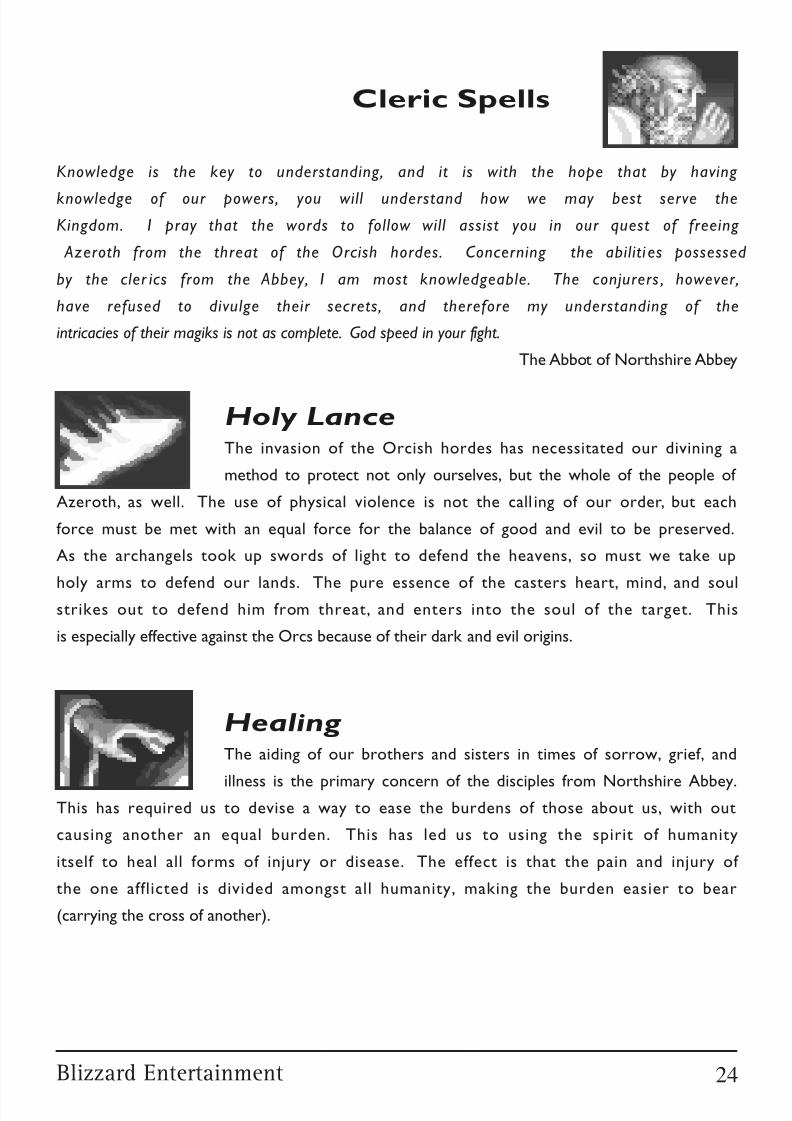
Healing The aiding of our brothers and sisters in times of sorrow, grief, and
illness is the primary concern of the disciples from Northshire Abbey.This has required us to devise a way to ease the burdens of those about us, with out
causing another an equal burden. This has led us to using the spirit of humanity
itself to heal all forms of injury or disease. The effect is that the pain and injury of
the one afflicted is divided amongst all humanity, making the burden easier to bear
(carrying the cross of another).
Holy LanceThe invasion of the Orcish hordes has necessitated our divining a
method to protect not only ourselves, but the whole of the people of
Azeroth, as well. The use of physical violence is not the call ing of our order, but each
force must be met with an equal force for the balance of good and evil to be preserved.
As the archangels took up swords of light to defend the heavens, so must we take up
holy arms to defend our lands. The pure essence of the casters heart, mind, and soulstrikes out to defend him from threat, and enters into the soul of the target. This
is especially effective against the Orcs because of their dark and evil origins.
Knowledge is the key to understanding, and it is with the hope that by having
knowledge of our powers, you will understand how we may best serve the
Kingdom. I pray that the words to follow will assist you in our quest of freeing
Azeroth from the threat of the Orcish hordes. Concerning the abiliti es possessed
by the cler ics from the Abbey, I am most knowledgeable. The conjurers , however,
have refused to divulge their secrets, and therefore my understanding of the
intricacies of their magiks is not as complete. God speed in your fight.
The Abbot of Northshire Abbey
24

8/7/2019 Warcraft 1 manual
http://slidepdf.com/reader/full/warcraft-1-manual 30/81
Warcraft: Orcs & Humans
Elemental BlastConjurers maintain a close relationship with the elements about them,
and the ability to focus those forces is the basis of this spell. This
channeling manifests itself as a sphere of charged energy that issues forth from the
hands, enabling the caster to strike an enemy from a great distance . This is one of
the basic magiks taught to conjurers and serves as the cornerstone for training the
caster in focusing both mind and will to the task of summoning.
Invisibility This is the ability to cloud the perceptions of others so that they do
not recognise the physical existence of the caster. This was originally
employed as a tool to make the confessing of secrets that weighed heavily upon the
souls of worshippers easier to speak. The clerics of Northshire Abbey have found it
very useful in assisting the armies of King Llane in ridding Azeroth of the Orcs.
Far Seeing As dispensers of peace and understanding to the people, the need to
keep a clear perspective is a vital one. This ability has developed from
that need, and therefore allows the caster to see in an all encompassing fashion, asGod does. His vision extends to all corners of the land, and his view is omnipotent .
The power of this divination is limited, for when one strives to see the world as God
does, the human mind can only partake of a meager portion before it is forever
blinded by the clarity of that sight.
Conjurer Spells
25
8/7/2019 Warcraft 1 manual
http://slidepdf.com/reader/full/warcraft-1-manual 31/81
Blizzard Entertainment
Summon ScorpionsThe caster calls upon the creatures of the desert by magically
transporting them to do his bidding. They are under the conjurer's
direction and will do his bidding to the death. Research has proven that it is
simpler for the conjurer to transport several smaller scorpions in a short time than
to drain his energies further by summoning a single, large creature.
Summon Elemental The caster uses the forces of nature to create a water elemental. He
summons the forces of air and water and combines them into a
simulacrum to defend the lands. They are excellent creatures, and will never turn
upon their creators. The element of water was chosen because it is persistent as in
the state of erosion, and it is the opposite of fire, which seems to be the element that
the Orcs favor.
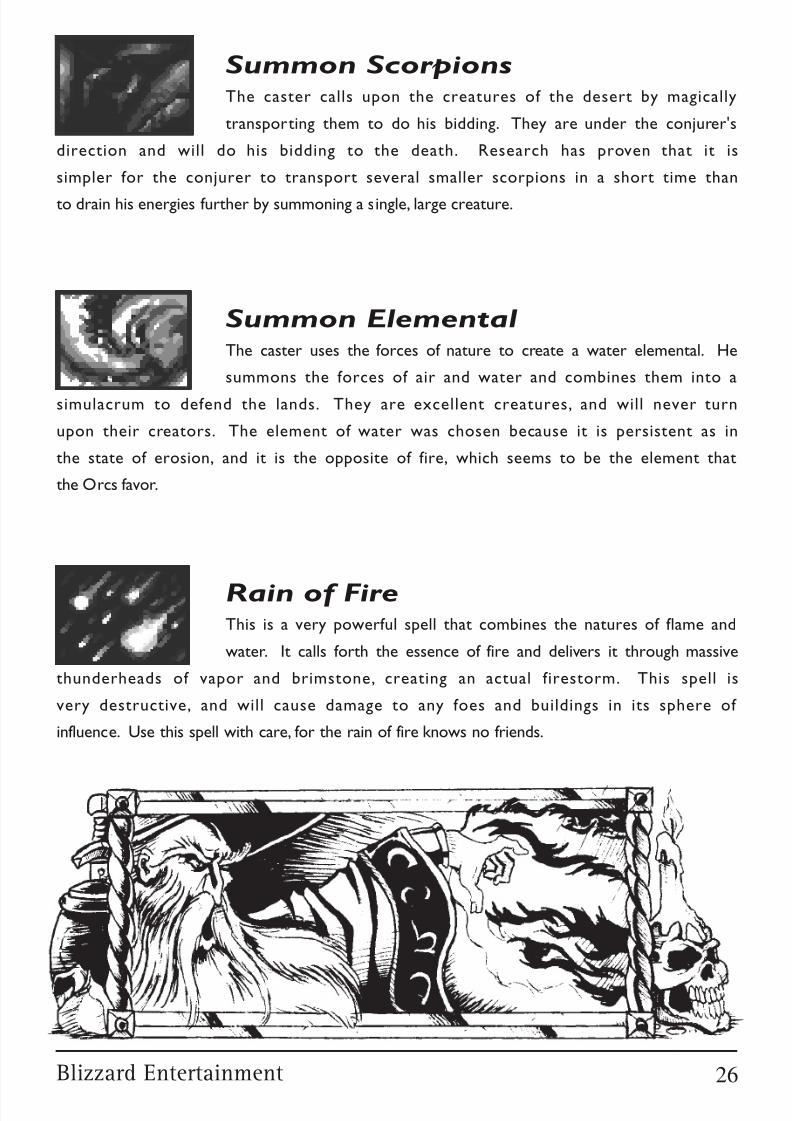
Rain of FireThis is a very powerful spell that combines the natures of flame and
water. It calls forth the essence of fire and delivers it through massive
thunderheads of vapor and brimstone, creating an actual firestorm. This spell is
very destructive, and will cause damage to any foes and buildings in its sphere of
influence. Use this spell with care, for the rain of fire knows no friends.
26
8/7/2019 Warcraft 1 manual
http://slidepdf.com/reader/full/warcraft-1-manual 32/81
Warcraft: Orcs & Humans
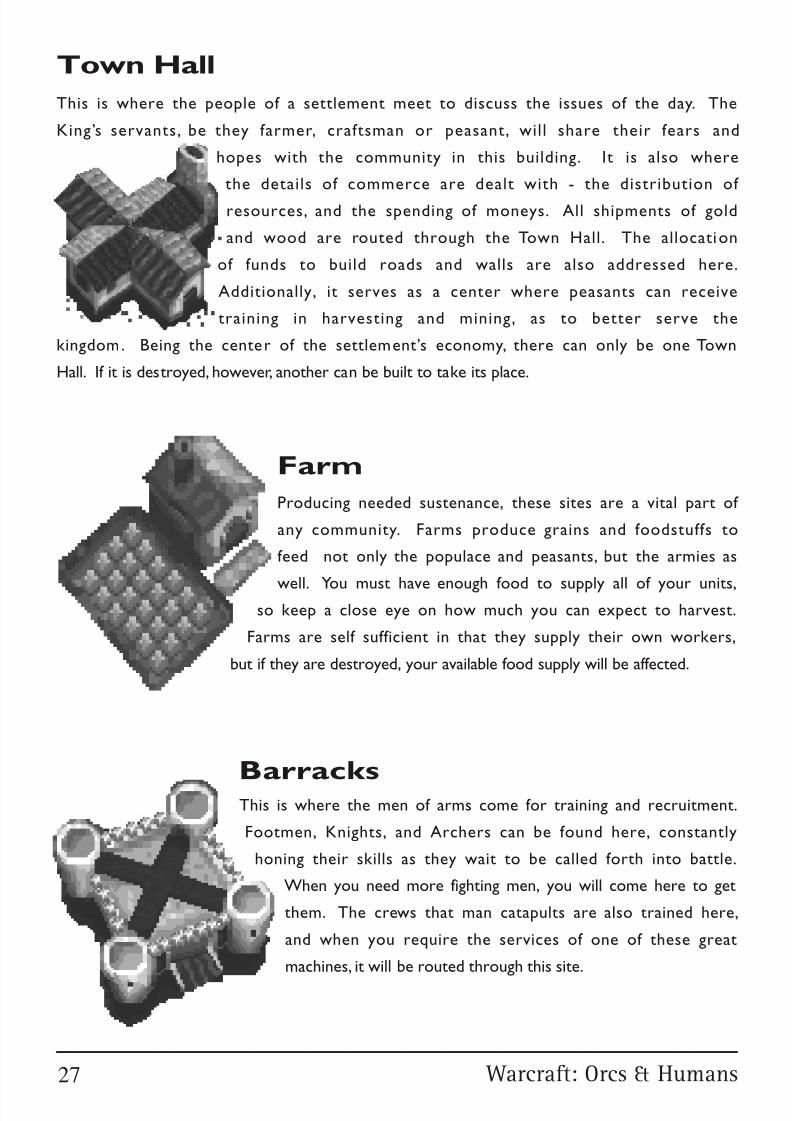
Town Hall
This is where the people of a settlement meet to discuss the issues of the day. The
King’s servants, be they farmer, craftsman or peasant, will share their fears and
hopes with the community in this building. It is also where
the details of commerce are dealt with - the distribution of
resources, and the spending of moneys. All shipments of gold
and wood are routed through the Town Hall. The allocation
of funds to build roads and walls are also addressed here.
Additionally, it serves as a center where peasants can receive
training in harvesting and mining, as to better serve the
kingdom. Being the center of the settlement’s economy, there can only be one Town
Hall. If it is destroyed, however, another can be built to take its place.
Barracks
This is where the men of arms come for training and recruitment.
Footmen, Knights, and Archers can be found here, constantly
honing their skills as they wait to be called forth into battle.
When you need more fighting men, you will come here to get
them. The crews that man catapults are also trained here,
and when you require the services of one of these great
machines, it will be routed through this site.
Producing needed sustenance, these sites are a vital part of
any community. Farms produce grains and foodstuffs to
feed not only the populace and peasants, but the armies as
well. You must have enough food to supply all of your units,so keep a close eye on how much you can expect to harvest.
Farms are self sufficient in that they supply their own workers,
but if they are destroyed, your available food supply will be affected.
Farm
27
8/7/2019 Warcraft 1 manual
http://slidepdf.com/reader/full/warcraft-1-manual 33/81
Blizzard Entertainment
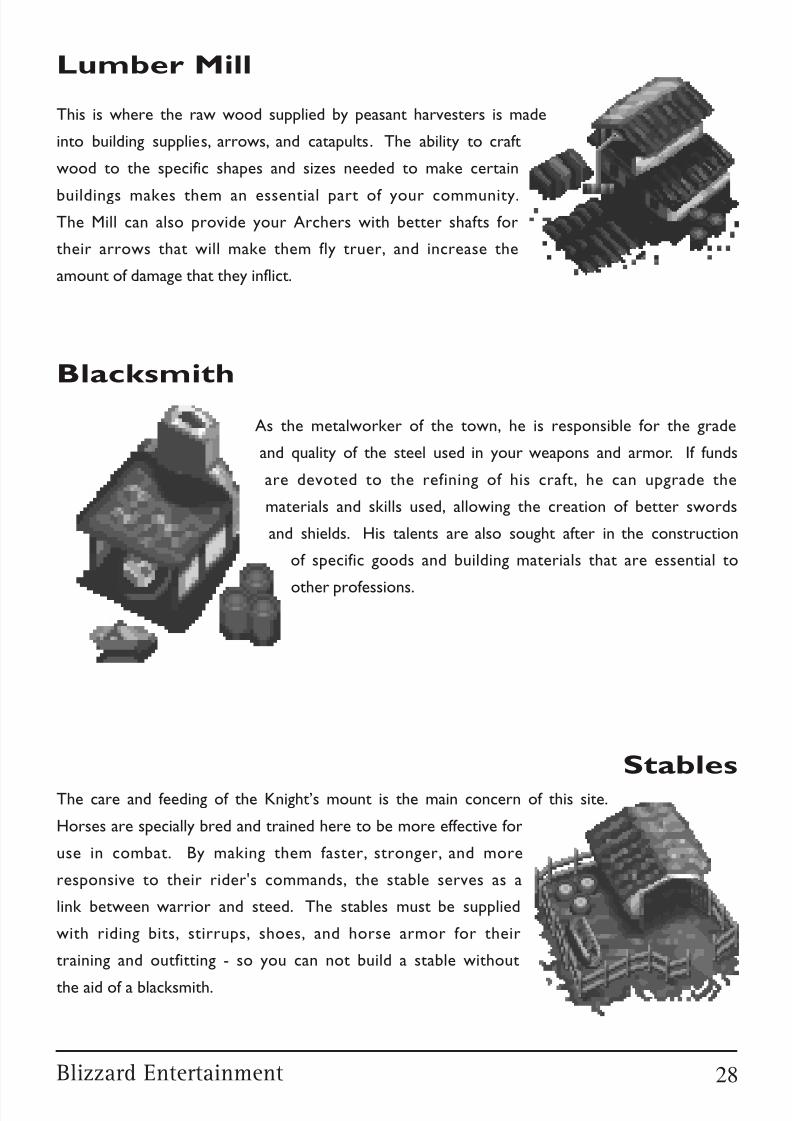
The care and feeding of the Knight’s mount is the main concern of this site.
Horses are specially bred and trained here to be more effective for
use in combat. By making them faster, stronger, and more
responsive to their rider's commands, the stable serves as a
link between warrior and steed. The stables must be supplied
with riding bits, stirrups, shoes, and horse armor for their
training and outfitting - so you can not build a stable without
the aid of a blacksmith.
Stables
Lumber Mill
This is where the raw wood supplied by peasant harvesters is made
into building supplies, arrows, and catapults. The ability to craft
wood to the specific shapes and sizes needed to make certain
buildings makes them an essential part of your community.The Mill can also provide your Archers with better shafts for
their arrows that will make them fly truer, and increase the
amount of damage that they inflict.
As the metalworker of the town, he is responsible for the grade
and quality of the steel used in your weapons and armor. If funds
are devoted to the refining of his craft, he can upgrade the
materials and skills used, allowing the creation of better swords
and shields. His talents are also sought after in the construction
of specific goods and building materials that are essential to
other professions.
Blacksmith
28
8/7/2019 Warcraft 1 manual
http://slidepdf.com/reader/full/warcraft-1-manual 34/81
Warcraft: Orcs & Humans
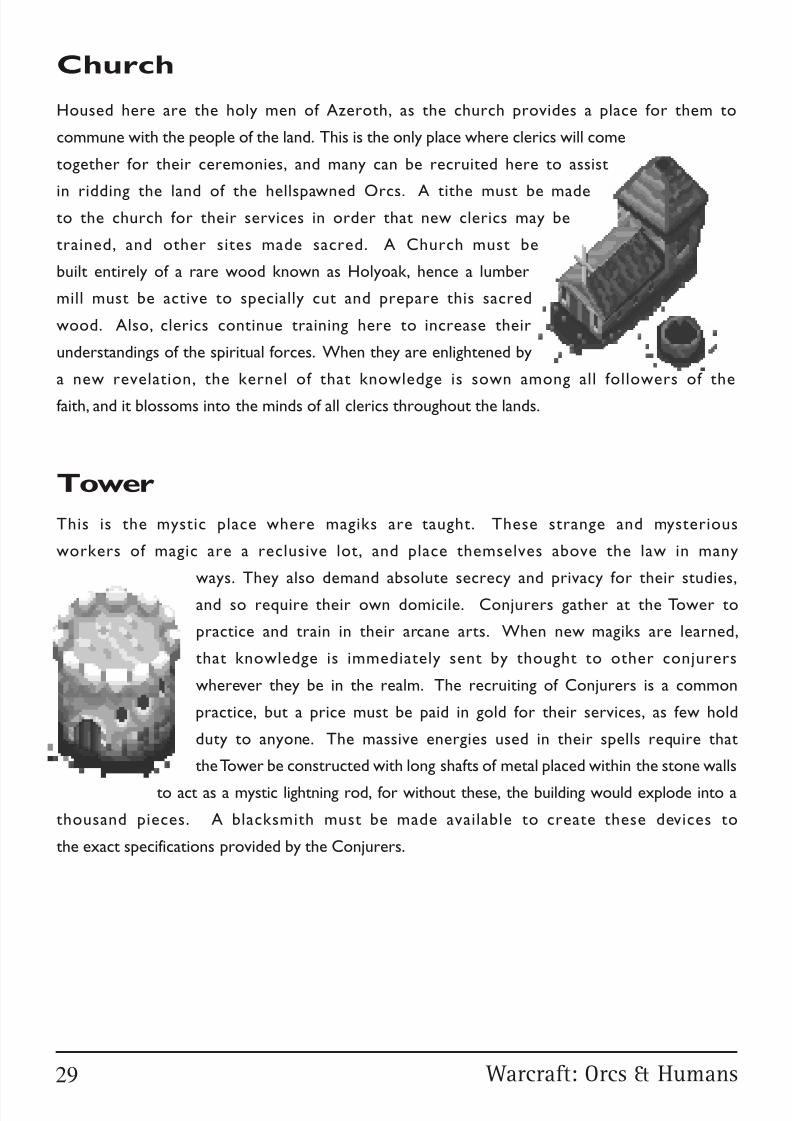
This is the mystic place where magiks are taught. These strange and mysterious
workers of magic are a reclusive lot, and place themselves above the law in many
ways. They also demand absolute secrecy and privacy for their studies,
and so require their own domicile. Conjurers gather at the Tower to
practice and train in their arcane arts. When new magiks are learned,
that knowledge is immediately sent by thought to other conjurers
wherever they be in the realm. The recruiting of Conjurers is a common
practice, but a price must be paid in gold for their services, as few hold
duty to anyone. The massive energies used in their spells require that
the Tower be constructed with long shafts of metal placed within the stone walls
to act as a mystic lightning rod, for without these, the building would explode into a
thousand pieces. A blacksmith must be made available to create these devices to
the exact specifications provided by the Conjurers.
Tower
Church
Housed here are the holy men of Azeroth, as the church provides a place for them to
commune with the people of the land. This is the only place where clerics will come
together for their ceremonies, and many can be recruited here to assist
in ridding the land of the hellspawned Orcs. A tithe must be madeto the church for their services in order that new clerics may be
trained, and other sites made sacred. A Church must be
built entirely of a rare wood known as Holyoak, hence a lumber
mill must be active to specially cut and prepare this sacred
wood. Also, clerics continue training here to increase their
understandings of the spiritual forces. When they are enlightened by
a new revelation, the kernel of that knowledge is sown among all followers of the
faith, and it blossoms into the minds of all clerics throughout the lands.
29

8/7/2019 Warcraft 1 manual
http://slidepdf.com/reader/full/warcraft-1-manual 35/81
Blizzard Entertainment
King Llane has sent many a surveyor into the hills and mountains
throughout the kingdom in search of new deposits of gold.
You may discover one of these sites, and find that there are
still veins of the precious metal to be mined. Peasants can betrained in the skills required to mine and deliver this gold to
your Town Hall for disbursement as you see fit.
Gold Mine
30
8/7/2019 Warcraft 1 manual
http://slidepdf.com/reader/full/warcraft-1-manual 36/81
Warcraft: Orcs & Humans
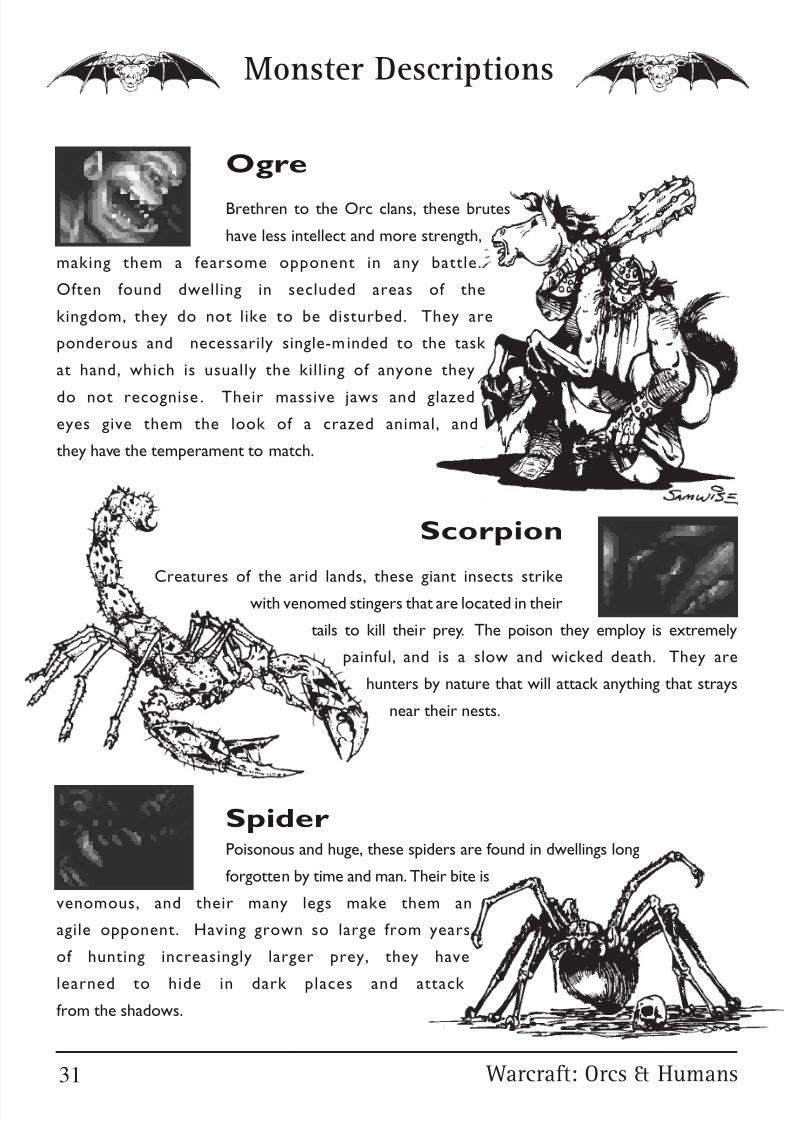
SpiderPoisonous and huge, these spiders are found in dwellings long
forgotten by time and man. Their bite is
venomous, and their many legs make them an
agile opponent. Having grown so large from years
of hunting increasingly larger prey, they have
learned to hide in dark places and attack
from the shadows.
Creatures of the arid lands, these giant insects strike
with venomed stingers that are located in their
tails to kill their prey. The poison they employ is extremely
painful, and is a slow and wicked death. They are
hunters by nature that will attack anything that strays
near their nests.
Scorpion
Brethren to the Orc clans, these brutes
have less intellect and more strength,
making them a fearsome opponent in any battle.
Often found dwelling in secluded areas of the
kingdom, they do not like to be disturbed. They are
ponderous and necessarily single-minded to the task
at hand, which is usually the killing of anyone they
do not recognise . Their massive jaws and glazed
eyes give them the look of a crazed animal, and
they have the temperament to match.
Monster Descriptions
Ogre
31
8/7/2019 Warcraft 1 manual
http://slidepdf.com/reader/full/warcraft-1-manual 37/81
Blizzard Entertainment
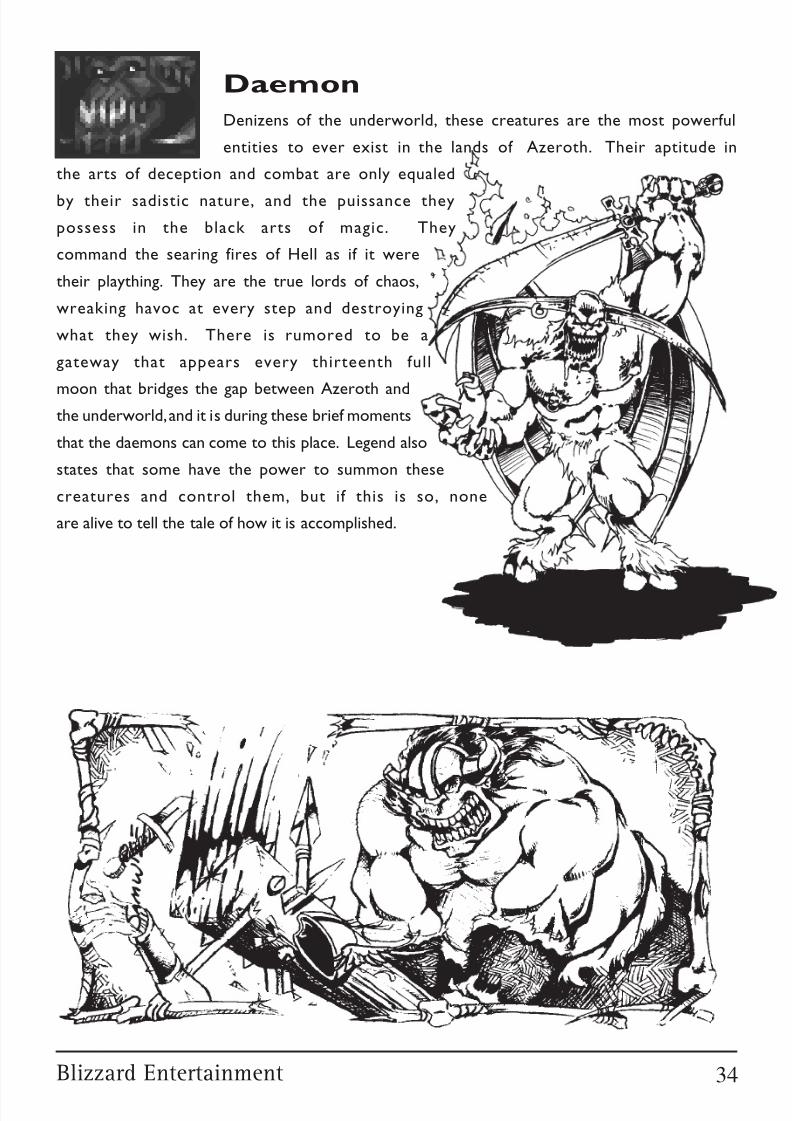
Skeleton
These abominations are magical
constructs made from the bones of the
dead. They roam the forbidden lands and forgotten
realms of Azeroth, seeking to take their anguish out
on the living. They know only pain and death, and
strive to embrace the living in their arms so they
may drag them into the pits of hell.
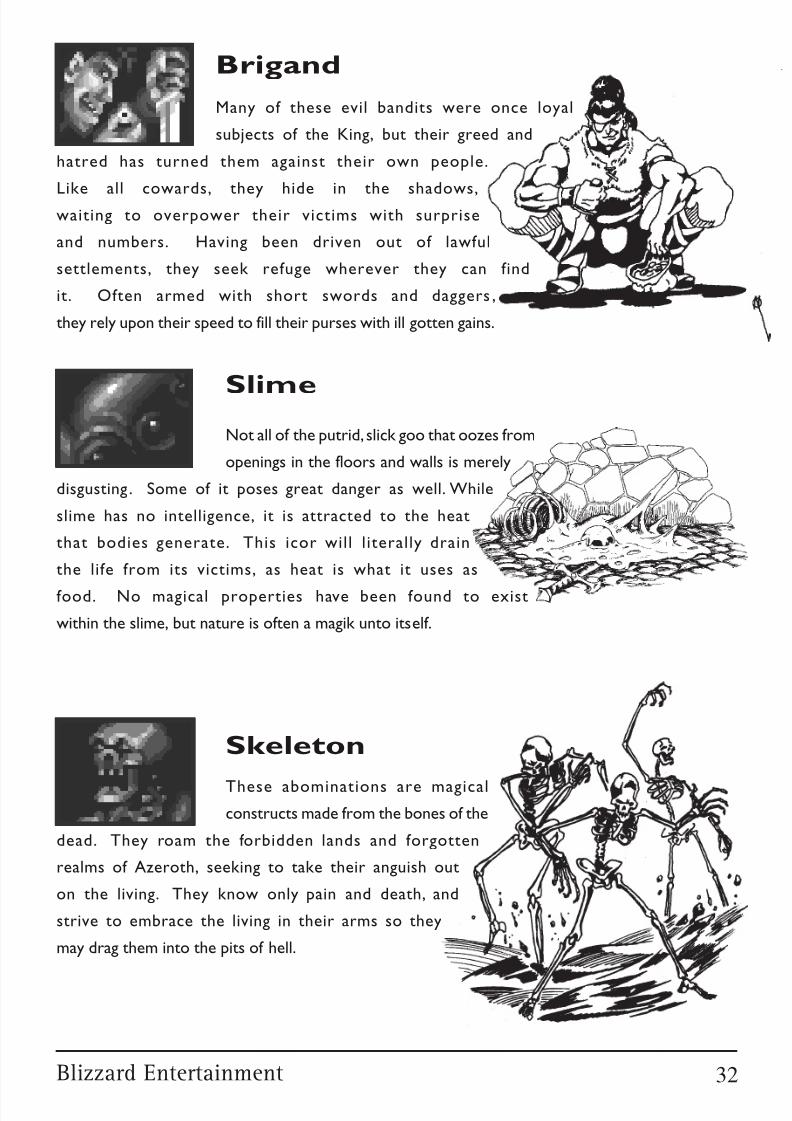
Many of these evil bandits were once loyal
subjects of the King, but their greed and
hatred has turned them against their own people.
Like all cowards, they hide in the shadows,waiting to overpower their victims with surprise
and numbers. Having been driven out of lawful
settlements, they seek refuge wherever they can find
it. Often armed with short swords and daggers ,
they rely upon their speed to fill their purses with ill gotten gains.
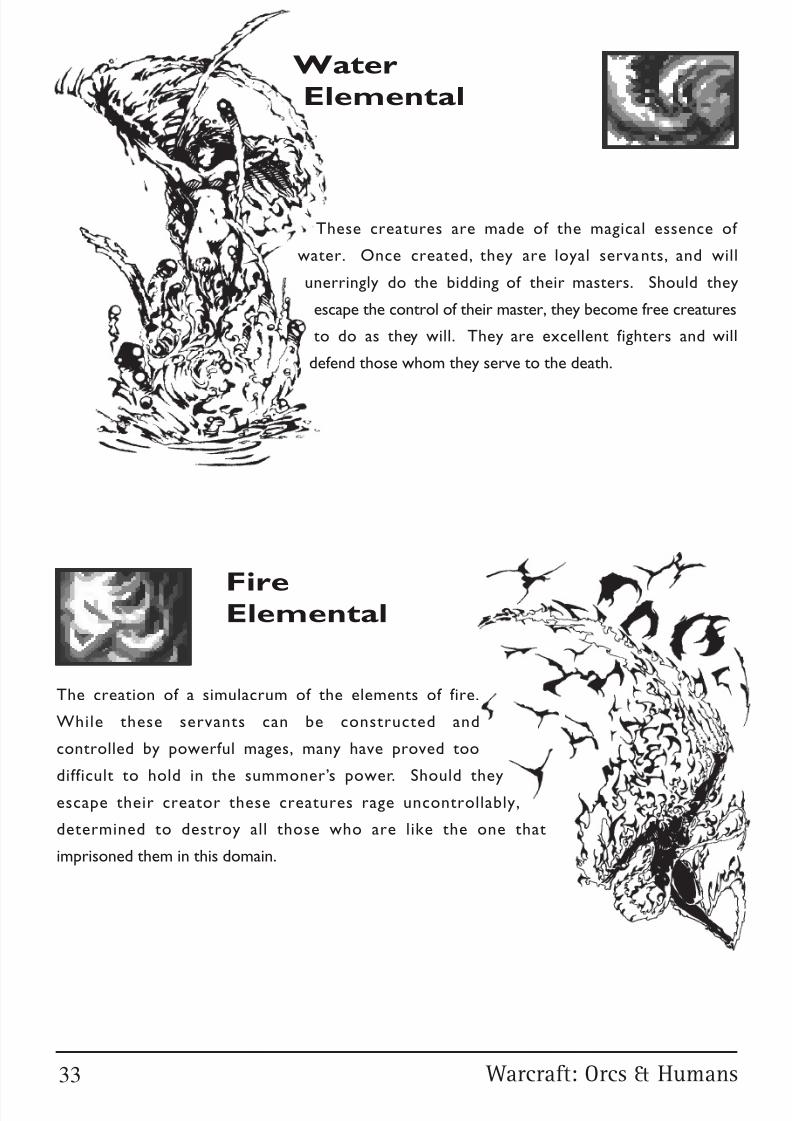
SlimeNot all of the putrid, slick goo that oozes from
openings in the floors and walls is merely
disgusting. Some of it poses great danger as well. While
slime has no intelligence, it is attracted to the heat
that bodies generate. This icor will l iterally drain
the life from its victims, as heat is what it uses as
food. No magical properties have been found to exist
within the slime, but nature is often a magik unto itself.
Brigand
32
8/7/2019 Warcraft 1 manual
http://slidepdf.com/reader/full/warcraft-1-manual 38/81
Warcraft: Orcs & Humans
FireElemental
The creation of a simulacrum of the elements of fire.
While these servants can be constructed and
controlled by powerful mages, many have proved too
difficult to hold in the summoner’s power. Should they
escape their creator these creatures rage uncontrollably,
determined to destroy all those who are like the one that
imprisoned them in this domain.
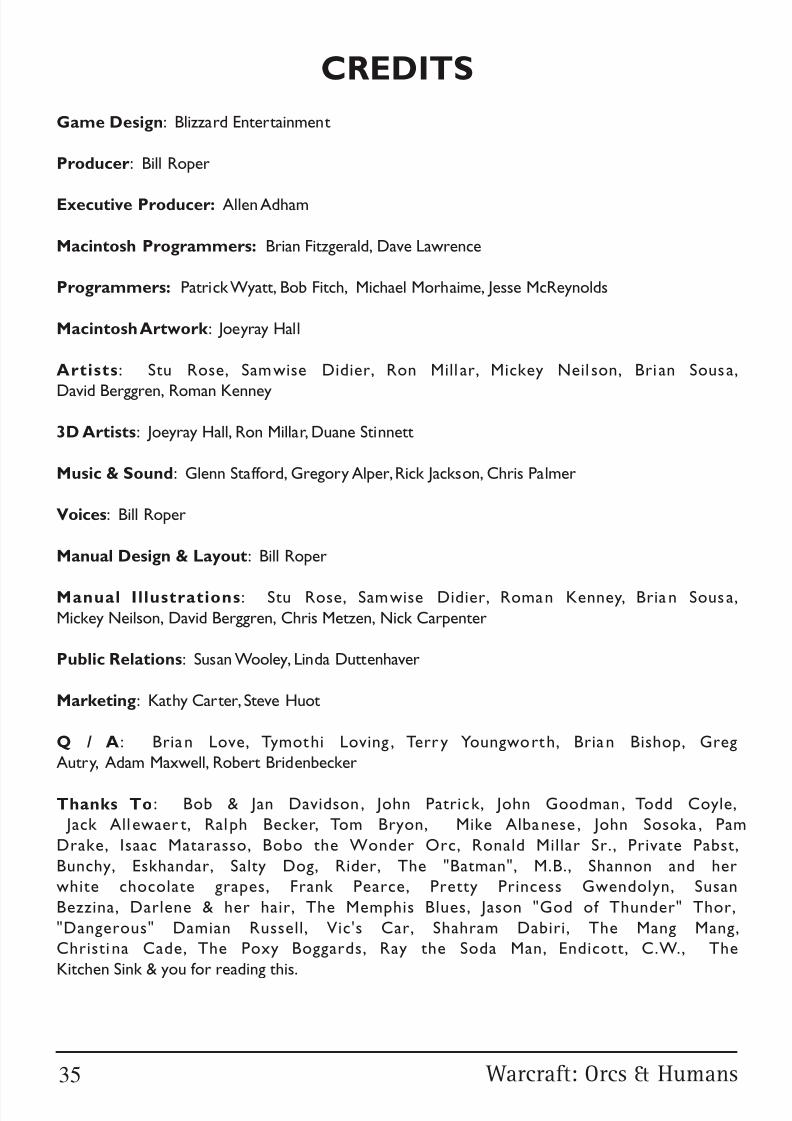
These creatures are made of the magical essence of
water. Once created, they are loyal servants, and will
unerringly do the bidding of their masters. Should they
escape the control of their master, they become free creatures
to do as they will. They are excellent fighters and will
defend those whom they serve to the death.
Water
Elemental
33
8/7/2019 Warcraft 1 manual
http://slidepdf.com/reader/full/warcraft-1-manual 39/81
Blizzard Entertainment
Denizens of the underworld, these creatures are the most powerful
entities to ever exist in the lands of Azeroth. Their aptitude in
the arts of deception and combat are only equaled
by their sadistic nature, and the puissance they
possess in the black arts of magic. They
command the searing fires of Hell as if it were
their plaything. They are the true lords of chaos,
wreaking havoc at every step and destroying
what they wish. There is rumored to be a
gateway that appears every thirteenth full
moon that bridges the gap between Azeroth andthe underworld, and it is during these brief moments
that the daemons can come to this place. Legend also
states that some have the power to summon these
creatures and control them, but if this is so, none
are alive to tell the tale of how it is accomplished.
Daemon
34
8/7/2019 Warcraft 1 manual
http://slidepdf.com/reader/full/warcraft-1-manual 40/81
Warcraft: Orcs & Humans
CREDITS
Game Design: Blizzard Entertainment
Producer: Bill Roper
Executive Producer: Allen Adham
Macintosh Programmers: Brian Fitzgerald, Dave Lawrence
Programmers: Patrick Wyatt, Bob Fitch, Michael Morhaime, Jesse McReynolds
Macintosh Artwork: Joeyray Hall
Artists: Stu Rose, Samwise Didier, Ron Mill ar, Mickey Neil son, Brian Sousa,
David Berggren, Roman Kenney
3D Artists: Joeyray Hall, Ron Millar, Duane Stinnett
Music & Sound: Glenn Stafford, Gregory Alper, Rick Jackson, Chris Palmer
Voices: Bill Roper
Manual Design & Layout: Bill Roper
Manual Illustrations: Stu Rose, Samwise Didier, Roman Kenney, Brian Sousa,
Mickey Neilson, David Berggren, Chris Metzen, Nick Carpenter
Public Relations: Susan Wooley, Linda Duttenhaver
Marketing: Kathy Carter, Steve Huot
Q / A : Brian Love, Tymothi Loving , Terr y Youngworth, Brian Bishop, Greg
Autry, Adam Maxwell, Robert Bridenbecker
Thanks To: Bob & Jan Davidson , John Patrick, John Goodman , Todd Coyle,
Jack Allewaer t, Ralph Becker, Tom Bryon, Mike Albanese , John Sosoka , Pam
Drake, Isaac Matarasso, Bobo the Wonder Orc, Ronald Millar Sr., Private Pabst,
Bunchy, Eskhandar, Salty Dog, Rider, The "Batman", M.B., Shannon and her
white chocolate grapes, Frank Pearce, Pretty Princess Gwendolyn, Susan
Bezzina, Darlene & her hair, The Memphis Blues, Jason "God of Thunder" Thor,
"Dangerous" Damian Russell, Vic's Car, Shahram Dabiri, The Mang Mang,
Christi na Cade, The Poxy Boggards, Ray the Soda Man, Endicott, C.W., The
Kitchen Sink & you for reading this.
35
8/7/2019 Warcraft 1 manual
http://slidepdf.com/reader/full/warcraft-1-manual 41/81
Blizzard Entertainment
WARRANTY
If within the first 90 days of purchase you have any problems with the product please return it to the
retailer. After 90 days you may return the software program to Interplay Productions provided that
fault is not due to normal wear and tear and Interplay will mail a replacement to you.
To receive a replacement you should enclose the defective medium (including the original productlabel) in protective packaging accompanied by:-
1. A cheque or money order for £10 sterling (to cover postage and packaging)
2. A brief statement describing the defect
3. The original receipt or address of the retailer and
4. Your name and address.
Registered mail is recommended for returns.
PLEASE SEND TO:
Warranty Replacements,
Interplay Production
Harleyford Manor
Harleyford
Henley Rd,
Marlow
Buckinghamshire,
SL7 2DX
COPYING PROHIBITED
This software product is copyrighted and all rights are reserved by Interplay Production. This product
is protected by the copyright laws that pertain to computer software. This does not mean you can make
unlimited copies. It is illegal to sell, give or otherwise distribute a copy to another person.
NOTICE
Interplay Productions reserve the right to make modifications or improvements to the product
described in this manual at any time and without notice.
36
8/7/2019 Warcraft 1 manual
http://slidepdf.com/reader/full/warcraft-1-manual 42/81
ORCS
E N T E R T A I N M E N T
8/7/2019 Warcraft 1 manual
http://slidepdf.com/reader/full/warcraft-1-manual 43/81
Blizzard Entertainment
ORCS
8/7/2019 Warcraft 1 manual
http://slidepdf.com/reader/full/warcraft-1-manual 44/81
Warcraft: Orcs & Humans
Blizzard Entertainment
P.O. Box 18077
Irvine, CA 92713
(714) 955-1380 Phone(714) 955-1381 Fax(714) 955-1382 Technical Support(714) 955-1481 Blizzard Icenet(800) 953-SNOW Sales
Copyright © 1994-1995 by Blizzard Entertainment
The software and the manual are copyrighted. All rights reserved. They may not, inwhole or part, be copied, photocopied, reproduced, translated or reduced to any electronic
medium or machine-readable form without prior consent, in writing, from BlizzardEntertainment. The user of this product shall be entitled to use the product for his orher own use, but shall not be entitled to sell to transfer reproductions of the software or
manual to other parties in any way, nor to rent or lease the product to others withoutpermission of Blizzard Entertainment.
The trademarks Warcraft and Blizzard Entertainment are registered in the U.S. Patentand Trademark Office.
E N T E R T A I N M E N T
Distributed by
Interplay Productions
Harleyford Manor
Harleyford
Henley Rd, Marlow
Buckinghamshire, SL7 2DX
Tel:- 01628 423666 Fax:- 01628 423777E-mail: [email protected]:- http://www.interplay.com
8/7/2019 Warcraft 1 manual
http://slidepdf.com/reader/full/warcraft-1-manual 45/81
Blizzard Entertainment
Table of Contents
System Requirements ......................................................................... 1
Getting Started..................................................................................... 1
Installation ............................................................................................. 1
Troubleshooting ................................................................................... 2
Technical Support ................................................................................ 4
On-line Support Services................................................................... 4
Tutorial ................................................................................................... 5
Game Options/Hotkeys ................................................................... 15
Destiny of the Orcs .......................................................................... 17
Unit Descriptions .............................................................................. 21
Necrolyte Spells ................................................................................. 24
Warlock Spells .................................................................................... 25
Building Descriptions ........................................................................ 27
Monster Descriptions ....................................................................... 31
Credits ................................................................................................. 35
Notice .................................................................................................. 36
Map of Azeroth................................................... Center of the Book

8/7/2019 Warcraft 1 manual
http://slidepdf.com/reader/full/warcraft-1-manual 46/81
Warcraft: Orcs & Humans
GETTING STARTED
SYSTEM REQUIREMENTS
Computer
Warcraft requires at least a Macintosh 68030 processor (68040 recommended)and at least 8 MB RAM. Warcraft is also accelerated for Power Macintosh.
Controls
You will need a Mouse and Keyboard to play Warcraft.
Display
Warcraft requires a 13" color monitor with 256 colors and Quicktime 2.0 or greater.
Disk Drives
A CD-ROM drive and a Hard Disk are required for installation and play.
System
You must have System 7.0 or greater (7.1 or greater recommended).
Sound
Sound Manager 3.1 or greater.
Two-Player Support
Warcraft requires Communication Toolbox tools for 2-player mode.
GETTING STARTED
INSTALLATION
For Automatic Installation: Double-click on the Warcraft installer icon on the Warcraft CD-ROM. Select the Warcraft setup that you wish to install. Necessary system extensions will alsobe installed at this time.
For Manual Installation: Select and drag one of the prepared versions of Warcraft from theCD-ROM onto your hard disk. You may make an alias to original files on the Warcraft CD-ROM as desired. For speed in launching games, the War Data file should be on the hard disk.
If you do not have Sound Manager 3.1, Quicktime 2.1 or Communications Toolbox tools installedon your system, install them from the files supplied in the System Extras folder.
Copy Protection
Warcraft has a tiered copy protection format. The program requires that your CD-ROM be inthe disk drive. If you do not want to keep the CD-ROM in the drive, then you will be asked toenter a specific word from a page in the Game Manual during the startup of each game. The
final option is to identify your copy as a “Spawned” version, and no copy protection will berequired (Spawned versions may only play in 2-player mode versus an opponent that has thecopy protected version on their machine). We regret that continuing software piracy requiresthat this minimum form of copy protection be required.
1
8/7/2019 Warcraft 1 manual
http://slidepdf.com/reader/full/warcraft-1-manual 47/81
Blizzard Entertainment
SYSTEM EXTRASThe following applications are found in the System Extras folder on the Warcraft CD-ROM.
Sound Manager 3.1 provides several important features for Warcraft. If you do not use theWarcraft Installer, you will need to install Sound Manager 3.1 by putting the Sound control
panel in the Control Panels folder, and the Sound Manager extension in the Extensions folder.You will need to reboot your system for Sound Manager 3.1 to become active.
Quicktime 2.1 is used to play the 3-D rendered sequences during the game. If Quicktime 2.0 or
greater is not present on your system, the game will still play, but the movies will not run. If you do not use the Warcraft Installer, you will need to install Quicktime 2.1 by putting theQuicktime, Quicktime Power Plug and Quicktime Musical Instruments files in the Extensionsfolder. You will need to reboot your system for Quicktime 2.1 to become active.
Communications Toolbox Tools appropriate for two-player Warcraft are found in the SystemExtras folder on the Warcraft CD-ROM. If you do not use the Warcraft Installer, you will need
to install Communications Toolbox tools by placing them in the Extensions folder. You do notneed to reboot your system for Communications Toolbox tools to be recognised.
TROUBLESHOOTING
Q. Why can’t I install the game to my hard disk?
You must check all System Requirements, especially any mention of hard disk space required,as mentioned in the installation program.
Q. The game says I don't have enough memory. What can I do?
Warcraft is a very memory intensive game, and you may need to turn off a number of extensionsand/or control panels. Freeing up memory in this way is fairly simple:
If you are running System 7.5 or later, use the Extensions Manager control panel that shippedwith your system. It is suggested that you turn everything off that isn't vital and restart beforerunning Warcraft. To do this conveniently, first save your current configuration by choosing
Save Set... from the pop-up menu above the list. Name this set “Standard”. Next, turn off
everything in Extensions Manager except your CD-ROM driver, Sound Manager, Quicktime,Quicktime Power Plug and Quicktime Musical Instruments and choose Save Set... again, namingthis set “Warcraft”. Now, before you run Warcraft, choose your “Warcraft” set from the pop-
up menu in Extensions Manager, and restart your system. To return to your usual setup, choose“Standard” from the pop-up menu and restart again.
If you are running a System version prior to 7.5, Install the Extensions Manager provided
with your Warcraft CD-ROM in the System Extras folder. Then follow the above instructions.
Also, you may turn off Quicktime to conserve memory space, but movies will not play.
2
8/7/2019 Warcraft 1 manual
http://slidepdf.com/reader/full/warcraft-1-manual 48/81
Warcraft: Orcs & Humans
Q. Why doesn’t the sound work?
Go to the Sound Control Panel and make sure that output volume is not set on zero. Also makesure that the Warcraft Preferences do not have volume set to zero. If music during the gamedoes not work, make sure that the CD is in the drive and that your Input Source is set to Internal
CD and Playthrough is checked. This is set from the Sound Control Panel, under Sound InOptions.
Q. I can’t get the game to run correctly. What else can I do?
If you are experiencing problems with the game, try configuring for no sound. Try disablingextensions to see if there is a conflict. Make sure that you have the basic system requirements
as listed in the SYSTEM REQUIREMENTS section of this manual.
Q. Can I play against a human opponent?
Yes , Warcraft can be played via modem, direct link or network between two players. You mayconnect to either Macintosh or IBM Warcraft: Orcs & Humans opponents. Warcraft uses aunique “Spawning” technology that allows head-to-head play by installing multiple copies from
the origin al CD-ROM. To play a two player game, at least one of the players will need theoriginal copy of Warcraft. A detailed description for installing “spawned” copies of Warcraft
and playing head-to-head games is in the readme text file on the Warcraft CD-ROM.
Q. I have problems connecting for a 2-player game with AutoDoubler on - Why?
There is an incompatibility with Power Macintoshes, Auto-Doubler and two-player Warcraft
games usi ng the Communic ations Toolbox. To avoid this conflict, boot your system wi thoutAutoDoubler or connect with a method other than Communications Toolbox.
TWO-PLAYER WARCRAFTWarcraft uses the Communicat ions Toolbox for most two-player connec tions. The
Communications Toolbox provides a consistent interface, and it also allows for new types of
connections by simply dropping Communcations Toolbox tools into the Extensions folder.Warcraft comes with the AppleTalk Modem Tool, Direct Serial Tool and AppleTalk ADSP
Tool extensions. Adding new connection types (such as TCP/IP) are as simple as dropping thetool into the Extensions folder.
Warcraft uses a “wait for/ connect to” method for establishing the connection for a two-playergame. One player must wait for a connection, and the other player must then connect to the firstplayer. The Communicati ons Toolbox has a Connection Settin gs dialog where players set up
the connection that will be used. Both players must of course use the same connection. Detaileddescriptions for each of the three types of connections included on the Warcraft CD-ROM are
located in the readme text file on the CD-ROM.
IPX CONNECTIONS
IPX connections use a slightly different setup that is fully detailed in the readme text file on theWarcraft CD-ROM. Please reference this text for more specific help.
There are many reasons why you may have difficulty in connecting with modems or hooking
up to your network. We have provided a list of connection techniques and command lines
for modem support in the readme text file found on your Warcraft CD-ROM. Also, check
all connections, and if you are sti l l experiencing difficulty, consult your modem and/or
network manual for any other commands you may need to know to configure your modemcorrectly. Running diagnostic software for nets is also recommended.
3
8/7/2019 Warcraft 1 manual
http://slidepdf.com/reader/full/warcraft-1-manual 49/81
Blizzard Entertainment
BEFORE YOU CALL FOR TECHNICAL SUPPORT If you are having problems, please consult the “Troubleshooting” section of this book and thereadme file on your Warcraft CD-ROM before calling technical support. We receive manycalls every day and can deal with your inquiry more efficiently if you have the followinginformation available:
1. The correct name of the game
2. The type of computer you are running the game on3. Your Operating System (OS) version4. Know your free memory / largest unused block5. Exact error message reported (if any)
Our technical support number is +44 (0) 1628 423666. Our hours are 9 A.M. to 7 P.M. PacificStandard Time, Monday through Friday, holidays excluded. Have a pen and paper handy whenyou call, and be near your computer if at all possible.
ON-LINE SUPPORT SERVICES
Blizzard Entertainment provides Upcoming News, Latest Versions, Updates, Product Demos,Reviews, Technical Support and more on the following On-line Services for Modem users.
Blizzard IceNet: Available 24 hours a day, 7 days a week USA (714) 955-1481, with settings of 8,N,1, and support of up to 14400 baud.
America Online: The Warcraft Discussion site can be found in the Computer Gaming Sectionin the Strategy and Other Sims folder under Warcraft. We can also be contacted directly byE-Mail at Address: BlizzrdEnt.
CompuServe: The Blizzard Entertnmnt forum is located in Game Publishers Forum D(GO GAMEDPUB). We can also be contacted directly by E-Mail at Address: 74777,1115
Internet: Customer Support can be contacted by direct E-Mail at Address: [email protected]
ADDITIONAL SUPPORT SERVICES
You may also contact Blizzard Entertainment via fax and mail.Fax: (714) 955-1381 • 24 hours every day
Mail: Customer Support, Blizzard EntertainmentP.O. Box 18077 • Irvine, CA 92713 USA
CUSTOMER SUPPORT
Wrire to: Interplay ProductionsHarleyford ManorHarleyfordHenley RoadMarlowBuckinghamshireSL7 2DX
Tel:- 01628 423666 Fax:- 01628 423777
E-mail: [email protected]:- http://www.interplay.com
4
8/7/2019 Warcraft 1 manual
http://slidepdf.com/reader/full/warcraft-1-manual 50/81
Warcraft: Orcs & Humans
TUTORIAL
INSTALLATION
1. To install the game, place your Warcraft: Orcs & Humans CD-ROM in your drive.
2. Double-click theWarcraft install Icon.
3. Follow the on-screen prompts to complete installation.
If you experience problems during installation, please refer to the Troubleshooting section
of this book. Additional information regarding memory, sound and video setup can be
found there as well.
STARTING THE GAME
1. Boot your system normally with System 7.0 or higher.
2. Double-click the Warcraft game Icon.
STARTING A NEW GAME
1. The game begins with a graphic introduction to the world of Warcraft. If you would like to
bypass this introduction, press the space bar or click the mouse button. After the introduction,you will be taken to the Warcraft Main Menu.
2. Move the mouse over the Start a new game option and click on the mouse button, or type
“S” to select. You will also notice that the letter S in the first word is of another color thanthe rest of the message. This allows you to enter any selection by pressing the key thatcorresponds to the different coloured letter - in this case “S”. You will now be taken to theRace Selection Screen.
3. Begin by selecting the Single Player option. Then choose to command the Orcs by selecting
Orc Campaign and clicking on the Mouse Button to continue. There will be a shortdescription of your first assignment, and then you will be taken to the main game screen,the Command Screen.
4. You may also open the New Game Window by moving the mouse to the top of the screento activate the menu bar and then selecting New Game under File. You may also holddown the Apple key and press the N key. You will be given a set of boxes for selecting
between campaign games and custom games. Choose to command the Orcs by selectingthe Single Player and Orc Campaign options and then clicking OK to continue. Therewill be a short description of your first assignment, and then you will be taken to the maingame screen, the Command Screen.
5
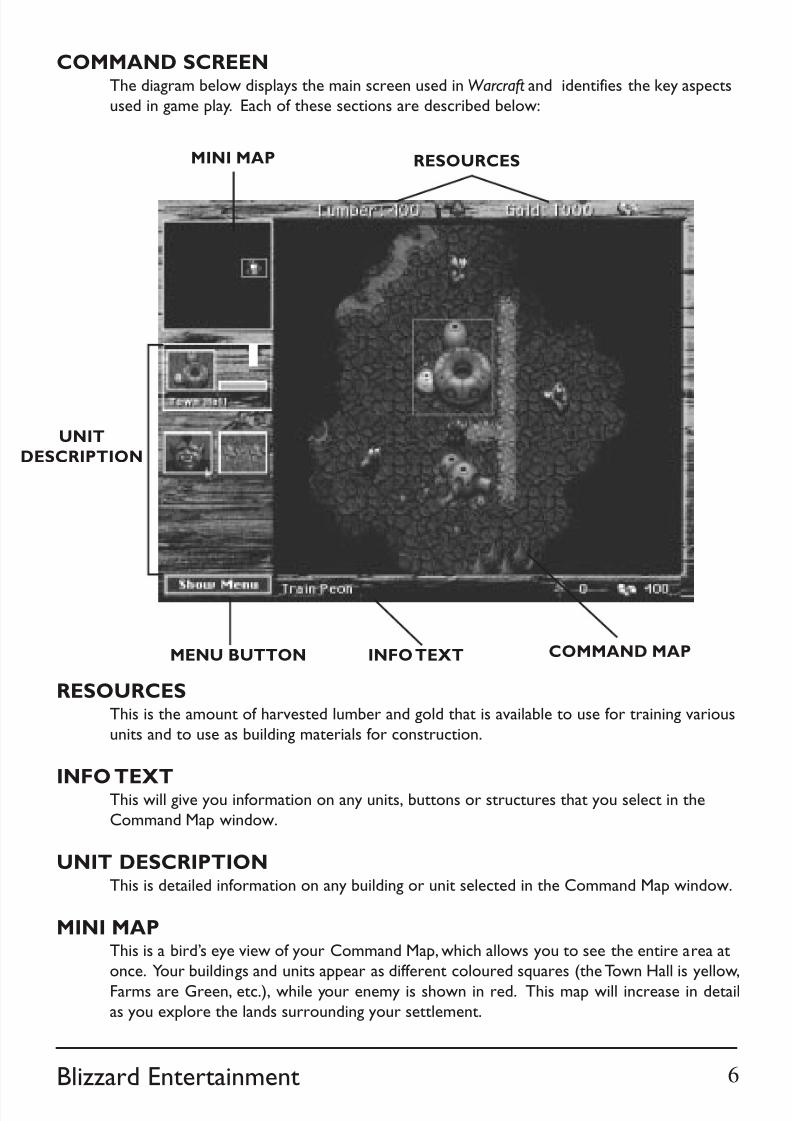
8/7/2019 Warcraft 1 manual
http://slidepdf.com/reader/full/warcraft-1-manual 51/81
Blizzard Entertainment
MINI MAP RESOURCES
INFO TEXT COMMAND MAPMENU BUTTON
UNIT
DESCRIPTION
RESOURCESThis is the amount of harvested lumber and gold that is available to use for training variousunits and to use as building materials for construction.
INFO TEXTThis will give you information on any units, buttons or structures that you select in theCommand Map window.
UNIT DESCRIPTIONThis is detailed information on any building or unit selected in the Command Map window.
MINI MAPThis is a bird’s eye view of your Command Map, which allows you to see the entire area atonce. Your buildings and units appear as different coloured squares (the Town Hall is yellow,
Farms are Green, etc.), while your enemy is shown in red. This map will increase in detailas you explore the lands surrounding your settlement.
COMMAND SCREENThe diagram below displays the main screen used in Warcraft and identifies the key aspectsused in game play. Each of these sections are described below:
6
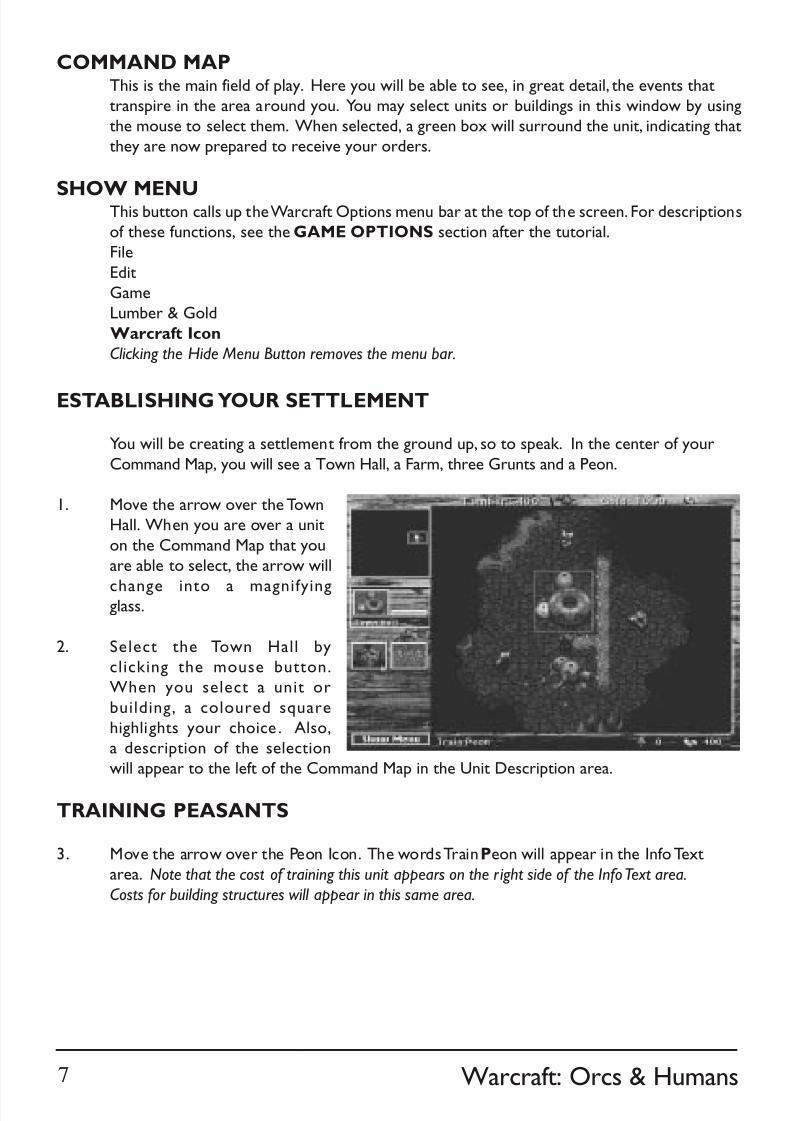
8/7/2019 Warcraft 1 manual
http://slidepdf.com/reader/full/warcraft-1-manual 52/81
Warcraft: Orcs & Humans
COMMAND MAPThis is the main field of play. Here you will be able to see, in great detail, the events thattranspire in the area around you. You may select units or buildings in this window by usingthe mouse to select them. When selected, a green box will surround the unit, indicating thatthey are now prepared to receive your orders.
SHOW MENUThis button calls up the Warcraft Options menu bar at the top of the screen. For descriptionsof these functions, see the GAME OPTIONS section after the tutorial.File
EditGameLumber & Gold
Warcraft Icon
Clicking the Hide Menu Button removes the menu bar.
ESTABLISHING YOUR SETTLEMENT
You will be creating a settlement from the ground up, so to speak. In the center of your
Command Map, you will see a Town Hall, a Farm, three Grunts and a Peon.
1. Move the arrow over the TownHall. When you are over a unit
on the Command Map that youare able to select, the arrow will
change into a magnifyingglass.
2. Select the Town Hall byclicking the mouse button.When you select a unit or
building, a coloured squarehighlights your choice . Also,a description of the selectionwill appear to the left of the Command Map in the Unit Description area.
TRAINING PEASANTS
3. Move the arrow over the Peon Icon. The words Train Peon will appear in the Info Textarea. Note that the cost of training this unit appears on the r ight side of the Info Text area.
Costs for building structures will appear in this same area.
7
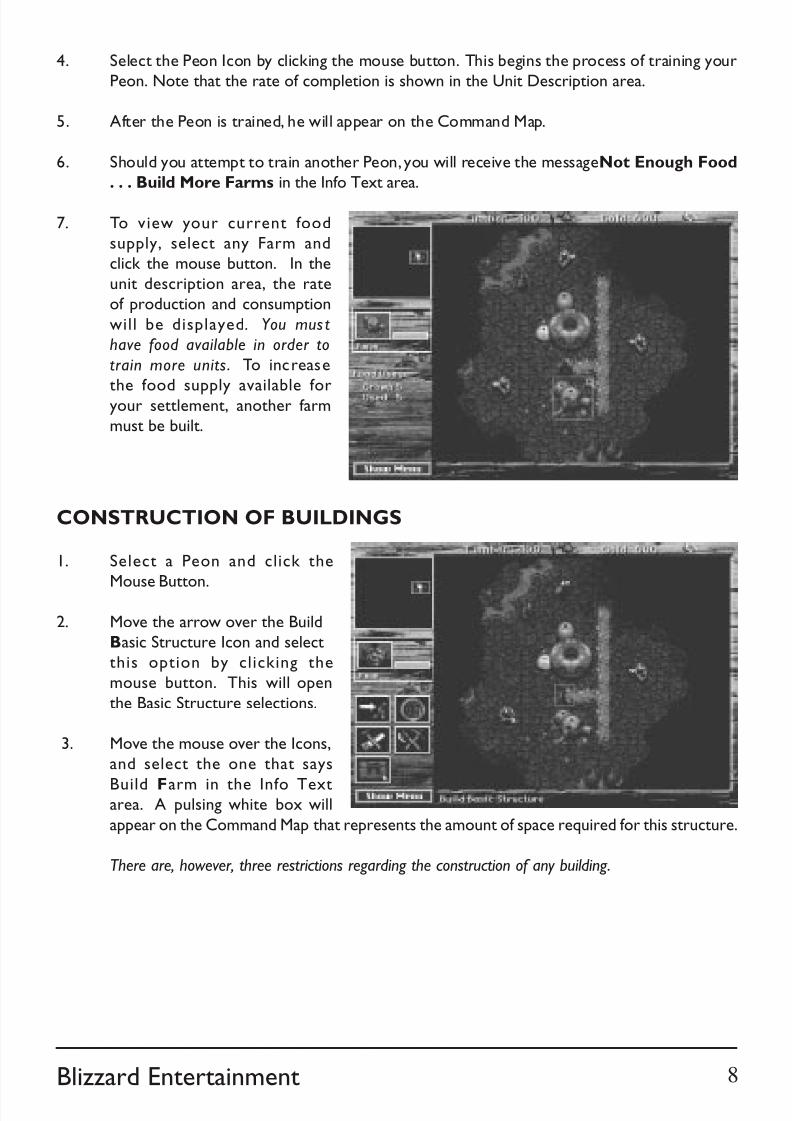
8/7/2019 Warcraft 1 manual
http://slidepdf.com/reader/full/warcraft-1-manual 53/81
Blizzard Entertainment
4. Select the Peon Icon by clicking the mouse button. This begins the process of training yourPeon. Note that the rate of completion is shown in the Unit Description area.
5. After the Peon is trained, he will appear on the Command Map.
6. Should you attempt to train another Peon, you will receive the message Not Enough Food
. . . Build More Farms in the Info Text area.
7. To view your current foodsupply, select any Farm andclick the mouse button. In theunit description area, the rateof production and consumption
will be displayed . You mus t
have food available in order to
train more units. To increase
the food supply available foryour settlement, another farmmust be built.
CONSTRUCTION OF BUILDINGS
1. Select a Peon and click the
Mouse Button.
2. Move the arrow over the BuildBasic Structure Icon and selectthis option by clicking themouse button. This will open
the Basic Structure selections.
3. Move the mouse over the Icons,and select the one that says
Build Farm in the Info Textarea. A pulsing white box will
appear on the Command Map that represents the amount of space required for this structure.
There are, however, three restrictions regarding the construction of any building .
8
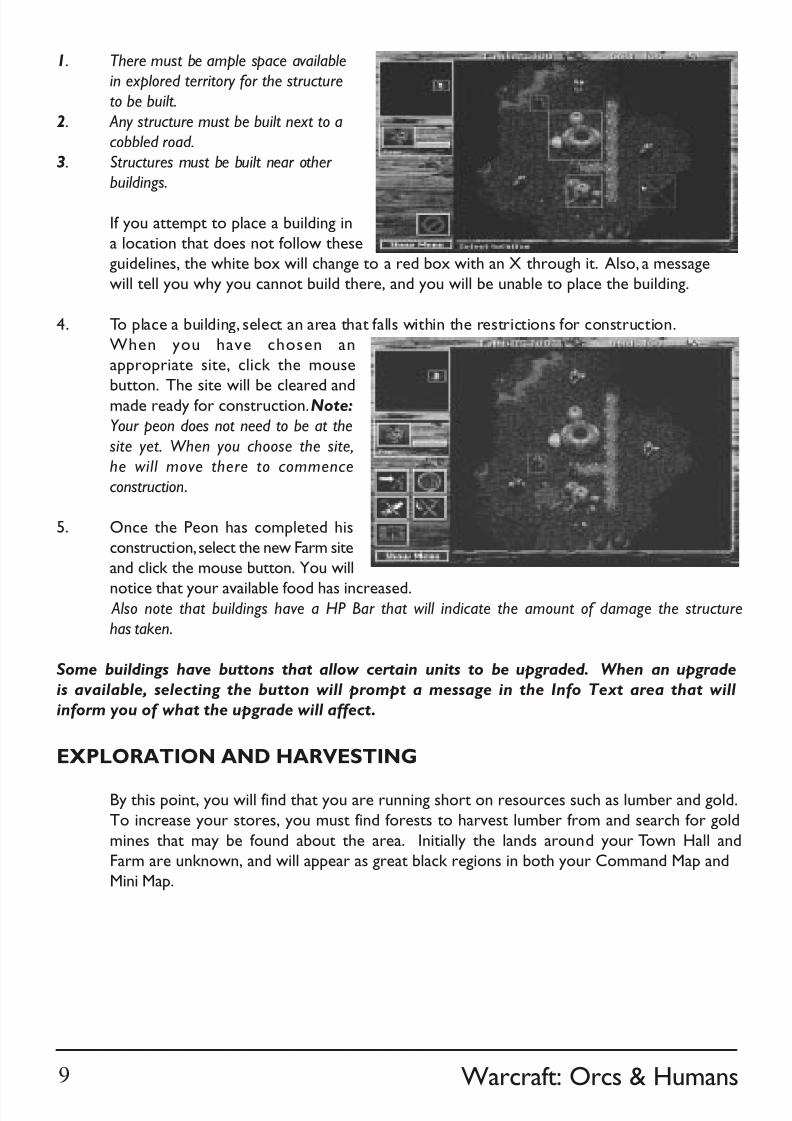
8/7/2019 Warcraft 1 manual
http://slidepdf.com/reader/full/warcraft-1-manual 54/81
Warcraft: Orcs & Humans
1. There must be ample space available
in explored territory for the structure
to be built.
2. Any structure must be built next to a
cobbled road.
3. Structures must be built near other
buildings.
If you attempt to place a building ina location that does not follow theseguidelines, the white box will change to a red box with an X through it. Also, a messagewill tell you why you cannot build there, and you will be unable to place the building.
4. To place a building, select an area that falls within the restrictions for construction.When you have chosen anappropriate site, click the mouse
button. The site will be cleared andmade ready for construction. Note:
Your peon does not need to be at the
site yet. When you choose the site,
he will move there to commence
construction.
5. Once the Peon has completed his
construction, select the new Farm site
and click the mouse button. You will
notice that your available food has increased. Also note that buildings have a HP Bar that will indicate the amount of damage the structure
has taken.
Some buildings have buttons that allow certain units to be upgraded. When an upgrade
is available, selecting the button will prompt a message in the Info Text area that will
inform you of what the upgrade will affect.
EXPLORATION AND HARVESTING
By this point, you will find that you are running short on resources such as lumber and gold.To increase your stores, you must find forests to harvest lumber from and search for gold
mines that may be found about the area. Initially the lands around your Town Hall andFarm are unknown, and will appear as great black regions in both your Command Map andMini Map.
9
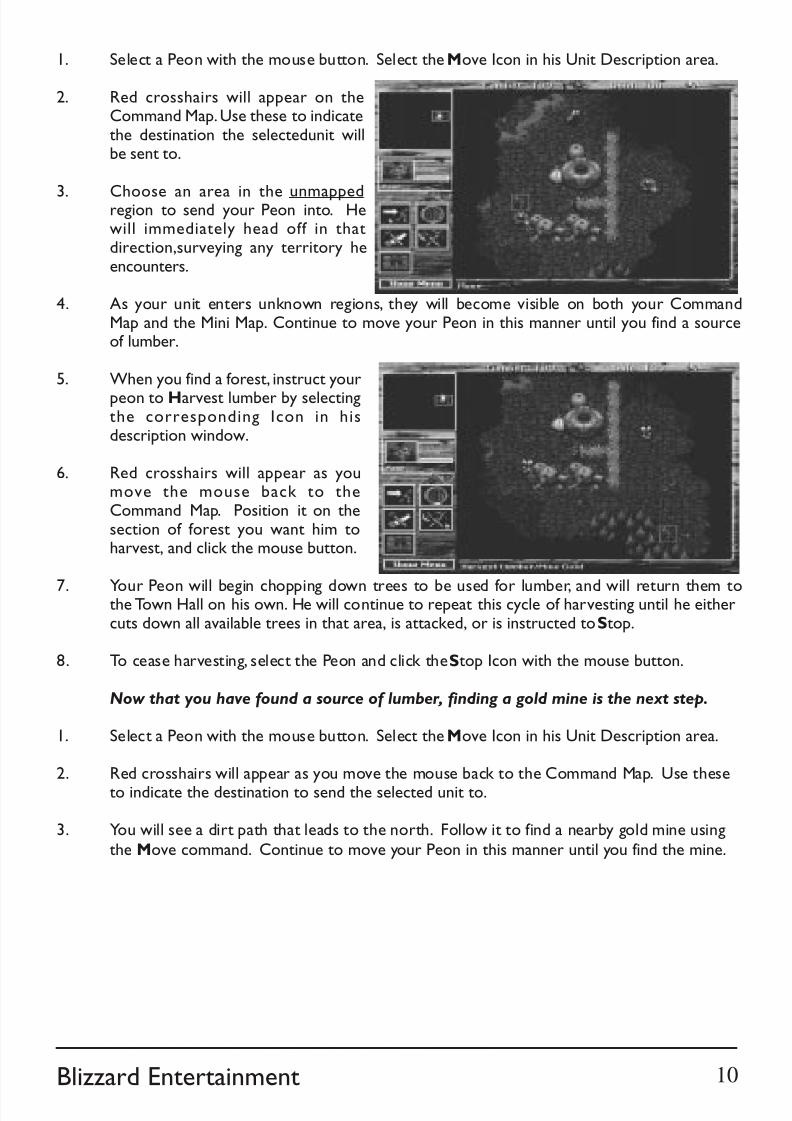
8/7/2019 Warcraft 1 manual
http://slidepdf.com/reader/full/warcraft-1-manual 55/81
Blizzard Entertainment
1. Select a Peon with the mouse button. Select the Move Icon in his Unit Description area.
2. Red crosshairs will appear on theCommand Map. Use these to indicatethe destination the selectedunit willbe sent to.
3. Choose an area in the unmappedregion to send your Peon into. Hewill immediately head off in thatdirection,surveying any territory heencounters.
4. As your unit enters unknown regions, they will become visible on both your CommandMap and the Mini Map. Continue to move your Peon in this manner until you find a sourceof lumber.
5. When you find a forest, instruct your
peon to Harvest lumber by selectingthe corresponding Icon in hisdescription window.
6. Red crosshairs will appear as youmove the mouse back to theCommand Map. Position it on thesection of forest you want him toharvest, and click the mouse button.
7. Your Peon will begin chopping down trees to be used for lumber, and will return them tothe Town Hall on his own. He will continue to repeat this cycle of harvesting until he eithercuts down all available trees in that area, is attacked, or is instructed to Stop.
8. To cease harvesting, select the Peon and click the Stop Icon with the mouse button.
Now that you have found a source of lumber, finding a gold mine is the next step.
1. Select a Peon with the mouse button. Select the Move Icon in his Unit Description area.
2. Red crosshairs will appear as you move the mouse back to the Command Map. Use theseto indicate the destination to send the selected unit to.
3. You will see a dirt path that leads to the north. Follow it to find a nearby gold mine usingthe Move command. Continue to move your Peon in this manner until you find the mine.
10
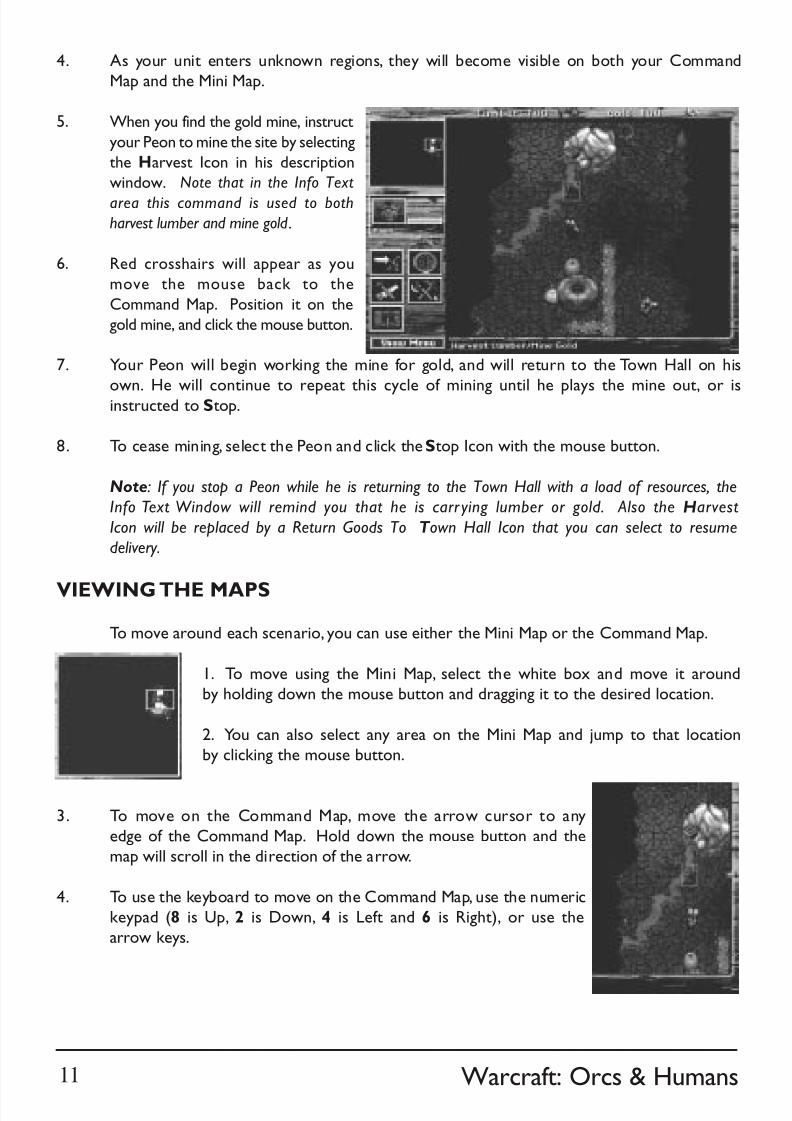
8/7/2019 Warcraft 1 manual
http://slidepdf.com/reader/full/warcraft-1-manual 56/81
Warcraft: Orcs & Humans
4. As your unit enters unknown regions, they will become visible on both your CommandMap and the Mini Map.
5. When you find the gold mine, instruct
your Peon to mine the site by selecting
the Harvest Icon in his description
window. Note that in the Info Text
area this command is used to both
harvest lumber and mine gold .
6. Red crosshairs will appear as you
move the mouse back to the
Command Map. Position it on the
gold mine, and click the mouse button.
7. Your Peon will begin working the mine for gold, and will return to the Town Hall on his
own. He will continue to repeat this cycle of mining until he plays the mine out, or isinstructed to Stop.
8. To cease mining, select the Peon and click the Stop Icon with the mouse button.
Note: If you stop a Peon while he is returning to the Town Hall with a load of resources, the
Info Text Window will remind you that he is carr ying lumber or gold. Also the Harvest
Icon will be replaced by a Return Goods To T own Hall Icon that you can select to resume
delivery.
VIEWING THE MAPS
To move around each scenario, you can use either the Mini Map or the Command Map.
1. To move using the Mini Map, select the white box and move it aroundby holding down the mouse button and dragging it to the desired location.
2. You can also select any area on the Mini Map and jump to that locationby clicking the mouse button.
3. To move on the Command Map, move the arrow cursor to anyedge of the Command Map. Hold down the mouse button and themap will scroll in the direction of the arrow.
4. To use the keyboard to move on the Command Map, use the numerickeypad (8 is Up, 2 is Down, 4 is Left and 6 is Right), or use thearrow keys.
11
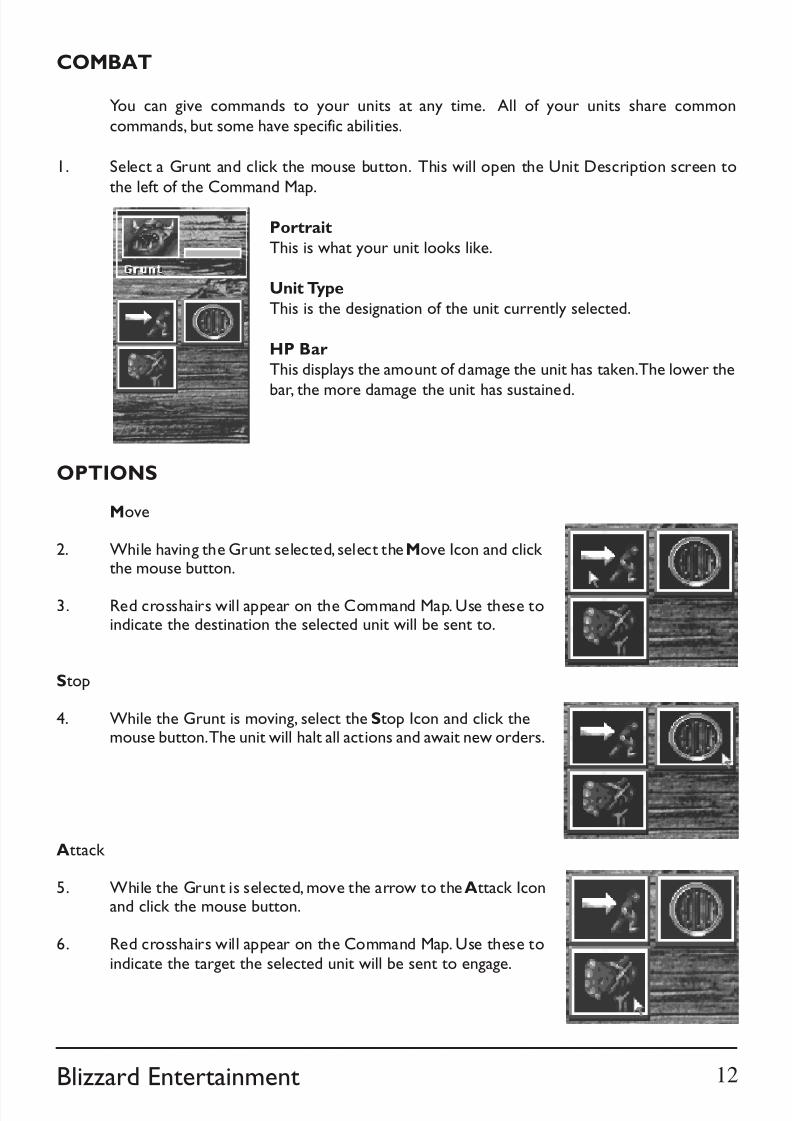
8/7/2019 Warcraft 1 manual
http://slidepdf.com/reader/full/warcraft-1-manual 57/81
Blizzard Entertainment
COMBAT
You can give commands to your units at any time. All of your units share commoncommands, but some have specific abilities.
1. Select a Grunt and click the mouse button. This will open the Unit Description screen tothe left of the Command Map.
Portrait
This is what your unit looks like.
Unit Type
This is the designation of the unit currently selected.
HP Bar
This displays the amount of damage the unit has taken. The lower the
bar, the more damage the unit has sustained.
OPTIONS
Move
2. While having the Grunt selected, select the Move Icon and click the mouse button.
3. Red crosshairs will appear on the Command Map. Use these toindicate the destination the selected unit will be sent to.
Stop
4. While the Grunt is moving, select the Stop Icon and click themouse button. The unit will halt all actions and await new orders.
Attack
5. While the Grunt is selected, move the arrow to the Attack Iconand click the mouse button.
6. Red crosshairs will appear on the Command Map. Use these toindicate the target the selected unit will be sent to engage.
12
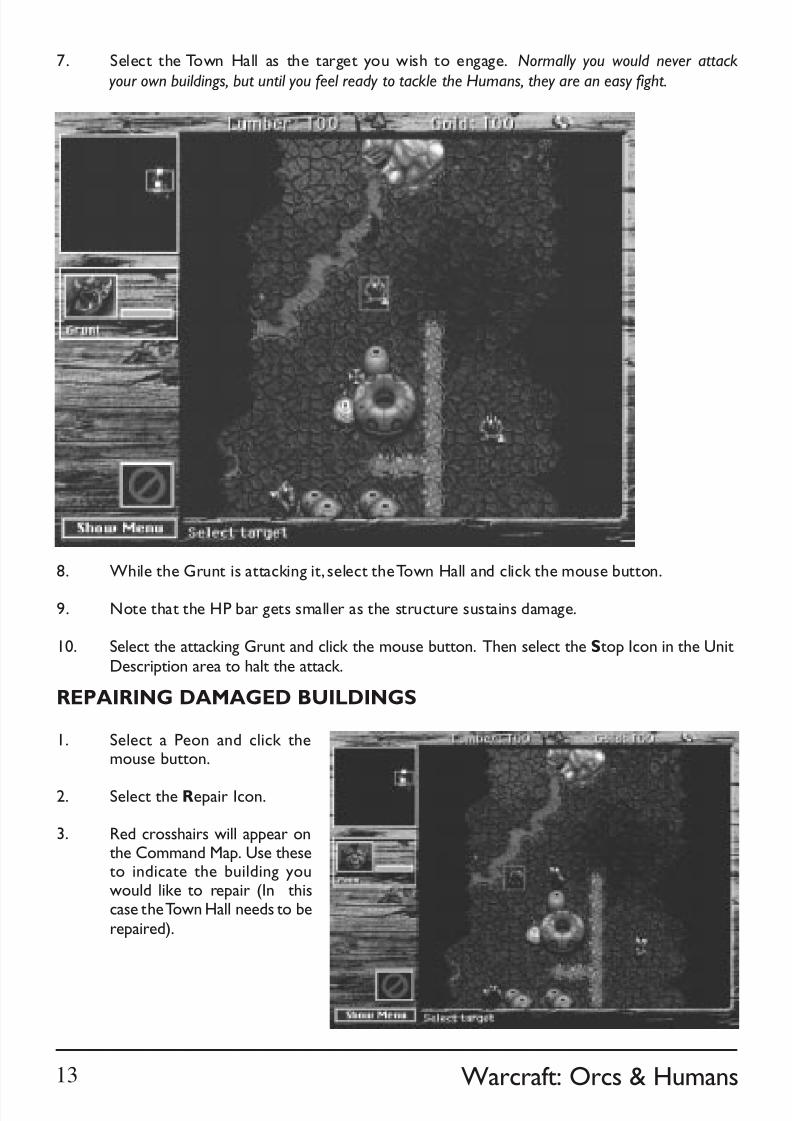
8/7/2019 Warcraft 1 manual
http://slidepdf.com/reader/full/warcraft-1-manual 58/81
Warcraft: Orcs & Humans
7. Select the Town Hall as the target you wish to engage. Normally you would never attack
your own buildings, but until you feel ready to tackle the Humans, they are an easy fight.
8. While the Grunt is attacking it, select the Town Hall and click the mouse button.
9. Note that the HP bar gets smaller as the structure sustains damage.
10. Select the attacking Grunt and click the mouse button. Then select the Stop Icon in the UnitDescription area to halt the attack.
REPAIRING DAMAGED BUILDINGS
1. Select a Peon and click themouse button.
2. Select the Repair Icon.
3. Red crosshairs will appear onthe Command Map. Use theseto indicate the building youwould like to repair (In thiscase the Town Hall needs to berepaired).
13
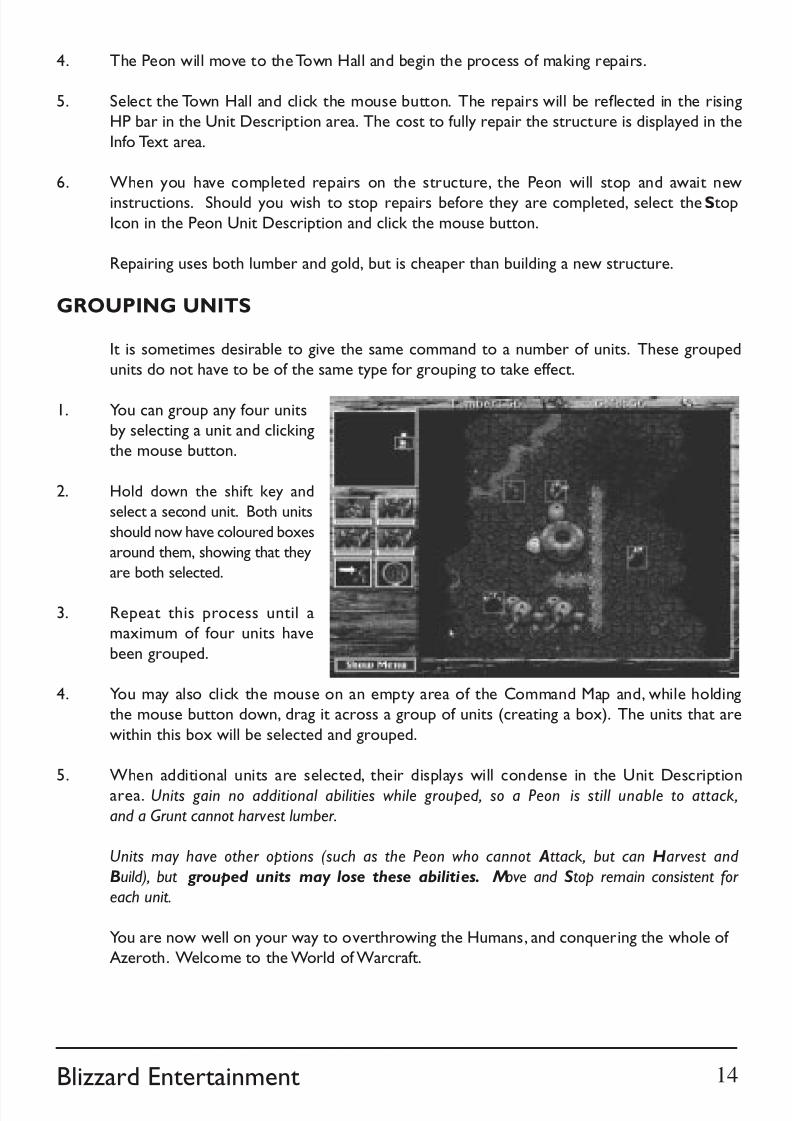
8/7/2019 Warcraft 1 manual
http://slidepdf.com/reader/full/warcraft-1-manual 59/81
Blizzard Entertainment
4. The Peon will move to the Town Hall and begin the process of making repairs.
5. Select the Town Hall and click the mouse button. The repairs will be reflected in the risingHP bar in the Unit Description area. The cost to fully repair the structure is displayed in the
Info Text area.
6. When you have completed repairs on the structure, the Peon will stop and await new
instructions. Should you wish to stop repairs before they are completed, select the StopIcon in the Peon Unit Description and click the mouse button.
Repairing uses both lumber and gold, but is cheaper than building a new structure.
GROUPING UNITS
It is sometimes desirable to give the same command to a number of units. These groupedunits do not have to be of the same type for grouping to take effect.
1. You can group any four unitsby selecting a unit and clickingthe mouse button.
2. Hold down the shift key and
select a second unit. Both units
should now have coloured boxes
around them, showing that they
are both selected.
3. Repeat this process until amaximum of four units have
been grouped.
4. You may also click the mouse on an empty area of the Command Map and, while holdingthe mouse button down, drag it across a group of units (creating a box). The units that are
within this box will be selected and grouped.
5. When additional units are selected, their displays will condense in the Unit Descriptionarea. Units gain no additional abilities while grouped, so a Peon is still unable to attack,
and a Grunt cannot harvest lumber.
Units may have other options (such as the Peon who cannot Attack, but can Harvest and
Build), but grouped units may lose these abilities. Move and Stop remain consistent for
each unit.
You are now well on your way to overthrowing the Humans, and conquering the whole of Azeroth. Welcome to the World of Warcraft.
14
8/7/2019 Warcraft 1 manual
http://slidepdf.com/reader/full/warcraft-1-manual 60/81
Warcraft: Orcs & Humans
GAME OPTIONS
MENU BUTTON
When you select the Show Menu button or press F10, the Menu Bar appears at the top of the screen. The menu bar is usually hidden to allow scrolling at the top Command Mapduring game play. The Menu gives you access to several pulldown menu options:
FILE
New Game: This begins a new game and takes you to the NEW GAME menu.Open Game: This allows you to load and continue a game that you have previously saved.End Game: This ends the current game and takes you to the MAIN MENU.Save Game: This allows you to save the game you are currently playing.Save Game As: Save the game you are currently playing under a specific name.Restart Scenario: This allows you to restart the scenario you are currently playing.Continue: This returns you to the Command Map.
Quit: This ends the current game, quits the application and takes you to the FINDER.
EDIT
Preferences: This takes you to the PREFERENCES dialog window.
PREFERENCESGame Speed SLOWEST / SLOW / NORMAL / FAST / FASTESTMusic OFF / 1, 2. . .10SFX OFF / 1, 2. . .10Mouse Scroll SLOWEST / SLOW / NORMAL / FAST / FASTEST
Key Scroll SLOWEST / SLOW / NORMAL / FAST / FASTESTOK ACCEPTS changes and returns you to the gameCancel NO changes are made and you are returned to the game
GAME
Pause This Pauses the game (ON/OFF) and the menu bar is still activeLocation (Option+F1-F4) This saves the current Command Map game play position.Recall Location (F1-F4) This centers the Command Map on a saved game play
location.
Mini Map (F5) Turns on the Mini Map from any other screen.Unit Screen (F6) Lists all units in play and units destroyed.Economy Screen (F7) Lists total resources harvested.Score (F8) This gives an indication as to your rank and victory conditions.
ADDITIONAL KEYS / MENUS
G = Hold this key down to show the construction grid.Click & Dragging the mouse = Selects up to four units at once.+, - = Increase or decrease game speed during play.Esc = Cancel any command just issued in any menu.
15

8/7/2019 Warcraft 1 manual
http://slidepdf.com/reader/full/warcraft-1-manual 61/81
Blizzard Entertainment
The Destiny
of the
Orcish HordesThe history and legends concerning
the invasion and domination of the Human lands
scribed by
Garona of the Shadow Council
16
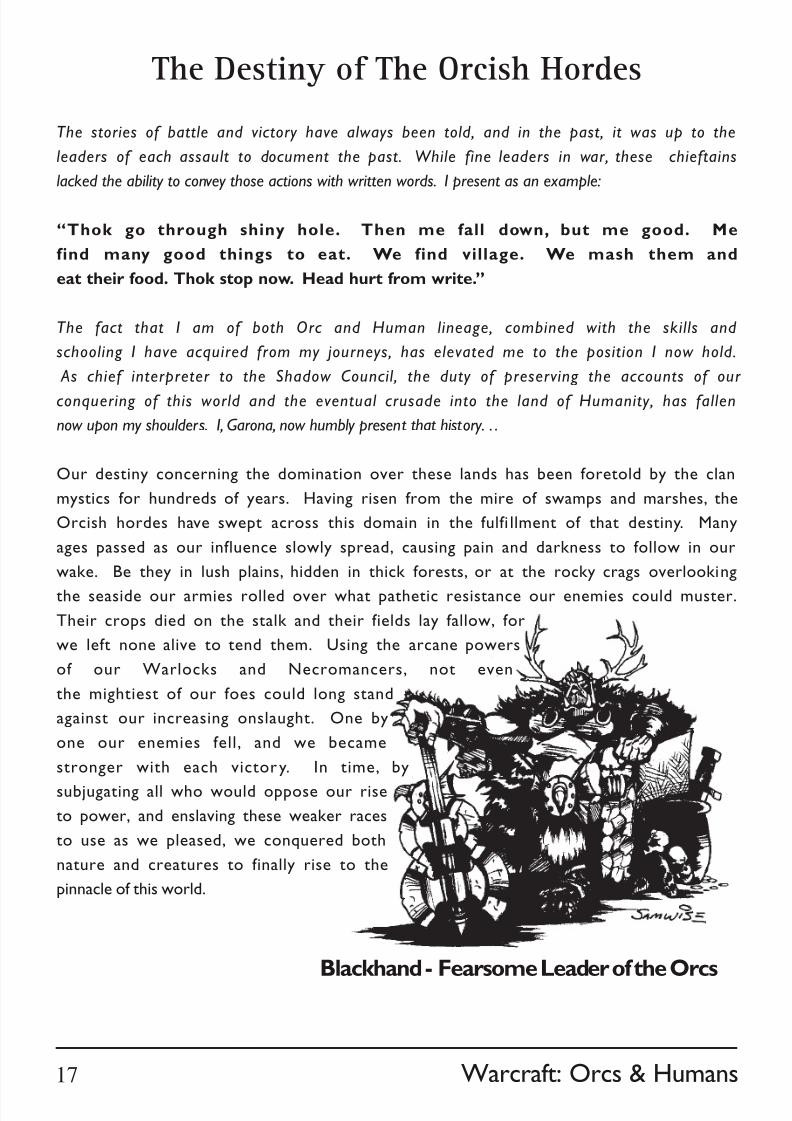
8/7/2019 Warcraft 1 manual
http://slidepdf.com/reader/full/warcraft-1-manual 62/81
Warcraft: Orcs & Humans
The Destiny of The Orcish Hordes
The stories of battle and victory have always been told, and in the past, it was up to the
leaders of each assault to document the past. While fine leaders in war, these chieftains
lacked the ability to convey those actions with written words. I present as an example:
“Thok go through shiny hole. Then me fall down, but me good. Me
find many good things to eat. We find village. We mash them and
eat their food. Thok stop now. Head hurt from write.”
The fact that I am of both Orc and Human lineage, combined with the skills and
schooling I have acquired from my journeys, has elevated me to the position I now hold.
As chief interpreter to the Shadow Council, the duty of preserving the accounts of our
conquering of this world and the eventual crusade into the land of Humanity, has fallen
now upon my shoulders. I, Garona, now humbly present that history. . .
Our destiny concerning the domination over these lands has been foretold by the clan
mystics for hundreds of years. Having risen from the mire of swamps and marshes, the
Orcish hordes have swept across this domain in the fulfi llment of that destiny. Many
ages passed as our influence slowly spread, causing pain and darkness to follow in our
wake. Be they in lush plains, hidden in thick forests, or at the rocky crags overlooking
the seaside our armies rolled over what pathetic resistance our enemies could muster.
Their crops died on the stalk and their fields lay fallow, for
we left none alive to tend them. Using the arcane powers
of our Warlocks and Necromancers, not even
the mightiest of our foes could long stand
against our increasing onslaught. One by
one our enemies fell, and we became
stronger with each victory. In time, by
subjugating all who would oppose our rise
to power, and enslaving these weaker races
to use as we pleased, we conquered both
nature and creatures to finally rise to the
pinnacle of this world.
Blackhand - Fearsome Leader of the Orcs
17
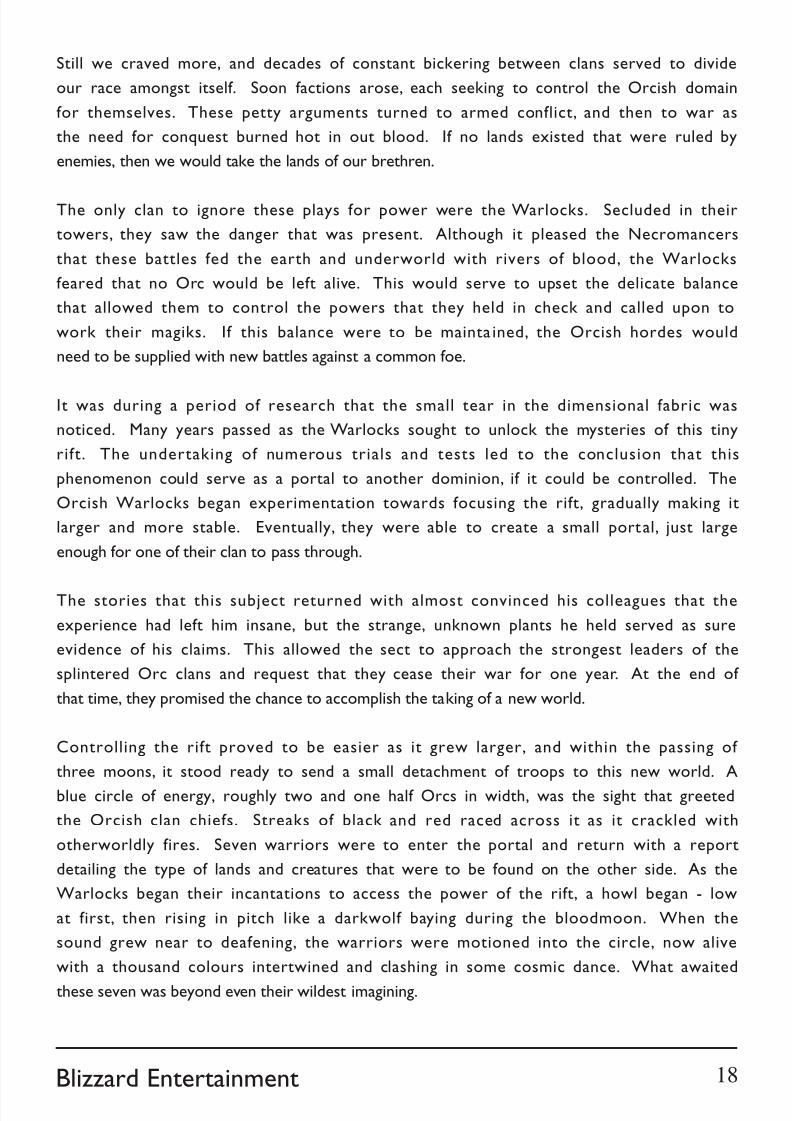
8/7/2019 Warcraft 1 manual
http://slidepdf.com/reader/full/warcraft-1-manual 63/81
Blizzard Entertainment
Still we craved more, and decades of constant bickering between clans served to divide
our race amongst itself. Soon factions arose, each seeking to control the Orcish domain
for themselves. These petty arguments turned to armed conflict, and then to war as
the need for conquest burned hot in out blood. If no lands existed that were ruled by
enemies, then we would take the lands of our brethren.
The only clan to ignore these plays for power were the Warlocks. Secluded in their
towers, they saw the danger that was present. Although it pleased the Necromancers
that these battles fed the earth and underworld with rivers of blood, the Warlocks
feared that no Orc would be left alive. This would serve to upset the delicate balance
that allowed them to control the powers that they held in check and called upon to
work their magiks. If this balance were to be mainta ined, the Orcish hordes would
need to be supplied with new battles against a common foe.
It was during a period of research that the small tear in the dimensional fabric was
noticed. Many years passed as the Warlocks sought to unlock the mysteries of this tiny
rift. The undertaking of numerous trials and tests led to the conclusion that this
phenomenon could serve as a portal to another dominion, if it could be controlled. The
Orcish Warlocks began experimentation towards focusing the rift, gradually making it
larger and more stable. Eventually, they were able to create a small portal, just large
enough for one of their clan to pass through.
The stories that this subject returned with almost convinced his colleagues that the
experience had left him insane, but the strange, unknown plants he held served as sure
evidence of his claims. This allowed the sect to approach the strongest leaders of the
splintered Orc clans and request that they cease their war for one year. At the end of
that time, they promised the chance to accomplish the taking of a new world.
Controlling the rift proved to be easier as it grew larger, and within the passing of
three moons, it stood ready to send a small detachment of troops to this new world. A
blue circle of energy, roughly two and one half Orcs in width, was the sight that greeted
the Orcish clan chiefs. Streaks of black and red raced across it as it crackled with
otherworldly fires. Seven warriors were to enter the portal and return with a report
detailing the type of lands and creatures that were to be found on the other side. As the
Warlocks began their incantations to access the power of the rift, a howl began - low
at first, then rising in pitch like a darkwolf baying during the bloodmoon. When the
sound grew near to deafening, the warriors were motioned into the circle, now alive
with a thousand colours intertwined and clashing in some cosmic dance. What awaited
these seven was beyond even their wildest imagining.
18

8/7/2019 Warcraft 1 manual
http://slidepdf.com/reader/full/warcraft-1-manual 64/81
Warcraft: Orcs & Humans
The sack of the vill age was a simple matter, hardly worth the telling. Yet hundreds of
times the tale was recounted, and a hundred more would be expected and relished. A
group of strange, sharp edged buildings was the first sign of any true opposition they
encountered. A rough dirt path lead into a trio of farms. The gray of dawn was
lightening as the sun of this world rose over the hilltops. It was a bright, yellow orb
that shone twice as brightly as our own, and made the days exceedingly hot. Then out
of the odd little hut came what must have been a member of this lands true race.
Small , pink and spare of muscle were these creatures. The warriors grinned wickedly
at each other, knowing that if this represented the breed of stock they would need to
pen in order to take this world, victory was but a matter of moments. Rushing out of
their hiding place, they swarmed upon the village and slew every living thing they could
find. The males offered some small resistance, but the females and children were like
taking grok to the slaughter. Their homes held few values, but their field were full of a
tasty grain. Their livestock, as little as there was, also proved excellent, and what they
could not eat or pack was set to the torch. The trinkets brought back from this place
were of a craftsmanship unknown to the Orcs, and were quickly taken by the leaders of
the clans for their own treasure hordes. This new world, heavy with vast expanses and
soft, weak protectors would prove a rich jewel to add the crown of the Orcs.
Our order of ascension is a simple one - only the strongest survive. All matters of
politics or dispute are settled in open debate. This can lead to hostilities in many cases,
but it is the fastest and simplest way to come to a conclusion on most matters. Each
Orc has the right to make heard his arguments, as long as he can back them up with
fact - or steel. To gain the upper hand is a sign of strength, and strength is counted
highly among the hordes. A decisive victory in battle raises the commander and his
warriors to a place of honor and control. This hold is tenuous, however, for the higher
one climbs, the farther - and more deadly - the fall.
By this time, we had learned much of this new
domain, and those who dwelled here. While
difficult to understand in many ways, they
proved similar enough to us in many ways. A
sharp blow to the head resulted in death. Lack
of food led to starvation. Pain also affected
them in the same way it had all of our
enemies, and proved to be an effective
means of extracting information.
19
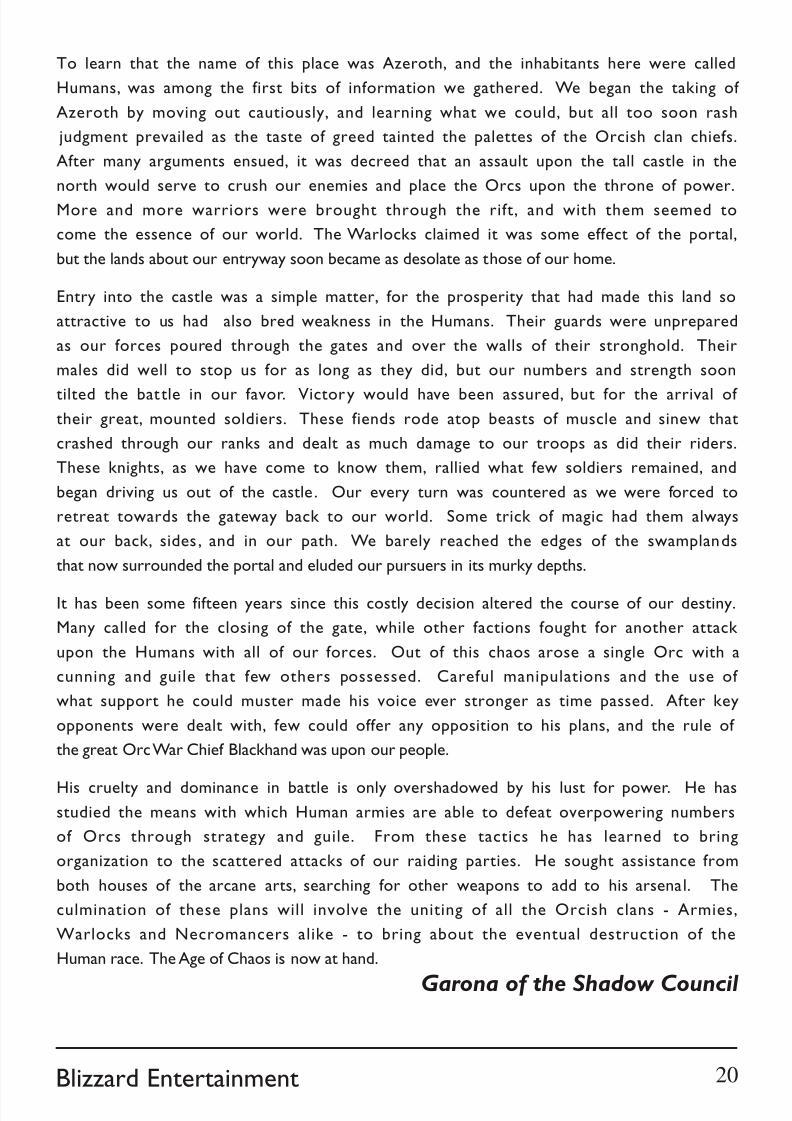
8/7/2019 Warcraft 1 manual
http://slidepdf.com/reader/full/warcraft-1-manual 65/81
Blizzard Entertainment
To learn that the name of this place was Azeroth, and the inhabitants here were called
Humans, was among the first bits of information we gathered. We began the taking of
Azeroth by moving out cautiously, and learning what we could, but all too soon rash
judgment prevailed as the taste of greed tainted the palettes of the Orcish clan chiefs.
After many arguments ensued, it was decreed that an assault upon the tall castle in the
north would serve to crush our enemies and place the Orcs upon the throne of power.
More and more warriors were brought through the rift, and with them seemed to
come the essence of our world. The Warlocks claimed it was some effect of the portal,
but the lands about our entryway soon became as desolate as those of our home.
Entry into the castle was a simple matter, for the prosperity that had made this land so
attractive to us had also bred weakness in the Humans. Their guards were unprepared
as our forces poured through the gates and over the walls of their stronghold. Their
males did well to stop us for as long as they did, but our numbers and strength soon
tilted the battle in our favor. Victory would have been assured, but for the arrival of their great, mounted soldiers. These fiends rode atop beasts of muscle and sinew that
crashed through our ranks and dealt as much damage to our troops as did their riders.
These knights, as we have come to know them, rallied what few soldiers remained, and
began driving us out of the castle . Our every turn was countered as we were forced to
retreat towards the gateway back to our world. Some trick of magic had them always
at our back, sides , and in our path. We barely reached the edges of the swamplands
that now surrounded the portal and eluded our pursuers in its murky depths.
It has been some fifteen years since this costly decision altered the course of our destiny.
Many called for the closing of the gate, while other factions fought for another attack
upon the Humans with all of our forces. Out of this chaos arose a single Orc with a
cunning and guile that few others possessed. Careful manipulations and the use of
what support he could muster made his voice ever stronger as time passed. After key
opponents were dealt with, few could offer any opposition to his plans, and the rule of
the great Orc War Chief Blackhand was upon our people.
His cruelty and dominance in battle is only overshadowed by his lust for power. He hasstudied the means with which Human armies are able to defeat overpowering numbers
of Orcs through strategy and guile. From these tactics he has learned to bring
organization to the scattered attacks of our raiding parties. He sought assistance from
both houses of the arcane arts, searching for other weapons to add to his arsenal. The
culmination of these plans will involve the uniting of all the Orcish clans - Armies,
Warlocks and Necromancers alike - to bring about the eventual destruction of the
Human race. The Age of Chaos is now at hand.
Garona of the Shadow Council
20

8/7/2019 Warcraft 1 manual
http://slidepdf.com/reader/full/warcraft-1-manual 66/81
Warcraft: Orcs & Humans
Grunts trained in the use of the
spear. They are faster than their
ax wielding brethren, but have lighter armor so that
they may move about more freely. The ability to hurl
their deadly missiles across a battlefield makes them a
formidable unit to employ.
Spearman
The lowliest of the Orcs, these dogs are good
for little more than rough work. Command
them to cut wood or mine the pits for gold. They also
make strong laborers in the construction of all manner of
buildings . They are all cowards, and will run like little
children if attacked.
Peon
GruntThe first level of warrior in the
service of our armies. Trained for
close combat, these soldiers make excellent fodder
for wading through Human forces. Use of the ax andshield is their specialty, and they are hearty fighters
with a taste for blood.
Unit Descriptions
21
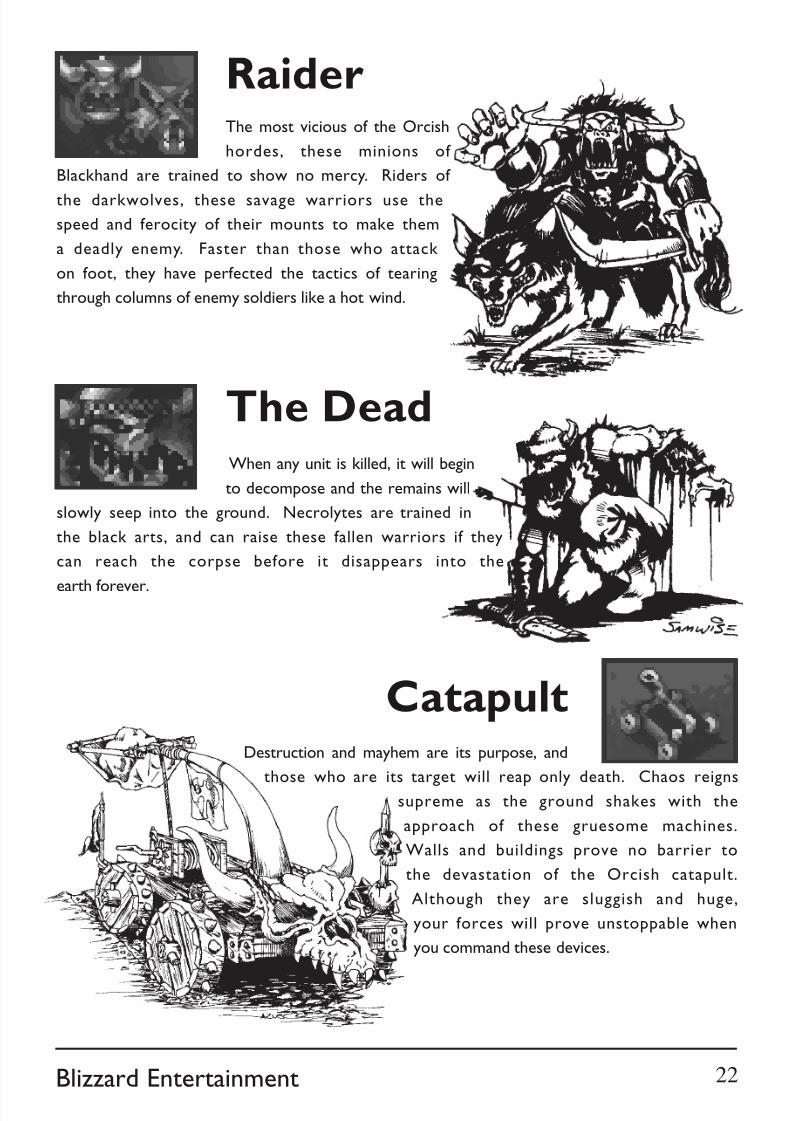
8/7/2019 Warcraft 1 manual
http://slidepdf.com/reader/full/warcraft-1-manual 67/81
Blizzard Entertainment
The most vicious of the Orcish
hordes, these minions of
Blackhand are trained to show no mercy. Riders of
the darkwolves, these savage warriors use the
speed and ferocity of their mounts to make them
a deadly enemy. Faster than those who attack
on foot, they have perfected the tactics of tearing
through columns of enemy soldiers like a hot wind.
Destruction and mayhem are its purpose, and
those who are its target will reap only death. Chaos reignssupreme as the ground shakes with the
approach of these gruesome machines.
Walls and buildings prove no barrier to
the devastation of the Orcish catapult.
Although they are sluggish and huge,
your forces will prove unstoppable when
you command these devices.
Catapult
The DeadWhen any unit is killed, it will begin
to decompose and the remains will
slowly seep into the ground. Necrolytes are trained in
the black arts, and can raise these fallen warriors if they
can reach the corpse before it disappears into the
earth forever.
Raider
22

8/7/2019 Warcraft 1 manual
http://slidepdf.com/reader/full/warcraft-1-manual 68/81
Warcraft: Orcs & Humans
If the energies of this world can be used for destruction, then the
energies of the underworld could destroy
Azeroth. It is this destructive power that the Orcish
Warlocks use in their incantations and
rituals. As the most powerful of the Orcish
sects, these dark brethren of Hades go
where none others dare in search of
ultimate power. Their Towers hold the
keys to unleashing the very essence of evil upon
those they see as a threat to their devious plans. Spells
that channel the fire and brimstone of hell through their bodies,
or can summon forth great creatures - even daemons - are theirs to use.
Warlock
Practitioners of the Orcish religions,these binders of souls command the
black powers that hold control over the earth. Linked
into the dominions of the lower plains, Necrolytes
have power over all things dark and evil, including
the raising of fallen warriors to create armies of the
undead. Through ceremonies performed at their
Temples, they learn to warp the essence of
shadow to use for their advantage.
Necrolyte
23
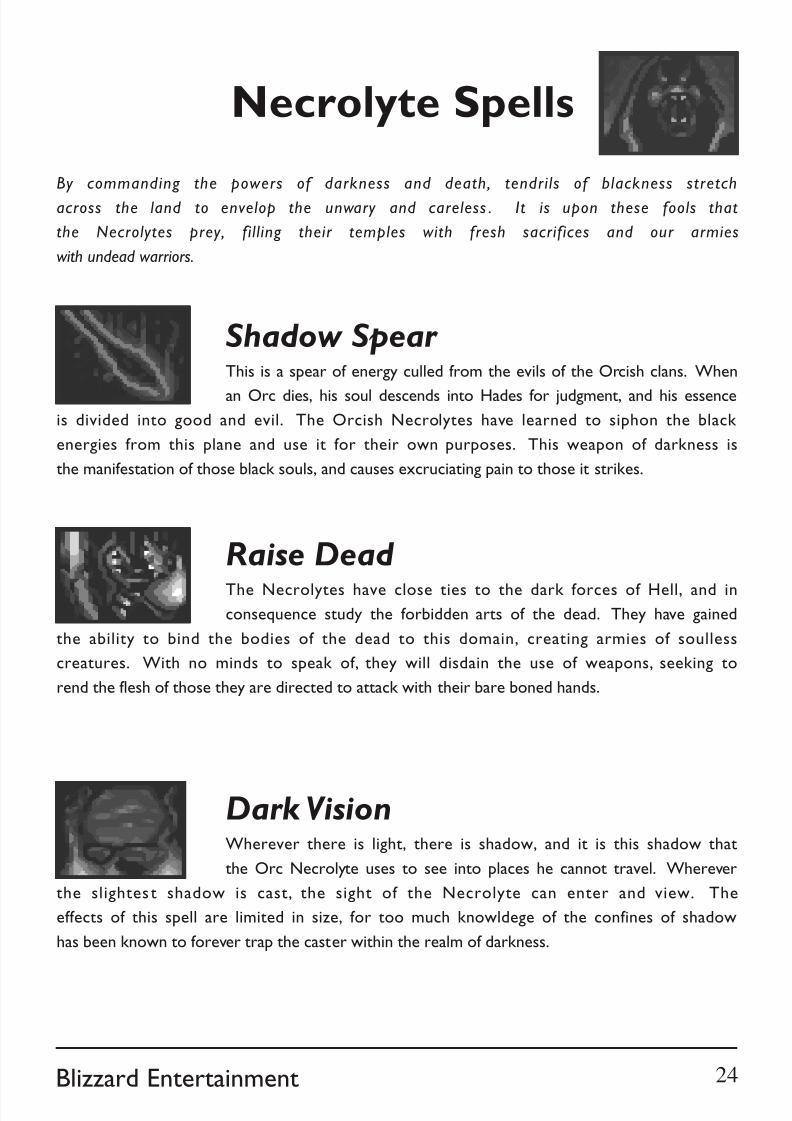
8/7/2019 Warcraft 1 manual
http://slidepdf.com/reader/full/warcraft-1-manual 69/81
Blizzard Entertainment
Necrolyte Spells
By commanding the powers of darkness and death, tendrils of blackness stretch
across the land to envelop the unwary and careless . It is upon these fools that
the Necrolytes prey, fill ing their temples with fresh sacrifices and our armies
with undead warriors.
Shadow Spear This is a spear of energy culled from the evils of the Orcish clans. When
an Orc dies, his soul descends into Hades for judgment, and his essence
is divided into good and evil. The Orcish Necrolytes have learned to siphon the black
energies from this plane and use it for their own purposes. This weapon of darkness is
the manifestation of those black souls, and causes excruciating pain to those it strikes.
Dark VisionWherever there is light, there is shadow, and it is this shadow that
the Orc Necrolyte uses to see into places he cannot travel. Wherever
the slightes t shadow is cast, the sight of the Necrolyte can enter and view. The
effects of this spell are limited in size, for too much knowldege of the confines of shadow
has been known to forever trap the caster within the realm of darkness.
Raise Dead The Necrolytes have close ties to the dark forces of Hell, and inconsequence study the forbidden arts of the dead. They have gained
the ability to bind the bodies of the dead to this domain, creating armies of soulless
creatures. With no minds to speak of, they will disdain the use of weapons, seeking to
rend the flesh of those they are directed to attack with their bare boned hands.
24
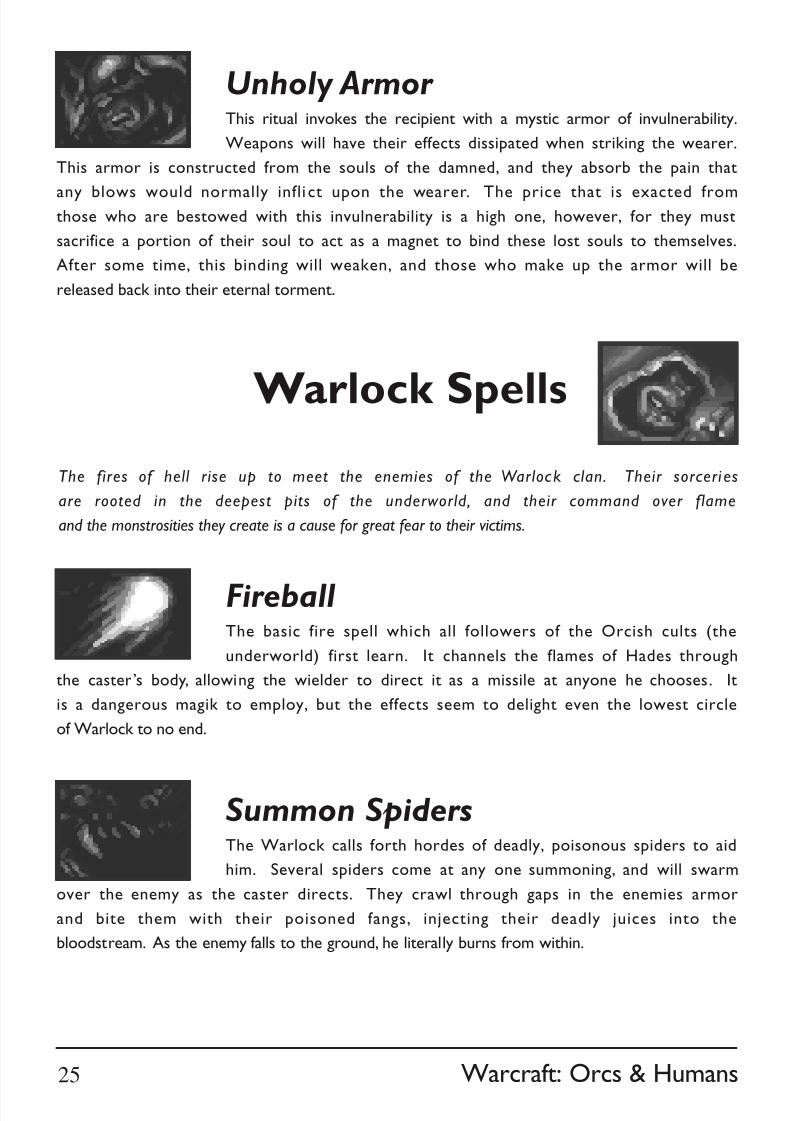
8/7/2019 Warcraft 1 manual
http://slidepdf.com/reader/full/warcraft-1-manual 70/81
Warcraft: Orcs & Humans
Unholy Armor This ritual invokes the recipient with a mystic armor of invulnerability.
Weapons will have their effects dissipated when striking the wearer.
This armor is constructed from the souls of the damned, and they absorb the pain that
any blows would normally infli ct upon the wearer. The price that is exacted fromthose who are bestowed with this invulnerability is a high one, however, for they must
sacrifice a portion of their soul to act as a magnet to bind these lost souls to themselves.
After some time, this binding will weaken, and those who make up the armor will be
released back into their eternal torment.
Summon SpidersThe Warlock calls forth hordes of deadly, poisonous spiders to aid
him. Several spiders come at any one summoning, and will swarm
over the enemy as the caster directs. They crawl through gaps in the enemies armor
and bite them with their poisoned fangs, injecting their deadly juices into the
bloodstream. As the enemy falls to the ground, he literally burns from within.
The fires of hell rise up to meet the enemies of the Warlock clan. Their sorceri es
are rooted in the deepest pits of the underworld, and their command over flame
and the monstrosities they create is a cause for great fear to their victims.
FireballThe basic fire spell which all followers of the Orcish cults (the
underworld) first learn. It channels the flames of Hades through
the caster’s body, allowing the wielder to direct it as a missile at anyone he chooses. It
is a dangerous magik to employ, but the effects seem to delight even the lowest circle
of Warlock to no end.
Warlock Spells
25
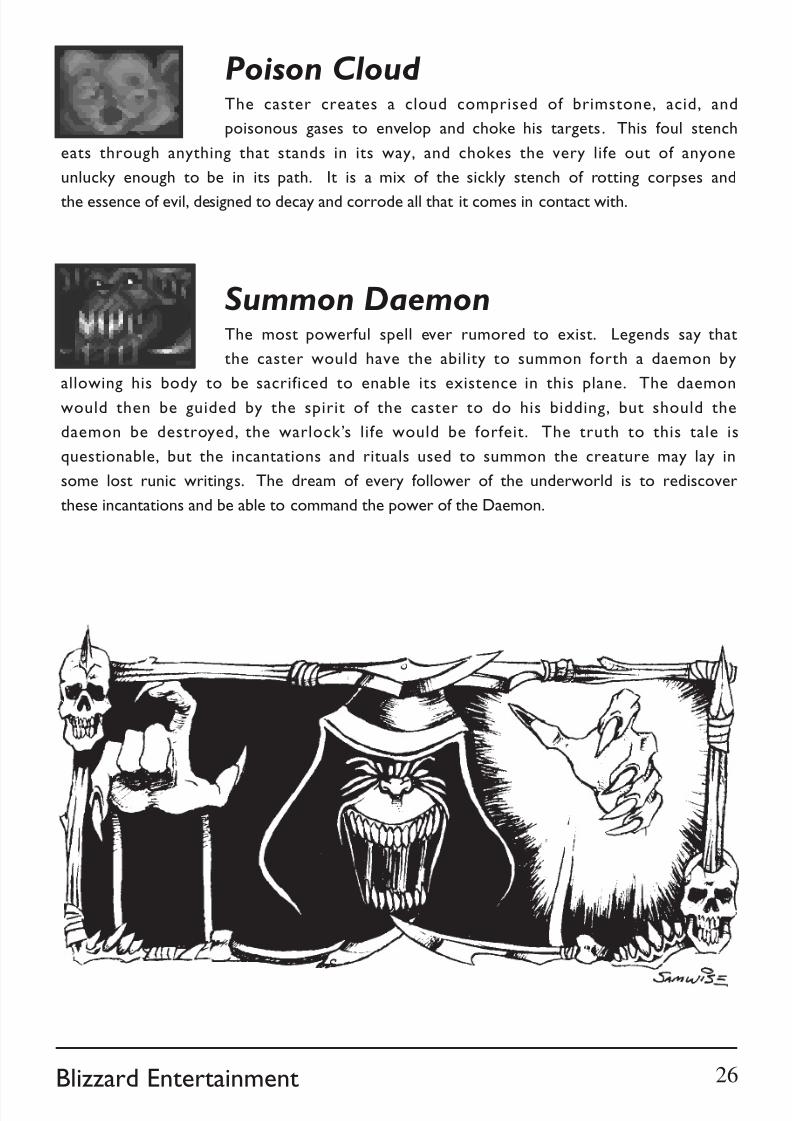
8/7/2019 Warcraft 1 manual
http://slidepdf.com/reader/full/warcraft-1-manual 71/81
Blizzard Entertainment
Poison Cloud The caster creates a cloud comprised of brimstone, acid, and
poisonous gases to envelop and choke his targets. This foul stench
eats through anything that stands in its way, and chokes the very life out of anyone
unlucky enough to be in its path. It is a mix of the sickly stench of rotting corpses and
the essence of evil, designed to decay and corrode all that it comes in contact with.
Summon DaemonThe most powerful spell ever rumored to exist. Legends say that
the caster would have the ability to summon forth a daemon by
allowing his body to be sacrificed to enable its existence in this plane. The daemon
would then be guided by the spirit of the caster to do his bidding, but should the
daemon be destroyed, the warlock’s life would be forfeit. The truth to this tale is
questionable, but the incantations and rituals used to summon the creature may lay in
some lost runic writings. The dream of every follower of the underworld is to rediscover
these incantations and be able to command the power of the Daemon.
26

8/7/2019 Warcraft 1 manual
http://slidepdf.com/reader/full/warcraft-1-manual 72/81
Warcraft: Orcs & Humans
This is where the denizens of an encampment come to meet and make their
arguments heard. The constant bickering and backstabb ing that occurs here is
necessary, however, for it keeps them from killing each other in the street. The
Town Hall is also where the encampment’s Overseer can keep a closeeye on the resources and funds that are available, and use them as he
sees fit. All shipments of wood and gold are brought here for his
inspection. This is also where peons are given the training to
do the simple tasks demanded of them by the Orcish empire.
Blackhand has ordered that only one Town Hall be allowed
to stand in each encampment, so that separate factions of
Orcs will not arise . If the Town Hall is destroyed in battle, another can be built to
replace it.
The training of Orcish armies takes place in this structure. Grunts,
Spearmen, and Raiders all practice the skills needed to slay the
enemy in the cruelest form imaginable. When your forces have
been depleted and more warriors are needed, fresh recruits
can be found here. The crews that man the awesome catapults
are also trained here, and when one of the mighty devices is
required, it will be routed through here as well.
Farms produce the grains and animals needed to keep the
encampment and the army well fed. You must produce enough
food to supply all of the Orcs you control. Once your peons have
constructed the site, the farm will prosper with no furtherconcern on your part. If you have a farm destroyed in battle,
your ability to produce enough food will be affected.
Farm
Barracks
Town Hall
27
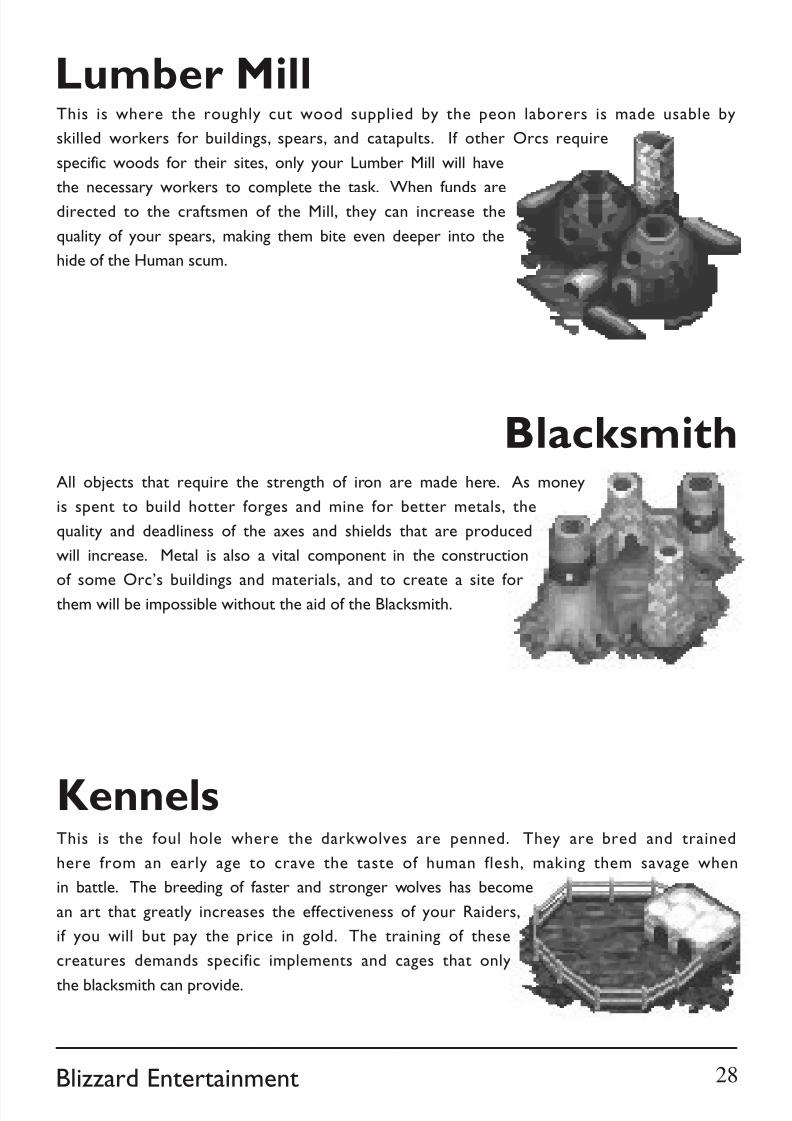
8/7/2019 Warcraft 1 manual
http://slidepdf.com/reader/full/warcraft-1-manual 73/81
Blizzard Entertainment
This is where the roughly cut wood supplied by the peon laborers is made usable by
skilled workers for buildings, spears, and catapults. If other Orcs require
specific woods for their sites, only your Lumber Mill will have
the necessary workers to complete the task. When funds are
directed to the craftsmen of the Mill, they can increase the
quality of your spears, making them bite even deeper into the
hide of the Human scum.
This is the foul hole where the darkwolves are penned. They are bred and trained
here from an early age to crave the taste of human flesh, making them savage when
in battle. The breeding of faster and stronger wolves has become
an art that greatly increases the effectiveness of your Raiders,
if you will but pay the price in gold. The training of these
creatures demands specific implements and cages that only
the blacksmith can provide.
Kennels
BlacksmithAll objects that require the strength of iron are made here. As money
is spent to build hotter forges and mine for better metals, the
quality and deadliness of the axes and shields that are produced
will increase. Metal is also a vital component in the construction
of some Orc’s buildings and materials, and to create a site for
them will be impossible without the aid of the Blacksmith.
Lumber Mill
28
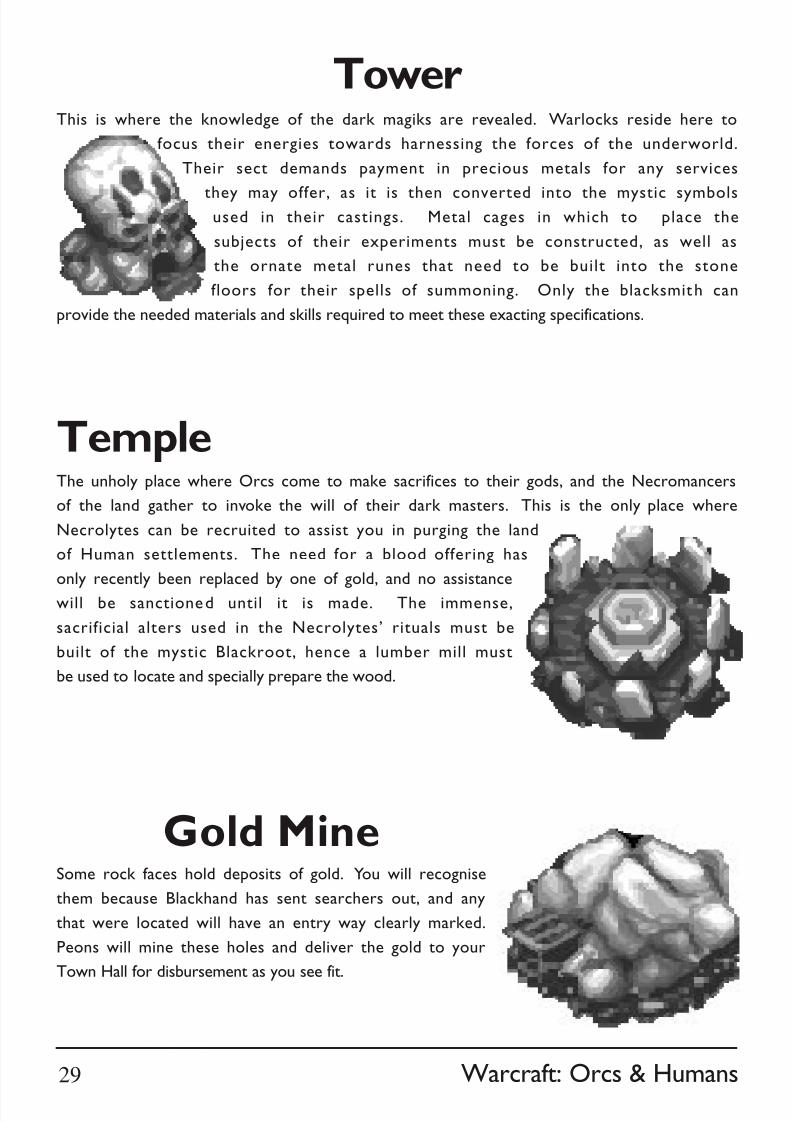
8/7/2019 Warcraft 1 manual
http://slidepdf.com/reader/full/warcraft-1-manual 74/81
Warcraft: Orcs & Humans
Tower
Some rock faces hold deposits of gold. You will recognise
them because Blackhand has sent searchers out, and any
that were located will have an entry way clearly marked.
Peons will mine these holes and deliver the gold to your
Town Hall for disbursement as you see fit.
Gold Mine
This is where the knowledge of the dark magiks are revealed. Warlocks reside here to
focus their energies towards harnessing the forces of the underworld.
Their sect demands payment in precious metals for any services
they may offer, as it is then converted into the mystic symbolsused in their castings. Metal cages in which to place the
subjects of their experiments must be constructed, as well as
the ornate metal runes that need to be built into the stone
floors for their spells of summoning. Only the blacksmith can
provide the needed materials and skills required to meet these exacting specifications.
TempleThe unholy place where Orcs come to make sacrifices to their gods, and the Necromancers
of the land gather to invoke the will of their dark masters. This is the only place where
Necrolytes can be recruited to assist you in purging the land
of Human settlements. The need for a blood offering has
only recently been replaced by one of gold, and no assistance
will be sanctioned until it is made. The immense,
sacrificial alters used in the Necrolytes’ rituals must be
built of the mystic Blackroot, hence a lumber mill must
be used to locate and specially prepare the wood.
29
8/7/2019 Warcraft 1 manual
http://slidepdf.com/reader/full/warcraft-1-manual 75/81
Blizzard Entertainment
Creaturesof the
Land
30

8/7/2019 Warcraft 1 manual
http://slidepdf.com/reader/full/warcraft-1-manual 76/81
Warcraft: Orcs & Humans
The Ogres came through the portal that
brought the Orcs to this land. Their
blood hatred of the Orcs remains second only to their
hatred of humans . They are a vicious opponent, withthe strength to rip off a warrior's limbs should they
so choose. The Ogres favor huge, spiked clubs that they
use to bash in the skulls of their enemies and to
bring down the large prey they hunt. Ogres favor
lands not frequented by the Orcs, and are
seldom seen near the encampments.
Ogre
ScorpionHunters of the underground, these are as venomous and
deadly as any creation of the Warlocks. Their tails are
tipped by a sharp spike, and can tear through the armor and
flesh of their prey to inject a deadly and painful poison
into the unfortunate. The Humans have learned
to command the smallest of these fiends, and can
summon them to do their bidding.
SpiderThe Warlock clan have used their magiks to create the hideous
abominat ion that they call spiders. Mutated from the smaller
creatures commonly found in the area, these huge poison fanged beasts are twisted
and predatory. While some are controlled by the Warlocks, many
grow too large to maintain control over, and are
released into the forbidden lands. These giant
spiders lurk in dark, dank places and spin their
webs, seeking to entrap the unwary.
31

8/7/2019 Warcraft 1 manual
http://slidepdf.com/reader/full/warcraft-1-manual 77/81
Blizzard Entertainment
“Them not good like Necrolyte skeletons.
These try catch you and stick their fingers into your eyes and brain.”
These are the diabolical Humans, whom even
their brethren distrus t. They use
numbers and tactics to overpower much stronger
units, and will fight like rabid wolves when
cornered. They hide in untraveled lands, and are
turned away from any village or encampment where
they seek shelter. The short blades they wield
are made for quick slashing attacks, and are most effective.
The Necrolyte clan believes that the strange
slimes found in certain areas seek to eat
the blood of the Orcs. No magiks could have created
these crawling masses, but yet they exist. This
slime seems attracted to the heat of Orcish bodies,
and will seep through even the tightest armor to drain
into the pores of its victims skin and sap them of strength and life.
Slime
Uncontrolled spirits of the underworld
sometimes roam the lands where their
bodies were slain. Rotted cloth and flesh hangs from their
bones as they seek revenge upon those who caused them
to endure this eternal damnation. Held together by
forces too dark for most to comprehend, they are more
difficult to destroy than might be anticipated.
Skeleton
Brigand
32
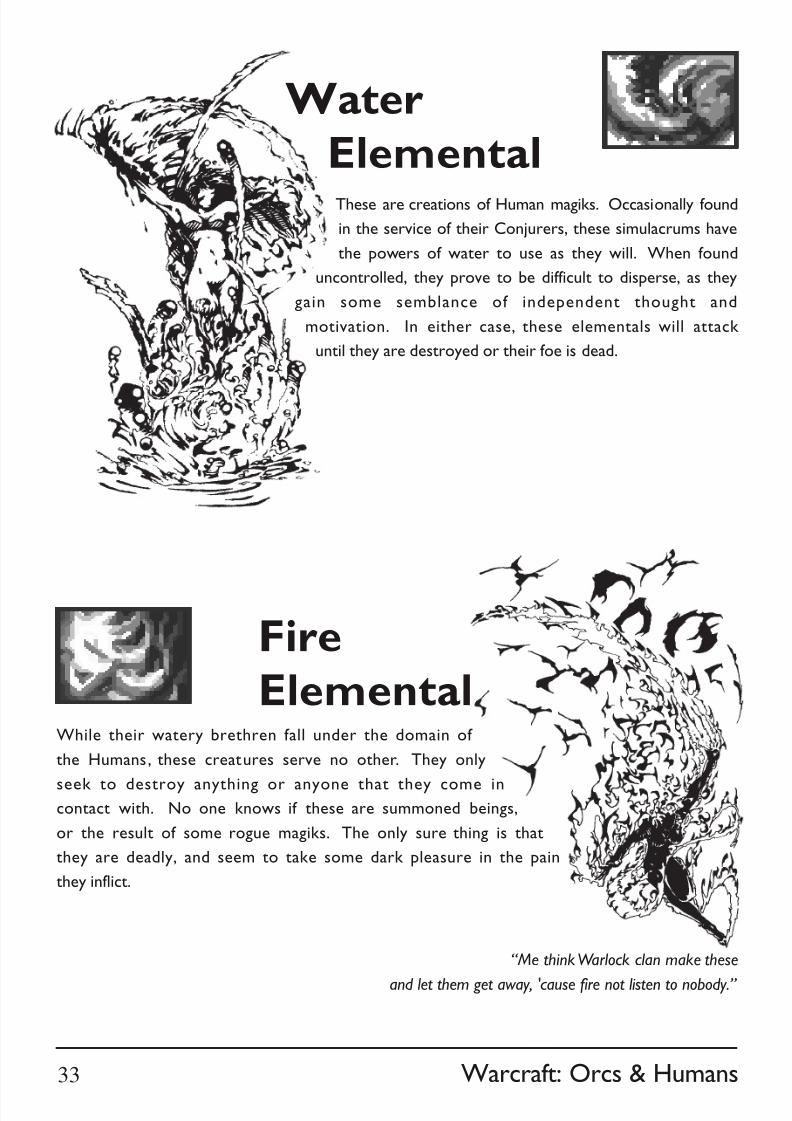
8/7/2019 Warcraft 1 manual
http://slidepdf.com/reader/full/warcraft-1-manual 78/81
Warcraft: Orcs & Humans
These are creations of Human magiks. Occasionally found
in the service of their Conjurers, these simulacrums have
the powers of water to use as they will. When found
uncontrolled, they prove to be difficult to disperse, as they
gain some semblance of independent thought and
motivation. In either case, these elementals will attack
until they are destroyed or their foe is dead.
While their watery brethren fall under the domain of
the Humans, these creatures serve no other. They only
seek to destroy anything or anyone that they come incontact with. No one knows if these are summoned beings,
or the result of some rogue magiks. The only sure thing is that
they are deadly, and seem to take some dark pleasure in the pain
they inflict.
“Me think Warlock clan make these
and let them get away, 'cause fire not listen to nobody.”
Fire
Elemental
Water
Elemental
33
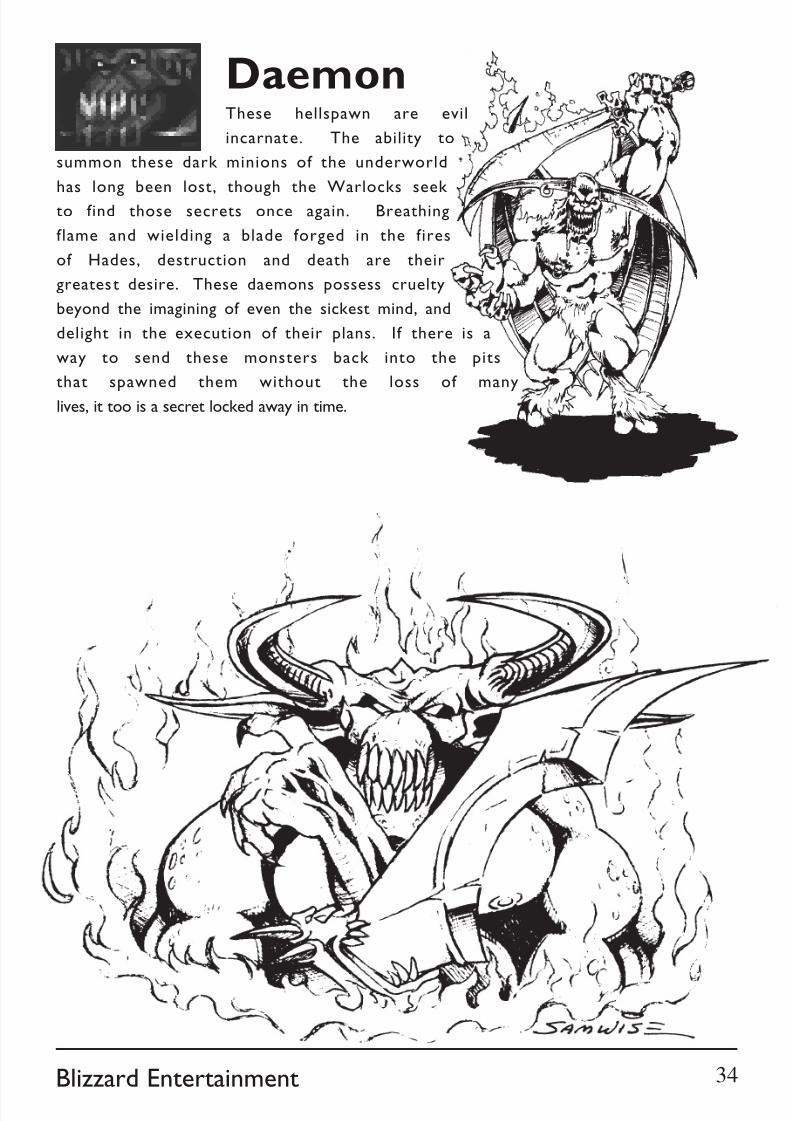
8/7/2019 Warcraft 1 manual
http://slidepdf.com/reader/full/warcraft-1-manual 79/81
Blizzard Entertainment
DaemonThese hellspawn are evil
incarnate. The ability to
summon these dark minions of the underworld
has long been lost, though the Warlocks seek
to find those secrets once again. Breathing
flame and wielding a blade forged in the fires
of Hades, destruction and death are their
greatest desire. These daemons possess cruelty
beyond the imagining of even the sickest mind, and
delight in the execution of their plans. If there is a
way to send these monsters back into the pits
that spawned them without the loss of many
lives, it too is a secret locked away in time.
34
8/7/2019 Warcraft 1 manual
http://slidepdf.com/reader/full/warcraft-1-manual 80/81
Warcraft: Orcs & Humans
CREDITS
Game Design: Blizzard Entertainment
Producer: Bill Roper
Executive Producer: Allen Adham
Macintosh Programmers: Brian Fitzgerald, Dave Lawrence
Programmers: Patrick Wyatt, Bob Fitch, Michael Morhaime, Jesse McReynolds
Macintosh Artwork: Joeyray Hall
Artists: Stu Rose, Samwise Didier, Ron Mill ar, Mickey Neil son, Brian Sousa,David Berggren, Roman Kenney
3D Artists: Joeyray Hall, Ron Millar, Duane Stinnett
Music & Sound: Glenn Stafford, Gregory Alper, Rick Jackson, Chris Palmer
Voices: Bill Roper
Manual Design & Layout: Bill Roper
Manual Illustrations: Stu Rose, Samwise Didier, Roman Kenney, Brian Sousa,
Mickey Neilson, David Berggren, Chris Metzen, Nick Carpenter
Public Relations: Susan Wooley, Linda Duttenhaver
Marketing: Kathy Carter, Steve Huot
Q / A : Brian Love, Tymothi Loving , Terr y Youngworth, Brian Bishop, Greg
Autry, Adam Maxwell, Robert Bridenbecker
Thanks To: Bob & Jan Davidson , John Patrick, John Goodman , Todd Coyle,
Jack Allewaer t, Ralph Becker, Tom Bryon, Mike Albanese , John Sosoka , Pam
Drake, Isaac Matarasso, Bobo the Wonder Orc, Ronald Millar Sr., Private Pabst,
Bunchy, Eskhandar, Salty Dog, Rider, The "Batman", M.B., Shannon and her
white chocolate grapes, Frank Pearce, Pretty Princess Gwendolyn, Susan
Bezzina, Darlene & her hair, The Memphis Blues, Jason "God of Thunder" Thor,
"Dangerous" Damian Russell, Vic's Car, Shahram Dabi ri, The Mang Mang,
Christi na Cade, The Poxy Boggards, Ray the Soda Man, Endicott, C.W., The
Kitchen Sink & you for reading this.
35

8/7/2019 Warcraft 1 manual
http://slidepdf.com/reader/full/warcraft-1-manual 81/81
WARRANTY
If within the first 90 days of purchase you have any problems with the product please return it to the
retailer. After 90 days you may return the software program to Interplay Productions provided that
fault is not due to normal wear and tear and Interplay will mail a replacement to you.
To receive a replacement you should enclose the defective medium (including the original product
label) in protective packaging accompanied by:-
1. A cheque or money order for £10 sterling (to cover postage and packaging)
2. A brief statement describing the defect
3. The original receipt or address of the retailer and
4. Your name and address.
Registered mail is recommended for returns.
PLEASE SEND TO:
Warranty Replacements,
Interplay Production
Harleyford Manor
Harleyford
Henley Rd,
Marlow
Buckinghamshire,
SL7 2DX
COPYING PROHIBITEDThis software product is copyrighted and all rights are reserved by Interplay Production. This product
is protected by the copyright laws that pertain to computer software. This does not mean you can make
unlimited copies. It is illegal to sell, give or otherwise distribute a copy to another person.
NOTICE
Interplay Productions reserve the right to make modifications or improvements to the product
described in this manual at any time and without notice.
Related Documents
![Warcraft ][ Guide - Blue Guitar · Warcraft ][ Guide Page 1 Introduction This is not a strategy guide for Warcraft ][ per se, but it should help you in speeding up your attacks and](https://static.cupdf.com/doc/110x72/5ad374257f8b9abd6c8df6d9/warcraft-guide-blue-guide-page-1-introduction-this-is-not-a-strategy-guide.jpg)


![Manual World of Warcraft: The Burning Crusade [Español]](https://static.cupdf.com/doc/110x72/577d33e01a28ab3a6b8bf73f/manual-world-of-warcraft-the-burning-crusade-espanol.jpg)