VPAP™ Tx Lab System BY AHMAD YOUNES PROFESSOR OF THORACIC MEDICINE Mansoura Faculty of Medicine

VPAP™ Tx Lab System BY AHMAD YOUNES PROFESSOR OF THORACIC MEDICINE Mansoura Faculty of Medicine.
Dec 21, 2015
Welcome message from author
This document is posted to help you gain knowledge. Please leave a comment to let me know what you think about it! Share it to your friends and learn new things together.
Transcript

VPAP™ Tx Lab System
BYAHMAD YOUNES
PROFESSOR OF THORACIC MEDICINEMansoura Faculty of Medicine

The VPAP Tx Lab System
• ResMed’s revolutionary sleep lab titration system was designed with the patient’s comfort in mind.
• A truly all-in-one lab system, the VPAP™ Tx delivers comfortable therapy and caters to all patient types , allowing them to fall asleep and stay asleep, so your titrations are an overnight success.
• The VPAP Tx is a component of the VPAP Tx Lab System.
• The VPAP Tx Lab System provides remote PC control of a positive airway pressure therapy device (therapy device) capable of delivering multiple therapy modes.

The system comprises:1. VPAP Tx or other compatible therapy device.
2. Tx Link connection module.
3. EasyCare Tx titration software.
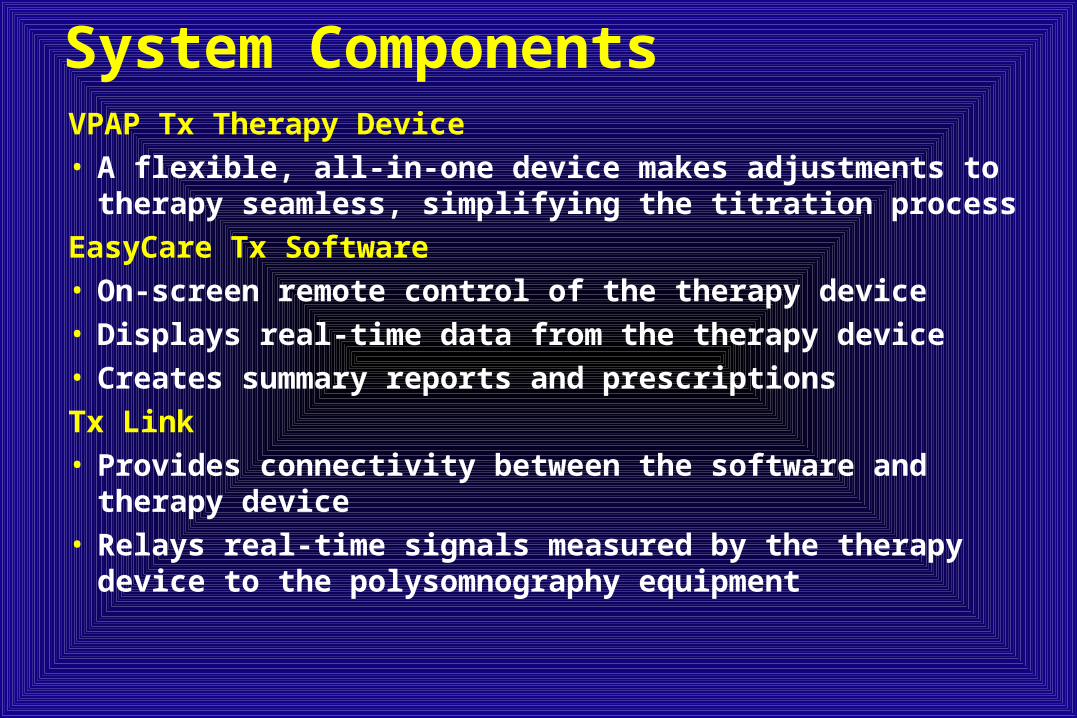
System ComponentsVPAP Tx Therapy Device• A flexible, all-in-one device makes adjustments to therapy
seamless, simplifying the titration process
EasyCare Tx Software• On-screen remote control of the therapy device• Displays real-time data from the therapy device• Creates summary reports and prescriptions
Tx Link• Provides connectivity between the software and therapy
device• Relays real-time signals measured by the therapy device
to the polysomnography equipment

VPAP™ Tx Lab System
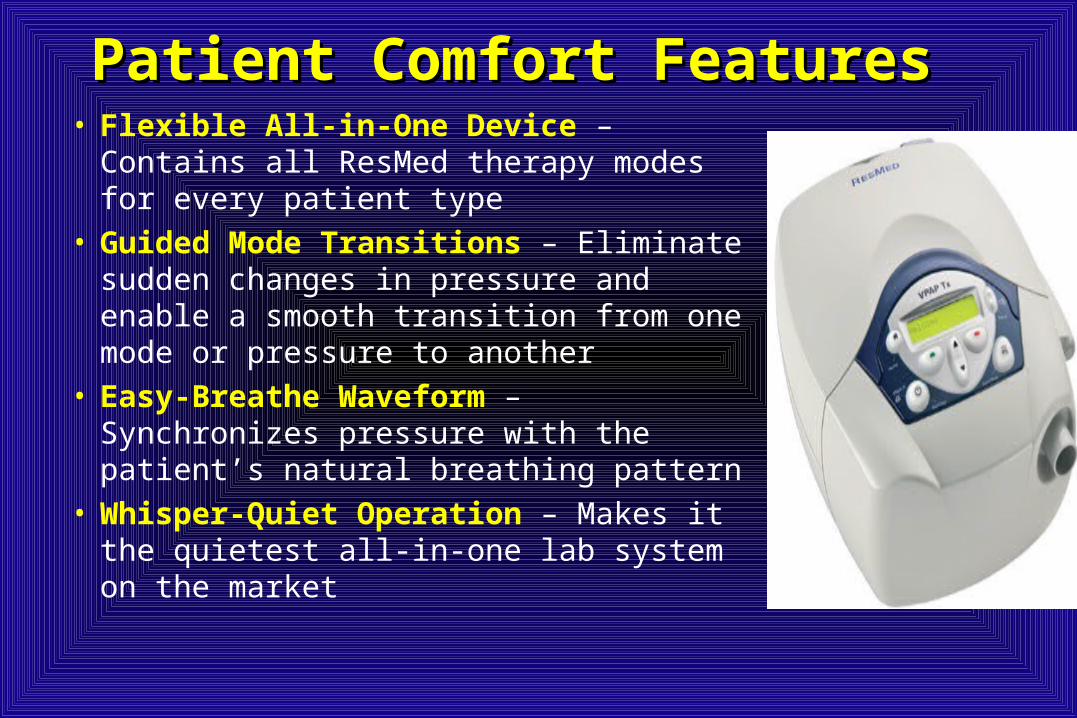
Patient Comfort FeaturesPatient Comfort Features• Flexible All-in-One Device – Contains all
ResMed therapy modes for every patient type
• Guided Mode Transitions – Eliminate sudden changes in pressure and enable a smooth transition from one mode or pressure to another
• Easy-Breathe Waveform – Synchronizes pressure with the patient’s natural breathing pattern
• Whisper-Quiet Operation – Makes it the quietest all-in-one lab system on the market
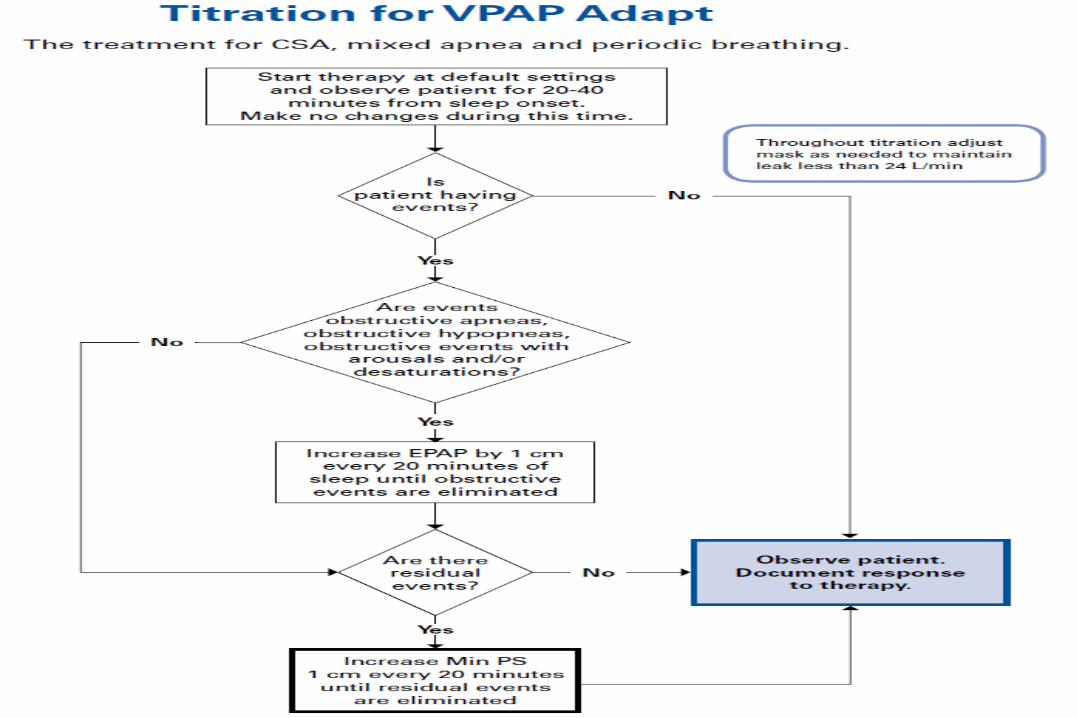
VPAP Tx • Indications for use :Treatment and titration of
patients weighing >30kg with OSA, respiratory insufficiency, central or mixed apneas, or periodic breathing.
• Contraindications : severe bullous lung disease , pneumothorax or pneumomediastinum , low blood pressure, cerebrospinal fluid leak, recent cranial surgery or trauma.
• Adverse effects: drying of the nose, mouth or throat ,nose bleed ,bloating, ear or sinus discomfort , eye irritation ,skin rashes ,chest discomfort
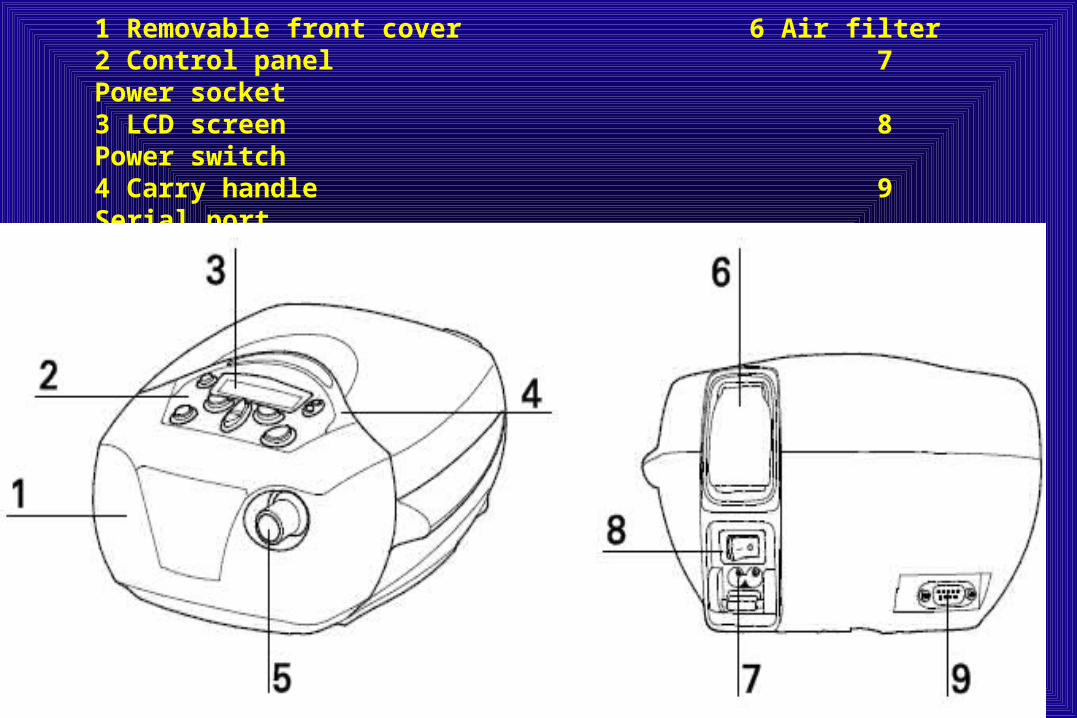
1 Removable front cover 6 Air filter2 Control panel 7 Power socket3 LCD screen 8 Power switch4 Carry handle 9 Serial port5 Air tubing connector
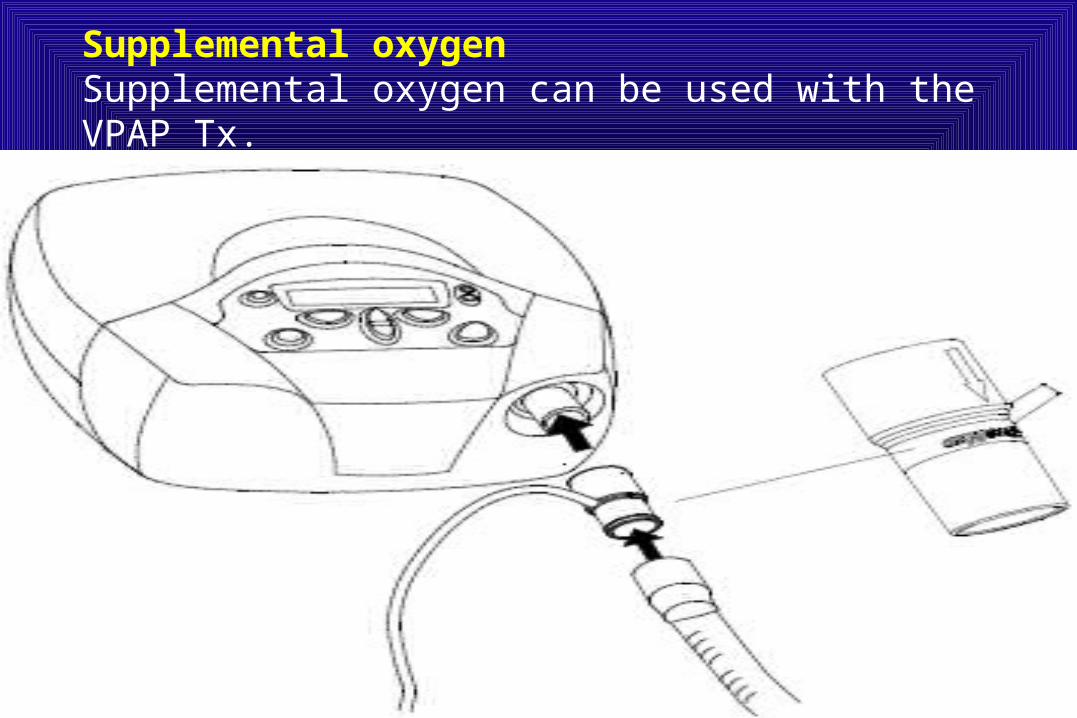
Supplemental oxygenSupplemental oxygen can be used with the VPAP Tx.
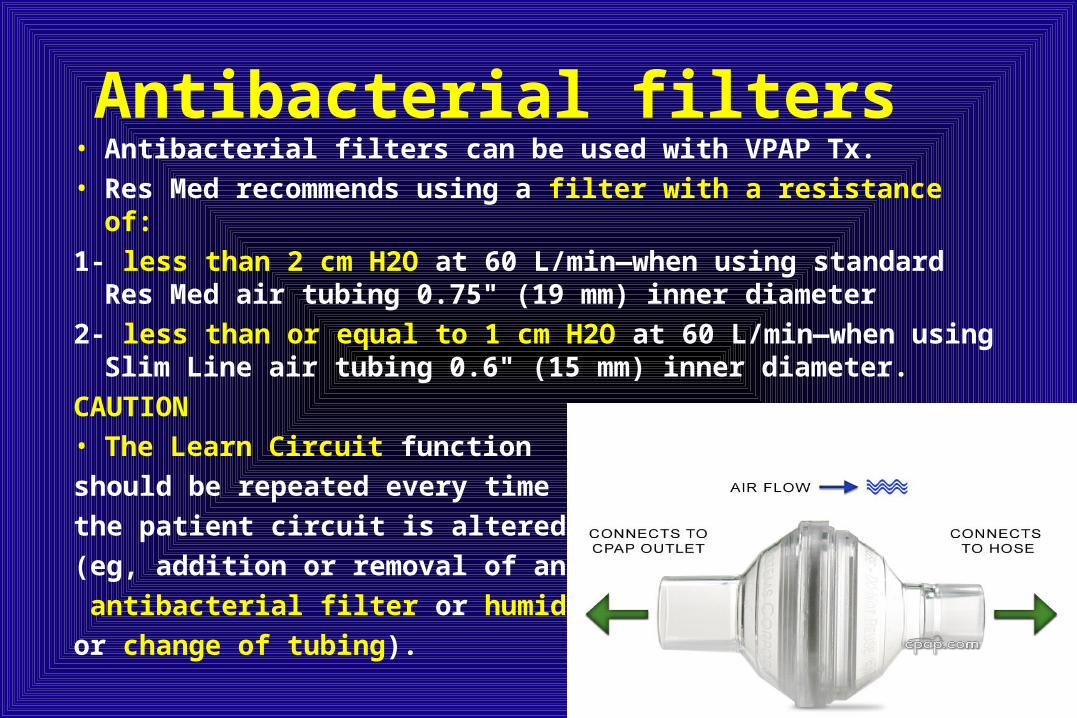
Antibacterial filters• Antibacterial filters can be used with VPAP Tx.
• Res Med recommends using a filter with a resistance of:
1- less than 2 cm H2O at 60 L/min—when using standard Res Med air tubing 0.75" (19 mm) inner diameter
2- less than or equal to 1 cm H2O at 60 L/min—when using Slim Line air tubing 0.6" (15 mm) inner diameter.
CAUTION
• The Learn Circuit function
should be repeated every time
the patient circuit is altered
(eg, addition or removal of an
antibacterial filter or humidifier
or change of tubing).
Humidifier• The VPAP Tx is compatible with the HumidAire 2i
integrated humidifier. • An external humidifier may be used with the VPAP Tx if it
has a water capacity that does not exceed 600 mL and has a resistance that does not exceed 2 cm H2O at 60 L/min.
CAUTION• When the VPAP Tx is in use and attached to a humidifier,
do not turn off the power source.• The Learn Circuit function should be repeated every time
the patient circuit is altered (eg, addition or removal of an antibacterial filter or humidifier or change of tubing).
HumidAire 2i™• The ResMed HumidAire 2i™ is designed to humidify
the air delivered to the airway during CPAP, automatic positive airway pressure (APAP), and bilevel therapy.
• Nasal congestion or dryness of the nose, mouth or throat may be experienced during therapy.
• These symptoms are caused by dry climates, cold air temperatures, the airflow delivered from the CPAP, APAP, or bilevel system and mouth leak.
• Moist air helps relieve symptoms of dryness and can make therapy more comfortable.
HumidAire 2i™
• The HumidAire 2i is intended for single patient re-use in the home environment and multi-patient re-use in a hospital/institutional environment.
Contraindications• The HumidAire 2i is contraindicated for use with
patients whose supraglottic airways have been bypassed.
WARNINGS• Always place the HumidAire 2i device lower than the level of
the patient. If it is placed at or above the level of the patient, heated water may flow down the air tubing and into the mask.
• Do not attempt to dismantle the HumidAire 2i docking station. There are no user-serviceable parts inside. Repairs and internal servicing should only be performed by an authorised service agent.
• Take care when handling the HumidAire 2i. The water in the water chamber may be hot.
• If liquids are inadvertently spilled on the HumidAire 2i docking station, unplug the CPAP, APAP, or bilevel device from the power outlet and allow the docking station to drain and dry before using.
WARNINGS• The water chamber should not be connected to the
docking station when transporting the HumidAire 2i in the carry bag. Place the water chamber in a separate compartment in the carry bag.
• Make sure that the water chamber is empty and thoroughly dried before transporting the HumidAire 2i.
• There exists the possibility that if the device is placed above the level of the patient and is tipped over, or if the tubing is filled with condensate, the mask might fill with water.
• Do not operate the HumidAire 2i if it is not working properly or if any part of it has been dropped or damaged.
• Keep the power cord away from heated surfaces.
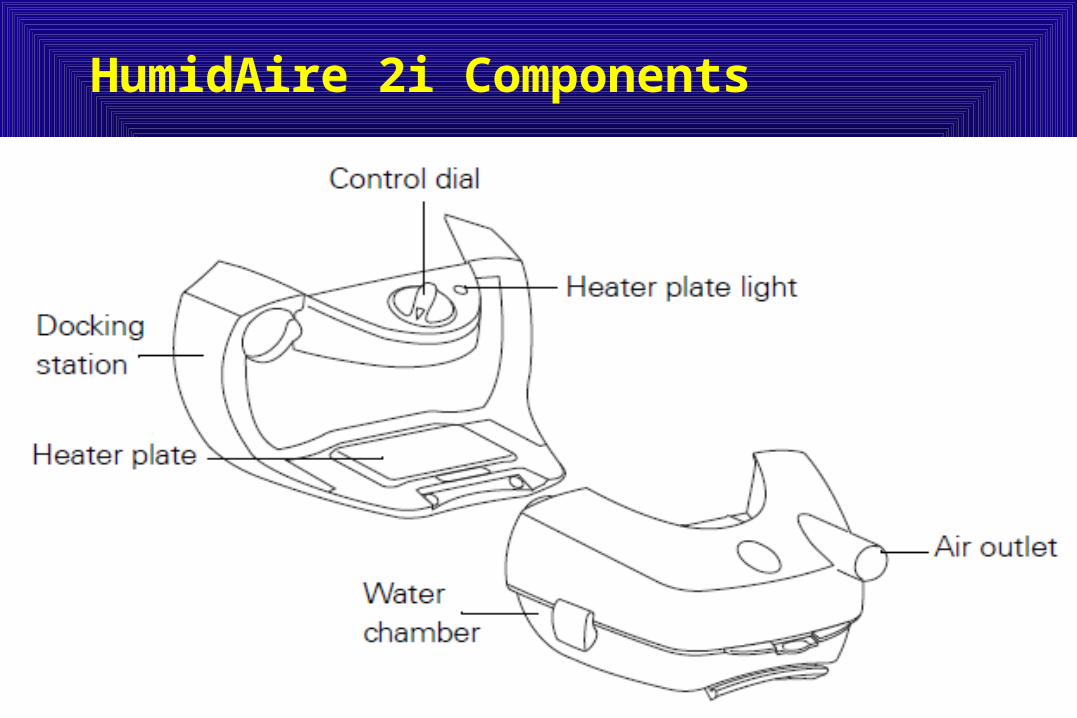
HumidAire 2i Components
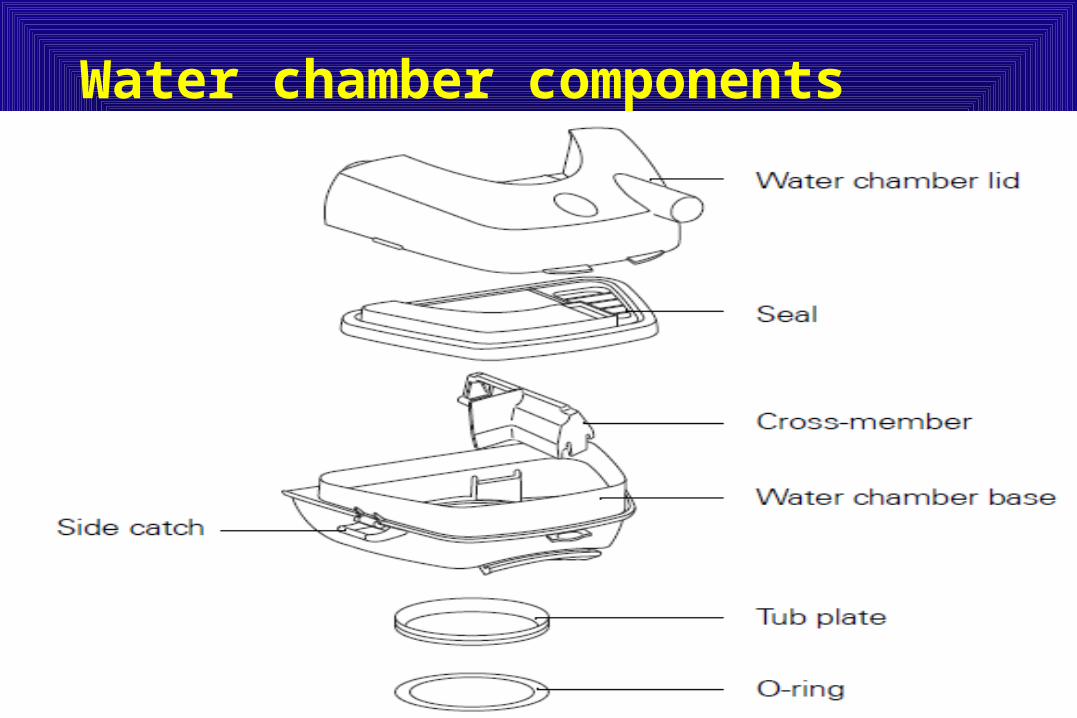
Water chamber components
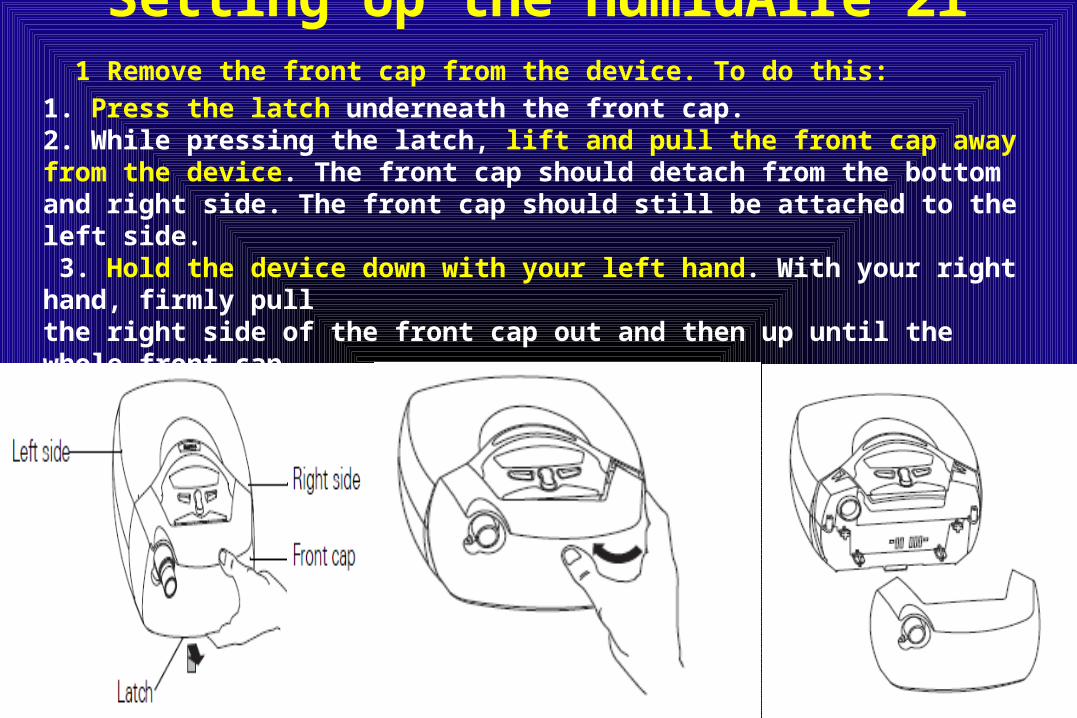
Setting Up the HumidAire 2i 1 Remove the front cap from the device. To do this:
1. Press the latch underneath the front cap.2. While pressing the latch, lift and pull the front cap away from the device. The front cap should detach from the bottom and right side. The front cap should still be attached to the left side. 3. Hold the device down with your left hand. With your right hand, firmly pullthe right side of the front cap out and then up until the whole front capcomes off.
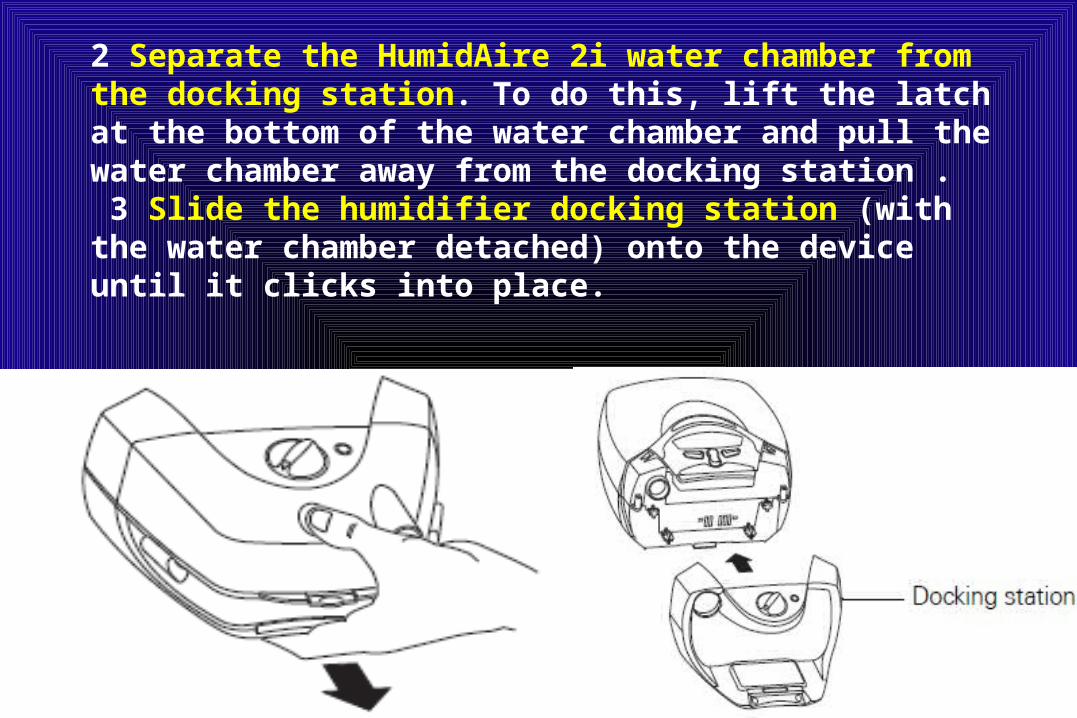
2 Separate the HumidAire 2i water chamber from the docking station. To do this, lift the latch at the bottom of the water chamber and pull the water chamber away from the docking station . 3 Slide the humidifier docking station (with the water chamber detached) onto the device until it clicks into place.
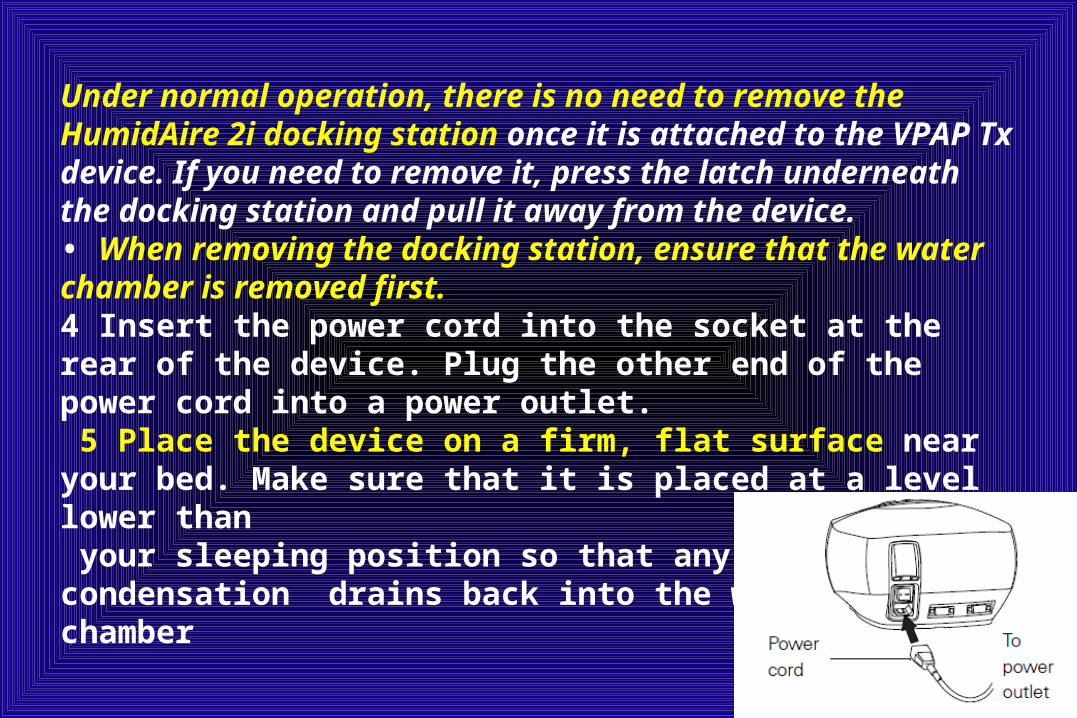
Under normal operation, there is no need to remove the HumidAire 2i docking station once it is attached to the VPAP Tx device. If you need to remove it, press the latch underneath the docking station and pull it away from the device.• When removing the docking station, ensure that the water chamber is removed first. 4 Insert the power cord into the socket at the rear of the device. Plug the other end of the power cord into a power outlet. 5 Place the device on a firm, flat surface near your bed. Make sure that it is placed at a level lower than your sleeping position so that any excess condensation drains back into the water chamber
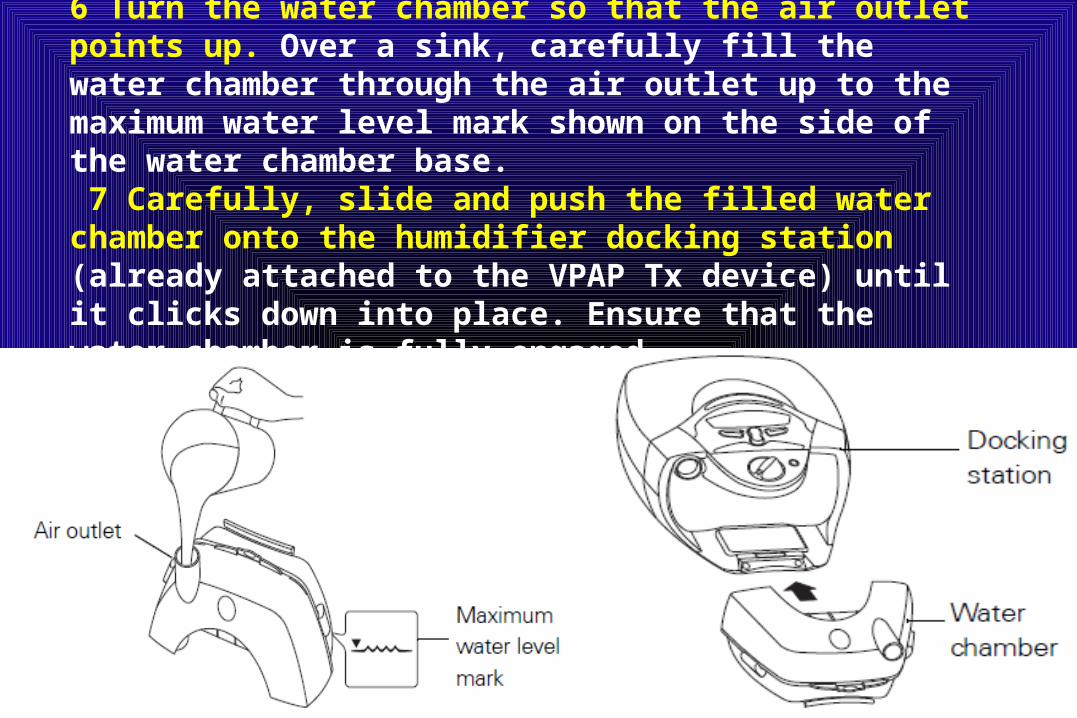
6 Turn the water chamber so that the air outlet points up. Over a sink, carefully fill the water chamber through the air outlet up to the maximum water level mark shown on the side of the water chamber base. 7 Carefully, slide and push the filled water chamber onto the humidifier docking station (already attached to the VPAP Tx device) until it clicks down into place. Ensure that the water chamber is fully engaged.
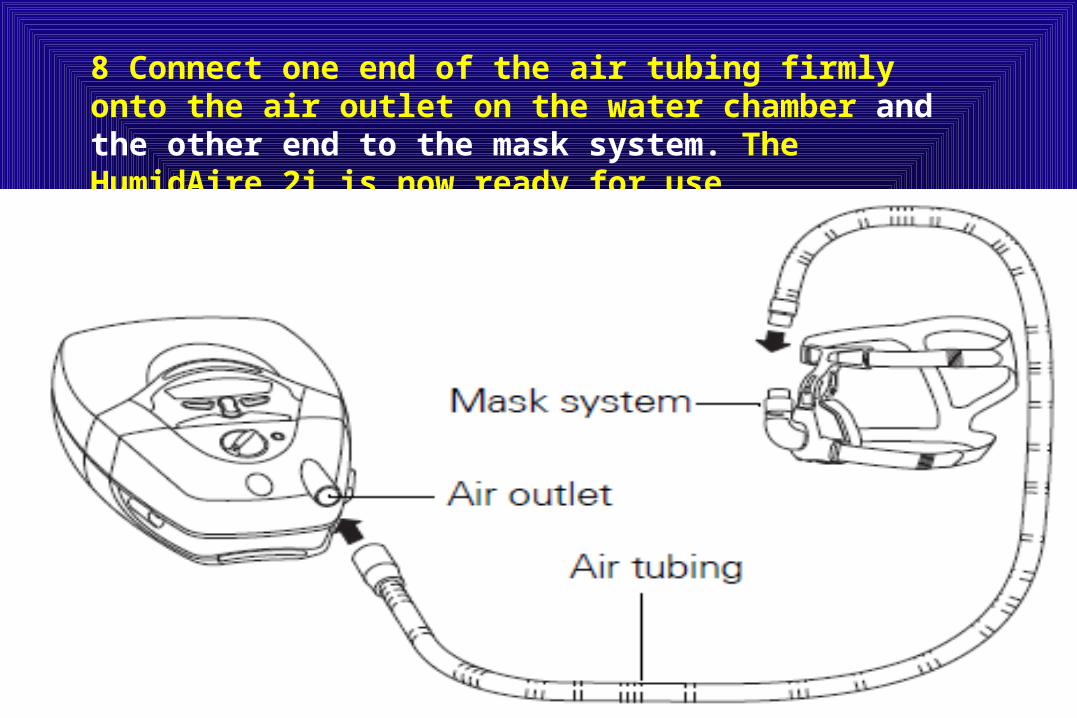
8 Connect one end of the air tubing firmly onto the air outlet on the water chamber and the other end to the mask system. The HumidAire 2i is now ready for use

Cleaning the HumidAire 2i 1 Turn the main power switch at the back of the device to OFF, and unplug the power cord from the power outlet.2 Allow 10 minutes for the heater plate and any excess water to cool.3 Remove the water chamber. To do this, lift the latch at the bottom of the water chamber and pull the water chamber away from the docking station.
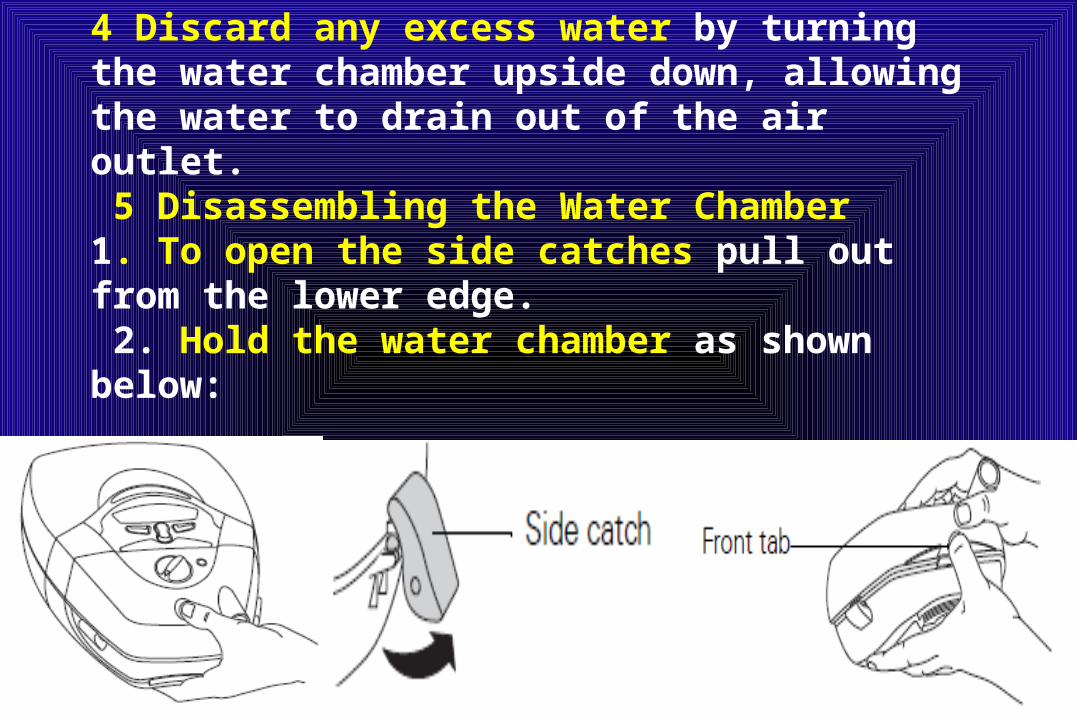
4 Discard any excess water by turning the water chamber upside down, allowing the water to drain out of the air outlet. 5 Disassembling the Water Chamber1. To open the side catches pull out from the lower edge. 2. Hold the water chamber as shown below:
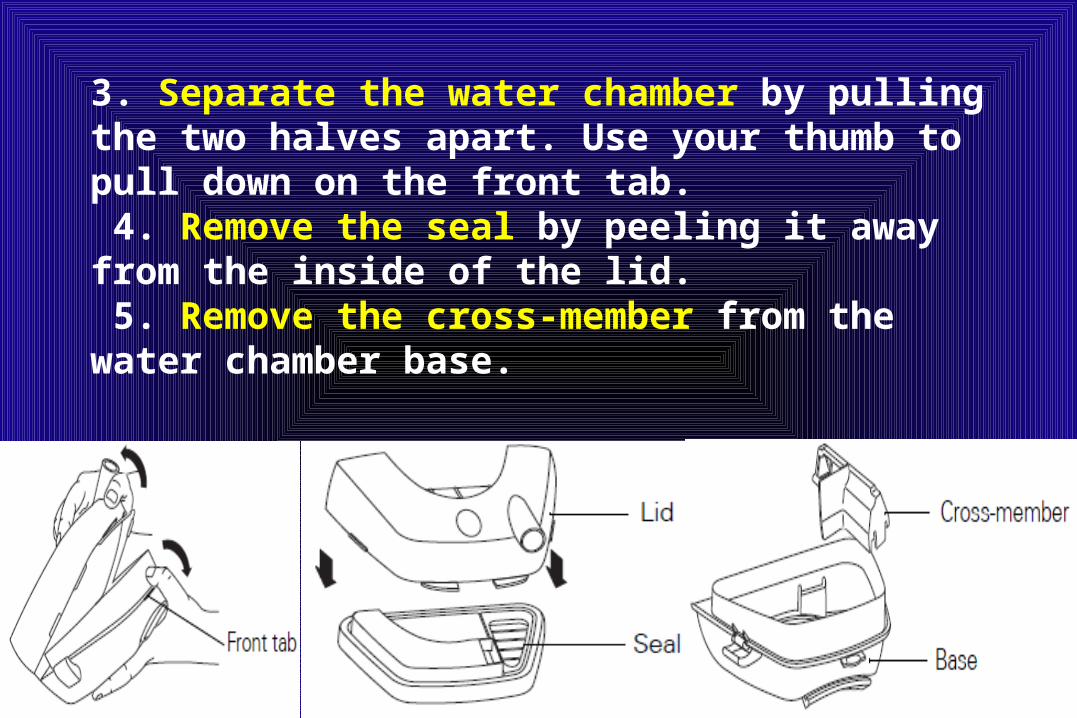
3. Separate the water chamber by pulling the two halves apart. Use your thumb to pull down on the front tab. 4. Remove the seal by peeling it away from the inside of the lid. 5. Remove the cross-member from the water chamber base.
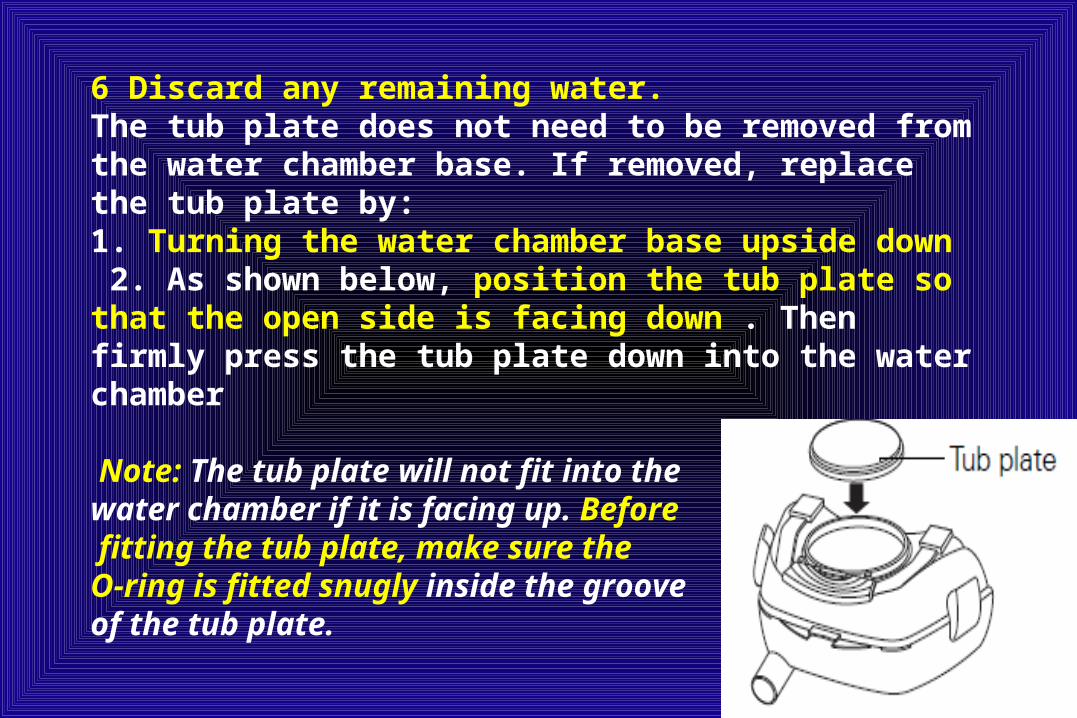
6 Discard any remaining water.The tub plate does not need to be removed from the water chamber base. If removed, replace the tub plate by:1. Turning the water chamber base upside down 2. As shown below, position the tub plate so that the open side is facing down . Then firmly press the tub plate down into the water chamber
Note: The tub plate will not fit into the water chamber if it is facing up. Before fitting the tub plate, make sure the O-ring is fitted snugly inside the groove of the tub plate.
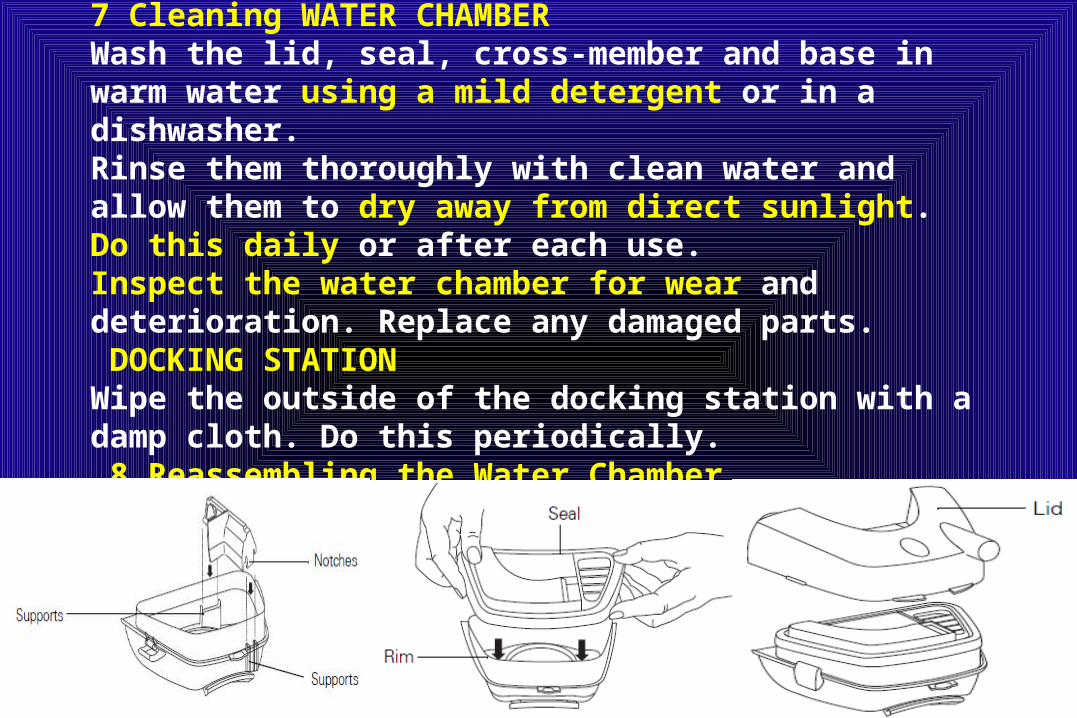
7 Cleaning WATER CHAMBERWash the lid, seal, cross-member and base in warm water using a mild detergent or in a dishwasher.Rinse them thoroughly with clean water and allow them to dry away from direct sunlight. Do this daily or after each use. Inspect the water chamber for wear and deterioration. Replace any damaged parts. DOCKING STATIONWipe the outside of the docking station with a damp cloth. Do this periodically. 8 Reassembling the Water Chamber
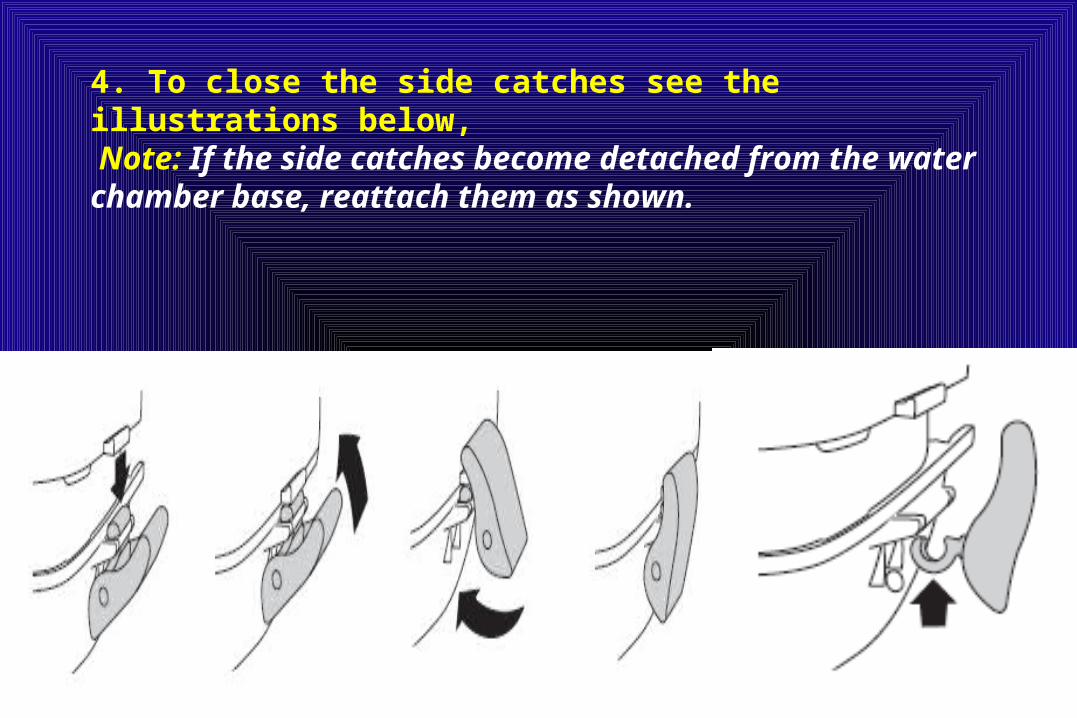
4. To close the side catches see the illustrations below, Note: If the side catches become detached from the water chamber base, reattach them as shown.

The side catches consist of two parts. If they become separated clip them back together as shown. Insert the smaller end (a) of the hinge (b) first, hold it flat,and press firmly into place.

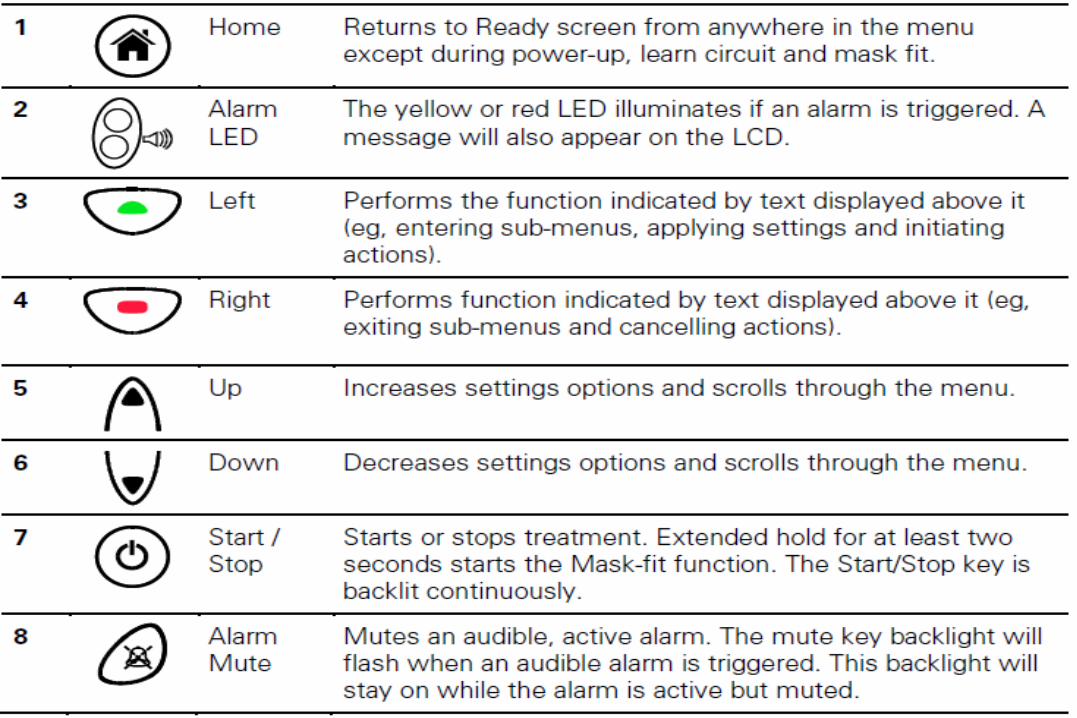
The VPAP Tx control panel
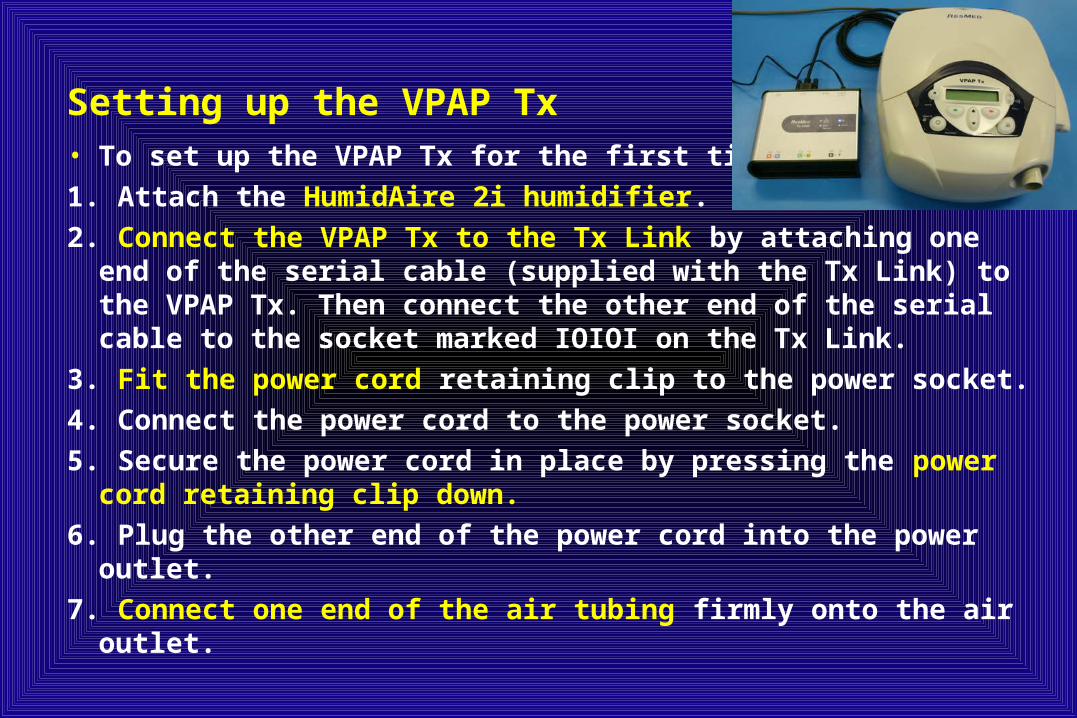
Setting up the VPAP Tx
• To set up the VPAP Tx for the first time:
1. Attach the HumidAire 2i humidifier.
2. Connect the VPAP Tx to the Tx Link by attaching one end of the serial cable (supplied with the Tx Link) to the VPAP Tx. Then connect the other end of the serial cable to the socket marked IOIOI on the Tx Link.
3. Fit the power cord retaining clip to the power socket.
4. Connect the power cord to the power socket.
5. Secure the power cord in place by pressing the power cord retaining clip down.
6. Plug the other end of the power cord into the power outlet.
7. Connect one end of the air tubing firmly onto the air outlet.
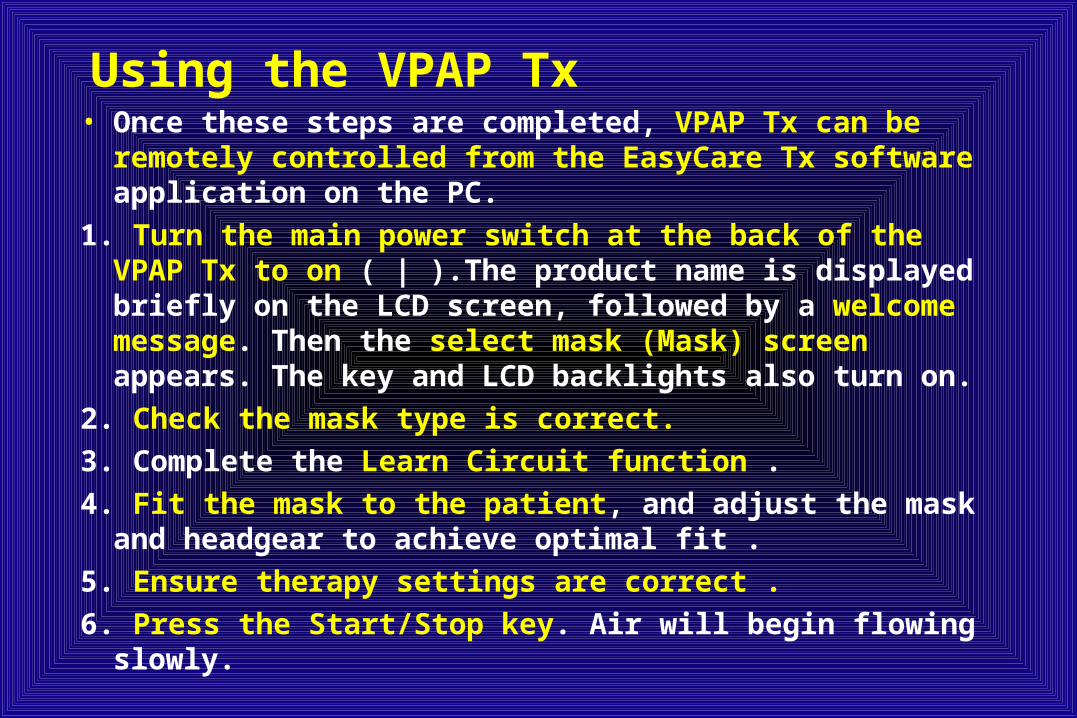
Using the VPAP Tx• Once these steps are completed, VPAP Tx can be
remotely controlled from the EasyCare Tx software application on the PC.
1. Turn the main power switch at the back of the VPAP Tx to on ( | ).The product name is displayed briefly on the LCD screen, followed by a welcome message. Then the select mask (Mask) screen appears. The key and LCD backlights also turn on.
2. Check the mask type is correct.
3. Complete the Learn Circuit function .
4. Fit the mask to the patient, and adjust the mask and headgear to achieve optimal fit .
5. Ensure therapy settings are correct .
6. Press the Start/Stop key. Air will begin flowing slowly.
WARNING• Do not leave long lengths of air tubing around the top of
the bed . They could twist around the patient's head or neck while they are sleeping.
• Be careful to place the therapy device where it cannot be bumped , and where no one will trip over the power cord.
• Ensure that the area in which the therapy device is placed is free from dust and clear of bedding, clothes, or any other objects that could block the air inlet. Blocking the hose and/or air inlet of the therapy device while in operation could lead to overheating of the therapy device.
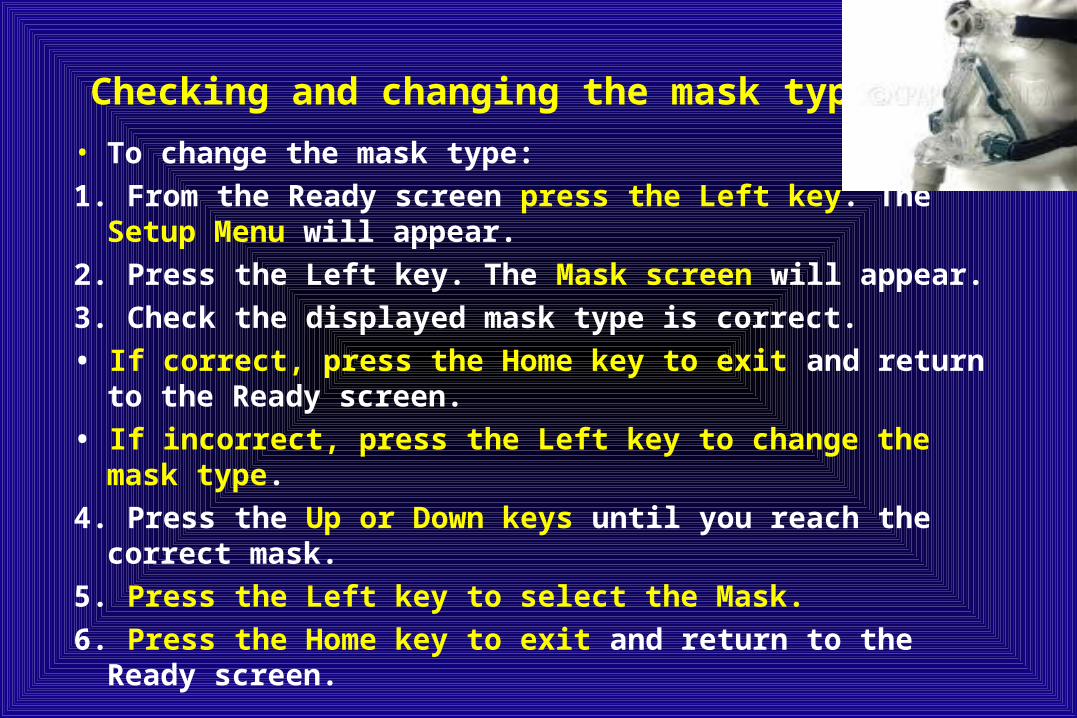
Checking and changing the mask type
• To change the mask type:
1. From the Ready screen press the Left key. The Setup Menu will appear.
2. Press the Left key. The Mask screen will appear.
3. Check the displayed mask type is correct.
• If correct, press the Home key to exit and return to the Ready screen.
• If incorrect, press the Left key to change the mask type.
4. Press the Up or Down keys until you reach the correct mask.
5. Press the Left key to select the Mask.
6. Press the Home key to exit and return to the Ready screen.

Learn Circuit• The Learn Circuit function detects the resistance in
the circuit to ensure accurate delivery of pressure at the mask.
• The Learn Circuit function should be repeated every time the patient circuit is altered eg, adding or removing an antibacterial filter or humidifier; or changing the tubing length or diameter.
• The mask should not be attached to the tube when the Learn Circuit is performed. As a result, when changing the mask type the Learn Circuit does not need to be repeated.
To learn the circuit1. Remove the mask assembly from the tube.
2. Ensure all other air circuit components to be used are correctly attached (eg, tube, humidifier and antibacterial filter).
3. Press the Left key to enter the menus from the Ready screen. The Setup menu will appear.
4. Press the Left key to select the Setup menu.
5. Press the Up and Down keys until you reach Learn Circuit.
6. Press the Left key to start learning the air circuit resistance (Learn Circuit). Ensure the end of the tube is clear of all obstructions.
7. When Learn Circuit is complete, a 'Learn circuit successful' message will appear followed by the Ready screen. Connect the assembled mask system to the free end of air tubing.
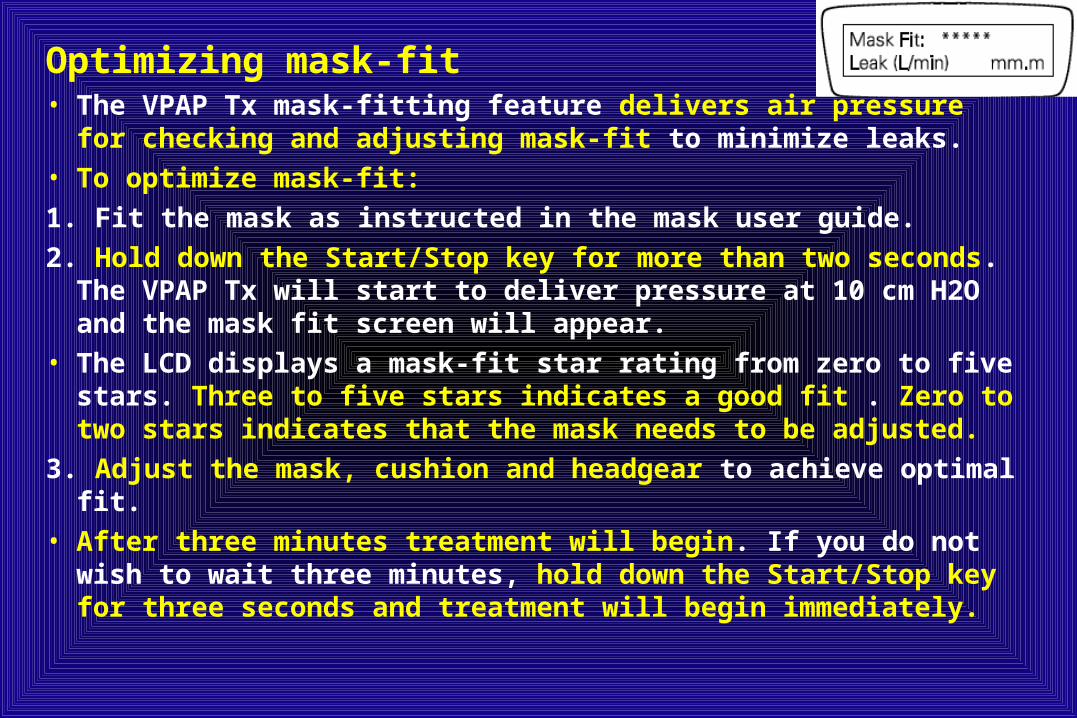
Optimizing mask-fit• The VPAP Tx mask-fitting feature delivers air pressure for
checking and adjusting mask-fit to minimize leaks.
• To optimize mask-fit:
1. Fit the mask as instructed in the mask user guide.
2. Hold down the Start/Stop key for more than two seconds. The VPAP Tx will start to deliver pressure at 10 cm H2O and the mask fit screen will appear.
• The LCD displays a mask-fit star rating from zero to five stars. Three to five stars indicates a good fit . Zero to two stars indicates that the mask needs to be adjusted.
3. Adjust the mask, cushion and headgear to achieve optimal fit.
• After three minutes treatment will begin. If you do not wish to wait three minutes, hold down the Start/Stop key for three seconds and treatment will begin immediately.
Adjusting therapy settings• Prior to commencing therapy, therapy settings can be
checked and adjusted at the VPAP Tx via the Therapy menu.
• After commencing therapy, adjust therapy settings remotely from the PC using EasyCare Tx.
• During therapy, the VPAP Tx LCD will display information about the current therapy mode.
• Press the Home key to return to the Ready screen. The Therapy screen will be restored after two minutes without a key being pressed.
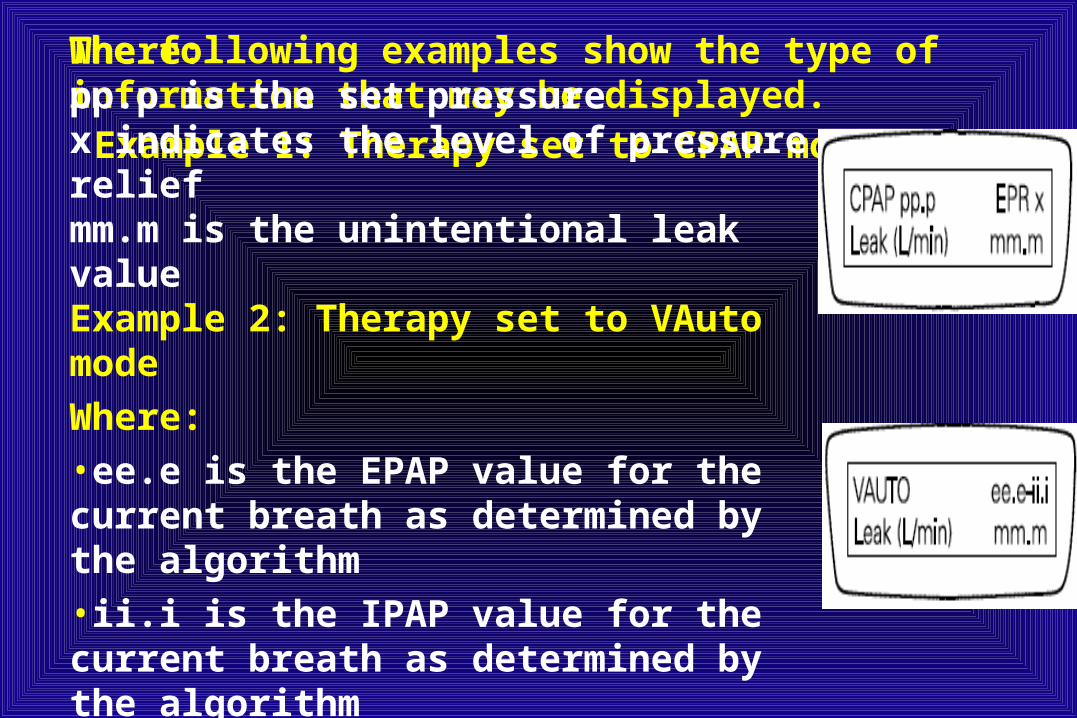
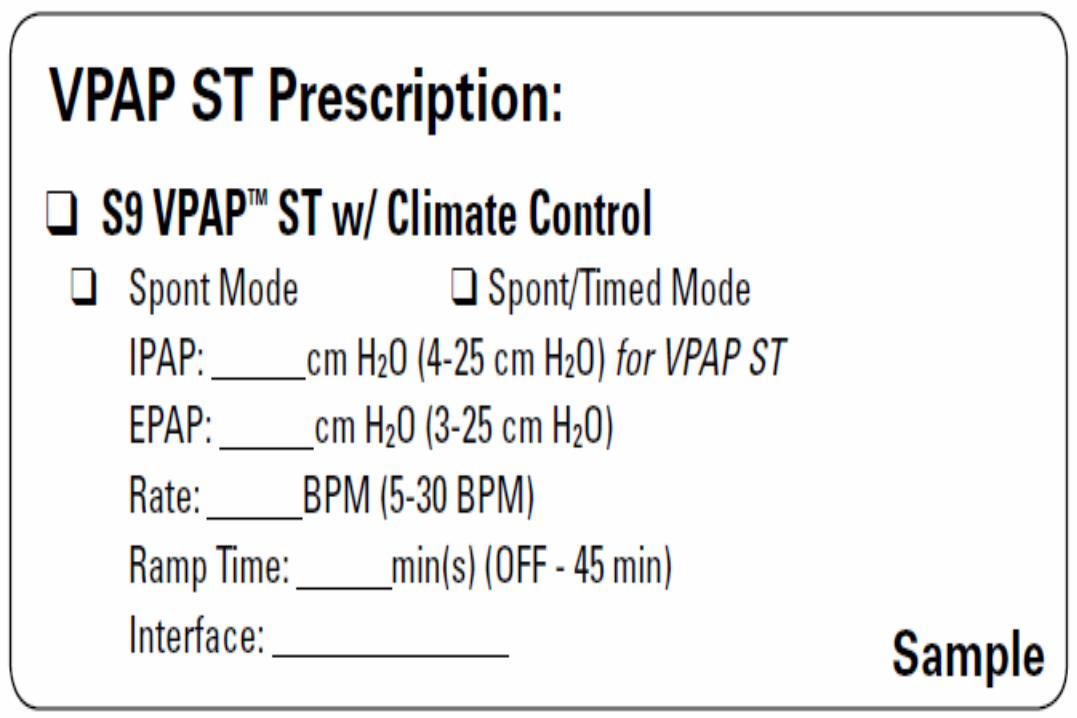
The following examples show the type of information that may be displayed. Example 1: Therapy set to CPAP modeWhere:pp.p is the set pressurex indicates the level of pressure reliefmm.m is the unintentional leak valueExample 2: Therapy set to VAuto mode
Where:•ee.e is the EPAP value for the current breath as determined by the algorithm•ii.i is the IPAP value for the current breath as determined by the algorithm•mm.m is the unintentional leak value
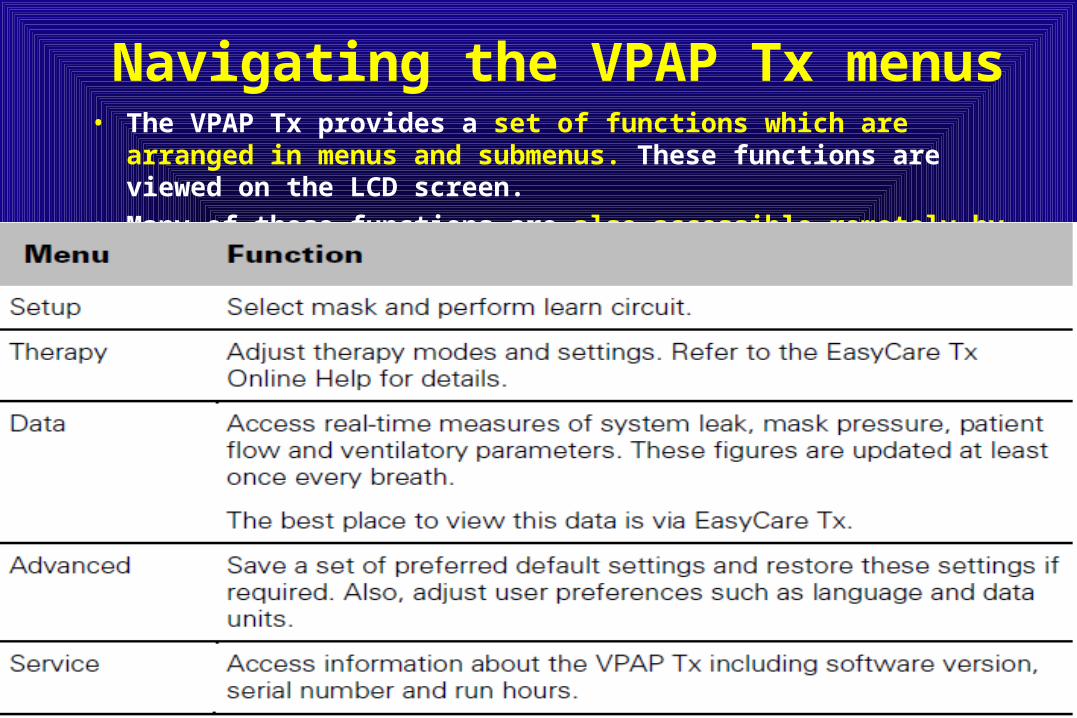
Navigating the VPAP Tx menus• The VPAP Tx provides a set of functions which are arranged in menus
and submenus. These functions are viewed on the LCD screen. • Many of these functions are also accessible remotely by Easy Care Tx.

To navigate and make selections within the menus:1. From the Ready screen, press the Left key to view the
menu items.
2. Press the Up and Down keys until you reach the relevant menu.
3. Press the Left key to enter the menu.
4. Press the Up and Down keys to look through the available sub-menus.
5. Press the Left key to select a sub-menu.
6. Press the Up and Down keys to change the option.
7. Press the Left key to apply the option.
8. Press the Home key to exit and return to the Ready screen.
Saving and restoring default therapy settings• If required, the Advanced Menu on VPAP Tx can
be used to save a set of preferred default therapy settings and restore these settings.
• Default therapy settings are more easily saved and restored from the PC using Easy Care Tx.
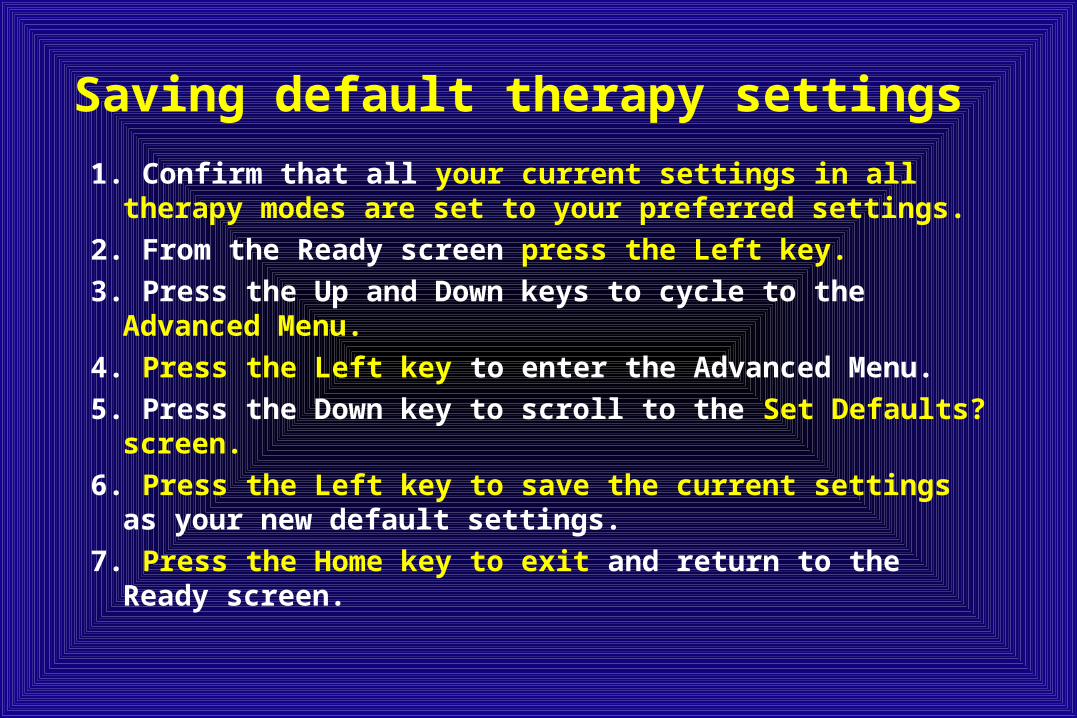
Saving default therapy settings
1. Confirm that all your current settings in all therapy modes are set to your preferred settings.
2. From the Ready screen press the Left key.
3. Press the Up and Down keys to cycle to the Advanced Menu.
4. Press the Left key to enter the Advanced Menu.
5. Press the Down key to scroll to the Set Defaults? screen.
6. Press the Left key to save the current settings as your new default settings.
7. Press the Home key to exit and return to the Ready screen.
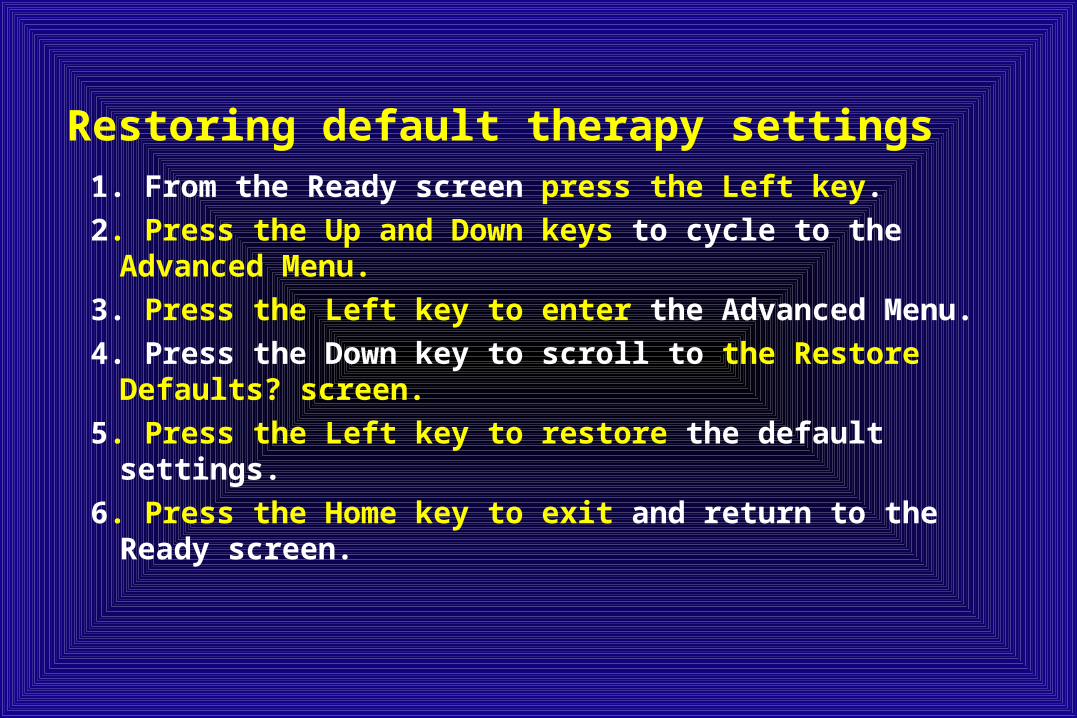
Restoring default therapy settings
1. From the Ready screen press the Left key.
2. Press the Up and Down keys to cycle to the Advanced Menu.
3. Press the Left key to enter the Advanced Menu.
4. Press the Down key to scroll to the Restore Defaults? screen.
5. Press the Left key to restore the default settings.
6. Press the Home key to exit and return to the Ready screen.

Adding supplemental oxygenThe VPAP Tx is designed to be compatible with the
following levels of supplemental oxygen:• up to 15 L/min for CPAP, S, T, ST and ASV modes• up to 4 L/min for AutoSet, VAuto, iVAPS and ASVAuto
modes.• At a fixed rate of supplemental oxygen flow, the inhaled
oxygen concentration will vary depending on: where the oxygen is introduced, the pressure settings, patient breathing pattern, mask selection, and leak rate.
• Adding oxygen may affect the trigger and cycle reliability, delivered pressure, and the accuracy of the displayed leak, tidal volume, minute ventilation and alveolar ventilation.
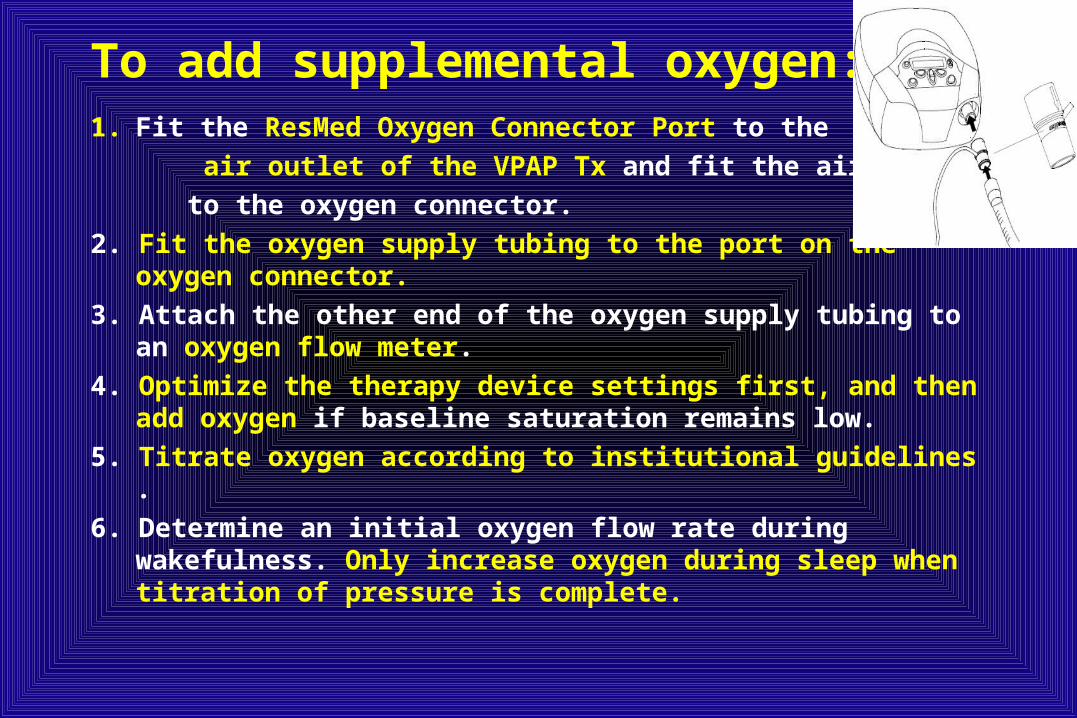
To add supplemental oxygen:1. Fit the ResMed Oxygen Connector Port to the
air outlet of the VPAP Tx and fit the air tubing
to the oxygen connector.
2. Fit the oxygen supply tubing to the port on the oxygen connector.
3. Attach the other end of the oxygen supply tubing to an oxygen flow meter.
4. Optimize the therapy device settings first, and then add oxygen if baseline saturation remains low.
5. Titrate oxygen according to institutional guidelines .
6. Determine an initial oxygen flow rate during wakefulness. Only increase oxygen during sleep when titration of pressure is complete.

WARNING• If oxygen is used with this therapy device, the oxygen flow
must be turned off when the therapy device is not operating. If the oxygen has been left on, turn off the therapy device, then wait 30 minutes before turning on the therapy device again.
• Explanation: When the VPAP Tx therapy device is not in operation and the oxygen flow is left on, oxygen delivered into the air delivery tubing may accumulate within the therapy device enclosure and create a risk of fire.
• Oxygen supports combustion. Oxygen should not be used while you are smoking or in the presence of an open flame.
• Always ensure airflow is being generated by the therapy device before the oxygen supply is turned on.
• Always turn the oxygen supply off before stopping the airflow from the therapy device.
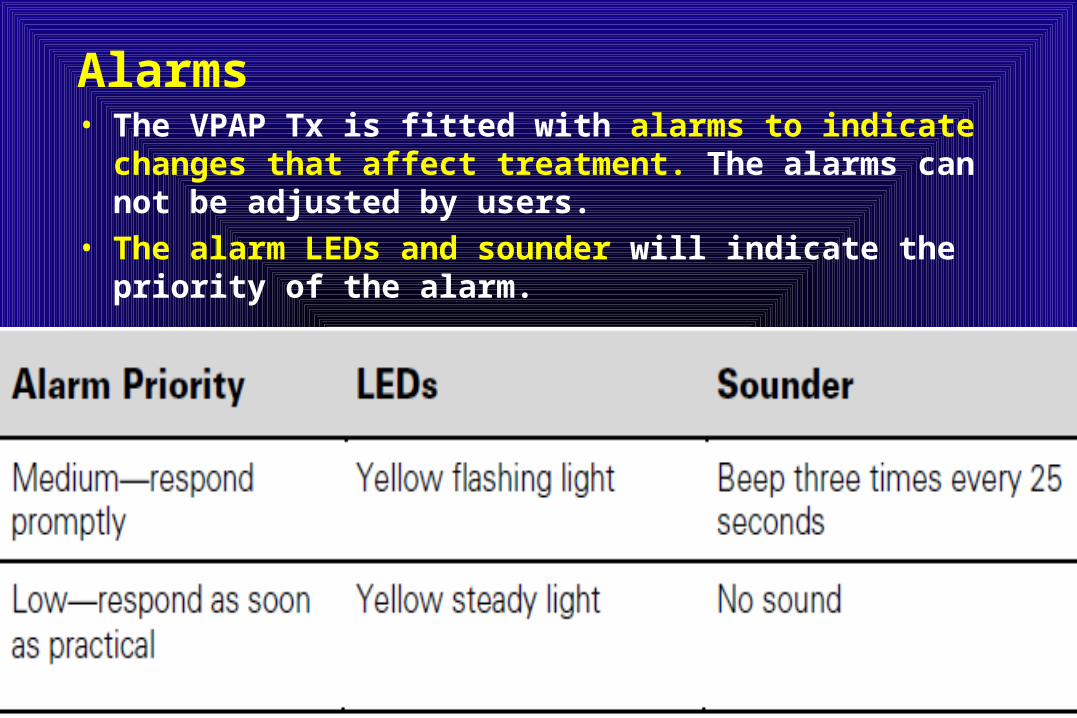
Alarms• The VPAP Tx is fitted with alarms to indicate changes that
affect treatment. The alarms can not be adjusted by users.• The alarm LEDs and sounder will indicate the priority of
the alarm.
Medium priority• Power Fail alarm triggered when mains power is lost
during therapy. An audible alarm tone sounds at the therapy device for two minutes or until the alarm mute key is pressed. If power is restored within two minutes the VPAP Tx will automatically resume therapy. If the power outage is longer than two minutes therapy will not re-start automatically.
Low priority• Flow Blocked alarm (air circuit obstructed) triggered when
total flow is <6 L/min for more than 30 seconds continuously. Therapy will continue when this alarm is triggered.
• Pressure Fault alarm (therapy device fault) triggered when therapy device pressure > 40 cm H2O for more than 1 sec continuously. Therapy will stop when this alarm is triggered.
Alarm Mute key• An alarm can be muted by pressing the Alarm Mute key
once. If the problem remains, the alarm will sound again after two minutes. An alarm LED will remain lit as long as the problem is present.
Clearing the alarm
1. Turn off the power at the main power switch at the back of the VPAP Tx.
2. Ensure that the display on the LCD screen has cleared before turning the power back on.
Testing the alarm system• Hold down the Alarm Mute key while turning the main
power switch on VPAP Tx to on ( | ).• The LEDs flash and the alarm sounds briefly before
entering the normal start-up sequence.
Cleaning and maintenance
1. Remove the air tubing from the therapy device and the mask.
2. Wash the air tubing in warm water using mild detergent.
3. Rinse thoroughly, hang, and allow to dry.
4. Before next use, reconnect the air tubing to the air outlet and mask.
Weekly cleaning• Clean the exterior of the therapy device with a
damp cloth and mild liquid soap.
WARNING• Beware of electric shock. Do not immerse the unit or power cord in
water. Always unplug the unit before cleaning and be sure it is dry before plugging back in.
• Ensure the power cord and plug are in good condition and the equipment is not damaged.
• The use of accessories or masks which are disposable or can be disinfected is recommended in situations where cross-contamination is possible. The use of an antibacterial filter is an alternative in certain situations.
CAUTION
• Do not hang the air tubing in direct sunlight as it may harden over time and eventually crack.
• Do not use bleach, chlorine, alcohol, or aromatic-based solutions, moisturizing or antibacterial soaps or scented oils to clean the air tubing or the therapy device. These solutions may cause hardening and reduce the life of the product.
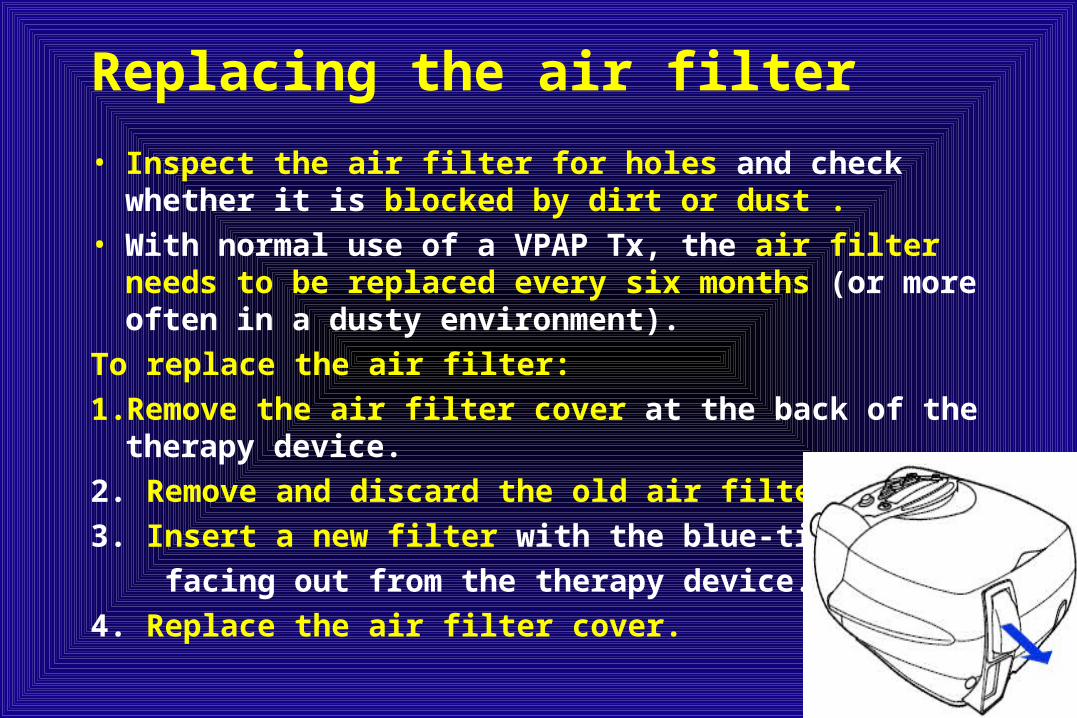
Replacing the air filter
• Inspect the air filter for holes and check whether it is blocked by dirt or dust .
• With normal use of a VPAP Tx, the air filter needs to be replaced every six months (or more often in a dusty environment).
To replace the air filter:
1. Remove the air filter cover at the back of the therapy device.
2. Remove and discard the old air filter.
3. Insert a new filter with the blue-tinted side
facing out from the therapy device.
4. Replace the air filter cover.
WARNING• Do not wash the air filter. The air filter is not washable or
reusable.• The air filter cover protects the therapy device in the event of
accidental liquid spillage onto the therapy device. Ensure the air filter and cover are fitted at all times.
Servicing• The VPAP Tx is intended to provide safe and reliable
operation when operated in accordance with the instructions provided by ResMed.
• ResMed recommends that the VPAP Tx be inspected and serviced by an authorized ResMed Service Center if there is any sign of wear or concern with device function. Otherwise , service and inspection of the devices generally should not be required during the five year design life of the device.

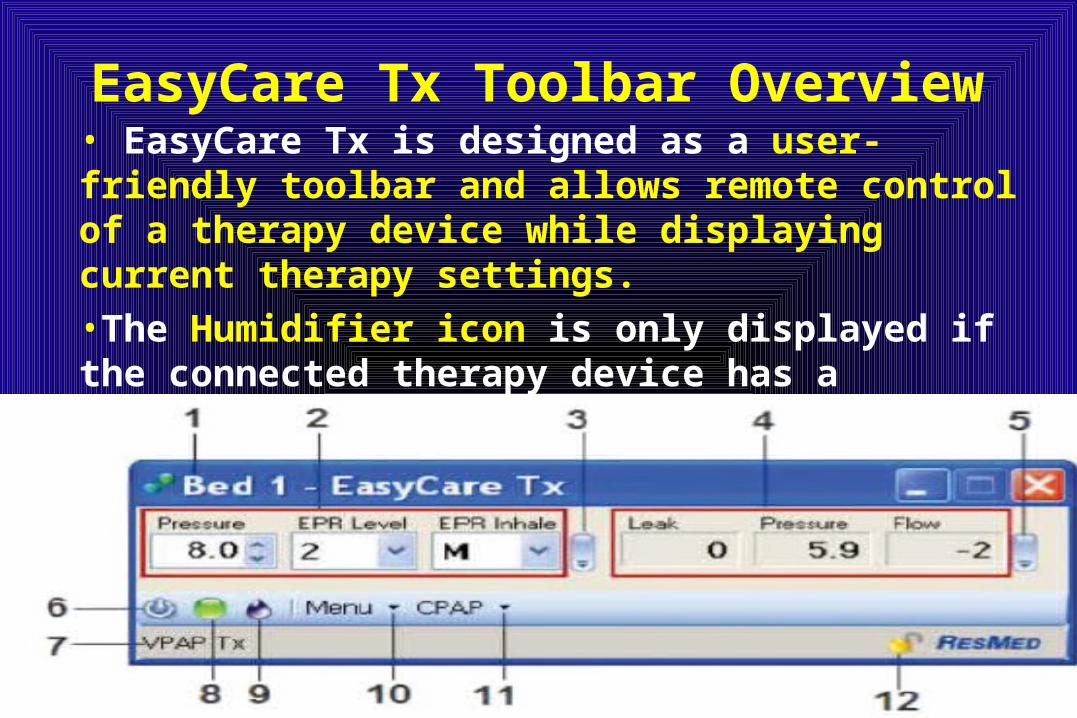
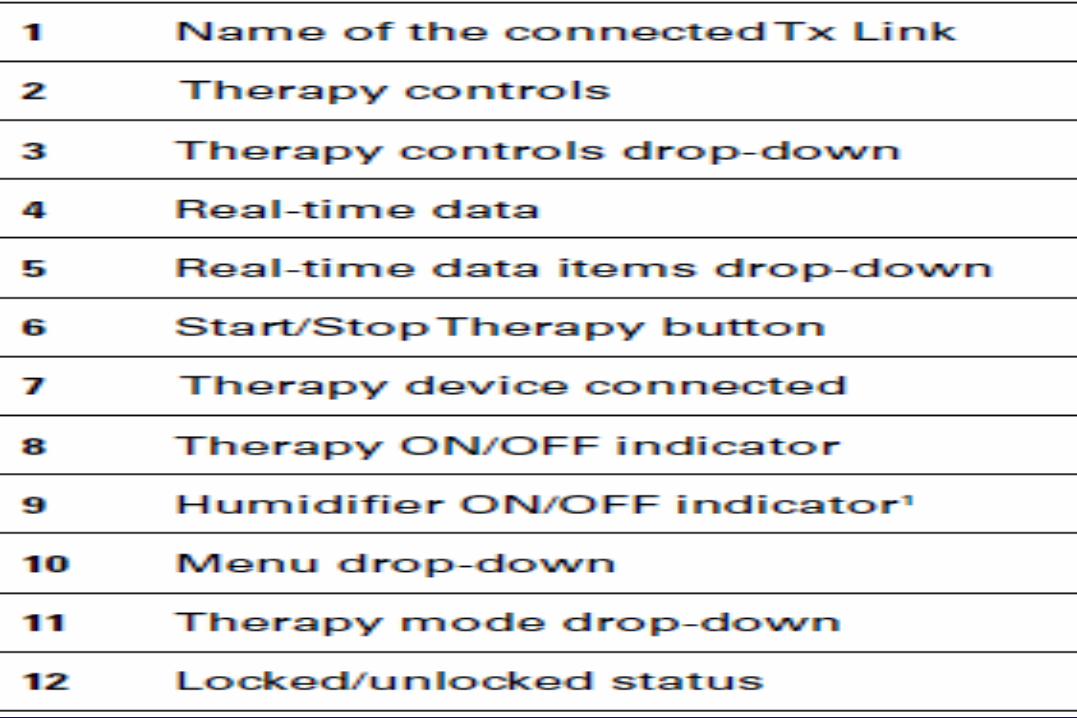
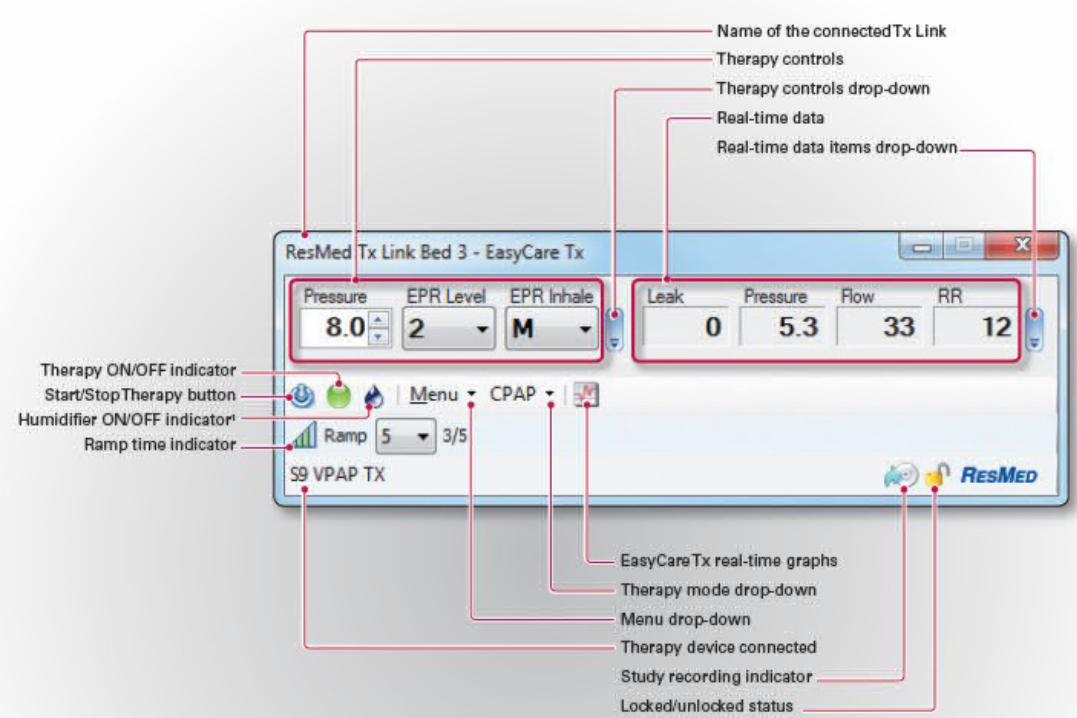
EasyCare Tx Toolbar Overview• EasyCare Tx is designed as a user-friendly toolbar and allows remote control of a therapy device while displaying current therapy settings.•The Humidifier icon is only displayed if the connected therapy device has a humidifier that can be remotely controlled.
Starting a Session
• Before you start titrating a patient, you need to start EasyCare Tx and then start a titration session.
To start a titration session:
1. Double-click the EasyCare Tx icon on the Desktop. The EasyCare Tx toolbar is displayed and the default Tx Link is automatically connected. If the Tx Link is not automatically connected , connect to a Tx Link.
2. Configure Mask and Humidifier Settings.
3. Click the Therapy Start/Stop icon. Titration begins and the therapy indicator turns green.
• Note: The Therapy ON/OFF indicator turns green during therapy and gray when therapy is off.
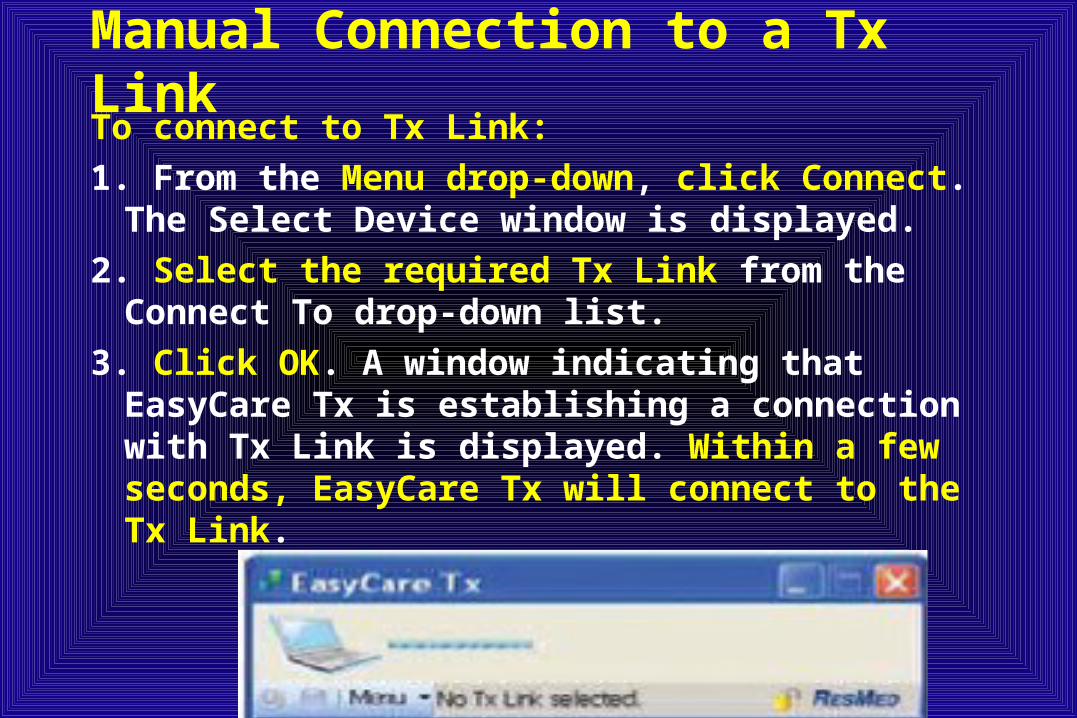
Manual Connection to a Tx LinkTo connect to Tx Link:
1. From the Menu drop-down, click Connect. The Select Device window is displayed.
2. Select the required Tx Link from the Connect To drop-down list.
3. Click OK. A window indicating that EasyCare Tx is establishing a connection with Tx Link is displayed. Within a few seconds, EasyCare Tx will connect to the Tx Link.

Connectivity issuesYou may experience connectivity issues in the
following circumstances:• EasyCare Tx is unable to connect to the Tx Link• EasyCare Tx loses connectivity with the Tx Link• Tx Link is unable to connect to the therapy device• Tx Link loses connectivity with the therapy device.• In such instances, a window indicating the
connectivity status is displayed and this helps you to take the appropriate action to restore connectivity.
Configuring Mask and Humidifier Settings• Configuring circuit settings
Before starting therapy, select the mask type used by the patient and review the humidifier settings.
• Mask Settings
Mask Settings can be specified either at the bedside from the therapy device, or remotely using EasyCare Tx.
• Humidifier Settings
EasyCare Tx automatically provides humidifier controls relevant to the therapy device and type of humidifier connected.
Some humidifiers are not ontrollable. Others can be disabled (for cold passover),or enabled (and adjusted using the dial on the humidifier). Still others can be adjusted remotely to a specific humidity level or to a climate controlled temperature.
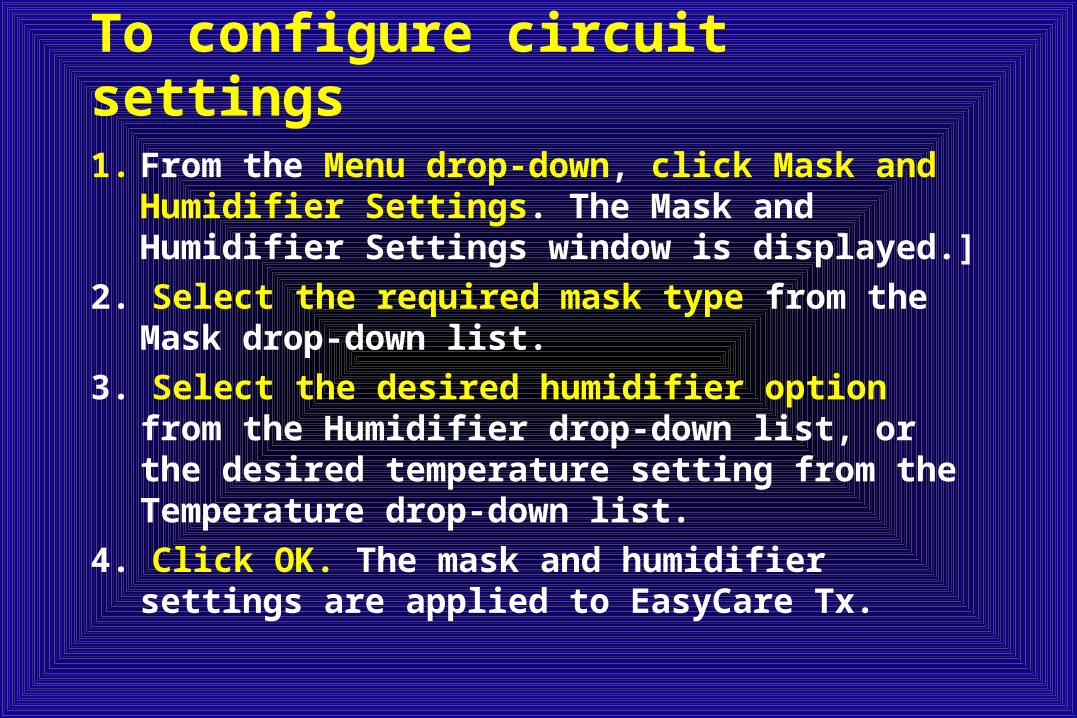
To configure circuit settings
1. From the Menu drop-down, click Mask and Humidifier Settings. The Mask and Humidifier Settings window is displayed.]
2. Select the required mask type from the Mask drop-down list.
3. Select the desired humidifier option from the Humidifier drop-down list, or the desired temperature setting from the Temperature drop-down list.
4. Click OK. The mask and humidifier settings are applied to EasyCare Tx.


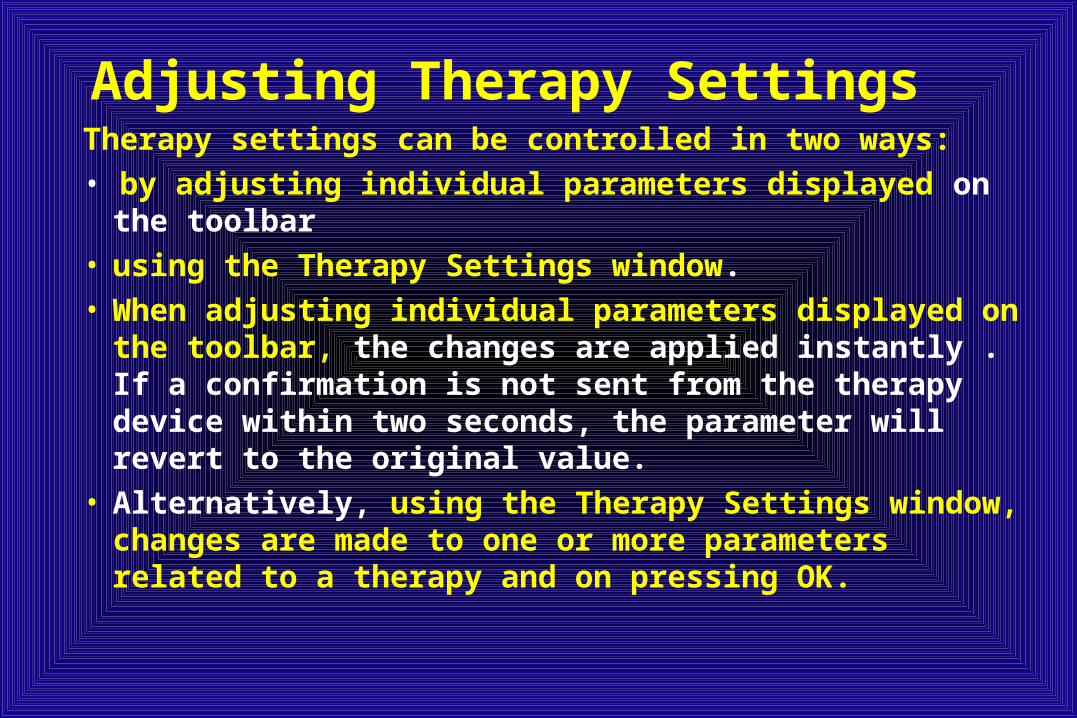
Adjusting Therapy SettingsTherapy settings can be controlled in two ways:
• by adjusting individual parameters displayed on the toolbar
• using the Therapy Settings window.• When adjusting individual parameters displayed on the
toolbar, the changes are applied instantly . If a confirmation is not sent from the therapy device within two seconds, the parameter will revert to the original value.
• Alternatively, using the Therapy Settings window, changes are made to one or more parameters related to a therapy and on pressing OK.

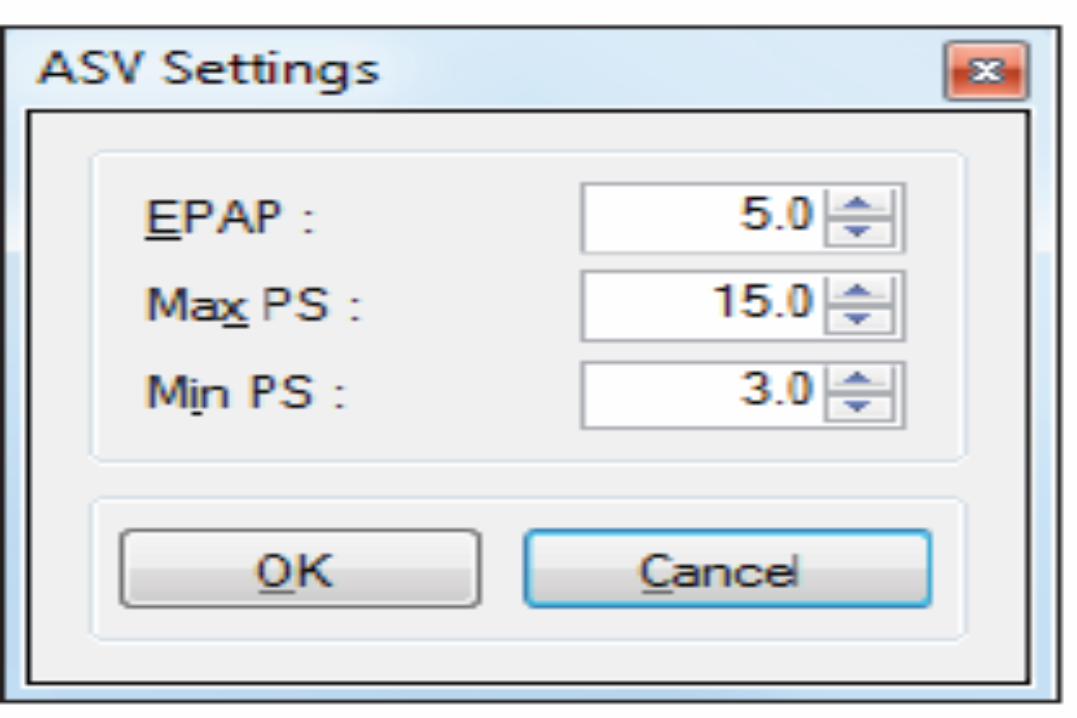
To adjust therapy settings from the Therapy Settings window
1. From the Menu drop-down, select Therapy Settings. The current therapy settings window is displayed.
2. Change the appropriate therapy settings as required.
3. Click Apply.

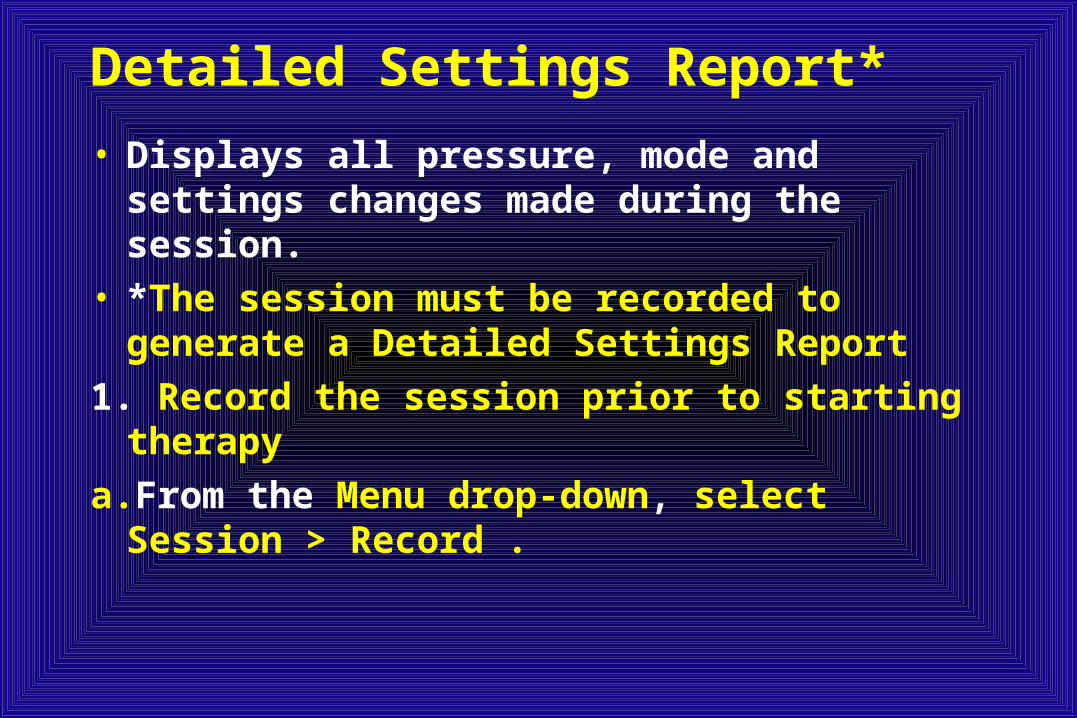
Detailed Settings Report*
• Displays all pressure, mode and settings changes made during the session.
• *The session must be recorded to generate a Detailed Settings Report
1. Record the session prior to starting therapy
a.From the Menu drop-down, select Session > Record .

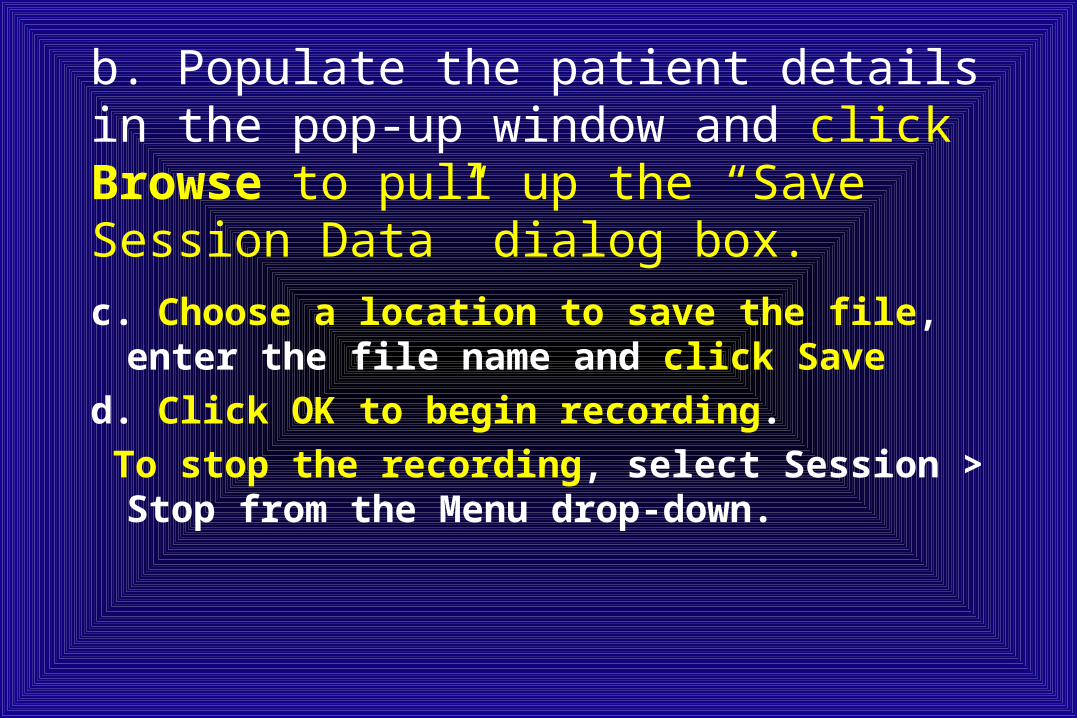
b. Populate the patient details in the pop-up window and click Browse to pull up the “Save Session Data” dialog box.
c. Choose a location to save the file, enter the file name and click Save
d. Click OK to begin recording.
To stop the recording, select Session > Stop from the Menu drop-down.


2. Run and print the Detailed Settings Report a. From the Menu drop-down, select Reports > Detailed Settings Report .
b. Click Browse and select the saved patient file
c. Click Open, and click OK to display the report.

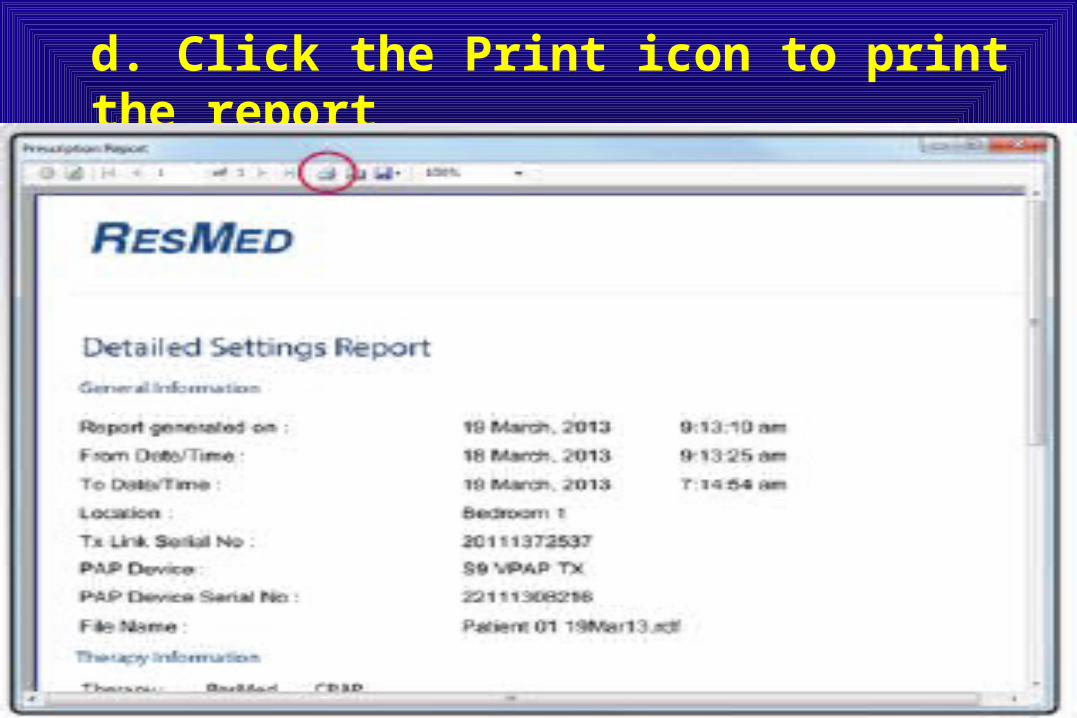
d. Click the Print icon to print the report

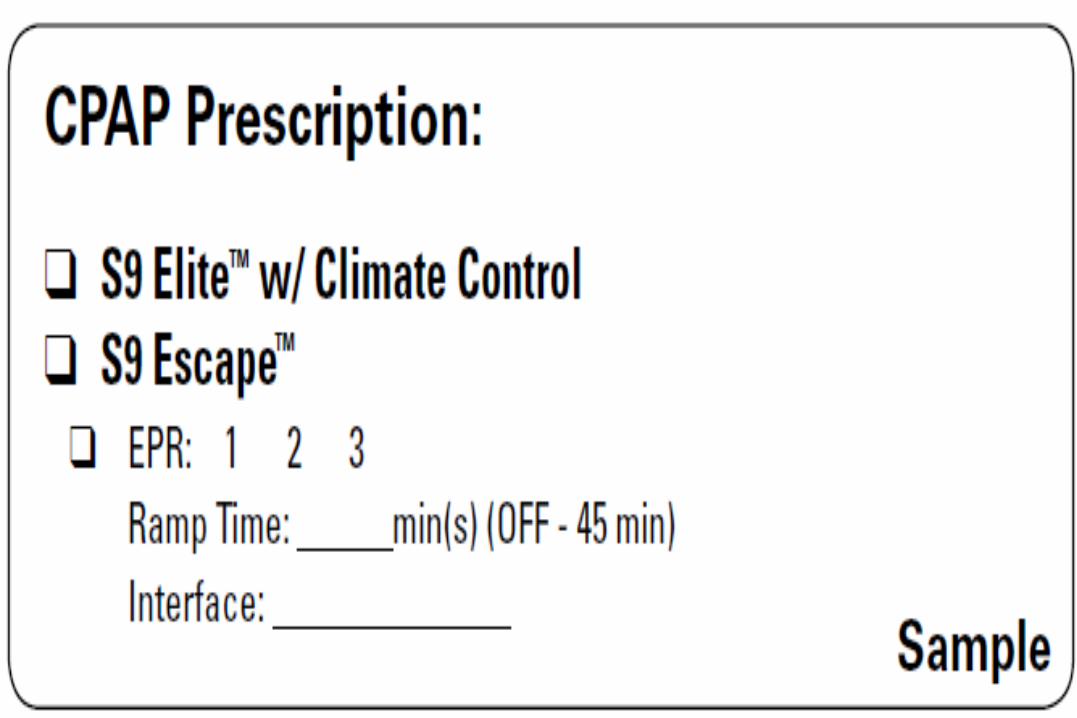
Titration for CPAP Therapy• Set mode to CPAP• Initial pressure: 4–5 cm H2O• Note: A higher pressure may be required for re-
titrations, patients with a higher BMI or patients complaining of air hunger or suffocating sensations
• For re-titrations, it is recommended that the pressure be started 2–3 cm H2O below the patient’s current pressure
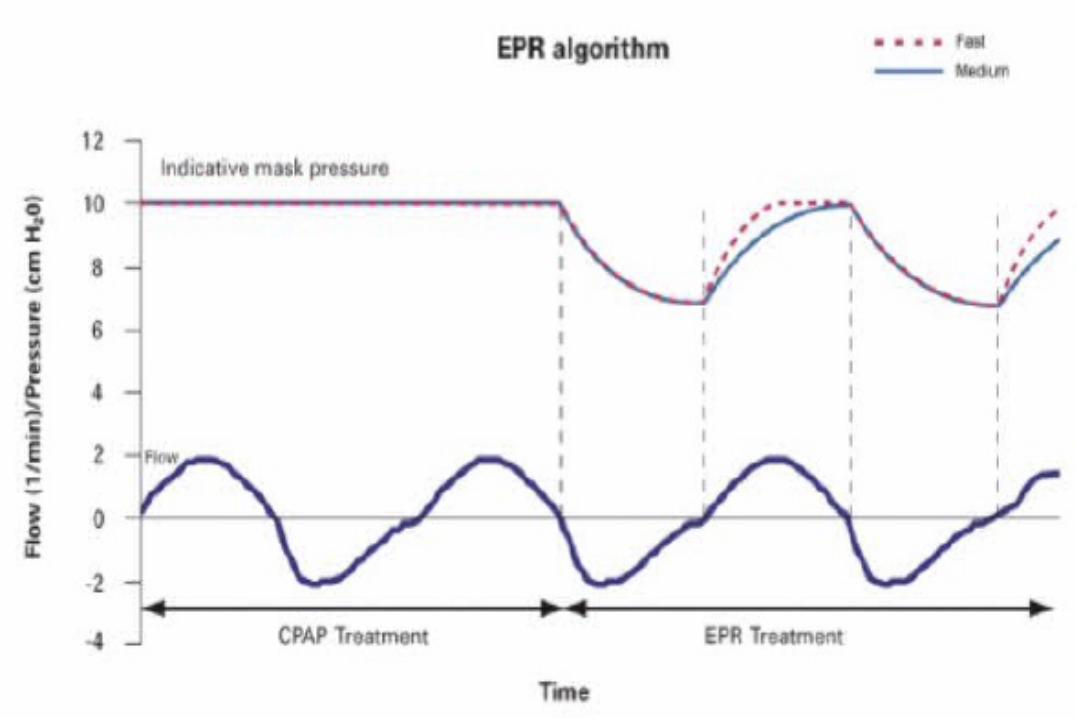
EPR™ and Easy-Breathe (CPAP and AutoSet™)
• EPR is designed to maintain optimal treatment for the patient during inhalation and reduce the delivered mask pressure during exhalation in the CPAP or AutoSet mode.
• The desired result of EPR is to decrease the pressure the patient must breathe out against, making the overall therapy more comfortable.
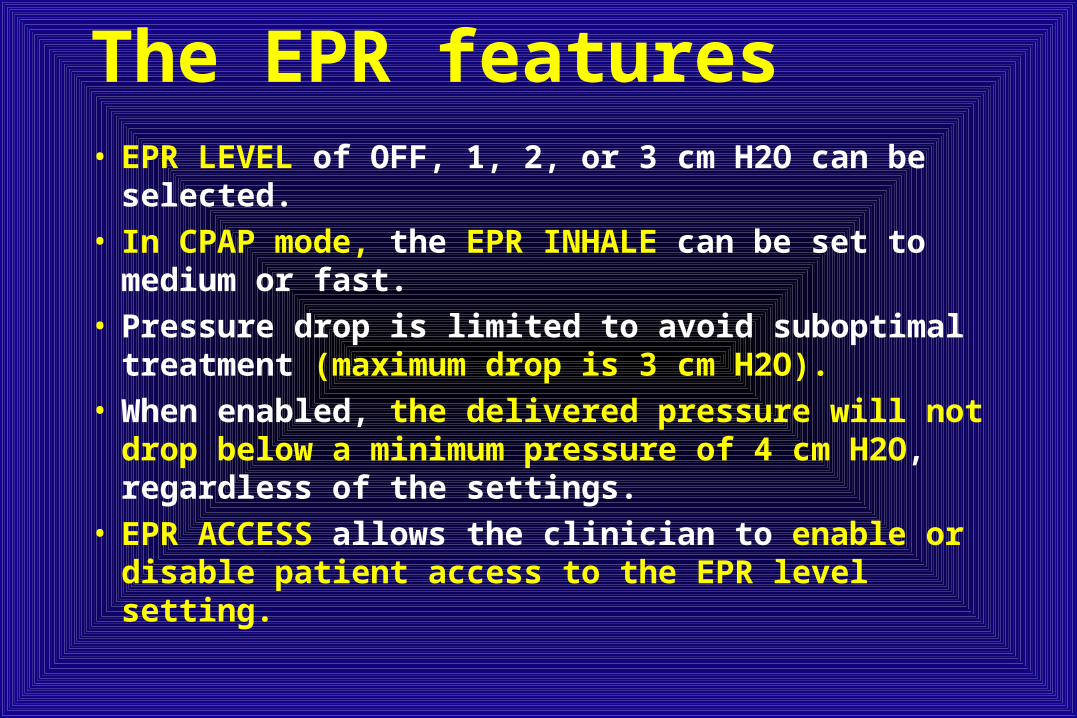
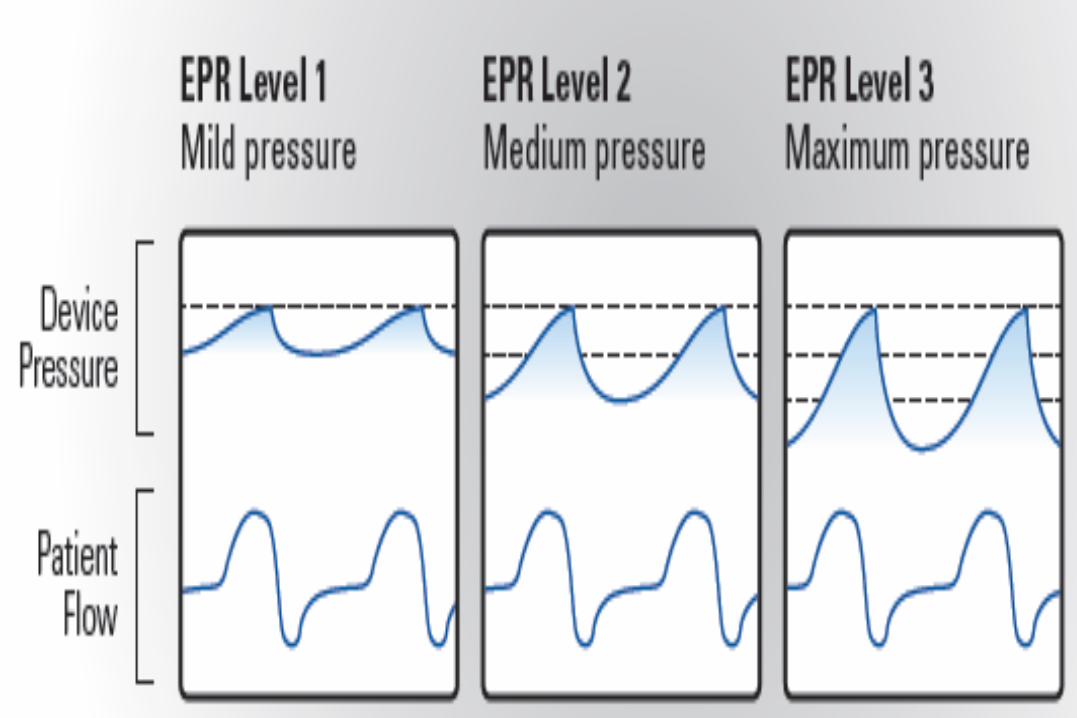
The EPR features• EPR LEVEL of OFF, 1, 2, or 3 cm H2O can be
selected.• In CPAP mode, the EPR INHALE can be set to
medium or fast.• Pressure drop is limited to avoid suboptimal
treatment (maximum drop is 3 cm H2O).• When enabled, the delivered pressure will not
drop below a minimum pressure of 4 cm H2O, regardless of the settings.
• EPR ACCESS allows the clinician to enable or disable patient access to the EPR level setting.

Related Documents


