TOSHIBA Telecommunication Systems Division Voice Processing System LVMU Installation and Programming Guide ® March 2008

Welcome message from author
This document is posted to help you gain knowledge. Please leave a comment to let me know what you think about it! Share it to your friends and learn new things together.
Transcript
TOSHIBA Telecommunication Systems Division
Voice Processing System
LVMUInstallation and Programming Guide
®
March 2008

Publication InformationToshiba America Information Systems, Inc.
Telecommunication Systems DivisionPublication InformationToshiba America Information Systems, Inc., Telecommunication Systems Division, reserves the right, without prior notice, to revise this information publication for any reason, including, but not limited to, utilization of new advances in the state of technical arts or to simply change the design of this document.
Further, Toshiba America Information Systems, Inc., Telecommunication Systems Division, also reserves the right, without prior notice, to make such changes in equipment design or components as engineering or manufacturing methods may warrant.
CIX-IG-LVMU-VA
Version A.1, March 2008
Our mission to publish accurate, complete, and user accessible documentation. At the time of printing, the information in this document was as accurate and current as was reasonably possible. However in the time required to print and distribute this manual additions, corrections, or other changes may have been made. To view the latest version of this or other documents please refer to the Toshiba FYI web site.
Toshiba America Information Systems shall not be liable for any commercial losses, loss of revenues or profits, loss of goodwill, inconvenience, or exemplary, special, incidental, indirect or consequential damages whatsoever, or claims of third parties, regardless of the form of any claim that may result from the use of this document.
THE SPECIFICATIONS AND INFORMATION PROVIDED HEREIN ARE FOR INFORMATIONAL PURPOSES ONLY AND ARE NOT A WARRANTY OF ACTUAL PERFORMANCE, WHETHER EXPRESSED OR IMPLIED. THE SPECIFICATIONS AND INFORMATION ARE SUBJECT TO CHANGE WITHOUT NOTICE. ACTUAL PERFORMANCE MAY VARY BASED ON INDIVIDUAL CONFIGURATIONS, USE OF COLLATERAL EQUIPMENT, OR OTHER FACTORS.
© Copyright 2007, 2008This document is copyrighted by Toshiba America Information Systems, Inc. with all rights reserved. Under the copyright laws, this document cannot be reproduced in any form or by any means—graphic, electronic, or mechanical, including recording, taping, photocopying, without prior written permission of Toshiba. No patent liability is assumed, however, with respect to the use of the information contained herein.
TrademarksStrata, SmartMedia, SD (Secure Digital) and CIX are registered trademarks of Toshiba Corporation. Stratagy, eManager, My Phone Manager and Info Manager are registered trademarks of Toshiba America Information Systems, Inc. Windows and Microsoft are registered trademarks of Microsoft.Trademarks, registered trademarks, and service marks are the property of their respective owners.
TOSHIBA AMERICA INFORMATION SYSTEMS, INC. (“TAIS”)Telecommunication Systems Division License Agreement
IMPORTANT: THIS LICENSE AGREEMENT (“AGREEMENT”) IS A LEGAL AGREEMENT BETWEEN YOU (“YOU”) AND TAIS. CAREFULLY READ THIS LICENSE AGREEMENT. USE OF ANY SOFTWARE OR ANY RELATED INFORMATION (COLLECTIVELY, “SOFTWARE”) INSTALLED ON OR SHIPPED WITH A TAIS DIGITAL SOLUTIONS PRODUCT OR OTHERWISE MADE AVAILABLE TO YOU BY TAIS IN WHATEVER FORM OR MEDIA, WILL CONSTITUTE YOUR ACCEPTANCE OF THESE TERMS, UNLESS SEPARATE TERMS ARE PROVIDED BY THE SOFTWARE SUPPLIER. IF YOU DO NOT AGREE WITH THE TERMS OF THIS LICENSE AGREEMENT, DO NOT INSTALL, COPY OR USE THE SOFTWARE AND PROMPTLY RETURN IT TO THE LOCATION FROM WHICH YOU OBTAINED IT IN ACCORDANCE WITH APPLICABLE RETURN POLICIES. EXCEPT AS OTHERWISE AUTHORIZED IN WRITING BY TAIS, THIS SOFTWARE IS LICENSED FOR DISTRIBUTION THROUGH TAIS AUTHORIZED CHANNELS ONLY TO END-USERS PURSUANT TO THIS LICENSE AGREEMENT.
1. License Grant. The Software is not sold; it is licensed upon payment of applicable charges. TAIS grants to you a personal, non-transferable and non-exclusive right to use the copy of the Software provided under this License Agreement. You agree you will not copy the Software except as necessary to use it on one TAIS system at a time at one location. Modifying, translating, renting, copying, distributing, printing, sublicensing, transferring or assigning all or part of the Software, or any rights granted hereunder, to any other persons and removing any proprietary notices, labels or marks from the Software is strictly prohibited except as permitted by applicable law; you agree violation of such restrictions will cause irreparable harm to TAIS and provide grounds for injunctive relief, without notice, against you or any other person in possession of the Software. You and any other person whose possession of the software violates this License Agreement shall promptly surrender possession of the Software to TAIS, upon demand. Furthermore, you hereby agree not to create derivative works based on the Software. TAIS reserves the right to terminate this license and to immediately repossess the software in the event that you or any other person violates this License Agreement. Execution of the Software for any additional capabilities require a valid run-time license.
2. Intellectual Property. You acknowledge that no title to the intellectual property in the Software is transferred to you. You further acknowledge that title and full ownership rights to the Software will remain the exclusive property of TAIS and/or its suppliers, and you will not acquire any rights to the Software, except the license expressly set forth above. You will not remove or change any proprietary notices contained in or on the Software. The Software is protected under US patent, copyright, trade secret, and/or other proprietary laws, as well as international treaties. Any transfer, use, or copying of the software in violation of the License Agreement constitutes copyright infringement. You are hereby on notice that any transfer, use, or copying of the Software in violation of this License Agreement constitutes a willful infringement of copyright.
3. No Reverse Engineering. You agree that you will not attempt, and if you employ employees or engage contractors, you will use your best efforts to prevent your employees and contractors from attempting to reverse compile, reverse engineer, modify, translate or disassemble the Software in whole or in part. Any failure to comply with the above or any other terms and conditions contained herein will result in the automatic termination of this license and the reversion of the rights granted hereunder back to TAIS.
4. Limited Warranty. THE SOFTWARE IS PROVIDED “AS IS” WITHOUT WARRANTY OF ANY KIND. TO THE MAXIMUM EXTENT PERMITTED BY APPLICABLE LAW, TAIS AND ITS SUPPLIERS DISCLAIM ALL WARRANTIES WITH REGARD TO THE SOFTWARE, EITHER EXPRESS OR IMPLIED, INCLUDING, BUT NOT LIMITED TO, THE WARRANTY OF NON-INFRINGEMENT OF THIRD PARTY RIGHTS, THE WARRANTY OF YEAR 2000 COMPLIANCE, AND THE IMPLIED WARRANTIES OF MERCHANTABILITY AND FITNESS FOR A PARTICULAR PURPOSE. THE ENTIRE RISK AS TO THE QUALITY AND PERFORMANCE OF THE SOFTWARE IS WITH YOU. NEITHER TAIS NOR ITS SUPPLIERS WARRANT THAT THE FUNCTIONS CONTAINED IN THE SOFTWARE WILL MEET YOUR REQUIREMENTS OR THAT THE OPERATION OF THE SOFTWARE WILL BE UNINTERRUPTED OR ERROR-FREE. HOWEVER, TAIS WARRANTS THAT ANY MEDIA ON WHICH THE SOFTWARE IS FURNISHED IS FREE FROM DEFECTS IN MATERIAL AND WORKMANSHIP UNDER NORMAL USE FOR A PERIOD OF NINETY (90) DAYS FROM THE DATE OF DELIVERY TO YOU.
5. Limitation Of Liability. TAIS’ ENTIRE LIABILITY AND YOUR SOLE AND EXCLUSIVE REMEDY UNDER THIS LICENSE AGREEMENT SHALL BE AT TAIS’ OPTION REPLACEMENT OF THE MEDIA OR REFUND OF THE PRICE PAID. TO THE MAXIMUM EXTENT PERMITTED BY APPLICABLE LAW, IN NO EVENT SHALL TAIS OR ITS SUPPLIERS BE LIABLE TO YOU FOR ANY CONSEQUENTIAL, SPECIAL, INCIDENTAL OR INDIRECT DAMAGES FOR PERSONAL INJURY, LOSS OF BUSINESS PROFITS, BUSINESS INTERRUPTION, LOSS OF BUSINESS INFORMATION/DATA, OR ANY OTHER PECUNIARY LOSS OF ANY KIND ARISING OUT OF THE USE OR INABILITY TO USE THE SOFTWARE, EVEN IF TAIS OR ITS SUPPLIER HAS BEEN ADVISED OF THE POSSIBILITY OF SUCH DAMAGES. IN NO EVENT SHALL TAIS OR ITS SUPPLIERS BE LIABLE FOR ANY CLAIM BY A THIRD PARTY.
6. State/Jurisdiction Laws. SOME STATES/JURISDICTIONS DO NOT ALLOW THE EXCLUSION OF IMPLIED WARRANTIES OR LIMITATIONS ON HOW LONG AN IMPLIED WARRANTY MAY LAST, OR THE EXCLUSION OR LIMITATION OF INCIDENTAL OR CONSEQUENTIAL DAMAGES, SO SUCH LIMITATIONS OR EXCLUSIONS MAY NOT APPLY TO YOU. THIS LIMITED WARRANTY GIVES YOU SPECIFIC RIGHTS AND YOU MAY ALSO HAVE OTHER RIGHTS WHICH VARY FROM STATE/JURISDICTION TO STATE/JURISDICTION.
7. Export Laws. This License Agreement involves products and/or technical data that may be controlled under the United States Export Administration Regulations and may be subject to the approval of the United States Department of Commerce prior to export. Any export, directly or indirectly, in contravention of the United States Export Administration Regulations, or any other applicable law, regulation or order, is prohibited.
8. Governing Law. This License Agreement will be governed by the laws of the State of California, United States of America, excluding its conflict of law provisions.
9. United States Government Restricted Rights. The Software is provided with Restricted Rights. The Software and other materials provided hereunder constitute Commercial Computer Software and Software Documentation and Technical Data related to Commercial Items. Consistent with F.A.R. 12.211 and 12.212 they are licensed to the U.S. Government under, and the U.S. Government’s rights therein are restricted pursuant to, the vendor’s commercial license.
10. Severability. If any provision of this License Agreement shall be held to be invalid, illegal or unenforceable, the validity, legality and enforceability of the remaining provisions hereof shall not in any way be affected or impaired.
11. No Waiver. No waiver of any breach of any provision of this License Agreement shall constitute a waiver of any prior, concurrent or subsequent breach of the same or any other provisions hereof, and no waiver shall be effective unless made in writing and signed by an authorized representative of the waiving party.
12. Supplier Software. The Software may include certain software provided by TAIS suppliers. In such event, you agree that such supplier may be designated by TAIS as a third party beneficiary of TAIS with rights to enforce the Agreement with respect to supplier’s software.
YOU ACKNOWLEDGE THAT YOU HAVE READ THIS LICENSE AGREEMENT AND THAT YOU UNDERSTAND ITS PROVISIONS. YOU AGREE TO BE BOUND BY ITS TERMS AND CONDITIONS. YOU FURTHER AGREE THAT THIS LICENSE AGREEMENT CONTAINS THE COMPLETE AND EXCLUSIVE AGREEMENT BETWEEN YOU AND TAIS AND SUPERSEDES ANY PROPOSAL OR PRIOR AGREEMENT, ORAL OR WRITTEN, OR ANY OTHER COMMUNICATION RELATING TO THE SUBJECT MATTER OF THIS LICENSE AGREEMENT.
Toshiba America Information Systems, Inc.Telecommunication Systems Division9740 Irvine BoulevardIrvine, California 92618-1697 United States of America
DSD 020905
5932
T
Toshiba America Information Systems, Inc.Telecommunication Systems Division
End-User Limited Warranty
Toshiba America Information Systems, Inc., (“TAIS”) warrants that this telephone equipment manufactured by Toshiba (except for fuses, lamps, and other consumables) will, upon delivery by TAIS or an authorized TAIS dealer to a retail customer in new condition, be free from defects in material and workmanship for twenty-four (24) months after delivery, except as otherwise provided by TAIS in the TAIS warranty accompanying the products or posted on TAIS’s website. Products which are not manufactured by Toshiba but are purchased from Toshiba, will be subject to the warranty provisions provided by the equipment manufacturer, unless TAIS notifies the end-user of any additional warranty provisions in writing.
This warranty is void (a) if the equipment is used under other than normal use and maintenance conditions, (b) if the equipment is modified or altered, unless the modification or alteration is expressly authorized by TAIS, (c) if the equipment is subject to abuse, neglect, lightning, electrical fault, or accident, (d) if the equipment is repaired by someone other than TAIS or an authorized TAIS dealer, (e) if the equipment’s serial number is defaced or miss-ing, or (f) if the equipment is installed or used in combination or in assembly with products not supplied by TAIS and which are not compatible or are of inferior quality, design, or performance.
The sole obligation of TAIS or Toshiba Corporation under this warranty, or under any other legal obligation with respect to the equipment, is the repair or replacement of such defective or missing parts as are causing the malfunc-tion by TAIS or its authorized dealer with new or refurbished parts (at their option). If TAIS or one of its autho-rized dealers does not replace or repair such parts, the retail customer’s sole remedy will be a refund of the price charged by TAIS to its dealers for such parts as are proven to be defective, and which are returned to TAIS through one of its authorized dealers within the warranty period and no later than thirty (30) days after such malfunction, whichever first occurs.
Under no circumstances will the retail customer or any user or dealer or other person be entitled to any direct, special, indirect, consequential, or exemplary damages, for breach of contract, tort, or otherwise. Under no circum-stances will any such person be entitled to any sum greater than the purchase price paid for the item of equipment that is malfunctioning.
To obtain service under this warranty, the retail customer must bring the malfunction of the machine to the atten-tion of one of TAIS’ authorized dealers within the applicable warranty period and no later than thirty (30) days after such malfunction, whichever first occurs. Failure to bring the malfunction to the attention of an authorized TAIS dealer within the prescribed time results in the customer being not entitled to warranty service.
THERE ARE NO OTHER WARRANTIES FROM EITHER TOSHIBA AMERICA INFORMATION SYSTEMS, INC., OR TOSHIBA CORPORATION WHICH EXTEND BEYOND THE FACE OF THIS WARRANTY. ALL OTHER WARRANTIES, EXPRESS OR IMPLIED, INCLUDING THE WARRANTIES OF MERCHANTABILITY, FITNESS FOR A PARTICULAR PURPOSE, AND FITNESS FOR USE, ARE EXCLUDED.
No TAIS dealer and no person other than an officer of TAIS may extend or modify this warranty. No such modifi-cation or extension is effective unless it is in writing and signed by the Vice President and General Manager, Tele-communication Systems Division.

LVMU Installation Guide 03/06 i
Contents
Chapter 1 – The Grand TourLVMU ...................................................................................................................................... 1
CIX Software Requirements.............................................................................................. 2UAdmin2.1 .............................................................................................................................. 2
Chapter 2 – InstallationInstallation............................................................................................................................... 3
Strata CIX Systems........................................................................................................... 6Local Access ..................................................................................................................... 8Remote Access ................................................................................................................. 8Toshiba Plug and Play ...................................................................................................... 9
Telephone System Configuration.......................................................................................... 10Stratagy System Configuration ....................................................................................... 10
LVMU Playback Audio Level Adjustment.............................................................................. 12
Chapter 3 – MaintenanceTools ..................................................................................................................................... 17Backup Utility ........................................................................................................................ 17Restore Utility........................................................................................................................ 20Upgrade the LVMU Software ................................................................................................ 21Retrieve Trace File................................................................................................................ 22Filecopy................................................................................................................................. 23Shut Down the LVMU ........................................................................................................... 23
Methods of Shutdown ..................................................................................................... 23Diagnostics ........................................................................................................................... 25

This page is intentionaly left blank.

Before You Install the LVMU in Strata CIX...please read and complete this checklist before starting your installation.
This checklist only highlights important installation information. Please reference the LVMU Installation Guide for details on programming individual features, etc.
1 Are you aware of the prescribed handling precautions for the LVMU?Whenever handling the LVMU, always wear an anti-static wrist strap (not included). Keep the strap by the unit.
Always hold the unit by its edges. Remember that an electrostatic charge from your body, even your own body oils can damage the LVMU.Never drop or jar the LVMU! Care should be taken whenever handling the unit.Temperature changes greater than 10°C can cause condensation on the LVMU. If there is such a temperature variation, wait 24 hours before installation.Always keep the LVMU in its individual shipping box until it’s time to install it in the Strata CIX.Never transport the LVMU inside the Strata CIX.
2 Do you have everything you need for programming the LVMU using Stratagy UAdmin 2.1?Stratagy UAdmin Release 2 software is compatible with the LVMU, GVMU, IPV8 and Stratagy DK R3.X. UAdmin does not support Release 2 Stratagy DK systems.
Local Administration? You’ll need a PC, 5MB hard drive space, and 580KB free RAM. You’ll also need Toshiba’s PPTC-9 to connect your PC to the LVMU.Remote (modem) Administration? Use UAdmin software with the internal (soft) 33.6Kbps-baud modem. No additional equipment is necessary.
3 All set? Just a few more things...
Be sure to change the default password of the Shutdown Mailbox User ID 983 (see the LVMU Installation Guide).Don’t forget to wear an anti-static wrist strap (not included) during handling.When using an internal modem in the Admin PC, remember that UAdmin does not work with COM 3 or 4. Do not write over the UAdmin subdirectory on your remote PC when installing the newer version of UAdmin. Always retain previous versions of UAdmin.Make sure your Strata CIX I&M/Programming Manuals and Stratagy I&M Manuals are handy. Be sure to read the entire LVMU Installation Guide before installing.Remember to back up your database after installation.
If you have read and completed this checklist, installation will be a breeze!OK, let’s get started!

This page is intentionally left blank.

LVMU Installation Guide 03/08 ii
Introduction
This Installation Guide introduces you to the LVMU Voice Mail System and serves as a supplement to the Stratagy I&M Manual. All information concerning the LVMU is contained in this document. Applicable references can be found in the Stratagy I&M Manual.
Organization• Chapter 1 – The Grand Tour gives you a general description of the LVMU’s capabilities and
basic operations. Features exclusive to the LVMU are described in detail.• Chapter 2 – Installation contains vital information on how to install the LVMU, load and
configure UAdmin software, and access and configure LVMU software.• Chapter 3 – Maintenance provides instructions on how to use the Tool Utility for backing up,
restoring, upgrading software, and performing file copies. Also describes the LVMU’s trace diagnostics.
Related Documents/MediaNote Some documents listed here may appear in different versions on the Toshiba FYI web site,
or in print. To find the most current version, check the version/date in the Publication Information on the back of the document’s title page.
You can find additional detailed information about Stratagy in the following companion documents:
• Stratagy Voice Processing General Description provides a system overview, available hardware, and features of the Stratagy systems.
• Stratagy Installation and Maintenance Manual provides installation and maintenance requirements and procedures for the Stratagy system. Also includes System Administration forms and instructions on how to configure the system.
• Stratagy User Guide provides the procedures necessary to operate the Stratagy system. The Guide includes a tear-out (wallet-size) Quick Reference Guide and a quick reference map (flowchart) outlining Stratagy’s features and operation.
• Stratagy Quick Reference Guide provides a quick reference of frequently-used features.
For authorized users, the Toshiba FYI web site contains all current documentation and enables you to view, print, and download current publications.

This page is intentlionally left blank.

LVMU Installation Guide 03/06 1
The Grand Tour
LVMUA brand new voice mail circuit card, the LVMU was designed by Toshiba specifically for the Strata CIX100, 200 and 670 systems, which provides comprehensive Auto Attendant/Voice Mail capabilities. The features include:
• Up to 8 Voice Ports in 2 port increments• 40 hours voice storage, allowing up to 10,000 total messages• 360 mailboxes• The LVMU has similar features and operation as the popular Stratagy IVP8 & DK, but includes
newer features• CIX integration through the backplane. No serial port SMDI required.• Voice Mail LCD Feature Prompting with Soft Key Operation – operates like Stratagy iES32.• Call Record – A station user can record the coversation and store it in a voice mailbox by
pressing an optionally programmed key on the station• Call Monitor – A station user can listen to a caller while the caller records a message in the
voice mailbox and intercept the call.• Bilingual Language Support – English and Spanish Voice Mail LCD Feature Prompting with
Soft Key Operation (English and Spanish).• Onboard remote maintenance modem (AMDS1A). • Remote software update and prompt update capability. • Embedded Backup and Restore utility - Stores Names, Greetings, Mailbox numbers, and all
other database parameters
There is a RS232 maintenance jack to connect an Admin PC. Administration requires the LVMU UAdmin 2.1 Administration Software. This is a new version of UAdmin for the LVMU that also can be used for Stratagy Flash, DK R3.X, IVP8, and GVMU.
The LVMU is pre-programmed with default mailboxes 200 ~ 217, adding simplicity to any installation.
This document covers how to install the LVMU into the CIX cabinet slot and how to program the CIX.
For further information please refer to the CIX Installation, Maintenance and Programming manuals.
Before starting the installation, read through these instructions thoroughly. Important information is included in this guide that is crucial to a successful installation.
The Grand TourUAdmin2.1
2 LVMU Installation Guide 03/06
CIX Software RequirementsThe LVMU requires programming in the CIX database. • The CIX software requirement is R4.20MP026 or later.• The eManager must be Release 4.2A09 or later.• The LVMU requires up to eight voice mail port licenses in two port increments.• One CIX basic port license is required for each LVMU port.• The LVMU is programmed in a CIX card slot with Prog 100, card type 35.
UAdmin2.1The LVMU uses UAdmin2.1 (UADM2) software to configure and maintain its voice processing system. This chapter discusses how to start up, use and shut down the UADM2 Admin software for maintenance and other functions. More specifically, this chapter discusses:• Access UADM2 Admin – Compares the two methods for accessing the UADM2 Admin software:
locally, or remotely.• Local Access – Access UADM2 Admin software via a cable connecting the LVMU with a
portable or desktop PC.• Remote Access – Access LVMU via a modem from a portable or desktop PC.• System Startup – How the Strata CIX voice processing system starts up.• Use UADM2 Admin software – Navigating through the menus and using online help.• Online Help Function – Describes help line and detailed help.• System Shutdown – Exiting the UADM2 Admin program and accessing the Stratagy
Configuration Utility.• Main Menu Options – Using the Main Menu for customization and administration.• Main Menu Field Descriptions – shows the main menu and gives a definition of each field.

LVMU Installation Guide 03/06 3
Installation
InstallationBefore starting the installation, read through these instructions thoroughly. Important information is included in this guide that is crucial to a successful installation.
Step 1: Unpack and Inspect the LVMU1. When you receive the system, examine all packages carefully and note any visible damage. If
you find any damage, do not open the packages. Contact the delivery carrier immediately and make the proper claims.
2. Check the items contained in the packages against the packing list.
3. Inspect all equipment for damage. If equipment is missing or damaged, contact your supplier immediately.
4. Remove any shipping tape and packing material used to protect the system during shipment. Retain the packing materials for re-use when transporting system hardware.
CAUTION!
You will be handling the LVMU when it is most fragile — unpacked and exposed. The LVMU, if handled properly, will give long, reliable service. To ensure that the unit is not damaged during installation or maintenance, follow these precautions.Damage may not always be immediately evident (e.g., no physical damage on the outside of the unit) and system failure may result weeks or months later.• Handle the LVMU with care. Mechanical shock from dropping, shaking, excessive force
when seating the board into the slot, rocking a connector on or other activities can severely damage the printed circuit board.
• Wear an anti-static wrist strap (not included). An electrostatic charge from your body can damage the drive or circuitry permanently.
• Hold the LVMU by the edges or the strap and never touch the board’s surface. Pressure on the printed circuit board or contaminants from your hands (e.g., skin oil, food particles, hand lotion) can cause component failure.

InstallationInstallation
4 LVMU Installation Guide 03/06
Figure 1 LVMU Circuit Card
Battery Jumper
CH7
CH1
CH8
Language Selection
Status
CH6CH5CH4CH3CH2
Serial cableconnector
Built-in modem
OFF - EnglishON - Spanish
(Strap shown in ON position)SW1
SW2 SW3

InstallationInstallation
LVMU Installation Guide 03/06 5
Step 2: Program the Strata CIXImportant! When installing the LVMU, the Strata CIX system software must be version
4.20MP026 or higher. Refer to “CIX Software Requirements” on page 2 for software and license requirements.
To the Strata CIX processor, the LVMU functions as an analogue card.
The LVMU uses information passed along the backplane of the CIX for it's integration so there are no special program settings required for the LVMU. In addition no additional equipment is required (i.e. the BSIS).
Important! Should the Strata CIX need to be reset to initialize any Strata CIX programming assignments, it is important that you make all such assignments before installing the LVMU.
If more detailed information is required around the CIX programming please refer to the Strata CIX Programming manual.
1. Log into the Strata CIX via eManager
2. Configure the nominated CIX slot that the LVMU will be installed into is set as a LVMU.
3. Assign the LVMU ports in CIX Program 200.Ensure that the LVMU ports are configured as follows:
- The station type is enabled for SLT working (FB 02)
- The circuit type is set to Voice Mail (FB 03).
- The display DN (FB 15) is set to that of the number assigned to the Pilot Hunt Group that the LVMU ports will be assigned to.
4. Set up the Pilot Hunt Group for the LVMU Voice Mail ports, (CIX Program 209/Group Tab). Ensure the following:
- The Pilot Number (FB 02) matches the Number to Display (FB 04)
- The Number to Display (FB 04) matches that programmed for the LVMU Voice Mail ports Display DN (Program 200, FB 15)
- The DHG Auto Camp On (FB 07) is Enabled.
5. Assign the LVMU Voice Mail Ports to the Pilot Hunt Group, (CIX Program 209/Member Tab).
6. Using CIX Program 579, System Voice Mail Data, ensure the following is programmed:
- the Output of Class/ANI and DNIS (FB 04) is Enabled
- the Pilot DN of the Voice Mail is set as a direct transfer destination by entering the Pilot Hunt Group Number, assigned in CIX Program 209, as the Transfer Direct to VM DN (FB 16).
7. Using CIX Program 580, Voice Mail Port Data, configure each of the LVMU Voice Mail ports.Ensure that:
- The Control Method (FB 01) is set to SMDI
- Send A/D Tone (FB 02) is Enabled
- End to End Signalling (FB 06) is Enabled
- VM to VM Call Blocking (FB 05) is set for Blocking
InstallationInstallation
6 LVMU Installation Guide 03/06
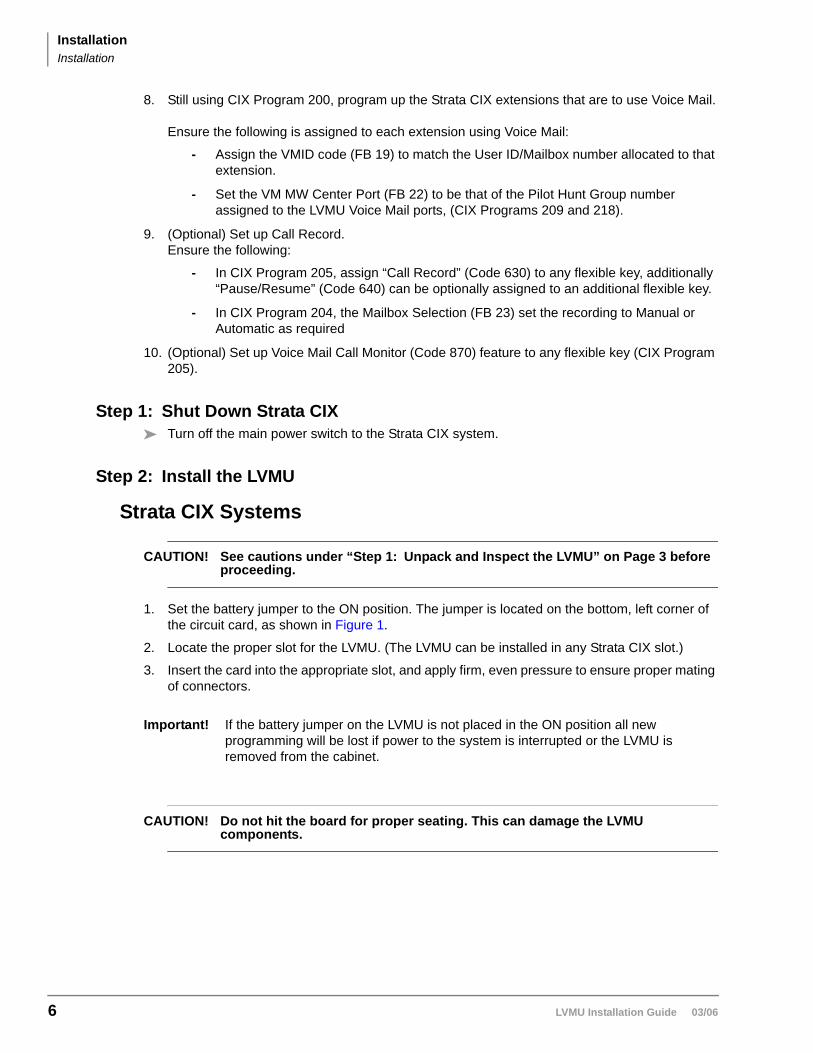
8. Still using CIX Program 200, program up the Strata CIX extensions that are to use Voice Mail.
Ensure the following is assigned to each extension using Voice Mail:
- Assign the VMID code (FB 19) to match the User ID/Mailbox number allocated to that extension.
- Set the VM MW Center Port (FB 22) to be that of the Pilot Hunt Group number assigned to the LVMU Voice Mail ports, (CIX Programs 209 and 218).
9. (Optional) Set up Call Record.Ensure the following:
- In CIX Program 205, assign “Call Record” (Code 630) to any flexible key, additionally “Pause/Resume” (Code 640) can be optionally assigned to an additional flexible key.
- In CIX Program 204, the Mailbox Selection (FB 23) set the recording to Manual or Automatic as required
10. (Optional) Set up Voice Mail Call Monitor (Code 870) feature to any flexible key (CIX Program 205).
Step 1: Shut Down Strata CIXTurn off the main power switch to the Strata CIX system.
Step 2: Install the LVMU
Strata CIX Systems
CAUTION! See cautions under “Step 1: Unpack and Inspect the LVMU” on Page 3 before proceeding.
1. Set the battery jumper to the ON position. The jumper is located on the bottom, left corner of the circuit card, as shown in Figure 1.
2. Locate the proper slot for the LVMU. (The LVMU can be installed in any Strata CIX slot.)
3. Insert the card into the appropriate slot, and apply firm, even pressure to ensure proper mating of connectors.
Important! If the battery jumper on the LVMU is not placed in the ON position all new programming will be lost if power to the system is interrupted or the LVMU is removed from the cabinet.
CAUTION! Do not hit the board for proper seating. This can damage the LVMU components.
InstallationInstallation
LVMU Installation Guide 03/06 7
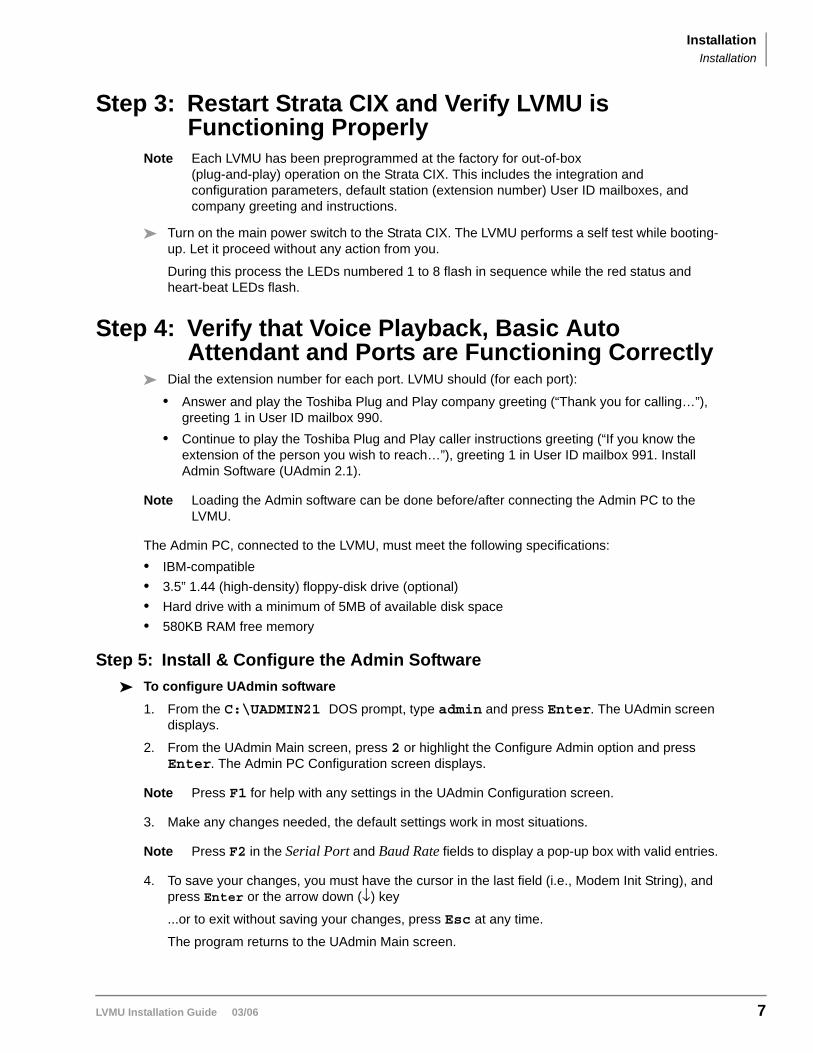
Step 3: Restart Strata CIX and Verify LVMU is Functioning Properly
Note Each LVMU has been preprogrammed at the factory for out-of-box(plug-and-play) operation on the Strata CIX. This includes the integration and configuration parameters, default station (extension number) User ID mailboxes, and company greeting and instructions.
Turn on the main power switch to the Strata CIX. The LVMU performs a self test while booting-up. Let it proceed without any action from you.
During this process the LEDs numbered 1 to 8 flash in sequence while the red status and heart-beat LEDs flash.
Step 4: Verify that Voice Playback, Basic Auto Attendant and Ports are Functioning Correctly
Dial the extension number for each port. LVMU should (for each port):
• Answer and play the Toshiba Plug and Play company greeting (“Thank you for calling…”), greeting 1 in User ID mailbox 990.
• Continue to play the Toshiba Plug and Play caller instructions greeting (“If you know the extension of the person you wish to reach…”), greeting 1 in User ID mailbox 991. Install Admin Software (UAdmin 2.1).
Note Loading the Admin software can be done before/after connecting the Admin PC to the LVMU.
The Admin PC, connected to the LVMU, must meet the following specifications:• IBM-compatible• 3.5” 1.44 (high-density) floppy-disk drive (optional)• Hard drive with a minimum of 5MB of available disk space• 580KB RAM free memory
Step 5: Install & Configure the Admin SoftwareTo configure UAdmin software1. From the C:\UADMIN21 DOS prompt, type admin and press Enter. The UAdmin screen
displays.
2. From the UAdmin Main screen, press 2 or highlight the Configure Admin option and press Enter. The Admin PC Configuration screen displays.
Note Press F1 for help with any settings in the UAdmin Configuration screen.
3. Make any changes needed, the default settings work in most situations.
Note Press F2 in the Serial Port and Baud Rate fields to display a pop-up box with valid entries.
4. To save your changes, you must have the cursor in the last field (i.e., Modem Init String), and press Enter or the arrow down (↓) key
...or to exit without saving your changes, press Esc at any time.
The program returns to the UAdmin Main screen.

InstallationInstallation
8 LVMU Installation Guide 03/06
Step 6: Access the LVMUPrior to accessing the LVMU, verify that the LVMU is operational by making a test call into the system.
Local Access1. From the DOS prompt (C:\UADMIN21), type: admin and press Enter. The UAdmin
screen displays.
Important! The Admin PC must be configured for the correct serial port in UAdmin prior to performing Substep 2.
2. Press Enter.The UAdmin software prompts for the LVMU’s system password.
3. Type the password (the default is Stratagy) and press Enter.
If a modem is not detected, UAdmin establishes a direct connection (local access) and a version of the standard Main Menu displays If a modem is detected, the LVMU displays the screen shown at right:
Remote AccessUAdmin software version 2.1 has two modes of accessing the LVMU remotely:
• Direct Dialing Mode — the LVMU has a built-in modem reached by accessing user 993 from the auto-attendant.
• Manual Dialing Mode — an operator must transfer the call to the auto-attendant.
Note Manual dialing requires a standard telephone be connected to the Admin PC modem.
Direct Dialing ModeType the telephone number plus , , , , , 993# (50 digits maximum). Do not use dashes (e.g., 9,9054703500,,,,,993#). Press Enter. Each comma produces a pause of about two seconds. Five commas will pause the dialing for about 10 seconds to allow the Auto-attendant to answer. The pause (number of commas) may need to be adjusted based on how long it takes the system to answer.
Once the connection is made to the LVMU modem, a carrier tone is heard. UAdmin synchs up to the modem. A message reading Connection established appears briefly on the screen and the Main Menu displays. Proceed to Step 7 “Configure the LVMU”.
Manual Dialing Mode1. Press Enter to go to the Manual Dialing Mode screen.
2. Go off-hook on the standard telephone and dial the telephone number. If necessary ask the operator to transfer the call to the voice mail pilot DN, then dial 993. Once connection is made to the LVMU built-in modem, a carrier tone is heard.
3297

InstallationInstallation
LVMU Installation Guide 03/06 9
3. Press Enter. UAdmin synchs up to the modem. A message reading Connection established appears briefly on the screen and the Main Menu displays.
Step 7: Configure the LVMUTo configure the LVMU, you may need to use the following menu selections available from the Tools option on the Main Menu:
• Toshiba Plug and Play• Telephone System Configuration• Stratagy System Configuration
For a complete description of the standard menu selections and field descriptions, see the Stratagy Installation & Maintenance manual on OPGONLINE.
To access Tools Option1. Press Alt+t.
2. Type the password (the default password is Stratagy) and press Enter.
Toshiba Plug and PlayThe LVMU is pre-installed for the Strata CIX100 processors. If you need to change this selection to a different Strata CIX telephone system, change it now using this selection.
Note If you only want to change the PBX type, do not use this function. Instead, set the pbx_type parameter in the Stratagy System Configuration screen.
Selecting this function:
• Changes all the settings to the new Toshiba telephone system default values.• Deletes any User ID mailbox customizations.• Installs the LVMU default mailboxes.
Note Existing messages and mailbox greetings are not deleted when Plug and Play is selected. For example, if Mailbox 200 has messages and greetings and Toshiba Plug and Play for Strata CIX is run, then Mailbox 200 retains the messages and greetings from the previous database.
Change Toshiba Plug and Play Option1. From the Tools menu, press 5.
2. From the Toshiba Plug and Play screen, enter the number of the selection.
The LVMU utility automatically defines the telephone system dial codes and tone patterns, system integration patterns and default mailboxes for the specific telephone system.
Note Strata CTX28 is not supported.
3. When the process is complete, press any key to reboot. The DOS prompt displays.
4. To continue, re-enter UAdmin.The Main Menu displays with the new telephone system designation.
5. Press Alt+t to access the Tools submenu.
InstallationTelephone System Configuration
10 LVMU Installation Guide 03/06
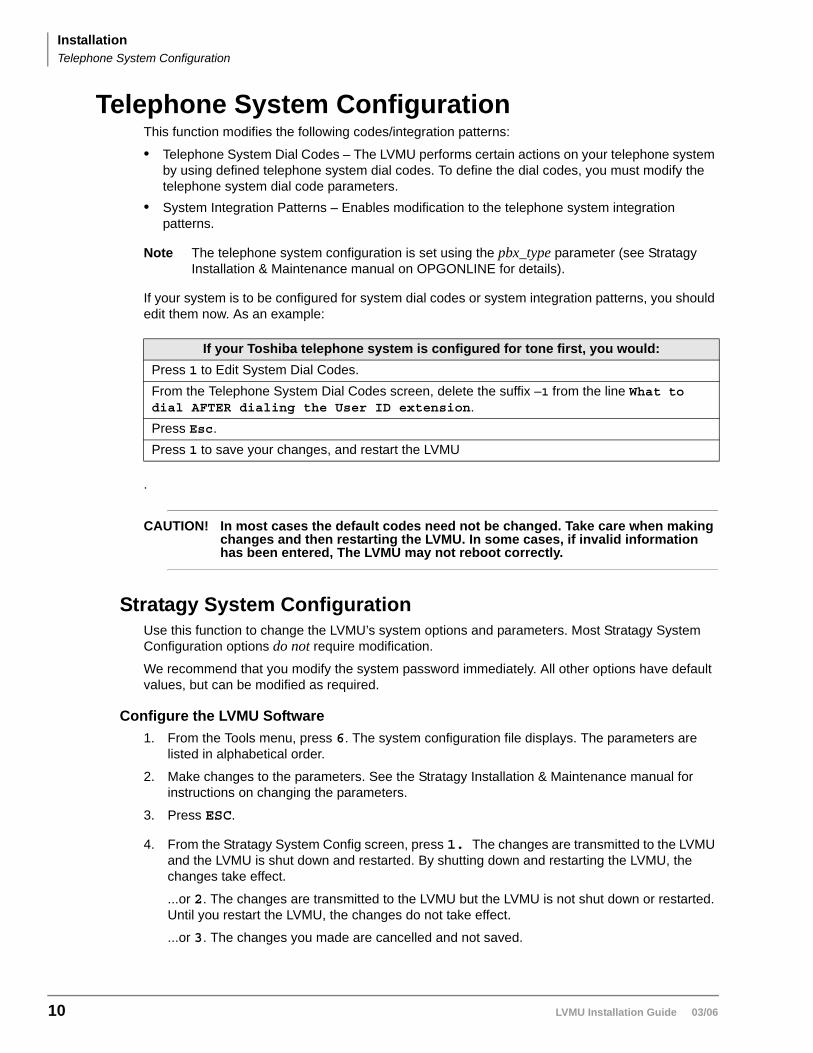
Telephone System ConfigurationThis function modifies the following codes/integration patterns:
• Telephone System Dial Codes – The LVMU performs certain actions on your telephone system by using defined telephone system dial codes. To define the dial codes, you must modify the telephone system dial code parameters.
• System Integration Patterns – Enables modification to the telephone system integration patterns.
Note The telephone system configuration is set using the pbx_type parameter (see Stratagy Installation & Maintenance manual on OPGONLINE for details).
If your system is to be configured for system dial codes or system integration patterns, you should edit them now. As an example:
.
CAUTION! In most cases the default codes need not be changed. Take care when making changes and then restarting the LVMU. In some cases, if invalid information has been entered, The LVMU may not reboot correctly.
Stratagy System ConfigurationUse this function to change the LVMU’s system options and parameters. Most Stratagy System Configuration options do not require modification.
We recommend that you modify the system password immediately. All other options have default values, but can be modified as required.
Configure the LVMU Software1. From the Tools menu, press 6. The system configuration file displays. The parameters are
listed in alphabetical order.
2. Make changes to the parameters. See the Stratagy Installation & Maintenance manual for instructions on changing the parameters.
3. Press ESC.
4. From the Stratagy System Config screen, press 1. The changes are transmitted to the LVMU and the LVMU is shut down and restarted. By shutting down and restarting the LVMU, the changes take effect.
...or 2. The changes are transmitted to the LVMU but the LVMU is not shut down or restarted. Until you restart the LVMU, the changes do not take effect.
...or 3. The changes you made are cancelled and not saved.
If your Toshiba telephone system is configured for tone first, you would:Press 1 to Edit System Dial Codes.From the Telephone System Dial Codes screen, delete the suffix –1 from the line What to dial AFTER dialing the User ID extension.Press Esc.Press 1 to save your changes, and restart the LVMU

InstallationTelephone System Configuration
LVMU Installation Guide 03/06 11
5. If you pressed 1 to save the changes, press any key to reboot. The DOS prompt displays. To continue, you must re-enter UAdmin.
Step 8: Program the MailboxesProgram the User mailboxes for the customer’s application.
Step 9: Program the ApplicationsNote See the Stratagy Installation & Maintenance manual on OPGONLINE for details.
Step 10: (Optional) Back up Database, Mailbox Names and GreetingsWhen you finish the installation process, we recommend you back up your new database, mailbox names and greetings. See “Backup Utility” on page 17 for instructions.
InstallationLVMU Playback Audio Level Adjustment
12 LVMU Installation Guide 03/06
LVMU Playback Audio Level AdjustmentCustomers may experience lower LVMU1A playback audio levels when internally calling from one model / style of Toshiba phone (e.g. IPT phones) than other Toshiba phones. The following procedure describes how to create PAD levels and adjust the LVMU1A voice playback levels between various model phones or extensions, using the CIX pad table in eManager.
Preparation in advance:1. Ensure your eManager version is V4.20 A09.
2. Make a note of the DN numbers assigned to the LVMU1A.These DN numbers are available in station assignment window.
3. Make sure the equipment number shows the slot number the LVMU1A is programmed into.
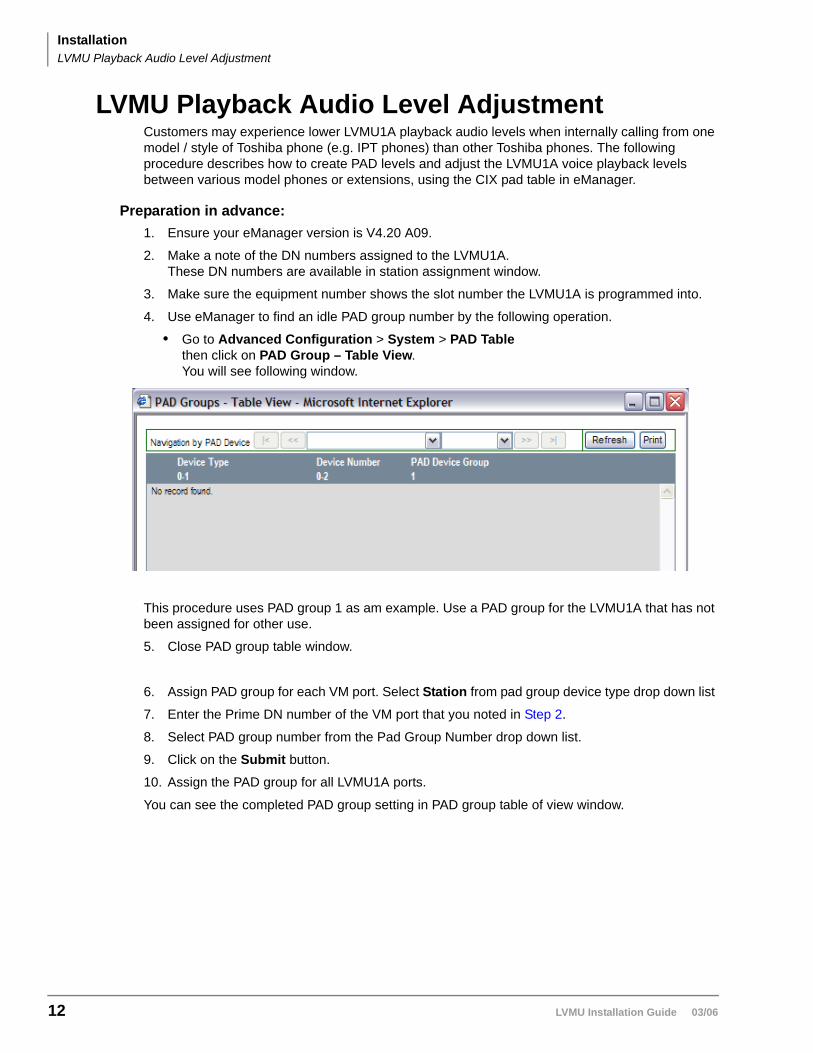
4. Use eManager to find an idle PAD group number by the following operation.
• Go to Advanced Configuration > System > PAD Table then click on PAD Group – Table View.You will see following window.
This procedure uses PAD group 1 as am example. Use a PAD group for the LVMU1A that has not been assigned for other use.
5. Close PAD group table window.
6. Assign PAD group for each VM port. Select Station from pad group device type drop down list
7. Enter the Prime DN number of the VM port that you noted in Step 2.
8. Select PAD group number from the Pad Group Number drop down list.
9. Click on the Submit button.
10. Assign the PAD group for all LVMU1A ports.
You can see the completed PAD group setting in PAD group table of view window.

InstallationLVMU Playback Audio Level Adjustment
LVMU Installation Guide 03/06 13
11. Fill PAD value in the PAD table. Open PAD values table of view by clicking the PAD Values – Table View icon. The PAD values table view window will open.

InstallationLVMU Playback Audio Level Adjustment
14 LVMU Installation Guide 03/06
12. Fill PAD values in the boxes which are red-circled in below. You can change a PAD value by clicking the box and selecting arrow up or down. When done, click the submit button in PAD values table view window.

InstallationLVMU Playback Audio Level Adjustment
LVMU Installation Guide 03/06 15
13. Close the PAD values table view window.
14. Check voice levels at IPT stations.
• From IPT phone, call VM pilot number and hear the prompt. The prompt level should be same level as DKT’s prompt.
• Repeat until all LVMU1A ports are confirmed.• If you hear a high or low prompt level, please make sure the correct PAD group and PAD
table are assigned.
End of PAD level adjustment.
LVMU Installation Guide 03/06 16
Maintenance
The UAdmin software provides the utility and diagnostic programs to maintain and monitor the LVMU.
This section discusses:
• Tools Utility – Available from the Main Menu, this utility consists of procedures that:• Back up and restore databases and/or mailbox names and greetings• Upgrade LVMU software• Retrieve trace files• Copy files to and from the storage of the LVMU.• Configure the LVMU software• Change the Toshiba Plug and Play option• Modify codes and integration patterns using the Telephone System Configuration option
• Shut down the LVMU – This function consists of multiple shutdown options: Shutdown and Restart Current Version; Shutdown and Trace Current Version; Shutdown and Start New Version; Shutdown and Start Old Version; Shutdown, Scandisk and Restart; Shutdown and Stop for Power off, and Backup and shutdown for power off (This final option can take 32 minutes).
• Diagnostics – The LVMU has powerful troubleshooting tools. The following three files assist you in determining the source of a problem:• TRACE.OUT logs the LVMU’s activity.• STRATAGY.LOG contains information on how many channels (ports) the system started up
with and the CKDB execution summary (tells you basically that all of your messages have a home), etc.
• MSG.LOG logs all messages received and every mailbox that checks for messages along with the DTMF entered.

MaintenanceTools
LVMU Installation Guide 03/06 17
ToolsThis section discusses the Tools menu (shown below).
Backup UtilityThe LVMU Backup Utility is used to back up information from the LVMU’s flash memory to the hard drive of the Admin PC.
CAUTION! Because of possible errors that can be induced through the telephone network, Toshiba advises that you perform the Backup Utility on site.
Tools Menu(select menu item)
Backup Utility
Stratagy SystemConfiguration
Edit Telephone Systems Dial Codes(select dial codes)
Upgrade StratagySoftware
Toshiba Plug and Play
Restore Utility
Edit System Integration Patterns
Retrieve Trace File
Filecopy
Telephone SystemConfiguration
Parameters
7404_A
Strata CIX40
Strata CIX40 w/SMDI
Strata CIX 100
Strata CIX 100 w/SMDI
Strata CIX 670 Basic / CIX200
Strata CIX 670 Basic / CIX200 w/SMDI
Strata CIX 670 Expanded
Strata CIX 670 Expanded w/SMDI

MaintenanceBackup Utility
18 LVMU Installation Guide 03/06
Backup functions are available for either a customer’s database or mailbox names and greetings, or both. They consist of:
• DatabaseAll mailbox settings and information, LVMU system configuration settings, notification templates, auto schedules, and all information concerning the selected telephone system’s integration information.
• Mailbox names and greetingsAll names and greetings that have been recorded for all programmed mailboxes (personal and company).
Backing up your LVMU system regularly enables you to restore the system with minimal data loss if the system fails.
Note Messages cannot be backed up to the Admin PC.
CAUTION! During the Backup and Restore procedures, the LVMU cannot process calls. When any Backup or Restore function is selected, UAdmin queries the LVMU concerning calls currently in progress. If calls are in progress, UAdmin asks if the calls can be terminated. If call termination is selected, any current connection is disconnected, and all ports are commanded to go off-hook to prevent any further calls. If call termination is denied, the Backup or Restore procedure is halted.
If the connection between the Admin PC to the LVMU is lost, communication can be re-established by simply shutting down and restarting UAdmin in the usual manner.
Back up the Database(s)/Names/Greetings1. From the Tools menu, press Enter.
2. From the Backup screen (shown at right), enter the selection number.
A second screen requesting a backup directory displays.
3. The directory defaults to C:\UADMIN21\BACKUP on the Admin PC. If you want the back up to be stored in a different directory, type over the default. Press Enter.
We recommend that the new directory name represent the site that is being backed up. For example, if backing up ABC Company, you can enter the directory name “C:\UADMIN21\BACKUP\ABC”.
Notesl You cannot back up files to the Admin PC’s floppy disk drive.l Be sure to enter the complete path, including the drive letter.
3234

MaintenanceBackup Utility
LVMU Installation Guide 03/06 19
4. (Optional) If you entered selection 2 “Backup Names & Greetings” in Step 2, you are asked to enter a beginning and ending mailbox number. Type the mailbox numbers and press Enter after each entry.
Note Leaving both fields blank defines all mailboxes.
...or if you entered selection 3 “Backup Database, Names & Greetings” in Step 2, press Enter in the mailbox fields to leave them blank.
Important! This selection backs up the entire database and all names and greetings. You cannot backup selective mailboxes.
Before the backup starts, UAdmin calculates the time the backup takes and displays a status message (sample shown at right).
5. Verify that the Admin PC has enough available disk space to accommodate the backup file.
Based on the LVMU’s estimated Backup time (shown on your screen), use the calculations shown below to estimate the required hard drive space.
Transmitting at: Bytes Per Second (bps) written to hard drive:
9600 bps800 bytes4800 bps400 bytes2400 bps200 bytes
Example: If UAdmin displays a five minute backup time and communication is at 9600 bps, then:
5 minutes = 300 seconds300 seconds x 800 bytes = 240,000 bytes
BPS values are not exact. Additional amounts have been factored in to estimate a higher quantity of space than is actually required.
6. If your Admin PC’s hard drive has enough available disk space, press Y to backup the files
...or if not, press N to cancel the backup procedure.
7. Press Y to continue.
CAUTION! If the LVMU is not rebooted, all ports remain in an off-hook condition.
8. When the backup is complete, press Y to reboot the LVMU. The Admin PC returns to the C:\UADMIN21 DOS prompt.
Note You cannot reconnect to the LVMU using UAdmin until the LVMU has finished rebooting. Any attempt prior to that time fails.
3235
3236
MaintenanceRestore Utility
20 LVMU Installation Guide 03/06
Restore UtilityCAUTION! Because of possible errors that can be induced through the telephone network,
Toshiba advises that you perform the Restore Utility on site.
The LVMU Restore Utility is used to restore previously backed up names, greetings and/or database from the Admin PC to the LVMU.
Restore the Database(s)/Names/Greetings
CAUTION! LVMU Voice Processing is suspended during the restore procedure. Any existing connection is broken.
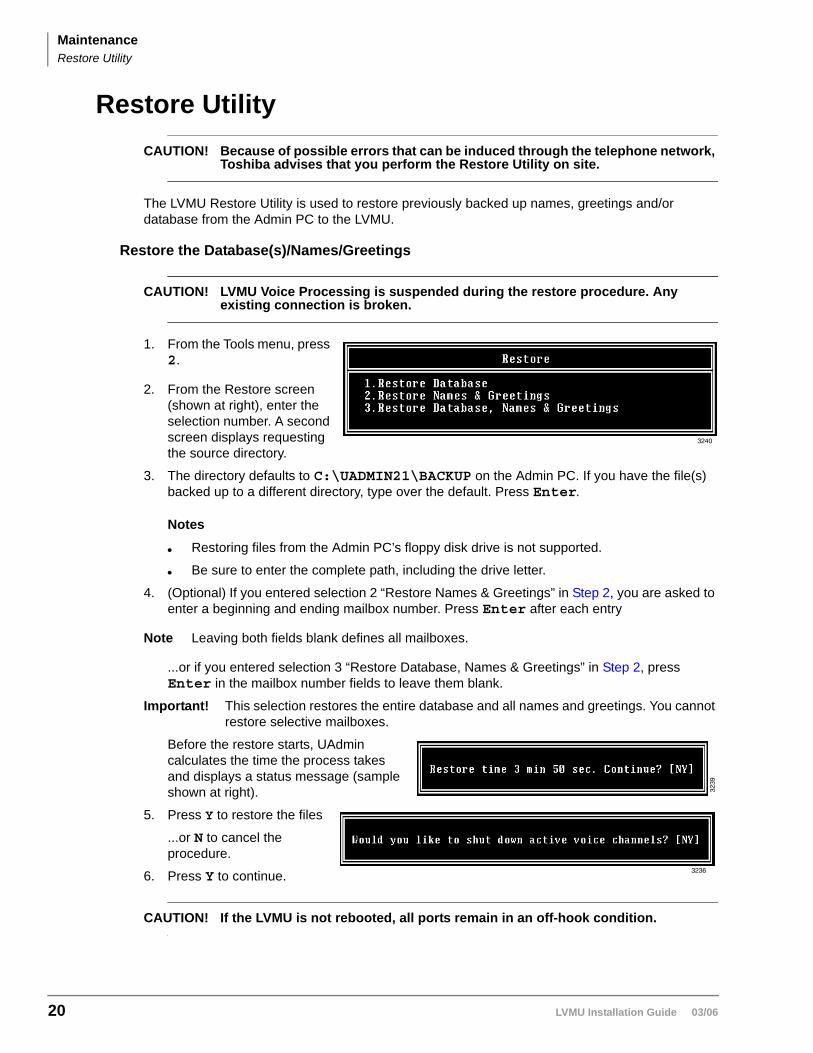
1. From the Tools menu, press 2.
2. From the Restore screen (shown at right), enter the selection number. A second screen displays requesting the source directory.
3. The directory defaults to C:\UADMIN21\BACKUP on the Admin PC. If you have the file(s) backed up to a different directory, type over the default. Press Enter.
Notes
l Restoring files from the Admin PC’s floppy disk drive is not supported.
l Be sure to enter the complete path, including the drive letter.
4. (Optional) If you entered selection 2 “Restore Names & Greetings” in Step 2, you are asked to enter a beginning and ending mailbox number. Press Enter after each entry
Note Leaving both fields blank defines all mailboxes.
...or if you entered selection 3 “Restore Database, Names & Greetings” in Step 2, press Enter in the mailbox number fields to leave them blank.
Important! This selection restores the entire database and all names and greetings. You cannot restore selective mailboxes.
Before the restore starts, UAdmin calculates the time the process takes and displays a status message (sample shown at right).
5. Press Y to restore the files
...or N to cancel the procedure.
6. Press Y to continue.
CAUTION! If the LVMU is not rebooted, all ports remain in an off-hook condition.
3240
3239
3236

MaintenanceUpgrade the LVMU Software
LVMU Installation Guide 03/06 21
7. When the restore is complete, press Y to reboot the LVMU. The Admin PC returns to the C:\UADMIN21 DOS prompt. When the LVMU port LEDs stop cycling, the LVMU is operational.
Note You cannot reconnect to the LVMU using UAdmin until the LVMU is operational. Any attempt prior to that time fails.
Upgrade the LVMU SoftwareTo upgrade the LVMU system software, you need the correct set of files obtained from Toshiba.
CAUTION! Because of possible errors that can be induced through the telephone network, Toshiba advises that you perform the Upgrade Utility on site.
1. From the Tools menu, press 3. The Upgrade screen displays (shown at right).
2. Copy the upgrade files to the C:\UADMIN21 folder
3. The default directory is A:. Your Admin PC uses a different drive, change it to C:\UADMIN21. Press Enter.
4. When the upgrade procedure is complete, press any key. The Admin PC returns to the C:\UADMIN21 DOS prompt.
Note You cannot reconnect to the LVMU using UAdmin until the LVMU is operational. Any attempt prior to that time fails.
3251

MaintenanceRetrieve Trace File
22 LVMU Installation Guide 03/06
Retrieve Trace FileThis function copies the trace data log file (TRACE.OUT) to the Admin PC’s hard drive. As part of this function, a Trace Filter Setup screen enables you to specify the filtering rules for selecting the desired trace records.
After UAdmin filters the trace data, it decodes and expands the data into readable records containing the information requested by you in the Trace Filter Setup screen.
1. From the Tools menu, press 7.
2. The trace file name defaults to TRACE.OUT. From the Retrieve Trace File screen, press Enter.
3. Enter the directory where you want to copy the file. The default is: C:\UADMIN21.
If you need a different directory, type over the default. Press Enter. Be sure to enter the complete path. If the directory already exists, you are given the option of entering a new directory or overwriting the file. The Trace Filter Setup screen displays.
4. Select the items you want included in the TRACE.OUT file. Refer to the field descriptions in the Stratagy Installation & Maintenance manual on OPGONLINE.
5. When you are finished, press Alt+e.
Once the data has been expanded, the LVMU copies the file to the directory/file specified in Step 3 of this procedure. A dialogue status box displays (shown at right).
When the copy is complete, another status box displays (shown at right):
You can use any text editor to review the file.
0033-sc
3253
3254

MaintenanceFilecopy
LVMU Installation Guide 03/06 23
FilecopyUse UAdmin’s Filecopy option to copy files to and from the flash drive of the LVMU and the Admin PC’s hard drive.
1. From the Tools menu, press 8. The Filecopy screen displays (shown right).
2. In the Source System field (where the file currently resides), press F2 to display a pop-up box of selections.
3. Highlight PC to copy from the Admin PC or Stratagy to copy from the LVMU. Press Enter.
4. In the Copy From field, type the directory name, if necessary, and the file name.
Note If a directory name is not entered, Filecopy searches the Stratagy or UAdmin21 directory (Admin PC) for the file to be copied.
5. Press Enter when finished.
6. In the Copy To field, type the directory name, if necessary, and the file name.
Note If a directory name is not entered, Filecopy assigns the destination for the file to the Stratagy or UAdmin directory.
7. Press Enter when finished. While the LVMU copies the file, a dialogue status box displays (shown at right).
When the copy is complete, this status box displays (shown right):
8. Press any key to continue.
Note Do not enter a drive letter when the Copy From or Copy To is the LVMU
Shut Down the LVMUOccasionally you need to shut down, or exit the LVMU call processing. Circumstances include:
• Turning power off to perform hardware maintenance• Moving the system to another location
CAUTION! Never shut the LVMU down by turning off the Strata CIX’s power. Doing so may corrupt the system files that are in use and damage the storage media.
Methods of ShutdownThe LVMU can be shut down in two ways:• From a telephone dial pad• From the Shutdown function on the UAdmin Main Menu
3249
3253
3254
MaintenanceShut Down the LVMU
24 LVMU Installation Guide 03/06
Shutdown Using the Telephone Dial Pad MethodImportant! System shutdown using the telephone dial pad is not operable if UAdmin is
connected.
To enable shutdown procedure and change mailbox 983 security codeImportant! It is extremely important that the security code for mailbox 983 be changed. If the
security code is not changed, it is possible for someone who knows the LVMU’s default password scheme to call into the system and shut it down.
1. Using UAdmin, log on to the LVMU. The UAdmin Main Menu displays.
2. Press Alt+U. The Users Menu, Options screen displays.
3. In the User ID field, type 983 and press Enter. The Options screen displays for box 983.
4. Using the arrow down key, place the cursor in the Security Code field.
5. Type the new security code.
Note For added security, the security code does not appear on the screen as you type it.
6. Navigate to the Do Not Disturb field.
7. Press the spacebar to change the field from On to Off.
Note Changing the Do Not Disturb option enables the token programming residing in the Extension field of the mailbox. It is the token string in this mailbox that performs the shutdown procedure.
8. Press Alt+S to save the changes.
To shut down the LVMU using the telephone dial pad1. From the telephone dial pad, call the LVMU. Once you dial into the LVMU, the system answers
with the enter your security code greeting. Press # to bypass. The LVMU prompts you to enter the User ID.
2. Enter 983. The LVMU prompts you to enter the security code.
Important! You must wait until the entire prompt has been played before entering the security code. If the code is entered prior to the completion of the prompt, the shutdown does not occur.
3. Enter the new security code (the default is 983997) and press #. All inactive channels are taken off-hook. All active channels are given a 60 second time delay to complete processing the current activity. After 60 seconds, they are disconnected and the system shuts down.
Note The LVMU is completely shut down when the status light is Out and all port LEDs are On.
Important! For security reasons, you should change the default security code.
Shutdown Using UAdmin’s Main Menu1. From UAdmin’s Main Menu, select Shutdown by pressing Alt+s. The LVMU asks for the
password.
2. Enter the password (the default is Stratagy) and press Enter. The screen enables you to select one of the following options:
• Shutdown and Restart CURRENT Version — Restarts the LVMU.• Shutdown and Trace CURRENT Version — Shuts down, then restarts LVMU in the TRACE
mode (TRACE.OUT file is created) on the LVMU’s flash drive.

MaintenanceDiagnostics
LVMU Installation Guide 03/06 25
• Shutdown and Start NEW Version —Shuts down, then restarts LVMU using the new database and new system software, if any. Use Hardware Jumper SW3 NEW.
• Shutdown and Start OLD Version — Shuts down, then restarts LVMU using the software version previous to the upgraded software. Use Hardware Jumper SW3 NEW.
• Shutdown, SCANDISK, and Restart — Not Applicable to the LVMU. Running this will simply Shutdown and Restart the CURRENT Version.
• Shutdown and STOP for power off — Takes the LVMU off-line and does not restart it.• Backup and Shutdown for power off — Backs up LVMU Database/Names/Greetings to the
on-board flash ROM. This process can take up to 32 minutes and does not restart it.
Notes
• The LVMU is completely shut down when the status light is Out and all port LEDs are On.
• This option is not available when accessing LVMU remotely.3. From the Shutdown Menu, highlight your selection and press Enter.
4. If you chose the “Shutdown and STOP for power off” or “Backup and Shutdown for power off” option, LVMU asks you to confirm the shutdown. Type Y to confirm. The DOS prompt (C:\UADMIN21) displays.
To restart/reset the LVMU system after selecting “Shutdown and STOP for power off” option
Note If you select any of the first five options on the Shutdown Menu, the LVMU automatically restarts.
1. Holding the LVMU by the edges or the strap, gently pull the card part way out of the slot. The card needs only to be pulled out so that the connectors do not meet.
2. Wait a few seconds and then gently push the card back into place. Apply firm, even pressure to ensure proper mating of the connectors. This automatically restarts the system and puts all channels on-hook and ready to accept calls.
DiagnosticsThe LVMU has several very powerful troubleshooting tools—TRACE.OUT, STRATAGY.LOG, and MSG.LOG. All three of these files are stored in the Stratagy directory and are best utilized in combination with each other. For example, if you are looking for actions related to a specific message, enable MSG.LOG and start a trace. If you think you have a site with a power problem, viewing STRATAGY.LOG and TRACE.OUT would be the best course of action.

This is the last page of the document.
Related Documents