www.gbo.com/preanalytics VACUETTE ® Preanalytics Manual Preanalytics Handling Recommendations

Welcome message from author
This document is posted to help you gain knowledge. Please leave a comment to let me know what you think about it! Share it to your friends and learn new things together.
Transcript

www.gbo.com/preanalytics
VACUETTE® Preanalytics Manual
Preanalytics Handling Recommendations

2 3
www.gbo.com/preanalytics
Contents
1. What Is Preanalytics? ................................................................. 6
2. Who Is Involved in Preanalytics? ................................................. 6
3. Patient-Related Influencing Factors ............................................ 83.1 Non-changeable influencing factors ................................................ 83.1.1 Gender .......................................................................................... 83.1.2 Geographical origin and ethnic differences ..................................... 93.2 Long-term changeable influencing factors ....................................... 93.2.1 Age ............................................................................................... 93.2.2 Body weight ................................................................................ 103.2.3 Lifestyle ....................................................................................... 103.2.4 Pregnancy .................................................................................. 103.3 Short-term changeable influencing factors .................................... 113.3.1 Daily rhythms and biorhythms ...................................................... 113.3.2 Physical strain ............................................................................. 133.3.3 Stress .......................................................................................... 133.3.4 Food intake ................................................................................. 133.3.5 Stimulants: Coffee, nicotine, alcohol ........................................... 153.3.6 Drugs .......................................................................................... 163.3.7 Medication ................................................................................... 173.3.8 Patient‘s Behaviour ...................................................................... 17
4. Widespread Errors Made With Identification ............................. 184.1 Patient identification / requisition papers ....................................... 184.2 Sample identification ..................................................................... 19
5. The Special Meaning of Haemolysis ......................................... 21
6. Widespread Errors Made During Blood Collection ................... 246.1 Patient preparation ....................................................................... 246.2 Time of blood collection ................................................................ 246.3 Body position .............................................................................. 246.4 Duration and intensity of the stasis................................................ 256.5 Techniques for finding the vein ...................................................... 276.6 Disinfecting the puncture site ........................................................ 286.7 Venipuncture ................................................................................ 286.8 Collection from catheter ................................................................ 286.9 Order of draw ............................................................................... 296.10 Wrong anticoagulant ..................................................................... 296.11 Expiry date .................................................................................. 326.12 Mixing ratios and specimen volumes ............................................. 326.13 Mixing blood and tube additives.................................................... 33
4 5
www.gbo.com/preanalytics
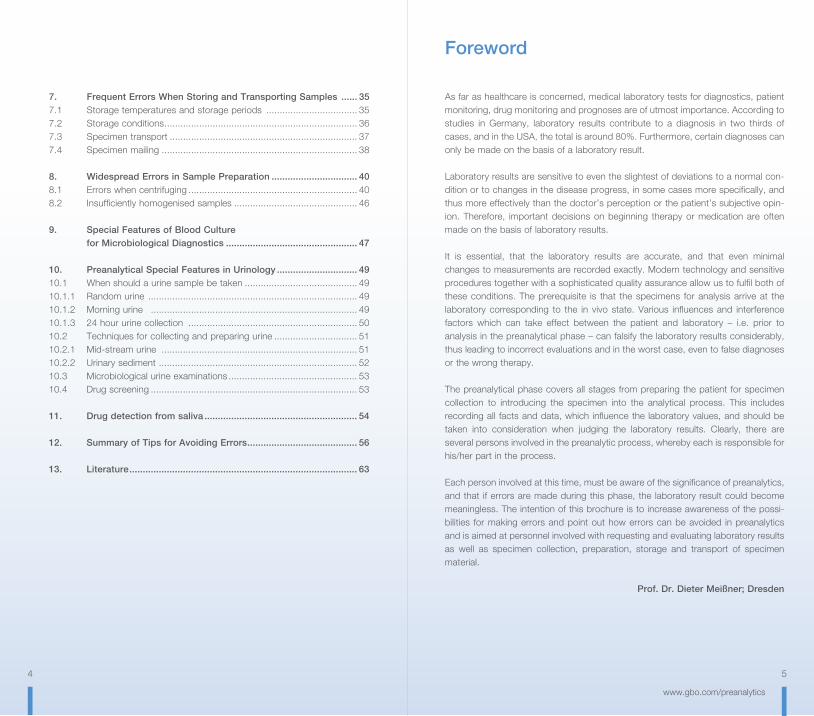
Foreword
As far as healthcare is concerned, medical laboratory tests for diagnostics, patient monitoring, drug monitoring and prognoses are of utmost importance. According to studies in Germany, laboratory results contribute to a diagnosis in two thirds of cases, and in the USA, the total is around 80%. Furthermore, certain diagnoses can only be made on the basis of a laboratory result.
Laboratory results are sensitive to even the slightest of deviations to a normal con-dition or to changes in the disease progress, in some cases more specifically, and thus more effectively than the doctor’s perception or the patient’s subjective opin-ion. Therefore, important decisions on beginning therapy or medication are often made on the basis of laboratory results.
It is essential, that the laboratory results are accurate, and that even minimal changes to measurements are recorded exactly. Modern technology and sensitive procedures together with a sophisticated quality assurance allow us to fulfil both of these conditions. The prerequisite is that the specimens for analysis arrive at the laboratory corresponding to the in vivo state. Various influences and interference factors which can take effect between the patient and laboratory – i.e. prior to analysis in the preanalytical phase – can falsify the laboratory results considerably, thus leading to incorrect evaluations and in the worst case, even to false diagnoses or the wrong therapy.
The preanalytical phase covers all stages from preparing the patient for specimen collection to introducing the specimen into the analytical process. This includes recording all facts and data, which influence the laboratory values, and should be taken into consideration when judging the laboratory results. Clearly, there are several persons involved in the preanalytic process, whereby each is responsible for his/her part in the process.
Each person involved at this time, must be aware of the significance of preanalytics, and that if errors are made during this phase, the laboratory result could become meaningless. The intention of this brochure is to increase awareness of the possi-bilities for making errors and point out how errors can be avoided in preanalytics and is aimed at personnel involved with requesting and evaluating laboratory results as well as specimen collection, preparation, storage and transport of specimen material.
Prof. Dr. Dieter Meißner; Dresden
7. Frequent Errors When Storing and Transporting Samples ...... 357.1 Storage temperatures and storage periods .................................. 357.2 Storage conditions ........................................................................ 367.3 Specimen transport ...................................................................... 377.4 Specimen mailing ......................................................................... 38
8. Widespread Errors in Sample Preparation ................................ 408.1 Errors when centrifuging ............................................................... 408.2 Insufficiently homogenised samples .............................................. 46
9. Special Features of Blood Culture for Microbiological Diagnostics ................................................. 47
10. Preanalytical Special Features in Urinology .............................. 4910.1 When should a urine sample be taken .......................................... 4910.1.1 Random urine .............................................................................. 4910.1.2 Morning urine ............................................................................. 4910.1.3 24 hour urine collection ............................................................... 5010.2 Techniques for collecting and preparing urine ............................... 5110.2.1 Mid-stream urine ......................................................................... 5110.2.2 Urinary sediment .......................................................................... 5210.3 Microbiological urine examinations ................................................ 5310.4 Drug screening ............................................................................. 53
11. Drug detection from saliva ......................................................... 54
12. Summary of Tips for Avoiding Errors ......................................... 56
13. Literature ..................................................................................... 63

6 7
www.gbo.com/preanalytics
1. What Is Preanalytics?
The term “Preanalytics” refers to the entire administrative and practical process of collecting, processing, storing and transporting diagnostic examination material prior to carrying out laboratory tests.
This covers preparation of the patient, sample collection, pre-processing, storage and transport of specimen material as well as handling in the laboratory prior to analysis.
We differentiate here between patient-related influencing factors and errors.
Patient-related influencing factors affect the concentration of a parameter, and are taken into account in the reference values.
These influences always come from the patients, from the physical condition or from his/her behaviour, and can be taken into consideration when interpreting the results, provided that the appropriate information has been made available to the laboratory.
Errors are often made due to not knowing the correlation, and thus, even errors made during the preanalytical phase can have an effect on the final analysis results, or can cause implausible laboratory values or under certain circumstances even false diagnoses.
The following should describe the handling basics, which serve to take patient-related influences into consideration. Furthermore, the most frequent errors made in the varying activities of the preanalytical field are represented together with their consequences.
2. Who Is Involved in Preanalytics?
There are always several persons involved in Preanalytics:
The patient, the treating doctor, the nurse, the attendant, the transport service, the medical technical assistant and the laboratory doctor; They all share the responsibility for the quality of the specimen material and should understand the significance of the preanalytical phase, as well as recognise possi-ble causes of error and their consequence for the examination results.
Activities Persons involved
Requisition for analysis Treating doctor
Preparation of patient Treating doctor, nursing staff,doctor’s assistant, patient, lab staff
Identification of patients and specimens
Treating doctor, nursing staff,doctor’s assistant, patient, lab staff
Blood collection Doctor, nursing staff, doctor´s assistant
Mixing blood sample Doctor, nursing staff, doctor´s assistant
Storage until transportation
Nursing staff, doctor’s assistant
Transportation Collection or courier service
Acceptance, storage andpreparation of samples
Laboratory staff, medical technical assistants, laboratory doctors
Table 1: Activities during and after the preanalytical phase and responsible personnel
The time required for the preanalytical phase is often underestimated. In fact, it takes up more than 58% of total time required, which is more than required for the laboratory analysis.
Thanks to modern technology, the actual analysis only takes up around 25% of the time.
Fig. 1: Total time for the different preanalytical phases
Präanalytische Phaseaußerhalb des Labors 20,5%Präanalytische Phaseinnerhalb des Labors 37,1%Analytische Phase 25,1%Postanalytische Phase 13,6%Befundübermittlung 3,7%
Preanalytical phaseoutside laboratory 20.5%
Preanalytical phasewithin laboratory 37.1%
Analytical phase 25.1%
Postanalytical phase 13.6%
Notifying of results 3.7%

8 9
www.gbo.com/preanalytics
3. Patient-Related Influencing FactorsPatient-related influencing factors can differ from patient to patient, and can even remain the same for a lifetime. However, they could also change for the same patient either long-term or short-term, from one day to the next or even during one day.
3.1 Non-changeable influencing factors
Gender, geographical origin and ethnic differences are included here.
3.1.1 GenderThe differences between genders can account for up to 80%. In addition to gender specific hormones, clinical chemistry and haematological parameters such as tri-glyceride, creatinine, HDL-cholesterol, iron and others can differ significantly.
Parameters Man Woman Unit
Alanine aminotransferase
< 50 < 35 U/l
Iron 6,3 - 30,1 4,1 - 24 µmol/l
Ferritin 18 - 360 9 - 140 µg/l
Uric acid 3,6 - 7 2,3 - 6,1 mg/dl
Creatinine, Jaffé reaction kinetic
0,81 - 1,44 0,66 - 1,09 mg/dl
Haematocrit 40 - 53 36 - 48 %
Haemoglobin 13,5 - 17,5 12 - 16 g/dl
Erythrocytesedimentation rate
< 15 < 20 mm/1h
Table 2: Gender specific differences Source: Thomas L.: Labor und Diagnose 6. Edition
3.1.2 Geographical origin and ethnic differencesLeukocyte counts are significantly lower in black populations than in fair-skinned populations, whilst Europeans have higher concentrations of granulocytes and monocytes.
Fig. 2: Influence of origin on concentration of granulocytes
The alpha-amylase concentration for North-West Europeans is significantly different to that of the inhabitants of the Antilles and Asia. Around 50% of the values, taken from Antilles inhabitants, were pathologically evaluated, compared with British nor-mal values.
Fig. 3: Influence of origin on alpha-amylase concentration
3.2 Long-term changeable influencing factors
3.2.1 AgeThe total of erythrocytes and thus the haemoglobin and bilirubin concentrations are significantly higher for neonates than for adults. Alkaline phosphatase is consider-ably higher during a young person’s growth period. The cholesterol value, in par-ticular LDL-cholesterol, increases with age.
1
Black Africans
Europeans
G/L1 2 3 4 5
North West Europeans
Antilles inhabitants
Asians
100 200 300 400 U/L

10 11
www.gbo.com/preanalytics
Decreases with age Increases with age
Albumin Cholesterol
Calcium Erythrocyte sedimentation rate
Creatinine clearance Ferritin
Anorg. phosphate Glucose
pO2
Quick
Table 3: Influence of age on selected parameters
3.2.2 Body weightWith increasing body weight, the following factors also increase: cholesterol, triglyc-eride, uric acid, cortisol and insulin, amongst others.
3.2.3 LifestyleParticular lifestyle habits such as occupational stress or sport have an influence on different laboratory values. Regardless of fitness level, athletes have, for example, increased creatine kinase.
Fig. 4: Change of various serum concentrations after extreme physical activity – marathon run
3.2.4 Pregnancy During pregnancy, the plasma volume increases by around 50%. Concentration changes can be seen in a range of parameters; important electrolytes are reduced, blood lipids are elevated, copper is doubled.
Glucose
anorgan. phosphate
uric acid
urea
bilirubin
aspartate aminotransferase
pyruvate kinase
creatine kinase
1-fold 2-fold 3-fold 4-fold
For patient-related influencing factors such as gender, age and pregnancy, different reference ranges for men, women, pregnant women are taken into consideration as well as different age groups. Under certain circumstances for foreign geographical origin and ethnic differences, other reference ranges that are not typical of the region must be taken as a basis.
3.3 Short-term changeable influencing factors
3.3.1 Daily rhythms and biorhythmsVarious parameters change over the daily rhythm. Some parameters will have their maximum in the morning, some at midday or in the evening.
Maximum fluctuations in course of day as %
Maximum in the morningAdrenocorticotropic (ACTH)
200 % Adrenaline 20 %
Renin 140 % Haemoglobin 20 %
Noradrenaline 120 % Haematocrit 20 %
Prolactin 100 % Leukocytes 20 %
Aldosterone 80 % Protein 20 %
Cortisol 50 % Thyroxin (T4) 20 %
Testosterone 50 % Bilirubin 20 %
Maximum at midday
Iron 100 %
Eosinophil granulocytes
30 %
Potassium 15 %
Maximum in the evening
Creatinine 100 %
Uric acid 50 %
Thyreotropine (TSH) 50 %
Acid phosphatese 200 %
Table 4: Fluctuation over course of day in the daily rhythm
An essential condition for correct classification of the reference ranges is correct patient data on the requisition form.

12 13
www.gbo.com/preanalytics
Fig. 5: Fluctuation of cortisol in daily rhythm
With regard to the bio-rhythm, not just fluctuations due to different times of year should be taken into consideration, but also, for example, fertility hormones in the menstrual cycle and vitamin D concentrations, for which the values are at their high-est in the summer.
Besides fluctuations in daily rhythms and bio-rhythms, there are considerable intra-individual fluctuations for different parameters from day to day.
0 h 6 h 12 h 18 h 24 h Time of day
0
50
Cortisol 100
150
200
µg/dL
The influence of fluctuations in the daily rhythm is minimised by adhering tothe recommended specimen collection time of between 7 am and 9 am.
3.3.2 Physical strainWhen under physical strain, water and small molecules from vessels leak into the extravascular space. This increases the concentration of high-molecular structures like proteins or substances bound to protein in vessels.
This also happens when sitting up after lying down and during stasis cf. chapter 6.3 and 6.4.
3.3.3 StressFear of blood collection or the situation prior to an operation can lead to extreme mental stress.
This causes various hormones to be released, e.g. aldosterone, katecholamine, cortisol, prolactin and renin.
Increased concentrations of albumin, fibrinogen, glucose and insulin can also be observed.
3.3.4 Food intakeAfter food intake, depending on composition of the meal and the time passed since eating and taking the specimen, various parameters can be altered.
After a meal rich in fat the effects are visible due to cloudiness in the plasma – lipae-mia. Lipaemic samples only have limited use in a laboratory.
g Before giving a blood specimen as an outpatient, the patient should rest for around 5 minutes.
g A blood sample should never be taken after physical exertion, e.g. after a morning jog.
g During the 3 days prior to giving a blood sample, there should be no exhausting physical activities.
A calm atmosphere and encouragement prior to blood collection can havea very positive effect.

14 15
www.gbo.com/preanalytics
Fig. 6: Samples with varying degrees of cloudiness
Fig. 7: Parameters for which 12-hour food abstinence is required prior to taking the specimen
Long-term fasting can also influence laboratory results.
g Alkaline phosphate
g Cholesterol (total, HDL, LDL)
g Dopamine
g Iron
g Glucose
g Uric acid
g Insulin
g Potassium
g Cortisol
g Corticotropin stimulation test
g Anorg. phosphate
g Triglyceride
Prior to blood collection, a 12-hour food abstinence is recommendable, in particular for a lipometabolism diagnosis.
For glucose tolerance tests, a high-carb diet should be adhered to during the 3 days prior to the test, i.e. > 150g carbohydrates per day.
3.3.5 Stimulants: Coffee, nicotine, alcohol Coffee drinking can lead to a strong increase in cortisol – up to 40% after 200mg of caffeine (contained in two cups of coffee).
Heavy smoking leads to changes in leukocytes, lipoproteins, enzyme activities, hormones, vitamins, tumour markers and heavy metals.
Just one cigarette can lead to very significant changes in the serum concentra-tion of different measurements within an hour.
Fig. 8: Differences of more than 10% for smokers compared to non-smokers
In case of alcohol consumption, there is a difference between acute and chronic effects. The increased activity of liver enzymes is most well-known.
0 +10 +20 +30 +40 +50 +60 (%)-10-20-30-40
Angiotensin-Converting-EnzymeProlactinß-CarotinoidePyridoxalphosphate
FibrinogenCopperMCHC
Cadmium
LeadMonocytes
LymphocytesGranulocytes
CEA
g It is recommended to neither smoke nor drink before blood
collection. Furthermore, alcohol should be abstained from
for 24 hours.
g Alcohol excesses must be avoided, in the days leading
up to blood collection.

16 17
www.gbo.com/preanalytics
Fig. 9: Acute changes in case of alcohol consumption
Fig. 10: Chronic changes in case of alcohol consumption
3.3.6 DrugsDrug consumption has biological effects, which can influence laboratory examina-tions, whereby every drug has it’s own effects.
Cannabis, for example can lead to an increase in sodium, potassium, urea, insulin and chloride, whilst leading to a decrease in creatinine, glucose and uric acid.
0 +100 +200-50 Changes as %
Osteocalcin
Prolactin
ADH
Cortisol
ANP
Cholesterol
Triglycerides
Aldosterone
0 +100 +200-50 Changes as %
LDL-Cholesterol
VMS (Vanillylmandelic acid)
MCV
Cholesterol
Triglycerides
Cortisol
Alanine aminotransferase
Estradiol
Adrenaline
Noradrenaline
Aspartate aminotransferase
γ-glutamyl transferase
3.3.7 MedicationSimilar effects can be seen if medication is being taken. This is a common cause of interference to laboratory analyses in a hospital.
For therapeutic drug monitoring, blood collection should be as soon as possible prior to taking the medication (measurement at trough level). The collection is not to be carried out when plasma is at maximum concentration.
Fig. 11: Ideal time for measuring medication levels
However, blood collection must be carried out immediately if there is suspicion of an overdose or intoxication.
3.3.8 Patient‘s BehaviourThe patient is not always aware of many of the influencing factors, and he/she can only behave appropriately, if the factors are made known.
To prevent misinterpretations of laboratory results, the patient should always be asked if medication is taken regularly, and if medication has been taken before blood collection.
Consumption of vitamins and hormones should be referred to specifically, as these substances are not automatically viewed by patients as medica-tion. The substance, the amount taken and the time of consuming should be reported to the laboratory.
Collection times,just before next intake
Pla
sma
con
cen
trat
ion
g Thoroughly preparing the patient can help avoid errors.
g Asking questions prior to blood collection can help to expose incorrect behaviour.
g Under certain circumstances, the blood collection procedure should postponed due to incorrect behaviour.

18 19
www.gbo.com/preanalytics
For different analytes of tests, the following data is also required:
4.2 Sample identification
Frequent errors made here are: incorrectly attached, dirty, illegible or incorrect label-ling.
An incorrectly attached label prevents optical control of the specimen. Visual control of the fill line and sample quality is prevented.
The fill level and specimen consistency cannot be judged. For barcode labels, it is difficult or even impossible to scan in data. An illegible or incomplete label may be refused for analysis.
Fig. 12: Incorrectly attached labels, compared to correctly attached label (left)
g Collection time for day’s profiles or function tests.
g Intake of medication including vitamins and hormones.
g Body size and weight.
g For 24h urine: total collected volume.
For small amounts of specimen material, only the most important parameters should be entered.
4. Widespread Errors Made With Identification
Errors in identification do not impair the quality of a sample, but they do complicate laboratory work considerably.
Misunderstandings and late results can occur, or it could even become impossible for the laboratory results to be traced back to the patient. Missing samples or req-uisition papers, or illegible labelling come under this category. These potential sources of error can be counteracted by using pre-barcoded specimen containers.
Errors made with identification can often be put down to carelessness, rushing or being distracted.
Incorrect assignment of a sample and the test requisition leads to mistakes that will only be discovered at the plausibility check or by the treating doctor, if at all.
4.1 Patient identification / requisition papers
Missing patient identification data on the requisition papers occurs again and again. The additional identification provided by scanning the patient’s wristband can increase safety.
The following data is obligatory:
Prior to blood collection, the patient should identify him/herself by stating his/her name.
g Surname, first name, date of birth
g Patient number, ward, room number, name or number of doctor’s office
g Date and collection time
g Gender
g If required week of gestation

20 21
www.gbo.com/preanalytics
To avoid errors, the following must be observed:
If labels for automatic reading are used, special attention should be paid to the preparation of whole tube series to avoid mixing up tubes.
4.2.1
Pre-barcoded sample tubes guarantee consistent high quality of barcodes, which are already in the correct position on the tube.
Fig. 13: Pre-barcoded tubes
g Fill in label carefully and legibly.
g Only use waterproof pens.
g Label STAT samples specially.
g Label infectious material on the sample tube and requisition papers.
g NOTE: Timing of labelling varies from country to country.
g Always position the label correctly.
g Stick the label onto the collection tube, never on the transport tube.
5. The Special Meaning of Haemolysis Various errors can lead to haemolysis, which makes it a very important topic for preanalytics. Therefore a separate chapter has been dedicated to it. Individual activities, the formation of haemolysis will be covered in detail, as well as how it can be avoided.
Haemolysis occurs, when the cell membrane of the red blood cells is destroyed. Intracellular components get into serum or plasma. Even just a slight haemolysis can cause increased serum or plasma values, in parameters with a high concentra-tion difference between erythrocyte and in serum.
Fig. 14: Concentration ratio of various parameters in erythrocytes and serum e.g. the concentration of LDH in erythrocytes is 160 times higher as serum
Uric acid
Chloride
Cholesterol
Glucose
Urea
Magnesium
GPT (ALAT)
GOT (ASAT)
Potassium
Phosphatase acid
LDH
20
24
67
160
20151050

22 23
www.gbo.com/preanalytics
The following errors lead to haemolysis, and should beavoided in any case:
Haemolysis has a three-fold effect:
1. The above-described release of components from cells changes the concentration in serum or plasma.
2. The red discolouration due to haemoglobin interferes with the photometric measuring.
3. Chemical reactions during analysis can be influenced by cell substances.
g Tourniquet applied too tightly.
g Needles with too small diameter.
g Aspiration of tissue fluid after puncturing the vein.
g Transfer of blood into other containers with a syringe.
g Shaking the sample instead of gently mixing.
g Delayed separation of cells from serum or plasma > 3 hours.
g Too long or too high centrifugation.
g Influence of temperature, heat or cold, e.g. during transport or if samples touch cooling elements.
g Freezing whole blood.Fig. 15: Changes in different parameters at a haemoglobin concentration of 0,5 g/dL
The serum or plasma, turns red due to the haemoglobin from the erythrocytes. As of a haemoglobin concentration of around 0,03 g/dL it is possible to see the discol-ouration with the naked eye. The intensity of the haemolysis is indicated by the intensity of the red colouring.
Fig. 16: Samples in various strengths of haemolysis
Lactate hydrogenase
Aspartate aminotransferase
HDL-cholesterolPotassiumCreatine cinaseTriglycerideCholesterolγ-glutamyl transferase
Alkaline phosphatase
Cha
nge
in c
onc
entr
atio
n
0,1 0,2 0,3 0,4 0,5
0
1
2
3
4
g/dL Haemoglobin

24 25
www.gbo.com/preanalytics
6. Widespread Errors Made During Blood Collection
6.1 Patient preparation
The patient’s family doctor must emphasise the significance of his/her behaviour prior to a blood collection.
Patients are not always aware of the short-term changing influencing factors due to diet, stimulants, stress, physical activity etc., see chapter 3.3. Correct behaviour is only possible, if there is awareness of possible problems.
Behaviour recommendations are often just forgotten. It can be helpful to ask prior to blood collection, in order to find out if there has been unsuitable behaviour. If circumstances require, then the blood collection may have to be postponed.
6.2 Time of blood collection
The influence of fluctuations due to daily rhythm, see chapter 3.3.1, can be mini-mised if the time of blood collection is kept to between 7 am and 9 am. Collection at any other time of day may cause incomparable results.
6.3 Body position
Changing from a lying position to a sitting position causes displacement of plasma volume and various small volume blood components from the vessels to the extra vascular space by around 12%.
This also involves a change in concentration of a number of parameters, in particu-lar blood cells and high molecular substances.
If possible, blood collection for outpatients should be carried out in a lying position rather than sitting. If this is not possible then the sitting position can be used.It is important that blood collection is always carried out in the same body position. In this way the results remain comparable.
Increase when changing fromlying down to sitting up
Parameter
Up to 10%
HaemoglobinLeukocytesTotal calciumAspartate aminotransferaseAlkaline phosphataseThyroxinImmunoglobulin G und AAlbuminTotal proteinCholesterolTriglycerides
Between 10% and 20%HaematocritApolipoproteinErythrocytes
More than 50%AdrenalineReninNoradrenaline
Table 5: Influence of body position during sample collection
6.4 Duration and intensity of the stasis
A tourniquet is applied to assist in locating the vein and make the venipuncture easier.
This creates a filtration pressure in the vein, which results in haemoconcentration. The effects are similar to those as described in chapter 4.1, ”Body position“. The change in concentration depends on length and intensity of the stasis.
A stasis of up to 60 seconds is acceptable and has no significant effect on the sample.

26 27
www.gbo.com/preanalytics
Fig. 17: Haemoconcentration due to transfer of plasma and small molecules from intravascular to interstitial space
IncreasedBetween 6% und 12%
DecreasedUp to 4%
Alanine aminotransferase Glucose
Creatine kinase Anorg. phosphatase
Bilirubin Leucocytes
Lactate dehydrogenase (LDH) Urea
Albumin Creatinine
γ-glutamyl transferase Chloride
Alkaline phosphatase
Total protein
Cholesterol
Triglyceride
Aspartate aminotransferase
Changes can occur even in case of shorter stases
Table 6: Change in different parameters as percent
Stasis
Blood cells
Protein molecules Protein bound substance
Calcium
The tourniquet pressure should be 40mmHg. The purpose of the tourniquet is to reduce venous outflow without affecting the arterial inflow. In this way, intravenous pressure is increased, the vein fills well and is thus easier to palpate. In addition to this, a properly applied tourniquet makes it easier to differentiate between a vein and pulsating artery.
Furthermore, if the tourniquet remains applied for the entire blood collection, hae-molysis can occur, in particular for patients with good vein conditions and high blood pressure.
6.5 Techniques for finding the vein
For easy location of the vein, there are various techniques that are often applied, which have an effect on the specimen quality and should therefore be avoided:
Improper techniques for finding the vein more easily:• The patient opens and closes his fist. This technique is also known as
”pumping”. This can cause a considerable increase in potassium.• Tapping the puncture site can also lead to distortion of the sample.
Proper techniques for finding the vein more easily:• Make a fist, do not pump• Apply warmth, by using a warm arm bath, a heating pad or
a local anaesthetic patch.
The tourniquet should not be applied too tightly – it should still be possible to feel the pulse.
In case of good veins, the tourniquet should be loosened immediately on successful puncture of the vein, before the blood collection is started.
Opening and closing the fist as well as tapping of the puncture site are improper techniques.
In the booklet ”VACUETTE® Blood Collection Techniques”, the procedure for successful venipuncture is described. Please also refer to the "VACUETTE® Collection System Handling Recommendations” from Greiner Bio-One.

28 29
www.gbo.com/preanalytics
6.6 Disinfecting the puncture site
If disinfection is carried out incorrectly, disinfectant can also get into the blood sample and corrupt the analysis results.
6.7 Venipuncture
Repeated attempts during venipuncture to locate the vein or probing the tissue can lead to contamination due to tissue thromboplastin, which can, for example, have a considerable influence on coagulation determinations.
6.8 Collection from catheter
If collection from a horizontal catheter is unavoidable, great care should be taken to avoid contaminating the sample with remains of infusion solution.
Disinfectant should be used in accordance with the manufacturer’s instruc-tions. Before carrying out the skin puncture, the disinfected site should be allowed to dry completely.
Do not probe when locating the vein. If necessary, puncture the other arm.
If possible do not take blood from a horizontal catheter.
The first 10ml of blood from a catheter are not to be used as specimen material and should be discarded.
6.9 Order of draw
Filling blood collection tubes in the wrong order can also lead to sample contamina-tion. The outside of a cap can be contaminated, meaning that bacteria can get into the sample.
For this reason, a blood culture sample should always be taken first. Anticoagulants or coagulation activators can be carried over into the next tube, or tissue fluids getinto the tube due to problems.
This is the recommended order of draw:1. No additive tube or blood culture 2. Citrate blood for coagulation diagnostics3. Whole blood for serum4. Heparin blood for plasma5. EDTA blood for haematology6. Na-fluoride blood for glucose determination7. Other tubes
Always adhere to the blood collection guidelines applicable within your institution or facility.
6.10 Wrong anticoagulant
Thanks to the ISO 6710 international coding system for blood collection tubes, confusion is by and large avoided.
Nevertheless, carelessness or lack of knowledge can lead to taking the wrong anticoagulant or tube. Such samples can then no longer be used in the laboratory.
g If a blood culture sample is not required, a no-additive discard tube should be filled and discarded first.
g If a citrate tube for coagulation diagnostics is used as the first or only tube, a 5ml no additive should be filled and discarded beforehand. This prevents impurities due to tissue thromboplastin.
Use the correct anticoagulant or tube.

30 31
www.gbo.com/preanalytics
VACUETTE® tube type
Colour codingof cap
Additive Intended pupose
Serum Clot activatorDeterminations in serum for clinical chemistry, microbiological serology, immunology, TDM
Serum Sep Clot activator and separator
Determinations in serum for clinical chemistry, microbiological serology, immunology, TDM
Serum Crossmatch Clot activator Determinations in serum for
crossmatch testing
Plasma Sodium heparin Determinations in heparinised plasma for clinical chemistry
Plasma Lithium heparin Determinations in heparinised plasma for clinical chemistry
Plasma Sep
Lithium heparinand separator
Determinations in heparinised plasma for clinical chemistry
EDTA K2 EDTAK3 EDTA
Determinations in EDTA whole blood for haematology
EDTA Crossmatch K3 EDTA Determinations in EDTA whole blood
for crossmatch testing
EDTA Sep K2 EDTA and separatorl
Determinations in EDTA plasma for molecular biological identification of viruses, parasites and bacteria
Coagulation Citrate solution (3.2%)Citrate solution (3.8%)
Determinations in citrated plasma for coagulation testing
CTAD CTAD (3.2%)Determinations in citrated plasma for coagulation testing where the artificial entry of platelet factors into the plasma is avoided
Glucose Anticoagulantglycolysis inhibitor
Determinations in stabilised anti-coagulated whole blood or plasma for glucose and lactate testing
Trace Elements Sodium Heparin Determinations in heparinised
plasma for trace elements testing
BloodGrouping
ACD-AACD-BCPDA
Determinations in ACD / CPDA whole blood for blood grouping
Table 7: International Colour Coding according to ISO 6710
Parameter Interfering Anticoagulants
Acid phosphatase Citrate, EDTA, fluoride, heparin, oxalate
Albumin Heparin
Alkaline phosphatase Citrate, EDTA, fluoride, oxalate
Alpha-amylase Citrate, EDTA, fluoride
Alpha-1-antitrypsin Citrate, EDTA, oxalate
ALAT (GPT) Oxalate
ASAT (GOT) Oxalate
Bilirubin Citrate, fluoride, oxalate
Calcium Citrate, EDTA, oxalate
Cholesterol Citrate, fluoride
Cholinesterase EDTA, fluoride, heparin
CK-MB Citrate, EDTA, fluoride, heparin, oxalate
Coeruloplasmin EDTA
Copper Citrate, EDTA, fluoride, oxalate
Creatine kinase (CK) Citrate, fluoride, oxalate
Creatinine Citrate, EDTA, fluoride
Erythrocyte sedimentation rate (ESR) Heparin
γ-Glutamyltransferase Citrate, fluoride, heparin, oxalate
GLDH Fluoride
Glucose Citrate, oxalate
HBDH Oxalate
HDL-cholesterol Citrate, fluoride
Insulin Oxalate
Iron Citrate, EDTA, heparin, oxalate
Iron-binding capacity EDTA
Lactate dehydrogenase (LDH) Fluoride, oxalate
LDL-cholesterol Oxalate
Leucyl aminopeptidase (LAP) Citrate, EDTA, fluoride, heparin, oxalate
Lipase EDTA
Lipids EDTA
Lipid electrophoresis Oxalate
Lithium Oxalate
Phosphate Citrate
Potassium Oxalate
Protein electrophoresis Oxalate
Quick (Thromboplastin time) Oxalate
Sodium Citrate, EDTA, oxalate
T3 (triiodothyronine) Oxalate
Triglycerides Citrate, fluoride, oxalate
Urea Fluoride
Uric acid EDTA, citrate, fluoride
Vitamin B12 Oxalate
Table 8: Influence of anticoagulants on selected parameters

32 33
www.gbo.com/preanalytics
6.11 Expiry date
The vacuum in the tubes can only fulfil its function if used prior to the expiry date printed on the label. The tube should no longer be used after this date.
Fig. 18: Colour-coded label with expiry date according to ISO 6710
6.12 Mixing ratios and specimen volumes
It is absolutely essential, that tubes (in particular those with anticoagulant ratios) are filled exactly, taking fill tolerances into account.
Particularly serious errors can occur when citrate tubes for coagulation diagnostics are either over-filled or under-filled.
g Always use up all tubes before opening a new carton.
g First use products with the earliest expiry date.
50mm
27m
m
5 ml 2018-10-15
Z Serum Sep Clot Activator
A16
0910
4560
19
Fill mark Chemical additive tube description
Item number
LOT number
Symbol for“single-use“
Greiner Bio-One logoSymbol for “Expiry Date“
“IVD“ Symbolfor In Vitro Diagnostic
“STERILE R“ Symbol for sterile via radiation
Fill volume
VACUETTE® logo
CE symbol
Fig. 19: Fill tolerances for coagulation tubes
However, even tubes not containing anticoagulants arrive in the laboratory with incorrect fill levels. These samples are not false, but the specimen volume may be insufficient to measure all required parameters.
6.13 Mixing blood and tube additives
Nowadays, there are additives in nearly all specimen tubes. Even the supposedly ”empty“ tubes for serum contain additives for accelerating the blood coagulation. Tube contents must be mixed thoroughly and slowly immediately after blood collec-tion, so that the additive can mix with the blood. Coagulation tubes are inverted 4-5 times, all other tubes 5-10 times.
Fill tubes exactly and ensure correct mixing ratio.
3.5mlTube 13/75mm
2mlTube 13/75mm
The fill tolerances correspond to the international standards
ISO 6710 and CLSI
Filltolerance
Filltolerance
All tubes should be fully inverted 5 times immediately after sample collection - do not shake. Even serum tubes contain additions and need to be inverted.

34 35
www.gbo.com/preanalytics
Particular care must be taken when mixing tubes with a high fill level and not much space.
An indicator for good mixing is the air bubble which moves through the tube from top to bottom during inversion.
Fig. 20: Air bubble as indicator for mixing
7. Frequent Errors When Storing and Transporting Samples
7.1 Storage temperatures and storage periods
The shelf-life of a sample is limited. Many samples can be kept at room temperaturefor a lengthy period, whilst others must be stored in the refrigerator or frozen.
Fig. 21: Influence of time and temperature on, e.g. glucose
As a general guideline:m
g/d
L
Dev
iatio
n in
%
100
90
80
70
60
50
40
30
20
0 2 4 6 8 24 48 h
4°C 23°C 30°C
100
78
46
29
EDTA blood for haematology should be stored at room temperature. For blood cell counting it can be kept for 24 hours at room temperature, for differential blood counts 2 – 3 hours.
With a few exceptions, serum or plasma samples must be stored in the refrigerator at 4°C after cell separation.

36 37
www.gbo.com/preanalytics
7.3 Specimen transport
Due to the partly very short stability, samples should be brought to the laboratory as soon as possible.
If light-sensitive parameters are to be determined, e.g. bilirubin, the samples must be protected from light during transport and storage.
Extreme fluctuations of temperature during transport can have negative effects. When the temperatures are especially high, temperature stability with suitable iso-lating containers is essential.
It is advisable, to transport centrifuged tubes and tubes that are to be centrifuged later in an upright position.
g Transport the samples as quickly as possible to the laboratory.
g If necessary, protect from light.
g Avoid extreme fluctuations of temperature.
g Transport serum and plasma tubes in an upright position as far as possible.
g Avoid spillages.
Your laboratory can tell you which samples require particular storage temperatures or must be deep frozen.
7.2 Storage conditions
If samples are not closed firmly during storage, evaporation can occur, which can change the concentration.
If serum or plasma is not separated from the cells, either via separator gel or after centrifugation by decanting, substances can seep from cells via diffusion into plasma or serum.
The cell wall is not destroyed during this process, as in haemolysis. However, the effects on the sample are similar, resulting in increased LDH and potassium values, for example.
Blood sugar is broken down via glycolysis. During this, the cells also absorb in vitro glucose from the serum or plasma, changing the blood sugar level continually over time.
If serum or plasma is not separated from cells, the process can lead to significant changes after just 2 – 3 hours.
Since blood cells are destroyed during the freezing process, only serum or plasma may be frozen.
For long-term storage of serum or plasma, temperatures of < -20°C are necessary. The defrosting process must be slow, either overnight in the refrigerator or in a water bath, with continual mixing.
g Only store samples in closed containers.
g Serum or plasma must be separated from cells immediately after centrifugation, either via separator gel or decanting.

38 39
www.gbo.com/preanalytics
7.4 Specimen mailing
The ADR (Accord Européan Relatif au Transport International des Marchandises Dangereuses par Route) regulations are applicable for sample transport. The pur-pose is safe transport as well as protection of the sample and personnel.
With reference to infection risk, there are two categories for differentiation, category A and category B. Category A corresponds to the WHO risk classifications 3 and 4. Category B corresponds to the WHO risk classification 2. Samples in the WHO risk classification 1 are not affected by the ADR.
Fig. 22: Suitable transport containers
If category A specimens are to be transported, it is sufficient to pack according to the Instruction P620. P620 is basically comparable to P650, but must be design approved and licensed.
Category B specimens are subject to the instruction P650. The specimen is in a primary container, the secondary container is a liquid-proof, unbreakable container with an absorbent pad inside, sufficient to absorb entire contents. The outer pack-aging is a carton or padded envelope, labelled with ”Diagnostic Specimen” or ”Clinical Specimens”. The UN symbol 3373 must also be printed on the outer packaging. (The number 3373 is a diamond shape).
As a general rule, when sending blood specimens for diagnostic purposes, the packaging instruction P650 according to ADR should be observed. Mailing of cat-egory B samples by post is only permissible as a small packet and if packed in accordance with the instruction P650.
If there is any suspicion, that the diagnostic specimen could contain category A pathogens, the laboratory must be contacted, in order to clarify the method of dispatch.
The sender is responsible for observing the legal requirements. Any members of staff involved in packing, sending and transporting samples must be trained accord-ingly.
Observe specimen shipping regulations.

40 41
www.gbo.com/preanalytics
8. Widespread Errors in Sample Preparation
8.1 Errors when centrifuging
Waiting too long before centrifugation can cause changes in serum / plasma above the cells (see chapter 7.2).
Specimen coagulation in upright tubes means better separation during centrifuga-tion, in particular for tubes with separator gel.
Fig. 23: Samples that have coagulated in horizontal and upright positions.
If the waiting time for serum tubes before centrifugation is too short, and the blood has not been able to fully coagulate, post-clotting could occur in serum. This results in fibrin fibres in serum which may cause blockages in the tubing of the analyser. Furthermore, the gel in the separator gel tubes will not be able to form a sufficient barrier. Serum tubes should not be centrifuged within 30 minutes after blood col-lection.
Fig. 24: Serum sample after being centrifuged straight after blood collection. The fibrin thrombus in the serum can be seen.
For patients taking anticoagulation therapy, the clotting will be delayed. These samples should only be centrifuged when retraction (i.e. the blood clot has con-tracted) is completely finished.It is not necessary to wait with plasma samples.
Extreme cooling down or warming up in the centrifuge can lead to haemolysis. The temperature inside the centrifuge should be 20°C – 22°C. (CLSI recommendation).
Centrifugation in open containers leads to evaporation of the sample, especially in case of smaller specimen volumes.
Therefore always ensure that specimen containers are firmly closed for centrifuga-tion, and hygiene.

42 43
www.gbo.com/preanalytics
Fig. 25: Incorrectly centrifuged serum sep tubes: the wrong centrifugation speed has been applied. From left to right, the effects of an increasingly higher g-force. On the right, a correctly centrifuged serum sep tube.
Fig. 26: Incorrectly centrifuged serum sep tubes: the tubes have been centrifuged for too long / insufficiently. From left to right, an increasing centrifugation length. On the right, a correctly centrifuged serum sep tube.
Centrifugation speed Duration
Coagulation tubes
Platelet richcitrate plasma (PRP)
150 g 5 minutes
Platelet poorcitrate plasma (PPP)
1500 – 2000 g 10 minutes
Platelet free citrate plasma
2500 – 3000 g 20 minutes
Serum tubes 1800 – 2200 g 10-15 minutes
Serum sep tubes 1800 – 2200 g 10-15 minutes
Heparin tubes 1800 – 2200 g 10-15 minutes
Heparin sep tubes 1800 – 2200 g 10-15 minutes
EDTA sep tubes 1800 – 2200 g 10-15 minutes
Glucose tubes 1800 – 2200 g 10-15 minutes
Table 9: Centrifugation recommendations of VACUETTE® tubes
The English terms g-force or RCF stand for relative centrifugal force and should not be confused with rotations per minute.
This formula is used for the calculation:
g = RCF = 1,118 x 10-5 x r x (rpm)2
g = RCF = relative centrifugal forcer = radius in cm
rpm = revolutions per minute

44 45
www.gbo.com/preanalytics
During centrifugation, the following should be observed:
For an optimal gel barrier in serum sep tubes a swing-out centrifuge should be used.
If tubes that have been centrifuged in this manner are transported upright, the gelbarrier remains stable even when shaken during transport from the doctor’s surgery into the laboratory.
In a fixed-angle centrifuge, a sloping gel barrier will be formed. In this position, the gel barrier is less stable, and even the slightest of shakes during road transportation could cause the barrier to break down, especially if horizontal.
g The serum specimen should be allowed to coagulate in an upright tube.
g Centrifuge as soon as possible, taking note of required waiting times.
g Select correct temperature in the centrifuge.
g Only centrifuge firmly closed specimens.
g Apply recommended duration and speed of centrifugation.
g Where possible, do not use a fixed-angle centrifuge, but rather a swing-out centrifuge.
g Transport centrifuged gel separator tubes in an upright position whenever possible.
Fig. 27: Left: Separator gel tubes centrifuged in a fixed-angle centrifuge. Right: Separator gel tubes centrifuged in a swing-out centrifuge.
Fig. 28: Separator gel tubes centrifuged in fixed-angle centrifuges and transported horizontally. Jolts could break the gel barrier.

46 47
www.gbo.com/preanalytics
8.2 Insufficiently homogenised samples
Whole blood must be homogenous before being inserted into the analyser. EDTA whole blood, for example, must be mixed thoroughly before being used. Mechanical mixers are preferable.
A particular problem is when using blood collection tubes with a small diameter, for example erythrocyte sedimentation rate (ESR) tubes can occur, when samples are not sufficiently homogenised, resulting in increased sedimentation rates.
Special care must therefore be taken to mix ESR tubes thoroughly before placing them in the sedimentation stand, if the blood collection was some time ago, and the erythrocyte sedimentation has already started (see chapter 6.13).
Thawing causes serum or plasma specimens to have different concentration gradi-ents. The substances dissolved in the specimen are no longer evenly distributed. These samples must of course be sufficiently mixed before being processed further.
Fig. 29: Calcium concentration after thawing and before sufficient mixing
0.2 mmol/L
0.6 mmol/L
1.8 mmol/L
Always mix carefully prior to analysis, not just thawed samples but newly arrived samples.
9. Special Features of Blood Culture for Microbiological Diagnostics
Contaminants are a particularly frequent cause of interference in microbiological examinations of blood samples. Contaminating skin germs often get into blood culture bottles.
If the specimen is handled incorrectly, these germs can reproduce faster than the pathogen, resulting in an overgrowth of germs, which makes it difficult for the labo-ratory to find the actual pathogen.
Usually only a few pathogens are to be found in blood. The total of pathogens is highest when the fever is on the increase. This criteria must be taken into consid-eration when deciding on the time for collecting the sample.
Cooling the sample as well as changes to the pH value impair the survival chances of various pathogens. It is essential that the ideal transport conditions are provided.
Short transport times are important, as sensitive germs which can furthermore be weakened due to treatment with antibiotics, can quickly die off, whilst the con-taminants can increase over a longer transport time. Prolonged transport times can therefore often cause inaccurate results.
The following basics should be observed when collecting samples for blood cultures:
g Use blood culture bottles with the appropriate culture medium.
g Store blood culture bottles according to manufacturer’s instructions.
g Allow to warm to room temperature before use.
g Always collect blood sample prior to beginning with antibiotic treatment.
g The sample should be collected during the shivers stage, when the patient has a fever. The germ density is at its highest during this phase. If antibiotic treatment has been started, the sample should be collected at the end of the dosage interval.
g It is very important to thoroughly disinfect the skin prior to sample collection. Apply the disinfectant, and allow at least 30 seconds

48 49
www.gbo.com/preanalytics
If the in vitro multiplication of a fastidious pathogen is difficult or too time consum-ing, it is preferable to use molecular biological detection methods, e.g. PCR.
When collecting samples for PCR analytics, particular care should be taken in the preanalytical stage:
(or follow manufacturer’s instructions) for it to take effect. Do not wipe off. After disinfection, do not touch the skin again.
g The rubber stoppers to blood culture bottles must also be disinfected after the protective cap has been removed.
g If several samples are to be taken, blood culture samples should be taken first.
g Do not take samples using a horizontal catheter.
g For collection, a closed system is used without decanting, whereby the blood culture bottle should be held below the venipuncture site.
g To prevent air from getting into the anaerobic bottle, the aerobic bottle should be filled first.
g Details on the suspected clinical diagnosis are to be given on the accompanying report.
g Immediate transport to the laboratory.
g Never store in the refrigerator.
g Always collect samples wearing disposable gloves.
g Do not touch the puncture site again once disinfected, even if wearing gloves.
g Always use a separate tube for samples.
g VACUETTE® K2E K2EDTA Separator tubes are recommended.
g Never decant samples.
g Do not use heparin tubes.
g Refer to the package insert of the Test Kit and treat specimen material as instructed.
10. Preanalytical Special Features in Urinology
In urine, substances usually eliminated in urine are detected and in pathological cases, even substances that do not normally occur in urine, for example metabo-lites, exogenic substances and cells in urine sediment.
Only a clean and correctly collected urine sample can provide accurate results.
10.1 When should a urine sample be taken
There is a difference between random urine, morning urine and collection urine.
10.1.1 Random urine
Random urine is taken at any time. This is the simplest form of urine collection, and is generally only useful if the clinical symptoms indicate that an immediate analysis is necessary, for example, if there is a suspicion of urinary tract infection or intoxica-tion.
10.1.2 Morning urine
There is a further differentiation to be made between first morning urine and second morning urine.
First morning urine is often sour and concentrated, making it suitable for detection of bacteria. The second morning urine is after a time interval has elapsed following emptying of the bladder in the morning.
This kind of sample is recommended for determining hyperglycosuria and for examination of the urine sediment.
Ensure the following when collecting second morning urine:
g If required, patient has empty stomach.
g No sport participation prior to sample.

50 51
www.gbo.com/preanalytics
10.1.3 24 hour urine collection
The urine is collected over a 24 hour period. This balances out fluctuations occur-ring throughout the day. Collection errors occur frequently and can be avoided by giving careful, exact instructions to the patient.
Ensure the following when collecting 24-hour urine:
g Intake of 1.5 - 2 litres liquid throughout the 24 hours.
g If the urine must be stabilised, add appropriate preservatives.
g Begin at 7am in the morning.
g Discard first morning urine.
g Collect all urine throughout the 24-hour period until the first morning urine of the next day.
g Hygienic conditions.
g Cool storage conditions, protected from light.
g Exact measurement of the collection volume.
g Mix the urine thoroughly.
g Transfer required amount into specimen tube.
g Give the patient exact instructions on urine collection, as the completeness of collection and quality of sample is dependent on the patient’s cooperation.
10.2 Techniques for collecting and preparing urine
10.2.1 Mid-stream urine
If possible, mid-stream urine should be used for all urine examinations. By collecting mid-stream urine, contamination by foreign bacteria is effectively prevented
Take note of the following when collecting mid-stream urine:
Fig. 30: Sample is transferred from urine beaker to urine tube
Bladder catheters and bladder puncture are reserved for special cases.
g Thorough cleansing of genital area.
g Do not use cleaning substances or disinfectants.
g If cleansing is too intensive, slight bleeding can occur, causing addition of erythrocytes.
g The first amount of urine contains contaminants and is discarded.
g The second amount of urine is collected in a sterile beaker without interrupting the stream.
g The end stream is discarded.
g Urine is mixed well in the beaker and is transferred to a urine tube.
g The urine sample should be brought to the laboratory within 2 hours.

52 53
www.gbo.com/preanalytics
10.2.2 Urinary sediment
To make urine sediment, a defined part of the urine specimen is first centrifuged.The supernatant is decanted. The sediment is homogenised and finally micro-scoped.
The sample should not be more than 2 hours old, otherwise sedimenting uric acid crystals, lysis and morphological changes of cylinders and cells could influence theanalytics.
To obtain a standardised sediment, the following should be observed:
g Use at least 10ml mid-stream urine, already mixed.
g Centrifuge for 5 minutes at 400g.
g Discard 9.5ml of the supernatant.
g Add the remaining 0.5ml to the analysis.
g The sample may not be more than 2 hours old.
10.3 Microbiological urine examinations
For microbiological urine examinations, a mid-stream from first morning urine is preferable.
The following should be ensured during collection:
10.4 Drug screening
During drug screening, it is not unusual for a drug user to attempt to manipulate urine samples in order to cause falsely negative results.
This can be brought about by diluting, excessive drinking or even by providing for-eign urine or by adding substances which could distort the analysis (e.g. washing powder or similar).
To a large extent, this can be prevented, for example, by checking identity and supervising the urine collection, as well as determining the creatinine concentration as control value.
With supervised saliva tests, this problem can be completely avoided.
g Take urine prior to beginning antibiotics treatment.
g Use the first morning urine – the patient should not pass water after 2 am.
g Use mid-stream urine, see chapter 10.2.1
g After mixing, transfer urine from the sterile beaker to a sterile specimen tube, and close the tube firmly.
g If using an immersion culture medium, please observe the instructions for use.
g Transport quickly to laboratory.
g For long-term catheter users, do not use the urine from the collection bag. Instead, puncture the intended site after careful disinfection.

54 55
www.gbo.com/preanalytics
11. Drug detection from salivaSubstances can be detected in saliva, which are produced either by the saliva glands or get into saliva from the blood by means of passive diffusion, active trans-port or ultrafiltration. This is made possible, mainly because in comparison to blood, saliva has a slightly acidic pH-value and behaves hypotonically.
Only a clean, correctly collected saliva sample ensures a correct analysis result.
Fig. 31: Sample is transferred from the saliva collection beaker to the saliva transfer tube.
Please observe the following when collecting saliva:
Drug analysis using saliva is becoming increasingly common. It is significant, that the saliva is collected on an acidic basis, as then it is easier for drugs, which are mainly alkaline, to diffuse in saliva.
Detecting falsification of a sample or sabotage during saliva collection is the big challenge in the area of drug testing.
The simplest way of doing this is with water in the oral cavity. The authenticity of the sample can be checked by determining endogenic biomarkers, for example saliva amylase or cortisol.
g Wait 10 minutes to ensure an empty oral cavity.
g Monitor the collection with the patient.
g Keep to the recommended collection time.

56 57
www.gbo.com/preanalytics
12. Summary of Tips for Avoiding Errors
Patient preparation:
g Inform patient of abstinence from food and give dietary instructions.
g Remind the patient that physical activity, e.g. jogging is not allowed.
g Indicate to patient that smoking, coffee and alcohol should be abstained from.
g Establish medication intake and dose.
g Get the doctor’s order and request permission from the patient.
Identification:
g Clearly identify the patient.
g Enter patient data fully and accurately.
g Write clearly.
g Label STAT samples.
g Label infectious material.
g Write on label legibly with a waterproof pen.
g Position label correctly.
g Write on label prior to blood collection, then attach (if applicable). NOTE: Timing of labelling varies from country to country.
g Never attach label to transport tube! Label the specimen tube.
Storage and transport:
g Avoid temperature fluctuations, e.g. direct sunlight.
g Ensure that tubes are closed firmly for storage and transport.
g Keep serum and plasma cool at 4°C.
Blood collection:
g Select correct anticoagulant and tubes.
g Take the blood sample between 7 am and 9 am.
g Reduce fear and stress, especially for children.
g Create a calm atmosphere.
g Outpatients should sit quietly for 5 minutes prior to blood collection.
g Take the sample from the patient lying down, wherever possible (outpatients sitting).
g No opening and closing of fist for patient.
g No hard tapping on vein.
g Do not apply tourniquet for longer than 60 seconds. Arterial blood flow may not be interrupted.
g Do not apply tourniquet too tightly (40mmHg) - it should still be possible to feel pulse.
g Allow the disinfectant to dry according to instructions.
g Carry out the venipuncture correctly, refer to the ”VACUETTE® Blood Collection Techniques” booklet.
g Do not probe tissue to locate the vein.
g If possible, do not collect from a catheter.
g Release the tourniquet upon successful venipuncture as soon as blood flows into the first tube.
g Follow the recommended order of draw for blood collection tubes.
g Check the fill mark.
g Fill tube completely.
g After blood collection, mix the tube contents thoroughly.
g Mix tube contents gently, do not shake.
g Avoid transferring blood from syringes into other containers.

58 59
www.gbo.com/preanalytics
g Thaw out frozen samples slowly in a refrigerator or in water bath, mixing constantly.
g Do not re-freeze thawed samples.
g Samples should be transported to the laboratory as quickly and smoothly as possible, if necessary, cooled.
g Transport serum and plasma samples in an upright position where possible.
g Pay attention to light protection in case of light-sensitive parameters.
g Pay attention to sample transport regulations.
Sample preparation:
g Let serum samples coagulate fully for around 30 minutes in upright tubes, then centrifuge.
g For serum samples from patients having anticoagulant treatment, wait at least 60 minutes or until clot retraction is complete.
g Plasma samples can be centrifuged immediately.
g Set the correct temperature in a cooling centrifuge.
g Observe the specified length and speed of centrifugation.
g Differentiate between g-force and rotations per minute.
g Always ensure tubes are closed before centrifuging.
g Use serum or plasma soon after centrifugation of cells, or use separator gel tubes.
g Mix carefully prior to analysis – even thawed samples.
g Mix ESR tubes thoroughly before placing in sedimentation stand or ESR analyser.
Blood culture:
g Use blood culture bottles with appropriate culture medium.
g Store blood culture bottles according to manufacturer’s instructions.
g Warm to room temperature before use.
g Always take a first blood culture before beginning antibiotic treatment.
g Collect blood during the shivers stage when the patient has a fever, and if antibiotic treatment has already started, at the end of a dosage interval.
g Rub in disinfectant and allow to take effect for at least 30 seconds, according to manufacturer’s instructions. Do not wipe.
g Do not touch the puncture site after disinfection.
g Also disinfect the stopper of the blood culture bottle when the protective cap is removed.
g Take the sample for blood culture first.
g Do not take samples from horizontal catheters.
g Use a closed collection system for taking samples. No decanting.
g Observe the manufacturer’s instructions when filling aerobic or anaerobic blood culture bottles.
g Enter data regarding suspected clinical diagnosis in accompanying report.
g During blood collection, hold blood culture bottle below puncture site.
g Transport immediately to laboratory.
g Never store in the refrigerator.
PCR diagnostics:
g Always wear fresh disposable gloves when taking samples.
g Always use separate tubes.
g Never decant samples.
g Do not use heparin tubes.

60 61
www.gbo.com/preanalytics
Morning urine:
g If required, food abstinence for patient.
g No early morning sport prior to sample.
24 hour collection urine:
g Liquid intake of 1.5 – 2 litres over the 24 hours.
g If the urine is to be stabilised, add appropriate preservative.
g Begin at 7 am.
g Discard first morning urine.
g Collect all amounts of urine up until the next morning, including the first morning urine of the next day.
g Ensure hygienic conditions.
g Keep urine cool and protected from light.
g Measure collection volume exactly.
g Mix urine well.
g Transfer required amount into specimen tube.
g Give the patient precise instructions on collecting urine.
Mid-stream urine:
g Thorough cleansing of genital area.
g Do not use cleansing substances or disinfectants.
g Intensive cleaning can cause slight bleeding and admixture of erythrocytes.
g The first urine amount contains contamination germs and is discarded.
g The second amount is collected in a sterile beaker without interrupting the stream. The end stream is discarded.
g Mix urine in beaker well and transfer to a urine tube.
g Transport the sample immediately into laboratory.
Urinary sediment:
g Use 10ml mid-stream urine, already mixed.
g Centrifuge for 5 minutes at 400g.
g Discard 9.5ml supernatant.
g Use the remaining 0.5ml for the analysis.
g The sample may not be more than 2 hours old.
Urine culture:
g Take urine before beginning antibiotics treatment.
g Use the first morning urine – the patient should no longer pass water after 2am.
g Use mid-stream urine.
g After mixing the urine in the sterile beaker, transfer to a sterile specimen tube and close tube firmly.
g If using immersion culture media, pay attention to application instructions.
g Quickly transport to laboratory.
g For long-term catheter users, never take urine from collection bag.
Saliva Collection:
g Wait 10 minutes to guarantee empty oral cavity.
g Monitor sample collection.
g Keep to the recommended collection time.

62 63
www.gbo.com/preanalytics
13. LiteratureArbeitsgruppe Präanalytik der Deutschen Vereinten Gesellschaft für Klinische Chemie und Laboratoriumsmedizin: Die Qualität diagnostischer Proben, 5. Auflage 2005
Dörner K.: Klinische Chemie und Hämatologie, 8. Auflage 2013, Thieme Verlag
Guder W.G., Nayaranan S., Wisser H., Zawta B.: Proben zwischen Patient und Labor GIT Verlag, Darmstadt 1999
Thomas L: Labor und Diagnose, TH Books Verlagsgesellschaft, Frankfurt, 6. Auflage 2005
CLSI. Procedures for the Handling and Processing of Blood Specimensfor Common Laboratory Tests; Approved Guideline – Fourth Edition. CLSI document GP44-A4. Wayne, PA: Clinical and Laboratory Standards Institute; 2010.
CLSI. Procedures for the Collection of Diagnostic Blood Specimens by Venipuncture; Approved Standard - Sixth Edition. CLSI document GP41-A6. Wayne, PA: Clinical and Laboratory Standards Institute; 2007.
Hallbach J. (2011): Klinische Chemie und Hämatologie. Biomedizinische Analytik für MTLA und Studium. Stuttgart, Thieme Verlag
McCall R.; Tankersley C. M. (2012): Phlebotomy Essentials. Baltimore, Wolters Kluwer | Lippincott Williams & Wilkins
RKI (2011): Anforderungen an die Hygiene bei Punktionen und Injektionen. Springer-Verlag
Notes
© Greiner Bio-One GmbHAll rights reserved

USAGreiner Bio-One North America Inc.Phone +1 704 261-7800Fax +1 704 261-7899E-Mail [email protected]
HungaryGreiner Bio-One Hungary Kft.Phone +36 96 213 088Fax +36 96 213 198E-Mail [email protected]
Thailand Greiner Bio-One Thailand LtdPhone +66 38 4656 33Fax +66 38 4656 36E-Mail [email protected]
BrazilGreiner Bio-One BrasilPhone +55 19 3468-9600Fax +55 19 3468-9621E-Mail [email protected]
FranceGreiner Bio-One SASPhone +33 1 69 86 25 25Fax +33 1 69 86 25 35E-Mail [email protected]
Austria (Main Office)Greiner Bio-One GmbHPhone +43 7583 6791-0Fax +43 7583 6318E-Mail [email protected]
United KingdomGreiner Bio-One Ltd.Phone +44 1453 8252 55Fax +44 1453 8262 66E-Mail [email protected]
NetherlandsGreiner Bio-One B.V.Phone +31 172 4209 00Fax +31 172 4438 01E-Mail [email protected]
Spain VACUETTE Espana S.A.Phone +34 91 652 77 07Fax +34 91 652 33 35E-Mail [email protected]
Switzerland Greiner Bio-One VACUETTE Schweiz GmbHPhone +41 7 12 28 55 22Fax +41 7 12 28 55 21E-Mail [email protected]
India Greiner Bio-One INDIA Pvt., Ltd.Phone +91 120 456 8787Fax +91 120 456 8788E-Mail [email protected]
ChinaGreiner Bio-One Suns Co., Ltd.Phone +86 10 83 55 19 91Fax +86 10 63 56 69 00 E-Mail [email protected]
JapanGreiner Bio-One Co. Ltd.Phone +81 3350 58875Fax +81 3505 8974E-Mail [email protected]
GermanyGreiner Bio-One GmbH/PreanalyticsPhone +49 7022 948-0Fax +49 7022 948-514E-Mail [email protected] 98
0183
rev
05,
02.
2016
e
For further information, please visit ourwebsite www.gbo.com/preanalytics or contact us:
Related Documents


