UV Unwrapping & Texturing a Human Head By: Derek Marsh (a.k.a. BgDM)

UV Unwrapping & Texturing a Human Head By: Derek Marsh (a.k.a. BgDM)
Dec 13, 2015
Welcome message from author
This document is posted to help you gain knowledge. Please leave a comment to let me know what you think about it! Share it to your friends and learn new things together.
Transcript

UV Unwrapping & Texturing a Human Head
By: Derek Marsh (a.k.a. BgDM)
Overview
• What are UV’s?• What is LSCM?• Marking seams on the head mesh• The UV Editor & Pinning Vertices• Exporting the UV Face layout• Painting textures in Photoshop• Lighting and Final Image

What are UV’s
• UV’s are a way of saying u, v texture coordinates, (as opposed to the X, Y & Z that you construct your mesh on).
• These “UV” coordinates correspond to locations on your mesh that position an image to the meshes surface.
– They “pin” an exact spot on the image that you wish to use to texture your model to a specific point on the mesh.
– Between these points, Blender will stretch the image smoothly across the mesh surface.

What is LSCM?
• Least Squares Conformal Mapping, (i.e. LSCM) is a UV layout tool that preserves local angles of the mesh faces.
• Often a mesh cannot be unwrapped as one group of faces, but must be cut up into multiple groups. If seams divide the selected faces into multiple face groups, then LSCM unwrapping will unwrap them separately, and position them in the UV editor so the face groups don't overlap
Adding Seams to your mesh
• Seams are created in Blender by selecting edges or loops and pressing CTRL+E in Edit Mode.
• Seams mark locations where you want your mesh divided/separated or “cut”
• It is difficult to determine where the best seam placement should be on your mesh. Trial and error is the only way to determine the best possible unwrap for your particular mesh.

Adding Seams to your mesh
Select the edges where you want the seams to be located

Adding Seams to your mesh
Press CTRL+E and select “Mark Seam” from the pop-up menu

UV Editor & Pinning Vertices
•Now that the seams have been marked on the mesh, enter Object Mode and press “F” to enter Face Select Mode.•To ensure all the faces are selected for the unwrap, press “A” to select all.•To perform the unwrap, press “U” and then select LSCM from the pop-up menu.
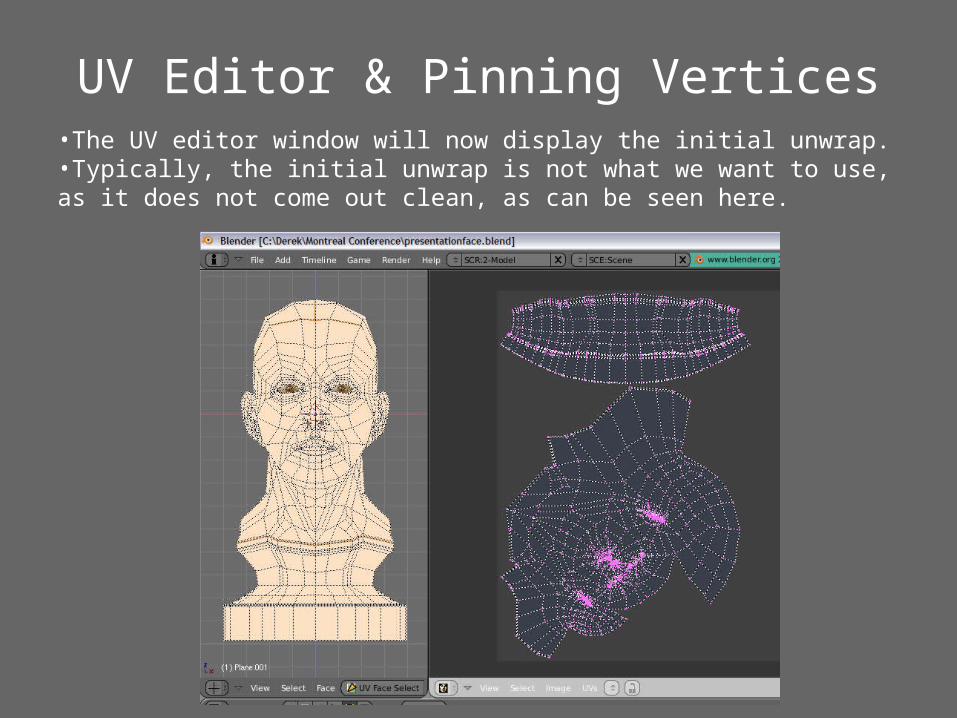
UV Editor & Pinning Vertices•The UV editor window will now display the initial unwrap.•Typically, the initial unwrap is not what we want to use, as it does not come out clean, as can be seen here.

UV Editor & Pinning Vertices•In order to see how the initial unwrap look with an image on the model, we will open a test map image and apply it to the model.•In the UV window, select IMAGE>OPEN and select the UV Test image.
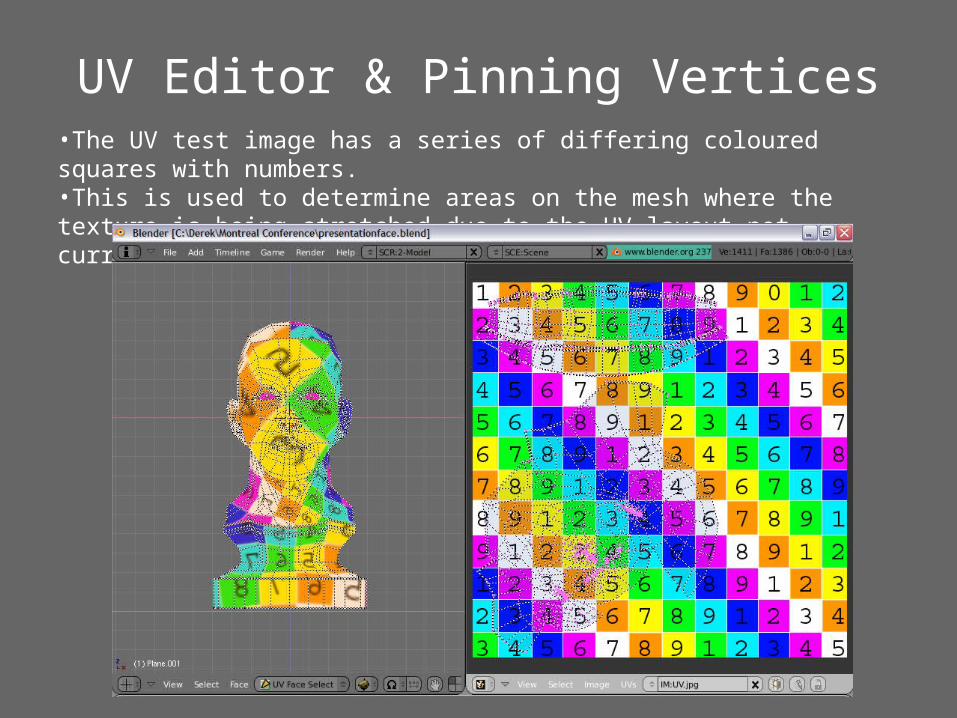
UV Editor & Pinning Vertices•The UV test image has a series of differing coloured squares with numbers.•This is used to determine areas on the mesh where the texture is being stretched due to the UV layout not currently being correct.
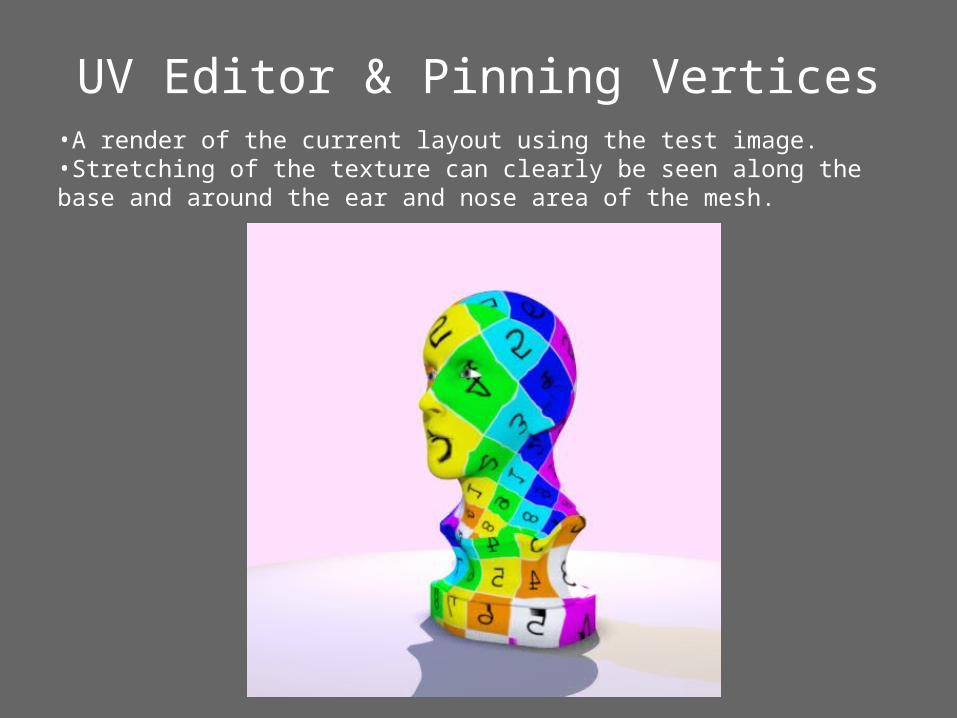
UV Editor & Pinning Vertices•A render of the current layout using the test image.•Stretching of the texture can clearly be seen along the base and around the ear and nose area of the mesh.
UV Editor & Pinning Vertices
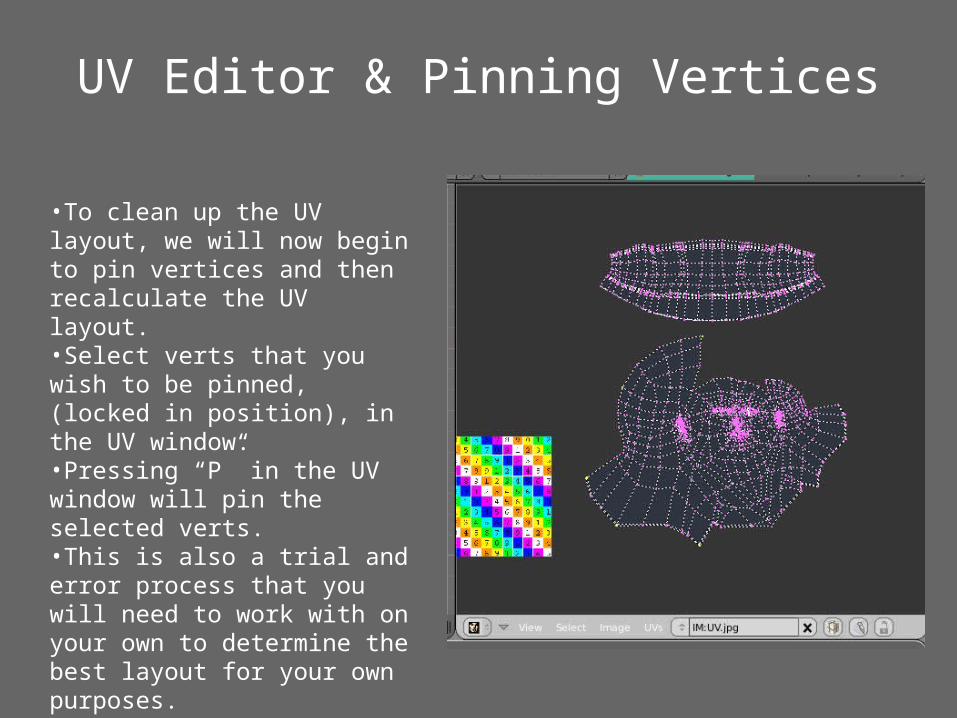
•To clean up the UV layout, we will now begin to pin vertices and then recalculate the UV layout.•Select verts that you wish to be pinned, (locked in position), in the UV window.•Pressing “P” in the UV window will pin the selected verts.•This is also a trial and error process that you will need to work with on your own to determine the best layout for your own purposes.
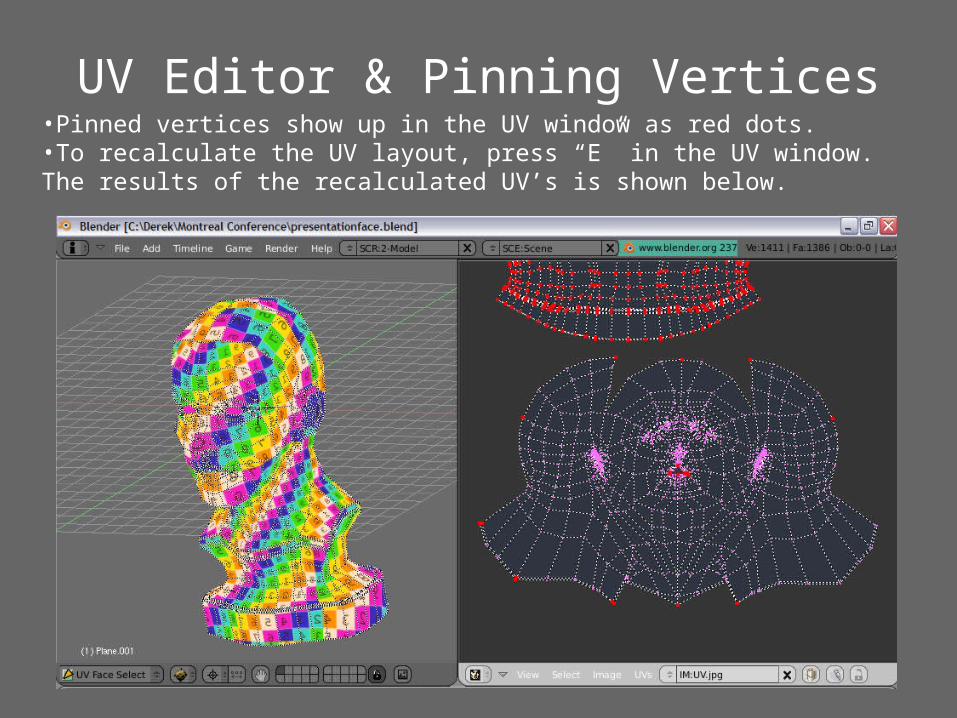
UV Editor & Pinning Vertices•Pinned vertices show up in the UV window as red dots.•To recalculate the UV layout, press “E” in the UV window. The results of the recalculated UV’s is shown below.

Exporting UV’s for Texture Painting
•Now that we have a fairly decent unwrap, we will export the UV layout for use in Photoshop, (or GIMP), in order to paint texture maps for the mesh.•Ensure the UV’s are scaled and located within the edges of the test map image in the UV window. If they are not, the UV’s will not be exported properly.•In the UV’s menu, select “Save UV Face Layout…”•A Python script window will open

Exporting UV’s for Texture Painting
•Input the size of the final image that you want to export. Typically, I prefer sizes of 3000 pixels or larger for higher detailed textures.•Input the Wire Size. A size of 1 id typically fine, but you may wish to increase this depending on your preferences. This determines the weight, or thickness of the wire.•Ensure ALL FACES is selected.•Input the location to where you wish to save the TGA file, without the TGA extension. The script will perform this automatically.•Select EXPORT and wait for the script to complete.

Texture Painting•Open the previously exported UV layout and begin painting textures for the skin.•There are multiple tutorials online explaining this process.•For this particular model, I have painted the colour map, bump map, specularity map, translucency map and a reflection map.
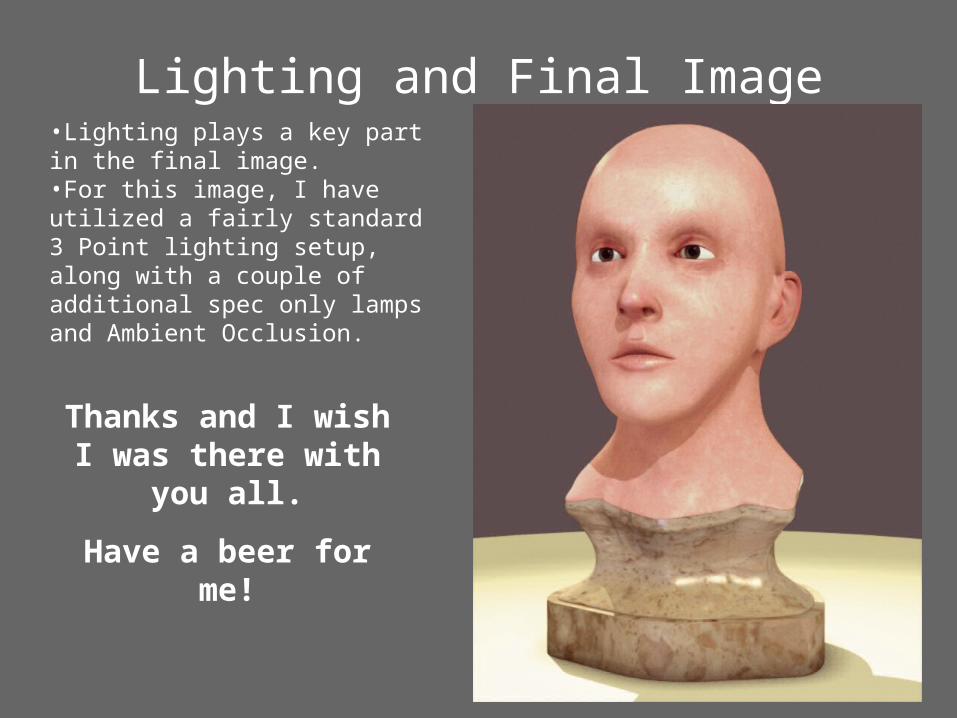
Lighting and Final Image•Lighting plays a key part in the final image.•For this image, I have utilized a fairly standard 3 Point lighting setup, along with a couple of additional spec only lamps and Ambient Occlusion.
Thanks and I wish I was there with you all.
Have a beer for me!
Related Documents