UNIT-V Swings: The origin and design philosophy of swing, Components and containers, Layout managers, Event handling, Using a push button, jtextfield, jlabel and image icon, The swing buttons, Trees, An overview of jmenubar, jmenu and jmenuitem, Creating a main menu, Add mnemonics and accelerators to Menu items, showmessagedialog, showconfirmdialog, showinputdialog, showoptiondialog, jdialog, Create a modeless dialog. Swings: The origin and design philosophy of swing, Swing did not exist in the early days of Java. Rather, it was a response to deficiencies present in Java’s original GUI subsystem: the Abstract Window Toolkit. The AWT defines a basic set of controls, windows, and dialog boxes that support a usable, but limited graphical interface. The use of native peers (platform-specific equivalents) led to several problems. First, because of variations between operating systems, a component might look, or even act, differently on different platforms. This potential variability threatened the overarching philosophy of Java: write once, run anywhere. Second, the look and feel of each component was fixed (because it is defined by the platform) and could not be (easily) changed. Third, the use of heavyweight components caused some frustrating restrictions. The solution to the limitations and restrictions present in the AWT was Swing. Introduced in 1997; Swing was initially available for use with Java 1.1 as a separate library. However, beginning with Java 1.2, Swing (and the rest of the JFC) was fully integrated into Java. Swing is built on the foundation of the AWT. This is why the AWT is still a crucial part of Java. Swing also uses the same event handling mechanism as the AWT. Swing addresses the limitations associated with AWT’s components through two key features: lightweight components and a pluggable look and feel. With very few exceptions, Swing components are lightweight. This means that they are written entirely in Java and do not map directly to platform-specific peers. Thus, lightweight components are more efficient and more flexible. Furthermore, because lightweight components do not translate into native peers, the look and feel of each component is determined by Swing, not by the underlying operating system. This means that each component will work in a consistent manner across all platforms. It is possible to “plug in” a new look and feel for any given component without creating any side effects in the code that uses that component. Pluggable look-and-feels offer several important advantages. It is possible to define a look and feel that is consistent across all platforms. Conversely, it is possible to create a look and feel that acts like a specific platform. For example, if you know that an application will be running only in a Windows environment, it is possible to specify the Windows look and feel. It is also possible to design a custom look and feel. Finally, the look and feel can be changed dynamically at run time. The MVC Connection In general, a visual component is a composite of three distinct aspects: • The way that the component looks when rendered on the screen • The way that the component reacts to the user • The state information associated with the component Swing uses a modified version of a classic component architecture called: Model-View-Controller, (MVC). In MVC terminology, the model corresponds to the state information associated with the component. For example, in the case of a check box, the model contains a field that indicates if the box is checked or unchecked. The view determines how the component is displayed on the screen, including any aspects of the view that are affected by the current state of the model. The controller determines how the component reacts to the user. For example, when the user clicks a check box, the controller reacts by changing the model to reflect the user’s choice (checked or unchecked). This then results in the view being updated. Swing uses a modified version of MVC that combines the view and the controller into a single logical entity called the UI delegate. For this reason, Swing’s approach is called either the Model-Delegate architecture or the Separable Model architecture. UNIT-V 1 KNREDDY JAVA PROGRAMMING

Welcome message from author
This document is posted to help you gain knowledge. Please leave a comment to let me know what you think about it! Share it to your friends and learn new things together.
Transcript

UNIT-V Swings: The origin and design philosophy of swing, Components and containers, Layout managers, Event handling, Using a push button, jtextfield, jlabel and image icon, The swing buttons, Trees, An overview of jmenubar, jmenu and jmenuitem, Creating a main menu, Add mnemonics and accelerators to Menu items, showmessagedialog, showconfirmdialog, showinputdialog, showoptiondialog, jdialog, Create a modeless dialog.
Swings: The origin and design philosophy of swing, Swing did not exist in the early days of Java. Rather, it was a response to deficiencies present
in Java’s original GUI subsystem: the Abstract Window Toolkit. The AWT defines a basic set of controls, windows, and dialog boxes that support a usable, but limited graphical interface.
The use of native peers (platform-specific equivalents) led to several problems. First, because of variations between operating systems, a component might look, or even act, differently on different platforms. This potential variability threatened the overarching philosophy of Java: write once, run anywhere.
Second, the look and feel of each component was fixed (because it is defined by the platform) and could not be (easily) changed.
Third, the use of heavyweight components caused some frustrating restrictions. The solution to the limitations and restrictions present in the AWT was Swing. Introduced in
1997; Swing was initially available for use with Java 1.1 as a separate library. However, beginning with Java 1.2, Swing (and the rest of the JFC) was fully integrated into Java.
Swing is built on the foundation of the AWT. This is why the AWT is still a crucial part of Java. Swing also uses the same event handling mechanism as the AWT.
Swing addresses the limitations associated with AWT’s components through two key features: lightweight components and a pluggable look and feel.
With very few exceptions, Swing components are lightweight. This means that they are written entirely in Java and do not map directly to platform-specific peers. Thus, lightweight components are more efficient and more flexible.
Furthermore, because lightweight components do not translate into native peers, the look and feel of each component is determined by Swing, not by the underlying operating system. This means that each component will work in a consistent manner across all platforms.
It is possible to “plug in” a new look and feel for any given component without creating any side effects in the code that uses that component.
Pluggable look-and-feels offer several important advantages. It is possible to define a look and feel that is consistent across all platforms. Conversely, it is possible to create a look and feel that acts like a specific platform. For example, if you know that an application will be running only in a Windows environment, it is possible to specify the Windows look and feel. It is also possible to design a custom look and feel. Finally, the look and feel can be changed dynamically at run time. The MVC Connection
In general, a visual component is a composite of three distinct aspects: • The way that the component looks when rendered on the screen • The way that the component reacts to the user • The state information associated with the component
Swing uses a modified version of a classic component architecture called: Model-View-Controller, (MVC).
In MVC terminology, the model corresponds to the state information associated with the component. For example, in the case of a check box, the model contains a field that indicates if the box is checked or unchecked. The view determines how the component is displayed on the screen, including any aspects of the view that are affected by the current state of the model. The controller determines how the component reacts to the user. For example, when the user clicks a check box, the controller reacts by changing the model to reflect the user’s choice (checked or unchecked). This then results in the view being updated.
Swing uses a modified version of MVC that combines the view and the controller into a single logical entity called the UI delegate. For this reason, Swing’s approach is called either the Model-Delegate architecture or the Separable Model architecture.
UNIT-V 1 KNREDDY
JAVA PROGRAMMING
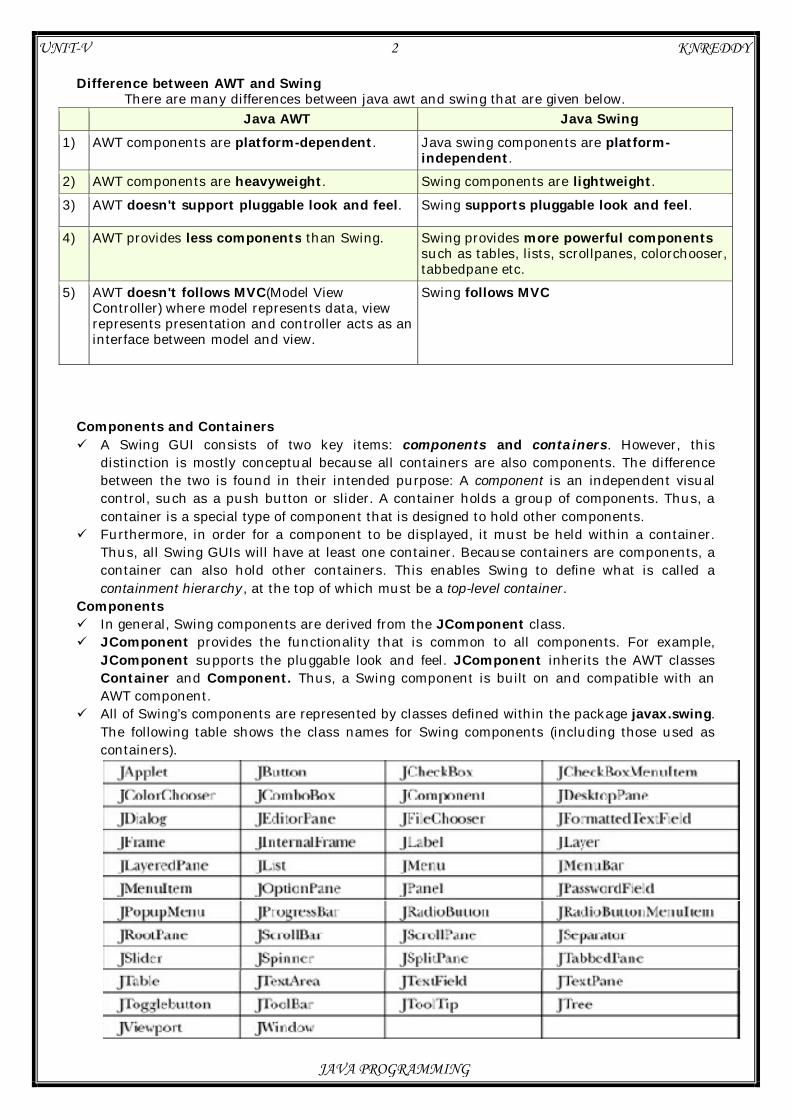
Difference between AWT and Swing There are many differences between java awt and swing that are given below.
Java AWT Java Swing 1) AWT components are platform-dependent. Java swing components are platform-
independent. 2) AWT components are heavyweight. Swing components are lightweight. 3) AWT doesn't support pluggable look and feel. Swing supports pluggable look and feel.
4) AWT provides less components than Swing. Swing provides more powerful components such as tables, lists, scrollpanes, colorchooser, tabbedpane etc.
5) AWT doesn't follows MVC(Model View Controller) where model represents data, view represents presentation and controller acts as an interface between model and view.
Swing follows MVC
Components and Containers A Swing GUI consists of two key items: components and containers. However, this
distinction is mostly conceptual because all containers are also components. The difference between the two is found in their intended purpose: A component is an independent visual control, such as a push button or slider. A container holds a group of components. Thus, a container is a special type of component that is designed to hold other components.
Furthermore, in order for a component to be displayed, it must be held within a container. Thus, all Swing GUIs will have at least one container. Because containers are components, a container can also hold other containers. This enables Swing to define what is called a containment hierarchy, at the top of which must be a top-level container.
Components In general, Swing components are derived from the JComponent class. JComponent provides the functionality that is common to all components. For example,
JComponent supports the pluggable look and feel. JComponent inherits the AWT classes Container and Component. Thus, a Swing component is built on and compatible with an AWT component.
All of Swing’s components are represented by classes defined within the package javax.swing. The following table shows the class names for Swing components (including those used as containers).
UNIT-V 2 KNREDDY
JAVA PROGRAMMING
Containers Swing defines two types of containers. The first are top-level containers: JFrame, JApplet,
JWindow, and JDialog. These containers do not inherit JComponent. They do, however, inherit the AWT classes Component and Container.
The top-level containers are heavyweight. A top-level container is not contained within any other container. Furthermore, every containment hierarchy must begin with a top-level container. The one
most commonly used for applications is JFrame. The one used for applets is JApplet. The second type of containers supported by Swing are lightweight containers. Lightweight containers do inherit JComponent. An example of a lightweight container is
JPanel, which is a general-purpose container. Lightweight containers are often used to organize and manage groups of related components because a lightweight container can be contained within another container. The Top-Level Container Panes
Each top-level container defines a set of panes. At the top of the hierarchy is an instance of JRootPane. JRootPane is a lightweight container whose purpose is to manage the other panes. It also helps manage the optional menu bar. The panes that comprise the root pane are called the glass pane, the content pane, and the layered pane.
The glass pane is the top-level pane. It sits above and completely covers all other panes. By default, it is a transparent instance of JPanel. The glass pane enables you to manage mouse events that affect the entire container (rather than an individual control) or to paint over any other component, for example.
The layered pane is an instance of JLayeredPane. The layered pane allows components to be given a depth value. This value determines which component overlays another. (Thus, the layered pane lets you specify a Z-order for a component, although this is not something that you will usually need to do.) The layered pane holds the content pane and the (optional) menu bar.
The pane with which your application will interact the most is the content pane, because this is the pane to which you will add visual components. In other words, when you add a component, such as a button, to a top-level container, you will add it to the content pane. By default, the content pane is an opaque instance of JPanel.
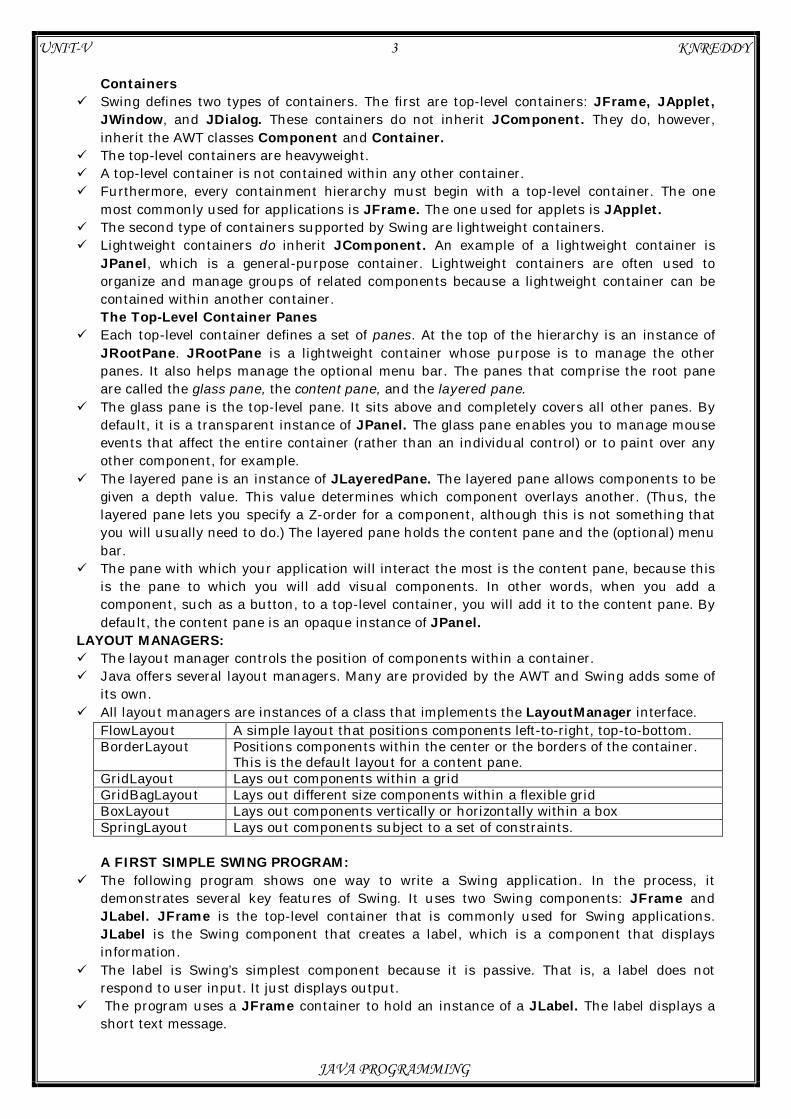
LAYOUT MANAGERS: The layout manager controls the position of components within a container. Java offers several layout managers. Many are provided by the AWT and Swing adds some of
its own. All layout managers are instances of a class that implements the LayoutManager interface.
FlowLayout A simple layout that positions components left-to-right, top-to-bottom. BorderLayout Positions components within the center or the borders of the container.
This is the default layout for a content pane. GridLayout Lays out components within a grid GridBagLayout Lays out different size components within a flexible grid BoxLayout Lays out components vertically or horizontally within a box SpringLayout Lays out components subject to a set of constraints. A FIRST SIMPLE SWING PROGRAM:
The following program shows one way to write a Swing application. In the process, it demonstrates several key features of Swing. It uses two Swing components: JFrame and JLabel. JFrame is the top-level container that is commonly used for Swing applications. JLabel is the Swing component that creates a label, which is a component that displays information.
The label is Swing’s simplest component because it is passive. That is, a label does not respond to user input. It just displays output.
The program uses a JFrame container to hold an instance of a JLabel. The label displays a short text message.
UNIT-V 3 KNREDDY
JAVA PROGRAMMING

// A simple Swing program. import javax.swing.*; class SwingDemo { SwingDemo() { // Create a new JFrame container. JFrame jfrm = new JFrame("A Simple Swing Application"); // Give the frame an initial size. jfrm.setSize(275, 100); // Terminate the program when the user closes the application. jfrm.setDefaultCloseOperation(JFrame.EXIT_ON_CLOSE); // Create a text-based label. JLabel jlab = new JLabel(" Swing defines the modern Java GUI."); // Add the label to the content pane. jfrm.add(jlab); // Display the frame. jfrm.setVisible(true); } public static void main(String[] args) { // Create the frame on the event dispatching thread. SwingUtilities.invokeLater(new Runnable() { public void run() { new SwingDemo(); } } ); } } Swing programs are compiled and run in the same way as other Java applications. Thus, to compile this program, you can use this command line:
javac SwingDemo.java To run the program, use this command line:
java SwingDemo
When the program is run, it will produce the window shown in Figure
UNIT-V 4 KNREDDY
JAVA PROGRAMMING

The program begins by importing javax.swing. javax.swing defines classes that implement labels, buttons, text controls, and menus. It will be included in all programs that use Swing.
Next, the program declares the SwingDemo class and a constructor for that class. The constructor is where most of the action of the program occurs. It begins by creating a JFrame, using this line of code: JFrame jfrm = new JFrame("A Simple Swing Application");
This creates a container called jfrm that defines a rectangular window complete with a title bar; close, minimize, maximize, and restore buttons; and a system menu. Thus, it creates a standard, top-level window. The title of the window is passed to the constructor.
Next, the window is sized using this statement: jfrm.setSize(275, 100);
jfrm.setDefaultCloseOperation(JFrame.EXIT_ON_CLOSE); After this call executes, closing the window causes the entire application to terminate.
The next line of code creates a Swing JLabel component: JLabel jlab = new JLabel(" Swing means powerful GUIs.");
JLabel is the simplest and easiest-to-use component because it does not accept user input. It simply displays information, which can consist of text, an icon, or a combination of the two. The label created by the program contains only text, which is passed to its constructor.
The next line of code adds the label to the content pane of the frame: jfrm.add(jlab);
All top-level containers have a content pane in which components are stored. Thus, to add a component to a frame, you must add it to the frame’s content pane.
The last statement in the SwingDemo constructor causes the window to become visible: jfrm.setVisible(true);
The setVisible( ) method is inherited from the AWT Component class. If its argument is true, the window will be displayed. Otherwise, it will be hidden. By default, a JFrame is invisible, so setVisible(true) must be called to show it.
Inside main( ), a SwingDemo object is created, which causes the window and the label to be displayed. Notice that the SwingDemo constructor is invoked using these lines of code: SwingUtilities.invokeLater(new Runnable() { public void run() { new SwingDemo(); } });
This sequence causes a SwingDemo object to be created on the event dispatching thread rather than on the main thread of the application.
To avoid problems (including the potential for deadlock), all Swing GUI components must be created and updated from the event dispatching thread, not the main thread of the application. However, main( ) is executed on the main thread. Thus, main( ) cannot directly instantiate a SwingDemo object. Instead, it must create a Runnable object that executes on the event dispatching thread and have this object create the GUI.
UNIT-V 5 KNREDDY
JAVA PROGRAMMING
EVENT HANDLING The modern approach to handling events is based on the delegation event model, which
defines standard and consistent mechanisms to generate and process events. Its concept is quite simple: a source generates an event and sends it to one or more listeners.
In this scheme, the listener simply waits until it receives an event. Once an event is received, the listener processes the event and then returns.
The advantage of this design is that the application logic that processes events is cleanly separated from the user interface logic that generates those events.
A user interface element is able to “delegate” the processing of an event to a separate piece of code.
In the delegation event model, listeners must register with a source in order to receive an event notification. This provides an important benefit: notifications are sent only to listeners that want to receive them. Events
In the delegation model, an event is an object that describes a state change in a source. It can be generated as a consequence of a person interacting with the elements in a graphical
user interface. Some of the activities that cause events to be generated are pressing a button, entering a character via the keyboard, selecting an item in a list, and clicking the mouse. Event Sources
A source is an object that generates an event. This occurs when the internal state of that object changes in some way. Sources may generate more than one type of event.
A source must register listeners in order for the listeners to receive notifications about a specific type of event. Each type of event has its own registration method. Here is the general form: public void addTypeListener (Type Listener el)
Here, Type is the name of the event, and el is a reference to the event listener. For example, the method that registers a keyboard event listener is called addKeyListener().
The method that registers a mouse motion listener is called addMouseMotionListener( ). When an event occurs, all registered listeners are notified and receive a copy of the event
object. This is known as multicasting the event. In all cases, notifications are sent only to listeners that register to receive them.
A source must also provide a method that allows a listener to unregister an interest in a specific type of event. The general form of such a method is this: public void remove Type Listener (Type Listener el)
Here, Type is the name of the event, and el is a reference to the event listener. For example, to remove a keyboard listener, you would call removeKeyListener( ).
Event Listeners A listener is an object that is notified when an event occurs. It has two major requirements.
First, it must have been registered with one or more sources to receive notifications about specific types of events. Second, it must implement methods to receive and process these notifications.
The methods that receive and process events are defined in a set of interfaces found in java.awt.event. For example, the MouseMotionListener interface defines two methods to receive notifications when the mouse is dragged or moved.
At the root of the Java event class hierarchy is EventObject, which is in java.util. It is the superclass for all events. Its one constructor is shown here:
EventObject(Object src) Here, src is the object that generates this event. EventObject contains two methods: getSource( ) and toString( ). The getSource( ) method
returns the source of the event. Its general form is shown here: Object getSource( )
As expected, toString( ) returns the string equivalent of the event.
UNIT-V 6 KNREDDY
JAVA PROGRAMMING
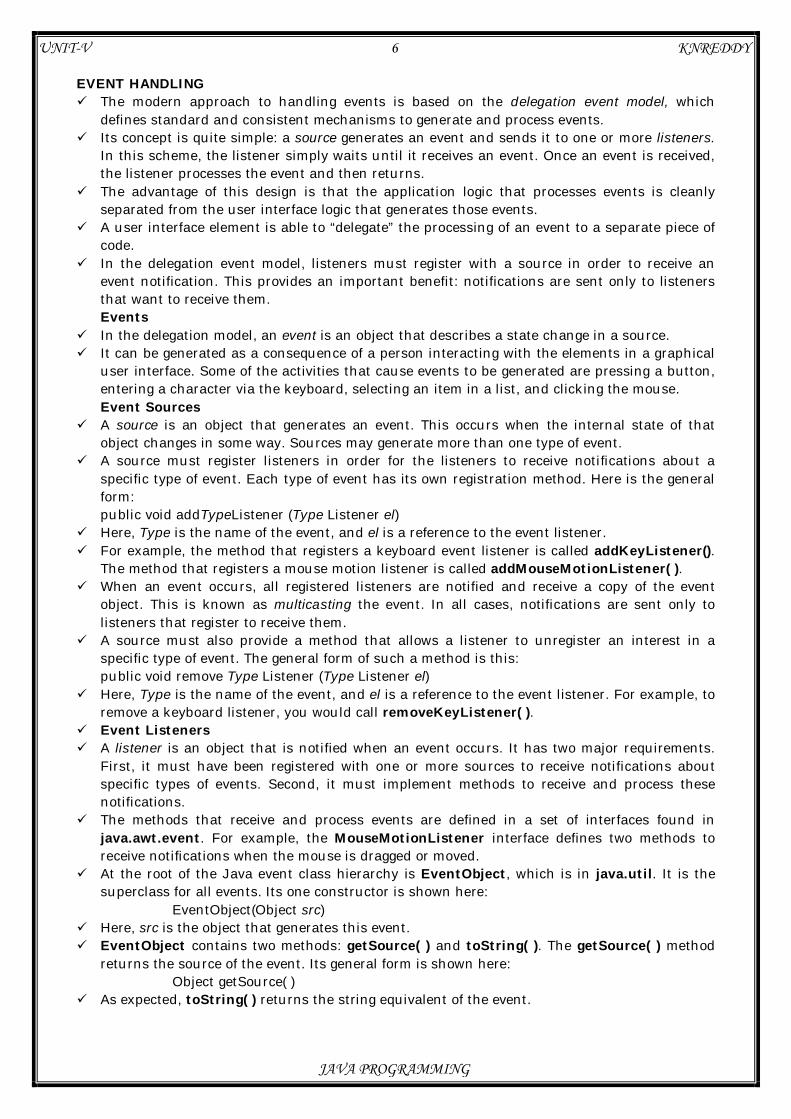
The class AWTEvent, defined within the java.awt package, is a subclass of EventObject. It is the superclass (either directly or indirectly) of all AWT-based events used by the delegation event model. Its getID( ) method can be used to determine the type of the event. The signature of this method is shown here:
int getID( ) The package java.awt.event defines many types of events that are generated by various user
interface elements.
USING A PUSH BUTTON
A push button is an instance of JButton. JButton inherits the abstract class AbstractButton, which defines the functionality common to all buttons.
JButton allows an icon, a string, or both to be associated with the push button. Three of its constructors are shown here: JButton(Icon icon) JButton(String str) JButton(String str, Icon icon)
Here, str and icon are the string and icon used for the button. When the button is pressed, an ActionEvent is generated. Thus JButton provides the
following methods which are used to add or remove an action listener void addActionListener(ActionListener al) void removeActionListener(ActionListener al)
ActionListener interface defines only one method: actionPerformed(). void actionPerformed(ActionEvent ae)
This method is called when a button is pressed. Using the ActionEvent object passed to the actionPerformed( ) method of the registered
ActionListener, you can obtain the action command string associated with the button. The action command is obtained by calling setActionCommand( ) on the button.
String getActionCommand( ) The action command identifies the button. Thus, when using two or more buttons within the
same application, the action command gives you an easy way to determine which button was pressed.
UNIT-V 7 KNREDDY
JAVA PROGRAMMING
// Demonstrate a button. import java.awt.*; import java.awt.event.*; import javax.swing.*; class ButtonDemo implements ActionListener { JLabel jlab; ButtonDemo() { // Create a new JFrame container. JFrame jfrm = new JFrame("A Button Example"); // Specify FlowLayout for the layout manager. jfrm.setLayout(new FlowLayout()); // Give the frame an initial size. jfrm.setSize(220, 90); // Terminate the program when the user closes the application. jfrm.setDefaultCloseOperation(JFrame.EXIT_ON_CLOSE); // Make two buttons. JButton jbtnFirst = new JButton("First"); JButton jbtnSecond = new JButton("Second"); // Add action listeners. jbtnFirst.addActionListener(this); jbtnSecond.addActionListener(this); // Add the buttons to the content pane. jfrm.add(jbtnFirst); jfrm.add(jbtnSecond); // Create a text-based label. jlab = new JLabel("Press a button."); // Add the label to the frame. jfrm.add(jlab); // Display the frame. jfrm.setVisible(true); } // Handle button events. public void actionPerformed(ActionEvent ae) { if(ae.getActionCommand().equals("First")) jlab.setText("First button was pressed."); else jlab.setText("Second button was pressed. "); } public static void main(String[] args) { // Create the frame on the event dispatching thread. SwingUtilities.invokeLater(new Runnable() { public void run() { new ButtonDemo(); } }); } }
UNIT-V 8 KNREDDY
JAVA PROGRAMMING
JTextField: JTextField is the simplest Swing text component. It is also probably its most widely used text
component. JTextField allows you to edit one line of text. It is derived from JTextComponent, which provides the basic functionality common to Swing text components.
Three of JTextField’s constructors are shown here: JTextField(int cols) JTextField(String str, int cols) JTextField(String str)
Here, str is the string to be initially presented, and cols is the number of columns in the text field.
JTextField generates events in response to user interaction. For example, an ActionEvent is fired when the user presses ENTER. A CaretEvent is fired each time the caret (i.e., the cursor) changes position. (CaretEvent is packaged in javax.swing.event.)
To obtain the text currently in the text field, call getText( ). // Demonstrate a text field. import java.awt.*; import java.awt.event.*; import javax.swing.*; class JTextFieldDemo implements ActionListener { JTextField jtf; JLabel jlab; JTextFieldDemo() { // Create a new JFrame container. JFrame jfrm = new JFrame("A Text Field Example"); // Specify FlowLayout for the layout manager. jfrm.setLayout(new FlowLayout()); // Give the frame an initial size. jfrm.setSize(240, 90); // Terminate the program when the user closes the application. jfrm.setDefaultCloseOperation(JFrame.EXIT_ON_CLOSE); // Create a text field instance. jtf = new JTextField(10); // Add an action listener for the text field. jtf.addActionListener(this); // Add the text field to the content pane. jfrm.add(jtf); // Create an empty text-based label. jlab = new JLabel(""); // Add the label to the frame. jfrm.add(jlab); // Display the frame. jfrm.setVisible(true); } // Handle action events. public void actionPerformed(ActionEvent ae) { // Obtain the current text and display it in a label. jlab.setText("Current contents: " + jtf.getText()); } public static void main(String[] args) { // Create the frame on the event dispatching thread. SwingUtilities.invokeLater(new Runnable() { public void run() { new JTextFieldDemo(); } }); } }
UNIT-V 9 KNREDDY
JAVA PROGRAMMING
JLabel and ImageIcon JLabel is Swing’s easiest-to-use component. JLabel can be used to display text and/or an icon. It is a passive component in that it does
not respond to user input. JLabel defines several constructors. Here are three of them: JLabel(Icon icon) JLabel(String str) JLabel(String str, Icon icon, int align)
Here, str and icon are the text and icon used for the label. The align argument specifies the horizontal alignment of the text and/or icon within the dimensions of the label. It must be one of the following values: LEFT, RIGHT, CENTER, LEADING, or TRAILING.
The easiest way to obtain an icon is to use the ImageIcon class. ImageIcon implements Icon and encapsulates an image. Thus, an object of type ImageIcon can be passed as an argument to the Icon parameter of JLabel’s constructor. There are several ways to provide the image, including reading it from a file or downloading it from a URL.
Here is the ImageIcon constructor used by the example in this section: ImageIcon(String filename)
It obtains the image in the file named filename. The icon and text associated with the label can be obtained by the following methods:
Icon getIcon( ) String getText( )
The icon and text associated with a label can be set by these methods: void setIcon(Icon icon) void setText(String str)
Here, icon and str are the icon and text, respectively. Therefore, using setText( ) it is possible to change the text inside a label during program execution.
import javax.swing.*; import java.awt.*; class JLabelDemo { JLabelDemo() { // Create a new JFrame container. JFrame jfrm = new JFrame("JLabel and ImageIcon Example"); // Give the frame an initial size. jfrm.setSize(320, 280); // Terminate the program when the user closes the application. jfrm.setDefaultCloseOperation(JFrame.EXIT_ON_CLOSE); // Create an icon and label for Go. ImageIcon goIcon = new ImageIcon("Go.jpg"); JLabel jlabGo = new JLabel(" Go ", goIcon, SwingConstants.LEFT); // Create an icon and label for Caution. ImageIcon cautionIcon = new ImageIcon("Caution.jpg"); JLabel jlabCaution = new JLabel("Caution", cautionIcon, SwingConstants.CENTER); // Create an icon and label for Stop. ImageIcon stopIcon = new ImageIcon("Stop.jpg"); JLabel jlabStop = new JLabel(" Stop ", stopIcon, SwingConstants.RIGHT); // Add the labels to the content pane. jfrm.add(jlabGo, BorderLayout.NORTH); jfrm.add(jlabCaution, BorderLayout.CENTER); jfrm.add(jlabStop, BorderLayout.SOUTH); // Display the frame. jfrm.setVisible(true); } public static void main(String[] args) { // Create the GUI on the event dispatching thread. SwingUtilities.invokeLater(new Runnable() { public void run() { new JLabelDemo(); } }); } }
UNIT-V 10 KNREDDY
JAVA PROGRAMMING

THE SWING BUTTONS Swing defines four types of buttons: JButton, JToggleButton, JCheckBox, and
JRadioButton. All are subclasses of the AbstractButton class, which extends JComponent. AbstractButton contains many methods that allow you to control the behavior of buttons.
JButton
The JButton class provides the functionality of a push button. JButton allows an icon, a string, or both to be associated with the push button. Three of its constructors are shown here: JButton(Icon icon) JButton(String str) JButton(String str, Icon icon)
Here, str and icon are the string and icon used for the button. When the button is pressed, an ActionEvent is generated. Using the ActionEvent object
passed to the actionPerformed( ) method of the registered ActionListener, you can obtain the action command string associated with the button. By default, this is the string displayed inside the button. However, you can set the action command by calling setActionCommand() on the button. You can obtain the action command by calling getActionCommand( ) on the event object. It is declared like this: String getActionCommand( )
The action command identifies the button. Thus, when using two or more buttons within the same application, the action command gives you an easy way to determine which button was pressed.
// Demonstrate icon-based JButtons. // This example displays traffic light icons inside buttons. import java.awt.*; import java.awt.event.*; import javax.swing.*; public class JButtonDemo implements ActionListener { JLabel jlab; JButtonDemo() { // Create a new JFrame container. JFrame jfrm = new JFrame("JButton Example"); // Specify FlowLayout for the layout manager. jfrm.setLayout(new FlowLayout()); // Give the frame an initial size. jfrm.setSize(300, 180); // Terminate the program when the user closes the application. jfrm.setDefaultCloseOperation(JFrame.EXIT_ON_CLOSE); // Create the buttons. ImageIcon goIcon = new ImageIcon("Go.jpg"); JButton jbtnGo = new JButton(goIcon); jbtnGo.setActionCommand("Go"); jbtnGo.addActionListener(this); ImageIcon cautionIcon = new ImageIcon("Caution.jpg"); JButton jbtnCaution = new JButton(cautionIcon); jbtnCaution.setActionCommand("Caution"); jbtnCaution.addActionListener(this);
UNIT-V 11 KNREDDY
JAVA PROGRAMMING
ImageIcon stopIcon = new ImageIcon("Stop.jpg"); JButton jbtnStop = new JButton(stopIcon); jbtnStop.setActionCommand("Stop"); jbtnStop.addActionListener(this); // Add the buttons to the content pane. jfrm.add(jbtnGo); jfrm.add(jbtnCaution); jfrm.add(jbtnStop); // Create and add the label to content pane. jlab = new JLabel("Select a Traffic Light"); jfrm.add(jlab); // Display the frame. jfrm.setVisible(true); } // Handle button events. public void actionPerformed(ActionEvent ae) { jlab.setText("You selected " + ae.getActionCommand() + "."); } public static void main(String[] args) { // Create the GUI on the event dispatching thread. SwingUtilities.invokeLater(new Runnable() { public void run() { new JButtonDemo(); } }); } } JToggleButton A useful variation on the push button is called a toggle button. A toggle button looks just like
a push button, but it acts di�erently because it has two states: pushed and released. That is, when you press a toggle button, it stays pressed rather than popping back up as a regular push button does. When you press the toggle button a second time, it releases (pops up). Therefore, each time a toggle button is pushed, it toggles between its two states.
Toggle buttons are objects of the JToggleButton class. JToggleButton implements AbstractButton. In addition to creating standard toggle buttons, JToggleButton is a superclass for two other Swing components that also represent two-state controls. These are JCheckBox and JRadioButton.
JToggleButton defines several constructors. JToggleButton(String str)
This creates a toggle button that contains the text passed in str. By default, the button is in the off position.
JToggleButton also generates an item event. This event is used by those components that support the concept of selection. When a JToggleButton is pressed in, it is selected. When it is popped out, it is deselected.
Each time an item event is generated, it is passed to the itemStateChanged( ) method defined by ItemListener. Inside itemStateChanged( ), the getItem( ) method can be called on the ItemEvent object to obtain a reference to the JToggleButton instance that generated the event. It is shown here: Object getItem( )
The easiest way to determine a toggle button’s state is by calling the isSelected( ) method (inherited from AbstractButton) on the button that generated the event. It returns true if the button is selected and false otherwise
UNIT-V 12 KNREDDY
JAVA PROGRAMMING
// Demonstrate JToggleButton. import java.awt.*; import java.awt.event.*; import javax.swing.*; public class JToggleButtonDemo { JLabel jlab; JToggleButton jtbn; JToggleButtonDemo() { // Create a new JFrame container. JFrame jfrm = new JFrame("JToggleButton Example"); // Specify FlowLayout for the layout manager. jfrm.setLayout(new FlowLayout()); // Give the frame an initial size. jfrm.setSize(200, 100); // Terminate the program when the user closes the application. jfrm.setDefaultCloseOperation(JFrame.EXIT_ON_CLOSE); // Create a label. jlab = new JLabel("Button is off."); // Make a toggle button. jtbn = new JToggleButton("On/Off"); // Add an item listener for the toggle button. jtbn.addItemListener(new ItemListener() { public void itemStateChanged(ItemEvent ie) { if(jtbn.isSelected()) jlab.setText("Button is on."); else jlab.setText("Button is off."); } }); // Add the toggle button and label to the content pane. jfrm.add(jtbn); jfrm.add(jlab); // Display the frame. jfrm.setVisible(true); } public static void main(String[] args) { // Create the GUI on the event dispatching thread. SwingUtilities.invokeLater(new Runnable() { public void run() { new JToggleButtonDemo(); } }); } }
UNIT-V 13 KNREDDY
JAVA PROGRAMMING
Check Boxes The JCheckBox class provides the functionality of a check box. Its immediate superclass is
JToggleButton, which provides support for two-state buttons. JCheckBox defines several constructors. JCheckBox(String str)
It creates a check box that has the text specified by str as a label When the user selects or deselects a check box, an ItemEvent is generated. You can obtain a
reference to the JCheckBox that generated the event by calling getItem( ) on the ItemEvent passed to the itemStateChanged( ) method defined by ItemListener. The easiest way to determine the selected state of a check box is to call isSelected( ) on the JCheckBox instance.
// Demonstrate JCheckbox. import java.awt.*; import java.awt.event.*; import javax.swing.*; public class JCheckBoxDemo implements ItemListener { JLabel jlabChange; JLabel jlabSupported; JCheckBox cbWin; JCheckBox cbLinux; JCheckBox cbMac; JCheckBoxDemo() { // Create a new JFrame container. JFrame jfrm = new JFrame("JCheckBox Example"); // Specify FlowLayout for the layout manager. jfrm.setLayout(new FlowLayout()); // Give the frame an initial size. jfrm.setSize(340, 140); // Terminate the program when the user closes the application. jfrm.setDefaultCloseOperation(JFrame.EXIT_ON_CLOSE); // Add check boxes to the content pane. cbWin = new JCheckBox("Windows"); cbWin.addItemListener(this); jfrm.add(cbWin); cbLinux = new JCheckBox("Linux"); cbLinux.addItemListener(this); jfrm.add(cbLinux); cbMac = new JCheckBox("Mac OS"); cbMac.addItemListener(this); jfrm.add(cbMac); // Create labels. jlabChange = new JLabel("Select Supported Operating Systems"); jfrm.add(jlabChange); jlabSupported = new JLabel(); jfrm.add(jlabSupported); // Display the frame. jfrm.setVisible(true); }
UNIT-V 14 KNREDDY
JAVA PROGRAMMING
// Handle item events for the check boxes. public void itemStateChanged(ItemEvent ie) { JCheckBox cb = (JCheckBox)ie.getItem(); if(cb.isSelected()) jlabChange.setText(cb.getText() + " has been selected"); else jlabChange.setText(cb.getText() + " has been cleared"); // Build a string the indicate all selections. String supported = "Supported Operating Systems: "; if(cbWin.isSelected()) supported += "Windows "; if(cbLinux.isSelected()) supported += "Linux "; if(cbMac.isSelected()) supported += "Mac OS"; jlabSupported.setText(supported); } public static void main(String[] args) { // Create the GUI on the event dispatching thread. SwingUtilities.invokeLater(new Runnable() { public void run() { new JCheckBoxDemo(); } }); } } Radio Buttons Radio buttons are a group of mutually exclusive buttons, in which only one button can be
selected at any one time. They are supported by the JRadioButton class, which extends JToggleButton. JRadioButton provides several constructors. JRadioButton(String str)
Here, str is the label for the button. In order for their mutually exclusive nature to be activated, radio buttons must be configured
into a group. Only one of the buttons in the group can be selected at any time. For example, if a user presses a radio button that is in a group, any previously selected button in that group is automatically deselected. A button group is created by the ButtonGroup class. Its default constructor is invoked for this purpose. Elements are then added to the button group via the following method: void add(AbstractButton ab)
A JRadioButton generates action events, item events, and change events each time the button selection changes. Most often, it is the action event that is handled, which means that you will normally implement the ActionListener interface.
// Demonstrate JRadioButton import java.awt.*; import java.awt.event.*; import javax.swing.*; public class JRadioButtonDemo implements ActionListener { JLabel jlab; JRadioButtonDemo() { // Create a new JFrame container. JFrame jfrm = new JFrame("JRadioButton Example");
UNIT-V 15 KNREDDY
JAVA PROGRAMMING
// Specify FlowLayout for the layout manager. jfrm.setLayout(new FlowLayout()); // Give the frame an initial size. jfrm.setSize(350, 100); // Terminate the program when the user closes the application. jfrm.setDefaultCloseOperation(JFrame.EXIT_ON_CLOSE); // Create radio buttons and add them to content pane. JRadioButton b1 = new JRadioButton("C"); b1.addActionListener(this); jfrm.add(b1); JRadioButton b2 = new JRadioButton("JAVA"); b2.addActionListener(this); jfrm.add(b2); JRadioButton b3 = new JRadioButton("C++"); b3.addActionListener(this); jfrm.add(b3); // Define a button group. ButtonGroup bg = new ButtonGroup(); bg.add(b1); bg.add(b2); bg.add(b3); // Create a label and add it to the content pane. jlab = new JLabel("Select One"); jfrm.add(jlab); // Display the frame. jfrm.setVisible(true); } // Handle button selection. public void actionPerformed(ActionEvent ae) { jlab.setText("You selected " + ae.getActionCommand()); } public static void main(String[] args) { // Create the GUI on the event dispatching thread. SwingUtilities.invokeLater(new Runnable() { public void run() { new JRadioButtonDemo(); } }); } }
UNIT-V 16 KNREDDY
JAVA PROGRAMMING
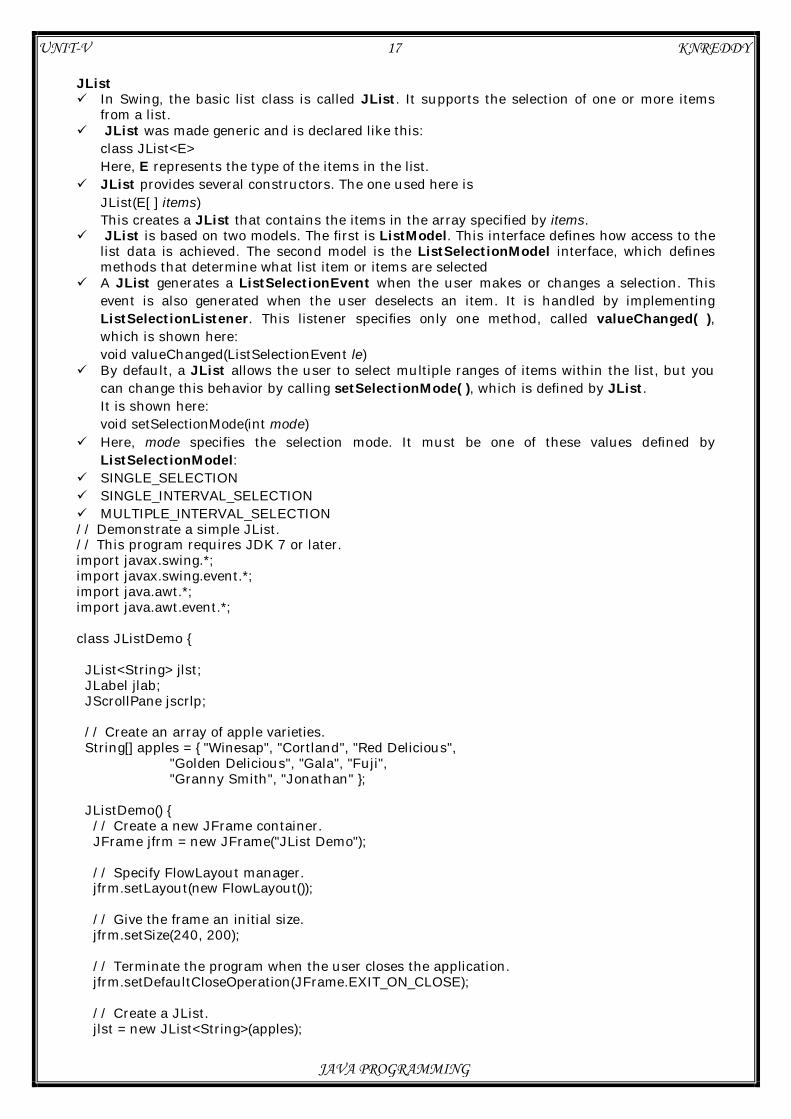
JList In Swing, the basic list class is called JList. It supports the selection of one or more items
from a list. JList was made generic and is declared like this:
class JList<E> Here, E represents the type of the items in the list.
JList provides several constructors. The one used here is JList(E[ ] items) This creates a JList that contains the items in the array specified by items.
JList is based on two models. The first is ListModel. This interface defines how access to the list data is achieved. The second model is the ListSelectionModel interface, which defines methods that determine what list item or items are selected
A JList generates a ListSelectionEvent when the user makes or changes a selection. This event is also generated when the user deselects an item. It is handled by implementing ListSelectionListener. This listener specifies only one method, called valueChanged( ), which is shown here: void valueChanged(ListSelectionEvent le)
By default, a JList allows the user to select multiple ranges of items within the list, but you can change this behavior by calling setSelectionMode( ), which is defined by JList. It is shown here: void setSelectionMode(int mode)
Here, mode specifies the selection mode. It must be one of these values defined by ListSelectionModel:
SINGLE_SELECTION SINGLE_INTERVAL_SELECTION MULTIPLE_INTERVAL_SELECTION // Demonstrate a simple JList. // This program requires JDK 7 or later. import javax.swing.*; import javax.swing.event.*; import java.awt.*; import java.awt.event.*; class JListDemo { JList<String> jlst; JLabel jlab; JScrollPane jscrlp; // Create an array of apple varieties. String[] apples = { "Winesap", "Cortland", "Red Delicious", "Golden Delicious", "Gala", "Fuji", "Granny Smith", "Jonathan" }; JListDemo() { // Create a new JFrame container. JFrame jfrm = new JFrame("JList Demo"); // Specify FlowLayout manager. jfrm.setLayout(new FlowLayout()); // Give the frame an initial size. jfrm.setSize(240, 200); // Terminate the program when the user closes the application. jfrm.setDefaultCloseOperation(JFrame.EXIT_ON_CLOSE); // Create a JList. jlst = new JList<String>(apples);
UNIT-V 17 KNREDDY
JAVA PROGRAMMING
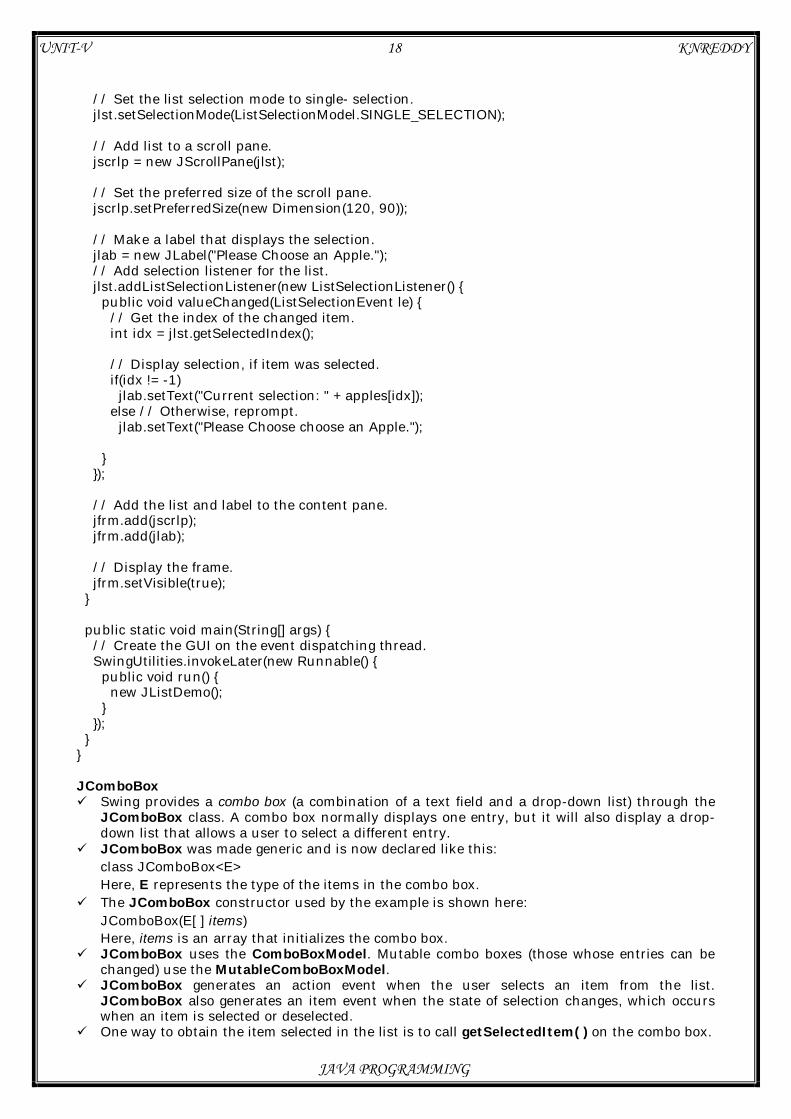
// Set the list selection mode to single- selection. jlst.setSelectionMode(ListSelectionModel.SINGLE_SELECTION); // Add list to a scroll pane. jscrlp = new JScrollPane(jlst); // Set the preferred size of the scroll pane. jscrlp.setPreferredSize(new Dimension(120, 90)); // Make a label that displays the selection. jlab = new JLabel("Please Choose an Apple."); // Add selection listener for the list. jlst.addListSelectionListener(new ListSelectionListener() { public void valueChanged(ListSelectionEvent le) { // Get the index of the changed item. int idx = jlst.getSelectedIndex(); // Display selection, if item was selected. if(idx != -1) jlab.setText("Current selection: " + apples[idx]); else // Otherwise, reprompt. jlab.setText("Please Choose choose an Apple."); } }); // Add the list and label to the content pane. jfrm.add(jscrlp); jfrm.add(jlab); // Display the frame. jfrm.setVisible(true); } public static void main(String[] args) { // Create the GUI on the event dispatching thread. SwingUtilities.invokeLater(new Runnable() { public void run() { new JListDemo(); } }); } } JComboBox Swing provides a combo box (a combination of a text field and a drop-down list) through the
JComboBox class. A combo box normally displays one entry, but it will also display a drop-down list that allows a user to select a different entry.
JComboBox was made generic and is now declared like this: class JComboBox<E> Here, E represents the type of the items in the combo box.
The JComboBox constructor used by the example is shown here: JComboBox(E[ ] items) Here, items is an array that initializes the combo box.
JComboBox uses the ComboBoxModel. Mutable combo boxes (those whose entries can be changed) use the MutableComboBoxModel.
JComboBox generates an action event when the user selects an item from the list. JComboBox also generates an item event when the state of selection changes, which occurs when an item is selected or deselected.
One way to obtain the item selected in the list is to call getSelectedItem( ) on the combo box.
UNIT-V 18 KNREDDY
JAVA PROGRAMMING
// Demonstrate a simple combo box. // This program requires JDK 7 or later. import javax.swing.*; import java.awt.*; import java.awt.event.*; class JComboBoxDemo { JComboBox<String> jcbb; JLabel jlab; // Create an array of apple varieties. String[] apples = { "Winesap", "Cortland", "Red Delicious", "Golden Delicious", "Gala", "Fuji", "Granny Smith", "Jonathan" }; JComboBoxDemo() { // Create a new JFrame container. JFrame jfrm = new JFrame("JComboBox Demo"); // Specify FlowLayout for the layout manager. jfrm.setLayout(new FlowLayout()); // Give the frame an initial size. jfrm.setSize(380, 240); // Terminate the program when the user closes the application. jfrm.setDefaultCloseOperation(JFrame.EXIT_ON_CLOSE); // Create a JComboBox jcbb = new JComboBox<String>(apples); // Make a label that displays the selection. jlab = new JLabel("Please Choose an Apple."); // Add action listener for the combo box. jcbb.addActionListener(new ActionListener() { public void actionPerformed(ActionEvent ae) { // Get a reference to the item selected. String item = (String) jcbb.getSelectedItem(); // Display the selected item. jlab.setText("Current selection: " + item); } }); // Add the combo box and label to the content pane. jfrm.add(jcbb); jfrm.add(jlab); // Display the frame. jfrm.setVisible(true); } public static void main(String[] args) { // Create the GUI on the event dispatching thread. SwingUtilities.invokeLater(new Runnable() { public void run() { new JComboBoxDemo(); } }); } }
UNIT-V 19 KNREDDY
JAVA PROGRAMMING
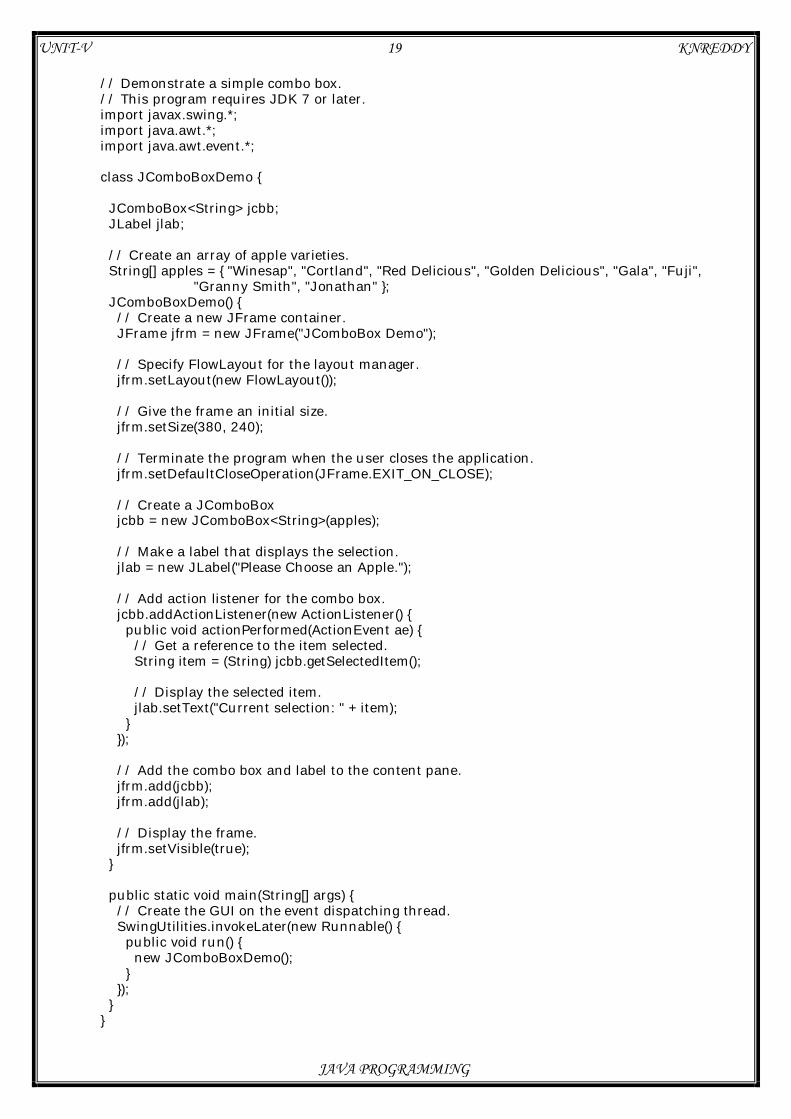
Trees A tree is a component that presents a hierarchical view of data. The user has the ability to
expand or collapse individual subtrees in this display. Trees are implemented in Swing by the JTree class. A sampling of its constructors is shown here: JTree(Object obj [ ]) JTree(Vector<?> v) JTree(TreeNode tn)
In the first form, the tree is constructed from the elements in the array obj. The second form constructs the tree from the elements of vector v. In the third form, the tree whose root node is specified by tn specifies the tree.
JTree relies on two models: TreeModel and TreeSelectionModel. A JTree generates a variety of events, but three relate specifically to trees:
TreeExpansionEvent, TreeSelectionEvent, and TreeModelEvent. TreeExpansionEvent events occur when a node is expanded or collapsed.
A TreeSelectionEvent is generated when the user selects or deselects a node within the tree. A TreeModelEvent is fired when the data or structure of the tree changes.
The listeners for these events are TreeExpansionListener, TreeSelectionListener, and TreeModelListener, respectively.
To listen for this event, implement TreeSelectionListener. It defines only one method, called valueChanged( ), which receives the TreeSelectionEvent object. You can obtain the path to the selected object by calling getPath( ), shown here, on the event object: TreePath getPath( )
To create a hierarchy of tree nodes, the add( ) method JTree does not provide any scrolling capabilities of its own. Instead, a JTree is typically
placed within a JScrollPane.
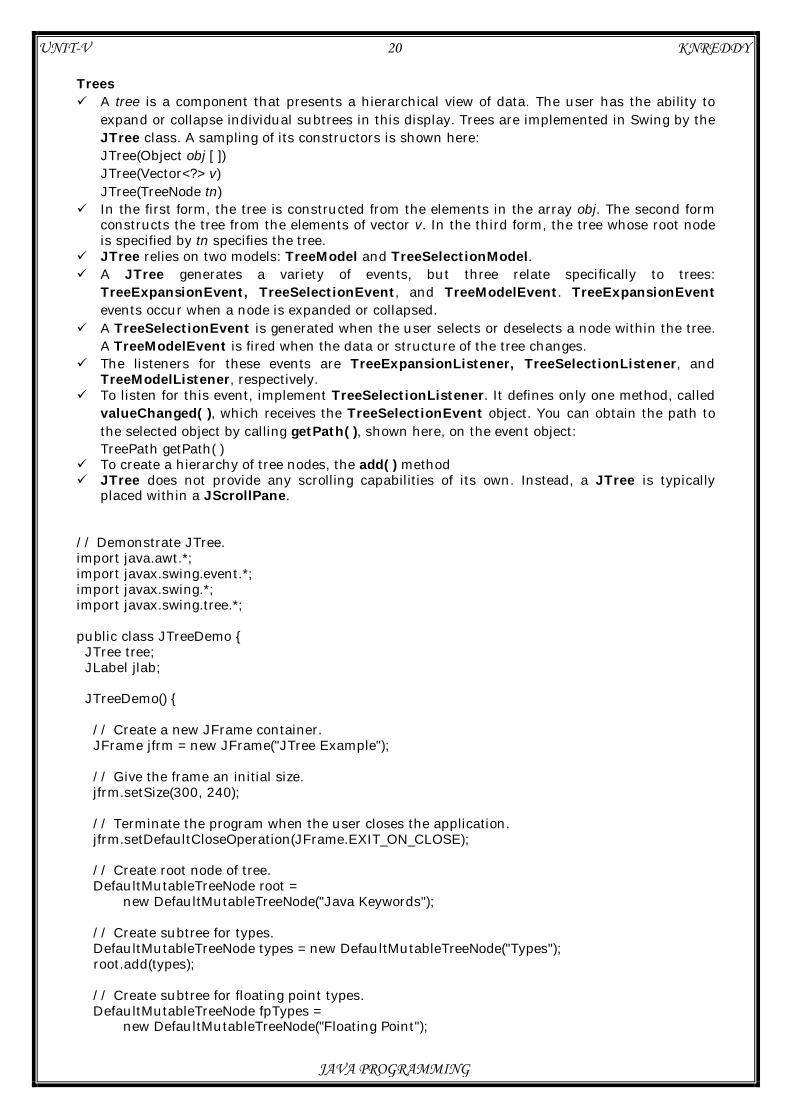
// Demonstrate JTree. import java.awt.*; import javax.swing.event.*; import javax.swing.*; import javax.swing.tree.*; public class JTreeDemo { JTree tree; JLabel jlab; JTreeDemo() { // Create a new JFrame container. JFrame jfrm = new JFrame("JTree Example"); // Give the frame an initial size. jfrm.setSize(300, 240); // Terminate the program when the user closes the application. jfrm.setDefaultCloseOperation(JFrame.EXIT_ON_CLOSE); // Create root node of tree. DefaultMutableTreeNode root = new DefaultMutableTreeNode("Java Keywords"); // Create subtree for types. DefaultMutableTreeNode types = new DefaultMutableTreeNode("Types"); root.add(types); // Create subtree for floating point types. DefaultMutableTreeNode fpTypes = new DefaultMutableTreeNode("Floating Point");
UNIT-V 20 KNREDDY
JAVA PROGRAMMING

types.add(fpTypes); fpTypes.add(new DefaultMutableTreeNode("float")); fpTypes.add(new DefaultMutableTreeNode("double")); // Create subtree for integer types. DefaultMutableTreeNode intTypes = new DefaultMutableTreeNode("Integer"); types.add(intTypes); intTypes.add(new DefaultMutableTreeNode("byte")); intTypes.add(new DefaultMutableTreeNode("short")); intTypes.add(new DefaultMutableTreeNode("int")); intTypes.add(new DefaultMutableTreeNode("long")); // Create nodes for char and boolean. types.add(new DefaultMutableTreeNode("char")); types.add(new DefaultMutableTreeNode("boolean")); // Create subtree for loops. DefaultMutableTreeNode loops = new DefaultMutableTreeNode("Loops"); root.add(loops); loops.add(new DefaultMutableTreeNode("for")); loops.add(new DefaultMutableTreeNode("while")); loops.add(new DefaultMutableTreeNode("do")); // Create the tree. tree = new JTree(root); // Add the tree to a scroll pane. JScrollPane jsp = new JScrollPane(tree); // Add the scroll pane to the center of the default BorderLayout. jfrm.add(jsp); // Add the label to the south region of the default BorderLayout. jlab = new JLabel("Select from the tree."); jfrm.add(jlab, BorderLayout.SOUTH); // Handle tree selection events. tree.addTreeSelectionListener(new TreeSelectionListener() { public void valueChanged(TreeSelectionEvent tse) { jlab.setText("Selection is " + tse.getPath().getLastPathComponent()); } }); // Display the frame. jfrm.setVisible(true); } public static void main(String[] args) { // Create the GUI on the event dispatching thread. SwingUtilities.invokeLater(new Runnable() { public void run() { new JTreeDemo(); } }); } }
UNIT-V 21 KNREDDY
JAVA PROGRAMMING
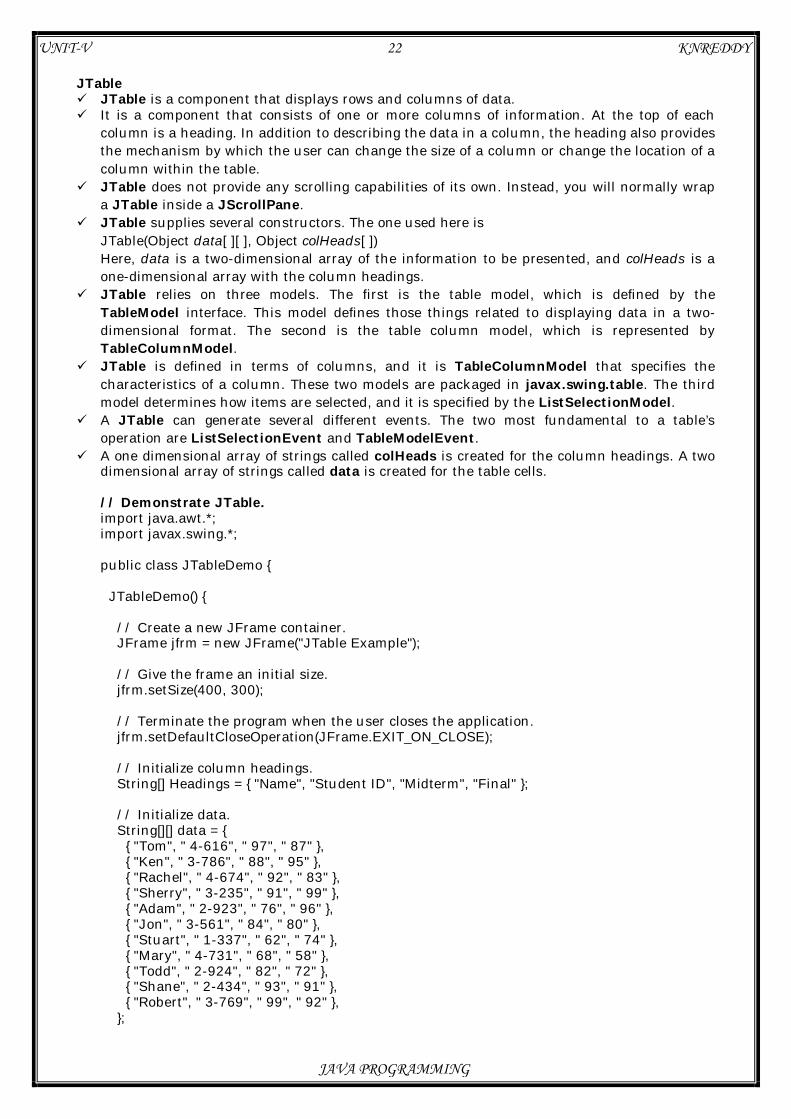
JTable JTable is a component that displays rows and columns of data. It is a component that consists of one or more columns of information. At the top of each
column is a heading. In addition to describing the data in a column, the heading also provides the mechanism by which the user can change the size of a column or change the location of a column within the table.
JTable does not provide any scrolling capabilities of its own. Instead, you will normally wrap a JTable inside a JScrollPane.
JTable supplies several constructors. The one used here is JTable(Object data[ ][ ], Object colHeads[ ]) Here, data is a two-dimensional array of the information to be presented, and colHeads is a one-dimensional array with the column headings.
JTable relies on three models. The first is the table model, which is defined by the TableModel interface. This model defines those things related to displaying data in a two-dimensional format. The second is the table column model, which is represented by TableColumnModel.
JTable is defined in terms of columns, and it is TableColumnModel that specifies the characteristics of a column. These two models are packaged in javax.swing.table. The third model determines how items are selected, and it is specified by the ListSelectionModel.
A JTable can generate several different events. The two most fundamental to a table’s operation are ListSelectionEvent and TableModelEvent.
A one dimensional array of strings called colHeads is created for the column headings. A two dimensional array of strings called data is created for the table cells. // Demonstrate JTable. import java.awt.*; import javax.swing.*; public class JTableDemo { JTableDemo() { // Create a new JFrame container. JFrame jfrm = new JFrame("JTable Example"); // Give the frame an initial size. jfrm.setSize(400, 300); // Terminate the program when the user closes the application. jfrm.setDefaultCloseOperation(JFrame.EXIT_ON_CLOSE); // Initialize column headings. String[] Headings = { "Name", "Student ID", "Midterm", "Final" }; // Initialize data. String[][] data = { { "Tom", " 4-616", " 97", " 87" }, { "Ken", " 3-786", " 88", " 95" }, { "Rachel", " 4-674", " 92", " 83" }, { "Sherry", " 3-235", " 91", " 99" }, { "Adam", " 2-923", " 76", " 96" }, { "Jon", " 3-561", " 84", " 80" }, { "Stuart", " 1-337", " 62", " 74" }, { "Mary", " 4-731", " 68", " 58" }, { "Todd", " 2-924", " 82", " 72" }, { "Shane", " 2-434", " 93", " 91" }, { "Robert", " 3-769", " 99", " 92" }, };
UNIT-V 22 KNREDDY
JAVA PROGRAMMING
// Create the table. JTable table = new JTable(data, Headings); // Add the table to a scroll pane. JScrollPane jsp = new JScrollPane(table); // Add the scroll pane to the content pane. jfrm.add(jsp); // Display the frame. jfrm.setVisible(true); } public static void main(String[] args) { // Create the GUI on the event dispatching thread. SwingUtilities.invokeLater(new Runnable() { public void run() { new JTableDemo(); } }); } }
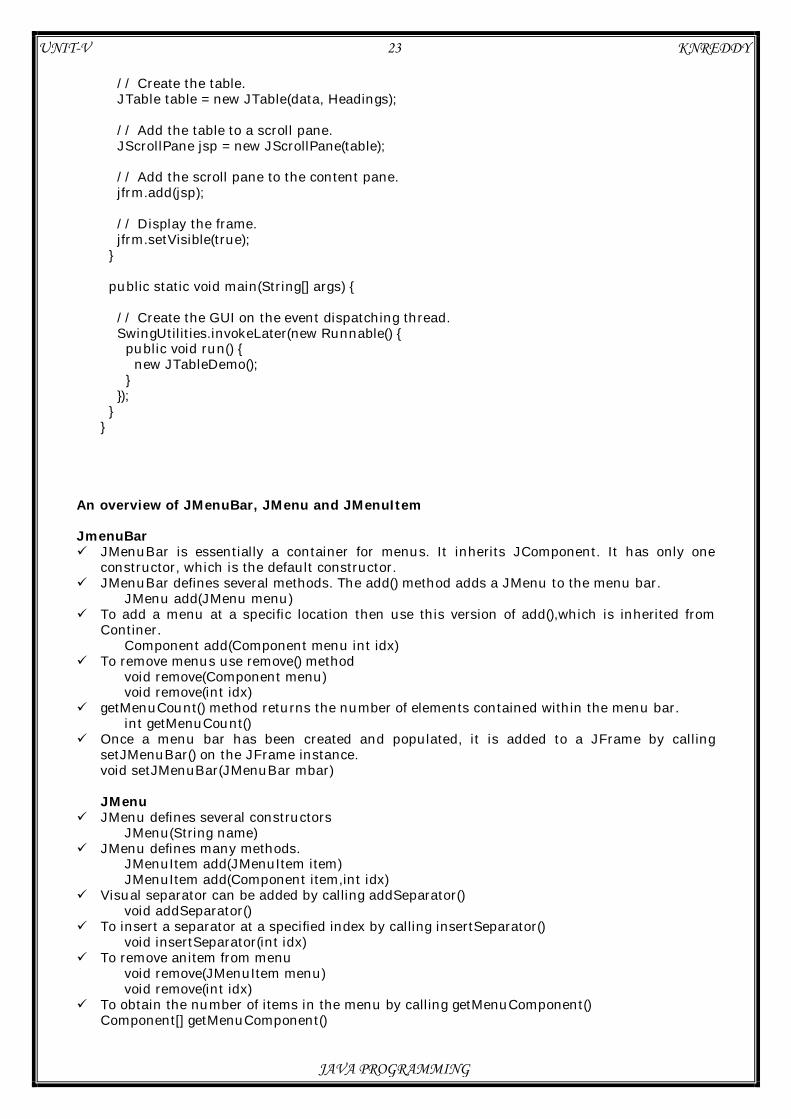
An overview of JMenuBar, JMenu and JMenuItem JmenuBar JMenuBar is essentially a container for menus. It inherits JComponent. It has only one
constructor, which is the default constructor. JMenuBar defines several methods. The add() method adds a JMenu to the menu bar.
JMenu add(JMenu menu) To add a menu at a specific location then use this version of add(),which is inherited from
Continer. Component add(Component menu int idx)
To remove menus use remove() method void remove(Component menu) void remove(int idx)
getMenuCount() method returns the number of elements contained within the menu bar. int getMenuCount()
Once a menu bar has been created and populated, it is added to a JFrame by calling setJMenuBar() on the JFrame instance. void setJMenuBar(JMenuBar mbar) JMenu
JMenu defines several constructors JMenu(String name)
JMenu defines many methods. JMenuItem add(JMenuItem item) JMenuItem add(Component item,int idx)
Visual separator can be added by calling addSeparator() void addSeparator()
To insert a separator at a specified index by calling insertSeparator() void insertSeparator(int idx)
To remove anitem from menu void remove(JMenuItem menu) void remove(int idx)
To obtain the number of items in the menu by calling getMenuComponent() Component[] getMenuComponent()
UNIT-V 23 KNREDDY
JAVA PROGRAMMING

JMenuItem JMenuItem encapsulates an element in a menu. JMenuItem is derived from AbrtractButton. JMenuItem defines several constructors
JMenuItem( String name) To enable/disable a menu item call setEnabled()
void setEnabled(boolean enable) If enable is true the menu is enabled. If enable is false the item is disabled and cannot be
selected.
CREATING A MAIN MENU Constructing the main menu requires several steps. First, create the JMenuBar object that
will hold the menu. Next, construct each menu that will be in the menu bar. In general, a menu is constructed by first creating a JMenu object and the adding
JMenuItems to it. After the menus have been created, add them to the menu bar. The menu bar itself must then be added to the frame by calling setJMenuBar().
Finally for each menu item we must add an action listener that handles the action event fired when the menu item is selected. // Demonstrate a simple main menu. import java.awt.*; import java.awt.event.*; import javax.swing.*; class MenuDemo implements ActionListener { JLabel jlab; MenuDemo() { // Create a new JFrame container. JFrame jfrm = new JFrame("Menu Demo"); // Specify FlowLayout for the layout manager. jfrm.setLayout(new FlowLayout()); // Give the frame an initial size. jfrm.setSize(220, 200); // Terminate the program when the user closes the application. jfrm.setDefaultCloseOperation(JFrame.EXIT_ON_CLOSE); // Create a label that will display the menu selection. jlab = new JLabel(); // Create the menu bar. JMenuBar jmb = new JMenuBar(); // Create the File menu. JMenu jmFile = new JMenu("File"); JMenuItem jmiOpen = new JMenuItem("Open"); JMenuItem jmiClose = new JMenuItem("Close"); JMenuItem jmiSave = new JMenuItem("Save"); JMenuItem jmiExit = new JMenuItem("Exit"); jmFile.add(jmiOpen); jmFile.add(jmiClose); jmFile.add(jmiSave); jmFile.addSeparator(); jmFile.add(jmiExit); jmb.add(jmFile);
UNIT-V 24 KNREDDY
JAVA PROGRAMMING
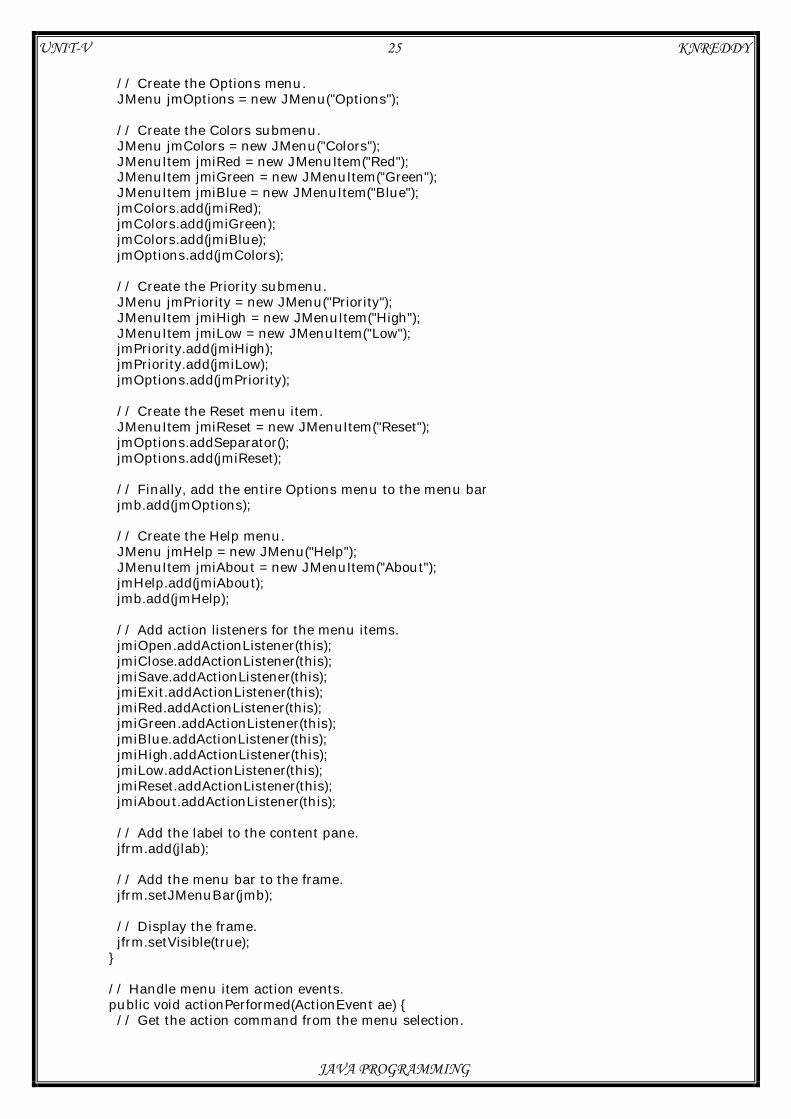
// Create the Options menu. JMenu jmOptions = new JMenu("Options"); // Create the Colors submenu. JMenu jmColors = new JMenu("Colors"); JMenuItem jmiRed = new JMenuItem("Red"); JMenuItem jmiGreen = new JMenuItem("Green"); JMenuItem jmiBlue = new JMenuItem("Blue"); jmColors.add(jmiRed); jmColors.add(jmiGreen); jmColors.add(jmiBlue); jmOptions.add(jmColors); // Create the Priority submenu. JMenu jmPriority = new JMenu("Priority"); JMenuItem jmiHigh = new JMenuItem("High"); JMenuItem jmiLow = new JMenuItem("Low"); jmPriority.add(jmiHigh); jmPriority.add(jmiLow); jmOptions.add(jmPriority); // Create the Reset menu item. JMenuItem jmiReset = new JMenuItem("Reset"); jmOptions.addSeparator(); jmOptions.add(jmiReset); // Finally, add the entire Options menu to the menu bar jmb.add(jmOptions); // Create the Help menu. JMenu jmHelp = new JMenu("Help"); JMenuItem jmiAbout = new JMenuItem("About"); jmHelp.add(jmiAbout); jmb.add(jmHelp); // Add action listeners for the menu items. jmiOpen.addActionListener(this); jmiClose.addActionListener(this); jmiSave.addActionListener(this); jmiExit.addActionListener(this); jmiRed.addActionListener(this); jmiGreen.addActionListener(this); jmiBlue.addActionListener(this); jmiHigh.addActionListener(this); jmiLow.addActionListener(this); jmiReset.addActionListener(this); jmiAbout.addActionListener(this); // Add the label to the content pane. jfrm.add(jlab); // Add the menu bar to the frame. jfrm.setJMenuBar(jmb); // Display the frame. jfrm.setVisible(true); } // Handle menu item action events. public void actionPerformed(ActionEvent ae) { // Get the action command from the menu selection.
UNIT-V 25 KNREDDY
JAVA PROGRAMMING
String comStr = ae.getActionCommand(); // If user chooses Exit, then exit the program. if(comStr.equals("Exit")) System.exit(0); // Otherwise, display the selection. jlab.setText(comStr + " Selected"); } public static void main(String[] args) { // Create the GUI on the event dispatching thread. SwingUtilities.invokeLater(new Runnable() { public void run() { new MenuDemo(); } }); } }
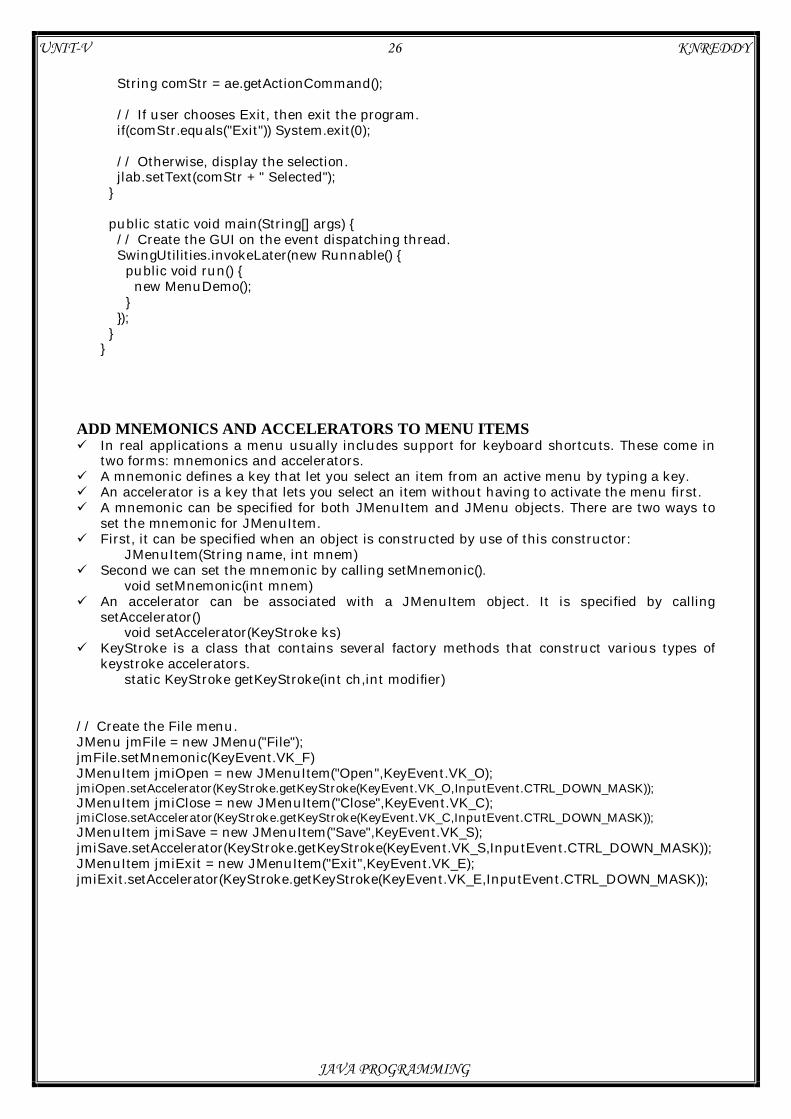
ADD MNEMONICS AND ACCELERATORS TO MENU ITEMS In real applications a menu usually includes support for keyboard shortcuts. These come in
two forms: mnemonics and accelerators. A mnemonic defines a key that let you select an item from an active menu by typing a key. An accelerator is a key that lets you select an item without having to activate the menu first. A mnemonic can be specified for both JMenuItem and JMenu objects. There are two ways to
set the mnemonic for JMenuItem. First, it can be specified when an object is constructed by use of this constructor:
JMenuItem(String name, int mnem) Second we can set the mnemonic by calling setMnemonic().
void setMnemonic(int mnem) An accelerator can be associated with a JMenuItem object. It is specified by calling
setAccelerator() void setAccelerator(KeyStroke ks)
KeyStroke is a class that contains several factory methods that construct various types of keystroke accelerators.
static KeyStroke getKeyStroke(int ch,int modifier)
// Create the File menu. JMenu jmFile = new JMenu("File"); jmFile.setMnemonic(KeyEvent.VK_F) JMenuItem jmiOpen = new JMenuItem("Open",KeyEvent.VK_O); jmiOpen.setAccelerator(KeyStroke.getKeyStroke(KeyEvent.VK_O,InputEvent.CTRL_DOWN_MASK)); JMenuItem jmiClose = new JMenuItem("Close",KeyEvent.VK_C); jmiClose.setAccelerator(KeyStroke.getKeyStroke(KeyEvent.VK_C,InputEvent.CTRL_DOWN_MASK)); JMenuItem jmiSave = new JMenuItem("Save",KeyEvent.VK_S); jmiSave.setAccelerator(KeyStroke.getKeyStroke(KeyEvent.VK_S,InputEvent.CTRL_DOWN_MASK));JMenuItem jmiExit = new JMenuItem("Exit",KeyEvent.VK_E); jmiExit.setAccelerator(KeyStroke.getKeyStroke(KeyEvent.VK_E,InputEvent.CTRL_DOWN_MASK));
UNIT-V 26 KNREDDY
JAVA PROGRAMMING

JOption Pane: Swing provides extensive built-in support for dialogs through the JOptionPane class. JOptionPane is an easy-to-use dialog class that offers solutions to many common dialog
based problems. JOptionPane supports the four basic types of dialogs : Message Confirmation Input Option
A message dialog displays a message and then waits until the user presses the OK button. This dialog provides an easy and effective way to ensure that the user is aware of some pieces of information.
A confirmation dialog asks the user a question that typically has a Yes/No answer, and then waits for a response
An input dialog allows the user to enter a string or select an item from a list. An option dialog lets you specify a list of options from which the user will choose. All dialogs created by JOptionPane are modal. A modal dialog demands a response before the
program will continue. As a result you cannot refocus input to another part of the application without first closing the dialog. Thus a modal dialog stops the program until the user responds.
A modeless( also called nonmodal) dialog does not prevent other parts of the program from being used. Thus, the rest of the program remains active and input can be refocused to other windows.
JOptionPane defines the following four factory methods that create standard. JDialog based dialogs: showConfirmDilog(), showInputDialog(), showMessageDialog(), and
showOptionDialog(). showMessageDialog()
The showMessageDialog() method creates the simplest dialog that can be constructed. static void showMessageDialog(Component parent, Object msg) throws HeadlessException
Here parent specifies the component relative to which the dialog is displayed. If this argument is null, the dialog is usually displayed in the center of the screen. msg- message to be displayed // A very simple JOptionPane demonstration. import java.awt.*; import java.awt.event.*; import javax.swing.*; class MsgDialogDemo { JLabel jlab; JButton jbtnShow; JFrame jfrm; MsgDialogDemo() { // Create a new JFrame container. jfrm = new JFrame("Simple Message Dialog"); // Specify FlowLayout for the layout manager. jfrm.setLayout(new FlowLayout()); // Give the frame an initial size. jfrm.setSize(400, 250); // Terminate the program when the user closes the application. jfrm.setDefaultCloseOperation(JFrame.EXIT_ON_CLOSE); // Create a label that will show when the dialog returns. jlab = new JLabel();
UNIT-V 27 KNREDDY
JAVA PROGRAMMING

// Create a button that will display the dialog. jbtnShow = new JButton("Show Dialog"); // Add action listener for the button. jbtnShow.addActionListener(new ActionListener() { public void actionPerformed(ActionEvent le) { jlab.setText("Dialog Opened"); // Create a dialog that shows a message. JOptionPane.showMessageDialog(jfrm, "Disk space is low."); // This statement won't execute until the // call to showMessageDialog() returns. jlab.setText("Dialog Closed"); } }); // Add the button and label to the content pane. jfrm.add(jbtnShow); jfrm.add(jlab); // Display the frame. jfrm.setVisible(true); } public static void main(String[] args) { // Create the GUI on the event dispatching thread. SwingUtilities.invokeLater(new Runnable() { public void run() { new MsgDialogDemo(); } }); } }
There are two other forms of showMessageDialog() : static void showMessageDialog(Component parent, Object msg, String title,int msgT) throws HeadlessException
The title parameter lets you specify a title foe the dialog. By default the title is Message, but it is usually better to specify a title that fits the message that is displaying.
The msgT parameter indicates the nature of the message. It must be one of the following values defined by JOptionPane. ERROR_MESSAGE Indicates that an error message is displayed.
The standard error icon is used INFORMATION_MESSAGE Indicates that an informational message is displayed.
The standard information icon is used. This is the default message type.
PLAIN_MESSAGE Indicates a “plain” message which is one in which no icon is displayed.
QUESTIN_MESSAGE Indicates that a question message is displayed. The question mark icon is used.
WARNING_MESSAGE Indicates that a warning message is displayed. The standard warning icon is used.
We can specify one of our own by using the following version of showMessageDialog().
static void showMessageDialog(Component parent, Object msg, String title, int msgT,Icon image) throws HeadlessException
UNIT-V 28 KNREDDY
JAVA PROGRAMMING
Related Documents