Unit 2 Archaeological skills and method Overview Part 2

Unit 2 Archaeological skills and methodOverview Part 2.
Dec 19, 2015
Welcome message from author
This document is posted to help you gain knowledge. Please leave a comment to let me know what you think about it! Share it to your friends and learn new things together.
Transcript

Unit 2 Archaeological skills and method Overview
Part 2

Unit 2 Archaeological skills and method The exam
1 hour 45 minutes 90 marks
Section A (60 minutes)Source response (6–8 questions) (60 marks)
Read introduction and source booklet answer all questions 1 minute per mark
Section B (45 minutes)Chose one question from 3. Use lots of examples (including the sources and Unit 1 material)
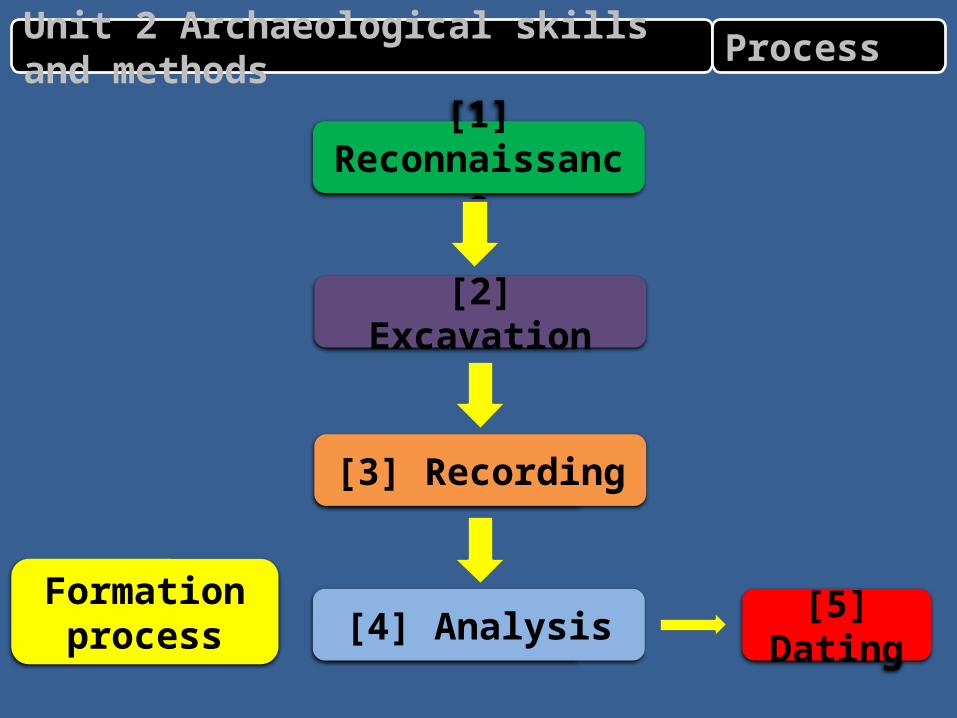
[1] Reconnaissance
Unit 2 Archaeological skills and methods Process
[2] Excavation
[3] Recording
[4] Analysis [5] DatingFormation
process

[2] Excavation Excavation
Q: Briefly note down the reasons for and against excavation.
The aim of excavation is to identify, uncover, date and – by understanding the formation processes – interpret each archaeological context on the site.

[2] Excavation Research or rescue excavationTypes of Excavation
Research excavation• On sites where there is no immediate threat of destruction. • Selected by archaeologists for its suitability to answer the
questions. • When the perceived benefits to archaeological understanding
outweigh the loss of the original site, or part of it, to future generations.
Rescue excavation• Involved trying to excavate and record as much as possible in the
time before the builders began work. • Today most digs are rescue excavation. They take place within the
framework of the planning process. • Sometimes results in many tiny ‘keyhole’ excavations into parts of
sites rather than always revealing large parts of them.

Management diagram
Director
Excavation Finds Specialists
Site supervisors
Site assistants
Diggers
Find supervisors
Conservator
Finds processors
Surveyor
Photographer
Environmentalist
[2] Excavation

Digging equipment
Recording equipment
Finds processing equipment
General site equipment
Q: Provide at least three examples for each type of equipment.
The tools[2] ExcavationPrelim
inaries

The Health and Safety at Work Act can be summed up as follows: first, an employer (the excavation director) must provide proper premises (the site) in which, and proper plant and appliances (tools) by means of which, the worker’s duty can be performed; second, the employer must maintain the premises, plant and apparatus in a proper condition; third, the employer must establish and enforce a proper system of working.
The tools[2] ExcavationPrelim
inaries

Study Figure 1 and use your own knowledge.Explain how this type of feature can be effectively and safely excavated. (8 marks)
Figure 1: Photograph of the partially excavated well at Pumsaint fort
Exam question[2] Excavation

L1: List of general health and safety considerations or excavation techniquessuitable for deep excavation. More complete lists score 2 marks.
L2: General description on dealing with organic remains, but no link to source.Or Description of a few health and safety considerations and explanation ofwhy they are relevant, but no link to source.Or General description of how to carry out deep excavation, but no link to source. 3–4
L3: Two parts of L2 with link to source. 5–6
L4: Discussion of at least three health and safety considerations or excavation methodsspecific to this type of feature or dealing with waterlogged deposits or some combinationof the three and explanation of relevance. Explicit link to source required. 7–8
Expect: Shoring, fencing-off deep excavations, gas meters, no lone working, pumping/sponging out water, bucket chains, bucket hoist. Students may point out that this feature is deep enough to require shoring, and this should be credited.
NB: Precautions for dealing with anaerobic conditions should be credited.
Exam question mark scheme[2] Excavation

There are two key elements to the excavation method vertical sequence and horizontal layout – what is the significance of these?
Trenches, test pits and shovel pit testing
Area excavation
Box-grid or quadrant excavation
Planum excavation
How to dig[2] ExcavationExcavation strategies

A rectangular-shaped excavation of variable width and length.
Test pits or ‘sondages’ are essentially square trenches, usually 1m square.
Used either to evaluate the stratigraphy of a site before a decision is made on whether or not to excavate or as part of an excavation sampling strategy.
Q: What is the purpose of digging a test pit and trenches? How might this relate to reconnaissance?
Trenches and test pits[2] ExcavationExcavation strategies

On very shallow sites with little stratigraphy, shovel pit testing is sometimes used.
Q: Identify the main advantages and disadvantages of trenches, test pits and shovel pit testing.
Shovel pit testing[2] ExcavationExcavation strategies

Barrow excavated in quadrants
Un-excavated quadrant
Un-excavated quadrant
Ring-ditch
Sections
Sections
Q: Using Figure 1 explain the process of a quadrant excavation.
Quadrant[2] ExcavationExcavation strategies

System of excavating circular or near-circular sites and features such as round barrows, pits or round houses.
Divided into four equal sectors (quadrants).
The removal of two alternate quadrants provides a complete transverse section along each of the major axes and thus allows good control over the stratigraphy.
Variations in the method include leaving cross baulks along the main axes and staggering the baulks so that complete sections are retained while the central area is excavated.
Quadrant[2] ExcavationExcavation strategies

Extent of the features to be uncovered determines the size of the excavation.
Digging may take place over several seasons. Different parts of the site are dug and recorded each year.
Q: What are the main strengths and limitations of this excavation method?
• Complete structures can be studied.• Complex relationships between
features can be clarified.• It provides excellent recording
possibilities.• A total understanding of horizontal
relationships is possible.• Doesn’t reveal the vertical stratigraphy
– but this can be overcome.
Area excavation[2] ExcavationExcavation strategies

Between trenches and area excavation.
Give access to both the horizontal view and the vertical cut simultaneously.
Q: What are the main strengths and limitations of this method?
Whole layout of a site is not revealed until the baulks are finally removed.
Important relationships between features or structures would not be understood while digging.
The system was complex, costly of time and manpower and of little use on sites with very deep stratigraphy.
Box-grid excavation[2] ExcavationExcavation strategies

If a site lacks clear stratification and generally comprises soil rather than stones or building materials, the identification of contexts can present problems.
Excavators ‘plane’ off a predetermined thickness of deposit across the whole site, plan and photograph the revealed surface and then repeat the process.
Excavation of cave deposits at Creswell Crags took the planum method one step further by also dividing the deposits vertically so as to create small cubes of cave earth for precision in recording ecofacts and artefacts
Finds at Creswell Crags using the planum excavation method
Planum[2] ExcavationExcavation strategies

Q: Explain the process of excavation – think about the equipment that archaeologists use and how they would gather material.
Recovering material[2] Excavation
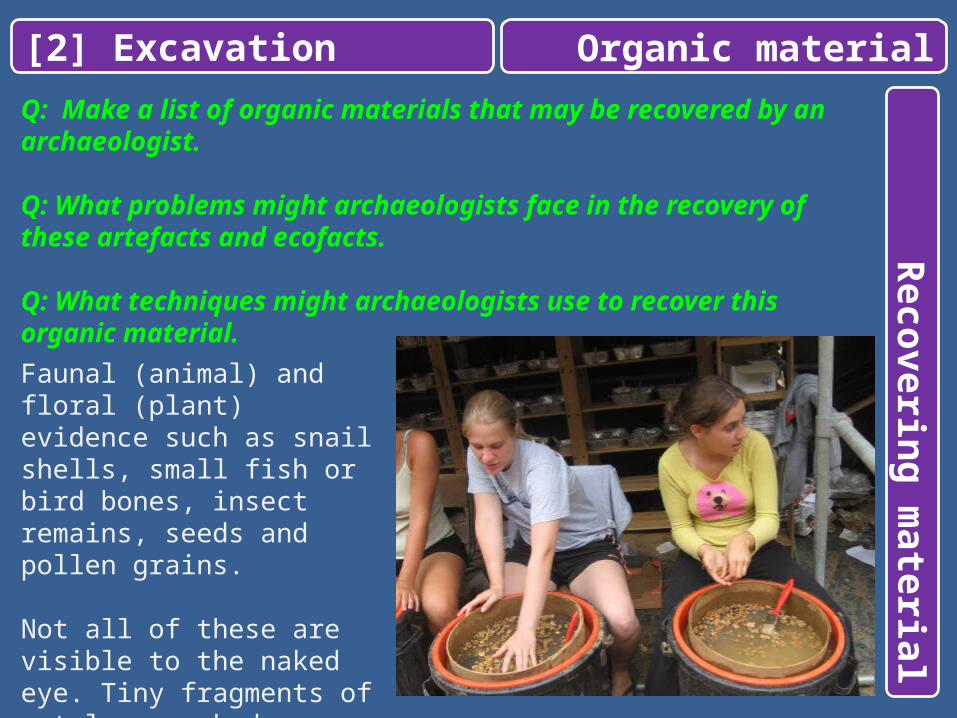
Q: Make a list of organic materials that may be recovered by an archaeologist.
Q: What problems might archaeologists face in the recovery of these artefacts and ecofacts.
Q: What techniques might archaeologists use to recover this organic material.Faunal (animal) and floral (plant) evidence such as snail shells, small fish or bird bones, insect remains, seeds and pollen grains.
Not all of these are visible to the naked eye. Tiny fragments of metal or worked material such as flint or glass present the same problem.
Organic material[2] ExcavationRecovering m
aterial

Some recovery of environmental remains occurs off-site.
Bags of soil samples are taken from selected locations such as pits, ditches or other similar diagnostic features or layers.
On peat sites, long sampling tins are hammered vertically into the sides of freshly dug sections, removed and quickly sealed in plastic to avoid contamination.
They are then placed in cold storage before detailed analysis in the laboratory.
One aspect of soil sampling which has often been neglected is attempting to recover dietary evidence when excavating human remains. Studies have suggested that around 70% of burials have evidence surviving in abdominal soils.
Q: In the laboratory pollens and plant remains are analysed along with chemical analysis (particularly for phosphates) of soil samples. What can these samples tell us about past activity?
Soil sampling[2] ExcavationRecovering m
aterial

Involves putting soil samples into water.
Lighter materials such as plant remains float to the surface while the soil drops to the bottom of the container.
Oil can be added to hold tiny particles together.
Water is drained from the top through a sequence of increasingly finely meshed sieves.
Soil sampling[2] ExcavationRecovering m
aterial

They do not, in fact, belong to anyone.
Generally thought to be covered by the Burial Act, 1857.
Required to obtain a Licence for the Removal of Human Remains from the Ministry of Justice.
Conditions relating to how the remains should be removed, how and where they might be studied and where they should finally be deposited (storage in a museum, reburial or cremation).
If you find human remains during an excavation and you do not hold a licence, then you should immediately inform a coroner, as required under the Coroners’ Amendment Act, 1926.
Human remains[2] Excavation
Related Documents