INSTALLATION GUIDE How to Install uniCenta oPOS… Version 1 : Jan’ 11 Copyright © uniCenta 2009-2011

Welcome message from author
This document is posted to help you gain knowledge. Please leave a comment to let me know what you think about it! Share it to your friends and learn new things together.
Transcript

INSTALLATION GUIDE
How to Install uniCenta oPOS…Version 1 : Jan’ 11
Copyright © uniCenta 2009-2011

Some Facts
uniCenta oPOS is
In 2010 (May-December) it was
Downloaded over 4,000 times
...by users in 66 Countries
It will always be closely aligned
to Openbravo POS
Copyright © uniCenta 2009-2011

Some More Facts
Its own dedicated website since June 2010 www.unicentaopos.co.uk
Sourceforge.netsince April 2010
Regular bug-fix & upgrade schedule
Source Code will always be available on request
Copyright © uniCenta 2009-2011

Essential Ingredients
Coded in Java
Developed using Netbeans
Only proven Open Source
components used
Copyright © uniCenta 2009-2011

3 Simple steps
1. Download and Install Java
2. Download and Install uniCenta oPOS
3. Configure to suit your needs
But first, watch the video on the next page
too see how simple the install is…
Copyright © uniCenta 2009-2011

Install Video
Click on the image to
start the video
It’s shows you “How To…”
in real-time
Copyright © uniCenta 2009-2011

Step 1 : Get Java runtime
Go to www.java.com and
get your Java download
Runs across hundreds of
different types of devices
and Operating Systems
Copyright © uniCenta 2009-2011
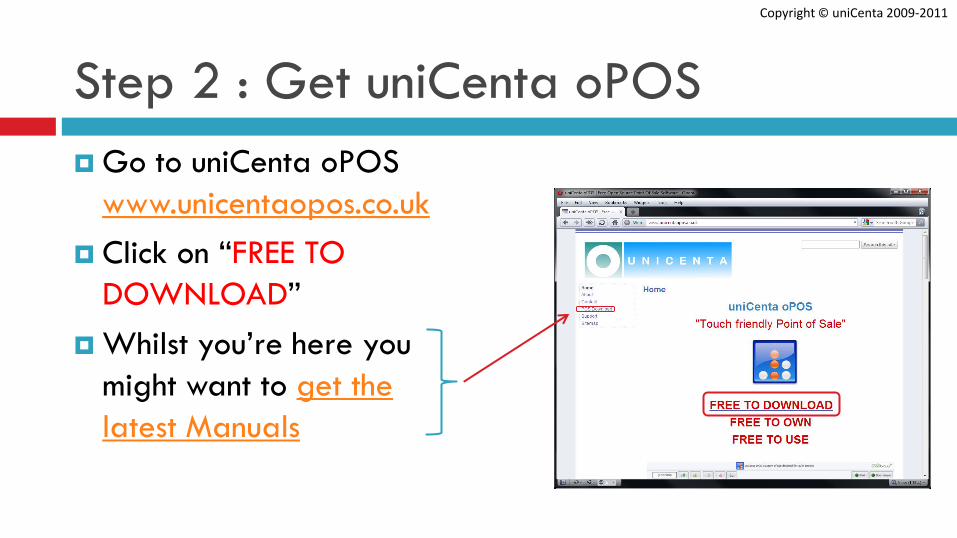
Step 2 : Get uniCenta oPOS
Go to uniCenta oPOS
www.unicentaopos.co.uk
Click on “FREE TO
DOWNLOAD”
Whilst you’re here you
might want to get the
latest Manuals
Copyright © uniCenta 2009-2011

Step 2 : continued
Run the Installer Select Install Language
Copyright © uniCenta 2009-2011

Step 2 : continued
Click Next Accept the License
Copyright © uniCenta 2009-2011

Step 2 : continued
Install Directory Click Next
Suggest you install in
this directory
Copyright © uniCenta 2009-2011

Step 2 : continued
Install Running… Install Complete!
Always a good idea to read the
Readme file as it has info’ about
the current release
Copyright © uniCenta 2009-2011

Step 3 : Running uniCenta oPOS
Look for new icon on your Desktop
New Folder in your Start>Programs
First: you need to Configure uniCentaoPOS
Copyright © uniCenta 2009-2011

Step 3 : Configuration - Database
These are Default settings created during the Install.
Leave “as is”, unless you installed in another directory or intend using a different database
database driver library location
database driver in use
location of your databaseOnly needed if you use another database such as MySQL & etc
Copyright © uniCenta 2009-2011

Step 3 : Configuration - Register
These are Default settings created during the Install
…the name of this terminal
…the “look & feel” – colour; buttons; fonts & etc
…run in a Window or Full screen
…simple; standard or restaurant
…customer facing display
…usually the receipt/ticket printer at the POS
…could be a kitchen, inventory, pick-list & etc., printer
…any other printer
…weighing scales
…barcode scanner
…printer for report output such as laser or inkjet
Copyright © uniCenta 2009-2011

Copyright © uniCenta 2009-2011
Step 3 : Configuration - Locale
These are Default settings created during the Install.
Locale (Language/Country) is usually the only option you will need to change here.
The others use the Regional settings format of your Operating System.

Copyright © uniCenta 2009-2011
Step 3 : Configuration - Payment
These are Default settings created during the Install.
Payment Gateways are discussed in another document
…type of card reader attachment

Install and Configure. Done!
Configuration Saved
* Configuration changes you make later
usually require a restart of uniCentaoPOS
Run uniCenta oPOS
Copyright © uniCenta 2009-2011

Copyright © uniCenta 2009-2011
Running for the First Time
The first time uniCenta
oPOS is run, it looks for
a database
Click “Yes” to create…
getting itself ready
could take several
minutes
Copyright © uniCenta 2009-2011

Up & Running!
…when the
Database build is
complete; the Main
Screen is displayed
Click Administrator
Copyright © uniCenta 2009-2011

Copyright © uniCenta 2009-2011
You’re Good to Go!
Sales screen
Sidebar

Sidebar
Functions just a click
away
If you need to make
changes… use
Configuration
Open
Sidebar
Copyright © uniCenta 2009-2011

Available Manuals
Installation Guide
Hardware Installation
Administrator Guide
FAQ
User Guide
Copyright © uniCenta 2009-2011

END OF INSTALLATION GUIDE
Now read the Administrator Guide…
Copyright © uniCenta 2009-2011
Related Documents


