Ubuntu Server Guide Changes, errors and bugs This is the current edition for Ubuntu 20.04 LTS, Focal Fossa. Ubuntu serverguides for previous LTS versions: 18.04 (PDF), 16.04 (PDF). If you find any errors or have suggestions for improvements to pages, please use the link at the bottom of each topic titled: “Help improve this document in the forum.” This link will take you to the Server Discourse forum for the specific page you are viewing. There you can share your comments or let us know about bugs with each page. Offline Download this guide as a PDF Support There are a couple of different ways that Ubuntu Server Edition is supported: commercial support and community support. The main commercial support (and development funding) is available from Canonical, Ltd. They supply reasonably- priced support contracts on a per desktop or per server basis. For more information see the Ubuntu Advantage page. Community support is also provided by dedicated individuals and companies that wish to make Ubuntu the best distribution possible. Support is provided through multiple mailing lists, IRC channels, forums, blogs, wikis, etc. The large amount of information available can be overwhelming, but a good search engine query can usually provide an answer to your questions. See the Ubuntu Support page for more information. Basic installation This chapter provides an overview of installing Ubuntu 20.04 Server Edition. There is more detailed docu- mentation on other installer topics. Preparing to Install This section explains various aspects to consider before starting the installation. System requirements Ubuntu 20.04 Server Edition provides a common, minimalist base for a variety of server applications, such as file/print services, web hosting, email hosting, etc. This version supports four 64-bit architectures: • amd64 (Intel/AMD 64-bit) • arm64 (64-bit ARM) • ppc64el (POWER8 and POWER9) • s390x (IBM Z and LinuxONE) The recommended system requirements are: • CPU: 1 gigahertz or better 1

Welcome message from author
This document is posted to help you gain knowledge. Please leave a comment to let me know what you think about it! Share it to your friends and learn new things together.
Transcript
Ubuntu Server Guide
Changes, errors and bugs
This is the current edition for Ubuntu 20.04 LTS, Focal Fossa. Ubuntu serverguides for previous LTS versions:18.04 (PDF), 16.04 (PDF).
If you find any errors or have suggestions for improvements to pages, please use the link at the bottom ofeach topic titled: “Help improve this document in the forum.” This link will take you to the Server Discourseforum for the specific page you are viewing. There you can share your comments or let us know about bugswith each page.
Offline
Download this guide as a PDF
Support
There are a couple of different ways that Ubuntu Server Edition is supported: commercial support andcommunity support. The main commercial support (and development funding) is available from Canonical,Ltd. They supply reasonably- priced support contracts on a per desktop or per server basis. For moreinformation see the Ubuntu Advantage page.
Community support is also provided by dedicated individuals and companies that wish to make Ubuntu thebest distribution possible. Support is provided through multiple mailing lists, IRC channels, forums, blogs,wikis, etc. The large amount of information available can be overwhelming, but a good search engine querycan usually provide an answer to your questions. See the Ubuntu Support page for more information.
Basic installation
This chapter provides an overview of installing Ubuntu 20.04 Server Edition. There is more detailed docu-mentation on other installer topics.
Preparing to Install
This section explains various aspects to consider before starting the installation.
System requirements
Ubuntu 20.04 Server Edition provides a common, minimalist base for a variety of server applications, suchas file/print services, web hosting, email hosting, etc. This version supports four 64-bit architectures:
• amd64 (Intel/AMD 64-bit)• arm64 (64-bit ARM)• ppc64el (POWER8 and POWER9)• s390x (IBM Z and LinuxONE)
The recommended system requirements are:
• CPU: 1 gigahertz or better
1
• RAM: 1 gigabyte or more• Disk: a minimum of 2.5 gigabytes
Server and Desktop Differences
The Ubuntu Server Edition and the Ubuntu Desktop Edition use the same apt repositories, making it justas easy to install a server application on the Desktop Edition as on the Server Edition.
One major difference is that the graphical environment used for the Desktop Edition is not installed forthe Server. This includes the graphics server itself, the graphical utilities and applications, and the varioususer-supporting services needed by desktop users.
Backing Up
Before installing Ubuntu Server Edition you should make sure all data on the system is backed up.
If this is not the first time an operating system has been installed on your computer, it is likely you will needto re-partition your disk to make room for Ubuntu.
Any time you partition your disk, you should be prepared to lose everything on the disk should you make amistake or something goes wrong during partitioning. The programs used in installation are quite reliable,most have seen years of use, but they also perform destructive actions.
Preparing install media
There are platform specific step-by-step examples for s390x LPAR, z/VM and ppc64el installations.
For amd64, download the install image from https://releases.ubuntu.com/20.04/.
There are many ways to boot the installer but the simplest and commonest way is to create a bootable USBstick to boot the system to be installed with (tutorials for other operating systems are also available).
Booting the installer
Plug the USB stick into the system to be installed and start it.
Most computers will automatically boot from USB or DVD, though in some cases this is disabled to improveboot times. If you don’t see the boot message and the “Welcome” screen which should appear after it, youwill need to set your computer to boot from the install media.
There should be an on-screen message when the computer starts telling you what key to press for settingsor a boot menu. Depending on the manufacturer, this could be Escape, F2,F10 or F12. Simply restart yourcomputer and hold down this key until the boot menu appears, then select the drive with the Ubuntu installmedia.
If you are still having problems, check out the Ubuntu Community documentation on booting from CD/DVD.
After a few moments, the installer will start in its language selection screen.
welcome_c|690x517
2

Using the installer
The installer is designed to be easy to use and have sensible defaults so for a first install you can mostly justaccept the defaults for the most straightforward install:
• Choose your language• Update the installer (if offered)• Select your keyboard layout• Do not configure networking (the installer attempts to configure wired network interfaces via DHCP,
but you can continue without networking if this fails)• Do not configure a proxy or custom mirror unless you have to in your network• For storage, leave “use an entire disk” checked, and choose a disk to install to, then select “Done” on
the configuration screen and confirm the install• Enter a username, hostname and password• Just select Done on the SSH and snap screens• You will now see log messages as the install is completed• Select restart when this is complete, and log in using the username and password provided
There is more detailed documentation on all these options.
Advanced Installation
Software RAID
Redundant Array of Independent Disks “RAID” is a method of using multiple disks to provide differentbalances of increasing data reliability and/or increasing input/output performance, depending on the RAIDlevel being used. RAID is implemented in either software (where the operating system knows about bothdrives and actively maintains both of them) or hardware (where a special controller makes the OS thinkthere’s only one drive and maintains the drives ‘invisibly’).
The RAID software included with current versions of Linux (and Ubuntu) is based on the ‘mdadm’ driverand works very well, better even than many so-called ‘hardware’ RAID controllers. This section will guideyou through installing Ubuntu Server Edition using two RAID1 partitions on two physical hard drives, onefor / and another for swap.
RAID Configuration
Follow the installation steps until you get to the Guided storage configuration step, then:
Select Custom storage layout.
Create the /boot partition in a local disk. So select one of the devices listed in available devices and AddGPT Partition. Next, enter the partition size, then choose the desired Format (ext4) and /boot as mountpoint. And finally, select Create.
Now to create the RAID device select Create software RAID (md) under AVAILABLE DEVICES.
Add the name of the RAID disk (the default is md0).
For this example, select “1 (mirrored)” in RAID level, but if you are using a different setup choose theappropriate type (RAID0 RAID1 RAID5 RAID6 RAID10).
Note
In order to use RAID5, RAID6 and RAID10 you need more than two drives. Using RAID0 orRAID1 only two drives are required.
3
Select the devices that will be used by this RAID device. The real devices can be marked as active or spare,by default it becomes active when is selected.
Select the Size of the RAID device.
Select Create.
The new RAID device (md0 if you did not change the default) will show up in the available devices list, withsoftware RAID 1 type and the chosen size.
Repeat steps above for the other RAID devices.
Partitioning
Select the RAID 1 device created (md0) then select “Add GPT Partition”.
Next, select the Size of the partition. This partition will be the swap partition, and a general rule for swapsize is twice that of RAM. Enter the partition size, then choose swap in Format. And finally, select Create.
Note
A swap partition size of twice the available RAM capacity may not always be desirable, especiallyon systems with large amounts of RAM. Calculating the swap partition size for servers is highlydependent on how the system is going to be used.
For the / partition once again select the RAID 1 device then “Add GPT Partition”.
Use the rest of the free space on the device, choose the format (default is ext4) and select / as mount point,then Create.
Repeat steps above for the other partitions.
Once it is finished select “Done”.
The installation process will then continue normally.
Degraded RAID
At some point in the life of the computer a disk failure event may occur. When this happens, using SoftwareRAID, the operating system will place the array into what is known as a degraded state.
If the array has become degraded, due to the chance of data corruption, by default Ubuntu Server Editionwill boot to initramfs after thirty seconds. Once the initramfs has booted there is a fifteen second promptgiving you the option to go ahead and boot the system, or attempt manual recover. Booting to the initramfsprompt may or may not be the desired behavior, especially if the machine is in a remote location. Bootingto a degraded array can be configured several ways:
• The dpkg-reconfigure utility can be used to configure the default behavior, and during the process youwill be queried about additional settings related to the array. Such as monitoring, email alerts, etc. Toreconfigure mdadm enter the following:
sudo dpkg−r e c on f i g u r e mdadm
• The dpkg−reconfigure mdadm process will change the /etc/initramfs−tools/conf.d/mdadm configura-tion file. The file has the advantage of being able to pre-configure the system’s behavior, and can alsobe manually edited:
BOOT_DEGRADED=true
4

Note
The configuration file can be overridden by using a Kernel argument.
• Using a Kernel argument will allow the system to boot to a degraded array as well:
– When the server is booting press Shift to open the Grub menu.
– Press e to edit your kernel command options.
– Press the down arrow to highlight the kernel line.
– Add “bootdegraded=true” (without the quotes) to the end of the line.
– Press Ctrl+x to boot the system.
Once the system has booted you can either repair the array see the next section for details, or copy importantdata to another machine due to major hardware failure.
RAID Maintenance
The mdadm utility can be used to view the status of an array, add disks to an array, remove disks, etc:
• To view the status of an array, from a terminal prompt enter:
sudo mdadm −D /dev/md0
The -D tells mdadm to display detailed information about the /dev/md0 device. Replace /dev/md0with the appropriate RAID device.
• To view the status of a disk in an array:
sudo mdadm −E /dev/ sda1
The output if very similar to the mdadm −D command, adjust /dev/sda1 for each disk.
• If a disk fails and needs to be removed from an array enter:
sudo mdadm −−remove /dev/md0 /dev/ sda1
Change /dev/md0 and /dev/sda1 to the appropriate RAID device and disk.
• Similarly, to add a new disk:
sudo mdadm −−add /dev/md0 /dev/ sda1
Sometimes a disk can change to a faulty state even though there is nothing physically wrong with the drive.It is usually worthwhile to remove the drive from the array then re-add it. This will cause the drive tore-sync with the array. If the drive will not sync with the array, it is a good indication of hardware failure.
The /proc/mdstat file also contains useful information about the system’s RAID devices:
cat /proc /mdstatP e r s o n a l i t i e s : [ l i n e a r ] [ mult ipath ] [ ra id0 ] [ r a id1 ] [ r a id6 ] [ r a id5 ] [ r a id4 ] [
ra id10 ]md0 : a c t i v e ra id1 sda1 [ 0 ] sdb1 [ 1 ]
10016384 b locks [ 2 / 2 ] [UU]
unused dev i c e s : <none>
The following command is great for watching the status of a syncing drive:
watch −n1 cat /proc /mdstat
5

Press Ctrl+c to stop the watch command.
If you do need to replace a faulty drive, after the drive has been replaced and synced, grub will need to beinstalled. To install grub on the new drive, enter the following:
sudo grub− i n s t a l l /dev/md0
Replace /dev/md0 with the appropriate array device name.
Resources
The topic of RAID arrays is a complex one due to the plethora of ways RAID can be configured. Please seethe following links for more information:
• Ubuntu Wiki Articles on RAID.
• Software RAID HOWTO
• Managing RAID on Linux
Logical Volume Manager (LVM)
Logical Volume Manger, or LVM, allows administrators to create logical volumes out of one or multiplephysical hard disks. LVM volumes can be created on both software RAID partitions and standard partitionsresiding on a single disk. Volumes can also be extended, giving greater flexibility to systems as requirementschange.
Overview
A side effect of LVM’s power and flexibility is a greater degree of complication. Before diving into the LVMinstallation process, it is best to get familiar with some terms.
• Physical Volume (PV): physical hard disk, disk partition or software RAID partition formatted asLVM PV.
• Volume Group (VG): is made from one or more physical volumes. A VG can can be extended byadding more PVs. A VG is like a virtual disk drive, from which one or more logical volumes are carved.
• Logical Volume (LV): is similar to a partition in a non-LVM system. A LV is formatted with the desiredfile system (EXT3, XFS, JFS, etc), it is then available for mounting and data storage.
Installation
As an example this section covers installing Ubuntu Server Edition with /srv mounted on a LVM volume.During the initial install only one Physical Volume (PV) will be part of the Volume Group (VG). AnotherPV will be added after install to demonstrate how a VG can be extended.
There are several installation options for LVM in Guided storage configuration step:
• Select “Use an entire disk”, “Set up this disk as an LVM group”, and Done. This option will create a/boot partition in the local disk and the rest of the disk space is allocated to the LVM group.
• Select “Use an entire disk”, “Set up this disk as an LVM group”, “Encrypt the LVM group with LUKS”,insert the password (and confirm it), and Done. The output is the same as described above but theLVM group is encrypted.
6

• Select “Custom storage layout”, and Done. At this time the only way to configure a system with bothLVM and standard partitions, during installation, is to use this approach. This is the option used inthis example.
Follow the installation steps until you get to the Storage configuration step, then:
Let’s first create a /boot partition in a local disk. Select the hard disk under AVAILABLE DEVICES, andAdd GPT Parition. Add the size and format (ext4), then select /boot as mount point. Finally, select Create.The /boot partition will be listed under FILE SYSTEM SUMMARY.
Next, create standard swap, and / partitions with whichever filesystem you prefer following the steps above.
Now the LVM volume group will be created. Select “Create volume group (LVM)”. Enter a name for thevolume group (default is vg0), select the device (LVM physical volume) and the size, and choose “Create”.There is an option to encrypt your volume, if you want it encrypted select “Create encrypted volume” andenter a password (also confirm it). The brand new LVM group (if the default was not changed it is vg0) willbe listed as a device in AVAILABLE DEVICES.
To create a LVM logical volume select the created LVM volume group and “Create Logical Volume”. Give ita name (default is lv-0), let’s call it lv-srv since this will be used to mount /srv. Insert the size of the volume,your preferred filesytem format, and select /srv as mount point. Choose “Create”. The LVM logical volumemounted at /srv will be listed in the FILESYSTEM SUMMARY.
Finally, select “Done”. Then confirm the changes and continue with the rest of the installation.
There are some useful utilities to view information about LVM:
• pvdisplay: shows information about Physical Volumes.
• vgdisplay: shows information about Volume Groups.
• lvdisplay: shows information about Logical Volumes.
Extending Volume Groups
Continuing with srv as an LVM volume example, this section covers adding a second hard disk, creating aPhysical Volume (PV), adding it to the volume group (VG), extending the logical volume srv and finallyextending the filesystem. This example assumes a second hard disk has been added to the system. In thisexample, this hard disk will be named /dev/sdb and we will use the entire disk as a physical volume (youcould choose to create partitions and use them as different physical volumes)
Warning
Make sure you don’t already have an existing /dev/sdb before issuing the commands below. Youcould lose some data if you issue those commands on a non-empty disk.
First, create the physical volume, in a terminal execute:
sudo pvcreate /dev/sdb
Now extend the Volume Group (VG):
sudo vgextend vg0 /dev/sdb
Use vgdisplay to find out the free physical extents - Free PE / size (the size you can allocate). We willassume a free size of 511 PE (equivalent to 2GB with a PE size of 4MB) and we will use the whole free spaceavailable. Use your own PE and/or free space.
The Logical Volume (LV) can now be extended by different methods, we will only see how to use the PE toextend the LV:
sudo lvextend /dev/vg0/ srv − l +511
7

The -l option allows the LV to be extended using PE. The -L option allows the LV to be extended usingMeg, Gig, Tera, etc bytes.
Even though you are supposed to be able to expand an ext3 or ext4 filesystem without unmounting it first,it may be a good practice to unmount it anyway and check the filesystem, so that you don’t mess up theday you want to reduce a logical volume (in that case unmounting first is compulsory).
The following commands are for an EXT3 or EXT4 filesystem. If you are using another filesystem theremay be other utilities available.
sudo umount / srvsudo e2 f s ck −f /dev/vg0/ srv
The -f option of e2fsck forces checking even if the system seems clean.
Finally, resize the filesystem:
sudo r e s i z e 2 f s /dev/vg0/ srv
Now mount the partition and check its size.
mount /dev/vg0/ srv / srv && df −h / srv
Resources
• See the Ubuntu Wiki LVM Articles.
• See the LVM HOWTO for more information.
• For more information on fdisk see the fdisk man page.
iSCSI
The iSCSI protocol can be used to install Ubuntu on systems with or without hard disks attached, and iBFTcan be used to automate iSCSI setup on installation and boot.
Installation on a diskless system
The first steps of a diskless iSCSI installation are identical to the Installation using debian-installer sectionup to “Hard drive layout”.
The installer will display a warning with the following message:
No d i sk dr iv e was detec ted . I f you know the name o f the d r i v e r needed by yourd i sk dr ive , you can s e l e c t i t from the l i s t .
Select the item in the list titled login to iSCSI targets.
You will be prompted to enter an IP address to scan for iSCSI targets with a description of the format forthe address. Enter the IP address for the location of your iSCSI target and navigate to <continue> then hitENTER
If authentication is required in order to access the iSCSI device, provide the username in the next field.Otherwise, leave it blank.
If your system is able to connect to the iSCSI provider, you should see a list of available iSCSI targets wherethe operating system can be installed. The list should be similar to the following :
8

Se l e c t the iSCSI t a r g e t s you wish to use .
iSCSI t a r g e t s on 1 9 2 . 1 6 8 . 1 . 2 9 : 3 2 6 0 :
[ ] iqn .2016−03. TrustyS− i s c s i t a r g e t : s t o rage . sys0
<Go Back> <Continue>
Select the iSCSI target that you want to use with the space bar. Use the arrow keys to navigate to the targetthat you want to select.
Navigate to <Continue> and hit ENTER.
If the connection to the iSCSI target is successful, you will be prompted with the [!!] Partition disksinstallation menu. The rest of the procedure is identical to any normal installation on attached disks. Oncethe installation is completed, you will be asked to reboot.
Installation on a system with disk attached
Again, the iSCSI installation on a normal server with one or many disks attached is identical to the Instal-lation using debian-installer section until we reach the disk partitioning menu. Instead of using any of theGuided selection, we need to perform the following steps :
Navigate to the Manual menu entry
Select the Configure iSCSI Volumes menu entry
Choose the Log into iSCSI targets
You will be prompted to Enter an IP address to scan for iSCSI targets. with a description of the format forthe address. Enter the IP address and navigate to <continue> then hit ENTER
If authentication is required in order to access the iSCSI device, provide the username in the next field orleave it blank.
If your system is able to connect to the iSCSI provider, you should see a list of available iSCSI targets wherethe operating system can be installed. The list should be similar to the following :
S e l e c t the iSCSI t a r g e t s you wish to use .
iSCSI t a r g e t s on 1 9 2 . 1 6 8 . 1 . 2 9 : 3 2 6 0 :
[ ] iqn .2016−03. TrustyS− i s c s i t a r g e t : s t o rage . sys0
<Go Back> <Continue>
Select the iSCSI target that you want to use with the space bar. Use the arrow keys to navigate to the targetthat you want to select
Navigate to <Continue> and hit ENTER.
If successful, you will come back to the menu asking you to Log into iSCSI targets. Navigate to Finish andhit ENTER
The newly connected iSCSI disk will appear in the overview section as a device prefixed with SCSI. Thisis the disk that you should select as your installation disk. Once identified, you can choose any of thepartitioning methods.
9
Warning
Depending on your system configuration, there may be other SCSI disks attached to the system.Be very careful to identify the proper device before proceeding with the installation. Otherwise,irreversible data loss may result from performing an installation on the wrong disk.
Installation with iBFT
In order to setup iSCSI based on the iBFT (iSCSI Boot Firmware Table) on the installation and boot,append these options at the installer prompt (or to the preseed file):
disk−det ec t / i b f t / enable=true partman− i s c s i / i s c s i_auto=true
This should probe for iBFT information and configure network interface(s) and iSCSI target(s) accordinglyduring the installation, and configure system boot (initramfs) to do that too in order to find the root device.
Warning The support for iBFT is available in the debian-installer on netboot images as of2019-06-20 and (expected) on ISO images for the 18.04.3 point release and later.
Rebooting to an iSCSI target
The procedure is specific to your hardware platform. As an example, here is how to reboot to your iSCSItarget using iPXE
iPXE> dhcp
Conf igur ing ( net0 5 2 : 5 4 : 0 0 : a4 : f 2 : a9 ) . . . . . . . ok
iPXE> sanboot i s c s i : 1 9 2 . 1 6 8 . 1 . 2 9 : : : : iqn .2016−03. TrustyS− i s c s i t a r g e t : s t o rage .sys0
If the procedure is successful, you should see the Grub menu appear on the screen.
Package Management
Ubuntu features a comprehensive package management system for installing, upgrading, configuring, andremoving software. In addition to providing access to an organized base of over 60,000 software packages foryour Ubuntu computer, the package management facilities also feature dependency resolution capabilitiesand software update checking.
Several tools are available for interacting with Ubuntu’s package management system, from simple command-line utilities which may be easily automated by system administrators, to a graphical interface which is easyto use by those new to Ubuntu.
Introduction
Ubuntu’s package management system is derived from the same system used by the Debian GNU/Linuxdistribution. The package files contain all of the necessary files, meta-data, and instructions to implement aparticular functionality or software application on your Ubuntu computer.
Debian package files typically have the extension .deb, and usually exist in repositories which are collectionsof packages found online or on physical media, such as CD-ROM discs. Packages are normally in a pre-compiled binary format; thus installation is quick and requires no compiling of software.
10

Many packages use dependencies. Dependencies are additional packages required by the principal packagein order to function properly. For example, the speech synthesis package festival depends upon the packagealsa−utils, which is a package supplying the ALSA sound library tools needed for audio playback. In orderfor festival to function, it and all of its dependencies must be installed. The software management tools inUbuntu will do this automatically.
Apt
The apt command is a powerful command-line tool, which works with Ubuntu’s Advanced Packaging Tool(APT) performing such functions as installation of new software packages, upgrade of existing softwarepackages, updating of the package list index, and even upgrading the entire Ubuntu system.
Some examples of popular uses for the apt utility:
• Install a Package: Installation of packages using the apt tool is quite simple. For example, to installthe nmap network scanner, type the following:
sudo apt i n s t a l l nmap
• Remove a Package: Removal of a package (or packages) is also straightforward. To remove thepackage installed in the previous example, type the following:
sudo apt remove nmap
Tip
Multiple Packages: You may specify multiple packages to be installed or removed, sepa-rated by spaces.
Notice
Scripting: While apt is a command-line tool, it is intended to be used interactively, and notto be called from non-interactive scripts. The apt−get command should be used in scripts(perhaps with the −−quiet flag). For basic commands the syntax of the two tools is identical.
Also, adding the −−purge option to apt remove will remove the package configuration files as well.This may or may not be the desired effect, so use with caution.
• Update the Package Index: The APT package index is essentially a database of available packagesfrom the repositories defined in the /etc/apt/sources. list file and in the /etc/apt/sources. list .d di-rectory. To update the local package index with the latest changes made in the repositories, type thefollowing:
sudo apt update
• Upgrade Packages: Over time, updated versions of packages currently installed on your computermay become available from the package repositories (for example security updates). To upgrade yoursystem, first, update your package index as outlined above, and then type:
sudo apt upgrade
For information on upgrading to a new Ubuntu release see Upgrading.
Actions of the apt command, such as installation and removal of packages, are logged in the /var/log/dpkg.loglog file.
For further information about the use of APT, read the comprehensive APT User’s Guide or type:
apt he lp
11
Aptitude
Launching Aptitude with no command-line options will give you a menu-driven, text-based front-end tothe Advanced Packaging Tool (APT) system. Many of the common package management functions, suchas installation, removal, and upgrade, can be performed in Aptitude with single-key commands, which aretypically lowercase letters.
Aptitude is best suited for use in a non-graphical terminal environment to ensure proper functioning ofthe command keys. You may start the menu-driven interface of Aptitude as a normal user by typing thefollowing command at a terminal prompt:sudo apt i tude
When Aptitude starts, you will see a menu bar at the top of the screen and two panes below the menu bar.The top pane contains package categories, such as New Packages and Not Installed Packages. The bottompane contains information related to the packages and package categories.
Using Aptitude for package management is relatively straightforward, and the user interface makes commontasks simple to perform. The following are examples of common package management functions as performedin Aptitude:
• Install Packages: To install a package, locate the package via the Not Installed Packages packagecategory, by using the keyboard arrow keys and the ENTER key. Highlight the desired package,then press the + key. The package entry should turn green, indicating that it has been marked forinstallation. Now press g to be presented with a summary of package actions. Press g again, anddownloading and installation of the package will commence. When finished, press ENTER, to returnto the menu.
• Remove Packages: To remove a package, locate the package via the Installed Packages packagecategory, by using the keyboard arrow keys and the ENTER key. Highlight the desired package youwish to remove, then press the - key. The package entry should turn pink, indicating it has beenmarked for removal. Now press g to be presented with a summary of package actions. Press g again,and removal of the package will commence. When finished, press ENTER, to return to the menu.
• Update Package Index: To update the package index, simply press the u key. Updating of thepackage index will commence.
• Upgrade Packages: To upgrade packages, perform the update of the package index as detailed above,and then press the U key to mark all packages with updates. Now press g whereby you’ll be presentedwith a summary of package actions. Press g again, and the download and installation will commence.When finished, press ENTER, to return to the menu.
The first column of the information displayed in the package list in the top pane, when actually viewingpackages lists the current state of the package, and uses the following key to describe the state of the package:
• i: Installed package
• c: Package not installed, but package configuration remains on the system
• p: Purged from system
• v: Virtual package
• B: Broken package
• u: Unpacked files, but package not yet configured
• C: Half-configured - Configuration failed and requires fix
• H: Half-installed - Removal failed and requires a fix
To exit Aptitude, simply press the q key and confirm you wish to exit. Many other functions are availablefrom the Aptitude menu by pressing the F10 key.
12

Command Line Aptitude
You can also use Aptitude as a command-line tool, similar to apt. To install the nmap package with allnecessary dependencies, as in the apt example, you would use the following command:
sudo apt i tude i n s t a l l nmap
To remove the same package, you would use the command:
sudo apt i tude remove nmap
Consult the man pages for more details of command-line options for Aptitude.
dpkg
dpkg is a package manager for Debian-based systems. It can install, remove, and build packages, butunlike other package management systems, it cannot automatically download and install packages or theirdependencies. Apt and Aptitude are newer, and layer additional features on top of dpkg. Thissection covers using dpkg to manage locally installed packages:
• To list all packages in the system’s package database, including all packages, installed and uninstalled,from a terminal prompt type:
dpkg − l
• Depending on the number of packages on your system, this can generate a large amount of output.Pipe the output through grep to see if a specific package is installed:
dpkg − l | grep apache2
Replace apache2 with any package name, part of a package name, or a regular expression.
• To list the files installed by a package, in this case the ufw package, enter:
dpkg −L ufw
• If you are not sure which package installed a file, dpkg −S may be able to tell you. For example:
dpkg −S / etc / host . confbase− f i l e s : / e t c / host . conf
The output shows that the /etc/host.conf belongs to the base-files package.
Note
Many files are automatically generated during the package install process, and even thoughthey are on the filesystem, dpkg −S may not know which package they belong to.
• You can install a local .deb file by entering:
sudo dpkg − i zip_3 .0−4_amd64 . deb
Change zip_3.0−4_amd64.deb to the actual file name of the local .deb file you wish to install.
• Uninstalling a package can be accomplished by:
sudo dpkg −r z ip
13
Caution
Uninstalling packages using dpkg, in most cases, is NOT recommended. It is better to usea package manager that handles dependencies to ensure that the system is in a consistentstate. For example, using dpkg −r zip will remove the zip package, but any packages thatdepend on it will still be installed and may no longer function correctly.
For more dpkg options see the man page: man dpkg.
APT Configuration
Configuration of the Advanced Packaging Tool (APT) system repositories is stored in the /etc/apt/sources. list file and the /etc/apt/sources. list .d directory. An example of this file is referenced here, along withinformation on adding or removing repository references from the file.
You may edit the file to enable repositories or disable them. For example, to disable the requirement ofinserting the Ubuntu CD-ROM whenever package operations occur, simply comment out the appropriateline for the CD-ROM, which appears at the top of the file:# no more prompting f o r CD−ROM pl ea s e# deb cdrom : [ DISTRO−APT−CD−NAME − Release i386 (20111013 .1 ) ] / DISTRO−SHORT−
CODENAME main r e s t r i c t e d
Extra Repositories
In addition to the officially supported package repositories available for Ubuntu, there exist additionalcommunity-maintained repositories which add thousands more packages for potential installation. Two ofthe most popular are the universe and multiverse repositories. These repositories are not officially supportedby Ubuntu, but because they are maintained by the community they generally provide packages which aresafe for use with your Ubuntu computer.
Note
Packages in the multiverse repository often have licensing issues that prevent them from beingdistributed with a free operating system, and they may be illegal in your locality.
Warning
Be advised that neither the universe or multiverse repositories contain officially supported pack-ages. In particular, there may not be security updates for these packages.
Many other package sources are available, sometimes even offering only one package, as in the case ofpackage sources provided by the developer of a single application. You should always be very careful andcautious when using non-standard package sources, however. Research the source and packages carefullybefore performing any installation, as some package sources and their packages could render your systemunstable or non-functional in some respects.
By default, the universe and multiverse repositories are enabled but if you would like to disable them edit/etc/apt/sources. list and comment the following lines:deb http :// a rch ive . ubuntu . com/ubuntu DISTRO−SHORT−CODENAME un ive r s e mu l t i v e r s edeb−s r c http :// a rch ive . ubuntu . com/ubuntu DISTRO−SHORT−CODENAME un ive r s e
mu l t i v e r s e
deb http :// us . a r ch ive . ubuntu . com/ubuntu/ DISTRO−SHORT−CODENAME un ive r s edeb−s r c http :// us . a r ch ive . ubuntu . com/ubuntu/ DISTRO−SHORT−CODENAME un ive r s edeb http :// us . a r ch ive . ubuntu . com/ubuntu/ DISTRO−SHORT−CODENAME−updates
un ive r s e
14

deb−s r c http :// us . a r ch ive . ubuntu . com/ubuntu/ DISTRO−SHORT−CODENAME−updatesun ive r s e
deb http :// us . a r ch ive . ubuntu . com/ubuntu/ DISTRO−SHORT−CODENAME mul t i v e r s edeb−s r c http :// us . a r ch ive . ubuntu . com/ubuntu/ DISTRO−SHORT−CODENAME mul t i v e r s edeb http :// us . a r ch ive . ubuntu . com/ubuntu/ DISTRO−SHORT−CODENAME−updates
mu l t i v e r s edeb−s r c http :// us . a r ch ive . ubuntu . com/ubuntu/ DISTRO−SHORT−CODENAME−updates
mu l t i v e r s e
deb http :// s e c u r i t y . ubuntu . com/ubuntu DISTRO−SHORT−CODENAME−s e c u r i t y un ive r s edeb−s r c http :// s e c u r i t y . ubuntu . com/ubuntu DISTRO−SHORT−CODENAME−s e c u r i t y
un ive r s edeb http :// s e c u r i t y . ubuntu . com/ubuntu DISTRO−SHORT−CODENAME−s e c u r i t y
mu l t i v e r s edeb−s r c http :// s e c u r i t y . ubuntu . com/ubuntu DISTRO−SHORT−CODENAME−s e c u r i t y
mu l t i v e r s e
Automatic Updates
The unattended-upgrades package can be used to automatically install updated packages and can be con-figured to update all packages or just install security updates. First, install the package by entering thefollowing in a terminal:
sudo apt i n s t a l l unattended−upgrades
To configure unattended-upgrades, edit /etc/apt/apt.conf.d/50unattended−upgrades and adjust the follow-ing to fit your needs:
Unattended−Upgrade : : Allowed−Orig ins {”${ d i s t ro_id } : ${distro_codename }” ;”${ d i s t ro_id } : ${distro_codename}− s e c u r i t y ” ;
// ”${ d i s t ro_id } : ${distro_codename}−updates ” ;// ”${ d i s t ro_id } : ${distro_codename}−proposed ” ;// ”${ d i s t ro_id } : ${distro_codename}−backports ” ;} ;
Certain packages can also be blacklisted and therefore will not be automatically updated. To blacklist apackage, add it to the list:
Unattended−Upgrade : : Package−B l a c k l i s t {// ”vim ” ;// ” l i b c 6 ” ;// ” l i b c6−dev ” ;// ” l i b c6−i 686 ” ;} ;
Note
The double “//” serve as comments, so whatever follows “//” will not be evaluated.
To enable automatic updates, edit /etc/apt/apt.conf.d/20auto−upgrades and set the appropriate apt con-figuration options:
APT: : Pe r i od i c : : Update−Package−L i s t s ”1” ;APT: : Pe r i od i c : : Download−Upgradeable−Packages ”1” ;
15
APT: : Pe r i od i c : : Autoc l ean Inte rva l ”7” ;APT: : Pe r i od i c : : Unattended−Upgrade ”1” ;
The above configuration updates the package list, downloads, and installs available upgrades every day. Thelocal download archive is cleaned every week. On servers upgraded to newer versions of Ubuntu, dependingon your responses, the file listed above may not be there. In this case, creating a new file of this name shouldalso work.
Note
You can read more about apt Periodic configuration options in the apt.conf(5) manpage and inthe /usr/lib/apt/apt.systemd.daily script header.
The results of unattended-upgrades will be logged to /var/log/unattended−upgrades.
Notifications
Configuring Unattended−Upgrade::Mail in /etc/apt/apt.conf.d/50unattended−upgrades will enableunattended-upgrades to email an administrator detailing any packages that need upgrading or haveproblems.
Another useful package is apticron. apticron will configure a cron job to email an administrator informationabout any packages on the system that have updates available, as well as a summary of changes in eachpackage.
To install the apticron package, in a terminal enter:
sudo apt i n s t a l l ap t i c ron
Once the package is installed edit /etc/apticron/apticron.conf, to set the email address and other options:
EMAIL=”root@example . com”
References
Most of the material covered in this chapter is available in man pages, many of which are available online.
• The InstallingSoftware Ubuntu wiki page has more information.
• For more dpkg details see the dpkg man page.
• The APT User’s Guide and apt man page contain useful information regarding apt usage.
• See the aptitude user’s manual for more aptitude options.
• The Adding Repositories HOWTO (Ubuntu Wiki) page contains more details on adding repositories.
Kernel Crash Dump
Introduction
A Kernel Crash Dump refers to a portion of the contents of volatile memory (RAM) that is copied to diskwhenever the execution of the kernel is disrupted. The following events can cause a kernel disruption :
• Kernel Panic
• Non Maskable Interrupts (NMI)
16
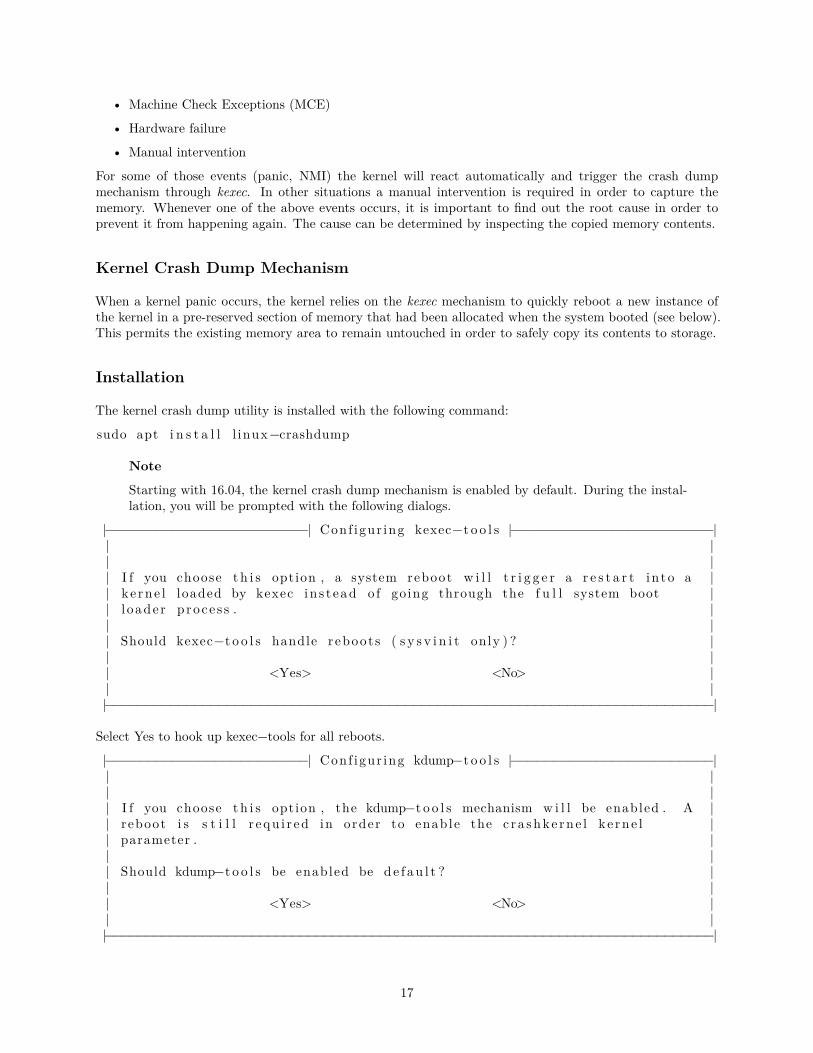
• Machine Check Exceptions (MCE)
• Hardware failure
• Manual intervention
For some of those events (panic, NMI) the kernel will react automatically and trigger the crash dumpmechanism through kexec. In other situations a manual intervention is required in order to capture thememory. Whenever one of the above events occurs, it is important to find out the root cause in order toprevent it from happening again. The cause can be determined by inspecting the copied memory contents.
Kernel Crash Dump Mechanism
When a kernel panic occurs, the kernel relies on the kexec mechanism to quickly reboot a new instance ofthe kernel in a pre-reserved section of memory that had been allocated when the system booted (see below).This permits the existing memory area to remain untouched in order to safely copy its contents to storage.
Installation
The kernel crash dump utility is installed with the following command:
sudo apt i n s t a l l l inux−crashdump
Note
Starting with 16.04, the kernel crash dump mechanism is enabled by default. During the instal-lation, you will be prompted with the following dialogs.
|−−−−−−−−−−−−−−−−−−−−−−−−| Conf igur ing kexec−t o o l s |−−−−−−−−−−−−−−−−−−−−−−−−|| || || I f you choose t h i s option , a system reboot w i l l t r i g g e r a r e s t a r t i n to a || k e rne l loaded by kexec in s t ead o f going through the f u l l system boot || l oade r p roce s s . || || Should kexec−t o o l s handle r eboot s ( s y s v i n i t only ) ? || || <Yes> <No> || ||−−−−−−−−−−−−−−−−−−−−−−−−−−−−−−−−−−−−−−−−−−−−−−−−−−−−−−−−−−−−−−−−−−−−−−−−−−−|
Select Yes to hook up kexec−tools for all reboots.
|−−−−−−−−−−−−−−−−−−−−−−−−| Conf igur ing kdump−t o o l s |−−−−−−−−−−−−−−−−−−−−−−−−|| || || I f you choose t h i s option , the kdump−t o o l s mechanism w i l l be enabled . A || reboot i s s t i l l r equ i r ed in order to enable the c r a shke rne l k e rne l || parameter . || || Should kdump−t o o l s be enabled be d e f au l t ? || || <Yes> <No> || ||−−−−−−−−−−−−−−−−−−−−−−−−−−−−−−−−−−−−−−−−−−−−−−−−−−−−−−−−−−−−−−−−−−−−−−−−−−−|
17
Yes should be selected here as well, to enable kdump−tools.
If you ever need to manually enable the functionality, you can use the dpkg−reconfigure kexec−tools anddpkg−reconfigure kdump−tools commands and answer Yes to the questions. You can also edit /etc/default/kexec and set parameters directly:
# Load a kexec ke rne l ( t rue / f a l s e )LOAD_KEXEC=true
As well, edit /etc/default/kdump−tools to enable kdump by including the following line:
USE_KDUMP=1
If a reboot has not been done since installation of the linux−crashdump package, a reboot will be required inorder to activate the crashkernel= boot parameter. Upon reboot, kdump−tools will be enabled and active.
If you enable kdump−tools after a reboot, you will only need to issue the kdump−config load command toactivate the kdump mechanism.
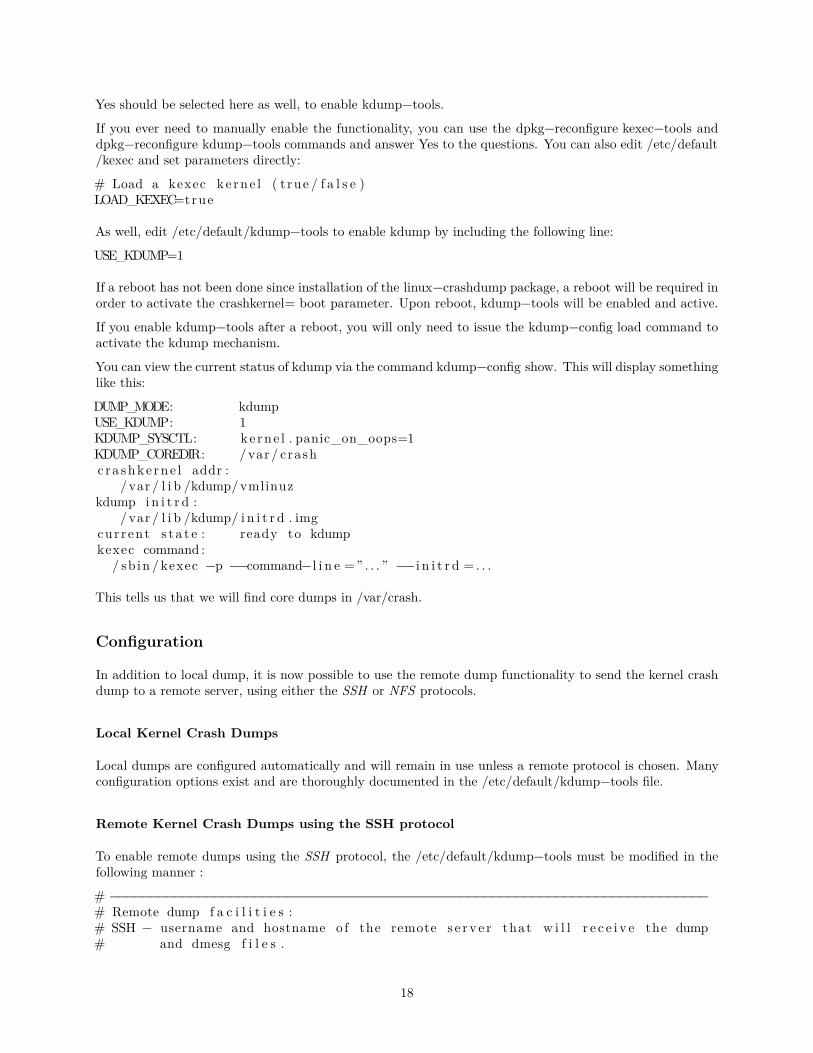
You can view the current status of kdump via the command kdump−config show. This will display somethinglike this:
DUMP_MODE: kdumpUSE_KDUMP: 1KDUMP_SYSCTL: ke rne l . panic_on_oops=1KDUMP_COREDIR: /var / crashc ra shke rne l addr :
/ var / l i b /kdump/vmlinuzkdump i n i t r d :
/ var / l i b /kdump/ i n i t r d . imgcur rent s t a t e : ready to kdumpkexec command :
/ sb in / kexec −p −−command−l i n e =” . . . ” −− i n i t r d = . . .
This tells us that we will find core dumps in /var/crash.
Configuration
In addition to local dump, it is now possible to use the remote dump functionality to send the kernel crashdump to a remote server, using either the SSH or NFS protocols.
Local Kernel Crash Dumps
Local dumps are configured automatically and will remain in use unless a remote protocol is chosen. Manyconfiguration options exist and are thoroughly documented in the /etc/default/kdump−tools file.
Remote Kernel Crash Dumps using the SSH protocol
To enable remote dumps using the SSH protocol, the /etc/default/kdump−tools must be modified in thefollowing manner :
# −−−−−−−−−−−−−−−−−−−−−−−−−−−−−−−−−−−−−−−−−−−−−−−−−−−−−−−−−−−−−−−−−−−−−−−−−−−# Remote dump f a c i l i t i e s :# SSH − username and hostname o f the remote s e r v e r that w i l l r e c e i v e the dump# and dmesg f i l e s .
18
# SSH_KEY − Ful l path o f the ssh p r i va t e key to be used to l o g i n to the remote# se rv e r . use kdump−c on f i g propagate to send the pub l i c key to the# remote s e r v e r# HOSTTAG − Se l e c t i f hostname o f IP address w i l l be used as a p r e f i x to the# timestamped d i r e c t o r y when sending f i l e s to the remote s e r v e r .# ’ ip ’ i s the d e f au l t .SSH=”ubuntu@kdump−netcrash ”
The only mandatory variable to define is SSH. It must contain the username and hostname of the remoteserver using the format {username}@{remote server}.
SSH_KEY may be used to provide an existing private key to be used. Otherwise, the kdump−configpropagate command will create a new keypair. The HOSTTAG variable may be used to use the hostnameof the system as a prefix to the remote directory to be created instead of the IP address.
The following example shows how kdump−config propagate is used to create and propagate a new keypairto the remote server :sudo kdump−c on f i g propagateNeed to generate a new ssh key . . .The au th en t i c i t y o f host ’kdump−netcrash ( 1 9 2 . 1 6 8 . 1 . 7 4 ) ’ can ’ t be e s t ab l i s h ed .ECDSA key f i n g e r p r i n t i s SHA256 : iMp+5Y28qhbd+tevFCWrEXykDd4dI3yN4OVlu3CBBQ4 .Are you sure you want to cont inue connect ing ( yes /no ) ? yesubuntu@kdump−netcrash ’ s password :propagated ssh key / root / . ssh /kdump_id_rsa to s e r v e r ubuntu@kdump−netcrash
The password of the account used on the remote server will be required in order to successfully send thepublic key to the server
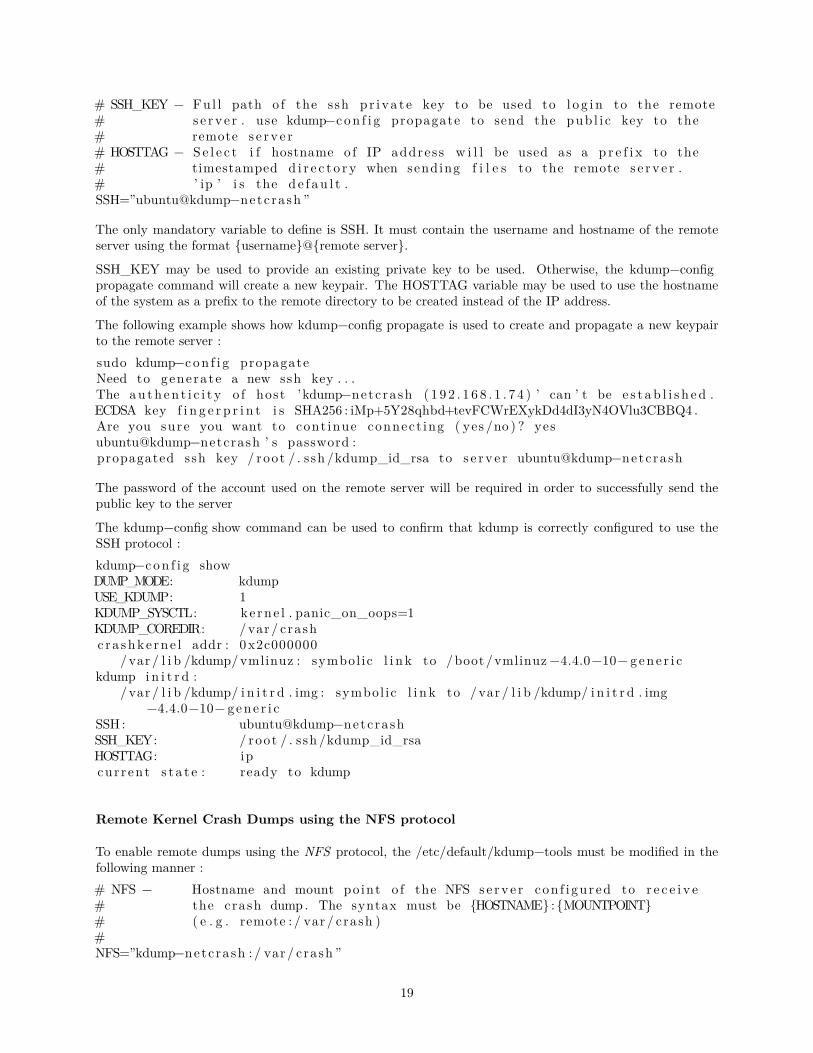
The kdump−config show command can be used to confirm that kdump is correctly configured to use theSSH protocol :kdump−c on f i g showDUMP_MODE: kdumpUSE_KDUMP: 1KDUMP_SYSCTL: ke rne l . panic_on_oops=1KDUMP_COREDIR: /var / crashc ra shke rne l addr : 0x2c000000
/var / l i b /kdump/vmlinuz : symbol ic l i n k to /boot/vmlinuz −4.4.0−10− g ene r i ckdump i n i t r d :
/ var / l i b /kdump/ i n i t r d . img : symbol ic l i n k to /var / l i b /kdump/ i n i t r d . img−4.4.0−10− g ene r i c
SSH : ubuntu@kdump−netcrashSSH_KEY: / root / . ssh /kdump_id_rsaHOSTTAG: ipcur rent s t a t e : ready to kdump
Remote Kernel Crash Dumps using the NFS protocol
To enable remote dumps using the NFS protocol, the /etc/default/kdump−tools must be modified in thefollowing manner :# NFS − Hostname and mount po int o f the NFS s e r v e r con f i gu r ed to r e c e i v e# the crash dump . The syntax must be {HOSTNAME}:{MOUNTPOINT}# ( e . g . remote : / var / crash )#NFS=”kdump−netcrash : / var / crash ”
19

As with the SSH protocol, the HOSTTAG variable can be used to replace the IP address by the hostnameas the prefix of the remote directory.
The kdump−config show command can be used to confirm that kdump is correctly configured to use theNFS protocol :
kdump−c on f i g showDUMP_MODE: kdumpUSE_KDUMP: 1KDUMP_SYSCTL: ke rne l . panic_on_oops=1KDUMP_COREDIR: /var / crashc ra shke rne l addr : 0x2c000000
/var / l i b /kdump/vmlinuz : symbol ic l i n k to /boot/vmlinuz −4.4.0−10− g ene r i ckdump i n i t r d :
/ var / l i b /kdump/ i n i t r d . img : symbol ic l i n k to /var / l i b /kdump/ i n i t r d . img−4.4.0−10− g ene r i c
NFS: kdump−netcrash : / var / crashHOSTTAG: hostnamecur rent s t a t e : ready to kdump
Verification
To confirm that the kernel dump mechanism is enabled, there are a few things to verify. First, confirm thatthe crashkernel boot parameter is present (note: The following line has been split into two to fit the formatof this document:
cat /proc / cmdline
BOOT_IMAGE=/vmlinuz −3.2.0−17− s e r v e r root=/dev/mapper/Prec i seS−root roc r a shke rne l=384M−2G:64M,2G−:128M
The crashkernel parameter has the following syntax:
c r a shke rne l=<range1>:<s i z e1 >[,<range2>:<s i z e2 > , . . . ] [ @o f f s e t ]range=sta r t −[ end ] ’ s t a r t ’ i s i n c l u s i v e and ’ end ’ i s e x c l u s i v e .
So for the crashkernel parameter found in /proc/cmdline we would have :
c r a shke rne l=384M−2G:64M,2G−:128M
The above value means:
• if the RAM is smaller than 384M, then don’t reserve anything (this is the “rescue” case)
• if the RAM size is between 386M and 2G (exclusive), then reserve 64M
• if the RAM size is larger than 2G, then reserve 128M
Second, verify that the kernel has reserved the requested memory area for the kdump kernel by doing:
dmesg | grep − i c rash
. . .[ 0 . 000000 ] Reserv ing 64MB of memory at 800MB fo r c r a shke rne l ( System RAM:
1023MB)
Finally, as seen previously, the kdump−config show command displays the current status of the kdump-toolsconfiguration :
20
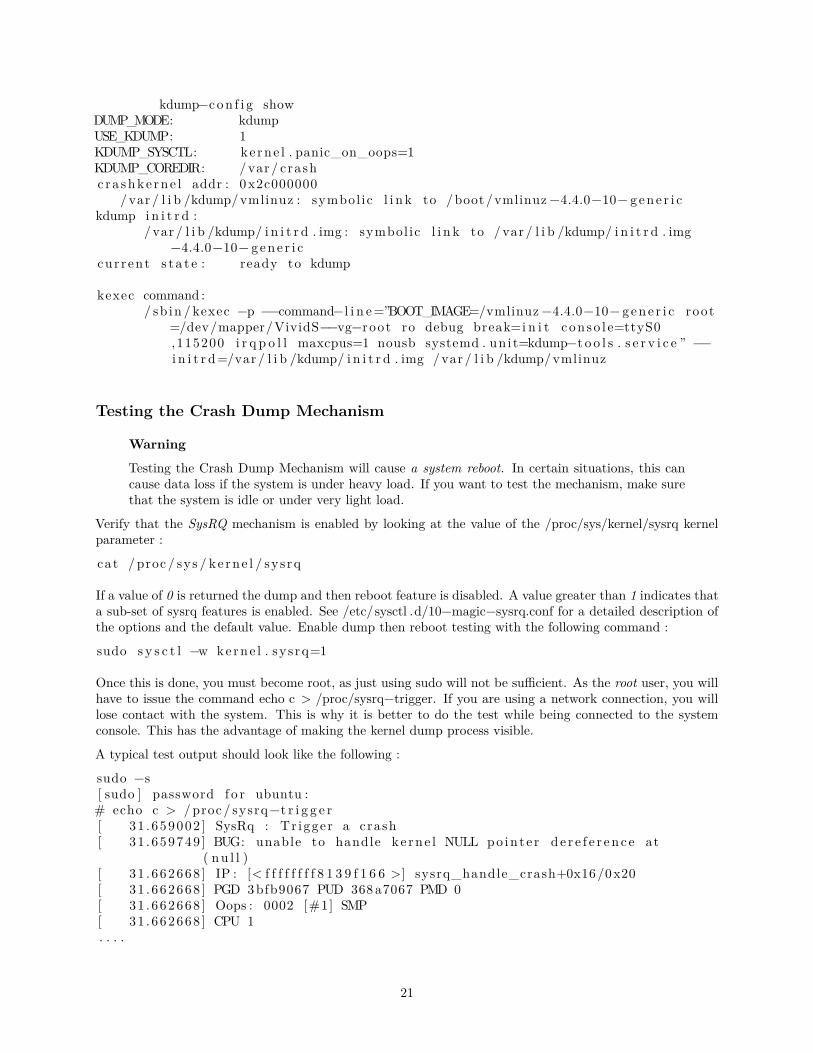
kdump−c on f i g showDUMP_MODE: kdumpUSE_KDUMP: 1KDUMP_SYSCTL: ke rne l . panic_on_oops=1KDUMP_COREDIR: /var / crashc ra shke rne l addr : 0x2c000000
/var / l i b /kdump/vmlinuz : symbol ic l i n k to /boot/vmlinuz −4.4.0−10− g ene r i ckdump i n i t r d :
/ var / l i b /kdump/ i n i t r d . img : symbol ic l i n k to /var / l i b /kdump/ i n i t r d . img−4.4.0−10− g ene r i c
cur rent s t a t e : ready to kdump
kexec command :/ sb in / kexec −p −−command−l i n e=”BOOT_IMAGE=/vmlinuz −4.4.0−10− g ene r i c root
=/dev/mapper/VividS−−vg−root ro debug break=i n i t con so l e=ttyS0,115200 i r q p o l l maxcpus=1 nousb systemd . un i t=kdump−t o o l s . s e r v i c e ” −−i n i t r d=/var / l i b /kdump/ i n i t r d . img /var / l i b /kdump/vmlinuz
Testing the Crash Dump Mechanism
Warning
Testing the Crash Dump Mechanism will cause a system reboot. In certain situations, this cancause data loss if the system is under heavy load. If you want to test the mechanism, make surethat the system is idle or under very light load.
Verify that the SysRQ mechanism is enabled by looking at the value of the /proc/sys/kernel/sysrq kernelparameter :
cat /proc / sys / ke rne l / sys rq
If a value of 0 is returned the dump and then reboot feature is disabled. A value greater than 1 indicates thata sub-set of sysrq features is enabled. See /etc/sysctl .d/10−magic−sysrq.conf for a detailed description ofthe options and the default value. Enable dump then reboot testing with the following command :
sudo s y s c t l −w kerne l . sy s rq=1
Once this is done, you must become root, as just using sudo will not be sufficient. As the root user, you willhave to issue the command echo c > /proc/sysrq−trigger. If you are using a network connection, you willlose contact with the system. This is why it is better to do the test while being connected to the systemconsole. This has the advantage of making the kernel dump process visible.
A typical test output should look like the following :
sudo −s[ sudo ] password f o r ubuntu :# echo c > /proc / sysrq−t r i g g e r[ 31 . 659002 ] SysRq : Tr igger a crash[ 31 .659749 ] BUG: unable to handle ke rne l NULL po in t e r d e r e f e r en c e at
( nu l l )[ 31 . 662668 ] IP : [< f f f f f f f f 8 1 3 9 f 1 6 6 >] sysrq_handle_crash+0x16/0x20[ 31 .662668 ] PGD 3bfb9067 PUD 368 a7067 PMD 0[ 31 .662668 ] Oops : 0002 [#1] SMP[ 31 .662668 ] CPU 1. . . .
21
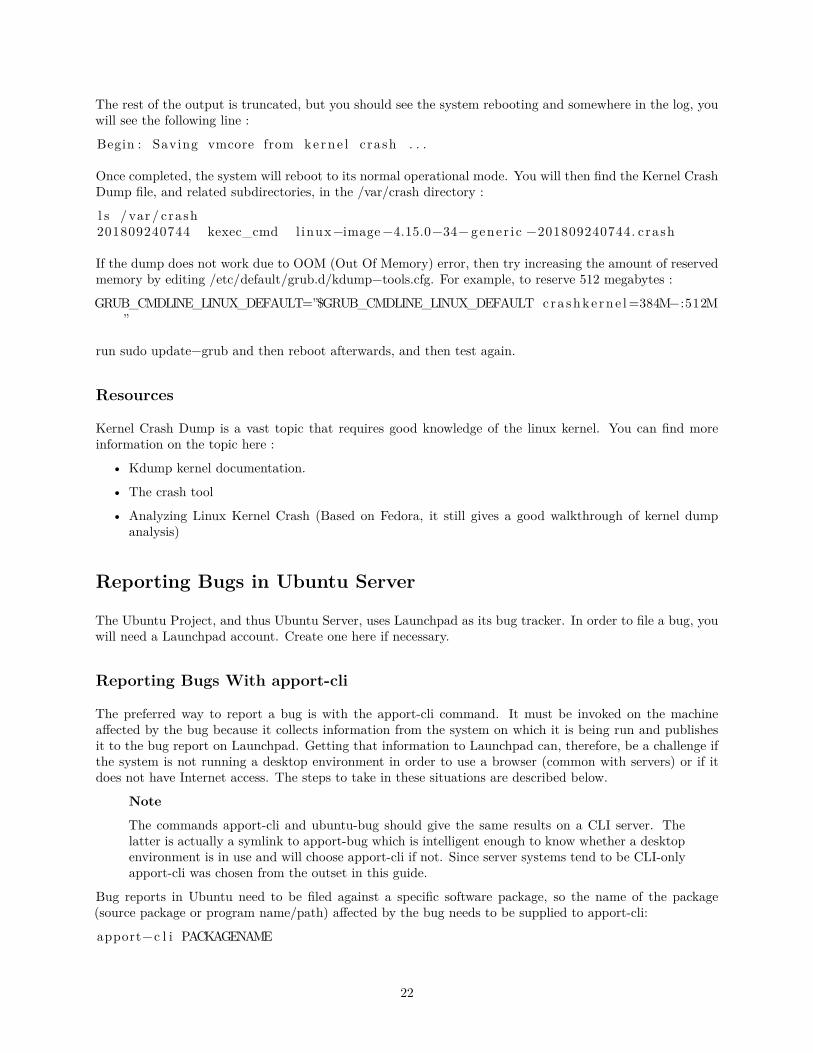
The rest of the output is truncated, but you should see the system rebooting and somewhere in the log, youwill see the following line :
Begin : Saving vmcore from ke rne l crash . . .
Once completed, the system will reboot to its normal operational mode. You will then find the Kernel CrashDump file, and related subdirectories, in the /var/crash directory :
l s / var / crash201809240744 kexec_cmd l inux−image−4.15.0−34− gener i c −201809240744. crash
If the dump does not work due to OOM (Out Of Memory) error, then try increasing the amount of reservedmemory by editing /etc/default/grub.d/kdump−tools.cfg. For example, to reserve 512 megabytes :
GRUB_CMDLINE_LINUX_DEFAULT=”$GRUB_CMDLINE_LINUX_DEFAULT cra shke rne l=384M−:512M”
run sudo update−grub and then reboot afterwards, and then test again.
Resources
Kernel Crash Dump is a vast topic that requires good knowledge of the linux kernel. You can find moreinformation on the topic here :
• Kdump kernel documentation.
• The crash tool
• Analyzing Linux Kernel Crash (Based on Fedora, it still gives a good walkthrough of kernel dumpanalysis)
Reporting Bugs in Ubuntu Server
The Ubuntu Project, and thus Ubuntu Server, uses Launchpad as its bug tracker. In order to file a bug, youwill need a Launchpad account. Create one here if necessary.
Reporting Bugs With apport-cli
The preferred way to report a bug is with the apport-cli command. It must be invoked on the machineaffected by the bug because it collects information from the system on which it is being run and publishesit to the bug report on Launchpad. Getting that information to Launchpad can, therefore, be a challenge ifthe system is not running a desktop environment in order to use a browser (common with servers) or if itdoes not have Internet access. The steps to take in these situations are described below.
Note
The commands apport-cli and ubuntu-bug should give the same results on a CLI server. Thelatter is actually a symlink to apport-bug which is intelligent enough to know whether a desktopenvironment is in use and will choose apport-cli if not. Since server systems tend to be CLI-onlyapport-cli was chosen from the outset in this guide.
Bug reports in Ubuntu need to be filed against a specific software package, so the name of the package(source package or program name/path) affected by the bug needs to be supplied to apport-cli:
apport−c l i PACKAGENAME
22

Once apport-cli has finished gathering information you will be asked what to do with it. For instance, toreport a bug in vim:
$ apport−c l i vim
*** Co l l e c t i n g problem in format ion
The c o l l e c t e d in fo rmat ion can be sent to the deve l ope r s to improve theapp l i c a t i o n . This might take a few minutes .. . .
*** Send problem repor t to the deve l ope r s ?
After the problem repor t has been sent , p l e a s e f i l l out the form in theautomat i ca l l y opened web browser .
What would you l i k e to do? Your opt ions are :S : Send repor t ( 2 . 8 KB)V: View repor tK: Keep repor t f i l e f o r sending l a t e r or copying to somewhere e l s eI : Cancel and ignore fu tu r e c ra she s o f t h i s program ve r s i onC: Cancel
P lease choose (S/V/K/ I /C) :
The first three options are described below:
• Send: submits the collected information to Launchpad as part of the process of filing a new bug report.You will be given the opportunity to describe the bug in your own words.
*** Uploading problem in format ion
The c o l l e c t e d in fo rmat ion i s be ing sent to the bug t rack ing system .This might take a few minutes .94%
*** To continue , you must v i s i t the f o l l ow i ng URL:
https : // bugs . launchpad . net /ubuntu/+source /vim/+f i l e b u g /09b2495a−e2ab−11e3−879b−68b5996a96c8 ?
You can launch a browser now , or copy t h i s URL in to a browser on anothercomputer .
Choices :1 : Launch a browser nowC: Cancel
P lease choose (1/C) : 1
The browser that will be used when choosing ‘1’ will be the one known on the system as www-browservia the Debian alternatives system. Examples of text-based browsers to install include links, elinks,lynx, and w3m. You can also manually point an existing browser at the given URL.
• View: displays the collected information on the screen for review. This can be a lot of information.Press ‘Enter’ to scroll by a screenful. Press ‘q’ to quit and return to the choice menu.
23
• Keep: writes the collected information to disk. The resulting file can be later used to file the bugreport, typically after transferring it to another Ubuntu system.
What would you l i k e to do? Your opt ions are :S : Send repor t ( 2 . 8 KB)V: View repor tK: Keep repor t f i l e f o r sending l a t e r or copying to somewhere e l s eI : Cancel and ignore fu tu r e c ra she s o f t h i s program ve r s i onC: Cancel
P lease choose (S/V/K/ I /C) : kProblem repor t f i l e : /tmp/apport . vim . 1 pg92p02 . apport
To report the bug, get the file onto an Internet-enabled Ubuntu system and apply apport-cli to it. Thiswill cause the menu to appear immediately (the information is already collected). You should thenpress ‘s’ to send:
apport−c l i apport . vim .1 pg92p02 . apport
To directly save a report to disk (without menus) you can do:
apport−c l i vim −−save apport . vim . t e s t . apport
Report names should end in .apport.
Note
If this Internet-enabled system is non-Ubuntu/Debian, apport-cli is not available so the bugwill need to be created manually. An apport report is also not to be included as an attachmentto a bug either so it is completely useless in this scenario.
Reporting Application Crashes
The software package that provides the apport-cli utility, apport, can be configured to automatically capturethe state of a crashed application. This is enabled by default (in /etc/default/apport).
After an application crashes, if enabled, apport will store a crash report under /var/crash:
−rw−r−−−−− 1 pete r whoopsie 150K Jul 24 16 :17 _usr_lib_x86_64−l inux−gnu_libmenu−cache2_libexec_menu−cached . 1 0 0 0 . crash
Use the apport-cli command without arguments to process any pending crash reports. It will offer to reportthem one by one.
apport−c l i
*** Send problem repor t to the deve l ope r s ?
After the problem repor t has been sent , p l e a s e f i l l out the form in theautomat i ca l l y opened web browser .
What would you l i k e to do? Your opt ions are :S : Send repor t (153 . 0 KB)V: View repor tK: Keep repor t f i l e f o r sending l a t e r or copying to somewhere e l s eI : Cancel and ignore fu tu r e c ra she s o f t h i s program ve r s i onC: Cancel
P lease choose (S/V/K/ I /C) : s
24
If you send the report, as was done above, the prompt will be returned immediately and the /var/crashdirectory will then contain 2 extra files:
−rw−r−−−−− 1 pete r whoopsie 150K Jul 24 16 :17 _usr_lib_x86_64−l inux−gnu_libmenu−cache2_libexec_menu−cached . 1 0 0 0 . crash
−rw−rw−r−− 1 pete r whoopsie 0 Jul 24 16 :37 _usr_lib_x86_64−l inux−gnu_libmenu−cache2_libexec_menu−cached . 1 0 0 0 . upload
−rw−−−−−−− 1 whoopsie whoopsie 0 Jul 24 16 :37 _usr_lib_x86_64−l inux−gnu_libmenu−cache2_libexec_menu−cached . 1 0 0 0 . uploaded
Sending in a crash report like this will not immediately result in the creation of a new public bug. The reportwill be made private on Launchpad, meaning that it will be visible to only a limited set of bug triagers. Thesetriagers will then scan the report for possible private data before creating a public bug.
Resources
• See the Reporting Bugs Ubuntu wiki page.
• Also, the Apport page has some useful information. Though some of it pertains to using a GUI.
Upgrading
There are several ways to upgrade from one Ubuntu release to another. This section gives an overview ofthe recommended upgrade method.
do-release-upgrade
The recommended way to upgrade a Server Edition installation is to use the do-release-upgrade utility. Partof the update-manager-core package, it does not have any graphical dependencies and is installed by default.
Debian based systems can also be upgraded by using apt dist−upgrade. However, using do-release-upgradeis recommended because it has the ability to handle system configuration changes sometimes needed betweenreleases.
To upgrade to a newer release, from a terminal prompt enter:
do−r e l e a s e −upgrade
It is also possible to use do-release-upgrade to upgrade to a development version of Ubuntu. To accomplishthis use the -d switch:
do−r e l e a s e −upgrade −d
Warning
Upgrading to a development release is not recommended for production environments.
For further stability of an LTS release, there is a slight change in behaviour if you are currently running anLTS version. LTS systems are only automatically considered for an upgrade to the next LTS via do-release-upgrade with the first point release. So for example 18.04 will only upgrade once 20.04.1 is released. If youwant to update before, e.g. on a subset of machines to evaluate the LTS upgrade for your setup the sameargument as an upgrade to a dev release has to be used via the -d switch.
25
Device Mapper Multipathing - Introduction
Device Mapper Multipath will be referred here as multipath only.
Multipath allows you to configure multiple I/O paths between server nodes and storage arrays into a singledevice. These I/O paths are physical SAN connections that can include separate cables, switches, andcontrollers.
Multipathing aggregates the I/O paths, creating a new device that consists of the aggregated paths. Thischapter provides an introduction and a high-level overview of multipath.
Overview
Multipath can be used to provide:
• Redundancy multipath can provide failover in an active/passive configuration. In an active/passiveconfiguration, only half the paths are used at any time for I/O. If any element of an I/O path (thecable, switch, or controller) fails, multipath switches to an alternate path.
• Improved Performance Multipath can be configured in active/active mode, where I/O is spread overthe paths in a round-robin fashion. In some configurations, multipath can detect loading on the I/Opaths and dynamically re-balance the load.
Storage Array Overview
It is a very good idea to consult your storage vendor installation guide for the recommended multipathconfiguration variables for your storage model. The default configuration will probably work but will likelyneed adjustments based on your storage setup.
Multipath Components
| Component | Description | | - | - | | dm_multipath kernel module | ReroutesI/O and supports failover for paths and path groups. | | multipath command | Lists and configuresmultipath devices. Normally started up with /etc/rc. sysinit , it can also be started up by a udev programwhenever a block device is added or it can be run by the initramfs file system. | | multipathd daemon |Monitors paths; as paths fail and come back, it may initiate path group switches. Provides for interactivechanges to multipath devices. This daemon must be restarted for any changes to the /etc/multipath.conffile to take effect. | | kpartx command | Creates device mapper devices for the partitions on a device It isnecessary to use this command for DOS-based partitions with multipath. The kpartx is provided in its ownpackage, but the multipath-tools package depends on it. |
Multipath Setup Overview
multipath includes compiled-in default settings that are suitable for common multipath configurations.Setting up multipath is often a simple procedure. The basic procedure for configuring your system withmultipath is as follows:
1. Install the multipath-tools and multipath-tools-boot packages
2. Create an empty config file called /etc/multipath.conf
3. Edit the multipath.conf file to modify default values and save the updated file.
4. Start the multipath daemon
26
5. Update initial ramdisk
For detailed setup instructions for multipath configuration see DM-Multipath Configuration and DM-Multipath Setup.
Multipath Devices
Without multipath, each path from a server node to a storage controller is treated by the system as aseparate device, even when the I/O path connects the same server node to the same storage controller.Multipath provides a way of organizing the I/O paths logically, by creating a single device on top of theunderlying paths.
Multipath Device Identifiers
Each multipath device has a World Wide Identifier (WWID), which is guaranteed to be globally uniqueand unchanging. By default, the name of a multipath device is set to its WWID. Alternately, you can setthe user_friendly_names option in multipath.conf, which causes multipath to use a node-unique aliasof the form mpathn as the name.
For example, a node with two HBAs attached to a storage controller with two ports via a single unzonedFC switch sees four devices: /dev/sda, /dev/sdb, /dev/sdc, and /dev/sdd. Multipath creates a singledevice with a unique WWID that reroutes I/O to those four underlying devices according to the multipathconfiguration.
When the user_friendly_names configuration option is set to yes, the name of the multipath device is setto mpathn. When new devices are brought under the control of multipath, the new devices may be seen intwo different places under the /dev directory: /dev/mapper/mpathn and /dev/dm-n.
• The devices in /dev/mapper are created early in the boot process. Use these devices to accessthe multipathed devices.
• Any devices of the form /dev/dm-n are for internal use only and should never be used directly.
You can also set the name of a multipath device to a name of your choosing by using the alias option in themultipaths section of the multipath configuration file.
For information on the multipath configuration defaults, including the user_friendly_namesand alias configuration options, see DM-Multipath Configuration.
Consistent Multipath Device Names in a Cluster
When the user_friendly_names configuration option is set to yes, the name of the multipath device isunique to a node, but it is not guaranteed to be the same on all nodes using the multipath device. Similarly,if you set the alias option for a device in the multipaths section of /etc/multipath.conf, the name is notautomatically consistent across all nodes in the cluster.
This should not cause any difficulties if you use LVM to create logical devices from the multipath device,but if you require that your multipath device names be consistent in every node it is recommended that youleave the user_friendly_names option set to no and that you not configure aliases for the devices.
If you configure an alias for a device that you would like to be consistent across the nodes in the cluster,you should ensure that the /etc/multipath.conf file is the same for each node in the cluster by following thesame procedure:
1. Configure the aliases for the multipath devices in the in the multipath.conf file on one machine.
27
2. Disable all of your multipath devices on your other machines by running the following commands:
# sys t emct l stop multipath−t o o l s . s e r v i c e# mult ipath −F
3. Copy the /etc/multipath.conf file from the first machine to all the other machines in the cluster.
4. Re-enable the multipathd daemon on all the other machines in the cluster by running the followingcommand:
# sys t emct l s t a r t multipath−t o o l s . s e r v i c e
When you add a new device you will need to repeat this process.
Multipath Device attributes
In addition to the user_friendly_names and alias options, a multipath device has numerous attributes.You can modify these attributes for a specific multipath device by creating an entry for that device in themultipaths section of /etc/multipath.conf.
For information on the multipaths section of the multipath configuration file, see DM-Multipath Configu-ration.
Multipath Devices in Logical Volumes
After creating multipath devices, you can use the multipath device names just as you would use a physicaldevice name when creating an LVM physical volume.
For example, if /dev/mapper/mpatha is the name of a multipath device, the following command will mark/dev/mapper/mpatha as a physical volume:
# pvcreate /dev/mapper/mpatha
You can use the resulting LVM physical device when you create an LVM volume group just as you woulduse any other LVM physical device.
Note
If you attempt to create an LVM physical volume on a whole device on which you have configuredpartitions, the pvcreate command will fail.
When you create an LVM logical volume that uses active/passive multipath arrays as the underlying physicaldevices, you should include filters in the lvm.conf to exclude the disks that underlie the multipath devices.This is because if the array automatically changes the active path to the passive path when it receives I/O,multipath will failover and failback whenever LVM scans the passive path if these devices are not filtered.
For active/passive arrays that require a command to make the passive path active, LVM prints a warningmessage when this occurs. To filter all SCSI devices in the LVM configuration file (lvm.conf), include thefollowing filter in the devices section of the file.
f i l t e r = [ ” r / block /” , ” r / d i sk /” , ” r / sd . */” , ”a / .*/” ]
After updating /etc/lvm.conf, it’s necessary to update the initrd so that this file will be copied there, wherethe filter matters the most, during boot.
Perform:
update−i n i t r am f s −u −k a l l
28
Note
Every time either /etc/lvm.conf or /etc/multipath.conf is updated, the initrd should be rebuiltto reflect these changes. This is imperative when blacklists and filters are necessary to maintaina stable storage configuration.
Device Mapper Multipathing - Configuration
Device Mapper Multipath will be referred here as multipath only.
Before moving on with this session it is recommended that you read: 1. Device Mapper Multi-pathing - Introduction
Multipath is usually able to work out-of-the-box with most common storages. This doesn’t mean the defaultconfiguration variables should be used in production: they don’t treat important parameters your storagemight need.
Consult your storage manufacturer’s install guide for the Linux Multipath configurationoptions. It is very common that storage vendors provide the most adequate options for Linux,including minimal kernel and multipath-tools versions required.
Default configuration values for DM-Multipath can be overridden by editing the /etc/multipath.conf file andrestarting the multipathd service.
This chapter provides information on parsing and modifying the multipath.conf file and it is split into thefollowing configuration file sections:
• Configuration File Overview
• Configuration File Defaults
• Configuration File Blacklist & Exceptions
• Configuration File Multipath Section
• Configuration File Devices Section
Configuration File Overview
The configuration file contains entries of the form:
<sec t i on> {<at t r i bu t e > <value>. . .<subsect ion> {
<at t r i bu t e > <value>. . .
}}
The following keywords are recognized:
• defaults - This section defines default values for attributes which are used whenever no values aregiven in the appropriate device or multipath sections.
• blacklist - This section defines which devices should be excluded from the multipath topology discov-ery.
29

• blacklist_exceptions - This section defines which devices should be included in the multipath topol-ogy discovery, despite being listed in the blacklist section.
• multipaths - This section defines the multipath topologies. They are indexed by a World WideIdentifier(WWID).Attributes set in this section take precedence over all others.
• devices - This section defines the device-specific settings. Devices are identified by vendor, product,and revision.
• overrides - This section defines values for attributes that should override the device-specific settingsfor all devices.
Configuration File Defaults
Currently, the multipath configuration file ONLY includes a minor defaults section that sets theuser_friendly_names parameter to yes:
d e f a u l t s {user_friendly_names yes
}
This overwrites the default value of the user_friendly_names parameter.
All the multipath attributes that can set in the defaults section of the multipath.conf file can be foundHERE with an explanation of what they mean. The attributes are:
• verbosity• polling_interval• max_polling_interval• reassign_maps• multipath_dir• path_selector• path_grouping_policy• uid_attrs• uid_attribute• getuid_callout• prio• prio_args• features• path_checker• alias_prefix• failback• rr_min_io• rr_min_io_rq• max_fds• rr_weight• no_path_retry• queue_without_daemon• checker_timeout• flush_on_last_del• user_friendly_names• fast_io_fail_tmo• dev_loss_tmo• bindings_file• wwids_file• prkeys_file
30

• log_checker_err• reservation_key• all_tg_pt• retain_attached_hw_handler• detect_prio• detect_checker• force_sync• strict_timing• deferred_remove• partition_delimiter• config_dir• san_path_err_threshold• san_path_err_forget_rate• san_path_err_recovery_time• marginal_path_double_failed_time• marginal_path_err_sample_time• marginal_path_err_rate_threshold• marginal_path_err_recheck_gap_time• delay_watch_checks• delay_wait_checks• marginal_pathgroups• find_multipaths• find_multipaths_timeout• uxsock_timeout• retrigger_tries• retrigger_delay• missing_uev_wait_timeout• skip_kpartx• disable_changed_wwids• remove_retries• max_sectors_kb• ghost_delay• enable_foreign
Previously the multipath-tools project used to provide a complete configuration file with allthe most used options for each of the most used storage devices. Currently you can see all thosedefault options by executing sudo multipath −t. This will dump used configuration file includingall the embedded default options.
Configuration File Blacklist & Exceptions
The blacklist section is used to exclude specific devices from the multipath topology. It is most commonlyused to exclude local disks, non-multipathed OR non-disk devices.
1. Blacklist by devnode
The default blacklist consists of the regular expressions “ˆ(ram|zram|raw|loop|fd|md|dm-|sr|scd|st|dcssblk)[0-9]” and “ˆ(td|hd|vd)[a-z]”. This causes virtual devices, non-disk devices, and some other device typesto be excluded from multipath handling by default.
b l a c k l i s t {devnode ”^(ram | zram | raw | loop | fd |md|dm−| s r | scd | s t | dc s sb lk ) [0 −9]”devnode ”^( td | hd | vd ) [ a−z ] ”devnode ”^ c c i s s ! c [0−9]d [0 −9]*”
}
31
2. Blacklist by wwid
Regular expression for the World Wide Identifier of a device to be excluded/included
3. Blacklist by device
Subsection for the device description. This subsection recognizes the vendor and product keywords.Both are regular expressions.
dev i c e {vendor ”LENOVO”product ” Unive r sa l Xport”
}
4. Blacklist by property
Regular expression for an udev property. All devices that have matching udev properties will beexcluded/included. The handling of the property keyword is special, because devices must have at leastone whitelisted udev property; otherwise they’re treated as blacklisted, and the message “blacklisted,udev property missing” is displayed in the logs.
5. Blacklist by protocol
The protocol strings that multipath recognizes are scsi:fcp, scsi:spi, scsi:ssa, scsi:sbp, scsi:srp, scsi:iscsi,scsi:sas, scsi:adt, scsi:ata, scsi:unspec, ccw, cciss, nvme, and undef. The protocol that a path is usingcan be viewed by running multipathd show paths format “%d %P”
6. Blacklist Exceptions
The blacklist_exceptions section is used to revert the actions of the blacklist section. This allows oneto selectively include (“whitelist”) devices which would normally be excluded via the blacklist section.
b l a c k l i s t_ex c ep t i on s {property ”(SCSI_IDENT_|ID_WWN) ”
}
A common usage is to blacklist “everything” using a catch-all regular expression, and createspecific blacklist_exceptions entries for those devices that should be handled by multipath-tools.
Configuration File Multipath Section
The multipaths section allows setting attributes of multipath maps. The attributes that are set via themultipaths section (see list below) take precedence over all other configuration settings, including thosefrom the overrides section.
The only recognized attribute for the multipaths section is the multipath subsection. If there are multiplemultipath subsections matching a given WWID, the contents of these sections are merged, and settings fromlater entries take precedence.
The multipath subsection recognizes the following attributes:
• wwid = (Mandatory) World Wide Identifier. Detected multipath maps are matched agains thisattribute. Note that, unlike the wwid attribute in the blacklist section, this is not a regular expressionor a substring; WWIDs must match exactly inside the multipaths section.
• alias = Symbolic name for the multipath map. This takes precedence over a an entry for the sameWWID in the bindings_file.
The following attributes are optional; if not set the default values are taken from the overrides, devices, ordefaults section:
32

• path_grouping_policy• path_selector• prio• prio_args• failback• rr_weight• no_path_retry• rr_min_io• rr_min_io_rq• flush_on_last_del• features• reservation_key• user_friendly_names• deferred_remove• san_path_err_threshold• san_path_err_forget_rate• san_path_err_recovery_time• marginal_path_err_sample_time• marginal_path_err_rate_threshold• marginal_path_err_recheck_gap_time• marginal_path_double_failed_time• delay_watch_checks• delay_wait_checks• skip_kpartx• max_sectors_kb• ghost_delay
Example:
mult ipaths {mult ipath {
wwid 3600508 b4000156d700012000000b0000a l i a s ye l lowpath_grouping_policy mult ibuspath_se l ec tor ” round−rob in 0”f a i l b a c k manualrr_weight p r i o r i t i e sno_path_retry 5
}mult ipath {
wwid 1DEC_____321816758474a l i a s red
}}
Configuration File Devices Section
multipath-tools have a built-in device table with reasonable defaults for more than 100 known multipath-capable storage devices.The devices section can be used to override these settings. If there are multiplematches for a given device, the attributes of all matching entries are applied to it. If an attribute is specifiedin several matching device subsections, later entries take precedence.
The only recognized attribute for the devices section is the device subsection. Devices detected in the systemare matched against the device entries using the vendor, product, and revision fields.
33

The vendor, product, and revision fields that multipath or multipathd detect for devices in a system dependon the device type. For SCSI devices, they correspond to the respective fields of the SCSI INQUIRY page. Ingeneral, the command ‘multipathd show paths format “%d %s” ’ command can be used to see the detectedproperties for all devices in the system.
The device subsection recognizes the following attributes:
1. vendor(Mandatory) Regular expression to match the vendor name.2. product(Mandatory) Regular expression to match the product name.3. revisionRegular expression to match the product revision.4. product_blacklistProducts with the given vendor matching this string are blacklisted.5. alias_prefixThe user_friendly_names prefix to use for this device type, instead of the default
“mpath”.6. hardware_handlerThe hardware handler to use for this device type. The following hardware handler
are implemented:• 1 emc - (Hardware-dependent) Hardware handler for DGC class arrays as CLARiiON CX/AX
and EMC VNX and Unity families.• 1 rdac - (Hardware-dependent) Hardware handler for LSI / Engenio / NetApp RDAC class as
NetApp SANtricity E/EF Series, and OEM arrays from IBM DELL SGI STK and SUN.• 1 hp_sw - (Hardware-dependent) Hardware handler for HP/COMPAQ/DEC HSG80 and
MSA/HSV arrays with Active/Standby mode exclusively.• 1 alua - (Hardware-dependent) Hardware handler for SCSI-3 ALUA compatible arrays.• 1 ana - (Hardware-dependent) Hardware handler for NVMe ANA compatible arrays.
The following attributes are optional; if not set the default values are taken from the defaults section:
• path_grouping_policy• uid_attribute• getuid_callout• path_selector• path_checker• prio• prio_args• features• failback• rr_weight• no_path_retry• rr_min_io• rr_min_io_rq• fast_io_fail_tmo• dev_loss_tmo• flush_on_last_del• user_friendly_names• retain_attached_hw_handler• detect_prio• detect_checker• deferred_remove• san_path_err_threshold• san_path_err_forget_rate• san_path_err_recovery_time• marginal_path_err_sample_time• marginal_path_err_rate_threshold• marginal_path_err_recheck_gap_time• marginal_path_double_failed_time• delay_watch_checks• delay_wait_checks
34
• skip_kpartx• max_sectors_kb• ghost_delay• all_tg_pt
Example:
d ev i c e s {dev i c e {
vendor ”3PARdata”product ”VV”path_grouping_policy ”group_by_prio”hardware_handler ”1 alua ”pr i o ” a lua ”f a i l b a c k ” immediate ”no_path_retry 18fast_io_fai l_tmo 10dev_loss_tmo ” i n f i n i t y ”
}dev i c e {
vendor ”DEC”product ”HSG80”path_grouping_policy ”group_by_prio”path_checker ”hp_sw”hardware_handler ”1 hp_sw”pr i o ”hp_sw”no_path_retry ”queue”
}}
Device Mapper Multipathing - Setup
Device Mapper Multipath will be referred here as multipath only.
Before moving on with this session it is recommended that you read: 1. Device Mapper Multi-pathing - Introduction 2. Device Mapper Multipathing - Configuration
This section provides step-by-step example procedures for configuring multipath.
It includes the following procedures:
• Basic setup
– Main defaults & devices attributes.
– Shows how to ignore disks with blacklists
– Shows how to rename disks using WWIDs
• Configuring active/active paths
Basic Setup
Before setting up multipath on your system, ensure that your system has been updated and includes themultipath-tools package. If boot from SAN is desired, then the multipath-tools-boot package is alsorequired.
35
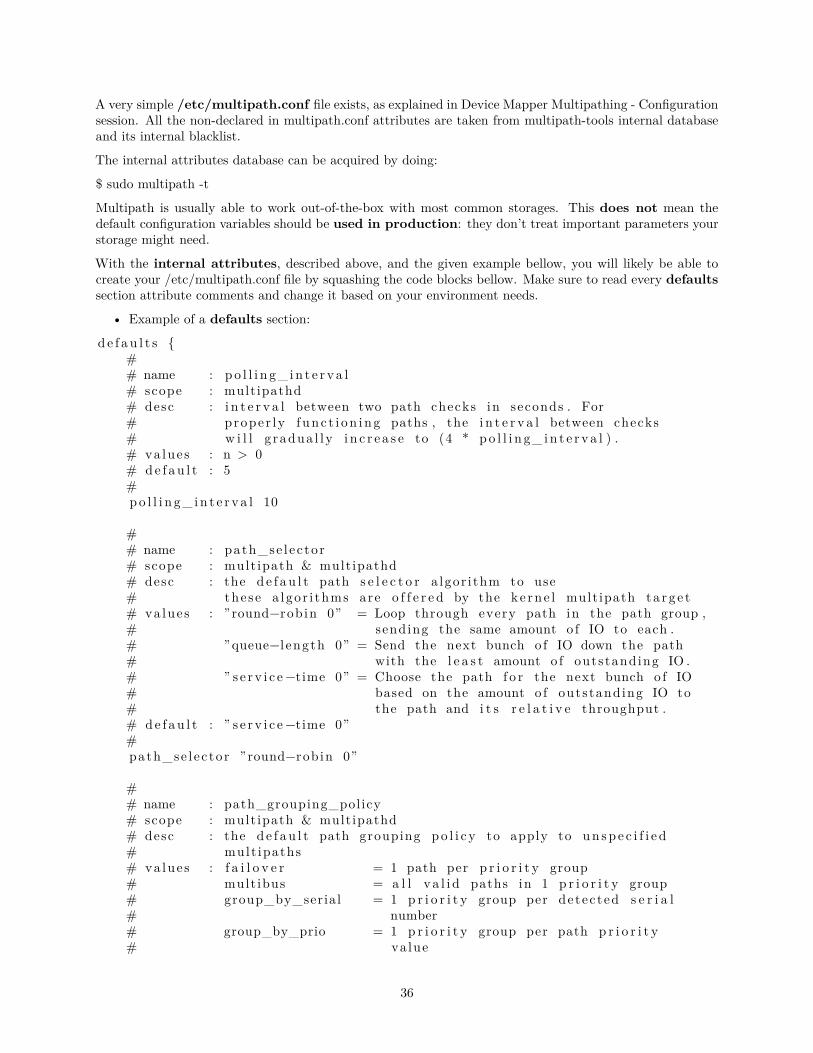
A very simple /etc/multipath.conf file exists, as explained in Device Mapper Multipathing - Configurationsession. All the non-declared in multipath.conf attributes are taken from multipath-tools internal databaseand its internal blacklist.
The internal attributes database can be acquired by doing:
$ sudo multipath -t
Multipath is usually able to work out-of-the-box with most common storages. This does not mean thedefault configuration variables should be used in production: they don’t treat important parameters yourstorage might need.
With the internal attributes, described above, and the given example bellow, you will likely be able tocreate your /etc/multipath.conf file by squashing the code blocks bellow. Make sure to read every defaultssection attribute comments and change it based on your environment needs.
• Example of a defaults section:
d e f a u l t s {## name : p o l l i n g_ i n t e r v a l# scope : multipathd# desc : i n t e r v a l between two path checks in seconds . For# proper ly f unc t i on ing paths , the i n t e r v a l between checks# w i l l g radua l l y i n c r e a s e to (4 * po l l i n g_ in t e r v a l ) .# va lues : n > 0# de f au l t : 5#po l l i n g_ i n t e r v a l 10
## name : path_se l ec tor# scope : mult ipath & multipathd# desc : the d e f au l t path s e l e c t o r a lgor i thm to use# these a lgor i thms are o f f e r e d by the ke rne l mult ipath ta r g e t# va lues : ” round−rob in 0” = Loop through every path in the path group ,# sending the same amount o f IO to each .# ”queue−l ength 0” = Send the next bunch o f IO down the path# with the l e a s t amount o f outstanding IO .# ” s e rv i c e −time 0” = Choose the path f o r the next bunch o f IO# based on the amount o f outstanding IO to# the path and i t s r e l a t i v e throughput .# de f au l t : ” s e r v i c e−time 0”#path_se l ec tor ” round−rob in 0”
## name : path_grouping_policy# scope : mult ipath & multipathd# desc : the d e f au l t path grouping po l i c y to apply to un sp e c i f i e d# mult ipaths# va lues : f a i l o v e r = 1 path per p r i o r i t y group# mult ibus = a l l v a l i d paths in 1 p r i o r i t y group# group_by_serial = 1 p r i o r i t y group per detec ted s e r i a l# number# group_by_prio = 1 p r i o r i t y group per path p r i o r i t y# value
36
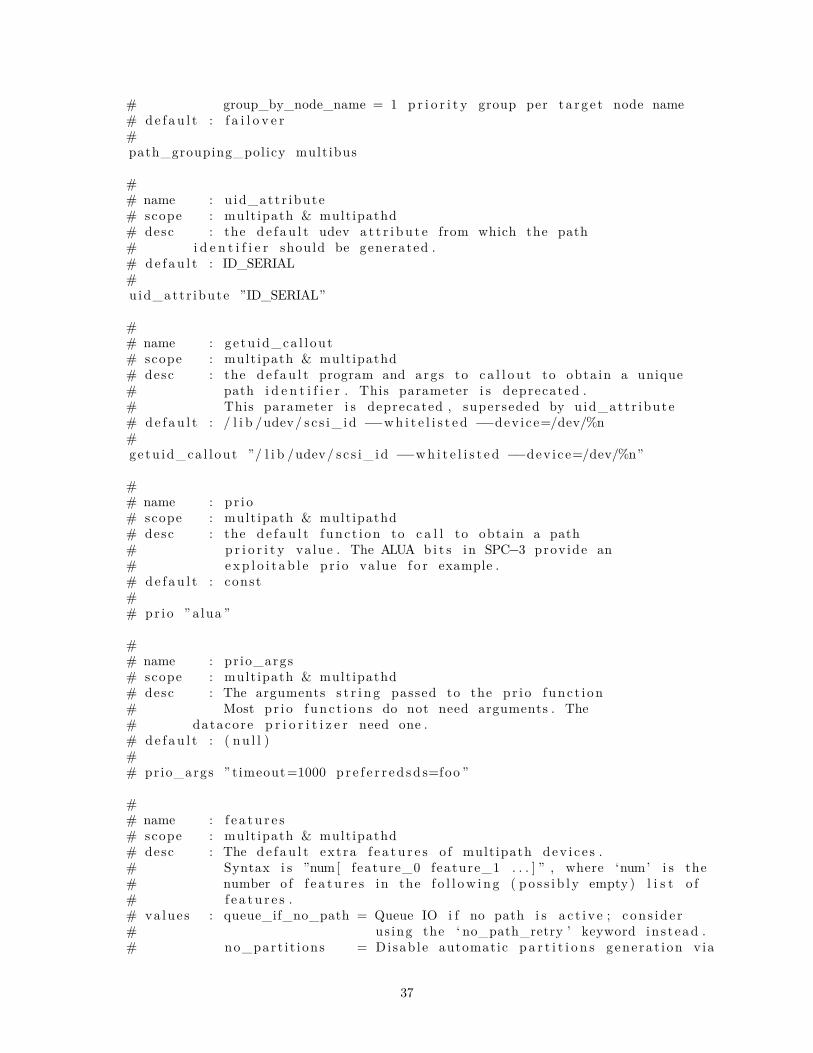
# group_by_node_name = 1 p r i o r i t y group per t a r g e t node name# de f au l t : f a i l o v e r#path_grouping_policy mult ibus
## name : u id_att r ibute# scope : mult ipath & multipathd# desc : the d e f au l t udev a t t r i b u t e from which the path# i d e n t i f i e r should be generated .# de f au l t : ID_SERIAL#uid_att r ibute ”ID_SERIAL”
## name : ge tu id_ca l l ou t# scope : mult ipath & multipathd# desc : the d e f au l t program and args to c a l l o u t to obta in a unique# path i d e n t i f i e r . This parameter i s deprecated .# This parameter i s deprecated , superseded by u id_att r ibute# de f au l t : / l i b /udev/ s c s i_ id −−wh i t e l i s t e d −−dev i c e=/dev/%n#getu id_ca l l ou t ”/ l i b /udev/ s c s i_ id −−wh i t e l i s t e d −−dev i c e=/dev/%n”
## name : p r i o# scope : mult ipath & multipathd# desc : the d e f au l t func t i on to c a l l to obta in a path# p r i o r i t y value . The ALUA b i t s in SPC−3 prov ide an# exp l o i t a b l e p r i o value f o r example .# de f au l t : const## pr i o ” alua ”
## name : pr io_args# scope : mult ipath & multipathd# desc : The arguments s t r i n g passed to the pr i o func t i on# Most p r i o f unc t i on s do not need arguments . The# datacore p r i o r i t i z e r need one .# de f au l t : ( nu l l )## prio_args ” timeout=1000 p r e f e r r e d sd s=foo ”
## name : f e a t u r e s# scope : mult ipath & multipathd# desc : The d e f au l t ext ra f e a t u r e s o f mult ipath dev i c e s .# Syntax i s ”num[ feature_0 feature_1 . . . ] ” , where ‘num’ i s the# number o f f e a t u r e s in the f o l l ow i n g ( po s s i b l y empty ) l i s t o f# f e a t u r e s .# va lues : queue_if_no_path = Queue IO i f no path i s a c t i v e ; c on s id e r# us ing the ‘ no_path_retry ’ keyword in s t ead .# no_part i t i ons = Disab le automatic p a r t i t i o n s gene ra t i on v ia
37

# kpartx .# de f au l t : ”0”#f e a t u r e s ”0”#f e a t u r e s ”1 queue_if_no_path”#f e a t u r e s ”1 no_part i t i ons ”#f e a t u r e s ”2 queue_if_no_path no_part i t i ons ”
## name : path_checker , checker# scope : mult ipath & multipathd# desc : the d e f au l t method used to determine the paths ’ s t a t e# va lues : r e ad s e c to r0 | tur | emc_clar i ion | hp_sw | d i r e c t i o | rdac | c c i s s_tur# de f au l t : d i r e c t i o#path_checker d i r e c t i o
## name : rr_min_io# scope : mult ipath & multipathd# desc : the number o f IO to route to a path be f o r e sw i t ch ing# to the next in the same path group f o r the bio−based# mult ipath implementation . This parameter i s used f o r# ke rn e l s v e r s i on up to 2 . 6 . 3 1 ; newer ke rne l v e r s i on# use the parameter rr_min_io_rq# de f au l t : 1000#rr_min_io 100
## name : rr_min_io_rq# scope : mult ipath & multipathd# desc : the number o f IO to route to a path be f o r e sw i t ch ing# to the next in the same path group f o r the request−based# mult ipath implementation . This parameter i s used f o r# ke rn e l s v e r s i on s l a t e r than 2 . 6 . 3 1 .# de f au l t : 1#rr_min_io_rq 1
## name : f lush_on_last_del# scope : multipathd# desc : I f s e t to ” yes ” , multipathd w i l l d i s a b l e queueing when the# l a s t path to a dev i c e has been de l e t ed .# va lues : yes | no# de f au l t : no#flush_on_last_del yes
## name : max_fds# scope : multipathd# desc : Set s the maximum number o f open f i l e d e s c r i p t o r s f o r the
38

# multipathd proce s s .# va lues : max | n > 0# de f au l t : None#max_fds 8192
## name : rr_weight# scope : mult ipath & multipathd# desc : i f s e t to p r i o r i t i e s the mult ipath c on f i gu r a t o r w i l l a s s i gn# path weights as ”path pr i o * rr_min_io”# va lues : p r i o r i t i e s | uniform# de f au l t : uniform#rr_weight p r i o r i t i e s
## name : f a i l b a c k# scope : multipathd# desc : t e l l the daemon to manage path group f a i l b a ck , or not to .# 0 means immediate f a i l b a ck , va lue s >0 means d e f f e r e d# f a i l b a c k expres sed in seconds .# va lues : manual | immediate | n > 0# de f au l t : manual#f a i l b a c k immediate
## name : no_path_retry# scope : mult ipath & multipathd# desc : t e l l the number o f r e t r i e s u n t i l d i s a b l e queueing , or# ” f a i l ” means immediate f a i l u r e ( no queueing ) ,# ”queue” means never stop queueing# va lues : queue | f a i l | n (>0)# de f au l t : ( nu l l )#no_path_retry f a i l
## name : queue_without_daemon# scope : multipathd# desc : I f s e t to ”no ” , multipathd w i l l d i s a b l e queueing f o r a l l# dev i c e s when i t i s shut down .# va lues : yes | no# de f au l t : yesqueue_without_daemon no
## name : user_friendly_names# scope : mult ipath & multipathd# desc : I f s e t to ” yes ” , us ing the b ind ings f i l e# / etc /mult ipath / b ind ings to a s s i gn a p e r s i s t e n t and# unique a l i a s to the multipath , in the form o f mpath<n>.# I f s e t to ”no” use the WWID as the a l i a s . In e i t h e r case
39
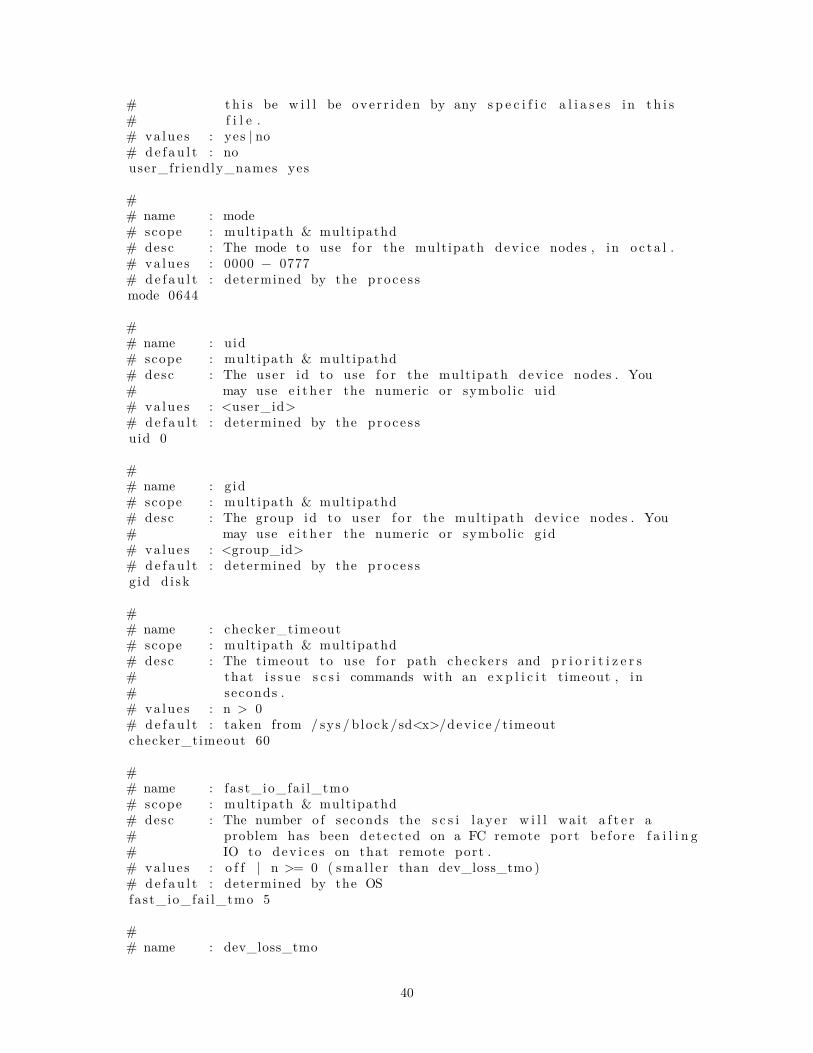
# th i s be w i l l be ove r r iden by any s p e c i f i c a l i a s e s in t h i s# f i l e .# va lues : yes | no# de f au l t : nouser_friendly_names yes
## name : mode# scope : mult ipath & multipathd# desc : The mode to use f o r the mult ipath dev i c e nodes , in o c t a l .# va lues : 0000 − 0777# de f au l t : determined by the proce s smode 0644
## name : uid# scope : mult ipath & multipathd# desc : The user id to use f o r the mult ipath dev i ce nodes . You# may use e i t h e r the numeric or symbol ic uid# va lues : <user_id># de f au l t : determined by the proce s suid 0
## name : g id# scope : mult ipath & multipathd# desc : The group id to user f o r the mult ipath dev i ce nodes . You# may use e i t h e r the numeric or symbol ic g id# va lues : <group_id># de f au l t : determined by the proce s sg id d i sk
## name : checker_timeout# scope : mult ipath & multipathd# desc : The timeout to use f o r path checker s and p r i o r i t i z e r s# that i s s u e s c s i commands with an e x p l i c i t timeout , in# seconds .# va lues : n > 0# de f au l t : taken from / sys / block /sd<x>/dev i c e / timeoutchecker_timeout 60
## name : fast_io_fai l_tmo# scope : mult ipath & multipathd# desc : The number o f seconds the s c s i l a y e r w i l l wait a f t e r a# problem has been detec ted on a FC remote port be f o r e f a i l i n g# IO to dev i c e s on that remote port .# va lues : o f f | n >= 0 ( sma l l e r than dev_loss_tmo )# de f au l t : determined by the OSfast_io_fai l_tmo 5
## name : dev_loss_tmo
40

# scope : mult ipath & multipathd# desc : The number o f seconds the s c s i l a y e r w i l l wait a f t e r a# problem has been detec ted on a FC remote port be f o r e# removing i t from the system .# va lues : i n f i n i t y | n > 0# de f au l t : determined by the OSdev_loss_tmo 120
## name : b i nd i n g s_ f i l e# scope : mult ipath# desc : The l o c a t i o n o f the b ind ings f i l e that i s used with# the user_friendly_names opt ion .# va lues : <full_pathname># de f au l t : ”/ var / l i b /mult ipath / b ind ings ”# b ind i n g s_ f i l e ”/ e t c /mult ipath / b ind ings ”
## name : wwids_f i l e# scope : mult ipath# desc : The l o c a t i o n o f the wwids f i l e mult ipath uses to# keep track o f the c rea ted mult ipath dev i c e s .# va lues : <full_pathname># de f au l t : ”/ var / l i b /mult ipath /wwids”# wwids_f i l e ”/ e t c /mult ipath /wwids”
## name : reservat ion_key# scope : mult ipath# desc : S e rv i c e ac t i on r e s e r v a t i o n key used by mpathpers i s t .# va lues : <key># de f au l t : ( nu l l )# reservat ion_key ”mpathkey”
## name : force_sync# scope : multipathd# desc : I f s e t to yes , mult ipath w i l l run a l l o f the checker s in# sync mode , even i f the checker has an async mode .# va lues : yes | no# de f au l t : noforce_sync yes
## name : con f i g_d i r# scope : mult ipath & multipathd# desc : I f not s e t to an empty s t r i ng , mult ipath w i l l s earch# th i s d i r e c t o r y a l p h ab e t i c a l l y f o r f i l e s ending in ” . conf ”# and i t w i l l read c on f i gu r a t i on in fo rmat ion from these# f i l e s , j u s t as i f i t was in / e t c /mult ipath . conf# va lues : ”” or a f u l l y q u a l i f i e d pathname# de f au l t : ”/ e t c /mult ipath / conf . d”
#
41

# name : delay_watch_checks# scope : multipathd# desc : I f s e t to a value g r e a t e r than 0 , multipathd w i l l watch# paths that have r e c en t l y become va l i d f o r t h i s many# checks . I f they f a i l again whi l e they are being watched ,# when they next become va l id , they w i l l not be used un t i l# they have stayed up f o r delay_wait_checks checks .# va lues : no|<n> > 0# de f au l t : nodelay_watch_checks 12
## name : delay_wait_checks# scope : multipathd# desc : I f s e t to a value g r e a t e r than 0 , when a dev i ce that has# r e c en t l y come back on l i n e f a i l s again with in# delay_watch_checks checks , the next time i t comes back# onl ine , i t w i l l marked and delayed , and not used un t i l# i t has passed delay_wait_checks checks .# va lues : no|<n> > 0# de f au l t : nodelay_wait_checks 12
}
• Example of a multipaths section. > Note: You can obtain the WWIDs for your LUNs executing: >> $ multipath -ll > > after the service multipath-tools.service has been restarted.
mult ipaths {mult ipath {
wwid 360000000000000000 e00000000030001a l i a s ye l low
}mult ipath {
wwid 360000000000000000 e00000000020001a l i a s blue
}mult ipath {
wwid 360000000000000000 e00000000010001a l i a s red
}mult ipath {
wwid 360000000000000000 e00000000040001a l i a s green
}mult ipath {
wwid 360000000000000000 e00000000050001a l i a s purple
}}
• Small example of a devices section:
# dev i c e s {# dev i ce {# vendor ”IBM”
42

# product ”2107900”# path_grouping_policy group_by_serial# }# }#
• Example of a blacklist section:
# name : b l a c k l i s t# scope : mult ipath & multipathd# desc : l i s t o f dev i c e names to d i s ca rd as not mult ipath cand idate s## Devices can be i d e n t i f i e d by t h e i r dev i c e node name ”devnode ” ,# th e i r WWID ”wwid” , or t h e i r vender and product s t r i n g s ” dev i ce ”# de f au l t : fd , hd , md, dm, sr , scd , st , ram , raw , loop , dc s sb lk## b l a c k l i s t {# wwid 26353900 f02796769# devnode ”^(ram | raw | loop | fd |md|dm−| s r | scd | s t ) [0 −9]\*”# devnode ”^hd [ a−z ] ”# devnode ”^ dcs sb lk [0 −9]\*”# dev i ce {# vendor DEC.\*# product MSA[ 1 5 ] 0 0# }# }
• Example of a blacklist exception section:
# name : b l a c k l i s t_ex c ep t i on s# scope : mult ipath & multipathd# desc : l i s t o f dev i c e names to be t r ea t ed as mult ipath cand idate s# even i f they are on the b l a c k l i s t .## Note : b l a c k l i s t except i on s are only va l i d in the same c l a s s .# I t i s not p o s s i b l e to b l a c k l i s t d ev i c e s us ing the devnode keyword# and to exc lude some dev i c e s o f them us ing the wwid keyword .# de f au l t : −## b la ck l i s t_ex c ep t i on s {# devnode ”^dasd [ c−d]+[0−9]\*”# wwid ”IBM.75000000092461 .4 d00 .34”# wwid ”IBM.75000000092461 .4 d00 .35”# wwid ”IBM.75000000092461 .4 d00 .36”# }
Device Mapper Multipathing - Usage & Debug
Device Mapper Multipath will be referred here as multipath only.
Before moving on with this session it is recommended that you read: 1. Device Mapper Mul-tipathing - Introduction 2. Device Mapper Multipathing - Configuration 3. Device MapperMultipathing - Setup
43

This section provides step-by-step example procedures for configuring multipath.
It includes the following procedures:
• Resizing Online Multipath Devices
• Moving root File System from a Single Path Device to a Multipath Device
• The Multipath Daemon
• Issues with queue_if_no_path
• Multipath Command Output
• Multipath Queries with multipath Command
• Determining Device Mapper Entries with dmsetup Command
• Troubleshooting with the multipathd interactive console
Resizing Online Multipath Devices
First find all the paths to the LUN about to be resized:
$ sudo mult ipath − l lmpathb (360014056 eee8ec6e1164fcb959086482 ) dm−0 LIO−ORG, lun01s i z e =1.0G f e a t u r e s = ’0 ’ hwhandler=’1 alua ’ wp=rw|−+− po l i c y=’ s e r v i c e −time 0 ’ p r i o=50 s t a tu s=ac t i v e| ‘− 7 : 0 : 0 : 1 sde 8 :64 a c t i v e ready running‘−+− po l i c y=’ s e r v i c e −time 0 ’ p r i o=50 s t a tu s=enabled
‘− 8 : 0 : 0 : 1 sd f 8 :80 a c t i v e ready runningmpatha (36001405 e3c2841430ee4bf3871b1998b ) dm−1 LIO−ORG, lun02s i z e =1.0G f e a t u r e s = ’0 ’ hwhandler=’1 alua ’ wp=rw|−+− po l i c y=’ s e r v i c e −time 0 ’ p r i o=50 s t a tu s=ac t i v e| ‘− 7 : 0 : 0 : 2 sdc 8 :32 a c t i v e ready running‘−+− po l i c y=’ s e r v i c e −time 0 ’ p r i o=50 s t a tu s=enabled
‘− 8 : 0 : 0 : 2 sdd 8 :48 a c t i v e ready running
Now I’ll reconfigure mpathb (with wwid = 360014056eee8ec6e1164fcb959086482) to have 2GB instead ofjust 1Gb and check if has changed:
$ echo 1 | sudo tee / sys / block / sde / dev i ce / rescan1$ echo 1 | sudo tee / sys / block / sd f / dev i ce / rescan1$ sudo mult ipath − l lmpathb (360014056 eee8ec6e1164fcb959086482 ) dm−0 LIO−ORG, lun01s i z e =1.0G f e a t u r e s = ’0 ’ hwhandler=’1 alua ’ wp=rw|−+− po l i c y=’ s e r v i c e −time 0 ’ p r i o=50 s t a tu s=ac t i v e| ‘− 7 : 0 : 0 : 1 sde 8 :64 a c t i v e ready running‘−+− po l i c y=’ s e r v i c e −time 0 ’ p r i o=50 s t a tu s=enabled
‘− 8 : 0 : 0 : 1 sd f 8 :80 a c t i v e ready runningmpatha (36001405 e3c2841430ee4bf3871b1998b ) dm−1 LIO−ORG, lun02s i z e =1.0G f e a t u r e s = ’0 ’ hwhandler=’1 alua ’ wp=rw|−+− po l i c y=’ s e r v i c e −time 0 ’ p r i o=50 s t a tu s=ac t i v e| ‘− 7 : 0 : 0 : 2 sdc 8 :32 a c t i v e ready running‘−+− po l i c y=’ s e r v i c e −time 0 ’ p r i o=50 s t a tu s=enabled
‘− 8 : 0 : 0 : 2 sdd 8 :48 a c t i v e ready running
44

Not yet! We still need to re-scan the multipath map:$ sudo multipathd r e s i z e map mpathbok
And then we are good:$ sudo mult ipath − l lmpathb (360014056 eee8ec6e1164fcb959086482 ) dm−0 LIO−ORG, lun01s i z e =2.0G f e a t u r e s = ’0 ’ hwhandler=’1 alua ’ wp=rw|−+− po l i c y=’ s e r v i c e −time 0 ’ p r i o=50 s t a tu s=ac t i v e| ‘− 7 : 0 : 0 : 1 sde 8 :64 a c t i v e ready running.‘−+− po l i c y=’ s e r v i c e−time 0 ’ p r i o=50 s t a tu s=enabled
‘− 8 : 0 : 0 : 1 sd f 8 :80 a c t i v e ready runningmpatha (36001405 e3c2841430ee4bf3871b1998b ) dm−1 LIO−ORG, lun02s i z e =1.0G f e a t u r e s = ’0 ’ hwhandler=’1 alua ’ wp=rw|−+− po l i c y=’ s e r v i c e −time 0 ’ p r i o=50 s t a tu s=ac t i v e| ‘− 7 : 0 : 0 : 2 sdc 8 :32 a c t i v e ready running‘−+− po l i c y=’ s e r v i c e −time 0 ’ p r i o=50 s t a tu s=enabled
‘− 8 : 0 : 0 : 2 sdd 8 :48 a c t i v e ready running
Make sure to run resize2fs /dev/mapper/mpathb to resize the filesystem.
Moving root File System from a Single Path Device to a Multipath Device
This is dramatically simplified by the use of UUIDs to identify devices as an intrinsic label. Simply installmultipath-tools-boot and reboot. This will rebuild the initial ramdisk and afford multipath the opportunityto build it’s paths before the root filesystem is mounted by UUID.
NoteWhenever multipath.conf is updated, so should the initrd by executing:update−initramfs −u −k allThe reason behind is multipath.conf is copied to the ramdisk and is integral to determining theavailable devices to map via it’s blacklist and devices sections.
The Multipath Daemon
If you find you have trouble implementing a multipath configuration, you should ensure the multipathdaemon is running as described in Device Mapper Multipathing - Setup. The multipathd daemon must berunning in order to use** multipath** devices.
Multipath Command Output
When you create, modify, or list a multipath device, you get a printout of the current device setup. The for-mat is as follows. For each multipath device: ~~~~~~~~~~~~~~~~~~~~~~~~~~~~~~~~~~~~~~~~~~~~~~~~~~~~~~~~~~~~~~~~~~~~~~~~~~~~~~~~action_if_any: alias (wwid_if_different_from_alias) dm_device_name_if_known vendor,productsize=size features=‘features’ hwhandler=‘hardware_handler’ wp=write_permission_if_known ~~~~~~~~~~~~~~~~~~~~~~~~~~~~~~~~~~~~~~~~~~~~~~~~~~~~~~~~~~~~~~~~~~~~~~~~~~~~~~~~For each path group: ~~~~~~~~~~~~~~~~~~~~~~~~~~~~~~~~~~~~~~~~~~~~~~~~~~~~~~~~~~~~~~~~~~~~~~~~~~~~~~~~-+- policy=‘scheduling_policy’ prio=prio_if_known status=path_group_status_if_known ~~~~~~~~~~~~~~~~~~~~~~~~~~~~~~~~~~~~~~~~~~~~~~~~~~~~~~~~~~~~~~~~~~~~~~~~~~~~~~~~For each path: ~~~~~~~~~~~~~~~~~~~~~~~~~~~~~~~~~~~~~~~~~~~~~~~~~~~~~~~~~~~~~~~~~~~~~~~~~~~~~~~~− host:channel:id:lun devnode major:minor dm_status_if_known path_status online_status ~~~~~~~~~~~~~~~~~~~~~~~~~~~~~~~~~~~~~~~~~~~~~~~~~~~~~~~~~~~~~~~~~~~~~~~~~~~~~~~~For example, the output of a multipath command might appear as follows: ~~~~~~~~~~~~~~~~~~~~~~~~~~~~~~~~~~~~~~~~~~~~~~~~~~~~~~~~~~~~~~~~~~~~~~~~~~~~~~~~mpathb (360014056eee8ec6e1164fcb959086482)dm−0 LIO−ORG,lun01 size=2.0G features=’0’ hwhandler=’1 alua’ wp=rw |−+− policy=’service−time 0’ prio=50 status=active |- 7:0:0:1 sde 8:64 active ready
45
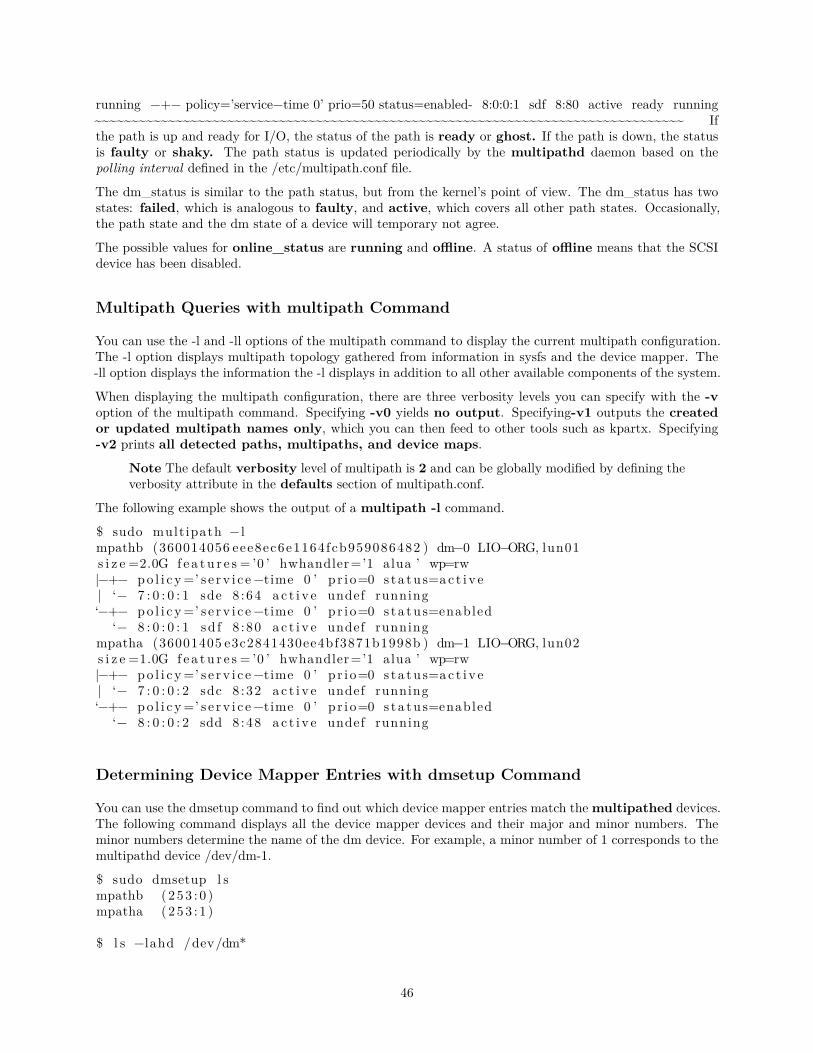
running −+− policy=’service−time 0’ prio=50 status=enabled- 8:0:0:1 sdf 8:80 active ready running~~~~~~~~~~~~~~~~~~~~~~~~~~~~~~~~~~~~~~~~~~~~~~~~~~~~~~~~~~~~~~~~~~~~~~~~~~~~~~~~ Ifthe path is up and ready for I/O, the status of the path is ready or ghost. If the path is down, the statusis faulty or shaky. The path status is updated periodically by the multipathd daemon based on thepolling interval defined in the /etc/multipath.conf file.
The dm_status is similar to the path status, but from the kernel’s point of view. The dm_status has twostates: failed, which is analogous to faulty, and active, which covers all other path states. Occasionally,the path state and the dm state of a device will temporary not agree.
The possible values for online_status are running and offline. A status of offline means that the SCSIdevice has been disabled.
Multipath Queries with multipath Command
You can use the -l and -ll options of the multipath command to display the current multipath configuration.The -l option displays multipath topology gathered from information in sysfs and the device mapper. The-ll option displays the information the -l displays in addition to all other available components of the system.
When displaying the multipath configuration, there are three verbosity levels you can specify with the -voption of the multipath command. Specifying -v0 yields no output. Specifying-v1 outputs the createdor updated multipath names only, which you can then feed to other tools such as kpartx. Specifying-v2 prints all detected paths, multipaths, and device maps.
Note The default verbosity level of multipath is 2 and can be globally modified by defining theverbosity attribute in the defaults section of multipath.conf.
The following example shows the output of a multipath -l command.
$ sudo mult ipath − lmpathb (360014056 eee8ec6e1164fcb959086482 ) dm−0 LIO−ORG, lun01s i z e =2.0G f e a t u r e s = ’0 ’ hwhandler=’1 alua ’ wp=rw|−+− po l i c y=’ s e r v i c e −time 0 ’ p r i o=0 s ta tu s=ac t i v e| ‘− 7 : 0 : 0 : 1 sde 8 :64 a c t i v e undef running‘−+− po l i c y=’ s e r v i c e −time 0 ’ p r i o=0 s ta tu s=enabled
‘− 8 : 0 : 0 : 1 sd f 8 :80 a c t i v e undef runningmpatha (36001405 e3c2841430ee4bf3871b1998b ) dm−1 LIO−ORG, lun02s i z e =1.0G f e a t u r e s = ’0 ’ hwhandler=’1 alua ’ wp=rw|−+− po l i c y=’ s e r v i c e −time 0 ’ p r i o=0 s ta tu s=ac t i v e| ‘− 7 : 0 : 0 : 2 sdc 8 :32 a c t i v e undef running‘−+− po l i c y=’ s e r v i c e −time 0 ’ p r i o=0 s ta tu s=enabled
‘− 8 : 0 : 0 : 2 sdd 8 :48 a c t i v e undef running
Determining Device Mapper Entries with dmsetup Command
You can use the dmsetup command to find out which device mapper entries match the multipathed devices.The following command displays all the device mapper devices and their major and minor numbers. Theminor numbers determine the name of the dm device. For example, a minor number of 1 corresponds to themultipathd device /dev/dm-1.
$ sudo dmsetup l smpathb (253 : 0 )mpatha ( 253 : 1 )
$ l s −lahd /dev/dm*
46
brw−rw−−−− 1 root d i sk 253 , 0 Apr 27 14 :49 /dev/dm−0brw−rw−−−− 1 root d i sk 253 , 1 Apr 27 14 :47 /dev/dm−1
Troubleshooting with the multipathd interactive console
The multipathd -k command is an interactive interface to the multipathd daemon. Entering this commandbrings up an interactive multipath console. After entering this command, you can enter help to get a list ofavailable commands, you can enter a interactive command, or you can enter CTRL-D to quit.
The multipathd interactive console can be used to troubleshoot problems you may be having with your system.For example, the following command sequence displays the multipath configuration, including the defaults,before exiting the console. ~~~~~~~~~~~~~~~~~~~~~~~~~~~~~~~~~~~~~~~~~~~~~~~~~~~~~~~~~~~~~~~~~~~~~~~~~~~~~~~~$ sudo multipathd -k > show config > CTRL-D ~~~~~~~~~~~~~~~~~~~~~~~~~~~~~~~~~~~~~~~~~~~~~~~~~~~~~~~~~~~~~~~~~~~~~~~~~~~~~~~~The following command sequence ensures that multipath has picked up any changes to the multipath.conf,~~~~~~~~~~~~~~~~~~~~~~~~~~~~~~~~~~~~~~~~~~~~~~~~~~~~~~~~~~~~~~~~~~~~~~~~~~~~~~~~ $sudo multipathd -k > reconfigure > CTRL-D ~~~~~~~~~~~~~~~~~~~~~~~~~~~~~~~~~~~~~~~~~~~~~~~~~~~~~~~~~~~~~~~~~~~~~~~~~~~~~~~~Use the following command sequence to ensure that the path checker is working properly. ~~~~~~~~~~~~~~~~~~~~~~~~~~~~~~~~~~~~~~~~~~~~~~~~~~~~~~~~~~~~~~~~~~~~~~~~~~~~~~~~$ sudo multipathd -k > show paths > CTRL-D ~~~~~~~~~~~~~~~~~~~~~~~~~~~~~~~~~~~~~~~~~~~~~~~~~~~~~~~~~~~~~~~~~~~~~~~~~~~~~~~~Commands can also be streamed into multipathd using STDIN like so: ~~~~~~~~~~~~~~~~~~~~~~~~~~~~~~~~~~~~~~~~~~~~~~~~~~~~~~~~~~~~~~~~~~~~~~~~~~~~~~~~$ echo ‘show config’ | sudo multipathd -k ~~~~~~~~~~~~~~~~~~~~~~~~~~~~~~~~~~~~~~~~~~~~~~~~~~~~~~~~~~~~~~~~~~~~~~~~~~~~~~~~
Networking
Networks consist of two or more devices, such as computer systems, printers, and related equipment which areconnected by either physical cabling or wireless links for the purpose of sharing and distributing informationamong the connected devices.
This section provides general and specific information pertaining to networking, including an overview ofnetwork concepts and detailed discussion of popular network protocols.
TCP/IP
The Transmission Control Protocol and Internet Protocol (TCP/IP) is a standard set of protocols developedin the late 1970s by the Defense Advanced Research Projects Agency (DARPA) as a means of communicationbetween different types of computers and computer networks. TCP/IP is the driving force of the Internet,and thus it is the most popular set of network protocols on Earth.
TCP/IP Introduction
The two protocol components of TCP/IP deal with different aspects of computer networking. InternetProtocol, the “IP” of TCP/IP is a connectionless protocol which deals only with network packet routingusing the IP Datagram as the basic unit of networking information. The IP Datagram consists of a headerfollowed by a message. The Transmission Control Protocol is the “TCP” of TCP/IP and enables networkhosts to establish connections which may be used to exchange data streams. TCP also guarantees that thedata between connections is delivered and that it arrives at one network host in the same order as sent fromanother network host.
47
TCP/IP Configuration
The TCP/IP protocol configuration consists of several elements which must be set by editing the appropriateconfiguration files, or deploying solutions such as the Dynamic Host Configuration Protocol (DHCP) serverwhich in turn, can be configured to provide the proper TCP/IP configuration settings to network clientsautomatically. These configuration values must be set correctly in order to facilitate the proper networkoperation of your Ubuntu system.
The common configuration elements of TCP/IP and their purposes are as follows:
• IP address The IP address is a unique identifying string expressed as four decimal numbers rangingfrom zero (0) to two-hundred and fifty-five (255), separated by periods, with each of the four numbersrepresenting eight (8) bits of the address for a total length of thirty-two (32) bits for the whole address.This format is called dotted quad notation.
• Netmask The Subnet Mask (or simply, netmask) is a local bit mask, or set of flags which separatethe portions of an IP address significant to the network from the bits significant to the subnetwork.For example, in a Class C network, the standard netmask is 255.255.255.0 which masks the first threebytes of the IP address and allows the last byte of the IP address to remain available for specifyinghosts on the subnetwork.
• Network Address The Network Address represents the bytes comprising the network portion of anIP address. For example, the host 12.128.1.2 in a Class A network would use 12.0.0.0 as the networkaddress, where twelve (12) represents the first byte of the IP address, (the network part) and zeroes(0) in all of the remaining three bytes to represent the potential host values. A network host using theprivate IP address 192.168.1.100 would in turn use a Network Address of 192.168.1.0, which specifiesthe first three bytes of the Class C 192.168.1 network and a zero (0) for all the possible hosts on thenetwork.
• Broadcast Address The Broadcast Address is an IP address which allows network data to be sentsimultaneously to all hosts on a given subnetwork rather than specifying a particular host. Thestandard general broadcast address for IP networks is 255.255.255.255, but this broadcast addresscannot be used to send a broadcast message to every host on the Internet because routers block it.A more appropriate broadcast address is set to match a specific subnetwork. For example, on theprivate Class C IP network, 192.168.1.0, the broadcast address is 192.168.1.255. Broadcast messagesare typically produced by network protocols such as the Address Resolution Protocol (ARP) and theRouting Information Protocol (RIP).
• Gateway Address A Gateway Address is the IP address through which a particular network, or hoston a network, may be reached. If one network host wishes to communicate with another network host,and that host is not located on the same network, then a gateway must be used. In many cases, theGateway Address will be that of a router on the same network, which will in turn pass traffic on toother networks or hosts, such as Internet hosts. The value of the Gateway Address setting must becorrect, or your system will not be able to reach any hosts beyond those on the same network.
• Nameserver Address Nameserver Addresses represent the IP addresses of Domain Name Service(DNS) systems, which resolve network hostnames into IP addresses. There are three levels of Name-server Addresses, which may be specified in order of precedence: The Primary Nameserver, the Sec-ondary Nameserver, and the Tertiary Nameserver. In order for your system to be able to resolve networkhostnames into their corresponding IP addresses, you must specify valid Nameserver Addresses whichyou are authorized to use in your system’s TCP/IP configuration. In many cases these addresses canand will be provided by your network service provider, but many free and publicly accessible name-servers are available for use, such as the Level3 (Verizon) servers with IP addresses from 4.2.2.1 to4.2.2.6.
Tip
The IP address, Netmask, Network Address, Broadcast Address, Gateway Address, and
48
Nameserver Addresses are typically specified via the appropriate directives in the file /etc/network/interfaces. For more information, view the system manual page for interfaces , withthe following command typed at a terminal prompt:
Access the system manual page for interfaces with the following command:
man i n t e r f a c e s
IP Routing
IP routing is a means of specifying and discovering paths in a TCP/IP network along which network datamay be sent. Routing uses a set of routing tables to direct the forwarding of network data packets fromtheir source to the destination, often via many intermediary network nodes known as routers. There are twoprimary forms of IP routing: Static Routing and Dynamic Routing.
Static routing involves manually adding IP routes to the system’s routing table, and this is usually doneby manipulating the routing table with the route command. Static routing enjoys many advantages overdynamic routing, such as simplicity of implementation on smaller networks, predictability (the routing tableis always computed in advance, and thus the route is precisely the same each time it is used), and lowoverhead on other routers and network links due to the lack of a dynamic routing protocol. However, staticrouting does present some disadvantages as well. For example, static routing is limited to small networksand does not scale well. Static routing also fails completely to adapt to network outages and failures alongthe route due to the fixed nature of the route.
Dynamic routing depends on large networks with multiple possible IP routes from a source to a destinationand makes use of special routing protocols, such as the Router Information Protocol (RIP), which handle theautomatic adjustments in routing tables that make dynamic routing possible. Dynamic routing has severaladvantages over static routing, such as superior scalability and the ability to adapt to failures and outagesalong network routes. Additionally, there is less manual configuration of the routing tables, since routerslearn from one another about their existence and available routes. This trait also eliminates the possibilityof introducing mistakes in the routing tables via human error. Dynamic routing is not perfect, however,and presents disadvantages such as heightened complexity and additional network overhead from routercommunications, which does not immediately benefit the end users, but still consumes network bandwidth.
TCP and UDP
TCP is a connection-based protocol, offering error correction and guaranteed delivery of data via what isknown as flow control. Flow control determines when the flow of a data stream needs to be stopped, andpreviously sent data packets should to be re-sent due to problems such as collisions, for example, thusensuring complete and accurate delivery of the data. TCP is typically used in the exchange of importantinformation such as database transactions.
The User Datagram Protocol (UDP), on the other hand, is a connectionless protocol which seldom dealswith the transmission of important data because it lacks flow control or any other method to ensure reliabledelivery of the data. UDP is commonly used in such applications as audio and video streaming, where it isconsiderably faster than TCP due to the lack of error correction and flow control, and where the loss of afew packets is not generally catastrophic.
ICMP
The Internet Control Messaging Protocol (ICMP) is an extension to the Internet Protocol (IP) as definedin the Request For Comments (RFC) #792 and supports network packets containing control, error, andinformational messages. ICMP is used by such network applications as the ping utility, which can determine
49
the availability of a network host or device. Examples of some error messages returned by ICMP whichare useful to both network hosts and devices such as routers, include Destination Unreachable and TimeExceeded.
Daemons
Daemons are special system applications which typically execute continuously in the background and awaitrequests for the functions they provide from other applications. Many daemons are network-centric; that is,a large number of daemons executing in the background on an Ubuntu system may provide network-relatedfunctionality. Some examples of such network daemons include the Hyper Text Transport Protocol Daemon(httpd), which provides web server functionality; the Secure SHell Daemon (sshd), which provides secureremote login shell and file transfer capabilities; and the Internet Message Access Protocol Daemon (imapd),which provides E-Mail services.
Resources
• There are man pages for TCP and IP that contain more useful information.
• Also, see the TCP/IP Tutorial and Technical Overview IBM Redbook.
• Another resource is O’Reilly’s TCP/IP Network Administration.
Network Configuration
Ubuntu ships with a number of graphical utilities to configure your network devices. This document is gearedtoward server administrators and will focus on managing your network on the command line.
Ethernet Interfaces
Ethernet interfaces are identified by the system using predictable network interface names. These namescan appear as eno1 or enp0s25. However, in some cases an interface may still use the kernel eth# style ofnaming.
Identify Ethernet Interfaces
To quickly identify all available Ethernet interfaces, you can use the ip command as shown below.
ip a1 : l o : <LOOPBACK,UP,LOWER_UP> mtu 65536 qd i s c noqueue s t a t e UNKNOWN group
de f au l t q len 1000l i n k / loopback 0 0 : 0 0 : 0 0 : 0 0 : 0 0 : 0 0 brd 0 0 : 0 0 : 0 0 : 0 0 : 0 0 : 0 0i n e t 1 2 7 . 0 . 0 . 1 / 8 scope host l o
v a l i d_ l f t f o r e v e r p r e f e r r e d_ l f t f o r e v e ri n e t 6 : : 1 /128 scope host
v a l i d_ l f t f o r e v e r p r e f e r r e d_ l f t f o r e v e r2 : enp0s25 : <BROADCAST,MULTICAST,UP,LOWER_UP> mtu 1500 qd i s c noqueue s t a t e UP
group de f au l t q len 1000l i n k / e ther 00 : 1 6 : 3 e : e2 : 5 2 : 4 2 brd f f : f f : f f : f f : f f : f f l ink−netns id 0i n e t 10 . 102 . 66 . 200/24 brd 10 . 102 . 66 . 255 scope g l oba l dynamic eth0
v a l i d_ l f t 3257 sec p r e f e r r e d_ l f t 3257 seci n e t 6 f e80 : : 2 1 6 : 3 e f f : f e e 2 :5242/64 scope l i n k
50
va l i d_ l f t f o r e v e r p r e f e r r e d_ l f t f o r e v e r
Another application that can help identify all network interfaces available to your system is the lshw command.This command provides greater details around the hardware capabilities of specific adapters. In the examplebelow, lshw shows a single Ethernet interface with the logical name of eth0 along with bus information,driver details and all supported capabilities.
sudo lshw −c l a s s network*−network
d e s c r i p t i o n : Ethernet i n t e r f a c eproduct : MT26448 [ ConnectX EN 10GigE , PCIe 2 .0 5GT/ s ]vendor : Mellanox Techno log ie sphy s i c a l id : 0bus i n f o : pci@0004 : 0 1 : 0 0 . 0l o g i c a l name : eth4ve r s i on : b0s e r i a l : e4 : 1 d : 2 d : 6 7 : 8 3 : 5 6s l o t : U78CB. 0 0 1 .WZS09KB−P1−C6−T1s i z e : 10Gbit/ scapac i ty : 10Gbit/ swidth : 64 b i t sc l o ck : 33MHzc a p a b i l i t i e s : pm vpd msix pc i e xp r e s s bus_master cap_l i s t e the rne t
phy s i c a l f i b r e 10000bt−fdc on f i gu r a t i on : au tonego t i a t i on=o f f broadcast=yes d r i v e r=mlx4_en
d r i v e r v e r s i o n=4.0−0 duplex=f u l l f i rmware =2.9.1326 ip =192 .168 .1 .1l a t ency=0 l i n k=yes mu l t i ca s t=yes port=f i b r e speed=10Gbit/ s
r e s ou r c e s : iomemory :24000−23 f f f i r q :481 memory : 3 fe200000000−3f e 2 0 0 0 f f f f f memory:240000000000−240007 f f f f f f
Ethernet Interface Logical Names
Interface logical names can also be configured via a netplan configuration. If you would like control whichinterface receives a particular logical name use the match and set-name keys. The match key is used to findan adapter based on some criteria like MAC address, driver, etc. Then the set-name key can be used tochange the device to the desired logial name.
network :v e r s i on : 2r endere r : networkde the rne t s :
eth_lan0 :dhcp4 : t ruematch :
macaddress : 0 0 : 1 1 : 2 2 : 3 3 : 4 4 : 5 5set−name : eth_lan0
Ethernet Interface Settings
ethtool is a program that displays and changes Ethernet card settings such as auto-negotiation, port speed,duplex mode, and Wake-on-LAN. The following is an example of how to view supported features and con-figured settings of an Ethernet interface.
51
sudo e th t oo l eth4Se t t i n g s f o r eth4 :
Supported por t s : [ FIBRE ]Supported l i n k modes : 10000baseT/Ful lSupported pause frame use : NoSupports auto−nego t i a t i on : NoSupported FEC modes : Not reportedAdvert i sed l i n k modes : 10000baseT/Ful lAdvert i sed pause frame use : NoAdvert i sed auto−nego t i a t i on : NoAdvert i sed FEC modes : Not repor tedSpeed : 10000Mb/ sDuplex : Fu l lPort : FIBREPHYAD: 0Transce ive r : i n t e r n a lAuto−nego t i a t i on : o f fSupports Wake−on : dWake−on : dCurrent message l e v e l : 0x00000014 (20)
l i n k ifdownLink detec ted : yes
IP Addressing
The following section describes the process of configuring your systems IP address and default gatewayneeded for communicating on a local area network and the Internet.
Temporary IP Address Assignment
For temporary network configurations, you can use the ip command which is also found on most otherGNU/Linux operating systems. The ip command allows you to configure settings which take effect immedi-ately, however they are not persistent and will be lost after a reboot.
To temporarily configure an IP address, you can use the ip command in the following manner. Modify theIP address and subnet mask to match your network requirements.
sudo ip addr add 10 .102 . 66 . 200/24 dev enp0s25
The ip can then be used to set the link up or down.
ip l i n k s e t dev enp0s25 upip l i n k s e t dev enp0s25 down
To verify the IP address configuration of enp0s25, you can use the ip command in the following manner.
ip address show dev enp0s2510 : enp0s25 : <BROADCAST,MULTICAST,UP,LOWER_UP> mtu 1500 qd i s c noqueue s t a t e UP
group de f au l t q len 1000l i n k / e ther 00 : 1 6 : 3 e : e2 : 5 2 : 4 2 brd f f : f f : f f : f f : f f : f f l ink−netns id 0i n e t 10 . 102 . 66 . 200/24 brd 10 . 102 . 66 . 255 scope g l oba l dynamic eth0
v a l i d_ l f t 2857 sec p r e f e r r e d_ l f t 2857 seci n e t 6 f e80 : : 2 1 6 : 3 e f f : f e e 2 :5242/64 scope l i n k
v a l i d_ l f t f o r e v e r p r e f e r r e d_ l f t f o r ev e r 6
52
To configure a default gateway, you can use the ip command in the following manner. Modify the defaultgateway address to match your network requirements.
sudo ip route add de f au l t v ia 1 0 . 1 0 2 . 6 6 . 1
To verify your default gateway configuration, you can use the ip command in the following manner.
ip route showde f au l t v ia 1 0 . 1 0 2 . 6 6 . 1 dev eth0 proto dhcp s r c 10 . 102 . 66 . 2 00 metr ic 10010 . 102 . 66 . 0/24 dev eth0 proto ke rne l scope l i n k s r c 10 . 102 . 66 . 2 0010 . 1 0 2 . 6 6 . 1 dev eth0 proto dhcp scope l i n k s r c 10 . 102 . 66 . 2 00 metr ic 100
If you require DNS for your temporary network configuration, you can add DNS server IP addresses in the file/etc/resolv .conf. In general, editing /etc/resolv .conf directly is not recommanded, but this is a temporaryand non-persistent configuration. The example below shows how to enter two DNS servers to /etc/resolv .conf, which should be changed to servers appropriate for your network. A more lengthy description of theproper persistent way to do DNS client configuration is in a following section.
nameserver 8 . 8 . 8 . 8nameserver 8 . 8 . 4 . 4
If you no longer need this configuration and wish to purge all IP configuration from an interface, you canuse the ip command with the flush option as shown below.
ip addr f l u s h eth0
Note
Flushing the IP configuration using the ip command does not clear the contents of /etc/resolv.conf. You must remove or modify those entries manually, or re-boot which should also cause/etc/resolv .conf, which is a symlink to /run/systemd/resolve/stub−resolv.conf, to be re-written.
Dynamic IP Address Assignment (DHCP Client)
To configure your server to use DHCP for dynamic address assignment, create a netplan configuration inthe file /etc/netplan/99_config.yaml. The example below assumes you are configuring your first Ethernetinterface identified as enp3s0.
network :v e r s i on : 2r endere r : networkde the rne t s :
enp3s0 :dhcp4 : t rue
The configuration can then be applied using the netplan command.
sudo netplan apply
Static IP Address Assignment
To configure your system to use static address assignment, create a netplan configuration in the file /etc/netplan/99_config.yaml. The example below assumes you are configuring your first Ethernet interfaceidentified as eth0. Change the addresses, gateway4, and nameservers values to meet the requirements of yournetwork.
53
network :v e r s i on : 2r endere r : networkde the rne t s :
eth0 :addre s s e s :
− 10 . 10 . 10 . 2/24gateway4 : 1 0 . 1 0 . 1 0 . 1nameservers :
s earch : [ mydomain , otherdomain ]addre s s e s : [ 1 0 . 1 0 . 1 0 . 1 , 1 . 1 . 1 . 1 ]
The configuration can then be applied using the netplan command.
sudo netplan apply
Loopback Interface
The loopback interface is identified by the system as lo and has a default IP address of 127.0.0.1. It can beviewed using the ip command.
ip address show lo1 : l o : <LOOPBACK,UP,LOWER_UP> mtu 65536 qd i s c noqueue s t a t e UNKNOWN group
de f au l t q len 1000l i n k / loopback 0 0 : 0 0 : 0 0 : 0 0 : 0 0 : 0 0 brd 0 0 : 0 0 : 0 0 : 0 0 : 0 0 : 0 0i n e t 1 2 7 . 0 . 0 . 1 / 8 scope host l o
v a l i d_ l f t f o r e v e r p r e f e r r e d_ l f t f o r e v e ri n e t 6 : : 1 /128 scope host
v a l i d_ l f t f o r e v e r p r e f e r r e d_ l f t f o r e v e r
Name Resolution
Name resolution as it relates to IP networking is the process of mapping IP addresses to hostnames, makingit easier to identify resources on a network. The following section will explain how to properly configureyour system for name resolution using DNS and static hostname records.
DNS Client Configuration
Traditionally, the file /etc/resolv .conf was a static configuration file that rarely needed to be changed orautomatically changed via DCHP client hooks. Systemd-resolved handles name server configuration, and itshould be interacted with through the systemd−resolve command. Netplan configures systemd-resolved togenerate a list of nameservers and domains to put in /etc/resolv .conf, which is a symlink:
/ e t c / r e s o l v . conf −> . . / run/systemd/ r e s o l v e / stub−r e s o l v . conf
To configure the resolver, add the IP addresses of the nameservers that are appropriate for your network tothe netplan configuration file. You can also add an optional DNS suffix search-lists to match your networkdomain names. The resulting file might look like the following:
network :v e r s i on : 2r endere r : networkde the rne t s :
enp0s25 :addre s s e s :
54

− 192 .168 . 0 . 100/24gateway4 : 1 9 2 . 1 6 8 . 0 . 1nameservers :
s earch : [ mydomain , otherdomain ]addre s s e s : [ 1 . 1 . 1 . 1 , 8 . 8 . 8 . 8 , 4 . 4 . 4 . 4 ]
The search option can also be used with multiple domain names so that DNS queries will be appended inthe order in which they are entered. For example, your network may have multiple sub-domains to search;a parent domain of example.com, and two sub-domains, sales .example.com and dev.example.com.
If you have multiple domains you wish to search, your configuration might look like the following:
network :v e r s i on : 2r endere r : networkde the rne t s :
enp0s25 :addre s s e s :
− 192 .168 . 0 . 100/24gateway4 : 1 9 2 . 1 6 8 . 0 . 1nameservers :
s earch : [ example . com , s a l e s . example . com , dev . example . com ]addre s s e s : [ 1 . 1 . 1 . 1 , 8 . 8 . 8 . 8 , 4 . 4 . 4 . 4 ]
If you try to ping a host with the name of server1, your system will automatically query DNS for its FullyQualified Domain Name (FQDN) in the following order:
1. server1 .example.com
2. server1 . sales .example.com
3. server1 .dev.example.com
If no matches are found, the DNS server will provide a result of notfound and the DNS query will fail.
Static Hostnames
Static hostnames are locally defined hostname-to-IP mappings located in the file /etc/hosts. Entries inthe hosts file will have precedence over DNS by default. This means that if your system tries to resolvea hostname and it matches an entry in /etc/hosts, it will not attempt to look up the record in DNS. Insome configurations, especially when Internet access is not required, servers that communicate with a limitednumber of resources can be conveniently set to use static hostnames instead of DNS.
The following is an example of a hosts file where a number of local servers have been identified by simplehostnames, aliases and their equivalent Fully Qualified Domain Names (FQDN’s).
1 2 7 . 0 . 0 . 1 l o c a l h o s t1 2 7 . 0 . 1 . 1 ubuntu−s e r v e r1 0 . 0 . 0 . 1 1 s e rv e r1 s e rv e r1 . example . com vpn1 0 . 0 . 0 . 1 2 s e rv e r2 s e rv e r2 . example . com mail1 0 . 0 . 0 . 1 3 s e rv e r3 s e rv e r3 . example . com www10 . 0 . 0 . 1 4 s e rv e r4 s e rv e r4 . example . com f i l e
Note
In the above example, notice that each of the servers have been given aliases in addition to theirproper names and FQDN’s. Server1 has been mapped to the name vpn, server2 is referred to asmail, server3 as www, and server4 as file.
55
Name Service Switch Configuration
The order in which your system selects a method of resolving hostnames to IP addresses is controlled bythe Name Service Switch (NSS) configuration file /etc/nsswitch.conf. As mentioned in the previous section,typically static hostnames defined in the systems /etc/hosts file have precedence over names resolved fromDNS. The following is an example of the line responsible for this order of hostname lookups in the file/etc/nsswitch.conf.
hos t s : f i l e s mdns4_minimal [NOTFOUND=return ] dns mdns4
• files first tries to resolve static hostnames located in /etc/hosts.
• mdns4_minimal attempts to resolve the name using Multicast DNS.
• [NOTFOUND=return] means that any response of notfound by the preceding mdns4_minimalprocess should be treated as authoritative and that the system should not try to continue hunting foran answer.
• dns represents a legacy unicast DNS query.
• mdns4 represents a Multicast DNS query.
To modify the order of the above mentioned name resolution methods, you can simply change the hosts:string to the value of your choosing. For example, if you prefer to use legacy Unicast DNS versus MulticastDNS, you can change the string in /etc/nsswitch.conf as shown below.
hos t s : f i l e s dns [NOTFOUND=return ] mdns4_minimal mdns4
Bridging
Bridging multiple interfaces is a more advanced configuration, but is very useful in multiple scenarios. Onescenario is setting up a bridge with multiple network interfaces, then using a firewall to filter traffic betweentwo network segments. Another scenario is using bridge on a system with one interface to allow virtualmachines direct access to the outside network. The following example covers the latter scenario.
Configure the bridge by editing your netplan configuration found in /etc/netplan/:
network :v e r s i on : 2r endere r : networkde the rne t s :
enp3s0 :dhcp4 : no
br idge s :br0 :
dhcp4 : yesi n t e r f a c e s :
− enp3s0
Note
Enter the appropriate values for your physical interface and network.
Now apply the configuration to enable the bridge:
sudo netplan apply
The new bridge interface should now be up and running. The brctl provides useful information about thestate of the bridge, controls which interfaces are part of the bridge, etc. See man brctl for more information.
56
networkd-dispatcher for pre-up, post-up, etc. hook scripts
Users of the former ifupdown may be familiar with using hook scripts (e.g pre-up, post-up, etc.) in theirinterfaces file. Netplan configuration does not currently support hook scripts in its configuration definition.
Instead to achieve this functionality with the networkd renderer, users can use networkd-dispatcher. Thepackage provides users and packages hook points when specific network states are reached to aid in reactingto network state.
Note: If not on Ubuntu Server, but Desktop the network is driven by Network Manager - in that case you’dneed NM Dispatcher scripts instead.
The Netplan FAQ has a great table that compares event timings between ifupdown/systemd−networkd/network−manager
It is important to be aware that those hooks run asychronous; that is they will not block transition intoanother state.
The Netplan FAQ also has an example on converting an old ifupdown hook to networkd−dispatcher.
Resources
• The Ubuntu Wiki Network page has links to articles covering more advanced network configuration.
• The netplan website has additional examples and documentation.
• The netplan man page has more information on netplan.
• The systemd-resolve man page has details on systemd-resolve command.
• The systemd-resolved man page has more information on systemd-resolved service.
• For more information on bridging see the netplan.io examples page and the Linux Foundation’sNetworking-Bridge page.
Dynamic Host Configuration Protocol (DHCP)
The Dynamic Host Configuration Protocol (DHCP) is a network service that enables host computers tobe automatically assigned settings from a server as opposed to manually configuring each network host.Computers configured to be DHCP clients have no control over the settings they receive from the DHCPserver, and the configuration is transparent to the computer’s user.
The most common settings provided by a DHCP server to DHCP clients include:
• IP address and netmask
• IP address of the default-gateway to use
• IP adresses of the DNS servers to use
However, a DHCP server can also supply configuration properties such as:
• Host Name
• Domain Name
• Time Server
• Print Server
57
The advantage of using DHCP is that changes to the network, for example a change in the address of theDNS server, need only be changed at the DHCP server, and all network hosts will be reconfigured the nexttime their DHCP clients poll the DHCP server. As an added advantage, it is also easier to integrate newcomputers into the network, as there is no need to check for the availability of an IP address. Conflicts inIP address allocation are also reduced.
A DHCP server can provide configuration settings using the following methods:
• Manual allocation (MAC address)This method entails using DHCP to identify the unique hardware address of each network card con-nected to the network and then continually supplying a constant configuration each time the DHCPclient makes a request to the DHCP server using that network device. This ensures that a particularaddress is assigned automatically to that network card, based on it’s MAC address.
• Dynamic allocation (address pool)In this method, the DHCP server will assign an IP address from a pool of addresses (sometimes alsocalled a range or scope) for a period of time or lease, that is configured on the server or until the clientinforms the server that it doesn’t need the address anymore. This way, the clients will be receivingtheir configuration properties dynamically and on a “first come, first served” basis. When a DHCPclient is no longer on the network for a specified period, the configuration is expired and released backto the address pool for use by other DHCP Clients. This way, an address can be leased or used for aperiod of time. After this period, the client has to renegociate the lease with the server to maintainuse of the address.
• Automatic allocationUsing this method, the DHCP automatically assigns an IP address permanently to a device, selectingit from a pool of available addresses. Usually DHCP is used to assign a temporary address to a client,but a DHCP server can allow an infinite lease time.
The last two methods can be considered “automatic” because in each case the DHCP server assigns anaddress with no extra intervention needed. The only difference between them is in how long the IP addressis leased, in other words whether a client’s address varies over time. The DHCP server Ubuntu makesavailable is dhcpd (dynamic host configuration protocol daemon), which is easy to install and configure andwill be automatically started at system boot.
Installation
At a terminal prompt, enter the following command to install dhcpd:
sudo apt i n s t a l l i s c−dhcp−s e r v e r
NOTE: dhcpd’s messages are being sent to syslog. Look there for diagnostics messages.
Configuration
You will probably need to change the default configuration by editing /etc/dhcp/dhcpd.conf to suit yourneeds and particular configuration.
Most commonly, what you want to do is assign an IP address randomly. This can be done with settings asfollows:
# minimal sample / e tc /dhcp/dhcpd . confde fau l t−l e a s e−time 600 ;max−l e a s e−time 7200 ;
subnet 1 92 . 1 6 8 . 1 . 0 netmask 255 . 255 . 255 . 0 {
58
range 192 . 168 . 1 . 1 50 1 9 2 . 1 6 8 . 1 . 2 0 0 ;opt ion rou t e r s 1 9 2 . 1 6 8 . 1 . 2 5 4 ;opt ion domain−name−s e r v e r s 1 9 2 . 1 6 8 . 1 . 1 , 1 9 2 . 1 6 8 . 1 . 2 ;opt ion domain−name ”mydomain . example ” ;
}
This will result in the DHCP server giving clients an IP address from the range 192.168.1.150-192.168.1.200.It will lease an IP address for 600 seconds if the client doesn’t ask for a specific time frame. Otherwise themaximum (allowed) lease will be 7200 seconds. The server will also “advise” the client to use 192.168.1.254as the default-gateway and 192.168.1.1 and 192.168.1.2 as its DNS servers.
You also may need to edit /etc/default/isc−dhcp−server to specify the interfaces dhcpd should listen to.
INTERFACESv4=”eth4 ”
After changing the config files you have to restart the dhcpd service:
sudo sys t emct l r e s t a r t i s c−dhcp−s e r v e r . s e r v i c e
References
• The dhcp3-server Ubuntu Wiki page has more information.
• For more /etc/dhcp/dhcpd.conf options see the dhcpd.conf man page.
• ISC dhcp-server
Time Synchronization
NTP is a TCP/IP protocol for synchronizing time over a network. Basically a client requests the currenttime from a server, and uses it to set its own clock.
Behind this simple description, there is a lot of complexity - there are tiers of NTP servers, with the tierone NTP servers connected to atomic clocks, and tier two and three servers spreading the load of actuallyhandling requests across the Internet. Also the client software is a lot more complex than you might think- it has to factor out communication delays, and adjust the time in a way that does not upset all the otherprocesses that run on the server. But luckily all that complexity is hidden from you!
Ubuntu by default uses timedatectl / timesyncd to synchronize time and users can optionally use chrony toserve the Network Time Protocol.
Synchronizing your systems time
Since Ubuntu 16.04 timedatectl / timesyncd (which are part of systemd) replace most of ntpdate / ntp.
timesyncd is available by default and replaces not only ntpdate, but also the client portion of chrony (orformerly ntpd). So on top of the one-shot action that ntpdate provided on boot and network activation, nowtimesyncd by default regularly checks and keeps your local time in sync. It also stores time updates locally,so that after reboots monotonically advances if applicable.
If chrony is installed timedatectl steps back to let chrony do the time keeping. That shall ensure that notwo time syncing services are fighting. While no more recommended to be used, this still also applies tontpd being installed to retain any kind of old behavior/config that you had through an upgrade. But it alsoimplies that on an upgrade from a former release ntp/ntpdate might still be installed and therefore rendersthe new systemd based services disabled.
59
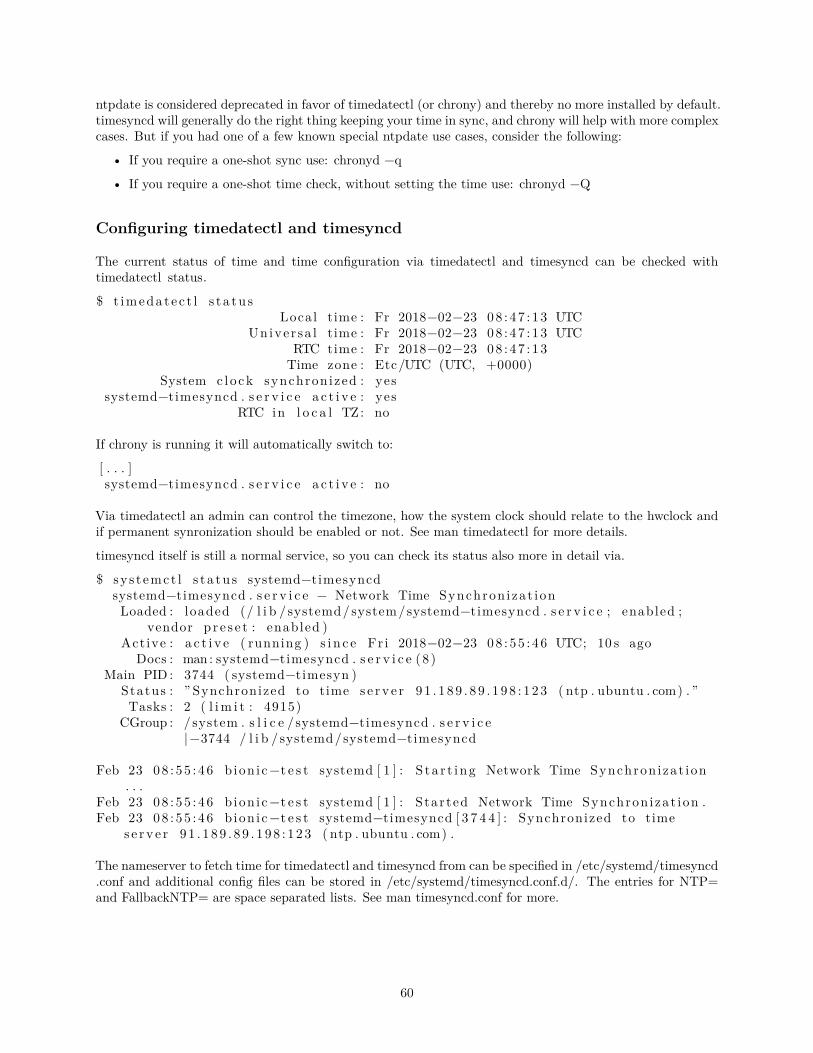
ntpdate is considered deprecated in favor of timedatectl (or chrony) and thereby no more installed by default.timesyncd will generally do the right thing keeping your time in sync, and chrony will help with more complexcases. But if you had one of a few known special ntpdate use cases, consider the following:
• If you require a one-shot sync use: chronyd −q
• If you require a one-shot time check, without setting the time use: chronyd −Q
Configuring timedatectl and timesyncd
The current status of time and time configuration via timedatectl and timesyncd can be checked withtimedatectl status.
$ t imeda t e c t l s t a tu sLocal time : Fr 2018−02−23 08 : 47 : 13 UTC
Univer sa l time : Fr 2018−02−23 08 : 47 : 13 UTCRTC time : Fr 2018−02−23 08 : 47 : 13Time zone : Etc/UTC (UTC, +0000)
System c lo ck synchronized : yessystemd−timesyncd . s e r v i c e a c t i v e : yes
RTC in l o c a l TZ: no
If chrony is running it will automatically switch to:
[ . . . ]systemd−timesyncd . s e r v i c e a c t i v e : no
Via timedatectl an admin can control the timezone, how the system clock should relate to the hwclock andif permanent synronization should be enabled or not. See man timedatectl for more details.
timesyncd itself is still a normal service, so you can check its status also more in detail via.
$ sy s t emct l s t a tu s systemd−timesyncdsystemd−timesyncd . s e r v i c e − Network Time Synchron izat ionLoaded : loaded (/ l i b / systemd/system/systemd−timesyncd . s e r v i c e ; enabled ;
vendor p r e s e t : enabled )Act ive : a c t i v e ( running ) s i n c e Fr i 2018−02−23 08 : 55 : 46 UTC; 10 s ago
Docs : man : systemd−timesyncd . s e r v i c e (8 )Main PID : 3744 ( systemd−timesyn )
Status : ” Synchronized to time s e r v e r 91 . 1 89 . 8 9 . 1 98 : 1 23 ( ntp . ubuntu . com) . ”Tasks : 2 ( l im i t : 4915)
CGroup : / system . s l i c e /systemd−timesyncd . s e r v i c e|−3744 / l i b / systemd/systemd−timesyncd
Feb 23 08 : 55 : 46 b ion ic−t e s t systemd [ 1 ] : S t a r t i ng Network Time Synchron izat ion. . .
Feb 23 08 : 55 : 46 b ion ic−t e s t systemd [ 1 ] : Started Network Time Synchron izat ion .Feb 23 08 : 55 : 46 b ion ic−t e s t systemd−timesyncd [ 3 7 4 4 ] : Synchronized to time
s e r v e r 91 . 1 89 . 8 9 . 1 98 : 1 23 ( ntp . ubuntu . com) .
The nameserver to fetch time for timedatectl and timesyncd from can be specified in /etc/systemd/timesyncd.conf and additional config files can be stored in /etc/systemd/timesyncd.conf.d/. The entries for NTP=and FallbackNTP= are space separated lists. See man timesyncd.conf for more.
60
Serve the Network Time Protocol
If in addition to synchronizing your system you also want to serve NTP information you need an NTP server.There are several options with chrony, ntpd and open-ntp. The recommended solution is chrony.
chrony(d)
The NTP daemon chronyd calculates the drift and offset of your system clock and continuously adjusts it, sothere are no large corrections that could lead to inconsistent logs for instance. The cost is a little processingpower and memory, but for a modern server this is usually negligible.
Installation
To install chrony, from a terminal prompt enter:
sudo apt i n s t a l l chrony
This will provide two binaries:
• chronyd - the actual daemon to sync and serve via the NTP protocol
• chronyc - command-line interface for chrony daemon
Chronyd Configuration
Edit /etc/chrony/chrony.conf to add/remove server lines. By default these servers are configured:
# Use s e r v e r s from the NTP Pool Pro j e c t . Approved by Ubuntu Technica l Board# on 2011−02−08 (LP: #104525) . See http ://www. pool . ntp . org / j o i n . html f o r# more in fo rmat ion .pool 0 . ubuntu . pool . ntp . org i bu r s tpool 1 . ubuntu . pool . ntp . org i bu r s tpool 2 . ubuntu . pool . ntp . org i bu r s tpool 3 . ubuntu . pool . ntp . org i bu r s t
See man chrony.conf for more details on the configuration options. After changing the any of the config fileyou have to restart chrony:
sudo sys t emct l r e s t a r t chrony . s e r v i c e
Of the pool 2.ubuntu.pool.ntp.org as well as ntp.ubuntu.com also support ipv6 if needed. If one needs toforce ipv6 there also is ipv6.ntp.ubuntu.com which is not configured by default.
Serving the NTP Protocol
You can install chrony (above) and configure special Hardware (below) for a local synchronization and as-installed that is the default to stay on the secure and conservative side. But if you want to serve NTP youneed adapt your configuration.
To enable serving the NTP protocol you’ll need at least to set the allow rule to which controls whichclients/networks you want chrony to serve NTP to.
An example would be
a l low 1 . 2 . 3 . 4
61
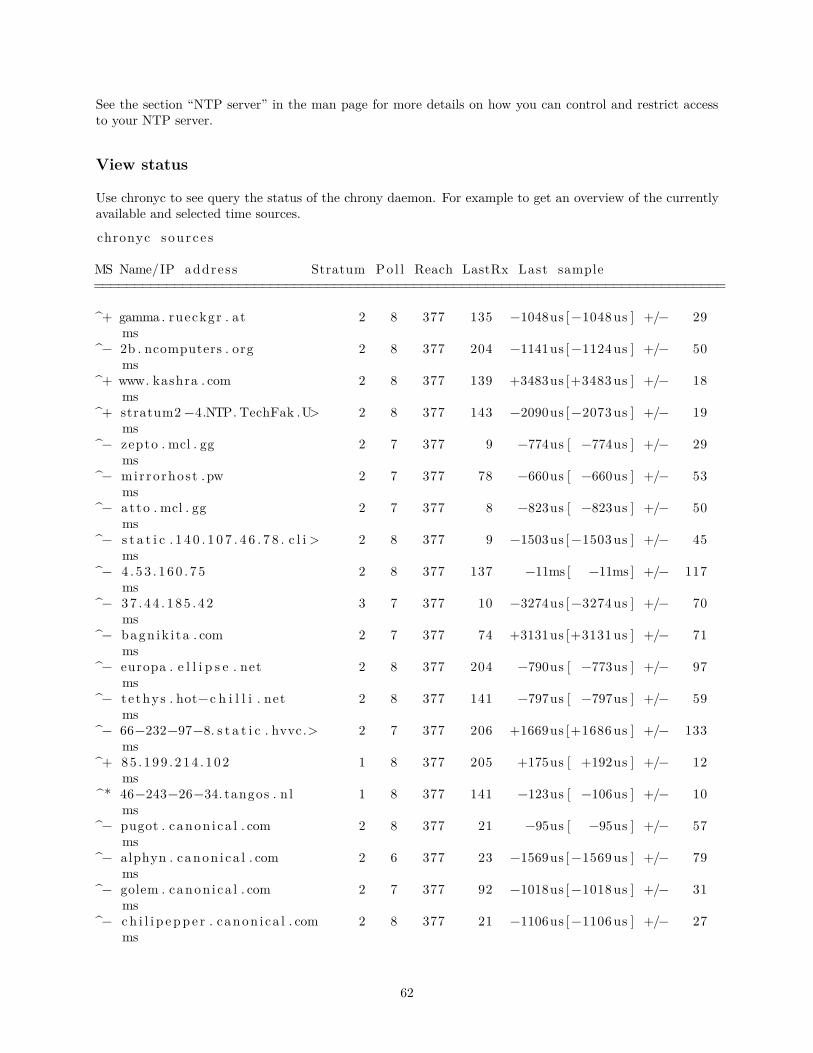
See the section “NTP server” in the man page for more details on how you can control and restrict accessto your NTP server.
View status
Use chronyc to see query the status of the chrony daemon. For example to get an overview of the currentlyavailable and selected time sources.
chronyc sour c e s
MS Name/IP address Stratum Po l l Reach LastRx Last sample===============================================================================
^+ gamma. rueckgr . at 2 8 377 135 −1048us [−1048us ] +/− 29ms
^− 2b . ncomputers . org 2 8 377 204 −1141us [−1124us ] +/− 50ms
^+ www. kashra . com 2 8 377 139 +3483us [+3483 us ] +/− 18ms
^+ stratum2 −4.NTP. TechFak .U> 2 8 377 143 −2090us [−2073us ] +/− 19ms
^− zepto . mcl . gg 2 7 377 9 −774us [ −774us ] +/− 29ms
^− mirrorhost .pw 2 7 377 78 −660us [ −660us ] +/− 53ms
^− atto . mcl . gg 2 7 377 8 −823us [ −823us ] +/− 50ms
^− s t a t i c . 1 4 0 . 1 0 7 . 4 6 . 7 8 . c l i > 2 8 377 9 −1503us [−1503us ] +/− 45ms
^− 4 . 5 3 . 1 6 0 . 7 5 2 8 377 137 −11ms [ −11ms ] +/− 117ms
^− 37 . 4 4 . 1 85 . 4 2 3 7 377 10 −3274us [−3274us ] +/− 70ms
^− bagn ik i ta . com 2 7 377 74 +3131us [+3131 us ] +/− 71ms
^− europa . e l l i p s e . net 2 8 377 204 −790us [ −773us ] +/− 97ms
^− t e thys . hot−c h i l l i . net 2 8 377 141 −797us [ −797us ] +/− 59ms
^− 66−232−97−8. s t a t i c . hvvc.> 2 7 377 206 +1669us [+1686 us ] +/− 133ms
^+ 85 . 199 . 214 . 102 1 8 377 205 +175us [ +192us ] +/− 12ms
^* 46−243−26−34. tangos . n l 1 8 377 141 −123us [ −106us ] +/− 10ms
^− pugot . canon i ca l . com 2 8 377 21 −95us [ −95us ] +/− 57ms
^− alphyn . canon i ca l . com 2 6 377 23 −1569us [−1569us ] +/− 79ms
^− golem . canon i ca l . com 2 7 377 92 −1018us [−1018us ] +/− 31ms
^− c h i l i p e pp e r . canon i ca l . com 2 8 377 21 −1106us [−1106us ] +/− 27ms
62
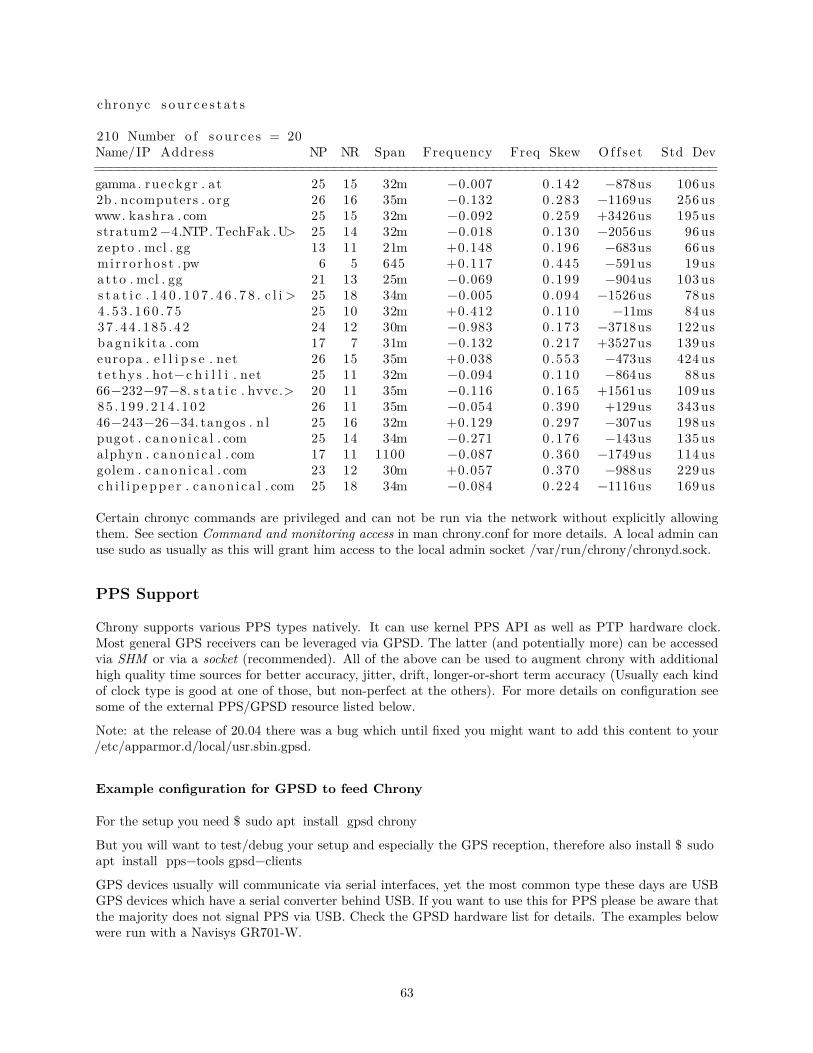
chronyc s ou r c e s t a t s
210 Number o f sour c e s = 20Name/IP Address NP NR Span Frequency Freq Skew Of f s e t Std Dev==============================================================================gamma. rueckgr . at 25 15 32m −0.007 0 .142 −878us 106 us2b . ncomputers . org 26 16 35m −0.132 0 .283 −1169us 256 uswww. kashra . com 25 15 32m −0.092 0 .259 +3426us 195 usstratum2 −4.NTP. TechFak .U> 25 14 32m −0.018 0 .130 −2056us 96uszepto . mcl . gg 13 11 21m +0.148 0 .196 −683us 66usmir rorhost .pw 6 5 645 +0.117 0 .445 −591us 19usat to . mcl . gg 21 13 25m −0.069 0 .199 −904us 103 uss t a t i c . 1 4 0 . 1 0 7 . 4 6 . 7 8 . c l i > 25 18 34m −0.005 0 .094 −1526us 78us4 . 5 3 . 1 6 0 . 7 5 25 10 32m +0.412 0 .110 −11ms 84us37 . 4 4 . 1 85 . 4 2 24 12 30m −0.983 0 .173 −3718us 122 usbagn ik i ta . com 17 7 31m −0.132 0 .217 +3527us 139 useuropa . e l l i p s e . net 26 15 35m +0.038 0 .553 −473us 424 uste thys . hot−c h i l l i . net 25 11 32m −0.094 0 .110 −864us 88us66−232−97−8. s t a t i c . hvvc.> 20 11 35m −0.116 0 .165 +1561us 109 us85 . 199 . 214 . 102 26 11 35m −0.054 0 .390 +129us 343 us46−243−26−34. tangos . n l 25 16 32m +0.129 0 .297 −307us 198 uspugot . canon i ca l . com 25 14 34m −0.271 0 .176 −143us 135 usalphyn . canon i ca l . com 17 11 1100 −0.087 0 .360 −1749us 114 usgolem . canon i ca l . com 23 12 30m +0.057 0 .370 −988us 229 usch i l i p e pp e r . canon i ca l . com 25 18 34m −0.084 0 .224 −1116us 169 us
Certain chronyc commands are privileged and can not be run via the network without explicitly allowingthem. See section Command and monitoring access in man chrony.conf for more details. A local admin canuse sudo as usually as this will grant him access to the local admin socket /var/run/chrony/chronyd.sock.
PPS Support
Chrony supports various PPS types natively. It can use kernel PPS API as well as PTP hardware clock.Most general GPS receivers can be leveraged via GPSD. The latter (and potentially more) can be accessedvia SHM or via a socket (recommended). All of the above can be used to augment chrony with additionalhigh quality time sources for better accuracy, jitter, drift, longer-or-short term accuracy (Usually each kindof clock type is good at one of those, but non-perfect at the others). For more details on configuration seesome of the external PPS/GPSD resource listed below.
Note: at the release of 20.04 there was a bug which until fixed you might want to add this content to your/etc/apparmor.d/local/usr.sbin.gpsd.
Example configuration for GPSD to feed Chrony
For the setup you need $ sudo apt install gpsd chrony
But you will want to test/debug your setup and especially the GPS reception, therefore also install $ sudoapt install pps−tools gpsd−clients
GPS devices usually will communicate via serial interfaces, yet the most common type these days are USBGPS devices which have a serial converter behind USB. If you want to use this for PPS please be aware thatthe majority does not signal PPS via USB. Check the GPSD hardware list for details. The examples belowwere run with a Navisys GR701-W.
63

When plugging in such a device (or at boot time) dmesg should report serial connection of some sorts,example:
[ 52 . 442199 ] usb 1−1.1: new f u l l −speed USB dev i ce number 3 us ing xhci_hcd[ 52 .546639 ] usb 1−1.1: New USB dev i ce found , idVendor=067b , idProduct=2303 ,
bcdDevice= 4.00[ 52 .546654 ] usb 1−1.1: New USB dev i ce s t r i n g s : Mfr=1, Product=2,
SerialNumber=0[ 52 .546665 ] usb 1−1.1: Product : USB−S e r i a l Con t r o l l e r D[ 52 .546675 ] usb 1−1.1: Manufacturer : P r o l i f i c Technology Inc .[ 52 . 602103 ] usbcore : r e g i s t e r e d new i n t e r f a c e d r i v e r u sb s e r i a l_gen e r i c[ 52 . 602244 ] u s b s e r i a l : USB S e r i a l support r e g i s t e r e d f o r g ene r i c[ 52 . 609471 ] usbcore : r e g i s t e r e d new i n t e r f a c e d r i v e r pl2303[ 52 .609503 ] u s b s e r i a l : USB S e r i a l support r e g i s t e r e d f o r pl2303[ 52 .609564 ] pl2303 1 −1 . 1 : 1 . 0 : pl2303 conver t e r detec ted[ 52 .618366 ] usb 1−1.1: pl2303 conve r t e r now attached to ttyUSB0
We see above that it appeared as ttyUSB0. To later on have chrony accept being feeded time informationby that we have to set it up in /etc/chrony/chrony.conf (Please replace USB0 to whatever applies to yoursetup):
r e f c l o c k SHM 0 r e f i d GPS p r e c i s i o n 1e−1 o f f s e t 0 .9999 de lay 0 .2r e f c l o c k SOCK /var /run/chrony . ttyUSB0 . sock r e f i d PPS
Then restart chrony to make the socket available and waiting. sudo systemctl restart chrony
Next one needs to tell gpsd which device to manager, therefore in /etc/default/gpsd we set: DEVICES=”/dev/ttyUSB0”
Furthermore the default use-case of gpsd is, well for gps position tracking. Therefore it will normally notconsume any cpu since it is not running the service but waiting on a socket for clients. Furthermore the clientwill then tell gpsd what it requests and gpsd will only do that. For the use case of gpsd as PPS-providing-daemon you want to set the option to:
• immediately start even without a client connected, this can be set in GPSD_OPTIONS of /etc/default/gpsd:
– GPSD_OPTIONS=”−n”• enable the service itself and not wait for a client to reach the socket in the future:
– sudo systemctl enable /lib/systemd/system/gpsd.service
Restarting gpsd will now initialize the PPS from GPS and in dmesg you will see
pps_ld i sc : PPS l i n e d i s c i p l i n e r e g i s t e r e dpps pps0 : new PPS source u s b s e r i a l 0pps pps0 : source ”/dev/ttyUSB0” added
In case you have multiple PPS the tool ppsfind might be useful to identify which PPS belongs to which GPS.You could check that with:
$ sudo pps f ind /dev/ttyUSB0pps0 : name=u sb s e r i a l 0 path=/dev/ttyUSB0
To get any further you need your GPS to get a lock. Tools like cgps or gpsmon need to report a 3D Fix forthe data being any good. Then you’d want to check to really have PPS data reported on that with ppstest
$ cgps. . . �Status : 3D FIX (7 s e c s ) . . .
64

Next one might want to ensure that the pps device really submits PPS data, to do so run ppstest:
$ sudo pps t e s t /dev/pps0t ry ing PPS source ”/dev/pps0”found PPS source ”/dev/pps0”ok , found 1 source ( s ) , now s t a r t f e t c h i n g data . . .source 0 − a s s e r t 1588140739.099526246 , sequence : 69 − c l e a r
1588140739.999663721 , sequence : 70source 0 − a s s e r t 1588140740.099661485 , sequence : 70 − c l e a r
1588140739.999663721 , sequence : 70source 0 − a s s e r t 1588140740.099661485 , sequence : 70 − c l e a r
1588140740.999786664 , sequence : 71source 0 − a s s e r t 1588140741.099792447 , sequence : 71 − c l e a r
1588140740.999786664 , sequence : 71
Ok, gpsd is now running, the GPS reception has found a fix and this is fed into chrony. Now lets check thatfrom the point of view of chrony.
Initially (e.g. before gpsd has started or before it has a lock) those will be new and “untrusted” sourcesmarked with an “?”. If your devices stay in the “?” state and won’t leave it even after quite some time thengpsd seems not to feed any data to chrony and you’d need to debug why.
chronyc> source s210 Number o f sour c e s = 10MS Name/IP address Stratum Po l l Reach LastRx Last sample===============================================================================
#? GPS 0 4 0 − +0ns [ +0ns ] +/− 0ns
#? PPS 0 4 0 − +0ns [ +0ns ] +/− 0ns
Over time chrony will classify them as good or bad. In the example case the raw GPS had too much deviationbut PPS is good.
chronyc> source s210 Number o f sour c e s = 10MS Name/IP address Stratum Po l l Reach LastRx Last sample===============================================================================
#x GPS 0 4 177 24 −876ms [ −876ms ] +/− 200ms#− PPS 0 4 177 21 +916us [ +916us ] +/− 63us^− c h i l i p e pp e r . canon i ca l . com 2 6 37 53 +33us [ +33us ] +/− 33ms
And finally after a while it used the hardware PPS input as it was better:
chronyc> source s210 Number o f sour c e s = 10MS Name/IP address Stratum Po l l Reach LastRx Last sample===============================================================================
#x GPS 0 4 377 20 −884ms [ −884ms ] +/− 200ms
#* PPS 0 4 377 18 +6677ns [ +52us ] +/− 58us
^− alphyn . canon i ca l . com 2 6 377 20 −1303us [−1258us ] +/− 114ms
65
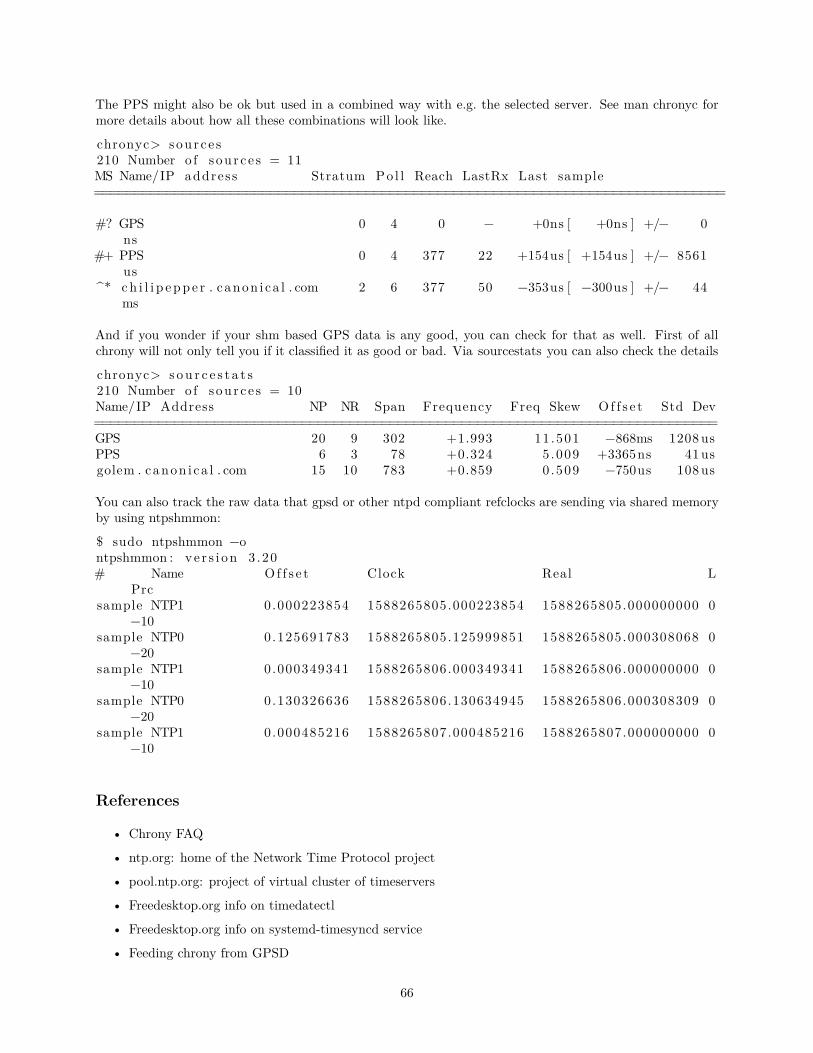
The PPS might also be ok but used in a combined way with e.g. the selected server. See man chronyc formore details about how all these combinations will look like.
chronyc> source s210 Number o f sour c e s = 11MS Name/IP address Stratum Po l l Reach LastRx Last sample===============================================================================
#? GPS 0 4 0 − +0ns [ +0ns ] +/− 0ns
#+ PPS 0 4 377 22 +154us [ +154us ] +/− 8561us
^* ch i l i p e pp e r . canon i ca l . com 2 6 377 50 −353us [ −300us ] +/− 44ms
And if you wonder if your shm based GPS data is any good, you can check for that as well. First of allchrony will not only tell you if it classified it as good or bad. Via sourcestats you can also check the details
chronyc> sou r c e s t a t s210 Number o f sour c e s = 10Name/IP Address NP NR Span Frequency Freq Skew Of f s e t Std Dev==============================================================================GPS 20 9 302 +1.993 11 .501 −868ms 1208 usPPS 6 3 78 +0.324 5 .009 +3365ns 41usgolem . canon i ca l . com 15 10 783 +0.859 0 .509 −750us 108 us
You can also track the raw data that gpsd or other ntpd compliant refclocks are sending via shared memoryby using ntpshmmon:
$ sudo ntpshmmon −ontpshmmon : v e r s i on 3 .20# Name Of f s e t Clock Real L
Prcsample NTP1 0.000223854 1588265805.000223854 1588265805.000000000 0
−10sample NTP0 0.125691783 1588265805.125999851 1588265805.000308068 0
−20sample NTP1 0.000349341 1588265806.000349341 1588265806.000000000 0
−10sample NTP0 0.130326636 1588265806.130634945 1588265806.000308309 0
−20sample NTP1 0.000485216 1588265807.000485216 1588265807.000000000 0
−10
References
• Chrony FAQ
• ntp.org: home of the Network Time Protocol project
• pool.ntp.org: project of virtual cluster of timeservers
• Freedesktop.org info on timedatectl
• Freedesktop.org info on systemd-timesyncd service
• Feeding chrony from GPSD
66
• See the Ubuntu Time wiki page for more information.
Data Plane Development Kit
The DPDK is a set of libraries and drivers for fast packet processing and runs mostly in Linux userland.It is a set of libraries that provide the so called “Environment Abstraction Layer” (EAL). The EAL hidesthe details of the environment and provides a standard programming interface. Common use cases arearound special solutions for instance network function virtualization and advanced high-throughput networkswitching. The DPDK uses a run-to-completion model for fast data plane performance and accesses devicesvia polling to eliminate the latency of interrupt processing at the tradeoff of higher cpu consumption. It wasdesigned to run on any processors. The first supported CPU was Intel x86 and it is now extended to IBMPPC64 and ARM64.
Ubuntu further provides some infrastructure to ease DPDKs usability.
Prerequisites
This package is currently compiled for the lowest possible CPU requirements allowed by upstream. Startingwith DPDK 17.08 that means it requires at least SSE4_2 and anything else activated by -march=corei7 (ingcc) to be supported by the CPU.
The list of upstream DPDK supported network cards can be found at supported NICs. But a lot of thoseare disabled by default in the upstream Project as they are not yet in a stable state. The subset of networkcards that DPDK has enabled in the package as available in Ubuntu 16.04 is:
DPDK has “userspace” drivers for the cards called PMDs. The packages for these follow the pattern oflibrte−pmd−<type>−<version>. Therefore the example for an intel e1000 in 18.11 would be librte−pmd−e1000−18.11.
The more commonly used, tested and fully supported drivers are installed as dependencies of dpdk. Butthere are way more in universe that follow the same naming pattern.
Unassigning the default Kernel drivers
Cards have to be unassigned from their kernel driver and instead be assigned to uio_pci_generic of vfio−pci.uio_pci_generic is older and usually getting to work more easily, but also has less features and isolation.
The newer vfio-pci requires that you activate the following kernel parameters to enable iommu.iommu=pt intel_iommu=on
Or on AMDamd_iommu=pt
On top for vfio-pci you then have to configure and assign the iommu groups accordingly. That is mostlydone in Firmware and by HW layout, you can check the group assignment the kernel probed in /sys/kernel/iommu_groups/.
Note: virtio is special, dpdk can directly work on those devices without vfio_pci/uio_pci_generic.But to avoid issues by kernel and DPDK managing the device you still have to unassign the kerneldriver.
Manual configuration and status checks can be done via sysfs or with the tool dpdk_nic_binddpdk_nic_bind . py −−help
67
Usage:
dpdk−devbind . py [ opt ions ] DEVICE1 DEVICE2 . . . .
where DEVICE1, DEVICE2 etc , are s p e c i f i e d v ia PCI ”domain : bus : s l o t . func ”syntax
or ”bus : s l o t . func ” syntax . For dev i c e s bound to Linux ke rne l d r i v e r s , they maya l s o be r e f e r r e d to by Linux i n t e r f a c e name e . g . eth0 , eth1 , em0 , em1 , e t c .
Options :−−help , −−usage :
Display usage in fo rmat ion and qu i t
−s , −−s t a tu s :Pr int the cur rent s t a tu s o f a l l known network , crypto , eventand mempool d ev i c e s .For each device , i t d i s p l a y s the PCI domain , bus , s l o t and funct ion ,a long with a text d e s c r i p t i o n o f the dev i ce . Depending upon whether thedev i c e i s be ing used by a ke rne l dr ive r , the igb_uio dr ive r , or nodr ive r , other r e l e van t in fo rmat ion w i l l be d i sp layed :* the Linux i n t e r f a c e name e . g . i f=eth0* the d r i v e r being used e . g . drv=igb_uio* any s u i t a b l e d r i v e r s not cu r r en t l y us ing that dev i ce
e . g . unused=igb_uioNOTE: i f t h i s f l a g i s passed along with a bind/unbind option , thes t a tu s d i sp l ay w i l l always occur a f t e r the other ope ra t i on s have takenp lace .
−−s tatus−dev :Pr int the s t a tu s o f g iven dev i c e group . Supported dev i ce groups are :” net ” , ” crypto ” , ” event ” , ”mempool” and ” compress ”
−b dr ive r , −−bind=dr i v e r :S e l e c t the d r i v e r to use or ”none” to unbind the dev i ce
−u , −−unbind :Unbind a dev i ce ( Equiva lent to ”−b none ”)
−−f o r c e :By de fau l t , network dev i c e s which are used by Linux − as i nd i c a t ed byhaving route s in the rout ing tab l e − cannot be modi f i ed . Using the−−f o r c e f l a g ov e r r i d e s t h i s behavior , a l l ow ing a c t i v e l i n k s to bef o r c i b l y unbound .WARNING: This can lead to l o s s o f network connect ion and should be usedwith caut ion .
Examples :−−−−−−−−−
To d i sp l ay cur rent dev i ce s t a tu s :dpdk−devbind . py −−s t a tu s
To d i sp l ay cur rent network dev i ce s t a tu s :dpdk−devbind . py −−s tatus−dev net
68
To bind eth1 from the cur rent d r i v e r and move to use igb_uiodpdk−devbind . py −−bind=igb_uio eth1
To unbind 0000 : 0 1 : 0 0 . 0 from us ing any d r i v e rdpdk−devbind . py −u 0000 : 0 1 : 0 0 . 0
To bind 0000 : 0 2 : 0 0 . 0 and 0000 : 0 2 : 0 0 . 1 to the ixgbe ke rne l d r i v e rdpdk−devbind . py −b ixgbe 02 : 0 0 . 0 02 : 0 0 . 1
DPDK Device configuration
The package dpdk provides init scripts that ease configuration of device assignment and huge pages. It alsomakes them persistent across reboots.
The following is an example of the file /etc/dpdk/interfaces configuring two ports of a network card. Onewith uio_pci_generic and the other one with vfio−pci.
# <bus> Current ly only ” pc i ” i s supported# <id> Device ID on the s p e c i f i e d bus# <dr iver> Driver to bind aga in s t ( v f i o−pc i or uio_pci_gener ic )## Be aware that the two DPDK compatible d r i v e r s u io_pci_gener ic and v f i o−pc i
are# part o f l inux−image−extra−<VERSION> package .# This package i s not always i n s t a l l e d by de f au l t − f o r example in cloud−
images .# So p l e a s e i n s t a l l i t in case you run in to miss ing module i s s u e s .## <bus> <id> <dr ive r>pc i 0 000 : 0 4 : 0 0 . 0 uio_pci_gener icpc i 0 000 : 0 4 : 0 0 . 1 v f i o−pc i
Cards are identified by their PCI-ID. If you are unsure you might use the tool dpdk_nic_bind.py to showthe current available devices and the drivers they are assigned to.
dpdk_nic_bind . py −−s t a tu s
Network dev i c e s us ing DPDK−compatible d r i v e r============================================0000 : 0 4 : 0 0 . 0 ’ Ethernet Cont r o l l e r 10−Gigabit X540−AT2’ drv=uio_pci_gener ic
unused=ixgbe
Network dev i c e s us ing ke rne l d r i v e r===================================0000 : 0 2 : 0 0 . 0 ’NetXtreme BCM5719 Gigabit Ethernet PCIe ’ i f=eth0 drv=tg3 unused=
uio_pci_gener ic *Active *0000 : 0 2 : 0 0 . 1 ’NetXtreme BCM5719 Gigabit Ethernet PCIe ’ i f=eth1 drv=tg3 unused=
uio_pci_gener ic0 000 : 0 2 : 0 0 . 2 ’NetXtreme BCM5719 Gigabit Ethernet PCIe ’ i f=eth2 drv=tg3 unused=
uio_pci_gener ic0 000 : 0 2 : 0 0 . 3 ’NetXtreme BCM5719 Gigabit Ethernet PCIe ’ i f=eth3 drv=tg3 unused=
uio_pci_gener ic0 000 : 0 4 : 0 0 . 1 ’ Ethernet Cont r o l l e r 10−Gigabit X540−AT2’ i f=eth5 drv=ixgbe
unused=uio_pci_gener ic
69

Other network dev i c e s=====================<none>
DPDK HugePage configuration
DPDK makes heavy use of huge pages to eliminate pressure on the TLB. Therefore hugepages have to beconfigured in your system.
The dpdk package has a config file and scripts that try to ease hugepage configuration for DPDK in the formof /etc/dpdk/dpdk.conf. If you have more consumers of hugepages than just DPDK in your system or veryspecial requirements how your hugepages are going to be set up you likely want to allocate/control them byyourself. If not this can be a great simplification to get DPDK configured for your needs.
Here an example configuring 1024 Hugepages of 2M each and 4 1G pages.
NR_2M_PAGES=1024NR_1G_PAGES=4
As shown this supports configuring 2M and the larger 1G hugepages (or a mix of both). It will make surethere are proper hugetlbfs mountpoints for DPDK to find both sizes no matter what your default huge pagesize is. The config file itself holds more details on certain corner cases and a few hints if you want to allocatehugepages manually via a kernel parameter.
It depends on your needs which size you want - 1G pages are certainly more effective regarding TLB pressure.But there were reports of them fragmenting inside the DPDK memory allocations. Also it can be harder tograb enough free space to set up a certain amount of 1G pages later in the life-cycle of a system.
Compile DPDK Applications
Currently there are not a lot consumers of the DPDK library that are stable and released. OpenVswitch-DPDK being an exception to that (see below) and more are appearing. But in general it might still happenthat you might want to compile an app against the library.
You will often find guides that tell you to fetch the DPDK sources, build them to your needs and eventuallybuild your application based on DPDK by setting values RTE_* for the build system. Since Ubuntu providesan already compiled DPDK for you can can skip all that.
DPDK provides a valid pkg-config file to simplify setting the proper variables and options.
sudo apt−get i n s t a l l dpdk−dev libdpdk−devgcc testdpdkprog . c $ ( pkg−c on f i g −− l i b s −−c f l a g s l ibdpdk ) −o testdpdkprog
An example of a complex (autoconfigure) user of pkg-config of DPDK including fallbacks to older nonpkg-config style can be seen in the OpenVswitch build system.
Depending on what you build it might be a good addition to install all of DPDK build dependencies beforethe make, which on Ubuntu can be done automatically with.
sudo apt−get i n s t a l l bui ld−dep dpdk
70
DPDK in KVM Guests
If you have no access to DPDK supported network cards you can still work with DPDK by using its supportfor virtio. To do so you have to create guests backed by hugepages (see above).
On top of that there it is required to have at least SSE3. The default CPU model qemu/libvirt uses is onlyup to SSE2. So you will have to define a model that passed the proper feature flags (or use host-passthrough).An example can be found in following snippet to your virsh xml (or the equivalent virsh interface you use).
<cpu mode=’host−passthrough ’>
Also virtio nowadays supports multiqueue which DPDK in turn can exploit for better speed. To modify anormal virtio definition to have multiple queues add the following to your interface definition. This is aboutenhancing a normal virtio nic to have multiple queues, to later on be consumed e.g. by DPDK in the guest.
<d r i v e r name=”vhost ” queues=”4”/>
Use DPDK
Since DPDK on its own is only (massive) library you most likely might continue to OpenVswitch-DPDK asan example to put it to use.
Resources
• DPDK Documentation
• Release Notes matching the version packages in Ubuntu 16.04
• Linux DPDK User Getting Started
• EAL Command-line Options
• DPDK Api Documentation
• OpenVswitch DPDK installation
• Wikipedias definition of DPDK
OpenVswitch-DPDK
With DPDK being just a library it doesn’t do a lot on its own, so it depends on emerging projects makinguse of it. One consumer of the library that already is part of Ubuntu is OpenVswitch with DPDK supportin the package openvswitch-switch-dpdk.
Here an example how to install and configure a basic OpenVswitch using DPDK for later use via libvirt/qemu-kvm.
sudo apt−get i n s t a l l openvswitch−switch−dpdksudo update−a l t e r n a t i v e s −−s e t ovs−vswitchd / usr / l i b /openvswitch−switch−dpdk/
ovs−vswitchd−dpdkovs−v s c t l s e t Open_vSwitch . ” other_conf ig : dpdk− i n i t=true ”# run on core 0 onlyovs−v s c t l s e t Open_vSwitch . ” other_conf ig : dpdk−l c o r e−mask=0x1”# Al l o ca t e 2G huge pages ( not Numa node aware )ovs−v s c t l s e t Open_vSwitch . ” other_conf ig : dpdk−a l l o c −mem=2048”# l im i t to one wh i t e l i s t e d dev i c e
71
ovs−v s c t l s e t Open_vSwitch . ” other_conf ig : dpdk−ext ra=−−pci−wh i t e l i s t=0000 :04 :00 .0”
sudo s e r v i c e openvswitch−switch r e s t a r t
Please remember that you have to assign devices to DPDK compatible drivers see above at Network - DPDKbefore restarting.
Please note that the section dpdk-alloc-mem=2048 above is the most basic numa setup for a single socketsystem. If you have multiple sockets you might want to define how to split your memory among them. Moredetails about these options are outlined in OpenVswitch setup.
Attaching DPDK ports to OpenVswitch
The OpenVswitch you now started supports all port types OpenVswitch usually does, plus DPDK port types.Here an example how to create a bridge and - instead of a normal external port - add an external DPDKport to it. When doing so you can specify the device that will be associated.
ovs−v s c t l add−br ovsdpdkbr0 −− s e t br idge ovsdpdkbr0 datapath_type=netdevovs−v s c t l add−port ovsdpdkbr0 dpdk0 −− s e t I n t e r f a c e dpdk0 type=dpdk ” opt ions
: dpdk−devargs=${OVSDEV_PCIID}”
Further tuning can be applied by setting options:
ovs−v s c t l s e t I n t e r f a c e dpdk0 ” opt ions : n_rxq=2”
OpenVswitch DPDK to KVM Guests
If you are not building some sort of SDN switch or NFV on top of DPDK it is very likely that you wantto forward traffic to KVM guests. The good news is, that with the new qemu/libvirt/dpdk/openvswitchversions in Ubuntu this is no more about manually appending commandline string. This chapter covers abasic configuration how to connect a KVM guest to a OpenVswitch-DPDK instance.
The recommended way to get to a KVM guest is using vhost_user_client. This will cause OVS-DPDK tocreate connect to a socket that qemu created. That way old issues like guest failures on OVS restart areavoided. Here an example how to add such a port to the bridge you created above.
ovs−v s c t l add−port ovsdpdkbr0 vhost−user−1 −− s e t I n t e r f a c e vhost−user−1 type=dpdkvhos tu s e r c l i en t ” opt ions : vhost−se rver−path=/var /run/ vho s t u s e r c l i e n t /vhost−user−c l i e n t −1”
This will connect to the specified path that has to be created by a guest listening on it.
To let libvirt/kvm consume this socket and create a guest virtio network device for it add a snippet like thisto your guest definition as the network definition.
<i n t e r f a c e type=’ vhostuser ’><source type=’unix ’path=’/var /run/ openvswitch /vhost−user−c l i e n t −1’mode=’ se rver ’/><model type=’ v i r t i o ’/></i n t e r f a c e >
72
Tuning Openvswitch-DPDK
DPDK has plenty of options - in combination with Openvswitch-DPDK the two most commonly used are:
ovs−v s c t l s e t Open_vSwitch . other_conf ig : n−dpdk−rxqs=2ovs−v s c t l s e t Open_vSwitch . other_conf ig :pmd−cpu−mask=0x6
The first select how many rx queues are to be used for each DPDK interface, while the second controlshow many and where to run PMD threads. The example above will utilize two rx queues and run PMDthreads on CPU 1 and 2. See the referred links to “EAL Command-line Options” and “OpenVswitch DPDKinstallation” at the end of this document for more.
As usual with tunings you have to know your system and workload really well - so please verify any tuningswith workloads matching your real use case.
Support and Troubleshooting
DPDK is a fast evolving project. In any case of a search for support and further guides it is highly recom-mended to first check if they apply to the current version.
Check if it is a known issue on:
• DPDK Mailing Lists• For OpenVswitch-DPDK OpenStack Mailing Lists• Known issues in DPDK Launchpad Area• Join the IRC channels #DPDK or #openvswitch on freenode.
Issues are often due to missing small details in the general setup. Later on, these missing details causeproblems which can be hard to track down to their root cause. A common case seems to be the “couldnot open network device dpdk0 (No such device)” issue. This occurs rather late when setting up a port inOpen vSwitch with DPDK. But the root cause most of the time is very early in the setup and initialization.Here an example how a proper initialization of a device looks - this can be found in the syslog/journal whenstarting Open vSwitch with DPDK enabled.
ovs−c t l [ 3 5 6 0 ] : EAL: PCI dev i c e 0000 : 0 4 : 0 0 . 1 on NUMA socket 0ovs−c t l [ 3 5 6 0 ] : EAL: probe d r i v e r : 8086:1528 rte_ixgbe_pmdovs−c t l [ 3 5 6 0 ] : EAL: PCI memory mapped at 0 x7f2140000000ovs−c t l [ 3 5 6 0 ] : EAL: PCI memory mapped at 0 x7f2140200000
If this is missing, either by ignored cards, failed initialization or other reasons, later on there will be noDPDK device to refer to. Unfortunately the logging is spread across syslog/journal and the openvswitchlog. To allow some cross checking here an example what can be found in these logs, relative to the enteredcommand.
#Note : This l og was taken with dpdk 2 .2 and openvswitch 2 .5 but s t i l l l ook squ i t e s im i l a r ( a b i t extended ) these days
Captions :CMD: that you ente rSYSLOG: ( In l cud ing EAL and OVS Messages )OVS−LOG: ( Openvswitch messages )
#PREPARATIONBind an i n t e r f a c e to DPDK UIO dr ive r s , make Hugepages ava i l ab l e , enable DPDK
on OVS
CMD: sudo s e r v i c e openvswitch−switch r e s t a r t
73
SYSLOG:2016−01−22T08 : 5 8 : 3 1 . 3 7 2Z | 00003 | daemon_unix ( monitor ) | INFO| pid 3329 died , k i l l e d
( Terminated ) , e x i t i n g2016−01−22T08 : 5 8 : 3 3 . 3 7 7Z | 00002 | v log | INFO| opened log f i l e / var / log / openvswitch /
ovs−vswitchd . l og2016−01−22T08 : 5 8 : 3 3 . 3 8 1Z | 00003 | ovs_numa | INFO| Discovered 12 CPU cor e s on NUMA
node 02016−01−22T08 : 5 8 : 3 3 . 3 8 1Z | 00004 | ovs_numa | INFO| Discovered 1 NUMA nodes and 12
CPU cor e s2016−01−22T08 : 5 8 : 3 3 . 3 8 1Z | 00005 | reconnect | INFO| unix : / var /run/ openvswitch /db .
sock : connect ing . . .2016−01−22T08 : 5 8 : 3 3 . 3 8 3Z | 00006 | reconnect | INFO| unix : / var /run/ openvswitch /db .
sock : connected2016−01−22T08 : 5 8 : 3 3 . 3 8 6Z | 00007 | br idge | INFO| ovs−vswitchd (Open vSwitch ) 2 . 5 . 0
OVS−LOG:systemd [ 1 ] : Stopping Open vSwitch . . .systemd [ 1 ] : Stopped Open vSwitch .systemd [ 1 ] : Stopping Open vSwitch In t e r na l Unit . . .ovs−c t l [ 3 5 4 1 ] : * K i l l i n g ovs−vswitchd (3329)ovs−c t l [ 3 5 4 1 ] : * K i l l i n g ovsdb−s e r v e r (3318)systemd [ 1 ] : Stopped Open vSwitch In t e r na l Unit .systemd [ 1 ] : S t a r t i ng Open vSwitch In t e r na l Unit . . .ovs−c t l [ 3 5 6 0 ] : * S ta r t i ng ovsdb−s e r v e rovs−v s c t l : ovs | 0 0001 | v s c t l | INFO| Cal led as ovs−v s c t l −−no−wait −− i n i t −− s e t
Open_vSwitch . db−ve r s i on =7.12.1ovs−v s c t l : ovs | 0 0001 | v s c t l | INFO| Cal led as ovs−v s c t l −−no−wait s e t Open_vSwitch
. ovs−ve r s i on =2.5.0 ” exte rna l−i d s : system−id=\”e7c5ba80−bb14−45c1−b8eb−628f3ad03903 \”” ” system−type=\”Ubuntu\”” ” system−ve r s i on =\”16.04− xen i a l \””
ovs−c t l [ 3 5 6 0 ] : * Conf igur ing Open vSwitch system IDsovs−c t l [ 3 5 6 0 ] : 2016−01−22T08 : 5 8 : 3 1Z | 00001 | dpdk | INFO|No −vhost_sock_dir
provided − de f au l t i n g to /var /run/ openvswitchovs−vswitchd : ovs | 0 0001 | dpdk | INFO|No −vhost_sock_dir provided − de f au l t i n g to
/var /run/ openvswitchovs−c t l [ 3 5 6 0 ] : EAL: Detected l c o r e 0 as core 0 on socke t 0ovs−c t l [ 3 5 6 0 ] : EAL: Detected l c o r e 1 as core 1 on socke t 0ovs−c t l [ 3 5 6 0 ] : EAL: Detected l c o r e 2 as core 2 on socke t 0ovs−c t l [ 3 5 6 0 ] : EAL: Detected l c o r e 3 as core 3 on socke t 0ovs−c t l [ 3 5 6 0 ] : EAL: Detected l c o r e 4 as core 4 on socke t 0ovs−c t l [ 3 5 6 0 ] : EAL: Detected l c o r e 5 as core 5 on socke t 0ovs−c t l [ 3 5 6 0 ] : EAL: Detected l c o r e 6 as core 0 on socke t 0ovs−c t l [ 3 5 6 0 ] : EAL: Detected l c o r e 7 as core 1 on socke t 0ovs−c t l [ 3 5 6 0 ] : EAL: Detected l c o r e 8 as core 2 on socke t 0ovs−c t l [ 3 5 6 0 ] : EAL: Detected l c o r e 9 as core 3 on socke t 0ovs−c t l [ 3 5 6 0 ] : EAL: Detected l c o r e 10 as core 4 on socke t 0ovs−c t l [ 3 5 6 0 ] : EAL: Detected l c o r e 11 as core 5 on socke t 0ovs−c t l [ 3 5 6 0 ] : EAL: Support maximum 128 l o g i c a l core ( s ) by c on f i gu r a t i on .ovs−c t l [ 3 5 6 0 ] : EAL: Detected 12 l c o r e ( s )ovs−c t l [ 3 5 6 0 ] : EAL: VFIO modules not a l l loaded , sk ip VFIO support . . .ovs−c t l [ 3 5 6 0 ] : EAL: Se t t i ng up phy s i c a l l y cont iguous memory . . .ovs−c t l [ 3 5 6 0 ] : EAL: Ask a v i r t u a l area o f 0x100000000 bytesovs−c t l [ 3 5 6 0 ] : EAL: V i r tua l area found at 0 x7f2040000000 ( s i z e = 0x100000000 )ovs−c t l [ 3 5 6 0 ] : EAL: Request ing 4 pages o f s i z e 1024MB from socket 0ovs−c t l [ 3 5 6 0 ] : EAL: TSC frequency i s ~2397202 KHz
74
ovs−vswitchd [ 3 5 9 2 ] : EAL: TSC frequency i s ~2397202 KHzovs−vswitchd [ 3 5 9 2 ] : EAL: Master l c o r e 0 i s ready ( t i d=fc6cbb00 ; cpuset =[0 ] )ovs−vswitchd [ 3 5 9 2 ] : EAL: PCI dev i ce 0000 : 0 4 : 0 0 . 0 on NUMA socket 0ovs−vswitchd [ 3 5 9 2 ] : EAL: probe d r i v e r : 8086:1528 rte_ixgbe_pmdovs−vswitchd [ 3 5 9 2 ] : EAL: Not managed by a supported ke rne l dr ive r , sk ippedovs−vswitchd [ 3 5 9 2 ] : EAL: PCI dev i ce 0000 : 0 4 : 0 0 . 1 on NUMA socket 0ovs−vswitchd [ 3 5 9 2 ] : EAL: probe d r i v e r : 8086:1528 rte_ixgbe_pmdovs−vswitchd [ 3 5 9 2 ] : EAL: PCI memory mapped at 0 x7f2140000000ovs−vswitchd [ 3 5 9 2 ] : EAL: PCI memory mapped at 0 x7f2140200000ovs−c t l [ 3 5 6 0 ] : EAL: Master l c o r e 0 i s ready ( t i d=fc6cbb00 ; cpuset =[0 ] )ovs−c t l [ 3 5 6 0 ] : EAL: PCI dev i c e 0000 : 0 4 : 0 0 . 0 on NUMA socket 0ovs−c t l [ 3 5 6 0 ] : EAL: probe d r i v e r : 8086:1528 rte_ixgbe_pmdovs−c t l [ 3 5 6 0 ] : EAL: Not managed by a supported ke rne l dr ive r , sk ippedovs−c t l [ 3 5 6 0 ] : EAL: PCI dev i c e 0000 : 0 4 : 0 0 . 1 on NUMA socket 0ovs−c t l [ 3 5 6 0 ] : EAL: probe d r i v e r : 8086:1528 rte_ixgbe_pmdovs−c t l [ 3 5 6 0 ] : EAL: PCI memory mapped at 0 x7f2140000000ovs−c t l [ 3 5 6 0 ] : EAL: PCI memory mapped at 0 x7f2140200000ovs−vswitchd [ 3 5 9 2 ] : PMD: eth_ixgbe_dev_init ( ) : MAC: 4 , PHY: 3ovs−vswitchd [ 3 5 9 2 ] : PMD: eth_ixgbe_dev_init ( ) : port 0 vendorID=0x8086 deviceID
=0x1528ovs−c t l [ 3 5 6 0 ] : PMD: eth_ixgbe_dev_init ( ) : MAC: 4 , PHY: 3ovs−c t l [ 3 5 6 0 ] : PMD: eth_ixgbe_dev_init ( ) : port 0 vendorID=0x8086 deviceID=0
x1528ovs−c t l [ 3 5 6 0 ] : Zone 0 : name:<RG_MP_log_history>, phys : 0 x83 f f f d e c0 , l en : 0 x2080 ,
v i r t : 0 x7 f 213 f f f d e c0 , socket_id : 0 , f l a g s : 0ovs−c t l [ 3 5 6 0 ] : Zone 1 : name:<MP_log_history>, phys : 0 x83fd73d40 , l en : 0 x28a0c0 ,
v i r t : 0 x7f213fd73d40 , socket_id : 0 , f l a g s : 0ovs−c t l [ 3 5 6 0 ] : Zone 2 : name:<rte_eth_dev_data>, phys : 0 x83fd43380 , l en : 0 x2f700 ,
v i r t : 0 x7f213fd43380 , socket_id : 0 , f l a g s : 0ovs−c t l [ 3 5 6 0 ] : * S ta r t i ng ovs−vswitchdovs−c t l [ 3 5 6 0 ] : * Enabling remote OVSDB managerssystemd [ 1 ] : Started Open vSwitch In t e r na l Unit .systemd [ 1 ] : S t a r t i ng Open vSwitch . . .systemd [ 1 ] : Started Open vSwitch .
CMD: sudo ovs−v s c t l add−br ovsdpdkbr0 −− s e t br idge ovsdpdkbr0 datapath_type=netdev
SYSLOG:2016−01−22T08 : 5 8 : 5 6 . 3 4 4Z | 00008 |memory | INFO|37256 kB peak r e s i d en t s e t s i z e
a f t e r 24 .5 seconds2016−01−22T08 : 5 8 : 5 6 . 3 4 6Z | 00009 | o fproto_dpi f | INFO| netdev@ovs−netdev : Datapath
supports r e c i r c u l a t i o n2016−01−22T08 : 5 8 : 5 6 . 3 4 6Z | 00010 | o fproto_dpi f | INFO| netdev@ovs−netdev : MPLS l a b e l
s tack l ength probed as 32016−01−22T08 : 5 8 : 5 6 . 3 4 6Z | 00011 | o fproto_dpi f | INFO| netdev@ovs−netdev : Datapath
supports unique f low id s2016−01−22T08 : 5 8 : 5 6 . 3 4 6Z | 00012 | o fproto_dpi f | INFO| netdev@ovs−netdev : Datapath
does not support ct_state2016−01−22T08 : 5 8 : 5 6 . 3 4 6Z | 00013 | o fproto_dpi f | INFO| netdev@ovs−netdev : Datapath
does not support ct_zone2016−01−22T08 : 5 8 : 5 6 . 3 4 6Z | 00014 | o fproto_dpi f | INFO| netdev@ovs−netdev : Datapath
does not support ct_mark
75
2016−01−22T08 : 5 8 : 5 6 . 3 4 6Z | 00015 | o fproto_dpi f | INFO| netdev@ovs−netdev : Datapathdoes not support c t_ labe l
2016−01−22T08 : 5 8 : 5 6 . 3 6 0Z | 00016 | br idge | INFO| br idge ovsdpdkbr0 : added i n t e r f a c eovsdpdkbr0 on port 65534
2016−01−22T08 : 5 8 : 5 6 . 3 6 1Z | 00017 | br idge | INFO| br idge ovsdpdkbr0 : us ing datapathID 00005 a4a1ed0a14d
2016−01−22T08 : 5 8 : 5 6 . 3 6 1Z | 00018 | connmgr | INFO| ovsdpdkbr0 : added s e r v i c ec o n t r o l l e r ” punix : / var /run/ openvswitch /ovsdpdkbr0 .mgmt”
OVS−LOG:ovs−v s c t l : ovs | 0 0001 | v s c t l | INFO| Cal led as ovs−v s c t l add−br ovsdpdkbr0 −− s e t
br idge ovsdpdkbr0 datapath_type=netdevsystemd−udevd [ 3 6 0 7 ] : Could not generate p e r s i s t e n t MAC address f o r ovs−netdev :
No such f i l e or d i r e c t o r yke rne l : [ 5 0165 . 886554 ] dev i c e ovs−netdev entered promiscuous modeke rne l : [ 5 0165 . 901261 ] dev i c e ovsdpdkbr0 entered promiscuous mode
CMD: sudo ovs−v s c t l add−port ovsdpdkbr0 dpdk0 −− s e t I n t e r f a c e dpdk0 type=dpdk
SYSLOG:2016−01−22T08 : 5 9 : 0 6 . 3 6 9Z | 00019 |memory | INFO| peak r e s i d en t s e t s i z e grew 155% in
l a s t 10 .0 seconds , from 37256 kB to 95008 kB2016−01−22T08 : 5 9 : 0 6 . 3 6 9Z | 00020 |memory | INFO| hand le r s : 4 por t s : 1 r e v a l i d a t o r s : 2
r u l e s : 52016−01−22T08 : 5 9 : 3 0 . 9 8 9Z | 00021 | dpdk | INFO| Port 0 : 8c : dc : d4 : b3 : 6 d : e92016−01−22T08 : 5 9 : 3 1 . 5 2 0Z | 00022 | dpdk | INFO| Port 0 : 8c : dc : d4 : b3 : 6 d : e92016−01−22T08 : 5 9 : 3 1 . 5 2 1Z | 00023 | dpif_netdev | INFO| Created 1 pmd threads on numa
node 02016−01−22T08 : 5 9 : 3 1 . 5 2 2Z | 00001 | dpif_netdev (pmd16) | INFO| Core 0 p ro c e s s i ng port
’ dpdk0 ’2016−01−22T08 : 5 9 : 3 1 . 5 2 2Z | 00024 | br idge | INFO| br idge ovsdpdkbr0 : added i n t e r f a c e
dpdk0 on port 12016−01−22T08 : 5 9 : 3 1 . 5 2 2Z | 00025 | br idge | INFO| br idge ovsdpdkbr0 : us ing datapath
ID 00008 cdcd4b36de92016−01−22T08 : 5 9 : 3 1 . 5 2 3Z | 00002 | dpif_netdev (pmd16) | INFO| Core 0 p ro c e s s i ng port
’ dpdk0 ’
OVS−LOG:ovs−v s c t l : ovs | 0 0001 | v s c t l | INFO| Cal led as ovs−v s c t l add−port ovsdpdkbr0 dpdk0
−− s e t I n t e r f a c e dpdk0 type=dpdkovs−vswitchd [ 3 5 9 5 ] : PMD: ixgbe_dev_tx_queue_setup ( ) : sw_ring=0x7f211a79ebc0
hw_ring=0x7f211a7a6c00 dma_addr=0x81a7a6c00ovs−vswitchd [ 3 5 9 5 ] : PMD: ixgbe_set_tx_function ( ) : Using s imple tx code pathovs−vswitchd [ 3 5 9 5 ] : PMD: ixgbe_set_tx_function ( ) : Vector tx enabled .ovs−vswitchd [ 3 5 9 5 ] : PMD: ixgbe_dev_rx_queue_setup ( ) : sw_ring=0x7f211a78a6c0
sw_sc_ring=0x7f211a786580 hw_ring=0x7f211a78e800 dma_addr=0x81a78e800ovs−vswitchd [ 3 5 9 5 ] : PMD: ixgbe_set_rx_function ( ) : Vector rx enabled , p l e a s e
make sure RX burst s i z e no l e s s than 4 ( port=0) .ovs−vswitchd [ 3 5 9 5 ] : PMD: ixgbe_dev_tx_queue_setup ( ) : sw_ring=0x7f211a79ebc0
hw_ring=0x7f211a7a6c00 dma_addr=0x81a7a6c00. . .
76
CMD: sudo ovs−v s c t l add−port ovsdpdkbr0 vhost−user−1 −− s e t I n t e r f a c e vhost−user−1 type=dpdkvhostuser
OVS−LOG:2016−01−22T09 : 0 0 : 3 5 . 1 4 5Z | 00026 | dpdk | INFO| Socket /var /run/ openvswitch /vhost−
user−1 crea ted f o r vhost−user port vhost−user−12016−01−22T09 : 0 0 : 3 5 . 1 4 5Z | 00003 | dpif_netdev (pmd16) | INFO| Core 0 p ro c e s s i ng port
’ dpdk0 ’2016−01−22T09 : 0 0 : 3 5 . 1 4 5Z | 00004 | dpif_netdev (pmd16) | INFO| Core 0 p ro c e s s i ng port
’ vhost−user −1’2016−01−22T09 : 0 0 : 3 5 . 1 4 5Z | 00027 | br idge | INFO| br idge ovsdpdkbr0 : added i n t e r f a c e
vhost−user−1 on port 2
SYSLOG:ovs−v s c t l : ovs | 0 0001 | v s c t l | INFO| Cal led as ovs−v s c t l add−port ovsdpdkbr0 vhost−
user−1 −− s e t I n t e r f a c e vhost−user−1 type=dpdkvhostuserovs−vswitchd [ 3 5 9 5 ] : VHOST_CONFIG: socke t created , fd : 46ovs−vswitchd [ 3 5 9 5 ] : VHOST_CONFIG: bind to /var /run/ openvswitch /vhost−user−1
Eventual ly we can see the p o l l thread in topPID USER PR NI VIRT RES SHR S %CPU %MEM TIME+ COMMAND
3595 root 10 −10 4975344 103936 9916 S 100 .0 0 .3 33 : 13 . 56 ovs−vswitchd
Resources
• DPDK Documentation
• Release Notes matching the version packages in Ubuntu 16.04
• Linux DPDK User Getting Started
• EAL Command-line Options
• DPDK Api Documentation
• OpenVswitch DPDK installation
• Wikipedias definition of DPDK
Security
Security should always be considered when installing, deploying, and using any type of computer system.Although a fresh installation of Ubuntu is relatively safe for immediate use on the Internet, it is importantto have a balanced understanding of your system’s security posture based on how it will be used afterdeployment.
This chapter provides an overview of security-related topics as they pertain to Ubuntu DISTRO-REV ServerEdition, and outlines simple measures you may use to protect your server and network from any number ofpotential security threats.
77
User Management
User management is a critical part of maintaining a secure system. Ineffective user and privilege managementoften lead many systems into being compromised. Therefore, it is important that you understand how youcan protect your server through simple and effective user account management techniques.
Where is root?
Ubuntu developers made a conscientious decision to disable the administrative root account by default inall Ubuntu installations. This does not mean that the root account has been deleted or that it may not beaccessed. It merely has been given a password hash which matches no possible value, therefore may not login directly by itself.
Instead, users are encouraged to make use of a tool by the name of ‘sudo’ to carry out system administrativeduties. Sudo allows an authorized user to temporarily elevate their privileges using their own passwordinstead of having to know the password belonging to the root account. This simple yet effective methodologyprovides accountability for all user actions, and gives the administrator granular control over which actionsa user can perform with said privileges.
• If for some reason you wish to enable the root account, simply give it a password:
sudo passwd
Sudo will prompt you for your password, and then ask you to supply a new password for root as shownbelow:
[ sudo ] password f o r username : ( ente r your own password )Enter new UNIX password : ( ente r a new password f o r root )Retype new UNIX password : ( repeat new password f o r root )passwd : password updated s u c c e s s f u l l y
• To disable the root account password, use the following passwd syntax:
sudo passwd − l root
• You should read more on Sudo by reading the man page:
man sudo
By default, the initial user created by the Ubuntu installer is a member of the group sudo which is addedto the file /etc/sudoers as an authorized sudo user. If you wish to give any other account full root accessthrough sudo, simply add them to the sudo group.
Adding and Deleting Users
The process for managing local users and groups is straightforward and differs very little from most otherGNU/Linux operating systems. Ubuntu and other Debian based distributions encourage the use of the‘adduser’ package for account management.
• To add a user account, use the following syntax, and follow the prompts to give the account a passwordand identifiable characteristics, such as a full name, phone number, etc.
sudo adduser username
• To delete a user account and its primary group, use the following syntax:
sudo de l u s e r username
78
Deleting an account does not remove their respective home folder. It is up to you whether or not youwish to delete the folder manually or keep it according to your desired retention policies.
Remember, any user added later on with the same UID/GID as the previous owner will now haveaccess to this folder if you have not taken the necessary precautions.
You may want to change these UID/GID values to something more appropriate, such as the rootaccount, and perhaps even relocate the folder to avoid future conflicts:sudo chown −R root : root /home/username/sudo mkdir /home/ arch ived_users /sudo mv /home/username /home/ arch ived_users /
• To temporarily lock or unlock a user password, use the following syntax, respectively:sudo passwd − l usernamesudo passwd −u username
• To add or delete a personalized group, use the following syntax, respectively:sudo addgroup groupnamesudo delgroup groupname
• To add a user to a group, use the following syntax:sudo adduser username groupname
User Profile Security
When a new user is created, the adduser utility creates a brand new home directory named /home/username.The default profile is modeled after the contents found in the directory of /etc/skel, which includes all profilebasics.
If your server will be home to multiple users, you should pay close attention to the user home directorypermissions to ensure confidentiality. By default, user home directories in Ubuntu are created with worldread/execute permissions. This means that all users can browse and access the contents of other users homedirectories. This may not be suitable for your environment.
• To verify your current user home directory permissions, use the following syntax:l s −ld /home/username
The following output shows that the directory /home/username has world-readable permissions:drwxr−xr−x 2 username username 4096 2007−10−02 20 :03 username
• You can remove the world readable-permissions using the following syntax:sudo chmod 0750 /home/username
Note
Some people tend to use the recursive option (-R) indiscriminately which modifies all childfolders and files, but this is not necessary, and may yield other undesirable results. Theparent directory alone is sufficient for preventing unauthorized access to anything below theparent.
A much more efficient approach to the matter would be to modify the adduser global default permissionswhen creating user home folders. Simply edit the file /etc/adduser.conf and modify the DIR_MODEvariable to something appropriate, so that all new home directories will receive the correct permissions.
79
DIR_MODE=0750
• After correcting the directory permissions using any of the previously mentioned techniques, verify theresults using the following syntax:l s −ld /home/username
The results below show that world-readable permissions have been removed:drwxr−x−−− 2 username username 4096 2007−10−02 20 :03 username
Password Policy
A strong password policy is one of the most important aspects of your security posture. Many successfulsecurity breaches involve simple brute force and dictionary attacks against weak passwords. If you intendto offer any form of remote access involving your local password system, make sure you adequately addressminimum password complexity requirements, maximum password lifetimes, and frequent audits of yourauthentication systems.
Minimum Password Length
By default, Ubuntu requires a minimum password length of 6 characters, as well as some basic entropychecks. These values are controlled in the file /etc/pam.d/common−password, which is outlined below.password [ su c c e s s=1 de f au l t=ignore ] pam_unix . so obscure sha512
If you would like to adjust the minimum length to 8 characters, change the appropriate variable to min=8.The modification is outlined below.password [ su c c e s s=1 de f au l t=ignore ] pam_unix . so obscure sha512
minlen=8
Note
Basic password entropy checks and minimum length rules do not apply to the administrator usingsudo level commands to setup a new user.
Password Expiration
When creating user accounts, you should make it a policy to have a minimum and maximum password ageforcing users to change their passwords when they expire.
• To easily view the current status of a user account, use the following syntax:sudo chage − l username
The output below shows interesting facts about the user account, namely that there are no policiesapplied:Last password change : Jan 20 , 2015Password exp i r e s : neverPassword i n a c t i v e : neverAccount exp i r e s : neverMinimum number o f days between password change : 0Maximum number o f days between password change : 99999Number o f days o f warning be f o r e password exp i r e s : 7
80
• To set any of these values, simply use the following syntax, and follow the interactive prompts:sudo chage username
The following is also an example of how you can manually change the explicit expiration date (-E) to01/31/2015, minimum password age (-m) of 5 days, maximum password age (-M) of 90 days, inactivityperiod (-I) of 30 days after password expiration, and a warning time period (-W) of 14 days beforepassword expiration:sudo chage −E 01/31/2015 −m 5 −M 90 −I 30 −W 14 username
• To verify changes, use the same syntax as mentioned previously:sudo chage − l username
The output below shows the new policies that have been established for the account:Last password change : Jan 20 , 2015Password exp i r e s : Apr 19 , 2015Password i n a c t i v e : May 19 , 2015Account exp i r e s : Jan 31 , 2015Minimum number o f days between password change : 5Maximum number o f days between password change : 90Number o f days o f warning be f o r e password exp i r e s : 14
Other Security Considerations
Many applications use alternate authentication mechanisms that can be easily overlooked by even experiencedsystem administrators. Therefore, it is important to understand and control how users authenticate and gainaccess to services and applications on your server.
SSH Access by Disabled Users
Simply disabling/locking a user password will not prevent a user from logging into your server remotely ifthey have previously set up SSH public key authentication. They will still be able to gain shell access to theserver, without the need for any password. Remember to check the users home directory for files that willallow for this type of authenticated SSH access, e.g. /home/username/.ssh/authorized_keys.
Remove or rename the directory .ssh/ in the user’s home folder to prevent further SSH authenticationcapabilities.
Be sure to check for any established SSH connections by the disabled user, as it is possible they may haveexisting inbound or outbound connections. Kill any that are found.who | grep username ( to get the pts/# termina l )sudo p k i l l −f pts/#
Restrict SSH access to only user accounts that should have it. For example, you may create a group called“sshlogin” and add the group name as the value associated with the AllowGroups variable located in the file/etc/ssh/sshd_config.AllowGroups s s h l o g i n
Then add your permitted SSH users to the group “sshlogin”, and restart the SSH service.sudo adduser username s s h l o g i nsudo sys t emct l r e s t a r t sshd . s e r v i c e
81
External User Database Authentication
Most enterprise networks require centralized authentication and access controls for all system resources. Ifyou have configured your server to authenticate users against external databases, be sure to disable the useraccounts both externally and locally. This way you ensure that local fallback authentication is not possible.
AppArmor
AppArmor is a Linux Security Module implementation of name-based mandatory access controls. AppArmorconfines individual programs to a set of listed files and posix 1003.1e draft capabilities.
AppArmor is installed and loaded by default. It uses profiles of an application to determine what files andpermissions the application requires. Some packages will install their own profiles, and additional profilescan be found in the apparmor-profiles package.
To install the apparmor-profiles package from a terminal prompt:sudo apt i n s t a l l apparmor−p r o f i l e s
AppArmor profiles have two modes of execution:
• Complaining/Learning: profile violations are permitted and logged. Useful for testing and developingnew profiles.
• Enforced/Confined: enforces profile policy as well as logging the violation.
Using AppArmor
The optional apparmor-utils package contains command line utilities that you can use to change the AppAr-mor execution mode, find the status of a profile, create new profiles, etc.
• apparmor_status is used to view the current status of AppArmor profiles.sudo apparmor_status
• aa-complain places a profile into complain mode.sudo aa−complain /path/ to /bin
• aa-enforce places a profile into enforce mode.sudo aa−en f o r c e /path/ to /bin
• The /etc/apparmor.d directory is where the AppArmor profiles are located. It can be used to manip-ulate the mode of all profiles.
Enter the following to place all profiles into complain mode:sudo aa−complain / e tc /apparmor . d/*
To place all profiles in enforce mode:sudo aa−en f o r c e / e t c /apparmor . d/*
• apparmor_parser is used to load a profile into the kernel. It can also be used to reload a currentlyloaded profile using the -r option after modifying it to have the changes take effect. To reload a profile:sudo apparmor_parser −r / e t c /apparmor . d/ p r o f i l e . name
82
• systemctl can be used to reload all profiles:
sudo sys t emct l r e l oad apparmor . s e r v i c e
• The /etc/apparmor.d/disable directory can be used along with the apparmor_parser -R option todisable a profile.
sudo ln −s / e t c /apparmor . d/ p r o f i l e . name / etc /apparmor . d/ d i s ab l e /sudo apparmor_parser −R / etc /apparmor . d/ p r o f i l e . name
To re-enable a disabled profile remove the symbolic link to the profile in /etc/apparmor.d/disable/.Then load the profile using the -a option.
sudo rm / etc /apparmor . d/ d i s ab l e / p r o f i l e . namecat / e t c /apparmor . d/ p r o f i l e . name | sudo apparmor_parser −a
• AppArmor can be disabled, and the kernel module unloaded by entering the following:
sudo sys t emct l stop apparmor . s e r v i c esudo sys t emct l d i s ab l e apparmor . s e r v i c e
• To re-enable AppArmor enter:
sudo sys t emct l enable apparmor . s e r v i c esudo sys t emct l s t a r t apparmor . s e r v i c e
Note
Replace profile.name with the name of the profile you want to manipulate. Also, replace /path/to/bin/ with the actual executable file path. For example for the ping command use /bin/ping
Profiles
AppArmor profiles are simple text files located in /etc/apparmor.d/. The files are named after the fullpath to the executable they profile replacing the “/” with “.”. For example /etc/apparmor.d/bin.ping is theAppArmor profile for the /bin/ping command.
There are two main type of rules used in profiles:
• Path entries: detail which files an application can access in the file system.
• Capability entries: determine what privileges a confined process is allowed to use.
As an example, take a look at /etc/apparmor.d/bin.ping:
#inc lude <tunab le s / g loba l>/bin /ping f l a g s =(complain ) {
#inc lude <ab s t r a c t i on s /base>#inc lude <ab s t r a c t i on s / conso l e s>#inc lude <ab s t r a c t i on s /nameservice>
capab i l i t y net_raw ,c ap ab i l i t y se tu id ,network i n e t raw ,
/bin /ping mixr ,/ e t c /modules . conf r ,
}
83
• #include <tunables/global>: include statements from other files. This allows statements pertaining tomultiple applications to be placed in a common file.
• /bin/ping flags=(complain): path to the profiled program, also setting the mode to complain.
• capability net_raw,: allows the application access to the CAP_NET_RAW Posix.1e capability.
• /bin/ping mixr,: allows the application read and execute access to the file.
Note
After editing a profile file the profile must be reloaded. See above at Using AppArmor for details.
Creating a Profile
• Design a test plan: Try to think about how the application should be exercised. The test plan shouldbe divided into small test cases. Each test case should have a small description and list the steps tofollow.
Some standard test cases are:
– Starting the program.
– Stopping the program.
– Reloading the program.
– Testing all the commands supported by the init script.
• Generate the new profile: Use aa-genprof to generate a new profile. From a terminal:
sudo aa−genpro f executab l e
For example:
sudo aa−genpro f s lapd
• To get your new profile included in the apparmor-profiles package, file a bug in Launchpad against theAppArmor package:
– Include your test plan and test cases.
– Attach your new profile to the bug.
Updating Profiles
When the program is misbehaving, audit messages are sent to the log files. The program aa-logprof can beused to scan log files for AppArmor audit messages, review them and update the profiles. From a terminal:
sudo aa−l o gp r o f
Further pre-existing Profiles
The packages apport−profiles and apparmor−profiles−extra ship some experimental profiles for AppArmorsecurity policies. Do not expect these profiles to work out-of-the-box, but they can give you a head startwhen trynig to create a new profile by starting off a base that exists.
These profiles are not considered mature enough to be shipped in enforce mode by default. Therefore theyare shipped in complain mode so that users can test them, choose which are desired, and help improve themupstream if needed.
84
Some even more experimental profiles carried by the package are placed in/usr/share/doc/apparmor−profiles/extras/
Checking and debugging denies
You will see in ‘dmesg’ and any log that collects kernel messages if you have hit a deny. Right away it is worthto know that this will cover any access that was denied because it was not allowed, but explicit denies willput no message in your logs at all.
Examples might look like:
[ 1521056 .552037 ] audi t : type=1400 audi t (1571868402 .378 :24425) : apparmor=”DENIED” operat ion=”open” p r o f i l e =”/usr / sb in /cups−browsed” name=”/var / l i b /l i b v i r t /dnsmasq/” pid=1128 comm=”cups−browsed” requested_mask=”r ”denied_mask=”r ” f s u i d=0 ouid=0
[1482106 .651527 ] audi t : type=1400 audi t (1571829452 .330 :24323) : apparmor=”DENIED” operat ion=”sendmsg” p r o f i l e=”snap . lxd . l x c ” pid=24115 comm=”lxc ”laddr =10 .7 .0 .69 l p o r t =48796 faddr =10 .7 .0 .231 f po r t=445 fami ly=” i n e t ”sock_type=”stream” pro to co l=6 requested_mask=”send ” denied_mask=”send ”
That follows a generic structure starting with a timestamp, an audit tag and the category apparmor=”DENIED”. From the following fields you can derive what was going on and why it was failing.
In the examples above that would be
First example: * operation: open (program tried to open a file) * profile: /usr/sbin/cups−browsed (you’ll find/etc/apparmor.d/usr.bin.cups−browsed) * name: /var/lib/ libvirt /dnsmasq (what it wanted to access) *pid/comm: the program that did trigger the access * requested_mask/denied_mask/fsuid/ouid: parametersof that open call
Second example: * operation: sendmsg (program tried send via network) * profile: snap.lxd. lxc (snapsare special, you’ll find /var/lib/snapd/apparmor/profiles/snap.lxd.lxc) * pid/comm: the program that didtrigger the access * laddr/lport/faddr/fport/family/sock_type/protocol: parameters of that sendmsg call
That way you know in which profile and at what action you have to start if you consider either debuggingor adapting the profiles.
Profile customization
Profiles are meant to provide security and thereby can’t be all too open. But quite often a very special setupwould work with a profile if it wold just allow this one extra access. To handle that there are three ways.
• modify the profile itself– always works, but has the drawback that profiles are in /etc and considered conffiles. So after
modification on a related package update you might get a conffile prompt. Worst case dependingon configuration automatic updates might even override it and your custom rule is gone.
• use tunables– those provide variables that can be used in templates, for example if you want a custom dir
considered as it would be a home directory you could modify /etc/apparmor.d/tunables/homewhich defines the base path rules use for home directories
– by design those variables will only influence profiles that use them• modify a local override
– to mitigate the drawbacks of above approaches local includes got introduced adding the ability towrite arbitrary rules that will be used, and not get issues on upgrades that modify the packagedrule.
85
– The files can be found in /etc/apparmor.d/local/ and exist for the packages that are known tosometimes need slight tweaks for special setups
References
• See the AppArmor Administration Guide for advanced configuration options.• For details using AppArmor with other Ubuntu releases see the AppArmor Community Wiki page.• The OpenSUSE AppArmor page is another introduction to AppArmor.• (https://wiki.debian.org/AppArmor) is another introduction and basic howto for AppArmor.• A great place to ask for AppArmor assistance, and get involved with the Ubuntu Server community,
is the #ubuntu-hardened IRC channel on freenode.
Firewall
Introduction
The Linux kernel includes the Netfilter subsystem, which is used to manipulate or decide the fate of networktraffic headed into or through your server. All modern Linux firewall solutions use this system for packetfiltering.
The kernel’s packet filtering system would be of little use to administrators without a userspace interfaceto manage it. This is the purpose of iptables: When a packet reaches your server, it will be handed offto the Netfilter subsystem for acceptance, manipulation, or rejection based on the rules supplied to it fromuserspace via iptables. Thus, iptables is all you need to manage your firewall, if you’re familiar with it, butmany frontends are available to simplify the task.
ufw - Uncomplicated Firewall
The default firewall configuration tool for Ubuntu is ufw. Developed to ease iptables firewall configuration,ufw provides a user-friendly way to create an IPv4 or IPv6 host-based firewall.
ufw by default is initially disabled. From the ufw man page:
“ufw is not intended to provide complete firewall functionality via its command interface, but instead providesan easy way to add or remove simple rules. It is currently mainly used for host-based firewalls.”
The following are some examples of how to use ufw:
• First, ufw needs to be enabled. From a terminal prompt enter:
sudo ufw enable
• To open a port (SSH in this example):
sudo ufw al low 22
• Rules can also be added using a numbered format:
sudo ufw i n s e r t 1 a l low 80
• Similarly, to close an opened port:
sudo ufw deny 22
• To remove a rule, use delete followed by the rule:
86
sudo ufw de l e t e deny 22
• It is also possible to allow access from specific hosts or networks to a port. The following exampleallows SSH access from host 192.168.0.2 to any IP address on this host:
sudo ufw al low proto tcp from 192 . 1 6 8 . 0 . 2 to any port 22
Replace 192.168.0.2 with 192.168.0.0/24 to allow SSH access from the entire subnet.
• Adding the –dry-run option to a ufw command will output the resulting rules, but not apply them.For example, the following is what would be applied if opening the HTTP port:
sudo ufw −−dry−run a l low http
* f i l t e r: ufw−user−input − [ 0 : 0 ]: ufw−user−output − [ 0 : 0 ]: ufw−user−forward − [ 0 : 0 ]: ufw−user−l im i t − [ 0 : 0 ]: ufw−user−l im i t−accept − [ 0 : 0 ]### RULES ###
### tup le ### al low tcp 80 0 . 0 . 0 . 0 / 0 any 0 . 0 . 0 . 0 / 0−A ufw−user−input −p tcp −−dport 80 −j ACCEPT
### END RULES ###−A ufw−user−input −j RETURN−A ufw−user−output −j RETURN−A ufw−user−forward −j RETURN−A ufw−user−l im i t −m l im i t −− l im i t 3/minute −j LOG −−log−p r e f i x ” [UFW
LIMIT ] : ”−A ufw−user−l im i t −j REJECT−A ufw−user−l im i t−accept −j ACCEPTCOMMITRules updated
• ufw can be disabled by:
sudo ufw d i s ab l e
• To see the firewall status, enter:
sudo ufw s ta tu s
• And for more verbose status information use:
sudo ufw s ta tu s verbose
• To view the numbered format:
sudo ufw s ta tu s numbered
Note
If the port you want to open or close is defined in /etc/services , you can use the port nameinstead of the number. In the above examples, replace 22 with ssh.
This is a quick introduction to using ufw. Please refer to the ufw man page for more information.
87
ufw Application Integration
Applications that open ports can include an ufw profile, which details the ports needed for the applicationto function properly. The profiles are kept in /etc/ufw/applications.d, and can be edited if the default portshave been changed.
• To view which applications have installed a profile, enter the following in a terminal:
sudo ufw app l i s t
• Similar to allowing traffic to a port, using an application profile is accomplished by entering:
sudo ufw al low Samba
• An extended syntax is available as well:
ufw a l low from 192 . 168 . 0 . 0/24 to any app Samba
Replace Samba and 192.168.0.0/24 with the application profile you are using and the IP range for yournetwork.
Note
There is no need to specify the protocol for the application, because that information isdetailed in the profile. Also, note that the app name replaces the port number.
• To view details about which ports, protocols, etc., are defined for an application, enter:
sudo ufw app i n f o Samba
Not all applications that require opening a network port come with ufw profiles, but if you have profiledan application and want the file to be included with the package, please file a bug against the package inLaunchpad.
ubuntu−bug nameofpackage
IP Masquerading
The purpose of IP Masquerading is to allow machines with private, non-routable IP addresses on yournetwork to access the Internet through the machine doing the masquerading. Traffic from your privatenetwork destined for the Internet must be manipulated for replies to be routable back to the machine thatmade the request. To do this, the kernel must modify the source IP address of each packet so that replieswill be routed back to it, rather than to the private IP address that made the request, which is impossibleover the Internet. Linux uses Connection Tracking (conntrack) to keep track of which connections belongto which machines and reroute each return packet accordingly. Traffic leaving your private network is thus“masqueraded” as having originated from your Ubuntu gateway machine. This process is referred to inMicrosoft documentation as Internet Connection Sharing.
ufw Masquerading
IP Masquerading can be achieved using custom ufw rules. This is possible because the current back-end forufw is iptables-restore with the rules files located in /etc/ufw/*.rules. These files are a great place to addlegacy iptables rules used without ufw, and rules that are more network gateway or bridge related.
The rules are split into two different files, rules that should be executed before ufw command line rules, andrules that are executed after ufw command line rules.
88
• First, packet forwarding needs to be enabled in ufw. Two configuration files will need to be adjusted,in /etc/default/ufw change the DEFAULT_FORWARD_POLICY to “ACCEPT”:
DEFAULT_FORWARD_POLICY=”ACCEPT”
Then edit /etc/ufw/sysctl.conf and uncomment:
net / ipv4 / ip_forward=1
Similarly, for IPv6 forwarding uncomment:
net / ipv6 / conf / d e f au l t / forwarding=1
• Now add rules to the /etc/ufw/before.rules file. The default rules only configure the filter table, andto enable masquerading the nat table will need to be configured. Add the following to the top of thefile just after the header comments:
# nat Table r u l e s*nat:POSTROUTING ACCEPT [ 0 : 0 ]
# Forward t r a f f i c from eth1 through eth0 .−A POSTROUTING −s 192 . 168 . 0 . 0/24 −o eth0 −j MASQUERADE
# don ’ t d e l e t e the ’COMMIT’ l i n e or the se nat t ab l e r u l e s won ’ t beproce s s ed
COMMIT
The comments are not strictly necessary, but it is considered good practice to document your configu-ration. Also, when modifying any of the rules files in /etc/ufw, make sure these lines are the last linefor each table modified:
# don ’ t d e l e t e the ’COMMIT’ l i n e or the se r u l e s won ’ t be proce s s edCOMMIT
For each Table a corresponding COMMIT statement is required. In these examples only the nat andfilter tables are shown, but you can also add rules for the raw and mangle tables.
Note
In the above example replace eth0, eth1, and 192.168.0.0/24 with the appropriate interfacesand IP range for your network.
• Finally, disable and re-enable ufw to apply the changes:
sudo ufw d i s ab l e && sudo ufw enable
IP Masquerading should now be enabled. You can also add any additional FORWARD rules to the /etc/ufw/before.rules. It is recommended that these additional rules be added to the ufw-before-forward chain.
iptables Masquerading
iptables can also be used to enable Masquerading.
• Similar to ufw, the first step is to enable IPv4 packet forwarding by editing /etc/sysctl .conf anduncomment the following line:
net . ipv4 . ip_forward=1
89
If you wish to enable IPv6 forwarding also uncomment:
net . ipv6 . conf . d e f au l t . forwarding=1
• Next, execute the sysctl command to enable the new settings in the configuration file:
sudo s y s c t l −p
• IP Masquerading can now be accomplished with a single iptables rule, which may differ slightly basedon your network configuration:
sudo i p t a b l e s −t nat −A POSTROUTING −s 192 . 168 . 0 . 0/16 −o ppp0 −jMASQUERADE
The above command assumes that your private address space is 192.168.0.0/16 and that your Internet-facing device is ppp0. The syntax is broken down as follows:
– -t nat – the rule is to go into the nat table
– -A POSTROUTING – the rule is to be appended (-A) to the POSTROUTING chain
– -s 192.168.0.0/16 – the rule applies to traffic originating from the specified address space
– -o ppp0 – the rule applies to traffic scheduled to be routed through the specified network device
– -j MASQUERADE – traffic matching this rule is to “jump” (-j) to the MASQUERADE target tobe manipulated as described above
• Also, each chain in the filter table (the default table, and where most or all packet filtering occurs) hasa default policy of ACCEPT, but if you are creating a firewall in addition to a gateway device, youmay have set the policies to DROP or REJECT, in which case your masqueraded traffic needs to beallowed through the FORWARD chain for the above rule to work:
sudo i p t a b l e s −A FORWARD −s 192 . 168 . 0 . 0/16 −o ppp0 −j ACCEPTsudo i p t a b l e s −A FORWARD −d 192 . 168 . 0 . 0/16 −m sta t e \−−s t a t e ESTABLISHED,RELATED − i ppp0 −j ACCEPT
The above commands will allow all connections from your local network to the Internet and all trafficrelated to those connections to return to the machine that initiated them.
• If you want masquerading to be enabled on reboot, which you probably do, edit /etc/rc. local and addany commands used above. For example add the first command with no filtering:
i p t a b l e s −t nat −A POSTROUTING −s 192 . 168 . 0 . 0/16 −o ppp0 −j MASQUERADE
Logs
Firewall logs are essential for recognizing attacks, troubleshooting your firewall rules, and noticing unusualactivity on your network. You must include logging rules in your firewall for them to be generated, though,and logging rules must come before any applicable terminating rule (a rule with a target that decides thefate of the packet, such as ACCEPT, DROP, or REJECT).
If you are using ufw, you can turn on logging by entering the following in a terminal:
sudo ufw logg ing on
To turn logging off in ufw, simply replace on with off in the above command.
If using iptables instead of ufw, enter:
90

sudo i p t a b l e s −A INPUT −m sta t e −−s t a t e NEW −p tcp −−dport 80 \−j LOG −−log−p r e f i x ”NEW_HTTP_CONN: ”
A request on port 80 from the local machine, then, would generate a log in dmesg that looks like this (singleline split into 3 to fit this document):
[ 4304885 .870000 ] NEW_HTTP_CONN: IN=lo OUT= MAC=00 : 0 0 : 0 0 : 0 0 : 0 0 : 0 0 : 0 0 : 0 0 : 0 0 : 0 0 : 0 0 : 0 0 : 0 8 : 0 0
SRC=127 .0 .0 .1 DST=127 .0 .0 .1 LEN=60 TOS=0x00 PREC=0x00 TTL=64 ID=58288 DF PROTO=TCP
SPT=53981 DPT=80 WINDOW=32767 RES=0x00 SYN URGP=0
The above log will also appear in /var/log/messages, /var/log/syslog, and /var/log/kern.log. This behaviorcan be modified by editing /etc/syslog .conf appropriately or by installing and configuring ulogd and usingthe ULOG target instead of LOG. The ulogd daemon is a userspace server that listens for logging instructionsfrom the kernel specifically for firewalls, and can log to any file you like, or even to a PostgreSQL or MySQLdatabase. Making sense of your firewall logs can be simplified by using a log analyzing tool such as logwatch,fwanalog, fwlogwatch, or lire.
Other Tools
There are many tools available to help you construct a complete firewall without intimate knowledge ofiptables. A command-line tool with plain-text configuration files:
• Shorewall is a very powerful solution to help you configure an advanced firewall for any network.
References
• The Ubuntu Firewall wiki page contains information on the development of ufw.
• Also, the ufw manual page contains some very useful information: man ufw.
• See the packet-filtering-HOWTO for more information on using iptables.
• The nat-HOWTO contains further details on masquerading.
• The IPTables HowTo in the Ubuntu wiki is a great resource.
Certificates
One of the most common forms of cryptography today is public-key cryptography. Public-key cryptographyutilizes a public key and a private key. The system works by encrypting information using the public key.The information can then only be decrypted using the private key.
A common use for public-key cryptography is encrypting application traffic using a Secure Socket Layer(SSL) or Transport Layer Security (TLS) connection. One example: configuring Apache to provide HTTPS,the HTTP protocol over SSL/TLS. This allows a way to encrypt traffic using a protocol that does not itselfprovide encryption.
A certificate is a method used to distribute a public key and other information about a server and theorganization who is responsible for it. Certificates can be digitally signed by a Certification Authority, orCA. A CA is a trusted third party that has confirmed that the information contained in the certificate isaccurate.
91

Types of Certificates
To set up a secure server using public-key cryptography, in most cases, you send your certificate request(including your public key), proof of your company’s identity, and payment to a CA. The CA verifies thecertificate request and your identity, and then sends back a certificate for your secure server. Alternatively,you can create your own self-signed certificate.
Note
Note that self-signed certificates should not be used in most production environments.
Continuing the HTTPS example, a CA-signed certificate provides two important capabilities that a self-signed certificate does not:
• Browsers (usually) automatically recognize the CA signature and allow a secure connection to be madewithout prompting the user.
• When a CA issues a signed certificate, it is guaranteeing the identity of the organization that isproviding the web pages to the browser.
Most of the software supporting SSL/TLS have a list of CAs whose certificates they automatically accept.If a browser encounters a certificate whose authorizing CA is not in the list, the browser asks the user toeither accept or decline the connection. Also, other applications may generate an error message when usinga self-signed certificate.
The process of getting a certificate from a CA is fairly easy. A quick overview is as follows:
1. Create a private and public encryption key pair.
2. Create a certificate signing request based on the public key. The certificate request contains informationabout your server and the company hosting it.
3. Send the certificate request, along with documents proving your identity, to a CA. We cannot tell youwhich certificate authority to choose. Your decision may be based on your past experiences, or on theexperiences of your friends or colleagues, or purely on monetary factors.
Once you have decided upon a CA, you need to follow the instructions they provide on how to obtaina certificate from them.
4. When the CA is satisfied that you are indeed who you claim to be, they send you a digital certificate.
5. Install this certificate on your secure server, and configure the appropriate applications to use thecertificate.
Generating a Certificate Signing Request (CSR)
Whether you are getting a certificate from a CA or generating your own self-signed certificate, the first stepis to generate a key.
If the certificate will be used by service daemons, such as Apache, Postfix, Dovecot, etc., a key withouta passphrase is often appropriate. Not having a passphrase allows the services to start without manualintervention, usually the preferred way to start a daemon.
This section will cover generating a key with a passphrase, and one without. The non-passphrase key willthen be used to generate a certificate that can be used with various service daemons.
Warning
Running your secure service without a passphrase is convenient because you will not need to enterthe passphrase every time you start your secure service. But it is insecure and a compromise ofthe key means a compromise of the server as well.
92

To generate the keys for the Certificate Signing Request (CSR) run the following command from a terminalprompt:
opens s l genrsa −des3 −out s e r v e r . key 2048
Generating RSA pr i va t e key , 2048 b i t long modulus. . . . . . . . . . . . . . . . . . . . . . . . . . + + ++++.......++++++e i s 65537 (0 x10001 )Enter pass phrase f o r s e r v e r . key :
You can now enter your passphrase. For best security, it should at least contain eight characters. Theminimum length when specifying −des3 is four characters. As a best practice it should include numbersand/or punctuation and not be a word in a dictionary. Also remember that your passphrase is case-sensitive.
Re-type the passphrase to verify. Once you have re-typed it correctly, the server key is generated and storedin the server .key file.
Now create the insecure key, the one without a passphrase, and shuffle the key names:
opens s l r sa −in s e r v e r . key −out s e r v e r . key . i n s e cu r emv s e r v e r . key s e r v e r . key . s e cur emv s e r v e r . key . i n s e cu r e s e r v e r . key
The insecure key is now named server .key, and you can use this file to generate the CSR without passphrase.
To create the CSR, run the following command at a terminal prompt:
opens s l req −new −key s e r v e r . key −out s e r v e r . c s r
It will prompt you enter the passphrase. If you enter the correct passphrase, it will prompt you to enterCompany Name, Site Name, Email Id, etc. Once you enter all these details, your CSR will be created andit will be stored in the server . csr file.
You can now submit this CSR file to a CA for processing. The CA will use this CSR file and issue thecertificate. On the other hand, you can create self-signed certificate using this CSR.
Creating a Self-Signed Certificate
To create the self-signed certificate, run the following command at a terminal prompt:
opens s l x509 −req −days 365 −in s e r v e r . c s r −s ignkey s e r v e r . key −out s e r v e r . c r t
The above command will prompt you to enter the passphrase. Once you enter the correct passphrase, yourcertificate will be created and it will be stored in the server . crt file.
Warning
If your secure server is to be used in a production environment, you probably need a CA-signedcertificate. It is not recommended to use self-signed certificate.
Installing the Certificate
You can install the key file server .key and certificate file server . crt, or the certificate file issued by your CA,by running following commands at a terminal prompt:
sudo cp s e r v e r . c r t / e t c / s s l / c e r t ssudo cp s e r v e r . key / e t c / s s l / p r i va t e
93

Now simply configure any applications, with the ability to use public-key cryptography, to use the certificateand key files. For example, Apache can provide HTTPS, Dovecot can provide IMAPS and POP3S, etc.
Certification Authority
If the services on your network require more than a few self-signed certificates it may be worth the additionaleffort to setup your own internal Certification Authority (CA). Using certificates signed by your own CA,allows the various services using the certificates to easily trust other services using certificates issued fromthe same CA.
First, create the directories to hold the CA certificate and related files:
sudo mkdir / e t c / s s l /CAsudo mkdir / e t c / s s l / newcerts
The CA needs a few additional files to operate, one to keep track of the last serial number used by the CA,each certificate must have a unique serial number, and another file to record which certificates have beenissued:
sudo sh −c ” echo ’01 ’ > / etc / s s l /CA/ s e r i a l ”sudo touch / e tc / s s l /CA/ index . txt
The third file is a CA configuration file. Though not strictly necessary, it is very convenient when issuingmultiple certificates. Edit /etc/ssl/openssl.cnf, and in the [ CA_default ] change:
d i r = / etc / s s l # Where everyth ing i s keptdatabase = $d i r /CA/ index . txt # database index f i l e .c e r t i f i c a t e = $d i r / c e r t s / ca c e r t . pem # The CA c e r t i f i c a t es e r i a l = $d i r /CA/ s e r i a l # The cur rent s e r i a l numberprivate_key = $d i r / p r i va t e / cakey . pem# The pr i va t e key
Next, create the self-signed root certificate:
opens s l req −new −x509 −ex t en s i on s v3_ca −keyout cakey . pem −out ca c e r t . pem −days 3650
You will then be asked to enter the details about the certificate.
Now install the root certificate and key:
sudo mv cakey . pem / etc / s s l / p r i va t e /sudo mv cac e r t . pem / etc / s s l / c e r t s /
You are now ready to start signing certificates. The first item needed is a Certificate Signing Request (CSR),see Generating a Certificate Signing Request (CSR) for details. Once you have a CSR, enter the followingto generate a certificate signed by the CA:
sudo opens s l ca −in s e r v e r . c s r −c on f i g / e t c / s s l / opens s l . cn f
After entering the password for the CA key, you will be prompted to sign the certificate, and again to committhe new certificate. You should then see a somewhat large amount of output related to the certificate creation.
There should now be a new file, /etc/ssl/newcerts/01.pem, containing the same output. Copy and pasteeverything beginning with the line: —–BEGIN CERTIFICATE—– and continuing through the line: —-END CERTIFICATE—– lines to a file named after the hostname of the server where the certificate will beinstalled. For example mail.example.com.crt, is a nice descriptive name.
Subsequent certificates will be named 02.pem, 03.pem, etc.
94
Note
Replace mail.example.com.crt with your own descriptive name.
Finally, copy the new certificate to the host that needs it, and configure the appropriate applications to useit. The default location to install certificates is /etc/ssl/certs. This enables multiple services to use thesame certificate without overly complicated file permissions.
For applications that can be configured to use a CA certificate, you should also copy the /etc/ssl/certs/cacert .pem file to the /etc/ssl/certs/ directory on each server.
References
• The Wikipedia HTTPS page has more information regarding HTTPS.
• For more information on OpenSSL see the OpenSSL Home Page.
• Also, O’Reilly’s Network Security with OpenSSL is a good in-depth reference.
Console Security
As with any other security barrier you put in place to protect your server, it is pretty tough to defendagainst untold damage caused by someone with physical access to your environment, for example, theft ofhard drives, power or service disruption, and so on. Therefore, console security should be addressed merelyas one component of your overall physical security strategy. A locked “screen door” may deter a casualcriminal, or at the very least slow down a determined one, so it is still advisable to perform basic precautionswith regard to console security.
The following instructions will help defend your server against issues that could otherwise yield very seriousconsequences.
Disable Ctrl+Alt+Delete
Anyone that has physical access to the keyboard can simply use the Ctrl+Alt+Delete key combination toreboot the server without having to log on. While someone could simply unplug the power source, youshould still prevent the use of this key combination on a production server. This forces an attacker to takemore drastic measures to reboot the server, and will prevent accidental reboots at the same time.
To disable the reboot action taken by pressing the Ctrl+Alt+Delete key combination, run the following twocommands:
sudo sys t emct l mask c t r l −a l t−de l . t a r g e tsudo sys t emct l daemon−r e l oad
eCryptfs is deprecated
eCryptfs is deprecated and should not be used, instead the LUKS setup as defined by the Ubuntu installeris recommended. That in turn - for a typical remote server setup will need a remote key store as usually noone is there to enter a key on boot.
Virtualization is being adopted in many different environments and situations. If you are a developer,virtualization can provide you with a contained environment where you can safely do almost any sort of
95
development safe from messing up your main working environment. If you are a systems administrator, youcan use virtualization to more easily separate your services and move them around based on demand.
The default virtualization technology supported in Ubuntu is KVM. For Intel and AMD hardware KVMrequires virtualization extensions. But KVM is also available for IBM Z and LinuxONE, IBM POWER aswell as for ARM64. Qemu is part of the KVM experience being the userspace backend for it, but it also canbe used for hardware without virtualization extensions by using its TCG mode.
While virtualization is in many ways similar to containers those are different and implemented via othersolutions like LXD, systemd-nspawn, containerd and others.
Multipass is the recommended method to create Ubuntu VMs on Ubuntu. It’s designed for developers whowant a fresh Ubuntu environment with a single command and works on Linux, Windows and macOS.
On Linux it’s available as a snap:
sudo snap i n s t a l l mul t ipass −−beta −−c l a s s i c
Usage
Find available images
$ mult ipass f i ndImage A l i a s e s Vers ion Desc r ip t i oncore core16 20190424 Ubuntu Core 16core18 20190213 Ubuntu Core 1816 .04 x en i a l 20190628 Ubuntu 16 .04 LTS18.04 b ion ic , l t s 20190627.1 Ubuntu 18 .04 LTS18.10 cosmic 20190628 Ubuntu 18 .1019 .04 d i s c o 20190628 Ubuntu 19 .04da i l y : 1 9 . 1 0 devel , eoan 20190623 Ubuntu 19 .10
Launch a fresh instance of the current Ubuntu LTS
$ mult ipass launch ubuntuLaunching dancing−chipmunk . . .Downloading Ubuntu 18 .04 LTS . . . . . . . . . .Launched : dancing chipmunk
Check out the running instances
$ mult ipass l i s tName State IPv4 Releasedancing−chipmunk RUNNING 10 . 125 . 174 . 247 Ubuntu 18 .04 LTSl i v e −naiad RUNNING 10 . 125 . 174 . 243 Ubuntu 18 .04 LTSsnapcra f t−asc i inema STOPPED −− Ubuntu Snapcra f t
bu i l d e r f o r Core 18
Learn more about the VM instance you just launched
$ mult ipass i n f o dancing−chipmunkName : dancing−chipmunkState : RUNNINGIPv4 : 10 . 125 . 174 . 247
96
Release : Ubuntu 18 . 0 4 . 1 LTSImage hash : 19 e9853d8267 (Ubuntu 18 .04 LTS)Load : 0 .97 0 .30 0 .10Disk usage : 1 . 1G out o f 4 . 7GMemory usage : 85 .1M out o f 985 .4M
Connect to a running instance
$ mult ipass s h e l l dancing−chipmunkWelcome to Ubuntu 18 . 0 4 . 1 LTS (GNU/Linux 4.15.0−42− g ene r i c x86_64 )
. . .
Don’t forget to logout (or Ctrl-D) or you may find yourself heading all the way down the Inception levels…;)
Run commands inside an instance from outside
$ mult ipass exec dancing−chipmunk −− l s b_r e l e a s e −aNo LSB modules are a v a i l a b l e .D i s t r i bu t o r ID : UbuntuDesc r ip t i on : Ubuntu 18 . 0 4 . 1 LTSRelease : 18 .04Codename : b i on i c
Stop an instance to save resources
$ mult ipass stop dancing−chipmunk
Delete the instance
$ mult ipass d e l e t e dancing−chipmunk
It will now show up as deleted: $ multipass list Name State IPv4 Release snapcraft−asciinema STOPPED−− Ubuntu Snapcraft builder for Core 18 dancing−chipmunk DELETED −− Not Available
And when you want to completely get rid of it:
$ mult ipass purge
Integrate into the rest of your virtualization
You might have other virtualization already based on libvirt either through using the similar older uvtoolalready or through the common virt-manager.
You might for example want those guests to be on the same bridge to communicate to each other or youneed access to the graphical output for some reason.
Fortunately it is possible to integrate this by using the libvirt backend of multipass
$ sudo mult ipass s e t l o c a l . d r i v e r=l i b v i r t
After that when you start a guest you can also access it via tools like virt-manager or virsh
97
$ mult ipass launch ubuntuLaunched : engaged−amberjack
$ v i r sh l i s tId Name State
−−−−−−−−−−−−−−−−−−−−−−−−−−−−−−−−−−−−−−−−−−−−−−−−−−−−15 engaged−amberjack running
Get help
mult ipass he lpmult ipass he lp <command>
See the multipass documentation for more details.
Qemu
Qemu is a machine emulator that can run operating systems and programs for one machine on a differentmachine. Mostly it is not used as emulator but as virtualizer in collaboration with KVM kernel components.In that case it utilizes the virtualization technology of the hardware to virtualize guests.
While qemu has a command line interface and a monitor to interact with running guests those is rarely usedthat way for other means than development purposes. Libvirt provides an abstraction from specific versionsand hypervisors and encapsulates some workarounds and best practices.
Running Qemu/KVM
While there are much more user friendly and comfortable ways, using the command below is probably thequickest way to see some called Ubuntu moving on screen is directly running it from the netboot iso.
Warning: this is just for illustration - not generally recommended without verifying the check-sums; Multipass and UVTool are much better ways to get actual guests easily.
Run:
sudo qemu−system−x86_64 −enable−kvm −cdrom http://archive.ubuntu.com/ubuntu/dists/bionic−updates/main/installer−amd64/current/images/netboot/mini.iso
You could download the ISO for faster access at runtime and e.g. add a disk to the same by:
• creating the disk > qemu−img create −f qcow2 disk.qcow 5G• Using the disk by adding −drive file =disk.qcow,format=qcow2
Those tools can do much more, as you’ll find in their respective (long) man pages. There also is a vastassortment of auxiliary tools to make them more consumable for specific use-cases and needs - for examplevirt-manager for UI driven use through libvirt. But in general - even the tools eventually use that - it comesdown to:
qemu-system-x86_64 options image[s]
So take a look at the man page of qemu, qemu-img and the documentation of qemu and see which optionsare the right one for your needs.
98
Graphics
Graphics for qemu/kvm always comes in two pieces.
• A front end - controlled via the −vga argument - which is provided to the guest. Usually one of cirrus ,std, qxl, virtio . The default these days is qxl which strikes a good balance between guest compatibilityand performance. The guest needs a driver for what is selected, which is the most common reason toswitch from the default to either cirrus (e.g. very old Windows versions)
• A back end - controlled via the −display argument - which is what the host uses to actually displaythe graphical content. That can be an application window via gtk or a vnc.
• In addition one can enable the −spice back-end (can be done in addition to vnc) which can be fasterand provides more authentication methods than vnc.
• if you want no graphical output at all you can save some memory and cpu cycles by setting −nographic
If you run with spice or vnc you can use native vnc tools or virtualization focused tools like virt−viewer.More about these in the libvirt section.
All those options above are considered basic usage of graphics. There are advanced options for further needs.Those cases usually differ in their ease-of-use and capability are:
• Need some 3D acceleration: −vga virtio with a local display having a GL context −display gtk,gl=on;That will use virgil3d on the host and needs guest drivers for [virt3d] which are common in Linux sinceKernels >=4.4 but hard to get by for other cases. While not as fast as the next two options, the bigbenefit is that it can be used without additional hardware and without a proper IOMMU setup fordevice passthrough.
• Need native performance: use PCI passthrough of additional GPUs in the system. You’ll needan IOMMU setup and unbind the cards from the host before you can pass it through like−device vfio−pci,host=05:00.0,bus=1,addr=00.0,multifunction=on,x−vga=on −device vfio−pci,host=05:00.1,bus=1,addr=00.1
• Need native performance, but multiple guests per card: Like PCI Passthrough, but using mediateddevices to shard a card on the Host into multiple devices and pass those like −display gtk,gl=on −device vfio−pci,sysfsdev=/sys/bus/pci/devices/0000:00:02.0/4dd511f6−ec08−11e8−b839−2f163ddee3b3,display=on,rombar=0. More at kraxel on vgpu and Ubuntu GPU mdev evaluation. Thesharding of the cards is driver specific and therefore will differ per manufacturer like Intel or Nvidia.
Especially the advanced cases can get pretty complex, therefore it is recommended to use qemu throughlibvirt for those cases. Libvirt will take care of all but the host kernel/bios tasks of such configurations.
Upgrading the machine type
If you are unsure what this is, you might consider this as buying (virtual) Hardware of the same spec buta newer release date. You are encouraged in general and might want to update your machine type of anexisting defined guests in particular to:
• to pick up latest security fixes and features• continue using a guest created on a now unsupported release
In general it is recommended to update machine types when upgrading qemu/kvm to a new major version.But this can likely never be an automated task as this change is guest visible. The guest devices mightchange in appearance, new features will be announced to the guest and so on. Linux is usually very goodat tolerating such changes, but it depends so much on the setup and workload of the guest that this has tobe evaluated by the owner/admin of the system. Other operating systems where known to often have severeimpacts by changing the hardware. Consider a machine type change similar to replacing all devices andfirmware of a physical machine to the latest revision - all considerations that apply there apply to evaluatinga machine type upgrade as well.
99

As usual with major configuration changes it is wise to back up your guest definition and disk state to beable to do a rollback just in case. There is no integrated single command to update the machine type viavirsh or similar tools. It is a normal part of your machine definition. And therefore updated the same wayas most others.
First shutdown your machine and wait until it has reached that state.
v i r s h shutdown <yourmachine># waitv i r s h l i s t −−i n a c t i v e# should now l i s t your machine as ” shut o f f ”
Then edit the machine definition and find the type in the type tag at the machine attribute.
v i r s h ed i t <yourmachine><type arch=’x86_64 ’ machine=’pc−i 440 fx−bion ic ’>hvm</type>
Change this to the value you want. If you need to check what types are available via “-M ?” Note that whileproviding upstream types as convenience only Ubuntu types are supported. There you can also see what thecurrent default would be. In general it is strongly recommended that you change to newer types if possibleto exploit newer features, but also to benefit of bugfixes that only apply to the newer device virtualization.
kvm −M ?# l i s t s machine types , e . g .pc−i 440 fx−xen i a l Ubuntu 16 .04 PC ( i440FX + PIIX , 1996) ( d e f au l t ). . .pc−i 440 fx−b i on i c Ubuntu 18 .04 PC ( i440FX + PIIX , 1996) ( d e f au l t ). . .
After this you can start your guest again. You can check the current machine type from guest and hostdepending on your needs.
v i r s h s t a r t <yourmachine># check from host , v ia dumping the a c t i v e xml d e f i n i t i o nv i r sh dumpxml <yourmachine> | xml l in t −−xpath ” s t r i n g (// domain/ os / type/
@machine ) ” −# or from the guest v ia dmidecode ( i f supported )sudo dmidecode | grep Product −A 1
Product Name : Standard PC ( i440FX + PIIX , 1996)Vers ion : pc−i 440 fx−b i on i c
If you keep non-live definitions around - like xml files - remember to update those as well.
Note
This also is documented along some more constraints and considerations at the Ubuntu Wiki
QEMU usage for microvms
QEMU became another use case being used in a container-like style providing an enhanced isolation comparedto containers but being focused on initialization speed.
To achieve that several components have been added: - the microvm machine type - alternative simpleFW that can boot linux called qboot - qemu build with reduced features matching these use cases calledqemu−system−x86−microvm
For example if you happen to already have a stripped down workload that has all it would execute in aninitrd you would run it maybe like the following:
100

$ sudo qemu−system−x86_64 −M ubuntu−q35 −cpu host −m 1024 −enable−kvm −serial mon:stdio −nographic −display curses −append ’console=ttyS0,115200,8n1’ −kernel vmlinuz−5.4.0−21 −initrd /boot/initrd.img−5.4.0−21−workload
To run the same with microvm, qboot and the minimized qemu you would do the following
1. run it with with type microvm, so change -M to −M microvm
2. use the qboot bios, add −bios /usr/share/qemu/bios−microvm.bin
3. install the feature-minimized qemu-system package, do $ sudo apt install qemu−system−x86−microvm
An invocation will now look like:
$ sudo qemu-system-x86_64 -Mmicrovm -bios /usr/share/qemu/bios-microvm.bin -cpu host -m 1024 -enable-kvm -serial mon:stdio -nographic -display curses -append ‘console=ttyS0,115200,8n1’ -kernel vmlinuz-5.4.0-21-initrd /boot/initrd.img-5.4.0-21-workload
That will have cut down the qemu, bios and virtual-hw initialization time down a lot. You will now - morethan you already have before - spend the majority inside the guest which implies that further tuning probablyhas to go into that kernel and userspace initialization time.
** Note ** For now microvm, the qboot bios and other components of this are rather newupstream and not as verified as many other parts of the virtualization stack. Therefore noneof the above is the default. Further being the default would also mean many upgraders wouldregress finding a qemu that doesn’t have most features they are used to use. Due to that theqemu-system-x86-microvm package is intentionally a strong opt-in conflicting with the normalqemu-system-x86 package.
libvirt
The libvirt library is used to interface with different virtualization technologies. Before getting started withlibvirt it is best to make sure your hardware supports the necessary virtualization extensions for KVM. Enterthe following from a terminal prompt:
kvm−ok
A message will be printed informing you if your CPU does or does not support hardware virtualization.
Note
On many computers with processors supporting hardware assisted virtualization, it is necessaryto activate an option in the BIOS to enable it.
Virtual Networking
There are a few different ways to allow a virtual machine access to the external network. The default virtualnetwork configuration includes bridging and iptables rules implementing usermode networking, which usesthe SLIRP protocol. Traffic is NATed through the host interface to the outside network.
To enable external hosts to directly access services on virtual machines a different type of bridge than thedefault needs to be configured. This allows the virtual interfaces to connect to the outside network throughthe physical interface, making them appear as normal hosts to the rest of the network.
There is a great example how to configure an own bridge and combining it with libvirt so that guests willuse it at the netplan.io.
101
Installation
To install the necessary packages, from a terminal prompt enter:
sudo apt updatesudo apt i n s t a l l qemu−kvm l i b v i r t −daemon−system
After installing libvirt-daemon-system, the user used to manage virtual machines will need to be added tothe libvirt group. This is done automatically for members of the sudo group, but needs to be done in additonfor anyone else that should access system wide libvirt resources. Doing so will grant the user access to theadvanced networking options.
In a terminal enter:
sudo adduser $USER l i b v i r t
Note
If the user chosen is the current user, you will need to log out and back in for the new groupmembership to take effect.
You are now ready to install a Guest operating system. Installing a virtual machine follows the same processas installing the operating system directly on the hardware.
You either need: - a way to automate the installation - a keyboard and monitor will need to be attached tothe physical machine. - use cloud images which are meant to self-initialize (see Multipass and UVTool)
In the case of virtual machines a Graphical User Interface (GUI) is analogous to using a physical keyboardand mouse on a real computer. Instead of installing a GUI the virt-viewer or virt-manager application canbe used to connect to a virtual machine’s console using VNC. See Virtual Machine Manager / Viewer formore information.
Virtual Machine Management
The following section covers the command-line tools around virsh that are part of libvirt itself. But thereare various options at different levels of complexities and feature-sets, like:
• multipass• uvt• virt-* tools• openstack
virsh
There are several utilities available to manage virtual machines and libvirt. The virsh utility can be usedfrom the command line. Some examples:
• To list running virtual machines:
v i r s h l i s t
• To start a virtual machine:
v i r s h s t a r t <guestname>
• Similarly, to start a virtual machine at boot:
v i r s h au to s t a r t <guestname>
102

• Reboot a virtual machine with:v i r s h reboot <guestname>
• The state of virtual machines can be saved to a file in order to be restored later. The following willsave the virtual machine state into a file named according to the date:v i r s h save <guestname> save−my. s t a t e
Once saved the virtual machine will no longer be running.
• A saved virtual machine can be restored using:v i r s h r e s t o r e save−my. s t a t e
• To shutdown a virtual machine do:v i r s h shutdown <guestname>
• A CDROM device can be mounted in a virtual machine by entering:v i r s h attach−d i sk <guestname> /dev/cdrom /media/cdrom
• To change the definition of a guest virsh exposes the domain viav i r sh ed i t <guestname>
That will allow one to edit the XML representation that defines the guest and when saving it will applyformat and integrity checks on these definitions.
Editing the XML directly certainly is the most powerful way, but also the most complex one. Tools likeVirtual Machine Manager / Viewer can help unexperienced users to do most of the common tasks.
If virsh (or other vir* tools) shall connect to something else than the default qemu-kvm/systemhipervisor one can find alternatives for the connect option in man virsh or libvirt doc
system and session scope
Virsh - as well as most other tools to manage virtualization - can be passed connection strings.
$ virsh –connect qemu:///system
There are two options for the connection.
• qemu:///system - connect locally as root to the daemon supervising QEMU and KVM domains• qemu:///session - connect locally as a normal user to his own set of QEMU and KVM domains
The default always was (and still is) qemu:///system as that is the behavior users are used to. But thereare a few benefits (and drawbacks) to qemu:///session to consider it.
qemu:///session is per user and can on a multi-user system be used to separate the people. But mostimportantly things run under the permissions of the user which means no permission struggle on the justdonwloaded image in your $HOME or the just attached USB-stick. On the other hand it can’t access systemresources that well, which includes network setup that is known to be hard with qemu:///session. It fallsback to slirp networking which is functional but slow and makes it impossible to be reached from othersystems.
qemu:///system is different in that it is run by the global system wide libvirt that can arbitrate resources asneeded. But you might need to mv and/or chown files to the right places permssions to have them usable.
Applications usually will decide on their primary use-case. Desktop-centric applications often choose qemu:///session while most solutions that involve an administrator anyway continue to default to qemu:///system.
Read more about that in the libvirt FAQ and this blog about the topic.
103
Migration
There are different types of migration available depending on the versions of libvirt and the hipervisor beingused. In general those types are:
• offline migration
• live migration
• postcopy migration
There are various options to those methods, but the entry point for all of them is virsh migrate. Read theintegrated help for more detail.
v i r s h migrate −−help
Some useful documentation on constraints and considerations about live migration can be found at theUbuntu Wiki
Device Passthrough / Hotplug
If instead of the here described hotplugging you want to always pass through a device add the xml contentof the device to your static guest xml representation via e.g. virsh edit <guestname>. In that case youdon’t need to use attach/detach. There are different kinds of passthrough. Types available to you dependon your Hardware and software setup.
• USB hotplug/passthrough
• VF hotplug/Passthrough
But both kinds are handled in a very similar way and while there are various way to do it (e.g. also via qemumonitor) driving such a change via libvirt is recommended. That way libvirt can try to manage all sorts ofspecial cases for you and also somewhat masks version differences.
In general when driving hotplug via libvirt you create a xml snippet that describes the device just as youwould do in a static guest description. A usb device is usually identified by Vendor/Product id’s:
<hostdev mode=’subsystem ’ type=’usb ’ managed=’yes ’><source>
<vendor id=’0x0b6d ’/><product id=’0x3880 ’/>
</source></hostdev>
Virtual functions are usually assigned via their PCI-ID (domain, bus, slot, function).
<hostdev mode=’subsystem ’ type=’pci ’ managed=’yes ’><source>
<address domain=’0x0000 ’ bus=’0x04 ’ s l o t =’0x10 ’ func t i on=’0x0 ’/></source>
</hostdev>
Note
To get the Virtual function in the first place is very device dependent and can therefore not befully covered here. But in general it involves setting up an iommu, registering via VFIO andsometimes requesting a number of VFs. Here an example on ppc64el to get 4 VFs on a device:
104
$ sudo modprobe v f i o−pc i# i d e n t i f y dev i ce$ l s p c i −n −s 0 005 : 0 1 : 0 1 . 30005 : 0 1 : 0 1 . 3 0200 : 10 df : e228 ( rev 10)# r e g i s t e r and reques t VFs$ echo 10 df e228 | sudo tee / sys /bus/ pc i / d r i v e r s / v f i o−pc i /new_id$ echo 4 | sudo tee / sys /bus/ pc i / dev i c e s /0005\ : 01\ : 00 . 0/ sriov_numvfs
You then attach or detach the device via libvirt by relating the guest with the xml snippet.
v i r s h attach−dev i c e <guestname> <device−xml># Use the Device i n t the Guestv i r s h detach−dev i c e <guestname> <device−xml>
Access Qemu Monitor via libvirt
The Qemu Monitor is the way to interact with qemu/KVM while a guest is running. This interface hasmany and very powerful features for experienced users. When running under libvirt that monitor interfaceis bound by libvirt itself for management purposes, but a user can run qemu monitor commands via libvirtstill. The general syntax is virsh qemu−monitor−command [options] [guest] ’command’
Libvirt covers most use cases needed, but if you every want/need to work around libvirt or want to tweakvery special options you can e.g. add a device that way:
v i r s h qemu−monitor−command −−hmp foca l−t e s t−l og ’ drive_add 0 i f=none , f i l e =/var/ l i b / l i b v i r t / images / t e s t . img , format=raw , id=disk1 ’
But since the monitor is so powerful, you can do a lot especially for debugging purposes like showing theguest registers:
v i r s h qemu−monitor−command −−hmp y−ipns ’ i n f o r e g i s t e r s ’RAX=00 f f f f c 0 0 0 0 00000 RBX=f f f f 8 f 0 f 5 d 5 c 7 e 4 8 RCX=0000000000000000 RDX=
f f f f e a 0 0007571 c 0RSI=0000000000000000 RDI=f f f f 8 f 0 f d d 5 c 7 e 4 8 RBP=f f f f 8 f 0 f 5 d 5 c 7 e 1 8 RSP=
f f f f 8 f 0 f 5 d 5 c 7 d f 8[ . . . ]
Huge Pages
Using huge pages can help to reduce TLB pressure, page table overhead and speed up some further memoryrelate actions. Furthermore by default Transparent huge pages are useful, but can be quite some overhead -so if it is clear that using huge pages is preferred making them explicit usually has some gains.
While huge page are admittedly harder to manage, especially later in the lifetime of a system if memory isfragmented they provide a useful boost especially for rather large guests.
Bonus: When using device pass through on very large guests there is an extra benefit of using huge pagesas it is faster to do the initial memory clear on vfio dma pin.
Huge page allocation
Huge pages come in different sizes. A normal page usually is 4k and huge pages are eithe 2M or 1G, butdepending on the architecture other options are possible.
105

The most simple, yet least reliable way to allocate some huge pages is to just echo a value to sysfs Be sureto re-check if it worked.
$ echo 256 | sudo tee / sys / ke rne l /mm/hugepages /hugepages −2048kB/nr_hugepages$ cat / sys / ke rne l /mm/hugepages /hugepages −2048kB/nr_hugepages256
There one of these sizes is “default huge page size” which will be used in the auto-mounted /dev/hugepages.Changing the default size requires a reboot and is set via default_hugepagesz
You can check the current default size:
$ grep Hugepages ize /proc /meminfoHugepages ize : 2048 kB
But there can be more than one at the same time one better check:
$ t a i l / sys / ke rne l /mm/hugepages /hugepages−*/nr_hugepages ‘==> / sys / ke rne l /mm/hugepages /hugepages −1048576kB/nr_hugepages <==0==> / sys / ke rne l /mm/hugepages /hugepages −2048kB/nr_hugepages <==2
And even that could on bigger systems be further split per Numa node.
One can allocate huge pages at boot or runtime, but due to fragmentation there are no guarantees it workslater. The kernel documentation lists details on both ways.
Huge pages need to be allocated by the kernel as mentioned above but to be consumable they also have tobe mounted. By default systemd will make /dev/hugepages available for the default huge page size. Feelfree to add more mount points if you need different sized. An overview can be queried with
$ hugeadm −− l i s t −a l l −mountsMount Point Options/dev/hugepages rw , re la t ime , page s i z e=2M
A one-stop info for the overall huge page status of the system can be reported with
$ hugeadm −−exp la in
Huge page usage in libvirt
With the above in place libvirt can map guest memory to huge pages. In a guest definition add the mostsimple form of
<memoryBacking><hugepages/>
</memoryBacking>
That will allocate the huge pages using the default huge page size from a autodetected mountpoint. Formore control e.g. how memory is spread over Numa nodes or which page size to use check out the details atthe libvirt doc.
Apparmor isolation
By default libvirt will spawn qemu guests using apparmor isolation for enhanced security. The apparmorrules for a guest will consist of multiple elements:
106
• a static part that all guests share => /etc/apparmor.d/abstractions/libvirt−qemu• a dynamic part created at guest start time and modified on hotplug/unplug => /etc/apparmor.d/
libvirt/ libvirt−f9533e35−6b63−45f5−96be−7cccc9696d5e.files
Of the above the former is provided and updated by the libvirt −daemon package and the latter is generatedon guest start. None of the two should be manually edited. They will by default cover the vast majority ofuse cases and work fine. But there are certain cases where users either want to:
• further lock down the guest (e.g. by explicitly denying access that usually would be allowed)• open up the guest isolation (most of the time this is needed if the setup on the local machine does not
follow the commonly used paths.
To do so there are two files to do so. Both are local overrides which allow you to modify them withoutgetting them clobbered or command file prompts on package upgrades.
• /etc/apparmor.d/local/abstractions/libvirt−qemu this will be applied to every guest. Therefore it israther powerful, but also a rather blunt tool. It is a quite useful place thou to add additional denyrules.
• /etc/apparmor.d/local/usr.lib. libvirt . virt−aa−helper the above mentioned dynamic part that is in-dividual per guest is generated by a tool called libvirt . virt−aa−helper. That is under apparmorisolation as well. This is most commonly used if you want to use uncommon paths as it allows toahve those uncommon paths in the guest XML (see virsh edit) and have those paths rendered to theper-guest dynamic rules.
Resources
• See the KVM home page for more details.
• For more information on libvirt see the libvirt home page
– xml configuration of domains and storage being the most often used libvirt reference
• Another good resource is the Ubuntu Wiki KVM page.
• For basics how to assign VT-d devices to qemu/KVM, please see the linux-kvm page.
Cloud images and uvtool
Introduction
With Ubuntu being one of the most used operating systems on many cloud platforms, the availability ofstable and secure cloud images has become very important. As of 12.04 the utilization of cloud imagesoutside of a cloud infrastructure has been improved. It is now possible to use those images to create avirtual machine without the need of a complete installation.
Creating virtual machines using uvtool
Starting with 14.04 LTS, a tool called uvtool greatly facilitates the task of generating virtual machines (VM)using the cloud images. uvtool provides a simple mechanism to synchronize cloud-images locally and usethem to create new VMs in minutes.
107
Uvtool packages
The following packages and their dependencies will be required in order to use uvtool:
• uvtool
• uvtool-libvirt
To install uvtool, run:
$ sudo apt −y i n s t a l l uvtoo l
This will install uvtool’s main commands:
• uvt-simplestreams-libvirt
• uvt-kvm
Get the Ubuntu Cloud Image with uvt-simplestreams-libvirt
This is one of the major simplifications that uvtool brings. It is aware of where to find the cloud images soonly one command is required to get a new cloud image. For instance, if you want to synchronize all cloudimages for the amd64 architecture, the uvtool command would be:
$ uvt−s implestreams− l i b v i r t −−verbose sync arch=amd64
After an amount of time required to download all the images from the Internet, you will have a complete setof cloud images stored locally. To see what has been downloaded use the following command:
$ uvt−s implestreams− l i b v i r t queryr e l e a s e=b i on i c arch=amd64 l a b e l=da i l y (20191107)r e l e a s e=f o c a l arch=amd64 l a b e l=da i l y (20191029). . .
In the case where you want to synchronize only one specific cloud-image, you need to use the release= andarch= filters to identify which image needs to be synchronized.
$ uvt−s implestreams− l i b v i r t sync r e l e a s e=DISTRO−SHORT−CODENAME arch=amd64
Furthermore you can provide an alternative URL to fetch images from. A common case are the daily imageswhich helps to get the very latest images or if you need access to the not yet released development releaseof Ubuntu.
$ uvt−s implestreams− l i b v i r t sync −−source http :// cloud−images . ubuntu . com/ da i l y[ . . . f u r t h e r opt ions ]
Create the VM using uvt-kvm
In order to connect to the virtual machine once it has been created, you must have a valid SSH key availablefor the Ubuntu user. If your environment does not have an SSH key, you can easily create one using thefollowing command:
$ ssh−keygenGenerating pub l i c / p r i va t e r sa key pa i r .Enter f i l e in which to save the key (/home/ubuntu / . ssh / id_rsa ) :Enter passphrase ( empty f o r no passphrase ) :Enter same passphrase again :Your i d e n t i f i c a t i o n has been saved in /home/ubuntu / . ssh / id_rsa .
108
Your pub l i c key has been saved in /home/ubuntu / . ssh / id_rsa . pub .The key f i n g e r p r i n t i s :4d : ba : 5 d : 5 7 : c9 : 4 9 : e f : b5 : ab : 7 1 : 1 4 : 5 6 : 6 e : 2 b : ad : 9 b ubuntu@DISTRO−SHORT−CODENAMESThe key ’ s randomart image i s :+−−[ RSA 2048]−−−−+| . . || o .=|| . ** || + o+=|| S . . . . = . || o . .+ . || . . o o || * || E |+−−−−−−−−−−−−−−−−−+
To create of a new virtual machine using uvtool, run the following in a terminal:
$ uvt−kvm cr ea t e f i r s t t e s t
This will create a VM named firsttest using the current LTS cloud image available locally. If you want tospecify a release to be used to create the VM, you need to use the release= filter:
$ uvt−kvm cr ea t e s e condt e s t r e l e a s e=DISTRO−SHORT−CODENAME
uvt-kvm wait can be used to wait until the creation of the VM has completed:
$ uvt−kvm wait s e c ond t t e s t
Connect to the running VM
Once the virtual machine creation is completed, you can connect to it using SSH:
$ uvt−kvm ssh s e condt e s t
You can also connect to your VM using a regular SSH session using the IP address of the VM. The addresscan be queried using the following command:
$ uvt−kvm ip s e condt e s t192 . 168 . 122 . 199$ ssh − i ~/ . ssh / id_rsa ubuntu@192 . 1 68 . 1 22 . 1 99[ . . . ]To run a command as admin i s t ra to r ( user ” root ”) , use ” sudo <command>”.See ”man sudo_root ” f o r d e t a i l s .
ubuntu@secondtest :~ $
Get the list of running VMs
You can get the list of VMs running on your system with this command:
$ uvt−kvm l i s ts e condt e s t
109
Destroy your VM
Once you are done with your VM, you can destroy it with:
$ uvt−kvm dest roy s e condt e s t
Note: other than libvirts destroy action this will by default also remove the associated virtual storage files.
More uvt-kvm options
The following options can be used to change some of the characteristics of the VM that you are creating:
• --memory : Amount of RAM in megabytes. Default: 512.
• --disk : Size of the OS disk in gigabytes. Default: 8.
• --cpu : Number of CPU cores. Default: 1.
Some other parameters will have an impact on the cloud-init configuration:
• --password password : Allow login to the VM using the Ubuntu account and this provided password.
• --run-script-once script_file : Run script_file as root on the VM the first time it is booted, but neveragain.
• --packages package_list : Install the comma-separated packages specified in package_list on first boot.
A complete description of all available modifiers is available in the manpage of uvt-kvm.
Resources
If you are interested in learning more, have questions or suggestions, please contact the Ubuntu Server Teamat:
• IRC: #ubuntu-server on freenode
• Mailing list: ubuntu-server at lists.ubuntu.com
Introduction
The virt-manager source contains not only virt-manager itself but also a collection of further helpful toolslike virt-install, virt-clone and virt-viewer.
Virtual Machine Manager
The virt-manager package contains a graphical utility to manage local and remote virtual machines. Toinstall virt-manager enter:
sudo apt i n s t a l l v i r t−manager
Since virt-manager requires a Graphical User Interface (GUI) environment it is recommended to be installedon a workstation or test machine instead of a production server. To connect to the local libvirt service enter:
v i r t−manager
You can connect to the libvirt service running on another host by entering the following in a terminal prompt:
v i r t−manager −c qemu+ssh :// v i r tnode1 . mydomain . com/system
110

Note
The above example assumes that SSH connectivity between the management system and thetarget system has already been configured, and uses SSH keys for authentication. SSH keys areneeded because libvirt sends the password prompt to another process.
virt-manager guest lifecycle
When using virt−manager it is always important to know the context you look at. The main window initiallylists only the currently defined guests, you’ll see their name, state and a small chart on cpu usage.
virt-manager-gui-start|499x597
On that context there isn’t much one can do except start/stop a guest. But by double-clicking on a guestor by clicking the open button at the top one can see the guest itself. For a running guest that includes theguests main-console/virtual-screen output.
virt-manager-gui-showoutput|690x386
If you are deeper in the guest config a click in the top left onto “show the graphical console” will get youback to this output.
virt-manager guest modification
virt−manager provides a gui assisted way to edit guest definitions which can be handy. To do so the per-guest context view will at the top have “show virtual hardware details”. Here a user can edit the virtualhardware of the guest which will under the cover alter the guest representation.
virt-manager-gui-edit|690x346
The UI edit is limited to the features known and supported to that GUI feature. Not only does libvirt growfeatures faster than virt-manager can keep up - adding every feature would also overload the UI to the extendto be unusable. To strike a balance between the two there also is the XML view which can be reached viathe “edit libvirt XML” button.
virt-manager-gui-XML|690x346
By default this will be read-only and you can see what the UI driven actions have changed, but one can allowRW access in this view in the preferences. This is the same content that the virsh edit of the libvirt-clientexposes.
Virtual Machine Viewer
The virt-viewer application allows you to connect to a virtual machine’s console like virt-manager reducedto the GUI functionality. virt-viewer does require a Graphical User Interface (GUI) to interface with thevirtual machine.
To install virt-viewer from a terminal enter:
sudo apt i n s t a l l v i r t−viewer
Once a virtual machine is installed and running you can connect to the virtual machine’s console by using:
v i r t−viewer <guestname>
The UI will be a window representing the virtual screen of the guest, just like virt-manager above but withoutthe extra buttons and features around it.
111
virt-viewer-gui-showoutput|690x598
Similar to virt-manager, virt-viewer can connect to a remote host using SSH with key authentication, aswell:
v i r t−viewer −c qemu+ssh :// v i r tnode1 . mydomain . com/system <guestname>
Be sure to replace web_devel with the appropriate virtual machine name.
If configured to use a bridged network interface you can also setup SSH access to the virtual machine.
virt-install
virt-install is part of the virtinst package. It can help installing classic ISO based systems and provides aCLI options for the most common options needed to do so. To install it, from a terminal prompt enter:
sudo apt install virtinst
There are several options available when using virt-install. For example:
v i r t− i n s t a l l −n web_devel −r 8192 \−−d i sk path=/home/doug/vm/web_devel . img , bus=v i r t i o , s i z e=50 \−c f o ca l−desktop−amd64 . i s o \−−network network=de fau l t , model=v i r t i o \−−video=vmvga −−graph i c s vnc , l i s t e n =0 .0 . 0 . 0 −−noautoconso le −v −−vcpus=4
There are much more arguments that can be found in the man page, explaining those of the exampleabove one by one: * -n web_devel the name of the new virtual machine will be web_devel in this ex-ample. * -r 8192 specifies the amount of memory the virtual machine will use in megabytes. * –diskpath=/home/doug/vm/web_devel.img,bus=virtio,size=50 indicates the path to the virtual disk which canbe a file, partition, or logical volume. In this example a file named web_devel.img in the current usersdirectory, with a size of 50 gigabytes, and using virtio for the disk bus. Depending on the disk path, virt-install my need to be run with elevated privileges. * -c focal-desktop-amd64.iso file to be used as a virtualCDROM. The file can be either an ISO file or the path to the host’s CDROM device. * –network providesdetails related to the VM’s network interface. Here the default network is used, and the interface model isconfigured for virtio. * –video=vmvga the video driver to use. * –graphics vnc,listen=0.0.0.0 exports theguest’s virtual console using VNC and on all host interfaces. Typically servers have no GUI, so anotherGUI based computer on the Local Area Network (LAN) can connect via VNC to complete the installa-tion. * –noautoconsole will not automatically connect to the virtual machine’s console. * -v: creates a fullyvirtualized guest. * –vcpus=4 allocate 4 virtual CPUs.
After launching virt-install you can connect to the virtual machine’s console either locally using a GUI (ifyour server has a GUI), or via a remote VNC client from a GUI-based computer.
virt-clone
The virt-clone application can be used to copy one virtual machine to another. For example:
virt−clone −−auto−clone −−original focal
Options used: * –auto-clone: to have virt-clone come up with guest names and disk paths on its own *–original: name of the virtual machine to copy
Also, use -d or –debug option to help troubleshoot problems with virt-clone.
Replace focal and with appropriate virtual machine names of your case.
112

Warning: please be aware that this is a full clone, therefore any sorts of secrets, keys and forexample /etc/machine-id will be shared causing e.g. issues to security and anything that needs toidentify the machine like DHCP. You most likely want to edit those afterwards and de-duplicatethem as needed.
Resources
• See the KVM home page for more details.
• For more information on libvirt see the libvirt home page
• The Virtual Machine Manager site has more information on virt-manager development.
LXD
LXD (pronounced lex-dee) is the lightervisor, or lightweight container hypervisor. LXC (lex-see) is a programwhich creates and administers “containers” on a local system. It also provides an API to allow higher levelmanagers, such as LXD, to administer containers. In a sense, one could compare LXC to QEMU, whilecomparing LXD to libvirt.
The LXC API deals with a ‘container’. The LXD API deals with ‘remotes’, which serve images and containers.This extends the LXC functionality over the network, and allows concise management of tasks like containermigration and container image publishing.
LXD uses LXC under the covers for some container management tasks. However, it keeps its own containerconfiguration information and has its own conventions, so that it is best not to use classic LXC commands byhand with LXD containers. This document will focus on how to configure and administer LXD on Ubuntusystems.
Online Resources
There is excellent documentation for getting started with LXD and an online server allowing you to tryout LXD remotely. Stephane Graber also has an excellent blog series on LXD 2.0. Finally, there is greatdocumentation on how to drive lxd using juju.
This document will offer an Ubuntu Server-specific view of LXD, focusing on administration.
Installation
LXD is pre-installed on Ubuntu Server cloud images. On other systems, the lxd package can be installedusing:
sudo snap i n s t a l l lxd
This will install the self-contained LXD snap package.
Kernel preparation
In general, Ubuntu should have all the desired features enabled by default. One exception to this is thatin order to enable swap accounting the boot argument swapaccount=1 must be set. This can be done byappending it to the GRUB_CMDLINE_LINUX_DEFAULT=variable in /etc/default/grub, then running‘update-grub’ as root and rebooting.
113

Configuration
In order to use LXD, some basic settings need to be configured first. This is done by running lxd init , whichwill allow you to choose:
• Directory or ZFS container backend. If you choose ZFS, you can choose which block devices to use, orthe size of a file to use as backing store.
• Availability over the network.
• A ‘trust password’ used by remote clients to vouch for their client certificate.
You must run ‘lxd init’ as root. ‘lxc’ commands can be run as any user who is a member of group lxd. Ifuser joe is not a member of group ‘lxd’, you may run:
adduser j o e lxd
as root to change it. The new membership will take effect on the next login, or after running newgrp lxdfrom an existing login.
For more information on server, container, profile, and device configuration, please refer to the definitiveconfiguration provided with the source code, which can be found online.
Creating your first container
This section will describe the simplest container tasks.
Creating a container
Every new container is created based on either an image, an existing container, or a container snapshot. Atinstall time, LXD is configured with the following image servers:
• ubuntu: this serves official Ubuntu server cloud image releases.
• ubuntu−daily: this serves official Ubuntu server cloud images of the daily development releases.
• images: this is a default-installed alias for images.linuxcontainers.org. This is serves classical lxcimages built using the same images which the LXC ‘download’ template uses. This includes variousdistributions and minimal custom-made Ubuntu images. This is not the recommended server forUbuntu images.
The command to create and start a container is
l x c launch remote : image containername
Images are identified by their hash, but are also aliased. The ubuntu remote knows many aliases such as18.04 and bionic. A list of all images available from the Ubuntu Server can be seen using:
l x c image l i s t ubuntu :
To see more information about a particular image, including all the aliases it is known by, you can use:
l x c image i n f o ubuntu : b i on i c
You can generally refer to an Ubuntu image using the release name (bionic) or the release number (18.04).In addition, lts is an alias for the latest supported LTS release. To choose a different architecture, you canspecify the desired architecture:
l x c image i n f o ubuntu : l t s /arm64
114
Now, let’s start our first container:
l x c launch ubuntu : b i on i c b1
This will download the official current Bionic cloud image for your current architecture, then create acontainer named b1 using that image, and finally start it. Once the command returns, you can see it using:
l x c l i s tl x c i n f o b1
and open a shell in it using:
l x c exec b1 −− bash
The try-it page mentioned above gives a full synopsis of the commands you can use to administer containers.
Now that the xenial image has been downloaded, it will be kept in sync until no new containers have beencreated based on it for (by default) 10 days. After that, it will be deleted.
LXD Server Configuration
By default, LXD is socket activated and configured to listen only on a local UNIX socket. While LXD maynot be running when you first look at the process listing, any LXC command will start it up. For instance:
l x c l i s t
This will create your client certificate and contact the LXD server for a list of containers. To make the serveraccessible over the network you can set the http port using:
l x c c on f i g s e t core . https_address :8443
This will tell LXD to listen to port 8843 on all addresses.
Authentication
By default, LXD will allow all members of group lxd to talk to it over the UNIX socket. Communicationover the network is authorized using server and client certificates.
Before client c1 wishes to use remote r1, r1 must be registered using:
l x c remote add r1 r1 . example . com:8443
The fingerprint of r1’s certificate will be shown, to allow the user at c1 to reject a false certificate. The serverin turn will verify that c1 may be trusted in one of two ways. The first is to register it in advance from anyalready-registered client, using:
l x c c on f i g t r u s t add r1 c e r t f i l e . c r t
Now when the client adds r1 as a known remote, it will not need to provide a password as it is alreadytrusted by the server.
The other step is to configure a ‘trust password’ with r1, either at initial configuration using lxd init , orafter the fact using:
l x c c on f i g s e t core . trust_password PASSWORD
The password can then be provided when the client registers r1 as a known remote.
115
Backing store
LXD supports several backing stores. The recommended and the default backing store is zfs . If you alreadyhave a ZFS pool configured, you can tell LXD to use it during the lxd init procedure, otherwise a file-backedzpool will be created automatically. With ZFS, launching a new container is fast because the filesystem startsas a copy on write clone of the images’ filesystem. Note that unless the container is privileged (see below)LXD will need to change ownership of all files before the container can start, however this is fast and changevery little of the actual filesystem data.
The other supported backing stores are described in detail in the Storage configuration section of the LXDdocumentation.
Container configuration
Containers are configured according to a set of profiles, described in the next section, and a set of container-specific configuration. Profiles are applied first, so that container specific configuration can override profileconfiguration.
Container configuration includes properties like the architecture, limits on resources such as CPU and RAM,security details including apparmor restriction overrides, and devices to apply to the container.
Devices can be of several types, including UNIX character, UNIX block, network interface, or disk. In orderto insert a host mount into a container, a ‘disk’ device type would be used. For instance, to mount /opt incontainer c1 at /opt, you could use:l x c c on f i g dev i c e add c1 opt d i sk source=/opt path=opt
See:l x c he lp c on f i g
for more information about editing container configurations. You may also use:l x c c on f i g ed i t c1
to edit the whole of c1’s configuration. Comments at the top of the configuration will show examples ofcorrect syntax to help administrators hit the ground running. If the edited configuration is not valid whenthe editor is exited, then the editor will be restarted.
Profiles
Profiles are named collections of configurations which may be applied to more than one container. Forinstance, all containers created with lxc launch, by default, include the default profile, which provides anetwork interface eth0.
To mask a device which would be inherited from a profile but which should not be in the final container,define a device by the same name but of type ‘none’:l x c c on f i g dev i c e add c1 eth1 none
Nesting
Containers all share the same host kernel. This means that there is always an inherent trade-off betweenfeatures exposed to the container and host security from malicious containers. Containers by default aretherefore restricted from features needed to nest child containers. In order to run lxc or lxd containers undera lxd container, the security .nesting feature must be set to true:
116

l x c c on f i g s e t conta ine r1 s e c u r i t y . ne s t i ng t rue
Once this is done, container1 will be able to start sub-containers.
In order to run unprivileged (the default in LXD) containers nested under an unprivileged container, youwill need to ensure a wide enough UID mapping. Please see the ‘UID mapping’ section below.
Limits
LXD supports flexible constraints on the resources which containers can consume. The limits come in thefollowing categories:
• CPU: limit cpu available to the container in several ways.
• Disk: configure the priority of I/O requests under load
• RAM: configure memory and swap availability
• Network: configure the network priority under load
• Processes: limit the number of concurrent processes in the container.
For a full list of limits known to LXD, see the configuration documentation.
UID mappings and Privileged containers
By default, LXD creates unprivileged containers. This means that root in the container is a non-root UIDon the host. It is privileged against the resources owned by the container, but unprivileged with respectto the host, making root in a container roughly equivalent to an unprivileged user on the host. (The mainexception is the increased attack surface exposed through the system call interface)
Briefly, in an unprivileged container, 65536 UIDs are ‘shifted’ into the container. For instance, UID 0 in thecontainer may be 100000 on the host, UID 1 in the container is 100001, etc, up to 165535. The startingvalue for UIDs and GIDs, respectively, is determined by the ‘root’ entry the /etc/subuid and /etc/subgidfiles. (See the subuid(5) man page.)
It is possible to request a container to run without a UID mapping by setting the security . privileged flagto true:
l x c c on f i g s e t c1 s e c u r i t y . p r i v i l e g e d true
Note however that in this case the root user in the container is the root user on the host.
Apparmor
LXD confines containers by default with an apparmor profile which protects containers from each otherand the host from containers. For instance this will prevent root in one container from signaling root inanother container, even though they have the same uid mapping. It also prevents writing to dangerous,un-namespaced files such as many sysctls and /proc/sysrq−trigger.
If the apparmor policy for a container needs to be modified for a container c1, specific apparmor policy linescan be added in the raw.apparmor configuration key.
117
Seccomp
All containers are confined by a default seccomp policy. This policy prevents some dangerous actions suchas forced umounts, kernel module loading and unloading, kexec, and the open_by_handle_at system call.The seccomp configuration cannot be modified, however a completely different seccomp policy – or none –can be requested using raw.lxc (see below).
Raw LXC configuration
LXD configures containers for the best balance of host safety and container usability. Whenever possible itis highly recommended to use the defaults, and use the LXD configuration keys to request LXD to modifyas needed. Sometimes, however, it may be necessary to talk to the underlying lxc driver itself. This can bedone by specifying LXC configuration items in the ‘raw.lxc’ LXD configuration key. These must be validitems as documented in the lxc.container.conf(5) manual page.
Snapshots
Containers can be renamed and live-migrated using the lxc move command:
l x c move c1 f i n a l −beta
They can also be snapshotted:
l x c snapshot c1 YYYY−MM−DD
Later changes to c1 can then be reverted by restoring the snapshot:
l x c r e s t o r e u1 YYYY−MM−DD
New containers can also be created by copying a container or snapshot:
l x c copy u1/YYYY−MM−DD te s t c on t a i n e r
Publishing images
When a container or container snapshot is ready for consumption by others, it can be published as a newimage using;
l x c pub l i sh u1/YYYY−MM−DD −−a l i a s foo −2.0
The published image will be private by default, meaning that LXD will not allow clients without a trustedcertificate to see them. If the image is safe for public viewing (i.e. contains no private information), then the‘public’ flag can be set, either at publish time using
l x c pub l i sh u1/YYYY−MM−DD −−a l i a s foo −2.0 pub l i c=true
or after the fact using
l x c image ed i t foo −2.0
and changing the value of the public field.
118
Image export and import
Image can be exported as, and imported from, tarballs:
l x c image export foo −2.0 foo −2.0 . ta r . gzl x c image import foo −2.0 . ta r . gz −−a l i a s foo −2.0 −−pub l i c
Troubleshooting
To view debug information about LXD itself, on a systemd based host use
j o u r n a l c t l −u lxd
Container logfiles for container c1 may be seen using:
l x c i n f o c1 −−show−l og
The configuration file which was used may be found under /var/log/lxd/c1/lxc.conf while apparmor profilescan be found in /var/lib/lxd/security/apparmor/profiles/c1 and seccomp profiles in /var/lib/lxd/security/seccomp/c1.
LXC
Containers are a lightweight virtualization technology. They are more akin to an enhanced chroot thanto full virtualization like Qemu or VMware, both because they do not emulate hardware and because con-tainers share the same operating system as the host. Containers are similar to Solaris zones or BSD jails.Linux-vserver and OpenVZ are two pre-existing, independently developed implementations of containers-likefunctionality for Linux. In fact, containers came about as a result of the work to upstream the vserver andOpenVZ functionality.
There are two user-space implementations of containers, each exploiting the same kernel features. Libvirtallows the use of containers through the LXC driver by connecting to lxc:///. This can be very convenientas it supports the same usage as its other drivers. The other implementation, called simply ‘LXC’, is notcompatible with libvirt, but is more flexible with more userspace tools. It is possible to switch between thetwo, though there are peculiarities which can cause confusion.
In this document we will mainly describe the lxc package. Use of libvirt-lxc is not generally recommendeddue to a lack of Apparmor protection for libvirt-lxc containers.
In this document, a container name will be shown as CN, C1, or C2.
Installation
The lxc package can be installed using
sudo apt i n s t a l l l x c
This will pull in the required and recommended dependencies, as well as set up a network bridge for con-tainers to use. If you wish to use unprivileged containers, you will need to ensure that users have sufficientallocated subuids and subgids, and will likely want to allow users to connect containers to a bridge (see Basicunprivileged usage below).
119
Basic usage
LXC can be used in two distinct ways - privileged, by running the lxc commands as the root user; orunprivileged, by running the lxc commands as a non-root user. (The starting of unprivileged containers bythe root user is possible, but not described here.) Unprivileged containers are more limited, for instancebeing unable to create device nodes or mount block-backed filesystems. However they are less dangerous tothe host, as the root UID in the container is mapped to a non-root UID on the host.
Basic privileged usage
To create a privileged container, you can simply do:
sudo lxc−c r e a t e −−template download −−name u1
or, abbreviated
sudo lxc−c r e a t e −t download −n u1
This will interactively ask for a container root filesystem type to download – in particular the distribution,release, and architecture. To create the container non-interactively, you can specify these values on thecommand line:
sudo lxc−c r e a t e −t download −n u1 −− −−d i s t ubuntu −−r e l e a s e DISTRO−SHORT−CODENAME −−arch amd64
or
sudo lxc−c r e a t e −t download −n u1 −− −d ubuntu −r DISTRO−SHORT−CODENAME −aamd64
You can now use lxc−ls to list containers, lxc−info to obtain detailed container information, lxc−start tostart and lxc−stop to stop the container. lxc−attach and lxc−console allow you to enter a container, if sshis not an option. lxc−destroy removes the container, including its rootfs. See the manual pages for moreinformation on each command. An example session might look like:
sudo lxc− l s −−fancysudo lxc−s t a r t −−name u1 −−daemonsudo lxc−i n f o −−name u1sudo lxc−stop −−name u1sudo lxc−dest roy −−name u1
User namespaces
Unprivileged containers allow users to create and administer containers without having any root privilege.The feature underpinning this is called user namespaces. User namespaces are hierarchical, with privilegedtasks in a parent namespace being able to map its ids into child namespaces. By default every task on thehost runs in the initial user namespace, where the full range of ids is mapped onto the full range. This canbe seen by looking at /proc/self/uid_map and /proc/self/gid_map, which both will show 0 0 4294967295when read from the initial user namespace. As of Ubuntu 14.04, when new users are created they are bydefault offered a range of UIDs. The list of assigned ids can be seen in the files /etc/subuid and /etc/subgidSee their respective manpages for more information. Subuids and subgids are by convention started at id100000 to avoid conflicting with system users.
If a user was created on an earlier release, it can be granted a range of ids using usermod, as follows:
sudo usermod −v 100000−200000 −w 100000−200000 user1
120
The programs newuidmap and newgidmap are setuid-root programs in the uidmap package, which are usedinternally by lxc to map subuids and subgids from the host into the unprivileged container. They ensurethat the user only maps ids which are authorized by the host configuration.
Basic unprivileged usage
To create unprivileged containers, a few first steps are needed. You will need to create a default containerconfiguration file, specifying your desired id mappings and network setup, as well as configure the host toallow the unprivileged user to hook into the host network. The example below assumes that your mappeduser and group id ranges are 100000–165536. Check your actual user and group id ranges and modify theexample accordingly:
grep $USER / etc / subuidgrep $USER / etc / subgid
mkdir −p ~/. c on f i g / l x cecho ” l x c . id_map = u 0 100000 65536” > ~/. c on f i g / l x c / d e f au l t . confecho ” l x c . id_map = g 0 100000 65536” >> ~/. c on f i g / l x c / d e f au l t . confecho ” l x c . network . type = veth ” >> ~/. c on f i g / l x c / d e f au l t . confecho ” l x c . network . l i n k = lxcbr0 ” >> ~/. c on f i g / l x c / d e f au l t . confecho ”$USER veth lxcbr0 2” | sudo tee −a / e tc / l x c / lxc−use rnet
After this, you can create unprivileged containers the same way as privileged ones, simply without usingsudo.
lxc−c r e a t e −t download −n u1 −− −d ubuntu −r DISTRO−SHORT−CODENAME −a amd64lxc−s t a r t −n u1 −dlxc−attach −n u1lxc−stop −n u1lxc−dest roy −n u1
Nesting
In order to run containers inside containers - referred to as nested containers - two lines must be present inthe parent container configuration file:
l x c . mount . auto = cgrouplx c . aa_pro f i l e = lxc−conta iner−de fau l t−with−ne s t ing
The first will cause the cgroup manager socket to be bound into the container, so that lxc inside the containeris able to administer cgroups for its nested containers. The second causes the container to run in a looserApparmor policy which allows the container to do the mounting required for starting containers. Note thatthis policy, when used with a privileged container, is much less safe than the regular policy or an unprivilegedcontainer. See the Apparmor section for more information.
Global configuration
The following configuration files are consulted by LXC. For privileged use, they are found under /etc/lxc,while for unprivileged use they are under ~/.config/lxc.
• lxc .conf may optionally specify alternate values for several lxc settings, including the lxcpath, thedefault configuration, cgroups to use, a cgroup creation pattern, and storage backend settings for lvmand zfs.
121
• default .conf specifies configuration which every newly created container should contain. This usuallycontains at least a network section, and, for unprivileged users, an id mapping section
• lxc−usernet.conf specifies how unprivileged users may connect their containers to the host-ownednetwork.
lxc .conf and default .conf are both under /etc/lxc and $HOME/.config/lxc, while lxc−usernet.conf is onlyhost-wide.
By default, containers are located under /var/lib/lxc for the root user.
Networking
By default LXC creates a private network namespace for each container, which includes a layer 2 networkingstack. Containers usually connect to the outside world by either having a physical NIC or a veth tunnelendpoint passed into the container. LXC creates a NATed bridge, lxcbr0, at host startup. Containers createdusing the default configuration will have one veth NIC with the remote end plugged into the lxcbr0 bridge.A NIC can only exist in one namespace at a time, so a physical NIC passed into the container is not usableon the host.
It is possible to create a container without a private network namespace. In this case, the container willhave access to the host networking like any other application. Note that this is particularly dangerous ifthe container is running a distribution with upstart, like Ubuntu, since programs which talk to init, likeshutdown, will talk over the abstract Unix domain socket to the host’s upstart, and shut down the host.
To give containers on lxcbr0 a persistent ip address based on domain name, you can write entries to /etc/lxc/dnsmasq.conf like:
dhcp−host=lxcmai l , 1 0 . 0 . 3 . 1 0 0dhcp−host=t t r s s , 1 0 . 0 . 3 . 1 0 1
If it is desirable for the container to be publicly accessible, there are a few ways to go about it. One is touse iptables to forward host ports to the container, for instance
i p t a b l e s −t nat −A PREROUTING −p tcp − i eth0 −−dport 587 −j DNAT \−−to−de s t i n a t i on 1 0 . 0 . 3 . 1 0 0 : 5 8 7
Then, specify the host’s bridge in the container configuration file in place of lxcbr0, for instance
l x c . network . type = vethlx c . network . l i n k = br0
Finally, you can ask LXC to use macvlan for the container’s NIC. Note that this has limitations and dependingon configuration may not allow the container to talk to the host itself. Therefore the other two options arepreferred and more commonly used.
There are several ways to determine the ip address for a container. First, you can use lxc−ls −−fancy whichwill print the ip addresses for all running containers, or lxc−info −i −H −n C1 which will print C1’s ipaddress. If dnsmasq is installed on the host, you can also add an entry to /etc/dnsmasq.conf as follows
s e r v e r=/lx c / 1 0 . 0 . 3 . 1
after which dnsmasq will resolve C1.lxc locally, so that you can do:
ping C1ssh C1
For more information, see the lxc .conf(5) manpage as well as the example network configurations under/usr/share/doc/lxc/examples/.
122
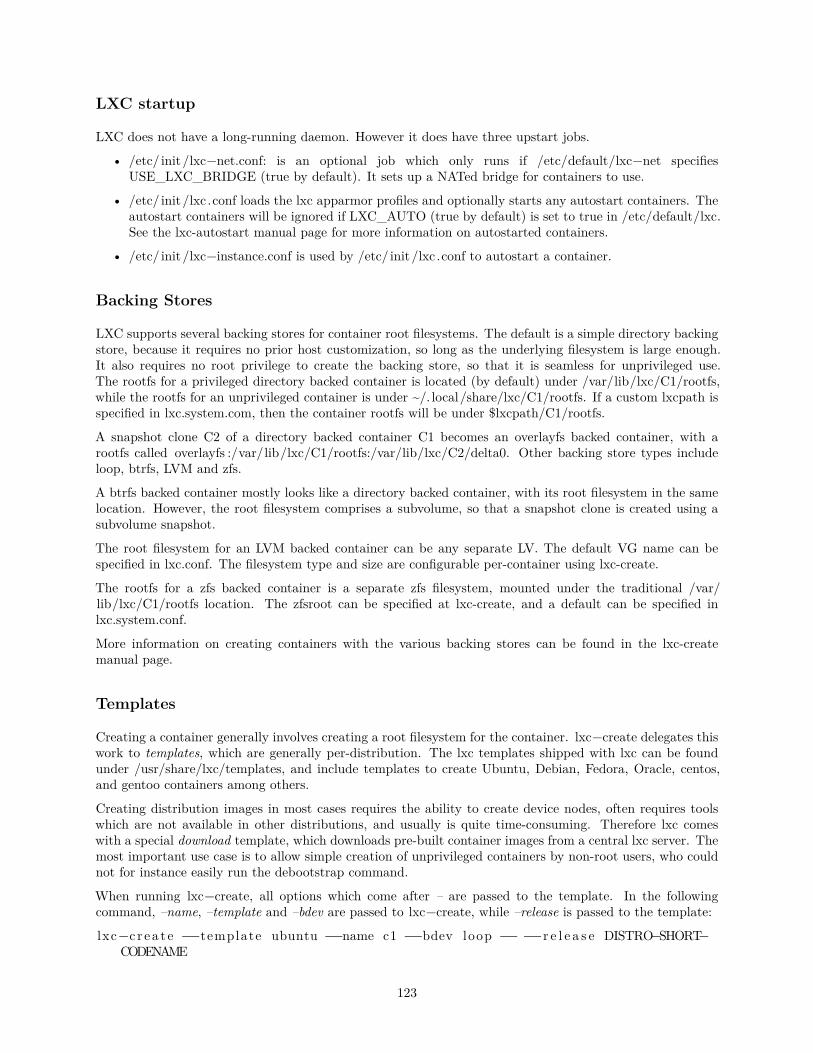
LXC startup
LXC does not have a long-running daemon. However it does have three upstart jobs.
• /etc/ init/lxc−net.conf: is an optional job which only runs if /etc/default/lxc−net specifiesUSE_LXC_BRIDGE (true by default). It sets up a NATed bridge for containers to use.
• /etc/ init/lxc .conf loads the lxc apparmor profiles and optionally starts any autostart containers. Theautostart containers will be ignored if LXC_AUTO (true by default) is set to true in /etc/default/lxc.See the lxc-autostart manual page for more information on autostarted containers.
• /etc/ init/lxc−instance.conf is used by /etc/ init/lxc .conf to autostart a container.
Backing Stores
LXC supports several backing stores for container root filesystems. The default is a simple directory backingstore, because it requires no prior host customization, so long as the underlying filesystem is large enough.It also requires no root privilege to create the backing store, so that it is seamless for unprivileged use.The rootfs for a privileged directory backed container is located (by default) under /var/lib/lxc/C1/rootfs,while the rootfs for an unprivileged container is under ~/. local/share/lxc/C1/rootfs. If a custom lxcpath isspecified in lxc.system.com, then the container rootfs will be under $lxcpath/C1/rootfs.
A snapshot clone C2 of a directory backed container C1 becomes an overlayfs backed container, with arootfs called overlayfs :/var/lib/lxc/C1/rootfs:/var/lib/lxc/C2/delta0. Other backing store types includeloop, btrfs, LVM and zfs.
A btrfs backed container mostly looks like a directory backed container, with its root filesystem in the samelocation. However, the root filesystem comprises a subvolume, so that a snapshot clone is created using asubvolume snapshot.
The root filesystem for an LVM backed container can be any separate LV. The default VG name can bespecified in lxc.conf. The filesystem type and size are configurable per-container using lxc-create.
The rootfs for a zfs backed container is a separate zfs filesystem, mounted under the traditional /var/lib/lxc/C1/rootfs location. The zfsroot can be specified at lxc-create, and a default can be specified inlxc.system.conf.
More information on creating containers with the various backing stores can be found in the lxc-createmanual page.
Templates
Creating a container generally involves creating a root filesystem for the container. lxc−create delegates thiswork to templates, which are generally per-distribution. The lxc templates shipped with lxc can be foundunder /usr/share/lxc/templates, and include templates to create Ubuntu, Debian, Fedora, Oracle, centos,and gentoo containers among others.
Creating distribution images in most cases requires the ability to create device nodes, often requires toolswhich are not available in other distributions, and usually is quite time-consuming. Therefore lxc comeswith a special download template, which downloads pre-built container images from a central lxc server. Themost important use case is to allow simple creation of unprivileged containers by non-root users, who couldnot for instance easily run the debootstrap command.
When running lxc−create, all options which come after – are passed to the template. In the followingcommand, –name, –template and –bdev are passed to lxc−create, while –release is passed to the template:
lxc−c r e a t e −−template ubuntu −−name c1 −−bdev loop −− −−r e l e a s e DISTRO−SHORT−CODENAME
123
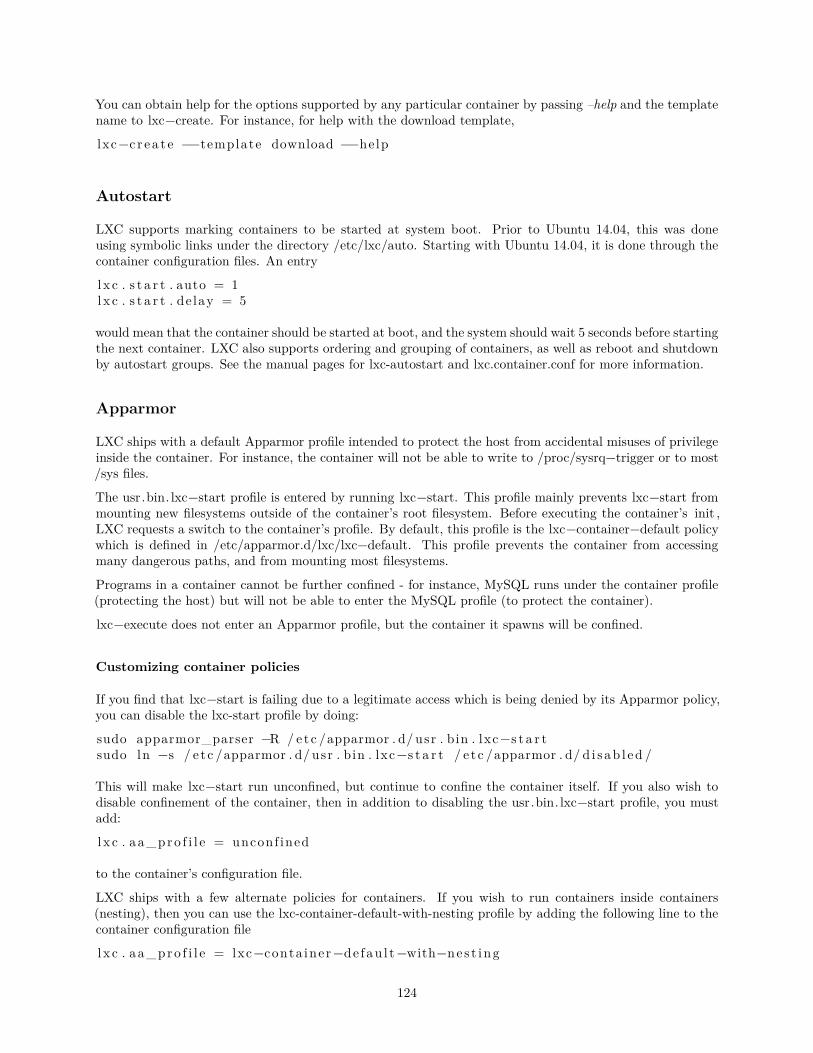
You can obtain help for the options supported by any particular container by passing –help and the templatename to lxc−create. For instance, for help with the download template,
lxc−c r e a t e −−template download −−help
Autostart
LXC supports marking containers to be started at system boot. Prior to Ubuntu 14.04, this was doneusing symbolic links under the directory /etc/lxc/auto. Starting with Ubuntu 14.04, it is done through thecontainer configuration files. An entry
l x c . s t a r t . auto = 1lx c . s t a r t . de lay = 5
would mean that the container should be started at boot, and the system should wait 5 seconds before startingthe next container. LXC also supports ordering and grouping of containers, as well as reboot and shutdownby autostart groups. See the manual pages for lxc-autostart and lxc.container.conf for more information.
Apparmor
LXC ships with a default Apparmor profile intended to protect the host from accidental misuses of privilegeinside the container. For instance, the container will not be able to write to /proc/sysrq−trigger or to most/sys files.
The usr.bin. lxc−start profile is entered by running lxc−start. This profile mainly prevents lxc−start frommounting new filesystems outside of the container’s root filesystem. Before executing the container’s init ,LXC requests a switch to the container’s profile. By default, this profile is the lxc−container−default policywhich is defined in /etc/apparmor.d/lxc/lxc−default. This profile prevents the container from accessingmany dangerous paths, and from mounting most filesystems.
Programs in a container cannot be further confined - for instance, MySQL runs under the container profile(protecting the host) but will not be able to enter the MySQL profile (to protect the container).
lxc−execute does not enter an Apparmor profile, but the container it spawns will be confined.
Customizing container policies
If you find that lxc−start is failing due to a legitimate access which is being denied by its Apparmor policy,you can disable the lxc-start profile by doing:
sudo apparmor_parser −R / etc /apparmor . d/ usr . bin . lxc−s t a r tsudo ln −s / e t c /apparmor . d/ usr . bin . lxc−s t a r t / e t c /apparmor . d/ d i s ab l ed /
This will make lxc−start run unconfined, but continue to confine the container itself. If you also wish todisable confinement of the container, then in addition to disabling the usr.bin. lxc−start profile, you mustadd:
l x c . aa_pro f i l e = unconf ined
to the container’s configuration file.
LXC ships with a few alternate policies for containers. If you wish to run containers inside containers(nesting), then you can use the lxc-container-default-with-nesting profile by adding the following line to thecontainer configuration file
l x c . aa_pro f i l e = lxc−conta iner−de fau l t−with−ne s t ing
124
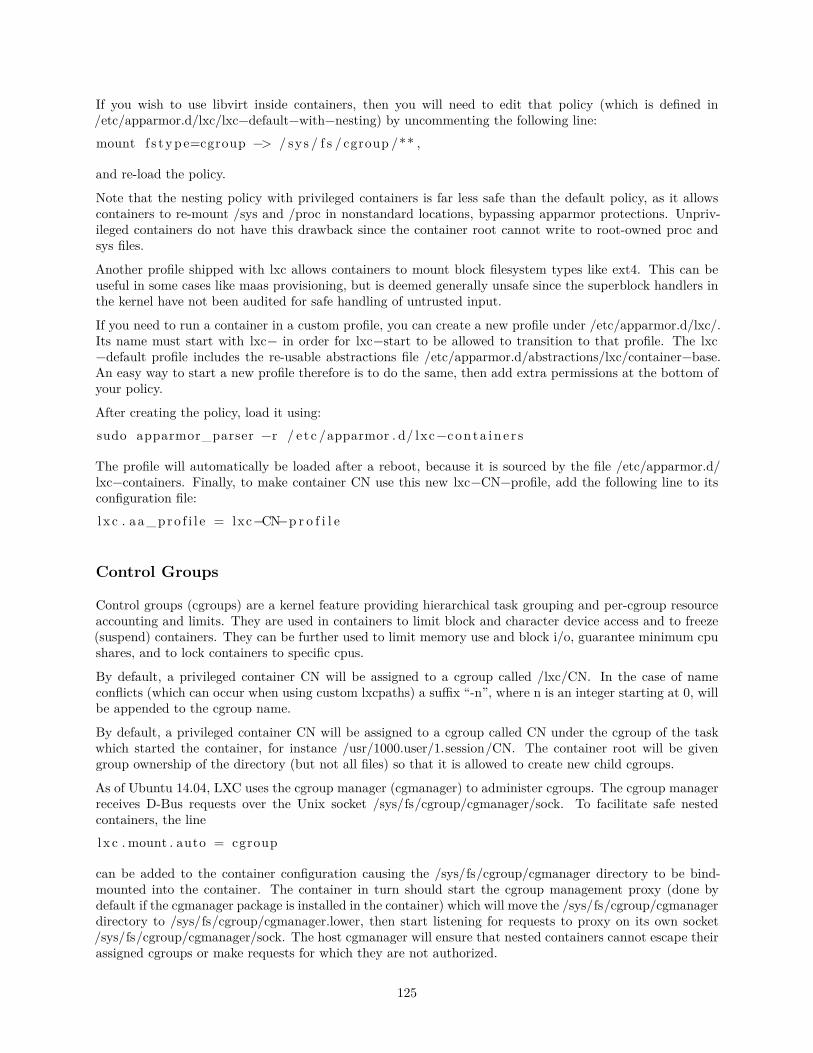
If you wish to use libvirt inside containers, then you will need to edit that policy (which is defined in/etc/apparmor.d/lxc/lxc−default−with−nesting) by uncommenting the following line:mount f s t ype=cgroup −> / sys / f s / cgroup /** ,
and re-load the policy.
Note that the nesting policy with privileged containers is far less safe than the default policy, as it allowscontainers to re-mount /sys and /proc in nonstandard locations, bypassing apparmor protections. Unpriv-ileged containers do not have this drawback since the container root cannot write to root-owned proc andsys files.
Another profile shipped with lxc allows containers to mount block filesystem types like ext4. This can beuseful in some cases like maas provisioning, but is deemed generally unsafe since the superblock handlers inthe kernel have not been audited for safe handling of untrusted input.
If you need to run a container in a custom profile, you can create a new profile under /etc/apparmor.d/lxc/.Its name must start with lxc− in order for lxc−start to be allowed to transition to that profile. The lxc−default profile includes the re-usable abstractions file /etc/apparmor.d/abstractions/lxc/container−base.An easy way to start a new profile therefore is to do the same, then add extra permissions at the bottom ofyour policy.
After creating the policy, load it using:sudo apparmor_parser −r / e t c /apparmor . d/ lxc−con ta i n e r s
The profile will automatically be loaded after a reboot, because it is sourced by the file /etc/apparmor.d/lxc−containers. Finally, to make container CN use this new lxc−CN−profile, add the following line to itsconfiguration file:l x c . aa_pro f i l e = lxc−CN−p r o f i l e
Control Groups
Control groups (cgroups) are a kernel feature providing hierarchical task grouping and per-cgroup resourceaccounting and limits. They are used in containers to limit block and character device access and to freeze(suspend) containers. They can be further used to limit memory use and block i/o, guarantee minimum cpushares, and to lock containers to specific cpus.
By default, a privileged container CN will be assigned to a cgroup called /lxc/CN. In the case of nameconflicts (which can occur when using custom lxcpaths) a suffix “-n”, where n is an integer starting at 0, willbe appended to the cgroup name.
By default, a privileged container CN will be assigned to a cgroup called CN under the cgroup of the taskwhich started the container, for instance /usr/1000.user/1.session/CN. The container root will be givengroup ownership of the directory (but not all files) so that it is allowed to create new child cgroups.
As of Ubuntu 14.04, LXC uses the cgroup manager (cgmanager) to administer cgroups. The cgroup managerreceives D-Bus requests over the Unix socket /sys/fs/cgroup/cgmanager/sock. To facilitate safe nestedcontainers, the linel x c . mount . auto = cgroup
can be added to the container configuration causing the /sys/fs/cgroup/cgmanager directory to be bind-mounted into the container. The container in turn should start the cgroup management proxy (done bydefault if the cgmanager package is installed in the container) which will move the /sys/fs/cgroup/cgmanagerdirectory to /sys/fs/cgroup/cgmanager.lower, then start listening for requests to proxy on its own socket/sys/fs/cgroup/cgmanager/sock. The host cgmanager will ensure that nested containers cannot escape theirassigned cgroups or make requests for which they are not authorized.
125
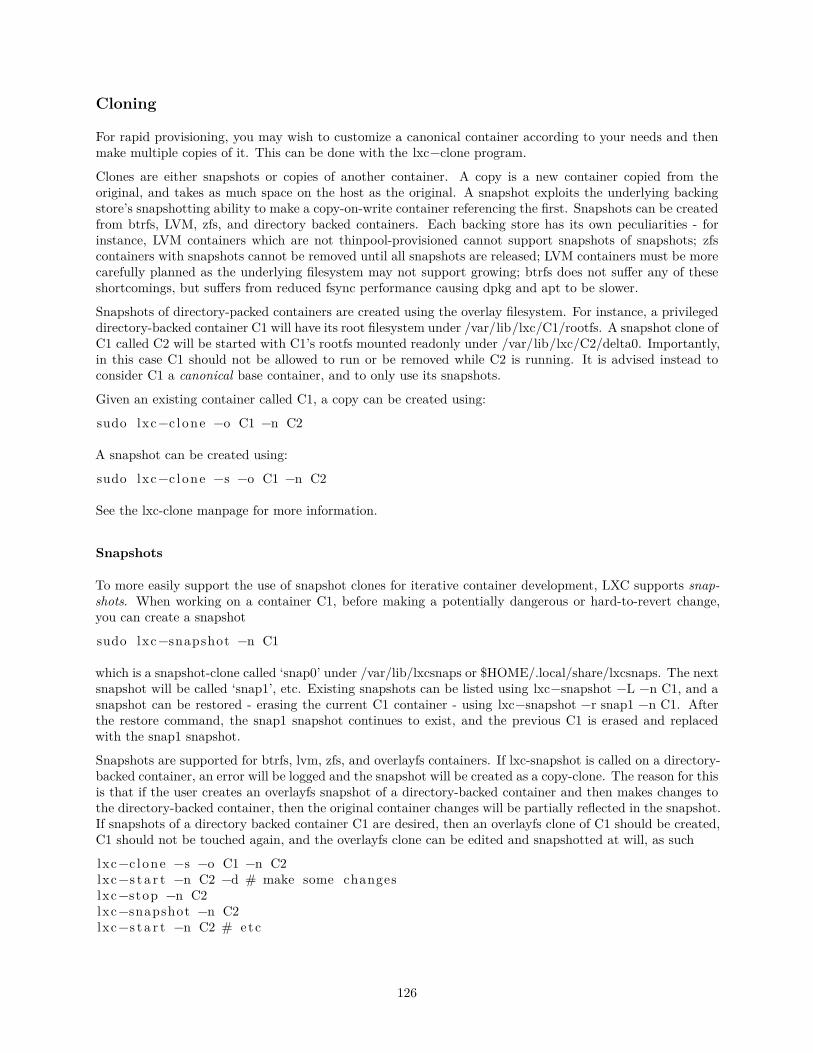
Cloning
For rapid provisioning, you may wish to customize a canonical container according to your needs and thenmake multiple copies of it. This can be done with the lxc−clone program.
Clones are either snapshots or copies of another container. A copy is a new container copied from theoriginal, and takes as much space on the host as the original. A snapshot exploits the underlying backingstore’s snapshotting ability to make a copy-on-write container referencing the first. Snapshots can be createdfrom btrfs, LVM, zfs, and directory backed containers. Each backing store has its own peculiarities - forinstance, LVM containers which are not thinpool-provisioned cannot support snapshots of snapshots; zfscontainers with snapshots cannot be removed until all snapshots are released; LVM containers must be morecarefully planned as the underlying filesystem may not support growing; btrfs does not suffer any of theseshortcomings, but suffers from reduced fsync performance causing dpkg and apt to be slower.
Snapshots of directory-packed containers are created using the overlay filesystem. For instance, a privilegeddirectory-backed container C1 will have its root filesystem under /var/lib/lxc/C1/rootfs. A snapshot clone ofC1 called C2 will be started with C1’s rootfs mounted readonly under /var/lib/lxc/C2/delta0. Importantly,in this case C1 should not be allowed to run or be removed while C2 is running. It is advised instead toconsider C1 a canonical base container, and to only use its snapshots.
Given an existing container called C1, a copy can be created using:
sudo lxc−c l one −o C1 −n C2
A snapshot can be created using:
sudo lxc−c l one −s −o C1 −n C2
See the lxc-clone manpage for more information.
Snapshots
To more easily support the use of snapshot clones for iterative container development, LXC supports snap-shots. When working on a container C1, before making a potentially dangerous or hard-to-revert change,you can create a snapshot
sudo lxc−snapshot −n C1
which is a snapshot-clone called ‘snap0’ under /var/lib/lxcsnaps or $HOME/.local/share/lxcsnaps. The nextsnapshot will be called ‘snap1’, etc. Existing snapshots can be listed using lxc−snapshot −L −n C1, and asnapshot can be restored - erasing the current C1 container - using lxc−snapshot −r snap1 −n C1. Afterthe restore command, the snap1 snapshot continues to exist, and the previous C1 is erased and replacedwith the snap1 snapshot.
Snapshots are supported for btrfs, lvm, zfs, and overlayfs containers. If lxc-snapshot is called on a directory-backed container, an error will be logged and the snapshot will be created as a copy-clone. The reason for thisis that if the user creates an overlayfs snapshot of a directory-backed container and then makes changes tothe directory-backed container, then the original container changes will be partially reflected in the snapshot.If snapshots of a directory backed container C1 are desired, then an overlayfs clone of C1 should be created,C1 should not be touched again, and the overlayfs clone can be edited and snapshotted at will, as such
lxc−c l one −s −o C1 −n C2lxc−s t a r t −n C2 −d # make some changeslxc−stop −n C2lxc−snapshot −n C2lxc−s t a r t −n C2 # etc
126
Ephemeral Containers
While snapshots are useful for longer-term incremental development of images, ephemeral containers utilizesnapshots for quick, single-use throwaway containers. Given a base container C1, you can start an ephemeralcontainer using
lxc−s t a r t−ephemeral −o C1
The container begins as a snapshot of C1. Instructions for logging into the container will be printed to theconsole. After shutdown, the ephemeral container will be destroyed. See the lxc-start-ephemeral manualpage for more options.
Lifecycle management hooks
Beginning with Ubuntu 12.10, it is possible to define hooks to be executed at specific points in a container’slifetime:
• Pre-start hooks are run in the host’s namespace before the container ttys, consoles, or mounts are up.If any mounts are done in this hook, they should be cleaned up in the post-stop hook.
• Pre-mount hooks are run in the container’s namespaces, but before the root filesystem has beenmounted. Mounts done in this hook will be automatically cleaned up when the container shuts down.
• Mount hooks are run after the container filesystems have been mounted, but before the container hascalled pivot_root to change its root filesystem.
• Start hooks are run immediately before executing the container’s init. Since these are executed afterpivoting into the container’s filesystem, the command to be executed must be copied into the container’sfilesystem.
• Post-stop hooks are executed after the container has been shut down.
If any hook returns an error, the container’s run will be aborted. Any post-stop hook will still be executed.Any output generated by the script will be logged at the debug priority.
Please see the lxc .container.conf(5) manual page for the configuration file format with which to specifyhooks. Some sample hooks are shipped with the lxc package to serve as an example of how to write and usesuch hooks.
Consoles
Containers have a configurable number of consoles. One always exists on the container’s /dev/console. Thisis shown on the terminal from which you ran lxc−start, unless the -d option is specified. The output on/dev/console can be redirected to a file using the -c console-file option to lxc−start. The number of extraconsoles is specified by the lxc . tty variable, and is usually set to 4. Those consoles are shown on /dev/ttyN(for 1 <= N <= 4). To log into console 3 from the host, use:
sudo lxc−conso l e −n conta ine r −t 3
or if the −t N option is not specified, an unused console will be automatically chosen. To exit the console,use the escape sequence Ctrl−a q. Note that the escape sequence does not work in the console resultingfrom lxc−start without the −d option.
Each container console is actually a Unix98 pty in the host’s (not the guest’s) pty mount, bind-mountedover the guest’s /dev/ttyN and /dev/console. Therefore, if the guest unmounts those or otherwise tries toaccess the actual character device 4:N, it will not be serving getty to the LXC consoles. (With the defaultsettings, the container will not be able to access that character device and getty will therefore fail.) Thiscan easily happen when a boot script blindly mounts a new /dev.
127

Troubleshooting
Logging
If something goes wrong when starting a container, the first step should be to get full logging from LXC:
sudo lxc−s t a r t −n C1 − l t r a c e −o debug . out
This will cause lxc to log at the most verbose level, trace, and to output log information to a file called‘debug.out’. If the file debug.out already exists, the new log information will be appended.
Monitoring container status
Two commands are available to monitor container state changes. lxc−monitor monitors one or more con-tainers for any state changes. It takes a container name as usual with the -n option, but in this case thecontainer name can be a posix regular expression to allow monitoring desirable sets of containers. lxc−monitor continues running as it prints container changes. lxc−wait waits for a specific state change andthen exits. For instance,
sudo lxc−monitor −n cont [0−5]*
would print all state changes to any containers matching the listed regular expression, whereas
sudo lxc−wait −n cont1 −s ’STOPPED|FROZEN’
will wait until container cont1 enters state STOPPED or state FROZEN and then exit.
Attach
As of Ubuntu 14.04, it is possible to attach to a container’s namespaces. The simplest case is to simply do
sudo lxc−attach −n C1
which will start a shell attached to C1’s namespaces, or, effectively inside the container. The attach func-tionality is very flexible, allowing attaching to a subset of the container’s namespaces and security context.See the manual page for more information.
Container init verbosity
If LXC completes the container startup, but the container init fails to complete (for instance, no login promptis shown), it can be useful to request additional verbosity from the init process. For an upstart container,this might be:
sudo lxc−s t a r t −n C1 / sb in / i n i t l o g l e v e l=debug
You can also start an entirely different program in place of init, for instance
sudo lxc−s t a r t −n C1 /bin /bashsudo lxc−s t a r t −n C1 /bin / s l e e p 100sudo lxc−s t a r t −n C1 /bin / cat /proc /1/ s t a tu s
128
LXC API
Most of the LXC functionality can now be accessed through an API exported by liblxc for which bindingsare available in several languages, including Python, lua, ruby, and go.
Below is an example using the python bindings (which are available in the python3-lxc package) whichcreates and starts a container, then waits until it has been shut down:
# sudo python3Python 3 . 2 . 3 ( de fau l t , Aug 28 2012 , 0 8 : 2 6 : 0 3 )[GCC 4 . 7 . 1 20120814 ( p r e r e l e a s e ) ] on l inux2Type ” help ” , ” copyr ight ” , ” c r e d i t s ” or ” l i c e n s e ” f o r more in fo rmat ion .>>> import l x c__main__ : 1 : Warning : The python−l x c API isn ’ t yet s t ab l e and may change at any
po int in the fu tu r e .>>> c=lxc . Container (”C1”)>>> c . c r e a t e (” ubuntu ”)True>>> c . s t a r t ( )True>>> c . wait (”STOPPED”)True
Security
A namespace maps ids to resources. By not providing a container any id with which to reference a resource,the resource can be protected. This is the basis of some of the security afforded to container users. Forinstance, IPC namespaces are completely isolated. Other namespaces, however, have various leaks whichallow privilege to be inappropriately exerted from a container into another container or to the host.
By default, LXC containers are started under a Apparmor policy to restrict some actions. The details ofAppArmor integration with lxc are in section Apparmor. Unprivileged containers go further by mappingroot in the container to an unprivileged host UID. This prevents access to /proc and /sys files representinghost resources, as well as any other files owned by root on the host.
Exploitable system calls
It is a core container feature that containers share a kernel with the host. Therefore if the kernel containsany exploitable system calls the container can exploit these as well. Once the container controls the kernelit can fully control any resource known to the host.
In general to run a full distribution container a large number of system calls will be needed. However forapplication containers it may be possible to reduce the number of available system calls to only a few. Evenfor system containers running a full distribution security gains may be had, for instance by removing the32-bit compatibility system calls in a 64-bit container. See the lxc.container.conf manual page for details ofhow to configure a container to use seccomp. By default, no seccomp policy is loaded.
Resources
• The DeveloperWorks article LXC: Linux container tools was an early introduction to the use of con-tainers.
• The Secure Containers Cookbook demonstrated the use of security modules to make containers moresecure.
129
• The upstream LXC project is hosted at linuxcontainers.org.
Databases
Ubuntu provides two popular database servers. They are:
• MySQL• PostgreSQL
Both are popular choices among developers, with similar feature sets and performance capabilities. Histor-ically, Postgres tended to be a preferred choice for its attention to standards conformance, features, andextensibility, whereas Mysql may be more preferred for higher performance requirements, however over timeeach has made good strides catching up with the other. Specialized needs may make one a better option fora certain application, but in general both are good, strong options.
They are available in the main repository and equally supported by Ubuntu. This section explains how toinstall and configure these database servers.
MySQL
MySQL is a fast, multi-threaded, multi-user, and robust SQL database server. It is intended for mission-critical, heavy-load production systems and mass-deployed software.
Installation
To install MySQL, run the following command from a terminal prompt:
sudo apt i n s t a l l mysql−s e r v e r
Once the installation is complete, the MySQL server should be started automatically. You can quickly checkits current status via systemd:
sudo s e r v i c e mysql s t a tu s �
mysql . s e r v i c e − MySQL Community ServerLoaded : loaded (/ l i b / systemd/system/mysql . s e r v i c e ; enabled ; vendor p r e s e t :
enabled )Act ive : a c t i v e ( running ) s i n c e Tue 2019−10−08 14 : 37 : 38 PDT; 2 weeks 5 days
agoMain PID : 2028 (mysqld )
Tasks : 28 ( l im i t : 4915)CGroup : / system . s l i c e /mysql . s e r v i c e ��
2028 / usr / sb in /mysqld −−daemonize −−pid− f i l e =/run/mysqld/mysqld . pid
Oct 08 14 : 37 : 36 db . example . org systemd [ 1 ] : S t a r t i ng MySQL Community Server . . .Oct 08 14 : 37 : 38 db . example . org systemd [ 1 ] : Started MySQL Community Server .
The network status of the MySQL service can also be checked by running the ss command at the terminalprompt:
sudo s s −tap | grep mysql
When you run this command, you should see something similar to the following:
130
LISTEN 0 151 1 2 7 . 0 . 0 . 1 : mysql 0 . 0 . 0 . 0 : *u s e r s : ( ( ” mysqld ” , pid=149190 , fd=29) )
LISTEN 0 70 *:33060 * :*u s e r s : ( ( ” mysqld ” , pid=149190 , fd=32) )
If the server is not running correctly, you can type the following command to start it:
sudo s e r v i c e mysql r e s t a r t
A good starting point for troubleshooting problems is the systemd journal, which can be accessed at theterminal prompt with this command:
sudo j o u r n a l c t l −u mysql
Configuration
You can edit the files in /etc/mysql/ to configure the basic settings – log file, port number, etc. For example,to configure MySQL to listen for connections from network hosts, in the file /etc/mysql/mysql.conf.d/mysqld.cnf, change the bind-address directive to the server’s IP address:
bind−address = 192 . 1 6 8 . 0 . 5
Note
Replace 192.168.0.5 with the appropriate address, which can be determined via ip address show.
After making a configuration change, the MySQL daemon will need to be restarted:
sudo sys t emct l r e s t a r t mysql . s e r v i c e
Database Engines
Whilst the default configuration of MySQL provided by the Ubuntu packages is perfectly functional andperforms well there are things you may wish to consider before you proceed.
MySQL is designed to allow data to be stored in different ways. These methods are referred to as eitherdatabase or storage engines. There are two main engines that you’ll be interested in: InnoDB and MyISAM.Storage engines are transparent to the end user. MySQL will handle things differently under the surface,but regardless of which storage engine is in use, you will interact with the database in the same way.
Each engine has its own advantages and disadvantages.
While it is possible, and may be advantageous to mix and match database engines on a table level, doing soreduces the effectiveness of the performance tuning you can do as you’ll be splitting the resources betweentwo engines instead of dedicating them to one.
• MyISAM is the older of the two. It can be faster than InnoDB under certain circumstances and favoursa read only workload. Some web applications have been tuned around MyISAM (though that’s not toimply that they will slow under InnoDB). MyISAM also supports the FULLTEXT data type, whichallows very fast searches of large quantities of text data. However MyISAM is only capable of locking anentire table for writing. This means only one process can update a table at a time. As any applicationthat uses the table scales this may prove to be a hindrance. It also lacks journaling, which makes itharder for data to be recovered after a crash. The following link provides some points for considerationabout using MyISAM on a production database.
131
• InnoDB is a more modern database engine, designed to be ACID compliant which guarantees databasetransactions are processed reliably. Write locking can occur on a row level basis within a table. Thatmeans multiple updates can occur on a single table simultaneously. Data caching is also handled inmemory within the database engine, allowing caching on a more efficient row level basis rather thanfile block. To meet ACID compliance all transactions are journaled independently of the main tables.This allows for much more reliable data recovery as data consistency can be checked.
As of MySQL 5.5 InnoDB is the default engine, and is highly recommended over MyISAM unless you havespecific need for features unique to the engine.
Advanced configuration
Creating a tuned configuration
There are a number of parameters that can be adjusted within MySQL’s configuration files that will allowyou to improve the performance of the server over time.
Many of the parameters can be adjusted with the existing database, however some may affect the data layoutand thus need more care to apply.
First, if you have existing data, you will need to carry out a mysqldump and reload:
mysqldump −−a l l −databases −−r ou t i n e s −u root −p > ~/ fulldump . s q l
This will then prompt you for the root password before creating a copy of the data. It is advisable to makesure there are no other users or processes using the database whilst this takes place. Depending on howmuch data you’ve got in your database, this may take a while. You won’t see anything on the screen duringthis process.
Once the dump has been completed, shut down MySQL:
sudo s e r v i c e mysql stop
It’s also a good idea to backup the original configuration:
sudo rsync −avz / e t c /mysql / root /mysql−backup
Next, make any desired configuration changes.
Then delete and re-initialise the database space and make sure ownership is correct before restarting MySQL:
sudo rm −r f / var / l i b /mysql /*sudo mysqld −− i n i t i a l i z esudo chown −R mysql : / var / l i b /mysqlsudo s e r v i c e mysql s t a r t
The final step is re-importation of your data by piping your SQL commands to the database.
cat ~/ fulldump . s q l | mysql
For large data imports, the ‘Pipe Viewer’ utility can be useful to track import progress. Ignore any ETAtimes produced by pv, they’re based on the average time taken to handle each row of the file, but the speedof inserting can vary wildly from row to row with mysqldumps:
sudo apt i n s t a l l pvpv ~/ fulldump . s q l | mysql
Once that is complete all is good to go!
132
Note
This is not necessary for all my.cnf changes. Most of the variables you may wish to change toimprove performance are adjustable even whilst the server is running. As with anything, makesure to have a good backup copy of config files and data before making changes.
MySQL Tuner
MySQL Tuner connects to a running MySQL instance and offer configuration suggestions to optimize thedatabase for your workload. The longer the server has been running, the better the advice mysqltuner canprovide. In a production environment, consider waiting for at least 24 hours before running the tool. Youcan install mysqltuner from the Ubuntu repositories:
sudo apt i n s t a l l mysqltuner
Then once its been installed, run:
mysqltuner
and wait for its final report. The top section provides general information about the database server, andthe bottom section provides tuning suggestions to alter in your my.cnf. Most of these can be altered live onthe server without restarting; look through the official MySQL documentation (link in Resources section) forthe relevant variables to change in production. The following example is part of a report from a productiondatabase showing potential benefits from increasing the query cache:
−−−−−−−− Recommendations −−−−−−−−−−−−−−−−−−−−−−−−−−−−−−−−−−−−−−−−−−−−−−−−−−−−−General recommendations :
Run OPTIMIZE TABLE to defragment t ab l e s f o r b e t t e r performanceIn c r ea s e table_cache gradua l l y to avoid f i l e d e s c r i p t o r l im i t s
Var i ab l e s to ad jus t :key_buf fer_s ize (> 1 .4G)query_cache_size (> 32M)table_cache (> 64)innodb_buffer_pool_size (>= 22G)
It goes without saying that performance optimization strategies vary from application to application. So forexample, what works best for Wordpress might not be the best for Drupal or Joomla. Performance can bedependent on the types of queries, use of indexes, how efficient the database design is and so on. You mayfind it useful to spend some time searching for database tuning tips based on what applications you’re using.Once you’ve reached the point of diminishing returns from database configuration adjustments, look to theapplication itself for improvements, or invest in more powerful hardware and/or scaling up the databaseenvironment.
Resources
• See the MySQL Home Page for more information.
• Full documentation is available in both online and offline formats from the MySQL Developers portal
• For general SQL information see the O’Reilly books Getting Started with SQL: A Hands-On Approachfor Beginners by Thomas Nield as an entry point and SQL in a Nutshell as a quick reference.
• The Apache MySQL PHP Ubuntu Wiki page also has useful information.
133
PostgreSQL
PostgreSQL is an object-relational database system that has the features of traditional commercial databasesystems with enhancements to be found in next-generation DBMS systems.
Installation
To install PostgreSQL, run the following command in the command prompt:
sudo apt i n s t a l l p o s t g r e s q l
The database service is automatically configured with viable defaults, but can be customized based on yourspecialized needs.
Configuration
PostgreSQL supports multiple client authentication methods. By default, the IDENT authentication methodis used for postgres and local users. Please refer to the PostgreSQL Administrator’s Guide if you would liketo configure alternatives like Kerberos.
The following discussion assumes that you wish to enable TCP/IP connections and use the MD5 methodfor client authentication. PostgreSQL configuration files are stored in the /etc/postgresql/<version>/maindirectory. For example, if you install PostgreSQL 12, the configuration files are stored in the /etc/postgresql/12/main directory.
Tip
To configure IDENT authentication, add entries to the /etc/postgresql/12/main/pg_ident.conffile. There are detailed comments in the file to guide you.
To enable other computers to connect to your PostgreSQL server, edit the file /etc/postgresql/12/main/postgresql.conf
Locate the line #listen_addresses = ‘localhost’ and change it to:
l i s t en_add r e s s e s = ’* ’
Note
To allow both IPv4 and IPv6 connections replace ‘localhost’ with ‘::’
For details on other parameters, refer to the configuration file or to the PostgreSQL documentation forinformation on how they can be edited.
Now that we can connect to our PostgreSQL server, the next step is to set a password for the postgres user.Run the following command at a terminal prompt to connect to the default PostgreSQL template database:
sudo −u pos tg r e s psq l template1
The above command connects to PostgreSQL database template1 as user postgres. Once you connect to thePostgreSQL server, you will be at a SQL prompt. You can run the following SQL command at the psqlprompt to configure the password for the user postgres.
ALTER USER pos tg r e s with encrypted password ’ your_password ’ ;
After configuring the password, edit the file /etc/postgresql/12/main/pg_hba.conf to use MD5 authentica-tion with the postgres user:
l o c a l a l l po s t g r e s md5
134
Finally, you should restart the PostgreSQL service to initialize the new configuration. From a terminalprompt enter the following to restart PostgreSQL:sudo sys t emct l r e s t a r t p o s t g r e s q l . s e r v i c e
Warning
The above configuration is not complete by any means. Please refer to the PostgreSQL Admin-istrator’s Guide to configure more parameters.
You can test server connections from other machines by using the PostgreSQL client.sudo apt i n s t a l l po s tg r e sq l−c l i e n tpsq l −h pos tg r e s . example . com −U pos tg r e s −W
Note
Replace the domain name with your actual server domain name.
Streaming Replication
PostgreSQL has a nice feature called Streaming Replication which provides the capability to continuouslyship and apply the WAL XLOG records to some number of standby servers in order to keep them current.Here is presented a very basic and simple way to replicate a PostgreSQL server (master) in a standby server.
First, create a replication user in the master to be used by the standby server:$ sudo −u pos tg r e s c r e a t eu s e r −−r e p l i c a t i o n −P −e r e p l i c a t o r
Let’s configure the master server to turn on the streaming replication. Open the file /etc/postgresql/12/main/postgresql.conf and make sure you have the following lines:l i s t en_add r e s s e s = ’* ’wal_leve l = r e p l i c amax_wal_senders = 10
Also edit the file /etc/postgresql/12/main/pg_hba.conf to add an extra line to allow tthe standby serverconnection using the replicator user:host r e p l i c a t i o n r e p l i c a t o r <IP address o f the standby> md5
Restart the service to apply changes:$ sudo sys t emct l r e s t a r t p o s t g r e s q l
Now, in the standby server, let’s stop the PostgreSQL service:$ sudo sys t emct l stop po s t g r e s q l
Edit the /etc/postgresql/12/main/postgresql.conf to set up hot standby:hot_standby = on
Back up the current state of the master server:$ sudo su − pos tg r e s$ cp −R /var / l i b / po s t g r e s q l /12/main /var / l i b / po s t g r e s q l /12/main_bak$ rm −r f / var / l i b / po s t g r e s q l /12/main/* # remove a l l the f i l e s in the data
d i r e c t o r y$ pg_basebackup −h <IP adr r e s s o f the master> −D /var / l i b / po s t g r e s q l /12/main −
U r e p l i c a t o r −P −v −R
135
In the pg_basebackup command the flags represent the following:
• −h: the hostname or IP address of the master server• −D: the data directory• −U: the user to be used in the operation• −P: tuns on progess reporting• −v: enables verbose mode• −R: Creates a standby.signal file and append connection settings to postgresql .auto.conf
Finally, let’s start the PostgreSQL service on standby server:$ sudo sys t emct l s t a r t p o s t g r e s q l
To make sure it is working, go to the master server and run the following command:$ sudo −u pos tg r e s psq l −c ” s e l e c t * from pg_stat_rep l i ca t i on ; ”
You need to see an entry for the standby server. As you can see in the presented row the data synchronizationis assynchronous. If you want to make it synchronous, go to the /etc/postgresql/12/main/postgresql.conffile in the master server and make sure you have the following lines:synchronous_commit = onsynchronous_standby_names = ’* ’ # you can a l s o s p e c i f y a IP address
And restart the service:$ sudo sys t emct l r e s t a r t p o s t g r e s q l
Now, you can check the pg_stat_replication table again and the sync_state of the standby server need tobecome sync instead of async:$ sudo −u pos tg r e s psq l −c ” s e l e c t * from pg_stat_rep l i ca t i on ; ”
To test the replication you can now create a test database in the master and check if it is replicated in thestandby server:$ sudo −u pos tg r e s createdb t e s t # on the master s e r v e r$ sudo −u pos tg r e s psq l −c ”\ l ” # on the standby s e r v e r
You need to be able to see the test database created on the master in the standby server.
Backups
PostgreSQL databases should be backed up regularly. Refer to the PostgreSQL Administrator’s Guide fordifferent approaches.
Resources
• As mentioned above the PostgreSQL Administrator’s Guide is an excellent resource. The guide is alsoavailable in the postgresql-doc-12 package. Execute the following in a terminal to install the package:sudo apt i n s t a l l po s tg r e sq l−doc−12
To view the guide enter file :///usr/share/doc/postgresql−doc−12/html/index.html into the addressbar of your browser.
• For general SQL information see the O’Reilly books Getting Started with SQL: A Hands-On Approachfor Beginners by Thomas Nield as an entry point and SQL in a Nutshell as a quick reference.
• Also, see the PostgreSQL Ubuntu Wiki page for more information.
136
Active Directory Integration
Accessing a Samba Share
Another, use for Samba is to integrate into an existing Windows network. Once part of an Active Directorydomain, Samba can provide file and print services to AD users. For details on how to join a domain, see theSSSD and Active Directory chapter of this guide.
Once part of the Active Directory domain, enter the following command in the terminal prompt:
sudo apt i n s t a l l samba c i f s −u t i l s smbc l i ent
Next, edit /etc/samba/smb.conf changing:
workgroup = EXAMPLE. . .s e c u r i t y = adsrealm = EXAMPLE.COM. . .idmap backend = lwopenidmap uid = 50−9999999999idmap gid = 50−9999999999
Restart samba for the new settings to take effect:
sudo sys t emct l r e s t a r t smbd . s e r v i c e nmbd . s e r v i c e
You should now be able to access any Samba shares from a Windows client. However, be sure to give theappropriate AD users or groups access to the share directory. See Securing File and Print Server for moredetails.
Accessing a Windows Share
Now that the Samba server is part of the Active Directory domain you can access any Windows server shares:
• To mount a Windows file share enter the following in a terminal prompt:
mount . c i f s // f s 01 . example . com/ share mount_point
It is also possible to access shares on computers not part of an AD domain, but a username andpassword will need to be provided.
• To mount the share during boot place an entry in /etc/fstab, for example:
//192 . 168 . 0 . 5/ share /mnt/windows c i f s auto , username=steve , password=sec r e t ,rw 0 0
• Another way to copy files from a Windows server is to use the smbclient utility. To list the files in aWindows share:
smbc l i ent // f s 01 . example . com/ share −k −c ” l s ”
• To copy a file from the share, enter:
smbc l i ent // f s 01 . example . com/ share −k −c ” get f i l e . txt ”
This will copy the file .txt into the current directory.
137

• And to copy a file to the share:
smbc l i ent // f s 01 . example . com/ share −k −c ”put / e t c / hos t s hos t s ”
This will copy the /etc/hosts to //fs01.example.com/share/hosts.
• The -c option used above allows you to execute the smbclient command all at once. This is useful forscripting and minor file operations. To enter the smb: \> prompt, a FTP like prompt where you canexecute normal file and directory commands, simply execute:
smbc l i ent // f s 01 . example . com/ share −k
Note
Replace all instances of fs01.example.com/share, //192.168.0.5/share, username=steve,password=secret,and file.txt with your server’s IP, hostname, share name, file name, and an actual username andpassword with rights to the share.
Resources
For more smbclient options see the man page: man smbclient, also available online.
The mount.cifs man page is also useful for more detailed information.
The Ubuntu Wiki Samba page.
As a Domain Controller
A Samba server can be configured to appear as a Windows NT4-style domain controller. A major advantageof this configuration is the ability to centralize user and machine credentials. Samba can also use multiplebackends to store the user information.
Primary Domain Controller
This section covers configuring Samba as a Primary Domain Controller (PDC) using the default smbpasswdbackend.
First, install Samba, and libpam-winbind to sync the user accounts, by entering the following in a terminalprompt:
sudo apt i n s t a l l samba libpam−winbind
Next, configure Samba by editing /etc/samba/smb.conf. The security mode should be set to user, and theworkgroup should relate to your organization:
workgroup = EXAMPLE. . .s e c u r i t y = user
In the commented “Domains” section add or uncomment the following (the last line has been split to fit theformat of this document):
domain logons = yeslogon path = \\%N\%U\ p r o f i l elogon dr ive = H:logon home = \\%N\%U
138
logon s c r i p t = logon . cmdadd machine s c r i p t = sudo / usr / sb in /useradd −N −g machines −c Machine −d
/var / l i b /samba −s / bin / f a l s e %u
Note
If you wish to not use Roaming Profiles leave the logon home and logon path options commented.
• domain logons: provides the netlogon service causing Samba to act as a domain controller.
• logon path: places the user’s Windows profile into their home directory. It is also possible to configurea [profiles] share placing all profiles under a single directory.
• logon drive: specifies the home directory local path.
• logon home: specifies the home directory location.
• logon script: determines the script to be run locally once a user has logged in. The script needs to beplaced in the [netlogon] share.
• add machine script: a script that will automatically create the Machine Trust Account needed for aworkstation to join the domain.
In this example the machines group will need to be created using the addgroup utility see ??? fordetails.
Uncomment the [homes] share to allow the logon home to be mapped:
[ homes ]comment = Home D i r e c t o r i e sbrowseable = noread only = noc r ea t e mask = 0700d i r e c t o r y mask = 0700va l i d u s e r s = %S
When configured as a domain controller a [netlogon] share needs to be configured. To enable the share,uncomment:
[ net logon ]comment = Network Logon Se rv i c epath = / srv /samba/ net logonguest ok = yesread only = yesshare modes = no
Note
The original netlogon share path is /home/samba/netlogon, but according to the FilesystemHierarchy Standard (FHS), /srv is the correct location for site-specific data provided by thesystem.
Now create the netlogon directory, and an empty (for now) logon.cmd script file:
sudo mkdir −p / srv /samba/ net logonsudo touch / srv /samba/ net logon / logon . cmd
You can enter any normal Windows logon script commands in logon.cmd to customize the client’s environ-ment.
Restart Samba to enable the new domain controller:
139

sudo sys t emct l r e s t a r t smbd . s e r v i c e nmbd . s e r v i c e
Lastly, there are a few additional commands needed to setup the appropriate rights.
With root being disabled by default, in order to join a workstation to the domain, a system group needs tobe mapped to the Windows Domain Admins group. Using the net utility, from a terminal enter:
sudo net groupmap add ntgroup=”Domain Admins” unixgroup=sysadmin r i d=512 type=d
Note
Change sysadmin to whichever group you prefer. Also, the user used to join the domain needsto be a member of the sysadmin group, as well as a member of the system admin group. Theadmin group allows sudo use.
If the user does not have Samba credentials yet, you can add them with the smbpasswd utility,change the sysadmin username appropriately:
sudo smbpasswd −a sysadmin
Also, rights need to be explicitly provided to the Domain Admins group to allow the add machine script(and other admin functions) to work. This is achieved by executing:
net rpc r i g h t s grant −U sysadmin ”EXAMPLE\Domain Admins”SeMachineAccountPrivi lege \
SePr in tOpera to rPr iv i l e g e SeAddUsersPr iv i l ege SeDi skOperatorPr iv i l ege \SeRemoteShutdownPrivilege
You should now be able to join Windows clients to the Domain in the same manner as joining them to anNT4 domain running on a Windows server.
Backup Domain Controller
With a Primary Domain Controller (PDC) on the network it is best to have a Backup Domain Controller(BDC) as well. This will allow clients to authenticate in case the PDC becomes unavailable.
When configuring Samba as a BDC you need a way to sync account information with the PDC. There aremultiple ways of accomplishing this scp, rsync, or by using LDAP as the passdb backend.
Using LDAP is the most robust way to sync account information, because both domain controllers can usethe same information in real time. However, setting up a LDAP server may be overly complicated for asmall number of user and computer accounts. See ??? for details.
First, install samba and libpam-winbind. From a terminal enter:
sudo apt i n s t a l l samba libpam−winbind
Now, edit /etc/samba/smb.conf and uncomment the following in the [global]:
workgroup = EXAMPLE. . .s e c u r i t y = user
In the commented Domains uncomment or add:
domain logons = yesdomain master = no
140
Make sure a user has rights to read the files in /var/lib/samba. For example, to allow users in the admingroup to scp the files, enter:
sudo chgrp −R admin /var / l i b /samba
Next, sync the user accounts, using scp to copy the /var/lib/samba directory from the PDC:
sudo scp −r username@pdc : / var / l i b /samba /var / l i b
Note
Replace username with a valid username and pdc with the hostname or IP Address of your actualPDC.
Finally, restart samba:
sudo sys t emct l r e s t a r t smbd . s e r v i c e nmbd . s e r v i c e
You can test that your Backup Domain controller is working by stopping the Samba daemon on the PDC,then trying to login to a Windows client joined to the domain.
Another thing to keep in mind is if you have configured the logon home option as a directory on the PDC,and the PDC becomes unavailable, access to the user’s Home drive will also be unavailable. For this reasonit is best to configure the logon home to reside on a separate file server from the PDC and BDC.
Resources
• For in depth Samba configurations see the Samba HOWTO Collection
• The guide is also available in printed format.
• O’Reilly’s Using Samba is also a good reference.
• Chapter 4 of the Samba HOWTO Collection explains setting up a Primary Domain Controller.
• Chapter 5 of the Samba HOWTO Collection explains setting up a Backup Domain Controller.
• The Ubuntu Wiki Samba page.
File Server
One of the most common ways to network Ubuntu and Windows computers is to configure Samba as a FileServer. This section covers setting up a Samba server to share files with Windows clients.
The server will be configured to share files with any client on the network without prompting for a password.If your environment requires stricter Access Controls see Securing File and Print Server.
Installation
The first step is to install the samba package. From a terminal prompt enter:
sudo apt i n s t a l l samba
That’s all there is to it; you are now ready to configure Samba to share files.
141
Configuration
The main Samba configuration file is located in /etc/samba/smb.conf. The default configuration file has asignificant number of comments in order to document various configuration directives.
Note
Not all the available options are included in the default configuration file. See the smb.conf manpage or the Samba HOWTO Collection for more details.
First, edit the following key/value pairs in the [global] section of /etc/samba/smb.conf:
workgroup = EXAMPLE. . .s e c u r i t y = user
The security parameter is farther down in the [global] section, and is commented by default. Also, changeEXAMPLE to better match your environment.
Create a new section at the bottom of the file, or uncomment one of the examples, for the directory to beshared:
[ share ]comment = Ubuntu F i l e Server Sharepath = / srv /samba/ sharebrowsable = yesguest ok = yesread only = noc r ea t e mask = 0755
• comment: a short description of the share. Adjust to fit your needs.
• path: the path to the directory to share.
This example uses /srv/samba/sharename because, according to the Filesystem Hierarchy Standard(FHS), /srv is where site-specific data should be served. Technically Samba shares can be placedanywhere on the filesystem as long as the permissions are correct, but adhering to standards is recom-mended.
• browsable: enables Windows clients to browse the shared directory using Windows Explorer.
• guest ok: allows clients to connect to the share without supplying a password.
• read only: determines if the share is read only or if write privileges are granted. Write privileges areallowed only when the value is no, as is seen in this example. If the value is yes, then access to theshare is read only.
• create mask: determines the permissions new files will have when created.
Now that Samba is configured, the directory needs to be created and the permissions changed. From aterminal enter:
sudo mkdir −p / srv /samba/ sharesudo chown nobody : nogroup / srv /samba/ share /
Note
The -p switch tells mkdir to create the entire directory tree if it doesn’t exist.
Finally, restart the samba services to enable the new configuration:
sudo sys t emct l r e s t a r t smbd . s e r v i c e nmbd . s e r v i c e
142
Warning
Once again, the above configuration gives all access to any client on the local network. For amore secure configuration see Securing File and Print Server.
From a Windows client you should now be able to browse to the Ubuntu file server and see the shareddirectory. If your client doesn’t show your share automatically, try to access your server by its IP address,e.g. \\192.168.1.1, in a Windows Explorer window. To check that everything is working try creating adirectory from Windows.
To create additional shares simply create new [dir] sections in /etc/samba/smb.conf, and restart Samba.Just make sure that the directory you want to share actually exists and the permissions are correct.
Note
The file share named “[share]” and the path /srv/samba/share are just examples. Adjust theshare and path names to fit your environment. It is a good idea to name a share after a directoryon the file system. Another example would be a share name of [qa] with a path of /srv/samba/qa.
Resources
• For in depth Samba configurations see the Samba HOWTO Collection
• The guide is also available in printed format.
• O’Reilly’s Using Samba is another good reference.
• The Ubuntu Wiki Samba page.
Samba
Computer networks are often comprised of diverse systems, and while operating a network made up entirelyof Ubuntu desktop and server computers would certainly be fun, some network environments must consistof both Ubuntu and Microsoft Windows systems working together in harmony. This section of the Sambaguide introduces principles and tools used in configuring your Ubuntu Server for sharing network resourceswith Windows computers.
Introduction
Successfully networking your Ubuntu system with Windows clients involves providing and integrating withservices common to Windows environments. Such services assist the sharing of data and information aboutthe computers and users involved in the network, and maybe classified under three major categories offunctionality:
• File and Printer Sharing Services. Using the Server Message Block (SMB) protocol to facilitatethe sharing of files, folders, volumes, and the sharing of printers throughout the network.
• Directory Services. Sharing vital information about the computers and users of the network withsuch technologies as the Lightweight Directory Access Protocol (LDAP) and Microsoft Active Directory.
• Authentication and Access. Establishing the identity of a computer or user of the network anddetermining the information the computer or user is authorized to access using such principles andtechnologies as file permissions, group policies, and the Kerberos authentication service.
143
Fortunately, your Ubuntu system may provide all such facilities to Windows clients and share networkresources among them. One of the principal pieces of software your Ubuntu system includes for Windowsnetworking is the Samba suite of SMB server applications and tools.
This section of the Samba guide will introduce some of the common Samba use cases, and how to installand configure the necessary packages. Additional detailed documentation and information on Samba can befound on the Samba website.
Print Server
Another common use of Samba is to configure it to share printers installed, either locally or over the network,on an Ubuntu server. Similar to File Server this section will configure Samba to allow any client on the localnetwork to use the installed printers without prompting for a username and password.
For a more secure configuration see Securing File and Print Server.
Installation
Before installing and configuring Samba it is best to already have a working CUPS installation. See ??? fordetails.
To install the samba package, from a terminal enter:sudo apt i n s t a l l samba
Configuration
After installing samba edit /etc/samba/smb.conf. Change the workgroup attribute to what is appropriatefor your network, and change security to user:
workgroup = EXAMPLE. . .s e c u r i t y = user
In the [printers] section change the guest ok option to yes:browsable = yesguest ok = yes
After editing smb.conf restart Samba:sudo sys t emct l r e s t a r t smbd . s e r v i c e nmbd . s e r v i c e
The default Samba configuration will automatically share any printers installed. Simply install the printerlocally on your Windows clients.
Resources
• For in depth Samba configurations see the Samba HOWTO Collection
• The guide is also available in printed format.
• O’Reilly’s Using Samba is another good reference.
• Also, see the CUPS Website for more information on configuring CUPS.
144
• The Ubuntu Wiki Samba page.
Securing File and Print Server
Samba Security Modes
There are two security levels available to the Common Internet Filesystem (CIFS) network protocol user-level and share-level. Samba’s security mode implementation allows more flexibility, providing four ways ofimplementing user-level security and one way to implement share-level:
• security = user: requires clients to supply a username and password to connect to shares. Samba useraccounts are separate from system accounts, but the libpam-winbind package will sync system usersand passwords with the Samba user database.
• security = domain: this mode allows the Samba server to appear to Windows clients as a PrimaryDomain Controller (PDC), Backup Domain Controller (BDC), or a Domain Member Server (DMS).See As a Domain Controller for further information.
• security = ADS: allows the Samba server to join an Active Directory domain as a native member. SeeActive Directory Integration for details.
• security = server: this mode is left over from before Samba could become a member server, and due tosome security issues should not be used. See the Server Security section of the Samba guide for moredetails.
• security = share: allows clients to connect to shares without supplying a username and password.
The security mode you choose will depend on your environment and what you need the Samba server toaccomplish.
Security = User
This section will reconfigure the Samba file and print server, from File Server and Print Server, to requireauthentication.
First, install the libpam-winbind package which will sync the system users to the Samba user database:sudo apt i n s t a l l libpam−winbind
Note
If you chose the Samba Server task during installation libpam-winbind is already installed.
Edit /etc/samba/smb.conf, and in the [share] section change:guest ok = no
Finally, restart Samba for the new settings to take effect:sudo sys t emct l r e s t a r t smbd . s e r v i c e nmbd . s e r v i c e
Now when connecting to the shared directories or printers you should be prompted for a username andpassword.
Note
If you choose to map a network drive to the share you can check the “Reconnect at Logon” checkbox, which will require you to only enter the username and password once, at least until thepassword changes.
145
Share Security
There are several options available to increase the security for each individual shared directory. Using the[share] example, this section will cover some common options.
Groups
Groups define a collection of computers or users which have a common level of access to particular networkresources and offer a level of granularity in controlling access to such resources. For example, if a group qais defined and contains the users freda, danika, and rob and a second group support is defined and consists ofusers danika, jeremy, and vincent then certain network resources configured to allow access by the qa groupwill subsequently enable access by freda, danika, and rob, but not jeremy or vincent. Since the user danikabelongs to both the qa and support groups, she will be able to access resources configured for access by bothgroups, whereas all other users will have only access to resources explicitly allowing the group they are partof.
By default Samba looks for the local system groups defined in /etc/group to determine which users belongto which groups. For more information on adding and removing users from groups see ???.
When defining groups in the Samba configuration file, /etc/samba/smb.conf, the recognized syntax is topreface the group name with an “@” symbol. For example, if you wished to define a group named sysadminin a certain section of the /etc/samba/smb.conf, you would do so by entering the group name as @sysadmin.
File Permissions
File Permissions define the explicit rights a computer or user has to a particular directory, file, or set offiles. Such permissions may be defined by editing the /etc/samba/smb.conf file and specifying the explicitpermissions of a defined file share.
For example, if you have defined a Samba share called share and wish to give read-only permissions to thegroup of users known as qa, but wanted to allow writing to the share by the group called sysadmin and theuser named vincent, then you could edit the /etc/samba/smb.conf file, and add the following entries underthe [share] entry:
read l i s t = @qawr i t e l i s t = @sysadmin , v incent
Another possible Samba permission is to declare administrative permissions to a particular shared resource.Users having administrative permissions may read, write, or modify any information contained in the resourcethe user has been given explicit administrative permissions to.
For example, if you wanted to give the user melissa administrative permissions to the share example, youwould edit the /etc/samba/smb.conf file, and add the following line under the [share] entry:
admin use r s = me l i s s a
After editing /etc/samba/smb.conf, restart Samba for the changes to take effect:
sudo sys t emct l r e s t a r t smbd . s e r v i c e nmbd . s e r v i c e
Note
For the read list and write list to work the Samba security mode must not be set to security =share
146
Now that Samba has been configured to limit which groups have access to the shared directory, the filesystempermissions need to be updated.
Traditional Linux file permissions do not map well to Windows NT Access Control Lists (ACLs). FortunatelyPOSIX ACLs are available on Ubuntu servers providing more fine grained control. For example, to enableACLs on /srv an EXT3 filesystem, edit /etc/fstab adding the acl option:
UUID=66bcdd2e−8861−4fb0−b7e4−e61c569fe17d / srv ext3 noatime , re la t ime , a c l 01
Then remount the partition:
sudo mount −v −o remount / srv
Note
The above example assumes /srv on a separate partition. If /srv, or wherever you have configuredyour share path, is part of the / partition a reboot may be required.
To match the Samba configuration above the sysadmin group will be given read, write, and execute permis-sions to /srv/samba/share, the qa group will be given read and execute permissions, and the files will beowned by the username melissa. Enter the following in a terminal:
sudo chown −R me l i s s a / srv /samba/ share /sudo chgrp −R sysadmin / srv /samba/ share /sudo s e t f a c l −R −m g : qa : rx / srv /samba/ share /
Note
The setfacl command above gives execute permissions to all files in the /srv/samba/share direc-tory, which you may or may not want.
Now from a Windows client you should notice the new file permissions are implemented. See the acl andsetfacl man pages for more information on POSIX ACLs.
Samba AppArmor Profile
Ubuntu comes with the AppArmor security module, which provides mandatory access controls. The defaultAppArmor profile for Samba will need to be adapted to your configuration. For more details on usingAppArmor see ???.
There are default AppArmor profiles for /usr/sbin/smbd and /usr/sbin/nmbd, the Samba daemon binaries,as part of the apparmor-profiles packages. To install the package, from a terminal prompt enter:
sudo apt i n s t a l l apparmor−p r o f i l e s apparmor−u t i l s
Note
This package contains profiles for several other binaries.
By default the profiles for smbd and nmbd are in complain mode allowing Samba to work without modifyingthe profile, and only logging errors. To place the smbd profile into enforce mode, and have Samba work asexpected, the profile will need to be modified to reflect any directories that are shared.
Edit /etc/apparmor.d/usr.sbin.smbd adding information for [share] from the file server example:
/ s rv /samba/ share / r ,/ s rv /samba/ share /** rwkix ,
Now place the profile into enforce and reload it:
147
sudo aa−en f o r c e / usr / sb in /smbdcat / e tc /apparmor . d/ usr . sb in . smbd | sudo apparmor_parser −r
You should now be able to read, write, and execute files in the shared directory as normal, and the smbdbinary will have access to only the configured files and directories. Be sure to add entries for each directoryyou configure Samba to share. Also, any errors will be logged to /var/log/syslog.
Resources
• For in depth Samba configurations see the Samba HOWTO Collection
• The guide is also available in printed format.
• O’Reilly’s Using Samba is also a good reference.
• Chapter 18 of the Samba HOWTO Collection is devoted to security.
• For more information on Samba and ACLs see the Samba ACLs page.
• The Ubuntu Wiki Samba page.
Samba - OpenLDAP Backend
NOTE
This section is flagged as legacy because nowadays Samba 4 is best integrated with its ownLDAP server in AD mode. Integrating Samba with LDAP as described here covers the NT4mode, deprecated for many years.
This section covers the integration of Samba with LDAP. The Samba server’s role will be that of a “standalone”server and the LDAP directory will provide the authentication layer in addition to containing the user, group,and machine account information that Samba requires in order to function (in any of its 3 possible roles).The pre-requisite is an OpenLDAP server configured with a directory that can accept authentication requests.See Service - LDAP and Service - LDAP with TLS for details on fulfilling this requirement. Once those stepsare completed, you will need to decide what specifically you want Samba to do for you and then configureit accordingly.
This guide will assume that the LDAP and Samba services are running on the same server and thereforeuse SASL EXTERNAL authentication whenever changing something under cn=config. If that is not yourscenario, you will have to run those ldap commands on the LDAP server.
Software Installation
There are two packages needed when integrating Samba with LDAP: samba and smbldap-tools.
Strictly speaking, the smbldap-tools package isn’t needed, but unless you have some other way to managethe various Samba entities (users, groups, computers) in an LDAP context then you should install it.
Install these packages now:
sudo apt i n s t a l l samba smbldap−t o o l s
148
LDAP Configuration
We will now configure the LDAP server so that it can accomodate Samba data. We will perform three tasksin this section:
• Import a schema
• Index some entries
• Add objects
Samba schema
In order for OpenLDAP to be used as a backend for Samba, the DIT will need to use attributes that canproperly describe Samba data. Such attributes can be obtained by introducing a Samba LDAP schema.Let’s do this now.
The schema is found in the now-installed samba package and is already in the ldif format. We can importit with one simple command:
sudo ldapadd −Q −Y EXTERNAL −H ldap i :/// −f / usr / share /doc/samba/examples /LDAP/samba . l d i f
To query and view this new schema:
sudo ldapsearch −Q −LLL −Y EXTERNAL −H ldap i :/// −b cn=schema , cn=con f i g ’ cn=*samba* ’
Samba indices
Now that slapd knows about the Samba attributes, we can set up some indices based on them. Indexingentries is a way to improve performance when a client performs a filtered search on the DIT.
Create the file samba_indices.ldif with the following contents:
dn : o lcDatabase={1}mdb, cn=con f i gchangetype : modifyr ep l a c e : olcDbIndexolcDbIndex : ob j e c tC l a s s eqolcDbIndex : uidNumber , gidNumber eqolcDbIndex : l o g i n S h e l l eqolcDbIndex : uid , cn eq , subolcDbIndex : memberUid eq , subolcDbIndex : member , uniqueMember eqolcDbIndex : sambaSID eqolcDbIndex : sambaPrimaryGroupSID eqolcDbIndex : sambaGroupType eqolcDbIndex : sambaSIDList eqolcDbIndex : sambaDomainName eqolcDbIndex : d e f au l t sub , eq
Using the ldapmodify utility load the new indices:
sudo ldapmodify −Q −Y EXTERNAL −H ldap i :/// −f samba_indices . l d i f
If all went well you should see the new indices using ldapsearch:
149

sudo ldapsearch −Q −LLL −Y EXTERNAL −H \ldap i :/// −b cn=con f i g olcDatabase={1}mdb olcDbIndex
Adding Samba LDAP objects
Next, configure the smbldap-tools package to match your environment. The package comes with a configu-ration helper script called smbldap-config. Before running it, though, you should decide on two importantconfiguration settings in /etc/samba/smb.conf:
• netbios name: how this server will be known. The default value is derived from the server’s hostname,but truncated at 15 characters.
• workgroup: the workgroup name for this server, or, if you later decide to make it a domain controller,this will be the domain.
It’s important to make these choices now because smbldap-config will use them to generate the config thatwill be later stored in the LDAP directory. If you run smbldap-config now and later change these values in/etc/samba/smb.conf there will be an inconsistency.
Once you are happy with netbios name and workgroup, proceed to generate the smbldap-tools configurationby running the configuration script which will ask you some questions:
sudo smbldap−c on f i g
Some of the more important ones:
• workgroup name: has to match what you will configure in /etc/samba/smb.conf later on.
• ldap suffix: has to match the ldap suffix you chose when you configured the LDAP server.
• other ldap suffixes: they are all relative to ldap suffix above. For example, for ldap user suffix youshould use ou=People, and for computer/machines, use ou=Computers.
• ldap master bind dn and bind password: use the rootDN credentials.
The smbldap-populate script will then add the LDAP objects required for Samba. It will ask you for apassword for the “domain root” user, which is also the “root” user stored in LDAP:
sudo smbldap−populate −g 10000 −u 10000 −r 10000
The -g, -u and -r parameters tell smbldap-tools where to start the numeric uid and gid allocation for theLDAP users. You should pick a range start that does not overlap with your local /etc/passwd users.
You can create a LDIF file containing the new Samba objects by executing sudo smbldap−populate −esamba.ldif. This allows you to look over the changes making sure everything is correct. If it is, rerun thescript without the ‘-e’ switch. Alternatively, you can take the LDIF file and import its data per usual.
Your LDAP directory now has the necessary information to authenticate Samba users.
Samba Configuration
To configure Samba to use LDAP, edit its configuration file /etc/samba/smb.conf commenting out the defaultpassdb backend parameter and adding some ldap-related ones. Make sure to use the same values you usedwhen running smbldap-populate:
# passdb backend = tdbsamworkgroup = EXAMPLE
# LDAP Se t t i ng s
150
passdb backend = ldapsam : ldap :// ldap01 . example . comldap s u f f i x = dc=example , dc=comldap user s u f f i x = ou=Peopleldap group s u f f i x = ou=Groupsldap machine s u f f i x = ou=Computersldap idmap s u f f i x = ou=Idmapldap admin dn = cn=admin , dc=example , dc=comldap s s l = s t a r t t l sldap passwd sync = yes
Change the values to match your environment.
Note
The smb.conf as shipped by the package is quite long and has many configuration examples. Aneasy way to visualize it without any comments is to run testparm -s.
Now inform Samba about the rootDN user’s password (the one set during the installation of the slapdpackage):
sudo smbpasswd −W
As a final step to have your LDAP users be able to connect to samba and authenticate, we need these usersto also show up in the system as “unix” users. Use SSSD for that as detailed in Service - SSSD.
Install sssd-ldap
sudo apt i n s t a l l sssd−ldap
Configure /etc/sssd/sssd.conf :
[ s s sd ]c on f i g_ f i l e_ve r s i on = 2domains = example . com
[ domain/example . com ]id_provider = ldapauth_provider = ldapldap_uri = ldap :// ldap01 . example . comcache_credent i a l s = Trueldap_search_base = dc=example , dc=com
Adjust permissions and start the service:
sudo chmod 0600 / e tc / s s sd / s s sd . confsudo chown root : root / e t c / s s sd / s s sd . confsudo sys t emct l s t a r t s s sd
Restart the Samba services:
sudo sys t emct l r e s t a r t smbd . s e r v i c e nmbd . s e r v i c e
To quickly test the setup, see if getent can list the Samba groups:
$ getent group Rep l i c a t o r sRep l i c a t o r s : * : 5 5 2 :
Note
The names are case sensitive!
151
If you have existing LDAP users that you want to include in your new LDAP-backed Samba they will, ofcourse, also need to be given some of the extra Samba specific attributes. The smbpasswd utility can do thisfor you:
sudo smbpasswd −a username
You will prompted to enter a password. It will be considered as the new password for that user. Making itthe same as before is reasonable. Note that this command cannot be used to create a new user from scratchin LDAP (unless you are using ldapsam:trusted and ldapsam:editposix, not covered in this guide).
To manage user, group, and machine accounts use the utilities provided by the smbldap-tools package. Hereare some examples:
• To add a new user with a home directory:
sudo smbldap−useradd −a −P −m username
The -a option adds the Samba attributes, and the -P option calls the smbldap-passwd utility after theuser is created allowing you to enter a password for the user. Finally, -m creates a local home directory.Test with the getent command:
getent passwd username
• To remove a user:
sudo smbldap−us e rd e l username
In the above command, use the -r option to remove the user’s home directory.
• To add a group:
sudo smbldap−groupadd −a groupname
As for smbldap-useradd, the -a adds the Samba attributes.
• To make an existing user a member of a group:
sudo smbldap−groupmod −m username groupname
The -m option can add more than one user at a time by listing them in comma-separated format.
• To remove a user from a group:
sudo smbldap−groupmod −x username groupname
• To add a Samba machine account:
sudo smbldap−useradd −t 0 −w username
Replace username with the name of the workstation. The -t 0 option creates the machine accountwithout a delay, while the -w option specifies the user as a machine account.
Resources
• Upstream documentation collection: https://www.samba.org/samba/docs/
• Upstream samba wiki: https://wiki.samba.org/index.php/Main_Page
152
CUPS - Print Server
The primary mechanism for Ubuntu printing and print services is the Common UNIX Printing System(CUPS). This printing system is a freely available, portable printing layer which has become the new standardfor printing in most Linux distributions.
CUPS manages print jobs and queues and provides network printing using the standard Internet PrintingProtocol (IPP), while offering support for a very large range of printers, from dot-matrix to laser and many inbetween. CUPS also supports PostScript Printer Description (PPD) and auto-detection of network printers,and features a simple web-based configuration and administration tool.
Installation
To install CUPS on your Ubuntu computer, simply use sudo with the apt command and give the packagesto install as the first parameter. A complete CUPS install has many package dependencies, but they mayall be specified on the same command line. Enter the following at a terminal prompt to install CUPS:
sudo apt i n s t a l l cups
Upon authenticating with your user password, the packages should be downloaded and installed withouterror. Upon the conclusion of installation, the CUPS server will be started automatically.
For troubleshooting purposes, you can access CUPS server errors via the error log file at: /var/log/cups/error_log. If the error log does not show enough information to troubleshoot any problems you encounter,the verbosity of the CUPS log can be increased by changing the LogLevel directive in the configurationfile (discussed below) to “debug” or even “debug2”, which logs everything, from the default of “info”. If youmake this change, remember to change it back once you’ve solved your problem, to prevent the log file frombecoming overly large.
Configuration
The Common UNIX Printing System server’s behavior is configured through the directives contained in thefile /etc/cups/cupsd.conf. The CUPS configuration file follows the same syntax as the primary configurationfile for the Apache HTTP server, so users familiar with editing Apache’s configuration file should feel at easewhen editing the CUPS configuration file. Some examples of settings you may wish to change initially willbe presented here.
Tip
Prior to editing the configuration file, you should make a copy of the original file and protect itfrom writing, so you will have the original settings as a reference, and to reuse as necessary.
Copy the /etc/cups/cupsd.conf file and protect it from writing with the following commands,issued at a terminal prompt:
sudo cp / e tc / cups/cupsd . conf / e t c / cups/cupsd . conf . o r i g i n a lsudo chmod a−w / etc / cups/cupsd . conf . o r i g i n a l
• ServerAdmin: To configure the email address of the designated administrator of the CUPS server,simply edit the /etc/cups/cupsd.conf configuration file with your preferred text editor, and add ormodify the ServerAdmin line accordingly. For example, if you are the Administrator for the CUPSserver, and your e-mail address is ‘[email protected]’, then you would modify the ServerAdmin lineto appear as such:
ServerAdmin bjoy@somebigco . com
153

• Listen: By default on Ubuntu, the CUPS server installation listens only on the loopback interface atIP address 127.0.0.1. In order to instruct the CUPS server to listen on an actual network adapter’s IPaddress, you must specify either a hostname, the IP address, or optionally, an IP address/port pairingvia the addition of a Listen directive. For example, if your CUPS server resides on a local networkat the IP address 192.168.10.250 and you’d like to make it accessible to the other systems on thissubnetwork, you would edit the /etc/cups/cupsd.conf and add a Listen directive, as such:
L i s t en 1 2 7 . 0 . 0 . 1 : 6 3 1 # ex i s t i n g loopback L i s t enL i s t en /var /run/cups/ cups . sock # ex i s t i n g socket L i s t enL i s t en 192 . 1 68 . 1 0 . 2 50 : 6 31 # Li s t en on the LAN in t e r f a c e , Port 631 (
IPP)
In the example above, you may comment out or remove the reference to the Loopback address(127.0.0.1) if you do not wish cupsd to listen on that interface, but would rather have it only lis-ten on the Ethernet interfaces of the Local Area Network (LAN). To enable listening for all networkinterfaces for which a certain hostname is bound, including the Loopback, you could create a Listenentry for the hostname socrates as such:
L i s t en s o c r a t e s :631 # Li s t en on a l l i n t e r f a c e s f o r the hostname ’ soc ra t e s’
or by omitting the Listen directive and using Port instead, as in:
Port 631 # Li s t en on port 631 on a l l i n t e r f a c e s
For more examples of configuration directives in the CUPS server configuration file, view the associatedsystem manual page by entering the following command at a terminal prompt:
man cupsd . conf
Note
Whenever you make changes to the /etc/cups/cupsd.conf configuration file, you’ll need to restartthe CUPS server by typing the following command at a terminal prompt:
sudo sys t emct l r e s t a r t cups . s e r v i c e
Web Interface
Tip
CUPS can be configured and monitored using a web interface, which by default is available athttp://localhost:631/admin. The web interface can be used to perform all printer managementtasks.
In order to perform administrative tasks via the web interface, you must either have the root account enabledon your server, or authenticate as a user in the lpadmin group. For security reasons, CUPS won’t authenticatea user that doesn’t have a password.
To add a user to the lpadmin group, run at the terminal prompt:
sudo usermod −aG lpadmin username
Further documentation is available in the Documentation/Help tab of the web interface.
154
References
CUPS Website
Debian Open-iSCSI page
Domain Name Service (DNS)
Domain Name Service (DNS) is an Internet service that maps IP addresses and fully qualified domain names(FQDN) to one another. In this way, DNS alleviates the need to remember IP addresses. Computers thatrun DNS are called name servers. Ubuntu ships with BIND (Berkley Internet Naming Daemon), the mostcommon program used for maintaining a name server on Linux.
Installation
At a terminal prompt, enter the following command to install dns:sudo apt i n s t a l l bind9
A very useful package for testing and troubleshooting DNS issues is the dnsutils package. Very often thesetools will be installed already, but to check and/or install dnsutils enter the following:sudo apt i n s t a l l d n s u t i l s
Configuration
There are many ways to configure BIND9. Some of the most common configurations are a caching nameserver,primary server, and secondary server.
• When configured as a caching nameserver BIND9 will find the answer to name queries and rememberthe answer when the domain is queried again.
• As a primary server, BIND9 reads the data for a zone from a file on its host and is authoritative forthat zone.
• As a secondary server, BIND9 gets the zone data from another nameserver that is authoritative forthe zone.
Overview
The DNS configuration files are stored in the /etc/bind directory. The primary configuration file is /etc/bind/named.conf, which in the layout provided by the package just includes these files.
• /etc/bind/named.conf.options: global DNS options• /etc/bind/named.conf.local: for your zones• /etc/bind/named.conf.default−zones: default zones such as localhost, its reverse, and the root hints
The root nameservers used to be described in the file /etc/bind/db.root. This is now provided insteadby the /usr/share/dns/root.hints file shipped with the dns−root−data package, and is referenced in thenamed.conf.default−zones configuration file above.
It is possible to configure the same server to be a caching name server, primary, and secondary: it alldepends on the zones it is serving. A server can be the Start of Authority (SOA) for one zone, while
155
providing secondary service for another zone. All the while providing caching services for hosts on the localLAN.
Caching Nameserver
The default configuration acts as a caching server. Simply uncomment and edit /etc/bind/named.conf.options to set the IP addresses of your ISP’s DNS servers:
f o rwarder s {1 . 2 . 3 . 4 ;5 . 6 . 7 . 8 ;
} ;
Note
Replace 1.2.3.4 and 5.6.7.8 with the IP Addresses of actual nameservers.
To enable the new configuration, restart the DNS server. From a terminal prompt:
sudo sys t emct l r e s t a r t bind9 . s e r v i c e
See dig for information on testing a caching DNS server.
Primary Server
In this section BIND9 will be configured as the Primary server for the domain example.com. Simply replaceexample.com with your FQDN (Fully Qualified Domain Name).
Forward Zone File
To add a DNS zone to BIND9, turning BIND9 into a Primary server, first edit /etc/bind/named.conf.local:
zone ” example . com” {type master ;f i l e ”/ e t c /bind/db . example . com” ;
} ;
Note
If bind will be receiving automatic updates to the file as with DDNS, then use /var/lib/bind/db.example.com rather than /etc/bind/db.example.com both here and in the copy commandbelow.
Now use an existing zone file as a template to create the /etc/bind/db.example.com file:
sudo cp / e tc /bind/db . l o c a l / e t c /bind/db . example . com
Edit the new zone file /etc/bind/db.example.com and change localhost . to the FQDN of your server, leavingthe additional . at the end. Change 127.0.0.1 to the nameserver’s IP Address and root. localhost to a validemail address, but with a . instead of the usual @ symbol, again leaving the . at the end. Change thecomment to indicate the domain that this file is for.
Create an A record for the base domain, example.com. Also, create an A record for ns.example.com, thename server in this example:
;; BIND data f i l e f o r example . com;$TTL 604800
156

@ IN SOA example . com . root . example . com . (2 ; S e r i a l
604800 ; Refresh86400 ; Retry
2419200 ; Expire604800 ) ; Negative Cache TTL
@ IN NS ns . example . com .@ IN A 192 . 1 68 . 1 . 1 0@ IN AAAA : : 1ns IN A 192 . 1 68 . 1 . 1 0
You must increment the Serial Number every time you make changes to the zone file. If you make multiplechanges before restarting BIND9, simply increment the Serial once.
Now, you can add DNS records to the bottom of the zone file. See Common Record Types for details.
Note
Many admins like to use the last date edited as the serial of a zone, such as 2020012100 whichis yyyymmddss (where ss is the Serial Number)
Once you have made changes to the zone file BIND9 needs to be restarted for the changes to take effect:sudo sys t emct l r e s t a r t bind9 . s e r v i c e
Reverse Zone File
Now that the zone is setup and resolving names to IP Addresses, a Reverse zone needs to be added to allowsDNS to resolve an address to a name.
Edit /etc/bind/named.conf.local and add the following:zone ” 1 . 1 6 8 . 1 9 2 . in−addr . arpa ” {
type master ;f i l e ”/ e t c /bind/db . 1 9 2 ” ;
} ;
Note
Replace 1.168.192 with the first three octets of whatever network you are using. Also, name thezone file /etc/bind/db.192 appropriately. It should match the first octet of your network.
Now create the /etc/bind/db.192 file:sudo cp / e tc /bind/db .127 / e t c /bind/db .192
Next edit /etc/bind/db.192 changing the same options as /etc/bind/db.example.com:;; BIND rev e r s e data f i l e f o r l o c a l 1 9 2 . 1 6 8 . 1 .XXX net;$TTL 604800@ IN SOA ns . example . com . root . example . com . (
2 ; S e r i a l604800 ; Refresh86400 ; Retry
2419200 ; Expire604800 ) ; Negative Cache TTL
157

;@ IN NS ns .10 IN PTR ns . example . com .
The Serial Number in the Reverse zone needs to be incremented on each change as well. For each A recordyou configure in /etc/bind/db.example.com, that is for a different address, you need to create a PTR recordin /etc/bind/db.192.
After creating the reverse zone file restart BIND9:sudo sys t emct l r e s t a r t bind9 . s e r v i c e
Secondary Server
Once a Primary Server has been configured a Secondary Server is highly recommended in order to maintainthe availability of the domain should the Primary become unavailable.
First, on the Primary server, the zone transfer needs to be allowed. Add the allow−transfer option to theexample Forward and Reverse zone definitions in /etc/bind/named.conf.local:zone ” example . com” {
type master ;f i l e ”/ e t c /bind/db . example . com” ;al low−t r a n s f e r { 1 9 2 . 1 6 8 . 1 . 1 1 ; } ;
} ;
zone ” 1 . 1 6 8 . 1 9 2 . in−addr . arpa ” {type master ;f i l e ”/ e t c /bind/db . 1 9 2 ” ;al low−t r a n s f e r { 1 9 2 . 1 6 8 . 1 . 1 1 ; } ;
} ;
Note
Replace 192.168.1.11 with the IP Address of your Secondary nameserver.
Restart BIND9 on the Primary server:sudo sys t emct l r e s t a r t bind9 . s e r v i c e
Next, on the Secondary server, install the bind9 package the same way as on the Primary. Then edit the/etc/bind/named.conf.local and add the following declarations for the Forward and Reverse zones:zone ” example . com” {
type s l av e ;f i l e ”db . example . com” ;masters { 1 9 2 . 1 6 8 . 1 . 1 0 ; } ;
} ;
zone ” 1 . 1 6 8 . 1 9 2 . in−addr . arpa ” {type s l av e ;f i l e ”db . 1 9 2 ” ;masters { 1 9 2 . 1 6 8 . 1 . 1 0 ; } ;
} ;
Note
Replace 192.168.1.10 with the IP Address of your Primary nameserver.
158

Restart BIND9 on the Secondary server:sudo sys t emct l r e s t a r t bind9 . s e r v i c e
In /var/log/syslog you should see something similar to the following (some lines have been split to fit theformat of this document):c l i e n t 192 .168 .1 .10#39448 : r e c e i v ed no t i f y f o r zone ’ 1 . 1 6 8 . 1 9 2 . in−addr . arpa ’zone 1 . 1 6 8 . 1 9 2 . in−addr . arpa/IN : Trans fe r s t a r t ed .t r a n s f e r o f ’ 1 0 0 . 1 8 . 1 7 2 . in−addr . arpa/IN ’ from 192 .168 .1 .10#53 :connected us ing 192.168.1 .11#37531
zone 1 . 1 6 8 . 1 9 2 . in−addr . arpa/IN : t r a n s f e r r e d s e r i a l 5t r a n s f e r o f ’ 1 0 0 . 1 8 . 1 7 2 . in−addr . arpa/IN ’ from 192 .168 .1 .10#53 :Trans fe r completed : 1 messages ,
6 records , 212 bytes , 0 .002 s e c s (106000 bytes / sec )zone 1 . 1 6 8 . 1 9 2 . in−addr . arpa/IN : sending n o t i f i e s ( s e r i a l 5)
c l i e n t 192 .168 .1 .10#20329 : r e c e i v ed no t i f y f o r zone ’ example . com ’zone example . com/IN : Trans fe r s t a r t ed .t r a n s f e r o f ’ example . com/IN ’ from 192 .168 .1 .10#53 : connected us ing
192.168.1 .11#38577zone example . com/IN : t r a n s f e r r e d s e r i a l 5t r a n s f e r o f ’ example . com/IN ’ from 192 .168 .1 .10#53 : Trans fe r completed : 1
messages ,8 records , 225 bytes , 0 .002 s e c s (112500 bytes / sec )
Note
Note: A zone is only transferred if the Serial Number on the Primary is larger than the one onthe Secondary. If you want to have your Primary DNS notifying other Secondary DNS Servers ofzone changes, you can add also−notify { ipaddress; }; to /etc/bind/named.conf.local as shownin the example below:
zone ” example . com” {type master ;f i l e ”/ e t c /bind/db . example . com” ;al low−t r a n s f e r { 1 9 2 . 1 6 8 . 1 . 1 1 ; } ;a l so−no t i f y { 1 9 2 . 1 6 8 . 1 . 1 1 ; } ;
} ;
zone ” 1 . 1 6 8 . 1 9 2 . in−addr . arpa ” {type master ;f i l e ”/ e t c /bind/db . 1 9 2 ” ;al low−t r a n s f e r { 1 9 2 . 1 6 8 . 1 . 1 1 ; } ;a l so−no t i f y { 1 9 2 . 1 6 8 . 1 . 1 1 ; } ;
} ;
Note
The default directory for non-authoritative zone files is /var/cache/bind/. This directory is alsoconfigured in AppArmor to allow the named daemon to write to it. For more information onAppArmor see Security - AppArmor.
Troubleshooting
This section covers diagnosing problems with DNS and BIND9 configurations.
159
Testing
resolv.conf
The first step in testing BIND9 is to add the nameserver’s IP Address to a hosts resolver. The Primarynameserver should be configured as well as another host to double check things. Refer to DNS clientconfiguration for details on adding nameserver addresses to your network clients. In the end your nameserverline in /etc/resolv .conf should be pointing at 127.0.0.53 and you should have a search parameter for yourdomain. Something like this:
nameserver 1 2 7 . 0 . 0 . 5 3search example . com
To check which DNS server your local resolver is using, run:
systemd−r e s o l v e −−s t a tu s
Note
You should also add the IP Address of the Secondary nameserver to your client configuration incase the Primary becomes unavailable.
dig
If you installed the dnsutils package you can test your setup using the DNS lookup utility dig:
• After installing BIND9 use dig against the loopback interface to make sure it is listening on port 53.From a terminal prompt:
d ig −x 1 2 7 . 0 . 0 . 1
You should see lines similar to the following in the command output:
; ; Query time : 1 msec; ; SERVER: 192 . 168 . 1 . 10#53(192 . 168 . 1 . 10 )
• If you have configured BIND9 as a Caching nameserver “dig” an outside domain to check the querytime:
d ig ubuntu . com
Note the query time toward the end of the command output:
; ; Query time : 49 msec
After a second dig there should be improvement:
; ; Query time : 1 msec
ping
Now to demonstrate how applications make use of DNS to resolve a host name use the ping utility to sendan ICMP echo request:
ping example . com
This tests if the nameserver can resolve the name ns.example.com to an IP Address. The command outputshould resemble:
160

PING ns . example . com ( 1 9 2 . 1 6 8 . 1 . 1 0 ) 56(84) bytes o f data .64 bytes from 19 2 . 1 6 8 . 1 . 1 0 : icmp_seq=1 t t l =64 time=0.800 ms64 bytes from 19 2 . 1 6 8 . 1 . 1 0 : icmp_seq=2 t t l =64 time=0.813 ms
named-checkzone
A great way to test your zone files is by using the named−checkzone utility installed with the bind9 package.This utility allows you to make sure the configuration is correct before restarting BIND9 and making thechanges live.
• To test our example Forward zone file enter the following from a command prompt:
named−checkzone example . com / etc /bind/db . example . com
If everything is configured correctly you should see output similar to:
zone example . com/IN : loaded s e r i a l 6OK
• Similarly, to test the Reverse zone file enter the following:
named−checkzone 1 . 1 6 8 . 1 9 2 . in−addr . arpa / e tc /bind/db .192
The output should be similar to:
zone 1 . 1 6 8 . 1 9 2 . in−addr . arpa/IN : loaded s e r i a l 3OK
Note
The Serial Number of your zone file will probably be different.
Quick temporary query logging
With the rndc tool, you can quickly turn query logging on and off, without restarting the service or changingthe configuration file.
To turn query logging on, run:
sudo rndc query log on
Likewise, to turn it off, run:
sudo rndc query log o f f
The logs will be sent to syslog and will show up in /var/log/syslog by default:
Jan 20 19 : 40 : 50 new−n1 named [ 8 1 6 ] : r e c e i v ed con t r o l channel command ’ query logon ’
Jan 20 19 : 40 : 50 new−n1 named [ 8 1 6 ] : query l ogg ing i s now onJan 20 19 : 40 : 57 new−n1 named [ 8 1 6 ] : c l i e n t @0x7f48ec101480 192.168.1 .10#36139 (
ubuntu . com) : query : ubuntu . com IN A +E(0)K ( 1 9 2 . 1 6 8 . 1 . 1 0 )
Note
The amount of logs generated by enabling querylog could be huge!
161

Logging
BIND9 has a wide variety of logging configuration options available, but the two main ones are channel andcategory, which configure where logs go, and what information gets logged, respectively.
If no logging options are configured the default configuration is:
l o gg ing {category d e f au l t { de f au l t_sy s l og ; default_debug ; } ;category unmatched { nu l l ; } ;
} ;
Let’s instead configure BIND9 to send debug messages related to DNS queries to a separate file.
We need to configure a channel to specify which file to send the messages to, and a category. In this example,the category will log all queries. Edit /etc/bind/named.conf.local and add the following:
l ogg ing {channel query . l og {
f i l e ”/ var / log /named/query . l og ” ;s e v e r i t y debug 3 ;
} ;category que r i e s { query . l og ; } ;
} ;
Note
The debug option can be set from 1 to 3. If a level isn’t specified, level 1 is the default.
• Since the named daemon runs as the bind user the /var/log/named directory must be created and theownership changed:
sudo mkdir /var / log /namedsudo chown bind : bind /var / log /named
• Now restart BIND9 for the changes to take effect:
sudo sys t emct l r e s t a r t bind9 . s e r v i c e
You should see the file /var/log/named/query.log fill with query information. This is a simple example ofthe BIND9 logging options. For coverage of advanced options see More Information.
References
Common Record Types
This section covers some of the most common DNS record types.
• A record: This record maps an IP Address to a hostname.
www IN A 192 . 1 68 . 1 . 1 2
• CNAME record: Used to create an alias to an existing A record. You cannot create a CNAME recordpointing to another CNAME record.
web IN CNAME www
• MX record: Used to define where email should be sent to. Must point to an A record, not a CNAME.
162
@ IN MX 1 mail . example . com .mail IN A 192 . 1 68 . 1 . 1 3
• NS record: Used to define which servers serve copies of a zone. It must point to an A record, not aCNAME. This is where Primary and Secondary servers are defined.
@ IN NS ns . example . com .@ IN NS ns2 . example . com .ns IN A 192 . 1 68 . 1 . 1 0ns2 IN A 192 . 1 68 . 1 . 1 1
More Information
• Upstream BIND9 Documentation
• Bind9.net has links to a large collection of DNS and BIND9 resources.
• DNS and BIND is a popular book now in it’s fifth edition. There is now also a DNS and BIND onIPv6 book.
• A great place to ask for BIND9 assistance, and get involved with the Ubuntu Server community, is the#ubuntu-server IRC channel on freenode.
FTP Server
File Transfer Protocol (FTP) is a TCP protocol for downloading files between computers. In the past, ithas also been used for uploading but, as that method does not use encryption, user credentials as well asdata transferred in the clear and are easily intercepted. So if you are here looking for a way to upload anddownload files securely, see the OpenSSH documentation instead.
FTP works on a client/server model. The server component is called an FTP daemon. It continuouslylistens for FTP requests from remote clients. When a request is received, it manages the login and sets upthe connection. For the duration of the session it executes any of commands sent by the FTP client.
Access to an FTP server can be managed in two ways:
• Anonymous
• Authenticated
In the Anonymous mode, remote clients can access the FTP server by using the default user account called“anonymous” or “ftp” and sending an email address as the password. In the Authenticated mode a user musthave an account and a password. This latter choice is very insecure and should not be used except in specialcircumstances. If you are looking to transfer files securely see SFTP in the section on OpenSSH-Server. Useraccess to the FTP server directories and files is dependent on the permissions defined for the account usedat login. As a general rule, the FTP daemon will hide the root directory of the FTP server and change it tothe FTP Home directory. This hides the rest of the file system from remote sessions.
vsftpd - FTP Server Installation
vsftpd is an FTP daemon available in Ubuntu. It is easy to install, set up, and maintain. To install vsftpdyou can run the following command:
sudo apt i n s t a l l v s f tpd
163
Anonymous FTP Configuration
By default vsftpd is not configured to allow anonymous download. If you wish to enable anonymous downloadedit /etc/vsftpd.conf by changing:
anonymous_enable=YES
During installation a ftp user is created with a home directory of /srv/ftp. This is the default FTP directory.
If you wish to change this location, to /srv/ files /ftp for example, simply create a directory in anotherlocation and change the ftp user’s home directory:
sudo mkdir −p / srv / f i l e s / f tpsudo usermod −d / srv / f i l e s / f tp f tp
After making the change restart vsftpd:
sudo sys t emct l r e s t a r t vs f tpd . s e r v i c e
Finally, copy any files and directories you would like to make available through anonymous FTP to /srv/files /ftp, or /srv/ftp if you wish to use the default.
User Authenticated FTP Configuration
By default vsftpd is configured to authenticate system users and allow them to download files. If you wantusers to be able to upload files, edit /etc/vsftpd.conf:
write_enable=YES
Now restart vsftpd:
sudo sys t emct l r e s t a r t vs f tpd . s e r v i c e
Now when system users login to FTP they will start in their home directories where they can download,upload, create directories, etc.
Similarly, by default, anonymous users are not allowed to upload files to FTP server. To change this setting,you should uncomment the following line, and restart vsftpd:
anon_upload_enable=YES
Warning
Enabling anonymous FTP upload can be an extreme security risk. It is best to not enableanonymous upload on servers accessed directly from the Internet.
The configuration file consists of many configuration parameters. The information about each parameter isavailable in the configuration file. Alternatively, you can refer to the man page, man 5 vsftpd.conf for detailsof each parameter.
Securing FTP
There are options in /etc/vsftpd.conf to help make vsftpd more secure. For example users can be limited totheir home directories by uncommenting:
chroot_loca l_user=YES
You can also limit a specific list of users to just their home directories:
164
chroot_l i s t_enab le=YESch r o o t_ l i s t_ f i l e=/etc / vs f tpd . ch r oo t_ l i s t
After uncommenting the above options, create a /etc/vsftpd.chroot_list containing a list of users one perline. Then restart vsftpd:
sudo sys t emct l r e s t a r t vs f tpd . s e r v i c e
Also, the /etc/ftpusers file is a list of users that are disallowed FTP access. The default list includes root,daemon, nobody, etc. To disable FTP access for additional users simply add them to the list.
FTP can also be encrypted using FTPS. Different from SFTP, FTPS is FTP over Secure Socket Layer(SSL). SFTP is a FTP like session over an encrypted SSH connection. A major difference is that users ofSFTP need to have a shell account on the system, instead of a nologin shell. Providing all users with a shellmay not be ideal for some environments, such as a shared web host. However, it is possible to restrict suchaccounts to only SFTP and disable shell interaction.
To configure FTPS, edit /etc/vsftpd.conf and at the bottom add:
s s l_enab l e=YES
Also, notice the certificate and key related options:
r s a_c e r t_ f i l e=/etc / s s l / c e r t s / s s l −cer t−s n ak e o i l . pemrsa_pr ivate_key_f i l e=/etc / s s l / p r i va t e / s s l −cer t−s n ak e o i l . key
By default these options are set to the certificate and key provided by the ssl-cert package. In a productionenvironment these should be replaced with a certificate and key generated for the specific host. For moreinformation on certificates see Security - Certificates.
Now restart vsftpd, and non-anonymous users will be forced to use FTPS:
sudo sys t emct l r e s t a r t vs f tpd . s e r v i c e
To allow users with a shell of /usr/sbin/nologin access to FTP, but have no shell access, edit /etc/ shellsadding the nologin shell:
# / etc / s h e l l s : v a l i d l o g i n s h e l l s/ bin / csh/bin / sh/ usr / bin / es/ usr / bin /ksh/bin /ksh/ usr / bin / rc/ usr / bin / tcsh/bin / tcsh/ usr / bin / esh/bin /dash/bin /bash/bin / rbash/ usr / bin / sc r e en/ usr / sb in / no log in
This is necessary because, by default vsftpd uses PAM for authentication, and the /etc/pam.d/vsftpd con-figuration file contains:
auth r equ i r ed pam_shells . so
165
The shells PAM module restricts access to shells listed in the /etc/ shells file.
Most popular FTP clients can be configured to connect using FTPS. The lftp command line FTP client hasthe ability to use FTPS as well.
References
• See the vsftpd website for more information.
iSCSI Initiator (or Client)
Wikipedia iSCSI Definition:
iSCSI an acronym for Internet Small Computer Systems Interface , an Internet Protocol(IP)-based storage networking standard for linking data storage facilities. It provides block-levelaccess to storage devices by carrying SCSI commands over a TCP/IP network.
iSCSI is used to facilitate data transfers over intranets and to manage storage over long distances.It can be used to transmit data over local area networks (LANs), wide area networks (WANs),or the Internet and can enable location-independent data storage and retrieval.
The protocol allows clients (called initiators) to send SCSI commands (CDBs) to storage devices(targets) on remote servers. It is a storage area network (SAN) protocol, allowing organizations toconsolidate storage into storage arrays while providing clients (such as database and web servers)with the illusion of locally attached SCSI disks.
It mainly competes with Fibre Channel, but unlike traditional Fibre Channel, which usuallyrequires dedicated cabling, iSCSI can be run over long distances using existing network infras-tructure.
Ubuntu Server can be configured as both: iSCSI initiator and iSCSI target. This guide provides com-mands and configuration options to setup an iSCSI initiator (or Client).
Note: It is assumed that you already have an iSCSI target on your local network and have theappropriate rights to connect to it. The instructions for setting up a target vary greatly between hardwareproviders, so consult your vendor documentation to configure your specific iSCSI target.
Network Interfaces Configuration
Before start configuring iSCSI, make sure to have the network interfaces correctly set and configured in orderto have open-iscsi package to behave appropriately, specially during boot time. In Ubuntu 20.04 LTS, thedefault network configuration tool is netplan.io.
For all the iSCSI examples bellow please consider the following netplan configuration for my iSCSI initiator:
/etc/cloud/cloud.cfg.d/99-disable-network-config.cfg
{ con f i g : d i s ab l ed }
/etc/netplan/50-cloud-init.yaml
network :e th e rne t s :
enp5s0 :match :
macaddress : 0 0 : 1 6 : 3 e : a f : c4 : d6
166

set−name : eth0dhcp4 : t ruedhcp− i d e n t i f i e r : mac
enp6s0 :match :
macaddress : 0 0 : 1 6 : 3 e : 5 0 : 1 1 : 9 cset−name : i s c s i 0 1dhcp4 : t ruedhcp− i d e n t i f i e r : macdhcp4−ov e r r i d e s :
route−metr ic : 300enp7s0 :
match :macaddress : 0 0 : 1 6 : 3 e : b3 : cc : 50
set−name : i s c s i 0 2dhcp4 : t ruedhcp− i d e n t i f i e r : macdhcp4−ov e r r i d e s :
route−metr ic : 300ve r s i on : 2r endere r : networkd
With this configuration, the interfaces names change by matching their mac addresses. This makes it easierto manage them in a server containing multiple interfaces.
From this point and beyond, 2 interfaces are going to be mentioned: iscsi01 and iscsi02. This helps todemonstrate how to configure iSCSI in a multipath environment as well (check the Device Mapper Multipathsession in this same Server Guide).
If you have only a single interface for the iSCSI network, make sure to follow the same instructions,but only consider the iscsi01 interface command line examples.
iSCSI Initiator Install
To configure Ubuntu Server as an iSCSI initiator install the open-iscsi package. In a terminal enter:
$ sudo apt i n s t a l l open− i s c s i
Once the package is installed you will find the following files:
• /etc/iscsi/iscsid.conf• /etc/iscsi/initiatorname.iscsi
iSCSI Initiator Configuration
Configure the main configuration file like the example bellow:
/etc/iscsi/iscsid.conf
### star tup s e t t i n g s
## w i l l be c on t r o l l e d by systemd , l eave as i si s c s i d . s ta r tup = /usr / sb in / i s c s i dnode . s ta r tup = manual
### chap s e t t i n g s
167

# node . s e s s i o n . auth . authmethod = CHAP
## authen t i c a t i on o f i n i t i a t o r by ta r g e t ( s e s s i o n )# node . s e s s i o n . auth . username = username# node . s e s s i o n . auth . password = password
# d i s cove ry . s end ta rg e t s . auth . authmethod = CHAP
## authen t i c a t i on o f i n i t i a t o r by ta r g e t ( d i s cove ry )# d i s cove ry . s end ta rg e t s . auth . username = username# di s cove ry . s end ta rg e t s . auth . password = password
### timeouts
## con t r o l how much time i s c s i takes to propagate an e r r o r to the## upper l ay e r . i f us ing multipath , having 0 here i s d e s i r a b l e## so mult ipath can handle path e r r o r s as qu i ck ly as p o s s i b l e## (and dec ide to queue or not i f mis s ing a l l paths )node . s e s s i o n . timeo . replacement_timeout = 0
node . conn [ 0 ] . timeo . log in_timeout = 15node . conn [ 0 ] . timeo . logout_timeout = 15
## in t e r v a l f o r a NOP−Out reque s t ( a ping to the t a r g e t )node . conn [ 0 ] . timeo . noop_out_interval = 5
## and how much time to wait be f o r e d e c l a r i n g a timeoutnode . conn [ 0 ] . timeo . noop_out_timeout = 5
## de f au l t t imeouts f o r e r r o r recovery l o g i c s ( lu & tgt r e s e t s )node . s e s s i o n . err_timeo . abort_timeout = 15node . s e s s i o n . err_timeo . lu_reset_timeout = 30node . s e s s i o n . err_timeo . tgt_reset_timeout = 30
### re t ry
node . s e s s i o n . in i t ia l_log in_retry_max = 8
### se s s i o n and dev i c e queue depth
node . s e s s i o n . cmds_max = 128node . s e s s i o n . queue_depth = 32
### performance
node . s e s s i o n . xmit_thread_prior i ty = −20
and re-start the iSCSI daemon:
$ sys t emct l r e s t a r t i s c s i d . s e r v i c e
This will set basic things up for the rest of configuration.
The other file mentioned:
168

/etc/iscsi/initiatorname.iscsiIn i t iatorName=iqn .1993−08. org . debian : 0 1 : 6 0 f3517884c3
contains this node’s initiator name and is generated during open-iscsi package installation. If youmodify this setting, make sure that you don’t have duplicates in the same iSCSI SAN (StorageArea Network).
iSCSI Network Configuration
Before configuring the Logical Units that are going to be accessed by the initiator, it is important to informthe iSCSI service what are the interfaces acting as paths.
A straightforward way to do that is by:
• configuring the following environment variables$ i s c s i 0 1_ ip=$ ( ip −4 −o addr show i s c s i 0 1 | sed −r ’ s : . * ( ( [ 0 −9 ] {1 , 3}\ . )
{3}[0 −9]{1 ,3}) / . * : \ 1 : ’ )$ i s c s i 0 2_ ip=$ ( ip −4 −o addr show i s c s i 0 2 | sed −r ’ s : . * ( ( [ 0 −9 ] {1 , 3}\ . )
{3}[0 −9]{1 ,3}) / . * : \ 1 : ’ )
$ iscs i01_mac=$ ( ip −o l i n k show i s c s i 0 1 | sed −r ’ s : . * \ s+l i n k / e ther (([0− f] { 2 } ( \ : | ) ) {6}) . * : \ 1 : g ’ )
$ iscs i02_mac=$ ( ip −o l i n k show i s c s i 0 2 | sed −r ’ s : . * \ s+l i n k / e ther (([0− f] { 2 } ( \ : | ) ) {6}) . * : \ 1 : g ’ )
• configuring iscsi01 interface$ sudo i sc s iadm −m i f a c e −I i s c s i 0 1 −−op=newNew i n t e r f a c e i s c s i 0 1 added$ sudo i sc s iadm −m i f a c e −I i s c s i 0 1 −−op=update −n i f a c e . hwaddress −v
$iscs i01_maci s c s i 0 1 updated .$ sudo i sc s iadm −m i f a c e −I i s c s i 0 1 −−op=update −n i f a c e . i paddre s s −v
$ i s c s i 0 1_ ipi s c s i 0 1 updated .
• configuring iscsi02 interface$ sudo i sc s iadm −m i f a c e −I i s c s i 0 2 −−op=newNew i n t e r f a c e i s c s i 0 2 added$ sudo i sc s iadm −m i f a c e −I i s c s i 0 2 −−op=update −n i f a c e . hwaddress −v
$iscs i02_maci s c s i 0 2 updated .$ sudo i sc s iadm −m i f a c e −I i s c s i 0 2 −−op=update −n i f a c e . i paddre s s −v
$ i s c s i 0 2_ ipi s c s i 0 2 updated .
• discovering the targets$ sudo i sc s iadm −m di s cove ry −I i s c s i 0 1 −−op=new −−op=de l −−type s endta rg e t s
−−po r t a l s t o rage . i s c s i 0 110 . 2 50 . 9 4 . 9 9 : 3 260 , 1 iqn .2003−01. org . l inux− i s c s i . s t o rage . x8664 : sn . 2 c084c8320ca
$ sudo i sc s iadm −m di s cove ry −I i s c s i 0 2 −−op=new −−op=de l −−type s endta rg e t s−−po r t a l s t o rage . i s c s i 0 2
10 . 2 50 . 9 3 . 9 9 : 3 260 , 1 iqn .2003−01. org . l inux− i s c s i . s t o rage . x8664 : sn . 2 c084c8320ca
169
• configuring automatic login
$ sudo i sc s iadm −m node −−op=update −n node . conn [ 0 ] . s ta r tup −v automatic$ sudo i sc s iadm −m node −−op=update −n node . s ta r tup −v automatic
• make sure needed services are enabled during OS initialization:
$ sys t emct l enable open− i s c s iSynchroniz ing s t a t e o f open− i s c s i . s e r v i c e with SysV s e r v i c e s c r i p t with / l i b /
systemd/systemd−sysv− i n s t a l l .Executing : / l i b / systemd/systemd−sysv− i n s t a l l enable open− i s c s iCreated symlink / e tc / systemd/system/ i s c s i . s e r v i c e → / l i b / systemd/system/open−
i s c s i . s e r v i c e .Created symlink / e tc / systemd/system/ s y s i n i t . t a r g e t . wants/open− i s c s i . s e r v i c e
→ / l i b / systemd/system/open− i s c s i . s e r v i c e .
$ sy s t emct l enable i s c s i dSynchroniz ing s t a t e o f i s c s i d . s e r v i c e with SysV s e r v i c e s c r i p t with / l i b /
systemd/systemd−sysv− i n s t a l l .Executing : / l i b / systemd/systemd−sysv− i n s t a l l enable i s c s i dCreated symlink / e tc / systemd/system/ s y s i n i t . t a r g e t . wants/ i s c s i d . s e r v i c e → /
l i b / systemd/system/ i s c s i d . s e r v i c e .
• restarting iscsid service
$ sys t emct l r e s t a r t i s c s i d . s e r v i c e
• and, finally, login in discovered logical units
$ sudo i sc s iadm −m node −− l o g i n a l l=automaticLogging in to [ i f a c e : i s c s i 0 2 , t a r g e t : iqn .2003−01. org . l inux− i s c s i . s t o rage .
x8664 : sn . 2 c084c8320ca , po r t a l : 1 0 . 2 5 0 . 9 3 . 9 9 , 3 2 60 ] ( mu l t ip l e )Logging in to [ i f a c e : i s c s i 0 1 , t a r g e t : iqn .2003−01. org . l inux− i s c s i . s t o rage .
x8664 : sn . 2 c084c8320ca , po r t a l : 1 0 . 2 5 0 . 9 4 . 9 9 , 3 2 60 ] ( mu l t ip l e )Login to [ i f a c e : i s c s i 0 2 , t a r g e t : iqn .2003−01. org . l inux− i s c s i . s t o rage . x8664 : sn
. 2 c084c8320ca , po r t a l : 1 0 . 2 5 0 . 9 3 . 9 9 , 3 260 ] s u c c e s s f u l .Login to [ i f a c e : i s c s i 0 1 , t a r g e t : iqn .2003−01. org . l inux− i s c s i . s t o rage . x8664 : sn
. 2 c084c8320ca , po r t a l : 1 0 . 2 5 0 . 9 4 . 9 9 , 3 260 ] s u c c e s s f u l .
Accessing the Logical Units (or LUNs)
Check dmesg to make sure that the new disks have been detected:
dmesg
[ 166 .840694 ] s c s i 7 : 0 : 0 : 4 : Direct−Access LIO−ORG TCMU dev i ce >0002 PQ: 0 ANSI : 5
[ 166 .840892 ] s c s i 8 : 0 : 0 : 4 : Direct−Access LIO−ORG TCMU dev i ce >0002 PQ: 0 ANSI : 5
[ 166 .841741 ] sd 7 : 0 : 0 : 4 : Attached s c s i g en e r i c sg2 type 0[ 166 .841808 ] sd 8 : 0 : 0 : 4 : Attached s c s i g en e r i c sg3 type 0[ 166 .842278 ] s c s i 7 : 0 : 0 : 3 : Direct−Access LIO−ORG TCMU dev i ce >
0002 PQ: 0 ANSI : 5[ 166 .842571 ] s c s i 8 : 0 : 0 : 3 : Direct−Access LIO−ORG TCMU dev i ce >
0002 PQ: 0 ANSI : 5[ 166 .843482 ] sd 8 : 0 : 0 : 3 : Attached s c s i g en e r i c sg4 type 0
170

[ 166 .843681 ] sd 7 : 0 : 0 : 3 : Attached s c s i g en e r i c sg5 type 0[ 166 .843706 ] sd 8 : 0 : 0 : 4 : [ sdd ] 2097152 512−byte l o g i c a l b locks : >
(1 . 07 GB/1.00 GiB)[ 166 .843884 ] s c s i 8 : 0 : 0 : 2 : Direct−Access LIO−ORG TCMU dev i ce >
0002 PQ: 0 ANSI : 5[ 166 .843971 ] sd 8 : 0 : 0 : 4 : [ sdd ] Write Protect i s o f f[ 166 .843972 ] sd 8 : 0 : 0 : 4 : [ sdd ] Mode Sense : 2 f 00 00 00[ 166 .844127 ] s c s i 7 : 0 : 0 : 2 : Direct−Access LIO−ORG TCMU dev i ce >
0002 PQ: 0 ANSI : 5[ 166 .844232 ] sd 7 : 0 : 0 : 4 : [ sdc ] 2097152 512−byte l o g i c a l b locks : >
(1 . 07 GB/1.00 GiB)[ 166 .844421 ] sd 8 : 0 : 0 : 4 : [ sdd ] Write cache : enabled , read cache : >
enabled , doesn ’ t support DPO or FUA[ 166 .844566 ] sd 7 : 0 : 0 : 4 : [ sdc ] Write Protect i s o f f[ 166 .844568 ] sd 7 : 0 : 0 : 4 : [ sdc ] Mode Sense : 2 f 00 00 00[ 166 .844846 ] sd 8 : 0 : 0 : 2 : Attached s c s i g en e r i c sg6 type 0[ 166 .845147 ] sd 7 : 0 : 0 : 4 : [ sdc ] Write cache : enabled , read cache : >
enabled , doesn ’ t support DPO or FUA[ 166 .845188 ] sd 8 : 0 : 0 : 4 : [ sdd ] Optimal t r a n s f e r s i z e 65536 bytes[ 166 .845527 ] sd 7 : 0 : 0 : 2 : Attached s c s i g en e r i c sg7 type 0[ 166 .845678 ] sd 8 : 0 : 0 : 3 : [ sde ] 2097152 512−byte l o g i c a l b locks : >
(1 . 07 GB/1.00 GiB)[ 166 .845785 ] s c s i 8 : 0 : 0 : 1 : Direct−Access LIO−ORG TCMU dev i ce >
0002 PQ: 0 ANSI : 5[ 166 .845799 ] sd 7 : 0 : 0 : 4 : [ sdc ] Optimal t r a n s f e r s i z e 65536 bytes[ 166 .845931 ] sd 8 : 0 : 0 : 3 : [ sde ] Write Protect i s o f f[ 166 .845933 ] sd 8 : 0 : 0 : 3 : [ sde ] Mode Sense : 2 f 00 00 00[ 166 .846424 ] s c s i 7 : 0 : 0 : 1 : Direct−Access LIO−ORG TCMU dev i ce >
0002 PQ: 0 ANSI : 5[ 166 .846552 ] sd 8 : 0 : 0 : 3 : [ sde ] Write cache : enabled , read cache : >
enabled , doesn ’ t support DPO or FUA[ 166 .846708 ] sd 7 : 0 : 0 : 3 : [ sd f ] 2097152 512−byte l o g i c a l b locks : >
(1 . 07 GB/1.00 GiB)[ 166 .847024 ] sd 8 : 0 : 0 : 1 : Attached s c s i g en e r i c sg8 type 0[ 166 .847029 ] sd 7 : 0 : 0 : 3 : [ sd f ] Write Protect i s o f f[ 166 .847031 ] sd 7 : 0 : 0 : 3 : [ sd f ] Mode Sense : 2 f 00 00 00[ 166 .847043 ] sd 8 : 0 : 0 : 3 : [ sde ] Optimal t r a n s f e r s i z e 65536 bytes[ 166 .847133 ] sd 8 : 0 : 0 : 2 : [ sdg ] 2097152 512−byte l o g i c a l b locks : >
(1 . 07 GB/1.00 GiB)[ 166 .849212 ] sd 8 : 0 : 0 : 2 : [ sdg ] Write Protect i s o f f[ 166 .849214 ] sd 8 : 0 : 0 : 2 : [ sdg ] Mode Sense : 2 f 00 00 00[ 166 .849711 ] sd 7 : 0 : 0 : 3 : [ sd f ] Write cache : enabled , read cache : >
enabled , doesn ’ t support DPO or FUA[ 166 .849718 ] sd 7 : 0 : 0 : 1 : Attached s c s i g en e r i c sg9 type 0[ 166 .849721 ] sd 7 : 0 : 0 : 2 : [ sdh ] 2097152 512−byte l o g i c a l b locks : >
(1 . 07 GB/1.00 GiB)[ 166 .853296 ] sd 8 : 0 : 0 : 2 : [ sdg ] Write cache : enabled , read cache : >
enabled , doesn ’ t support DPO or FUA[ 166 .853721 ] sd 8 : 0 : 0 : 2 : [ sdg ] Optimal t r a n s f e r s i z e 65536 bytes[ 166 .853810 ] sd 7 : 0 : 0 : 2 : [ sdh ] Write Protect i s o f f[ 166 .853812 ] sd 7 : 0 : 0 : 2 : [ sdh ] Mode Sense : 2 f 00 00 00[ 166 .854026 ] sd 7 : 0 : 0 : 3 : [ sd f ] Optimal t r a n s f e r s i z e 65536 bytes[ 166 .854431 ] sd 7 : 0 : 0 : 2 : [ sdh ] Write cache : enabled , read cache : >
enabled , doesn ’ t support DPO or FUA
171
[ 166 .854625 ] sd 8 : 0 : 0 : 1 : [ s d i ] 2097152 512−byte l o g i c a l b locks : >(1 . 07 GB/1.00 GiB)
[ 166 .854898 ] sd 8 : 0 : 0 : 1 : [ s d i ] Write Protect i s o f f[ 166 .854900 ] sd 8 : 0 : 0 : 1 : [ s d i ] Mode Sense : 2 f 00 00 00[ 166 .855022 ] sd 7 : 0 : 0 : 2 : [ sdh ] Optimal t r a n s f e r s i z e 65536 bytes[ 166 .855465 ] sd 8 : 0 : 0 : 1 : [ s d i ] Write cache : enabled , read cache : >
enabled , doesn ’ t support DPO or FUA[ 166 .855578 ] sd 7 : 0 : 0 : 1 : [ sd j ] 2097152 512−byte l o g i c a l b locks : >
(1 . 07 GB/1.00 GiB)[ 166 .855845 ] sd 7 : 0 : 0 : 1 : [ sd j ] Write Protect i s o f f[ 166 .855847 ] sd 7 : 0 : 0 : 1 : [ sd j ] Mode Sense : 2 f 00 00 00[ 166 .855978 ] sd 8 : 0 : 0 : 1 : [ s d i ] Optimal t r a n s f e r s i z e 65536 bytes[ 166 .856305 ] sd 7 : 0 : 0 : 1 : [ sd j ] Write cache : enabled , read cache : >
enabled , doesn ’ t support DPO or FUA[ 166 .856701 ] sd 7 : 0 : 0 : 1 : [ sd j ] Optimal t r a n s f e r s i z e 65536 bytes[ 166 .859624 ] sd 8 : 0 : 0 : 4 : [ sdd ] Attached SCSI d i sk[ 166 .861304 ] sd 7 : 0 : 0 : 4 : [ sdc ] Attached SCSI d i sk[ 166 .864409 ] sd 8 : 0 : 0 : 3 : [ sde ] Attached SCSI d i sk[ 166 .864833 ] sd 7 : 0 : 0 : 3 : [ sd f ] Attached SCSI d i sk[ 166 .867906 ] sd 8 : 0 : 0 : 2 : [ sdg ] Attached SCSI d i sk[ 166 .868446 ] sd 8 : 0 : 0 : 1 : [ s d i ] Attached SCSI d i sk[ 166 .871588 ] sd 7 : 0 : 0 : 1 : [ sd j ] Attached SCSI d i sk[ 166 .871773 ] sd 7 : 0 : 0 : 2 : [ sdh ] Attached SCSI d i sk
In the output above you will find 8 x SCSI disks recognized. The storage server is mapping 4 x LUNs tothis node, AND the node has 2 x PATHs to each LUN. The OS recognizes each path to each device as 1SCSI device.
You will find different output depending on the storage server your node is mapping the LUNsfrom, and the amount of LUNs being mapped as well.
Although not the objective of this session, let’s find the 4 mapped LUNs using multipath-tools.
You will find further details about multipath in “Device Mapper Multipathing” session of thissame guide.
$ apt−get i n s t a l l multipath−t o o l s
$ sudo mult ipath −r
$ sudo mult ipath − l lmpathd (360014051 a042 fb7c41c4249a f9 f2c fbc ) dm−3 LIO−ORG,TCMU dev i ces i z e =1.0G f e a t u r e s = ’0 ’ hwhandler= ’0 ’ wp=rw|−+− po l i c y=’ s e r v i c e −time 0 ’ p r i o=1 s ta tu s=ac t i v e| ‘− 7 : 0 : 0 : 4 sde 8 :64 a c t i v e ready running‘−+− po l i c y=’ s e r v i c e −time 0 ’ p r i o=1 s ta tu s=enabled
‘− 8 : 0 : 0 : 4 sdc 8 :32 a c t i v e ready runningmpathc (360014050 d6871110232471d8bcd155a3 ) dm−2 LIO−ORG,TCMU dev i ces i z e =1.0G f e a t u r e s = ’0 ’ hwhandler= ’0 ’ wp=rw|−+− po l i c y=’ s e r v i c e −time 0 ’ p r i o=1 s ta tu s=ac t i v e| ‘− 7 : 0 : 0 : 3 sd f 8 :80 a c t i v e ready running‘−+− po l i c y=’ s e r v i c e −time 0 ’ p r i o=1 s ta tu s=enabled
‘− 8 : 0 : 0 : 3 sdd 8 :48 a c t i v e ready runningmpathb (360014051 f65c6cb11b74541b703ce1d4 ) dm−1 LIO−ORG,TCMU dev i ces i z e =1.0G f e a t u r e s = ’0 ’ hwhandler= ’0 ’ wp=rw|−+− po l i c y=’ s e r v i c e −time 0 ’ p r i o=1 s ta tu s=ac t i v e
172
| ‘− 7 : 0 : 0 : 2 sdh 8 :112 a c t i v e ready running‘−+− po l i c y=’ s e r v i c e −time 0 ’ p r i o=1 s ta tu s=enabled
‘− 8 : 0 : 0 : 2 sdg 8 :96 a c t i v e ready runningmpatha (36001405 b816e24fcab64fb88332a3fc9 ) dm−0 LIO−ORG,TCMU dev i ces i z e =1.0G f e a t u r e s = ’0 ’ hwhandler= ’0 ’ wp=rw|−+− po l i c y=’ s e r v i c e −time 0 ’ p r i o=1 s ta tu s=ac t i v e| ‘− 7 : 0 : 0 : 1 sd j 8 :144 a c t i v e ready running‘−+− po l i c y=’ s e r v i c e −time 0 ’ p r i o=1 s ta tu s=enabled
‘− 8 : 0 : 0 : 1 sd i 8 :128 a c t i v e ready running
Now it is much easier to understand each recognized SCSI device and common paths to same LUNs in thestorage server. With the output above one can easily see that:
• mpatha device (/dev/mapper/mpatha) is a multipath device for:– /dev/sdj– /dev/dsi
• mpathb device (/dev/mapper/mpathb) is a multipath device for:– /dev/sdh– /dev/dsg
• mpathc device (/dev/mapper/mpathc) is a multipath device for:– /dev/sdf– /dev/sdd
• mpathd device (/dev/mapper/mpathd) is a multipath device for:– /dev/sde– /dev/sdc
Do not use this in production without checking appropriate multipath configuration optionsin the Device Mapper Multipathing session. The default multipath configuration is less thanoptimal for regular usage.
Finally, to access the LUN (or remote iSCSI disk) you will:
• If accessing through a single network interface:– access it through /dev/sdX where X is a letter given by the OS
• If accessing through multiple network interfaces:– configure multipath and access the device through /dev/mapper/X
For everything else, the created devices are block devices and all commands used with local disks shouldwork the same way:
• Creating a partition:$ sudo f d i s k /dev/mapper/mpatha
Welcome to f d i s k ( u t i l −l i nux 2 . 34 ) .Changes w i l l remain in memory only , u n t i l you dec ide to wr i t e them .Be c a r e f u l b e f o r e us ing the wr i t e command .
Device does not conta in a recogn i z ed p a r t i t i o n tab l e .Created a new DOS d i s k l a b e l with d i sk i d e n t i f i e r 0x92c0322a .
Command (m f o r he lp ) : pDisk /dev/mapper/mpatha : 1 GiB , 1073741824 bytes , 2097152 s e c t o r sUnits : s e c t o r s o f 1 * 512 = 512 bytesSector s i z e ( l o g i c a l / phy s i c a l ) : 512 bytes / 512 bytesI /O s i z e (minimum/optimal ) : 512 bytes / 65536 bytesD i sk l abe l type : dosDisk i d e n t i f i e r : 0 x92c0322a
173
Command (m f o r he lp ) : nPa r t i t i on type
p primary (0 primary , 0 extended , 4 f r e e )e extended ( conta ine r f o r l o g i c a l p a r t i t i o n s )
S e l e c t ( d e f au l t p) : pPa r t i t i on number (1−4 , d e f au l t 1) :F i r s t s e c t o r (2048−2097151 , d e f au l t 2048) :Last s ec to r , +/−s e c t o r s or +/−s i z e {K,M,G,T,P} (2048−2097151 , d e f au l t 2097151) :
Created a new pa r t i t i o n 1 o f type ’ Linux ’ and o f s i z e 1023 MiB .
Command (m f o r he lp ) : wThe p a r t i t i o n tab l e has been a l t e r e d .
• Creating a filesystem:
$ sudo mkfs . ext4 /dev/mapper/mpatha−part1mke2fs 1 . 4 5 . 5 (07−Jan−2020)Creat ing f i l e s y s t em with 261888 4k b locks and 65536 inodesFi l e sys tem UUID: cdb70b1e−c47c−47fd−9c4a−03db6f038988Superblock backups s to r ed on b locks :
32768 , 98304 , 163840 , 229376
A l l o ca t i ng group t ab l e s : doneWriting inode t ab l e s : doneCreat ing j ou rna l (4096 b locks ) : doneWriting superb locks and f i l e s y s t em account ing in fo rmat ion : done
• Mounting the block device:
$ sudo mount /dev/mapper/mpatha−part1 /mnt
• Accessing the data:
$ l s /mntl o s t+found
Make sure to read other important sessions in Ubuntu Server Guide to follow up with concepts explored inthis one.
References
1. iscsid2. iscsi.conf3. iscsid.conf4. iscsi.service5. iscsid.service6. Open-iSCSI7. Debian Open-iSCSI
174
Kerberos
Kerberos is a network authentication system based on the principal of a trusted third party. The other twoparties being the user and the service the user wishes to authenticate to. Not all services and applicationscan use Kerberos, but for those that can, it brings the network environment one step closer to being SingleSign On (SSO).
This section covers installation and configuration of a Kerberos server, and some example client configura-tions.
Overview
If you are new to Kerberos there are a few terms that are good to understand before setting up a Kerberosserver. Most of the terms will relate to things you may be familiar with in other environments:
• Principal: any users, computers, and services provided by servers need to be defined as KerberosPrincipals.
• Instances: are used for service principals and special administrative principals.
• Realms: the unique realm of control provided by the Kerberos installation. Think of it as the domainor group your hosts and users belong to. Convention dictates the realm should be in uppercase. Bydefault, ubuntu will use the DNS domain converted to uppercase (EXAMPLE.COM) as the realm.
• Key Distribution Center: (KDC) consist of three parts: a database of all principals, the authenticationserver, and the ticket granting server. For each realm there must be at least one KDC.
• Ticket Granting Ticket: issued by the Authentication Server (AS), the Ticket Granting Ticket (TGT)is encrypted in the user’s password which is known only to the user and the KDC.
• Ticket Granting Server: (TGS) issues service tickets to clients upon request.
• Tickets: confirm the identity of the two principals. One principal being a user and the other a servicerequested by the user. Tickets establish an encryption key used for secure communication during theauthenticated session.
• Keytab Files: are files extracted from the KDC principal database and contain the encryption key fora service or host.
To put the pieces together, a Realm has at least one KDC, preferably more for redundancy, which containsa database of Principals. When a user principal logs into a workstation that is configured for Kerberosauthentication, the KDC issues a Ticket Granting Ticket (TGT). If the user supplied credentials match, theuser is authenticated and can then request tickets for Kerberized services from the Ticket Granting Server(TGS). The service tickets allow the user to authenticate to the service without entering another usernameand password.
Kerberos Server
Installation
For this discussion, we will create a MIT Kerberos domain with the following features (edit them to fit yourneeds):
• Realm: EXAMPLE.COM
• Primary KDC: kdc01.example.com (192.168.0.1)
• Secondary KDC: kdc02.example.com (192.168.0.2)
175

• User principal: ubuntu
• Admin principal: ubuntu/admin
Note
It is strongly recommended that your network-authenticated users have their uid in a differentrange (say, starting at 5000) than that of your local users.
Before installing the Kerberos server a properly configured DNS server is needed for your domain. Since theKerberos Realm by convention matches the domain name, this section uses the EXAMPLE.COM domainconfigured in the section Primary Server of the DNS documentation.
Also, Kerberos is a time sensitive protocol. So if the local system time between a client machine and theserver differs by more than five minutes (by default), the workstation will not be able to authenticate. Tocorrect the problem all hosts should have their time synchronized using the same Network Time Protocol(NTP) server. Check out the NTP chapter for more details.
The first step in creating a Kerberos Realm is to install the krb5-kdc and krb5-admin-server packages. Froma terminal enter:
sudo apt i n s t a l l krb5−kdc krb5−admin−s e r v e r
You will be asked at the end of the install to supply the hostname for the Kerberos and Admin servers, whichmay or may not be the same server, for the realm. Since we are going to create the realm, and thus theseservers, type in the full hostname of this server.
Note
By default the realm is created from the KDC’s domain name.
Next, create the new realm with the kdb5_newrealm utility:
sudo krb5_newrealm
It will ask you for a database master password, which is used to encrypt the local database. Chose a securepassword: its strength is not verified for you.
Configuration
The questions asked during installation are used to configure the /etc/krb5.conf and /etc/krb5kdc/kdc.conffiles. The former is used by the kerberos 5 libraries, and the latter configures the KDC. If you need to adjustthe Key Distribution Center (KDC) settings simply edit the file and restart the krb5-kdc daemon. If youneed to reconfigure Kerberos from scratch, perhaps to change the realm name, you can do so by typing
sudo dpkg−r e c on f i g u r e krb5−kdc
Note
The manpage for krb5.conf is in the krb5−doc package.
Once the KDC is properly running, an admin user – the admin principal – is needed. It is recommended touse a different username from your everyday username. Using the kadmin.local utility in a terminal promptenter:
$ sudo kadmin . l o c a lAuthent icat ing as p r i n c i p a l root /[email protected] with password .kadmin . l o c a l : addprinc ubuntu/adminWARNING: no po l i c y s p e c i f i e d f o r ubuntu/[email protected]; d e f au l t i n g to no
po l i c yEnter password f o r p r i n c i p a l ”ubuntu/[email protected]” :
176

Re−ente r password f o r p r i n c i p a l ”ubuntu/[email protected]” :Pr i n c i pa l ”ubuntu/[email protected]” created .kadmin . l o c a l : qu i t
In the above example ubuntu is the Principal, /admin is an Instance of tha principal, and @EXAMPLE.COMsignifies the realm. The “every day” Principal, a.k.a. the user principal, would be [email protected],and should have only normal user rights.
Note
Replace EXAMPLE.COM and ubuntu with your Realm and admin username.
Next, the new admin user needs to have the appropriate Access Control List (ACL) permissions. Thepermissions are configured in the /etc/krb5kdc/kadm5.acl file:ubuntu/[email protected] *
This entry grants ubuntu/admin the ability to perform any operation on all principals in the realm. You canconfigure principals with more restrictive privileges, which is convenient if you need an admin principal thatjunior staff can use in Kerberos clients. Please see the kadm5.acl man page for details.
Note
The extract privilege is not included in the wildcard privilege; it must be explicitly assigned. hisprivilege allows the user to extract keys from the database, and must be handled with great careto avoid disclosure of important keys like those of the kadmin/* or krbtgt/* principals. See thekadm5.acl man page for details.
Now restart the krb5-admin-server for the new ACL to take affect:sudo sys t emct l r e s t a r t krb5−admin−s e r v e r . s e r v i c e
The new user principal can be tested using the kinit utility:$ k i n i t ubuntu/adminPassword f o r ubuntu/[email protected]:
After entering the password, use the klist utility to view information about the Ticket Granting Ticket(TGT):$ k l i s tTicket cache : FILE :/ tmp/krb5cc_1000Defau l t p r i n c i p a l : ubuntu/[email protected]
Valid s t a r t i n g Expires S e rv i c e p r i n c i p a l04/03/20 19 : 16 : 57 04/04/20 05 : 16 : 57 krbtgt /[email protected]
renew un t i l 04/04/20 19 : 16 : 55
Where the cache filename krb5cc_1000 is composed of the prefix krb5cc_ and the user id (uid), which inthis case is 1000.
kinit will inspect /etc/krb5.conf to find out which KDC to contact, and its address. The KDC can also befound via DNS lookups for special TXT and SRV records. You can add these records to your example.comDNS zone:_kerberos ._udp .EXAMPLE.COM. IN SRV 1 0 88 kdc01 . example . com ._kerberos . _tcp .EXAMPLE.COM. IN SRV 1 0 88 kdc01 . example . com ._kerberos ._udp .EXAMPLE.COM. IN SRV 10 0 88 kdc02 . example . com ._kerberos . _tcp .EXAMPLE.COM. IN SRV 10 0 88 kdc02 . example . com ._kerberos−adm. _tcp .EXAMPLE.COM. IN SRV 1 0 749 kdc01 . example . com ._kpasswd ._udp .EXAMPLE.COM. IN SRV 1 0 464 kdc01 . example . com .
177

Note
Replace EXAMPLE.COM, kdc01, and kdc02 with your domain name, primary KDC, and sec-ondary KDC.
See the DNS chapter for detailed instructions on setting up DNS.
A very quick and useful way to troubleshoot what kinit is doing is to set the environment variableKRB5_TRACE to a file, or stderr, and it will show extra information. The output is quite verbose, andwon’t be shown fully here:
$ KRB5_TRACE=/dev/ s t d e r r k i n i t ubuntu/admin[ 2 8 9 8 ] 1585941845 .278578 : Gett ing i n i t i a l c r e d e n t i a l s f o r ubuntu/admin@EXAMPLE
.COM[2898 ] 1585941845 .278580 : Sending unauthent icated reque s t[ 2 8 9 8 ] 1585941845 .278581 : Sending reque s t (189 bytes ) to EXAMPLE.COM[2898 ] 1585941845 .278582 : Reso lv ing hostname kdc01 . example . com( . . . )
Your new Kerberos Realm is now ready to authenticate clients.
Secondary KDC
Once you have one Key Distribution Center (KDC) on your network, it is good practice to have a SecondaryKDC in case the primary becomes unavailable. Also, if you have Kerberos clients that are in differentnetworks (possibly separated by routers using NAT), it is wise to place a secondary KDC in each of thosenetworks.
Note
The native replication mechanism explained here relies on a cronjob, and essentially dumps theDB on the primary and loads it back up on the secondary. You may want to take a look at usingthe kldap backend which can use the OpenLDAP replication mechanism. It is explained furtherbelow.
First, install the packages, and when asked for the Kerberos and Admin server names enter the name of thePrimary KDC:
sudo apt i n s t a l l krb5−kdc krb5−admin−s e r v e r
Once you have the packages installed, create the host principals for both KDCs. From a terminal prompt,enter:
kadmin −q ” addprinc −randkey host /kdc01 . example . com”kadmin −q ” addprinc −randkey host /kdc02 . example . com”
Note
The kadmin command defaults to using a principal like username/[email protected],where username is your current shell user. If you need to override that, use −p <principal−you−want>
Make sure the principal you are using has the extra extract−keys privilege in kdc01’s /etc/krb5kdc/kadm5.acl file. Something like this:
ubuntu/[email protected] *e
Where “*” means all privileges (except extract−keys), and e means exactly extract−keys.
Extract the keytab file:
178

kadmin −q ”ktadd −norandkey −k keytab . kdc02 host /kdc02 . example . com”
There should now be a keytab.kdc02 in the current directory, move the file to /etc/krb5.keytab:sudo mv keytab . kdc02 / e tc /krb5 . keytabsudo chown root : root / e t c /krb5 . keytab
Note
If the path to the keytab.kdc02 file is different adjust accordingly.
Also, you can list the principals in a Keytab file, which can be useful when troubleshooting, using the klistutility:sudo k l i s t −k / e tc /krb5 . keytab
The -k option indicates the file is a keytab file.
Next, there needs to be a kpropd.acl file on each KDC that lists all KDCs for the Realm. For example, onboth primary and secondary KDC, create /etc/krb5kdc/kpropd.acl:host /kdc01 . example [email protected] /kdc02 . example [email protected]
Create an empty database on the Secondary KDC :sudo kdb5_uti l −s c r e a t e
Now install kpropd daemon, which listens for connections from the kprop utility from the primary kdc:sudo apt i n s t a l l krb5−kpropd
The service will be running right after installation.
From a terminal on the Primary KDC, create a dump file of the principal database:sudo kdb5_uti l dump /var / l i b /krb5kdc/dump
Still on the Primary KDC, extract its keytab file and copy it to /etc/krb5.keytab:kadmin −q ”ktadd −k keytab . kdc01 host /kdc01 . example . com”sudo mv keytab . kdc01 / e tc /krb5 . keytabsudo chown root : root / e t c /krb5 . keytab
Note
You can now remove the extract−keys privilege from this principal in kdc01’s /etc/krb5kdc/kadm5.acl file
On the Primary KDC, run the kprop utility to push the database dump made before to the Secondary KDC:$ sudo kprop −r EXAMPLE.COM −f / var / l i b /krb5kdc/dump kdc02 . example . comDatabase propagat ion to kdc02 . example . com : SUCCEEDED
Note the SUCCEEDED message, which signals that the propagation worked. If there is an error messagecheck /var/log/syslog on the secondary KDC for more information.
You may also want to create a cron job to periodically update the database on the Secondary KDC. Forexample, the following will push the database every hour:# m h dom mon dow command0 * * * * root / usr / sb in /kdb5_uti l dump /var / l i b /krb5kdc/dump && /usr / sb in /
kprop −r EXAMPLE.COM −f / var / l i b /krb5kdc/dump kdc02 . example . com
179
Back on the Secondary KDC, create a stash file to hold the Kerberos master key:
sudo kdb5_uti l s ta sh
Finally, start the krb5−kdc daemon on the Secondary KDC:
sudo sys t emct l s t a r t krb5−kdc . s e r v i c e
Note
The Secondary KDC does not run an admin server, since it’s a read-only copy
From now on, you can specify both KDC servers in /etc/krb5.conf for the EXAMPLE.COM realm, in anyhost participating in this realm (including kdc01 and kdc02), but remember that there can only be oneadmin server and that’s the one running on kdc01:
[ realms ]EXAMPLE.COM = {
kdc = kdc01 . example . comkdc = kdc02 . example . comadmin_server = kdc01 . example . com
}
The Secondary KDC should now be able to issue tickets for the Realm. You can test this by stopping thekrb5−kdc daemon on the Primary KDC, then by using kinit to request a ticket. If all goes well you shouldreceive a ticket from the Secondary KDC. Otherwise, check /var/log/syslog and /var/log/auth.log in theSecondary KDC.
Kerberos Linux Client
This section covers configuring a Linux system as a Kerberos client. This will allow access to any kerberizedservices once a user has successfully logged into the system.
Note that Kerberos alone is not enough for a user to exist in a Linux system. Meaning, we cannot justpoint the system at a kerberos server and expect all the kerberos principals to be able to login on the linuxsystem, simply because these users do not exist locally. Kerberos only provides authentication: it doesn’tknow about user groups, Linux uids and gids, home directories, etc. Normally another network source isused for this information, such as an LDAP or Windows server, and, in the old days, NIS was used for thatas well.
Installation
If you have local users matching the principals in a Kerberos realm, and just want to switch the authenticationfrom local to remote using Kerberos, you can follow this section. This is not a very usual scenario, but servesto highlight the separation between user authentication and user information (full name, uid, gid, homedirectory, groups, etc). If you just want to be able to grab tickets and use them, it’s enough to installkrb5−user and run kinit .
We are going to use sssd with a trick so that it will fetch the user information from the local system files,instead of a remote source which is the common case.
To install the packages enter the following in a terminal prompt:
sudo apt i n s t a l l krb5−user sssd−krb5
You will be prompted for the addresses of your KDCs and admin servers. If you have been following thischapter so far, the KDCs will be: kdc01.example.com kdc02.example.com (space separated)
180
And the admin server will be: kdc01.example.com. Remember that kdc02 is a read-only copy of the primaryKDC, so it doesn’t run an admin server.
Note
If you have added the appropriate SRV records to DNS, none of those prompts will need answer-ing.
Configuration
If you missed the questions earlier, you can reconfigure the package to fill them in again: sudo dpkg−reconfigure krb5−config.
You can test the kerberos configuration by requesting a ticket using the kinit utility. For example:
$ k i n i t ubuntu/[email protected] f o r ubuntu/[email protected]:
Note
kinit doesn’t need for the principal to exist as a local user in the system. In fact, you can kinitany principal you want. If you don’t specify one, then the tool will use the username of whoeveris running kinit .
Since we are at it, let’s also create a non-admin principal for ubuntu:
$ kadmin −q ” addprinc ubuntu”Authent icat ing as p r i n c i p a l ubuntu/[email protected] with password .Password f o r ubuntu/[email protected]:WARNING: no po l i c y s p e c i f i e d f o r [email protected]; d e f au l t i n g to no po l i c yEnter password f o r p r i n c i p a l ”[email protected]” :Re−ente r password f o r p r i n c i p a l ”[email protected]” :Pr i n c i pa l ”[email protected]” created .
The only remaining configuration now is for sssd. Create the file /etc/sssd/sssd.conf with the followingcontent:
[ s s sd ]c on f i g_ f i l e_ve r s i on = 2s e r v i c e s = pamdomains = example . com
[pam]
[ domain/example . com ]id_provider = proxyproxy_lib_name = f i l e sauth_provider = krb5krb5_server = kdc01 . example . com , kdc01 . example . comkrb5_kpasswd = kdc01 . example . comkrb5_realm = EXAMPLE.COM
The above configuration will use kerberos for authentication (auth_provider), but will use the local systemusers for user and group information (id_provider).
Adjust the permissions of the config file and start sssd:
181
$ sudo chown root : root / e t c / s s sd / s s sd . conf$ sudo chmod 0600 / e tc / s s sd / s s sd . conf$ sudo sys t emct l s t a r t s s sd
Just by having installed sssd and its dependencies, PAM will already have been configured to use sssd, witha fallback to local user authentication. To try it out, if this is a workstation, simply switch users (in theGUI), or open a login terminal (CTRL-ALT-<number>), or spawn a login shell with sudo login, and trylogging in using the name of a kerberos principal. Remember that this user must already exist on the localsystem:
$ sudo l o g i nf o ca l−krb5−c l i e n t l o g i n : ubuntuPassword :Welcome to Ubuntu Focal Fossa ( development branch ) (GNU/Linux 5.4.0−21− g ene r i c
x86_64 )
( . . . )
Last l o g i n : Thu Apr 9 21 : 23 : 50 UTC 2020 from 10 . 2 0 . 2 0 . 1 on pts /0$ k l i s tTicket cache : FILE :/ tmp/krb5cc_1000_NlfnSXDefau l t p r i n c i p a l : [email protected]
Valid s t a r t i n g Expires S e rv i c e p r i n c i p a l04/09/20 21 : 36 : 12 04/10/20 07 : 36 : 12 krbtgt /[email protected]
renew un t i l 04/10/20 21 : 36 : 12
And you will have a Kerberos ticket already right after login.
Resources
• For more information on MIT’s version of Kerberos, see the MIT Kerberos site.
• The Ubuntu Wiki Kerberos page has more details.
• O’Reilly’s Kerberos: The Definitive Guide is a great reference when setting up Kerberos.
• Also, feel free to stop by the #ubuntu-server and #kerberos IRC channels on Freenode if you haveKerberos questions.
Kerberos and LDAP
Kerberos supports a few database backends. The default one is what we have been using so far, called db2.The DB Types documentation shows all the options, one of which is LDAP.
There are several reasons why one would want to have the Kerberos principals stored in LDAP as opposed toa local on-disk database. There are also cases when it is not a good idea. Each site has to evaluate the prosand cons. Here are a few: - the OpenLDAP replication is faster and more robust then the native Kerberosone, based on a cron job - setting things up with the LDAP backend isn’t exactly trivial and shouldn’t beattempted by administrators without prior knowledge of OpenLDAP - as highlighted in LDAP section ofDB Types, since krb5kdc is single threaded there may be higher latency in servicing requests when using theOpenLDAP backend - if you already have OpenLDAP setup for other things, like storing users and groups,adding the Kerberos attributes to the same mix might be beneficial and can provide a nice integrated story
182
This section covers configuring a primary and secondary kerberos server to use OpenLDAP for the principaldatabase. Note that as of version 1.18, the KDC from MIT Kerberos does not support a primary KDC usinga read-only consumer (secondary) LDAP server. What we have to consider here is that a Primary KDCis read-write, and it needs a read-write backend. The Secondaries can use both a read-write and read-onlybackend, because they are expected to be read-only. Therefore there are only some possible layouts we canuse:
1. Simple case: Primary KDC connected to primary OpenLDAP, Secondary KDC connected to bothPrimary and Secondary OpenLDAP
2. Extended simple case: Multiple Primary KDCs connected to one Primary OpenLDAP, and multipleSecondary KDCs connected to Primary and Secondary OpenLDAP
3. OpenLDAP with multi-master replication: multiple primary KDCs connected to all primary OpenL-DAP servers
We haven’t covered OpenLDAP multi-master replication in this guide, so we will show the first case only.The second scenario is an extension: just add another primary KDC to the mix, talking to the same primaryOpenLDAP server.
Configuring OpenLDAP
We are going to install the OpenLDAP server on the same host as the KDC, to simplify the communicationbetween them. In such a setup, we can use the ldapi:/// transport, which is via an unix socket, and don’tneed to setup SSL certificates to secure the communication between the Kerberos services and OpenLDAP.Note, however, that SSL is still needed for the OpenLDAP replication. See LDAP with TLS for details.
If you want to use an existing OpenLDAP server that you have somewhere else, that’s of course also possible,but keep in mind that you should then use SSL for the communication between the KDC and this OpenLDAPserver.
First, the necessary schema needs to be loaded on an OpenLDAP server that has network connectivity tothe Primary and Secondary KDCs. The rest of this section assumes that you also have LDAP replicationconfigured between at least two servers. For information on setting up OpenLDAP see OpenLDAP Server.
Note
cn=admin,dc=example,dc=com is a default admin user that is created during the installation ofthe slapd package (the OpenLDAP server). The domain component will change for your server,so adjust accordingly.
• Install the necessary packages (it’s assumed that OpenLDAP is already installed):
sudo apt i n s t a l l krb5−kdc−ldap krb5−admin−s e r v e r
• Next, extract the kerberos.schema.gz file:
sudo cp / usr / share /doc/krb5−kdc−ldap / kerberos . schema . gz / e t c / ldap/schema/sudo gunzip / e t c / ldap/schema/ kerberos . schema . gz
• The kerberos schema needs to be added to the cn=config tree. This schema file needs to be convertedto LDIF format before it can be added. For that we will use a helper tool, called schema2ldif, providedby the package of the same name which is available in the Universe archive:
sudo apt i n s t a l l s chema2 ld i f
• To import the kerberos schema, run:
$ sudo ldap−schema−manager − i k e rberos . schemaSASL/EXTERNAL authen t i c a t i on s t a r t edSASL username : gidNumber=0+uidNumber=0,cn=peercred , cn=exte rna l , cn=auth
183
SASL SSF : 0execut ing ’ ldapadd −Y EXTERNAL −H ldap i :/// −f / e t c / ldap/schema/ kerberos .
l d i f ’SASL/EXTERNAL authen t i c a t i on s t a r t edSASL username : gidNumber=0+uidNumber=0,cn=peercred , cn=exte rna l , cn=authSASL SSF : 0adding new entry ”cn=kerberos , cn=schema , cn=con f i g ”
• With the new schema loaded, let’s index an attribute often used in searches:$ sudo ldapmodify −Q −Y EXTERNAL −H ldap i :/// <<EOFdn : olcDatabase={1}mdb, cn=con f i gadd : olcDbIndexolcDbIndex : krbPrincipalName eq , pres , subEOF
modifying entry ” olcDatabase={1}mdb, cn=con f i g ”
• Let’s create LDAP entries for the Kerberos administrative entities that will contact the OpenLDAPserver to perform operations. There are two:
– ldap_kdc_dn: needs to have read rights on the realm container, principal container andrealm sub-trees. If disable_last_success and disable_lockout are not set, however, thenldap_kdc_dn needs write access to the kerberos container just like the admin dn below.
– ldap_kadmind_dn: needs to have read and write rights on the realm container, principalcontainer and realm sub-trees
Here is the command to create these entities:$ ldapadd −x −D cn=admin , dc=example , dc=com −W<<EOFdn : uid=kdc−s e r v i c e , dc=example , dc=comuid : kdc−s e r v i c eob j e c tC l a s s : accountob j e c tC l a s s : s imp leSecur i tyObjec tuserPassword : {CRYPT}xd e s c r i p t i o n : Account used f o r the Kerberos KDC
dn : uid=kadmin−s e r v i c e , dc=example , dc=comuid : kadmin−s e r v i c eob j e c tC l a s s : accountob j e c tC l a s s : s imp leSecur i tyObjec tuserPassword : {CRYPT}xd e s c r i p t i o n : Account used f o r the Kerberos Admin s e r v e rEOFEnter LDAP Password :adding new entry ” uid=kdc−s e r v i c e , dc=example , dc=com”
adding new entry ” uid=kadmin−s e r v i c e , dc=example , dc=com”
Now let’s set a password for them. Note that first the tool asks for the password you want forthe specified user dn, and then for the password of the cn=admin dn: $ ldappasswd -x -Dcn=admin,dc=example,dc=com -W -S uid=kdc-service,dc=example,dc=com New password: <–password you want for uid-kdc-service Re-enter new password: Enter LDAP Password: <– passwordfor the dn specified with the -D option
Repeat for the uid=kadmin−service dn. These passwords will be needed later.
You can test these with ldapwhoami:
184

$ ldapwhoami −x −D uid=kdc−s e r v i c e , dc=example , dc=com −WEnter LDAP Password :dn : uid=kdc−s e r v i c e , dc=example , dc=com
• Finally, update the Access Control Lists (ACL). These can be tricky, as it highly depends on what youhave defined already. By default, the slapd package configures your database with the following ACLs:
o l cAcce s s : {0} to a t t r s=userPassword by s e l f wr i t e by anonymous auth by *none
o l cAcce s s : {1} to a t t r s=shadowLastChange by s e l f wr i t e by * reado l cAcce s s : {2} to * by * read
We need to insert new rules before the final to * by * read one, to control access to the Kerberosrelated entries and attributes:
$ sudo ldapmodify −Q −Y EXTERNAL −H ldap i :/// <<EOFdn : olcDatabase={1}mdb, cn=con f i gadd : o l cAcce s so l cAcce s s : {2} to a t t r s=krbPrinc ipalKey
by anonymous authby dn . exact=”uid=kdc−s e r v i c e , dc=example , dc=com” readby dn . exact=”uid=kadmin−s e r v i c e , dc=example , dc=com” wr i t eby s e l f wr i t eby * none
−add : o l cAcce s so l cAcce s s : {3} to dn . subt ree=”cn=krbContainer , dc=example , dc=com”
by dn . exact=”uid=kdc−s e r v i c e , dc=example , dc=com” readby dn . exact=”uid=kadmin−s e r v i c e , dc=example , dc=com” wr i t eby * none
EOF
modifying entry ” olcDatabase={1}mdb, cn=con f i g ”
This will make the existing {2} rule become {4}. Check with sudo slapcat −b cn=config (the outputbelow was reformatted a bit for clarity):
o l cAcce s s : {0} to a t t r s=userPasswordby s e l f wr i t eby anonymous authby * none
o l cAcce s s : {1} to a t t r s=shadowLastChangeby s e l f wr i t eby * read
o l cAcce s s : {2} to a t t r s=krbPrinc ipalKey by anonymous authby dn . exact=”uid=kdc−s e r v i c e , dc=example , dc=com” readby dn . exact=”uid=kadmin−s e r v i c e , dc=example , dc=com” wr i t eby s e l f wr i t eby * none
o l cAcce s s : {3} to dn . subt ree=”cn=krbContainer , dc=example , dc=com”by dn . exact=”uid=kdc−s e r v i c e , dc=example , dc=com” readby dn . exact=”uid=kadmin−s e r v i c e , dc=example , dc=com” wr i t eby * none
o l cAcce s s : {4} to * by * read
That’s it, your LDAP directory is now ready to serve as a Kerberos principal database.
185
Primary KDC Configuration (LDAP)
With OpenLDAP configured it is time to configure the KDC. In this example we are doing it in the sameOpenLDAP server to take advantage of local unix socket communication.
• Reconfigure the krb5−config package if neededd to get a good starting point with /etc/krb5.conf:
sudo dpkg−r e c on f i g u r e krb5−c on f i g
• Now edit /etc/krb5.conf adding the database_module option to the EXAMPLE.COM realm section:[ realms ]
EXAMPLE.COM = {kdc = kdc01 . example . comkdc = kdc02 . example . comadmin_server = kdc01 . example . comdefault_domain = example . comdatabase_module = openldap_ldapconf
}
Then also add these new sections:[ dbde fau l t s ]
ldap_kerberos_container_dn = cn=krbContainer , dc=example , dc=com
[ dbmodules ]openldap_ldapconf = {
db_library = kldap
# i f e i t h e r o f the se i s f a l s e , then the ldap_kdc_dn needsto
# have wr i t e a c c e s sd i s ab l e_ la s t_succe s s = trued i sab l e_lockout = true
# th i s ob j e c t needs to have read r i g h t s on# the realm conta iner , p r i n c i p a l conta ine r and realm sub−
t r e e sldap_kdc_dn = ”uid=kdc−s e r v i c e , dc=example , dc=com”
# th i s ob j e c t needs to have read and wr i t e r i g h t s on# the realm conta iner , p r i n c i p a l conta ine r and realm sub−
t r e e sldap_kadmind_dn = ”uid=kadmin−s e r v i c e , dc=example , dc=com”
ldap_serv ice_password_f i l e = / etc /krb5kdc/ s e r v i c e . k e y f i l eldap_servers = ldap i :///ldap_conns_per_server = 5
}
• Next, use the kdb5_ldap_util utility to create the realm:$ sudo kdb5_ldap_util −D cn=admin , dc=example , dc=com cr ea t e −sub t r e e s dc=
example , dc=com −r EXAMPLE.COM −s −H ldap i :///Password f o r ”cn=admin , dc=example , dc=com” :I n i t i a l i z i n g database f o r realm ’EXAMPLE.COM’You w i l l be prompted f o r the database Master Password .
186
I t i s important that you NOT FORGET th i s password .Enter KDC database master key :Re−ente r KDC database master key to v e r i f y :
• Create a stash of the password used to bind to the LDAP server. Run it once for each ldap_kdc_dnand ldap_kadmin_dn::
sudo kdb5_ldap_util −D cn=admin , dc=example , dc=com stashsrvpw −f / e t c /krb5kdc/ s e r v i c e . k e y f i l e uid=kdc−s e r v i c e , dc=example , dc=com
sudo kdb5_ldap_util −D cn=admin , dc=example , dc=com stashsrvpw −f / e t c /krb5kdc/ s e r v i c e . k e y f i l e uid=kadmin−s e r v i c e , dc=example , dc=com
Note
The /etc/krb5kdc/service. keyfile file now contains clear text versions of the passwords usedby the KDC to contact the LDAP server!
• Create a /etc/krb5kdc/kadm5.acl file for the admin server, if you haven’t already:
• Start the Kerberos KDC and admin server:
sudo sys t emct l s t a r t krb5−kdc . s e r v i c e krb5−admin−s e r v e r . s e r v i c e
You can now add Kerberos principals to the LDAP database, and they will be copied to any other LDAPservers configured for replication. To add a principal using the kadmin.local utility enter:
$ sudo kadmin . l o c a lAuthent icat ing as p r i n c i p a l root /[email protected] with password .kadmin . l o c a l : addprinc ubuntuWARNING: no po l i c y s p e c i f i e d f o r [email protected]; d e f au l t i n g to no po l i c yEnter password f o r p r i n c i p a l ”[email protected]” :Re−ente r password f o r p r i n c i p a l ”[email protected]” :Pr i n c i pa l ”[email protected]” created .kadmin . l o c a l :
The above will create an ubuntu principal with a dn of [email protected],cn=EXAMPLE.COM,cn=krbContainer,dc=example,dc=com. Let’s say, however, that you already have anuser in your directory, and it’s in uid=testuser1,ou=People,dc=example,dc=com, how to add the kerberosattributes to it? You use the −x parameter:
$ sudo kadmin . l o c a lAuthent icat ing as p r i n c i p a l root /[email protected] with password .kadmin . l o c a l : addprinc −x dn=uid=te s tu s e r1 , ou=People , dc=example , dc=com
t e s t u s e r 1WARNING: no po l i c y s p e c i f i e d f o r testuser1@EXAMPLE .COM; d e f au l t i n g to no
po l i c yEnter password f o r p r i n c i p a l ”testuser1@EXAMPLE .COM” :Re−ente r password f o r p r i n c i p a l ”testuser1@EXAMPLE .COM” :Pr i n c i pa l ”testuser1@EXAMPLE .COM” created .
Since the specified dn already exists, kadmin.local will just add the required kerberos attributes to thisexisting entry. If it didn’t exist, it would be created from scratch, with just the kerberos attributes, likewhat happened with the ubuntu example above, but in the specified location.
Both places are visible for kinit , since, when the realm was created with kdb5_ldap_util, the default valuefor the search scope and base were taken: subtree, and dc=example,dc=com.
187
Secondary KDC Configuration (LDAP)
The setup of the secondary KDC (and its OpenLDAP replica) is very similar. Once you have the OpenLDAPreplication setup, repeat these steps on the secondary: - install krb5-kdc-ldap, ldap-utils. Do not install krb5-admin-server. - load the kerberos schema using schema2ldif - add the index for krbPrincipalName - add theACLs - configure krb5.conf in the same way, initially. If you want and if you configured SSL properly, youcan add ldaps://kdc01.example.com to the ldap_servers list after ldapi:///, so that the Secondary KDC canhave two LDAP backends at its disposal - DO NOT run kdb5_ldap_util. There is no need to create thedatabase since it’s being replicated from the Primary - copy over the following files from the Primary KDCand place them in the same location on the Secondary: - /etc/krb5kdc/stash - /etc/krb5kdc/service. keyfile- start the KDC: sudo systemctl start krb5−kdc.service
Resources
• Configuring Kerberos with OpenLDAP back-end
• MIT Kerberos backend types
OpenLDAP Server
The Lightweight Directory Access Protocol, or LDAP, is a protocol for querying and modifying a X.500-baseddirectory service running over TCP/IP. The current LDAP version is LDAPv3, as defined in RFC4510, andthe implementation used in Ubuntu is OpenLDAP.”
The LDAP protocol accesses directories. A common mistake is to call a directory an LDAP directory, orLDAP database, but it’s really so common, and we all know what we are talking about, that it’s ok. Hereare some key concepts and terms:
• A directory is a tree of data entries that is hierarchical in nature and is called the Directory InformationTree (DIT).
• An entry consists of a set of attributes.
• An attribute has a key (a name/description) and one or more values.
• Every attribute must be defined in at least one objectClass.
• Attributes and objectclasses are defined in schemas (an objectclass is actually considered as a specialkind of attribute).
• Each entry has a unique identifier: its Distinguished Name (DN or dn). This, in turn, consists of aRelative Distinguished Name (RDN) followed by the parent entry’s DN.
• The entry’s DN is not an attribute. It is not considered part of the entry itself.
Note
The terms object, container, and node have certain connotations but they all essentially meanthe same thing as entry, the technically correct term.
For example, below we have a single entry consisting of 11 attributes where the following is true:
• DN is “cn=John Doe,dc=example,dc=com”
• RDN is “cn=John Doe”
• parent DN is “dc=example,dc=com”
188
dn : cn=John Doe , dc=example , dc=comcn : John DoegivenName : Johnsn : DoetelephoneNumber : +1 888 555 6789telephoneNumber : +1 888 555 1232mail : john@example . commanager : cn=Larry Smith , dc=example , dc=comob j e c tC l a s s : inetOrgPersonob j e c tC l a s s : o r gan i za t i ona lPe r sonob j e c tC l a s s : personob j e c tC l a s s : top
The above entry is in LDIF format (LDAP Data Interchange Format). Any information that you feed intoyour DIT must also be in such a format. It is defined in RFC2849.
Such a directory accessed via LDAP is good for anything that involves a large number of access requeststo a mostly-read, attribute-based (name:value) backend, and that can benefit from a hierarchical struc-ture. Examples include an address book, company directory, a list of email addresses, and a mail server’sconfiguration.
Installation
The installation of slapd will create a minimal working configuration with a top level entry, and an adminis-trator’s DN. In particular, it will create a database instance that you can use to store your data. However,the suffix (or base DN) of this instance will be determined from the domain name of the host. If you wantsomething different, you can change it right after the installation when you still don’t have any useful data.
Note
This guide will use a database suffix of dc=example,dc=com.
Proceed with the install of the server and the main command line utilities:
sudo apt i n s t a l l s lapd ldap−u t i l s
If you want to change your DIT suffix, now would be a good time, because changing it discards your existingone. To change the suffix, run the following command:
sudo dpkg−r e c on f i g u r e s lapd
To switch your DIT suffix to dc=example,dc=com, for example, so you can follow this guide more closely,answer example.com when asked about the DNS domain name.
Throughout this guide we will issue many commands with the LDAP utilities. To save some typing, we canconfigure the OpenLDAP libraries with certain defaults in /etc/ldap/ldap.conf:
BASE dc=example , dc=comURI ldap :// ldap01 . example . comTLS_CACERT / etc / s s l / c e r t s /ca−c e r t i f i c a t e s . c r t
Note
Adjust for your server name and directory suffix
Post-install Inspection
The packaging of slapd is designed to be configured within the service itself by dedicating a separate DITfor that purpose. This allows one to dynamically configure slapd without the need to restart the service or
189
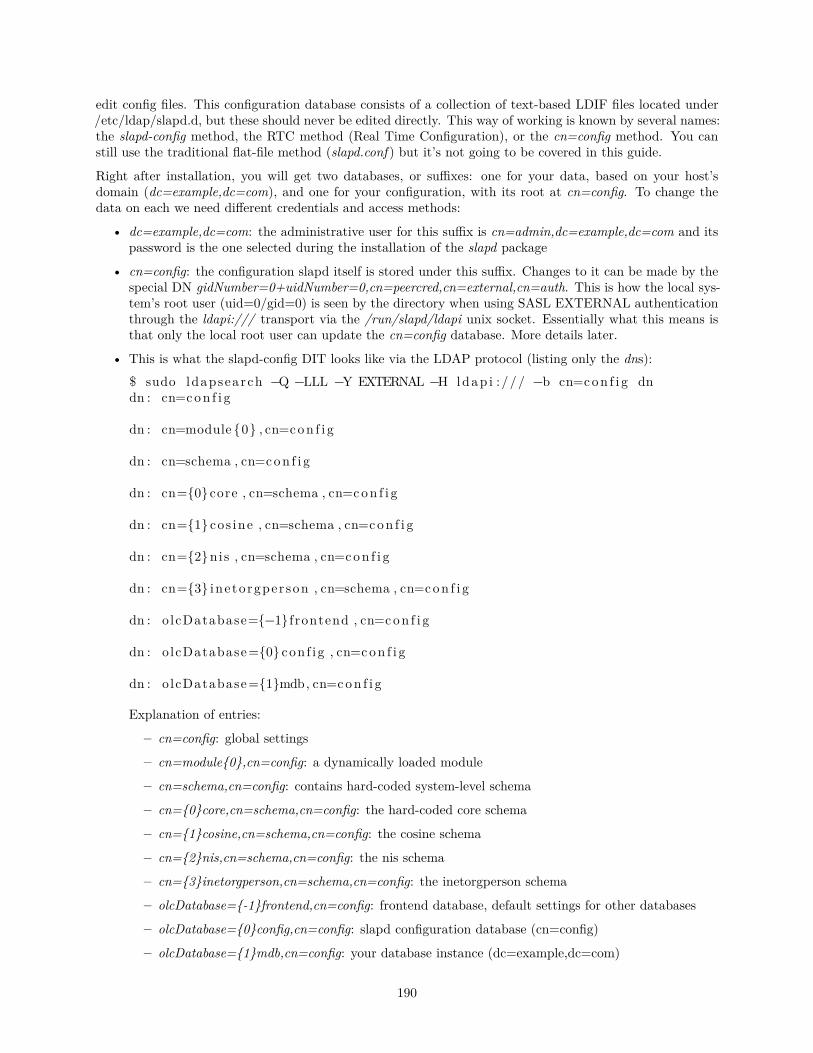
edit config files. This configuration database consists of a collection of text-based LDIF files located under/etc/ldap/slapd.d, but these should never be edited directly. This way of working is known by several names:the slapd-config method, the RTC method (Real Time Configuration), or the cn=config method. You canstill use the traditional flat-file method (slapd.conf ) but it’s not going to be covered in this guide.
Right after installation, you will get two databases, or suffixes: one for your data, based on your host’sdomain (dc=example,dc=com), and one for your configuration, with its root at cn=config. To change thedata on each we need different credentials and access methods:
• dc=example,dc=com: the administrative user for this suffix is cn=admin,dc=example,dc=com and itspassword is the one selected during the installation of the slapd package
• cn=config: the configuration slapd itself is stored under this suffix. Changes to it can be made by thespecial DN gidNumber=0+uidNumber=0,cn=peercred,cn=external,cn=auth. This is how the local sys-tem’s root user (uid=0/gid=0) is seen by the directory when using SASL EXTERNAL authenticationthrough the ldapi:/// transport via the /run/slapd/ldapi unix socket. Essentially what this means isthat only the local root user can update the cn=config database. More details later.
• This is what the slapd-config DIT looks like via the LDAP protocol (listing only the dns):$ sudo ldapsearch −Q −LLL −Y EXTERNAL −H ldap i :/// −b cn=con f i g dndn : cn=con f i g
dn : cn=module {0} , cn=con f i g
dn : cn=schema , cn=con f i g
dn : cn={0}core , cn=schema , cn=con f i g
dn : cn={1} cos ine , cn=schema , cn=con f i g
dn : cn={2}nis , cn=schema , cn=con f i g
dn : cn={3} inetorgper son , cn=schema , cn=con f i g
dn : o lcDatabase={−1}frontend , cn=con f i g
dn : o lcDatabase={0} con f i g , cn=con f i g
dn : o lcDatabase={1}mdb, cn=con f i g
Explanation of entries:
– cn=config: global settings
– cn=module{0},cn=config: a dynamically loaded module
– cn=schema,cn=config: contains hard-coded system-level schema
– cn={0}core,cn=schema,cn=config: the hard-coded core schema
– cn={1}cosine,cn=schema,cn=config: the cosine schema
– cn={2}nis,cn=schema,cn=config: the nis schema
– cn={3}inetorgperson,cn=schema,cn=config: the inetorgperson schema
– olcDatabase={-1}frontend,cn=config: frontend database, default settings for other databases
– olcDatabase={0}config,cn=config: slapd configuration database (cn=config)
– olcDatabase={1}mdb,cn=config: your database instance (dc=example,dc=com)
190
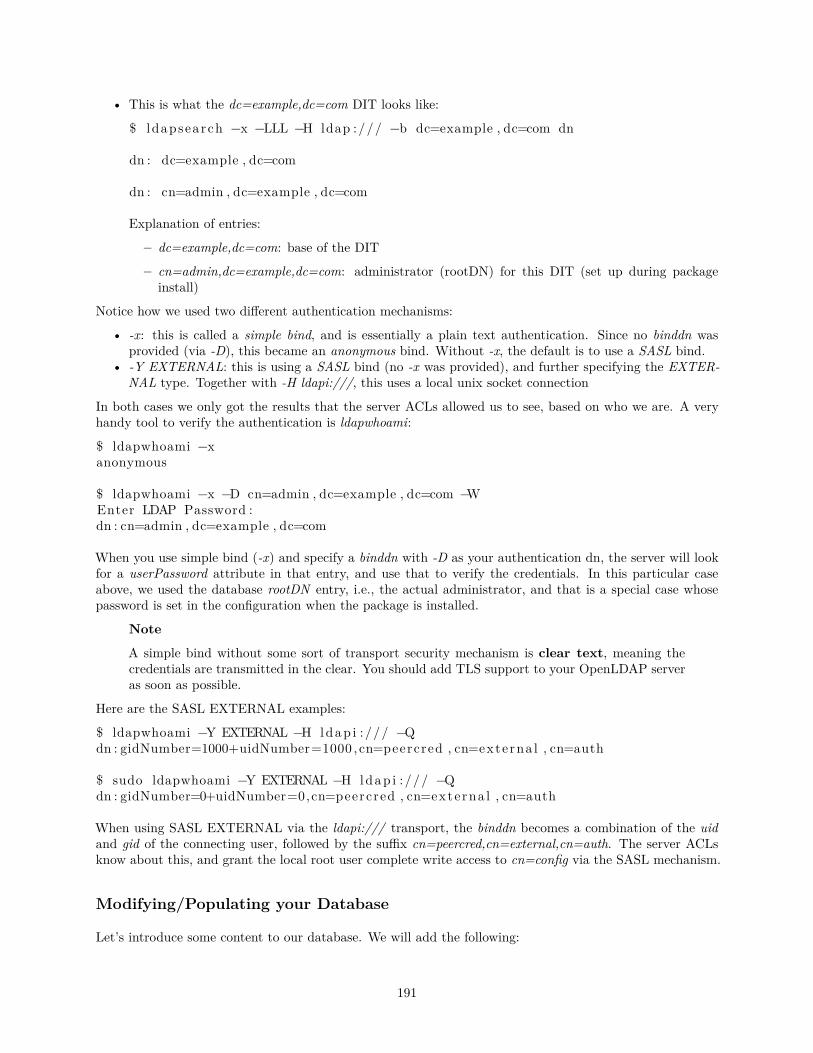
• This is what the dc=example,dc=com DIT looks like:
$ ldapsearch −x −LLL −H ldap :/// −b dc=example , dc=com dn
dn : dc=example , dc=com
dn : cn=admin , dc=example , dc=com
Explanation of entries:
– dc=example,dc=com: base of the DIT
– cn=admin,dc=example,dc=com: administrator (rootDN) for this DIT (set up during packageinstall)
Notice how we used two different authentication mechanisms:
• -x: this is called a simple bind, and is essentially a plain text authentication. Since no binddn wasprovided (via -D), this became an anonymous bind. Without -x, the default is to use a SASL bind.
• -Y EXTERNAL: this is using a SASL bind (no -x was provided), and further specifying the EXTER-NAL type. Together with -H ldapi:///, this uses a local unix socket connection
In both cases we only got the results that the server ACLs allowed us to see, based on who we are. A veryhandy tool to verify the authentication is ldapwhoami:
$ ldapwhoami −xanonymous
$ ldapwhoami −x −D cn=admin , dc=example , dc=com −WEnter LDAP Password :dn : cn=admin , dc=example , dc=com
When you use simple bind (-x) and specify a binddn with -D as your authentication dn, the server will lookfor a userPassword attribute in that entry, and use that to verify the credentials. In this particular caseabove, we used the database rootDN entry, i.e., the actual administrator, and that is a special case whosepassword is set in the configuration when the package is installed.
Note
A simple bind without some sort of transport security mechanism is clear text, meaning thecredentials are transmitted in the clear. You should add TLS support to your OpenLDAP serveras soon as possible.
Here are the SASL EXTERNAL examples:
$ ldapwhoami −Y EXTERNAL −H ldap i :/// −Qdn : gidNumber=1000+uidNumber=1000 , cn=peercred , cn=exte rna l , cn=auth
$ sudo ldapwhoami −Y EXTERNAL −H ldap i :/// −Qdn : gidNumber=0+uidNumber=0,cn=peercred , cn=exte rna l , cn=auth
When using SASL EXTERNAL via the ldapi:/// transport, the binddn becomes a combination of the uidand gid of the connecting user, followed by the suffix cn=peercred,cn=external,cn=auth. The server ACLsknow about this, and grant the local root user complete write access to cn=config via the SASL mechanism.
Modifying/Populating your Database
Let’s introduce some content to our database. We will add the following:
191

• a node called People (to store users)
• a node called Groups (to store groups)
• a group called miners
• a user called john
Create the following LDIF file and call it add_content.ldif:
dn : ou=People , dc=example , dc=comob j e c tC l a s s : o r gan i z a t i ona lUn i tou : People
dn : ou=Groups , dc=example , dc=comob j e c tC l a s s : o r gan i z a t i ona lUn i tou : Groups
dn : cn=miners , ou=Groups , dc=example , dc=comob j e c tC l a s s : posixGroupcn : minersgidNumber : 5000
dn : uid=john , ou=People , dc=example , dc=comob j e c tC l a s s : inetOrgPersonob j e c tC l a s s : posixAccountob j e c tC l a s s : shadowAccountuid : johnsn : DoegivenName : Johncn : John DoedisplayName : John DoeuidNumber : 10000gidNumber : 5000userPassword : {CRYPT}xgecos : John Doel o g i n S h e l l : / bin /bashhomeDirectory : /home/ john
Note
It’s important that uid and gid values in your directory do not collide with local values. You canuse high number ranges, such as starting at 5000 or even higher.
Add the content:
$ ldapadd −x −D cn=admin , dc=example , dc=com −W −f add_content . l d i fEnter LDAP Password : ********adding new entry ”ou=People , dc=example , dc=com”
adding new entry ”ou=Groups , dc=example , dc=com”
adding new entry ”cn=miners , ou=Groups , dc=example , dc=com”
adding new entry ” uid=john , ou=People , dc=example , dc=com”
We can check that the information has been correctly added with the ldapsearch utility. For example, let’ssearch for the john entry, and request the cn and gidnumber attributes:
192
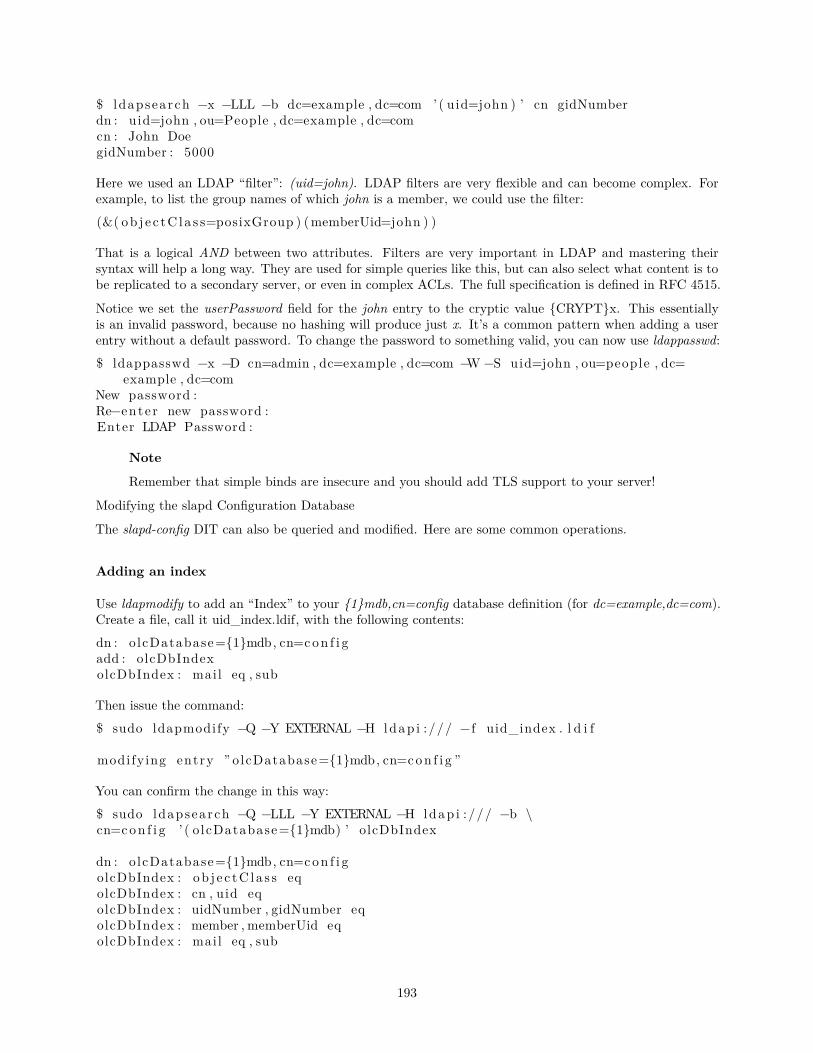
$ ldapsearch −x −LLL −b dc=example , dc=com ’ ( uid=john ) ’ cn gidNumberdn : uid=john , ou=People , dc=example , dc=comcn : John DoegidNumber : 5000
Here we used an LDAP “filter”: (uid=john). LDAP filters are very flexible and can become complex. Forexample, to list the group names of which john is a member, we could use the filter:(&( ob j e c tC l a s s=posixGroup ) (memberUid=john ) )
That is a logical AND between two attributes. Filters are very important in LDAP and mastering theirsyntax will help a long way. They are used for simple queries like this, but can also select what content is tobe replicated to a secondary server, or even in complex ACLs. The full specification is defined in RFC 4515.
Notice we set the userPassword field for the john entry to the cryptic value {CRYPT}x. This essentiallyis an invalid password, because no hashing will produce just x. It’s a common pattern when adding a userentry without a default password. To change the password to something valid, you can now use ldappasswd:$ ldappasswd −x −D cn=admin , dc=example , dc=com −W −S uid=john , ou=people , dc=
example , dc=comNew password :Re−ente r new password :Enter LDAP Password :
Note
Remember that simple binds are insecure and you should add TLS support to your server!
Modifying the slapd Configuration Database
The slapd-config DIT can also be queried and modified. Here are some common operations.
Adding an index
Use ldapmodify to add an “Index” to your {1}mdb,cn=config database definition (for dc=example,dc=com).Create a file, call it uid_index.ldif, with the following contents:dn : o lcDatabase={1}mdb, cn=con f i gadd : olcDbIndexolcDbIndex : mail eq , sub
Then issue the command:$ sudo ldapmodify −Q −Y EXTERNAL −H ldap i :/// −f uid_index . l d i f
modifying entry ” olcDatabase={1}mdb, cn=con f i g ”
You can confirm the change in this way:$ sudo ldapsearch −Q −LLL −Y EXTERNAL −H ldap i :/// −b \cn=con f i g ’ ( o lcDatabase={1}mdb) ’ olcDbIndex
dn : o lcDatabase={1}mdb, cn=con f i golcDbIndex : ob j e c tC l a s s eqolcDbIndex : cn , uid eqolcDbIndex : uidNumber , gidNumber eqolcDbIndex : member , memberUid eqolcDbIndex : mail eq , sub
193
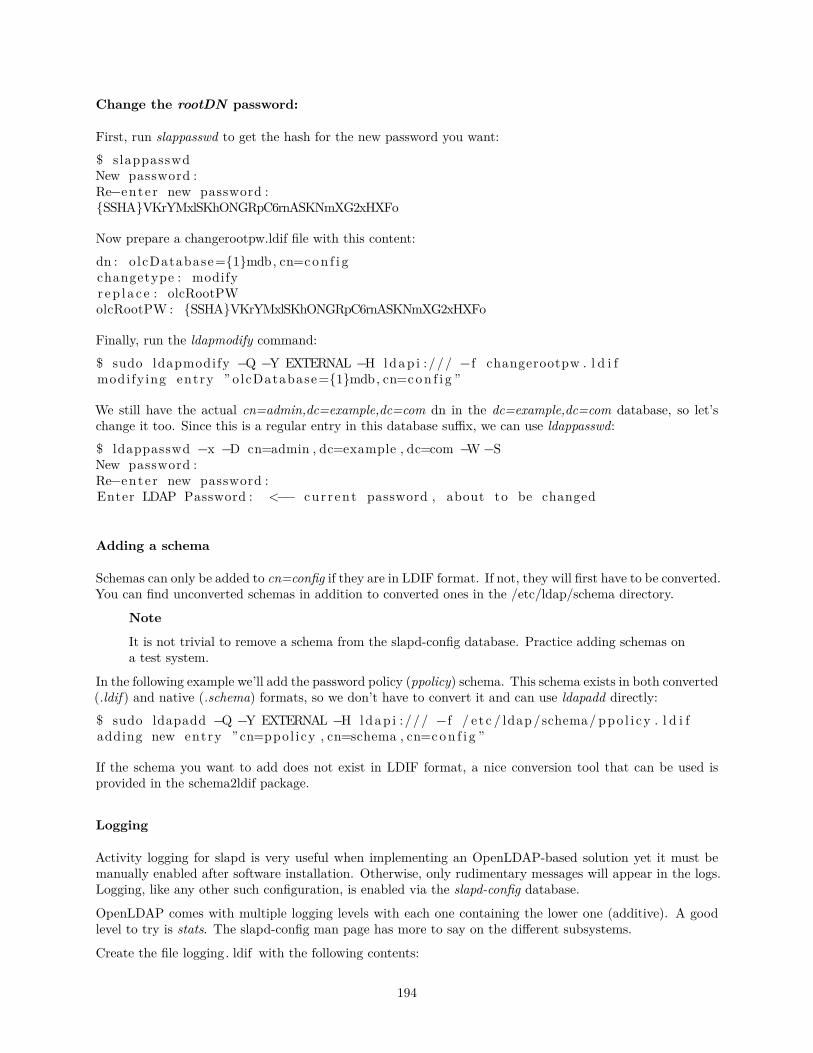
Change the rootDN password:
First, run slappasswd to get the hash for the new password you want:$ slappasswdNew password :Re−ente r new password :{SSHA}VKrYMxlSKhONGRpC6rnASKNmXG2xHXFo
Now prepare a changerootpw.ldif file with this content:dn : o lcDatabase={1}mdb, cn=con f i gchangetype : modifyr ep l a c e : olcRootPWolcRootPW : {SSHA}VKrYMxlSKhONGRpC6rnASKNmXG2xHXFo
Finally, run the ldapmodify command:$ sudo ldapmodify −Q −Y EXTERNAL −H ldap i :/// −f changerootpw . l d i fmodifying entry ” olcDatabase={1}mdb, cn=con f i g ”
We still have the actual cn=admin,dc=example,dc=com dn in the dc=example,dc=com database, so let’schange it too. Since this is a regular entry in this database suffix, we can use ldappasswd:$ ldappasswd −x −D cn=admin , dc=example , dc=com −W −SNew password :Re−ente r new password :Enter LDAP Password : <−− cur rent password , about to be changed
Adding a schema
Schemas can only be added to cn=config if they are in LDIF format. If not, they will first have to be converted.You can find unconverted schemas in addition to converted ones in the /etc/ldap/schema directory.
Note
It is not trivial to remove a schema from the slapd-config database. Practice adding schemas ona test system.
In the following example we’ll add the password policy (ppolicy) schema. This schema exists in both converted(.ldif ) and native (.schema) formats, so we don’t have to convert it and can use ldapadd directly:$ sudo ldapadd −Q −Y EXTERNAL −H ldap i :/// −f / e t c / ldap/schema/ ppo l i cy . l d i fadding new entry ”cn=ppol icy , cn=schema , cn=con f i g ”
If the schema you want to add does not exist in LDIF format, a nice conversion tool that can be used isprovided in the schema2ldif package.
Logging
Activity logging for slapd is very useful when implementing an OpenLDAP-based solution yet it must bemanually enabled after software installation. Otherwise, only rudimentary messages will appear in the logs.Logging, like any other such configuration, is enabled via the slapd-config database.
OpenLDAP comes with multiple logging levels with each one containing the lower one (additive). A goodlevel to try is stats. The slapd-config man page has more to say on the different subsystems.
Create the file logging. ldif with the following contents:
194
dn : cn=con f i gchangetype : modifyr ep l a c e : o l cLogLeve lo lcLogLeve l : s t a t s
Implement the change:
sudo ldapmodify −Q −Y EXTERNAL −H ldap i :/// −f l o gg ing . l d i f
This will produce a significant amount of logging and you will want to throttle back to a less verbose levelonce your system is in production. While in this verbose mode your host’s syslog engine (rsyslog) may havea hard time keeping up and may drop messages:
r sys logd −2177: imuxsock l o s t 228 messages from pid 2547 due to rate−l im i t i n g
You may consider a change to rsyslog’s configuration. In /etc/rsyslog .conf, put:
# Disab le ra t e l im i t i n g# ( de f au l t i s 200 messages in 5 seconds ; below we make the 5 become 0)$SystemLogRateLimitInterval 0
And then restart the rsyslog daemon:
sudo sys t emct l r e s t a r t s y s l o g . s e r v i c e
Backup and Restore
Now we have ldap running just the way we want, it is time to ensure we can save all of our work and restoreit as needed.
What we need is a way to backup the directory database(s), specifically the configuration backend (cn=config)and the DIT (dc=example,dc=com). If we are going to backup those databases into, say, /export/backup,we could use slapcat as shown in the following script, called /usr/local/bin/ldapbackup:
#!/bin /bash
s e t −e
BACKUP_PATH=/export /backupSLAPCAT=/usr / sb in / s l ap ca t
n i c e ${SLAPCAT} −b cn=con f i g > ${BACKUP_PATH}/ con f i g . l d i fn i c e ${SLAPCAT} −b dc=example , dc=com > ${BACKUP_PATH}/example . com . l d i fchown root : root ${BACKUP_PATH}/*chmod 600 ${BACKUP_PATH}/* . l d i f
Note
These files are uncompressed text files containing everything in your directory including the treelayout, usernames, and every password. So, you might want to consider making /export/backupan encrypted partition and even having the script encrypt those files as it creates them. Ideallyyou should do both, but that depends on your security requirements.
Then, it is just a matter of having a cron script to run this program as often as you feel comfortable with.For many, once a day suffices. For others, more often is required. Here is an example of a cron script called/etc/cron.d/ldapbackup that is run every night at 22:45h:
195
MAILTO=backup−emails@domain . com45 22 * * * root / usr / l o c a l / bin / ldapbackup
Now the files are created, they should be copied to a backup server.
Assuming we did a fresh reinstall of ldap, the restore process could be something like this:
#!/bin /bash
s e t −e
BACKUP_PATH=/export /backupSLAPADD=/usr / sb in / s lapadd
i f [ −n ”$ ( l s − l / var / l i b / ldap /* 2>/dev/ nu l l ) ” −o −n ”$ ( l s − l / e t c / ldap/ s lapd .d/* 2>/dev/ nu l l ) ” ] ; thenecho Run the f o l l ow i ng to remove the e x i s t i n g db :echo sudo sys t emct l stop s lapd . s e r v i c eecho sudo rm −r f / e t c / ldap/ s lapd . d/* /var / l i b / ldap /*e x i t 1
f isudo sys t emct l stop s lapd . s e r v i c e | | :sudo slapadd −F / etc / ldap/ s lapd . d −b cn=con f i g − l / export /backup/ con f i g . l d i fsudo slapadd −F / etc / ldap/ s lapd . d −b dc=example , dc=com − l / export /backup/
example . com . l d i fsudo chown −R openldap : openldap / e tc / ldap/ s lapd . d/sudo chown −R openldap : openldap /var / l i b / ldap/sudo sys t emct l s t a r t s lapd . s e r v i c e
This is a simplistic backup strategy, of course. It’s being shown here as a reference for the basic tooling youcan use for backups and restores.
References
• The OpenLDAP administrators guide
• LDAP string representation of search filters
OpenLDAP Replication
The LDAP service becomes increasingly important as more networked systems begin to depend on it. Insuch an environment, it is standard practice to build redundancy (high availability) into LDAP to preventhavoc should the LDAP server become unresponsive. This is done through LDAP replication.
Replication is achieved via the Syncrepl engine. This allows changes to be synchronized using a Consumer -Provider model. A detailed description this replication mechanism can be found in the OpenLDAP Admin-istrator’s Guide and in its defining RFC 4533.
There are two ways to use this replication:
• standard replication: changed entries are sent to the consumer in their entirety. For example, if theuserPassword attribute of the uid=john,ou=people,dc=example,dc=com entry changed, then the wholeentry is sent to the consumer
• delta replication: only the actual change is sent, instead of the whole entry
196
The delta replication sends less data over the network, but is more complex to setup. We will show both inthis guide.
Important
You must have TLS enabled already. Please consult the LDAP with TLS guide
Provider Configuration - replication user
Both replication strategies will need a replication user and updates to the ACLs and limits regarding thisuser.
To create the replication user, save the following contents to a file called replicator . ldif :
dn : cn=r ep l i c a t o r , dc=example , dc=comob j e c tC l a s s : s imp leSecur i tyObjec tob j e c tC l a s s : o r gan i z a t i ona lRo l ecn : r e p l i c a t o rd e s c r i p t i o n : Rep l i c a t i on useruserPassword : {CRYPT}x
Then add it with ldapadd:
$ ldapadd −x −ZZ −D cn=admin , dc=example , dc=com −W −f r e p l i c a t o r . l d i fEnter LDAP Password :adding new entry ”cn=r ep l i c a t o r , dc=example , dc=com”
Now set a password for it with ldappasswd:
$ ldappasswd −x −ZZ −D cn=admin , dc=example , dc=com −W −S cn=r ep l i c a t o r , dc=example , dc=com
New password :Re−ente r new password :Enter LDAP Password :
The next step is to give this replication user the correct privileges:
• read access to the content that we want replicated• no search limits on this content
For that we need to update the ACLs on the provider. Since ordering matters, first check what the existingACLs look like on the dc=example,dc=com tree:
$ sudo ldapsearch −Q −Y EXTERNAL −H ldap i :/// −LLL −b cn=con f i g ’ ( o l c S u f f i x=dc=example , dc=com) ’ o l cAcce s s
dn : o lcDatabase={1}mdb, cn=con f i go l cAcce s s : {0} to a t t r s=userPassword by s e l f wr i t e by anonymous auth by * noneo l cAcce s s : {1} to a t t r s=shadowLastChange by s e l f wr i t e by * reado l cAcce s s : {2} to * by * read
What we need is to insert a new rule before the first one, and also adjust the limits for the replicator user.Prepare the replicator−acl−limits. ldif file with this content:
dn : o lcDatabase={1}mdb, cn=con f i gchangetype : modifyadd : o l cAcce s so l cAcce s s : {0} to *
by dn . exact=”cn=r ep l i c a t o r , dc=example , dc=com” read
197
by * break−add : o l cL im i t so l cL im i t s : dn . exact=”cn=r ep l i c a t o r , dc=example , dc=com”
time . s o f t=unl imited time . hard=unl imiteds i z e . s o f t=unl imited s i z e . hard=unl imited
And add it to the server:$ sudo ldapmodify −Q −Y EXTERNAL −H ldap i :/// −f r e p l i c a t o r −ac l−l im i t s . l d i fmodifying entry ” olcDatabase={1}mdb, cn=con f i g ”
Provider Configuration - standard replication
The remaining configuration for the provider using standard replication is to add the syncprov overlay ontop of the dc=example,dc=com database.o
Create a file called provider_simple_sync.ldif with this content:# Add indexes to the f rontend db .dn : o lcDatabase={1}mdb, cn=con f i gchangetype : modifyadd : olcDbIndexolcDbIndex : entryCSN eq−add : olcDbIndexolcDbIndex : entryUUID eq
#Load the syncprov module .dn : cn=module {0} , cn=con f i gchangetype : modifyadd : olcModuleLoadolcModuleLoad : syncprov
# sync r ep l Provider f o r primary dbdn : o lcOver lay=syncprov , o lcDatabase={1}mdb, cn=con f i gchangetype : addob j e c tC l a s s : o l cOver layConf igob j e c tC l a s s : o lcSyncProvConf igo lcOver lay : syncprovolcSpCheckpoint : 100 10o lcSpSess ionLog : 100
Customization warning
The LDIF above has some parameters that you should review before deploying in production onyour directory. In particular:
• olcSpCheckpoint, olcSpSessionLog: please see the slapo-syncprov(5) manpage. In general,olcSpSessionLog should be equal to, or preferably larger, than the number of entries in yourdirectory. Also see ITS #8125 for details on an existing bug.
Add the new content:sudo ldapadd −Q −Y EXTERNAL −H ldap i :/// −f provider_simple_sync . l d i f
The Provider is now configured.
198
Consumer Configuration - standard replication
Install the software by going through Installation. Make sure schemas and the database suffix are the same,and enable TLS.
Create an LDIF file with the following contents and name it consumer_simple_sync.ldif:
dn : cn=module {0} , cn=con f i gchangetype : modifyadd : olcModuleLoadolcModuleLoad : syncprov
dn : o lcDatabase={1}mdb, cn=con f i gchangetype : modifyadd : olcDbIndexolcDbIndex : entryUUID eq−add : o l cSync r ep lo l cSync r ep l : r i d=0
prov ide r=ldap :// ldap01 . example . combindmethod=simplebinddn=”cn=r ep l i c a t o r , dc=example , dc=com” c r e d e n t i a l s=<sec r e t >searchbase=”dc=example , dc=com”schemachecking=ontype=re f r e shAndPer s i s t r e t r y=”60 +”s t a r t t l s=c r i t i c a l t l s_ r eq c e r t=demand
−add : olcUpdateRefolcUpdateRef : ldap :// ldap01 . example . com
Ensure the following attributes have the correct values:
• provider (Provider server’s hostname – ldap01.example.com in this example – or IP address). It mustmatch what is presented in the provider’s SSL certificate.
• binddn (the bind DN for the replicator user)
• credentials (the password you selected for the replicator user)
• searchbase (the database suffix you’re using, i.e., content that is to be replicated)
• olcUpdateRef (Provider server’s hostname or IP address, given to clients if they try to write to thisconsumer)
• rid (Replica ID, an unique 3-digit that identifies the replica. Each consumer should have at least onerid)
Note
Note that a successful encrypted connection via START_TLS is being enforced in this configu-ration, to avoid sending the credentials in the clear across the network. See LDAP with TLS fordetails on how to setup OpenLDAP with trusted SSL certificates.
Add the new configuration:
sudo ldapadd −Q −Y EXTERNAL −H ldap i :/// −f consumer_simple_sync . l d i f
You’re done. The dc=example,dc=com tree should now be synchronizing.
199
Provider Configuration - delta replication
The remaining provider configuration for delta replication is:
• create a new database called accesslog• add the syncprov overlay on top of the accesslog and dc=example,dc=com databases• add the accesslog overlay on top of the dc=example,dc=com database
Add syncprov and accesslog overlays and DBs
Create an LDIF file with the following contents and name it provider_sync.ldif:
# Add indexes to the f rontend db .dn : o lcDatabase={1}mdb, cn=con f i gchangetype : modifyadd : olcDbIndexolcDbIndex : entryCSN eq−add : olcDbIndexolcDbIndex : entryUUID eq
#Load the syncprov and a c c e s s l o g modules .dn : cn=module {0} , cn=con f i gchangetype : modifyadd : olcModuleLoadolcModuleLoad : syncprov−add : olcModuleLoadolcModuleLoad : a c c e s s l o g
# Acces s log database d e f i n i t i o n sdn : o lcDatabase={2}mdb, cn=con f i gob j e c tC l a s s : o lcDatabaseConf igob j e c tC l a s s : olcMdbConfigolcDatabase : {2}mdbolcDbDirectory : / var / l i b / ldap/ a c c e s s l o go l c S u f f i x : cn=ac c e s s l o golcRootDN : cn=admin , dc=example , dc=comolcDbIndex : d e f au l t eqolcDbIndex : entryCSN , ob j ec tC las s , reqEnd , reqResult , r eqS ta r to l cAcce s s : {0} to * by dn . exact=”cn=r ep l i c a t o r , dc=example , dc=com” read by *
breako l cL im i t s : dn . exact=”cn=r ep l i c a t o r , dc=example , dc=com”
time . s o f t=unl imited time . hard=unl imiteds i z e . s o f t=unl imited s i z e . hard=unl imited
# Acces s log db syncprov .dn : o lcOver lay=syncprov , o lcDatabase={2}mdb, cn=con f i gchangetype : addob j e c tC l a s s : o l cOver layConf igob j e c tC l a s s : o lcSyncProvConf igo lcOver lay : syncprovolcSpNoPresent : TRUEolcSpReloadHint : TRUE
200
# syncr ep l Provider f o r primary dbdn : o lcOver lay=syncprov , o lcDatabase={1}mdb, cn=con f i gchangetype : addob j e c tC l a s s : o l cOver layConf igob j e c tC l a s s : o lcSyncProvConf igo lcOver lay : syncprovolcSpCheckpoint : 100 10o lcSpSess ionLog : 100
# ac c e s s l o g over l ay d e f i n i t i o n s f o r primary dbdn : o lcOver lay=acce s s l og , o lcDatabase={1}mdb, cn=con f i gob j e c tC l a s s : o l cOver layConf igob j e c tC l a s s : o lcAccessLogConf igo lcOver lay : a c c e s s l o golcAccessLogDB : cn=ac c e s s l o golcAccessLogOps : wr i t e so l cAccessLogSucces s : TRUE# scan the a c c e s s l o g DB every day , and purge e n t r i e s o l d e r than 7 daysolcAccessLogPurge : 07+00:00 01+00:00
Customization warning
The LDIF above has some parameters that you should review before deploying in production onyour directory. In particular:
• olcSpCheckpoint, olcSpSessionLog: please see the slapo-syncprov(5) manpage. In general,olcSpSessionLog should be equal to, or preferably larger, than the number of entries in yourdirectory. Also see ITS #8125 for details on an existing bug.
• olcAccessLogPurge: check the slapo-accesslog(5) manpage
Create a directory:
sudo −u openldap mkdir /var / l i b / ldap/ a c c e s s l o g
Add the new content:
sudo ldapadd −Q −Y EXTERNAL −H ldap i :/// −f provider_sync . l d i f
The Provider is now configured.
Consumer Configuration
Install the software by going through Installation. Make sure schemas and the database suffix are the same,and enable TLS.
Create an LDIF file with the following contents and name it consumer_sync.ldif:
dn : cn=module {0} , cn=con f i gchangetype : modifyadd : olcModuleLoadolcModuleLoad : syncprov
dn : o lcDatabase={1}mdb, cn=con f i gchangetype : modifyadd : olcDbIndexolcDbIndex : entryUUID eq
201
−add : o l cSync r ep lo l cSync r ep l : r i d=0
prov ide r=ldap :// ldap01 . example . combindmethod=simplebinddn=”cn=r ep l i c a t o r , dc=example , dc=com” c r e d e n t i a l s=<sec r e t >searchbase=”dc=example , dc=com”logbase=”cn=ac c e s s l o g ”l o g f i l t e r =”(&( ob j e c tC l a s s=auditWriteObject ) ( reqResu l t=0) ) ”schemachecking=ontype=re f r e shAndPer s i s t r e t r y=”60 +”syncdata=ac c e s s l o gs t a r t t l s=c r i t i c a l t l s_ r eq c e r t=demand
−add : olcUpdateRefolcUpdateRef : ldap :// ldap01 . example . com
Ensure the following attributes have the correct values:
• provider (Provider server’s hostname – ldap01.example.com in this example – or IP address). It mustmatch what is presented in the provider’s SSL certificate.
• binddn (the bind DN for the replicator user)
• credentials (the password you selected for the replicator user)
• searchbase (the database suffix you’re using, i.e., content that is to be replicated)
• olcUpdateRef (Provider server’s hostname or IP address, given to clients if they try to write to thisconsumer)
• rid (Replica ID, an unique 3-digit that identifies the replica. Each consumer should have at least onerid)
Note
Note that a successful encrypted connection via START_TLS is being enforced in this configu-ration, to avoid sending the credentials in the clear across the network. See LDAP with TLS fordetails on how to setup OpenLDAP with trusted SSL certificates.
Add the new configuration:sudo ldapadd −Q −Y EXTERNAL −H ldap i :/// −f consumer_sync . l d i f
You’re done. The dc=example,dc=com tree should now be synchronizing.
Testing
Once replication starts, you can monitor it by running$ ldapsearch −z1 −LLL −x −s base −b dc=example , dc=com contextCSNdn : dc=example , dc=comcontextCSN : 20200423222317.722667Z#000000#000#000000
on both the provider and the consumer. Once the contextCSN value for both match, both trees are in sync.Every time a change is done in the provider, this value will change and so should the one in the consumer(s).
If your connection is slow and/or your ldap database large, it might take a while for the consumer’s con-textCSN match the provider’s. But, you will know it is progressing since the consumer’s contextCSN will besteadly increasing.
202
If the consumer’s contextCSN is missing or does not match the provider, you should stop and figure outthe issue before continuing. Try checking the slapd entries in /var/log/syslog in the provider to see if theconsumer’s authentication requests were successful or its requests to retrieve data return no errors. Inparticular, verify that you can connect to the provider from the consumer as the replicator binddn usingSTART_TLS:
ldapwhoami −x −ZZ −D cn=r ep l i c a t o r , dc=example , dc=com −W −h ldap01 . example . com
For our example, you should now see the john user in the replicated tree:
$ ldapsearch −x −LLL −b dc=example , dc=com −h ldap02 . example . com ’ ( uid=john ) ’uid
dn : uid=john , ou=People , dc=example , dc=comuid : john
References
• Replication types, OpenLDAP Administrator’s Guide• LDAP Sync Replication - OpenLDAP Administrator’s Guide• RFC 4533.
LDAP Workstation Authentication
Once you have a working LDAP server, you will need to install libraries on the client that will know howand when to contact it. On Ubuntu, this has been traditionally accomplished by installing the libnss-ldappackage, but nowadays you should use SSSD. Please refer to Service - SSSD.
User and Group Management - ldapscripts
Another very common usage case for having an LDAP server is to store unix user and group information inthe directory. There are many tools out there, but usually big deployments will have developed their own.Here we will briefly show how to use the ldapscripts package for an easy and quick way to start storing userand group information in OpenLDAP.
Install the package:
sudo apt i n s t a l l l d a p s c r i p t s
Then edit the file /etc/ldapscripts/ldapscripts .conf to arrive at something similar to the following:
SERVER=ldap :// ldap01 . example . comLDAPBINOPTS=”−ZZ”BINDDN=’cn=admin , dc=example , dc=com ’BINDPWDFILE=”/etc / l d ap s c r i p t s / l d ap s c r i p t s . passwd”SUFFIX=’dc=example , dc=com ’GSUFFIX=’ou=Groups ’USUFFIX=’ou=People ’MSUFFIX=’ou=Computers ’
Note
• Adjust SERVER and related SUFFIX options to suit your directory structure.• Note we are forcing START_TLS usage here (-ZZ parameter), please refer to LDAP with
TLS for details on how to set the server up with TLS support
203

Store the cn=admin password in the /etc/ldapscripts/ldapscripts .passwd file and make sure it’s only read-able by the root local user:
$ sudo chmod 400 / e tc / l d ap s c r i p t s / l d a p s c r i p t s . passwd
The scripts are now ready to help manage your directory. Here are some examples of how to use them:
• Create a new user:
sudo ldapaddgroup georgesudo ldapadduser george george
This will create a group and user with name george and set the user’s primary group (gid) to george
• Change a user’s password:
$ sudo ldapsetpasswd georgeChanging password f o r user uid=george , ou=People , dc=example , dc=comNew Password :Retype New Password :S u c c e s s f u l l y s e t password f o r user uid=george , ou=People , dc=example , dc=com
• Delete a user:
sudo l dapde l e t eu s e r george
> **Note**>> This won ’ t d e l e t e the user ’ s primary group , but w i l l remove the user
from supplementary ones .
• Add a group:
sudo ldapaddgroup qa
• Delete a group:
sudo ldapde l e t egroup qa
• Add a user to a group:
sudo ldapaddusertogroup george qa
You should now see a memberUid attribute for the qa group with a value of george.
• Remove a user from a group:
sudo ldapde l e teuse r f romgroup george qa
The memberUid attribute should now be removed from the qa group.
• The ldapmodifyuser script allows you to add, remove, or replace a user’s attributes. The script usesthe same syntax as the ldapmodify utility. For example:
sudo ldapmodi fyuser george# About to modify the f o l l ow i n g entry :dn : uid=george , ou=People , dc=example , dc=comob j e c tC l a s s : accountob j e c tC l a s s : posixAccountcn : georgeuid : george
204
uidNumber : 10001gidNumber : 10001homeDirectory : /home/ georgel o g i n S h e l l : / bin /bashgecos : georged e s c r i p t i o n : User accountuserPassword : : e1NTSEF9eXFsTFcyWlhwWkF1eGUybVdFWHZKRzJVMjFTSG9vcHk=
# Enter your mod i f i c a t i on s here , end with CTRL−D.dn : uid=george , ou=People , dc=example , dc=comrep l a c e : gecosgecos : George Car l in
The user’s gecos should now be “George Carlin”.
• A nice feature of ldapscripts is the template system. Templates allow you to customize the attributesof user, group, and machine objects. For example, to enable the user template edit /etc/ldapscripts/ldapscripts .conf changing:
UTEMPLATE=”/etc / l d a p s c r i p t s / ldapadduser . template ”
There are sample templates in the /usr/share/doc/ldapscripts/examples directory. Copy or renamethe ldapadduser.template.sample file to /etc/ldapscripts/ldapadduser.template:
sudo cp / usr / share /doc/ l d ap s c r i p t s / examples / ldapadduser . template . sample \/ e t c / l d ap s c r i p t s / ldapadduser . template
Edit the new template to add the desired attributes. The following will create new users with anobjectClass of inetOrgPerson:
dn : uid=<user >,<usu f f i x >,<su f f i x >ob j e c tC l a s s : inetOrgPersonob j e c tC l a s s : posixAccountcn : <user>sn : <ask>uid : <user>uidNumber : <uid>gidNumber : <gid>homeDirectory : <home>l o g i n S h e l l : <sh e l l >gecos : <user>de s c r i p t i o n : User accountt i t l e : Employee
Notice the <ask> option used for the sn attribute. This will make ldapadduser prompt you for itsvalue.
There are utilities in the package that were not covered here. This command will output a list:
dpkg −L l d ap s c r i p t s | grep / usr / sb in
Resources
• The primary resource is the upstream documentation: www.openldap.org
• Zytrax’s LDAP for Rocket Scientists; a less pedantic but comprehensive treatment of LDAP
205
• A Ubuntu community OpenLDAP wiki page has a collection of notes
• O’Reilly’s LDAP System Administration (textbook; 2003)
• Packt’s Mastering OpenLDAP (textbook; 2007)
LDAP & TLS
When authenticating to an OpenLDAP server it is best to do so using an encrypted session. This can beaccomplished using Transport Layer Security (TLS).
Here, we will be our own Certificate Authority and then create and sign our LDAP server certificate as thatCA. This guide will use the certtool utility to complete these tasks. For simplicity, this is being done on theOpenLDAP server itself, but your real internal CA should be elsewhere.
Install the gnutls-bin and ssl-cert packages:sudo apt i n s t a l l gnut l s−bin s s l −c e r t
Create a private key for the Certificate Authority:sudo c e r t t o o l −−generate−pr ivkey −−b i t s 4096 −−o u t f i l e / e t c / s s l / p r i va t e /
mycakey . pem
Create the template/file /etc/ssl/ca. info to define the CA:cn = Example Companycacert_signing_keyexpirat ion_days = 3650
Create the self-signed CA certificate:sudo c e r t t o o l −−generate−s e l f −s igned \−−load−pr ivkey / e tc / s s l / p r i va t e /mycakey . pem \−−template / e t c / s s l / ca . i n f o \−−o u t f i l e / usr / l o c a l / share /ca−c e r t i f i c a t e s /mycacert . c r t
Note
Yes, the –outfile path is correct, we are writing the CA certificate to /usr/local/share/ca-certificates. This is where update-ca-certificates will pick up trusted local CAs from. To pick upCAs from /usr/share/ca-certificates, a call to dpkg−reconfigure ca−certificates is necessary.
Run update−ca−certificates to add the new CA certificate to the list of trusted CAs. Note the one addedCA:$ sudo update−ca−c e r t i f i c a t e sUpdating c e r t i f i c a t e s in / e t c / s s l / c e r t s . . .1 added , 0 removed ; done .Running hooks in / e t c /ca−c e r t i f i c a t e s /update . d . . .done .
This also creates a /etc/ssl/certs/mycacert.pem symlink pointing to the real file in /usr/local/share/ca−certificates .
Make a private key for the server:sudo c e r t t o o l −−generate−pr ivkey \−−b i t s 2048 \−−o u t f i l e / e t c / ldap/ ldap01_slapd_key . pem
206
Note
Replace ldap01 in the filename with your server’s hostname. Naming the certificate and key forthe host and service that will be using them will help keep things clear.
Create the /etc/ssl/ldap01.info info file containing:
o r gan i z a t i on = Example Companycn = ldap01 . example . comtls_www_serverencryption_keysigning_keyexpirat ion_days = 365
The above certificate is good for 1 year, and it’s valid only for the ldap01.example.com hostname. Adjustaccordingly.
Create the server’s certificate:
sudo c e r t t o o l −−generate−c e r t i f i c a t e \−−load−pr ivkey / e tc / ldap/ ldap01_slapd_key . pem \−−load−ca−c e r t i f i c a t e / e t c / s s l / c e r t s /mycacert . pem \−−load−ca−pr ivkey / e tc / s s l / p r i va t e /mycakey . pem \−−template / e t c / s s l / ldap01 . i n f o \−−o u t f i l e / e t c / ldap/ ldap01_slapd_cert . pem
Adjust permissions and ownership:
sudo chgrp openldap / e tc / ldap/ ldap01_slapd_key . pemsudo chmod 0640 / e tc / ldap/ ldap01_slapd_key . pem
Your server is now ready to accept the new TLS configuration.
Create the file certinfo . ldif with the following contents (adjust paths and filenames accordingly):
dn : cn=con f i gadd : o l cTLSCACert i f i cateF i l eo l cTLSCACert i f i cateF i l e : / e t c / s s l / c e r t s /mycacert . pem−add : o l cTLSCe r t i f i c a t eF i l eo l cTLSCe r t i f i c a t eF i l e : / e t c / ldap/ ldap01_slapd_cert . pem−add : o l cTLSCer t i f i ca t eKeyF i l eo l cTLSCer t i f i c a t eKeyF i l e : / e t c / ldap/ ldap01_slapd_key . pem
Use the ldapmodify command to tell slapd about our TLS work via the slapd-config database:
sudo ldapmodify −Y EXTERNAL −H ldap i :/// −f c e r t i n f o . l d i f
Contratry to popular belief, you do not need ldaps:// in /etc/default/slapd in order to use encryption. Youshould have just:
SLAPD_SERVICES=”ldap :/// ldap i :///”
Note
LDAP over TLS/SSL (ldaps://) is deprecated in favour of StartTLS. The latter refers to anexisting LDAP session (listening on TCP port 389) becoming protected by TLS/SSL whereasLDAPS, like HTTPS, is a distinct encrypted-from-the-start protocol that operates over TCPport 636.
207

Certificate for an OpenLDAP replica
To generate a certificate pair for an OpenLDAP replica (consumer), create a holding directory (which willbe used for the eventual transfer) and:
mkdir ldap02−s s lcd ldap02−s s lc e r t t o o l −−generate−pr ivkey \
−−b i t s 2048 \−−o u t f i l e ldap02_slapd_key . pem
Create an info file, ldap02.info, for the Consumer server, adjusting its values accordingly:
o r gan i z a t i on = Example Companycn = ldap02 . example . comtls_www_serverencryption_keysigning_keyexpirat ion_days = 365
Create the Consumer’s certificate:
sudo c e r t t o o l −−generate−c e r t i f i c a t e \−−load−pr ivkey ldap02_slapd_key . pem \−−load−ca−c e r t i f i c a t e / e t c / s s l / c e r t s /mycacert . pem \−−load−ca−pr ivkey / e tc / s s l / p r i va t e /mycakey . pem \−−template ldap02 . i n f o \−−o u t f i l e ldap02_slapd_cert . pem
Note
We had to use sudo to get access to the CA’s private key. This means the generated certificatefile is owned by root. You should change that ownership back to your regular user before copyingthese files over to the Consumer.
Get a copy of the CA certificate:
cp / e t c / s s l / c e r t s /mycacert . pem .
We’re done. Now transfer the ldap02−ssl directory to the Consumer. Here we use scp (adjust accordingly):
cd . .scp −r ldap02−s s l user@consumer :
On the Consumer side, install the certificate files you just transferred:
sudo cp ldap02_slapd_cert . pem ldap02_slapd_key . pem / etc / ldapsudo chgrp openldap / e tc / ldap/ ldap02_slapd_key . pemsudo chmod 0640 / e tc / ldap/ ldap02_slapd_key . pemsudo cp mycacert . pem /usr / l o c a l / share /ca−c e r t i f i c a t e s /mycacert . c r tsudo update−ca−c e r t i f i c a t e s
Create the file certinfo . ldif with the following contents (adjust accordingly regarding paths and filenames,if needed):
dn : cn=con f i gadd : o l cTLSCACert i f i cateF i l eo l cTLSCACert i f i cateF i l e : / e t c / s s l / c e r t s /mycacert . pem−
208
add : o l cTLSCe r t i f i c a t eF i l eo l cTLSCe r t i f i c a t eF i l e : / e t c / ldap/ ldap02_slapd_cert . pem−add : o l cTLSCer t i f i ca t eKeyF i l eo l cTLSCer t i f i c a t eKeyF i l e : / e t c / ldap/ ldap02_slapd_key . pem
Configure the slapd-config database:
sudo ldapmodify −Y EXTERNAL −H ldap i :/// −f c e r t i n f o . l d i f
Test:
$ ldapwhoami −x −ZZ −h ldap02 . example . comanonymous
Network File System (NFS)
NFS allows a system to share directories and files with others over a network. By using NFS, users andprograms can access files on remote systems almost as if they were local files.
Some of the most notable benefits that NFS can provide are:
• Local workstations use less disk space because commonly used data can be stored on a single machineand still remain accessible to others over the network.
• There is no need for users to have separate home directories on every network machine. Home directoriescould be set up on the NFS server and made available throughout the network.
• Storage devices such as floppy disks, CDROM drives, and USB Thumb drives can be used by othermachines on the network. This may reduce the number of removable media drives throughout thenetwork.
Installation
At a terminal prompt enter the following command to install the NFS Server:
sudo apt i n s t a l l nfs−kerne l−s e r v e r
To start the NFS server, you can run the following command at a terminal prompt:
sudo sys t emct l s t a r t nfs−kerne l−s e r v e r . s e r v i c e
Configuration
You can configure the directories to be exported by adding them to the /etc/exports file. For example:
/ s rv *( ro , sync , subtree_check )/home * . hostname . com(rw , sync , no_subtree_check )/ s c ra t ch *(rw , async , no_subtree_check , no_root_squash , noexec )
Make sure any custom mount points you’re adding have been created (/srv and /home will already exist):
sudo mkdir / s c ra t ch
Apply the new config via:
209
sudo expo r t f s −a
You can replace * with one of the hostname formats. Make the hostname declaration as specific as possibleso unwanted systems cannot access the NFS mount. Be aware that *.hostname.com will matchfoo.hostname.com but not foo.bar.my−domain.com.
The sync/async options control whether changes are gauranteed to be committed to stable storage beforereplying to requests. async thus gives a performance benefit but risks data loss or corruption. Even thoughsync is the default, it’s worth setting since exportfs will issue a warning if it’s left unspecified.
subtree_check and no_subtree_check enables or disables a security verification that subdirectories a clientattempts to mount for an exported filesystem are ones they’re permitted to do so. This verification stephas some performance implications for some use cases, such as home directories with frequent file renames.Read-only filesystems are more suitable to enable subtree_check on. Like with sync, exportfs will warn ifit’s left unspecified.
There are a number of optional settings for NFS mounts for tuning performance, tightening security, orproviding conveniences. These settings each have their own trade-offs so it is important to use them withcare, only as needed for the particular use case. no_root_squash, for example, adds a convenience toallow root-owned files to be modified by any client system’s root user; in a multi-user environment whereexecutables are allowed on a shared mount point, this could lead to security problems. noexec preventsexecutables from running from the mount point.
NFS Client Configuration
To enable NFS support on a client system, enter the following command at the terminal prompt:
sudo apt i n s t a l l nfs−common
Use the mount command to mount a shared NFS directory from another machine, by typing a commandline similar to the following at a terminal prompt:
sudo mkdir /opt/examplesudo mount example . hostname . com :/ srv /opt/example
Warning
The mount point directory /opt/example must exist. There should be no files or subdirecto-ries in the /opt/example directory, else they will become inaccessible until the nfs filesystem isunmounted.
An alternate way to mount an NFS share from another machine is to add a line to the /etc/fstab file. Theline must state the hostname of the NFS server, the directory on the server being exported, and the directoryon the local machine where the NFS share is to be mounted.
The general syntax for the line in /etc/fstab file is as follows:
example . hostname . com :/ srv /opt/example n f s r s i z e =8192 , ws ize =8192 , timeo=14, i n t r
References
Linux NFS wiki Linux NFS faq
Ubuntu Wiki NFS Howto Ubuntu Wiki NFSv4 Howto
210
OpenSSH Server
Introduction
OpenSSH is a powerful collection of tools for the remote control of, and transfer of data between, networkedcomputers. You will also learn about some of the configuration settings possible with the OpenSSH serverapplication and how to change them on your Ubuntu system.
OpenSSH is a freely available version of the Secure Shell (SSH) protocol family of tools for remotely con-trolling, or transferring files between, computers. Traditional tools used to accomplish these functions, suchas telnet or rcp, are insecure and transmit the user’s password in cleartext when used. OpenSSH providesa server daemon and client tools to facilitate secure, encrypted remote control and file transfer operations,effectively replacing the legacy tools.
The OpenSSH server component, sshd, listens continuously for client connections from any of the client tools.When a connection request occurs, sshd sets up the correct connection depending on the type of client toolconnecting. For example, if the remote computer is connecting with the ssh client application, the OpenSSHserver sets up a remote control session after authentication. If a remote user connects to an OpenSSH serverwith scp, the OpenSSH server daemon initiates a secure copy of files between the server and client afterauthentication. OpenSSH can use many authentication methods, including plain password, public key, andKerberos tickets.
Installation
Installation of the OpenSSH client and server applications is simple. To install the OpenSSH client applica-tions on your Ubuntu system, use this command at a terminal prompt:
sudo apt i n s t a l l openssh−c l i e n t
To install the OpenSSH server application, and related support files, use this command at a terminal prompt:
sudo apt i n s t a l l openssh−s e r v e r
Configuration
You may configure the default behavior of the OpenSSH server application, sshd, by editing the file /etc/ssh/sshd_config. For information about the configuration directives used in this file, you may view theappropriate manual page with the following command, issued at a terminal prompt:
man sshd_conf ig
There are many directives in the sshd configuration file controlling such things as communication settings,and authentication modes. The following are examples of configuration directives that can be changed byediting the /etc/ssh/sshd_config file.
Tip
Prior to editing the configuration file, you should make a copy of the original file and protect itfrom writing so you will have the original settings as a reference and to reuse as necessary.
Copy the /etc/ssh/sshd_config file and protect it from writing with the following commands,issued at a terminal prompt:
sudo cp / e tc / ssh / sshd_conf ig / e t c / ssh / sshd_conf ig . o r i g i n a lsudo chmod a−w / etc / ssh / sshd_conf ig . o r i g i n a l
211
Furthermore since losing an ssh server might mean losing your way to reach a server, check the configurationafter changing it and before restarting the server:
sudo sshd −t −f / e t c / ssh / sshd_conf ig
The following are examples of configuration directives you may change:
• To set your OpenSSH to listen on TCP port 2222 instead of the default TCP port 22, change the Portdirective as such:
Port 2222
• To make your OpenSSH server display the contents of the /etc/issue .net file as a pre-login banner,simply add or modify this line in the /etc/ssh/sshd_config file:
Banner /etc/issue.net
After making changes to the /etc/ssh/sshd_config file, save the file, and restart the sshd server applicationto effect the changes using the following command at a terminal prompt:
sudo sys t emct l r e s t a r t sshd . s e r v i c e
Warning
Many other configuration directives for sshd are available to change the server application’sbehavior to fit your needs. Be advised, however, if your only method of access to a server isssh, and you make a mistake in configuring sshd via the /etc/ssh/sshd_config file, you may findyou are locked out of the server upon restarting it. Additionally, if an incorrect configurationdirective is supplied, the sshd server may refuse to start, so be extra careful when editing thisfile on a remote server.
SSH Keys
SSH allow authentication between two hosts without the need of a password. SSH key authentication usesa private key and a public key.
To generate the keys, from a terminal prompt enter:
ssh−keygen −t r sa
This will generate the keys using the RSA Algorithm. At the time of this writing, the generated keys willhave 3072 bits. You can modify the number of bits by using the −b option. For example, to generate keyswith 4096 bits, you can do:
ssh−keygen −t r sa −b 4096
During the process you will be prompted for a password. Simply hit Enter when prompted to create thekey.
By default the public key is saved in the file ~/.ssh/id_rsa.pub, while ~/.ssh/id_rsa is the private key. Nowcopy the id_rsa.pub file to the remote host and append it to ~/.ssh/authorized_keys by entering:
ssh−copy−id username@remotehost
Finally, double check the permissions on the authorized_keys file, only the authenticated user should haveread and write permissions. If the permissions are not correct change them by:
chmod 600 . ssh / author ized_keys
You should now be able to SSH to the host without being prompted for a password.
212
Import keys from public keyservers
These days many users have already ssh keys registered with services like launchpad or github. Those canbe easily imported with:
ssh−import−id <username−on−remote−s e r v i c e >
The prefix lp : is implied and means fetching from launchpad, the alternative gh: will make the tool fetchfrom github instead.
Two factor authentication with U2F/FIDO
OpenSSH 8.2 added support for U2F/FIDO hardware authentication devices. These devices are used toprovide an extra layer of security on top of the existing key-based authentication, as the hardware tokenneeds to be present to finish the authentication.
It’s very simple to use and setup. The only extra step is generate a new keypair that can be used with thehardware device. For that, there are two key types that can be used: ecdsa−sk and ed25519−sk. The formerhas broader hardware support, while the latter might need a more recent device.
Once the keypair is generated, it can be used as you would normally use any other type of key in openssh.The only requirement is that in order to use the private key, the U2F device has to be present on the host.
For example, plug the U2F device in and generate a keypair to use with it:
$ ssh−keygen −t ecdsa−skGenerating pub l i c / p r i va t e ecdsa−sk key pa i r .You may need to touch your authen t i c a to r to author i z e key gene ra t i on . <−−
touch dev i ceEnter f i l e in which to save the key (/home/ubuntu / . ssh / id_ecdsa_sk ) :Enter passphrase ( empty f o r no passphrase ) :Enter same passphrase again :Your i d e n t i f i c a t i o n has been saved in /home/ubuntu / . ssh / id_ecdsa_skYour pub l i c key has been saved in /home/ubuntu / . ssh / id_ecdsa_sk . pubThe key f i n g e r p r i n t i s :SHA256 :V9PQ1MqaU8FODXdHqDiH9Mxb8XK3o5aVYDQLVl9IFRo ubuntu@focal
Now just transfer the public part to the server to ~/.ssh/authorized_keys and you are ready to go:
$ ssh − i . s sh / id_ecdsa_sk ubuntu@focal . s e r v e rConfirm user presence f o r key ECDSA−SK SHA256 :
V9PQ1MqaU8FODXdHqDiH9Mxb8XK3o5aVYDQLVl9IFRo <−− touch dev i ceWelcome to Ubuntu Focal Fossa (GNU/Linux 5.4.0−21− g ene r i c x86_64 )( . . . )ubuntu@focal . s e r v e r :~ $
References
• Ubuntu Wiki SSH page.
• OpenSSH Website
• OpenSSH 8.2 release notes
• Advanced OpenSSH Wiki Page
213
VPN
OpenVPN is a Virtual Private Networking (VPN) solution provided in the Ubuntu Repositories. It is flexible,reliable and secure. It belongs to the family of SSL/TLS VPN stacks (different from IPSec VPNs). Thischapter will cover installing and configuring OpenVPN to create a VPN.
OpenVPN
If you want more than just pre-shared keys OpenVPN makes it easy to set up a Public Key Infrastructure(PKI) to use SSL/TLS certificates for authentication and key exchange between the VPN server and clients.OpenVPN can be used in a routed or bridged VPN mode and can be configured to use either UDP orTCP. The port number can be configured as well, but port 1194 is the official one; this single port is usedfor all communication. VPN client implementations are available for almost anything including all Linuxdistributions, OS X, Windows and OpenWRT based WLAN routers.
Server Installation
To install openvpn in a terminal enter:
sudo apt i n s t a l l openvpn easy−r sa
Public Key Infrastructure Setup
The first step in building an OpenVPN configuration is to establish a PKI (public key infrastructure). ThePKI consists of:
• a separate certificate (also known as a public key) and private key for the server and each client.
• a master Certificate Authority (CA) certificate and key, used to sign the server and client certificates.
OpenVPN supports bidirectional authentication based on certificates, meaning that the client must authen-ticate the server certificate and the server must authenticate the client certificate before mutual trust isestablished.
Both server and client will authenticate the other by first verifying that the presented certificate was signedby the master certificate authority (CA), and then by testing information in the now-authenticated certificateheader, such as the certificate common name or certificate type (client or server).
Certificate Authority Setup
To setup your own Certificate Authority (CA) and generate certificates and keys for an OpenVPN serverand multiple clients first copy the easy−rsa directory to /etc/openvpn. This will ensure that any changes tothe scripts will not be lost when the package is updated. From a terminal, run:
sudo make−cad i r / e t c /openvpn/easy−r sa
Note: If desired, you can alternatively edit /etc/openvpn/easy−rsa/vars directly, adjusting it to your needs.
As root user change to the newly created directory /etc/openvpn/easy−rsa and run:
. / ea sy r sa i n i t −pki
. / ea sy r sa bui ld−ca
214
Server Keys and Certificates
Next, we will generate a key pair for the server:
. / ea sy r sa gen−req myservername nopass
Diffie Hellman parameters must be generated for the OpenVPN server. The following will place them inpki/dh.pem.
. / ea sy r sa gen−dh
And finally a certificate for the server:
. / ea sy r sa gen−req myservername nopass
. / ea sy r sa s ign−req s e r v e r myservername
All certificates and keys have been generated in subdirectories. Common practice is to copy them to/etc/openvpn/:
cp pki /dh . pem pki / ca . c r t pki / i s su ed /myservername . c r t pki / p r i va t e /myservername .key / e tc /openvpn/
Client Certificates
The VPN client will also need a certificate to authenticate itself to the server. Usually you create a differentcertificate for each client.
This can either be done on the server (as the keys and certificates above) and then securely distributed tothe client. Or vice versa: the client can generate and submit a request that is sent and signed by the server.
To create the certificate, enter the following in a terminal while being user root:
. / ea sy r sa gen−req mycl ient1 nopass
. / ea sy r sa s ign−req c l i e n t mycl ient1
If the first command above was done on a remote system, then copy the .req file to the CA server. There youcan then import it via easyrsa import−req /incoming/myclient1.req myclient1. Then you can go on withthe second sign−eq command.
In both cases, afterwards copy the following files to the client using a secure method:
• pki/ca.crt• pki/issued/myclient1.crt
As the client certificates and keys are only required on the client machine, you can remove them from theserver.
Simple Server Configuration
Along with your OpenVPN installation you got these sample config files (and many more if you check):
root@server :/# l s − l / usr / share /doc/openvpn/examples /sample−con f i g− f i l e s /t o t a l 68−rw−r−−r−− 1 root root 3427 2011−07−04 15 :09 c l i e n t . conf−rw−r−−r−− 1 root root 4141 2011−07−04 15 :09 s e r v e r . conf . gz
Start with copying and unpacking server.conf.gz to /etc/openvpn/server.conf.
215
sudo cp / usr / share /doc/openvpn/examples /sample−con f i g− f i l e s / s e r v e r . conf . gz /e t c /openvpn/myserver . conf . gz
sudo gz ip −d / etc /openvpn/myserver . conf . gz
Edit /etc/openvpn/myserver.conf to make sure the following lines are pointing to the certificates and keysyou created in the section above.
ca ca . c r tc e r t myservername . c r tkey myservername . keydh dh2048 . pem
Complete this set with a ta key in etc/openvpn for tls-auth like:
sudo openvpn −−genkey −−s e c r e t ta . key
Edit /etc/sysctl .conf and uncomment the following line to enable IP forwarding.
#net . ipv4 . ip_forward=1
Then reload sysctl.
sudo s y s c t l −p / etc / s y s c t l . conf
That is the minimum you have to configure to get a working OpenVPN server. You can use all the defaultsettings in the sample server.conf file. Now start the server.
Be aware that the “systemctl start openvpn” is not starting your openvpn you just defined. Openvpnuses templatized systemd jobs, openvpn@CONFIGFILENAME. So if for example your configuration fileis myserver.conf your service is called openvpn@myserver. You can run all kinds of service and systemctlcommands like start/stop/enable/disable/preset against a templatized service like openvpn@server.
$ sudo sys t emct l s t a r t openvpn@myserver
You will find logging and error messages in the journal. For example, if you started a templatized serviceopenvpn@server you can filter for this particular message source with:
sudo j o u r n a l c t l −u openvpn@myserver −xe
The same templatized approach works for all of systemctl:
$ sudo sys t emct l s t a tu s openvpn@myserveropenvpn@myserver . s e r v i c e − OpenVPN connect ion to myserver
Loaded : loaded (/ l i b / systemd/system/openvpn@ . s e r v i c e ; d i s ab l ed ; vendorp r e s e t : enabled )
Act ive : a c t i v e ( running ) s i n c e Thu 2019−10−24 10 : 59 : 25 UTC; 10 s agoDocs : man : openvpn (8 )
https : // community . openvpn . net /openvpn/wik i /Openvpn24ManPagehttps : // community . openvpn . net /openvpn/wik i /HOWTO
Main PID : 4138 ( openvpn )Status : ” I n i t i a l i z a t i o n Sequence Completed”Tasks : 1 ( l im i t : 533)
Memory : 1 . 0MCGroup : / system . s l i c e /system−openvpn . s l i c e /openvpn@myserver . s e r v i c e ��
4138 / usr / sb in /openvpn −−daemon ovpn−myserver −−s t a tu s /run/openvpn/myserver . s t a tu s 10 −−cd / e tc /openvpn −−s c r i p t −s e c u r i t y 2 −−c on f i g / e t c /openvpn/myserver . conf −−wr i t ep id /run/
216
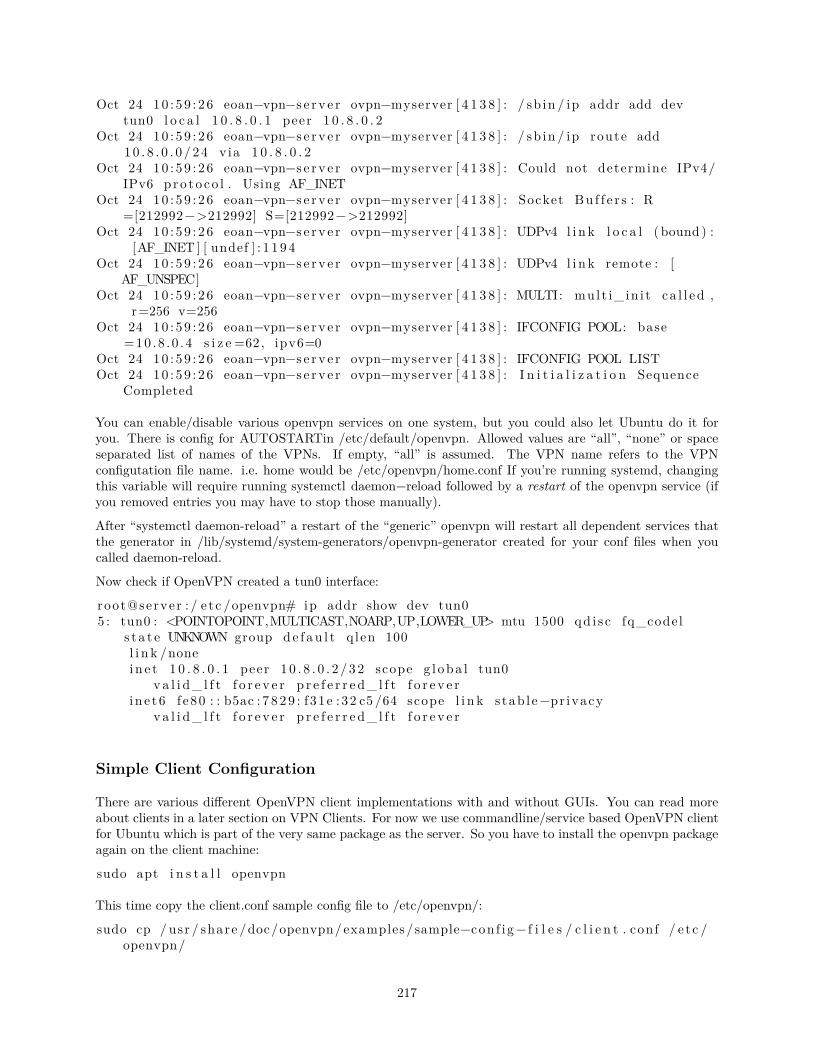
Oct 24 10 : 59 : 26 eoan−vpn−s e r v e r ovpn−myserver [ 4 1 3 8 ] : / sb in / ip addr add devtun0 l o c a l 1 0 . 8 . 0 . 1 peer 1 0 . 8 . 0 . 2
Oct 24 10 : 59 : 26 eoan−vpn−s e r v e r ovpn−myserver [ 4 1 3 8 ] : / sb in / ip route add10 . 8 . 0 . 0 / 24 v ia 1 0 . 8 . 0 . 2
Oct 24 10 : 59 : 26 eoan−vpn−s e r v e r ovpn−myserver [ 4 1 3 8 ] : Could not determine IPv4/IPv6 pro to co l . Using AF_INET
Oct 24 10 : 59 : 26 eoan−vpn−s e r v e r ovpn−myserver [ 4 1 3 8 ] : Socket Bu f f e r s : R=[212992−>212992] S=[212992−>212992]
Oct 24 10 : 59 : 26 eoan−vpn−s e r v e r ovpn−myserver [ 4 1 3 8 ] : UDPv4 l i n k l o c a l ( bound ) :[AF_INET ] [ undef ] : 1 1 9 4
Oct 24 10 : 59 : 26 eoan−vpn−s e r v e r ovpn−myserver [ 4 1 3 8 ] : UDPv4 l i n k remote : [AF_UNSPEC]
Oct 24 10 : 59 : 26 eoan−vpn−s e r v e r ovpn−myserver [ 4 1 3 8 ] : MULTI: mul t i_ in i t c a l l ed ,r=256 v=256
Oct 24 10 : 59 : 26 eoan−vpn−s e r v e r ovpn−myserver [ 4 1 3 8 ] : IFCONFIG POOL: base=10 .8 .0 . 4 s i z e =62, ipv6=0
Oct 24 10 : 59 : 26 eoan−vpn−s e r v e r ovpn−myserver [ 4 1 3 8 ] : IFCONFIG POOL LISTOct 24 10 : 59 : 26 eoan−vpn−s e r v e r ovpn−myserver [ 4 1 3 8 ] : I n i t i a l i z a t i o n Sequence
Completed
You can enable/disable various openvpn services on one system, but you could also let Ubuntu do it foryou. There is config for AUTOSTARTin /etc/default/openvpn. Allowed values are “all”, “none” or spaceseparated list of names of the VPNs. If empty, “all” is assumed. The VPN name refers to the VPNconfigutation file name. i.e. home would be /etc/openvpn/home.conf If you’re running systemd, changingthis variable will require running systemctl daemon−reload followed by a restart of the openvpn service (ifyou removed entries you may have to stop those manually).
After “systemctl daemon-reload” a restart of the “generic” openvpn will restart all dependent services thatthe generator in /lib/systemd/system-generators/openvpn-generator created for your conf files when youcalled daemon-reload.
Now check if OpenVPN created a tun0 interface:
root@server : / e t c /openvpn# ip addr show dev tun05 : tun0 : <POINTOPOINT,MULTICAST,NOARP,UP,LOWER_UP> mtu 1500 qd i s c fq_codel
s t a t e UNKNOWN group de f au l t q len 100l i n k /nonei n e t 1 0 . 8 . 0 . 1 peer 1 0 . 8 . 0 . 2 / 32 scope g l oba l tun0
v a l i d_ l f t f o r e v e r p r e f e r r e d_ l f t f o r e v e ri n e t 6 f e80 : : b5ac : 7 8 2 9 : f 31e : 32 c5 /64 scope l i n k s tab l e−pr ivacy
v a l i d_ l f t f o r e v e r p r e f e r r e d_ l f t f o r e v e r
Simple Client Configuration
There are various different OpenVPN client implementations with and without GUIs. You can read moreabout clients in a later section on VPN Clients. For now we use commandline/service based OpenVPN clientfor Ubuntu which is part of the very same package as the server. So you have to install the openvpn packageagain on the client machine:
sudo apt i n s t a l l openvpn
This time copy the client.conf sample config file to /etc/openvpn/:
sudo cp / usr / share /doc/openvpn/examples /sample−con f i g− f i l e s / c l i e n t . conf / e t c /openvpn/
217
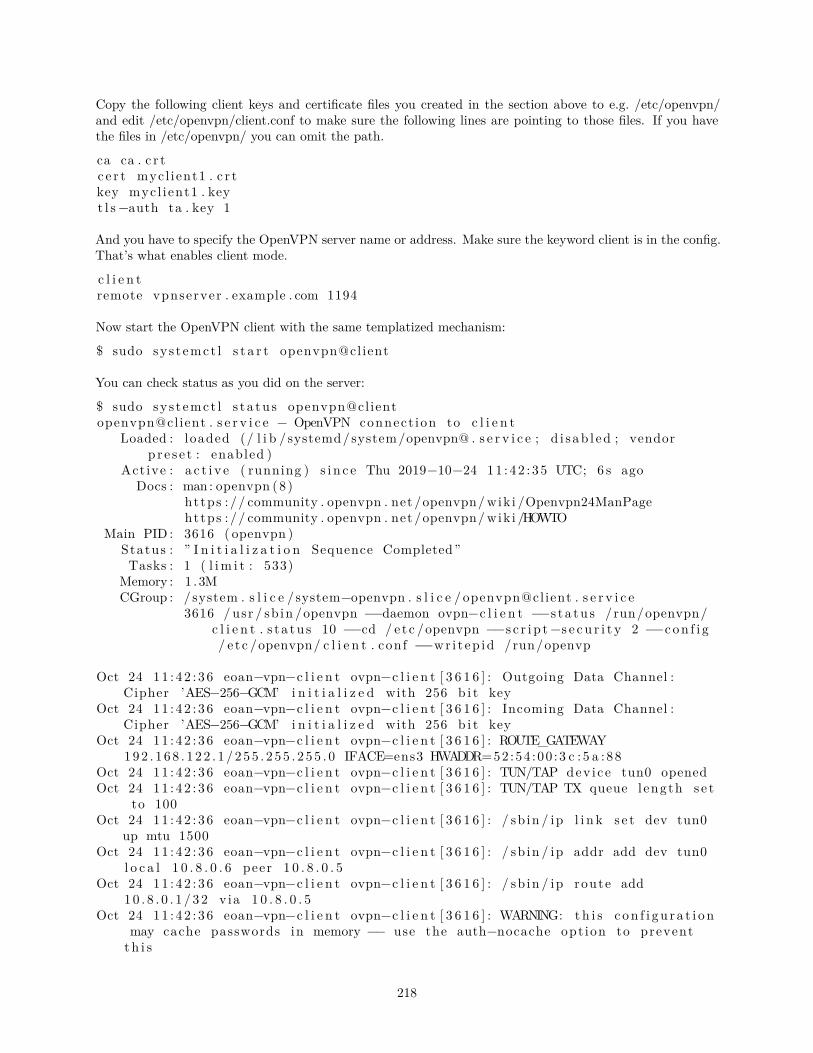
Copy the following client keys and certificate files you created in the section above to e.g. /etc/openvpn/and edit /etc/openvpn/client.conf to make sure the following lines are pointing to those files. If you havethe files in /etc/openvpn/ you can omit the path.
ca ca . c r tc e r t mycl ient1 . c r tkey mycl ient1 . keyt l s −auth ta . key 1
And you have to specify the OpenVPN server name or address. Make sure the keyword client is in the config.That’s what enables client mode.
c l i e n tremote vpnserver . example . com 1194
Now start the OpenVPN client with the same templatized mechanism:
$ sudo sys t emct l s t a r t openvpn@client
You can check status as you did on the server:
$ sudo sys t emct l s t a tu s openvpn@clientopenvpn@client . s e r v i c e − OpenVPN connect ion to c l i e n t
Loaded : loaded (/ l i b / systemd/system/openvpn@ . s e r v i c e ; d i s ab l ed ; vendorp r e s e t : enabled )
Act ive : a c t i v e ( running ) s i n c e Thu 2019−10−24 11 : 42 : 35 UTC; 6 s agoDocs : man : openvpn (8 )
https : // community . openvpn . net /openvpn/wik i /Openvpn24ManPagehttps : // community . openvpn . net /openvpn/wik i /HOWTO
Main PID : 3616 ( openvpn )Status : ” I n i t i a l i z a t i o n Sequence Completed”Tasks : 1 ( l im i t : 533)
Memory : 1 . 3MCGroup : / system . s l i c e /system−openvpn . s l i c e / openvpn@client . s e r v i c e ��
3616 / usr / sb in /openvpn −−daemon ovpn−c l i e n t −−s t a tu s /run/openvpn/c l i e n t . s t a tu s 10 −−cd / e tc /openvpn −−s c r i p t −s e c u r i t y 2 −−c on f i g/ e t c /openvpn/ c l i e n t . conf −−wr i t ep id /run/openvp
Oct 24 11 : 42 : 36 eoan−vpn−c l i e n t ovpn−c l i e n t [ 3 6 1 6 ] : Outgoing Data Channel :Cipher ’AES−256−GCM’ i n i t i a l i z e d with 256 b i t key
Oct 24 11 : 42 : 36 eoan−vpn−c l i e n t ovpn−c l i e n t [ 3 6 1 6 ] : Incoming Data Channel :Cipher ’AES−256−GCM’ i n i t i a l i z e d with 256 b i t key
Oct 24 11 : 42 : 36 eoan−vpn−c l i e n t ovpn−c l i e n t [ 3 6 1 6 ] : ROUTE_GATEWAY192 . 1 68 . 1 22 . 1 /255 . 2 55 . 2 55 . 0 IFACE=ens3 HWADDR=52:54 :00 :3 c : 5 a : 88
Oct 24 11 : 42 : 36 eoan−vpn−c l i e n t ovpn−c l i e n t [ 3 6 1 6 ] : TUN/TAP dev i ce tun0 openedOct 24 11 : 42 : 36 eoan−vpn−c l i e n t ovpn−c l i e n t [ 3 6 1 6 ] : TUN/TAP TX queue l ength s e t
to 100Oct 24 11 : 42 : 36 eoan−vpn−c l i e n t ovpn−c l i e n t [ 3 6 1 6 ] : / sb in / ip l i n k s e t dev tun0
up mtu 1500Oct 24 11 : 42 : 36 eoan−vpn−c l i e n t ovpn−c l i e n t [ 3 6 1 6 ] : / sb in / ip addr add dev tun0
l o c a l 1 0 . 8 . 0 . 6 peer 1 0 . 8 . 0 . 5Oct 24 11 : 42 : 36 eoan−vpn−c l i e n t ovpn−c l i e n t [ 3 6 1 6 ] : / sb in / ip route add
10 . 8 . 0 . 1 / 32 v ia 1 0 . 8 . 0 . 5Oct 24 11 : 42 : 36 eoan−vpn−c l i e n t ovpn−c l i e n t [ 3 6 1 6 ] : WARNING: t h i s c on f i gu r a t i on
may cache passwords in memory −− use the auth−nocache opt ion to preventt h i s
218

Oct 24 11 : 42 : 36 eoan−vpn−c l i e n t ovpn−c l i e n t [ 3 6 1 6 ] : I n i t i a l i z a t i o n SequenceCompleted
On the server log an incoming connection looks like the following. You can see client name and sourceaddress as well as success/failure messages.
ovpn−myserver [ 4 8 1 8 ] : 192 . 168 . 122 . 114 : 55738 TLS : I n i t i a l packet from [AF_INET]192 . 1 6 8 . 1 22 . 1 14 : 5 5738 , s i d=5e943ab8 40 ab9fed
ovpn−myserver [ 4 8 1 8 ] : 192 . 168 . 122 . 114 : 55738 VERIFY OK: depth=1, CN=Easy−RSA CAovpn−myserver [ 4 8 1 8 ] : 192 . 168 . 122 . 114 : 55738 VERIFY OK: depth=0, CN=mycl ient1ovpn−myserver [ 4 8 1 8 ] : 192 . 168 . 122 . 114 : 55738 peer i n f o : IV_VER=2.4.7ovpn−myserver [ 4 8 1 8 ] : 192 . 168 . 122 . 114 : 55738 peer i n f o : IV_PLAT=l inuxovpn−myserver [ 4 8 1 8 ] : 192 . 168 . 122 . 114 : 55738 peer i n f o : IV_PROTO=2ovpn−myserver [ 4 8 1 8 ] : 192 . 168 . 122 . 114 : 55738 peer i n f o : IV_NCP=2ovpn−myserver [ 4 8 1 8 ] : 192 . 168 . 122 . 114 : 55738 peer i n f o : IV_LZ4=1ovpn−myserver [ 4 8 1 8 ] : 192 . 168 . 122 . 114 : 55738 peer i n f o : IV_LZ4v2=1ovpn−myserver [ 4 8 1 8 ] : 192 . 168 . 122 . 114 : 55738 peer i n f o : IV_LZO=1ovpn−myserver [ 4 8 1 8 ] : 192 . 168 . 122 . 114 : 55738 peer i n f o : IV_COMP_STUB=1ovpn−myserver [ 4 8 1 8 ] : 192 . 168 . 122 . 114 : 55738 peer i n f o : IV_COMP_STUBv2=1ovpn−myserver [ 4 8 1 8 ] : 192 . 168 . 122 . 114 : 55738 peer i n f o : IV_TCPNL=1ovpn−myserver [ 4 8 1 8 ] : 192 . 168 . 122 . 114 : 55738 Control Channel : TLSv1 . 3 , c iphe r
TLSv1 . 3 TLS_AES_256_GCM_SHA384, 2048 b i t RSAovpn−myserver [ 4 8 1 8 ] : 192 . 168 . 122 . 114 : 55738 [ mycl ient1 ] Peer Connection
I n i t i a t e d with [AF_INET]192 . 1 68 . 1 22 . 1 14 : 5 5738ovpn−myserver [ 4 8 1 8 ] : mycl ient1 /192 . 168 . 122 . 114 : 55738 MULTI_sva : pool returned
IPv4 =10 .8 . 0 . 6 , IPv6=(Not enabled )ovpn−myserver [ 4 8 1 8 ] : mycl ient1 /192 . 168 . 122 . 114 : 55738 MULTI: Learn : 1 0 . 8 . 0 . 6 −>
mycl ient1 /192 . 168 . 122 . 114 : 55738ovpn−myserver [ 4 8 1 8 ] : mycl ient1 /192 . 168 . 122 . 114 : 55738 MULTI: primary v i r t u a l IP
f o r mycl ient1 /192 . 1 68 . 1 22 . 1 14 : 5 5738 : 1 0 . 8 . 0 . 6ovpn−myserver [ 4 8 1 8 ] : mycl ient1 /192 . 168 . 122 . 114 : 55738 PUSH: Received con t r o l
message : ’PUSH_REQUEST’ovpn−myserver [ 4 8 1 8 ] : mycl ient1 /192 . 168 . 122 . 114 : 55738 SENT CONTROL [ mycl ient1 ] :
’PUSH_REPLY, route 1 0 . 8 . 0 . 1 , topo logy net30 , ping 10 , ping−r e s t a r t 120 ,i f c o n f i g 1 0 . 8 . 0 . 6 1 0 . 8 . 0 . 5 , peer−id 0 , c iphe r AES−256−GCM’ ( s t a tu s=1)
ovpn−myserver [ 4 8 1 8 ] : mycl ient1 /192 . 168 . 122 . 114 : 55738 Data Channel : us ingnegot i a t ed c iphe r ’AES−256−GCM’
ovpn−myserver [ 4 8 1 8 ] : mycl ient1 /192 . 168 . 122 . 114 : 55738 Outgoing Data Channel :Cipher ’AES−256−GCM’ i n i t i a l i z e d with 256 b i t key
ovpn−myserver [ 4 8 1 8 ] : mycl ient1 /192 . 168 . 122 . 114 : 55738 Incoming Data Channel :Cipher ’AES−256−GCM’ i n i t i a l i z e d with 256 b i t key
And you can check on the client if it created a tun0 interface:
$ ip addr show dev tun04 : tun0 : <POINTOPOINT,MULTICAST,NOARP,UP,LOWER_UP> mtu 1500 qd i s c fq_codel
s t a t e UNKNOWN group de f au l t q len 100l i n k /nonei n e t 1 0 . 8 . 0 . 6 peer 1 0 . 8 . 0 . 5 / 32 scope g l oba l tun0
v a l i d_ l f t f o r e v e r p r e f e r r e d_ l f t f o r e v e ri n e t 6 f e80 : : 5 a94 : ae12 : 8 901 : 5 a75 /64 scope l i n k s tab l e−pr ivacy
v a l i d_ l f t f o r e v e r p r e f e r r e d_ l f t f o r e v e r
Check if you can ping the OpenVPN server:
r oo t@c l i en t : / e t c /openvpn# ping 1 0 . 8 . 0 . 1
219
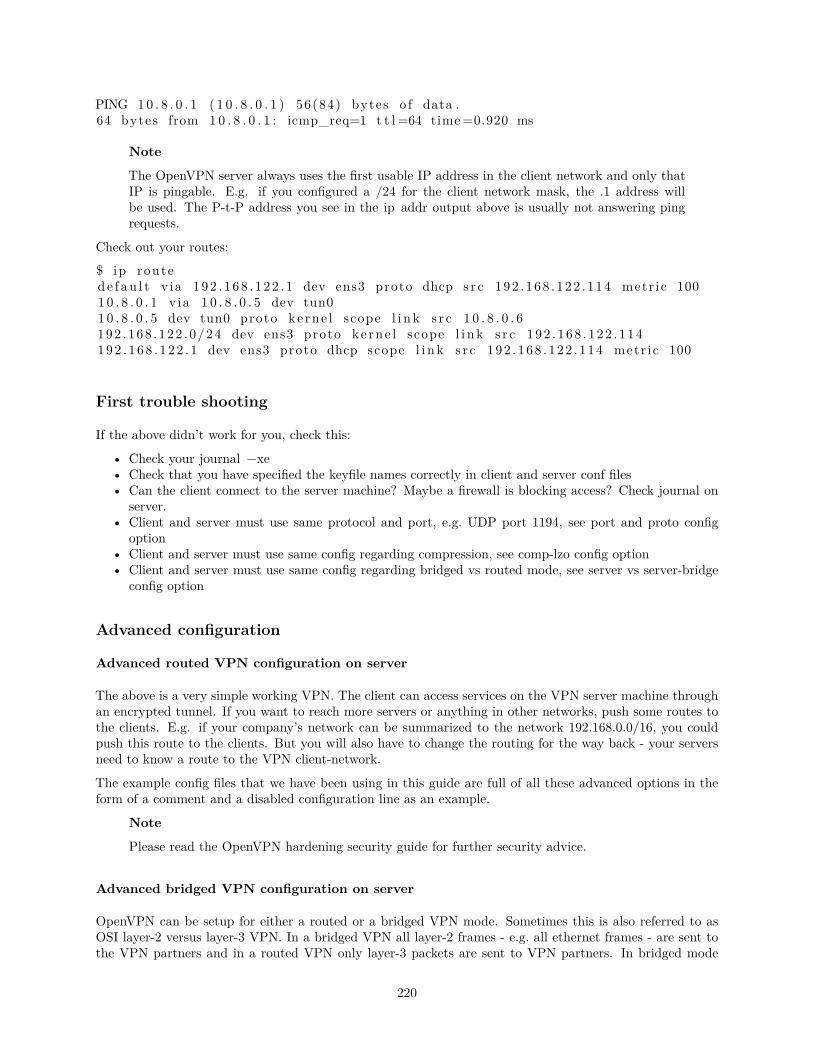
PING 10 . 8 . 0 . 1 ( 1 0 . 8 . 0 . 1 ) 56(84) bytes o f data .64 bytes from 1 0 . 8 . 0 . 1 : icmp_req=1 t t l =64 time=0.920 ms
Note
The OpenVPN server always uses the first usable IP address in the client network and only thatIP is pingable. E.g. if you configured a /24 for the client network mask, the .1 address willbe used. The P-t-P address you see in the ip addr output above is usually not answering pingrequests.
Check out your routes:$ ip routed e f au l t v ia 192 . 168 . 122 . 1 dev ens3 proto dhcp s r c 192 . 168 . 122 . 114 metr ic 1001 0 . 8 . 0 . 1 v ia 1 0 . 8 . 0 . 5 dev tun01 0 . 8 . 0 . 5 dev tun0 proto ke rne l scope l i n k s r c 1 0 . 8 . 0 . 6192 . 168 . 122 . 0/24 dev ens3 proto ke rne l scope l i n k s r c 192 . 168 . 122 . 114192 . 168 . 122 . 1 dev ens3 proto dhcp scope l i n k s r c 192 . 168 . 122 . 114 metr ic 100
First trouble shooting
If the above didn’t work for you, check this:
• Check your journal −xe• Check that you have specified the keyfile names correctly in client and server conf files• Can the client connect to the server machine? Maybe a firewall is blocking access? Check journal on
server.• Client and server must use same protocol and port, e.g. UDP port 1194, see port and proto config
option• Client and server must use same config regarding compression, see comp-lzo config option• Client and server must use same config regarding bridged vs routed mode, see server vs server-bridge
config option
Advanced configuration
Advanced routed VPN configuration on server
The above is a very simple working VPN. The client can access services on the VPN server machine throughan encrypted tunnel. If you want to reach more servers or anything in other networks, push some routes tothe clients. E.g. if your company’s network can be summarized to the network 192.168.0.0/16, you couldpush this route to the clients. But you will also have to change the routing for the way back - your serversneed to know a route to the VPN client-network.
The example config files that we have been using in this guide are full of all these advanced options in theform of a comment and a disabled configuration line as an example.
Note
Please read the OpenVPN hardening security guide for further security advice.
Advanced bridged VPN configuration on server
OpenVPN can be setup for either a routed or a bridged VPN mode. Sometimes this is also referred to asOSI layer-2 versus layer-3 VPN. In a bridged VPN all layer-2 frames - e.g. all ethernet frames - are sent tothe VPN partners and in a routed VPN only layer-3 packets are sent to VPN partners. In bridged mode
220

all traffic including traffic which was traditionally LAN-local like local network broadcasts, DHCP requests,ARP requests etc. are sent to VPN partners whereas in routed mode this would be filtered.
Prepare interface config for bridging on server First, use netplan to configure a bridge device usingthe desired ethernet device.
$ cat / e t c / netplan/01−ne t c f g . yamlnetwork :
v e r s i on : 2r endere r : networkde the rne t s :
enp0s31f6 :dhcp4 : no
br idge s :br0 :
i n t e r f a c e s : [ enp0s31f6 ]dhcp4 : noaddre s s e s : [ 1 0 . 0 . 1 . 1 0 0 / 2 4 ]gateway4 : 1 0 . 0 . 1 . 1nameservers :
addre s s e s : [ 1 0 . 0 . 1 . 1 ]
Static IP addressing is highly suggested. DHCP addressing can also work, but you will still have to encodea static address in the OpenVPN configuration file.
The next step on the server is to configure the ethernet device for promiscuous mode on boot. To do this,ensure the networkd-dispatcher package is installed and create the following configuration script.
sudo apt updatesudo apt i n s t a l l networkd−d i spa t che rsudo touch / usr / l i b /networkd−d i spa t che r /dormant . d/promisc_bridgesudo chmod +x /usr / l i b /networkd−d i spa t che r /dormant . d/promisc_bridge
Then add the following contents.
#!/bin / shs e t −ei f [ ”$IFACE” = br0 ] ; then
# no networkd−d i spa t che r event f o r ’ c a r r i e r ’ on the phy s i c a l i n t e r f a c eip l i n k s e t enp0s31f6 up promisc on
f i
Prepare server config for bridging Edit /etc/openvpn/server.conf to use tap rather than tun and setthe server to use the server-bridge directive:
; dev tundev tap; s e r v e r 1 0 . 8 . 0 . 0 255 . 255 . 255 . 0se rver−br idge 1 0 . 0 . 0 . 4 255 . 255 . 255 . 0 1 0 . 0 . 0 . 1 2 8 1 0 . 0 . 0 . 2 5 4
After configuring the server, restart openvpn by entering:
sudo sys t emct l r e s t a r t openvpn@myserver
221
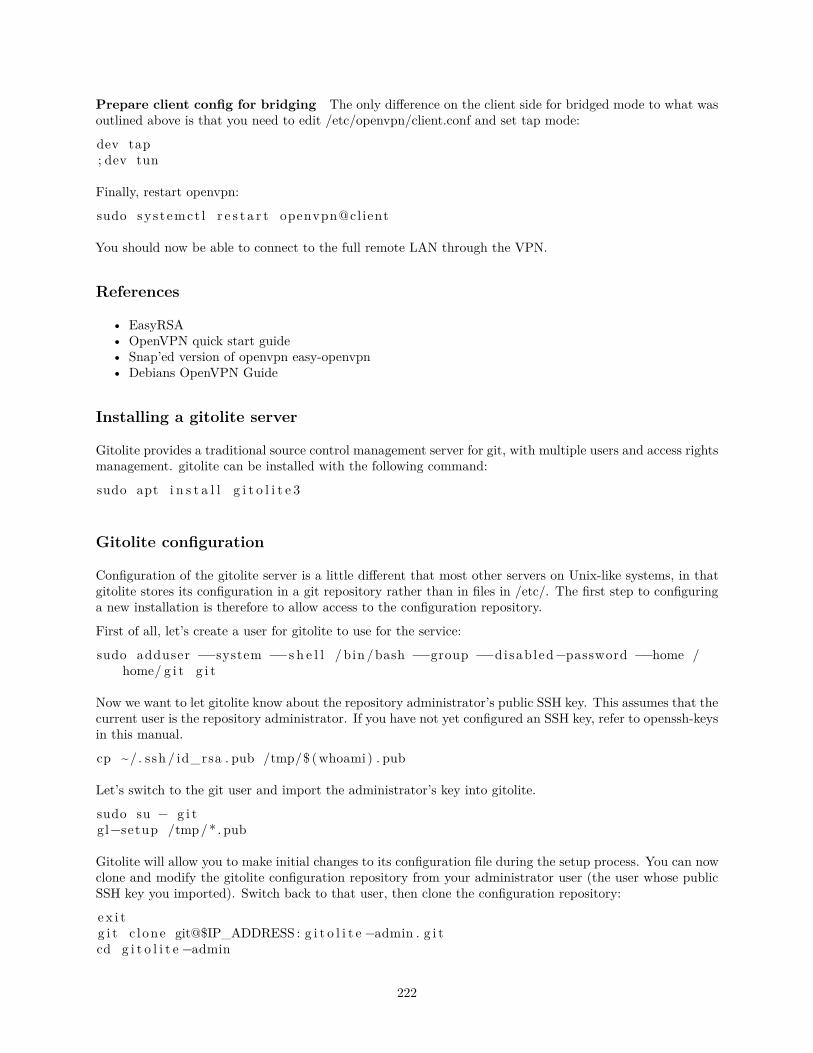
Prepare client config for bridging The only difference on the client side for bridged mode to what wasoutlined above is that you need to edit /etc/openvpn/client.conf and set tap mode:
dev tap; dev tun
Finally, restart openvpn:
sudo sys t emct l r e s t a r t openvpn@client
You should now be able to connect to the full remote LAN through the VPN.
References
• EasyRSA• OpenVPN quick start guide• Snap’ed version of openvpn easy-openvpn• Debians OpenVPN Guide
Installing a gitolite server
Gitolite provides a traditional source control management server for git, with multiple users and access rightsmanagement. gitolite can be installed with the following command:
sudo apt i n s t a l l g i t o l i t e 3
Gitolite configuration
Configuration of the gitolite server is a little different that most other servers on Unix-like systems, in thatgitolite stores its configuration in a git repository rather than in files in /etc/. The first step to configuringa new installation is therefore to allow access to the configuration repository.
First of all, let’s create a user for gitolite to use for the service:
sudo adduser −−system −−s h e l l / bin /bash −−group −−di sab led−password −−home /home/ g i t g i t
Now we want to let gitolite know about the repository administrator’s public SSH key. This assumes that thecurrent user is the repository administrator. If you have not yet configured an SSH key, refer to openssh-keysin this manual.
cp ~/. ssh / id_rsa . pub /tmp/$ (whoami ) . pub
Let’s switch to the git user and import the administrator’s key into gitolite.
sudo su − g i tgl−setup /tmp/* . pub
Gitolite will allow you to make initial changes to its configuration file during the setup process. You can nowclone and modify the gitolite configuration repository from your administrator user (the user whose publicSSH key you imported). Switch back to that user, then clone the configuration repository:
e x i tg i t c l one git@$IP_ADDRESS : g i t o l i t e −admin . g i tcd g i t o l i t e −admin
222
The gitolite-admin contains two subdirectories, “conf” and “keydir”. The configuration files are in the confdir, and the keydir directory contains the list of user’s public SSH keys.
Managing gitolite users and repositories
Adding a new user to gitolite is simple: just obtain their public SSH key and add it to the keydir directoryas $DESIRED_USER_NAME.pub. Note that the gitolite usernames don’t have to match the systemusernames - they are only used in the gitolite configuration file to manage access control. Similarly, usersare deleted by deleting their public key files. After each change, do not forget to commit the changes to git,and push the changes back to the server withg i t commit −ag i t push o r i g i n master
Repositories are managed by editing the conf/ gitolite .conf file. The syntax is space separated, and simplyspecifies the list of repositories followed by some access rules. The following is a default examplerepo g i t o l i t e −admin
RW+ = adminR = a l i c e
repo p ro j e c t 1RW+ = a l i c eRW = bobR = den i s e
Using your server
Once a user’s public key has been imported by the gitolite admin and authorization granted to the user toone or more repositories, the user can access repositories with the following command:g i t c l one git@$SERVER_IP :$PROJECT_NAME. g i t
To add the server as a new remote for an existing git repository:g i t remote add g i t o l i t e git@$SERVER_IP :$PROJECT_NAME. g i t
References
• Gitolite’s code repository provides access to source code.• Gitolite’s documentation includes a “fool proof setup” guide and a cookbook with recipes for common
tasks.• Gitolite’s maintainer has written a book, Gitolite Essentials, for more in-depth information about the
software.• General information about git itself can be found at the Git homepage.
Client software implementations
Linux Network-Manager GUI for OpenVPN
Many Linux distributions including Ubuntu desktop variants come with Network Manager, a nice GUI toconfigure your network settings. It also can manage your VPN connections. It is the default, but if in doubt
223
make sure you have package network−manager−openvpn installed.
Open the Network Manager GUI, select the VPN tab and then the ‘Add’ button. Select OpenVPN as theVPN type in the opening requester and press ‘Create’. In the next window add the OpenVPN’s server nameas the ‘Gateway’, set ‘Type’ to ‘Certificates (TLS)’, point ‘User Certificate’ to your user certificate, ‘CACertificate’ to your CA certificate and ‘Private Key’ to your private key file. Use the advanced button toenable compression (e.g. comp-lzo), dev tap, or other special settings you set on the server. Now try toestablish your VPN.
OpenVPN with GUI for Mac OS X
• Tunnelblick is an excellent free, open source implementation of a GUI for OpenVPN for OS X. Downloadthe latest OS X installer from there and install it. It also is recommended by upstream which wouldhave a alternative on their own
Then put your client.ovpn config file together with the certificates and keys in /Users/username/Library/Ap-plication Support/Tunnelblick/Configurations/ and lauch Tunnelblick from your Application folder.
Instead of downloading manually, if you have brew set up on MacOS this is as easy as:
brew cask install tunnelblick
OpenVPN with GUI for Win
First download and install the latest OpenVPN Windows Installer. As of this writing, the management GUIis included with the Windows binary installer.
You need to start the OpenVPN service. Goto Start > Computer > Manage > Services and Applications >Services. Find the OpenVPN service and start it. Set it’s startup type to automatic.
When you start the OpenVPN MI GUI the first time you need to run it as an administrator. You have toright click on it and you will see that option.
There is an updated guide by the upstream project for the client on Windows.
References
• See the OpenVPN website for additional information.
• OpenVPN hardening security guide
• Also, Pakt’s OpenVPN: Building and Integrating Virtual Private Networks is a good resource.
SSSD
SSSD stands for System Security Services Daemon and it’s actually a collection of daemons that handleauthentication, authorization, and user and group information from a variety of network sources. At its coreit has support for: - Active Directory - LDAP - Kerberos
SSSD provides PAM and NSS modules to integrate these remote sources into your system and allow remoteusers to login and be recognized as valid users, including group membership. To allow for disconnectedoperation, SSSD also can also cache this information, so that users can continue to login in the event of anetwork failure, or other problem of the same sort.
This guide will focus on the most common scenarios where SSSD is deployed.
224
SSSD and Active Directory
This section describes the use of sssd to authenticate user logins against an Active Directory via using sssd’s“ad” provider. At the end, Active Directory users will be able to login on the host using their AD credentials.Group membership will also be maintained.
Prerequisites, Assumptions, and Requirements
• This guide does not explain Active Directory, how it works, how to set one up, or how to maintain it.
• This guide assumes that a working Active Directory domain is already configured and you have accessto the credentials to join a machine to that domain.
• The domain controller is acting as an authoritative DNS server for the domain.
• The domain controller is the primary DNS resolver (check with systemd−resolve −−status)
• System time is correct and in sync, maintained via a service like chrony or ntp
• The domain used in this example is ad1.example.com .
Software Installation
Install the following packages:
sudo apt i n s t a l l sssd−ad sssd−t o o l s realmd ad c l i
Join the domain
We will use the realm command, from the realmd package, to join the domain and create the sssd configu-ration.
Let’s verify the domain is discoverable via DNS:
$ sudo realm −v d i s c ove r ad1 . example . com* Reso lv ing : _ldap . _tcp . ad1 . example . com* Performing LDAP DSE lookup on : 1 0 . 5 1 . 0 . 5* Su c c e s s f u l l y d i s cove r ed : ad1 . example . com
ad1 . example . comtype : ke rberosrealm−name : AD1.EXAMPLE.COMdomain−name : ad1 . example . comcon f i gu r ed : nose rver−so f tware : ac t ive−d i r e c t o r yc l i e n t −so f tware : s s sdrequ i red−package : sssd−t o o l srequ i red−package : s s sdrequ i red−package : l i bn s s −s s srequ i red−package : libpam−s s srequ i red−package : a d c l ir equ i red−package : samba−common−bin
This performs several checks and determines the best software stack to use with sssd. sssd can install themissing packages via packagekit, but we installed them already previously.
Now let’s join the domain:
225

$ sudo realm j o i n ad1 . example . comPassword f o r Administrator :
That was quite uneventful. If you want to see what it was doing, pass the −v option:$ sudo realm j o i n −v ad1 . example . com* Reso lv ing : _ldap . _tcp . ad1 . example . com* Performing LDAP DSE lookup on : 1 0 . 5 1 . 0 . 5* Su c c e s s f u l l y d i s cove r ed : ad1 . example . com
Password f o r Administrator :* Uncond i t i ona l ly check ing packages* Reso lv ing r equ i r ed packages* LANG=C /usr / sb in / ad c l i j o i n −−verbose −−domain ad1 . example . com −−domain−
realm AD1.EXAMPLE.COM −−domain−c o n t r o l l e r 1 0 . 5 1 . 0 . 5 −−l og in−type user −−l og in−user Administrator −−std in−password
* Using domain name : ad1 . example . com* Calcu lated computer account name from fqdn : AD−CLIENT* Using domain realm : ad1 . example . com* Sending NetLogon ping to domain c o n t r o l l e r : 1 0 . 5 1 . 0 . 5* Received NetLogon i n f o from : SERVER1. ad1 . example . com* Wrote out krb5 . conf sn ippet to /var / cache / realmd/ adc l i−krb5−hUfTUg/krb5 . d/
adc l i−krb5−conf−hv2kzi* Authent icated as user : Administrator@AD1 .EXAMPLE.COM* Looked up shor t domain name : AD1* Looked up domain SID : S−1−5−21−2660147319−831819607−3409034899* Using f u l l y q u a l i f i e d name : ad−c l i e n t . ad1 . example . com* Using domain name : ad1 . example . com* Using computer account name : AD−CLIENT* Using domain realm : ad1 . example . com* Calcu lated computer account name from fqdn : AD−CLIENT* Generated 120 charac t e r computer password* Using keytab : FILE :/ e tc /krb5 . keytab* Found computer account f o r AD−CLIENT$ at : CN=AD−CLIENT,CN=Computers ,DC=ad1 ,
DC=example ,DC=com* Sending NetLogon ping to domain c o n t r o l l e r : 1 0 . 5 1 . 0 . 5* Received NetLogon i n f o from : SERVER1. ad1 . example . com* Set computer password* Retr ieved kvno ’3 ’ f o r computer account in d i r e c t o r y : CN=AD−CLIENT,CN=
Computers ,DC=ad1 ,DC=example ,DC=com* Checking Restr ictedKrbHost /ad−c l i e n t . ad1 . example . com* Added Restr ictedKrbHost /ad−c l i e n t . ad1 . example . com* Checking Restr ictedKrbHost /AD−CLIENT* Added Restr ictedKrbHost /AD−CLIENT* Checking host /ad−c l i e n t . ad1 . example . com* Added host /ad−c l i e n t . ad1 . example . com* Checking host /AD−CLIENT* Added host /AD−CLIENT* Discovered which keytab s a l t to use* Added the e n t r i e s to the keytab : AD−[email protected]: FILE :/ e t c /krb5
. keytab* Added the e n t r i e s to the keytab : host /AD−[email protected]: FILE :/ e t c /
krb5 . keytab* Added the e n t r i e s to the keytab : host /ad−c l i e n t . ad1 . example [email protected]
.COM: FILE :/ e t c /krb5 . keytab* Added the e n t r i e s to the keytab : Restr ictedKrbHost /AD−[email protected].
226
COM: FILE :/ e t c /krb5 . keytab* Added the e n t r i e s to the keytab : Restr ictedKrbHost /ad−c l i e n t . ad1 . example .
[email protected]: FILE :/ e tc /krb5 . keytab* / usr / sb in /update−rc . d s s sd enable* / usr / sb in / s e r v i c e s s sd r e s t a r t* Su c c e s s f u l l y e n r o l l e d machine in realm
By default, realm will use the Administrator account of the domain to request the join. If you need to useanother account, pass it to the tool with the −U option.
Another popular way of joining a domain is using an OTP, or One Time Password, token. For that, use the−−one−time−password option.
SSSD Configuration
The realm tool already took care of creating an sssd configuration, adding the pam and nss modules, andstarting the necessary services.
Let’s take a look at /etc/sssd/sssd.conf:
[ s s sd ]domains = ad1 . example . comcon f i g_ f i l e_ve r s i on = 2s e r v i c e s = nss , pam
[ domain/ad1 . example . com ]d e f au l t_ sh e l l = /bin /bashkrb5_store_password_i f_of f l ine = Truecache_credent i a l s = Truekrb5_realm = AD1.EXAMPLE.COMrealmd_tags = manages−system jo ined−with−ad c l iid_provider = adfa l lback_homedir = /home/%u@%dad_domain = ad1 . example . comuse_ful ly_qual i f i ed_names = Trueldap_id_mapping = Trueacces s_prov ider = ad
Note
Something very important to remember is that this file must have permissions 0600 and ownershiproot:root, or else sssd won’t start!
Let’s highlight a few things from this config:
• cache_credentials: this allows logins when the AD server is unreachable• home directory: it’s by default /home/<user>@<domain>. For example, the AD user john will have
a home directory of /home/[email protected]• use_fully_qualified_names: users will be of the form user@domain, not just user. This should only be
changed if you are certain no other domains will ever join the AD forest, via one of the several possibletrust relationships
Automatic home directory creation
What the realm tool didn’t do for us is setup pam_mkhomedir, so that network users can get a homedirectory when they login. This remaining step can be done by running the following command:
227
sudo pam−auth−update −−enable mkhomedir
Checks
You should now be able to fetch information about AD users. In this example, John Smith is an AD user:
$ getent passwd john@ad1 . example . comjohn@ad1 . example . com:* :1725801106 :1725800513 : John Smith : / home/john@ad1 . example
. com :/ bin /bash
Let’s see his groups:
$ groups john@ad1 . example . comjohn@ad1 . example . com : domain users@ad1 . example . com engineer ing@ad1 . example .
com
Note
If you just changed the group membership of a user, it may be a while before sssd notices due tocaching.
Finally, how about we try a login:
$ sudo l o g i nad−c l i e n t l o g i n : john@ad1 . example . comPassword :Welcome to Ubuntu 20 .04 LTS (GNU/Linux 5.4.0−24− g ene r i c x86_64 ). . .Creat ing d i r e c t o r y ’/home/john@ad1 . example . com ’ .john@ad1 . example . com@ad−c l i e n t :~ $
Notice how the home directory was automatically created.
You can also use ssh, but note that the command will look a bit funny because of the multiple *@* signs:
$ ssh john@ad1 . example . com@10 . 5 1 . 0 . 1 1Welcome to Ubuntu 20 .04 LTS (GNU/Linux 5.4.0−24− g ene r i c x86_64 )( . . . )Last l o g i n : Thu Apr 16 21 : 22 : 55 2020john@ad1 . example . com@ad−c l i e n t :~ $
Note
In the ssh example, public key authentication was used, so no password was required. Rememberthat ssh password authentication is by default disabled in /etc/ssh/sshd_config.
Kerberos Tickets
If you install krb5−user, your AD users will also get a kerberos ticket upon logging in:
john@ad1 . example . com@ad−c l i e n t :~ $ k l i s tTicket cache : FILE :/ tmp/krb5cc_1725801106_9UxVIzDefau l t p r i n c i p a l : john@AD1 .EXAMPLE.COM
Valid s t a r t i n g Expires S e rv i c e p r i n c i p a l04/16/20 21 : 32 : 12 04/17/20 07 : 32 : 12 krbtgt /[email protected]
renew un t i l 04/17/20 21 : 32 : 12
228

Note
realm also configured /etc/krb5.conf for you, so there should be no further configuration promptswhen installing krb5−user
Let’s test with smbclient using kerberos authentication to list he shares of the domain controller:john@ad1 . example . com@ad−c l i e n t :~ $ smbc l i ent −k −L se rv e r1 . ad1 . example . com
Sharename Type Comment−−−−−−−−− −−−− −−−−−−−ADMIN$ Disk Remote AdminC$ Disk Defau l t shareIPC$ IPC Remote IPCNETLOGON Disk Logon s e r v e r shareSYSVOL Disk Logon s e r v e r share
SMB1 d i s ab l ed −− no workgroup av a i l a b l e
Notice how we now have a ticket for the cifs service, which was used for the share list above:john@ad1 . example . com@ad−c l i e n t :~ $ k l i s tTicket cache : FILE :/ tmp/krb5cc_1725801106_9UxVIzDefau l t p r i n c i p a l : john@AD1 .EXAMPLE.COM
Valid s t a r t i n g Expires S e rv i c e p r i n c i p a l04/16/20 21 : 32 : 12 04/17/20 07 : 32 : 12 krbtgt /[email protected]
renew un t i l 04/17/20 21 : 32 : 1204/16/20 21 : 32 : 21 04/17/20 07 : 32 : 12 c i f s / s e rv e r1 . ad1 . example [email protected]
.COM
Desktop Ubuntu Authentication
The desktop login only shows local users in the list to pick from, and that’s on purpose.
To login with an Active Directory user for the first time, follow these steps:
• click on the “Not listed?” option:
click-not-listed|690x517,50%
• type in the login name followed by the password:
type-in-username|690x517,50%
• the next time you login, the AD user will be listed as if it was a local user:
next-time|690x517,50%
Resources
• GitHub SSSD Project
• Active Directory DNS Zone Entries
SSSD and LDAP
SSSD can also use LDAP for authentication, authorization, and user/group information. In this section wewill configure a host to authenticate users from an OpenLDAP directory.
229
Prerequisites, Assumptions, and Requirements
For this setup, we need:
• an existing OpenLDAP server with SSL enabled and using the RFC2307 schema for users and groups• a client host where we will install the necessary tools and login as an user from the LDAP server
Software Installation
Install the following packages:
sudo apt i n s t a l l sssd−ldap ldap−u t i l s
SSSD Configuration
Create the /etc/sssd/sssd.conf configuration file, with permissions 0600 and ownership root:root, and thiscontent:
[ s s sd ]c on f i g_ f i l e_ve r s i on = 2domains = example . com
[ domain/example . com ]id_provider = ldapauth_provider = ldapldap_uri = ldap :// ldap01 . example . comcache_credent i a l s = Trueldap_search_base = dc=example , dc=com
Make sure to start the sssd service:
sudo sys t emct l s t a r t s s sd . s e r v i c e
Note
sssd will use START_TLS by default for authentication requests against the LDAP server (theauth_provider), but not for the id_provider. If you want to also enable START_TLS for theid_provider, specify ldap_id_use_start_tls = true.
Automatic home directory creation
To enable automatic home directory creation, run the following command:
sudo pam−auth−update −−enable mkhomedir
Check SSL setup on the client
The client must be able to use START_TLS when connecting to the LDAP server, with full certificatechecking. This means:
• the client host knows and trusts the CA that signed the LDAP server certificate• the server certificate was issued for the correct host (ldap01.example.com in this guide)• the time is correct on all hosts performing the TLS connection• and, of course, that neither certificate (CA or server’s) expired
230
If using a custom CA, an easy way to have a host trust it is to place it in /usr/local/share/ca−certificates/with a . crt extension and run sudo update−ca−certificates.
Alternatively, you can edit /etc/ldap/ldap.conf and point TLS_CACERT to the CA public key file.
Note
You may have to restart sssd after these changes: sudo systemctl restart sssd
Once that is all done, check that you can connect to the LDAP server using verified SSL connections:
$ ldapwhoami −x −ZZ −h ldap01 . example . comanonymous
The −ZZ parameter tells the tool to use START_TLS, and that it must not fail. If you have LDAP loggingenabled on the server, it will show something like this:
s lapd [ 7 7 9 ] : conn=1032 op=0 STARTTLSs lapd [ 7 7 9 ] : conn=1032 op=0 RESULT oid= e r r=0 text=s lapd [ 7 7 9 ] : conn=1032 fd=15 TLS e s t ab l i s h ed t l s_ s s f =256 s s f =256s lapd [ 7 7 9 ] : conn=1032 op=1 BIND dn=”” method=128s lapd [ 7 7 9 ] : conn=1032 op=1 RESULT tag=97 e r r=0 text=s lapd [ 7 7 9 ] : conn=1032 op=2 EXT oid =1 . 3 . 6 . 1 . 4 . 1 . 4 2 0 3 . 1 . 1 1 . 3s lapd [ 7 7 9 ] : conn=1032 op=2 WHOAMIs lapd [ 7 7 9 ] : conn=1032 op=2 RESULT oid= e r r=0 text=
START_TLS with err=0 and TLS established is what we want to see there, and, of course, the WHOAMIextended operation.
Final verification
In this example, the LDAP server has the following user and group entry we are going to use for testing:
dn : uid=john , ou=People , dc=example , dc=comuid : johnob j e c tC l a s s : inetOrgPersonob j e c tC l a s s : posixAccountcn : John Smithsn : SmithgivenName : Johnmail : john@example . comuserPassword : j ohn s e c r e tuidNumber : 10001gidNumber : 10001l o g i n S h e l l : / bin /bashhomeDirectory : /home/ john
dn : cn=john , ou=Group , dc=example , dc=comcn : johnob j e c tC l a s s : posixGroupgidNumber : 10001memberUid : john
dn : cn=Engineer ing , ou=Group , dc=example , dc=comcn : Engineer ingob j e c tC l a s s : posixGroupgidNumber : 10100
231
memberUid : john
The user john should be known to the system:
ubuntu@ldap−c l i e n t :~ $ getent passwd johnjohn : * : 1 0 0 0 1 : 1 0 0 0 1 : John Smith : / home/ john : / bin /bash
ubuntu@ldap−c l i e n t :~ $ id johnuid=10001( john ) g id=10001( john ) groups=10001( john ) ,10100( Engineer ing )
And we should be able to authenticate as john:
ubuntu@ldap−c l i e n t :~ $ sudo l o g i nldap−c l i e n t l o g i n : johnPassword :Welcome to Ubuntu Focal Fossa ( development branch ) (GNU/Linux 5.4.0−24− g ene r i c
x86_64 )( . . . )Creat ing d i r e c t o r y ’/home/ john ’ .john@ldap−c l i e n t :~ $
SSSD, LDAP and Kerberos
Finally, we can mix it all together in a setup that is very similar to Active Directory in terms of thetechnologies used: use LDAP for users and groups, and Kerberos for authentication.
Prerequisites, Assumptions, and Requirements
For this setup, we will need:
• an existing OpenLDAP server using the RFC2307 schema for users and groups. SSL support is rec-ommended, but not strictly necessary because authentication in this setup is being done via Kerberos,and not LDAP.
• a Kerberos server. It doesn’t have to be using the OpenLDAP backend• a client host where we will install and configure SSSD
Software Installation
On the client host, install the following packages:
sudo apt i n s t a l l sssd−ldap sssd−krb5 ldap−u t i l s krb5−user
You may be asked about the default Kerberos realm. For this guide, we are using EXAMPLE.COM.
At this point, you should alreaedy be able to obtain tickets from your Kerberos server, assuming DNS recordspoint at it like explained elsewhere in this guide:
$ k i n i t ubuntuPassword f o r [email protected]:
ubuntu@ldap−krb−c l i e n t :~ $ k l i s tTicket cache : FILE :/ tmp/krb5cc_1000Defau l t p r i n c i p a l : [email protected]
232

Valid s t a r t i n g Expires S e rv i c e p r i n c i p a l04/17/20 19 : 51 : 06 04/18/20 05 : 51 : 06 krbtgt /[email protected]
renew un t i l 04/18/20 19 : 51 : 05
But we want to be able to login as an LDAP user, authenticated via Kerberos. Let’s continue with theconfiguration.
SSSD Configuration
Create the /etc/sssd/sssd.conf configuration file, with permissions 0600 and ownership root:root, and thiscontent:[ s s sd ]c on f i g_ f i l e_ve r s i on = 2domains = example . com
[ domain/example . com ]id_provider = ldapldap_uri = ldap :// ldap01 . example . comldap_search_base = dc=example , dc=comauth_provider = krb5krb5_server = kdc01 . example . com , kdc02 . example . comkrb5_kpasswd = kdc01 . example . comkrb5_realm = EXAMPLE.COMcache_credent i a l s = True
This example uses two KDCs, which made it necessary to also specify the krb5_kpasswd server because thesecond KDC is a replica and is not running the admin server.
Start the sssd service:sudo sys t emct l s t a r t s s sd . s e r v i c e
Automatic home directory creation
To enable automatic home directory creation, run the following command:sudo pam−auth−update −−enable mkhomedir
Final verification
In this example, the LDAP server has the following user and group entry we are going to use for testing:dn : uid=john , ou=People , dc=example , dc=comuid : johnob j e c tC l a s s : inetOrgPersonob j e c tC l a s s : posixAccountcn : John Smithsn : SmithgivenName : Johnmail : john@example . comuidNumber : 10001gidNumber : 10001l o g i n S h e l l : / bin /bash
233

homeDirectory : /home/ john
dn : cn=john , ou=Group , dc=example , dc=comcn : johnob j e c tC l a s s : posixGroupgidNumber : 10001memberUid : john
dn : cn=Engineer ing , ou=Group , dc=example , dc=comcn : Engineer ingob j e c tC l a s s : posixGroupgidNumber : 10100memberUid : john
Note how the john user has no userPassword attribute.
The user john should be known to the system:
ubuntu@ldap−c l i e n t :~ $ getent passwd johnjohn : * : 1 0 0 0 1 : 1 0 0 0 1 : John Smith : / home/ john : / bin /bash
ubuntu@ldap−c l i e n t :~ $ id johnuid=10001( john ) g id=10001( john ) groups=10001( john ) ,10100( Engineer ing )
Let’s try a login as this user:
ubuntu@ldap−krb−c l i e n t :~ $ sudo l o g i nldap−krb−c l i e n t l o g i n : johnPassword :Welcome to Ubuntu 20 .04 LTS (GNU/Linux 5.4.0−24− g ene r i c x86_64 )( . . . )Creat ing d i r e c t o r y ’/home/ john ’ .
john@ldap−krb−c l i e n t :~ $ k l i s tTicket cache : FILE :/ tmp/krb5cc_10001_BOrxWrDefau l t p r i n c i p a l : [email protected]
Valid s t a r t i n g Expires S e rv i c e p r i n c i p a l04/17/20 20 : 29 : 50 04/18/20 06 : 29 : 50 krbtgt /[email protected]
renew un t i l 04/18/20 20 : 29 : 50john@ldap−krb−c l i e n t :~ $
We logged in using the kerberos password, and user/group information from the LDAP server.
SSSD and KDC spoofing
When using SSSD to manage kerberos logins on a Linux host, there is an attack scenario you should beaware of: KDC spoofing.
The objective of the attacker is to login on a workstation that is using Kerberos authentication. Let’s sayhe knows john is a valid user on that machine.
The attacker first deploys a rogue KDC server in the network, and creates the john principal there with apassword of his choosing. What he has to do now is to have his rogue KDC respond to the login requestfrom the workstation, before (or instead of) the real KDC. If the workstation isn’t authenticating the KDC,it will accept the reply from the rogue server and let john in.
234

There is a configuration parameter that can be set to protect the workstation from this attack. It willhave SSSD authenticate the KDC, and block the login if the KDC cannot be verified. This option is calledkrb5_validate, and it’s false by default.
To enable it, edit /etc/sssd/sssd.conf and add this line to the domain section:
[ s s sd ]c on f i g_ f i l e_ve r s i on = 2domains = example . com
[ domain/example . com ]id_provider = ldap. . .krb5_val idate = True
The second step is to create a host principal on the KDC for this workstation. This is how the KDC’sauthenticity is verified. It’s like a “machine account”, with a shared secret that the attacker cannot controland replicate in his rogue KDC..The host principal has the format host/<fqdn>@REALM.
After the host principal is created, its keytab needs to be stored on the workstation. This two step processcan be easily done on the workstation itself via kadmin (not kadmin.local) to contact the KDC remotely:
$ sudo kadmin −p ubuntu/adminkadmin : addprinc −randkey host / ldap−krb−c l i e n t . example [email protected]: no po l i c y s p e c i f i e d f o r host / ldap−krb−c l i e n t . example [email protected];
de f au l t i n g to no po l i c yPr i n c i pa l ” host / ldap−krb−c l i e n t . example [email protected]” created .
kadmin : ktadd −k / e tc /krb5 . keytab host / ldap−krb−c l i e n t . example . comEntry f o r p r i n c i p a l host / ldap−krb−c l i e n t . example . com with kvno 6 , encrypt ion
type aes256−cts−hmac−sha1−96 added to keytab WRFILE:/ e t c /krb5 . keytab .Entry f o r p r i n c i p a l host / ldap−krb−c l i e n t . example . com with kvno 6 , encrypt ion
type aes128−cts−hmac−sha1−96 added to keytab WRFILE:/ e t c /krb5 . keytab .
Then exit the tool and make sure the permissions on the keytab file are tight:
sudo chmod 0600 / e tc /krb5 . keytabsudo chown root : root / e t c /krb5 . keytab
You can also do it on the KDC itself using kadmin.local, but you will have to store the keytab temporarilyin another file and securely copy it over to the workstation.
Once these steps are complete, you can restart sssd on the workstation and perform the login. If the rogueKDC picks the attempt up and replies, it will fail the host verification. With debugging we can see thathappening on the workstation:
==> /var / log / s s sd / krb5_chi ld . l og <==(Mon Apr 20 19 : 43 : 58 2020) [ [ s s sd [ krb5_chi ld [ 2 1 0 2 ] ] ] ] [ va l ida t e_tgt ] (0 x0020 ) :
TGT f a i l e d v e r i f i c a t i o n us ing key f o r [ host / ldap−krb−c l i e n t . example [email protected]] .
(Mon Apr 20 19 : 43 : 58 2020) [ [ s s sd [ krb5_chi ld [ 2 1 0 2 ] ] ] ] [ get_and_save_tgt ] (0x0020 ) : 1741 : [ −1765328377] [ Server host / ldap−krb−c l i e n t . example [email protected] not found in Kerberos database ]
And the login is denied. If the real KDC picks it up, however, the host verification succeeds:
==> /var / log / s s sd / krb5_chi ld . l og <==
235

(Mon Apr 20 19 : 46 : 22 2020) [ [ s s sd [ krb5_chi ld [ 2 2 6 8 ] ] ] ] [ va l ida t e_tgt ] (0 x0400 ) :TGT v e r i f i e d us ing key f o r [ host / ldap−krb−c l i e n t . example [email protected]] .
And the login is accepted.
Debugging and troubleshooting
Here are some tips to help troubleshoot sssd.
debug_level
The debug level of sssd can be changed on-the-fly via sssctl , from the sssd−tools package:
sudo apt i n s t a l l sssd−t o o l ss s s c t l debug−l e v e l <new−l e v e l >
Or change add it to the config file and restart sssd:
[ s s sd ]c on f i g_ f i l e_ve r s i on = 2domains = example . com
[ domain/example . com ]debug_level = 6. . .
Either will yield more logs in /var/log/sssd/*.log and can help identify what is going on. The sssctl approachhas the clear advantage of not having to restart the service.
Caching
Caching is useful to speed things up, but it can get in the way big time when troubleshooting. It’s useful tobe able to remove the cache while chasing down a problem. This can also be done with the sssctl tool fromthe sssd−tools package.
You can either remove the whole cache:
# s s s c t l cache−removeCreat ing backup o f l o c a l data . . .SSSD backup o f l o c a l data a l r eady ex i s t s , ov e r r i d e ? ( yes /no ) [ no ] yesRemoving cache f i l e s . . .SSSD= needs to be running . S ta r t SSSD now? ( yes /no ) [ yes ] yes
Or just one element:
s s s c t l cache−exp i r e −u john
Or expire everything:
s s s c t l cache−exp i r e −E
236
Dovecot Server
Dovecot is a Mail Delivery Agent, written with security primarily in mind. It supports the major mailboxformats: mbox or Maildir. This section explains how to set it up as an IMAP or POP3 server.
Installation
To install a basic Dovecot server with common POP3 and IMAP functions, run the following command:
sudo apt i n s t a l l dovecot−imapd dovecot−pop3d
There are various other Dovecot modules including dovecot-sieve (mail filtering), dovecot-solr (full textsearch), dovecot-antispam (spam filter training), dovecot-ldap (user directory).
Configuration
To configure Dovecot, edit the file /etc/dovecot/dovecot.conf and its included config files in /etc/dovecot/conf.d/. By default all installed protocols will be enabled via an include directive in /etc/dovecot/dovecot.conf.
! inc lude_try / usr / share / dovecot / p r o t o c o l s . d /* . p ro to co l
IMAPS and POP3S are more secure because they use SSL encryption to connect. A basic self-signed sslcertificate is automatically set up by package ssl-cert and used by Dovecot in /etc/dovecot/conf.d/10−ssl.conf.
By default mbox format is configured, if required you can also use Maildir. More about that can be found inthe comments in /etc/dovecot/conf.d//10−mail.conf. Also see the Dovecot web site to learn about furtherbenefits and details.
Make sure to also configure your Mail Transport Agent (MTA) to transfer the incoming mail to the selectedtype of mailbox.
Once you have configured Dovecot, restart its daemon in order to test your setup:
sudo s e r v i c e dovecot r e s t a r t
Try to log in with the commands telnet localhost pop3 (for POP3) or telnet localhost imap2 (for IMAP).You should see something like the following:
bhuvan@rainbow :~ $ t e l n e t l o c a l h o s t pop3Trying 1 2 7 . 0 . 0 . 1 . . .Connected to l o c a l h o s t . loca ldomain .Escape charac t e r i s ’ ^ ] ’ .+OK Dovecot ready .
Dovecot SSL Configuration
Dovecot is configured to use SSL automatically by default, using the package ssl-cert which provides a selfsigned certificate.
You can instead generate your own custom certificate for Dovecot using openssh, for example:
sudo opens s l req −new −x509 −days 1000 −nodes −out ”/ e tc / dovecot / dovecot . pem”\−keyout ”/ e tc / dovecot / p r i va t e / dovecot . pem”
237
See certificates-and-security for more details on creating custom certificates.
Then edit /etc/dovecot/conf.d/10−ssl.conf and amend following lines to specify Dovecat use these customcertificates :
s s l_c e r t = </etc / dovecot / p r i va t e / dovecot . pemss l_key = </etc / dovecot / p r i va t e / dovecot . key
You can get the SSL certificate from a Certificate Issuing Authority or you can create self-signed one (seecertificates-and-security for details). Once you create the certificate, you will have a key file and a certificatefile that you want to make known in the config shown above.
Firewall Configuration for an Email Server
To access your mail server from another computer, you must configure your firewall to allow connections tothe server on the necessary ports.
• IMAP - 143
• IMAPS - 993
• POP3 - 110
• POP3S - 995
References
• See the Dovecot website for more information.
• Also, the Dovecot Ubuntu Wiki page has more details.
Exim4
Exim4 is a Message Transfer Agent (MTA) developed at the University of Cambridge for use on Unix systemsconnected to the Internet. Exim can be installed in place of sendmail, although its configuration is quitedifferent.
Installation
To install exim4, run the following command:
sudo apt i n s t a l l exim4
Configuration
To configure Exim4, run the following command:
sudo dpkg−r e c on f i g u r e exim4−c on f i g
This displays a user interface “wizard” for configuring the software. For example, in Exim4 the configurationfiles are split among multiple files; if you wish to have them in one file you can configure accordingly via thisuser interface.
238
All the configurable parameters from the user interface are stored in /etc/exim4/update−exim4.conf.conffile, so to re-configure you can either re-run the wizard or manually edit this file using your favorite editor.Once you are finished, you can run the following command to generate the master configuration file:
sudo update−exim4 . conf
The master configuration file is stored in /var/lib/exim4/config.autogenerated.
Warning
At any time, you should not manually edit the master configuration file, /var/lib/exim4/config.autogenerated, because it is updated automatically every time you run update−exim4.conf, soyour changes will risk being accidentally lost during a future update.
The following command will start the Exim4 daemon:
sudo s e r v i c e exim4 s t a r t
SMTP Authentication
Exim4 can be configured to use SMTP-AUTH with TLS and SASL.
First, enter the following into a terminal prompt to create a certificate for use with TLS:
sudo / usr / share /doc/exim4−base / examples /exim−gence r t
Configure Exim4 for TLS by editing /etc/exim4/conf.d/main/03_exim4−config_tlsoptions and adding thefollowing:
MAIN_TLS_ENABLE = yes
Second, configure Exim4 to use the saslauthd for authentication by editing /etc/exim4/conf.d/auth/30_exim4−config_examples and uncomment the plain_saslauthd_server and login_saslauthd_server sections:
p la in_sas lauthd_server :d r i v e r = p l a i n t e x tpublic_name = PLAINserve r_cond i t i on = ${ i f sa s l authd {{ $auth2 }{ $auth3 }}{1}{0}}server_set_id = $auth2server_prompts = :. i f n d e f AUTH_SERVER_ALLOW_NOTLS_PASSWORDSserve r_adver t i s e_cond i t i on = ${ i f eq{ $ t l s_c iphe r }{}{}{*}}. end i f
#log in_sas lauthd_server :
d r i v e r = p l a i n t e x tpublic_name = LOGINserver_prompts = ”Username : : : Password : : ”# don ’ t send system passwords over unencrypted connect i onsse rve r_cond i t i on = ${ i f sa s l authd {{ $auth1 }{ $auth2 }}{1}{0}}server_set_id = $auth1. i f n d e f AUTH_SERVER_ALLOW_NOTLS_PASSWORDSserve r_adver t i s e_cond i t i on = ${ i f eq{ $ t l s_c iphe r }{}{}{*}}. end i f
Additionally, to enable outside mail clients to connect to the new server, a new user needs to be added intoexim by using the following commands.
239
sudo / usr / share /doc/exim4−base / examples /exim−adduser
Protect the new password files with the following commands:
sudo chown root : Debian−exim / etc /exim4/passwdsudo chmod 640 / e tc /exim4/passwd
Finally, update the Exim4 configuration and restart the service:
sudo update−exim4 . confsudo sys t emct l r e s t a r t exim4 . s e r v i c e
Configuring SASL
To configure the saslauthd to provide authentication for Exim4, first install the sasl2-bin package by runningthis command at a terminal prompt:
sudo apt i n s t a l l s a s l 2−bin
To configure saslauthd, edit the /etc/default/saslauthd configuration file and set:
START=yes
Next, to make Exim4 use the saslauthd service, the Debian-exim user needs to be part of the sasl group:
sudo adduser Debian−exim s a s l
Finally, start the saslauthd service:
sudo s e r v i c e sas l authd s t a r t
Exim4 is now configured with SMTP-AUTH using TLS and SASL authentication.
References
• See exim.org for more information.
• There is also an Exim4 Book available.
• Another resource is the Exim4 Ubuntu Wiki page.
• Further resources to set up mailman3 with exim4
Email Services
The process of getting an email from one person to another over a network or the Internet involves manysystems working together. Each of these systems must be correctly configured for the process to work. Thesender uses a Mail User Agent (MUA), or email client, to send the message through one or more MailTransfer Agents (MTA), the last of which will hand it off to a Mail Delivery Agent (MDA) for delivery tothe recipient’s mailbox, from which it will be retrieved by the recipient’s email client, usually via a POP3 orIMAP server.
240
Postfix
Postfix is the default Mail Transfer Agent (MTA) in Ubuntu. It attempts to be fast and secure, withflexibility in administration. It is compatible with the MTA sendmail. This section will explain installation,including how to configure SMTP for secure communications.
Note
This guide does not cover setting up Postfix Virtual Domains, for information on Virtual Domainsand other advanced configurations see References.
Installation
To install Postfix run the following command:
sudo apt i n s t a l l p o s t f i x
For now, it is ok to simply accept defaults by pressing return for each question. Some of the configurationoptions will be investigated in greater detail in the next stage.
Deprecation warning: please note that the mail−stack−delivery metapackage has been dep-recated in Focal. The package still exists for compatibility reasons, but won’t setup a workingemail system.
Basic Configuration
There are four things you should decide before starting configuration: - The <Domain> for which you’llaccept email (we’ll use mail.example.com in our example) - The network and class range of your mail server(we’ll use 192.168.0.0/24) - The username (we’re using steve) - Type of mailbox format (mbox is default,we’ll use the alternative, Maildir)
To configure postfix, run the following command:
sudo dpkg−r e c on f i g u r e p o s t f i x
The user interface will be displayed. On each screen, select the following values:
• Internet Site• mail.example.com• steve• mail.example.com, localhost.localdomain, localhost• No• 127.0.0.0/8 [::ffff:127.0.0.0]/104 [::1]/128 192.168.0.0/24• 0• +• all
To set the mailbox format, you can either edit the configuration file directly, or use the postconf command.In either case, the configuration parameters will be stored in /etc/postfix/main.cf file. Later if you wish tore-configure a particular parameter, you can either run the command or change it manually in the file.
To configure the mailbox format for Maildir:
sudo pos tcon f −e ’ home_mailbox = Mai ld i r / ’
241
Note
This will place new mail in /home/username/Maildir so you will need to configure your MailDelivery Agent (MDA) to use the same path.
SMTP Authentication
SMTP-AUTH allows a client to identify itself through the SASL authentication mechanism, using TransportLayer Security (TLS) to encrypt the authentication process. Once authenticated the SMTP server will allowthe client to relay mail.
To configure Postfix for SMTP-AUTH using SASL (Dovecot SASL), run these commands at a terminalprompt:
sudo pos tcon f −e ’ smtpd_sasl_type = dovecot ’sudo pos tcon f −e ’ smtpd_sasl_path = pr i va t e /auth ’sudo pos tcon f −e ’ smtpd_sasl_local_domain =’sudo pos tcon f −e ’ smtpd_sasl_secur ity_options = noanonymous , nop la intext ’sudo pos tcon f −e ’ smtpd_sas l_t ls_secur i ty_opt ions = noanonymous ’sudo pos tcon f −e ’ broken_sas l_auth_cl ients = yes ’sudo pos tcon f −e ’ smtpd_sasl_auth_enable = yes ’sudo pos tcon f −e ’ smtpd_rec ip i en t_re s t r i c t i on s = \permit_sas l_authent icated , permit_mynetworks , re ject_unauth_dest inat ion ’
Note
The smtpd_sasl_path config parameter is a path relative to the Postfix queue directory.
There are several SASL mechanism properties worth evaluating to improve the security of your deployment.The options “noanonymous,noplaintext” prevent use of mechanisms that permit anonymous authenticationor that transmit credentials unencrypted.
Next, generate or obtain a digital certificate for TLS. See security - certificates in this guide for details aboutgenerating digital certificates and setting up your own Certificate Authority (CA).
Note
MUAs connecting to your mail server via TLS will need to recognize the certificate used for TLS.This can either be done using a certificate from Let’s Encrypt, from a commercial CA or with aself-signed certificate that users manually install/accept. For MTA to MTA TLS certficates arenever validated without advance agreement from the affected organizations. For MTA to MTATLS, unless local policy requires it, there is no reason not to use a self-signed certificate. Referto security - certificates in this guide for more details.
Once you have a certificate, configure Postfix to provide TLS encryption for both incoming and outgoingmail:
sudo pos tcon f −e ’ smtp_t l s_secur i ty_leve l = may ’sudo pos tcon f −e ’ smtpd_tl s_secur i ty_leve l = may ’sudo pos tcon f −e ’ smtp_t l s_note_star t t l s_of f e r = yes ’sudo pos tcon f −e ’ smtpd_tls_key_fi le = / etc / s s l / p r i va t e / s e r v e r . key ’sudo pos tcon f −e ’ smtpd_tl s_cert_f i l e = / etc / s s l / c e r t s / s e r v e r . crt ’sudo pos tcon f −e ’ smtpd_tl s_log leve l = 1 ’sudo pos tcon f −e ’ smtpd_tls_received_header = yes ’sudo pos tcon f −e ’myhostname = mail . example . com ’
If you are using your own Certificate Authority to sign the certificate enter:
sudo pos tcon f −e ’ smtpd_tls_CAfile = / etc / s s l / c e r t s / ca c e r t . pem ’
242

Again, for more details about certificates see security - certificates in this guide.
Note
After running all the commands, Postfix is configured for SMTP-AUTH and a self-signed certifi-cate has been created for TLS encryption.
Now, the file /etc/postfix/main.cf should look like this:
# See / usr / share / p o s t f i x /main . c f . d i s t f o r a commented , more complete# ve r s i on
smtpd_banner = $myhostname ESMTP $mail_name (Ubuntu )b i f f = no
# appending . domain i s the MUA’ s job .append_dot_mydomain = no
# Uncomment the next l i n e to generate ” delayed mail ” warnings#delay_warning_time = 4h
myhostname = se rve r1 . example . comalias_maps = hash : / e t c / a l i a s e sa l i a s_database = hash : / e t c / a l i a s e smyorigin = / etc /mailnamemydest inat ion = se rve r1 . example . com , l o c a l h o s t . example . com , l o c a l h o s tr e l ayho s t =mynetworks = 127 . 0 . 0 . 0 / 8mailbox_command = procmai l −a ”$EXTENSION”mai lbox_size_l imit = 0r e c i p i e n t_de l im i t e r = +in e t_ i n t e r f a c e s = a l lsmtpd_sasl_local_domain =smtpd_sasl_auth_enable = yessmtpd_sasl_secur ity_options = noanonymousbroken_sas l_auth_cl ients = yessmtpd_rec ip i en t_re s t r i c t i on s =permit_sas l_authent icated , permit_mynetworks , r e j e c t _unauth_destinationsmtpd_tls_auth_only = nosmtp_t l s_secur i ty_leve l = maysmtpd_tls_secur i ty_leve l = maysmtp_t l s_note_star t t l s_of f e r = yessmtpd_tls_key_fi le = / etc / s s l / p r i va t e /smtpd . keysmtpd_t l s_cert_f i l e = / etc / s s l / c e r t s /smtpd . c r tsmtpd_tls_CAfile = / etc / s s l / c e r t s / ca c e r t . pemsmtpd_tl s_log leve l = 1smtpd_tls_received_header = yessmtpd_tls_session_cache_timeout = 3600 stls_random_source = dev : / dev/urandom
The postfix initial configuration is complete. Run the following command to restart the postfix daemon:
sudo sys t emct l r e s t a r t p o s t f i x . s e r v i c e
Postfix supports SMTP-AUTH as defined in RFC2554. It is based on SASL. However it is still necessary toset up SASL authentication before you can use SMTP-AUTH.
243
When using ipv6, the mynetworks parameter may need to be modified to allow ipv6 addresses, for example:
mynetworks = 127 . 0 . 0 . 0 / 8 , [ : : 1 ] / 1 2 8
Configuring SASL
Postfix supports two SASL implementations: Cyrus SASL and Dovecot SASL. To enable Dovecot SASL thedovecot-core package will need to be installed:
sudo apt i n s t a l l dovecot−core
Next, edit /etc/dovecot/conf.d/10−master.conf and change the following:
s e r v i c e auth {# auth_socket_path po in t s to t h i s userdb socke t by d e f au l t . I t ’ s t y p i c a l l y# used by dovecot−lda , doveadm , po s s i b l y imap process , e t c . I t s d e f au l t# permi s s i ons make i t r eadab le only by root , but you may need to r e l ax these# permi s s i ons . Users that have ac c e s s to t h i s socke t are ab le to get a l i s t# o f a l l usernames and get r e s u l t s o f everyone ’ s userdb lookups .un i x_ l i s t en e r auth−userdb {#mode = 0600#user =#group =
}
# Pos t f i x smtp−authun ix_ l i s t en e r /var / spoo l / p o s t f i x / p r i va t e /auth {
mode = 0660user = po s t f i xgroup = po s t f i x
}
To permit use of SMTP-AUTH by Outlook clients, change the following line in the authentication mechanismssection of /etc/dovecot/conf.d/10−auth.conf from:
auth_mechanisms = p la in
to this:
auth_mechanisms = p la in l o g i n
Once you have Dovecot configured, restart it with:
sudo sys t emct l r e s t a r t dovecot . s e r v i c e
Testing
SMTP-AUTH configuration is complete. Now it is time to test the setup.
To see if SMTP-AUTH and TLS work properly, run the following command:
t e l n e t mail . example . com 25
After you have established the connection to the Postfix mail server, type:
eh lo mail . example . com
244
If you see the following in the output, then everything is working perfectly. Type quit to exit.
250−STARTTLS250−AUTH LOGIN PLAIN250−AUTH=LOGIN PLAIN250 8BITMIME
Troubleshooting
When problems arise, there are a few common ways to diagnose the cause.
Escaping chroot
The Ubuntu Postfix package will by default install into a chroot environment for security reasons. This canadd greater complexity when troubleshooting problems.
To turn off the chroot usage, locate the following line in the /etc/postfix/master.cf configuration file:
smtp i n e t n − − − − smtpd
and modify it as follows:
smtp i n e t n − n − − smtpd
You will then need to restart Postfix to use the new configuration. From a terminal prompt enter:
sudo s e r v i c e p o s t f i x r e s t a r t
SMTPS
If you need secure SMTP, edit /etc/postfix/master.cf and uncomment the following line:
smtps i n e t n − − − − smtpd−o smtpd_tls_wrappermode=yes−o smtpd_sasl_auth_enable=yes−o smtpd_c l i en t_re s t r i c t i on s=permit_sas l_authent icated , r e j e c t−o milter_macro_daemon_name=ORIGINATING
Log Viewing
Postfix sends all log messages to /var/log/mail.log. However, error and warning messages can sometimesget lost in the normal log output so they are also logged to /var/log/mail.err and /var/log/mail.warnrespectively.
To see messages entered into the logs in real time you can use the tail -f command:
t a i l −f / var / log /mail . e r r
245
Increasing Logging Detail
The amount of detail that is recorded in the logs can be increased via the configuration options. For example,to increase TLS activity logging set the smtpd_tls_loglevel option to a value from 1 to 4.
sudo pos tcon f −e ’ smtpd_tl s_log leve l = 4 ’
Reload the service after any configuration change, to make the new config active:
sudo sys t emct l r e l oad p o s t f i x . s e r v i c e
Logging mail delivery
If you are having trouble sending or receiving mail from a specific domain you can add the domain to thedebug_peer_list parameter.
sudo pos tcon f −e ’ debug_peer_list = problem . domain ’sudo sys t emct l r e l oad p o s t f i x . s e r v i c e
Increasing daemon verbosity
You can increase the verbosity of any Postfix daemon process by editing the /etc/postfix/master.cf andadding a -v after the entry. For example, edit the smtp entry:
smtp unix − − − − − smtp −v
Then, reload the service as usual:
sudo sys t emct l r e l oad p o s t f i x . s e r v i c e
Logging SASL debug info
To increase the amount of information logged when troubleshooting SASL issues you can set the followingoptions in /etc/dovecot/conf.d/10−logging.conf
auth_debug=yesauth_debug_passwords=yes
Just like Postfix if you change a Dovecot configuration the process will need to be reloaded:
sudo sys t emct l r e l oad dovecot . s e r v i c e
Note
Some of the options above can drastically increase the amount of information sent to the log files.Remember to return the log level back to normal after you have corrected the problem. Thenreload the appropriate daemon for the new configuration to take affect.
References
Administering a Postfix server can be a very complicated task. At some point you may need to turn to theUbuntu community for more experienced help.
• The Postfix website documents all available configuration options.• O’Reilly’s Postfix: The Definitive Guide is rather dated but provides deep background information
about configuration options.
246
• The Ubuntu Wiki Postfix page has more information from a Ubuntu context. There is also a DebianWiki Postfix page that’s a bit more up to date; they also have a set of Postfix Tutorials for differentDebian versions.
• Info on how to set up mailman3 with postfix
Squid
Squid is a full-featured web proxy cache server application which provides proxy and cache services for HyperText Transport Protocol (HTTP), File Transfer Protocol (FTP), and other popular network protocols. Squidcan implement caching and proxying of Secure Sockets Layer (SSL) requests and caching of Domain NameServer (DNS) lookups, and perform transparent caching. Squid also supports a wide variety of cachingprotocols, such as Internet Cache Protocol (ICP), the Hyper Text Caching Protocol (HTCP), the CacheArray Routing Protocol (CARP), and the Web Cache Coordination Protocol (WCCP).
The Squid proxy cache server is an excellent solution to a variety of proxy and caching server needs, andscales from the branch office to enterprise level networks while providing extensive, granular access controlmechanisms, and monitoring of critical parameters via the Simple Network Management Protocol (SNMP).When selecting a computer system for use as a dedicated Squid caching proxy server for many users ensure itis configured with a large amount of physical memory as Squid maintains an in-memory cache for increasedperformance.
Installation
At a terminal prompt, enter the following command to install the Squid server:
sudo apt i n s t a l l squid
Configuration
Squid is configured by editing the directives contained within the /etc/squid/squid.conf configuration file.The following examples illustrate some of the directives which may be modified to affect the behavior of theSquid server. For more in-depth configuration of Squid, see the References section.
Tip
Prior to editing the configuration file, you should make a copy of the original file and protectit from writing so you will have the original settings as a reference, and to re-use as necessary.Make this copy and protect it from writing using the following commands:
sudo cp / e tc / squid / squid . conf / e t c / squid / squid . conf . o r i g i n a lsudo chmod a−w / etc / squid / squid . conf . o r i g i n a l
• To set your Squid server to listen on TCP port 8888 instead of the default TCP port 3128, change thehttp_port directive as such:
http_port 8888
• Change the visible_hostname directive in order to give the Squid server a specific hostname. Thishostname does not necessarily need to be the computer’s hostname. In this example it is set to weezie
vis ib le_hostname weez ie
• The cache_dir option allows one to configure an on-disk cache, the default option is on-memory cache.The cache_dir directive takes the following arguments:
247
cache_dir <Type> <Directory−Name> <Fs−s p e c i f i c −data> [ opt ions ]
In the config file you can find the default cache_dir directive commented out:# Uncomment and ad jus t the f o l l ow i ng to add a d i sk cache d i r e c t o r y .#cache_dir u f s /var / spoo l / squid 100 16 256
You can just use the default option but you can also customize your cache directory, basically changingthe <Type> of this directory, it can be:
– ufs: the old well-known Squid storage format that has always been there.– aufs: uses the same storage format as ufs, utilizing POSIX-threads to avoid blocking the main
Squid process on disk-I/O. This was formerly known in Squid as async−io.– diskd: uses the same storage format as ufs, utilizing a separate process to avoid blocking the main
Squid process on disk-I/O.– rock: is a database-style storage. All cached entries are stored in a “database” file, using fixed-size
slots. A single entry occupies one or more slots.
If you want to use a different directory type please take a look at their different options.
• Using Squid’s access control, you may configure use of Internet services proxied by Squid to be availableonly users with certain Internet Protocol (IP) addresses. For example, we will illustrate access by usersof the 192.168.42.0/24 subnetwork only:
Add the following to the bottom of the ACL section of your /etc/squid/squid.conf file:a c l fortytwo_network s r c 192 . 168 . 42 . 0/24
Then, add the following to the top of the http_access section of your /etc/squid/squid.conf file:http_access a l low fortytwo_network
• Using the excellent access control features of Squid, you may configure use of Internet services proxiedby Squid to be available only during normal business hours. For example, we’ll illustrate access byemployees of a business which is operating between 9:00AM and 5:00PM, Monday through Friday, andwhich uses the 10.1.42.0/24 subnetwork:
Add the following to the bottom of the ACL section of your /etc/squid/squid.conf file:a c l biz_network s r c 10 . 1 . 4 2 . 0 /24a c l biz_hours time M T W T F 9:00−17:00
Then, add the following to the top of the http_access section of your /etc/squid/squid.conf file:http_access a l low biz_network biz_hours
Note
After making changes to the /etc/squid/squid.conf file, save the file and restart the squid serverapplication to effect the changes using the following command entered at a terminal prompt:sudo sys t emct l r e s t a r t squid . s e r v i c e
Note
If formerly a customized squid3 was used that set up the spool at /var/log/squid3 to be amountpoint, but otherwise kept the default configuration the upgrade will fail. The upgradetries to rename/move files as needed, but it can’t do so for an active mountpoint. In that caseplease either adapt the mountpoint or the config in /etc/squid/squid.conf so that they match.
The same applies if the include config statement was used to pull in more files from the old pathat /etc/squid3/. In those cases you should move and adapt your configuration accordingly.
248
References
Squid Website
Ubuntu Wiki Squid page.
HTTPD - Apache2 Web Server
Apache is the most commonly used Web server on Linux systems. Web servers are used to serve Web pagesrequested by client computers. Clients typically request and view Web pages using Web browser applicationssuch as Firefox, Opera, Chromium, or Internet Explorer.
Users enter a Uniform Resource Locator (URL) to point to a Web server by means of its Fully QualifiedDomain Name (FQDN) and a path to the required resource. For example, to view the home page of theUbuntu Web site a user will enter only the FQDN:
www. ubuntu . com
To view the community sub-page, a user will enter the FQDN followed by a path:
www. ubuntu . com/community
The most common protocol used to transfer Web pages is the Hyper Text Transfer Protocol (HTTP). Proto-cols such as Hyper Text Transfer Protocol over Secure Sockets Layer (HTTPS), and File Transfer Protocol(FTP), a protocol for uploading and downloading files, are also supported.
Apache Web Servers are often used in combination with the MySQL database engine, the HyperText Pre-processor (PHP) scripting language, and other popular scripting languages such as Python and Perl. Thisconfiguration is termed LAMP (Linux, Apache, MySQL and Perl/Python/PHP) and forms a powerful androbust platform for the development and deployment of Web-based applications.
Installation
The Apache2 web server is available in Ubuntu Linux. To install Apache2:
At a terminal prompt enter the following command:
sudo apt i n s t a l l apache2
Configuration
Apache2 is configured by placing directives in plain text configuration files. These directives are separatedbetween the following files and directories:
• apache2.conf: the main Apache2 configuration file. Contains settings that are global to Apache2.
• httpd.conf: historically the main Apache2 configuration file, named after the httpd daemon. In otherdistributions (or older versions of Ubuntu), the file might be present. In Ubuntu, all configurationoptions have been moved to apache2.conf and the below referenced directories, and this file no longerexists.
• conf-available: this directory contains available configuration files. All files that were previously in/etc/apache2/conf.d should be moved to /etc/apache2/conf−available.
• conf-enabled: holds symlinks to the files in /etc/apache2/conf−available. When a configuration file issymlinked, it will be enabled the next time apache2 is restarted.
249
• envvars: file where Apache2 environment variables are set.
• mods-available: this directory contains configuration files to both load modules and configure them.Not all modules will have specific configuration files, however.
• mods-enabled: holds symlinks to the files in /etc/apache2/mods−available. When a module configura-tion file is symlinked it will be enabled the next time apache2 is restarted.
• ports.conf: houses the directives that determine which TCP ports Apache2 is listening on.
• sites-available: this directory has configuration files for Apache2 Virtual Hosts. Virtual Hosts allowApache2 to be configured for multiple sites that have separate configurations.
• sites-enabled: like mods-enabled, sites−enabled contains symlinks to the /etc/apache2/sites−availabledirectory. Similarly when a configuration file in sites-available is symlinked, the site configured by itwill be active once Apache2 is restarted.
• magic: instructions for determining MIME type based on the first few bytes of a file.
In addition, other configuration files may be added using the Include directive, and wildcards can be used toinclude many configuration files. Any directive may be placed in any of these configuration files. Changesto the main configuration files are only recognized by Apache2 when it is started or restarted.
The server also reads a file containing mime document types; the filename is set by the TypesConfig directive,typically via /etc/apache2/mods−available/mime.conf, which might also include additions and overrides, andis /etc/mime.types by default.
Basic Settings
This section explains Apache2 server essential configuration parameters. Refer to the Apache2 Documenta-tion for more details.
• Apache2 ships with a virtual-host-friendly default configuration. That is, it is configured with a singledefault virtual host (using the VirtualHost directive) which can be modified or used as-is if you havea single site, or used as a template for additional virtual hosts if you have multiple sites. If left alone,the default virtual host will serve as your default site, or the site users will see if the URL they enterdoes not match the ServerName directive of any of your custom sites. To modify the default virtualhost, edit the file /etc/apache2/sites−available/000−default.conf.
Note
The directives set for a virtual host only apply to that particular virtual host. If a directiveis set server-wide and not defined within the virtual host settings, the default setting is used.For example, you can define a Webmaster email address and not define individual emailaddresses for each virtual host.
If you wish to configure a new virtual host or site, copy that file into the same directory with a nameyou choose. For example:
sudo cp / e tc /apache2/ s i t e s −av a i l a b l e /000− de f au l t . conf / e t c /apache2/ s i t e s −av a i l a b l e /mynewsite . conf
Edit the new file to configure the new site using some of the directives described below.
• The ServerAdmin directive specifies the email address to be advertised for the server’s administrator.The default value is webmaster@localhost. This should be changed to an email address that is deliveredto you (if you are the server’s administrator). If your website has a problem, Apache2 will display anerror message containing this email address to report the problem to. Find this directive in your site’sconfiguration file in /etc/apache2/sites-available.
250
• The Listen directive specifies the port, and optionally the IP address, Apache2 should listen on. If theIP address is not specified, Apache2 will listen on all IP addresses assigned to the machine it runs on.The default value for the Listen directive is 80. Change this to 127.0.0.1:80 to cause Apache2 to listenonly on your loopback interface so that it will not be available to the Internet, to (for example) 81 tochange the port that it listens on, or leave it as is for normal operation. This directive can be foundand changed in its own file, /etc/apache2/ports.conf
• The ServerName directive is optional and specifies what FQDN your site should answer to. The defaultvirtual host has no ServerName directive specified, so it will respond to all requests that do not matcha ServerName directive in another virtual host. If you have just acquired the domain name mynewsite.com and wish to host it on your Ubuntu server, the value of the ServerName directive in your virtualhost configuration file should be mynewsite.com. Add this directive to the new virtual host file youcreated earlier (/etc/apache2/sites−available/mynewsite.conf).
You may also want your site to respond to www.mynewsite.com, since many users will assume thewww prefix is appropriate. Use the ServerAlias directive for this. You may also use wildcards in theServerAlias directive.
For example, the following configuration will cause your site to respond to any domain request endingin .mynewsite.com.
S e rve rA l i a s * . mynewsite . com
• The DocumentRoot directive specifies where Apache2 should look for the files that make up the site.The default value is /var/www/html, as specified in /etc/apache2/sites−available/000−default.conf.If desired, change this value in your site’s virtual host file, and remember to create that directory ifnecessary!
Enable the new VirtualHost using the a2ensite utility and restart Apache2:
sudo a2 en s i t e mynewsitesudo sys t emct l r e s t a r t apache2 . s e r v i c e
Note
Be sure to replace mynewsite with a more descriptive name for the VirtualHost. One method isto name the file after the ServerName directive of the VirtualHost.
Similarly, use the a2dissite utility to disable sites. This is can be useful when troubleshooting configurationproblems with multiple VirtualHosts:
sudo a 2 d i s s i t e mynewsitesudo sys t emct l r e s t a r t apache2 . s e r v i c e
Default Settings
This section explains configuration of the Apache2 server default settings. For example, if you add a virtualhost, the settings you configure for the virtual host take precedence for that virtual host. For a directive notdefined within the virtual host settings, the default value is used.
• The DirectoryIndex is the default page served by the server when a user requests an index of a directoryby specifying a forward slash (/) at the end of the directory name.
For example, when a user requests the page http://www.example.com/this_directory/, he or she willget either the DirectoryIndex page if it exists, a server-generated directory list if it does not and theIndexes option is specified, or a Permission Denied page if neither is true. The server will try to find oneof the files listed in the DirectoryIndex directive and will return the first one it finds. If it does not findany of these files and if Options Indexes is set for that directory, the server will generate and return a
251
list, in HTML format, of the subdirectories and files in the directory. The default value, found in /etc/apache2/mods−available/dir.conf is “index.html index.cgi index.pl index.php index.xhtml index.htm”.Thus, if Apache2 finds a file in a requested directory matching any of these names, the first will bedisplayed.
• The ErrorDocument directive allows you to specify a file for Apache2 to use for specific error events.For example, if a user requests a resource that does not exist, a 404 error will occur. By default,Apache2 will simply return a HTTP 404 Return code. Read /etc/apache2/conf−available/localized−error−pages.conf for detailed instructions for using ErrorDocument, including locations of examplefiles.
• By default, the server writes the transfer log to the file /var/log/apache2/access.log. You can changethis on a per-site basis in your virtual host configuration files with the CustomLog directive, or omit itto accept the default, specified in /etc/apache2/conf−available/other−vhosts−access−log.conf. Youmay also specify the file to which errors are logged, via the ErrorLog directive, whose default is /var/log/apache2/error.log. These are kept separate from the transfer logs to aid in troubleshooting problemswith your Apache2 server. You may also specify the LogLevel (the default value is “warn”) and theLogFormat (see /etc/apache2/apache2.conf for the default value).
• Some options are specified on a per-directory basis rather than per-server. Options is one of thesedirectives. A Directory stanza is enclosed in XML-like tags, like so:
<Direc tory /var /www/html/mynewsite>. . .</Directory>
The Options directive within a Directory stanza accepts one or more of the following values (amongothers), separated by spaces:
– ExecCGI - Allow execution of CGI scripts. CGI scripts are not executed if this option is notchosen.
Caution
Most files should not be executed as CGI scripts. This would be very dangerous. CGIscripts should kept in a directory separate from and outside your DocumentRoot, andonly this directory should have the ExecCGI option set. This is the default, and thedefault location for CGI scripts is /usr/lib/cgi−bin.
– Includes - Allow server-side includes. Server-side includes allow an HTML file to include otherfiles. See Apache SSI documentation (Ubuntu community) for more information.
– IncludesNOEXEC - Allow server-side includes, but disable the #exec and #include commandsin CGI scripts.
– Indexes - Display a formatted list of the directory’s contents, if no DirectoryIndex (such asindex.html) exists in the requested directory.
Caution
For security reasons, this should usually not be set, and certainly should not be set onyour DocumentRoot directory. Enable this option carefully on a per-directory basis onlyif you are certain you want users to see the entire contents of the directory.
– Multiview - Support content-negotiated multiviews; this option is disabled by default for securityreasons. See the Apache2 documentation on this option.
– SymLinksIfOwnerMatch - Only follow symbolic links if the target file or directory has thesame owner as the link.
252
apache2 Settings
This section explains some basic apache2 daemon configuration settings.
LockFile - The LockFile directive sets the path to the lockfile used when the server is compiled with eitherUSE_FCNTL_SERIALIZED_ACCEPT or USE_FLOCK_SERIALIZED_ACCEPT. It must be stored onthe local disk. It should be left to the default value unless the logs directory is located on an NFS share. Ifthis is the case, the default value should be changed to a location on the local disk and to a directory thatis readable only by root.
PidFile - The PidFile directive sets the file in which the server records its process ID (pid). This file shouldonly be readable by root. In most cases, it should be left to the default value.
User - The User directive sets the userid used by the server to answer requests. This setting determinesthe server’s access. Any files inaccessible to this user will also be inaccessible to your website’s visitors. Thedefault value for User is “www-data”.
Warning
Unless you know exactly what you are doing, do not set the User directive to root. Using rootas the User will create large security holes for your Web server.
Group - The Group directive is similar to the User directive. Group sets the group under which the serverwill answer requests. The default group is also “www-data”.
Apache2 Modules
Apache2 is a modular server. This implies that only the most basic functionality is included in the coreserver. Extended features are available through modules which can be loaded into Apache2. By default, abase set of modules is included in the server at compile-time. If the server is compiled to use dynamicallyloaded modules, then modules can be compiled separately, and added at any time using the LoadModuledirective. Otherwise, Apache2 must be recompiled to add or remove modules.
Ubuntu compiles Apache2 to allow the dynamic loading of modules. Configuration directives may be condi-tionally included on the presence of a particular module by enclosing them in an <IfModule> block.
You can install additional Apache2 modules and use them with your Web server. For example, run thefollowing command at a terminal prompt to install the Python 3 WSGI module:
sudo apt i n s t a l l l ibapache2−mod−wsgi−py3
The installation will enable the module automatically, but we can disable it with a2dismod:
sudo a2dismod wsgisudo sys t emct l r e s t a r t apache2 . s e r v i c e
And then use the a2enmod utility to re-enable it:
sudo a2enmod wsgisudo sys t emct l r e s t a r t apache2 . s e r v i c e
See the /etc/apache2/mods−available directory for additional modules already available on your system.
HTTPS Configuration
The mod_ssl module adds an important feature to the Apache2 server - the ability to encrypt communica-tions. Thus, when your browser is communicating using SSL, the https:// prefix is used at the beginning ofthe Uniform Resource Locator (URL) in the browser navigation bar.
253
The mod_ssl module is available in apache2-common package. Execute the following command at a terminalprompt to enable the mod_ssl module:sudo a2enmod s s l
There is a default HTTPS configuration file in /etc/apache2/sites−available/default−ssl.conf. In order forApache2 to provide HTTPS, a certificate and key file are also needed. The default HTTPS configurationwill use a certificate and key generated by the ssl−cert package. They are good for testing, but the auto-generated certificate and key should be replaced by a certificate specific to the site or server. For informationon generating a key and obtaining a certificate see Certificates.
To configure Apache2 for HTTPS, enter the following:sudo a2 en s i t e de fau l t−s s l
Note
The directories /etc/ssl/certs and /etc/ssl/private are the default locations. If you install thecertificate and key in another directory make sure to change SSLCertificateFile and SSLCertifi-cateKeyFile appropriately.
With Apache2 now configured for HTTPS, restart the service to enable the new settings:sudo sys t emct l r e s t a r t apache2 . s e r v i c e
Note
Depending on how you obtained your certificate you may need to enter a passphrase whenApache2 starts.
You can access the secure server pages by typing https://your_hostname/url/ in your browser address bar.
Sharing Write Permission
For more than one user to be able to write to the same directory it will be necessary to grant write permissionto a group they share in common. The following example grants shared write permission to /var/www/htmlto the group “webmasters”.sudo chgrp −R webmasters /var /www/htmlsudo chmod −R g=rwX /var /www/html/
These commands recursively set the group permission on all files and directories in /var/www/html to allowreading, writing and searching of directories. Many admins find this useful for allowing multiple users toedit files in a directory tree.
Warning
The apache2 daemon will run as the www−data user, which has a corresponding www−datagroup. These should not be granted write access to the document root, as this would mean thatvulnerabilities in Apache or the applications it is serving would allow attackers to overwrite theserved content.
References
• Apache2 Documentation contains in depth information on Apache2 configuration directives. Also, seethe apache2-doc package for the official Apache2 docs.
• O’Reilly’s Apache Cookbook is a good resource for accomplishing specific Apache2 configurations.
• For Ubuntu specific Apache2 questions, ask in the #ubuntu-server IRC channel on freenode.net.
254
Web Servers
The primary function of a web server is to store, process and deliver Web pages to clients. The clientscommunicate with the server sending HTTP requests. Clients, mostly via Web Browsers, request for aspecific resources and the server responds with the content of that resource or an error message. Theresponse is usually a Web page such as HTML documents which may include images, style sheets, scripts,and the content in form of text.
When accessing a Web Server, every HTTP request that is received is responded to with a content and aHTTP status code. HTTP status codes are three-digit codes, and are grouped into five different classes.The class of a status code can be quickly identified by its first digit:
• 1xx : Informational - Request received, continuing process• 2xx : Success - The action was successfully received, understood, and accepted• 3xx : Redirection - Further action must be taken in order to complete the request• 4xx : Client Error - The request contains bad syntax or cannot be fulfilled• 5xx : Server Error - The server failed to fulfill an apparently valid request
More information about status code check the RFC 2616.
Implementation
Web Servers are heavily used in the deployment of Web sites and in this scenario we can use two differentimplementations:
• Static Web Server: The content of the server’s response will be the hosted files “as-is”.• Dynamic Web Server: Consist in a Web Server plus an extra software, usually an application server
and a database. For example, to produce the Web pages you see in the Web browser, the applicationserver might fill an HTML template with contents from a database. Due to that we say that thecontent of the server’s response is generated dynamically.
Introduction to High Availability
A definition of High Availability Clusters from Wikipedia:
High Availability Clusters
High-availability clusters (also known as HA clusters , fail-over clusters or Metroclus-ters Active/Active ) are groups of computers that support server applications that can bereliably utilized with a minimum amount of down-time.
They operate by using high availability software to harness redundant computers in groups orclusters that provide continued service when system components fail.
Without clustering, if a server running a particular application crashes, the application will beunavailable until the crashed server is fixed. HA clustering remedies this situation by detectinghardware/software faults, and immediately restarting the application on another system withoutrequiring administrative intervention, a process known as failover.
As part of this process, clustering software may configure the node before starting the applicationon it. For example, appropriate file systems may need to be imported and mounted, networkhardware may have to be configured, and some supporting applications may need to be runningas well.
255
HA clusters are often used for critical databases, file sharing on a network, business applications,and customer services such as electronic commerce websites.
High Availability Cluster Heartbeat
HA cluster implementations attempt to build redundancy into a cluster to eliminate single pointsof failure, including multiple network connections and data storage which is redundantly con-nected via storage area networks.
HA clusters usually use a heartbeat private network connection which is used to monitor thehealth and status of each node in the cluster. One subtle but serious condition all clusteringsoftware must be able to handle is split-brain, which occurs when all of the private links go downsimultaneously, but the cluster nodes are still running.
If that happens, each node in the cluster may mistakenly decide that every other node has gonedown and attempt to start services that other nodes are still running. Having duplicate instancesof services may cause data corruption on the shared storage.
High Availability Cluster Quorum
HA clusters often also use quorum witness storage (local or cloud) to avoid this scenario. Awitness device cannot be shared between two halves of a split cluster, so in the event that allcluster members cannot communicate with each other (e.g., failed heartbeat), if a member cannotaccess the witness, it cannot become active.
Example
2nodeHAcluster|578x674,75%
Fencing
Fencing protects your data from being corrupted, and your application from becoming unavailable, due tounintended concurrent access by rogue nodes.
Just because a node is unresponsive doesn’t mean it has stopped accessing your data. The only way to be100% sure that your data is safe, is to use fencing to ensure that the node is truly offline before allowing thedata to be accessed from another node.
Fencing also has a role to play in the event that a clustered service cannot be stopped. In this case, thecluster uses fencing to force the whole node offline, thereby making it safe to start the service elsewhere.
Fencing is also known as STONITH, an acronym for “Shoot The Other Node In The Head”, since the mostpopular form of fencing is cutting a host’s power.
Key Benefits:
• Active countermeasure taken by a functioning host to isolate a misbehaving (usually dead) host fromshared data.
• MOST CRITICAL part of a cluster utilizing SAN or other shared storage technology (Ubuntu HAClusters can only be supported if the fencing mechanism is configured).
• Required by OCFS2, GFS2, cLVMd (before Ubuntu 20.04), lvmlockd (from 20.04 and beyond).
256

Linux High Availability Projects
There are many upstream high availability related projects that are included in Ubuntu Linux. This sectionwill describe the most important ones.
The following packages are present in latest Ubuntu LTS release:
Ubuntu HA Core Packages
Packages in this list are supported just like any other package available in [main] repository would be.
Package URLlibqb Ubuntu | Upstreamkronosnet Ubuntu | Upstreamcorosync Ubuntu | Upstreampacemaker Ubuntu | Upstreamresource-agents Ubuntu | Upstreamfence-agents Ubuntu | Upstreamcrmsh Ubuntu | Upstreamcluster-glue Ubuntu | Upstreamdrbd-utils Ubuntu | Upstreamdlm Ubuntu | Upstreamgfs2-utils Ubuntu | Upstreamkeepalived Ubuntu | Upstream
• Kronosnet - Kronosnet, often referred to as knet, is a network abstraction layer designed for HighAvailability. Corosync uses Kronosnet to provide multiple networks for its interconnect (replacing theold Totem Redundant Ring Protocol) and add support for some more features like interconnect networkhot-plug.
• Corosync - or Cluster Membership Layer, provides reliable messaging, membership and quorum in-formation about the cluster. Currently, Pacemaker supports Corosync as this layer.
• Resource Agents - Scripts or operating system components that start, stop or monitor resources,given a set of resource parameters. These provide a uniform interface between pacemaker and themanaged services.
• Fence Agents - Scripts that execute node fencing actions, given a target and fence device parameters.
• Pacemaker - or Cluster Resource Manager, provides the brain that processes and reacts to eventsthat occur in the cluster. Events might be: nodes joining or leaving the cluster, resource events causedby failures, maintenance, or scheduled activities. To achieve the desired availability, Pacemaker maystart and stop resources and fence nodes.
• DRBD - Distributed Replicated Block Device, DRBD is a distributed replicated storage system forthe Linuxplatform. It is implemented as a kernel driver, several userspace management applications,and some shell scripts. DRBD is traditionally used in high availability (HA) clusters.
• DLM - A distributed lock manager (DLM) runs in every machine in a cluster, with an identical copyof a cluster-wide lock database. In this way DLM provides software applications which are distributedacross a cluster on multiple machines with a means to synchronize their accesses to shared resources.
• Keepalived - Keepalived provides simple and robust facilities for loadbalancing and high-availabilityto Linux system and Linux based infrastructures. Loadbalancing framework relies on well-known andwidely used Linux Virtual Server (IPVS) kernel module providing Layer4 loadbalancing. Keepalived
257
implements a set of checkers to dynamically and adaptively maintain and manage loadbalanced serverpool according their health. On the other hand high-availability is achieved by VRRP protocol.
Ubuntu HA Community Packages
Packages in this list are supported just like any other package available in [universe] repository would be.
Package URLpcs* Ubuntu | Upstreamcsync2 Ubuntu | Upstreamcorosync-qdevice Ubuntu | Upstreamfence-virt Ubuntu | Upstreamsbd Ubuntu | Upstreambooth Ubuntu | Upstream
• Corosync-Qdevice - Its primary use is for even-node clusters, operates at corosync (quorum) layer.Corosync-Qdevice is an independent arbiter for solving split-brain situations. (qdevice-net supportsmultiple algorithms).
• SBD - STONITH Block Device can be particularly useful in environments where traditional fencingmechanisms are not possible. SBD integrates with Pacemaker, a watchdog device and shared storageto arrange for nodes to reliably self-terminate when fencing is required.
Note: pcs will likely replace crmsh in [main] repository in future Ubuntu versions.
Ubuntu HA Deprecated Packages
Packages in this list are only supported by the upstream community . All bugs opened against theseagents will be forwarded to upstream IF makes sense (affected version is close to upstream).
Package URLocfs2-tools Ubuntu | Upstream
Ubuntu HA Related Packages
Packages in this list aren’t necessarily HA related packages, but they have a very important role in HighAvailability Clusters and are supported like any other package provide by the [main] repository.
Package URLmultipath-tools Ubuntu | Upstreamopen-iscsi Ubuntu | Upstreamsg3-utils Ubuntu | Upstreamtgt OR targetcli-fb* Ubuntu | Upstreamlvm2 Ubuntu | Upstream
• LVM2 in a Shared-Storage Cluster Scenario: CLVM - supported before Ubuntu 20.04 A distributedlock manager (DLM) is used to broker concurrent LVM metadata accesses. Whenever a cluster nodeneeds to modify the LVM metadata, it must secure permission from its local clvmd , which is inconstant contact with other clvmd daemons in the cluster and can communicate a desire to get a lock
258

on a particular set of objects. lvmlockd - supported after Ubuntu 20.04 As of 2017, a stable LVMcomponent that is designed to replace clvmd by making the locking of LVM objects transparent to therest of LVM, without relying on a distributed lock manager. The lvmlockd benefits over clvm are:
– lvmlockd supports two cluster locking plugins: DLM and SANLOCK. SANLOCK plugin cansupports up to ~2000 nodes that benefits LVM usage in big virtualization / storage cluster, whileDLM plugin fits HA cluster.
– lvmlockd has better design than clvmd. clvmd is command-line level based locking system, whichmeans the whole LVM software will get hang if any LVM command gets dead-locking issue.
– lvmlockd can work with lvmetad.
Note: targetcli-fb (Linux LIO) will likely replace tgt in future Ubuntu versions.
Upstream Documentation
The server guide does not have the intent to document every existing option for all the HA related softwaresdescribed in this page, but to document recommended scenarios for Ubuntu HA Clusters. You will find morecomplete documentation upstream at:
• ClusterLabs– Clusters From Scratch– Managing Pacemaker Clusters– Pacemaker Configuration Explained– Pacemaker Remote - Scaling HA Clusters
• Other– Ubuntu Bionic HA in Shared Disk Environments (Azure)
A very special thanks, and all the credits, to ClusterLabs Project for all that detailed documen-tation.
Ubuntu HA - Pacemaker Resource Agents Supportability
After discussions among Ubuntu Developers, it was decided that Ubuntu project should focus in splittingall existing Pacemaker Resource Agents into different categories:
• Resource Agents: [main]• Resource Agents: [universe]• Resource Agents: [universe]-community• Resource Agents: [non-supported]• Resource Agents: [deprecated]
Note: There is a current plan to split resource agents into different packages so supported agentscan be installed independently.
Resource Agents: [main]
Agents in this list are supported just like any other package available in [main] repository would be.
|
RESOURCE AGENT
|
RESOURCE AGENT DESCRIPTION
259

| |
SUPPORT AGENTS
|Delay|test resource for introducing delay| |MailTo|sends email to a sysadmin whenever a takeover occurs||ClusterMon|runs crm_mon to a html page from time to time| |HealthCPU|measures CPU idling and up-dates #health-cpu attr| |HealthIOWait|measures CPU idling and updates #health-iowait attr| |HealthS-MART|measures CPU idling and updates #health-smart attr| ||
SERVICES (OCF, Systemd, SysV)
| |apache|apache web server instance| |dovecot|dovecot IMAP/POP3 server instance| |dhcpd|chrooted ISCdhcp server instance| |mysql|MySQL instance| |mysql-proxy|MySQL proxy instance| |pgsql|pgsql databaseinstance| |named|bind/named server instance| |nfsnotify|nfs sm-notify reboot notifications daemon| |nf-sserver|nfs server resource| |exportfs|nfs exports (not the nfs server)| |nginx|Nginx web/proxy server instance||postfix|postfix mail server instance| |rabbitmq-cluster|cloned rabbitmq cluster instance| |remote|pacemakerremote resource agent| |rsyncd|rsyncd instance| |rsyslog|rsyslogd instance| |slapd|stand-alone LDAP daemoninstance| |Squid|squid proxy server instance| |vsftpd|vsftpd server instance| | |
STORAGE
|Raid1|software RAID (MD) devices on shared storage| |iscsi|local iscsi initiator and its conns to targets||iSCSILogicalUnit|iSCSI logical units| |iSCSITarget|iSCSI target export agent (implementation: tgt / lio)||LVM|LVM volume as an HA resource| |LVM-activate|LVM activation/deact work for VGs (lvmlockd+LVM-activate OR clvm+LVM-activate)| |Filesystem|filesystem on a shared storage medium| |symlink|symboliclink| |ZFS|ZFS pools import/export| ||
LOCKING & RESERVATIONS
|controld|distributed lock manager for clustered FSs| |clvm|clvmd daemon (cluster logical vol manager)||lvmlockd|agent manages the lvmlockd daemon.| |mpathpersist|SCSI persistent reservations on mpath devs||sg_persist|master/slave resource for SCSI3 reservations| ||
NETWORKING
|Route|network routes| |iface-bridge|bridge network interfaces| |iface-vlan|vlan network interfaces||IPaddr2|virtual IPv4 and IPv6 addresses| |ipsec|ipsec tunnels for VIPs| |IPsrcaddr|preferred sourceaddress modification| |IPv6addr|IPv6 aliases| |conntrackd|conntrackd instance| |SendArp|send gratuitousARP for IP address| |VIPArip|virtual IP address through RIP2| |ifspeed|monitor action runs -> updatesCIB with if speed| ||
VIRTUALIZATION
|VirtualDomain|manages virtual domains through libvirt (virtual machine only)| ||
CONTAINERS
|lxc|allows LXC containers to be managed by the cluster|
Resource Agents: [universe]
Agents in this list are supported just like any other package available in [universe] repository would be.
RESOURCE AGENT RESOURCE AGENT DESCRIPTION
||
SUPPORT AGENTS
260
|anything|generic agent to manage virtually anything| |Dummy|testing dummy resource agent (template forRA writers)| |AudibleAlarm|audible beeps at interval| |Stateful|example agent that supports two states||WinPopup|sends a SMB notification msg (popup) to a host| ||
SERVICES
|asterisk|asterisk PBX| |CTDB|clustered samba (for needed clustered underlying)| |dnsupdate|ip take-over viadynamic dns updates| |fio|fio instance| |galera|galera instance| |garbd|galera arbitrator instance| |jboss|JBossapplication server instance| |jira|JIRA server instance| |kamailio|kamailio SIP proxy/registrar instance| |mari-adb|MariaDB master/slave instance| |nagios|nagios instance| |ovsmonitor|clone resource to monitor net-work bonds on diff nodes| |pgagent|pgagent instance| |pound|pound reverse proxy load-bal server instance||proftpd|proftpd instance| |Pure-FTPd|pure-ftpd instance| |redis|redis server (supports master/slave repli-cas)| |syslog-ng|syslog-ng instance| |tomcat|tomcat servlet environment instance| |varnish|varnish instance|||
STORAGE
|AoEtarget|ata over ethernet| ||
NETWORKING
|IPaddr|virtual IPv4 addresses| |ocf:pacemaker:ping|records in CIB number of nodes host can connect to||portblock|temporarily block/unblock access to tcp/udp ports| ||
OPENSTACK
|openstack-cinder-volume|attach cinder vol to an instance (os-info <->)| |openstack-floating-ip|move a float-ing IP from an instance to another| ||
VIRTUALIZATION
|Xen|xen unprivileged domains| ||
REGISTRATION (CIB)
|lxd-info|nr of lxd containers running in CIB| |machine-info|records various node attributes in CIB| |NodeU-tilization|cpu / host mem / hypervisor mem etc… into CIB| |openstack-info|records attributes of a nodeinto CIB| |SysInfo|records various node attributes into CIB| |SystemHealth|monitors health of system usingIPMI| |attribute|sets node attr one way when started and vice-versa|
Resource Agents: [universe]-community
Agents in this list are only supported by the upstream community. All bugs opened against theseagents will be forwarded to upstream IF makes sense (affected version is close to upstream).
RESOURCE AGENT RESOURCE AGENT DESCRIPTION
||
SERVICES
|SphinxSearchDaemon|sphix search daemon| |Xinetd|start/stop services managed by xinetd| |zab-bixserver|zabbix server instance| ||
STORAGE
|o2cb|oracle cluster filesystem userspace daemon (oracle)| |sfex|excl access to shared storage using SF-EX| ||
VIRTUALIZATION
261
|aliyun-vpc-move-ip|move ip within a vpc of the aliyum ecs (alibaba)| |awseip|manages aws elastic IP address(aws)| |awsvip|manages aws secondary private ip addresses (aws)| |aws-vpc-move-ip|move ip within a vpc ofthe aws ec2 (aws)| |aws-vpc-route53|update route53 vpc record for aws ec2 (aws)| |azure-events|monitor forscheduled events for azure vm (azure)| |azure-lb|answers azure load balancer health probe req (azure)| |gcp-vpc-move-ip|floating ip address within a GCP VPC (google)| |ManageVE|openVZ virtual environment (vir-tuozzo)| |minio|minio server instance| |podman|creates/launches podman containers| |rkt|creates/launchescontainer based on supplied image| ||
CONTAINERS
|docker|docker container resource agent|
Resource Agents: [non-supported]
Agents in this list are NOT supported in Ubuntu and might be removed in future Ubuntu HA versions.
RESOURCE AGENT RESOURCE AGENT DESCRIPTION
||
UNSUPPORTED
|db2|manages IBM DB2 LUW databases (IBM)| |eDir88|Novell eDirectory directory server instance (nov-ell)| |ICP|ICP vortex clustered host drive (intel)| |ids|IBM informix dynamic server (IDS) (IBM)| |SAP-Database|SAP database (of any type) instance agent (SAP)| |SAPInstance|SAP application server instancesagent (SAP)| |ServeRAID|enables/disables shared serveRAID merge groups (IBM)| |ManageRAID|raid de-vices (/etc/conf.d/HB-ManageRAID)| |oraasm|oracle asm agent / uses ohasd for asm disk grp (oracle)| |ora-cle|oracle database instance (oracle)| |oralsnr|oracle TNS listener (oracle)| |sybaseASE|sybase ASE failover in-stance (Sybase)| |vdo-vol|https://bugs.launchpad.net/ubuntu/+bug/1869825| |WAS|websphere applicationserver instance (IBM)| |WAS6|websphere application server instance (IBM)|
Resource Agents: [deprecated]
Agents in this list are NOT supported in Ubuntu OR Upstream (due to being deprecated in favor of otheragents) and might be removed in future Ubuntu HA versions.
RESOURCE AGENT RESOURCE AGENT DESCRIPTION
||
DEPRECATED
|Evmsd|clustered evms vol mgmt (evms is not maintained)| |EvmsSCC|clustered evms vol mgmt (evms isnot maintained)| |LinuxSCSI|enables/disables scsi devs through kernel scsi hotplug| |scsi2reservation|SCSI-2 reservation agent (depends on scsi_reserve)| |ocf:heartbeat:pingd|monitors connectivity to specific hosts||ocf:pacemaker:pingd|replaced by pacemaker:ping (this is broken)| |vmware|control vmware server 2.0 virtualmachines (2009)|
262

Ubuntu HA - Pacemaker Fence Agents Supportability
After discussions among Ubuntu Developers, it was decided that Ubuntu project should focus in splittingall existing Pacemaker Fence Agents into different categories:
• Fence Agents: [main]• Fence Agents: [universe]• Fence Agents: [universe]-community• Fence Agents: [non-supported]• Fence Agents: [deprecated]
Note: There is a current plan to split fence agents into different packages so supported agentscan be installed independently.
Fence Agents: [main]
Agents in this list are supported just like any other package available in [main] repository would be.
FENCE AGENT FENCE AGENT DESCRIPTION EXTRA DESCRIPTION
||
POWER FENCING AGENTS|| |fence_ipmilan|IPMI controlled machines|| |fence_ilo3|symlink tofence_ipmilan|| |fence_ilo4|symlink to fence_ipmilan|| |fence_ilo5|symlink to fence_ipmilan|| |fence_imm|symlinkto fence_ipmilan|| |fence_idrac|symlink to fence_ipmilan|| ||
STORAGE FENCING AGENTS|| |fence_mpath|SCSI-3 persistent reservations to control mpath devs|||fence_sbd|SBD (shared storage) fencing|| |fence_scsi|SCSI-3 persistent reservations|| ||
VIRTUALIZATION FENCING AGENTS|| |fence_virsh|Libvirt managed virtual machines||
Fence Agents: [universe]
Agents in this list are supported just like any other package available in [universe] repository would be.
FENCE AGENT FENCE AGENT DESCRIPTION EXTRA DESCRIPTION
||
GENERIC AGENTS|| |fence_dummy|dummy fence agent (for testing)|| |fence_ack_manual|overridefencing operations manually|| |fence_kdump|kdump crash recovery service (acks being in kdump)|||fence_kdump_send|-|acks entered kdump crash recovery service (tool)| ||
POWER FENCING AGENTS|| |fence_amt|Intel AMT|| |fence_intelmodular|Intel Modular device(Intel MFSYS25, MFSYS35)|| |fence_ilo|HP servers with iLO|| |fence_ilo2|-|symlink to fence_ilo||fence_ilo_ssh|HP iLO devices through ssh|| |fence_ilo3_ssh|-|symlink to fence_ilo_ssh| |fence_ilo4_ssh|-|symlink to fence_ilo_ssh| |fence_ilo5_ssh|-|symlink to fence_ilo_ssh| |fence_ilo_moonshot|HP Moon-shot iLO|| |fence_ilo_mp|HP iLO MP|| |fence_hpblade|HP BladeSystem and HP Integrity Super-dome X|| |fence_cisco_ucs|Cisco UCS (fence machines)|| |fence_alom|Sun Microsystems ALOM|||fence_bladecenter|IBM BladeCenter (w/ telnet/ssh support)|| |fence_ipdu|IBM iPDU (networkpower switch) over SNMP|| |fence_lpar|IBM LPARs (using HMC)|| |fence_ibmblade|IBM BladeCen-ter over SNMP|| |fence_rsa|IBM RSA II management interface|| |fence_drac|Dell remote access card||
263

|fence_drac5|Dell remote access card v5 or CMC (DRAC)|| |fence_hds_cb|Hitachi Compute Blade systems|||fence_rsb|Fujitsu-Siemens RSB management interface|| ||
NETWORK FENCING AGENTS|| |fence_heuristics_ping|uses ping-heuristics to exec other fence in samelevel|| |fence_ifmib|Any SNMP IF-MIB device (ethernet switches w/ iSCSI)|| ||
STORAGE FENCING AGENTS|| |fence_cisco_mds|Cisco MDS 9000 w/ SNMP enabled|| |fence_sanbox2|QLogicSANBox2 FC switches|| |fence_brocade|Brocade FC switches (disables specified port)|| ||
VIRTUALIZATION FENCING AGENTS|| |fence_vmware|VMware ESX|ESXi virtual machines||fence_vmware_rest|VMware virtual machines (w/ VMware API)|| |fence_vmware_soap|VMware vir-tual machines (w/ SOAP API v4.1+)|| |fence_vmware_vcloud|VMware virtual machines on VMwarevCloud Director API|| ||
CLOUD FENCING AGENTS|| |fence_aws|AWS (boto3 library)|| |fence_azure_arm|Azure ResourceManager (Azure SDK for Python)|| |fence_compute|OpenStack Nova|| |fence_evacuate|OpenStack Nova|||fence_openstack|Fence OpenStack’s Nova (w/ python-novaclient)|| |fence_gce|Google Cloud Engine(googleapiclient lib)|| ||
CONTAINERS FENCING AGENTS|| |fence_docker|Docker engine containers||
Fence Agents: [universe]-community
Agents in this list are only supported by the upstream community. All bugs opened against theseagents will be forwarded to upstream IF makes sense (affected version is close to upstream).
FENCE AGENT FENCE AGENT DESCRIPTION EXTRA DESCRIPTION
||
POWER FENCING AGENTS|| |fence_apc|APC network power switch|| |fence_apc_snmp|APC net-work power switch or Tripplite PDU devices|| |fence_tripplite_snmp|-|symlink to fence_tripplite_snmp||fence_rdc_serial|Serial cable to reset Motherboard switches|| |fence_eaton_snmp|Eaton network powerswitch (SNMP)|| |fence_emerson|Emerson MPX and MPH2 managed rack PDU|| |fence_eps|ePowerSwitch8M+|| |fence_netio|Koukaam NETIO-230B PDU (telnet)|| |fence_powerman|Powerman management utility(LLNL Systems)|| |fence_raritan|Raritan Dominion PX (DPXS12-20 PDU)|| |fence_redfish|Out-of-Bandcontrollers supporting Redfish APIs|| |fence_wti|WTI Network Power Switch (NPS)|| ||
VIRTUALIZATION FENCING AGENTS|| |fence_xenapi|Citrix Xen Server over XenAPI|| |fence_vbox|VirtualBoxvirtual machines|| |fence_pve|Proxmox Virtual Environment|| |fence_zvm|Power fencing on GFS VM inz/VM cluster (z/VM SMAPI)|| |fence_zvmip|z/VM virtual machines (z/VM SMAPI via TCP/IP)|| ||
CLOUD FENCING AGENTS|| |fence_ovh|OVH Cloud Data Centers|| |fence_aliyun|Aliyun||
Fence Agents: [non-supported]
Agents in this list are NOT supported in Ubuntu and might be removed in future Ubuntu HA versions.
|FENCE AGENT|
FENCE AGENT DESCRIPTION EXTRA DESCRIPTIONfence_ironic OpenStack’s Ironic (not intended for production)fence_rhevm RHEV-M REST API to fence virtual machines
264

FENCE AGENT DESCRIPTION EXTRA DESCRIPTIONfence_ldom Sun Microsystems Logical Domain virtual machines
Fence Agents: [deprecated]
Agents in this list are NOT supported in Ubuntu OR Upstream (due to being deprecated in favor of otheragents) and might be removed in future Ubuntu HA versions.
|FENCE AGENT|
FENCE AGENT DESCRIPTION EXTRA DESCRIPTIONN/A N/A N/A
Ubuntu HA - DRBD
Distributed Replicated Block Device (DRBD) mirrors block devices between multiple hosts. The replicationis transparent to other applications on the host systems. Any block device hard disks, partitions, RAIDdevices, logical volumes, etc can be mirrored.
To get started using drbd, first install the necessary packages. From a terminal enter:
sudo apt i n s t a l l drbd8−u t i l s
Note
If you are using the virtual kernel as part of a virtual machine you will need to manually compilethe drbd module. It may be easier to install the linux-server package inside the virtual machine.
This section covers setting up a drbd to replicate a separate /srv partition, with an ext3 filesystem betweentwo hosts. The partition size is not particularly relevant, but both partitions need to be the same size.
Configuration
The two hosts in this example will be called drbd01 and drbd02. They will need to have name resolutionconfigured either through DNS or the /etc/hosts file. See ??? for details.
• To configure drbd, on the first host edit /etc/drbd.conf:
g l oba l { usage−count no ; }common { syncer { ra t e 100M; } }r e sou r c e r0 {
p ro to co l C;s ta r tup {
wfc−t imeout 15 ;degr−wfc−t imeout 60 ;
}net {
cram−hmac−a lg sha1 ;shared−s e c r e t ” s e c r e t ” ;
}on drbd01 {
265

dev i c e /dev/drbd0 ;d i sk /dev/sdb1 ;address 1 9 2 . 1 6 8 . 0 . 1 : 7 7 8 8 ;meta−d i sk i n t e r n a l ;
}on drbd02 {
dev i c e /dev/drbd0 ;d i sk /dev/sdb1 ;address 1 9 2 . 1 6 8 . 0 . 2 : 7 7 8 8 ;meta−d i sk i n t e r n a l ;
}}
Note
There are many other options in /etc/drbd.conf, but for this example their default valuesare fine.
• Now copy /etc/drbd.conf to the second host:
scp / e t c /drbd . conf drbd02 :~
• And, on drbd02 move the file to /etc:
sudo mv drbd . conf / e t c /
• Now using the drbdadm utility initialize the meta data storage. On each server execute:
sudo drbdadm create−md r0
• Next, on both hosts, start the drbd daemon:
sudo sys t emct l s t a r t drbd . s e r v i c e
• On the drbd01, or whichever host you wish to be the primary, enter the following:
sudo drbdadm −− −−overwr i te−data−of−peer primary a l l
• After executing the above command, the data will start syncing with the secondary host. To watchthe progress, on drbd02 enter the following:
watch −n1 cat /proc /drbd
To stop watching the output press Ctrl+c.
• Finally, add a filesystem to /dev/drbd0 and mount it:
sudo mkfs . ext3 /dev/drbd0sudo mount /dev/drbd0 / srv
Testing
To test that the data is actually syncing between the hosts copy some files on the drbd01, the primary, to/srv:
sudo cp −r / e t c / d e f au l t / srv
Next, unmount /srv:
266
sudo umount / srv
Demote the primary server to the secondary role:
sudo drbdadm secondary r0
Now on the secondary server promote it to the primary role:
sudo drbdadm primary r0
Lastly, mount the partition:
sudo mount /dev/drbd0 / srv
Using ls you should see /srv/default copied from the former primary host drbd01.
References
• For more information on DRBD see the DRBD web site.
• The drbd.conf man page contains details on the options not covered in this guide.
• Also, see the drbdadm man page.
• The DRBD Ubuntu Wiki page also has more information.
Byobu
One of the most useful applications for any system administrator is an xterm multiplexor such as screenor tmux. It allows for the execution of multiple shells in one terminal. To make some of the advancedmultiplexor features more user-friendly and provide some useful information about the system, the byobupackage was created. It acts as a wrapper to these programs. By default Byobu is installed in Ubuntu serverand it uses tmux (if installed) but this can be changed by the user.
Invoke it simply with:
byobu
Now bring up the configuration menu. By default this is done by pressing the F9 key. This will allow youto:
• Help – Quick Start Guide
• Toggle status notifications
• Change the escape sequence
• Byobu currently does not launch at login (toggle on)
byobu provides a menu which displays the Ubuntu release, processor information, memory information, andthe time and date. The effect is similar to a desktop menu.
Using the “Byobu currently does not launch at login (toggle on)” option will cause byobu to be executed anytime a terminal is opened. Changes made to byobu are on a per user basis, and will not affect other userson the system.
One difference when using byobu is the scrollback mode. Press the F7 key to enter scrollback mode. Scroll-back mode allows you to navigate past output using vi like commands. Here is a quick list of movementcommands:
267
• h - Move the cursor left by one character
• j - Move the cursor down by one line
• k - Move the cursor up by one line
• l - Move the cursor right by one character
• 0 - Move to the beginning of the current line
• $ - Move to the end of the current line
• G - Moves to the specified line (defaults to the end of the buffer)
• / - Search forward
• ? - Search backward
• n - Moves to the next match, either forward or backward
Resources
• For more information on screen see the screen web site.
• And the Ubuntu Wiki screen page.
• Also, see the byobu project page for more information.
etckeeper
etckeeper allows the contents of /etc to be stored in a Version Control System (VCS) repository. It integrateswith APT and automatically commits changes to /etc when packages are installed or upgraded. Placing/etc under version control is considered an industry best practice, and the goal of etckeeper is to make thisprocess as painless as possible.
Install etckeeper by entering the following in a terminal:
sudo apt i n s t a l l e t ckeepe r
The main configuration file, /etc/etckeeper/etckeeper.conf, is fairly simple. The main option is which VCSto use and by default etckeeper is configured to use git. The repository is automatically initialized (andcommitted for the first time) during package installation. It is possible to undo this by entering the followingcommand:
sudo e t ckeepe r un in i t
By default, etckeeper will commit uncommitted changes made to /etc daily. This can be disabled using theAVOID_DAILY_AUTOCOMMITS configuration option. It will also automatically commit changes beforeand after package installation. For a more precise tracking of changes, it is recommended to commit yourchanges manually, together with a commit message, using:
sudo e t ckeepe r commit ”Reason f o r c on f i gu r a t i on change ”
The vcs etckeeper command allows to run any subcommand of the VCS that etckeeper is configured to run.t will be run in /etc. For example, in the case of git:
sudo e t ckeepe r vcs l og / e t c /passwd
To demonstrate the integration with the package management system (APT), install postfix:
268

sudo apt i n s t a l l p o s t f i x
When the installation is finished, all the postfix configuration files should be committed to the repository:
[ master 5a16a0d ] committing changes in / e tc made by ” apt i n s t a l l p o s t f i x ”Author : Your Name <xyz@example . com>36 f i l e s changed , 2987 i n s e r t i o n s (+) , 4 d e l e t i o n s (−)c r e a t e mode 100755 i n i t . d/ p o s t f i xc r e a t e mode 100644 i n s s e r v . conf . d/ p o s t f i xc r e a t e mode 100755 network/ i f −down . d/ p o s t f i xc r e a t e mode 100755 network/ i f −up . d/ p o s t f i xc r e a t e mode 100644 p o s t f i x /dynamicmaps . c fc r e a t e mode 100644 p o s t f i x /main . c fc r e a t e mode 100644 p o s t f i x /main . c f . protoc r e a t e mode 120000 p o s t f i x /makedefs . outc r e a t e mode 100644 p o s t f i x /master . c fc r e a t e mode 100644 p o s t f i x /master . c f . protoc r e a t e mode 100755 p o s t f i x /post− i n s t a l lc r e a t e mode 100644 p o s t f i x / po s t f i x− f i l e sc r e a t e mode 100755 p o s t f i x / po s t f i x−s c r i p tc r e a t e mode 100755 ppp/ ip−down . d/ p o s t f i xc r e a t e mode 100755 ppp/ ip−up . d/ p o s t f i xc r e a t e mode 120000 rc0 . d/K01post f ixc r e a t e mode 120000 rc1 . d/K01post f ixc r e a t e mode 120000 rc2 . d/ S01pos t f i xc r e a t e mode 120000 rc3 . d/ S01pos t f i xc r e a t e mode 120000 rc4 . d/ S01pos t f i xc r e a t e mode 120000 rc5 . d/ S01pos t f i xc r e a t e mode 120000 rc6 . d/K01post f ixc r e a t e mode 100755 r e s o l v c on f /update−l i b c . d/ p o s t f i xc r e a t e mode 100644 r s y s l o g . d/ p o s t f i x . confc r e a t e mode 120000 systemd/system/multi−user . t a r g e t . wants/ p o s t f i x . s e r v i c ec r e a t e mode 100644 ufw/ app l i c a t i o n s . d/ p o s t f i x
For an example of how etckeeper tracks manual changes, add new a host to /etc/hosts. Using git you cansee which files have been modified:
sudo e t ckeepe r vcs s t a tu s
and how:
sudo e t ckeepe r vcs d i f f
If you are happy with the changes you can now commit them:
sudo e t ckeepe r commit ”added new host ”
Resources
• See the etckeeper site for more details on using etckeeper.
• For documentation on the git VCS tool see the Git website.
269
Munin
Installation
Before installing Munin on server01 apache2 will need to be installed. The default configuration is fine forrunning a munin server. For more information see ???.
First, on server01 install munin. In a terminal enter:
sudo apt i n s t a l l munin
Now on server02 install the munin-node package:
sudo apt i n s t a l l munin−node
Configuration
On server01 edit the /etc/munin/munin.conf adding the IP address for server02:
## F i r s t our ”normal ” host .[ s e rve r02 ]
address 172 . 18 . 100 . 101
Note
Replace server02 and 172.18.100.101 with the actual hostname and IP address for your server.
Next, configure munin-node on server02. Edit /etc/munin/munin−node.conf to allow access by server01:
a l low ^172\ .18\ .100\ .100 $
Note
Replace ˆ172\.18\.100\.100$ with IP address for your munin server.
Now restart munin-node on server02 for the changes to take effect:
sudo sys t emct l r e s t a r t munin−node . s e r v i c e
Finally, in a browser go to http://server01/munin, and you should see links to nice graphs displayinginformation from the standard munin-plugins for disk, network, processes, and system.
Note
Since this is a new install it may take some time for the graphs to display anything useful.
Additional Plugins
The munin-plugins-extra package contains performance checks additional services such as DNS, DHCP,Samba, etc. To install the package, from a terminal enter:
sudo apt i n s t a l l munin−plug ins−ext ra
Be sure to install the package on both the server and node machines.
270
References
• See the Munin website for more details.
• Specifically the Munin Documentation page includes information on additional plugins, writing plugins,etc.
Nagios
Installation
First, on server01 install the nagios package. In a terminal enter:
sudo apt i n s t a l l nag ios3 nagios−nrpe−plug in
You will be asked to enter a password for the nagiosadmin user. The user’s credentials are stored in /etc/nagios3/htpasswd.users. To change the nagiosadmin password, or add additional users to the Nagios CGIscripts, use the htpasswd that is part of the apache2-utils package.
For example, to change the password for the nagiosadmin user enter:
sudo htpasswd / etc / nag ios3 /htpasswd . u s e r s nagiosadmin
To add a user:
sudo htpasswd / etc / nag ios3 /htpasswd . u s e r s s t eve
Next, on server02 install the nagios-nrpe-server package. From a terminal on server02 enter:
sudo apt i n s t a l l nagios−nrpe−s e r v e r
Note
NRPE allows you to execute local checks on remote hosts. There are other ways of accomplishingthis through other Nagios plugins as well as other checks.
Configuration Overview
There are a couple of directories containing Nagios configuration and check files.
• /etc/nagios3: contains configuration files for the operation of the nagios daemon, CGI files, hosts, etc.
• /etc/nagios−plugins: houses configuration files for the service checks.
• /etc/nagios: on the remote host contains the nagios-nrpe-server configuration files.
• /usr/lib/nagios/plugins/: where the check binaries are stored. To see the options of a check use the-h option.
For example: /usr/lib/nagios/plugins/check_dhcp −h
There are a plethora of checks Nagios can be configured to execute for any given host. For this exampleNagios will be configured to check disk space, DNS, and a MySQL hostgroup. The DNS check will be onserver02, and the MySQL hostgroup will include both server01 and server02.
Note
See ??? for details on setting up Apache, ??? for DNS, and ??? for MySQL.
271

Additionally, there are some terms that once explained will hopefully make understanding Nagios configura-tion easier:
• Host: a server, workstation, network device, etc that is being monitored.
• Host Group: a group of similar hosts. For example, you could group all web servers, file server, etc.
• Service: the service being monitored on the host. Such as HTTP, DNS, NFS, etc.
• Service Group: allows you to group multiple services together. This is useful for grouping multipleHTTP for example.
• Contact: person to be notified when an event takes place. Nagios can be configured to send emails,SMS messages, etc.
By default Nagios is configured to check HTTP, disk space, SSH, current users, processes, and load on thelocalhost. Nagios will also ping check the gateway.
Large Nagios installations can be quite complex to configure. It is usually best to start small, one or twohosts, get things configured the way you like then expand.
Configuration
• First, create a host configuration file for server02. Unless otherwise specified, run all these commandson server01. In a terminal enter:
sudo cp / e tc / nag ios3 / conf . d/ l oca lho s t_nag io s2 . c f g \/ e t c / nag ios3 / conf . d/ s e rve r02 . c f g
Note
In the above and following command examples, replace “server01”, “server02”172.18.100.100, and 172.18.100.101 with the host names and IP addresses of yourservers.
Next, edit /etc/nagios3/conf.d/server02.cfg:
d e f i n e host {use gener i c−host ; Name o f host template to
usehost_name se rve r02a l i a s Server 02address 172 . 18 . 100 . 101
}
# check DNS s e r v i c e .d e f i n e s e r v i c e {
use gener i c−s e r v i c ehost_name se rve r02s e r v i c e_de s c r i p t i on DNScheck_command check_dns ! 1 7 2 . 1 8 . 1 0 0 . 1 0 1
}
Restart the nagios daemon to enable the new configuration:
sudo sys t emct l r e s t a r t nagio3 . s e r v i c e
• Now add a service definition for the MySQL check by adding the following to /etc/nagios3/conf.d/services_nagios2.cfg:
272

# check MySQL s e r v e r s .d e f i n e s e r v i c e {
hostgroup_name mysql−s e r v e r ss e r v i c e_de s c r i p t i on MySQLcheck_command check_mysql_cmdlinecred ! nag ios ! s e c r e t !
$HOSTADDRESSuse gener i c−s e r v i c en o t i f i c a t i o n_ i n t e r v a l 0 ; s e t > 0 i f you want to be r e n o t i f i e d
}
A mysql-servers hostgroup now needs to be defined. Edit /etc/nagios3/conf.d/hostgroups_nagios2.cfgadding:
# MySQL hostgroup .d e f i n e hostgroup {
hostgroup_name mysql−s e r v e r sa l i a s MySQL s e r v e r smembers l o c a l ho s t , s e rve r02
}
The Nagios check needs to authenticate to MySQL. To add a nagios user to MySQL enter:
mysql −u root −p −e ” c r e a t e user nag ios i d e n t i f i e d by ’ s e c r e t ’ ; ”
Note
The nagios user will need to be added all hosts in the mysql-servers hostgroup.
Restart nagios to start checking the MySQL servers.
sudo sys t emct l r e s t a r t nag ios3 . s e r v i c e
• Lastly configure NRPE to check the disk space on server02.
On server01 add the service check to /etc/nagios3/conf.d/server02.cfg:
# NRPE di sk check .d e f i n e s e r v i c e {
use gener i c−s e r v i c ehost_name se rve r02s e r v i c e_de s c r i p t i on nrpe−d i skcheck_command check_nrpe_1arg ! check_al l_disks
! 1 7 2 . 1 8 . 1 0 0 . 1 0 1}
Now on server02 edit /etc/nagios/nrpe.cfg changing:
a l lowed_hosts =172.18 .100 .100
And below in the command definition area add:
command [ check_al l_disks ]=/ usr / l i b / nag ios / p lug in s / check_disk −w 20% −c 10%−e
Finally, restart nagios-nrpe-server:
sudo sys t emct l r e s t a r t nagios−nrpe−s e r v e r . s e r v i c e
Also, on server01 restart nagios:
273
sudo sys t emct l r e s t a r t nag ios3 . s e r v i c e
You should now be able to see the host and service checks in the Nagios CGI files. To access them point abrowser to http://server01/nagios3. You will then be prompted for the nagiosadmin username and password.
References
This section has just scratched the surface of Nagios’ features. The nagios-plugins-extra and nagios-snmp-plugins contain many more service checks.
• For more information see Nagios website.
• Specifically the Nagios Online Documentation site.
• There is also a list of books related to Nagios and network monitoring:
• The Nagios Ubuntu Wiki page also has more details.
pam_motd
When logging into an Ubuntu server you may have noticed the informative Message Of The Day (MOTD).This information is obtained and displayed using a couple of packages:
• landscape-common: provides the core libraries of landscape-client, which is needed to manage systemswith Landscape (proprietary). Yet the package also includes the landscape-sysinfo utility which isresponsible for displaying core system data involving cpu, memory, disk space, etc. For instance:
System load : 0 . 0 Proce s s e s : 76Usage o f / : 30.2% o f 3 .11GB Users logged in : 1Memory usage : 20% IP address f o r eth0 : 10 . 153 . 107 . 115Swap usage : 0%
Graph t h i s data and manage t h i s system at https : // landscape .canon i ca l . com/
Note
You can run landscape-sysinfo manually at any time.
• update-notifier-common: provides information on available package updates, impending filesystemchecks (fsck), and required reboots (e.g.: after a kernel upgrade).
pam_motd executes the scripts in /etc/update−motd.d in order based on the number prepended to the script.The output of the scripts is written to /var/run/motd, keeping the numerical order, then concatenated with/etc/motd.tail.
You can add your own dynamic information to the MOTD. For example, to add local weather information:
• First, install the weather-util package:
sudo apt i n s t a l l weather−u t i l
• The weather utility uses METAR data from the National Oceanic and Atmospheric Administrationand forecasts from the National Weather Service. In order to find local information you will need the4-character ICAO location indicator. This can be determined by browsing to the National WeatherService site.
274
Although the National Weather Service is a United States government agency there are weather stationsavailable world wide. However, local weather information for all locations outside the U.S. may not beavailable.
• Create /usr/local/bin/local−weather, a simple shell script to use weather with your local ICAO indi-cator:
#!/bin / sh### Pr int s the l o c a l weather in fo rmat ion f o r the MOTD.##
# Replace KINT with your l o c a l weather s t a t i o n .# Local s t a t i o n s can be found here : http ://www. weather . gov/ tg / s i t e l o c .
shtml
echoweather KINTecho
• Make the script executable:
sudo chmod 755 / usr / l o c a l / bin / l o c a l −weather
• Next, create a symlink to /etc/update−motd.d/98−local−weather:
sudo ln −s / usr / l o c a l / bin / l o c a l −weather / e t c /update−motd . d/98− l o c a l −weather
• Finally, exit the server and re-login to view the new MOTD.
You should now be greeted with some useful information, and some information about the local weather thatmay not be quite so useful. Hopefully the local-weather example demonstrates the flexibility of pam_motd.
Resources
• See the update-motd man page for more options available to update-motd.
• The Debian Package of the Day weather article has more details about using the weatherutility.
Puppet
Puppet is a cross platform framework enabling system administrators to perform common tasks using code.The code can do a variety of tasks from installing new software, to checking file permissions, or updatinguser accounts. Puppet is great not only during the initial installation of a system, but also throughout thesystem’s entire life cycle. In most circumstances puppet will be used in a client/server configuration.
This section will cover installing and configuring Puppet in a client/server configuration. This simple examplewill demonstrate how to install Apache using Puppet.
275
Preconfiguration
Prior to configuring puppet you may want to add a DNS CNAME record for puppet.example.com, whereexample.com is your domain. By default Puppet clients check DNS for puppet.example.com as the puppetserver name, or Puppet Master. See Domain Name Server for more details.
If you do not wish to use DNS, you can add entries to the server and client /etc/hosts file. For example, inthe Puppet server’s /etc/hosts file add:1 2 7 . 0 . 0 . 1 l o c a l h o s t . loca ldomain l o c a l h o s t puppet192 . 1 68 . 1 . 1 7 puppe t c l i en t . example . com puppe t c l i en t
On each Puppet client, add an entry for the server:1 92 . 1 68 . 1 . 1 6 puppetmaster . example . com puppetmaster puppet
Note
Replace the example IP addresses and domain names above with your actual server and clientaddresses and domain names.
Installation
To install Puppet, in a terminal on the server enter:sudo apt i n s t a l l puppetmaster
On the client machine, or machines, enter:sudo apt i n s t a l l puppet
Configuration
Create a folder path for the apache2 class:sudo mkdir −p / etc /puppet/modules/apache2/man i f e s t s
Now setup some resources for apache2. Create a file /etc/puppet/modules/apache2/manifests/init.pp con-taining the following:c l a s s apache2 {
package { ’ apache2 ’ :ensure => i n s t a l l e d ,
}
s e r v i c e { ’ apache2 ’ :ensure => true ,enable => true ,r e qu i r e => Package [ ’ apache2 ’ ] ,
}}
Next, create a node file /etc/puppet/code/environments/production/manifests/site.pp with:node ’ puppe t c l i en t . example . com ’ {
inc lude apache2}
276
Note
Replace puppetclient .example.com with your actual Puppet client’s host name.
The final step for this simple Puppet server is to restart the daemon:
sudo sys t emct l r e s t a r t puppetmaster . s e r v i c e
Now everything is configured on the Puppet server, it is time to configure the client.
First, configure the Puppet agent daemon to start. Edit /etc/default/puppet, changing START to yes:
START=yes
Then start the service:
sudo sys t emct l s t a r t puppet . s e r v i c e
View the client cert fingerprint
sudo puppet agent −−f i n g e r p r i n t
Back on the Puppet server, view pending certificate signing requests:
sudo puppet c e r t l i s t
On the Puppet server, verify the fingerprint of the client and sign puppetclient’s cert:
sudo puppet c e r t s i gn puppe t c l i en t . example . com
On the Puppet client, run the puppet agent manually in the foreground. This step isn’t strictly speakingnecessary, but it is the best way to test and debug the puppet service.
sudo puppet agent −−t e s t
Check /var/log/syslog on both hosts for any errors with the configuration. If all goes well the apache2package and it’s dependencies will be installed on the Puppet client.
Note
This example is very simple, and does not highlight many of Puppet’s features and benefits. Formore information see Resources.
Resources
• See the Official Puppet Documentation web site.
• See the Puppet forge, online repository of puppet modules.
• Also see Pro Puppet.
Monitoring
Overview
The monitoring of essential servers and services is an important part of system administration. Most net-work services are monitored for performance, availability, or both. This section will cover installation andconfiguration of Nagios for availability monitoring, and Munin for performance monitoring.
277
The examples in this section will use two servers with hostnames server01 and server02. Server01 will beconfigured with Nagios to monitor services on itself and server02. Server01 will also be setup with the muninpackage to gather information from the network. Using the munin-node package, server02 will be configuredto send information to server01.
Hopefully these simple examples will allow you to monitor additional servers and services on your network.
Nagios
Installation
First, on server01 install the nagios package. In a terminal enter:
sudo apt i n s t a l l nag ios3 nagios−nrpe−plug in
You will be asked to enter a password for the nagiosadmin user. The user’s credentials are stored in /etc/nagios3/htpasswd.users. To change the nagiosadmin password, or add additional users to the Nagios CGIscripts, use the htpasswd that is part of the apache2-utils package.
For example, to change the password for the nagiosadmin user enter:
sudo htpasswd / etc / nag ios3 /htpasswd . u s e r s nagiosadmin
To add a user:
sudo htpasswd / etc / nag ios3 /htpasswd . u s e r s s t eve
Next, on server02 install the nagios-nrpe-server package. From a terminal on server02 enter:
sudo apt i n s t a l l nagios−nrpe−s e r v e r
Note
NRPE allows you to execute local checks on remote hosts. There are other ways of accomplishingthis through other Nagios plugins as well as other checks.
Configuration Overview
There are a couple of directories containing Nagios configuration and check files.
• /etc/nagios3: contains configuration files for the operation of the nagios daemon, CGI files, hosts, etc.
• /etc/nagios−plugins: houses configuration files for the service checks.
• /etc/nagios: on the remote host contains the nagios-nrpe-server configuration files.
• /usr/lib/nagios/plugins/: where the check binaries are stored. To see the options of a check use the-h option.
For example: /usr/lib/nagios/plugins/check_dhcp −h
There are a plethora of checks Nagios can be configured to execute for any given host. For this exampleNagios will be configured to check disk space, DNS, and a MySQL hostgroup. The DNS check will be onserver02, and the MySQL hostgroup will include both server01 and server02.
Note
See details on setting up Apache, Domain Name Service, and MySQL.
278
Additionally, there are some terms that once explained will hopefully make understanding Nagios configura-tion easier:
• Host: a server, workstation, network device, etc that is being monitored.
• Host Group: a group of similar hosts. For example, you could group all web servers, file server, etc.
• Service: the service being monitored on the host. Such as HTTP, DNS, NFS, etc.
• Service Group: allows you to group multiple services together. This is useful for grouping multipleHTTP for example.
• Contact: person to be notified when an event takes place. Nagios can be configured to send emails,SMS messages, etc.
By default Nagios is configured to check HTTP, disk space, SSH, current users, processes, and load on thelocalhost. Nagios will also ping check the gateway.
Large Nagios installations can be quite complex to configure. It is usually best to start small, one or twohosts, get things configured the way you like then expand.
Configuration
• First, create a host configuration file for server02. Unless otherwise specified, run all these commandson server01. In a terminal enter:
sudo cp / e tc / nag ios3 / conf . d/ l oca lho s t_nag io s2 . c f g \/ e t c / nag ios3 / conf . d/ s e rve r02 . c f g
Note
In the above and following command examples, replace “server01”, “server02”172.18.100.100, and 172.18.100.101 with the host names and IP addresses of yourservers.
Next, edit /etc/nagios3/conf.d/server02.cfg:
d e f i n e host {use gener i c−host ; Name o f host template to
usehost_name se rve r02a l i a s Server 02address 172 . 18 . 100 . 101
}
# check DNS s e r v i c e .d e f i n e s e r v i c e {
use gener i c−s e r v i c ehost_name se rve r02s e r v i c e_de s c r i p t i on DNScheck_command check_dns ! 1 7 2 . 1 8 . 1 0 0 . 1 0 1
}
Restart the nagios daemon to enable the new configuration:
sudo sys t emct l r e s t a r t nagio3 . s e r v i c e
• Now add a service definition for the MySQL check by adding the following to /etc/nagios3/conf.d/services_nagios2.cfg:
279

# check MySQL s e r v e r s .d e f i n e s e r v i c e {
hostgroup_name mysql−s e r v e r ss e r v i c e_de s c r i p t i on MySQLcheck_command check_mysql_cmdlinecred ! nag ios ! s e c r e t !
$HOSTADDRESSuse gener i c−s e r v i c en o t i f i c a t i o n_ i n t e r v a l 0 ; s e t > 0 i f you want to be r e n o t i f i e d
}
A mysql-servers hostgroup now needs to be defined. Edit /etc/nagios3/conf.d/hostgroups_nagios2.cfgadding:
# MySQL hostgroup .d e f i n e hostgroup {
hostgroup_name mysql−s e r v e r sa l i a s MySQL s e r v e r smembers l o c a l ho s t , s e rve r02
}
The Nagios check needs to authenticate to MySQL. To add a nagios user to MySQL enter:
mysql −u root −p −e ” c r e a t e user nag ios i d e n t i f i e d by ’ s e c r e t ’ ; ”
Note
The nagios user will need to be added all hosts in the mysql-servers hostgroup.
Restart nagios to start checking the MySQL servers.
sudo sys t emct l r e s t a r t nag ios3 . s e r v i c e
• Lastly configure NRPE to check the disk space on server02.
On server01 add the service check to /etc/nagios3/conf.d/server02.cfg:
# NRPE di sk check .d e f i n e s e r v i c e {
use gener i c−s e r v i c ehost_name se rve r02s e r v i c e_de s c r i p t i on nrpe−d i skcheck_command check_nrpe_1arg ! check_al l_disks
! 1 7 2 . 1 8 . 1 0 0 . 1 0 1}
Now on server02 edit /etc/nagios/nrpe.cfg changing:
a l lowed_hosts =172.18 .100 .100
And below in the command definition area add:
command [ check_al l_disks ]=/ usr / l i b / nag ios / p lug in s / check_disk −w 20% −c 10%−e
Finally, restart nagios-nrpe-server:
sudo sys t emct l r e s t a r t nagios−nrpe−s e r v e r . s e r v i c e
Also, on server01 restart nagios:
280
sudo sys t emct l r e s t a r t nag ios3 . s e r v i c e
You should now be able to see the host and service checks in the Nagios CGI files. To access them point abrowser to http://server01/nagios3. You will then be prompted for the nagiosadmin username and password.
References
This section has just scratched the surface of Nagios’ features. The nagios-plugins-extra and nagios-snmp-plugins contain many more service checks.
• For more information see Nagios website.
• Specifically the Nagios Online Documentation site.
• There is also a list of books related to Nagios and network monitoring:
• The Nagios Ubuntu Wiki page also has more details.
Munin
Installation
Before installing Munin on server01 apache2 will need to be installed. The default configuration is fine forrunning a munin server. For more information see setting up Apache.
First, on server01 install munin. In a terminal enter:
sudo apt i n s t a l l munin
Now on server02 install the munin-node package:
sudo apt i n s t a l l munin−node
Configuration
On server01 edit the /etc/munin/munin.conf adding the IP address for server02:
## F i r s t our ”normal ” host .[ s e rve r02 ]
address 172 . 18 . 100 . 101
Note
Replace server02 and 172.18.100.101 with the actual hostname and IP address for your server.
Next, configure munin-node on server02. Edit /etc/munin/munin−node.conf to allow access by server01:
a l low ^172\ .18\ .100\ .100 $
Note
Replace ˆ172\.18\.100\.100$ with IP address for your munin server.
Now restart munin-node on server02 for the changes to take effect:
sudo sys t emct l r e s t a r t munin−node . s e r v i c e
281

Finally, in a browser go to http://server01/munin, and you should see links to nice graphs displayinginformation from the standard munin-plugins for disk, network, processes, and system.
Note
Since this is a new install it may take some time for the graphs to display anything useful.
Additional Plugins
The munin-plugins-extra package contains performance checks additional services such as DNS, DHCP,Samba, etc. To install the package, from a terminal enter:
sudo apt i n s t a l l munin−plug ins−ext ra
Be sure to install the package on both the server and node machines.
References
• See the Munin website for more details.
• Specifically the Munin Documentation page includes information on additional plugins, writing plugins,etc.
Rsnapshot
Rsnapshot is an rsync-based filesystem snapshot utility. It can take incremental backups of local and remotefilesystems for any number of machines. Rsnapshot makes extensive use of hard links, so disk space is onlyused when absolutely necessary. It leverages the power of rsync to create scheduled, incremental backups.
To install it open a terminal shell and run:
sudo apt−get i n s t a l l r snapshot
If you want to backup a remote filesystem the rsnapshot server needs to be able to access the target machineover SSH without password. For more information on how to enable it please see OpenSSH documentation.If the backup target is a local filesystem there is no need to set up OpenSSH.
Configuration
The rsnapshot configuration resides in /etc/rsnapshot.conf. Below you can find some of the options availablethere.
The root directory where all snapshots will be stored:
snapshot_root /var / cache / rsnapshot /
How many old backups you would like to keep. Since rsnapshot uses incremental backups, we can affordto keep older backups for awhile before removing them. You set these up under the BACKUP LEVELS /INTERVALS section. You tell rsnapshot to retain a specific number of backups of each kind of interval.
r e t a i n da i l y 6r e t a i n weekly 7r e t a i n monthly 4
282
In this example we will keep 6 snapshots of our daily strategy, 7 snapshots of our weekly strategy, and 4snapshots of our monthly strategy. These data will guide the rotation made by rsnapshot.
If you are accessing a remote machine over SSH and the port to bind is not the default (port 22), you needto set the following variable with the port number:ssh_args −p 22222
And the most important part, you need to decide on what you would like to backup. If you are backing uplocally to the same machine, this is as easy as specifying the directories that you want to save and followingit with localhost/ which will be a sub-directory in the snapshot_root that you set up earlier.backup /home/ l o c a l h o s t /backup / e tc / l o c a l h o s t /backup / usr / l o c a l / l o c a l h o s t /
If you are backing up a remote machine you just need to tell rsnapshot where the server is and whichdirectories you would like to back up.backup root@example . com :/home/ example . com/ +rsync_long_args=−−bwlimit=16,
exc lude=corebackup root@example . com :/ e t c / example . com/ exc lude=mtab , exc lude=core
As you can see you can see you can pass extra rsync parameters (the + append the parameter to the defaultlist, if you remove the + sign you override it) and also exclude directories.
You can check the comments in /etc/rsnapshot.conf and the rsnapshot man page for more options.
Test Configuration
After modifying the configuration file is a good practice to check if the syntax is ok:sudo rsnapshot c o n f i g t e s t
You can also test your backup levels with the following command:
sudo rsnapshot -t daily
If you are happy with the output and want to see it in action you can run:sudo rsnapshot da i l y
Scheduling Backups
With rsnapshot working correctly with the current configuration, the only thing left to do is to schedule itto run at certain intervals. We will use cron to make this happen since rsnapshot includes a default cron filein /etc/cron.d/rsnapshot. If you open this file there are some entries commented out as reference.0 4 * * * root / usr / bin / rsnapshot da i l y0 3 * * 1 root / usr / bin / rsnapshot weekly0 2 1 * * root / usr / bin / rsnapshot monthly
The settings above added to /etc/cron.d/rsnapshot run:
• the daily snapshot everyday at 4:00 am• the weekly snapshot every Monday at 3:00 am• the monthly snapshot on the first of every month at 2:00 am
For more information on how to schedule a backup using cron please take a look at Executing with cronsection in Backups - Shell Scripts.
283
References
• Rsnapshot offical web page• Rsnapshot man page• Rsync man page
PHP - Scripting Language
PHP is a general-purpose scripting language suited for Web development. PHP scripts can be embeddedinto HTML. This section explains how to install and configure PHP in an Ubuntu System with Apache2 andMySQL.
This section assumes you have installed and configured Apache2 Web Server and MySQL Database Server.You can refer to the Apache2 and MySQL sections in this document to install and configure Apache2 andMySQL respectively.
Installation
PHP is available in Ubuntu Linux. Unlike Python, which is installed in the base system, PHP must beadded.
To install PHP and the Apache PHP module you can enter the following command at a terminal prompt:
sudo apt i n s t a l l php l ibapache2−mod−php
You can run PHP scripts at a terminal prompt. To run PHP scripts at a terminal prompt you should installthe php-cli package. To install php-cli you can enter the following command:
sudo apt i n s t a l l php−c l i
You can also execute PHP scripts without installing the Apache PHP module. To accomplish this, youshould install the php-cgi package via this command:
sudo apt i n s t a l l php−c g i
To use MySQL with PHP you should install the php-mysql package, like so:
sudo apt i n s t a l l php−mysql
Similarly, to use PostgreSQL with PHP you should install the php-pgsql package:
sudo apt i n s t a l l php−pgsq l
Configuration
If you have installed the libapache2-mod-php or php-cgi packages, you can run PHP scripts from your webbrowser. If you have installed the php-cli package, you can run PHP scripts at a terminal prompt.
By default, when libapache2-mod-php is installed, the Apache 2 Web server is configured to run PHP scriptsusing this module. Please verify if the files /etc/apache2/mods−enabled/php7.*.conf and /etc/apache2/mods−enabled/php7.*.load exist. If they do not exist, you can enable the module using the a2enmodcommand.
Once you have installed the PHP related packages and enabled the Apache PHP module, you should restartthe Apache2 Web server to run PHP scripts, by running the following command:
284
sudo sys t emct l r e s t a r t apache2 . s e r v i c e
Testing
To verify your installation, you can run the following PHP phpinfo script:
<?phpphpinfo ( ) ;
?>
You can save the content in a file phpinfo.php and place it under the DocumentRoot directory of the Apache2Web server. Pointing your browser to http://hostname/phpinfo.php will display the values of various PHPconfiguration parameters.
References
• For more in depth information see the php.net documentation.
• There are a plethora of books on PHP. A good book from O’Reilly is Learning PHP, which includesan exploration of PHP 7’s enhancements to the language. PHP Cook Book, 3rd Edition is also good,but has not yet been updated for PHP 7.
• Also, see the Apache MySQL PHP Ubuntu Wiki page for more information.
Ruby on Rails
Ruby on Rails is an open source web framework for developing database backed web applications. It isoptimized for sustainable productivity of the programmer since it lets the programmer to write code byfavouring convention over configuration.
Installation
Before installing Rails you should install Apache (or a preferred web server) and a database service such asMySQL. To install the Apache package, please refer to HTTPD - Apache2 Web Server. For instructions oninstalling and configuring a database service refer to MySQL documentation for example.
Once you have a web server (e.g. Apache) and a database service (e.g. MySQL) installed and configured,you are ready to install Ruby on Rails package.
To install the Ruby base packages and Ruby on Rails, you can enter the following command in the terminalprompt:
sudo apt i n s t a l l r a i l s
Configuration
Web Server
Modify the /etc/apache2/sites−available/000−default.conf configuration file to setup your domains.
The first thing to change is the DocumentRoot directive:
285
DocumentRoot /path/ to / r a i l s / app l i c a t i o n / pub l i c
Next, change the <Directory “/path/to/rails/application/public”> directive:
<Direc tory ”/path/ to / r a i l s / app l i c a t i o n / pub l i c”>Options Indexes FollowSymLinks MultiViews ExecCGIAllowOverride Al lOrder al low , denya l low from a l lAddHandler cg i−s c r i p t . c g i
</Directory>
You should also enable the mod_rewrite module for Apache. To enable mod_rewrite module, please enterthe following command in a terminal prompt:
sudo a2enmod r ewr i t e
Finally you will need to change the ownership of the /path/to/rails/application/public and /path/to/rails/application/tmp directories to the user used to run the Apache process:
sudo chown −R www−data :www−data /path/ to / r a i l s / app l i c a t i o n / pub l i csudo chown −R www−data :www−data /path/ to / r a i l s / app l i c a t i o n /tmp
If you need to compile your application assets run the following command in your application directory:
RAILS_ENV=product ion rake a s s e t s : precompi le
Database
With your database service in place you need to make sure your app database configuration is also correct.For example, if you are using MySQL your config/database.yml should look like this:
# Mysqlproduct ion :
adapter : mysql2username : userpassword : passwordhost : 1 2 7 . 0 . 0 . 1database : app
To finally create your application database and apply its migrations you can run the following commandsfrom your app directory:
RAILS_ENV=product ion rake db : c r e a t eRAILS_ENV=product ion rake db : migrate
That’s it! Now you have your Server ready for your Ruby on Rails application. You can daemonize yourapplication as you want.
References
• See the Ruby on Rails website for more information.
• Also Agile Development with Rails is a great resource.
286
Backups
There are many ways to backup an Ubuntu installation. The most important thing about backups is todevelop a backup plan consisting of what to backup, where to back it up to, and how to restore it.
It is good practice to take backup media off-site in case of a disaster. For backup plans involving physicaltape or removable hard drives, the tapes or drives can be manually taken off-site, but in other cases this maynot be practical and the archives will need copied over a WAN link to a server in another location.
Archive Rotation
The shell script in Shell Scripts only allows for seven different archives. For a server whose data doesn’tchange often, this may be enough. If the server has a large amount of data, a more complex rotation schemeshould be used.
Rotating NFS Archives
In this section, the shell script will be slightly modified to implement a grandfather-father-son rotationscheme (monthly-weekly-daily):
• The rotation will do a daily backup Sunday through Friday.
• On Saturday a weekly backup is done giving you four weekly backups a month.
• The monthly backup is done on the first of the month rotating two monthly backups based on if themonth is odd or even.
Here is the new script:
#!/bin /bash###################################### Backup to NFS mount s c r i p t with# grandfather−f a ther−son r o t a t i on .#####################################
# What to backup .backup_f i l e s=”/home /var / spoo l /mail / e t c / root /boot /opt ”
# Where to backup to .des t=”/mnt/backup”
# Setup va r i a b l e s f o r the a rch ive f i l ename .day=$ ( date +%A)hostname=$ ( hostname −s )
# Find which week o f the month 1−4 i t i s .day_num=$ ( date +%−d)i f ( ( $day_num <= 7 ) ) ; then
week_f i l e=”$hostname−week1 . tgz ”e l i f ( ( $day_num > 7 && $day_num <= 14 ) ) ; then
week_f i l e=”$hostname−week2 . tgz ”e l i f ( ( $day_num > 14 && $day_num <= 21 ) ) ; then
287

week_f i l e=”$hostname−week3 . tgz ”e l i f ( ( $day_num > 21 && $day_num < 32 ) ) ; then
week_f i l e=”$hostname−week4 . tgz ”f i
# Find i f the Month i s odd or even .month_num=$ ( date +%m)month=$ ( expr $month_num % 2)i f [ $month −eq 0 ] ; then
month_fi le=”$hostname−month2 . tgz ”e l s e
month_fi le=”$hostname−month1 . tgz ”f i
# Create a r ch ive f i l ename .i f [ $day_num == 1 ] ; then
a r c h i v e_ f i l e=$month_fi lee l i f [ $day != ”Saturday ” ] ; then
a r c h i v e_ f i l e=”$hostname−$day . tgz ”e l s e
a r c h i v e_ f i l e=$week_f i l ef i
# Print s t a r t s t a tu s message .echo ”Backing up $backup_f i l e s to $dest / $ a r c h i v e_ f i l e ”dateecho
# Backup the f i l e s us ing ta r .ta r c z f $dest / $ a r c h i v e_ f i l e $backup_f i l e s
# Print end s t a tu s message .echoecho ”Backup f i n i s h e d ”date
# Long l i s t i n g o f f i l e s in $dest to check f i l e s i z e s .l s −lh $dest /
The script can be executed using the same methods as in Executing the Script.
As discussed in the introduction, a copy of the backup archives and/or media can then be transferred off-site.
Tape Drives
A tape drive attached to the server can be used instead of an NFS share. Using a tape drive simplifiesarchive rotation, and makes taking the media off-site easier as well.
When using a tape drive, the filename portions of the script aren’t needed because the data is sent directlyto the tape device. Some commands to manipulate the tape are needed. This is accomplished using mt, amagnetic tape control utility part of the cpio package.
Here is the shell script modified to use a tape drive:
#!/bin /bash
288

###################################### Backup to tape dr ive s c r i p t .#####################################
# What to backup .backup_f i l e s=”/home /var / spoo l /mail / e t c / root /boot /opt ”
# Where to backup to .des t=”/dev/ s t0 ”
# Print s t a r t s t a tu s message .echo ”Backing up $backup_f i l e s to $dest ”dateecho
# Make sure the tape i s rewound .mt −f $dest rewind
# Backup the f i l e s us ing ta r .ta r c z f $dest $backup_f i l e s
# Rewind and e j e c t the tape .mt −f $dest r ewo f f l
# Print end s t a tu s message .echoecho ”Backup f i n i s h e d ”date
Note
The default device name for a SCSI tape drive is /dev/st0. Use the appropriate device path foryour system.
Restoring from a tape drive is basically the same as restoring from a file. Simply rewind the tape and usethe device path instead of a file path. For example to restore the /etc/hosts file to /tmp/etc/hosts:
mt −f /dev/ s t0 rewindtar −xz f /dev/ s t0 −C /tmp etc / hos t s
Bacula
Bacula is a backup program enabling you to backup, restore, and verify data across your network. Thereare Bacula clients for Linux, Windows, and Mac OS X - making it a cross-platform network wide solution.
Overview
Bacula is made up of several components and services used to manage which files to backup and backuplocations:
• Bacula Director: a service that controls all backup, restore, verify, and archive operations.
289
• Bacula Console: an application allowing communication with the Director. There are three versionsof the Console:
– Text based command line version.
– Gnome based GTK+ Graphical User Interface (GUI) interface.
– wxWidgets GUI interface.
• Bacula File: also known as the Bacula Client program. This application is installed on machines to bebacked up, and is responsible for the data requested by the Director.
• Bacula Storage: the programs that perform the storage and recovery of data to the physical media.
• Bacula Catalog: is responsible for maintaining the file indexes and volume databases for all files backedup, enabling quick location and restoration of archived files. The Catalog supports three differentdatabases MySQL, PostgreSQL, and SQLite.
• Bacula Monitor: allows the monitoring of the Director, File daemons, and Storage daemons. Currentlythe Monitor is only available as a GTK+ GUI application.
These services and applications can be run on multiple servers and clients, or they can be installed on onemachine if backing up a single disk or volume.
Installation
Note
If using MySQL or PostgreSQL as your database, you should already have the services available.Bacula will not install them for you. For more information take a look at Databases -MySQLand Databases - PostgreSQL.
There are multiple packages containing the different Bacula components. To install Bacula, from a terminalprompt enter:
sudo apt i n s t a l l bacula
By default installing the bacula package will use a PostgreSQL database for the Catalog. If you want to useSQLite or MySQL, for the Catalog, install bacula−director−sqlite3 or bacula−director−mysql respectively.
During the install process you will be asked to supply a password for the database owner of the baculadatabase.
Configuration
Bacula configuration files are formatted based on resources comprising of directives surrounded by “{}”braces. Each Bacula component has an individual file in the /etc/bacula directory.
The various Bacula components must authorize themselves to each other. This is accomplished using thepassword directive. For example, the Storage resource password in the /etc/bacula/bacula−dir.conf file mustmatch the Director resource password in /etc/bacula/bacula−sd.conf.
By default the backup job named BackupClient1 is configured to archive the Bacula Catalog. If you plan onusing the server to backup more than one client you should change the name of this job to something moredescriptive. To change the name edit /etc/bacula/bacula−dir.conf:
## Def ine the main n i gh t l y save backup job# By de fau l t , t h i s job w i l l back up to d i sk inJob {
290
Name = ”BackupServer ”JobDefs = ”DefaultJob ”Write Bootstrap = ”/ var / l i b / bacula /Cl i ent1 . bsr ”
}
Note
The example above changes the job name to BackupServer matching the machine’s host name.Replace “BackupServer” with your appropriate hostname, or other descriptive name.
The Console can be used to query the Director about jobs, but to use the Console with a non-root user, theuser needs to be in the bacula group. To add a user to the bacula group enter the following from a terminal:
sudo adduser $username bacula
Note
Replace $username with the actual username. Also, if you are adding the current user to thegroup you should log out and back in for the new permissions to take effect.
Localhost Backup
This section describes how to backup specified directories on a single host to a local tape drive.
• First, the Storage device needs to be configured. Edit /etc/bacula/bacula−sd.conf add:
Device {Name = ”Tape Drive ”Device Type = tapeMedia Type = DDS−4Archive Device = /dev/ s t0Hardware end o f medium = No ;AutomaticMount = yes ; # when dev i ce opened , read i tAlwaysOpen = Yes ;RemovableMedia = yes ;RandomAccess = no ;Aler t Command = ” sh −c ’ t ape i n f o −f %c | grep TapeAlert ’ ”
}
The example is for a DDS-4 tape drive. Adjust the “Media Type” and “Archive Device” to match yourhardware.
You could also uncomment one of the other examples in the file.
• After editing /etc/bacula/bacula−sd.conf the Storage daemon will need to be restarted:
sudo sys t emct l r e s t a r t bacula−sd . s e r v i c e
• Now add a Storage resource in /etc/bacula/bacula−dir.conf to use the new Device:
# De f i n i t i o n o f ”Tape Drive ” s to rage dev i ceStorage {
Name = TapeDrive# Do not use ” l o c a l h o s t ” hereAddress = backupserver # N.B. Use a f u l l y q u a l i f i e d name
hereSDPort = 9103Password = ”Cv70F6pf1t6pBopT4vQOnigDrR0v3LT3Cgkiyjc”
291

Device = ”Tape Drive ”Media Type = tape
}
The Address directive needs to be the Fully Qualified Domain Name (FQDN) of the server. Changebackupserver to the actual host name.
Also, make sure the Password directive matches the password string in /etc/bacula/bacula−sd.conf.
• Create a new FileSet, which will determine what directories to backup, by adding:
# LocalhostBacup F i l e S e t .F i l e S e t {
Name = ” Loca l ho s tF i l e s ”Inc lude {
Options {s i gna tu r e = MD5compress ion=GZIP
}F i l e = / etcF i l e = /home
}}
This FileSet will backup the /etc and /home directories. The Options resource directives configure theFileSet to create an MD5 signature for each file backed up, and to compress the files using GZIP.
• Next, create a new Schedule for the backup job:
# LocalhostBackup Schedule −− Daily .Schedule {
Name = ” Loca lhos tDa i ly ”Run = Ful l da i l y at 00 :01
}
The job will run every day at 00:01 or 12:01 am. There are many other scheduling options available.
• Finally create the Job:
# Loca lhost backup .Job {
Name = ”LocalhostBackup ”JobDefs = ”DefaultJob ”Enabled = yesLeve l = Ful lF i l e S e t = ” Loca l ho s tF i l e s ”Schedule = ” Loca lhostDa i ly ”Storage = TapeDriveWrite Bootstrap = ”/ var / l i b / bacula /LocalhostBackup . bsr ”
}
The job will do a Full backup every day to the tape drive.
• Each tape used will need to have a Label. If the current tape does not have a label Bacula will sendan email letting you know. To label a tape using the Console enter the following from a terminal:
bconso l e
• At the Bacula Console prompt enter:
292
l a b e l
• You will then be prompted for the Storage resource:
Automatica l ly s e l e c t e d Catalog : MyCatalogUsing Catalog ”MyCatalog”The de f ined Storage r e s ou r c e s are :
1 : F i l e2 : TapeDrive
S e l e c t Storage r e sou r c e (1−2) : 2
• Enter the new Volume name:
Enter new Volume name : SundayDef ined Pools :
1 : De fau l t2 : Scratch
Replace Sunday with the desired label.
• Now, select the Pool:
S e l e c t the Pool (1−2) : 1Connecting to Storage daemon TapeDrive at backupserver :9103 . . .Sending l a b e l command f o r Volume ”Sunday” S lo t 0 . . .
Congratulations, you have now configured Bacula to backup the localhost to an attached tape drive.
Resources
• For more Bacula configuration options, refer to Bacula’s Documentation.
• The Bacula Home Page contains the latest Bacula news and developments.
• Also, see the Bacula Ubuntu Wiki page.
Shell Scripts
One of the simplest ways to backup a system is using a shell script. For example, a script can be usedto configure which directories to backup, and pass those directories as arguments to the tar utility, whichcreates an archive file. The archive file can then be moved or copied to another location. The archive canalso be created on a remote file system such as an NFS mount.
The tar utility creates one archive file out of many files or directories. tar can also filter the files throughcompression utilities, thus reducing the size of the archive file.
Simple Shell Script
The following shell script uses tar to create an archive file on a remotely mounted NFS file system. Thearchive filename is determined using additional command line utilities.
293

#!/bin /bash###################################### Backup to NFS mount s c r i p t .#####################################
# What to backup .backup_f i l e s=”/home /var / spoo l /mail / e t c / root /boot /opt ”
# Where to backup to .des t=”/mnt/backup”
# Create a r ch ive f i l ename .day=$ ( date +%A)hostname=$ ( hostname −s )a r c h i v e_ f i l e=”$hostname−$day . tgz ”
# Print s t a r t s t a tu s message .echo ”Backing up $backup_f i l e s to $dest / $ a r c h i v e_ f i l e ”dateecho
# Backup the f i l e s us ing ta r .ta r c z f $dest / $ a r c h i v e_ f i l e $backup_f i l e s
# Print end s t a tu s message .echoecho ”Backup f i n i s h e d ”date
# Long l i s t i n g o f f i l e s in $dest to check f i l e s i z e s .l s −lh $dest
• $backup_files: a variable listing which directories you would like to backup. The list should be cus-tomized to fit your needs.
• $day: a variable holding the day of the week (Monday, Tuesday, Wednesday, etc). This is used tocreate an archive file for each day of the week, giving a backup history of seven days. There are otherways to accomplish this including using the date utility.
• $hostname: variable containing the short hostname of the system. Using the hostname in the archivefilename gives you the option of placing daily archive files from multiple systems in the same directory.
• $archive_file: the full archive filename.
• $dest: destination of the archive file. The directory needs to be created and in this case mounted beforeexecuting the backup script. See ??? for details of using NFS.
• status messages: optional messages printed to the console using the echo utility.
• tar czf 𝑑𝑒𝑠𝑡/archive_file $backup_files: the tar command used to create the archive file.
– c: creates an archive.
– z: filter the archive through the gzip utility compressing the archive.
– f: output to an archive file. Otherwise the tar output will be sent to STDOUT.
294

• ls -lh $dest: optional statement prints a -l long listing in -h human readable format of the destinationdirectory. This is useful for a quick file size check of the archive file. This check should not replacetesting the archive file.
This is a simple example of a backup shell script; however there are many options that can be included insuch a script. See References for links to resources providing more in-depth shell scripting information.
Executing the Script
Executing from a Terminal
The simplest way of executing the above backup script is to copy and paste the contents into a file. backup.shfor example. The file must be made executable:
chmod u+x backup . sh
Then from a terminal prompt:
sudo . / backup . sh
This is a great way to test the script to make sure everything works as expected.
Executing with cron
The cron utility can be used to automate the script execution. The cron daemon allows the execution ofscripts, or commands, at a specified time and date.
cron is configured through entries in a crontab file. crontab files are separated into fields:
# m h dom mon dow command
• m: minute the command executes on, between 0 and 59.
• h: hour the command executes on, between 0 and 23.
• dom: day of month the command executes on.
• mon: the month the command executes on, between 1 and 12.
• dow: the day of the week the command executes on, between 0 and 7. Sunday may be specified byusing 0 or 7, both values are valid.
• command: the command to execute.
To add or change entries in a crontab file the crontab -e command should be used. Also, the contents of acrontab file can be viewed using the crontab -l command.
To execute the backup.sh script listed above using cron. Enter the following from a terminal prompt:
sudo crontab −e
Note
Using sudo with the crontab -e command edits the root user’s crontab. This is necessary if youare backing up directories only the root user has access to.
Add the following entry to the crontab file:
# m h dom mon dow command0 0 * * * bash / usr / l o c a l / bin /backup . sh
295

The backup.sh script will now be executed every day at 12:00 pm.
Note
The backup.sh script will need to be copied to the /usr/local/bin/ directory in order for thisentry to execute properly. The script can reside anywhere on the file system, simply change thescript path appropriately.
For more in-depth crontab options see References.
Restoring from the Archive
Once an archive has been created it is important to test the archive. The archive can be tested by listingthe files it contains, but the best test is to restore a file from the archive.
• To see a listing of the archive contents. From a terminal prompt type:
ta r −t z v f /mnt/backup/host−Monday . tgz
• To restore a file from the archive to a different directory enter:
ta r −xzvf /mnt/backup/host−Monday . tgz −C /tmp etc / hos t s
The -C option to tar redirects the extracted files to the specified directory. The above example willextract the /etc/hosts file to /tmp/etc/hosts. tar recreates the directory structure that it contains.
Also, notice the leading “/” is left off the path of the file to restore.
• To restore all files in the archive enter the following:
cd /sudo tar −xzvf /mnt/backup/host−Monday . tgz
Note
This will overwrite the files currently on the file system.
References
• For more information on shell scripting see the Advanced Bash-Scripting Guide
• The book Teach Yourself Shell Programming in 24 Hours is available online and a great resource forshell scripting.
• The CronHowto Wiki Page contains details on advanced cron options.
• See the GNU tar Manual for more tar options.
• The Wikipedia Backup Rotation Scheme article contains information on other backup rotation schemes.
• The shell script uses tar to create the archive, but there many other command line utilities that canbe used. For example:
– cpio: used to copy files to and from archives.
– dd: part of the coreutils package. A low level utility that can copy data from one format toanother.
– rsnapshot: a file system snapshot utility used to create copies of an entire file system. Also checkthe Tools - rsnapshot for some information.
– rsync: a flexible utility used to create incremental copies of files.
296
LAMP Applications
Overview
LAMP installations (Linux + Apache + MySQL + PHP/Perl/Python) are a popular setup for Ubuntuservers. There is a plethora of Open Source applications written using the LAMP application stack. Somepopular LAMP applications are Wiki’s, Content Management Systems, and Management Software such asphpMyAdmin.
One advantage of LAMP is the substantial flexibility for different database, web server, and scripting lan-guages. Popular substitutes for MySQL include PostgreSQL and SQLite. Python, Perl, and Ruby are alsofrequently used instead of PHP. While Nginx, Cherokee and Lighttpd can replace Apache.
The fastest way to get started is to install LAMP using tasksel. Tasksel is a Debian/Ubuntu tool that installsmultiple related packages as a co-ordinated “task” onto your system. To install a LAMP server:
At a terminal prompt enter the following command:
sudo t a s k s e l i n s t a l l lamp−s e r v e r
After installing it you’ll be able to install most LAMP applications in this way:
• Download an archive containing the application source files.
• Unpack the archive, usually in a directory accessible to a web server.
• Depending on where the source was extracted, configure a web server to serve the files.
• Configure the application to connect to the database.
• Run a script, or browse to a page of the application, to install the database needed by the application.
• Once the steps above, or similar steps, are completed you are ready to begin using the application.
A disadvantage of using this approach is that the application files are not placed in the file system in astandard way, which can cause confusion as to where the application is installed. Another larger disadvantageis updating the application. When a new version is released, the same process used to install the applicationis needed to apply updates.
Fortunately, a number of LAMP applications are already packaged for Ubuntu, and are available for instal-lation in the same way as non-LAMP applications. Depending on the application some extra configurationand setup steps may be needed, however.
This section covers how to install some LAMP applications.
phpMyAdmin
phpMyAdmin is a LAMP application specifically written for administering MySQL servers. Written in PHP,and accessed through a web browser, phpMyAdmin provides a graphical interface for database administrationtasks.
Installation
Before installing phpMyAdmin you will need access to a MySQL database either on the same host as thatphpMyAdmin is installed on, or on a host accessible over the network. For more information see MySQLdocumentation. From a terminal prompt enter:
297
sudo apt i n s t a l l phpmyadmin
At the prompt choose which web server to be configured for phpMyAdmin. The rest of this section will useApache2 for the web server.
In a browser go to http://servername/phpmyadmin, replacing servername with the server’s actual hostname.At the login, page enter root for the username, or another MySQL user, if you have any setup, and enter theMySQL user’s password.
Once logged in you can reset the root password if needed, create users, create/destroy databases and tables,etc.
Configuration
The configuration files for phpMyAdmin are located in /etc/phpmyadmin. The main configuration file is /etc/phpmyadmin/config.inc.php. This file contains configuration options that apply globally to phpMyAdmin.
To use phpMyAdmin to administer a MySQL database hosted on another server, adjust the following in/etc/phpmyadmin/config.inc.php:
$c fg [ ’ Servers ’ ] [ $ i ] [ ’ host ’ ] = ’ db_server ’ ;
Note
Replace db_server with the actual remote database server name or IP address. Also, be surethat the phpMyAdmin host has permissions to access the remote database.
Once configured, log out of phpMyAdmin and back in, and you should be accessing the new server.
The config .header.inc .php and config . footer . inc .php files in /etc/phpmyadmin directory are used to adda HTML header and footer to phpMyAdmin.
Another important configuration file is /etc/phpmyadmin/apache.conf, this file is symlinked to /etc/apache2/conf−available/phpmyadmin.conf, and, once enabled, is used to configure Apache2 to serve the phpMyAdminsite. The file contains directives for loading PHP, directory permissions, etc. From a terminal type:
sudo ln −s / e t c /phpmyadmin/apache . conf / e t c /apache2/ conf−av a i l a b l e /phpmyadmin .conf
sudo a2enconf phpmyadmin . confsudo sys t emct l r e l oad apache2 . s e r v i c e
For more information on configuring Apache2 see this documentation.
References
• The phpMyAdmin documentation comes installed with the package and can be accessed from thephpMyAdmin Documentation link (a question mark with a box around it) under the phpMyAdminlogo. The official docs can also be access on the phpMyAdmin site.
• Another resource is the phpMyAdmin Ubuntu Wiki page.
WordPress
Wordpress is a blog tool, publishing platform and CMS implemented in PHP and licensed under the GNUGPLv2.
298
Installation
To install WordPress, run the following comand in the command prompt:
sudo apt i n s t a l l wordpress
You should also install apache2 web server and mysql server. For installing apache2 web server, please referto Apache2 documentation. For installing mysql server, please refer to MySQL documentation.
Configuration
For configuring your first WordPress application, configure an apache site. Open /etc/apache2/sites−available/wordpress.conf and write the following lines:
A l i a s / blog / usr / share /wordpress<Direc tory / usr / share /wordpress>
Options FollowSymLinksAllowOverride Limit Options F i l e I n f oDirectoryIndex index . phpOrder al low , denyAllow from a l l
</Directory><Direc tory / usr / share /wordpress /wp−content>
Options FollowSymLinksOrder al low , denyAllow from a l l
</Directory>
Enable this new WordPress site
sudo a2 en s i t e wordpress
Once you configure the apache2 web server and make it ready for your WordPress application, you shouldrestart it. You can run the following command to restart the apache2 web server:
sudo sys t emct l r e l oad apache2 . s e r v i c e
To facilitate multiple WordPress installations, the name of this configuration file is based on the Host headerof the HTTP request. This means that you can have a configuration per VirtualHost by simply matchingthe hostname portion of this configuration with your Apache Virtual Host. e.g. /etc/wordpress/config-10.211.55.50.php, /etc/wordpress/config-hostalias1.php, etc. These instructions assume you can accessApache via the localhost hostname (perhaps by using an ssh tunnel) if not, replace /etc/wordpress/config-localhost.php with /etc/wordpress/config-NAME_OF_YOUR_VIRTUAL_HOST.php.
Once the configuration file is written, it is up to you to choose a convention for username and password tomysql for each WordPress database instance. This documentation shows only one, localhost, example.
Now configure WordPress to use a mysql database. Open /etc/wordpress/config−localhost.php file and writethe following lines:
<?phpde f i n e ( ’DB_NAME’ , ’ wordpress ’ ) ;d e f i n e ( ’DB_USER’ , ’ wordpress ’ ) ;d e f i n e ( ’DB_PASSWORD’ , ’ yourpasswordhere ’ ) ;d e f i n e ( ’DB_HOST’ , ’ l o c a l ho s t ’ ) ;d e f i n e ( ’WP_CONTENT_DIR’ , ’/ usr / share /wordpress /wp−content ’ ) ;?>
299
Now create this mysql database. Open a temporary file with mysql commands wordpress.sql and write thefollowing lines:
CREATE DATABASE wordpress ;CREATE USER ’ wordpress ’@’ l o c a l ho s t ’IDENTIFIED BY ’ yourpasswordhere ’ ;GRANT SELECT, INSERT,UPDATE,DELETE,CREATE,DROP,ALTERON wordpress . *TO wordpress@loca lhost ;FLUSH PRIVILEGES ;
Execute these commands.
cat wordpress . s q l | sudo mysql −−de f au l t s−extra− f i l e =/etc /mysql/ debian . cn f
Your new WordPress can now be configured by visiting http://localhost/blog/wp-admin/install.php. (Orhttp://NAME_OF_YOUR_VIRTUAL_HOST/blog/wp-admin/install.php if your server has no GUI andyou are completing WordPress configuration via a web browser running on another computer.) Fill out theSite Title, username, password, and E-mail and click Install WordPress.
Note the generated password (if applicable) and click the login password. Your WordPress is now ready foruse.
References
• WordPress.org Codex
• Ubuntu Wiki WordPress
Using the installer
This document explains how to use the installer in general terms. There is another document that containsdocumentation for each screen of the installer.
Getting the installer
You can download the server installer for amd64 from https://ubuntu.com/download/server and other ar-chitectures from http://cdimage.ubuntu.com/releases/20.04/release/.
Installer images are made (approximately) daily and are available from http://cdimage.ubuntu.com/ubuntu-server/focal/daily-live/current/. These are not tested as extensively as the images from release day, but theycontain the latest packages and installer so fewer updates will be required during or after installation.
Installer UI generalities
In general, the installer can be used with the up and down arrow and space or enter keys and a little typing.Tab and shift-tab move the focus down and up respectively. Home / End / Page Up / Page Down can beused to navigate through long lists more quickly in the usual way.
300

Running the installer over serial
By default, the installer runs on the first virtual terminal, tty1. This is what is displayed on any connectedmonitor by default. Clearly though, servers do not always have a monitor. Some out-of-band managementsystems provide a remote virtual terminal, but some times it is necessary to run the installer on the serialport. To do this, the kernel command line needs to have an appropriate console specified on it – a commonvalue is console=ttyS0 but this is not something that can be generically documented.
When running on serial, the installer starts in a basic mode that does using only the ASCII character setand black and white colours. If you are connecting from a terminal emulator such as gnome-terminal thatsupports unicode and rich colours you can switch to “rich mode” which uses unicode, colours and supportsmany languages.
## Connecting to the installer over SSH
If the only available terminal is very basic, an alternative is to connect via SSH. If the network is up by thetime the installer starts, instructions are offered on the initial screen in basic mode. Otherwise, instructionsare available from the help menu once networking is configured.
In addition, connecting via SSH is assumed to be capable of displaying all unicode characters, enabling moretranslations to be used than can be displayed on a virtual terminal.
Help menu
The help menu is always in the top right of the screen. It contains help, both general and for the currentlydisplayed screen, and some general actions.
Switching to a shell prompt
You can switch to a shell at any time by selecting “Enter shell” from the help menu, or pressing Control-Zor F2.
If you are accessing the installer via tty1, you can also access a shell by switching to a different virtualterminal (control-alt-arrow or control-alt-number keys move between virtual terminals).
Global keys
There are some global keys you can press at any time:
Key ActionESC go backF1 open help menuControl-Z, F2 switch to shellControl-L, F3 redraw screenControl-T, F4 toggle rich mode (colour, unicode) on and off
Using the installer step by step
The installer is designed to be easy to use without constant reference to documentation.
301

Language selection
welcome_c|690x517
This screen selects the language for the installer and the default language for the installed system.
More languages can be displayed if you connect via SSH.
Refresh
refresh|690x517
This screen is shown if there is an update for the installer available. This allows you to get improvementsand bug fixes made since release.
If you choose to update, the new version will be downloaded and the installer will restart at the same pointof the installation.
Keyboard
keyboard|690x517
Choose the layout and variant of keyboard attached to the system, if any. When running in a virtual terminal,it is possible to guess the layout and variant by answering questions about the keyboard.
Zdev (s390x only)
====================================================================Zdev setup
====================================================================ID ONLINE NAMES ^
�
gener i c−ccw �0 . 0 . 0009 > �0 . 0 . 0 00 c > �0 . 0 . 0 00 d > �0 . 0 . 0 00 e > ��
dasd−eckd �0 . 0 . 0190 > �0 . 0 . 0191 > �0 . 0 . 0 19 d > �0 . 0 . 0 19 e �������������� >0 . 0 . 0200 � >< ( c l o s e ) �0 . 0 . 0300 � > Enable �0 . 0 . 0400 � > Disab le �0 . 0 . 0592 �������������� > v
[ Continue ][ Back ]
This screen is only shown on s390x and allows z-specific configuration of devices.
302
The list of device can be long. Home / End / Page Up / Page Down can be used to navigate through thelist more quickly.
Network
network|690x517
This screen allows the configuration of the network. Ubuntu Server uses netplan to configure networking andthe UI of the installer can configure a subset of netplan’s capabilities. In particular it can configure DHCPor static addressing, VLANs and bonds.
If networking is present (defined as “at least one interface has a default route”) then the installer will installupdates from the archive at the end of installation.
Proxy
proxy|690x517
The proxy configured on this screen is used for accessing the package repository and the snap store both inthe installer environment and in the installed system.
Mirror
mirror|690x517
The installer will attempt to use geoip to look up an appropriate default package mirror for your location.If you want or need to use a different mirror, enter its URL here.
Storage
storage_config|690x517
Storage configuration is a complicated topic and has its own page for documentation.
storage_confirm|690x517
Once the storage configuration is confirmed, the install begins in the background.
Identity
identity|690x517
The default user will be an administrator, able to use sudo (this is why a password is needed, even if SSHpublic key access is enabled on the next screen).
SSH
ssh|690x517
A default Ubuntu install has no open ports. It is very common to administer servers via SSH so the installerallows it to be installed with the click of a button.
You can import keys for the default user from Github or Launchpad.
If you import a key, then password authentication is disabled by default but it can be re-enabled again ifyou wish.
303
Snaps
snaps|690x517
If a network connection is enabled, a selection of snaps that are useful in a server environment are presentedand can be selected for installation.
Installation logs
install_progress|690x517
The final screen of the installer shows the progress of the installer and allows viewing of the full log file.Once the install has completed and security updates installed, the installer waits for confirmation beforerestarting.
install_done|690x517
Configuring storage in the server installer
Guided options
storage_guided|690x517
Selecting “Use an entire disk” on the Guided storage configuration screen will install Ubuntu onto the selecteddisk, replacing any partitions or data already there.
You can choose whether or not to set up LVM, and if you do whether or not to encrypt the volume withLUKS. If you encrypt the volume, you need to choose a passphrase that will need to be entered each timethe system boots.
If you select “Custom storage layout” no configuration will be applied to the disks.
In either case, the installer moves onto the main storage customization screen.
The main storage screen
storage_manual|690x517
This screen presents a summary of the current storage configuration. Each device or partition of a devicecorresponds to a selectable row, and pressing enter or space while a device is selected opens a menu of actionsthat apply to that device.
Partitions
add_partition_menu|608x157
To add a partition to a device, select “Add GPT partition” for that device.
add_dialog|690x517
You can leave size blank to use all the remaining space on the device.
304
RAID
add_raid|690x517,100%
Linux software RAID (RAID stands for “Redundant Array of Inexpensive Disks”) can be used to combineseveral disks into a single device that (usually) is tolerant to any one disk failure.
A software RAID device can be created out of entire disks or unformatted partitions. Select the “Createsoftware RAID (md)” button to open the creation dialog.
The server installer supports creating devices with RAID level 0, 1, 5, 6 or 10. It does not allow customizingother options such as metadata format or RAID10 layout at this time. See the linux RAID documentationfor more.
A software RAID device can be formatted and mounted directly, or partitioned into several partitions (oreven be used as part of another RAID device or LVM volume group).
LVM
add_lvm|690x517
LVM (the “Logical Volume Manager”) is a system of managing logical volumes, or filesystems, that is muchmore advanced and flexible than the traditional method of partitioning a disk into one or more segmentsand formatting that partition with a filesystem. It can be used to combine several disks into one larger poolof storage but it offers advantages even in a single disk system, such as snapshots and easy resizing of logicalvolumes.
As with RAID, a LVM volume group can be created out of entire disks or unformatted partitions. Selectthe “Create volume group (LVM)” button to open the creation dialog.
Once a volume group has been created, it can be divided into named logical volumes which can then beformatted and mounted. It generally makes sense to leave some space in the volume group for storage ofsnapshots and creation of more logical volumes as needed.
The server installer does not supported configuring any of the many, many options LVM supports whencreating volume groups and logical volumes.
Selecting boot devices
add_boot_device|614x163
On all architectures other than s390x, the bootloader needs to be installed to a disk in a way such that thesystem firmware can find it on boot. By default, the first device to have a partition created on it is selectedas a boot device but this can be changed later.
On amd64 and arm64 systems, multiple disks can be selected as boot devices, which means a system canbe configured so that it will continue to boot after a failure of any one drive (assuming the root filesystemis placed on a RAID). The bootloader will be installed to each of these drives, and the operating systemconfigured to install new versions of grub to each drive as it is updated.
amd64 systems use grub as the bootloader. amd64 systems can boot in either UEFI or legacy (sometimescalled “BIOS”) mode (many systems can be configured to boot in either mode) and the bootloader is locatedcompletely differently in the two modes.
In legacy mode, the bootloader is read from the first “sector” of a hard drive (exactly which hard drive is upto the system firmware, which can usually be configured in a vendor specific way). The installer will writegrub to the start of all disks selected as a boot devices. As Grub does not entirely fit in one sector, a smallunformatted partition is needed at the start of the disk, which will automatically be created when a disk is
305
selected as a boot device (a disk with an existing GPT partition table can only be used as a boot device ifit has this partition).
In UEFI mode, the bootloader loaded from a “EFI System Partition” (ESP), which is a partition with aparticular type GUID. The installer automatically creates an 512MiB ESP on a disk when it is selected asa boot device and will install grub to there (a disk with an existing partition table can only be used as aboot device if it has an ESP – bootloaders for multiple operating systems can be installed into a single ESP).UEFI defines a standard way to configure the way in which the operating system is chosen on boot, and theinstaller uses this to configure the system to boot the just-installed operating system. One of the ESPs mustbe mounted at /boot/efi.
Supported arm64 servers boot using UEFI, and are configured the same way as an UEFI-booting amd64system.
ppc64el systems also load their bootloader (petitboot, a small linux kernel) from a “PReP” partition witha special flag, so in most ways they are similar to a UEFI system. The installer only supports one PRePpartition at this time.
Limitations and workarounds
Currently the installer cannot edit partition tables. You can use existing partitions or reformat a driveentirely but you cannot, for example, remove a large partition and replace it with two smaller ones.
The installer allows the creation of LVM volume groups and logical volumes and MD raid devices, but doesnot allow tweaking of the parameters – for example, all logical volumes are linear and all MD raid devicsuse the default metadata format (1.2).
These limits can both be worked around in the same way: drop to a shell and use the usual shell commandsto edit the partition table or create the LV or RAID with desired parameters, and then select these partitionsor devices as mount points in the installer. Any changes you make while the installer is running but beforealtering the storage configuration will reflected in the installer.
The installer cannot yet configure iSCSI mounts, ZFS at all, or btrfs subvolumes.
Automated Server Installs
Introduction
The server installer for 20.04 supports a new mode of operation: automated installation, autoinstallation forshort. You might also know this feature as unattended or handsoff or preseeded installation.
Autoinstallation lets you answer all those configuration questions ahead of time with an autoinstall configand lets the installation process run without any interaction.
Differences from debian-installer preseeding
preseeds are the way to automate an installer based on debian-installer (aka d-i).
autoinstalls for the new server installer differ from preseeds in the following main ways:
• the format is completely different (cloud-init config, usually yaml, vs debconf-set-selections format)• when the answer to a question is not present in a preseed, d-i stops and asks the user for input.
autoinstalls are not like this: by default, if there is any autoinstall config at all, the installer takes thedefault for any unanswered question (and fails if there is no default).
306

– You can designate particular sections in the config as “interactive”, which means the installer willstill stop and ask about those.
Providing the autoinstall config
The autoinstall config is provided via cloud-init configuration, which is almost endlessly flexible. In mostscenarios the easiest way will be to provide user-data via the nocloud data source.
The autoinstall config should be provided under the autoinstall key in the config. For example:
#cloud−c on f i ga u t o i n s t a l l :
v e r s i on : 1. . .
Running a truly automatic autoinstall
Even if a fully noninteractive autoinstall config is found, the server installer will ask for confirmation beforewriting to the disks unless autoinstall is present on the kernel command line. This is to make it harder toaccidentally create a USB stick that will reformat a machine it is plugged into at boot. Many autoinstallswill be done via netboot, where the kernel command line is controlled by the netboot config – just rememberto put autoinstall in there!
Quick start
So you just want to try it out? Well we have the page for you.
Creating an autoinstall config
When any system is installed using the server installer, an autoinstall file for repeating the install is createdat /var/log/ installer /autoinstall−user−data.
The snap described here does not yet exist
Alternatively there is a snap, autoinstall−editor, that can be used to either edit or create from scratch anautoinstall config (it is actually mostly the same code as that that runs the installation in interactive mode).
# s t a r t e d i t i n g new con f i g f i l e$ au t o i n s t a l l −ed i t o r# dump out to stdout a complete a u t o i n s t a l l c on f i g with d e f au l t answers
everywhere$ au t o i n s t a l l −ed i t o r −−c r e a t e > my−a u t o i n s t a l l . yaml# ed i t e x i s t i n g a u t o i n s t a l l c on f i g$ au t o i n s t a l l −ed i t o r my−a u t o i n s t a l l . yaml
307
The structure of an autoinstall config
The autoinstall config has full documentation.
Technically speaking the config is not defined as a textual format, but cloud-init config is usually providedas YAML so that is the syntax the documentation uses.
A minimal config is:
v e r s i on : 1i d e n t i t y :
hostname : hostnameusername : usernamepassword : $crypted_pass
Here is an example file that shows off most features:
Many keys and values correspond straightforwardly to questions the installer asks (e.g. keyboard selection).See the reference for details of those that do not.
Error handling
Progress through the installer is reported via the reporting system, including errors. In addition, when afatal error occurs, the error−commands are executed and the traceback printed to the console. The serverthen just waits.
Possible future directions
We might want to extend the ‘match specs’ for disks to cover other ways of selecting disks.
Autoinstall Quick Start
The intent of this page is to provide simple instructions to perform an autoinstall in a VM on your machine.
This page assumes you are on the amd64 architecture. There is a version for s390x too.
Providing the autoinstall data over the network
This method is the one that generalizes most easily to doing an entirely network based install, where amachine netboots and then is automatically installed.
Download the ISO
Mount the ISO
Write your autoinstall config
This means creating cloud-init config as follows:
The crypted password is just “ubuntu”.
308

Serve the cloud-init config over http
Leave this running in one terminal window:
Create a target disk
Run the install!
This will boot, download the config from the server set up in the previous step and run the install. Theinstaller reboots at the end but the -no-reboot flag to kvm means that kvm will exit when this happens. Itshould take about 5 minutes.
Boot the installed system
This will boot into the freshly installed system and you should be able to log in as ubuntu/ubuntu.
Using another volume to provide the autoinstall config
This is the method to use when you want to create media that you can just plug into a system to have it beinstalled.
Download the ISO
Create your user-data & meta-data files
The crypted password is just “ubuntu”.
Create an ISO to use as a cloud-init data source
Create a target disk
Run the install!
This will boot and run the install. Unless you interrupt boot to add ‘autoinstall’ to the kernel commandline, the installer will prompt for confirmation before touching the disk.
The installer reboots at the end but the -no-reboot flag to kvm means that kvm will exit when this happens.
The whole process should take about 5 minutes.
Boot the installed system
This will boot into the freshly installed system and you should be able to log in as ubuntu/ubuntu.
JSON Schema for autoinstall config
Introduction
The server installer validates the provided autoinstall config against a JSON Schema.
309
How the config is validated
Although the schema is presented below as a single document, and if you want to pre-validate your configyou should validate it against this document, the config is not actually validated against this document atrun time. What happens instead is that some sections are loaded, validated and applied first, before allother sections are validated. In detail:
1. The reporting section is loaded, validated and applied.2. The error commands are loaded and validated.3. The early commands are loaded and validated.4. The early commands, if any, are run.5. The config is reloaded, and now all sections are loaded and validated.
This is so that validation errors in most sections can be reported via the reporting and error-commandsconfiguration, as all other errors are.
Schema
The JSON schema for autoinstall data is as follows:
Regeneration
The schema above can be regenerated by running “make schema” in a subiquity source checkout.
Automated Server Installs Config File Reference
Overall format
The autoinstall file is YAML. At top level it must be a mapping containing the keys described in thisdocument. Unrecognized keys are ignored.
Schema
Autoinstall configs are validated against a JSON schema before they are used.
# Command lists
Several config keys are lists of commands to be executed. Each command can be a string (in which case it isexecuted via “sh -c”) or a list, in which case it is executed directly. Any command exiting with a non-zeroreturn code is considered an error and aborts the install (except for error-commands, where it is ignored).
Top-level keys
## version
type: integer default: no default
A future-proofing config file version field. Currently this must be “1”.
## interactive-sections
310
type: list of strings default: []
A list of config keys to still show in the UI. So for example:
v e r s i on : 1i n t e r a c t i v e −s e c t i o n s :− networki d e n t i t y :username : ubuntupassword : $crypted_pass
Would stop on the network screen and allow the user to change the defaults. If a value is provided for aninteractive section it is used as the default.
You can use the special section name of ”*” to indicate that the installer should ask all the usual questions– in this case, the autoinstall .yaml file is not really an “autoinstall” file at all, instead just a way to changethe defaults in the UI.
Not all config keys correspond to screens in the UI. This documentation indicates if a given section can beinteractive or not.
If there are any interactive sections at all, the reporting key is ignored.
## early-commands
type: command list default: no commands can be interactive: no
A list of shell commands to invoke as soon as the installer starts, in particular before probing for blockand network devices. The autoinstall config is available at /autoinstall .yaml (irrespective of how it wasprovided) and the file will be re-read after the early−commands have run to allow them to alter the configif necessary.
## locale
type: string default: en_US.UTF−8 can be interactive: yes, always interactive if any section is
The locale to configure for the installed system.
## refresh-installer
type: mapping default: see below can be interactive: yes
Controls whether the installer updates to a new version available in the given channel before continuing.
The mapping contains keys:
update
type: boolean default: no
Whether to update or not.
channel
type: string default: ”stable/ubuntu−$REL”
The channel to check for updates.
## keyboard
type: mapping, see below default: US English keyboard can be interactive: yes
311
The layout of any attached keyboard. Often systems being automatically installed will not have a keyboardat all in which case the value used here does not matter.
The mapping’s keys correspond to settings in the /etc/default/keyboard configuration file. See its manualpage for more details.
The mapping contains keys:
layout
type: string default: ”us”
Corresponds to the XKBLAYOUT setting.
variant
type: string default: ””
Corresponds to the XKBVARIANT setting.
toggle
type: string or null default: null
Corresponds to the value of grp: option from the XKBOPTIONS setting. Acceptable values are (but notethat the installer does not validate these): caps_toggle, toggle, rctrl_toggle, rshift_toggle, rwin_toggle,menu_toggle, alt_shift_toggle, ctrl_shift_toggle, ctrl_alt_toggle, alt_caps_toggle, lctrl_lshift_toggle ,lalt_toggle, lctrl_toggle , lshift_toggle , lwin_toggle, sclk_toggle
The version of subiquity released with 20.04 GA does not accept null for this field due to a bug.
## network
type: netplan-format mapping, see below default: DHCP on interfaces named eth* or en* can be inter-active: yes
netplan formatted network configuration. This will be applied during installation as well as in the installedsystem. The default is to interpret the config for the install media, which runs DHCPv4 on any interfacewith a name matching “eth” or ”en” but then disables any interface that does not receive an address.
For example, to run dhcp6 on a particular NIC:
network :v e r s i on : 2e the rne t s :
enp0s31f6 :dhcp6 : yes
Note that thanks to a bug, the version of subiquity released with 20.04 GA forces you to write this with anextra “network:” key like so:
network :network :
v e r s i on : 2e the rne t s :
enp0s31f6 :dhcp6 : yes
312
Later versions support this syntax too for compatibility but if you can assume a newer version you shoulduse the former.
## proxy
type: URL or null default: no proxy can be interactive: yes
The proxy to configure both during installation and for apt and for snapd in the target system.
## apt
type: mapping default: see below can be interactive: yes
Apt configuration, used both during the install and once booted into the target system.
This uses the same format as curtin which is documented at https://curtin.readthedocs.io/en/latest/topics/apt_source.html,with one extension: the geoip key controls whether a geoip lookup is done.
The default is:
apt :p r e s e rv e_sou r c e s_ l i s t : f a l s eprimary :
− arches : [ i386 , amd64 ]u r i : ” http :// a rch ive . ubuntu . com/ubuntu”
− arches : [ d e f au l t ]u r i : ” http :// por t s . ubuntu . com/ubuntu−por t s ”
geo ip : t rue
If geoip is true and the mirror to be used is the default, a request is made to https://geoip.ubuntu.com/lookup and the mirror uri to be used changed to be http://CC.archive.ubuntu.com/ubuntu where CC is thecountry code returned by the lookup (or similar for ports). If this section is not interactive, the request istimed out after 10 seconds.
Any supplied config is merged with the default rather than replacing it.
If you just want to set a mirror, use a config like this:
apt :primary :
− arches : [ d e f au l t ]u r i : YOUR_MIRROR_GOES_HERE
To add a ppa:
apt :s ou r c e s :
curt in−ppa :source : ppa : curt in−dev/ te s t−arch ive
## storage
type: mapping, see below default: use “lvm” layout in a single disk system, no default in a multiple disksystem can be interactive: yes
Storage configuration is a complex topic and the description of the desired configuration in the autoinstallfile can necessarily also be complex. The installer supports “layouts”, simple ways of expressing commonconfigurations.
313
Supported layouts
The two supported layouts at the time of writing are “lvm” and “direct”.
s t o rage :layout :
name : lvmsto rage :
layout :name : d i r e c t
By default these will install to the largest disk in a system, but you can supply a match spec (see below) toindicate which disk to use:
s t o rage :layout :
name : lvmmatch :
s e r i a l : CT*s to rage :
layout :name : d i skmatch :
ssd : yes
(you can just say “match: {}” to match an arbitrary disk)
The default is to use the lvm layout.
action-based config
For full flexibility, the installer allows storage configuration to be done using a syntax which is a superset ofthat supported by curtin, described at https://curtin.readthedocs.io/en/latest/topics/storage.html. As wellas putting the list of actions under the ‘config’ key, the grub and swap curtin config items can be put here.So a storage section might look like:
s t o rage :swap :
s i z e : 0c on f i g :
− type : d i skid : d i sk0s e r i a l : ADATA_SX8200PNP_XXXXXXXXXXX
− type : p a r t i t i o n. . .
The extensions to the curtin syntax are around disk selection and partition/logical volume sizing.
Disk selection extensions Curtin supported identifying disks by serial (e.g. Crucial_CT512MX100SSD1_14250C57FECE) or by path (e.g. /dev/sdc) and the server installer supports this as well. The installer additionally supportsa ‘’match spec” on a disk action that supports more flexible matching.
The actions in the storage config are processed in the order they are in the autoinstall file. Any disk actionis assigned a matching disk – chosen arbitrarily from the set of unassigned disks if there is more than one,and causing the installation to fail if there is no unassigned matching disk.
314

A match spec supports the following keys:
• model: foo: matches a disk where ID_VENDOR=foo in udev, supporting globbing• path: foo: matches a disk where DEVPATH=foo in udev, supporting globbing (the globbing support
distinguishes this from specifying path: foo directly in the disk action)• serial : foo: matches a disk where ID_SERIAL=foo in udev, supporting globbing (the globbing sup-
port distinguishes this from specifying serial: foo directly in the disk action)• ssd: yes|no: matches a disk that is or is not an SSD (vs a rotating drive)• size : largest | smallest: take the largest or smallest disk rather than an arbitrary one if there are
multiple matches (support for smallest added in version 20.06.1)
So for example, to match an arbitrary disk it is simply:
− type : d i skid : d i sk0
To match the largest ssd:
To match a Seagate drive:
partition/logical volume extensions The size of a partition or logical volume in curtin is specified asa number of bytes. The autoinstall config is more flexible:
• You can specify the size using the “1G”, “512M” syntax supported in the installer UI• You can specify the size as a percentage of the containing disk (or RAID), e.g. “50%”• For the last partition specified for a particular device, you can specify the size as “-1” to indicate that
the partition should fill the remaining space.
The snap described here does not yet exist
autoinstall−editor supports creating and editing configs with arbitrary disk match specs.
## identity
type: mapping, see below default: no default can be interactive: yes
Configure the initial user for the system. This is the only config key that must be present (unless theuser-data section is present, in which case it is optional).
A mapping that can contain keys, all of which take string values:
realname
The real name for the user. This field is optional.
username
The user name to create.
hostname
The hostname for the system.
315
password
The password for the new user, crypted. This is required for use with sudo, even if SSH access is configured.
## ssh
type: mapping, see below default: see below can be interactive: yes
Configure ssh for the installed system. A mapping that can contain keys:
install-server
type: boolean default: false
Whether to install OpenSSH server in the target system.
authorized-keys
type: list of strings default: []
A list of SSH public keys to install in the initial user’s account.
allow-pw
type: boolean default: true if authorized_keys is empty, false otherwise
## snaps
type: list default: install no extra snaps can be interactive: yes
A list of snaps to install. Each snap is represented as a mapping with required name and optional channel(defaulting to stable) and classic (defaulting to false ) keys. For example:
## debconf-selections
type: string default: no config can be interactive: no
The installer will update the target with debconf set-selection values. Users will need to be familiar withthe package debconf options.
## packages
type: list default: no packages can be interactive: no
A list of packages to install into the target system. More precisely, a list of strings to pass to “apt−get install”, so this includes things like task selection (dns−server^) and installing particular versions of a package(my−package=1−1).
## late-commands
type: command list default: no commands can be interactive: no
Shell commands to run after the install has completed successfully and any updates and packages installed,just before the system reboots. They are run in the installer environment with the installed system mountedat /target. You can run curtin in−target −− $shell_command (with the version of subiquity released with20.04 GA you need to specify this as curtin in−target −−target=/target −− $shell_command) to run inthe target system (similar to how plain in−target can be used in d−i preseed/late_command).
## error-commands
type: command list default: no commands can be interactive: no
316
Shell commands to run after the install has failed. They are run in the installer environment, and the targetsystem (or as much of it as the installer managed to configure) will be mounted at /target. Logs will beavailable at /var/log/ installer in the live session.
## reporting
type: mapping default: type: print which causes output on tty1 and any configured serial consoles canbe interactive: no
The installer supports reporting progress to a variety of destinations. Note that this section is ignored ifthere are any interactive sections; it only applies to fully automated installs.
The config, and indeed the implementation, is 90% the same as that used by curtin.
Each key in the reporting mapping in the config defines a destination, where the type sub-key is one of:
The rsyslog reporter does not yet exist
• print: print progress information on tty1 and any configured serial console. There is no other config-uration.
• rsyslog: report progress via rsyslog. The destination key specifies where to send output.• webhook: report progress via POSTing JSON reports to a URL. Accepts the same configuration as
curtin.• none: do not report progress. Only useful to inhibit the default output.
Examples:
The default configuration is:
Report to rsyslog:
Suppress the default output:
Report to a curtin-style webhook:
## user-data
type: mapping default: {} can be interactive: no
Provide cloud-init user-data which will be merged with the user-data the installer produces. If you supplythis, you don’t need to supply an identity section (but then it’s your responsibility to make sure that youcan log into the installed system!).
Netbooting the server installer on amd64
amd64 systems boot in either UEFI or legacy (“BIOS”) mode (many systems can be configured to bootin either mode). The precise details depend on the system firmware, but both modes usually support thePXE (“Preboot eXecution Environment”) specification, which allows the provisioning of a bootloader overthe network.
The process for network booting the live server installer is similar for both modes and goes like this:
1. The to-be-installed machine boots, and is directed to network boot.2. The DHCP/bootp server tells the machine its network configuration and where to get the bootloader.3. The machine’s firmware downloads the bootloader over tftp and executes it.4. The bootloader downloads configuration, also over tftp, telling it where to download the kernel, ramdisk
and kernel command line to use.5. The ramdisk looks at the kernel command line to learn how to configure the network and where to
download the server ISO from.6. The ramdisk downloads the ISO and mounts it as a loop device.7. From this point on the install follows the same path as if the ISO was on a local block device.
317
The difference between UEFI and legacy modes is that in UEFI mode the bootloader is a EFI executable,signed so that is accepted by SecureBoot, and in legacy mode it is PXELINUX. Most DHCP/bootp serverscan be configured to serve the right bootloader to a particular machine.
Configuring DHCP/bootp and tftp
There are several implementations of the DHCP/bootp and tftp protocols available. This document willbriefly describe how to configure dnsmasq to perform both of these roles.
1. Install dnsmasq with “sudo apt install dnsmasq”
2. Put something like this in /etc/dnsmasq.conf.d/pxe.conf:
i n t e r f a c e=<your i n t e r f a c e >, l obind−i n t e r f a c e sdhcp−range=<your i n t e r f a c e > ,192 . 168 . 0 . 100 , 192 . 168 . 0 . 200dhcp−boot=pxe l inux . 0dhcp−match=se t : e f i −x86_64 , opt ion : c l i e n t −arch , 7dhcp−boot=tag : e f i −x86_64 , bootx64 . e f ienable−t f t pt f tp−root=/srv / t f t p
(This assumes several things about your network; read man dnsmasq or the default /etc/dnsmasq.conffor lots more options).
3. restart dnsmasq with sudo systemctl restart dnsmasq.service.
Serving the bootloaders and configuration.
We need to make this section possible to write sanely
Ideally this would be something like:
# apt i n s t a l l cd−boot−images−amd64# ln −s / usr / share /cd−boot−images−amd64 / srv / t f t p /boot−amd64
Mode independent set up
1. Download the latest live server ISO for the release you want to install:
# wget http :// cdimage . ubuntu . com/ubuntu−s e r v e r / da i ly− l i v e / cur rent / f o ca l−l i v e −s e rver−amd64 . i s o
2. Mount it.
# mount ubuntu−19.10− l i v e −se rver−amd64 . i s o /mnt
3. Copy the kernel and initrd from it to where the dnsmasq serves tftp from:
# cp /mnt/ casper /{vmlinuz , i n i t r d } / srv / t f t p /
318
Setting up the files for UEFI booting
1. Copy the signed shim binary into place:# apt download shim−s igned# dpkg−deb −−f sy s−t a r f i l e shim−s igned *deb | ta r x . / usr / l i b /shim/shimx64 .
e f i . s i gned −O > / srv / t f t p /bootx64 . e f i
2. Copy the signed grub binary into place:# apt download grub−e f i −amd64−s igned# dpkg−deb −−f sy s−t a r f i l e grub−e f i −amd64−s igned *deb | ta r x . / usr / l i b /grub
/x86_64−e f i −s igned /grubnetx64 . e f i . s i gned −O > / srv / t f t p /grubx64 . e f i
3. Grub also needs a font to be available over tftp:# apt download grub−common# dpkg−deb −−f sy s−t a r f i l e grub−common*deb | ta r x . / usr / share /grub/
unicode . pf2 −O > / srv / t f t p / unicode . pf2
4. Create /srv/tftp/grub/grub.cfg that contains:s e t d e f au l t =”0”s e t timeout=−1
i f l oad fon t unicode ; thens e t gfxmode=autos e t l o c a l e_d i r=$p r e f i x / l o c a l es e t lang=en_US
f iterminal_output gfxterm
s e t menu_color_normal=white / blacks e t menu_color_highl ight=black / l i gh t −grayi f background_color 44 , 0 , 30 ; then
c l e a rf i
f unc t i on gfxmode {s e t gfxpayload=”${1}”i f [ ”${1}” = ”keep ” ] ; then
s e t vt_handoff=vt . handof f=7e l s e
s e t vt_handoff=f i
}
s e t linux_gfx_mode=keep
export linux_gfx_mode
menuentry ’Ubuntu 20 .04 ’ {gfxmode $linux_gfx_model i nux /vmlinux $vt_handoff qu i e t sp l a shi n i t r d / i n i t r d
}
319

Setting up the files for legacy boot
1. Download pxelinux.0 and put it into place:
# wget http :// a rch ive . ubuntu . com/ubuntu/ d i s t s /eoan/main/ i n s t a l l e r −amd64/cur rent / images / netboot /ubuntu− i n s t a l l e r /amd64/ pxe l inux . 0
# mkdir −p / srv / t f t p# mv pxe l inux . 0 / srv / t f t p /
2. Make sure to have installed package syslinux−common and then:
# cp / usr / l i b / sy s l i nux /modules/ b i o s / l d l i nux . c32 / srv / t f t p /
3. Create /srv/tftp/pxelinux.cfg/default containing:
DEFAULT i n s t a l lLABEL i n s t a l l
KERNEL vmlinuzINITRD i n i t r dAPPEND root=/dev/ram0 ramdisk_size=1500000 ip=dhcp u r l=http :// cdimage .
ubuntu . com/ubuntu−s e r v e r / da i ly− l i v e / cur rent / f o ca l−l i v e −se rver−amd64 .i s o
As you can see, this downloads the ISO from Ubuntu’s servers. You may well want to host it somewhereon your infrastructure and change the url to match.
This configuration is obviously very simple. PXELINUX has many, many options, and you can consult itsdocumentation at https://wiki.syslinux.org/wiki/index.php?title=PXELINUX for more.
Netbooting the live server installer on IBM Power (ppc64el) with Petitboot
• Open a terminal window on your workstation and make sure the ‘ipmitool’ package is installed.
• Verify if you can reach the BMC of the IBM Power system via ipmitool with a simple ipmitool calllike:
$ ipmi too l −I l anp lu s −H Power9Box −U <user> −P <password> power s t a tu sChass i s Power i s o f f
or:
$ ipmi too l −I l anp lu s −H Power9Box −U <user> −P <password> f ru p r in t 47Product Name : OpenPOWER FirmwareProduct Vers ion : open−power−SUPERMICRO−P9DSU−V2.12−20190404−prodProduct Extra : op−bui ld −1b9269eProduct Extra : bu i ld root −2018.11.3−12−g222837aProduct Extra : sk iboot−v6 . 0 . 1 9Product Extra : hostboot−c00d44a−pb1307d7Product Extra : occ−8fa3854Product Extra : l inux −4.19.30−openpower1−p22d1df8Product Extra : pe t i tboot−v1 .7.5− p8 f5 f c86
or:
$ ipmi too l −I l anp lu s −H Power9Box −U <user> −P <password> s o l i n f oSet in p rog r e s s : set−completeEnabled : t rueForce Encryption : f a l s eForce Authent icat ion : f a l s e
320

Pr i v i l e g e Leve l : OPERATORCharacter Accumulate Leve l (ms) : 0Character Send Threshold : 0Retry Count : 0Retry I n t e r v a l (ms) : 0Vo l a t i l e Bit Rate ( kbps ) : 115 .2Non−Vo l a t i l e Bit Rate ( kbps ) : 115 .2Payload Channel : 1 (0 x01 )Payload Port : 623
• Open a second terminal and activate serial-over-LAN (sol), so that you have two terminal windowsopen:
1) to control the BMC via IPMI2) for the serial-over-LAN console
• Activate serial-over-LAN:
$ ipmi too l −I l anp lu s −H Power9Box −U <user> −P <password> s o l a c t i v a t e. . .
• And power the system on in the ‘control terminal’ and watch the sol console:
$ ipmi too l −I l anp lu s −H Power9Box −U <user> −P <password> power on. . .
It takes some time to see the first lines in the sol console:
[SOL Ses s i on ope r a t i ona l . Use ~? f o r he lp ]−−== Welcome to Hostboot ==−−
2 . 77131 | s e cu re | SecureROM va l i d − enab l ing f u n c t i o n a l i t y3 . 15860 | s e cu re | Booting in s ecure mode .5 . 59684 | Booting from SBE s i d e 0 on master proc=000500005 . 60502 | ISTEP 6 . 5 − ho s t_ in i t_ f s i5 . 87228 | ISTEP 6 . 6 − host_set_ipl_parms6 . 11032 | ISTEP 6 . 7 − host_di scover_target s6 . 67868 |HWAS|PRESENT> DIMM[03]=A0A00000000000006 . 67870 |HWAS|PRESENT> Proc [05]=88000000000000006 . 67871 |HWAS|PRESENT> Core [07]=3FFF0C33FFC300006 . 98988 | ISTEP 6 . 8 − host_update_master_tpm7 .22711 |SECURE| Secur i ty Access Bit> 0xC0000000000000007 . 22711 |SECURE| Secure Mode Disab le ( v ia Jumper )> 0x00000000000000007 . 22731 | ISTEP 6 . 9 − host_gard7 . 43353 |HWAS|FUNCTIONAL> DIMM[03]=A0A00000000000007 . 43354 |HWAS|FUNCTIONAL> Proc [05]=88000000000000007 . 43356 |HWAS|FUNCTIONAL> Core [07]=3FFF0C33FFC300007 . 44509 | ISTEP 6.10 − host_revert_sbe_mcs_setup…
• After a moment the system reaches the Petitboot screen:
Pet i tboot ( v1 .7.5− p8 f5 f c86 ) 9006−12P1302NXA�������������������������������������������������
[ Network : enP2p1s0f0 / 0c : c4 : 7 a : 8 7 : 0 4 : d8 ]Executenetboot enP2p1s0f0 ( pxe l inux . 0 )
321
[CD/DVD: s r0 / 2019−10−17−13−35−12−00]I n s t a l l Ubuntu Server
[ Disk : sda2 / 295 f571b−b731−4ebb−b752−60aadc80fc1b ]Ubuntu , with Linux 5.4.0−14− g ene r i c ( r ecovery mode)Ubuntu , with Linux 5.4.0−14− g ene r i cUbuntu
System in format ionSystem con f i gu r a t i onSystem s ta tu s l ogLanguageRescan dev i c e sRet r i eve c on f i g from URLPlug ins (0 )
*Exit to s h e l l �������������������������������������������������
Enter=accept , e=edi t , n=new , x=ex i t , l=language , g=log , h=help
Select ‘*Exit to shell’
Notice: Make sure you really watch the sol, since the petitboot screen (above) has a time out (usually10 or 30 seconds) and afterwards it automatically proceeds and it tries to boot from the configureddevices (usually disk). This can be prevented by just navigating in petitboot. The petitboot shell issmall Linux based OS:
. . .Ex i t ing pe t i t boo t . Type ’ ex i t ’ to re turn .You may run ’pb−sos ’ to gather d i a gno s t i c data
Notice: In case one needs to gather system details and diagnostic data for IBM support, this can bedone here by running ‘pb-sos’ (see msg).
• Now download the ‘live-server’ ISO image (notice that ‘focal-live-server-ppc64el.iso’ uses subiquity,‘focal-server-s390x.iso’ uses d-i): Again for certain web locations a proxy needs to be used:
/ # export http_proxy=http :// squid . proxy :3128 # in case a proxy i sr equ i r ed
/ #/ # wget http :// cdimage . ubuntu . com/ubuntu−s e r v e r / da i ly− l i v e / cur rent / f o ca l−
l i v e −s e rver−ppc64e l . i s oConnecting to <proxy−ip >:3128 (<proxy−ip >:3128)f o ca l−l i v e −s e rver−pp 100% | . . . . . . . . . . . . . . . . . . . . | 922M 0 : 00 : 0 0 ETA
• Next is to loop-back mount the ISO:
/ # mkdir i s o/ # mount −o loop f o ca l−l i v e −se rver−ppc64e l . i s o i s o
Or in case autodetect of type iso9660 is not supported or not working, explicitly specify the ‘iso9660’type:
/ # mount −t i so9660 −o loop f o ca l−l i v e −se rver−ppc64e l . i s o i s o
• Now load kernel and initrd from the loop-back mount, specify any needed kernel parameters and getit going:
322
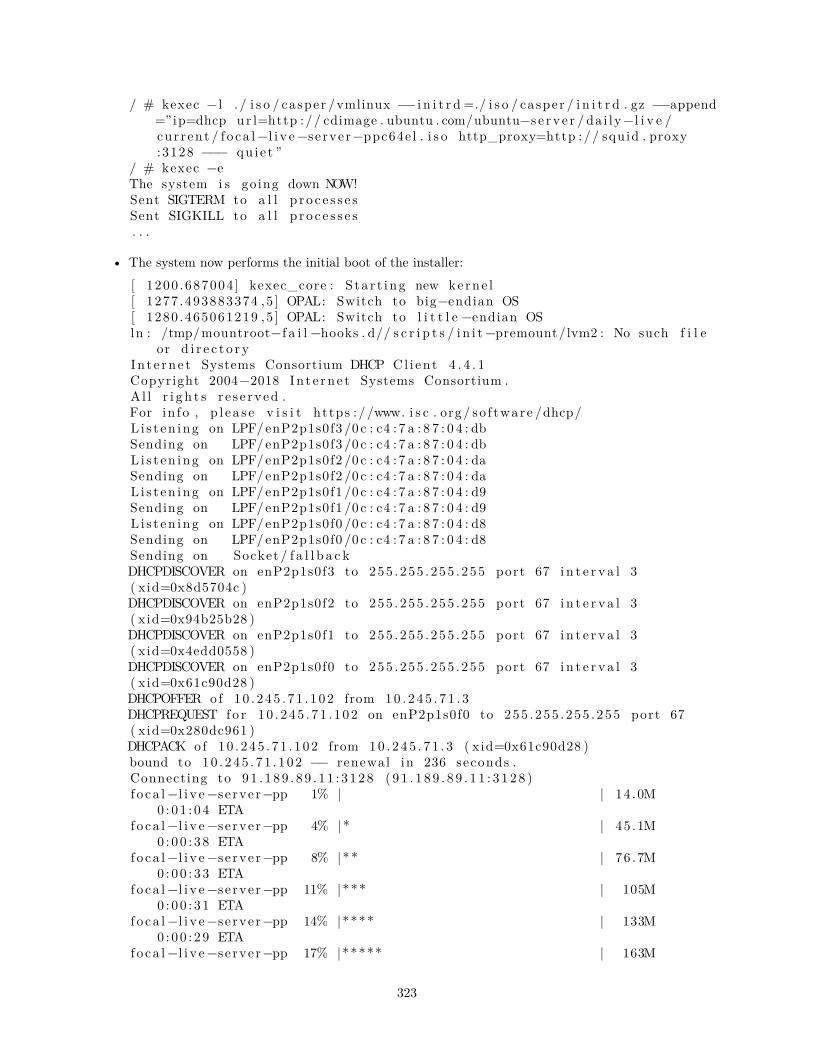
/ # kexec − l . / i s o / casper /vmlinux −− i n i t r d =./ i s o / casper / i n i t r d . gz −−append=”ip=dhcp u r l=http :// cdimage . ubuntu . com/ubuntu−s e r v e r / da i ly− l i v e /cur rent / f o ca l−l i v e −se rver−ppc64e l . i s o http_proxy=http :// squid . proxy:3128 −−− qu i e t ”
/ # kexec −eThe system i s going down NOW!Sent SIGTERM to a l l p r o c e s s e sSent SIGKILL to a l l p r o c e s s e s. . .
• The system now performs the initial boot of the installer:[ 1200 .687004 ] kexec_core : S ta r t i ng new ke rne l[ 1277 .493883374 ,5 ] OPAL: Switch to big−endian OS[ 1280 .465061219 ,5 ] OPAL: Switch to l i t t l e −endian OSln : /tmp/mountroot−f a i l −hooks . d// s c r i p t s / i n i t −premount/lvm2 : No such f i l e
or d i r e c t o r yIn t e rn e t Systems Consortium DHCP Cl i en t 4 . 4 . 1Copyright 2004−2018 In t e rn e t Systems Consortium .Al l r i g h t s r e s e rved .For in fo , p l e a s e v i s i t https : //www. i s c . org / so f tware /dhcp/L i s t en ing on LPF/enP2p1s0f3 /0 c : c4 : 7 a : 8 7 : 0 4 : dbSending on LPF/enP2p1s0f3 /0 c : c4 : 7 a : 8 7 : 0 4 : dbL i s t en ing on LPF/enP2p1s0f2 /0 c : c4 : 7 a : 8 7 : 0 4 : daSending on LPF/enP2p1s0f2 /0 c : c4 : 7 a : 8 7 : 0 4 : daL i s t en ing on LPF/enP2p1s0f1 /0 c : c4 : 7 a : 8 7 : 0 4 : d9Sending on LPF/enP2p1s0f1 /0 c : c4 : 7 a : 8 7 : 0 4 : d9L i s t en ing on LPF/enP2p1s0f0 /0 c : c4 : 7 a : 8 7 : 0 4 : d8Sending on LPF/enP2p1s0f0 /0 c : c4 : 7 a : 8 7 : 0 4 : d8Sending on Socket / f a l l b a c kDHCPDISCOVER on enP2p1s0f3 to 255 . 255 . 255 . 255 port 67 i n t e r v a l 3( xid=0x8d5704c )DHCPDISCOVER on enP2p1s0f2 to 255 . 255 . 255 . 255 port 67 i n t e r v a l 3( xid=0x94b25b28 )DHCPDISCOVER on enP2p1s0f1 to 255 . 255 . 255 . 255 port 67 i n t e r v a l 3( xid=0x4edd0558 )DHCPDISCOVER on enP2p1s0f0 to 255 . 255 . 255 . 255 port 67 i n t e r v a l 3( xid=0x61c90d28 )DHCPOFFER of 10 . 245 . 71 . 1 02 from 10 . 2 4 5 . 7 1 . 3DHCPREQUEST f o r 10 . 245 . 71 . 1 02 on enP2p1s0f0 to 255 . 255 . 255 . 255 port 67( xid=0x280dc961 )DHCPACK of 10 . 245 . 71 . 1 02 from 10 . 2 4 5 . 7 1 . 3 ( xid=0x61c90d28 )bound to 10 . 245 . 71 . 102 −− renewal in 236 seconds .Connecting to 91 . 1 89 . 8 9 . 1 1 : 3 128 ( 9 1 . 1 8 9 . 8 9 . 1 1 : 3 1 2 8 )f o ca l−l i v e −s e rver−pp 1% | | 14 .0M
0 : 01 : 0 4 ETAfoca l−l i v e −s e rver−pp 4% |* | 45 .1M
0 : 00 : 3 8 ETAfoca l−l i v e −s e rver−pp 8% |** | 76 .7M
0 : 00 : 3 3 ETAfoca l−l i v e −s e rver−pp 11% |*** | 105M
0 : 00 : 3 1 ETAfoca l−l i v e −s e rver−pp 14% |**** | 133M
0 : 00 : 2 9 ETAfoca l−l i v e −s e rver−pp 17% |***** | 163M
323

0 : 0 0 : 2 7 ETAfoca l−l i v e −s e rver−pp 20% |****** | 190M
0 : 00 : 2 6 ETAfoca l−l i v e −s e rver−pp 24% |******* | 222M
0 : 00 : 2 5 ETAfoca l−l i v e −s e rver−pp 27% |******** | 253M
0 : 00 : 2 3 ETAfoca l−l i v e −s e rver−pp 30% |********* | 283M
0 : 00 : 2 2 ETAfoca l−l i v e −s e rver−pp 34% |********** | 315M
0 : 00 : 2 1 ETAfoca l−l i v e −s e rver−pp 37% |*********** | 343M
0 : 00 : 2 0 ETAfoca l−l i v e −s e rver−pp 39% |************ | 367M
0 : 00 : 1 9 ETAfoca l−l i v e −s e rver−pp 42% |************* | 392M
0 : 00 : 1 8 ETAfoca l−l i v e −s e rver−pp 45% |************** | 420M
0 : 00 : 1 7 ETAfoca l−l i v e −s e rver−pp 48% |*************** | 451M
0 : 00 : 1 6 ETAfoca l−l i v e −s e rver−pp 52% |**************** | 482M
0 : 00 : 1 5 ETAfoca l−l i v e −s e rver−pp 55% |***************** | 514M
0 : 00 : 1 4 ETAfoca l−l i v e −s e rver−pp 59% |****************** | 546M
0 : 00 : 1 3 ETAfoca l−l i v e −s e rver−pp 62% |******************** | 578M
0 : 00 : 1 1 ETAfoca l−l i v e −s e rver−pp 65% |********************* | 607M
0 : 00 : 1 0 ETAfoca l−l i v e −s e rver−pp 69% |********************** | 637M
0 : 00 : 0 9 ETAfoca l−l i v e −s e rver−pp 72% |*********************** | 669M
0 : 00 : 0 8 ETAfoca l−l i v e −s e rver−pp 75% |************************ | 700M
0 : 00 : 0 7 ETAfoca l−l i v e −s e rver−pp 79% |************************* | 729M
0 : 00 : 0 6 ETAfoca l−l i v e −s e rver−pp 82% |************************** | 758M
0 : 00 : 0 5 ETAfoca l−l i v e −s e rver−pp 85% |*************************** | 789M
0 : 00 : 0 4 ETAfoca l−l i v e −s e rver−pp 88% |**************************** | 817M
0 : 00 : 0 3 ETAfoca l−l i v e −s e rver−pp 91% |***************************** | 842M
0 : 00 : 0 2 ETAfoca l−l i v e −s e rver−pp 93% |****************************** | 867M
0 : 00 : 0 1 ETAfoca l−l i v e −s e rver−pp 97% |******************************* | 897M
0 : 00 : 0 0 ETAfoca l−l i v e −s e rver−pp 100% |********************************| 922M
0 : 00 : 0 0 ETAmount : mounting /cow on / root /cow f a i l e d : No such f i l e or d i r e c t o r y
324

Connecting to plymouth : Connection r e fu s edpasswd : password exp i ry in fo rmat ion changed .[ 47 . 202736 ] /dev/ loop3 : Can ’ t open blockdev[ 52 . 672550 ] cloud− i n i t [ 3 7 5 9 ] : Cloud− i n i t v . 20.1−10− g71af48df −0ubuntu1
running’ i n i t −l o c a l ’ at Wed, 18 Mar 2020 15 : 18 : 07 +0000. Up 51 .87 seconds .
. . .
• And you will eventually reach the initial subiquity installer screen:��������������������������������������������������������������
Willkommen ! Bienvenue ! Welcome ! ��������������� ! Welkom��������������������������������������������������������������
Use UP, DOWN and ENTER keys to s e l e c t your language .
[ Eng l i sh � ][ Asturianu � ][ Català � ][ Hrvatsk i � ][ Nederlands � ][ Suomi � ][ França i s � ][ Deutsch � ][ Ε�������� ][ Magyar � ][ šLatvieu � ][ Norsk bokmål � ][ Po l sk i � ][ �������� ][ Español � ][ ����������� ]
‘ ‘ ‘* The r e s t i s ( sub iqu i ty −) i n s t a l l a t i o n as usua l . . .
# Auto i n s t a l l Quick Star t f o r s390x
The in t en t o f t h i s page i s to prov ide s imple i n s t r u c t i o n s to perform ana u t o i n s t a l l in a VM on your machine on s390x .
This page i s j u s t a s l i g h t l y adapted page o f https : // d i s c ou r s e . ubuntu . com/ t /dra f t−automated−se rver−i n s t a l l −qu i c k s t a r t /16614 mapped to s390x .
## Download an ISO
At the time o f wr i t i ng ( j u s t be f o r e f o c a l r e l e a s e ) , the best p lace to go i shere :
http :// cdimage . ubuntu . com/ubuntu/ r e l e a s e s /20.04/ r e l e a s e /
<pre><code>wget http :// cdimage . ubuntu . com/ubuntu/ r e l e a s e s /20.04/ r e l e a s e /ubuntu−20.04− l i v e −se rver−s390x . i s o −P ~/Downloads</code></pre>
## Mount the ISO
325
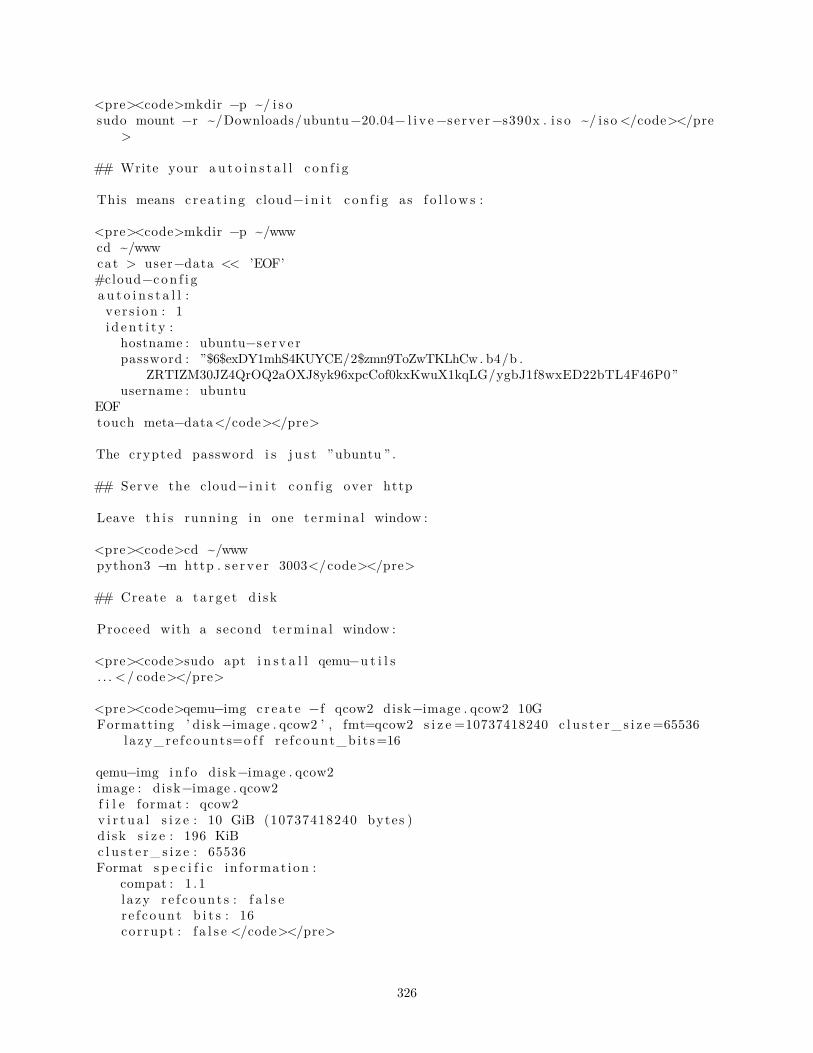
<pre><code>mkdir −p ~/ i s osudo mount −r ~/Downloads/ubuntu−20.04− l i v e −se rver−s390x . i s o ~/ i so </code></pre
>
## Write your a u t o i n s t a l l c on f i g
This means c r e a t i n g cloud− i n i t c on f i g as f o l l ow s :
<pre><code>mkdir −p ~/wwwcd ~/wwwcat > user−data << ’EOF’#cloud−c on f i ga u t o i n s t a l l :v e r s i on : 1i d e n t i t y :
hostname : ubuntu−s e r v e rpassword : ”$6$exDY1mhS4KUYCE/2$zmn9ToZwTKLhCw. b4/b .
ZRTIZM30JZ4QrOQ2aOXJ8yk96xpcCof0kxKwuX1kqLG/ygbJ1f8wxED22bTL4F46P0”username : ubuntu
EOFtouch meta−data</code></pre>
The crypted password i s j u s t ”ubuntu ” .
## Serve the cloud− i n i t c on f i g over http
Leave t h i s running in one te rmina l window :
<pre><code>cd ~/wwwpython3 −m http . s e r v e r 3003</code></pre>
## Create a t a r g e t d i sk
Proceed with a second termina l window :
<pre><code>sudo apt i n s t a l l qemu−u t i l s. . . </ code></pre>
<pre><code>qemu−img c r ea t e −f qcow2 disk−image . qcow2 10GFormatting ’ disk−image . qcow2 ’ , fmt=qcow2 s i z e =10737418240 c l u s t e r_ s i z e =65536
lazy_re f counts=o f f r e f count_b i t s=16
qemu−img i n f o disk−image . qcow2image : disk−image . qcow2f i l e format : qcow2v i r t u a l s i z e : 10 GiB (10737418240 bytes )d i sk s i z e : 196 KiBc l u s t e r_ s i z e : 65536Format s p e c i f i c in fo rmat ion :
compat : 1 . 1l azy r e f c oun t s : f a l s er e f count b i t s : 16corrupt : f a l s e </code></pre>
326

## Run the i n s t a l l !
<pre><code>sudo apt i n s t a l l qemu−kvm. . . </ code></pre>
You may need to add the d e f au l t user to the kvm group : <<BR>>‘ sudo usermod −a −G kvm ubuntu # re−l o g i n to make the changes take e f f e c t ‘
<pre><code>kvm −no−reboot −name auto−i n s t−t e s t −nographic −m 2048 \−dr ive f i l e=disk−image . qcow2 , format=qcow2 , cache=none , i f=v i r t i o \−cdrom ~/Downloads/ubuntu−20.04− l i v e −se rver−s390x . i s o \−ke rne l ~/ i s o /boot/ ke rne l . ubuntu \− i n i t r d ~/ i s o /boot/ i n i t r d . ubuntu \−append ’ a u t o i n s t a l l ds=nocloud−net ; s=http ://_gateway :3003/ conso l e=
tty sc lp0 ’</code></pre>
This w i l l boot , download the c on f i g from the s e r v e r s e t up in the prev iouss tep and run the i n s t a l l .
The i n s t a l l e r r eboot s at the end but the −no−reboot f l a g to kvm means that kvmw i l l e x i t when t h i s happens .
I t should take about 5 minutes .
## Boot the i n s t a l l e d system
<pre><code>kvm −no−reboot −name auto−i n s t−t e s t −nographic −m 2048 \−dr ive f i l e=disk−image . qcow2 , format=qcow2 , cache=none , i f=v i r t i o </code></pre>
This w i l l boot in to the f r e s h l y i n s t a l l e d system and you should be ab le to l ogin as ubuntu/ubuntu .
# Reporting problems with the i n s t a l l e r
We o f course hope that every i n s t a l l with the s e r v e r i n s t a l l e r succeeds . Buto f course r e a l i t y doesn ’ t always work that way and there w i l l be f a i l u r e so f va r i ous k inds . This s e c t i o n exp l a i n s the most u s e f u l way to r epor t themso that we can f i x the bugs caus ing them , and we ’ l l keep the top i c up to
date as the i n s t a l l e r changes .
The f i r s t th ing to do i s to update your sub iqu i ty snap . Not only because wef i x i s s u e s that cause f a i l u r e s over time but a l s o because we ’ ve beenworking on f e a t u r e s to make f a i l u r e r epo r t i ng e a s i e r .
A f a i l u r e w i l l r e s u l t in a crash r epor t being generated which bundles up a l lthe in fo rmat ion we need to f u l l y d iagnose a f a i l u r e . These l i v e in /var /crash in the i n s t a l l e r environment , and f o r Ubuntu 19 .10 and newer t h i s i sp e r s i s t e d to the i n s t a l l media by de f au l t ( i f the re i s space ) .
When an e r r o r occurs you are presented with a d i a l o g which a l l ows you toupload the r epor t to the e r r o r t r a cke r and o f f e r s opt ions f o r cont inu ing .Uploads to the e r r o r t r a cke r are non−i n t e r a c t i v e and anonymous , so theyare u s e f u l f o r t r a ck ing which kinds o f e r r o r s are a f f e c t i n g most users ,but they do not g ive us a way to ask you to he lp d iagnose the f a i l u r e .
You can c r ea t e a Launchpad bug report , which does l e t us e s t a b l i s h t h i s kind
327
o f two way communication , based on the content s o f a crash r epor t by us ingthe standard ‘ apport−c l i ‘ t o o l that i s part o f Ubuntu . Copy the crash
repor t to another system , run ” apport−c l i /path/ to / repor t . c rash ” andf o l l ow the prompts .
You can a l s o run apport−c l i in the i n s t a l l e r environment by swi tch ing to as h e l l but apport won ’ t be ab le to open a browser to a l low you to completethe r epor t so you ’ l l have to type the URL by hand on another machine .
# Using a v i r t u a l CDROM and Pet i tboot to s t a r t a l i v e s e r v e r i n s t a l l a t i o n onIBM Power ( ppc64e l )
There i s a l s o documentation on [ boot ing the i n s t a l l e r over the network ] ( https: // ubuntu . com/ s e r v e r /docs / i n s t a l l / netboot−ppc64e l ) .
* *Not ice : *Not a l l IBM Power machines come with the c ap ab i l i t y to i n s t a l l v ia a v i r t u a l
CDROM !
* A separa te system ( i d e a l l y in the same network , because o f ipmi too l ) i sneeded to host the ppc64e l ISO Image f i l e , that i s l a t e r used as v i r t u a lCDROM.
* Login to t h i s s epara te host and make sure that the ipmi too l package i si n s t a l l e d :
$ sudo apt install ipmitool as well as Samba: $ sudo apt install samba “‘
• Next is to setup and configure Samba:
$ sudo touch / e tc /samba/smb . conf && sudo tee −a / e tc /samba/smb . conf <<EOF[ winshare ]
path=/var /winsharebrowseable = yesread only = noguest ok = yes
EOF
And do a quick verification that the required lines are in:
$ t a i l −n 5 / e tc /samba/smb . conf[ winshare ]
path=/var /winsharebrowseable = yesread only = noguest ok = yes
• (Optional) For downloading the image you may have to use a proxy server:
$ sudo touch ~/. wgetrc && sudo tee −a ~/. wgetrc <<EOFuse_proxy=yeshttp_proxy=squid . proxy :3128https_proxy=squid . proxy :3128EOF
• The ISO image needs to be downloaded now:
328
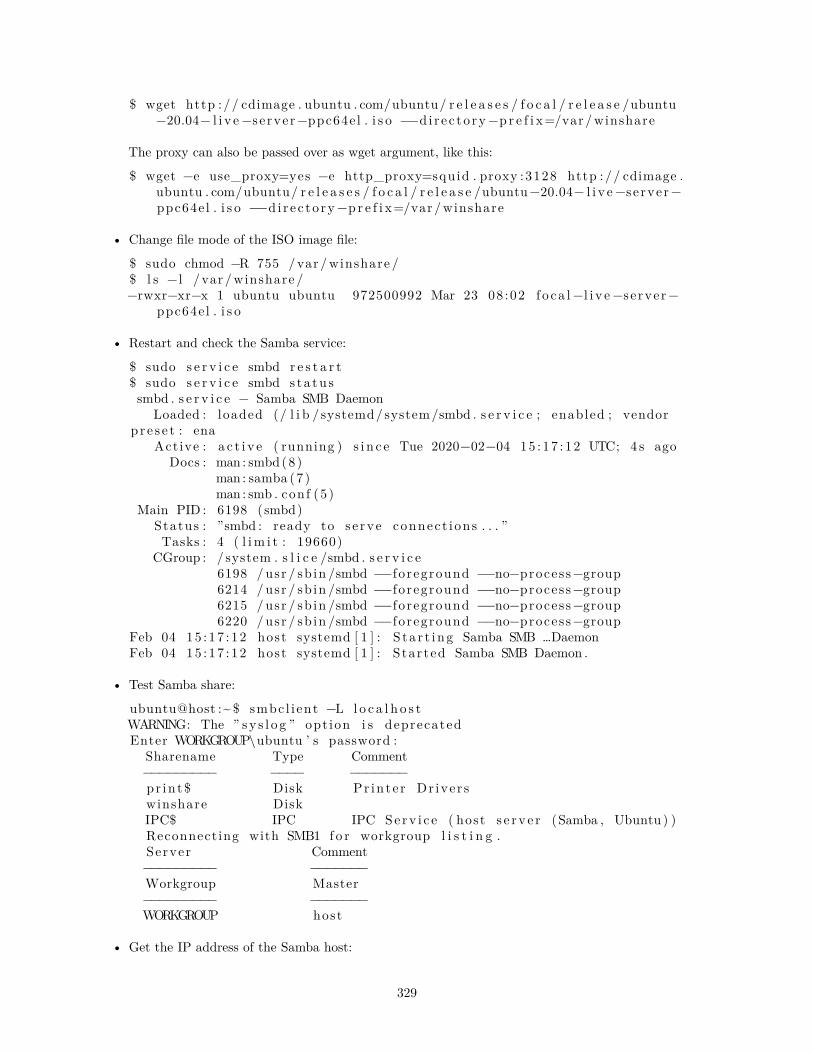
$ wget http :// cdimage . ubuntu . com/ubuntu/ r e l e a s e s / f o c a l / r e l e a s e /ubuntu−20.04− l i v e −se rver−ppc64e l . i s o −−d i r e c to ry−p r e f i x=/var /winshare
The proxy can also be passed over as wget argument, like this:
$ wget −e use_proxy=yes −e http_proxy=squid . proxy :3128 http :// cdimage .ubuntu . com/ubuntu/ r e l e a s e s / f o c a l / r e l e a s e /ubuntu−20.04− l i v e −se rver−ppc64e l . i s o −−d i r e c to ry−p r e f i x=/var /winshare
• Change file mode of the ISO image file:
$ sudo chmod −R 755 /var /winshare /$ l s − l / var /winshare /−rwxr−xr−x 1 ubuntu ubuntu 972500992 Mar 23 08 :02 f o ca l−l i v e −s e rver−
ppc64e l . i s o
• Restart and check the Samba service:
$ sudo s e r v i c e smbd r e s t a r t$ sudo s e r v i c e smbd s ta tu s �smbd . s e r v i c e − Samba SMB Daemon
Loaded : loaded (/ l i b / systemd/system/smbd . s e r v i c e ; enabled ; vendorp r e s e t : ena
Active : a c t i v e ( running ) s i n c e Tue 2020−02−04 15 : 17 : 12 UTC; 4 s agoDocs : man : smbd(8)
man : samba (7)man : smb . conf (5 )
Main PID : 6198 (smbd)Status : ”smbd : ready to s e rve connect i ons . . . ”Tasks : 4 ( l im i t : 19660)
CGroup : / system . s l i c e /smbd . s e r v i c e ��6198 / usr / sb in /smbd −−foreground −−no−process−group��6214 / usr / sb in /smbd −−foreground −−no−process−group��6215 / usr / sb in /smbd −−foreground −−no−process−group��6220 / usr / sb in /smbd −−foreground −−no−process−group
Feb 04 15 : 17 : 12 host systemd [ 1 ] : S t a r t i ng Samba SMB …DaemonFeb 04 15 : 17 : 12 host systemd [ 1 ] : Started Samba SMB Daemon .
• Test Samba share:
ubuntu@host :~ $ smbc l i ent −L l o c a l h o s tWARNING: The ” sy s l o g ” opt ion i s deprecatedEnter WORKGROUP\ubuntu ’ s password :
Sharename Type Comment−−−−−−−−− −−−− −−−−−−−pr in t$ Disk Pr in t e r Dr iver swinshare DiskIPC$ IPC IPC Se rv i c e ( host s e r v e r (Samba , Ubuntu ) )Reconnecting with SMB1 f o r workgroup l i s t i n g .Server Comment
−−−−−−−−− −−−−−−−Workgroup Master−−−−−−−−− −−−−−−−WORKGROUP host
• Get the IP address of the Samba host:
329

$ ip −4 −b r i e f address showlo UNKNOWN 127 . 0 . 0 . 1 / 8ibmveth2 UNKNOWN 10 .245 . 246 . 42/24
• (Optional) Even more testing if the Samba share is accessible from remote:
user@workstat ion :~ $ mkdir −p /tmp/ t e s tuser@workstat ion :~ $ sudo mount −t c i f s −ousername=guest , password=guest //10 . 245 . 246 . 42/ winshare /tmp/ t e s t /user@workstat ion :~ $ l s −l a /tmp/ t e s t /t o t a l 1014784drwxr−xr−x 2 root root 0 May 4 15 :46 .drwxrwxrwt 18 root root 420 May 4 19 :25 . .−rwxr−xr−x 1 root root 1038249984 May 3 19 :37 ubuntu−20.04− l i v e −s e rver−
ppc64e l . i s o
• Now use a browser and navigate to the BMC of the Power system that should be installed (let’s assumethe BMC’s IP address is 10.245.246.247):
f i r e f o x http : //10 . 245 . 246 . 247/
• Login to the BMC and find and select: Virtual Media –> CDROM
• Enter the IP address of the Samba share: 10.245.246.42 and the path to the Samba share:
\winshare \ f o ca l−l i v e −se rver−ppc64e l . i s o
• Click Save and Mount (make sure that the virtual CDROM is really properly mounted !)
CD−ROM Image :
This opt ion a l l ows you to share a CD−ROM image over a Windows Share with amaximum s i z e o f 4 . 7GB. This image w i l l be emulated to the host as USB
dev i c e .
Device 1 There i s an i s o f i l e mounted .Device 2 No d i sk emulation s e t .Device 3 No d i sk emulation s e t .<Refresh Status>
Share host : 1 0 . 245 . 246 . 42Path to image : \winshare \ f o ca l−l i v e −s e rver−ppc64e l . i s oUser ( op t i ona l ) :Password ( op t i ona l ) :<Save> <Mount> <Unmount>
• Notice: It’s important that you see a status like:
Device 1 There i s an i s o f i l e mounted
Only in this case the virtual CDROM is properly mounted and you will see the boot / install fromCDROM entry in petitboot:
[CD/DVD: s r0 / 2020−03−23−08−02−42−00]I n s t a l l Ubuntu Server
• Now use the ipmitool to boot the system into the petitboot loader:
330

$ ipmi too l −I l anp lu s −H 10 .245 . 246 . 247 −U ADMIN −P <password> powers t a tu s
$ ipmi too l −I l anp lu s −H 10 .245 . 246 . 247 −U ADMIN −P <password> s o la c t i v a t e
$ ipmi too l −I l anp lu s −H 10 .245 . 246 . 247 −U ADMIN −P <password> power onChass i s Power Control : Up/On
• And reach the Petitboot screen:
Pet i tboot ( v1 .7.5− p8 f5 f c86 ) 9006−12CBOS0026���������������������������������������������
[ Network : enP2p1s0f0 / ac : 1 f : 6 b : 0 9 : c0 : 5 2 ]executenetboot enP2p1s0f0 ( pxe l inux . 0 )
System in format ionSystem con f i gu r a t i onSystem s ta tu s l ogLanguageRescan dev i c e sRet r i eve c on f i g from URL
*Plug ins (0 )Exit to s h e l l ���������������������������������������������
Enter=accept , e=edi t , n=new , x=ex i t , l=language , g=log , h=helpDefau l t boot c an c e l l e d
• And make sure that booting from CDROM is enabled:
Pet i tboot ( v1 .7.5− p8 f5 f c86 ) 9006−12CBOS0026���������������������������������������������
[ Network : enP2p1s0f0 / ac : 1 f : 6 b : 0 9 : c0 : 5 2 ]Executenetboot enP2p1s0f0 ( pxe l inux . 0 )
[ Disk : sda2 / ebdb022b−96b2−4f 4 f−ae63 −69300ded13f4 ]Ubuntu , with Linux 5.4.0−12− g ene r i c ( r ecovery mode)Ubuntu , with Linux 5.4.0−12− g ene r i cUbuntu
System in format ionSystem con f i gu r a t i onSystem s ta tu s l ogLanguageRescan dev i c e sRet r i eve c on f i g from URL
*Plug ins (0 )Exit to s h e l l ���������������������������������������������
Enter=accept , e=edi t , n=new , x=ex i t , l=language , g=log , h=help[ sda3 ] Proce s s ing new Disk dev i ce
Pet i tboot System Conf igurat ion ����������������������������������������������
331
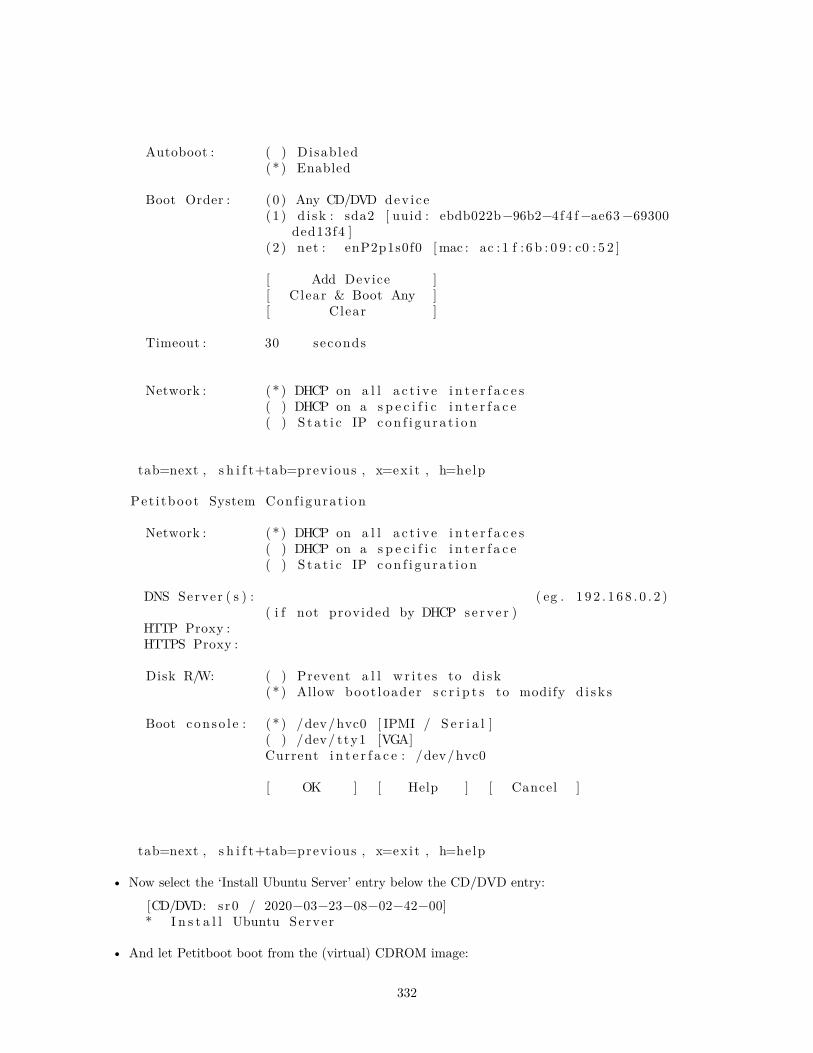
Autoboot : ( ) Disabled(* ) Enabled
Boot Order : (0 ) Any CD/DVD dev i ce(1 ) d i sk : sda2 [ uuid : ebdb022b−96b2−4f 4 f−ae63 −69300
ded13f4 ](2 ) net : enP2p1s0f0 [mac : ac : 1 f : 6 b : 0 9 : c0 : 5 2 ]
[ Add Device ][ Clear & Boot Any ][ Clear ]
Timeout : 30 seconds
Network : (* ) DHCP on a l l a c t i v e i n t e r f a c e s( ) DHCP on a s p e c i f i c i n t e r f a c e( ) S t a t i c IP con f i gu r a t i on ���������������������������������������������
tab=next , s h i f t+tab=previous , x=ex i t , h=help
Pet i tboot System Conf igurat ion ���������������������������������������������
Network : (* ) DHCP on a l l a c t i v e i n t e r f a c e s( ) DHCP on a s p e c i f i c i n t e r f a c e( ) S t a t i c IP con f i gu r a t i on
DNS Server ( s ) : ( eg . 1 9 2 . 1 6 8 . 0 . 2 )( i f not provided by DHCP se rv e r )
HTTP Proxy :HTTPS Proxy :
Disk R/W: ( ) Prevent a l l w r i t e s to d i sk(* ) Allow boot loader s c r i p t s to modify d i s k s
Boot conso l e : ( * ) /dev/hvc0 [ IPMI / S e r i a l ]( ) /dev/ tty1 [VGA]Current i n t e r f a c e : /dev/hvc0
[ OK ] [ Help ] [ Cancel ]�������������������������������������������
tab=next , s h i f t+tab=previous , x=ex i t , h=help
• Now select the ‘Install Ubuntu Server’ entry below the CD/DVD entry:[CD/DVD: s r0 / 2020−03−23−08−02−42−00]* I n s t a l l Ubuntu Server
• And let Petitboot boot from the (virtual) CDROM image:
332

Sent SIGKILL to a l l p r o c e s s e s[ 119 .355371 ] kexec_core : S ta r t i ng new ke rne l[ 194 .483947394 ,5 ] OPAL: Switch to big−endian OS[ 197 .454615202 ,5 ] OPAL: Switch to l i t t l e −endian OS
• Finally the initial subiquity installer screen will show up in the console:
�������������������������������������������
Willkommen ! Bienvenue ! Welcome ! ��������������� ! Welkom�������������������������������������������
Use UP, DOWN and ENTER keys to s e l e c t your language .
[ Eng l i sh � ][ Asturianu � ][ Català � ][ Hrvatsk i � ][ Nederlands � ][ Suomi � ][ França i s � ][ Deutsch � ][ Ε�������� ][ Magyar � ][ šLatvieu � ][ Norsk bokmål � ][ Po l sk i � ][ �������� ][ Español � ][ ����������� ]
• The rest of the installation is business as usual …
Interactive live server installation on IBM z/VM (s390x)
Doing a manual live installation like described here - means without specifying a parmfile - is supported sinceUbuntu Server LTS 20.04.1 (‘focal’) and any newer release, like 20.10 (‘groovy’).
• The following guide assumes that a z/VM guest got defined, and that it is able to either reach the publiccdimage.ubuntu.com server or an internal FTP or HTTP server that hosts an Ubuntu Server 20.04 in-staller image, like this 20.04 aka focal daily live image here: http://cdimage.ubuntu.com/ubuntu/releases/20.04.1/release/ubuntu-20.04.1-live-server-s390x.iso
• Find a place to download the installer image:
user@workstat ion :~ $ wgethttp :// cdimage . ubuntu . com/ubuntu/ r e l e a s e s /20 . 04 . 1/ r e l e a s e /ubuntu−20.04.1−
l i v e −s e rver−s390x . i s o−−2020−08−08 16:01:52−−http :// cdimage . ubuntu . com/ubuntu/ r e l e a s e s /20 . 04 . 1/ r e l e a s e /ubuntu−20.04.1−
l i v e −s e rver−s390x . i s oReso lv ing cdimage . ubuntu . com ( cdimage . ubuntu . com) . . . 2001 :67 c : 1 5 6 0 : 8 0 0 1 : : 1
d , 2001:67 c : 1 3 6 0 : 8 0 0 1 : : 2 7 , 2001:67 c : 1 3 6 0 : 8 0 0 1 : : 2 8 , . . .Connecting to cdimage . ubuntu . com( cdimage . ubuntu . com) | 2001 : 67 c : 1 5 6 0 : 8 0 0 1 : : 1 d | : 8 0 . . . connected .HTTP reques t sent , awai t ing response . . . 200 OKLength : 705628160 (673M) [ app l i c a t i o n /x−i so9660−image ]Saving to : ‘ubuntu−20.04.1− l i v e −se rver−s390x . ’ i s o
333

ubuntu−20.04.1− l i v e 100%[===================>] 672 .94M 37.1MB/ s in17 s
2020−08−08 16 : 02 : 10 (38 . 8 MB/ s ) − ‘ubuntu−20.04.1− l i v e −se rver−s390x . ’ i s osaved
[705628160/705628160]
user@workstat ion :~ $
• Now loop-back mount the ISO to extract four files that are needed for a z/VM guest installationuser@workstat ion :~ $ mkdir i s ouser@workstat ion :~ $ sudo mount −o loop ubuntu−20.04.1− l i v e −se rver−s390x .
i s o i s ouser@workstat ion :~ $
user@workstat ion :~ $ l s −1 . / i s o /boot /{ubuntu . exec , pa rmf i l e . * , k e rne l . u* ,i n i t r d . u*}
. / i s o /boot/ i n i t r d . ubuntu
. / i s o /boot/ ke rne l . ubuntu
. / i s o /boot/ pa rmf i l e . ubuntu
. / i s o /boot/ubuntu . execuser@workstat ion :~ $
• Now transfer these four files to your z/VM guest (for example to its ‘A’ file mode), using either the3270 terminal emulator or ftp.
• Then log on to your z/VM guest that you want to use for the installation, in this example it will beguest ‘10.222.111.24’
• And execute the ubuntu REXX script to kick-off the installation:ubuntu00 : 0000004 FILES PURGED00 : RDR FILE 0125 SENT FROM 10 . 222 . 111 . 24 PUN WAS 0125 RECS 101K CPY 001
A NOHOLD NOKEEP00 : RDR FILE 0129 SENT FROM 10 . 222 . 111 . 24 PUN WAS 0129 RECS 0001 CPY 001
A NOHOLD NOKEEP00 : RDR FILE 0133 SENT FROM 10 . 222 . 111 . 24 PUN WAS 0133 RECS 334K CPY 001
A NOHOLD NOKEEP00 : 0000003 FILES CHANGED00 : 0000003 FILES CHANGED01 : HCPGSP2627I The v i r t u a l machine i s p laced in CP mode due to a SIGP
i n i t i a l CPU r e s e t from CPU 00 .02 : HCPGSP2627I The v i r t u a l machine i s p laced in CP mode due to a SIGP
i n i t i a l CPU r e s e t from CPU 00 .03 : HCPGSP2627I The v i r t u a l machine i s p laced in CP mode due to a SIGP
i n i t i a l CPU r e s e t from CPU 00 .¬ 0 .390935 | In i t r amf s unpacking f a i l e d : Decoding f a i l e dUnable to f i nd a medium conta ine r a l i v e f i l e system
• In the usual case that no parmfile got configured, the installation system now offers to interactivelyconfigure the basic network:
334
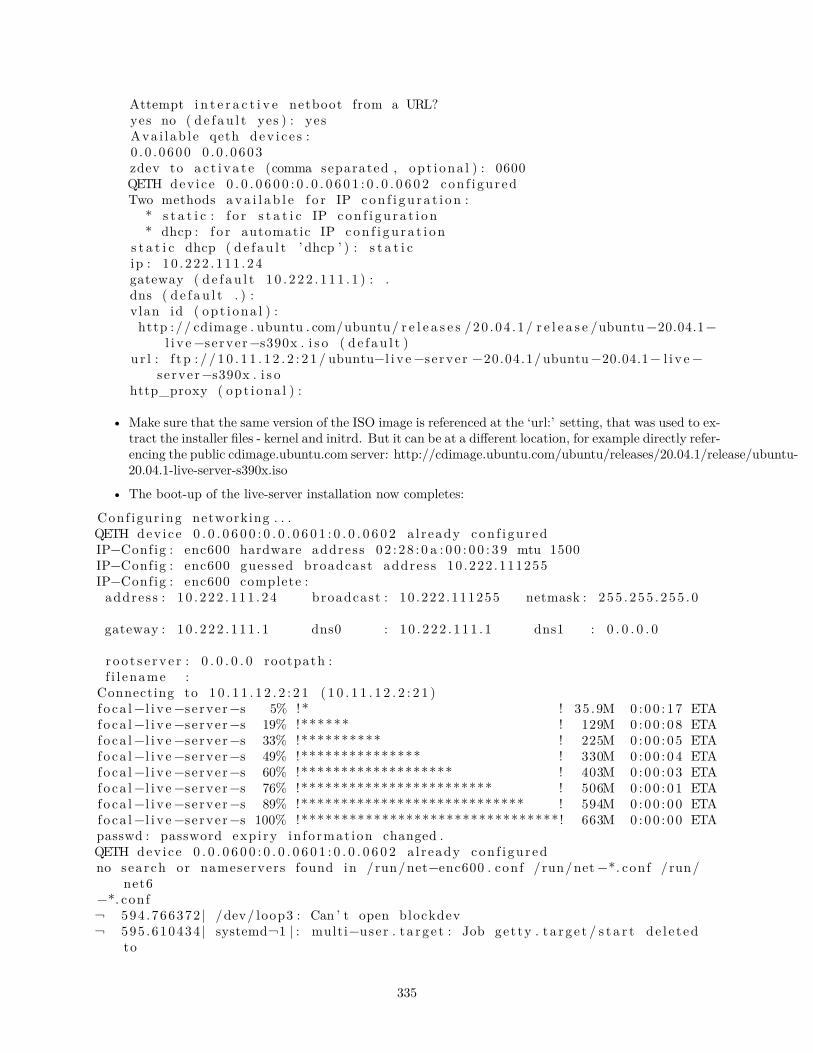
Attempt i n t e r a c t i v e netboot from a URL?yes no ( d e f au l t yes ) : yesAva i l ab l e qeth dev i c e s :0 . 0 . 0600 0 . 0 . 0603zdev to a c t i v a t e (comma separated , op t i ona l ) : 0600QETH dev i ce 0 . 0 . 0 6 0 0 : 0 . 0 . 0 6 0 1 : 0 . 0 . 0 6 0 2 con f i gu r edTwo methods a v a i l a b l e f o r IP con f i gu r a t i on :
* s t a t i c : f o r s t a t i c IP con f i gu r a t i on* dhcp : f o r automatic IP con f i gu r a t i on
s t a t i c dhcp ( d e f au l t ’ dhcp ’ ) : s t a t i cip : 1 0 . 2 22 . 111 . 24gateway ( d e f au l t 1 0 . 2 2 2 . 1 1 1 . 1 ) : .dns ( d e f au l t . ) :v lan id ( op t i ona l ) :http :// cdimage . ubuntu . com/ubuntu/ r e l e a s e s /20 . 04 . 1/ r e l e a s e /ubuntu−20.04.1−
l i v e −se rver−s390x . i s o ( d e f au l t )u r l : f t p : / / 1 0 . 1 1 . 1 2 . 2 : 2 1 / ubuntu−l i v e −se rver −20.04.1/ ubuntu−20.04.1− l i v e −
s e rver−s390x . i s ohttp_proxy ( op t i ona l ) :
• Make sure that the same version of the ISO image is referenced at the ‘url:’ setting, that was used to ex-tract the installer files - kernel and initrd. But it can be at a different location, for example directly refer-encing the public cdimage.ubuntu.com server: http://cdimage.ubuntu.com/ubuntu/releases/20.04.1/release/ubuntu-20.04.1-live-server-s390x.iso
• The boot-up of the live-server installation now completes:
Conf igur ing networking . . .QETH dev i ce 0 . 0 . 0 6 0 0 : 0 . 0 . 0 6 0 1 : 0 . 0 . 0 6 0 2 a l ready con f i gu r edIP−Config : enc600 hardware address 02 : 2 8 : 0 a : 0 0 : 0 0 : 3 9 mtu 1500IP−Config : enc600 guessed broadcast address 10 .222 .111255IP−Config : enc600 complete :address : 1 0 . 222 . 111 . 24 broadcast : 10 .222 .111255 netmask : 255 . 255 . 255 . 0
gateway : 1 0 . 2 22 . 1 11 . 1 dns0 : 1 0 . 2 22 . 1 11 . 1 dns1 : 0 . 0 . 0 . 0
r o o t s e r v e r : 0 . 0 . 0 . 0 rootpath :f i l ename :
Connecting to 1 0 . 1 1 . 1 2 . 2 : 2 1 ( 1 0 . 1 1 . 1 2 . 2 : 2 1 )f o ca l−l i v e −se rver−s 5% !* ! 35 .9M 0 : 00 : 1 7 ETAfoca l−l i v e −se rver−s 19% !****** ! 129M 0 : 00 : 0 8 ETAfoca l−l i v e −se rver−s 33% !********** ! 225M 0 : 00 : 0 5 ETAfoca l−l i v e −se rver−s 49% !*************** ! 330M 0 : 00 : 0 4 ETAfoca l−l i v e −se rver−s 60% !******************* ! 403M 0 : 00 : 0 3 ETAfoca l−l i v e −se rver−s 76% !************************ ! 506M 0 : 00 : 0 1 ETAfoca l−l i v e −se rver−s 89% !**************************** ! 594M 0 : 00 : 0 0 ETAfoca l−l i v e −se rver−s 100% !********************************! 663M 0 : 00 : 0 0 ETApasswd : password exp i ry in fo rmat ion changed .QETH dev i ce 0 . 0 . 0 6 0 0 : 0 . 0 . 0 6 0 1 : 0 . 0 . 0 6 0 2 a l ready con f i gu r edno search or nameservers found in /run/net−enc600 . conf /run/net −*. conf /run/
net6−*. conf¬ 594 .766372 | /dev/ loop3 : Can ’ t open blockdev¬ 595 .610434 | systemd¬1 | : multi−user . t a r g e t : Job get ty . t a r g e t / s t a r t de l e t ed
to
335

break orde r ing cy c l e s t a r t i n g with multi−user . t a r g e t / s t a r t¬ ¬0; 1 ; 3 1m SKIP ¬0m| Ordering cy c l e found , sk ipp ing ¬0 ; 1 ; 3 9 mLogin Prompts
¬0m¬ 595 .623027 | systemd¬1 | : Fa i l ed unmounting /cdrom .¬ ¬0; 1 ; 3 1mFAILED ¬0m| Fa i l ed unmounting ¬0 ; 1 ; 3 9m/cdrom ¬0m.
¬ 598 .973538 | cloud−in i t¬1256 | : Cloud− i n i t v . 20.2−45−g5f7825e2−0ubuntu1runnin
g ’ i n i t −l o c a l ’ at Thu , 04 Jun 2020 12 : 06 : 46 +0000. Up 598.72 seconds .¬ 599 .829069 | cloud−in i t¬1288 | : Cloud− i n i t v . 20.2−45−g5f7825e2−0ubuntu1
running ’ i n i t ’ at Thu , 04 Jun 2020 12 : 06 : 47 +0000. Up 599.64 seconds .¬ 599 .829182 | cloud−in i t¬1288 | : c i−i n f o : ++++++++++++++++++++++++++++++++++++
Net dev i c e i n f o+++++++++++++++++++++++++++++++++++++¬ 599 .829218 | cloud−in i t¬1288 | : c i−i n f o :
+−−−−−−−−+−−−−−−+−−−−−−−−−−−−−−−−−−−−−−−−−+−−−−−−−−−−−−−−−+−−−−−−−−+−−−−−−−−−−−−−−−−−−−+¬ 599 .829255 | cloud−in i t¬1288 | : c i−i n f o : ! Device ! Up ! Address
! Mask ! Scope ! Hw−Address !¬ 599 .829292 | cloud−in i t¬1288 | : c i−i n f o :
+−−−−−−−−+−−−−−−+−−−−−−−−−−−−−−−−−−−−−−−−−+−−−−−−−−−−−−−−−+−−−−−−−−+−−−−−−−−−−−−−−−−−−−+¬ 599 .829333 | cloud−in i t¬1288 | : c i−i n f o : ! enc600 ! True ! 10 . 2 22 . 111 . 24
! 2 55 . 255 . 255 . 0 ! g l oba l ! 0 2 : 2 8 : 0 a : 0 0 : 0 0 : 3 9 !¬ 599 .829376 | cloud−in i t¬1288 | : c i−i n f o : ! enc600 ! True ! f e80 : : 2 8 : a f f : f e00
: 3/64 ! . ! l i n k ! 0 2 : 2 8 : 0 a : 0 0 : 0 0 : 3 9 !¬ 599 .829416 | cloud−in i t¬1288 | : c i−i n f o : ! l o ! True ! 1 2 7 . 0 . 0 . 1
! 2 5 5 . 0 . 0 . 0 ! host ! . !¬ 599 .829606 | cloud−in i t¬1288 | : c i−i n f o : ! l o ! True ! : : 1 / 128
! . ! host ! . !¬ 599 .829684 | cloud−in i t¬1288 | : c i−i n f o :
+−−−−−−−−+−−−−−−+−−−−−−−−−−−−−−−−−−−−−−−−−+−−−−−−−−−−−−−−−+−−−−−−−−+−−−−−−−−−−−−−−−−−−−+¬ 599 .829721 | cloud−in i t¬1288 | : c i−i n f o : ++++++++++++++++++++++++++++++Route
IPv4 i n f o++++++++++++++++++++++++++++++¬ 599 .829754 | cloud−in i t¬1288 | : c i−i n f o :
+−−−−−−−+−−−−−−−−−−−−−−+−−−−−−−−−−−−−−+−−−−−−−−−−−−−−−+−−−−−−−−−−−+−−−−−−−+¬ 599 .829789 | cloud−in i t¬1288 | : c i−i n f o : ! Route ! Des t inat i on ! Gateway! Genmask ! I n t e r f a c e ! Flags !¬ 599 .829822 | cloud−in i t¬1288 | : c i−i n f o :
+−−−−−−−+−−−−−−−−−−−−−−+−−−−−−−−−−−−−−+−−−−−−−−−−−−−−−+−−−−−−−−−−−+−−−−−−−+¬ 599 .829858 | cloud−in i t¬1288 | : c i−i n f o : ! 0 ! 0 . 0 . 0 . 0 !
1 0 . 2 22 . 1 11 . 1! 0 . 0 . 0 . 0 ! enc600 ! UG !¬ 599 .829896 | cloud−in i t¬1288 | : c i−i n f o : ! 1 ! 10 .222 .1110 ! 0 . 0 . 0 . 0! 2 55 . 2 55 . 255 . 0 ! enc600 ! U !¬ 599 .829930 | cloud−in i t¬1288 | : c i−i n f o :
+−−−−−−−+−−−−−−−−−−−−−−+−−−−−−−−−−−−−−+−−−−−−−−−−−−−−−+−−−−−−−−−−−+−−−−−−−+
336

¬ 599 .829962 | cloud−in i t¬1288 | : c i−i n f o : +++++++++++++++++++Route IPv6 i n f o++++
+++++++++++++++¬ 599 .829998 | cloud−in i t¬1288 | : c i−i n f o :
+−−−−−−−+−−−−−−−−−−−−−+−−−−−−−−−+−−−−−−−−−−−+−−−−−−−+¬ 599 .830031 | cloud−in i t¬1288 | : c i−i n f o : ! Route ! Des t inat i on ! Gateway !
In ter f a c e ! Flags !¬ 599 .830064 | cloud−in i t¬1288 | : c i−i n f o :
+−−−−−−−+−−−−−−−−−−−−−+−−−−−−−−−+−−−−−−−−−−−+−−−−−−−+¬ 599 .830096 | cloud−in i t¬1288 | : c i−i n f o : ! 1 ! f e80 : : / 6 4 ! : : !
enc600 ! U !¬ 599 .830131 | cloud−in i t¬1288 | : c i−i n f o : ! 3 ! l o c a l ! : : !
enc600 ! U !¬ 599 .830164 | cloud−in i t¬1288 | : c i−i n f o : ! 4 ! f f 0 0 : : / 8 ! : : !
enc600 ! U !¬ 599 .830212 | cloud−in i t¬1288 | : c i−i n f o :
+−−−−−−−+−−−−−−−−−−−−−+−−−−−−−−−+−−−−−−−−−−−+−−−−−−−+¬ 601 .077953 | cloud−in i t¬1288 | : Generating pub l i c / p r i va t e r sa key pa i r .¬ 601 .078101 | cloud−in i t¬1288 | : Your i d e n t i f i c a t i o n has been saved in / e t c /
ssh /ssh_host_rsa_key¬ 601 .078136 | cloud−in i t¬1288 | : Your pub l i c key has been saved in / e t c / ssh /
sshhost_rsa_key . pub¬ 601 .078170 | cloud−in i t¬1288 | : The key f i n g e r p r i n t i s :¬ 601 .078203 | cloud−in i t¬1288 | : SHA256 :
kHtkABZwk8AE80fy0KPzTRcYpht4iXdZmJ37Cgi3fJ0 root§ubuntu−s e r v e r¬ 601 .078236 | cloud−in i t¬1288 | : The key ’ s randomart image i s :¬ 601 .078274 | cloud−in i t¬1288 | : +−−−¬RSA 3072|−−−−+¬ 601 .078307 | cloud−in i t¬1288 | : ! o+*+B++*.. !¬ 601 .078340 | cloud−in i t¬1288 | : ! o .X+=+=+ !¬ 601 .078373 | cloud−in i t¬1288 | : ! +.O.= oo !¬ 601 .078406 | cloud−in i t¬1288 | : ! ++.+.=o !¬ 601 .078439 | cloud−in i t¬1288 | : ! * .=. oSo !¬ 601 .078471 | cloud−in i t¬1288 | : ! = +.E . !¬ 601 .078503 | cloud−in i t¬1288 | : ! . . . !¬ 601 .078537 | cloud−in i t¬1288 | : ! . !¬ 601 .078570 | cloud−in i t¬1288 | : ! !¬ 601 .078602 | cloud−in i t¬1288 | : +−−−−¬SHA256|−−−−−+¬ 601 .078635 | cloud−in i t¬1288 | : Generating pub l i c / p r i va t e dsa key pa i r .¬ 601 .078671 | cloud−in i t¬1288 | : Your i d e n t i f i c a t i o n has been saved in / e t c /
ssh /ssh_host_dsa_key¬ 601 .078704 | cloud−in i t¬1288 | : Your pub l i c key has been saved in / e t c / ssh /
ssh_host_dsa_key . pub
337
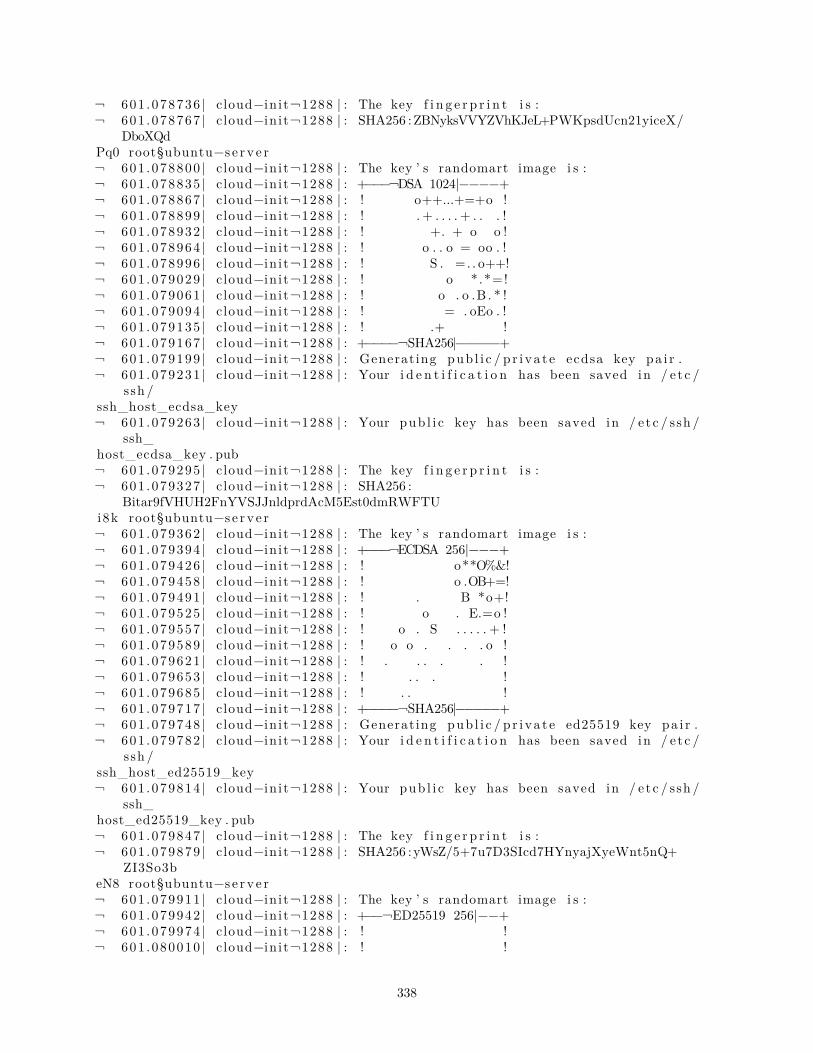
¬ 601 .078736 | cloud−in i t¬1288 | : The key f i n g e r p r i n t i s :¬ 601 .078767 | cloud−in i t¬1288 | : SHA256 :ZBNyksVVYZVhKJeL+PWKpsdUcn21yiceX/
DboXQdPq0 root§ubuntu−s e r v e r¬ 601 .078800 | cloud−in i t¬1288 | : The key ’ s randomart image i s :¬ 601 .078835 | cloud−in i t¬1288 | : +−−−¬DSA 1024|−−−−+¬ 601 .078867 | cloud−in i t¬1288 | : ! o++...+=+o !¬ 601 .078899 | cloud−in i t¬1288 | : ! . + . . . . + . . . !¬ 601 .078932 | cloud−in i t¬1288 | : ! +. + o o !¬ 601 .078964 | cloud−in i t¬1288 | : ! o . . o = oo . !¬ 601 .078996 | cloud−in i t¬1288 | : ! S . =. . o++!¬ 601 .079029 | cloud−in i t¬1288 | : ! o * .*=!¬ 601 .079061 | cloud−in i t¬1288 | : ! o . o .B . * !¬ 601 .079094 | cloud−in i t¬1288 | : ! = . oEo . !¬ 601 .079135 | cloud−in i t¬1288 | : ! .+ !¬ 601 .079167 | cloud−in i t¬1288 | : +−−−−¬SHA256|−−−−−+¬ 601 .079199 | cloud−in i t¬1288 | : Generating pub l i c / p r i va t e ecdsa key pa i r .¬ 601 .079231 | cloud−in i t¬1288 | : Your i d e n t i f i c a t i o n has been saved in / e t c /
ssh /ssh_host_ecdsa_key¬ 601 .079263 | cloud−in i t¬1288 | : Your pub l i c key has been saved in / e t c / ssh /
ssh_host_ecdsa_key . pub¬ 601 .079295 | cloud−in i t¬1288 | : The key f i n g e r p r i n t i s :¬ 601 .079327 | cloud−in i t¬1288 | : SHA256 :
Bitar9fVHUH2FnYVSJJnldprdAcM5Est0dmRWFTUi8k root§ubuntu−s e r v e r¬ 601 .079362 | cloud−in i t¬1288 | : The key ’ s randomart image i s :¬ 601 .079394 | cloud−in i t¬1288 | : +−−−¬ECDSA 256|−−−+¬ 601 .079426 | cloud−in i t¬1288 | : ! o**O%&!¬ 601 .079458 | cloud−in i t¬1288 | : ! o .OB+=!¬ 601 .079491 | cloud−in i t¬1288 | : ! . B *o+!¬ 601 .079525 | cloud−in i t¬1288 | : ! o . E.=o !¬ 601 .079557 | cloud−in i t¬1288 | : ! o . S . . . . . + !¬ 601 .079589 | cloud−in i t¬1288 | : ! o o . . . . o !¬ 601 .079621 | cloud−in i t¬1288 | : ! . . . . . !¬ 601 .079653 | cloud−in i t¬1288 | : ! . . . !¬ 601 .079685 | cloud−in i t¬1288 | : ! . . !¬ 601 .079717 | cloud−in i t¬1288 | : +−−−−¬SHA256|−−−−−+¬ 601 .079748 | cloud−in i t¬1288 | : Generating pub l i c / p r i va t e ed25519 key pa i r .¬ 601 .079782 | cloud−in i t¬1288 | : Your i d e n t i f i c a t i o n has been saved in / e t c /
ssh /ssh_host_ed25519_key¬ 601 .079814 | cloud−in i t¬1288 | : Your pub l i c key has been saved in / e t c / ssh /
ssh_host_ed25519_key . pub¬ 601 .079847 | cloud−in i t¬1288 | : The key f i n g e r p r i n t i s :¬ 601 .079879 | cloud−in i t¬1288 | : SHA256 :yWsZ/5+7u7D3SIcd7HYnyajXyeWnt5nQ+
ZI3So3beN8 root§ubuntu−s e r v e r¬ 601 .079911 | cloud−in i t¬1288 | : The key ’ s randomart image i s :¬ 601 .079942 | cloud−in i t¬1288 | : +−−¬ED25519 256|−−+¬ 601 .079974 | cloud−in i t¬1288 | : ! !¬ 601 .080010 | cloud−in i t¬1288 | : ! !
338
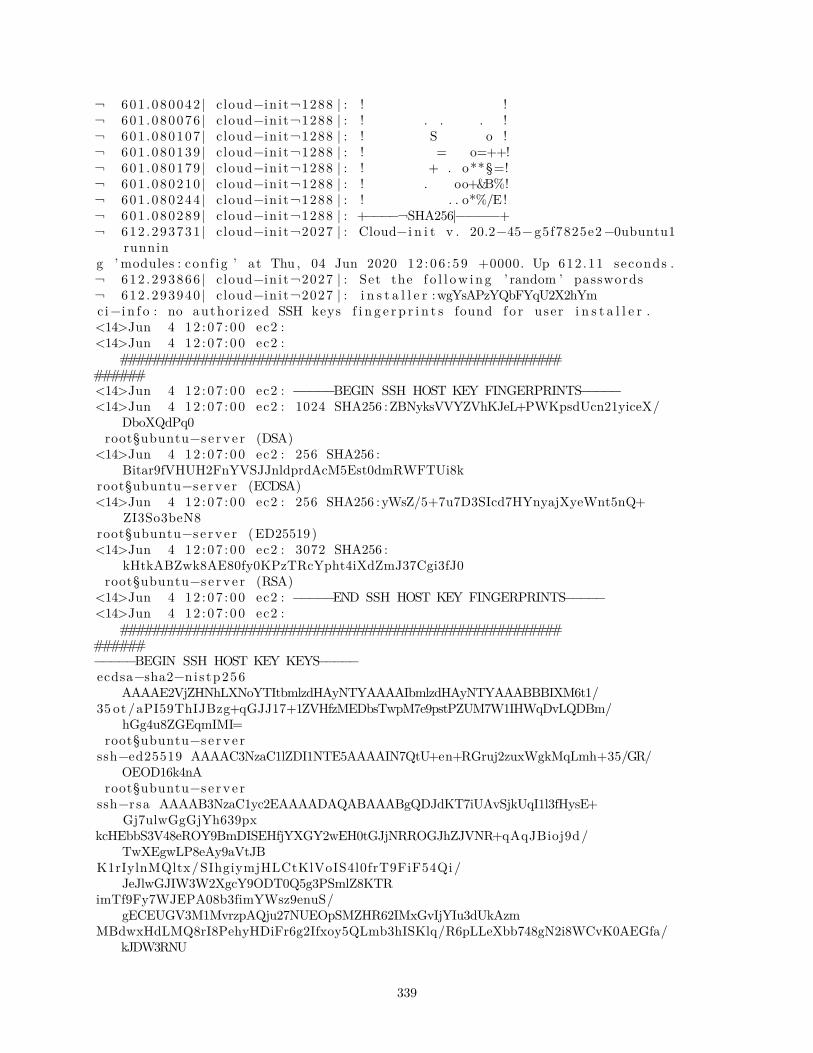
¬ 601 .080042 | cloud−in i t¬1288 | : ! !¬ 601 .080076 | cloud−in i t¬1288 | : ! . . . !¬ 601 .080107 | cloud−in i t¬1288 | : ! S o !¬ 601 .080139 | cloud−in i t¬1288 | : ! = o=++!¬ 601 .080179 | cloud−in i t¬1288 | : ! + . o**§=!¬ 601 .080210 | cloud−in i t¬1288 | : ! . oo+&B%!¬ 601 .080244 | cloud−in i t¬1288 | : ! . . o*%/E!¬ 601 .080289 | cloud−in i t¬1288 | : +−−−−¬SHA256|−−−−−+¬ 612 .293731 | cloud−in i t¬2027 | : Cloud− i n i t v . 20.2−45−g5f7825e2−0ubuntu1
running ’ modules : con f i g ’ at Thu , 04 Jun 2020 12 : 06 : 59 +0000. Up 612.11 seconds .¬ 612 .293866 | cloud−in i t¬2027 | : Set the f o l l ow i ng ’ random ’ passwords¬ 612 .293940 | cloud−in i t¬2027 | : i n s t a l l e r :wgYsAPzYQbFYqU2X2hYmci−i n f o : no author i zed SSH keys f i n g e r p r i n t s found f o r user i n s t a l l e r .<14>Jun 4 12 : 07 : 00 ec2 :<14>Jun 4 12 : 07 : 00 ec2 :
#############################################################<14>Jun 4 12 : 07 : 00 ec2 : −−−−−BEGIN SSH HOST KEY FINGERPRINTS−−−−−<14>Jun 4 12 : 07 : 00 ec2 : 1024 SHA256 :ZBNyksVVYZVhKJeL+PWKpsdUcn21yiceX/
DboXQdPq0root§ubuntu−s e r v e r (DSA)
<14>Jun 4 12 : 07 : 00 ec2 : 256 SHA256 :Bitar9fVHUH2FnYVSJJnldprdAcM5Est0dmRWFTUi8k
root§ubuntu−s e r v e r (ECDSA)<14>Jun 4 12 : 07 : 00 ec2 : 256 SHA256 :yWsZ/5+7u7D3SIcd7HYnyajXyeWnt5nQ+
ZI3So3beN8root§ubuntu−s e r v e r (ED25519 )<14>Jun 4 12 : 07 : 00 ec2 : 3072 SHA256 :
kHtkABZwk8AE80fy0KPzTRcYpht4iXdZmJ37Cgi3fJ0root§ubuntu−s e r v e r (RSA)
<14>Jun 4 12 : 07 : 00 ec2 : −−−−−END SSH HOST KEY FINGERPRINTS−−−−−<14>Jun 4 12 : 07 : 00 ec2 :
#############################################################−−−−−BEGIN SSH HOST KEY KEYS−−−−−ecdsa−sha2−ni s tp256
AAAAE2VjZHNhLXNoYTItbmlzdHAyNTYAAAAIbmlzdHAyNTYAAABBBIXM6t1/35 ot /aPI59ThIJBzg+qGJJ17+1ZVHfzMEDbsTwpM7e9pstPZUM7W1IHWqDvLQDBm/
hGg4u8ZGEqmIMI=root§ubuntu−s e r v e r
ssh−ed25519 AAAAC3NzaC1lZDI1NTE5AAAAIN7QtU+en+RGruj2zuxWgkMqLmh+35/GR/OEOD16k4nA
root§ubuntu−s e r v e rssh−r sa AAAAB3NzaC1yc2EAAAADAQABAAABgQDJdKT7iUAvSjkUqI1l3fHysE+
Gj7ulwGgGjYh639pxkcHEbbS3V48eROY9BmDISEHfjYXGY2wEH0tGJjNRROGJhZJVNR+qAqJBioj9d/
TwXEgwLP8eAy9aVtJBK1rIylnMQltx/SIhgiymjHLCtKlVoIS4l0frT9FiF54Qi/
JeJlwGJIW3W2XgcY9ODT0Q5g3PSmlZ8KTRimTf9Fy7WJEPA08b3fimYWsz9enuS/
gECEUGV3M1MvrzpAQju27NUEOpSMZHR62IMxGvIjYIu3dUkAzmMBdwxHdLMQ8rI8PehyHDiFr6g2Ifxoy5QLmb3hISKlq/R6pLLeXbb748gN2i8WCvK0AEGfa/
kJDW3RNU
339
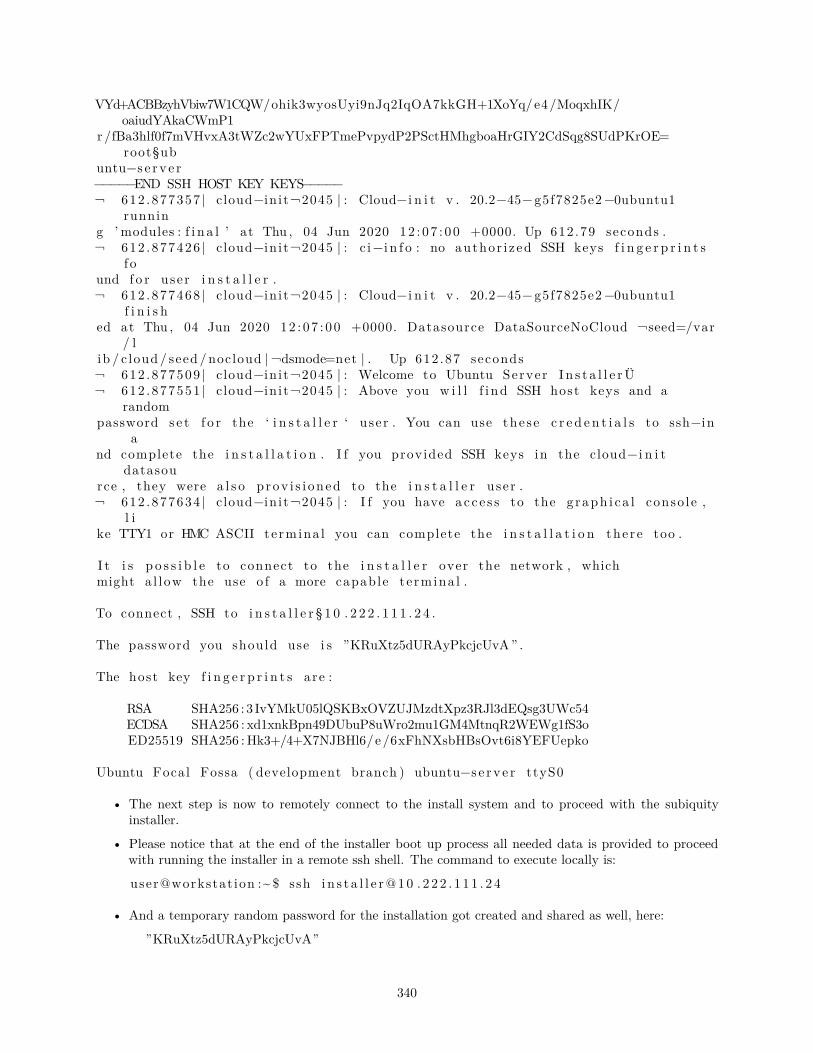
VYd+ACBBzyhVbiw7W1CQW/ohik3wyosUyi9nJq2IqOA7kkGH+1XoYq/e4/MoqxhIK/oaiudYAkaCWmP1
r /fBa3hlf0f7mVHvxA3tWZc2wYUxFPTmePvpydP2PSctHMhgboaHrGIY2CdSqg8SUdPKrOE=root§ub
untu−s e r v e r−−−−−END SSH HOST KEY KEYS−−−−−¬ 612 .877357 | cloud−in i t¬2045 | : Cloud− i n i t v . 20.2−45−g5f7825e2−0ubuntu1
running ’ modules : f i n a l ’ at Thu , 04 Jun 2020 12 : 07 : 00 +0000. Up 612.79 seconds .¬ 612 .877426 | cloud−in i t¬2045 | : c i−i n f o : no author i zed SSH keys f i n g e r p r i n t s
f ound f o r user i n s t a l l e r .¬ 612 .877468 | cloud−in i t¬2045 | : Cloud− i n i t v . 20.2−45−g5f7825e2−0ubuntu1
f i n i s hed at Thu , 04 Jun 2020 12 : 07 : 00 +0000. Datasource DataSourceNoCloud ¬seed=/var
/ lib / c loud / seed /nocloud | ¬dsmode=net | . Up 612.87 seconds¬ 612 .877509 | cloud−in i t¬2045 | : Welcome to Ubuntu Server I n s t a l l e rܬ 612 .877551 | cloud−in i t¬2045 | : Above you w i l l f i nd SSH host keys and a
randompassword s e t f o r the ‘ i n s t a l l e r ‘ user . You can use these c r e d e n t i a l s to ssh−in
and complete the i n s t a l l a t i o n . I f you provided SSH keys in the cloud− i n i t
datasource , they were a l s o p rov i s i oned to the i n s t a l l e r user .¬ 612 .877634 | cloud−in i t¬2045 | : I f you have ac c e s s to the g raph i c a l conso le ,
l ike TTY1 or HMC ASCII te rmina l you can complete the i n s t a l l a t i o n there too .
I t i s p o s s i b l e to connect to the i n s t a l l e r over the network , whichmight a l low the use o f a more capable te rmina l .
To connect , SSH to i n s t a l l e r § 1 0 . 2 2 2 . 1 1 1 . 2 4 .
The password you should use i s ”KRuXtz5dURAyPkcjcUvA” .
The host key f i n g e r p r i n t s are :
RSA SHA256 : 3 IvYMkU05lQSKBxOVZUJMzdtXpz3RJl3dEQsg3UWc54ECDSA SHA256 : xd1xnkBpn49DUbuP8uWro2mu1GM4MtnqR2WEWg1fS3oED25519 SHA256 :Hk3+/4+X7NJBHl6/e/6xFhNXsbHBsOvt6i8YEFUepko
Ubuntu Focal Fossa ( development branch ) ubuntu−s e r v e r ttyS0
• The next step is now to remotely connect to the install system and to proceed with the subiquityinstaller.
• Please notice that at the end of the installer boot up process all needed data is provided to proceedwith running the installer in a remote ssh shell. The command to execute locally is:
user@workstat ion :~ $ ssh i n s t a l l e r@10 . 2 2 2 . 1 1 1 . 2 4
• And a temporary random password for the installation got created and shared as well, here:
”KRuXtz5dURAyPkcjcUvA”
340

(Use it without the leading and trailing double quotes.)user@workstat ion :~ $ ssh i n s t a l l e r@10 . 2 2 2 . 1 1 1 . 2 4The au th en t i c i t y o f host ’ 1 0 . 2 22 . 1 11 . 2 4 ( 1 0 . 2 2 2 . 1 1 1 . 2 4 ) ’ can ’ t be
e s t ab l i s h ed .ECDSA key f i n g e r p r i n t i sSHA256 : xd1xnkBpn49DUbuP8uWro2mu1GM4MtnqR2WEWg1fS3o .Are you sure you want to cont inue connect ing ( yes /no / [ f i n g e r p r i n t ] ) ? yesWarning : Permanently added ’ 1 0 . 2 22 . 1 11 . 2 4 ’ (ECDSA) to the l i s t o f known
host s .i n s t a l l e r@10 . 2 2 2 . 1 1 1 . 2 4 ’ s password : KRuXtz5dURAyPkcjcUvA
• One may now temporarily see some login messages like these:Welcome to Ubuntu Focal Fossa ( development branch ) (GNU/Linux 5.4.0−42−
g ene r i c s390x )
* Documentation : https : // help . ubuntu . com* Management : https : // landscape . canon i ca l . com* Support : https : // ubuntu . com/advantage
System in format ion as o f Wed Jun 3 17 : 32 : 10 UTC 2020
System load : 0 . 0 Memory usage : 2% Proce s s e s : 146Usage o f /home : unknown Swap usage : 0% Users logged in : 0
0 updates can be i n s t a l l e d immediately .0 o f the se updates are s e c u r i t y updates .
The programs inc luded with the Ubuntu system are f r e e so f tware ;the exact d i s t r i b u t i o n terms f o r each program are de s c r ibed in thei nd i v i dua l f i l e s in / usr / share /doc /*/ copyr ight .
Ubuntu comes with ABSOLUTELY NO WARRANTY, to the extent permitted byapp l i c ab l e law .
• And eventually the initial subiquity installer screen shows up:====================================================================
Willkommen ! Bienvenue ! Welcome ! ????? ?????????? ! Welkom !====================================================================
Use UP, DOWN and ENTER keys to s e l e c t your language .
[ Eng l i sh > ][ Asturianu > ][ Cataln > ][ Hrvatsk i > ][ Nederlands > ][ Suomi > ][ Franca i s > ][ Deutsch > ][ Magyar > ][ Latv ie ?u > ][ Norsk bokm? l > ][ Po l sk i > ][ Espanol > ]
341

• From here just proceed with the installation as usual … (I’m leaving some pretty standard screenshotshere just to give an example for a basic installation …)
====================================================================Keyboard con f i gu r a t i on
====================================================================Please s e l e c t your keyboard layout below , or s e l e c t ” I d e n t i f y keyboard ” tode t e c t your layout automat i ca l l y .
Layout : [ Eng l i sh (US) v ]
Variant : [ Eng l i sh (US) v ]
[ I d e n t i f y keyboard ]
[ Done ][ Back ]
====================================================================Zdev setup
====================================================================ID ONLINE NAMES ^
�
gener i c−ccw �0 . 0 . 0009 > �0 . 0 . 0 00 c > �0 . 0 . 0 00 d > �0 . 0 . 0 00 e > ��
dasd−eckd �0 . 0 . 0190 > �0 . 0 . 0191 > �0 . 0 . 0 19 d > �0 . 0 . 0 19 e >0 . 0 . 0200 >0 .0 . 0300 >0 .0 . 0400 >0 .0 . 0592 > v
[ Continue ][ Back ]
• If the list is long, hit the ‘End’ key that will automatically scroll you down to the bottom of the Zdevices list and screen.
====================================================================
342

Zdev setup====================================================================
ID ONLINE NAMES ^�
gener i c−ccw �0 . 0 . 0009 > �0 . 0 . 0 00 c > �0 . 0 . 0 00 d > �0 . 0 . 0 00 e > ��
dasd−eckd �0 . 0 . 0190 > �0 . 0 . 0191 > �0 . 0 . 0 19 d > �0 . 0 . 0 19 e �������������� >0 . 0 . 0200 � >< ( c l o s e ) �0 . 0 . 0300 � > Enable �0 . 0 . 0400 � > Disab le �0 . 0 . 0592 �������������� > v
[ Continue ][ Back ]
====================================================================Zdev setup
====================================================================ID ONLINE NAMES ^
�
gener i c−ccw �0 . 0 . 0009 > �0 . 0 . 0 00 c > �0 . 0 . 0 00 d > �0 . 0 . 0 00 e > ��
dasd−eckd �0 . 0 . 0190 > �0 . 0 . 0191 > �0 . 0 . 0 19 d > �0 . 0 . 0 19 e >0 . 0 . 0200 on l i n e dasda >0 .0 . 0300 >0 .0 . 0400 >0 .0 . 0592 > v
[ Continue ][ Back ]
====================================================================Zdev setup
====================================================================^
dasd−eckd
343
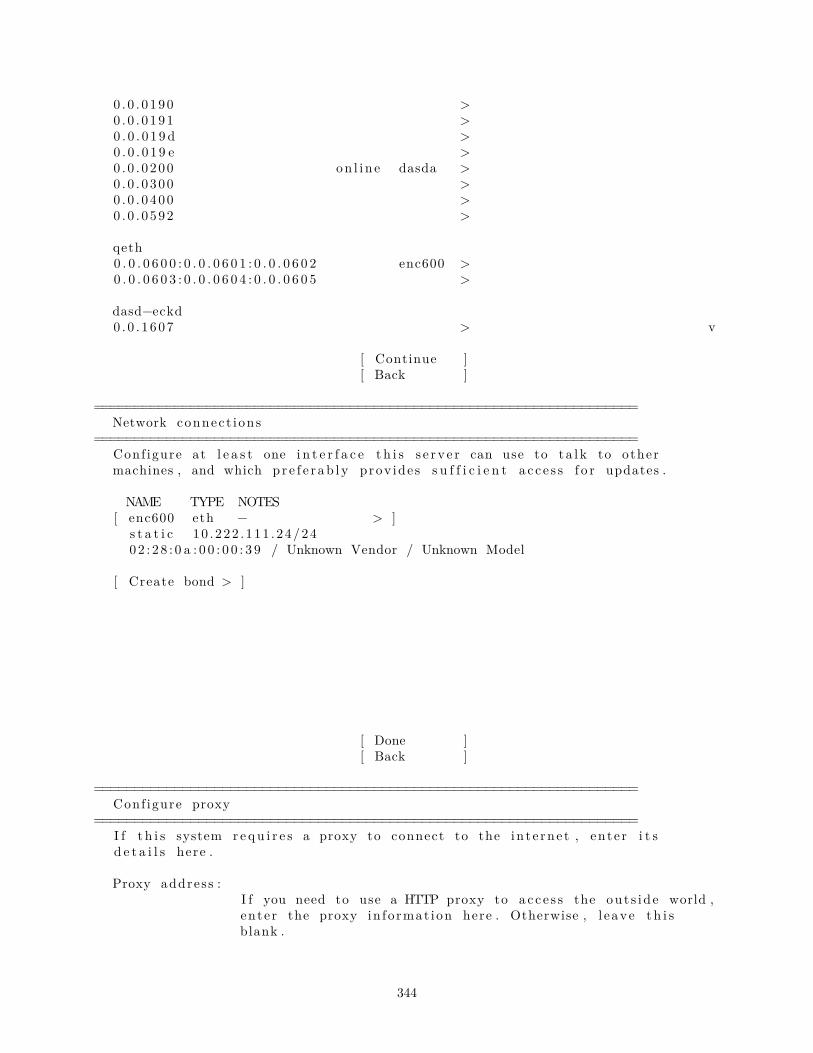
0 . 0 . 0190 >0 .0 . 0191 >0 . 0 . 0 19 d >0 . 0 . 0 19 e > �0 . 0 . 0200 on l i n e dasda > �0 . 0 . 0300 > �0 . 0 . 0400 > �0 . 0 . 0592 > ��
qeth �0 . 0 . 0 6 0 0 : 0 . 0 . 0 6 0 1 : 0 . 0 . 0 6 0 2 enc600 > �0 . 0 . 0 6 0 3 : 0 . 0 . 0 6 0 4 : 0 . 0 . 0 6 0 5 > ��
dasd−eckd �0 . 0 . 1607 > v
[ Continue ][ Back ]
====================================================================Network connec t i ons
====================================================================Conf igure at l e a s t one i n t e r f a c e t h i s s e r v e r can use to t a l k to othermachines , and which p r e f e r ab l y prov ide s s u f f i c i e n t a c c e s s f o r updates .
NAME TYPE NOTES[ enc600 eth − > ]
s t a t i c 10 . 222 . 111 . 24/2402 : 2 8 : 0 a : 0 0 : 0 0 : 3 9 / Unknown Vendor / Unknown Model
[ Create bond > ]
[ Done ][ Back ]
====================================================================Conf igure proxy
====================================================================I f t h i s system r e qu i r e s a proxy to connect to the in t e rne t , ente r i t sd e t a i l s here .
Proxy address :I f you need to use a HTTP proxy to a c c e s s the out s id e world ,ente r the proxy in fo rmat ion here . Otherwise , l e ave t h i sblank .
344

The proxy in fo rmat ion should be g iven in the standard formof ” http : / / [ [ user ] [ : pass ]@] host [ : port ] / ” .
[ Done ][ Back ]
====================================================================Conf igure Ubuntu arch ive mirror
====================================================================I f you use an a l t e r n a t i v e mirror f o r Ubuntu , ente r i t s d e t a i l s here .
Mirror address : http :// por t s . ubuntu . com/ubuntu−por t sYou may prov ide an arch ive mirror that w i l l be used in s t eado f the d e f au l t .
[ Done ][ Back ]
====================================================================Guided s to rage c on f i gu r a t i on
====================================================================Conf igure a guided s to rage layout , or c r e a t e a custom one :
(X) Use an e n t i r e d i sk
[ 0X0200 l o c a l d i sk 6 .876G v ]
[ ] Set up t h i s d i sk as an LVM group
[ ] Encrypt the LVM group with LUKS
Passphrase :
Confirm passphrase :
345
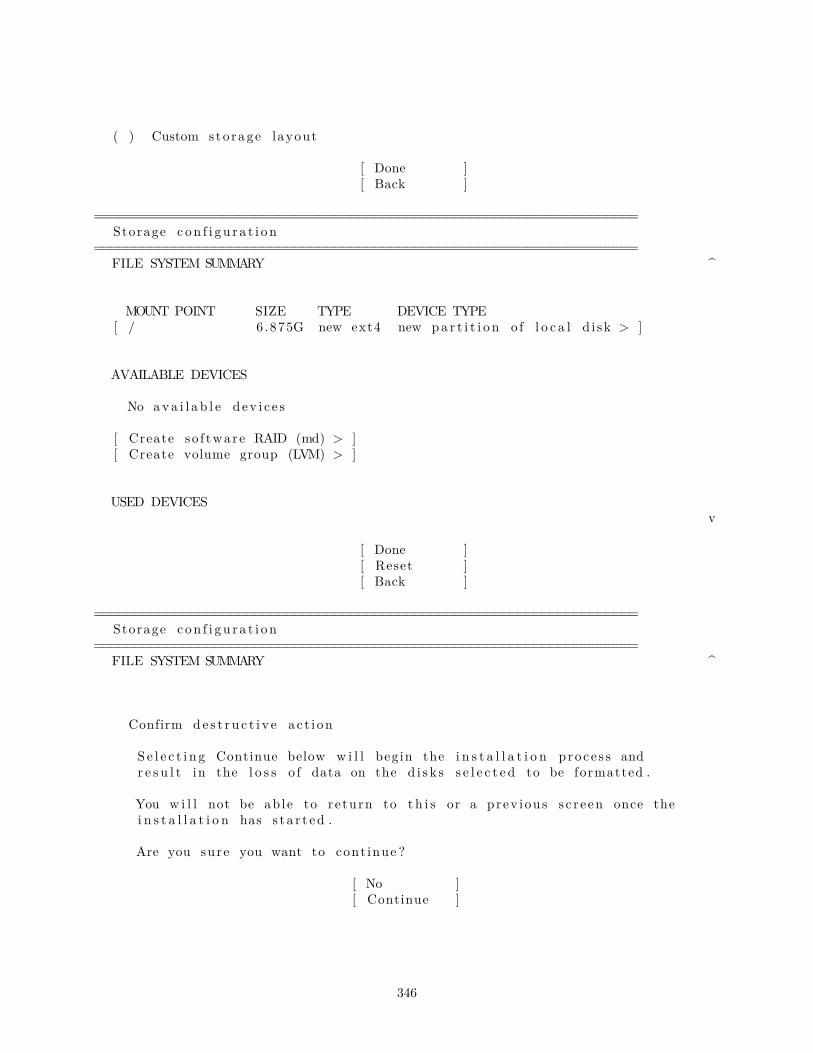
( ) Custom sto rage layout
[ Done ][ Back ]
====================================================================Storage c on f i gu r a t i on
====================================================================FILE SYSTEM SUMMARY ^
�
MOUNT POINT SIZE TYPE DEVICE TYPE �[ / 6 .875G new ext4 new pa r t i t i o n o f l o c a l d i sk > ] ���
AVAILABLE DEVICES ��
No av a i l a b l e dev i c e s ��
[ Create so f tware RAID (md) > ] �[ Create volume group (LVM) > ] �
USED DEVICESv
[ Done ][ Reset ][ Back ]
====================================================================Storage c on f i gu r a t i on
====================================================================FILE SYSTEM SUMMARY ^
������������������������
Confirm de s t r u c t i v e ac t i on ��������������������������
S e l e c t i n g Continue below w i l l begin the i n s t a l l a t i o n proce s s and ��r e s u l t in the l o s s o f data on the d i s k s s e l e c t e d to be formatted . ����
You w i l l not be ab le to re turn to t h i s or a prev ious s c r e en once the ��i n s t a l l a t i o n has s t a r t ed . ����
Are you sure you want to cont inue ? ����
[ No ] ��[ Continue ]
�����������������������������������������������������������������������������
346

[ Reset ][ Back ]
====================================================================Pr o f i l e setup
====================================================================Enter the username and password you w i l l use to l og in to the system . Youcan con f i gu r e SSH acc e s s on the next s c r e en but a password i s s t i l l neededf o r sudo .
Your name : Ed Example
Your se rver ’ s name : 10 . 222 . 111 . 24The name i t uses when i t t a l k s to other computers .
Pick a username : ubuntu
Choose a password : ********
Confirm your password : ********
[ Done ]
====================================================================SSH Setup
====================================================================You can choose to i n s t a l l the OpenSSH se rv e r package to enable s e cure remotea c c e s s to your s e r v e r .
[ ] I n s t a l l OpenSSH se rv e r
Import SSH i d en t i t y : [ No v ]You can import your SSH keys from Github or Launchpad .
Import Username :
[X] Allow password au then t i c a t i on over SSH
[ Done ][ Back ]
• It’s an nice and convenient new feature to add the users ssh keys during the installation to the system,since that makes the system login password-less already on the initial login!
347
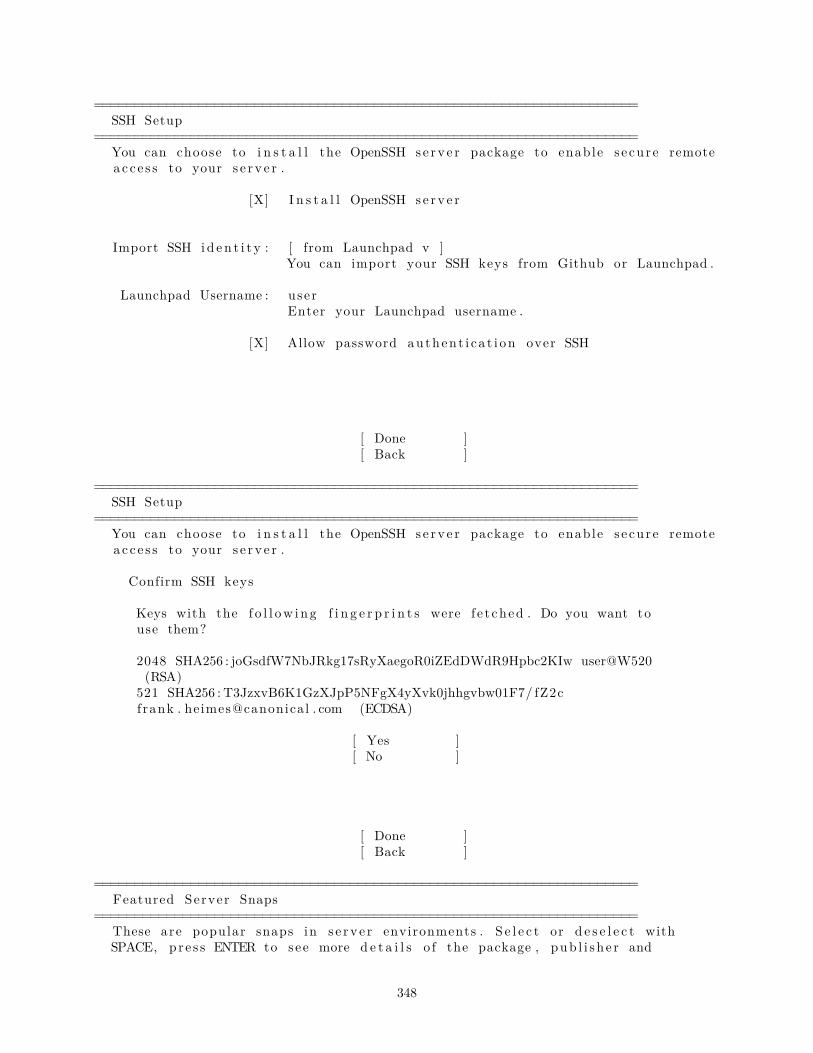
====================================================================SSH Setup
====================================================================You can choose to i n s t a l l the OpenSSH se rv e r package to enable s e cure remotea c c e s s to your s e r v e r .
[X] I n s t a l l OpenSSH se rv e r
Import SSH i d en t i t y : [ from Launchpad v ]You can import your SSH keys from Github or Launchpad .
Launchpad Username : userEnter your Launchpad username .
[X] Allow password au then t i c a t i on over SSH
[ Done ][ Back ]
====================================================================SSH Setup
====================================================================You can choose to i n s t a l l the OpenSSH se rv e r package to enable s e cure remotea c c e s s to your s e r v e r . ����������������������������
Confirm SSH keys �������������������������������
Keys with the f o l l ow i ng f i n g e r p r i n t s were f e t ched . Do you want to ��use them? ����
2048 SHA256 : joGsdfW7NbJRkg17sRyXaegoR0iZEdDWdR9Hpbc2KIw user@W520 ��(RSA) ��
521 SHA256 : T3JzxvB6K1GzXJpP5NFgX4yXvk0jhhgvbw01F7/ fZ2c ��f rank . heimes@canonical . com (ECDSA) ����
[ Yes ] ��[ No ]
�����������������������������������������������������������������������������
[ Done ][ Back ]
====================================================================Featured Server Snaps
====================================================================These are popular snaps in s e r v e r environments . S e l e c t or d e s e l e c t withSPACE, p r e s s ENTER to see more d e t a i l s o f the package , pub l i s h e r and
348
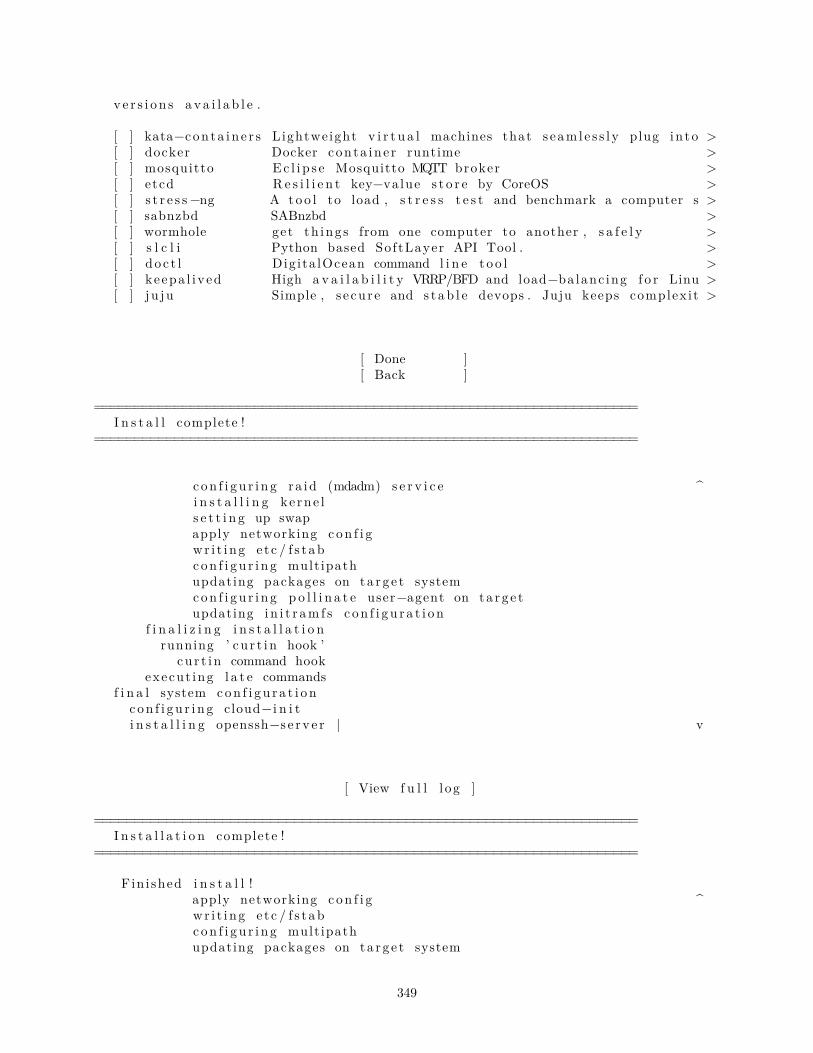
ve r s i on s a v a i l a b l e .
[ ] kata−con ta i n e r s Lightweight v i r t u a l machines that s eaml e s s l y plug in to >[ ] docker Docker conta ine r runtime >[ ] mosquitto Ec l i p s e Mosquitto MQTT broker >[ ] etcd R e s i l i e n t key−value s t o r e by CoreOS >[ ] s t r e s s −ng A too l to load , s t r e s s t e s t and benchmark a computer s >[ ] sabnzbd SABnzbd >[ ] wormhole get th ing s from one computer to another , s a f e l y >[ ] s l c l i Python based SoftLayer API Tool . >[ ] do c t l Dig i ta lOcean command l i n e t o o l >[ ] keepa l i ved High a v a i l a b i l i t y VRRP/BFD and load−ba lanc ing f o r Linu >[ ] j u ju Simple , s e cu re and s t ab l e devops . Juju keeps complex it >
[ Done ][ Back ]
====================================================================I n s t a l l complete !
====================================================================�����������������������������������������������������������������������������
c on f i gu r i n g ra id (mdadm) s e r v i c e � ^�i n s t a l l i n g ke rne l ��s e t t i n g up swap ��apply networking c on f i g ��wr i t i ng e tc / f s t ab ��c on f i gu r i n g mult ipath ��updating packages on ta r g e t system ��c on f i gu r i n g p o l l i n a t e user−agent on ta rg e t ��updating i n i t r am f s c on f i gu r a t i on ��
f i n a l i z i n g i n s t a l l a t i o n ��running ’ cu r t i n hook ’ ��
c u r t i n command hook ��execut ing l a t e commands ��
f i n a l system con f i gu r a t i on ��c on f i gu r i n g cloud− i n i t ���i n s t a l l i n g openssh−s e r v e r | � v
����������������������������������������������������������������������������
[ View f u l l l og ]
====================================================================I n s t a l l a t i o n complete !
====================================================================�����������������������������F in i shed i n s t a l l ! �����������������������������
apply networking c on f i g � ^�wr i t i ng e tc / f s t ab ��c on f i gu r i n g mult ipath ��updating packages on ta r g e t system ��
349
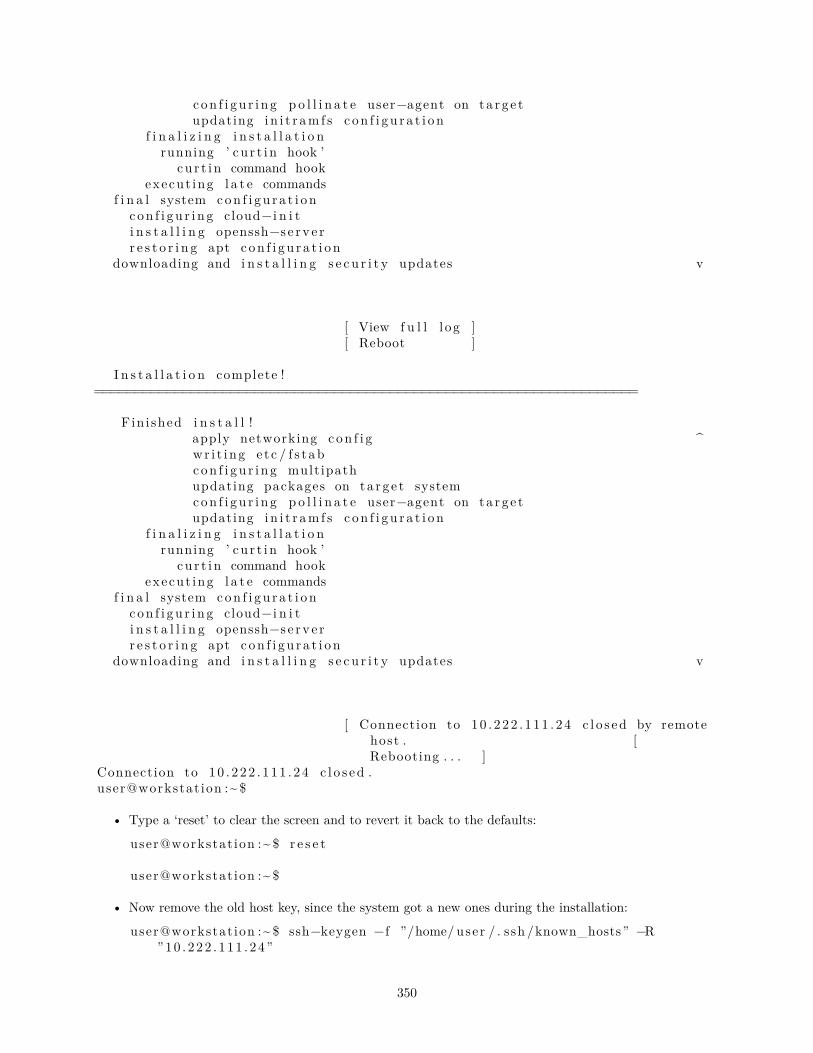
c on f i gu r i n g p o l l i n a t e user−agent on ta rg e t ��updating i n i t r am f s c on f i gu r a t i on ��
f i n a l i z i n g i n s t a l l a t i o n ��running ’ cu r t i n hook ’ ��
c u r t i n command hook ��execut ing l a t e commands ��
f i n a l system con f i gu r a t i on ��c on f i gu r i n g cloud− i n i t ��i n s t a l l i n g openssh−s e r v e r ��r e s t o r i n g apt c on f i gu r a t i on ���
downloading and i n s t a l l i n g s e c u r i t y updates � v����������������������������������������������������������������������������
[ View f u l l l og ][ Reboot ]
I n s t a l l a t i o n complete !====================================================================
�����������������������������F in i shed i n s t a l l ! �����������������������������
apply networking c on f i g � ^�wr i t i ng e tc / f s t ab ��c on f i gu r i n g mult ipath ��updating packages on ta r g e t system ��c on f i gu r i n g p o l l i n a t e user−agent on ta rg e t ��updating i n i t r am f s c on f i gu r a t i on ��
f i n a l i z i n g i n s t a l l a t i o n ��running ’ cu r t i n hook ’ ��
c u r t i n command hook ��execut ing l a t e commands ��
f i n a l system con f i gu r a t i on ��c on f i gu r i n g cloud− i n i t ��i n s t a l l i n g openssh−s e r v e r ��r e s t o r i n g apt c on f i gu r a t i on ���
downloading and i n s t a l l i n g s e c u r i t y updates � v����������������������������������������������������������������������������
[ Connection to 10 . 222 . 111 . 24 c l o s ed by remotehost . [Rebooting . . . ]
Connection to 10 . 222 . 111 . 24 c l o s ed .user@workstat ion :~ $
• Type a ‘reset’ to clear the screen and to revert it back to the defaults:
user@workstat ion :~ $ r e s e t
user@workstat ion :~ $
• Now remove the old host key, since the system got a new ones during the installation:
user@workstat ion :~ $ ssh−keygen −f ”/home/ user / . ssh /known_hosts” −R”10 . 222 . 111 . 24”
350

# Host 10 . 222 . 111 . 24 found : l i n e 159/home/ user / . ssh /known_hosts updated .Or i g ina l contents r e t a in ed as /home/ user / . ssh /known_hosts . o lduser@workstat ion :~ $
• And finally login to the newly installed z/VM guest:user@workstat ion :~ $ ssh ubuntu@10 . 2 2 2 . 1 1 1 . 2 4Warning : Permanently added the ECDSA host key f o r IP address’ 1 0 . 2 22 . 1 11 . 2 4 ’ to the l i s t o f known host s .Welcome to Ubuntu 20 . 0 4 . 1 LTS (GNU/Linux 5.4.0−42− g ene r i c s390x )
* Documentation : https : // help . ubuntu . com* Management : https : // landscape . canon i ca l . com* Support : https : // ubuntu . com/advantage
System in format ion as o f Wed 03 Jun 2020 05 : 50 : 05 PM UTC
System load : 0 .08 Memory usage : 2% Proce s s e s : 157Usage o f / : 18.7% o f 6 .70GB Swap usage : 0% Users logged in : 0
0 updates can be i n s t a l l e d immediately .0 o f the se updates are s e c u r i t y updates .
The programs inc luded with the Ubuntu system are f r e e so f tware ;the exact d i s t r i b u t i o n terms f o r each program are de s c r ibed in the
i nd i v i dua l f i l e s in / usr / share /doc /*/ copyr ight .
Ubuntu comes with ABSOLUTELY NO WARRANTY, to the extent permitted byapp l i c ab l e law .
To run a command as admin i s t ra to r ( user ” root ”) , use ” sudo <command>”.See ”man sudo_root ” f o r d e t a i l s .
ubuntu@10 . 2 2 2 . 1 1 1 . 2 4 : ~ $ uptime17 : 50 : 09 up 1 min , 1 user , load average : 0 . 08 , 0 . 11 , 0 .05
ubuntu@10 . 2 2 2 . 1 1 1 . 2 4 : ~ $ l s b_r e l e a s e −aNo LSB modules are a v a i l a b l e .D i s t r i bu t o r ID : UbuntuDesc r ip t i on : Ubuntu 20 . 0 4 . 1 LTSRelease : 20 .04Codename : f o c a lubuntu@10 . 2 2 2 . 1 1 1 . 2 4 : ~ $ uname −aLinux 10 . 222 . 111 . 24 5.4.0−42− g ene r i c #30−Ubuntu SMP Wed Aug 05 16 : 57 : 22
UTC 2020 s390x s390x s390x GNU/Linuxubuntu@10 . 2 2 2 . 1 1 1 . 2 4 : ~ $ e x i tl ogoutConnection to 10 . 222 . 111 . 24 c l o s ed .user@workstat ion :~ $
Done !
Interactive live server installation on IBM Z LPAR (s390x)
Doing a manual live installation like described here - means without specifying a parmfile - is supported sinceUbuntu Server LTS 20.04.1 (‘focal’) and any newer release, like 20.10 (‘groovy’).
351

• The following guide assumes that an FTP installation server is in place, that can be used by the ‘Loadfrom Removable Media and Server’ task of the HMC.
• Download the ‘focal daily live image’ from here (later 20.04.1 image): http://cdimage.ubuntu.com/ubuntu/releases/20.04.1/release/ubuntu-20.04.1-live-server-s390x.iso and extract and make it available via your FTP-hosted installation server.
• Open the IBM Z Hardware Management Console (HMC) and navigate to ‘Systems Management’ –>‘<your system indicated by it’s serial number>’
• Select the LPAR that you are going to install Ubuntu Server on; in this example LPAR ‘s1lp11’ is used
• Now select menu: ‘Recovery’ –> ‘Load from Removable Media or Server’ task
• And fill out the ‘Load from Removable Media or Server’ form like follows (adapt the settings to yourparticular installation environment):
Load from Removable Media , or Server − <s e r i a l >: s1 lp11Use t h i s task to load operat ing system so f tware or u t i l i t y programsfrom a CD / DVD−ROM or a s e r v e r that can be acce s s ed us ing FTP.S e l e c t the source o f the so f tware :o Hardware Management Console CD / DVD−ROMo Hardware Management Console CD / DVD−ROM and as s i gn f o r opera t ing system
useo Hardware Management Console USB f l a s h memory dr iv eo Hardware Management Console USB f l a s h memory dr iv e and a s s i gn f o r
operat ing system use* FTP Source
Host computer : i n s t a l l −s e r v e rUser ID : f t pu s e rPassword : ********Account ( op t i ona l ) :F i l e l o c a t i o n ( op t i ona l ) : ubuntu−l i v e −s e rver −20.04.1/ boot
You may need to adjust the File location according to your install server environment.
• Confirm the entered data
Load from Removable Media or Server − Se l e c t Software to I n s t a l l −<s e r i a l >: s1 lp11S e l e c t the so f tware to i n s t a l l .S e l e c t Name Desc r ip t i on* ubuntu−l i v e −s e rver −20.04.1/ boot/ubuntu . i n s Ubuntu f o r IBM Z (
de f au l t k e rne l )
• Confirm again that jobs might be canceled if proceeding
Load from Removable Media or Server Task Conf irmation −<s e r i a l >: s1 lp11Load w i l l cause jobs to be c an c e l l e d .Do you want to cont inue with t h i s task ?ACT33501
• And confirm a last time that it’s understood that the task is disruptive:
D i s rupt ive Task Confirmation : Load from Removable Media or Server −<s e r i a l >: s1 lp11
Attent ion : The Load from Removable Media or Server task i s d i s r up t i v e .
352

Executing the Load from Removable Media or Server task mayadve r s e l y a f f e c t the ob j e c t s l i s t e d below . Review the con f i rmat ion textf o r each ob j e c t be f o r e cont inu ing with the Load from Removable Mediaor Server task .
Objects that w i l l be a f f e c t e d by the Load from Removable Media orServer task
System Name Type OS Name Status Conf irmation Text<s e r i a l >: s1 lp11 Image Operating Load from Removable
Mediaor Server causes ope ra t i on s to be disrupted , s i n c e the t a r g e t i scu r r en t l y in use and opera t ing normally .
Do you want to execute the Load from Removable Media or Server task ?
• The ‘Load from Removable media or Server’ task is now executed …
Load from Removable media or Server Progres s − P00B8F67 : S1LPBTurn on context s e n s i t i v e he lp .Function durat ion time : 00 : 55 : 00Elapsed time : 00 : 00 : 04S e l e c t Object Name Status* <s e r i a l > s1 lp11 Please wait whi l e the image i s be ing loaded .
• This may take a moment, but you will soon see:
Load from Removable media or Server Progres s − <s e r i a l >: s1 lp11Function durat ion time : 00 : 55 : 00Elapsed time : 00 : 00 : 21S e l e c t Object Name Status* <s e r i a l > s1 lp11 Success
• Close the ‘Load from Removable media or Server’ task and open the console aka ‘Operating SystemMessages’ instead. And in case no parmfile got configured or provided, one will find the following linesin the ‘Operating System Messages’ task:
Operating System Messages − <s e r i a l >: s1 lp11
Message
Unable to f i nd a medium conta ine r a l i v e f i l e systemAttempt i n t e r a c t i v e netboot from a URL?yes no ( d e f au l t yes ) :
• So one will now by default land in the interactive network configuration menu (again, only if no parmfilegot prepared with sufficient network configuration information).
• Proceed with the interactive network configuration, here in this case in a VLAN environment:
Unable to f i nd a medium conta ine r a l i v e f i l e systemAttempt i n t e r a c t i v e netboot from a URL?yes no ( d e f au l t yes ) :yesAva i l ab l e qeth dev i c e s :0 . 0 . c000 0 . 0 . c003 0 . 0 . c006 0 . 0 . c009 0 . 0 . c00c 0 . 0 . c00 fzdev to a c t i v a t e (comma separated , op t i ona l ) :
353
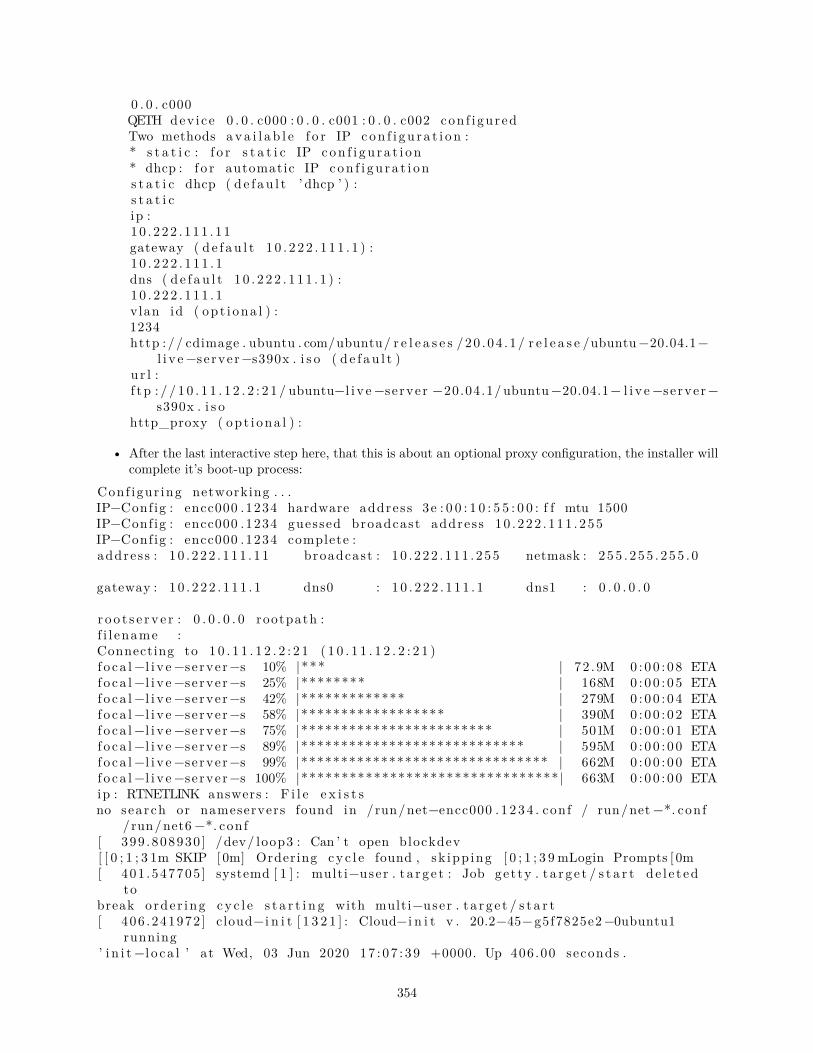
0 . 0 . c000QETH dev i ce 0 . 0 . c000 : 0 . 0 . c001 : 0 . 0 . c002 con f i gu r edTwo methods a v a i l a b l e f o r IP con f i gu r a t i on :* s t a t i c : f o r s t a t i c IP con f i gu r a t i on* dhcp : f o r automatic IP con f i gu r a t i ons t a t i c dhcp ( d e f au l t ’ dhcp ’ ) :s t a t i cip :1 0 . 2 22 . 111 . 11gateway ( d e f au l t 1 0 . 2 2 2 . 1 1 1 . 1 ) :1 0 . 2 22 . 1 11 . 1dns ( d e f au l t 1 0 . 2 2 2 . 1 1 1 . 1 ) :1 0 . 2 22 . 1 11 . 1vlan id ( op t i ona l ) :1234http :// cdimage . ubuntu . com/ubuntu/ r e l e a s e s /20 . 04 . 1/ r e l e a s e /ubuntu−20.04.1−
l i v e −s e rver−s390x . i s o ( d e f au l t )u r l :f t p : / / 1 0 . 1 1 . 1 2 . 2 : 2 1 / ubuntu−l i v e −s e rver −20.04.1/ ubuntu−20.04.1− l i v e −se rver−
s390x . i s ohttp_proxy ( op t i ona l ) :
• After the last interactive step here, that this is about an optional proxy configuration, the installer willcomplete it’s boot-up process:
Conf igur ing networking . . .IP−Config : encc000 .1234 hardware address 3e : 0 0 : 1 0 : 5 5 : 0 0 : f f mtu 1500IP−Config : encc000 .1234 guessed broadcast address 10 . 222 . 111 . 255IP−Config : encc000 .1234 complete :address : 1 0 . 222 . 111 . 11 broadcast : 10 . 222 . 111 . 255 netmask : 255 . 255 . 255 . 0
gateway : 1 0 . 2 22 . 1 11 . 1 dns0 : 1 0 . 2 22 . 1 11 . 1 dns1 : 0 . 0 . 0 . 0
r o o t s e r v e r : 0 . 0 . 0 . 0 rootpath :f i l ename :Connecting to 1 0 . 1 1 . 1 2 . 2 : 2 1 ( 1 0 . 1 1 . 1 2 . 2 : 2 1 )f o ca l−l i v e −se rver−s 10% |*** | 72 .9M 0 : 00 : 0 8 ETAfoca l−l i v e −se rver−s 25% |******** | 168M 0 : 00 : 0 5 ETAfoca l−l i v e −se rver−s 42% |************* | 279M 0 : 00 : 0 4 ETAfoca l−l i v e −se rver−s 58% |****************** | 390M 0 : 00 : 0 2 ETAfoca l−l i v e −se rver−s 75% |************************ | 501M 0 : 00 : 0 1 ETAfoca l−l i v e −se rver−s 89% |**************************** | 595M 0 : 00 : 0 0 ETAfoca l−l i v e −se rver−s 99% |******************************* | 662M 0 : 00 : 0 0 ETAfoca l−l i v e −se rver−s 100% |********************************| 663M 0 : 00 : 0 0 ETAip : RTNETLINK answers : F i l e e x i s t sno search or nameservers found in /run/net−encc000 . 1 2 3 4 . conf / run/net −*. conf
/run/net6 −*. conf[ 399 .808930 ] /dev/ loop3 : Can ’ t open blockdev[ [ 0 ; 1 ; 3 1m SKIP [0m] Ordering cy c l e found , sk ipp ing [ 0 ; 1 ; 3 9 mLogin Prompts [ 0m[ 401 .547705 ] systemd [ 1 ] : multi−user . t a r g e t : Job get ty . t a r g e t / s t a r t de l e t ed
tobreak orde r ing cy c l e s t a r t i n g with multi−user . t a r g e t / s t a r t[ 406 .241972 ] cloud− i n i t [ 1 3 2 1 ] : Cloud− i n i t v . 20.2−45−g5f7825e2−0ubuntu1
running’ i n i t −l o c a l ’ at Wed, 03 Jun 2020 17 : 07 : 39 +0000. Up 406 .00 seconds .
354

[ 407 .025557 ] cloud− i n i t [ 1 3 4 8 ] : Cloud− i n i t v . 20.2−45−g5f7825e2−0ubuntu1running
’ i n i t ’ at Wed, 03 Jun 2020 17 : 07 : 40 +0000. Up 406 .87 seconds .[ 407 .025618 ] cloud− i n i t [ 1 3 4 8 ] : c i−i n f o : ++++Net dev i ce i n f o++++[ 407 .025658 ] cloud− i n i t [ 1 3 4 8 ] : c i−i n f o :
+−−−−−−−−−−−−−−+−−−−−−+−−−−−−−−−−−−−−−−−−−−−−−−−−−−−−+−−−−−−−−−−−−−−−+−−−−−−−−+−−−−−−−−−−−−−−−−−−−+[ 407 .025696 ] cloud− i n i t [ 1 3 4 8 ] : c i−i n f o : | Device | Up |
Addre s s | Mask | Scope | Hw−Address |[ 407 .025731 ] cloud− i n i t [ 1 3 4 8 ] : c i−i n f o :
+−−−−−−−−−−−−−−+−−−−−−+−−−−−−−−−−−−−−−−−−−−−−−−−−−−−−+−−−−−−−−−−−−−−−+−−−−−−−−+−−−−−−−−−−−−−−−−−−−+[ 407 .025766 ] cloud− i n i t [ 1 3 4 8 ] : c i−i n f o : | encc000 | True | f e80 : : 3 ca7
:10 ff : f ea5 : c69e /64 | . | l i n k | 72 :5d : 0 d : 0 9 : ea : 76 |[ 407 .025802 ] cloud− i n i t [ 1 3 4 8 ] : c i−i n f o : | encc000 .1234 | True |
1 0 . 2 45 .236 .11 | 255 . 255 . 255 . 0 | g l oba l | 72 :5d : 0 d : 0 9 : ea : 76 |[ 407 .025837 ] cloud− i n i t [ 1 3 4 8 ] : c i−i n f o : | encc000 .1234 | True | f e80 : : 3 ca7
:10 ff : f ea5 : c69e /64 | . | l i n k | 72 :5d : 0 d : 0 9 : ea : 76 |[ 407 .025874 ] cloud− i n i t [ 1 3 4 8 ] : c i−i n f o : | l o | True |
127 .0. 0 . 1 | 2 5 5 . 0 . 0 . 0 | host | . |[ 407 .025909 ] cloud− i n i t [ 1 3 4 8 ] : c i−i n f o : | l o | True |
: : 1 /128 | . | host | . |[ 407 .025944 ] cloud− i n i t [ 1 3 4 8 ] : c i−i n f o :
+−−−−−−−−−−−−−−+−−−−−−+−−−−−−−−−−−−−−−−−−−−−−−−−−−−−−+−−−−−−−−−−−−−−−+−−−−−−−−+−−−−−−−−−−−−−−−−−−−+[ 407 .025982 ] cloud− i n i t [ 1 3 4 8 ] : c i−i n f o : +++++++++++++Route IPv4 i n f o++++++++++++++[ 407 .026017 ] cloud− i n i t [ 1 3 4 8 ] : c i−i n f o :
+−−−−−−−+−−−−−−−−−−−−−−+−−−−−−−−−−−−−−+−−−−−−−−−−−−−−−+−−−−−−−−−−−−−−+−−−−−−−+[ 407 .026072 ] cloud− i n i t [ 1 3 4 8 ] : c i−i n f o : | Route | Des t inat i on | Gateway| Genmask | I n t e r f a c e | Flags |[ 407 .026107 ] cloud− i n i t [ 1 3 4 8 ] : c i−i n f o :
+−−−−−−−+−−−−−−−−−−−−−−+−−−−−−−−−−−−−−+−−−−−−−−−−−−−−−+−−−−−−−−−−−−−−+−−−−−−−+[ 407 .026141 ] cloud− i n i t [ 1 3 4 8 ] : c i−i n f o : | 0 | 0 . 0 . 0 . 0 |
1 0 . 2 22 . 1 11 . 1| 0 . 0 . 0 . 0 | encc000 .1234 | UG |[ 407 .026176 ] cloud− i n i t [ 1 3 4 8 ] : c i−i n f o : | 1 | 1 0 . 2 22 . 1 11 . 0 | 0 . 0 . 0 . 0| 2 55 . 2 55 . 255 . 0 | encc000 .1234 | U |[ 407 .026212 ] cloud− i n i t [ 1 3 4 8 ] : c i−i n f o :
+−−−−−−−+−−−−−−−−−−−−−−+−−−−−−−−−−−−−−+−−−−−−−−−−−−−−−+−−−−−−−−−−−−−−+−−−−−−−+[ 407 .026246 ] cloud− i n i t [ 1 3 4 8 ] : c i−i n f o : ++++++++++++++++++++Route IPv6 i n f o
+++++++++++++++++++++[ 407 .026280 ] cloud− i n i t [ 1 3 4 8 ] : c i−i n f o :
+−−−−−−−+−−−−−−−−−−−−−+−−−−−−−−−+−−−−−
355

−−−−−−−−−+−−−−−−−+[ 407 .026315 ] cloud− i n i t [ 1 3 4 8 ] : c i−i n f o : | Route | Des t inat i on | Gateway |
Inte r f a c e | Flags |[ 407 .026355 ] cloud− i n i t [ 1 3 4 8 ] : c i−i n f o :
+−−−−−−−+−−−−−−−−−−−−−+−−−−−−−−−+−−−−−−−−−−−−−−+−−−−−−−+[ 407 .026390 ] cloud− i n i t [ 1 3 4 8 ] : c i−i n f o : | 1 | f e80 : : / 6 4 | : : |
encc000 | U |[ 407 .026424 ] cloud− i n i t [ 1 3 4 8 ] : c i−i n f o : | 2 | f e80 : : / 6 4 | : : |
encc000.1234 | U |[ 407 .026458 ] cloud− i n i t [ 1 3 4 8 ] : c i−i n f o : | 4 | l o c a l | : : |
encc000 | U |[ 407 .026495 ] cloud− i n i t [ 1 3 4 8 ] : c i−i n f o : | 5 | l o c a l | : : |
encc000.1234 | U |[ 407 .026531 ] cloud− i n i t [ 1 3 4 8 ] : c i−i n f o : | 6 | f f 0 0 : : / 8 | : : |
encc000 | U |[ 407 .026566 ] cloud− i n i t [ 1 3 4 8 ] : c i−i n f o : | 7 | f f 0 0 : : / 8 | : : |
encc000.1234 | U |[ 407 .026600 ] cloud− i n i t [ 1 3 4 8 ] : c i−i n f o :
+−−−−−−−+−−−−−−−−−−−−−+−−−−−−−−−+−−−−−−−−−−−−−−+−−−−−−−+[ 407 .883058 ] cloud− i n i t [ 1 3 4 8 ] : Generating pub l i c / p r i va t e r sa key pa i r .[ 407 .883117 ] cloud− i n i t [ 1 3 4 8 ] : Your i d e n t i f i c a t i o n has been saved in / e t c /
ssh /ssh_host_rsa_key[ 407 .883154 ] cloud− i n i t [ 1 3 4 8 ] : Your pub l i c key has been saved in / e tc / ssh /
ssh_host_rsa_key . pub[ 407 .883190 ] cloud− i n i t [ 1 3 4 8 ] : The key f i n g e r p r i n t i s :[ 407 .883232 ] cloud− i n i t [ 1 3 4 8 ] : SHA256 :KX5cHC4YL9dXpvhnP6eSfS+J/
zmKgg9zdlEzaEb+RTA root@ubuntu−s e r v e r[ 407 .883267 ] cloud− i n i t [ 1 3 4 8 ] : The key ’ s randomart image i s :[ 407 .883302 ] cloud− i n i t [ 1 3 4 8 ] : +−−−[RSA 3072]−−−−+[ 407 .883338 ] cloud− i n i t [ 1 3 4 8 ] : | . E . . |[ 407 .883374 ] cloud− i n i t [ 1 3 4 8 ] : | o . o |[ 407 .883408 ] cloud− i n i t [ 1 3 4 8 ] : | . .= +o . |[ 407 .883443 ] cloud− i n i t [ 1 3 4 8 ] : | + =ooo++ |[ 407 .883478 ] cloud− i n i t [ 1 3 4 8 ] : | + S * . o . |[ 407 .883512 ] cloud− i n i t [ 1 3 4 8 ] : | . = o o . |[ 407 .883546 ] cloud− i n i t [ 1 3 4 8 ] : | . o+o . .+ o . |[ 407 .883579 ] cloud− i n i t [ 1 3 4 8 ] : | o=. . =o+++|[ 407 .883613 ] cloud− i n i t [ 1 3 4 8 ] : | . . . . ++*O|[ 407 .883648 ] cloud− i n i t [ 1 3 4 8 ] : +−−−−[SHA256]−−−−−+[ 407 .883682 ] cloud− i n i t [ 1 3 4 8 ] : Generating pub l i c / p r i va t e dsa key pa i r .[ 407 .883716 ] cloud− i n i t [ 1 3 4 8 ] : Your i d e n t i f i c a t i o n has been saved in / e t c /
ssh /
356
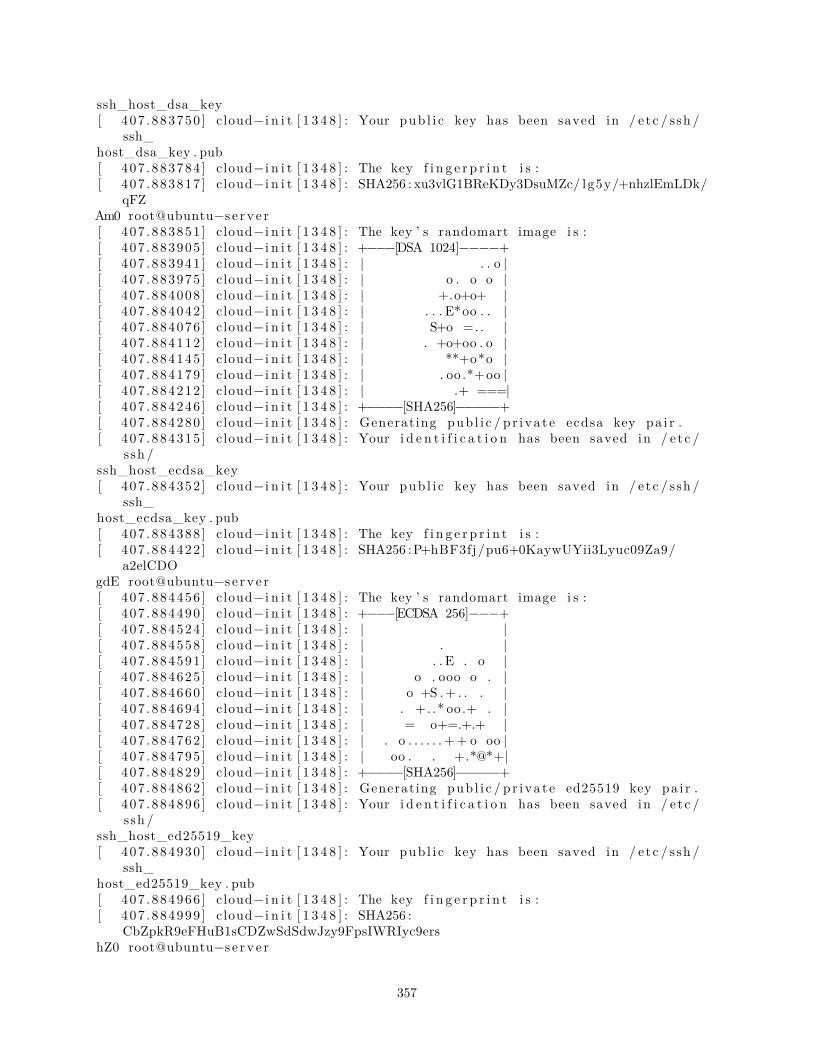
ssh_host_dsa_key[ 407 .883750 ] cloud− i n i t [ 1 3 4 8 ] : Your pub l i c key has been saved in / e tc / ssh /
ssh_host_dsa_key . pub[ 407 .883784 ] cloud− i n i t [ 1 3 4 8 ] : The key f i n g e r p r i n t i s :[ 407 .883817 ] cloud− i n i t [ 1 3 4 8 ] : SHA256 : xu3vlG1BReKDy3DsuMZc/ lg5y/+nhzlEmLDk/
qFZAm0 root@ubuntu−s e r v e r[ 407 .883851 ] cloud− i n i t [ 1 3 4 8 ] : The key ’ s randomart image i s :[ 407 .883905 ] cloud− i n i t [ 1 3 4 8 ] : +−−−[DSA 1024]−−−−+[ 407 .883941 ] cloud− i n i t [ 1 3 4 8 ] : | . . o |[ 407 .883975 ] cloud− i n i t [ 1 3 4 8 ] : | o . o o |[ 407 .884008 ] cloud− i n i t [ 1 3 4 8 ] : | +.o+o+ |[ 407 .884042 ] cloud− i n i t [ 1 3 4 8 ] : | . . . E*oo . . |[ 407 .884076 ] cloud− i n i t [ 1 3 4 8 ] : | S+o =. . |[ 407 .884112 ] cloud− i n i t [ 1 3 4 8 ] : | . +o+oo . o |[ 407 .884145 ] cloud− i n i t [ 1 3 4 8 ] : | **+o*o |[ 407 .884179 ] cloud− i n i t [ 1 3 4 8 ] : | . oo .*+oo |[ 407 .884212 ] cloud− i n i t [ 1 3 4 8 ] : | .+ ===|[ 407 .884246 ] cloud− i n i t [ 1 3 4 8 ] : +−−−−[SHA256]−−−−−+[ 407 .884280 ] cloud− i n i t [ 1 3 4 8 ] : Generating pub l i c / p r i va t e ecdsa key pa i r .[ 407 .884315 ] cloud− i n i t [ 1 3 4 8 ] : Your i d e n t i f i c a t i o n has been saved in / e t c /
ssh /ssh_host_ecdsa_key[ 407 .884352 ] cloud− i n i t [ 1 3 4 8 ] : Your pub l i c key has been saved in / e tc / ssh /
ssh_host_ecdsa_key . pub[ 407 .884388 ] cloud− i n i t [ 1 3 4 8 ] : The key f i n g e r p r i n t i s :[ 407 .884422 ] cloud− i n i t [ 1 3 4 8 ] : SHA256 :P+hBF3fj /pu6+0KaywUYii3Lyuc09Za9/
a2elCDOgdE root@ubuntu−s e r v e r[ 407 .884456 ] cloud− i n i t [ 1 3 4 8 ] : The key ’ s randomart image i s :[ 407 .884490 ] cloud− i n i t [ 1 3 4 8 ] : +−−−[ECDSA 256]−−−+[ 407 .884524 ] cloud− i n i t [ 1 3 4 8 ] : | |[ 407 .884558 ] cloud− i n i t [ 1 3 4 8 ] : | . |[ 407 .884591 ] cloud− i n i t [ 1 3 4 8 ] : | . . E . o |[ 407 .884625 ] cloud− i n i t [ 1 3 4 8 ] : | o . ooo o . |[ 407 .884660 ] cloud− i n i t [ 1 3 4 8 ] : | o +S .+ . . . |[ 407 .884694 ] cloud− i n i t [ 1 3 4 8 ] : | . +. .* oo .+ . |[ 407 .884728 ] cloud− i n i t [ 1 3 4 8 ] : | = o+=.+.+ |[ 407 .884762 ] cloud− i n i t [ 1 3 4 8 ] : | . o . . . . . . ++ o oo |[ 407 .884795 ] cloud− i n i t [ 1 3 4 8 ] : | oo . . +.*@*+|[ 407 .884829 ] cloud− i n i t [ 1 3 4 8 ] : +−−−−[SHA256]−−−−−+[ 407 .884862 ] cloud− i n i t [ 1 3 4 8 ] : Generating pub l i c / p r i va t e ed25519 key pa i r .[ 407 .884896 ] cloud− i n i t [ 1 3 4 8 ] : Your i d e n t i f i c a t i o n has been saved in / e t c /
ssh /ssh_host_ed25519_key[ 407 .884930 ] cloud− i n i t [ 1 3 4 8 ] : Your pub l i c key has been saved in / e tc / ssh /
ssh_host_ed25519_key . pub[ 407 .884966 ] cloud− i n i t [ 1 3 4 8 ] : The key f i n g e r p r i n t i s :[ 407 .884999 ] cloud− i n i t [ 1 3 4 8 ] : SHA256 :
CbZpkR9eFHuB1sCDZwSdSdwJzy9FpsIWRIyc9ershZ0 root@ubuntu−s e r v e r
357
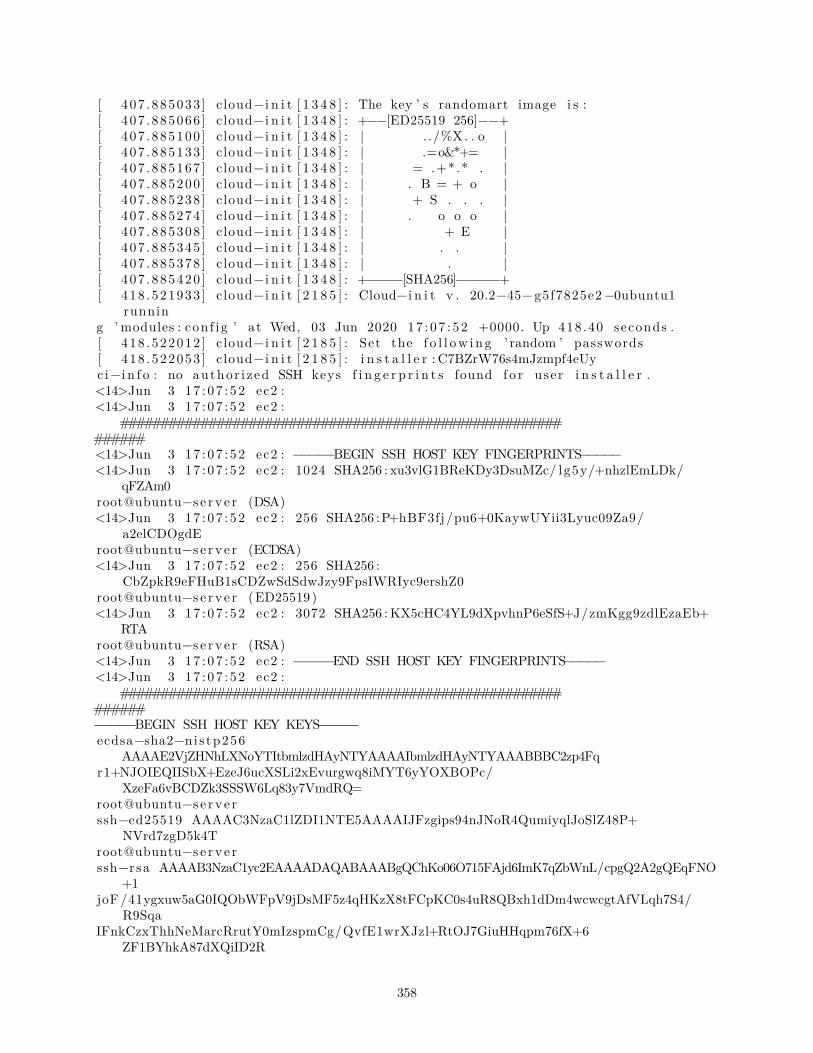
[ 407 .885033 ] cloud− i n i t [ 1 3 4 8 ] : The key ’ s randomart image i s :[ 407 .885066 ] cloud− i n i t [ 1 3 4 8 ] : +−−[ED25519 256]−−+[ 407 .885100 ] cloud− i n i t [ 1 3 4 8 ] : | . ./%X. . o |[ 407 .885133 ] cloud− i n i t [ 1 3 4 8 ] : | .=o&*+= |[ 407 .885167 ] cloud− i n i t [ 1 3 4 8 ] : | = .+*.* . |[ 407 .885200 ] cloud− i n i t [ 1 3 4 8 ] : | . B = + o |[ 407 .885238 ] cloud− i n i t [ 1 3 4 8 ] : | + S . . . |[ 407 .885274 ] cloud− i n i t [ 1 3 4 8 ] : | . o o o |[ 407 .885308 ] cloud− i n i t [ 1 3 4 8 ] : | + E |[ 407 .885345 ] cloud− i n i t [ 1 3 4 8 ] : | . . |[ 407 .885378 ] cloud− i n i t [ 1 3 4 8 ] : | . |[ 407 .885420 ] cloud− i n i t [ 1 3 4 8 ] : +−−−−[SHA256]−−−−−+[ 418 .521933 ] cloud− i n i t [ 2 1 8 5 ] : Cloud− i n i t v . 20.2−45−g5f7825e2−0ubuntu1
running ’ modules : con f i g ’ at Wed, 03 Jun 2020 17 : 07 : 52 +0000. Up 418.40 seconds .[ 418 .522012 ] cloud− i n i t [ 2 1 8 5 ] : Set the f o l l ow i ng ’ random ’ passwords[ 418 .522053 ] cloud− i n i t [ 2 1 8 5 ] : i n s t a l l e r : C7BZrW76s4mJzmpf4eUyc i−i n f o : no author i zed SSH keys f i n g e r p r i n t s found f o r user i n s t a l l e r .<14>Jun 3 17 : 07 : 52 ec2 :<14>Jun 3 17 : 07 : 52 ec2 :
#############################################################<14>Jun 3 17 : 07 : 52 ec2 : −−−−−BEGIN SSH HOST KEY FINGERPRINTS−−−−−<14>Jun 3 17 : 07 : 52 ec2 : 1024 SHA256 : xu3vlG1BReKDy3DsuMZc/ lg5y/+nhzlEmLDk/
qFZAm0root@ubuntu−s e r v e r (DSA)<14>Jun 3 17 : 07 : 52 ec2 : 256 SHA256 :P+hBF3fj /pu6+0KaywUYii3Lyuc09Za9/
a2elCDOgdEroot@ubuntu−s e r v e r (ECDSA)<14>Jun 3 17 : 07 : 52 ec2 : 256 SHA256 :
CbZpkR9eFHuB1sCDZwSdSdwJzy9FpsIWRIyc9ershZ0root@ubuntu−s e r v e r (ED25519 )<14>Jun 3 17 : 07 : 52 ec2 : 3072 SHA256 :KX5cHC4YL9dXpvhnP6eSfS+J/zmKgg9zdlEzaEb+
RTAroot@ubuntu−s e r v e r (RSA)<14>Jun 3 17 : 07 : 52 ec2 : −−−−−END SSH HOST KEY FINGERPRINTS−−−−−<14>Jun 3 17 : 07 : 52 ec2 :
#############################################################−−−−−BEGIN SSH HOST KEY KEYS−−−−−ecdsa−sha2−ni s tp256
AAAAE2VjZHNhLXNoYTItbmlzdHAyNTYAAAAIbmlzdHAyNTYAAABBBC2zp4Fqr1+NJOIEQIISbX+EzeJ6ucXSLi2xEvurgwq8iMYT6yYOXBOPc/
XzeFa6vBCDZk3SSSW6Lq83y7VmdRQ=root@ubuntu−s e r v e rssh−ed25519 AAAAC3NzaC1lZDI1NTE5AAAAIJFzgips94nJNoR4QumiyqlJoSlZ48P+
NVrd7zgD5k4Troot@ubuntu−s e r v e rssh−r sa AAAAB3NzaC1yc2EAAAADAQABAAABgQChKo06O715FAjd6ImK7qZbWnL/cpgQ2A2gQEqFNO
+1joF/41ygxuw5aG0IQObWFpV9jDsMF5z4qHKzX8tFCpKC0s4uR8QBxh1dDm4wcwcgtAfVLqh7S4/
R9SqaIFnkCzxThhNeMarcRrutY0mIzspmCg/QvfE1wrXJzl+RtOJ7GiuHHqpm76fX+6
ZF1BYhkA87dXQiID2R
358
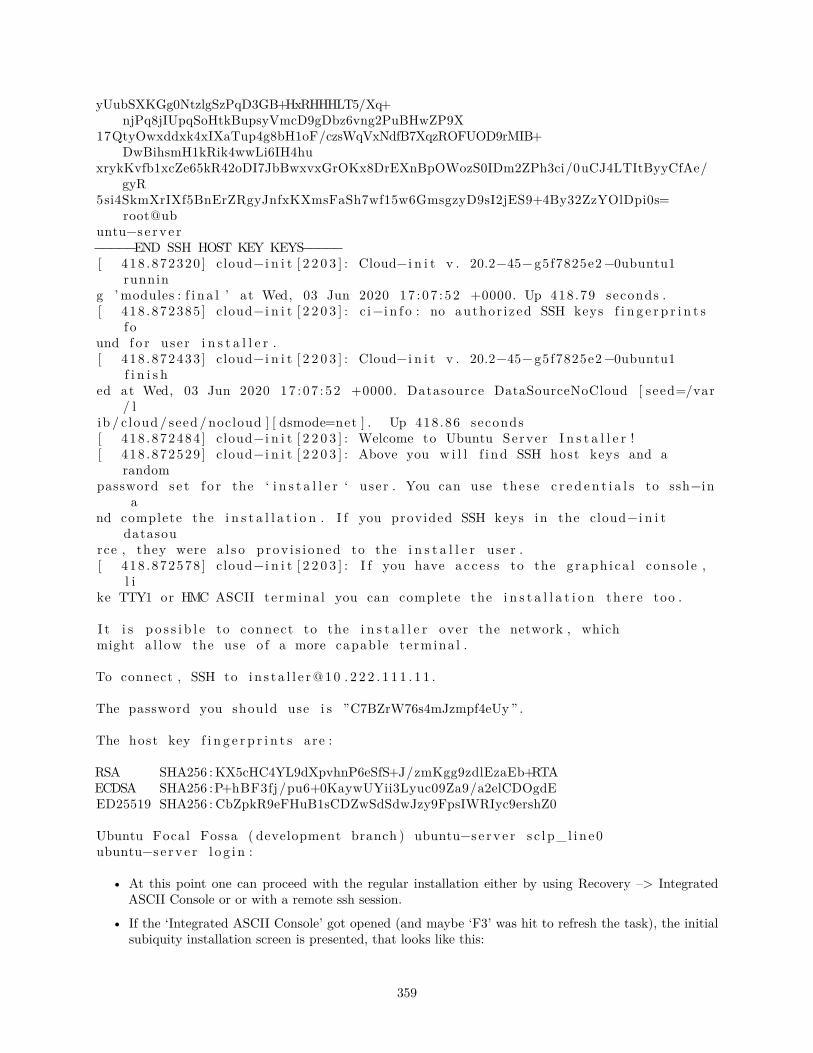
yUubSXKGg0NtzlgSzPqD3GB+HxRHHHLT5/Xq+njPq8jIUpqSoHtkBupsyVmcD9gDbz6vng2PuBHwZP9X
17QtyOwxddxk4xIXaTup4g8bH1oF/czsWqVxNdfB7XqzROFUOD9rMIB+DwBihsmH1kRik4wwLi6IH4hu
xrykKvfb1xcZe65kR42oDI7JbBwxvxGrOKx8DrEXnBpOWozS0IDm2ZPh3ci/0uCJ4LTItByyCfAe/gyR
5si4SkmXrIXf5BnErZRgyJnfxKXmsFaSh7wf15w6GmsgzyD9sI2jES9+4By32ZzYOlDpi0s=root@ub
untu−s e r v e r−−−−−END SSH HOST KEY KEYS−−−−−[ 418 .872320 ] cloud− i n i t [ 2 2 0 3 ] : Cloud− i n i t v . 20.2−45−g5f7825e2−0ubuntu1
running ’ modules : f i n a l ’ at Wed, 03 Jun 2020 17 : 07 : 52 +0000. Up 418.79 seconds .[ 418 .872385 ] cloud− i n i t [ 2 2 0 3 ] : c i−i n f o : no author i zed SSH keys f i n g e r p r i n t s
f ound f o r user i n s t a l l e r .[ 418 .872433 ] cloud− i n i t [ 2 2 0 3 ] : Cloud− i n i t v . 20.2−45−g5f7825e2−0ubuntu1
f i n i s hed at Wed, 03 Jun 2020 17 : 07 : 52 +0000. Datasource DataSourceNoCloud [ seed=/var
/ lib / c loud / seed /nocloud ] [ dsmode=net ] . Up 418.86 seconds[ 418 .872484 ] cloud− i n i t [ 2 2 0 3 ] : Welcome to Ubuntu Server I n s t a l l e r ![ 418 .872529 ] cloud− i n i t [ 2 2 0 3 ] : Above you w i l l f i nd SSH host keys and a
randompassword s e t f o r the ‘ i n s t a l l e r ‘ user . You can use these c r e d e n t i a l s to ssh−in
and complete the i n s t a l l a t i o n . I f you provided SSH keys in the cloud− i n i t
datasource , they were a l s o p rov i s i oned to the i n s t a l l e r user .[ 418 .872578 ] cloud− i n i t [ 2 2 0 3 ] : I f you have ac c e s s to the g raph i c a l conso le ,
l ike TTY1 or HMC ASCII te rmina l you can complete the i n s t a l l a t i o n there too .
I t i s p o s s i b l e to connect to the i n s t a l l e r over the network , whichmight a l low the use o f a more capable te rmina l .
To connect , SSH to i n s t a l l e r@10 . 2 2 2 . 1 1 1 . 1 1 .
The password you should use i s ”C7BZrW76s4mJzmpf4eUy ” .
The host key f i n g e r p r i n t s are :
RSA SHA256 :KX5cHC4YL9dXpvhnP6eSfS+J/zmKgg9zdlEzaEb+RTAECDSA SHA256 :P+hBF3fj /pu6+0KaywUYii3Lyuc09Za9/a2elCDOgdEED25519 SHA256 : CbZpkR9eFHuB1sCDZwSdSdwJzy9FpsIWRIyc9ershZ0
Ubuntu Focal Fossa ( development branch ) ubuntu−s e r v e r s c l p_ l i n e0ubuntu−s e r v e r l o g i n :
• At this point one can proceed with the regular installation either by using Recovery –> IntegratedASCII Console or or with a remote ssh session.
• If the ‘Integrated ASCII Console’ got opened (and maybe ‘F3’ was hit to refresh the task), the initialsubiquity installation screen is presented, that looks like this:
359
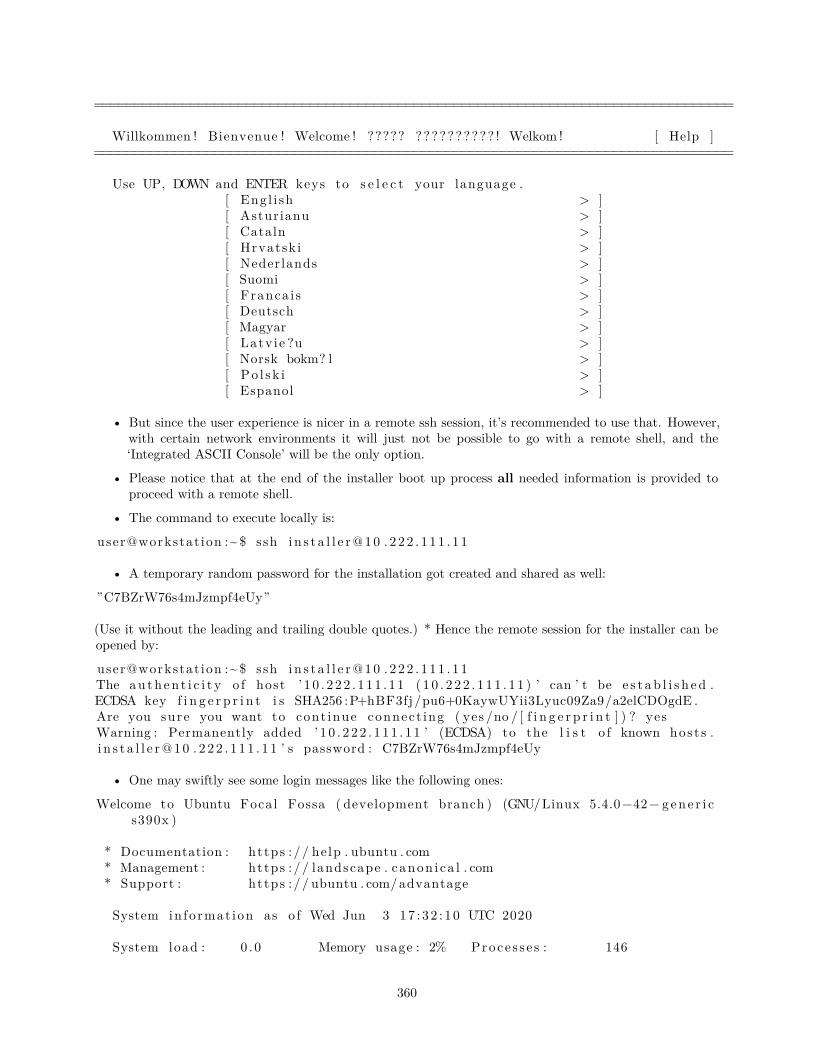
================================================================================
Willkommen ! Bienvenue ! Welcome ! ????? ?????????? ! Welkom ! [ Help ]================================================================================
Use UP, DOWN and ENTER keys to s e l e c t your language .[ Eng l i sh > ][ Asturianu > ][ Cataln > ][ Hrvatsk i > ][ Nederlands > ][ Suomi > ][ Franca i s > ][ Deutsch > ][ Magyar > ][ Latv ie ?u > ][ Norsk bokm? l > ][ Po l sk i > ][ Espanol > ]
• But since the user experience is nicer in a remote ssh session, it’s recommended to use that. However,with certain network environments it will just not be possible to go with a remote shell, and the‘Integrated ASCII Console’ will be the only option.
• Please notice that at the end of the installer boot up process all needed information is provided toproceed with a remote shell.
• The command to execute locally is:
user@workstat ion :~ $ ssh i n s t a l l e r@10 . 2 2 2 . 1 1 1 . 1 1
• A temporary random password for the installation got created and shared as well:
”C7BZrW76s4mJzmpf4eUy”
(Use it without the leading and trailing double quotes.) * Hence the remote session for the installer can beopened by:
user@workstat ion :~ $ ssh i n s t a l l e r@10 . 2 2 2 . 1 1 1 . 1 1The au th en t i c i t y o f host ’ 1 0 . 2 22 . 1 11 . 1 1 ( 1 0 . 2 2 2 . 1 1 1 . 1 1 ) ’ can ’ t be e s t ab l i s h ed .ECDSA key f i n g e r p r i n t i s SHA256 :P+hBF3fj /pu6+0KaywUYii3Lyuc09Za9/a2elCDOgdE .Are you sure you want to cont inue connect ing ( yes /no / [ f i n g e r p r i n t ] ) ? yesWarning : Permanently added ’ 1 0 . 2 22 . 1 11 . 1 1 ’ (ECDSA) to the l i s t o f known host s .i n s t a l l e r@10 . 2 2 2 . 1 1 1 . 1 1 ’ s password : C7BZrW76s4mJzmpf4eUy
• One may swiftly see some login messages like the following ones:
Welcome to Ubuntu Focal Fossa ( development branch ) (GNU/Linux 5.4.0−42− g ene r i cs390x )
* Documentation : https : // help . ubuntu . com* Management : https : // landscape . canon i ca l . com* Support : https : // ubuntu . com/advantage
System in format ion as o f Wed Jun 3 17 : 32 : 10 UTC 2020
System load : 0 . 0 Memory usage : 2% Proce s s e s : 146
360

Usage o f /home : unknown Swap usage : 0% Users logged in : 0
0 updates can be i n s t a l l e d immediately .0 o f the se updates are s e c u r i t y updates .
The programs inc luded with the Ubuntu system are f r e e so f tware ;the exact d i s t r i b u t i o n terms f o r each program are de s c r ibed in thei nd i v i dua l f i l e s in / usr / share /doc /*/ copyr ight .
Ubuntu comes with ABSOLUTELY NO WARRANTY, to the extent permitted byapp l i c ab l e law .
Eventually the initial subiquity installer screen shows up:
====================================================================Willkommen ! Bienvenue ! Welcome ! ????? ?????????? ! Welkom !
====================================================================Use UP, DOWN and ENTER keys to s e l e c t your language .
[ Eng l i sh > ][ Asturianu > ][ Cataln > ][ Hrvatsk i > ][ Nederlands > ][ Suomi > ][ Franca i s > ][ Deutsch > ][ Magyar > ][ Latv ie ?u > ][ Norsk bokm? l > ][ Po l sk i > ][ Espanol > ]
• From here just proceed with the installation as usual … (I’m leaving some pretty standard screenshotshere just to give an example for a basic installation …)
====================================================================Keyboard con f i gu r a t i on
====================================================================Please s e l e c t your keyboard layout below , or s e l e c t ” I d e n t i f y keyboard ” tode t e c t your layout automat i ca l l y .
Layout : [ Eng l i sh (US) v ]
Variant : [ Eng l i sh (US) v ]
[ I d e n t i f y keyboard ]
361

[ Done ][ Back ]
====================================================================Zdev setup
====================================================================ID ONLINE NAMES ^
�
dasd−eckd0 . 0 . 1600 >0 .0 . 1601 >0 .0 . 1602 >0 .0 . 1603 >0 .0 . 1604 >0 .0 . 1605 >0 .0 . 1606 >0 .0 . 1607 >0 .0 . 1608 >0 .0 . 1609 >0 . 0 . 1 60 a >0 . 0 . 1 60 b >0 . 0 . 1 60 c >0 . 0 . 1 60 d > v
[ Continue ][ Back ]
====================================================================Zdev setup
====================================================================ID ONLINE NAMES ^
�
dasd−eckd0 . 0 . 1600 �������������� >0 . 0 . 1601 � >< ( c l o s e ) �0 . 0 . 1602 � > Enable �0 . 0 . 1603 � > Disab le �0 . 0 . 1604 �������������� >0 . 0 . 1605 >0 .0 . 1606 >0 .0 . 1607 >0 .0 . 1608 >0 .0 . 1609 >0 . 0 . 1 60 a >0 . 0 . 1 60 b >0 . 0 . 1 60 c >0 . 0 . 1 60 d > v
362

[ Continue ][ Back ]
====================================================================Zdev setup
====================================================================ID ONLINE NAMES ^
�
dasd−eckd0 . 0 . 1600 >0 .0 . 1601 on l i n e dasda >0 .0 . 1602 >0 .0 . 1603 >0 .0 . 1604 >0 .0 . 1605 >0 .0 . 1606 >0 .0 . 1607 >0 .0 . 1608 >0 .0 . 1609 >0 . 0 . 1 60 a >0 . 0 . 1 60 b >0 . 0 . 1 60 c >0 . 0 . 1 60 d > v
[ Continue ][ Back ]
• One may hit the ‘End’ key here, that will automatically scroll down to the bottom of the Z devices listand screen:
====================================================================Zdev setup
====================================================================0 . 0 . f1de : 0 . 0 . f 1 d f > ^0 . 0 . f 1 e0 : 0 . 0 . f 1 e1 >0 . 0 . f 1 e2 : 0 . 0 . f 1 e3 >0 . 0 . f 1 e4 : 0 . 0 . f 1 e5 >0 . 0 . f 1 e6 : 0 . 0 . f 1 e7 >0 . 0 . f 1 e8 : 0 . 0 . f 1 e9 >0 . 0 . f 1 ea : 0 . 0 . f1eb >0 . 0 . f 1 e c : 0 . 0 . f1ed >0 . 0 . f 1 e e : 0 . 0 . f 1 e f >0 . 0 . f 1 f 0 : 0 . 0 . f 1 f 1 >0 . 0 . f 1 f 2 : 0 . 0 . f 1 f 3 >0 . 0 . f 1 f 4 : 0 . 0 . f 1 f 5 >0 . 0 . f 1 f 6 : 0 . 0 . f 1 f 7 >0 . 0 . f 1 f 8 : 0 . 0 . f 1 f 9 >0 . 0 . f 1 f a : 0 . 0 . f 1 f b >0 . 0 . f 1 f c : 0 . 0 . f 1 f d > �0 . 0 . f 1 f e : 0 . 0 . f 1 f f > v
[ Continue ][ Back ]
363
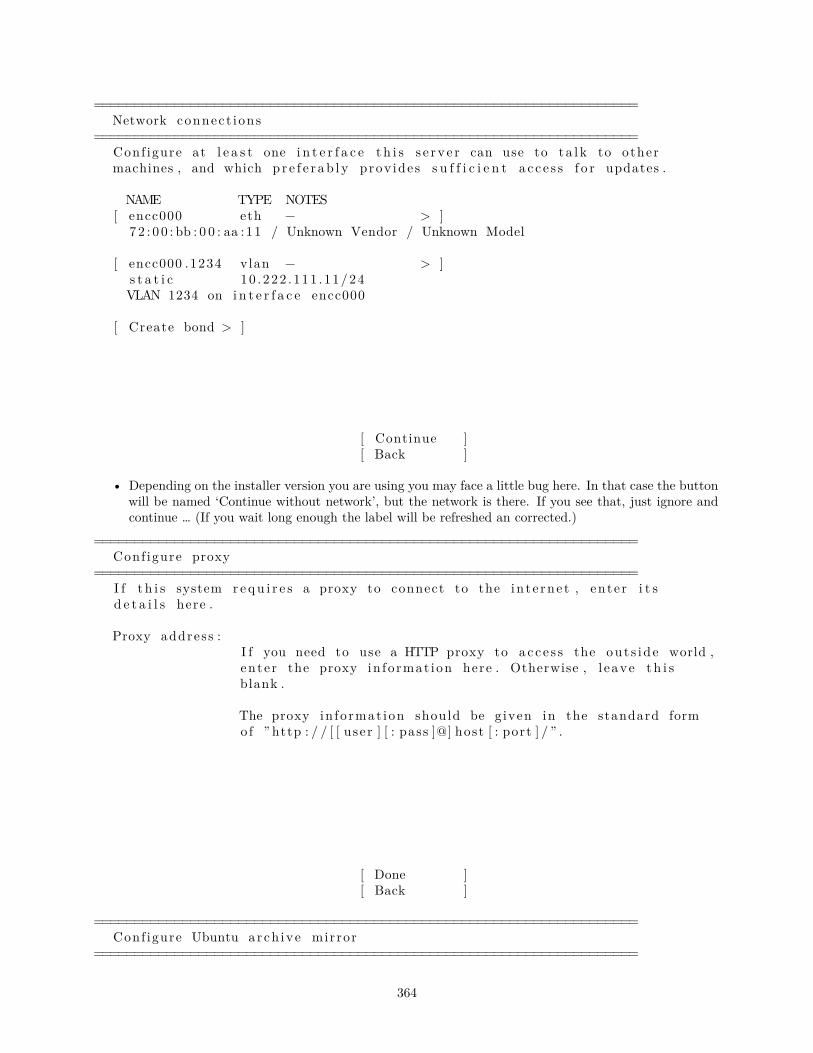
====================================================================Network connec t i ons
====================================================================Conf igure at l e a s t one i n t e r f a c e t h i s s e r v e r can use to t a l k to othermachines , and which p r e f e r ab l y prov ide s s u f f i c i e n t a c c e s s f o r updates .
NAME TYPE NOTES[ encc000 eth − > ]
72 : 0 0 : bb : 0 0 : aa :11 / Unknown Vendor / Unknown Model
[ encc000 .1234 vlan − > ]s t a t i c 10 . 222 . 111 . 11/24VLAN 1234 on i n t e r f a c e encc000
[ Create bond > ]
[ Continue ][ Back ]
• Depending on the installer version you are using you may face a little bug here. In that case the buttonwill be named ‘Continue without network’, but the network is there. If you see that, just ignore andcontinue … (If you wait long enough the label will be refreshed an corrected.)
====================================================================Conf igure proxy
====================================================================I f t h i s system r e qu i r e s a proxy to connect to the in t e rne t , ente r i t sd e t a i l s here .
Proxy address :I f you need to use a HTTP proxy to a c c e s s the out s id e world ,ente r the proxy in fo rmat ion here . Otherwise , l e ave t h i sblank .
The proxy in fo rmat ion should be g iven in the standard formof ” http : / / [ [ user ] [ : pass ]@] host [ : port ] / ” .
[ Done ][ Back ]
====================================================================Conf igure Ubuntu arch ive mirror
====================================================================
364

I f you use an a l t e r n a t i v e mirror f o r Ubuntu , ente r i t s d e t a i l s here .
Mirror address : http :// por t s . ubuntu . com/ubuntu−por t sYou may prov ide an arch ive mirror that w i l l be used in s t eado f the d e f au l t .
[ Done ][ Back ]
====================================================================Guided s to rage c on f i gu r a t i on
====================================================================Conf igure a guided s to rage layout , or c r e a t e a custom one :
(X) Use an e n t i r e d i sk
[ 0X1601 l o c a l d i sk 6 .877G v ]
[ ] Set up t h i s d i sk as an LVM group
[ ] Encrypt the LVM group with LUKS
Passphrase :
Confirm passphrase :
( ) Custom sto rage layout
[ Done ][ Back ]
====================================================================Storage c on f i gu r a t i on
====================================================================FILE SYSTEM SUMMARY ^
�
MOUNT POINT SIZE TYPE DEVICE TYPE �[ / 6 .875G new ext4 new pa r t i t i o n o f l o c a l d i sk > ] ���
365
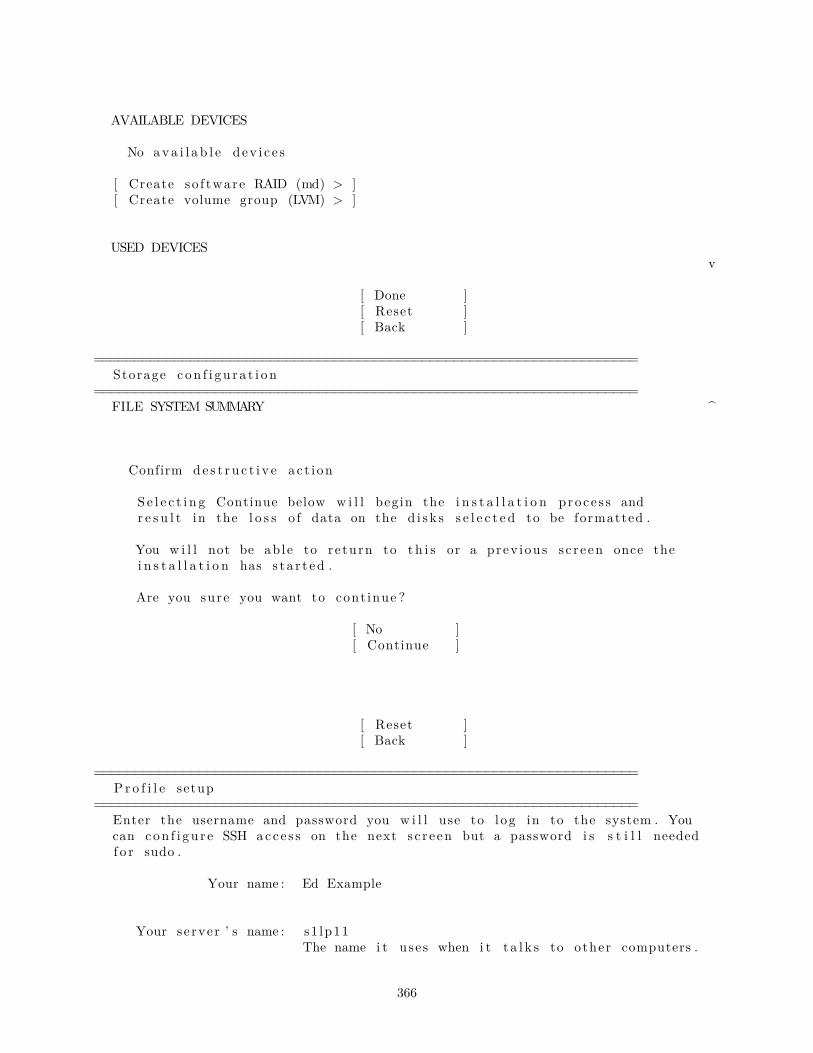
AVAILABLE DEVICES ��
No av a i l a b l e dev i c e s ��
[ Create so f tware RAID (md) > ] �[ Create volume group (LVM) > ] �
USED DEVICESv
[ Done ][ Reset ][ Back ]
====================================================================Storage c on f i gu r a t i on
====================================================================FILE SYSTEM SUMMARY ^
������������������������
Confirm de s t r u c t i v e ac t i on ��������������������������
S e l e c t i n g Continue below w i l l begin the i n s t a l l a t i o n proce s s and ��r e s u l t in the l o s s o f data on the d i s k s s e l e c t e d to be formatted . ����
You w i l l not be ab le to re turn to t h i s or a prev ious s c r e en once the ��i n s t a l l a t i o n has s t a r t ed . ����
Are you sure you want to cont inue ? ����
[ No ] ��[ Continue ]
�����������������������������������������������������������������������������
[ Reset ][ Back ]
====================================================================Pr o f i l e setup
====================================================================Enter the username and password you w i l l use to l og in to the system . Youcan con f i gu r e SSH acc e s s on the next s c r e en but a password i s s t i l l neededf o r sudo .
Your name : Ed Example
Your se rver ’ s name : s1 lp11The name i t uses when i t t a l k s to other computers .
366
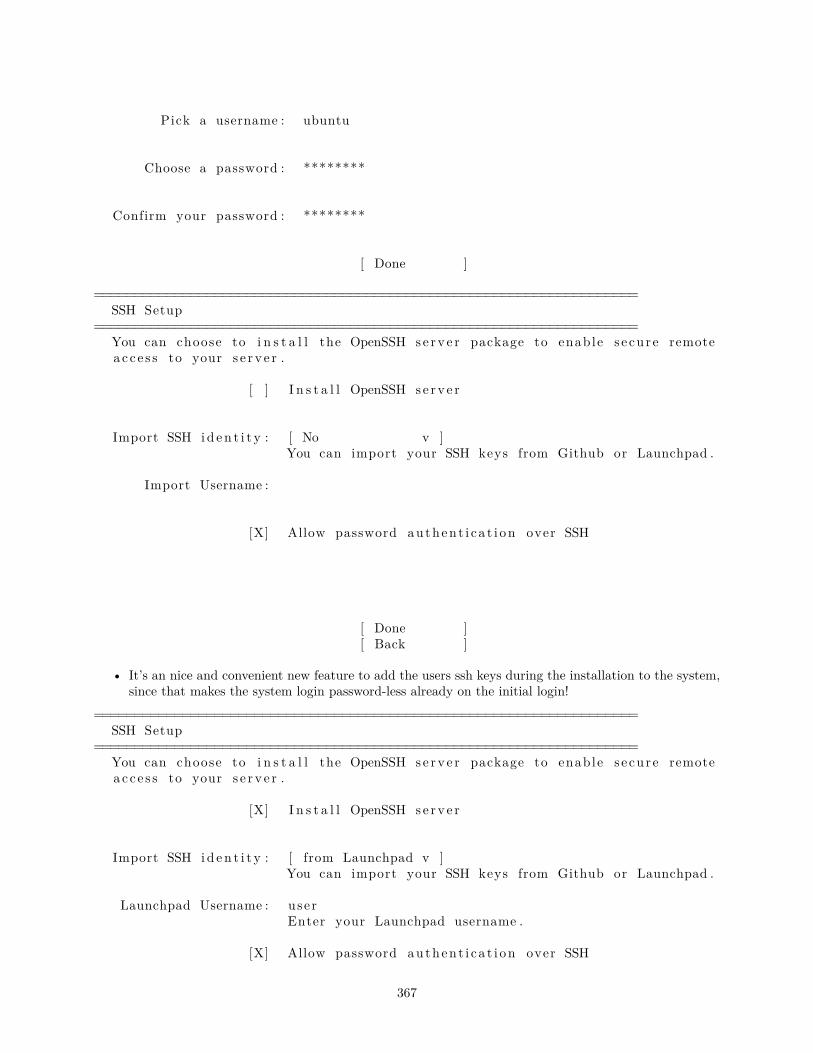
Pick a username : ubuntu
Choose a password : ********
Confirm your password : ********
[ Done ]
====================================================================SSH Setup
====================================================================You can choose to i n s t a l l the OpenSSH se rv e r package to enable s e cure remotea c c e s s to your s e r v e r .
[ ] I n s t a l l OpenSSH se rv e r
Import SSH i d en t i t y : [ No v ]You can import your SSH keys from Github or Launchpad .
Import Username :
[X] Allow password au then t i c a t i on over SSH
[ Done ][ Back ]
• It’s an nice and convenient new feature to add the users ssh keys during the installation to the system,since that makes the system login password-less already on the initial login!
====================================================================SSH Setup
====================================================================You can choose to i n s t a l l the OpenSSH se rv e r package to enable s e cure remotea c c e s s to your s e r v e r .
[X] I n s t a l l OpenSSH se rv e r
Import SSH i d en t i t y : [ from Launchpad v ]You can import your SSH keys from Github or Launchpad .
Launchpad Username : userEnter your Launchpad username .
[X] Allow password au then t i c a t i on over SSH
367
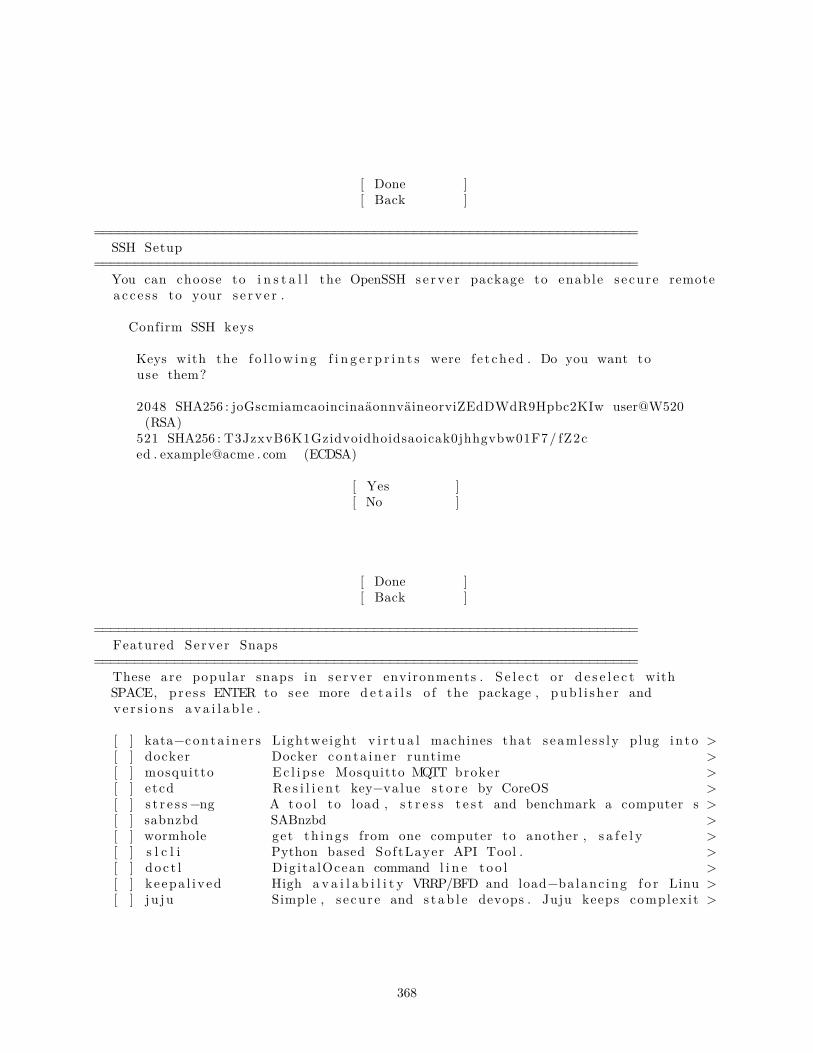
[ Done ][ Back ]
====================================================================SSH Setup
====================================================================You can choose to i n s t a l l the OpenSSH se rv e r package to enable s e cure remotea c c e s s to your s e r v e r . ����������������������������
Confirm SSH keys �������������������������������
Keys with the f o l l ow i ng f i n g e r p r i n t s were f e t ched . Do you want to ��use them? ����
2048 SHA256 : joGscmiamcaoincinaäonnväineorviZEdDWdR9Hpbc2KIw user@W520 ��(RSA) ��
521 SHA256 : T3JzxvB6K1Gzidvoidhoidsaoicak0jhhgvbw01F7/ fZ2c ��ed . example@acme . com (ECDSA) ����
[ Yes ] ��[ No ]
�����������������������������������������������������������������������������
[ Done ][ Back ]
====================================================================Featured Server Snaps
====================================================================These are popular snaps in s e r v e r environments . S e l e c t or d e s e l e c t withSPACE, p r e s s ENTER to see more d e t a i l s o f the package , pub l i s h e r andve r s i on s a v a i l a b l e .
[ ] kata−con ta i n e r s Lightweight v i r t u a l machines that s eaml e s s l y plug in to >[ ] docker Docker conta ine r runtime >[ ] mosquitto Ec l i p s e Mosquitto MQTT broker >[ ] etcd R e s i l i e n t key−value s t o r e by CoreOS >[ ] s t r e s s −ng A too l to load , s t r e s s t e s t and benchmark a computer s >[ ] sabnzbd SABnzbd >[ ] wormhole get th ing s from one computer to another , s a f e l y >[ ] s l c l i Python based SoftLayer API Tool . >[ ] do c t l Dig i ta lOcean command l i n e t o o l >[ ] keepa l i ved High a v a i l a b i l i t y VRRP/BFD and load−ba lanc ing f o r Linu >[ ] j u ju Simple , s e cu re and s t ab l e devops . Juju keeps complex it >
368

[ Done ][ Back ]
====================================================================I n s t a l l complete !
====================================================================�����������������������������������������������������������������������������
c on f i gu r i n g ra id (mdadm) s e r v i c e � ^�i n s t a l l i n g ke rne l ��s e t t i n g up swap ��apply networking c on f i g ��wr i t i ng e tc / f s t ab ��c on f i gu r i n g mult ipath ��updating packages on ta r g e t system ��c on f i gu r i n g p o l l i n a t e user−agent on ta rg e t ��updating i n i t r am f s c on f i gu r a t i on ��
f i n a l i z i n g i n s t a l l a t i o n ��running ’ cu r t i n hook ’ ��
c u r t i n command hook ��execut ing l a t e commands ��
f i n a l system con f i gu r a t i on ��c on f i gu r i n g cloud− i n i t ���i n s t a l l i n g openssh−s e r v e r \ � v
����������������������������������������������������������������������������
[ View f u l l l og ]
====================================================================I n s t a l l a t i o n complete !
====================================================================�����������������������������F in i shed i n s t a l l ! �����������������������������
apply networking c on f i g � ^�wr i t i ng e tc / f s t ab ��c on f i gu r i n g mult ipath ��updating packages on ta r g e t system ��c on f i gu r i n g p o l l i n a t e user−agent on ta rg e t ��updating i n i t r am f s c on f i gu r a t i on ��
f i n a l i z i n g i n s t a l l a t i o n ��running ’ cu r t i n hook ’ ��
c u r t i n command hook ��execut ing l a t e commands ��
f i n a l system con f i gu r a t i on ��c on f i gu r i n g cloud− i n i t ��i n s t a l l i n g openssh−s e r v e r ��r e s t o r i n g apt c on f i gu r a t i on ���
downloading and i n s t a l l i n g s e c u r i t y updates � v����������������������������������������������������������������������������
[ View f u l l l og ][ Reboot ]
369
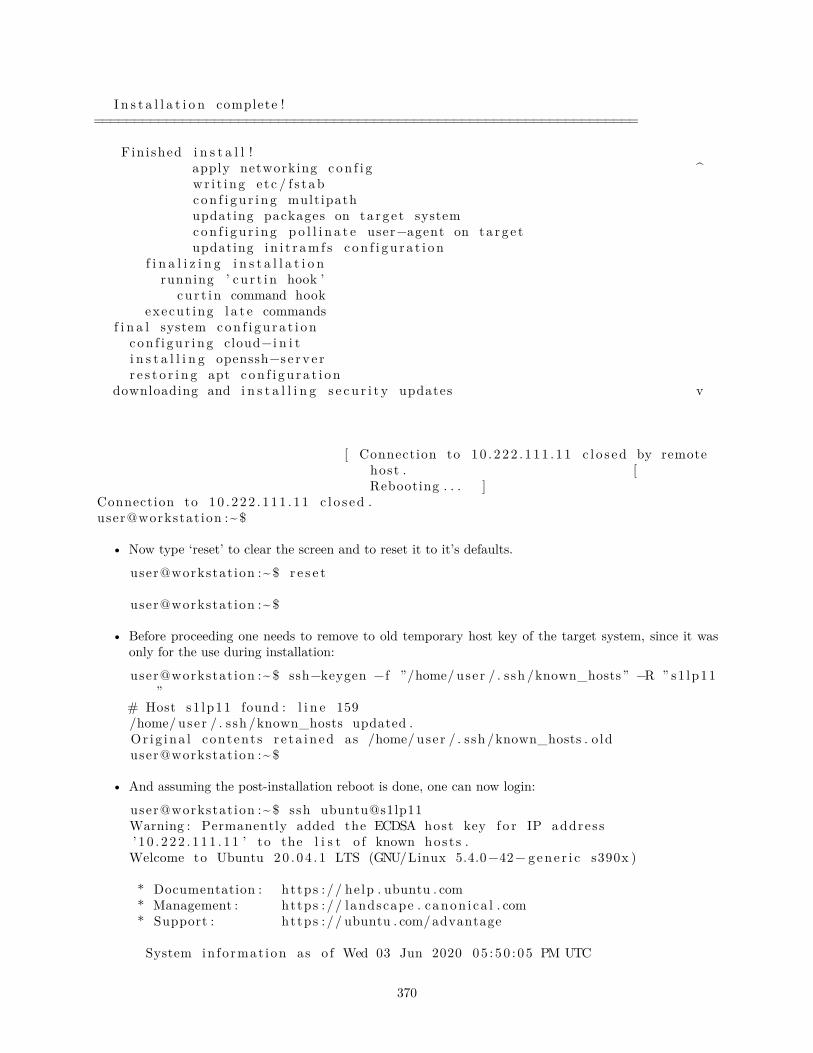
I n s t a l l a t i o n complete !====================================================================
�����������������������������F in i shed i n s t a l l ! �����������������������������
apply networking c on f i g � ^�wr i t i ng e tc / f s t ab ��c on f i gu r i n g mult ipath ��updating packages on ta r g e t system ��c on f i gu r i n g p o l l i n a t e user−agent on ta rg e t ��updating i n i t r am f s c on f i gu r a t i on ��
f i n a l i z i n g i n s t a l l a t i o n ��running ’ cu r t i n hook ’ ��
c u r t i n command hook ��execut ing l a t e commands ��
f i n a l system con f i gu r a t i on ��c on f i gu r i n g cloud− i n i t ��i n s t a l l i n g openssh−s e r v e r ��r e s t o r i n g apt c on f i gu r a t i on ���
downloading and i n s t a l l i n g s e c u r i t y updates � v����������������������������������������������������������������������������
[ Connection to 10 . 222 . 111 . 11 c l o s ed by remotehost . [Rebooting . . . ]
Connection to 10 . 222 . 111 . 11 c l o s ed .user@workstat ion :~ $
• Now type ‘reset’ to clear the screen and to reset it to it’s defaults.
user@workstat ion :~ $ r e s e t
user@workstat ion :~ $
• Before proceeding one needs to remove to old temporary host key of the target system, since it wasonly for the use during installation:
user@workstat ion :~ $ ssh−keygen −f ”/home/ user / . ssh /known_hosts” −R ” s1 lp11”
# Host s1 lp11 found : l i n e 159/home/ user / . ssh /known_hosts updated .Or i g ina l contents r e t a in ed as /home/ user / . ssh /known_hosts . o lduser@workstat ion :~ $
• And assuming the post-installation reboot is done, one can now login:
user@workstat ion :~ $ ssh ubuntu@s1lp11Warning : Permanently added the ECDSA host key f o r IP address’ 1 0 . 2 22 . 1 11 . 1 1 ’ to the l i s t o f known host s .Welcome to Ubuntu 20 . 0 4 . 1 LTS (GNU/Linux 5.4.0−42− g ene r i c s390x )
* Documentation : https : // he lp . ubuntu . com* Management : https : // landscape . canon i ca l . com* Support : https : // ubuntu . com/advantage
System in format ion as o f Wed 03 Jun 2020 05 : 50 : 05 PM UTC
370

System load : 0 .08 Memory usage : 2% Proce s s e s : 157Usage o f / : 18.7% o f 6 .70GB Swap usage : 0% Users logged in : 0
0 updates can be i n s t a l l e d immediately .0 o f the se updates are s e c u r i t y updates .
The programs inc luded with the Ubuntu system are f r e e so f tware ;the exact d i s t r i b u t i o n terms f o r each program are de s c r ibed in thei nd i v i dua l f i l e s in / usr / share /doc /*/ copyr ight .
Ubuntu comes with ABSOLUTELY NO WARRANTY, to the extent permitted byapp l i c ab l e law .
To run a command as admin i s t ra to r ( user ” root ”) , use ” sudo <command>”.See ”man sudo_root ” f o r d e t a i l s .
ubuntu@s1lp11 :~ $ uptime17 : 50 : 09 up 1 min , 1 user , load average : 0 . 08 , 0 . 11 , 0 .05
ubuntu@s1lp11 :~ $ l s b_r e l e a s e −aNo LSB modules are a v a i l a b l e .D i s t r i bu t o r ID : UbuntuDesc r ip t i on : Ubuntu 20 . 0 4 . 1 LTSRelease : 20 .04Codename : f o c a lubuntu@s1lp11 :~ $ uname −aLinux s1 lp11 5.4.0−42− g ene r i c #30−Ubuntu SMP Wed Aug 05 16 : 57 : 22 UTC 2020
s390x s390x s390x GNU/Linuxubuntu@s1lp11 :~ $ e x i tl ogoutConnection to s1 lp11 c l o s ed .user@workstat ion :~ $
Done !
Generated on 2020-11-11 03:52:35
371
Related Documents