TYPING CHAPTER 8 ,9

TYPING CHAPTER 8,9. AFTER COMPLETING THIS LESSON STUDENTS SHOULD UNDERSTAND: Correct and incorrect posture when typing Home row position when typing Groups.
Dec 16, 2015
Welcome message from author
This document is posted to help you gain knowledge. Please leave a comment to let me know what you think about it! Share it to your friends and learn new things together.
Transcript
TYP ING
CHAPTER 8 ,9

AFTER COMPLETING THIS LESSON STUDENTS SHOULD UNDERSTAND:
• Correct and incorrect posture when typing• Home row position when typing• Groups of Keys for Each Finger• Typing using Fingers• Typing fast but correct• Exercise and practice

INCORRECT POSTURE FOR TYPING:
• Incorrect posture can lead to multiple health problems:• Back problems• Problems with joints• Problems with tendons• Problems with shoulders • Problems with eyes/vision

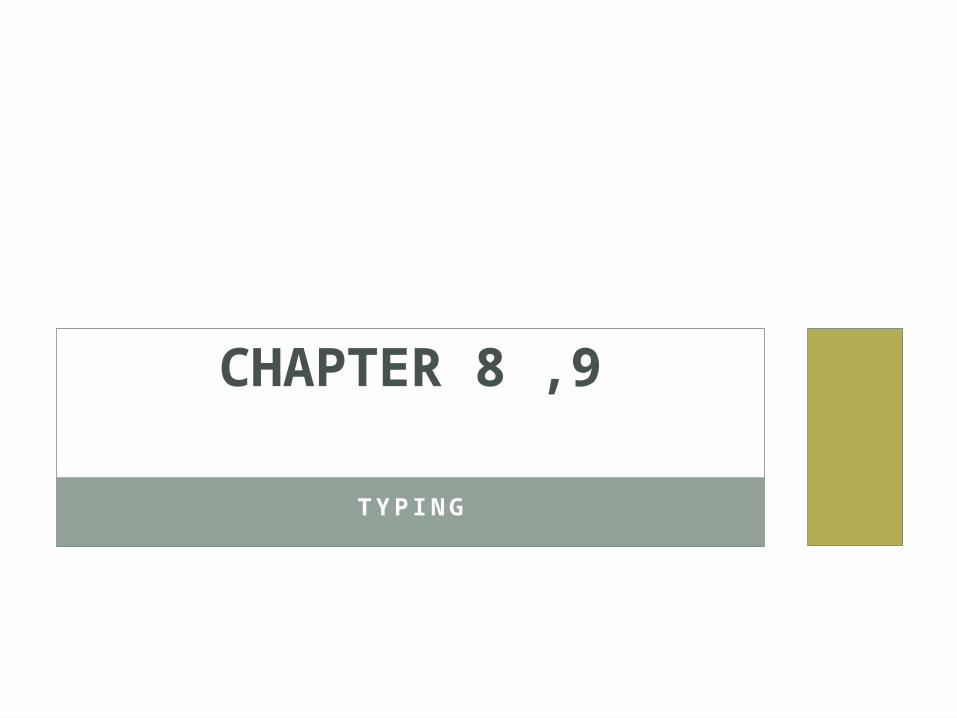
CORRECT POSTURE FOR TYPING:
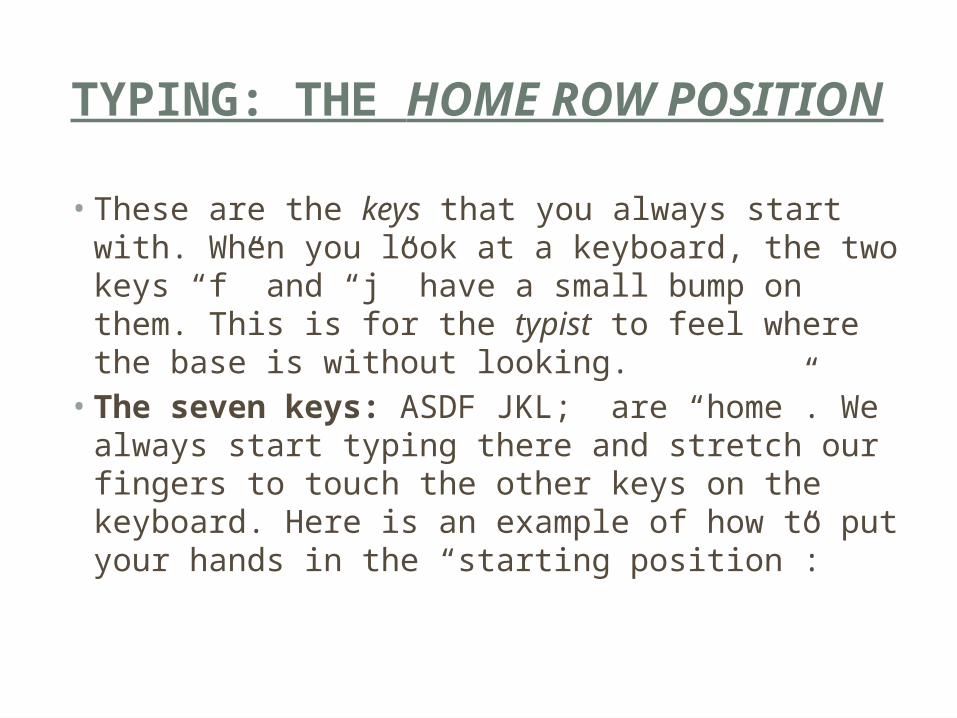
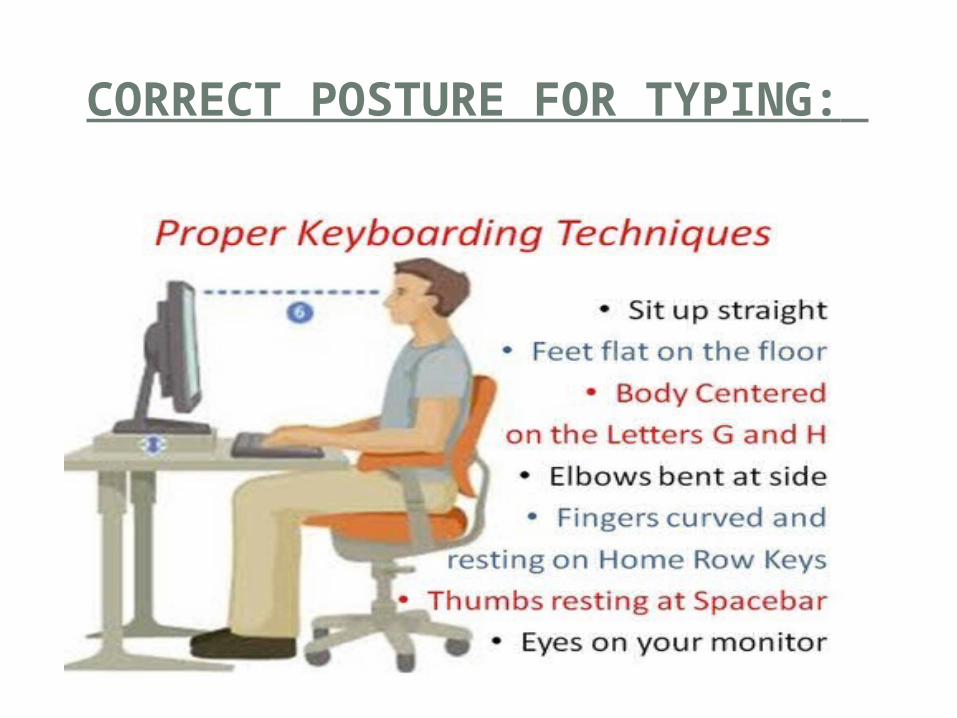
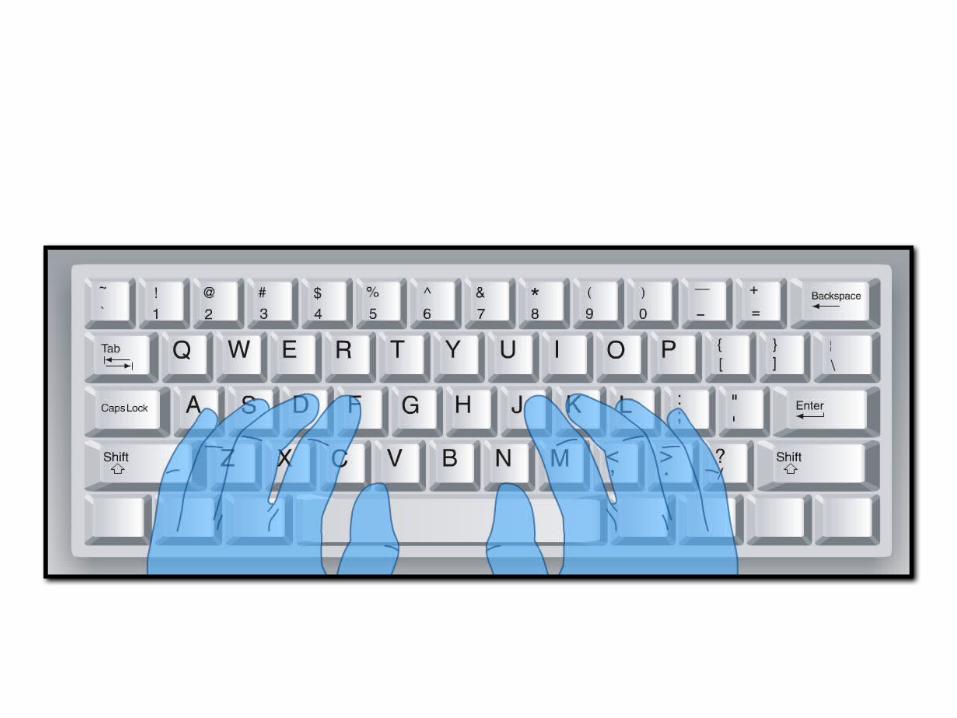
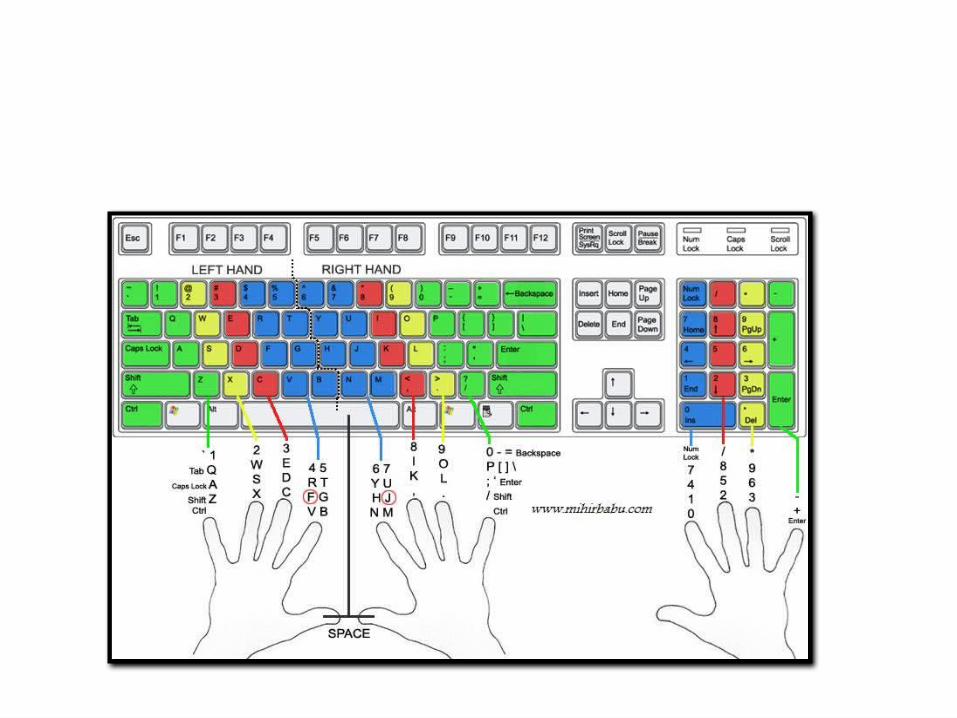
TYPING: THE HOME ROW POSITION
• These are the keys that you always start with. When you look at a keyboard, the two keys “f” and “j” have a small bump on them. This is for the typist to feel where the base is without looking.• The seven keys: ASDF JKL; are “home”. We
always start typing there and stretch our fingers to touch the other keys on the keyboard. Here is an example of how to put your hands in the “starting position”:
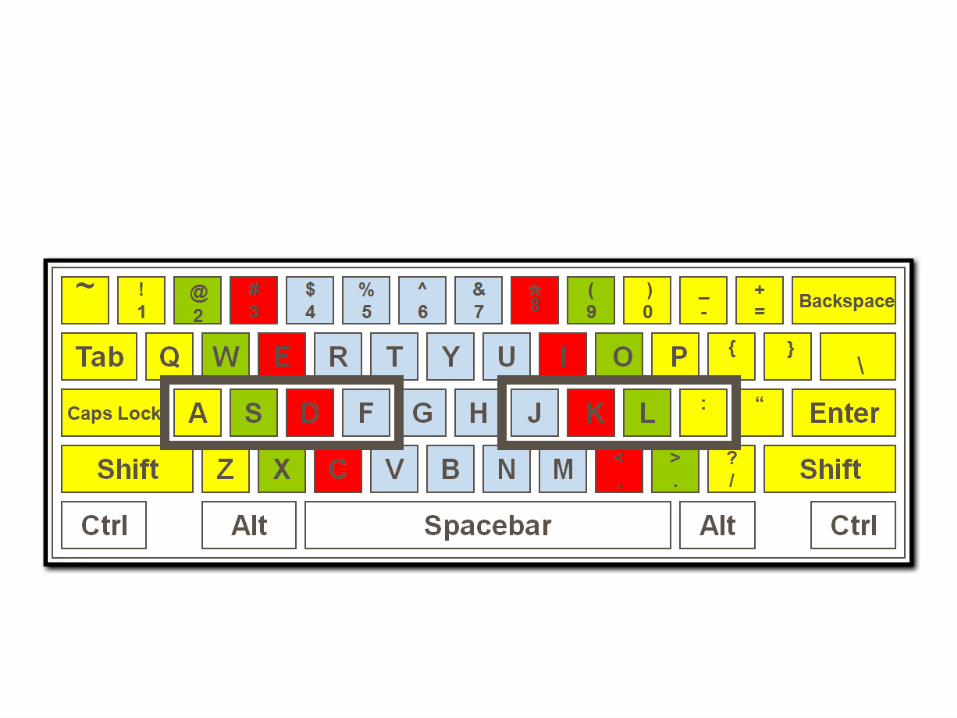
GROUPS OF KEYS FOR EACH FINGER
• You use only one finger for each group of keys. This is very important to be able to type fast.
• Only use the correct finger to hit the matching key.• ALWAYS return to the home row – ASDF – JKL;.• When typing, try to make a picture of the keyboard in
your mind.• Try to type in a rhythm; this will make it easier to
keep typing.• The SHIFT key is pressed by the OPPOSITE little finger
(e.g. D = Right little finger pressing “SHIFT” + Left middle finger pressing “d”).
• Use either thumb to press the SPACE BAR (i.e. the left thumb OR the right thumb is okay).
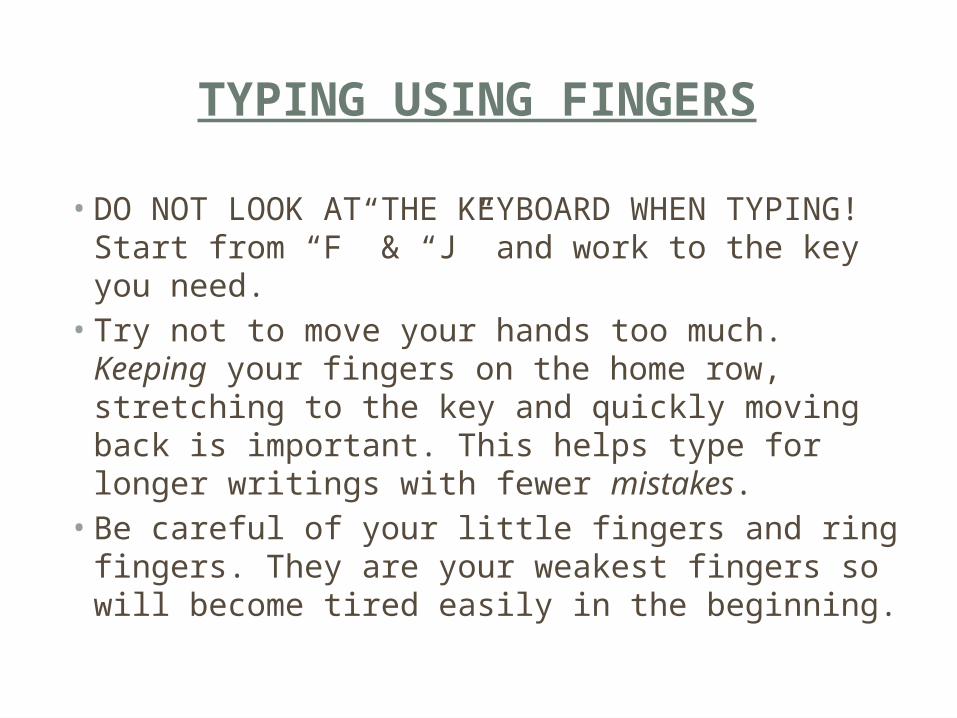
TYPING USING FINGERS
• DO NOT LOOK AT THE KEYBOARD WHEN TYPING! Start from “F” & “J” and work to the key you need.• Try not to move your hands too much. Keeping
your fingers on the home row, stretching to the key and quickly moving back is important. This helps type for longer writings with fewer mistakes.• Be careful of your little fingers and ring fingers.
They are your weakest fingers so will become tired easily in the beginning.
TYPING FAST BUT CORRECT
• Focus on not making mistakes.• Always try to look a few words ahead and type
what you see.• Do not rush when starting. You are monitoring
your technique. Later it will be automatic. If you take your time now, you can become much faster later.• Take your time. SLOWLY AT FIRST IS OKAY! THIS IS
IMPORTANT!

Time 01
Time 02
Time 03
Time 04
Time 05
0%10%20%30%40%50%60%70%80%90%
100%
SpeedTechnique
EXERCISE AND PRACTICE (DURING WEEK 8 AND WEEK 9)
• It is possible to use Microsoft Word for typing test and practice but it is recommended to use these websites as well. They provide direct results and analysis reports, and typing games are more attractive for the students. Typing competitions in class are highly recommended.• http://www.goodtyping.com/test.php• http://www.freetypinggame.net/play.asp• http://www.typingtest.com/• http://www.typeonline.co.uk/typingspeed.php
Related Documents