1 Théo Gindre & Florian Laloge Tutoriel installation Italc Attention Ce tutoriel fait suite au tutoriel sur la création de domaine et DNS sous Windows 2012.Pour installer Italc, il est nécessaire d’avoir un domaine. En premier lieu, il faudra installer Italc sur l’ordinateur du prof en lançant l’exe. Acceptez les conditions de la licence.

Welcome message from author
This document is posted to help you gain knowledge. Please leave a comment to let me know what you think about it! Share it to your friends and learn new things together.
Transcript
1
Théo Gindre & Florian Laloge
Tutoriel installation Italc
Attention Ce tutoriel fait suite au tutoriel sur la création de domaine et DNS sous Windows
2012.Pour installer Italc, il est nécessaire d’avoir un domaine.
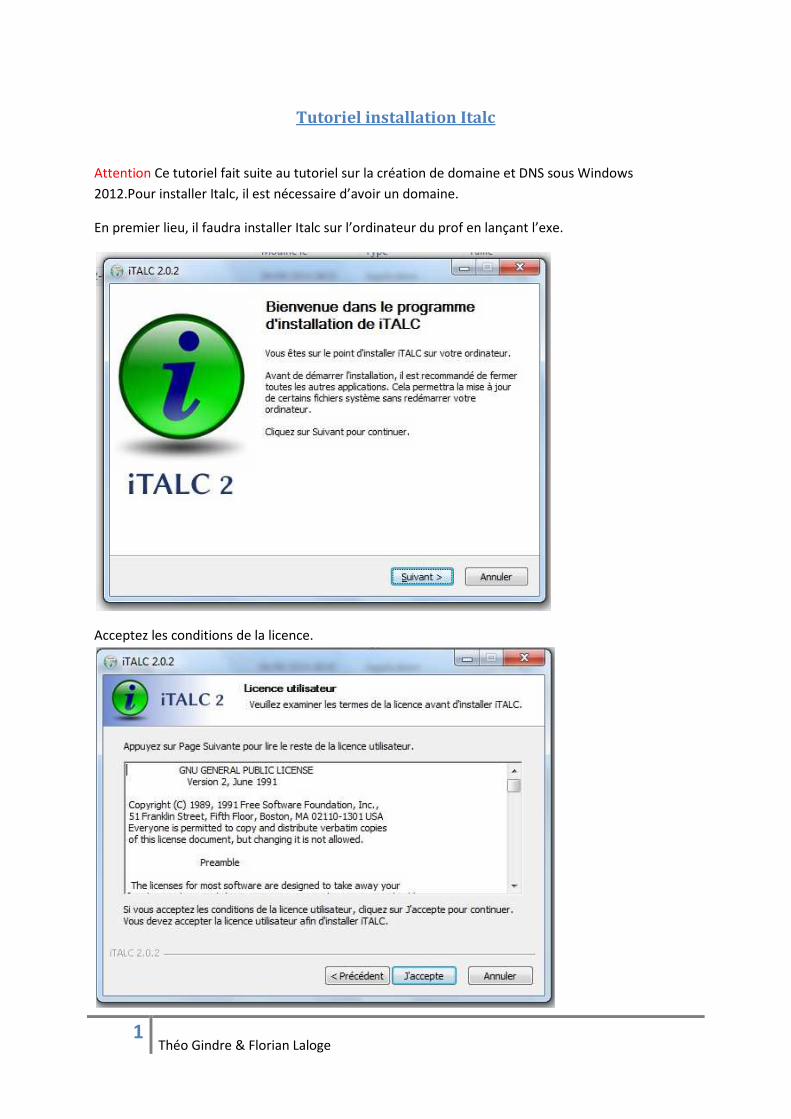
En premier lieu, il faudra installer Italc sur l’ordinateur du prof en lançant l’exe.
Acceptez les conditions de la licence.
2
Théo Gindre & Florian Laloge
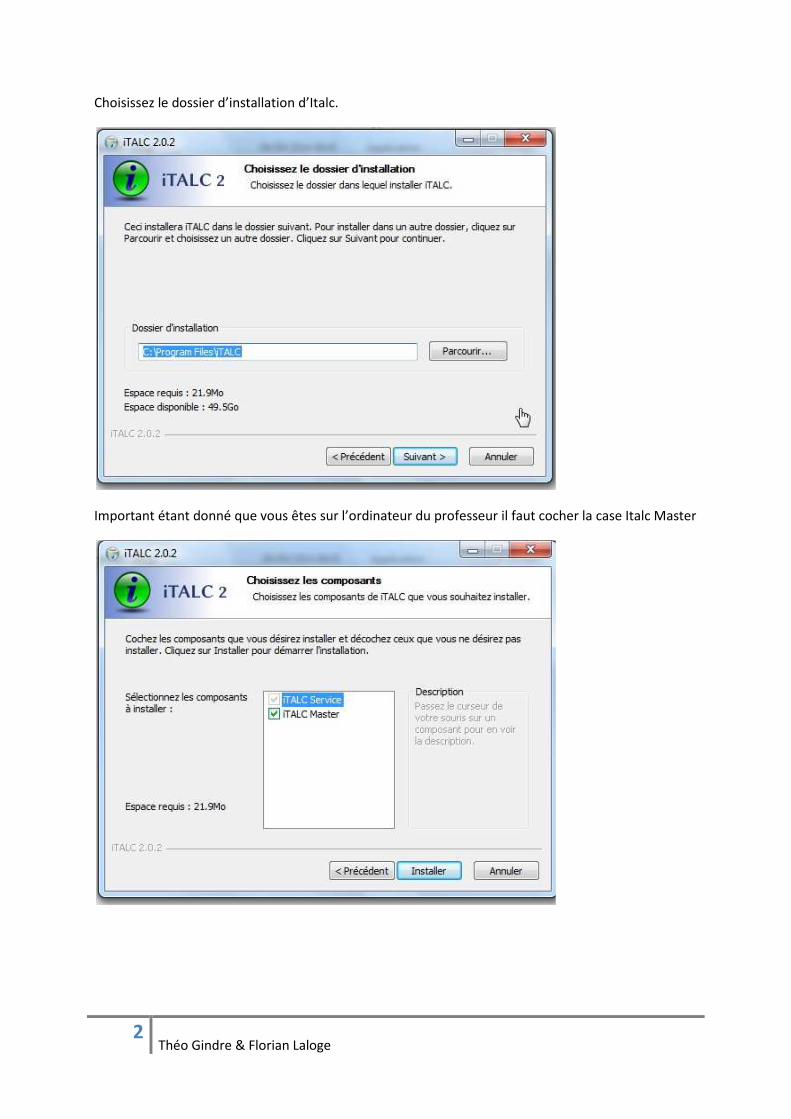
Choisissez le dossier d’installation d’Italc.
Important étant donné que vous êtes sur l’ordinateur du professeur il faut cocher la case Italc Master

3
Théo Gindre & Florian Laloge
Fermer l’installation en cochant la case ‘Run Italc management console now ‘
Rendez vous sur l’onglet Authentication
4
Théo Gindre & Florian Laloge
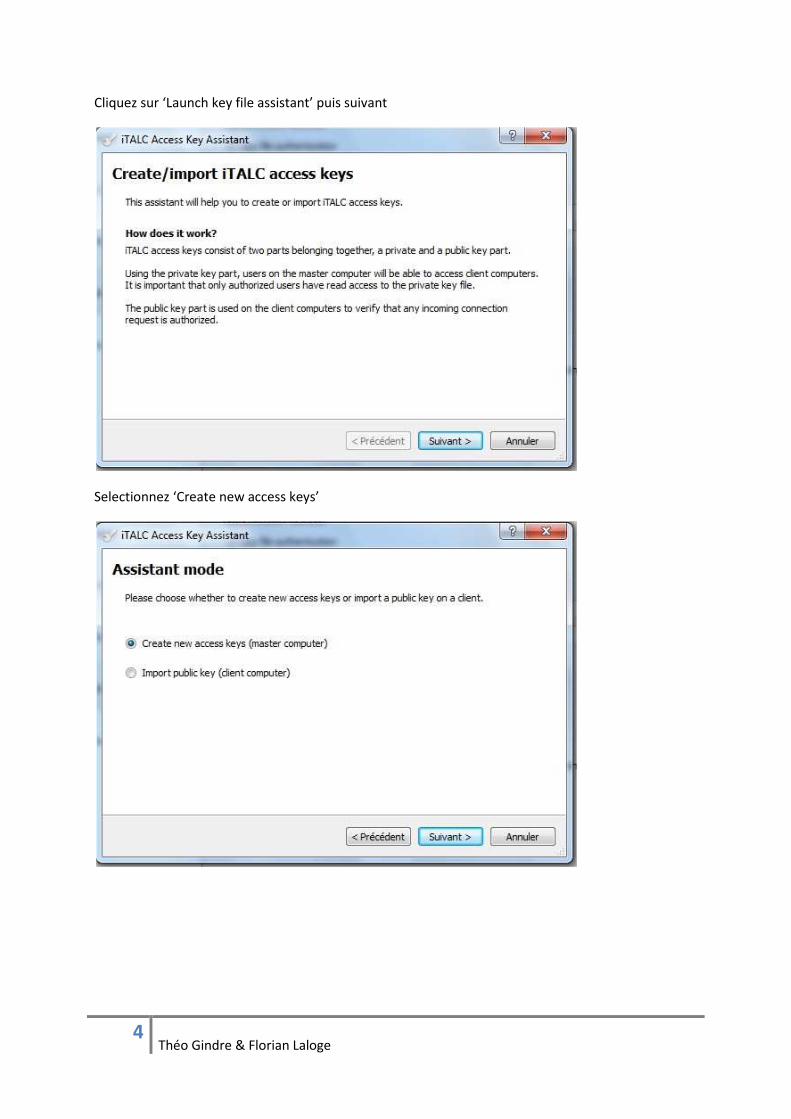
Cliquez sur ‘Launch key file assistant’ puis suivant
Selectionnez ‘Create new access keys’
5
Théo Gindre & Florian Laloge
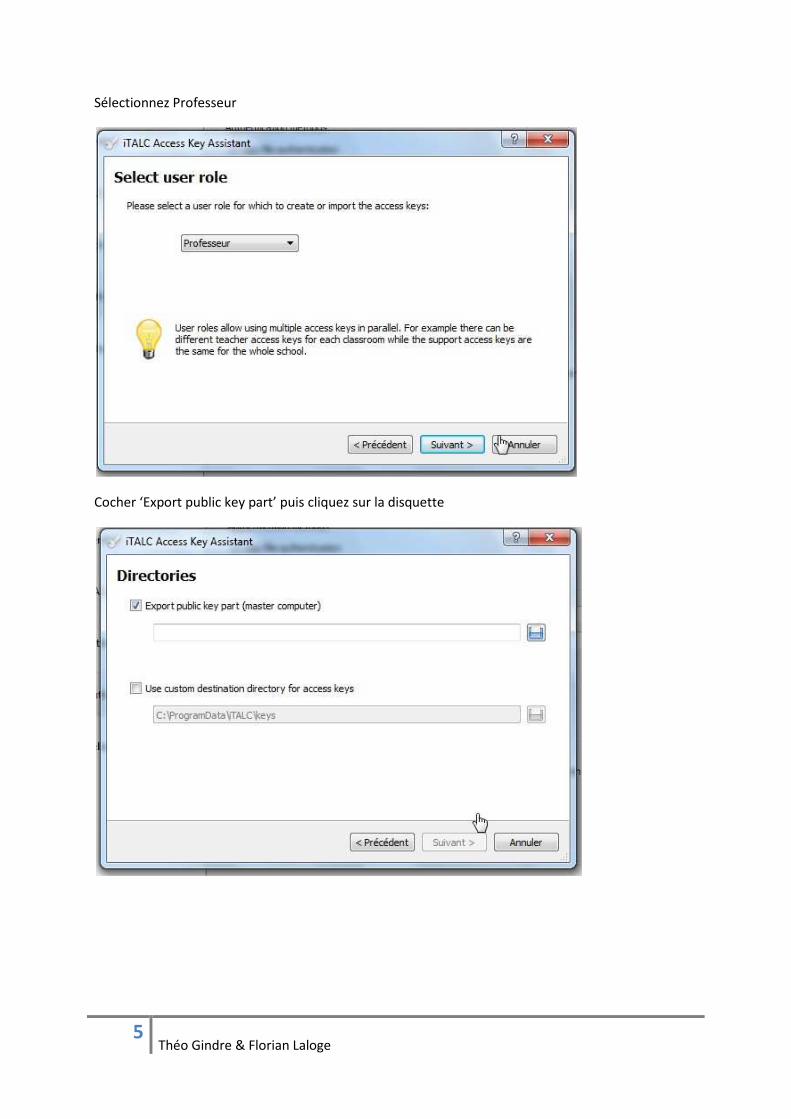
Sélectionnez Professeur
Cocher ‘Export public key part’ puis cliquez sur la disquette

6
Théo Gindre & Florian Laloge
Choisissez un emplacement accessible par tous les clients du réseau ou une clé USB (non
recommandé)
Cliquez sur ‘Sélectionner un dossier’ puis sur terminer
7
Théo Gindre & Florian Laloge
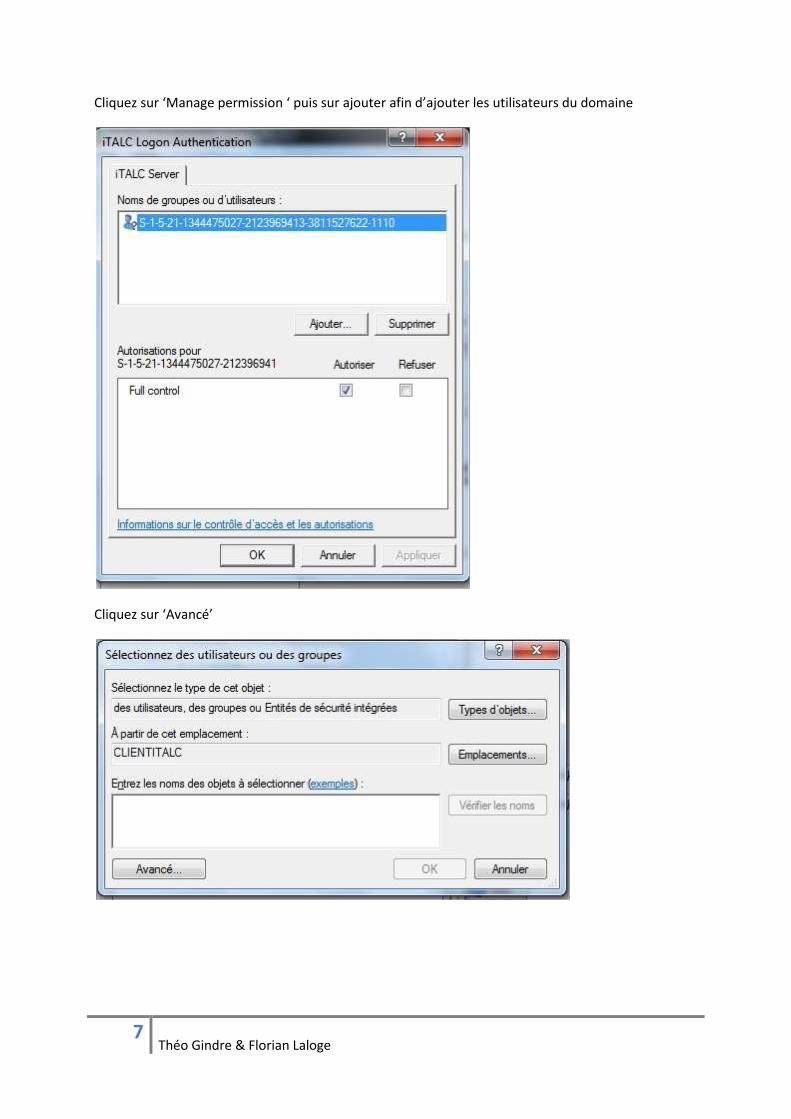
Cliquez sur ‘Manage permission ‘ puis sur ajouter afin d’ajouter les utilisateurs du domaine
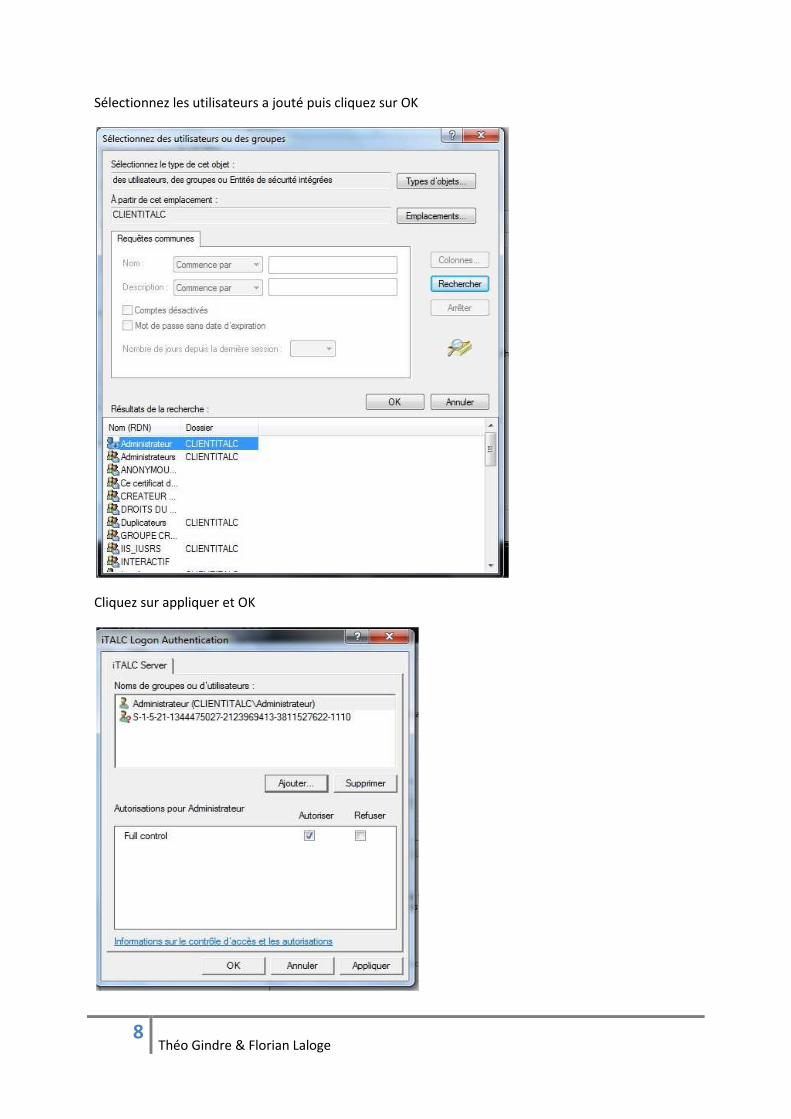
Cliquez sur ‘Avancé’
8
Théo Gindre & Florian Laloge
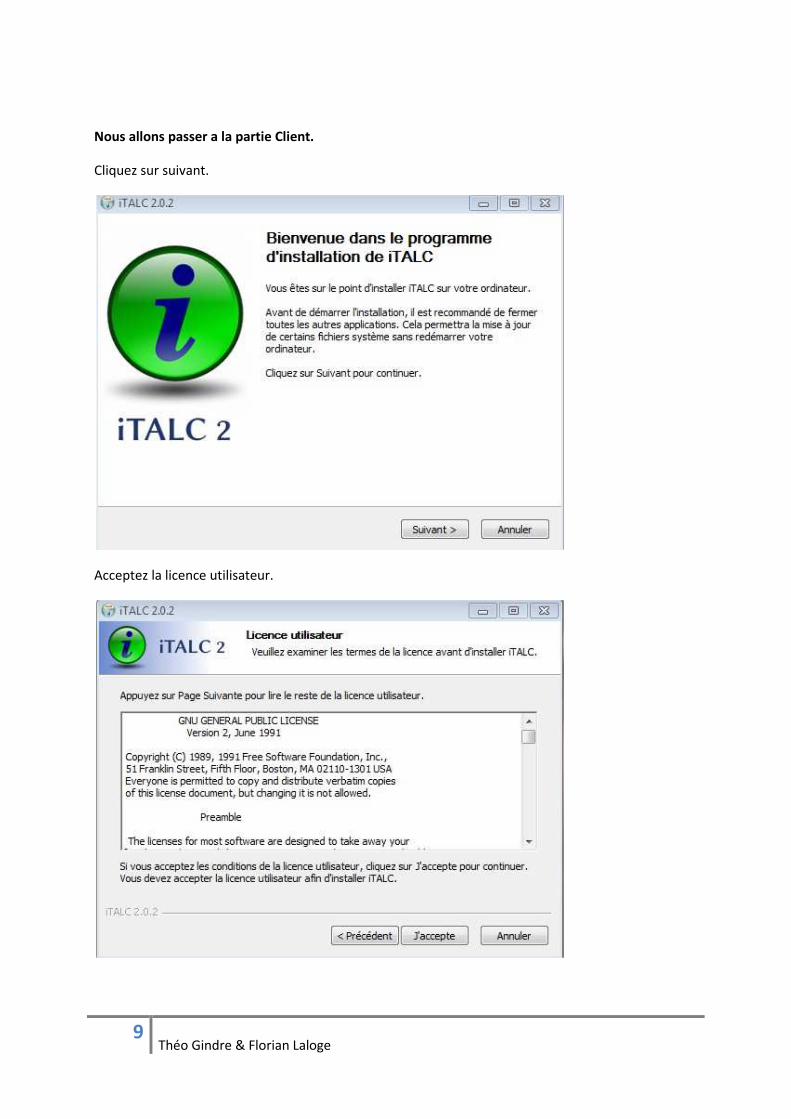
Sélectionnez les utilisateurs a jouté puis cliquez sur OK
Cliquez sur appliquer et OK
9
Théo Gindre & Florian Laloge
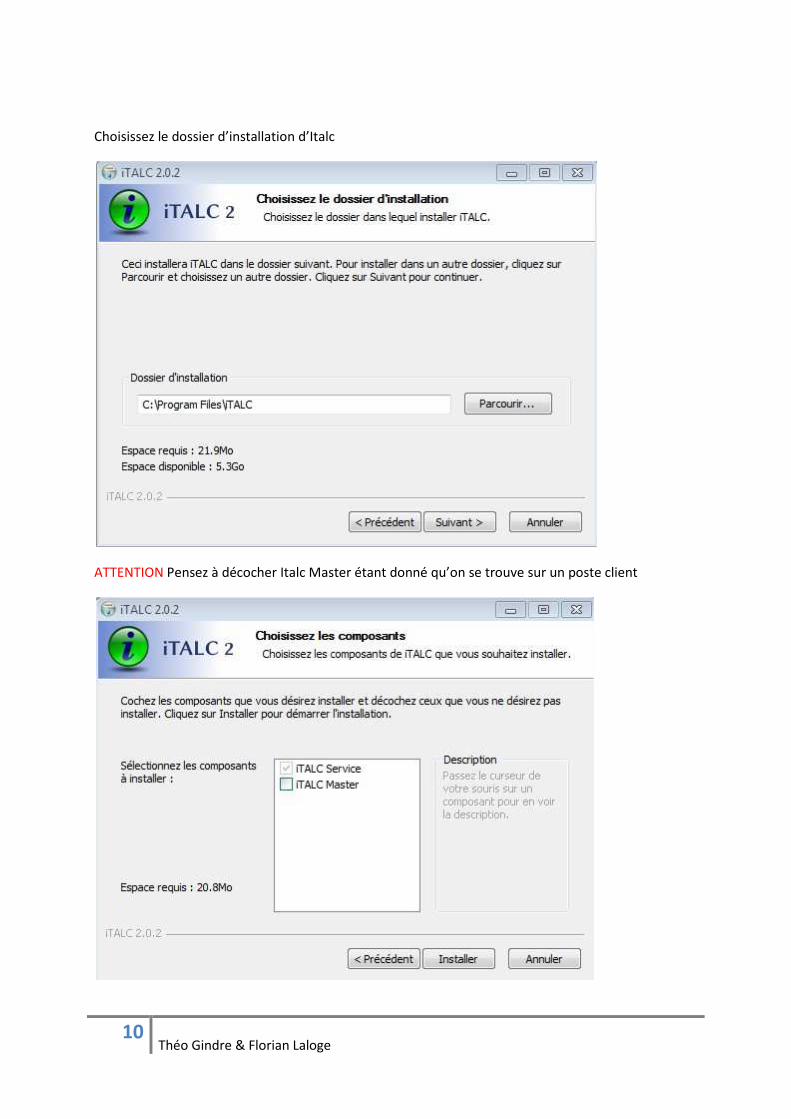
Nous allons passer a la partie Client.
Cliquez sur suivant.
Acceptez la licence utilisateur.
10
Théo Gindre & Florian Laloge
Choisissez le dossier d’installation d’Italc
ATTENTION Pensez à décocher Italc Master étant donné qu’on se trouve sur un poste client
11
Théo Gindre & Florian Laloge
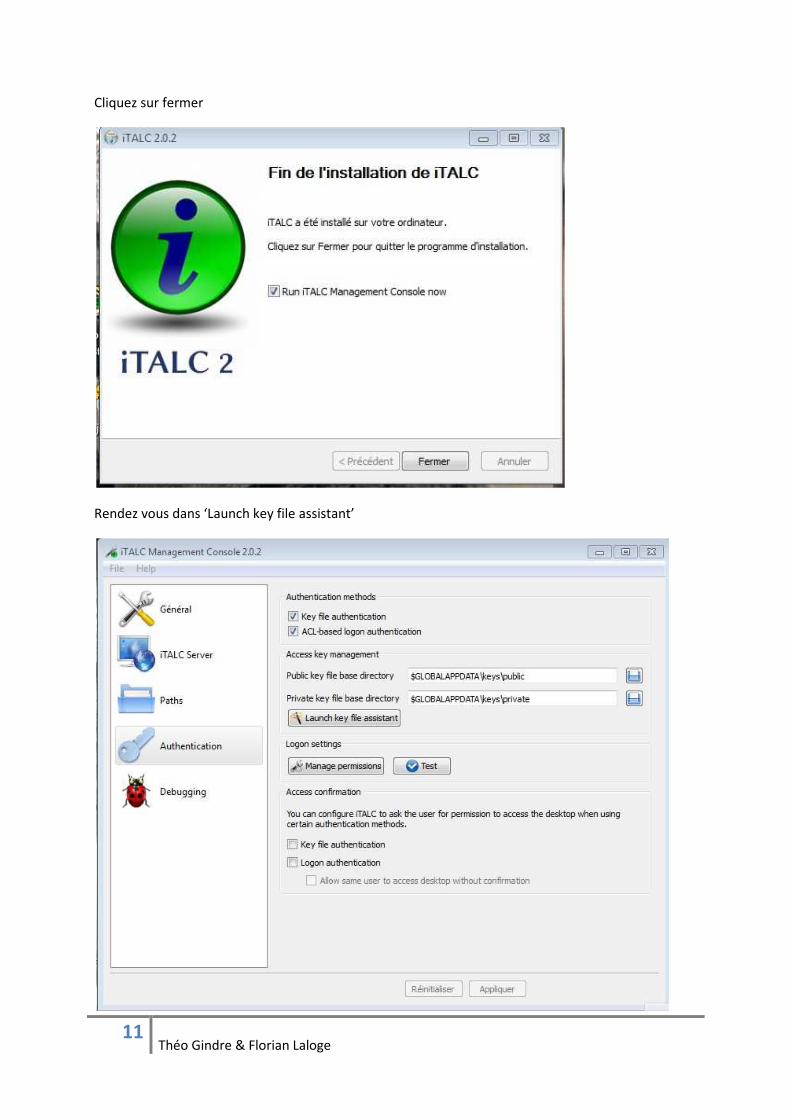
Cliquez sur fermer
Rendez vous dans ‘Launch key file assistant’
12
Théo Gindre & Florian Laloge
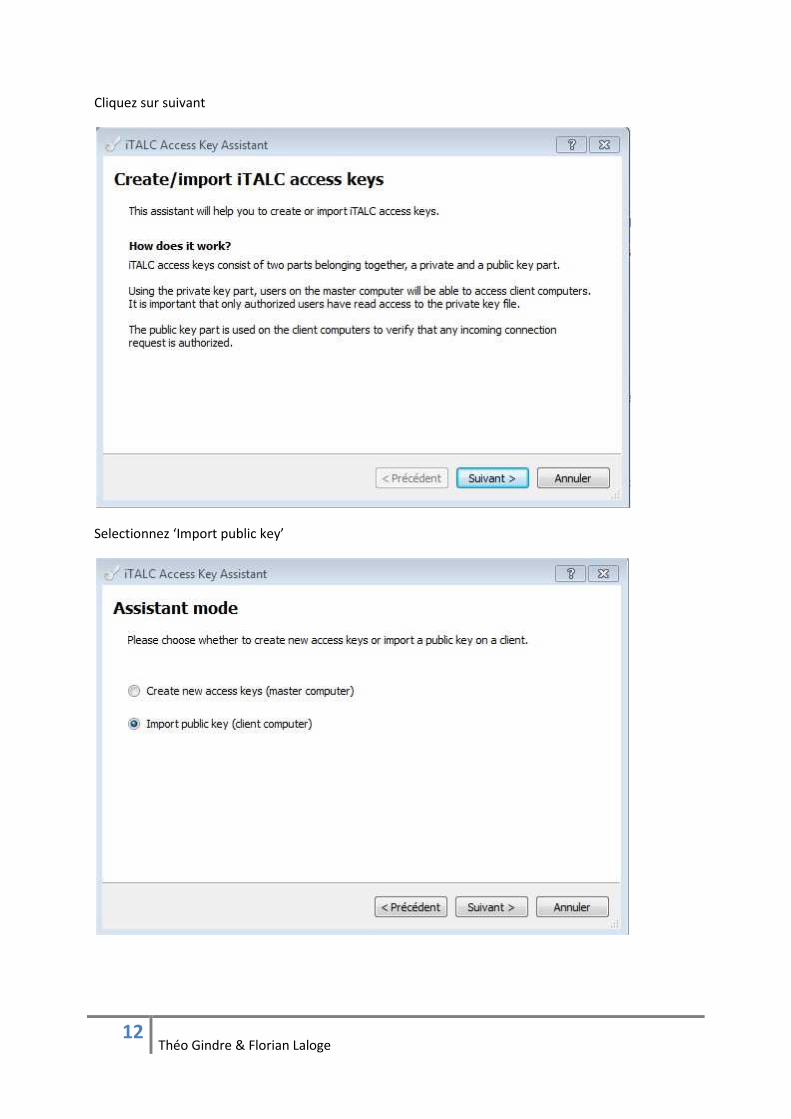
Cliquez sur suivant
Selectionnez ‘Import public key’
13
Théo Gindre & Florian Laloge
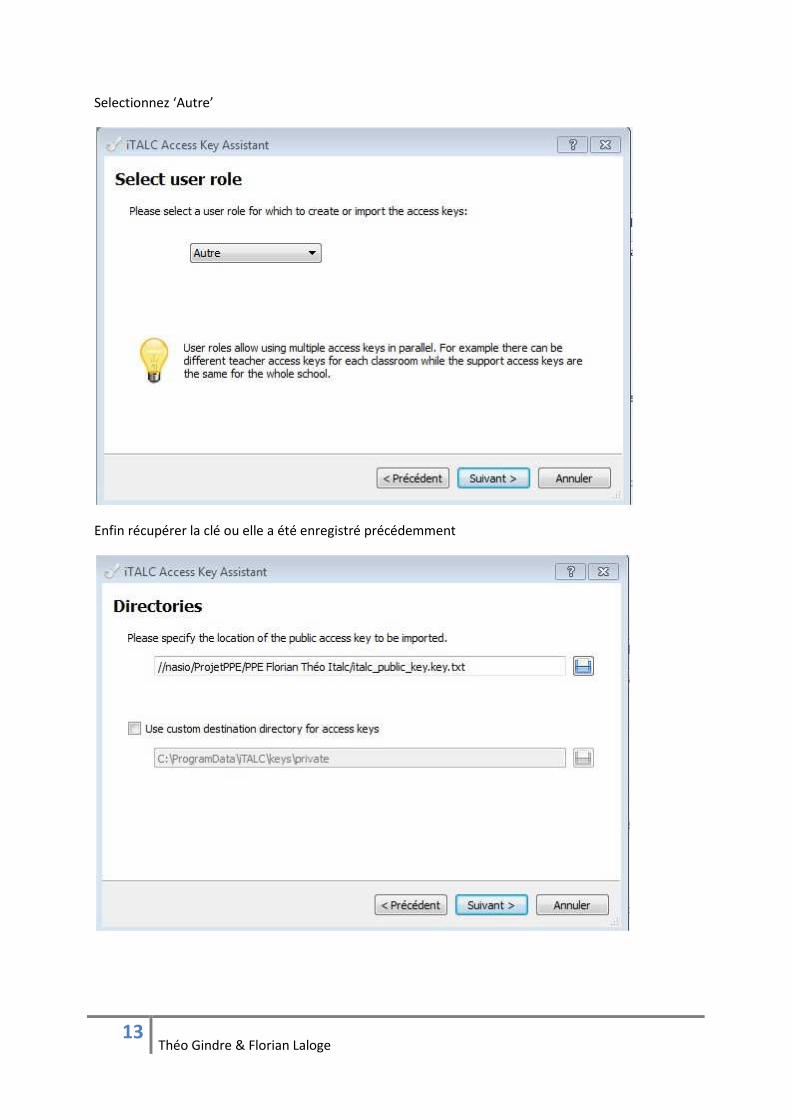
Selectionnez ‘Autre’
Enfin récupérer la clé ou elle a été enregistré précédemment
14
Théo Gindre & Florian Laloge
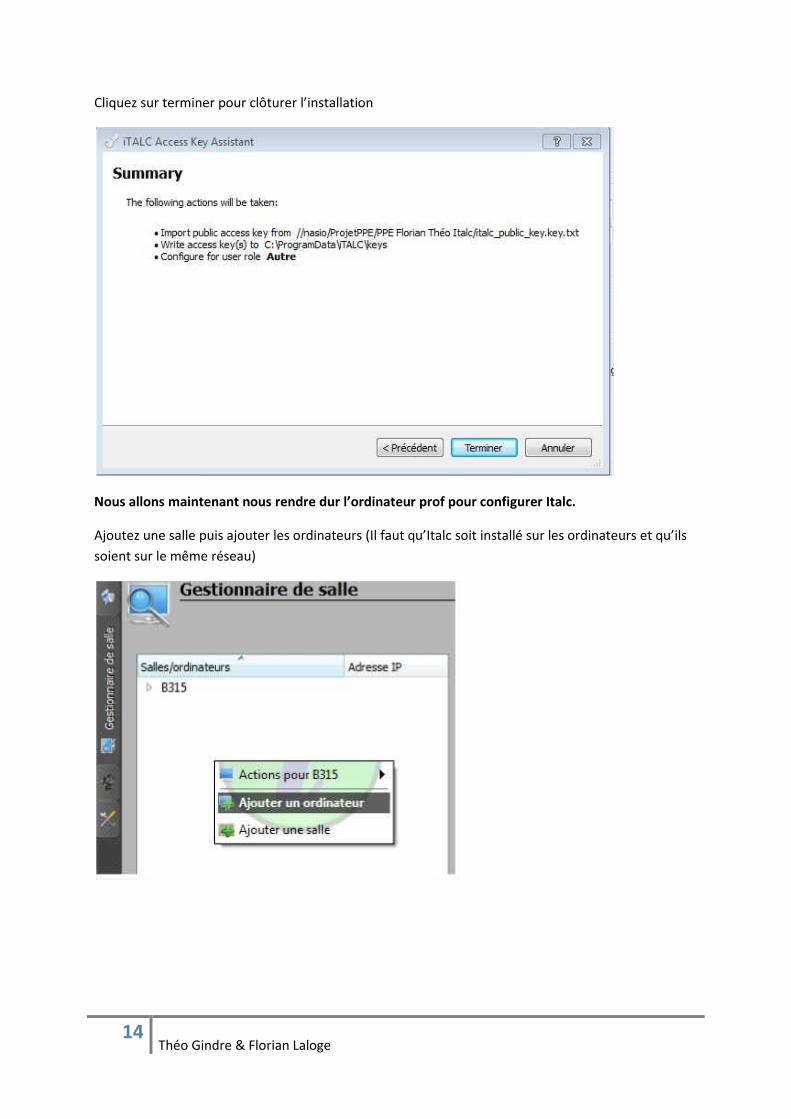
Cliquez sur terminer pour clôturer l’installation
Nous allons maintenant nous rendre dur l’ordinateur prof pour configurer Italc.
Ajoutez une salle puis ajouter les ordinateurs (Il faut qu’Italc soit installé sur les ordinateurs et qu’ils
soient sur le même réseau)
15
Théo Gindre & Florian Laloge
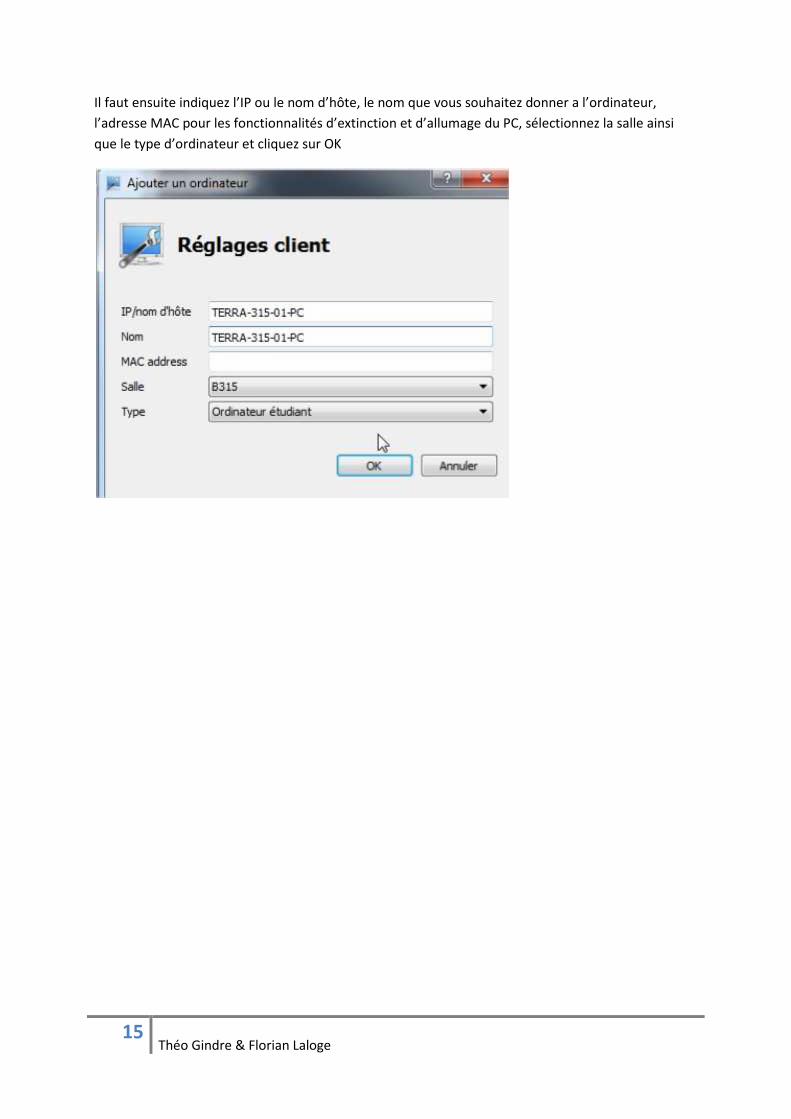
Il faut ensuite indiquez l’IP ou le nom d’hôte, le nom que vous souhaitez donner a l’ordinateur,
l’adresse MAC pour les fonctionnalités d’extinction et d’allumage du PC, sélectionnez la salle ainsi
que le type d’ordinateur et cliquez sur OK
Related Documents