1 Tutorial on Basic Android Setup EE368/CS232 Digital Image Processing, Winter 2018 Introduction In this tutorial, we will learn how to set up the Android software development environment and how to implement image processing operations on an Android mobile device. Android is an open-source platform developed by Google and the Open Handset Alliance on which interesting and powerful new applications can be quickly developed and distributed to many mobile devices. There is a large, growing community of Android developers and a vast selection of Android devices, which includes smartphones, tablets, and TV setup boxes. Android also comes with an extension library of useful functions, including functions for user interfaces, image/bitmap manipulation, and camera control that we will frequently use in EE368/CS232. We look forward to seeing your novel image processing algorithms and applications running on Android devices as the quarter progresses. The tutorial is split into two parts. In the first part, we will explain how to download and install the Android software tools onto your computer. Then, in the second part, we will explain how to develop image processing programs that can run on an Android mobile device. Part I: Downloading Android Studio We will use the Android Studio IDE to design, implement, and debug Android-compatible programs in this class. Note: Before December 2014, the official IDE was Eclipse. Android Studio is backwards compatible with projects created with Eclipse, but you may notice differences in the file structure of older Android projects. Downloading and installing Android Studio 1. Download the latest Android Studio version for your system by following the instructions at this link: https://developer.android.com/studio/index.html 2. Open the Android Studio application. A window will appear saying that no Android SDK was found on your system. Click Next and leave the settings as default. Click Next again and Finish. Android Studio will now download and install all the necessary components, which will take a few minutes. 3. Once this is done, a window like in Figure 1 should be shown. You are now ready to use Android Studio.

Welcome message from author
This document is posted to help you gain knowledge. Please leave a comment to let me know what you think about it! Share it to your friends and learn new things together.
Transcript
1"
"
Tutorial on Basic Android Setup
EE368/CS232 Digital Image Processing, Winter 2018
Introduction In this tutorial, we will learn how to set up the Android software development environment and how to implement image processing operations on an Android mobile device. Android is an open-source platform developed by Google and the Open Handset Alliance on which interesting and powerful new applications can be quickly developed and distributed to many mobile devices. There is a large, growing community of Android developers and a vast selection of Android devices, which includes smartphones, tablets, and TV setup boxes. Android also comes with an extension library of useful functions, including functions for user interfaces, image/bitmap manipulation, and camera control that we will frequently use in EE368/CS232. We look forward to seeing your novel image processing algorithms and applications running on Android devices as the quarter progresses. The tutorial is split into two parts. In the first part, we will explain how to download and install the Android software tools onto your computer. Then, in the second part, we will explain how to develop image processing programs that can run on an Android mobile device. Part I: Downloading Android Studio We will use the Android Studio IDE to design, implement, and debug Android-compatible programs in this class. Note: Before December 2014, the official IDE was Eclipse. Android Studio is backwards compatible with projects created with Eclipse, but you may notice differences in the file structure of older Android projects. Downloading and installing Android Studio
1. Download the latest Android Studio version for your system by following the instructions at this link: https://developer.android.com/studio/index.html
2. Open the Android Studio application. A window will appear saying that no Android SDK
was found on your system. Click Next and leave the settings as default. Click Next again and Finish. Android Studio will now download and install all the necessary components, which will take a few minutes.
3. Once this is done, a window like in Figure 1 should be shown. You are now ready to use Android Studio.

2"
"
Figure 1. Initial start-up screen of Android Studio.
Part II: Developing Image Processing Programs for Android Now that Android Studio is set up on your computer, we are ready to start writing image processing programs that can run an Android-compatible mobile device. Building Your First App The official Android tutorial “Building Your First App” is a great resource for people who have never used Android. https://developer.android.com/training/basics/firstapp/index.html
We recommend that you go through this tutorial so that you learn how to write, build and run a basic Android app. If you want to know more about Android Studio, the following page is also very informative: https://developer.android.com/studio/intro/index.html
EE368 Viewfinder Example Now, having grasped the fundamentals of building and running an Android application, we will create a more complicated project involving the onboard camera and real-time image processing.
1. Create a new Android project with the following parameters. a. “Create Android project”
Application name: Viewfinder EE368 Company Domain: ee368.stanford.edu Click Next.
b. “Target Android Devices”
3"
"
Leave as default. Click Next.
c. “Add an Activity to Mobile” Choose “Empty Activity”. Click Next.
d. “Configure Activity” Activity Name: ViewfinderEE368 Uncheck “Generate Layout File”. Leave “Backwards Compatibility” checked. Click Finish.
2. Go to the EE368 git repository at the following URL:
https://github.com/ee368/EE368-Android-Samples
You can choose to clone it on your computer.
3. Open the file located at: Tutorial1/ViewfinderEE368/app/src/main/java/edu/stanford/ee368/viewfinderee368/ViewfinderEE368.java
and copy its content in the ViewfinderEE368.java in the project that you just created.
4. Similarly, open the file located at: Tutorial1/ViewfinderEE368/app/src/main/AndroidManifest.xml and copy its content in your own AndroidManifest.xml file.
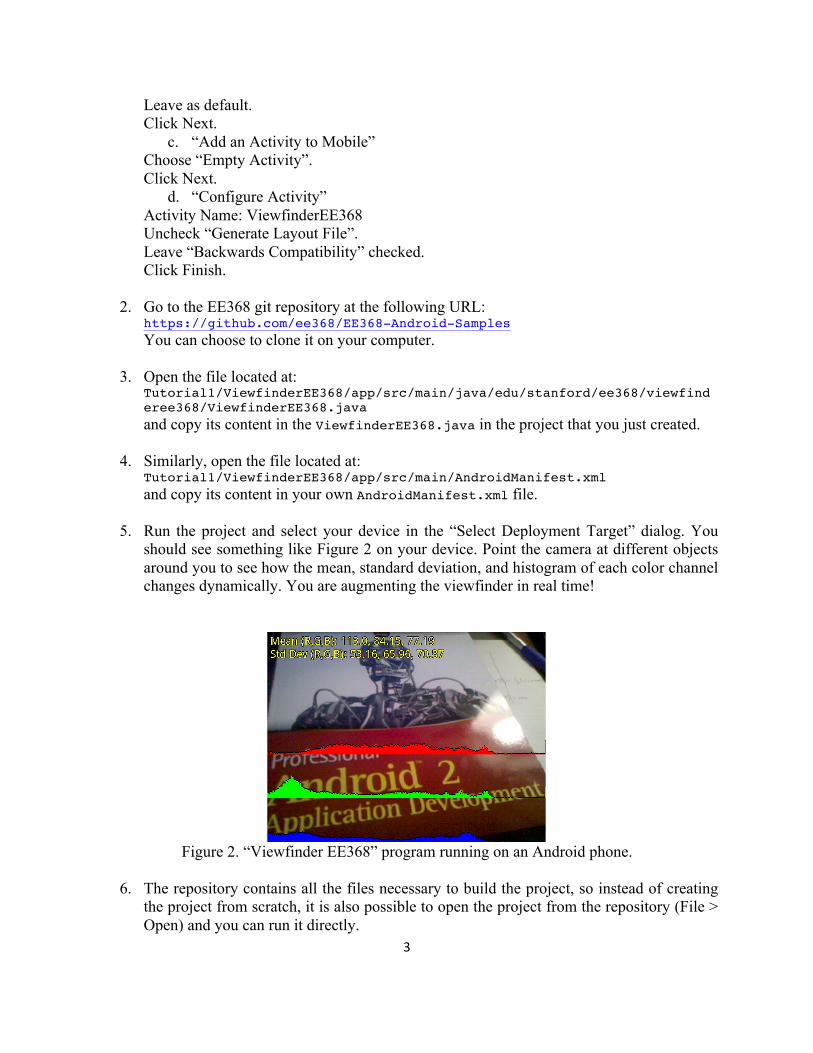
5. Run the project and select your device in the “Select Deployment Target” dialog. You
should see something like Figure 2 on your device. Point the camera at different objects around you to see how the mean, standard deviation, and histogram of each color channel changes dynamically. You are augmenting the viewfinder in real time!
Figure 2. “Viewfinder EE368” program running on an Android phone.
6. The repository contains all the files necessary to build the project, so instead of creating
the project from scratch, it is also possible to open the project from the repository (File > Open) and you can run it directly.
4"
"
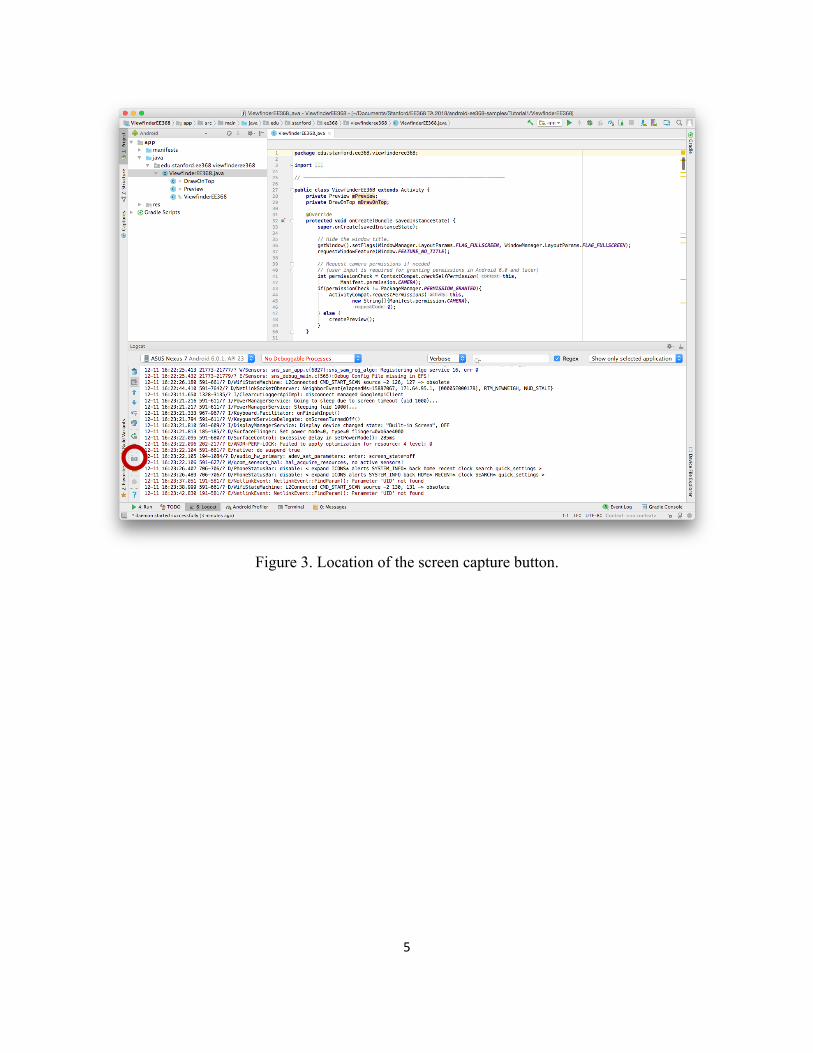
Real-time Phone Debugging in Android Studio It is actually possible to view real-time messages from the phone in Android Studio, which can be very helpful for debugging and code development. Click on the “Logcat” button at the bottom of your Android Studio window. This view shows a sequential list of real-time messages from the phone. In particular, error messages in red can be very useful when trying to debug a problem. Taking a Screenshot of the Phone At some point, it may be useful to take a screenshot of the phone, e.g., to use as a figure in your project report.
1. Open the “Logcat” view by clicking on the corresponding button at the bottom of your Android Studio window.
2. Make sure your Android device is selected in the drop-down menu, as shown in Figure 3.
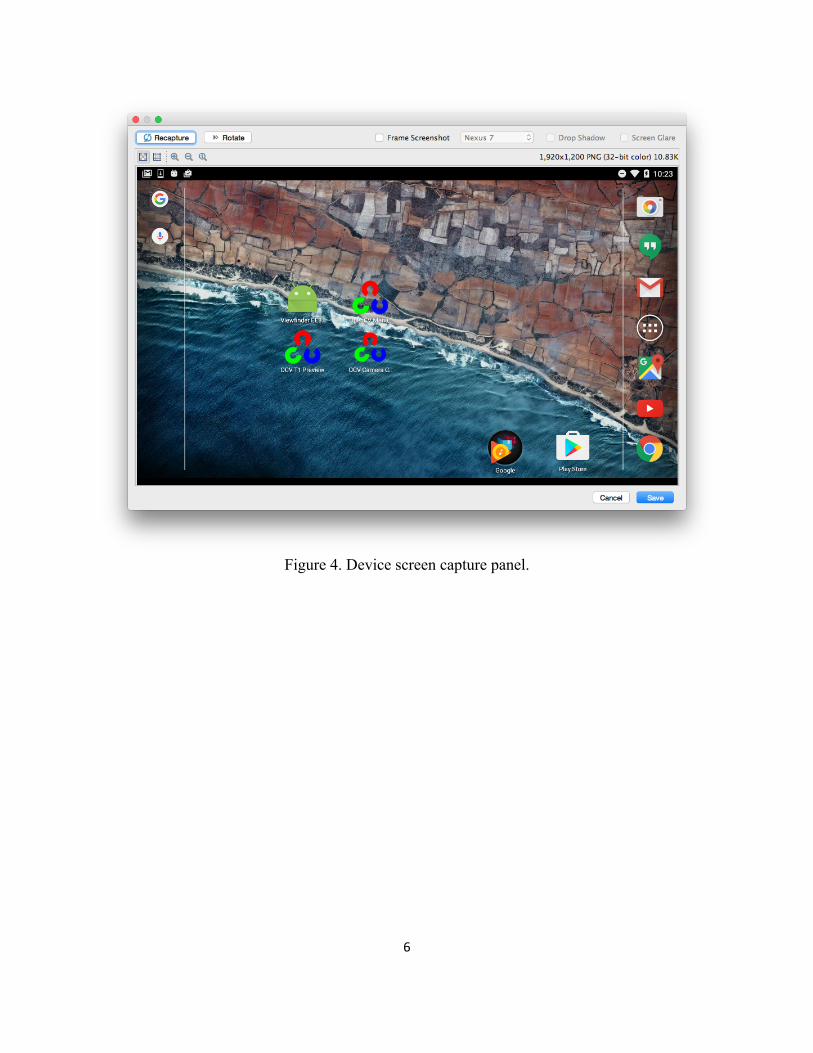
3. Click the camera icon (circled in red in Figure 3), and a panel like Figure 4 should pop
up.
4. Finally, when you have the desired screen shown, click Save to extract the screenshot.
5"
"
Figure 3. Location of the screen capture button.
6"
"
Figure 4. Device screen capture panel.
Related Documents