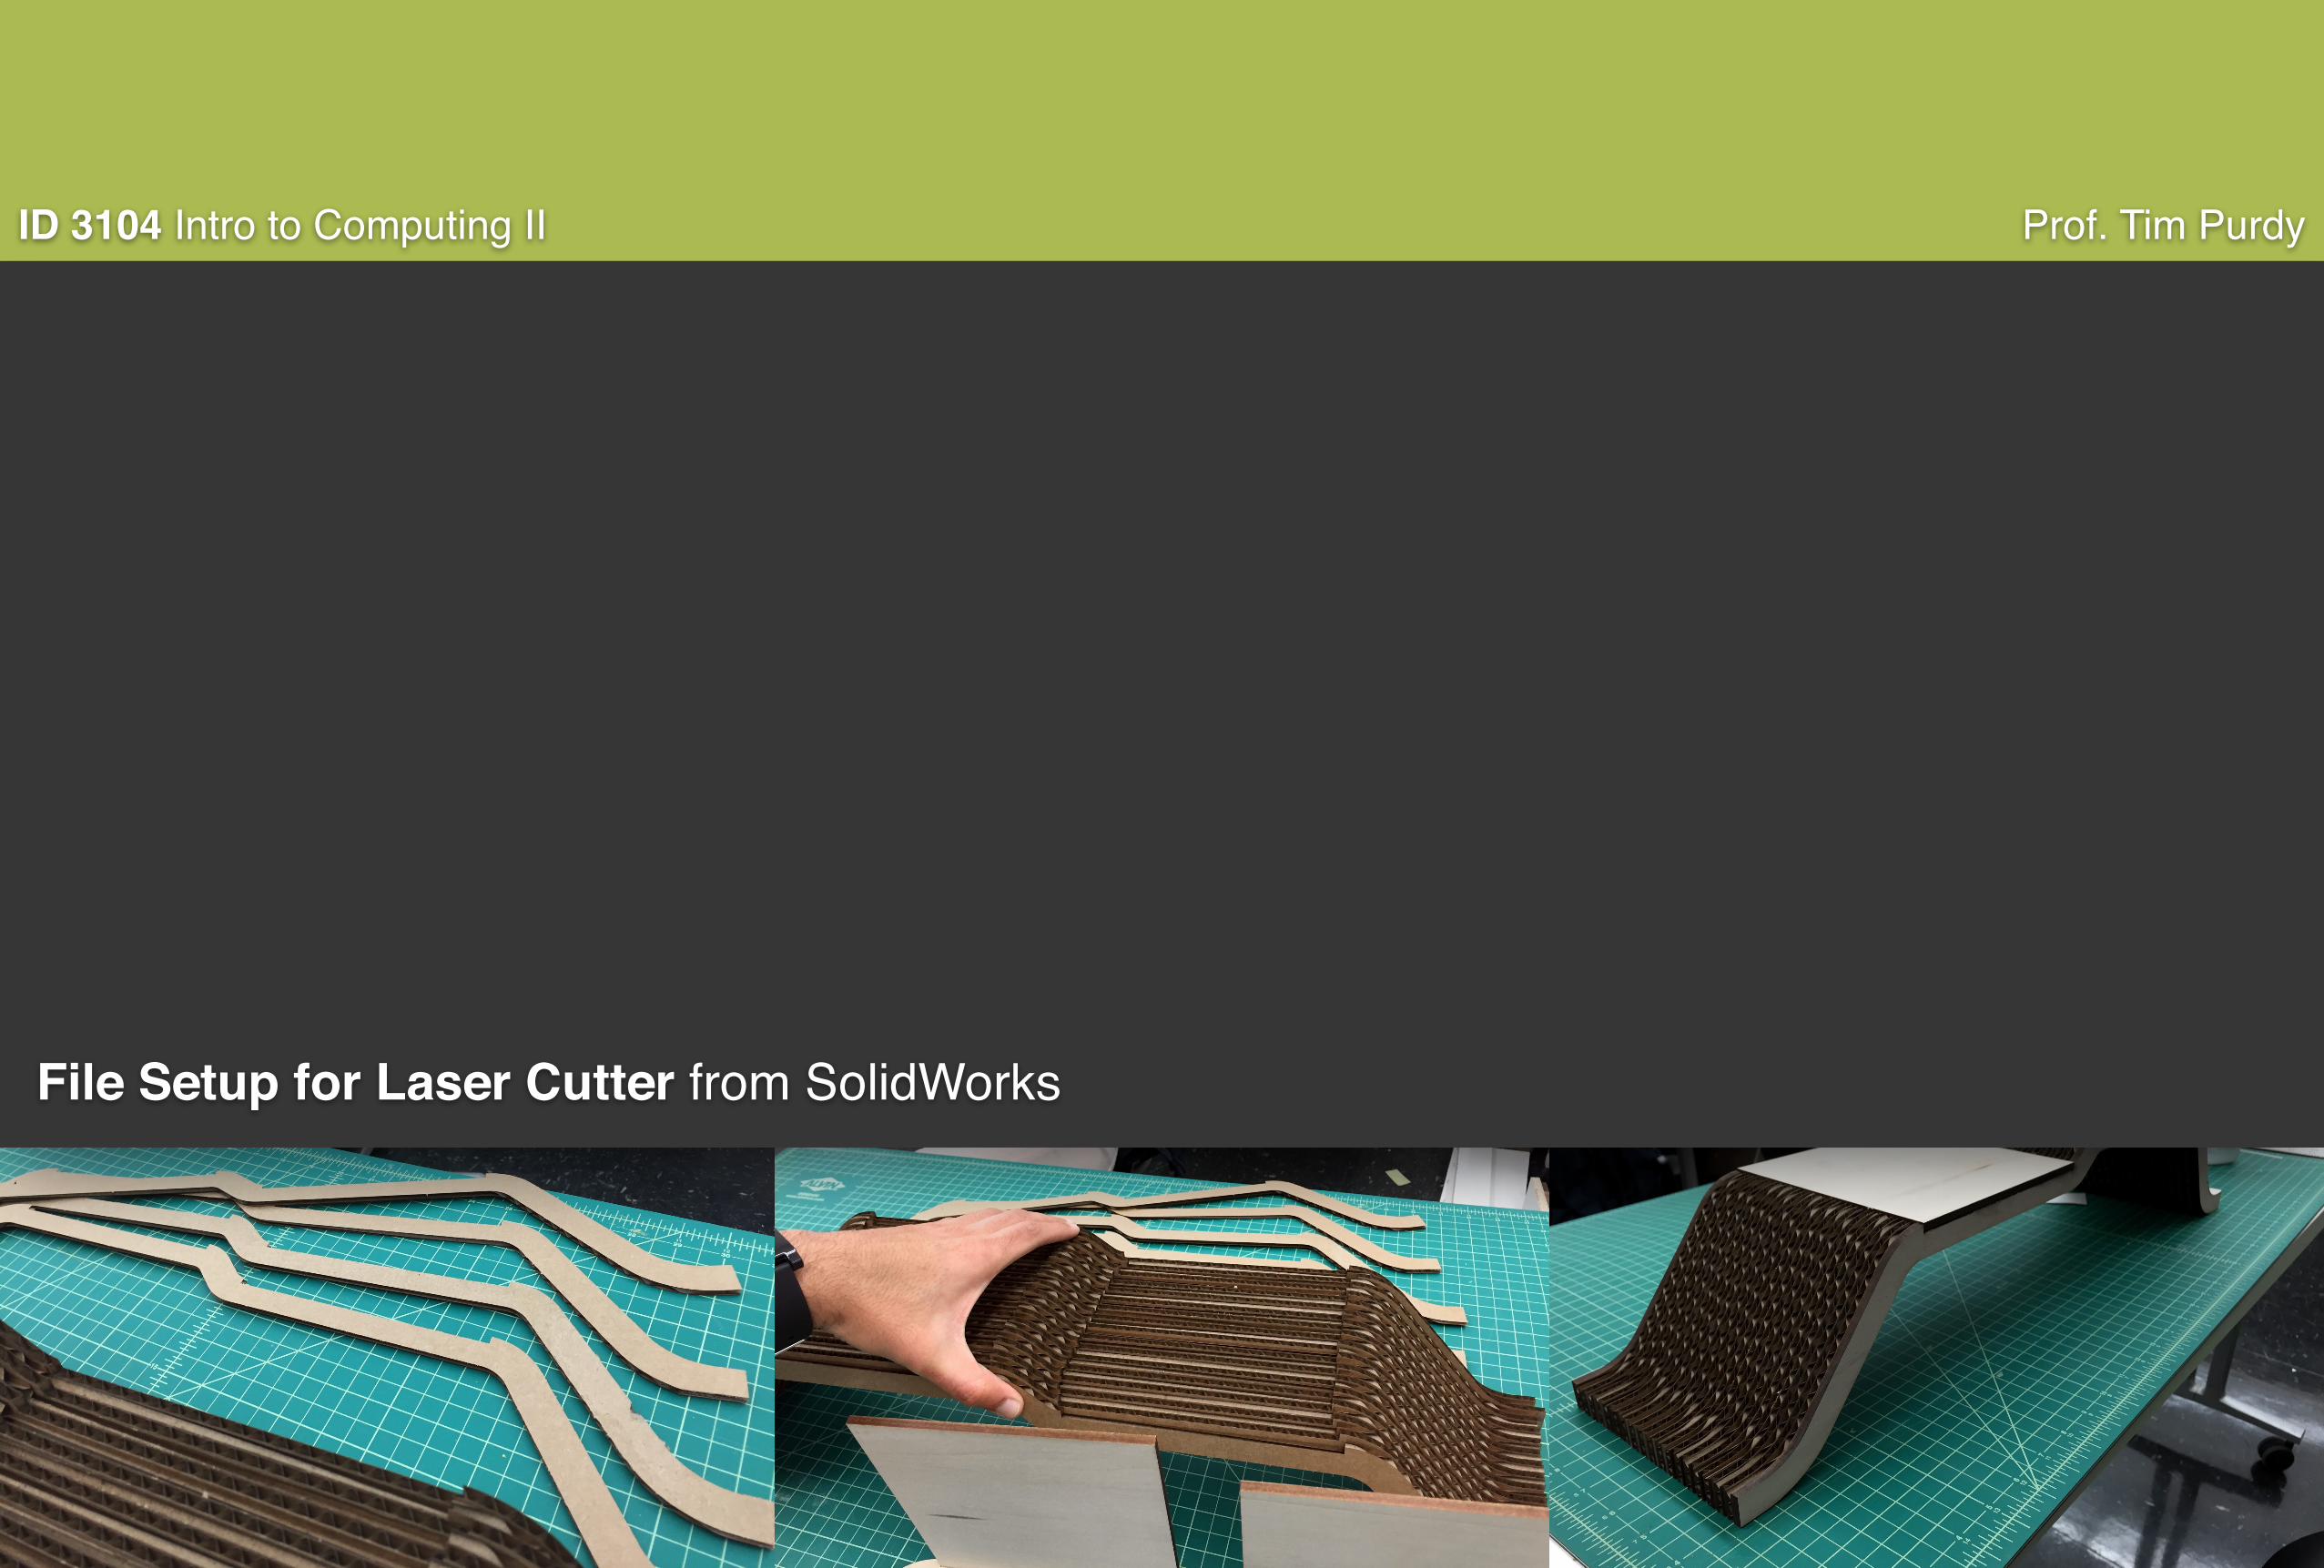
ID 3104 Intro to Computing II Prof. Tim Purdy File Setup for Laser Cutter from SolidWorks

Welcome message from author
This document is posted to help you gain knowledge. Please leave a comment to let me know what you think about it! Share it to your friends and learn new things together.
Transcript
ID 3104 Intro to Computing II Prof. Tim Purdy
File Setup for Laser Cutter from SolidWorks
ID 3104 Intro to Computing II Prof. Tim Purdy
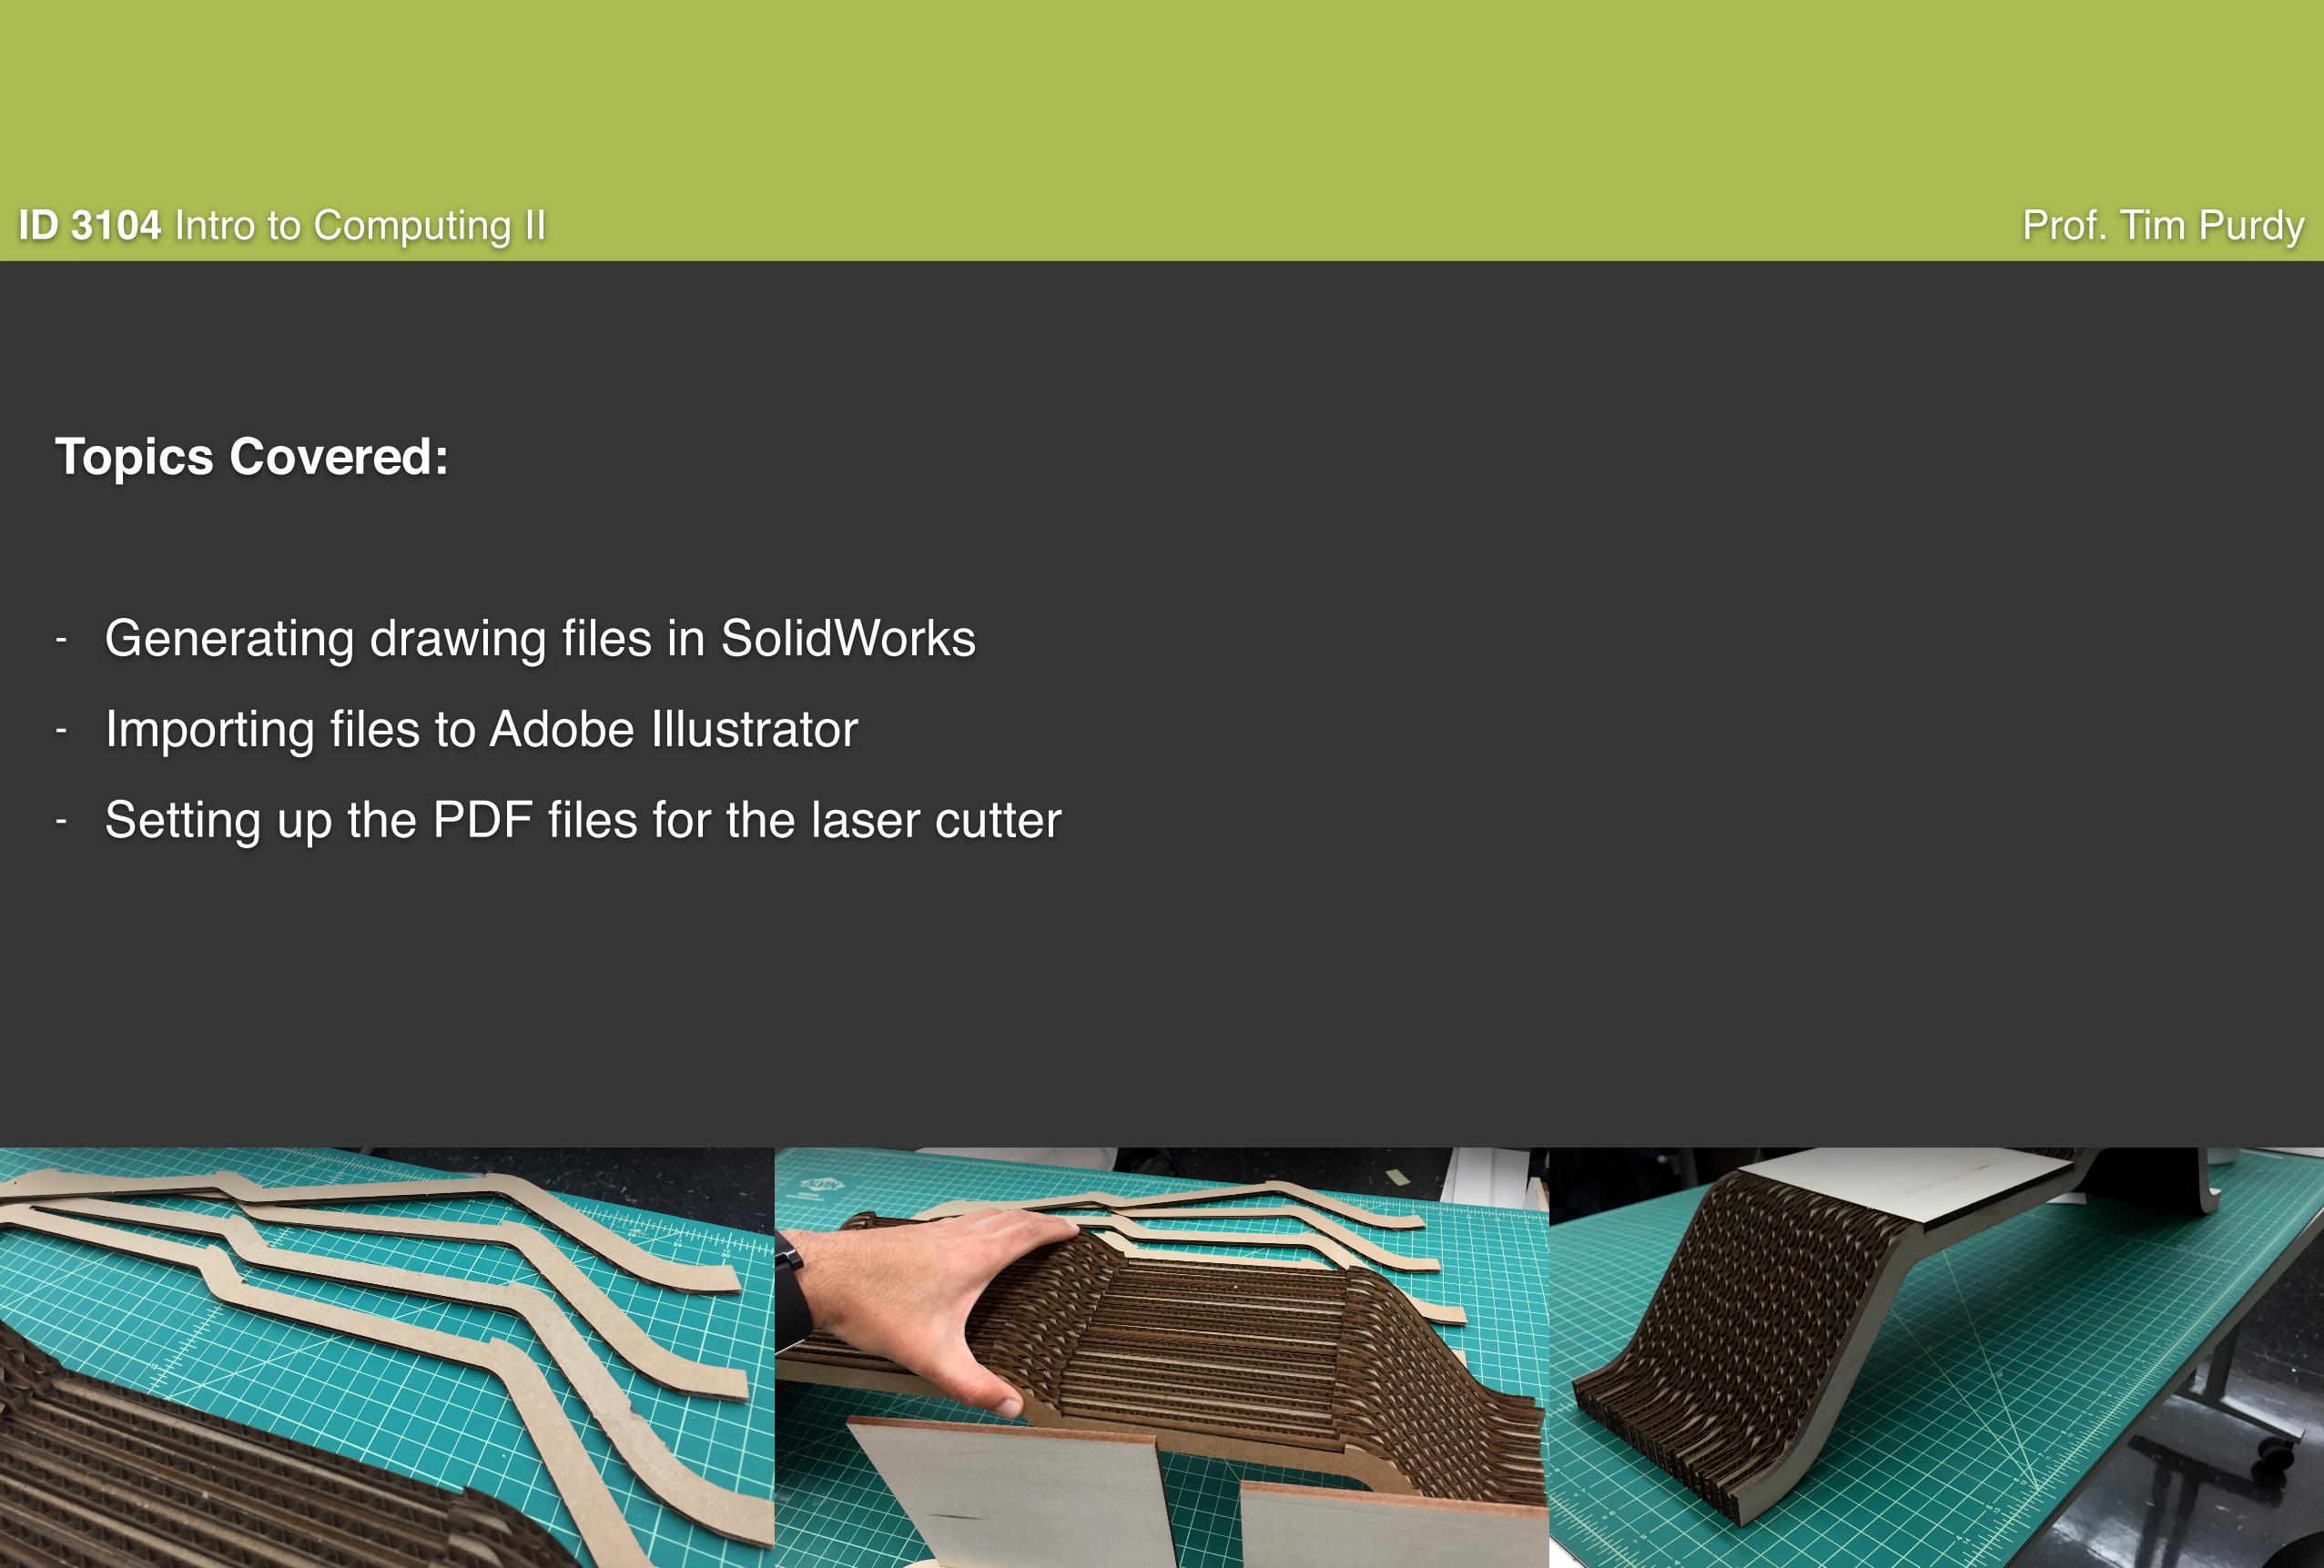
Topics Covered:
- Generating drawing files in SolidWorks- Importing files to Adobe Illustrator- Setting up the PDF files for the laser cutter
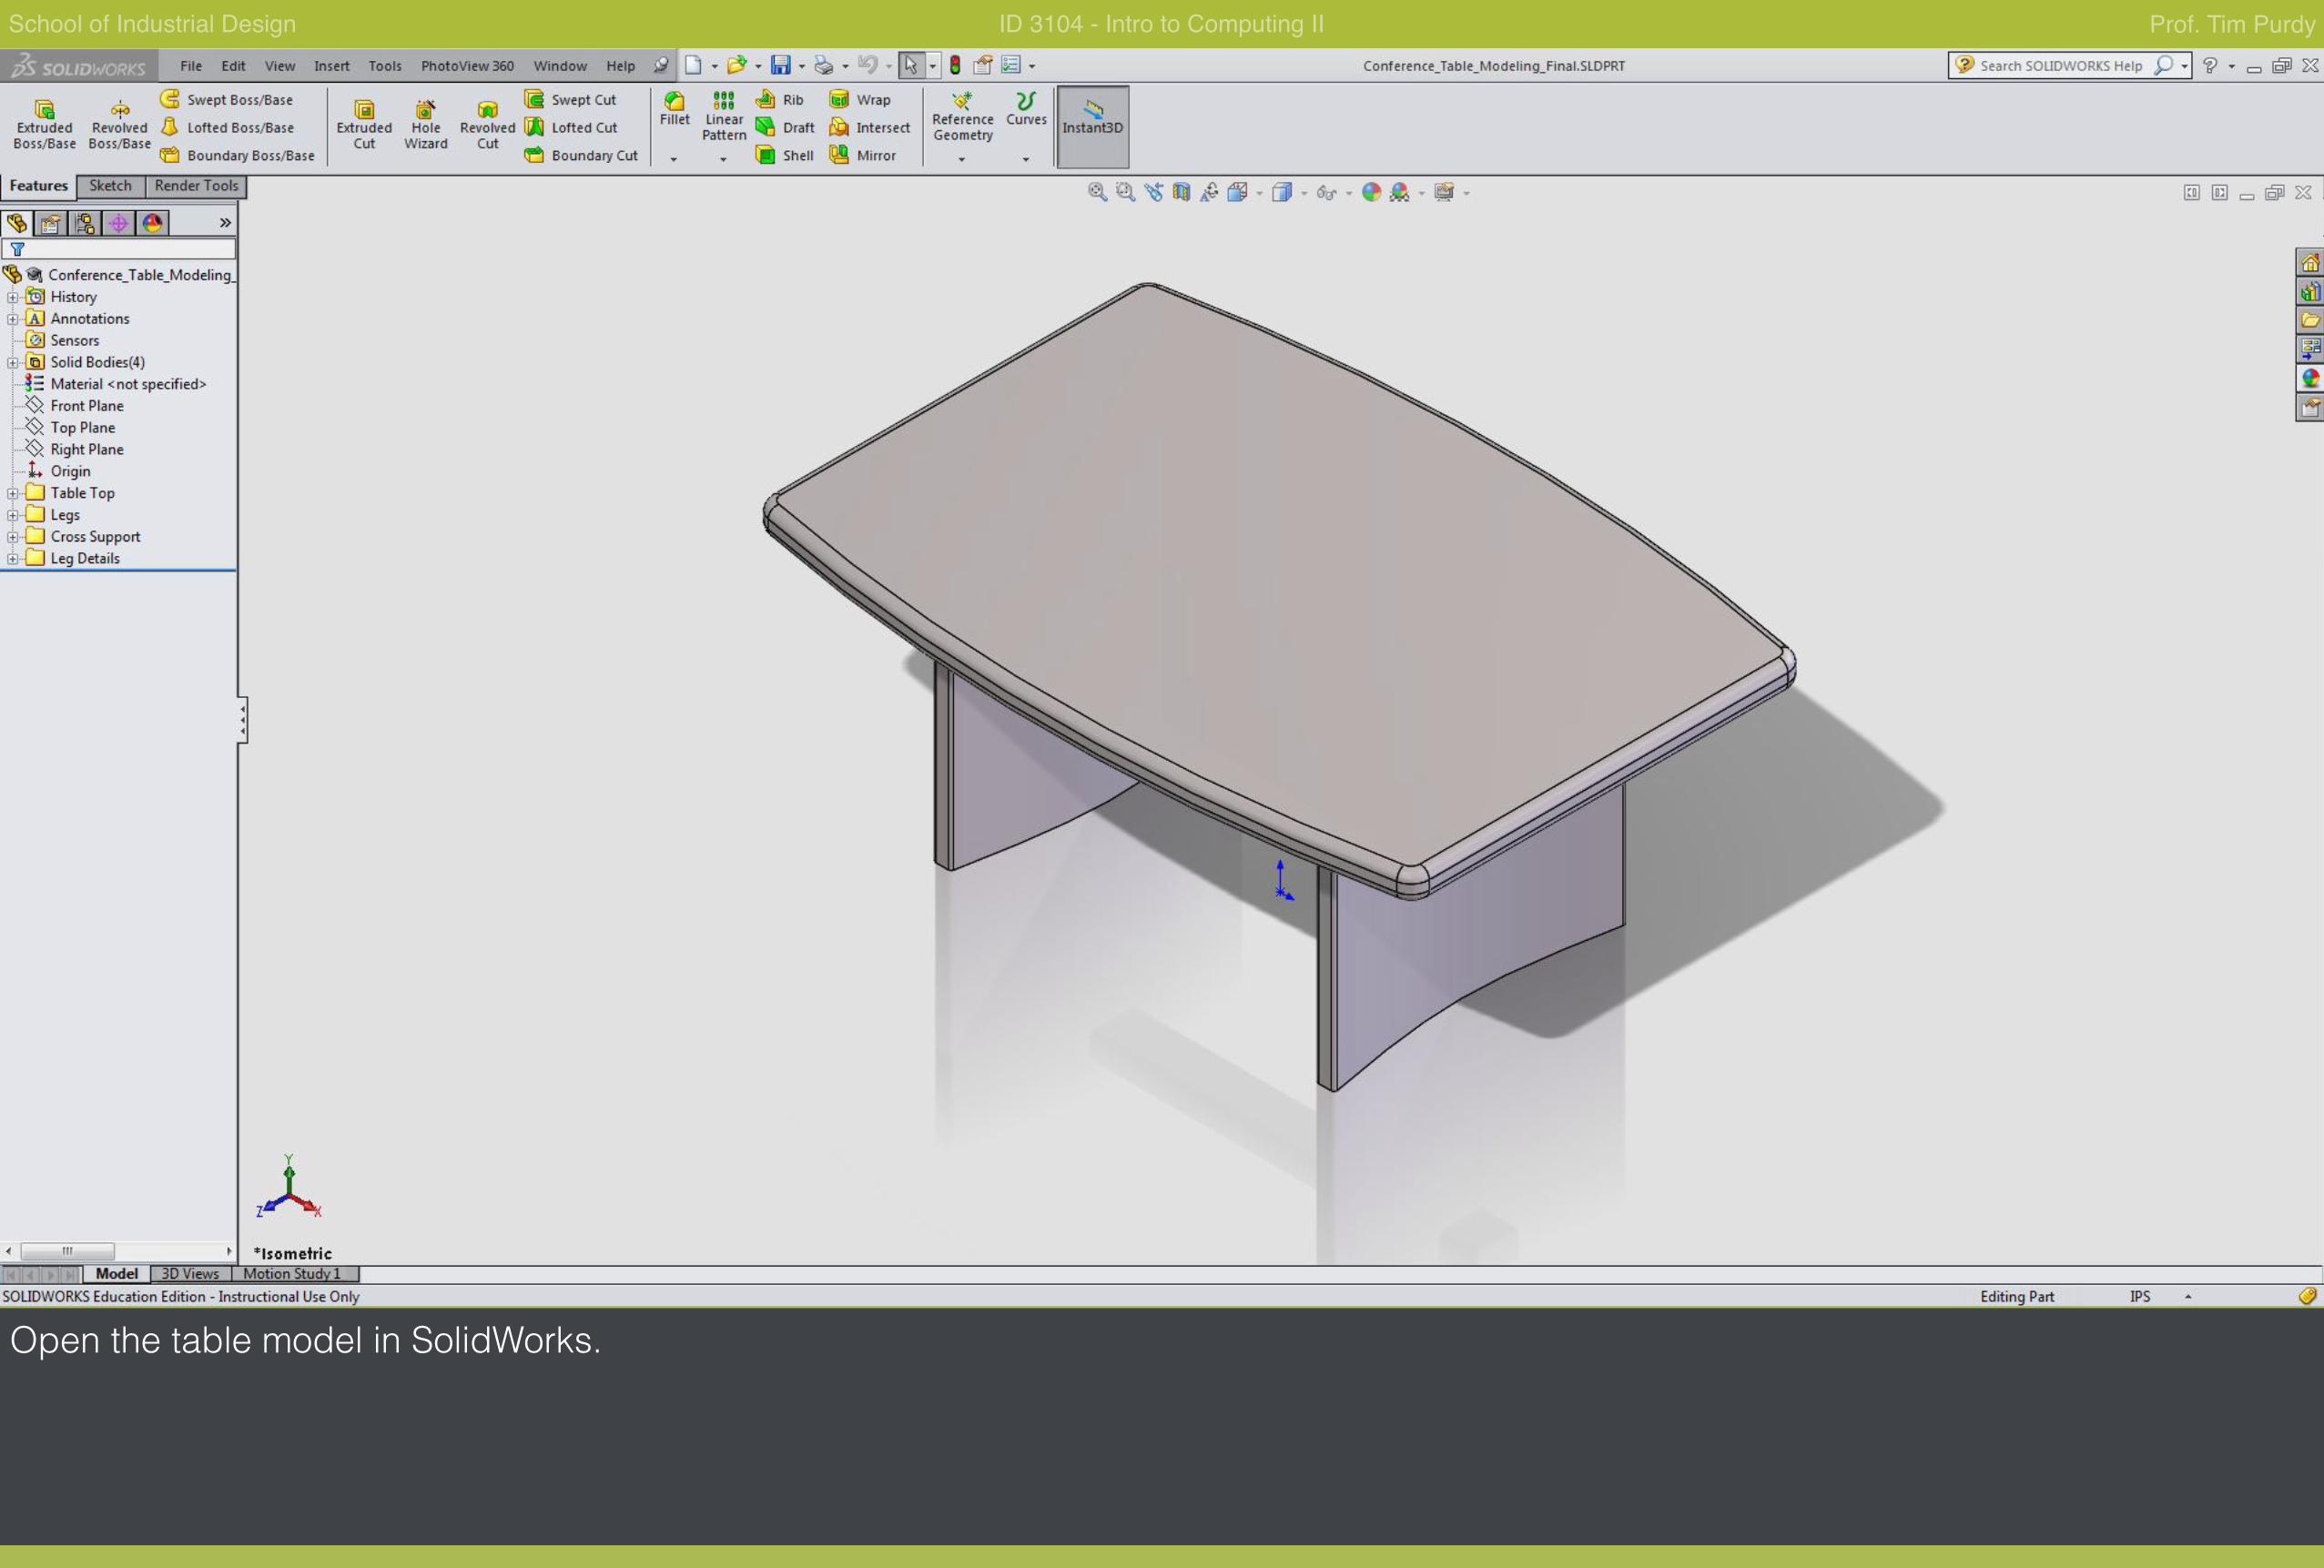
School of Industrial Design ID 3104 - Intro to Computing II Prof. Tim Purdy
Open the table model in SolidWorks.
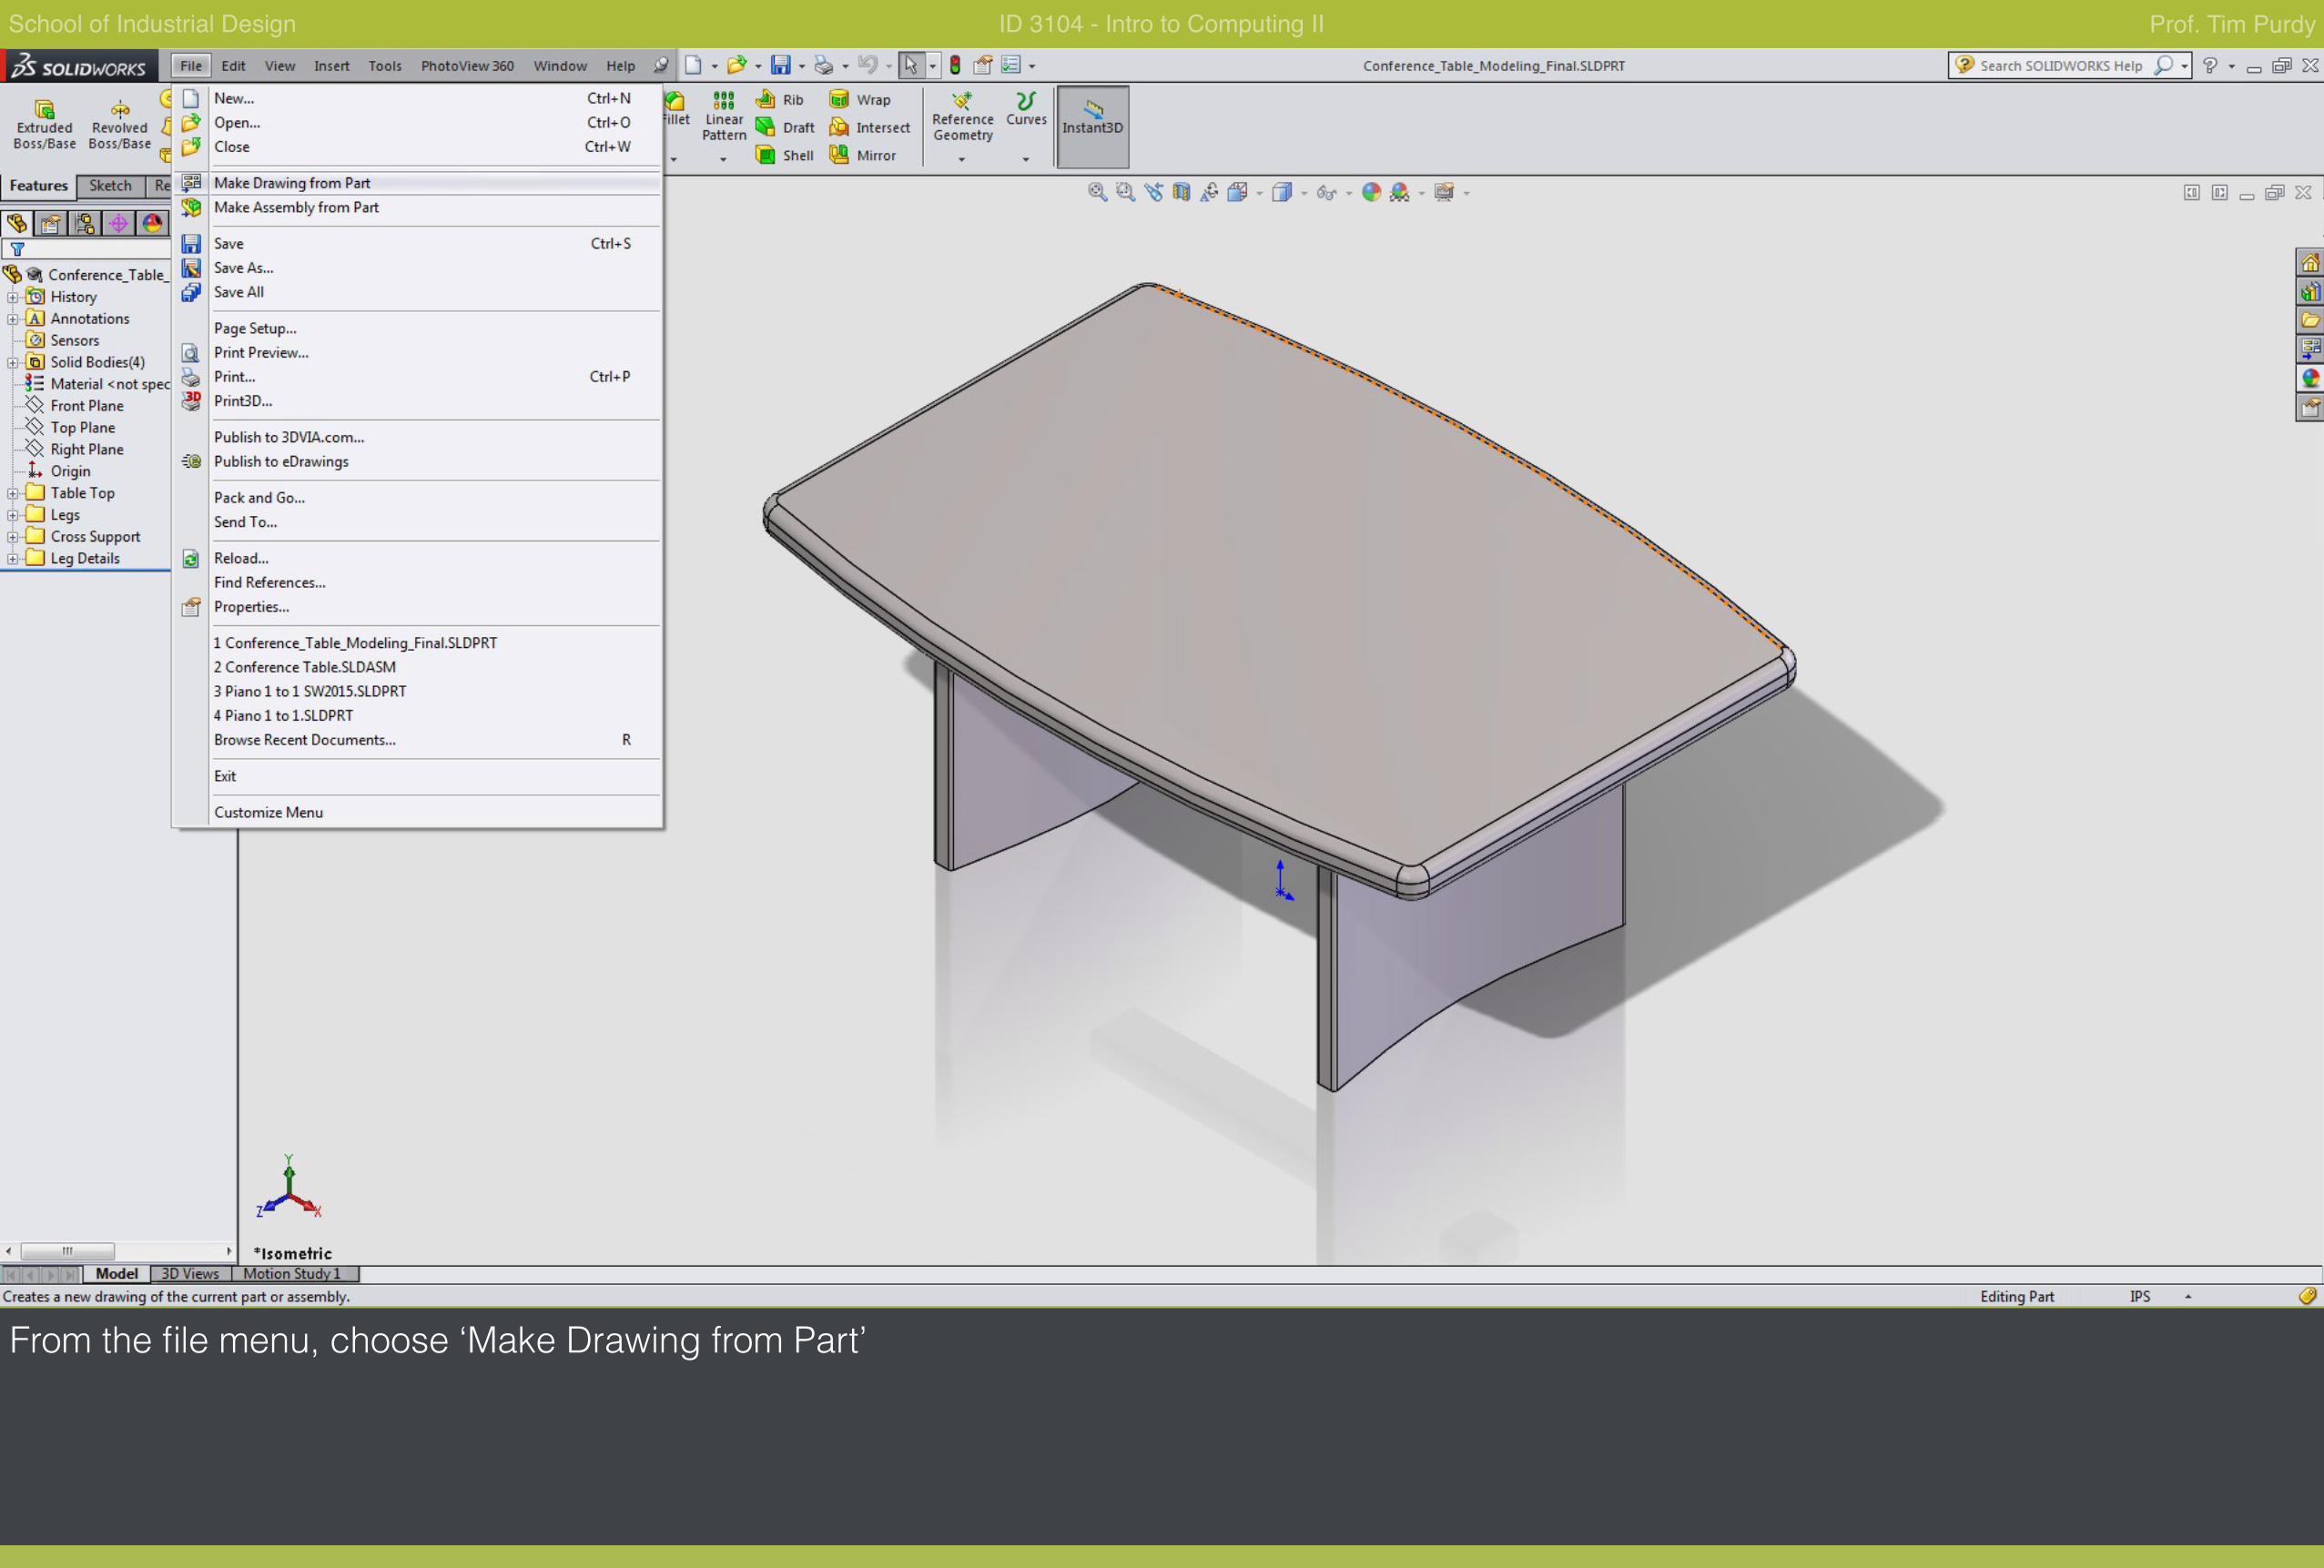
School of Industrial Design ID 3104 - Intro to Computing II Prof. Tim Purdy
From the file menu, choose ‘Make Drawing from Part’
School of Industrial Design ID 3104 - Intro to Computing II Prof. Tim Purdy
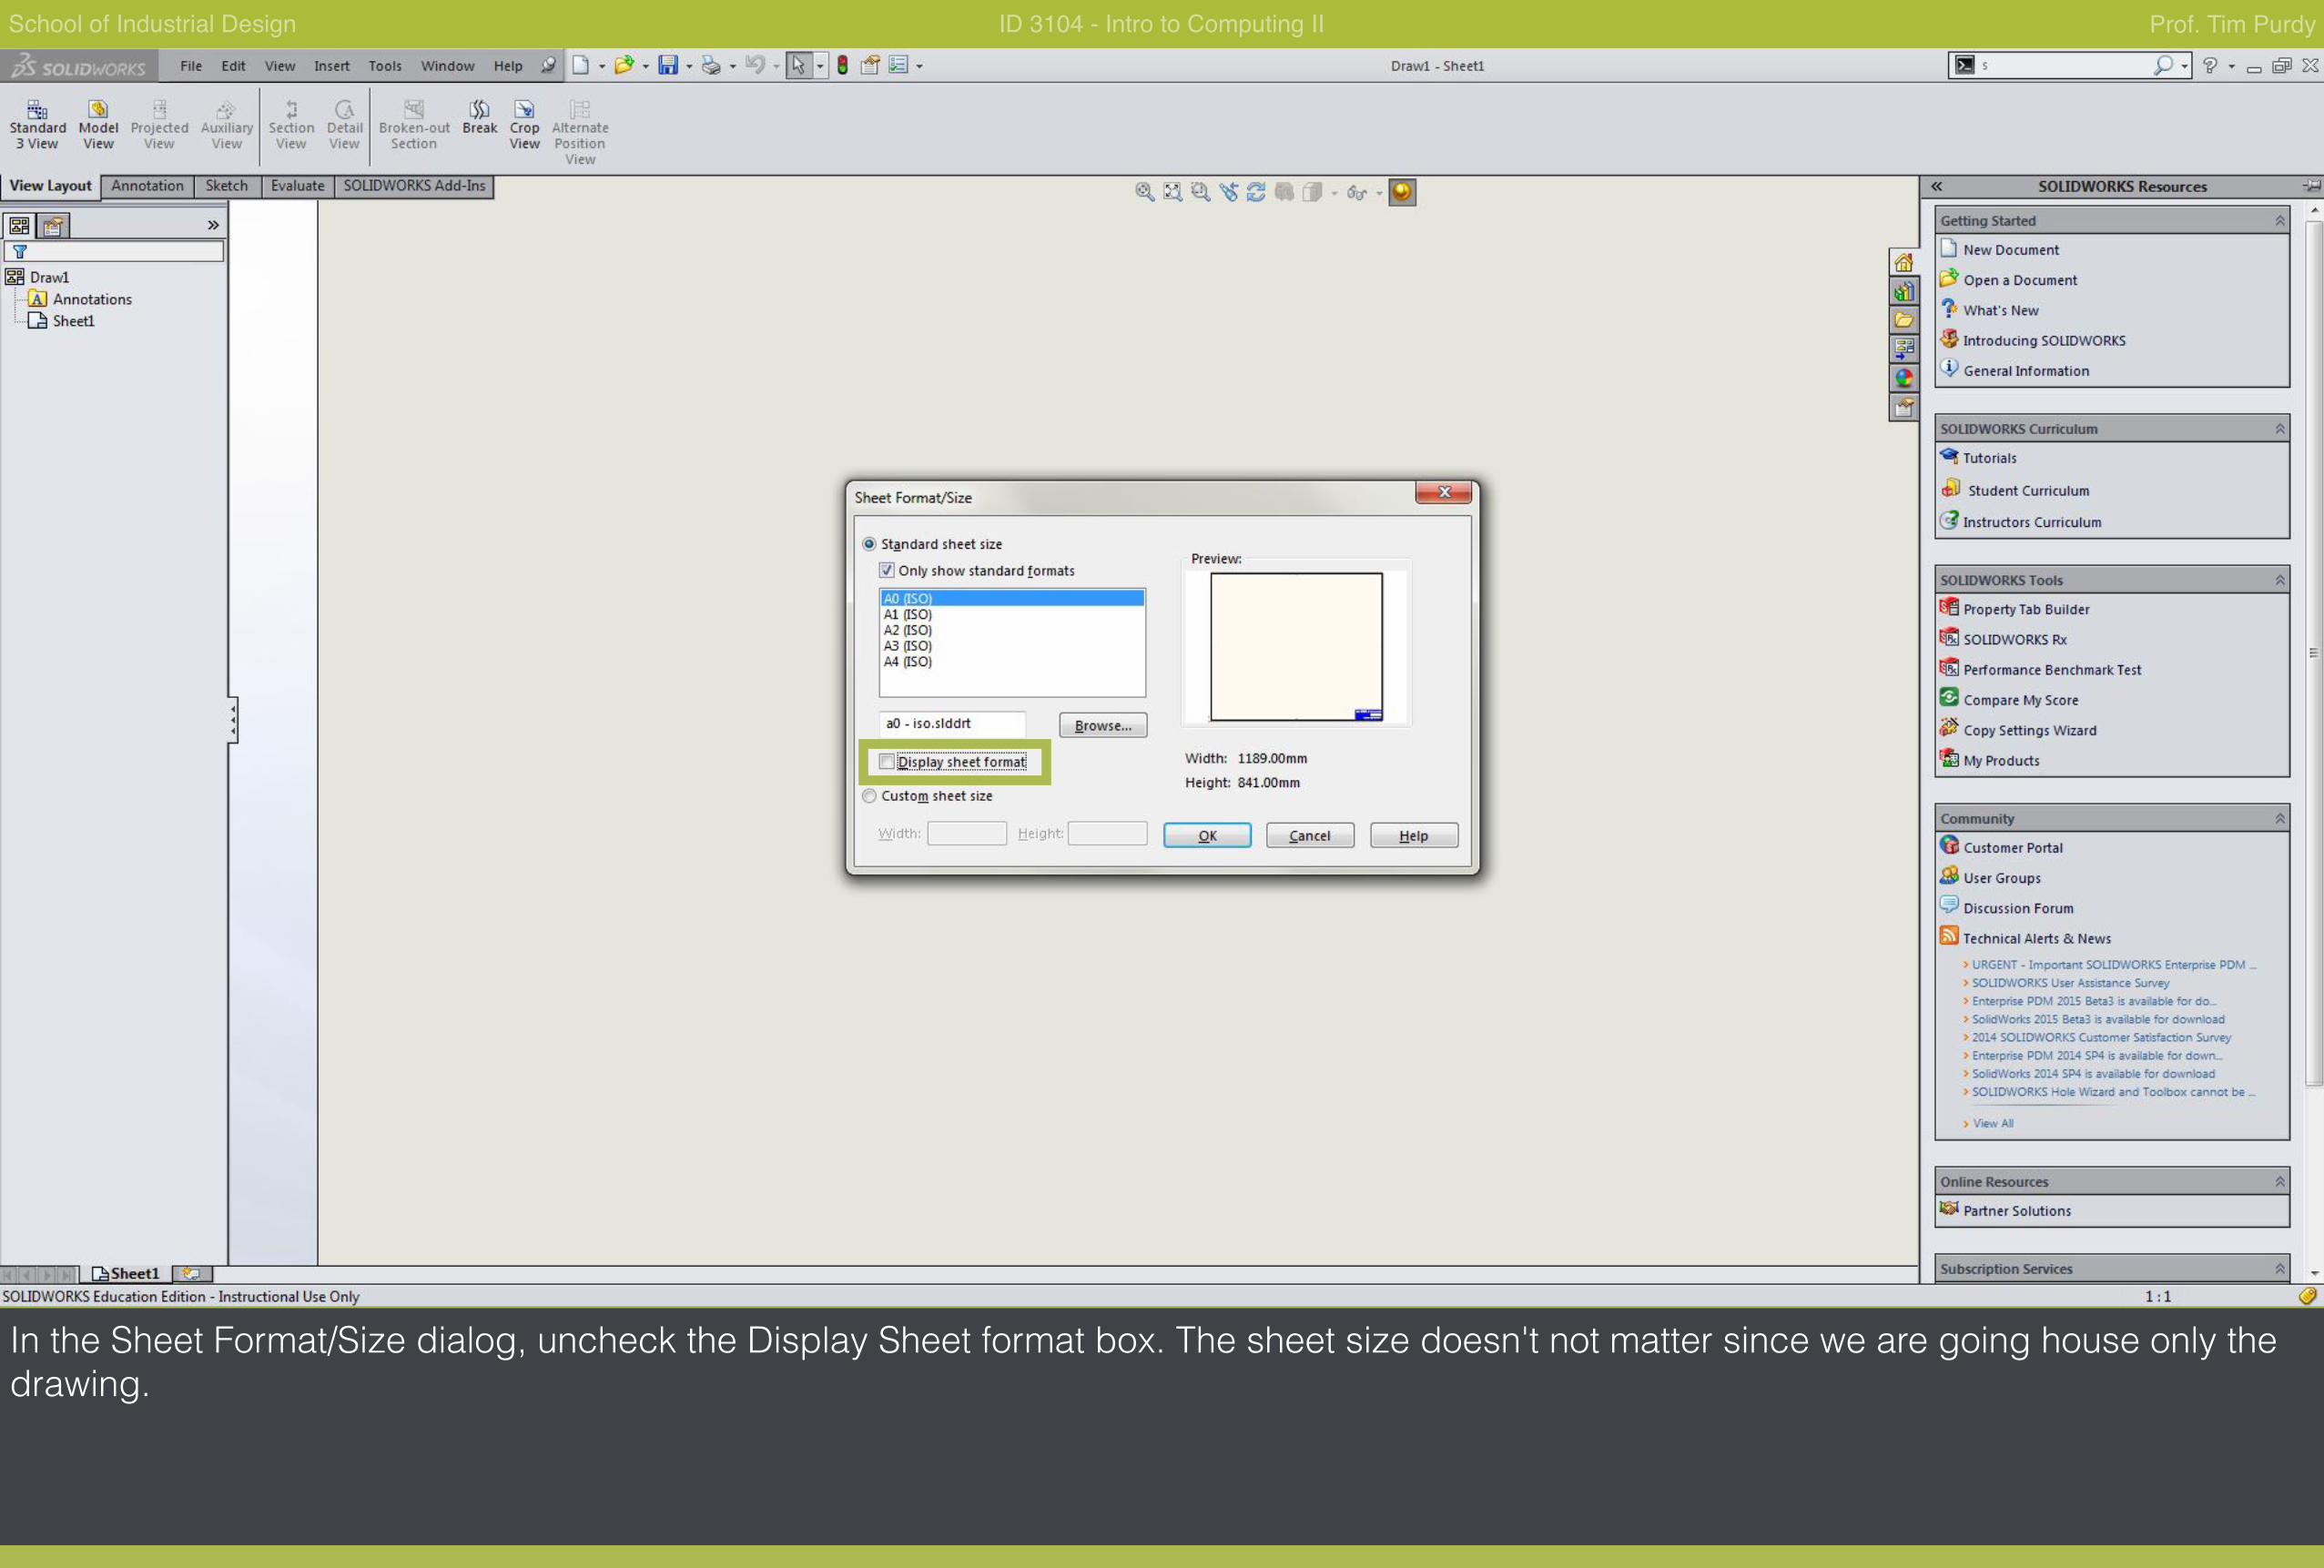
In the Sheet Format/Size dialog, uncheck the Display Sheet format box. The sheet size doesn't not matter since we are going house only the drawing.
School of Industrial Design ID 3104 - Intro to Computing II Prof. Tim Purdy
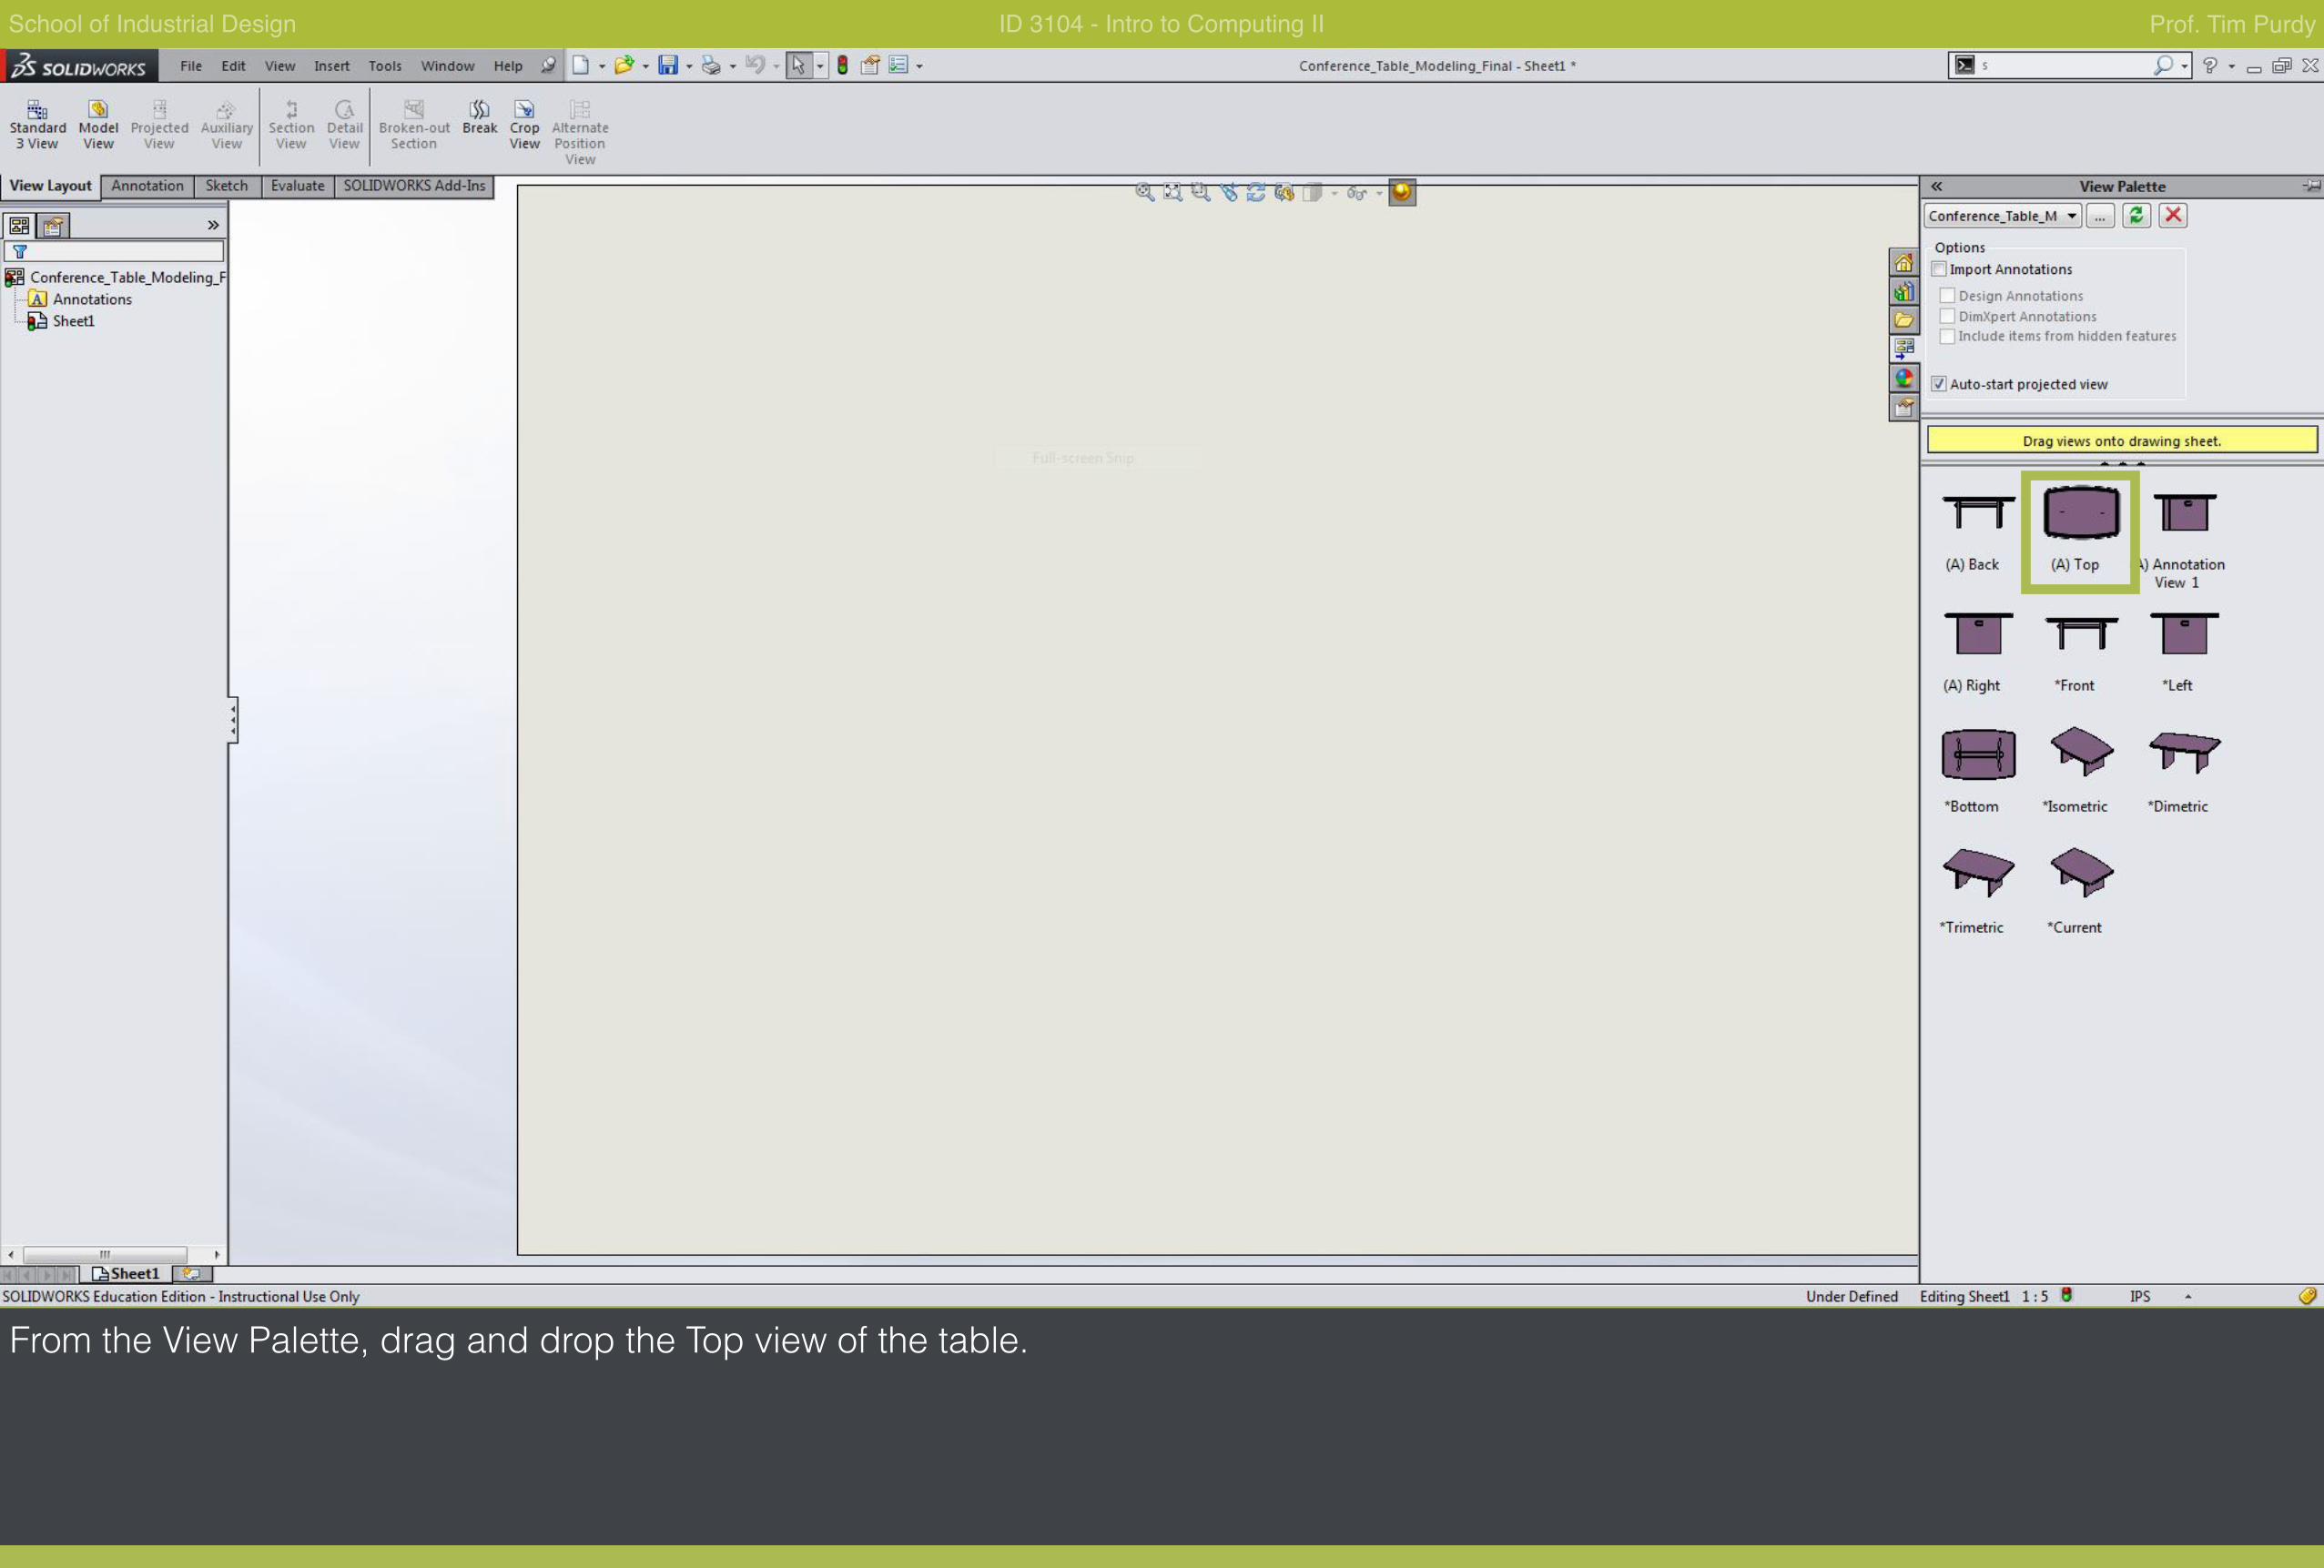
From the View Palette, drag and drop the Top view of the table.
School of Industrial Design ID 3104 - Intro to Computing II Prof. Tim Purdy
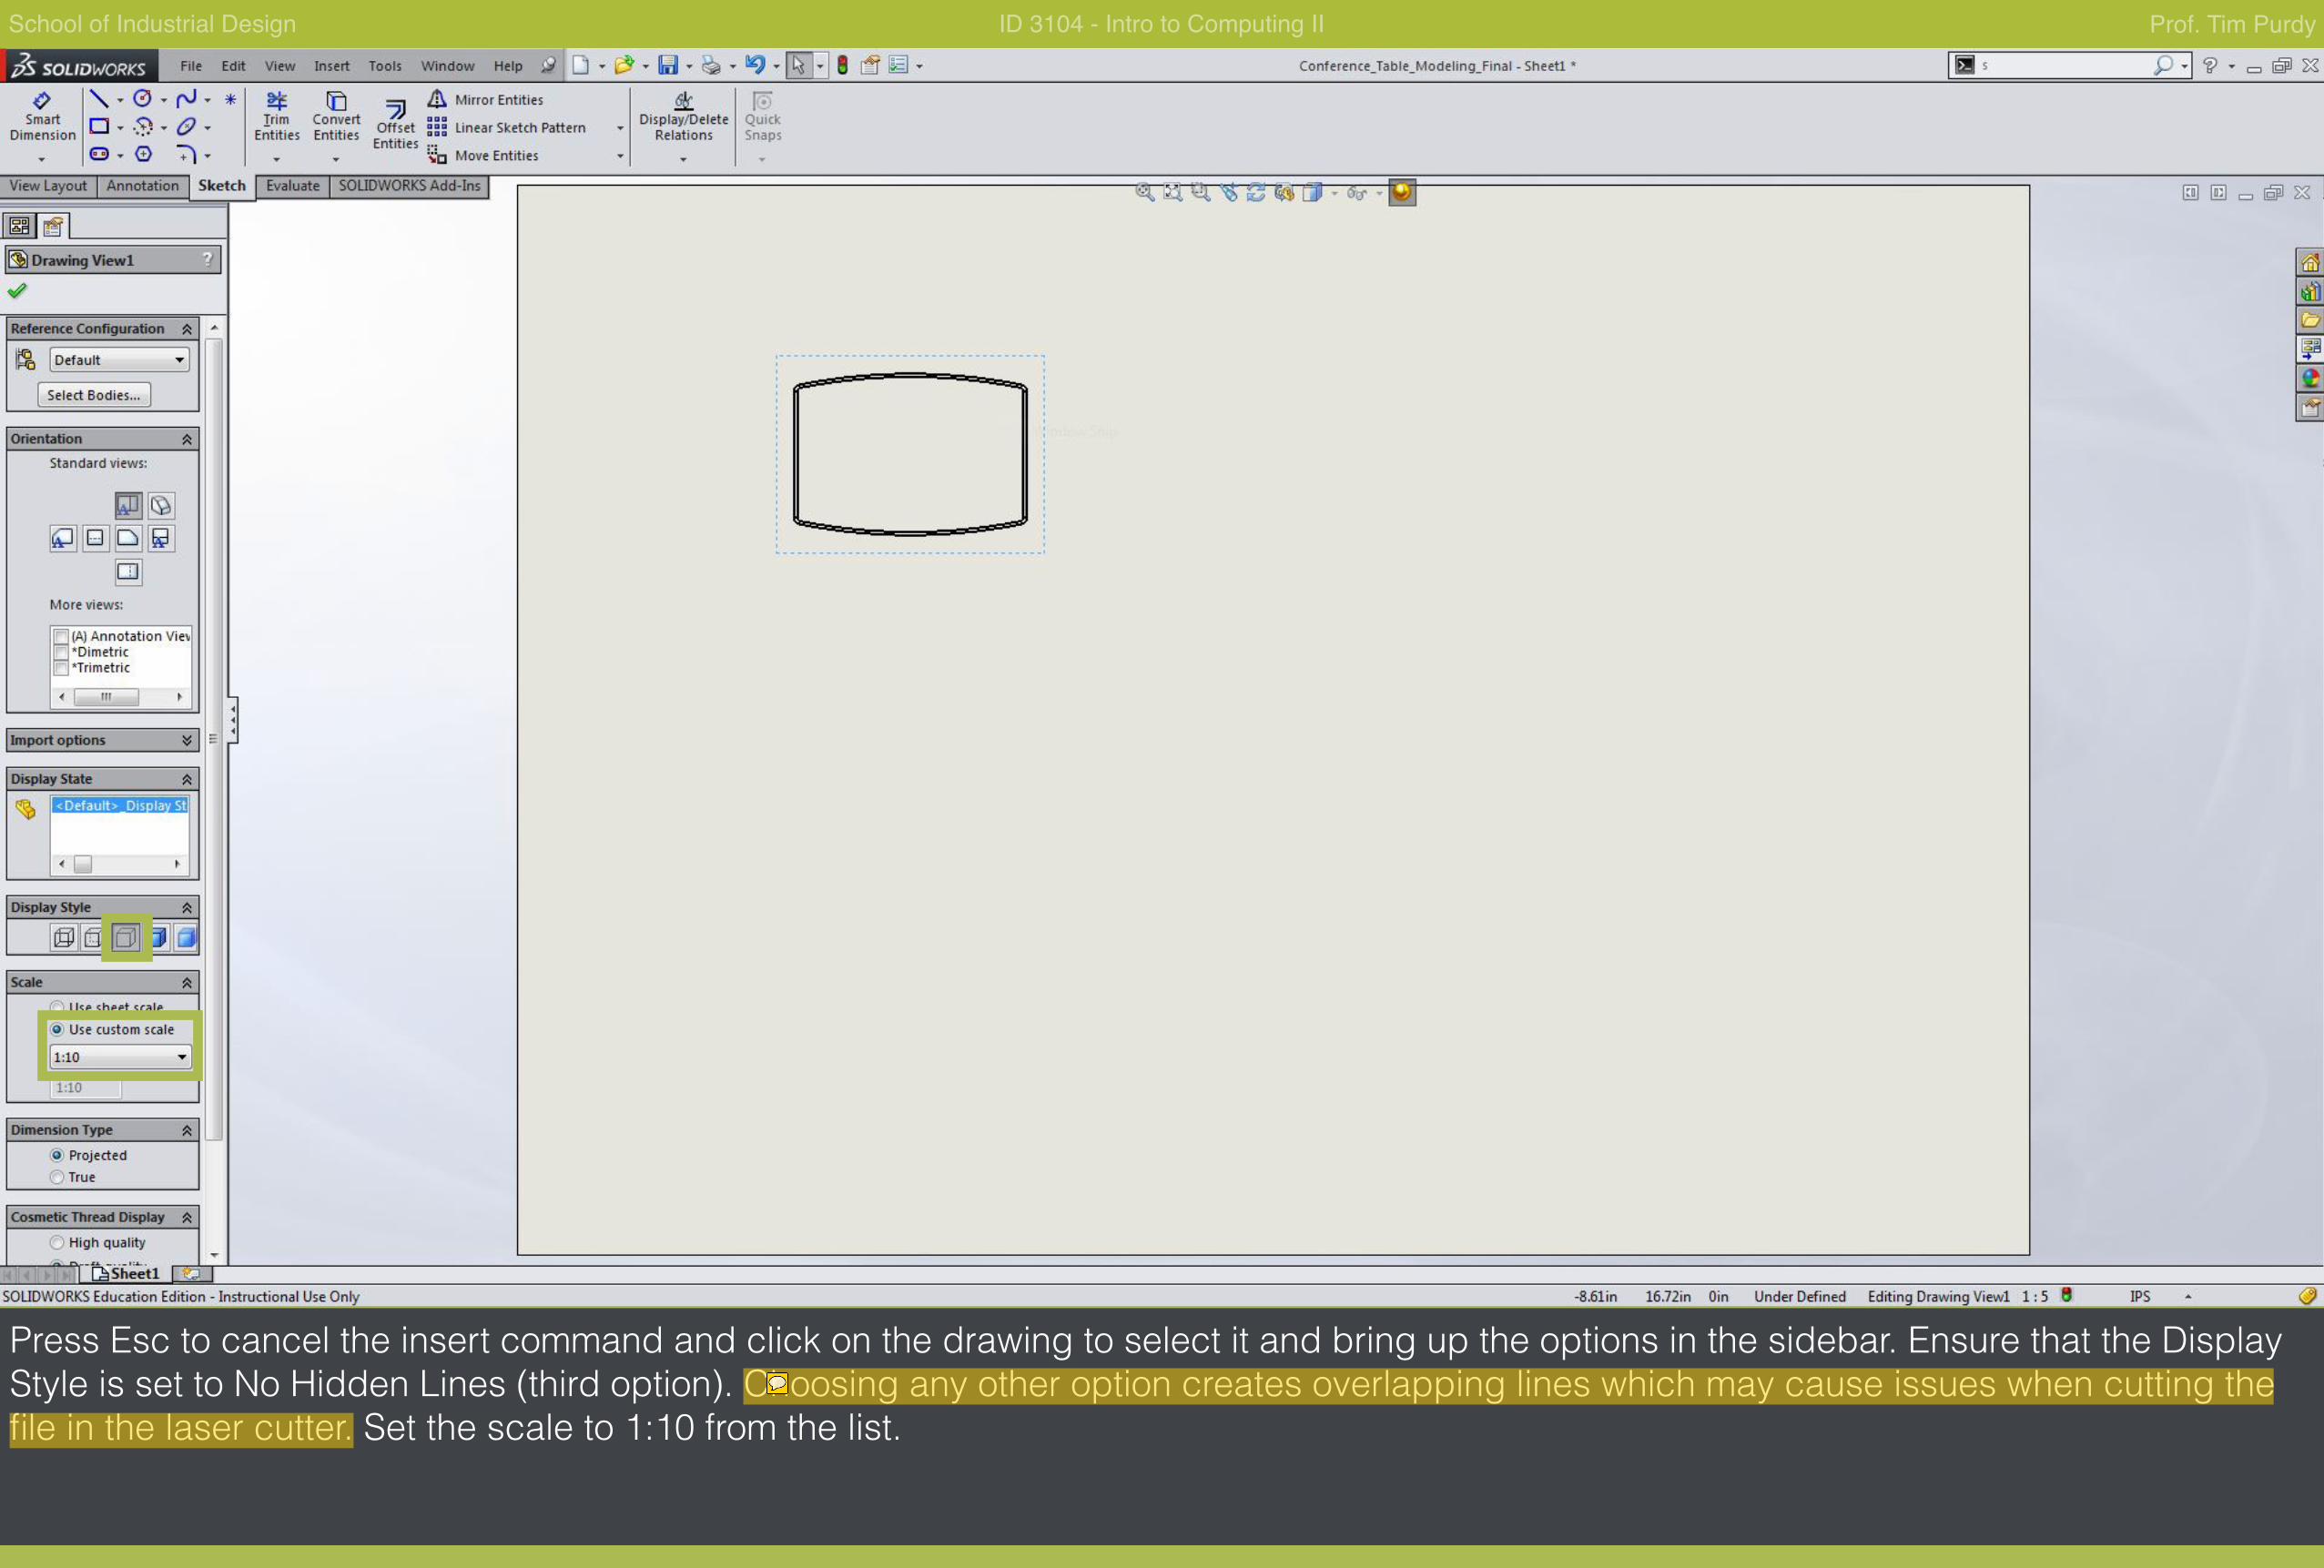
Press Esc to cancel the insert command and click on the drawing to select it and bring up the options in the sidebar. Ensure that the Display Style is set to No Hidden Lines (third option). Choosing any other option creates overlapping lines which may cause issues when cutting the file in the laser cutter. Set the scale to 1:10 from the list.
tim
Sticky Note
tim
Highlight
tim
Revised
tim
Text Box
In addition to selecting No Hidden Lines, right mouse click on the view and choose Tangent Edge > Tangent Edge Removed. Besides removing the fillet edges so the only the outside edge is visible, the double lines that were part of the outside edge are remove. This will keep the laser cutter from tracing over an already cut edge and burning the material. This is very important step to do!!!
tim
Sticky Note
See the note on the page.
School of Industrial Design ID 3104 - Intro to Computing II Prof. Tim Purdy
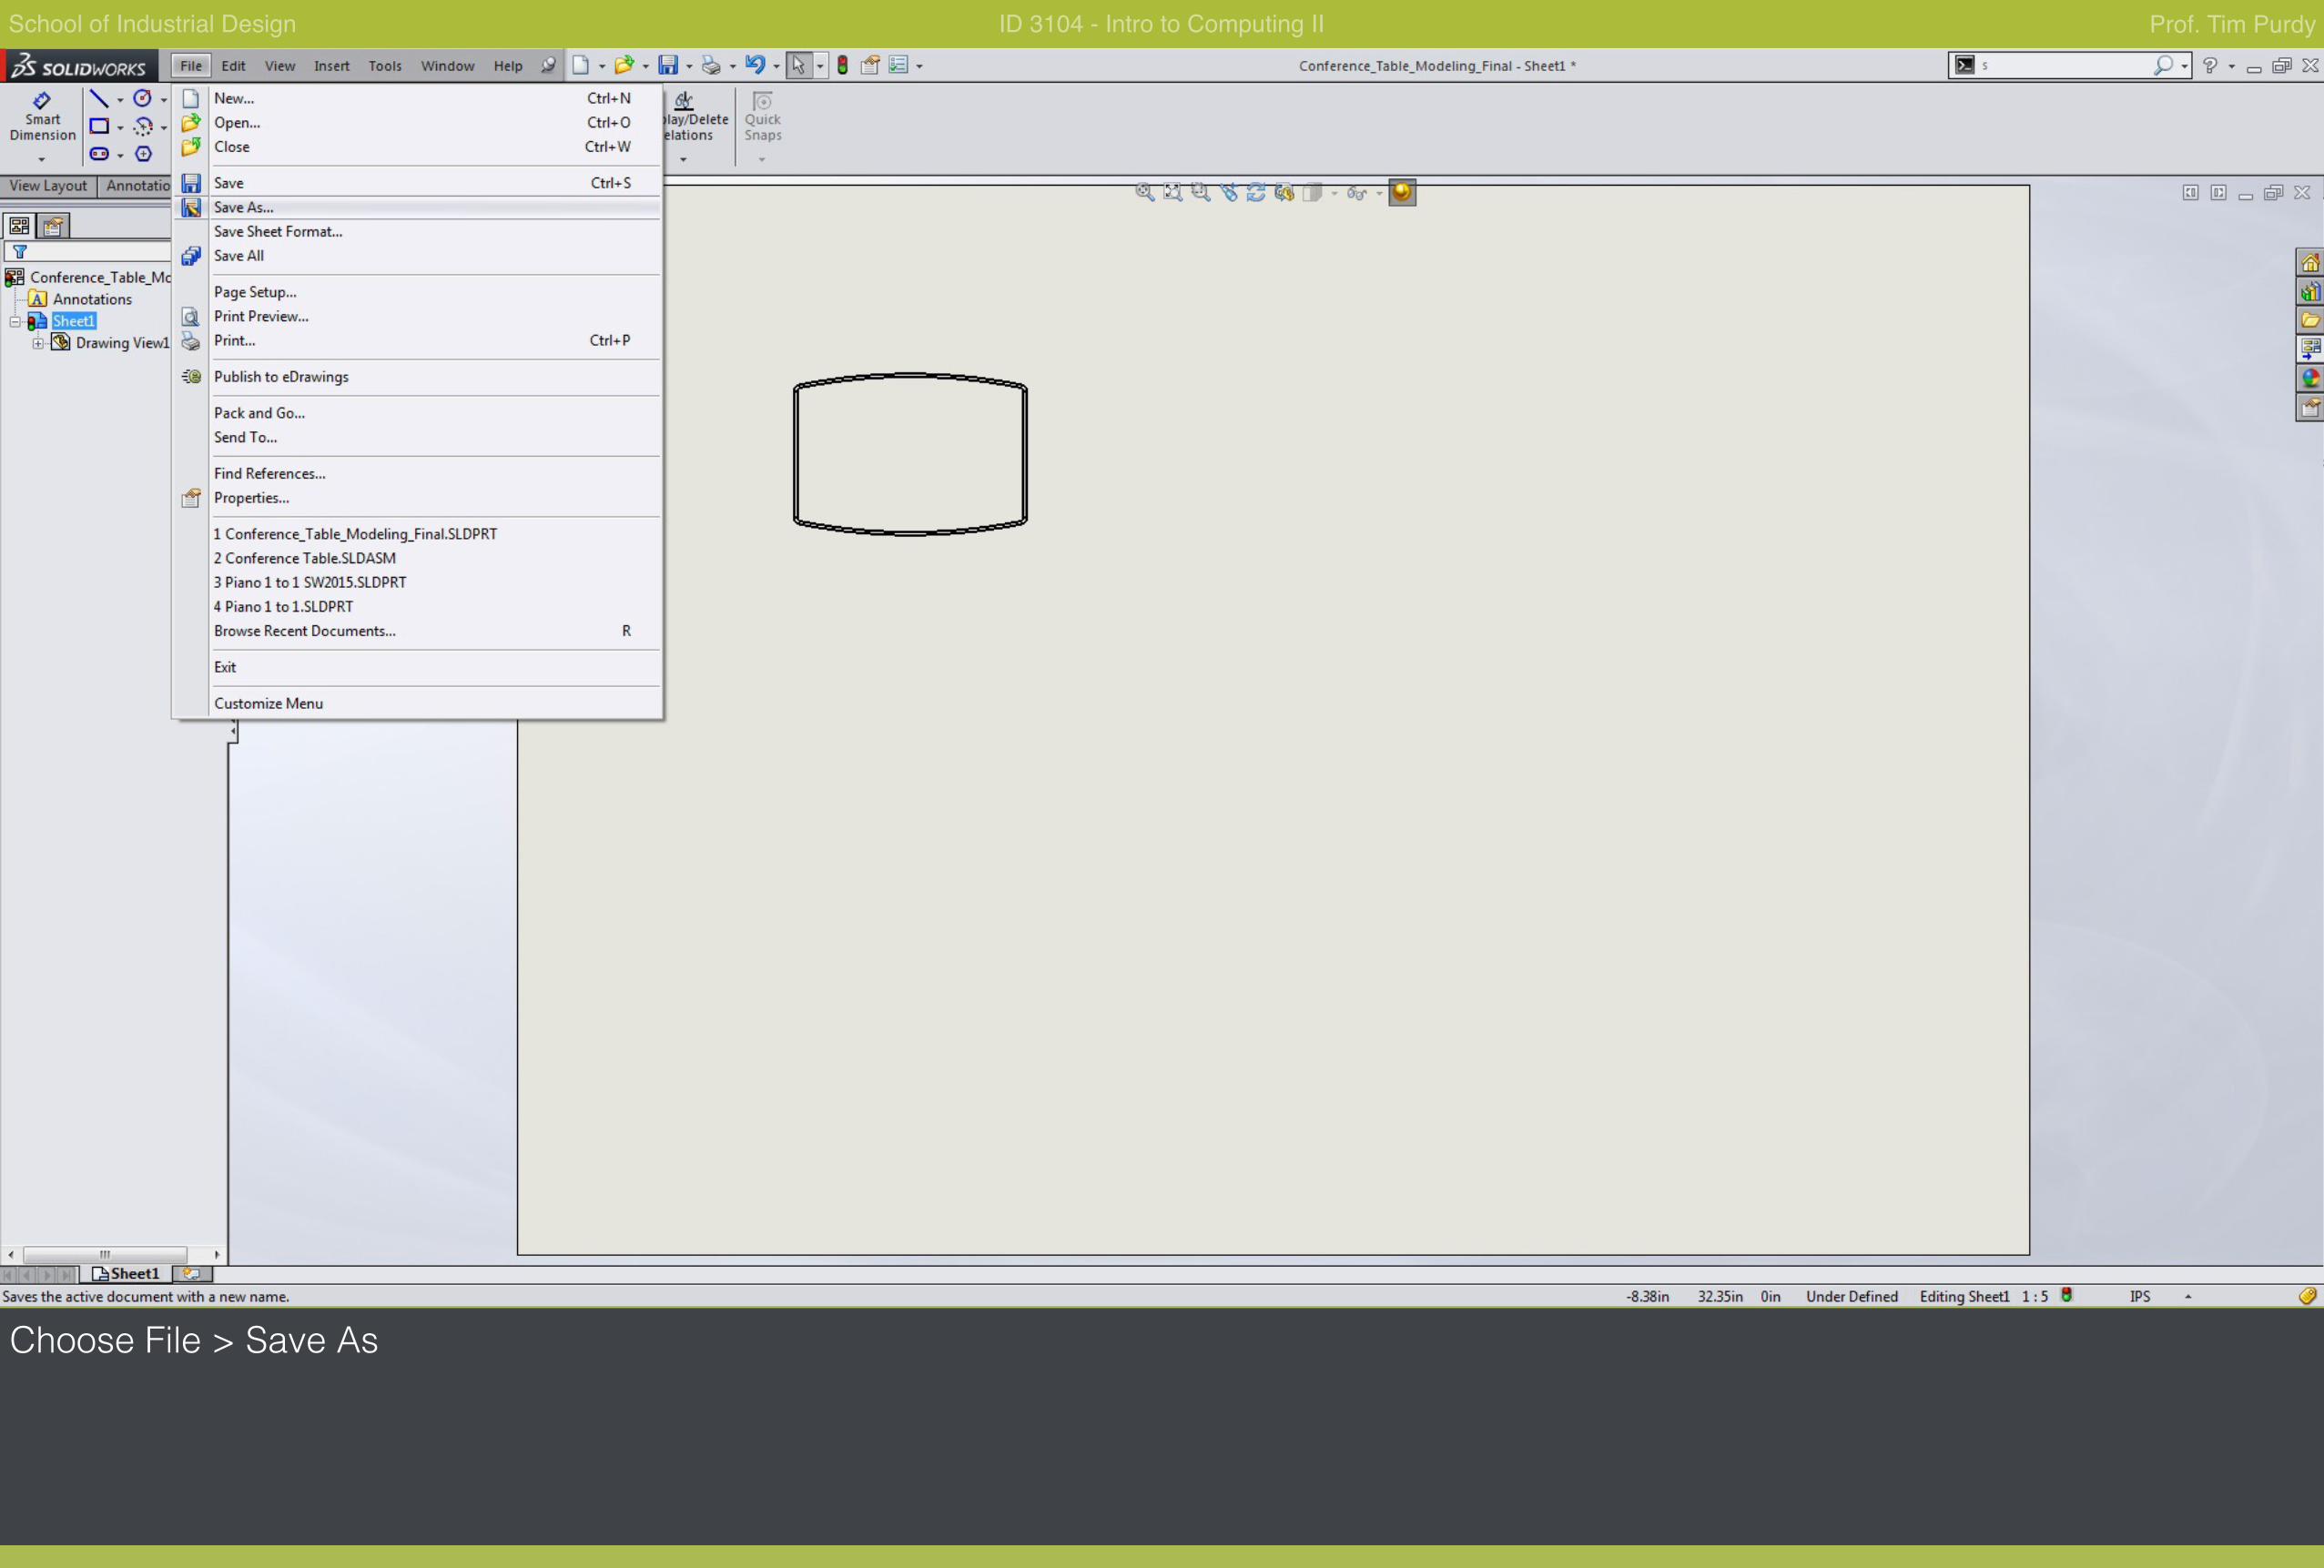
Choose File > Save As
School of Industrial Design ID 3104 - Intro to Computing II Prof. Tim Purdy
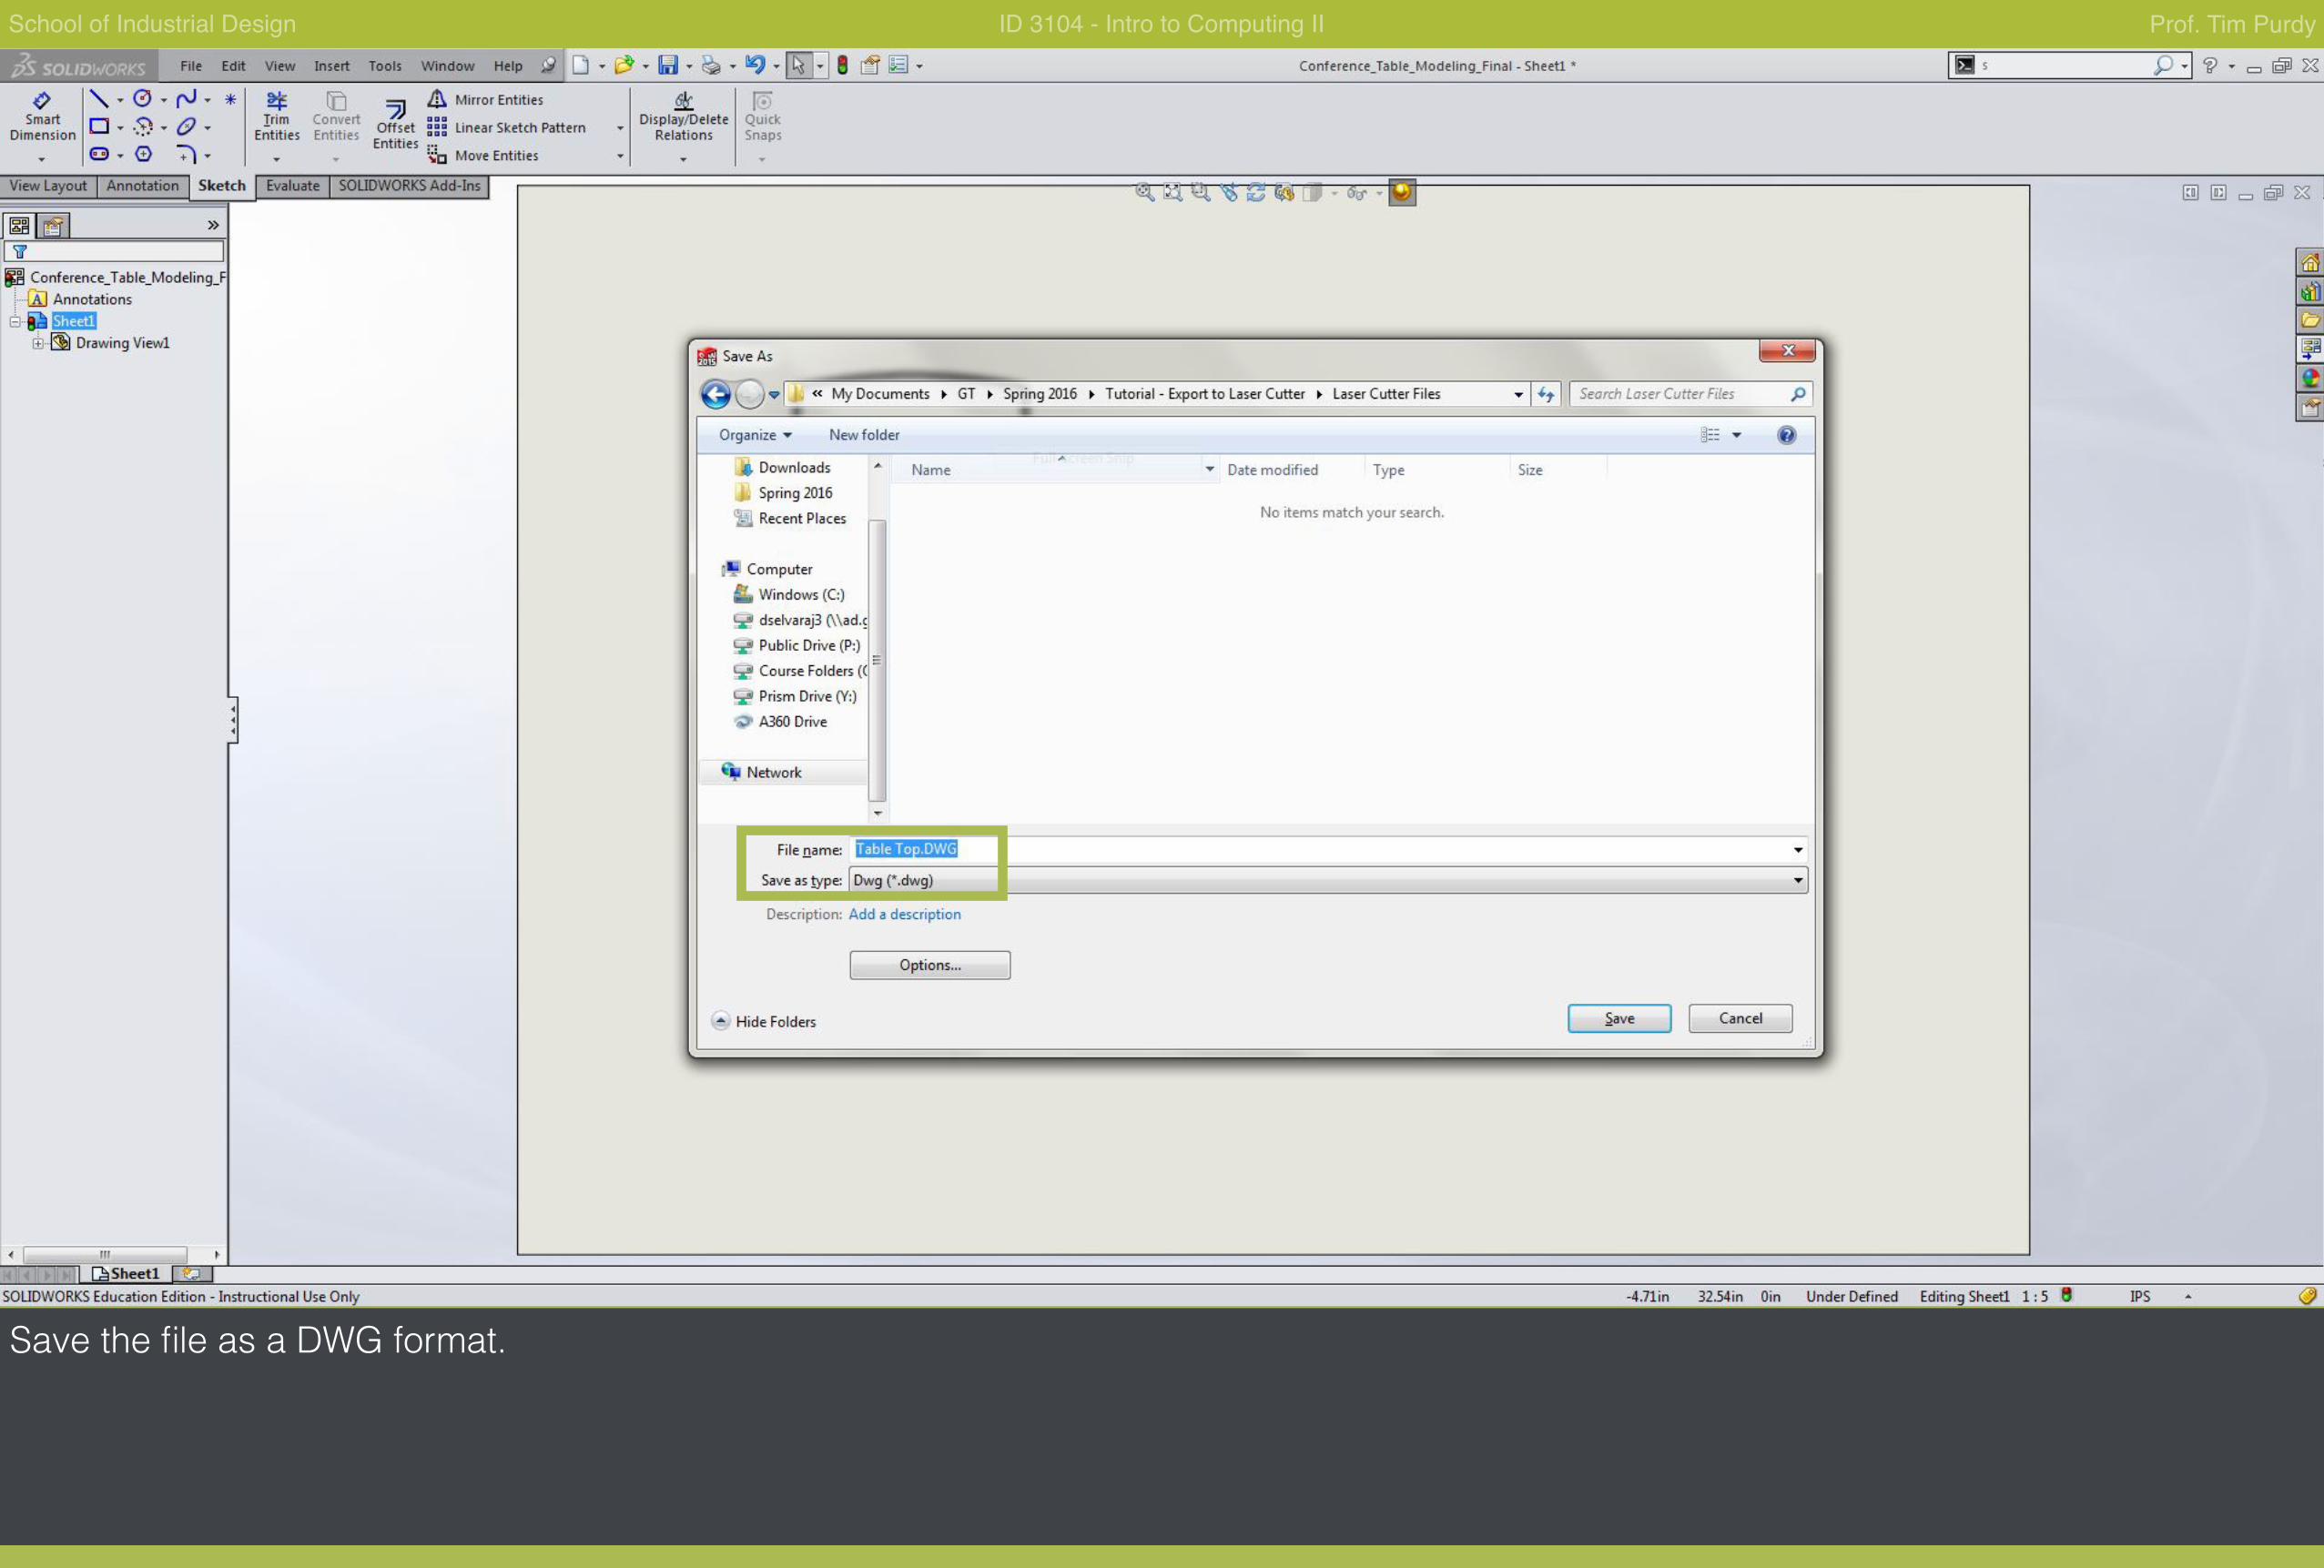
Save the file as a DWG format.
School of Industrial Design ID 3104 - Intro to Computing II Prof. Tim Purdy
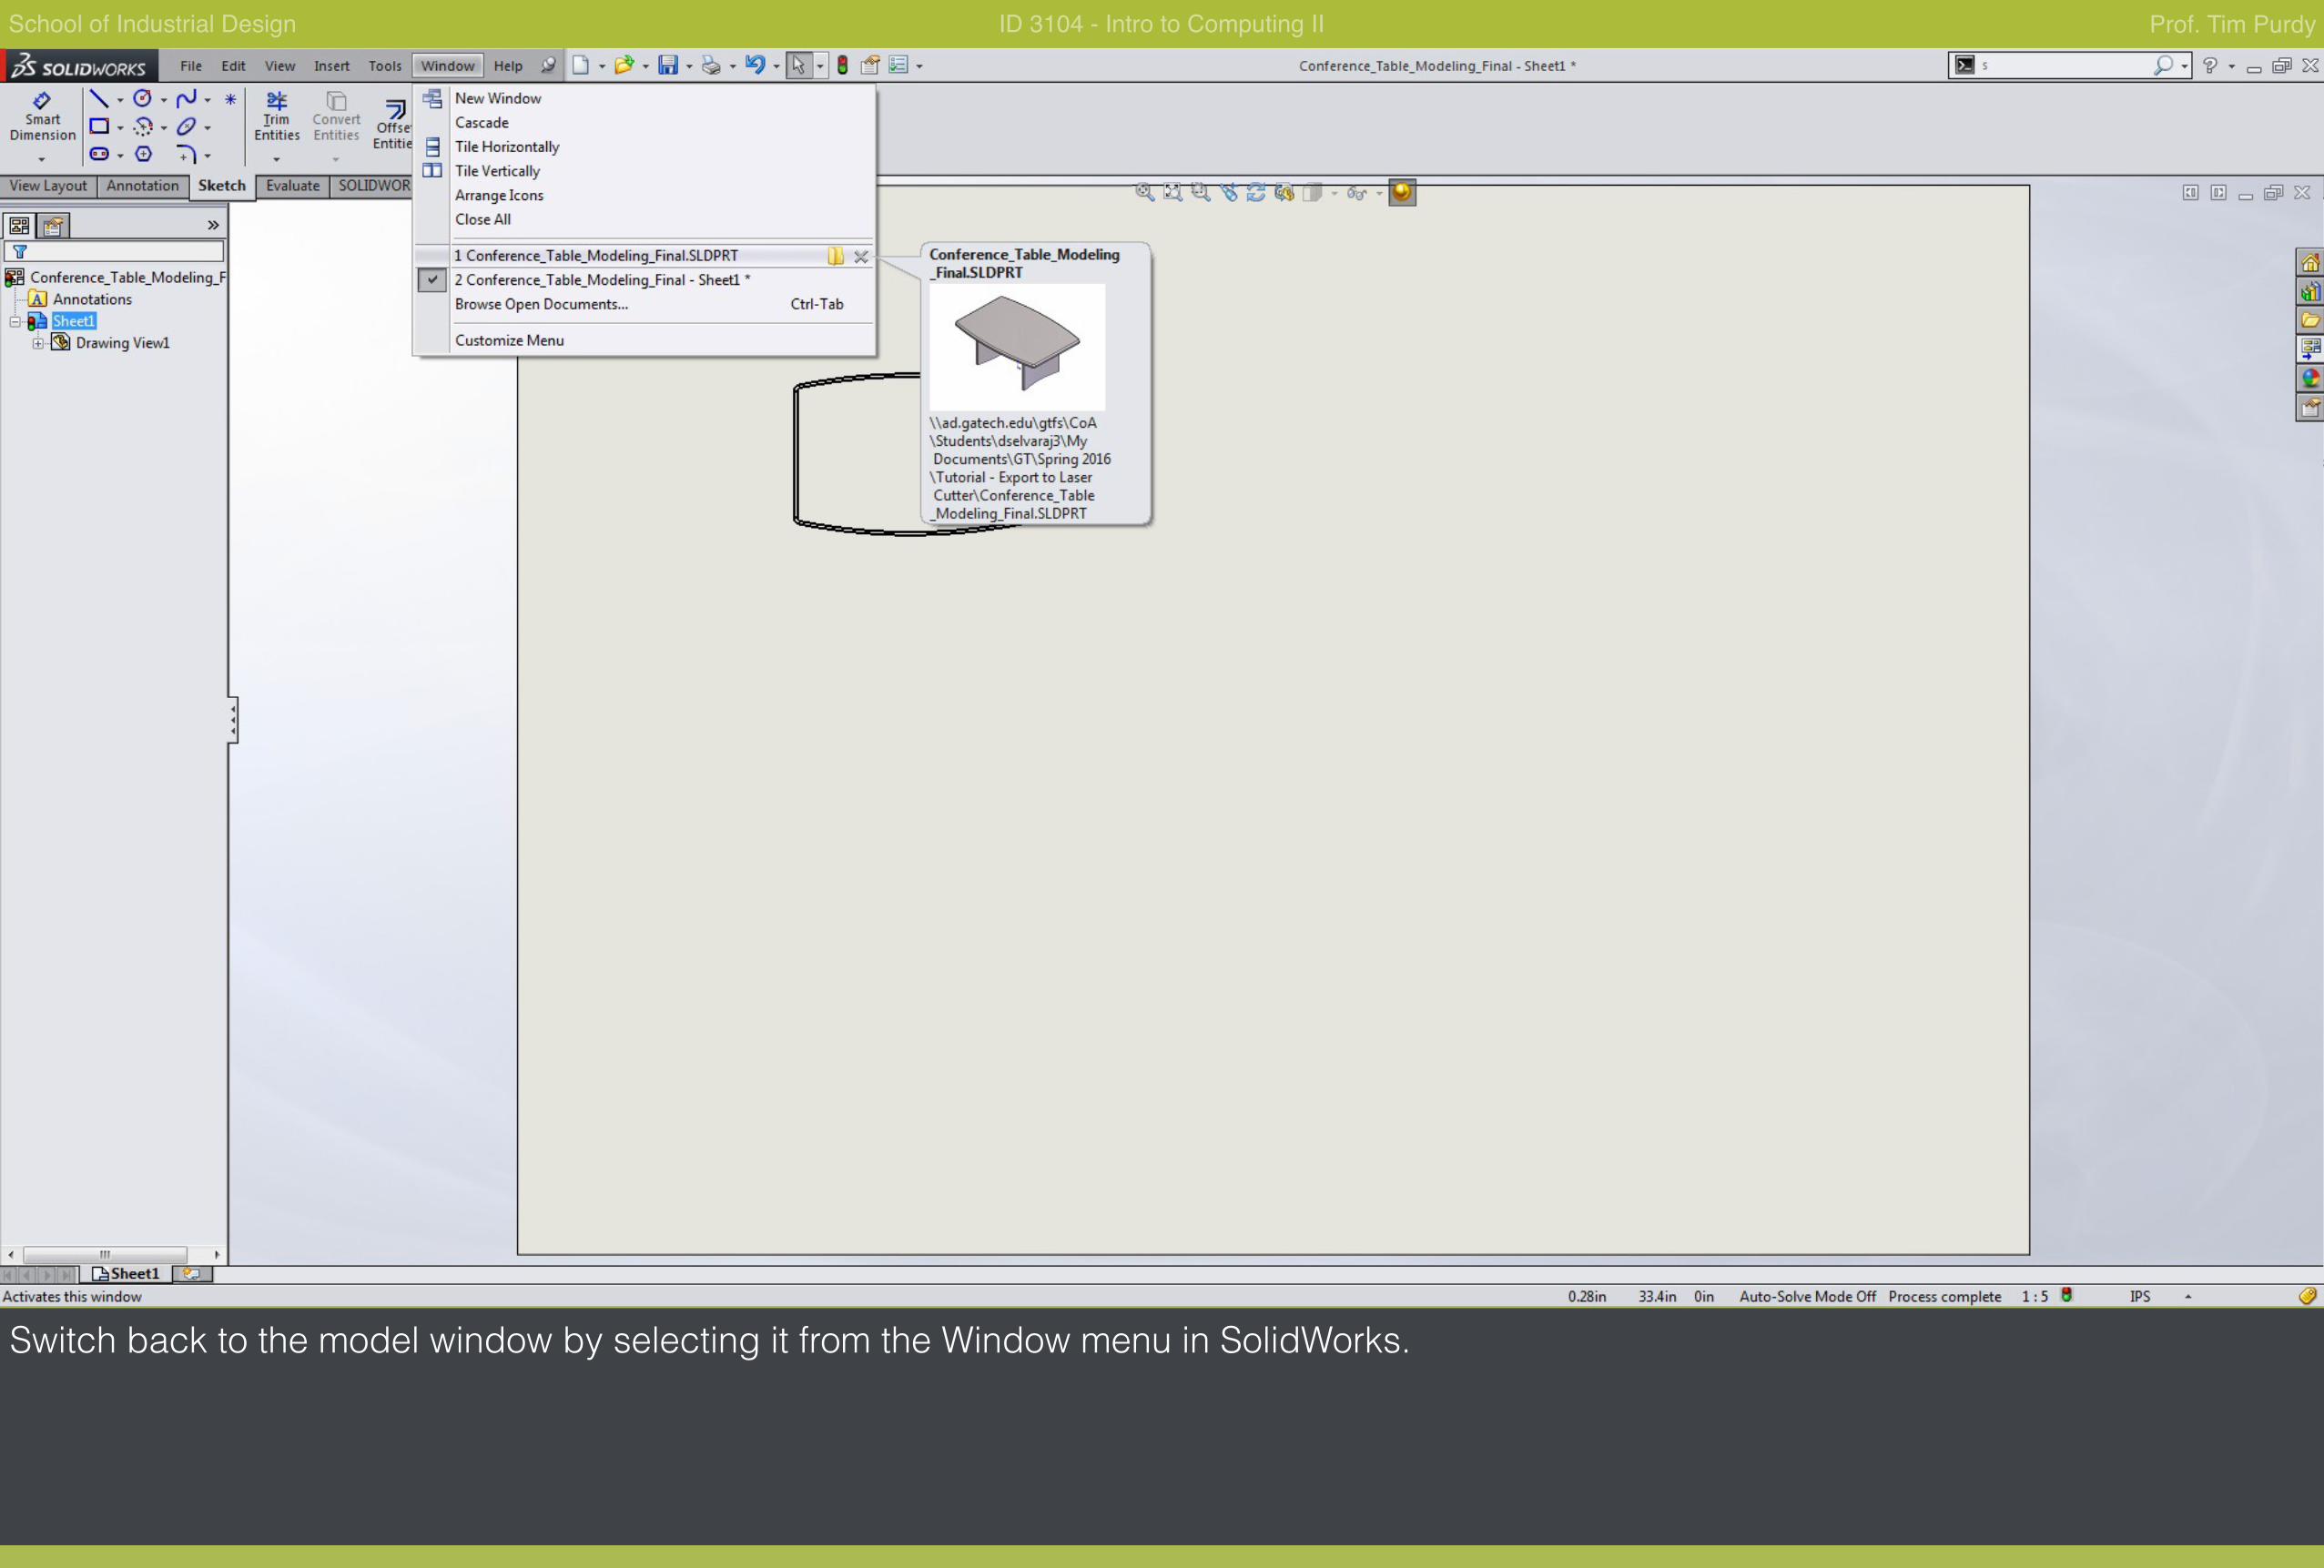
Switch back to the model window by selecting it from the Window menu in SolidWorks.
School of Industrial Design ID 3104 - Intro to Computing II Prof. Tim Purdy
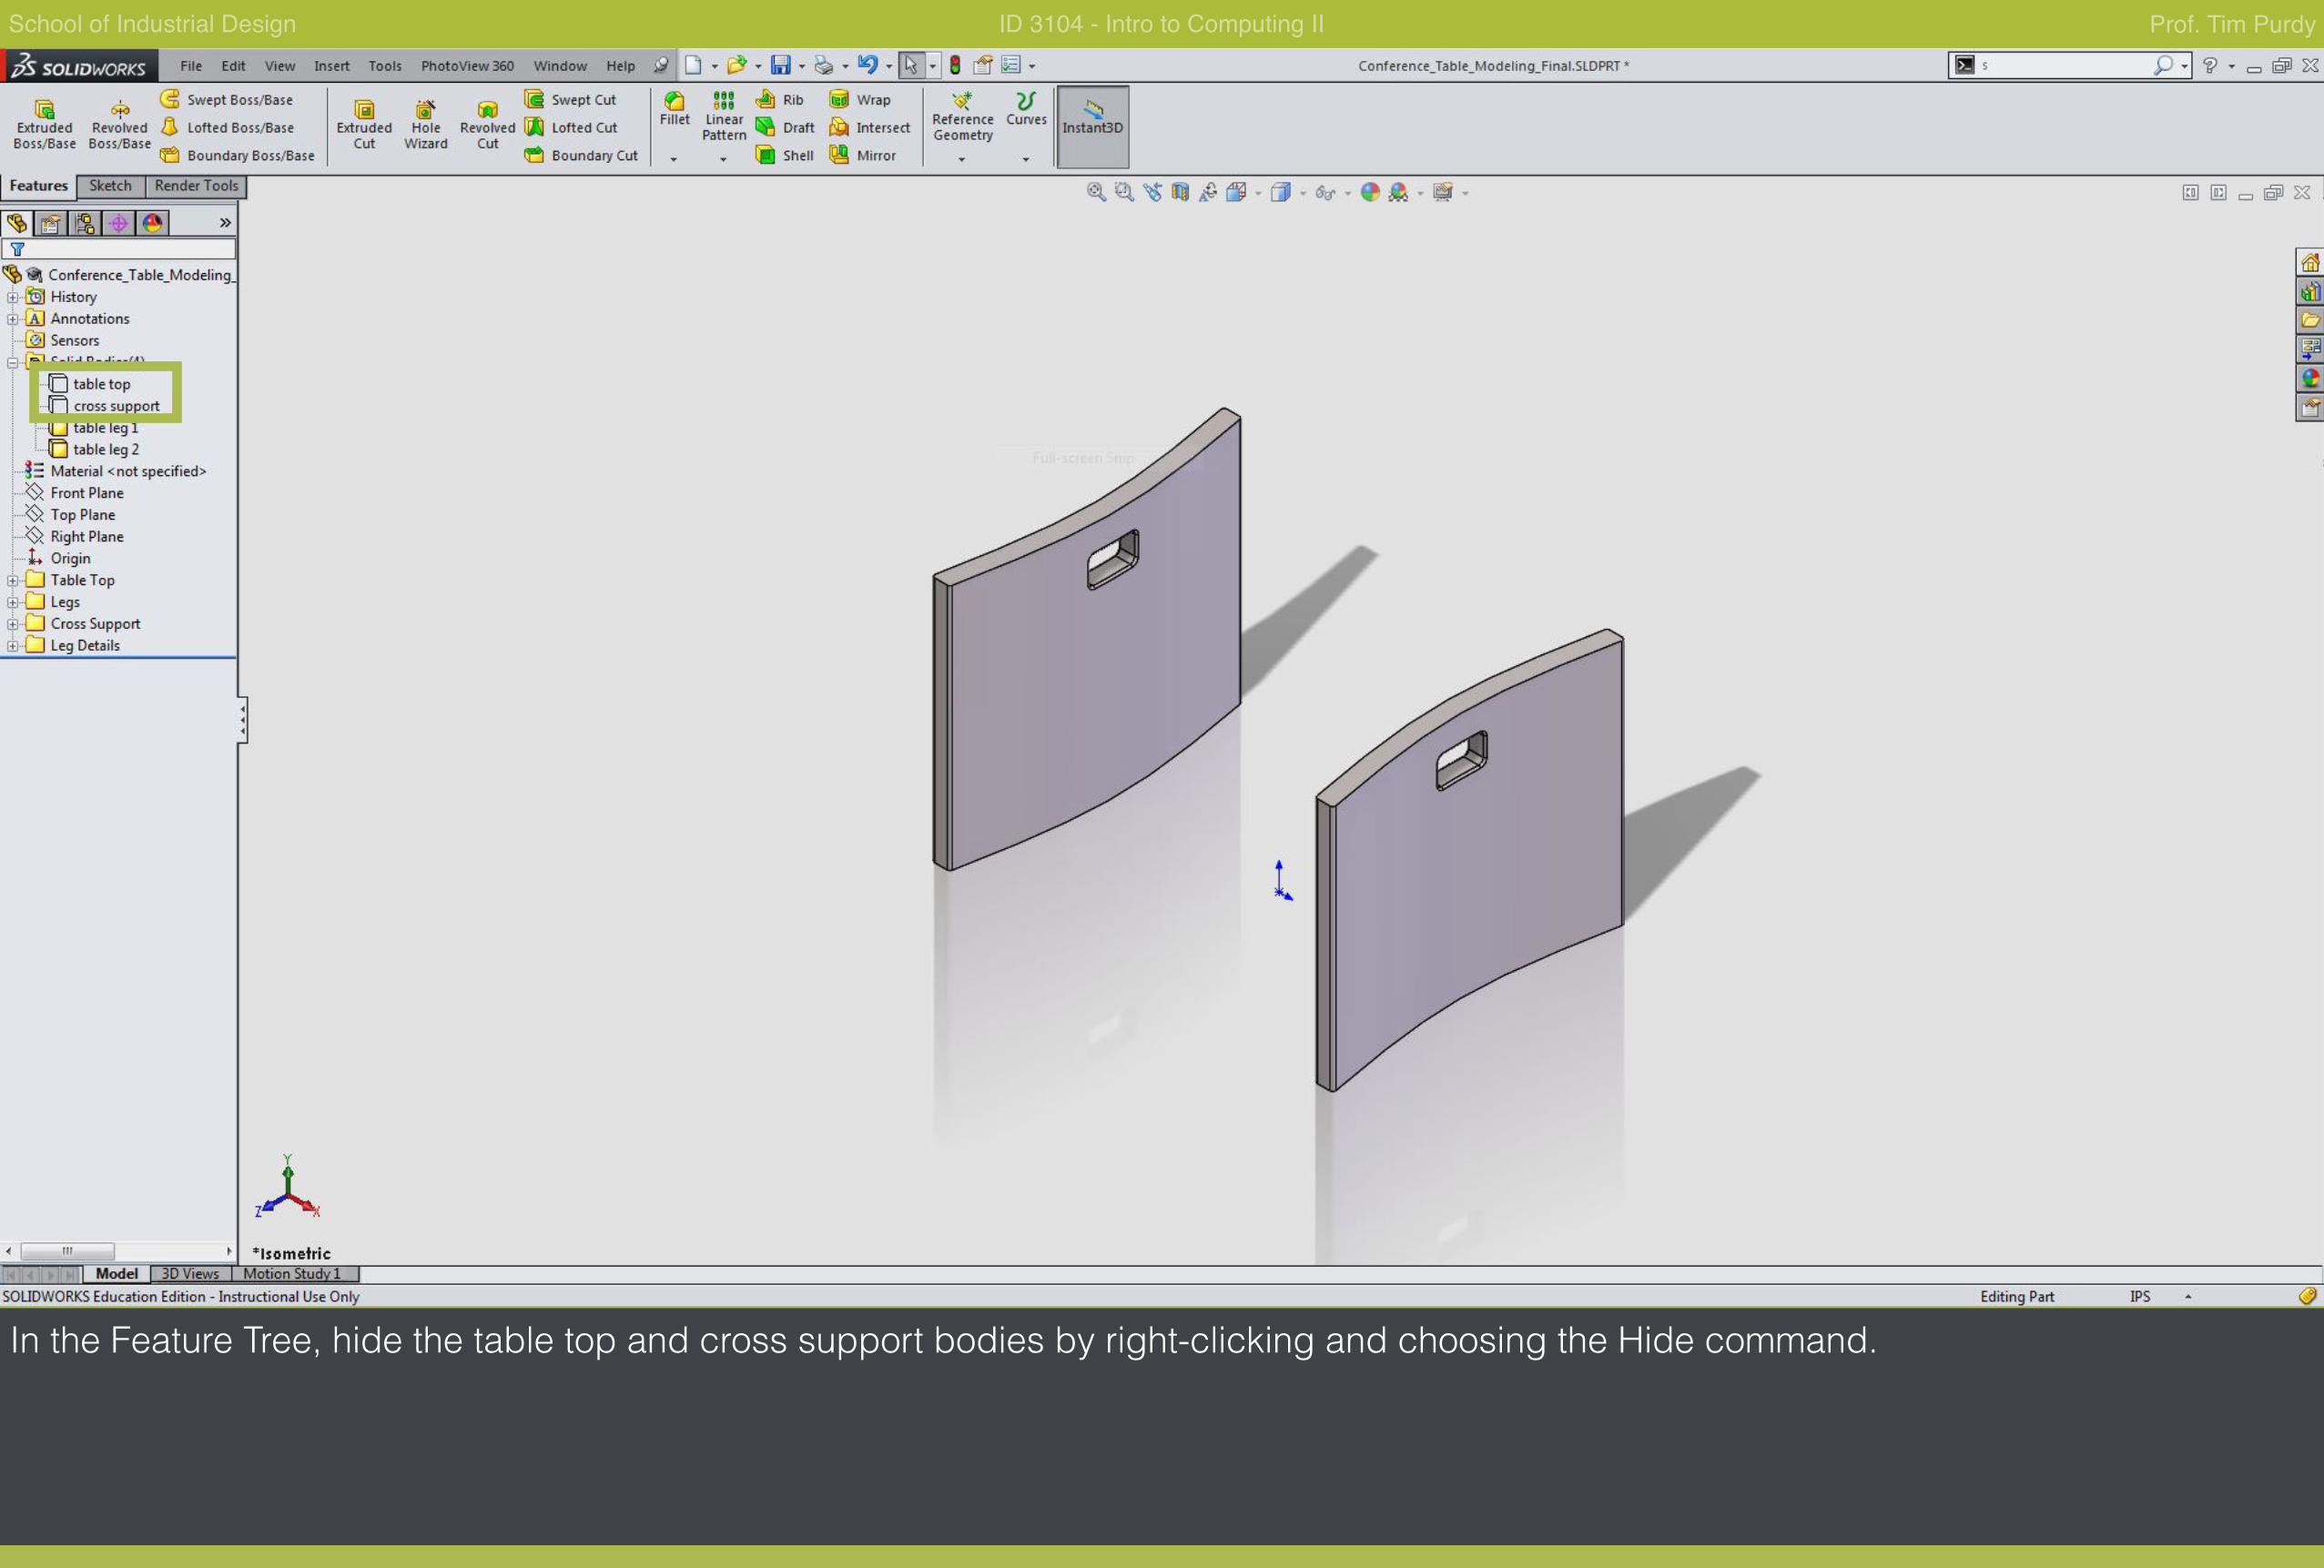
In the Feature Tree, hide the table top and cross support bodies by right-clicking and choosing the Hide command.
School of Industrial Design ID 3104 - Intro to Computing II Prof. Tim Purdy
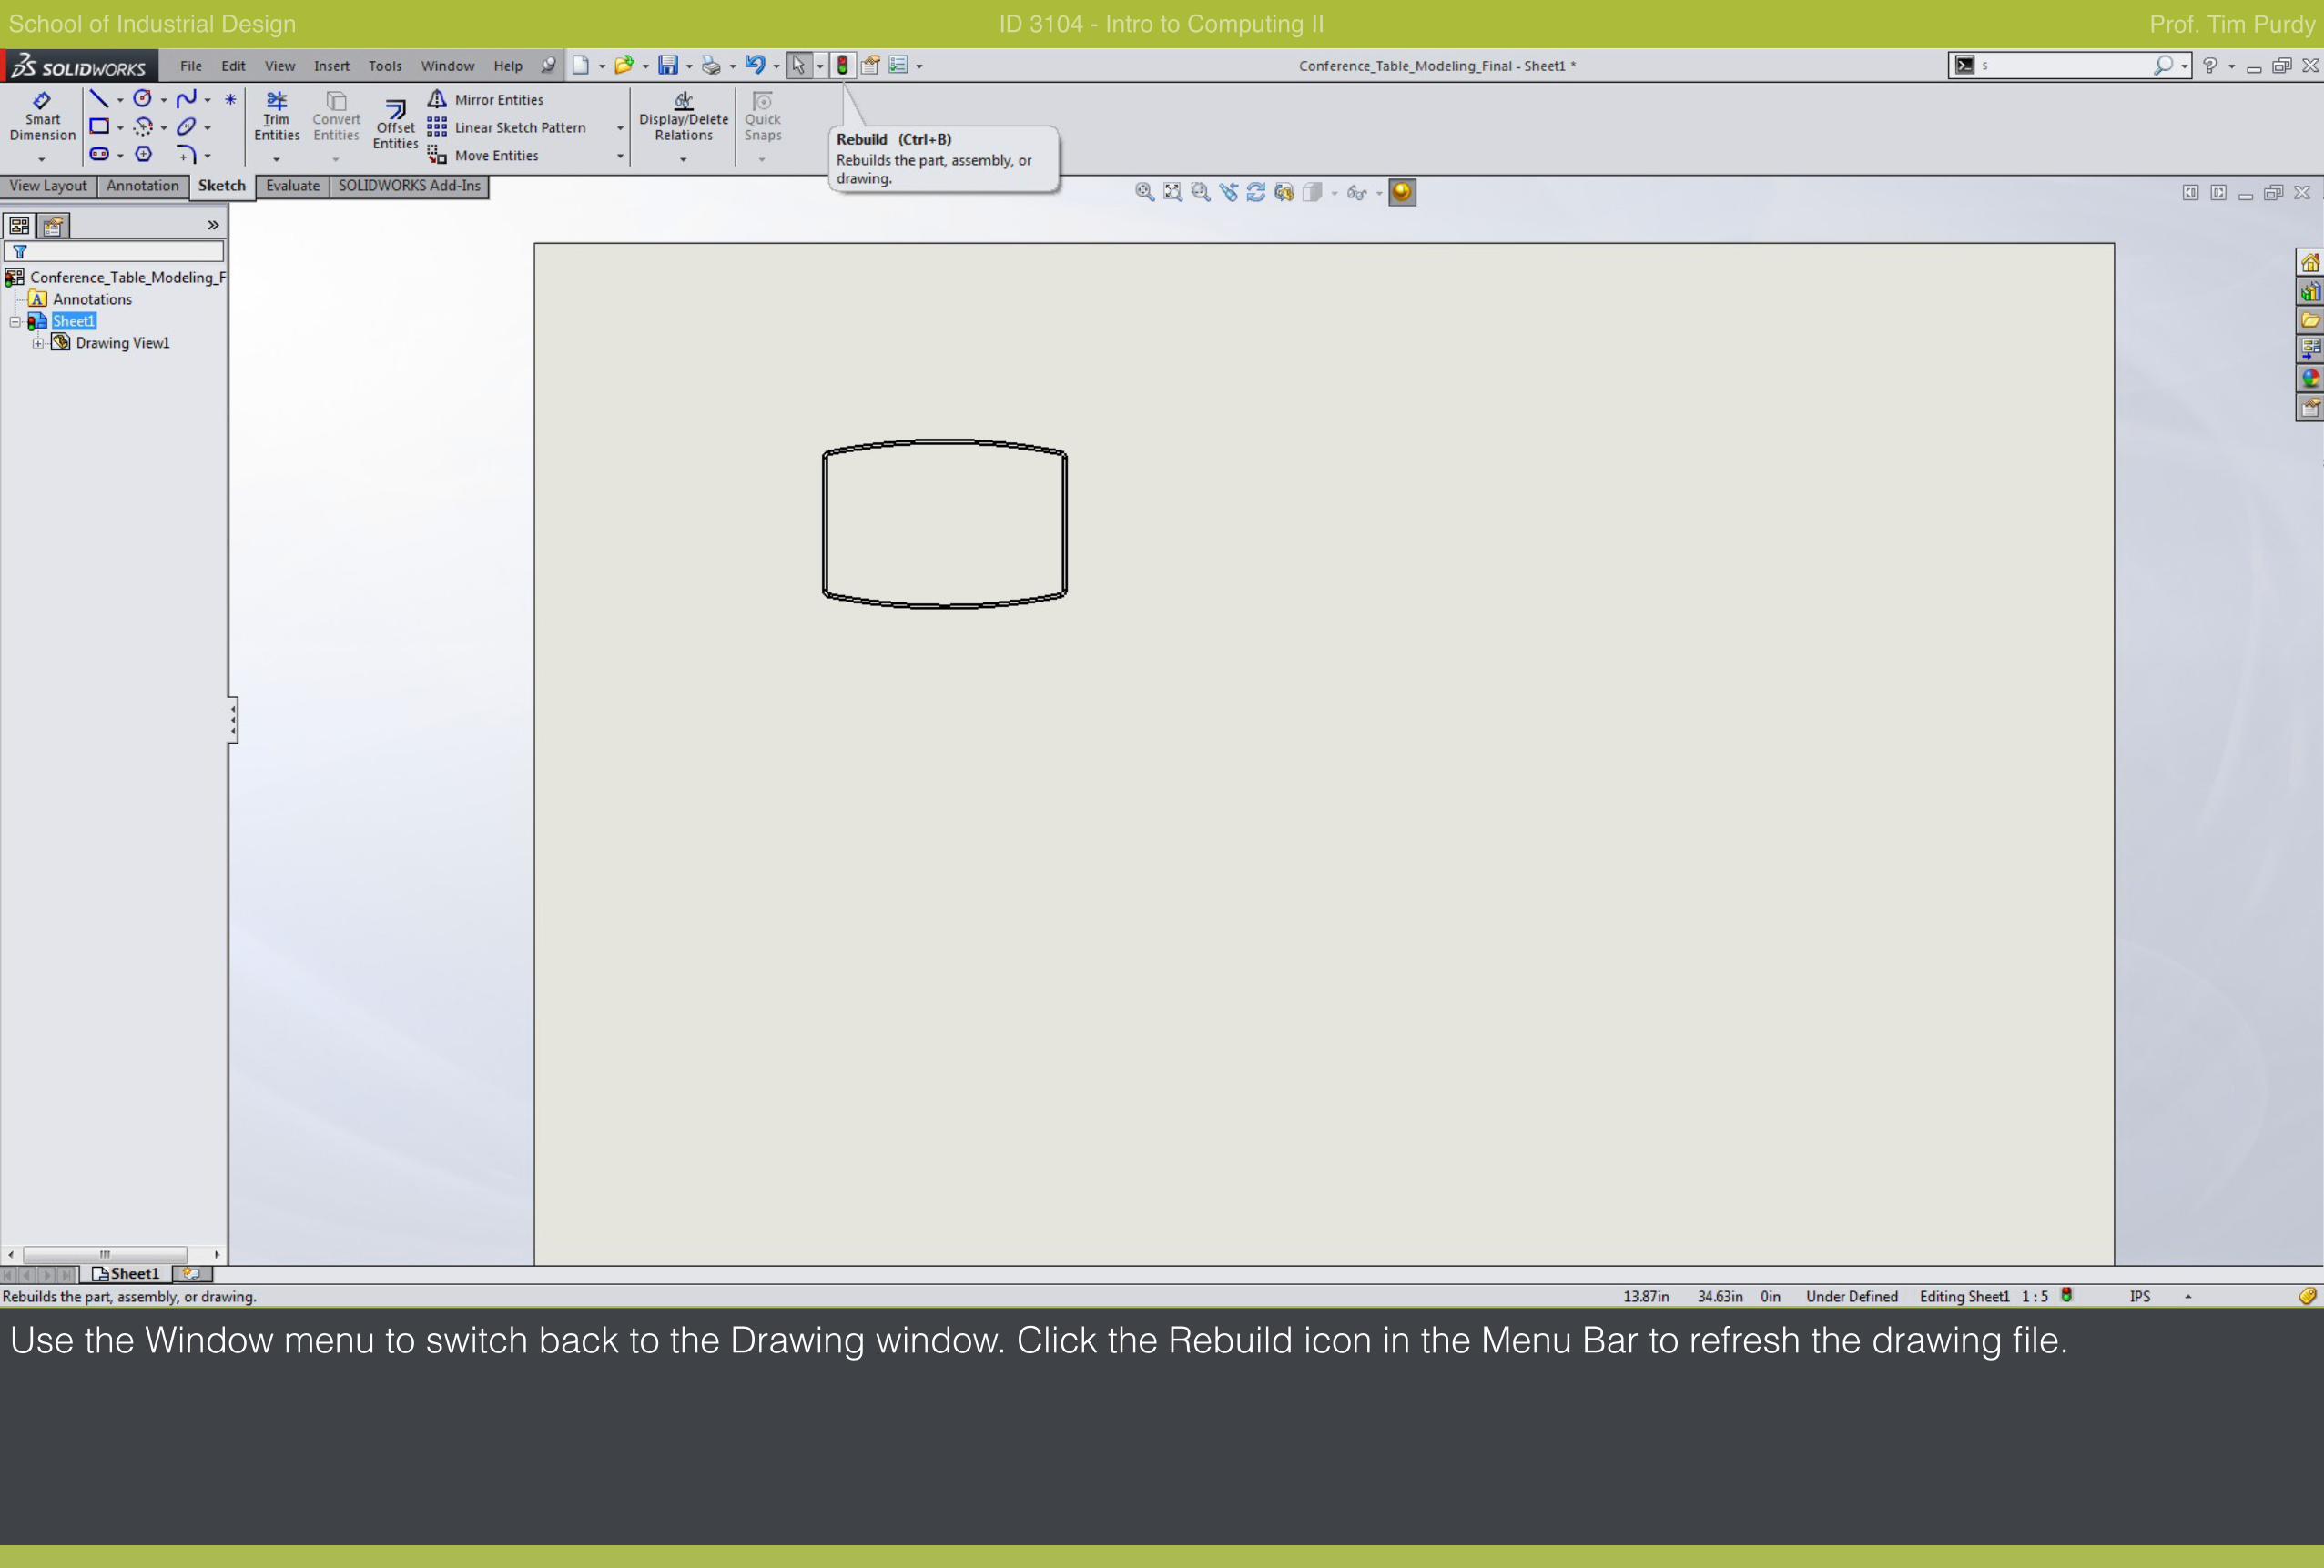
Use the Window menu to switch back to the Drawing window. Click the Rebuild icon in the Menu Bar to refresh the drawing file.
School of Industrial Design ID 3104 - Intro to Computing II Prof. Tim Purdy
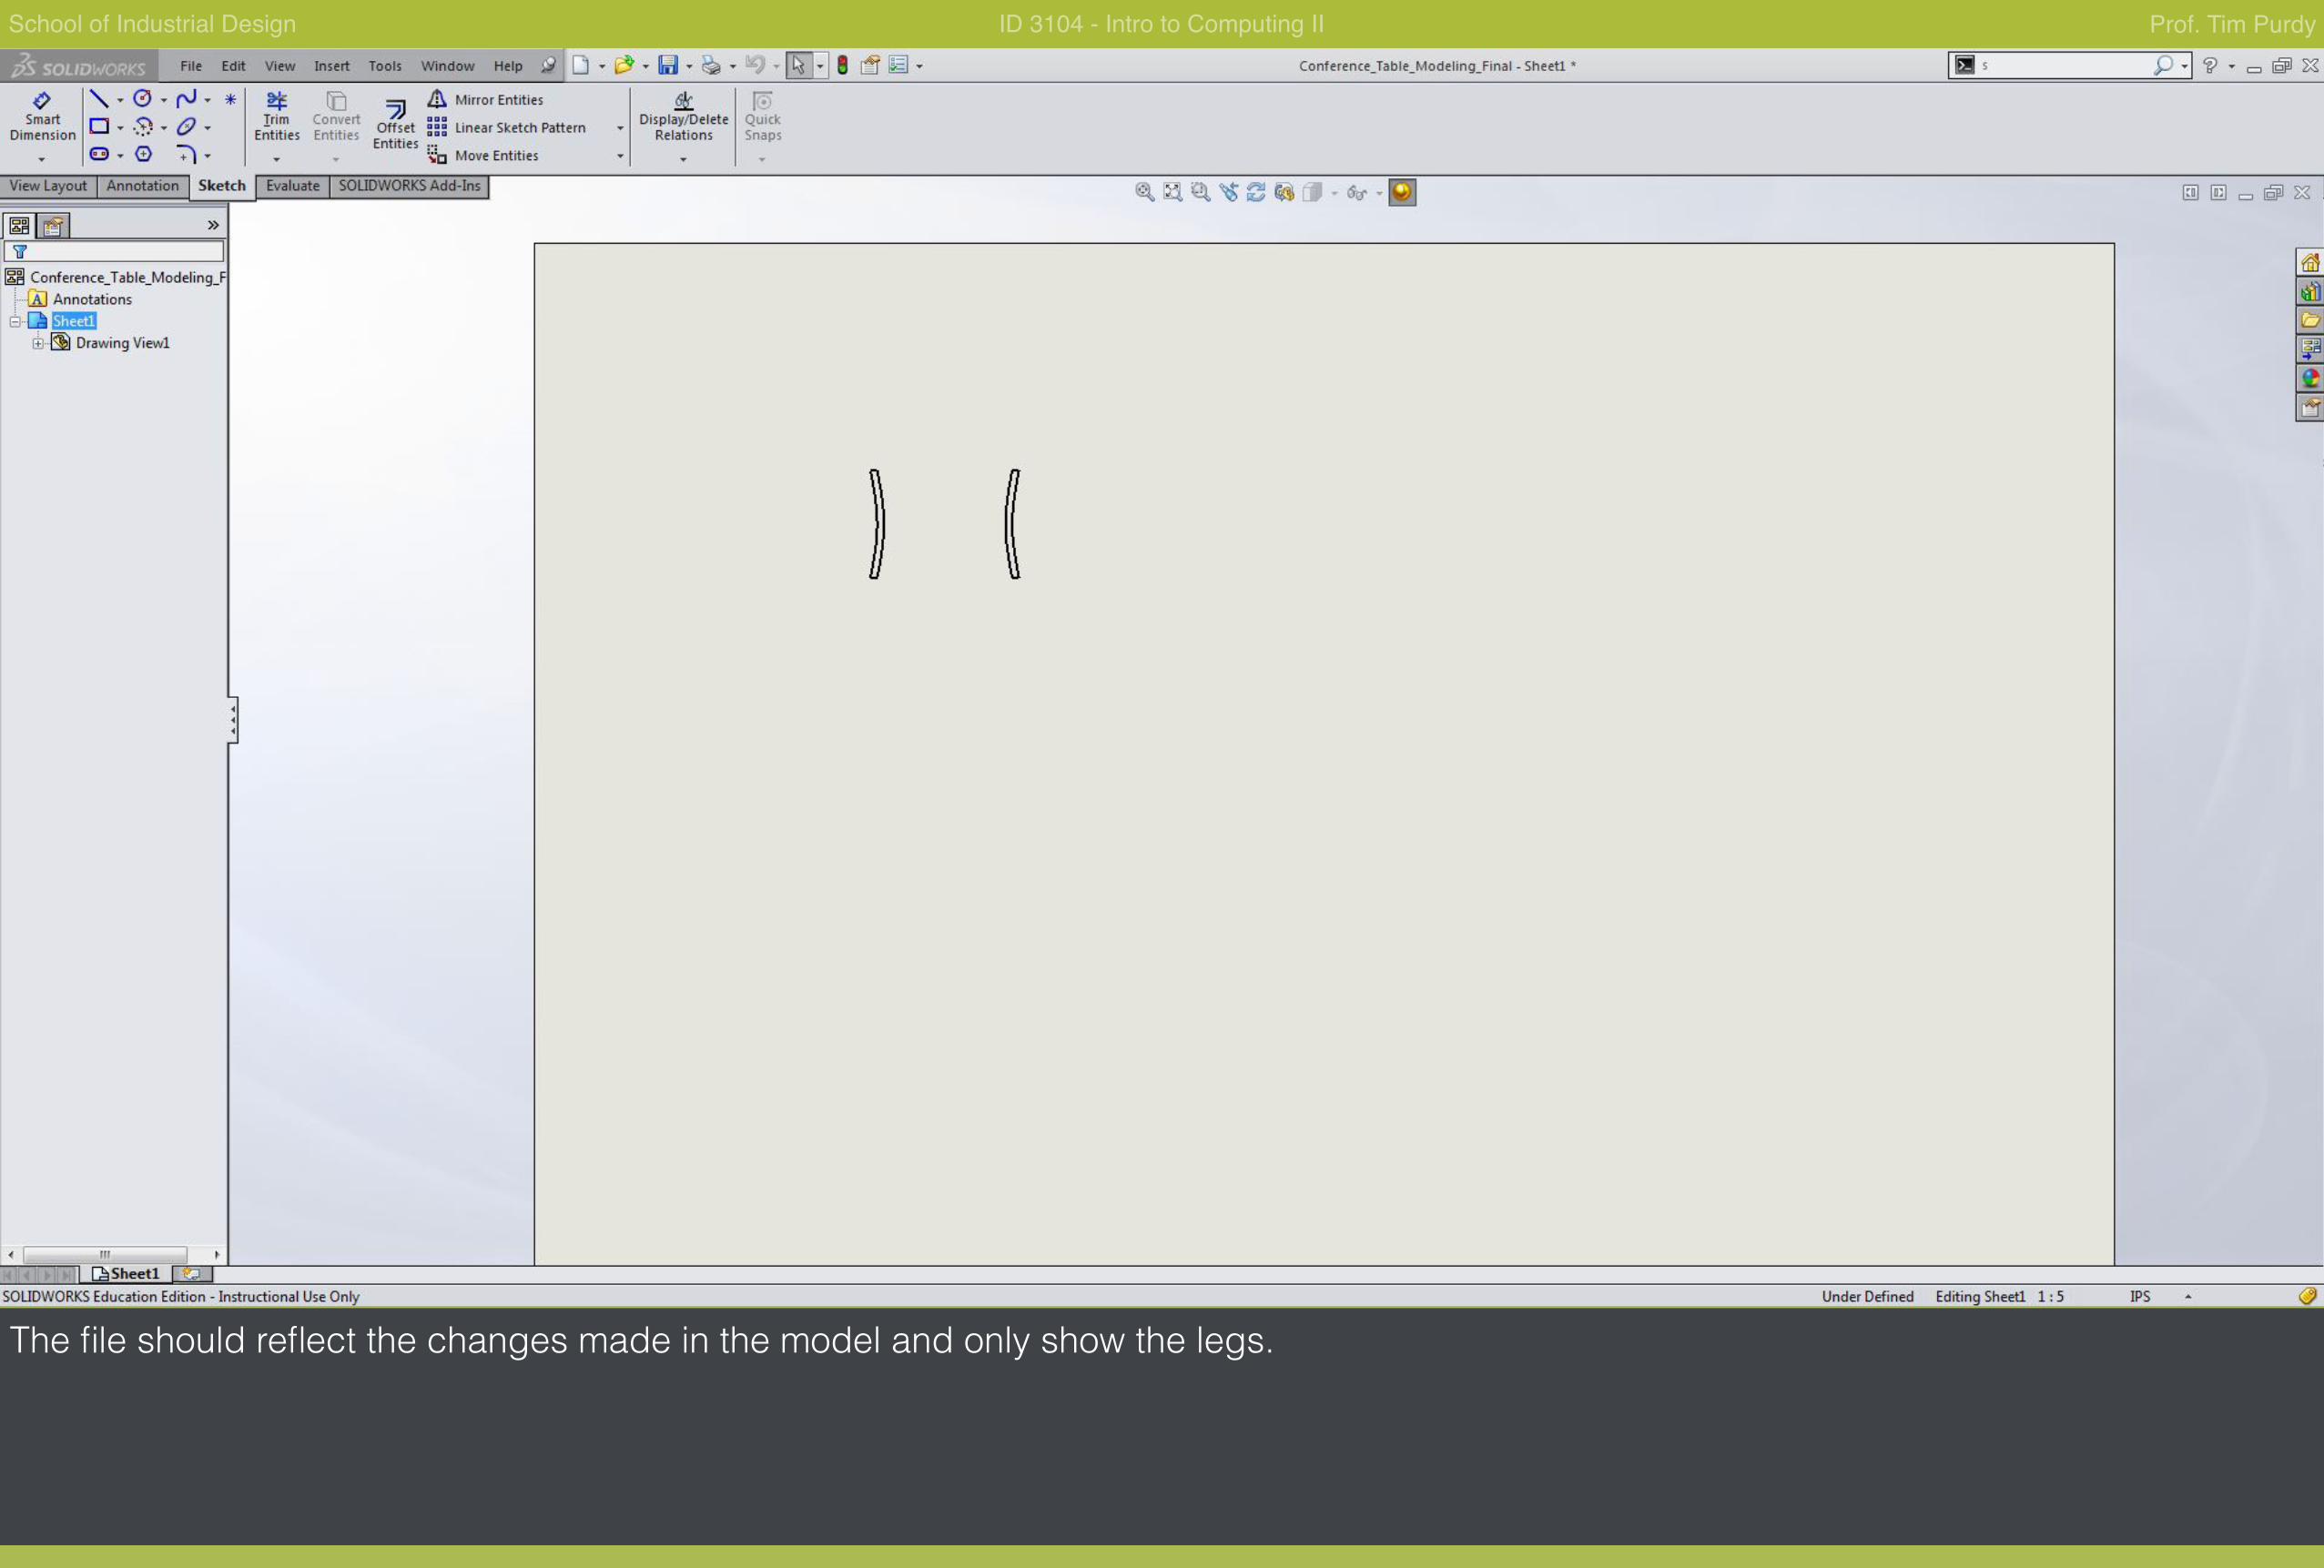
The file should reflect the changes made in the model and only show the legs.
School of Industrial Design ID 3104 - Intro to Computing II Prof. Tim Purdy
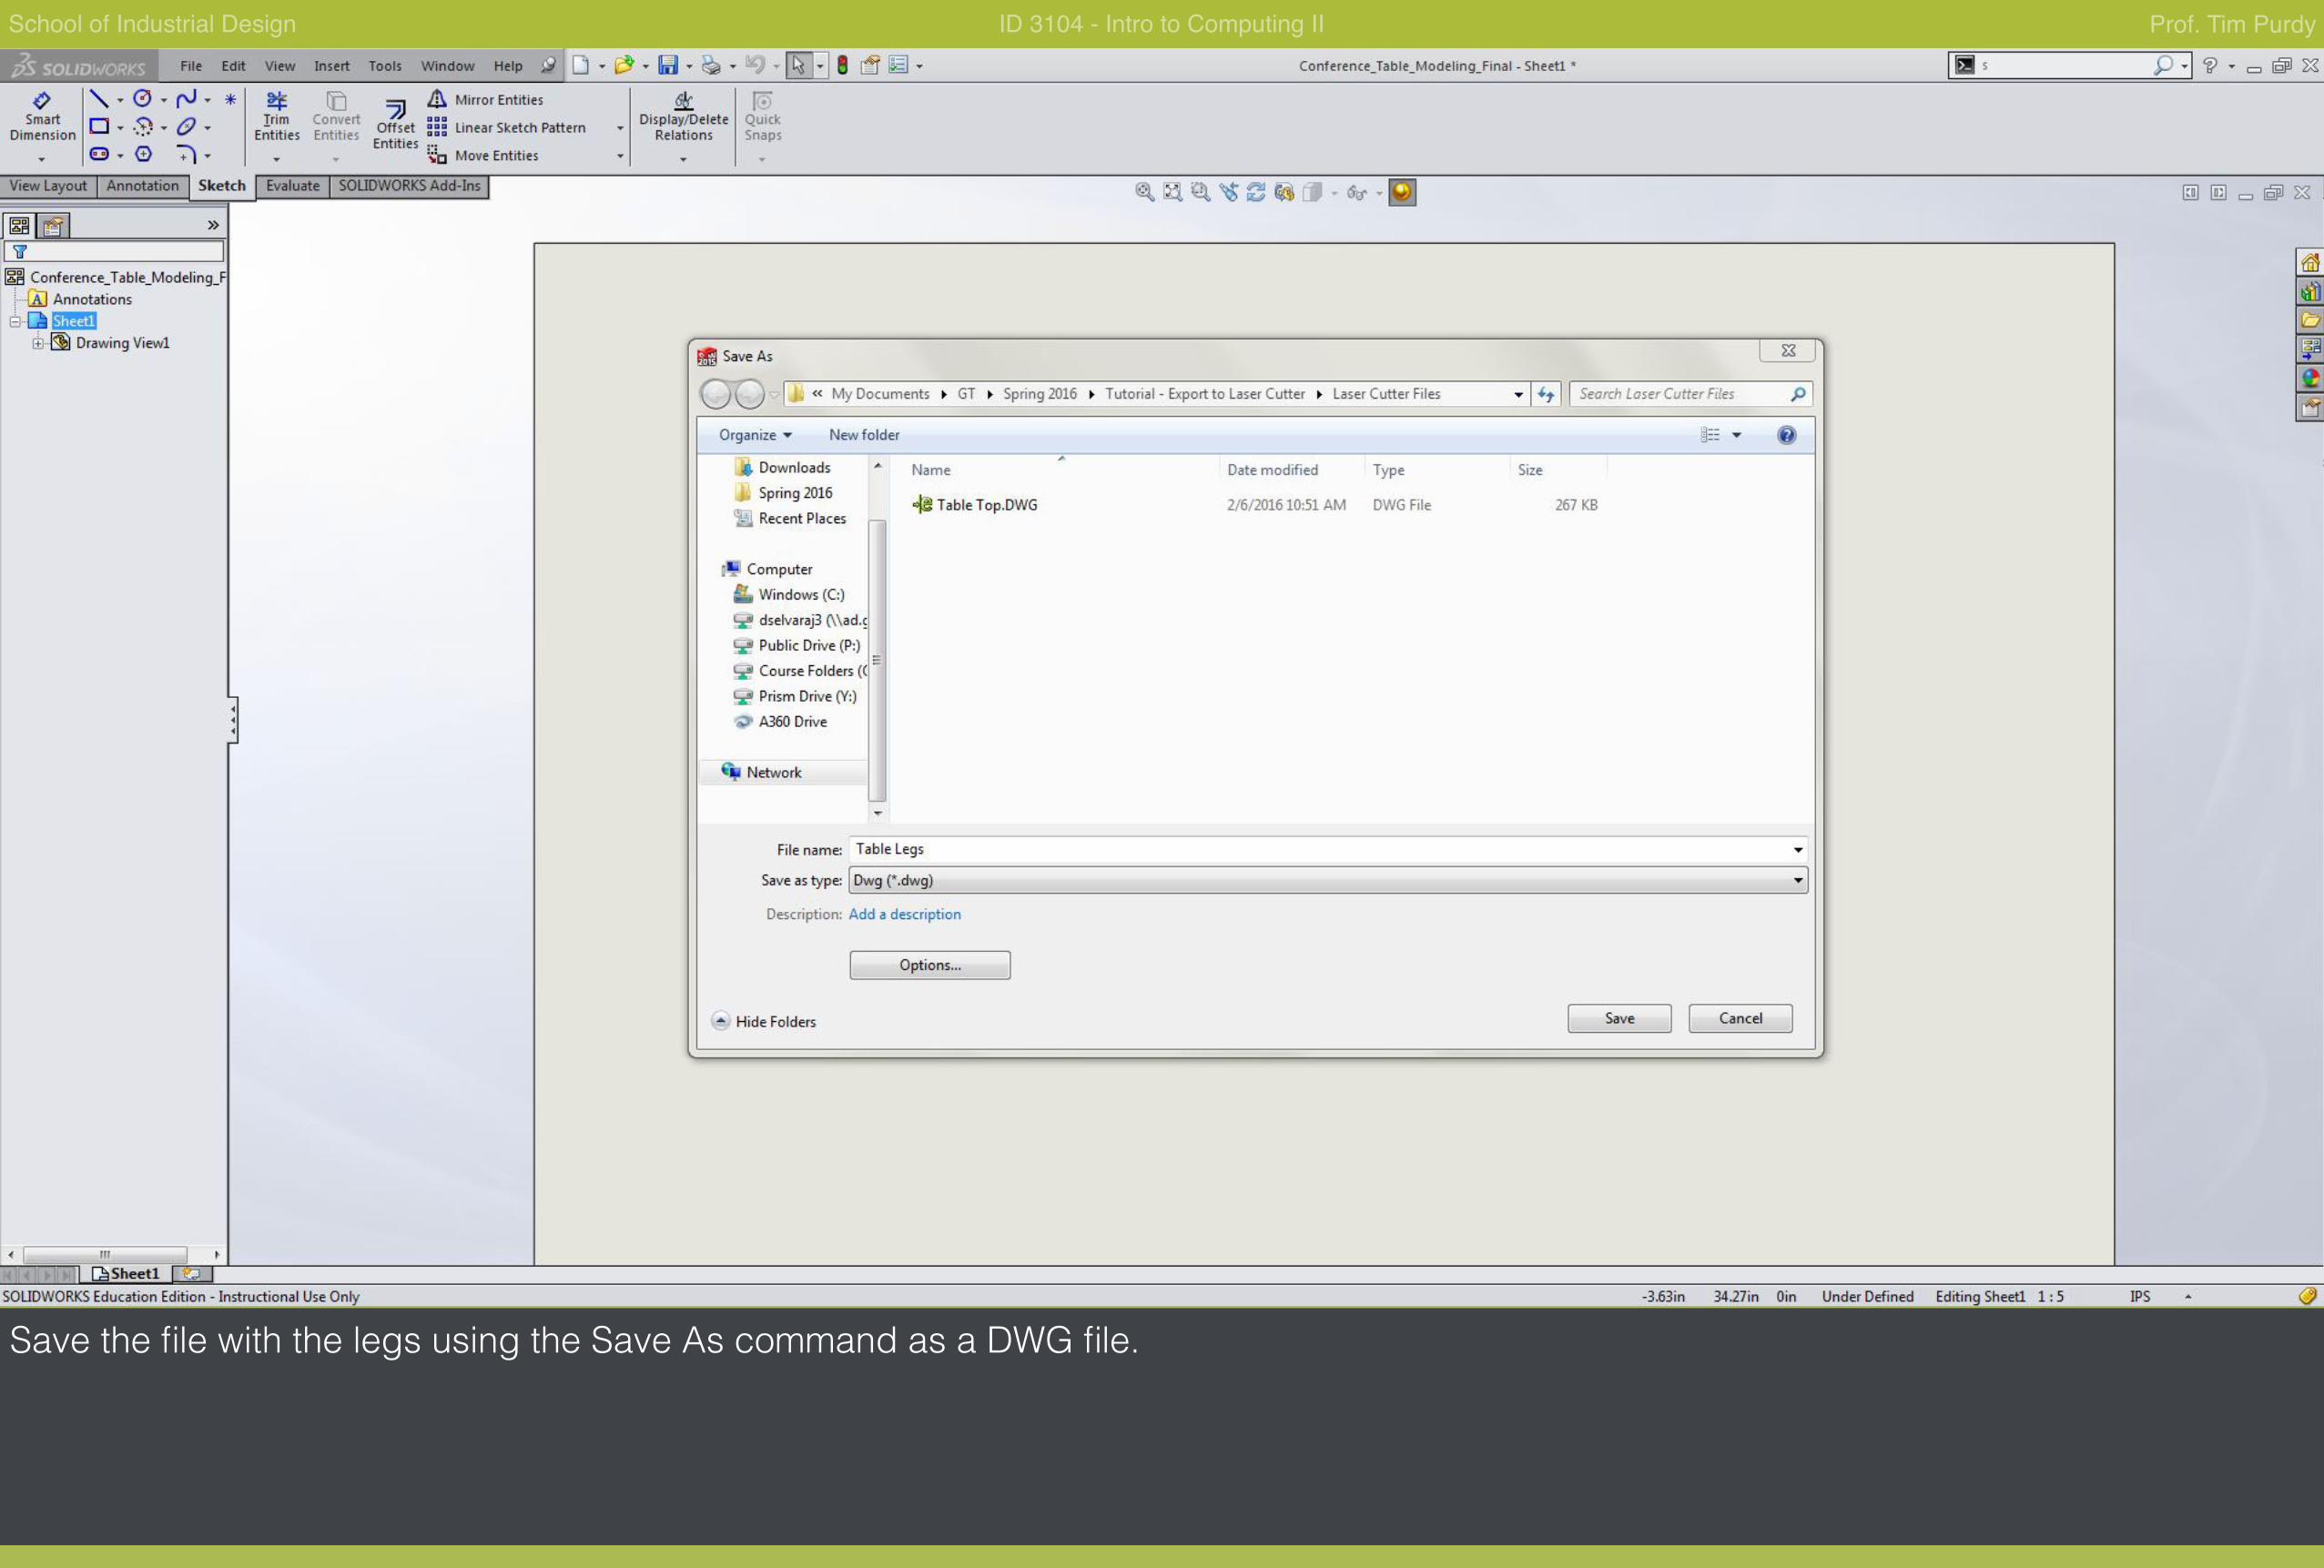
Save the file with the legs using the Save As command as a DWG file.
School of Industrial Design ID 3104 - Intro to Computing II Prof. Tim Purdy
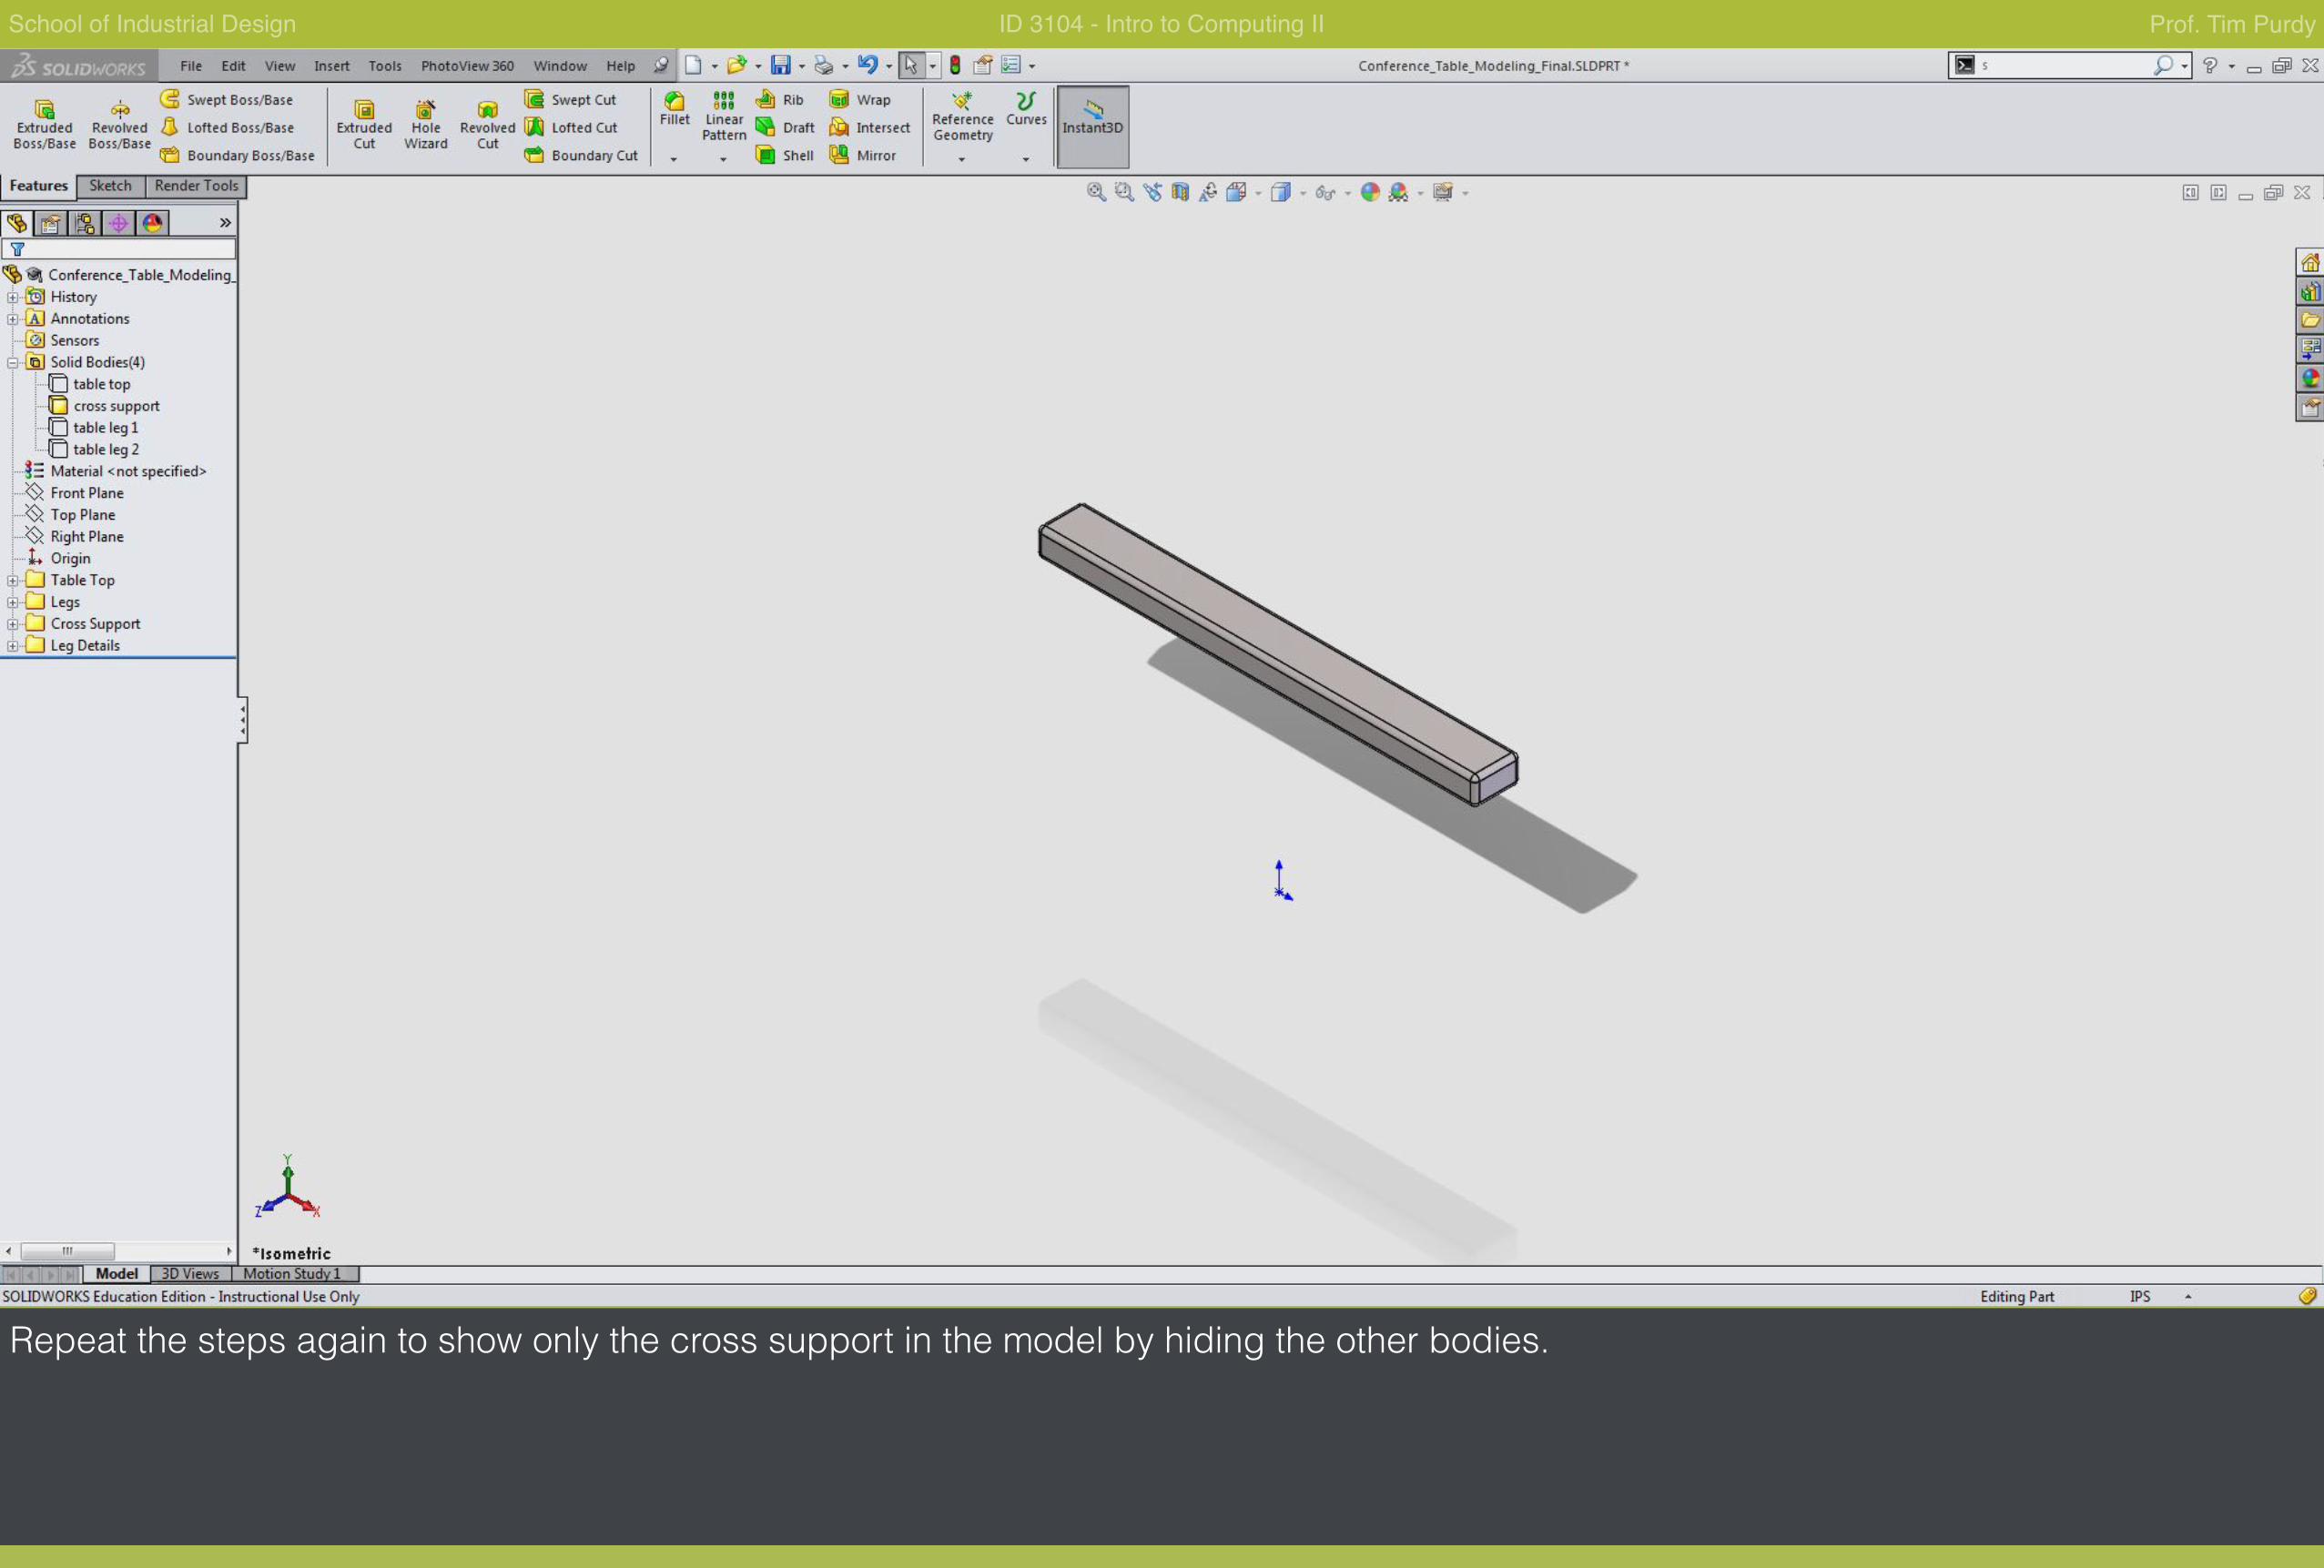
Repeat the steps again to show only the cross support in the model by hiding the other bodies.
School of Industrial Design ID 3104 - Intro to Computing II Prof. Tim Purdy
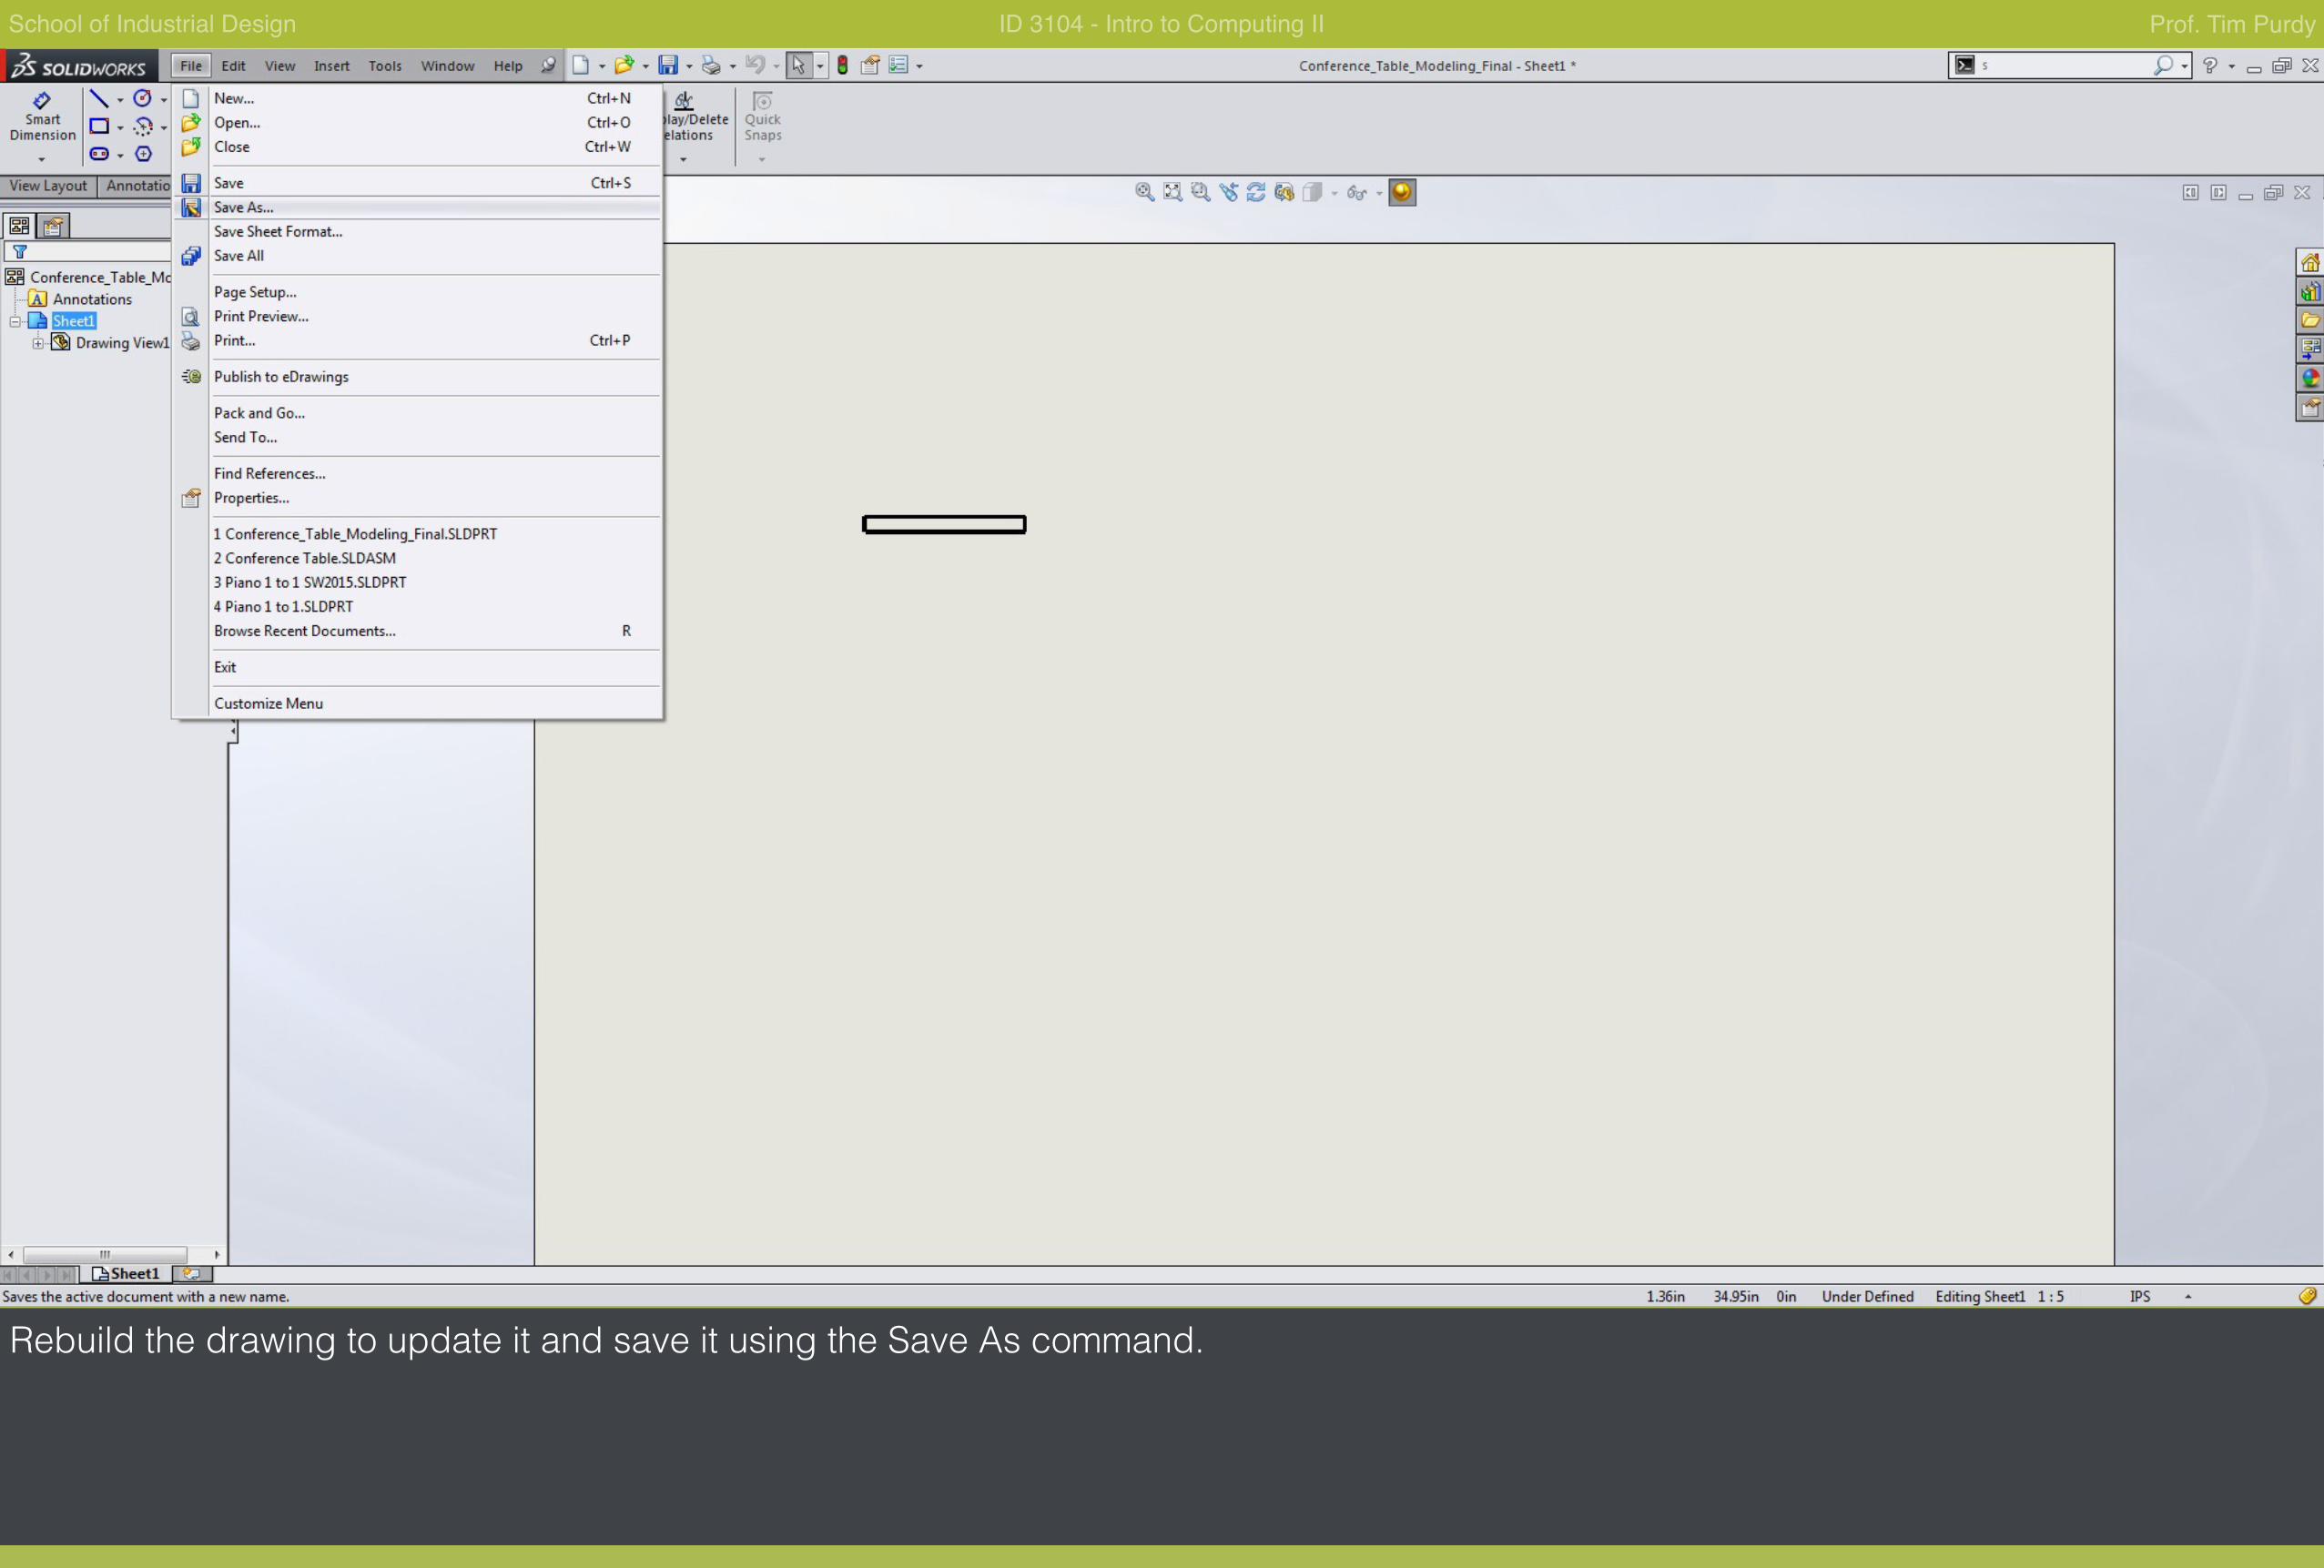
Rebuild the drawing to update it and save it using the Save As command.
School of Industrial Design ID 3104 - Intro to Computing II Prof. Tim Purdy
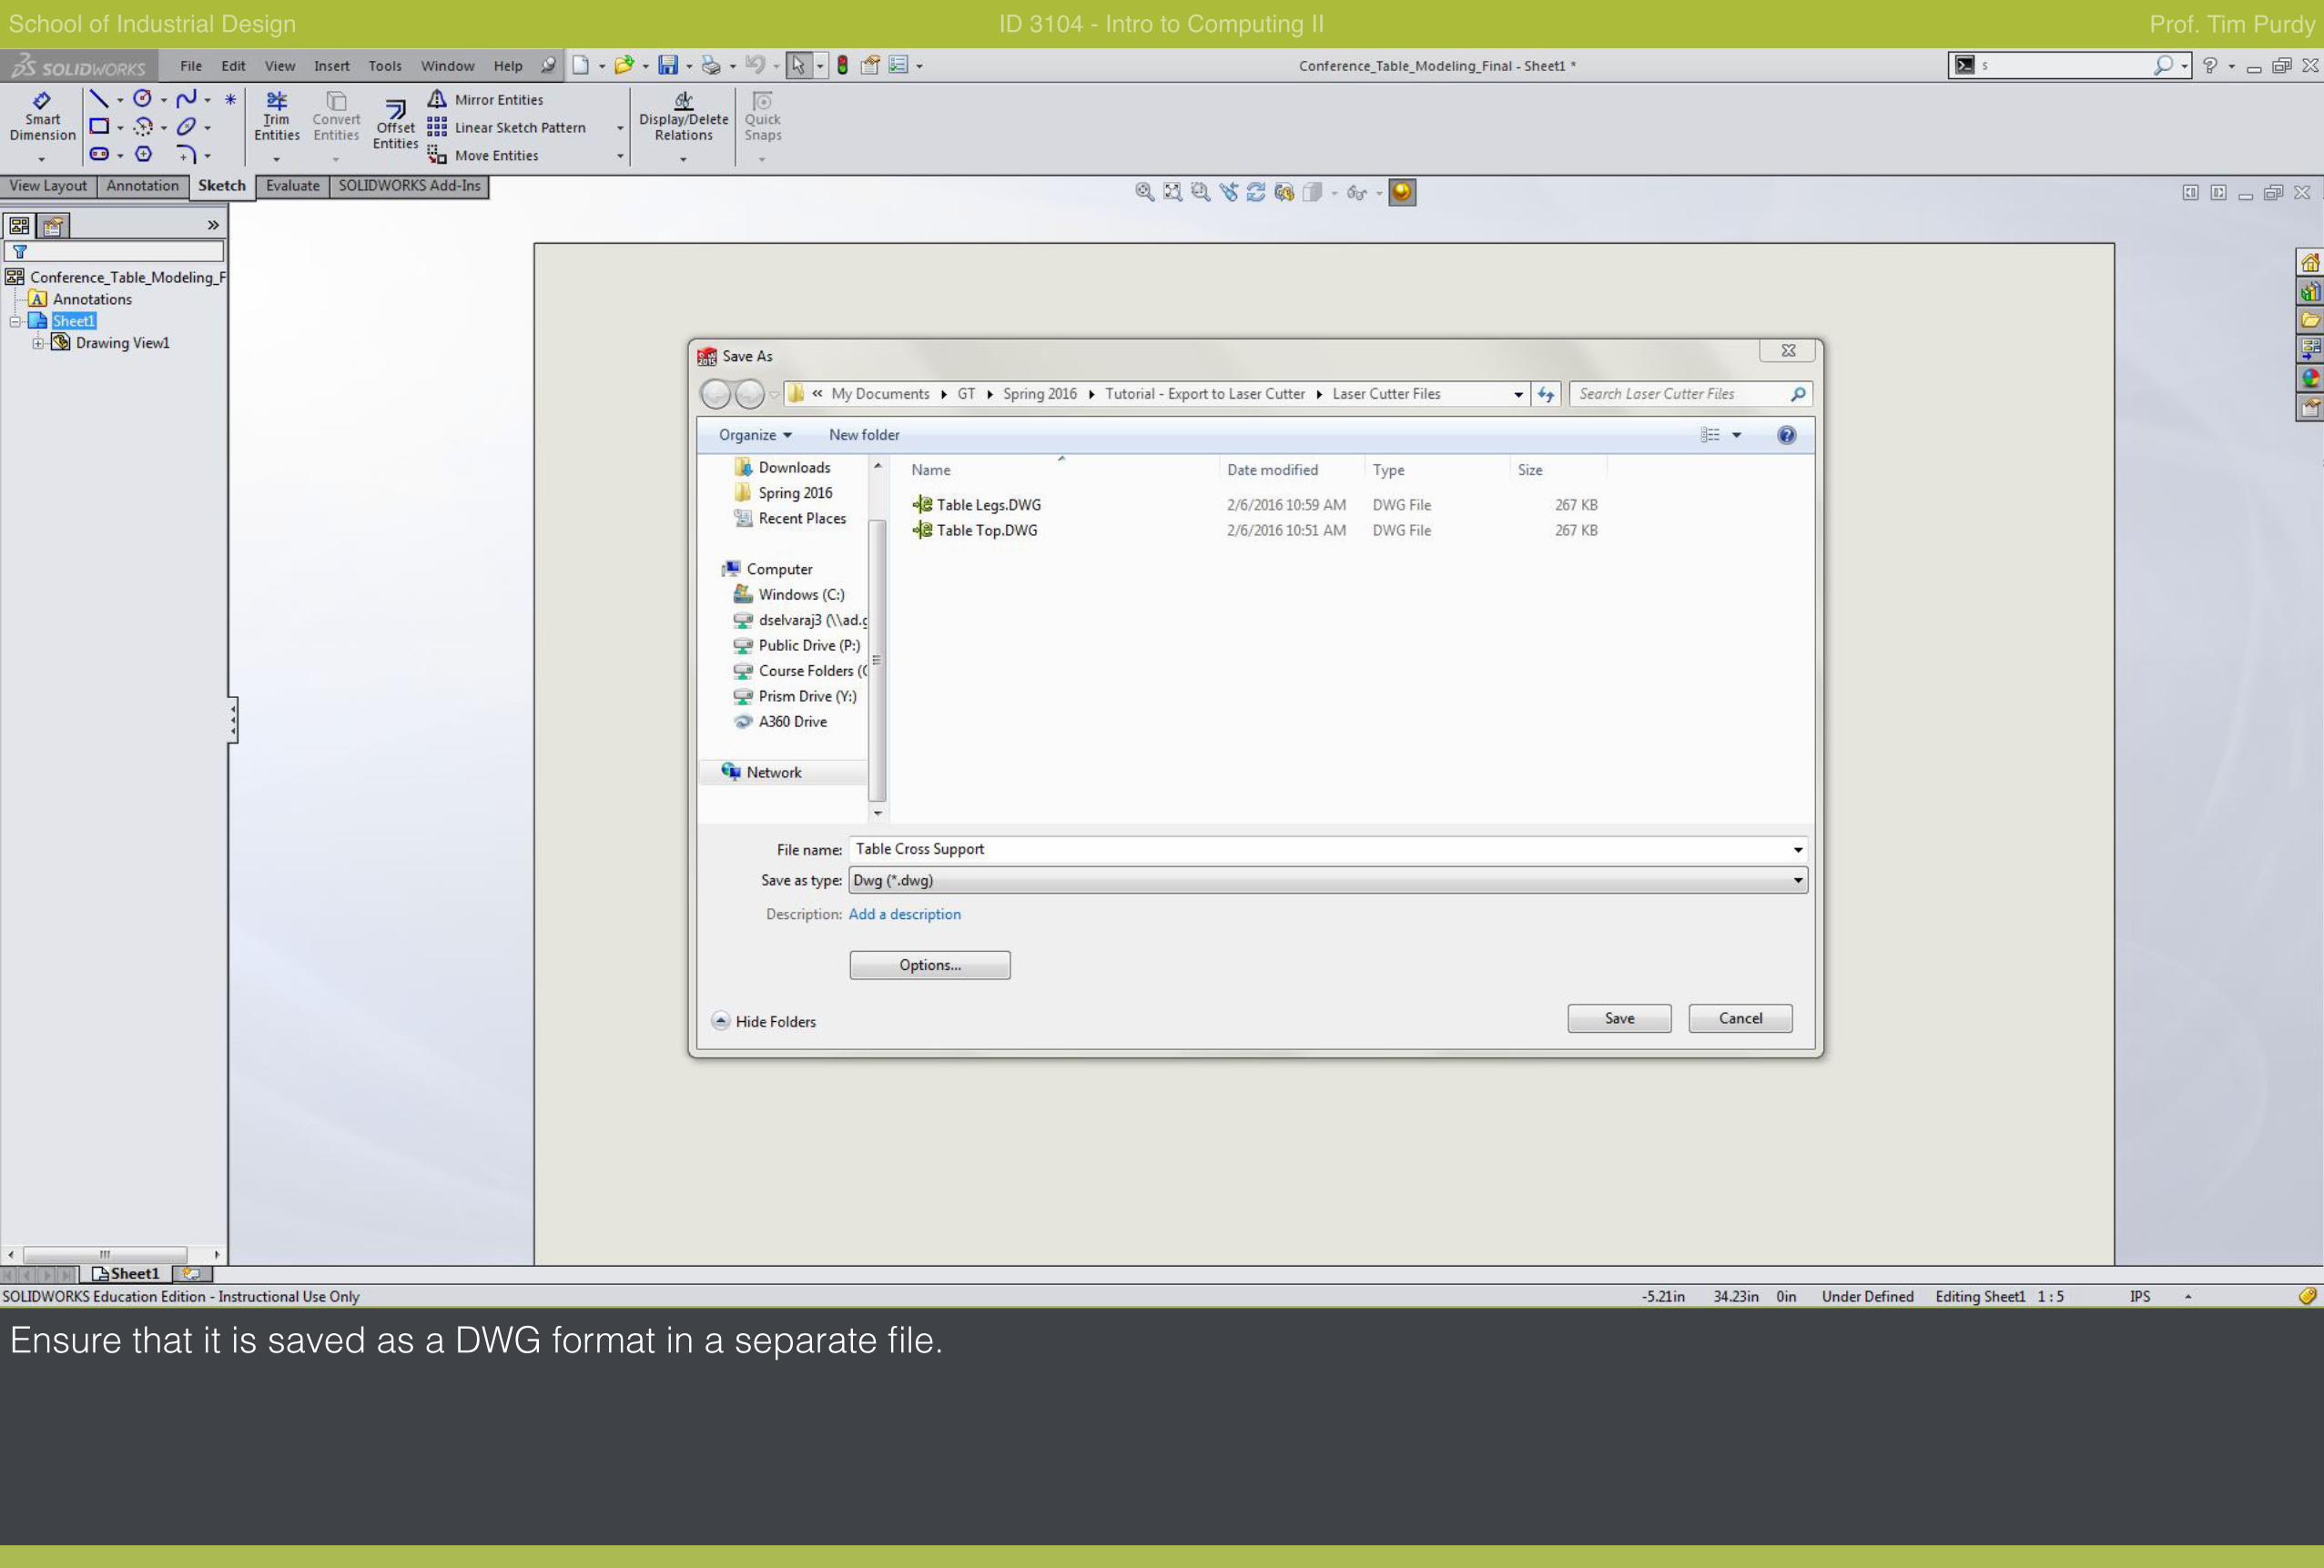
Ensure that it is saved as a DWG format in a separate file.

School of Industrial Design ID 3104 - Intro to Computing II Prof. Tim Purdy
Open Adobe Illustrator and create a new document with the following settings: 32” x 18” - Landscape - RGB - 300 dpi
The 32” x 18” size matches the bed size of the laser cutter.
School of Industrial Design ID 3104 - Intro to Computing II Prof. Tim Purdy
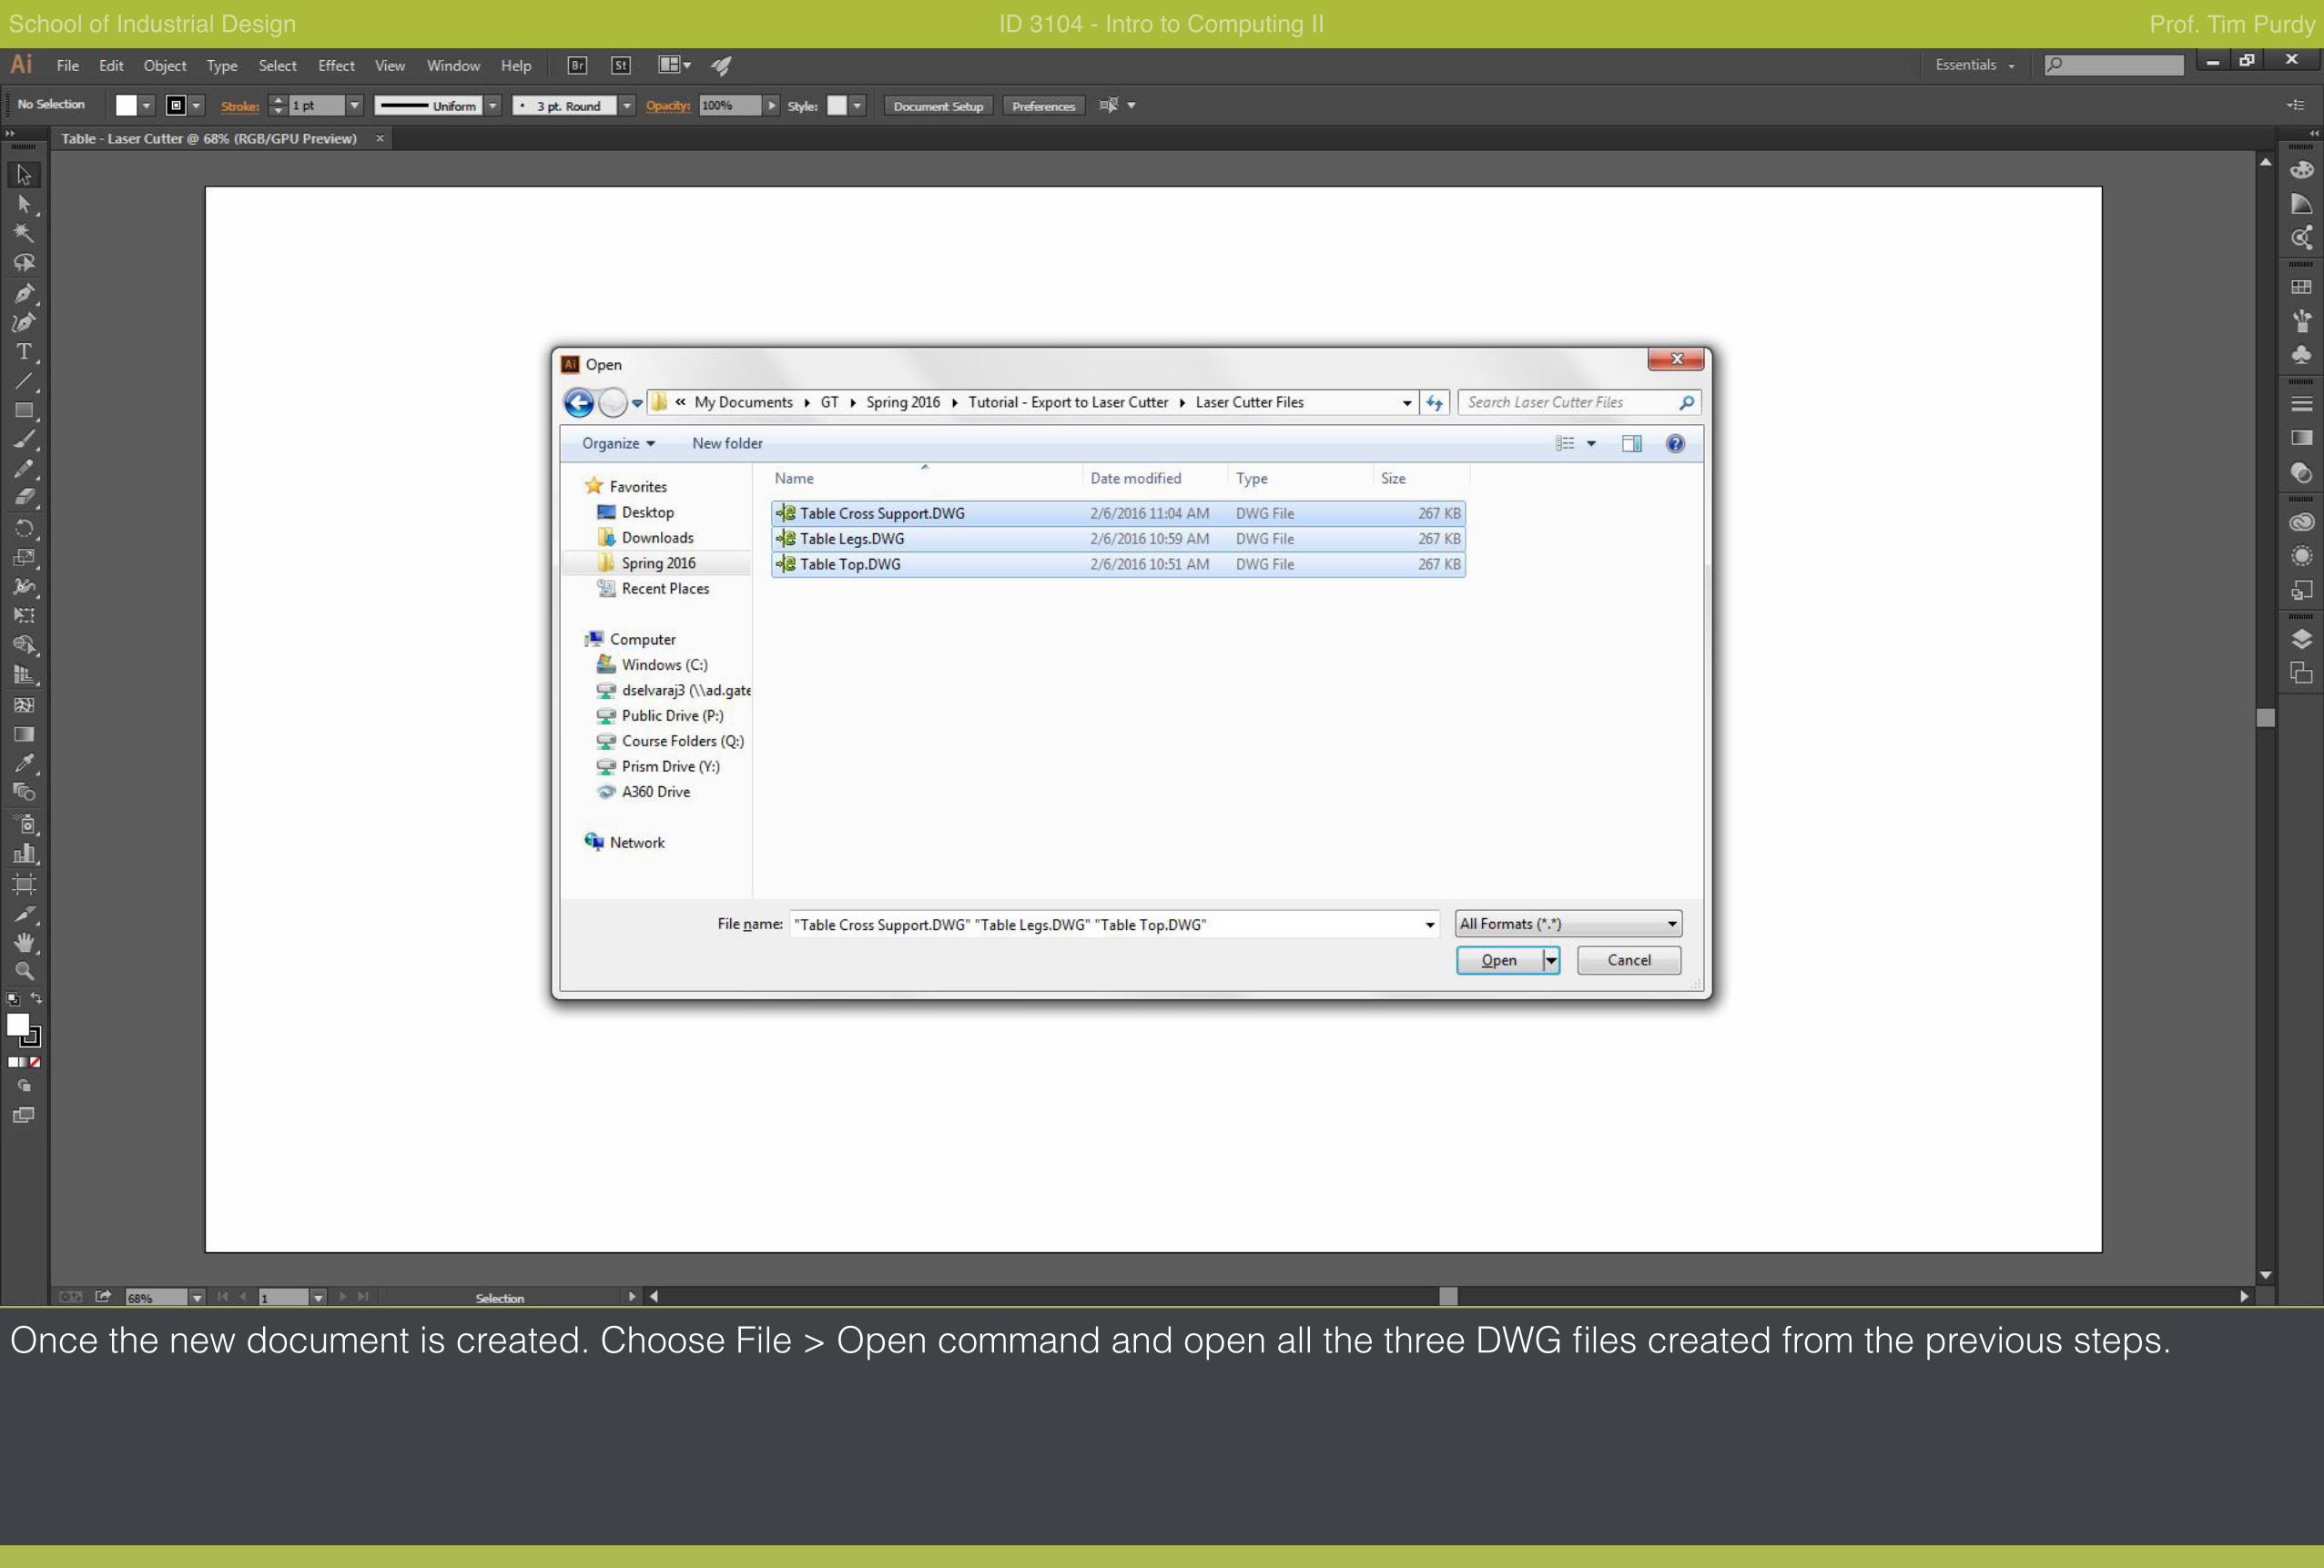
Once the new document is created. Choose File > Open command and open all the three DWG files created from the previous steps.
School of Industrial Design ID 3104 - Intro to Computing II Prof. Tim Purdy
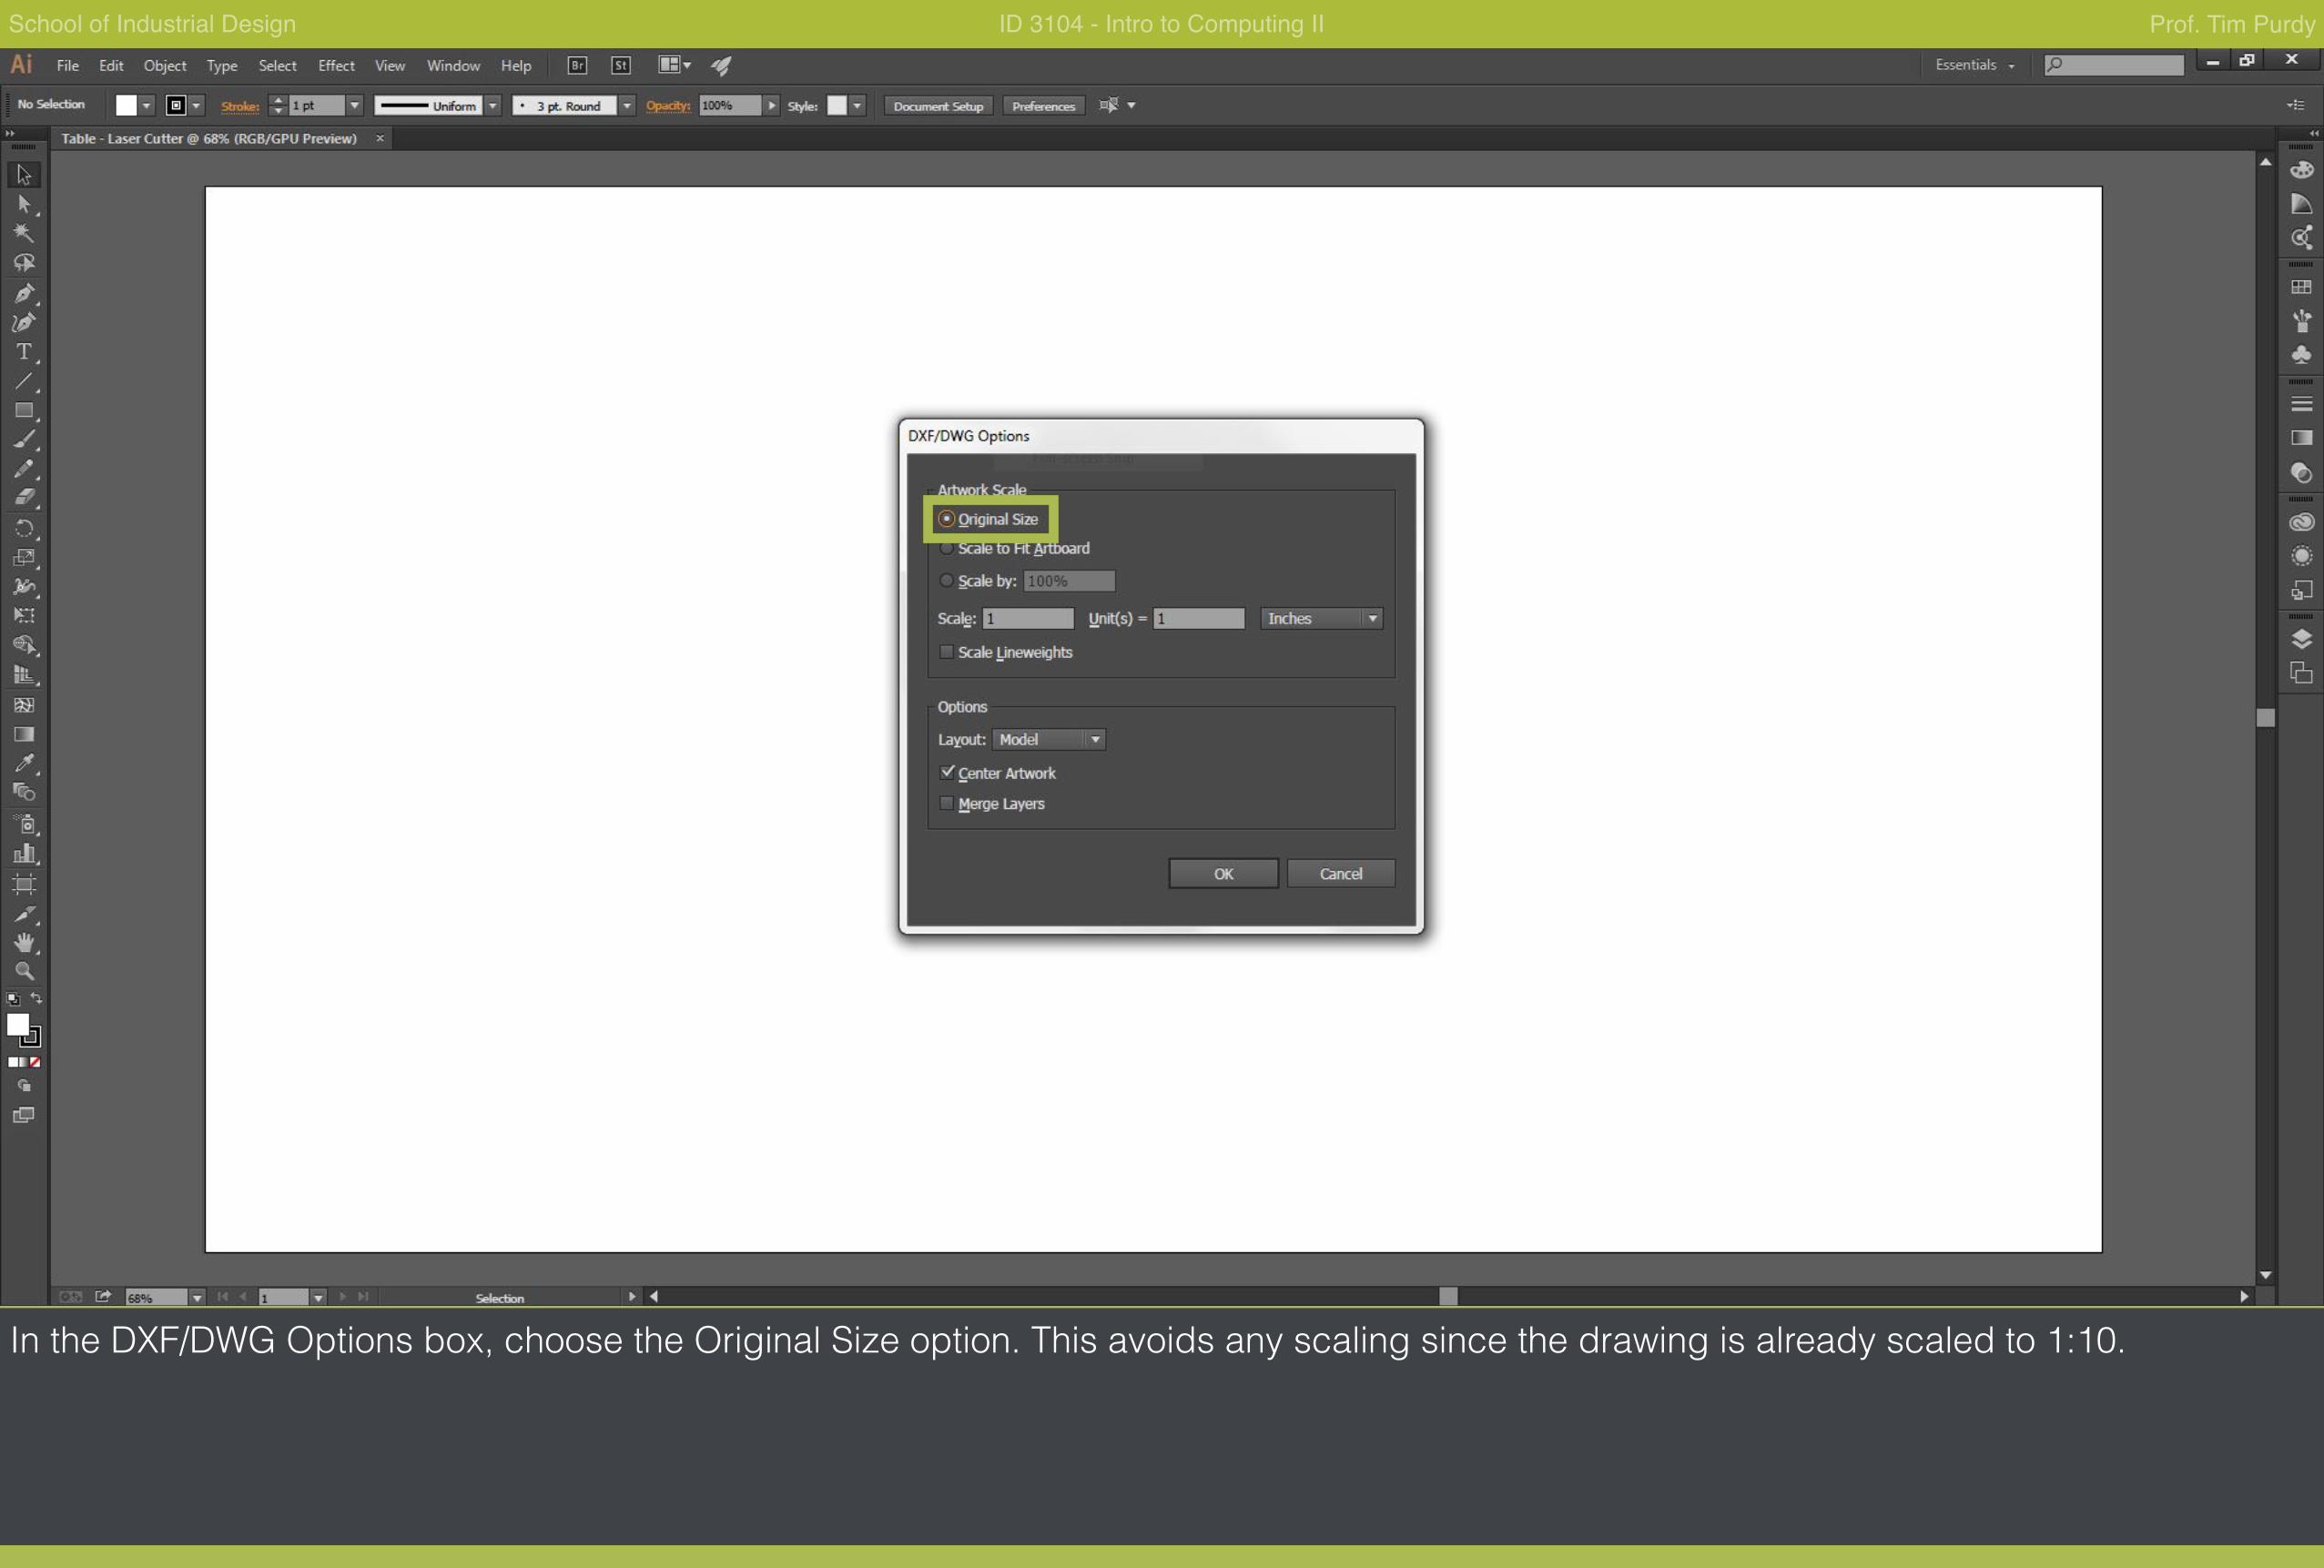
In the DXF/DWG Options box, choose the Original Size option. This avoids any scaling since the drawing is already scaled to 1:10.
School of Industrial Design ID 3104 - Intro to Computing II Prof. Tim Purdy
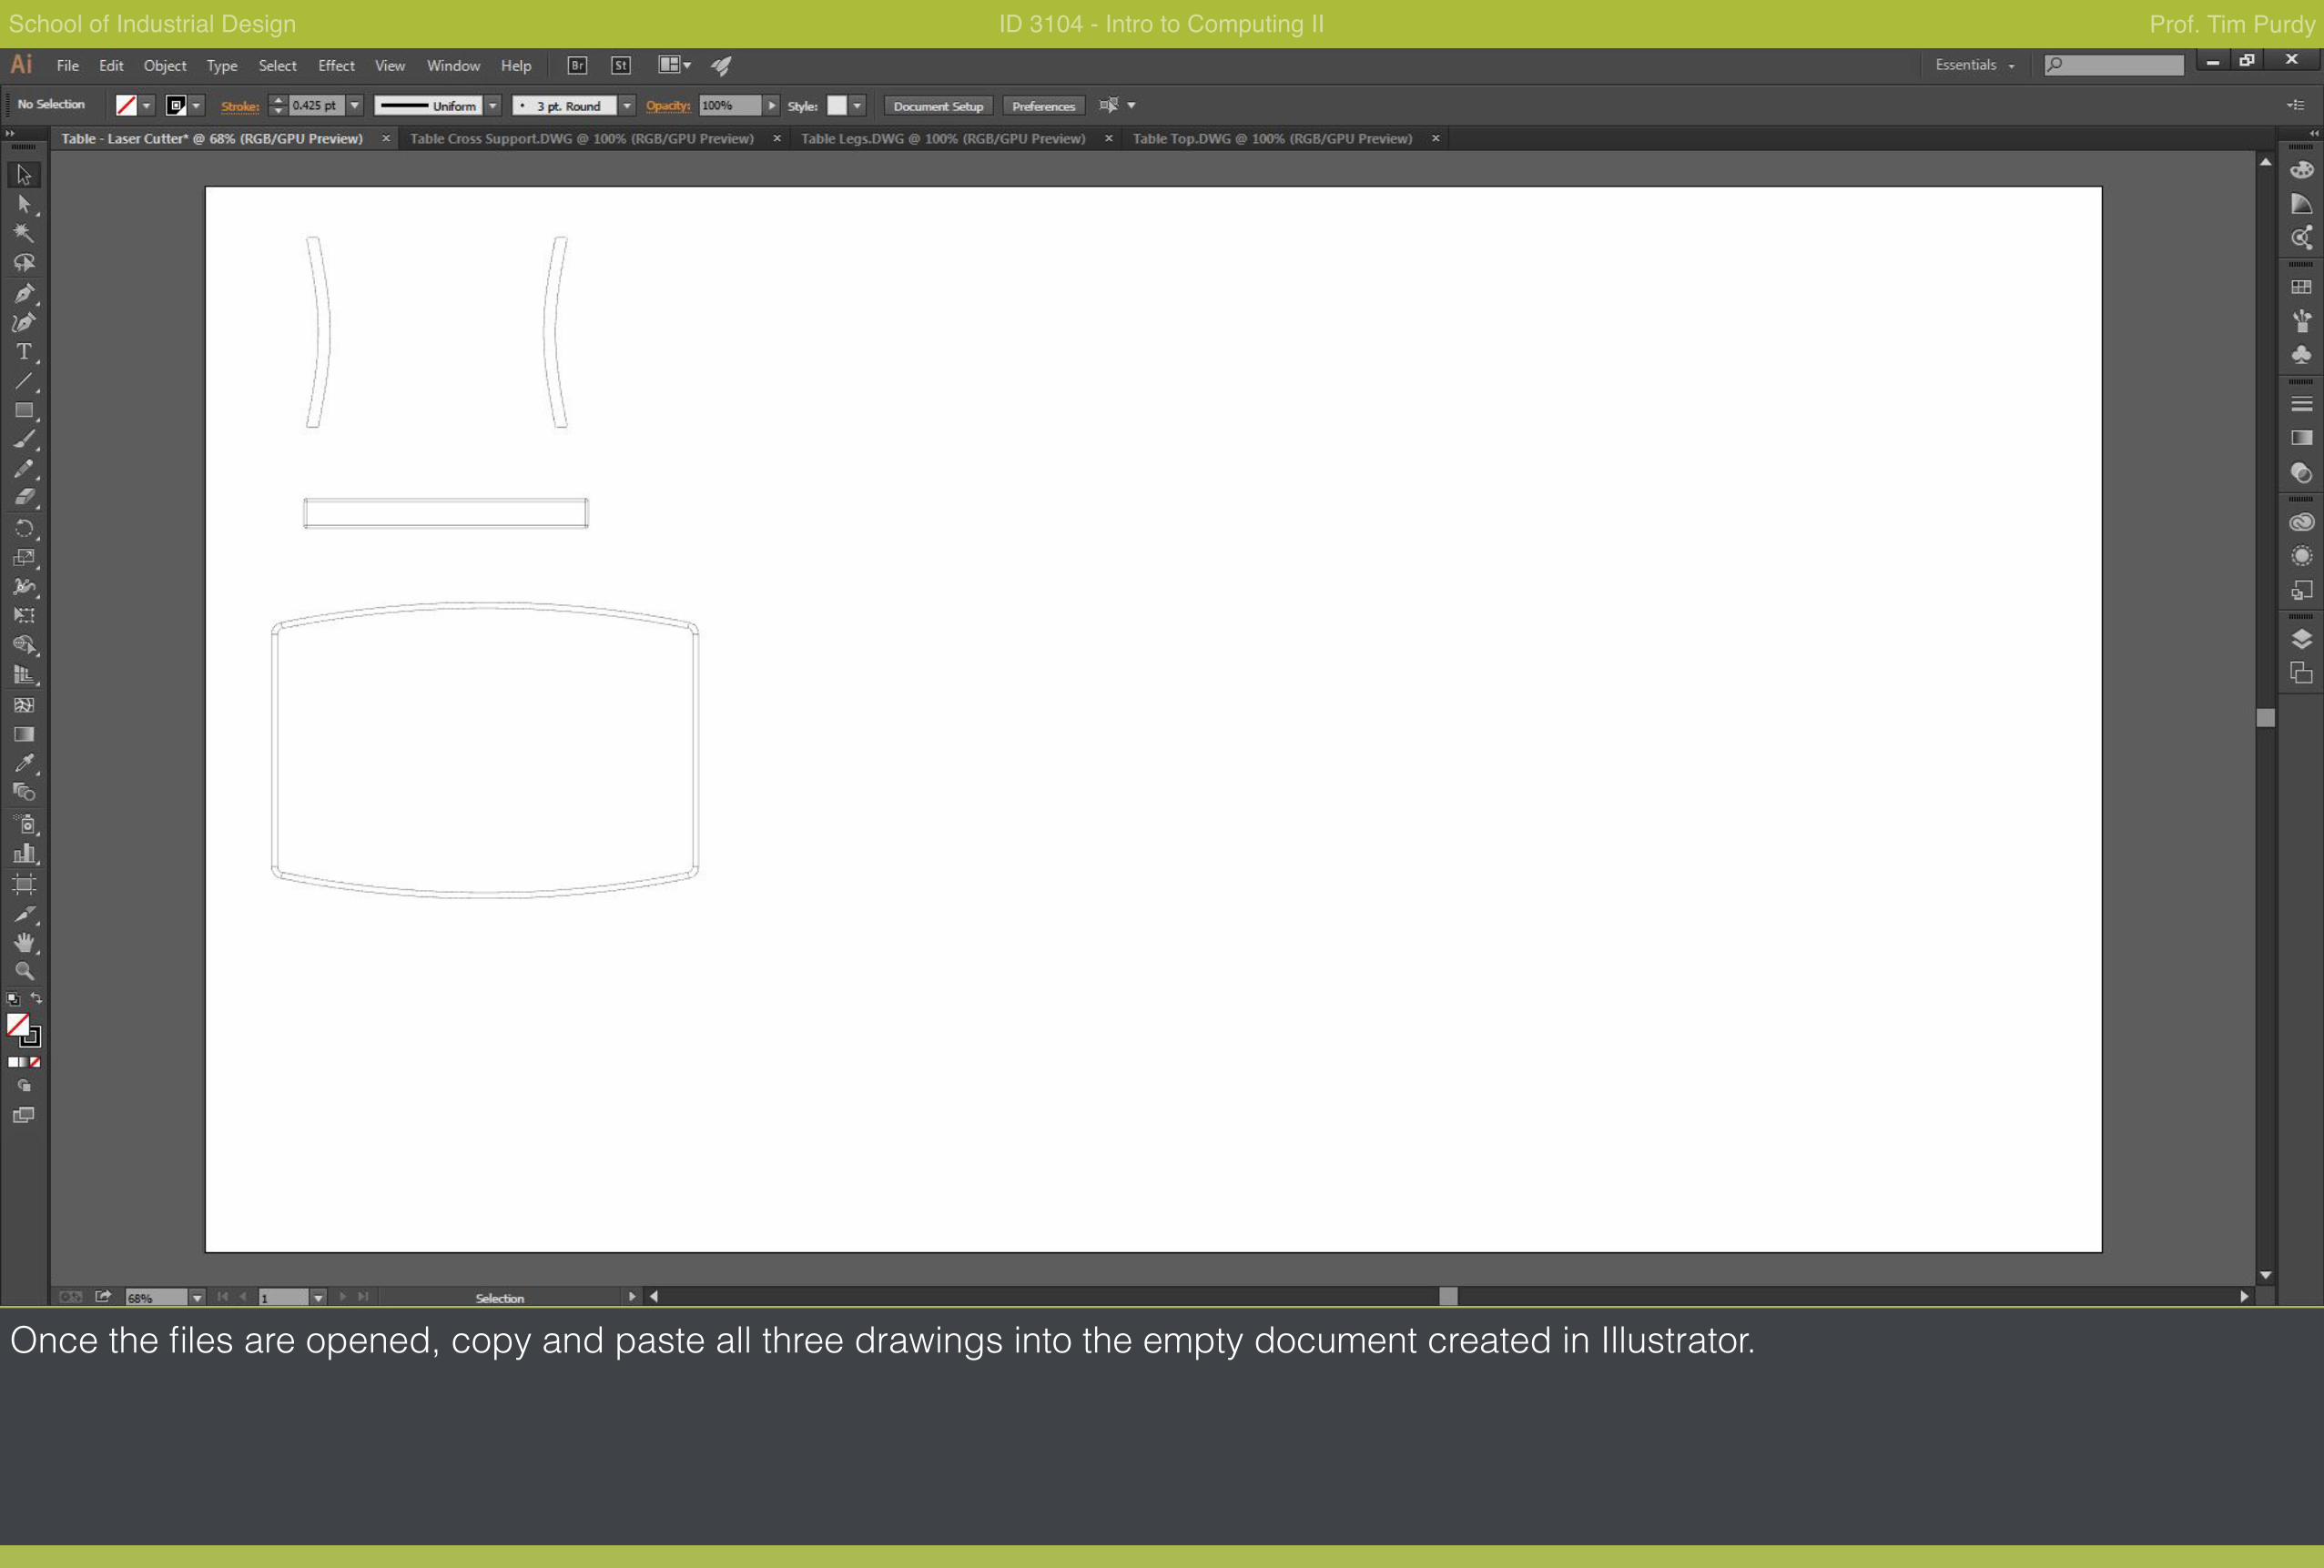
Once the files are opened, copy and paste all three drawings into the empty document created in Illustrator.
School of Industrial Design ID 3104 - Intro to Computing II Prof. Tim Purdy
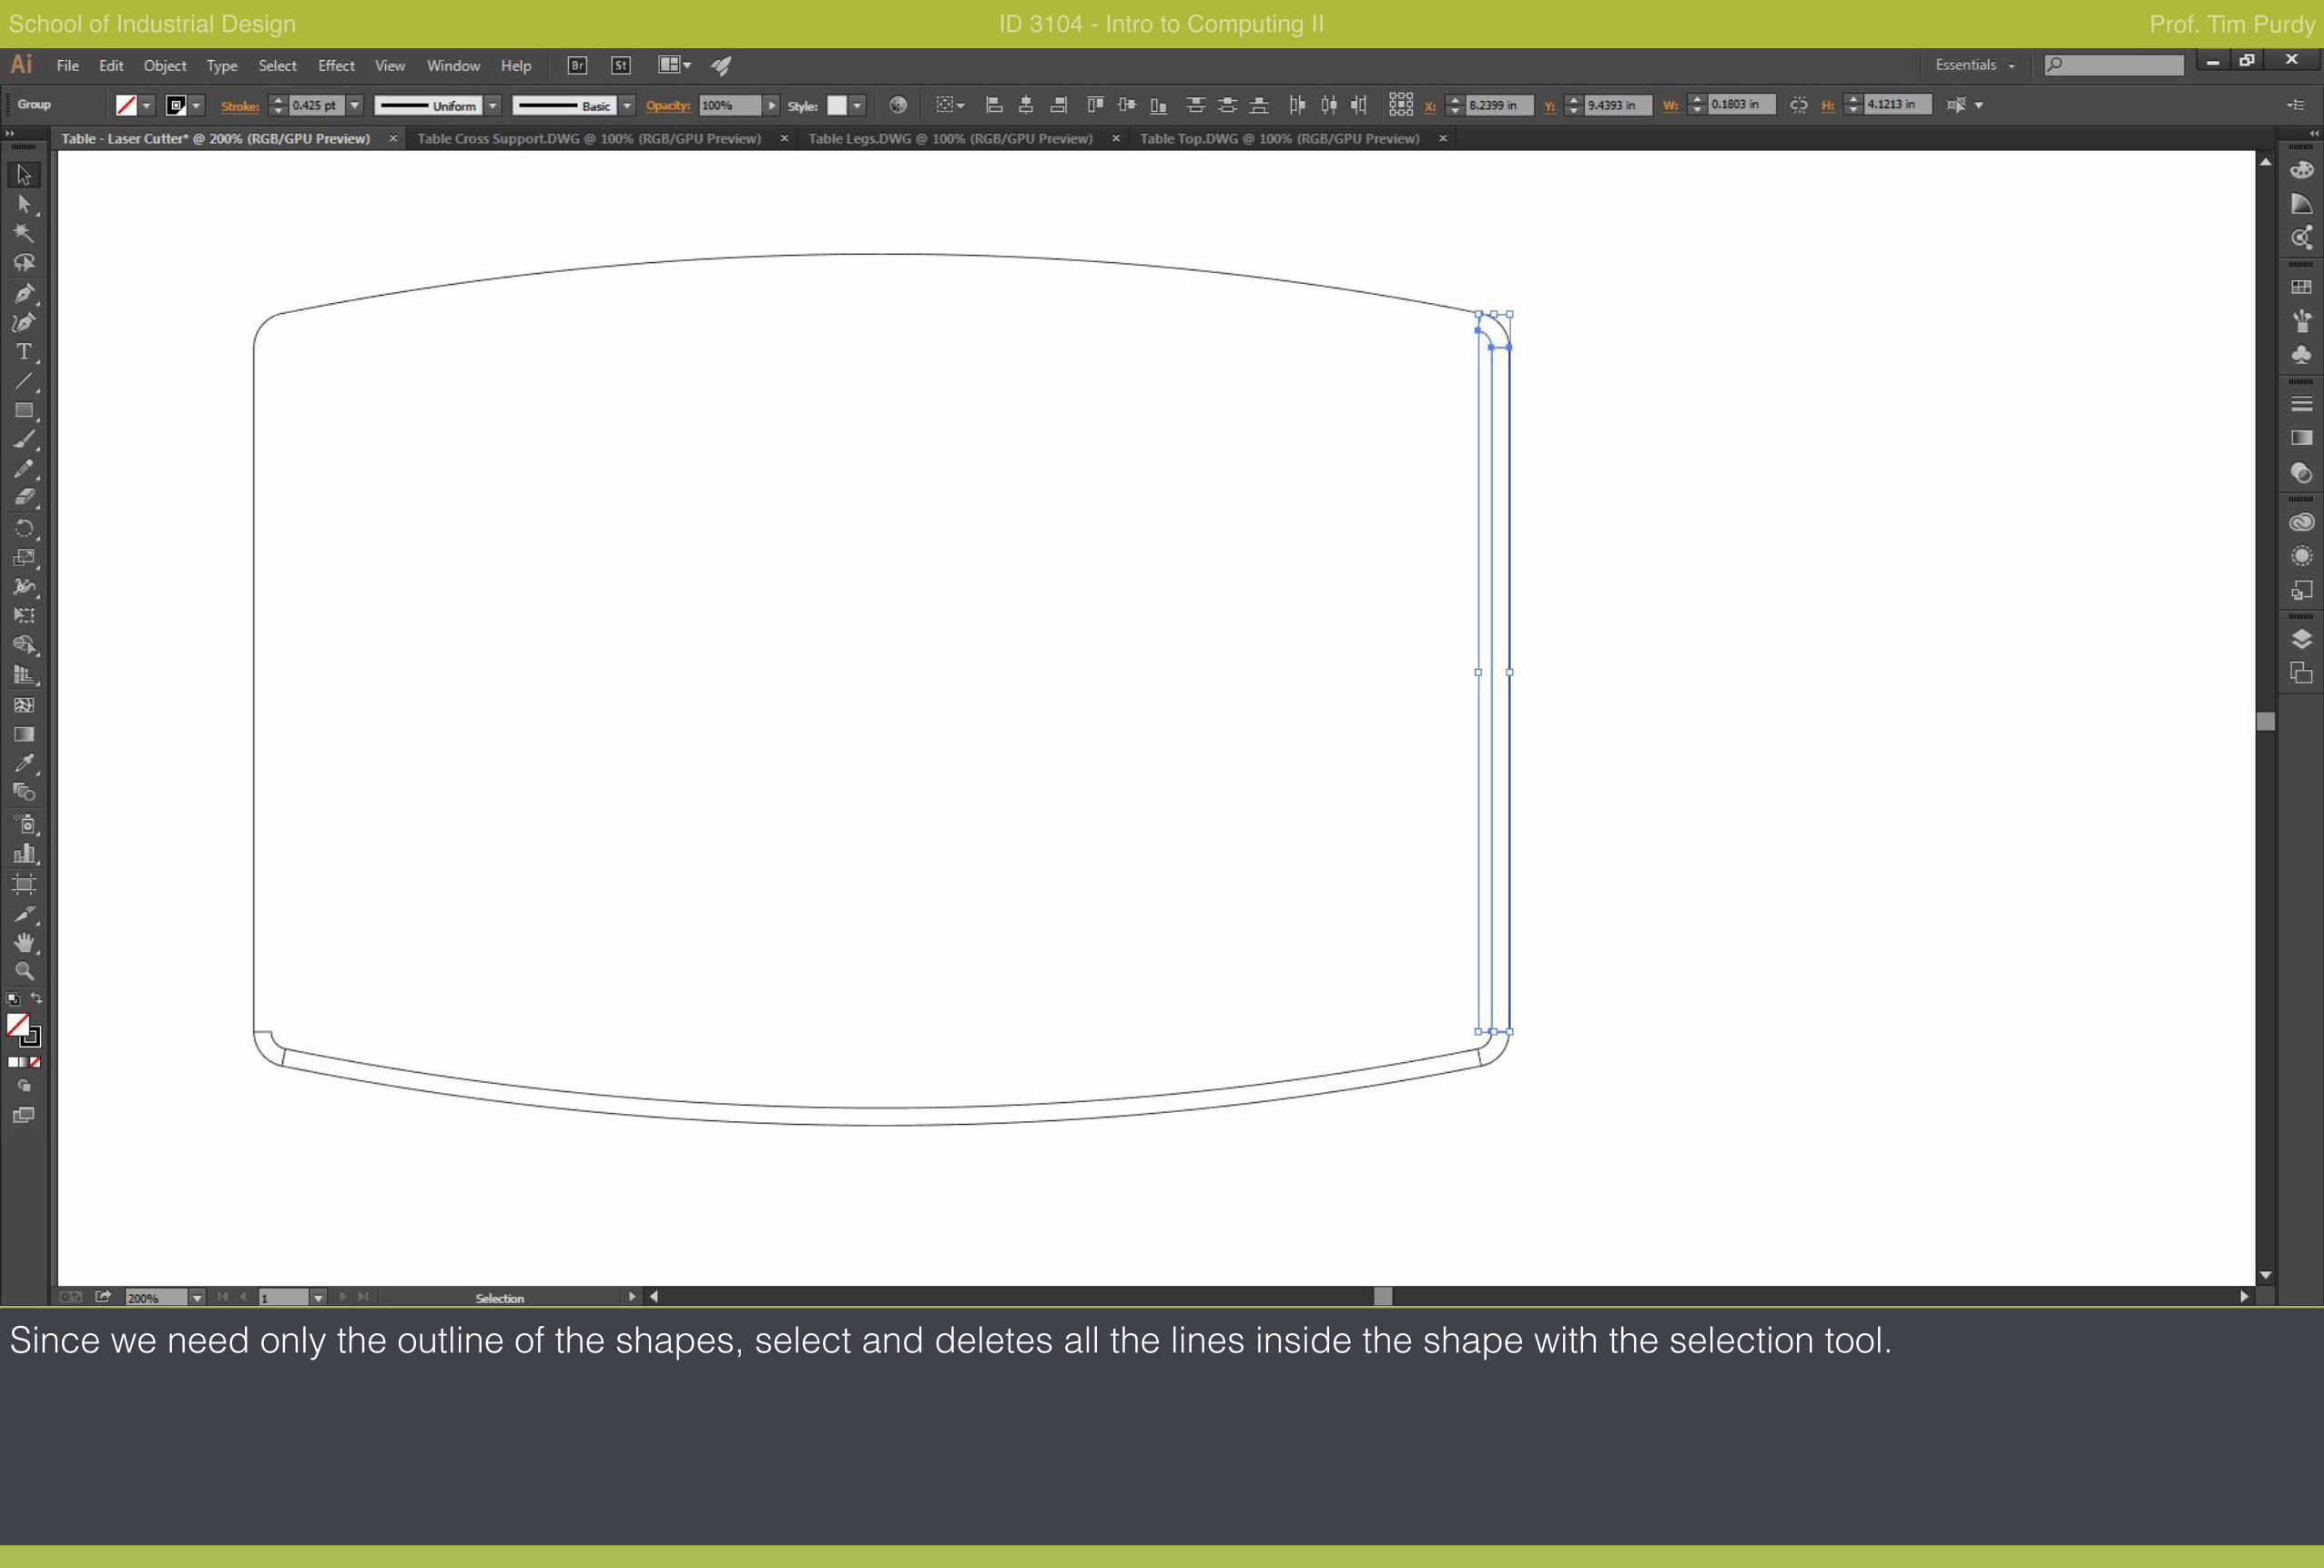
Since we need only the outline of the shapes, select and deletes all the lines inside the shape with the selection tool.
School of Industrial Design ID 3104 - Intro to Computing II Prof. Tim Purdy
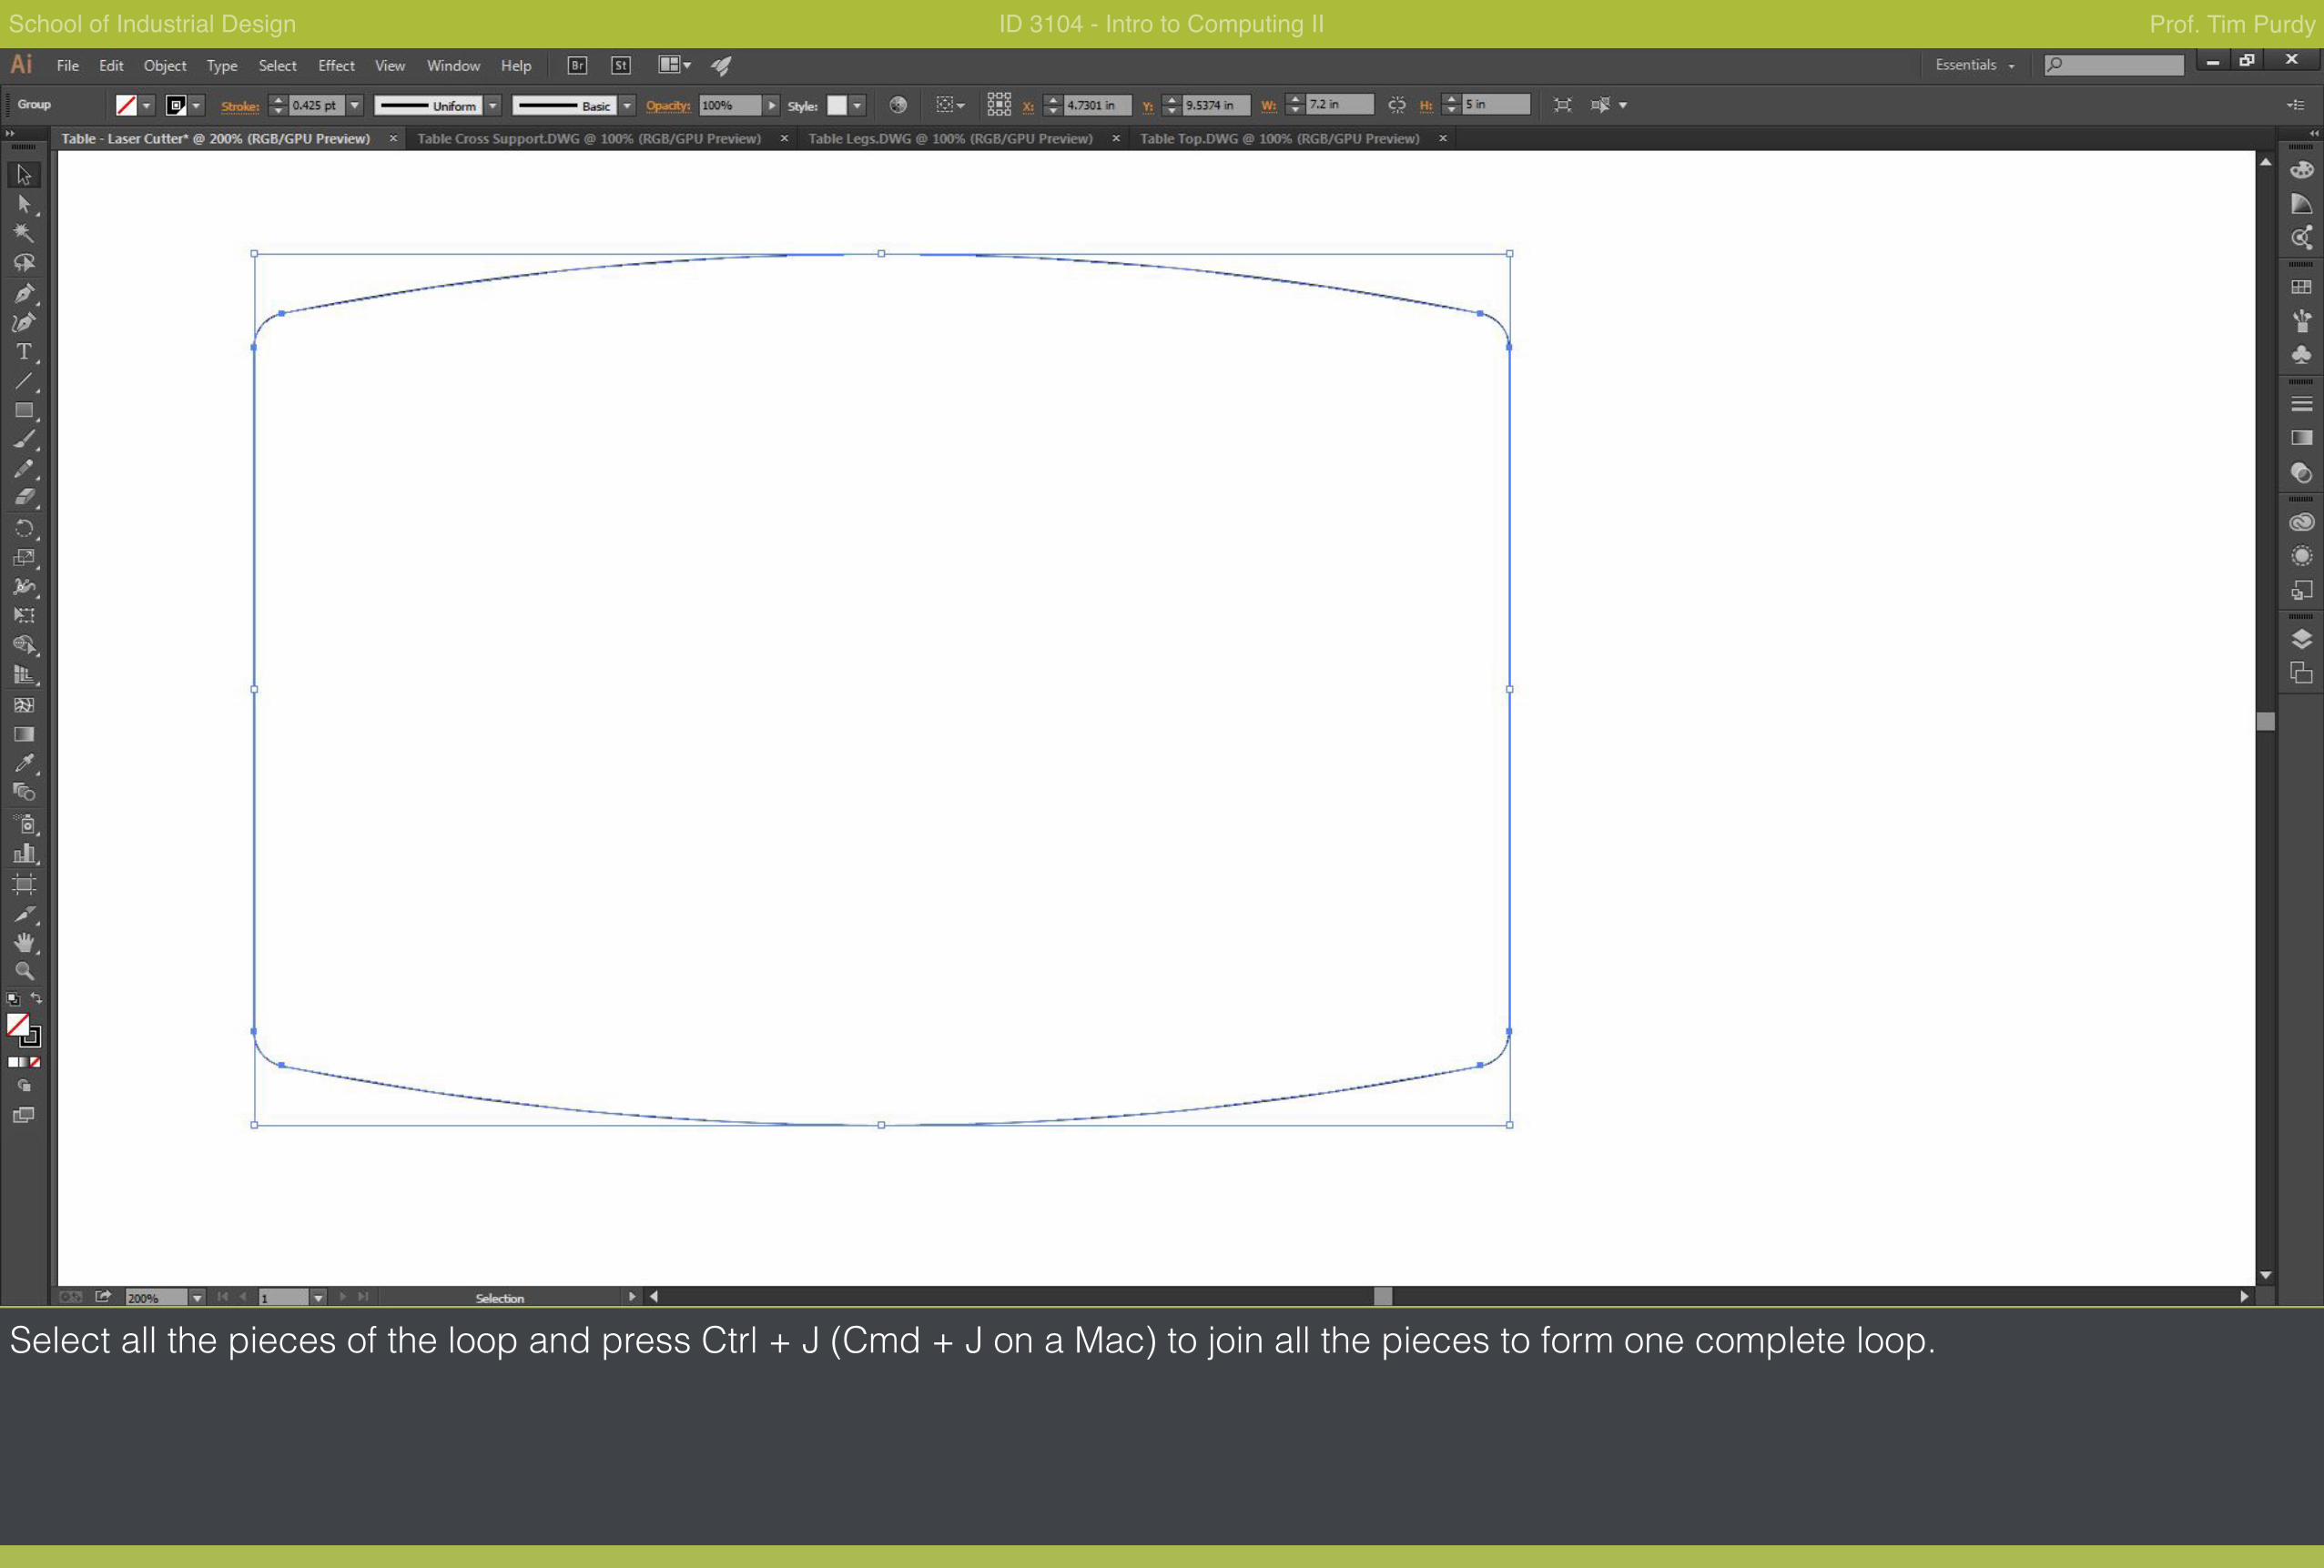
Select all the pieces of the loop and press Ctrl + J (Cmd + J on a Mac) to join all the pieces to form one complete loop.
School of Industrial Design ID 3104 - Intro to Computing II Prof. Tim Purdy
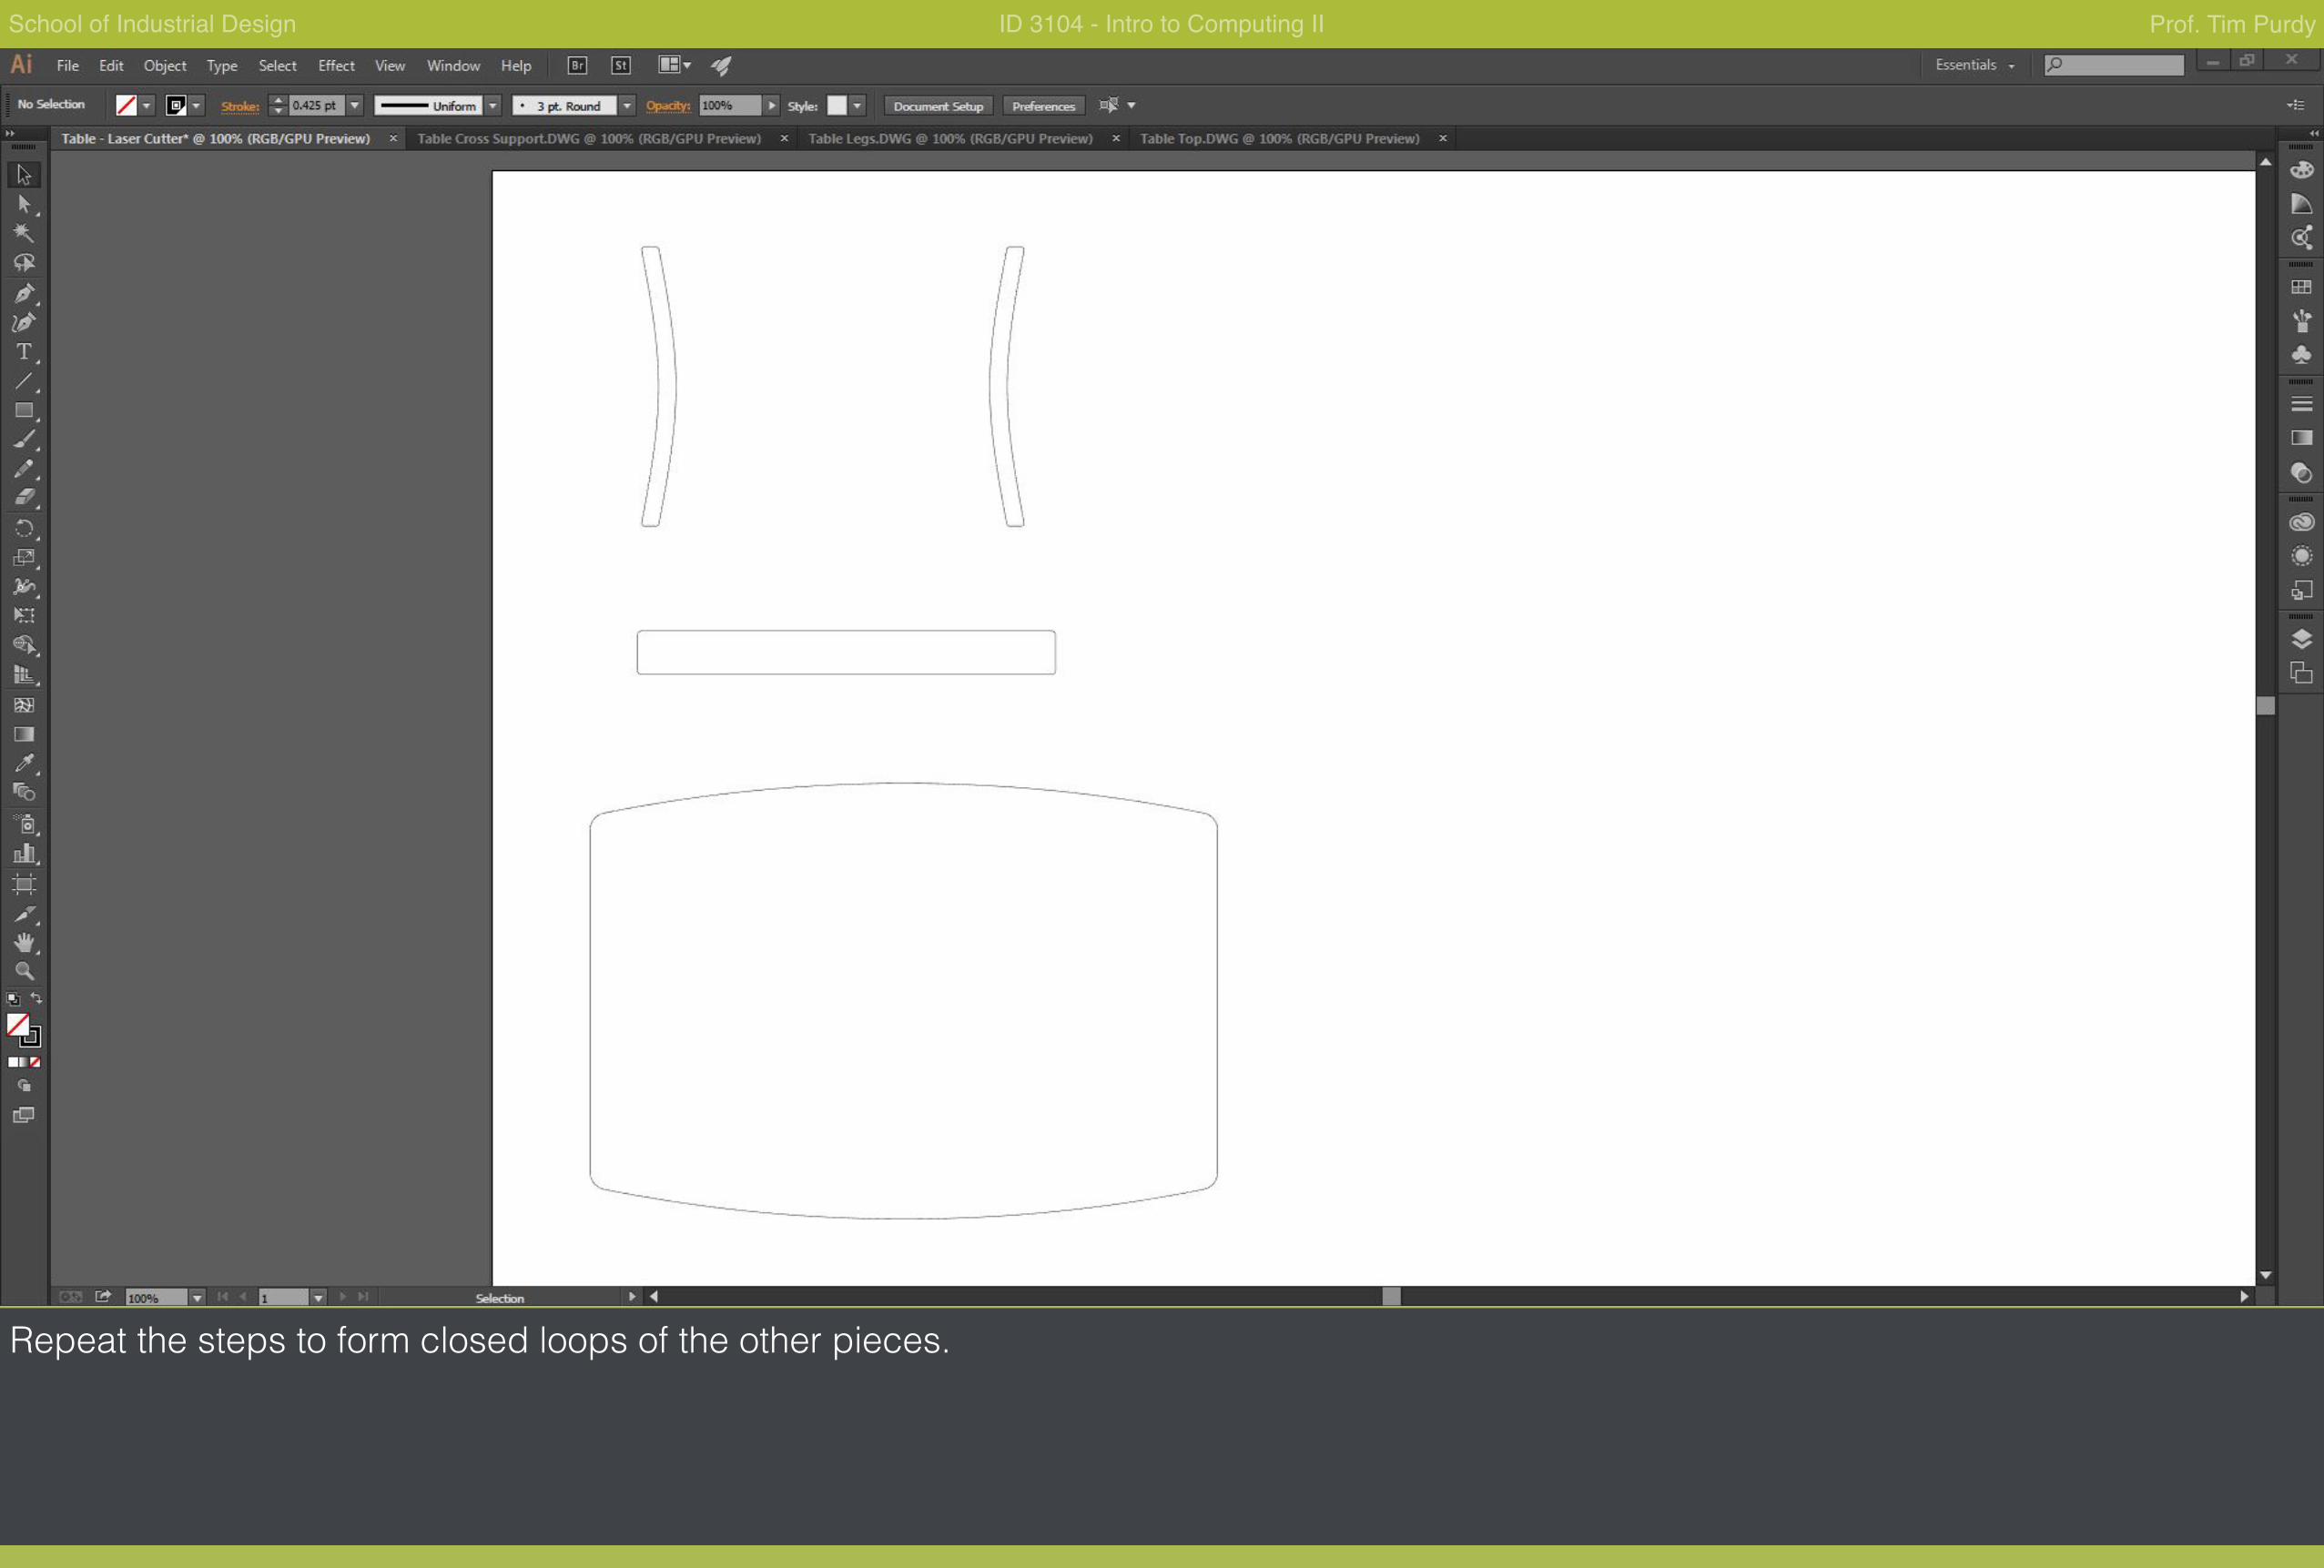
Repeat the steps to form closed loops of the other pieces.

School of Industrial Design ID 3104 - Intro to Computing II Prof. Tim Purdy
Make copies and lay it out to fit the area of the material you will be using to cut.
School of Industrial Design ID 3104 - Intro to Computing II Prof. Tim Purdy
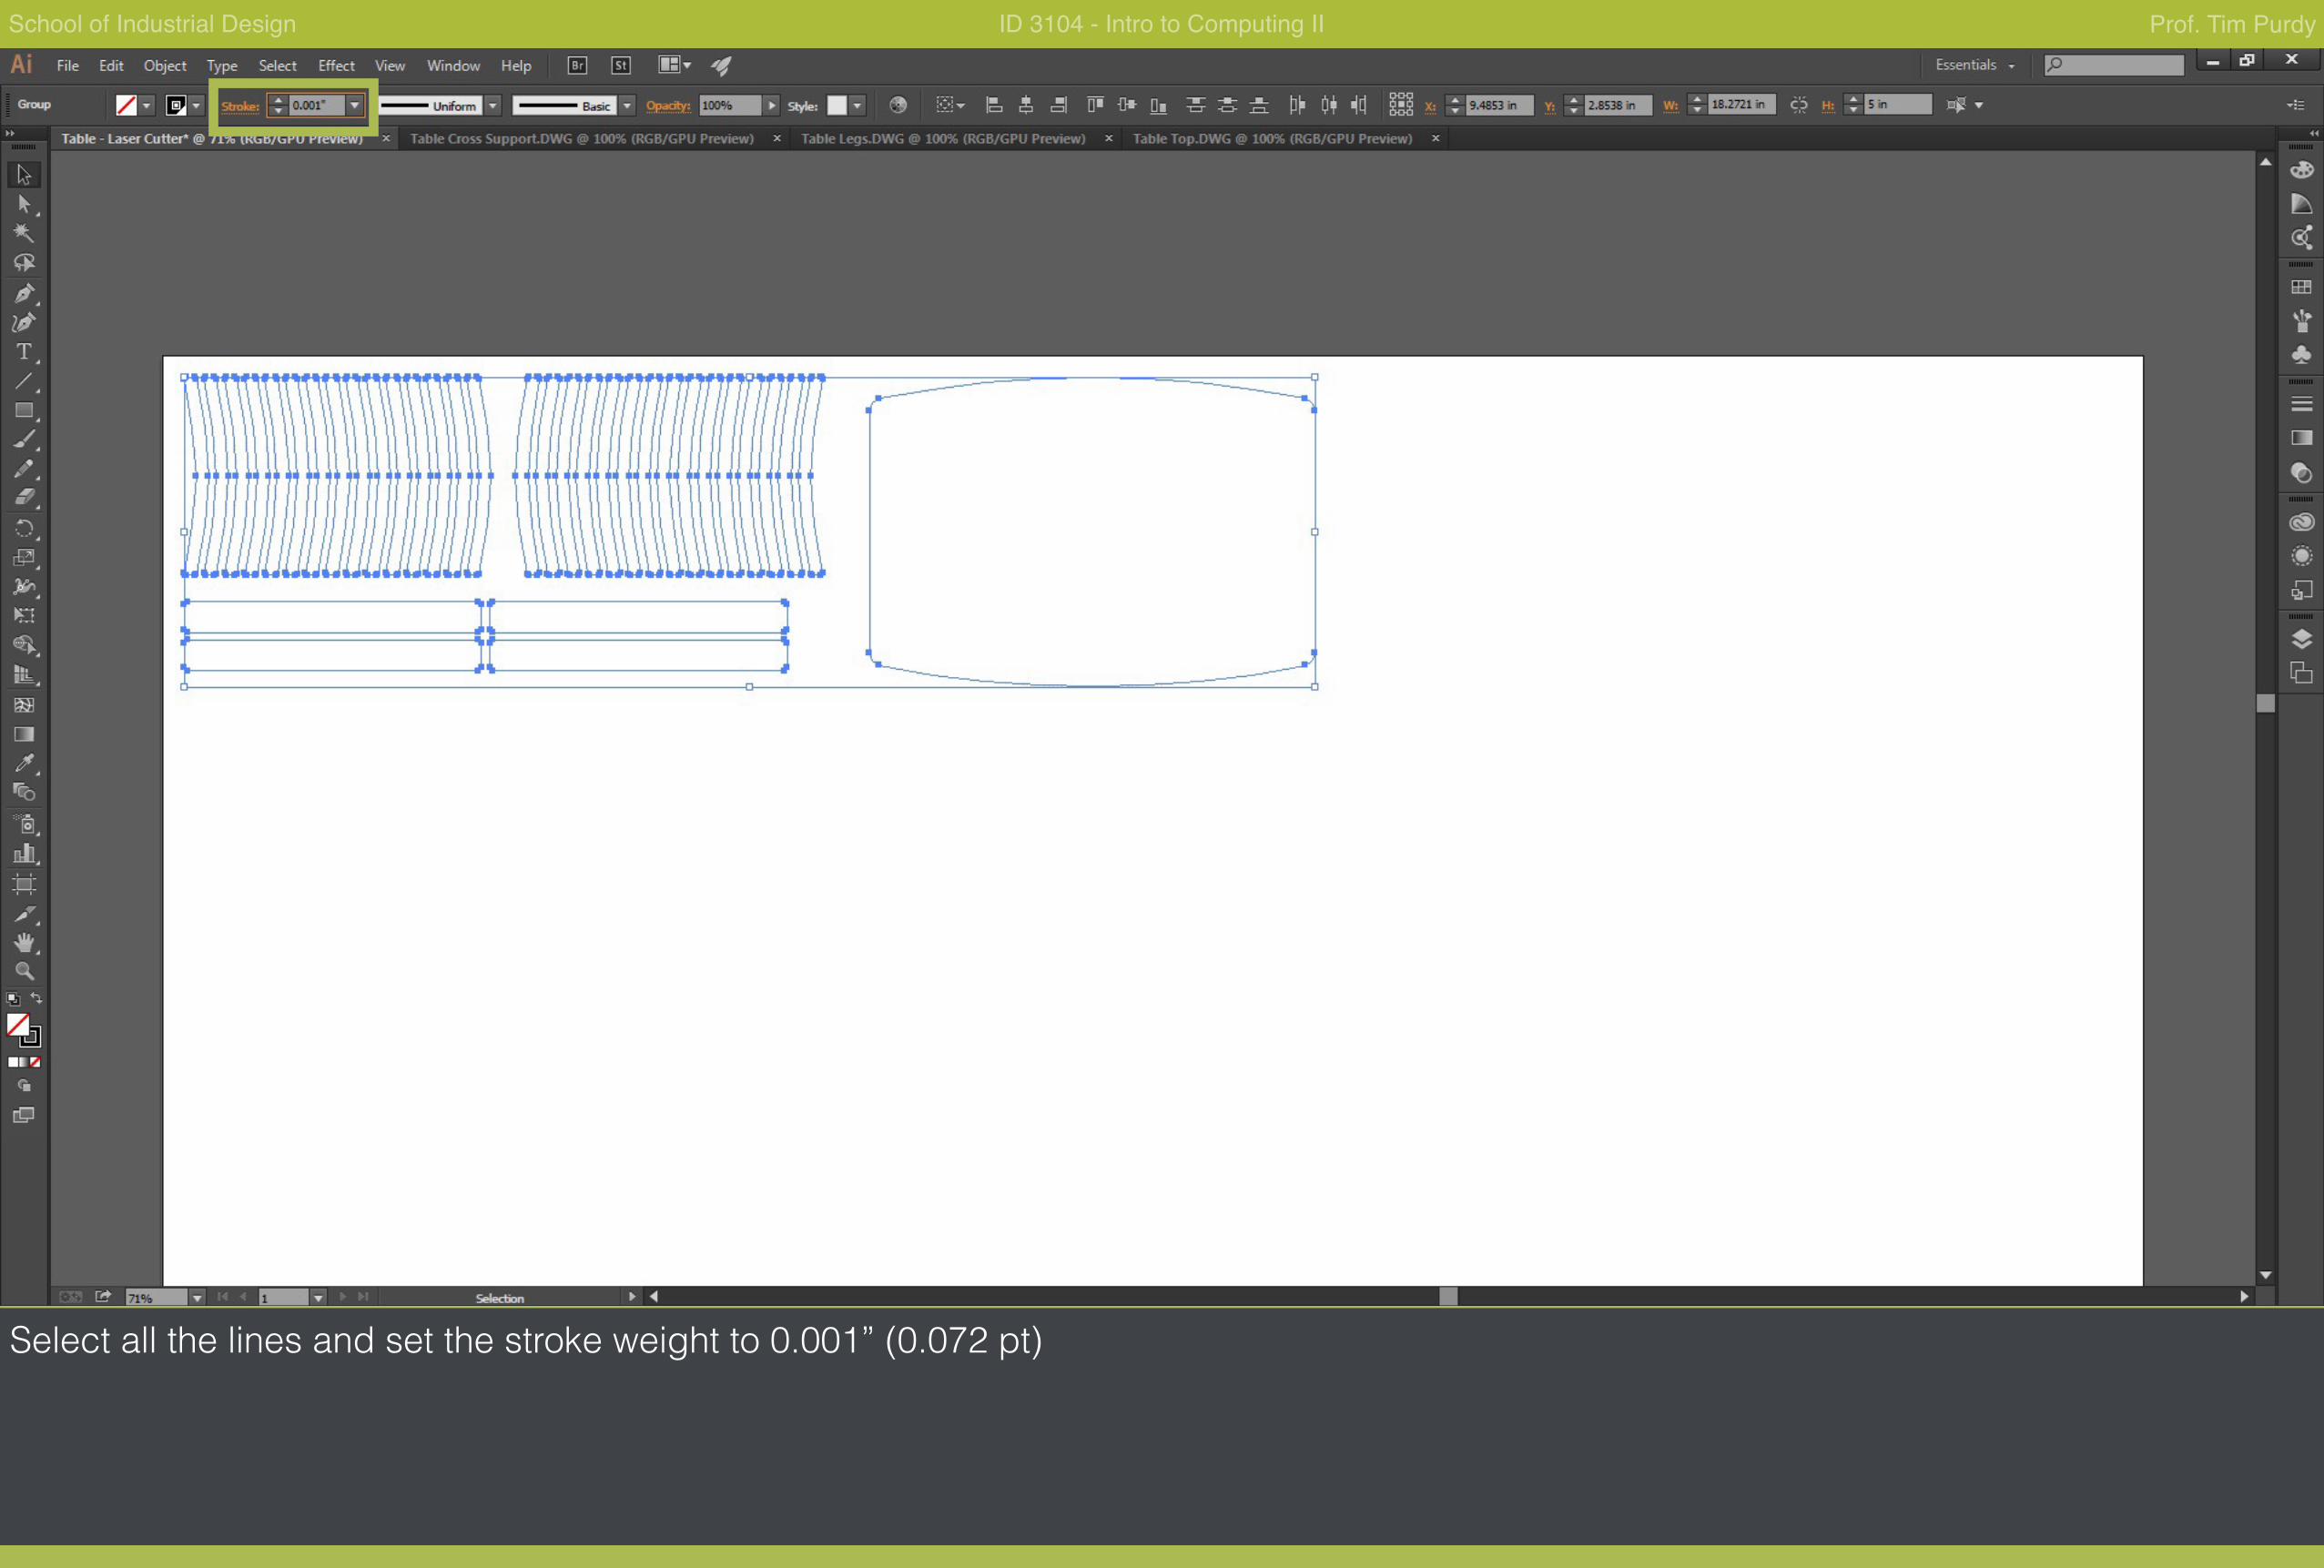
Select all the lines and set the stroke weight to 0.001” (0.072 pt)
School of Industrial Design ID 3104 - Intro to Computing II Prof. Tim Purdy
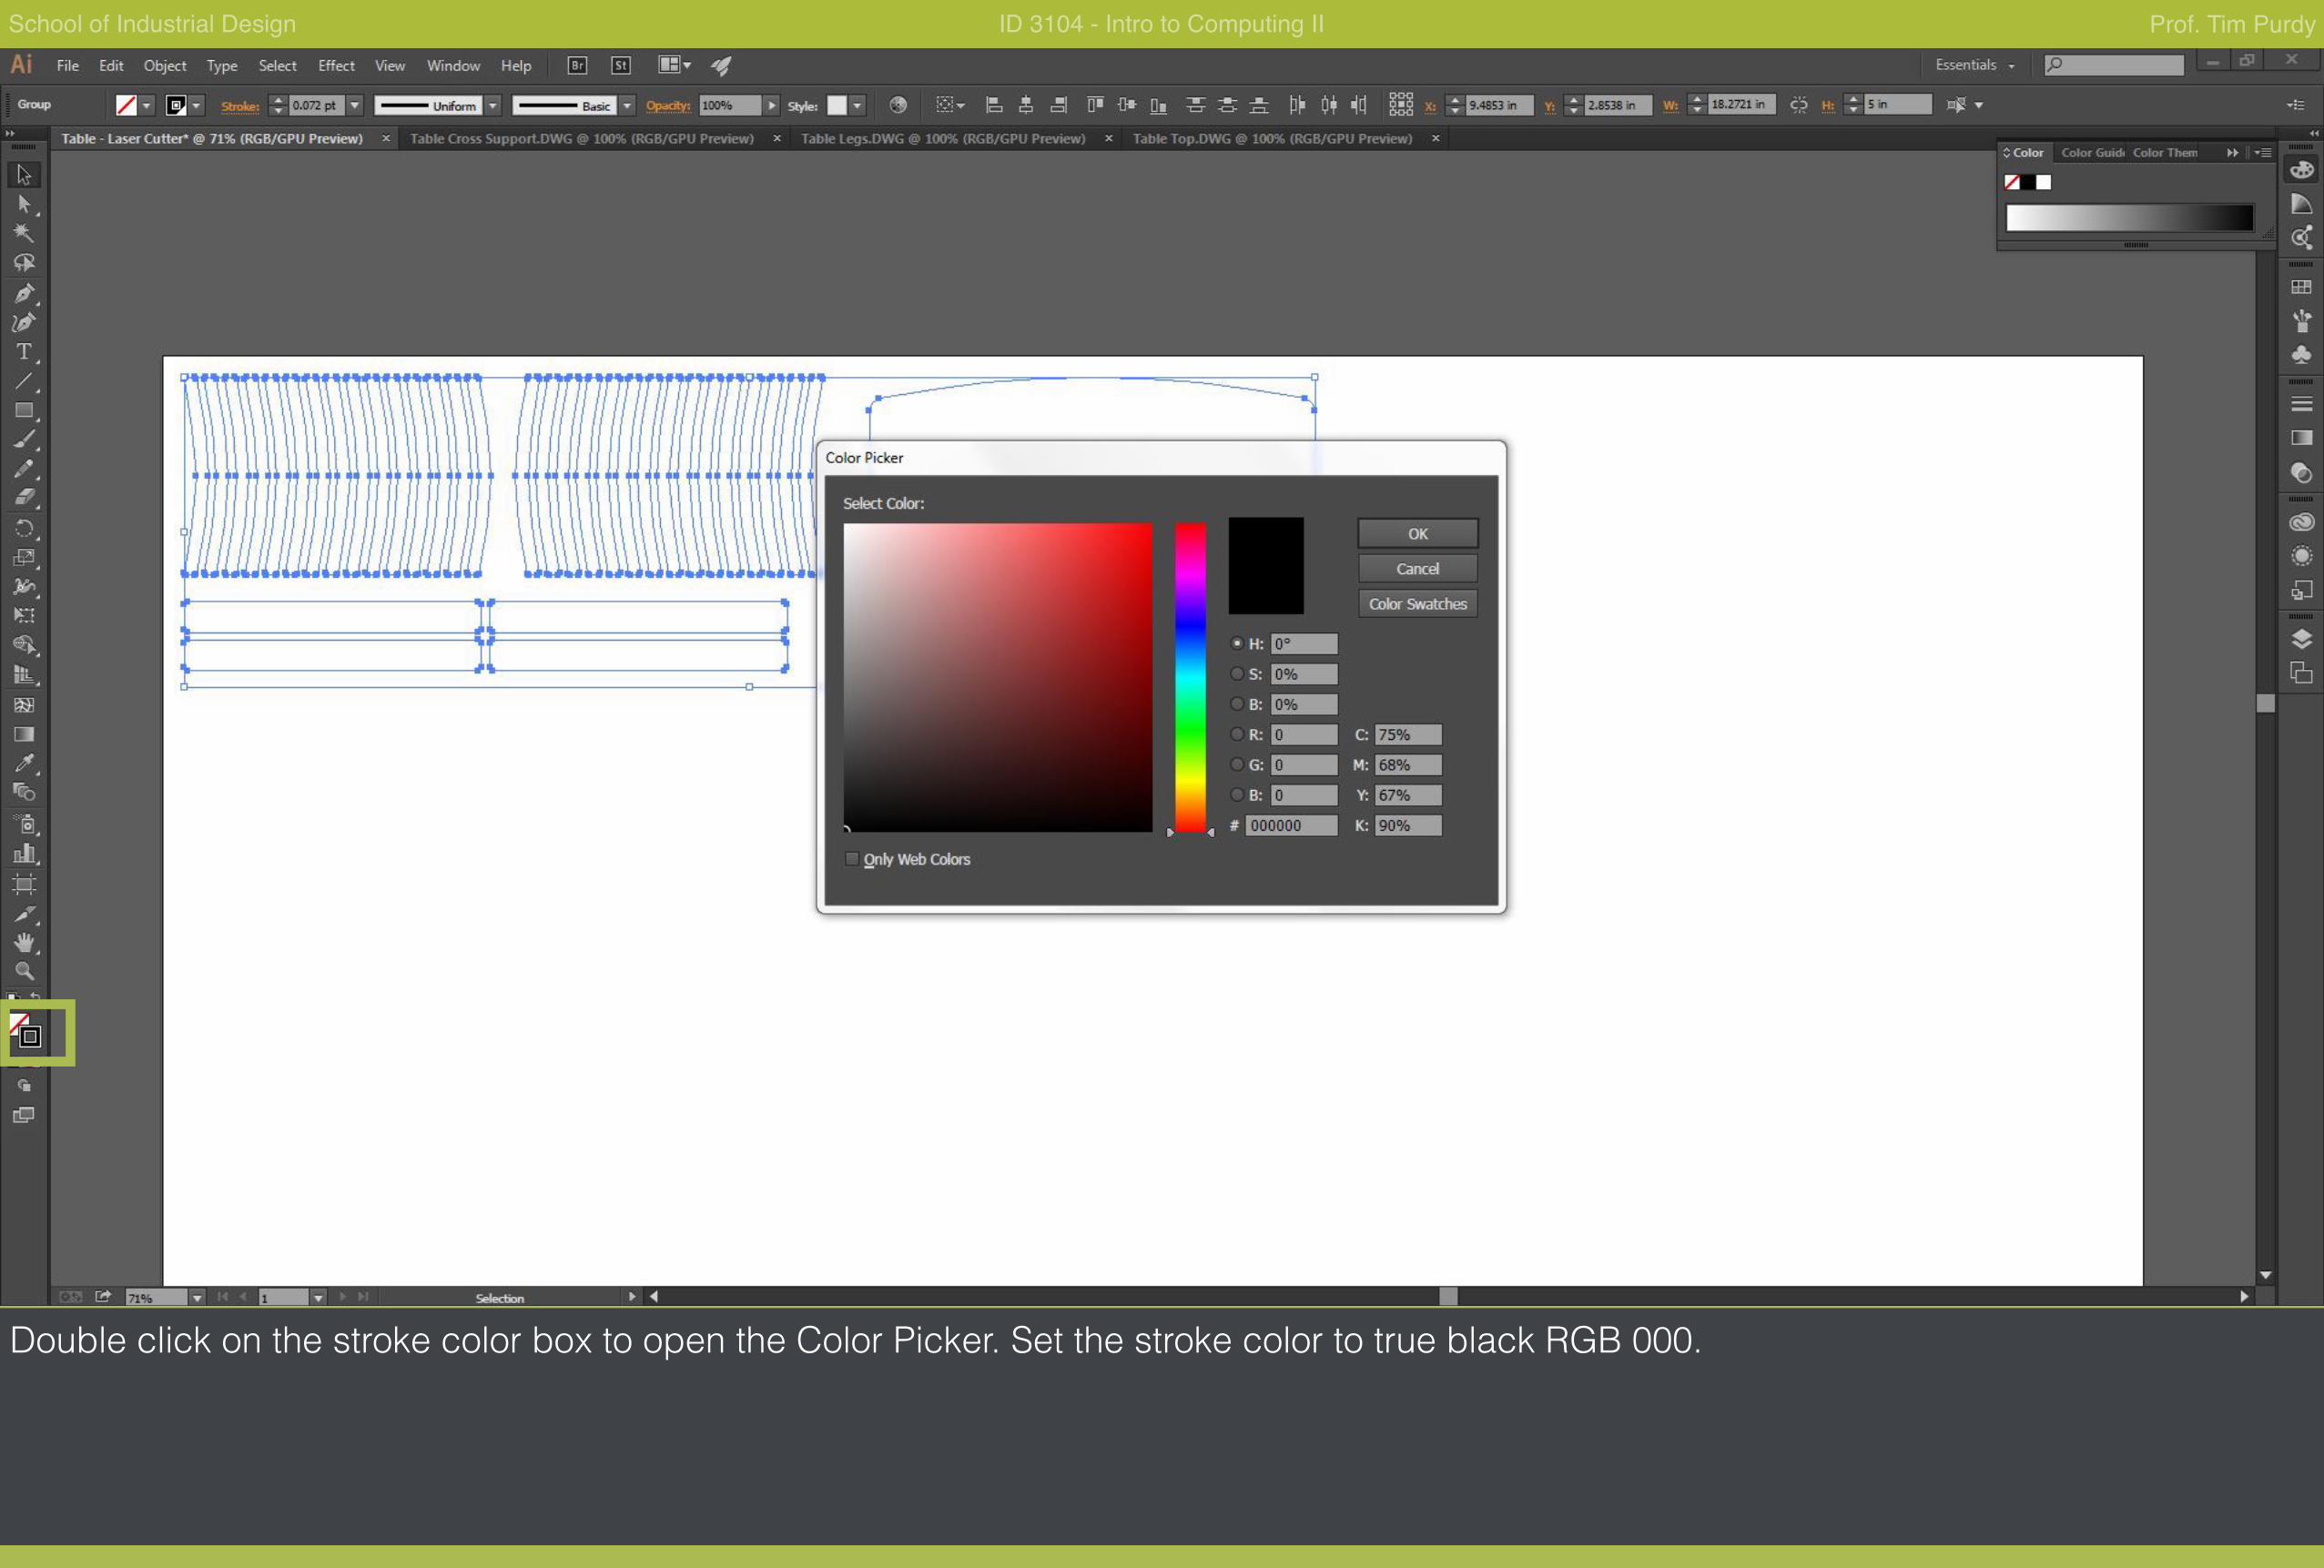
Double click on the stroke color box to open the Color Picker. Set the stroke color to true black RGB 000.
School of Industrial Design ID 3104 - Intro to Computing II Prof. Tim Purdy
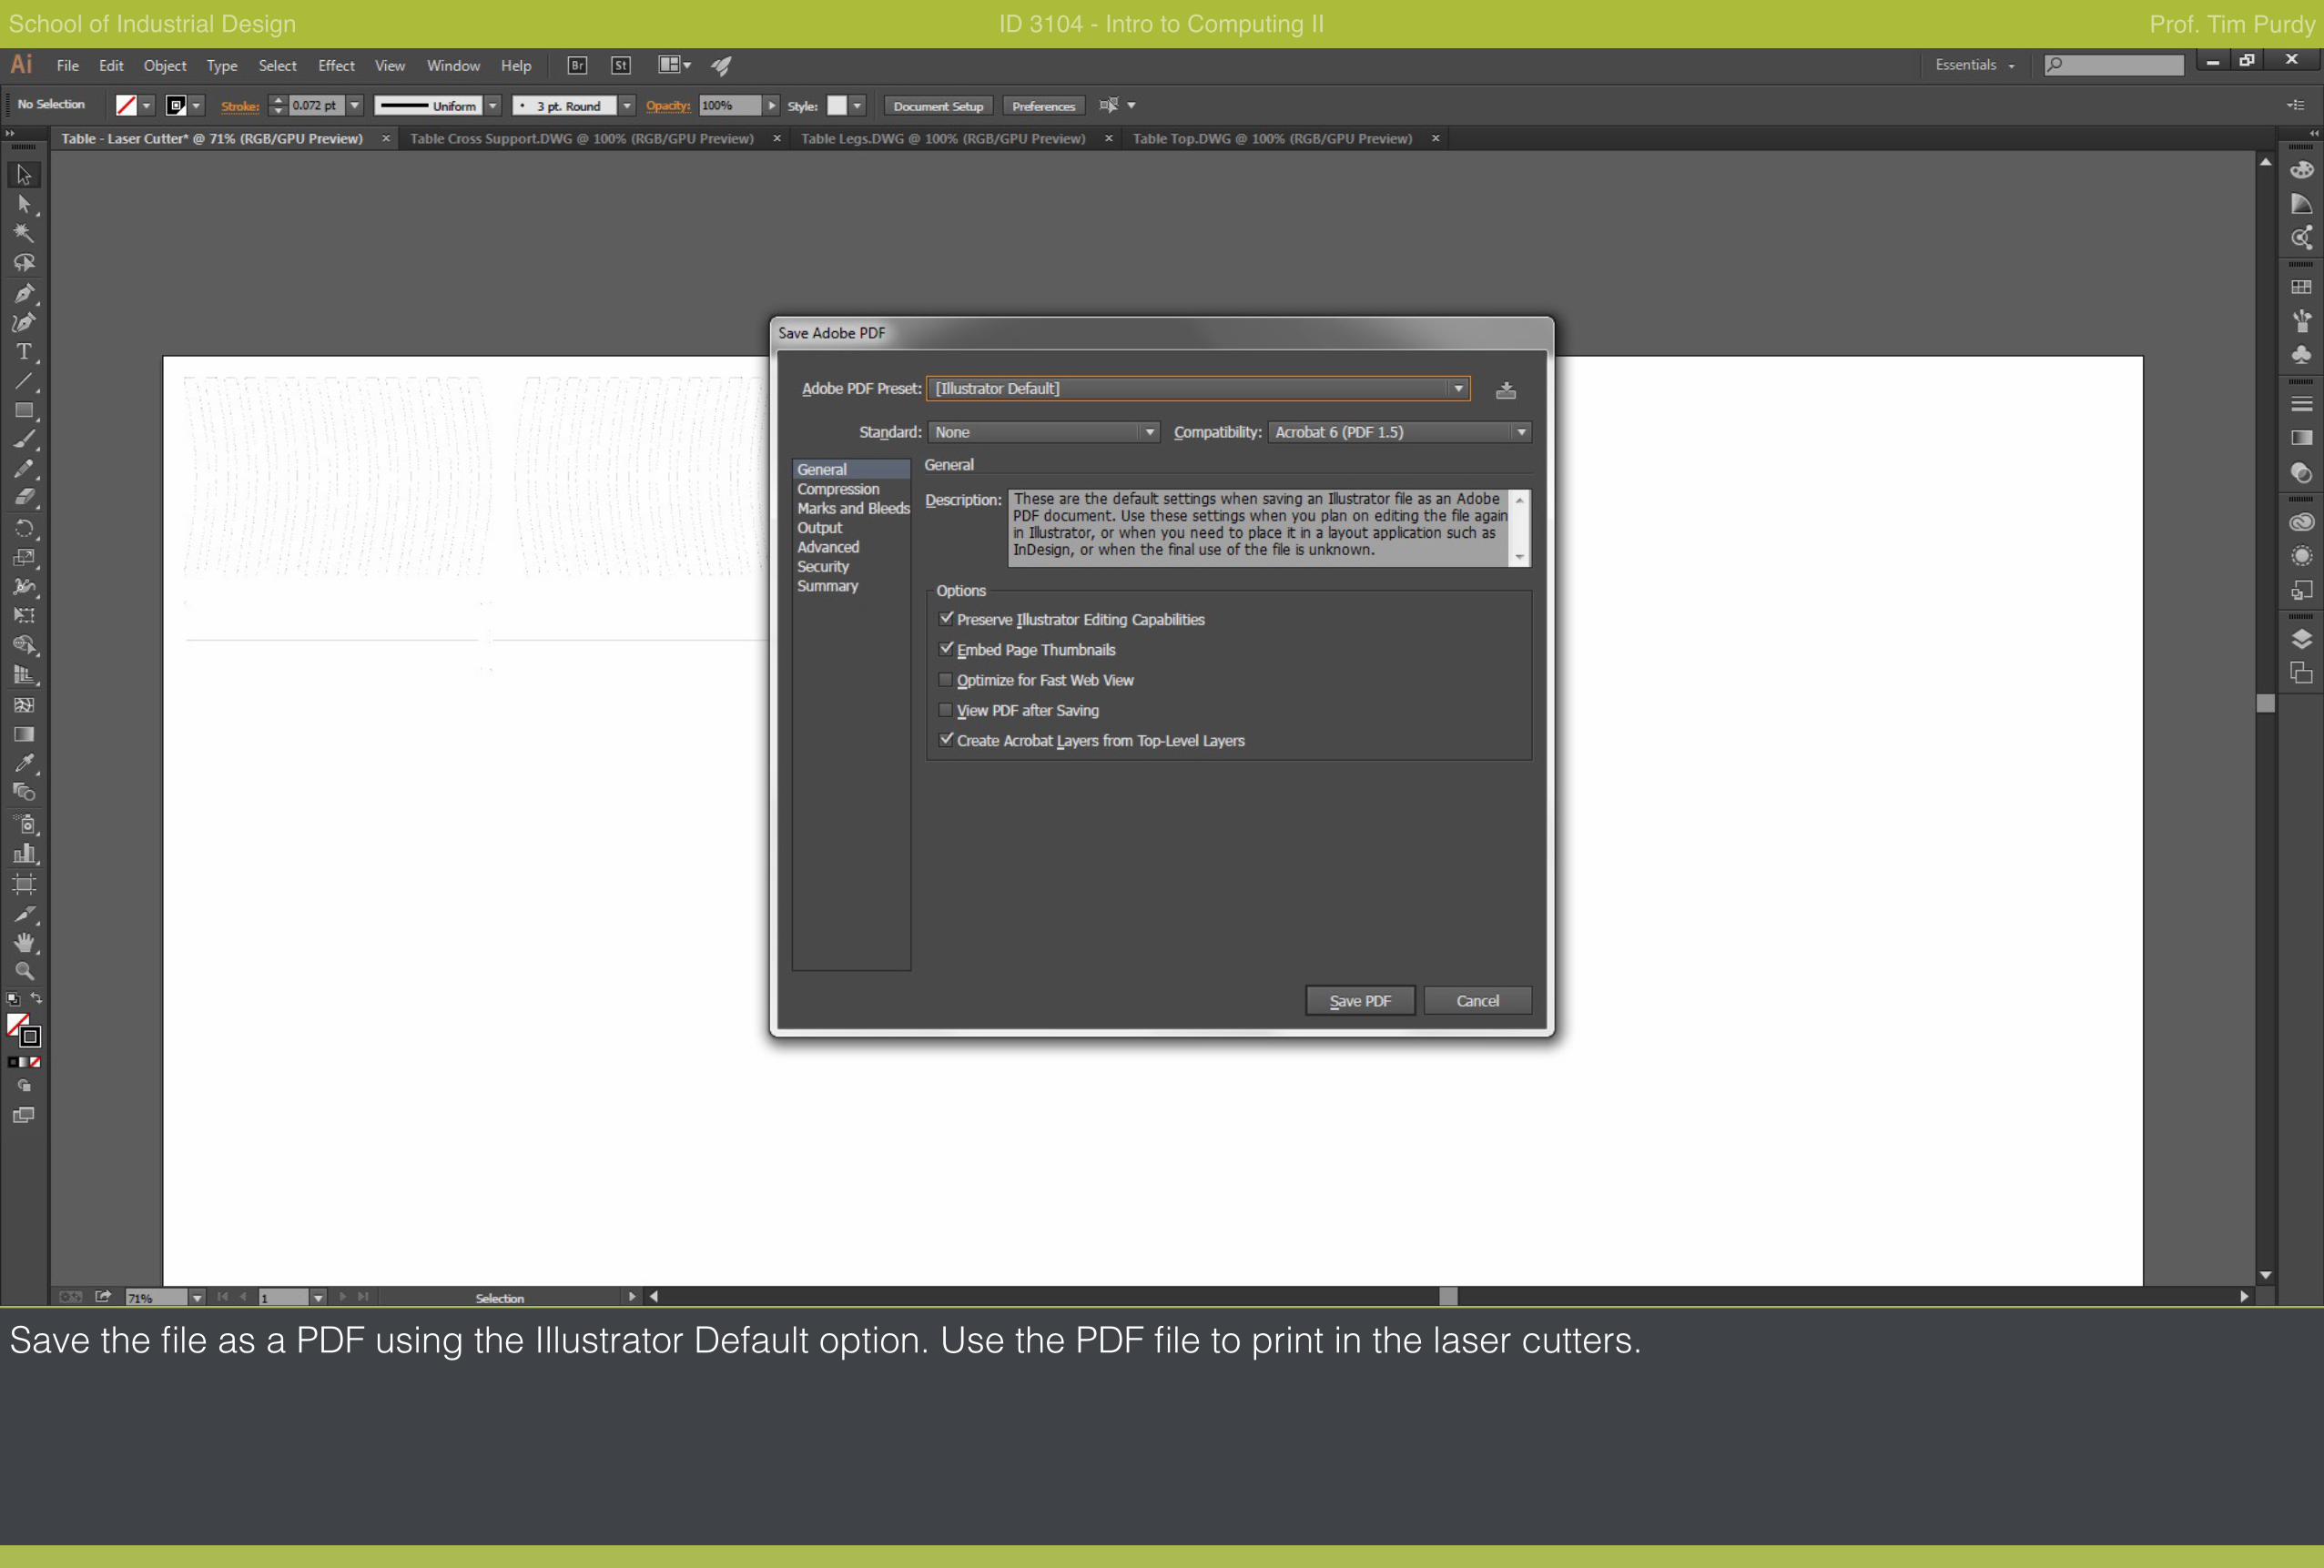
Save the file as a PDF using the Illustrator Default option. Use the PDF file to print in the laser cutters.
Related Documents


![QL EditorQL Editor - Yamaha · Mixer Setup (configuración del mezclador) Para abrir el cuadro de diálogo Mixer Setup, elija [Mixer Setup] en el menú [File]. 1Mix Bus Setup (configuración](https://static.cupdf.com/doc/110x72/603bd1cd42f2ba7e6b79a8cd/ql-editorql-editor-yamaha-mixer-setup-configuracin-del-mezclador-para-abrir.jpg)


