Kit Contents Hardware Bag Contents Additional Items Required For Installation Recommended Tools Safety Tools Special Tools INSTALLATION TOOLS Special Chemicals General Applicability Recommended Sequence of Application Item # Accessory Item # Qty Description 1 3 Red T-Tap Terminal 2 12 8" Black Cable Ties 3 1 Foam Mounting Pad Phillip screwdriver Ratchet w/extension 10 mm socket Diagonal wire cutters Common pliers Flashlight Nylon trim tool Drill motor Item # Qty Description Item # Qty Description 1 1 Security Interface Module 2 1 Shock Sensor 3 1 Main Harness 4 1 Hardware Bag 5 2 Anti Theft Window Decals 6 1 Owner's Card Vehicle Service Parts (may be required for reassembly) Safety Glasses Fender Cover (s) P/N Qty Description 00016-47031-03 1 Interface Control Module 00016-30960-02 1 Shock Sensor Module 00016-47031-02 1 Hardware Bag 00016-30960-03 2 Window Warning Decal 00016-47031-01 1 Wire Harness Toyota Prius 2008 - Factory Alarm Interface Part Number: 00016-47031 Accessory Code: QS1 Prius with factory remote keyless entry only Southeast Toyota Distributors, LLC Page 1 of 9 Torque Wrench 53in lbs.

Welcome message from author
This document is posted to help you gain knowledge. Please leave a comment to let me know what you think about it! Share it to your friends and learn new things together.
Transcript
Kit Contents
Hardware Bag Contents
Additional Items Required For Installation
Recommended ToolsSafety Tools
Special Tools
INSTALLATION TOOLS
Special Chemicals
General Applicability
Recommended Sequence of ApplicationItem # Accessory
Item # Qty Description 1 3 Red T-Tap Terminal
2 12 8" Black Cable Ties3 1 Foam Mounting Pad
Phillip screwdriver Ratchet w/extension10 mm socket Diagonal wire cuttersCommon pliers FlashlightNylon trim tool Drill motor
Item # Qty Description
Item # Qty Description1 1 Security Interface Module2 1 Shock Sensor3 1 Main Harness4 1 Hardware Bag5 2 Anti Theft Window Decals6 1 Owner's Card Vehicle Service Parts (may be required for reassembly)
Safety GlassesFender Cover (s)
P/N Qty Description00016-47031-03 1 Interface Control Module00016-30960-02 1 Shock Sensor Module00016-47031-02 1 Hardware Bag00016-30960-03 2 Window Warning Decal00016-47031-01 1 Wire Harness
Toyota Prius 2008 - Factory Alarm Interface
Part Number: 00016-47031Accessory Code: QS1
Prius with factory remote keyless entry only
Southeast Toyota Distributors, LLC Page 1 of 9
Torque Wrench 53in lbs.
IUSTYFA
Stamp
IUSTYFA
Stamp
IUSTYFA
Stamp
IUSTYFA
Text Box
Document: 09.15.00 PIO / DIO 08/14/08
INSTALLATION PREPARATION
Before starting installation1. Familiarize yourself with the installation instructions.
2. Inspect kit components (Refer to kit contents and hardware bag contents).
VEHICLE PREPARATION
1. Place protective coverings on vehicle.
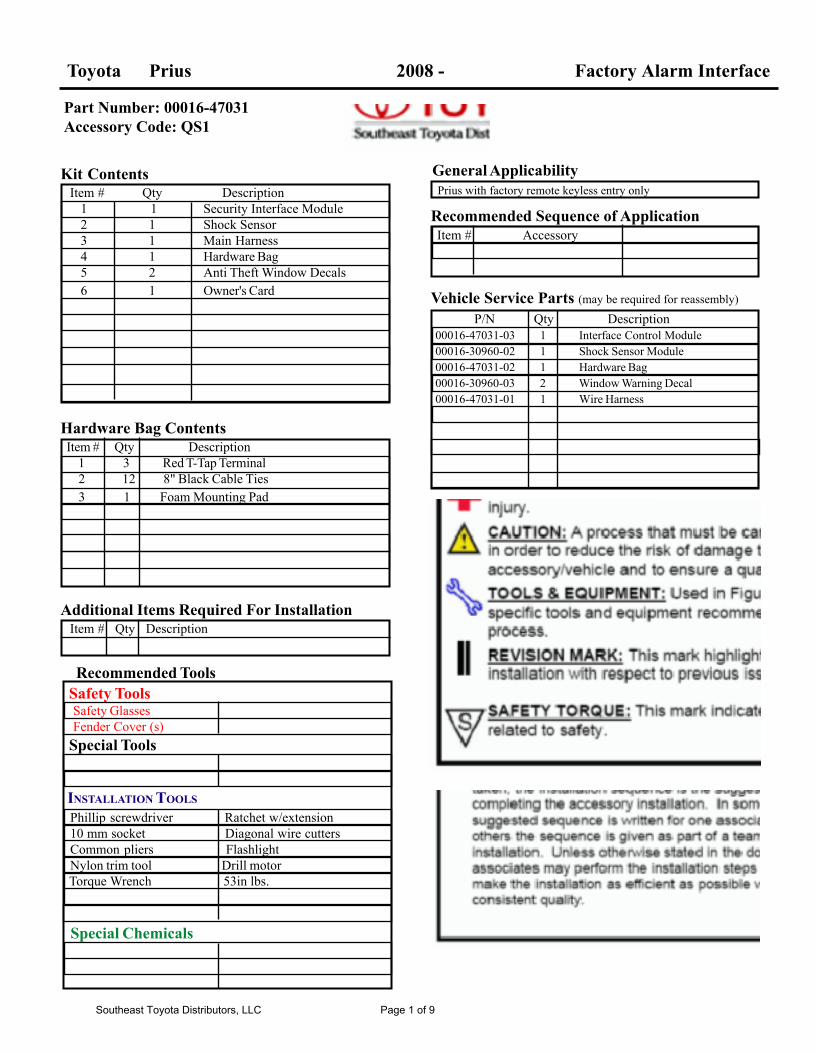
2. "IMPORTANT........IMPORTANT" Disconnect Negative Battery Cable
Negative Battery
3. Refer to the vehicle repair manual, and carefuly remove the driver's front sill panel, driver's front kick panel and driver's side lower finish panel.
PREPARING FOR INSTALLATION
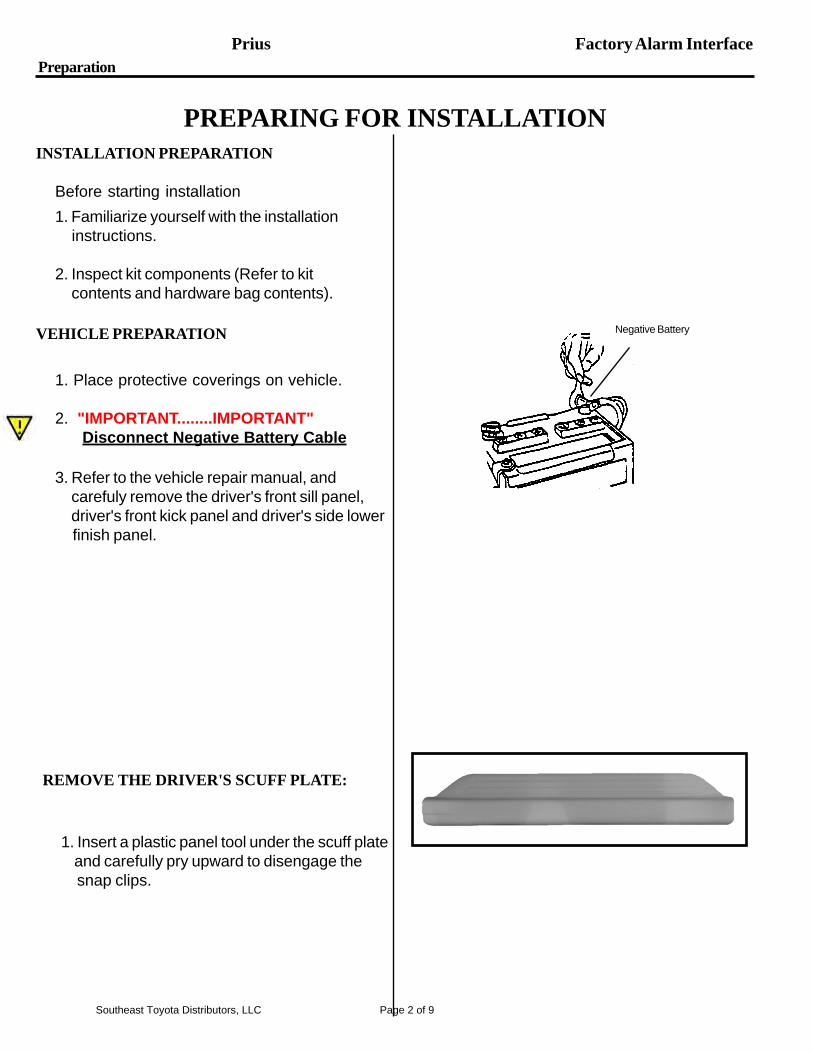
REMOVE THE DRIVER'S SCUFF PLATE:
1. Insert a plastic panel tool under the scuff plate and carefully pry upward to disengage the snap clips.
Prius Factory Alarm InterfacePreparation
Southeast Toyota Distributors, LLC Page 2 of 9
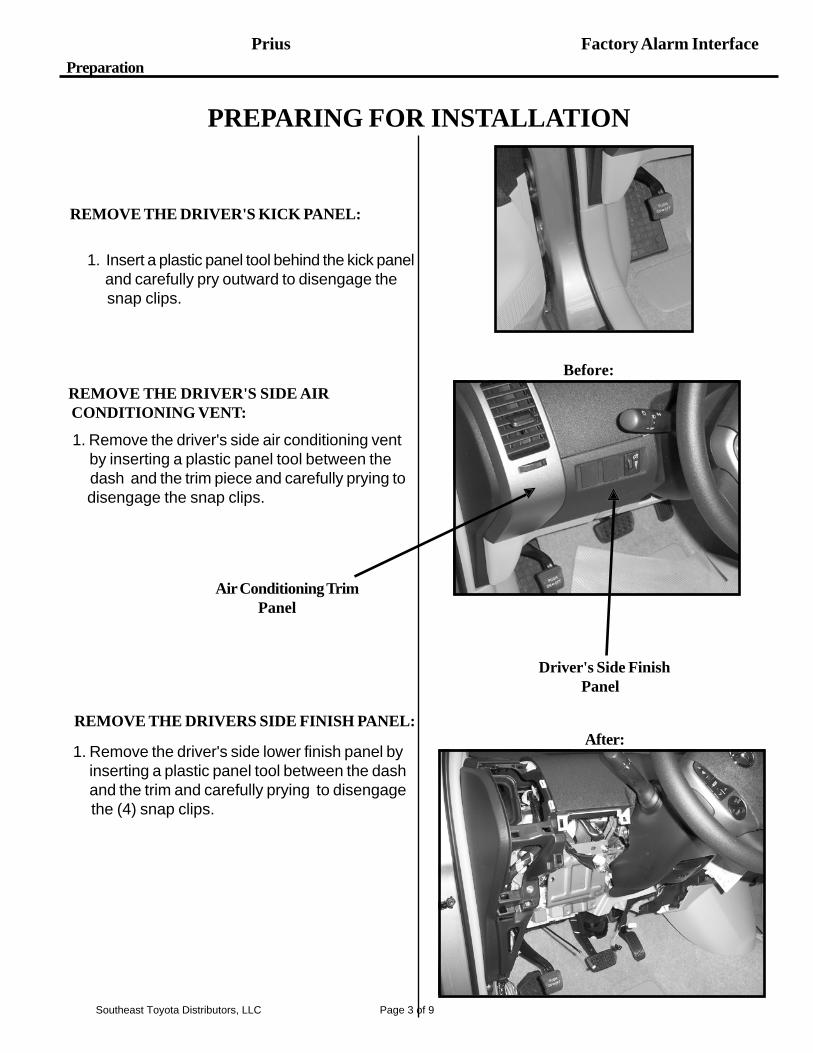
1. Remove the driver's side air conditioning vent by inserting a plastic panel tool between the dash and the trim piece and carefully prying to
disengage the snap clips.
1. Remove the driver's side lower finish panel by inserting a plastic panel tool between the dash and the trim and carefully prying to disengage the (4) snap clips.
REMOVE THE DRIVERS SIDE FINISH PANEL:
1. Insert a plastic panel tool behind the kick panel and carefully pry outward to disengage the snap clips.
PREPARING FOR INSTALLATION
REMOVE THE DRIVER'S KICK PANEL:
REMOVE THE DRIVER'S SIDE AIR CONDITIONING VENT:
Air Conditioning Trim Panel
Driver's Side Finish Panel
Before:
After:
Prius Factory Alarm InterfacePreparation
Southeast Toyota Distributors, LLC Page 3 of 9

INSTALLING THE ALARM INTERFACE
1. remove the (3) 10 mm bolts securing the large metal brace, located behind the finish panel.
PREPARING FOR INSTALLATION
REMOVE THE METAL BRACE BEHIND THEFINISH PANEL:
10mmBolts x 3
1. At the main body ECU, Locate the 1O connector.
2. Install (1) red T-Tap on the RED (Pin 5) wire.
3. Connect the shock sensor harness RED/WHITE wire to the RED (Pin 5) wire in the 1O connector.
INSTALLING MAI
Prius Factory Alarm Interface
Connector 1O
Installation
Southeast Toyota Distributors, LLC Page 4 of 9
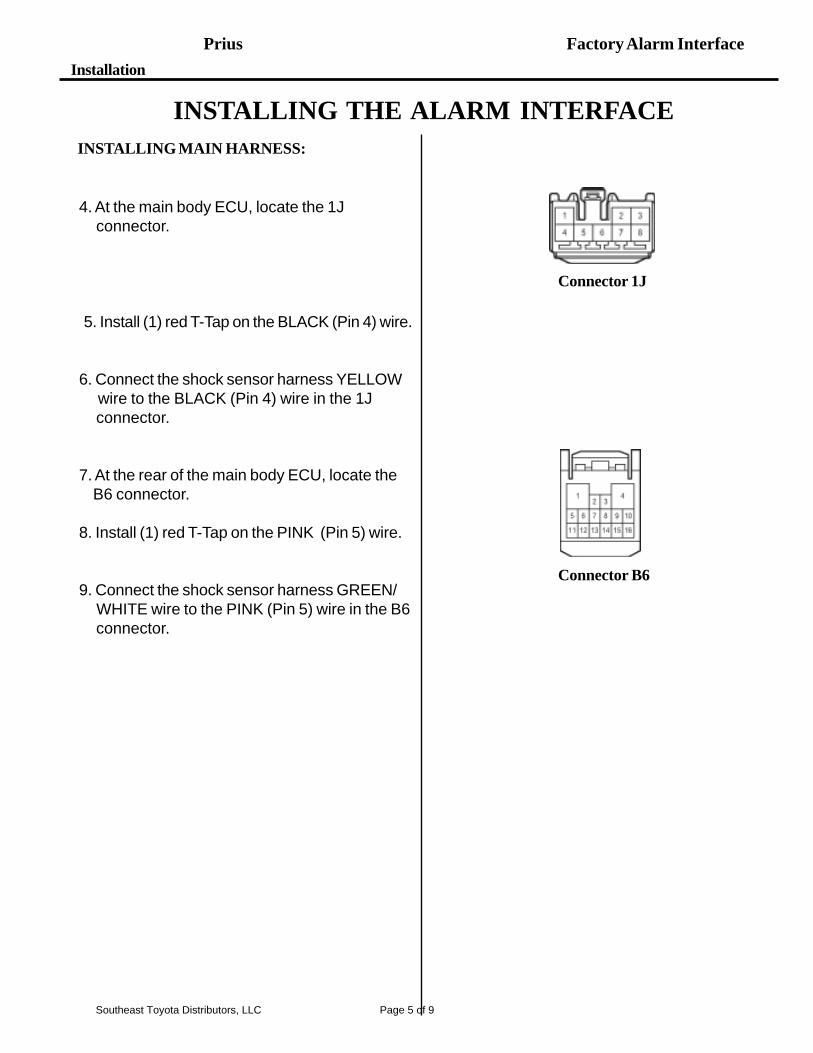
4. At the main body ECU, locate the 1J connector.
5. Install (1) red T-Tap on the BLACK (Pin 4) wire.
6. Connect the shock sensor harness YELLOW wire to the BLACK (Pin 4) wire in the 1J connector.
7. At the rear of the main body ECU, locate the B6 connector.
8. Install (1) red T-Tap on the PINK (Pin 5) wire.
9. Connect the shock sensor harness GREEN/ WHITE wire to the PINK (Pin 5) wire in the B6 connector.
Prius Factory Alarm Interface
Connector 1J
Connector B6
INSTALLING MAIN HARNESS:
INSTALLING THE ALARM INTERFACE
Installation
Southeast Toyota Distributors, LLC Page 5 of 9

INSTALLING ALARM INTERFACE RELAY:
1. Plug in 10 way Molex connector from the main harness into the Alarm Interface Relay.
2. Secure Alarm Interface Relay to factory harness running behind the driver's side air conditioning vent using (2) wire ties.
INSTALLING THE ALARM INTERFACE
SECURE ALARM INTERFACE GROUNDCONNECTION:
1. Reassemble the large metal brace to the left of the steering wheel.
2. Attach the alarm interface ground ring to the upper right hand nut securing the metal brace.
Ground Terminal
Prius Factory Alarm Interface
INSTALLING THE SHOCK SENSOR:
1. Secure shock sensor to wire loom running near the firewall, to the left of the brake pedal with (2) wire ties.
2. Plug in 4 cavity Molex connector from the main harness into the rear of the shock sensor.
Installation
Southeast Toyota Distributors, LLC Page 6 of 9
WIR
ING
DIA
GR
AM
Prius Factory Alarm Interface
AlarmInterface
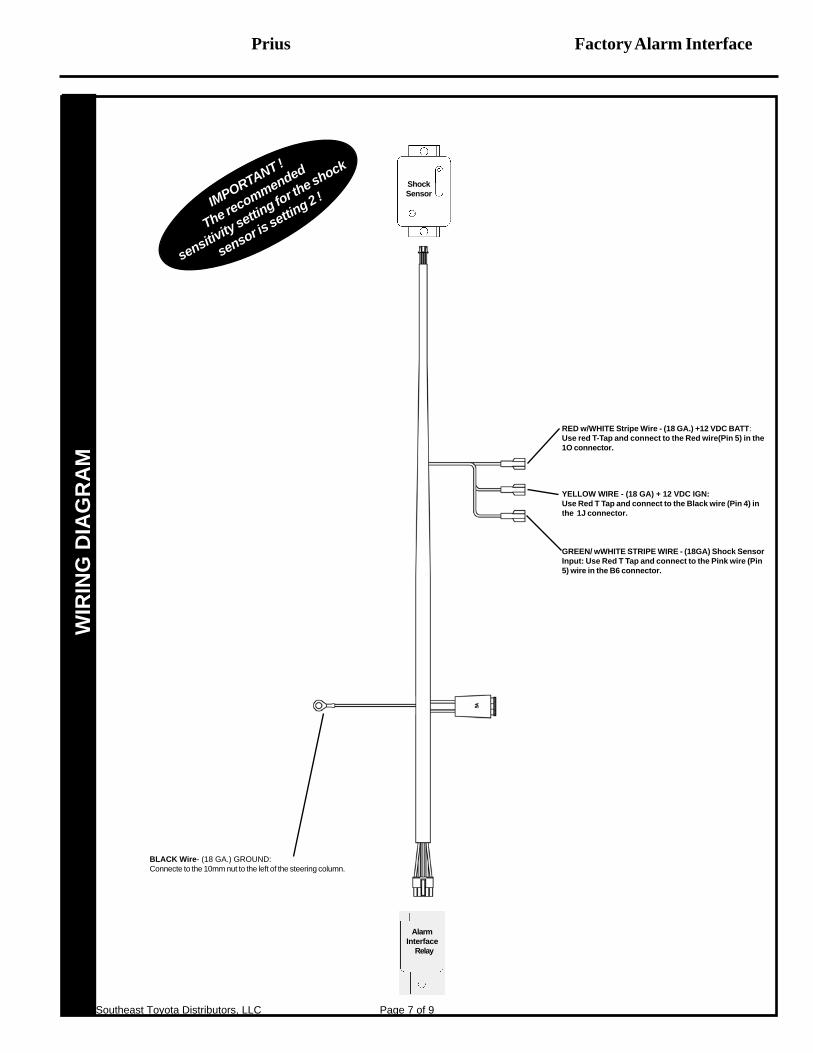
BLACK Wire- (18 GA.) GROUND:Connecte to the 10mm nut to the left of the steering column.
ShockSensor
IMPORTANT !
The recommended
sensitivity settin
g for the shock
sensor is settin
g 2 !
RED w/WHITE Stripe Wire - (18 GA.) +12 VDC BATT:Use red T-Tap and connect to the Red wire(Pin 5) in the1O connector.
YELLOW WIRE - (18 GA) + 12 VDC IGN:Use Red T Tap and connect to the Black wire (Pin 4) inthe 1J connector.
GREEN/ wWHITE STRIPE WIRE - (18GA) Shock SensorInput: Use Red T Tap and connect to the Pink wire (Pin5) wire in the B6 connector.
Relay
Southeast Toyota Distributors, LLC Page 7 of 9

1. Main Body ECU
Location : Left of steering column
ALARM CARGreen/White PinkRed/White RedYellow Black
Location 5Pink Wire
Shock Sensor Input
Location 4Black Wire
Ignition
Location 5Red Wire
Constant 12v +
Prius
Southeast Toyota Distributors, LLC Page 8 of 9
COMPLETING THE INSTALLATION
Prius Factory Alarm Interface
ACTIVATING THE SYSTEM:
1. For vehicle's that have the factory security option turned off, use the TIS TechStream tool to activatethe security option. You can find this in......
-CUSTOMIZE--OPTION SETUP--DOP SECURITY--ON-
ASSEMBLE ALL REMOVED PANELS TO THE VEHICLE :
1. Refer again to the vehicle repair manual and re assemble all panels that were removed for installationback onto the vehicle.
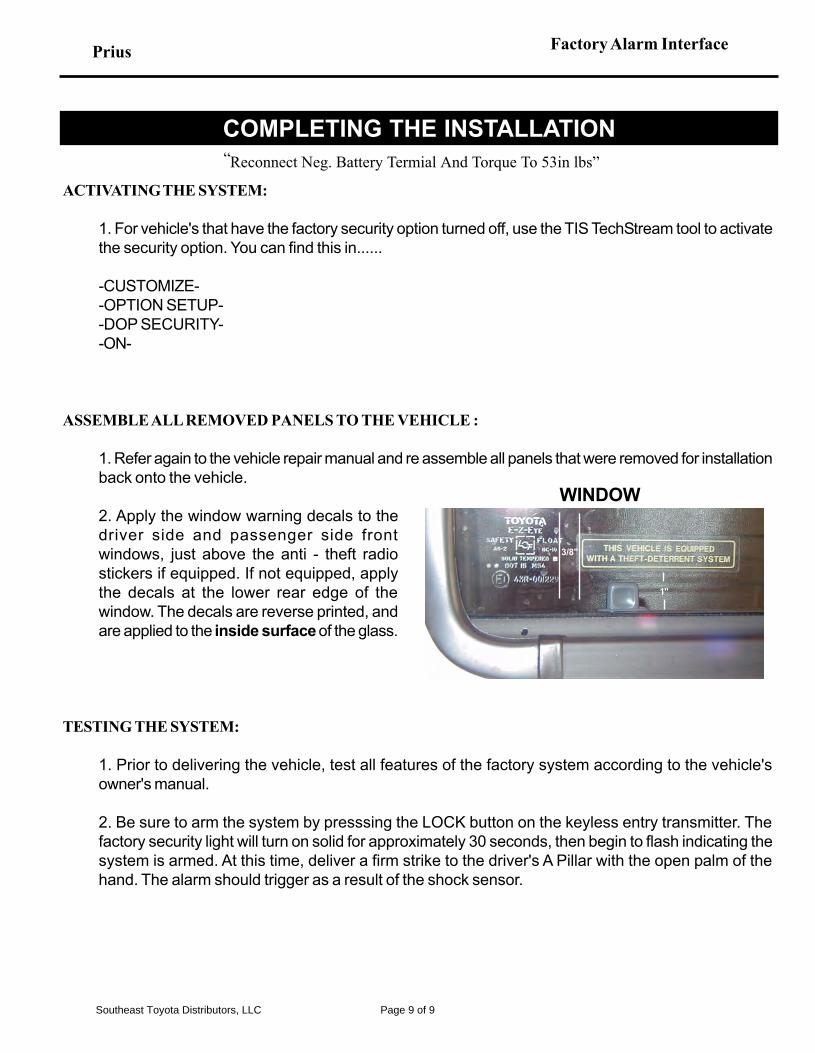
2. Apply the window warning decals to thedriver side and passenger side frontwindows, just above the anti - theft radiostickers if equipped. If not equipped, applythe decals at the lower rear edge of thewindow. The decals are reverse printed, andare applied to the inside surface of the glass.
TESTING THE SYSTEM:
1. Prior to delivering the vehicle, test all features of the factory system according to the vehicle'sowner's manual.
2. Be sure to arm the system by presssing the LOCK button on the keyless entry transmitter. Thefactory security light will turn on solid for approximately 30 seconds, then begin to flash indicating thesystem is armed. At this time, deliver a firm strike to the driver's A Pillar with the open palm of thehand. The alarm should trigger as a result of the shock sensor.
WINDOW
3/8"
1"
Reconnect Neg. Battery Termial And Torque To 53in lbs”“
Southeast Toyota Distributors, LLC Page 9 of 9
Related Documents