Tool Development Chapter 01: Introduction to Tool Development Nick Prühs

Welcome message from author
This document is posted to help you gain knowledge. Please leave a comment to let me know what you think about it! Share it to your friends and learn new things together.
Transcript
Tool DevelopmentChapter 01: Introduction to Tool Development
Nick Prühs
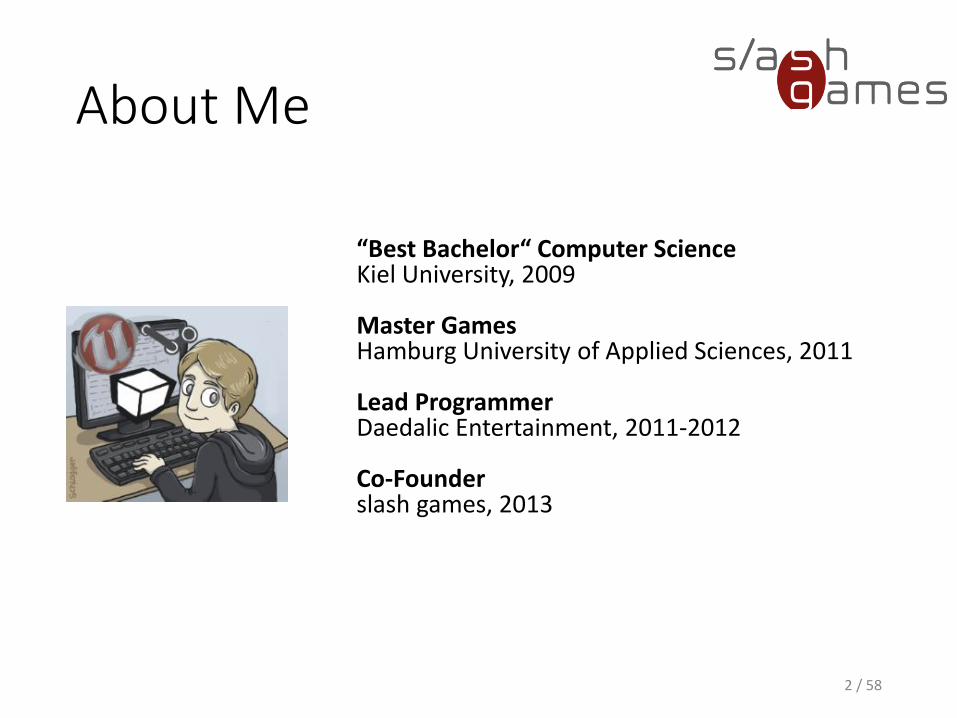
About Me
“Best Bachelor“ Computer ScienceKiel University, 2009
Master GamesHamburg University of Applied Sciences, 2011
Lead ProgrammerDaedalic Entertainment, 2011-2012
Co-Founderslash games, 2013
2 / 58

First Things First
• At npruehs.de/teaching you‘ll always find• these slides
• solutions to all assignments
• Ask your questions – any time!
• Each lecture will close with• further reading
• an optional assignment
• Contact me any time at [email protected]!
3 / 58
Objectives
• To get an idea of the basic development process of good Desktop applications
• To understand the importance of good UI and UX design
• To learn how to development a basic Desktop application with Windows Presentation Foundation
4 / 58
Motivation
“You wouldn't use a screwdriver on a nail.”
5 / 60
Motivation
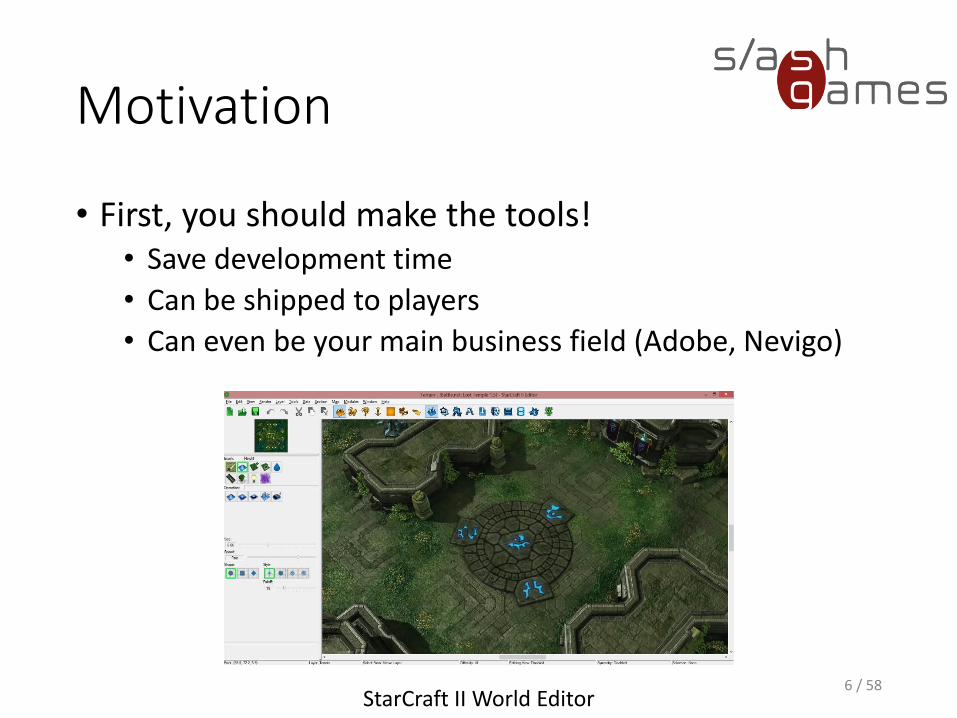
• First, you should make the tools!• Save development time
• Can be shipped to players
• Can even be your main business field (Adobe, Nevigo)
6 / 58StarCraft II World Editor
Motivation
• Highly workflow-dependent• Level Editor• Blueprint Editor
• Common Functionality• New• Load & Save• Selection & Inspector• Brush• Perspectives & Zoom• Copy & Paste & Cut• Undo & Redo• Settings• Test Run
7 / 58
Requirements
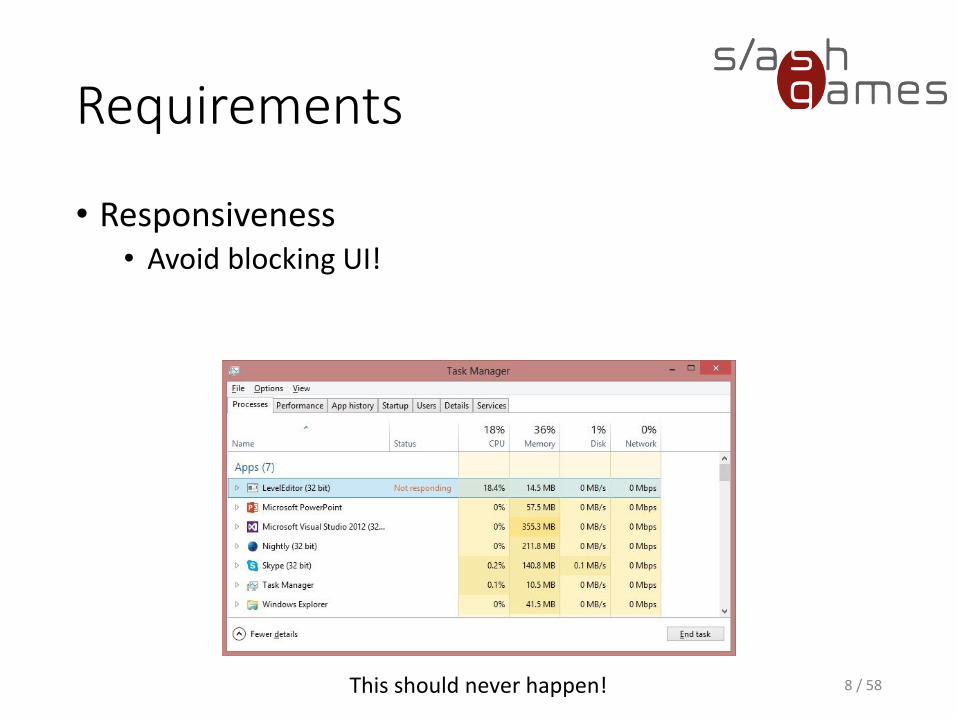
• Responsiveness• Avoid blocking UI!
8 / 58This should never happen!

Requirements
• Robust error handling• Handle exceptions!
9 / 58
This must never happen. Never, never, never, never, never!
Requirements
• Extensibility
• Adaptive window size
• Backward compatibility
• WYSIWYG
• Localization
• Security Context
10 / 58

Development Process
1. Design1. Define Functional Requirements
2. Analyze Target Group
3. Develop Overall Application Architecture
2. Implement1. Create Prototypes
2. Develop Application
3. Test1. Write Unit Tests
2. Perform Usability Tests
11 / 58
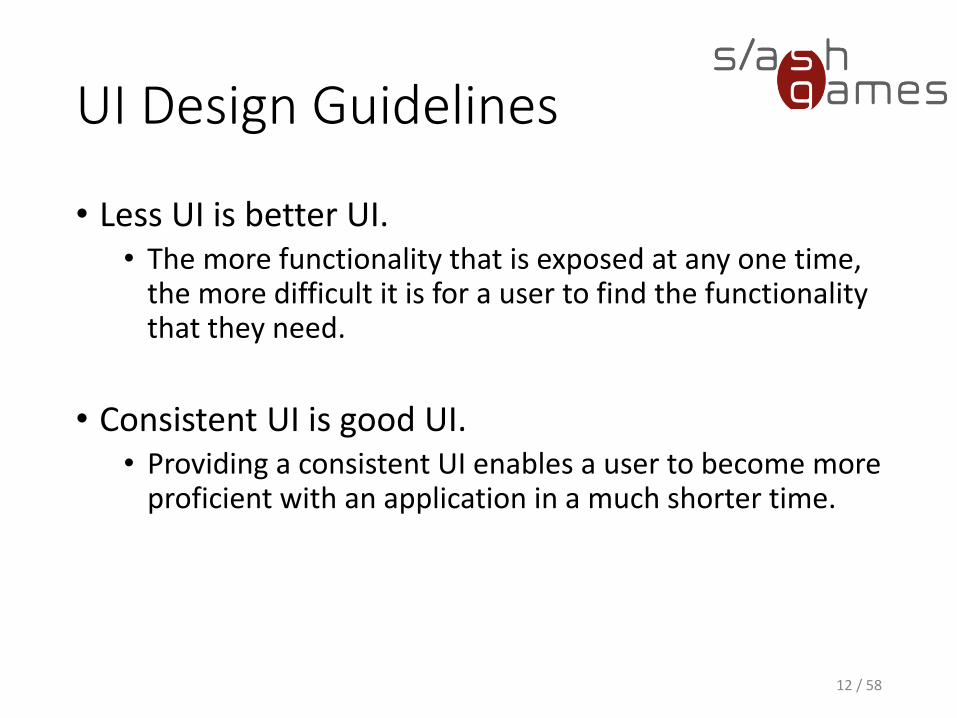
UI Design Guidelines
• Less UI is better UI.• The more functionality that is exposed at any one time,
the more difficult it is for a user to find the functionality that they need.
• Consistent UI is good UI.• Providing a consistent UI enables a user to become more
proficient with an application in a much shorter time.
12 / 58
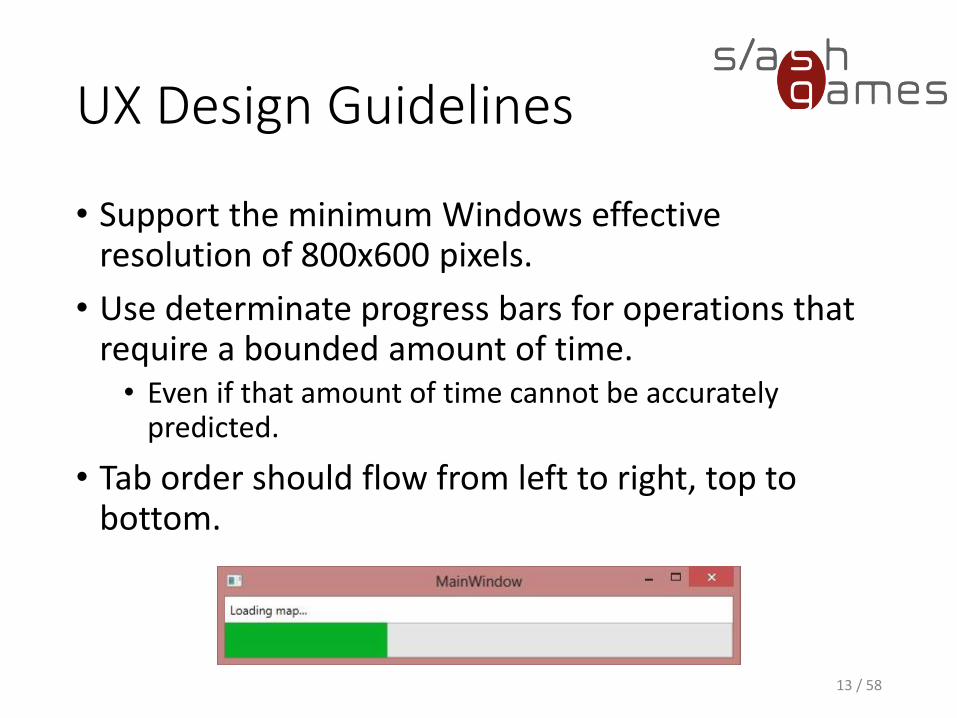
UX Design Guidelines
• Support the minimum Windows effective resolution of 800x600 pixels.
• Use determinate progress bars for operations that require a bounded amount of time.• Even if that amount of time cannot be accurately
predicted.
• Tab order should flow from left to right, top to bottom.
13 / 58
UX Design Guidelines
• Assign shortcut keys to the most commonly used commands.
• It's rude to interrupt.• When an application displays a dialog box, it forces the
user to stop whatever it is that they are doing and pay attention to something else. If it is possible, remove the need for a dialog box completely by avoiding error cases and other disruptive user experiences.
• And many, many, many, many more… (see References)
14 / 58
Model-View-Controller
• Design pattern that separates data from its visual representation• Model: Data, such as names, phone numbers, or health
points.
• View: Visual representation of that data, such as console output, UI textfields or health bars.
• Controller: Layer that separates model from view, serving as interface for any interaction with the data.
15 / 58
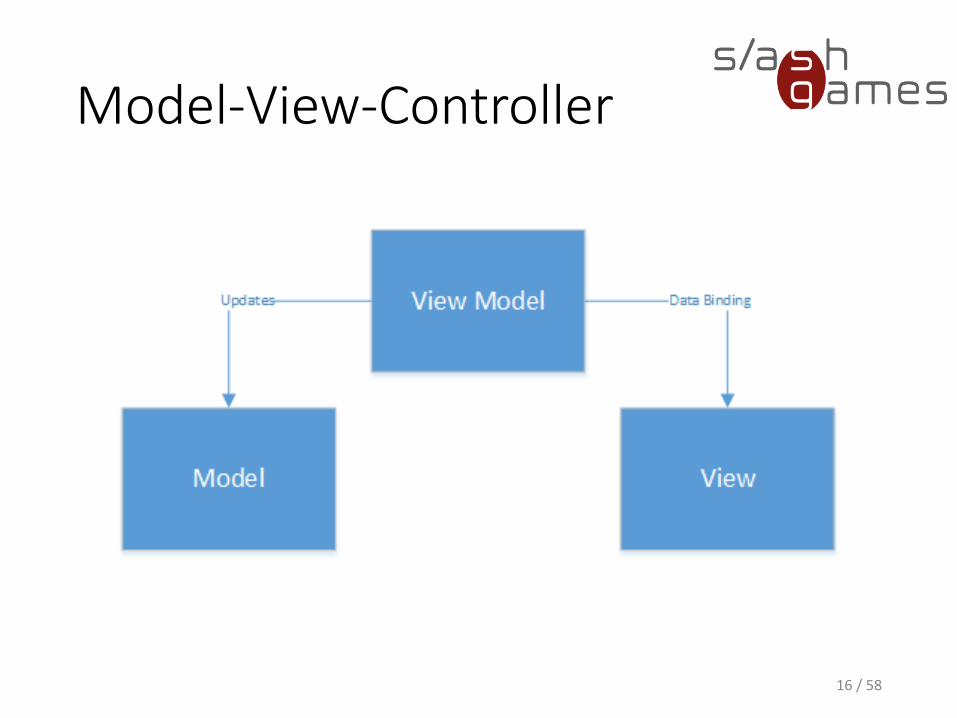
Model-View-Controller
16 / 58
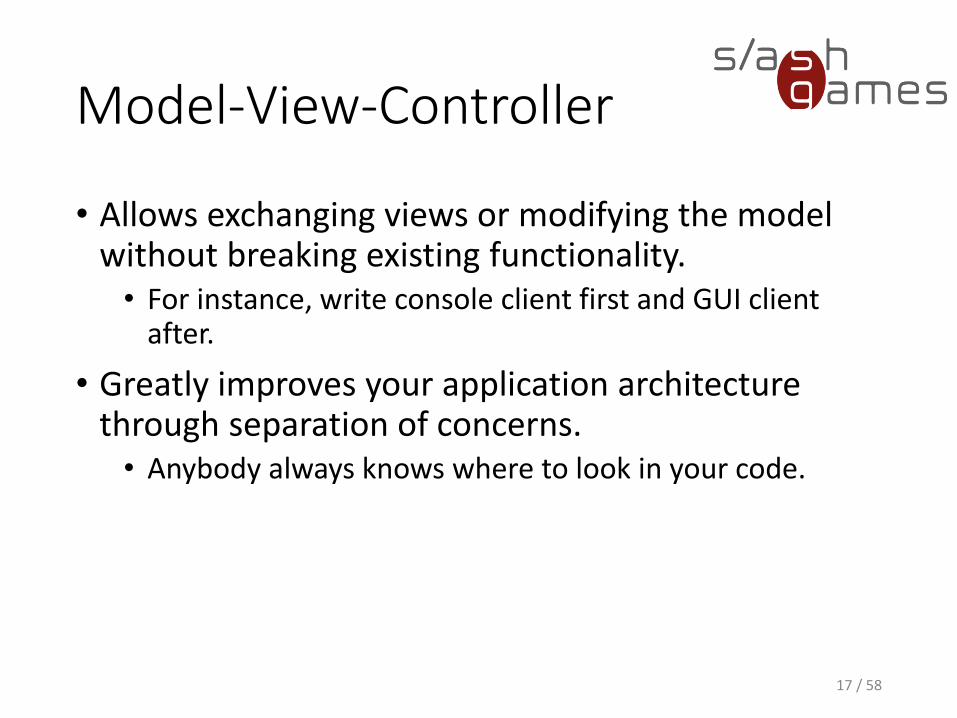
Model-View-Controller
• Allows exchanging views or modifying the model without breaking existing functionality.• For instance, write console client first and GUI client
after.
• Greatly improves your application architecture through separation of concerns.• Anybody always knows where to look in your code.
17 / 58

Introduction to Windows Presentation Foundation (WPF) • Presentation system for building Windows client
applications
• Part of the Microsoft .NET Framework
• Both standalone and browser-hosted applications
• Resolution-independent and vector-based rendering engine
18 / 58

Architecture ofWPF Applications• Extensible Application Markup Language
(XAML) markup for defining the application appearance• XML-based markup language
• Used to create windows, dialog boxes, pages, and controls
• Code-Behind for defining the application behavior• Responds to user interaction
• Implements Business Logic
19 / 58
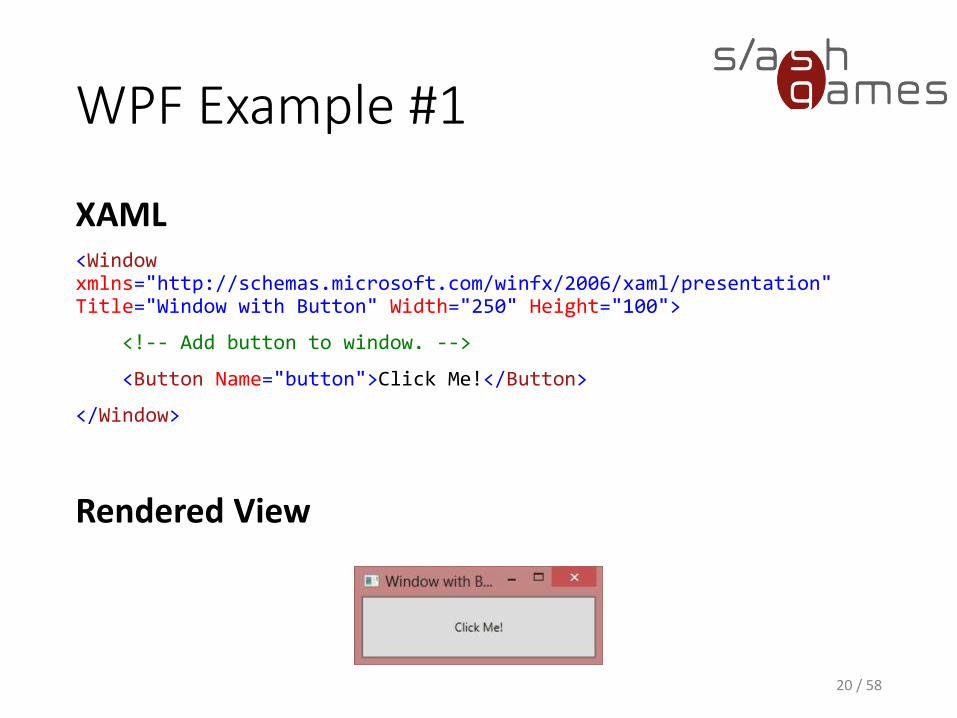
WPF Example #1
XAML<Windowxmlns="http://schemas.microsoft.com/winfx/2006/xaml/presentation"Title="Window with Button" Width="250" Height="100">
<!-- Add button to window. -->
<Button Name="button">Click Me!</Button>
</Window>
20 / 58
Rendered View
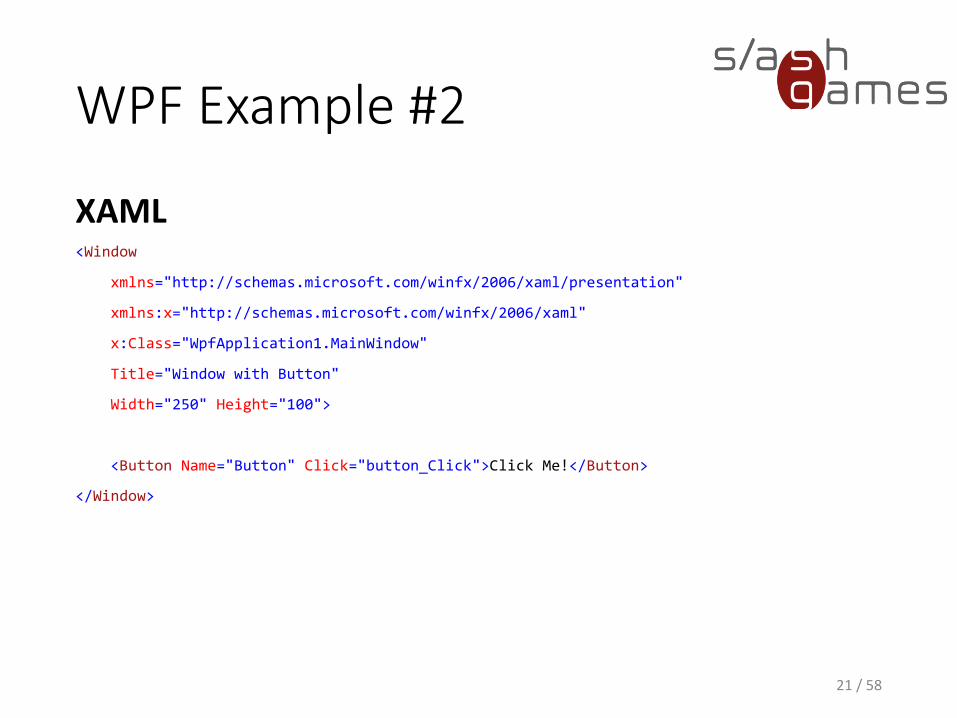
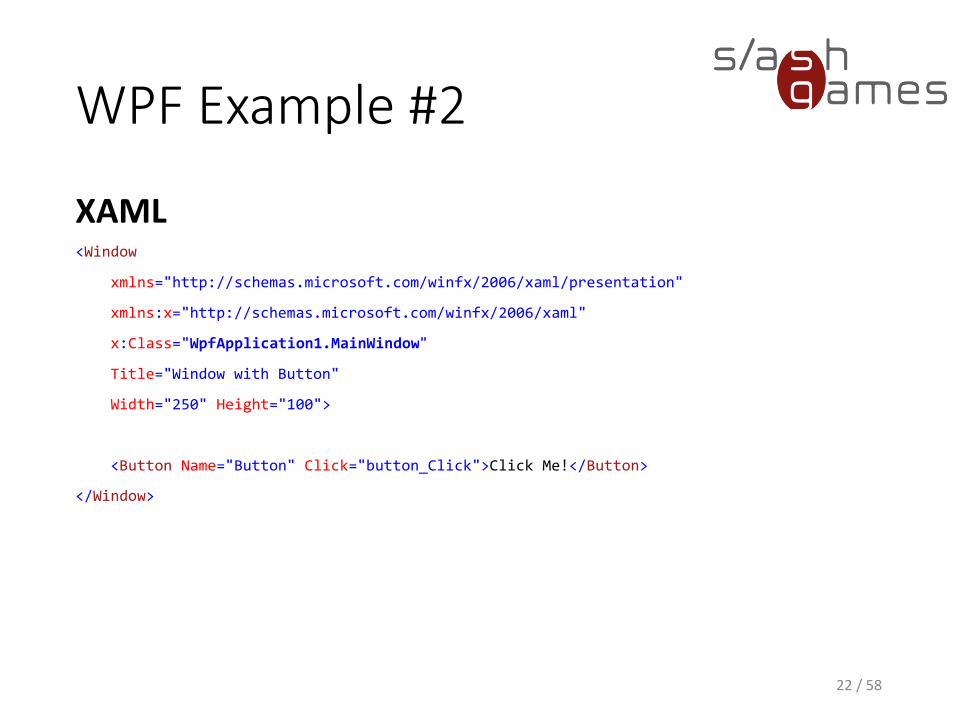
WPF Example #2
XAML
21 / 58
<Window
xmlns="http://schemas.microsoft.com/winfx/2006/xaml/presentation"
xmlns:x="http://schemas.microsoft.com/winfx/2006/xaml"
x:Class="WpfApplication1.MainWindow"
Title="Window with Button"
Width="250" Height="100">
<Button Name="Button" Click="button_Click">Click Me!</Button>
</Window>
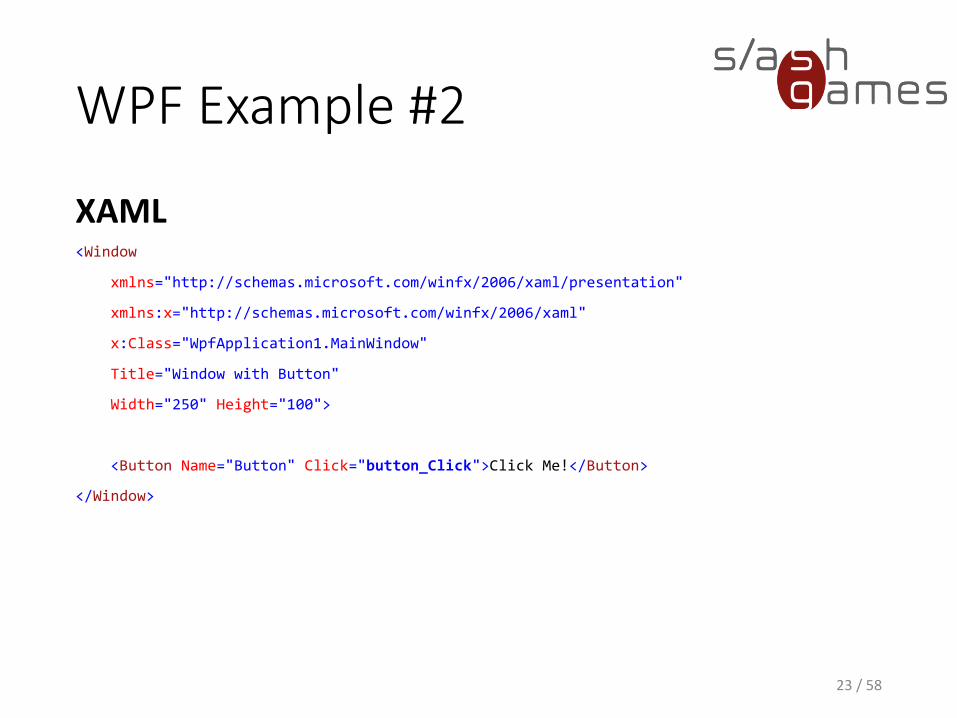
WPF Example #2
XAML
22 / 58
<Window
xmlns="http://schemas.microsoft.com/winfx/2006/xaml/presentation"
xmlns:x="http://schemas.microsoft.com/winfx/2006/xaml"
x:Class="WpfApplication1.MainWindow"
Title="Window with Button"
Width="250" Height="100">
<Button Name="Button" Click="button_Click">Click Me!</Button>
</Window>
WPF Example #2
XAML
23 / 58
<Window
xmlns="http://schemas.microsoft.com/winfx/2006/xaml/presentation"
xmlns:x="http://schemas.microsoft.com/winfx/2006/xaml"
x:Class="WpfApplication1.MainWindow"
Title="Window with Button"
Width="250" Height="100">
<Button Name="Button" Click="button_Click">Click Me!</Button>
</Window>

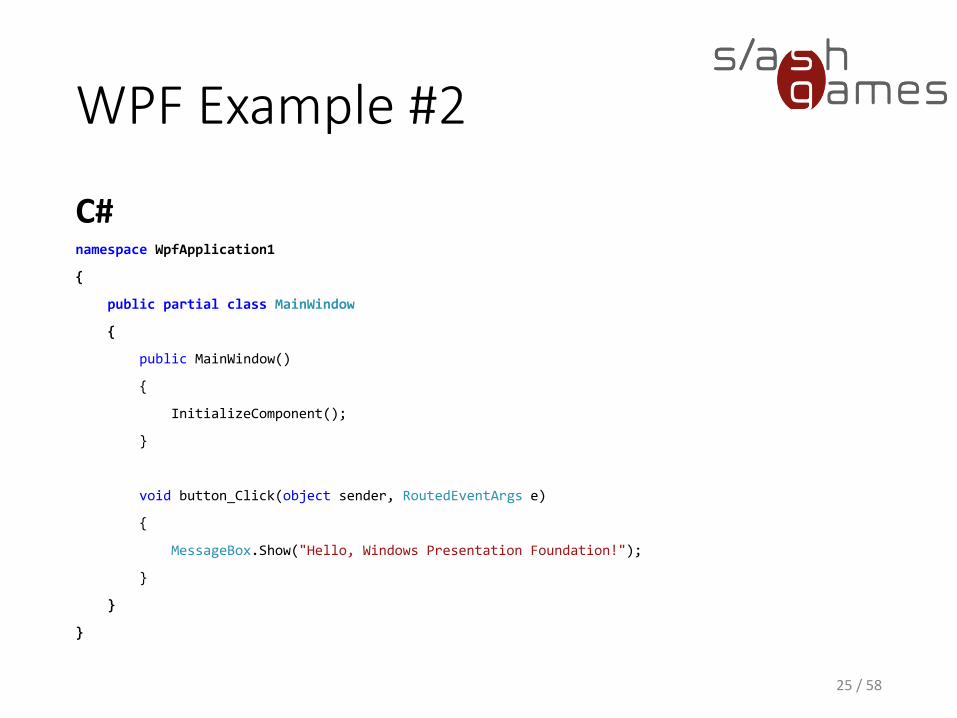
WPF Example #2
C#
24 / 58
namespace WpfApplication1
{
public partial class MainWindow
{
public MainWindow()
{
InitializeComponent();
}
void button_Click(object sender, RoutedEventArgs e)
{
MessageBox.Show("Hello, Windows Presentation Foundation!");
}
}
}
WPF Example #2
C#
25 / 58
namespace WpfApplication1
{
public partial class MainWindow
{
public MainWindow()
{
InitializeComponent();
}
void button_Click(object sender, RoutedEventArgs e)
{
MessageBox.Show("Hello, Windows Presentation Foundation!");
}
}
}

WPF Example #2
C#
26 / 58
namespace WpfApplication1
{
public partial class MainWindow
{
public MainWindow()
{
InitializeComponent();
}
void button_Click(object sender, RoutedEventArgs e)
{
MessageBox.Show("Hello, Windows Presentation Foundation!");
}
}
}

WPF Example #2
C#
27 / 58
namespace WpfApplication1
{
public partial class MainWindow
{
public MainWindow()
{
InitializeComponent();
}
void button_Click(object sender, RoutedEventArgs e)
{
MessageBox.Show("Hello, Windows Presentation Foundation!");
}
}
}
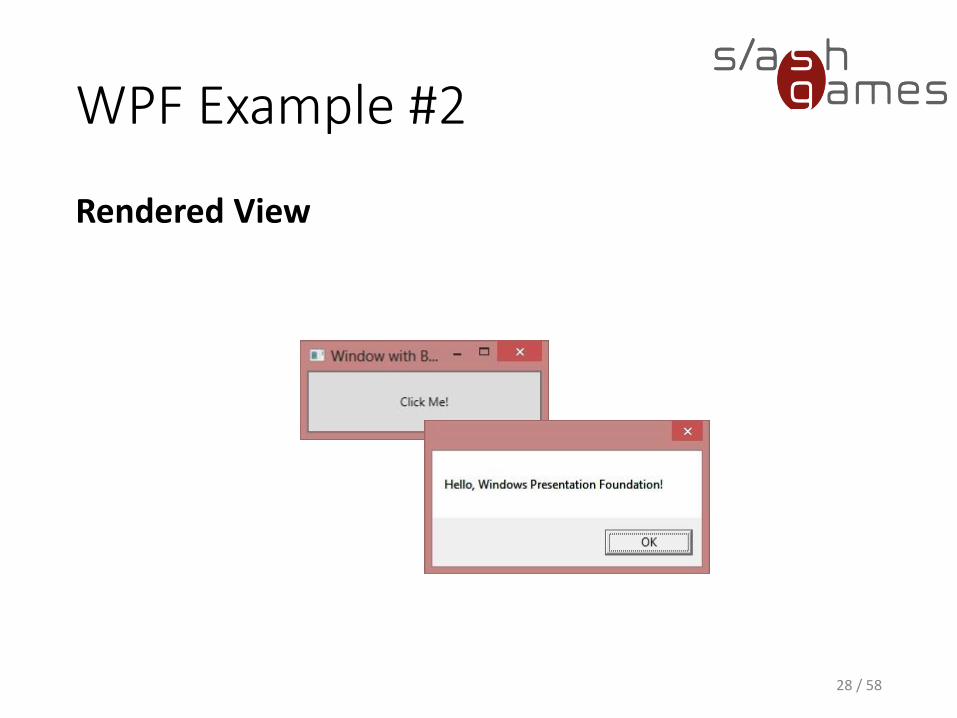
WPF Example #2
Rendered View
28 / 58

Excursus: C# Events
• Enable a class or object to notify other classes or objects when something of interest occurs• Class that sends (or raises) the event is called the
publisher.
• Classes that receive (or handle) the event are called subscribers.
29 / 58
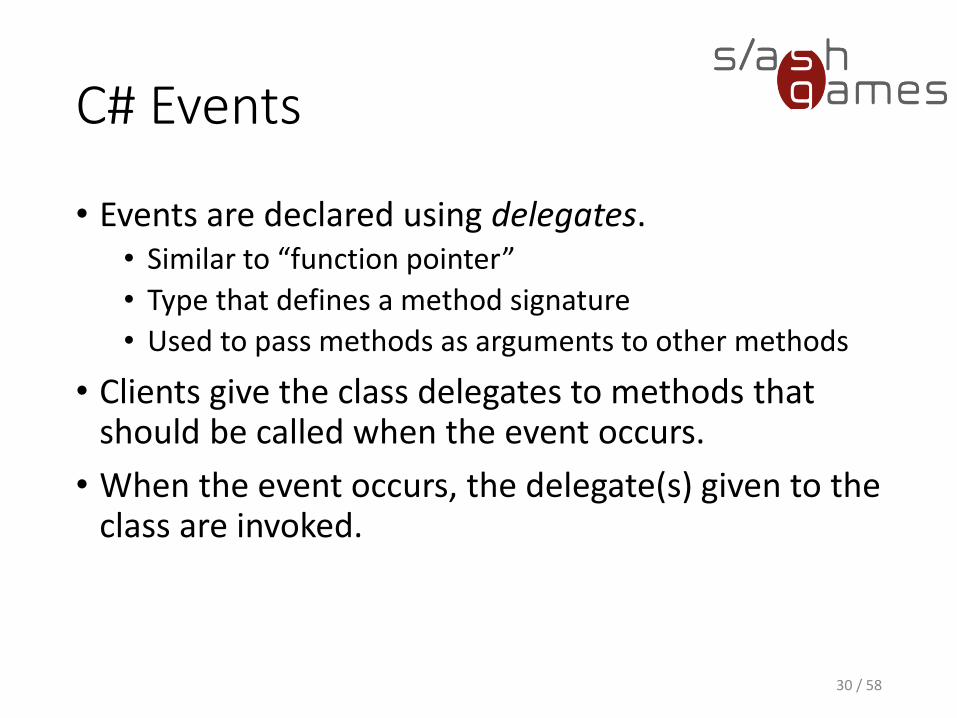
C# Events
• Events are declared using delegates.• Similar to “function pointer”
• Type that defines a method signature
• Used to pass methods as arguments to other methods
• Clients give the class delegates to methods that should be called when the event occurs.
• When the event occurs, the delegate(s) given to the class are invoked.
30 / 58
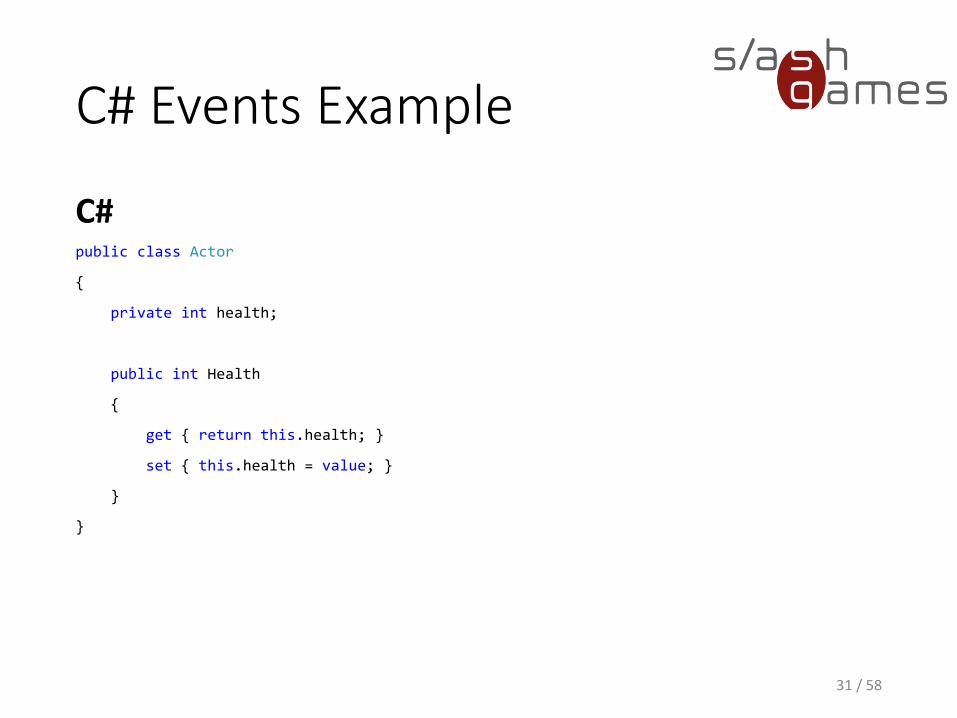
C# Events Example
C#
31 / 58
public class Actor
{
private int health;
public int Health
{
get { return this.health; }
set { this.health = value; }
}
}
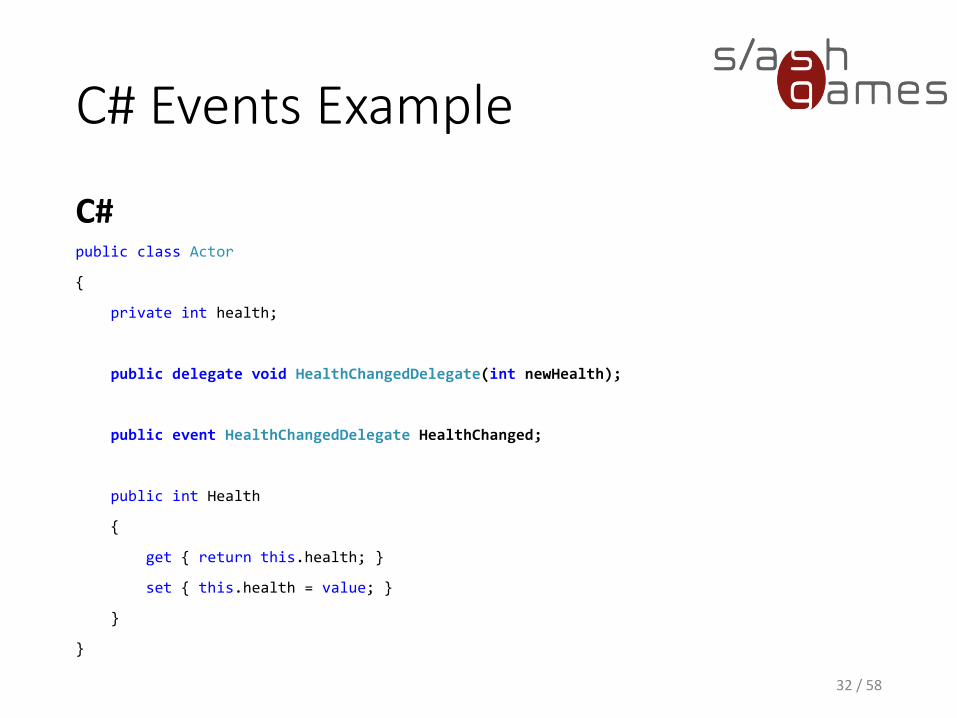
C# Events Example
C#
32 / 58
public class Actor
{
private int health;
public delegate void HealthChangedDelegate(int newHealth);
public event HealthChangedDelegate HealthChanged;
public int Health
{
get { return this.health; }
set { this.health = value; }
}
}
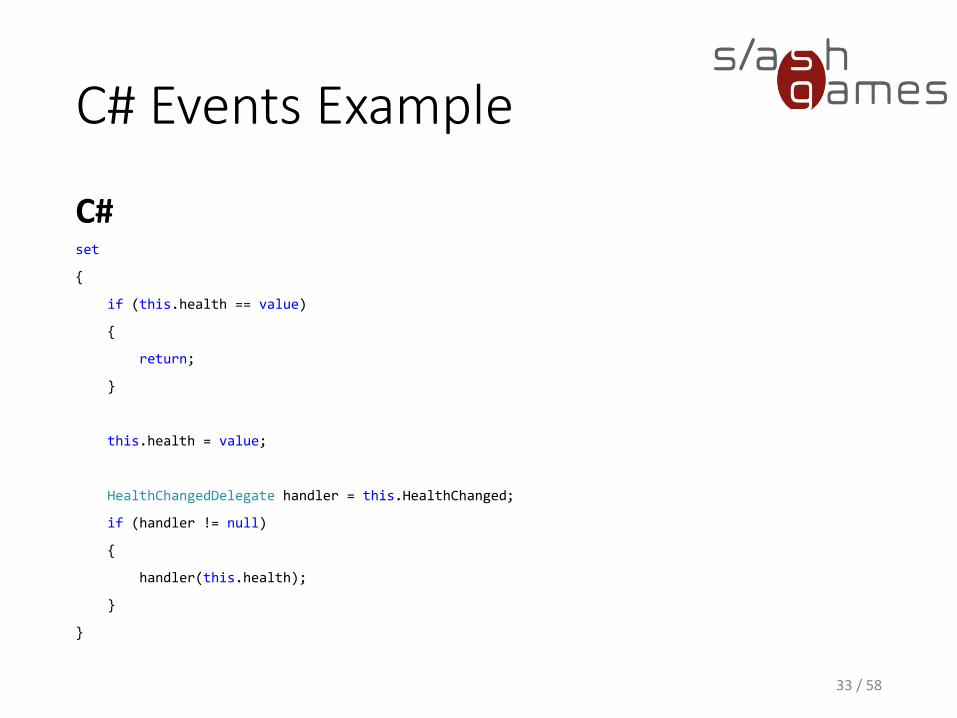
C# Events Example
C#
33 / 58
set
{
if (this.health == value)
{
return;
}
this.health = value;
HealthChangedDelegate handler = this.HealthChanged;
if (handler != null)
{
handler(this.health);
}
}
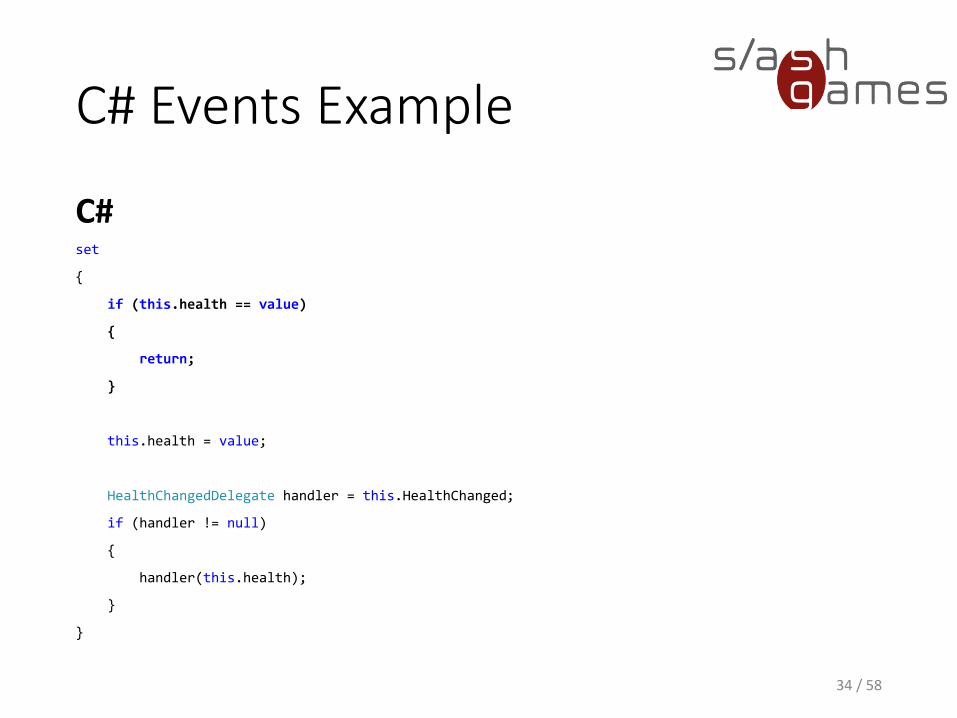
C# Events Example
C#
34 / 58
set
{
if (this.health == value)
{
return;
}
this.health = value;
HealthChangedDelegate handler = this.HealthChanged;
if (handler != null)
{
handler(this.health);
}
}

C# Events Example
C#
35 / 58
set
{
if (this.health == value)
{
return;
}
this.health = value;
HealthChangedDelegate handler = this.HealthChanged;
if (handler != null)
{
handler(this.health);
}
}
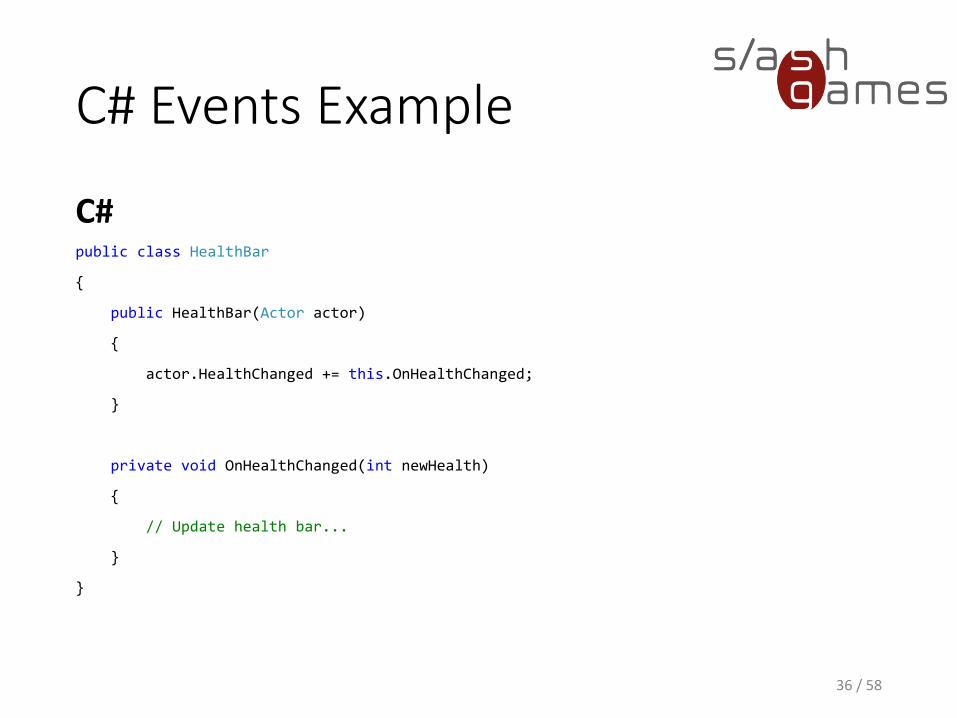
C# Events Example
C#
36 / 58
public class HealthBar
{
public HealthBar(Actor actor)
{
actor.HealthChanged += this.OnHealthChanged;
}
private void OnHealthChanged(int newHealth)
{
// Update health bar...
}
}
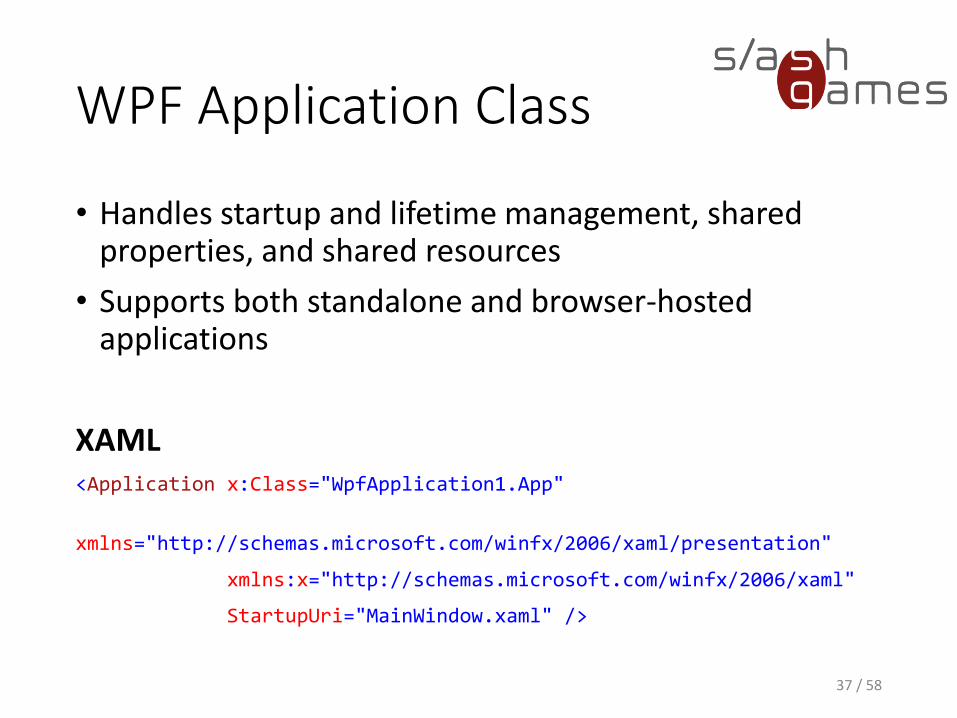
WPF Application Class
• Handles startup and lifetime management, shared properties, and shared resources
• Supports both standalone and browser-hosted applications
XAML<Application x:Class="WpfApplication1.App"
xmlns="http://schemas.microsoft.com/winfx/2006/xaml/presentation"
xmlns:x="http://schemas.microsoft.com/winfx/2006/xaml"
StartupUri="MainWindow.xaml" />
37 / 58
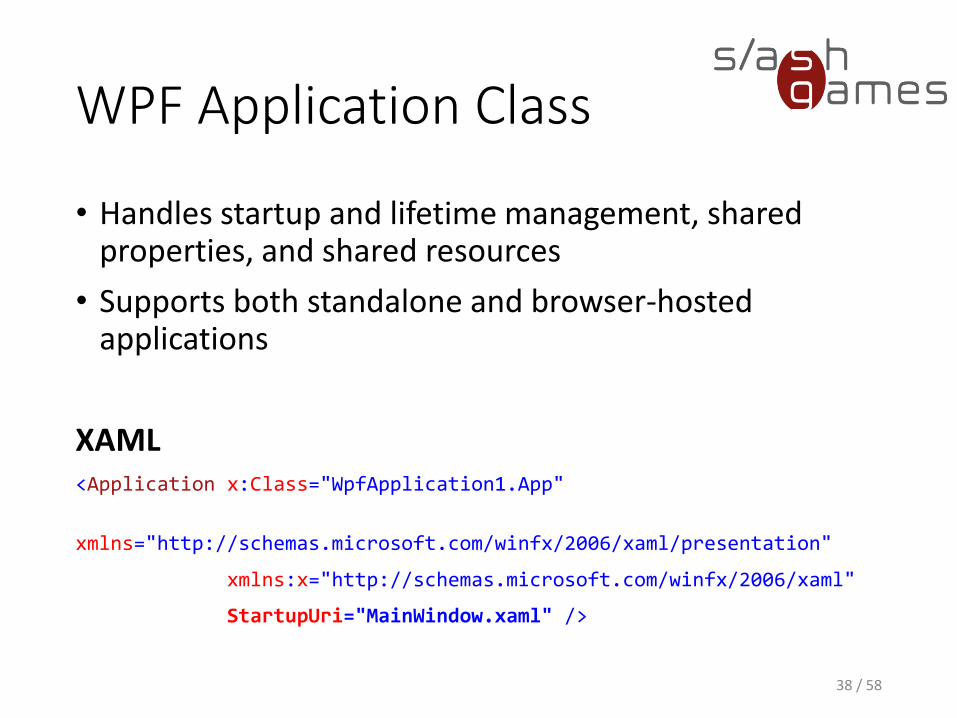
WPF Application Class
• Handles startup and lifetime management, shared properties, and shared resources
• Supports both standalone and browser-hosted applications
XAML<Application x:Class="WpfApplication1.App"
xmlns="http://schemas.microsoft.com/winfx/2006/xaml/presentation"
xmlns:x="http://schemas.microsoft.com/winfx/2006/xaml"
StartupUri="MainWindow.xaml" />
38 / 58

WPF Controls
• Basic Controls• Labels• Buttons• Textboxes• Checkboxes, ComboBoxes, RadioButtons• Panels, Boxes, Scrollbars• Menus, Dialog Boxes• Progress Bars, Status Bars
• Advanced Controls• Grids, Lists and Trees• Calendars• Document Viewers (XPS, *sigh*…)• Images, Media Players
39 / 58
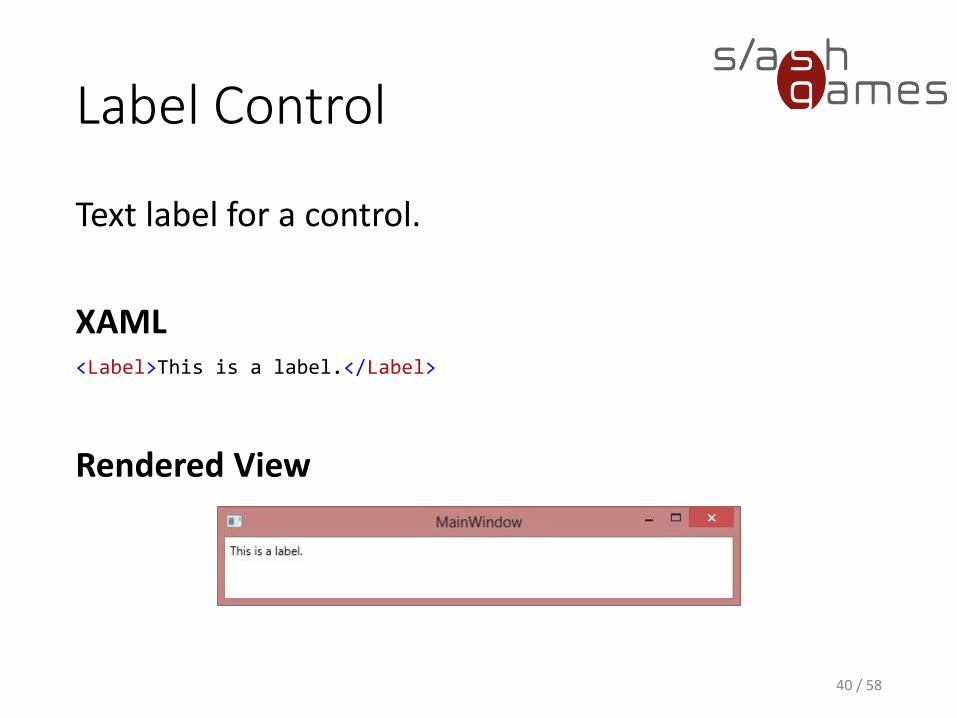
Label Control
Text label for a control.
XAML<Label>This is a label.</Label>
Rendered View
40 / 58
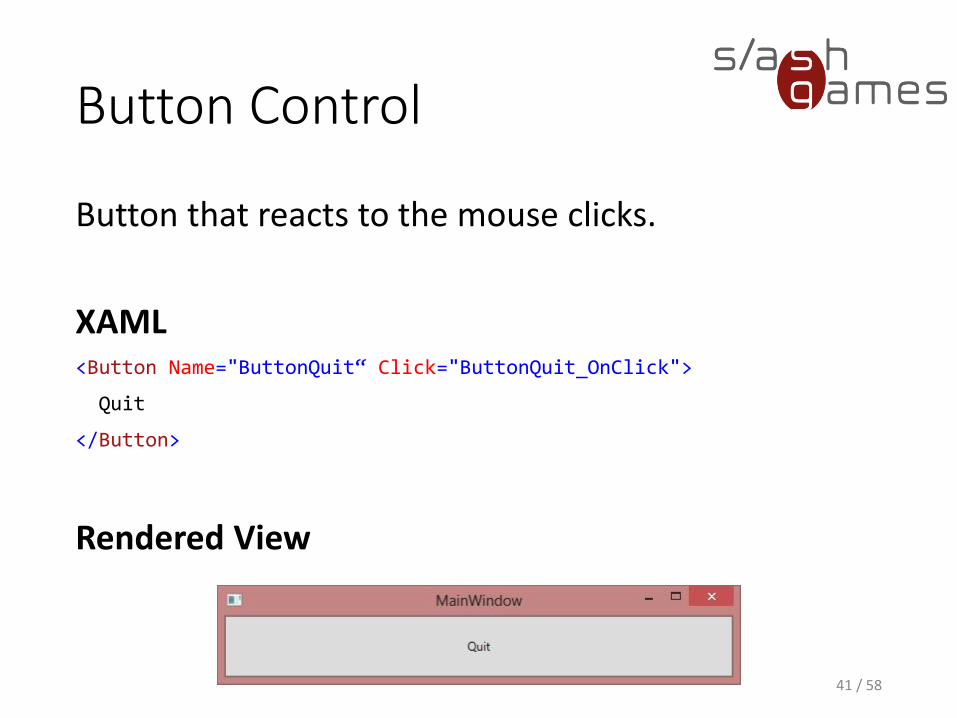
Button Control
Button that reacts to the mouse clicks.
XAML<Button Name="ButtonQuit“ Click="ButtonQuit_OnClick">
Quit
</Button>
Rendered View
41 / 58

TextBox Control
Used to display or edit text.
XAML<TextBox Name="TextBoxName" TextChanged="TextBoxName_OnTextChanged">
Please enter your name!
</TextBox>
Rendered View
42 / 58

CheckBox Control
Control that a user can select and clear.
XAML<CheckBox Name="CheckBoxEnabled“ IsChecked="True"
Checked="CheckBoxEnabled_OnChecked“
Unchecked="CheckBoxEnabled_OnUnchecked">
Enabled
</CheckBox>
Rendered View
43 / 58
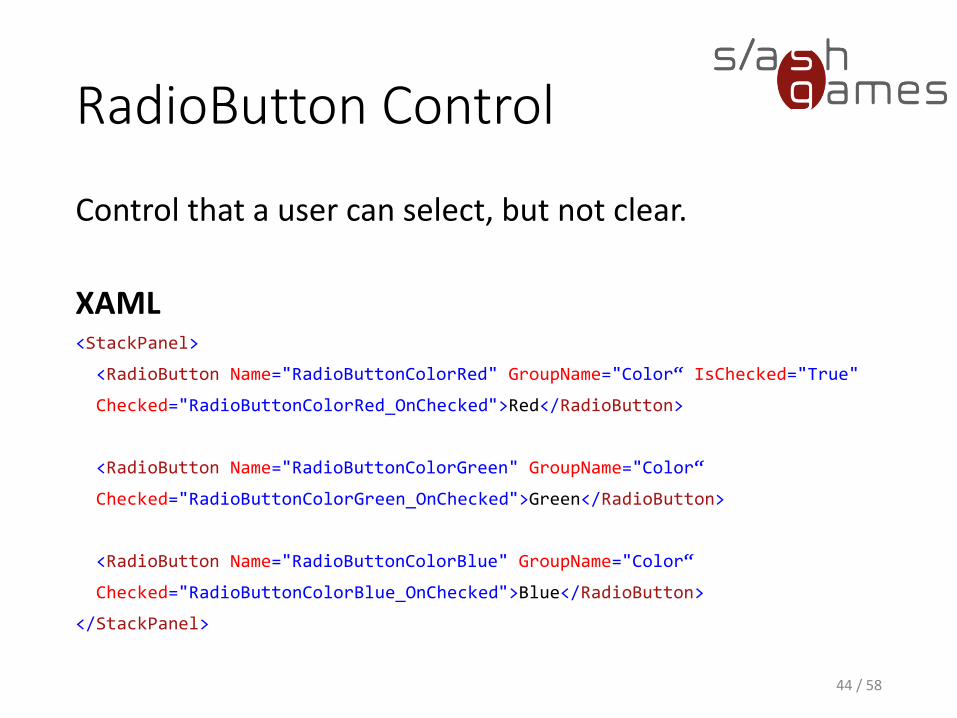
RadioButton Control
Control that a user can select, but not clear.
XAML<StackPanel>
<RadioButton Name="RadioButtonColorRed" GroupName="Color“ IsChecked="True"
Checked="RadioButtonColorRed_OnChecked">Red</RadioButton>
<RadioButton Name="RadioButtonColorGreen" GroupName="Color“
Checked="RadioButtonColorGreen_OnChecked">Green</RadioButton>
<RadioButton Name="RadioButtonColorBlue" GroupName="Color“
Checked="RadioButtonColorBlue_OnChecked">Blue</RadioButton>
</StackPanel>
44 / 58

RadioButton Control
Control that a user can select, but not clear.
Rendered View
45 / 58
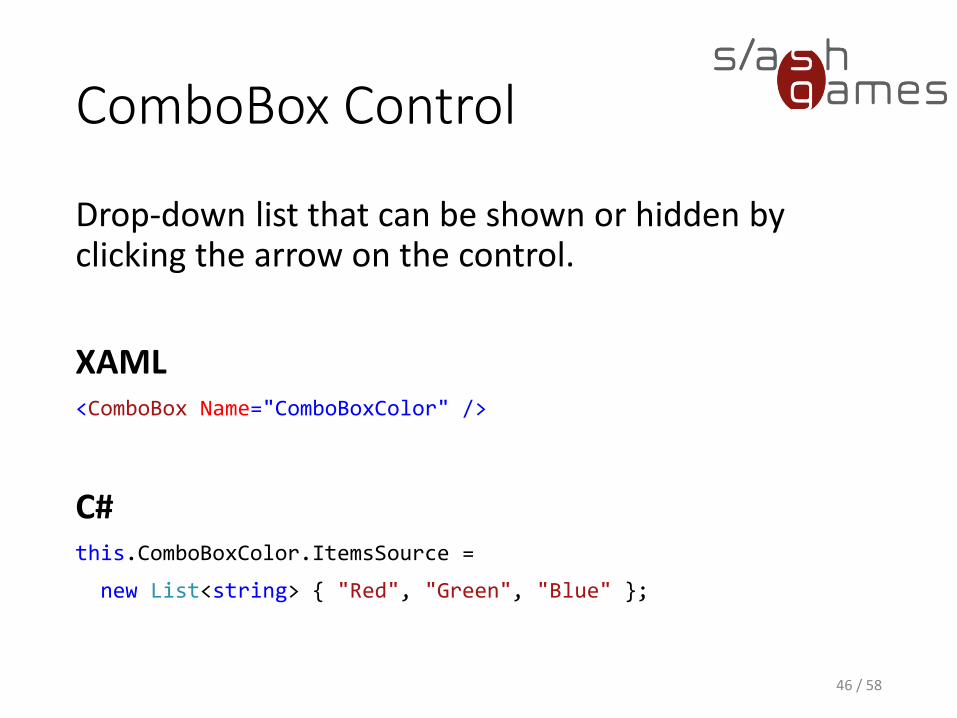
ComboBox Control
Drop-down list that can be shown or hidden by clicking the arrow on the control.
XAML<ComboBox Name="ComboBoxColor" />
C#this.ComboBoxColor.ItemsSource =
new List<string> { "Red", "Green", "Blue" };
46 / 58
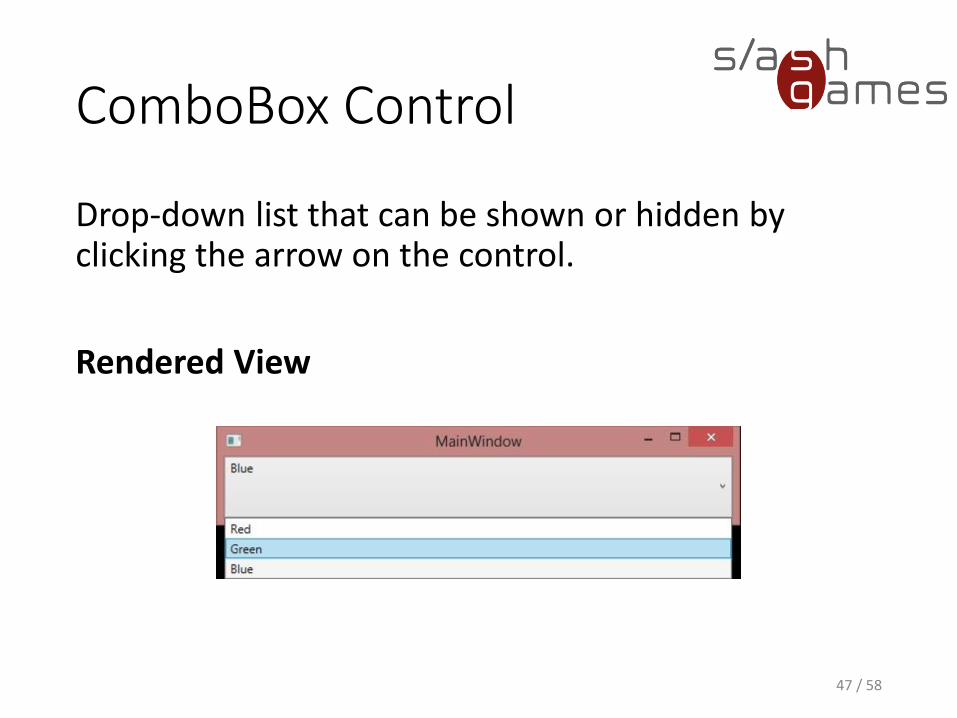
ComboBox Control
Drop-down list that can be shown or hidden by clicking the arrow on the control.
Rendered View
47 / 58
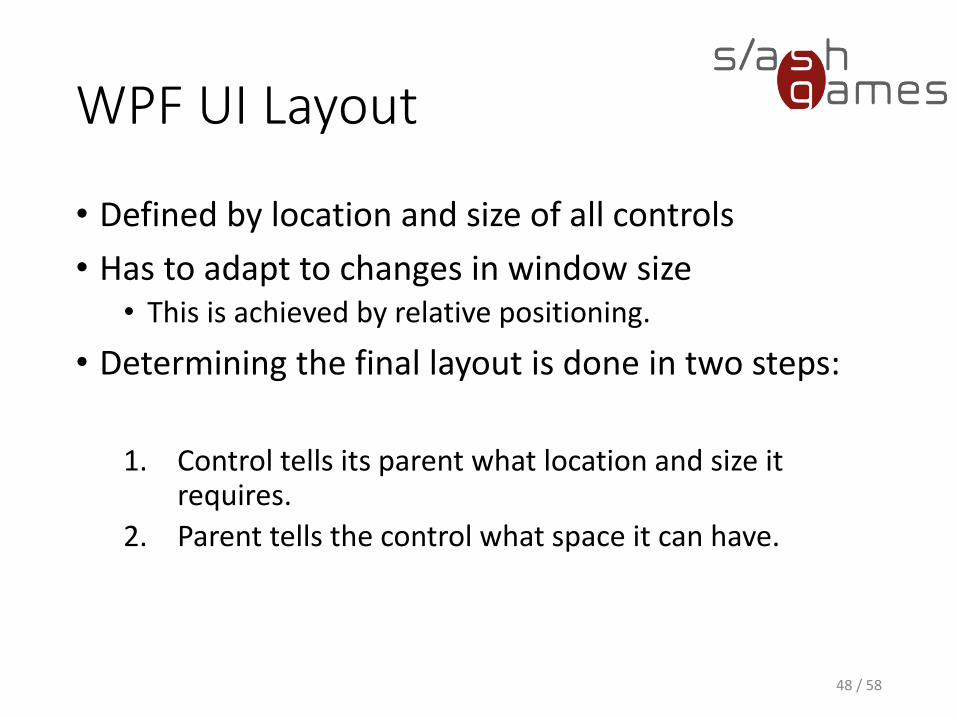
WPF UI Layout
• Defined by location and size of all controls
• Has to adapt to changes in window size• This is achieved by relative positioning.
• Determining the final layout is done in two steps:
1. Control tells its parent what location and size it requires.
2. Parent tells the control what space it can have.
48 / 58
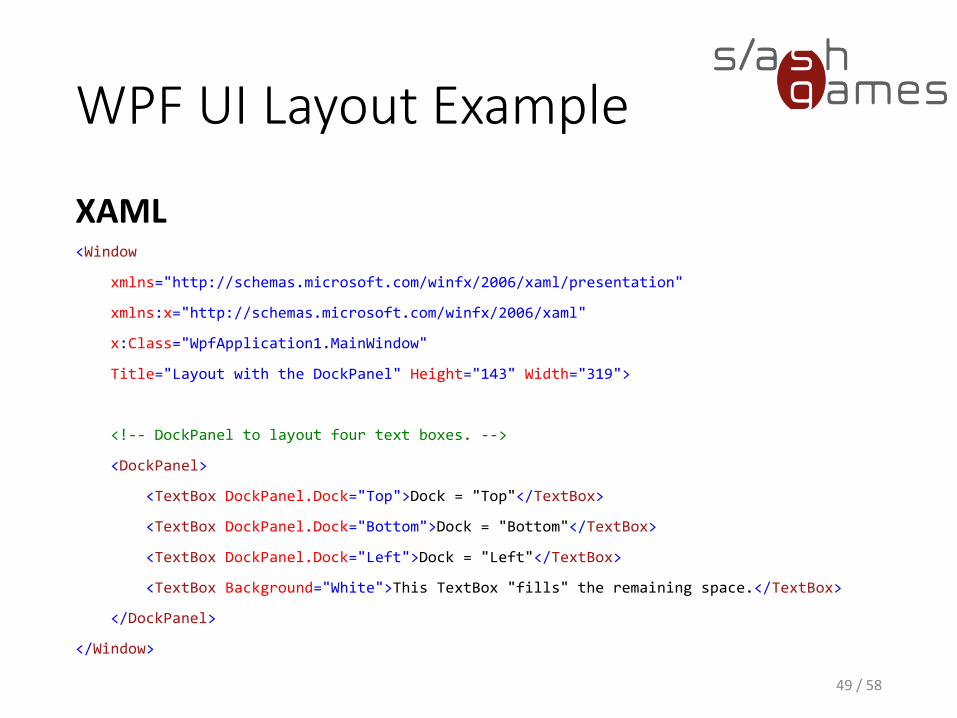
WPF UI Layout Example
XAML
49 / 58
<Window
xmlns="http://schemas.microsoft.com/winfx/2006/xaml/presentation"
xmlns:x="http://schemas.microsoft.com/winfx/2006/xaml"
x:Class="WpfApplication1.MainWindow"
Title="Layout with the DockPanel" Height="143" Width="319">
<!-- DockPanel to layout four text boxes. -->
<DockPanel>
<TextBox DockPanel.Dock="Top">Dock = "Top"</TextBox>
<TextBox DockPanel.Dock="Bottom">Dock = "Bottom"</TextBox>
<TextBox DockPanel.Dock="Left">Dock = "Left"</TextBox>
<TextBox Background="White">This TextBox "fills" the remaining space.</TextBox>
</DockPanel>
</Window>
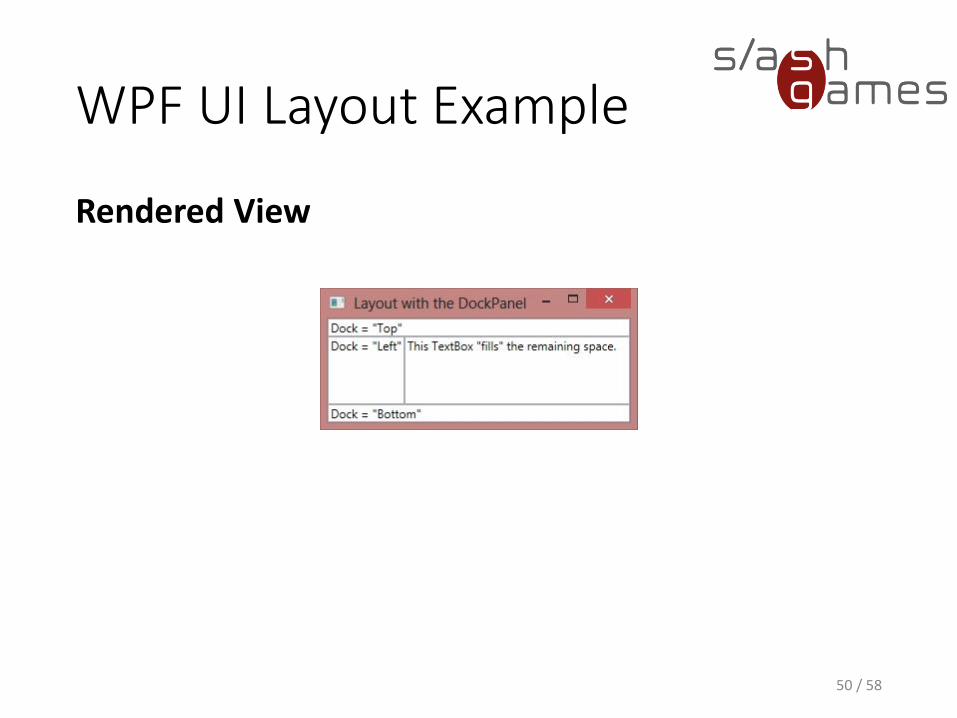
WPF UI Layout Example
Rendered View
50 / 58
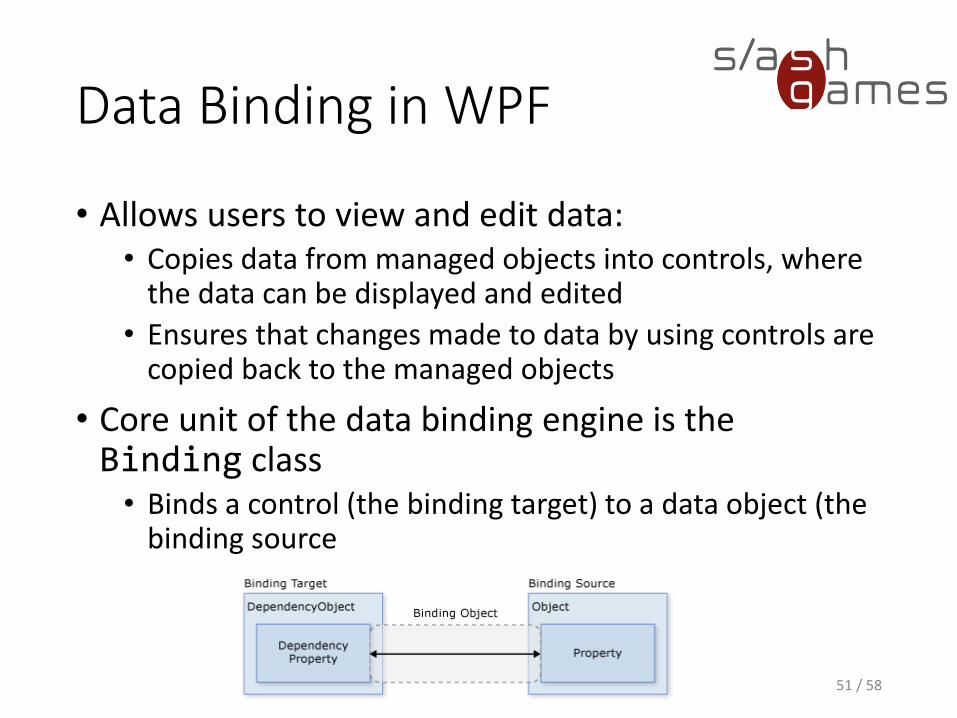
Data Binding in WPF
• Allows users to view and edit data:• Copies data from managed objects into controls, where
the data can be displayed and edited
• Ensures that changes made to data by using controls are copied back to the managed objects
• Core unit of the data binding engine is the Binding class• Binds a control (the binding target) to a data object (the
binding source
51 / 58
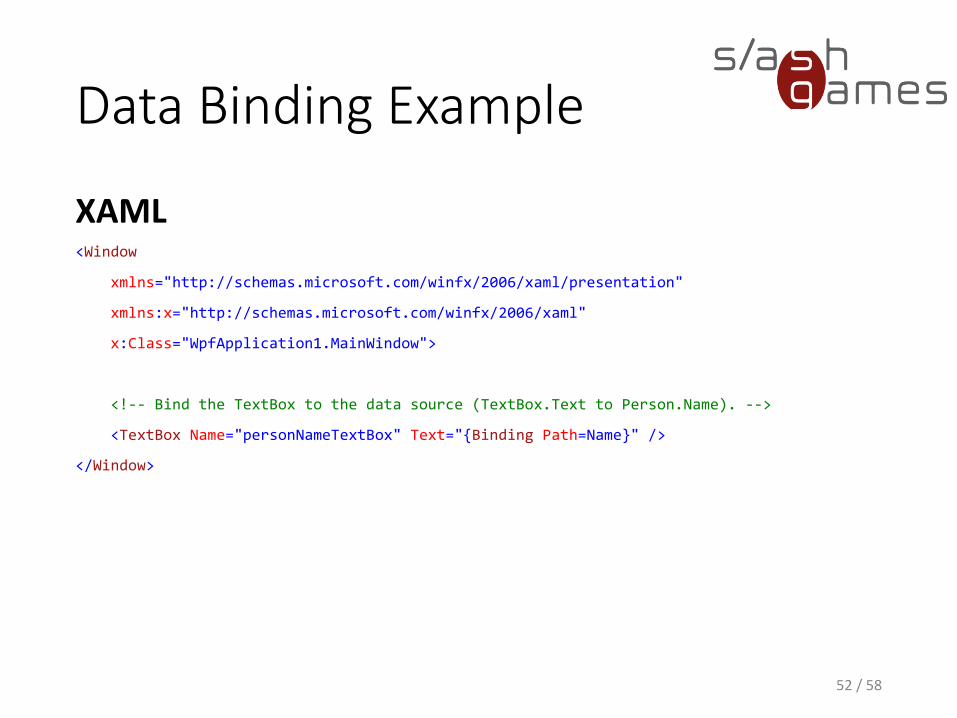
Data Binding Example
XAML
52 / 58
<Window
xmlns="http://schemas.microsoft.com/winfx/2006/xaml/presentation"
xmlns:x="http://schemas.microsoft.com/winfx/2006/xaml"
x:Class="WpfApplication1.MainWindow">
<!-- Bind the TextBox to the data source (TextBox.Text to Person.Name). -->
<TextBox Name="personNameTextBox" Text="{Binding Path=Name}" />
</Window>
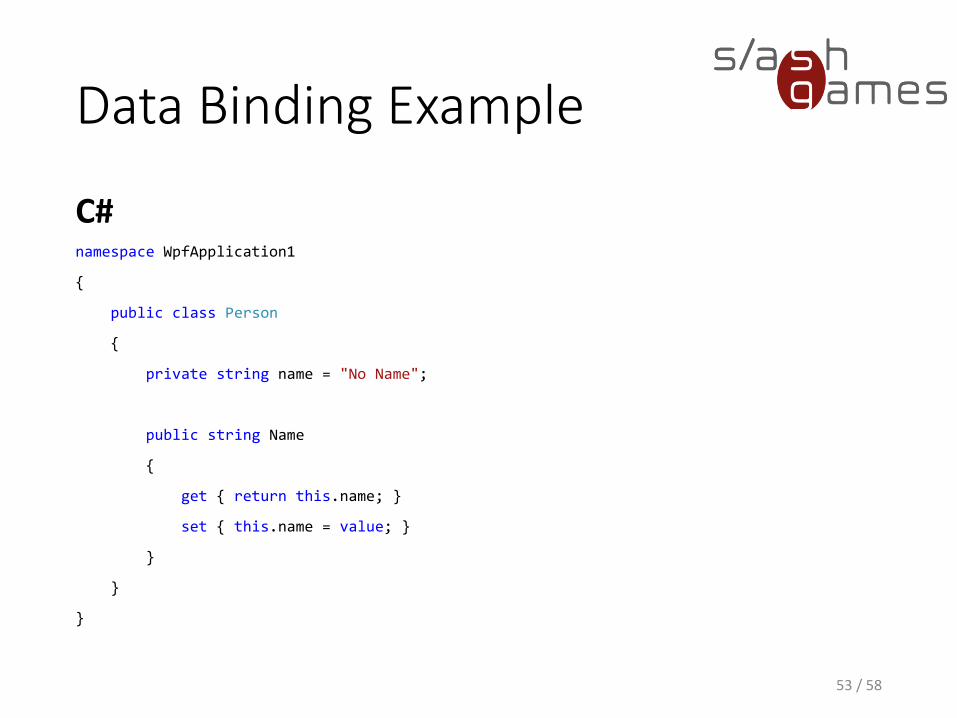
Data Binding Example
C#
53 / 58
namespace WpfApplication1
{
public class Person
{
private string name = "No Name";
public string Name
{
get { return this.name; }
set { this.name = value; }
}
}
}
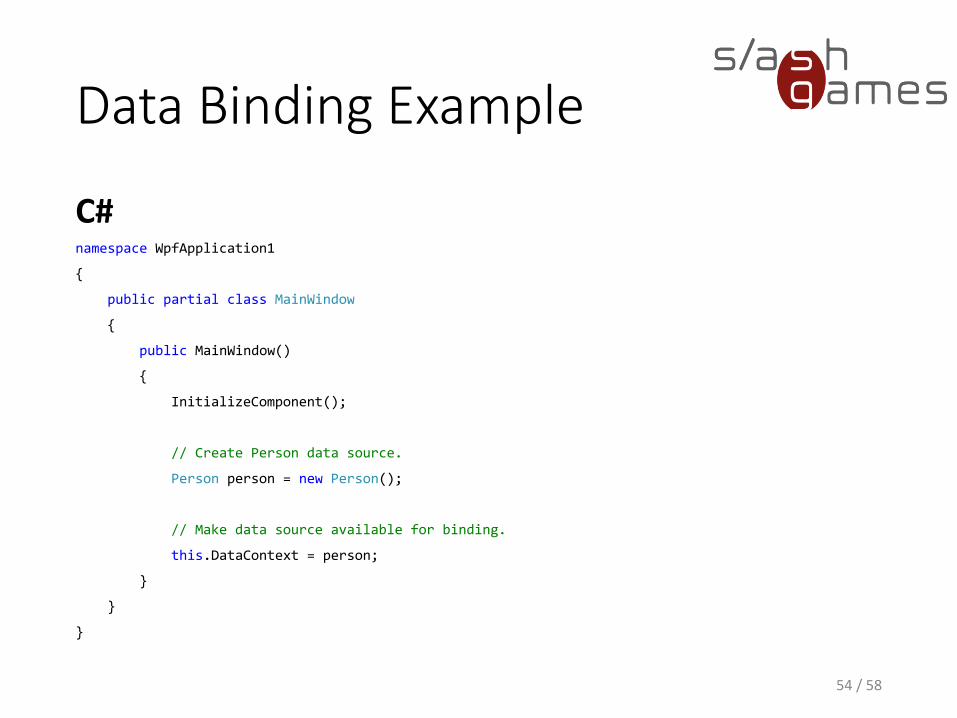
Data Binding Example
C#
54 / 58
namespace WpfApplication1
{
public partial class MainWindow
{
public MainWindow()
{
InitializeComponent();
// Create Person data source.
Person person = new Person();
// Make data source available for binding.
this.DataContext = person;
}
}
}
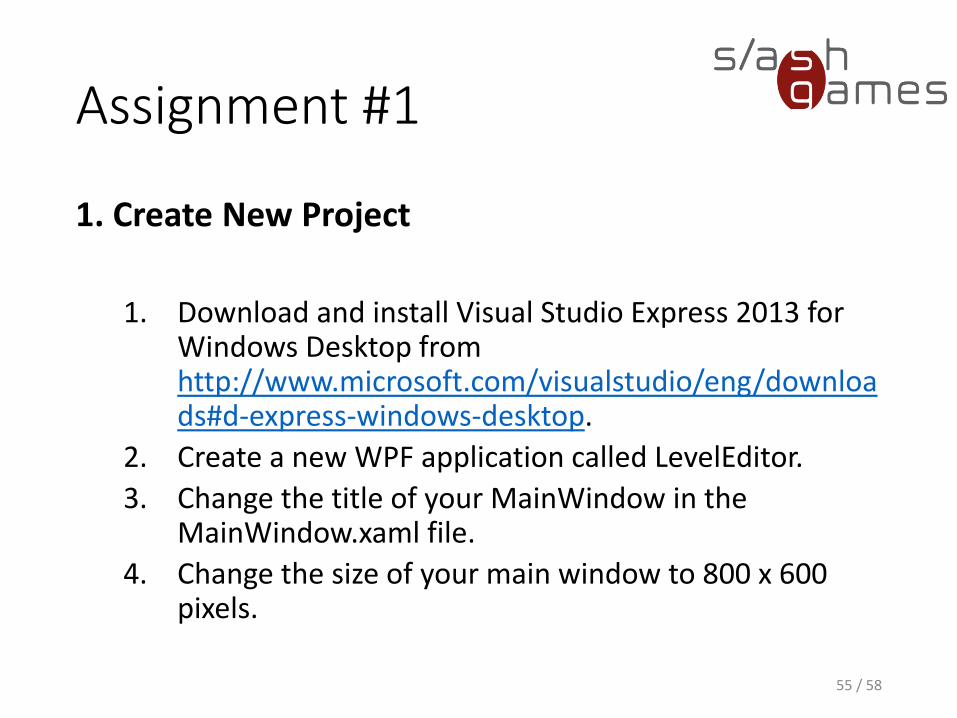
Assignment #1
1. Create New Project
1. Download and install Visual Studio Express 2013 for Windows Desktop from http://www.microsoft.com/visualstudio/eng/downloads#d-express-windows-desktop.
2. Create a new WPF application called LevelEditor.
3. Change the title of your MainWindow in theMainWindow.xaml file.
4. Change the size of your main window to 800 x 600 pixels.
55 / 58
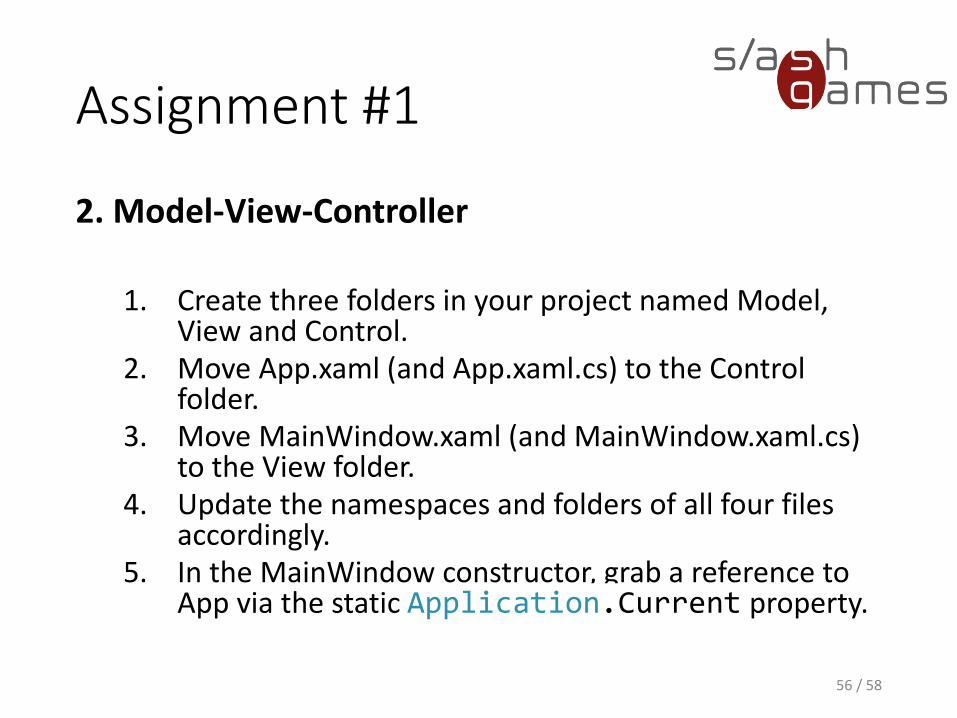
Assignment #1
2. Model-View-Controller
1. Create three folders in your project named Model, View and Control.
2. Move App.xaml (and App.xaml.cs) to the Controlfolder.
3. Move MainWindow.xaml (and MainWindow.xaml.cs) to the View folder.
4. Update the namespaces and folders of all four filesaccordingly.
5. In the MainWindow constructor, grab a reference toApp via the static Application.Current property.
56 / 58

Assignment #1
3. Quit Button
1. In App.xaml.cs, add a Quit method that calls theapplication Shutdown method.
2. Add a Quit button to MainWindow.xaml.
3. In MainWindow.xaml.cs, implement the Click eventhandler of the button, calling the Quit method of yourApp class.
57 / 58

Assignment #1
4. About Window
1. Create a new window called AboutWindow in your View folder.2. Add some nice information (e.g. your name, application version
number) to that window using the <TextBlock> and<LineBreak/> tags.
3. In App.xaml.cs, add a About method that instantiates a newAboutWindow object and calls its Show method.
4. Add an About button to MainWindow.xaml.5. Change the surronding panel in MainWIndow.xaml from Grid to
DockPanel in order to prevent both buttons from overlapping.6. In MainWindow.xaml.cs, implement the Click event handler of
the button, calling the About method of your App class.
58 / 58
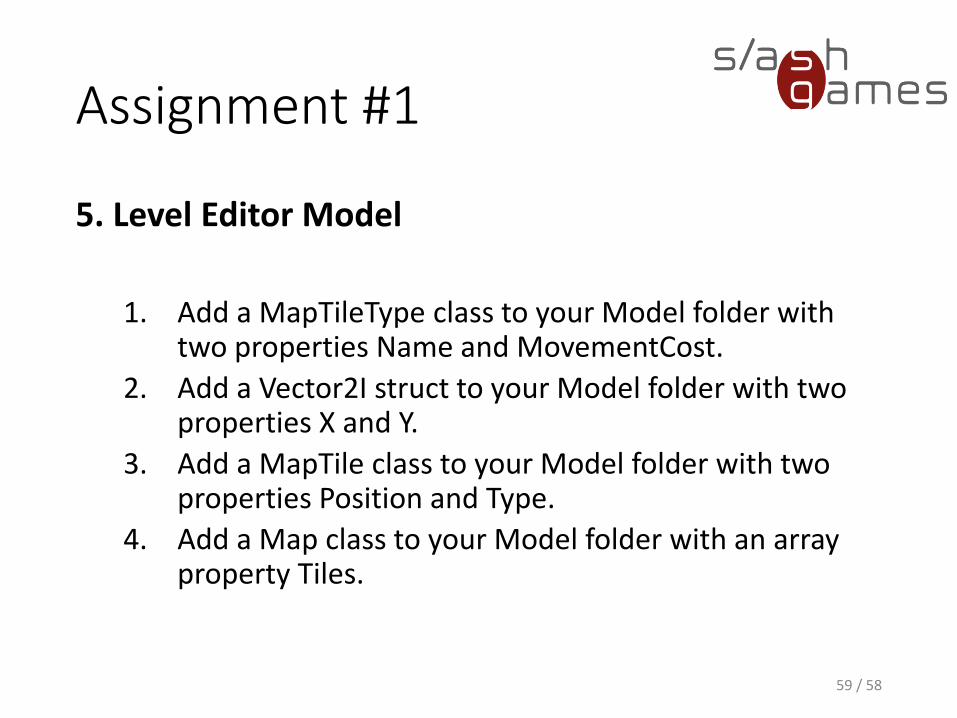
Assignment #1
5. Level Editor Model
1. Add a MapTileType class to your Model folder withtwo properties Name and MovementCost.
2. Add a Vector2I struct to your Model folder with twoproperties X and Y.
3. Add a MapTile class to your Model folder with twoproperties Position and Type.
4. Add a Map class to your Model folder with an arrayproperty Tiles.
59 / 58
References
• MSDN. Overview of the User Interface Development Process.http://msdn.microsoft.com/en-us/library/windows/desktop/ff728828%28v=vs.85%29.aspx, April 2015.
• MSDN. Implementing a User Interface. http://msdn.microsoft.com/en-us/library/windows/desktop/ff728823%28v=vs.85%29.aspx, April 2015.
• MSDN. Top Guidelines Violations. http://msdn.microsoft.com/en-us/library/windows/desktop/dn742479.aspx, April 2015.
• MSDN. Windows Presentation Foundation. http://msdn.microsoft.com/en-us//library/ms754130.aspx , April 2015.
• MSDN. Introduction to WPF. http://msdn.microsoft.com/en-us/library/aa970268.aspx, April 2015.
• MSDN. Delegates (C# Programming Guide).http://msdn.microsoft.com/en-us/library/ms173171.aspx, April 2015.
• MSDN. Events (C# Programming Guide). http://msdn.microsoft.com/en-us/library/awbftdfh.aspx, April 2015.
60 / 58
Thank you for your attention!
Contact
Blog
http://www.npruehs.de
@npruehs
Github
https://github.com/npruehs
61 / 58
Related Documents


