TNR Handbook The Guide to Trap-Neuter-Return For the Feral Cat Caretaker

Welcome message from author
This document is posted to help you gain knowledge. Please leave a comment to let me know what you think about it! Share it to your friends and learn new things together.
Transcript
TNR Handbook
The Guide to Trap-Neuter-Return For the Feral Cat Caretaker

Neighborhood Cats TNR Handbook
2nd edition
The Guide to Trap-Neuter-Return
for the Feral Cat Caretaker
www.neighborhoodcats.org
find us on Facebook
@NbrhoodCats
Text by: Bryan Kortis
Additional text by: Susan Richmond, Meredith Weiss, Anitra Frazier, joE. Needham,
Lois McClurg & Laura Gay Senk
Cover photo by: Petr Salidar
Photos by: Meredith Weiss, Bryan Kortis & feral cat caretakers (as credited)
Neighborhood Cats, Inc. © 2013 The contents of this book may be copied or distributed in whole or in part for educational purposes or
personal use, except in the City of New York, NY. In the City of New York, NY, contents of this book
may not be copied or distributed for any purpose without the express written consent of Neighborhood
Cats, Inc. With respect to any organization or individual, permission to copy or distribute may be
withdrawn at any time within the sole discretion of Neighborhood Cats, Inc. Please contact us for further
information. Except as specified herein, all rights are reserved.
Table of Contents
Foreword by Susan Richmond 1
Introduction by Anitra Frazier 3
Chapter One: What is a Feral Cat? 4
Chapter Two: What is Trap-Neuter-Return? 6 The advantages of TNR – colony level 6
The advantages of TNR - community level 7
Failed alternatives to TNR 9
1. Trap and remove 9
2. Feeding bans 10
3. Rescue or relocation 11
4. Do nothing 12
Chapter Three: The TNR Process – An Overview 13
Chapter Four: Building Good Community Relations 16 Community development techniques 17
1. Walk and talk 17
2. Deal calmly with hostility and resistance 17
3. Hold community meetings 18
4. Send a community appeal letter 19
5. Post informational flyers 19
6. Change municipal laws and animal control policies 20
Poisoning threats 20
Fleas 21
Keeping cats out of gardens & yards 22
1. Deterrents 23
2. Containment systems 26
Chapter Five: Food & Water 28 Feeding stations 28
Feeding tricks 32
Preventing water from freezing 34
Preventing food from freezing 36
Nutrition 37
Vitamin C to the Rescue by Anitra Frazier 40
Preventing urinary tract infections 43

ii
Chapter Six: Winter Shelter 44 Types of shelters 45
Doorway flaps 49
Insulating materials 49
Extreme cold 50
Placement 50
Chapter Seven: Preparations for Trapping – the Sequence 51
Chapter Eight: Recommended Equipment 57
Box traps 57
Drop traps 61
Trap dividers 62
Kitten screen 63
Feral cat dens 64
Transfer cages 65
Chapter Nine: Trapping 67
Mass trapping 67
Trapping supplies – the basics 68
Trapping supplies – optional 69
The trapping 70
1. Withhold food 70
2. Allow enough time for trapping 71
3. Check the traps 72
4. Prepare the traps 73
5. Place the traps in the territory 73
6. During the trapping 75
Winter trapping 78
Transfers from traps 79
Special cases 79
1. Friendly ferals 79
2. Kittens 80
3. Nursing mothers 82
4. Pregnant cats 87
Wildlife 88
Raccoons 89
Skunks 90
Opossum 90
Hard-to-catch cats 91
Drop trap 91
Train the cat to enter a box trap 92
Camouflage trap 93
Lure into a closed space 93
Picking one out from the crowd 94
Cats who avoid the trip plate 95
Cleaning traps & equipment 95
iii
Chapter Ten: The Neighborhood Cats Drop Trap 97
Preparations 98
Setting up the trap 98
Dropping the trap 101
Transferring out of the drop trap 101
Disassembling the trap 103
Chapter Eleven: Caring for Cats in Traps 104 Materials needed 105
Preparing the holding space 105
Feeding and cleaning 106
What if a cat does escape? 108
Chapter Twelve: The Feral Cat Setup: Long-term Fosters 109
Materials needed 109
Placing the cat inside 110
Feeding and cleaning 111
Chapter Thirteen: Spay/Neuter & Veterinary Care 113
Preparing for surgery 113
Types of veterinary treatment 115
Eartipping 117
Post-surgery 119
FIV/FeLV testing 120
Chapter Fourteen: Recovery & Return 125
Length of recovery period 125
Lactating mother 126
Location of release 126
Chapter Fifteen: Relocation & Sanctuaries 127
Relocation 127
Sanctuaries 131
Chapter Sixteen: Adoptable Cats 133
Determining if a cat is adoptable 133
Lost or abandoned pet cats 133
Feral kittens 135
Friendly adult ferals 136
Veterinary care for adoptable cats 136
Socializing feral kittens 137
Socializing feral teenagers & adults 139
Finding good homes 142

iv
Chapter Seventeen: Storm Preparation & Recovery 147 Before the storm 147
The aftermath 148
Chapter Eighteen: Feral Cat Resources 150 Books 150
Children’s books 150
Equipment & supplies 151
Feral cat organizations – lists 151
Funding for TNR 151
Handouts & flyers 152
Kitten care 152
Spay/neuter resources 153
TNR ordinances 153
Tool kits 153
Videos 154
Webinars 154
Appendices
Stop poisoning poster 155
How to build the Neighborhood Cats Winter Shelter 156
TNR trapping log 160
1
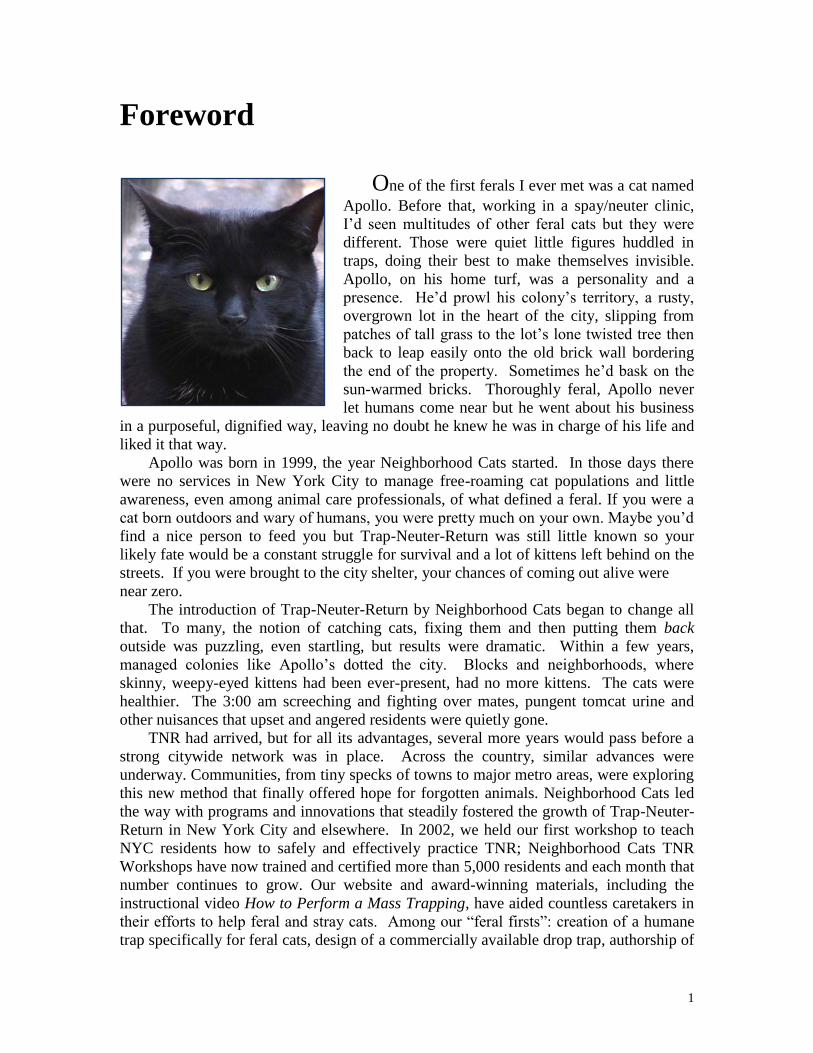
Foreword
One of the first ferals I ever met was a cat named
Apollo. Before that, working in a spay/neuter clinic,
I’d seen multitudes of other feral cats but they were
different. Those were quiet little figures huddled in
traps, doing their best to make themselves invisible.
Apollo, on his home turf, was a personality and a
presence. He’d prowl his colony’s territory, a rusty,
overgrown lot in the heart of the city, slipping from
patches of tall grass to the lot’s lone twisted tree then
back to leap easily onto the old brick wall bordering
the end of the property. Sometimes he’d bask on the
sun-warmed bricks. Thoroughly feral, Apollo never
let humans come near but he went about his business
in a purposeful, dignified way, leaving no doubt he knew he was in charge of his life and
liked it that way.
Apollo was born in 1999, the year Neighborhood Cats started. In those days there
were no services in New York City to manage free-roaming cat populations and little
awareness, even among animal care professionals, of what defined a feral. If you were a
cat born outdoors and wary of humans, you were pretty much on your own. Maybe you’d
find a nice person to feed you but Trap-Neuter-Return was still little known so your
likely fate would be a constant struggle for survival and a lot of kittens left behind on the
streets. If you were brought to the city shelter, your chances of coming out alive were
near zero.
The introduction of Trap-Neuter-Return by Neighborhood Cats began to change all
that. To many, the notion of catching cats, fixing them and then putting them back
outside was puzzling, even startling, but results were dramatic. Within a few years,
managed colonies like Apollo’s dotted the city. Blocks and neighborhoods, where
skinny, weepy-eyed kittens had been ever-present, had no more kittens. The cats were
healthier. The 3:00 am screeching and fighting over mates, pungent tomcat urine and
other nuisances that upset and angered residents were quietly gone.
TNR had arrived, but for all its advantages, several more years would pass before a
strong citywide network was in place. Across the country, similar advances were
underway. Communities, from tiny specks of towns to major metro areas, were exploring
this new method that finally offered hope for forgotten animals. Neighborhood Cats led
the way with programs and innovations that steadily fostered the growth of Trap-Neuter-
Return in New York City and elsewhere. In 2002, we held our first workshop to teach
NYC residents how to safely and effectively practice TNR; Neighborhood Cats TNR
Workshops have now trained and certified more than 5,000 residents and each month that
number continues to grow. Our website and award-winning materials, including the
instructional video How to Perform a Mass Trapping, have aided countless caretakers in
their efforts to help feral and stray cats. Among our “feral firsts”: creation of a humane
trap specifically for feral cats, design of a commercially available drop trap, authorship of

2
an online course on TNR for Humane Society University, development of an online
database to track feral cat colonies and help return eartipped cats to their caretakers, and
drafting a model TNR ordinance to guide municipalities nationwide.
In 2006, The Humane Society of the United States, the nation’s most influential
animal welfare organization, officially endorsed Trap-Neuter-Return, affirming the power
of TNR to impact lives for the better. Other national animal welfare groups are also now
solidly in support of TNR, including the ASPCA, Best Friends Animal Society, Maddie’s
Fund and PetSmart Charities. In 2011, as numerous other municipalities have done, the
New York City Council made TNR its official policy for managing free-roaming cats.
Today, the discussion has shifted from whether TNR should be practiced to how it can be
spread most widely and effectively.
These are promising days for community cats. None of this would be possible
without the caretakers everywhere who fill the food bowls no matter the weather, bait
traps, provide shelter, tame and carefully re-home kittens, and sacrifice their own time
and money. A million small acts of kindness have led to the accomplishment of these
milestones.
By the time Apollo and I crossed paths, he was a well-fed, well-sheltered,
comfortably middle-aged ex-tomcat. He and his colony mates fully enjoyed their lives,
in a way that could not have happened without TNR. There are no cats left in the lot now
though sometimes when I walk past I can almost see a little black shape basking on sun-
dappled bricks. This guide was written in memory of old friends and with hope for the
future. It is dedicated to all feral cat caretakers, to help speed the way to a better
tomorrow for community cats.
Susan Richmond
Executive Director, Neighborhood Cats
April, 2013
3
Introduction
“If we keep ‘em in a cage, at least they’ll be safe.” This
has been the reasoning of numerous well-meaning cat
rescuers in the past. Surely the operative words here are “at
least” for we would have to admit that, for an animal or a
young child or any of us, a lot more than safety is required
if anything resembling a normal, healthy life is our goal.
Happily, there is a better way, a veritable win-win situation.
For feral cats, TNR (Trap-Neuter-Return) is the answer.
My own concept of feral cats was limited by the
glimpses I had caught of them over the years. Pitiful, thin
creatures with runny eyes and weeping sores. Most of them
were sick or lame, scurrying along the alleys or underneath
cars parked at the curb. My heart broke but what could I do
if the cats wouldn’t even let me come close.
It was Bryan Kortis who explained TNR to me and
showed me my first managed feral cat colony. Late on a midwinter afternoon when the
temperature was below freezing with ice underfoot and a promise of more snow
tomorrow, Bryan led me through a maze of Upper West Side alleys and courtyards,
around rows of garbage cans and under rusty fire escapes. I had steeled my mind and
emotions for the pitiful sight I knew I was about to witness. Was I ever in for a surprise!
We rounded the last corner into a small courtyard. To my left the space was enclosed
by a three-foot stone wall topped by an enormous chain link fence. I scarcely had time to
turn to my right where four large Styrofoam boxes were held up off the ground by stacks
of bricks, because one second after we rounded that corner, a series of furry bodies
exploded out of those boxes, hit the pavement, streaked for the fence, flew up, cleared the
top, hit the ground running on the other side and disappeared into the twilight of the
alleys beyond. In the four or five seconds that they had been visible, I had seen bright
eyes, rich, thick furs, rippling muscles and a feat of athletic prowess I had never imagined
possible for a cat. My heart leapt for joy.
“They’re beautiful,” I cried. “They’re healthy and clean and strong.”
“They’re a managed colony,” Bryan replied. He led me over to the Styrofoam boxes.
“These are insulated shelters. They cost about twenty-five dollars each. Stick your hand
inside. Don’t worry, the cats have all gone.”
I peeled the glove off my icy fingers and reached through the little round door in the
side. The box was like an oven!
Now, with this handbook, anyone can manage a feral colony. Everybody’s ferals can
be strong and happy and proud. The book is beautifully organized; the instructions are
crystal clear and logical.
May your path be as full of wonder and laughter as mine has been ever since that
winter evening when I discovered the intriguing world of feral cats.
Anitra Frazier (author, The Natural Cat)
October, 2004
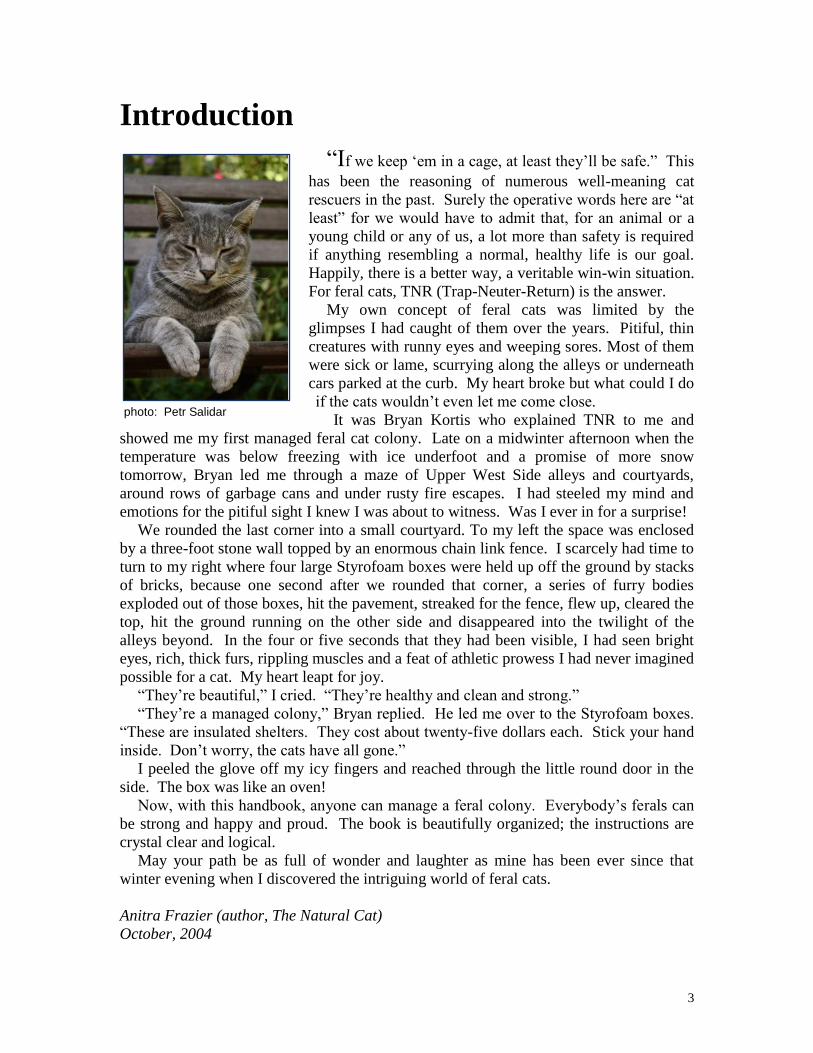
photo: Petr Salidar
4
1. What is a Feral Cat?
A “feral” is a cat who is not socialized and
exhibits some degree of wild behavior. Ferals tend
to be fearful of people and keep their distance
unless it is someone they have come to know and
trust. This often makes them difficult to handle and
place in adoptive homes. They may be lost or
abandoned pets who once had a home but over time
have reverted to a wild state or they may be the
offspring of former pets, sometimes many
generations removed. In contrast, a “stray” is a
former pet who, though now without a home, is still
socialized. When re-introduced to a domestic
setting, a stray will usually quickly display his tame
nature.
In recent years, cats who live outside typical
household situations and are not considered anyone’s pet, have come to be referred to as
“free-roaming” or “community” cats. These terms are useful because they focus on the
circumstances in which the cats live rather than on individual characteristics like feral vs.
stray. In the case of “community cats,” the term also implies there is a collective
responsibility for their care.
Most free-roaming or community cats form groups called “colonies.” Most of the
cats will tend to be feral, although the mixture of ferals and strays can vary widely. The
cats in a colony share the same territory and a common food source. Often they are
related, but not always. Colonies can form anywhere there is adequate food and shelter.
In urban or suburban areas, they can be found in alleyways, vacant lots, abandoned
buildings, warehouses, factories, parks, shopping centers and backyards, to name a few.
In rural settings, colonies are often found in barns as well as the back streets of small
towns. The vast majority of ferals in these colonies are not completely wild because they
rely on people for their food source, whether it’s a dumpster behind a restaurant or a kind
neighbor who comes by once a day. Relatively few subsist by hunting alone.
“Feral” is not a biological trait, but a behavioral one. As a result, the same cat can be
feral at one point in her life and tame at another. A socialized pet cat, abandoned and left
to fend for herself outdoors, may become feral. Likewise, a feral cat, given enough time
and attention, may grow tame. Because “feral” describes behavior and socialization, it is
not an all or nothing characteristic, but is present in different degrees in different cats.
Just how wild a cat is will depend on a combination of four factors:
Age Age is the most influential factor. Kittens six weeks of age or younger are usually not
yet developed enough to be highly feral and can be easily socialized, sometimes with
the first touch of a hand. Seven to eight week old kittens may take a few days or
more to socialize, but are still young enough in most cases to tame relatively quickly.
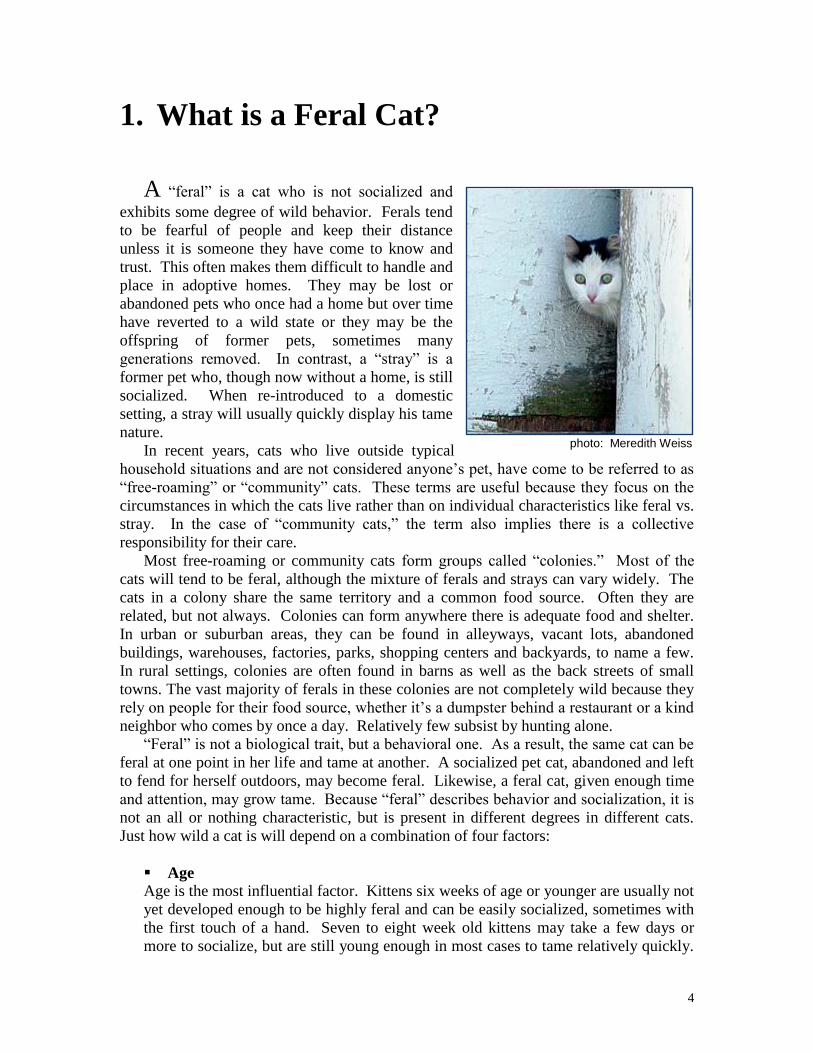
photo: Meredith Weiss
5
Beyond eight weeks, the feral imprint grows increasingly stronger with each passing
day, requiring longer and more intensive socialization to reverse. By the age of four
months, many kittens, even if they are eventually tamed, will exhibit some feral
behavior for the rest of their lives, such as a profound attachment to one person and a
fear of others. Beyond five to six months, in most instances a cat born feral will
rarely become fully socialized.
Number of generations feral Cats grow wilder with each succeeding
feral generation. A colony cat who
herself once lived as a pet in a home will
tend to be less feral than her offspring
while, as another example, a tenth
generation feral cat will tend to be
wilder than a second generation.
Amount of human contact The amount of contact a cat has with
people on a regular basis is another
important factor. A cat who lives in a community garden and has visitors coming
every day to talk and play with him will be less feral than a cat who lives in the
woods and rarely encounters people.
Personality Feral cats are individuals and their unique personalities must be taken into account.
On occasion, a cat will be friendly towards people despite being beyond kitten age,
born of a feral mother and living in a reclusive environment. But the naturally
occurring “gregarious feral” is very much the exception, at least prior to spay/neuter.
Many caretakers do report that after neutering, some of their feral wards gradually
grow friendlier and more approachable, sometimes to the point of becoming
adoptable.
Assessing whether a cat is feral and, if so, to what extent, can be helpful in
determining the best situation for the feline. If the cat is friendly and can be handled,
then adoption is likely the best option if there are foster or permanent homes available. If
the cat is feral to a significant degree, then allowing him to live in his own territory with
his colony mates could be the most compassionate choice. For further discussion on this
question, see the section, “Determining if a cat is adoptable,” in Chapter 16.
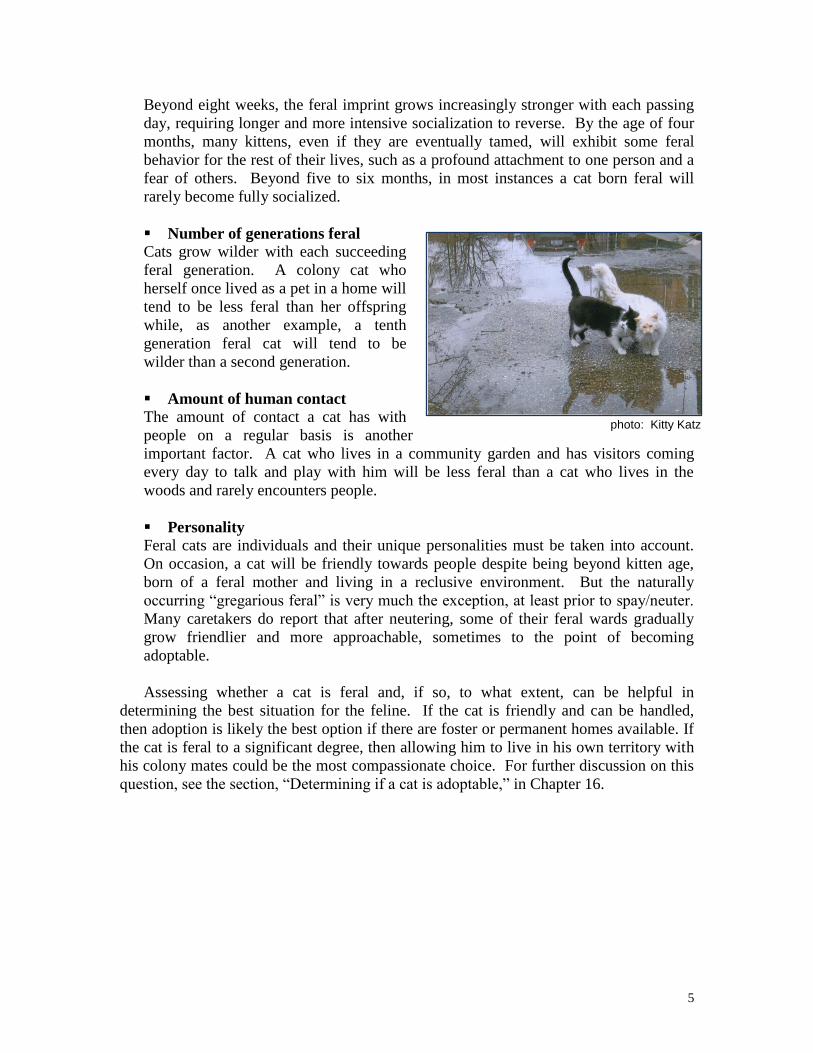
photo: Kitty Katz
6
2. What is Trap-Neuter-Return?
Trap-Neuter-Return, commonly
known as TNR, is a method for
humanely and effectively managing
cat colonies and reducing free-
roaming cat populations. The process
involves trapping the cats in a colony,
having them spayed and neutered,
eartipped for identification and, where
appropriate, vaccinated for rabies, then
releasing them back into their
territory. Whenever possible, friendly
adults and kittens young enough to be
easily socialized are removed and
placed for adoption. A designated
caretaker provides regular food and shelter to the returned cats, monitors the colony for
newcomers, and mediates any conflicts between the cats and the surrounding community.
TNR offers a number of benefits on both the colony and community levels. As a
TNR activist, it’s wise to become knowledgeable about these advantages and be able to
articulate them whenever necessary. TNR is still a relatively new concept and many
people don’t understand why it’s a good idea to put the cats back where you found them.
So let them know!
The advantages of TNR – colony level
For a particular colony, getting the cats spayed and neutered has the following
advantages for their neighborhood:
1. No more kittens and a gradually falling population. If all the cats are fixed, or
at least all the females, no more litters will be born. If newcomers to the colony
are quickly trapped and altered or adopted out, the size of the colony should
decline over time.
2. Noise is dramatically reduced. Most of the noise from an unmanaged colony
comes from activity related to mating, such as yowling and fighting – behaviors
which are greatly reduced by spay/neuter.
3. Noxious odors are eliminated. Unaltered males mark their territory by spraying
urine tinged with testosterone, causing an especially foul odor. Neutering
eliminates the testosterone and the pungent smell associated with it. In addition,
most altered male cats will stop marking or do so less frequently.
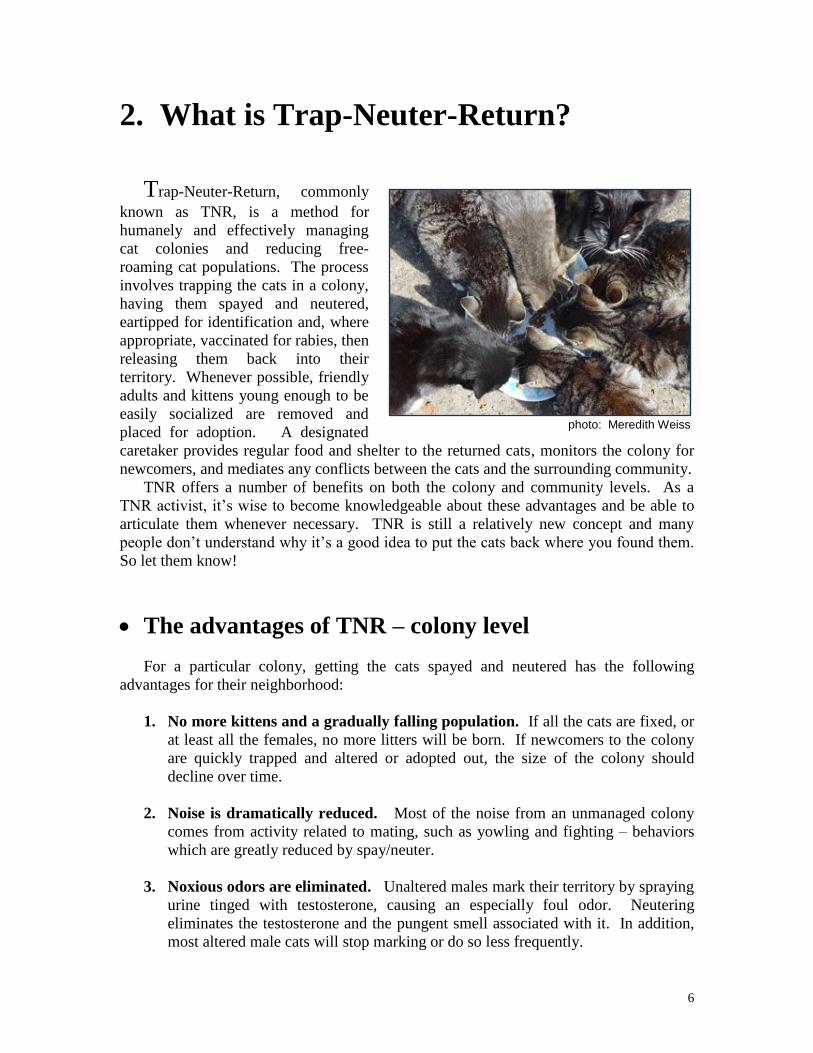
photo: Meredith Weiss

7
4. Rodent control is maintained. Cats provide a natural form of rodent control,
primarily by their scent deterring possible prey. Returning the cats allows this to
continue.
5. A healthier and less visible colony. Neutering, regular food and adequate
shelter greatly improve the cats’ health. As a result, they will be much less prone
to infestation by parasites like fleas, a benefit to their human neighbors. In
addition, neutered cats tend to roam much less and so become less visible.
6. Removal of the pity/sadness factor. Concerned neighborhood residents no
longer have to observe hungry cats or dying kittens, sights commonly associated
with an out-of-control free-roaming cat population.
7. The presence of a caretaker. With TNR, someone is there to take responsibility
for the colony, watch over them and work out any problems with neighbors.
8. Prevents a new, unaltered colony from forming. Removing most or all of a
colony leaves the territory vulnerable to re-colonization by new, unaltered cats
and resumption of the same problems as before. This is commonly referred to as
the “vacuum effect,” a phenomenon discussed in more detail later in this chapter.
Fixing the colony and leaving them in place breaks this cycle. The colony will
usually guard its territory from newcomers if its food source is limited to an
amount which can only support its members.
The advantages of TNR - community level
The advantages of TNR when the method is practiced on a community-wide scale
extend well beyond each individual colony:
a) Reduction of the community’s free-roaming cat population. If a substantial
percentage of the colonies in a community are spay/neutered and managed
properly, then the overall number of feral and stray cats in that community will
decline over time. The rate of decline will increase as more and more colonies are
TNR’ed.
b) Lower intake and euthanasia rates. Feral cats and especially their offspring are
flooding shelters throughout the United States, thereby raising cat intake rates,
creating overcrowded conditions and draining limited shelter resources. Because
adult ferals are unadoptable and the sheer quantity of kittens can be
overwhelming, euthanasia is often the outcome for these cats. By reducing the
number of feral cats in a community, TNR can lower intake rates and lessen the
need for euthanasia.
c) Fewer nuisance complaints. As mentioned, spay/neuter alone eliminates much
of the nuisance behavior associated with unaltered feral cats, such as noise and

8
noxious odors. This in turn reduces the burden on local animal control or public
health authorities of investigating and acting upon complaint calls. An overall
reduction of the number of feral cats in a community, achieved through TNR, will
also lead to fewer complaint calls.
d) Rabies control. In regions where rabies is present in the environment, rabies
vaccinations are a part of the standard veterinary protocol for TNR. This reduces
the number of unprotected cats and reduces the threat of people being exposed to
the disease. While cases of rabid cats attacking a person are extremely rare, it is
possible for young kittens carrying rabies to be unknowingly handled by people.
When it is later learned these people were exposed, the required treatments are
expensive and can strain the budgets of local health departments. By both
vaccinating cats and reducing litters of kittens, TNR lowers the incidence of
potential rabies exposures.
e) Ability to mobilize volunteers. Because TNR is life affirming, it attracts large
numbers of people who care about the cats and their well-being. Volunteers will
contribute their time, labor and funds to trap the cats and get them fixed, knowing
the cats will live. In contrast, efforts to trap and remove the cats usually result in
their deaths and are not something many people will volunteer to do. With
estimates on the number of free-roaming cats in the U.S. in the tens of millions,
the ability to mobilize an army of volunteers is essential to put an end to their
overpopulation.
f) Cost savings for shelters. Every time a cat is intaked to a shelter and euthanized,
there are costs involved. There may have been the cost of sending an animal
control officer out to capture the cat. There is staff time spent processing the
intake and providing care during whatever mandatory holding period may be
required. There is food and litter. The euthanasia procedure is a cost as is the
disposal of the body. As a result, for every feral cat that is TNR’ed instead of
being brought to a shelter, the shelter saves funds, especially if a private
individual or another animal welfare group conducts the trapping and pays for the
surgery.
g) Gaining caretaker cooperation. Caretakers of colonies typically know their
cats’ numbers, whereabouts and habits. They can help trappings go well by
sharing information and withholding food at the appropriate time, or they can
thwart trappings by doing the opposite. Caretakers’ cooperation is crucial for any
successful attempt at feral cat population control and TNR gains this by ensuring
the cats will not be harmed.
h) Improved public relations for animal control. When animal control supports
TNR instead of trying to round up and put down cats, their public image gets a
major boost in a positive direction. This can lead to more volunteers, more people
coming to municipal shelters to adopt cats and improved fundraising.
9
Failed alternatives to TNR
One of the most persuasive reasons for doing Trap-Neuter-Return is that nothing else
works! To achieve the goals of population reduction and lowered nuisance behavior, no
other technique has a realistic chance of long-term success. An examination of the
available alternatives to TNR makes this clear.
1. Trap and remove
“Trap and remove” is often referred to as “trap and euthanize” because euthanasia is
the common outcome for the cats. We prefer the term “trap and remove” because it
focuses on the attempt to eradicate the cats from the environment. It has been the
predominant approach by animal control agencies in the U.S. towards feral cats for
decades. The current proliferation of the cats in every nook and cranny of the country
speaks eloquently to the utter failure of this method to achieve long-term reduction of
their populations. There are several reasons why it doesn’t work:
The vacuum effect
Cat colonies spring up and subsist in certain locations because the habitat provides
adequate food and shelter. When a colony is removed from a site, but the habitat is left
unchanged, cats who were recently abandoned or belong to neighboring colonies will
move into the vacant territory to take advantage of the remaining food and shelter. The
cycle of reproduction begins anew and the colony quickly returns to the size which
available resources can support. This phenomenon, known as the “vacuum effect,” was
first documented by wildlife biologist Roger Tabor in his studies of London street cats
(Tabor, R., The Wild Life of the Domestic Cat (1983) Arrow Books.)
Altering the habitat to discourage immigration of new cats is difficult. All it takes to
create an adequate food source is an unsealed dumpster, open garbage cans or one person
leaving out cans of food when they spot a cat. Which people, being compassionate by
nature, are prone to do. One study found that a quarter of the respondents in a random
survey of adults in Ohio had recently fed a feral or stray cat. (Lord, L., Attitudes toward
and perceptions of free-roaming cats among individuals living in Ohio (1983) Journal of
the American Veterinary Medical Association Vol. 232: 1159-1167.)
Higher survival rates
Trapping all the members of a colony can be done, and one of the purposes of this
handbook is to explain how, but it requires close knowledge of the colony, training,
patience and dedication. When local authorities attempt to trap and remove feral cats,
they rarely have the information or time needed to do a thorough job and, inevitably,
some cats are left behind. These cats and their offspring now have less competition for
the food and shelter remaining at the site, resulting in a higher percentage of kittens
surviving until the colony’s natural ceiling – the number of cats which the available food
and shelter can support – is again reached.

10
Lack of animal control resources
At this point in time, there are so many feral cats in the environment that is the rare
animal control agency which has the manpower to try to trap and remove a significant
number from its community. More urgent matters, such as dangerous dogs, take priority.
Cat trapping occurs only anecdotally in response to complaints. An officer will go out to
a location, put out a few traps for an unknown (to him) number of cats, take away
whoever he happens to have caught when he come back in a few hours, then move on to
the next problem. Many communities, like New York City, have recognized the futility
of this approach and the wastefulness and no longer send officers out to trap cats unless
there is a significant public health issue involved.
Caretaker resistance
As discussed earlier, one of the advantages of TNR to the community is that
caretakers of colonies will cooperate. On the flip side, if the approach instead is to trap
and euthanize the cats, caretakers will resist, either actively or passively. Passive
resistance may include withholding important information, such as the number of cats,
and where and when they eat. Active resistance may include feeding the cats before
trapping attempts to discourage them from entering baited traps, or setting off or
damaging traps when they’re left unguarded.
Synergy
Most situations involving trap and remove attempts have more than one and often all
the relevant factors present at the same time – the vacuum effect, higher survival rates for
untrapped cats, lack of animal control resources and caretaker resistance. They combine
to render trap and euthanize completely ineffectual for long-term, community-wide
population control. Municipalities that continue to utilize this method typically
experience constant levels from year to year of seized cats, complaint calls and
euthanasia rates. These unchanging numbers indicate all that is being accomplished is
population turnover rather than reduction – new feline faces, but not fewer. The problem
is not being solved.
2. Feeding bans
Feeding bans, at first glance, may have a simplistic appeal to authorities trying to
reduce their community’s free-roaming cat population – “stop feeding cats and there
won’t be any,” is basically the thinking. The first fault with this approach is it is
inherently cruel and irresponsible. If a feeding ban was going to work, it would be
because the cats would either starve to death or go somewhere else and become someone
else’s problem.
In reality, assuming a feeding ban can be enforced, the cats won’t all die nor will they
pack their kitty bags and board a bus to the next town over. Ferals are extremely
territorial and will not wander far in search of food. However, they are quite resourceful

11
and as their hunger grows, they will encroach farther into inhabited spaces, including
homes and workplaces, locate previously untapped food sources within their territory and
raise their level of predation. Though it may well damage their health, cats can survive
for weeks without food and continue to reproduce. If they become malnourished, their
vulnerability to parasites like fleas increases. A common tale is a workplace where first
feeding cats is prohibited, then hungry cats enter the factories or trailers looking for food,
then flea infestations break out in these areas. What might have seemed like a simple
solution ends up making the situation much worse.
The second reason feeding bans invariably fail is because they are almost impossible
to enforce. Caretakers of colonies feel as much of a bond towards the cats as owners feel
towards their pets and most will not just walk away when they know the cats are
depending upon them. Caring people have repeatedly demonstrated they will risk their
jobs, their homes, jail, fines and even bodily harm to prevent the animals from starving.
Given the level and intensity of resistance that typically arises when a feeding ban is
imposed, enforcement becomes impractical in areas of any significant size. People will
simply put out food when no one is watching. Attempts to make free-roaming cats
disappear by banning feeding usually result in suffering for the cats and increased
conflict among local residents, pitting those who care for the cats against those who
don’t, but little else.
3. Rescue or relocation
Neighborhood Cats encourages the placement of adoptable cats and kittens into
responsible homes whenever possible. This is both humane and one way in which TNR
activists can help reduce the street cat population. However, the goal that all ferals
should be rescued and placed in homes is not realistic. There are far too many cats and
too few foster or permanent homes with the willingness and patience to socialize a feral.
Perhaps one day this will change, but we are a long way from that time. Resources now
are better spent neutering the feral population rather than going through the long and
uncertain process of socializing and placing feral cats, especially when there are plenty of
already tame cats dying in our shelters for lack of homes. For the cat’s sake, too,
allowing a feral to live out his life in the wild may be a more compassionate choice than
having him spend fearful years in a cage or hiding under a bed.
In addition to rescue, bringing the cats to a sanctuary or relocating them to a safer site
are other possible solutions people often jump to when they first come upon an
unmanaged colony in distress. This is understandable – the cats appear to be in danger
due to anger and hostility towards them in the community and the immediate urge is to
remove them from these risks. But there are few reputable sanctuaries and little room in
them, and relocation to a new site is a difficult and uncertain process. See Chapter 16 for
an extended discussion of both sanctuaries and relocation projects
There is also the question of what happens at the old site when the cats are removed,
whether to be adopted out, sent to a sanctuary or relocated elsewhere. Unless the food
source is also removed, the vacuum effect may come into play and new cats may appear.
In addition, survival rates may increase among any cats left behind, including their
offspring. In the end, despite the rescue or relocation of some cats, the end result may be
just as many cats living in the same area.

12
4. Do nothing
If nothing is done, then the number of cats in a colony or in the community at large
will grow to the carrying capacity of the environment. In other words, however many
cats the available food and shelter can support, that’s how many cats there will be. At the
point where capacity is exceeded, population control takes the form of disease, starvation
or other natural means. Impacts on shelters, including higher intake, euthanasia and
costs, are not reduced. Public health concerns such as rabies and noise, odor and other
quality of life complaints are left unaddressed. If the human population in the area
grows, so will the carrying capacity and the number of cats. Doing nothing may be an
option, but it’s hardly a solution.
In sum, trying to solve free-roaming cat overpopulation by removing feral cats –
whether to euthanize, rescue or relocate – does not work. In nature’s ongoing cycle, new
cats replace the old ones and nothing much changes in terms of the numbers or nuisance
behavior. Feeding bans, besides being cruel in concept, are ineffective in practice.
Doing nothing means accepting the status quo and all the problems that come with it.
Ultimately, targeting the cats’ reproductive capacity through spay/neuter and returning
them back to their territory is the best approach available for lowering their numbers,
reducing their impact on the environment and improving their lives.
photo: Heather Letzkus
13
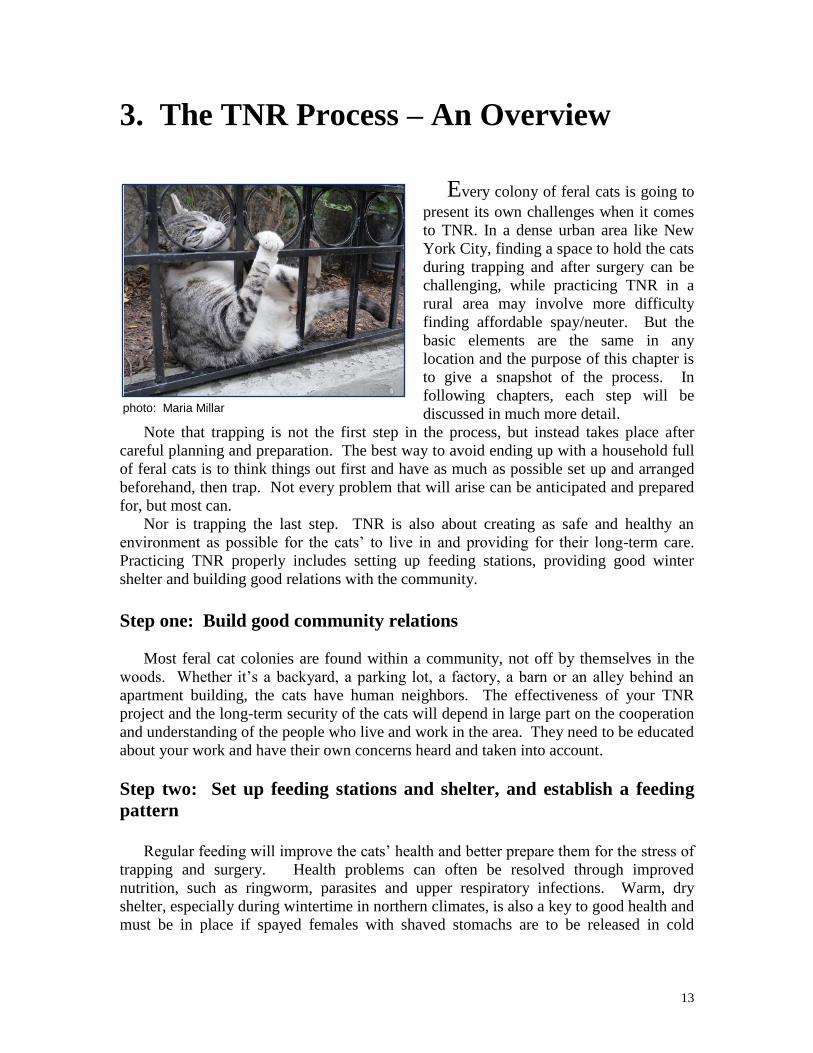
3. The TNR Process – An Overview
Every colony of feral cats is going to
present its own challenges when it comes
to TNR. In a dense urban area like New
York City, finding a space to hold the cats
during trapping and after surgery can be
challenging, while practicing TNR in a
rural area may involve more difficulty
finding affordable spay/neuter. But the
basic elements are the same in any
location and the purpose of this chapter is
to give a snapshot of the process. In
following chapters, each step will be
discussed in much more detail.
Note that trapping is not the first step in the process, but instead takes place after
careful planning and preparation. The best way to avoid ending up with a household full
of feral cats is to think things out first and have as much as possible set up and arranged
beforehand, then trap. Not every problem that will arise can be anticipated and prepared
for, but most can.
Nor is trapping the last step. TNR is also about creating as safe and healthy an
environment as possible for the cats’ to live in and providing for their long-term care.
Practicing TNR properly includes setting up feeding stations, providing good winter
shelter and building good relations with the community.
Step one: Build good community relations
Most feral cat colonies are found within a community, not off by themselves in the
woods. Whether it’s a backyard, a parking lot, a factory, a barn or an alley behind an
apartment building, the cats have human neighbors. The effectiveness of your TNR
project and the long-term security of the cats will depend in large part on the cooperation
and understanding of the people who live and work in the area. They need to be educated
about your work and have their own concerns heard and taken into account.
Step two: Set up feeding stations and shelter, and establish a feeding
pattern
Regular feeding will improve the cats’ health and better prepare them for the stress of
trapping and surgery. Health problems can often be resolved through improved
nutrition, such as ringworm, parasites and upper respiratory infections. Warm, dry
shelter, especially during wintertime in northern climates, is also a key to good health and
must be in place if spayed females with shaved stomachs are to be released in cold
photo: Maria Millar

14
weather. In addition, thoughtful location of feeding stations and shelters can help reduce
tensions with neighbors.
Starting at least two weeks before the trapping, the cats should be fed at the same
time and place on as consistently as possible. Establishing a feeding pattern will let you
get to know the colony. How many cats are there, what condition are they in, are any
adoptable? Knowing all this ahead of time allows you to schedule an appropriate number
of surgical slots, line up foster homes if needed, arrange extra veterinary care for any
special cases and, in general, explore your options in a more relaxed way than will be the
case if you wait until the cats are trapped before you figure things out.
A reliable feeding pattern will also make the trapping much easier because the cats
will be trained where and when to show up. Feral cats are very habitual creatures. You
won’t have to go searching throughout the territory for them – they’ll come to you
instead at the appointed hour.
Step three: Secure a holding space
During the trapping and after the spay/neuter surgery, the cats will need to be
confined. Except during the actual surgeries when they are sedated, the cats should
remain in their traps at all times. This is for the safety of anyone working with the cats
and to prevent escapes. Using the techniques described in this handbook, the traps
effectively double as cages and the cats can be comfortably housed and fed in them.
The holding space where the cats are kept in their traps must be warm, dry and
secure. It could be a garage, basement, warehouse, empty room in an apartment or
enclosed porch in the summertime. Any space will work where the temperature can be
kept warm, the cats can be protected from the elements and no threat of harm will be
presented by other animals or people not associated with the project. Trapping will
normally take place over two or three days, then post-surgical recovery time may also last
two or three days, so the time the cats are held will usually run from four to six days.
Step four: Schedule spay/neuter and arrange needed equipment &
transportation
Once you’ve educated the community on what you’re doing, set up a feeding pattern
and counted the cats, and found a suitable holding space, you can safely schedule your
spay/neuter date. Whenever possible, mass trapping – the TNR of an entire colony at
once - is recommended. Mass trapping is the most efficient approach to TNR and brings
the quickest results. However, your ability to mass trap may be constrained by the cost
and availability of spay/neuter, the availability of traps, your time limitations or the size
of your holding space.
Train the cats to come eat at an hour that will work best for you when it comes time to trap. Also, cats are rarely on the prowl when the mercury climbs so summertime trapping works best if you train ferals to come for meals early in the morning or after sunset when the temperatures are cooler.
15
After you’ve determined how many cats you’ll be after when you first trap, schedule
that number of surgeries with your spay/neuter provider. If traps are available to borrow,
reserve them right after you’ve set up your spay/neuter appointment – ask for one trap per
cat plus a couple of extra if you’re mass trapping. You may need to reduce the number of
scheduled surgeries if you can’t secure enough traps, or re-schedule your spay/neuter date
to a time when enough equipment will be available. Also, make arrangements for
transportation. The cats will need to be transported from their territory to the holding
space, back and forth from the spay/neuter clinic and then back to their territory.
Step five: Trap
Now that everything is in place, the trapping can proceed. Food is withheld from the
cats the entire day before trapping begins. How many days you allot for trapping will
depend on the number of cats you’re after. Always leaving at least two days is advisable,
three if you’re after more than a few cats. The extra time protects against poor weather,
the cats not showing up for some unknown reason, your neighbor deciding to start a
construction project right at that time, or any other unexpected condition which could
impair the trapping. Waiting until the day before your surgery appointment, or the
morning of, is risky and could damage your relationship with the clinic if you show up
empty-handed.
Step six: Spay Day
Food and water are withheld the night before the spay/neuter date, except for young
kittens who need to be fed closer to the time of surgery. The morning of the
appointments, the cats are transported to the clinic where standard treatment includes
spay/neuter, eartipping and, where appropriate, rabies vaccination. Flea medication, ear
mite treatment and other extra veterinary care are recommended on an “as needed” basis.
Step seven: Recovery & return
If everything goes normally, the cats will be confined from 24 to 72 hours post-
surgery and then returned back to their territory. It’s important the cats are released in
close proximity to where they were trapped and not at an unfamiliar location. Otherwise,
without the proper relocation procedures being followed, they will likely run off in search
of their old home. During the time they’re held, both before and after surgery, the cats
should be fed and their traps cleaned twice a day.
Step eight: Long-term care and monitoring
After the trapping and spay/neuter of the cats is complete, the long-term care of the
colony begins. For TNR to be most successful at reducing numbers and providing
humane care, a designated caretaker should feed the cats regularly, make sure there is
adequate shelter, watch out for and trap any newcomers, and act as an intermediary with
the community.

16
4. Building Good Community Relations
For the most part, feral cats live among
us, their territory overlapping our own. Many
people will interact with the cats on a daily
basis, whether it’s leaving out food, playing
with them or watching from a distance. There
will be those who love the cats and enjoy their
presence, while others may be angry at the
noise and odor if the cats are not neutered.
Few people are aware anything can be done to
improve the situation for the cats and the
community.
To ensure the long-term security of the
colony and to facilitate your trapping and
caretaking, the community and its attitudes
towards the cats must be considered.
Whenever possible, efforts need to be made to
shape attitudes in a favorable way. To ignore
this aspect of TNR and go about the work with
no concern for the neighborhood in general is
to potentially place the cats and your project in
needless peril. With a little education about
what you’re doing and its advantages,
understanding and support can be built. In this respect, TNR is not only about working
with cats, but about community activism and working with people.
What “community” will be involved in your project will depend on the
circumstances. The relevant community might be a factory and the people who work
there, a municipal facility and the agency which runs it, a homeowner and his backyard, a
condominium complex, a hospital, a neighborhood or even an entire town or city. No
matter how broadly or narrowly the community is defined, the importance of developing
good relations is paramount. It will be much easier to trap if you have permission to
enter someone’s property than if you trespass and try not to be spotted. Feeding and care,
too, is easier and more reliable when you have the community’s support as opposed to
hoping no one throws away the food or challenges your right to provide care. Releasing
cats back onto property where the residents know what you’re doing and approve of TNR
is much safer for the cats than putting them back into an uncertain situation where the
reaction of the community is unknown.
By performing TNR, you’re helping bring a problem under control that affects
everyone who lives or works near the colony. In this respect, TNR is a community
service. So let people know you’re helping them! You may be surprised how many
welcome and appreciate your efforts.
Before you can win over the neighborhood, you need to educate yourself about TNR
and be able to speak persuasively about its many advantages. Review Chapter 2 closely
photo: Petr Salidar

17
for this purpose. Once you can talk about TNR in a knowledgeable manner, you’ll be
able to effectively use the community development techniques described below.
Community development techniques
1. Walk and talk
One way to gauge the prevailing attitudes towards the cats in a neighborhood, as well
as learn about the history of the colony, is walk around and talk to people. Talk to
doormen, superintendents, store owners, parking lot attendants, local residents whose
front or backyards are part of the cats’ territory, the closest veterinarian, people you
notice stopping and watching the cats – anyone who might be acquainted with the felines.
The idea is to gather as much information as possible: How many cats are there? Who
feeds them? When? How often? How did the situation start? Has anyone tried to do
anything about it before? How do people feel about the cats – welcoming, hostile,
indifferent? If you come across someone friendly to your cause, get their contact
information or give them yours – down the road you may need their help or they may
have more information for you. Stay alert for people who might help feed or trap, or who
want to donate food, money or holding space.
During this “get acquainted” phase, explain to people what TNR is and let them know
you are organizing a TNR project. Keep repeating the mantra, “No more kittens, no
more noise, no more odor.” Where relevant, emphasize the natural rodent control
provided by the cats. Refer those who are interested to resources where they can learn
more about TNR, such as the Neighborhood Cats website (www.neighborhoodcats.org).
If you can, make up business cards – see Vistaprint.com (www.vistaprint.com) for a way
to design and print cards inexpensively. Keep your appearance neat and clean. The more
professional an image you convey, the more effectively your message will be delivered.
2. Deal calmly with hostility and resistance Often, a feral cat problem will come to your attention after a crisis situation has
already developed – there are too many cats, people can’t sleep at night because of the
yowling, piles of unsightly empty cat food cans litter the block, backyards can’t be used
because of the smell. These are all typical signs of an out-of-control, unmanaged colony.
Many people affected by these conditions will resent the cats and blame anyone who
feeds them for their continued presence. Their attitude towards you, a cat-friendly
person, may at first be hostile and even confrontational. Anticipating this kind of
hostility and dealing with it well is essential, especially if the person or agency which is
upset has the authority to decide whether a TNR project moves forward or not.
The key is not to take anything said personally and be hostile in return, as difficult as
it may be to hold back a good retort. Instead, try to understand why someone might be
frustrated and unhappy with the cats. Put yourself in the place of those who are
complaining – if cats fighting woke you up every night at 2 a.m., if your garden had

18
become the neighborhood litter box or if the laundry room in your building stank from
the spray of unaltered male cats, you might be resentful, too. Especially if no one took
your grievances seriously or ever offered a solution.
Don’t argue with those who voice these complaints, but listen carefully. Openly
sympathize with what they’ve had to deal with and explain how TNR will help and why
trying to permanently remove the cats from the area will just end up with new cats and
the same old problems. Most people calm down and respond well when they see their
side of the story is being heard. When they understand there’s a way to keep the cats and
lose the problems, most are willing to give it a try. The worst thing you can do is lose
your temper and act angry and critical. All you’ll accomplish is making the person, who
you need to get on board with TNR, even more hostile and defensive. When the
argument ends and you walk away, you’ll have made the situation more precarious for
the cats, not better. Stay in control at all times and, if you’re new at this, consider doing
some role-playing with friends before you start talking to people for real. Let your
friends act out the part of the angry neighbor who hates the cats while you try to listen to,
understand and defuse their hostility.
There will be times when someone in a position of authority won’t agree to TNR no
matter how well you perform your role as advocate. Don’t give up easily. Try to get
someone else to speak to the person whose word may carry more weight with him. A
supportive animal control or public health official, for example, or a local councilman or
minister may be able to make more progress. If you still don’t get anywhere, you have to
decide whether to keep the lines of communication open in case the person or agency
changes their mind in the future or attempt to apply public pressure to get them to change
their mind now. If you withdraw quietly and remain available, eventually, if other
attempts at resolving the feral cat situation fail, the person or agency may become more
open to trying TNR. Of course, cats may suffer in the meantime and definitely will if
trapping and euthanizing takes place.
Trying to apply public pressure instead of waiting to see if minds change is not a
simple task and you should be realistic about your capacity to launch an effective
campaign. Are you acting alone or as part of an organization? Usually, the support of a
group is needed. Does the organization have the media contacts, volunteers and
resources necessary for sustaining a campaign that might include demonstrations, online
advocacy, interviews, etc.? Sometimes these situations are resolved quickly, but other
times they drag on for weeks or months. Has support for TNR already been built up in
your community and you know public opinion will be on your side? Is the person or
entity you’re trying to persuade vulnerable to public pressure or can they easily ignore it?
Sometimes there is value in putting up a fight even if you don’t prevail in order to
promote TNR in general, but then you still have to put up a good fight. Knowing your
opponent, your own capacity to campaign and the value of a struggle are all important in
deciding, when the answer to TNR is “no,” whether to quietly move on or instead stand
your ground.
3. Hold community meetings
Community meetings take primarily two forms – meetings with members of the
community, such as residents in a neighborhood, and meetings with community leaders,
19
like the board of a homeowner’s association. Depending on the circumstances, you may
hold one or the other or even both. If your work involves an apartment building, make an
appointment to meet the landlord, co-op board or superintendent. Once you have their
blessings, it might be wise to hold a general informational meeting for residents so as
many people as possible are supportive of your work. If a government-owned facility or
a private workplace is where the cats are located, getting the consent of whoever is in
charge is usually enough. If it’s an entire neighborhood that you’re targeting and there are
no identifiable authorities, schedule a meeting at a local coffee shop and post flyers
announcing it around the area. Invite everyone interested in the cats, pro and con. If you
can get people initially hostile to the cats to attend, you’ll have an opportunity to educate
and change minds.
With neighborhoods, find out if there is a local Community Board. If so, call up and
get on the agenda for the next meeting. Be prepared to speak for a few minutes and have
both a list of suggested volunteer activities, such as providing holding space, assistance
with trapping or fostering baby kittens, and a signup sheet. The people who regularly
attend these Board meetings are often the more active members of the community and the
most willing to help out.
Churches, libraries or the offices of local elected officials could be asked to host a
meeting. Getting the backing of recognized community leaders - like the mayor, a
council member, a respected priest - is a plus, so try to meet with them, too, and ask for
their endorsement. Check with your local police precinct to see if they have a community
affairs officer. These officers can be helpful in a variety of ways, from helping gain the
cooperation of others to reserving parking space for a mobile spay/neuter clinic.
4. Send a community appeal letter One technique for informing people of your work and gaining their support is a letter
addressed to everyone in the building, apartment complex or neighborhood. Real estate
brokers have the names and addresses of all residents in a particular area. If you know
someone in the business, ask if you can use the list to do a mailing. Or else slip the letter
under everyone’s door. The letter should explain the current problems going on with the
cats, what TNR is, and how you intend to use TNR to solve the situation. Include a
contact number for yourself or the organization you’re working with. Mention ways
people can help, including donations if you’re working with a nonprofit. Also consider
announcing a meeting where any questions will be answered.
5. Post informational flyers A one page flyer describing TNR and how you plan to implement it in your
neighborhood is another way to build support. Keep it simple and easy to read (don’t use
small type) and list contact info. Post it on bulletin boards, permissible public areas,
veterinarians’ offices and local animal shelters. Include a solicitation for volunteers and,
if you’re affiliated with a nonprofit, for funds.
20
6. Change municipal laws and animal control policies In some municipalities, there are laws which effectively outlaw TNR, such as bans on
feeding any animal outdoors, laws prohibiting cats from roaming freely (“leash laws”)
and limits on the number of animals a resident can own with “ownership” defined in a
manner that includes feral cat caretakers. In other locales, animal control may have a
policy of trying to trap and remove all free-roaming cats, neutered or not. To openly
practice TNR in such communities, these kinds of hostile laws and policies must first be
addressed and changed.
Effective advocacy of TNR on the government level requires careful planning and
experience in this realm is very helpful. If you’re new to TNR and political advocacy,
consult with more experienced activists before meeting with the town council or the head
of animal control. Again, study Chapter 2 so you can clearly explain to others the
benefits of TNR. See if there is a feral cat organization or program nearby with the
knowledge of how best to approach the issue. Consult the Neighborhood Cats website
under for ideas and materials, such as pro-TNR position statements from The Humane
Society of the United States and the ASPCA. You can also contact us for advice at
Poisoning threats
When a feral cat colony is unmanaged and in crisis, occasionally a threat to poison is
made by a resident in the area. If this happens, the first thing to do is find out what the
law is in your state or county. In many jurisdictions, poisoning is a form of animal
cruelty and a crime, even a felony with a possible prison sentence in some states. Check
your laws by calling your local shelter or animal control agency, or ask an attorney friend
to look it up. Find out if poisoning is an offense and, if so, what the penalties are.
People who threaten or actually attempt to poison are usually unaware this is a serious
offense. One way to deter them is to let them know. Make up a “Stop Poisoning” poster
similar to the one in Appendix A of this handbook. The poster should include the
maximum penalty for poisoning and offer a reward for information leading to arrest and
conviction. Print out copies on bright pink paper and post them around the neighborhood
in question, leaving a few extra copies in front of the suspect’s residence or place of
employment.
Keep in mind the purpose of the poster is not to catch anyone, but to deter any would-
be poisoner from acting. It’s extremely unlikely anyone will ever be arrested, let alone
convicted, as a result of information provided because of the poster. You can rest easy
Government officials will make their decisions based on what they believe is best for their human constituents, not what’s best for the cats. So focus on topics like lowering the number of free-roaming cats, cost savings and public health benefits, not on how the cats’ health improves with TNR. Look the part by dressing professionally and leave the cat-themed T-shirt, cap and sweater at home!
21
about having to pay the reward, although be reasonable about the amount you list so the
poster appears credible. But despite the unlikelihood of finding and convicting anyone,
the poster has two important effects – it alerts someone considering poisoning that he
would be committing a crime and it also lets him know others are watching. Not many
people will care enough about getting rid of the cats to risk going to jail. As a result, in
our experience, the poster is an effective deterrent.
The Stop Poisoning poster should only be used if there is a reasonable suspicion of
possible poisoning. It should not be used simply because you’re afraid someone is so
angry, he might try it. Something concrete like an articulated threat or the mysterious
death of a cat should be the threshold. Otherwise, you could be needlessly stirring things
up and planting the idea.
Fleas
One reason someone may give for wanting to remove feral cats from an area is fleas.
Flea infestations can become severe, especially if the cats shelter in a spot favorable to
fleas, such as the crawl space beneath a building. Employees at a workplace or residents
of an apartment complex may complain of flea bites and attempts to fumigate may fail.
The thinking then becomes, “get rid of the cats and we’ll get rid of the fleas.” As
discussed in Chapter 2, removing feral cats is much easier said than done and there are
better ways.
Improved living conditions
Every animal has parasites in their system. When parasites, such as fleas, are so
plentiful that the condition reaches the level of an infestation, this can be a sign
something is wrong with the animal’s health. Healthy cats have strong immune systems
and rarely become flea infested. They may carry a few – more in warm weather, fewer in
cold - but not so many it becomes a serious problem for their human neighbors.
Situations where ferals are causing flea infestations are almost always unmanaged ones
where the cats are unneutered and/or poorly fed. A factory where feeding of cats has
been banned would be typical. The cats, deprived of adequate nutrition and facing the
demands of mating behavior, become weakened and susceptible to fleas. They start
coming in closer to where people are working because of hunger and their search for
food. The result is a flea infestation of the workplace.
Neutering the cats and providing them with regular food and adequate shelter boosts
their immune systems and usually eliminates the problem. While the cats are in surgery,
the areas infested can be fumigated and the cats given flea medication so everyone can
start off clean. In addition, by managing the colony and deciding where the cats will eat
and sleep, they can be drawn out of locations which fleas favor and away from the
immediate areas where people live and work.
22
Diatomaceous earth
One tool for addressing fleas is an all-natural insecticide called diatomaceous earth, a
fine powder made from the fossilized remains of a tiny, hard-shelled type of algae called
diatoms. While it feels like talcum powder to our touch, on a microscopic level, the
fossilized remains are razor sharp and kill fleas upon contact. The product is often fed to
cows and other farm animals to help clear their digestive systems of worms. It can be
spread in locations where fleas are found, like cracks between walls and floors, under
sinks, beneath trailers and other problem areas. It can also be sprinkled in locations
where the cats spend time, like inside their shelters. Cats who can be handled can be
dusted with it as a cheap form of flea control, although a flea medication is likely to be
more effective.
Important note! There are many varieties of diatomaceous earth and it’s essential, for
purposes of safety and efficacy, to only use the “Food Grade” variety with and around
animals. Do not, for example, use “pool grade” diatomaceous earth. The product is
relatively inexpensive and can be purchased in bulk, up to 50 lbs. in a bag, at many
agricultural feed stores. You can also buy it online or over the phone – one vendor is Dirt
Works (www.dirtworks.net or call 1-877-213-3828).
Beneficial Nematodes
Another natural product for flea control in natural outdoor settings like lawns or
gardens is Beneficial Nematodes, microscopic worms which eat the larvae of fleas and
other common insects. They are applied using a lawn sprayer to moist, shady areas
where fleas thrive. Nematodes reproduce rapidly and within a matter of days, will
significantly reduce the resident flea population. They are not parasites and will not harm
the cats.
Nematodes are sensitive to light and temperature so should be applied either at dusk
or early in the morning – neither fleas nor nematodes will survive in the hot sun. They
mostly die off in cold winter weather, so may need to be re-applied in the spring. If there
are no fleas or other suitable insects for them to eat, the worms will naturally die off.
Different varieties suitable for different insects and soil types are now available. They
can be purchased at many home garden stores, especially ones oriented towards organic
gardening. One source is Arbico Organics (www.arbico-organics.com or call 1-800-827-
2847.)
Keeping cats out of gardens & yards
A common source of complaints about feral cats is people who don't want them in
their yards or gardens or on other parts of their property. Trying to work with property
owners to alleviate this problem is a better way to protect the cats than arguing the felines
have a right to go wherever they want. Listed below are several products and methods
for keeping the cats away from places they’re not welcomed. There are deterrents, which

23
act to discourage cats from entering or remaining in a space, and confinement systems
which restrict their movement to certain areas. In most situations involving free-roaming
cats, a deterrent will likely be the most practical approach.
1. Deterrents
In our experience, the motion-activated sprinkler is by far the most effective deterrent
when the area in question is well-defined, such as a garden or a backyard, and not too
large. The other deterrents listed below have worked for others and may work for you,
too.
Motion-activated sprinklers
A motion-activated sprinkler works just as its name suggests. The device emits an
infra-red field which covers the area you’re trying to protect. When a cat enters the field,
the sprinkler shoots off in her general direction a loud and violent burst of water that lasts
a few seconds. Rarely will the cat be hit by the spray; rather, the cat becomes frightened
and runs off. Before long, cats learn the boundaries of the infra-red field, avoid entering
it and, eventually, the sprinkler is rarely triggered. Because water is needed, the device
will not function in freezing temperatures. The trick is to start using it in warmer weather
so the cats are trained to stay away by winter. Motion-activated sprinklers on the market
include:
The Scarecrow by Contech
This product detects motion up to 45 feet away and covers a maximum
area of 1300 square feet. The device must be connected to a water
source via a hose and operates for six months on one 9 volt battery.
Multiple units can be connected via hoses to one another, requiring
only one water source. The distance of the spray and area covered are
adjustable, as is the sensitivity of the device to detecting motion.
Changing these variables can prevent cats from growing too
accustomed to the device. It can be purchased directly from the
manufacturer at www.contech-inc.com or call 1-800-767-8658. If you
do an online search for other retail outlets, you may find it at a lower
price. Try Safe Pet Products (www.safepetproducts.com or call 1-888-
977-7387) or search Amazon (www.amazon.com).
Spray Away by Havahart
This device’s advertised coverage of 1000 square feet and range of
motion detection of 35 feet are slightly less than those claimed by the
Scarecrow. Similar to The Scarecrow, it operates on one 9 volt
battery, has adjustable settings and can have multiple units linked to
one water source. Available at www.havahart.com.
24
Spray Away Elite by Havahart
This new product operates in a manner similar to other motion-
activated sprinklers, but is hose-free. Because it contains its own 3.5
gallon reservoir, it does not need to be connected to another water
source and has great mobility in terms of placement. Another
innovative feature is its lifetime battery which is recharged by solar
panels located on top of the unit. Its motion-detecting range is listed at
35 feet and coverage area is 1000 square feet. It is more expensive
than models which require hose connections, so you might want to
limit its use to situations where a hose is unavailable or impractical.
Go to www.havahart.com.
Ultrasonic devices
An ultrasonic device, like a motion-activated sprinkler, emits an infra-red field.
When a cat steps into the field, the device gives off a high frequency sound annoying to
cats, but not perceptible by people. The key to their effectiveness is making sure the
device or devices have the capacity to cover the size of the area you’re trying to guard.
Otherwise, they won’t work. In our experience, ultrasonic devices have received mixed
reviews. There are experienced feral cat groups which swear by them and use them in
creative ways, such as mounting one on a garage, pointing down at a parking space to
keep cats from jumping onto cars. Or placing two devices at opposite ends of a property
line, facing one another, in order to keep cats from crossing the line. Others, however,
have reported the devices have no effect on the cats.
Part of the problem when the device doesn’t have the desired effect may be that cats
are smart. Because the device is motion-activated, it will turn off if the cat enters the
territory and then stays still or hides behind a large object. As a result, it may take some
trial and error and strategizing about placement of the device before the desired effect of
keeping the cats away is achieved. If you’re thinking of trying one, it might be wise to
buy one or two first and test them out before making a larger investment. The devices
work in all types of weather, though if you’re using batteries, you may need to replace
them more often in colder seasons. Models include:
CatStop by Contech
This is the most popular brand. One device covers 280 square feet
and operates on either a 9 volt battery or, for purchase at an additional
cost, an AC adaptor. Go to www.contech-inc.com or call 1-800-767-
8658. A search for other online retailers of the product on Amazon
(www.amazon.com) may turn up a lower price.
Yard Gard Ultrasonic Animal Repeller by Bird-X
The Yard Gard has an advertised range of 4,000 square feet, quite a
bit larger than the CatStop. It can be set to be either motion-activated
or produce sound continuously. We recommend using the motion-
activated setting so the least amount of audio disturbance is created in
the environment, which may contain other animals you don’t want to
25
repel. It operates on four “C” batteries or an AC adaptor. Go to
www.bird-x.com or call 1-800-662-5021. You may find lower prices
for the product at other online outlets by searching Amazon
(www.amazon.com).
Scent repellents
Reports on the effectiveness of scent repellants are mixed, sometimes working quite
well and at other times, not at all. Scent repellants should be sprayed or placed around
the edges of the yard, the tops of fences and on any favorite digging areas or plants.
Sprays will need to be replenished frequently and especially after rain. Chemically based
repellents often contain the active ingredient methylnonylketone. Manufacturers claim
this ingredient is safe, but also warn the chemical is poisonous and should not be applied
to food crops. Because of the possible risks, we recommend using chemically-based
scent repellants only if they will be used in a closed container. Otherwise, we
recommend naturally-based products, including the following:
Coleus Canina
This plant, a weed originating in Europe, is known as the "Scaredy-
Cat" or "Pee-off" plant because it emits an odor offensive to cats (but
not to humans). They should be planted three feet apart around the area
to be protected. To obtain them, you may need to order cuttings or
seeds from a nursery or dealer. The order should be placed during the
winter or early in the spring planting season before dealers run out of
stock. WARNING: There are many varieties of Coleus plants, so be
sure to buy the correct type – Coleus Canina. One online merchant
specializing in Coleus plants is Rosy Dawn Gardens
(www.rosydawngardens.com)
Critter Ridder Animal Repellent by Havahart
This all natural product can be purchased in either granular or spray
form. It is advertised as compliant for use in organic gardening, safe
for children and pets and effective for thirty days with one application.
Go to www.havahart.com.
Household items
Anecdotal reports indicate some degree of success from sprinkling or
dripping in gardens or flower beds one or more of the following items:
orange, grapefruit or lemon rinds (cats dislike citrus smells), coffee
grounds, pipe tobacco, lavender oil, lemon grass oil, peppermint oil,
eucalyptus oil, and mustard oil.
26
Barriers to digging
Cats may be attracted to gardens and flower beds because they like digging in the soil
and doing their business. Creating physical barriers to digging is one way to keep them
away. Products or items include:
Cat Scat Mats from Gardener’s Supply
These are plastic mats with flexible spikes sticking up out of them.
You press them into the soil, spikes facing upwards. While they’re
harmless to cats and other animals, they’re irritating and discourage
excavation. Go to Gardener’s Supply (www.gardeners.com) or call 1-
888-833-1412.
Rocks
Cover exposed ground with rocks that have rough surfaces, deterring a
cat from touching or trying to move them.
Lattice
Lay lattice fencing on the ground prior to planting, then plant flowers
or seeds in the openings.
Make an Outdoor Litter box
One way to keep the cats from using the garden or the lawn to poop or pee is by
giving them somewhere more attractive to go. A child’s sandbox, strategically situated
in a far corner of the yard, should do the trick. Regular sandbox sand is inexpensive. It
should be scooped out regularly and, occasionally, completely replaced. A large pile of
peat moss, approximately four feet square and eight inches deep, has also been reported
to be effective. It too, should be scooped out regularly and, once a month or so, entirely
replaced.
If you want the outdoor litter box to be contained, you can make one out of a large –
30 or 55 gallon - Rubbermaid storage bin (also called a storage “tote.”) Using a box-
cutter, slice open a doorway in one of the narrower sides of the bin, making the bottom of
the doorway several inches above the ground. An 8” x 8” opening will work. Then fill
the bin up to the bottom of the doorway with regular sandbox sand or, if you prefer, cat
litter. Cover the bin with its lid. If you can, put a couple of pieces of the cats' stool in the
sand to help draw them over. Scoop occasionally and once a month or so, dump and
replace the sand or litter.
You can also put a regular litter box with litter inside the storage bin after you’ve cut
open a doorway. You’ll likely then need to clean it out on a daily basis.
2. Containment systems
Sometimes, when it’s possible, the best way to avoid problems with neighbors is to
keep the cats confined to your own backyard or property. Special fencing is available to
accomplish this.

27
Free-standing fences
Purrfect Fence
The Purrfect Fence is made up of metal posts and plastic grid fencing
which blends in well with its surroundings. Inwardly arched tops
prevent climbing over the fence and ground stakes every two feet
prevent digging under. It can be installed around very large open
spaces with your budget being the only real limitation. The product
has been installed at the Hemingway House in Key West, Florida,
keeping the famous six-toed cats from wandering off the grounds and
into the neighborhood. Discounts are available for section 501(c)(3)
rescues and shelters. Go to www.purrfectfence.com or call 1-888-280-
4066.
Attachments to an existing fence
Attachments can be added to the top of an existing fence to keep the cats from climbing
over. These systems consist of inward leaning posts and special fencing material. Before
ordering, make sure the product you want to purchase complies with any zoning
requirements in your area, particularly height restrictions on fences. There are a few to
choose from:
Purrfect Fence
The company makes a system which can be added to existing fences as
well as a free-standing system. Discounts are available for section
501(c)(3) rescues and shelters. Go to www.purrfectfence.com or call
1-888-280-4066.
Cat Fence-In
Go to www.catfencein.com or call 1-888-738-9099.
Affordable Cat Fence
Go to www.catfence.com or call 1-888-840-2287.
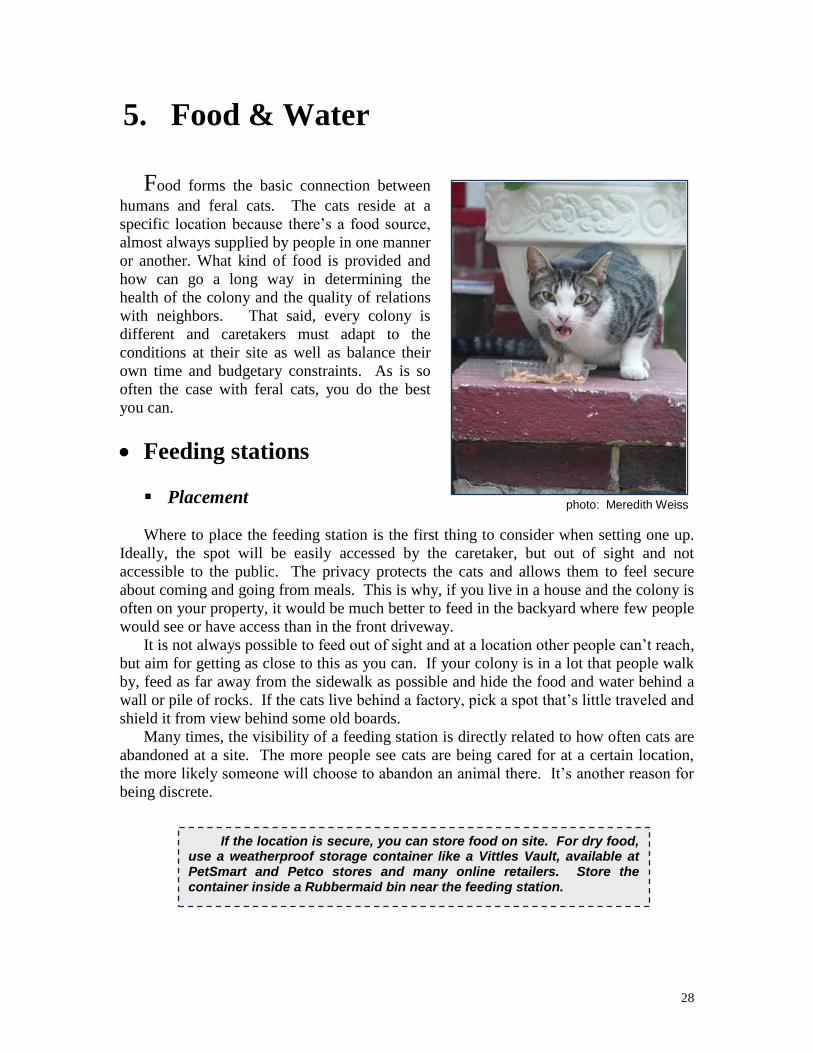
28
5. Food & Water
Food forms the basic connection between
humans and feral cats. The cats reside at a
specific location because there’s a food source,
almost always supplied by people in one manner
or another. What kind of food is provided and
how can go a long way in determining the
health of the colony and the quality of relations
with neighbors. That said, every colony is
different and caretakers must adapt to the
conditions at their site as well as balance their
own time and budgetary constraints. As is so
often the case with feral cats, you do the best
you can.
Feeding stations
Placement
Where to place the feeding station is the first thing to consider when setting one up.
Ideally, the spot will be easily accessed by the caretaker, but out of sight and not
accessible to the public. The privacy protects the cats and allows them to feel secure
about coming and going from meals. This is why, if you live in a house and the colony is
often on your property, it would be much better to feed in the backyard where few people
would see or have access than in the front driveway.
It is not always possible to feed out of sight and at a location other people can’t reach,
but aim for getting as close to this as you can. If your colony is in a lot that people walk
by, feed as far away from the sidewalk as possible and hide the food and water behind a
wall or pile of rocks. If the cats live behind a factory, pick a spot that’s little traveled and
shield it from view behind some old boards.
Many times, the visibility of a feeding station is directly related to how often cats are
abandoned at a site. The more people see cats are being cared for at a certain location,
the more likely someone will choose to abandon an animal there. It’s another reason for
being discrete.
photo: Meredith Weiss
If the location is secure, you can store food on site. For dry food, use a weatherproof storage container like a Vittles Vault, available at PetSmart and Petco stores and many online retailers. Store the container inside a Rubbermaid bin near the feeding station.

29
Type of feeding station
The perfect feeding station shields the food and water from the elements and has
room for a cat or two to be inside while eating. The type of station you set up will
depend on where it’s located and what the property owner will permit. If you feed in a
spot open to the public, you might not be able to put out equipment that could be easily
damaged or removed. Or if the property owner won’t allow you to use a structure of any
kind, your options are also limited. On the other hand, if you’re feeding in a private
location that you own and have complete say over what goes where, you can be as
elaborate as you’d like. The goal is to get as close to the ideal as circumstances allow.
Rubbermaid bin
You can turn a Rubbermaid storage
bin into a station by cutting out an
opening in one of the longer sides of
the bin with a box cutter, leaving a lip
of about three inches off the ground to
keep out any ground water from rain
(Figure 5-1). A large opening like this
is needed to prevent a dominant cat
from going in and keeping everyone
else out.
Rubbermaid brand bins are
recommended because, in our
experience, they are better made for the
rigors of the outdoors, like freezing temperatures, and will last longer before cracking and
needing to be replaced. If you use a box cutter to make an opening, start by tracing the
doorway lightly with the edge of the blade, then keep re-tracing the same lines, cutting in
a little deeper each time. Don’t try to slice all the way through at once.
Instead of one large opening in the front,
you can cut two smaller openings, one on each
of the bin’s narrower sides (Figure 5-2).
Again, leave a lip of a few inches on the
bottom. Having two doorways and not just
one will help prevent one cat from taking over
the whole cafeteria.
The bins in the photos are 55 gallons in
size. If more suitable to the location, a
smaller bin, such as a 30 gallon, can be used.
If even a 30 gallon bin is too large and
noticeable for your site, then try to use one that
will at least protect the food and water from the elements and allow the cats to stick their
heads in to eat and drink. Feeding stations made from storage bins are easy to clean
because they’re plastic, have a removable top and are quick to assemble.
Figure 5-1
Figure 5-2
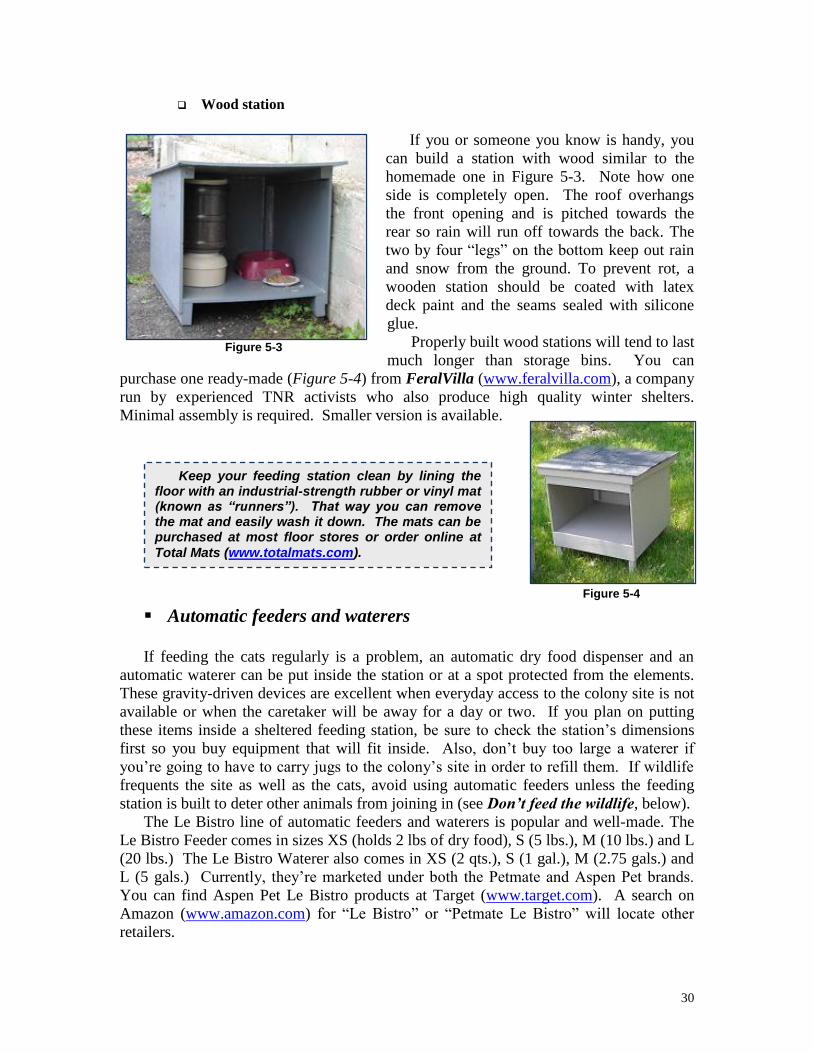
30
Wood station
If you or someone you know is handy, you
can build a station with wood similar to the
homemade one in Figure 5-3. Note how one
side is completely open. The roof overhangs
the front opening and is pitched towards the
rear so rain will run off towards the back. The
two by four “legs” on the bottom keep out rain
and snow from the ground. To prevent rot, a
wooden station should be coated with latex
deck paint and the seams sealed with silicone
glue.
Properly built wood stations will tend to last
much longer than storage bins. You can
purchase one ready-made (Figure 5-4) from FeralVilla (www.feralvilla.com), a company
run by experienced TNR activists who also produce high quality winter shelters.
Minimal assembly is required. Smaller version is available.
Automatic feeders and waterers
If feeding the cats regularly is a problem, an automatic dry food dispenser and an
automatic waterer can be put inside the station or at a spot protected from the elements.
These gravity-driven devices are excellent when everyday access to the colony site is not
available or when the caretaker will be away for a day or two. If you plan on putting
these items inside a sheltered feeding station, be sure to check the station’s dimensions
first so you buy equipment that will fit inside. Also, don’t buy too large a waterer if
you’re going to have to carry jugs to the colony’s site in order to refill them. If wildlife
frequents the site as well as the cats, avoid using automatic feeders unless the feeding
station is built to deter other animals from joining in (see Don’t feed the wildlife, below).
The Le Bistro line of automatic feeders and waterers is popular and well-made. The
Le Bistro Feeder comes in sizes XS (holds 2 lbs of dry food), S (5 lbs.), M (10 lbs.) and L
(20 lbs.) The Le Bistro Waterer also comes in XS (2 qts.), S (1 gal.), M (2.75 gals.) and
L (5 gals.) Currently, they’re marketed under both the Petmate and Aspen Pet brands.
You can find Aspen Pet Le Bistro products at Target (www.target.com). A search on
Amazon (www.amazon.com) for “Le Bistro” or “Petmate Le Bistro” will locate other
retailers.
Keep your feeding station clean by lining the floor with an industrial-strength rubber or vinyl mat (known as “runners”). That way you can remove the mat and easily wash it down. The mats can be purchased at most floor stores or order online at
Total Mats (www.totalmats.com).
Figure 5-3
Figure 5-4

31
Avoid overfeeding & attracting new cats
One of the advantages of TNR is that a neutered colony of cats will guard their
territory against intrusion by new cats, who will likely be unaltered, thereby preventing
the reproductive cycle from starting up again at that location. The reason this occurs has
to do largely with the amount of available food. If there is just enough available to
provide for the colony cats, they are highly motivated not to allow newcomers to move in
and share their meals. On the flip side, if more than enough food is always left out,
what’s the harm in allowing a few guests to join in?
As a caretaker, you can control the quantity of food. The key is to feed your cats
what they need to be well nourished, but not to be excessive and invite in the rest of the
ferals in the neighborhood. Over time, as the size of the colony declines, the amount of
food provided should be reduced accordingly.
Clean up!
One easy way to avoid friction with neighbors is to keep the area clean where you
feed. Pick up and remove empty cans, plates, plastic spoons, etc., even if someone else
left it there. Not only is a mess unsightly for residents, it could be considered unsanitary
and result in a health code violation and fine for the property owner. If you can, help
keep the general area clean and not only the feeding area. This will reinforce the
impression your presence at the site is a benefit to the community.
Don’t feed the wildlife
If your colony is located in an area inhabited by wildlife, such as raccoons, skunks,
coyotes or bears, you want to avoid attracting these other critters to your feeding station.
The best way to do this is to not leave food out at night – most wildlife are nocturnal -
and limit the time period in which the cats have food available. Alternatively, you can
construct a feeding station which wildlife can’t access.
The ideal method of feeding in a wildlife-intensive location is to put the food out for
a certain length of time, like half an hour, once or twice a day during daylight hours.
Feral cats are very habitual creatures and will soon learn the routine. “The food comes
out at 9 am and is gone by 9:30, so better show up on time,” is what they’ll learn. This
avoids leaving any leftovers for other animals to scoop up. If putting out the food and
waiting half an hour is not practical for you, then narrow the window of feeding as much
as possible. For example, put out the food when you go to work in the morning, then
pick up whatever’s uneaten when you come home. Whatever routine you develop, don’t
leave food out overnight because that’s the surest way to train the wildlife when to come
and dine.
With raccoons, skunks and opossum, it’s possible to build a feeding station which
they can’t access, taking advantage of their inability to jump like a cat. Basically, you
need to build a flat platform raised several feet above the ground which the critters can’t
climb. To accomplish this, the platform must be raised high enough that an animal like a
raccoon can’t stand up on his hind legs, grab hold of the edge of the platform and pull
himself up. Next, the poles or legs supporting the platform must be covered with a

32
smooth, hard surface which animals with claws, like raccoons, opossum and skunks,
can’t climb. Metal flashing will do the job. Attaching flashing around the edges of the
raised platform will serve as a further deterrent.
To make it possible for the cats to jump up onto the platform, create a small “jump-
off” structure close to the feeding station. It could be a couple of cinder blocks, one on
top of the other. Put the jump-off structure close enough to the feeding station so the cats
can easily climb it and leap up onto the platform, but not so close that wildlife could
climb it, lean over and grab onto the platform.
For a description and photos of one wildlife-proof feeding station, see “Raccoons
can’t jump” at www.thewildones.net/raccoons.htm.
Feeding tricks
Ants
Ants can be kept out of food by building a small moat. Take a pan, tray or
Tupperware container – anything flat, wide and with raised edges – and fill it with a
quarter inch or so of water. Then place the cats’ food in a bowl and place the bowl in the
middle of the pan. The water will keep ants from reaching the food while the cats can
easily lean over and eat, provided the moat isn’t too wide.
If you want something fancier than a bowl in an aluminum tray, there are the Bugless
Bowls at www.buglessbowls.com. They have a circular moat at the base which can be
filled with water. There’s also “The Mote” at www.antproofbowl.com, a waterless bowl
whose shape – including a curved lip – prevents ants from climbing up and getting in the
food. An online search for “ant free pet bowl” will locate any number of other inventive
products.
Another trick for keeping ants out of the food is to draw a circle of “chalk powder”
around the food bowls or feeding area. Chalk powder is composed of diatoms (fossilized
marine microorganisms) and to an ant the edges of the diatoms are painfully sharp, so
they won’t attempt to cross the line. The product is used by gymnasts and in other sports
and is available online. Before purchasing, check that it’s real chalk and contains
diatoms. You can also crush soft Crayola sidewalk chalk and use that.
Slugs
Similar to ants, slugs will not cross a chalk powder line because the chalk is sharp for
them as well. A circle with a thick line can be drawn around the food bowls or feeding
station. Find chalk powder (made up of diatoms) or crush soft Crayola sidewalk chalk.
You can also create a barrier to slugs by placing the food bowl on a large sheet of rough
sandpaper.
Another way to keep slugs out of the food is to feed them separately. Sprinkle bits of
dry food on the ground several inches away from the cats’ bowls and dishes. The slugs
will be drawn to this easily reached food rather than go through the trouble of climbing
up into the bowls.
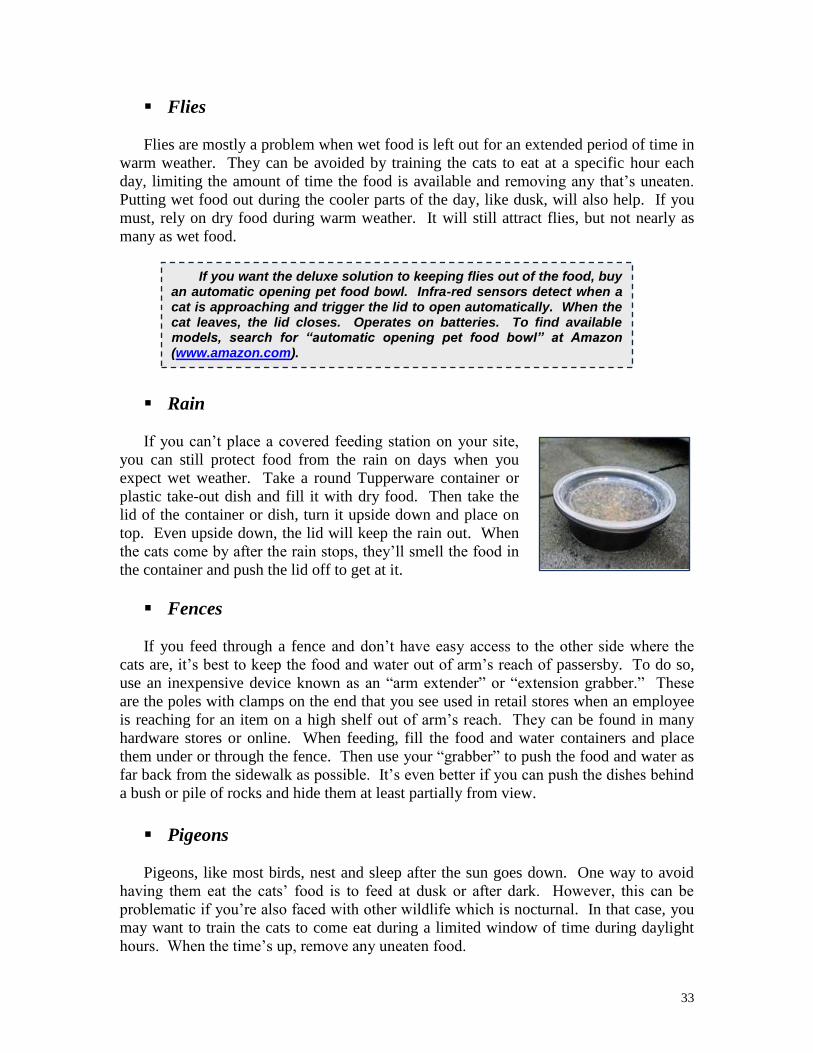
33
Flies
Flies are mostly a problem when wet food is left out for an extended period of time in
warm weather. They can be avoided by training the cats to eat at a specific hour each
day, limiting the amount of time the food is available and removing any that’s uneaten.
Putting wet food out during the cooler parts of the day, like dusk, will also help. If you
must, rely on dry food during warm weather. It will still attract flies, but not nearly as
many as wet food.
Rain
If you can’t place a covered feeding station on your site,
you can still protect food from the rain on days when you
expect wet weather. Take a round Tupperware container or
plastic take-out dish and fill it with dry food. Then take the
lid of the container or dish, turn it upside down and place on
top. Even upside down, the lid will keep the rain out. When
the cats come by after the rain stops, they’ll smell the food in
the container and push the lid off to get at it.
Fences
If you feed through a fence and don’t have easy access to the other side where the
cats are, it’s best to keep the food and water out of arm’s reach of passersby. To do so,
use an inexpensive device known as an “arm extender” or “extension grabber.” These
are the poles with clamps on the end that you see used in retail stores when an employee
is reaching for an item on a high shelf out of arm’s reach. They can be found in many
hardware stores or online. When feeding, fill the food and water containers and place
them under or through the fence. Then use your “grabber” to push the food and water as
far back from the sidewalk as possible. It’s even better if you can push the dishes behind
a bush or pile of rocks and hide them at least partially from view.
Pigeons
Pigeons, like most birds, nest and sleep after the sun goes down. One way to avoid
having them eat the cats’ food is to feed at dusk or after dark. However, this can be
problematic if you’re also faced with other wildlife which is nocturnal. In that case, you
may want to train the cats to come eat during a limited window of time during daylight
hours. When the time’s up, remove any uneaten food.
If you want the deluxe solution to keeping flies out of the food, buy an automatic opening pet food bowl. Infra-red sensors detect when a cat is approaching and trigger the lid to open automatically. When the cat leaves, the lid closes. Operates on batteries. To find available models, search for “automatic opening pet food bowl” at Amazon (www.amazon.com).
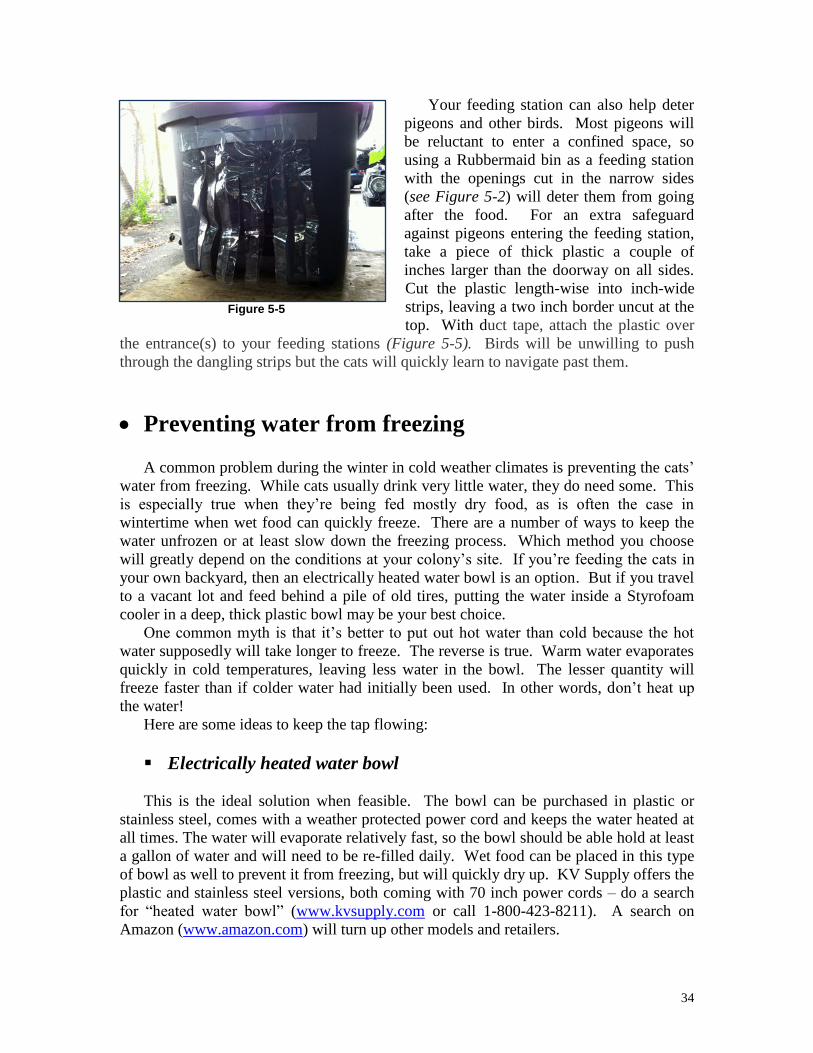
34
Your feeding station can also help deter
pigeons and other birds. Most pigeons will
be reluctant to enter a confined space, so
using a Rubbermaid bin as a feeding station
with the openings cut in the narrow sides
(see Figure 5-2) will deter them from going
after the food. For an extra safeguard
against pigeons entering the feeding station,
take a piece of thick plastic a couple of
inches larger than the doorway on all sides.
Cut the plastic length-wise into inch-wide
strips, leaving a two inch border uncut at the
top. With duct tape, attach the plastic over
the entrance(s) to your feeding stations (Figure 5-5). Birds will be unwilling to push
through the dangling strips but the cats will quickly learn to navigate past them.
Preventing water from freezing
A common problem during the winter in cold weather climates is preventing the cats’
water from freezing. While cats usually drink very little water, they do need some. This
is especially true when they’re being fed mostly dry food, as is often the case in
wintertime when wet food can quickly freeze. There are a number of ways to keep the
water unfrozen or at least slow down the freezing process. Which method you choose
will greatly depend on the conditions at your colony’s site. If you’re feeding the cats in
your own backyard, then an electrically heated water bowl is an option. But if you travel
to a vacant lot and feed behind a pile of old tires, putting the water inside a Styrofoam
cooler in a deep, thick plastic bowl may be your best choice.
One common myth is that it’s better to put out hot water than cold because the hot
water supposedly will take longer to freeze. The reverse is true. Warm water evaporates
quickly in cold temperatures, leaving less water in the bowl. The lesser quantity will
freeze faster than if colder water had initially been used. In other words, don’t heat up
the water!
Here are some ideas to keep the tap flowing:
Electrically heated water bowl
This is the ideal solution when feasible. The bowl can be purchased in plastic or
stainless steel, comes with a weather protected power cord and keeps the water heated at
all times. The water will evaporate relatively fast, so the bowl should be able hold at least
a gallon of water and will need to be re-filled daily. Wet food can be placed in this type
of bowl as well to prevent it from freezing, but will quickly dry up. KV Supply offers the
plastic and stainless steel versions, both coming with 70 inch power cords – do a search
for “heated water bowl” (www.kvsupply.com or call 1-800-423-8211). A search on
Amazon (www.amazon.com) will turn up other models and retailers.
Figure 5-5

35
Solar heated water bowl
Solar Sippers from the Happy Bird Corporation use the sun to keep water warm and
prevents freezing at 20 degrees Fahrenheit and above. Go to
www.solarsippers.com/main.html, click on “Solar Sipper Water Stations” in the left-hand
menu and look for the “Pet Sipper” (Models 10011 and 10012).
Immersion heaters
For those locations where electricity and solar power are not available, the Happy
Bird Corporation has designed a cordless, battery-powered heater than can be immersed
in the water bowl. A smaller heater will prevent one quart of water from freezing at 20
degrees Fahrenheit for two hours, while the largest one prevents freezing at that
temperature for eight hours. Go to www.solarsippers.com/main.html and click on “Solar
Sipper Water Warmers.”
“Snuggle Safe” heating pad
The Snuggle Safe heating pad is a plastic disc, measures nine inches in diameter and
is designed to keep pets’ bedding warm on chilly nights. Six minutes in an average
microwave oven will heat the disc enough for it to provide as long as 12 hours of warmth
in an indoor setting. For purposes of feral cat caretaking, the heated up disc can be
placed under a water bowl to prevent freezing for two to three hours in frigid conditions.
Having two disks on hand is convenient. That way you can leave a fresh warm one on
site while you take the used one home to be reheated.
The disc can also be used to provide added warmth inside feral cat winter shelters
(see Chapter 6.) Place the disc inside the Snuggle Safe cover or wrap it in thick cloth
before placing it inside a shelter. The product is available at Entirely Pets
(www.entirelypets.com). Other online retailers can be located by doing a search for
“Snuggle Safe heating disc.”
Styrofoam cooler
Buy a medium sized Styrofoam picnic cooler – one of the white ones normally used
for holding beverages or lunches on summer excursions. They measure approximately
two feet long by one foot wide and are available during warmer weather, so you may
need to think ahead. With a box cutter, cut out a six inch by six inch doorway in one of
the narrower sides. Place the water bowl inside at the far end opposite the doorway and
cover the cooler with its lid. The Styrofoam’s insulating quality will slow down the
freezing process. Don’t use too large of a cooler or the cats might use it as a shelter.
Winter shelters for ferals need to be dry at all times to safeguard their health, so you don’t
want them sleeping in the water station and getting wet.

36
Styrofoam vaccine shipping container
Vaccines are typically shipped to veterinarians in small Styrofoam boxes measuring
about 8 inches long by 4 inches wide. Line the inside of the box with a leak-proof plastic
bag and cut a small circular hole in the top of the box just large enough for a cat to drink
from. Fill the container with water. The Styrofoam will slow down the freezing.
An old tire and rocks
Find an old car tire that’s been removed from its rim and stuff it full of rocks. In the
center hole of the tire, wedge a container like a large bucket and fill it with water. Use
more than one tire if necessary to completely surround the container. The tire absorbs
sunlight and warms the rocks, which then radiate heat, slowing down the freezing
process. This method is used to provide water to horses in pastures.
Deep and thick plastic bowls
The type of bowl you use can make a big difference. Bowls made of thick plastic,
like a Tupperware container, provide more insulation. The best bowl will be thick, deep
and have a narrow width (in order to slow freezing, the opening at the top should be small
relative to the volume of water held). It also helps to place the bowl so it’s exposed to
sunlight and protected from the wind. Black or dark colored bowls will absorb heat from
the sun better than light colored ones.
Add water to wet food
If the cats come when you’re there and will eat right away, add a little extra water to
their wet food to help them get the moisture they need.
Place the water bowl near heating pipes inside building walls
If you're feeding in an alleyway between buildings, try to put the water bowl next to
where a heating pipe is located inside a wall. You can find the pipes by touch or observe
whether the cats tend to gather in a particular spot near the wall. If they do, it may be
because the spot is warmed by a heating pipe.
Preventing food from freezing
Because of its high moisture content, wet food left sitting out in cold weather will
freeze and become impossible for the cats to eat. This is why, in colder climates, dry
food often becomes the staple for feral cats during the winter. Even if you do manage to
feed some wet food, it’s a good idea to leave dry food out as a backup.
Freezing can be avoided by placing a bowl of wet food inside an insulated winter
shelter. While the cats are inside, the shelter will trap their body heat and keep the

37
interior warm enough to prevent or reverse freezing
of food. Before you place wet food inside a shelter,
check first to make sure there are no cats sleeping in
there. If the coast is clear, place a small bowl of
wet food in the corner of the shelter furthest from
the door. Be sure to remove any uneaten food and
replace it with fresh fare – you don’t want the cats
to eat food which has been frozen, thawed, then
frozen again. That’s a way for the food to become
contaminated. To be safe, you could put a small
bowl of dry food inside the shelter instead of wet.
Only place food in a shelter; never put water
inside. For the cats to stay healthy over the winter,
their shelter must be kept dry. A container of water
could easily spill, dampening the interior and getting the cats wet. Also, discontinue
putting any food in the shelter if you find it is attracting insects or wildlife.
Some of the products for preventing water from freezing may also assist with
stopping wet food from becoming frozen, like the heated water bowl or the Snuggle Safe
heated pad. The problem is that as the wet food is warmed, the moisture in the food
evaporates and the food dries out. So these products will be helpful only if the cats come
and eat the food quickly.
Nutrition
We believe the guiding principle when it comes to colony caretaking is feral cats
should be fed the highest quality food you can comfortably afford. This principle takes
two important considerations into account. First, nutrition is important for ferals who
often endure a physically demanding and stressful outdoor life. There is no better way to
help boost their overall health than to feed them well. Second and equally important are
your own financial circumstances. There’s no glory in feeding the cats premium brand
food if this means you can’t pay your rent. Your well-being matters too, and you must be
able to afford what you’re spending on the cats. If you’re managing a five cat colony and
the extra cost for high quality canned food won’t make much of a dent in your budget,
then that’s a good choice to make. On the other hand, if you’re feeding 30 cats in
multiple locations and buying the large bags of Kirkland dry food at Costco because
that’s what you can afford, then that’s the best choice and no less of a sacrifice.
In order to choose which food within your budget is the best quality, you need to
know a bit about cat nutrition. Here are some of the basics:
Interpreting the ingredients label
One quick way to evaluate the quality of cat food is to read the ingredients label.
This won’t tell you everything you need to know, but it’s a good start. The ingredients
are listed in the order of greatest quantity. If the first ingredient listed is “turkey,” then
photo: Meredith Weiss

38
turkey is the largest ingredient. If the first ingredient is “corn meal” followed by
“turkey,” then the food contains more corn meal than turkey.
It may not be readily apparent what some of the ingredients listed actually are. For
example, many lower quality foods list “by-products” as an ingredient. The label might
list “meat by-products,” “poultry by-products,” “fish by-products,” etc. Most people
assume this is some part of the animal normally consumed by people, too. In fact, by-
products are the waste parts of the slaughtered animal. They may include feathers, hair,
hooves, eyeballs, moldy, diseased or rancid meat rejected for human consumption, fecal
waste, or any other part of the animal you’d have thought would be tossed out.
If a food lists by-products on the ingredients label, especially if it is one of the first
few ingredients listed, don’t be fooled by the tasty-looking sauces, neatly cut slices or
artificial coloring. By-products are almost always less nutritious than their whole
counterparts no matter how nicely they’re dressed up, meaning the ingredient “beef” will
be healthier than “beef by-products.” Don’t assume either that a food full of by-products
must be healthy because your cats love to eat it. Poorer quality foods often have added
sweeteners and fish flavoring to hook your felines.
Pet food manufacturers use by-products because they’re cheap. This is why, with pet
food, you usually get what you pay for. Many brands of food available in high-volume
stores like supermarkets or large discount stores which are inexpensive often contain by-
products as one of the first ingredients listed on their labels. But beware, there are some
brands which trick people into believing they’re high quality simply because they cost
more, but they too consist largely of by-products or other inferior ingredients. Always
read the label and don’t go by price alone.
Another ingredient to watch out for is any kind of meat “meal,” such as chicken, fish
or turkey meal. In the cheaper brands of food, meal is often the same waste parts of the
carcass as by-products, just ground into an unrecognizable form. “Animal digest” is
another ingredient that can be of questionable nutritional value.
What you want to see listed first on the ingredients label are whole meats, such as
“chicken,” “beef,” or “turkey.” With few exceptions, the better brands will not contain
any form of by-products or meat meal.
Another common ingredient used heavily in lower quality foods, especially dry food,
is some form of corn. The label might read “corn meal,” “ground yellow corn” or
something similar. Cats are carnivores and do not satisfy their basic nutritional needs
from grains. If corn is the first ingredient on the label, then the largest part of the food
consists of something that has little nutritional value for the cat and is basically only
filler. It would be like having a meal yourself with the largest portion being potato chips.
You’ll get full, but it’s hardly a healthy diet.
Also check the ingredients for unnecessary sweeteners like corn syrup, blueberries,
brown rice syrup or beets. These all contain sugars meant to improve the taste. Any kind
of chemical, such as artificial coloring, artificial flavors, scents and artificial
preservatives, should be avoided, if possible. Artificial preservatives include BHA,
BHT, propyl gallate, nitrates and benzoate of soda.
Knowing the real makeup of cat food empowers you as a caretaker to make educated
choices. It doesn’t mean you’re doing something wrong if you decide to purchase foods
containing by-products or corn meal. The reality is that the higher quality brands without
these ingredients tend to be much more expensive. The bottom line is whatever choice of
39
food works best for your budget, the cats are better off because you care enough to
donate your time and funds towards feeding them.
Wet vs. dry food
Generally speaking, a wet food containing a certain quality of ingredients will have
more nutritional value than a dry food of the same quality. This is because the dry food
goes through a baking process which dries out the meats and, in so doing, loses some of
the ingredients’ nutritional content. In many cheaper brands of dry food, vitamins and
minerals are added before the baking process, with the result they are often destroyed in
the oven. The better quality brands add the supplements after the baking, which is
another reason why they cost more.
There are some common misconceptions about dry food. One is that it should be left
out all day so a cat can eat whenever he wants. In fact, this practice, especially for pet
cats, is potentially damaging to a feline’s health. Cats in the wild are not “grazers” like
cows, who are constantly eating. Instead, they are “feast and famine” animals. They kill
their prey, gorge upon it and then might not eat again for several days. The digestive
systems of the two types of animals are not the same. Feast and famine animals need
time away from food for their systems to stop working and clean themselves out. If they
are constantly eating or even constantly smelling food, their digestive systems never turn
off. As the cat ages, this can result in kidney and liver disease.
With indoor cats, the optimal way to feed is to leave food out twice a day for no more
than 20 to 30 minutes, then take what’s left over away and don’t put out more food until
the next meal. With feral cats, that kind of routine is also optimal, but often not possible
and a steady supply of dry food must be left out during at least some part of the day to
ensure all the cats in the colony get fed. It’s not as much of a problem though because
outdoor cats tend to not be as obsessed with eating as their indoor counterparts and are
less likely to hang out at the food bowl all day.
Another myth is dry food is good for cleaning a cat’s teeth. Possibly dry food
provides some minimal exercise for the jaw, but that’s about it. Prolonged chewing and
gnawing at something hard is required for a cat’s teeth to be scraped clean. Raw bones,
especially raw chicken necks, will achieve this. Cats can digest raw bones and in the
wild they derive the calcium their bodies’ need from them. The bones and necks must be
raw because cooked bones can splinter and can cause injury. Cooked bones should never
be fed to a cat. As with raw meat, it’s important uncooked bones or necks be very fresh
to avoid bacterial buildup and illness.
Adding ground beef
One way to substantially and inexpensively improve the nutritional content of low
quality cat food is to supplement it with ground beef, preferably ground chuck because of
its high fat content, which is good for cats. Unadulterated, 100% meat is great for cats.
If you do add ground beef though, always remember you must also mix in the correct
amount of calcium in order to balance the phosphate content of the meat. Otherwise, you
could cause the cats to develop frail bones and other long-term health problems. The
40
correct proportions are one teaspoon of either calcium lactate or bone meal for each one
pound of ground beef.
Ground beef with its calcium additive can be mixed into wet food or fed as an extra
dish on the side. Mixing it with dry food creates a real mess so you want to avoid that. If
you want to go the extra yard, add chopped-up and cooked broccoli, zucchini or carrots to
the beef/calcium recipe. The vegetables need to be cooked, preferably steamed, or the
cats won’t be able to digest them. Dried barley is also nutritious. Never add onions in
any form – they’re potentially toxic for cats in even a small amount (like chocolate).
Fresh (emphasis on “fresh”) ground beef, mixed with a calcium supplement, can be
fed to the cats raw and uncooked. Raw meat is the most natural diet for cats who, after
all, when they catch a mouse, don’t cook it first before dining. But raw meat must be
fresh, meaning it was put out that day at a reliable store and shows no outward signs of
browning. If it concerns you to feed meat raw, then lightly cook it. It will still greatly
improve the quality of the cats’ diet. Chicken and turkey can also be used in place of the
ground beef (adding calcium in the same proportions: one teaspoon per pound).
However, because of its greater susceptibility to bacterial buildup, it’s recommended you
do cook poultry unless it’s very fresh and organic.
Don’t feed the cats only the ground beef mixture described here, but use it as a
supplement. If you want to feed only a self-prepared raw or cooked meat diet, you need
to learn more about cat nutrition, including what vitamins and minerals to add. These
books are excellent resources for learning more about preparing your own cat food:
“The Natural Cat,” by Anitra Frazier (Penguin Books, 2008)
“Dr. Pitcairn's New Complete Guide to Natural Health for Dogs & Cats,” by
Dr. Richard Pitcairn, DVM (Rodale Press, 2005)
If you’re interested in learning more about what goes into manufactured cat food,
Ann M. Martin has written excellent and highly informative books on the topic:
“Food Pets Die For (2nd
ed.),” by Ann N. Martin (NewSage Press, 2002)
“Protect Your Pet: More Shocking Facts to Consider,” by Ann N. Martin
(NewSage Press, 2001)
Vitamin C to the Rescue by Anitra Frazier, author of “The Natural Cat”
It is certainly easier, cheaper and a lot more pleasant to prevent illness than it is to
trap a sick cat, transport him to a vet and then try to diagnose and treat the frightened
animal.
Vitamin C, the first vitamin discovered by humankind, is truly a friend indeed to the
caregiver of a feral colony. An efficient healer and powerful protector, it works like a
nutritional knight in shining armor fighting against invasions of germs and viruses and
battling stress of all kinds. Germs, viruses, dirt, x-rays and chemicals such as antibiotics,
41
steroids, tranquilizers, anesthetics, pesticides and the preservatives in commercial pet
foods have all been shown to use up large quantities of Vitamin C.
In addition, this versatile vitamin is user friendly.
It is water soluble and cannot be stored by the body so
an overdose is, for all practical purposes, almost
impossible. While 250 milligrams is the maximum
dose that a cat can absorb and put to use at one time, if
more is given, it will simply be excreted via the urine
and none will linger behind in the body.
Healthy cats can make some Vitamin C in their
intestine. The operative words here are "healthy" and
"some." Cats can manufacture enough C only if the
diet is rich in all the other nutrients they need and only
if daily stresses do not become too numerous, too
extreme or too prolonged. Stresses such as extreme
heat or cold, fighting, being wounded or hurt, being
trapped or caged, loud noises, strong, unpleasant smells or forced change of territory use
up Vitamin C at an alarming rate. Even a healthy, well-nourished cat can use up more
Vitamin C than he can produce if faced with a high level of stress. Depletion of this
vitamin leaves a cat easy prey to every germ or virus that happens along.
Any trap-neuter-return project will include the cats being trapped, caged, undergoing
surgery and having anesthesia and other medications administered. These are all
potentially stressful to the cats and can result in upper respiratory and other diseases.
What we need here is a knight in shining armor to bring the cats safely through all this.
Enter Vitamin C. This inexpensive and easily obtainable supplement will greatly
enhance any cat's chance for a full recovery.
There are three main types of Vitamin C in general use. Each has its own particular
strengths and drawbacks, but all will provide Vitamin C to the cats:
Ascorbic Acid is the cheapest and most popular form of Vitamin C. It is
readily available in pill or powder form from health food stores and
pharmacies. On the plus side, ascorbic acid helps keep the urine acidic,
thereby preventing bacterial growth and inhibiting formation of crystals.
Here’s how it works: a cat’s body can absorb only 250 mg and no more at
one time. If more is administered, the body will dispose of the excess by
sending it out in the urine. Ascorbic acid raises the acidity of the urine on
the way out, which is why holistic caregivers use it in doses greater than
250 milligrams to help dissolve bladder stones and crystals. The only
drawback to this form of Vitamin C is its acid or sour flavor – cats don’t
like it if too much is given. I counteract this by mixing it into a food with
a strong flavor of its own. Petguard Savory Seafood or Fish, Chicken &
Liver do the job nicely. For really finicky cats, I give only a half dose
(125 mg) or even a quarter (62.5 mg).
Sodium Ascorbate provides the same amount of Vitamin C as ascorbic
acid and is almost as cheap. If more than 250 mg is given at one time, the

42
excess will also be excreted harmlessly, but will not acidify the urine
because sodium ascorbate is alkaline. On the plus side, its flavor is
milder and it is the most readily accepted by cats of the three types of
Vitamin C, although as with ascorbic acid, it’s a good idea to add some
fish-flavored food to cover the sour taste. So if there is no reason to worry
about the acidity of the urine and you simply want to give a Vitamin C
supplement, sodium ascorbate is the one I would choose.
Calcium Ascorbate is very popular for use in humans because it is very
alkaline instead of acidic. It is used by people who suffer from ulcers or
hyperacidity because it tends to neutralize stomach acid. Unlike with
humans, the stomach of a healthy cat is supposed to be extremely acidic to
facilitate the digestion of protein, so calcium ascorbate can upset this
balance. Another drawback when it comes to cats is its very bitter taste.
A person can pop it down as a pill, but for cats we have to use a powder
form and mix it into the food. It makes the whole meal taste bitter. It’s
also a bit more expensive than the other two types. I don’t use it at all.
When found in its natural state in foods like tomato sauce, Vitamin C is accompanied
by bioflavonoids, rutin and hesperidin. Science has found that these nutritional sidekicks
are provided by nature to help the body absorb the C and put it to work more efficiently.
A cheap jar of ascorbic acid in powder form will certainly give wonderful support and
protection and it will help keep the urine acid as it should be, but C complex (ascorbic
acid with bioflavonoids, rutin and hesperidin) will do a lot more for only a little more
money. Health food stores will have several choices available. I use Twin Lab Super C,
yellow label.
Vitamin C does not need refrigeration but you must keep the contents of the bottle
dry. Use a clean, dry measuring spoon. Because C cannot be stored by the body, it must
be given every meal and can be continued indefinitely. A maximum dose of 250
milligrams equals about 1/8 teaspoon. Because the presence of moisture causes it to lose
potency, mix it into the food right before you feed. If everything is going well for a
colony, I recommend giving only 125 milligrams or 250 for each two cats. If the weather
turns harsh or some other stress presents itself, try to increase the dose to 250 milligrams
per cat. During trap-neuter-return projects when stress will skyrocket, give the full dose
for two days before trapping. During confinement and treatment, feed three or four small
meals a day in order to get the C into them more frequently. If a cat objects to the sour
flavor, as happens occasionally, cut the dose down by half or use just a few grains. Any
amount is better than zero. Remember to try adding a “bribe food,” something they love
that has a strong flavor. You can also sprinkle brewer's yeast on top.
Tomato sauce is a rich natural source of Vitamin C complex. If you know that a
colony enjoys it as part of the food mix (most do), make sure to include it along with the
supplement in times of stress. I prefer Muir Glen organic tomato sauce. Mix 1 or 2
tablespoons in a large 14 oz. can of cat food.
Remember, Vitamin C cannot be stored by the body so always giving a little with
every meal is like a mini-insurance policy. Adding 2 tablespoons of tomato sauce to each
large can of cat food is a delicious way to accomplish this. Then, if there is inclement

43
weather, loud construction work nearby, injury or any other stress, add up to 250 mg per cat per
meal of Vitamin C powder to a strong flavored food until the disruption is past. After the stress
is over, go back to adding the tomato sauce to each meal.
Because we are practicing prevention, caregivers may find it difficult at first to pinpoint a clear
demonstration of results. The benefits are mostly about what does not happen. Cats do not die
under anesthesia; wounds do not become infected; there is no outbreak of respiratory infections
shortly after a new cat arrives in the colony. Resistance is high; the cats are more resilient.
I would not feel even half as secure about managing a feral colony if I didn't have the help of
Vitamin C, my trusty knight in shining armor, to back me up.
Preventing urinary tract infections
A colony’s diet may include a relatively large amount of dry food, either for reasons of
cost, convenience or weather conditions. The concern, especially with male cats, is that ash in
the dry food can result in crystals forming in the bladder, leading to urinary tract infections.
Urinary tract infections are also possible independent of diet. In the worst cases, where
blockages occur in males, the condition can be fatal. Unlike with a pet cat, who is normally
closely observed as a matter of normal routine, it can be difficult to detect a urinary tract
infection in a colony cat. Prevention is really a caretaker’s best strategy and fortunately, an
excellent preventative does exist – D-mannose.
As described by Dr. Michael Dym, VMD, a leading homeopathic and holistic
veterinarian (www.doctordym.com), “Adding D-mannose to a colony's food may offer
preventative benefits for cats with underlying urinary tract issues, and may help protect males at
risk for urinary tract blockages. This natural glyconutrient, which is naturally found in
cranberries, binds to sites in the urinary tract where E coli bacteria attach, and therefore clears
the lining of the bladder and urethra of these type of bacteria, as well as harmful substances
including kidney and bladder crystals.” It can also be used during flare-ups of urinary tract
symptoms or preventatively in cats predisposed to urinary tract disease.
According to Dr. Dym, in acute situations, D-mannose can be given in dosages as high as
one level teaspoon (2 grams) every hour for up to 4 doses. It can be easily dissolved in water or
added to the food. In more chronic situations, he recommends dosing at 1/8 to 1/4 teaspoon (250
to 500 mg) daily. It can safely be added to the diet long term at this dose and is even safe to use
in pregnant or nursing cats. Because it is not digested or metabolized in the cat’s body, problems
with toxicity associated with the use of D-mannose have not been observed.
At Neighborhood Cats, we’ve administered D-mannose to cats with symptoms of a
urinary tract infection and have seen the condition quickly clear up. Providing it in a colony’s
food on a regular basis can help keep infections from occurring in the first place. D-mannose is
relatively expensive, but even dosing once a week or during times of heavy reliance on dry food
will be a big help in maintaining the cats’ health.
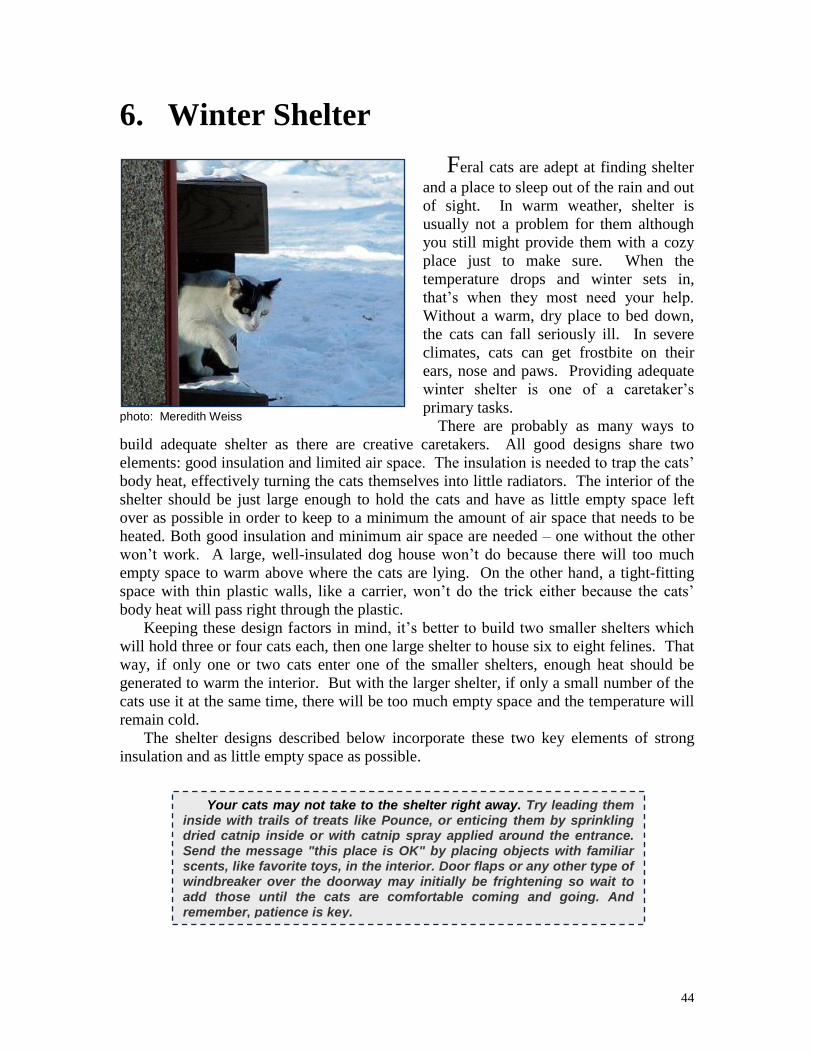
44
6. Winter Shelter
Feral cats are adept at finding shelter
and a place to sleep out of the rain and out
of sight. In warm weather, shelter is
usually not a problem for them although
you still might provide them with a cozy
place just to make sure. When the
temperature drops and winter sets in,
that’s when they most need your help.
Without a warm, dry place to bed down,
the cats can fall seriously ill. In severe
climates, cats can get frostbite on their
ears, nose and paws. Providing adequate
winter shelter is one of a caretaker’s
primary tasks.
There are probably as many ways to
build adequate shelter as there are creative caretakers. All good designs share two
elements: good insulation and limited air space. The insulation is needed to trap the cats’
body heat, effectively turning the cats themselves into little radiators. The interior of the
shelter should be just large enough to hold the cats and have as little empty space left
over as possible in order to keep to a minimum the amount of air space that needs to be
heated. Both good insulation and minimum air space are needed – one without the other
won’t work. A large, well-insulated dog house won’t do because there will too much
empty space to warm above where the cats are lying. On the other hand, a tight-fitting
space with thin plastic walls, like a carrier, won’t do the trick either because the cats’
body heat will pass right through the plastic.
Keeping these design factors in mind, it’s better to build two smaller shelters which
will hold three or four cats each, then one large shelter to house six to eight felines. That
way, if only one or two cats enter one of the smaller shelters, enough heat should be
generated to warm the interior. But with the larger shelter, if only a small number of the
cats use it at the same time, there will be too much empty space and the temperature will
remain cold.
The shelter designs described below incorporate these two key elements of strong
insulation and as little empty space as possible.
photo: Meredith Weiss
Your cats may not take to the shelter right away. Try leading them inside with trails of treats like Pounce, or enticing them by sprinkling dried catnip inside or with catnip spray applied around the entrance. Send the message "this place is OK" by placing objects with familiar scents, like favorite toys, in the interior. Door flaps or any other type of windbreaker over the doorway may initially be frightening so wait to add those until the cats are comfortable coming and going. And remember, patience is key.
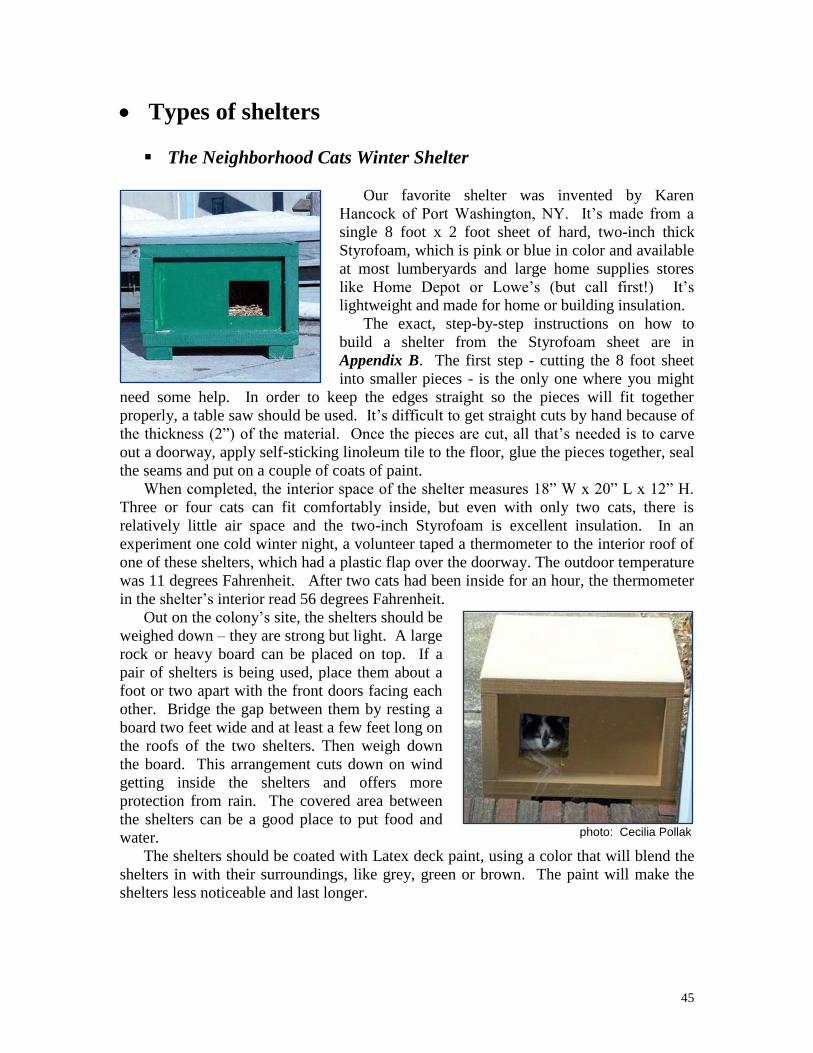
45
Types of shelters
The Neighborhood Cats Winter Shelter
Our favorite shelter was invented by Karen
Hancock of Port Washington, NY. It’s made from a
single 8 foot x 2 foot sheet of hard, two-inch thick
Styrofoam, which is pink or blue in color and available
at most lumberyards and large home supplies stores
like Home Depot or Lowe’s (but call first!) It’s
lightweight and made for home or building insulation.
The exact, step-by-step instructions on how to
build a shelter from the Styrofoam sheet are in
Appendix B. The first step - cutting the 8 foot sheet
into smaller pieces - is the only one where you might
need some help. In order to keep the edges straight so the pieces will fit together
properly, a table saw should be used. It’s difficult to get straight cuts by hand because of
the thickness (2”) of the material. Once the pieces are cut, all that’s needed is to carve
out a doorway, apply self-sticking linoleum tile to the floor, glue the pieces together, seal
the seams and put on a couple of coats of paint.
When completed, the interior space of the shelter measures 18” W x 20” L x 12” H.
Three or four cats can fit comfortably inside, but even with only two cats, there is
relatively little air space and the two-inch Styrofoam is excellent insulation. In an
experiment one cold winter night, a volunteer taped a thermometer to the interior roof of
one of these shelters, which had a plastic flap over the doorway. The outdoor temperature
was 11 degrees Fahrenheit. After two cats had been inside for an hour, the thermometer
in the shelter’s interior read 56 degrees Fahrenheit.
Out on the colony’s site, the shelters should be
weighed down – they are strong but light. A large
rock or heavy board can be placed on top. If a
pair of shelters is being used, place them about a
foot or two apart with the front doors facing each
other. Bridge the gap between them by resting a
board two feet wide and at least a few feet long on
the roofs of the two shelters. Then weigh down
the board. This arrangement cuts down on wind
getting inside the shelters and offers more
protection from rain. The covered area between
the shelters can be a good place to put food and
water.
The shelters should be coated with Latex deck paint, using a color that will blend the
shelters in with their surroundings, like grey, green or brown. The paint will make the
shelters less noticeable and last longer.
photo: Cecilia Pollak

46
Feralvilla Outdoor Cat Shelter
Don’t want to build a shelter from scratch?
Feralvilla (www.feralvilla.com) makes a pre-
fabricated wood shelter that you can assemble with a
screwdriver. The two-level cat house comes painted
and with a full shingle roof and insulated living area
on the second floor. Assembly takes approximately
fifteen to thirty minutes.
The overall size is 22" wide by 22" deep and
about 22" tall at the peak of the roof. The upper,
insulated "bedroom" is about 20" wide by 20" deep
and the height varies from 10" to 12".
From Feralvilla, you can also buy a box of straw
for further insulation in the interior. Also check out
their feeding stations.
The CSM Stray Foundation Winter Shelter
This shelter was designed by CSM Stray Foundation (USA), Inc., of Queens, NY
(www.csmstray.org):
Materials & tools needed:
Large Rubbermaid storage bin
with removable lid (at least 30
gallons) – it’s important to use
the Rubbermaid brand or your
bin may crack in freezing
temperatures
8 ft. x 2 ft. sheet of one-inch
thick hard Styrofoam
Straw
Yardstick
Box cutter
Trying to find a gift for the “Feral Who Has Everything”? Check out the ultra-luxury outdoor cat houses available at Stabobs Pet Houses (http://store.stabobspethouses.net).
photo: Carole S. Milker
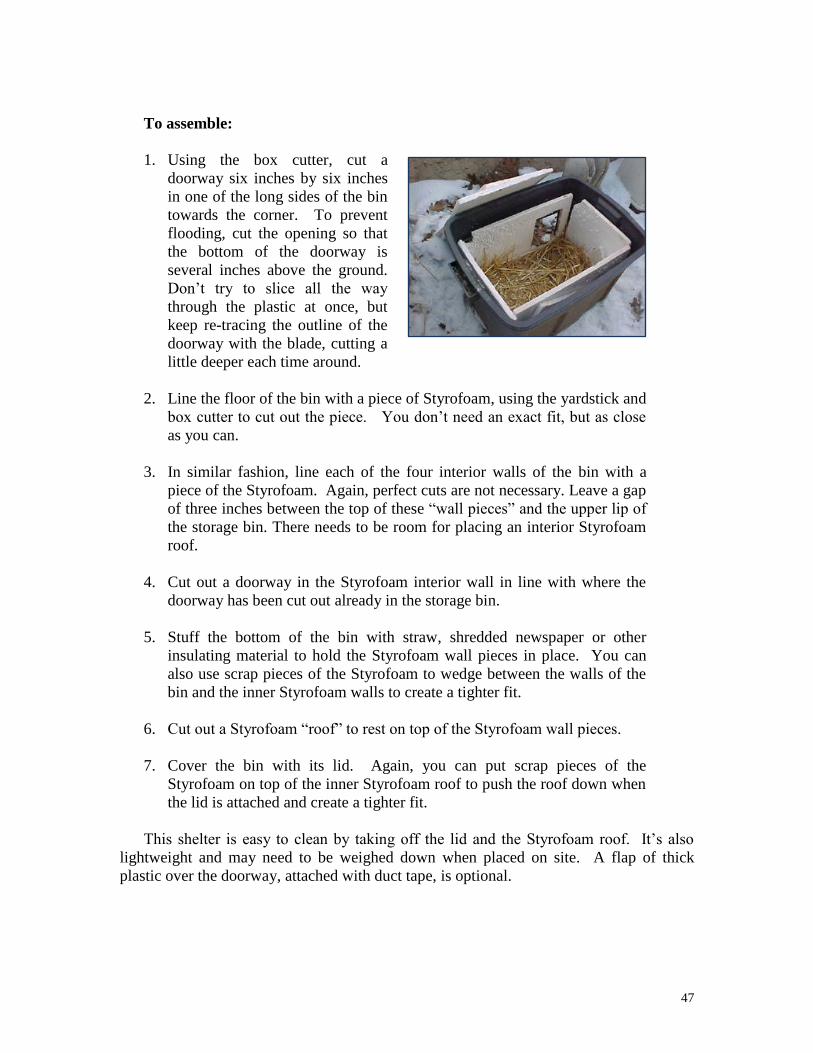
47
To assemble:
1. Using the box cutter, cut a
doorway six inches by six inches
in one of the long sides of the bin
towards the corner. To prevent
flooding, cut the opening so that
the bottom of the doorway is
several inches above the ground.
Don’t try to slice all the way
through the plastic at once, but
keep re-tracing the outline of the
doorway with the blade, cutting a
little deeper each time around.
2. Line the floor of the bin with a piece of Styrofoam, using the yardstick and
box cutter to cut out the piece. You don’t need an exact fit, but as close
as you can.
3. In similar fashion, line each of the four interior walls of the bin with a
piece of the Styrofoam. Again, perfect cuts are not necessary. Leave a gap
of three inches between the top of these “wall pieces” and the upper lip of
the storage bin. There needs to be room for placing an interior Styrofoam
roof.
4. Cut out a doorway in the Styrofoam interior wall in line with where the
doorway has been cut out already in the storage bin.
5. Stuff the bottom of the bin with straw, shredded newspaper or other
insulating material to hold the Styrofoam wall pieces in place. You can
also use scrap pieces of the Styrofoam to wedge between the walls of the
bin and the inner Styrofoam walls to create a tighter fit.
6. Cut out a Styrofoam “roof” to rest on top of the Styrofoam wall pieces.
7. Cover the bin with its lid. Again, you can put scrap pieces of the
Styrofoam on top of the inner Styrofoam roof to push the roof down when
the lid is attached and create a tighter fit.
This shelter is easy to clean by taking off the lid and the Styrofoam roof. It’s also
lightweight and may need to be weighed down when placed on site. A flap of thick
plastic over the doorway, attached with duct tape, is optional.
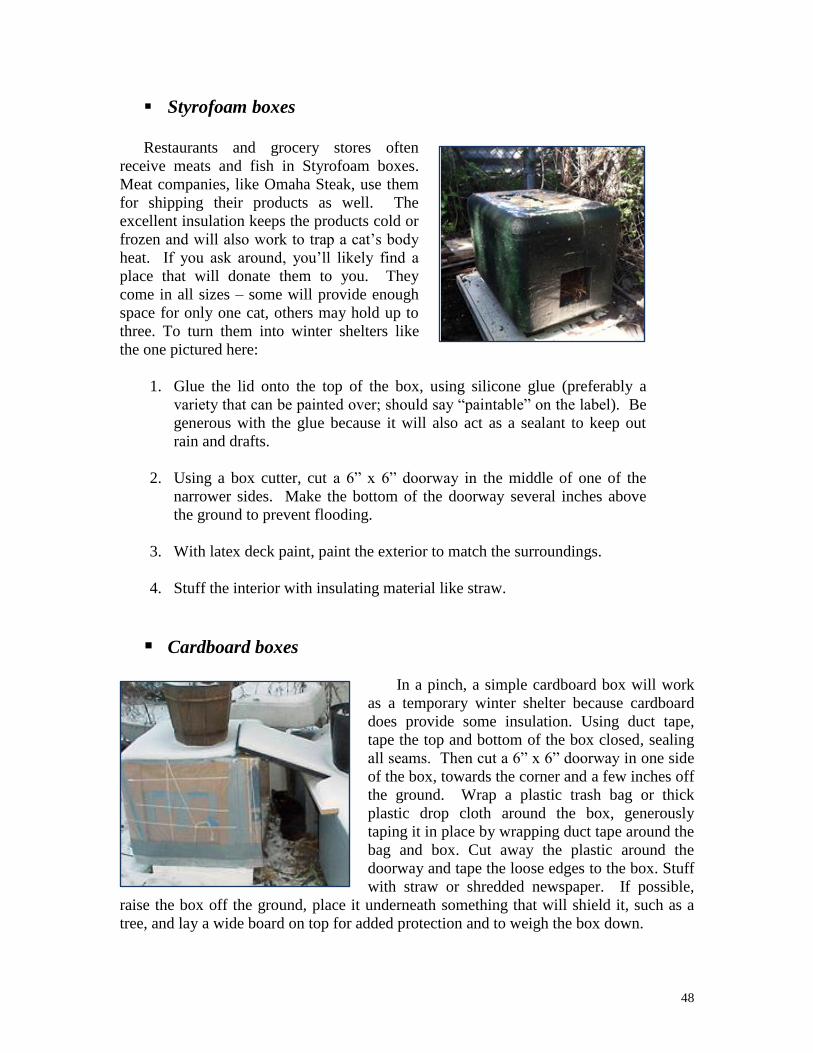
48
Styrofoam boxes
Restaurants and grocery stores often
receive meats and fish in Styrofoam boxes.
Meat companies, like Omaha Steak, use them
for shipping their products as well. The
excellent insulation keeps the products cold or
frozen and will also work to trap a cat’s body
heat. If you ask around, you’ll likely find a
place that will donate them to you. They
come in all sizes – some will provide enough
space for only one cat, others may hold up to
three. To turn them into winter shelters like
the one pictured here:
1. Glue the lid onto the top of the box, using silicone glue (preferably a
variety that can be painted over; should say “paintable” on the label). Be
generous with the glue because it will also act as a sealant to keep out
rain and drafts.
2. Using a box cutter, cut a 6” x 6” doorway in the middle of one of the
narrower sides. Make the bottom of the doorway several inches above
the ground to prevent flooding.
3. With latex deck paint, paint the exterior to match the surroundings.
4. Stuff the interior with insulating material like straw.
Cardboard boxes
In a pinch, a simple cardboard box will work
as a temporary winter shelter because cardboard
does provide some insulation. Using duct tape,
tape the top and bottom of the box closed, sealing
all seams. Then cut a 6” x 6” doorway in one side
of the box, towards the corner and a few inches off
the ground. Wrap a plastic trash bag or thick
plastic drop cloth around the box, generously
taping it in place by wrapping duct tape around the
bag and box. Cut away the plastic around the
doorway and tape the loose edges to the box. Stuff
with straw or shredded newspaper. If possible,
raise the box off the ground, place it underneath something that will shield it, such as a
tree, and lay a wide board on top for added protection and to weigh the box down.
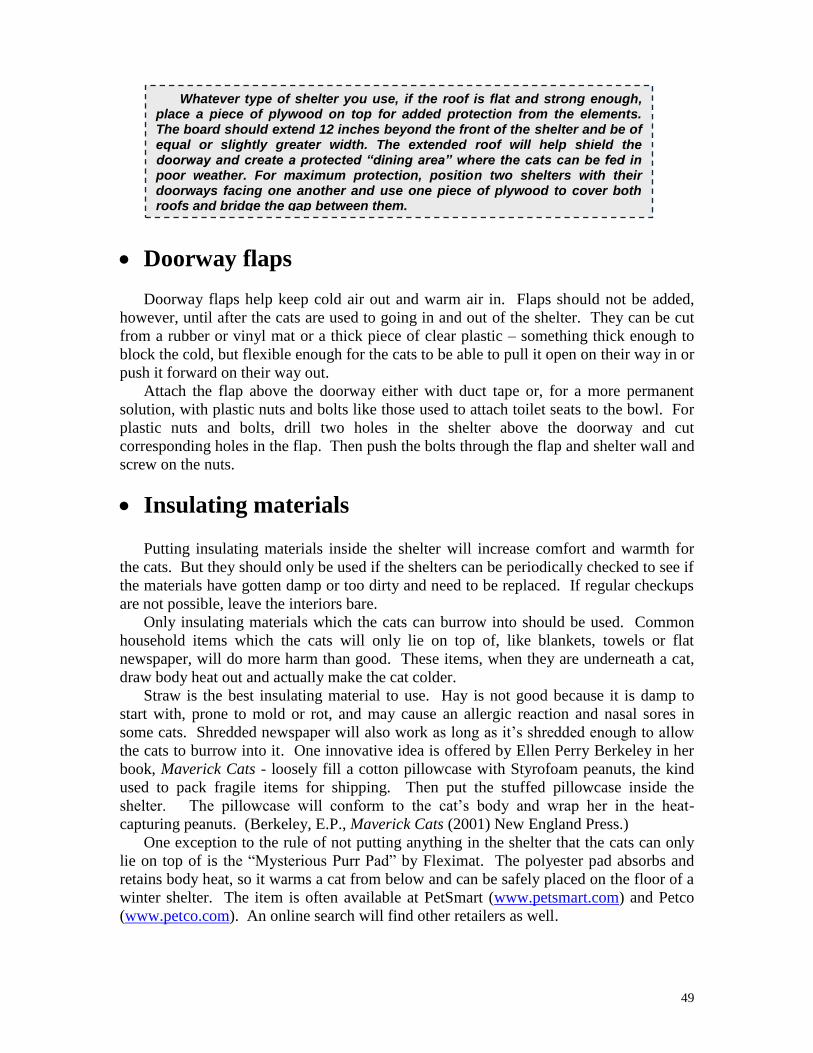
49
Doorway flaps
Doorway flaps help keep cold air out and warm air in. Flaps should not be added,
however, until after the cats are used to going in and out of the shelter. They can be cut
from a rubber or vinyl mat or a thick piece of clear plastic – something thick enough to
block the cold, but flexible enough for the cats to be able to pull it open on their way in or
push it forward on their way out.
Attach the flap above the doorway either with duct tape or, for a more permanent
solution, with plastic nuts and bolts like those used to attach toilet seats to the bowl. For
plastic nuts and bolts, drill two holes in the shelter above the doorway and cut
corresponding holes in the flap. Then push the bolts through the flap and shelter wall and
screw on the nuts.
Insulating materials
Putting insulating materials inside the shelter will increase comfort and warmth for
the cats. But they should only be used if the shelters can be periodically checked to see if
the materials have gotten damp or too dirty and need to be replaced. If regular checkups
are not possible, leave the interiors bare.
Only insulating materials which the cats can burrow into should be used. Common
household items which the cats will only lie on top of, like blankets, towels or flat
newspaper, will do more harm than good. These items, when they are underneath a cat,
draw body heat out and actually make the cat colder.
Straw is the best insulating material to use. Hay is not good because it is damp to
start with, prone to mold or rot, and may cause an allergic reaction and nasal sores in
some cats. Shredded newspaper will also work as long as it’s shredded enough to allow
the cats to burrow into it. One innovative idea is offered by Ellen Perry Berkeley in her
book, Maverick Cats - loosely fill a cotton pillowcase with Styrofoam peanuts, the kind
used to pack fragile items for shipping. Then put the stuffed pillowcase inside the
shelter. The pillowcase will conform to the cat’s body and wrap her in the heat-
capturing peanuts. (Berkeley, E.P., Maverick Cats (2001) New England Press.)
One exception to the rule of not putting anything in the shelter that the cats can only
lie on top of is the “Mysterious Purr Pad” by Fleximat. The polyester pad absorbs and
retains body heat, so it warms a cat from below and can be safely placed on the floor of a
winter shelter. The item is often available at PetSmart (www.petsmart.com) and Petco
(www.petco.com). An online search will find other retailers as well.
Whatever type of shelter you use, if the roof is flat and strong enough, place a piece of plywood on top for added protection from the elements. The board should extend 12 inches beyond the front of the shelter and be of equal or slightly greater width. The extended roof will help shield the doorway and create a protected “dining area” where the cats can be fed in poor weather. For maximum protection, position two shelters with their doorways facing one another and use one piece of plywood to cover both roofs and bridge the gap between them.

50
Another option is the Snuggle Safe heating pad mentioned in Chapter 5 in the
section, “Preventing Water from Freezing.” Be sure to use the cover that comes with the
product or wrap the disc well in a thick towel or pillow case so the cats don’t directly
touch the disc while it’s still at its hottest.
Extreme cold
In environments where the winter is especially harsh, extra measures may be needed.
One proven technique is to line the interior walls of the shelter with pieces cut from a
Mylar blanket. The blanket is made of a thin plastic coated with a metallic reflecting
agent. When wrapped around a person, it creates warmth by reflecting body heat back
and is a standard part of an emergency kit for people who may become stranded in their
cars during winter. When the walls and/or floor of a winter shelter are lined with Mylar,
the cats’ body heat is reflected back at them, increasing the interior temperature.
A Mylar blanket is very thin and light. During the shelter-building process, pieces
can be attached to the interior walls with freezer tape (such as Scotch Freezer Tape)
which is designed to stick at extremely low temperatures. For a more permanent fix, use
carpenter glue, being careful to keep all traces of the glue between the Mylar and the
walls and unexposed to the cats. Be sure to tuck in or cut off any excess Mylar at the
seams so none of the material is loose and inviting to a cat to tug at or chew on. If only
one side of the Mylar blanket is shiny, that’s the side which reflects heat and should be
facing in, towards the cats.
A search for “Mylar blanket” on Amazon (www.amazon.com) will turn up numerous
retailers. The product is very inexpensive, usually costing no more than a dollar or two
per blanket. The product can also often be found at camping stores, Wal-Mart or other
retailers with outdoors departments.
Placement
As with placement of feeding stations, the more discrete, the better when it comes to
winter shelters. With shelters, you have more choices because you don’t need constant
access to them. However, it’s nice for the cats if their shelters are close to their feeding
station so they won’t have to travel far in bad weather to eat.
The primary concern is security and putting the shelters in a spot where few, if any,
strangers will have access or even see them. This protects the cats plus, the more
secluded the shelters, the more the cats are apt to use them. They can be camouflaged by
painting them to blend into their environment and also by covering them with boards,
branches or other objects. If you can, put them behind something like a wall or bush
rather than in front. If they can’t be hidden from view, try to place them behind a fence
or other enclosure closed to the public. If the shelters are in a location where they might
get damaged or stolen, don’t invest in expensive ones which will be costly to replace.
The cats are likely to spend much of their time near their shelters and feeding station,
especially in severe weather. The placement of these items can be used to “herd” the cats
to a less visible location and one more acceptable to neighbors, thereby improving
community relations.
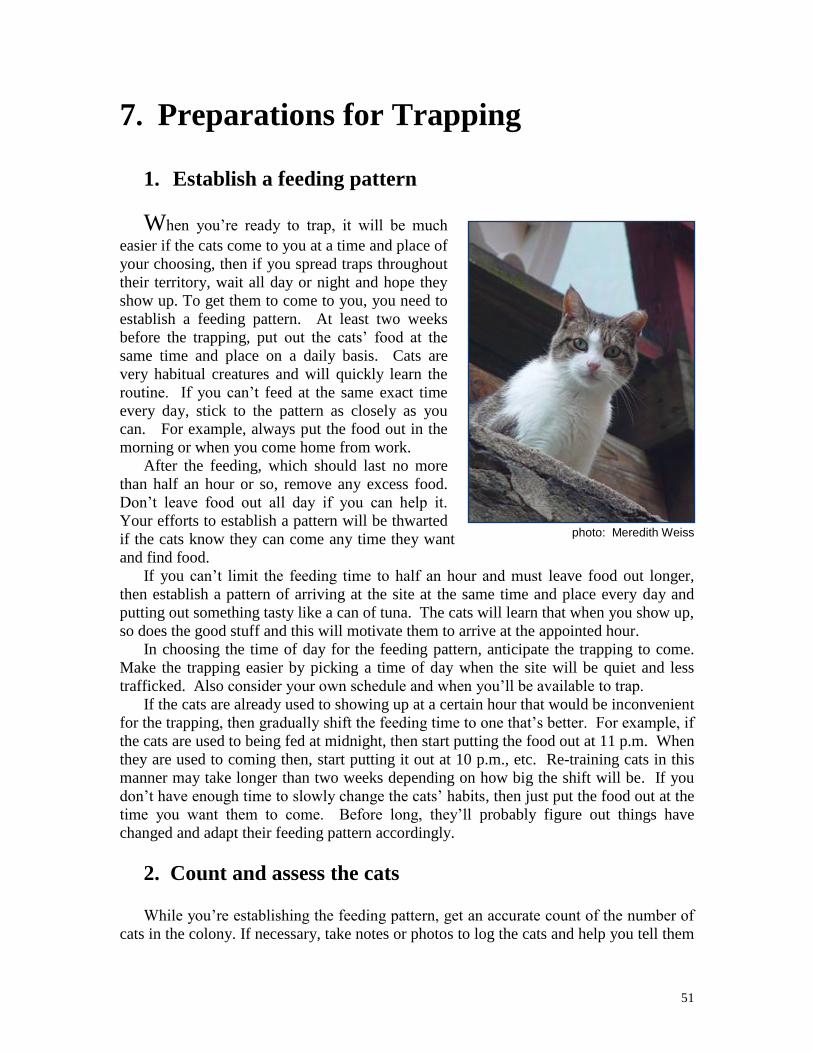
51
7. Preparations for Trapping
1. Establish a feeding pattern
When you’re ready to trap, it will be much
easier if the cats come to you at a time and place of
your choosing, then if you spread traps throughout
their territory, wait all day or night and hope they
show up. To get them to come to you, you need to
establish a feeding pattern. At least two weeks
before the trapping, put out the cats’ food at the
same time and place on a daily basis. Cats are
very habitual creatures and will quickly learn the
routine. If you can’t feed at the same exact time
every day, stick to the pattern as closely as you
can. For example, always put the food out in the
morning or when you come home from work.
After the feeding, which should last no more
than half an hour or so, remove any excess food.
Don’t leave food out all day if you can help it.
Your efforts to establish a pattern will be thwarted
if the cats know they can come any time they want
and find food.
If you can’t limit the feeding time to half an hour and must leave food out longer,
then establish a pattern of arriving at the site at the same time and place every day and
putting out something tasty like a can of tuna. The cats will learn that when you show up,
so does the good stuff and this will motivate them to arrive at the appointed hour.
In choosing the time of day for the feeding pattern, anticipate the trapping to come.
Make the trapping easier by picking a time of day when the site will be quiet and less
trafficked. Also consider your own schedule and when you’ll be available to trap.
If the cats are already used to showing up at a certain hour that would be inconvenient
for the trapping, then gradually shift the feeding time to one that’s better. For example, if
the cats are used to being fed at midnight, then start putting the food out at 11 p.m. When
they are used to coming then, start putting it out at 10 p.m., etc. Re-training cats in this
manner may take longer than two weeks depending on how big the shift will be. If you
don’t have enough time to slowly change the cats’ habits, then just put the food out at the
time you want them to come. Before long, they’ll probably figure out things have
changed and adapt their feeding pattern accordingly.
2. Count and assess the cats
While you’re establishing the feeding pattern, get an accurate count of the number of
cats in the colony. If necessary, take notes or photos to log the cats and help you tell them
photo: Meredith Weiss
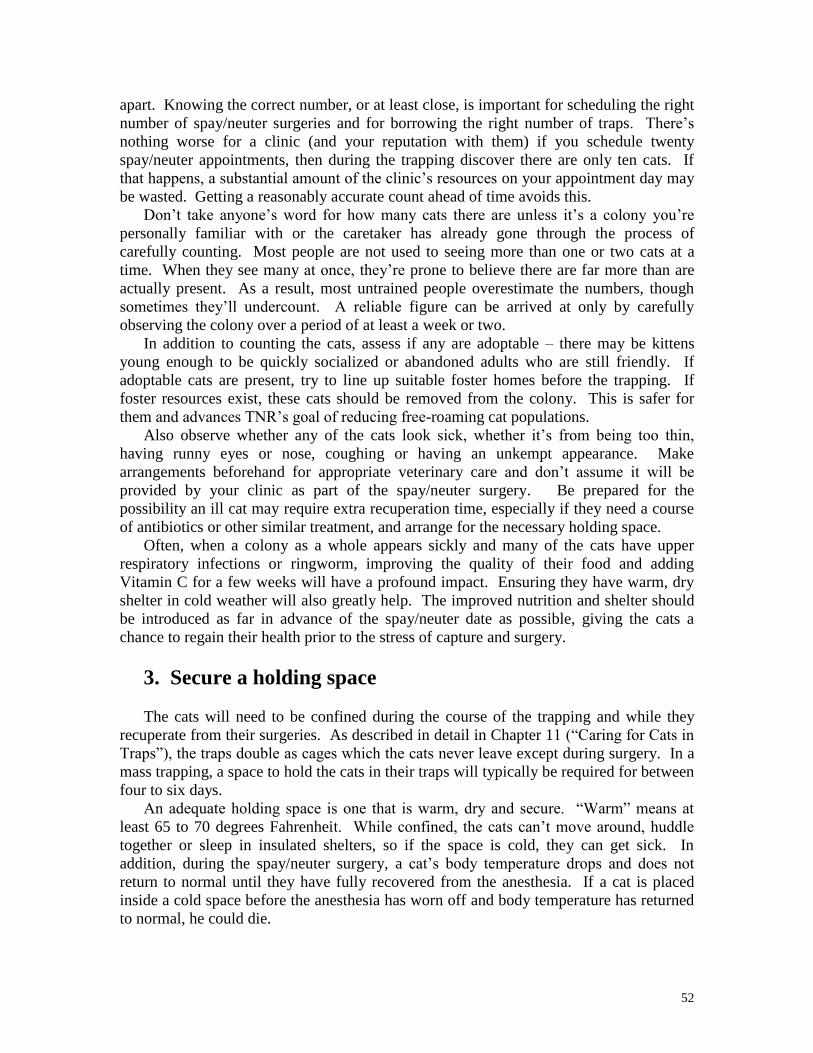
52
apart. Knowing the correct number, or at least close, is important for scheduling the right
number of spay/neuter surgeries and for borrowing the right number of traps. There’s
nothing worse for a clinic (and your reputation with them) if you schedule twenty
spay/neuter appointments, then during the trapping discover there are only ten cats. If
that happens, a substantial amount of the clinic’s resources on your appointment day may
be wasted. Getting a reasonably accurate count ahead of time avoids this.
Don’t take anyone’s word for how many cats there are unless it’s a colony you’re
personally familiar with or the caretaker has already gone through the process of
carefully counting. Most people are not used to seeing more than one or two cats at a
time. When they see many at once, they’re prone to believe there are far more than are
actually present. As a result, most untrained people overestimate the numbers, though
sometimes they’ll undercount. A reliable figure can be arrived at only by carefully
observing the colony over a period of at least a week or two.
In addition to counting the cats, assess if any are adoptable – there may be kittens
young enough to be quickly socialized or abandoned adults who are still friendly. If
adoptable cats are present, try to line up suitable foster homes before the trapping. If
foster resources exist, these cats should be removed from the colony. This is safer for
them and advances TNR’s goal of reducing free-roaming cat populations.
Also observe whether any of the cats look sick, whether it’s from being too thin,
having runny eyes or nose, coughing or having an unkempt appearance. Make
arrangements beforehand for appropriate veterinary care and don’t assume it will be
provided by your clinic as part of the spay/neuter surgery. Be prepared for the
possibility an ill cat may require extra recuperation time, especially if they need a course
of antibiotics or other similar treatment, and arrange for the necessary holding space.
Often, when a colony as a whole appears sickly and many of the cats have upper
respiratory infections or ringworm, improving the quality of their food and adding
Vitamin C for a few weeks will have a profound impact. Ensuring they have warm, dry
shelter in cold weather will also greatly help. The improved nutrition and shelter should
be introduced as far in advance of the spay/neuter date as possible, giving the cats a
chance to regain their health prior to the stress of capture and surgery.
3. Secure a holding space
The cats will need to be confined during the course of the trapping and while they
recuperate from their surgeries. As described in detail in Chapter 11 (“Caring for Cats in
Traps”), the traps double as cages which the cats never leave except during surgery. In a
mass trapping, a space to hold the cats in their traps will typically be required for between
four to six days.
An adequate holding space is one that is warm, dry and secure. “Warm” means at
least 65 to 70 degrees Fahrenheit. While confined, the cats can’t move around, huddle
together or sleep in insulated shelters, so if the space is cold, they can get sick. In
addition, during the spay/neuter surgery, a cat’s body temperature drops and does not
return to normal until they have fully recovered from the anesthesia. If a cat is placed
inside a cold space before the anesthesia has worn off and body temperature has returned
to normal, he could die.

53
A “dry” space is protected from the
elements, especially rain or snow, but also wind
or direct sunlight (which could cause
overheating inside the traps). A holding space
is “secure” if it is only accessible by people
associated with the project and not by strangers
or other animals.
Examples of adequate holding spaces may
include a garage, basement, ventilated shed,
empty trailer, empty room in an apartment,
empty retail or office space, part of a
warehouse, a bathroom if there’s only a couple
of cats involved, an empty adoption van, or a cargo van parked in a driveway. Indoor
spaces are preferable because they’re better protected from the elements and usually are
more secure. In a pinch, if the weather is warm and calm and the area secure, a canopy
tent set up in a private backyard, an open porch or a terrace could serve as holding space.
Sometimes people worry about fleas infesting a holding space. If the cats are well fed
and healthy, their immune systems will be strong enough to fight off most parasites and
it’s unlikely they will suffer severe flea infestations. But they may still have some. In
our experience, it’s rare for the presence of cats for a week to cause a flea infestation to in
a holding space. If the traps are kept covered with lightweight cotton sheets and the space
is cleaned or vacuumed thoroughly after the project, you should be fine. If fleas do
appear, flea bombing the space afterwards might be necessary. Remember to bomb once
after the cats are out and then a second time two or three weeks later to kill any fleas
which may have hatched from eggs not destroyed in the first round (see the instructions
on the flea bomb product). Another way to cut down on the risk of fleas, if you can
afford it, is to have flea medication applied to the cats during the spay/neuter procedure.
One trick, if a cat is staying in your bathroom, is to place the trap in your bathtub on
top of some bricks. Then fill your bathtub with an inch or so of water. Between the trap
being covered with a sheet and the moat below, it would be very hard for fleas to spread.
Sometimes people are worried the cats will make a great deal of noise. Simply put,
they won’t. Feral cats are very quiet in captivity and try to make themselves as
unnoticeable as possible. Once in a while, you might get a colony where one cat meows
softly and others join in for a couple of minutes. Most of the time, they remain still and
silent. If you do get a cat who’s meowing a lot and appears to be crying out for attention,
this is often the behavior of a former house cat, not a feral. Such a cat should be carefully
evaluated as a possible candidate for adoption.
If you are going to hold the cats in part of your home, segregate your own cats and
don’t allow them in the holding space in order to minimize any risk of disease or parasite
transmission.
During the project, the holding space can also act as your command center where you
keep your equipment, supplies and records, and meet up with volunteers. See the section,
“Preparing the holding space,” in Chapter 11.
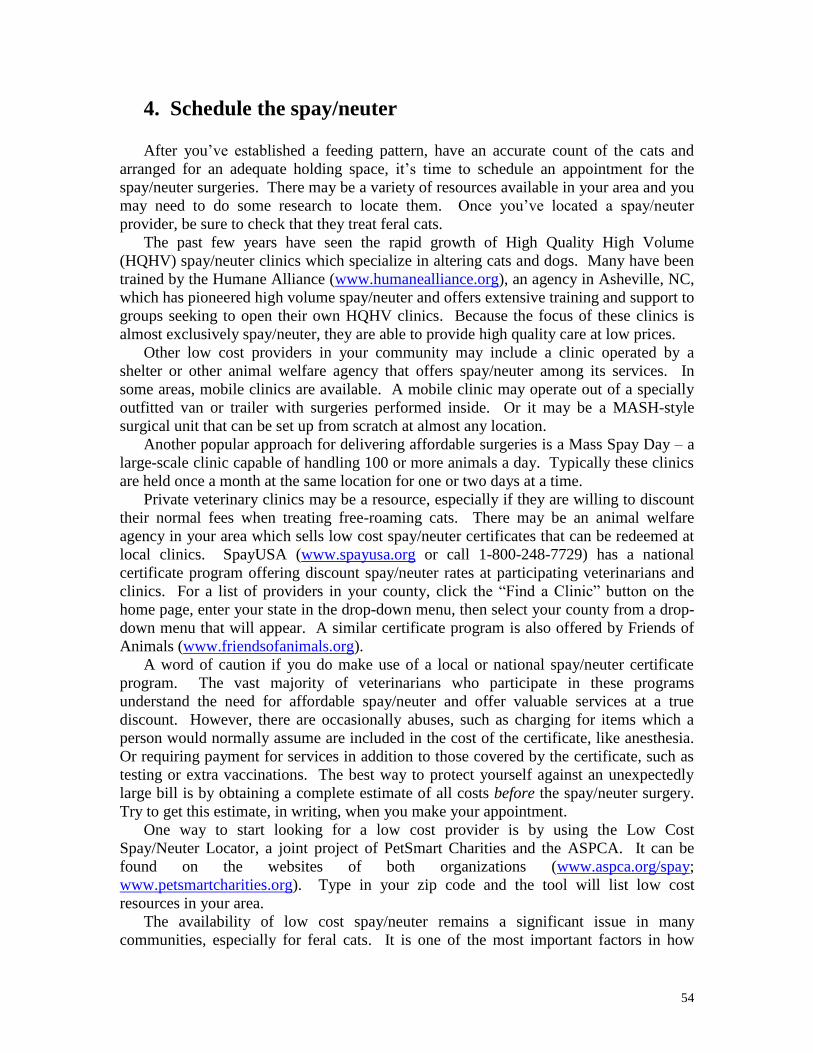
54
4. Schedule the spay/neuter After you’ve established a feeding pattern, have an accurate count of the cats and
arranged for an adequate holding space, it’s time to schedule an appointment for the
spay/neuter surgeries. There may be a variety of resources available in your area and you
may need to do some research to locate them. Once you’ve located a spay/neuter
provider, be sure to check that they treat feral cats.
The past few years have seen the rapid growth of High Quality High Volume
(HQHV) spay/neuter clinics which specialize in altering cats and dogs. Many have been
trained by the Humane Alliance (www.humanealliance.org), an agency in Asheville, NC,
which has pioneered high volume spay/neuter and offers extensive training and support to
groups seeking to open their own HQHV clinics. Because the focus of these clinics is
almost exclusively spay/neuter, they are able to provide high quality care at low prices.
Other low cost providers in your community may include a clinic operated by a
shelter or other animal welfare agency that offers spay/neuter among its services. In
some areas, mobile clinics are available. A mobile clinic may operate out of a specially
outfitted van or trailer with surgeries performed inside. Or it may be a MASH-style
surgical unit that can be set up from scratch at almost any location.
Another popular approach for delivering affordable surgeries is a Mass Spay Day – a
large-scale clinic capable of handling 100 or more animals a day. Typically these clinics
are held once a month at the same location for one or two days at a time.
Private veterinary clinics may be a resource, especially if they are willing to discount
their normal fees when treating free-roaming cats. There may be an animal welfare
agency in your area which sells low cost spay/neuter certificates that can be redeemed at
local clinics. SpayUSA (www.spayusa.org or call 1-800-248-7729) has a national
certificate program offering discount spay/neuter rates at participating veterinarians and
clinics. For a list of providers in your county, click the “Find a Clinic” button on the
home page, enter your state in the drop-down menu, then select your county from a drop-
down menu that will appear. A similar certificate program is also offered by Friends of
Animals (www.friendsofanimals.org).
A word of caution if you do make use of a local or national spay/neuter certificate
program. The vast majority of veterinarians who participate in these programs
understand the need for affordable spay/neuter and offer valuable services at a true
discount. However, there are occasionally abuses, such as charging for items which a
person would normally assume are included in the cost of the certificate, like anesthesia.
Or requiring payment for services in addition to those covered by the certificate, such as
testing or extra vaccinations. The best way to protect yourself against an unexpectedly
large bill is by obtaining a complete estimate of all costs before the spay/neuter surgery.
Try to get this estimate, in writing, when you make your appointment.
One way to start looking for a low cost provider is by using the Low Cost
Spay/Neuter Locator, a joint project of PetSmart Charities and the ASPCA. It can be
found on the websites of both organizations (www.aspca.org/spay;
www.petsmartcharities.org). Type in your zip code and the tool will list low cost
resources in your area.
The availability of low cost spay/neuter remains a significant issue in many
communities, especially for feral cats. It is one of the most important factors in how

55
quickly TNR can advance because it is difficult to alter large numbers of cats if costs are
not affordable. If there is no low cost provider for ferals where you live, then advocating
for these services may become a necessary part of your work. Study the advantages of
TNR discussed in Chapter 2 and meet with leaders in your community, such as shelter
directors, animal control officers, municipal officials and veterinarians. Especially in
places with a severe free-roaming cat overpopulation problem, you might find a willing
audience. Propose a pilot project to start, one small enough that it doesn’t demand many
resources but large enough to demonstrate TNR’s effectiveness. A positive experience
could go a long way towards building more support.
While you’re laying the groundwork for a larger TNR program in the future, try not
to wait to get your cats fixed. Speak to your own veterinarian and see if she’ll give you a
special rate for the free-roamers you’re feeding. Contact local shelters and animal rescue
groups and find out which veterinarians they use – they may offer you a good price as
well. A veterinarian who recently opened her practice and hasn’t built up a client base
yet may be happy to have your business, even at a heavy discount. Even if you can only
afford to fix one or two cats at a time, you can still make progress in getting the colony
under control. If you do have to start out slowly, try to trap the females in the colony first
– this will help reduce the colony’s reproductive capacity faster.
When you schedule your appointments, find out the unique procedures for that clinic,
including drop-off and pickup times and any paperwork you need to complete
beforehand, and be sure to follow their instructions closely. If you’re mass trapping, try
to secure enough slots so all the colony cats can get fixed at the same time.
5. Arrange for transportation
Unless a mobile clinic will be parked outside your holding space or your spay/neuter
clinic offers a transport service, you’ll need to transport the cats back and forth for their
surgeries. Transportation will also be needed during the trapping if the cats’ territory is
distant from the holding space. Plan for this ahead of time. If you’re thinking of using
your own vehicle, figure out how many traps will fit inside. You may need to rent a
cargo van, at least for the day of the surgeries, in order to transport all the cats at once. If
more than one person is volunteering their car, draw up a schedule and let everyone know
in advance when they will be needed.
Before placing any trapped cats inside a vehicle, line the seats and floor with thick
plastic to catch any urine or waste which may escape. A plastic drop cloth at least 3
millimeters thick is recommended. You should do this every time a trapped cat is placed
in a vehicle, even if it’s only to drive a short distance.
6. Reserve or secure traps and dividers Once your spay/neuter date is scheduled, make sure you’ll have all the equipment
you’ll need when the time comes to trap. If you’re mass trapping, arrange to have two or
three more traps than the number of cats in the colony. This is advisable for two reasons.
First, a cat you didn’t know about may appear. Second, when you’re down to trapping
the last cat or two, it’s much easier when you have a couple of extra traps. With three
traps to catch the last cat instead of only one, you can cover more of the territory and give
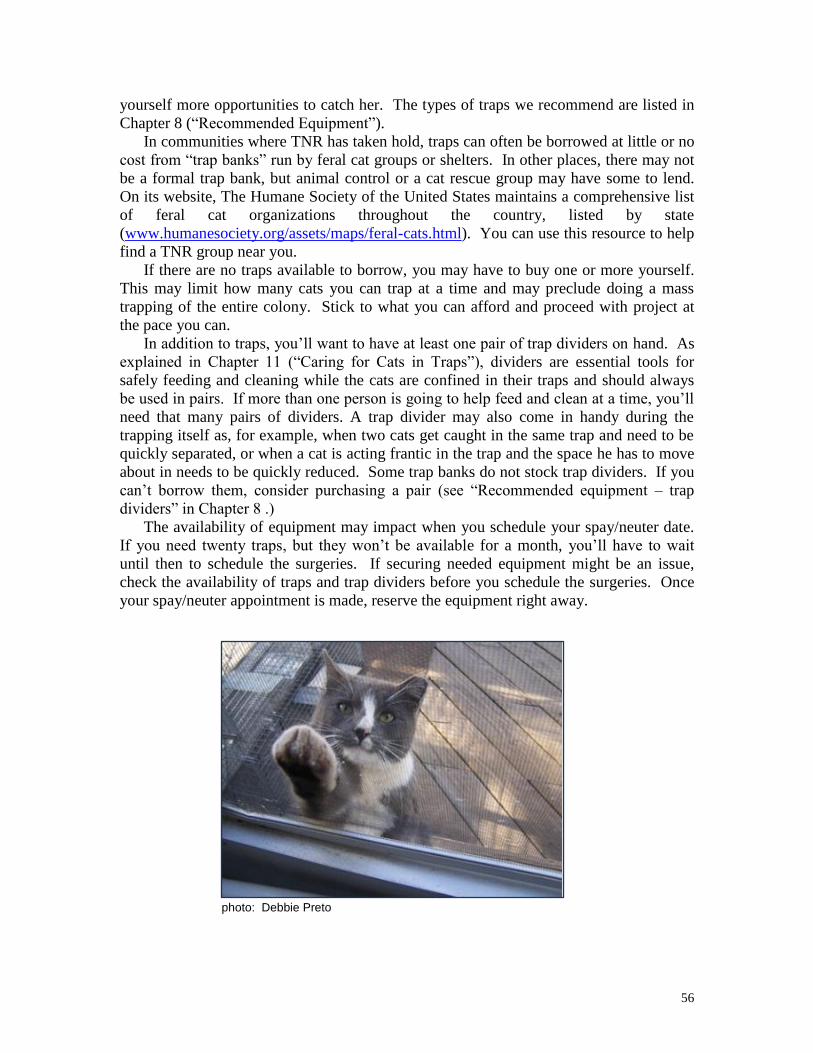
56
yourself more opportunities to catch her. The types of traps we recommend are listed in
Chapter 8 (“Recommended Equipment”).
In communities where TNR has taken hold, traps can often be borrowed at little or no
cost from “trap banks” run by feral cat groups or shelters. In other places, there may not
be a formal trap bank, but animal control or a cat rescue group may have some to lend.
On its website, The Humane Society of the United States maintains a comprehensive list
of feral cat organizations throughout the country, listed by state
(www.humanesociety.org/assets/maps/feral-cats.html). You can use this resource to help
find a TNR group near you.
If there are no traps available to borrow, you may have to buy one or more yourself.
This may limit how many cats you can trap at a time and may preclude doing a mass
trapping of the entire colony. Stick to what you can afford and proceed with project at
the pace you can.
In addition to traps, you’ll want to have at least one pair of trap dividers on hand. As
explained in Chapter 11 (“Caring for Cats in Traps”), dividers are essential tools for
safely feeding and cleaning while the cats are confined in their traps and should always
be used in pairs. If more than one person is going to help feed and clean at a time, you’ll
need that many pairs of dividers. A trap divider may also come in handy during the
trapping itself as, for example, when two cats get caught in the same trap and need to be
quickly separated, or when a cat is acting frantic in the trap and the space he has to move
about in needs to be quickly reduced. Some trap banks do not stock trap dividers. If you
can’t borrow them, consider purchasing a pair (see “Recommended equipment – trap
dividers” in Chapter 8 .)
The availability of equipment may impact when you schedule your spay/neuter date.
If you need twenty traps, but they won’t be available for a month, you’ll have to wait
until then to schedule the surgeries. If securing needed equipment might be an issue,
check the availability of traps and trap dividers before you schedule the surgeries. Once
your spay/neuter appointment is made, reserve the equipment right away.
photo: Debbie Preto

57
8. Recommended Equipment
Box Traps
The standard trap used for
feral cats is a “humane box trap.”
Shaped like a large rectangular
box, a cat enters through the
raised open door at the front in
order to reach bait placed at the
back. On his way to the bait, he
steps on a “trip plate,” causing the
front door to shut and lock behind
him.
There are many different
makes and models of humane box
traps available. For working with
feral cats, two features are
essential: the trap should have a rear door that opens by sliding it up (a “guillotine-style”
rear door) and be 30 to 36 inches in length. The sliding rear door makes it possible to use
the trap as a cage after the cat is caught by facilitating feeding and cleaning (see Chapter
11: “Caring for Cats in Traps.”) It allows for transfers out of the trap and into a transfer
cage, feral cat den or another trap. The rear door also makes it safer when releasing the
cats or any inadvertently captured wildlife.
To double as a cage, the trap must be large enough or at least 30 inches in length.
Preferred width is at least 10 inches. At Neighborhood Cats, we prefer the 36 inch length
traps because of the extra room they provide during the cat’s confinement. However,
many experienced TNR groups prefer 30 inch traps because they weigh less and are
easier to transport and store. Traps larger than 36 inches in length are bulkier and heavier
than needed.
When the first edition of this handbook was released, there were no traps on the
market specifically designed for feral cats. Traps
made for other animals, like raccoons, had to be
used and adapted. Recently, Neighborhood Cats
partnered with Tomahawk Live Trap
(www.livetrap.com) to design a box trap, and other
equipment, just for feral cats and TNR. The
“Neighborhood Cats Trap” by Tomahawk,
described below, is the model we now prefer.
However, preferences vary among trappers, so we
also list other traps we’ve worked with and are
popular in the field.
photo: Meredith Weiss
photo: Meredith Weiss
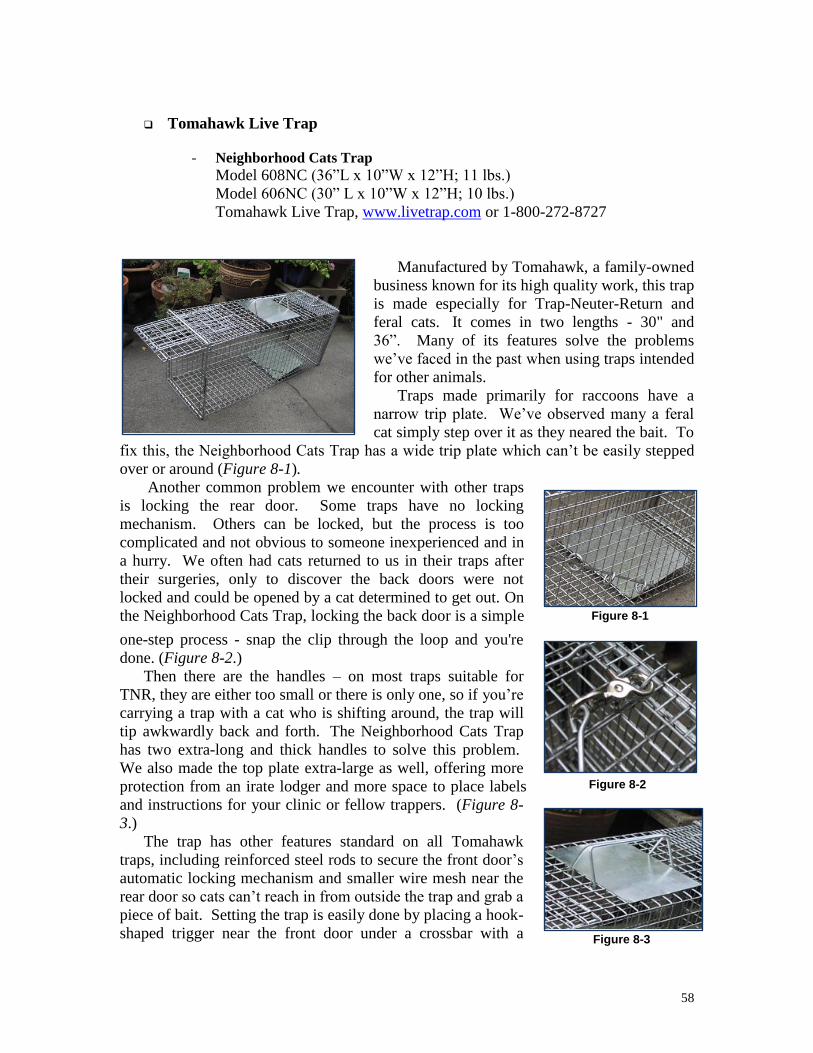
58
Tomahawk Live Trap
- Neighborhood Cats Trap
Model 608NC (36”L x 10”W x 12”H; 11 lbs.)
Model 606NC (30” L x 10”W x 12”H; 10 lbs.)
Tomahawk Live Trap, www.livetrap.com or 1-800-272-8727
Manufactured by Tomahawk, a family-owned
business known for its high quality work, this trap
is made especially for Trap-Neuter-Return and
feral cats. It comes in two lengths - 30" and
36”. Many of its features solve the problems
we’ve faced in the past when using traps intended
for other animals.
Traps made primarily for raccoons have a
narrow trip plate. We’ve observed many a feral
cat simply step over it as they neared the bait. To
fix this, the Neighborhood Cats Trap has a wide trip plate which can’t be easily stepped
over or around (Figure 8-1).
Another common problem we encounter with other traps
is locking the rear door. Some traps have no locking
mechanism. Others can be locked, but the process is too
complicated and not obvious to someone inexperienced and in
a hurry. We often had cats returned to us in their traps after
their surgeries, only to discover the back doors were not
locked and could be opened by a cat determined to get out. On
the Neighborhood Cats Trap, locking the back door is a simple
one-step process - snap the clip through the loop and you're
done. (Figure 8-2.)
Then there are the handles – on most traps suitable for
TNR, they are either too small or there is only one, so if you’re
carrying a trap with a cat who is shifting around, the trap will
tip awkwardly back and forth. The Neighborhood Cats Trap
has two extra-long and thick handles to solve this problem.
We also made the top plate extra-large as well, offering more
protection from an irate lodger and more space to place labels
and instructions for your clinic or fellow trappers. (Figure 8-
3.)
The trap has other features standard on all Tomahawk
traps, including reinforced steel rods to secure the front door’s
automatic locking mechanism and smaller wire mesh near the
rear door so cats can’t reach in from outside the trap and grab a
piece of bait. Setting the trap is easily done by placing a hook-
shaped trigger near the front door under a crossbar with a
Figure 8-1
Figure 8-2
Figure 8-3
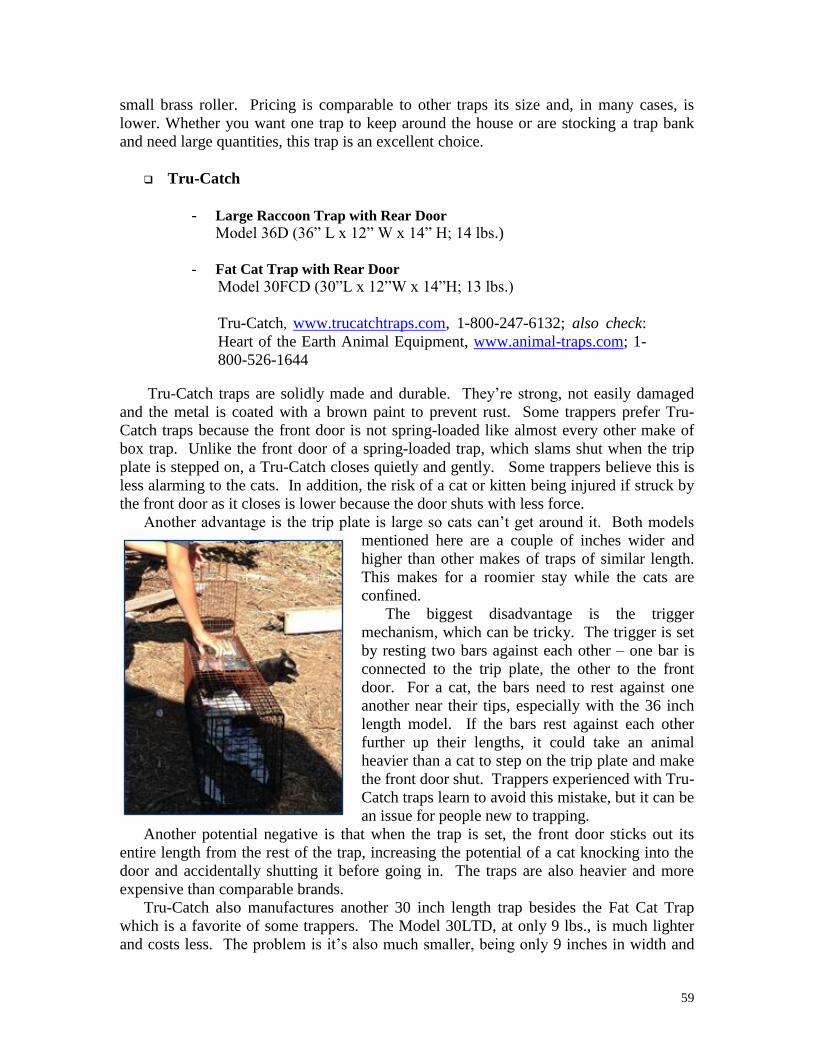
59
small brass roller. Pricing is comparable to other traps its size and, in many cases, is
lower. Whether you want one trap to keep around the house or are stocking a trap bank
and need large quantities, this trap is an excellent choice.
Tru-Catch
- Large Raccoon Trap with Rear Door Model 36D (36” L x 12” W x 14” H; 14 lbs.)
- Fat Cat Trap with Rear Door
Model 30FCD (30”L x 12”W x 14”H; 13 lbs.)
Tru-Catch, www.trucatchtraps.com, 1-800-247-6132; also check:
Heart of the Earth Animal Equipment, www.animal-traps.com; 1-
800-526-1644
Tru-Catch traps are solidly made and durable. They’re strong, not easily damaged
and the metal is coated with a brown paint to prevent rust. Some trappers prefer Tru-
Catch traps because the front door is not spring-loaded like almost every other make of
box trap. Unlike the front door of a spring-loaded trap, which slams shut when the trip
plate is stepped on, a Tru-Catch closes quietly and gently. Some trappers believe this is
less alarming to the cats. In addition, the risk of a cat or kitten being injured if struck by
the front door as it closes is lower because the door shuts with less force.
Another advantage is the trip plate is large so cats can’t get around it. Both models
mentioned here are a couple of inches wider and
higher than other makes of traps of similar length.
This makes for a roomier stay while the cats are
confined.
The biggest disadvantage is the trigger
mechanism, which can be tricky. The trigger is set
by resting two bars against each other – one bar is
connected to the trip plate, the other to the front
door. For a cat, the bars need to rest against one
another near their tips, especially with the 36 inch
length model. If the bars rest against each other
further up their lengths, it could take an animal
heavier than a cat to step on the trip plate and make
the front door shut. Trappers experienced with Tru-
Catch traps learn to avoid this mistake, but it can be
an issue for people new to trapping.
Another potential negative is that when the trap is set, the front door sticks out its
entire length from the rest of the trap, increasing the potential of a cat knocking into the
door and accidentally shutting it before going in. The traps are also heavier and more
expensive than comparable brands.
Tru-Catch also manufactures another 30 inch length trap besides the Fat Cat Trap
which is a favorite of some trappers. The Model 30LTD, at only 9 lbs., is much lighter
and costs less. The problem is it’s also much smaller, being only 9 inches in width and

60
11 inches in height. In our opinion, it is too small to double as a cage after a cat is
captured, so we don’t recommend it.
Safeguard
- Large Raccoon Trap with Rear Door
Model SG52836 / SG-36D (36”L x 11”W x 12”H; 12 lbs.)
- Raccoon Trap with Rear Door
Model SG52830 / SG-30D (30”L x 11”w x 12”H; 10 lbs.)
Heart of the Earth Animal Equipment, www.animal-traps.com; 1-
800-526-1644; also check: Animal Care Equipment & Services
(ACES), www.animal-care.com; 1-800-338-2237
The Safeguard trap has the basic features
needed for TNR – a sliding rear door and
length of either 30 or 36 inches. It’s
economically priced, so cost is a big
advantage, and it’s easy to set by pushing a
hook-shaped trigger under a crossbar near the
front door. Some trappers also like the 11
inch width, one inch wider than the
Neighborhood Cats Trap. This gives the cats
a little more room when confined.
The trap suffers from two major flaws.
First, the trip plate is too small and, left as is,
many cats will either step or lean over it to reach the bait. You can get around this by
taping a piece of cardboard to the middle of the trip plate, effectively extending it (Figure
8-4). The cardboard piece should be a little less than the width of the trap (approximately
10 inches) by 7 inches long.
The second flaw is the rear door’s locking
mechanism. The rear door locks by pushing
rotating hooks attached to the top of the door
beneath the crossbars on top of the trap. The handle
of the door is then held in place by a thin metal bar
which you pull over the handle. The design is
confusing and people who are inexperienced or in a
rush – like clinic workers – often make the mistake
of thinking the rear door is locked when the thin
metal bar is pulled over the door’s handle. They
forget or don’t realize the hooks on top of the door
need to be pushed under the crossbars. This omission allows the rear door to be pushed
up and open by a cat struggling to get out. If you use this trap, you must develop a habit
of constantly double-checking that the rear door is properly locked, especially when the
trap – with cat inside – is returned to you by your spay/neuter provider. Also check right
after baiting a trap out in the field, before lifting a trap with a recently captured cat, and
Figure 8-4
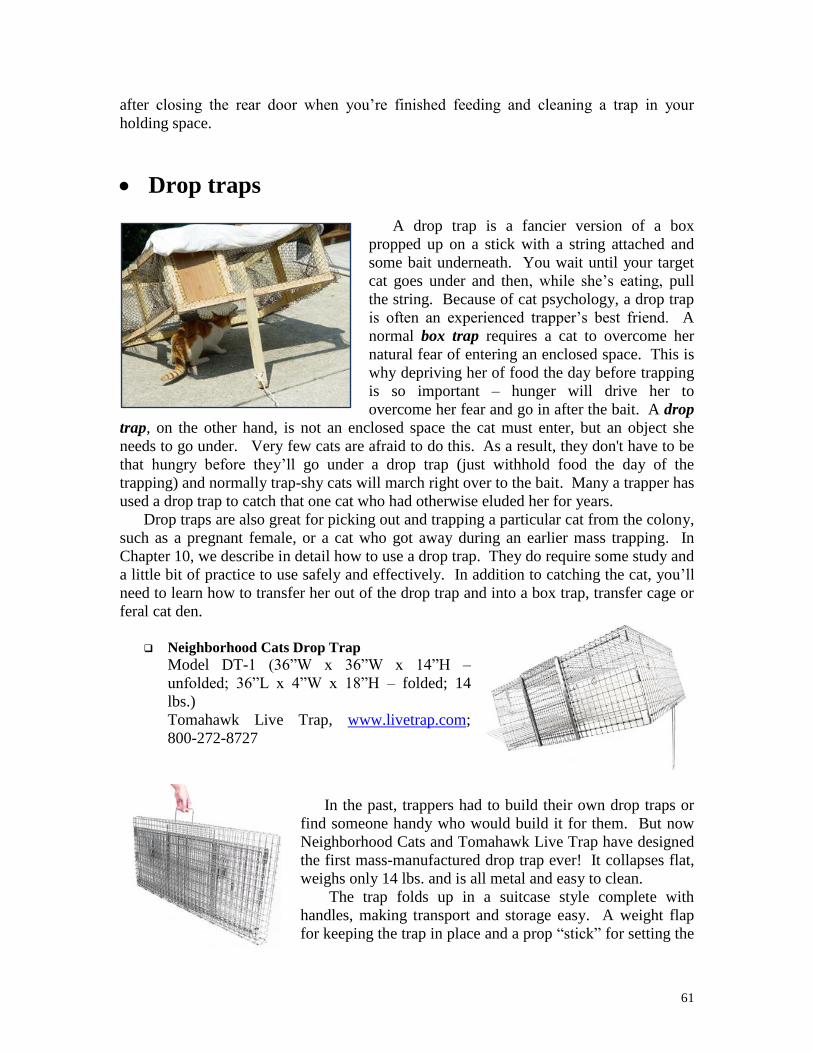
61
after closing the rear door when you’re finished feeding and cleaning a trap in your
holding space.
Drop traps
A drop trap is a fancier version of a box
propped up on a stick with a string attached and
some bait underneath. You wait until your target
cat goes under and then, while she’s eating, pull
the string. Because of cat psychology, a drop trap
is often an experienced trapper’s best friend. A
normal box trap requires a cat to overcome her
natural fear of entering an enclosed space. This is
why depriving her of food the day before trapping
is so important – hunger will drive her to
overcome her fear and go in after the bait. A drop
trap, on the other hand, is not an enclosed space the cat must enter, but an object she
needs to go under. Very few cats are afraid to do this. As a result, they don't have to be
that hungry before they’ll go under a drop trap (just withhold food the day of the
trapping) and normally trap-shy cats will march right over to the bait. Many a trapper has
used a drop trap to catch that one cat who had otherwise eluded her for years.
Drop traps are also great for picking out and trapping a particular cat from the colony,
such as a pregnant female, or a cat who got away during an earlier mass trapping. In
Chapter 10, we describe in detail how to use a drop trap. They do require some study and
a little bit of practice to use safely and effectively. In addition to catching the cat, you’ll
need to learn how to transfer her out of the drop trap and into a box trap, transfer cage or
feral cat den.
Neighborhood Cats Drop Trap
Model DT-1 (36”W x 36”W x 14”H –
unfolded; 36”L x 4”W x 18”H – folded; 14
lbs.)
Tomahawk Live Trap, www.livetrap.com;
800-272-8727
In the past, trappers had to build their own drop traps or
find someone handy who would build it for them. But now
Neighborhood Cats and Tomahawk Live Trap have designed
the first mass-manufactured drop trap ever! It collapses flat,
weighs only 14 lbs. and is all metal and easy to clean.
The trap folds up in a suitcase style complete with
handles, making transport and storage easy. A weight flap
for keeping the trap in place and a prop “stick” for setting the
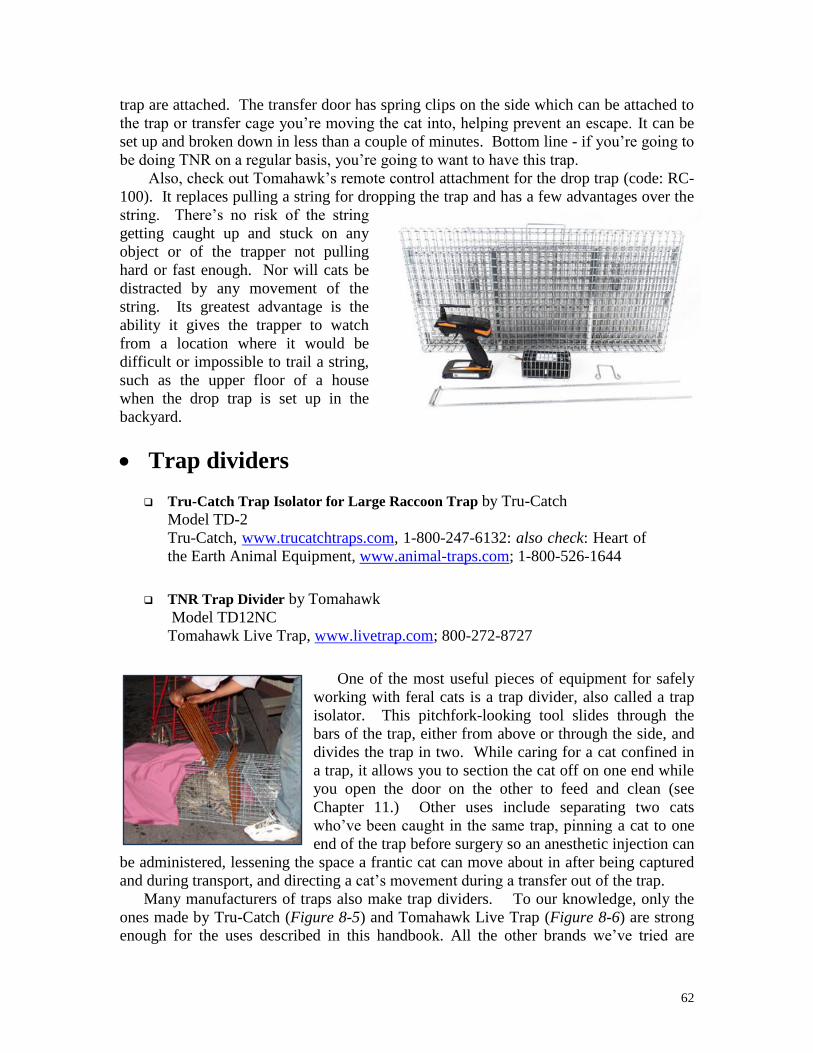
62
trap are attached. The transfer door has spring clips on the side which can be attached to
the trap or transfer cage you’re moving the cat into, helping prevent an escape. It can be
set up and broken down in less than a couple of minutes. Bottom line - if you’re going to
be doing TNR on a regular basis, you’re going to want to have this trap.
Also, check out Tomahawk’s remote control attachment for the drop trap (code: RC-
100). It replaces pulling a string for dropping the trap and has a few advantages over the
string. There’s no risk of the string
getting caught up and stuck on any
object or of the trapper not pulling
hard or fast enough. Nor will cats be
distracted by any movement of the
string. Its greatest advantage is the
ability it gives the trapper to watch
from a location where it would be
difficult or impossible to trail a string,
such as the upper floor of a house
when the drop trap is set up in the
backyard.
Trap dividers
Tru-Catch Trap Isolator for Large Raccoon Trap by Tru-Catch
Model TD-2
Tru-Catch, www.trucatchtraps.com, 1-800-247-6132: also check: Heart of
the Earth Animal Equipment, www.animal-traps.com; 1-800-526-1644
TNR Trap Divider by Tomahawk
Model TD12NC
Tomahawk Live Trap, www.livetrap.com; 800-272-8727
One of the most useful pieces of equipment for safely
working with feral cats is a trap divider, also called a trap
isolator. This pitchfork-looking tool slides through the
bars of the trap, either from above or through the side, and
divides the trap in two. While caring for a cat confined in
a trap, it allows you to section the cat off on one end while
you open the door on the other to feed and clean (see
Chapter 11.) Other uses include separating two cats
who’ve been caught in the same trap, pinning a cat to one
end of the trap before surgery so an anesthetic injection can
be administered, lessening the space a frantic cat can move about in after being captured
and during transport, and directing a cat’s movement during a transfer out of the trap.
Many manufacturers of traps also make trap dividers. To our knowledge, only the
ones made by Tru-Catch (Figure 8-5) and Tomahawk Live Trap (Figure 8-6) are strong
enough for the uses described in this handbook. All the other brands we’ve tried are
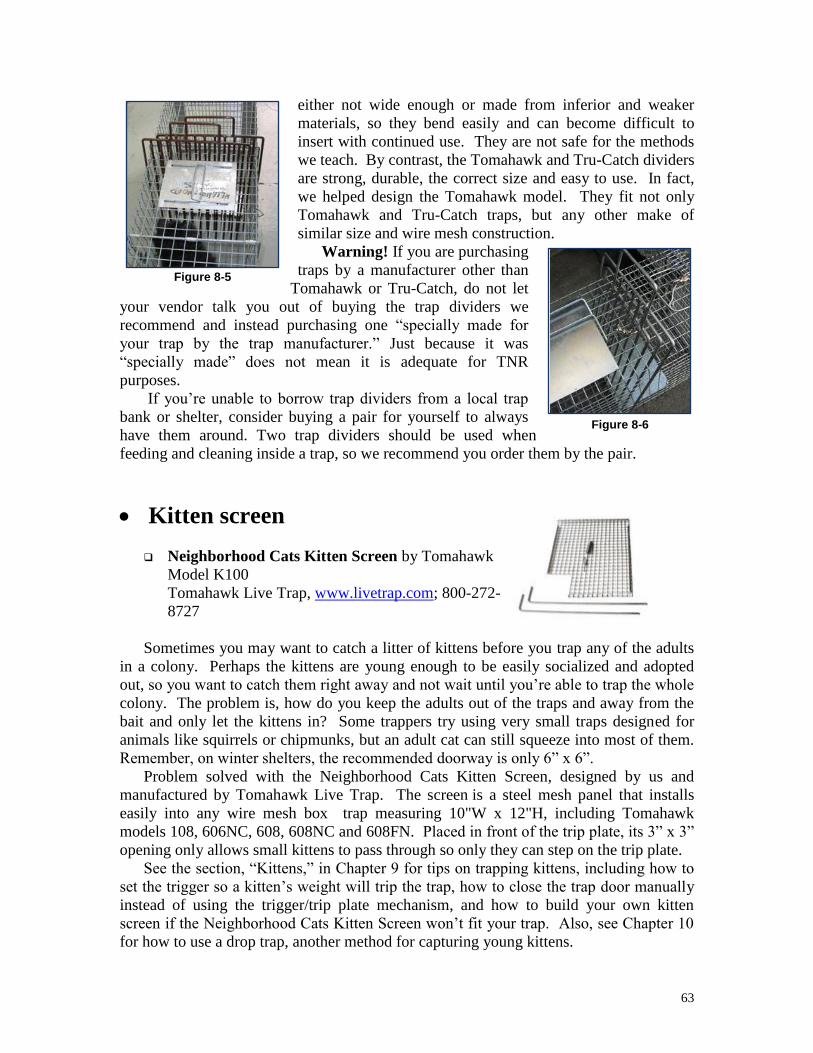
63
either not wide enough or made from inferior and weaker
materials, so they bend easily and can become difficult to
insert with continued use. They are not safe for the methods
we teach. By contrast, the Tomahawk and Tru-Catch dividers
are strong, durable, the correct size and easy to use. In fact,
we helped design the Tomahawk model. They fit not only
Tomahawk and Tru-Catch traps, but any other make of
similar size and wire mesh construction.
Warning! If you are purchasing
traps by a manufacturer other than
Tomahawk or Tru-Catch, do not let
your vendor talk you out of buying the trap dividers we
recommend and instead purchasing one “specially made for
your trap by the trap manufacturer.” Just because it was
“specially made” does not mean it is adequate for TNR
purposes.
If you’re unable to borrow trap dividers from a local trap
bank or shelter, consider buying a pair for yourself to always
have them around. Two trap dividers should be used when
feeding and cleaning inside a trap, so we recommend you order them by the pair.
Kitten screen
Neighborhood Cats Kitten Screen by Tomahawk
Model K100
Tomahawk Live Trap, www.livetrap.com; 800-272-
8727
Sometimes you may want to catch a litter of kittens before you trap any of the adults
in a colony. Perhaps the kittens are young enough to be easily socialized and adopted
out, so you want to catch them right away and not wait until you’re able to trap the whole
colony. The problem is, how do you keep the adults out of the traps and away from the
bait and only let the kittens in? Some trappers try using very small traps designed for
animals like squirrels or chipmunks, but an adult cat can still squeeze into most of them.
Remember, on winter shelters, the recommended doorway is only 6” x 6”.
Problem solved with the Neighborhood Cats Kitten Screen, designed by us and
manufactured by Tomahawk Live Trap. The screen is a steel mesh panel that installs
easily into any wire mesh box trap measuring 10"W x 12"H, including Tomahawk
models 108, 606NC, 608, 608NC and 608FN. Placed in front of the trip plate, its 3” x 3”
opening only allows small kittens to pass through so only they can step on the trip plate.
See the section, “Kittens,” in Chapter 9 for tips on trapping kittens, including how to
set the trigger so a kitten’s weight will trip the trap, how to close the trap door manually
instead of using the trigger/trip plate mechanism, and how to build your own kitten
screen if the Neighborhood Cats Kitten Screen won’t fit your trap. Also, see Chapter 10
for how to use a drop trap, another method for capturing young kittens.
Figure 8-6
Figure 8-5
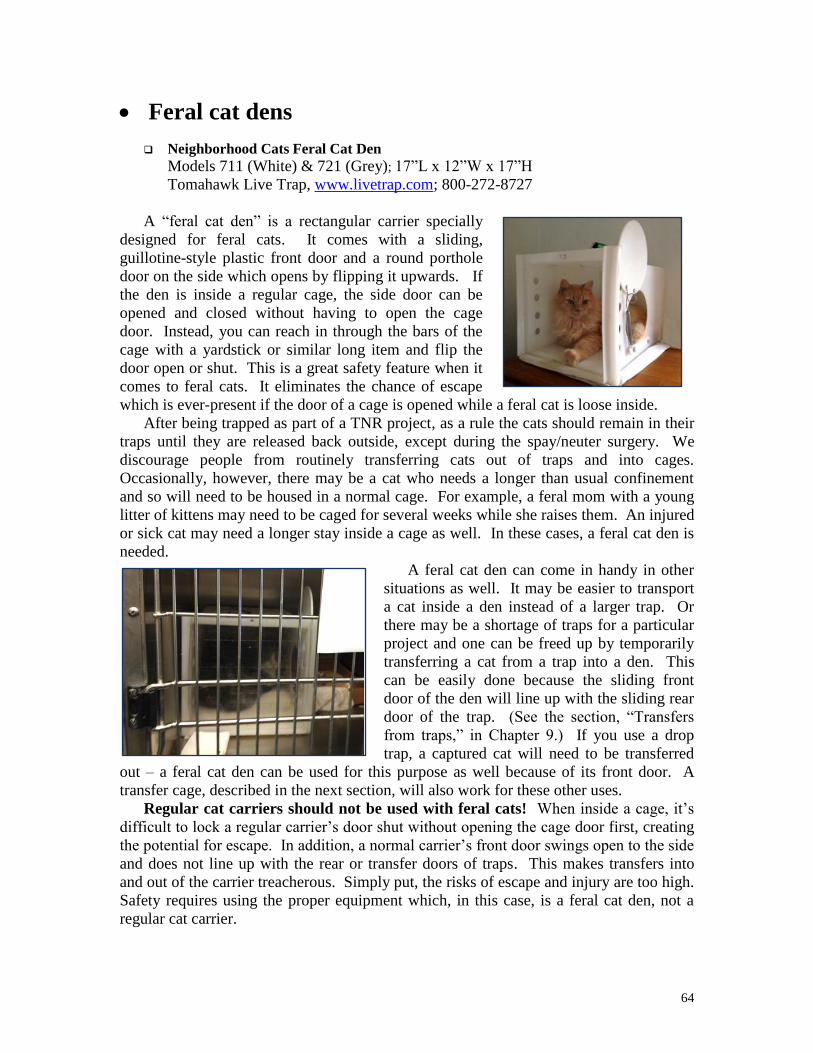
64
Feral cat dens
Neighborhood Cats Feral Cat Den Models 711 (White) & 721 (Grey); 17”L x 12”W x 17”H
Tomahawk Live Trap, www.livetrap.com; 800-272-8727
A “feral cat den” is a rectangular carrier specially
designed for feral cats. It comes with a sliding,
guillotine-style plastic front door and a round porthole
door on the side which opens by flipping it upwards. If
the den is inside a regular cage, the side door can be
opened and closed without having to open the cage
door. Instead, you can reach in through the bars of the
cage with a yardstick or similar long item and flip the
door open or shut. This is a great safety feature when it
comes to feral cats. It eliminates the chance of escape
which is ever-present if the door of a cage is opened while a feral cat is loose inside.
After being trapped as part of a TNR project, as a rule the cats should remain in their
traps until they are released back outside, except during the spay/neuter surgery. We
discourage people from routinely transferring cats out of traps and into cages.
Occasionally, however, there may be a cat who needs a longer than usual confinement
and so will need to be housed in a normal cage. For example, a feral mom with a young
litter of kittens may need to be caged for several weeks while she raises them. An injured
or sick cat may need a longer stay inside a cage as well. In these cases, a feral cat den is
needed.
A feral cat den can come in handy in other
situations as well. It may be easier to transport
a cat inside a den instead of a larger trap. Or
there may be a shortage of traps for a particular
project and one can be freed up by temporarily
transferring a cat from a trap into a den. This
can be easily done because the sliding front
door of the den will line up with the sliding rear
door of the trap. (See the section, “Transfers
from traps,” in Chapter 9.) If you use a drop
trap, a captured cat will need to be transferred
out – a feral cat den can be used for this purpose as well because of its front door. A
transfer cage, described in the next section, will also work for these other uses.
Regular cat carriers should not be used with feral cats! When inside a cage, it’s
difficult to lock a regular carrier’s door shut without opening the cage door first, creating
the potential for escape. In addition, a normal carrier’s front door swings open to the side
and does not line up with the rear or transfer doors of traps. This makes transfers into
and out of the carrier treacherous. Simply put, the risks of escape and injury are too high.
Safety requires using the proper equipment which, in this case, is a feral cat den, not a
regular cat carrier.

65
Neighborhood Cats has worked with
Tomahawk Live Trap to design a den with added
safety features. Most importantly, the side door
can be locked closed (or open) with an attached
spring clip (Figure 8-7). Without the side door
lock, there is a risk a feral cat could work the den’s
side door open and escape during transport.
Because, to our knowledge, no other model on the
market offers a side door lock, this is the only feral
cat den we recommend.
Other added features which we helped design are
a more comfortable handle, a steel cable attaching the front door clip to the handle and
rounded corners on the front sliding door to help prevent chipping if the door is
accidentally dropped.
In addition to the choice between a grey or white den, Tomahawk also offers a tinted
or clear front guillotine door. For feral cats, the clear door is usually the better choice,
giving you more opportunity to observe the cat when he’s inside.
Because the Neighborhood Cats Feral Cat Den is 17 inches high, higher than most
traps, be careful when transferring a cat out of a trap not to pull the den’s door up any
higher than the trap itself. Otherwise you create a gap which a cat could try to squeeze
through.
Transfer cages
A transfer cage is designed specifically for moving a cat out of a trap. It has a
guillotine-style front door which lines up with the rear door of a trap. Transfer cages can
be used to free up traps or to transport cats. They’re not large enough to confine the cats
for more than a short period and, because they lack a side door like a feral cat den,
they’re not suitable for use in cages for long-term confinement. Because of their limited
usefulness, it’s not an item we keep on hand at Neighborhood Cats. However, there are
many TNR groups which do use them frequently.
Generally, the best practice is to buy transfer cages made by the same manufacturer
as your trap so the dimensions of the front door of the transfer cage exactly match those
of the rear door of the trap. If you buy from different manufacturers, make sure the
height and width of the transfer cage is close enough to the dimensions of your trap to
prevent gaps which a cat can escape through during a transfer.
TNR Cat Transfer Cage by Tomahawk
Model 306NC (20”L x 11”W x 12”H)
Tomahawk Live Trap, www.livetrap.com; 1-800-272-8727
This model matches the Neighborhood Cats Traps, Models 606NC and 608NC, and
the Neighborhood Cats Drop Trap (Model DT-1). It can be purchased as a kit with the
Figure 8-7

66
drop trap (code: KITDT) – see Figure 8-8. It has a solid metal pan bottom, extra-large
hand guard on top and extra-large handles.
Tru-Catch Animal Carrier
Model T24TE (24”L x 12”W x 14”H)
Tru-Catch, www.trucatchtraps.com, 1-800-247-6132; also check: Heart of
the Earth Animal Equipment, www.animal-traps.com; 1-800-526-1644
The Model 24E goes with Tru-Catch traps Models 30FCD and 36D. It comes with
both a top-loading door as well as a front guillotine door. Normally, it would be rare
when working with feral cats to use the top-loading door, but it might come in handy for
tame cats or kittens. The floor is wire mesh.
Safeguard Carrier/Transfer Cage
Model SG53100 / SG20CTEL (20”L x 11”W x 12”H)
Heart of the Earth Animal Equipment, www.animal-traps.com; 1-800-526-
1644; also check: Animal Care Equipment & Services (ACES),
www.animal-care.com; 1-800-338-2237
This transfer cage matches the traps SG52836 / SG-36D and SG52830 / SG-30D. It
too, is made with both a top-loading door and a guillotine front door. A galvanized pan
with a 1” lip covers the entire floor.
Figure 8-8
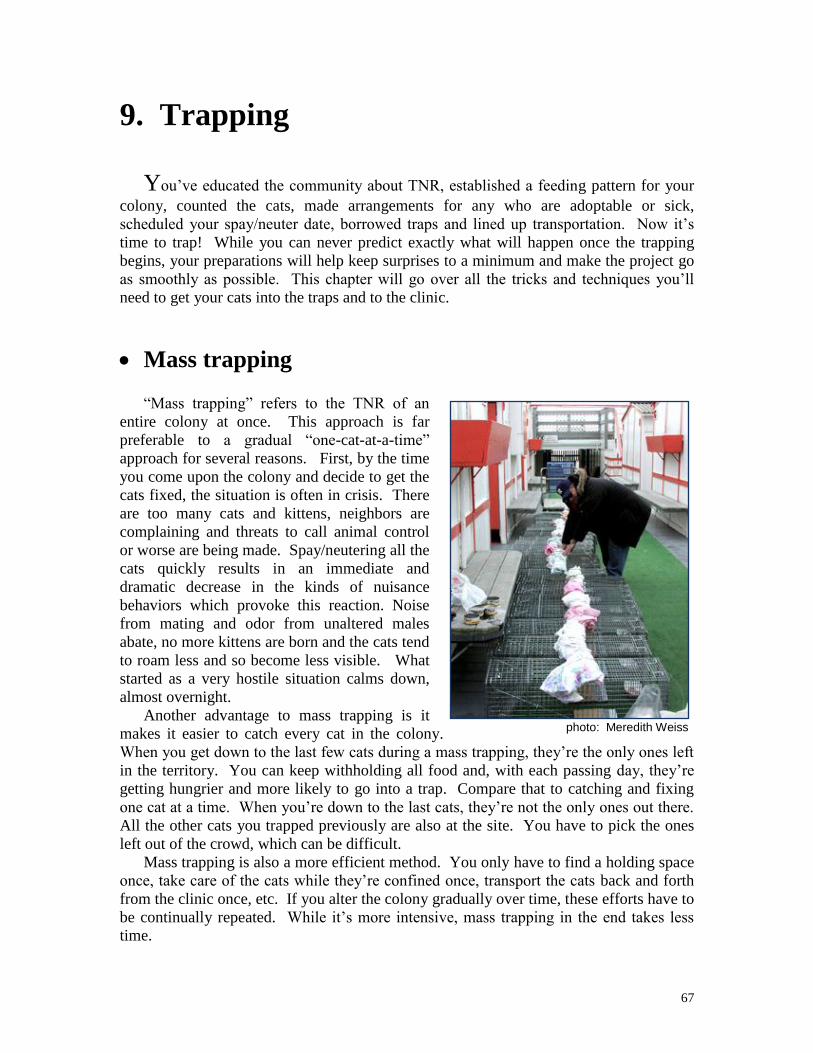
67
9. Trapping
You’ve educated the community about TNR, established a feeding pattern for your
colony, counted the cats, made arrangements for any who are adoptable or sick,
scheduled your spay/neuter date, borrowed traps and lined up transportation. Now it’s
time to trap! While you can never predict exactly what will happen once the trapping
begins, your preparations will help keep surprises to a minimum and make the project go
as smoothly as possible. This chapter will go over all the tricks and techniques you’ll
need to get your cats into the traps and to the clinic.
Mass trapping “Mass trapping” refers to the TNR of an
entire colony at once. This approach is far
preferable to a gradual “one-cat-at-a-time”
approach for several reasons. First, by the time
you come upon the colony and decide to get the
cats fixed, the situation is often in crisis. There
are too many cats and kittens, neighbors are
complaining and threats to call animal control
or worse are being made. Spay/neutering all the
cats quickly results in an immediate and
dramatic decrease in the kinds of nuisance
behaviors which provoke this reaction. Noise
from mating and odor from unaltered males
abate, no more kittens are born and the cats tend
to roam less and so become less visible. What
started as a very hostile situation calms down,
almost overnight.
Another advantage to mass trapping is it
makes it easier to catch every cat in the colony.
When you get down to the last few cats during a mass trapping, they’re the only ones left
in the territory. You can keep withholding all food and, with each passing day, they’re
getting hungrier and more likely to go into a trap. Compare that to catching and fixing
one cat at a time. When you’re down to the last cats, they’re not the only ones out there.
All the other cats you trapped previously are also at the site. You have to pick the ones
left out of the crowd, which can be difficult.
Mass trapping is also a more efficient method. You only have to find a holding space
once, take care of the cats while they’re confined once, transport the cats back and forth
from the clinic once, etc. If you alter the colony gradually over time, these efforts have to
be continually repeated. While it’s more intensive, mass trapping in the end takes less
time.
photo: Meredith Weiss

68
That said, not every community offers low cost spay/neuter for ferals, which is
essential for mass trapping, and not everyone has access to a large number of traps or a
holding space big enough for an entire colony. When it’s not possible to TNR the whole
colony at the same time, the goal instead should be to catch and neuter as many of the
cats at once as you can. Fixing even one or two cats at a time is still making important
progress if eventually the whole colony is done.
The entire mass trapping process, from pre-trapping preparations through the release
of the cats back outside, is demonstrated with live footage in the Neighborhood Cats
instructional video, “How to Perform a Mass Trapping.” The approximately 30 minute
video is available for free viewing on the Neighborhood Cats website
(www.neighborhoodcats.org). See either the home page or the Mass Trapping page. A
DVD copy can be ordered by emailing [email protected].
Trapping supplies – the basics
Here is a list of basic items you should always have with you when you trap:
Traps (2 or 3 more than the number of cats)
Trap divider (at least one)
Bait (two kinds)
Can opener
Plastic forks or spoons
Small paper or plastic plates
Pounce or a similar cat treat which can be easily crumbled
Sheets (one per trap)
(If needed) cardboard extenders for the trip plates of the traps & duct tape
First aid kit
Having a few more traps than cats makes it easier when you get down to the last
member or two of the colony. You’ll be able to spread out three or four traps to catch the
last cat instead of only one. Extra traps are also insurance against any unfamiliar felines
making an unexpected appearance. A trap divider is important to have on hand in case
you need to separate two cats caught in the same trap, reduce the space in a trap that a
frantic cat can thrash around in or transfer a cat out of a trap. (See the section, “Transfers
from traps” later in this chapter.)
Two kinds of bait should be placed on each plate because some cats may prefer one
over the other. There are as many favorite types of bait as there are trappers. Usually,
cheap cat food tuna does the trick, but also add a smelly wet food for those occasional
cats who dislike tuna. Other tried and true delectables include roast beef, grilled chicken,
human quality tuna, sardines, mackerel, fast-food hamburgers, white bread dipped in
clam sauce, valerian root and freshly cooked fish of any sort. Fresh catnip is another
favorite, but only put it inside the trap and on or behind the trip plate. If you try to entice
kitty over by sprinkling it outside the trap, you may end up with a very happy feral who
rolls around on the ground by the front door, then gets up and walks away.
69
Plastic or paper plates are recommended. Don’t use anything with a sharp or hard
edge, like a cat food can that could cause an injury if a trapped cat panics and starts
dashing back and forth, or a ceramic saucer. Buy plastic forks on spoons for placing the
bait on the plates so you have plenty of them around if needed.
Pounce or a similar cat treat that easily crumbles is perfect for making a trail leading
up to the trap.
The sheets are for covering traps after a cat is caught. Covering usually calms the cat
quickly by making him feel less exposed, helping prevent injury. From the time of
capture until the cat is released at the end of the project, the trap should be kept covered
at all times. This is very important for ferals who feel more secure in dark, enclosed
spaces when confined.
If you’re using traps with narrow trip plates, you’ll need cardboard extenders to make
them wider or else cats may simply step over them. The width of the cardboard extender
should be a little less than the width of the trap and seven inches long. Use duct tape to
attach the cardboard to the middle of the trip plate (see Figure 8-4 in Chapter 8).
A basic first aid kit is a must just in case of a bite or scratch or some other injury. An
injury caused by a cat shouldn’t happen if the techniques outlined in this handbook are
followed, but if it does, it’s important to be prepared. Quickly cleaning a wound inflicted
by a cat can stop a more serious infection from developing later. The kit should at a
minimum include hydrogen peroxide and cotton balls for cleaning a wound and band-
aids. If you are bitten or scratched by a cat, be sure to seek medical attention promptly.
A seemingly innocent wound can become serious if left untreated.
Trapping supplies - optional
The following list of items may or may not be needed, depending on the
circumstances of your project. Some you might want to bring along just in case.
Newspaper
Clothespins
Blankets
Plastic drop cloth (at least 3 millimeters thick)
Flashlight
Needle-nose pliers
Vegetable oil spray
Pens or pencils
Color labels & Sharpie pens (if trapping at multiple sites)
Logging sheet & pen (if trapping at multiple sites)
Another person or two
Once in a while, a cat won’t like the feel of the wire floor of a box trap and will
hesitate to enter. One way to prevent this is to cover the floor of the trap with a few
sheets of folded newspaper. Be aware that even the slightest breeze can cause the
newspaper to rustle and frighten a cat away, so attach the newspaper to the floor of the
trap with clothespins. Some trappers will put newspaper in all their traps as a standard
70
practice. In our experience, there are not that many cats who are deterred by the feel of a
wire floor. We don’t usually bother with the newspaper until we’re down to the last cats
who may be more trap-shy and need extra coaxing.
Blankets are useful if you’re trapping in cold weather and trapped cats cannot be
quickly moved into a warm space. Wrapping a blanket around the trap after a cat has
been caught, while leaving some openings for ventilation, will buy you a little time
depending on how cold it is.
A plastic drop cloth should be used to line the seats or floor of any vehicle used to
transport the cats or any other surface which will need protection.
Bring a flashlight if you’re trapping at night or in a dark space like a basement.
You’ll need it not only to see your way around, but to check the ears of trapped cats to
see if they’re already tipped. Needle-nose pliers are handy if a trap’s trigger mechanism
needs adjustment though it takes some experience to do it properly - a fraction of an inch
can be the difference between an adjustment that works and one that doesn’t. Vegetable
oil spray is good for traps whose moving parts need a little lubrication.
If you’re trapping at multiple sites simultaneously, as soon as a cat is caught, the trap
should be labeled to avoid future mix-ups. A good idea is to use a different color label for
each colony. Write down the location of the colony and the number of the trap (give each
trap its own unique number). Then enter the trap number, the colony name and a
description of the cat into your trapping log (see Appendix C for a sample log).
Finally, having someone help you is highly advisable, especially when trapping
multiple cats. Attention to more than one cat or trap at a time may be needed. Also, if an
item was forgotten or a phone call needs to be quickly made in the heat of the action,
having another person there can make a huge difference. At the same time, don’t have
more helpers than you need. Too many people standing around talking can make the cats
more wary. For smaller colonies, two or three people will do just fine. As you approach
20 or more cats, three or four is a good number.
The trapping
1. Withhold food
Most feral cats are naturally wary of entering an unfamiliar, enclosed space like a
humane box trap. Hunger is the key for getting them to overcome this fear and is the
single most important factor when trapping. You could prepare everything else perfectly,
but if the cats are not hungry, many or even most of them will not go in a box trap no
matter how tempting the bait.
Trapping at night? Consider using a headlamp instead of a flashlight. That way you’ll have both hands free to dish out bait, cover traps, etc. Sold as camping equipment at sporting goods stores, there are many models available which vary in brightness, beam distance, battery life and weight. Search Amazon (www.amazon.com) for “headlamp flashlight” or check Paragon stores (www.paragonsports.com).
71
Food should be withheld the entire day before the trapping begins. For example, if
the trapping begins on a Friday, then the cats should be fed at their regular time on
Wednesday and then not at all on Thursday. The only exceptions are young kittens,
nursing mothers, and cats who are clearly ill. If you can feed them separately and not let
the other cats get any of the food, then they can eat the day before the trapping though not
the day of. If you can’t feed them separately, then withhold the food.
Withholding food is often harder on the caretaker than it is on the cats. You feel
guilty, knowing they’re counting on you and wondering what happened. For sure, they
won’t like skipping their daily meal, but healthy adult cats can easily go a day or two
without food and not suffer any ill consequences. You have to remind yourself that a
day’s discomfort is a small price for the life-long benefit the cats will gain by being
spayed and neutered. Even if you’re sure everyone is on board with not feeding the cats,
it’s a good idea to check the feeding station and site at least once the day before the
trapping begins to make sure there’s no food lying around.
While the trapping proceeds, continue to withhold all food. Cats who you don’t catch
the first day will be hungrier the next. As long as there are loose cats remaining and the
rest of the colony is confined, continue to hold back food and keep setting traps. At all
times during the trapping, do leave out fresh water.
The importance of withholding food points to the need for locating and coordinating
with any other feeders. On occasion, you may run up against someone who will not
cooperate, not matter how articulately you explain it’s for the good of the cats. If this
happens, you need to try to work around that person as best you can. Find out when they
put food out, then show up soon afterwards and remove it. Or start trapping well before
the person usually comes to feed. A drop trap can be very handy in these situations
because the cats do not need to be as hungry before they’ll go under one. Most times, if
they have not eaten yet that day, they’ll venture under a drop trap.
2. Allow enough time for the trapping
Typically, if the cats are hungry and everything is in place, the first day of trapping
will net most of the cats in the colony. However, even with the best laid plans, some cats
may not show up the first day and others may not enter the traps if they do. The second
day often results in these remaining cats getting caught, but it is possible there will still
be one or two stubborn ones who refuse to go in. It can take a third day of being
deprived of food to make them hungry enough to enter a trap. This is why we
recommend budgeting at least two days for trapping and, for larger colonies of ten or
more, at least three days.
There are other good reasons for leaving at least two days and not waiting until the
day or night before your spay/neuter date. For one thing, there’s the weather. What if it
rains the day before the surgeries are scheduled? Then your project is literally washed
out. It’s possible you may show up to trap and discover a large bowl of dry food which
someone unwittingly (or not) put out. Your neighbor may have picked the exact time and
day you show up with your traps to start a new and loud construction project. By
planning on at least two days to trap, you give yourself a safety net for these kinds of
unexpected developments which could interfere with the trapping. After all the
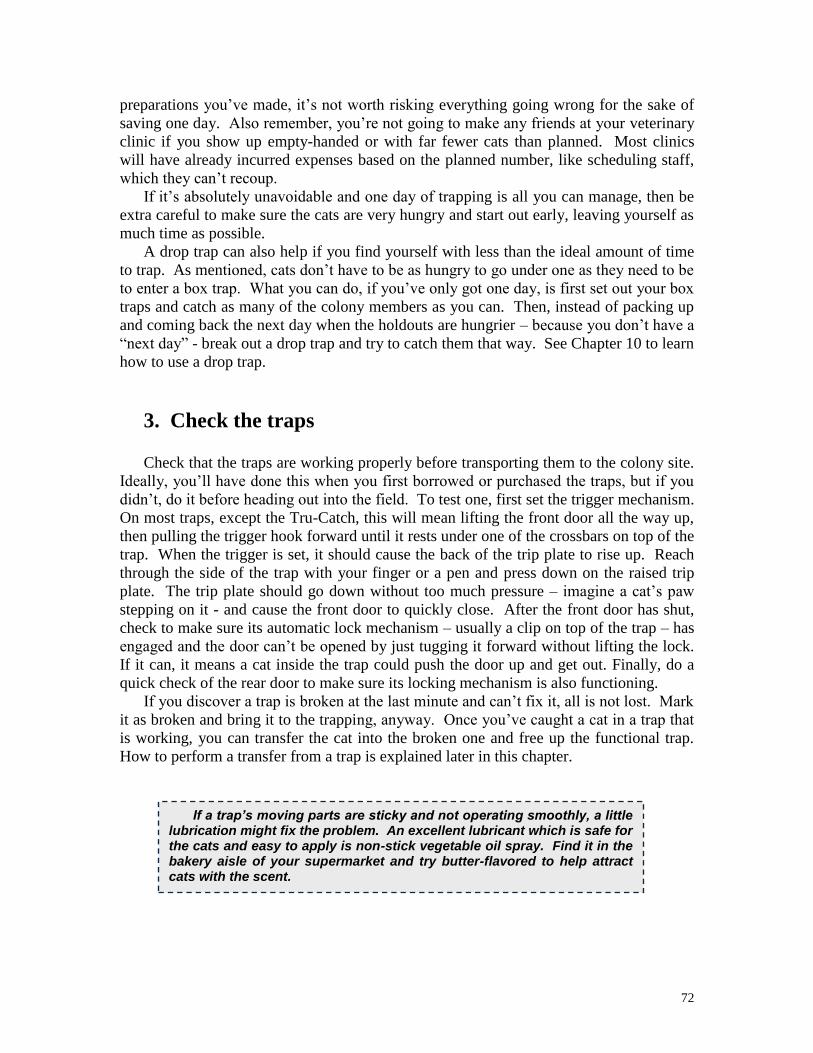
72
preparations you’ve made, it’s not worth risking everything going wrong for the sake of
saving one day. Also remember, you’re not going to make any friends at your veterinary
clinic if you show up empty-handed or with far fewer cats than planned. Most clinics
will have already incurred expenses based on the planned number, like scheduling staff,
which they can’t recoup.
If it’s absolutely unavoidable and one day of trapping is all you can manage, then be
extra careful to make sure the cats are very hungry and start out early, leaving yourself as
much time as possible.
A drop trap can also help if you find yourself with less than the ideal amount of time
to trap. As mentioned, cats don’t have to be as hungry to go under one as they need to be
to enter a box trap. What you can do, if you’ve only got one day, is first set out your box
traps and catch as many of the colony members as you can. Then, instead of packing up
and coming back the next day when the holdouts are hungrier – because you don’t have a
“next day” - break out a drop trap and try to catch them that way. See Chapter 10 to learn
how to use a drop trap.
3. Check the traps
Check that the traps are working properly before transporting them to the colony site.
Ideally, you’ll have done this when you first borrowed or purchased the traps, but if you
didn’t, do it before heading out into the field. To test one, first set the trigger mechanism.
On most traps, except the Tru-Catch, this will mean lifting the front door all the way up,
then pulling the trigger hook forward until it rests under one of the crossbars on top of the
trap. When the trigger is set, it should cause the back of the trip plate to rise up. Reach
through the side of the trap with your finger or a pen and press down on the raised trip
plate. The trip plate should go down without too much pressure – imagine a cat’s paw
stepping on it - and cause the front door to quickly close. After the front door has shut,
check to make sure its automatic lock mechanism – usually a clip on top of the trap – has
engaged and the door can’t be opened by just tugging it forward without lifting the lock.
If it can, it means a cat inside the trap could push the door up and get out. Finally, do a
quick check of the rear door to make sure its locking mechanism is also functioning.
If you discover a trap is broken at the last minute and can’t fix it, all is not lost. Mark
it as broken and bring it to the trapping, anyway. Once you’ve caught a cat in a trap that
is working, you can transfer the cat into the broken one and free up the functional trap.
How to perform a transfer from a trap is explained later in this chapter.
If a trap’s moving parts are sticky and not operating smoothly, a little lubrication might fix the problem. An excellent lubricant which is safe for the cats and easy to apply is non-stick vegetable oil spray. Find it in the bakery aisle of your supermarket and try butter-flavored to help attract cats with the scent.

73
4. Prepare the traps
After you’ve transported your equipment
and supplies to the colony site, unload the traps
and line them up in a row, rear doors all facing
the same way. Put the traps down a
comfortable distance from where the cats are
normally fed and, if possible, just around the
corner and out of sight. This will reduce the
chance of alarming the cats with what to them
will appear to be new and unusual activity.
Remove the rear doors, placing each on top
of its trap. At this point, if you’re using traps
with small trip plates, tape the cardboard
extenders on, making sure the edge of the
cardboard, and not simply the tape, reaches the middle of the plate (see Figure 8-4 in
Chapter 8). Next, open the bait and place generous portions on small paper or plastic
plates. Use mostly your favorite bait but also add at least a bit of a second kind. Then
place the bait behind the trip plate – right up against the rear door is good. Shut the rear
doors, double-checking that they’re locked properly.
One exception to using a fair amount of bait is if you know a cat is going to be
operated on within hours. For example, if the trap is set early in the morning of your
spay/neuter date. In that case, only use a small amount of very smelly bait. Ideally,
when a cat goes for surgery, her stomach is empty to avoid possible complications caused
by anesthesia, such as vomiting then choking and gagging. If the cat did eat within hours
of surgery, even a small amount, be sure to inform your veterinarian.
As mentioned earlier, at Neighborhood Cats, we don’t usually line the floors of all the
traps with newspaper, but only do so later in the trapping if there are cats reluctant to go
in. Some trappers prefer to start out with
newspaper on the bottom of all traps. If that’s
what you want to do, too, then after you’ve
locked the rear doors, go to the front of each trap,
open the front door and line the floor with
newspaper, using clothespins to attach it to the
sides of the trap.
Finally, roll up a sheet and tuck it between the
handles on top of each trap. That way, when a cat
is caught and you need to cover him quickly, you
won’t have to go running back and forth, looking
for a sheet.
5. Place the traps in the territory
Once all the traps are ready, place them all in the territory at the same time. Don’t put
only some out, thinking you’ll put out the rest after you’ve caught some cats. The fewer
photo: Bryan Kortis
photo: Meredith Weiss
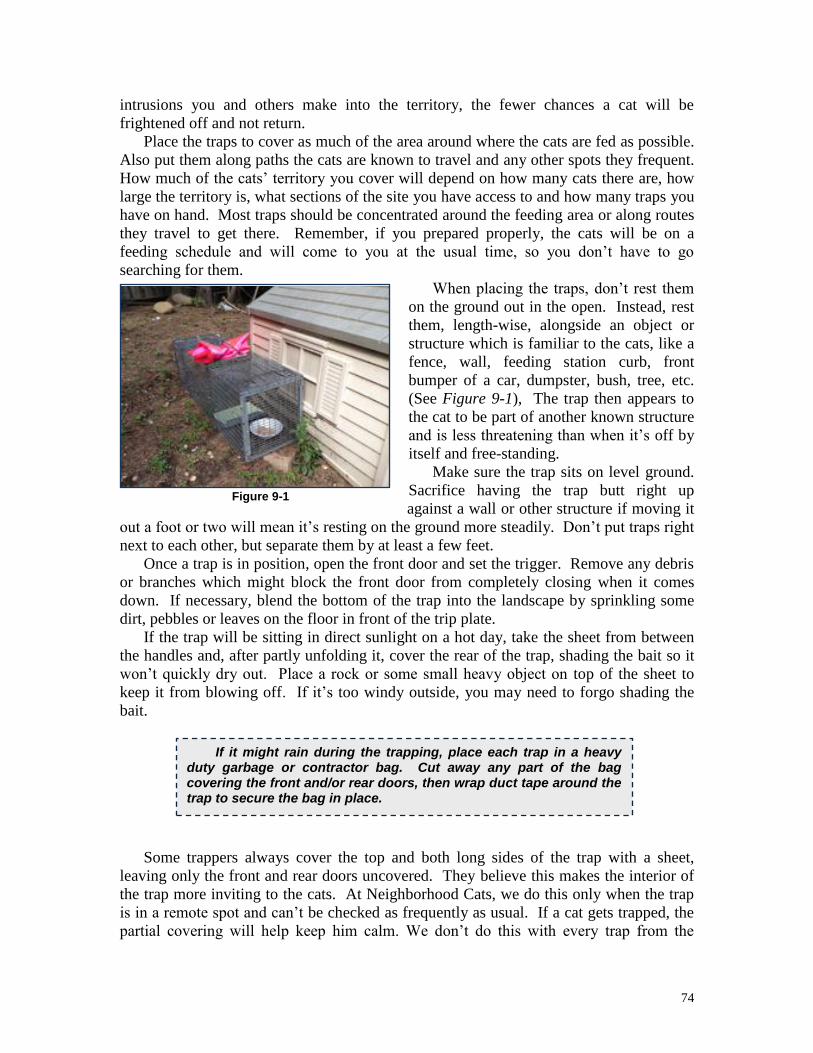
74
intrusions you and others make into the territory, the fewer chances a cat will be
frightened off and not return.
Place the traps to cover as much of the area around where the cats are fed as possible.
Also put them along paths the cats are known to travel and any other spots they frequent.
How much of the cats’ territory you cover will depend on how many cats there are, how
large the territory is, what sections of the site you have access to and how many traps you
have on hand. Most traps should be concentrated around the feeding area or along routes
they travel to get there. Remember, if you prepared properly, the cats will be on a
feeding schedule and will come to you at the usual time, so you don’t have to go
searching for them.
When placing the traps, don’t rest them
on the ground out in the open. Instead, rest
them, length-wise, alongside an object or
structure which is familiar to the cats, like a
fence, wall, feeding station curb, front
bumper of a car, dumpster, bush, tree, etc.
(See Figure 9-1), The trap then appears to
the cat to be part of another known structure
and is less threatening than when it’s off by
itself and free-standing.
Make sure the trap sits on level ground.
Sacrifice having the trap butt right up
against a wall or other structure if moving it
out a foot or two will mean it’s resting on the ground more steadily. Don’t put traps right
next to each other, but separate them by at least a few feet.
Once a trap is in position, open the front door and set the trigger. Remove any debris
or branches which might block the front door from completely closing when it comes
down. If necessary, blend the bottom of the trap into the landscape by sprinkling some
dirt, pebbles or leaves on the floor in front of the trip plate.
If the trap will be sitting in direct sunlight on a hot day, take the sheet from between
the handles and, after partly unfolding it, cover the rear of the trap, shading the bait so it
won’t quickly dry out. Place a rock or some small heavy object on top of the sheet to
keep it from blowing off. If it’s too windy outside, you may need to forgo shading the
bait.
Some trappers always cover the top and both long sides of the trap with a sheet,
leaving only the front and rear doors uncovered. They believe this makes the interior of
the trap more inviting to the cats. At Neighborhood Cats, we do this only when the trap
is in a remote spot and can’t be checked as frequently as usual. If a cat gets trapped, the
partial covering will help keep him calm. We don’t do this with every trap from the
Figure 9-1
If it might rain during the trapping, place each trap in a heavy duty garbage or contractor bag. Cut away any part of the bag covering the front and/or rear doors, then wrap duct tape around the trap to secure the bag in place.
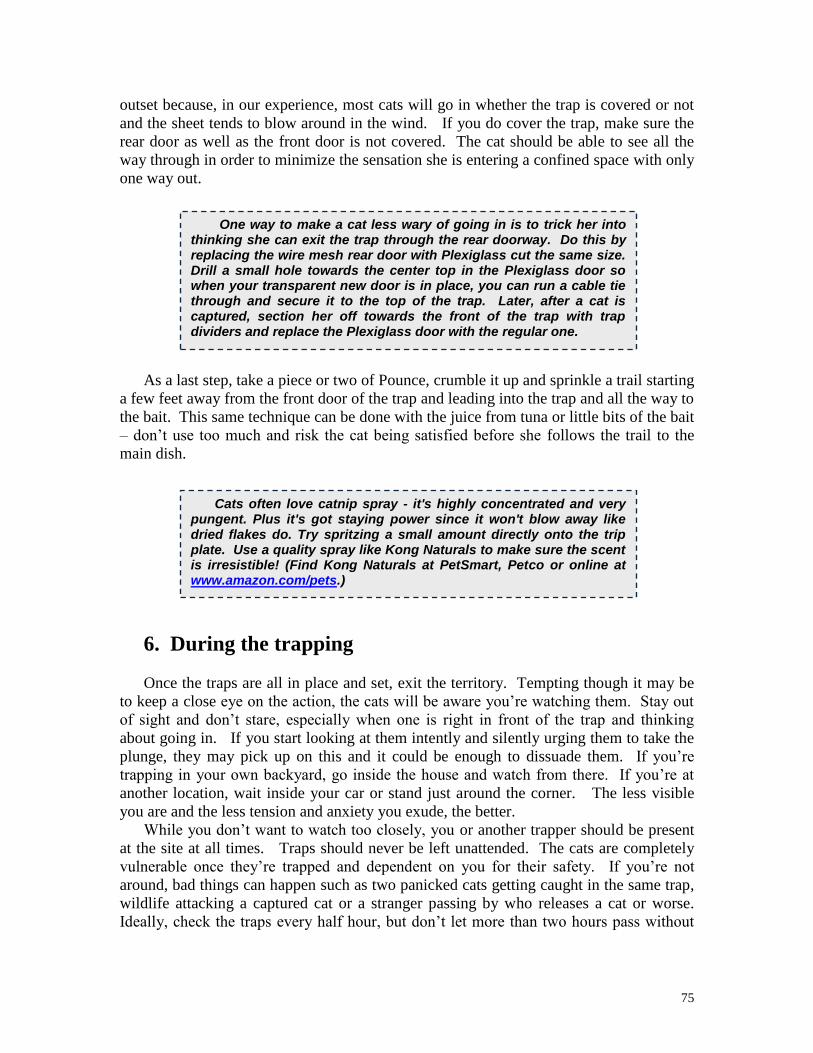
75
outset because, in our experience, most cats will go in whether the trap is covered or not
and the sheet tends to blow around in the wind. If you do cover the trap, make sure the
rear door as well as the front door is not covered. The cat should be able to see all the
way through in order to minimize the sensation she is entering a confined space with only
one way out.
As a last step, take a piece or two of Pounce, crumble it up and sprinkle a trail starting
a few feet away from the front door of the trap and leading into the trap and all the way to
the bait. This same technique can be done with the juice from tuna or little bits of the bait
– don’t use too much and risk the cat being satisfied before she follows the trail to the
main dish.
6. During the trapping
Once the traps are all in place and set, exit the territory. Tempting though it may be
to keep a close eye on the action, the cats will be aware you’re watching them. Stay out
of sight and don’t stare, especially when one is right in front of the trap and thinking
about going in. If you start looking at them intently and silently urging them to take the
plunge, they may pick up on this and it could be enough to dissuade them. If you’re
trapping in your own backyard, go inside the house and watch from there. If you’re at
another location, wait inside your car or stand just around the corner. The less visible
you are and the less tension and anxiety you exude, the better.
While you don’t want to watch too closely, you or another trapper should be present
at the site at all times. Traps should never be left unattended. The cats are completely
vulnerable once they’re trapped and dependent on you for their safety. If you’re not
around, bad things can happen such as two panicked cats getting caught in the same trap,
wildlife attacking a captured cat or a stranger passing by who releases a cat or worse.
Ideally, check the traps every half hour, but don’t let more than two hours pass without
One way to make a cat less wary of going in is to trick her into thinking she can exit the trap through the rear doorway. Do this by replacing the wire mesh rear door with Plexiglass cut the same size. Drill a small hole towards the center top in the Plexiglass door so when your transparent new door is in place, you can run a cable tie through and secure it to the top of the trap. Later, after a cat is captured, section her off towards the front of the trap with trap dividers and replace the Plexiglass door with the regular one.
Cats often love catnip spray - it's highly concentrated and very pungent. Plus it's got staying power since it won't blow away like dried flakes do. Try spritzing a small amount directly onto the trip plate. Use a quality spray like Kong Naturals to make sure the scent is irresistible! (Find Kong Naturals at PetSmart, Petco or online at www.amazon.com/pets.)

76
doing so. Don’t check too frequently because each
time you approach the traps, you might scare a cat
away.
If you see a cat trapped or hear a trap door
shut, don’t immediately go running into the
territory to cover the cat up. Observe how the cat
reacts. Most will become frantic and start dashing
back and forth. If that’s happening, go over and
cover the trap with its sheet, then stand back for a
minute and give the cat a chance to calm down.
But if the cat is eating or sitting quietly, then stay
back and wait. Remember, you want to keep
entries into the territory to a minimum.
When a cat does panic, never release the cat
out of fear she’ll hurt herself if you don’t. First
cover her with the sheet. Usually she’ll be fine in
a moment. In the rare case a cat does not calm
down and continues to thrash about, insert a trap
divider through the top of the trap and reduce the
amount of space the cat can move around in. Then
cover the trap again. Bloody noses or torn claws
will sometimes occur, but are not cause for serious
concern. Don’t give in to your fear and let the cat
go! If she is acting that frightened, you may never
get her into a trap again, which means she’ll never
have the benefit of being spayed, you’ll have to
keep finding homes for her kittens, etc.
Eventually, she will calm down and everyone will
be better off in the end.
After the cat has been covered and has quieted
down, pick up the trap, move it a few feet away
and place another trap in the same exact spot where
the cat was just caught. You’ll often find there are
“hot spots” where, for whatever reason, one cat
after another keeps going in. Carry trapped cats
out of the territory to a secure spot where someone
can keep a constant eye on them or transport them
to the holding space. If the cat starts moving back
and forth while you’re carrying her, tilt the trap
forward at about a 45 degree angle, forcing the cat
to expend her energy hanging on to the floor or
sides instead of moving around.
If you’re trapping at multiple sites, place a
label on the top plate of the trap and write on the
label the location, the trap number (you can
number the traps sequentially as cats are caught) photos: Emma Cobb
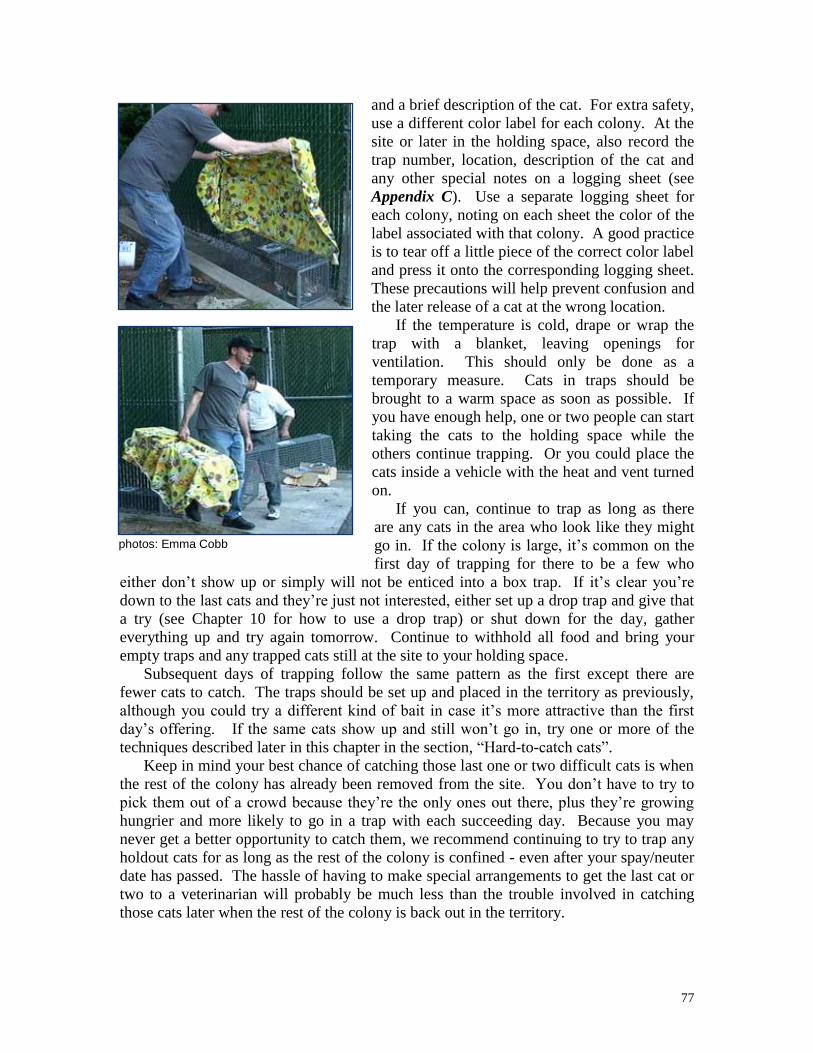
77
and a brief description of the cat. For extra safety,
use a different color label for each colony. At the
site or later in the holding space, also record the
trap number, location, description of the cat and
any other special notes on a logging sheet (see
Appendix C). Use a separate logging sheet for
each colony, noting on each sheet the color of the
label associated with that colony. A good practice
is to tear off a little piece of the correct color label
and press it onto the corresponding logging sheet.
These precautions will help prevent confusion and
the later release of a cat at the wrong location.
If the temperature is cold, drape or wrap the
trap with a blanket, leaving openings for
ventilation. This should only be done as a
temporary measure. Cats in traps should be
brought to a warm space as soon as possible. If
you have enough help, one or two people can start
taking the cats to the holding space while the
others continue trapping. Or you could place the
cats inside a vehicle with the heat and vent turned
on.
If you can, continue to trap as long as there
are any cats in the area who look like they might
go in. If the colony is large, it’s common on the
first day of trapping for there to be a few who
either don’t show up or simply will not be enticed into a box trap. If it’s clear you’re
down to the last cats and they’re just not interested, either set up a drop trap and give that
a try (see Chapter 10 for how to use a drop trap) or shut down for the day, gather
everything up and try again tomorrow. Continue to withhold all food and bring your
empty traps and any trapped cats still at the site to your holding space.
Subsequent days of trapping follow the same pattern as the first except there are
fewer cats to catch. The traps should be set up and placed in the territory as previously,
although you could try a different kind of bait in case it’s more attractive than the first
day’s offering. If the same cats show up and still won’t go in, try one or more of the
techniques described later in this chapter in the section, “Hard-to-catch cats”.
Keep in mind your best chance of catching those last one or two difficult cats is when
the rest of the colony has already been removed from the site. You don’t have to try to
pick them out of a crowd because they’re the only ones out there, plus they’re growing
hungrier and more likely to go in a trap with each succeeding day. Because you may
never get a better opportunity to catch them, we recommend continuing to try to trap any
holdout cats for as long as the rest of the colony is confined - even after your spay/neuter
date has passed. The hassle of having to make special arrangements to get the last cat or
two to a veterinarian will probably be much less than the trouble involved in catching
those cats later when the rest of the colony is back out in the territory.
photos: Emma Cobb
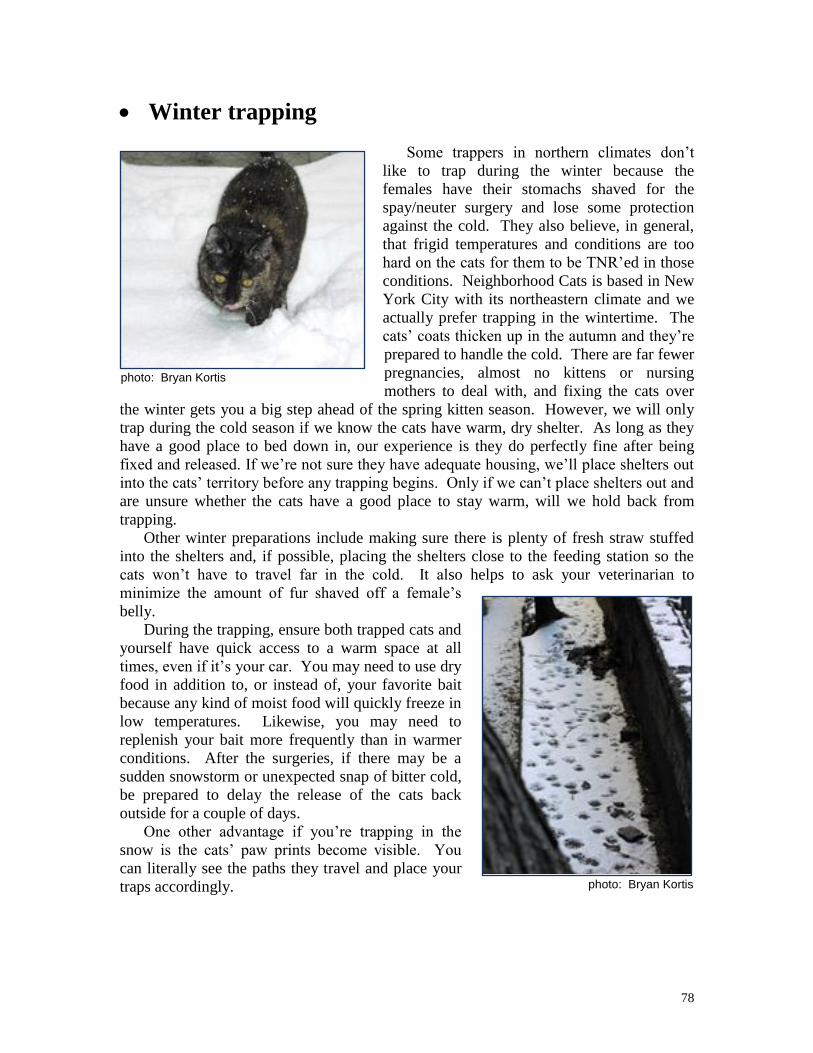
78
Winter trapping
Some trappers in northern climates don’t
like to trap during the winter because the
females have their stomachs shaved for the
spay/neuter surgery and lose some protection
against the cold. They also believe, in general,
that frigid temperatures and conditions are too
hard on the cats for them to be TNR’ed in those
conditions. Neighborhood Cats is based in New
York City with its northeastern climate and we
actually prefer trapping in the wintertime. The
cats’ coats thicken up in the autumn and they’re
prepared to handle the cold. There are far fewer
pregnancies, almost no kittens or nursing
mothers to deal with, and fixing the cats over
the winter gets you a big step ahead of the spring kitten season. However, we will only
trap during the cold season if we know the cats have warm, dry shelter. As long as they
have a good place to bed down in, our experience is they do perfectly fine after being
fixed and released. If we’re not sure they have adequate housing, we’ll place shelters out
into the cats’ territory before any trapping begins. Only if we can’t place shelters out and
are unsure whether the cats have a good place to stay warm, will we hold back from
trapping.
Other winter preparations include making sure there is plenty of fresh straw stuffed
into the shelters and, if possible, placing the shelters close to the feeding station so the
cats won’t have to travel far in the cold. It also helps to ask your veterinarian to
minimize the amount of fur shaved off a female’s
belly.
During the trapping, ensure both trapped cats and
yourself have quick access to a warm space at all
times, even if it’s your car. You may need to use dry
food in addition to, or instead of, your favorite bait
because any kind of moist food will quickly freeze in
low temperatures. Likewise, you may need to
replenish your bait more frequently than in warmer
conditions. After the surgeries, if there may be a
sudden snowstorm or unexpected snap of bitter cold,
be prepared to delay the release of the cats back
outside for a couple of days.
One other advantage if you’re trapping in the
snow is the cats’ paw prints become visible. You
can literally see the paths they travel and place your
traps accordingly.
photo: Bryan Kortis
photo: Bryan Kortis
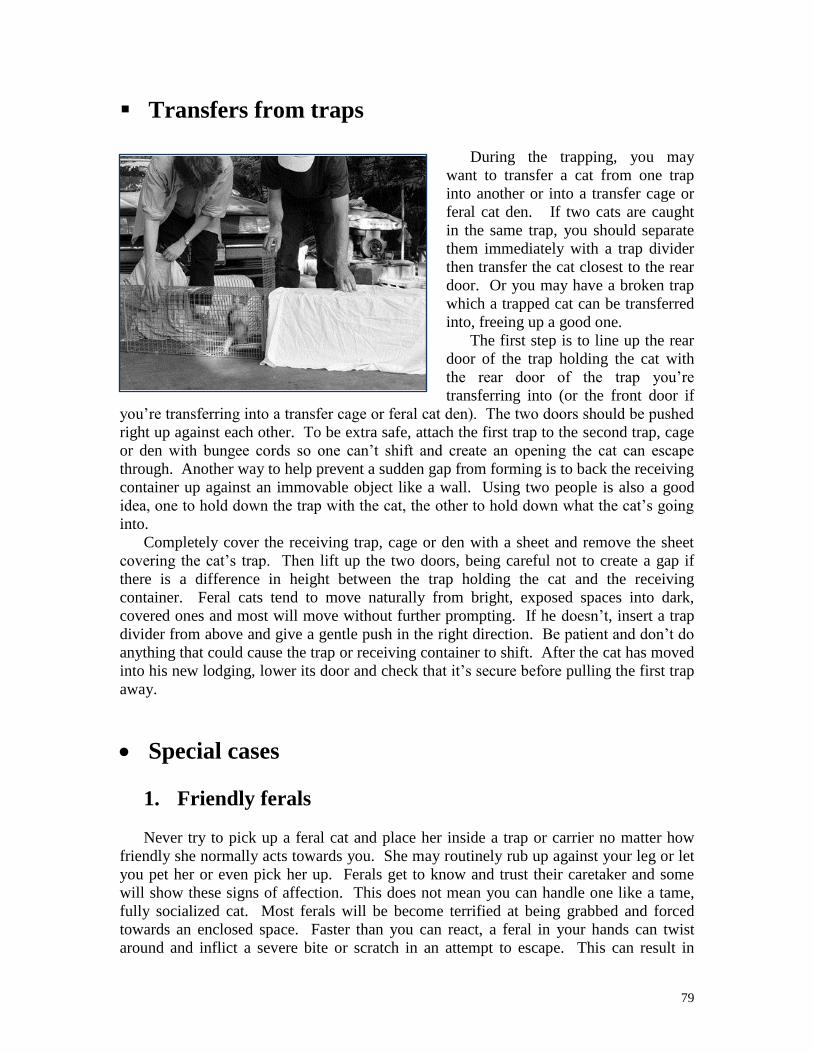
79
Transfers from traps
During the trapping, you may
want to transfer a cat from one trap
into another or into a transfer cage or
feral cat den. If two cats are caught
in the same trap, you should separate
them immediately with a trap divider
then transfer the cat closest to the rear
door. Or you may have a broken trap
which a trapped cat can be transferred
into, freeing up a good one.
The first step is to line up the rear
door of the trap holding the cat with
the rear door of the trap you’re
transferring into (or the front door if
you’re transferring into a transfer cage or feral cat den). The two doors should be pushed
right up against each other. To be extra safe, attach the first trap to the second trap, cage
or den with bungee cords so one can’t shift and create an opening the cat can escape
through. Another way to help prevent a sudden gap from forming is to back the receiving
container up against an immovable object like a wall. Using two people is also a good
idea, one to hold down the trap with the cat, the other to hold down what the cat’s going
into.
Completely cover the receiving trap, cage or den with a sheet and remove the sheet
covering the cat’s trap. Then lift up the two doors, being careful not to create a gap if
there is a difference in height between the trap holding the cat and the receiving
container. Feral cats tend to move naturally from bright, exposed spaces into dark,
covered ones and most will move without further prompting. If he doesn’t, insert a trap
divider from above and give a gentle push in the right direction. Be patient and don’t do
anything that could cause the trap or receiving container to shift. After the cat has moved
into his new lodging, lower its door and check that it’s secure before pulling the first trap
away.
Special cases
1. Friendly ferals
Never try to pick up a feral cat and place her inside a trap or carrier no matter how
friendly she normally acts towards you. She may routinely rub up against your leg or let
you pet her or even pick her up. Ferals get to know and trust their caretaker and some
will show these signs of affection. This does not mean you can handle one like a tame,
fully socialized cat. Most ferals will be become terrified at being grabbed and forced
towards an enclosed space. Faster than you can react, a feral in your hands can twist
around and inflict a severe bite or scratch in an attempt to escape. This can result in

80
serious injury. Err on the side of safety and go through the trapping process with every
cat in the colony unless you are certain a particular feline is a recently abandoned,
friendly house cat. Even then, you are taking your chances because some tame cats don’t
take well to being placed in a carrier and also will attack. If you are sure the cat is
friendly and placing him in a carrier is appropriate, instead of picking him up, first put a
can of tuna or something tasty in the back of the carrier and let the cat walk in on his
own. Then quickly shut and lock the door behind him.
2. Kittens
Never try to catch a feral kitten with your bare hands. Yes, their teeth and claws are
small, but picture tiny razor blades cutting into your fingers – they can do some damage.
If you’re going to try to pick them up, use gloves made of a special protective material
like Kevlar. A safer approach would be to use one of the methods described below.
Setting the trigger lightly
The same traps used to capture adults can be used to
catch young kittens, even five or six weeks old. Unless
the trap is creaky and needs some oil, a kitten’s weight
pressing down on the trip plate should be enough to shut
the front door if you use a technique known as “setting
the trigger lightly.” On the Neighborhood Cats traps by
Tomahawk, as well as most other models, the trigger is
hook-shaped. The trap is set by pushing the trigger
forward so it rests under a cross bar above the front
door. On the Tomahawk traps, there’s a small brass
cylinder to mark the spot. When the cat steps on the trip
plate, the trigger is pulled back, causing the front door to
fall down. Normally, you push the trigger forward as far as you can so the elbow of the
hook rests against the cross bar or brass cylinder. If you don’t push the trigger all the
way forward and instead rest the tip of the hook against the cross bar or cylinder (Figure
9-2), it will take less weight pressing down on the trip plate to make the trigger pull back
and the front door shut.
The same principle applies to Tru-Catch traps, although the trigger mechanism is
different. With Tru-Catch traps, the trigger is set by resting two bars bent at right angles
against each other – one bar is connected to the trip plate, the other to the front door. To
set this trigger mechanism lightly, the two bars should rest against one another at their
very tips.
Any injury caused by a feral or stray cat should be treated in consultation with a medical doctor. Serious bacterial infections and other diseases could result from a seemingly minor wound that is left untreated.
Figure 9-2
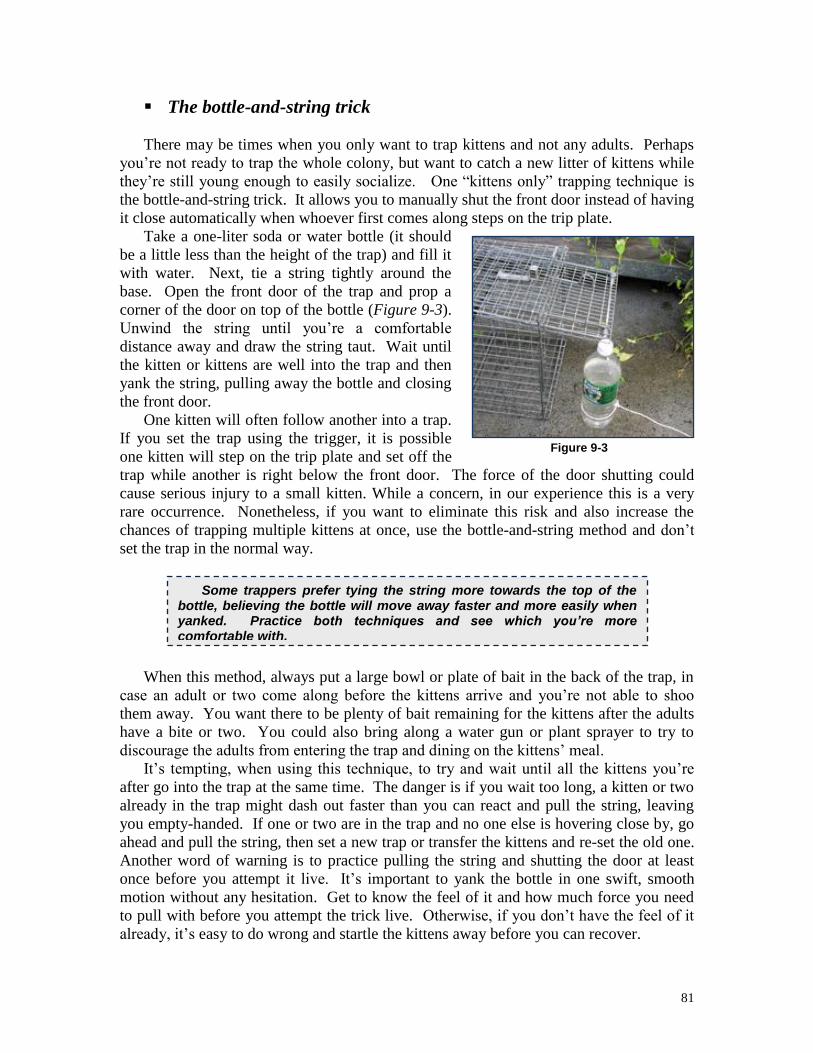
81
The bottle-and-string trick
There may be times when you only want to trap kittens and not any adults. Perhaps
you’re not ready to trap the whole colony, but want to catch a new litter of kittens while
they’re still young enough to easily socialize. One “kittens only” trapping technique is
the bottle-and-string trick. It allows you to manually shut the front door instead of having
it close automatically when whoever first comes along steps on the trip plate.
Take a one-liter soda or water bottle (it should
be a little less than the height of the trap) and fill it
with water. Next, tie a string tightly around the
base. Open the front door of the trap and prop a
corner of the door on top of the bottle (Figure 9-3).
Unwind the string until you’re a comfortable
distance away and draw the string taut. Wait until
the kitten or kittens are well into the trap and then
yank the string, pulling away the bottle and closing
the front door.
One kitten will often follow another into a trap.
If you set the trap using the trigger, it is possible
one kitten will step on the trip plate and set off the
trap while another is right below the front door. The force of the door shutting could
cause serious injury to a small kitten. While a concern, in our experience this is a very
rare occurrence. Nonetheless, if you want to eliminate this risk and also increase the
chances of trapping multiple kittens at once, use the bottle-and-string method and don’t
set the trap in the normal way.
When this method, always put a large bowl or plate of bait in the back of the trap, in
case an adult or two come along before the kittens arrive and you’re not able to shoo
them away. You want there to be plenty of bait remaining for the kittens after the adults
have a bite or two. You could also bring along a water gun or plant sprayer to try to
discourage the adults from entering the trap and dining on the kittens’ meal.
It’s tempting, when using this technique, to try and wait until all the kittens you’re
after go into the trap at the same time. The danger is if you wait too long, a kitten or two
already in the trap might dash out faster than you can react and pull the string, leaving
you empty-handed. If one or two are in the trap and no one else is hovering close by, go
ahead and pull the string, then set a new trap or transfer the kittens and re-set the old one.
Another word of warning is to practice pulling the string and shutting the door at least
once before you attempt it live. It’s important to yank the bottle in one swift, smooth
motion without any hesitation. Get to know the feel of it and how much force you need
to pull with before you attempt the trick live. Otherwise, if you don’t have the feel of it
already, it’s easy to do wrong and startle the kittens away before you can recover.
Figure 9-3
Some trappers prefer tying the string more towards the top of the bottle, believing the bottle will move away faster and more easily when yanked. Practice both techniques and see which you’re more comfortable with.

82
The bottle-and-string method is useful not only for catching kittens, but for targeting
any particular cat for trapping, like a pregnant female, a cat you missed during an earlier
mass trapping and a cat who appears ill or injured. The best way to pick cats out of the
crowd is by using a drop trap, as described in Chapter 10, but the bottle-and-string trick
can work, too.
“Kittens only” admission
Another way to trap only kittens is to transform a regular box trap into a “kittens
only” trap by use of a kitten screen. As discussed in the “Kitten screen” section of
Chapter 8, Tomahawk Live Trap manufactures a screen designed by Neighborhood Cats
which fits its traps that are 10 inches wide and 12 inches in height. It should work with
any wire mesh trap with the same dimensions. The screen creates a 3 inch by 3 inch
doorway in front of the trip plate which only young kittens can pass through. When
using a screen, the trigger should be set lightly as described earlier in this section.
If you’re using traps which are not 10
inches wide and 12 inches high, you can
make your own screen. Cut out a rectangular
piece of cardboard the height and width of
your trap. In one bottom corner, cut an
opening of 3” x 3”. Place the cardboard
inside the trap a few inches in front of the
trip plate, positioning it so it blocks further
access except for the doorway in the lower
corner (Figure 9-4). To hold the screen in
place and stop an adult cat from simply
pushing it out of the way, poke holes in the
three intact corners of the screen, next to the
upper, outer corner of the doorway and next
to the lower corner of the doorway as well.
(see Figure 9-4). Attach the cardboard to
the trap with twist ties or cable ties.
3. Nursing mothers
Free-roaming female cats can give birth at any time of year, especially in warmer
climates. In all regions, births peak during the spring and again, to a lesser extent, in the
early fall. Some TNR groups stop trapping during the peak seasons to avoid dealing
with nursing mothers and baby kittens. Most, including Neighborhood Cats, work
straight through. Whatever time of year it is, it’s important to decide ahead of time what
you will do if you capture a lactating mom. That way you can make any necessary
preparations and not have to make snap decisions in the heat of the action.
How to proceed with a nursing mother depends largely on three factors: (1) the age
of the kittens, (2) the location of the kittens, and (3) how much information, if any, you
have about their age and location.
Figure 9-4
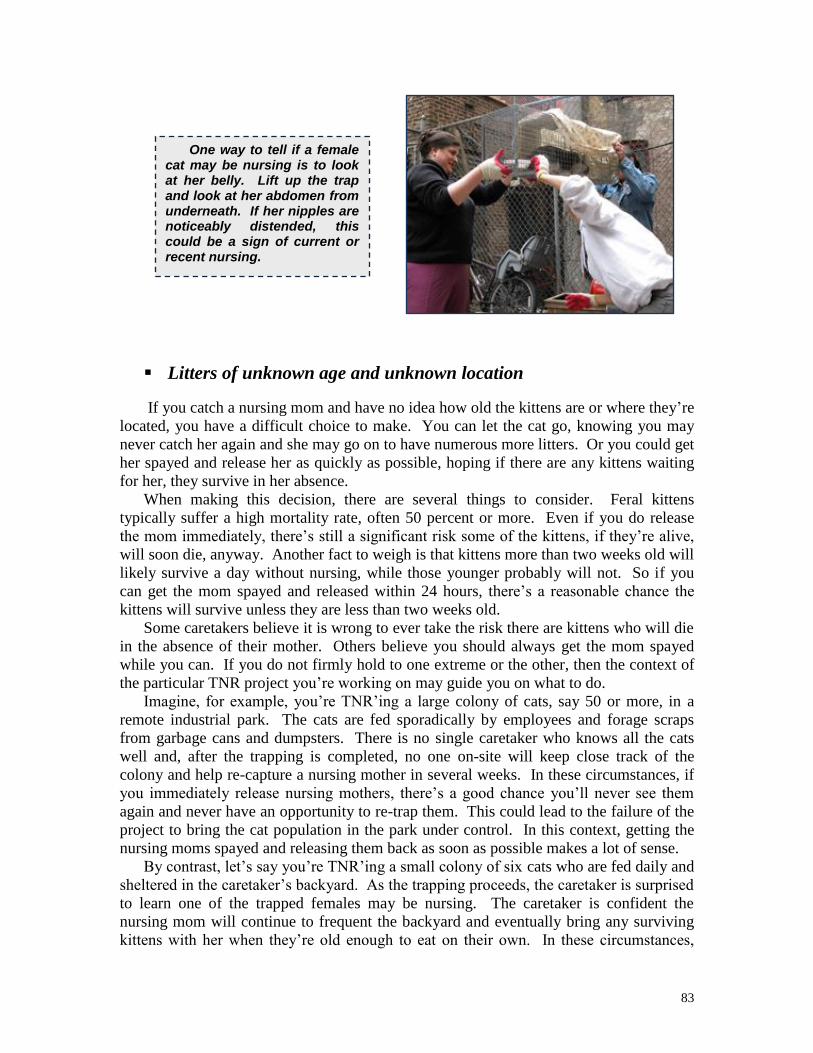
83
Litters of unknown age and unknown location
If you catch a nursing mom and have no idea how old the kittens are or where they’re
located, you have a difficult choice to make. You can let the cat go, knowing you may
never catch her again and she may go on to have numerous more litters. Or you could get
her spayed and release her as quickly as possible, hoping if there are any kittens waiting
for her, they survive in her absence.
When making this decision, there are several things to consider. Feral kittens
typically suffer a high mortality rate, often 50 percent or more. Even if you do release
the mom immediately, there’s still a significant risk some of the kittens, if they’re alive,
will soon die, anyway. Another fact to weigh is that kittens more than two weeks old will
likely survive a day without nursing, while those younger probably will not. So if you
can get the mom spayed and released within 24 hours, there’s a reasonable chance the
kittens will survive unless they are less than two weeks old.
Some caretakers believe it is wrong to ever take the risk there are kittens who will die
in the absence of their mother. Others believe you should always get the mom spayed
while you can. If you do not firmly hold to one extreme or the other, then the context of
the particular TNR project you’re working on may guide you on what to do.
Imagine, for example, you’re TNR’ing a large colony of cats, say 50 or more, in a
remote industrial park. The cats are fed sporadically by employees and forage scraps
from garbage cans and dumpsters. There is no single caretaker who knows all the cats
well and, after the trapping is completed, no one on-site will keep close track of the
colony and help re-capture a nursing mother in several weeks. In these circumstances, if
you immediately release nursing mothers, there’s a good chance you’ll never see them
again and never have an opportunity to re-trap them. This could lead to the failure of the
project to bring the cat population in the park under control. In this context, getting the
nursing moms spayed and releasing them back as soon as possible makes a lot of sense.
By contrast, let’s say you’re TNR’ing a small colony of six cats who are fed daily and
sheltered in the caretaker’s backyard. As the trapping proceeds, the caretaker is surprised
to learn one of the trapped females may be nursing. The caretaker is confident the
nursing mom will continue to frequent the backyard and eventually bring any surviving
kittens with her when they’re old enough to eat on their own. In these circumstances,
One way to tell if a female cat may be nursing is to look at her belly. Lift up the trap and look at her abdomen from underneath. If her nipples are noticeably distended, this could be a sign of current or recent nursing.
84
there is a decent chance you’ll be able to re-trap the mom later and prevent future births,
if you let her go right away.
At Neighborhood Cats, we favor fixing the nursing mom, holding her overnight and
then releasing her the next morning if all appears well. Our policy is to make decisions
based on what we do know, not on what we don’t. We don’t know if there are any young
kittens whose lives depend on the mother being released immediately. We do know we
have a fertile female in the trap and the opportunity to get her spayed.
If you know ahead of time that you’ll spay a nursing mom if you catch one, try to
make contingency plans to get her into surgery as quickly as possible, which may mean
sooner than the scheduled spay/neuter date.
Litters of known age, but unknown location
A caretaker may have observed one of her cats was pregnant and be able to
approximate, based on the shrinkage of her belly, when she gave birth and thus the age of
the kittens. If you do know how old the kittens are, even if you don’t know where they
are, it will make it simpler to decide what to do if you trap their mom.
If you know the kittens are less than two weeks old, you should release the mother
right away. It’s one thing if you have no idea how old the kittens are and whether they
would perish if you hold onto their mom for at least a day. It’s an entirely different
matter when you do know the kittens are too young to survive without her. The
compassionate choice in this case is to release the mother and try to catch the family at a
later time. The sooner you let the mom out of the trap, the less traumatic the experience
for her and the better your chance of trapping her again later.
If the kittens are older than two weeks, the risk of harm if their mom is gone
temporarily decreases the older they are. Again, there is no single right answer. Some
trappers will always let the mom go until the kittens show up and can be caught, too;
others will always spay the mom first before releasing. If you’re more flexible, context
may be the key – given the colony’s environment and dedication of the caretaker, how
likely is it you’ll be able to re-trap the mother if you let her go immediately? If you judge
it unlikely, you might decide spaying the mom is worth the risk to the kittens. If re-
capture seems likely, then releasing her at once could be a reasonable decision.
A spayed mom cat can still nurse her kittens – the surgery does not affect her ability to produce milk. If you don’t discover a female is nursing until she’s already on the surgery table, you should always go ahead and have her fixed.
Before releasing a nursing mom who was just spayed, lift her trap and, from below, examine her carefully for any complications, like bleeding or swelling at the site of the incision. If you see anything of concern or if the cat appears unusually lethargic, consult your veterinarian about the best course of action.

85
If you know you would release the mom right away, the best thing would be not to
trap her in the first place. It can be hard though, even for a skilled trapper, to avoid
catching any one particular cat when mass trapping a colony. Using a drop trap (see
Chapter 10) or the bottle-and-string technique discussed earlier in this chapter, would
allow you to decide which cats to trap and which not.
Litters of known age and known location
Knowing the kittens’ age and their location gives you more options if you end up
trapping their mother. Much will depend on whether you want to foster, socialize and
adopt out the kittens, or leave them to grow up outside as ferals. Taking friendly cats and
young kittens off the streets and placing them in good homes is always preferable, but
resources do not always allow.
(a) No foster resources available
If there is no one to foster the kittens while you look
for homes, the best course of action is to delay the
trapping until the kittens are old enough to be fixed.
Generally, the rule of thumb for pediatric spay/neuter is
two pounds, two months. Not all veterinarians,
however, are trained in early age spay/neuter, so consult
your veterinarian to find out the minimum age she is
comfortable operating upon.
If the trapping can’t be put off and the mom ends up
in a trap, you can go ahead and get her spayed while
you care for the kittens in her absence. What kind of
care is needed will depend on the kittens’ age. If they
are less than five weeks of age and unweaned, they will
need to be brought inside, kept in a warm place, bottle-fed and possibly stimulated to
pass urine and feces by gently rubbing their genital areas. It’s a big job and your life will
be easier if you can wait until they are weaned before trapping their mother.
If the kittens are weaned and eating on their own, you’ll need to provide them with
food and try to keep them in as safe a location as possible, preferably somewhere
enclosed like a garage or shed so they can’t go wandering off on their own. If necessary,
consider bringing them inside and caging them for the short time their mom is away.
Here are some guideposts for aging baby kittens by sight: their eyes and ear canals start to open at 7 to 10 days old. Teeth come in at two weeks. At three to four weeks old, they become ambulatory and can start walking and even running. At five weeks, their normally blue eyes start to change color.
photo: Meredith Weiss
86
(b) Foster resources available
If the kittens are going to be fostered and placed for adoption, then there are three
ways you can proceed, depending on your situation:
- Trap the whole family and keep them together in a cage, using the Feral Cat
Setup described in Chapter 12, until the kittens are eight weeks old, then start
finding homes for the little ones. At that point the mom can be spayed and
released. The great advantage to this approach is mom does all the work for
you when it comes to caring for the kittens. You should handle the kittens as
much as possible so they are well socialized and, if you brought the kittens in
at an early age, provide food when they’re five weeks old so they’re weaned.
- Leave the family outside and take the kittens from their mother when they
are five to six weeks old and can eat on their own. You’ll want to gather the
kittens this soon because of the dangers of outdoor life and the need to begin
the socialization process at as early an age as possible. Keep the litter
together and don’t adopt them out until eight weeks of age so they have a
chance to learn from one another about appropriate cat behavior, like not
biting too hard.
- Leave the mom outside and take the kittens in when they are less than five
weeks old and unweaned. This means you’ll need to bottle-feed and provide
neonatal kitten care. This approach is much more work than bringing the
mom inside, too, and not as healthy for the kittens who gain certain
immunities from their mother’s milk and learn from her how to be a cat.
There is a slight risk when you confine a feral family that the mother will attack her
kittens. This is rare, but happens once in a while with a female cat who is extremely feral
and greatly stressed by captivity. One way to assess this risk is to transfer the mom into a
cage inside a feral cat den. While she is locked inside the den, place her kittens in the
cage and close the cage door. Observe how she reacts. If she appears calm, open the
If you might have to care for unweaned kittens, have bottle-feeding formula on hand. “Kitten Milk Replacement,” also known as KMR, is available at many pet stores. For an alternative holistic
nursing formula, see “The Natural Cat,” by Anitra Frazier (page 88).
If you’re caring for kittens less than five weeks old (“bottle babies”), check out the highly informative, “Kitten Care Handbook” by Los Angeles-based Kitten Rescue (www.kitten-rescue.com). It’s important, for example, to hold the kittens in the proper position when feeding (tummy down as though nursing from the mother) and to use a special bottle designed for neonates, not an eyedropper, so the kitten can control the flow.
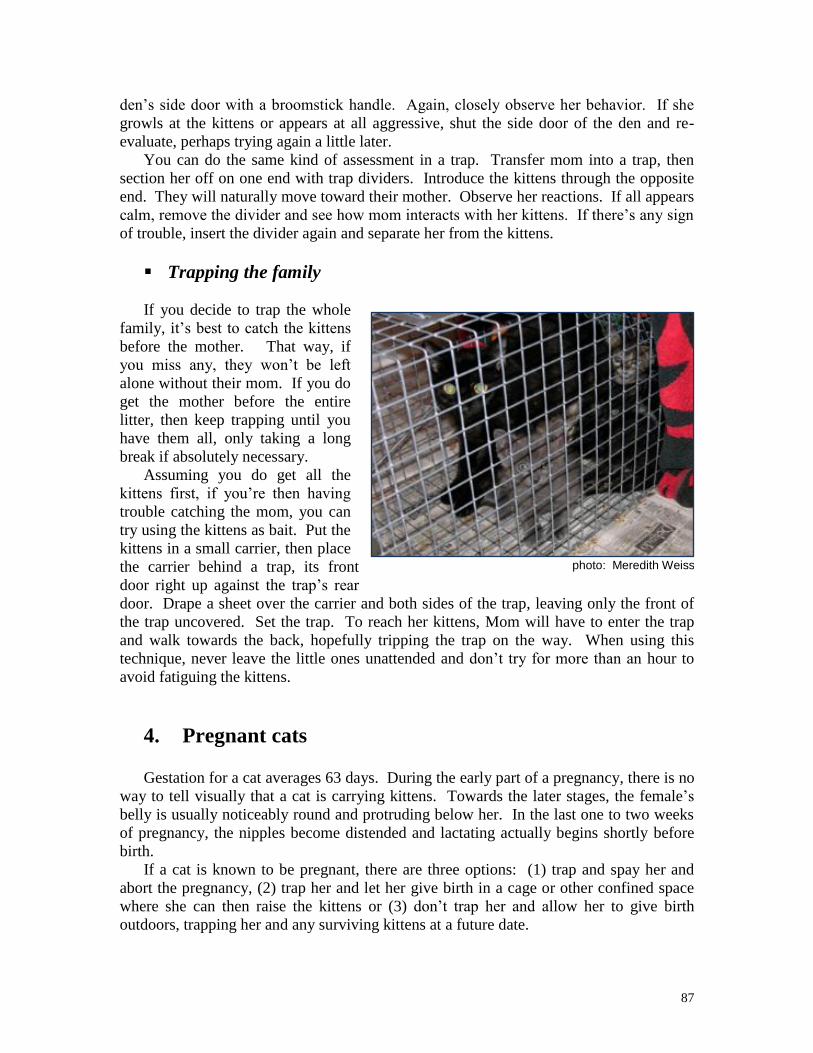
87
den’s side door with a broomstick handle. Again, closely observe her behavior. If she
growls at the kittens or appears at all aggressive, shut the side door of the den and re-
evaluate, perhaps trying again a little later.
You can do the same kind of assessment in a trap. Transfer mom into a trap, then
section her off on one end with trap dividers. Introduce the kittens through the opposite
end. They will naturally move toward their mother. Observe her reactions. If all appears
calm, remove the divider and see how mom interacts with her kittens. If there’s any sign
of trouble, insert the divider again and separate her from the kittens.
Trapping the family
If you decide to trap the whole
family, it’s best to catch the kittens
before the mother. That way, if
you miss any, they won’t be left
alone without their mom. If you do
get the mother before the entire
litter, then keep trapping until you
have them all, only taking a long
break if absolutely necessary.
Assuming you do get all the
kittens first, if you’re then having
trouble catching the mom, you can
try using the kittens as bait. Put the
kittens in a small carrier, then place
the carrier behind a trap, its front
door right up against the trap’s rear
door. Drape a sheet over the carrier and both sides of the trap, leaving only the front of
the trap uncovered. Set the trap. To reach her kittens, Mom will have to enter the trap
and walk towards the back, hopefully tripping the trap on the way. When using this
technique, never leave the little ones unattended and don’t try for more than an hour to
avoid fatiguing the kittens.
4. Pregnant cats
Gestation for a cat averages 63 days. During the early part of a pregnancy, there is no
way to tell visually that a cat is carrying kittens. Towards the later stages, the female’s
belly is usually noticeably round and protruding below her. In the last one to two weeks
of pregnancy, the nipples become distended and lactating actually begins shortly before
birth.
If a cat is known to be pregnant, there are three options: (1) trap and spay her and
abort the pregnancy, (2) trap her and let her give birth in a cage or other confined space
where she can then raise the kittens or (3) don’t trap her and allow her to give birth
outdoors, trapping her and any surviving kittens at a future date.
photo: Meredith Weiss
88
Unless a caretaker objects on religious or other deeply personal grounds,
Neighborhood Cats recommends trapping a pregnant cat and aborting the kittens
whenever possible. This is because of the harsh realities of cat overpopulation. If the
kittens are born and you find homes for them, it could mean other cats already in the
shelter system will not be adopted and will be euthanized instead. If the kittens are born
and not adopted, but live outdoors as ferals, their mortality rate is likely to be high and
most of their lives short. Right now, with so many cats dying in shelters and on the
streets, more kittens only make the situation worse. If your veterinarian is very
experienced with spay/neuter, cats can be safely spayed right up until the last days of a
pregnancy. Discuss with your clinic or veterinarian to find out what their policies are.
If the decision is not to abort, whether for ethical reasons or concerns for the health of
the pregnant female, then what happens to the kittens becomes the focus. Should you
trap the mom-to-be and let her raise the kittens in a cage, or leave her be to give birth
outdoors? Certainly, having her give birth indoors in a secure environment will be much
safer for the kittens. Outdoors, they face numerous threats - anemia induced by fleas,
disease from other cats which their undeveloped immune systems can’t fight off,
predators, traffic, and more. In addition, if the goal is to eventually adopt out the kittens,
it will be much easier and faster to socialize them if they are born indoors and handled by
people from birth.
If the mom and her kittens are kept indoors, use the Feral Cat Setup (see Chapter 12),
then when the litter is eight weeks or older, spay and release the mom and adopt out the
kittens.
Wildlife
If you’re working in an area with wildlife, sometimes you may discover an uninvited
visitor waiting inside one of your traps. They also like cat food and will wander in to
check it out. You should release any wildlife immediately at the same location –
remember, it’s their territory, too. Proceeding carefully and with the proper technique
will prevent injury to the animal and yourself.
Avoid having to release raccoons, skunks and opossum by offering them food outside the traps which they like and cats don’t. In the traps' general vicinity, set out a few servings of the foods they like best. For raccoons, they love sweet foods like sweet corn, white bread and marshmallows. For skunks offer nuts, seeds, eggs, fruits and berries. Opossum adore fruits, tomatoes, acorns, persimmons, nuts and seeds. Remember, one nut or a couple of berries won't get the job done. Be sure to leave ample food or your furry dinner guests will finish the appetizers you've thoughtfully provided, then go in a trap and eat the cat food too.
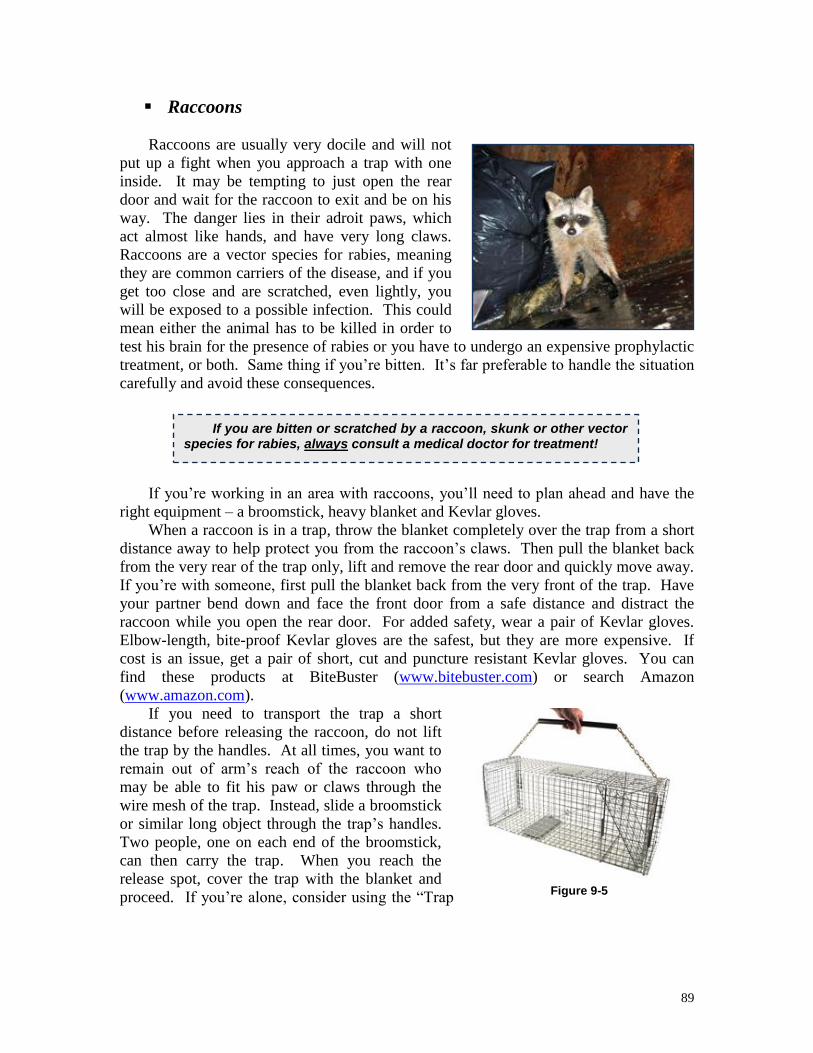
89
Raccoons
Raccoons are usually very docile and will not
put up a fight when you approach a trap with one
inside. It may be tempting to just open the rear
door and wait for the raccoon to exit and be on his
way. The danger lies in their adroit paws, which
act almost like hands, and have very long claws.
Raccoons are a vector species for rabies, meaning
they are common carriers of the disease, and if you
get too close and are scratched, even lightly, you
will be exposed to a possible infection. This could
mean either the animal has to be killed in order to
test his brain for the presence of rabies or you have to undergo an expensive prophylactic
treatment, or both. Same thing if you’re bitten. It’s far preferable to handle the situation
carefully and avoid these consequences.
If you’re working in an area with raccoons, you’ll need to plan ahead and have the
right equipment – a broomstick, heavy blanket and Kevlar gloves.
When a raccoon is in a trap, throw the blanket completely over the trap from a short
distance away to help protect you from the raccoon’s claws. Then pull the blanket back
from the very rear of the trap only, lift and remove the rear door and quickly move away.
If you’re with someone, first pull the blanket back from the very front of the trap. Have
your partner bend down and face the front door from a safe distance and distract the
raccoon while you open the rear door. For added safety, wear a pair of Kevlar gloves.
Elbow-length, bite-proof Kevlar gloves are the safest, but they are more expensive. If
cost is an issue, get a pair of short, cut and puncture resistant Kevlar gloves. You can
find these products at BiteBuster (www.bitebuster.com) or search Amazon
(www.amazon.com).
If you need to transport the trap a short
distance before releasing the raccoon, do not lift
the trap by the handles. At all times, you want to
remain out of arm’s reach of the raccoon who
may be able to fit his paw or claws through the
wire mesh of the trap. Instead, slide a broomstick
or similar long object through the trap’s handles.
Two people, one on each end of the broomstick,
can then carry the trap. When you reach the
release spot, cover the trap with the blanket and
proceed. If you’re alone, consider using the “Trap
If you are bitten or scratched by a raccoon, skunk or other vector species for rabies, always consult a medical doctor for treatment!
Figure 9-5
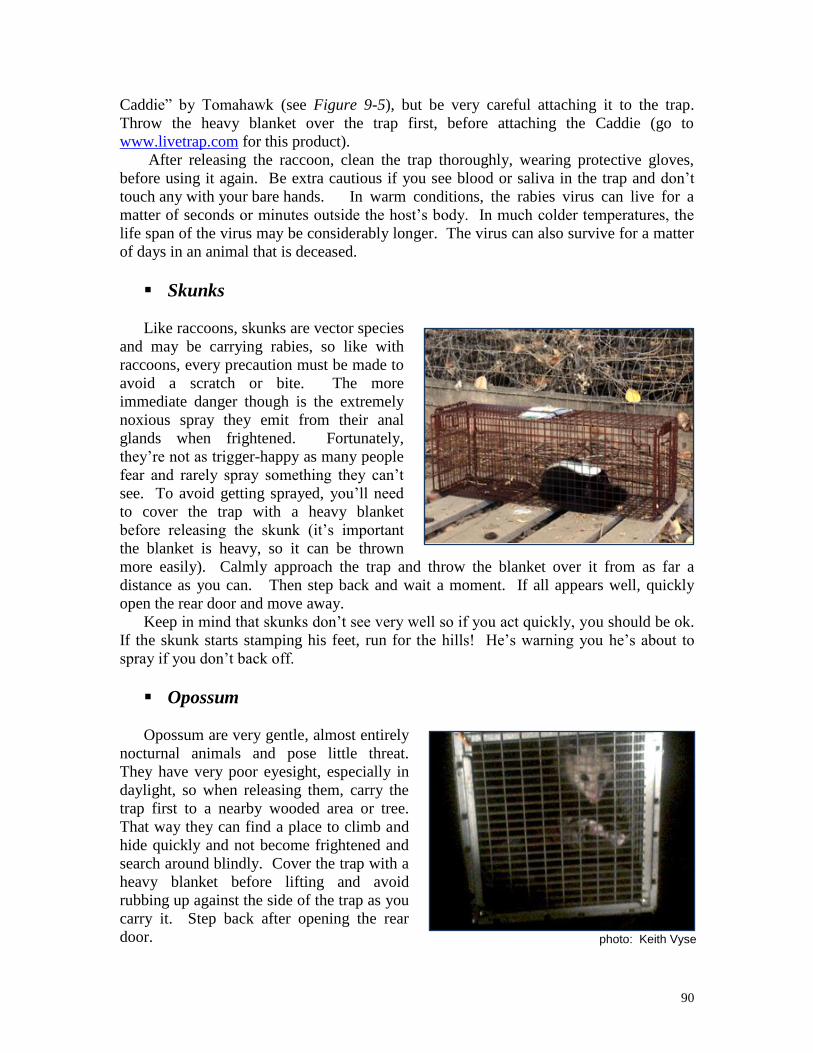
90
Caddie” by Tomahawk (see Figure 9-5), but be very careful attaching it to the trap.
Throw the heavy blanket over the trap first, before attaching the Caddie (go to
www.livetrap.com for this product).
After releasing the raccoon, clean the trap thoroughly, wearing protective gloves,
before using it again. Be extra cautious if you see blood or saliva in the trap and don’t
touch any with your bare hands. In warm conditions, the rabies virus can live for a
matter of seconds or minutes outside the host’s body. In much colder temperatures, the
life span of the virus may be considerably longer. The virus can also survive for a matter
of days in an animal that is deceased.
Skunks
Like raccoons, skunks are vector species
and may be carrying rabies, so like with
raccoons, every precaution must be made to
avoid a scratch or bite. The more
immediate danger though is the extremely
noxious spray they emit from their anal
glands when frightened. Fortunately,
they’re not as trigger-happy as many people
fear and rarely spray something they can’t
see. To avoid getting sprayed, you’ll need
to cover the trap with a heavy blanket
before releasing the skunk (it’s important
the blanket is heavy, so it can be thrown
more easily). Calmly approach the trap and throw the blanket over it from as far a
distance as you can. Then step back and wait a moment. If all appears well, quickly
open the rear door and move away.
Keep in mind that skunks don’t see very well so if you act quickly, you should be ok.
If the skunk starts stamping his feet, run for the hills! He’s warning you he’s about to
spray if you don’t back off.
Opossum
Opossum are very gentle, almost entirely
nocturnal animals and pose little threat.
They have very poor eyesight, especially in
daylight, so when releasing them, carry the
trap first to a nearby wooded area or tree.
That way they can find a place to climb and
hide quickly and not become frightened and
search around blindly. Cover the trap with a
heavy blanket before lifting and avoid
rubbing up against the side of the trap as you
carry it. Step back after opening the rear
door. photo: Keith Vyse

91
Hard-to-catch cats
The goal for every caretaker is
to have 100 percent of the cats in
the colony spayed and neutered.
This alone ensures no more
kittens. But many colonies have
one or two cats who just won’t go
in a normal box trap, no matter
how long you deprive them of
food or how many different types
of bait you try. For these stubborn
holdouts, there are a variety of
battle-tested special techniques
you can try. Be persistent and
eventually one of these
methods will work for you.
Do not, out of desperation, try using a net or graspers to catch a feral cat. The danger
lies in having to handle the cat after you’ve grabbed him, assuming you succeed in doing
so. Transferring a cat out of a net or graspers and into a trap or transfer cage requires
special training and only animal care professionals should ever attempt it. Always keep
in mind that a frightened cat can inflict severe injury, which is why this handbook only
teaches trapping and care techniques which avoid physical contact between the cat and
yourself.
Tranquilizers also should never be used. First, the delivery method could risk injury
to yourself or the cat. If you use a syringe, your arms and hands will be at least
momentarily exposed to a bite or scratch. If you use a dart gun, assuming that’s even
legal, you could easily misfire – for example, if the cat suddenly moves – and hit the cat
in the eye or other vulnerable spot. If you put drugs in the cat’s food, the wrong cat or
another animal might ingest it. However a tranquilizer is delivered, the cat could run off
before the drug takes full effect and harm himself. Try one of these approaches instead:
Drop trap
In most cases, a drop trap will be the fastest and most effective way to capture your
hard-to-catch cat. It originated as a grassroots invention designed by creative trappers,
most notably Laura Burns. The trap is propped up on a stick or similar object with a
string attached. When a cat goes under to eat the bait, the trapper pulls the string and the
trap falls down over the cat. The cat is then transferred out of the drop trap and into a
regular box trap or transfer cage.
As mentioned earlier in Chapter 8 (“Recommended Equipment”), a drop trap works
so well because a cat usually has no natural fear of going under it and the wariness
displayed with a box trap is absent. Because cats are much less afraid, they do not have
to be deprived of food for a long period before the trapping. Withholding food the same
day will be sufficient to get them interested enough in the bait. Because a drop trap is so
photo: Meredith Weiss
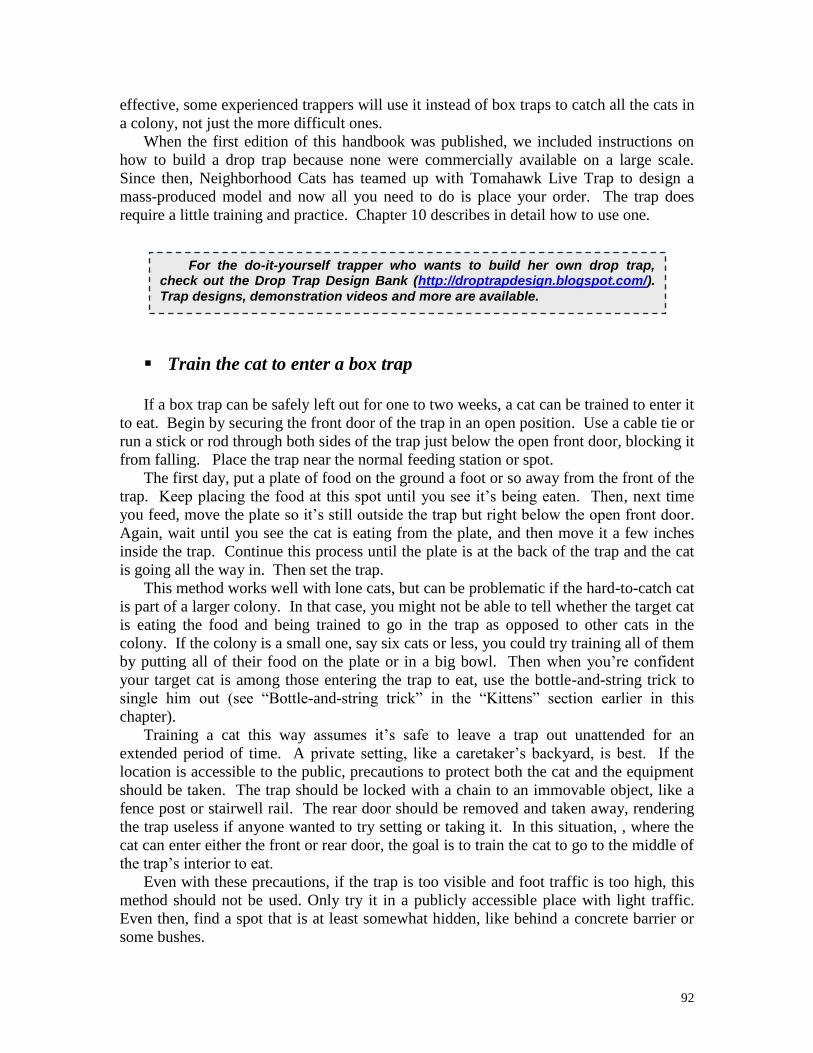
92
effective, some experienced trappers will use it instead of box traps to catch all the cats in
a colony, not just the more difficult ones.
When the first edition of this handbook was published, we included instructions on
how to build a drop trap because none were commercially available on a large scale.
Since then, Neighborhood Cats has teamed up with Tomahawk Live Trap to design a
mass-produced model and now all you need to do is place your order. The trap does
require a little training and practice. Chapter 10 describes in detail how to use one.
Train the cat to enter a box trap
If a box trap can be safely left out for one to two weeks, a cat can be trained to enter it
to eat. Begin by securing the front door of the trap in an open position. Use a cable tie or
run a stick or rod through both sides of the trap just below the open front door, blocking it
from falling. Place the trap near the normal feeding station or spot.
The first day, put a plate of food on the ground a foot or so away from the front of the
trap. Keep placing the food at this spot until you see it’s being eaten. Then, next time
you feed, move the plate so it’s still outside the trap but right below the open front door.
Again, wait until you see the cat is eating from the plate, and then move it a few inches
inside the trap. Continue this process until the plate is at the back of the trap and the cat
is going all the way in. Then set the trap.
This method works well with lone cats, but can be problematic if the hard-to-catch cat
is part of a larger colony. In that case, you might not be able to tell whether the target cat
is eating the food and being trained to go in the trap as opposed to other cats in the
colony. If the colony is a small one, say six cats or less, you could try training all of them
by putting all of their food on the plate or in a big bowl. Then when you’re confident
your target cat is among those entering the trap to eat, use the bottle-and-string trick to
single him out (see “Bottle-and-string trick” in the “Kittens” section earlier in this
chapter).
Training a cat this way assumes it’s safe to leave a trap out unattended for an
extended period of time. A private setting, like a caretaker’s backyard, is best. If the
location is accessible to the public, precautions to protect both the cat and the equipment
should be taken. The trap should be locked with a chain to an immovable object, like a
fence post or stairwell rail. The rear door should be removed and taken away, rendering
the trap useless if anyone wanted to try setting or taking it. In this situation, , where the
cat can enter either the front or rear door, the goal is to train the cat to go to the middle of
the trap’s interior to eat.
Even with these precautions, if the trap is too visible and foot traffic is too high, this
method should not be used. Only try it in a publicly accessible place with light traffic.
Even then, find a spot that is at least somewhat hidden, like behind a concrete barrier or
some bushes.
For the do-it-yourself trapper who wants to build her own drop trap, check out the Drop Trap Design Bank (http://droptrapdesign.blogspot.com/).
Trap designs, demonstration videos and more are available.
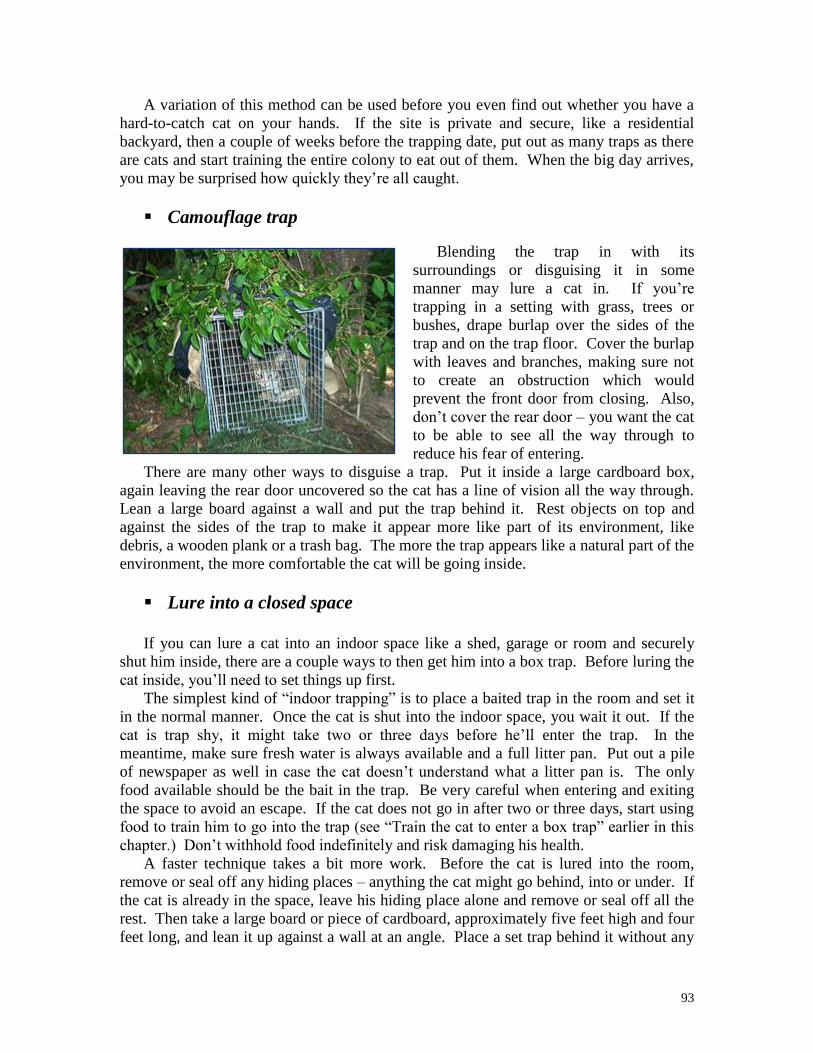
93
A variation of this method can be used before you even find out whether you have a
hard-to-catch cat on your hands. If the site is private and secure, like a residential
backyard, then a couple of weeks before the trapping date, put out as many traps as there
are cats and start training the entire colony to eat out of them. When the big day arrives,
you may be surprised how quickly they’re all caught.
Camouflage trap
Blending the trap in with its
surroundings or disguising it in some
manner may lure a cat in. If you’re
trapping in a setting with grass, trees or
bushes, drape burlap over the sides of the
trap and on the trap floor. Cover the burlap
with leaves and branches, making sure not
to create an obstruction which would
prevent the front door from closing. Also,
don’t cover the rear door – you want the cat
to be able to see all the way through to
reduce his fear of entering.
There are many other ways to disguise a trap. Put it inside a large cardboard box,
again leaving the rear door uncovered so the cat has a line of vision all the way through.
Lean a large board against a wall and put the trap behind it. Rest objects on top and
against the sides of the trap to make it appear more like part of its environment, like
debris, a wooden plank or a trash bag. The more the trap appears like a natural part of the
environment, the more comfortable the cat will be going inside.
Lure into a closed space
If you can lure a cat into an indoor space like a shed, garage or room and securely
shut him inside, there are a couple ways to then get him into a box trap. Before luring the
cat inside, you’ll need to set things up first.
The simplest kind of “indoor trapping” is to place a baited trap in the room and set it
in the normal manner. Once the cat is shut into the indoor space, you wait it out. If the
cat is trap shy, it might take two or three days before he’ll enter the trap. In the
meantime, make sure fresh water is always available and a full litter pan. Put out a pile
of newspaper as well in case the cat doesn’t understand what a litter pan is. The only
food available should be the bait in the trap. Be very careful when entering and exiting
the space to avoid an escape. If the cat does not go in after two or three days, start using
food to train him to go into the trap (see “Train the cat to enter a box trap” earlier in this
chapter.) Don’t withhold food indefinitely and risk damaging his health.
A faster technique takes a bit more work. Before the cat is lured into the room,
remove or seal off any hiding places – anything the cat might go behind, into or under. If
the cat is already in the space, leave his hiding place alone and remove or seal off all the
rest. Then take a large board or piece of cardboard, approximately five feet high and four
feet long, and lean it up against a wall at an angle. Place a set trap behind it without any

94
bait (Figure 9-6). Towards the back of the trap, drape a sheet over the board so it visibly
blocks any open space above and to the side of the trap. Leave the rear door uncovered
(Figure 9-7).
Once everything is ready, lure the cat into the room and shut the door, or gently shoo
him out from his hiding spot if he’s already inside. Once he enters the room for the first
time or is flushed out from his spot, he’ll look for somewhere to hide. The only place
he’ll see is behind the board and he’ll naturally go running behind it. The sheet will
make it appear that he’ll be blocked in if he goes over or around the trap, so in most
cases, he’ll go right in and step on the trip plate. He won’t realize, in the heat of the
moment, that he could easily push the sheet aside.
If the cat doesn’t go all the way into the trap or stops just in front of it, walk slowly
towards him, causing him to run away from you and into the trap. You could also slowly
move a long object, like a broom stick, towards him. Be careful not to get too close and
within his striking range. If he still doesn’t go into the trap, exit the room, give the cat
time to calm down, then come and try again to get him to run behind the board.
Another approach, if there is a closet in the room, is to set a trap inside it. Leave the
closet door open a crack - just enough so the cat can run in. Make the interior of the
closet dark and the rest of the room as brightly lit as possible. Block or remove any other
hiding places. When the cat enters the room or is shooed out from behind wherever in
the room he’s hiding, his natural tendency will be to run from the bright open space to the
dark enclosed one and, hopefully, into the trap. This method is less reliable than the “trap
behind the board” technique because there is more of a chance the cat will enter the closet
but not the trap.
If all else fails, bait the trap, withdraw and wait it out.
Picking one out from the crowd
A cat may be hard to catch because there are lots of other cats around who you’re not
after. This situation is typical when a colony is trapped and neutered gradually and you
get down to the last few unaltered felines. You might also want to trap a particular cat
who is pregnant, recently abandoned or sick or injured.
Figure 9-6 Figure 9-7
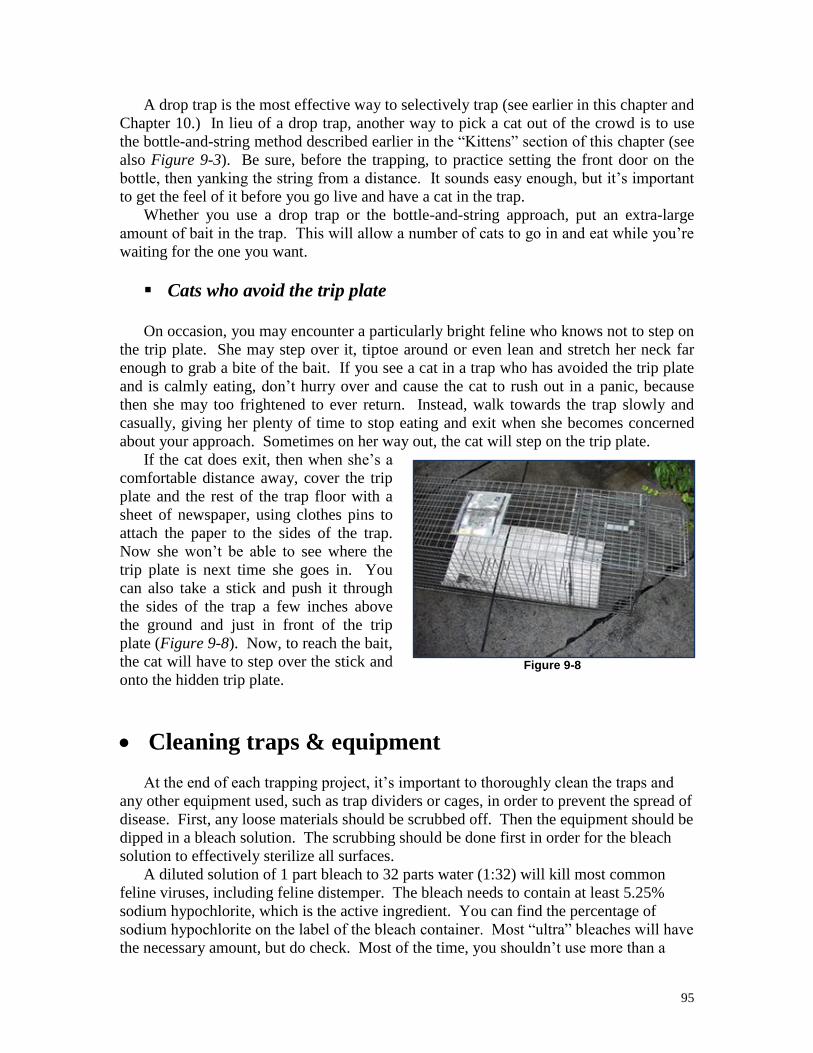
95
A drop trap is the most effective way to selectively trap (see earlier in this chapter and
Chapter 10.) In lieu of a drop trap, another way to pick a cat out of the crowd is to use
the bottle-and-string method described earlier in the “Kittens” section of this chapter (see
also Figure 9-3). Be sure, before the trapping, to practice setting the front door on the
bottle, then yanking the string from a distance. It sounds easy enough, but it’s important
to get the feel of it before you go live and have a cat in the trap.
Whether you use a drop trap or the bottle-and-string approach, put an extra-large
amount of bait in the trap. This will allow a number of cats to go in and eat while you’re
waiting for the one you want.
Cats who avoid the trip plate
On occasion, you may encounter a particularly bright feline who knows not to step on
the trip plate. She may step over it, tiptoe around or even lean and stretch her neck far
enough to grab a bite of the bait. If you see a cat in a trap who has avoided the trip plate
and is calmly eating, don’t hurry over and cause the cat to rush out in a panic, because
then she may too frightened to ever return. Instead, walk towards the trap slowly and
casually, giving her plenty of time to stop eating and exit when she becomes concerned
about your approach. Sometimes on her way out, the cat will step on the trip plate.
If the cat does exit, then when she’s a
comfortable distance away, cover the trip
plate and the rest of the trap floor with a
sheet of newspaper, using clothes pins to
attach the paper to the sides of the trap.
Now she won’t be able to see where the
trip plate is next time she goes in. You
can also take a stick and push it through
the sides of the trap a few inches above
the ground and just in front of the trip
plate (Figure 9-8). Now, to reach the bait,
the cat will have to step over the stick and
onto the hidden trip plate.
Cleaning traps & equipment
At the end of each trapping project, it’s important to thoroughly clean the traps and
any other equipment used, such as trap dividers or cages, in order to prevent the spread of
disease. First, any loose materials should be scrubbed off. Then the equipment should be
dipped in a bleach solution. The scrubbing should be done first in order for the bleach
solution to effectively sterilize all surfaces.
A diluted solution of 1 part bleach to 32 parts water (1:32) will kill most common
feline viruses, including feline distemper. The bleach needs to contain at least 5.25%
sodium hypochlorite, which is the active ingredient. You can find the percentage of
sodium hypochlorite on the label of the bleach container. Most “ultra” bleaches will have
the necessary amount, but do check. Most of the time, you shouldn’t use more than a
Figure 9-8
96
1:32 solution because bleach is corrosive to metal and repeated cleanings with too strong
a solution will ruin your traps and other equipment. If ringworm may be present, then
you’ll need a stronger solution to kill any spores. Several cleanings with 1:10 bleach to
water solution will kill ringworm spores or one cleaning with undiluted bleach.
To dip the traps in what is close enough to a diluted 1:32 bleach solution, use a 30
gallon Rubbermaid or similar garbage can. Fill the can a few inches from the top with
water and then pour in a gallon of bleach. Be sure to use rubber gloves and eye
protection, like safety goggles, to prevent burns from splashing. Wearing pants and a
long-sleeve shirt will give you added protection. Dip one end of the trap into the can,
then lift it up, turn it over and dip the other end. Remove the trap, place it on the ground
and let it air dry. Move the traps slowly and carefully to avoid getting the bleach solution
on yourself, but if you accidentally do get some on your skin, wash it off immediately
and apply Aloe Vera gel to mitigate any burns.
photo: Meredith Weiss
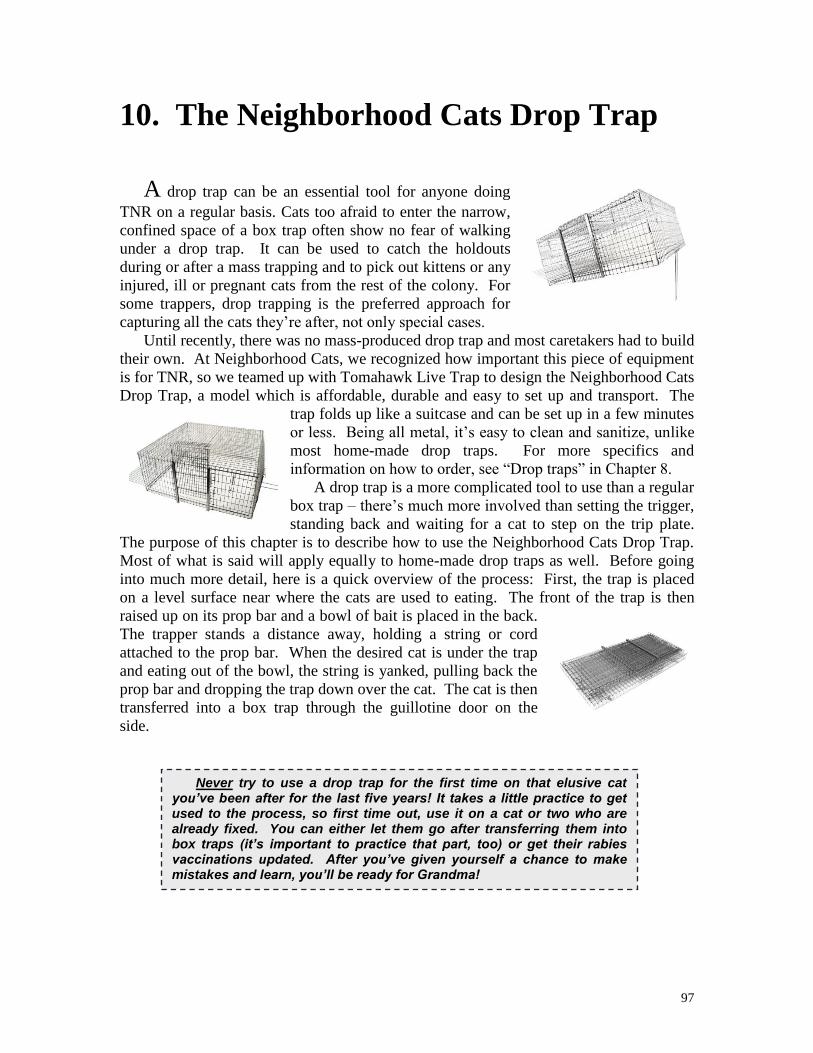
97
10. The Neighborhood Cats Drop Trap
A drop trap can be an essential tool for anyone doing
TNR on a regular basis. Cats too afraid to enter the narrow,
confined space of a box trap often show no fear of walking
under a drop trap. It can be used to catch the holdouts
during or after a mass trapping and to pick out kittens or any
injured, ill or pregnant cats from the rest of the colony. For
some trappers, drop trapping is the preferred approach for
capturing all the cats they’re after, not only special cases.
Until recently, there was no mass-produced drop trap and most caretakers had to build
their own. At Neighborhood Cats, we recognized how important this piece of equipment
is for TNR, so we teamed up with Tomahawk Live Trap to design the Neighborhood Cats
Drop Trap, a model which is affordable, durable and easy to set up and transport. The
trap folds up like a suitcase and can be set up in a few minutes
or less. Being all metal, it’s easy to clean and sanitize, unlike
most home-made drop traps. For more specifics and
information on how to order, see “Drop traps” in Chapter 8.
A drop trap is a more complicated tool to use than a regular
box trap – there’s much more involved than setting the trigger,
standing back and waiting for a cat to step on the trip plate.
The purpose of this chapter is to describe how to use the Neighborhood Cats Drop Trap.
Most of what is said will apply equally to home-made drop traps as well. Before going
into much more detail, here is a quick overview of the process: First, the trap is placed
on a level surface near where the cats are used to eating. The front of the trap is then
raised up on its prop bar and a bowl of bait is placed in the back.
The trapper stands a distance away, holding a string or cord
attached to the prop bar. When the desired cat is under the trap
and eating out of the bowl, the string is yanked, pulling back the
prop bar and dropping the trap down over the cat. The cat is then
transferred into a box trap through the guillotine door on the
side.
Never try to use a drop trap for the first time on that elusive cat you’ve been after for the last five years! It takes a little practice to get used to the process, so first time out, use it on a cat or two who are already fixed. You can either let them go after transferring them into box traps (it’s important to practice that part, too) or get their rabies vaccinations updated. After you’ve given yourself a chance to make mistakes and learn, you’ll be ready for Grandma!
98
Preparations
As with any trapping, it helps to get the cats on a routine so they show up at the same
time and place daily to eat. That way you know where and when to show up to trap. One
of the big advantages to using a drop trap is you don’t have to withhold food the day
before the trapping. Because the cats are less fearful of a drop trap, they don’t need to be
as hungry before they’ll go under. Just don’t feed the day of the trapping. Then they
should be interested enough to check out the bait.
Here’s a list of materials you’ll need, in addition to the drop trap itself:
Box traps with guillotine-style rear doors or transfer cages (as many as the
number of cats you plan to trap)
Trap divider
String or cord (should be strong, at least 50 feet in length and wrapped around
a stick or similar object)
Heavy object, like a large rock or bucket of rocks (for weighing down the
drop trap)
Large blanket (to cover the drop trap)
Sheets (to cover the box traps or transfer cages)
Large plastic bowl or equivalent
Bait (lots of it!)
Binoculars (optional - for spotting eartipped cats or if you’re going to watch
the trap from a far distance)
Setting up the trap
Choose a location
The first decision is where to place the trap. There are four factors to consider in
choosing the optimal spot:
(a) Good visibility. You'll need to see the trap clearly from a distance so
you can tell when to pull the string.
(b) Flat surface. Choose a place where the ground is flat. If there are any
gaps between the trap and the ground after it drops, a determined cat can
insert a paw and push the trap up just enough to escape.
(c) Place near the usual feeding site. Ideally, the trap will be set up where
the cats are used to coming to eat.
(d) Leave space for a box trap. Remember, you’re going to have to
transfer cats out of the drop trap through its sliding side door and into a box
trap or transfer cage. Make sure there’s enough room on the side of the drop
trap for a box trap or transfer cage to fit.

99
Assemble the trap
(For a video demonstration of how to set up and disassemble the drop trap, go to the
TNR Drop Trap page at www.livetrap.com.)
1. First steps. Separate the main frame of the trap from the top (Figure 10-1).
Unfold the main frame so it stands up and forms a square, and then unhook the weight
flap, laying it flat (Figure 10-2). Remove the sliding door and temporarily put it aside
(Figure 10-3).
2. Attach the top. Unfold the top then place it over the main frame of the drop trap
(Figure 10-4). Attach all the spring clips to the top (Figure 10-5), except the two clips
right next to the frame of the sliding side door, one on either side. These two clips are
used to attach a box trap or transfer cage during a transfer of a cat out of the drop trap
(Figure 10-9). Except for these two, all other spring clips should be fastened so no gaps
can form if a captured cat pushes up against the top.
3. Re-insert the sliding door. Secure the roll hooks at the top of the sliding door to
the top of the drop trap, locking the door in place.
Figure 10-1 Figure 10-3 Figure 10-2
Figure 10-4 Figure 10-5
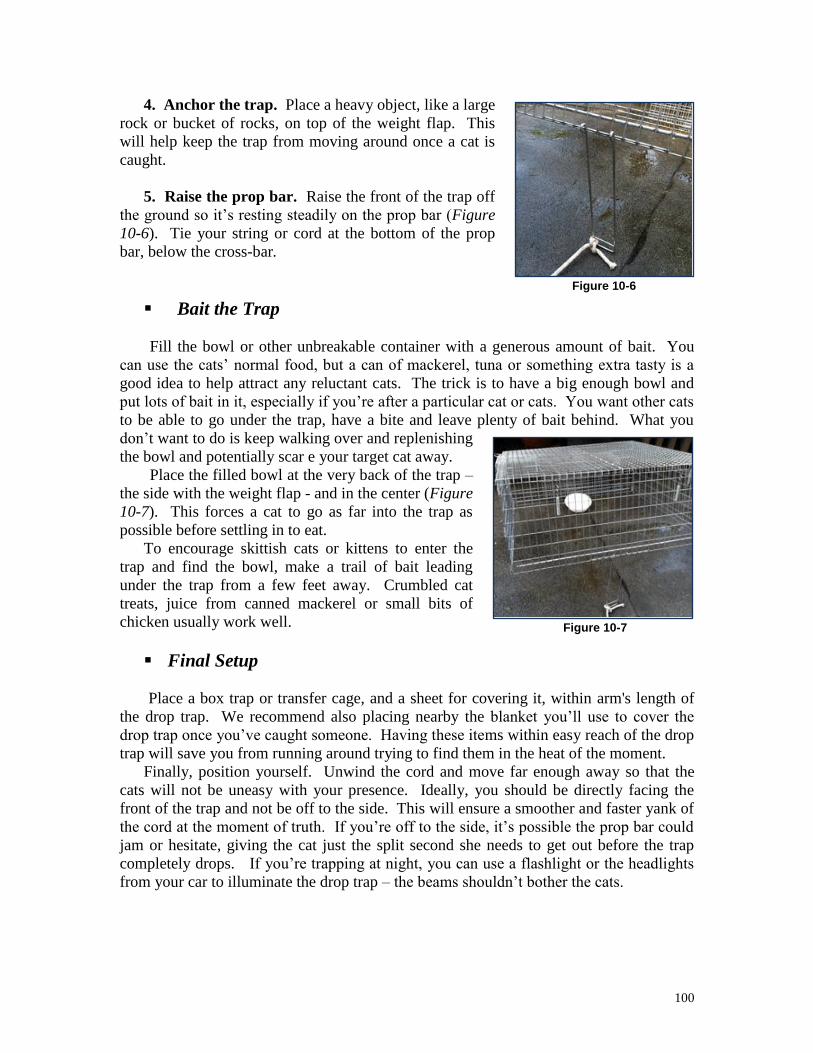
100
4. Anchor the trap. Place a heavy object, like a large
rock or bucket of rocks, on top of the weight flap. This
will help keep the trap from moving around once a cat is
caught.
5. Raise the prop bar. Raise the front of the trap off
the ground so it’s resting steadily on the prop bar (Figure
10-6). Tie your string or cord at the bottom of the prop
bar, below the cross-bar.
Bait the Trap
Fill the bowl or other unbreakable container with a generous amount of bait. You
can use the cats’ normal food, but a can of mackerel, tuna or something extra tasty is a
good idea to help attract any reluctant cats. The trick is to have a big enough bowl and
put lots of bait in it, especially if you’re after a particular cat or cats. You want other cats
to be able to go under the trap, have a bite and leave plenty of bait behind. What you
don’t want to do is keep walking over and replenishing
the bowl and potentially scar e your target cat away.
Place the filled bowl at the very back of the trap –
the side with the weight flap - and in the center (Figure
10-7). This forces a cat to go as far into the trap as
possible before settling in to eat.
To encourage skittish cats or kittens to enter the
trap and find the bowl, make a trail of bait leading
under the trap from a few feet away. Crumbled cat
treats, juice from canned mackerel or small bits of
chicken usually work well.
Final Setup
Place a box trap or transfer cage, and a sheet for covering it, within arm's length of
the drop trap. We recommend also placing nearby the blanket you’ll use to cover the
drop trap once you’ve caught someone. Having these items within easy reach of the drop
trap will save you from running around trying to find them in the heat of the moment.
Finally, position yourself. Unwind the cord and move far enough away so that the
cats will not be uneasy with your presence. Ideally, you should be directly facing the
front of the trap and not be off to the side. This will ensure a smoother and faster yank of
the cord at the moment of truth. If you’re off to the side, it’s possible the prop bar could
jam or hesitate, giving the cat just the split second she needs to get out before the trap
completely drops. If you’re trapping at night, you can use a flashlight or the headlights
from your car to illuminate the drop trap – the beams shouldn’t bother the cats.
Figure 10-6
Figure 10-7
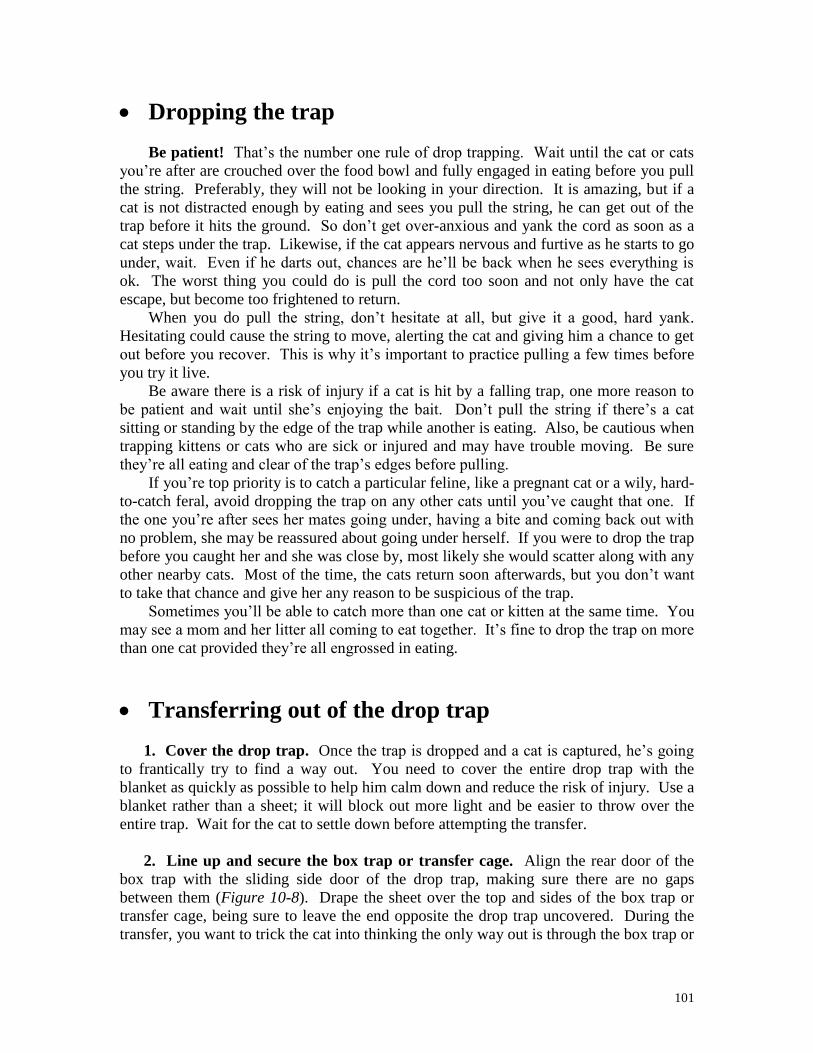
101
Dropping the trap
Be patient! That’s the number one rule of drop trapping. Wait until the cat or cats
you’re after are crouched over the food bowl and fully engaged in eating before you pull
the string. Preferably, they will not be looking in your direction. It is amazing, but if a
cat is not distracted enough by eating and sees you pull the string, he can get out of the
trap before it hits the ground. So don’t get over-anxious and yank the cord as soon as a
cat steps under the trap. Likewise, if the cat appears nervous and furtive as he starts to go
under, wait. Even if he darts out, chances are he’ll be back when he sees everything is
ok. The worst thing you could do is pull the cord too soon and not only have the cat
escape, but become too frightened to return.
When you do pull the string, don’t hesitate at all, but give it a good, hard yank.
Hesitating could cause the string to move, alerting the cat and giving him a chance to get
out before you recover. This is why it’s important to practice pulling a few times before
you try it live.
Be aware there is a risk of injury if a cat is hit by a falling trap, one more reason to
be patient and wait until she’s enjoying the bait. Don’t pull the string if there’s a cat
sitting or standing by the edge of the trap while another is eating. Also, be cautious when
trapping kittens or cats who are sick or injured and may have trouble moving. Be sure
they’re all eating and clear of the trap’s edges before pulling.
If you’re top priority is to catch a particular feline, like a pregnant cat or a wily, hard-
to-catch feral, avoid dropping the trap on any other cats until you’ve caught that one. If
the one you’re after sees her mates going under, having a bite and coming back out with
no problem, she may be reassured about going under herself. If you were to drop the trap
before you caught her and she was close by, most likely she would scatter along with any
other nearby cats. Most of the time, the cats return soon afterwards, but you don’t want
to take that chance and give her any reason to be suspicious of the trap.
Sometimes you’ll be able to catch more than one cat or kitten at the same time. You
may see a mom and her litter all coming to eat together. It’s fine to drop the trap on more
than one cat provided they’re all engrossed in eating.
Transferring out of the drop trap
1. Cover the drop trap. Once the trap is dropped and a cat is captured, he’s going
to frantically try to find a way out. You need to cover the entire drop trap with the
blanket as quickly as possible to help him calm down and reduce the risk of injury. Use a
blanket rather than a sheet; it will block out more light and be easier to throw over the
entire trap. Wait for the cat to settle down before attempting the transfer.
2. Line up and secure the box trap or transfer cage. Align the rear door of the
box trap with the sliding side door of the drop trap, making sure there are no gaps
between them (Figure 10-8). Drape the sheet over the top and sides of the box trap or
transfer cage, being sure to leave the end opposite the drop trap uncovered. During the
transfer, you want to trick the cat into thinking the only way out is through the box trap or

102
transfer cage, so the far end needs to be uncovered and looking like an exit. If you’re
transferring into a box trap, double-check that its front door is shut.
3. Attach the spring clips. Find the extra spring clips next to the frame of the drop
trap's sliding door, one on either side, and attach them to the box trap or transfer cage
(Figure 10-9). This will help keep both traps in place and prevent gaps from forming
during the transfer. Be careful not to pull the clips too far and tight or the door of the box
trap or transfer cage will press too hard against the drop trap’s sliding door, making it
difficult to open and close. After you’ve secured the clips, test opening and closing the
drop trap’s sliding door. If there’s too much resistance, loosen the spring clips and don’t
pull them out as far before re-attaching.
4. Position yourself. Place one foot on top of the box trap to further keep it in place.
Make sure both the drop trap and box trap or transfer cage are fully covered so the cat
won’t be able to see you when he approaches the doorway.
5. Open the doors. Release the roll hooks at the top of the drop trap’s sliding door.
Then, at the same time, lift up both the sliding door of the drop trap and the rear door of
the box trap or front door of the transfer cage. Don’t completely remove the doors from
their frames, but hold them up (Figure 10-10). Wait quietly for the cat to make the next
move. Within a minute or two, most cats will see light coming from the far end of the
box trap or transfer cage and head in that direction. Through the sliver of space created
between the sheet and blanket when you lift the doors, you should be able to see the cat
pass out of the drop trap. If not, pull back the sheet an inch or two from the doors so
there’s a little opening you can watch through. Once the cat fully enters the box trap or
cage, close its door. If you've caught more than one cat, also shut the door of the drop
trap. Completely cover the box trap and carry it away.
6. Repeat transfer for any remaining cats. If there are any cats remaining in the
drop trap, completely cover the drop trap, bring over another box trap and repeat the
transfer procedure.
7. Problem cats. Most cats will run into the box trap or transfer cage as soon as you
Figure 10-8 Figure 10-9 Figure 10-10
103
open both doors. Sometimes though, you’ll run into a problem kitty who won’t cooperate
and stays in the drop trap. The first thing to try, especially if you’re alone, is to slowly
pull the blanket on top of the drop trap towards you, exposing more and more of the
space beneath. Ferals, when frightened, prefer to be covered and in the dark. As you
pull the blanket off, the only place which will fit that description is inside the still
covered box trap or transfer cage and that’s where the cat is likely to go.
If you have someone helping you, have him to walk to the opposite side of the drop
trap from you. He should then lift the blanket from that side, kneel down to the cat’s eye
level and stare right at him, being careful to remain far enough back to avoid getting
scratched. The cat will usually respond by running in the other direction, towards the
doorway. If the cat still won’t go, your partner can try gently poking a long, thin rod or
stick towards the cat to encourage him to run away, hopefully into the box trap or transfer
cage.
If all else fails, be patient and wait quietly. Eventually, the cat will start exploring
and looking for a way out.
8. Two cats enter the box trap. If you caught more than one cat with the drop
trap and two go into the box trap or transfer cage at the same time, shut the doors and
immediately separate them with a trap divider. Then transfer one into another box trap or
cage (see “Transfers from traps” in Chapter 9).
If you forgot to bring a trap divider, cover the box trap or transfer cage completely
and see if the cats remain calm. If they do, wait until you have a divider or have
transported them to a secure indoor space before doing a transfer. If they are not calm
and you fear an injury, you may have to attempt a transfer out at the trapping site without
a divider. One possibility, as an absolute last resort, is to transfer one or more them back
under the drop trap and then try again to get one at a time out. They might not be so
quick to come out of the drop trap though, the second time around.
9. Escapes. If a cat escapes by getting out from under the drop trap before it hits
the ground or during the transfer – don’t give up! He may return later and go under the
drop trap again. It may help if there are other cats in the colony who the escaped cat can
observe going under and eating without incident. Don’t drop the trap again until your
escapee has been caught.
Disassembling the trap
Disconnect the top by pulling the spring clips loose. Important! – re-attach the
spring clips onto the top of the main frame. Don’t let the clips hang loose or they’ll
become tangled with other parts of the trap and may break. Also attach the two clips by
the sliding door onto the main frame. (You can order extra or replacement spring clips
from Tomahawk Live Trap if you need – www.livetrap.com).
Untie the cord from the prop stick and wind it up. Next, raise the weight flap and re-
attach to the main frame with the roll hooks. Insert the sliding door if it’s been removed.
Then fold the main frame flat. The main frame will then fit inside the top, which folds in
half like a suitcase.
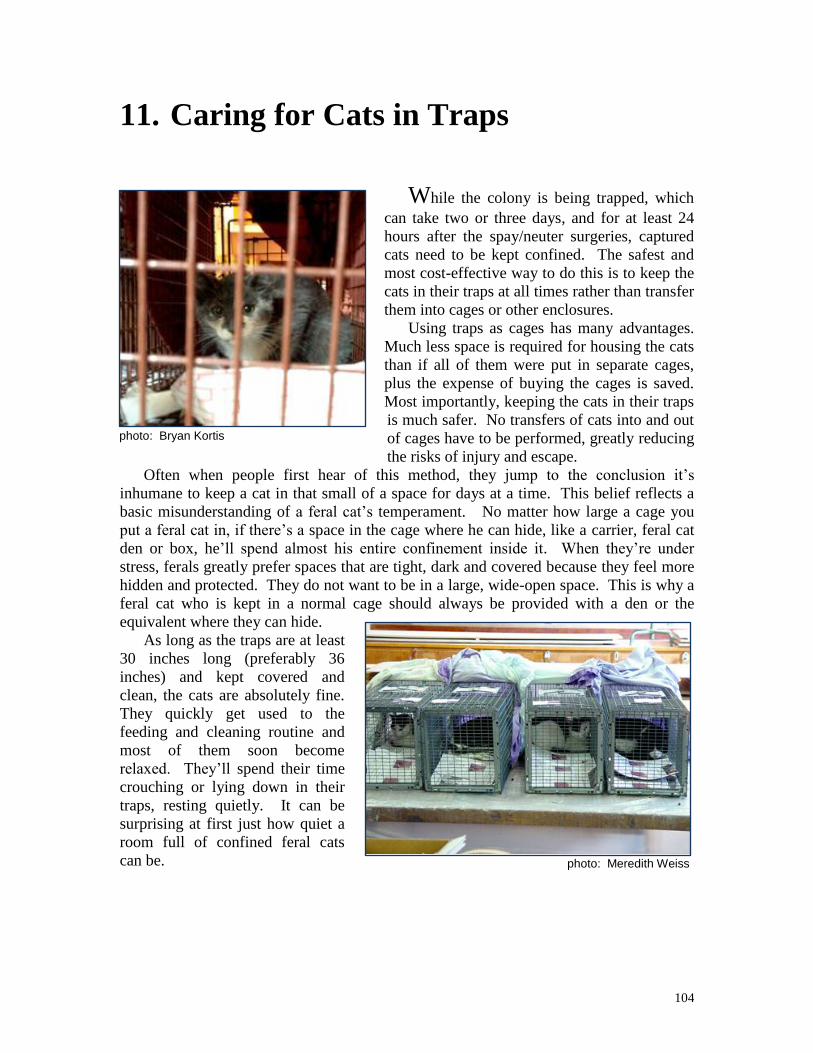
104
11. Caring for Cats in Traps
While the colony is being trapped, which
can take two or three days, and for at least 24
hours after the spay/neuter surgeries, captured
cats need to be kept confined. The safest and
most cost-effective way to do this is to keep the
cats in their traps at all times rather than transfer
them into cages or other enclosures.
Using traps as cages has many advantages.
Much less space is required for housing the cats
than if all of them were put in separate cages,
plus the expense of buying the cages is saved.
Most importantly, keeping the cats in their traps
is much safer. No transfers of cats into and out
of cages have to be performed, greatly reducing
the risks of injury and escape.
Often when people first hear of this method, they jump to the conclusion it’s
inhumane to keep a cat in that small of a space for days at a time. This belief reflects a
basic misunderstanding of a feral cat’s temperament. No matter how large a cage you
put a feral cat in, if there’s a space in the cage where he can hide, like a carrier, feral cat
den or box, he’ll spend almost his entire confinement inside it. When they’re under
stress, ferals greatly prefer spaces that are tight, dark and covered because they feel more
hidden and protected. They do not want to be in a large, wide-open space. This is why a
feral cat who is kept in a normal cage should always be provided with a den or the
equivalent where they can hide.
As long as the traps are at least
30 inches long (preferably 36
inches) and kept covered and
clean, the cats are absolutely fine.
They quickly get used to the
feeding and cleaning routine and
most of them soon become
relaxed. They’ll spend their time
crouching or lying down in their
traps, resting quietly. It can be
surprising at first just how quiet a
room full of confined feral cats
can be.
photo: Bryan Kortis
photo: Meredith Weiss
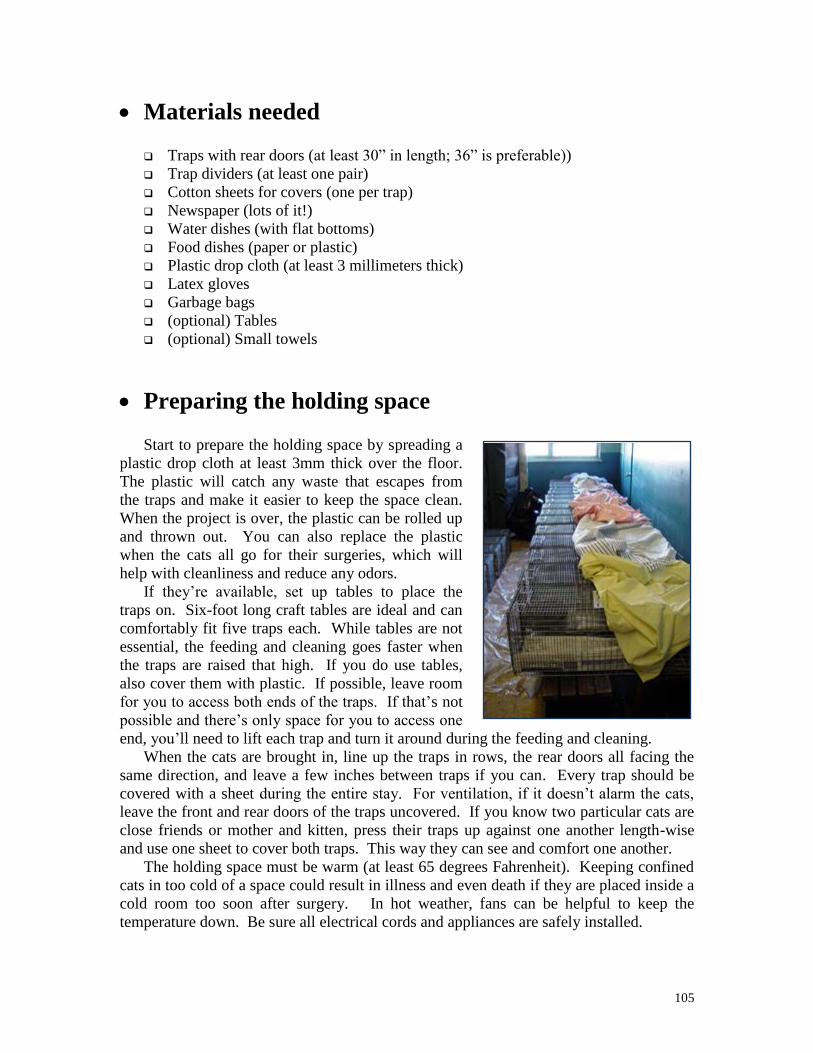
105
Materials needed Traps with rear doors (at least 30” in length; 36” is preferable))
Trap dividers (at least one pair)
Cotton sheets for covers (one per trap)
Newspaper (lots of it!)
Water dishes (with flat bottoms)
Food dishes (paper or plastic)
Plastic drop cloth (at least 3 millimeters thick)
Latex gloves
Garbage bags
(optional) Tables
(optional) Small towels
Preparing the holding space
Start to prepare the holding space by spreading a
plastic drop cloth at least 3mm thick over the floor.
The plastic will catch any waste that escapes from
the traps and make it easier to keep the space clean.
When the project is over, the plastic can be rolled up
and thrown out. You can also replace the plastic
when the cats all go for their surgeries, which will
help with cleanliness and reduce any odors.
If they’re available, set up tables to place the
traps on. Six-foot long craft tables are ideal and can
comfortably fit five traps each. While tables are not
essential, the feeding and cleaning goes faster when
the traps are raised that high. If you do use tables,
also cover them with plastic. If possible, leave room
for you to access both ends of the traps. If that’s not
possible and there’s only space for you to access one
end, you’ll need to lift each trap and turn it around during the feeding and cleaning.
When the cats are brought in, line up the traps in rows, the rear doors all facing the
same direction, and leave a few inches between traps if you can. Every trap should be
covered with a sheet during the entire stay. For ventilation, if it doesn’t alarm the cats,
leave the front and rear doors of the traps uncovered. If you know two particular cats are
close friends or mother and kitten, press their traps up against one another length-wise
and use one sheet to cover both traps. This way they can see and comfort one another.
The holding space must be warm (at least 65 degrees Fahrenheit). Keeping confined
cats in too cold of a space could result in illness and even death if they are placed inside a
cold room too soon after surgery. In hot weather, fans can be helpful to keep the
temperature down. Be sure all electrical cords and appliances are safely installed.
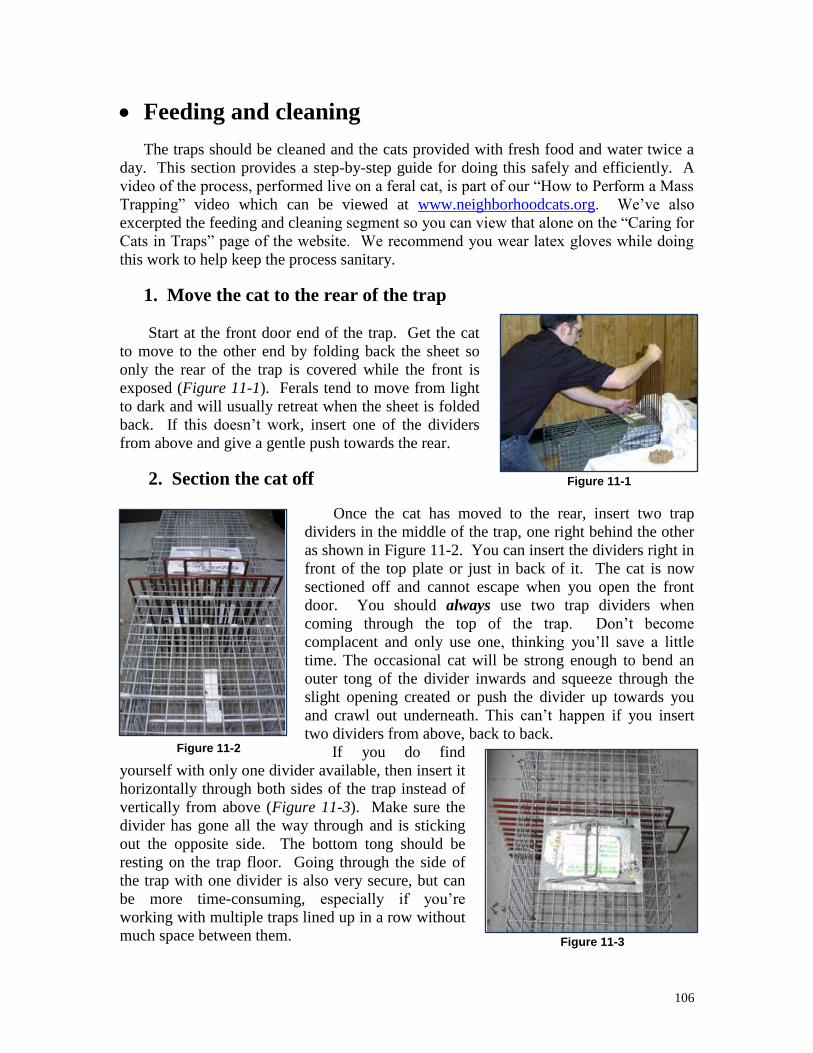
106
Feeding and cleaning
The traps should be cleaned and the cats provided with fresh food and water twice a
day. This section provides a step-by-step guide for doing this safely and efficiently. A
video of the process, performed live on a feral cat, is part of our “How to Perform a Mass
Trapping” video which can be viewed at www.neighborhoodcats.org. We’ve also
excerpted the feeding and cleaning segment so you can view that alone on the “Caring for
Cats in Traps” page of the website. We recommend you wear latex gloves while doing
this work to help keep the process sanitary.
1. Move the cat to the rear of the trap
Start at the front door end of the trap. Get the cat
to move to the other end by folding back the sheet so
only the rear of the trap is covered while the front is
exposed (Figure 11-1). Ferals tend to move from light
to dark and will usually retreat when the sheet is folded
back. If this doesn’t work, insert one of the dividers
from above and give a gentle push towards the rear.
2. Section the cat off
Once the cat has moved to the rear, insert two trap
dividers in the middle of the trap, one right behind the other
as shown in Figure 11-2. You can insert the dividers right in
front of the top plate or just in back of it. The cat is now
sectioned off and cannot escape when you open the front
door. You should always use two trap dividers when
coming through the top of the trap. Don’t become
complacent and only use one, thinking you’ll save a little
time. The occasional cat will be strong enough to bend an
outer tong of the divider inwards and squeeze through the
slight opening created or push the divider up towards you
and crawl out underneath. This can’t happen if you insert
two dividers from above, back to back.
If you do find
yourself with only one divider available, then insert it
horizontally through both sides of the trap instead of
vertically from above (Figure 11-3). Make sure the
divider has gone all the way through and is sticking
out the opposite side. The bottom tong should be
resting on the trap floor. Going through the side of
the trap with one divider is also very secure, but can
be more time-consuming, especially if you’re
working with multiple traps lined up in a row without
much space between them.
Figure 11-1
Figure 11-2
Figure 11-3
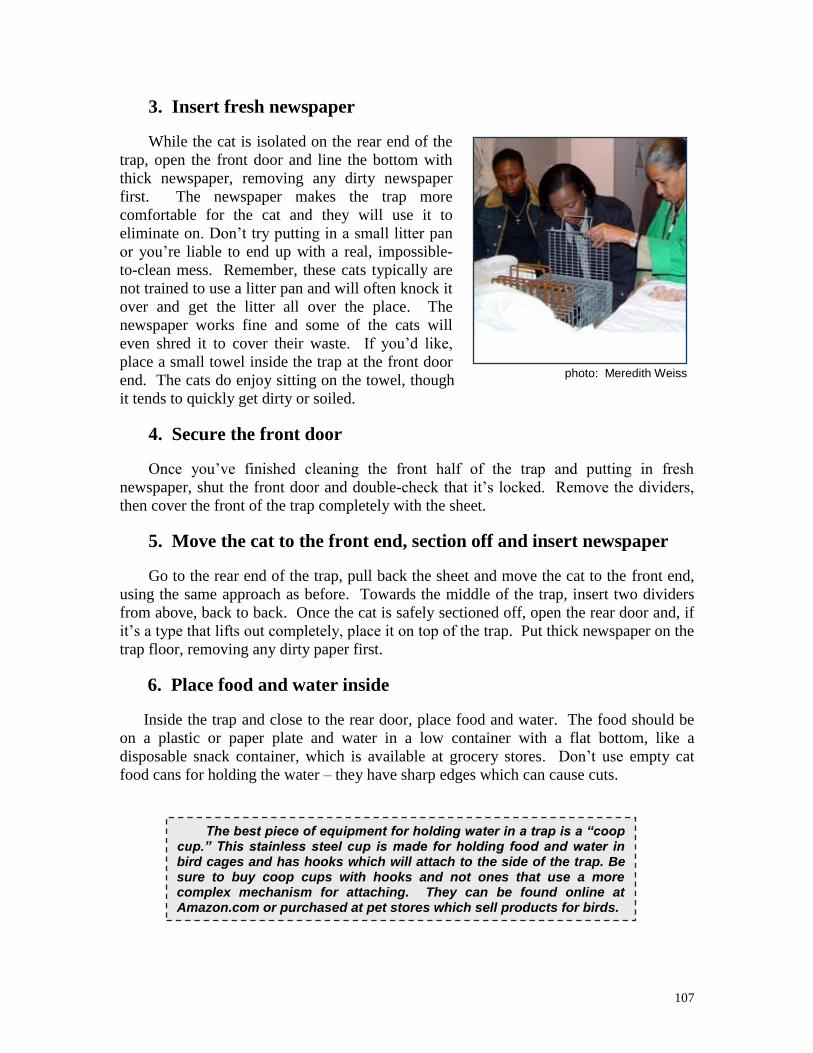
107
3. Insert fresh newspaper
While the cat is isolated on the rear end of the
trap, open the front door and line the bottom with
thick newspaper, removing any dirty newspaper
first. The newspaper makes the trap more
comfortable for the cat and they will use it to
eliminate on. Don’t try putting in a small litter pan
or you’re liable to end up with a real, impossible-
to-clean mess. Remember, these cats typically are
not trained to use a litter pan and will often knock it
over and get the litter all over the place. The
newspaper works fine and some of the cats will
even shred it to cover their waste. If you’d like,
place a small towel inside the trap at the front door
end. The cats do enjoy sitting on the towel, though
it tends to quickly get dirty or soiled.
4. Secure the front door
Once you’ve finished cleaning the front half of the trap and putting in fresh
newspaper, shut the front door and double-check that it’s locked. Remove the dividers,
then cover the front of the trap completely with the sheet.
5. Move the cat to the front end, section off and insert newspaper
Go to the rear end of the trap, pull back the sheet and move the cat to the front end,
using the same approach as before. Towards the middle of the trap, insert two dividers
from above, back to back. Once the cat is safely sectioned off, open the rear door and, if
it’s a type that lifts out completely, place it on top of the trap. Put thick newspaper on the
trap floor, removing any dirty paper first.
6. Place food and water inside
Inside the trap and close to the rear door, place food and water. The food should be
on a plastic or paper plate and water in a low container with a flat bottom, like a
disposable snack container, which is available at grocery stores. Don’t use empty cat
food cans for holding the water – they have sharp edges which can cause cuts.
The best piece of equipment for holding water in a trap is a “coop cup.” This stainless steel cup is made for holding food and water in bird cages and has hooks which will attach to the side of the trap. Be sure to buy coop cups with hooks and not ones that use a more complex mechanism for attaching. They can be found online at Amazon.com or purchased at pet stores which sell products for birds.
photo: Meredith Weiss
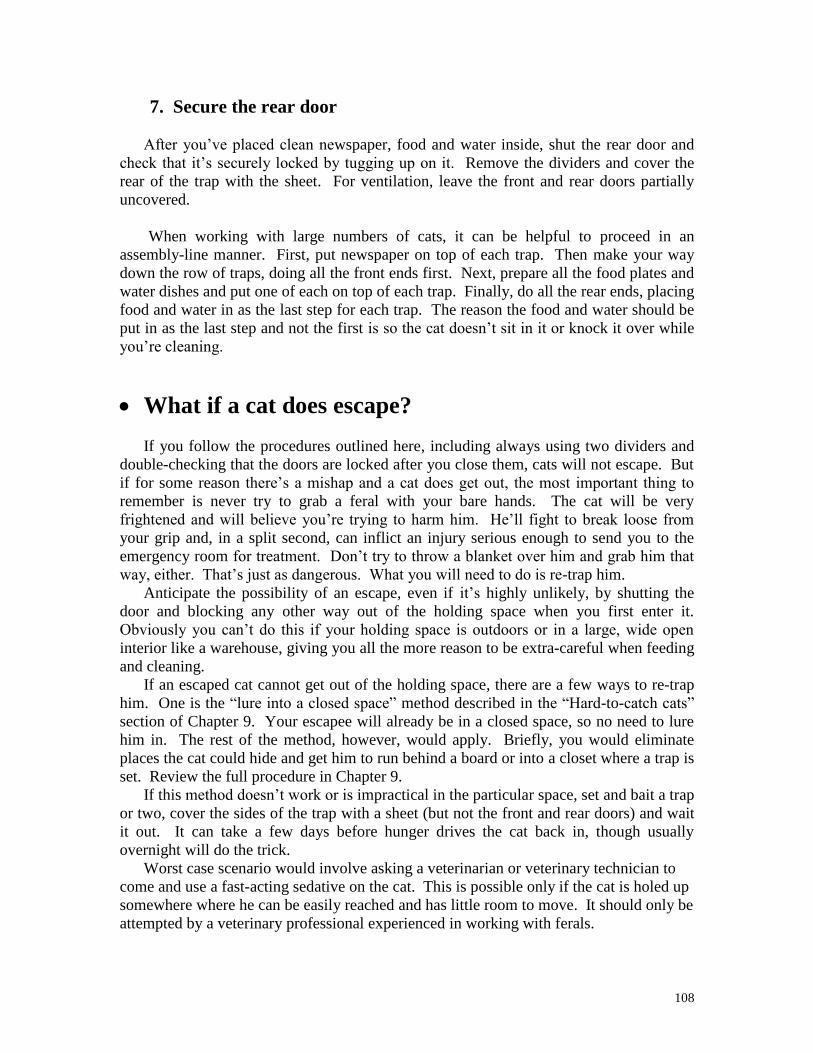
108
7. Secure the rear door
After you’ve placed clean newspaper, food and water inside, shut the rear door and
check that it’s securely locked by tugging up on it. Remove the dividers and cover the
rear of the trap with the sheet. For ventilation, leave the front and rear doors partially
uncovered.
When working with large numbers of cats, it can be helpful to proceed in an
assembly-line manner. First, put newspaper on top of each trap. Then make your way
down the row of traps, doing all the front ends first. Next, prepare all the food plates and
water dishes and put one of each on top of each trap. Finally, do all the rear ends, placing
food and water in as the last step for each trap. The reason the food and water should be
put in as the last step and not the first is so the cat doesn’t sit in it or knock it over while
you’re cleaning.
What if a cat does escape?
If you follow the procedures outlined here, including always using two dividers and
double-checking that the doors are locked after you close them, cats will not escape. But
if for some reason there’s a mishap and a cat does get out, the most important thing to
remember is never try to grab a feral with your bare hands. The cat will be very
frightened and will believe you’re trying to harm him. He’ll fight to break loose from
your grip and, in a split second, can inflict an injury serious enough to send you to the
emergency room for treatment. Don’t try to throw a blanket over him and grab him that
way, either. That’s just as dangerous. What you will need to do is re-trap him.
Anticipate the possibility of an escape, even if it’s highly unlikely, by shutting the
door and blocking any other way out of the holding space when you first enter it.
Obviously you can’t do this if your holding space is outdoors or in a large, wide open
interior like a warehouse, giving you all the more reason to be extra-careful when feeding
and cleaning.
If an escaped cat cannot get out of the holding space, there are a few ways to re-trap
him. One is the “lure into a closed space” method described in the “Hard-to-catch cats”
section of Chapter 9. Your escapee will already be in a closed space, so no need to lure
him in. The rest of the method, however, would apply. Briefly, you would eliminate
places the cat could hide and get him to run behind a board or into a closet where a trap is
set. Review the full procedure in Chapter 9.
If this method doesn’t work or is impractical in the particular space, set and bait a trap
or two, cover the sides of the trap with a sheet (but not the front and rear doors) and wait
it out. It can take a few days before hunger drives the cat back in, though usually
overnight will do the trick.
Worst case scenario would involve asking a veterinarian or veterinary technician to
come and use a fast-acting sedative on the cat. This is possible only if the cat is holed up
somewhere where he can be easily reached and has little room to move. It should only be
attempted by a veterinary professional experienced in working with ferals.
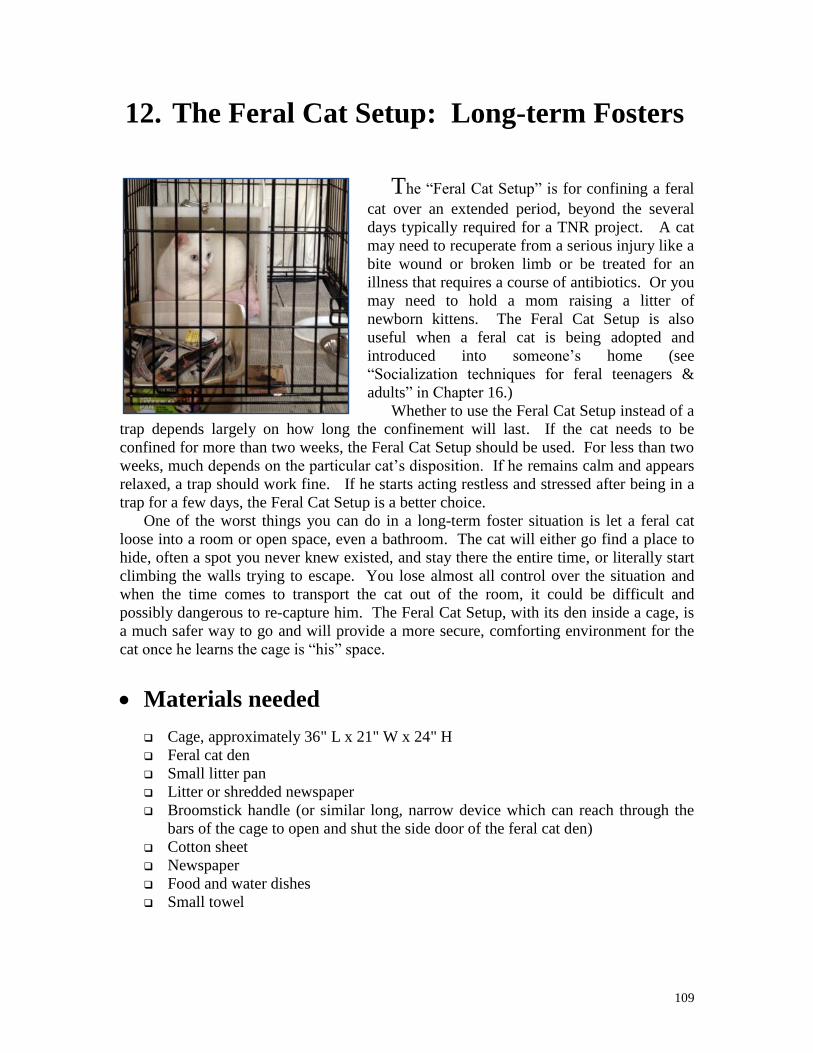
109
12. The Feral Cat Setup: Long-term Fosters
The “Feral Cat Setup” is for confining a feral
cat over an extended period, beyond the several
days typically required for a TNR project. A cat
may need to recuperate from a serious injury like a
bite wound or broken limb or be treated for an
illness that requires a course of antibiotics. Or you
may need to hold a mom raising a litter of
newborn kittens. The Feral Cat Setup is also
useful when a feral cat is being adopted and
introduced into someone’s home (see
“Socialization techniques for feral teenagers &
adults” in Chapter 16.)
Whether to use the Feral Cat Setup instead of a
trap depends largely on how long the confinement will last. If the cat needs to be
confined for more than two weeks, the Feral Cat Setup should be used. For less than two
weeks, much depends on the particular cat’s disposition. If he remains calm and appears
relaxed, a trap should work fine. If he starts acting restless and stressed after being in a
trap for a few days, the Feral Cat Setup is a better choice.
One of the worst things you can do in a long-term foster situation is let a feral cat
loose into a room or open space, even a bathroom. The cat will either go find a place to
hide, often a spot you never knew existed, and stay there the entire time, or literally start
climbing the walls trying to escape. You lose almost all control over the situation and
when the time comes to transport the cat out of the room, it could be difficult and
possibly dangerous to re-capture him. The Feral Cat Setup, with its den inside a cage, is
a much safer way to go and will provide a more secure, comforting environment for the
cat once he learns the cage is “his” space.
Materials needed
Cage, approximately 36" L x 21" W x 24" H
Feral cat den
Small litter pan
Litter or shredded newspaper
Broomstick handle (or similar long, narrow device which can reach through the
bars of the cage to open and shut the side door of the feral cat den)
Cotton sheet
Newspaper
Food and water dishes
Small towel
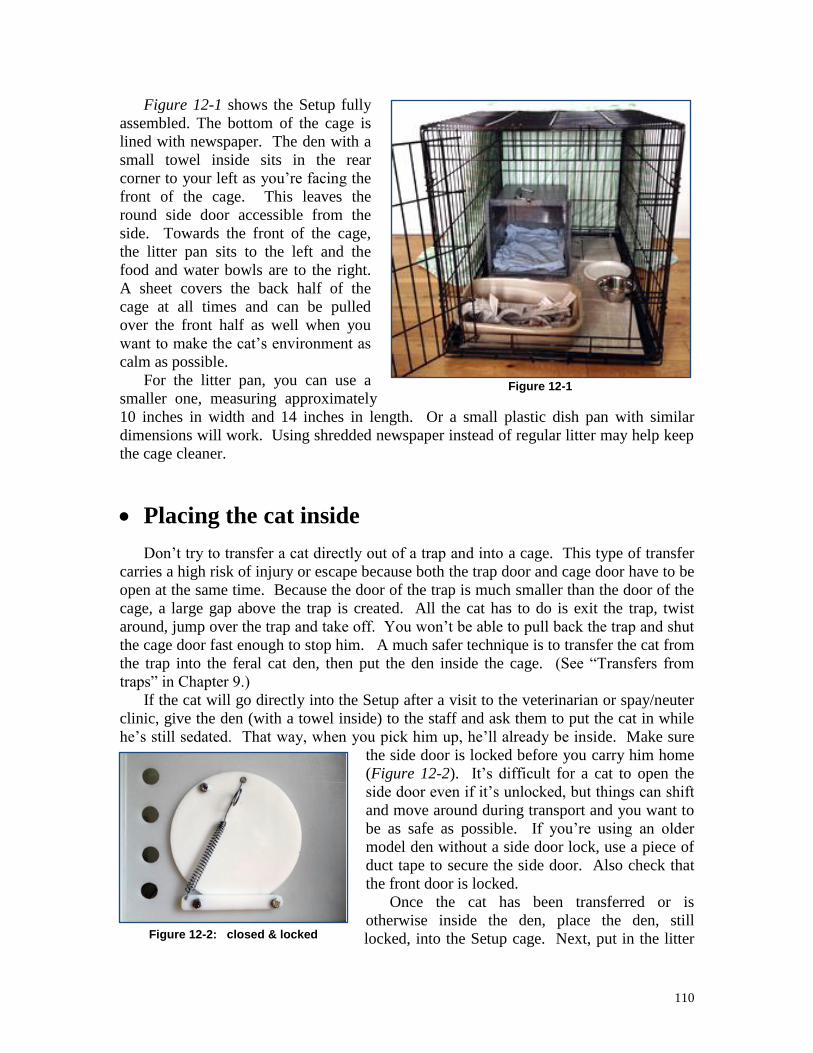
110
Figure 12-1 shows the Setup fully
assembled. The bottom of the cage is
lined with newspaper. The den with a
small towel inside sits in the rear
corner to your left as you’re facing the
front of the cage. This leaves the
round side door accessible from the
side. Towards the front of the cage,
the litter pan sits to the left and the
food and water bowls are to the right.
A sheet covers the back half of the
cage at all times and can be pulled
over the front half as well when you
want to make the cat’s environment as
calm as possible.
For the litter pan, you can use a
smaller one, measuring approximately
10 inches in width and 14 inches in length. Or a small plastic dish pan with similar
dimensions will work. Using shredded newspaper instead of regular litter may help keep
the cage cleaner.
Placing the cat inside
Don’t try to transfer a cat directly out of a trap and into a cage. This type of transfer
carries a high risk of injury or escape because both the trap door and cage door have to be
open at the same time. Because the door of the trap is much smaller than the door of the
cage, a large gap above the trap is created. All the cat has to do is exit the trap, twist
around, jump over the trap and take off. You won’t be able to pull back the trap and shut
the cage door fast enough to stop him. A much safer technique is to transfer the cat from
the trap into the feral cat den, then put the den inside the cage. (See “Transfers from
traps” in Chapter 9.)
If the cat will go directly into the Setup after a visit to the veterinarian or spay/neuter
clinic, give the den (with a towel inside) to the staff and ask them to put the cat in while
he’s still sedated. That way, when you pick him up, he’ll already be inside. Make sure
the side door is locked before you carry him home
(Figure 12-2). It’s difficult for a cat to open the
side door even if it’s unlocked, but things can shift
and move around during transport and you want to
be as safe as possible. If you’re using an older
model den without a side door lock, use a piece of
duct tape to secure the side door. Also check that
the front door is locked.
Once the cat has been transferred or is
otherwise inside the den, place the den, still
locked, into the Setup cage. Next, put in the litter
Figure 12-1
Figure 12-2: closed & locked
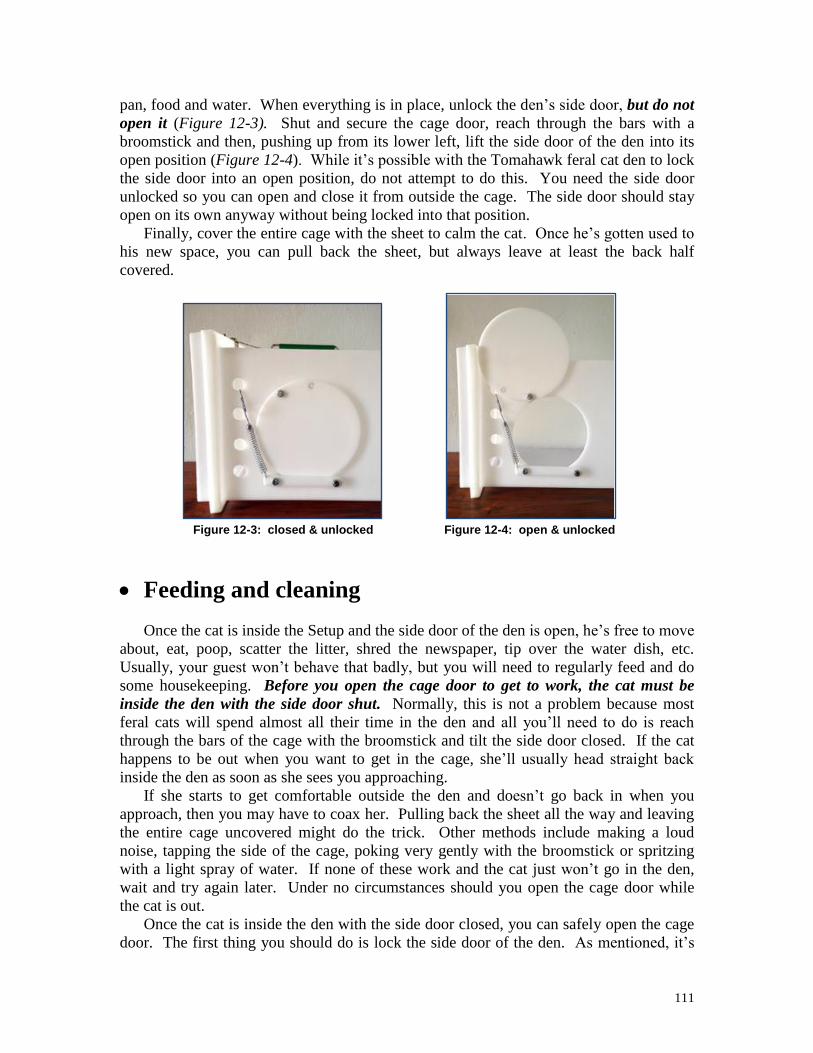
111
pan, food and water. When everything is in place, unlock the den’s side door, but do not
open it (Figure 12-3). Shut and secure the cage door, reach through the bars with a
broomstick and then, pushing up from its lower left, lift the side door of the den into its
open position (Figure 12-4). While it’s possible with the Tomahawk feral cat den to lock
the side door into an open position, do not attempt to do this. You need the side door
unlocked so you can open and close it from outside the cage. The side door should stay
open on its own anyway without being locked into that position.
Finally, cover the entire cage with the sheet to calm the cat. Once he’s gotten used to
his new space, you can pull back the sheet, but always leave at least the back half
covered.
Feeding and cleaning
Once the cat is inside the Setup and the side door of the den is open, he’s free to move
about, eat, poop, scatter the litter, shred the newspaper, tip over the water dish, etc.
Usually, your guest won’t behave that badly, but you will need to regularly feed and do
some housekeeping. Before you open the cage door to get to work, the cat must be
inside the den with the side door shut. Normally, this is not a problem because most
feral cats will spend almost all their time in the den and all you’ll need to do is reach
through the bars of the cage with the broomstick and tilt the side door closed. If the cat
happens to be out when you want to get in the cage, she’ll usually head straight back
inside the den as soon as she sees you approaching.
If she starts to get comfortable outside the den and doesn’t go back in when you
approach, then you may have to coax her. Pulling back the sheet all the way and leaving
the entire cage uncovered might do the trick. Other methods include making a loud
noise, tapping the side of the cage, poking very gently with the broomstick or spritzing
with a light spray of water. If none of these work and the cat just won’t go in the den,
wait and try again later. Under no circumstances should you open the cage door while
the cat is out.
Once the cat is inside the den with the side door closed, you can safely open the cage
door. The first thing you should do is lock the side door of the den. As mentioned, it’s
Figure 12-4: open & unlocked Figure 12-3: closed & unlocked
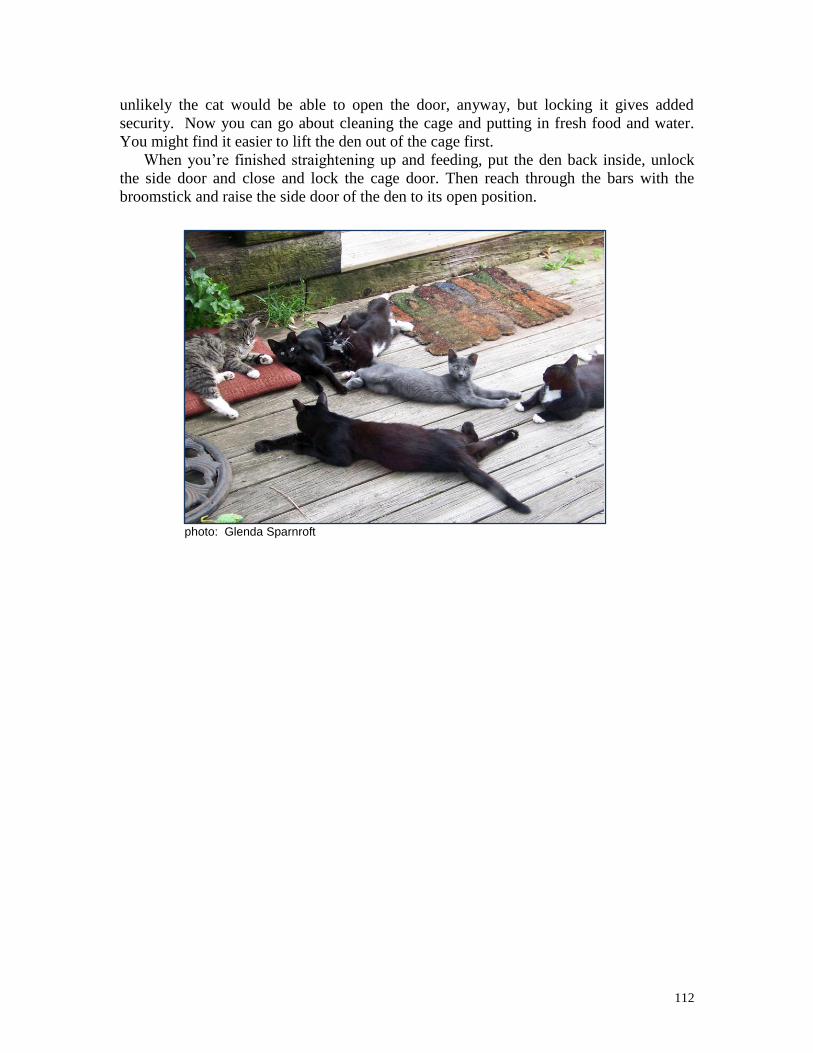
112
unlikely the cat would be able to open the door, anyway, but locking it gives added
security. Now you can go about cleaning the cage and putting in fresh food and water.
You might find it easier to lift the den out of the cage first.
When you’re finished straightening up and feeding, put the den back inside, unlock
the side door and close and lock the cage door. Then reach through the bars with the
broomstick and raise the side door of the den to its open position.
photo: Glenda Sparnroft

113
13. Spay/Neuter & Veterinary Care
Getting the cats spayed and neutered is
what the hard work of trapping is all about.
When the big Spay Day arrives, you want to be
as ready as possible. This means educating
yourself ahead of time on your clinic’s
protocols, getting the cats ready and knowing
what choices you will make for the cats’ care.
Preparing for surgery
Withhold food & water
For adult cats, all food should be removed
from their traps by 10 p.m. the night before the
surgery. It’s important for a cat’s stomach to
be empty while under anesthesia. Otherwise,
there is a chance the cat will vomit while
unconscious and the regurgitated food could
cause him to choke or gag, a potentially fatal
complication. Water should be withheld, too, although veterinarians differ on when. To
be conservative, withdraw the water at the same time you remove the food. It is
especially important to take away the water long enough before the surgery for a female
cat. If she drinks too much water and does not expel it in time, her bladder can swell and
become more susceptible to being accidentally cut during the spay procedure.
For kittens, food and water should not be withheld for as long. In order to maintain a
healthy energy level, they need to eat closer to the time of surgery than adults. Exactly
when food and water should be taken away depends in large part on their age. The
younger they are, the closer in time to the operation they should be fed. Consult your
veterinarian for the precise timing, keeping in mind that whatever age the kittens are,
there is some period before the surgery that food and water should be withheld.
Traps and covers
Feral cats should always be brought to the clinic in traps or transfer cages, one cat per
trap or cage. When a cat is in a trap or transfer cage, veterinary staff can use a trap
divider to pin the cat against one end and then sedate him through the bars with a long-
needled syringe. In contrast, if the cat is in a carrier or even a feral cat den, staff may
need to open the door and reach in to get at the cat. This can be very dangerous,
exposing staff and the cat to injury. This is why many clinics now require feral cats be
brought in traps or transfer cages or they will not be treated.
photo: Meredith Weiss
114
Each trap should be covered with a sheet to keep the cat calm. Cotton sheets, like
those used to cover the cat during the trapping, will do the trick. Write your or your
group’s name on the sheets with indelible ink if you want to be sure to get the same ones
back.
Special instructions
Any special instructions for the veterinary staff should be written on a label affixed to
the top plate of the trap. Examples include the cat is limping and you want the left front
leg examined, you’d like the teeth looked at, there’s a wound that needs cleaning or you
know the cat is pregnant. Any veterinary care you’d like beyond the clinic’s standard
treatment should be noted. Also find out ahead of time what, if any, extra charges will be
involved.
It’s especially important to write down in big bold letters if you do not want the cat
eartipped because you plan to adopt him out rather than return him to his colony. Keep in
mind, however, that many clinics require eartipping in order for you to qualify for a
discount feral rate. Otherwise, normal rates apply. Check your clinic’s policies
beforehand. If eartipping is required for a lower rate, then pay the higher price for
adoptables but still, if the cat is in a trap or transfer cage, make it very clear on the label
that you don’t want the cat tipped. If a mistake happens and a cat is accidentally tipped,
don’t be overly concerned – eartipped cats are no less adoptable in our experience.
In addition to writing special instructions on a label, also put them on the clinic’s
intake form. If there is no intake form, don’t rely only on giving verbal instructions.
Something you only say can easily be forgotten or misunderstood. Print or write your
own simple intake form if necessary, listing your name, the cat’s name and description,
the date, and your instructions, then hand it to the clinic staff when you bring in the cat.
That way there should be no confusion about what you’re asking to have done.
Educating the veterinary staff
TNR and the veterinary services available for feral cats continue to grow at a rapid
pace. Nonetheless, working with feral cats is something many veterinarians and clinics
remain unfamiliar with. They are set up and trained to work with pet cats who are used
to being handled, not semi-wild animals who have to be treated with much more caution.
As an experienced caretaker and trapper, it’s possible that at first you’ll know more about
the safe handling of ferals than your veterinarian or clinic. If that’s the case, it’s
important for you to educate them. Bring your cats in traps, covered with sheets, even if
the clinic does not tell you to do so and explain why to the staff. Also bring a pair of trap
dividers and demonstrate how to section the cat off on one end and feed and clean in the
trap. Many veterinarians new to ferals make the mistake of transferring them out of traps
and into cages. Explain how this increases the risk of escape and injury and how much
safer it is to keep the cats in their traps before and after surgery. If a cat does need to be
caged at the clinic for some reason, bring a feral cat den and show how to use it,
including transferring the cat into the den before placing him in a cage.
If your veterinarian or clinic is new to TNR, give them a photo of an eartipped cat and
copy the part of this chapter which explains how to perform the procedure. Do this

115
whenever you’re working with a veterinarian who is relatively inexperienced with ferals,
even if she says she knows what an “eartip” is. In veterinary school, students are taught
to perform “ear notches,” the V-shaped mark cut out of the side of the ear of livestock.
This mark doesn’t work well with ferals because from a distance, it can look like a fight
wound, making it hard to tell if the cat is neutered. When first working with ferals, a
veterinarian may believe an ear notch is the same thing as an eartip. Even if they do
know the difference, an inexperienced veterinarian may take too much or too little off the
tip of the ear. Don’t take chances when a simple photograph or drawing will prevent a
mishap.
Arrange for emergency post-surgery veterinary care
With veterinarians experienced in spay/neuter, the incidence of post-surgical
complications is very low. Still, it’s best to plan what you would do in the rare event
something does go wrong after the cat has been returned to your care. You want to make
these plans before the cats are returned to you, not afterwards when you’re in the middle
of a crisis. First, see if your spay/neuter provider will be available at all times after the
surgeries. If not, locate any 24 hour or other emergency care veterinary facilities in your
area. You can also try to arrange for another veterinarian, even if he didn’t perform the
spay/neuter, to be available in an emergency.
Two situations which could require post-surgical emergency care are pools of blood
or prolonged unconsciousness. Drops of blood around the scrotum for males or the spay
incision for females are normal, as is urine tinged with blood for the first day or two after
the procedure. A pool of blood, even an 1/8th
of a cup, is not normal and requires
immediate attention. Likewise, if a cat is not fully unconscious a couple of hours after
the surgery, this is cause for immediate action. Usually, a clinic will not return the cats to
you until they are fully conscious, but sometimes it isn’t possible for them to hold or
observe them for that long. In particular, some mobile spay/neuter clinics – van or
MASH-style - may need to return the cats to you earlier than is ideal.
Types of veterinary treatment
The standard treatment for feral cats being returned to their colonies includes (1)
spay/neuter, (2) eartipping and (3) rabies vaccination when required by law or when it’s
known rabies is present in the local environment. Some clinics may also include in their
standard feral cat package an FVRCP vaccine, flea treatment, ear mite medication and/or
worm medication. A few will also do dental work. Normally, however, these additional
treatments are considered optional and will cost extra.
Parasite medication (fleas, ear mites and worms) is not usually part of the standard
treatment because it’s normal for a healthy cat living outdoors to have a certain, tolerable
level of parasites present. If medication is applied, the parasites will return when it wears
off. This makes investing limited funds in these treatments of questionable utility. If an
infestation is severe, treatment should be sought and the extra cost incurred. In these
extreme cases, the parasites could cause serious health issues, such as fleas causing
anemia, worms causing weight loss or ear mites resulting in wounds from the cat
116
scratching behind his ears. Be aware that when parasites rise to this level, it can be a sign
of another underlying health issue such as a weakened immune system. Often, if efforts
are made to upgrade the cat’s shelter and nutrition, a recurrence of the infestation can be
avoided.
The FVRCP vaccine, also known as the “three-in-one” shot or the “feline distemper”
vaccine, protects against three diseases - panleukopenia (feline distemper), calici virus
and rhinotracheitis. Distemper is the most feared of the three because of its swift and
often deadly consequences, but the other two can be serious and even fatal as well. There
are good reasons though for why FVRCP is not usually part of a standard treatment for
ferals. First, there is the cost. With TNR, judgments must constantly be made on the best
use of scarce resources. In our experience at Neighborhood Cats, it is the kittens who are
most susceptible to distemper and other diseases because their immune systems are not
fully developed. Healthy adults, when well fed and sheltered, rarely catch them. We
would rather invest in the cats’ ongoing care than more vaccines. Another concern for
caretakers who are holistically minded is the stress to the cat’s immune system of
receiving anesthesia, a rabies vaccine, three more vaccines contained in the FVRCP shot
and possibly other medications, all at the same time. Finally, there is the question of how
effective an FVRCP vaccine is without a booster. Manufacturer’s instructions say a
follow-up shot is required in three to four weeks, but one research study found a single
dose was still effective ten weeks later and could potentially confer years of immunity.1
One possible compromise, followed by some TNR groups, is to only administer
FVRCP to younger cats, those less than a year old. The cost is justified, according to this
view, because these cats do not yet have fully developed immune systems and need the
extra protection.
Other vaccines, such as feline leukemia, FIV, “five-in-one,” or “seven-in-one” shots,
are rarely given to feral cats, largely due to concerns about costs. Efficacy is also a
concern with some of the vaccines, like feline leukemia.
If dental services are available and affordable, it’s an excellent idea to have the cat’s
teeth examined and treated at the time of the spay/neuter surgery. This might be the only
opportunity to provide dental care which, by preventing gum disease and oral infections,
could prolong the cat’s life by many years. Dental care may not be practical if the clinic
is only set up for spay/neuter and it may not be affordable if you’re dealing with a large
number of cats.
The spay/neuter surgery itself can be performed on kittens who are at least two
months of age and two lbs. in weight, if your veterinarian is trained in early age
spay/neuter. If your veterinarian is not trained, you’ll need to defer to her on how young
a cat she’s willing to perform surgery upon. Experience and training are also key when
dealing with a female who is pregnant. If your veterinarian is experienced with
spay/neuter and comfortable doing so, a pregnant cat can be aborted up until just before
giving birth. Lactating females or females in heat also can be safely spayed by a
veterinarian familiar with working on these cases. In these situations, including early age
spay/neuter, late-term pregnancies or in heat or lactating females, there are added risks,
which is why we emphasize the need for your veterinarian to be trained or experienced in
these types of procedures. Otherwise, it’s best to wait.
1 Fischer, S., et.al, Response of feral cats to vaccination at the time of neutering, (2007) Journal of the
American Veterinary Association Vol 230, No. 1.
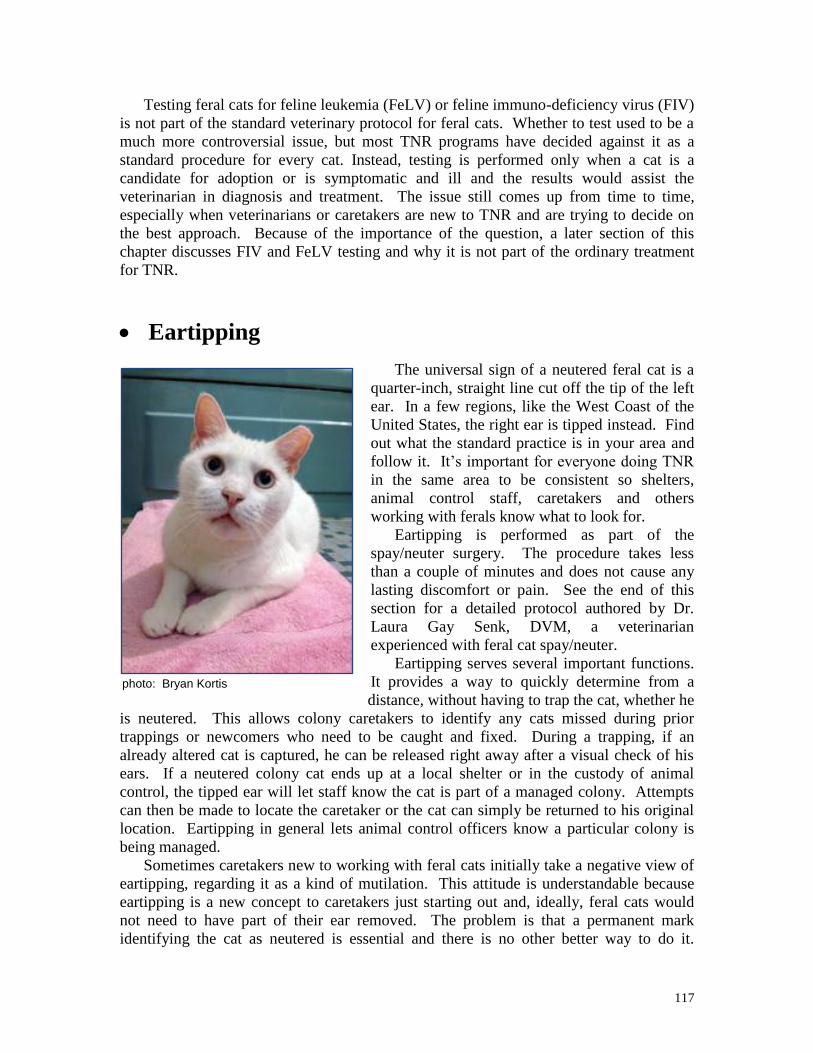
117
Testing feral cats for feline leukemia (FeLV) or feline immuno-deficiency virus (FIV)
is not part of the standard veterinary protocol for feral cats. Whether to test used to be a
much more controversial issue, but most TNR programs have decided against it as a
standard procedure for every cat. Instead, testing is performed only when a cat is a
candidate for adoption or is symptomatic and ill and the results would assist the
veterinarian in diagnosis and treatment. The issue still comes up from time to time,
especially when veterinarians or caretakers are new to TNR and are trying to decide on
the best approach. Because of the importance of the question, a later section of this
chapter discusses FIV and FeLV testing and why it is not part of the ordinary treatment
for TNR.
Eartipping
The universal sign of a neutered feral cat is a
quarter-inch, straight line cut off the tip of the left
ear. In a few regions, like the West Coast of the
United States, the right ear is tipped instead. Find
out what the standard practice is in your area and
follow it. It’s important for everyone doing TNR
in the same area to be consistent so shelters,
animal control staff, caretakers and others
working with ferals know what to look for.
Eartipping is performed as part of the
spay/neuter surgery. The procedure takes less
than a couple of minutes and does not cause any
lasting discomfort or pain. See the end of this
section for a detailed protocol authored by Dr.
Laura Gay Senk, DVM, a veterinarian
experienced with feral cat spay/neuter.
Eartipping serves several important functions.
It provides a way to quickly determine from a
distance, without having to trap the cat, whether he
is neutered. This allows colony caretakers to identify any cats missed during prior
trappings or newcomers who need to be caught and fixed. During a trapping, if an
already altered cat is captured, he can be released right away after a visual check of his
ears. If a neutered colony cat ends up at a local shelter or in the custody of animal
control, the tipped ear will let staff know the cat is part of a managed colony. Attempts
can then be made to locate the caretaker or the cat can simply be returned to his original
location. Eartipping in general lets animal control officers know a particular colony is
being managed.
Sometimes caretakers new to working with feral cats initially take a negative view of
eartipping, regarding it as a kind of mutilation. This attitude is understandable because
eartipping is a new concept to caretakers just starting out and, ideally, feral cats would
not need to have part of their ear removed. The problem is that a permanent mark
identifying the cat as neutered is essential and there is no other better way to do it.
photo: Bryan Kortis

118
Without such a mark, cats may be mistakenly
recaptured and subjected to needless surgery. Shelters
and animal control would have no way of knowing
anyone was caring for a cat if he or she came into their
custody. Colony management could be very difficult
without the ability to quickly tell from a distance
which cats were fixed and which were not.
Recognizing a permanent mark is necessary, some
new caretakers look for a less invasive approach.
Alternatives attempted have included ear-tagging,
tattooing, photographs and relying on the caretaker’s
memory. All these methods suffer serious flaws and
are inadequate substitutes for an eartip.
Ear-tagging involves insertion of a metal clip into
the side of the ear. The method was designed for
certain farm animals and is not suitable for free-
roaming cats. The tags are small and hard to observe at
a distance. They can get caught in thin branches or the like and cause the ear to tear and
become infected. Despite their “permanent” design, sometimes the tags fall off and then
no mark is left to identify the cat as neutered.
Tattooing the inner ear has also been tried. The problem is you can’t see the tattoo
from a distance. The cat has to be trapped and even then, sedation might be necessary
before the inner ear can be examined. To be effective and prevent unnecessary trapping,
a mark showing spay/neuter status must be visible while the cat is loose.
Photos which record neutered cats are impractical because they’re only useful to
whoever has a copy of them. If anyone besides the caretaker, like an animal control
officer or another resident in the area, wants to know if the cats are fixed, there will be no
way for them to tell. Even the caretaker in some colonies will not find photos that useful
if many of the cats have similar appearances, like if most are black or tabby. Photos can
also be lost or misplaced, leaving no record for future caretakers of the same colony.
Relying on the caretaker’s memory is risky, even when the caretaker knows the cats
extremely well. If the caretaker changes, there’s no record at all. Also, as with photos,
there’s no visual cue for third parties.
In the end, eartipping is the most efficient and effective method for marking neutered
feral cats. If the procedure is done properly and care is taken not to remove more than a
quarter inch of the tip, the cat’s appearance is not altered in a way that makes them look
unattractive. Cats with eartips who are found to be friendly after the procedure is
performed do not have trouble being placed in adoptive homes. Some owners even brag
about their new pet’s feral pedigree!
photo: Nancy SantoPietro
It’s easier to see an eartip out in the field when you are looking at the cat from behind. Binoculars are very useful for this purpose.

119
Detailed Protocol for Eartipping by Dr. Laura Gay Senk, DVM
http://www.myvetonline.com/drsenk
Procedure:
1. The ears are examined for ear mites,
cleaned and treated (milbemite;
milbemycin - novartis , acarexx;
ivermectin - idexx, or 0.1 ml eqvalan;
L.A. ivermectin injectable solution
into each ear)
2. The tip of the left ear is given a sterile scrub after placing cotton at the
entrance of the canal so that no excess prep solution runs down into the ear
canal.
3. A straight hemostat is held across the top 1/4 inch of the left ear, applying
gentle pressure. Do not clamp the hemostat closed or crushing tissue
damage may result beneath the ear tip.
4. The top 1/4 inch of the left ear is cut off straight across the top using a
straight edge sharp scissors (there is less bleeding when using scissors than
with using a scalpel blade). Proportionately less than 1/4 inch is removed for
kittens. It is the straight edge on the top of the ear that is identifying, not the
amount removed. Therefore, only 1/4 inch of ear tip need be removed.
5. A hemostatic paste (kwik stop) is prepared ahead of time with lidocaine and
epinephrine to make a thick paste. It's applied across the cut surface with a
Q - tip. This will lessen the pain and resultant head shaking after recovery.
6. This paste will immediately stop the bleeding once the gentle pressure of the
hemostat is removed. If bleeding does occur, apply more kwik stop and if
needed, reapply pressure for a short time.
Post-surgery
Anesthetic withdrawal
After their surgeries, most clinics will keep the cats until they have fully regained
consciousness. There may times though when the cats are returned to your care prior to
their full recovery from anesthesia. For example, a small mobile clinic may not have
space to hold the cats once surgery is done and may give them to you to recover. If that
happens, it’s important to recognize the typical stages of anesthetic withdrawal so you
can properly assess whether everything is going well.
In the first stage, the cat is unconscious. Everything is normal if the cat is breathing
regularly, her gums are pink and not white, and her eyes are wide open and reflexively
blink when tapped at the corner. Care must be taken to ensure the unconscious cat does
not lie in a position that would constrict her windpipe and cut off her breathing, such as
an awkward twisting of the neck. Because making sure she is lying in a good position

120
may require handling the cat, it’s always best if cats in the unconscious stage are not
returned to the caretaker unless veterinary staff is present. Ideally, only an experienced
veterinarian or veterinary technician would decide whether it is safe to touch a sedated
feral cat. However, if veterinary staff is not present and you’re concerned, first make
extra sure the cat is actually unconscious and then gently straighten her out so she’s lying
on her side with her throat unbent.
In the second stage of withdrawal, depending on the type of anesthetic used, the cat
may shake or twitch a fair amount, as though violently shivering or in a mild seizure.
This is nothing to be alarmed about. Anesthesia causes the cat to lose control over the
regulation of her body temperature, which drops. As the drugs wear off, the cat shivers
to regain warmth. Because of this drop in body temperature, it’s vital that a cat coming
out of surgery be placed in a warm space for recovery (at least 65 degrees Fahrenheit).
During the shivering stage and thereafter, the cat should be kept confined in her trap with
all doors shut and locked.
In the third stage, the cat has regained consciousness, but not full control over bodily
movements. The cat may struggle to move about and fall over or swoon, appearing in a
drunken state. She may bang up against the sides of the trap, trying to get out. The trap
should be covered with a sheet at this point to provide a sense of security.
Finally, upon full withdrawal from anesthesia, the cat will lie or sit quietly, appearing
perhaps a little tired but otherwise alert.
If the cats are returned to you before they’ve reached the final stage, be sure to ask the
veterinarian how long it should take before they get there. Generally speaking, if it takes
more than a couple of hours for a cat to go from unconscious to sitting or lying in an
upward position, that is cause for concern and veterinary staff should be consulted.
Food
Adult cats can be fed three or four hours after full anesthetic withdrawal. If the cats
are being transported from the clinic, wait until they’ve arrived at the holding space
before feeding. Start out providing about half the size of a normal meal in case their
stomachs are upset from the anesthesia. The next morning, full portions can be given.
Water should be provided as soon as the cat is fully awake. Sometimes the cats’ mouths
become dry from the anesthesia and at first they’ll drink more than usual. Kittens may
need to eat sooner than three or four hours after becoming fully alert, depending on their
age. Ask your veterinarian how long you should wait before feeding.
FIV/FeLV testing
The vast majority of TNR programs do not perform FIV/FeLV testing on every feral
cat, but only on those showing serious symptoms of ill health or who are candidates for
adoption. There are several good reasons for this policy:

121
1. With limited resources available, spay/neuter takes priority
One study found the prevalence of FIV (feline aids) and FeLV (feline leukemia) in
the unowned, free-roaming cat population is similar to that in the pet cat population –
approximately 8% tested positive for one or the other virus.2 On average then, based on
this study, testing 1000 feral cats will result in the identification of 80 cats testing positive
for either FIV or FeLV. Assuming even a low cost of $12 per test, that would mean
$12,000 needs to be spent to identify 80 positive cats. That same $12,000, at an average
spay/neuter cost of $50, could be put instead towards neutering 240 ferals. Because
funds are limited and the primary goal of TNR is not disease control but to stem
overpopulation, neutering 240 more cats should take priority over identifying 80
positives.
2. Spay/neuter can be a more effective means of disease prevention
Even if disease prevention is considered an important objective for a TNR program,
investing in spay/neuter may have more benefits than trying to identify and cull positive
cats. With respect to FIV, the primary mode of transmission is deep bite wounds. This
type of injury is most often inflicted by male cats during fights provoked by mating
behavior. Neutering males thus eliminates the most prevalent form of FIV transmission.
With respect to FeLV, experience and research has shown the greatest “at risk”
population among ferals is kittens,3 probably because their immature immune systems are
not capable of fighting off infection. Spay/neuter, of course, prevents the birth of kittens
and hence the spread of the virus. Sexual activity between adult females and males can
also spread FeLV, another route of transmission eliminated by spay/neuter.
3. The kinds of tests normally used on ferals are unreliable
The FIV/FeLV “test” is a misnomer. Each virus is actually tested for separately,
although the tests may be combined into one kit. There are also different kinds of tests
available for each virus. Depending on which virus is being tested for and which type of
test is being used, the results may be unreliable.
Feline Immunodeficiency Virus (FIV)
When it comes to testing feral cats for the FIV virus, most veterinarians and clinics
use the ELISA (Enzyme-Linked Immunosorbent Assay) test. Commonly referred to as a
“snap” test, it produces a result within minutes. It detects whether antibodies to the FIV
virus are present in the blood, not whether the virus itself is present. As a result, a
positive test result does not necessarily mean the cat is infected. For cats less than six
months of age, FIV antibodies may have been passed on to them from their nursing
mother, but not the virus. To confirm infection, these cats must be re-tested when they
2 Lee IT, Levy JK, Gorman SP, Crawford PC, Slater MR, Prevalence of feline leukemia virus infection and
serum antibodies against feline immunodeficiency virus in unowned free-roaming cats (2002) Journal of
the American Veterinary Medical Association, Vol. 220:620-622. 3 Ibid.

122
are older than six months. Another complication arises from the advent of the FIV
vaccine. Cats who have received the vaccine will test positive for FIV because their
immune system was stimulated by the vaccine to form antibodies, not because they are
infected.
Even putting aside the problems of kittens with their mother’s antibodies and cats
vaccinated against FIV, a positive ELISA test is not a definitive diagnosis. According to
The Merck Veterinary Manual, “With ELISA tests, the incidence of false positives is
relatively high. Positive results, especially in asymptomatic cats, should be confirmed by
another test such as Western blot.”4 A Western blot or similar test must be performed in
a laboratory and is usually considerably more expensive than the ELISA snap test.
Because of the added time and expense involved, follow-up lab tests are rarely performed
on feral cats.
Feline Leukemia Virus (FeLV)
For testing feline leukemia infection in ferals, the FeLV version of the ELISA snap
test is also the most commonly administered. It detects whether FeLV antigen, a product
of the virus, is present in the blood. A positive result indicates the cat was exposed to the
virus, but does not necessarily mean he is permanently infected. He may have fought off
the virus, leaving bits of antigen behind, or he might be in the process of fighting it off at
the time of testing. Infection is not permanent until the virus enters the cat’s white blood
cells where it can replicate and spread. The ELISA test does not indicate whether this has
occurred. Only a second test, such as the IFA (Immunofluoresence Assay), can
determine whether the virus has entered the white blood cells.
In addition, the ELISA test for FeLV is sensitive and prone to false positives from
mishandling. A classic example is when the result is labeled a “weak positive.” There is
no such thing. Either the antigen is present in the blood or it’s not. A “weak positive”
finding almost always indicates some type of testing error.
Follow-up tests for FeLV, similar to FIV, must be performed in a laboratory and are
rarely pursued in the context of TNR because it takes time to get results and they’re more
expensive than the ELISA test. The failure to have an IFA or similar laboratory test
performed prior to euthanizing a supposedly FeLV positive cat can literally be a fatal
mistake. In an article published in 2006, the National Veterinary Laboratory – a privately
owned diagnostic lab founded by the inventor of the IFA test – found that over the course
of three years, 32% of FeLV positive results from ELISA tests submitted to it for review
were not confirmed by subsequent IFA tests.5 In other words, almost one of three positive
ELISA results turned out to be potentially mistaken. The frequency of false positives
with FeLV ELISA tests is why The Merck Veterinary Manual states, “Confirmation of
4 The Merck Veterinary Manual, Feline Immunodeficiency Virus, (2012)
www.merckvetmanual.com/mvm/index.jsp?cfile=htm/bc/150225.htm (click on “Feline Immunodeficiency
Virus.”) 5 National Veterinary Laboratory Newsletter, Current Feline Leukemia Virus Research Supports:
Confirm All In-Hospital FeLV ELISA Positive Tests by IFA (2006), Vol. 5, No. 4.
123
positive results, especially in asymptomatic cats, should be pursued by testing for cell-
associated antigen, eg, with an immunofluorescent antibody assay [IFA test].”6
To summarize, the common practice when feral cats are tested is to use the ELISA
snap tests and then euthanize when results are positive for FIV or FeLV. This protocol is
highly flawed because the ELISA tests are prone to false positives and, in accordance
with best practices, require more precise follow-up laboratory tests to confirm a positive
result, especially with asymptomatic cats. A TNR program that tests all cats and
euthanizes based only on ELISA test results is not only incurring added expense, but may
euthanize cats who are not infected.
4. FIV positive cats can lead relatively long lives
Cats infected with FIV have commonly been known to live for many years and some
never get sick. While their immune systems are compromised, proper care and nutrition
can compensate to at least some degree. Even in outdoor colony settings, FIV cats can
live long lives. The caretaker does need to be alert for any symptoms of illness, which
may require re-trapping and a visit to the veterinarian. By contrast, FeLV positive cats
have a much higher mortality rate, with research showing 83% mortality within 3.5 years
of full-blown infection.7 Still, while they are alive, they can often live symptom-free
until near the end if properly fed and sheltered.
5. Euthanizing positive cats is ineffective colony management
Advocates of testing all cats argue that positive ferals need to be identified so they
can be removed from the colony and the remaining cats can be protected from the
disease. In truth, removing the positive cat makes little difference. By the time you catch
and identify the positive cat, it’s most likely the other cats in the colony have already
been exposed to the virus and will have become infected or not. Furthermore, no matter
how many ferals are removed because of positive test results, FIV and FeLV will remain
in the environment and be an ongoing threat. New cats passing through or entering the
colony could carry it and even colony members who test negative might be harboring one
of the viruses. While false negatives occur less frequently than false positives with the
ELISA tests, they are known to happen. Exposure may have occurred too soon before
the test for antigen (FeLV) or antibodies (FIV) to appear in the blood. Or, in the case of
FeLV, the virus might be absent from the blood but hiding in the bone marrow.
In our experience, the primary cause of illness in ferals, including FIV and FeLV, has
more to do with proper colony management than the presence of any virus. Colonies
with lots of sick cats are invariably ones that receive poor or insufficient nutrition, have
inadequate shelter from cold and rain, and are unneutered and reproducing. These
conditions lead to weakened immune systems and susceptibility to disease. The best way
to prevent the spread of disease is not by testing and removing individual cats, but by
6 The Merck Veterinary Manual, Feline Leukemia Virus (2012),
http://www.merckvetmanual.com/mvm/index.jsp?cfile=htm/bc/150225.htm (click on Feline Leukemia
Virus.”) 7 Beatty, J., Markers of Feline Leukaemia Virus Infection or Exposure in Cats from a Region of Low
Seroprevalence (2011) Journal of Feline Medicine and Surgery 13: 927.

124
improving the quality of food, making sure the cats have warm, dry shelter and getting
them altered.
6. The life of a FIV or FeLV positive cat has value, too
At Neighborhood Cats, we euthanize cats only if they are actively ill, suffering and
terminal. We believe all lives, including positive cats, have value. If a feral cat was to
test FIV or FeLV positive, but showed no signs of illness, we would return him to his
colony, anyway. As a result, there’s no point in our testing as a matter of routine. We
only test if the cat will be placed for adoption or is sick and the results are needed for
diagnosis and treatment, including determining whether euthanasia is appropriate.
There have been a few instances when we knowingly returned FIV or FeLV positive
but asymptomatic cats back to their colonies. These colonies were neutered and well
managed. We have yet to observe other cats falling ill as a consequence. Cats who are
known to be positive do need to be closely observed for signs the terminal stage of the
illness has taken hold. Loss of weight, persistent upper respiratory infections, drooling or
difficulty eating indicates the cat should be re-trapped and examined by a veterinarian.
If your veterinarian insists on testing, anyway….
Despite these reasons for not testing every cat, some veterinarians and clinics may
insist upon testing as a condition for using their services or giving you a discount rate. If
that’s the case, then find out before you bring in any cats what their policy is for treating
cats who do test positive. Most of the time, they will not follow up with a more definitive
laboratory test and will euthanize the cat based on the ELISA results alone. If this is the
policy, we recommend you do not work with that particular veterinarian or clinic if you
have any other spay/neuter alternatives. As the caretaker of the colony, the one who
watches over, worries about and feeds the cats on a daily basis, it is your right to decide
their fate. The veterinarian or clinic is there to help you care for the cats, not make life-
or-death decisions for you. Feral cats are not second-class animals and should receive the
same consideration as a pet. No veterinary professional would presume to decide for the
guardian of a pet cat that the animal is going to be euthanized, nor should they do so for
one of your feral wards.

125
14. Recovery & Return
Often people say TNR stands
for “trap-neuter-release,” but the
better and more accurate definition
is “trap-neuter-return.” The cats are
not simply being released randomly.
They’re being returned back to their
own territory – their home. The
difference is important because TNR
is not about letting cats go to fend
for themselves or create new
colonies. It’s about improving the
lives of cats who are already out
there and making them better
neighbors.
Length of recovery period
After their surgeries, the cats should be given time to recuperate before returning
them to their colony. Not only do the cats need time to recover, but also a period of
observation is needed to ensure there are no post-surgical complications, such as
excessive bleeding, lethargy or infection.
Among experienced TNR programs, the normal hold time varies from a minimum of
24 hours to a maximum of 72 hours. Anything less than 24 hours falls below any
generally accepted standard of humane care.
At Neighborhood Cats, we recommend 48 hours for males and 48 to 72 hours for
females, provided they are doing well. For a routine spay, 72 hours is preferred, if
resources permit, because a spay is a more invasive procedure than a neuter and the
additional time can ensure they’re making an optimal recovery. When a mid- to late-term
abortion has been performed as part of the spay, we recommend holding the cat four to
five days. Follow these guidelines for recovery times unless a cat is visibly ill or is being
treated for an injury. In those cases, seek appropriate veterinary care and continue to
hold the cat until the condition is resolved.
On occasion, a cat will not eat for the first 24 hours after surgery. If this occurs, offer
a few other tempting food choices such as Fancy Feast, cooked chicken or tuna. If the cat
is still not eating after another day or so, but otherwise appears fully alert and
asymptomatic, he may not be eating simply because of the stress of confinement and it
could be better to let him go rather than continue to hold him. If the cat is symptomatic,
consult a veterinarian prior to release.
photo: Bryan Kortis
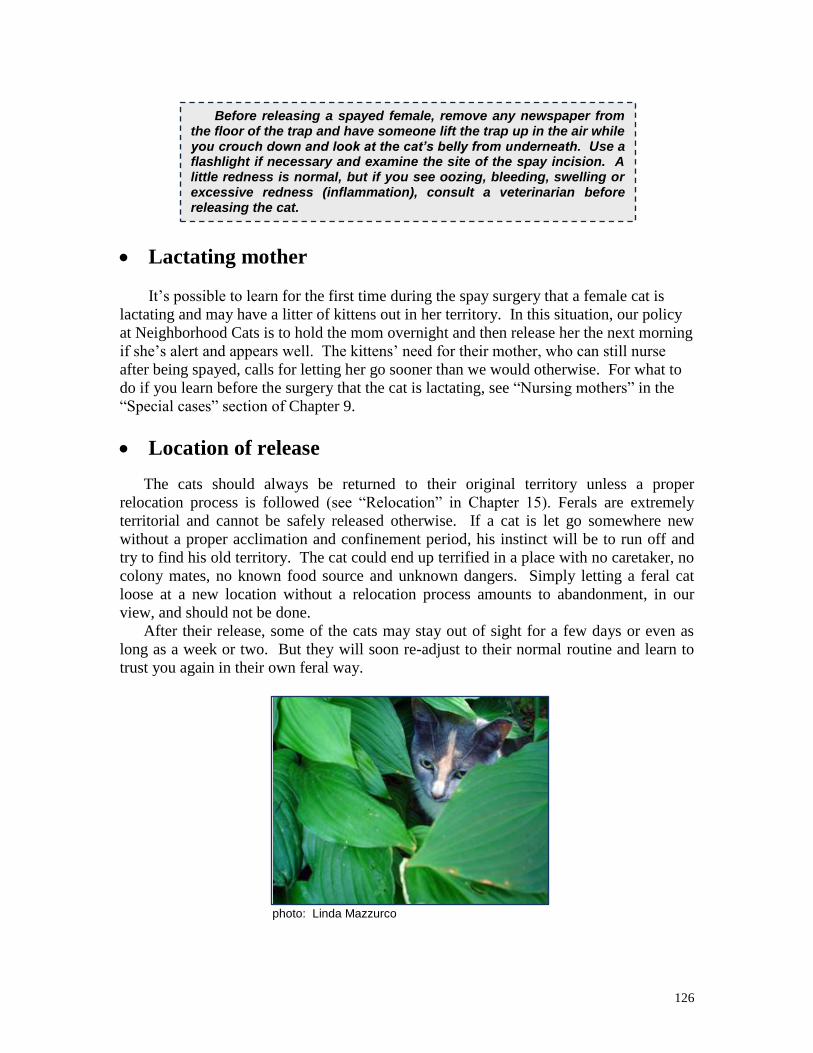
126
Lactating mother
It’s possible to learn for the first time during the spay surgery that a female cat is
lactating and may have a litter of kittens out in her territory. In this situation, our policy
at Neighborhood Cats is to hold the mom overnight and then release her the next morning
if she’s alert and appears well. The kittens’ need for their mother, who can still nurse
after being spayed, calls for letting her go sooner than we would otherwise. For what to
do if you learn before the surgery that the cat is lactating, see “Nursing mothers” in the
“Special cases” section of Chapter 9.
Location of release
The cats should always be returned to their original territory unless a proper
relocation process is followed (see “Relocation” in Chapter 15). Ferals are extremely
territorial and cannot be safely released otherwise. If a cat is let go somewhere new
without a proper acclimation and confinement period, his instinct will be to run off and
try to find his old territory. The cat could end up terrified in a place with no caretaker, no
colony mates, no known food source and unknown dangers. Simply letting a feral cat
loose at a new location without a relocation process amounts to abandonment, in our
view, and should not be done.
After their release, some of the cats may stay out of sight for a few days or even as
long as a week or two. But they will soon re-adjust to their normal routine and learn to
trust you again in their own feral way.
Before releasing a spayed female, remove any newspaper from the floor of the trap and have someone lift the trap up in the air while you crouch down and look at the cat’s belly from underneath. Use a flashlight if necessary and examine the site of the spay incision. A little redness is normal, but if you see oozing, bleeding, swelling or excessive redness (inflammation), consult a veterinarian before releasing the cat.
photo: Linda Mazzurco

127
15. Relocation & Sanctuaries
Relocation
When is relocation appropriate?
When a colony is unmanaged, a crisis
situation will often evolve. The cats’ unchecked
reproduction and the typical nuisance behavior of
unaltered cats can lead to intense hostility from
local residents towards the cats and anyone
associated with their care. Often when caring, but
inexperienced people first encounter this kind of
situation, their initial thought is to move the cats
to a safer place. They don’t understand how
difficult it is to find a safer place, how arduous
and uncertain the process of moving the cats can
be, how important it is to the cats to be able to
stay right where they are and how quickly the
problems can be brought under control by spaying
and neutering.
The cats in a feral colony cherish their
territory. They know their home intimately with
all its pitfalls, shortcuts and hidden passages.
Next to food, their surroundings are the factor most important to their survival. Their
home – inhospitable as the back alley, empty lot or abandoned building may seem to us –
is truly their castle and defines their very existence.
Because their territory and their bonds to one another are so important to the cats,
relocation should be considered only when their location is under clear, imminent threat
and all other alternatives have been considered and exhausted. Most problems can be
solved through TNR. A community’s initial hostility because of noise, odor and endless
litters of kittens is ended by neutering; encroachment in a garden can be easily deterred
with a motion-activated sprinkler; a property owner’s complaint might be addressed by
moving a feeding station further away.
Relocation is hard work with no guarantees of success. First, a suitable new site has
to be found with a new caretaker. Then, to reduce the chance of the cats running away,
they have to be taught their food source has changed and the only way to do this is to
confine them in their new territory for two to three weeks. Otherwise, they’re likely to go
in search of their old stomping grounds. Even with a proper confinement and everything
done by the book, some of the cats may still run away after they’re released.
Another consideration is what will happen in the old territory if the cats are
removed. If food and shelter are still available, sooner or later new cats will move in to
take advantage of these resources and the cycle will begin again. You’ll have simply
created a vacuum and traded one set of cats for another.
photo: Doris Burtner
128
For these reasons, every possible avenue towards allowing the cats to stay should be
thoroughly explored and relocation should be considered only as an absolute last resort.
If the colony lives in an abandoned building that is about to be demolished, first try to
find a nearby location where a new feeding station and shelters can be set up and train the
cats to eat and sleep there. If a cat dies mysteriously and you’re concerned about
poisoning, make sure all the cats are fixed in order to reduce nuisance behavior and post a
“Stop Poisoning” poster around the neighborhood (see Appendix A). If a caretaker
passes away, try to locate a new one in the same area before seeking to move the cats.
Remember that relocation bears its own risks and only when these are clearly outweighed
by the risks of keeping the cats where they are should it be attempted.
Choosing a new site
If you decide relocation is necessary after exploring all the alternatives, the first step
is to find a new site. You don’t have to duplicate the original territory – cats in a
warehouse can be moved to a backyard or from an abandoned building to a barn, etc.
What the new territory does need are: (1) a reliable new caretaker who will strictly follow
the guidelines for relocation and fully accept responsibility for the cats’ long-term care,
(2) a structure of some sort (barn, shed, garage) that will provide shelter and protection
from the elements during the confinement period, and (3) a location away from a
construction site or heavy traffic.
Cats can be relocated into a territory where there is already a colony, but it makes the
process harder for the new cats and should be avoided if possible. Also investigate other
factors, including potential danger from predatory wildlife like coyotes, wolves or dogs,
hostility from nearby neighbors or businesses, proximity to land designated for hunting
and any other potential environmental hazard. It’s likely you won’t find the perfect site
and will have to make some compromises, but it’s always good to aim for the ideal.
Don’t move the cats until you have personally inspected the new location – things are
not always as you might imagine. Not all barns are idyllic, cozy places filled with soft,
warm hay. A nice country home may sound perfect, but if it turns out the caretaker only
goes up on weekends, that won’t work because newly relocated cats need supervision for
two to three weeks, including the providing of food and water on a daily basis. So spend
the extra time and effort to see the prospective new place and meet the caretaker in
person before you bring the cats. Don’t risk receiving an unpleasant surprise and having
to make a terribly difficult decision on the spot after you’ve driven for hours with trapped
and frightened cats in tow.
Along the same lines, never hand the cats over to anyone without inspecting the new
site yourself. No matter how nice the new place may sound and how desperate you are to
move the cats, you are placing them in great danger if you blindly trust that someone else
will take care of everything for you. There are unscrupulous people who take advantage
of others’ concern for the cats and promise they will have a wonderful new life in their
new home when nothing of the sort is true. Sometimes they charge a fee per cat, which
they pocket, and then simply let the cat out the back door of wherever. Others will even
kill the animals out of a pathological belief they are doing a good thing for them, whether
a fee is paid or not. The only way you can protect the cats from these evils is if you
yourself inspect the new location and personally meet the new caretaker.

129
Doing the relocation
Whenever possible, relocate the entire
colony together in order not to break up
their strong bonds. If that’s not feasible,
then at the very least, relocate two
members of the same colony together who
you know are close. A familiar and loved
face in a strange new place can be
comforting and an important factor in
making the transition successful.
Spay/neuter the cats before relocating
them so they can get over the stress of the
surgery before having to adjust to a new
location, and nurse sick or injured cats
back to health first.
The process is going to be a little stressful for everyone, so you want to keep it as
smooth, fast and uneventful as possible. Trap the cats, get them neutered if necessary and
allow a few days for recovery. Also, be sure to tell the new caretaker-to-be the details of
the cats’ past routine. If they’re used to eating a certain type of food, continue with it.
Each change they have to make will add to their stress.
Before you transport the cats to the new site, have everything set up at your
destination. The interior space where the cats will be confined should allow them, once
released, to directly access the new territory on their own. It won’t do much good if the
cats are confined in a basement for three weeks, then have to be carried upstairs to the
backyard in their traps and released. If they can’t get there on their own from the
basement, they won’t learn the backyard is part of the same place.
Inside the space where the cats will be
confined, set up large playpens or cages in
a quiet area, preferably close to a spot
where they can hide after they’re
eventually released. Typically, when they
are released after the two to three week
confinement period, they will be
frightened and need somewhere close by
to hide for a day or two while they adjust.
So, for example, in a large barn, the cages
could be placed near bales of hay. Or in a
garage, cardboard boxes with small
openings for the cats could be set up near the cages. Cages or pens should always be
used unless there is no way for the cats to escape from the confinement space and the
new caretaker can come in and out of the space easily without cats darting past her. The
playpens or cages should contain a feral cat den the cats can hide in, a litter box and food
bowls – see the Feral Cat Setup described in Chapter 12. If dens are too expensive and
you must use carriers, be sure the cat is inside the carrier and the carrier door is barred
photo: Meredith Weiss
Figure 15-1
130
shut before opening the cage door. To bar the door, slide a yardstick, broomstick or the
like through both sides of the cage right in front of the carrier door (Figure 15-1).
The temperature ideally should be moderate, neither too hot nor too cold. In colder
climates, avoid doing a relocation to an unheated space during the severest months of
winter – cats in cages can’t move around much or huddle together, so the cold can pose a
risk to their health. If you must do it during the cold season, place small insulated shelters
inside the cages, such as Styrofoam coolers, that are stuffed with straw and cover the
cages with blankets. If insulated shelters are used instead of feral cat dens or carriers, the
caretaker must be very careful when opening the cage door and should wait until the cat
is inside his shelter and shows no signs of coming out.
No matter what the weather, the cats may try to escape, especially during the first few
days. Be certain the caretaker knows the procedures for how to handle feral cats in cages
and demonstrate them live. The cats need fresh food and water twice a day and clean
litter, so the cage door will be opened often, giving them lots of opportunities to make a
run for it if they’re not shut into their dens or carriers. In case of escape, have the
caretaker set out food and water near the cage or playpen and, in a barn or similar setting
where it’s possible, sprinkle used litter and old feces around the area to create a familiar
scent. Most likely an escaped cat inside a structure like a barn or stable will stay inside
and hide rather than seek the outdoors, especially if sufficient food is available close by.
Encourage the caretaker to talk to the cats and try to bond with them. They need to
adjust to a new voice or voices as well as everything else that’s new. If the cats form a
degree of trust and bond with the caretaker, the relocation process has a good chance of
success. Keeping their feeding times on a schedule is helpful, as is feeding wet food
during the period of confinement and for a few additional weeks after they’re released.
The wet food is consumed faster than the dry and helps habituate the cats to a new
routine. Gradually, a few weeks after the release, the wet food can be replaced or
supplemented with dry, if that’s preferable. At all times, water should be provided.
Three weeks of confinement is optimal. Keeping the cats confined for longer periods
is not recommended. The idea is to acclimate the cats to their new surroundings so they
won’t panic upon release. Once acclimation is accomplished, the stress of confinement is
unnecessary and can cause the cat to want to flee the area if carried on for too long.
Stay in touch with the new caretaker. You’ll want to know how the cats are doing and
be available to offer any help or advice based on your experience with them. If at any
time the relocation space becomes unsafe or unsuitable for the cats, make sure the
caretaker alerts you to the situation and knows you are willing to give support and
assistance. Whenever possible, have a backup plan – another site where the cats may go,
even temporarily – in case of unsolvable problems.
Remember to try to remove all evidence of feral life from the colony’s old location,
primarily any food sources. Even if construction or renovation in the area is imminent,
it’s possible for new cats to move into the vacuum created by the removal of the original
cats. You don’t want to go through this process all over again!
131
Sanctuaries
Finding a good sanctuary to accept your cats is a difficult task. The problem is plain:
there are millions of feral cats and only a handful of well-run, trustworthy sanctuaries.
There is rarely space available in one for even a single feral cat, let alone an entire
colony.
To place an animal in anything less than a stable, reputable sanctuary would be
irresponsible. Unfortunately, poorly run “sanctuaries” are abundant. They may be run by
people with good motivations, but usually lack sufficient staff, space or funds to sustain a
resource-intensive, long-term commitment like a sanctuary. These places can and often
do turn into hoarding situations where far too many animals are taken in, then neglected
and subjected to horrible conditions. If you hear about a place which keeps taking in
large numbers of feral cats, seemingly saying yes to anyone who asks, that’s a red flag
indicating something is probably very wrong. There are also, sadly, a few groups and
individuals who pretend to have sanctuaries and lie to people desperate to find a place for
ferals. They take donations for the cats and then either have them put down or warehouse
them in poor conditions.
Just like a relocation, the only way you can ensure your cats are going to a good place
and not a horror show is to investigate the sanctuary yourself. As the person responsible
for the lives of the cats, it’s up to you to exercise your own independent judgment.
Most importantly, you should personally visit the facility to make an on-site
inspection, preferably before you bring the cats. If the place is well run, they’ll be happy
to take you on a tour of the entire sanctuary. If they won’t let you past the front door,
that’s another red flag. While you’re there, ask lots of questions – again, if a place is well
run, the people in charge will be happy to tell you anything you want to know. If they
resent your questions or give less than complete answers, take this as a strong sign it’s
not going to be a good home for your cats.
To be a long-term, stable situation, a sanctuary must have a strong legal and financial
foundation. Here’s what you need to find out about these conditions:
1) Is the facility operating legally? Is a license required by the town, county or state
for running a shelter or sanctuary? If so, do they have one and is it current? Ask to
see it and call the licensing authority to verify information you’re given. Also
important is whether the property is zoned for sheltering large numbers of animals. If
zoning is a problem or if a license is needed but missing, reject the place.
2) What kind of right does the sanctuary have to the land? Do they own or lease it?
If it’s owned, is there an outstanding mortgage and if so, for how much? If it’s
leased, how long is the term? Does the lease allow for a sanctuary? Again, don’t be
afraid to ask to see the documentation. Cats can live to twenty years, and you need to
know the sanctuary is going to be around for that long. If the lease runs out soon or
the mortgage payments are large enough they may become a challenge to pay at some
point, what do the owners plan to do with the animals if they can’t stay?
3) Is the sanctuary in good standing with local authorities? Call the local health
department to see if there have been violations. The local animal control or law

132
enforcement agency will tell you if any complaints for cruelty or neglect have been
filed. A call to the Better Business Bureau or Chamber of Commerce may be
informative as well. Most states have some type of charity bureau that provides
oversight for nonprofits. It’s often part of the Attorney General’s Office.
4) How is the sanctuary funded? It takes a great deal of money to run a good
sanctuary, between mortgage or lease payments, staff, veterinary bills, property
upkeep and food. This is why almost all well-run sanctuaries will require a
substantial donation per cat from you. If they don’t, this could be a red flag and you
need to thoroughly investigate how they are funded. Preferably, the facility will be a
nonprofit registered with the state and the IRS. If so, request a recent financial
statement. You can always look up the agency, if it’s a 501c3 nonprofit, on Guidestar
(www.guidestar.org) and see their latest tax forms (form 990’s). The 990 form will
list the agency’s revenue, expenses, assets and liabilities. If the sanctuary is not run
by an IRS approved nonprofit, find out who pays the bills and how long have they
been doing it. Remember it’s much harder for someone to raise funds if they are not
part of a nonprofit.
If you determine that on balance, the sanctuary is on sound legal and financial
footing, you’ll still need to inspect the actual physical facility. Pay close attention to your
first impression when you initially walk in. Does the place appear to be friendly and
adequately staffed for the number of cats they’re housing? Is there literature describing
the facility? Walk around the whole place – not just the part where the feral cats live –
and see if the living conditions for the animals are clean and spacious as opposed to
crowded and unsanitary. Are the facilities warm and dry? Are sick cats kept separated?
How do they go about adding a new cat – is there a transition period and separate
enclosure within the larger space (as there should be) or do they just toss them right in (as
they shouldn’t)? A transition period of at least two weeks in a confined space is critical if
the ferals will have access to outdoor grounds that are not enclosed.
Find out if the sanctuary staff is sensitive to the special needs of ferals and
understands they’re not just “scaredy-cats.” Look to see that there are lots of places for
the ferals to hide and all the cats have plenty of scratching posts, toys and comfortable
napping places. Ask what kind of food they use and how often the cats are fed. Make
sure the animals look bright-eyed and healthy. Other questions to ask include: How do
they handle sick cats – are there veterinary services available on site? What is their
euthanasia policy? Do they have a cap on the number of cats they’ll take in? Do they
have a relocation program for ferals where they will send a number of them to a barn or
the like? If so, what are the guidelines and will your cats possibly be included?
Once you’ve inspected the grounds and gotten the answers to all your questions, you
can now make a well-informed decision on whether this is going to be a responsible,
healthy place where your cats will live in comfort and have a good chance of leading a
happy life. If you’re not satisfied, don’t settle but keep looking for other alternatives. As
the cats’ sole guardian, you’ll be at peace knowing you’ve done all you can to ensure
their future well-being.
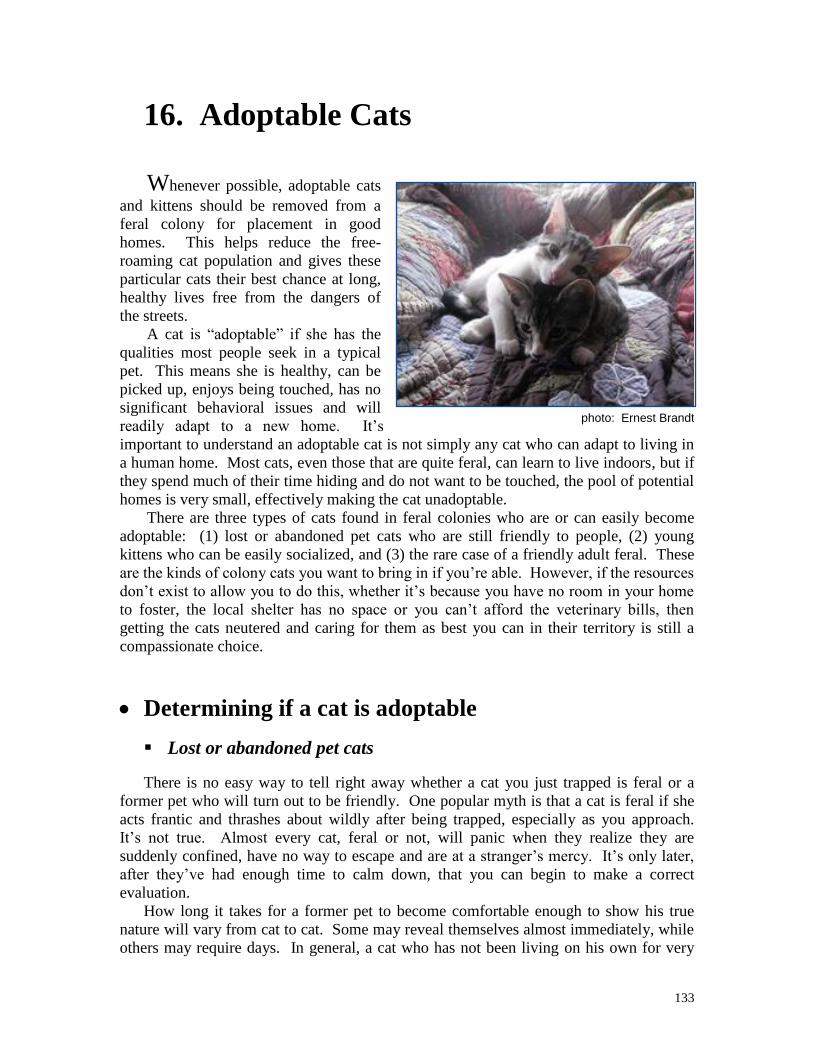
133
16. Adoptable Cats
Whenever possible, adoptable cats
and kittens should be removed from a
feral colony for placement in good
homes. This helps reduce the free-
roaming cat population and gives these
particular cats their best chance at long,
healthy lives free from the dangers of
the streets.
A cat is “adoptable” if she has the
qualities most people seek in a typical
pet. This means she is healthy, can be
picked up, enjoys being touched, has no
significant behavioral issues and will
readily adapt to a new home. It’s
important to understand an adoptable cat is not simply any cat who can adapt to living in
a human home. Most cats, even those that are quite feral, can learn to live indoors, but if
they spend much of their time hiding and do not want to be touched, the pool of potential
homes is very small, effectively making the cat unadoptable.
There are three types of cats found in feral colonies who are or can easily become
adoptable: (1) lost or abandoned pet cats who are still friendly to people, (2) young
kittens who can be easily socialized, and (3) the rare case of a friendly adult feral. These
are the kinds of colony cats you want to bring in if you’re able. However, if the resources
don’t exist to allow you to do this, whether it’s because you have no room in your home
to foster, the local shelter has no space or you can’t afford the veterinary bills, then
getting the cats neutered and caring for them as best you can in their territory is still a
compassionate choice.
Determining if a cat is adoptable
Lost or abandoned pet cats
There is no easy way to tell right away whether a cat you just trapped is feral or a
former pet who will turn out to be friendly. One popular myth is that a cat is feral if she
acts frantic and thrashes about wildly after being trapped, especially as you approach.
It’s not true. Almost every cat, feral or not, will panic when they realize they are
suddenly confined, have no way to escape and are at a stranger’s mercy. It’s only later,
after they’ve had enough time to calm down, that you can begin to make a correct
evaluation.
How long it takes for a former pet to become comfortable enough to show his true
nature will vary from cat to cat. Some may reveal themselves almost immediately, while
others may require days. In general, a cat who has not been living on his own for very
photo: Ernest Brandt
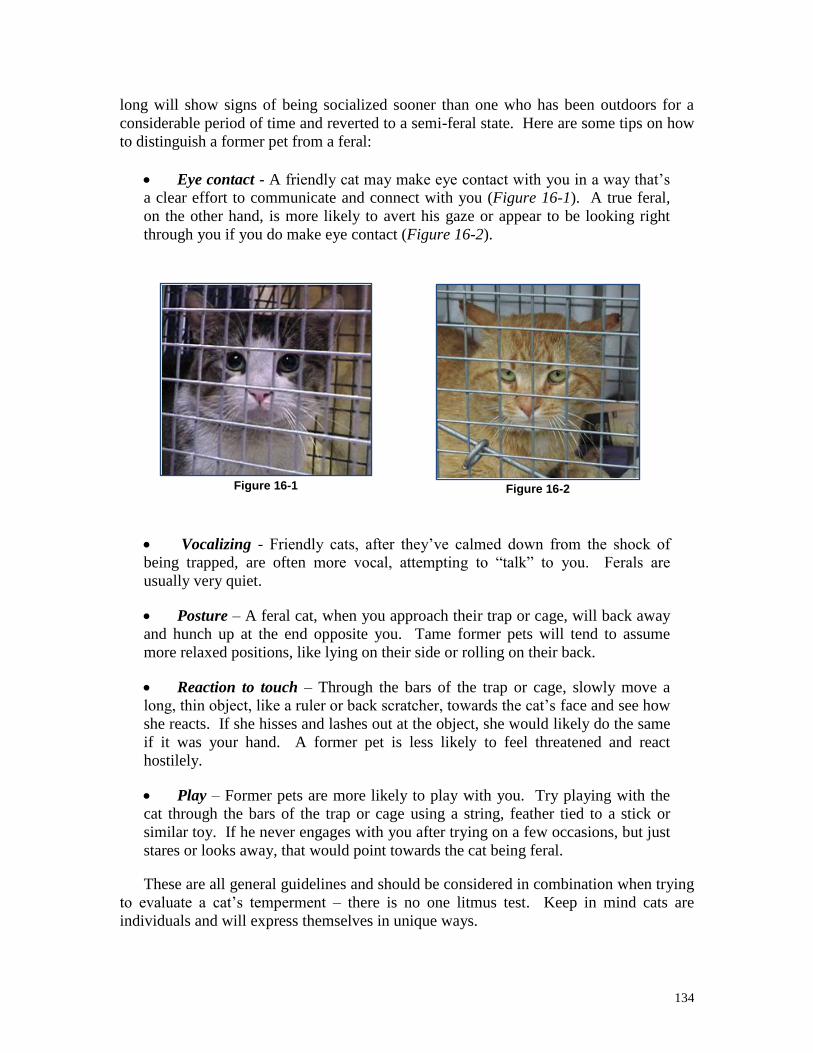
134
long will show signs of being socialized sooner than one who has been outdoors for a
considerable period of time and reverted to a semi-feral state. Here are some tips on how
to distinguish a former pet from a feral:
Eye contact - A friendly cat may make eye contact with you in a way that’s
a clear effort to communicate and connect with you (Figure 16-1). A true feral,
on the other hand, is more likely to avert his gaze or appear to be looking right
through you if you do make eye contact (Figure 16-2).
Vocalizing - Friendly cats, after they’ve calmed down from the shock of
being trapped, are often more vocal, attempting to “talk” to you. Ferals are
usually very quiet.
Posture – A feral cat, when you approach their trap or cage, will back away
and hunch up at the end opposite you. Tame former pets will tend to assume
more relaxed positions, like lying on their side or rolling on their back.
Reaction to touch – Through the bars of the trap or cage, slowly move a
long, thin object, like a ruler or back scratcher, towards the cat’s face and see how
she reacts. If she hisses and lashes out at the object, she would likely do the same
if it was your hand. A former pet is less likely to feel threatened and react
hostilely.
Play – Former pets are more likely to play with you. Try playing with the
cat through the bars of the trap or cage using a string, feather tied to a stick or
similar toy. If he never engages with you after trying on a few occasions, but just
stares or looks away, that would point towards the cat being feral.
These are all general guidelines and should be considered in combination when trying
to evaluate a cat’s temperment – there is no one litmus test. Keep in mind cats are
individuals and will express themselves in unique ways.
Figure 16-1 Figure 16-2
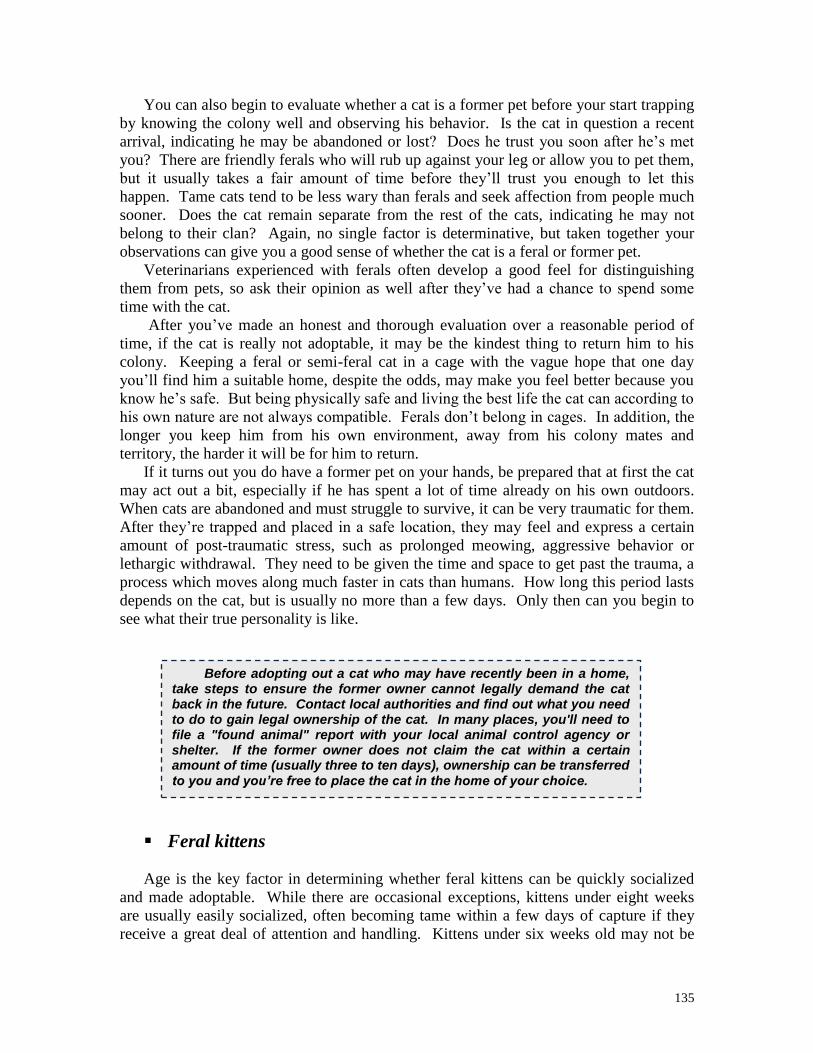
135
You can also begin to evaluate whether a cat is a former pet before your start trapping
by knowing the colony well and observing his behavior. Is the cat in question a recent
arrival, indicating he may be abandoned or lost? Does he trust you soon after he’s met
you? There are friendly ferals who will rub up against your leg or allow you to pet them,
but it usually takes a fair amount of time before they’ll trust you enough to let this
happen. Tame cats tend to be less wary than ferals and seek affection from people much
sooner. Does the cat remain separate from the rest of the cats, indicating he may not
belong to their clan? Again, no single factor is determinative, but taken together your
observations can give you a good sense of whether the cat is a feral or former pet.
Veterinarians experienced with ferals often develop a good feel for distinguishing
them from pets, so ask their opinion as well after they’ve had a chance to spend some
time with the cat.
After you’ve made an honest and thorough evaluation over a reasonable period of
time, if the cat is really not adoptable, it may be the kindest thing to return him to his
colony. Keeping a feral or semi-feral cat in a cage with the vague hope that one day
you’ll find him a suitable home, despite the odds, may make you feel better because you
know he’s safe. But being physically safe and living the best life the cat can according to
his own nature are not always compatible. Ferals don’t belong in cages. In addition, the
longer you keep him from his own environment, away from his colony mates and
territory, the harder it will be for him to return.
If it turns out you do have a former pet on your hands, be prepared that at first the cat
may act out a bit, especially if he has spent a lot of time already on his own outdoors.
When cats are abandoned and must struggle to survive, it can be very traumatic for them.
After they’re trapped and placed in a safe location, they may feel and express a certain
amount of post-traumatic stress, such as prolonged meowing, aggressive behavior or
lethargic withdrawal. They need to be given the time and space to get past the trauma, a
process which moves along much faster in cats than humans. How long this period lasts
depends on the cat, but is usually no more than a few days. Only then can you begin to
see what their true personality is like.
Feral kittens
Age is the key factor in determining whether feral kittens can be quickly socialized
and made adoptable. While there are occasional exceptions, kittens under eight weeks
are usually easily socialized, often becoming tame within a few days of capture if they
receive a great deal of attention and handling. Kittens under six weeks old may not be
Before adopting out a cat who may have recently been in a home, take steps to ensure the former owner cannot legally demand the cat back in the future. Contact local authorities and find out what you need to do to gain legal ownership of the cat. In many places, you'll need to file a "found animal" report with your local animal control agency or shelter. If the former owner does not claim the cat within a certain amount of time (usually three to ten days), ownership can be transferred to you and you’re free to place the cat in the home of your choice.
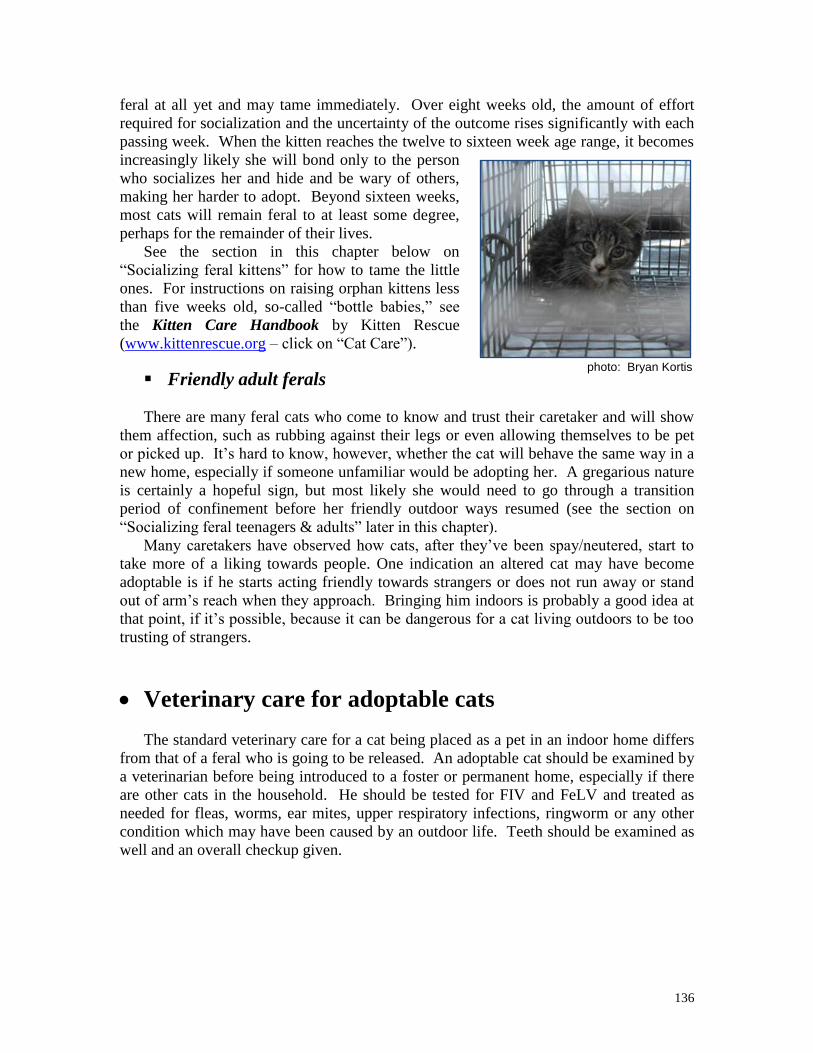
136
feral at all yet and may tame immediately. Over eight weeks old, the amount of effort
required for socialization and the uncertainty of the outcome rises significantly with each
passing week. When the kitten reaches the twelve to sixteen week age range, it becomes
increasingly likely she will bond only to the person
who socializes her and hide and be wary of others,
making her harder to adopt. Beyond sixteen weeks,
most cats will remain feral to at least some degree,
perhaps for the remainder of their lives.
See the section in this chapter below on
“Socializing feral kittens” for how to tame the little
ones. For instructions on raising orphan kittens less
than five weeks old, so-called “bottle babies,” see
the Kitten Care Handbook by Kitten Rescue
(www.kittenrescue.org – click on “Cat Care”).
Friendly adult ferals
There are many feral cats who come to know and trust their caretaker and will show
them affection, such as rubbing against their legs or even allowing themselves to be pet
or picked up. It’s hard to know, however, whether the cat will behave the same way in a
new home, especially if someone unfamiliar would be adopting her. A gregarious nature
is certainly a hopeful sign, but most likely she would need to go through a transition
period of confinement before her friendly outdoor ways resumed (see the section on
“Socializing feral teenagers & adults” later in this chapter).
Many caretakers have observed how cats, after they’ve been spay/neutered, start to
take more of a liking towards people. One indication an altered cat may have become
adoptable is if he starts acting friendly towards strangers or does not run away or stand
out of arm’s reach when they approach. Bringing him indoors is probably a good idea at
that point, if it’s possible, because it can be dangerous for a cat living outdoors to be too
trusting of strangers.
Veterinary care for adoptable cats
The standard veterinary care for a cat being placed as a pet in an indoor home differs
from that of a feral who is going to be released. An adoptable cat should be examined by
a veterinarian before being introduced to a foster or permanent home, especially if there
are other cats in the household. He should be tested for FIV and FeLV and treated as
needed for fleas, worms, ear mites, upper respiratory infections, ringworm or any other
condition which may have been caused by an outdoor life. Teeth should be examined as
well and an overall checkup given.
photo: Bryan Kortis
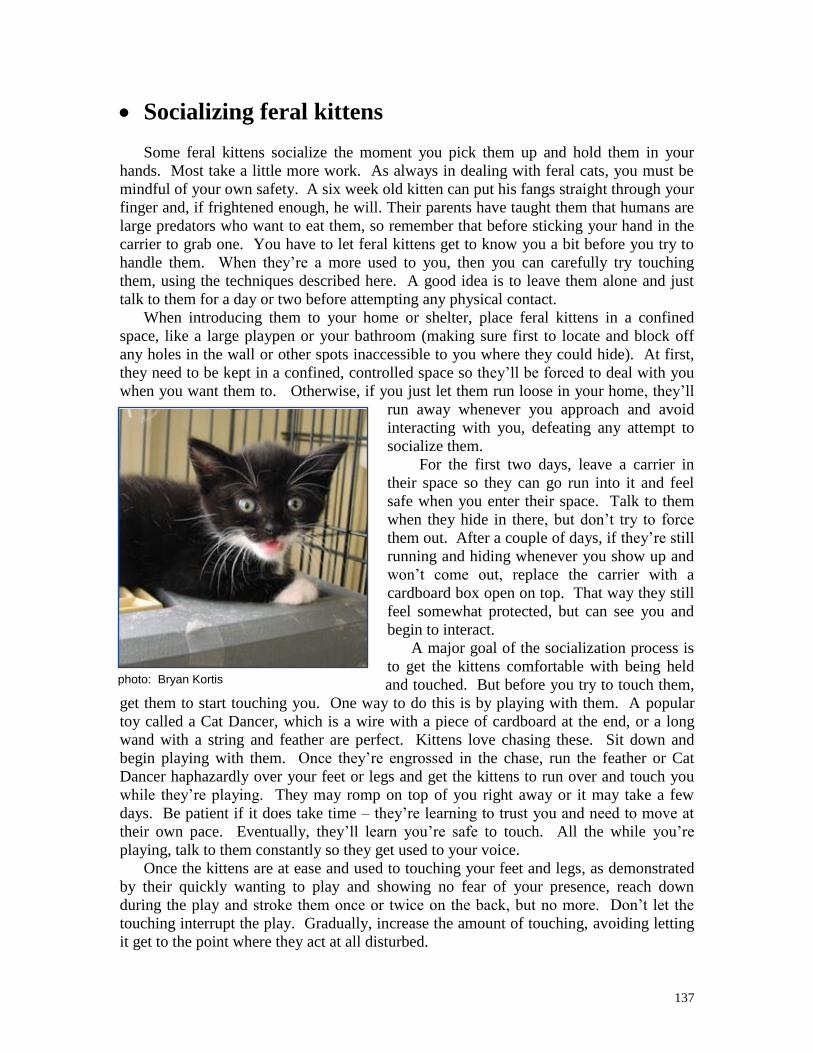
137
Socializing feral kittens
Some feral kittens socialize the moment you pick them up and hold them in your
hands. Most take a little more work. As always in dealing with feral cats, you must be
mindful of your own safety. A six week old kitten can put his fangs straight through your
finger and, if frightened enough, he will. Their parents have taught them that humans are
large predators who want to eat them, so remember that before sticking your hand in the
carrier to grab one. You have to let feral kittens get to know you a bit before you try to
handle them. When they’re a more used to you, then you can carefully try touching
them, using the techniques described here. A good idea is to leave them alone and just
talk to them for a day or two before attempting any physical contact.
When introducing them to your home or shelter, place feral kittens in a confined
space, like a large playpen or your bathroom (making sure first to locate and block off
any holes in the wall or other spots inaccessible to you where they could hide). At first,
they need to be kept in a confined, controlled space so they’ll be forced to deal with you
when you want them to. Otherwise, if you just let them run loose in your home, they’ll
run away whenever you approach and avoid
interacting with you, defeating any attempt to
socialize them.
For the first two days, leave a carrier in
their space so they can go run into it and feel
safe when you enter their space. Talk to them
when they hide in there, but don’t try to force
them out. After a couple of days, if they’re still
running and hiding whenever you show up and
won’t come out, replace the carrier with a
cardboard box open on top. That way they still
feel somewhat protected, but can see you and
begin to interact.
A major goal of the socialization process is
to get the kittens comfortable with being held
and touched. But before you try to touch them,
get them to start touching you. One way to do this is by playing with them. A popular
toy called a Cat Dancer, which is a wire with a piece of cardboard at the end, or a long
wand with a string and feather are perfect. Kittens love chasing these. Sit down and
begin playing with them. Once they’re engrossed in the chase, run the feather or Cat
Dancer haphazardly over your feet or legs and get the kittens to run over and touch you
while they’re playing. They may romp on top of you right away or it may take a few
days. Be patient if it does take time – they’re learning to trust you and need to move at
their own pace. Eventually, they’ll learn you’re safe to touch. All the while you’re
playing, talk to them constantly so they get used to your voice.
Once the kittens are at ease and used to touching your feet and legs, as demonstrated
by their quickly wanting to play and showing no fear of your presence, reach down
during the play and stroke them once or twice on the back, but no more. Don’t let the
touching interrupt the play. Gradually, increase the amount of touching, avoiding letting
it get to the point where they act at all disturbed.
photo: Bryan Kortis

138
When they’re very
comfortable with your petting
them, which again can take a few
days, you can start to pick them
up. Once again, escalate the
contact slowly. At first, only lift
them up off the ground for a
second or two. When they’re ok
with that, hold them a bit longer.
Eventually, place them on your
lap, but don’t force them to stay
there if they want to jump off.
Continue increasing contact until
they’re lying in your lap and purring as you stroke them. The length of this process –
from physical contact during play to petting to holding at length – will depend on the
temperament and age of the kitten. It’s an excellent strategy, if you’re able, to involve
more than one person in the process so the kittens don’t socialize only to yourself. Once
others can hold them and they enjoy it, the socialization is complete.
Another technique besides play for teaching feral kittens to touch and be touched is
bribing them with food. Start off putting some very smelly and tasty food, like tuna, on
the ground and let them eat it undisturbed while you remain at a distance. Next time,
place your hand a foot or so away. Let the kittens come and eat the tuna without moving
your hand. Each time you put the food down, move your hand a little closer. After the
kittens are eating with your hand only inches away, start putting the tuna on the tip of
your finger, hold it out and let them lick it off. Once they’re doing that, then sit on the
floor and put the tuna on your knee (while wearing pants). After they’ve gotten
comfortable eating while touching you, put the food on a plate in your lap. When they’re
fearlessly standing on your leg and eating off a plate in your lap, you can start touching
them. Just as with the play method, start slowly with a brief stroke or two and gradually
increase the amount of contact until you’re able to hold and lift them.
With a particularly wild kitten who resists these methods, try wrapping him in a towel
(to immobilize him), then put him in your lap and pet him on the head and over the towel.
Start off doing this briefly and, over the course of several days, slowly increase the time
period he’s held. When he’s comfortable and appears to enjoy the touching, then you can
try doing it without the towel.
Another method for very wild kittens is to start them off in a smaller cage (like 36" L
x 21" W x 24" H) instead of a larger space like a big play pen or bathroom. Put a litter
box and a small, open cardboard box inside the cage and some toys. Once the kitten is
used to his surroundings, which may take a day or two, use a back scratcher or a long,
soft-haired paint brush to reach through the bars and touch him. He may hiss and react
poorly at first, but eventually he’ll realize it feels good and start to purr. At this point,
you can try using your fingers through the bars, though be on the alert in case he tries to
scratch you. Play with the kitten through the bars, too, with a Cat Dancer or similar toy
and give him lots of little treats – anything that gives him a positive association with you
is good. Eventually, when trust has been built up, move the kitten into a confined space
like the bathroom and start using the play and food techniques described earlier.
photo: Meredith Weiss
139
The more contact feral kittens have with you, the faster they will socialize. This is
very important at the beginning of the socialization process when the kittens, especially
the younger ones, may identify you as their surrogate parent. So play, feed and talk with
them as often as you can. Interacting with them for short periods several times a day is
better than being with them for one long period and then leaving them alone the rest of
the time. As mentioned, it’s helpful with feral kittens to have multiple people handle
them. This way, you avoid the risk of having them only socialize to you and not become
adoptable to others. This risk is higher with feral kittens older than eight weeks so it’s
especially important with that age group to have more than one person involved in the
socialization process.
Even young kittens who quickly learn to become house cats will usually still retain
some feral characteristics. They may be extra sensitive to changes in their environment
or have more than the usual fear of leaving their territory, like when taken to the
veterinarian. If you move and their territory changes, they may at first revert to feral
behavior. It’s best to anticipate these reactions and take steps to lessen the cat’s stress.
For example, if you move, don’t let your former feral loose right away into the whole
house, but start him off in one room and give him a nice quiet place to hide. When he’s
gotten used to things and acts comfortable in the confined space, then you can give him
the run of the house.
Socializing feral teenagers & adults
Should you try?
Socializing a feral cat over sixteen weeks old can be a time-consuming, difficult task
with uncertain results. Past the age of sixteen weeks, the older the cat, the more likely he
will socialize only to a certain degree and then only to the person taming him. This of
course can make him difficult to adopt. If a potential adopter has a choice between an
eight week old kitten who curls up in her lap purring the first time they meet or a four
month old feral kitten who you know is a lovely creature but who hides when the adopter
comes over or scrambles to get out of her grasp, you can see the problem.
Even if you decide you’re up for the challenge, there are several other factors to
consider before attempting to socialize a feral teenager or adult.
The first question to think about is what is your plan for placement of the cat? If you
personally are going to adopt her and can accept she may or may not ever become a pet in
the traditional sense – one you can pick up, hold, etc. – then bringing her indoors will
likely work out just fine. On the other hand, if your goal is to totally tame the cat so
someone as yet unknown will want to adopt her, that’s much more difficult to achieve. If
the cat does not socialize enough, which is very likely, you may end up with another cat
in your own household.
For more ideas, see the step-by-step guide on taming feral kittens by the Feral Cat Coalition of San Diego, CA: www.feralcat.com/taming.html
140
Before removing a cat from a colony, you also need to assess the colony’s social
structure. Feral cats have complex relationships with each other. Couples may form and
last a lifetime. There are also hierarchies with dominant and submissive roles.
Removing a cat from the colony can upset this balance, plus you may be depriving the cat
of her closest ties. It’s important to try to get to know the colony well before making a
decision.
Another factor is whether the colony is relatively safe or facing impending danger.
Will their site be destroyed by new construction? Have there been incidents of violence
towards the cats, even after they’ve been spay/neutered? There are almost always some
risks present in an outdoor setting, so you need to be realistic about whether the situation
warrants trying to re-home at least some of the cats. The presence of undue danger would
weigh in favor of introducing a feral to the indoor life, while a secure situation might tend
towards leaving well enough alone.
Finally, what about the cat himself? Is he old? Alone? Handicapped? Sometimes a
feral cat does well in his territory for many years, but as he gets on in age, can’t handle
the rigors of living outdoors like he used to. A comfortable retirement in someone’s
warm home could be just what’s needed.
If none of these factors point towards bringing in a feral, it may be best to allow the
cat to remain in a setting that suits his nature and which he already considers his home.
Socialization techniques for feral teenagers & adults
There are experts at socializing ferals sixteen weeks and older who will work with
them intensively for however long it takes, even a year or more, in order to completely
tame them and make them fully adoptable. These people tend to have years of
experience, work in shelter settings and are extremely dedicated.
For the caretaker who does not have the same kind of time or expertise, the objective
in socializing a feral, especially if she is well beyond four or five months old, is more
limited. The goal usually is not to transform the cat into a traditional pet who can be
picked up, stroked and enjoys being around most people. Instead, a more realistic aim is
to teach her how to adjust and feel comfortable in a human home and not hide and be in
fear for years to come. Beyond this, how far the cat progresses towards being a normal
house cat will largely be up to her, not you or whoever takes her in. One day she may
decide you’re ok and come and sit next to you on the couch, letting you pet her. But this
may take years, if ever. This uncertainty must be accepted at the outset or the experience
can be a frustrating one - for you because the cat is not acting like you want and for the
cat because she’ll sense your frustration and not feel at ease. More than anything,
socializing an adult feral means learning to appreciate and love her for who she is, and
allowing her to develop as she chooses.
The key to a successful socialization is how the feral is introduced into her new home.
All too often, people let the cat loose right away with the predictable result that she finds
some obscure, unreachable place to hide, then only comes out late at night to eat. If not
addressed, this pattern can go unchanged for years. The way to prevent this is to start the
cat off in a cage for a period of two to four weeks, using the Feral Cat Setup described in
Chapter 12.
141
The Feral Cat Setup gives the cat a place where she feels safe, which is essential. In
unfamiliar settings, a feral cat prefers to be in a covered, enclosed space rather than a
wide-open one. That’s why if you just let them loose straight off, they’ll go run under the
bed or into the closet and stay there. By starting the cat off in a cage, you choose their
hiding spot, not the cat. This gives you control over the situation and the socialization
process, which includes establishing a regular feeding pattern and training the cat to use a
litter box. It also gives the cat a sense of security because she’ll soon learn she’s safe
when she’s in the cage and, in her mind, protected from you by the bars. Keeping the
back half of the cage covered at all times with a sheet will increase her sense of comfort.
The cage should be placed in a part of the home neither too isolated nor too busy.
This gives the cat an opportunity to learn the new sights and sounds of a human home
without becoming overwhelmed. Remember, she has never heard a phone ring or
smelled dinner being prepared. By being in a well-situated cage, she’ll also be able to
watch you and learn your patterns – such as the fact that you won’t attack her when you
walk by. Learning all these little things are crucial to the socialization process and won’t
necessarily happen if you simply let the cat run and hide anywhere she wants.
You and any others in the household should talk to the cat often so she learns to know
and trust your voices. This period in the cage also allows the feral to get to know and
become comfortable with any other resident cats, who can interact with her through the
bars of the cage.
The cat should be kept in the cage until she grows visibly comfortable in your
presence, but no less than two weeks. The desired comfort level is evidenced by the cat
no longer darting into the feral cat den whenever you walk into the room. Instead, she’ll
remain perched on top of the den or lying on the cage floor. She’ll also, when you put
food in the cage, come out to eat while you’re still in the room rather than waiting until
you’re gone. A minimum of two weeks may seem like a long time to confine a cat in a
cage, but considering this early process will shape the cat’s relationship with you for
years to come, it’s well worth it.
Once the cat is comfortable in your presence, leave the door of the cage open one
night before you go to sleep, but don’t change anything else. Above all, don’t try to coax
or force the cat out of the cage. Just casually leave the door open and let her come and go
as she pleases. Do this at night before you go to bed because she’ll feel safer venturing
out for the first time when it’s quiet and dark. If you discover the next day that she’s out
and about, do not take the cage away but leave it just as it’s always been. This is her safe
spot and often the cat will continue to use the cage for some time to sleep and for using
the litter box. You should continue to feed in the cage as well.
If four weeks have passed since the cat was first confined in the cage and she is not
acting at ease, open the door anyway as described. Past a month, the stress of
confinement can take away from whatever progress towards socialization the cat has
made. It’s better at that point to let her out.
When the cat no longer uses the cage as a refuge and can be easily fed elsewhere, the
transition into your home is complete. That’s not to say the cat is going to jump into your
arms when you approach. Instead, for a while, she’ll probably head the other way. She
has to learn to adapt to the entire home which will take time and may cause her to
temporarily regress a bit in her behavior. But many of her initial fears have been
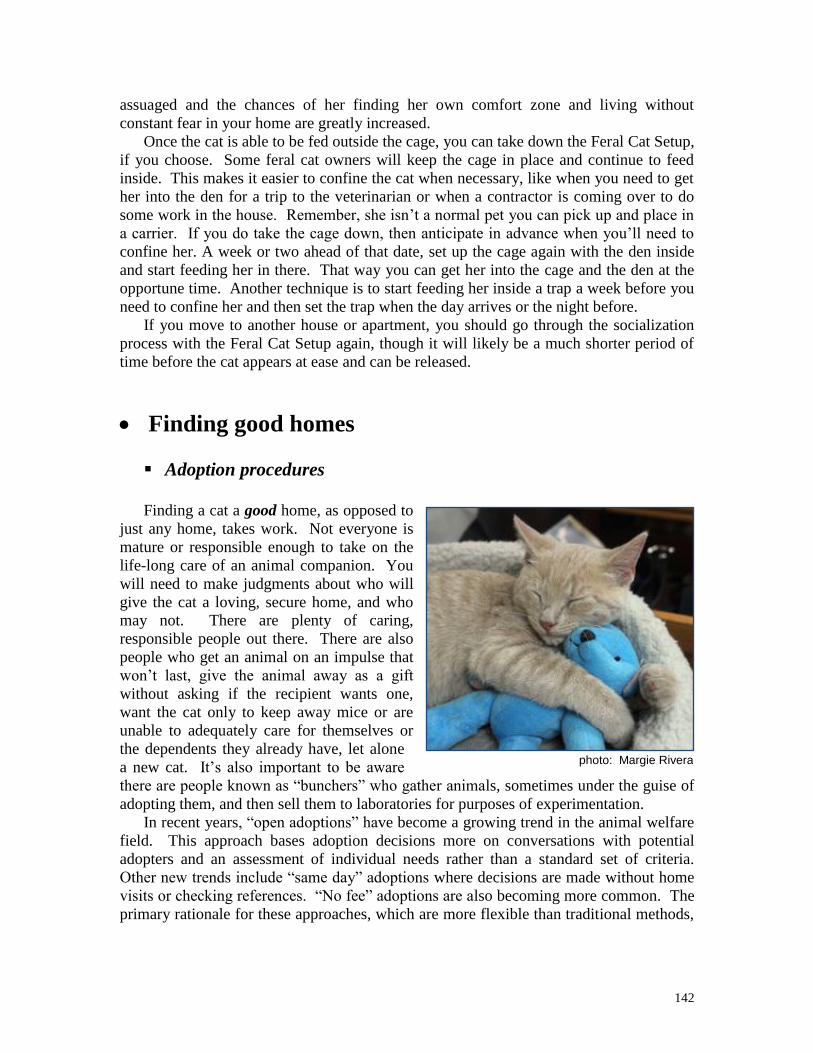
142
assuaged and the chances of her finding her own comfort zone and living without
constant fear in your home are greatly increased.
Once the cat is able to be fed outside the cage, you can take down the Feral Cat Setup,
if you choose. Some feral cat owners will keep the cage in place and continue to feed
inside. This makes it easier to confine the cat when necessary, like when you need to get
her into the den for a trip to the veterinarian or when a contractor is coming over to do
some work in the house. Remember, she isn’t a normal pet you can pick up and place in
a carrier. If you do take the cage down, then anticipate in advance when you’ll need to
confine her. A week or two ahead of that date, set up the cage again with the den inside
and start feeding her in there. That way you can get her into the cage and the den at the
opportune time. Another technique is to start feeding her inside a trap a week before you
need to confine her and then set the trap when the day arrives or the night before.
If you move to another house or apartment, you should go through the socialization
process with the Feral Cat Setup again, though it will likely be a much shorter period of
time before the cat appears at ease and can be released.
Finding good homes
Adoption procedures
Finding a cat a good home, as opposed to
just any home, takes work. Not everyone is
mature or responsible enough to take on the
life-long care of an animal companion. You
will need to make judgments about who will
give the cat a loving, secure home, and who
may not. There are plenty of caring,
responsible people out there. There are also
people who get an animal on an impulse that
won’t last, give the animal away as a gift
without asking if the recipient wants one,
want the cat only to keep away mice or are
unable to adequately care for themselves or
the dependents they already have, let alone
a new cat. It’s also important to be aware
there are people known as “bunchers” who gather animals, sometimes under the guise of
adopting them, and then sell them to laboratories for purposes of experimentation.
In recent years, “open adoptions” have become a growing trend in the animal welfare
field. This approach bases adoption decisions more on conversations with potential
adopters and an assessment of individual needs rather than a standard set of criteria.
Other new trends include “same day” adoptions where decisions are made without home
visits or checking references. “No fee” adoptions are also becoming more common. The
primary rationale for these approaches, which are more flexible than traditional methods,
photo: Margie Rivera
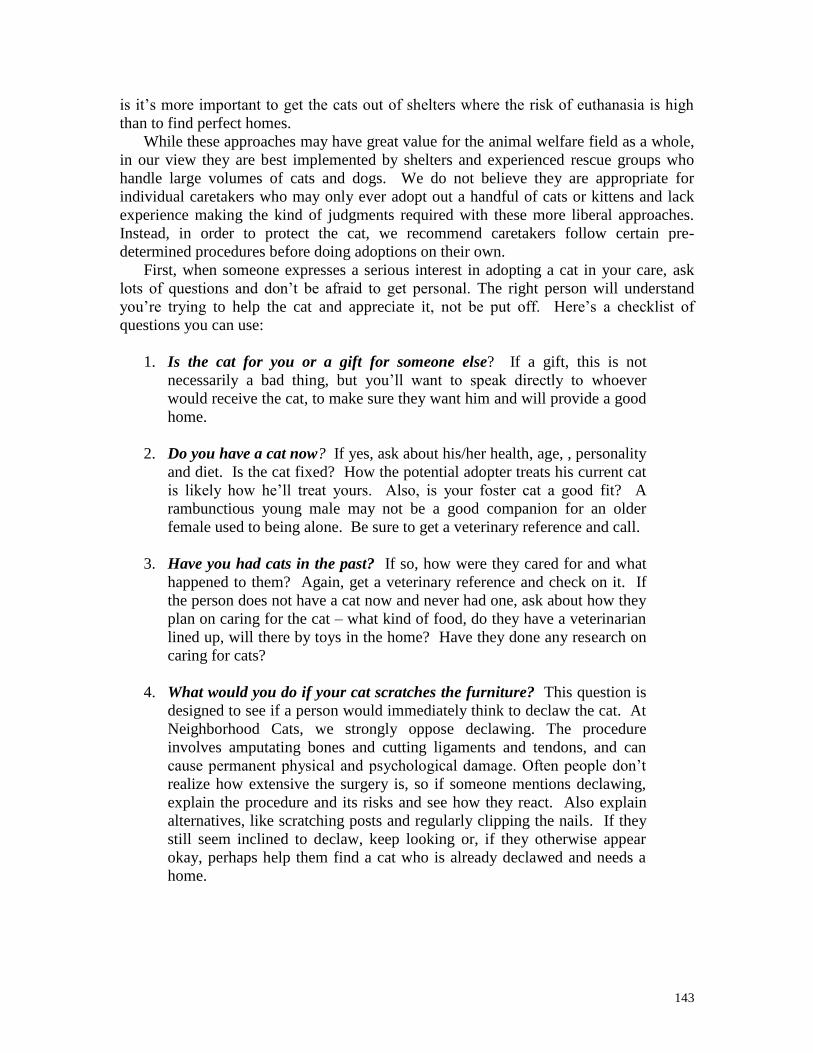
143
is it’s more important to get the cats out of shelters where the risk of euthanasia is high
than to find perfect homes.
While these approaches may have great value for the animal welfare field as a whole,
in our view they are best implemented by shelters and experienced rescue groups who
handle large volumes of cats and dogs. We do not believe they are appropriate for
individual caretakers who may only ever adopt out a handful of cats or kittens and lack
experience making the kind of judgments required with these more liberal approaches.
Instead, in order to protect the cat, we recommend caretakers follow certain pre-
determined procedures before doing adoptions on their own.
First, when someone expresses a serious interest in adopting a cat in your care, ask
lots of questions and don’t be afraid to get personal. The right person will understand
you’re trying to help the cat and appreciate it, not be put off. Here’s a checklist of
questions you can use:
1. Is the cat for you or a gift for someone else? If a gift, this is not
necessarily a bad thing, but you’ll want to speak directly to whoever
would receive the cat, to make sure they want him and will provide a good
home.
2. Do you have a cat now? If yes, ask about his/her health, age, , personality
and diet. Is the cat fixed? How the potential adopter treats his current cat
is likely how he’ll treat yours. Also, is your foster cat a good fit? A
rambunctious young male may not be a good companion for an older
female used to being alone. Be sure to get a veterinary reference and call.
3. Have you had cats in the past? If so, how were they cared for and what
happened to them? Again, get a veterinary reference and check on it. If
the person does not have a cat now and never had one, ask about how they
plan on caring for the cat – what kind of food, do they have a veterinarian
lined up, will there by toys in the home? Have they done any research on
caring for cats?
4. What would you do if your cat scratches the furniture? This question is
designed to see if a person would immediately think to declaw the cat. At
Neighborhood Cats, we strongly oppose declawing. The procedure
involves amputating bones and cutting ligaments and tendons, and can
cause permanent physical and psychological damage. Often people don’t
realize how extensive the surgery is, so if someone mentions declawing,
explain the procedure and its risks and see how they react. Also explain
alternatives, like scratching posts and regularly clipping the nails. If they
still seem inclined to declaw, keep looking or, if they otherwise appear
okay, perhaps help them find a cat who is already declawed and needs a
home.
144
5. What is your living situation? Own a house, apartment? Are you a
renter? If so, how long is your lease? How long have you lived at your
current location? Any plans to move?
6. Who else resides in your home? Are there roommates? Children? Is
anyone allergic to cats? If there are roommates, who will have ultimate
responsibility for the cat? Avoid shared ownership of the cat unless the
adopters are in a long-term intimate relationship. Otherwise, trouble
inevitably looms down the road when roommates part ways. If there are
other household members, you’ll want to meet them.
7. What safety features will there be in the home? Are there screens on all
the windows? Will the cats have access to an unscreened terrace or
balcony? Many people don’t realize cats lose their sense of height above a
certain number of stories and may inadvertently jump out the window of a
high-rise building. Will the cat be allowed on the fire escape? (Correct
answer: No!)
8. Will the cat be allowed outside? Neighborhood Cats believes pet cats, for
their protection, should always be confined with proper fencing or on a
harness if outdoors and should not be allowed to roam freely. See
“Containment systems” in Chapter 4.
9. Are you prepared to care for the cat his entire life? Pets are a lifetime
commitment. Cats can live to be 20 years old! Are you prepared to care
for the cat for her lifetime? What if your situation changes (a baby,
boyfriend/girlfriend, move, etc.)?
10. What is your employment situation? Occupation? How long?
You can also find good examples of adoption applications online which contain
questions similar to these. One form we like can be found on the website of Tabby’s
Place, a respected cat organization in New Jersey (www.tabbysplace.org.)
Remember there is no perfect home and so you’re not going to hear perfect answers
to all your questions. The goal is not to go down the list and check off requirements, but
to get a sense of who the person is, how stable is their situation and how they will treat
the cat. If you’re satisfied with the answers, we recommend you follow these steps: (1)
get references (personal, job and/or veterinary) and check them; (2) have the potential
adopter come over and meet the cat if they haven’t already; (3) if all goes well, pay a visit
to the new potential home. You can bring the cat with you unless you feel that will put
you under too much pressure, in which case go without the cat.
Having the person come see the cat gives you an opportunity to see how they interact
and if there is potential for a lasting bond. Going to see the new home before finalizing
the adoption lets you confirm that your evaluation of the person as a good placement is
correct. There is little more revealing than a person’s home. Is it pleasant, clean, has a
sense of warmth, screens on the windows like they said, etc.? If you go and get a bad
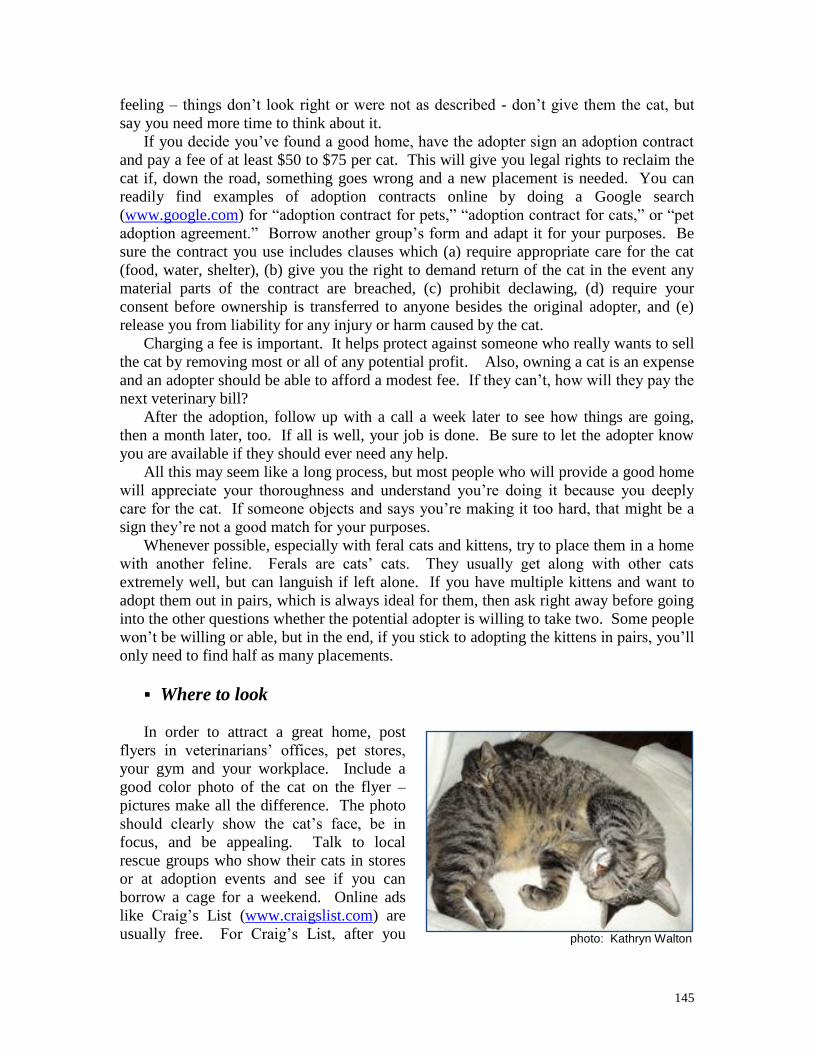
145
feeling – things don’t look right or were not as described - don’t give them the cat, but
say you need more time to think about it.
If you decide you’ve found a good home, have the adopter sign an adoption contract
and pay a fee of at least $50 to $75 per cat. This will give you legal rights to reclaim the
cat if, down the road, something goes wrong and a new placement is needed. You can
readily find examples of adoption contracts online by doing a Google search
(www.google.com) for “adoption contract for pets,” “adoption contract for cats,” or “pet
adoption agreement.” Borrow another group’s form and adapt it for your purposes. Be
sure the contract you use includes clauses which (a) require appropriate care for the cat
(food, water, shelter), (b) give you the right to demand return of the cat in the event any
material parts of the contract are breached, (c) prohibit declawing, (d) require your
consent before ownership is transferred to anyone besides the original adopter, and (e)
release you from liability for any injury or harm caused by the cat.
Charging a fee is important. It helps protect against someone who really wants to sell
the cat by removing most or all of any potential profit. Also, owning a cat is an expense
and an adopter should be able to afford a modest fee. If they can’t, how will they pay the
next veterinary bill?
After the adoption, follow up with a call a week later to see how things are going,
then a month later, too. If all is well, your job is done. Be sure to let the adopter know
you are available if they should ever need any help.
All this may seem like a long process, but most people who will provide a good home
will appreciate your thoroughness and understand you’re doing it because you deeply
care for the cat. If someone objects and says you’re making it too hard, that might be a
sign they’re not a good match for your purposes.
Whenever possible, especially with feral cats and kittens, try to place them in a home
with another feline. Ferals are cats’ cats. They usually get along with other cats
extremely well, but can languish if left alone. If you have multiple kittens and want to
adopt them out in pairs, which is always ideal for them, then ask right away before going
into the other questions whether the potential adopter is willing to take two. Some people
won’t be willing or able, but in the end, if you stick to adopting the kittens in pairs, you’ll
only need to find half as many placements.
Where to look
In order to attract a great home, post
flyers in veterinarians’ offices, pet stores,
your gym and your workplace. Include a
good color photo of the cat on the flyer –
pictures make all the difference. The photo
should clearly show the cat’s face, be in
focus, and be appealing. Talk to local
rescue groups who show their cats in stores
or at adoption events and see if you can
borrow a cage for a weekend. Online ads
like Craig’s List (www.craigslist.com) are
usually free. For Craig’s List, after you photo: Kathryn Walton

146
select your location, the best place to list your ad is under “Pets” in the “Community”
section.
The largest online adoption service is Petfinder (www.petfinder.com). Only animal
welfare groups registered with Petfinder can post, so you’ll want to team up with a
shelter, TNR or rescue group in your area and ask if they’ll post your kitty on their page.
Or help them get a page if they don’t already have one. Also check out Adopt a Pet.com
(www.adoptapet.com), another resource where shelters and rescue groups can post
available pets.
photo: Emilio Del Busto
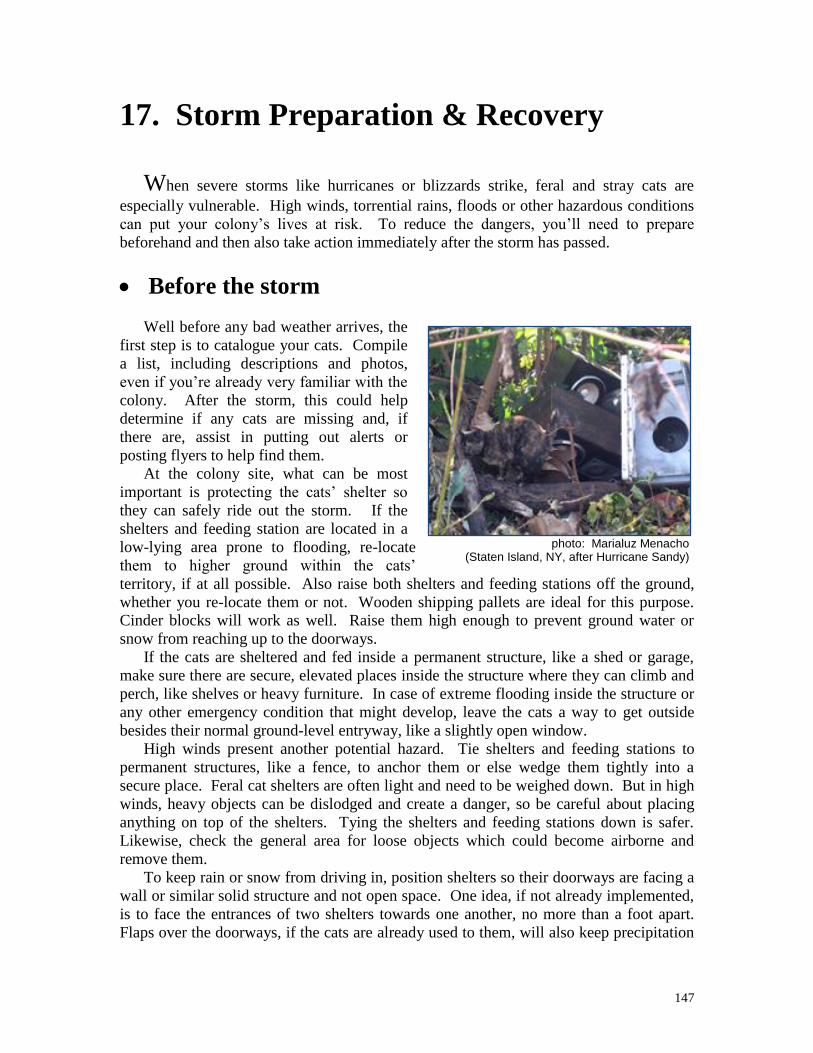
147
17. Storm Preparation & Recovery
When severe storms like hurricanes or blizzards strike, feral and stray cats are
especially vulnerable. High winds, torrential rains, floods or other hazardous conditions
can put your colony’s lives at risk. To reduce the dangers, you’ll need to prepare
beforehand and then also take action immediately after the storm has passed.
Before the storm
Well before any bad weather arrives, the
first step is to catalogue your cats. Compile
a list, including descriptions and photos,
even if you’re already very familiar with the
colony. After the storm, this could help
determine if any cats are missing and, if
there are, assist in putting out alerts or
posting flyers to help find them.
At the colony site, what can be most
important is protecting the cats’ shelter so
they can safely ride out the storm. If the
shelters and feeding station are located in a
low-lying area prone to flooding, re-locate
them to higher ground within the cats’
territory, if at all possible. Also raise both shelters and feeding stations off the ground,
whether you re-locate them or not. Wooden shipping pallets are ideal for this purpose.
Cinder blocks will work as well. Raise them high enough to prevent ground water or
snow from reaching up to the doorways.
If the cats are sheltered and fed inside a permanent structure, like a shed or garage,
make sure there are secure, elevated places inside the structure where they can climb and
perch, like shelves or heavy furniture. In case of extreme flooding inside the structure or
any other emergency condition that might develop, leave the cats a way to get outside
besides their normal ground-level entryway, like a slightly open window.
High winds present another potential hazard. Tie shelters and feeding stations to
permanent structures, like a fence, to anchor them or else wedge them tightly into a
secure place. Feral cat shelters are often light and need to be weighed down. But in high
winds, heavy objects can be dislodged and create a danger, so be careful about placing
anything on top of the shelters. Tying the shelters and feeding stations down is safer.
Likewise, check the general area for loose objects which could become airborne and
remove them.
To keep rain or snow from driving in, position shelters so their doorways are facing a
wall or similar solid structure and not open space. One idea, if not already implemented,
is to face the entrances of two shelters towards one another, no more than a foot apart.
Flaps over the doorways, if the cats are already used to them, will also keep precipitation
photo: Marialuz Menacho (Staten Island, NY, after Hurricane Sandy)
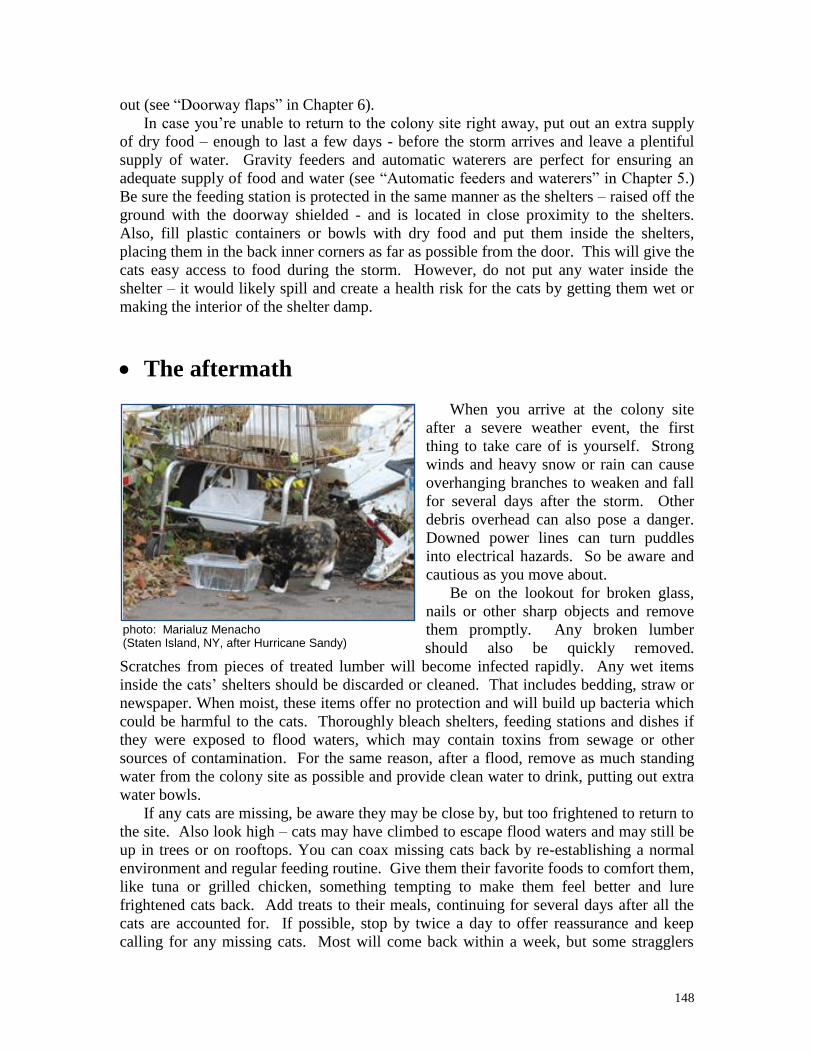
148
out (see “Doorway flaps” in Chapter 6).
In case you’re unable to return to the colony site right away, put out an extra supply
of dry food – enough to last a few days - before the storm arrives and leave a plentiful
supply of water. Gravity feeders and automatic waterers are perfect for ensuring an
adequate supply of food and water (see “Automatic feeders and waterers” in Chapter 5.)
Be sure the feeding station is protected in the same manner as the shelters – raised off the
ground with the doorway shielded - and is located in close proximity to the shelters.
Also, fill plastic containers or bowls with dry food and put them inside the shelters,
placing them in the back inner corners as far as possible from the door. This will give the
cats easy access to food during the storm. However, do not put any water inside the
shelter – it would likely spill and create a health risk for the cats by getting them wet or
making the interior of the shelter damp.
The aftermath
When you arrive at the colony site
after a severe weather event, the first
thing to take care of is yourself. Strong
winds and heavy snow or rain can cause
overhanging branches to weaken and fall
for several days after the storm. Other
debris overhead can also pose a danger.
Downed power lines can turn puddles
into electrical hazards. So be aware and
cautious as you move about.
Be on the lookout for broken glass,
nails or other sharp objects and remove
them promptly. Any broken lumber
should also be quickly removed.
Scratches from pieces of treated lumber will become infected rapidly. Any wet items
inside the cats’ shelters should be discarded or cleaned. That includes bedding, straw or
newspaper. When moist, these items offer no protection and will build up bacteria which
could be harmful to the cats. Thoroughly bleach shelters, feeding stations and dishes if
they were exposed to flood waters, which may contain toxins from sewage or other
sources of contamination. For the same reason, after a flood, remove as much standing
water from the colony site as possible and provide clean water to drink, putting out extra
water bowls.
If any cats are missing, be aware they may be close by, but too frightened to return to
the site. Also look high – cats may have climbed to escape flood waters and may still be
up in trees or on rooftops. You can coax missing cats back by re-establishing a normal
environment and regular feeding routine. Give them their favorite foods to comfort them,
like tuna or grilled chicken, something tempting to make them feel better and lure
frightened cats back. Add treats to their meals, continuing for several days after all the
cats are accounted for. If possible, stop by twice a day to offer reassurance and keep
calling for any missing cats. Most will come back within a week, but some stragglers
photo: Marialuz Menacho (Staten Island, NY, after Hurricane Sandy)

149
may take a few weeks to return.
Check the cats for any injuries. Contaminated flood waters can turn wounds septic so
if injuries are seen, trap and seek veterinary care immediately. The stress of the events
can cause an outbreak of upper respiratory infections. To ward off illness, add extra
Vitamin C to the cats’ food (see “Vitamin C to the Rescue” in Chapter 5.) If you do see
evidence of upper respiratory infections, consult a veterinarian about getting antibiotics
into their food before their conditions worsen. Remember, getting the colony's routine
back to normal as soon as possible is the best way to combat stress.
If your colony is located in an area that is closed off because of storm damage,
contact your local police precinct and speak to the officer in charge of Community
Affairs. Explain why you need to gain access and find out what you need to do to get
permission to go in.
For more information on disaster preparedness for you and the animals in your care,
see the extensive list of resource links on the website of Hoosier Kitties
(www.hoosierkitties.com/care/disaster.htm).
photo: Marialuz Menacho (Staten Island, NY, after Hurricane Sandy)

150
18. Feral Cat Resources
Books
Implementing a Community Trap-Neuter-Return Program by Bryan Kortis (The
Humane Society of the United States, 2007).
Part 1: www.humanesociety.org/assets/pdfs/pets/implementing_community_tnr_pt1.pdf
Part 2: www.humanesociety.org/assets/pdfs/pets/implementing_community_tnr_pt2.pdf
(Note: Available for free download. 2nd edition due out by end of 2013)
Shelter Medicine for Veterinarians & Staff, 2nd edition; Chapter 41:
“Management of Stray and Feral Community Cats” by Julie K. Levy & Christine L.
Wilford (Wiley-Blackwell Publishers, 2013).
www.wiley.com/WileyCDA/WileyTitle/productCd-EHEP002626.html
Community Approaches to Feral Cats: Problems, Alternatives and
Recommendations by Margaret R. Slater (Humane Society Press, 2002).
http://marketplace.animalsheltering.org/product/community_approached_to_feral_cats/fo
r_the_animal_care_community
Maverick Cats: Encounters with Feral Cats by Ellen Perry Berkeley (The New
England Press, 2001).
www.amazon.com (search for title)
The Wild Life of the Domestic Cat by Roger Tabor (Arrow Books, 1987) /
www.amazon.com (search for title)
Shadow Cats: Tales from New York City’s Animal Underground by Janet
Jensen (Adams Media Corp., 2002) / www.amazon.com (search for title)
Children’s books
Fairminded Fran and the three small black Community Cats by Linda Elder
(Foundation for Critical Thinking, 2012).
www.criticalthinking.org/store/products/fairminded-fran-and-the-three-small-black-
community-cats/454
Cat, Cat, Feral Cat by Clarissa Wolf (Avid Readers Publishing Group, 2009)
www.amazon.com (search for title)

151
Equipment & supplies
- Arbico Organics (www.arbico-organics.com) Beneficial nematodes for organic flea
control
- Cats-On-Line.com (www.cats-on-line.com) / Modular cat cages and containment
systems
- Contech (www.contech-inc.com) / “Scarecrow” motion-activated sprinklers &
“CatStop” ultrasonic devices
- Doctors Foster and Smith (www.drsfostersmith.com) / Pet supplies
- Entirely Pets (www.entirelypets.com) / Pet supplies
- Feralvilla (www.feralvilla.com) / Outdoor shelters and feeders
- Gamma2 (www.gamma2.net) / Vittles Vault food storage units
- Happy Bird Corporation (www.solarsippers.com) / Solar-powered, freeze-resistant
water bowls
- Jeffers (www.jefferspet.com) / Pet supplies
- KV Supply (www.kvsupply.com) / Pet supplies
- PurrFect Fence (www.PurrfectFence.com) / Free-standing cat containment system
- Tomahawk Live Trap (www.livetrap.com) / Feral cat traps and accessories
- Tru-Catch (www.trucatchtraps.com) / Feral cat traps and accessories
Feral cat organizations – lists
The Humane Society of the United States www.humanesociety.org/assets/maps/feral-cats.html
Castaway Critters
www.castawaycritters.org/info/display?PageID=158
Funding for TNR
ASPCA (American Society for the Prevention of Cruelty to Animals)
www.aspcapro.org/grants-for-animal-shelter-animal-control.php
Best Friends Animal Society (Life Saving Grants)
http://nmhpnetwork.bestfriends.org/apply/LifesavingGrants.aspx
Local Independent Charities of America (LIC) represents non-profits in
communities across the country. Visit their site to see if your organization is
eligible to receive donations through LIC’s extensive giving network.
www.lic.org/

152
Petco Foundation (4Rs Project Support Grant Program)
www.petco.com/petco_Page_PC_petcofoundationhome.aspx
PetSmart Charities (Free-Roaming Cat Spay/Neuter Grants)
www.petsmartcharities.org
(Note: before applying, view the webinar PetSmart Charities’ High Impact
Spay/Neuter Grants: What are We Looking For? Link to webinar available at:
www.petsmartcharities.org/grants/types/free-roaming-cat-neuter-program.html
The Foundation Center is the leading source of information about U.S. and
global philanthropy. Access their vast grantmaker database online or through their
network of regional library/learning centers and funding information centers.
http://foundationcenter.org
Handouts & flyers
Neighborhood Cats
Basic Flyer - English (doc)
Basic Flyer - Spanish (doc)
Koret Shelter Health Portal This resource from the Koret Shelter Medicine Program at UC Davis School of
Veterinary Medicine provides information sheets on a variety of animal-related topics.
For feral cat info enter keywords “feral” or “TNR” in the search field.
www.sheltermedicine.com/shelter-health-portal/information-sheets
PetSmart Charities
TNR Infograph – English (pdf)
TNR Infograph - Spanish (pdf)
Kitten care
Guide for Determining Kitten Age by Petfinder
http://members.petfinder.org/~PA16/kittenage.html
Kitten Care Handbook by Kitten Rescue
www.kittenrescue.org/pages.php?pageid=15
Taming Feral Kittens by Feral Cat Coalition
http://www.feralcat.com/taming.html
153
Spay/neuter resources
Neuter/Spay Nationwide - spay/neuter assistance and information.
http://neuterspaynationwide.blogspot.com/
Spay/Neuter Program Locator from PetSmart Charities and ASPCA
www.aspca.org/spay
www.petsmartcharities.org/spay-neuter/locator/
Spay/Neuter Program Locator from North Shore Animal League America’s Spay USA
www.spayusa.org/search.php
TNR ordinances
Neighborhood Cats (list of ordinances in U.S. by state &municipality, articles on TNR
ordinances and model TNR ordinances)
www.neighborhoodcats.org/resources_ordinances
Tool kits
Action Kit: Advocating for TNR in Your Community from Best Friends Animal
Society
Contains resources to help you implement a TNR program in your area. The Action
Kit includes What to Do Before Approaching Your Local Government About TNR (Word
doc, 6 pp.), Frequently Asked Questions About TNR (Word doc, 7 pp.) and Community
Cats and Trap/Neuter/Return: A Presentation to Local Government Officials About TNR
(PowerPoint, 4 MB)
www.bestfriends.org/Resources/No-Kill-Resources/Cat-initiatives/Helping-Community-
Cats/Action-Kit--Advocating-for-TNR-in-Your-Community/
Pets for Life from The Humane Society of the United States & PetSmart Charities
Designed to help organizations develop and implement a community outreach
program for promoting spay/neuter in underserved areas.
www.animalsheltering.org/how-we-help/work-for-change/pets-for-life/pets-for-life-
toolkit.html
www.petsmartcharities.org/resources/pets-for-life-toolkit.html
http://www.animalsheltering.org/how-we-help/work-for-change/pets-for-life/pets-for-life-toolkit.html
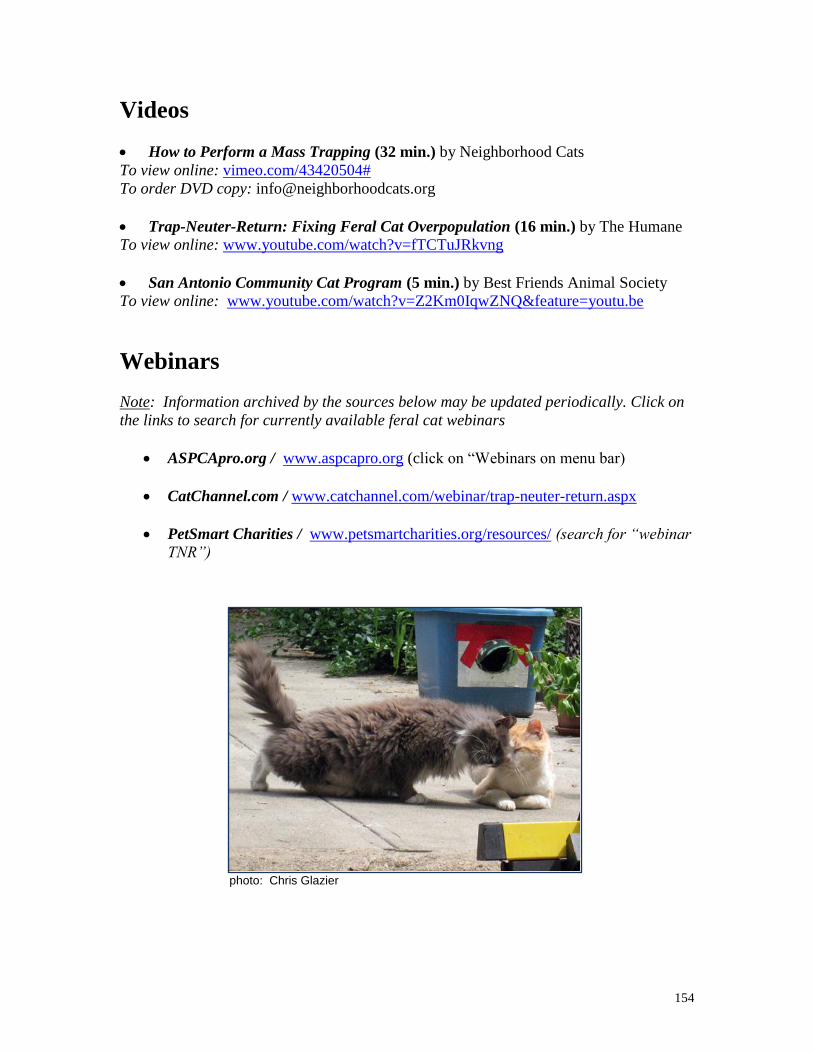
154
Videos
How to Perform a Mass Trapping (32 min.) by Neighborhood Cats
To view online: vimeo.com/43420504#
To order DVD copy: [email protected]
Trap-Neuter-Return: Fixing Feral Cat Overpopulation (16 min.) by The Humane
To view online: www.youtube.com/watch?v=fTCTuJRkvng
San Antonio Community Cat Program (5 min.) by Best Friends Animal Society
To view online: www.youtube.com/watch?v=Z2Km0IqwZNQ&feature=youtu.be
Webinars Note: Information archived by the sources below may be updated periodically. Click on
the links to search for currently available feral cat webinars
ASPCApro.org / www.aspcapro.org (click on “Webinars on menu bar)
CatChannel.com / www.catchannel.com/webinar/trap-neuter-return.aspx
PetSmart Charities / www.petsmartcharities.org/resources/ (search for “webinar
TNR”)
photo: Chris Glazier

155
POISONING CATS
IN NEW YORK STATE IS A FELONY
$2500
For information leading to the arrest
and conviction of the person or
persons responsible for the
POISONING OF CATS
in this neighborhood.
Punishment for this crime is up to
two years in prison and/or a $5000 fine
To file a report:
Humane Law Enforcement Division of the ASPCA
(212) 876-7700 x4450
To claim reward:
Neighborhood Cats, Inc.
(212) 662-5761
Appendix A
REWARD
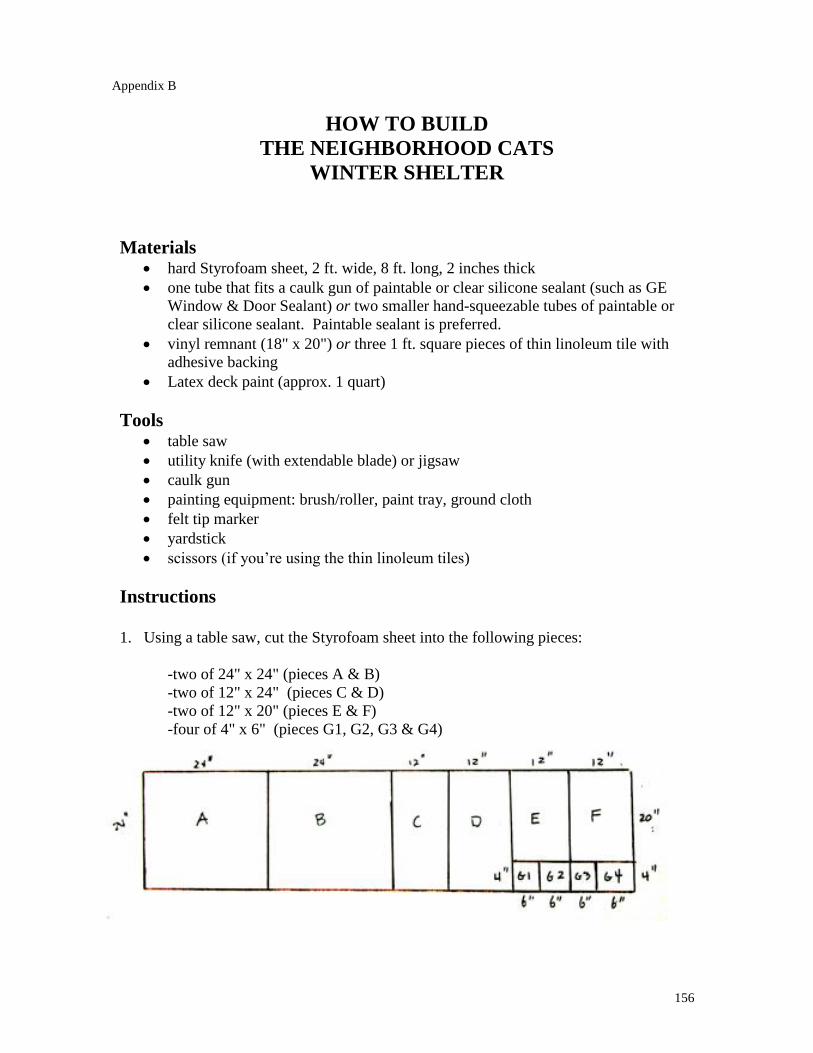
156
HOW TO BUILD
THE NEIGHBORHOOD CATS
WINTER SHELTER
Materials
hard Styrofoam sheet, 2 ft. wide, 8 ft. long, 2 inches thick
one tube that fits a caulk gun of paintable or clear silicone sealant (such as GE
Window & Door Sealant) or two smaller hand-squeezable tubes of paintable or
clear silicone sealant. Paintable sealant is preferred.
vinyl remnant (18" x 20") or three 1 ft. square pieces of thin linoleum tile with
adhesive backing
Latex deck paint (approx. 1 quart)
Tools
table saw
utility knife (with extendable blade) or jigsaw
caulk gun
painting equipment: brush/roller, paint tray, ground cloth
felt tip marker
yardstick
scissors (if you’re using the thin linoleum tiles)
Instructions
1. Using a table saw, cut the Styrofoam sheet into the following pieces:
-two of 24" x 24" (pieces A & B)
-two of 12" x 24" (pieces C & D)
-two of 12" x 20" (pieces E & F)
-four of 4" x 6" (pieces G1, G2, G3 & G4)
Appendix B
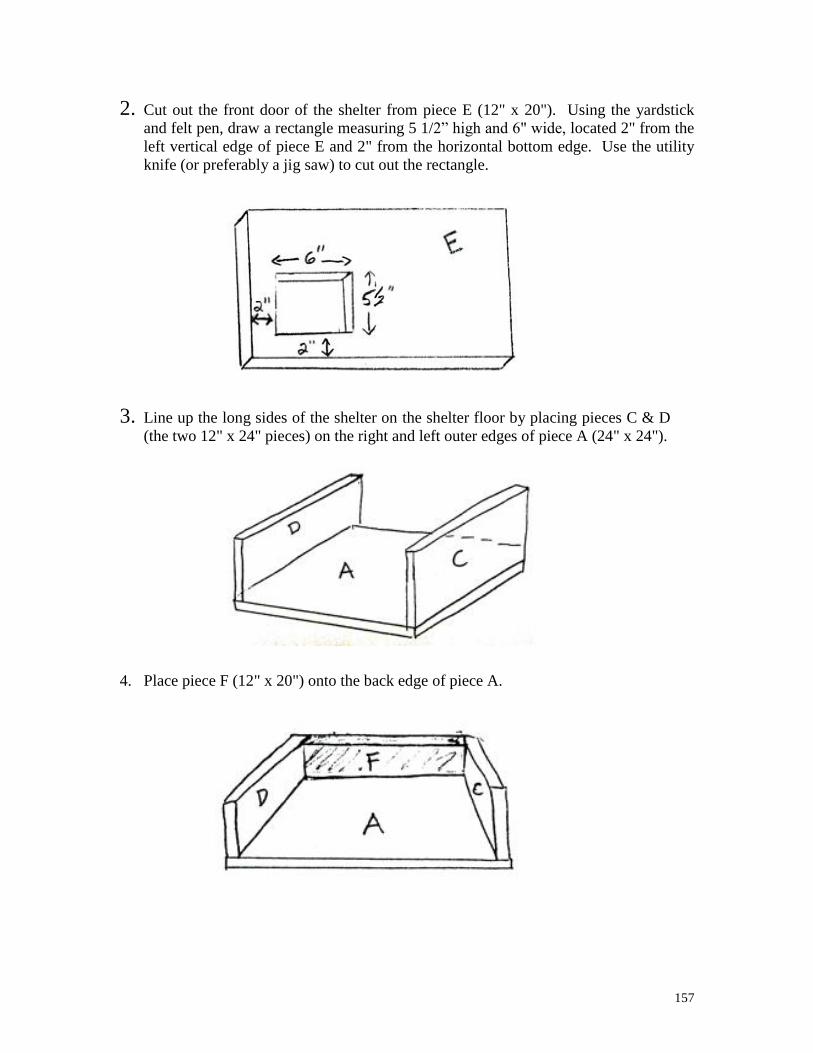
157
2. Cut out the front door of the shelter from piece E (12" x 20"). Using the yardstick
and felt pen, draw a rectangle measuring 5 1/2” high and 6" wide, located 2" from the
left vertical edge of piece E and 2" from the horizontal bottom edge. Use the utility
knife (or preferably a jig saw) to cut out the rectangle.
3. Line up the long sides of the shelter on the shelter floor by placing pieces C & D
(the two 12" x 24" pieces) on the right and left outer edges of piece A (24" x 24").
4. Place piece F (12" x 20") onto the back edge of piece A.
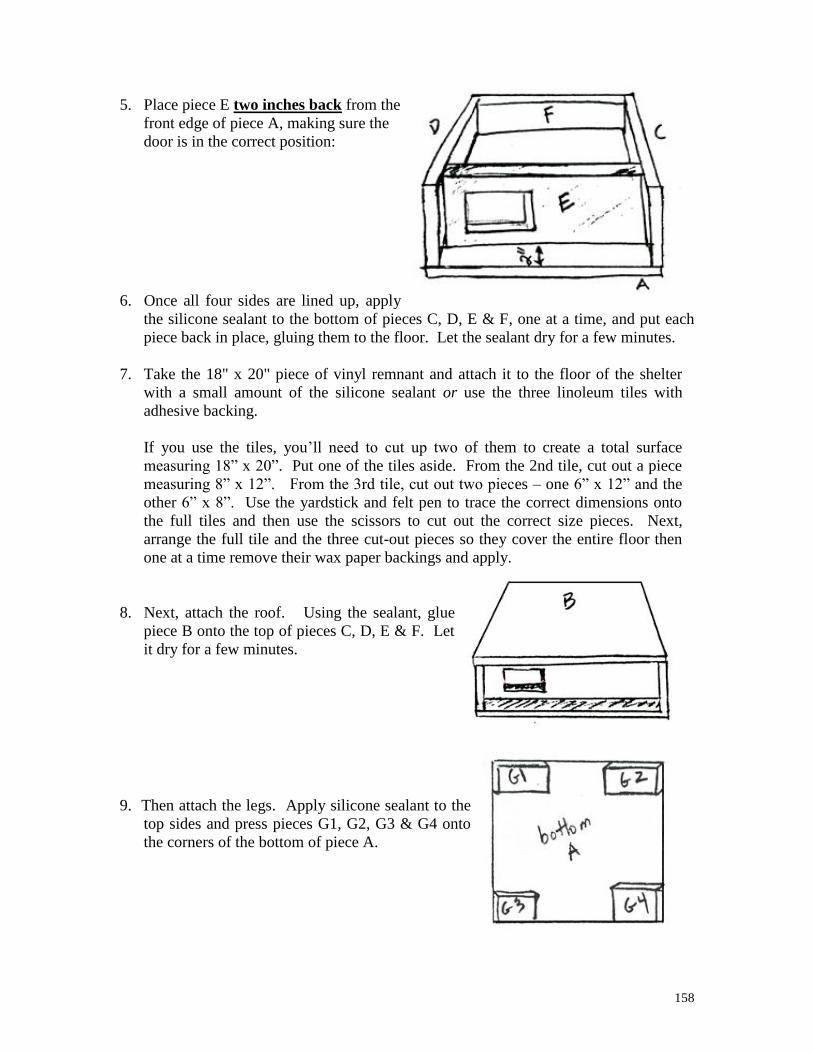
158
5. Place piece E two inches back from the
front edge of piece A, making sure the
door is in the correct position:
6. Once all four sides are lined up, apply
the silicone sealant to the bottom of pieces C, D, E & F, one at a time, and put each
piece back in place, gluing them to the floor. Let the sealant dry for a few minutes.
7. Take the 18" x 20" piece of vinyl remnant and attach it to the floor of the shelter
with a small amount of the silicone sealant or use the three linoleum tiles with
adhesive backing.
If you use the tiles, you’ll need to cut up two of them to create a total surface
measuring 18” x 20”. Put one of the tiles aside. From the 2nd tile, cut out a piece
measuring 8” x 12”. From the 3rd tile, cut out two pieces – one 6” x 12” and the
other 6” x 8”. Use the yardstick and felt pen to trace the correct dimensions onto
the full tiles and then use the scissors to cut out the correct size pieces. Next,
arrange the full tile and the three cut-out pieces so they cover the entire floor then
one at a time remove their wax paper backings and apply.
8. Next, attach the roof. Using the sealant, glue
piece B onto the top of pieces C, D, E & F. Let
it dry for a few minutes.
9. Then attach the legs. Apply silicone sealant to the
top sides and press pieces G1, G2, G3 & G4 onto
the corners of the bottom of piece A.

159
10. Seal all seams and cracks of the shelter with the silicone sealant. This is very
important! It keeps drafts out. Seal where the roof touches the side walls, where
each side wall meets another side wall and where the walls meet the floor. If
necessary, purchase and apply an extra tube of silicone sealant.
11. After the silicone glue has completely dried (usually 24 hours), paint the shelter
with one or two coats of latex deck paint, matching the color to the surroundings
where the shelter will be placed. (NOTE: the paint will not adhere to areas covered
with the sealant unless you’re using a paintable silicone. If you’re using a non-
paintable, clear sealant, you can choose to paint all the outer surfaces of the shelter
BEFORE gluing them together to avoid unpainted areas. )
12. [Optional]: You may eventually want to add a flap to the front door that the cats
can easily pull open, such as a piece of a vinyl mat. You can glue or duct tape it
on above the front door, or drill holes and use plastic nuts and bolts like the kind
used to attach toilet seats. It’s recommended you wait until the cats are familiar
with going in and out of the shelter before adding a flap.
TIPS:
The shelters are very light, so should be
weighed down with a large rock, board, a
few bricks, etc. The roof is strong enough
to hold a reasonable amount of weight.
To break the wind and protect from rain,
place two shelters with their front doors
facing each other and then place a board on
top of both, spanning the two roofs.
Straw is the best insulation for the interior.
Shredded newspaper will also work. Don’t use hay which is moist and can become
moldy. Don’t put towels or blankets on the floor – they will draw out body heat and
make the cats colder.
NEVER PUT WATER INSIDE!! Small bowls of dry food are ok.
Draw the cats inside the shelter with tasty treats or catnip.

160
TNR Tracking Sheet (Project/Colony __________________ )
Trap
# Trap
date Colony Description Special Notes M/F S/N
Date
Vac-
cines
Eartip Disposition
Appendix C
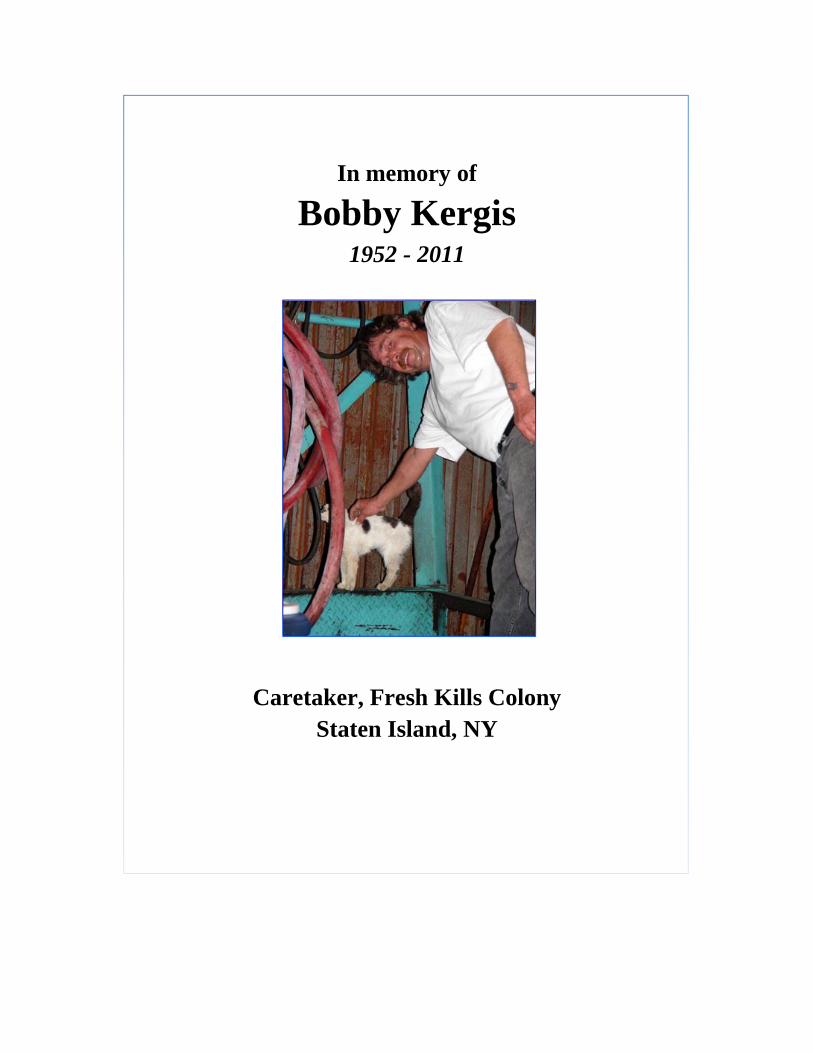
In memory of
Bobby Kergis
1952 - 2011
Caretaker, Fresh Kills Colony
Staten Island, NY
Related Documents