Two-Second Advantage ® TIBCO Data Virtualization ® File Data Sources Version 8.4 Last Updated: January 25, 2021

Welcome message from author
This document is posted to help you gain knowledge. Please leave a comment to let me know what you think about it! Share it to your friends and learn new things together.
Transcript
Two-Second Adva
TIBCO Data Virtualization®
File Data SourcesVersion 8.4
Last Updated: January 25, 2021
ntage®
Important Information SOME TIBCO SOFTWARE EMBEDS OR BUNDLES OTHER TIBCO SOFTWARE. USE OF SUCH EMBEDDED OR BUNDLED TIBCO SOFTWARE IS SOLELY TO ENABLE THE FUNCTIONALITY (OR PROVIDE LIMITED ADD-ON FUNCTIONALITY) OF THE LICENSED TIBCO SOFTWARE. THE EMBEDDED OR BUNDLED SOFTWARE IS NOT LICENSED TO BE USED OR ACCESSED BY ANY OTHER TIBCO SOFTWARE OR FOR ANY OTHER
PURPOSE.
USE OF TIBCO SOFTWARE AND THIS DOCUMENTATION IS SUBJECT TO THE TERMS AND CONDITIONS OF A LICENSE AGREEMENT FOUND IN EITHER A SEPARATELY EXECUTED SOFTWARE LICENSE AGREEMENT, OR, IF THERE IS NO SUCH SEPARATE AGREEMENT, THE CLICKWRAP END USER LICENSE AGREEMENT WHICH IS DISPLAYED DURING DOWNLOAD OR INSTALLATION OF THE SOFTWARE (AND WHICH IS DUPLICATED IN THE LICENSE FILE) OR IF THERE IS NO SUCH SOFTWARE LICENSE AGREEMENT OR CLICKWRAP END USER LICENSE AGREEMENT, THE LICENSE(S) LOCATED IN THE “LICENSE” FILE(S) OF THE SOFTWARE. USE OF THIS DOCUMENTATION IS SUBJECT TO THOSE TERMS AND CONDITIONS, AND YOUR USE HEREOF SHALL CONSTITUTE ACCEPTANCE OF AND AN AGREEMENT TO BE BOUND BY THE SAME.
This document is subject to U.S. and international copyright laws and treaties. No part of this document may be reproduced in any form without the written authorization of TIBCO Software Inc.
TIBCO and the TIBCO logo are either registered trademarks or trademarks of TIBCO Software Inc. in the United
States and/or other countries
TIBCO, Two-Second Advantage, TIBCO Spotfire, TIBCO ActiveSpaces, TIBCO Spotfire Developer, TIBCO EMS,
TIBCO Spotfire Automation Services, TIBCO Enterprise Runtime for R, TIBCO Spotfire Server, TIBCO Spotfire
Web Player, TIBCO Spotfire Statistics Services, S-PLUS, and TIBCO Spotfire S+ are either registered trademarks
or trademarks of TIBCO Software Inc. in the United States and/or other countries.
All other product and company names and marks mentioned in this document are the property of their
respective owners and are mentioned for identification purposes only.
THIS SOFTWARE MAY BE AVAILABLE ON MULTIPLE OPERATING SYSTEMS. HOWEVER, NOT ALL OPERATING SYSTEM PLATFORMS FOR A SPECIFIC SOFTWARE VERSION ARE RELEASED AT THE SAME TIME. SEE THE README FILE FOR THE AVAILABILITY OF THIS SOFTWARE VERSION ON A SPECIFIC OPERATING SYSTEM PLATFORM.
THIS DOCUMENTATION IS PROVIDED “AS IS” WITHOUT WARRANTY OF ANY KIND, EITHER EXPRESS OR IMPLIED, INCLUDING, BUT NOT LIMITED TO, THE IMPLIED WARRANTIES OF MERCHANTABILITY, FITNESS FOR A PARTICULAR PURPOSE, OR NON-INFRINGEMENT.
THIS DOCUMENTATION COULD INCLUDE TECHNICAL INACCURACIES OR TYPOGRAPHICAL ERRORS. CHANGES ARE PERIODICALLY ADDED TO THE INFORMATION HEREIN; THESE CHANGES WILL BE INCORPORATED IN NEW EDITIONS OF THIS DOCUMENTATION. TIBCO SOFTWARE INC. MAY MAKE IMPROVEMENTS AND/OR CHANGES IN THE PRODUCT(S) AND/OR THE PROGRAM(S) DESCRIBED IN THIS DOCUMENTATION AT ANY TIME.
THE CONTENTS OF THIS DOCUMENTATION MAY BE MODIFIED AND/OR QUALIFIED, DIRECTLY OR INDIRECTLY, BY OTHER DOCUMENTATION WHICH ACCOMPANIES THIS SOFTWARE, INCLUDING BUT NOT LIMITED TO ANY RELEASE NOTES AND "READ ME" FILES.
Copyright © 2002-2021 TIBCO Software Inc. ALL RIGHTS RESERVED.
TIBCO Software Inc. Confidential Information

TIBCO® Data Virtualization
Contents | 1
Contents
Preface . . . . . . . . . . . . . . . . . . . . . . . . . . . . . . . . . . . . . . . . . . . . . . . . . . . . . . . . . . . . . . . . . . . . . . . . .2
Product-Specific Documentation . . . . . . . . . . . . . . . . . . . . . . . . . . . . . . . . . . . . . . . . . . . . . . . . . . . . . . . . . . . 2How to Access TIBCO Documentation. . . . . . . . . . . . . . . . . . . . . . . . . . . . . . . . . . . . . . . . . . . . . . . . . . . . . . . 3How to Contact TIBCO Support . . . . . . . . . . . . . . . . . . . . . . . . . . . . . . . . . . . . . . . . . . . . . . . . . . . . . . . . . . . . 3How to Join TIBCO Community . . . . . . . . . . . . . . . . . . . . . . . . . . . . . . . . . . . . . . . . . . . . . . . . . . . . . . . . . . . . 4
TDV File Data Sources . . . . . . . . . . . . . . . . . . . . . . . . . . . . . . . . . . . . . . . . . . . . . . . . . . . . . . . . . . . .5
Supported Character Encoding Types. . . . . . . . . . . . . . . . . . . . . . . . . . . . . . . . . . . . . . . . . . . . . . . . . . . . . . . . . . . 6
Supported URL Protocols . . . . . . . . . . . . . . . . . . . . . . . . . . . . . . . . . . . . . . . . . . . . . . . . . . . . . . . . . . . . . . . . . . . . 6
About Export and Import of Custom Java Procedures. . . . . . . . . . . . . . . . . . . . . . . . . . . . . . . . . . . . . . . . . . . . . . . 7
Adding a Custom Java Procedure . . . . . . . . . . . . . . . . . . . . . . . . . . . . . . . . . . . . . . . . . . . . . . . . . . . . . . . . . . . . . . 7
File-Delimited Data Source . . . . . . . . . . . . . . . . . . . . . . . . . . . . . . . . . . . . . . . . . . . . . . . . . . . . . . . . . . . . . . . . . . . 9Adding a Delimited File Data Source . . . . . . . . . . . . . . . . . . . . . . . . . . . . . . . . . . . . . . . . . . . . . . . . . . . . . . . . 9File - Delimited to TDV Data Types Mapping . . . . . . . . . . . . . . . . . . . . . . . . . . . . . . . . . . . . . . . . . . . . . . . . . 12File Function Support . . . . . . . . . . . . . . . . . . . . . . . . . . . . . . . . . . . . . . . . . . . . . . . . . . . . . . . . . . . . . . . . . . . 12
Cache File Data Source. . . . . . . . . . . . . . . . . . . . . . . . . . . . . . . . . . . . . . . . . . . . . . . . . . . . . . . . . . . . . . . . . . . . . 15Adding a Cache File Data Source . . . . . . . . . . . . . . . . . . . . . . . . . . . . . . . . . . . . . . . . . . . . . . . . . . . . . . . . . 15File - Cache to TDV Data Types Mapping . . . . . . . . . . . . . . . . . . . . . . . . . . . . . . . . . . . . . . . . . . . . . . . . . . . 16File Cache Mapping . . . . . . . . . . . . . . . . . . . . . . . . . . . . . . . . . . . . . . . . . . . . . . . . . . . . . . . . . . . . . . . . . . . . 16
LDAP Data Source . . . . . . . . . . . . . . . . . . . . . . . . . . . . . . . . . . . . . . . . . . . . . . . . . . . . . . . . . . . . . . . . . . . . . . . . 19Adding an LDAP Data Source . . . . . . . . . . . . . . . . . . . . . . . . . . . . . . . . . . . . . . . . . . . . . . . . . . . . . . . . . . . . 19LDAP to TDV Data Types. . . . . . . . . . . . . . . . . . . . . . . . . . . . . . . . . . . . . . . . . . . . . . . . . . . . . . . . . . . . . . . . 21
Microsoft Excel Data Sources . . . . . . . . . . . . . . . . . . . . . . . . . . . . . . . . . . . . . . . . . . . . . . . . . . . . . . . . . . . . . . . . 21Adding Microsoft Excel Data Sources . . . . . . . . . . . . . . . . . . . . . . . . . . . . . . . . . . . . . . . . . . . . . . . . . . . . . . 21Adding Microsoft Excel (non-ODBC) Data Sources . . . . . . . . . . . . . . . . . . . . . . . . . . . . . . . . . . . . . . . . . . . . 26Microsoft Excel to TDV Data Types . . . . . . . . . . . . . . . . . . . . . . . . . . . . . . . . . . . . . . . . . . . . . . . . . . . . . . . . 29Microsoft Excel Function Support . . . . . . . . . . . . . . . . . . . . . . . . . . . . . . . . . . . . . . . . . . . . . . . . . . . . . . . . . . 29
XML File Data Source . . . . . . . . . . . . . . . . . . . . . . . . . . . . . . . . . . . . . . . . . . . . . . . . . . . . . . . . . . . . . . . . . . . . . . 30Adding an XML File Data Source . . . . . . . . . . . . . . . . . . . . . . . . . . . . . . . . . . . . . . . . . . . . . . . . . . . . . . . . . . 30XML Function Support . . . . . . . . . . . . . . . . . . . . . . . . . . . . . . . . . . . . . . . . . . . . . . . . . . . . . . . . . . . . . . . . . . 32
|2
Preface
Forinformationonthefollowing,seetheTDVUserGuide:
• AddingaDataSource
• IntrospectingaDataSource
• TestingtheConnectiontoYourDataSource
Documentation for this and other TIBCO products is available on the TIBCO Documentation site. This site is updated more frequently than any documentation that might be included with the product. To ensure that you are accessing the latest available help topics, please visit:
• https://docs.tibco.com
Product-Specific Documentation
The following documents form the TIBCO® Data Virtualization(TDV) documentation set:
• Users
TDV Getting Started Guide
TDV User Guide
TDV Client Interfaces Guide
TDV Tutorial Guide
TDV Northbay Example
• Administration
TDV Installation and Upgrade Guide
TDV Administration Guide
TDV Active Cluster Guide
TDV Security Features Guide
• Data Sources
TDV Adapter Guides
TDV Data Source Toolkit Guide (Formerly Extensibility Guide)
TIBCO® Data Virtualization
Preface |3
• References
TDV Reference Guide
TDV Application Programming Interface Guide
• Other
TDV Business Directory Guide
TDV Discovery Guide
• TIBCO TDV and Business Directory Release Notes Read the release notes for a list of new and changed features. This document also contains lists of known issues and closed issues for this release.
How to Access TIBCO Documentation
Documentation for TIBCO products is available on the TIBCO Product Documentation website mainly in the HTML and PDF formats.
The TIBCO Product Documentation website is updated frequently and is more current than any other documentation included with the product. To access the latest documentation, visit https://docs.tibco.com.
Documentation for TIBCO Data Virtualization is available on https://docs.tibco.com/products/tibco-data-virtualization-server.
How to Contact TIBCO Support
You can contact TIBCO Support in the following ways:
• For an overview of TIBCO Support, visit https://www.tibco.com/services/support.
• For accessing the Support Knowledge Base and getting personalized content about products you are interested in, visit the TIBCO Support portal at https://support.tibco.com.
• For creating a Support case, you must have a valid maintenance or support contract with TIBCO. You also need a user name and password to log in to https://support.tibco.com. If you do not have a user name, you can request one by clicking Register on the website.
TIBCO® Data Virtualization
4 | Preface
How to Join TIBCO Community
TIBCO Community is the official channel for TIBCO customers, partners, and employee subject matter experts to share and access their collective experience. TIBCO Community offers access to Q&A forums, product wikis, and best practices. It also offers access to extensions, adapters, solution accelerators, and tools that extend and enable customers to gain full value from TIBCO products. In addition, users can submit and vote on feature requests from within the TIBCO Ideas Portal. For a free registration, go to https://community.tibco.com.
TIBCO® Data Virtualization
|5
TDV File Data Sources
This topic describes the configuration of file-based data sources. For the purposes of TDV, the file data sources grouped in this topic are those that are file based and require similar configuration options.
• Supported Character Encoding Types, page 6
• Supported URL Protocols, page 6
• About Export and Import of Custom Java Procedures, page 7
• Adding a Custom Java Procedure, page 7
• File-Delimited Data Source, page 9
– Adding a Delimited File Data Source, page 9
– File - Delimited to TDV Data Types Mapping, page 12
– File Function Support, page 12
• Cache File Data Source, page 15
– Adding a Cache File Data Source, page 15
– File - Cache to TDV Data Types Mapping, page 16
– File Cache Mapping, page 16
• LDAP Data Source, page 19
– Adding an LDAP Data Source, page 19
– LDAP to TDV Data Types, page 21
• Microsoft Excel Data Sources, page 21
– Adding Microsoft Excel Data Sources, page 21
– Adding Microsoft Excel (non-ODBC) Data Sources, page 26
– Microsoft Excel to TDV Data Types, page 29
– Microsoft Excel Function Support, page 29
• XML File Data Source, page 30
– Adding an XML File Data Source, page 30
– XML Function Support, page 32
TIBCO® Data Virtualization
6 | Supported Character Encoding Types
Supported Character Encoding Types
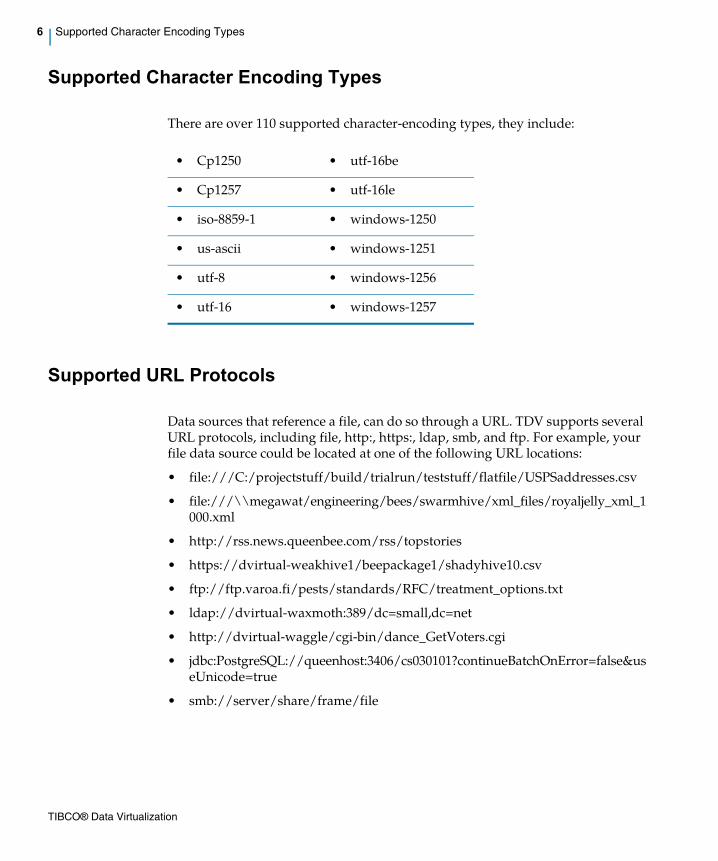
There are over 110 supported character-encoding types, they include:
Supported URL Protocols
Data sources that reference a file, can do so through a URL. TDV supports several URL protocols, including file, http:, https:, ldap, smb, and ftp. For example, your file data source could be located at one of the following URL locations:
• file:///C:/projectstuff/build/trialrun/teststuff/flatfile/USPSaddresses.csv
• file:///\\megawat/engineering/bees/swarmhive/xml_files/royaljelly_xml_1000.xml
• http://rss.news.queenbee.com/rss/topstories
• https://dvirtual-weakhive1/beepackage1/shadyhive10.csv
• ftp://ftp.varoa.fi/pests/standards/RFC/treatment_options.txt
• ldap://dvirtual-waxmoth:389/dc=small,dc=net
• http://dvirtual-waggle/cgi-bin/dance_GetVoters.cgi
• jdbc:PostgreSQL://queenhost:3406/cs030101?continueBatchOnError=false&useUnicode=true
• smb://server/share/frame/file
• Cp1250 • utf-16be
• Cp1257 • utf-16le
• iso-8859-1 • windows-1250
• us-ascii • windows-1251
• utf-8 • windows-1256
• utf-16 • windows-1257
TIBCO® Data Virtualization
About Export and Import of Custom Java Procedures |7
About Export and Import of Custom Java Procedures
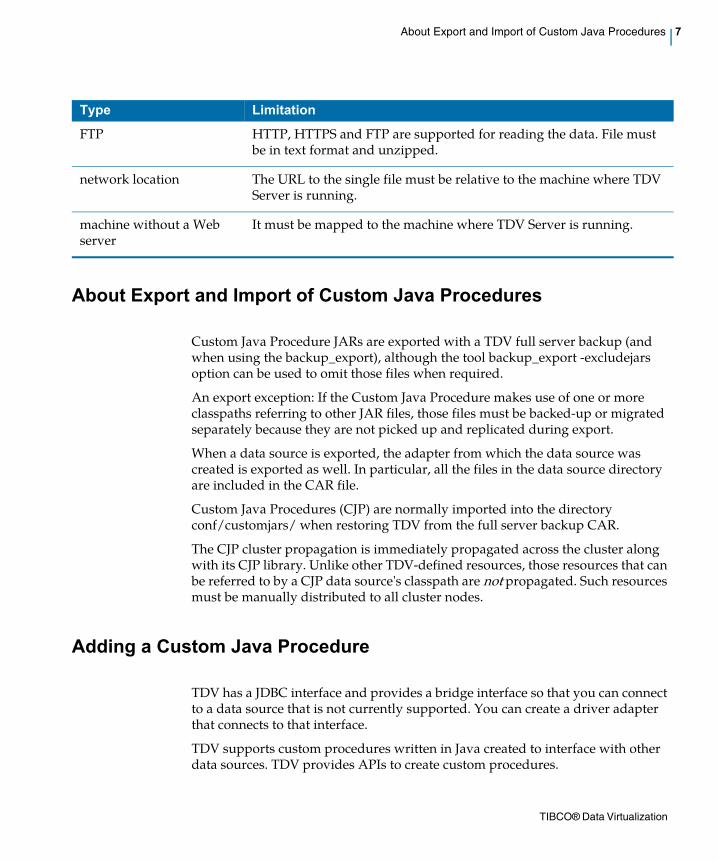
Custom Java Procedure JARs are exported with a TDV full server backup (and when using the backup_export), although the tool backup_export -excludejars option can be used to omit those files when required.
An export exception: If the Custom Java Procedure makes use of one or more classpaths referring to other JAR files, those files must be backed-up or migrated separately because they are not picked up and replicated during export.
When a data source is exported, the adapter from which the data source was created is exported as well. In particular, all the files in the data source directory are included in the CAR file.
Custom Java Procedures (CJP) are normally imported into the directory conf/customjars/ when restoring TDV from the full server backup CAR.
The CJP cluster propagation is immediately propagated across the cluster along with its CJP library. Unlike other TDV-defined resources, those resources that can be referred to by a CJP data source's classpath are not propagated. Such resources must be manually distributed to all cluster nodes.
Adding a Custom Java Procedure
TDV has a JDBC interface and provides a bridge interface so that you can connect to a data source that is not currently supported. You can create a driver adapter that connects to that interface.
TDV supports custom procedures written in Java created to interface with other data sources. TDV provides APIs to create custom procedures.
Type Limitation
FTP HTTP, HTTPS and FTP are supported for reading the data. File must be in text format and unzipped.
network location The URL to the single file must be relative to the machine where TDV Server is running.
machine without a Web server
It must be mapped to the machine where TDV Server is running.
TIBCO® Data Virtualization
8 | Adding a Custom Java Procedure
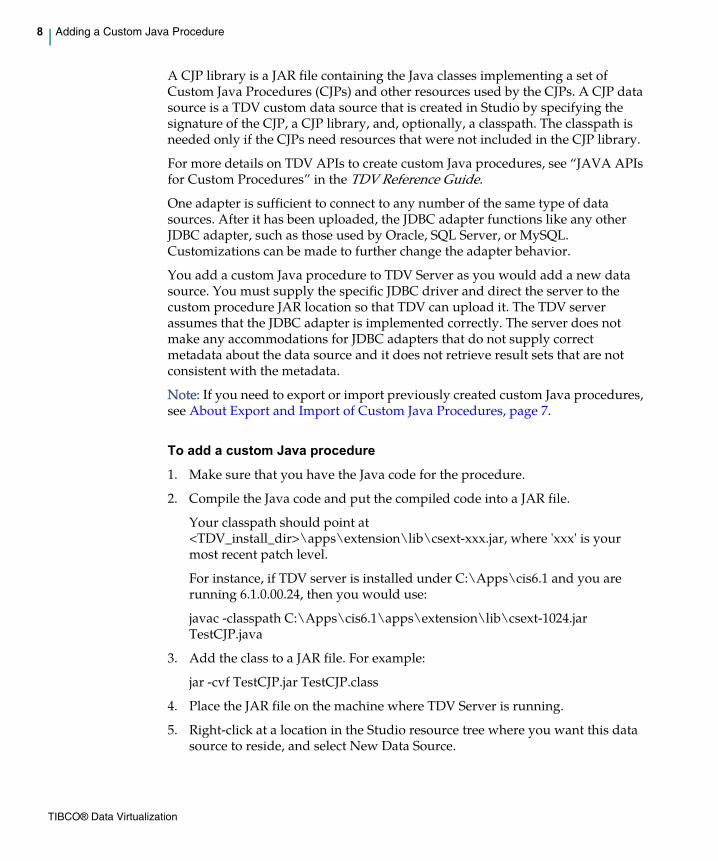
A CJP library is a JAR file containing the Java classes implementing a set of Custom Java Procedures (CJPs) and other resources used by the CJPs. A CJP data source is a TDV custom data source that is created in Studio by specifying the signature of the CJP, a CJP library, and, optionally, a classpath. The classpath is needed only if the CJPs need resources that were not included in the CJP library.
For more details on TDV APIs to create custom Java procedures, see “JAVA APIs for Custom Procedures” in the TDV Reference Guide.
One adapter is sufficient to connect to any number of the same type of data sources. After it has been uploaded, the JDBC adapter functions like any other JDBC adapter, such as those used by Oracle, SQL Server, or MySQL. Customizations can be made to further change the adapter behavior.
You add a custom Java procedure to TDV Server as you would add a new data source. You must supply the specific JDBC driver and direct the server to the custom procedure JAR location so that TDV can upload it. The TDV server assumes that the JDBC adapter is implemented correctly. The server does not make any accommodations for JDBC adapters that do not supply correct metadata about the data source and it does not retrieve result sets that are not consistent with the metadata.
Note: If you need to export or import previously created custom Java procedures, see About Export and Import of Custom Java Procedures, page 7.
To add a custom Java procedure
1. Make sure that you have the Java code for the procedure.
2. Compile the Java code and put the compiled code into a JAR file.
Your classpath should point at <TDV_install_dir>\apps\extension\lib\csext-xxx.jar, where 'xxx' is your most recent patch level.
For instance, if TDV server is installed under C:\Apps\cis6.1 and you are running 6.1.0.00.24, then you would use:
javac -classpath C:\Apps\cis6.1\apps\extension\lib\csext-1024.jar TestCJP.java
3. Add the class to a JAR file. For example:
jar -cvf TestCJP.jar TestCJP.class
4. Place the JAR file on the machine where TDV Server is running.
5. Right-click at a location in the Studio resource tree where you want this data source to reside, and select New Data Source.
TIBCO® Data Virtualization
File-Delimited Data Source |9
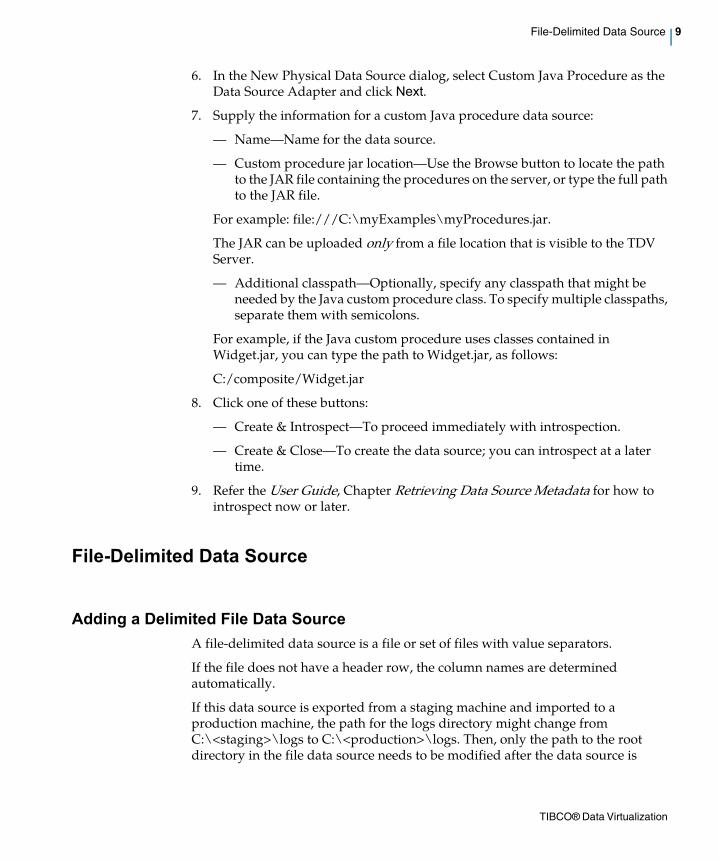
6. In the New Physical Data Source dialog, select Custom Java Procedure as the Data Source Adapter and click Next.
7. Supply the information for a custom Java procedure data source:
– Name–Name for the data source.
– Custom procedure jar location–Use the Browse button to locate the path to the JAR file containing the procedures on the server, or type the full path to the JAR file.
For example: file:///C:\myExamples\myProcedures.jar.
The JAR can be uploaded only from a file location that is visible to the TDV Server.
– Additional classpath–Optionally, specify any classpath that might be needed by the Java custom procedure class. To specify multiple classpaths, separate them with semicolons.
For example, if the Java custom procedure uses classes contained in Widget.jar, you can type the path to Widget.jar, as follows:
C:/composite/Widget.jar
8. Click one of these buttons:
– Create & Introspect–To proceed immediately with introspection.
– Create & Close–To create the data source; you can introspect at a later time.
9. Refer the User Guide, Chapter Retrieving Data Source Metadata for how to introspect now or later.
File-Delimited Data Source
Adding a Delimited File Data Source
A file-delimited data source is a file or set of files with value separators.
If the file does not have a header row, the column names are determined automatically.
If this data source is exported from a staging machine and imported to a production machine, the path for the logs directory might change from C:\<staging>\logs to C:\<production>\logs. Then, only the path to the root directory in the file data source needs to be modified after the data source is
TIBCO® Data Virtualization
10 | File-Delimited Data Source
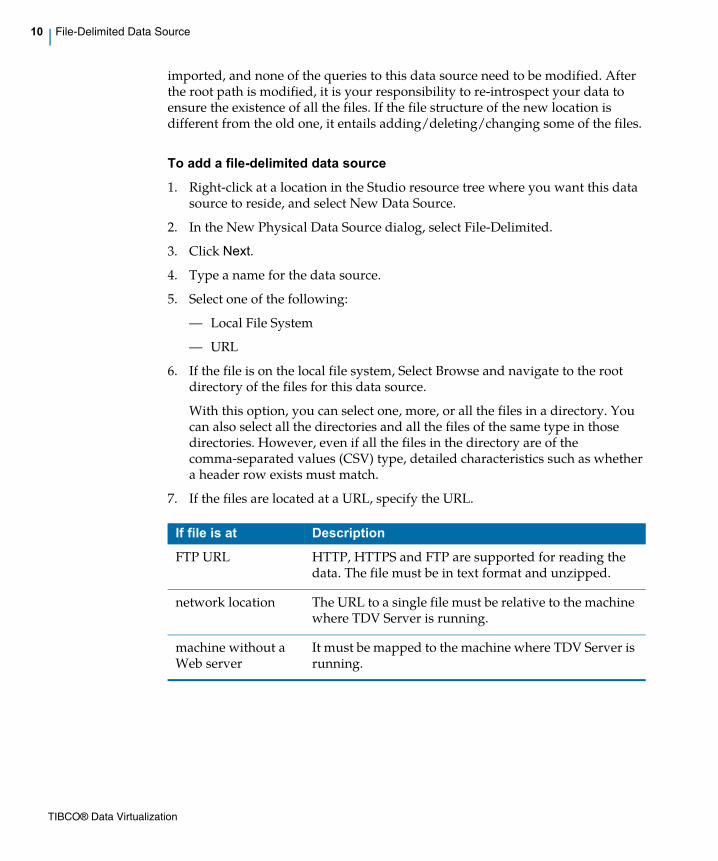
imported, and none of the queries to this data source need to be modified. After the root path is modified, it is your responsibility to re-introspect your data to ensure the existence of all the files. If the file structure of the new location is different from the old one, it entails adding/deleting/changing some of the files.
To add a file-delimited data source
1. Right-click at a location in the Studio resource tree where you want this data source to reside, and select New Data Source.
2. In the New Physical Data Source dialog, select File-Delimited.
3. Click Next.
4. Type a name for the data source.
5. Select one of the following:
– Local File System
– URL
6. If the file is on the local file system, Select Browse and navigate to the root directory of the files for this data source.
With this option, you can select one, more, or all the files in a directory. You can also select all the directories and all the files of the same type in those directories. However, even if all the files in the directory are of the comma-separated values (CSV) type, detailed characteristics such as whether a header row exists must match.
7. If the files are located at a URL, specify the URL.
If file is at Description
FTP URL HTTP, HTTPS and FTP are supported for reading the data. The file must be in text format and unzipped.
network location The URL to a single file must be relative to the machine where TDV Server is running.
machine without a Web server
It must be mapped to the machine where TDV Server is running.
TIBCO® Data Virtualization
File-Delimited Data Source |11
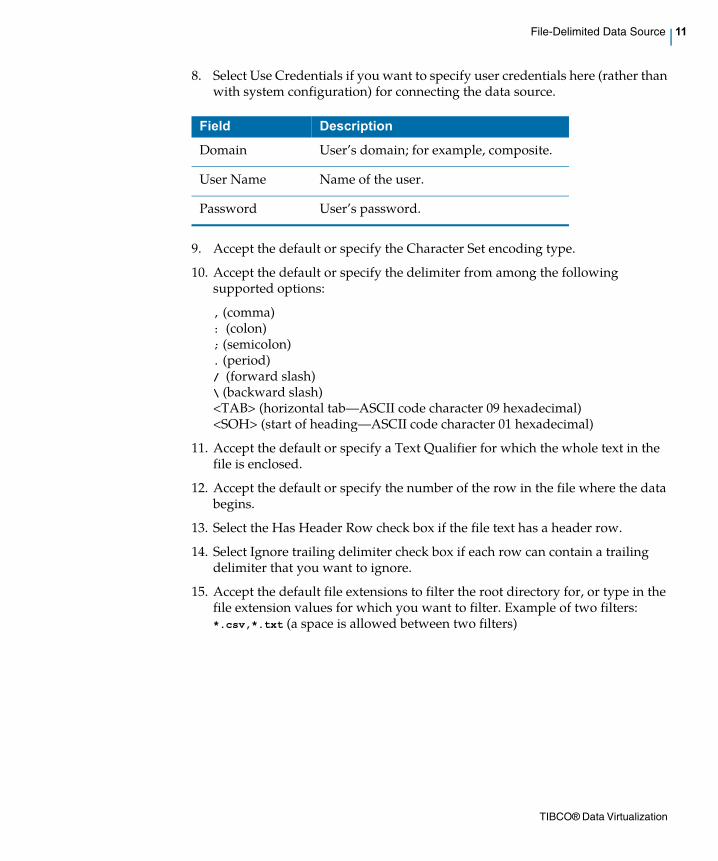
8. Select Use Credentials if you want to specify user credentials here (rather than with system configuration) for connecting the data source.
9. Accept the default or specify the Character Set encoding type.
10. Accept the default or specify the delimiter from among the following supported options:
, (comma): (colon); (semicolon). (period)/ (forward slash)\ (backward slash)<TAB> (horizontal tab–ASCII code character 09 hexadecimal)<SOH> (start of heading–ASCII code character 01 hexadecimal)
11. Accept the default or specify a Text Qualifier for which the whole text in the file is enclosed.
12. Accept the default or specify the number of the row in the file where the data begins.
13. Select the Has Header Row check box if the file text has a header row.
14. Select Ignore trailing delimiter check box if each row can contain a trailing delimiter that you want to ignore.
15. Accept the default file extensions to filter the root directory for, or type in the file extension values for which you want to filter. Example of two filters: *.csv,*.txt (a space is allowed between two filters)
Field Description
Domain User’s domain; for example, composite.
User Name Name of the user.
Password User’s password.
TIBCO® Data Virtualization
12 | File-Delimited Data Source
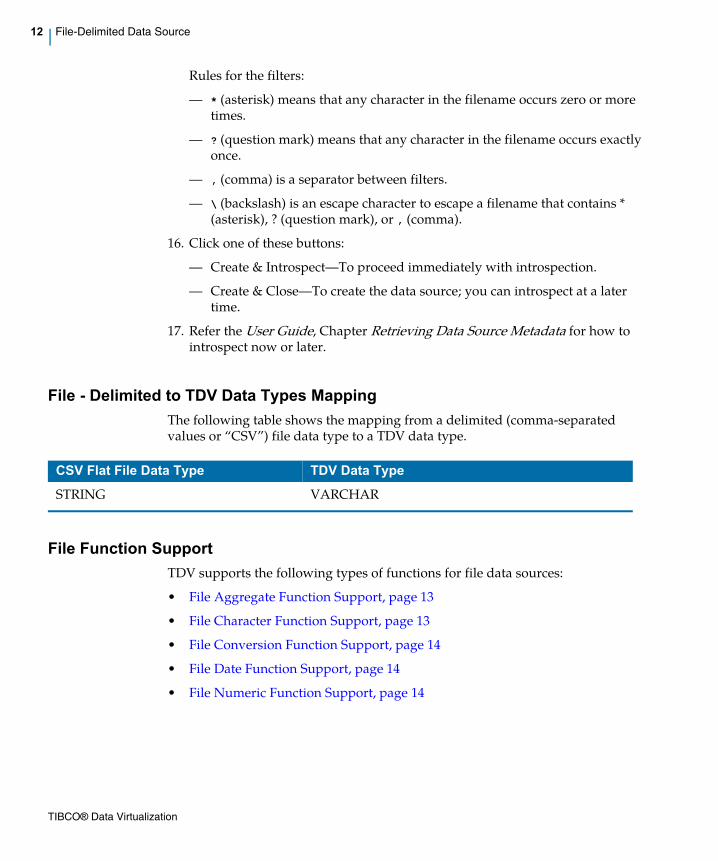
Rules for the filters:
– * (asterisk) means that any character in the filename occurs zero or more times.
– ? (question mark) means that any character in the filename occurs exactly once.
– , (comma) is a separator between filters.
– \ (backslash) is an escape character to escape a filename that contains * (asterisk), ? (question mark), or , (comma).
16. Click one of these buttons:
– Create & Introspect–To proceed immediately with introspection.
– Create & Close–To create the data source; you can introspect at a later time.
17. Refer the User Guide, Chapter Retrieving Data Source Metadata for how to introspect now or later.
File - Delimited to TDV Data Types Mapping
The following table shows the mapping from a delimited (comma-separated values or “CSV”) file data type to a TDV data type.
File Function Support
TDV supports the following types of functions for file data sources:
• File Aggregate Function Support, page 13
• File Character Function Support, page 13
• File Conversion Function Support, page 14
• File Date Function Support, page 14
• File Numeric Function Support, page 14
CSV Flat File Data Type TDV Data Type
STRING VARCHAR
TIBCO® Data Virtualization
File-Delimited Data Source |13
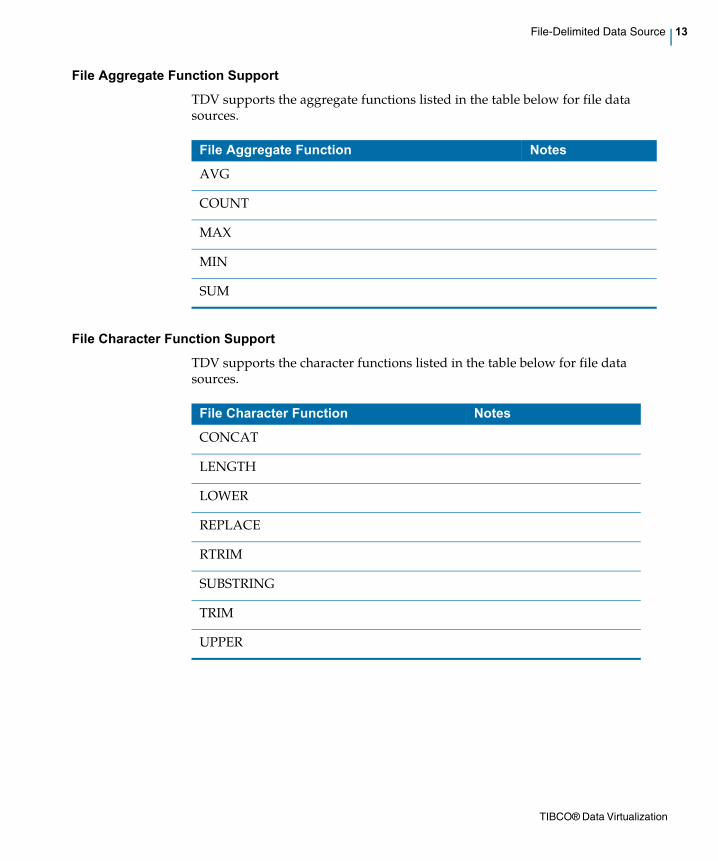
File Aggregate Function Support
TDV supports the aggregate functions listed in the table below for file data sources.
File Character Function Support
TDV supports the character functions listed in the table below for file data sources.
File Aggregate Function Notes
AVG
COUNT
MAX
MIN
SUM
File Character Function Notes
CONCAT
LENGTH
LOWER
REPLACE
RTRIM
SUBSTRING
TRIM
UPPER
TIBCO® Data Virtualization

14 | File-Delimited Data Source
File Conversion Function Support
TDV supports the conversion functions listed in the table below for file data sources.
File Date Function Support
TDV supports the date functions listed in the table below for file data sources.
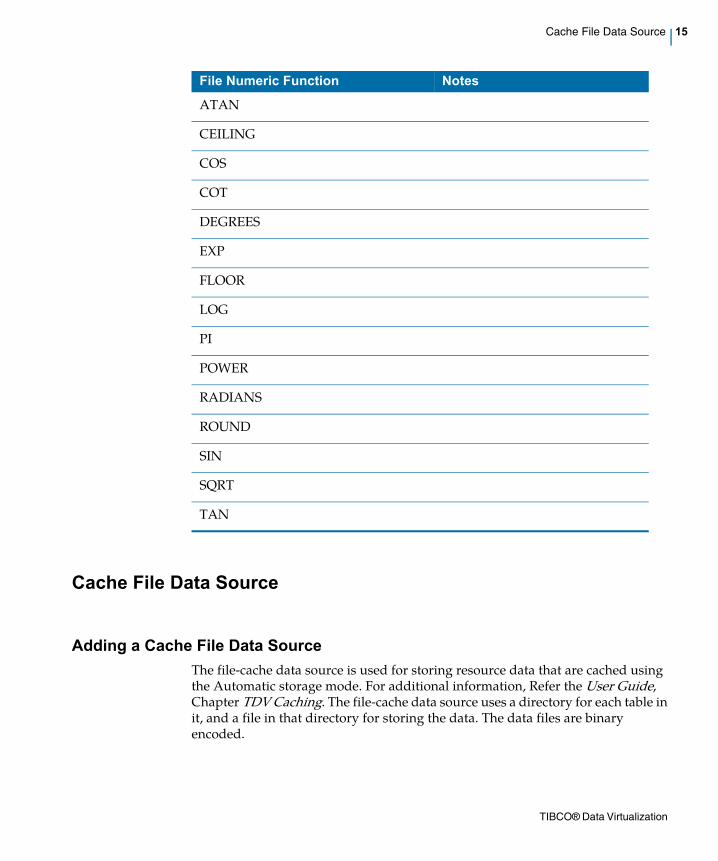
File Numeric Function Support
TDV supports the numeric functions listed in the table below for file data sources.
File Conversion Function Notes
CAST
TO_CHAR
TO_DATE
TO_NUMBER
TO_TIMESTAMP
File Date Function Notes
CURDAY
CURTIME
CURTIMESTAMP
DAY
MONTH
YEAR
File Numeric Function Notes
ABS
ACOS
ASIN
TIBCO® Data Virtualization
Cache File Data Source |15
Cache File Data Source
Adding a Cache File Data Source
The file-cache data source is used for storing resource data that are cached using the Automatic storage mode. For additional information, Refer the User Guide, Chapter TDV Caching. The file-cache data source uses a directory for each table in it, and a file in that directory for storing the data. The data files are binary encoded.
ATAN
CEILING
COS
COT
DEGREES
EXP
FLOOR
LOG
PI
POWER
RADIANS
ROUND
SIN
SQRT
TAN
File Numeric Function Notes
TIBCO® Data Virtualization
16 | Cache File Data Source
To add a file-cache data source
1. Right-click at a location in the Studio resource tree where you want this data source to reside, and select New Data Source.
2. In the New Physical Data Source dialog, select File-Cache as the Data Source Adapter and click Next.
3. Type a name for the data source.
4. Click Browse and use the Path Selection dialog box to locate the path to the storage directory for the file cache data source.
5. Click one of these buttons:
– Create & Introspect–To proceed immediately with introspection.
– Create & Close–To create the data source; you can introspect at a later time.
6. Refer the User Guide, Chapter Retrieving Data Source Metadata for how to introspect now or later.
File - Cache to TDV Data Types Mapping
The following restrictions apply to four file cache data types (BINARY, VARBINARY, CHAR, and VARCHAR) when they are mapped to TDV data types:
• The maximum length is 2147483647.
• The minimum length is 1.
As of TDV 7.0, the BOOLEAN file - cache data type maps to the BOOLEAN TDV data type. For details, see the section Mapping of Native to TDV Data Types Across TDV Versions in the User Guide, Chapter Function Support for Data Sources.
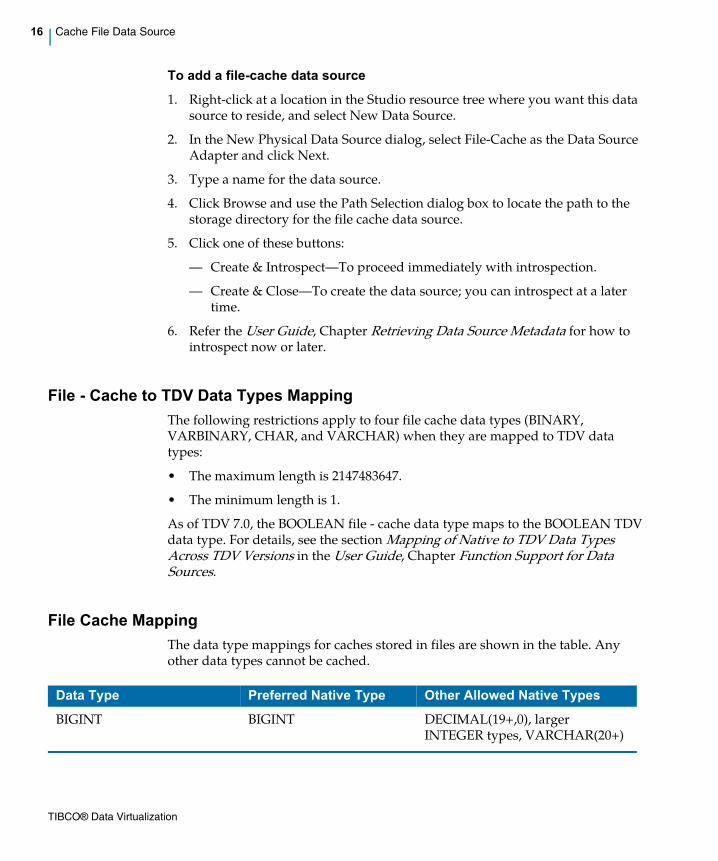
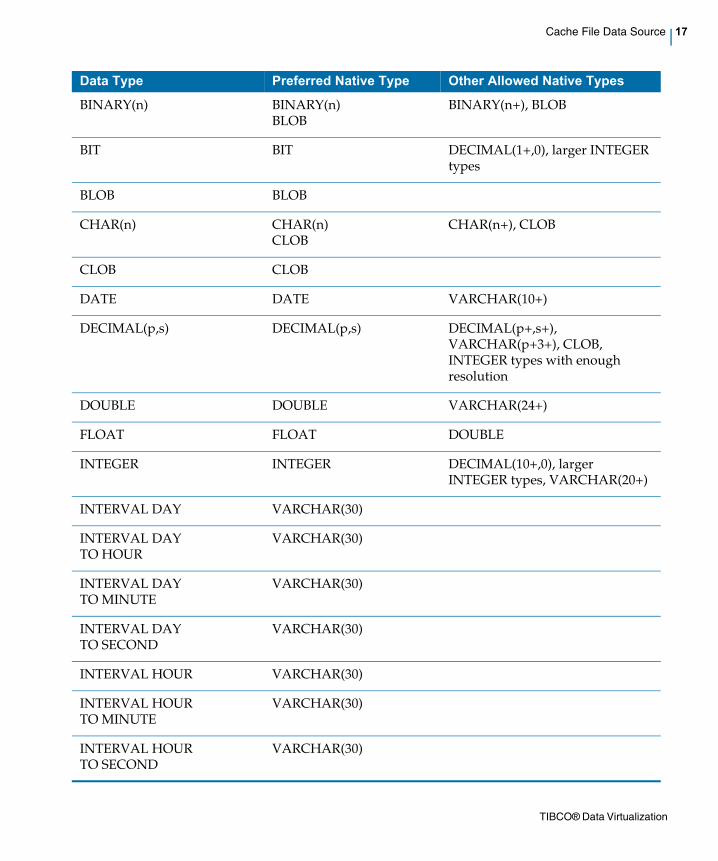
File Cache Mapping
The data type mappings for caches stored in files are shown in the table. Any other data types cannot be cached.
Data Type Preferred Native Type Other Allowed Native Types
BIGINT BIGINT DECIMAL(19+,0), larger INTEGER types, VARCHAR(20+)
TIBCO® Data Virtualization
Cache File Data Source |17
BINARY(n) BINARY(n)BLOB
BINARY(n+), BLOB
BIT BIT DECIMAL(1+,0), larger INTEGER types
BLOB BLOB
CHAR(n) CHAR(n)CLOB
CHAR(n+), CLOB
CLOB CLOB
DATE DATE VARCHAR(10+)
DECIMAL(p,s) DECIMAL(p,s) DECIMAL(p+,s+), VARCHAR(p+3+), CLOB, INTEGER types with enough resolution
DOUBLE DOUBLE VARCHAR(24+)
FLOAT FLOAT DOUBLE
INTEGER INTEGER DECIMAL(10+,0), larger INTEGER types, VARCHAR(20+)
INTERVAL DAY VARCHAR(30)
INTERVAL DAY TO HOUR
VARCHAR(30)
INTERVAL DAY TO MINUTE
VARCHAR(30)
INTERVAL DAY TO SECOND
VARCHAR(30)
INTERVAL HOUR VARCHAR(30)
INTERVAL HOUR TO MINUTE
VARCHAR(30)
INTERVAL HOUR TO SECOND
VARCHAR(30)
Data Type Preferred Native Type Other Allowed Native Types
TIBCO® Data Virtualization
18 | Cache File Data Source
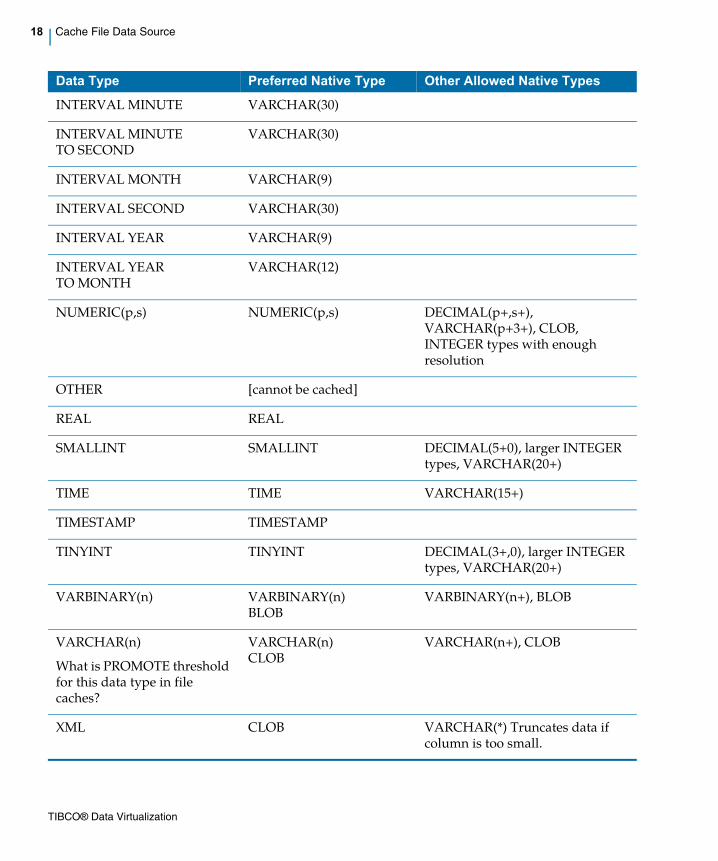
INTERVAL MINUTE VARCHAR(30)
INTERVAL MINUTE TO SECOND
VARCHAR(30)
INTERVAL MONTH VARCHAR(9)
INTERVAL SECOND VARCHAR(30)
INTERVAL YEAR VARCHAR(9)
INTERVAL YEAR TO MONTH
VARCHAR(12)
NUMERIC(p,s) NUMERIC(p,s) DECIMAL(p+,s+), VARCHAR(p+3+), CLOB, INTEGER types with enough resolution
OTHER [cannot be cached]
REAL REAL
SMALLINT SMALLINT DECIMAL(5+0), larger INTEGER types, VARCHAR(20+)
TIME TIME VARCHAR(15+)
TIMESTAMP TIMESTAMP
TINYINT TINYINT DECIMAL(3+,0), larger INTEGER types, VARCHAR(20+)
VARBINARY(n) VARBINARY(n)BLOB
VARBINARY(n+), BLOB
VARCHAR(n)
What is PROMOTE threshold for this data type in file caches?
VARCHAR(n)CLOB
VARCHAR(n+), CLOB
XML CLOB VARCHAR(*) Truncates data if column is too small.
Data Type Preferred Native Type Other Allowed Native Types
TIBCO® Data Virtualization
LDAP Data Source |19
LDAP Data Source
Adding an LDAP Data Source
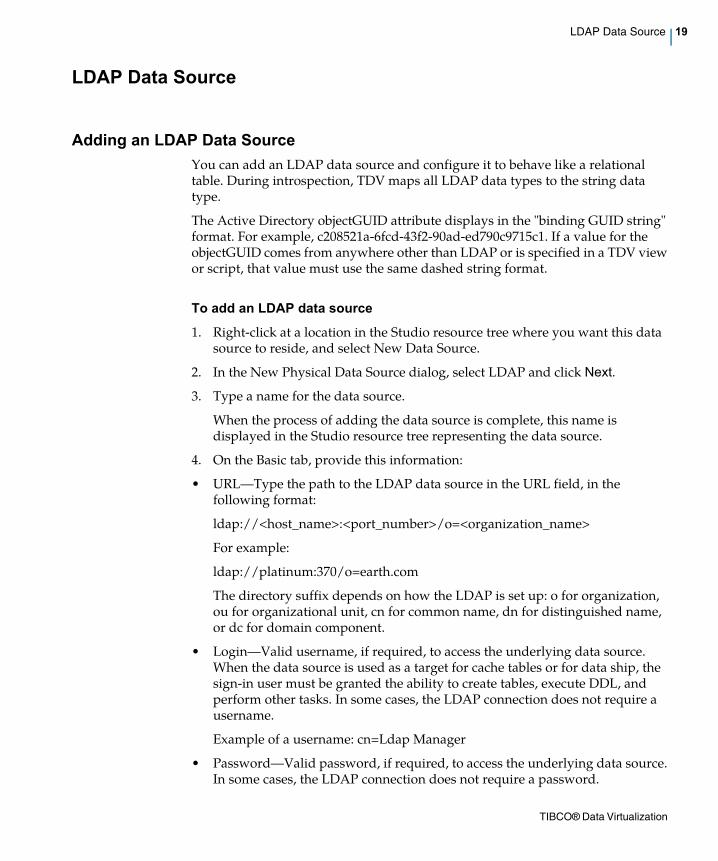
You can add an LDAP data source and configure it to behave like a relational table. During introspection, TDV maps all LDAP data types to the string data type.
The Active Directory objectGUID attribute displays in the "binding GUID string" format. For example, c208521a-6fcd-43f2-90ad-ed790c9715c1. If a value for the objectGUID comes from anywhere other than LDAP or is specified in a TDV view or script, that value must use the same dashed string format.
To add an LDAP data source
1. Right-click at a location in the Studio resource tree where you want this data source to reside, and select New Data Source.
2. In the New Physical Data Source dialog, select LDAP and click Next.
3. Type a name for the data source.
When the process of adding the data source is complete, this name is displayed in the Studio resource tree representing the data source.
4. On the Basic tab, provide this information:
• URL–Type the path to the LDAP data source in the URL field, in the following format:
ldap://<host_name>:<port_number>/o=<organization_name>
For example:
ldap://platinum:370/o=earth.com
The directory suffix depends on how the LDAP is set up: o for organization, ou for organizational unit, cn for common name, dn for distinguished name, or dc for domain component.
• Login–Valid username, if required, to access the underlying data source. When the data source is used as a target for cache tables or for data ship, the sign-in user must be granted the ability to create tables, execute DDL, and perform other tasks. In some cases, the LDAP connection does not require a username.
Example of a username: cn=Ldap Manager
• Password–Valid password, if required, to access the underlying data source. In some cases, the LDAP connection does not require a password.
TIBCO® Data Virtualization
20 | LDAP Data Source
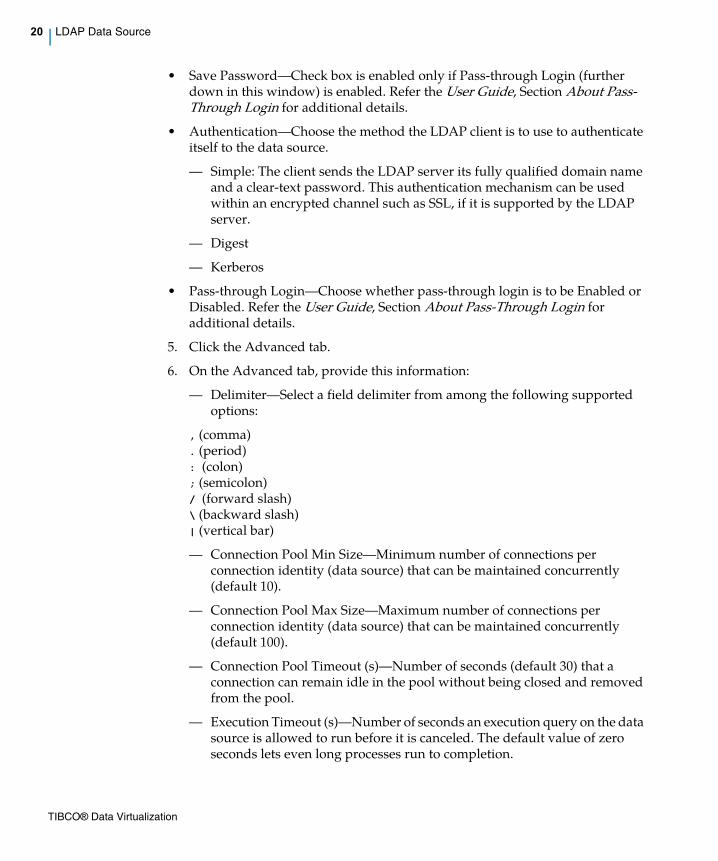
• Save Password–Check box is enabled only if Pass-through Login (further down in this window) is enabled. Refer the User Guide, Section About Pass- Through Login for additional details.
• Authentication–Choose the method the LDAP client is to use to authenticate itself to the data source.
– Simple: The client sends the LDAP server its fully qualified domain name and a clear-text password. This authentication mechanism can be used within an encrypted channel such as SSL, if it is supported by the LDAP server.
– Digest
– Kerberos
• Pass-through Login–Choose whether pass-through login is to be Enabled or Disabled. Refer the User Guide, Section About Pass-Through Login for additional details.
5. Click the Advanced tab.
6. On the Advanced tab, provide this information:
– Delimiter–Select a field delimiter from among the following supported options:
, (comma). (period): (colon); (semicolon)/ (forward slash)\ (backward slash)| (vertical bar)
– Connection Pool Min Size–Minimum number of connections per connection identity (data source) that can be maintained concurrently (default 10).
– Connection Pool Max Size–Maximum number of connections per connection identity (data source) that can be maintained concurrently (default 100).
– Connection Pool Timeout (s)–Number of seconds (default 30) that a connection can remain idle in the pool without being closed and removed from the pool.
– Execution Timeout (s)–Number of seconds an execution query on the data source is allowed to run before it is canceled. The default value of zero seconds lets even long processes run to completion.
TIBCO® Data Virtualization
Microsoft Excel Data Sources |21
7. Click one of these buttons:
– Create & Introspect–To proceed immediately with introspection.
– Create & Close–To create the data source; you can introspect at a later time.
8. Refer the User Guide, Chapter Retrieving Data Source Metadata for how to introspect (now or later).
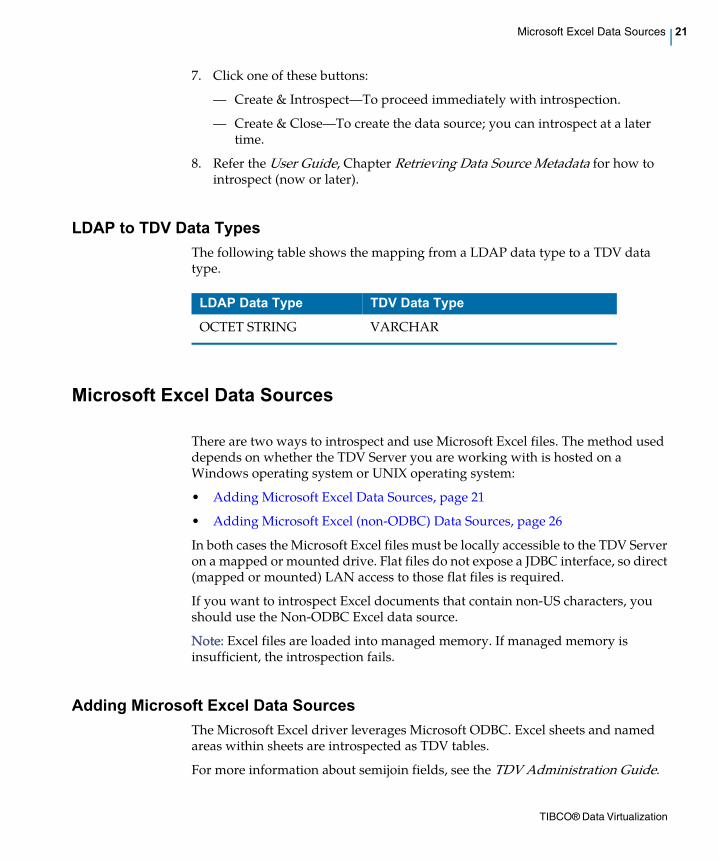
LDAP to TDV Data Types
The following table shows the mapping from a LDAP data type to a TDV data type.
Microsoft Excel Data Sources
There are two ways to introspect and use Microsoft Excel files. The method used depends on whether the TDV Server you are working with is hosted on a Windows operating system or UNIX operating system:
• Adding Microsoft Excel Data Sources, page 21
• Adding Microsoft Excel (non-ODBC) Data Sources, page 26
In both cases the Microsoft Excel files must be locally accessible to the TDV Server on a mapped or mounted drive. Flat files do not expose a JDBC interface, so direct (mapped or mounted) LAN access to those flat files is required.
If you want to introspect Excel documents that contain non-US characters, you should use the Non-ODBC Excel data source.
Note: Excel files are loaded into managed memory. If managed memory is insufficient, the introspection fails.
Adding Microsoft Excel Data Sources
The Microsoft Excel driver leverages Microsoft ODBC. Excel sheets and named areas within sheets are introspected as TDV tables.
For more information about semijoin fields, see the TDV Administration Guide.
LDAP Data Type TDV Data Type
OCTET STRING VARCHAR
TIBCO® Data Virtualization
22 | Microsoft Excel Data Sources
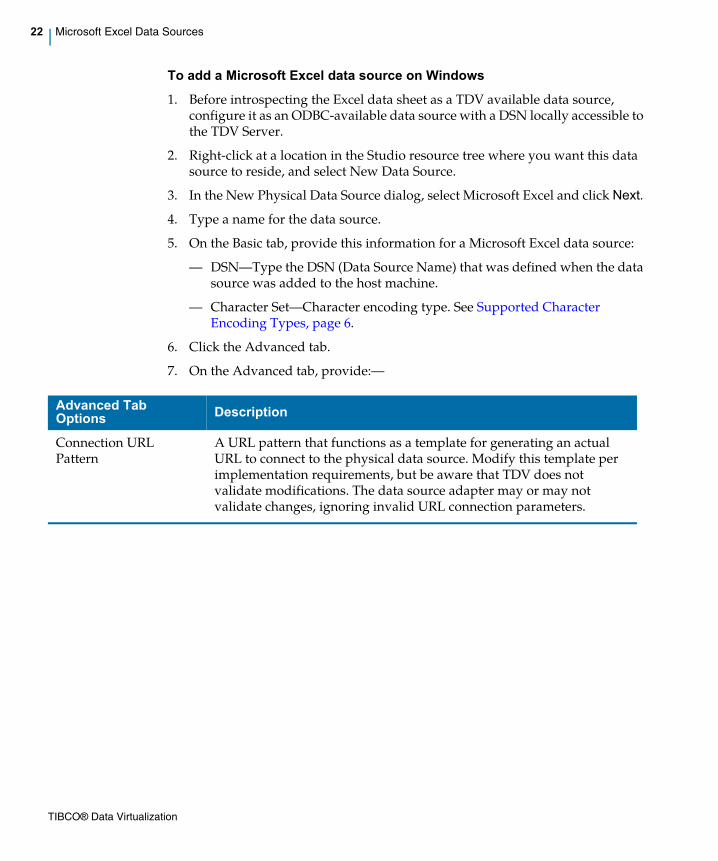
To add a Microsoft Excel data source on Windows
1. Before introspecting the Excel data sheet as a TDV available data source, configure it as an ODBC-available data source with a DSN locally accessible to the TDV Server.
2. Right-click at a location in the Studio resource tree where you want this data source to reside, and select New Data Source.
3. In the New Physical Data Source dialog, select Microsoft Excel and click Next.
4. Type a name for the data source.
5. On the Basic tab, provide this information for a Microsoft Excel data source:
– DSN–Type the DSN (Data Source Name) that was defined when the data source was added to the host machine.
– Character Set–Character encoding type. See Supported Character Encoding Types, page 6.
6. Click the Advanced tab.
7. On the Advanced tab, provide:–
Advanced Tab Options Description
Connection URL Pattern
A URL pattern that functions as a template for generating an actual URL to connect to the physical data source. Modify this template per implementation requirements, but be aware that TDV does not validate modifications. The data source adapter may or may not validate changes, ignoring invalid URL connection parameters.
TIBCO® Data Virtualization
Microsoft Excel Data Sources |23
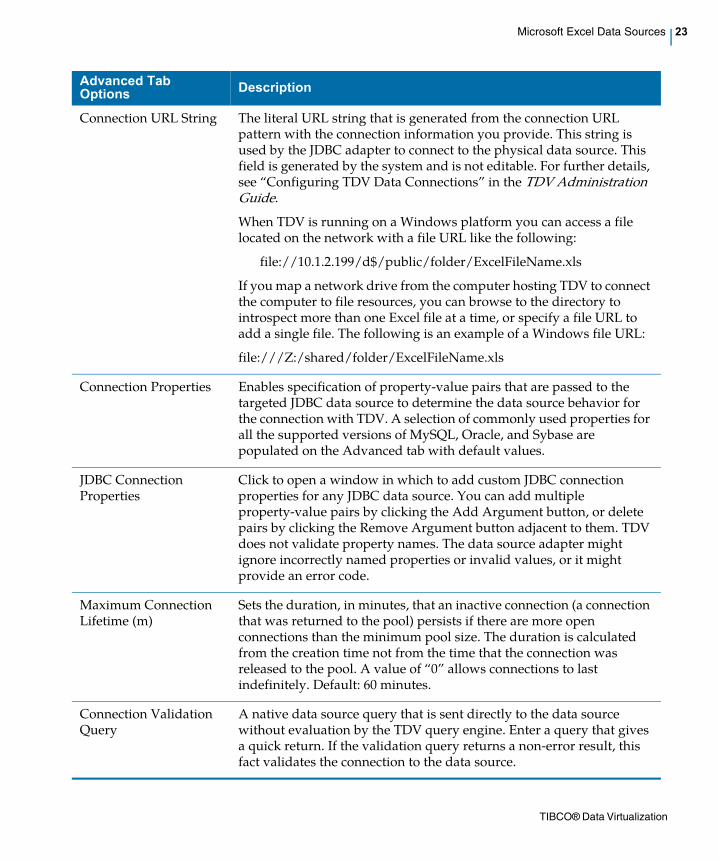
Connection URL String The literal URL string that is generated from the connection URL pattern with the connection information you provide. This string is used by the JDBC adapter to connect to the physical data source. This field is generated by the system and is not editable. For further details, see “Configuring TDV Data Connections” in the TDV Administration Guide.
When TDV is running on a Windows platform you can access a file located on the network with a file URL like the following:
file://10.1.2.199/d$/public/folder/ExcelFileName.xls
If you map a network drive from the computer hosting TDV to connect the computer to file resources, you can browse to the directory to introspect more than one Excel file at a time, or specify a file URL to add a single file. The following is an example of a Windows file URL:
file:///Z:/shared/folder/ExcelFileName.xls
Connection Properties Enables specification of property-value pairs that are passed to the targeted JDBC data source to determine the data source behavior for the connection with TDV. A selection of commonly used properties for all the supported versions of MySQL, Oracle, and Sybase are populated on the Advanced tab with default values.
JDBC Connection Properties
Click to open a window in which to add custom JDBC connection properties for any JDBC data source. You can add multiple property-value pairs by clicking the Add Argument button, or delete pairs by clicking the Remove Argument button adjacent to them. TDV does not validate property names. The data source adapter might ignore incorrectly named properties or invalid values, or it might provide an error code.
Maximum Connection Lifetime (m)
Sets the duration, in minutes, that an inactive connection (a connection that was returned to the pool) persists if there are more open connections than the minimum pool size. The duration is calculated from the creation time not from the time that the connection was released to the pool. A value of “0” allows connections to last indefinitely. Default: 60 minutes.
Connection Validation Query
A native data source query that is sent directly to the data source without evaluation by the TDV query engine. Enter a query that gives a quick return. If the validation query returns a non-error result, this fact validates the connection to the data source.
Advanced Tab Options Description
TIBCO® Data Virtualization
24 | Microsoft Excel Data Sources
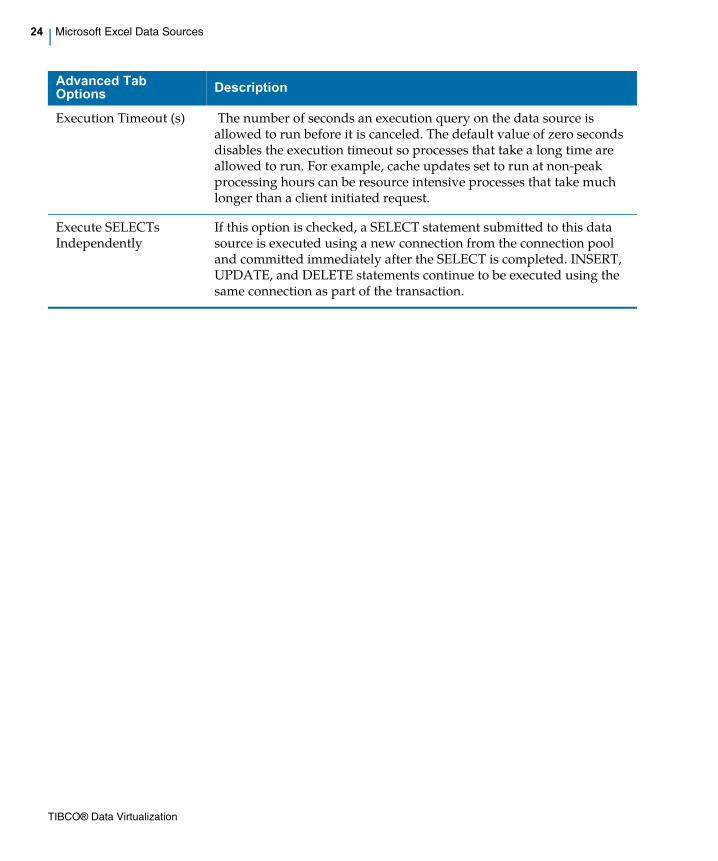
Execution Timeout (s) The number of seconds an execution query on the data source is allowed to run before it is canceled. The default value of zero seconds disables the execution timeout so processes that take a long time are allowed to run. For example, cache updates set to run at non-peak processing hours can be resource intensive processes that take much longer than a client initiated request.
Execute SELECTs Independently
If this option is checked, a SELECT statement submitted to this data source is executed using a new connection from the connection pool and committed immediately after the SELECT is completed. INSERT, UPDATE, and DELETE statements continue to be executed using the same connection as part of the transaction.
Advanced Tab Options Description
TIBCO® Data Virtualization
Microsoft Excel Data Sources |25
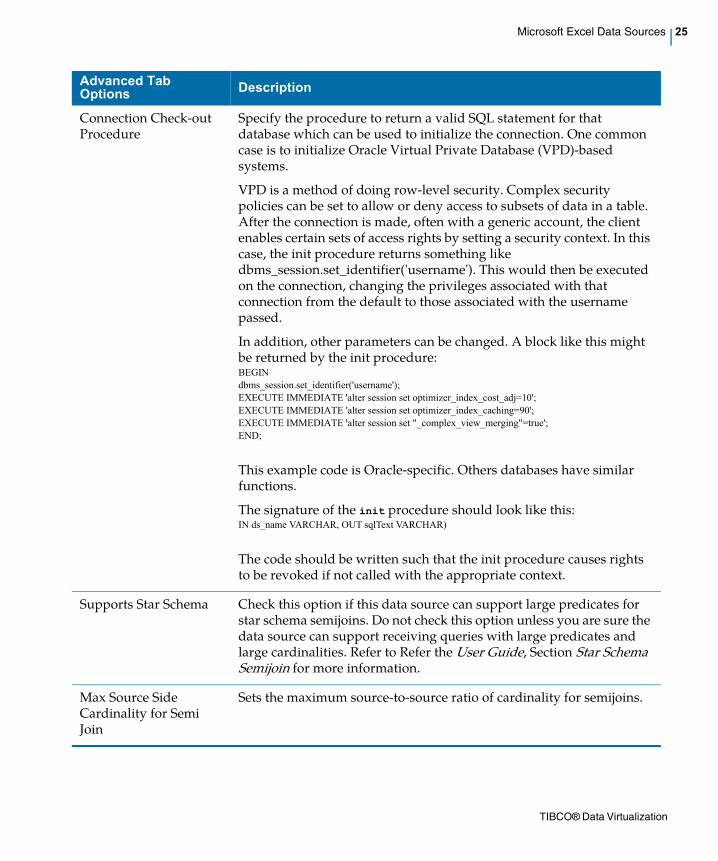
Connection Check-out Procedure
Specify the procedure to return a valid SQL statement for that database which can be used to initialize the connection. One common case is to initialize Oracle Virtual Private Database (VPD)-based systems.
VPD is a method of doing row-level security. Complex security policies can be set to allow or deny access to subsets of data in a table. After the connection is made, often with a generic account, the client enables certain sets of access rights by setting a security context. In this case, the init procedure returns something like dbms_session.set_identifier('username'). This would then be executed on the connection, changing the privileges associated with that connection from the default to those associated with the username passed.
In addition, other parameters can be changed. A block like this might be returned by the init procedure:BEGINdbms_session.set_identifier('username');EXECUTE IMMEDIATE 'alter session set optimizer_index_cost_adj=10';EXECUTE IMMEDIATE 'alter session set optimizer_index_caching=90';EXECUTE IMMEDIATE 'alter session set "_complex_view_merging"=true';END;
This example code is Oracle-specific. Others databases have similar functions.
The signature of the init procedure should look like this:IN ds_name VARCHAR, OUT sqlText VARCHAR)
The code should be written such that the init procedure causes rights to be revoked if not called with the appropriate context.
Supports Star Schema Check this option if this data source can support large predicates for star schema semijoins. Do not check this option unless you are sure the data source can support receiving queries with large predicates and large cardinalities. Refer to Refer the User Guide, Section Star Schema Semijoin for more information.
Max Source Side Cardinality for Semi Join
Sets the maximum source-to-source ratio of cardinality for semijoins.
Advanced Tab Options Description
TIBCO® Data Virtualization
26 | Microsoft Excel Data Sources
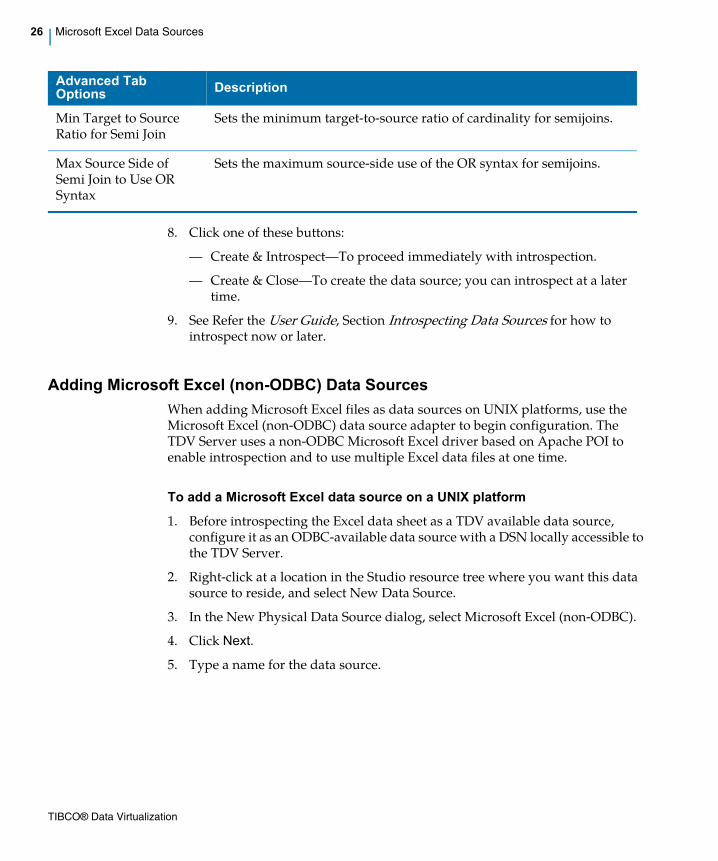
8. Click one of these buttons:
– Create & Introspect–To proceed immediately with introspection.
– Create & Close–To create the data source; you can introspect at a later time.
9. See Refer the User Guide, Section Introspecting Data Sources for how to introspect now or later.
Adding Microsoft Excel (non-ODBC) Data Sources
When adding Microsoft Excel files as data sources on UNIX platforms, use the Microsoft Excel (non-ODBC) data source adapter to begin configuration. The TDV Server uses a non-ODBC Microsoft Excel driver based on Apache POI to enable introspection and to use multiple Excel data files at one time.
To add a Microsoft Excel data source on a UNIX platform
1. Before introspecting the Excel data sheet as a TDV available data source, configure it as an ODBC-available data source with a DSN locally accessible to the TDV Server.
2. Right-click at a location in the Studio resource tree where you want this data source to reside, and select New Data Source.
3. In the New Physical Data Source dialog, select Microsoft Excel (non-ODBC).
4. Click Next.
5. Type a name for the data source.
Min Target to Source Ratio for Semi Join
Sets the minimum target-to-source ratio of cardinality for semijoins.
Max Source Side of Semi Join to Use OR Syntax
Sets the maximum source-side use of the OR syntax for semijoins.
Advanced Tab Options Description
TIBCO® Data Virtualization
Microsoft Excel Data Sources |27
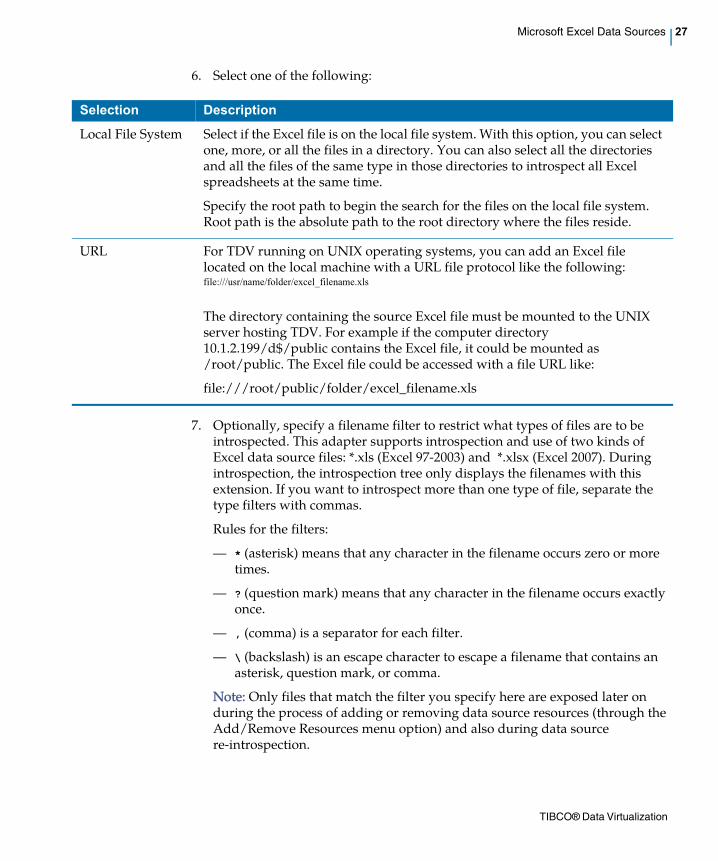
6. Select one of the following:
7. Optionally, specify a filename filter to restrict what types of files are to be introspected. This adapter supports introspection and use of two kinds of Excel data source files: *.xls (Excel 97-2003) and *.xlsx (Excel 2007). During introspection, the introspection tree only displays the filenames with this extension. If you want to introspect more than one type of file, separate the type filters with commas.
Rules for the filters:
– * (asterisk) means that any character in the filename occurs zero or more times.
– ? (question mark) means that any character in the filename occurs exactly once.
– , (comma) is a separator for each filter.
– \ (backslash) is an escape character to escape a filename that contains an asterisk, question mark, or comma.
Note: Only files that match the filter you specify here are exposed later on during the process of adding or removing data source resources (through the Add/Remove Resources menu option) and also during data source re-introspection.
Selection Description
Local File System Select if the Excel file is on the local file system. With this option, you can select one, more, or all the files in a directory. You can also select all the directories and all the files of the same type in those directories to introspect all Excel spreadsheets at the same time.
Specify the root path to begin the search for the files on the local file system. Root path is the absolute path to the root directory where the files reside.
URL For TDV running on UNIX operating systems, you can add an Excel file located on the local machine with a URL file protocol like the following:file:///usr/name/folder/excel_filename.xls
The directory containing the source Excel file must be mounted to the UNIX server hosting TDV. For example if the computer directory 10.1.2.199/d$/public contains the Excel file, it could be mounted as /root/public. The Excel file could be accessed with a file URL like:
file:///root/public/folder/excel_filename.xls
TIBCO® Data Virtualization

28 | Microsoft Excel Data Sources
8. Optionally type values for or make selections for the following:
9. Click one of these buttons:
– Create & Introspect–To proceed immediately with introspection.
– Create & Close–To create the data source; you can introspect at a later time.
10. Refer the User Guide, Chapter Retrieving Data Source Metadata for how to introspect now or later.
Element Description
Character Set Character encoding type. See Supported Character Encoding Types, page 6.
Data Range Enter the value that indicates the data range you want to introspect.
Blank Column Type Choose the data type to apply to blank columns: Varchar, Double, Boolean, or Datetime.
Has Header Row Check if the first row of all the introspected Excel sheets has a row of column names. If it is not selected, the first row of each Excel data sheet is introspected as a data row and the column names are: COL1, COL2, COL3. After the connection is established and the Excel files are introspected, each sheet is made available as a TABLE that can be defined as having or not having a header row independently of the original schema header row setting.
Columns in Every Row Use Format Categories of Columns in First Row
Check to introspect the data in every row formatted as specified in the first row.
Ignore Invalid Data Check to ignore invalid data.
Introspect with Formatted Display Values instead of Actual Values
Check to introspect the formatted display values.
Blank Value as Null Value
Check to introspect blank values as null values.
TIBCO® Data Virtualization
Microsoft Excel Data Sources |29
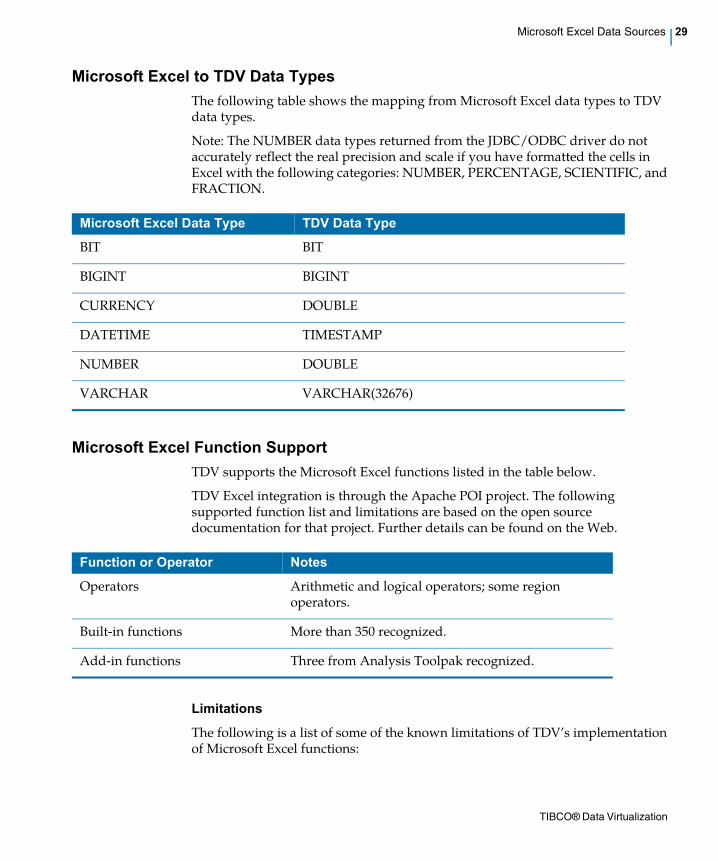
Microsoft Excel to TDV Data Types
The following table shows the mapping from Microsoft Excel data types to TDV data types.
Note: The NUMBER data types returned from the JDBC/ODBC driver do not accurately reflect the real precision and scale if you have formatted the cells in Excel with the following categories: NUMBER, PERCENTAGE, SCIENTIFIC, and FRACTION.
Microsoft Excel Function Support
TDV supports the Microsoft Excel functions listed in the table below.
TDV Excel integration is through the Apache POI project. The following supported function list and limitations are based on the open source documentation for that project. Further details can be found on the Web.
Limitations
The following is a list of some of the known limitations of TDV’s implementation of Microsoft Excel functions:
Microsoft Excel Data Type TDV Data Type
BIT BIT
BIGINT BIGINT
CURRENCY DOUBLE
DATETIME TIMESTAMP
NUMBER DOUBLE
VARCHAR VARCHAR(32676)
Function or Operator Notes
Operators Arithmetic and logical operators; some region operators.
Built-in functions More than 350 recognized.
Add-in functions Three from Analysis Toolpak recognized.
TIBCO® Data Virtualization
30 | XML File Data Source
• TDV cannot manipulate Excel array or table formulas of the form “{=...}” (rather than of the form “=...”).
• TDV cannot handle the region operators (UNION and INTERSECTION).
• TDV cannot parse add-in functions that have not previously been called.
• TDV cannot preserve white space in formulas.
• TDV cannot convert charts or macros to TDV objects.
• TDV does not support pivot tables.
XML File Data Source
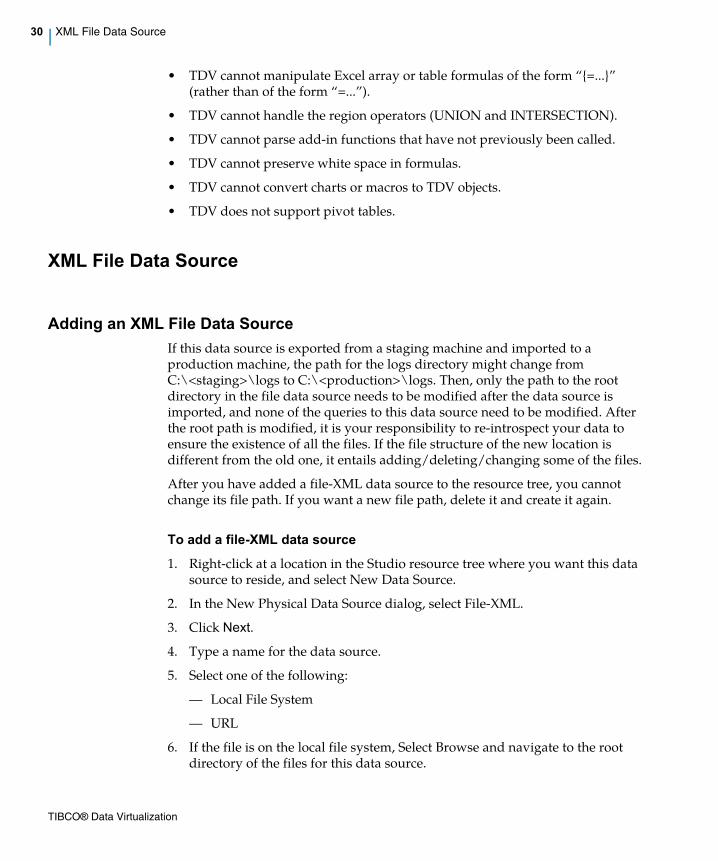
Adding an XML File Data Source
If this data source is exported from a staging machine and imported to a production machine, the path for the logs directory might change from C:\<staging>\logs to C:\<production>\logs. Then, only the path to the root directory in the file data source needs to be modified after the data source is imported, and none of the queries to this data source need to be modified. After the root path is modified, it is your responsibility to re-introspect your data to ensure the existence of all the files. If the file structure of the new location is different from the old one, it entails adding/deleting/changing some of the files.
After you have added a file-XML data source to the resource tree, you cannot change its file path. If you want a new file path, delete it and create it again.
To add a file-XML data source
1. Right-click at a location in the Studio resource tree where you want this data source to reside, and select New Data Source.
2. In the New Physical Data Source dialog, select File-XML.
3. Click Next.
4. Type a name for the data source.
5. Select one of the following:
– Local File System
– URL
6. If the file is on the local file system, Select Browse and navigate to the root directory of the files for this data source.
TIBCO® Data Virtualization
XML File Data Source |31
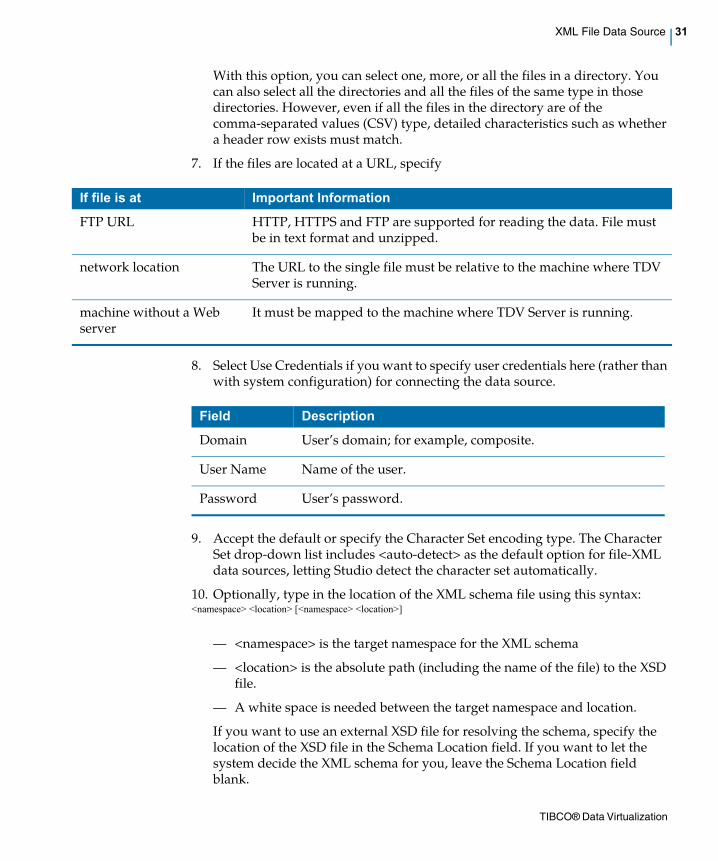
With this option, you can select one, more, or all the files in a directory. You can also select all the directories and all the files of the same type in those directories. However, even if all the files in the directory are of the comma-separated values (CSV) type, detailed characteristics such as whether a header row exists must match.
7. If the files are located at a URL, specify
8. Select Use Credentials if you want to specify user credentials here (rather than with system configuration) for connecting the data source.
9. Accept the default or specify the Character Set encoding type. The Character Set drop-down list includes <auto-detect> as the default option for file-XML data sources, letting Studio detect the character set automatically.
10. Optionally, type in the location of the XML schema file using this syntax: <namespace> <location> [<namespace> <location>]
– <namespace> is the target namespace for the XML schema
– <location> is the absolute path (including the name of the file) to the XSD file.
– A white space is needed between the target namespace and location.
If you want to use an external XSD file for resolving the schema, specify the location of the XSD file in the Schema Location field. If you want to let the system decide the XML schema for you, leave the Schema Location field blank.
If file is at Important Information
FTP URL HTTP, HTTPS and FTP are supported for reading the data. File must be in text format and unzipped.
network location The URL to the single file must be relative to the machine where TDV Server is running.
machine without a Web server
It must be mapped to the machine where TDV Server is running.
Field Description
Domain User’s domain; for example, composite.
User Name Name of the user.
Password User’s password.
TIBCO® Data Virtualization
32 | XML File Data Source
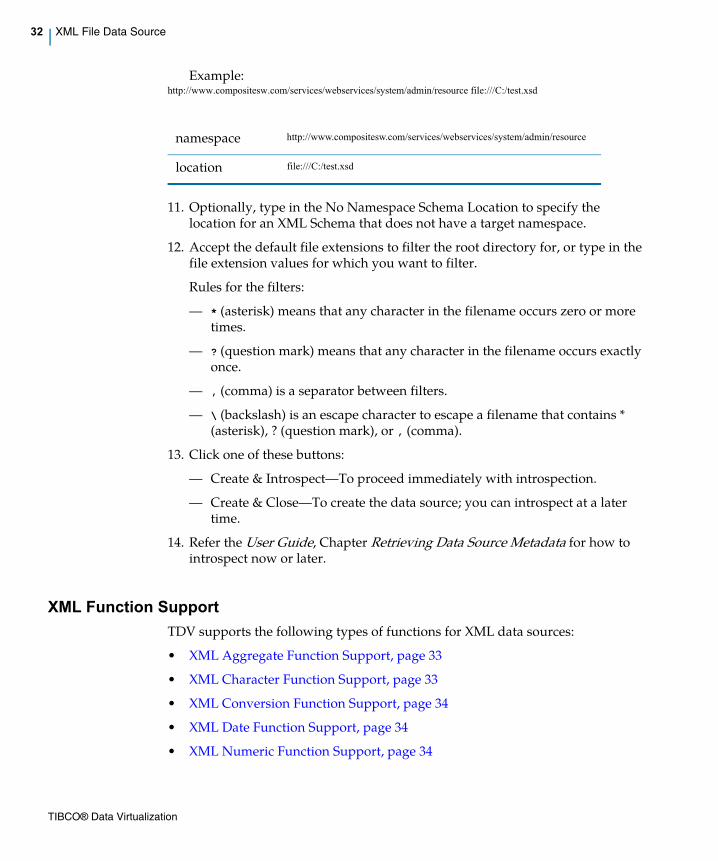
Example:http://www.compositesw.com/services/webservices/system/admin/resource file:///C:/test.xsd
11. Optionally, type in the No Namespace Schema Location to specify the location for an XML Schema that does not have a target namespace.
12. Accept the default file extensions to filter the root directory for, or type in the file extension values for which you want to filter.
Rules for the filters:
– * (asterisk) means that any character in the filename occurs zero or more times.
– ? (question mark) means that any character in the filename occurs exactly once.
– , (comma) is a separator between filters.
– \ (backslash) is an escape character to escape a filename that contains * (asterisk), ? (question mark), or , (comma).
13. Click one of these buttons:
– Create & Introspect–To proceed immediately with introspection.
– Create & Close–To create the data source; you can introspect at a later time.
14. Refer the User Guide, Chapter Retrieving Data Source Metadata for how to introspect now or later.
XML Function Support
TDV supports the following types of functions for XML data sources:
• XML Aggregate Function Support, page 33
• XML Character Function Support, page 33
• XML Conversion Function Support, page 34
• XML Date Function Support, page 34
• XML Numeric Function Support, page 34
namespace http://www.compositesw.com/services/webservices/system/admin/resource
location file:///C:/test.xsd
TIBCO® Data Virtualization
XML File Data Source |33
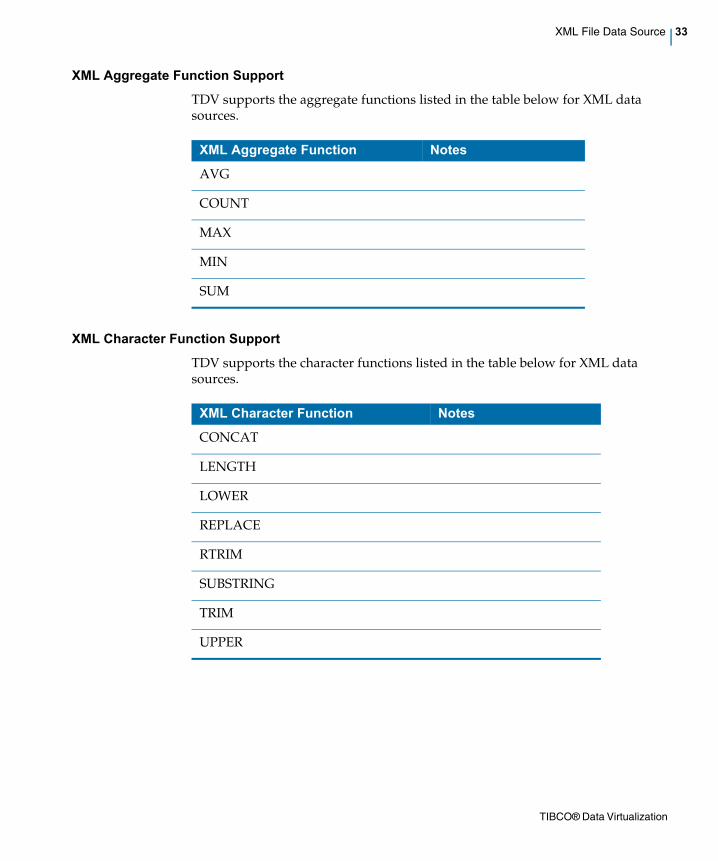
XML Aggregate Function Support
TDV supports the aggregate functions listed in the table below for XML data sources.
XML Character Function Support
TDV supports the character functions listed in the table below for XML data sources.
XML Aggregate Function Notes
AVG
COUNT
MAX
MIN
SUM
XML Character Function Notes
CONCAT
LENGTH
LOWER
REPLACE
RTRIM
SUBSTRING
TRIM
UPPER
TIBCO® Data Virtualization

34 | XML File Data Source
XML Conversion Function Support
TDV supports the conversion functions listed in the table below for XML data sources.
XML Date Function Support
TDV supports the date functions listed in the table below for XML data sources.
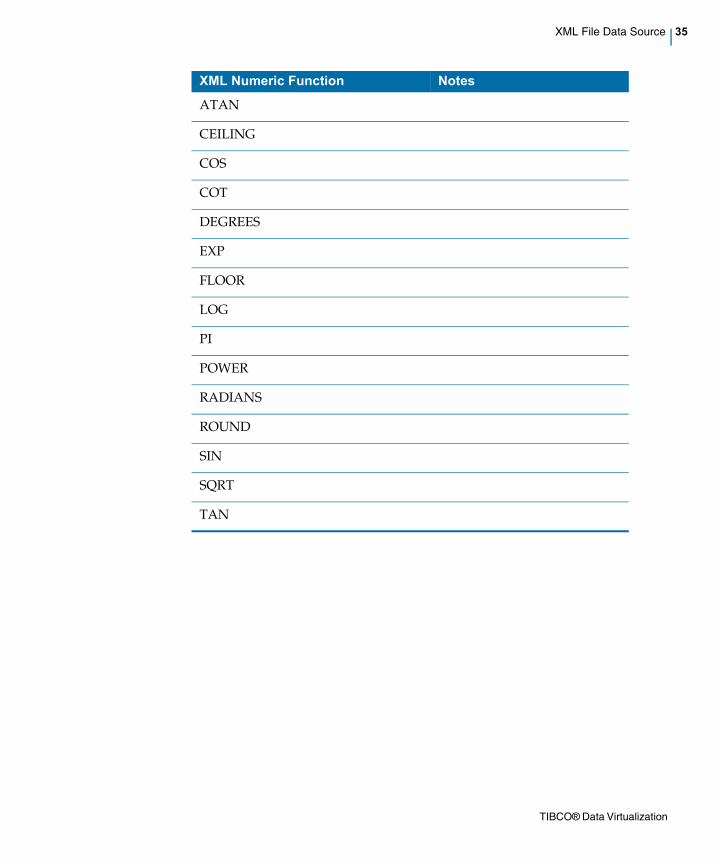
XML Numeric Function Support
TDV supports the numeric functions listed in the table below for XML data sources.
XML Conversion Function Notes
CAST
TO_CHAR
TO_DATE
TO_NUMBER
TO_TIMESTAMP
XML Date Function Notes
CURDAY
CURTIME
CURTIMESTAMP
DAY
MONTH
YEAR
XML Numeric Function Notes
ABS
ACOS
ASIN
TIBCO® Data Virtualization
XML File Data Source |35
ATAN
CEILING
COS
COT
DEGREES
EXP
FLOOR
LOG
PI
POWER
RADIANS
ROUND
SIN
SQRT
TAN
XML Numeric Function Notes
TIBCO® Data Virtualization
Related Documents