Guide to the FACS Calibur Turn on the pump. Check to see if the waste is full, if so replace it with an empty box (label it waste) of FACSflow sheath fluid and replace the sheath with a new box (I will leave these on the floor and dispose of the waste). Press reset alarm to turn the alarm off. Turn on the cytometer. Green button on the back right.

Welcome message from author
This document is posted to help you gain knowledge. Please leave a comment to let me know what you think about it! Share it to your friends and learn new things together.
Transcript
Guide to the FACS Calibur
Turn on the pump. Check to see if the waste is full, if so replace it with an
empty box (label it waste) of FACSflow sheath fluid and replace the sheath
with a new box (I will leave these on the floor and dispose of the waste).
Press reset alarm to turn the alarm off.
Turn on the cytometer. Green button on the back right.
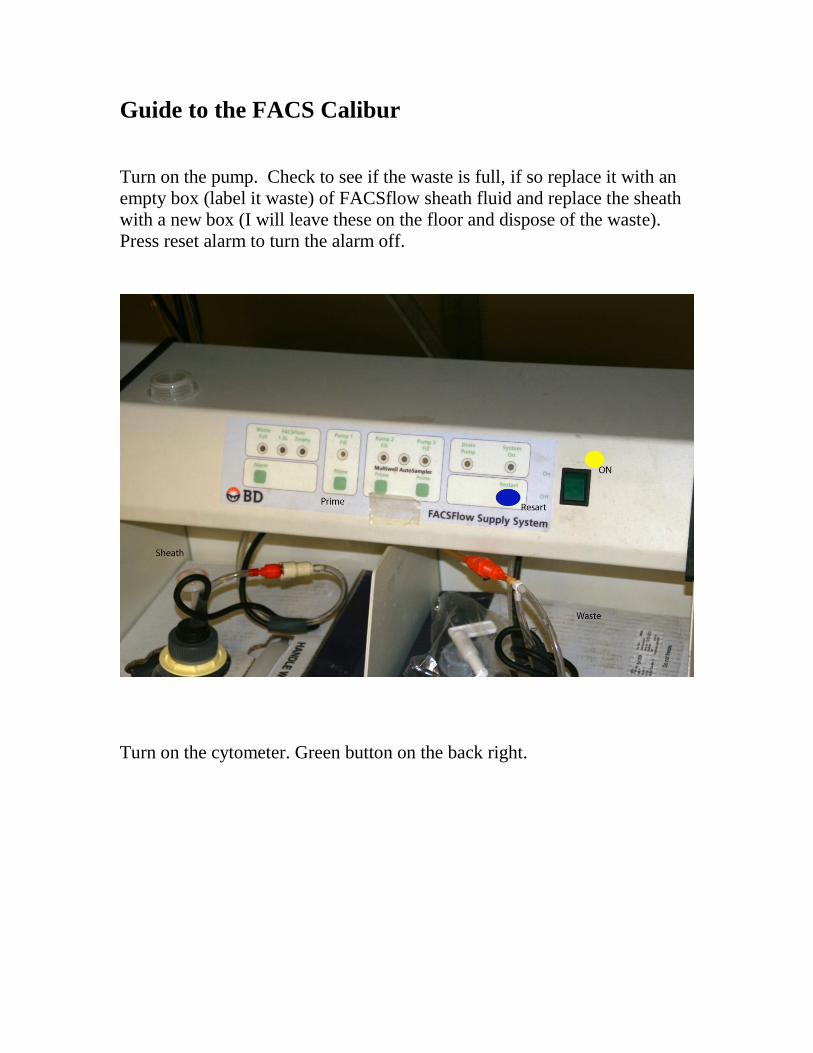
Log into your account (Please see IT to start up a new account).
Reboot the computer.
Start Cellquest Pro.
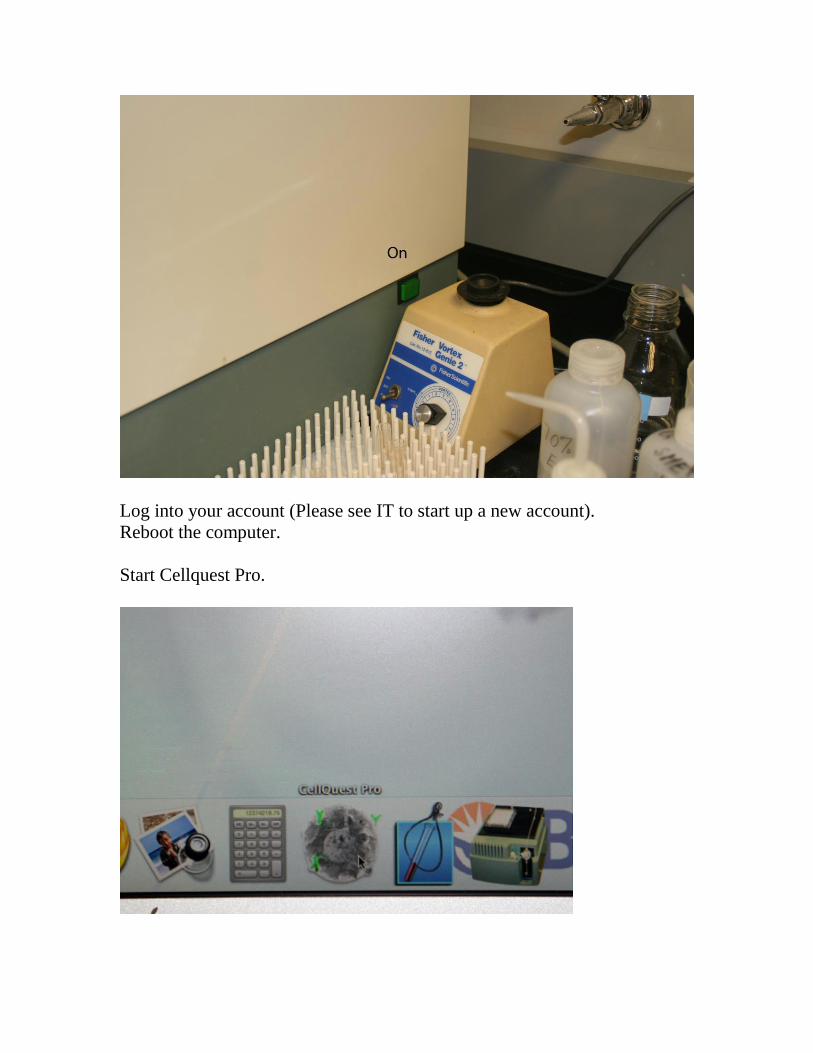
Choose connect to the Cytometer in the Acquire menu.
Check “setup” if this is not already clicked.
An acquisition control menu will pop up and this will allow you to change
the directory that your data will be saved into and also allow you to
assign file names to your data as well as fill out details about your
acquisition such as operator/project/comments and parameter settings.

Making a new acquisition document (Alternatively screen files and data
files that have been saved contain instrument settings and can be opened
directly into the program by double clicking or opening from the file menu).
Create an acquisition dot plot with FSC and SSC as the x and y-
Click and drag the dot plot tool on the toolbar onto the document and adjust
the size of the plot. Plots menu- format plot to modify (the size of this plot
will determine the size of the other plots).
Acquisition histogram plot for single fluorescent (FL1, 2, or 3)
Acquisition dot plot (arrow clicked below)
Acquisition density plot for dual parameters (e.g. FL1 vs. FL2)
Setting up instrument settings for FSC, SSC, FL1-FL3
Go to Cytometer menu- instrument control. By clicking on the axis of the
Plots and using the menu to the right you will be able to assign
the parameters you would like to measure.
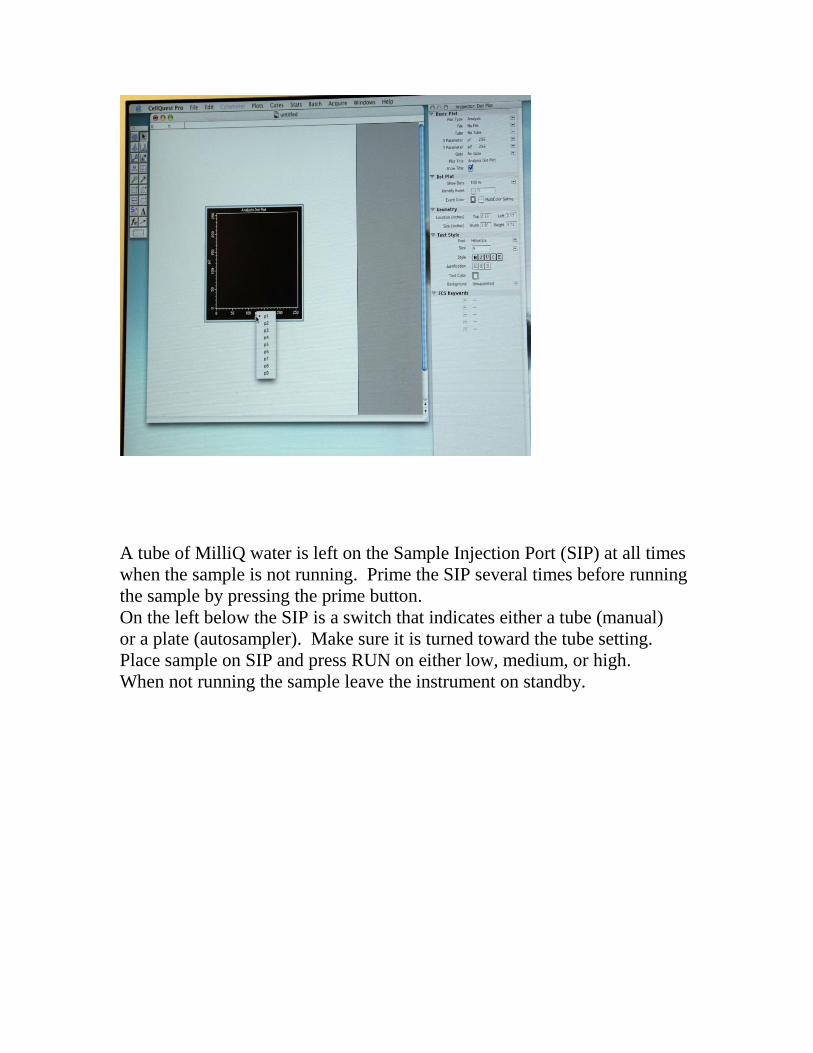
A tube of MilliQ water is left on the Sample Injection Port (SIP) at all times
when the sample is not running. Prime the SIP several times before running
the sample by pressing the prime button.
On the left below the SIP is a switch that indicates either a tube (manual)
or a plate (autosampler). Make sure it is turned toward the tube setting.
Place sample on SIP and press RUN on either low, medium, or high.
When not running the sample leave the instrument on standby.
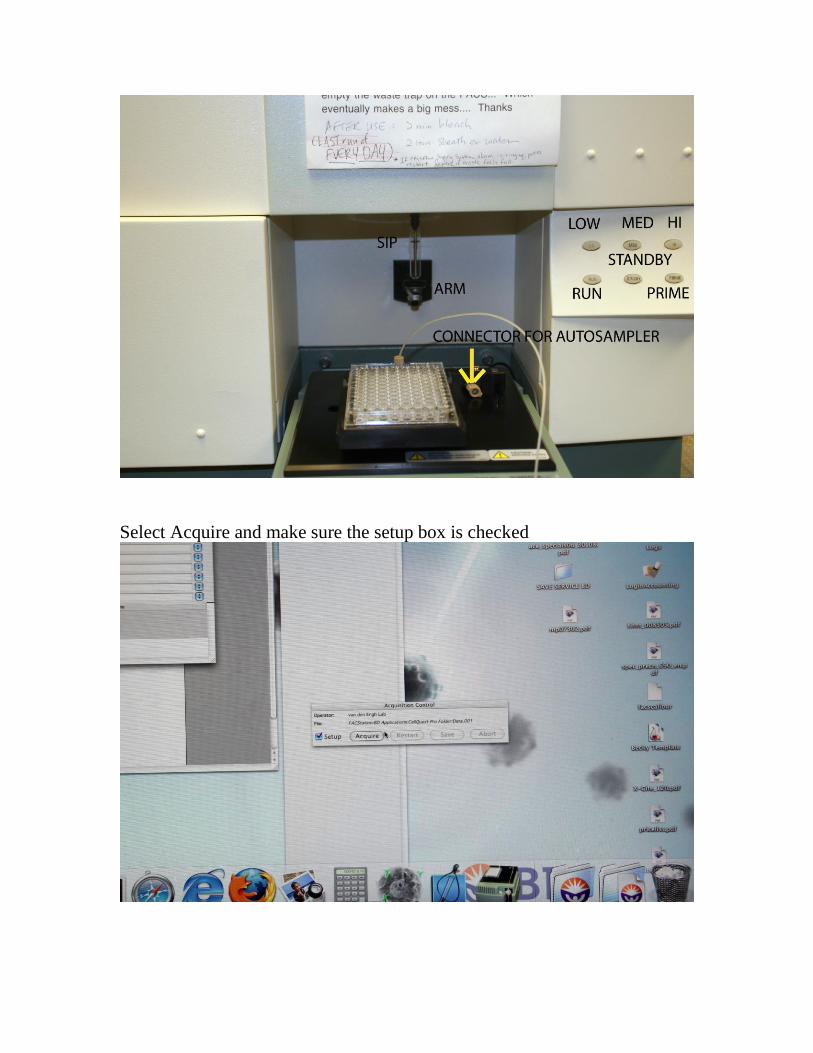
Select Acquire and make sure the setup box is checked
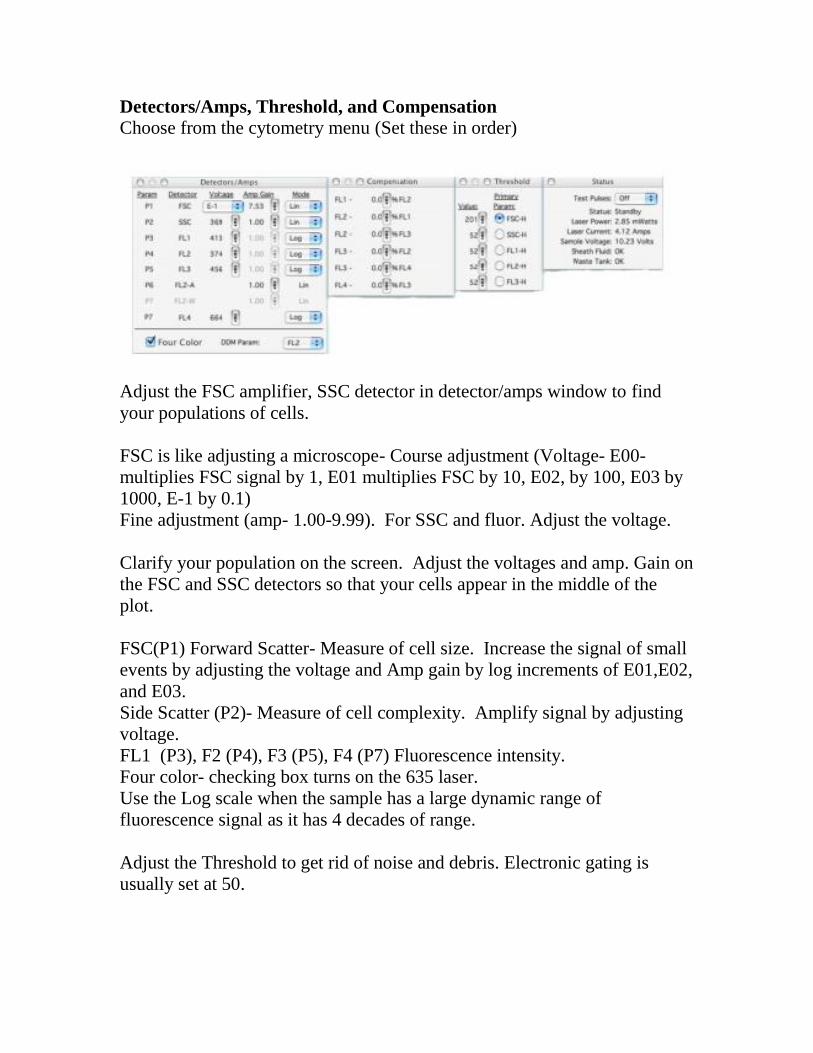
Detectors/Amps, Threshold, and Compensation
Choose from the cytometry menu (Set these in order)
Adjust the FSC amplifier, SSC detector in detector/amps window to find
your populations of cells.
FSC is like adjusting a microscope- Course adjustment (Voltage- E00-
multiplies FSC signal by 1, E01 multiplies FSC by 10, E02, by 100, E03 by
1000, E-1 by 0.1)
Fine adjustment (amp- 1.00-9.99). For SSC and fluor. Adjust the voltage.
Clarify your population on the screen. Adjust the voltages and amp. Gain on
the FSC and SSC detectors so that your cells appear in the middle of the
plot.
FSC(P1) Forward Scatter- Measure of cell size. Increase the signal of small
events by adjusting the voltage and Amp gain by log increments of E01,E02,
and E03.
Side Scatter (P2)- Measure of cell complexity. Amplify signal by adjusting
voltage.
FL1 (P3), F2 (P4), F3 (P5), F4 (P7) Fluorescence intensity.
Four color- checking box turns on the 635 laser.
Use the Log scale when the sample has a large dynamic range of
fluorescence signal as it has 4 decades of range.
Adjust the Threshold to get rid of noise and debris. Electronic gating is
usually set at 50.
Set ROI (rectangle, ellipse, or polygon) on tool palette. Draw region of
interest around events of interest. To set gate go to plot menu and choose
format. Turn gate on in plot source menu.
To adjust the background fluorescence (FL1, FL2, FL3)
Using the control sample, place the population in the first log decade by
adjusting the appropriate fluor. Detector. (Log mode- adjusts voltage).
Adjust the background fluor. For each fluor. Parameter.
Fluorescence Compensation
This is necessary for multi-color analysis (Perform this once initially for a
given set of cells/antibodies/stains). Place the compensation controls on the
cytometer and adjust the compensation for each.
Put on your first compensation control (i.e. FITC). If the FITC signal
fluoresces mostly in the FL1 channel, but bleeds over into the FL2 channel.
This needs to be compensated.
Go to the compensation window that you opened previously and adjust the
equation F2 -%FL1
View FL1 vs FL2 dot plot. As you increase the % compensation watch as
the FITC+ population is subtracted from the FL2 channel and placed solely
in the single positive quadrant.
The median of the FITC+ population should equal that of the unstained
population.

Acquire samples
Choose Counters- from the acquire menu and place on the screen
Uncheck the Setup box in the acquisition control bar
Place tube on cytometer- Run mode
Click acquire (setup box should be unchecked).
Load new tube and continue.
Saving your data:
Define where to store the data.
Change the directory to your lab folder.
Change the file name.
Define what data to acquire and save.
Define how many events to save
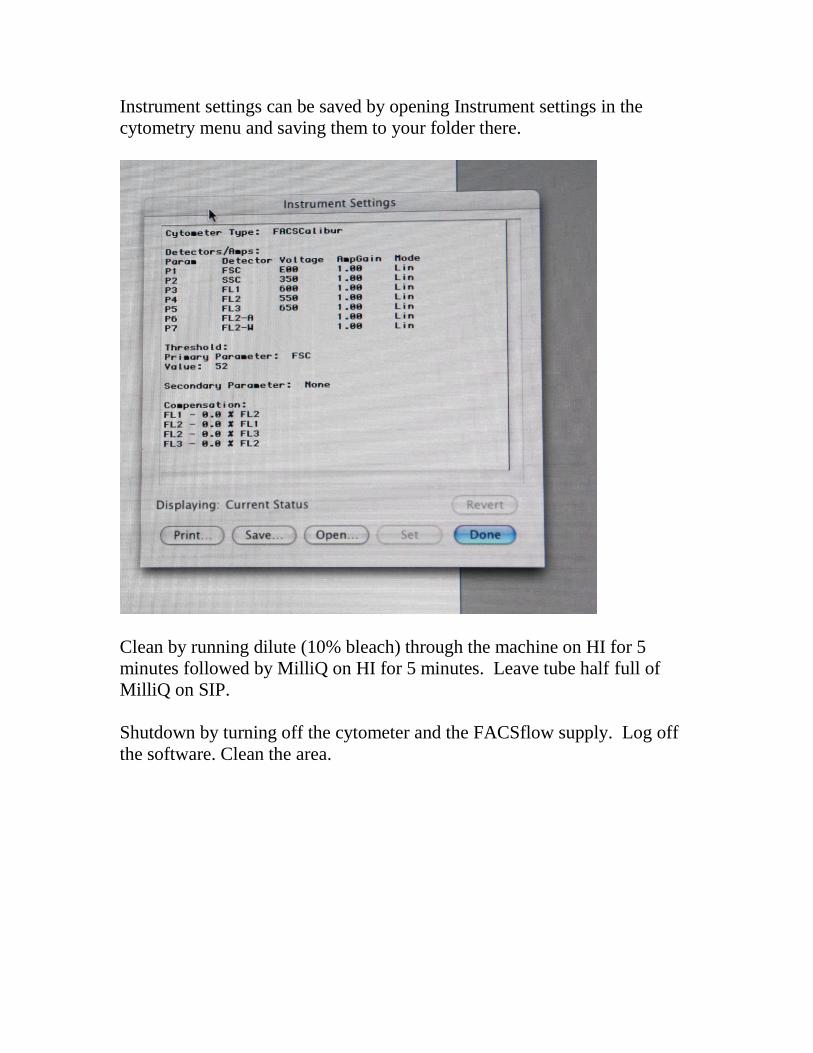
Instrument settings can be saved by opening Instrument settings in the
cytometry menu and saving them to your folder there.
Clean by running dilute (10% bleach) through the machine on HI for 5
minutes followed by MilliQ on HI for 5 minutes. Leave tube half full of
MilliQ on SIP.
Shutdown by turning off the cytometer and the FACSflow supply. Log off
the software. Clean the area.

Related Documents


![fJ 1?1”~)1?fl1]](https://static.cupdf.com/doc/110x72/626250a098785204f4645543/fj-111fl1.jpg)