Test Lab Guide: Configure eDiscovery for SharePoint Server 2013 This document is provided “as-is”. Information and views expressed in this document, including URL and other Internet Web site references, may change without notice. You bear the risk of using it. Some examples depicted herein are provided for illustration only and are fictitious. No real association or connection is intended or should be inferred. This document does not provide you with any legal rights to any intellectual property in any Microsoft product. You may copy and use this document for your internal, reference purposes. © 2013 Microsoft Corporation. All rights reserved.

Welcome message from author
This document is posted to help you gain knowledge. Please leave a comment to let me know what you think about it! Share it to your friends and learn new things together.
Transcript
Test Lab Guide: Configure eDiscovery for SharePoint Server 2013
This document is provided “as-is”. Information and views expressed in this document, including URL and
other Internet Web site references, may change without notice. You bear the risk of using it.
Some examples depicted herein are provided for illustration only and are fictitious. No real association or
connection is intended or should be inferred.
This document does not provide you with any legal rights to any intellectual property in any Microsoft
product. You may copy and use this document for your internal, reference purposes.
© 2013 Microsoft Corporation. All rights reserved.
Test Lab Guide: Configure eDiscovery for SharePoint Server 2013 May 2013
© 2013 Microsoft Corporation. All rights reserved. Page 2
To comment on this paper or request more documentation on these features, contact the Microsoft Office and
Servers Team ([email protected]).
Test Lab Guide: Configure eDiscovery for SharePoint Server 2013
Hal Zucati
Microsoft Corporation
Published: May 2013
Applies to: SharePoint Server 2013, Exchange Server 2013
Summary: This paper contains a brief introduction to the eDiscovery features in SharePoint Server 2013 and
step-by-step instructions for how to configure eDiscovery.
Test Lab Guide: Configure eDiscovery for SharePoint Server 2013 May 2013
© 2013 Microsoft Corporation. All rights reserved. Page 3
To comment on this paper or request more documentation on these features, contact the Microsoft Office and
Servers Team ([email protected]).
Contents Test Lab Guide: Configure eDiscovery for SharePoint Server 2013 ............................................................................ 2 Contents ........................................................................................................................................................... 3 Introduction ...................................................................................................................................................... 4
The eDiscovery process is as follows: ............................................................................................................. 4 Test Lab Guides ................................................................................................................................................. 4 In this guide ...................................................................................................................................................... 5 Test lab overview ............................................................................................................................................... 6 Hardware and software requirements ................................................................................................................... 7 Configuring the eDiscovery feature test lab ........................................................................................................... 8 Phase 1: Prerequisite Test Lab Guide configurations ............................................................................................... 8 Phase 2: eDiscovery configuration The following configuration steps apply only to eDiscovery and can come only after all other Test Lab Guide steps have been successfully completed: ................................................................................ 8 Step 1: Install the Exchange Web Service API ...................................................................................................... 10 Step 2: Configure a trust relationship between SharePoint Server 2013 and Exchange Server 2013 ........................... 10
Step 2, Part A: Configure the SharePoint Server 2013 server to trust the Exchange Server 2013 server ............... 11
Step 2, Part B: Configure permissions on the SharePoint Server 2013 server .................................................... 11
Step 2, Part C: Create a new eDiscovery web application ................................................................................ 12
Step 2, Part D: Configure the Exchange Server 2013 server to trust the SharePoint Server 2013 server ............... 12 Step 3: Configure Exchange for SharePoint eDiscovery Center ............................................................................... 13
Step 3, Part A: Configure server-to-server authentication for Exchange Server 2013 on the APP1 server .............. 13
Step 3, Part B: Configure server-to-server authentication for SharePoint Server 2013 on the EX1 server .............. 13 Step 4: Configure Search to crawl all discoverable content .................................................................................... 14 Step 5: Create an eDiscovery center ................................................................................................................... 14
Create a eDiscovery site collection ............................................................................................................... 14 Step 6: Add User1 to the Discovery Management Role Group in Exchange Server 2013 ............................................ 15
Use the EAC to add a user to the Discovery Management role group ................................................................ 15
Add User1 to the Discovery Management role group ....................................................................................... 15
How do you know this worked? .................................................................................................................... 15 Using eDiscovery in SharePoint 2013 .................................................................................................................. 16 Snapshot the configuration ................................................................................................................................ 16 Additional resources ......................................................................................................................................... 16
Test Lab Guide: Configure eDiscovery for SharePoint Server 2013 May 2013
© 2013 Microsoft Corporation. All rights reserved. Page 4
To comment on this paper or request more documentation on these features, contact the Microsoft Office and
Servers Team ([email protected]).
Introduction The eDiscovery feature in SharePoint Server 2013 provides a way to find, secure, review, and export content
in response to a legal demand or to meet a compliance demand. The eDiscovery feature allows users to find
and act on content stored in local folders, network locations, SharePoint sites, and Microsoft Exchange
mailboxes.
The eDiscovery process is as follows: 1. Content Preservation: A new eDiscovery case is created and its parameters defined. All known, required
content is placed on hold preventing further deletion or modification until the hold is lifted.
2. Content Search: After known content has been placed on hold, a search is performed to discover all
related but unknown content. This search starts with a user-defined query and allows for defined
searching as well as for duplication of found content.
3. Content Review: The known and newly discovered content is presented for visualization and
comprehensive reading and review. This ensures that only content relevant to the case is included.
4. Content Export: Allows all content to be gathered together in one place in a common format and
exported as a TIFF/PDF file along with other industry standard legal formats. You can also print hardcopy
versions of the content directly.
For more information about eDiscovery in SharePoint Server 2013, see Scenario: eDiscovery in SharePoint
Server 2013 and Exchange Server 2013.
Test Lab Guides Microsoft Test Lab Guides (TLGs) are a set of documents that step you through the configuration and
demonstration of a Microsoft technology or product in a standardized test lab environment, which starts
with a common base configuration that mimics a simplified intranet and the Internet. TLGs are designed to
be modular, extensible, and stackable to configure complex, multi-product solutions. TLGs make learning
about products, technologies, and solutions easier by providing that crucial hands-on, “I built it out myself”
experience.
For more information, see Test Lab Guides at http://microsoft.com/testlabguides.
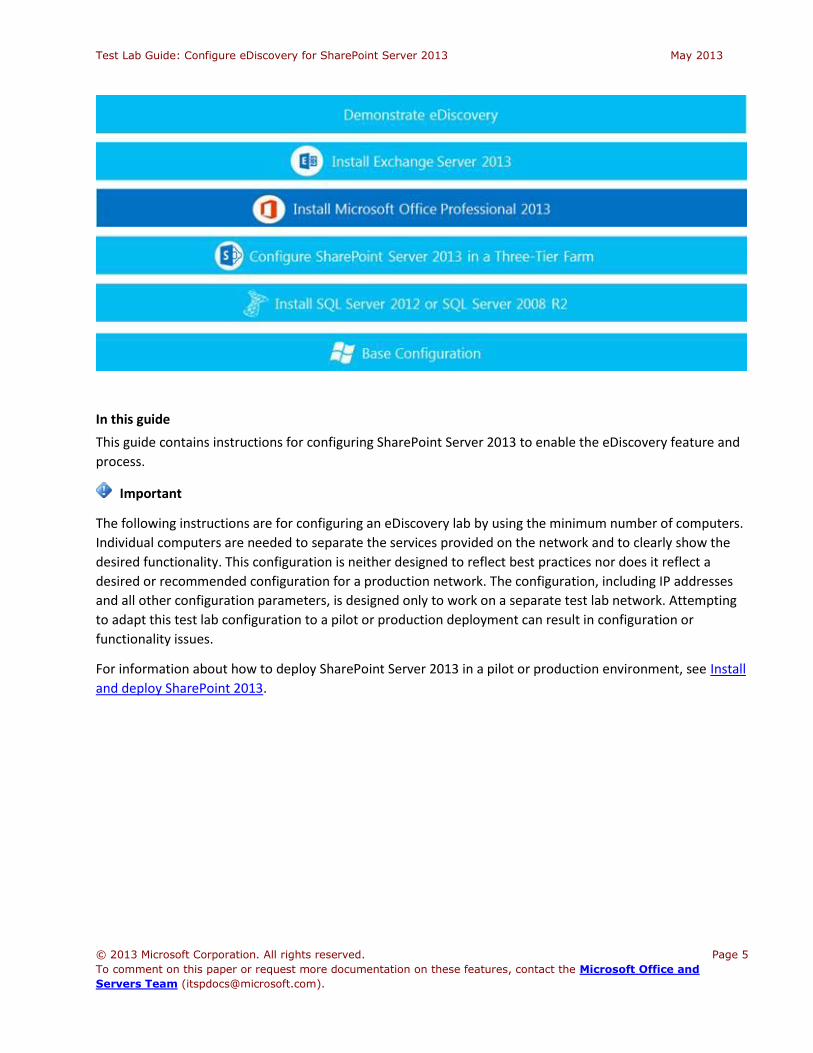
A TLG stack is a set of dependent TLGs that, when configured from the bottom of the stack, create a
meaningful test lab configuration. This TLG is at the top of the following TLG stack:
Test Lab Guide: Configure eDiscovery for SharePoint Server 2013 May 2013
© 2013 Microsoft Corporation. All rights reserved. Page 5
To comment on this paper or request more documentation on these features, contact the Microsoft Office and
Servers Team ([email protected]).
In this guide
This guide contains instructions for configuring SharePoint Server 2013 to enable the eDiscovery feature and
process.
Important
The following instructions are for configuring an eDiscovery lab by using the minimum number of computers.
Individual computers are needed to separate the services provided on the network and to clearly show the
desired functionality. This configuration is neither designed to reflect best practices nor does it reflect a
desired or recommended configuration for a production network. The configuration, including IP addresses
and all other configuration parameters, is designed only to work on a separate test lab network. Attempting
to adapt this test lab configuration to a pilot or production deployment can result in configuration or
functionality issues.
For information about how to deploy SharePoint Server 2013 in a pilot or production environment, see Install
and deploy SharePoint 2013.
Test Lab Guide: Configure eDiscovery for SharePoint Server 2013 May 2013
© 2013 Microsoft Corporation. All rights reserved. Page 6
To comment on this paper or request more documentation on these features, contact the Microsoft Office and
Servers Team ([email protected]).
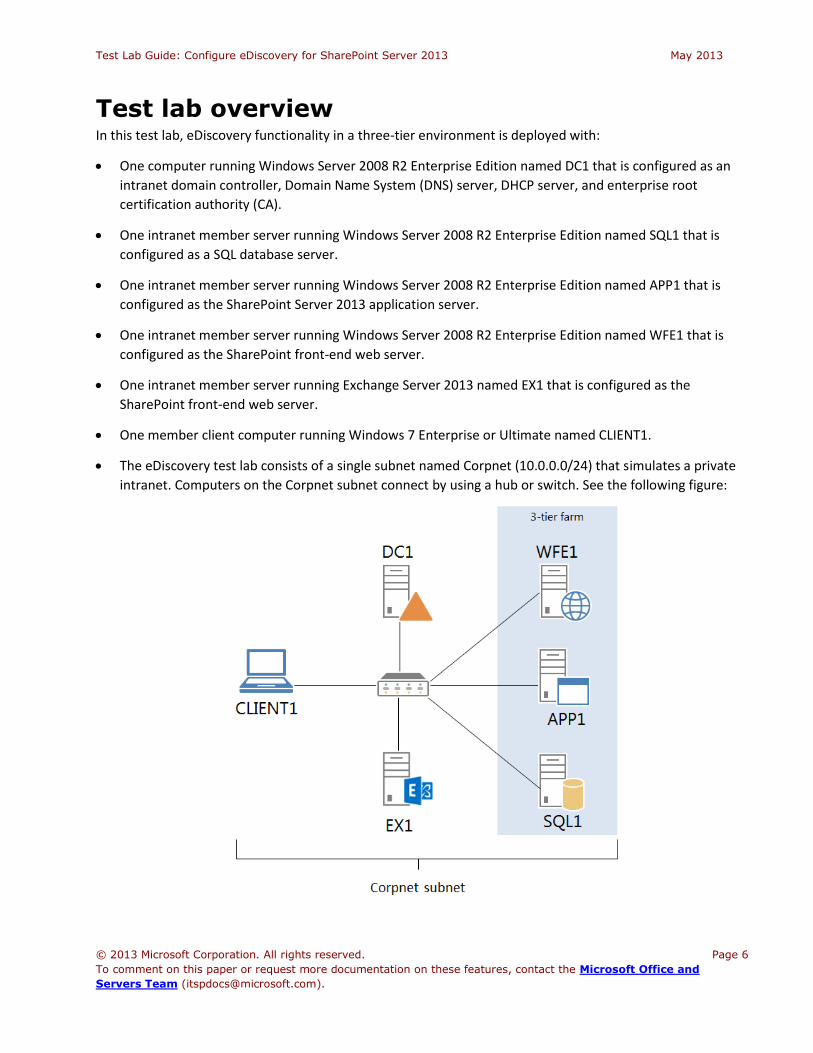
Test lab overview In this test lab, eDiscovery functionality in a three-tier environment is deployed with:
One computer running Windows Server 2008 R2 Enterprise Edition named DC1 that is configured as an
intranet domain controller, Domain Name System (DNS) server, DHCP server, and enterprise root
certification authority (CA).
One intranet member server running Windows Server 2008 R2 Enterprise Edition named SQL1 that is
configured as a SQL database server.
One intranet member server running Windows Server 2008 R2 Enterprise Edition named APP1 that is
configured as the SharePoint Server 2013 application server.
One intranet member server running Windows Server 2008 R2 Enterprise Edition named WFE1 that is
configured as the SharePoint front-end web server.
One intranet member server running Exchange Server 2013 named EX1 that is configured as the
SharePoint front-end web server.
One member client computer running Windows 7 Enterprise or Ultimate named CLIENT1.
The eDiscovery test lab consists of a single subnet named Corpnet (10.0.0.0/24) that simulates a private
intranet. Computers on the Corpnet subnet connect by using a hub or switch. See the following figure:
Test Lab Guide: Configure eDiscovery for SharePoint Server 2013 May 2013
© 2013 Microsoft Corporation. All rights reserved. Page 7
To comment on this paper or request more documentation on these features, contact the Microsoft Office and
Servers Team ([email protected]).
Hardware and software requirements The following are required components of the eDiscovery test lab:
The product disc or files for Windows Server 2008 R2.
The product disc or files for Windows 7.
The product disc or files for SharePoint Server 2013.
The product disc or files for Exchange Server 2013.
The product disc or files for SQL Server 2013.
The product disc or files for Microsoft Office 2013.
One computer that meets the minimum hardware requirements for Windows Server 2008 R2 Enterprise
Edition.
One computer that meets the minimum hardware requirements for Exchange Server 2013.
One computer that meets the minimum hardware requirements for Windows Server 2008 R2 Enterprise
Edition and either SQL Server 2012 Enterprise Edition or SQL Server 2008 R2 SP1.
Two computers that meet the minimum hardware requirements for SharePoint Server 2013.
One computer that meets the minimum hardware requirements for Windows 7 Enterprise or Ultimate.
Test Lab Guide: Configure eDiscovery for SharePoint Server 2013 May 2013
© 2013 Microsoft Corporation. All rights reserved. Page 8
To comment on this paper or request more documentation on these features, contact the Microsoft Office and
Servers Team ([email protected]).
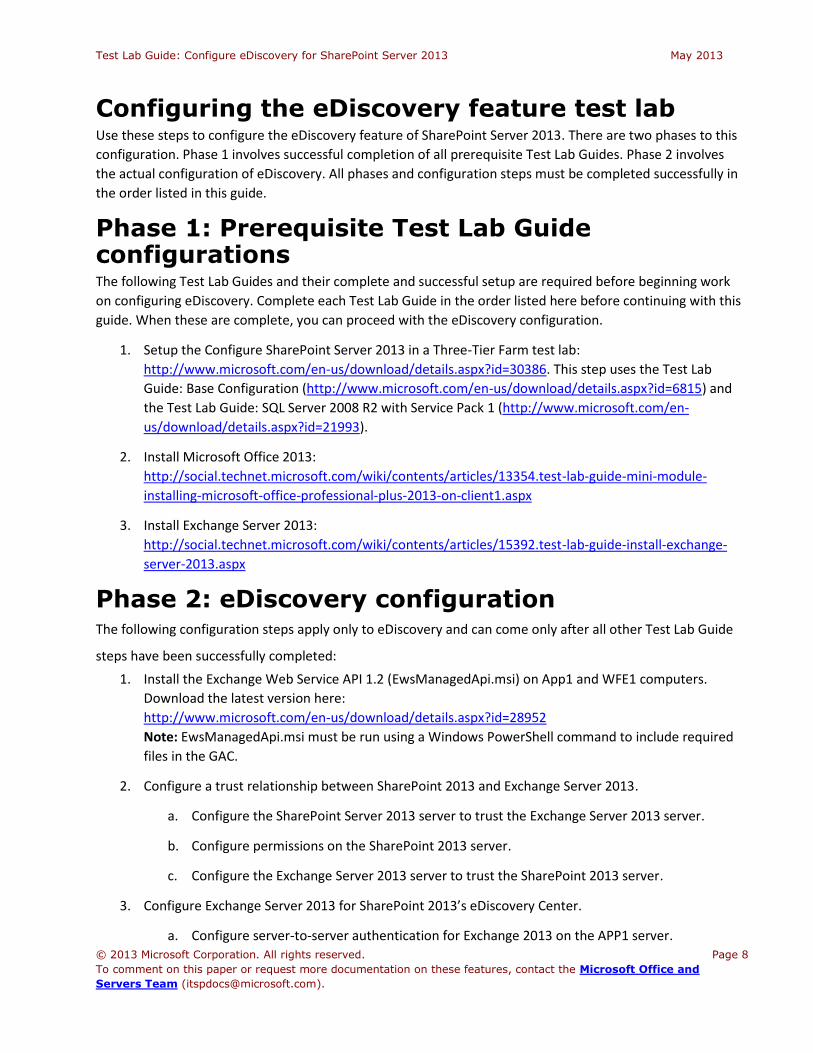
Configuring the eDiscovery feature test lab Use these steps to configure the eDiscovery feature of SharePoint Server 2013. There are two phases to this
configuration. Phase 1 involves successful completion of all prerequisite Test Lab Guides. Phase 2 involves
the actual configuration of eDiscovery. All phases and configuration steps must be completed successfully in
the order listed in this guide.
Phase 1: Prerequisite Test Lab Guide configurations The following Test Lab Guides and their complete and successful setup are required before beginning work
on configuring eDiscovery. Complete each Test Lab Guide in the order listed here before continuing with this
guide. When these are complete, you can proceed with the eDiscovery configuration.
1. Setup the Configure SharePoint Server 2013 in a Three-Tier Farm test lab:
http://www.microsoft.com/en-us/download/details.aspx?id=30386. This step uses the Test Lab
Guide: Base Configuration (http://www.microsoft.com/en-us/download/details.aspx?id=6815) and
the Test Lab Guide: SQL Server 2008 R2 with Service Pack 1 (http://www.microsoft.com/en-
us/download/details.aspx?id=21993).
2. Install Microsoft Office 2013:
http://social.technet.microsoft.com/wiki/contents/articles/13354.test-lab-guide-mini-module-
installing-microsoft-office-professional-plus-2013-on-client1.aspx
3. Install Exchange Server 2013:
http://social.technet.microsoft.com/wiki/contents/articles/15392.test-lab-guide-install-exchange-
server-2013.aspx
Phase 2: eDiscovery configuration The following configuration steps apply only to eDiscovery and can come only after all other Test Lab Guide
steps have been successfully completed:
1. Install the Exchange Web Service API 1.2 (EwsManagedApi.msi) on App1 and WFE1 computers.
Download the latest version here:
http://www.microsoft.com/en-us/download/details.aspx?id=28952
Note: EwsManagedApi.msi must be run using a Windows PowerShell command to include required
files in the GAC.
2. Configure a trust relationship between SharePoint 2013 and Exchange Server 2013.
a. Configure the SharePoint Server 2013 server to trust the Exchange Server 2013 server.
b. Configure permissions on the SharePoint 2013 server.
c. Configure the Exchange Server 2013 server to trust the SharePoint 2013 server.
3. Configure Exchange Server 2013 for SharePoint 2013’s eDiscovery Center.
a. Configure server-to-server authentication for Exchange 2013 on the APP1 server.
Test Lab Guide: Configure eDiscovery for SharePoint Server 2013 May 2013
© 2013 Microsoft Corporation. All rights reserved. Page 9
To comment on this paper or request more documentation on these features, contact the Microsoft Office and
Servers Team ([email protected]).
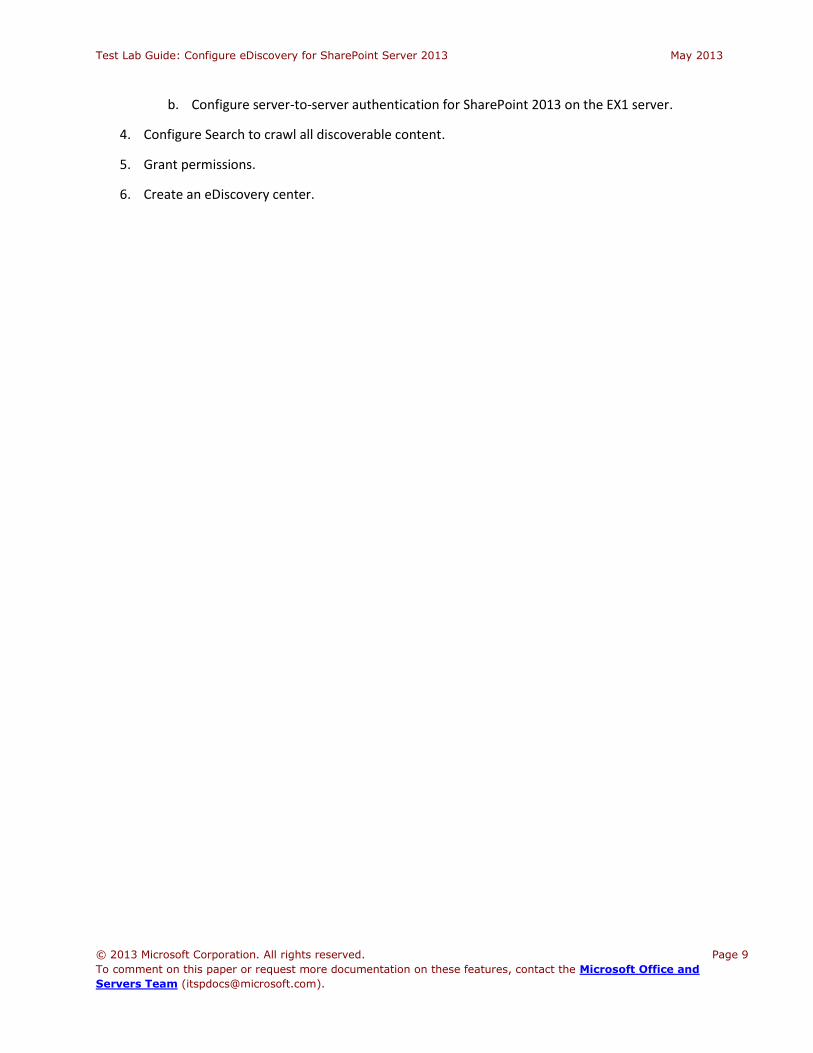
b. Configure server-to-server authentication for SharePoint 2013 on the EX1 server.
4. Configure Search to crawl all discoverable content.
5. Grant permissions.
6. Create an eDiscovery center.
Test Lab Guide: Configure eDiscovery for SharePoint Server 2013 May 2013
© 2013 Microsoft Corporation. All rights reserved. Page 10
To comment on this paper or request more documentation on these features, contact the Microsoft Office and
Servers Team ([email protected]).
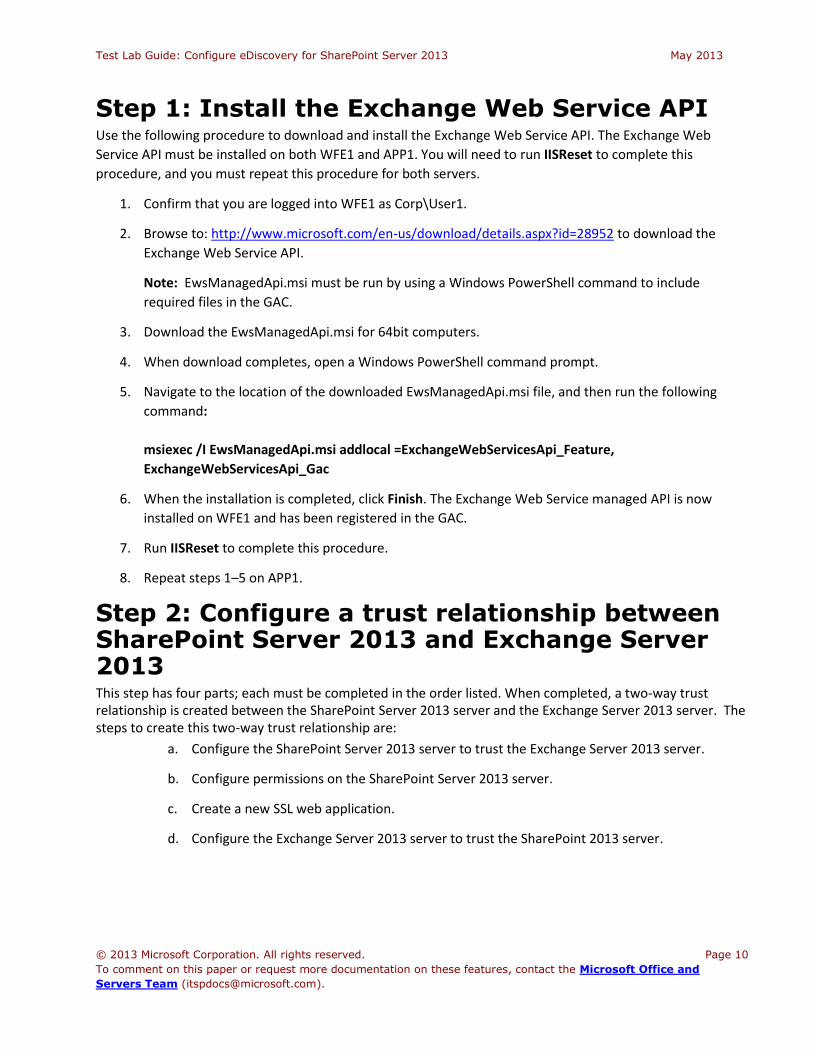
Step 1: Install the Exchange Web Service API Use the following procedure to download and install the Exchange Web Service API. The Exchange Web
Service API must be installed on both WFE1 and APP1. You will need to run IISReset to complete this
procedure, and you must repeat this procedure for both servers.
1. Confirm that you are logged into WFE1 as Corp\User1.
2. Browse to: http://www.microsoft.com/en-us/download/details.aspx?id=28952 to download the
Exchange Web Service API.
Note: EwsManagedApi.msi must be run by using a Windows PowerShell command to include
required files in the GAC.
3. Download the EwsManagedApi.msi for 64bit computers.
4. When download completes, open a Windows PowerShell command prompt.
5. Navigate to the location of the downloaded EwsManagedApi.msi file, and then run the following
command:
msiexec /I EwsManagedApi.msi addlocal =ExchangeWebServicesApi_Feature,
ExchangeWebServicesApi_Gac
6. When the installation is completed, click Finish. The Exchange Web Service managed API is now
installed on WFE1 and has been registered in the GAC.
7. Run IISReset to complete this procedure.
8. Repeat steps 1–5 on APP1.
Step 2: Configure a trust relationship between SharePoint Server 2013 and Exchange Server 2013 This step has four parts; each must be completed in the order listed. When completed, a two-way trust relationship is created between the SharePoint Server 2013 server and the Exchange Server 2013 server. The steps to create this two-way trust relationship are:
a. Configure the SharePoint Server 2013 server to trust the Exchange Server 2013 server.
b. Configure permissions on the SharePoint Server 2013 server.
c. Create a new SSL web application.
d. Configure the Exchange Server 2013 server to trust the SharePoint 2013 server.
Test Lab Guide: Configure eDiscovery for SharePoint Server 2013 May 2013
© 2013 Microsoft Corporation. All rights reserved. Page 11
To comment on this paper or request more documentation on these features, contact the Microsoft Office and
Servers Team ([email protected]).
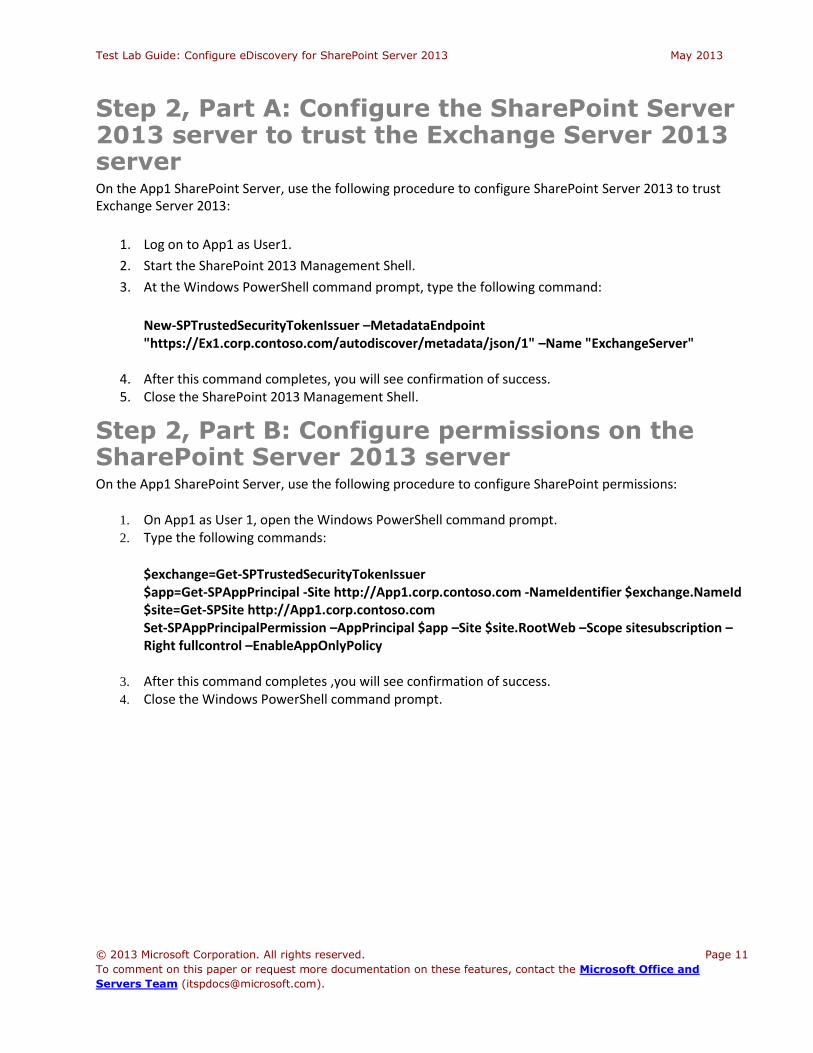
Step 2, Part A: Configure the SharePoint Server 2013 server to trust the Exchange Server 2013 server On the App1 SharePoint Server, use the following procedure to configure SharePoint Server 2013 to trust Exchange Server 2013:
1. Log on to App1 as User1.
2. Start the SharePoint 2013 Management Shell.
3. At the Windows PowerShell command prompt, type the following command:
New-SPTrustedSecurityTokenIssuer –MetadataEndpoint "https://Ex1.corp.contoso.com/autodiscover/metadata/json/1" –Name "ExchangeServer"
4. After this command completes, you will see confirmation of success. 5. Close the SharePoint 2013 Management Shell.
Step 2, Part B: Configure permissions on the SharePoint Server 2013 server On the App1 SharePoint Server, use the following procedure to configure SharePoint permissions:
1. On App1 as User 1, open the Windows PowerShell command prompt. 2. Type the following commands:
$exchange=Get-SPTrustedSecurityTokenIssuer $app=Get-SPAppPrincipal -Site http://App1.corp.contoso.com -NameIdentifier $exchange.NameId $site=Get-SPSite http://App1.corp.contoso.com Set-SPAppPrincipalPermission –AppPrincipal $app –Site $site.RootWeb –Scope sitesubscription –Right fullcontrol –EnableAppOnlyPolicy
3. After this command completes ,you will see confirmation of success. 4. Close the Windows PowerShell command prompt.
Test Lab Guide: Configure eDiscovery for SharePoint Server 2013 May 2013
© 2013 Microsoft Corporation. All rights reserved. Page 12
To comment on this paper or request more documentation on these features, contact the Microsoft Office and
Servers Team ([email protected]).
Step 2, Part C: Create a new eDiscovery web application On WFE1 use the following procedure to create a new SSL-enabled web application to be used with eDiscovery:
1. Log on to WFE1 as Corp\User1.
2. Navigate to SharePoint Central Administration.
3. In the Application Management section, click Web Application Management.
4. Click New.
5. On the Create New Web Application page, select Create new IIS web site, and in the Name field, type: eDiscoveryTLGWebApp.
6. In the Port field, type: 11111.
7. In the Security Configuration section for Use Secure Sockets Layer (SSL), select Yes.
8. In the Application Pool section, select Create new application pool, and in the Application pool name field, type: eDiscoveryTLGAppPool.
9. Leave all other settings as default, scroll to the bottom of the window, and then click OK.
10. The new eDiscoveryTLGWebApp web application is created and confirmation is displayed. Click OK.
11. The new eDiscoveryTLGAppPool web application now displays on the Web Applications page.
Step 2, Part D: Configure the Exchange Server 2013 server to trust the SharePoint Server 2013 server On EX1, use the following procedure to configure Exchange Server 2013 to trust SharePoint Server 2013 by using the new SSL-enabled web application:
1. Log on to Ex1 as User1. 2. Start the Exchange Management Shell. 3. At the Exchange Management Shell command prompt, type the following commands:
cd c:\'Program Files'\Microsoft\'Exchange Server'\V15\Scripts\
Configure-EnterprisePartnerApplication.ps1 -AuthMetadataUrl https://wfe1.corp.contoso. com:11111/_layouts/15/metadata/json/1 -ApplicationType SharePoint
4. You have now completed the configuration that allows Exchange Server 2013 to trust SharePoint Server 2013.
5. Close the Exchange Management Shell.
Test Lab Guide: Configure eDiscovery for SharePoint Server 2013 May 2013
© 2013 Microsoft Corporation. All rights reserved. Page 13
To comment on this paper or request more documentation on these features, contact the Microsoft Office and
Servers Team ([email protected]).
Step 3: Configure Exchange for SharePoint eDiscovery Center Use the following procedures to configure additional server-to-server authentication between Exchange
Server 2013 and SharePoint Server 2013 so users can use the eDiscovery Center in SharePoint Server 2013 to
search Exchange Server 2013 mailbox content.
There are two parts to this step. Perform each step in the order listed:
Configure server-to-server authentication for Exchange Server 2013 on the APP1 server.
Configure server-to-server authentication for SharePoint Server 2013 on the EX1 server.
Step 3, Part A: Configure server-to-server authentication for Exchange Server 2013 on the APP1 server Use the following procedures on the APP1 server to create Exchange Server 2013 as a trusted security token issuer in SharePoint 2013:
1. Confirm that you are logged on to APP1 as User1.
2. Open the SharePoint Management Shell.
3. Run the following commands to create Exchange Server 2013 as a trusted security token issuer in
SharePoint Server 2013 and to grant the Exchange service principal full control permissions to
SharePoint site subscription:
New-SPTrustedSecurityTokenIssuer -Name Exchange -MetadataEndPoint
https://EX1.corp.contoso.com/autodiscover/metadata/json/1
$exchange=Get-SPTrustedSecurityTokenIssuer
$app=Get-SPAppPrincipal -Site http://APP1.corp.contoso.com -NameIdentifier $exchange.NameId
$site=Get-SPSite http://APP1.corp.contoso.com
Set-SPAppPrincipalPermission -AppPrincipal $app -Site $site.RootWeb -Scope sitesubscription -Right
fullcontrol -EnableApplyOnlyPolicy
Step 3, Part B: Configure server-to-server authentication for SharePoint Server 2013 on the EX1 server Use the following procedure on the EX1 server to configure the SharePoint partner application:
1. Confirm that you are logged on to EX1 as User1.
2. Open the Exchange Management Shell.
Test Lab Guide: Configure eDiscovery for SharePoint Server 2013 May 2013
© 2013 Microsoft Corporation. All rights reserved. Page 14
To comment on this paper or request more documentation on these features, contact the Microsoft Office and
Servers Team ([email protected]).
3. Run the following commands:
cd c:\'Program Files'\Microsoft\'Exchange Server'\V15\Scripts
.\Configure-EnterprisePartnerApplication.ps1 -AuthMetadataUrl
https://wfe1.corp.contoso.com:11111/_layouts/15/metadata/json/1 -ApplicationType SharePoint
4. When complete, a success message will display.
5. You have now configured the SharePoint partner application for Exchange Server 2013.
6. Close the Exchange Management Shell.
Step 4: Configure Search to crawl all discoverable content Content is only discoverable if it is crawled and indexed by the Search service application that is associated
with the web application that the eDiscovery Center is in. You should have identified this Search service
application when you planned for eDiscovery. To configure the Search service application to crawl the
appropriate content, follow these steps:
1. If content in Exchange Server 2013 must be discoverable, add Exchange Server 2013 as a result
source. For information about how to configure a result source, see Configure result sources for
search in SharePoint Server 2013.
Note: The Search result source should be added only at the farm level or site collection level. Do not
add a Search result source at the site level.
2. Ensure that all websites that contain discoverable content are being crawled. For information about
how to configure a location to be crawled, see Add, edit, or delete a content source (SharePoint
Server 2010).
3. Ensure that all file shares that contain discoverable content are being crawled. For information about
how to configure a location to be crawled, see Add, edit, or delete a content source (SharePoint
Server 2010).
Step 5: Create an eDiscovery center An eDiscovery Center is a site collection from which users can create and manage eDiscovery cases.
Create a eDiscovery site collection The My Site Host site collection is a site collection that uses the Enterprise site template named eDiscovery
center.
1. Confirm that you are logged on to App1 as Corp\User1.
2. In Central Administration, click Application Management, and then click Create site collections.
Test Lab Guide: Configure eDiscovery for SharePoint Server 2013 May 2013
© 2013 Microsoft Corporation. All rights reserved. Page 15
To comment on this paper or request more documentation on these features, contact the Microsoft Office and
Servers Team ([email protected]).
3. On the Create Site Collection page, in the Web Application section, next to Select a web application,
the web application http://APP1:11111 is shown for Web Application. If it is not, expand the list, and
then change Web Application to http://APP1:11111.
4. In the Title section, type ediscoverysitecollection.
5. In the Template Selection section, in the Select experience version list, select 2013.
6. In the Select a Template section, on the Enterprise tab, click eDiscovery Center.
7. In the Primary Site Collection Administrator section, type corp\user1.
8. Click OK.
9. The ediscoverysitecollection site collection is created and you can now navigate to the new top level
site.
Step 6: Add User1 to the Discovery Management Role Group in Exchange Server 2013 If you want users to be able to use Exchange Server 2013 in-place eDiscovery, you must first authorize the
users by adding them to the Discovery Management role group. Members of the Discovery Management role
group have Full Access mailbox permissions for the Discovery mailbox that is created by Exchange Setup.
Use the EAC to add a user to the Discovery Management role group
1. Navigate to Permissions > Admin roles.
2. In the list view, select Discovery Management, and then click Edit.
3. In Role Group, under Members, click Add.
4. In Select Members, select one or more users, click Add, and then click OK.
5. In Role Group, click Save.
Add User1 to the Discovery Management role group This example adds the user User1 to the Discovery Management role group.
Add-RoleGroupMember -Identity "Discovery Management" -Member User1
For detailed syntax and parameter information, see Add-RoleGroupMember.
How do you know this worked? To verify that you’ve added the user to the Discovery Management role group, do the following:
Test Lab Guide: Configure eDiscovery for SharePoint Server 2013 May 2013
© 2013 Microsoft Corporation. All rights reserved. Page 16
To comment on this paper or request more documentation on these features, contact the Microsoft Office and
Servers Team ([email protected]).
1. Navigate to Permissions > Admin roles.
2. In the list view, select Discovery Management.
3. In the details pane, verify that the user is listed under Members.
You can also run this command to list the members of the Discovery Management role group:
Get-RoleGroupMember -Identity "Discovery Management"
Configuration is now complete and you are ready to begin using eDiscovery in SharePoint 2013.
Using eDiscovery in SharePoint 2013 Learn about the lifecycle of creating and managing e-Discovery cases. Use the following links in the order
listed to begin to learn and use eDiscovery in SharePoint 2013:
1. Plan, create, and manage eDiscovery cases
2. Place content sources on hold and add content to an eDiscovery case
3. Create and run eDiscovery queries
4. Searching and using keywords in eDiscovery
5. Export eDiscovery content and create reports
Snapshot the configuration This completes the eDiscovery test lab. To save this configuration so that you can quickly return to a working
configuration from which you can test other SharePoint TLGs or test lab extensions or for your own
experimentation and learning, do the following:
1. On all physical computers or virtual machines in the test lab, close all windows and then perform a
graceful shutdown.
2. If your lab is based on virtual machines, save a snapshot of each virtual machine and name the
snapshots eDiscovery. If your lab uses physical computers, create disk images to save the eDiscovery
test lab configuration.
Additional resources For more information about SharePoint Server 2013, see the SharePoint 2013 product information web page
and SharePoint 2013 for IT pros.
To provide the authors of this guide with feedback or suggestions for improvement, send an email message
To submit your questions about this test lab or SharePoint 2013, see the SharePoint 2013 for IT Professionals
Forum.
Test Lab Guide: Configure eDiscovery for SharePoint Server 2013 May 2013
© 2013 Microsoft Corporation. All rights reserved. Page 17
To comment on this paper or request more documentation on these features, contact the Microsoft Office and
Servers Team ([email protected]).
For a list of TLGs related to this test lab or extensions to demonstrate additional functionality, see SharePoint
Server 2013 Test Lab in the TechNet Wiki.
Microsoft encourages you to develop and publish your own TLG content for SharePoint Server 2013, either in
the TechNet Wiki (example: Test Lab Guide: Demonstrate Remote Access VPNs) or in your own publishing
forum (example: Test Lab Guide (Part 1) - Demonstrate TMG PPTP, L2TP/IPsec and SSTP Remote Access VPN
Server). If you want to publish your TLG content in the TechNet wiki, see How to contribute series of TLG blog
posts for information about the types of content you can create and for links to templates and guidance.
For a list of additional Microsoft TLGs, see Test Lab Guides in the TechNet Wiki.
Related Documents