Initial Overview: Website: http://www.teespring.com/ Introduction: It is a website that facilitates the creation and sales of custom apparel. It allows users to register and log in to the site and create apparel that they can sell to a global customer base. The website uses the sales money to fund production and this depends on how successful the campaign that your apparel is a part of. USP: The firm’s USP is a combination of online sales campaigns and customized apparel. Landing Page: Section 1

Welcome message from author
This document is posted to help you gain knowledge. Please leave a comment to let me know what you think about it! Share it to your friends and learn new things together.
Transcript
Initial Overview:
Website: http://www.teespring.com/
Introduction:
It is a website that facilitates the creation and sales of custom apparel. It allows users to register and log in to the site and createapparel that they can sell to a global customer base. The website uses the sales money to fund production and this depends on how successful the campaign that your apparel is a part of.
USP: The firm’s USP is a combination of online sales campaigns and customized apparel.
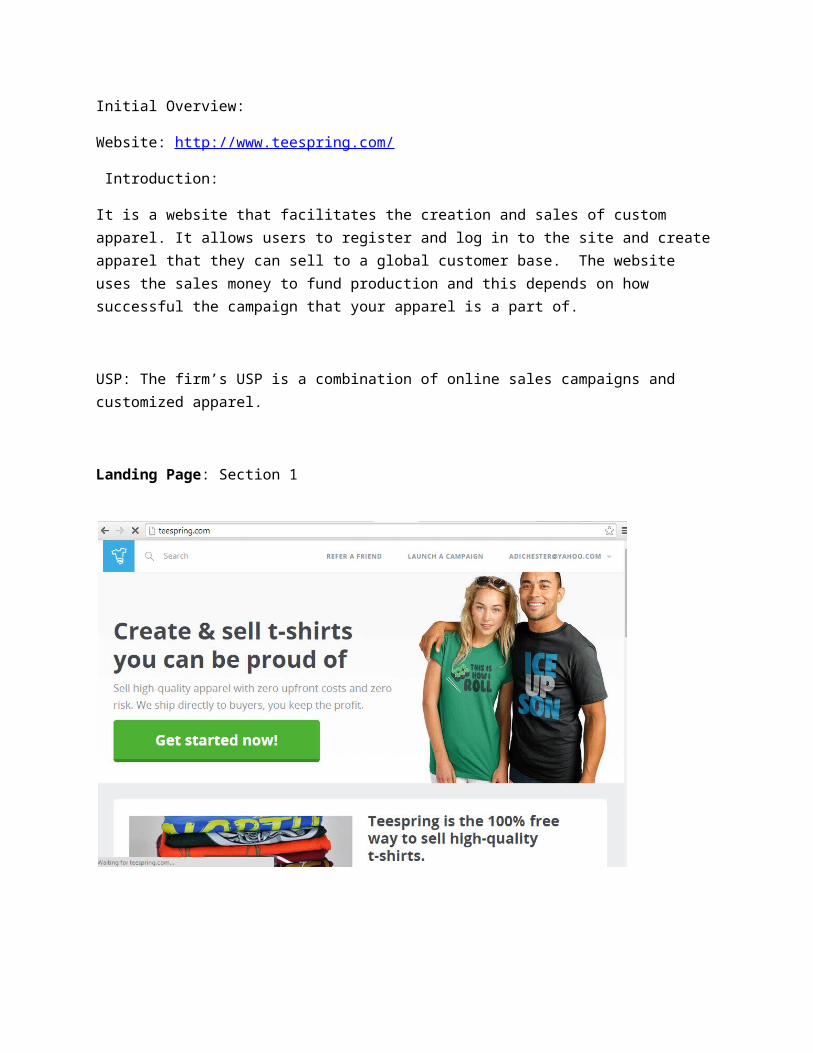
Landing Page: Section 1
The landing page is dedicated to the site’s USP and then proceeds to focus on their product features and product quality. This is a write up dedicated to the firm’s products and their idea of selling them. There is also a call to action button that allows the user to start creating apparel straight away. It also consists of a video which is aquirky video that takes the users on a short tour of how the site works. It is a well made video which is strategically placed on the landing page. The landing page consists of another section which we can see as we scroll down.
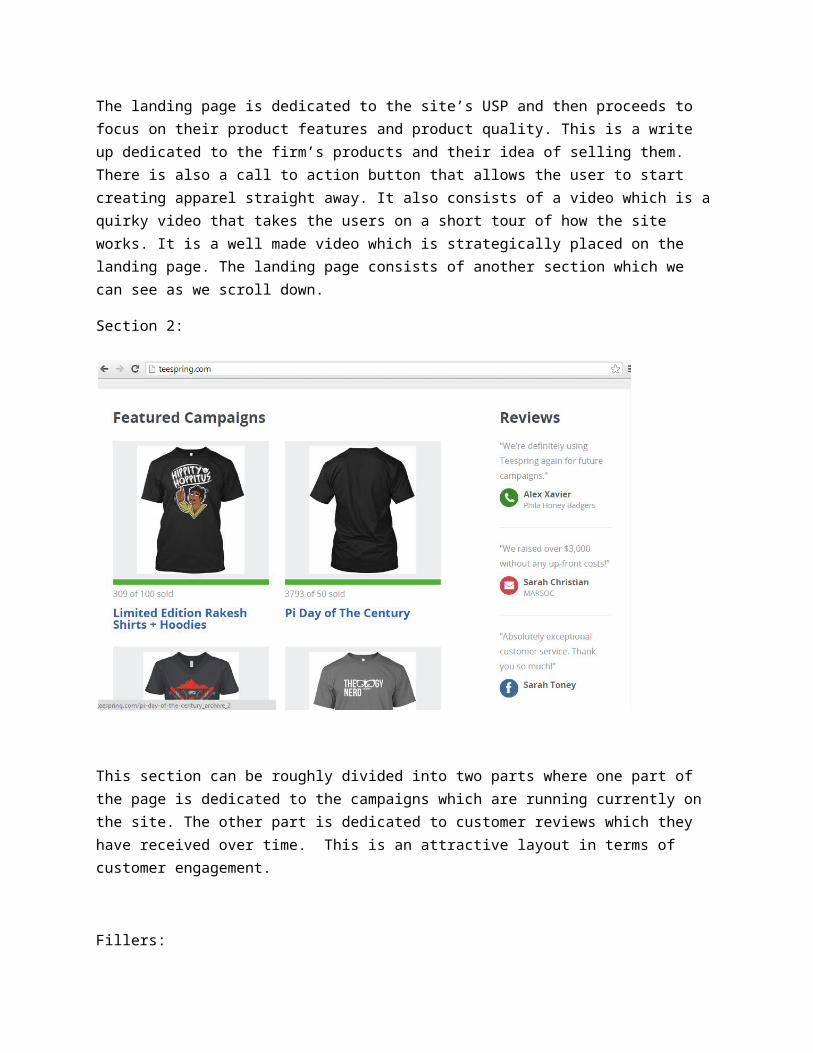
Section 2:
This section can be roughly divided into two parts where one part of the page is dedicated to the campaigns which are running currently on the site. The other part is dedicated to customer reviews which they have received over time. This is an attractive layout in terms of customer engagement.
Fillers:

A filler has been used in the landing page which can be found below:
Filler 1:
This filler features some of the major publishing labels and magazineswhich have written about or talked about the website. It is a smart way to use space in a web page and the same method can be seen in a lot of websites.
Footer:
The footer consists of all the commonly used site links such as “Aboutus” and “Blog”, etc. It also features the social media plug ins for the site along with a language toggle.
Get Started Now Buttons:
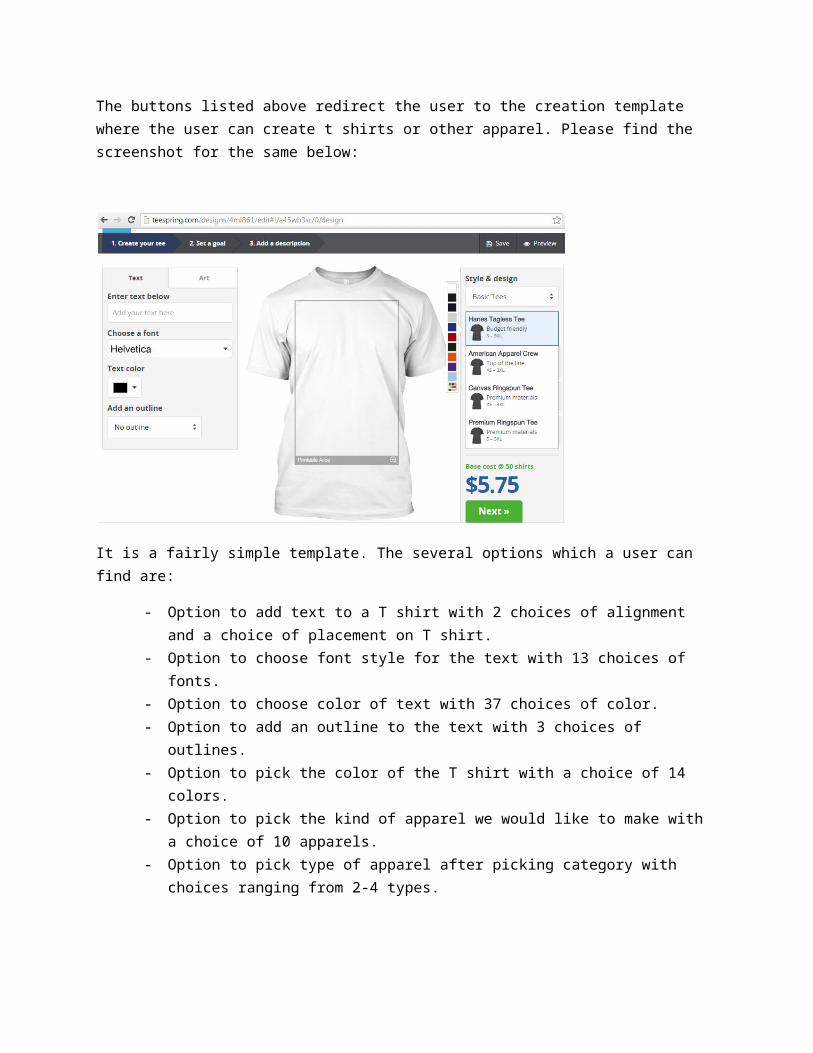
The buttons listed above redirect the user to the creation template where the user can create t shirts or other apparel. Please find the screenshot for the same below:
It is a fairly simple template. The several options which a user can find are:
- Option to add text to a T shirt with 2 choices of alignment and a choice of placement on T shirt.
- Option to choose font style for the text with 13 choices of fonts.
- Option to choose color of text with 37 choices of color.- Option to add an outline to the text with 3 choices of
outlines.- Option to pick the color of the T shirt with a choice of 14
colors.- Option to pick the kind of apparel we would like to make with
a choice of 10 apparels.- Option to pick type of apparel after picking category with
choices ranging from 2-4 types.
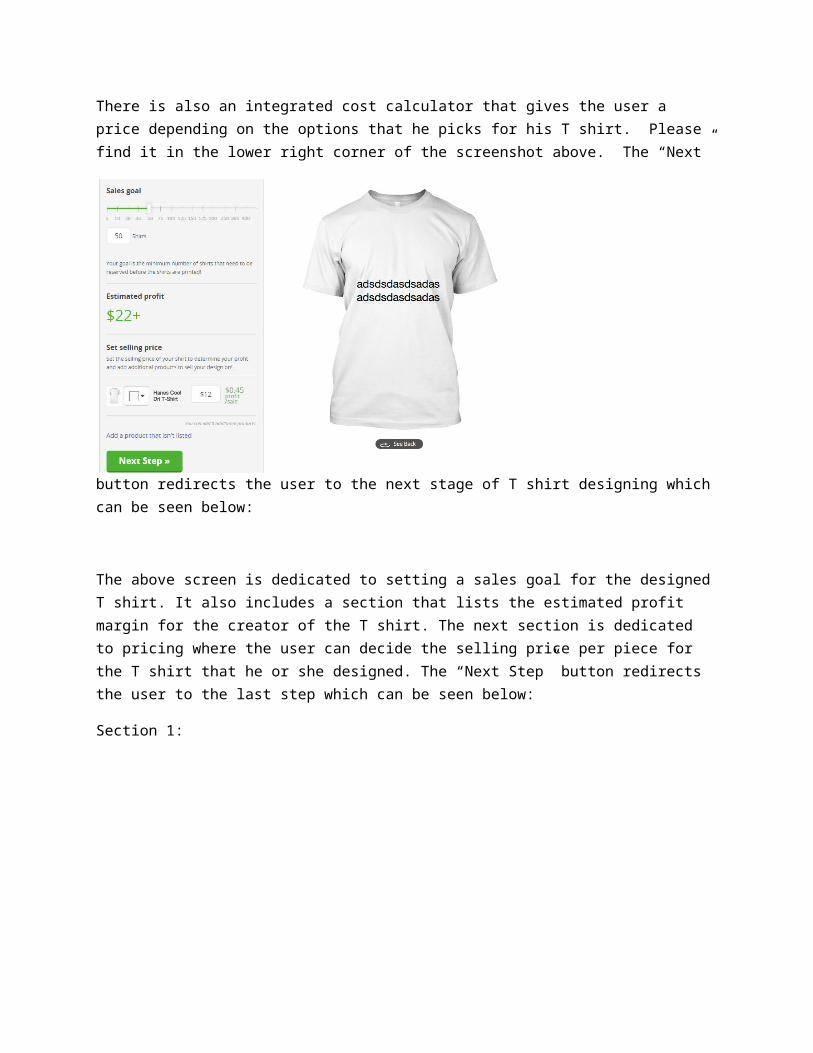
There is also an integrated cost calculator that gives the user a price depending on the options that he picks for his T shirt. Please find it in the lower right corner of the screenshot above. The “Next”
button redirects the user to the next stage of T shirt designing whichcan be seen below:
The above screen is dedicated to setting a sales goal for the designedT shirt. It also includes a section that lists the estimated profit margin for the creator of the T shirt. The next section is dedicated to pricing where the user can decide the selling price per piece for the T shirt that he or she designed. The “Next Step” button redirects the user to the last step which can be seen below:
Section 1:
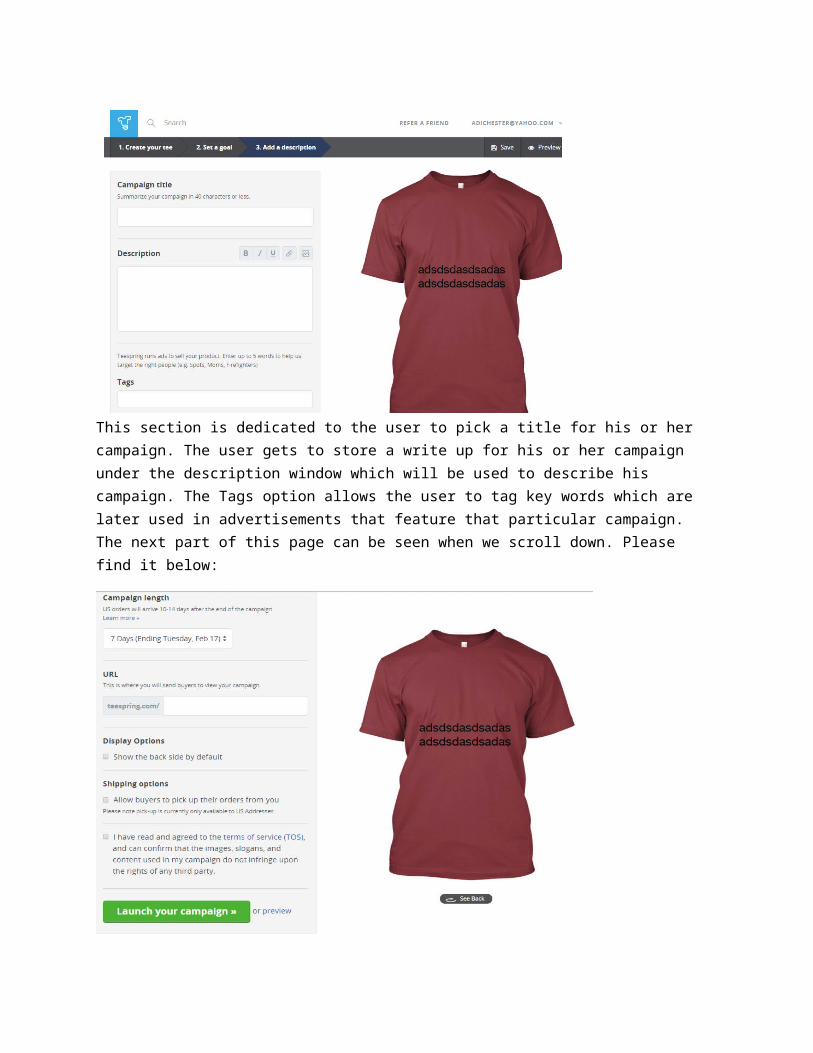
This section is dedicated to the user to pick a title for his or her campaign. The user gets to store a write up for his or her campaign under the description window which will be used to describe his campaign. The Tags option allows the user to tag key words which are later used in advertisements that feature that particular campaign. The next part of this page can be seen when we scroll down. Please find it below:
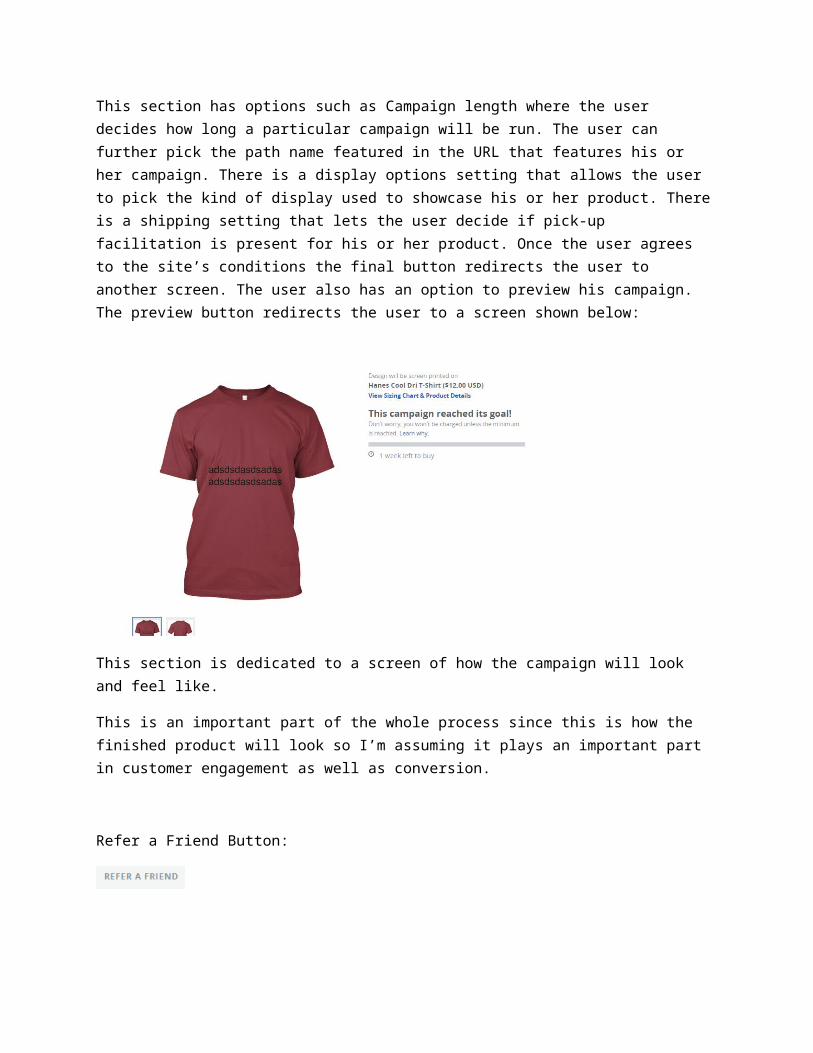
This section has options such as Campaign length where the user decides how long a particular campaign will be run. The user can further pick the path name featured in the URL that features his or her campaign. There is a display options setting that allows the user to pick the kind of display used to showcase his or her product. Thereis a shipping setting that lets the user decide if pick-up facilitation is present for his or her product. Once the user agrees to the site’s conditions the final button redirects the user to another screen. The user also has an option to preview his campaign. The preview button redirects the user to a screen shown below:
This section is dedicated to a screen of how the campaign will look and feel like.
This is an important part of the whole process since this is how the finished product will look so I’m assuming it plays an important part in customer engagement as well as conversion.
Refer a Friend Button:
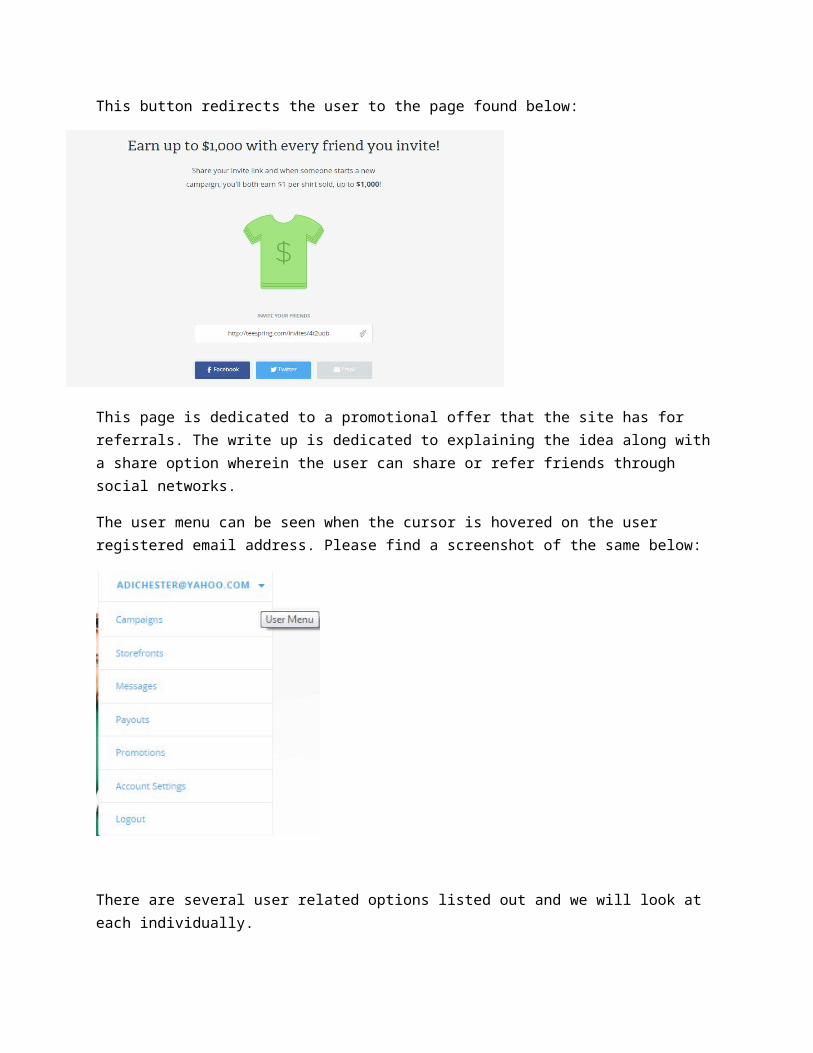
This button redirects the user to the page found below:
This page is dedicated to a promotional offer that the site has for referrals. The write up is dedicated to explaining the idea along witha share option wherein the user can share or refer friends through social networks.
The user menu can be seen when the cursor is hovered on the user registered email address. Please find a screenshot of the same below:
There are several user related options listed out and we will look at each individually.
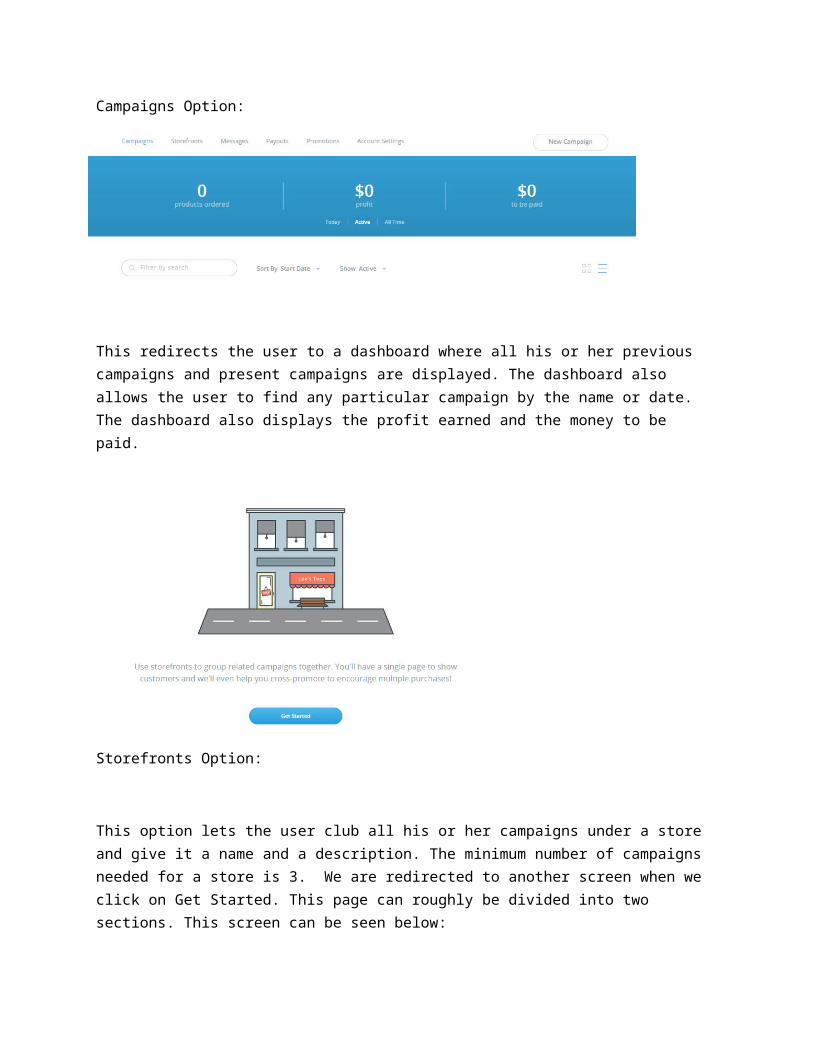
Campaigns Option:
This redirects the user to a dashboard where all his or her previous campaigns and present campaigns are displayed. The dashboard also allows the user to find any particular campaign by the name or date. The dashboard also displays the profit earned and the money to be paid.
Storefronts Option:
This option lets the user club all his or her campaigns under a store and give it a name and a description. The minimum number of campaigns needed for a store is 3. We are redirected to another screen when we click on Get Started. This page can roughly be divided into two sections. This screen can be seen below:
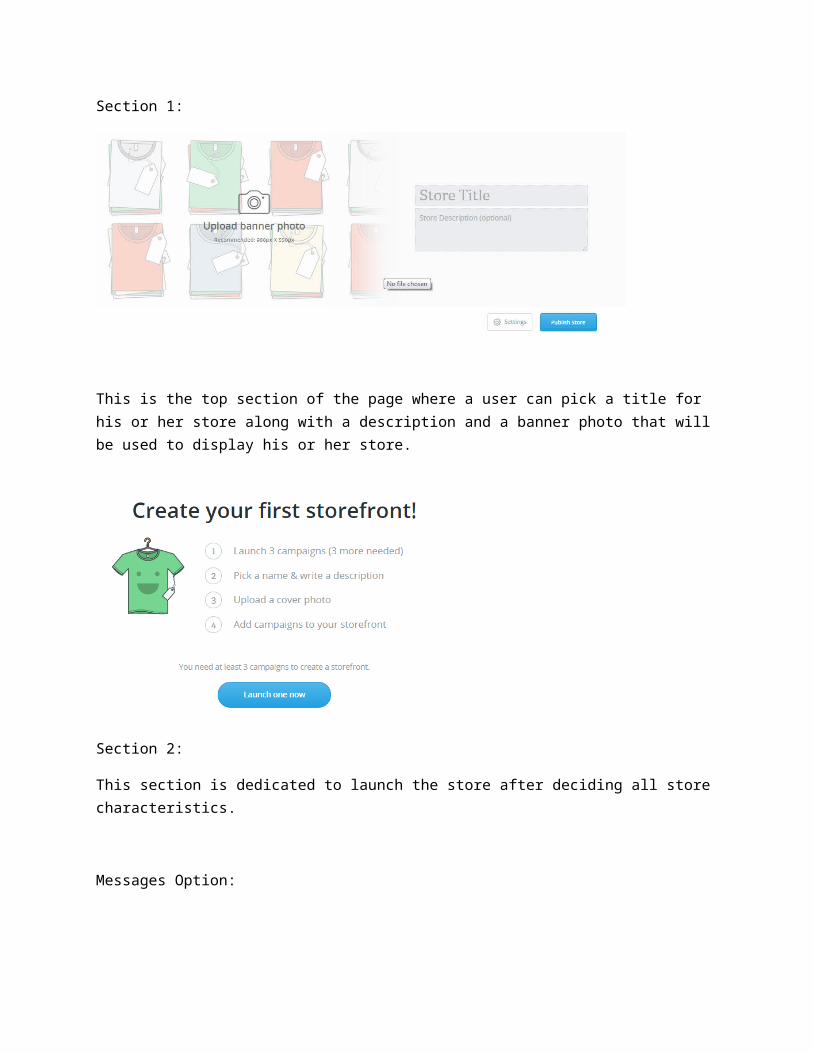
Section 1:
This is the top section of the page where a user can pick a title for his or her store along with a description and a banner photo that willbe used to display his or her store.
Section 2:
This section is dedicated to launch the store after deciding all storecharacteristics.
Messages Option:
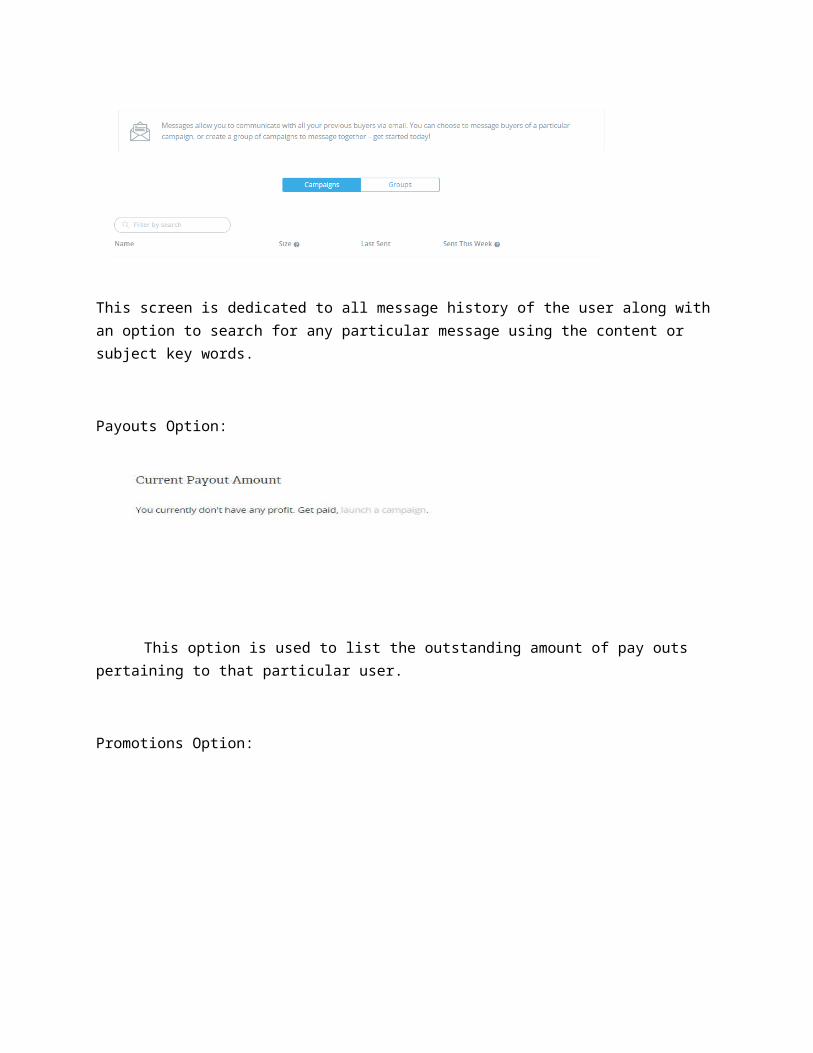
This screen is dedicated to all message history of the user along withan option to search for any particular message using the content or subject key words.
Payouts Option:
This option is used to list the outstanding amount of pay outs pertaining to that particular user.
Promotions Option:
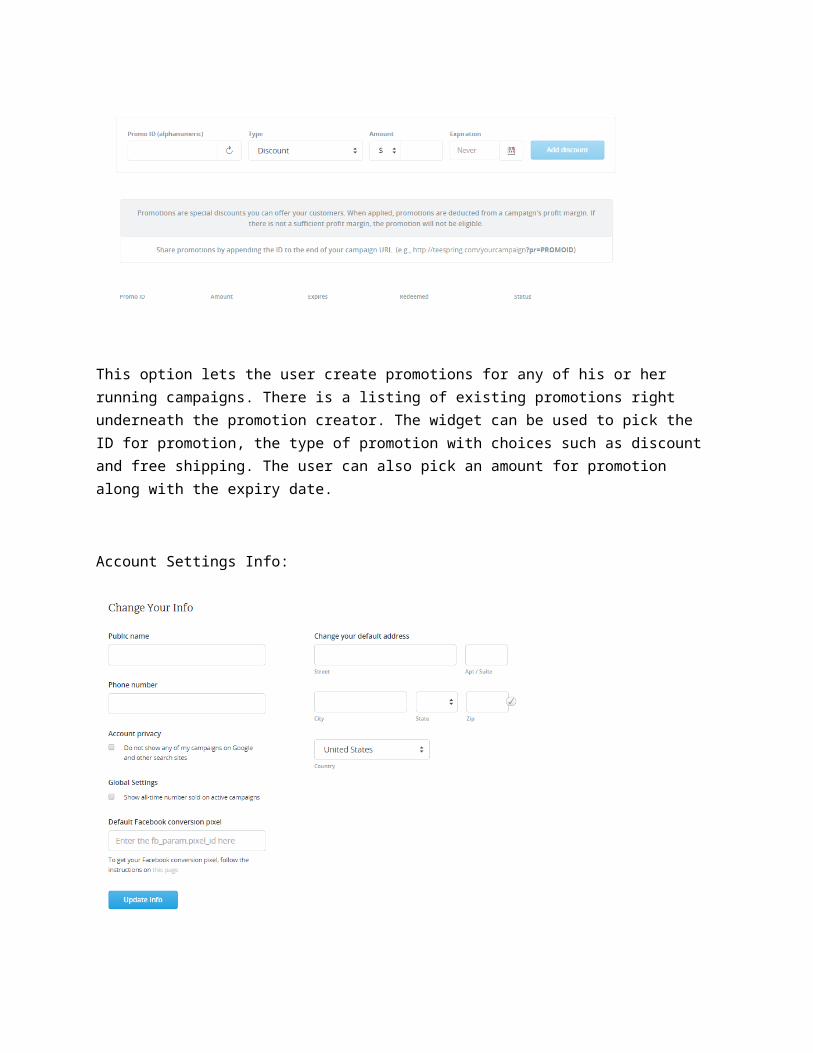
This option lets the user create promotions for any of his or her running campaigns. There is a listing of existing promotions right underneath the promotion creator. The widget can be used to pick the ID for promotion, the type of promotion with choices such as discount and free shipping. The user can also pick an amount for promotion along with the expiry date.
Account Settings Info:
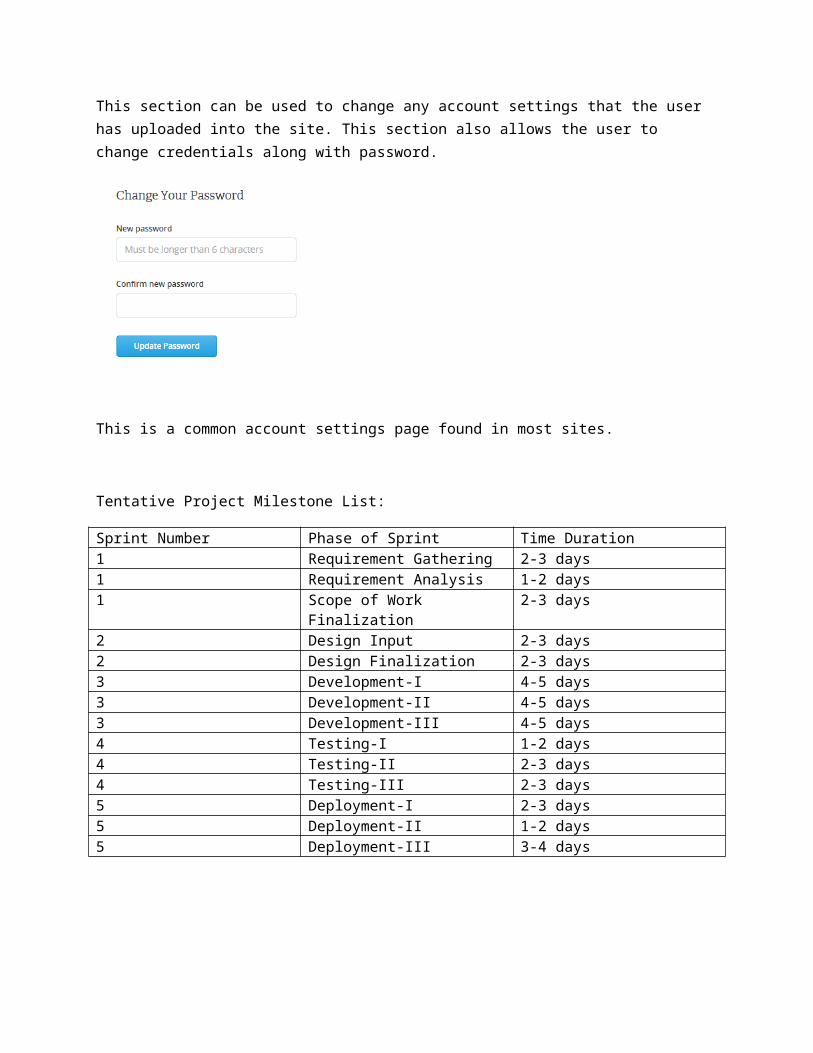
This section can be used to change any account settings that the user has uploaded into the site. This section also allows the user to change credentials along with password.
This is a common account settings page found in most sites.
Tentative Project Milestone List:
Sprint Number Phase of Sprint Time Duration1 Requirement Gathering 2-3 days1 Requirement Analysis 1-2 days1 Scope of Work
Finalization2-3 days
2 Design Input 2-3 days2 Design Finalization 2-3 days3 Development-I 4-5 days3 Development-II 4-5 days3 Development-III 4-5 days4 Testing-I 1-2 days4 Testing-II 2-3 days4 Testing-III 2-3 days5 Deployment-I 2-3 days5 Deployment-II 1-2 days5 Deployment-III 3-4 days
Related Documents