Teaching with PowerPoint Created by the Instructional Technology Center

Teaching with PowerPoint Created by the Instructional Technology Center.
Dec 18, 2015
Welcome message from author
This document is posted to help you gain knowledge. Please leave a comment to let me know what you think about it! Share it to your friends and learn new things together.
Transcript

Teaching with PowerPoint
Teaching with PowerPoint
Created by
the Instructional Technology
Center

Why PowerPoint?
Why PowerPoint?

Why PowerPoint?
• Accessible• Inexpensive• Portable• Digitize Lectures• Internet Capable• Integration of Media• Enhance the Learning Experience

Slide
Pane
Task
Pane
Menus
Slide
Drawing Toolbar

Common Uses and Misuses of
PowerPoint
Common Uses and Misuses of
PowerPoint

Uses
• Supplement Notes and Lecture Material• Incorporate Media into Lectures• Enhance Information Retention• Engage Students in Lecture

Misuses
• Bullet Points Only• Note Dependence• No Visual Stimulation• Too Much Information• Illegible• Visually Unappealing

DOs and DON’Ts
Can you determine what is wrong with the following PowerPoint
Slides?

DOs and DON’Ts
Can you determine what is wrong with the following PowerPoint
Slides?

DOs and DON’Ts
Can you determine what is wrong with the following PowerPoint
Slides?

•Who are they?
•What is their knowledge level on the topic?
Planning:Laying the Foundation
Consider the Audience
Consider the Message•What do you want to say?
•How do you want to say it?
•What role (if any) will graphics play in the presentation?
•What font will you use? Is it clean and readable?

•What topic(s) will you cover?
•How will you organize the content?
•What time constraints exist?
•Consider a theme to tie it all together.
Consider the Content
Planning:Laying the Foundation

Gagne’s 9 Events
of Instruction
Gagne’s 9 Events
of Instruction

Gagne’s 9 Events ofInstruction
1. Gain Attention2. Inform Learners of Objectives3. Stimulate Recall of Prior Learning4. Present the Content5. Provide “Learning Guidance”6. Elicit Performance (Practice)7. Provide Feedback8. Assess Performance9. Enhance Retention and Transfer
to the Job

Welcome to ITC’sPowerPoint Workshop
What’s wrong with this?

Welcome to ITC’sPowerPoint Workshop
How can we fix this?
Let’s add some color.

Welcome to ITC’sPowerPoint Workshop
Better, but we still need some improvement.We need some
tips on creating a theme.

Themes:Tying It All Together
• Themes unify a presentation
• Choose a theme that supports the content
• Choose an appropriate color or color scheme

Themes:Tying It All Together
• Color contrasts can emphasize a point.
• Colors elicit emotions and set the presentation’s tone
• Beware of certain colors and combinations
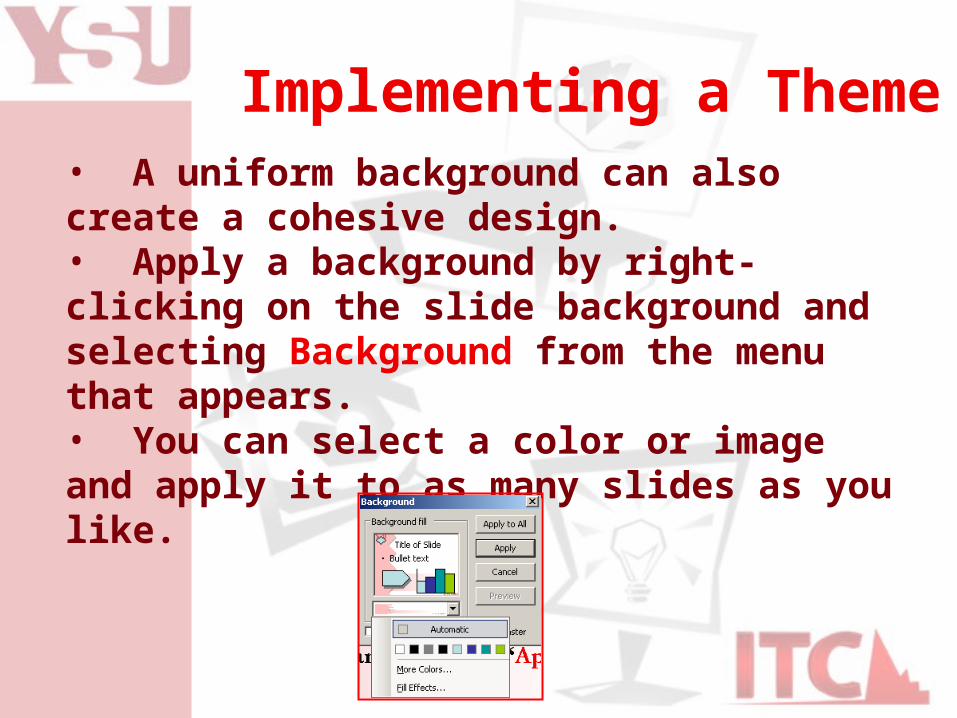
• A uniform background can also create a cohesive design.• Apply a background by right-clicking on the slide background and selecting Background from the menu that appears.• You can select a color or image and apply it to as many slides as you like.
Implementing a Theme

Welcome to ITC’sPowerPoint Workshop
Great! Now, how can we apply this to the rest of our presentation?
Let’s create a Master Slide.

• Let’s create a Master Slide -- a single layout that can be applied to the entire presentation for a more unified look.
• To do this, go to Format then Slide Design or Slide Layout
Implementing a Theme

• Pick a design that suits your needs, or create your own custom design and select the Apply to Selected Slides option.
• To add more slides, go to Insert > New Slide
Implementing a Theme
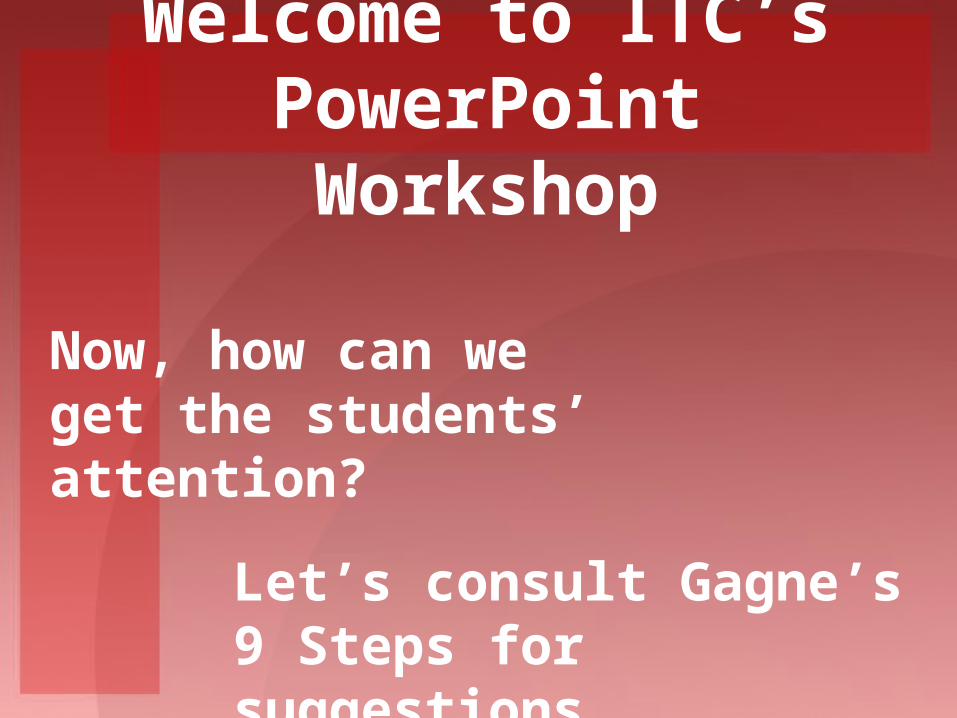
Welcome to ITC’sPowerPoint Workshop
Now, how can we get the students’ attention?
Let’s consult Gagne’s 9 Steps for suggestions.

Gain Attention• State an Interesting
Fact• Pose a Question• Use an Interesting
Sound, Videoor Image
• Maintain Attention ThroughVisual Interest and GoodPresentation Skills
• Don’t Just Read Slides

Welcome to ITC’sPowerPoint Workshop
Let’s add a movie clip as an attention grabber.

Adding Movie Clips
• To add movie clips, select Insert > Movies and Sounds > Movie from File
• Select the file you wish to add.
• Try adding the provided file.

Adding Movie Clips
• Modify the movie’s properties by right-clicking the movie clip and selecting Edit Movie Object
• Note: Only Quicktime files will play on a Mac version of PowerPoint while WMVs work
best for PCs.

Welcome to ITC’sPowerPoint Workshop
That wasn’t so difficult. Let’s add a sound for good measure.

Adding Sounds
• To add sounds, select Insert > Movies and Sounds > Sound from File or Sound from Clip Organizer
• Select the file you wish to add

Adding Sounds
• The Sound’s properties can be modified by right-clicking the sound icon.
• The sound can be set to play automatically or on a mouse click.

Welcome to ITC’sPowerPoint Workshop
Now, on to step 2.

Inform Learner of Objectives
• What Topics Will Be Covered?• What Will the Students Learn?• Highlight Main Ideas• Use Visuals If Possible• Use Clear Organization

Organizing Information
• Bullet points are a great way to organize information.
• Recall the earlier example of good organization.
• How can youcreate such a list?

Bullet Points
• To create a numbered list or a list with bullet points, highlight the desired text and click either of these icons.
• Press Enter or Return to get a new number or bullet point.
• To edit the list settings, either go to Format then Bullets and Numbering or right-click the list and select Bullets and Numbering from the box that appears.

Organizing Information
• Create a list of objectives
• Make them clear and concise
• Highlight main ideas
• Think beyond lists and use media

Recall Prior Knowledge
• Before we begin the lesson, we should urge students to recall prior knowledge.

Recall Prior Knowledge
• Ask Questions • Gauge Students’ Knowledge
Levels• Prepare for Lesson• Get Students to Think

Recall Prior Knowledge
Example:
•When did you last use PowerPoint?
•Why did you use it?
•Was it effective?
•What could you do differently?

Present Material
Now, we’re ready to present the lesson material.

Present Material• Organize Material• Highlight Main Ideas• Repeat Important Information• Encourage Thinking, Not
Mindless Note Taking

Present MaterialExample:
With PowerPoint, you can:
•Organize ideas
•Include multimedia
•Access the internet

Provide Guided Learning
• Use Multimedia• Learning Is Enhanced Through
Visual Media• Show Me

Implementing Guided Learning
Example:
•Add clipart or your own images to illustrate your point.
•How do we add images?

Adding Images
Images used in the PowerPoint should be very visible of relatively high quality. If it looks bad on a monitor, it will look even worse when blown up by a projector.
VS.

• To add an image to a slide, go to the Insert menu and select Picture
• From that menu, you can add whatever graphical content you choose.
Adding Images

• To edit an image, click it and drag the small, circular handles to adjust size or rotation.
Adding Images

• For advanced editing features, right-click on the object and select Format Picture
• This feature can also be accessed by double-clicking the image
Adding Images

Implementing Guided Learning
Example:
•Visuals add varietyand interest to presentations
•Visuals improveretention and understanding

Implementing Guided Learning
•To maintain attention, we cananimate the image.

• Go to Slide Show > Custom Animation
• Right-click on the desired object and select Custom Animation
•A Custom Animation menu will appear.
•Click the Add Effects button
Animation

Animation
• You can now change the speed and direction of the animation.

• Ordering Animation:
Access Custom Animation menu
Select and drag the animation to a
new location.
Animation

Transitions
• Creating Transitions:
Go to Slide Show > Slide Transition
Choose a transition and apply it to one slide or all slides.

Setting Transitions• Two Ways:
1. Automatic
Access Slide Transitions menu
Check Automatically After option
2. On Mouse Click
Access Slide Transitions menu
Check On Mouse Click option

Elicit Performance
•You’ve shown the students what you want them to learn.
•Now get them to participate.

Elicit Performance• Insert Places for Q & A• Use Notecards to Allow Student
Responses and Gauge Learning• Insert Interactivity

Elicit Performance
•One strategy is to incorporate interactivity.
•Try an index card quiz

Elicit PerformanceWhy use PowerPoint?•Students should answer on
a index card or piece of paper
•Collect the answers
•Open-ended questions encourage critical thinking

Provide Feedback• Inform Students of Performance• Gauge Progress of Learning• Gauge Effectiveness of Lecture

Provide Feedback
Any questions?
•Leave time for questions before proceeding
•Not too much time, however…
•…because we need test them, now

Assess Learning• Evaluate Learning Immediately
After or During the Presentation• Create an Interactive
Presentation (Multiple ChoiceQuizzes in Slides)

Assess Performance
•Assess performance by creating interactive quizzes
1. Build question set
2. Create a slide for each question
3. Create “Correct” and “Incorrect” answer slides
4. Insert interactive buttons

Buttons
• To add buttons, go to Insert > Picture > Autoshapes
• The Autoshapes palette will appear.

Buttons
• Select the Action Buttons button from the Autoshapes palette.
• This palette will provide you with a number of button choices.

Buttons
• With the desired button type selected, you can create one anywhere on the side
• You can use drawing tools to modify line and fill color.

Buttons
• Access Action Setting for the button by right-clicking the button and selecting Edit Hyperlink
• You can now set button actions

Assess Learning• Considering all you have learned
to this point let’s create a simple PowerPoint game1. First, create a question:
1. Then create three buttons for the possible answers:
1. Create 2 new slides – 1 for the correct answer, and 1 for the wrong answers.
How many Earths could fit across the Sun?
110 71000

Assess Learning
Sorry, that answer was incorrect. Please try
again.
Back

Assess Learning
Congratulations! You are correct!
Approximately 110 Earth’s could fit across the diameter of the
Sun.
And now, the final step.

Enhance Retention and
Transfer• Use Multimedia• Clearly Define Presentation
Objectives• Repeat important points• Evaluate Learning Immediately• Use the Web to Supplement
Presentations.

Enhance Retention and Transfer
•This workshop is essentially step 9
•The Internet can take the lesson beyond PowerPoint.
•Printouts are also useful

The Web
• Additional insight into the content.
•To link the Web, type the full site address into PowerPoint: http://www.ysu.edu
• PowerPoint automatically creates the link

The Web• You can modify the link by right-clicking it and selecting Edit Hyperlink
• Normal text can become a link by highlighting it, right-clicking and selecting Hyperlink

The Web• Remove the link by right-clicking it and selecting Edit Hyperlink and clickingthe Remove Link button on the lowerleft of the window.

Enhance Retention and Transfer
•Now you can add links to sources
•You can even add your e-mail address
•This is especially helpful if the presentation is uploaded to the Internet

Printing Handouts
• You can print a copy of the presentation as a handout with one or several slides on one page
• Go to File > Print

Printing Handouts• From the drop-down menu,
select the print style. 4-6 per page is optimum. 3-per-page provides lines for note taking.

Finally…
You’re almost done, but you still have a few things left to do.

Finalizing and Polishing
• Play the presentation several times, looking for anything that does not seem to be working.
• If possible, have an objective party view it for a different opinion.
• Test everything! Remember: anything that can go wrong, will.
Now that the pieces are in place, you must ensure that the gears are turning properly by performing a few simple procedures:

• Practice the presentation with a stopwatch
• Know the machine it will be presented on
• If possible, test the presentation on several other computers
Finalizing and Polishing

Finalizing and Polishing
* Remember to save and backup everything often!* Remember to save and backup everything often!

Conclusion• PowerPoint offers a nearly endless
number of tools to createinstructional presentation
• PowerPoint is only a tool• Interactivity increases learning• The only limit is your imagination
and willingness to experiment
Related Documents