Teaching Beginner Trumpet Lessons in a Synchronous Virtual Setting: An Intensive Case Study. by Nancy Taylor, MM, MOT A Dissertation Project In Trumpet Submitted to the Graduate Faculty of Texas Tech University in Partial Fulfillment of the Requirements for the Degree of DOCTOR OF MUSICAL ARTS Approved Andrew Stetson, D.M.A. Chair of Committee Kevin Whalen, D.M.A. Lisa Garner-Santa, D.M.A. Mark Sheridan, PhD Dean of the Graduate School May, 2021

Welcome message from author
This document is posted to help you gain knowledge. Please leave a comment to let me know what you think about it! Share it to your friends and learn new things together.
Transcript

Teaching Beginner Trumpet Lessons in a Synchronous Virtual Setting:
An Intensive Case Study.
by
Nancy Taylor, MM, MOT
A Dissertation Project
In
Trumpet
Submitted to the Graduate Faculty
of Texas Tech University in
Partial Fulfillment of
the Requirements for
the Degree of
DOCTOR OF MUSICAL ARTS
Approved
Andrew Stetson, D.M.A.
Chair of Committee
Kevin Whalen, D.M.A.
Lisa Garner-Santa, D.M.A.
Mark Sheridan, PhD
Dean of the Graduate School
May, 2021

2
Copyright 2021, Nancy Taylor
Texas Tech University, Nancy Taylor, May 2021
ii
ACKNOWLEDGMENTS
I am grateful for this opportunity to express thanks to those who contributed to
my music education and this project.
Thank you, Dr. Andrew Stetson, for your help with writing this document and
your guidance throughout this process. Thank you for inspiring me to learn new music
and for showing me how to be a better teacher.
To the Texas Tech University trumpet studio members who welcomed me into
their lives and shared experiences, I thank you with all my heart.
To my mentor, Lowell Graham, for your continued support, encouragement,
advice, and friendship, thank you.
To my friend, Becca Zeisler, thank you for sharing your incredible musicianship
and collaboration on recitals.
To the committee, Andrew Stetson, Dr. Lisa Garner, and Dr. Kevin Whalen thank
you for your guidance and support during the writing of this document.
To Suzy Graham: If it weren't for your sending me that first video of your
granddaughter blowing the trumpet on April 24th, and her first lesson on April 25th, and
this entire dissertation project would never have happened.
Olivia Peterson, thank you for being the subject of this project. I have learned a
great deal from the process of our virtual trumpet lessons and have had great joy in
witnessing you learn. I am excited about your future in music. You and your mother,
Leah, have been a bright light in my life throughout the pandemic.
And finally, I would like to express my deepest appreciation to my late husband,
Ron Hufstader, for encouraging me to start this degree and my family and friends for
supporting me throughout this journey.
Texas Tech University, Nancy Taylor, May 2021
iii
TABLE OF CONTENTS
ACKNOWLEDGMENTS ii
ABSTRACT v
LIST OF FIGURES vi
1
3
3
6
8
9
10
12
13
14
15
19
20
20
21
21
24
26
I. INTRODUCTION
II. REVIEW OF LITERATURE
Efficacy and Feasibility of Virtual Teaching
The Student/Teacher Interpersonal Relationship The
Sound-Before-Sight Principle
Trumpet Pedagogy on Articulation
Teacher use of YouTube Videos
III. METHODOLOGY
Lesson Environment and Technology
Lesson Content
Lessons 1-5: Embouchure Development
Lessons 6-10: Fingers and Articulation
Lessons 11-15: Developing Skill
Assessment
IV.THE WEBSITE
Resources: Virtual Teaching Setup, Lighting and Sound
Resources: Teacher Tips
The Lessons
V. CONCLUSION 29
WORKS CITED 31
APPENDICIES 33
A. LESSON PLANS 33
B. TRANSCRIPTS OF DEMONSTRATION VIDEOS 48

Texas Tech University, Nancy Taylor, May 2021
iv
C. PHOTO RELEASES 76
D. IRB WAIVER 78
Texas Tech University, Nancy Taylor, May 2021
v
ABSTRACT
This document is a case study in teaching a beginner trumpet player within a
virtual, synchronous setting based on the author's experience. The study examines the
first fifteen lessons between a student Cleveland, Ohio who had no previous experience
playing the trumpet, and a teacher in El Paso, Texas. The scope of the project includes
this document and a companion website, beginningtrumpet.com, an instructional guide
for music educators teaching beginning trumpet players. Content on the website draws on
the approaches and pedagogy used during the fifteen-lesson case study. Success was
measured by the student's proficiency in playing the instrument, demonstrating
understanding of various musical, and a continued display of eagerness to continue
trumpet lessons at the conclusion of the case study. Success in teaching was attributed to
the pedagogy, sequence of concepts presented, teacher's disposition, frequency of
lessons, and understanding of the technology. The primary limitation of teaching virtually
was internet latency, which prevented student and teacher from playing together. At the
time of this publication, this is the only case study involving teaching a beginner
instrumentalist in a virtual, synchronous setting. Additional research on feasibility and
successful tactics for teaching applied music virtually is needed.

Texas Tech University, Nancy Taylor, May 2021
vi
LIST OF FIGURES
3.1 Teacher's Setup. ....................................................................................................13
3.2 Student's Setup......................................................................................................14
3.3 Student Resting the Trumpet on her Knee............................................................15
3.4 Student Embouchure on Lesson #5.......................................................................17
3.5 Student Embouchure on Lesson #15.....................................................................17
3.6 Zoom Whiteboard Illustration of Valve Patterns..................................................19
3.7 Illustration of Zoom Whiteboard for Learning a Song................................. ........20
4.1 Blue Snowball and Blue Yeti................................................................................22
4.2 Close to the Computer Camera to Show Valve Positions.....................................23
4.3 Showing Enthusiasm and Making Eye Contact.....................................................25
4.4 Holding Mouthpiece in "Butterfly Wings"............................................................27

Texas Tech University, Nancy Taylor, May 2021
1
CHAPTER I
INTRODUCTION
When the COVID-19 pandemic spread to the United States in March of 2020,
cities went into lockdown, and people stayed home. This brought an end to academic
gatherings of any size, and schools transferred to online learning. Music teachers of all
levels faced a new challenge during this transition. While courses in music history and
theory have adapted to online learning, instruction in music performance has traditionally
been face-to-face.
About a month into this shutdown, I received a video text from a friend. Her nine-
year-old granddaughter had just been given a trumpet for her birthday and was making
loud, blurting sounds on the instrument. As the child was enthusiastic about playing, I
offered to meet her on Zoom the next day to offer some pointers for getting started. That
first trumpet lesson was on April 25, 2020 and serves as the genesis of this case study.
Presented here are the teaching environment, concepts, and strategies that led to student
engagement and overall success.
Teaching with enthusiasm and positive feedback was an intentional strategy used
by the teacher. Praising the student and recognizing effort over accuracy is a tactic that
can rouse intrinsic motivation. Teacher feedback that is evaluative or fear-based can be
counterproductive to student learning.2 Throughout the case study, the student was
engaged and eager to learn, as evidenced by her attention to the task and smiling
expression when scheduling the next day's lesson.
Even with 47 years as a trumpet player and 25 of those as a music educator, I had
no experience with online, virtual instruction. Distance education has been used
extensively in nearly all academic disciplines for several years. Music performance
instruction, however, seems to have made a slower, more cautious move to the virtual
setting. Though many resources offer how-to videos or pay-as-you-go lessons, few offer
any how-to instruction for the teacher.

Texas Tech University, Nancy Taylor, May 2021
2
Many young musicians will use poor posture in holding their instrument as a
compensatory strategy for not having the strength to hold the instrument. These poor
postures can lead to poor performance and often injury.4 It is for this reason that the
student in the case study was not instructed on playing with proper posture until her tenth
lesson. As a board-certified Occupational Therapist, this author specializes in injury
prevention for musicians. In researching for Teaching Healthy Musicianship: The Music
Educator's Guide to Injury Prevention and Wellness (Oxford, 2016), the author evaluated
young musicians and the role instrumental ergonomics played in their body mechanics.
More on this topic is covered in chapter 2.
This project is distinct because it offers training in virtual teaching and outlines
fifteen trumpet lessons for the person who wishes to teach beginners online. The resulting
website, beginningtrumpet.com, is designed to assist music teachers in starting beginners
on trumpet. The author of this study is a former member of the United States Marine
Band, The President's Own, has 30+ years of teaching experience, and is in her 11th year
of teaching trumpet at The University of Texas at El Paso. The information in this
document and on its companion website is not intended to be a pedagogical end-all. It is a
singular case study.

Texas Tech University, Nancy Taylor, May 2021
3
CHAPTER II
REVIEW OF LITERATURE
The scope of this project involves a case study and an instructional website for music
educators. The case study encompasses a fifteen-lesson sequence of teaching a beginner
trumpet player virtually. The website, Beginningtrumpet.com is modeled after the case study
and draws on the approaches and pedagogy used in the case study. There is, to date, no
literature that applies directly to the methodology used. Likewise, there is no instructional
website to guide the trumpet teacher in teaching trumpet virtually to a beginner. Following is a
review of the literature that draws on the applied concepts.
Efficacy and Feasibility of Virtual Teaching For centuries the traditional approach to learning to play an instrument has been based
on the apprenticeship model, and there are valid concerns about the value of teaching music
virtually.1 Bellelo (2013) executed a study to examine the lesson environment's effects on
beginning piano students. The study involved nineteen students ranging in age from six to
nine with no prior private music instruction. Nine of the children were taught traditional, in-
person lessons, and the other ten students were taught virtually via Skype. The study's
assessment included musical achievement, measured by the performance of a prepared piece,
sight-reading, aural memory, and visual memory, and attitude, measured by pre-lesson and
post-lesson surveys. Results of the data show only slightly lower scores for each of the
musical achievement areas for the students who were taught virtually.2 There was no
significant difference in the amount of lesson time spent on instruction and playing throughout
the session between the in-person and online groups. Time spent addressing technology issues
was understandably a factor in the online group, as was interactive performance. The time
spent on technology issues decreased significantly throughout the lesson period.
The author reported a slight difference in the students' perceived interpersonal
relationship with the teacher and noted that student comments that reported in-person teaching
1 Rebecca Carter Bellelo, Musical Achievement and Attitude of Beginning Piano Students in a Synchronous
Videoconferencing Lesson Environment, (LSU Digital Commons, 2013), 109.
2 Ibid., 61.

Texas Tech University, Nancy Taylor, May 2021
4
were better for some. However, there was greater student satisfaction due to the necessity for
student-guided activities and ensuing lesson content.3 Situational advantages to virtual
teaching include the opportunity to teach learners in remote areas and those who have limited
access to transportation. The opportunities for connecting with students and experts in the field
are seemingly endless. Additionally, online music theory games are readily available to be
used as supplemental material.
Wilson (2013) carried out a study to establish the feasibility of teaching individual
music performance lessons in a combined synchronous and asynchronous setting. In Bridging
the Virtual Gap in Internet-Based Music Instruction, the author evaluated his teaching
content's effectiveness to determine a practical format for online teaching. Using a multimedia
blog coupled with synchronous lessons via live video, he taught nine college-level trombone
players. Wilson found that students could learn and apply fundamental concepts provided in
the two settings and that students reported increased understanding of the material presented in
the in-person video lesson because of the content in the corresponding blog post.4
Although there were technological and logistical challenges involved, Wilson noted
some positive influences on instruction in the virtual setting5. For example, he was able to
demonstrate good slide technique by positioning his hands within the frame of the screen, thus
focusing the student's attention on that specific area. The presence of lag time and video
latency were issues in nearly every lesson, but the impact on lessons was minimal. The lag
time prevented the student and teacher from playing simultaneously but did not negatively
impact the lesson. Audio quality was impacted by internet connectivity and latency, but the
3 Rebecca Carter Bellelo, Musical Achievement and Attitude of Beginning Piano Students in a Synchronous
Videoconferencing Lesson Environment, (LSU Digital Commons, 2013), 111.
4 Aaron James Wilson, Bridging the Virtual Gap in Internet Based Music Instruction: A Feasibility Study in
Trombone Performance Education, (Dissertation, University of North Carolina at Greensboro, 2013), 7.
5 Ibid., 4.
Texas Tech University, Nancy Taylor, May 2021
5
problem was minimized when the student pointed the bell away from the microphone6.
Because of the inherent poor audio quality, the instructor's assessment of the student's
performance was often based on visual cues such as slide movement, movement of the face,
and posture. Wilson said that he used visual diagnosis more frequently in the video lessons
than during in-person lessons; traditional in-person lessons are more conducive to a highly
detailed evaluation of musical performance. The author concludes that the format of
synchronous and asynchronous lessons provided a satisfactory learning experience for his
students, notwithstanding the technological issues.7
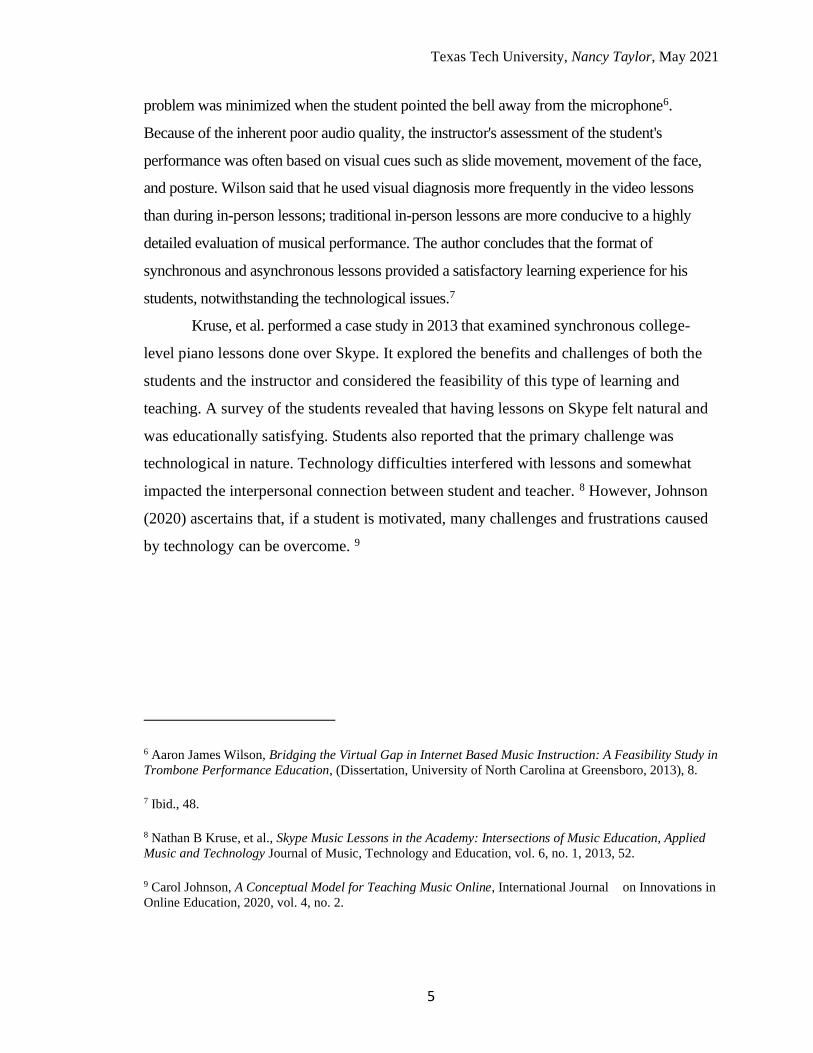
Kruse, et al. performed a case study in 2013 that examined synchronous college-
level piano lessons done over Skype. It explored the benefits and challenges of both the
students and the instructor and considered the feasibility of this type of learning and
teaching. A survey of the students revealed that having lessons on Skype felt natural and
was educationally satisfying. Students also reported that the primary challenge was
technological in nature. Technology difficulties interfered with lessons and somewhat
impacted the interpersonal connection between student and teacher. 8 However, Johnson
(2020) ascertains that, if a student is motivated, many challenges and frustrations caused
by technology can be overcome. 9
6 Aaron James Wilson, Bridging the Virtual Gap in Internet Based Music Instruction: A Feasibility Study in
Trombone Performance Education, (Dissertation, University of North Carolina at Greensboro, 2013), 8.
7 Ibid., 48.
8 Nathan B Kruse, et al., Skype Music Lessons in the Academy: Intersections of Music Education, Applied
Music and Technology Journal of Music, Technology and Education, vol. 6, no. 1, 2013, 52.
9 Carol Johnson, A Conceptual Model for Teaching Music Online, International Journal on Innovations in
Online Education, 2020, vol. 4, no. 2.
Texas Tech University, Nancy Taylor, May 2021
6
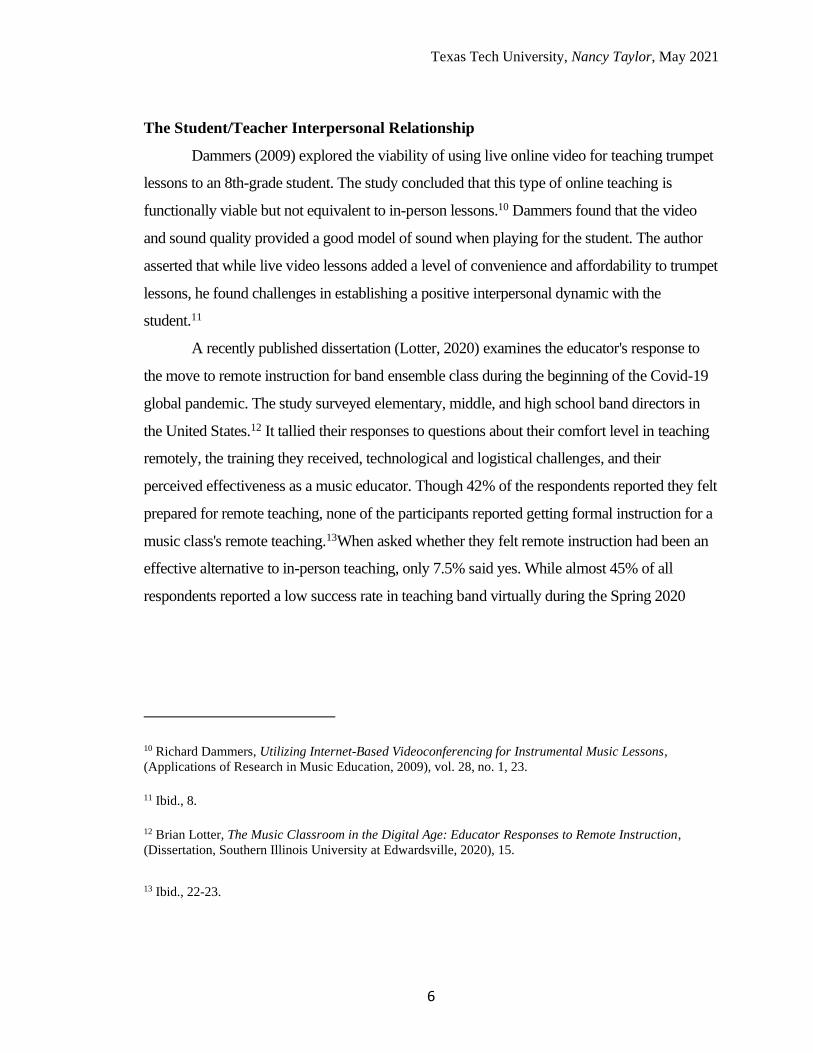
The Student/Teacher Interpersonal Relationship
Dammers (2009) explored the viability of using live online video for teaching trumpet
lessons to an 8th-grade student. The study concluded that this type of online teaching is
functionally viable but not equivalent to in-person lessons.10 Dammers found that the video
and sound quality provided a good model of sound when playing for the student. The author
asserted that while live video lessons added a level of convenience and affordability to trumpet
lessons, he found challenges in establishing a positive interpersonal dynamic with the
student.11
A recently published dissertation (Lotter, 2020) examines the educator's response to
the move to remote instruction for band ensemble class during the beginning of the Covid-19
global pandemic. The study surveyed elementary, middle, and high school band directors in
the United States.12 It tallied their responses to questions about their comfort level in teaching
remotely, the training they received, technological and logistical challenges, and their
perceived effectiveness as a music educator. Though 42% of the respondents reported they felt
prepared for remote teaching, none of the participants reported getting formal instruction for a
music class's remote teaching.13When asked whether they felt remote instruction had been an
effective alternative to in-person teaching, only 7.5% said yes. While almost 45% of all
respondents reported a low success rate in teaching band virtually during the Spring 2020
10 Richard Dammers, Utilizing Internet-Based Videoconferencing for Instrumental Music Lessons,
(Applications of Research in Music Education, 2009), vol. 28, no. 1, 23.
11 Ibid., 8.
12 Brian Lotter, The Music Classroom in the Digital Age: Educator Responses to Remote Instruction,
(Dissertation, Southern Illinois University at Edwardsville, 2020), 15.
13 Ibid., 22-23.

Texas Tech University, Nancy Taylor, May 2021
7
quarantine, more than 22% reported little or no success.14 Over half of the teachers indicated
that low student participation was the most challenging factor.15
While these band directors found that lack of student engagement was the main
problem in their online teaching, Hendricks, Smith, and Staunch (2014) may have found a
solution. In their journal article, “Creating Safe Spaces for Music Learning”, the authors
examine which learning environments, teacher attitudes, and interactions are best for enabling
students to become confident and independent music makers. The authors report that student
engagement is a primary factor in virtual education and were able to identify several factors to
increase participation, confidence, and creativity. Student engagement is a primary factor in
virtual education.16 Fostering that engagement through treating the students as individuals by
valuing their differences can allow the teacher to make more meaningful goals for them,
thereby stimulating intrinsic motivation.17
Furthermore, praising students and recognizing progress and effort can encourage
intrinsic motivation for the learning process itself. Allowing the student to have ownership in
their music learning can also contribute to their sense of engagement. Students tend to be more
spontaneous and creative in environments where they feel genuinely appreciated. 18
Positive teacher feedback is another primary component to creating a safe place for
music learning. Informative feedback encourages creativity; subsequently, evaluative
feedback inhibits creative efforts and can even bring on fear. Negative, fear-based feedback
14 Ibid., 21. 15 Ibid., 20.
16 Karin Hendricks, et al., Creating Safe Spaces for Music Learning, (Music Educators Journal, 2014), vol.
101, no. 1, 37.
17 Ibid., 36.
18 Karin Hendricks, et al., Creating Safe Spaces for Music Learning, (Music Educators Journal, 2014), vol.
101, no. 1, 37.

Texas Tech University, Nancy Taylor, May 2021
8
may, in some cases, appear to get students to do what teachers want, but in actuality, the
effects are either short-lived or detrimental to learning. 19
Creating a 'safe space' for music learning is essentially creating a place free of
judgment, negativity, or punishment, and the attitude of the teacher is vital. The authors of the
study assert that teachers must respect the vulnerability that comes with being creative and
honor the students' choices. In being completely present, giving full attention to the student,
the teacher can provide an environment conducive to creative engagement. Teachers can
create positive experiences through presenting challenges that are only moderately difficult for
the student. The authors assess that even unconventional teaching can create a safe space.
While allowing the students to be their authentic selves, teachers too should share their
authentic self. Being fully present and sharing personal struggles and experiences with
students can also be a positive experience for the student and help build a good interpersonal
dynamic.20
The Sound-Before-Sight Principle
The familiar music teaching pedagogy of 'sound before sight' refers to teaching music
first aurally and later with visual representations of pitches and duration. Starting with sound
before moving to symbol identification is not a new idea in music education. Suzuki, Orff, and
Kodály are just a few methods based on students learning by ear before learning notation.
21Because children learn to make sounds before words and can speak words before they can
read, the sound before sight principle is ideal for teaching music.
Hicks (1980) asserts that it is not critical that children be able to read music and
teaching by rote is not all bad. 22 Children are engaged when learning songs that they know.
19 Ibid.
20 Ibid., 38.
21 Charles Hicks, Sound Before Sight Strategies for Teaching Music Reading, (Music Educators Journal,
1980), vol. 66, no. 8), 54.
22 Charles Hicks, Sound Before Sight Strategies for Teaching Music Reading, (Music Educators Journal,
1980), vol. 66, no. 8), 54.

Texas Tech University, Nancy Taylor, May 2021
9
Adding the task of learning music notation while simultaneously learning to play an
instrument creates a great deal of work for their young brain. Hicks says, "it is a psychological
fact that small children first comprehend perceptually" and that concentrating on one concept
at a time helps the student build a solid foundation and possibly helps to save time in later
stages of learning. Therefore, sound before sight and experience before theory are sound
principles that should permeate good pedagogy at all levels of instrumental instruction. 23
Additional support for this theory comes from West (2016) in Sound Foundations:
Organic Approaches to Learning Notation in Beginning Band. West contends that band
directors' traditional approach using a method book from day one of playing the instrument do
their students a disservice. The beginning band method book consistently starts with an
exercise of, play one note, hold for four counts, rest for four counts, and so on. Method book
authors start this way to minimize the complexity of learning to play and read
simultaneously.24 The purpose of this is to teach music notation reading while keeping
instrument manipulation to a minimum. While this is indeed a way to teach music notation,
the students quickly get bored and may even ask, "when do we get to learn music?"25
Utilizing the sound before sight principle, one should think of two instruments, the
internal instrument, and the external instrument.26 The internal instrument is the student's
sense of pitch and rhythm; the external instrument is the actual wood or metal object in their
hands. It is of high importance that, as educators, we first correctly develop the internal
instrument. West declares, "A student's external instruments are only as well-tuned as their
internal instruments."27
23 Ibid.
24 Chad West, West, Sound Foundations, (Music Educators Journal, 2016). vol. 102, no. 4, 56.
25 Ibid., 57.
26 Chad West, Sound Foundations, (Music Educators Journal, 2016). vol. 102, no. 4, 57.
27 Ibid.
Texas Tech University, Nancy Taylor, May 2021
10
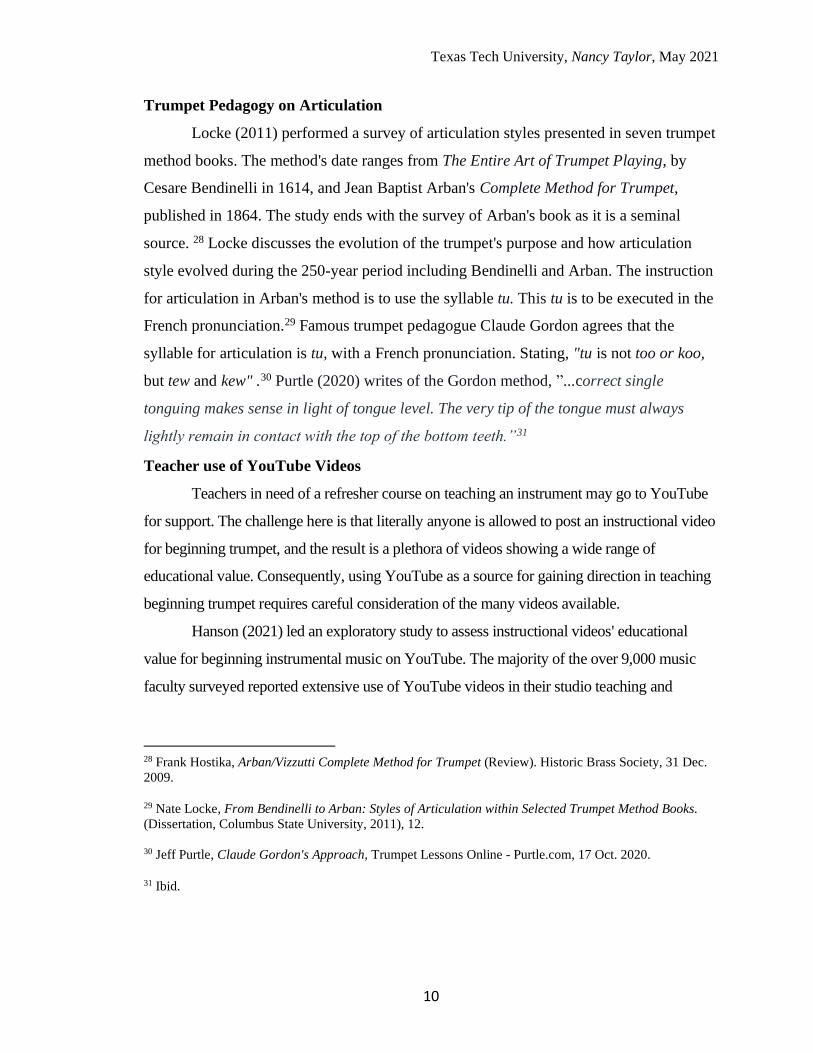
Trumpet Pedagogy on Articulation
Locke (2011) performed a survey of articulation styles presented in seven trumpet
method books. The method's date ranges from The Entire Art of Trumpet Playing, by
Cesare Bendinelli in 1614, and Jean Baptist Arban's Complete Method for Trumpet,
published in 1864. The study ends with the survey of Arban's book as it is a seminal
source. 28 Locke discusses the evolution of the trumpet's purpose and how articulation
style evolved during the 250-year period including Bendinelli and Arban. The instruction
for articulation in Arban's method is to use the syllable tu. This tu is to be executed in the
French pronunciation.29 Famous trumpet pedagogue Claude Gordon agrees that the
syllable for articulation is tu, with a French pronunciation. Stating, "tu is not too or koo,
but tew and kew" .30 Purtle (2020) writes of the Gordon method, ”...correct single
tonguing makes sense in light of tongue level. The very tip of the tongue must always
lightly remain in contact with the top of the bottom teeth.”31
Teacher use of YouTube Videos
Teachers in need of a refresher course on teaching an instrument may go to YouTube
for support. The challenge here is that literally anyone is allowed to post an instructional video
for beginning trumpet, and the result is a plethora of videos showing a wide range of
educational value. Consequently, using YouTube as a source for gaining direction in teaching
beginning trumpet requires careful consideration of the many videos available.
Hanson (2021) led an exploratory study to assess instructional videos' educational
value for beginning instrumental music on YouTube. The majority of the over 9,000 music
faculty surveyed reported extensive use of YouTube videos in their studio teaching and
28 Frank Hostika, Arban/Vizzutti Complete Method for Trumpet (Review). Historic Brass Society, 31 Dec.
2009.
29 Nate Locke, From Bendinelli to Arban: Styles of Articulation within Selected Trumpet Method Books.
(Dissertation, Columbus State University, 2011), 12.
30 Jeff Purtle, Claude Gordon's Approach, Trumpet Lessons Online - Purtle.com, 17 Oct. 2020. 31 Ibid.
Texas Tech University, Nancy Taylor, May 2021
11
classroom efforts.32 Hanson found that instrumental music teachers frequently used YouTube
videos to enrich their pedagogical understanding and found them to be an appropriate and
beneficial supplement for their students. Many of those surveyed expressed concerns over the
quality of instructional content in the videos.33
For the study, Hanson employed an expert panel to evaluate instructional videos for
beginners in five instruments: flute, clarinet, trumpet, trombone, and snare drum. Each panel
member evaluated the top twenty most watched videos for each of the five instruments.
Findings showed that though most of the videos' pedagogical value was good, some offered
questionable educational value.34 The study supports only limited use of YouTube videos in
teaching instrumental music due to the inconsistency of sound pedagogical information.
32 Josef Hanson, Assessing the Educational Value of YouTube Videos for Beginning Instrumental Music,
(Contributions to Music Education, 2018), vol. 43, 140.
33 Josef Hanson, Assessing the Educational Value of YouTube Videos for Beginning Instrumental Music,
(Contributions to Music Education, 2018), vol. 43, 140.
34 Ibid., 137.
Texas Tech University, Nancy Taylor, May 2021
12
CHAPTER III
METHODOLOGY
In April 2020, I was asked to teach trumpet lessons to a child in Cleveland, Ohio. I
The child had no prior experience playing the instrument and had just received a trumpet
for her ninth birthday. Because she is the granddaughter of a friend, I embarked on the
task of teaching her virtually through Zoom, as I live nearly 2000 miles away in Texas.
At this time, I had had no experience teaching virtually but would soon be teaching my
university students virtually for the remainder of the semester. The beginning of the
global pandemic brought an introduction to teaching music virtually, which launched
many music teachers into unchartered territories. While many disciplines have previously
connected with students through distance learning, instruction in music performance has
traditionally in-person.35
Music educators have been thrust into the zone of virtual teaching. Though I have
been a music educator and performer for 25 years, I had absolutely no experience with
teaching in a virtual setting. Part of my job description as a university faculty member is
to train music educators, and I had never addressed teaching in any way other than face to
face. This case study is a report of virtual teaching of a beginner trumpet player, and
analysis of the challenges and successes.
Lessons were 30-minutes every day for the first fifteen consecutive days. The
schedule moved to at least six days a week for the following three months and less
frequently when school started in the fall. For each lesson, the student's mother sat next to
her on the sofa. Her grandmother, who lives in Texas, was also able to join via Zoom for
every lesson.
Having played and taught the trumpet for 47 years, I and am confident in my
instruction. My years as an educator have revealed core elements vital to efficient
35 Aaron James Wilson, Bridging the Virtual Gap in Internet Based Music Instruction: A Feasibility Study
in Trombone Performance Education, (Dissertation, University of North Carolina at Greensboro, 2013), 47.
Texas Tech University, Nancy Taylor, May 2021
13
trumpet playing. The pedagogical choices made throughout the period of the case study
were intentional. These represent my own successful teaching and pedagogy and are not
intended to challenge or replace other pedagogics.
Lesson Environment and Technology
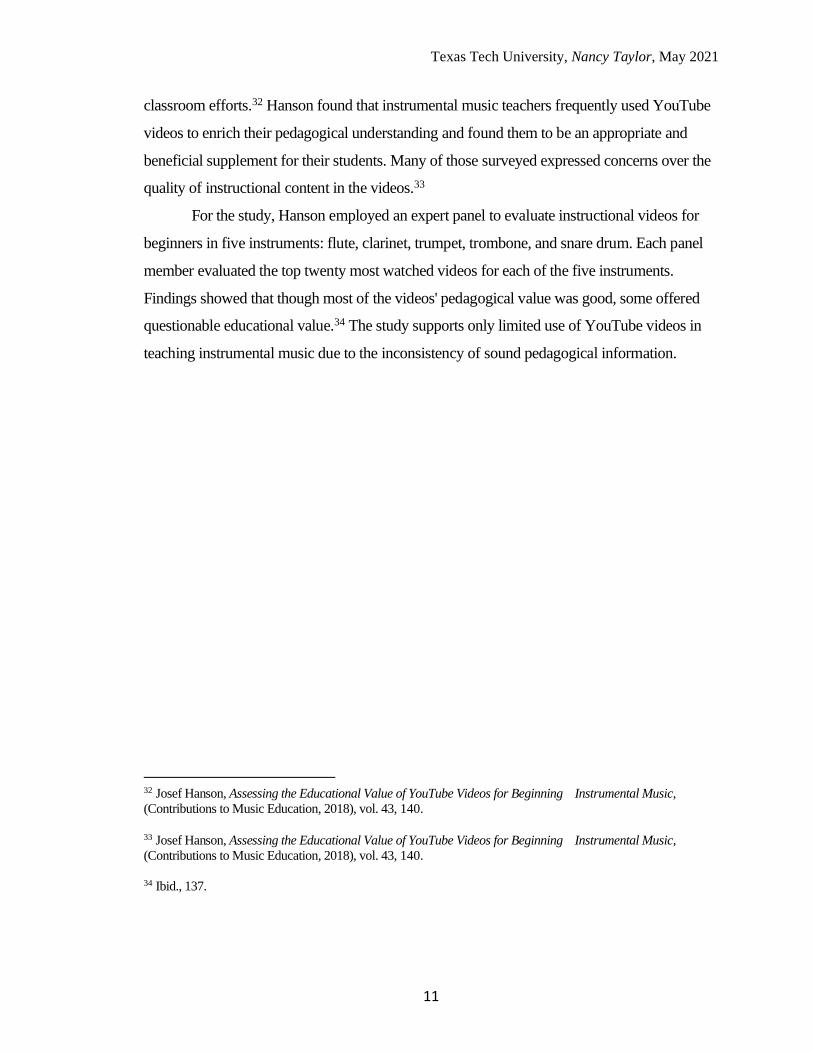
Lessons were conducted from my home office using my personal computer and Zoom
software. Initially, the built-in microphone on the computer was used, and by the fourth
lesson began using a $50 Blue Snowball USB microphone.36 Another upgrade to a Blue
Yeti USB microphone for about $150, resulted in better sound quality being transmitted
to the student.37 External speakers were also used ([Figure 3.1).
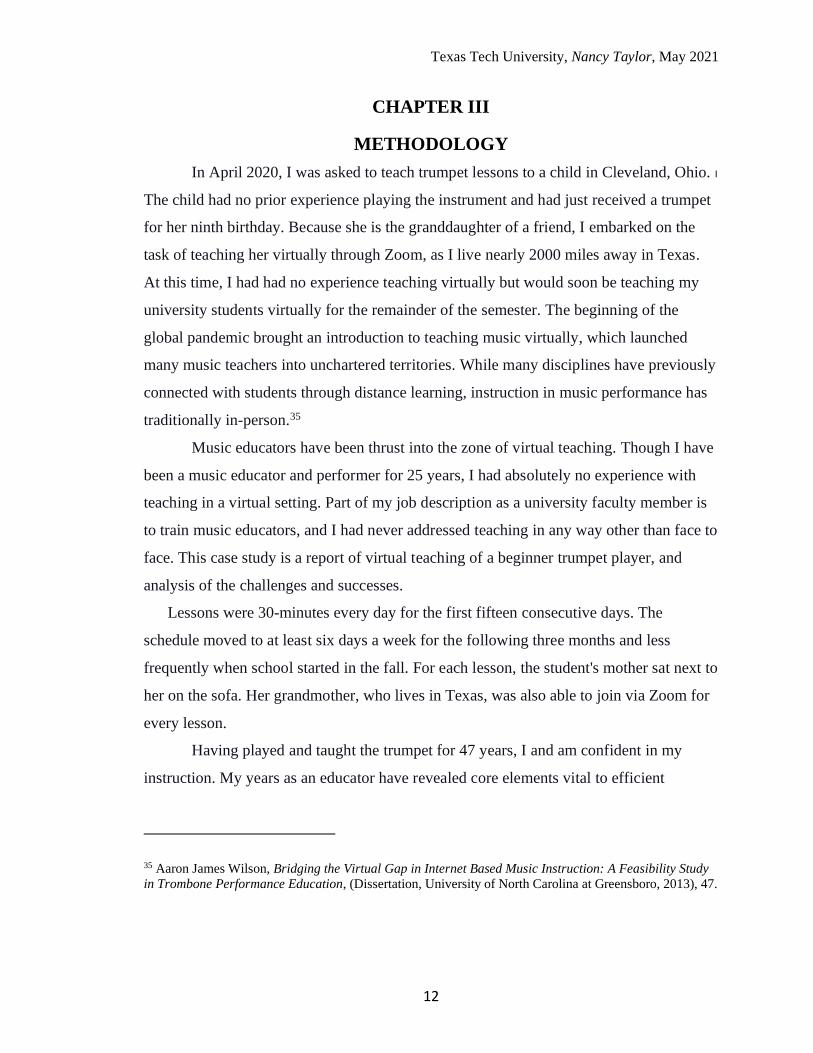
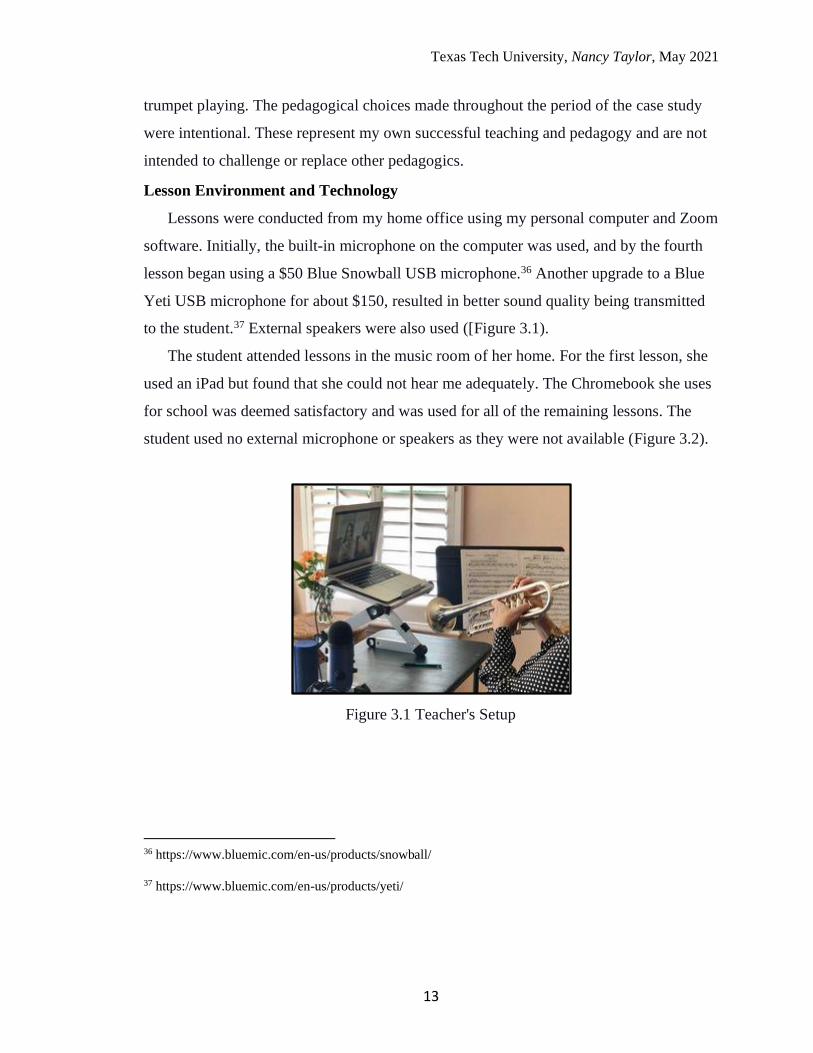
The student attended lessons in the music room of her home. For the first lesson, she
used an iPad but found that she could not hear me adequately. The Chromebook she uses
for school was deemed satisfactory and was used for all of the remaining lessons. The
student used no external microphone or speakers as they were not available (Figure 3.2).
Figure 3.1 Teacher's Setup
36 https://www.bluemic.com/en-us/products/snowball/ 37 https://www.bluemic.com/en-us/products/yeti/
Texas Tech University, Nancy Taylor, May 2021
14
Figure 3.2 Student's setup
Lesson Content
The design of the lessons and the sequence of material learned was experimental
by some degree. Having taught mostly university students, I understand what problems
students develop due to poor fundamental skills, bad habits, and possibly, poor initial
instruction. It was a personal goal to teach the student the first steps of playing the
instrument in a way that would facilitate trouble-free growth in strength and skill. For this
reason, emphasis was placed on the developing the habit of good embouchure formation
for each of the first fifteen lessons.
An important component of this series of lessons was my communication style.
throughout all lessons, I maintained eye contact with the student by looking into the
camera of the computer and addressed the student, not her mother. I was continually
enthusiastic about her progress and gave only positive feedback. If the student made a
mistake in repeating a pattern I played in call-and-response, I would change the pattern to
match what she had played. Through this, the student became confident in playing the
instrument.
Though good postural alignment is an important element of music performance, it
was intentionally not addressed in the initial phase of learning. Holding an object such as
a musical instrument in front of the body is likely a new task for most students and
recognizing the need for the large muscles to strengthen is essential. Young musicians

Texas Tech University, Nancy Taylor, May 2021
15
can develop bad habits if they modify their playing posture to compensate for weak
muscles.38 To avoid the development of a compensatory posture, I allowed the student to
occasionally rest the trumpet bell on her knee while she played (Figure 3.3). Throughout
the course of lessons and as her large muscles strengthened, the student was able to hold
the trumpet in the correct position for increasing durations.
Figure 3.3 Student resting the trumpet on knee
Lessons 1-5: Embouchure Development
The first five lessons focused on embouchure, matching pitch with the voice, and then
with buzzing the mouthpiece and playing the instrument. After the student met the goals
for these three tasks, it was time to play the instrument. With a sound embouchure and
pitch-matching skill, the student was able to play a concert Bb on the first try. Instructions
on articulation followed, using the concept of French articulation. After the student was
successful with answering rhythmic patterns in call-and-response, I introduced new notes.
Building the range lower was the next step. At this point, it was necessary to take
frequent breaks from playing and repeat the steps of embouchure formation and pitch
38 Prevention and Wellness. Oxford University Press, 2016. Nancy Taylor, Teaching Healthy Musicianship: The Music Educator's Guide to Injury Prevention and
Wellness, (New York, 2016), 71.
Texas Tech University, Nancy Taylor, May 2021
16
matching with the voice. This was to strengthen the habits and rest the muscles used in
holding and playing the instrument.
The initial steps in starting a beginner on trumpet are vital. Goals of the first
lesson is to teach and enforce good embouchure formation, mouthpiece placement, buzz
on the mouthpiece, and breathing through the corners of the mouth. Starting with the
embouchure, I asked the student to smile and say emm. After repeating this action several
times, we progressed to releasing the air. By inhaling, smiling, and saying emm and
exhale as if saying puu a natural aperture was created. These steps were repeated several
times and followed by instructions on mouthpiece placement.
When the embouchure is formed correctly and habitually, proper mouthpiece
placement follows easily. Following my demonstration, the student correctly placed the
mouthpiece on the lips. The next step was blowing air through the mouthpiece. Starting
with asking the student to inhale, say emm and exhale as if saying puu, I progressed by
asking the student to place the mouthpiece on the lips, then inhale through the corners of
the mouth, say emm and exhale as if saying puu. As expected, no mouthpiece buzz was
produced.
It is worth noting that this initial step of creating a mouthpiece buzz was the most
challenging part of teaching beginning trumpet online. When in-person, holding the
mouthpiece for the student and gradually adding pressure until a buzz is produced is an
easy way to teach appropriate mouthpiece pressure. I found that having the student
accomplish this task takes a little more time and patience. With repeated trials of the
embouchure forming steps, I asked the student to increase the mouthpiece pressure and to
exhale through the mouthpiece as if blowing out a candle. The student caught on to this
concept and was able to create a buzz on the mouthpiece.
The lesson continued with repeating the sequence of embouchure formation and
buzzing with the instructor matching the pitch buzzed by the student. I felt it was
important that the student get used to making a sound on the mouthpiece without the
added task of matching a pitch.

Texas Tech University, Nancy Taylor, May 2021
17
Figures 3.4 and 3.5 show the progress of embouchure development during the
period of the case study. Figure 3.5 shows a flatter chin and more appropriate instrument
angle due to increased strength in the muscles of the embouchure.
Figure 3.4 Embouchure after 1 day
Figure 3.5 Embouchure after 3 weeks
Once the student was fairly fluent in creating a buzz, we moved on to singing pitches.
This allowed the muscles of the embouchure to rest. I sang a pitch and asked the student
to respond by singing the matching pitch. The student adapted to the skill and within
about two minutes was able to match pitch.
Texas Tech University, Nancy Taylor, May 2021
18
In concluding the lesson, I repeated the steps of embouchure formation and buzzing
and then played something on my trumpet. The purpose of playing for the student was to
inspire and entertain. I was very clear in telling her that she did a great job in buzzing the
mouthpiece and that I was excited to hear her play the trumpet the next day.
The second lesson's goal was to increase the student's aptitude in matching a pitch
while developing embouchure strength. The lesson started with the steps for embouchure
formation and pitch matching with the voice and with the mouthpiece. I used call-and-
response in both buzzing and singing pitches using various articulation patterns. At no
time did I ever say anything to the effect of, 'no, that's wrong". On occasion, I would
smile and point to my ear while repeating the pattern. This nonverbal cue was enough to
tell the student to listen closely to the pitch. If the student responded incorrectly, I
repeated the pattern until she got it right.
Articulation using the French articulation method that I have taught all of my
first-year college students over the past 20 years. French articulation is the manner of
articulation taught in Arban's Complete Method for Trumpet. First published in 1879, the
book has undergone numerous translations and editions. Written by French cornetist,
John-Baptiste Arban, the instruction for articulation is written as 'tu' and is meant to be
executed with French pronunciation.39 Most English-speaking trumpet players interpret
this as 'too' and not the French pronunciation, 'thieu', hence the discrepancy in the
instruction of trumpet articulation.
Years of teaching trumpet has shown this author that the commonly taught 'duu'
articulation, in which the tongue articulates at the gumline of the top teeth, puts the
tongue in a low position, causing the pitch in the initial moment of the articulated note to
sag. This tongue placement also supports a retracted jaw position which is not conducive
to good tone and range development. With French articulation, the top of the tongue
articulates at the lower margin of the central incisors, as in saying 'thee'. Articulating this
39 Nate Locke, From Bendinelli to Arban: Styles of Articulation within Selected Trumpet
Method Books. (Dissertation, Columbus State University, 2011), 13.
Texas Tech University, Nancy Taylor, May 2021
19
way keeps the embouchure stable, leads to proper jaw placement, and creates a clear note
strike. The tongue should be visible in the aperture while saying 'thee'.
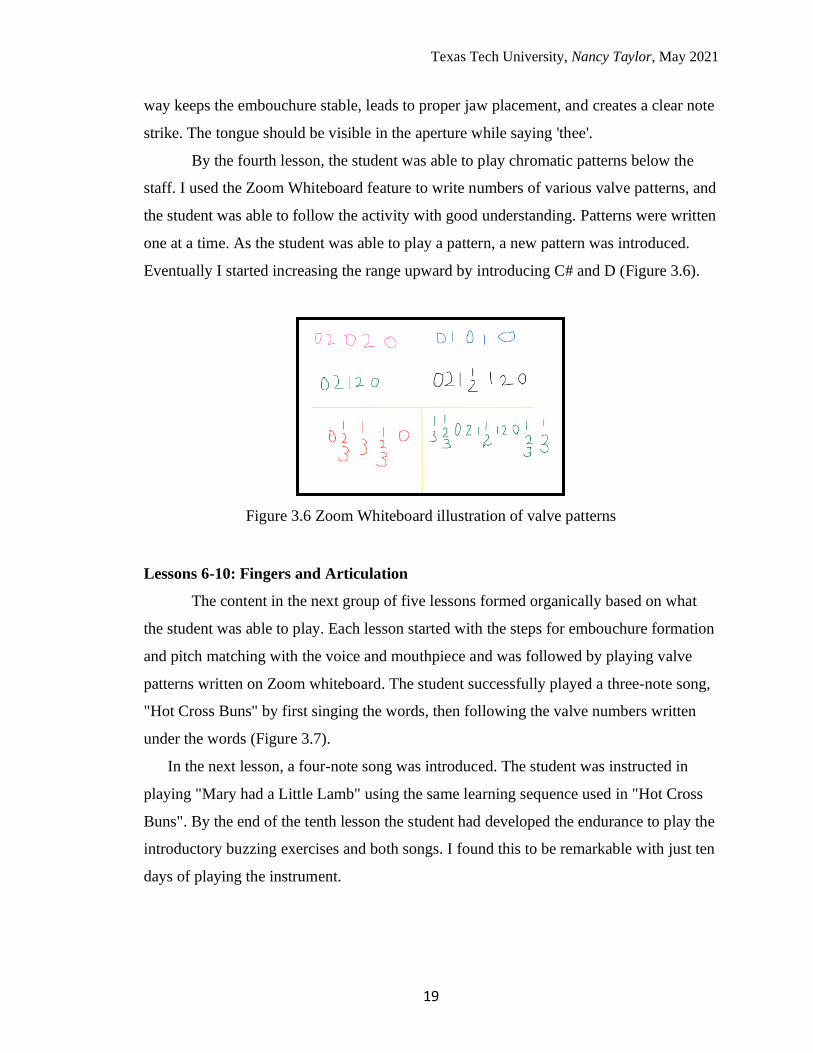
By the fourth lesson, the student was able to play chromatic patterns below the
staff. I used the Zoom Whiteboard feature to write numbers of various valve patterns, and
the student was able to follow the activity with good understanding. Patterns were written
one at a time. As the student was able to play a pattern, a new pattern was introduced.
Eventually I started increasing the range upward by introducing C# and D (Figure 3.6).
Figure 3.6 Zoom Whiteboard illustration of valve patterns
Lessons 6-10: Fingers and Articulation
The content in the next group of five lessons formed organically based on what
the student was able to play. Each lesson started with the steps for embouchure formation
and pitch matching with the voice and mouthpiece and was followed by playing valve
patterns written on Zoom whiteboard. The student successfully played a three-note song,
"Hot Cross Buns" by first singing the words, then following the valve numbers written
under the words (Figure 3.7).
In the next lesson, a four-note song was introduced. The student was instructed in
playing "Mary had a Little Lamb" using the same learning sequence used in "Hot Cross
Buns". By the end of the tenth lesson the student had developed the endurance to play the
introductory buzzing exercises and both songs. I found this to be remarkable with just ten
days of playing the instrument.

Texas Tech University, Nancy Taylor, May 2021
20
Figure 3.7 Illustration of Zoom Whiteboard for learning a song
Lessons 11-15: Developing Skill
By the eleventh lesson, the student's range had reached concert F4. Continuing
with the established format of starting with embouchure-formation, mouthpiece buzzing,
and call-and-response pitch matching, the student's endurance, and interest had increased;
she was able to stay engaged and play for the entire 30-minute lesson. Two new songs,
"Jingle Bells" and "Twinkle-Twinkle Little Star," added a new challenge with their
interval leaps of a 5th. Subsequent lessons introduced the articulation pattern of slur-
tongue and understanding the placement notes on the staff.
Assessment
Success was measured by pitch-matching ability in both singing and buzzing, the
range of notes the student can play, and student retention. At the end of just over two
weeks of playing trumpet, the student was able to play within the range of an octave.
Pitch-matching ability had improved and was accurate 100% of the time, and the student
was enthusiastic about playing the trumpet.
In this case study, the methodology was successful. The chosen trumpet pedagogy
led to success. By gradually introducing simple concepts, providing enthusiastic delivery
of information with continuous positive feedback, and reinforcing previously learned
concepts using the sound-before-sight principle, the student was able to achieve the goals.
Texas Tech University, Nancy Taylor, May 2021
21
CHAPTER IV
THE WEBSITE
The product of this case study is a website. Beginningtrumpet.com provides
teacher instruction with a dynamic approach to teaching beginning trumpet lessons in a
synchronous virtual setting. Most k-12 music teachers have the daunting task of teaching
over a dozen different instruments, only one of which is their primary instrument. The
move to virtual teaching created extra challenges in the initial phase of starting a child on
an instrument. Based on my experience of teaching on Zoom during the pandemic, this
website was designed to assist music teachers in teaching beginners on trumpet. Elements
of trumpet pedagogy proclaimed in this source are not meant to be a declaration for rigid
instruction rather, they are what was produced a successful outcome in the case study.
Any number of pedagogies and teaching styles could be reproduced within the outlined
framework.
The website is divided into two main sections: Resources and Lessons. The
Resources section includes is divided into "Virtual Teaching Setup" and "Teacher Tips".
Following is the content of the "Resources" section.
Resources: Virtual Teaching Setup, Lighting and Sound
Primary to the virtual teaching experience is the video and audio settings. Good
lighting is essential to good video. Having the main light source in front of the computer
reflects light off of the face and results in a clear image. Positioning yourself facing a
window on a sunny day is an effective way to get even, natural lighting. An overhead
light may provide adequate lighting but adding an additional light source such as a lamp
in front is ideal. If your image is still dark, adjusting the screen brightening buttons on the
computer keyboard will add more highlight to the face.
Bad lighting for teaching virtually creates an uncomfortable experience. Lighting
should be even and enough to highlight the teacher and their environment. Sitting with
your back to a window creates glare. Even if the blinds or drapes are drawn, the
remaining light coming through the window is bright and distracting resulting in an
unfavorable video appearance.

Texas Tech University, Nancy Taylor, May 2021
22
One of the many difficulties of virtual teaching is the virtual sound. Variables that
impact sound are an internet connection, speakers, microphone quality, and proximity to
the microphone. One of the main tenets of my lesson design is call-and-response. The
purpose of this type of teaching is to model a good trumpet tone, so the sound going to
the student must be as authentic as possible. Having a good microphone is key here.
There is no need to ask the students to use an external microphone. The built-in
microphone on their computer is adequate as quality of tone is not a paramount concern
in these initial stages of playing. However, having the student use external speakers is
favorable as it will enable them to better hear tone quality and instruction.
In the initial phase of teaching virtually, the built-in computer microphone was
used. There were no complaints from the student, but improvement was noted when I
began using a $50 Blue Snowball USB microphone. An upgrade to the Blue Yeti USB
microphone for about $150 resulted in measurably better sound quality heard by the
student (Figure 4.1). Using a microphone that plugs directly into the USB port on the
computer to eliminate the need for a microphone interface device.
Figure 4.1: Blue Snowball (left) and Blue Yeti (right)
Adjusting the audio settings on Zoom or another virtual platform can take some
time but is worth the effort. It is important to adjust the microphone settings so that the
Texas Tech University, Nancy Taylor, May 2021
23
output is at a setting where both speaking and playing trumpet are appropriately audible
for the student. It is possible to go into the audio settings on Zoom and adjust the
microphone input. It only takes a little trial and error to find the best microphone level
and trumpet bell proximity. It was found that speaking directly into the microphone
placed in front and to the left, while playing the trumpet about 90 degrees away and to the
right of the computer was the best solution for audio quality.
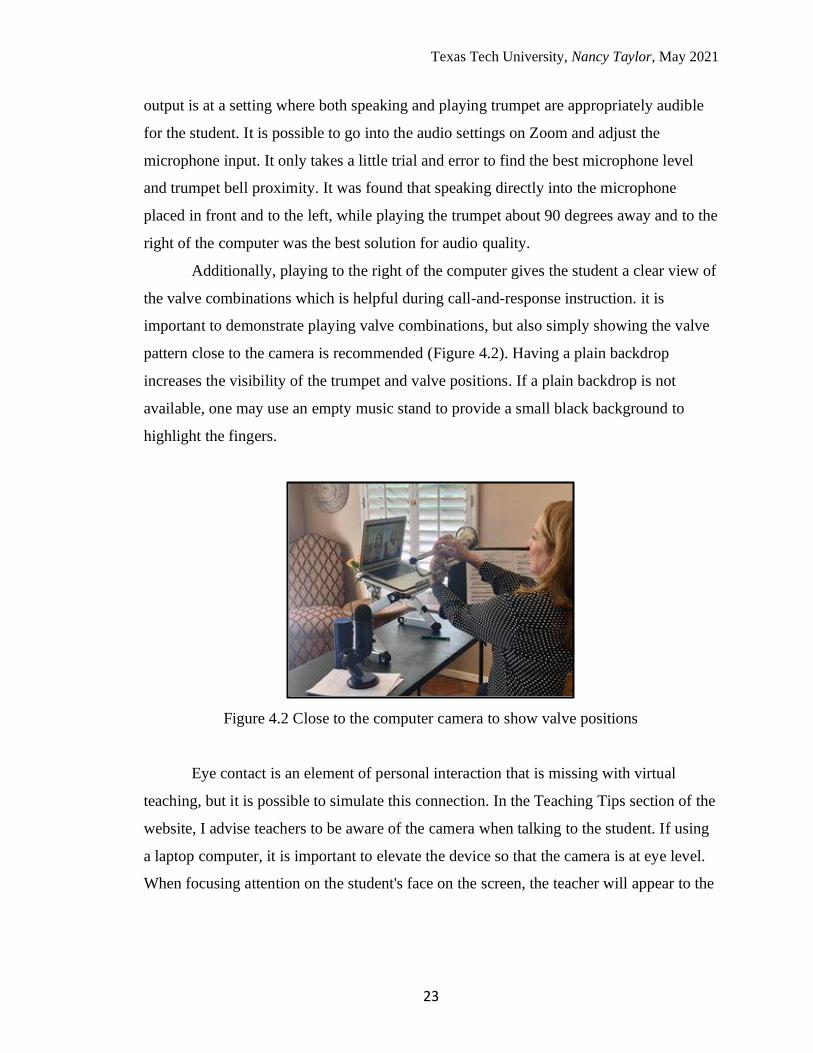
Additionally, playing to the right of the computer gives the student a clear view of
the valve combinations which is helpful during call-and-response instruction. it is
important to demonstrate playing valve combinations, but also simply showing the valve
pattern close to the camera is recommended (Figure 4.2). Having a plain backdrop
increases the visibility of the trumpet and valve positions. If a plain backdrop is not
available, one may use an empty music stand to provide a small black background to
highlight the fingers.
Figure 4.2 Close to the computer camera to show valve positions
Eye contact is an element of personal interaction that is missing with virtual
teaching, but it is possible to simulate this connection. In the Teaching Tips section of the
website, I advise teachers to be aware of the camera when talking to the student. If using
a laptop computer, it is important to elevate the device so that the camera is at eye level.
When focusing attention on the student's face on the screen, the teacher will appear to the

Texas Tech University, Nancy Taylor, May 2021
24
student to be looking down or to the side. Likewise, if the teacher is using a camera from
a different monitor it will appear that they are looking elsewhere. Looking directly into
the camera is awkward at first but what the student sees is the teacher looking into their
eyes, and eye contact is important for maintaining attention and building rapport.
Resources: Teacher Tips
Among the challenges of teaching virtually are developing a rapport and keeping
the student engaged. Through trial and error over months of virtual teaching I developed
an effective system of teaching. This section of the website provides suggestions for the
teacher on behavior and actions that I found conducive to fostering enthusiasm and the
engagement, and the pedagogical elements of playing posture, embouchure, tone, and the
lesson structure.
Communication style is an important factor in developing rapport. Keeping a
young student engaged in a lesson can be challenging. Teaching a young student virtually
presents an even greater challenge. Studies show that low student engagement is one of
the biggest detrimental factors in virtual education.40 Teacher communication in praising
students and recognizing progress and effort can encourage intrinsic motivation for the
learning process itself. Allowing the student to have ownership in their music learning can
also contribute to their sense of engagement.41
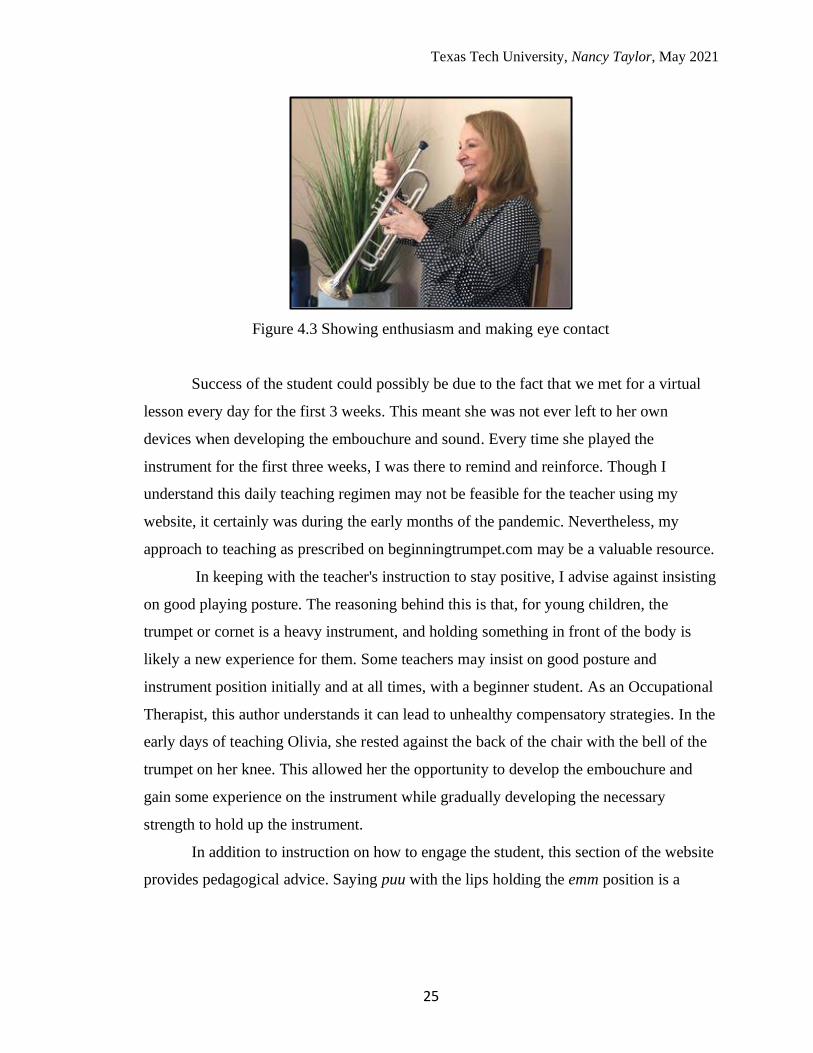
Through the case study associated with this website, it was determined that
cheerful, positive communication was effective in keeping the student engaged for the
entire 30-minute lesson. In teaching the student, my response to every sound she made
was an excited wow! or terrific! (Figure 4.3). Additionally, it is worth noting that at the
time of this writing, ten months after starting trumpet lessons the student remains
enthusiastic and continues to be engaged in trumpet lessons.
40 Brian Lotter, The Music Classroom in the Digital Age: Educator Responses to Remote Instruction,
(Dissertation, Southern Illinois University at Edwardsville, 2020), 20.
41 Karin Hendricks, et al., Creating Safe Spaces for Music Learning, (Music Educators Journal, 2014), vol.
101, no. 1, 36.
Texas Tech University, Nancy Taylor, May 2021
25
Figure 4.3 Showing enthusiasm and making eye contact
Success of the student could possibly be due to the fact that we met for a virtual
lesson every day for the first 3 weeks. This meant she was not ever left to her own
devices when developing the embouchure and sound. Every time she played the
instrument for the first three weeks, I was there to remind and reinforce. Though I
understand this daily teaching regimen may not be feasible for the teacher using my
website, it certainly was during the early months of the pandemic. Nevertheless, my
approach to teaching as prescribed on beginningtrumpet.com may be a valuable resource.
In keeping with the teacher's instruction to stay positive, I advise against insisting
on good playing posture. The reasoning behind this is that, for young children, the
trumpet or cornet is a heavy instrument, and holding something in front of the body is
likely a new experience for them. Some teachers may insist on good posture and
instrument position initially and at all times, with a beginner student. As an Occupational
Therapist, this author understands it can lead to unhealthy compensatory strategies. In the
early days of teaching Olivia, she rested against the back of the chair with the bell of the
trumpet on her knee. This allowed her the opportunity to develop the embouchure and
gain some experience on the instrument while gradually developing the necessary
strength to hold up the instrument.
In addition to instruction on how to engage the student, this section of the website
provides pedagogical advice. Saying puu with the lips holding the emm position is a

Texas Tech University, Nancy Taylor, May 2021
26
means to have the student use the air to naturally create the aperture. Increasing the
length of the puu exhale indirectly teaches the student to play a long note. The early
sounds of a beginner trumpet player are likely not ideal. It is important to maintain
positive feedback and allow the young player to develop. I advise here to never tell the
student to blow. I have found in my many years of teaching that 'blowing' is interpreted
by young players as pushing or forcing the air and the result is an unpleasant tone.
The Lessons:
Next to "Resources" is the dropdown menu for lessons. The Lessons on
beginningtrumpet.com are divided into three groups of five lessons each. The three large
groups are Embouchure, Fingers & Articulation, and Building Skill. Each of the fifteen
lessons is outlined step-by step starting with a goal and finishing with an activity. Lesson
plans for each of the fifteen lessons are listed in Appendix A. Accompanying each lesson
is a video of approximately three minutes in length. Each video summarizes the playing
and teaching techniques described in the text of the lesson plan. Transcripts of these
videos can be found in Appendix B. Following is a summary of each of the three
sections.
Lessons: 1-5 Embouchure
The initial five lessons are designed to develop the embouchure. Emphasis is
placed on proper embouchure development as it is a dominant factor in successful tone
production, flexibility, range, endurance, and intonation.42 Training the student for
correct embouchure formation will increase their chance for overall success, and possibly
prevent future injury.43 Furthermore, changing embouchure later is a cumbersome and
arduous process.
42 Gary Wurtz, Trumpet (Cornet) Embouchure Tips for Beginners, Banddirectors.com. 43 Nancy Taylor, Teaching Healthy Musicianship: The Music Educator's Guide to Injury Prevention and
Wellness, (New York, 2016), 70.
Texas Tech University, Nancy Taylor, May 2021
27
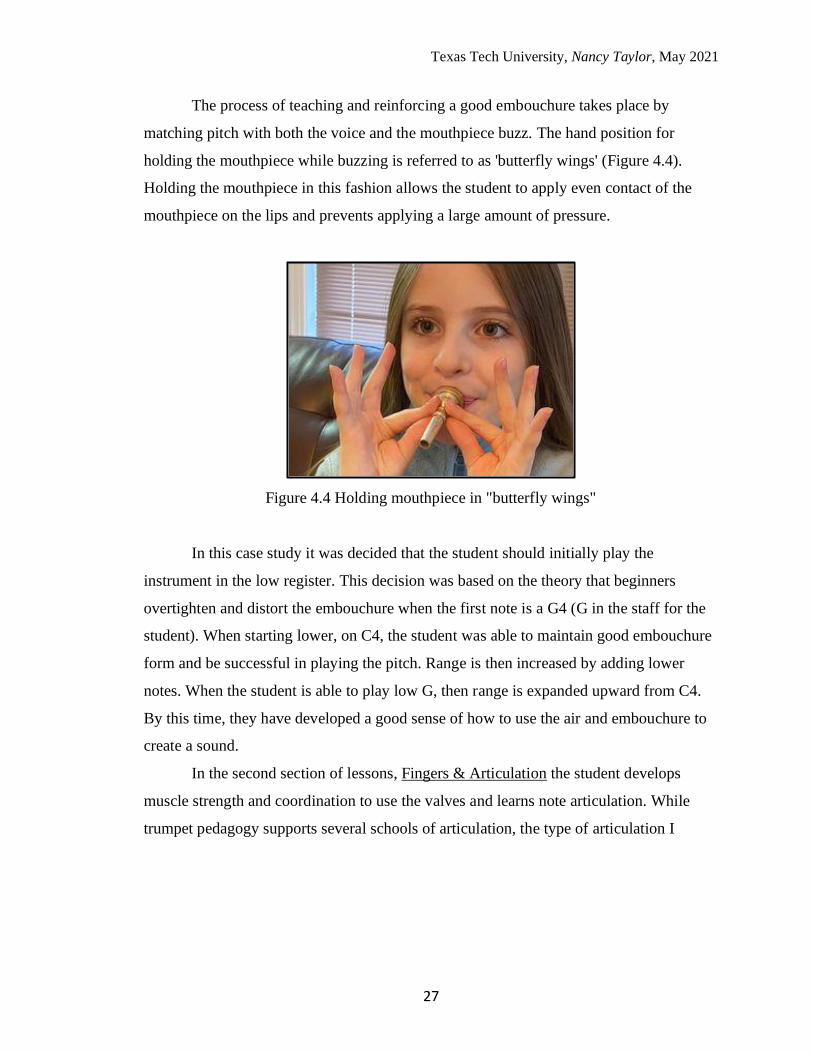
The process of teaching and reinforcing a good embouchure takes place by
matching pitch with both the voice and the mouthpiece buzz. The hand position for
holding the mouthpiece while buzzing is referred to as 'butterfly wings' (Figure 4.4).
Holding the mouthpiece in this fashion allows the student to apply even contact of the
mouthpiece on the lips and prevents applying a large amount of pressure.
Figure 4.4 Holding mouthpiece in "butterfly wings"
In this case study it was decided that the student should initially play the
instrument in the low register. This decision was based on the theory that beginners
overtighten and distort the embouchure when the first note is a G4 (G in the staff for the
student). When starting lower, on C4, the student was able to maintain good embouchure
form and be successful in playing the pitch. Range is then increased by adding lower
notes. When the student is able to play low G, then range is expanded upward from C4.
By this time, they have developed a good sense of how to use the air and embouchure to
create a sound.
In the second section of lessons, Fingers & Articulation the student develops
muscle strength and coordination to use the valves and learns note articulation. While
trumpet pedagogy supports several schools of articulation, the type of articulation I
Texas Tech University, Nancy Taylor, May 2021
28
choose to teach is known as French articulation.44 Regarding French articulation, the tip
of the tongue articulates with the bottom of the central incisors. This articulation is
simulated by saying thuu and is very different from the duu articulation where the tip of
the tongue articulates with at the gumline of the central incisors. The duu articulation
sounds dull and can create a wobble on the front of the pitch. Twenty-five years of
teaching experience has shown me that has also taught me that a student who uses French
articulation is more successful in learning to double and triple tongue, and in general able
to multiple tongue faster and more clearly. It was concluded that instructing the student in
French articulation was the optimal approach due to her ability to adapt to multiple
tonguing in the second month of playing the instrument.
The third section, Building Skill is dedicated to playing for increasing amounts of
time and learning more songs. By the eleventh lesson, the student had expanded the range
to F in the staff and had endurance to play for most of the 30-minute lesson. Lessons
eleven through fifteen primarily involve playing new songs and reinforcing previously
learned concepts.
44 Nate Locke, From Bendinelli to Arban: Styles of Articulation within Selected Trumpet Method Books.
(Dissertation, Columbus State University, 2011), 11.
Texas Tech University, Nancy Taylor, May 2021
29
CHAPTER V
CONCLUSION
This project's scope was to study the effectiveness of online teaching to a
beginner trumpet player and provide a website that modeled this approach. The author
concluded that the teaching methods, pedagogy, and concepts used in the online setting
were successful, as the student was engaged during the lessons and showed enthusiasm
about continuing lessons. Student achievement included the ability to match pitch (both
sung and buzzed) and play several songs by ear.
At the time of this writing, it has been eleven months since the first lesson in
April 2020. The student continues to show enthusiasm about trumpet playing, can play
within the range of two-and-a-half octaves (from concert E3 to B-flat 6), and multiple
tongue at an alarmingly fast tempo. Her finger technique is strong, and the tone is
characteristic of a high-school-level trumpet player. The pedagogy of embouchure
formation and French articulation was instrumental in this success. Additionally, the
teacher's attitude and presentation of materials fostered the student's enthusiasm and
dedication.
This author concludes that teaching beginning trumpet virtually is feasible. The
student does not need any special equipment or in-person assistance in the early stages of
learning. The 15-lesson program in this case study was effective because of the teaching
approach, pedagogy, and built rapport. While the particulars of trumpet instruction are
not intended to be a pedagogical end-all, it is determined that the teaching approach of
staying positive, smiling, and making eye contact are key.
The primary drawback of teaching a beginner trumpet player in a virtual
synchronous setting was network latency, as it dictated the pace of information delivery.
There was time for her to lower her instrument and look at the computer screen instead of
my saying something and having her do it in real-time. Though this was at times
cumbersome, it did not impact the overall effectiveness of the study. Latency became
more of an issue in the following months when teaching rhythm. A weakness of this case
study is that it did not include teaching rhythm.
Texas Tech University, Nancy Taylor, May 2021
30
The months following the case study proved that the primary challenge of
teaching in a virtual, synchronous, digital setting was network latency. The author
ascertains that teaching rhythm is challenging online because of the inability to use a
metronome or clap in time. The inability to play together made it impossible to do things
like play the subdivision of a long note, check intonation and ensure the use of dynamics.
A solution to this may be to have her purchase and use a metronome, but network latency
may still upset the rhythmic accuracy.
Teaching music performance virtually presents particular challenges to the
teacher as technology can be unreliable. However, these are relatively small problems.
Online teaching using the Zoom platform was ideal because of the access to the
Whiteboard. Moreover, while it was important for the teacher to have a good microphone
to transmit good tone quality, the student did not need to use an external microphone.
The resulting website, Beginningtrumpet.com, is a resource to guide music
educators in teaching beginning trumpet. One of the inherent benefits of online teaching
is that it brings together people who are a great distance apart. This source could be a
means for teaching trumpet all over the world or people in our community who may not
have access to transportation. Last but not least, there is the hope that online learning will
be able to provide education to anyone, anywhere, and anytime as long as they have
access to the Internet.
Texas Tech University, Nancy Taylor, May 2021
31
WORKS CITED
Bellelo, Rebecca Carter. “Musical Achievement and Attitude of Beginning Piano
Students in a Synchronous Videoconferencing Lesson Environment.” LSU Digital
Commons, digitalcommons.lsu.edu/gradschool_dissertations/2345/.
Dammers, Richard J. “Utilizing Internet-Based Videoconferencing for Instrumental
Music Lessons.” Update: Applications of Research in Music Education, vol. 28, no.
1, 2009, pp. 17–24., doi:10.1177/8755123309344159.
Johnson, Carol. “A Conceptual Model for Teaching Music Online.” International
Journal on Innovations in Online Education, vol. 4, no. 2, 2020,
doi:10.1615/intjinnovonlineedu.2020035128.
Hanson, Josef. “Assessing the Educational Value of YouTube Videos for Beginning
Instrumental Music.” Contributions to Music Education, vol. 43, 2018, pp. 137–
158. JSTOR, www.jstor.org/stable/26478003. Accessed 20 Feb. 2021.
Hendricks, Karin S., et al. “Creating Safe Spaces for Music Learning.” Music Educators
Journal, vol. 101, no. 1, 2014, pp. 35–40., doi:10.1177/0027432114540337.
Hicks, Charles E. “Sound Before Sight Strategies for Teaching Music Reading.” Music
Educators Journal, vol. 66, no. 8, 1980, pp. 53–67., doi:10.2307/3395858.
Hostika, Frank. “Arban/Vizzutti Complete Method for Trumpet.” Historic Brass Society -
Historic Brass Society, 31 Dec. 2009. Retrieved from
www.historicbrass.org/component/content/article/20-features/music-reviews/82-
arban-vizzutti-complete-method-for-trumpet.
Kruse, Nathan B., et al. “Skype Music Lessons in the Academy: Intersections of Music
Education, Applied Music and Technology.” Journal of Music, Technology and
Education, vol. 6, no. 1, 2013, pp. 43–60., doi:10.1386/jmte.6.1.43_1.
Locke, Nate. “From Bendinelli to Arban: Styles of Articulation within Selected Trumpet
Method Books” Columbus State University Schwob School of Music, Dec. 2011,
csuepress.columbusstate.edu/cgi/viewcontent.cgi?article=1189&context=theses_dis
sertations.
Lotter, Brian. The Music Classroom in the Digital Age: Educator Responses to Remote
Instruction, Southern Illinois University at Edwardsville, Ann Arbor, 2020.
ProQuest, http://0-search.proquest.com.lib.utep.edu/dissertations-theses/music-
classroom-digital-age-educator-responses/docview/2447268047/se-2?
accountid=7121
Texas Tech University, Nancy Taylor, May 2021
32
Taylor, Nancy. Teaching Healthy Musicianship: The Music Educator's Guide to Injury
Prevention and Wellness. Oxford University Press, 2016.
“Virtual Learning Resources for Music Educators.” NAfME, 5 Jan. 2021, nafme.org/my-
classroom/virtual-learning-resources-for-music-educators/.
West, Chad. “Sound Foundations.” Music Educators Journal, vol. 102, no. 4, 2016, pp.
56–61., doi:10.1177/0027432116636941.
Wilson, Aaron James. “Bridging the Virtual Gap in Internet Based Music Instruction: A
Feasibility Study in Trombone Performance Education.” ProQuest LLC, ProQuest
LLC. 789 East Eisenhower Parkway, P.O. Box 1346, Ann Arbor, MI 48106. Tel:
800-521-0600; Web Site: Http://Www.proquest.com/En-
US/Products/Dissertations/Individuals.shtml, 30 Nov. 2012,
eric.ed.gov/?id=ED554782.
Wurtz, Gary. “Trumpet (Cornet) Embouchure Tips for Beginners – Band ...”
Banddirectors.com, banddirector.com/brass/trumpet/trumpet-cornet-embouchure-
tips-for-beginners/.
Texas Tech University, Nancy Taylor, May 2021
33
APPENDICIES
APPENDIX A
LESSON PLANS
I: Embouchure II: Fingers & Articulation III: Building Skill
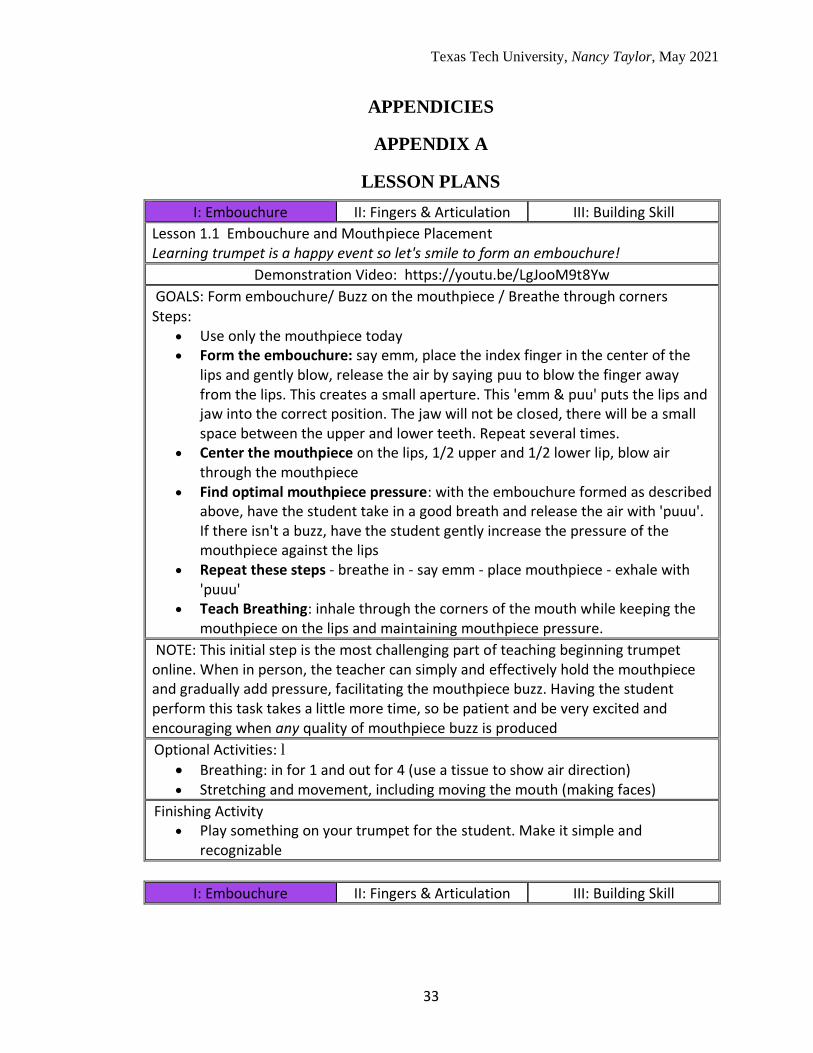
Lesson 1.1 Embouchure and Mouthpiece Placement Learning trumpet is a happy event so let's smile to form an embouchure!
Demonstration Video: https://youtu.be/LgJooM9t8Yw
GOALS: Form embouchure/ Buzz on the mouthpiece / Breathe through corners Steps:
• Use only the mouthpiece today
• Form the embouchure: say emm, place the index finger in the center of the lips and gently blow, release the air by saying puu to blow the finger away from the lips. This creates a small aperture. This 'emm & puu' puts the lips and jaw into the correct position. The jaw will not be closed, there will be a small space between the upper and lower teeth. Repeat several times.
• Center the mouthpiece on the lips, 1/2 upper and 1/2 lower lip, blow air through the mouthpiece
• Find optimal mouthpiece pressure: with the embouchure formed as described above, have the student take in a good breath and release the air with 'puuu'. If there isn't a buzz, have the student gently increase the pressure of the mouthpiece against the lips
• Repeat these steps - breathe in - say emm - place mouthpiece - exhale with 'puuu'
• Teach Breathing: inhale through the corners of the mouth while keeping the mouthpiece on the lips and maintaining mouthpiece pressure.
NOTE: This initial step is the most challenging part of teaching beginning trumpet online. When in person, the teacher can simply and effectively hold the mouthpiece and gradually add pressure, facilitating the mouthpiece buzz. Having the student perform this task takes a little more time, so be patient and be very excited and encouraging when any quality of mouthpiece buzz is produced
Optional Activities: l
• Breathing: in for 1 and out for 4 (use a tissue to show air direction) • Stretching and movement, including moving the mouth (making faces)
Finishing Activity • Play something on your trumpet for the student. Make it simple and
recognizable
I: Embouchure II: Fingers & Articulation III: Building Skill
Texas Tech University, Nancy Taylor, May 2021
34
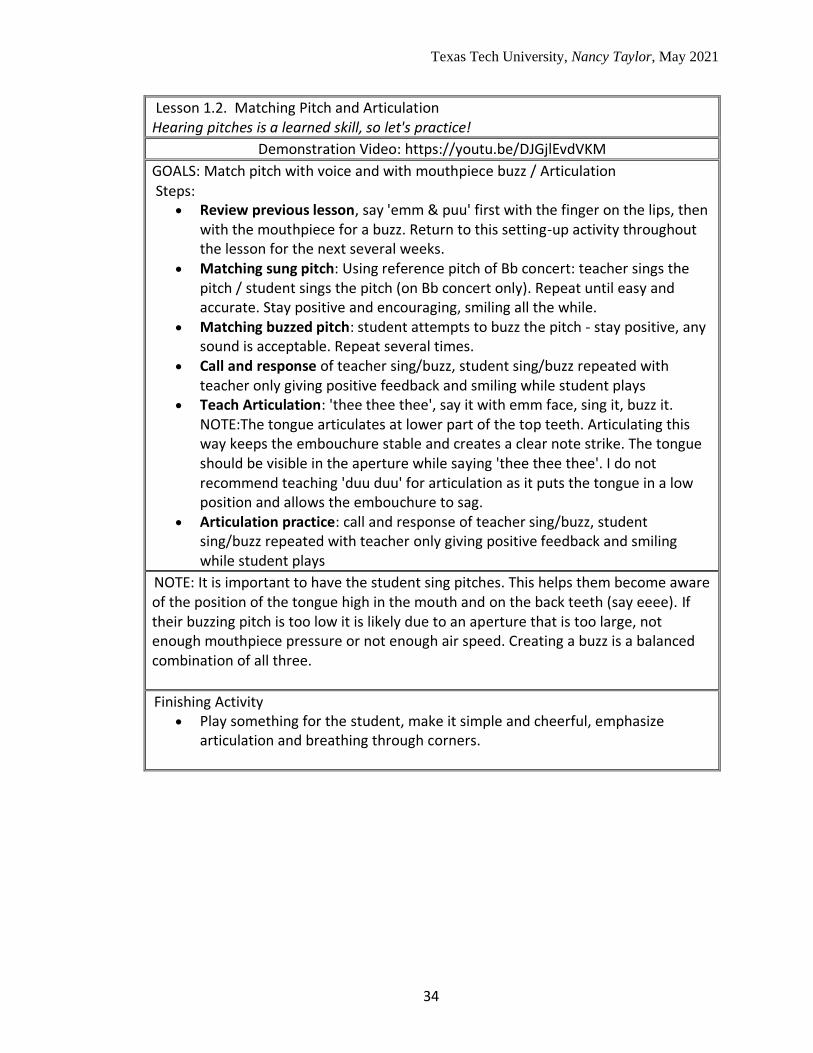
Lesson 1.2. Matching Pitch and Articulation Hearing pitches is a learned skill, so let's practice!
Demonstration Video: https://youtu.be/DJGjlEvdVKM
GOALS: Match pitch with voice and with mouthpiece buzz / Articulation Steps:
• Review previous lesson, say 'emm & puu' first with the finger on the lips, then with the mouthpiece for a buzz. Return to this setting-up activity throughout the lesson for the next several weeks.
• Matching sung pitch: Using reference pitch of Bb concert: teacher sings the pitch / student sings the pitch (on Bb concert only). Repeat until easy and accurate. Stay positive and encouraging, smiling all the while.
• Matching buzzed pitch: student attempts to buzz the pitch - stay positive, any sound is acceptable. Repeat several times.
• Call and response of teacher sing/buzz, student sing/buzz repeated with teacher only giving positive feedback and smiling while student plays
• Teach Articulation: 'thee thee thee', say it with emm face, sing it, buzz it. NOTE:The tongue articulates at lower part of the top teeth. Articulating this way keeps the embouchure stable and creates a clear note strike. The tongue should be visible in the aperture while saying 'thee thee thee'. I do not recommend teaching 'duu duu' for articulation as it puts the tongue in a low position and allows the embouchure to sag.
• Articulation practice: call and response of teacher sing/buzz, student sing/buzz repeated with teacher only giving positive feedback and smiling while student plays
NOTE: It is important to have the student sing pitches. This helps them become aware of the position of the tongue high in the mouth and on the back teeth (say eeee). If their buzzing pitch is too low it is likely due to an aperture that is too large, not enough mouthpiece pressure or not enough air speed. Creating a buzz is a balanced combination of all three.
Finishing Activity • Play something for the student, make it simple and cheerful, emphasize
articulation and breathing through corners.
Texas Tech University, Nancy Taylor, May 2021
35
I: Embouchure II: Fingers & Articulation III: Building Skill
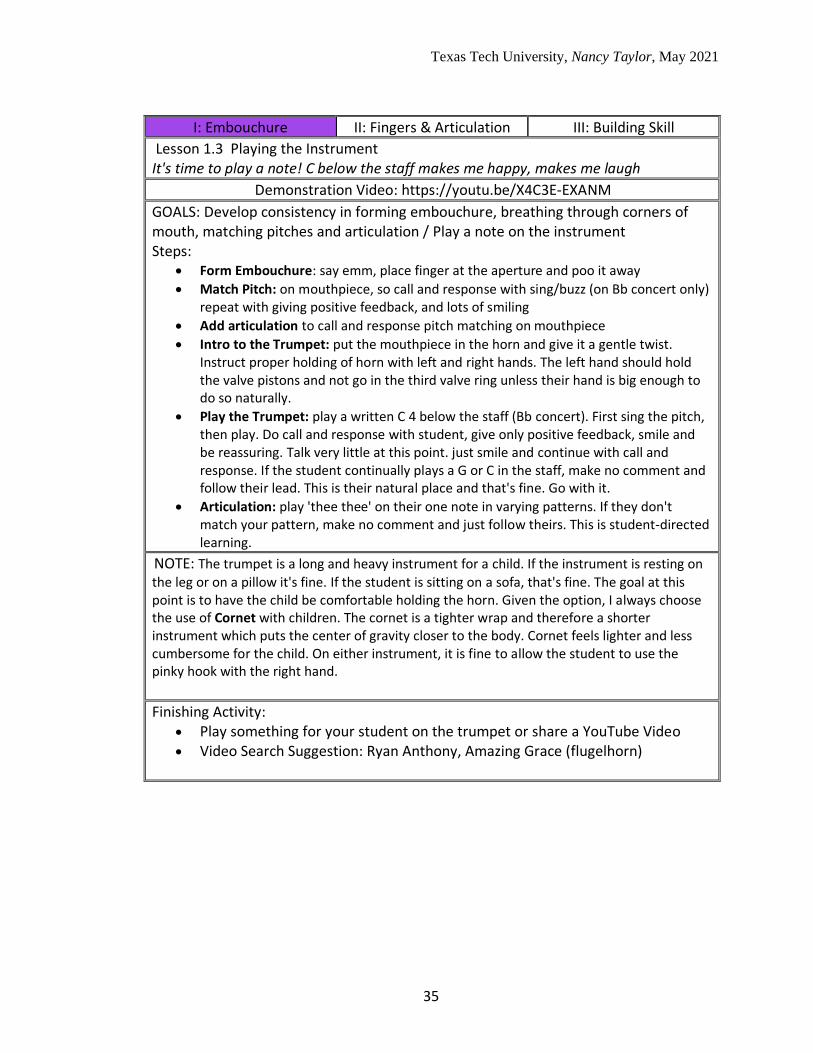
Lesson 1.3 Playing the Instrument It's time to play a note! C below the staff makes me happy, makes me laugh
Demonstration Video: https://youtu.be/X4C3E-EXANM
GOALS: Develop consistency in forming embouchure, breathing through corners of mouth, matching pitches and articulation / Play a note on the instrument Steps:
• Form Embouchure: say emm, place finger at the aperture and poo it away
• Match Pitch: on mouthpiece, so call and response with sing/buzz (on Bb concert only) repeat with giving positive feedback, and lots of smiling
• Add articulation to call and response pitch matching on mouthpiece
• Intro to the Trumpet: put the mouthpiece in the horn and give it a gentle twist. Instruct proper holding of horn with left and right hands. The left hand should hold the valve pistons and not go in the third valve ring unless their hand is big enough to do so naturally.
• Play the Trumpet: play a written C 4 below the staff (Bb concert). First sing the pitch, then play. Do call and response with student, give only positive feedback, smile and be reassuring. Talk very little at this point. just smile and continue with call and response. If the student continually plays a G or C in the staff, make no comment and follow their lead. This is their natural place and that's fine. Go with it.
• Articulation: play 'thee thee' on their one note in varying patterns. If they don't match your pattern, make no comment and just follow theirs. This is student-directed learning.
NOTE: The trumpet is a long and heavy instrument for a child. If the instrument is resting on
the leg or on a pillow it's fine. If the student is sitting on a sofa, that's fine. The goal at this point is to have the child be comfortable holding the horn. Given the option, I always choose the use of Cornet with children. The cornet is a tighter wrap and therefore a shorter instrument which puts the center of gravity closer to the body. Cornet feels lighter and less cumbersome for the child. On either instrument, it is fine to allow the student to use the pinky hook with the right hand.
Finishing Activity: • Play something for your student on the trumpet or share a YouTube Video
• Video Search Suggestion: Ryan Anthony, Amazing Grace (flugelhorn)

Texas Tech University, Nancy Taylor, May 2021
36
I: Embouchure II: Fingers & Articulation III: Building Skill
Lesson 1.4 Changing Notes and Using the Valves 1-2-3 Look at me! What are the buttons for?
Demonstration Video: https://youtu.be/2FLAXddHBDw
GOAL: Use the valves Steps:
• Start the lesson as previous lessons with setting up the embouchure saying emm, breathe and blow the finger away saying puu.
• Buzz: call and response (sing/buzz) on buzzing written C • Play: call and response (sing/play) on buzzing written C
• Use valves: add B, down a half step, alternate C-B-C-B-C first with slur, then with articulation
• add articulation, remind of breathing through corners of the mouth
• move between C and Bb, alternate C-Bb-C-Bb-C and then create a pattern using all three notes. The goal here is to have the student experience pushing down the valves and allowing the note to change.
NOTE: The student should make their first sounds in the low register of the instrument. Do not try to get them to play a G in the staff. Stay low for the first week, playing low C, B, Bb, A. Only then add the C# and D above the C4. You will gradually add notes to the high and low range as the student is able, but don't rush it.
TIP: Don't harp on the student for horn position unless it is causing really bad posture. Remember, the horn is heavy, and they are little people. This is all new, so keep the experience positive.
Finishing Activity: • Play something in the low register for the student or share a YouTube Video
• Video Search Suggestion: Solo de Trompeta - trio tokando tango

Texas Tech University, Nancy Taylor, May 2021
37
I: Embouchure II: Fingers & Articulation III: Building Skill
Lesson 1.5. Chromatic Low Notes Learning notes to play a song so we can music all day long
Demonstration Video: https://youtu.be/9_xWVJMie_0
GOAL: Gain strength and coordination using the valves Steps:
• Start the lesson as previous lessons with setting up the embouchure saying emm, breathe and blow the finger away saying puuu.
• Buzz: call and response (sing/buzz) on buzzing written C • Play: call and response (sing/play) on buzzing written C
• Use valves: add B, down a half step, alternate C-B-C-D-C first with slur, then with articulation
• add articulation, remind of breathing through corners of the mouth
• move alternately between C-B-Bb-A-Ab-G then create a pattern using three of the notes. The goal here is to have the student experience pushing down the valves and allowing the note to change.
NOTE: The student should make their first sounds in the low register of the instrument. Do not try to get them to play a G in the staff. Stay low for the first week, playing low C, B, Bb, A. Only then add the C# and D above the C4. You will gradually add notes to the high and low range as the student is able, but don't rush it.
TIP: don't harp on the student for horn position unless it is causing really bad posture. Remember, the horn is heavy, and they are little people. This is all new, so keep the experience positive
Finishing Activity: • Play something in the low register for the student or share a YouTube Video
• Video Search Suggestion: Tage Larson, Arutiunian's Rhapsody for Trumpet and Winds
Texas Tech University, Nancy Taylor, May 2021
38
I: Embouchure II: Fingers & Articulation III: Building Skill
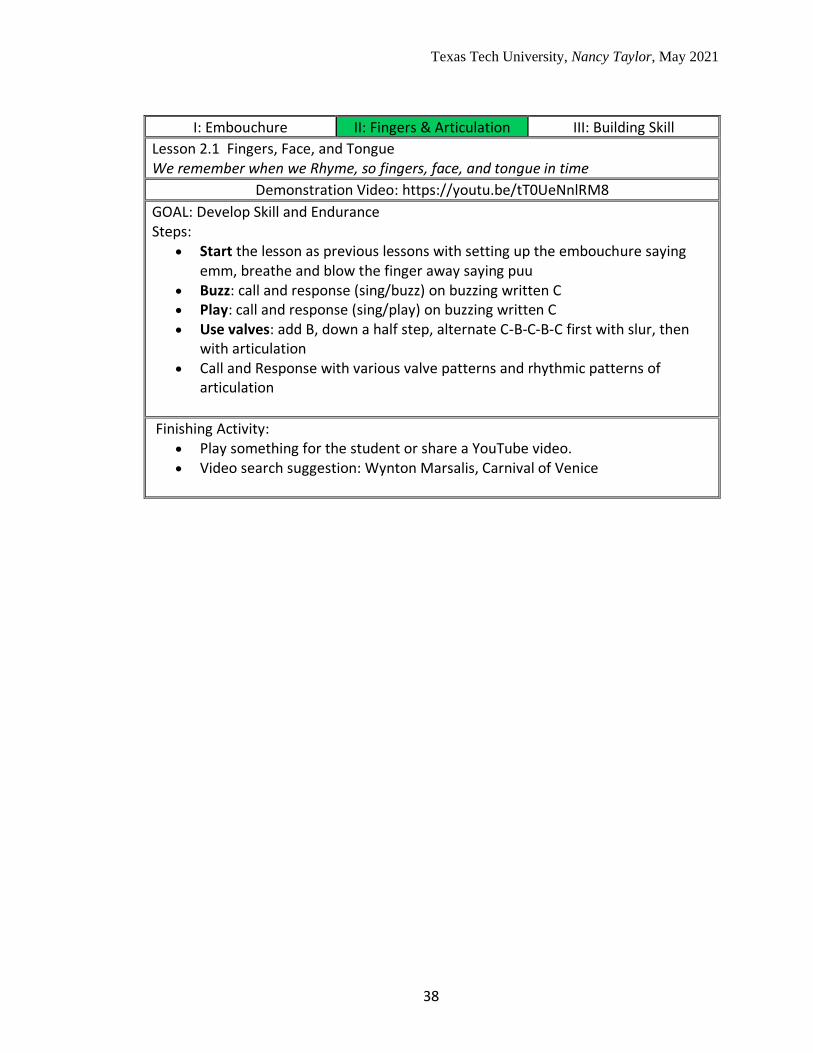
Lesson 2.1 Fingers, Face, and Tongue We remember when we Rhyme, so fingers, face, and tongue in time
Demonstration Video: https://youtu.be/tT0UeNnlRM8
GOAL: Develop Skill and Endurance Steps:
• Start the lesson as previous lessons with setting up the embouchure saying emm, breathe and blow the finger away saying puu
• Buzz: call and response (sing/buzz) on buzzing written C • Play: call and response (sing/play) on buzzing written C
• Use valves: add B, down a half step, alternate C-B-C-B-C first with slur, then with articulation
• Call and Response with various valve patterns and rhythmic patterns of articulation
Finishing Activity: • Play something for the student or share a YouTube video. • Video search suggestion: Wynton Marsalis, Carnival of Venice
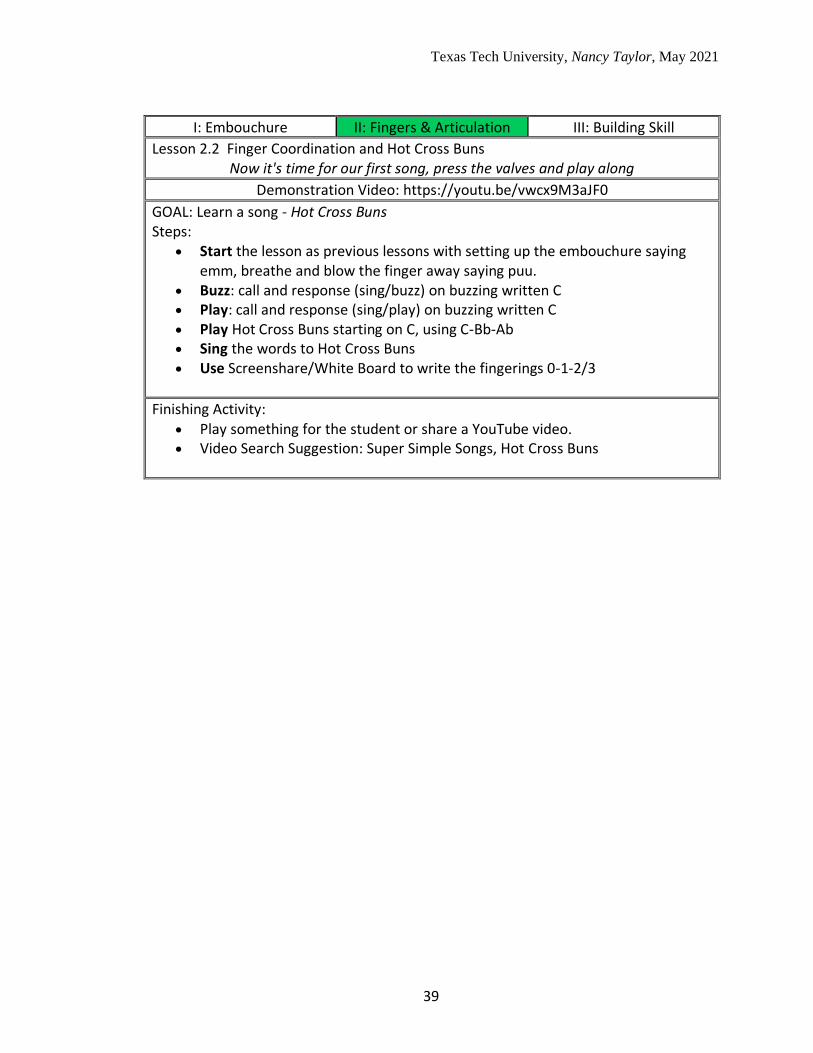
Texas Tech University, Nancy Taylor, May 2021
39
I: Embouchure II: Fingers & Articulation III: Building Skill
Lesson 2.2 Finger Coordination and Hot Cross Buns Now it's time for our first song, press the valves and play along
Demonstration Video: https://youtu.be/vwcx9M3aJF0
GOAL: Learn a song - Hot Cross Buns Steps:
• Start the lesson as previous lessons with setting up the embouchure saying emm, breathe and blow the finger away saying puu.
• Buzz: call and response (sing/buzz) on buzzing written C • Play: call and response (sing/play) on buzzing written C
• Play Hot Cross Buns starting on C, using C-Bb-Ab
• Sing the words to Hot Cross Buns
• Use Screenshare/White Board to write the fingerings 0-1-2/3
Finishing Activity: • Play something for the student or share a YouTube video. • Video Search Suggestion: Super Simple Songs, Hot Cross Buns
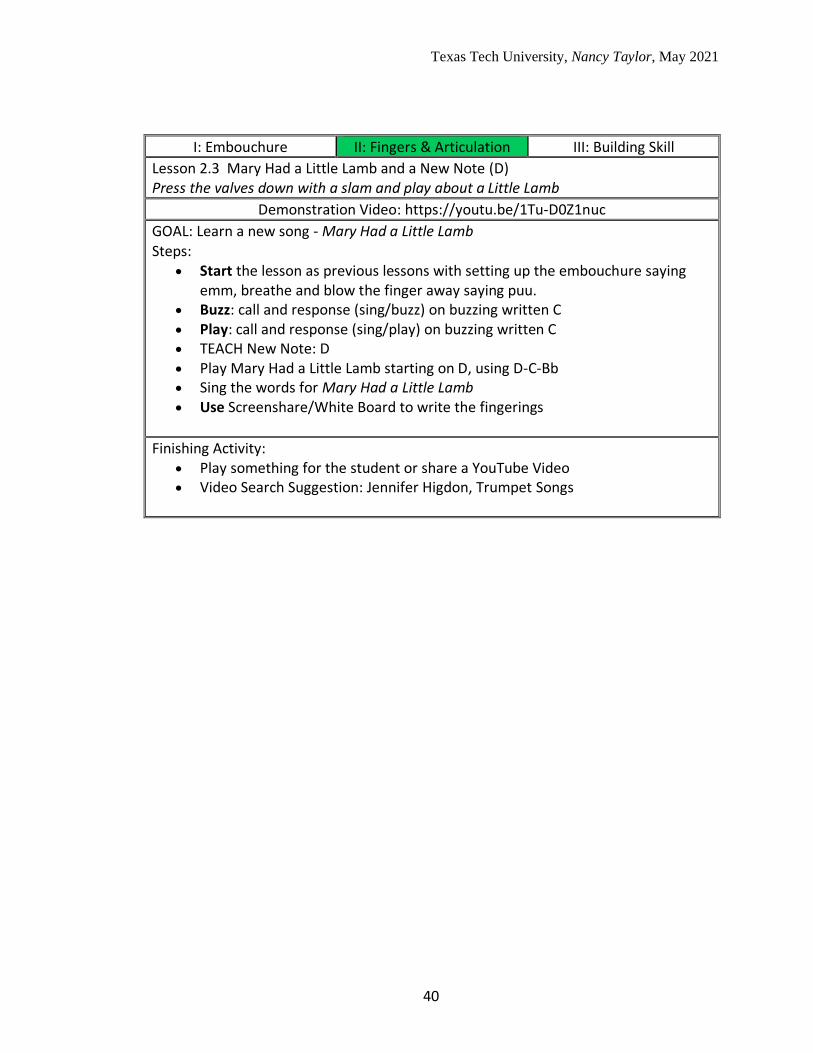
Texas Tech University, Nancy Taylor, May 2021
40
I: Embouchure II: Fingers & Articulation III: Building Skill
Lesson 2.3 Mary Had a Little Lamb and a New Note (D) Press the valves down with a slam and play about a Little Lamb
Demonstration Video: https://youtu.be/1Tu-D0Z1nuc
GOAL: Learn a new song - Mary Had a Little Lamb Steps:
• Start the lesson as previous lessons with setting up the embouchure saying emm, breathe and blow the finger away saying puu.
• Buzz: call and response (sing/buzz) on buzzing written C • Play: call and response (sing/play) on buzzing written C
• TEACH New Note: D
• Play Mary Had a Little Lamb starting on D, using D-C-Bb
• Sing the words for Mary Had a Little Lamb
• Use Screenshare/White Board to write the fingerings
Finishing Activity: • Play something for the student or share a YouTube Video
• Video Search Suggestion: Jennifer Higdon, Trumpet Songs
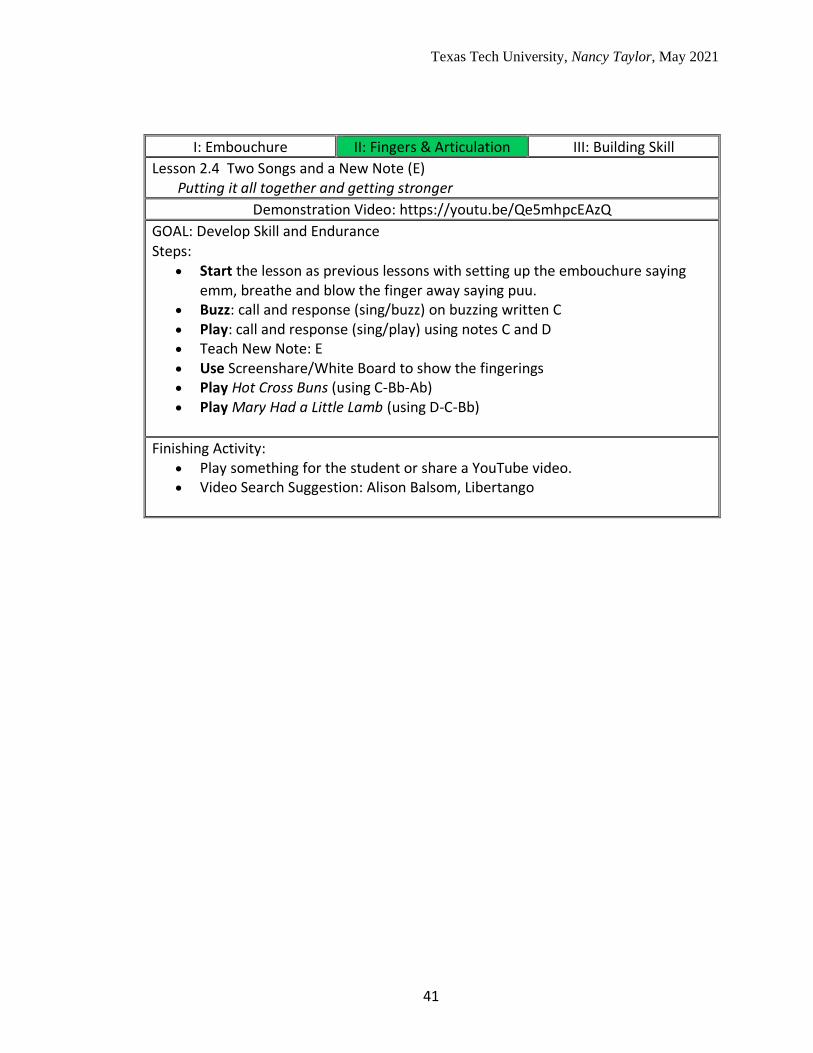
Texas Tech University, Nancy Taylor, May 2021
41
I: Embouchure II: Fingers & Articulation III: Building Skill
Lesson 2.4 Two Songs and a New Note (E) Putting it all together and getting stronger
Demonstration Video: https://youtu.be/Qe5mhpcEAzQ
GOAL: Develop Skill and Endurance Steps:
• Start the lesson as previous lessons with setting up the embouchure saying emm, breathe and blow the finger away saying puu.
• Buzz: call and response (sing/buzz) on buzzing written C • Play: call and response (sing/play) using notes C and D
• Teach New Note: E
• Use Screenshare/White Board to show the fingerings • Play Hot Cross Buns (using C-Bb-Ab) • Play Mary Had a Little Lamb (using D-C-Bb)
Finishing Activity: • Play something for the student or share a YouTube video. • Video Search Suggestion: Alison Balsom, Libertango
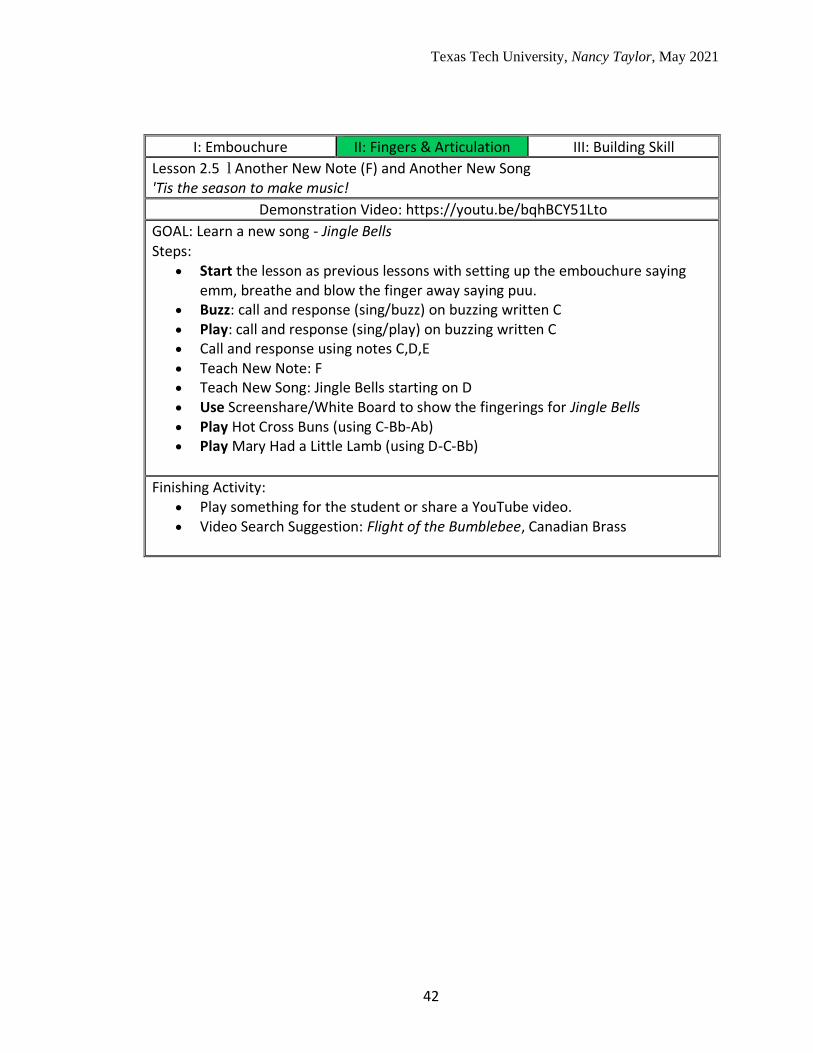
Texas Tech University, Nancy Taylor, May 2021
42
I: Embouchure II: Fingers & Articulation III: Building Skill
Lesson 2.5 l Another New Note (F) and Another New Song 'Tis the season to make music!
Demonstration Video: https://youtu.be/bqhBCY51Lto
GOAL: Learn a new song - Jingle Bells Steps:
• Start the lesson as previous lessons with setting up the embouchure saying emm, breathe and blow the finger away saying puu.
• Buzz: call and response (sing/buzz) on buzzing written C • Play: call and response (sing/play) on buzzing written C
• Call and response using notes C,D,E
• Teach New Note: F
• Teach New Song: Jingle Bells starting on D • Use Screenshare/White Board to show the fingerings for Jingle Bells
• Play Hot Cross Buns (using C-Bb-Ab) • Play Mary Had a Little Lamb (using D-C-Bb)
Finishing Activity: • Play something for the student or share a YouTube video. • Video Search Suggestion: Flight of the Bumblebee, Canadian Brass

Texas Tech University, Nancy Taylor, May 2021
43
I: Embouchure II: Fingers & Articulation III: Building Skill
Lesson 3.1. Single Note Articulation Start the note by releasing the air
Demonstration Video: https://youtu.be/SR1aS8AVe64
GOAL: New Note (G) Steps:
• Start this lesson like every other with emm and puu, singing and buzzing
• Review articulation by saying 'thee' and articulating the tongue between the teeth
• Play C-D-E-F-G (new note: G)
• Practice articulating long and short notes on the above pitches
• Play Jingle Bells (or whatever song they choose) at an increasingly faster tempo to challenge their articulation
Finishing Activity: • Play something for the student or share a YouTube video. • Video Search Suggestion: Aaron Ouellette 2016 - Concert Etude

Texas Tech University, Nancy Taylor, May 2021
44
I: Embouchure II: Fingers & Articulation III: Building Skill
Lesson 3.2 Playing Intervals (3rd and 4th) It's time to play some skips with the mouthpiece on your lips!
Demonstration Video: https://youtu.be/L89mRte8c7k
GOAL: New Note (A) Steps:
• Start this lesson like every other with emm and puu, singing and buzzing • Review articulation by saying 'thee' and articulating the tongue between the
teeth
• Play pattern in call and response: Bb-D-Bb-D-Bb
• Play pattern in call and response: B-D#-B-D#-B
• Play pattern in call and response: C-E-C-E-C
• Play pattern in call and response: C-F-C-F-C
• Review C-D-E-F-G from previous lesson
• Play C-D-E-F-G-A (new note: A)
Finishing Activity: • Play something for the student or share a YouTube video. • Video Search Suggestion: Boston Brass - Flight of the Green Hornet
Texas Tech University, Nancy Taylor, May 2021
45
I: Embouchure II: Fingers & Articulation III: Building Skill
Lesson 3.3 Playing Intervals (5th) More skips to play!
Demonstration Video: https://youtu.be/NlVuoUNi3Ok
GOAL: Learn a new song -Twinkle-Twinkle Little Star Steps:
• Prepare the White Board on ScreenShare with the words to Twinkle-Twinkle Little Star
• Start this lesson like every other with emm and puu, singing and buzzing • Review articulation by saying 'thee' and articulating the tongue between the
teeth
• Review using the spit valve, Review breathing through corners of the mouth
• Play pattern in call and response using intervals of a 3rd and 4th
• Play pattern in call and response: C-G-C-G-C
• Play pattern in call and response: B-F#-B-F#-B
• Play pattern in call and response: Bb-F-Bb-F-Bb
• Play pattern in call and response: A-E-A-E-A
• Learn Twinkle-Twinkle Little Star starting on C below the staff
Finishing Activity: • Play something for the student or share a YouTube video. • Video Search Suggestion: Army Band Trumpet Ensemble - Durenhorn Passage
Texas Tech University, Nancy Taylor, May 2021
46
I: Embouchure II: Fingers & Articulation III: Building Skill
Lesson 3.4 Articulation: Slur and Tongue Articulation patterns are fun and sound fancy!
Demonstration Video: https://youtu.be/bNuguBGskx4
GOALS: Alternate between slurring and tonguing, Learn 5-note pattern in C Steps:
• Start this lesson like every other with emm and puu, singing and buzzing • Review articulation by saying 'thee' and articulating the tongue between the
teeth
• Ask the student to SIT UP TALL if they are not
• Play pattern in call and response C-D-E-F-G-F-E-D-C • Play pattern in call and response using various tongue/slur articulations
• Play Mary Had a Little Lamb and discuss options for articulation
Finishing Activity: • Play something for the student or share a YouTube video. • Video Search Suggestion: Jens Lindeman and Army Band
(music starts at 1:24. Jazz style with lots of high notes)
Texas Tech University, Nancy Taylor, May 2021
47
I: Embouchure II: Fingers & Articulation III: Building Skill
Lesson 3.5 Introduction to Reading Music Get ready for the next big step - it's time to read music!
Demonstration Video: https://youtu.be/vqpdnN5Jkgk
GOAL: Read note names in and below the staff Steps:
• Prepare White Board on Share Screen with Music Staff Lines
• Start this lesson like every other with emm and puu, singing and buzzing • Review articulation by saying 'thee' and articulating the tongue between the
teeth
• Ask the student to SIT UP TALL if they are not • Using Share Screen/White Board write in the note G and play that note
• Write the name of the note above and the fingering below (using different colors)
• Write G-F-E-D-C. Write fingerings below and note names above
• Progress in this fashion. • Explain FACE (Face in the Space) and EGBDF (Elephants Get Big Dirty Feet)
• Explain reading notes below the staff
• Recommended for further learning: Breeze-Easy Method for Trumpet, Book 1
Finishing Activity: • Play something for the student or share a YouTube video. • Video Search Suggestion: 2018 NTC - Baylor WE - Sally Tepper
(trumpet ensemble with flugelhorn and mutes)

Texas Tech University, Nancy Taylor, May 2021
48
APPENDIX B
TRANSCRIPTS OF DEMONSTRATION VIDEOS
Lesson 1.1 Embouchure
Nancy Taylor: "Hi. So, this very first lesson is on creating an embouchure and found over
years of teaching that the quickest way is to say ‘M’.
[Demonstrates embouchure]
‘M’
We're just going to be happy and say ‘M’.
[Demonstrates smile with lips gently together and embouchure]
‘M’
Now, when you do that, the lips come together gently. We don't want to say ‘m’, right?
[Demonstrates tight embouchure with lips pressed tightly together]
We say ‘m’ because we're kind of happy.
[Demonstrates smiling and setting embouchure]
And when you say ‘M’ the teeth line up, right? And there's a little space between.
[Places finger between upper and lower teeth to demonstrate space]
That's the first step and then, you blow and let the air create the aperture, okay?
[Demonstrates setting embouchure, keeping lips together then blowing to create
aperture]
This is the first step. Spend a lot of time with the kids going ‘M’. Be positive. Say, Good
job, that's perfect. ‘M’. Now, then get them to go and blow out for four counts.
Remember, they're little kids, if you're teaching little kids. They have little lungs, so.
Right?
[Demonstrates setting embouchure and exhaling 4 counts]
Texas Tech University, Nancy Taylor, May 2021
49
The next step is to put the mouthpiece on the face. It just goes right in the center.
[Demonstrates placement of the mouthpiece]
All right? ‘M’. The next thing you do is, once, see, this is the toughest part about
teaching. If you were there, then you would press the mouthpiece on their face until the
vibration came out. But now you have to tell them. So, it takes a while. Be patient, be
super happy if they make any kind of sound. But I'm going to go like this when I start
making pressure. ‘M’.
[Demonstrates embouchure, mouthpiece placement, and buzzes mouthpiece for 3
counts]
The vibration starts when the balance between the pressure and the air is the same. Okay?
So, this is your entire first lesson. You can spend a lot of time doing it and always be
excited no matter what the kid does. If they make any sound or they don't make a sound
you want to be positive, you want to be energetic.
And then, at the end of the lesson, play them something on your own trumpet or a video.
Something to make them go, wow. Okay? See you tomorrow."
Texas Tech University, Nancy Taylor, May 2021
50
Lesson 1.2 Matching Pitch and Articulation.
Nancy Taylor: “Hi there. Welcome to day two. Today we're going to start by reviewing
what we did yesterday. In fact, we're going to do that every day for the next three weeks.
Start by reviewing what we learned yesterday, which is ‘M’
[Demonstrates embouchure]
‘M’,
[Demonstrates embouchure]
‘M’
[Demonstrates embouchure]”
Blow the finger away
[Demonstrates embouchure and blowing at tip of extended index finger]
[Buzzes mouthpiece]
‘M’
[Demonstrates embouchure]
All right? Also, on today is matching pitch and articulation. So, we want the first note
that they hear, sing, play for the next three weeks
[Plays C]
to be C, right? So, I'm going to sing it, I’m going to play it.
[Sings Bb and Buzzes Bb on the mouthpieces repeatedly]
This is the goal for today.
Now, they may have trouble matching the pitch. Just matching the sung pitch. Just keep
doing it. They will learn through repetition. Matching pitch is a learned skill, so give
them practice and teach it.
[Sings Bb, Buzzes Bb on the mouthpiece]
Texas Tech University, Nancy Taylor, May 2021
51
So, once they can get it with their voice, then get it with the mouthpiece, all right? The
next thing is articulation. A very efficient way to teach articulation is not to say “tah”,
because that puts the tongue at the roof of the mouth and it's not a really efficient way,
and you'll have a lot of students ending up
[Plays C for 3 counts]
with that kind of delayed kind of sound. We don't like that, so let's say “theu”. This is a
French articulation, and it creates a very clean front to the note. So, we're going to say ‘t’,
‘h’, ‘e’, ‘u’. I’d tell a student “now, put your put your finger in front of your face and say,
say “theu” and I want you to touch your finger with your tongue”. Now, your student is
going to say and that's fine. We're going to say “great, that's it!”, because that is the
movement, they just haven't developed the fine motor skill yet, but they will. So, we're
going to go ‘M’, all right? “Theu”, “theu”, “theu”, ‘M’
[Demonstrates embouchure and buzzes mouthpiece for 4 counts].
And just go back and forth. This is the lesson for today, enjoy. Stay positive, I'll see you
tomorrow."
Texas Tech University, Nancy Taylor, May 2021
52
Lesson 1.3 Playing the Instrument
Nancy Taylor: "Hi, welcome to lesson number three. We are moving right along. Today
we are going to start by always reviewing ‘M’, ‘M’. All right? So, let’s go back and forth,
and by this point I’m hoping that your student can match the pitch.
[Plays a Bb on the mouthpiece]
And you are going to just go back and forth.
[Plays C on the trumpet]
That was close.
[Plays C on the mouthpiece]
You are going to go back and forth. I play, you play.
[Plays a quarter note, two eighth notes, and a quarter note on the mouthpiece]
Now they are going to do it. Now I am going to go.
[Plays C for 3 counts]
Now you do it. We’ll go back and forth for a little bit. All right?
The next thing we are going to do is pick up the trumpet or the cornet. I actually prefer
cornet for little people because trumpet for them is way out here, cornet is closer in, so
the center of gravity is closer to their body and it’s easier to hold. It does not feel as
heavy for them. So, if you’re giving a choice, give them a cornet. That’s a beautiful thing.
Teach them how you hold this.
[Shows left hand around valve casing]
Their hands are going to be little, so putting them in these rings if they can, great.
[points to first valve slide saddle and third valve ring]
If they can’t, that’s fine. You hold it onto with your left hand. With your right hand 1, 2,
3,
[Places fingers on valves 1, 2, then 3 with trumpet close to the camera]

Texas Tech University, Nancy Taylor, May 2021
53
and notice when showing fingerings, I am being really close to the camera, yeah? I am
also smiling a lot. It helps kids stay engaged. This should feel a little bit like a, I don’t
know, comedian, sideshow, I don’t know. But it’s important, we need the kids to stay
engaged. So, be dynamic in your teaching. All right? One, two three.
[Demonstrates fingers on valves]
If they want to put their finger in here, that’s fine.
[Places small finger of right hand in pinky hook]
It helps them hold the instrument. It is really heavy for them, remember. Don’t let them
put their thumb here though.
[Places right hand thumb on the leadpipe in front of valve 1]
I like the thumb to go here.
[Places right hand thumb under leadpipe between valves 1 and 2]
Because then that puts the hand in this position,
[Demonstrates rounded fingers]
and not this position.
[Demonstrates fingers in a tiger-claw-like position]
We like this position.
[Demonstrates rounded fingers]
So, thumb goes here.
[Places thumb between valves 1 and 2]
All right, first note we are going to go for.
[Plays a C]
It's the one that you were buzzing all day yesterday. So, you are going to say “tah”
[Sings a C, clays a C on the mouthpiece, plays a C on the trumpet]
Texas Tech University, Nancy Taylor, May 2021
54
Good job. Even if they go
[Plays with a bad tone]
You’ll be like ‘M’, ‘M’.
[Smiles, demonstrates embouchure, plays a C]
‘M’
[Plays a C]
Just keep going back and forth. No matter the sound they make, be enthusiastic, be
positive. Go back and forth. Once they can play that note.
[Plays a C quarter note, two eighth notes and a quarter note]
And then they are going to play.
[Plays the same thing with a heavy articulation]
With way too much articulation and you are going to say, great, let’s do it again! and just
go back and forth on that.
Stay positive, be happy, be a great teacher. See you tomorrow.
Texas Tech University, Nancy Taylor, May 2021
55
Lesson 1.4 Changing Notes and Using the Valves
Nancy Taylor: "Hey there. Welcome to lesson number four. We're starting today's lesson
same way we start every day. ‘M’.
[Demonstrates embouchure]
Now that we've done this for a little while, we can start asking them to blow longer notes.
‘M’.
[Demonstrates embouchure, buzzes pitch for 4 counts]
Then you buzz.
[Buzzes a long tone followed by a half note and three quarter notes]
Do several minutes of back and forth making a good sound and matching the pitch.
[Sings pitch, buzzes same pitch]
Every day we want to review what has been done. This is a cumulative experience, all
right? Now, let's go to this. Remind them how to hold the horn, all right?
[Shows left and right hand positions holding the trumpet]
We're going to go back and forth. Now, talk to them, one, two, three.
[Places fingers on valves]
This is the third valve.
[Taps finger on third valve cap]
Show me which one is the second valve, “this one, yes”.
[taps finger on second valve]
Which is the first valve? “This one”.
[Taps first valve]
Which is the third this one?
[Taps third valve]

Texas Tech University, Nancy Taylor, May 2021
56
Good job. All right, we're going to push down the valves now. Now, when you push
down a valve, like when you push down this middle valve the air goes through here, so it
makes the note go lower.
[Presses middle valve and points to second valve slide]
When you push down the first valve, the air goes through here, so that makes it go even
lower because that's a bigger slide than that.
[Presses first valve and points to first valve slide]
Follow me on this. I'll play and you play.
[Plays several times between C and B]
Good job!
[Plays several times between C and B]
Right on, good job! All right, so this is what we're doing, go back and forth with different
articulation patterns.
[Plays a C-Bb pattern followed by a C-A pattern]
Yeah? Okay, so that's what we're doing today. We’re just pushing down valves, that's all.
Tomorrow, we're going to work on valve patterns and strengthening the hand. Keep in
mind this is new for them, this is heavy for them.
So, if your kid is sitting like this,
[Sits back in chair with slouched posture and trumpet bell pointing downward]
well, the horn is heavy. What does it take? It takes a lot of shoulder strength and back
strength for them to hold up like this
[Demonstrates good posture and horn position]
and we don't want them to be going like this, right?
[Demonstrates elevated left shoulder]
Texas Tech University, Nancy Taylor, May 2021
57
So, if they are resting the bell of the, especially if it's a trumpet, if they're resting the bell
of the trumpet on their knee, it's okay. That's okay. At this point they don't have to start
out with perfect posture. They'll get there as they get stronger, okay?
Stay positive and be fabulous. See you next time.

Texas Tech University, Nancy Taylor, May 2021
58
Lesson 1.5 Chromatic Low Notes
Nancy Taylor: "Hey there. Welcome to lesson number five. Today we're going to learn a
lot of notes, so we're going to start out again by saying ‘M’
[Demonstrates embouchure]
Yes? And then, mouthpiece buzzing,
[buzzes a C]
and then the first note is always
[Plays C on trumpet]
Yes? And we're not harping them, on them about their bad posture. We just want them to
make some sounds. We want them to come back. We want them to be happy, and
engaged, and excited about trumpet playing. So, let's talk more about playing with the
valves. Now I want you to follow me, all right? All right.
[Plays C, B, C]
Now they play it and you say, great!
[Plays C, B, Bb, B, C]
And you're going to say “open, second, first, second, open”.
[Shows valve positions with trumpet close to camera]
Yeah? And then they play it and you say, great!
[Plays chromatically from C to A and back to C]
And then they do it and you say, great! Now, if you feel like it, you can go on screen
share and you can share the whiteboard. Now, when we share the whiteboard, we're
going to say “open, two, one, two, open”.
[Opens white board on screen and writes 0, 1, 2, 0]
Yeah? That's it. And then you say, great! Now, we're going to go open, two, one. Then,
we're going to go 1 and 2, and then 1, and then 2 and then open. Yes? All right, great.
Now, let's go one more.
Texas Tech University, Nancy Taylor, May 2021
59
[Demonstrates finger patterns]
So, using the white board is an effective way and check it out, I'm doing where this is all
based on sound before sight, right? So, we're not learning to read music yet. They don't
need to. That's just too much for the brain at this point. So, let's just do this.
Now, playing low. Starting low in the in the register is really important. So, don't
encourage them to play even in the staff. We're not doing that yet. We're just playing
[Plays chromatically from C to A and back to C]
All right? If you feel like it, a little bonus action is playing C to C sharp.
[Plays C to C#]
Now, remember that that's a tough one, but if you, if we start this finger dexterity early,
then they get strong really fast and it's kind of fun to see. So, let's do this.
[Plays C, C# repeatedly]
Now, you do it, good job!
[Plays C, B repeatedly]
Good job! All right?
[Plays C, B, Bb, B, C]
Make sure they slam down the valves, yeah? Make sure the thumb isn't here. It's okay if
the finger's here. It's okay if their bell is resting on their knee, especially if they have a
trumpet.
All right, stay excited, stay fabulous, you're doing a great job. I'll see you tomorrow."
Texas Tech University, Nancy Taylor, May 2021
60
Lesson 2.1 Fingers and Articulation
Nancy Taylor: "Hey, welcome to section two. You've made it this far, right on. This
section is on fingers and articulation. We’re going to learn three different songs in this
section. Very cool, really exciting for the kids to be able to play something that they
know.
So, in this lesson today the goal is to gain skill and endurance. By this point, you and
your student should know to start every lesson by saying ‘M’, buzzing going back and
forth. Remember that you want to make the first note that they sing, that they buzz, that
they play is always
[Plays C]
C below the staff, okay? All right. Now, you're going to do your initial warm up. And
then, we're going to just go back and forth playing some valve patterns.
[Plays C, B, C, B, C repeatedly and changing articulation patterns]
And now you do it. Good job!
[Plays C, Bb, C, Bb, C repeatedly and changing articulation patterns]
Good job, excellent. Now, if you if you play to your student
[Plays quarter note and two eighth notes]
and your student plays back,
[Plays two quarter notes and three eighth notes]
I advise you to not correct them. It's not a big deal. Just play back what they did, all
right? And then, keep going from there. This is student directed learning. So, if they kind
of like, "there are no mistakes?" just say, great job! And then pick up what they did. We
want this to be a uniquely positive experience, okay? You're doing great.
Hang in there, keep smiling, look into the camera, and keep teaching."
Texas Tech University, Nancy Taylor, May 2021
61
Lesson 2.2 Finger Coordination and Hot Cross Buns.
Nancy Taylor: "Now, it's time for our first song. Press the valves and play along. Today's
an exciting day. Learning to play a song. Start of course by saying ‘M’. As you are
buzzing and playing back and forth, be sure and remind them to breathe through the
corners of the mouth, all right?
[Demonstrates breathing through the corners of the mouth]
We're not doing big heavy breathing exercises. They're little kids, so they'll figure it out.
Right now, just technique is important. The first song is Hot Cross Buns. It's a song I
guarantee they don't know, but it's easy to learn. So, we're going to start on C,
[Plays C, Bb, Ab, C, Bb, Ab]
which reminds me, you have to teach them to empty the water, right? Remember, teach
them to empty the spit valve, okay?
[Demonstrates pressing water key and blowing through trumpet without sound]
[Plays C, Bb, Ab, C, Bb, Ab]
It's so low, but this is important that they play low before they play high. We can mess up
a kid's chops by asking them to play in the staff too early. Just get them playing low. It's
good.
So, here we go. We're going to hit share screen. I'm going to go to whiteboard.
[Opens whiteboard, the words to "Hot Cross Buns" are typed on the screen]
Now, I went to text up here and wrote out the words to the song, yes?
[Points cursor to text insert]
Now in a different color, see where it says format and I hit red.
[Points cursor to color option]
I'm going to write the fingerings: open, one, two, and three. And then, the same thing:
open, one, two, and three. And then, one a penny is two and three. So, one-a-pen-ny, two
times, four times, right? And then, first valve, two a penny, first valve. And then, Hot
Cross Buns, okay?
[Writes in the fingerings below the words]
Texas Tech University, Nancy Taylor, May 2021
62
And this dynamic thing, you want it to be colors and the students can see it. And what I
just did here is kind of a mess, but it works. It's just fine. So, now you might have the
students say: “hot cross buns, hot cross buns”, having them say it “one a penny two a
penny hot cross buns”, all right? So, do that and stay enthusiastic. They're going to learn
a song today.
It's a beautiful day. Have a good one. See you tomorrow."
Texas Tech University, Nancy Taylor, May 2021
63
Lesson 2.3 Mary Had a Little Lamb and a New Note, too!
Nancy Taylor: "Hey, it's a new day, we can learn a new song, "Mary Had a Little Lamb"
so press the valves down with a slam and play about a little ham.
Today, we're going to learn a new note. So, after you do ‘m’, buzz, “tah, tah, tah, tah,
tah”.
[Demonstrates embouchure, buzzes mouthpiece, sings, plays C repeatedly]
Doing a little fingering exercise so that they can gain some dexterity. We're going to
learn a new note. The new note is D. Finally, we're going up. We're going to go up a note,
every lesson from now on. So now we're ready to start playing a little bit higher. It's
important to start the low register for little kids, that's just fine.
So, after you do your call and response, and we're going to teach a new note, we don't
even really have to tell them “today we're going to learn a new note”, but we're going to.
[Plays C, B, Bb, B slurred and then articulated]
And then you play it, and then you go,
[Plays C, D, C, D, C, D]
And with their little, tiny hands, they're going to do this. And keep in mind that this is not
super easy, so it's going to be a little bit slow, and that is just fine. So, once they can play
this note, then you're going to say, that's so cool, amazing! You know what? You just
learned a note that we can use for our new song. It goes like this.
[Plays the first phrase of "Mary Had a Little Lamb" at a slow tempo]
But you’ll play it slow, I just didn't want to put you through that. So, there you go. Mary
had a little lamb. And we're going to go to share screen, go to whiteboard.
[Opens whiteboard, the song words are already typed on the screen]
And before the lesson you can do this: you can go to whiteboard before the lesson and
type out Mary had a little lamb. And then when you're with the student, you go to share
screen and write in the notes, okay? Play Mary Had a Little Lamb. It's very exciting. This
is a song that they know. All right.
Stay enthusiastic, keep smiling. I hope you feel energized by doing this. Bye!"
Texas Tech University, Nancy Taylor, May 2021
64
Lesson 2.4 Two Songs and a New Note
Nancy Taylor: "Hey, welcome back. The goal for today is to continue to develop skill
and endurance. So, today we're going to play Mary Had a Little Lamb and Hot Cross
Buns, yes?
Your student should be developing some good strength by now, so they can play all the
way through. And we also don't want to pile on too much new stuff. So, we're going to go
back and review.
You should still have your files for Mary Had a Little Lamb and for Hot Cross Buns. So,
after you do your good warm up and the playing back and forth, you could play those, to
which you're going to say, great job, that was terrific, wow you are catching on so fast!
right? We do this. We want to pump the kid up, get him super excited about playing.
Now, let's do this.
Let's go back to playing back and forth, okay? Now we're going to learn to play E. Each
lesson from here on out we're learning a new note.
[Plays C-D-C-D-C-D-E]
And then, they do that, and you say, yay!
[Sings C-D-C-D-E]
Okay? Great. Stay excited, stay focused, smile a lot, be happy. You're doing a good deed.
I hope this is all helping. I love it. See you tomorrow."
Texas Tech University, Nancy Taylor, May 2021
65
Lesson 2.5 Another New Note and Another New Song
Nancy Taylor: "Hello, welcome back. 'Tis the season to make music. If you think about
it, there are a lot of songs that little kids can play just using three or four notes. So, you
don't necessarily have to use the songs that I got. Like the next one we're going to learn
today is Jingle Bells. It might be the middle of July, and that's fine. So, you might want to
teach them America or Taps or something else. If they have the range to do it, cool.
But what we've got today is learning a new note. We're learning F. After you do all your
stuff, articulation, buzzing, breathing through the corners, not harping on them about their
instrument position, we'll learn an F.
So, always start first pitch is always what? That's right. First pitch is always…
[Plays C]
That's what they're going to sing, buzz, and play. First note, always. Okay? After seven
more lessons and the range moves up, then the first note will always be G in the staff.
Then, as they advance a couple weeks later, then the first note is always c in the staff, all
right? We always want to start the same way with consistency, yeah? All right, so…
[Plays C, D, E, F]
Good job! You just learned to play an F. Now, you may want to do Jingle Bells right
away or you may want to start with Hot Cross Buns and Mary Had a Little Lamb. It
depends on the kid, depends on your judgment, or here's a great idea. Give the kid the
choice.
When kids have choices, they really love it. Say “okay you want to play Mary Had a
Little Lamb or you want to learn a new song? You do? Jingle Bells? Let's do jingle bells.
It starts on D, alright? D.
[Plays the first phrase of Jingle Bells]
And then you go on: “oh what fun it is to ride in a one horse open sleigh hey jingle bells”
Okay? So, then you play jingle bells. You might do it the same way by sharing the
screen. You've already typed out the Jingle Bells, yes? You don't have to type out the
whole song all the time because what we want them to kind of be doing is learning to
play by ear and learning that the sound goes with this finger, yeah? So, allow them to
have to figure some stuff out a little bit.
That's it for today, okay? That's it for this section. You've stuck with us for 10 lessons.
Good for you. I hope your student’s making great progress and that this is all helpful.
And you have a great day!"

Texas Tech University, Nancy Taylor, May 2021
66
Lesson 3.1 Single Note Articulation
Nancy Taylor: "Hey, welcome to section three, building skill. Your student knows a good
number of notes by this point, which is great because the more notes you know, the more
songs we can play. And, also, they've gained some endurance, they've gained some finger
dexterity.
Today's note is a G. So, you're going to warm up the same way every day. Start the lesson
the same way, first note they hear, they play, they buzz.
[Plays C]
C in the staff, right? And today you're going to introduce…
[Plays G]
G. If they're unable to play the G, then everything is too loose.
[points to embouchure]
We want to have ‘M’.
[Demonstrates embouchure]
Always go back to ‘M’, all right? Then, also you're going to review articulation. Review
that articulation is
[Demonstrates articulation with the tongue showing between the upper and lower
teeth]
all right? And I'm sure they're going and creating a really thuddy tongue. And today is the
day that you get to say, “let's lighten up on that articulation, just bring the tongue to here,
right?” And that will help lighten the articulation.
You're going to play Jingle Bells or whatever song they want to play and have them just
think about the articulation and listen to the articulation. You're going to play back and
forth a lot and it's going to be a great day. And you're going to be so happy for them and
you're going to say, good job! because we want them to be enthusiastic about trumpet
playing, okay? So, you're doing good.
Tomorrow we'll start learning even fancier stuff. Have fun."
Texas Tech University, Nancy Taylor, May 2021
67
Lesson 3.2 Playing Intervals 3rd and 4th
Nancy Taylor: "Hey, welcome back. It's time to play some skips with the mouthpiece on
your lips! The goal today is to learn a new note. We're going to learn A and also to play
the interval of a third and fourth.
Now, you're going to start today like every day. Make sure they breathe from the corners
and the mouth, right?
[Demonstrates breathing through corners]
yeah? Now, let's do some skips after you do all your introductory stuff.
[Plays Bb-D-Bb]
We're going to play B flat, D, B flat, D
[Plays Bb-D-Bb-D-Bb]
Good job! Now, we're going to play B, D sharp, B, D sharp
[Plays B-D#-B repeatedly]
Good job! And you might want to do each of these twice, okay? The next one is C to E
[Plays C-E]
You getting the drift there? Okay, now we're going to go C to F, increasing the interval
[Plays C-F-C-F]
And then they play it, and then you do C sharp, F sharp, C sharp, F sharp. Remember to
show the valves this way, okay?
[Demonstrates fingerings close to the camera]
And having a dark background for the valves or a clear background for the valves helps
them be able to see it a lot. And I recommend turning your horn this way
[Left hand is facing the camera]
so they can see it because if you're this way
[Right hand is facing the camera]
Texas Tech University, Nancy Taylor, May 2021
68
they can't really see it. If you're this way, they can't really see it. So, then the next thing
that we're going to do is add the A to the top of the range, all right?
So, yesterday you spent some time maybe doing the pattern:
[Plays diatonically from C to G]
and now today we're going to add the A on the top.
[Plays diatonically from C to A and back down to C]
[Plays F-G-A]
And if they go
[Plays F-G-A and cracks the A]
Then this is too relaxed, right?
[Points to embouchure]
So, you go back to saying ‘M’.
[Demonstrates embouchure]
You want to keep this kind of firm, right?
[Points to chin and corners of lips]
And maybe they're not pressing the mouthpiece enough, all right? But you troubleshoot a
little bit. Mostly we want them to just make a sound and learn to push down the buttons.
And so, they're doing a great job with that.
You're doing a great job with teaching. Stay focused, stay enthusiastic, keep smiling, tell
them they are wonderful, okay? Have a great day. See you tomorrow."
Texas Tech University, Nancy Taylor, May 2021
69
Lesson 3.3 Playing Intervals 5th.
Nancy Taylor: "Hey, big day today. We’re going to learn a new song. We’re going to
learn the interval of a fifth.
Before you start the lesson today, you're going to want to go on your share screen and the
whiteboard. And you're going to want to write this out, okay? Go to text, write out
“twinkle twinkle little star how I wonder what you are up above the world so high like a
diamond in the sky”, just that much, all right? That's what you need to do today.
You're going to do the regular warm up and play and emphasize articulation. Remind
them to breathe through the corners. This might be a good time if you haven't already,
talk to them about using the spit valve.
[Demonstrates pressing water key and blowing air through the horn]
We can call it the water key. I call it a spit valve because that's pretty much what it is.
Anyway, we're going to do call in response on
[Plays C, F, C, F,C]
Good job! Now we're going to play two notes with the same fingering.
[Plays C, G, C, G, C]
Excellent! Now, if they can't do this tell them it's kind of like when they're riding their
bike and they're going up a hill. They have to use a little more muscle, so. And that will
help them get that interval, okay?
[Plays B, F#, B, F#, B]
[Plays Bb, F, Bb, F, Bb]
Yeah? And now, this is important for them to be able to play a C to a G because that's
Twinkle Twinkle, right? That's the beginning of Twinkle Twinkle. If they can't play the C
to the G but they can play B flat to F then
[Plays Twinkle Twinkle starting in Bb]
Just change the key of Twinkle Twinkle, all right?
I'm going to go to the share screen now and show you how we're going to do this, same
way you always do it.

Texas Tech University, Nancy Taylor, May 2021
70
[Opens whiteboard]
So we're going to go and get a different color, right? Different color. Let's use this pretty
purple and we're going to draw. So, I like, I want to play it in this key, so we're going to
say: “twinkle” and then this is “twinkle” and this is higher, right? These are higher notes.
[Draws arrow above 2nd Twinkle]
and then “little star”
[Draws in fingerings below the words]
and then “how I, one and two, one and two, one and three, one and three, open”
[Draws in fingerings below the words]
So, write in all the fingerings this way and then from here
[Points cursor]
“up above the world so high, like a diamond in the sky”. And we go back to here
[Points cursor]
“twinkle twinkle little star how I wonder what you are”, good?
Now, if they're having trouble with this one, just spend some time on this. This is great. If
they're not awesome at this one, okay. How about we play Jingle Bells now? Let's play
Mary Had a Little Lamb. Let's play Hot Cross Buns”. Go back to something that they can
play, all right?
Make it a positive experience. Have a great day, I'll see you tomorrow."

Texas Tech University, Nancy Taylor, May 2021
71
Lesson 3.4 Slur and Tongue
Nancy Taylor: "Hey, welcome back! Today we're talking about articulation patterns
because they're fun and they sound fancy, yeah?
So, we're going to start today like every day ‘M’, good? Breathe through the corners of
the mouth, use the spit valve. At this point you might ask them to sit up tall. We haven't
bugged them at all about their posture, but they should be a little bit stronger now and
used to holding the instrument.
So they're going to sit up tall, good? After you've done your call and response with
buzzing and singing, first note every day.
[Plays C]
Yes? Every day. That's enough, they start with, so they know that's home, yes? In another
week we'll start with a G, but right now this is home. So, you do your call and response.
Now, let's do a call and response of this
[Sings C, D, E, F, G]
You might want to write it out on the whiteboard if you want “one, open, one and three,
one and two”, Okay, so,
[Plays C, D, E, F, G]
And then they do it. Now you say, All right. Now, we're going to slur two and articulate
two, so it's going to sound like this:
[Plays C, D, E, F, G slur C-C, slur E-F, articulate G]
Now you do it.” And they're going to do it. And it's going to be cool, and you're going to
say, fabulous!
[Plays C, D, E, F, G with the same articulation]
All right? And while we're here, I want to say I'm not a big fan of having students play
stuff really slow. Get them to move their fingers fast. They can do it. You want to do the
same thing with trombone. You want them to move it fast. If it's really slow, they're
going to go
[Sings glissing notes]
Texas Tech University, Nancy Taylor, May 2021
72
That's going to sound terrible. So, moving the fingers fast. Now, we can do Mary Had a
Little Lamb. Pick one of the songs that they know how to play and mess with the
articulation. Say “okay, Mary Had a Little Lamb”
[Plays the first two measures of Mary Had a Little Lamb slurring every two noes]
Right?
[Plays the first two measures Mary Had a Little Lamb with different articulation
pattern]
Or you can go,
[Plays the first two measures Mary Had a Little Lamb with yet another different
articulation pattern]
And if you want you can use the whiteboard and write out the words, maybe. And then,
and show them what a slur looks like and then put dots for the other ones, okay?
That's pretty much what today is about, is making things fancy by articulation.
You're doing great, see you tomorrow."

Texas Tech University, Nancy Taylor, May 2021
73
Lesson 3.5 Intro to Reading Music
Nancy Taylor: "Hey, today is a big day. Today we're going to learn to read music. We're
doing sound before sight. That's what all of this is about, is sound before sight.
So, they've spent three weeks learning to play the instrument. They can play songs. They
can articulate. They can move the valves. They can breathe through the corners of the
mouth. They can use the spit valve. Important stuff.
So we've done all of that without the task of learning to read music. Today you're going
to start the… Before you start the lesson you're going to want to go into share screen, all
right?
[Opens whiteboard with music staff already drawn]
And when you do share screen, you're going to set this up, all right? You're going to set
up a staff. The way you can set up a staff is you go into draw and click this straight line
thing here, and then you just drag that, all right?
[Points cursor at 'draw' option]
And you line them up, yeah? So, that's what you want to set up for today, yeah?
[Closes screen share]
You're going to start the lesson like always. You're going to play some songs. You'll want
to do the new part of reading music part at the end of the lesson, so make sure they get
some good playing in today.
Let's see. So, let's go back to share screen.
[Opens screenshare and shows whiteboard]
We've got this and now we're going to start on playing notes. I'm going to go to a
different color now. So, I'm going to go to red, yeah? And I'm going to show them the
first note that we play every day is this.
[Draws a C below the staff]
That note is called a C. Let's play a C. Good job, yay! That's called a C.
This one here is called a D, yeah?
[Draws a D below the staff]

Texas Tech University, Nancy Taylor, May 2021
74
And then you say “what's the fingering for that note?” And then they say “why miss
Taylor? It's one and three”, all right?
I'm going to go back, and you can, you know, use your own creativity this way, but using
this, use different colors. It can be really, really helpful. You may or may not want to say:
“I'm going for different colors” all right?
The way we read music is we've got face in the space, right? So, that's an F.
[Draws a whole note in lowest space on staff]
This note's an A.
[Draws a whole note in the space above the F]
That's a C.
[Draws a whole note in the space above the A]
That's an E,
[Draws a whole note in the space above the C]
which is kind of weird because they can't play up here yet, but it does help them know
that that's an E, okay?
So, we're not dealing with accidentals yet even though they can play, they could probably
play chromatic because you have been using all the valves. Let's do that, face in the space
and then E, G, B, D, F is “elephants get big dirty feet”.
[Draws whole notes on each of the staff lines]
I think that works pretty well, but then you're also going to need to teach them what notes
below the staff are. And that's pretty much just by habit.
So, you say,
[Points cursor to B]
that is 2 and it's a B, but I would use different colors for all of that. We want to make this
very dynamic, okay? Dynamic, meaning they're engaged and they're like, wow, this is
fabulous, and so much to look at, and I understand it! yeah? Now, working on the
whiteboard takes a little practice, but you can do it.

Texas Tech University, Nancy Taylor, May 2021
75
At this point I think I really like this book.
[Holds up a trumpet method book]
This is the Breeze-Easy Trumpet Method Book One. It's by John Kinyon and it's on
amazon for seven bucks, maybe 10 bucks. Volume one is green, and this is a good place
to start. You're going to cruise through volume one, but you need to because if they learn
to read music, they introduce a new note every lesson. So, you'll be able to go through
one or two lessons each lesson time.
At this point you can allow the or ask the student to prepare something for next time to
see how well they are able to, how well they are able to understand it.
Thanks for sticking with me through this. I hope you've learned a lot. Give me a call,
send me a message if there's, if you have any questions or comments, okay?
I really appreciate it, take care."
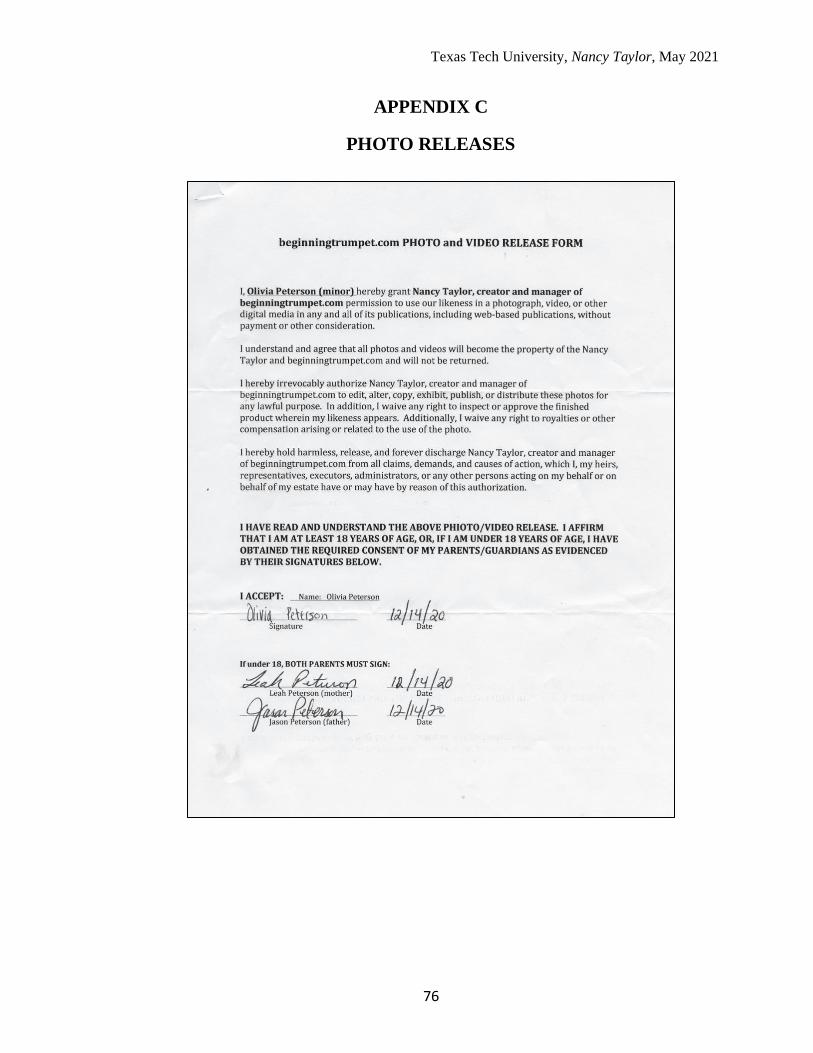
Texas Tech University, Nancy Taylor, May 2021
76
APPENDIX C
PHOTO RELEASES

Texas Tech University, Nancy Taylor, May 2021
77
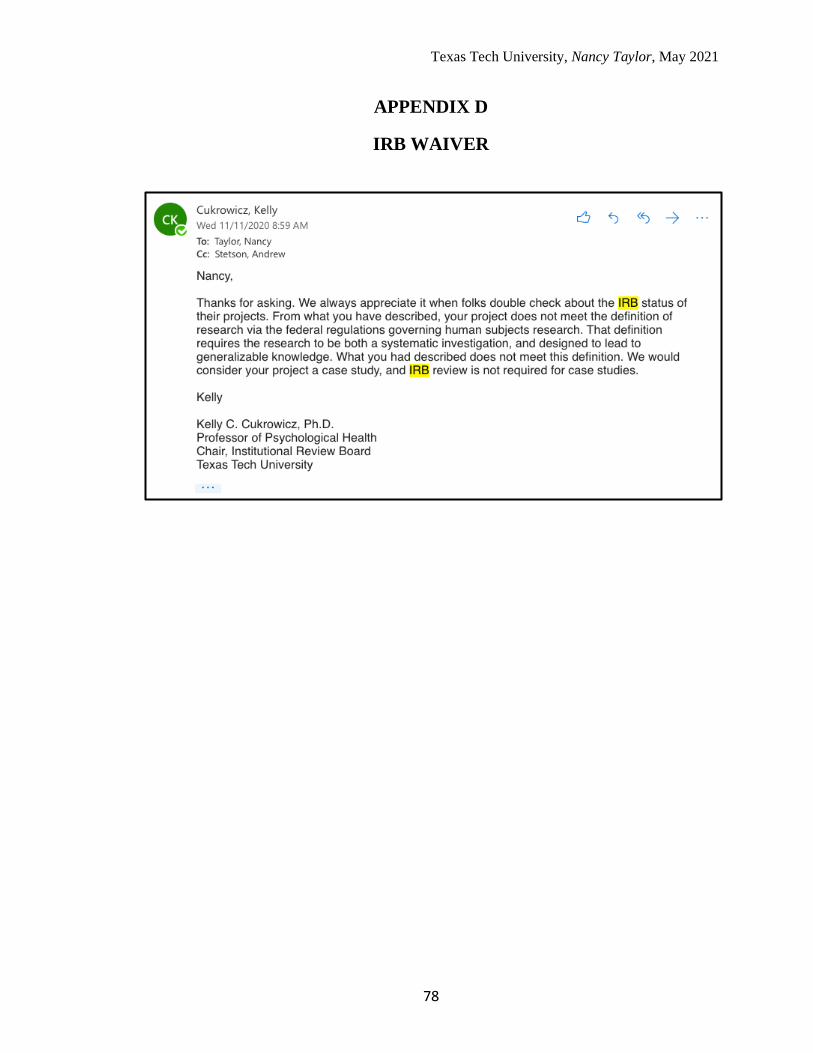
Texas Tech University, Nancy Taylor, May 2021
78
APPENDIX D
IRB WAIVER
Related Documents