Teach Yourself Windows 95 Module 2: Files, Folders, and Features

Welcome message from author
This document is posted to help you gain knowledge. Please leave a comment to let me know what you think about it! Share it to your friends and learn new things together.
Transcript
Teach Yourself
Windows 95
Module 2: Files, Folders, and Features
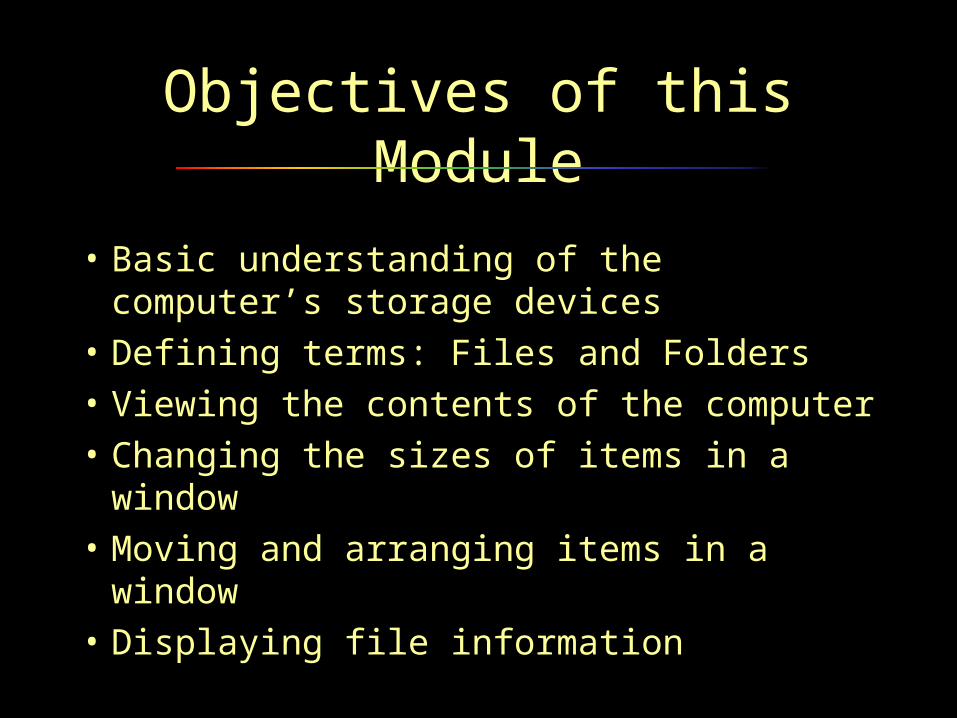
Objectives of this Module
• Basic understanding of the computer’s storage devices
• Defining terms: Files and Folders
• Viewing the contents of the computer
• Changing the sizes of items in a window
• Moving and arranging items in a window
• Displaying file information
Objectives of this Module, (cont’d)
• Sorting items in a window
• Selecting files
• Creating folders
• Copying and moving files
• Renaming files and folders
• Opening and previewing files
• Printing files

Objectives of this Module, (cont’d)
• Deleting files and folders
• Restoring deleted files
• Using Windows Explorer
• Using the Find Files or Folders feature
• Creating shortcuts
• Using file scraps
• Adding programs to the Start Menu
• Making programs start automatically
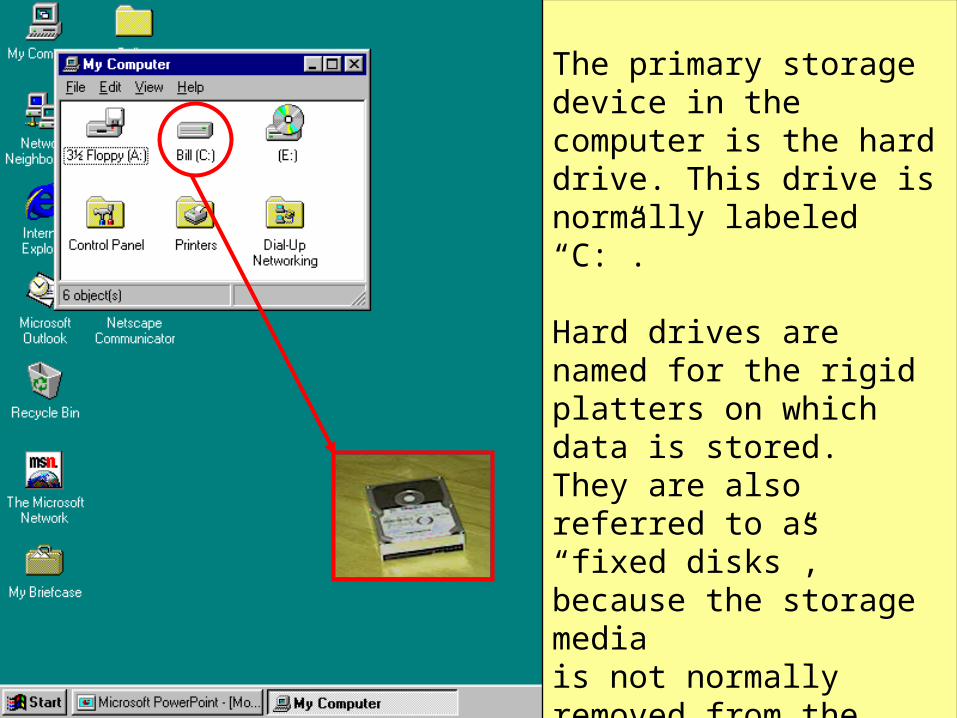
The primary storage device in the computer is the hard drive. This drive is normally labeled “C:”.
Hard drives are named for the rigid platters on which data is stored. They are alsoreferred to as “fixed disks”,because the storage mediais not normally removed from the drive.
Hard drives allow very quick access to vast amounts of data in your computer.
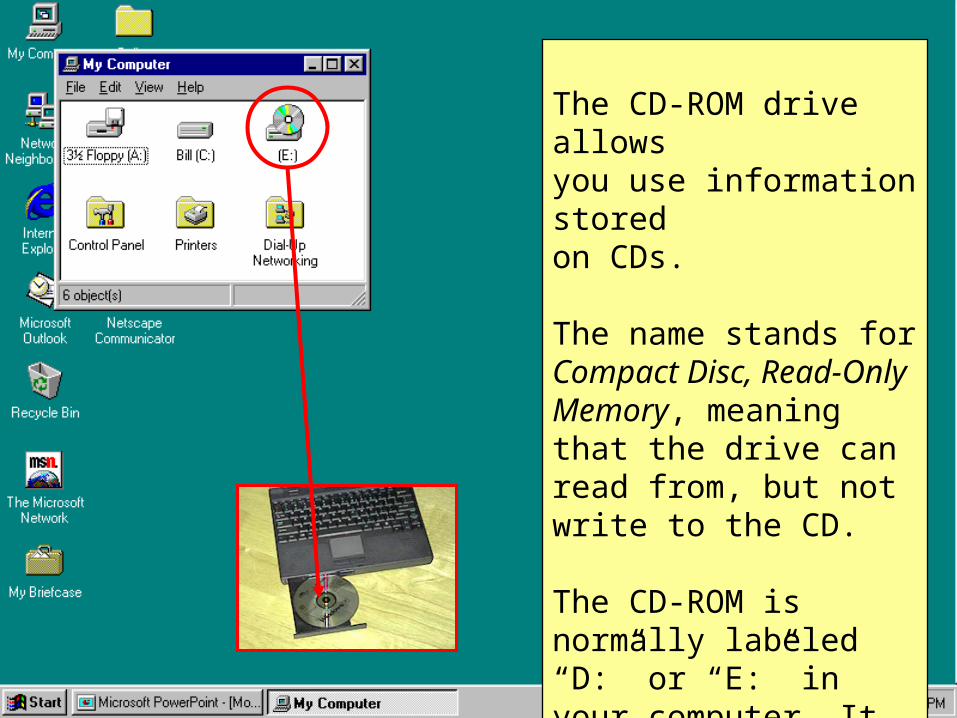
The CD-ROM drive allowsyou use information storedon CDs. The name stands for Compact Disc, Read-Only Memory, meaning that the drive can read from, but not write to the CD.
The CD-ROM is normally labeled “D:” or “E:” in your computer. It can store up to 650 megabytes of data.
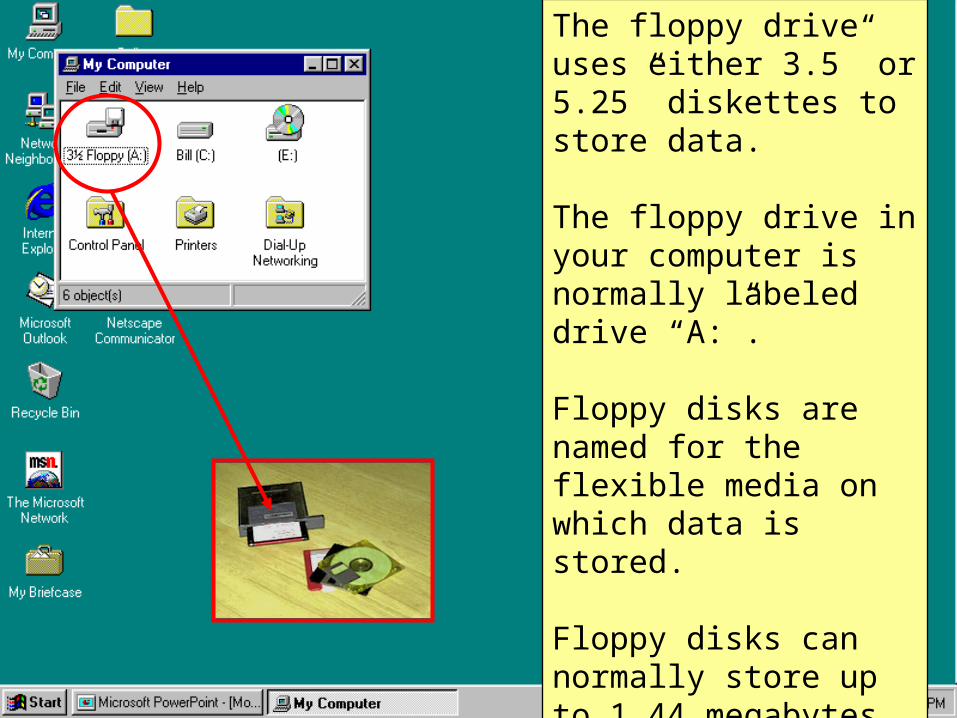
The floppy drive uses either 3.5” or 5.25” diskettes to store data.
The floppy drive in your computer is normally labeled drive “A:”.
Floppy disks are named for the flexible media on which data is stored.
Floppy disks can normally store up to 1.44 megabytes of data. They are also recognized as the slowest data storage device.
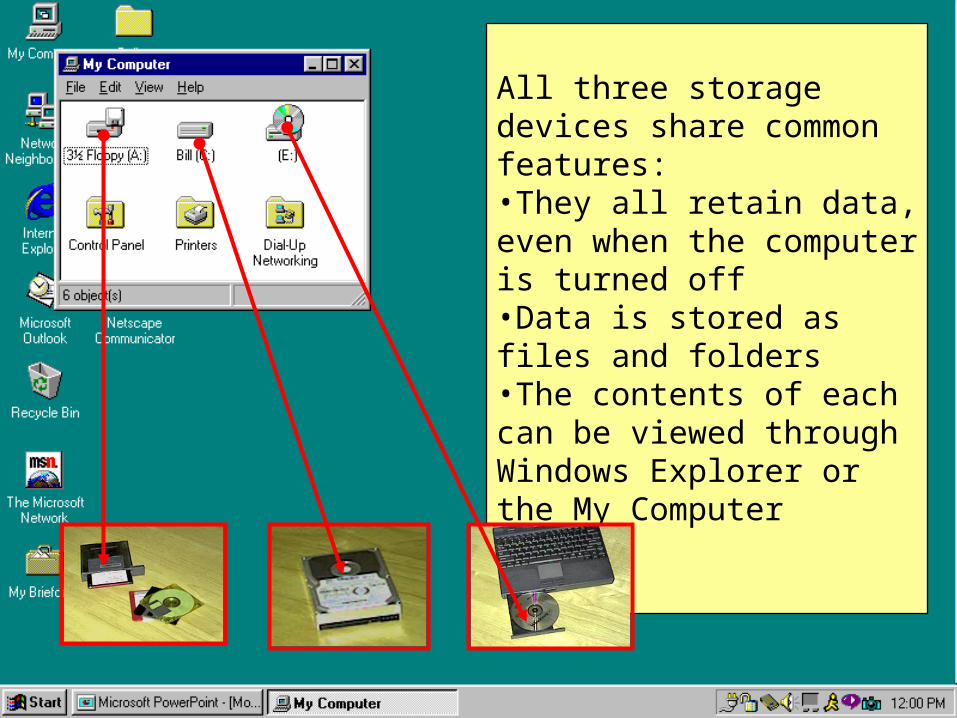
All three storage devices share common features:•They all retain data, even when the computer is turned off•Data is stored as files and folders•The contents of each can be viewed through Windows Explorer or the My Computer window.

To open the My Computer window, double-click on the My Computer icon:•Move the mouse pointer to the My Computer icon•Rapidly click the left mouse button twice

The My Computer window opens, displaying the contents of your computer.
From this window, you can view the contents of your entire computer, including the hard drive, floppy drive, CD-ROM, control panel, printers, and even dial-up networking settings!
Double-clicking an icon opens a window for that item.
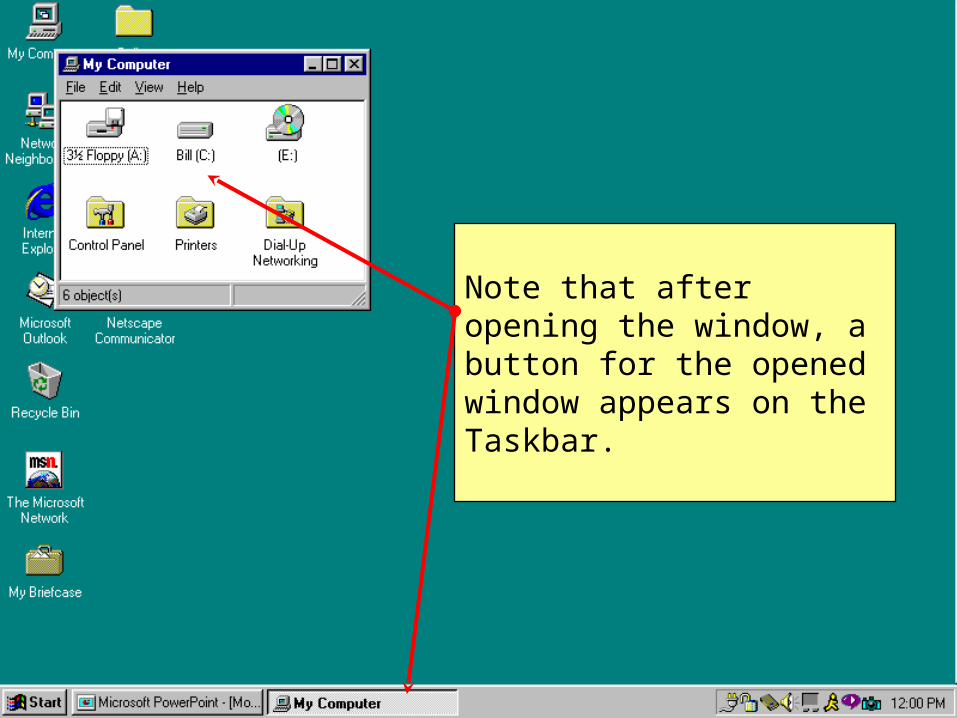
Note that after opening the window, a button for the opened window appears on the Taskbar.
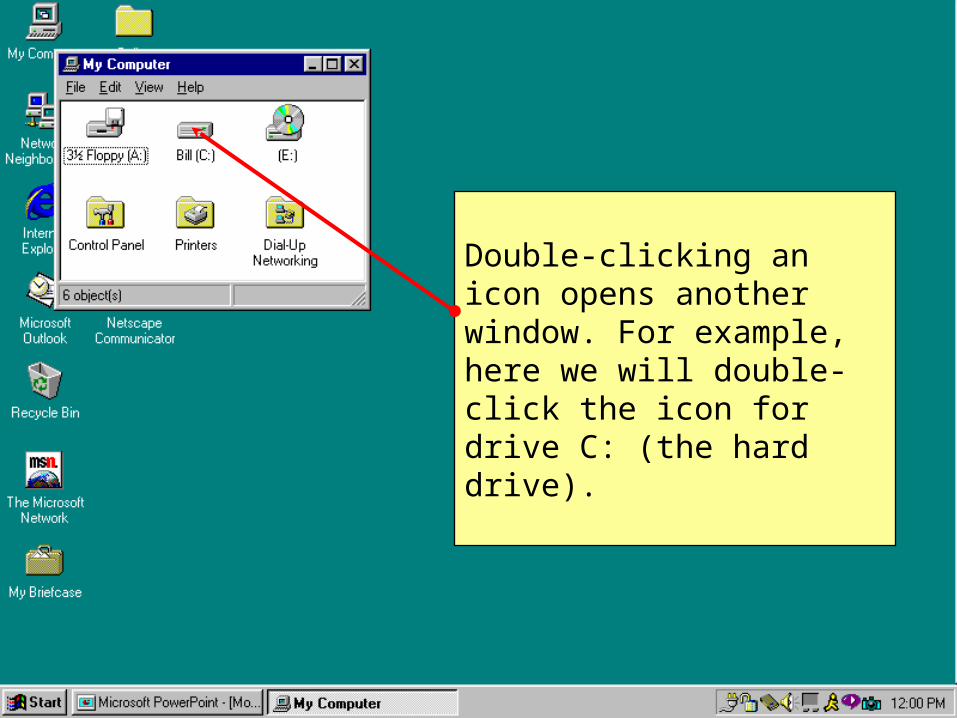
Double-clicking an icon opens another window. For example, here we will double-click the icon for drive C: (the hard drive).
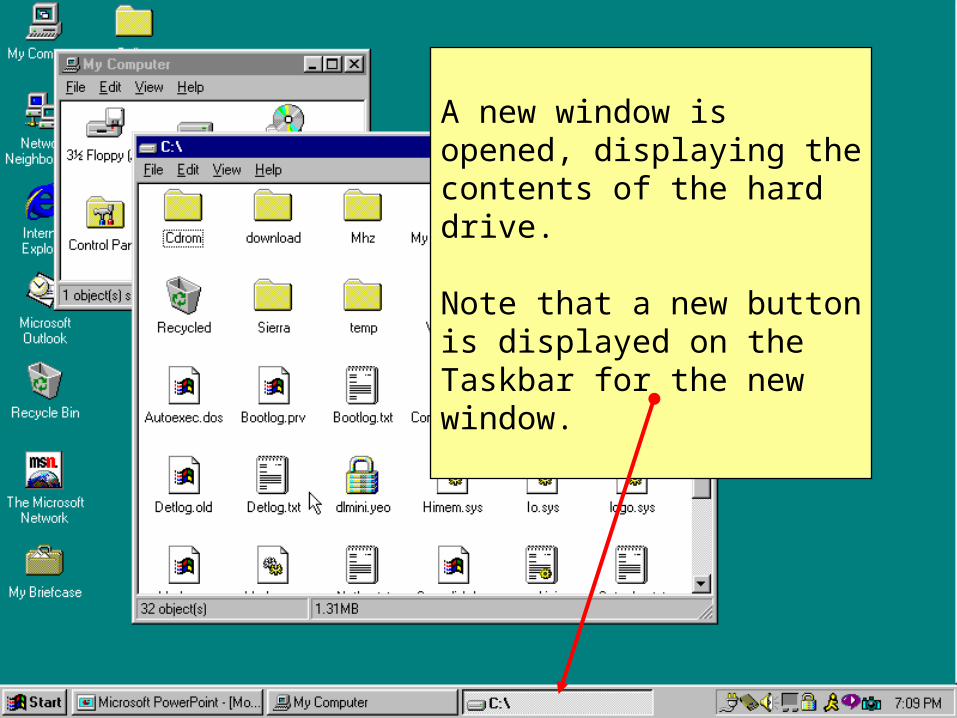
A new window is opened, displaying the contents of the hard drive.
Note that a new button is displayed on the Taskbar for the new window.
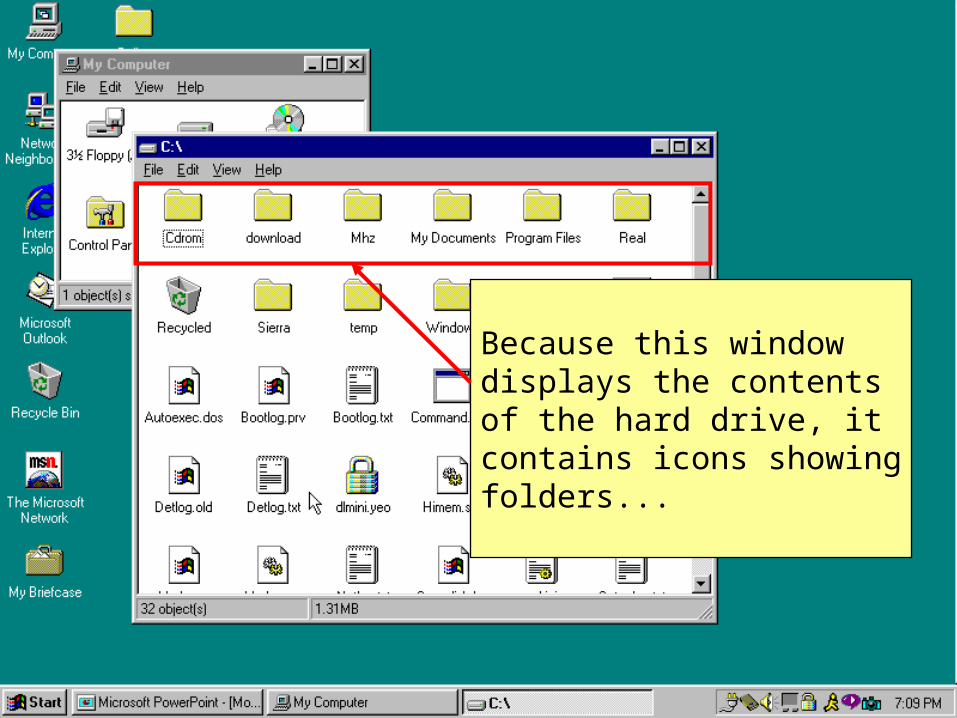
Because this window displays the contents of the hard drive, it contains icons showing folders...
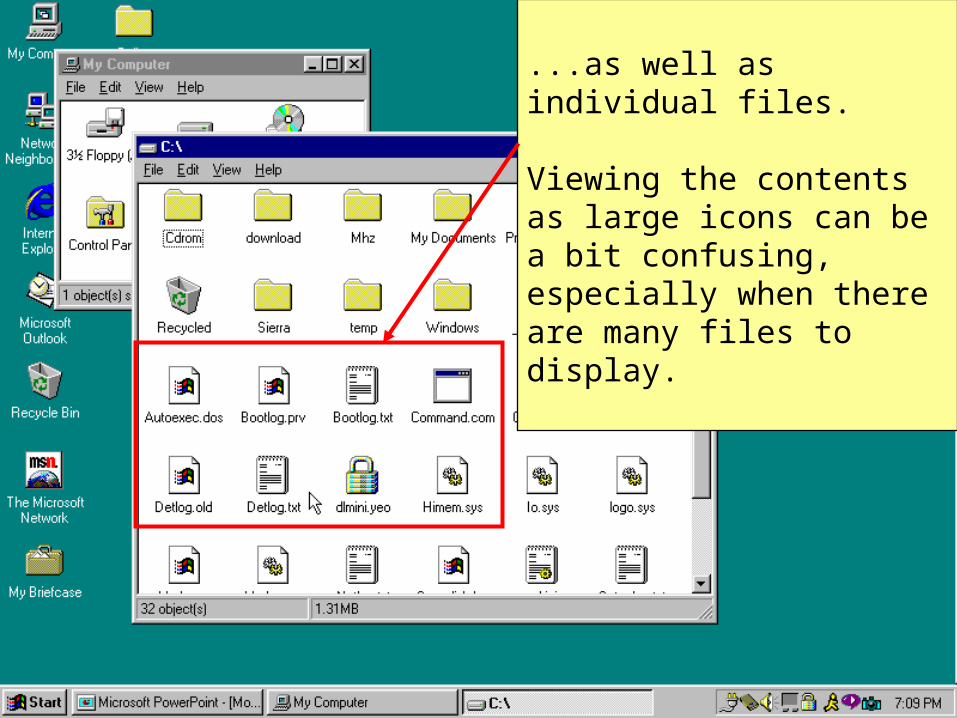
...as well as individual files.
Viewing the contents as large icons can be a bit confusing, especially when there are many files to display.

By clicking View on the Menu bar, you can select different sizes for the icons displayed.
Here, we will click Details for the most concise view of these folders and files.
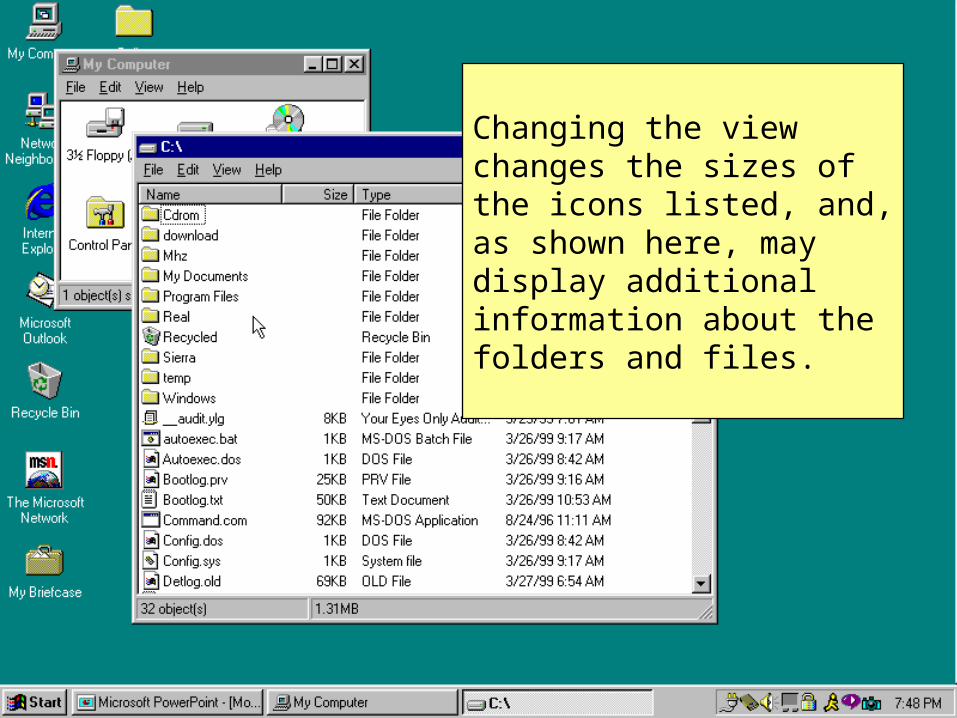
Changing the view changes the sizes of the icons listed, and, as shown here, may display additional information about the folders and files.
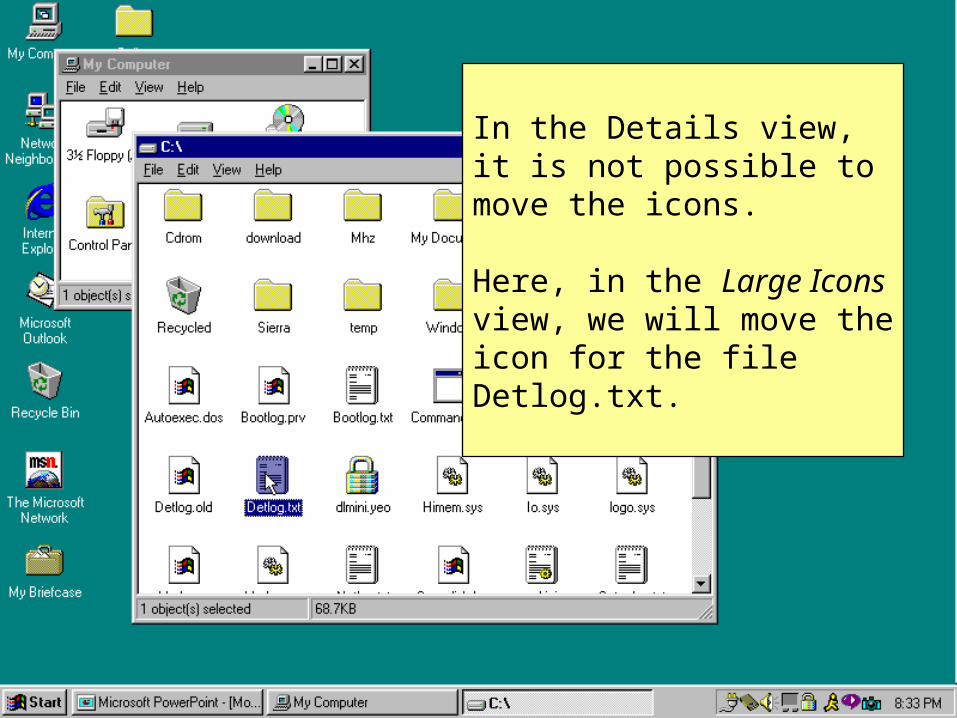
In the Details view, it is not possible to move the icons.
Here, in the Large Icons view, we will move the icon for the file Detlog.txt.
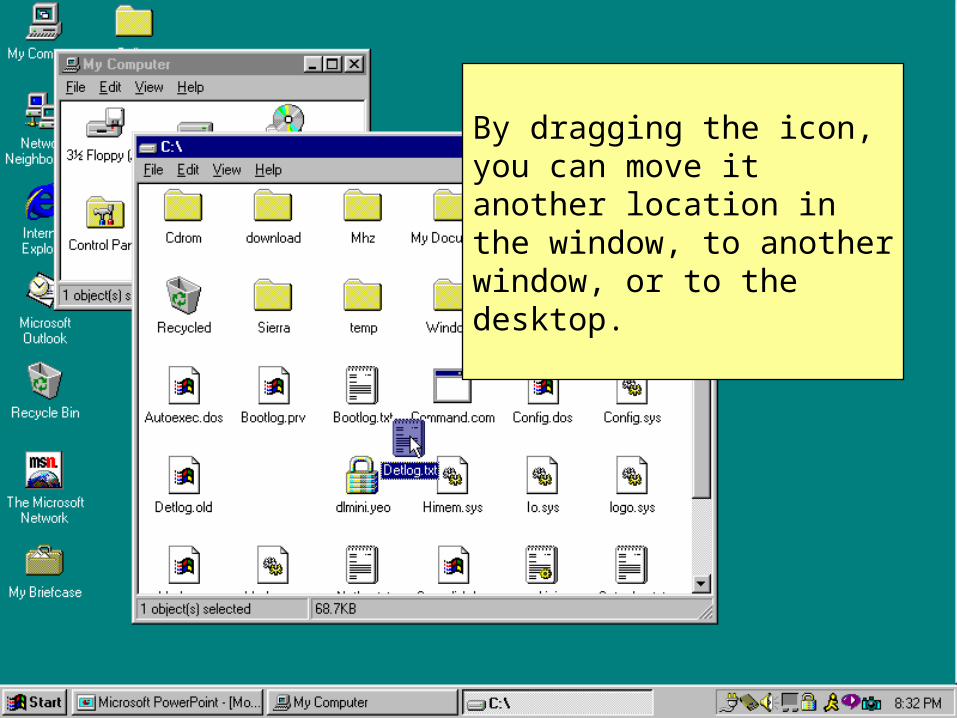
By dragging the icon, you can move it another location in the window, to another window, or to the desktop.
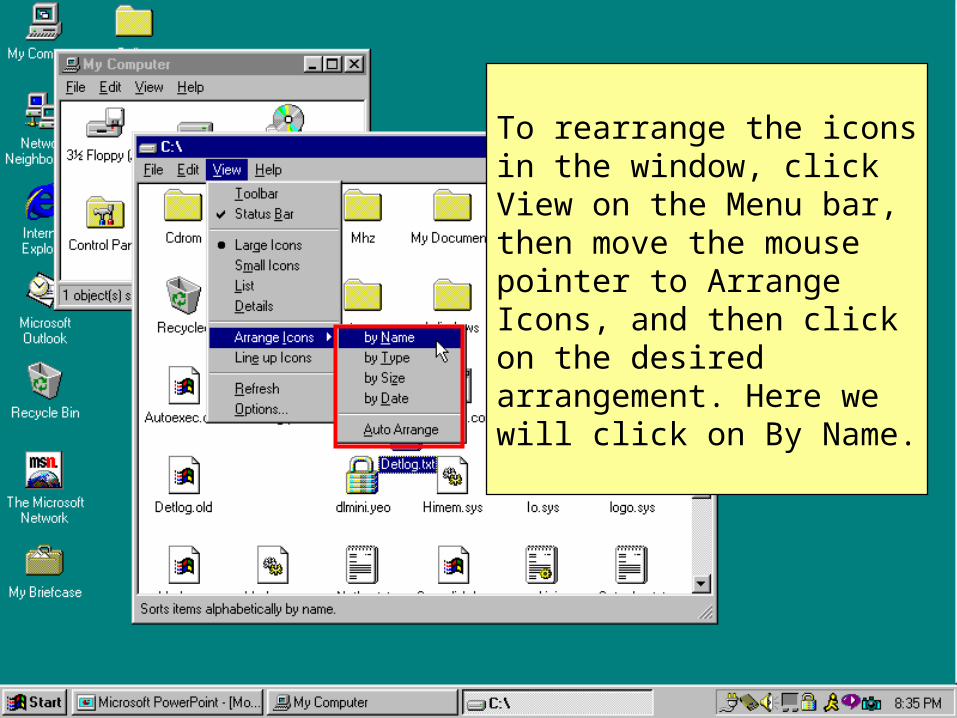
To rearrange the icons in the window, click View on the Menu bar, then move the mouse pointer to Arrange Icons, and then click on the desired arrangement. Here we will click on By Name.
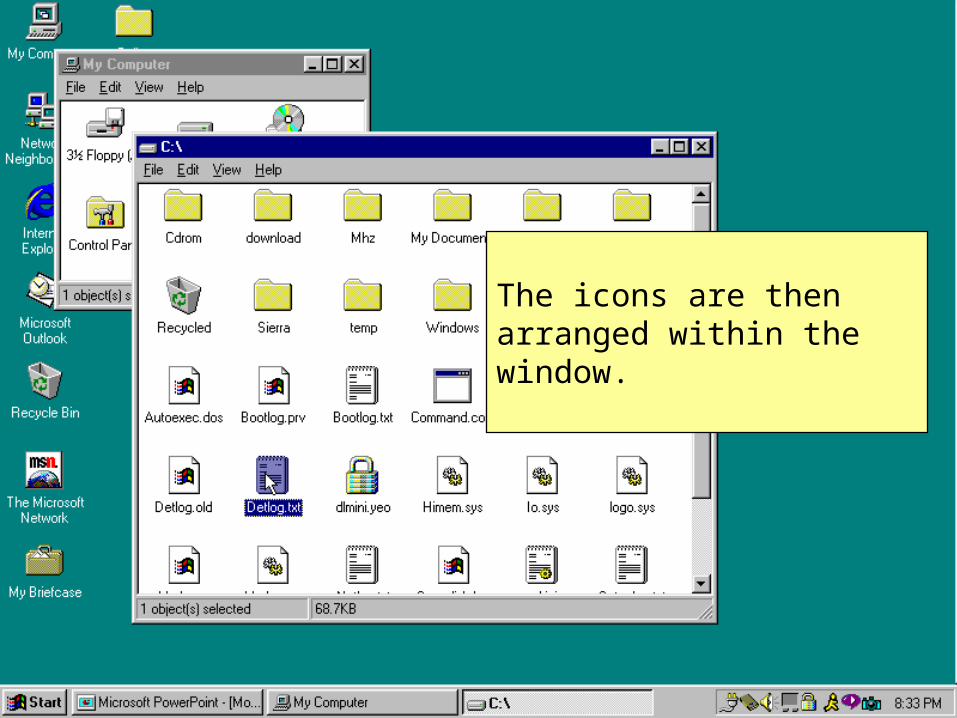
The icons are then arranged within the window.
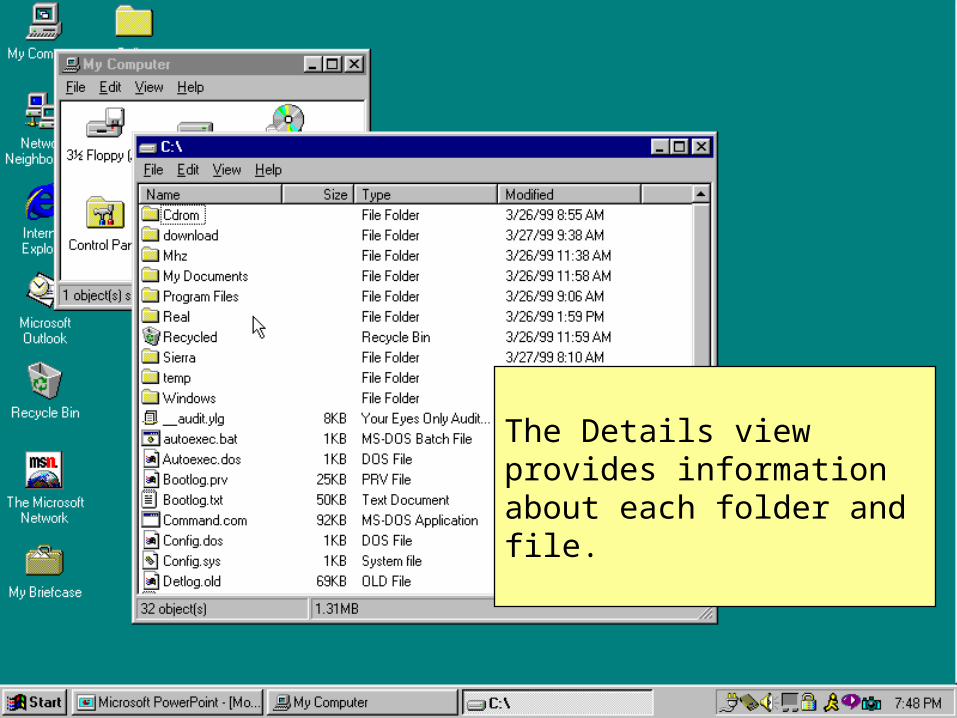
The Details view provides information about each folder and file.
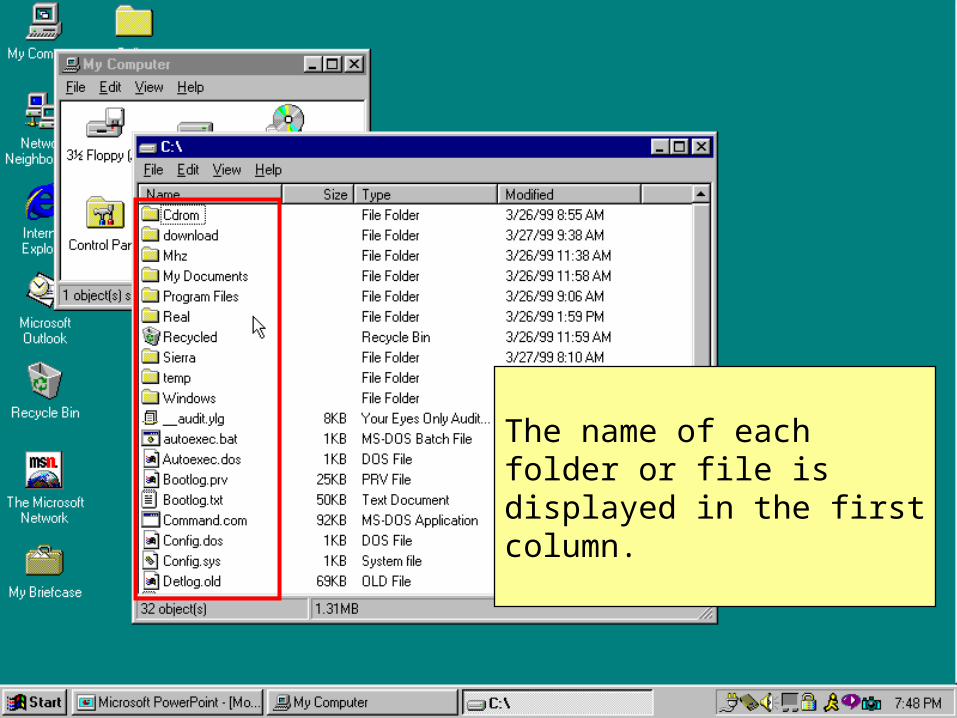
The name of each folder or file is displayed in the first column.
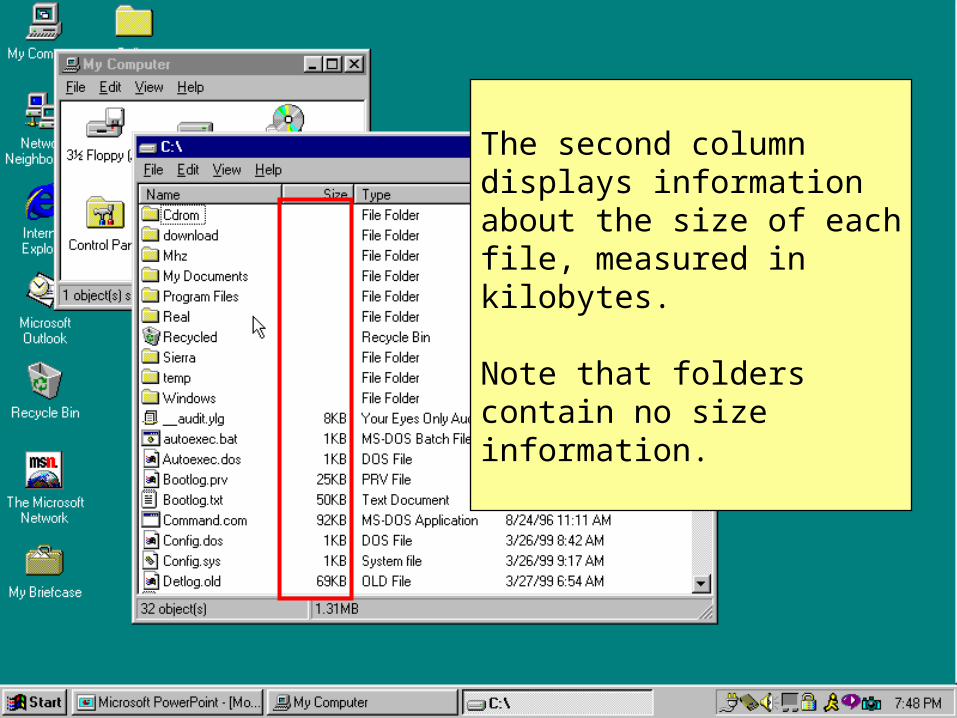
The second column displays information about the size of each file, measured in kilobytes.
Note that folders contain no size information.
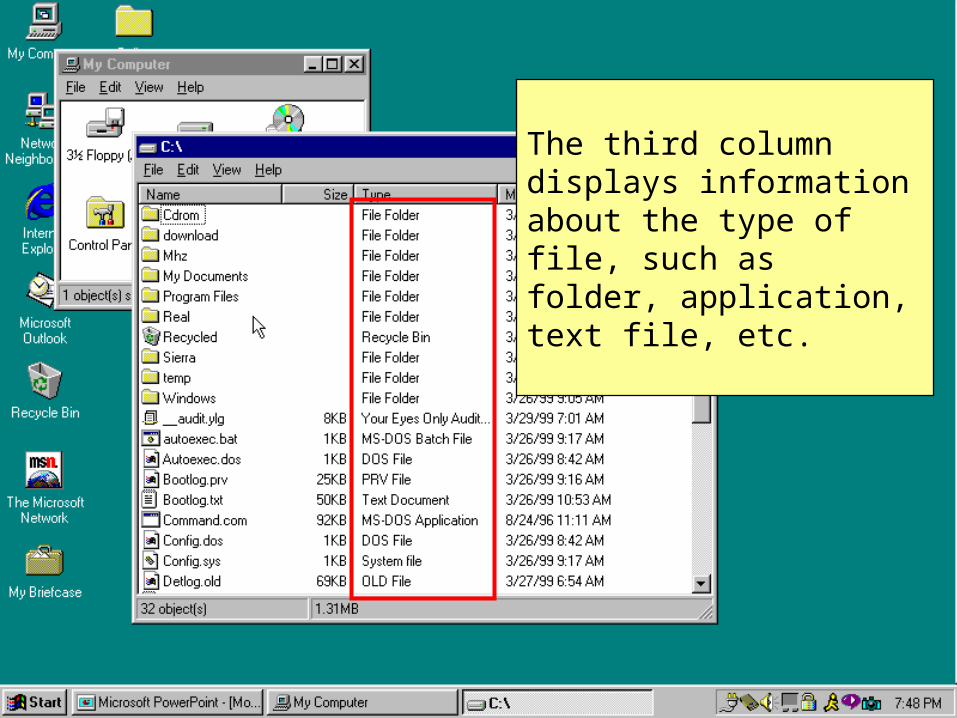
The third column displays information about the type of file, such as folder, application, text file, etc.
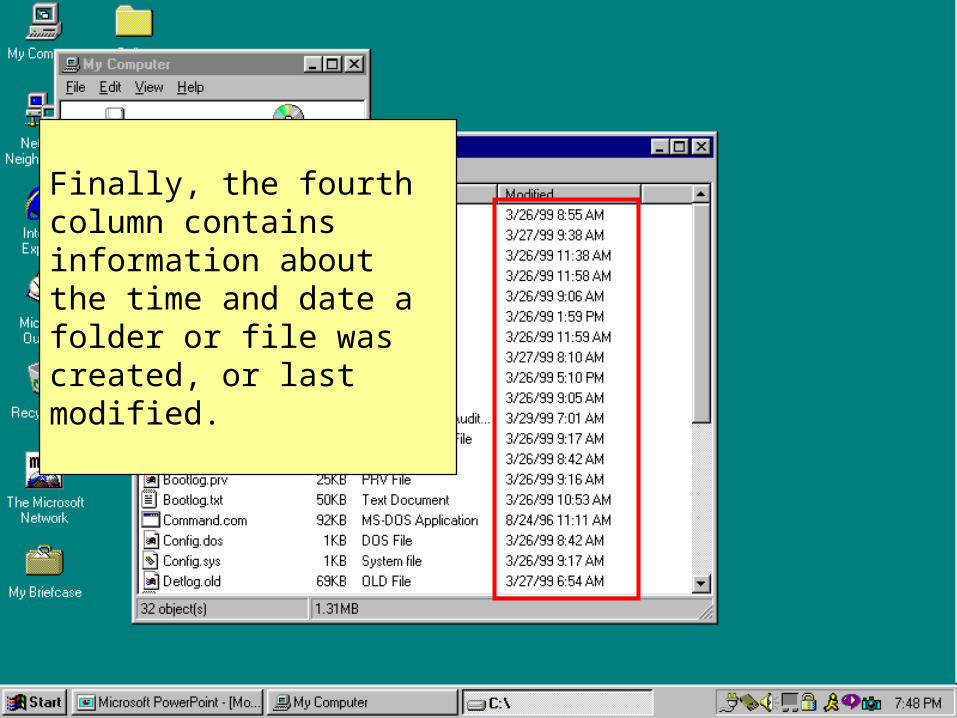
Finally, the fourth column contains information about the time and date a folder or file was created, or last modified.
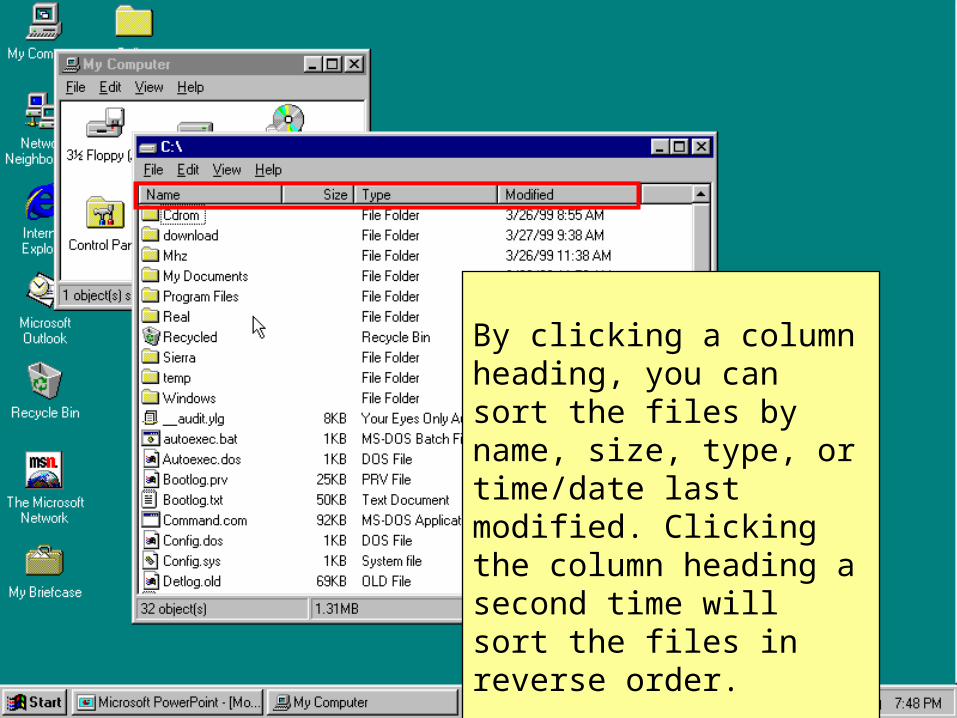
By clicking a column heading, you can sort the files by name, size, type, or time/date last modified. Clicking the column heading a second time will sort the files in reverse order.

Before working with any folder or file, you must first select it. To select a single folder or file, simply move the mouse pointer to it, and click the left mouse button one time.
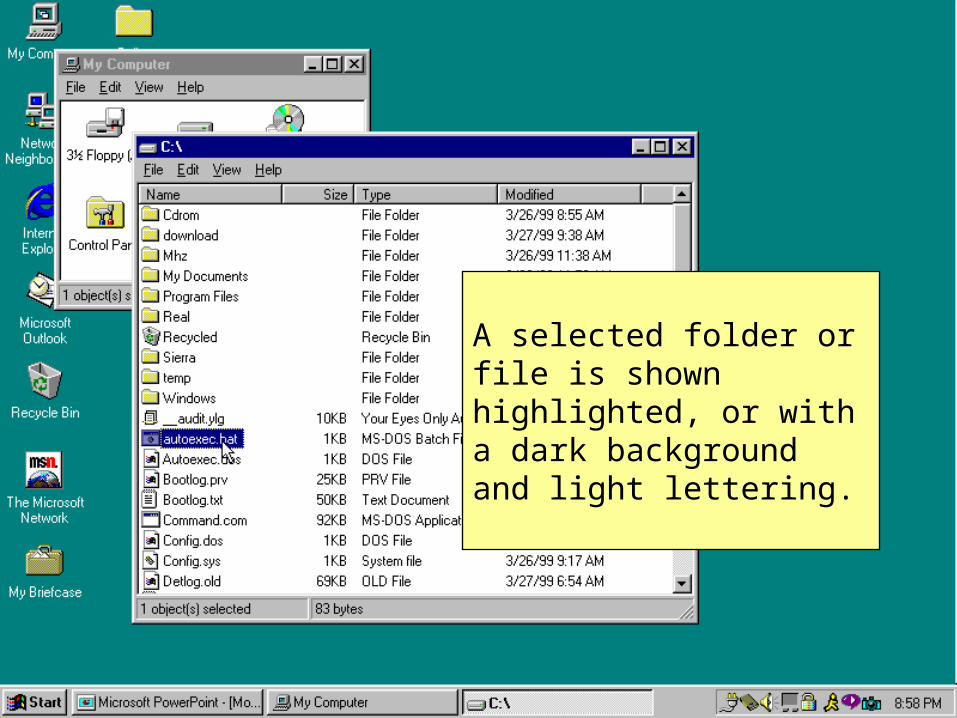
A selected folder or file is shown highlighted, or with a dark background and light lettering.
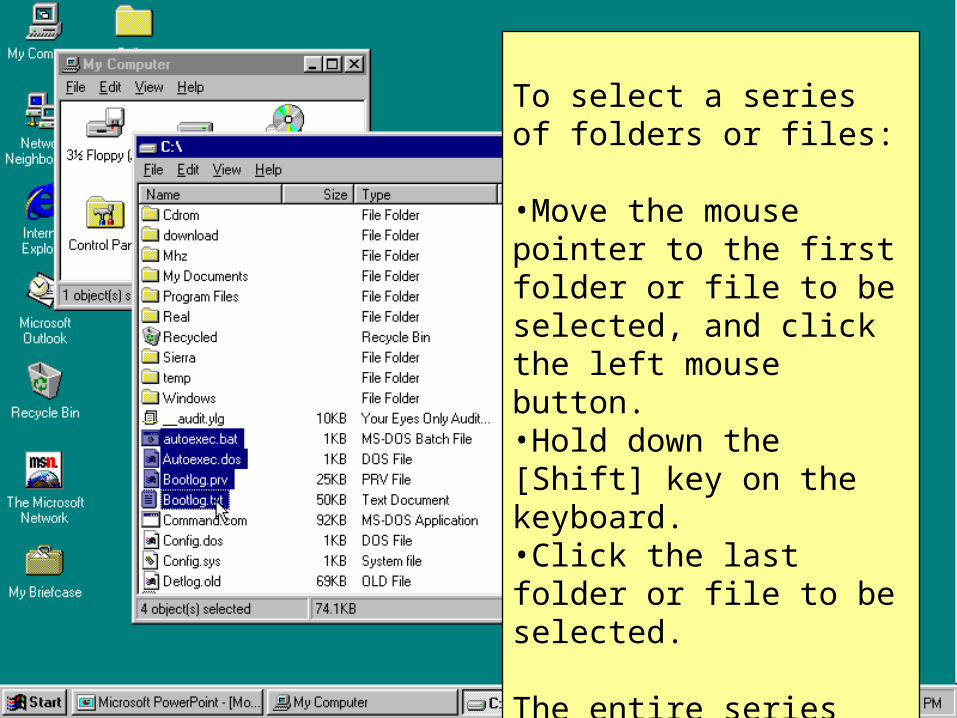
To select a series of folders or files:
•Move the mouse pointer to the first folder or file to be selected, and click the left mouse button.•Hold down the [Shift] key on the keyboard.•Click the last folder or file to be selected.
The entire series will then be highlighted.
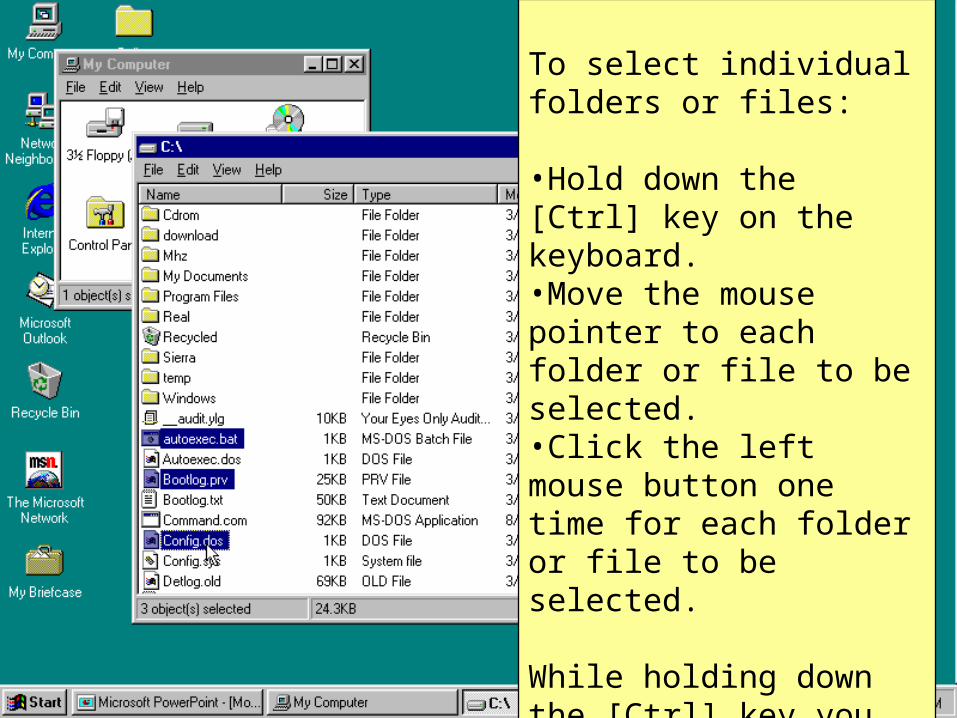
To select individual folders or files:
•Hold down the [Ctrl] key on the keyboard.•Move the mouse pointer to each folder or file to be selected.•Click the left mouse button one time for each folder or file to be selected.
While holding down the [Ctrl] key you can also click a selected folder or file to deselect it.
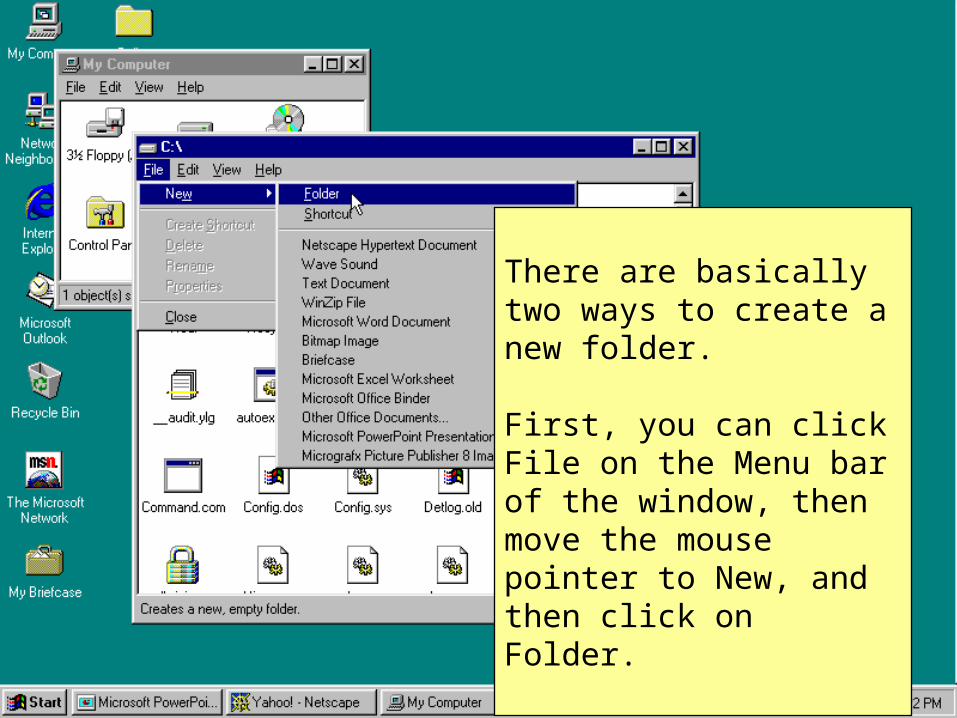
There are basically two ways to create a new folder.
First, you can click File on the Menu bar of the window, thenmove the mouse pointer to New, and then click on Folder.
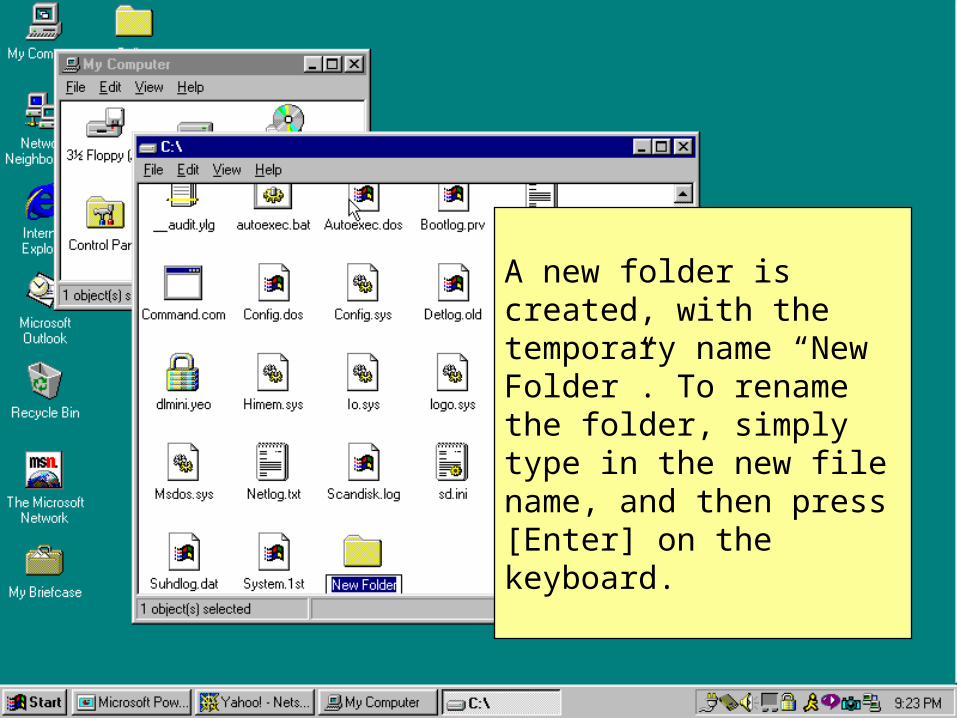
A new folder is created, with the temporary name “New Folder”. To rename the folder, simply type in the new file name, and then press [Enter] on the keyboard.
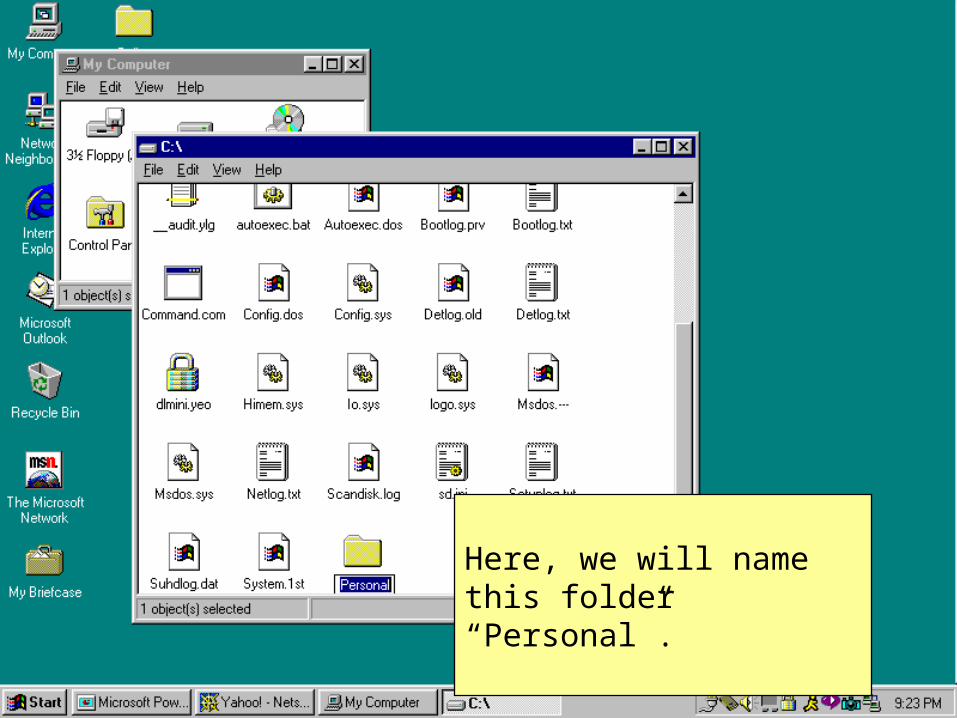
Here, we will name this folder “Personal”.
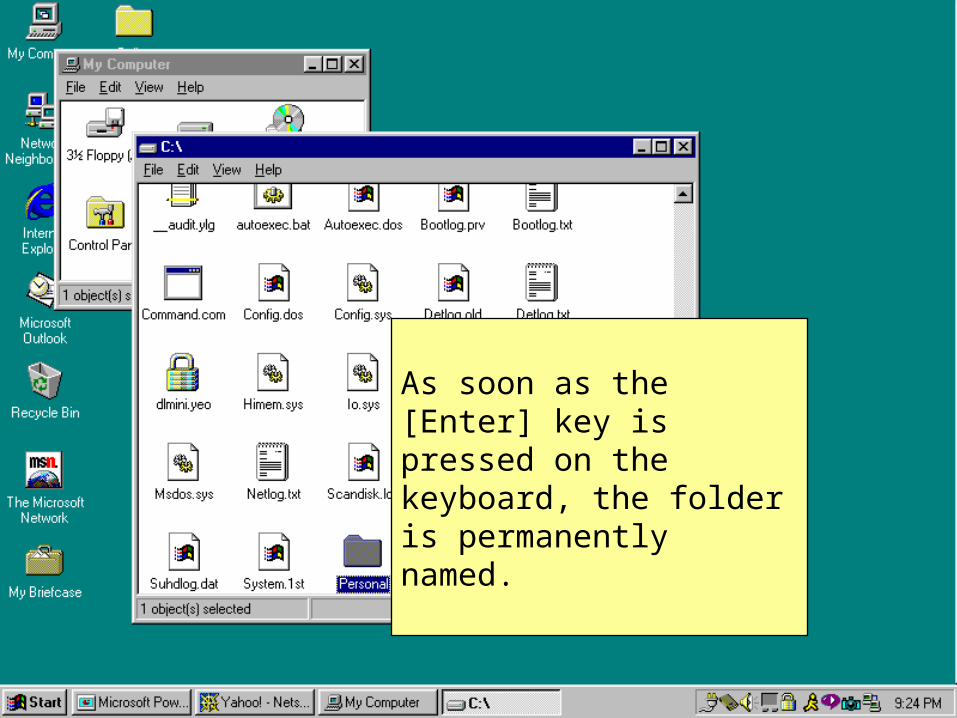
As soon as the [Enter] key is pressed on the keyboard, the folder is permanently named.

Another method for creating a new folder is to right-click a blank area in the window, move the mouse pointer to New, and then to click Folder.This method is merely a shortcut to using the Menu bar in the window.
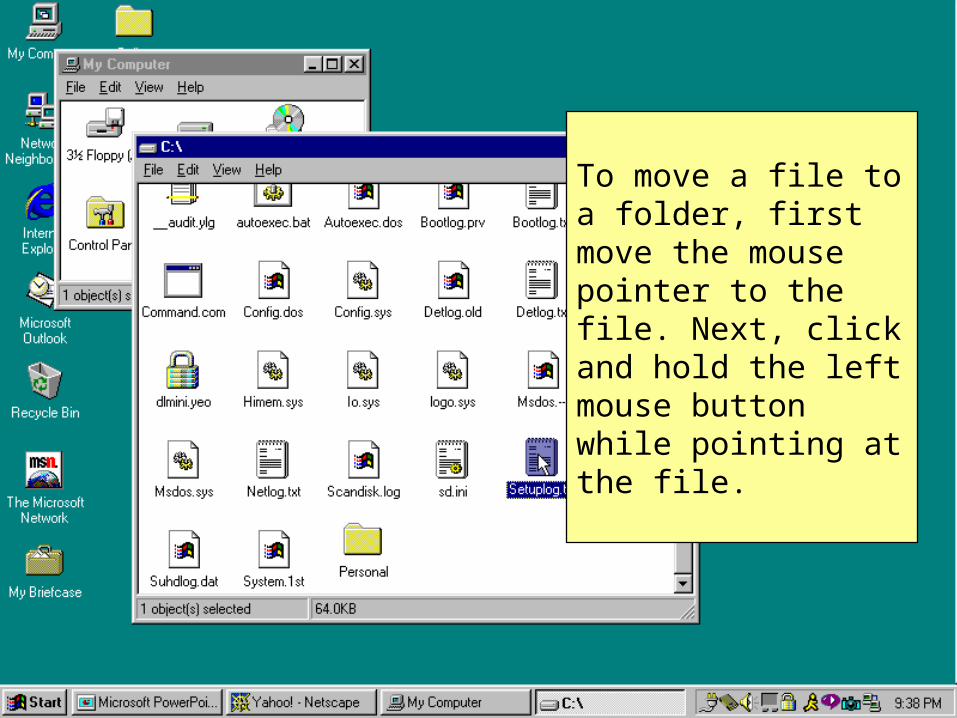
To move a file to a folder, first move the mouse pointer to the file. Next, click and hold the left mouse button while pointing at the file.
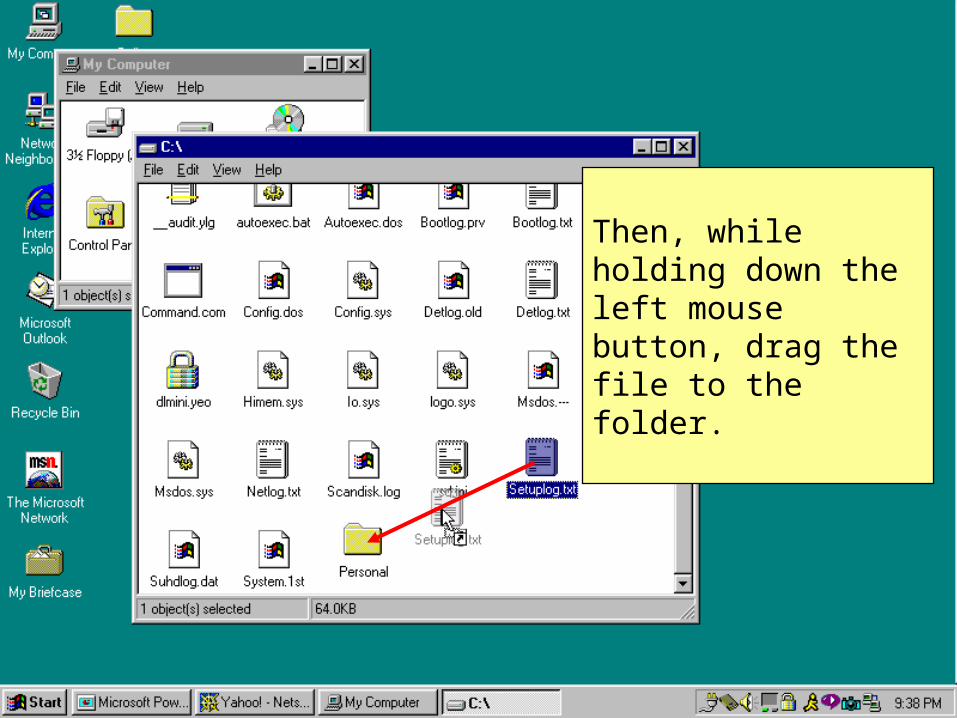
Then, while holding down the left mouse button, drag the file to the folder.
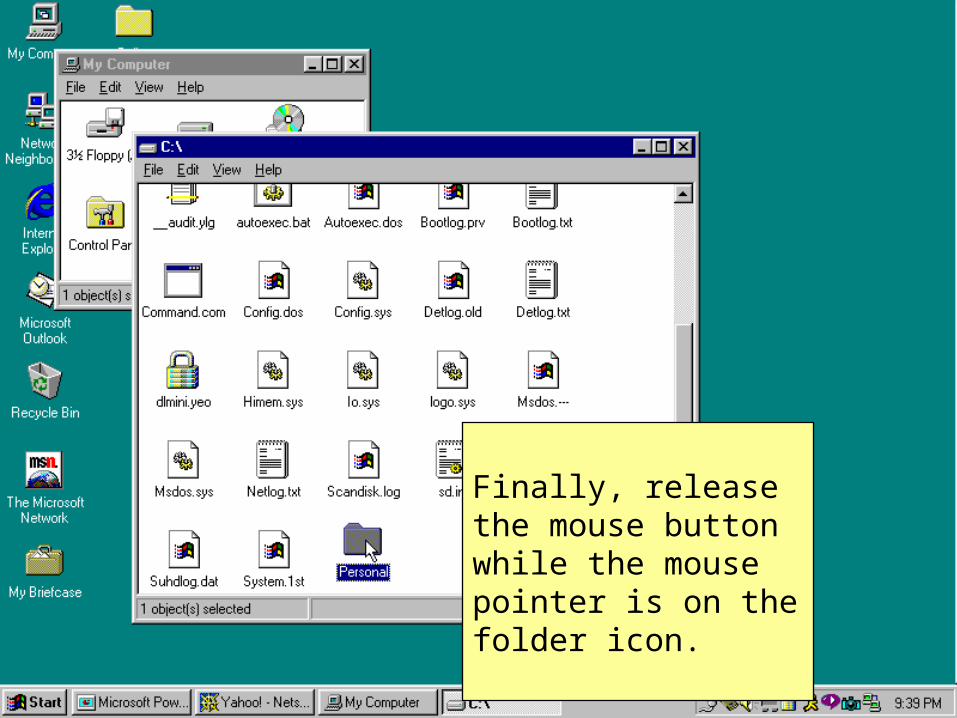
Finally, release the mouse button while the mouse pointer is on the folder icon.
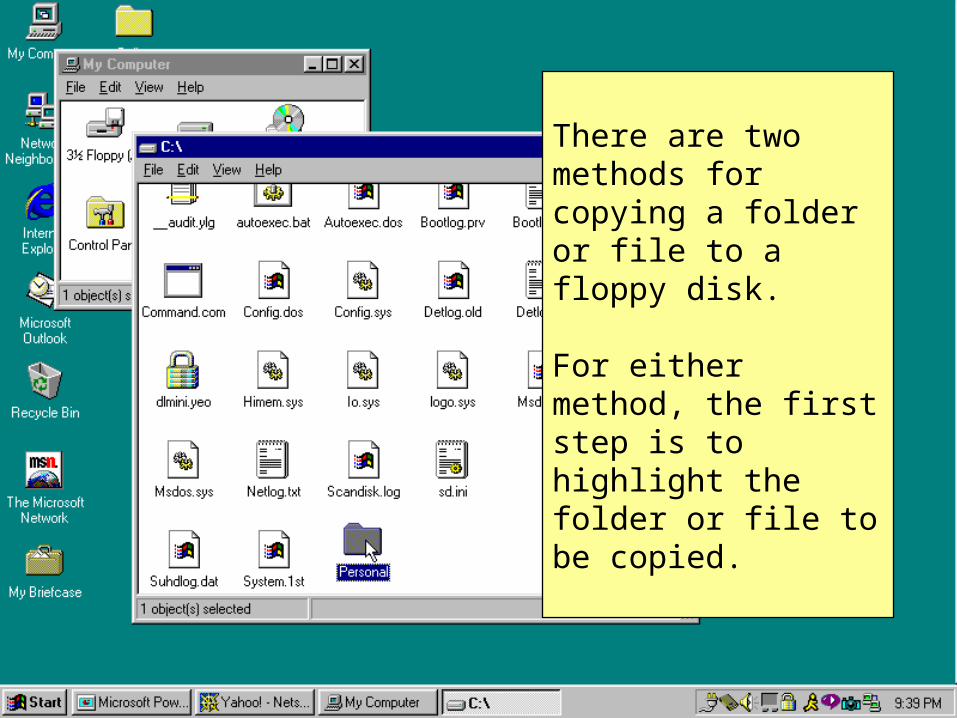
There are two methods for copying a folder or file to a floppy disk.
For either method, the first step is to highlight the folder or file to be copied.

You can click File on the Menu bar of the window, then move the mouse pointer to Send To, and then click on 3 1/2 Floppy (A:).
The file will then be copied to the floppy disk.

Alternatively, you can right-click the folder or file, then move the mouse pointer to Send To, and then click on 3 1/2 Floppy (A:).
The file will then be copied to the floppy disk.
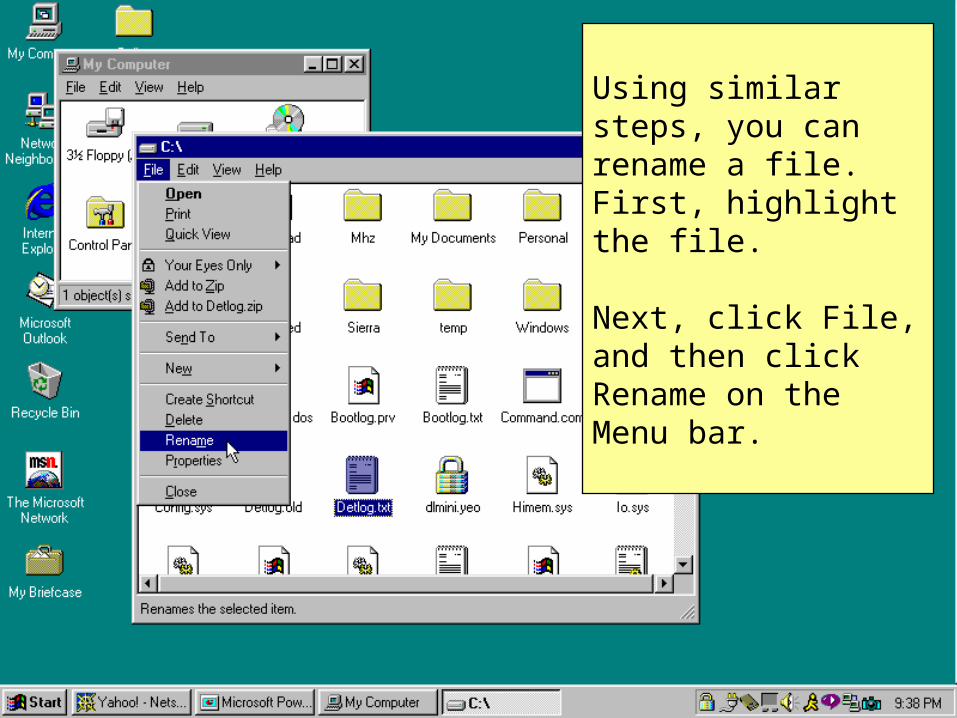
Using similar steps, you can rename a file. First, highlight the file.
Next, click File, and then click Rename on the Menu bar.
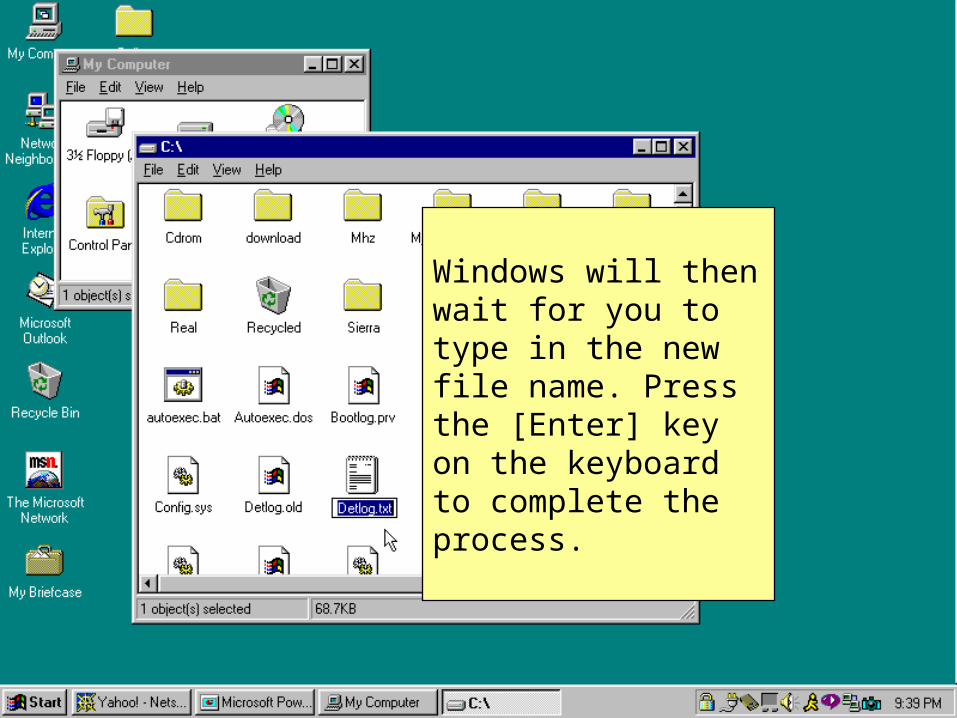
Windows will then wait for you to type in the new file name. Press the [Enter] key on the keyboard to complete the process.
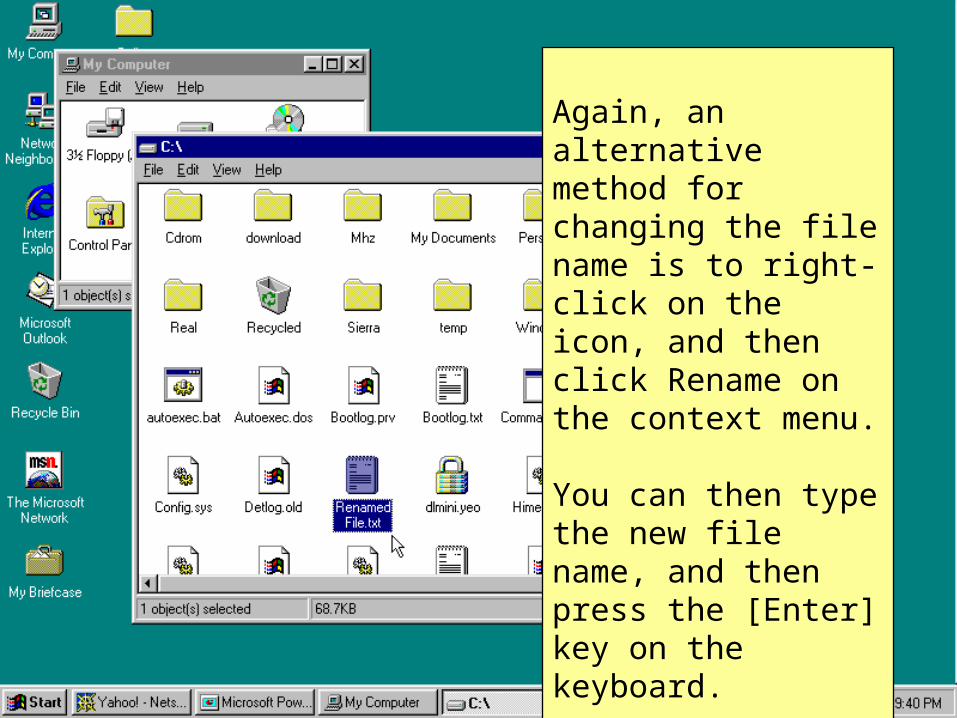
Again, an alternative method for changing the file name is to right-click on the icon, and then click Rename on the context menu.
You can then type the new file name, and then press the [Enter] key on the keyboard.

To open a file, double-click on it’s icon.
The longer method is to highlight the file, then click File on the Menu bar, and then click Open.
It is much quicker and easier just to double-click on the icon!
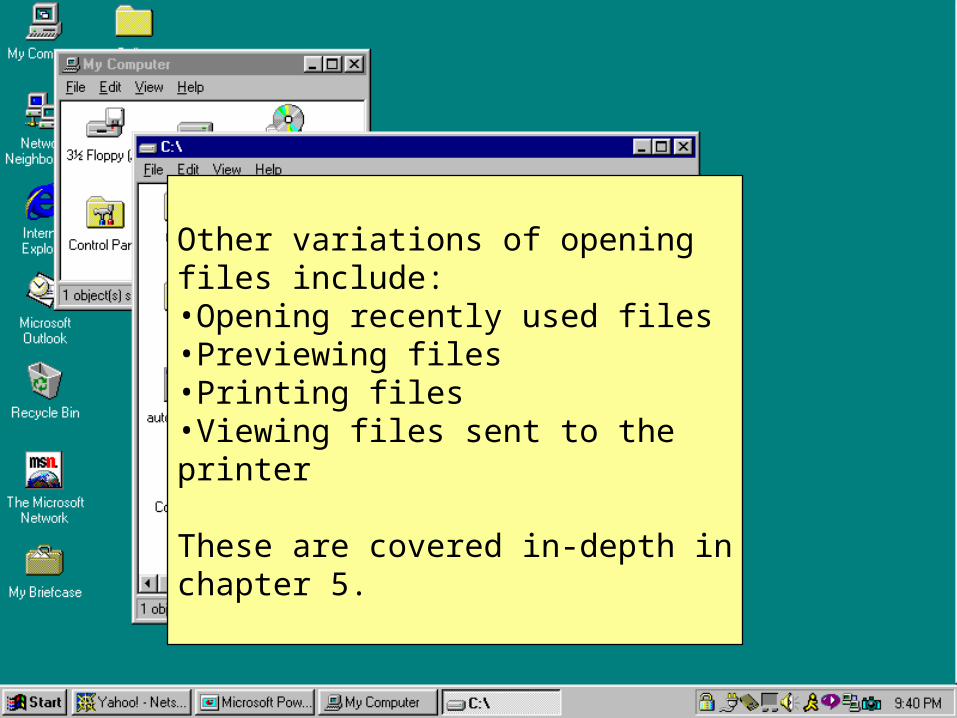
Other variations of opening files include:•Opening recently used files•Previewing files•Printing files•Viewing files sent to the printer
These are covered in-depth in chapter 5.
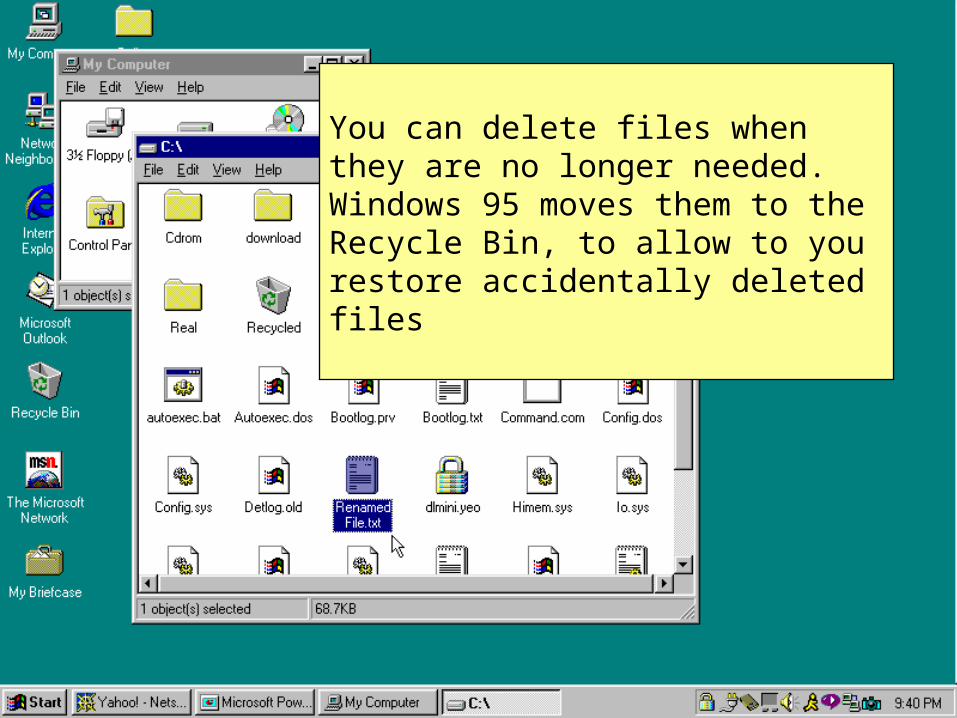
You can delete files when they are no longer needed. Windows 95 moves them to the Recycle Bin, to allow to you restore accidentally deleted files

The recycle bin changes appearance when files are deleted. Here, the magnified image depicts the recycle bin with files that can be restored, or permanently removed from the recycle bin.
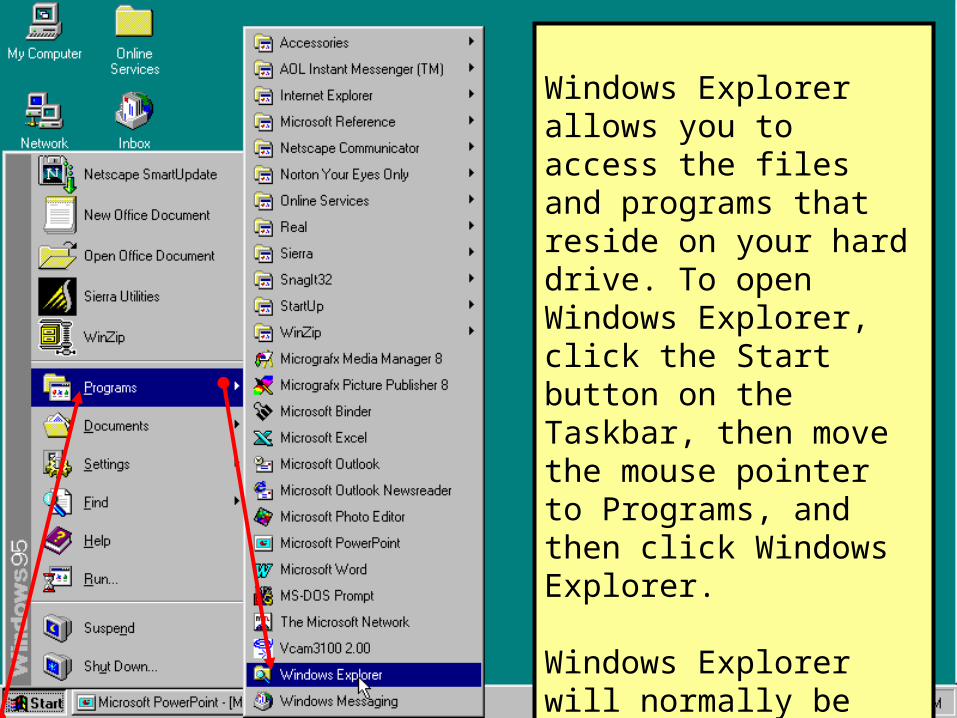
Windows Explorer allows you to access the files and programs that reside on your hard drive. To open Windows Explorer, click the Start button on the Taskbar, then move the mouse pointer to Programs, and then click Windows Explorer.
Windows Explorer will normally be near the end of the list of programs.

Windows Explorer is covered in depth in chapter five of the text.
When you right-click the mouse button on a file in Windows Explorer, or any other explorer window, a context menu is displayed, allowing you to select from the most common tasks.
Learning the right-click habit early will save you a lot of time and effort!

The Find features of Windows allow you to search for files on your computer, other computers on a network, and many other items.
Advanced file searches allow you to search by name, date, file type, or even by text contained in a file!
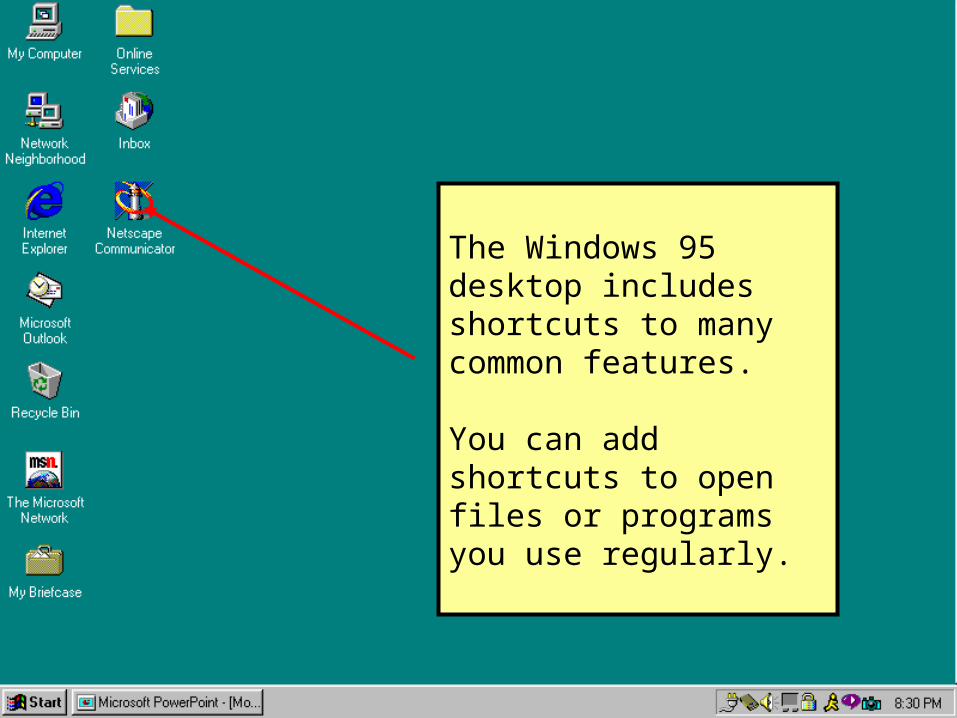
The Windows 95 desktop includes shortcuts to many common features.
You can add shortcuts to open files or programs you use regularly.
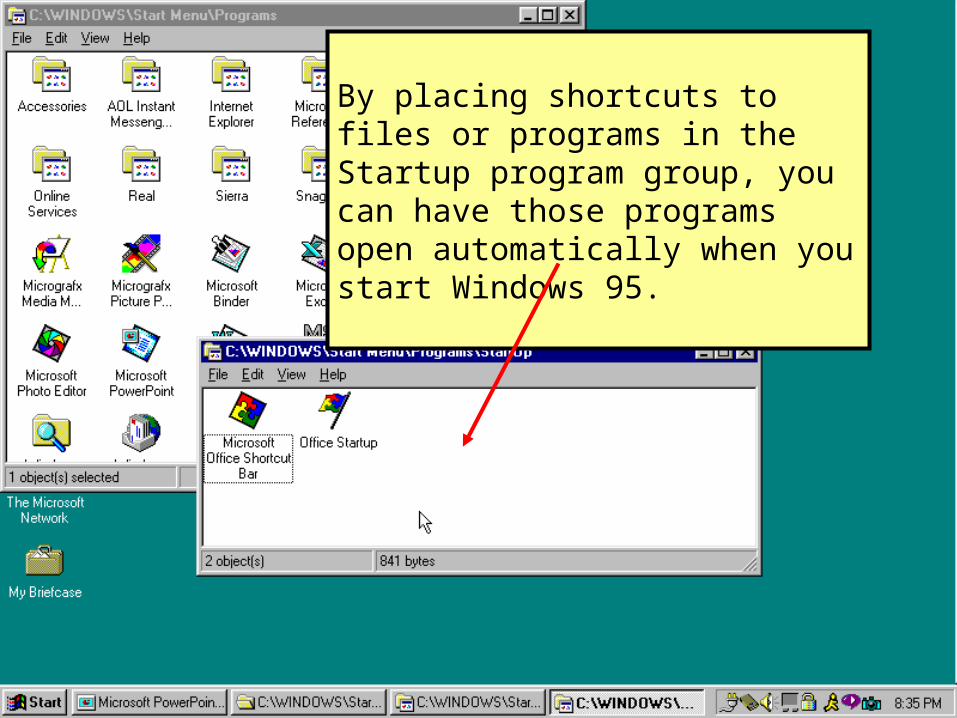
By placing shortcuts to files or programs in the Startup program group, you can have those programs open automatically when you start Windows 95.
Teach Yourself
Windows 95
This concludes Module 2

Related Documents