1 178643/11-17/10406 Installation To install managedIP UC on your PC or MAC: 1. Go to http://support.tdsmanagedip.com/uc 2. Select Desktop Download and follow instructions. 3. Launch managedIP UC and login. NOTE: Your managedIP UC login credentials are the same as your Web Portal username (10 digit # @domain) and password. 5. Click Sign In. 6. Acknowledge E911 Disclosure, click OK. Presence To add your photo to the avatar: 1. Right click on the avatar . 2. Select Change Profile Photo. To manually change presence status: 1. Click Presence dropdown. 2. Click Status. NOTE: Presence automatically updates based on current activity. Once status is manually changed, it will remain in that status until it is manually changed back to available status. Outlook Integration When Outlook integration is activated, the presence shown will include meetings on your calendar. PLEASE NOTE: Outlook integration (search and calendar) on Windows requires Outlook desktop versions 2007-2016. Location Location is automatically determined by the public IP address of the desktop. To manually update the Location: 1. Go to the location dialog box. 2. Click on the Location. 3. Select Use Manual Location. 4. Update with new location. 5. Click Publish Location. Contacts Contacts added from the Telephony Directory enables Instant Messaging (IM) and Presence with the contact once they accept your buddy request. To add a contact from Telephony Directory: 1. Enter a name in Search and Dial box. 2. Hover over contact and right click. 3. Select New Contact. NOTE: The contact is sent a buddy request to accept or reject. Until accepted, the contact will appear with a grey flag and question mark. To cancel the request, click X. IM and Presence of contacts will only be shown from the Telephony Directory. TDS ® managedIP HOSTED Unified Communication (UC) Quick Start

Welcome message from author
This document is posted to help you gain knowledge. Please leave a comment to let me know what you think about it! Share it to your friends and learn new things together.
Transcript

1178643/11-17/10406
InstallationTo install managedIP UC on your PC or MAC:1. Go to
http://support.tdsmanagedip.com/uc2. Select Desktop Download and follow instructions.3. Launch managedIP UC and login.
NOTE: Your managedIP UC login credentialsare the same as your Web Portal username(10 digit # @domain) and password.
5. Click Sign In.6. Acknowledge E911 Disclosure, click OK.
PresenceTo add your photo to the avatar:1. Right click on the avatar .2. Select Change Profile Photo.
To manually change presence status:1. Click Presence dropdown.
2. Click Status.
NOTE: Presence automatically updates basedon current activity. Once status is manuallychanged, it will remain in that status until it ismanually changed back to available status.
Outlook IntegrationWhen Outlook integration is activated, thepresence shown will include meetings on yourcalendar.
PLEASE NOTE: Outlook integration (search andcalendar) on Windows requires Outlookdesktop versions 2007-2016.
LocationLocation is automatically determined by thepublic IP address of the desktop.
To manually update the Location:1. Go to the location dialog box.
2. Click on the Location.3. Select Use Manual Location.4. Update with new location.5. Click Publish Location.
ContactsContacts added from the Telephony Directory enables Instant Messaging (IM) and Presence with the contact once they accept your buddy request.
To add a contact from Telephony Directory:1. Enter a name in Search and Dial box.2. Hover over contact and right click.3. Select New Contact.
NOTE: The contact is sent a buddy request toaccept or reject. Until accepted, the contact will appear with a grey flag and question mark. To cancel the request, click X. IM and Presence of contacts will only be shown from the Telephony Directory.
TDS® managedIP HOSTEDUnified Communication (UC) Quick Start

2178643/11-17/10406
To manually add an external contact:1. Click Add Icon.2. Select New Contact.3. The Contact Dialog Box appears.4. Enter the contact’s information.5. Click Add to Contact List Icon.
NOTE: IM and Presence information are not available with external contacts. To cancel adding a contact, click the X button.
To manage contacts in the contact list:1. Click Contacts icon .2. The contact list appears showing:
• Contact Names• Photos• Presence Status
NOTE: A photo will only display if the contact has uploaded a photo.
Presence status by flag icon is described below:
To filter contacts:1. Hover over Contacts icon, then right click.2. From the dropdown, select Filter.
Contact’s MenuThere are a number of options that can be performed within a specific contact.
To access the options:1. Hover over the contact and right click.2. Click on any of the options below:
To make a contact a favorite:1. Hover over a contact and right click.2. Click Set as Favorite.
NOTE: Favorites appear at the top of all contacts. As the contact list grows, favorites help sort the list by those most frequently contacted.
To create a group:1. Click Add Icon.2. Select New Group.3. Enter a group name.
(e.g. Support, Marketing).
4. Click OK.
TDS® managedIP HOSTEDUnified Communication (UC) Quick Start
3178643/11-17/10406
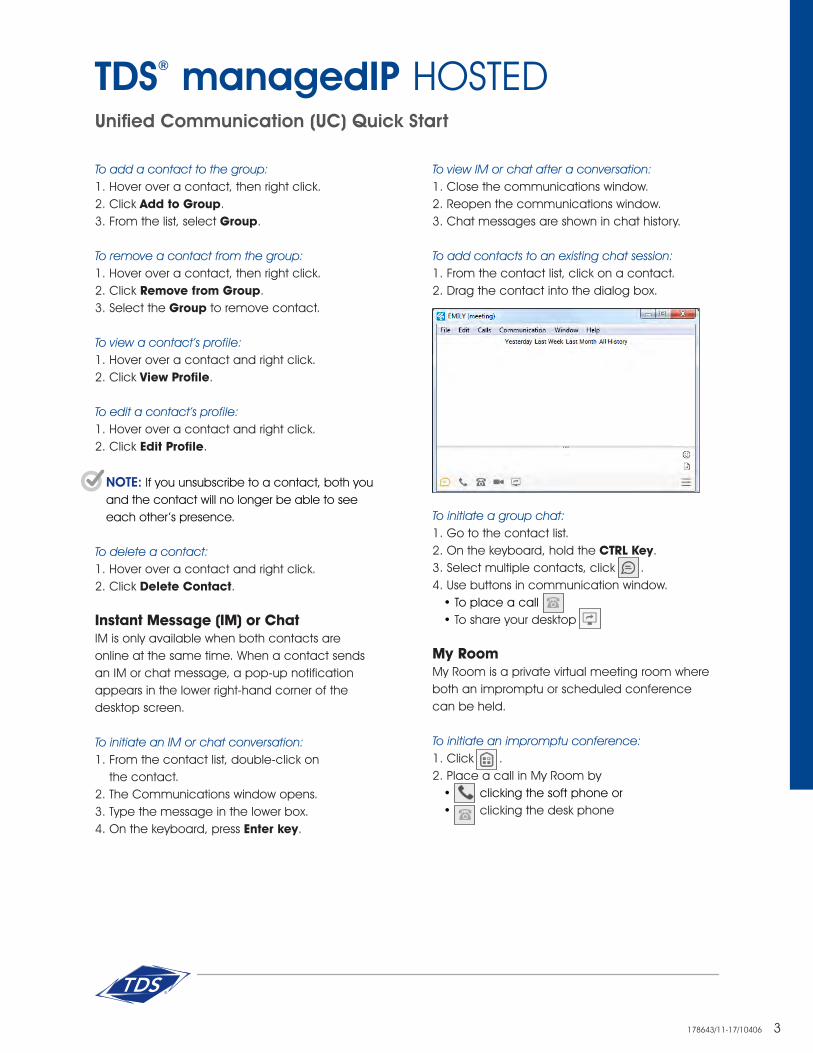
To view IM or chat after a conversation:1. Close the communications window.2. Reopen the communications window.3. Chat messages are shown in chat history.
To add contacts to an existing chat session:1. From the contact list, click on a contact.2. Drag the contact into the dialog box.
To initiate a group chat:1. Go to the contact list.2. On the keyboard, hold the CTRL Key.3. Select multiple contacts, click .4. Use buttons in communication window.
• To place a call • To share your desktop
My RoomMy Room is a private virtual meeting room where both an impromptu or scheduled conference can be held.
To initiate an impromptu conference:1. Click .2. Place a call in My Room by
• clicking the soft phone or• clicking the desk phone
To add a contact to the group:1. Hover over a contact, then right click.2. Click Add to Group.3. From the list, select Group.
To remove a contact from the group:1. Hover over a contact, then right click.2. Click Remove from Group.3. Select the Group to remove contact.
To view a contact’s profile:1. Hover over a contact and right click.2. Click View Profile.
To edit a contact’s profile:1. Hover over a contact and right click.2. Click Edit Profile.
NOTE: If you unsubscribe to a contact, both you and the contact will no longer be able to see each other’s presence.
To delete a contact:1. Hover over a contact and right click.2. Click Delete Contact.
Instant Message (IM) or ChatIM is only available when both contacts are online at the same time. When a contact sends an IM or chat message, a pop-up notification appears in the lower right-hand corner of the desktop screen.
To initiate an IM or chat conversation:1. From the contact list, double-click on
the contact.2. The Communications window opens.3. Type the message in the lower box.4. On the keyboard, press Enter key.
TDS® managedIP HOSTEDUnified Communication (UC) Quick Start

4178643/11-17/10406
3. The conference bridge number and ID will be dialed automatically.
4. After a short pause, you will be placed into the conference.
NOTE: If you are assigned as a host for Meet-Me Conferencing, the Dial in Number, Conference ID and Moderator PIN will auto-populate. If you do not see this information in the Dial-in section, speak with your managedIP administrator to be assigned as a conference host.
5. Click on a contact.6. Drag and drop contact into:
• Communications window or• Conference menu
NOTE: A participant can join the conference byhovering over the host’s name, right click andselect Join Room.
7. Once all participants have joined, click Call Button to join the conference.
To initiate a scheduled conference:Automatically Generated Email Invite1. Right click My Room icon .2. Click Email My Room Invitation.3. An email opens and auto-populates with
• The subject line• An invitation to join My Room event• Conference bridge information
Manually Generated Email/Meeting Invite1. Right click My Room icon .2. Click Copy My Room Invitation.3. Open email or meeting invite and paste link.4. Allow participants to join the event.
NOTE: If the invitation link does not add you to the conference, right click on the host’s contact and click Join Room.
Communications HistoryTo view communications history:1. Click communications history .2. The history view is divided into three areas:
• Calls• Chats• Voice Mail
NOTE: The red circle with a number indicatesthe number of missed communications.
To clear the missed communications indicator:1. Right click Communications History icon.2. Select Mark as Viewed.
To respond to a missed phone call:1. Click the icon.2. Click on the phone.3. Double click the contact to automatically
generate a phone call.
To respond to a missed chat conversation:1. Click the icon.
2. Click .3. Double click on chat conversation.4. Respond to the missed conversation.
TDS® managedIP HOSTEDUnified Communication (UC) Quick Start

5178643/11-17/10406
To answer an incoming call:1. Click the button in the incoming
call notification pop-up, or:2. Select Answer in the active
communications window.
To decline an incoming call:1. Click the button or:2. Click the button in the active
communications window.
To place a call using Search & Dial1. Enter number in Search & Dial box.2. On the keyboard, press Enter Key.
To place a call using the dial pad:1. Dial the number using the dial pad .2. On the keyboard, press Enter Key or Click .
To place a call from a contact record:1. Double click the contact.
• Click or• Right click on contact and select the number
to dial from the options shown
To place a call using the soft phone:1. Double click the contact.
• Press or right click on contact and select the number to dial from options shown
Desktop SharingTo share desktop during chat session:1. Click the Share button .2. Select the display(s) or application to share.
3. Click the Start Sharing button.
4. The Share Controls widget will appear.5. Use the following icons to manage your session:
a. Pauseb. Stopc. Selectd. Preview
NOTE: During personal or group chats, either party can desktop share. In My Room, only the host can desktop share.
To transfer a file during a chat session:1. Click .2. Drag and drop the file into dialog box.3. While the file is sending
• The sender will see• The recipient will see• Once the recipient accepts, a window opens
prompting them to save the file• Once the file has been saved, the sender will
see and the recipient will see
Call Control(Soft phone and Video users only)
TDS® managedIP HOSTEDUnified Communication (UC) Quick Start
6178643/11-17/10406
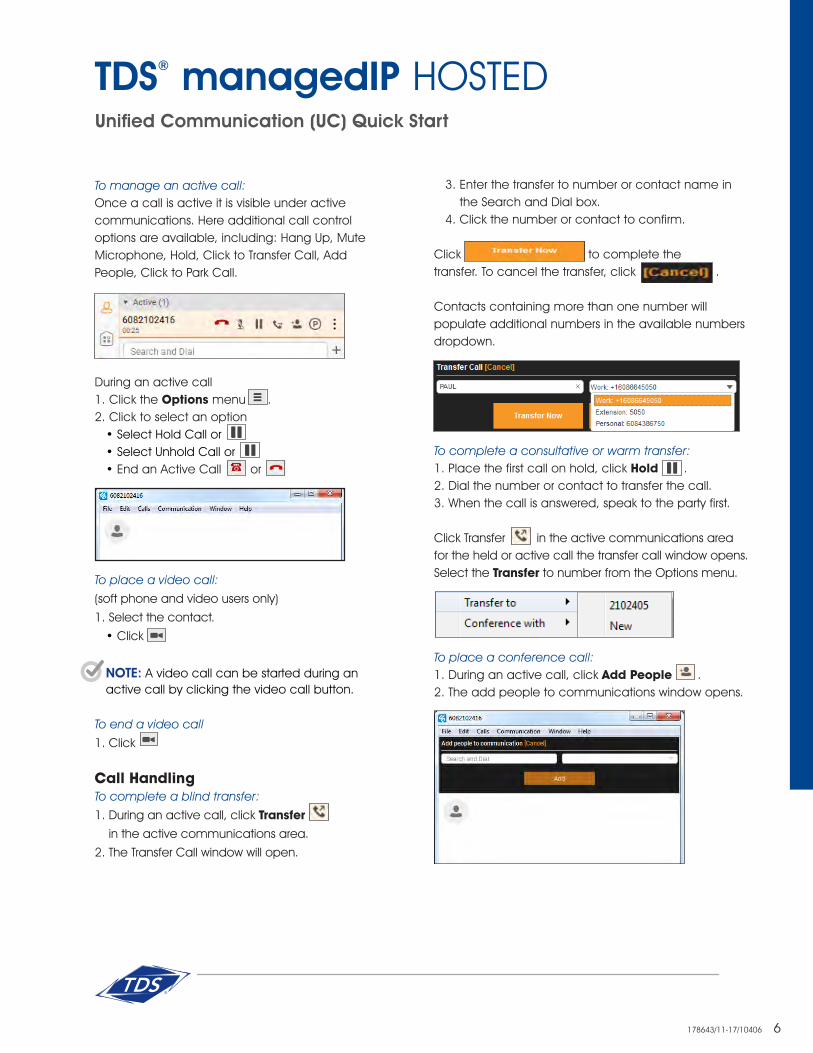
3. Enter the transfer to number or contact name in the Search and Dial box.
4. Click the number or contact to confirm.
Click to complete the transfer. To cancel the transfer, click .
Contacts containing more than one number will populate additional numbers in the available numbers dropdown.
To complete a consultative or warm transfer:1. Place the first call on hold, click Hold .2. Dial the number or contact to transfer the call.3. When the call is answered, speak to the party first.
Click Transfer in the active communications area for the held or active call the transfer call window opens. Select the Transfer to number from the Options menu.
To place a conference call:1. During an active call, click Add People .2. The add people to communications window opens.
To manage an active call:Once a call is active it is visible under active communications. Here additional call control options are available, including: Hang Up, Mute Microphone, Hold, Click to Transfer Call, Add People, Click to Park Call.
During an active call1. Click the Options menu .2. Click to select an option
• Select Hold Call or• Select Unhold Call or• End an Active Call or
To place a video call:
(soft phone and video users only)
1. Select the contact.
• Click
NOTE: A video call can be started during an active call by clicking the video call button.
To end a video call
1. Click
Call HandlingTo complete a blind transfer:
1. During an active call, click Transfer
in the active communications area.
2. The Transfer Call window will open.
TDS® managedIP HOSTEDUnified Communication (UC) Quick Start

3. Enter the conference number or contact name in the Search and Dial box.
1. Click the number or contact name to confirm.2. Click to dial the conference to
party. When the call is answered the conference will begin.
3. To cancel, click4. To end the conference, click Hang Up .
To park an active call:
1. In the active communications area select .
• Click Park to park the call to your extension
Call click
2. Or, enter a different extension using the radio
button and extension field.
3. To cancel, click .
To retrieve a parked call:1. Click Calls.2. Select Retrieve Parked Call.3. Select which device to retrieve the call.
• With TDS UC (soft phone) and then follow the prompts
• With Phone (desk phone)
7178643/11-17/10406
NOTE: retrieving calls With Phone is limited to calls parked against your extension. If the call is parked to another extension and the desktop phone is preferred, retrieve the call using the soft keys on the desktop phone.
To pull a call to your mobile device:1. Navigate to the dial pad on the mobile application.2. Select Pull Call from the call control menu.3. You can then pull the call using VoIP or Call
Through (recommended).
To pull a call to your desk phone:1. From your desk phone, dial *11 using the desk
phone dial pad.2. The call will automatically be active on your
desk phone.
To pull a call to your soft phone:(soft phone and video users only)1. Select Calls, then Pull Call.
2. The call will automatically be active on your soft phone.
TDS® managedIP HOSTEDUnified Communication (UC) Quick Start

8178643/11-17/10406
Call SettingsTo configure call settings:1. Click the Options icon .2. Select: • Incoming Calls • Outgoing Calls • Voice Mail3. Select the calling feature or service you would
like to configure from the call settings menu.
To configure preferences: To customize language, login, video and Outlook integration preferences:1. Click the Options icon .2. Select: • General • Media • Extensions • Advanced
Key Board ShortcutsThe following table lists the currently supported keyboard shortcuts. You can use these to quickly preform frequently used actions.
Shortcuts for Windows
Shortcuts for Mac
What it does
- Cmd-Q This quits the applications.
CTRL+4 Cmd-WThis closes the selected window (except for)
CTRL+C Cmd-CThis copies selected text to the clipboard.
CTRL+V Cmd-VThis pastes text from the clipboard to the colocation selected using the cursor.
Enter Enter
In the communications window, this sends a chat message (if the chat view is visible). In the contact list, this opens a chat with the selected contact. In the communications history, this opens a communication session with the contact or address related to the selected item. This opens a chat if the item was change and a call if the item was a call
- Cmd- Opens presences
F1 Cmd-? Opens help
CTRL+A Cmd-A This selects all text in the Chat view.
TDS® managedIP HOSTEDUnified Communication (UC) Quick Start
Related Documents