Welcome message from author
This document is posted to help you gain knowledge. Please leave a comment to let me know what you think about it! Share it to your friends and learn new things together.
Transcript


Table of ContentsPreface............................................................. 1Introduction ..................................................... 2Product Features ............................................. 3Usage-Turning unit ON/OFF ............................ 5Usage-Video Mode .......................................... 6Usage-Auto Detection Mode ........................... 7Usage-Digital Camera Mode ........................... 8Usage-Webcam Mode .................................... 8Usage-Charging Mode ................................... 10Usage-Read Mode ......................................... 11
Usage-Setting Date/Time ............................... 12Usage-Video Playback .................................... 14Usage-Replacing Refill ....................................14Accessories ....................................................15Product Specifications.................................... 16Troubleshooting ............................................. 18

Thank you for purchasing the multi-purpose camerapen. It is small and lightweight and packed with several useful features, like video and audio recording,small camera, fully functional black ink pen and more.
This user manual includes all aspects of unit’soperation, please read it carefully before usingthis product.
This pen is a super small, high-definition digital video camera, high-speed USB, digital camera, webcam, auto detection recording and so much more.Capture anything, anywhere!
Introduction
• 4-in-1 Design:-1280x960 High Definition video recording-2 mega pixels-Web camera-Auto detection recording• Compact, only 13 mm in diameter
• High-Definition video 1280x960 @ 30fps (frames per second), full real-time video• 8GB built-in memory, about 30,000 photos• Video date can be saved and used as flash drive• Video includes date and time stamp• Can be charged while in use• Comes with cap and key chain
Product Features

Product Features
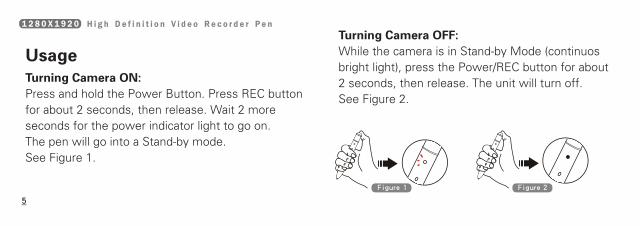
Turning Camera ON:Press and hold the Power Button. Press REC button for about 2 seconds, then release. Wait 2 more seconds for the power indicator light to go on.The pen will go into a Stand-by mode.See Figure 1.
Turning Camera OFF:While the camera is in Stand-by Mode (continuosbright light), press the Power/REC button for about2 seconds, then release. The unit will turn off.See Figure 2.
Usage
UsageVideo Mode
Audio Detection Recording Mode
Camera Mode
Webcam Mode
Data Read/Charging Mode
R position
L position
M position
turned on when connected to computer
turned off when connected to computer
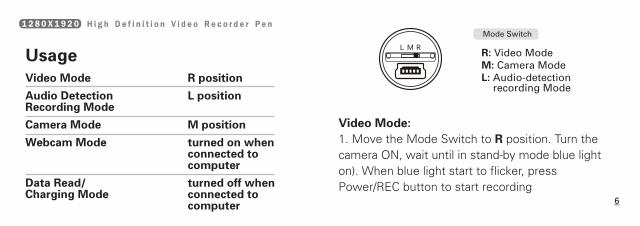
Video Mode:1. Move the Mode Switch to R position. Turn the camera ON, wait until in stand-by mode blue light on). When blue light start to flicker, pressPower/REC button to start recording
R: Video ModeM: Camera ModeL: Audio-detection recording Mode
Mode Switch

2. To Stop recording, press the Power/REC button again. The camera will enter a stand-bymode.
Audio-detection Recording Mode:1. Move the Mode Switch to L position. Turn the camera ON, wait until in stand-by mode blue light on). Do not press Power/REC Button to activate this mode. When the external volume reaches
a certain range, the camera will automaticallystart recording. The blue light will begin to flicker.
2. To Stop recording, press the Power/REC button again. The camera will enter a stand-bymode. If the external volume becomes greaterthan 45 dB, the camera will automaticallyactivate and start recording.

Digital Camera Mode:1. Move the Mode Switch to M position. Turn the camera ON, wait until in it goes into stand-by mode). Green light will go on. Press Power/REC button to take a picture. The green light will flash and theunit will return to stand-by mode.
Webcam Mode:1. Please install the webcam driver (CD-ROM):“location of the CD-ROM drive\Driver\driver.exe”

2. After the installation is complete, make surethe unit is in stand-by mode (blue light on continuously).
3. Use the USB data transfer cable to connectthe pen to the computer.
4. When the unit is correctly connected, the“standard camera” icon will appear.Now you can use the Webcam.
Note: If after connecting the unit to the computer,the “removable device” icon will appear insteadof “Standard camera”, disconnect and re-connectthe USB cable.

Charging Mode:1. Make sure that the unit is turned off prior tocharging (all lights will be off).
2. Use the USB data transfer cable to connectthe pen to the computer.
3. If connected properly, the blue light willbegin to flash (unit is charging).
4. When the light stops flashing and becomescontinuos, the unit is fully charged.
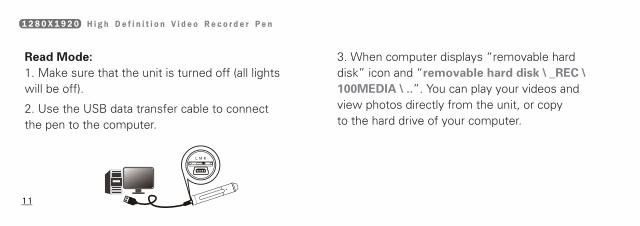
Read Mode:1. Make sure that the unit is turned off (all lights will be off).
2. Use the USB data transfer cable to connectthe pen to the computer.
3. When computer displays “removable harddisk” icon and “removable hard disk \ _REC \100MEDIA \ ..”. You can play your videos and view photos directly from the unit, or copyto the hard drive of your computer.

Setting Time and Date:This feature enables you to display the recordingdate/time in the video file:“Year. Month. Date : Minute : Second”.1. Copy file “CD-ROM disk location\time\time.txt”to your desktop. See figure 1 below.
2. Click on “time.txt” to see the default listof contents. See figure 2 below.
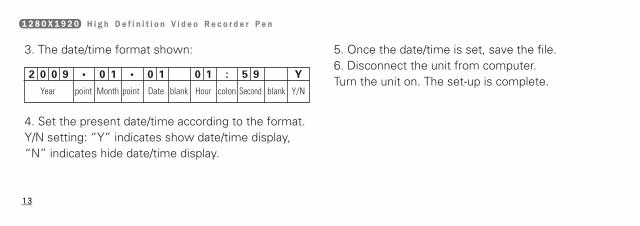
3. The date/time format shown: 5. Once the date/time is set, save the file.6. Disconnect the unit from computer. Turn the unit on. The set-up is complete.
4. Set the present date/time according to the format.Y/N setting: “Y” indicates show date/time display,“N” indicates hide date/time display.
2 0 0 9 • 0 1 • 0 1 0 1 : 5 9 Y
Year point point blank blank Y/NDate Hour colon SecondMonth

Video Playback:The unit records in AVI format. It can be viewedusing Windows Media Player or any other player.
2. Use a screwdriver to remove the refill.
3. Place new refill into the pen tube.
Replacing Pen Refill:Twist top half of pen counterclockwise to open.
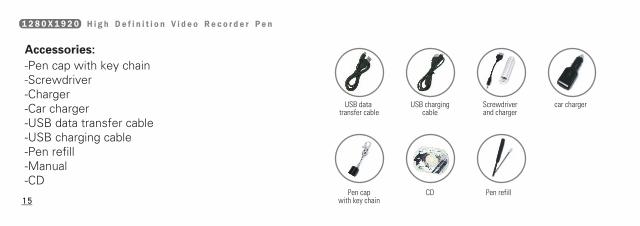
Accessories:-Pen cap with key chain-Screwdriver-Charger-Car charger-USB data transfer cable-USB charging cable-Pen refill-Manual-CD
USB data transfer cable
USB chargingcable
Screwdriverand charger
Pen capwith key chain
CD Pen refill
car charger
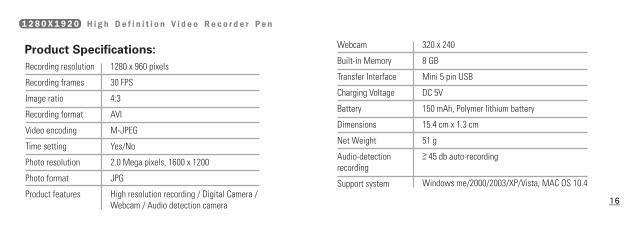
Recording resolution
Recording frames
Image ratio
Recording format
Video encoding
Time setting
Photo resolution
Photo format
Product features
1280 x 960 pixels
30 FPS
4:3
AVI
M-JPEG
Yes/No
2.0 Mega pixels, 1600 x 1200
JPG
High resolution recording / Digital Camera /Webcam / Audio detection camera
Webcam
Built-in Memory
Transfer Interface
Charging Voltage
Battery
Dimensions
Net Weight
Audio-detectionrecording
Support system
320 x 240
8 GB
Mini 5 pin USB
DC 5V
150 mAh, Polymer lithium battery
15.4 cm x 1.3 cm
51 g
45 db auto-recording
Windows me/2000/2003/XP/Vista; MAC OS 10.4
Product Specifications:
>=

Charging time
Recording time
Audio-detectionstand-by mode
Capacity
USB charger to PC, approx. 45 min
60 minutes continuos recording (at full charge)
166 min (at full charge)
8 GB / 30,000 images
Product Specifications continued:
>=
Troubleshooting:
After pressing Power/REC button, the unit doesnot turn on.Check to make sure the unit is charged. Connectthe unit to computer and charge for approximately40 minutes. Try turning unit on again.
The unit will not turn off.Press the Reset button to restore to factory setting.
After connecting to computer, the unit remains off and red light is on.It indicates connection error. Disconnect and re-connect.
Can I switch directly to digital camera or auto-detection mode while recording video?We do not advise it, as it may cause the unitto malfunction.
Troubleshooting continued:
When the power is drained, will the videos be automatically saved?When almost out of power, the unit will automaticallyturn off and save the video files.
When unit is connected to computer, it alwaysdisplays “removable hard disk”, and it can’tgo into webcam mode.
Make sure you are using the correct USB cable. Connect to the USB port in the back of computer.Check again.

Related Documents