T. Trimpe 2005 http://sciencespot.net/

T. Trimpe 2005 . Body Tube Stage Clips Light Stage Coarse Adjustment Always carry a microscope with one hand holding the arm and.
Dec 14, 2015
Welcome message from author
This document is posted to help you gain knowledge. Please leave a comment to let me know what you think about it! Share it to your friends and learn new things together.
Transcript

T. Trimpe 2005 http://sciencespot.net/
Body Tube
Stage Clips
Light
Stage
Coarse Adjustment
Always carry a microscope with one hand holding the arm and one hand under the base.
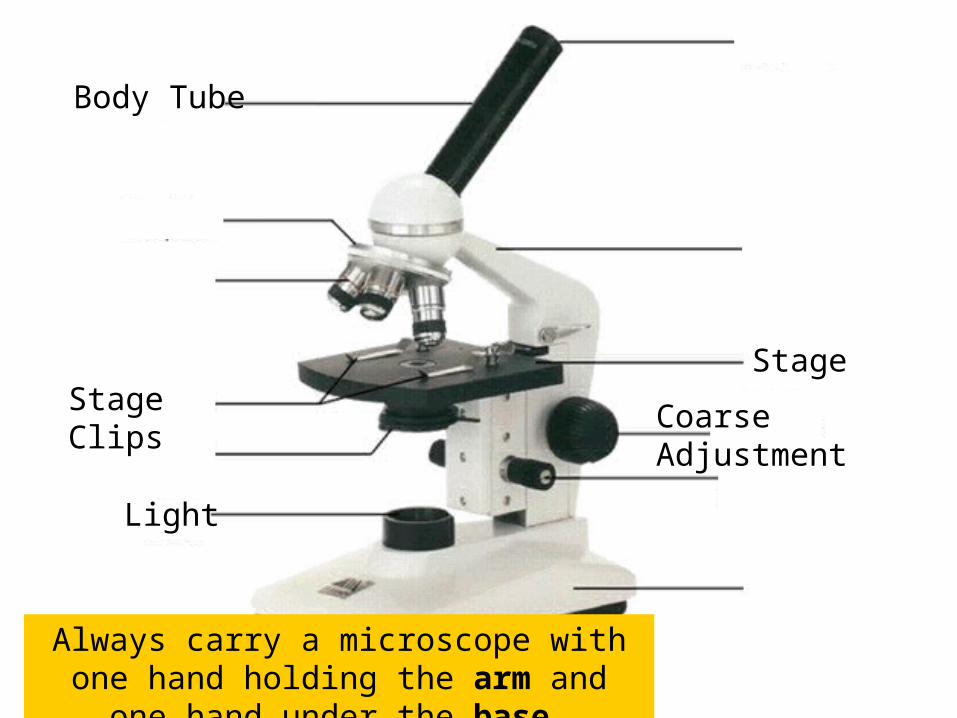
What’s my power?To calculate the power of magnification, ________the _______of the _____________by the _________of the __________.
What are the powers of magnification for each of the objectives we have on
our microscopes?
Fill in the table on your worksheet.

Comparing Powers of Magnification
We can see better details with higher the powers of magnification, but we cannot see as much of the image.
Which of these images would be viewed at a
higher power of magnification?
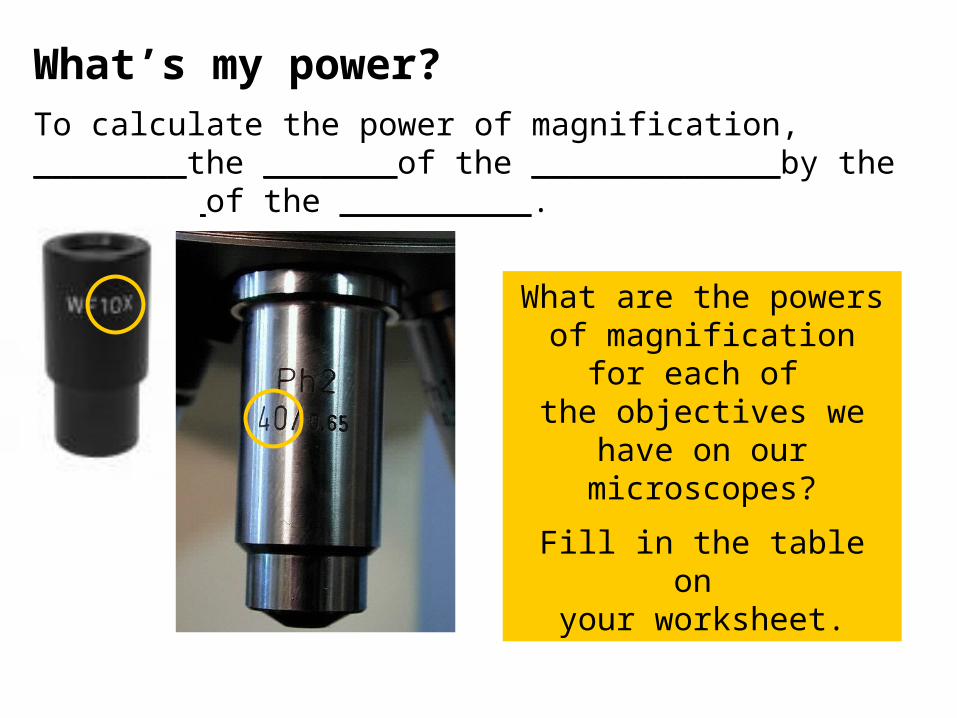
Parts of a
Micro-scope
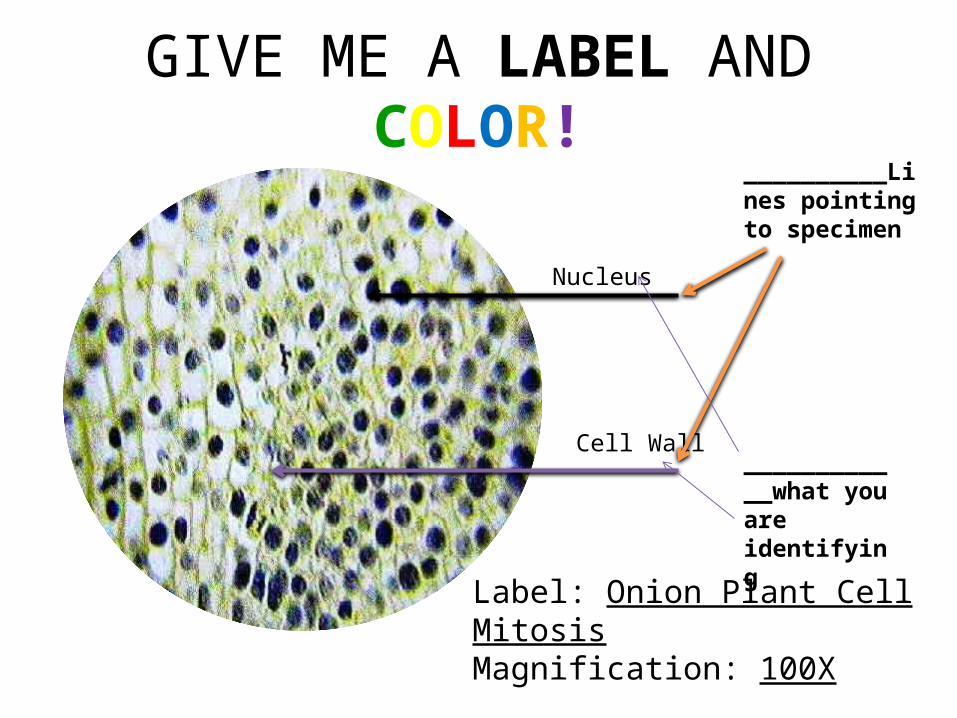
GIVE ME A LABEL AND COLOR!
Label: Onion Plant Cell MitosisMagnification: 100X
Nucleus
Cell Wall
__________Lines pointing to specimen
____________what you are identifying

Calculating Objective Magnification
• Magnification of Eyepiece = ____x
• Magnification of Objective = 4X, _____, or ______
• (10X) (____) = _____x magnification!

Microscopes
Dissection Scope
Surgical Scope

The MicroscopeRules of Handling:– Carry using __________hands.– Place it towards the ___________of the table.– Keep the cord out of the way.– Rotate the objective so the ___________objective
is set to the stage.– Turn ________the ____________.– Unplug & wind up the cord before returning to the
____________.
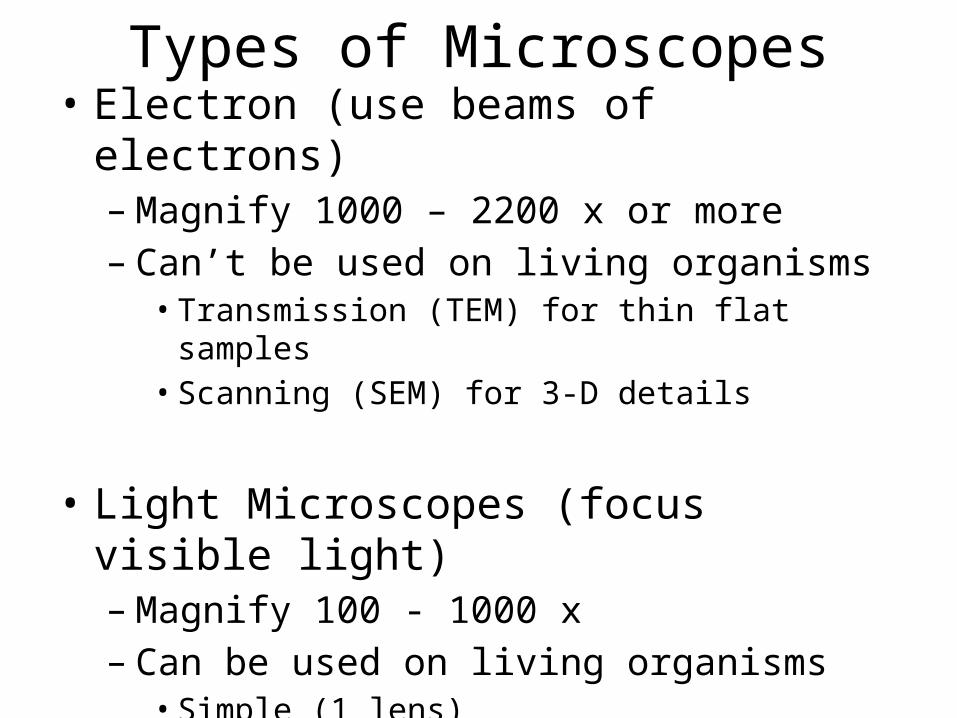
Types of Microscopes• Electron (use beams of electrons)– Magnify 1000 – 2200 x or more– Can’t be used on living organisms• Transmission (TEM) for thin flat samples• Scanning (SEM) for 3-D details
• Light Microscopes (focus visible light)– Magnify 100 - 1000 x– Can be used on living organisms• Simple (1 lens)• Compound (2 lenses)
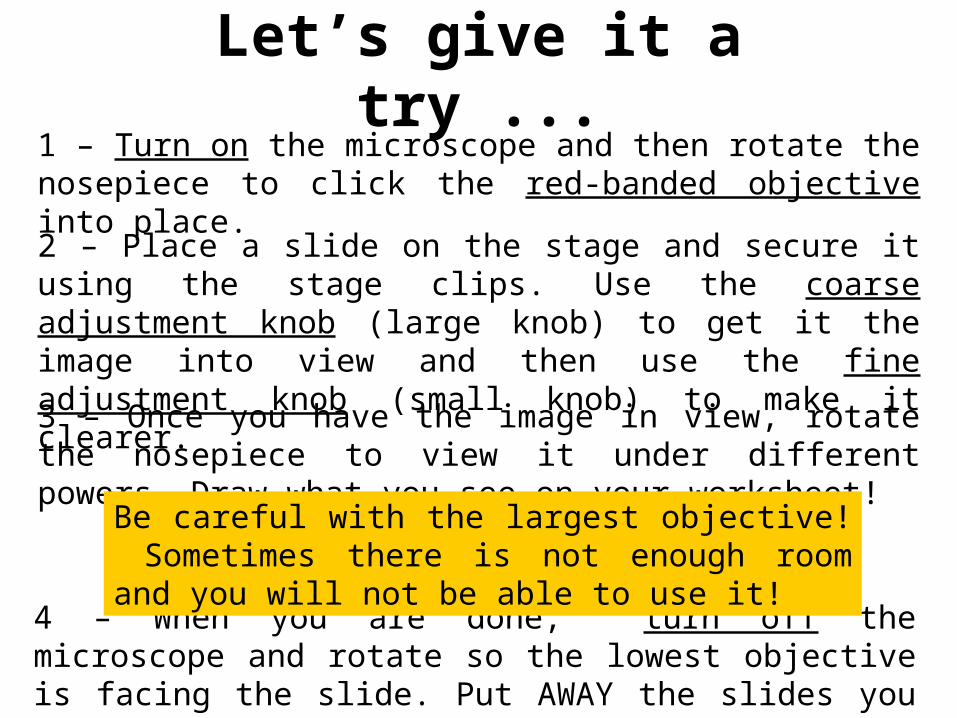
Let’s give it a try ...1 – Turn on the microscope and then rotate the nosepiece to click the red-banded objective into place.
2 – Place a slide on the stage and secure it using the stage clips. Use the coarse adjustment knob (large knob) to get it the image into view and then use the fine adjustment knob (small knob) to make it clearer.
4 – When you are done, turn off the microscope and rotate so the lowest objective is facing the slide. Put AWAY the slides you used.
3 – Once you have the image in view, rotate the nosepiece to view it under different powers. Draw what you see on your worksheet!
Be careful with the largest objective! Sometimes there is not enough room and you will not be able to use it!

How to make a wet-mount slide …
1 – Get a clean slide and coverslip from your teacher.
2 – Place ONE drop of water in the middle of the slide. Don’t use too much or the water will run off the edge and make a mess!
3 – Place the edge of the cover slip on one side of the water drop.
You do not need to use the stage clips when viewing wet-mount slides!
5 – Place the slide on the stage and view it first with the red-banded objective. Once you see the image, you can rotate the nosepiece to view the slide with the different objectives.
4 - Slowly lower the cover slip on top of the drop.
Cover Slip
Lower slowly
Related Documents