SYSLINK PROGRAMMING GUIDE Document Revision: 2.0 Issue Date: 11 Mar 2011 SysLink L24.11 Linux®

Welcome message from author
This document is posted to help you gain knowledge. Please leave a comment to let me know what you think about it! Share it to your friends and learn new things together.
Transcript
SYSLINK PROGRAMMING GUIDE
Document Revision: 2.0
Issue Date: 11 Mar 2011
SysLink L24.11 Linux®
CS_RelNote_Tmpl_95_00_02_01884 Revision 1.0 – 21 Dec 2009
OMAP™ is a Trademark of Texas Instruments Incorporated
OMAP-Vox™ is a Trademark of Texas Instruments Incorporated
Innovator™ is a Trademark of Texas Instruments Incorporated
Code Composer Studio™ is a Trademark of Texas Instruments Incorporated
DSP/BIOS™ is a Trademark of Texas Instruments Incorporated
eXpressDSP™ is a Trademark of Texas Instruments Incorporated
TMS320™ is a Trademark of Texas Instruments Incorporated
TMS320C28x™ is a Trademark of Texas Instruments Incorporated
TMS320C6000™ is a Trademark of Texas Instruments Incorporated
TMS320C5000™ is a Trademark of Texas Instruments Incorporated
TMS320C2000™ is a Trademark of Texas Instruments Incorporated
All other trademarks are the property of the respective owner.
Copyright © 2009 Texas Instruments Incorporated. All rights reserved.
Information in this document is subject to change without notice. Texas Instruments may have pending patent applications, trademarks, copyrights, or other intellectual property rights covering matter in this document. The furnishing of this document is given for usage with Texas Instruments products only and does not give you any license to the intellectual property that might be contained within this document. Texas Instruments makes no implied or expressed warranties in this document and is not responsible for the products based from this document.
ii
Linux® SysLink L24.11SysLink Programming Guide Revision 2.0 11 Mar 2011
Table of Contents
List of Tables
List of Figures
iiii
Linux® SysLink L24.11SysLink Programming Guide Revision 2.0 11 Mar 2011
Revision HistoryREV DATE AUTHOR NOTES
1.0 11/24/2009 Simon Que Updated for L24.1 release. No more Virtio.
1.1 12/08/2009 Simon Que Updated for L24.2 release. Removed old 0.x revision history from when we used Virtio. Added sample outputs.
2.0 03/08/2011 Subramaniam C.A Updated the document for SysLink 2.0 version based on the L24.11 release. Removed samples information.
Plan ApprovalsREV APPROVAL 1 DATE APPROVAL 2 DATE
Person dd Mmm YYYY Person dd Mmm YYYY
Please read the “Important Notice” on the next page.

iiiiii
Linux® SysLink L24.11SysLink Programming Guide Revision 2.0 11 Mar 2011

iviv
Linux® SysLink L24.11SysLink Programming Guide Revision 2.0 11 Mar 2011
IMPORTANT NOTICE
Texas Instruments Incorporated and its subsidiaries (TI) reserve the right to make corrections, modifications, enhancements, improvements, and other changes to its products and services at any time and to discontinue any product or service without notice. Customers should obtain the latest relevant information before placing orders and should verify that such information is current and complete. All products are sold subject to TI’s terms and conditions of sale supplied at the time of order acknowledgment.
TI warrants performance of its hardware products to the specifications applicable at the time of sale in accordance with TI’s standard warranty. Testing and other quality control techniques are used to the extent TI deems necessary to support this warranty. Except where mandated by government requirements, testing of all parameters of each product is not necessarily performed.
TI assumes no liability for applications assistance or customer product design. Customers are responsible for their products and applications using TI components. To minimize the risks associated with customer products and applications, customers should provide adequate design and operating safeguards.
TI does not warrant or represent that any license, either express or implied, is granted under any TI patent right, copyright, mask work right, or other TI intellectual property right relating to any combination, machine, or process in which TI products or services are used. Information published by TI regarding third-party products or services does not constitute a license from TI to use such products or services or a warranty or endorsement thereof. Use of such information may require a license from a third party under the patents or other intellectual property of the third party, or a license from TI under the patents or other intellectual property of TI.
Reproduction of information in TI data books or data sheets is permissible only if reproduction is without alteration and is accompanied by all associated warranties, conditions, limitations, and notices. Reproduction of this information with alteration is an unfair and deceptive business practice. TI is not responsible or liable for such altered documentation.
Resale of TI products or services with statements different from or beyond the parameters stated by TI for that product or service voids all express and any implied warranties for the associated TI product or service and is an unfair and deceptive business practice. TI is not responsible or liable for any such statements.
Following are URLs where you can obtain information on other Texas Instruments products and application solutions:1 Products 2 Applications
Amplifiers amplifier.ti.com Audio www.ti.com/audio
Data Converters dataconverter.ti.com Automotive www.ti.com/automotive
DSP dsp.ti.com Broadband www.ti.com/broadband
Interface interface.ti.com Digital Control www.ti.com/digitalcontrol
Logic logic.ti.com Military www.ti.com/military
Power Mgmt power.ti.com Optical Networking www.ti.com/opticalnetwork
Microcontrollers microcontroller.ti.com Security www.ti.com/security
Telephony www.ti.com/telephony
Video & Imaging www.ti.com/video
Wireless www.ti.com/wireless
Mailing Address: Texas InstrumentsPost Office Box 655303 Dallas, Texas 75265
Copyright © 2009, Texas Instruments Incorporated
Linux® SysLink L24.11Syslink User GuideRevision 2.0 11 Mar 2011
Page 1
1 IntroductionThis document accompanies OMAP™ Software L24.11 SysLink release for Linux® on SDP. The document provides instructions about:
1. Writing applications for MPU and Ducati using SysLink.2. Known Issues3. User Tips
1.1 Reference Material
All References can be found on the Cellular Systems web site or the World Wide Process and Tools Group web site
1.2 DefinitionsThe Cellular Systems Glossary Document may be found in every release.
1.3 File Name
The file name of this document is SysLink_Programming_Guide_2_0.doc.
1.4 File Location
\WTSD_MultiCoreSW\MPU\Linux\docs\release

Linux® SysLink L24.11Syslink User GuideRevision 2.0 11 Mar 2011
Page 2
2 SummaryThis document contains a guide for using SysLink in user applications on the SDP. The guide is intended for a consumer of SysLink who is working on the SDP, following the instructions and procedures listed in this document. The guide assumes that the reader is already familiar with building SysLink (Detailed information here).
Linux® SysLink L24.11Syslink User GuideRevision 2.0 11 Mar 2011
Page 3
3 Programming with SysLink on MPU (Linux)To incorporate SysLink into an application on MPU, there are several steps to take in implementing the code. The usage consists of calling several API functions in the IPC and ProcMgr modules. Some are mandatory and others are optional. You should determine whether the optional calls suit your application. The SysLink API calls should be made in the order they appear below.
3.1 IPC Setup
To begin, Ipc_setup must be called. This function initializes all the modules in IPC including ProcMgr, except for RCM. RCM is handled separately in a later section. All modules need to be initialized before they can be used. Otherwise, calling their functions will result in an error.
The following code snippet shows the usage of Ipc_setup:
/* IPC headers */#include <IpcUsr.h>#include <ProcMgr.h>
#include <OsalPrint.h>. . .
Ipc_Config config;. . .
Ipc_getConfig (&config); status = Ipc_setup (&config); if (status < 0) { Osal_printf ("ipcSetup: Error in Ipc_setup [0x%x]\n", status); goto exit; }
3.2 ProcMgr
3.2.1 Opening the ProcMgr Handle
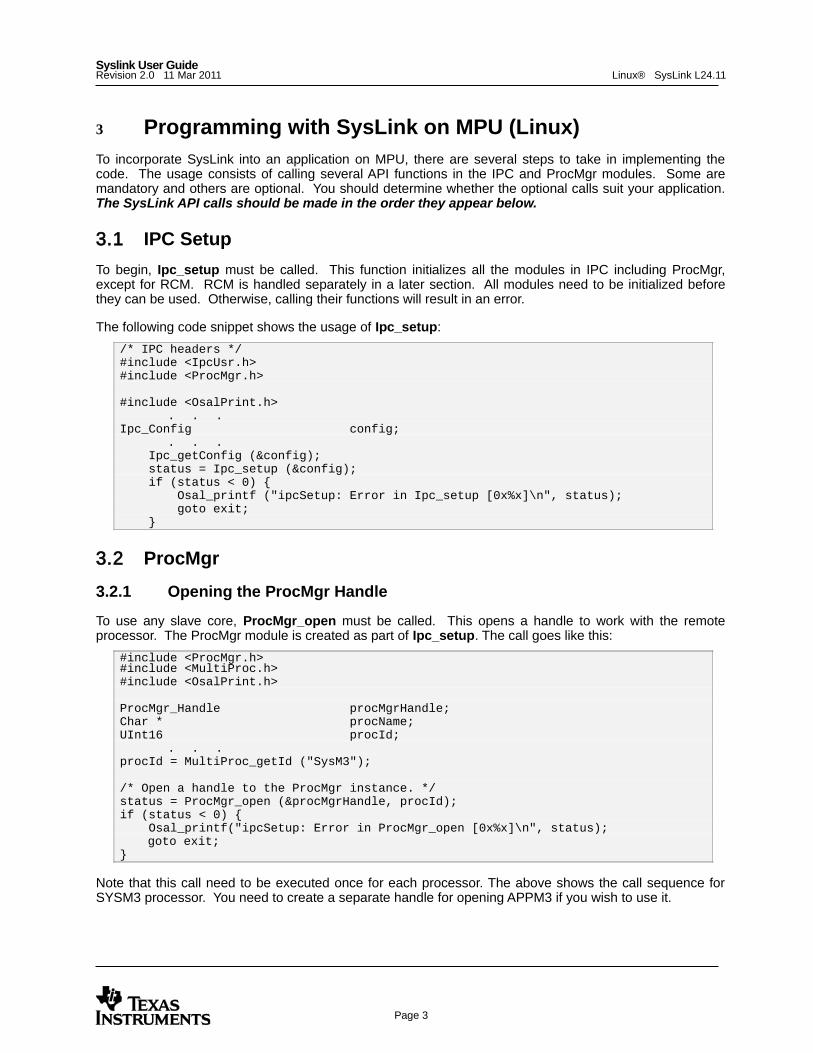
To use any slave core, ProcMgr_open must be called. This opens a handle to work with the remote processor. The ProcMgr module is created as part of Ipc_setup. The call goes like this:
#include <ProcMgr.h>#include <MultiProc.h>#include <OsalPrint.h>
ProcMgr_Handle procMgrHandle;Char * procName;UInt16 procId;
. . .procId = MultiProc_getId ("SysM3");
/* Open a handle to the ProcMgr instance. */status = ProcMgr_open (&procMgrHandle, procId);if (status < 0) { Osal_printf("ipcSetup: Error in ProcMgr_open [0x%x]\n", status);
goto exit;}
Note that this call need to be executed once for each processor. The above shows the call sequence for SYSM3 processor. You need to create a separate handle for opening APPM3 if you wish to use it.
Linux® SysLink L24.11Syslink User GuideRevision 2.0 11 Mar 2011
Page 4
3.2.2 Attaching to the ProcMgr module
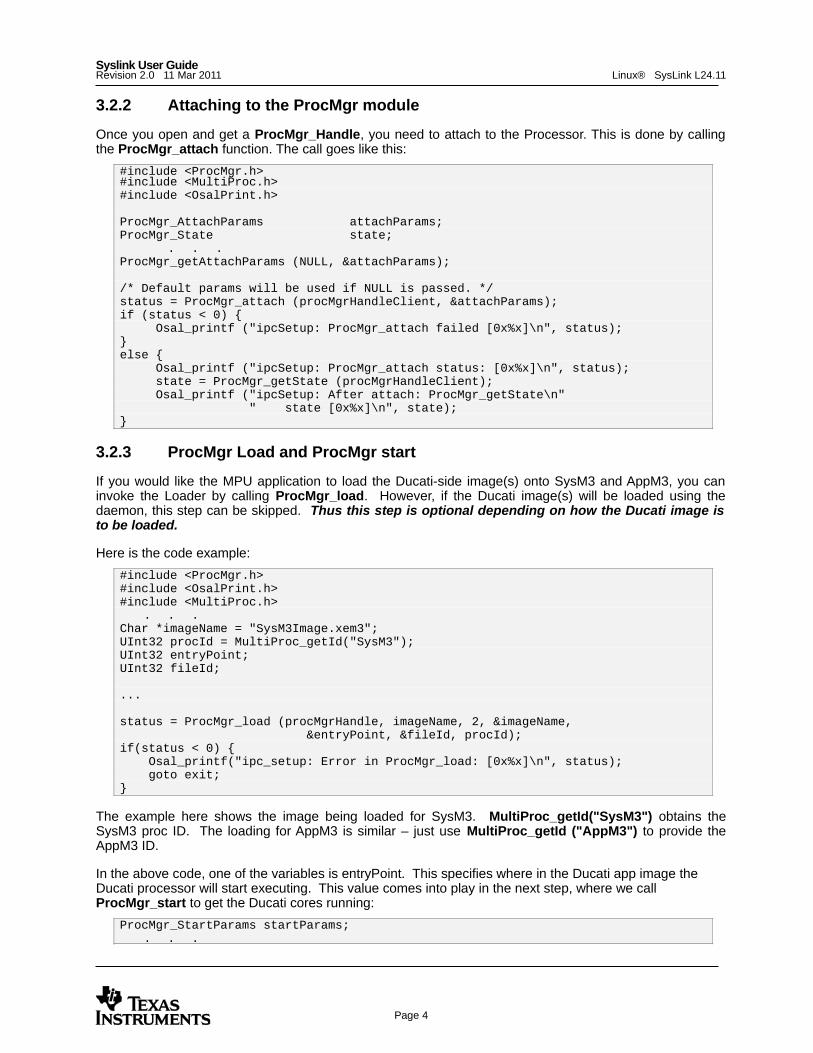
Once you open and get a ProcMgr_Handle, you need to attach to the Processor. This is done by calling the ProcMgr_attach function. The call goes like this:
#include <ProcMgr.h>#include <MultiProc.h>#include <OsalPrint.h>
ProcMgr_AttachParams attachParams;ProcMgr_State state;
. . .ProcMgr_getAttachParams (NULL, &attachParams);
/* Default params will be used if NULL is passed. */status = ProcMgr_attach (procMgrHandleClient, &attachParams);if (status < 0) { Osal_printf ("ipcSetup: ProcMgr_attach failed [0x%x]\n", status);}else { Osal_printf ("ipcSetup: ProcMgr_attach status: [0x%x]\n", status); state = ProcMgr_getState (procMgrHandleClient); Osal_printf ("ipcSetup: After attach: ProcMgr_getState\n" " state [0x%x]\n", state);}
3.2.3 ProcMgr Load and ProcMgr start
If you would like the MPU application to load the Ducati-side image(s) onto SysM3 and AppM3, you can invoke the Loader by calling ProcMgr_load. However, if the Ducati image(s) will be loaded using the daemon, this step can be skipped. Thus this step is optional depending on how the Ducati image is to be loaded.
Here is the code example:
#include <ProcMgr.h>#include <OsalPrint.h>#include <MultiProc.h>
. . .Char *imageName = "SysM3Image.xem3";UInt32 procId = MultiProc_getId("SysM3"); UInt32 entryPoint; UInt32 fileId;
...
status = ProcMgr_load (procMgrHandle, imageName, 2, &imageName, &entryPoint, &fileId, procId);if(status < 0) { Osal_printf("ipc_setup: Error in ProcMgr_load: [0x%x]\n", status); goto exit;}
The example here shows the image being loaded for SysM3. MultiProc_getId("SysM3") obtains the SysM3 proc ID. The loading for AppM3 is similar – just use MultiProc_getId ("AppM3") to provide the AppM3 ID.
In the above code, one of the variables is entryPoint. This specifies where in the Ducati app image the Ducati processor will start executing. This value comes into play in the next step, where we call ProcMgr_start to get the Ducati cores running:
ProcMgr_StartParams startParams;. . .
Linux® SysLink L24.11Syslink User GuideRevision 2.0 11 Mar 2011
Page 5
startParams.proc_id = procId;status = ProcMgr_start (procMgrHandle, entryPoint, &startParams);if (status < 0) { Osal_printf ("ipc_setup: Error in ProcMgr_start [0x%x]\n", status); goto exit;}
Once again, this needs to be called for each core that needs to be launched (Note that in the case of APPM3, the SYSM3 needs to be loaded and started before loading the APPM3 image). SysLink Daemon will call ProcMgr_start as well, so if you are using that to load the Ducati images, it is not necessary for the MPU userspace application to call ProcMgr_start.
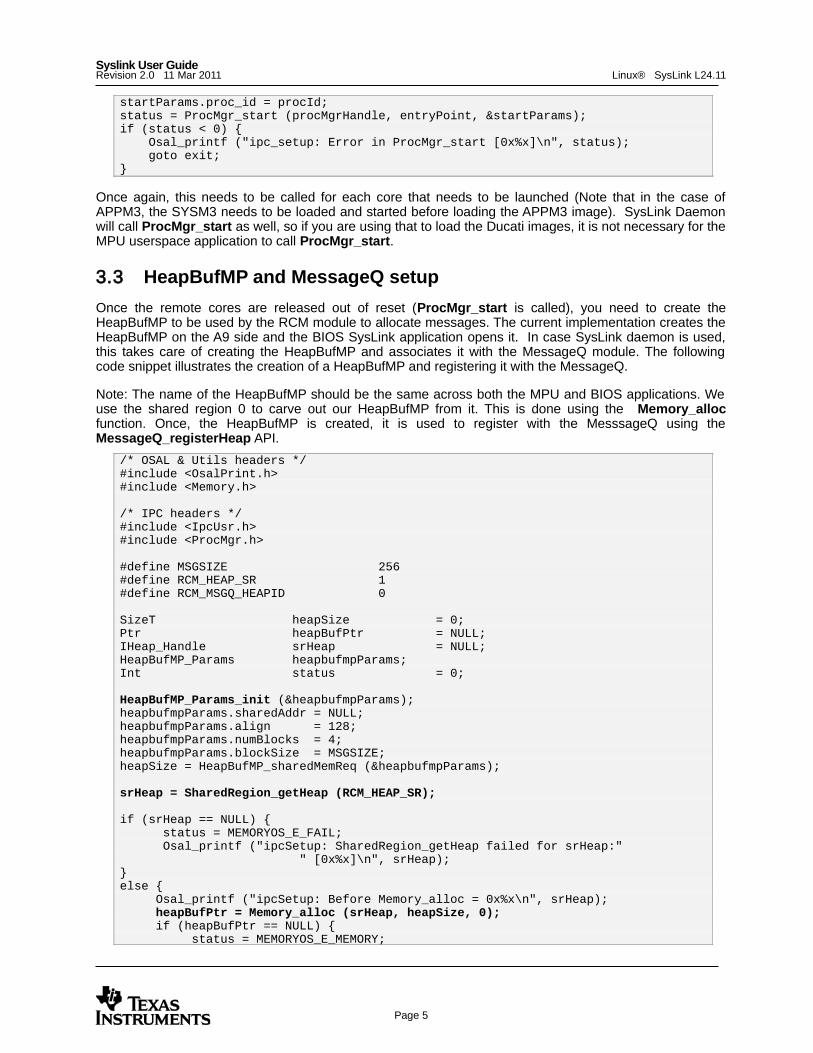
3.3 HeapBufMP and MessageQ setup
Once the remote cores are released out of reset (ProcMgr_start is called), you need to create the HeapBufMP to be used by the RCM module to allocate messages. The current implementation creates the HeapBufMP on the A9 side and the BIOS SysLink application opens it. In case SysLink daemon is used, this takes care of creating the HeapBufMP and associates it with the MessageQ module. The following code snippet illustrates the creation of a HeapBufMP and registering it with the MessageQ.
Note: The name of the HeapBufMP should be the same across both the MPU and BIOS applications. We use the shared region 0 to carve out our HeapBufMP from it. This is done using the Memory_alloc function. Once, the HeapBufMP is created, it is used to register with the MesssageQ using the MessageQ_registerHeap API.
/* OSAL & Utils headers */#include <OsalPrint.h>#include <Memory.h>
/* IPC headers */#include <IpcUsr.h>#include <ProcMgr.h>
#define MSGSIZE 256#define RCM_HEAP_SR 1#define RCM_MSGQ_HEAPID 0
SizeT heapSize = 0;Ptr heapBufPtr = NULL;IHeap_Handle srHeap = NULL;HeapBufMP_Params heapbufmpParams;Int status = 0;
HeapBufMP_Params_init (&heapbufmpParams);heapbufmpParams.sharedAddr = NULL;heapbufmpParams.align = 128;heapbufmpParams.numBlocks = 4;heapbufmpParams.blockSize = MSGSIZE;heapSize = HeapBufMP_sharedMemReq (&heapbufmpParams);
srHeap = SharedRegion_getHeap (RCM_HEAP_SR);
if (srHeap == NULL) { status = MEMORYOS_E_FAIL; Osal_printf ("ipcSetup: SharedRegion_getHeap failed for srHeap:" " [0x%x]\n", srHeap);}else { Osal_printf ("ipcSetup: Before Memory_alloc = 0x%x\n", srHeap); heapBufPtr = Memory_alloc (srHeap, heapSize, 0); if (heapBufPtr == NULL) { status = MEMORYOS_E_MEMORY;
Linux® SysLink L24.11Syslink User GuideRevision 2.0 11 Mar 2011
Page 6
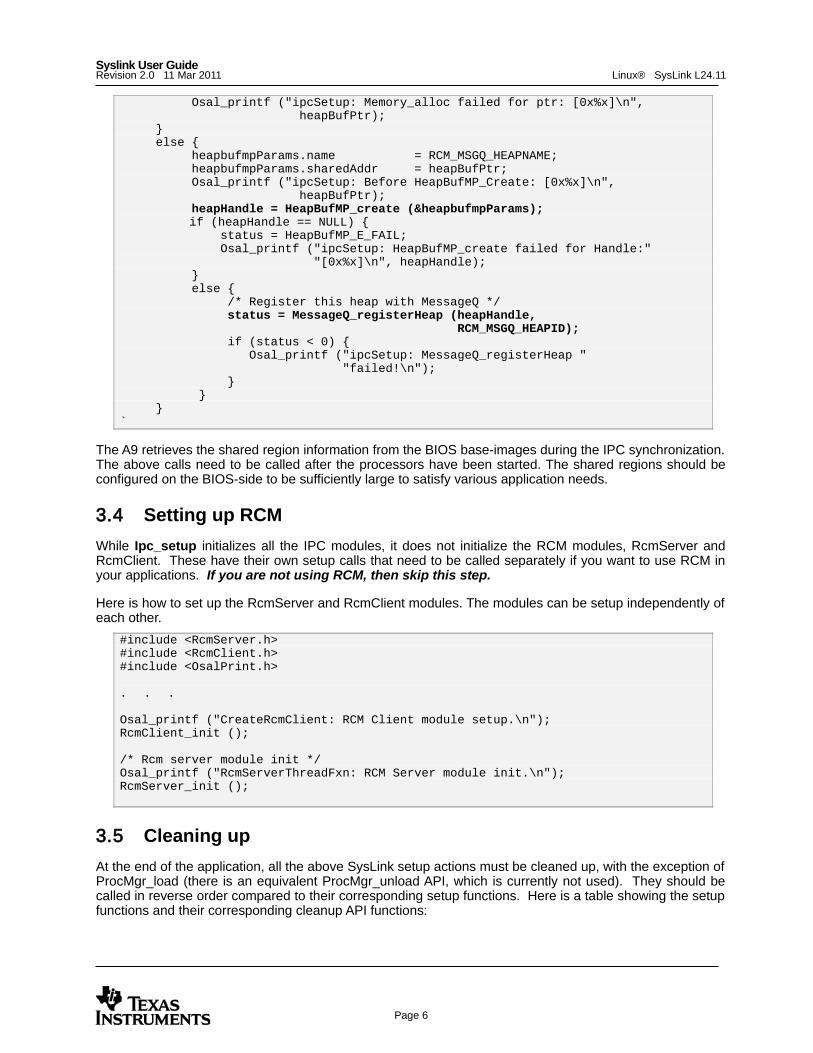
Osal_printf ("ipcSetup: Memory_alloc failed for ptr: [0x%x]\n", heapBufPtr); } else { heapbufmpParams.name = RCM_MSGQ_HEAPNAME; heapbufmpParams.sharedAddr = heapBufPtr; Osal_printf ("ipcSetup: Before HeapBufMP_Create: [0x%x]\n", heapBufPtr); heapHandle = HeapBufMP_create (&heapbufmpParams);
if (heapHandle == NULL) { status = HeapBufMP_E_FAIL; Osal_printf ("ipcSetup: HeapBufMP_create failed for Handle:" "[0x%x]\n", heapHandle); } else { /* Register this heap with MessageQ */ status = MessageQ_registerHeap (heapHandle, RCM_MSGQ_HEAPID); if (status < 0) { Osal_printf ("ipcSetup: MessageQ_registerHeap " "failed!\n"); } } }`
The A9 retrieves the shared region information from the BIOS base-images during the IPC synchronization. The above calls need to be called after the processors have been started. The shared regions should be configured on the BIOS-side to be sufficiently large to satisfy various application needs.
3.4 Setting up RCM
While Ipc_setup initializes all the IPC modules, it does not initialize the RCM modules, RcmServer and RcmClient. These have their own setup calls that need to be called separately if you want to use RCM in your applications. If you are not using RCM, then skip this step.
Here is how to set up the RcmServer and RcmClient modules. The modules can be setup independently of each other.
#include <RcmServer.h>#include <RcmClient.h>#include <OsalPrint.h>
. . .
Osal_printf ("CreateRcmClient: RCM Client module setup.\n");RcmClient_init ();
/* Rcm server module init */Osal_printf ("RcmServerThreadFxn: RCM Server module init.\n");RcmServer_init ();
3.5 Cleaning up
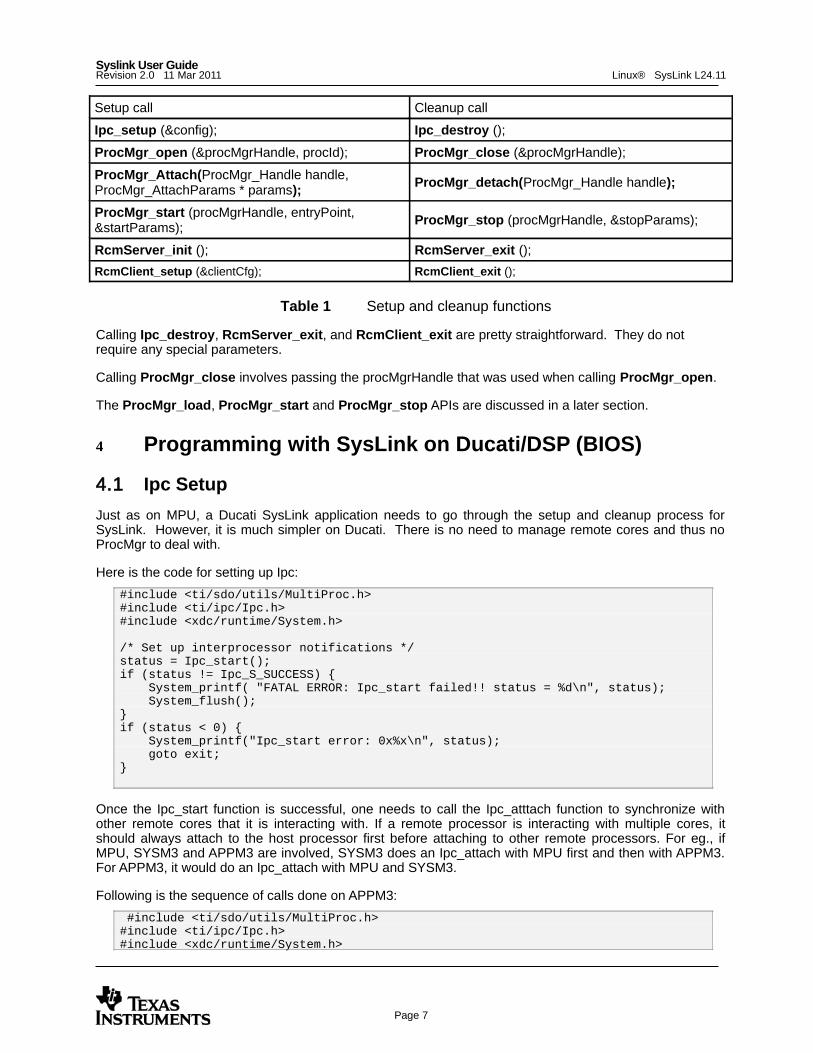
At the end of the application, all the above SysLink setup actions must be cleaned up, with the exception of ProcMgr_load (there is an equivalent ProcMgr_unload API, which is currently not used). They should be called in reverse order compared to their corresponding setup functions. Here is a table showing the setup functions and their corresponding cleanup API functions:
Linux® SysLink L24.11Syslink User GuideRevision 2.0 11 Mar 2011
Page 7
Setup call Cleanup call
Ipc_setup (&config); Ipc_destroy ();
ProcMgr_open (&procMgrHandle, procId); ProcMgr_close (&procMgrHandle);
ProcMgr_Attach(ProcMgr_Handle handle, ProcMgr_AttachParams * params);
ProcMgr_detach(ProcMgr_Handle handle);
ProcMgr_start (procMgrHandle, entryPoint, &startParams);
ProcMgr_stop (procMgrHandle, &stopParams);
RcmServer_init (); RcmServer_exit ();
RcmClient_setup (&clientCfg); RcmClient_exit ();
Table 1 Setup and cleanup functions
Calling Ipc_destroy, RcmServer_exit, and RcmClient_exit are pretty straightforward. They do not require any special parameters.
Calling ProcMgr_close involves passing the procMgrHandle that was used when calling ProcMgr_open.
The ProcMgr_load, ProcMgr_start and ProcMgr_stop APIs are discussed in a later section.
4 Programming with SysLink on Ducati/DSP (BIOS)
4.1 Ipc Setup
Just as on MPU, a Ducati SysLink application needs to go through the setup and cleanup process for SysLink. However, it is much simpler on Ducati. There is no need to manage remote cores and thus no ProcMgr to deal with.
Here is the code for setting up Ipc:
#include <ti/sdo/utils/MultiProc.h>#include <ti/ipc/Ipc.h>#include <xdc/runtime/System.h>
/* Set up interprocessor notifications */status = Ipc_start();if (status != Ipc_S_SUCCESS) { System_printf( "FATAL ERROR: Ipc_start failed!! status = %d\n", status); System_flush();}if (status < 0) { System_printf("Ipc_start error: 0x%x\n", status); goto exit;}
Once the Ipc_start function is successful, one needs to call the Ipc_atttach function to synchronize with other remote cores that it is interacting with. If a remote processor is interacting with multiple cores, it should always attach to the host processor first before attaching to other remote processors. For eg., if MPU, SYSM3 and APPM3 are involved, SYSM3 does an Ipc_attach with MPU first and then with APPM3. For APPM3, it would do an Ipc_attach with MPU and SYSM3.
Following is the sequence of calls done on APPM3:
#include <ti/sdo/utils/MultiProc.h>#include <ti/ipc/Ipc.h>#include <xdc/runtime/System.h>

Linux® SysLink L24.11Syslink User GuideRevision 2.0 11 Mar 2011
Page 8
. . .
/*----- Attach to MPU and SYSM3 -----*/hostId = MultiProc_getId("MPU");System_printf( "tsk:APPM3:IPC attaching to MPU... "); do { status = Ipc_attach(hostId); } while (status < 0); System_printf( "Done!\nIpc_attach to SysM3 ..."); System_flush();
sysProcId = MultiProc_getId("SysM3"); do { status = Ipc_attach(sysProcId); } while (status < 0); System_printf( "Done!\n"); System_flush();
4.2 HeapBufMP and MessageQ setup
Before you go ahead and start using RCM functionalities, you need to get a handle to the HeapBufMP that is created by the MPU side and also associate it with the MessageQ module. Note that you need to use the slpm_task_sleep function instead of regular equivalent BIOS call Task_sleep to avoid creating a tight loop for the HeapBufMP_open call. The MessageQ_registerHeap function takes the heap handle and a HeapID. This ID should be the same as the one that’s used on the MPU side. The calls are illustrated below:
#include <ti/sdo/utils/MultiProc.h>#include <ti/ipc/Ipc.h>#include <xdc/runtime/System.h>#include <ti/ipc/HeapBufMP.h>#include <ti/ipc/MessageQ.h>#include <ti/omap/slpm/slpm_interface.h>
. . . HeapBufMP_Handle heapHandle;
/*---- Open HeapBufMP created by other, wait till opened ----*/System_printf( "tskRcmServer:APPM3:Opening HeapBufMP....");do { slpm_Task_sleep(HEAPBUF_DELAY); status = HeapBufMP_open(HEAPNAME, &heapHandle);} while (status != HeapBufMP_S_SUCCESS);
System_printf( "Done\n");System_flush();
/* Open the core0 message queue. Spin until it is ready. */System_printf( "tskRcmServer:APPM3:Opening MessageQ....");status = MessageQ_registerHeap((IHeap_Handle)heapHandle, HEAPID);if(status != MessageQ_S_SUCCESS) { System_printf("\ntskRcmServer:APPM3:ERROR:MessageQ heap already registered\n"); goto leave;}System_printf( "Done\n");System_flush();
Linux® SysLink L24.11Syslink User GuideRevision 2.0 11 Mar 2011
Page 9
4.3 RCM Client and RCM Server
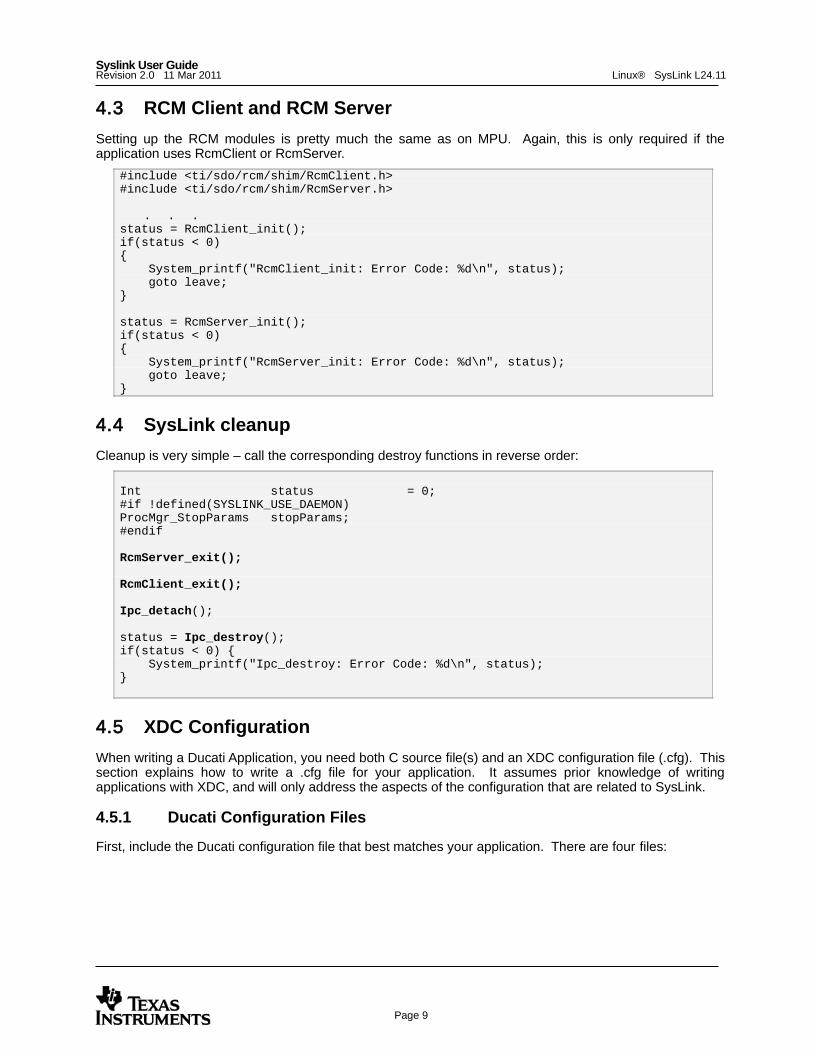
Setting up the RCM modules is pretty much the same as on MPU. Again, this is only required if the application uses RcmClient or RcmServer.
#include <ti/sdo/rcm/shim/RcmClient.h>#include <ti/sdo/rcm/shim/RcmServer.h>
. . .status = RcmClient_init();if(status < 0){ System_printf("RcmClient_init: Error Code: %d\n", status); goto leave;}
status = RcmServer_init();if(status < 0){ System_printf("RcmServer_init: Error Code: %d\n", status); goto leave;}
4.4 SysLink cleanup
Cleanup is very simple – call the corresponding destroy functions in reverse order:
Int status = 0;#if !defined(SYSLINK_USE_DAEMON)ProcMgr_StopParams stopParams;#endif
RcmServer_exit();
RcmClient_exit();
Ipc_detach();
status = Ipc_destroy();if(status < 0) { System_printf("Ipc_destroy: Error Code: %d\n", status);}
4.5 XDC Configuration
When writing a Ducati Application, you need both C source file(s) and an XDC configuration file (.cfg). This section explains how to write a .cfg file for your application. It assumes prior knowledge of writing applications with XDC, and will only address the aspects of the configuration that are related to SysLink.
4.5.1 Ducati Configuration Files
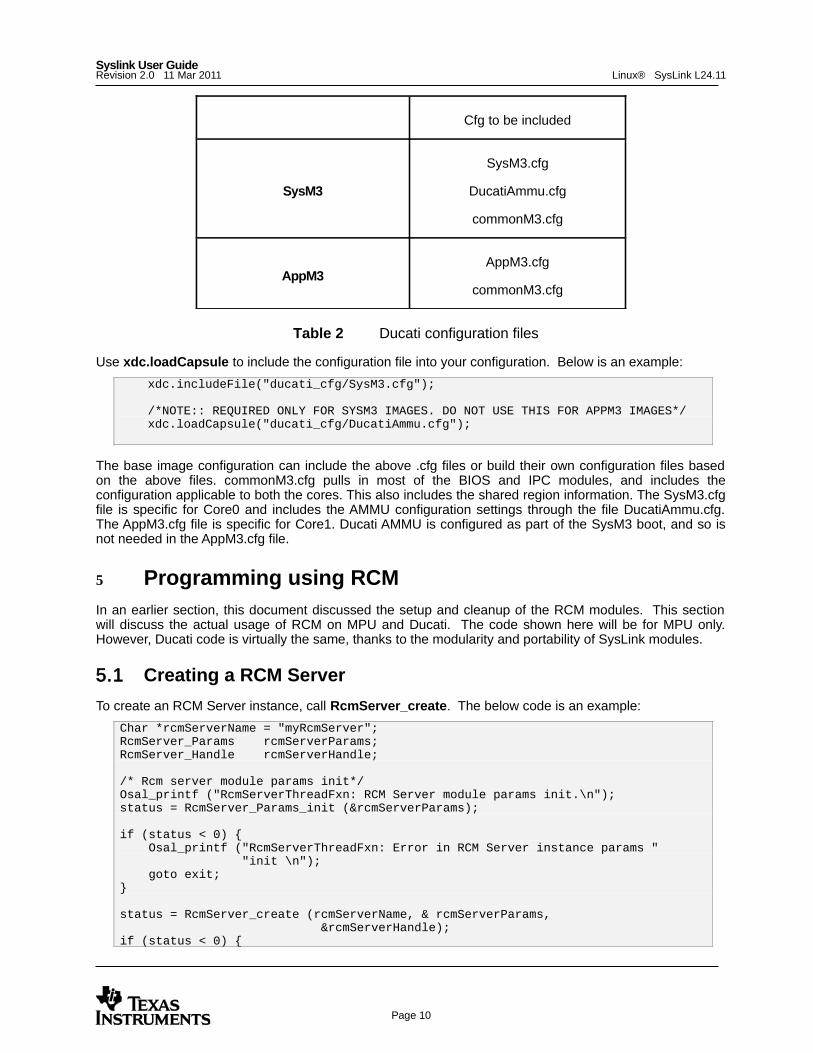
First, include the Ducati configuration file that best matches your application. There are four files:
Linux® SysLink L24.11Syslink User GuideRevision 2.0 11 Mar 2011
Page 10
Cfg to be included
SysM3
SysM3.cfg
DucatiAmmu.cfg
commonM3.cfg
AppM3AppM3.cfg
commonM3.cfg
Table 2 Ducati configuration files
Use xdc.loadCapsule to include the configuration file into your configuration. Below is an example:
xdc.includeFile("ducati_cfg/SysM3.cfg");
/*NOTE:: REQUIRED ONLY FOR SYSM3 IMAGES. DO NOT USE THIS FOR APPM3 IMAGES*/xdc.loadCapsule("ducati_cfg/DucatiAmmu.cfg");
The base image configuration can include the above .cfg files or build their own configuration files based on the above files. commonM3.cfg pulls in most of the BIOS and IPC modules, and includes the configuration applicable to both the cores. This also includes the shared region information. The SysM3.cfg file is specific for Core0 and includes the AMMU configuration settings through the file DucatiAmmu.cfg. The AppM3.cfg file is specific for Core1. Ducati AMMU is configured as part of the SysM3 boot, and so is not needed in the AppM3.cfg file.
5 Programming using RCMIn an earlier section, this document discussed the setup and cleanup of the RCM modules. This section will discuss the actual usage of RCM on MPU and Ducati. The code shown here will be for MPU only. However, Ducati code is virtually the same, thanks to the modularity and portability of SysLink modules.
5.1 Creating a RCM Server
To create an RCM Server instance, call RcmServer_create. The below code is an example:
Char *rcmServerName = "myRcmServer";RcmServer_Params rcmServerParams;RcmServer_Handle rcmServerHandle;
/* Rcm server module params init*/Osal_printf ("RcmServerThreadFxn: RCM Server module params init.\n");status = RcmServer_Params_init (&rcmServerParams);
if (status < 0) { Osal_printf ("RcmServerThreadFxn: Error in RCM Server instance params " "init \n"); goto exit;}
status = RcmServer_create (rcmServerName, & rcmServerParams, &rcmServerHandle);if (status < 0) {
Linux® SysLink L24.11Syslink User GuideRevision 2.0 11 Mar 2011
Page 11
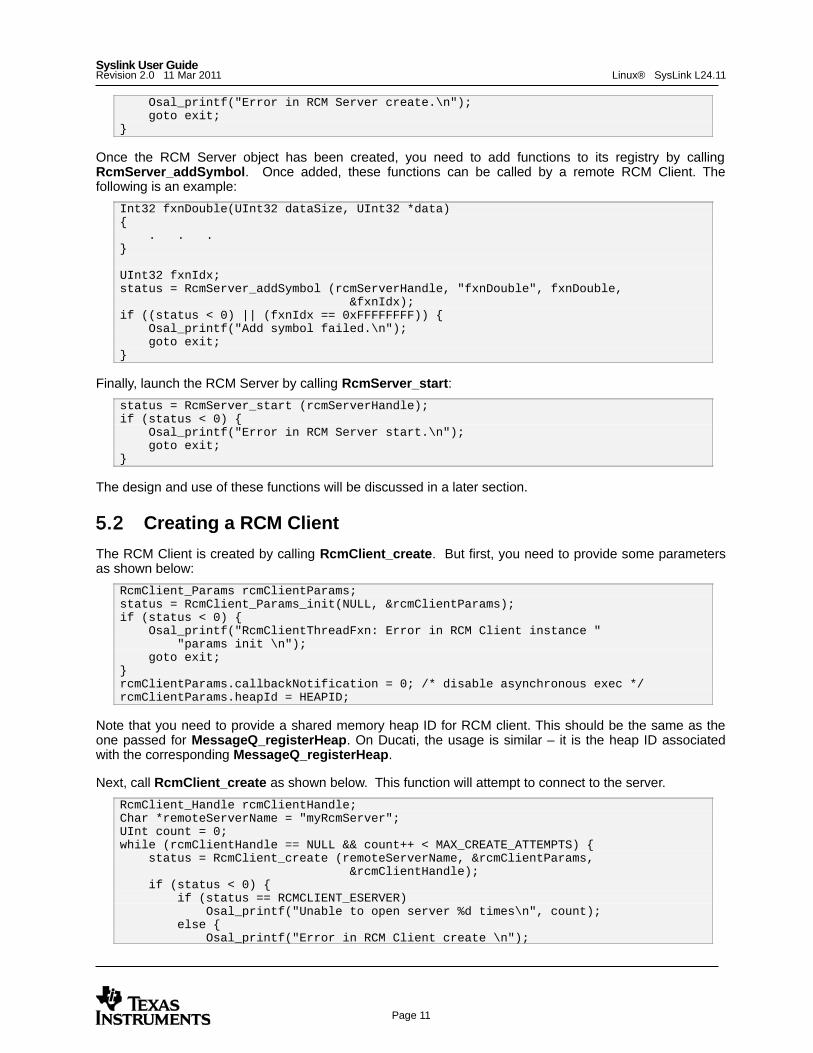
Osal_printf("Error in RCM Server create.\n"); goto exit;}
Once the RCM Server object has been created, you need to add functions to its registry by calling RcmServer_addSymbol. Once added, these functions can be called by a remote RCM Client. The following is an example:
Int32 fxnDouble(UInt32 dataSize, UInt32 *data){ . . .}
UInt32 fxnIdx;status = RcmServer_addSymbol (rcmServerHandle, "fxnDouble", fxnDouble, &fxnIdx);if ((status < 0) || (fxnIdx == 0xFFFFFFFF)) { Osal_printf("Add symbol failed.\n"); goto exit;}
Finally, launch the RCM Server by calling RcmServer_start:
status = RcmServer_start (rcmServerHandle);if (status < 0) { Osal_printf("Error in RCM Server start.\n"); goto exit;}
The design and use of these functions will be discussed in a later section.
5.2 Creating a RCM Client
The RCM Client is created by calling RcmClient_create. But first, you need to provide some parameters as shown below:
RcmClient_Params rcmClientParams;status = RcmClient_Params_init(NULL, &rcmClientParams);if (status < 0) { Osal_printf("RcmClientThreadFxn: Error in RCM Client instance " "params init \n"); goto exit;}rcmClientParams.callbackNotification = 0; /* disable asynchronous exec */rcmClientParams.heapId = HEAPID;
Note that you need to provide a shared memory heap ID for RCM client. This should be the same as the one passed for MessageQ_registerHeap. On Ducati, the usage is similar – it is the heap ID associated with the corresponding MessageQ_registerHeap.
Next, call RcmClient_create as shown below. This function will attempt to connect to the server.
RcmClient_Handle rcmClientHandle;Char *remoteServerName = "myRcmServer";UInt count = 0;while (rcmClientHandle == NULL && count++ < MAX_CREATE_ATTEMPTS) { status = RcmClient_create (remoteServerName, &rcmClientParams, &rcmClientHandle); if (status < 0) { if (status == RCMCLIENT_ESERVER) Osal_printf("Unable to open server %d times\n", count); else { Osal_printf("Error in RCM Client create \n");
Linux® SysLink L24.11Syslink User GuideRevision 2.0 11 Mar 2011
Page 12
goto exit; } }}
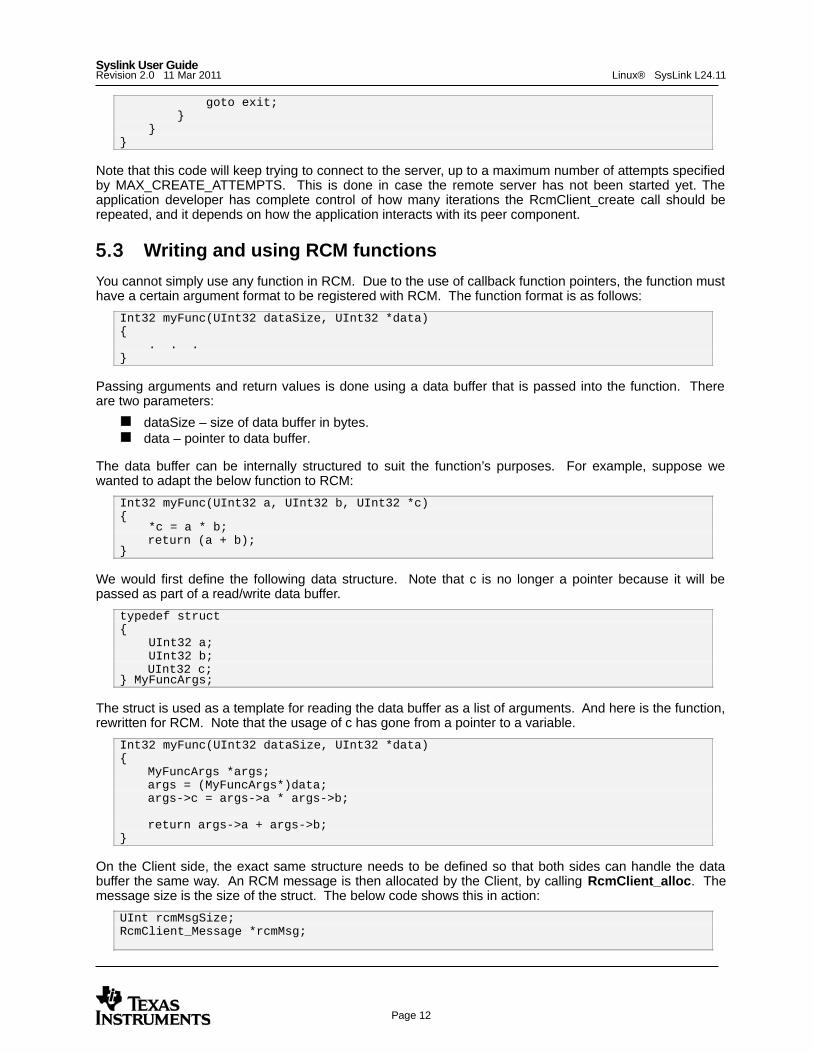
Note that this code will keep trying to connect to the server, up to a maximum number of attempts specified by MAX_CREATE_ATTEMPTS. This is done in case the remote server has not been started yet. The application developer has complete control of how many iterations the RcmClient_create call should be repeated, and it depends on how the application interacts with its peer component.
5.3 Writing and using RCM functions
You cannot simply use any function in RCM. Due to the use of callback function pointers, the function must have a certain argument format to be registered with RCM. The function format is as follows:
Int32 myFunc(UInt32 dataSize, UInt32 *data){ . . .}
Passing arguments and return values is done using a data buffer that is passed into the function. There are two parameters:
dataSize – size of data buffer in bytes. data – pointer to data buffer.
The data buffer can be internally structured to suit the function’s purposes. For example, suppose we wanted to adapt the below function to RCM:
Int32 myFunc(UInt32 a, UInt32 b, UInt32 *c){ *c = a * b;
return (a + b);}
We would first define the following data structure. Note that c is no longer a pointer because it will be passed as part of a read/write data buffer.
typedef struct { UInt32 a; UInt32 b;
UInt32 c;} MyFuncArgs;
The struct is used as a template for reading the data buffer as a list of arguments. And here is the function, rewritten for RCM. Note that the usage of c has gone from a pointer to a variable.
Int32 myFunc(UInt32 dataSize, UInt32 *data){
MyFuncArgs *args;args = (MyFuncArgs*)data;args->c = args->a * args->b;
return args->a + args->b;}
On the Client side, the exact same structure needs to be defined so that both sides can handle the data buffer the same way. An RCM message is then allocated by the Client, by calling RcmClient_alloc. The message size is the size of the struct. The below code shows this in action:
UInt rcmMsgSize;RcmClient_Message *rcmMsg;
Linux® SysLink L24.11Syslink User GuideRevision 2.0 11 Mar 2011
Page 13
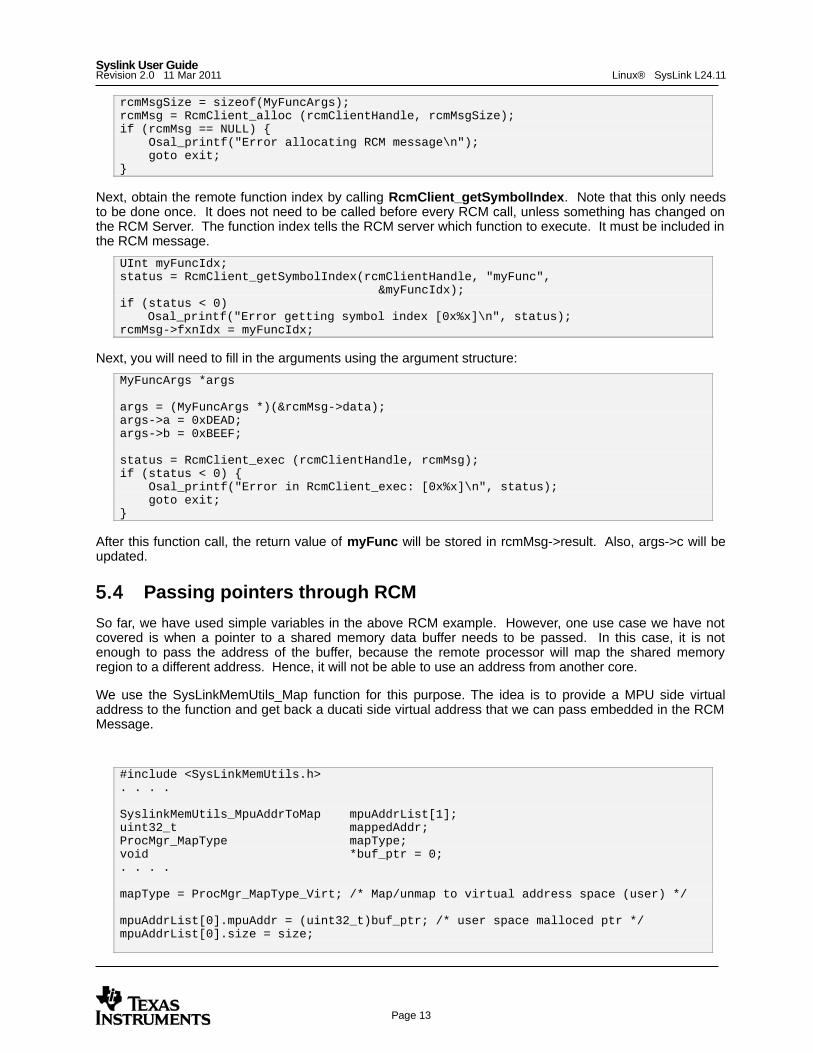
rcmMsgSize = sizeof(MyFuncArgs);rcmMsg = RcmClient_alloc (rcmClientHandle, rcmMsgSize);if (rcmMsg == NULL) { Osal_printf("Error allocating RCM message\n"); goto exit;}
Next, obtain the remote function index by calling RcmClient_getSymbolIndex. Note that this only needs to be done once. It does not need to be called before every RCM call, unless something has changed on the RCM Server. The function index tells the RCM server which function to execute. It must be included in the RCM message.
UInt myFuncIdx;status = RcmClient_getSymbolIndex(rcmClientHandle, "myFunc", &myFuncIdx);if (status < 0)
Osal_printf("Error getting symbol index [0x%x]\n", status);rcmMsg->fxnIdx = myFuncIdx;
Next, you will need to fill in the arguments using the argument structure:
MyFuncArgs *args
args = (MyFuncArgs *)(&rcmMsg->data);args->a = 0xDEAD;args->b = 0xBEEF;
status = RcmClient_exec (rcmClientHandle, rcmMsg);if (status < 0) { Osal_printf("Error in RcmClient_exec: [0x%x]\n", status); goto exit;}
After this function call, the return value of myFunc will be stored in rcmMsg->result. Also, args->c will be updated.
5.4 Passing pointers through RCM
So far, we have used simple variables in the above RCM example. However, one use case we have not covered is when a pointer to a shared memory data buffer needs to be passed. In this case, it is not enough to pass the address of the buffer, because the remote processor will map the shared memory region to a different address. Hence, it will not be able to use an address from another core.
We use the SysLinkMemUtils_Map function for this purpose. The idea is to provide a MPU side virtual address to the function and get back a ducati side virtual address that we can pass embedded in the RCM Message.
#include <SysLinkMemUtils.h>. . . .
SyslinkMemUtils_MpuAddrToMap mpuAddrList[1];uint32_t mappedAddr;ProcMgr_MapType mapType;void *buf_ptr = 0;. . . .
mapType = ProcMgr_MapType_Virt; /* Map/unmap to virtual address space (user) */
mpuAddrList[0].mpuAddr = (uint32_t)buf_ptr; /* user space malloced ptr */mpuAddrList[0].size = size;
Linux® SysLink L24.11Syslink User GuideRevision 2.0 11 Mar 2011
Page 14
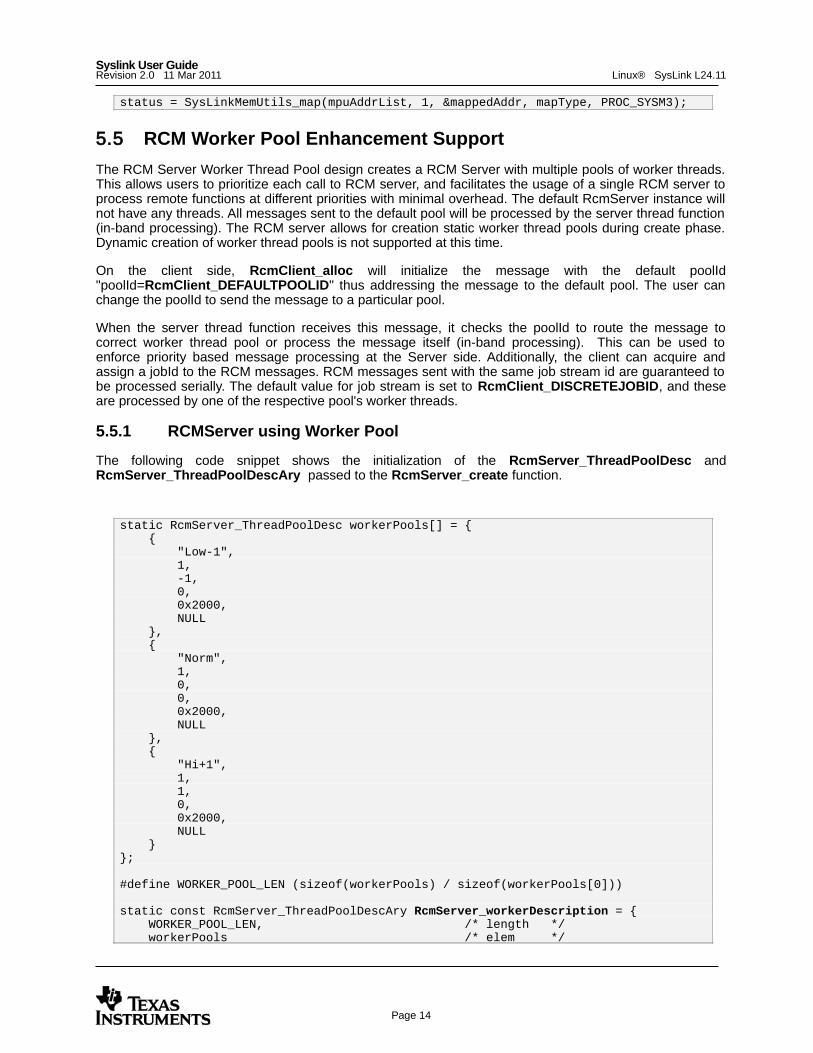
status = SysLinkMemUtils_map(mpuAddrList, 1, &mappedAddr, mapType, PROC_SYSM3);
5.5 RCM Worker Pool Enhancement Support
The RCM Server Worker Thread Pool design creates a RCM Server with multiple pools of worker threads. This allows users to prioritize each call to RCM server, and facilitates the usage of a single RCM server to process remote functions at different priorities with minimal overhead. The default RcmServer instance will not have any threads. All messages sent to the default pool will be processed by the server thread function (in-band processing). The RCM server allows for creation static worker thread pools during create phase. Dynamic creation of worker thread pools is not supported at this time.
On the client side, RcmClient_alloc will initialize the message with the default poolId "poolId=RcmClient_DEFAULTPOOLID" thus addressing the message to the default pool. The user can change the poolId to send the message to a particular pool.
When the server thread function receives this message, it checks the poolId to route the message to correct worker thread pool or process the message itself (in-band processing). This can be used to enforce priority based message processing at the Server side. Additionally, the client can acquire and assign a jobId to the RCM messages. RCM messages sent with the same job stream id are guaranteed to be processed serially. The default value for job stream is set to RcmClient_DISCRETEJOBID, and these are processed by one of the respective pool's worker threads.
5.5.1 RCMServer using Worker Pool
The following code snippet shows the initialization of the RcmServer_ThreadPoolDesc and RcmServer_ThreadPoolDescAry passed to the RcmServer_create function.
static RcmServer_ThreadPoolDesc workerPools[] = { { "Low-1", 1, -1, 0, 0x2000, NULL }, { "Norm", 1, 0, 0, 0x2000, NULL }, { "Hi+1", 1, 1, 0, 0x2000, NULL }};
#define WORKER_POOL_LEN (sizeof(workerPools) / sizeof(workerPools[0]))
static const RcmServer_ThreadPoolDescAry RcmServer_workerDescription = { WORKER_POOL_LEN, /* length */ workerPools /* elem */
Linux® SysLink L24.11Syslink User GuideRevision 2.0 11 Mar 2011
Page 15
};
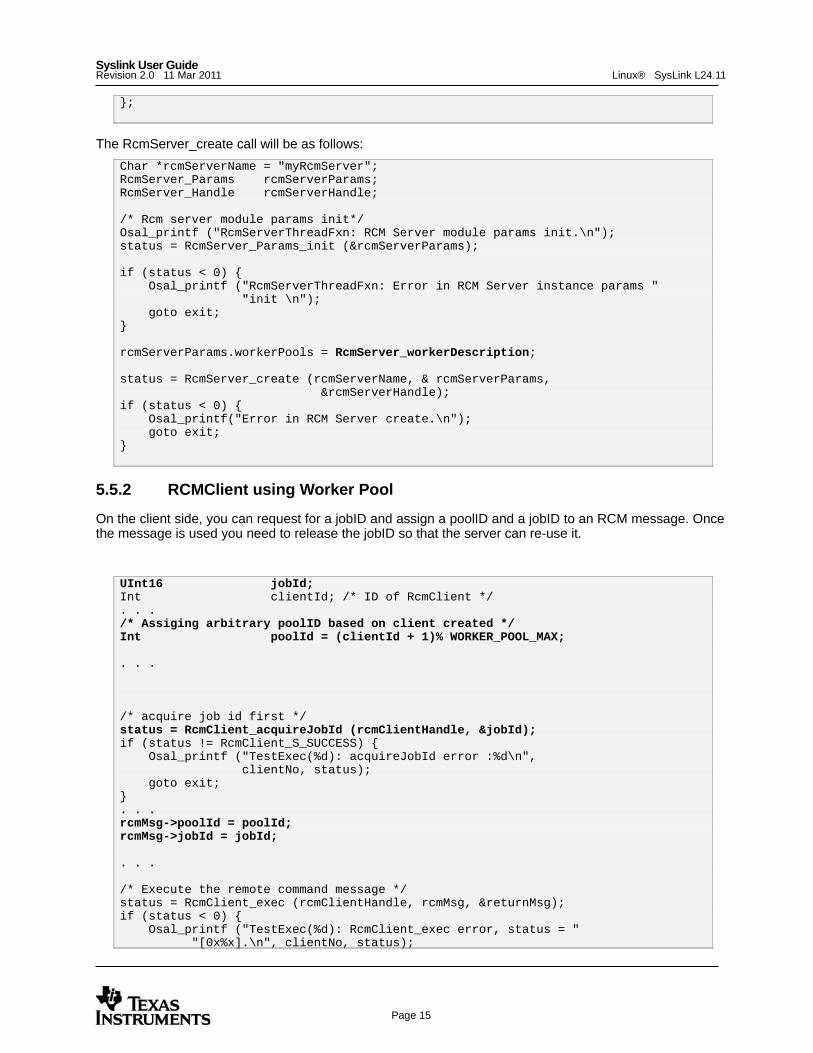
The RcmServer_create call will be as follows:
Char *rcmServerName = "myRcmServer";RcmServer_Params rcmServerParams;RcmServer_Handle rcmServerHandle;
/* Rcm server module params init*/Osal_printf ("RcmServerThreadFxn: RCM Server module params init.\n");status = RcmServer_Params_init (&rcmServerParams);
if (status < 0) { Osal_printf ("RcmServerThreadFxn: Error in RCM Server instance params " "init \n"); goto exit;}
rcmServerParams.workerPools = RcmServer_workerDescription;
status = RcmServer_create (rcmServerName, & rcmServerParams, &rcmServerHandle);if (status < 0) { Osal_printf("Error in RCM Server create.\n"); goto exit;}
5.5.2 RCMClient using Worker Pool
On the client side, you can request for a jobID and assign a poolID and a jobID to an RCM message. Once the message is used you need to release the jobID so that the server can re-use it.
UInt16 jobId;Int clientId; /* ID of RcmClient */. . ./* Assiging arbitrary poolID based on client created */Int poolId = (clientId + 1)% WORKER_POOL_MAX;
. . .
/* acquire job id first */status = RcmClient_acquireJobId (rcmClientHandle, &jobId);if (status != RcmClient_S_SUCCESS) { Osal_printf ("TestExec(%d): acquireJobId error :%d\n", clientNo, status); goto exit;}. . . rcmMsg->poolId = poolId;rcmMsg->jobId = jobId;
. . .
/* Execute the remote command message */status = RcmClient_exec (rcmClientHandle, rcmMsg, &returnMsg);if (status < 0) { Osal_printf ("TestExec(%d): RcmClient_exec error, status = " "[0x%x].\n", clientNo, status);
Linux® SysLink L24.11Syslink User GuideRevision 2.0 11 Mar 2011
Page 16
goto exit;}
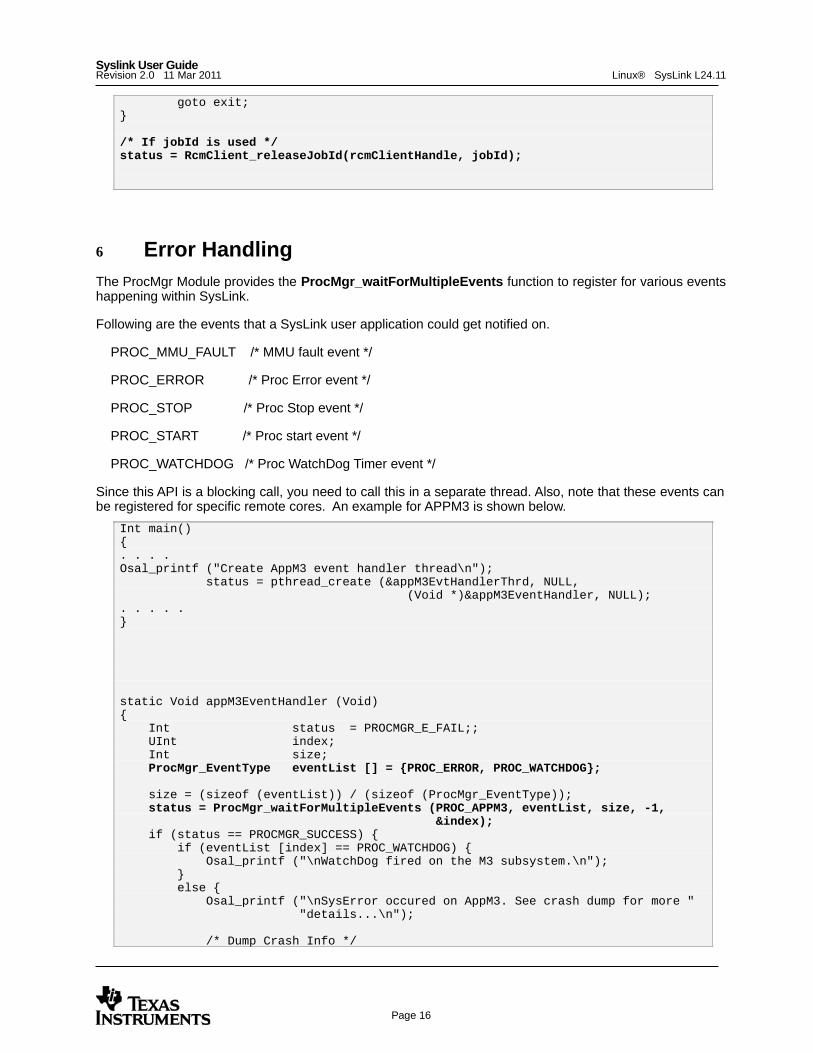
/* If jobId is used */status = RcmClient_releaseJobId(rcmClientHandle, jobId);
6 Error HandlingThe ProcMgr Module provides the ProcMgr_waitForMultipleEvents function to register for various events happening within SysLink.
Following are the events that a SysLink user application could get notified on.
PROC_MMU_FAULT /* MMU fault event */
PROC_ERROR /* Proc Error event */
PROC_STOP /* Proc Stop event */
PROC_START /* Proc start event */
PROC_WATCHDOG /* Proc WatchDog Timer event */
Since this API is a blocking call, you need to call this in a separate thread. Also, note that these events can be registered for specific remote cores. An example for APPM3 is shown below.
Int main(){. . . . Osal_printf ("Create AppM3 event handler thread\n"); status = pthread_create (&appM3EvtHandlerThrd, NULL, (Void *)&appM3EventHandler, NULL); . . . . .}
static Void appM3EventHandler (Void){ Int status = PROCMGR_E_FAIL;; UInt index; Int size; ProcMgr_EventType eventList [] = {PROC_ERROR, PROC_WATCHDOG};
size = (sizeof (eventList)) / (sizeof (ProcMgr_EventType)); status = ProcMgr_waitForMultipleEvents (PROC_APPM3, eventList, size, -1, &index); if (status == PROCMGR_SUCCESS) { if (eventList [index] == PROC_WATCHDOG) { Osal_printf ("\nWatchDog fired on the M3 subsystem.\n"); } else { Osal_printf ("\nSysError occured on AppM3. See crash dump for more " "details...\n");
/* Dump Crash Info */
Linux® SysLink L24.11Syslink User GuideRevision 2.0 11 Mar 2011
Page 17
. . . }
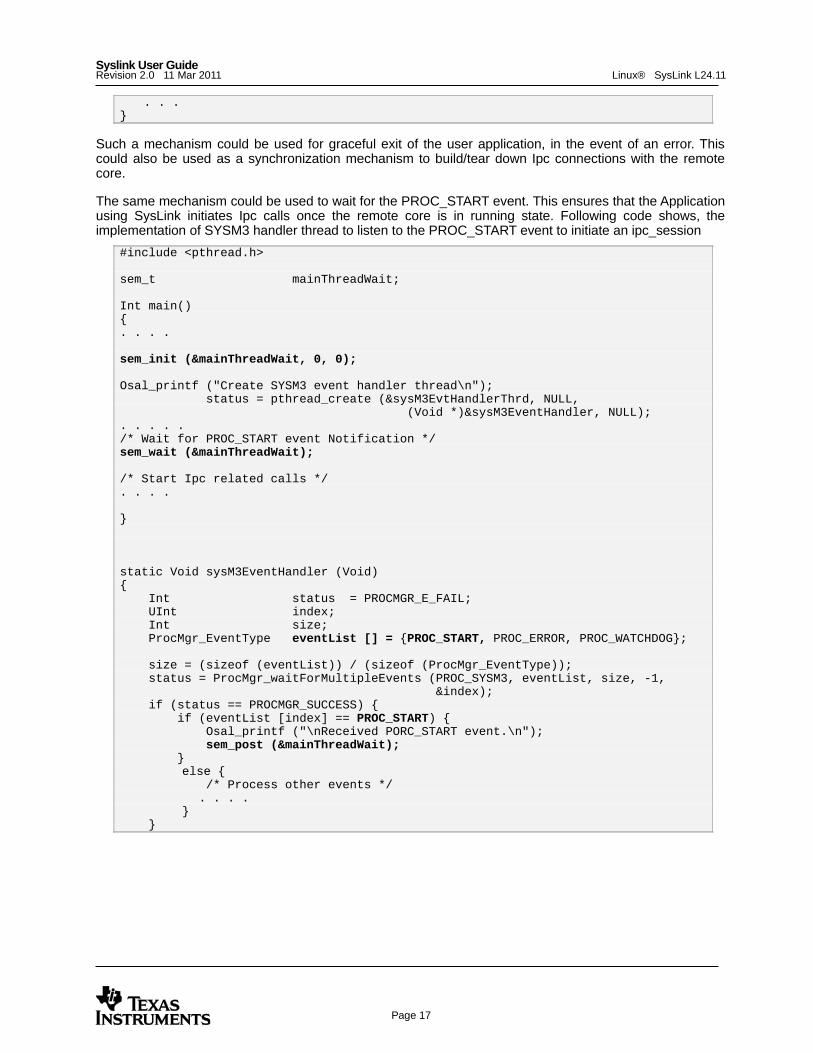
Such a mechanism could be used for graceful exit of the user application, in the event of an error. This could also be used as a synchronization mechanism to build/tear down Ipc connections with the remote core.
The same mechanism could be used to wait for the PROC_START event. This ensures that the Application using SysLink initiates Ipc calls once the remote core is in running state. Following code shows, the implementation of SYSM3 handler thread to listen to the PROC_START event to initiate an ipc_session
#include <pthread.h>
sem_t mainThreadWait;
Int main(){. . . .
sem_init (&mainThreadWait, 0, 0);
Osal_printf ("Create SYSM3 event handler thread\n"); status = pthread_create (&sysM3EvtHandlerThrd, NULL, (Void *)&sysM3EventHandler, NULL); . . . . ./* Wait for PROC_START event Notification */sem_wait (&mainThreadWait);
/* Start Ipc related calls */. . . .
}
static Void sysM3EventHandler (Void){ Int status = PROCMGR_E_FAIL; UInt index; Int size; ProcMgr_EventType eventList [] = {PROC_START, PROC_ERROR, PROC_WATCHDOG};
size = (sizeof (eventList)) / (sizeof (ProcMgr_EventType)); status = ProcMgr_waitForMultipleEvents (PROC_SYSM3, eventList, size, -1, &index); if (status == PROCMGR_SUCCESS) { if (eventList [index] == PROC_START) { Osal_printf ("\nReceived PORC_START event.\n");
sem_post (&mainThreadWait); }
else { /* Process other events */ . . . .
} }

Linux® SysLink L24.11Syslink User GuideRevision 2.0 11 Mar 2011
Page 18
7 SysLink DaemonThe current implementation of SysLink banks on the SysLink daemon to load/start firmware and monitor for events to trigger recovery. Since, SysLink Daemon is responsible for loading and starting of all remote cores, it is responsible for creating the HeabBufMP (in the current implementation 2 HeapBufs, Refer Section on creating HeapBufMP) and also registering the heaps with the MessageQ module. This crucial step is not done in applications that rely on SysLink daemon to control the remote cores.
Related Documents