1 Suhr PT100 Plugin Manual Developed by Brainworx Audio in partnership with JS Technologies and Distributed by Plugin Alliance.

Welcome message from author
This document is posted to help you gain knowledge. Please leave a comment to let me know what you think about it! Share it to your friends and learn new things together.
Transcript

1
Suhr PT100Plugin Manual
Developed by Brainworx Audio in partnership with JS Technologies
and Distributed by Plugin Alliance.

2
The PT100 is the result of the combined efforts of two guitar legends - John
Suhr and and Pete Thorn. Pete’s decades of experience in studio and touring
performance, combined with John’s decades of designing amplifiers to
form a unique partnership. The PT100 is the culmination of five years work,
tweaking, fine tuning, and shaping the amp into what it is today.
With three distinct channels each producing it’s own unique tone the
PT100 is as flexible as it is powerful. With it’s custom ‘plexi’ style output
transformer, four EL-34 power tubes and six 12AX7 pre amp you can
produce everything from American clean tones all the way through
blistering British high gain action.
Not only does the plugin nail the heart and soul of the PT100 but you’ll
find the extra features you’ve come to expect from Brainworx products.
A full FX Rack with host syncable lo-fi delay, noise gate, tight and smooth
filters, power soak and a power amp bypass feature.
On top of this you find 119 Brainworx Advanced Recording Chains (Impulse
Responses) created at Brainworx s studio using boutique cabinets, high
end microhones and their Neve VXS console. You’ll also find a number of
special IRs recorded by Pete Thorn himself.
2

3
Key Features Summary• Exact emulation of the original Suhr PT-100 Tube Guitar Amp
• Plugin approved by John Suhr and Peter Thorn
• 100 watt, three-channel tube amplifier head loaded with a custom
„Plexi-style“ output transformer, four EL-34 power tubes and six 12AX7
preamp tubes
• 119 Brainworx Advanced Recording Chains (Impulse Responses)
including
• FX Rack include host-syncable lo-fi delay, noise gate, tight and smooth
filters, power soak, pre and power amp bypass
The Suhr PT100 features three distinct channels offering unmatched versatility
Channel 1: The green channel is an American voiced clean with bottom
end punch and seemingly limitless headroom. It responds well to pedals
and has a Crunch mode that can be enabled which pushes this channel
into medium gain, overdrive territory.
Channel 2: The blue channel is voiced like a vintage British style amp,
but with more gain on tap. Pete wanted this channel to sound similar to
another one of his favorite amps, the Suhr SL68, but with a gain control
available in the preamp section. This is an extremely versatile channel
that works equally well with low, mid, and even high gain tones.
Channel 3: The red channel is the ultimate high gain, modded British tone,
that only Suhr can deliver. Its heritage is from the legendary high gain
circuit of the Custom Audio Amplifiers. The gain is thick and juicy, with
rich harmonic overtones and limitless sustain.
Suhr PT100Plugin Manual

4
Amp
1 Gain 1
Adjusts the overall gain of Channel 1.
2 Crunch
Engaging this switch changes the character of Channel 1 from pristine clean
to a thicker classic tone that breaks up when Gain 1 is set at higher settings.
3 Bright 1
Adds brightness and sparkle.
4 Bass 1
Adjusts the amount of bass. Turning it clockwise increases the amount of
bottom-end, giving you a fuller tone. Turning it counter clockwise will reduce
the bottom-end, which is useful when performing at louder volumes.
5 Middle 1
Adjusts the midrange. Turning it clockwise increases the amount of
mids. Turning it counter clockwise will reduce the mids and produce a
mid-scooped sound.
6 Treble 1
Adjusts the treble. Turning it clockwise increases the amount of top-end,
giving your tone clarity and brightness. Turning it counter clockwise will
produce a warmer sound, ideal for dialing in smoother Jazz-like tones.
7 Level 1
Adjusts the overall output (Master Volume) of Channel 1.
8 Gain 2
Adjusts the overall gain of Channel 2.
9 Bright
Adds brightness to Channels 2 and 3.
Suhr PT100Plugin Manual
1 4 5 6 7 8
2 3 9

5
Suhr PT100Plugin Manual
1 Gain 3
Adjusts the overall gain of Channel 3.
2 Bass 2/3
Adjusts the amount of bass. Turning it clockwise increases the amount
of bottom-end, giving you a fuller tone. Turning it counter clockwise
will reduce the bottom-end, which is useful when performing at louder
volumes.
3 Middle 2/3
Adjusts the midrange. Turning it clockwise increases the amount of
mids. Turning it counter clockwise will reduce the mids and produce a
mid-scooped sound.
4 Treble 2/3
Adjusts the treble. Turning it clockwise increases the amount of top-end,
giving your tone clarity and brightness. Turning it counter clockwise will
produce a warmer sound, excellent for dialing in smooth fluid-like lead tones.
5 Level 2
Adjusts the overall level (Master Volume) of Channel 2.
6 Level 3
Adjusts the overall level (Master Volume) of Channel 3.
7 Feedback
This control adjusts the overall feel of the power amp section from smooth
and spongy, (at lower settings) to tight and aggressive (at higher settings).
8 Presence
Adjusts the amount of high frequencies added to your tone. Turning it
clockwise will add more sparkle.
9 Depth
Selects the amount of low-end boost added to the PT-100’s power section,
this will provide more bottom end while retaining clarity.
1 2 3 4 5 6 7 8 9

6
Suhr PT100Plugin Manual
1 Boost
Engage gain boost in the pre amp stage for all channels.
2 Channels Selection
Selects the channels.
FX Rack
Noise Gate3 Closed
When lit, this LED indicates that the Noise Gate is Closed. This means the
Threshold setting is higher than the incoming signal and the noise gate
dims the output signal of the amplifier by the amount adjusted with the
Range control (e.g. 15dB in the picture above).
4 Noise Gate on/off
On/Off switch. Enable or disable the Noise Gate completely. Switch up
(‘On‘) means the Noise Gate is activated.
5 Threshold
Continuous knob, -120db to 0db. The Noise Gate will dim the output signal
of the amplifier as soon as the input signal (your guitar signal) falls below
a certain level. This level is called Threshold. Adjust the Thresold so the
noise of the overdriven amp will be reduced, but make sure you don t cut
fading notes or chords.
6 Range
Continuous knob, 0db to 100db. The output level of your amplifier
will be reduced or muted when the input signal is lower than the
Threshold setting. You may dim the output level only by a few
decibels (dB), or completely mute the output in pauses by setting the
Range to its maximum.
1 2
3 4 5 6

7
Suhr PT100Plugin Manual
Amp Filters1 Tight Filter
Three-way switch: ”Pre”, ”Post” and ”Off”. With the Tight filter you can cut
Low frequencies of either the DI guitar signal (Pre) or the processed amp
output (Post).
• Pre: If your pickups produce an unintentional rumbling bass sound you
can filter the low end before the DI sound even hits the amplifier.
• Post: If you want to cut some of the low end of your amplifier setting
(maybe even only temporary) you can use this studio quality high pass
filter to reduce the bass.
• Off: When set to Off the Tight filter is in bypass mode.
2 Tight Frequency
With the Tight filter you can cut Low frequencies of either the DI guitar
signal (Pre) or the processed amp output (Post).
3 Smooth Frequency
With the Smooth filter you can cut high frequencies of either the DI guitar
signal (Pre) or the processed amp output (Post).
4 Smooth Filter
Three-way switch: ”Pre”, ”Post” and ”Off”. With the Smooth filter you can
cut HIGH frequencies of either the DI guitar signal (Pre) or the processed
amp output (Post).
• Pre: If your pickups catch a lot of hiss or noise you can filter the high end
before the DI sound even hits the amplifier.
• Post: If you want to cut some of the high end of your amplifier setting
(maybe even only temporary) you can use this studio quality low pass
filter.
• Off: When set to Off the Smooth filter is in bypass mode.
2 31 4
8
Suhr PT100Plugin Manual
DelayWe closely modelled a vintage delay stomp box to capture the true
essence of retro delay effects. Limited frequency bandwidth and ever
decreasing high frequencies on repeats add authenticity to the sound.
We also included more contemporary features like a mix parameter &
DAW controlled bpm / tempo sync. We realise you will use your favourite
selection of external effects, such as Chorus, Flangers, Reverbs and
even other Delays to achieve your signature guitar tone but an instantly
accessible delay is extremely useful when surfing and creating patches.
For example, testing a new lead patch without hearing at least a touch of
delay wouldn’t sound realistic for many players, so we added this effect
for your convenience; plus we love vintage style echo!
1 Delay On/Off
Use this parameter to activate or deactivate the delay and all of its
parameters with this switch.
• Switch up: Delay is activated.
• Switch down: Delay is bypassed / off.
2 Tap*
Use this parameter with your mouse to click with the groove of the song
and the delay will adjust to your tapping automatically. This is a nice and
easy way to set delays to musically pleasing times, especially if there is
no fixed tempo in the song.
3 Time
Alternatively you may just dial in a delay time based on milliseconds using
the Time knob. Use this parameter to adjust the delay time between 15ms
and 1000ms.
4 x2*
Use this button to redouble the current Delay time.
5 /2*
Use this button to half the current Delay time.
x2 & /2 Buttons
Both buttons can be pressed repeatedly as long as the maximum delay
time of 400ms is not exceeded.
1 3 4 52
9
Suhr PT100Plugin Manual
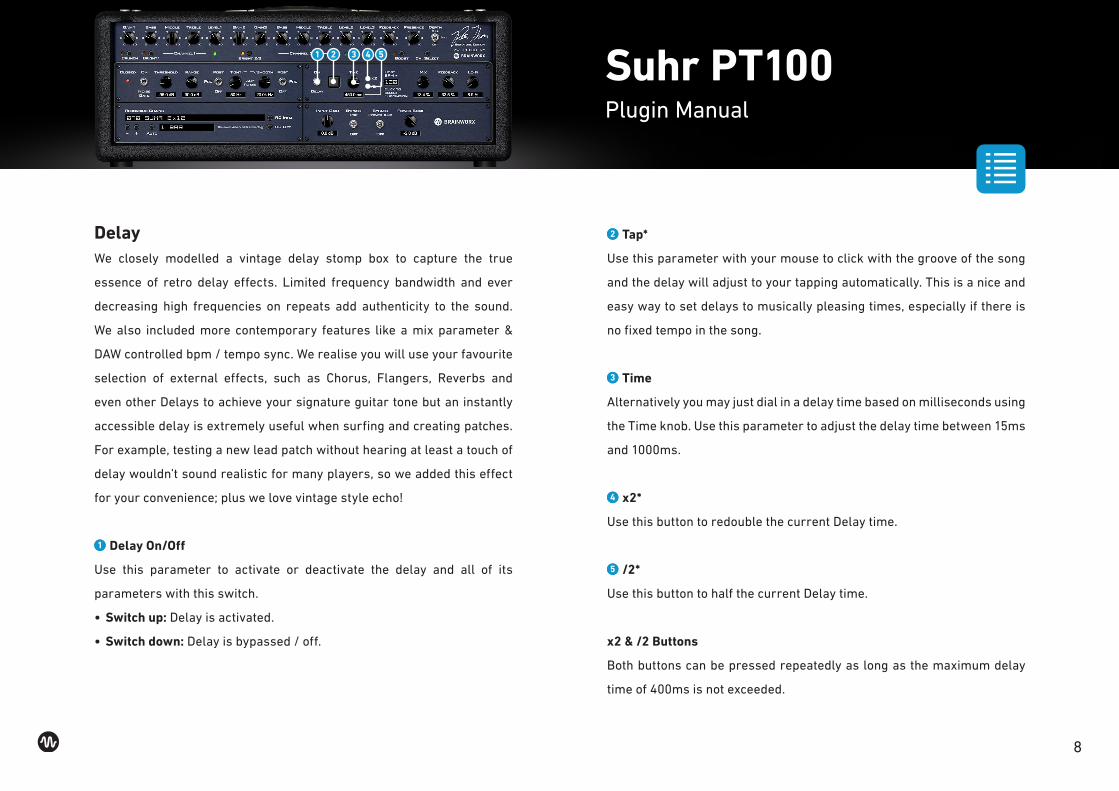
1 Host BPM
Click on the BPM number in the GUI and a pull-down menu opens up. Now
you can select musical values like half notes, quarters, triplets, etc. All
values will be based upon the tempo that is being displayed in the BPM
window. The tempo will be synced with the tempo of your audio session
automatically.
2 Mix
Use this parameter to control the amount of dry (unprocessed) vs. wet
(processed) signal. The Mix parameter blend in as much delay signal with
the dry amplifier sound as desired. For unobtrusive delays we recommend
settings around 10%, heavier effect sounds may require settings of 50%
or more.
3 Feedback
This controls the number of repeats. While a setting of 99% will result in
an almost infinite delay loop, a typical setting for a rock lead sound may
be around 25%.
* Note: Custom control, not automatable
4 Lo-Fi
Use this parameter to add creative destruction to your delay signal.
With the Lo-Fi knob you control the amount of internal distortion, the
resampling quality, etc. The higher you go the worse the quality gets from
a pure technical stand point... but the more interesting it may sound for
many guitar sounds and styles.
Recording Chain
Brainworx Advanced IR Technology
Simply select a speaker and a complete studio setup by browsing through
the Recording Chains pull-down menu.
In the past two decades Brainworx owner Dirk Ulrich has produced and
recorded with members of Dream Theater, Toto, Michael Jackson and with
many more famous and infamous acts. The Brainworx Studio in Germany
(www.brainworx- studio.de) is equipped with one of only nine NEVE VXS
72 consoles ever made, and it also hosts some of the best outboard EQs
and mic pre-amps available.
2 3 41
10
Suhr PT100Plugin Manual
Using this impressive setup Dirk has produced a huge variety of custo-
mized ‘Recording Chains’ for the Suhr PT100 amplifier, which you can
apply to your Plugin amp settings. Imagine a selection of 119 perfectly
mic’d and EQ-ed cabinets that you can select and use instantly with a
single mouse click!
We carefully placed up to 12 microphones on each cabinet used. These
mics were then fed to individual channels on the vintage Neve VXS console.
This configuration gave us fine control over the mix of the various micro-
phones used and the ability to apply Neve filters and EQs. The final mix
was routed to Pro Tools for recording.
An innovative new approach was also used to capture various pre-amps
and EQ chains. A parallel chain was created that was split to three
different hardware preamps and EQs. These parallel chains were also
routed to their own discrete channels on the Neve VXS console and then
sent to Pro Tools for capture. This routing allowed us to record each chain
individually or blend them for interesting combinations.
Many amp simulations give you some captured impulses of a selection of
cabinets and microphones, then they leave it up to you to EQ and further
process these incomplete setups by mixing different microphone setups,
adjusting phase and EQ, and so on. But this really is not an easy job; it
takes years of experience to get it right.
Now all you have to do is select the Recording Chain that sounds best for
your amp channel and setting, adjust the Tone Stack and Gain and you’re
good to go. Recallable, reliable, flexible and fast.
And if for any reason you should not like any of the Recording Chains the
Plugin offers, you may use the very last setting (labeled Cabinet Bypass)
and use your own mic’d cabinet or external IR software. This setting
will also give you the sound of a tube amp wired straight into a console,
which also may be a nice effects sound.
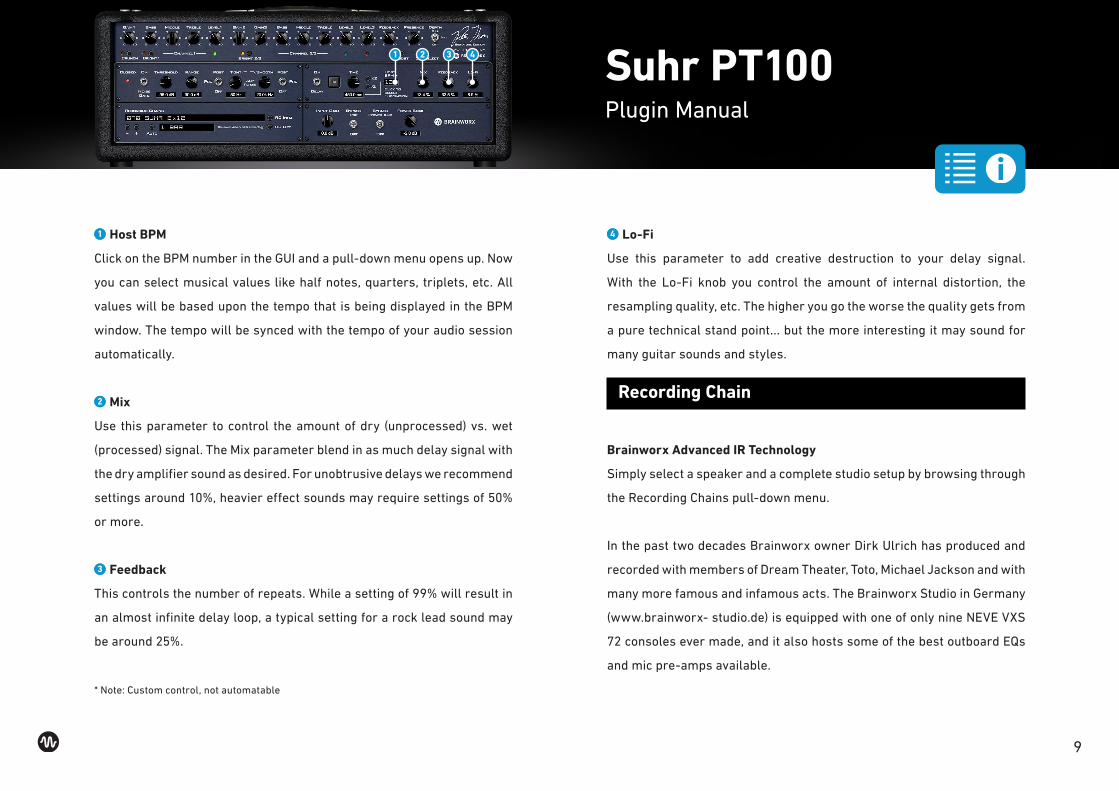
1 + / - Switches (Plus / Minus)
Browse through the Recording Chains by either using the pull-down
menu of the Recording Chain text box (see above) or just click through the
settings using the ‘+’ and ’-‘ symbols.
1

11
Suhr PT100Plugin Manual
1 Auto & Bar selection
If you are trying to find the best sounding Recording Chain for your song
it can be a hassle to have to play a few chords, grab the mouse to select
the next Recording Chain, play a few notes again, grabbing the mouse
again, etc.
For this reason the PT100 offers you Auto mode: Just select a pattern (1
Bar, 2 Bars or 4 Bars) and the Plugin will activate the available Recording
Chains automation, following the actual tempo setting of your DAW. You
can now play uninterrupted and simply listen to the sound of the various
Recording Chains as the Plugin switches through all of them every single
bar, every two bars or every four bars, depending on your setting. As soon as
you hear the speaker setup you like best just stop Auto mode by clicking
the AUTO button again and manually select the desired Recording Chain.
Afterwards just fine-tweak the Tone Section and Gain and there you are.
2 RC Info
The RC Info feature showing you exactly what kind of setup was used to
produce the Recording Chain you selected.
3 RC Off
This button lets you bypass the entire Recording Chain section. Use then
your own mic‘d cabinet or external IR loader.
4 Input Gain
If you want to drive the input of the Suhr PT100 preamp harder or softer
you may adjust the input gain to your liking. Some single coil pickups from
older or vintage guitars may deliver low level output that can be compen-
sated with the Input Gain.
The opposite goes for a lot of heavy metal style humbuckers. If you have
recorded the DI signal too hot or if you are using other Plugins before
entering the Suhr PT100 amp Plugin you may want to dim the input signal.
With most standard guitars you can and should leave the Input Gain at 0
(zero) though.
1 43
2
12
Suhr PT100Plugin Manual
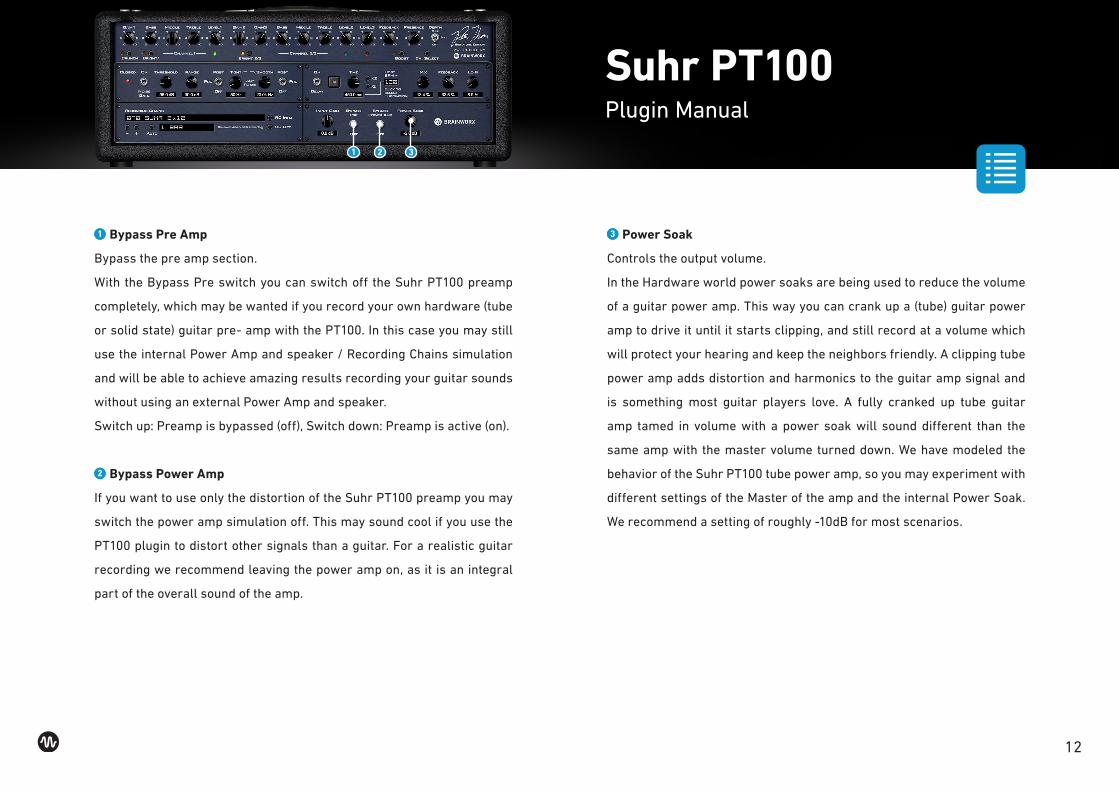
1 Bypass Pre Amp
Bypass the pre amp section.
With the Bypass Pre switch you can switch off the Suhr PT100 preamp
completely, which may be wanted if you record your own hardware (tube
or solid state) guitar pre- amp with the PT100. In this case you may still
use the internal Power Amp and speaker / Recording Chains simulation
and will be able to achieve amazing results recording your guitar sounds
without using an external Power Amp and speaker.
Switch up: Preamp is bypassed (off), Switch down: Preamp is active (on).
2 Bypass Power Amp
If you want to use only the distortion of the Suhr PT100 preamp you may
switch the power amp simulation off. This may sound cool if you use the
PT100 plugin to distort other signals than a guitar. For a realistic guitar
recording we recommend leaving the power amp on, as it is an integral
part of the overall sound of the amp.
3 Power Soak
Controls the output volume.
In the Hardware world power soaks are being used to reduce the volume
of a guitar power amp. This way you can crank up a (tube) guitar power
amp to drive it until it starts clipping, and still record at a volume which
will protect your hearing and keep the neighbors friendly. A clipping tube
power amp adds distortion and harmonics to the guitar amp signal and
is something most guitar players love. A fully cranked up tube guitar
amp tamed in volume with a power soak will sound different than the
same amp with the master volume turned down. We have modeled the
behavior of the Suhr PT100 tube power amp, so you may experiment with
different settings of the Master of the amp and the internal Power Soak.
We recommend a setting of roughly -10dB for most scenarios.
321
13
Suhr PT100Plugin Manual
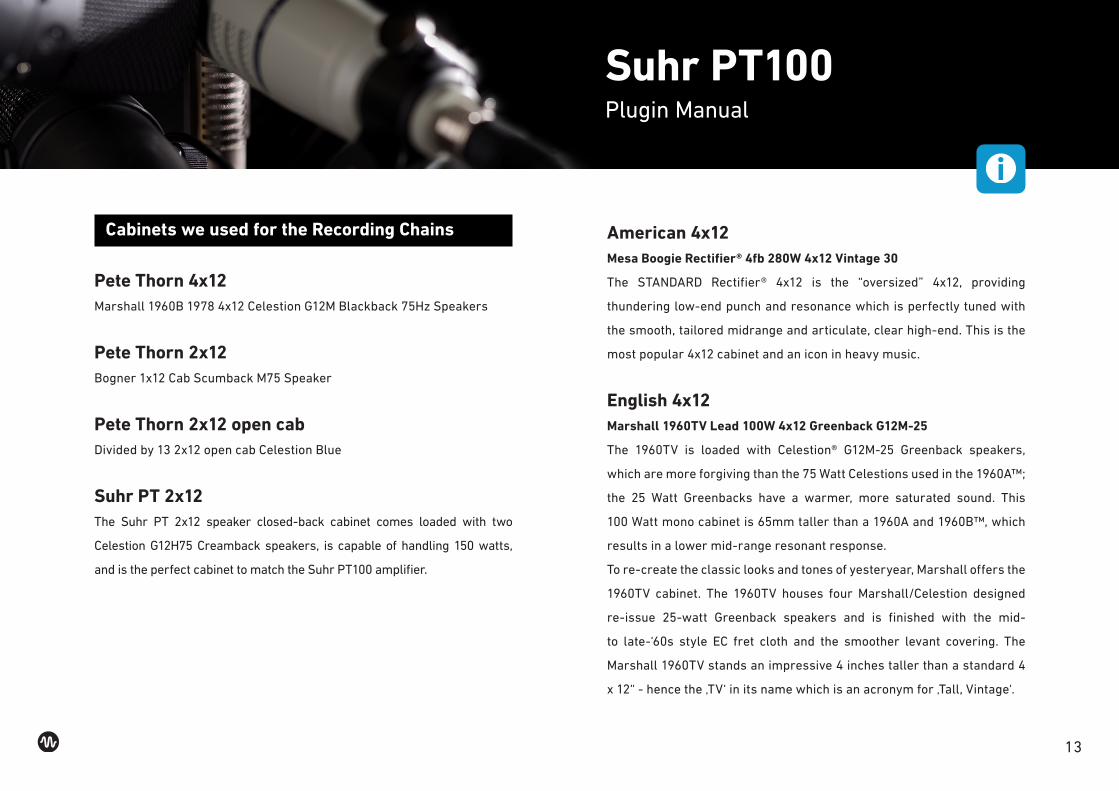
Cabinets we used for the Recording Chains
Pete Thorn 4x12 Marshall 1960B 1978 4x12 Celestion G12M Blackback 75Hz Speakers
Pete Thorn 2x12 Bogner 1x12 Cab Scumback M75 Speaker
Pete Thorn 2x12 open cab Divided by 13 2x12 open cab Celestion Blue
Suhr PT 2x12The Suhr PT 2x12 speaker closed-back cabinet comes loaded with two
Celestion G12H75 Creamback speakers, is capable of handling 150 watts,
and is the perfect cabinet to match the Suhr PT100 amplifier.
American 4x12Mesa Boogie Rectifier® 4fb 280W 4x12 Vintage 30
The STANDARD Rectifier® 4x12 is the “oversized” 4x12, providing
thundering low-end punch and resonance which is perfectly tuned with
the smooth, tailored midrange and articulate, clear high-end. This is the
most popular 4x12 cabinet and an icon in heavy music.
English 4x12Marshall 1960TV Lead 100W 4x12 Greenback G12M-25
The 1960TV is loaded with Celestion® G12M-25 Greenback speakers,
which are more forgiving than the 75 Watt Celestions used in the 1960A™;
the 25 Watt Greenbacks have a warmer, more saturated sound. This
100 Watt mono cabinet is 65mm taller than a 1960A and 1960B™, which
results in a lower mid-range resonant response.
To re-create the classic looks and tones of yesteryear, Marshall offers the
1960TV cabinet. The 1960TV houses four Marshall/Celestion designed
re-issue 25-watt Greenback speakers and is finished with the mid-
to late-‘60s style EC fret cloth and the smoother levant covering. The
Marshall 1960TV stands an impressive 4 inches taller than a standard 4
x 12“ - hence the ‚TV‘ in its name which is an acronym for ‚Tall, Vintage‘.
14
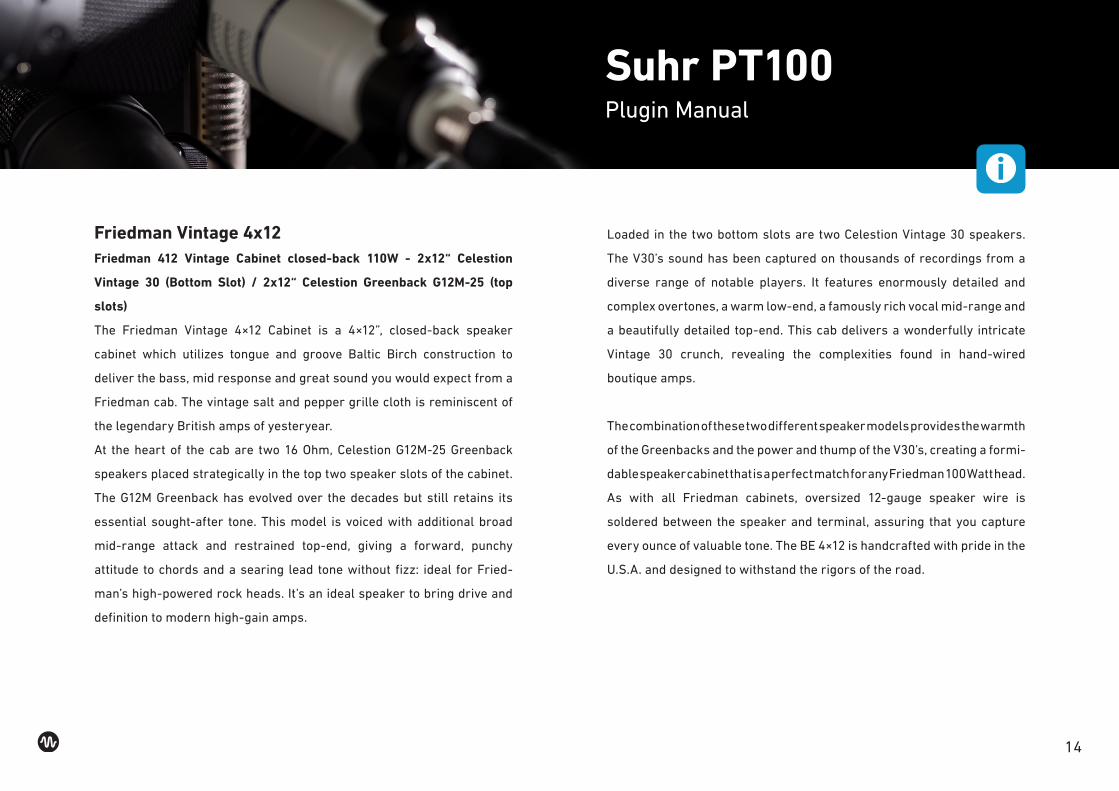
Friedman Vintage 4x12 Friedman 412 Vintage Cabinet closed-back 110W - 2x12“ Celestion
Vintage 30 (Bottom Slot) / 2x12“ Celestion Greenback G12M-25 (top
slots)
The Friedman Vintage 4×12 Cabinet is a 4×12”, closed-back speaker
cabinet which utilizes tongue and groove Baltic Birch construction to
deliver the bass, mid response and great sound you would expect from a
Friedman cab. The vintage salt and pepper grille cloth is reminiscent of
the legendary British amps of yesteryear.
At the heart of the cab are two 16 Ohm, Celestion G12M-25 Greenback
speakers placed strategically in the top two speaker slots of the cabinet.
The G12M Greenback has evolved over the decades but still retains its
essential sought-after tone. This model is voiced with additional broad
mid-range attack and restrained top-end, giving a forward, punchy
attitude to chords and a searing lead tone without fizz: ideal for Fried-
man’s high-powered rock heads. It’s an ideal speaker to bring drive and
definition to modern high-gain amps.
Loaded in the two bottom slots are two Celestion Vintage 30 speakers.
The V30’s sound has been captured on thousands of recordings from a
diverse range of notable players. It features enormously detailed and
complex overtones, a warm low-end, a famously rich vocal mid-range and
a beautifully detailed top-end. This cab delivers a wonderfully intricate
Vintage 30 crunch, revealing the complexities found in hand-wired
boutique amps.
The combination of these two different speaker models provides the warmth
of the Greenbacks and the power and thump of the V30’s, creating a formi-
dable speaker cabinet that is a perfect match for any Friedman 100 Watt head.
As with all Friedman cabinets, oversized 12-gauge speaker wire is
soldered between the speaker and terminal, assuring that you capture
every ounce of valuable tone. The BE 4×12 is handcrafted with pride in the
U.S.A. and designed to withstand the rigors of the road.
Suhr PT100Plugin Manual

15
Suhr PT100Plugin Manual
ORANGE 4x12Orange® PPC 212 closed-back 120W - 2x12 Celestion Vintage 30
speakers
The 120W Orange Amplifiers PPC212-C guitar speaker cabinet is crafted
using 13-ply high-density 18mm birch plywood throughout like every
Power Projection Cabinet (PPC). Orange speaker enclosures, like Orange
amplifiers, are built to last with manufacturing techniques that assure
extremely rugged construction. Orange‘s unique ‚skid‘ design feet help to
acoustically couple these cabinets to the stage to provide a tighter bass
response and full range definition. All Orange Amplifiers‘ speaker enclo-
sures are equipped with Celestion Vintage 30 speakers and are equipped
with comfortable flush cabinet handles. The Celestion Vintage 30 Speaker
recreates the sound of the original Celestion Blue with new cone and
coil assembly. Improved performance: rated at 60W capability, handles
extra heat generated by higher power equipment. The Vintage 30 handles
massive overdrive tones with ease. It‘s a classic 2x12 loudspeaker.

16
Suhr PT100Plugin Manual
Top Toolbar
1 Undo / Redo
You can undo and redo changes you made to the controls of the PT100
plugin at any time. The Undo / Redo will work for as many as 32 steps.
This makes experimenting and tweaking knobs easy. If you don t like
what you did... just undo it.
2 Settings (A/B/C/D)
The PT100 amp plugin offers four internal settings (A/B/C/D) which will
be stored with every preset. So, one preset can contain up to four amp
and effects settings.
You may use similar amp settings with more or less delay, different delay
times, etc., to quickly switch between different sounds, or you can switch
from clean to crunch to lead within one setup / preset.
The Settings can be automated in your DAW. This way it s possible to switch
from a dry rhythm sound to a lead sound with tons of delay, for example.
3 Copy / Paste
To set up variations of similar sounds you don t have to dial in all the
parameters several times. Let s say you like your setting A and want to
use the same sound, just without delay, as setting B.
• Simply press Copy while you are in setting A.
• Switch to setting B by pressing ‘B’ in the settings section.
• Press Paste, now setting B is identical to setting A.
• Bypass the Delay.
Now you can switch between A & B and play the same sound with or
without delay.
4 FX Rack
Toggle between FX Rack and Standard view.
5 About
Information about the development of the plugin.
1 2 3 4 5

17
Suhr PT100Plugin Manual
Bottom Toolbar
1 PA Logo
Clicking the Plugin Alliance logo takes you to the Plugin Alliance website
via your web browser, that s if your computer is online.
2 License Type
The toolbar displays information about the type of license you’re running:
Trial licenses will be displayed along with the number of days until
expiration; there is no note for full licenses as these are unlimited.
3 $ (Icon)
If you are using a demo / trial version of our products, you can always click
this icon to open a browser that redirects you to the respective product
page in the Plugin Alliance store. This is where you can easily purchase a
product without having to look it up on our website.
4 Key (Icon)
Clicking on the key icon brings up the activation dialog, allowing you
to manually reauthorize a device in the event of a license upgrade or
addition. You can also use this feature to activate additional computers
or USB ash drives.
5 ? (Icon)
Clicking the ? icon opens up a context menu that links to the product
manual PDF, as well as other helpful links, e.g. to check for product
updates online. You must have a PDF reader installed on your computer
to be able to read the manual.
System Requirements & FAQ (Links)
For latest System Requirements & Supported Platforms
https://www.plugin-alliance.com/en/systemrequirements.html
Particular details for your product
https://www.plugin-alliance.com/en/products.html
Installation, Activation, Authorisation and FAQ s
https://www.plugin-alliance.com/en/support.html
54321
18
Suhr PT100Plugin Manual
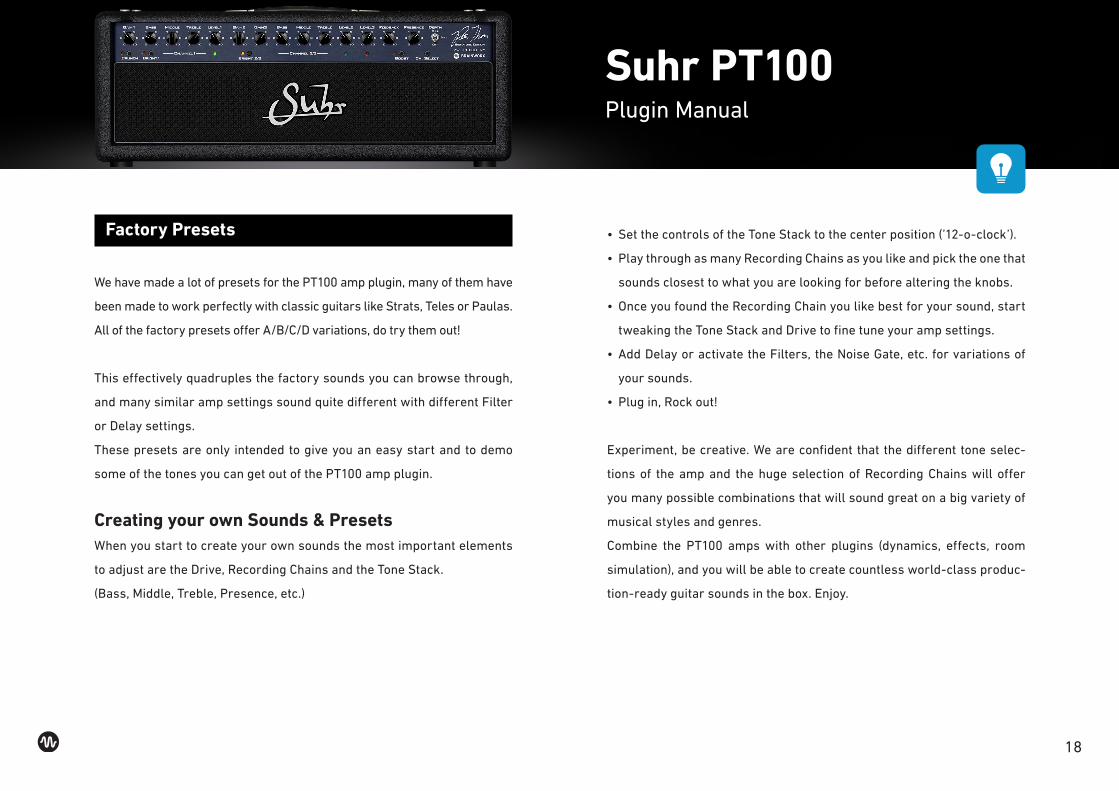
Factory Presets
We have made a lot of presets for the PT100 amp plugin, many of them have
been made to work perfectly with classic guitars like Strats, Teles or Paulas.
All of the factory presets offer A/B/C/D variations, do try them out!
This effectively quadruples the factory sounds you can browse through,
and many similar amp settings sound quite different with different Filter
or Delay settings.
These presets are only intended to give you an easy start and to demo
some of the tones you can get out of the PT100 amp plugin.
Creating your own Sounds & PresetsWhen you start to create your own sounds the most important elements
to adjust are the Drive, Recording Chains and the Tone Stack.
(Bass, Middle, Treble, Presence, etc.)
• Set the controls of the Tone Stack to the center position (’12-o-clock’).
• Play through as many Recording Chains as you like and pick the one that
sounds closest to what you are looking for before altering the knobs.
• Once you found the Recording Chain you like best for your sound, start
tweaking the Tone Stack and Drive to fine tune your amp settings.
• Add Delay or activate the Filters, the Noise Gate, etc. for variations of
your sounds.
• Plug in, Rock out!
Experiment, be creative. We are confident that the different tone selec-
tions of the amp and the huge selection of Recording Chains will offer
you many possible combinations that will sound great on a big variety of
musical styles and genres.
Combine the PT100 amps with other plugins (dynamics, effects, room
simulation), and you will be able to create countless world-class produc-
tion-ready guitar sounds in the box. Enjoy.

Plug in, Rock out! - www.brainworx.audio
Related Documents