D’source Digital Learning Environment for Design - www.dsource.in 1 Source: http://www.dsource.in/course/storyboard-and-ani- matic-animation Design Course Storyboard and Animatic Animation Images in sequence for Animation by Prof. Phani Tetali and Vajra Pancharia IDC, IIT Bombay 1. Storyboard for Animation 2. Animatic for Animation 3. Video 4. Contact Details

Welcome message from author
This document is posted to help you gain knowledge. Please leave a comment to let me know what you think about it! Share it to your friends and learn new things together.
Transcript
D’sourceDigital Learning Environment for Design - www.dsource.in
1
Source: http://www.dsource.in/course/storyboard-and-ani-matic-animation
Design Course
Storyboard and Animatic AnimationImages in sequence for AnimationbyProf. Phani Tetali and Vajra PanchariaIDC, IIT Bombay
1. Storyboard for Animation2. Animatic for Animation3. Video4. Contact Details
D’sourceDigital Learning Environment for Design - www.dsource.in
2
Storyboard for Animation
Source: http://www.dsource.in/course/storyboard-and-ani-matic-animation/storyboard-animation
Design Course
Storyboard and Animatic AnimationImages in sequence for AnimationbyProf. Phani Tetali and Vajra PanchariaIDC, IIT Bombay
1. Storyboard for Animation1.1. Introduction1.2. A Basic Storyboard Template1.3. Storyboard Conventions
2. Animatic for Animation3. Video4. Contact Details
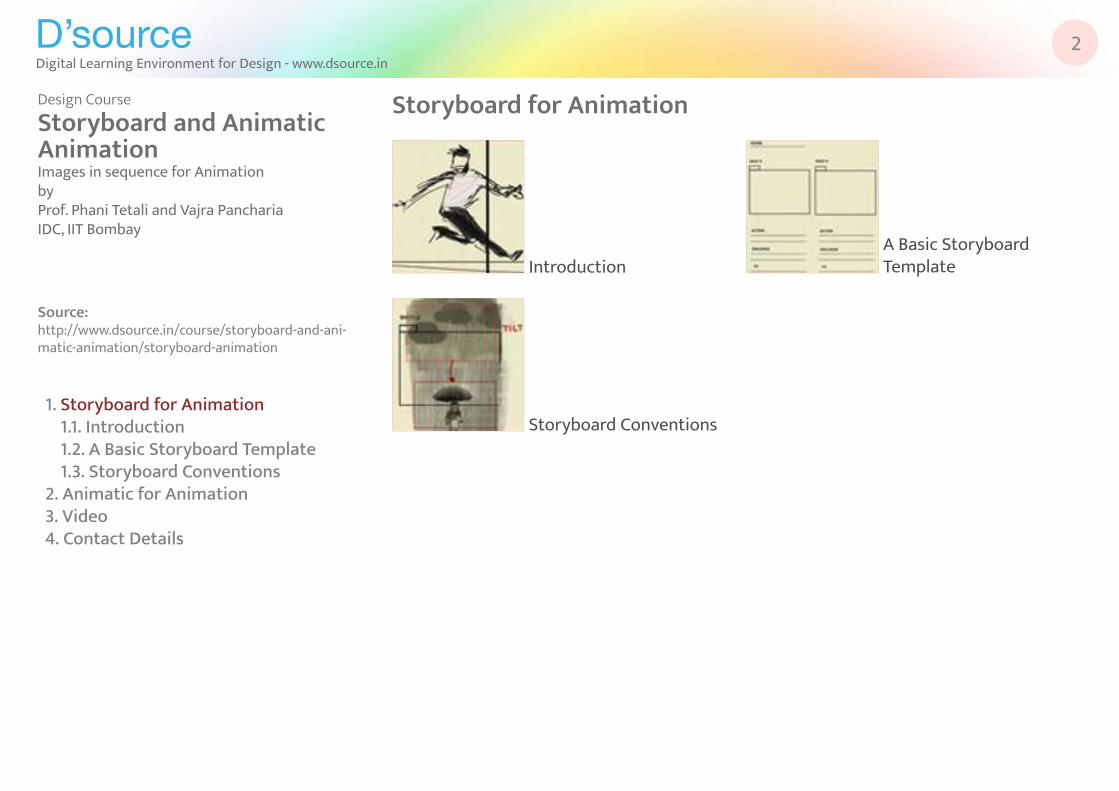
IntroductionA Basic Storyboard Template
Storyboard Conventions
D’sourceDigital Learning Environment for Design - www.dsource.in
3
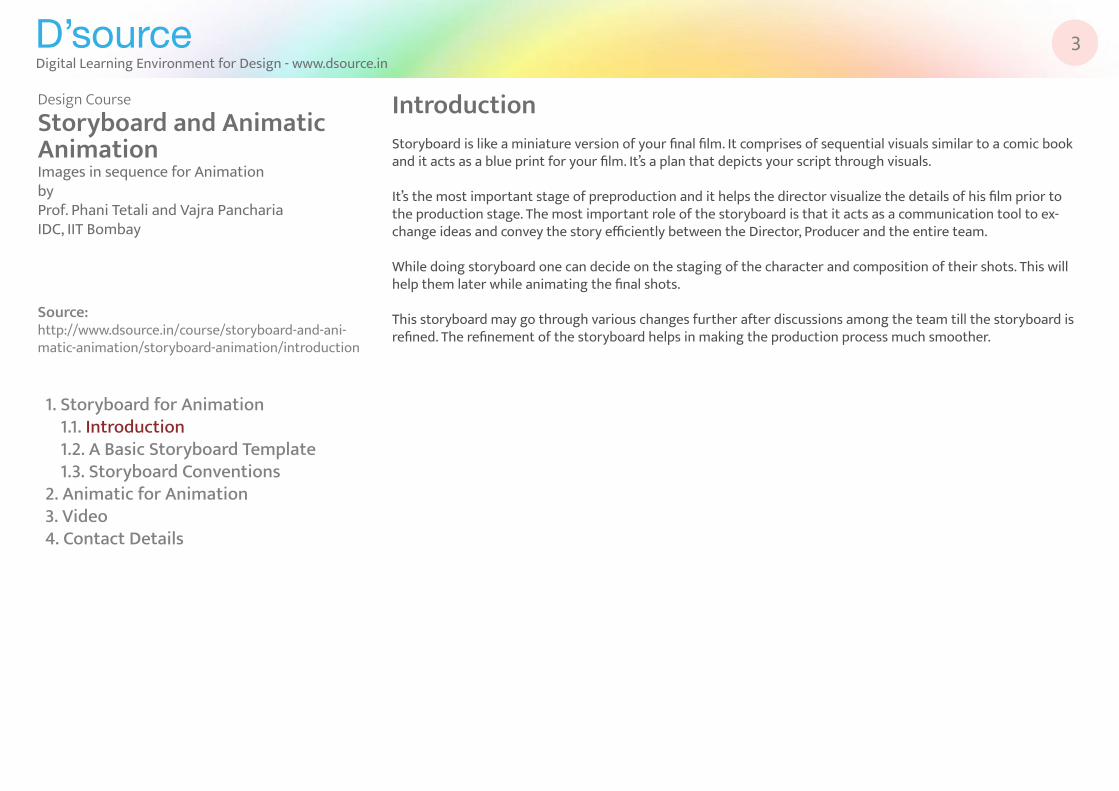
Introduction Storyboard is like a miniature version of your final film. It comprises of sequential visuals similar to a comic book and it acts as a blue print for your film. It’s a plan that depicts your script through visuals.
It’s the most important stage of preproduction and it helps the director visualize the details of his film prior to the production stage. The most important role of the storyboard is that it acts as a communication tool to ex-change ideas and convey the story efficiently between the Director, Producer and the entire team.
While doing storyboard one can decide on the staging of the character and composition of their shots. This will help them later while animating the final shots.
This storyboard may go through various changes further after discussions among the team till the storyboard is refined. The refinement of the storyboard helps in making the production process much smoother.
Source: http://www.dsource.in/course/storyboard-and-ani-matic-animation/storyboard-animation/introduction
Design Course
Storyboard and Animatic AnimationImages in sequence for AnimationbyProf. Phani Tetali and Vajra PanchariaIDC, IIT Bombay
1. Storyboard for Animation1.1. Introduction1.2. A Basic Storyboard Template1.3. Storyboard Conventions
2. Animatic for Animation3. Video4. Contact Details

D’sourceDigital Learning Environment for Design - www.dsource.in
4
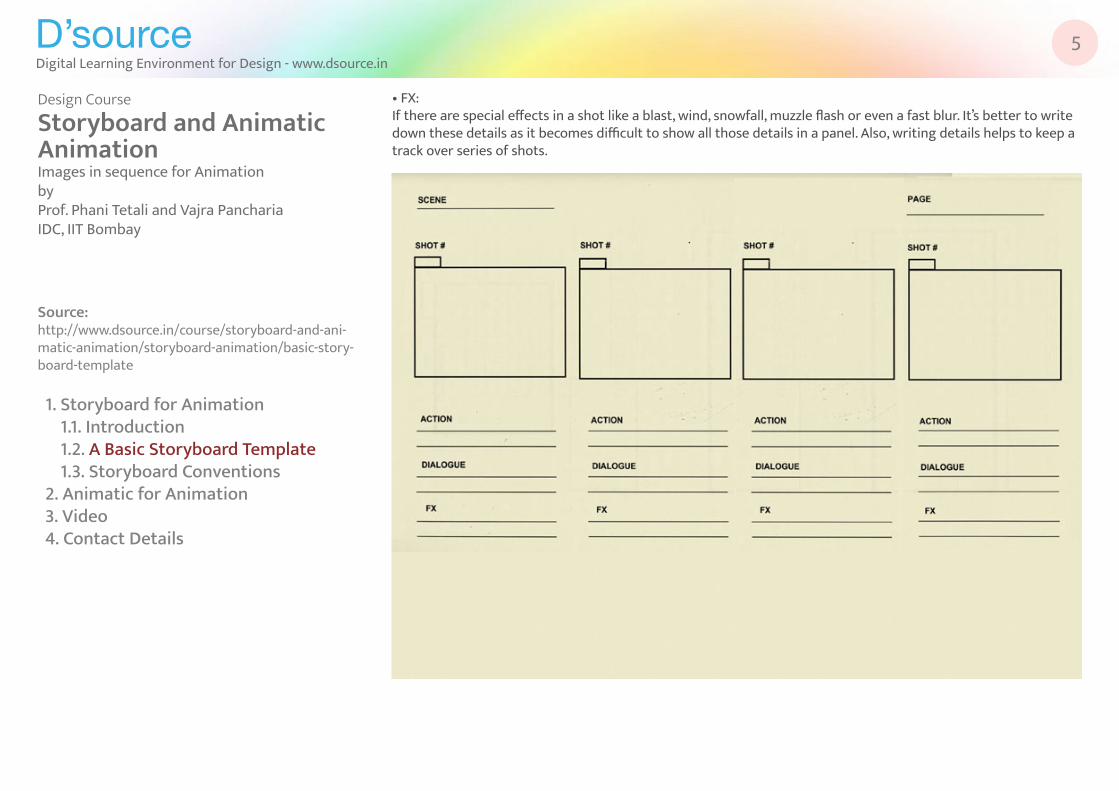
A Basic Storyboard Template A basic storyboard template comprises of the following information:
• Scene Number:As film comprises of many scenes, it’s important that one keeps a track of the scene number.
When does a scene change?A scene changes when there is a change in space or time in a film.
For Example:Sandy is in a meeting in his office room and suddenly he gets a call from his home. He goes out of his office to catch a rickshaw to his home. So in this situation, there are two scenes because of change in place. These are:- Scene 1- Sandy inside his office,- Scene 2 - Sandy outside his office in the rickshaw.
• Shot Number:A scene can comprise of many shots, so one needs to mention shot number in the storyboard template as it helps keep the track how many shots have been completed or which shot is being animated or cleaned or color-ed. This information helps a lot later in organizing the production process effectively.
• Panel to Draw:This area is for you to draw your shot as per the script description. The drawing size of this area depends on the aspect ratio of your film. • Action:It’s always better to fill in the details about the action that’s happening in the shot, whether it’s a conversation, a fight sequence or a chase sequence, those details should be mentioned in the action area. One has to describe the action in the shot and write it down beneath the panel, so that it’s easier to understand.
• Dialogue:According to the script if there is any dialogue in the shot, then it’s better to mention while doing your story-board.
Source: http://www.dsource.in/course/storyboard-and-ani-matic-animation/storyboard-animation/basic-story-board-template
Design Course
Storyboard and Animatic AnimationImages in sequence for AnimationbyProf. Phani Tetali and Vajra PanchariaIDC, IIT Bombay
1. Storyboard for Animation1.1. Introduction1.2. A Basic Storyboard Template1.3. Storyboard Conventions
2. Animatic for Animation3. Video4. Contact Details
D’sourceDigital Learning Environment for Design - www.dsource.in
5
• FX:If there are special effects in a shot like a blast, wind, snowfall, muzzle flash or even a fast blur. It’s better to write down these details as it becomes difficult to show all those details in a panel. Also, writing details helps to keep a track over series of shots.
Source: http://www.dsource.in/course/storyboard-and-ani-matic-animation/storyboard-animation/basic-story-board-template
Design Course
Storyboard and Animatic AnimationImages in sequence for AnimationbyProf. Phani Tetali and Vajra PanchariaIDC, IIT Bombay
1. Storyboard for Animation1.1. Introduction1.2. A Basic Storyboard Template1.3. Storyboard Conventions
2. Animatic for Animation3. Video4. Contact Details
D’sourceDigital Learning Environment for Design - www.dsource.in
6
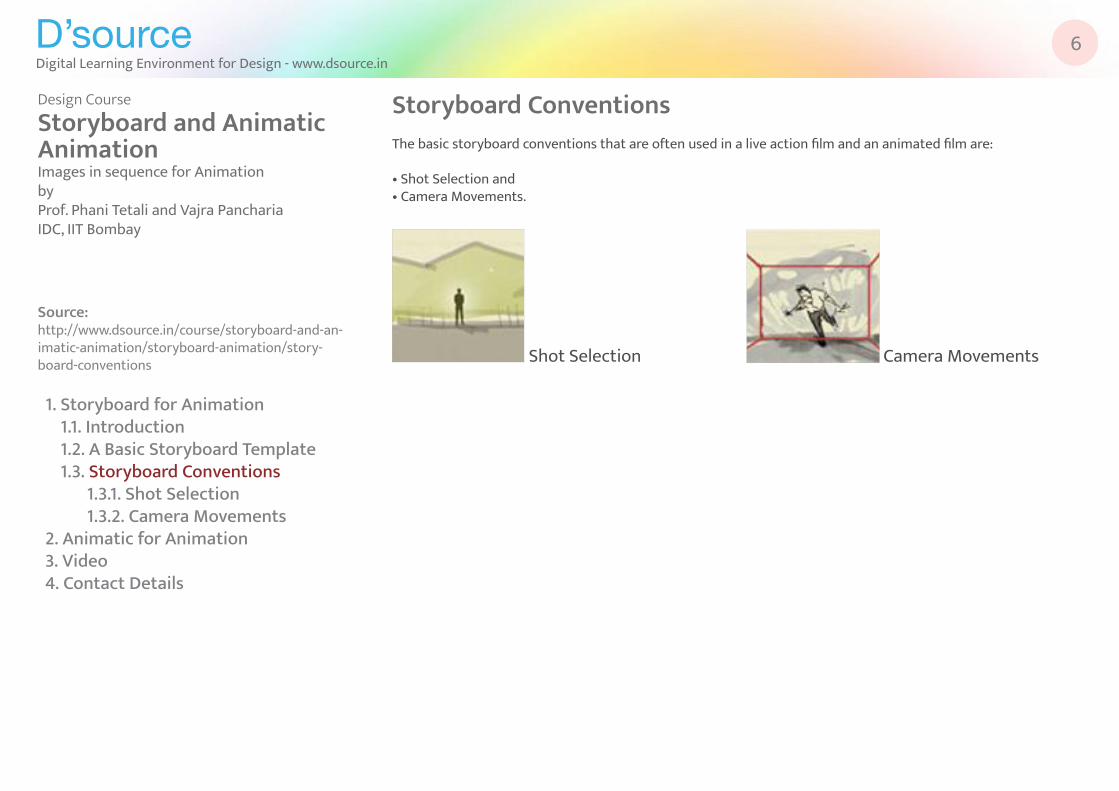
Storyboard Conventions The basic storyboard conventions that are often used in a live action film and an animated film are:
• Shot Selection and• Camera Movements.
Source: http://www.dsource.in/course/storyboard-and-an-imatic-animation/storyboard-animation/story-board-conventions
Design Course
Storyboard and Animatic AnimationImages in sequence for AnimationbyProf. Phani Tetali and Vajra PanchariaIDC, IIT Bombay
1. Storyboard for Animation1.1. Introduction1.2. A Basic Storyboard Template1.3. Storyboard Conventions
1.3.1. Shot Selection1.3.2. Camera Movements
2. Animatic for Animation3. Video4. Contact Details
Shot Selection Camera Movements
D’sourceDigital Learning Environment for Design - www.dsource.in
7
Shot Selection As the film making process evolved, there has been also an addition of terminologies that have been often used in this process. Which are by far the same in animation and live action filmmaking.They are:
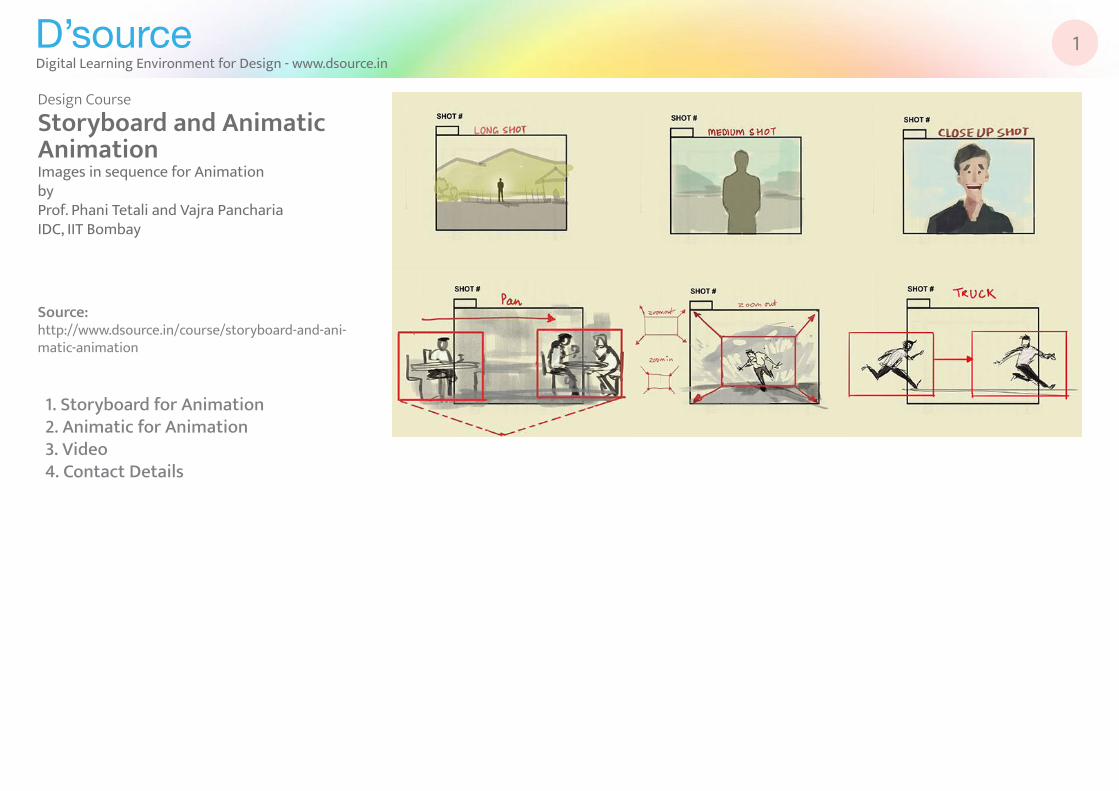
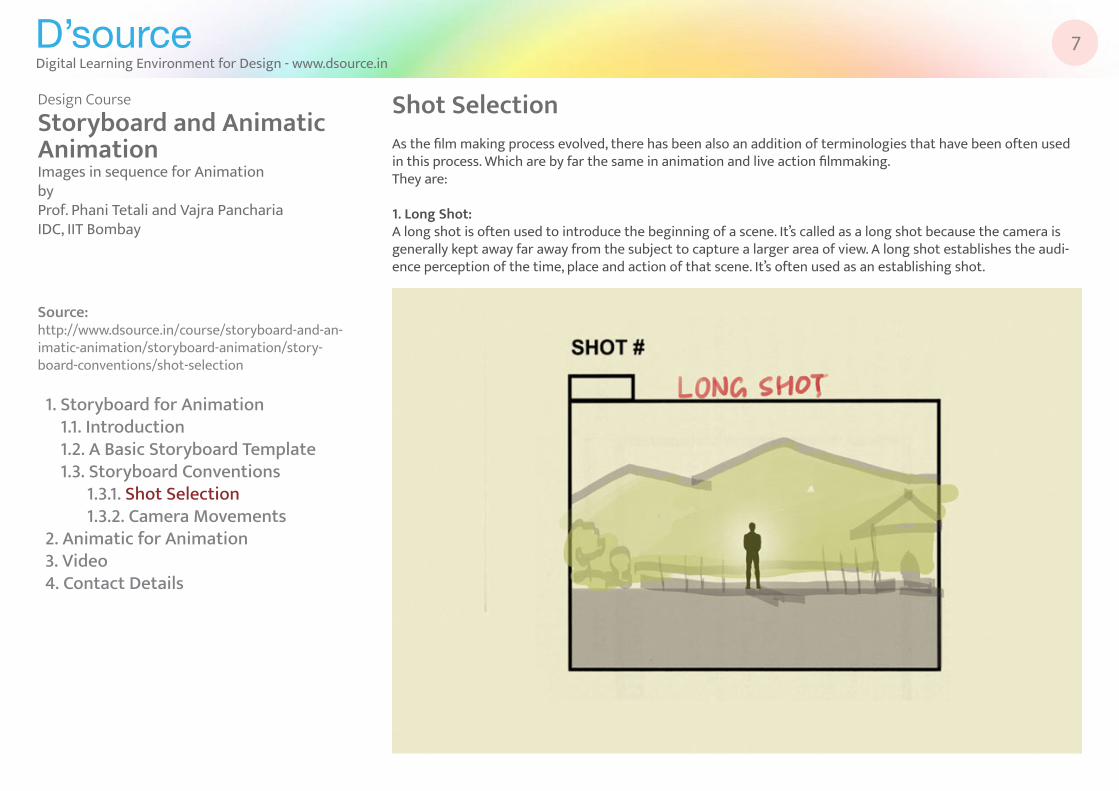
1. Long Shot:A long shot is often used to introduce the beginning of a scene. It’s called as a long shot because the camera is generally kept away far away from the subject to capture a larger area of view. A long shot establishes the audi-ence perception of the time, place and action of that scene. It’s often used as an establishing shot.
Source: http://www.dsource.in/course/storyboard-and-an-imatic-animation/storyboard-animation/story-board-conventions/shot-selection
Design Course
Storyboard and Animatic AnimationImages in sequence for AnimationbyProf. Phani Tetali and Vajra PanchariaIDC, IIT Bombay
1. Storyboard for Animation1.1. Introduction1.2. A Basic Storyboard Template1.3. Storyboard Conventions
1.3.1. Shot Selection1.3.2. Camera Movements
2. Animatic for Animation3. Video4. Contact Details
D’sourceDigital Learning Environment for Design - www.dsource.in
8
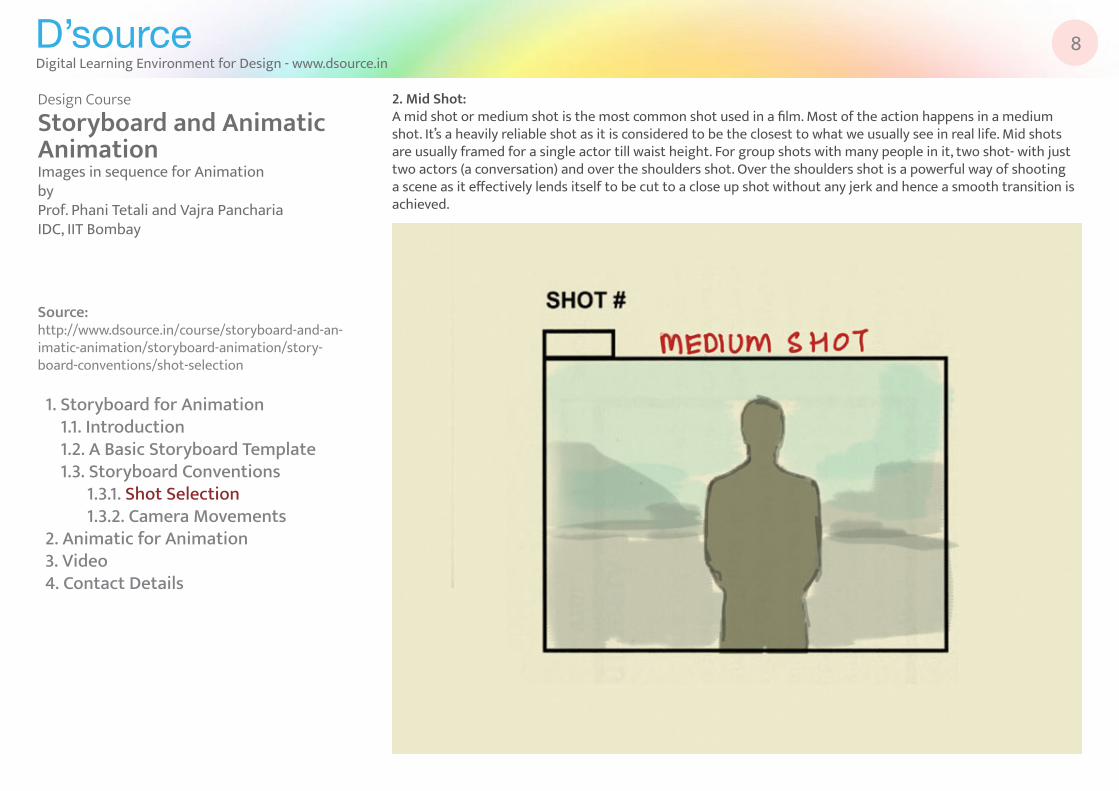
2. Mid Shot:A mid shot or medium shot is the most common shot used in a film. Most of the action happens in a medium shot. It’s a heavily reliable shot as it is considered to be the closest to what we usually see in real life. Mid shots are usually framed for a single actor till waist height. For group shots with many people in it, two shot- with just two actors (a conversation) and over the shoulders shot. Over the shoulders shot is a powerful way of shooting a scene as it effectively lends itself to be cut to a close up shot without any jerk and hence a smooth transition is achieved.
Source: http://www.dsource.in/course/storyboard-and-an-imatic-animation/storyboard-animation/story-board-conventions/shot-selection
Design Course
Storyboard and Animatic AnimationImages in sequence for AnimationbyProf. Phani Tetali and Vajra PanchariaIDC, IIT Bombay
1. Storyboard for Animation1.1. Introduction1.2. A Basic Storyboard Template1.3. Storyboard Conventions
1.3.1. Shot Selection1.3.2. Camera Movements
2. Animatic for Animation3. Video4. Contact Details
D’sourceDigital Learning Environment for Design - www.dsource.in
9
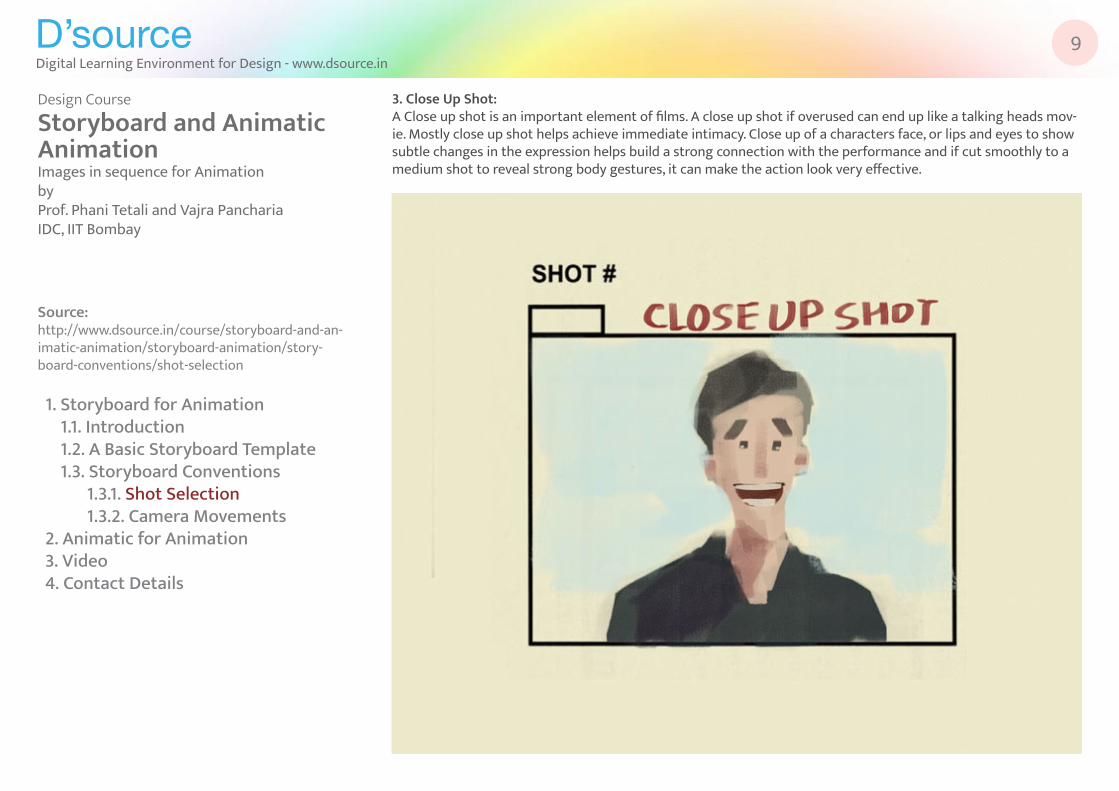
3. Close Up Shot:A Close up shot is an important element of films. A close up shot if overused can end up like a talking heads mov-ie. Mostly close up shot helps achieve immediate intimacy. Close up of a characters face, or lips and eyes to show subtle changes in the expression helps build a strong connection with the performance and if cut smoothly to a medium shot to reveal strong body gestures, it can make the action look very effective.
Source: http://www.dsource.in/course/storyboard-and-an-imatic-animation/storyboard-animation/story-board-conventions/shot-selection
Design Course
Storyboard and Animatic AnimationImages in sequence for AnimationbyProf. Phani Tetali and Vajra PanchariaIDC, IIT Bombay
1. Storyboard for Animation1.1. Introduction1.2. A Basic Storyboard Template1.3. Storyboard Conventions
1.3.1. Shot Selection1.3.2. Camera Movements
2. Animatic for Animation3. Video4. Contact Details
D’sourceDigital Learning Environment for Design - www.dsource.in
10
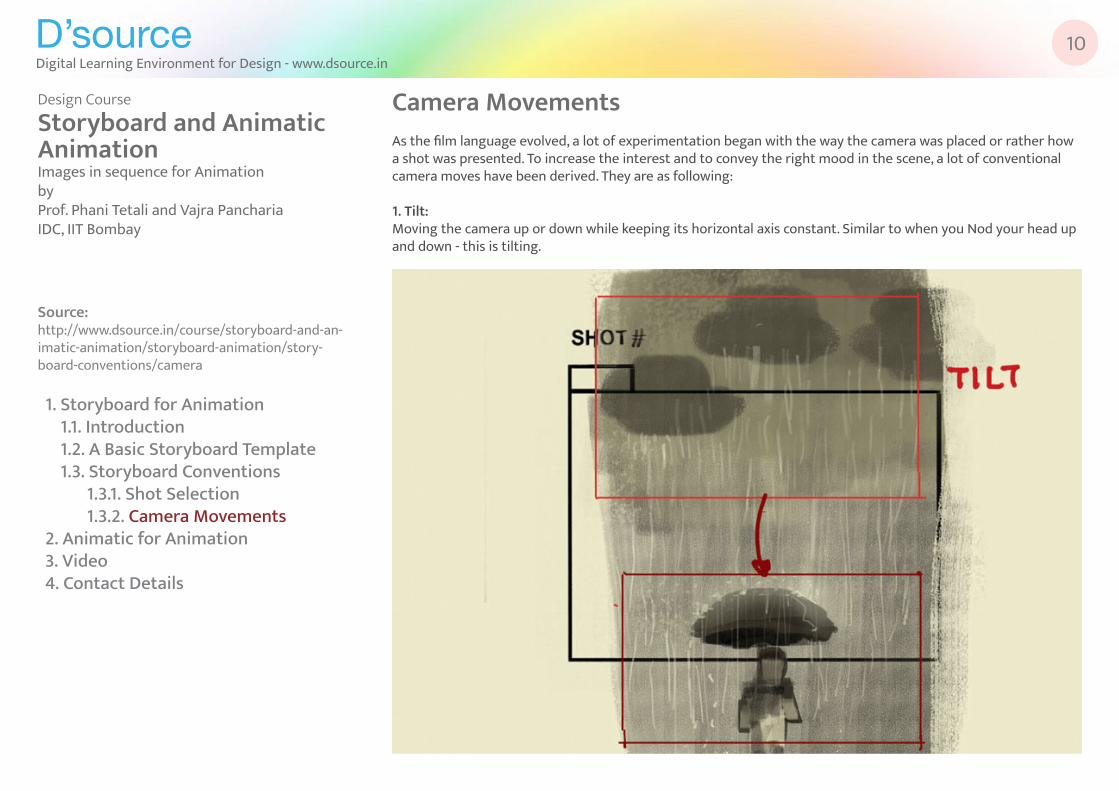
Camera Movements As the film language evolved, a lot of experimentation began with the way the camera was placed or rather how a shot was presented. To increase the interest and to convey the right mood in the scene, a lot of conventional camera moves have been derived. They are as following:
1. Tilt:Moving the camera up or down while keeping its horizontal axis constant. Similar to when you Nod your head up and down - this is tilting.
Source: http://www.dsource.in/course/storyboard-and-an-imatic-animation/storyboard-animation/story-board-conventions/camera
Design Course
Storyboard and Animatic AnimationImages in sequence for AnimationbyProf. Phani Tetali and Vajra PanchariaIDC, IIT Bombay
1. Storyboard for Animation1.1. Introduction1.2. A Basic Storyboard Template1.3. Storyboard Conventions
1.3.1. Shot Selection1.3.2. Camera Movements
2. Animatic for Animation3. Video4. Contact Details

D’sourceDigital Learning Environment for Design - www.dsource.in
11
2. Pan:Moving the camera to one side or another, keeping its pivot at a fix point. Look to your left, then look to your right - that’s panning.
Source: http://www.dsource.in/course/storyboard-and-an-imatic-animation/storyboard-animation/story-board-conventions/camera
Design Course
Storyboard and Animatic AnimationImages in sequence for AnimationbyProf. Phani Tetali and Vajra PanchariaIDC, IIT Bombay
1. Storyboard for Animation1.1. Introduction1.2. A Basic Storyboard Template1.3. Storyboard Conventions
1.3.1. Shot Selection1.3.2. Camera Movements
2. Animatic for Animation3. Video4. Contact Details
D’sourceDigital Learning Environment for Design - www.dsource.in
12
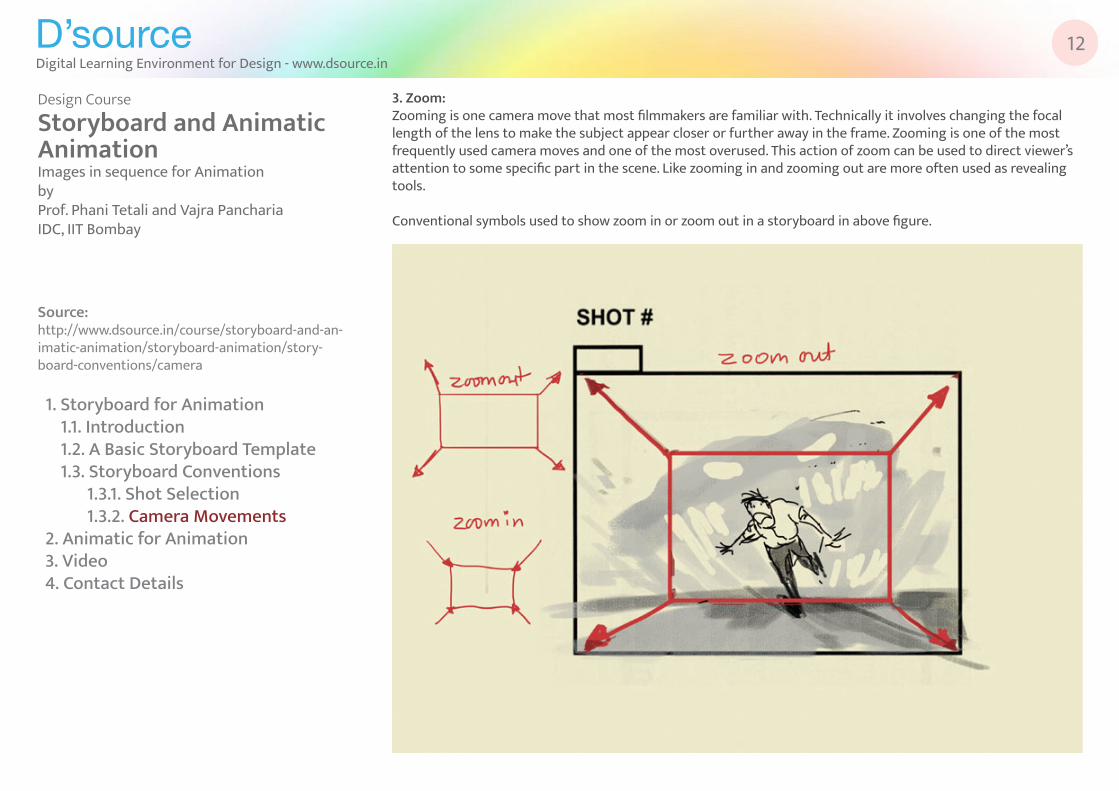
3. Zoom:Zooming is one camera move that most filmmakers are familiar with. Technically it involves changing the focal length of the lens to make the subject appear closer or further away in the frame. Zooming is one of the most frequently used camera moves and one of the most overused. This action of zoom can be used to direct viewer’s attention to some specific part in the scene. Like zooming in and zooming out are more often used as revealing tools.
Conventional symbols used to show zoom in or zoom out in a storyboard in above figure.
Source: http://www.dsource.in/course/storyboard-and-an-imatic-animation/storyboard-animation/story-board-conventions/camera
Design Course
Storyboard and Animatic AnimationImages in sequence for AnimationbyProf. Phani Tetali and Vajra PanchariaIDC, IIT Bombay
1. Storyboard for Animation1.1. Introduction1.2. A Basic Storyboard Template1.3. Storyboard Conventions
1.3.1. Shot Selection1.3.2. Camera Movements
2. Animatic for Animation3. Video4. Contact Details
D’sourceDigital Learning Environment for Design - www.dsource.in
13
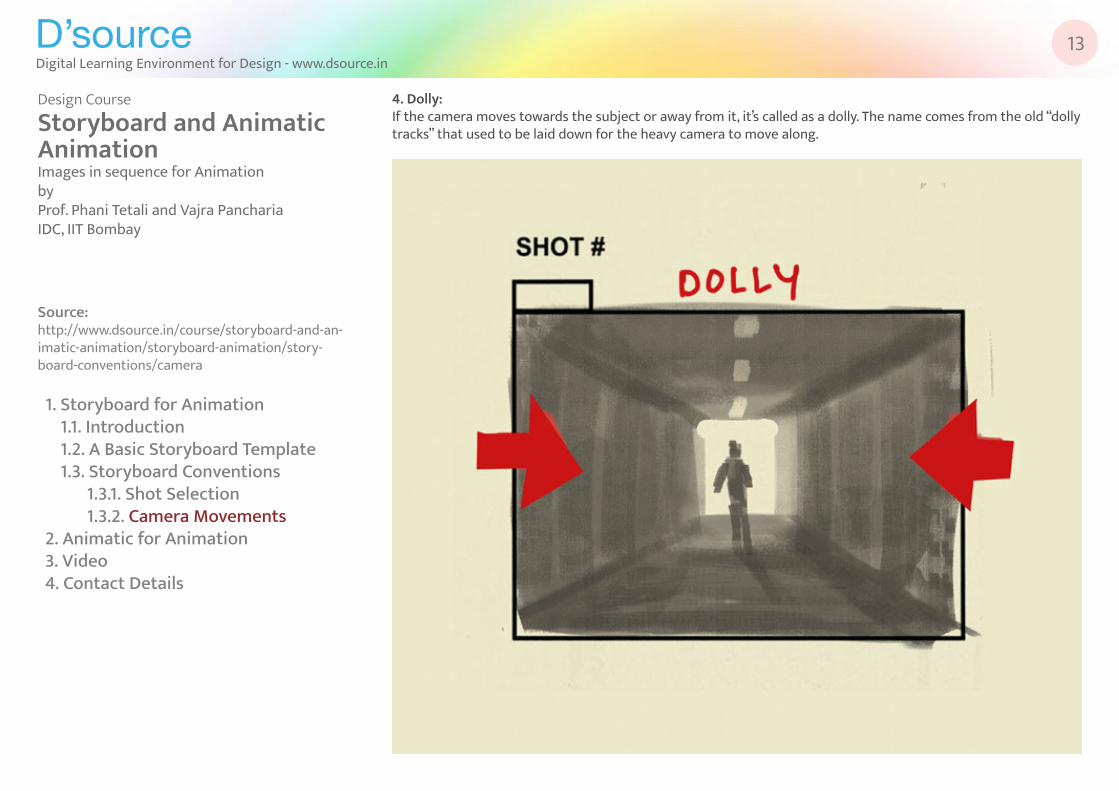
4. Dolly:If the camera moves towards the subject or away from it, it’s called as a dolly. The name comes from the old “dolly tracks” that used to be laid down for the heavy camera to move along.
Source: http://www.dsource.in/course/storyboard-and-an-imatic-animation/storyboard-animation/story-board-conventions/camera
Design Course
Storyboard and Animatic AnimationImages in sequence for AnimationbyProf. Phani Tetali and Vajra PanchariaIDC, IIT Bombay
1. Storyboard for Animation1.1. Introduction1.2. A Basic Storyboard Template1.3. Storyboard Conventions
1.3.1. Shot Selection1.3.2. Camera Movements
2. Animatic for Animation3. Video4. Contact Details
D’sourceDigital Learning Environment for Design - www.dsource.in
14
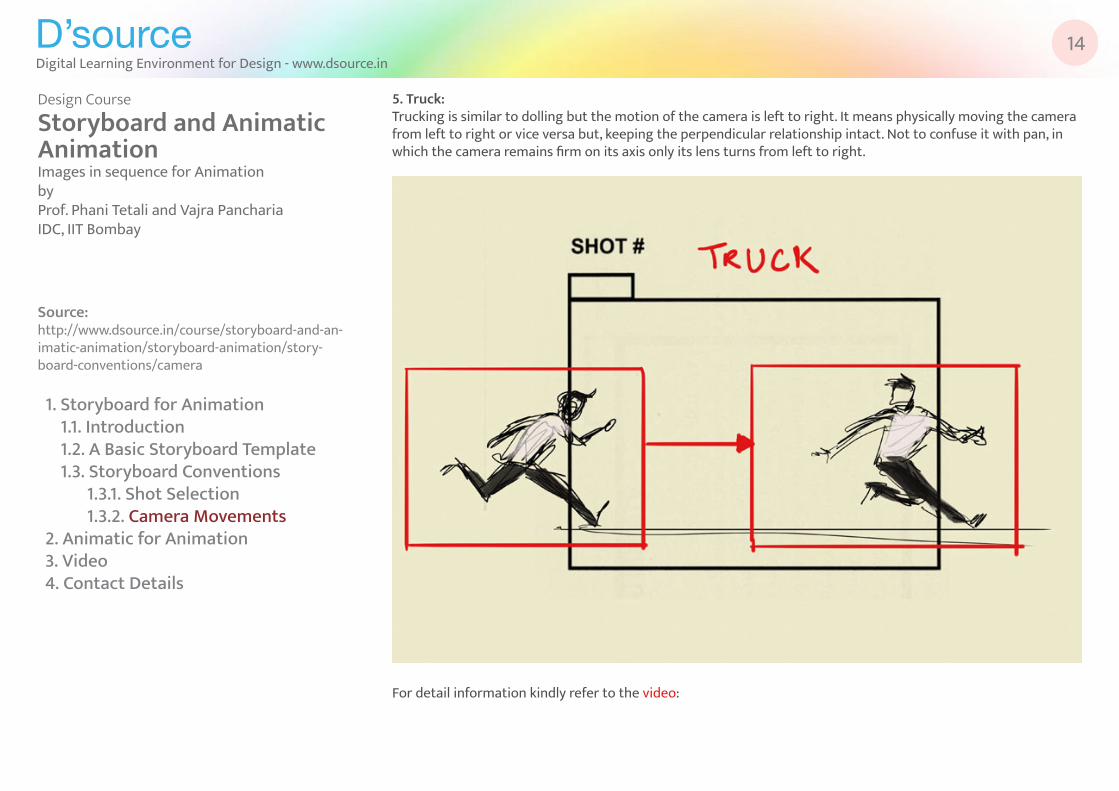
5. Truck:Trucking is similar to dolling but the motion of the camera is left to right. It means physically moving the camera from left to right or vice versa but, keeping the perpendicular relationship intact. Not to confuse it with pan, in which the camera remains firm on its axis only its lens turns from left to right.
For detail information kindly refer to the video:
Source: http://www.dsource.in/course/storyboard-and-an-imatic-animation/storyboard-animation/story-board-conventions/camera
Design Course
Storyboard and Animatic AnimationImages in sequence for AnimationbyProf. Phani Tetali and Vajra PanchariaIDC, IIT Bombay
1. Storyboard for Animation1.1. Introduction1.2. A Basic Storyboard Template1.3. Storyboard Conventions
1.3.1. Shot Selection1.3.2. Camera Movements
2. Animatic for Animation3. Video4. Contact Details
D’sourceDigital Learning Environment for Design - www.dsource.in
15
Animatic for Animation
Source: http://www.dsource.in/course/storyboard-and-ani-matic-animation/animatic-animation
Design Course
Storyboard and Animatic AnimationImages in sequence for AnimationbyProf. Phani Tetali and Vajra PanchariaIDC, IIT Bombay
Introduction
1. Storyboard for Animation2. Animatic for Animation
2.1. Introduction2.2. Basic Steps Involved
3. Video4. Contact Details
Basic Steps Involved
D’sourceDigital Learning Environment for Design - www.dsource.in
16
Introduction An animatic is the most important part of a preproduction stage, and it’s an important tool for planning once film. An animatic is a moving storyboard. Technically an animatic is a series of storyboard panels edited together and played in sequence with a scratch sound track or dialogue added to this sequence, to test whether the sound and images work in synchronization or not.
It helps the filmmaker plan the timing of the film in a very precise way, a rough animatic comprises of shots which are animated roughly to get the pace of the shots right and then these shots can be replaced by the final finished shots. This helps the filmmaker reduce the production time as the preplanning is already in place.
Since animation is a tedious process and time consuming, so it’s always better to know which shots work best for the film. An animatic is a very useful tool in this situation.
One can use various software’s available to create an animatic like Toonboom Storyboard Pro, Adobe premiere or Sonyvegas to edit the series of images and sound together.
Source: http://www.dsource.in/course/storyboard-and-ani-matic-animation/animatic-animation/introduction
Design Course
Storyboard and Animatic AnimationImages in sequence for AnimationbyProf. Phani Tetali and Vajra PanchariaIDC, IIT Bombay
1. Storyboard for Animation2. Animatic for Animation
2.1. Introduction2.2. Basic Steps Involved
3. Video4. Contact Details
D’sourceDigital Learning Environment for Design - www.dsource.in
17
Basic Steps Involved As explained above, one can easily create an animatic using the panels from the storyboard that is created.
Place the images sequentially and time them properly. Once the images are in place you can run (play) them once to check if the shots are connecting together to convey the story properly or not.
Sound and Music is also one of the most important aspect of an animatic. One can create a scratch/rough sound using the process of audition. This means you create all the necessary sounds like dialogue, Foley sounds, FX sounds with your own mouth. And then add a rough suitable music with it and edit it precisely with images. For me this process comes in very handy and its makes the animatic creation easier.
You can keep on playing with the animatic till the timing is right and you are satisfied with the pacing of the shots. Since animation is an expensive process its better the decisions or the necessary changes are done at the animatic stage itself.
For further details kindly check the video:
Source: http://www.dsource.in/course/storyboard-and-ani-matic-animation/animatic-animation/basic-steps-in-volved
Design Course
Storyboard and Animatic AnimationImages in sequence for AnimationbyProf. Phani Tetali and Vajra PanchariaIDC, IIT Bombay
1. Storyboard for Animation2. Animatic for Animation
2.1. Introduction2.2. Basic Steps Involved
3. Video4. Contact Details

D’sourceDigital Learning Environment for Design - www.dsource.in
18
Video
Source: http://www.dsource.in/course/storyboard-and-ani-matic-animation/video
Design Course
Storyboard and Animatic AnimationImages in sequence for AnimationbyProf. Phani Tetali and Vajra PanchariaIDC, IIT Bombay
1. Storyboard for Animation2. Animatic for Animation3. Video4. Contact Details
Storyboard for Animation Part-1 Storyboard for Animation Part-2
Storyboard for Animation Part-3 Storyboard for Animation Part-4
D’sourceDigital Learning Environment for Design - www.dsource.in
19
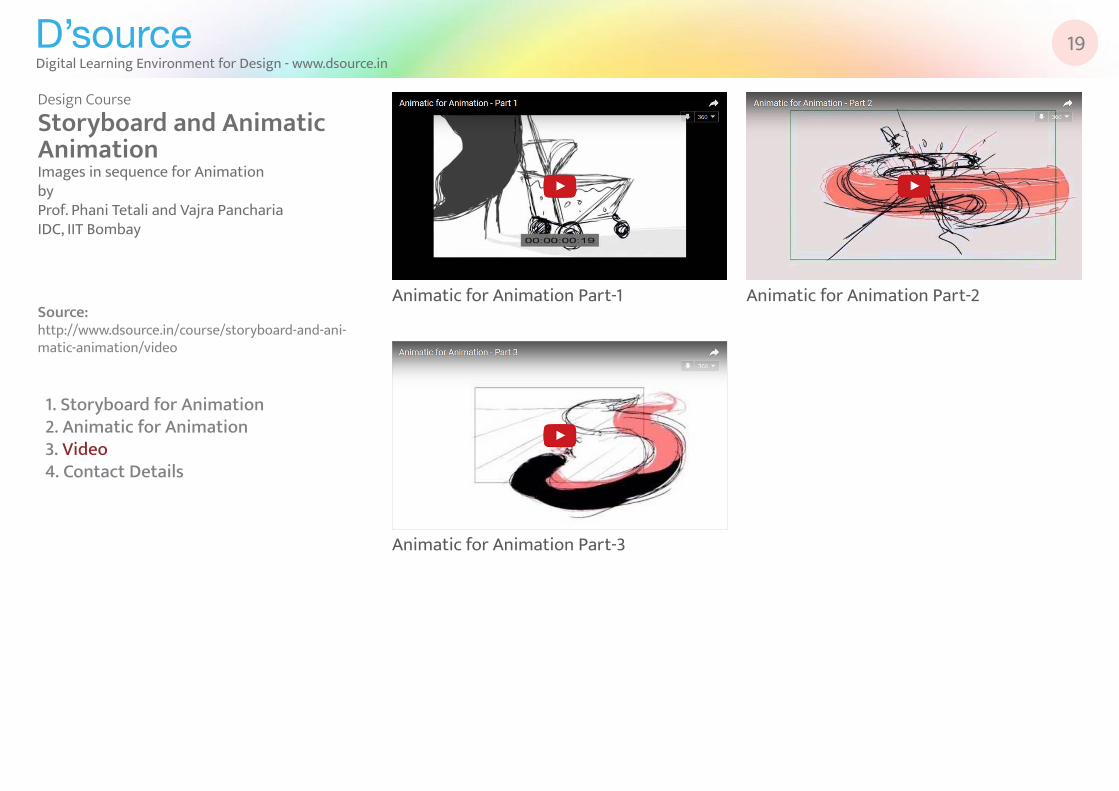
Animatic for Animation Part-1 Animatic for Animation Part-2
Animatic for Animation Part-3
Source: http://www.dsource.in/course/storyboard-and-ani-matic-animation/video
Design Course
Storyboard and Animatic AnimationImages in sequence for AnimationbyProf. Phani Tetali and Vajra PanchariaIDC, IIT Bombay
1. Storyboard for Animation2. Animatic for Animation3. Video4. Contact Details
D’sourceDigital Learning Environment for Design - www.dsource.in
20
Contact Details This documentation for the course was done by Vajra Pancharia at IDC, IIT Bombay.
You can get in touch with him at Email: pvajra[at]gmail.com
You could write to the following address regarding suggestions and clarifications:
Helpdesk Details:Co-ordinatorProject e-kalpaIndustrial Design CentreIIT BombayPowaiMumbai 400076India
Phone: 091-22-25767820/ 7801/ 7802Fax: 091-22-25767803Email: dsource.in[at]gmail.com
Source: http://www.dsource.in/course/storyboard-and-ani-matic-animation/contact-details
Design Course
Storyboard and Animatic AnimationImages in sequence for AnimationbyProf. Phani Tetali and Vajra PanchariaIDC, IIT Bombay
1. Storyboard for Animation2. Animatic for Animation3. Video4. Contact Details
Related Documents


