Steampunk Pen Blank Contributed by: Dennis Peabody A.K.A “denniszoomy” This tutorial was downloaded from http://www.penturners.org The International Association of Penturners - 2013

Steampunk Pen Blank - penturners.orgcontent.penturners.org/library/pen_blanks/steampunkpe… · · 2013-10-31Downloaded from http:/ Page 1 of 8 PEN BLANK Dennis Peabody [email protected]
Apr 14, 2018
Welcome message from author
This document is posted to help you gain knowledge. Please leave a comment to let me know what you think about it! Share it to your friends and learn new things together.
Transcript

Steampunk Pen Blank
Contributed by: Dennis Peabody
A.K.A “denniszoomy”
This tutorial was downloaded from
http://www.penturners.org
The International Association of Penturners - 2013

Downloaded from http:/www.penturners.org/ Page 1 of 8
PEN BLANK
Dennis Peabody [email protected]
Items Needed:
Pen kit of your choice – I am using a WOODCRAFT Atlas / Copper. Aluminum HVAC ducting tape Copper Tape Rub ‘n Buff – EBONY Pattern Tracing Tool Ruler Small utility knife Scissors Paper towels Cutting board / workspace

Downloaded from http:/www.penturners.org/ Page 2 of 8
Instructions:
Take tube out of pen kit. Using the length of the tube, measure out enough of the silver
HVAC tape to cover the entire tube length and width of tube.
Use the utility knife to cut the silver HVAC tape to match the
diameter of the tube.

Downloaded from http:/www.penturners.org/ Page 3 of 8
Cut the silver HVAC tape to the correct size.
Lay silver HVAC tape face down on your cutting surface. Use the ruler and pattern-tracing tool to make “rivets”.
(The ruler is needed at this time to be used as a straight edge) Using the straight edge and the pattern-tracing tool, press firmly along
all four edges of the silver HVAC tape to make small indentations (“rivets”) along the edge of the silver HVAC tape.

Downloaded from http:/www.penturners.org/ Page 4 of 8
This is what the front side of the silver HVAC tape looks like after completing these steps.
Peel the backing from the silver HVAC tape. Peel equally across the tape. Do NOT peel all of the silver
HVAC tape backing at once.

Downloaded from http:/www.penturners.org/ Page 5 of 8
As you start peeling and you have enough of the silver tape exposed, lay your tube down onto the tape.
Continue to peel the silver HVAC tape and roll the tube, until you have covered the tube completely.
Using the copper tape, straight edge (ruler) and utility knife,
cut random size rectangles and squares (not too big, as they’ll become accents on the aluminum tape).
When you have cut several shapes, you will use the pattern tracing tool to make “rivets” on the backside of the copper tape.
Make sure that you create “rivets” on all four edges of the copper tape shapes.
Downloaded from http:/www.penturners.org/ Page 6 of 8
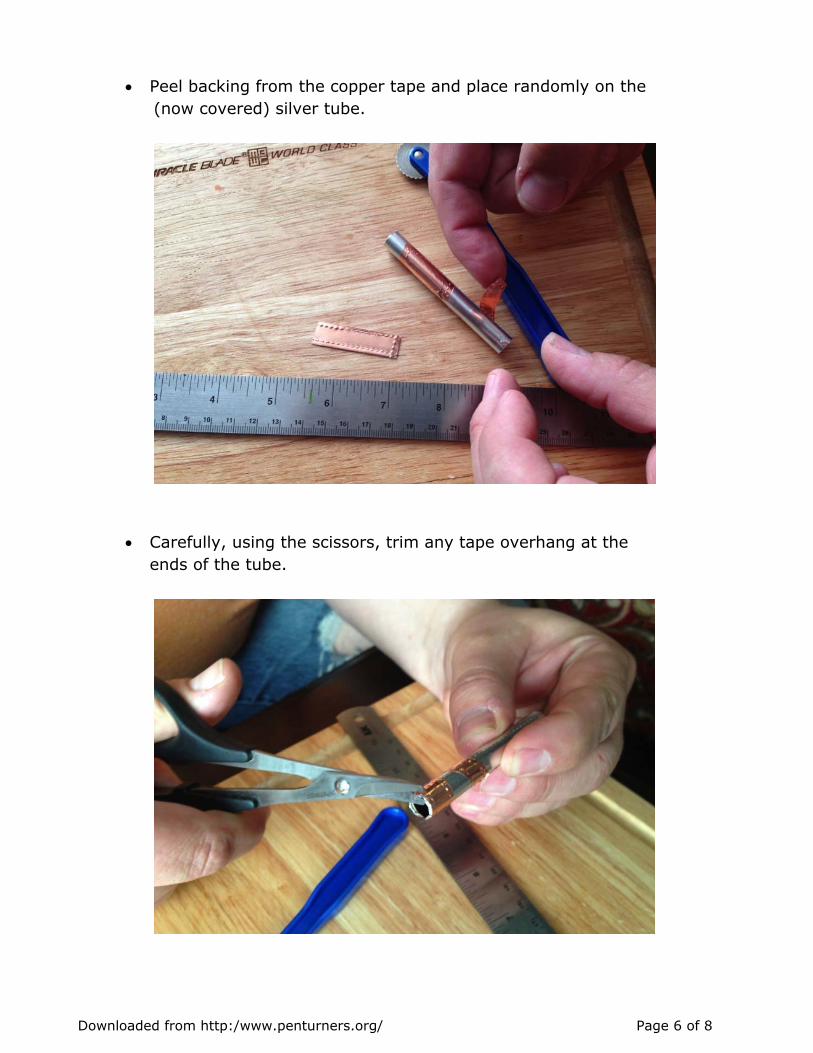
Peel backing from the copper tape and place randomly on the (now covered) silver tube.
Carefully, using the scissors, trim any tape overhang at the ends of the tube.

Downloaded from http:/www.penturners.org/ Page 7 of 8
Apply a small dab of the Rub ‘n Buff to your paper towel.
Fold Paper towel over its self, open again and apply the Rub ‘n Buff on the tube.
This will look quite messy and dirty at this stage. Let the Rub ‘n Buff dry on the tube for several minutes. Wipe off the excess Rub ‘n Buff from tube. You DO NOT want
to rub it all off (this will be the patina), just remove the excess. This provides the desirable, aged “Steampunk” look.
At this time you will be prepping for the Alumilite or PolyResin pour. Because you have altered the tube, you will not be able to pour this
tube in the same manner as you would pour a “regular” blank.

Downloaded from http:/www.penturners.org/ Page 8 of 8
You will need to plug the ends of the tube, to prevent the Alumilite or PolyResin from filling the tube, rendering it useless.
For this process, I have turned a couple of short dowels so that they fit the ends of the tube, thus preventing it from being filled with the Alumilite or PolyResin.
I have also cut two small squares of wood from a separate wood blank and have used CA glue to adhere the un-turned ends of the small dowels, to the small wood pieces.
At this point you are ready to pour, using your choice of CLEAR Alumilite or PolyResin. Disclaimer: This tutorial will not go into detail regarding: mold fabrication, the use of Alumilite or PolyResin, or the utilization of a “pressure pot” to cure the blank.
Finally turn your blank and you’ll have a Steampunk Pen like no other.
Related Documents