StarWind Software Technical Reference Series Copyright © StarWind Software 2008-2011. All rights reserved. StarWind iSCSI SAN Software: Using StarWind with MS Cluster on Windows Server 2003 www.starwindsoftware.com

Welcome message from author
This document is posted to help you gain knowledge. Please leave a comment to let me know what you think about it! Share it to your friends and learn new things together.
Transcript
StarWind SoftwareTechnical Reference Series
Copyright © StarWind Software 2008-2011. All rights reserved.
StarWind iSCSI SAN Software: Using StarWindwith MS Cluster on Windows Server 2003
www.starwindsoftware.com

StarWind SoftwareTechnical Reference Series
COPYRIGHT
Copyright © StarWind Software 2008-2011. All rights reserved. No part of thispublication may be reproduced, stored in a retrieval system, or transmitted in anyform or by any means, electronic, mechanical, photocopying, recording or otherwise,without the prior written consent of StarWind Software.
TRADEMARKS
“StarWind”, “StarWind Software” and the StarWind and the StarWind Software logosare trademarks of StarWind Software which may be registered in some jurisdictions.All other trademarks are owned by their respective owners.
CHANGES
The material in this document is for information only and is subject to change withoutnotice. While reasonable efforts have been made in the preparation of this documentto assure its accuracy, StarWind Software assumes no liability resulting from errors oromissions in this document, or from the use of the information contained herein.StarWind Software reserves the right to make changes in the product design withoutreservation and without notification to its users.
TECHNICAL SUPPORT AND SERVICES
If you have questions about installing or using this software, check this and otherdocuments first - you will find answers to most of your questions here or there. If youneed further assistance, please contact us.
StarWind SoftwareTechnical Reference Series
3Copyright © StarWind Software 2008-2011. All rights reserved.
Table of Contents
....................................................................................................... 4Introduction
....................................................................................................... 6Configuring Domain Controller................................................................................................................ 6Network Adapter ................................................................................................................ 7Active Directory
................................................................................................................ 21DNS
................................................................................................................ 33User Accounts ....................................................................................................... 48Configuring StarWind Server
................................................................................................................ 48Network Adapter
................................................................................................................ 49Preparing Quorum Volume
................................................................................................................ 56Preparing Generic Volume ....................................................................................................... 64Preparing Cluster Nodes
................................................................................................................ 64Node 1
................................................................................................................ 98Node 2 ....................................................................................................... 118Configuring Microsoft Cluster Service
................................................................................................................ 118Node 1
................................................................................................................ 129Node 2 ....................................................................................................... 138Adding New Shared Disk Resource
................................................................................................................ 138StarWind Target
................................................................................................................ 145Node 1
................................................................................................................ 159Node 2

StarWind SoftwareTechnical Reference Series
4Copyright © StarWind Software 2008-2011. All rights reserved.
Guide
Introduction
Software clustering technology enables you to make several servers to workas a unit. Various cluster configurations can be implemented. One of the mostfrequently used configurations is the failover cluster. This configurationassumes that if one of the cluster nodes fails, the reserved node automaticallybrings online, serving the applications. With that the workflow remainsuninterrupted and secured.
Failover cluster configuration includes two (or more) server nodes that sharean external storage. Based on the iSCSI technology, StarWind Software Inc.StarWind enables to create an external storage in Windows environmentwithout implementation of expensive FC or external SCSI solutions. WithStarWind you can create a shared disk array on a host running MicrosoftWindows.
StarWind SoftwareTechnical Reference Series
5Copyright © StarWind Software 2008-2011. All rights reserved.
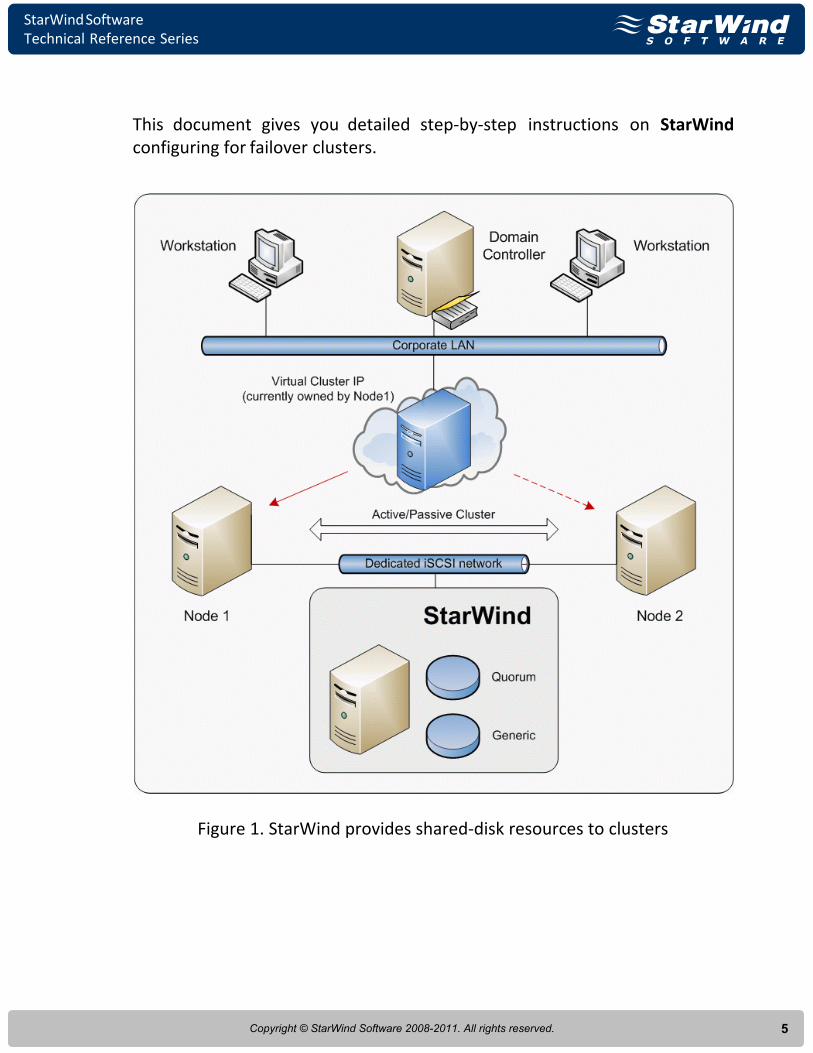
This document gives you detailed step-by-step instructions on StarWindconfiguring for failover clusters.
Figure 1. StarWind provides shared-disk resources to clusters

StarWind SoftwareTechnical Reference Series
6Copyright © StarWind Software 2008-2011. All rights reserved.
Configuring Domain Controller
Network Adapter
The network adapter must be assigned a static IP address. Select the Use thefollowing IP address option and type in the IP address you wish to use. TheSubnet mask must also be provided. Both values must be correctly chosengiven the networking configuration of the Corporate LAN. As AD requiresDNS, an address must be provided – in this case we can specify 127.0.0.1(loopback interface address). DNS will be installed later with the other ADcomponents.
Press the OK button.
StarWind SoftwareTechnical Reference Series
7Copyright © StarWind Software 2008-2011. All rights reserved.
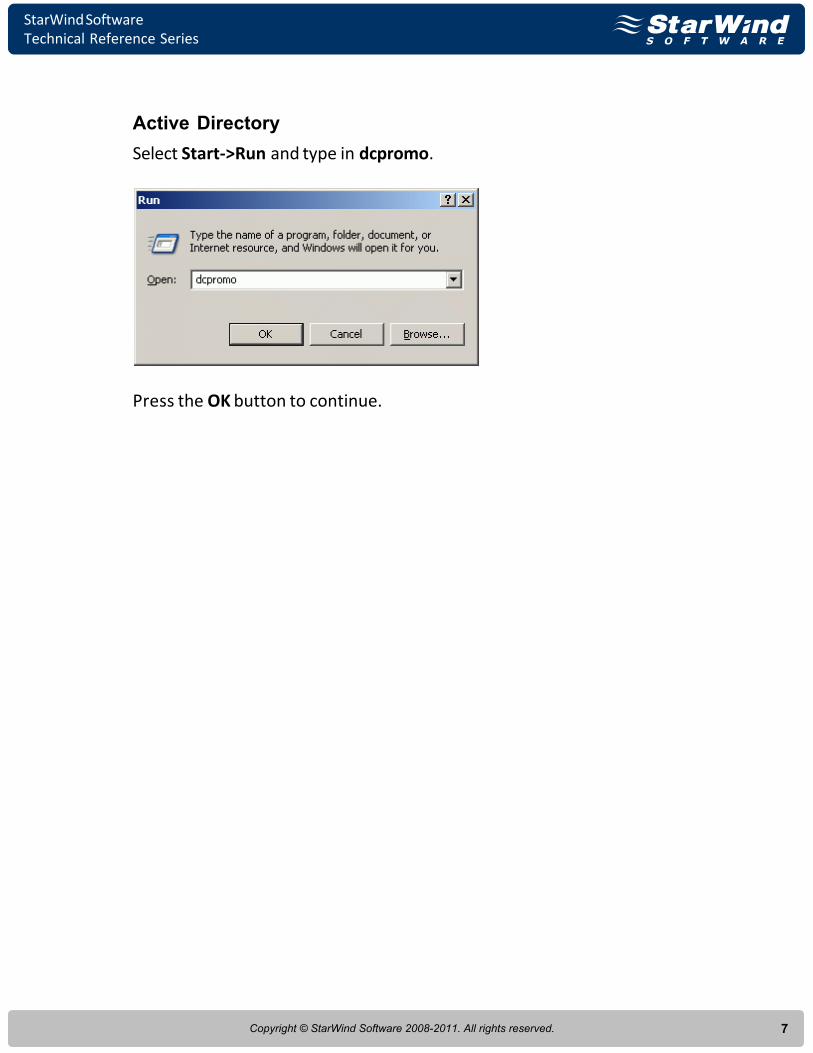
Active Directory
Select Start->Run and type in dcpromo.
Press the OK button to continue.

StarWind SoftwareTechnical Reference Series
8Copyright © StarWind Software 2008-2011. All rights reserved.
The Active Directory Installation Wizard appears.
Press the Next button to continue.
StarWind SoftwareTechnical Reference Series
9Copyright © StarWind Software 2008-2011. All rights reserved.
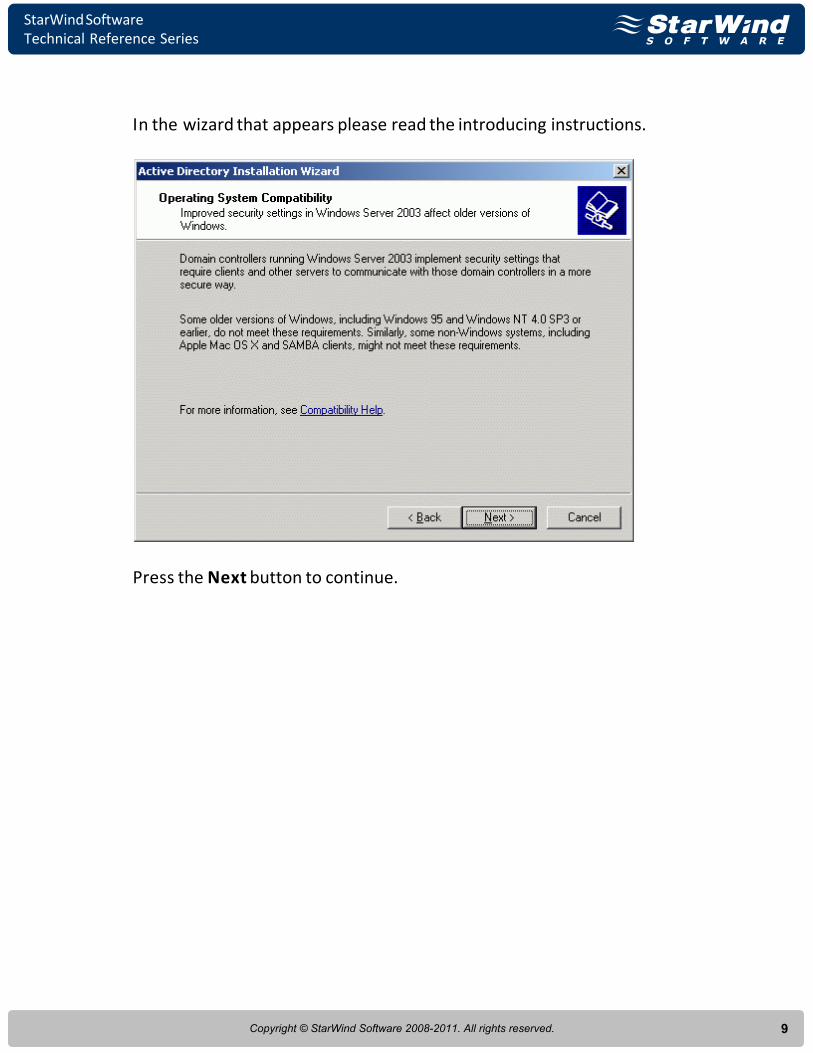
In the wizard that appears please read the introducing instructions.
Press the Next button to continue.
StarWind SoftwareTechnical Reference Series
10Copyright © StarWind Software 2008-2011. All rights reserved.
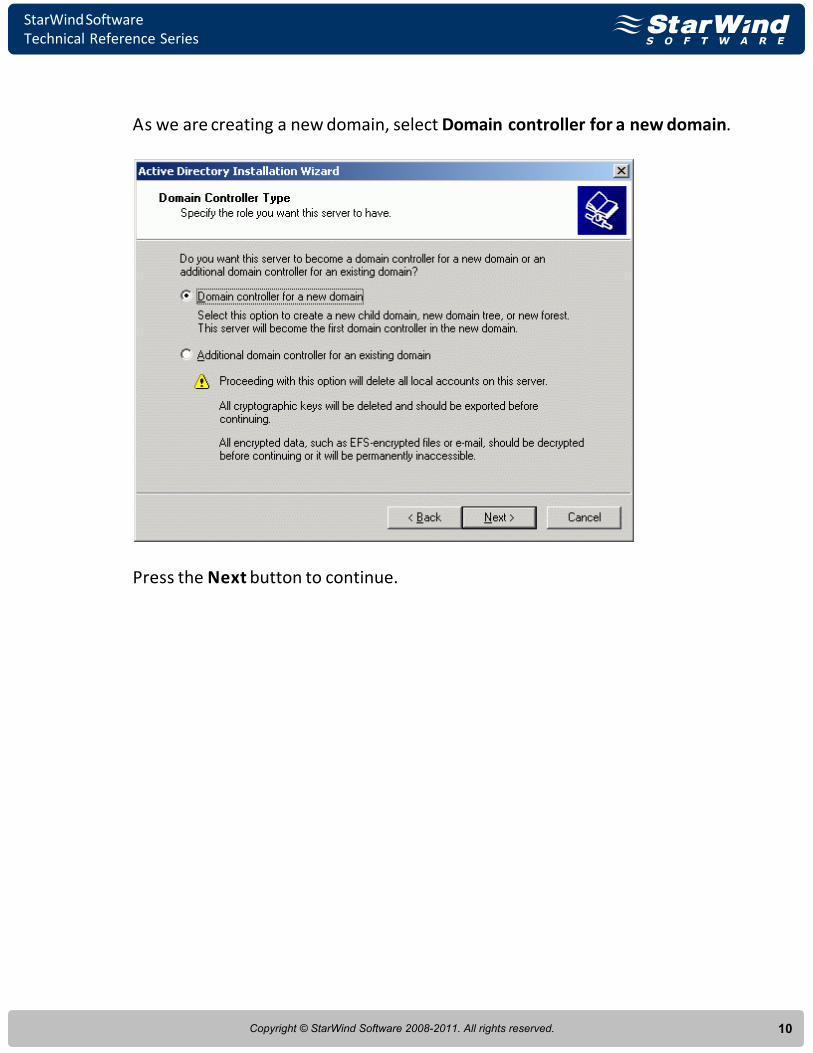
As we are creating a new domain, select Domain controller for a new domain.
Press the Next button to continue.

StarWind SoftwareTechnical Reference Series
11Copyright © StarWind Software 2008-2011. All rights reserved.
Create New Domain page appears. Select Domain in a new forest option.
Press the Next button to continue.

StarWind SoftwareTechnical Reference Series
12Copyright © StarWind Software 2008-2011. All rights reserved.
Specify the full DNS name of the domain to create.
Press the Next button to continue.
StarWind SoftwareTechnical Reference Series
13Copyright © StarWind Software 2008-2011. All rights reserved.
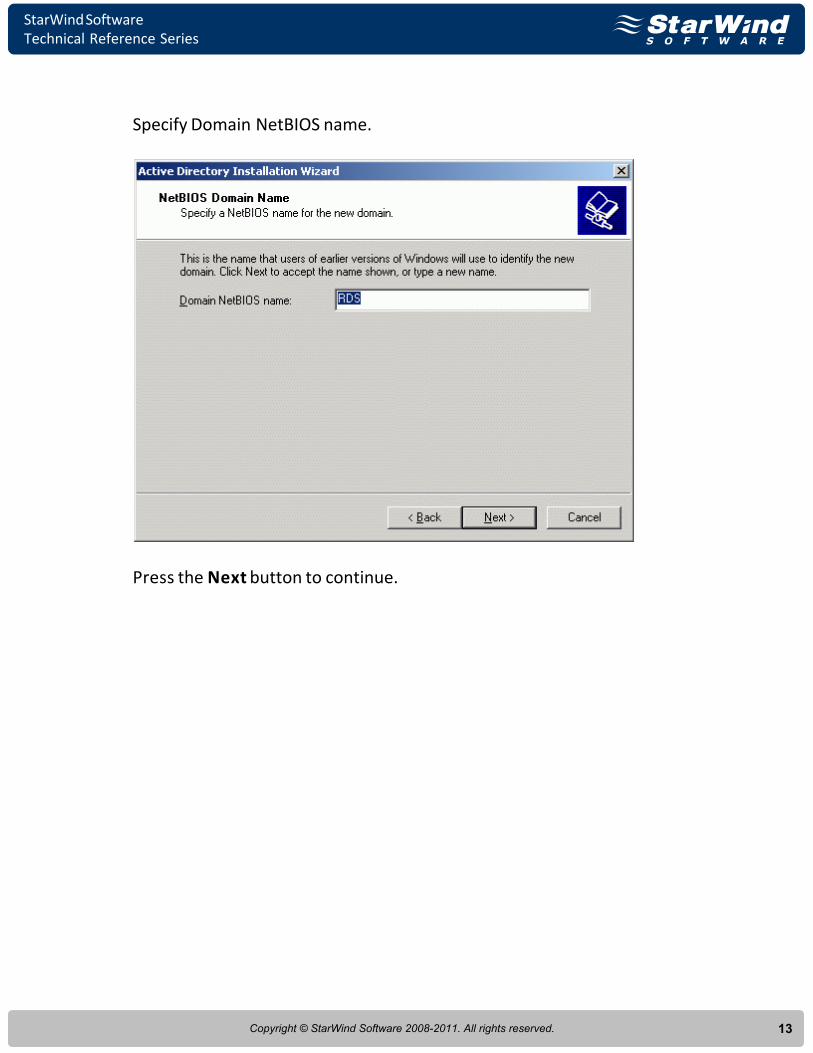
Specify Domain NetBIOS name.
Press the Next button to continue.

StarWind SoftwareTechnical Reference Series
14Copyright © StarWind Software 2008-2011. All rights reserved.
Customize the directories where the AD database and log files will be stored orleave the values at their defaults.
Press the Next button to continue.

StarWind SoftwareTechnical Reference Series
15Copyright © StarWind Software 2008-2011. All rights reserved.
Customize the directory where the SYSVOL data will be stored or leave thevalue at its default.
Press the Next button to continue.
StarWind SoftwareTechnical Reference Series
16Copyright © StarWind Software 2008-2011. All rights reserved.
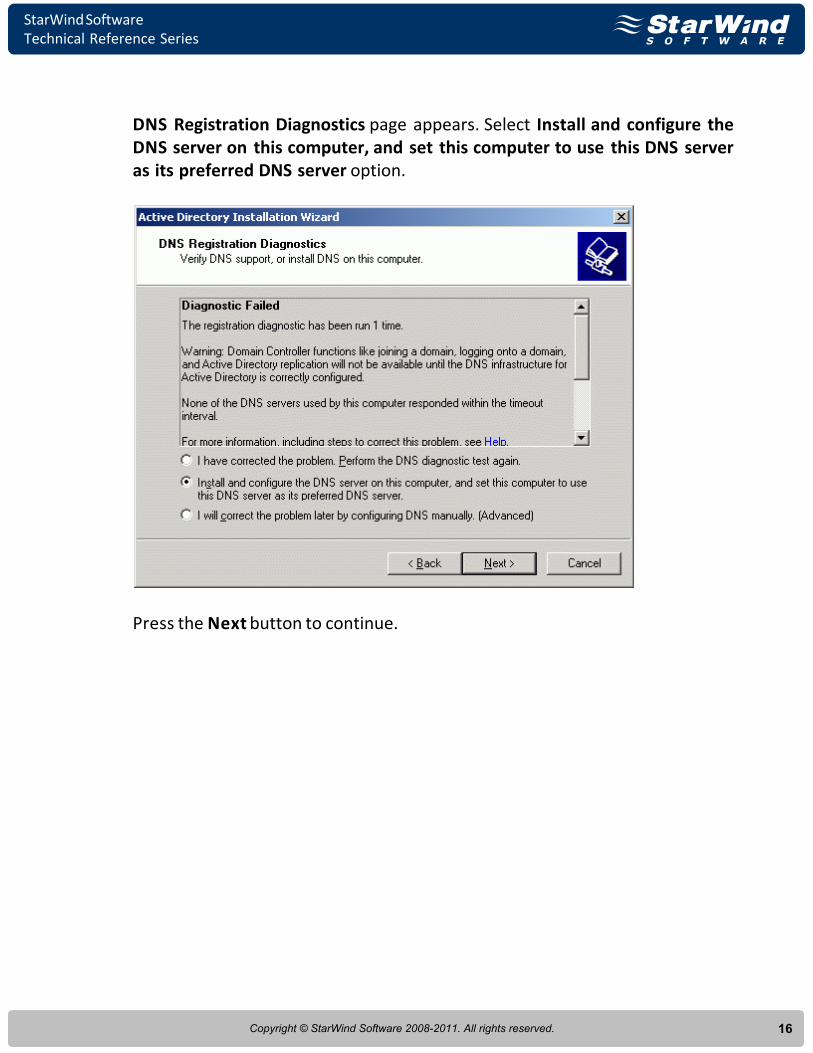
DNS Registration Diagnostics page appears. Select Install and configure theDNS server on this computer, and set this computer to use this DNS serveras its preferred DNS server option.
Press the Next button to continue.

StarWind SoftwareTechnical Reference Series
17Copyright © StarWind Software 2008-2011. All rights reserved.
Select default permissions for user and group objects.
Press the Next button to continue.

StarWind SoftwareTechnical Reference Series
18Copyright © StarWind Software 2008-2011. All rights reserved.
Type in the Directory Services Restore Mode Administrator Password.
Press the Next button to continue.

StarWind SoftwareTechnical Reference Series
19Copyright © StarWind Software 2008-2011. All rights reserved.
Review the options summary. Press the Back button should any changes berequired.
Press the Next button to continue.

StarWind SoftwareTechnical Reference Series
20Copyright © StarWind Software 2008-2011. All rights reserved.
If successful, the wizard should look like the example image provided below.
Press the Finish button to close the wizard.
Press the Restart Now button to restart the computer.

StarWind SoftwareTechnical Reference Series
21Copyright © StarWind Software 2008-2011. All rights reserved.
DNS
Log on to the Domain controller using an account with administrativeprivileges. Launch the DNS Manager and configure the Reverse Lookup Zone.
Press the right mouse button over the Reverse Lookup Zone node and selectNew Zone... popup menu item.

StarWind SoftwareTechnical Reference Series
22Copyright © StarWind Software 2008-2011. All rights reserved.
New Zone Wizard appears.
Press the Next button to continue.
StarWind SoftwareTechnical Reference Series
23Copyright © StarWind Software 2008-2011. All rights reserved.
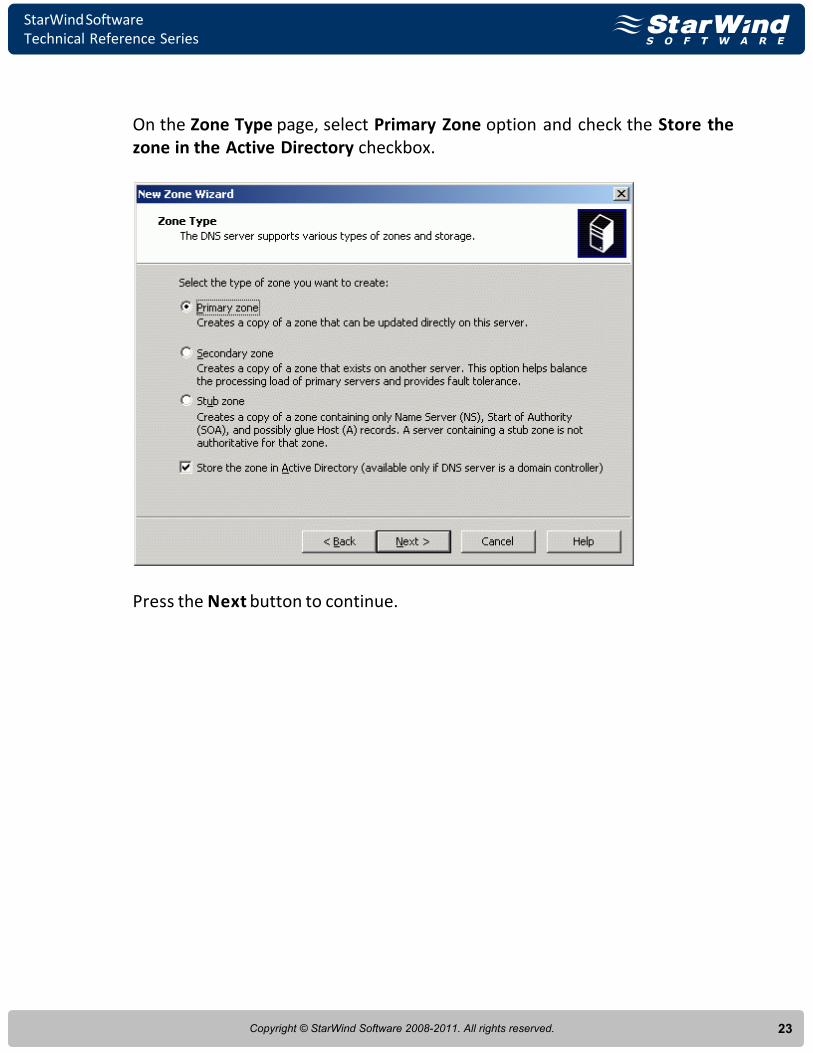
On the Zone Type page, select Primary Zone option and check the Store thezone in the Active Directory checkbox.
Press the Next button to continue.
StarWind SoftwareTechnical Reference Series
24Copyright © StarWind Software 2008-2011. All rights reserved.
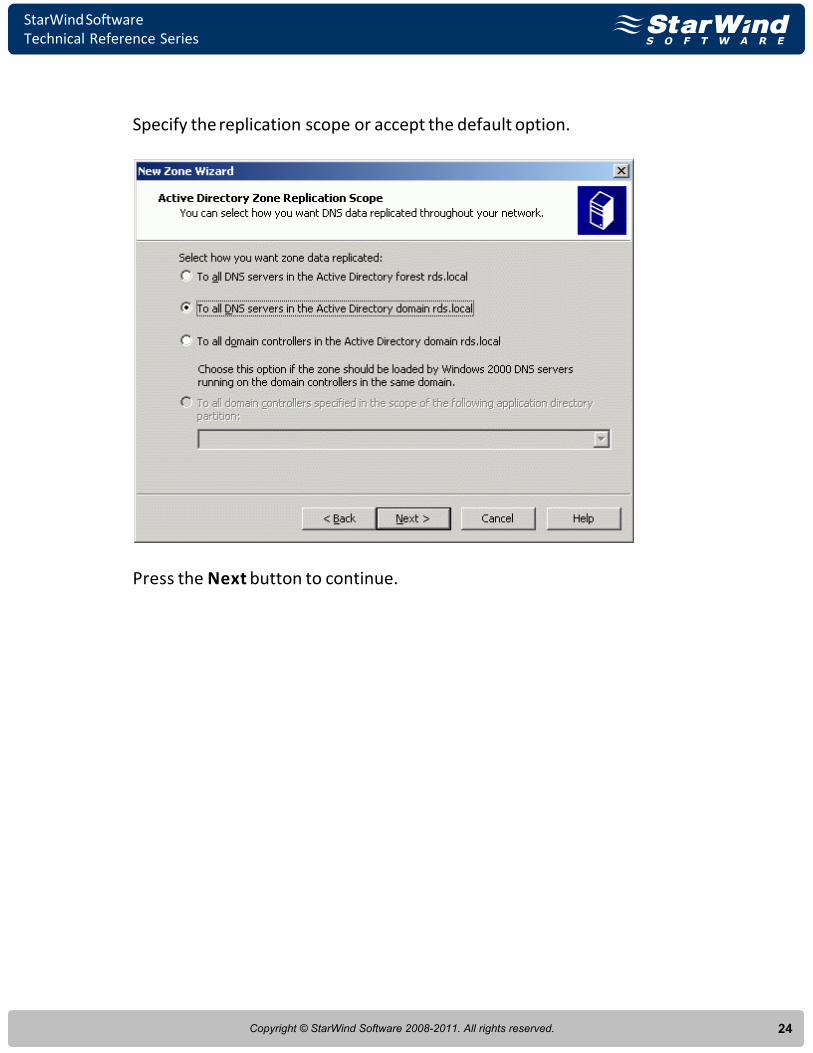
Specify the replication scope or accept the default option.
Press the Next button to continue.

StarWind SoftwareTechnical Reference Series
25Copyright © StarWind Software 2008-2011. All rights reserved.
Type in the Network ID to identify the reverse lookup zone.
Press the Next button to continue.
StarWind SoftwareTechnical Reference Series
26Copyright © StarWind Software 2008-2011. All rights reserved.
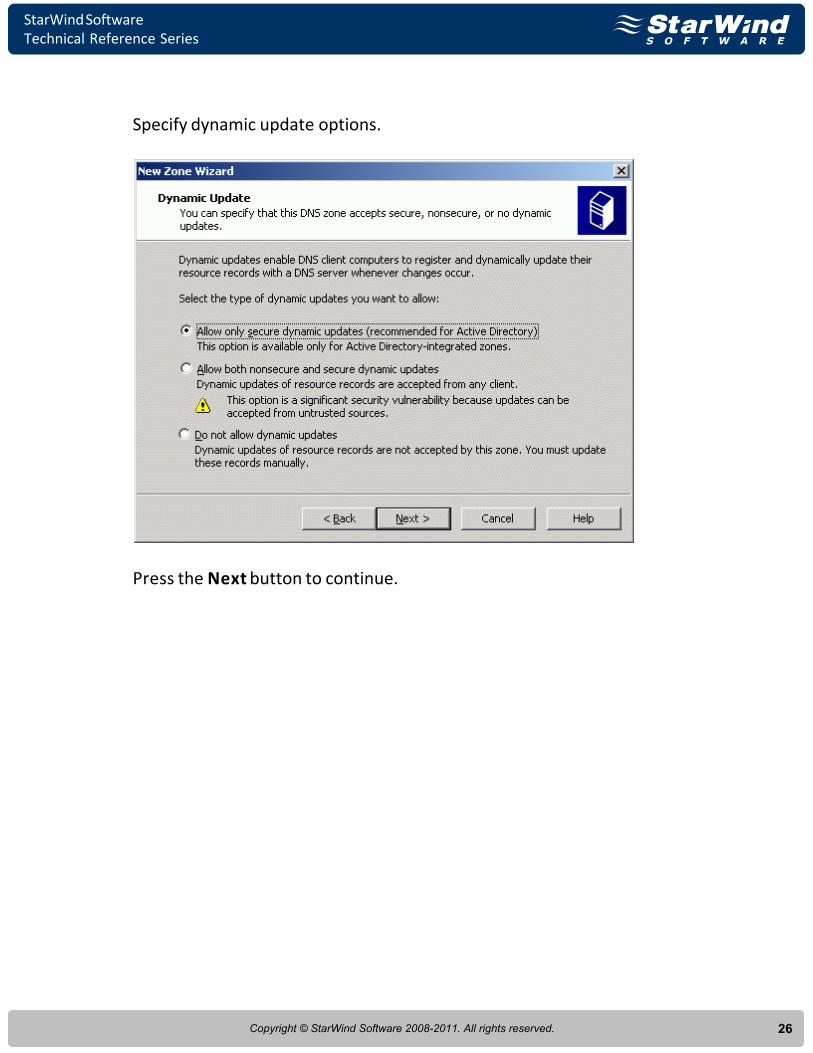
Specify dynamic update options.
Press the Next button to continue.

StarWind SoftwareTechnical Reference Series
27Copyright © StarWind Software 2008-2011. All rights reserved.
Check that all of the parameters are correct. Press the Back button should anychange be required.
Press the Finish button.

StarWind SoftwareTechnical Reference Series
28Copyright © StarWind Software 2008-2011. All rights reserved.
Press the right mouse button over rds.local forward lookup zone and selectNew Host (A)....pop-up menu item.

StarWind SoftwareTechnical Reference Series
29Copyright © StarWind Software 2008-2011. All rights reserved.
New Host dialog appears. Type in the hostname of the Cluster Node 1 Serverand its IP address. Also please check the Create associated pointer (PTR)record checkbox.
Press the Add Host button to add node1 DNS record.

StarWind SoftwareTechnical Reference Series
30Copyright © StarWind Software 2008-2011. All rights reserved.
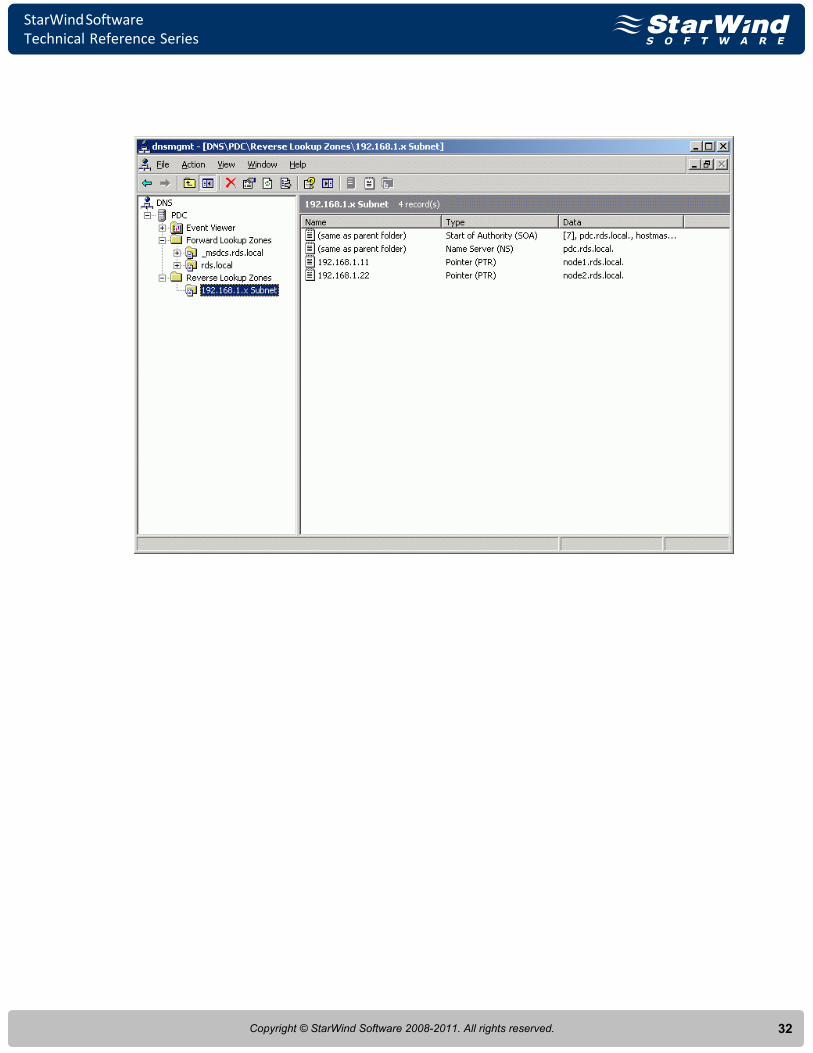
Type in the hostname of the Cluster Node 2 Server and its IP address. Alsoplease check the Create associated pointer (PTR) record checkbox.
Press the Add Host button to add node2 DNS record.
StarWind SoftwareTechnical Reference Series
31Copyright © StarWind Software 2008-2011. All rights reserved.
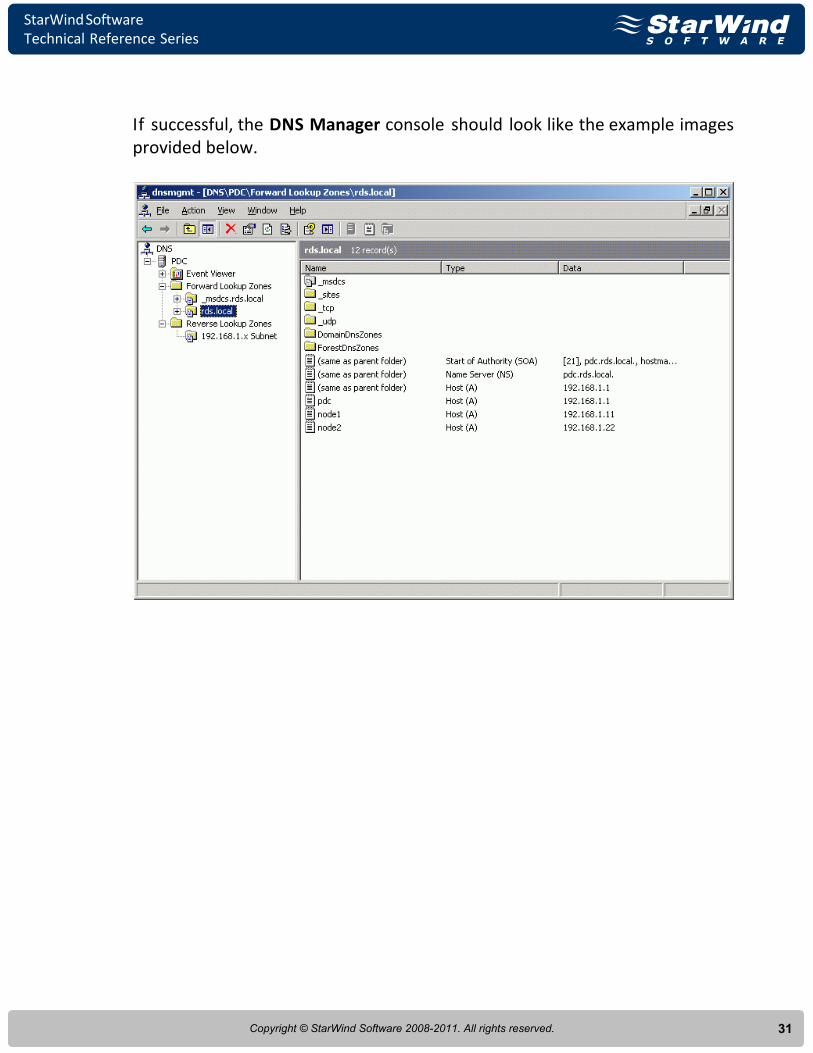
If successful, the DNS Manager console should look like the example imagesprovided below.
StarWind SoftwareTechnical Reference Series
32Copyright © StarWind Software 2008-2011. All rights reserved.
StarWind SoftwareTechnical Reference Series
33Copyright © StarWind Software 2008-2011. All rights reserved.
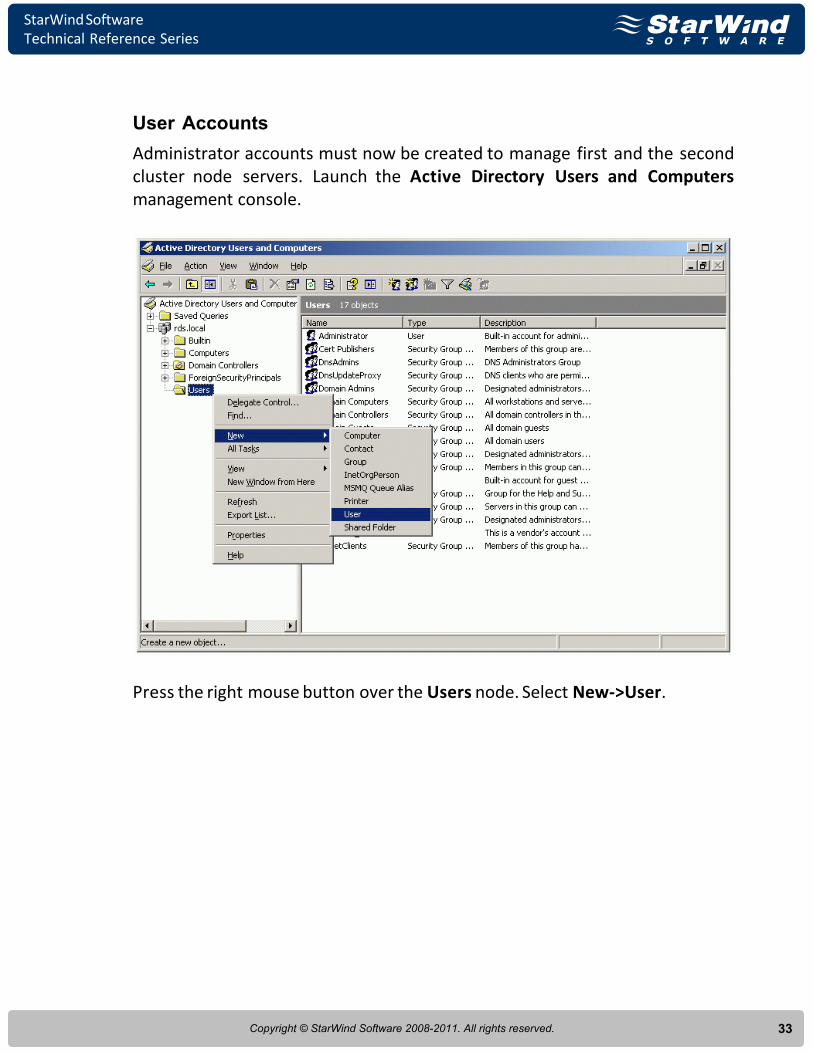
User Accounts
Administrator accounts must now be created to manage first and the secondcluster node servers. Launch the Active Directory Users and Computersmanagement console.
Press the right mouse button over the Users node. Select New->User.

StarWind SoftwareTechnical Reference Series
34Copyright © StarWind Software 2008-2011. All rights reserved.
In the dialog that appears, enter the required fields as shown in the exampleimage.
Press the Next button to continue.
StarWind SoftwareTechnical Reference Series
35Copyright © StarWind Software 2008-2011. All rights reserved.
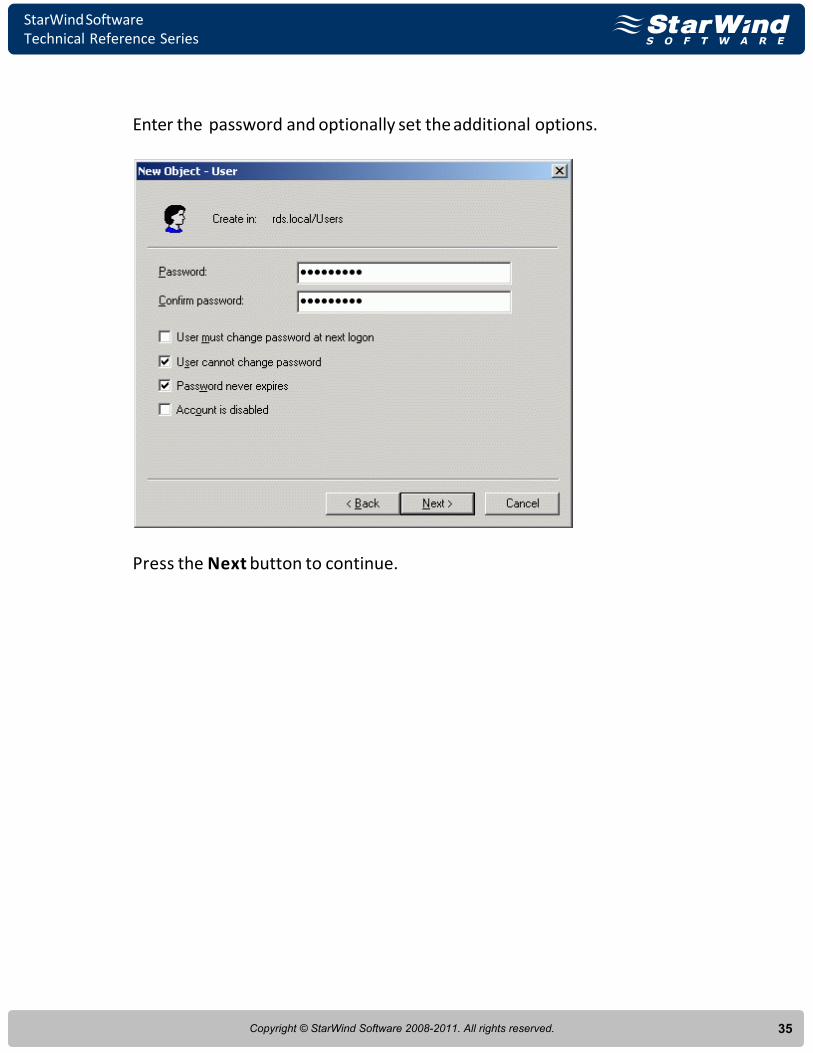
Enter the password and optionally set the additional options.
Press the Next button to continue.

StarWind SoftwareTechnical Reference Series
36Copyright © StarWind Software 2008-2011. All rights reserved.
Check that all of the parameters are correct. Press the Back button should anychange be required.
Press the Finish button to create new user.
StarWind SoftwareTechnical Reference Series
37Copyright © StarWind Software 2008-2011. All rights reserved.
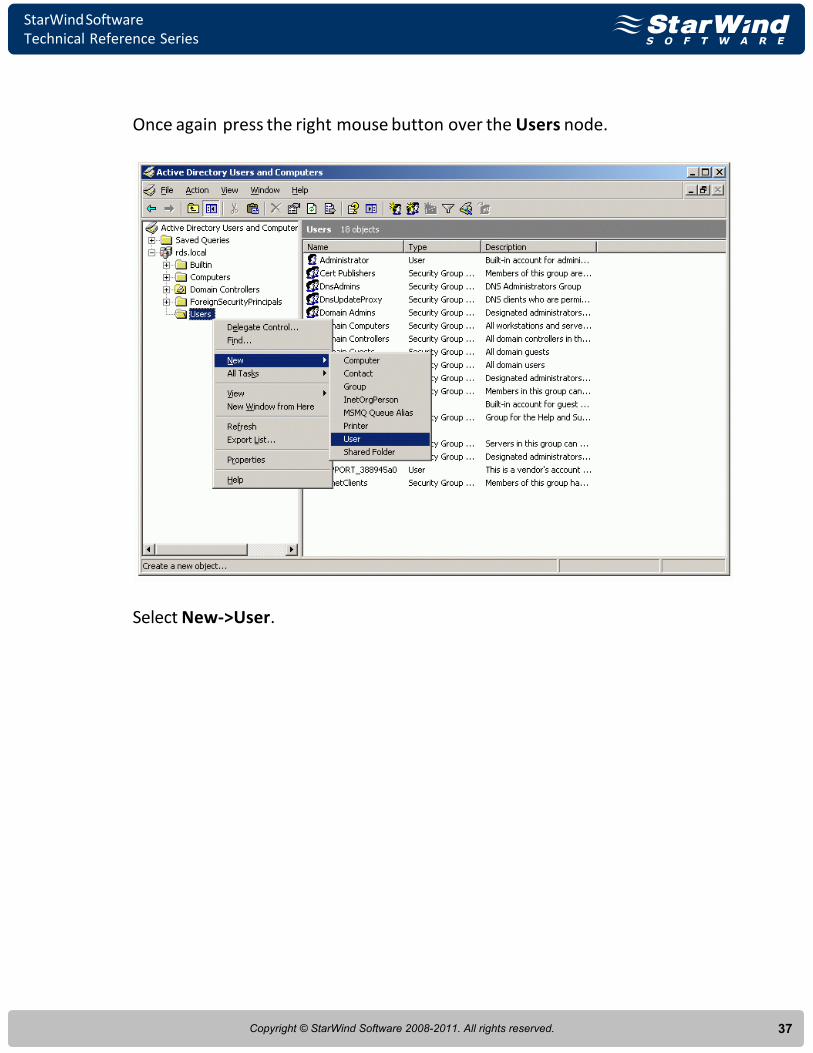
Once again press the right mouse button over the Users node.
Select New->User.

StarWind SoftwareTechnical Reference Series
38Copyright © StarWind Software 2008-2011. All rights reserved.
In the dialog that appears, enter the required fields as shown in the exampleimage.
Press the Next button to continue.

StarWind SoftwareTechnical Reference Series
39Copyright © StarWind Software 2008-2011. All rights reserved.
Enter the password and optionally set the additional options.
Press the Next button to continue.
StarWind SoftwareTechnical Reference Series
40Copyright © StarWind Software 2008-2011. All rights reserved.
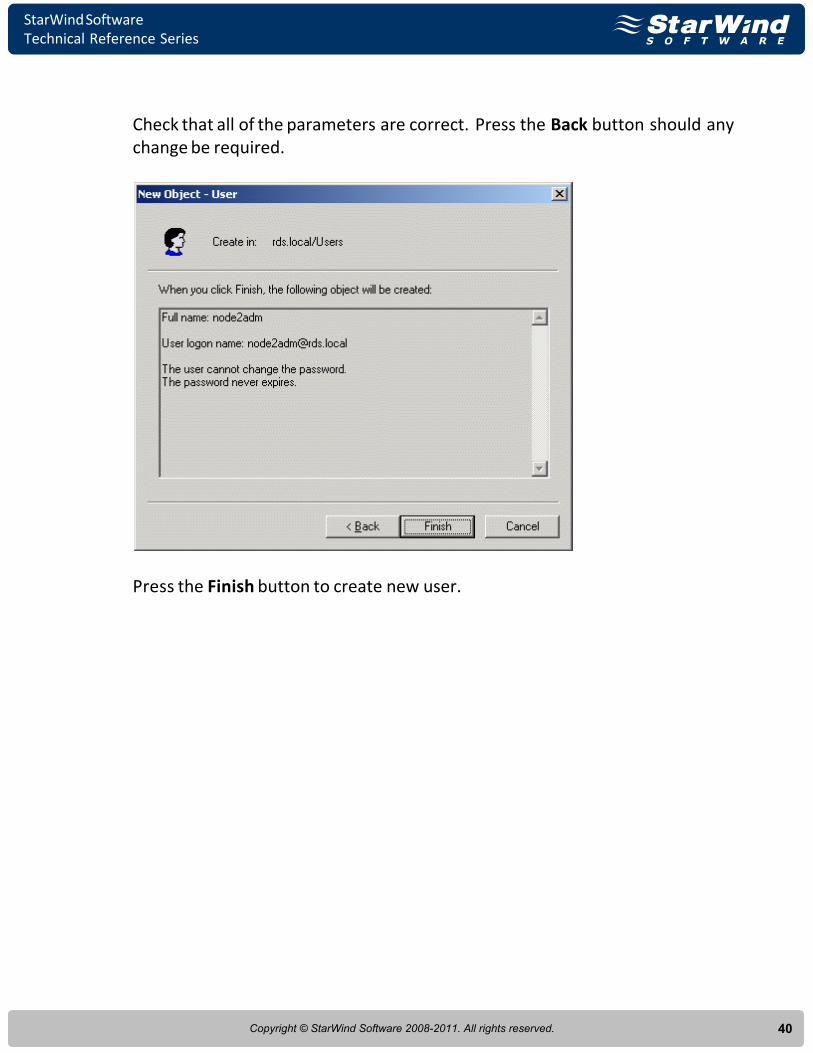
Check that all of the parameters are correct. Press the Back button should anychange be required.
Press the Finish button to create new user.

StarWind SoftwareTechnical Reference Series
41Copyright © StarWind Software 2008-2011. All rights reserved.
Also Cluster Service Account must now be created under which the clusterservice will be run. Launch the Active Directory Users and Computersmanagement console.
Press the right mouse button over the Users node. Select New->User.

StarWind SoftwareTechnical Reference Series
42Copyright © StarWind Software 2008-2011. All rights reserved.
In the dialog that appears, enter the required fields as shown in the exampleimage.
Press the Next button to continue.

StarWind SoftwareTechnical Reference Series
43Copyright © StarWind Software 2008-2011. All rights reserved.
Enter the password and optionally set the additional options.
Press the Next button to continue.

StarWind SoftwareTechnical Reference Series
44Copyright © StarWind Software 2008-2011. All rights reserved.
Check that all of the parameters are correct. Press the Back button should anychange be required.
Press the Finish button to create new user.
StarWind SoftwareTechnical Reference Series
45Copyright © StarWind Software 2008-2011. All rights reserved.
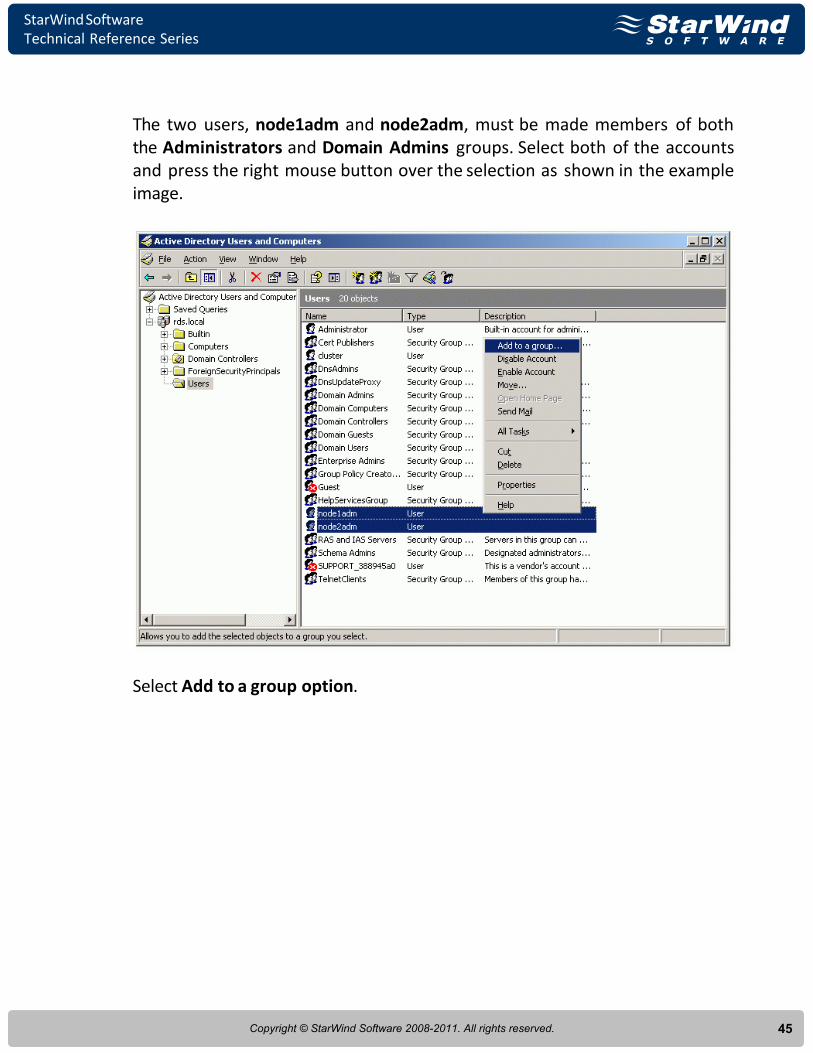
The two users, node1adm and node2adm, must be made members of boththe Administrators and Domain Admins groups. Select both of the accountsand press the right mouse button over the selection as shown in the exampleimage.
Select Add to a group option.

StarWind SoftwareTechnical Reference Series
46Copyright © StarWind Software 2008-2011. All rights reserved.
Select Group dialog appears. Enter Domain Admins as the name of the group.
Press the OK button.

StarWind SoftwareTechnical Reference Series
47Copyright © StarWind Software 2008-2011. All rights reserved.
Repeat the same steps to to add node1adm and node2adm users toAdministrators group.
Press the OK button.

StarWind SoftwareTechnical Reference Series
48Copyright © StarWind Software 2008-2011. All rights reserved.
Configuring StarWind Server
Network Adapter
The network adapter must be assigned a static IP address. Select the Use thefollowing IP address option and type in the IP address you wish to use. TheSubnet mask must also be provided. Both values must be correctly chosengiven the networking configuration of the dedicate iSCSI network that thecluster will be a part of. This interface is used for iSCSI target storagecommunications and a default gateway need not be specified.
Press the OK button.

StarWind SoftwareTechnical Reference Series
49Copyright © StarWind Software 2008-2011. All rights reserved.
Preparing Quorum Volume
Launch the StarWind Management Console selecting Start -> All Programs ->StarWind Software -> StarWind -> StarWind. After the console is launched itsicon appears in the system tray. Double click the icon with the left mousebutton or single click it with the right and select Start Management pop-upmenu item. From the StarWind Servers tree please select the computer youwish to connect to. Press the right mouse button over the desired host(computer) and select the Connect menu item. You will be prompted to enterthe login and password. Default ones are: root, starwind. You can alwayschange them later. After you have successfully connected to the StarWind Service, please clickthe right mouse button over the desired host (computer) and select AddTarget pop-up menu item. In the wizard that appears, select a target name.The name must be a unique name by which the device will be declared to theiSCSI initiators connecting to StarWind over an IP network.
Press the Next button to continue.

StarWind SoftwareTechnical Reference Series
50Copyright © StarWind Software 2008-2011. All rights reserved.
Select Image File device.
Press the Next button to continue.

StarWind SoftwareTechnical Reference Series
51Copyright © StarWind Software 2008-2011. All rights reserved.
Select Create new virtual disk to create a new virtual hard disk or Mountexisting virtual disk to mount an existing virtual disk that you’ve preparedbefore.
Press the Next button to continue.

StarWind SoftwareTechnical Reference Series
52Copyright © StarWind Software 2008-2011. All rights reserved.
If you have decided to create a new virtual disk please specify the location andthe name of the virtual disk you wish to be created. Also you have to providethe virtual disk size in megabytes. Check any additional parameters of thevirtual disk you wish to create. Please refer to the online help for detailsregarding those additional parameters (Compressed and Encrypted).
Press the Next button to continue.

StarWind SoftwareTechnical Reference Series
53Copyright © StarWind Software 2008-2011. All rights reserved.
Image File device has some extra parameters. Check Allow multipleconcurrent iSCSI connections (clustering) checkbox. Please refer to the onlinehelp for details regarding those additional parameters (Asynchronous mode,Allow multiple connections (clustering), Read-only mode and Specifyadvanced options).
Press the Next button to continue.

StarWind SoftwareTechnical Reference Series
54Copyright © StarWind Software 2008-2011. All rights reserved.
Check the device parameters are correct. Press the Back button should anychanges be required.
Press the Next button to continue.

StarWind SoftwareTechnical Reference Series
55Copyright © StarWind Software 2008-2011. All rights reserved.
A summary of the created device is displayed on the last wizard page (seeimage below).
Press the Finish button to close the wizard.

StarWind SoftwareTechnical Reference Series
56Copyright © StarWind Software 2008-2011. All rights reserved.
Preparing Generic Volume
Click the right mouse button over the host and select Add Target pop-up menuitem.In the wizard that appears, select a target name. The name must be a uniquename by which the device will be declared to the iSCSI initiators connecting toStarWind over an IP network.
Press the Next button to continue.

StarWind SoftwareTechnical Reference Series
57Copyright © StarWind Software 2008-2011. All rights reserved.
Select Image File device.
Press the Next button to continue.
StarWind SoftwareTechnical Reference Series
58Copyright © StarWind Software 2008-2011. All rights reserved.
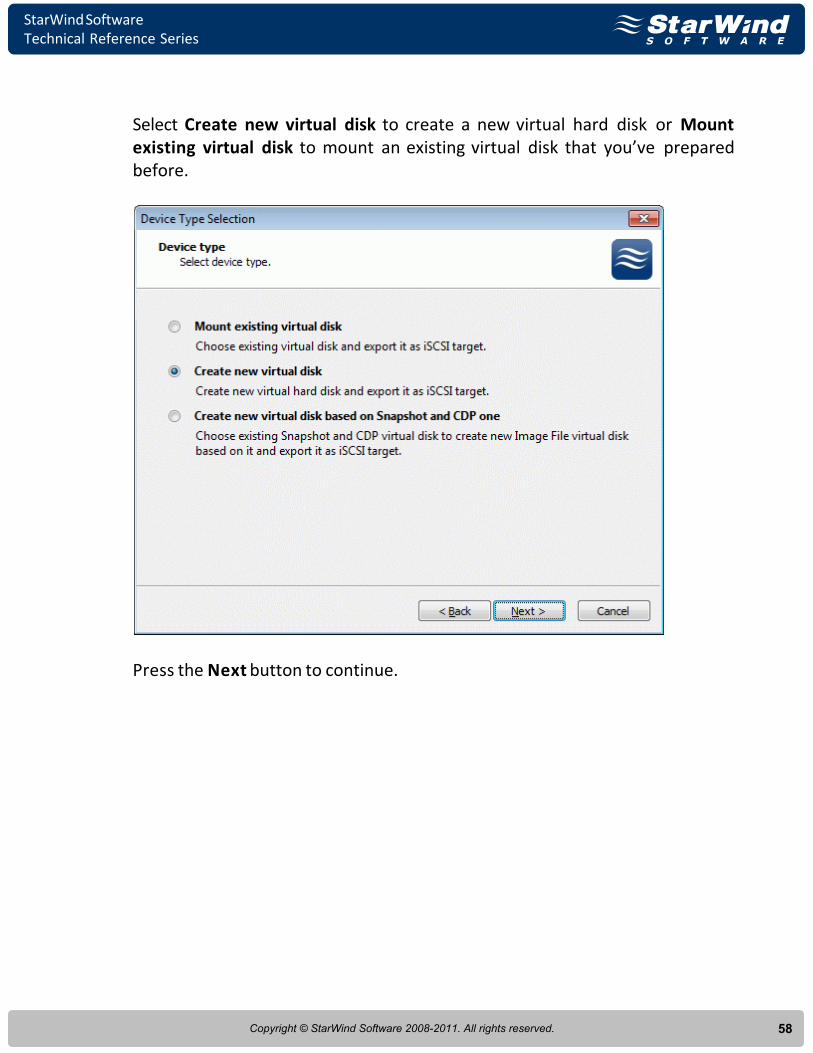
Select Create new virtual disk to create a new virtual hard disk or Mountexisting virtual disk to mount an existing virtual disk that you’ve preparedbefore.
Press the Next button to continue.
StarWind SoftwareTechnical Reference Series
59Copyright © StarWind Software 2008-2011. All rights reserved.
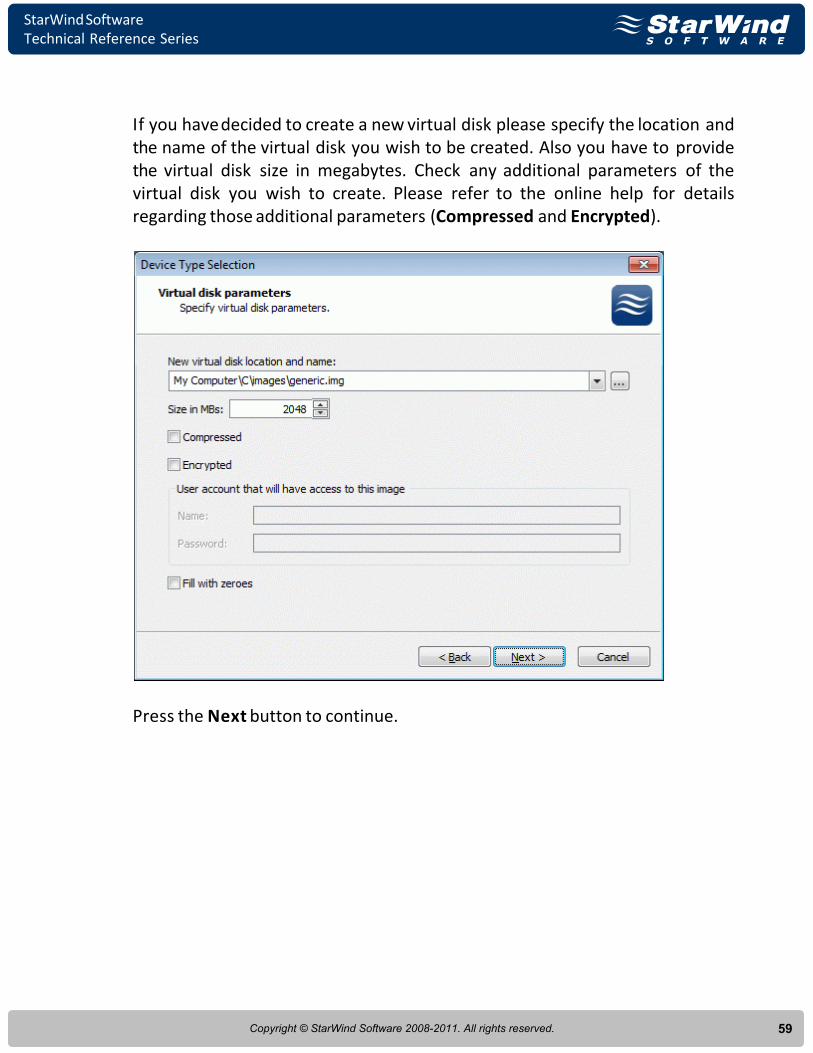
If you have decided to create a new virtual disk please specify the location andthe name of the virtual disk you wish to be created. Also you have to providethe virtual disk size in megabytes. Check any additional parameters of thevirtual disk you wish to create. Please refer to the online help for detailsregarding those additional parameters (Compressed and Encrypted).
Press the Next button to continue.

StarWind SoftwareTechnical Reference Series
60Copyright © StarWind Software 2008-2011. All rights reserved.
Image File device has some extra parameters. Check Allow multipleconcurrent iSCSI connections (clustering) checkbox. Please refer to the onlinehelp for details regarding those additional parameters (Asynchronous mode,Allow multiple connections (clustering), Read-only mode and Specifyadvanced options).
Press the Next button to continue.

StarWind SoftwareTechnical Reference Series
61Copyright © StarWind Software 2008-2011. All rights reserved.
Check the device parameters are correct. Press the Back button should anychanges be required.
Press the Next button to continue.

StarWind SoftwareTechnical Reference Series
62Copyright © StarWind Software 2008-2011. All rights reserved.
A summary of the created device is displayed on the last wizard page (seeimage below).
Press the Finish button to close the wizard.

StarWind SoftwareTechnical Reference Series
63Copyright © StarWind Software 2008-2011. All rights reserved.
If successful, the StarWind Console should look like the sample imageprovided below.
StarWind SoftwareTechnical Reference Series
64Copyright © StarWind Software 2008-2011. All rights reserved.
Preparing Cluster Nodes
Node 1
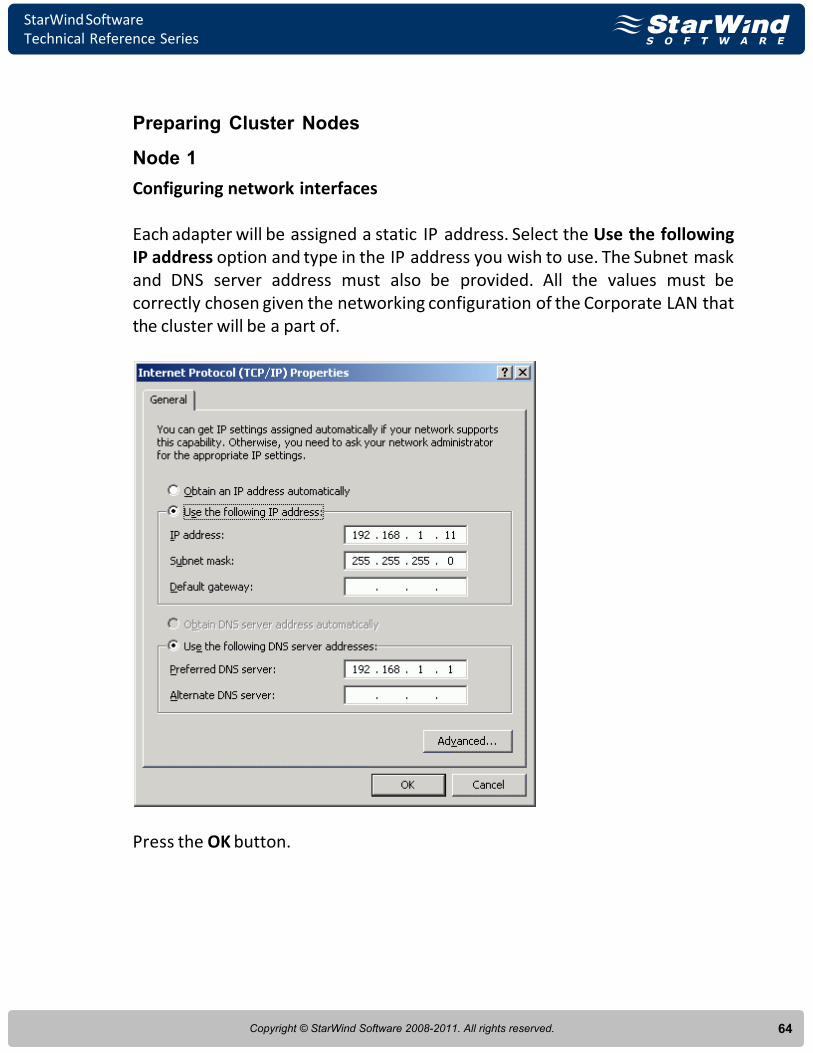
Configuring network interfaces
Each adapter will be assigned a static IP address. Select the Use the followingIP address option and type in the IP address you wish to use. The Subnet maskand DNS server address must also be provided. All the values must becorrectly chosen given the networking configuration of the Corporate LAN thatthe cluster will be a part of.
Press the OK button.
StarWind SoftwareTechnical Reference Series
65Copyright © StarWind Software 2008-2011. All rights reserved.
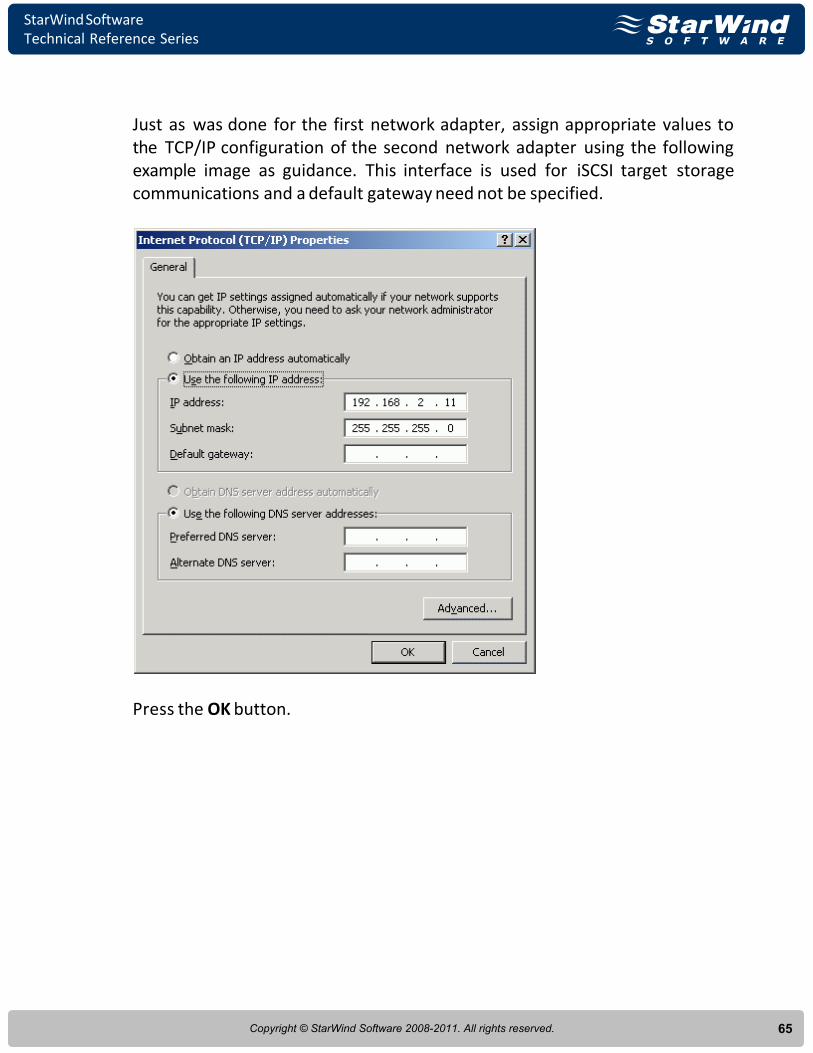
Just as was done for the first network adapter, assign appropriate values tothe TCP/IP configuration of the second network adapter using the followingexample image as guidance. This interface is used for iSCSI target storagecommunications and a default gateway need not be specified.
Press the OK button.

StarWind SoftwareTechnical Reference Series
66Copyright © StarWind Software 2008-2011. All rights reserved.
Joining the domain
Launch System Properties tool selecting Control Panel -> System. Select Computer Name tab.
Press the Change… button.

StarWind SoftwareTechnical Reference Series
67Copyright © StarWind Software 2008-2011. All rights reserved.
In the Computer Name Changes dialog enter domain to join.
Press the OK button.

StarWind SoftwareTechnical Reference Series
68Copyright © StarWind Software 2008-2011. All rights reserved.
Enter the name and password of an account with permission to join to thedomain (node1adm).
Press the OK button to join.

StarWind SoftwareTechnical Reference Series
69Copyright © StarWind Software 2008-2011. All rights reserved.
If successful, the notification dialog like the one on the image shown belowshould appear.
Press the OK button.

StarWind SoftwareTechnical Reference Series
70Copyright © StarWind Software 2008-2011. All rights reserved.
You must restart the computer for the changes to take effect.
Restart the server. Log in as node1adm and install MS iSCSI Initator.
StarWind SoftwareTechnical Reference Series
71Copyright © StarWind Software 2008-2011. All rights reserved.
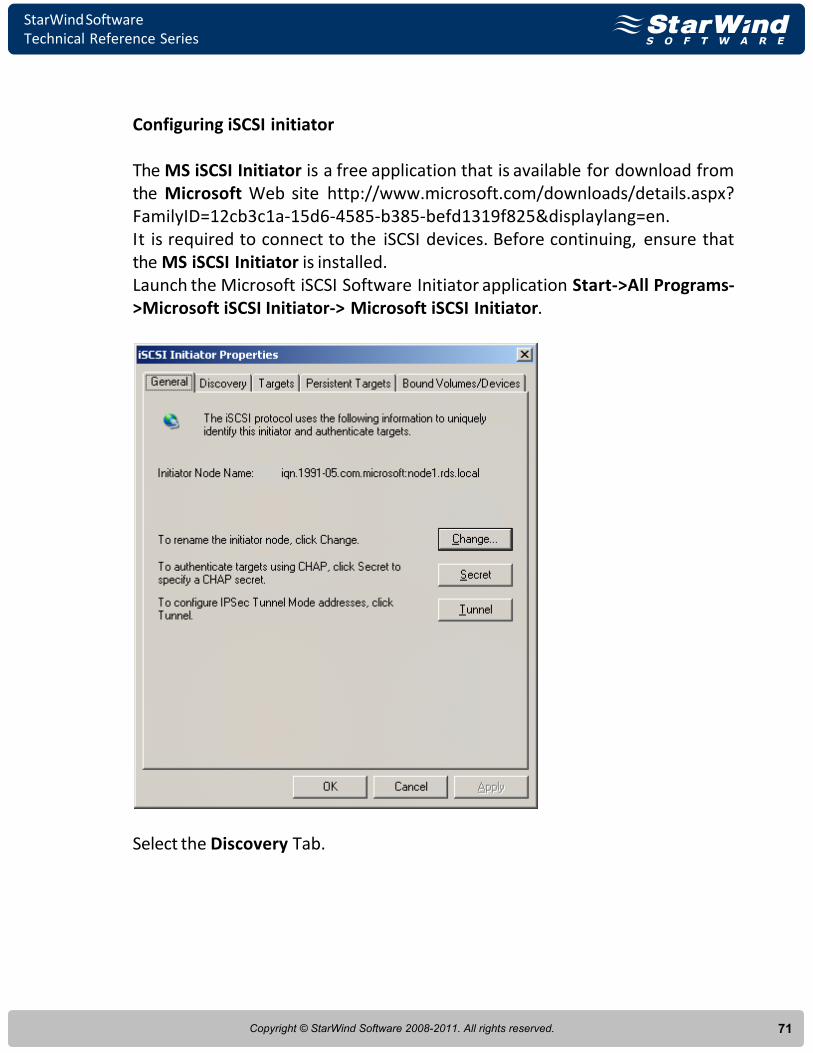
Configuring iSCSI initiator
The MS iSCSI Initiator is a free application that is available for download fromthe Microsoft Web site http://www.microsoft.com/downloads/details.aspx?FamilyID=12cb3c1a-15d6-4585-b385-befd1319f825&displaylang=en. It is required to connect to the iSCSI devices. Before continuing, ensure thatthe MS iSCSI Initiator is installed.Launch the Microsoft iSCSI Software Initiator application Start->All Programs->Microsoft iSCSI Initiator-> Microsoft iSCSI Initiator.
Select the Discovery Tab.
StarWind SoftwareTechnical Reference Series
72Copyright © StarWind Software 2008-2011. All rights reserved.
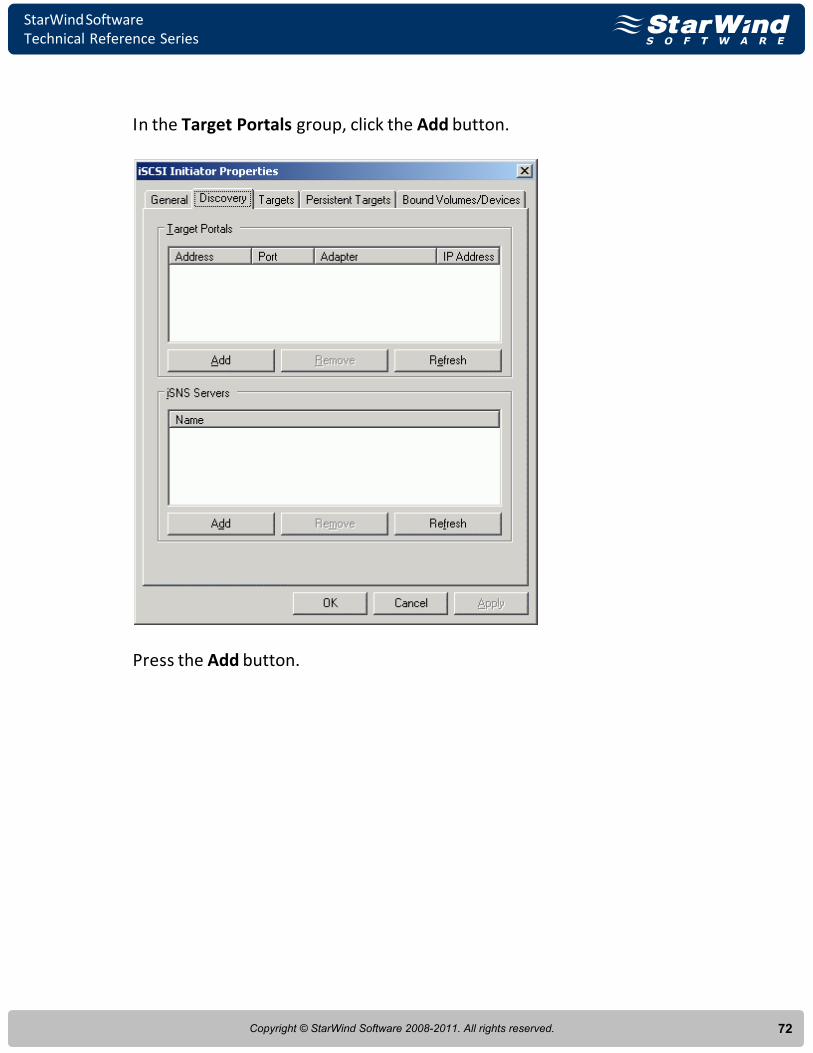
In the Target Portals group, click the Add button.
Press the Add button.
StarWind SoftwareTechnical Reference Series
73Copyright © StarWind Software 2008-2011. All rights reserved.
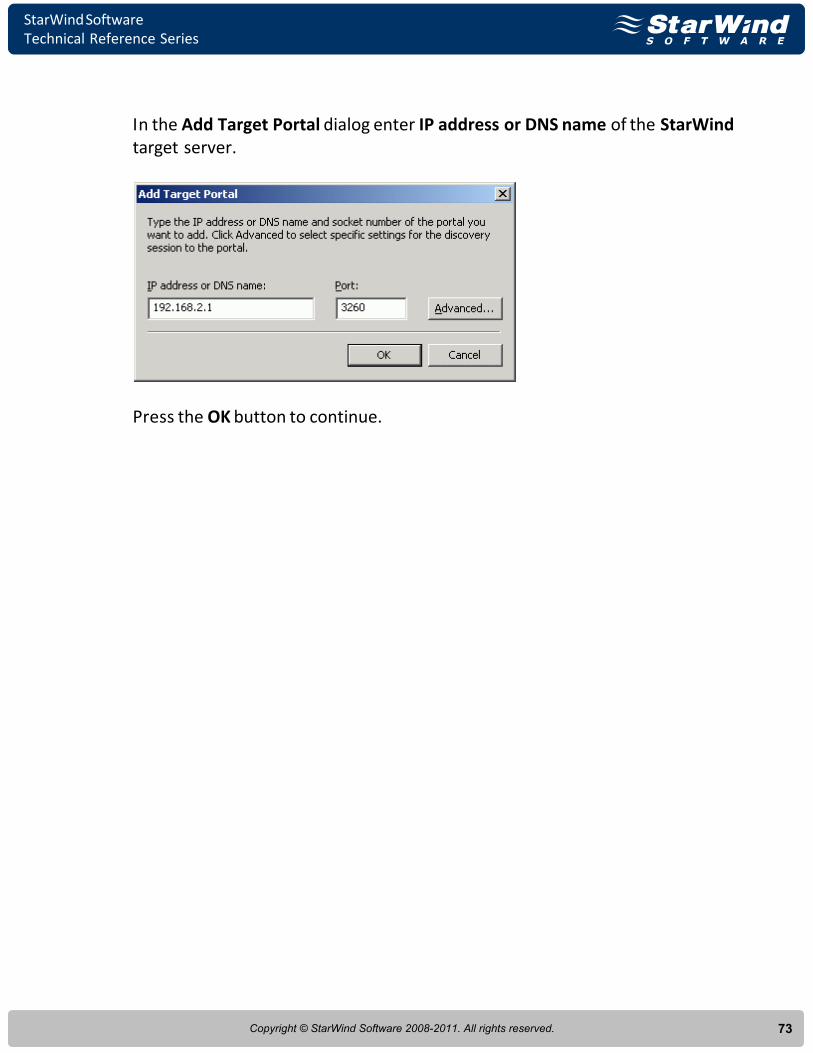
In the Add Target Portal dialog enter IP address or DNS name of the StarWindtarget server.
Press the OK button to continue.

StarWind SoftwareTechnical Reference Series
74Copyright © StarWind Software 2008-2011. All rights reserved.
Click on the Targets tab. Select the IQN of the target just added.
Press the Log On… button.

StarWind SoftwareTechnical Reference Series
75Copyright © StarWind Software 2008-2011. All rights reserved.
The Log On to Target dialog now appears. In this dialog click on the checkboxAutomatically restore this connection when the system boots to make thisconnection persistent.
Press the OK button to continue.
Press the OK button to continue.

StarWind SoftwareTechnical Reference Series
76Copyright © StarWind Software 2008-2011. All rights reserved.
If successful, the initiator is now logged on to StarWind.
StarWind SoftwareTechnical Reference Series
77Copyright © StarWind Software 2008-2011. All rights reserved.
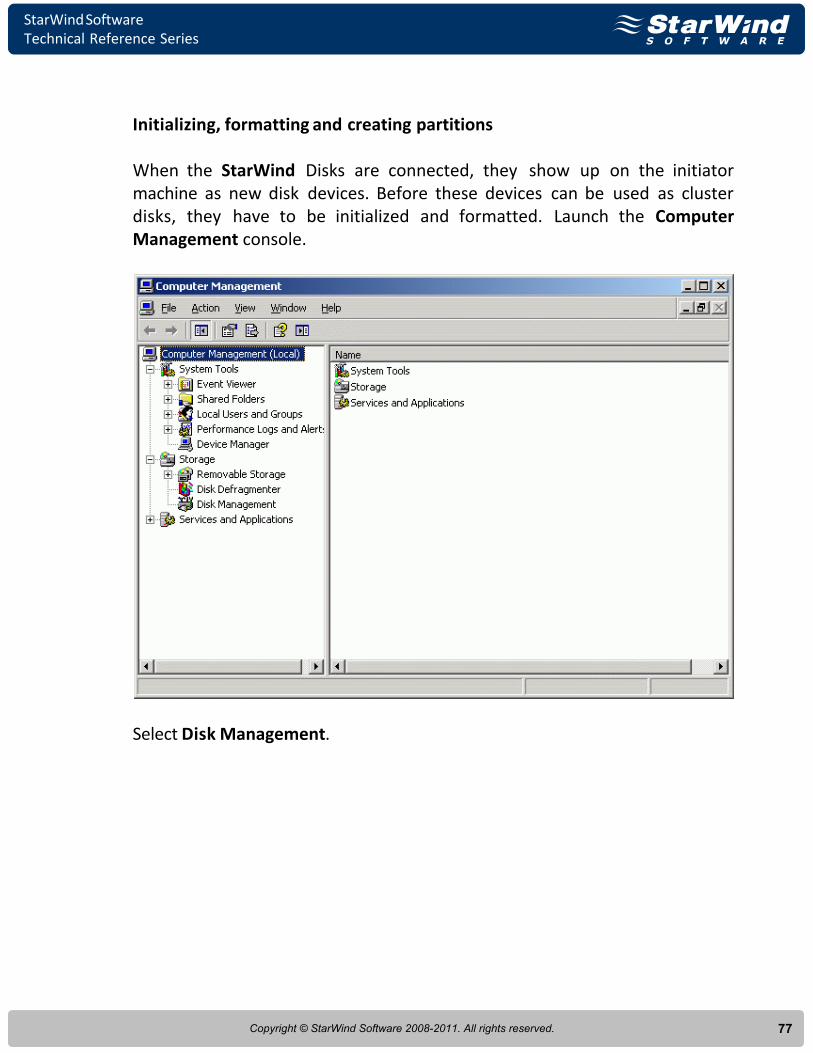
Initializing, formatting and creating partitions
When the StarWind Disks are connected, they show up on the initiatormachine as new disk devices. Before these devices can be used as clusterdisks, they have to be initialized and formatted. Launch the ComputerManagement console.
Select Disk Management.

StarWind SoftwareTechnical Reference Series
78Copyright © StarWind Software 2008-2011. All rights reserved.
Follow the Initialize and Convert Disk Wizard to initialize the new disks. Usethe default settings that Windows provides. By default the disk will beinitialized as the basic disk. MSCS works only with the basic disks.
Press the Next button to continue.

StarWind SoftwareTechnical Reference Series
79Copyright © StarWind Software 2008-2011. All rights reserved.
Press the Next button to continue.

StarWind SoftwareTechnical Reference Series
80Copyright © StarWind Software 2008-2011. All rights reserved.
Press the Next button to continue.
StarWind SoftwareTechnical Reference Series
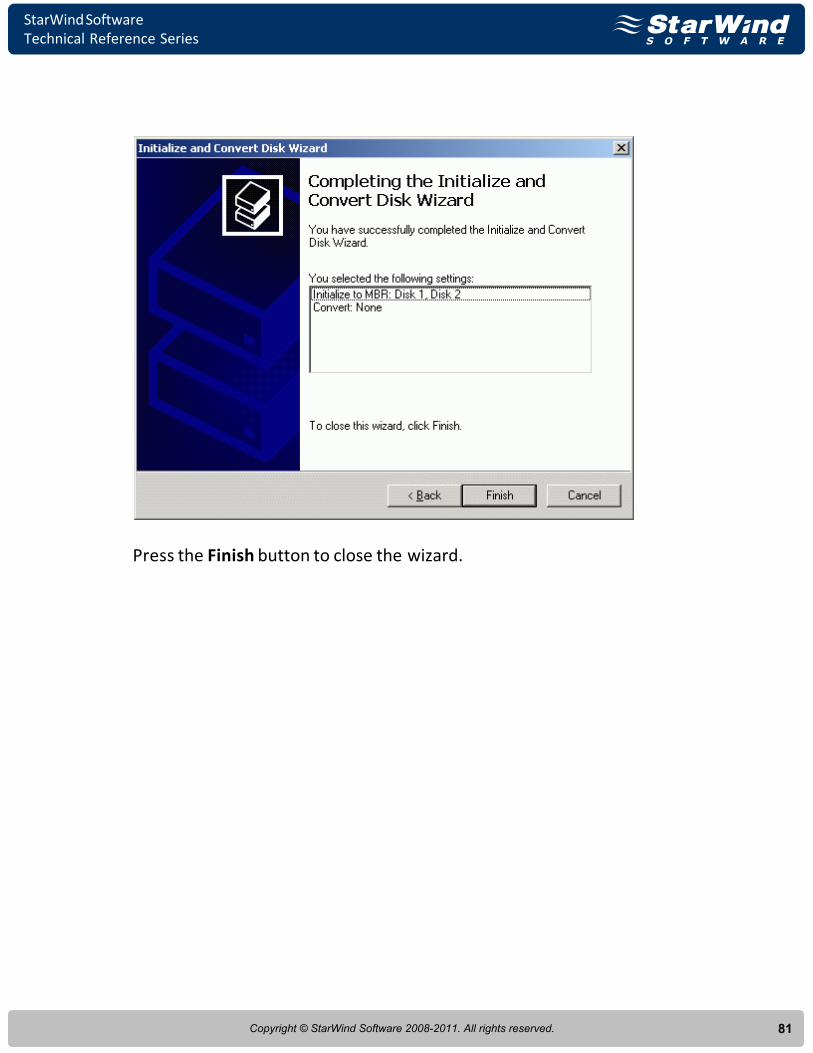
81Copyright © StarWind Software 2008-2011. All rights reserved.
Press the Finish button to close the wizard.

StarWind SoftwareTechnical Reference Series
82Copyright © StarWind Software 2008-2011. All rights reserved.

StarWind SoftwareTechnical Reference Series
83Copyright © StarWind Software 2008-2011. All rights reserved.
After the Wizard completes initialization, press the right mouse button on theunallocated space and select New Partition popup menu item. Follow theinstructions of the wizard to create an NTFS partition for use as the quorumdisk. Use the default settings that Windows provides. (The default settings aresufficient for most environments.)

StarWind SoftwareTechnical Reference Series
84Copyright © StarWind Software 2008-2011. All rights reserved.
New Partition Wizard appears.
Press the Next button to continue.

StarWind SoftwareTechnical Reference Series
85Copyright © StarWind Software 2008-2011. All rights reserved.
Select partition type to create.
Press the Next button to continue.

StarWind SoftwareTechnical Reference Series
86Copyright © StarWind Software 2008-2011. All rights reserved.
Specify new partition size in megabytes.
Press the Next button to continue.

StarWind SoftwareTechnical Reference Series
87Copyright © StarWind Software 2008-2011. All rights reserved.
Choose the Drive Letter to assign.
Press the Next button to continue.
StarWind SoftwareTechnical Reference Series
88Copyright © StarWind Software 2008-2011. All rights reserved.
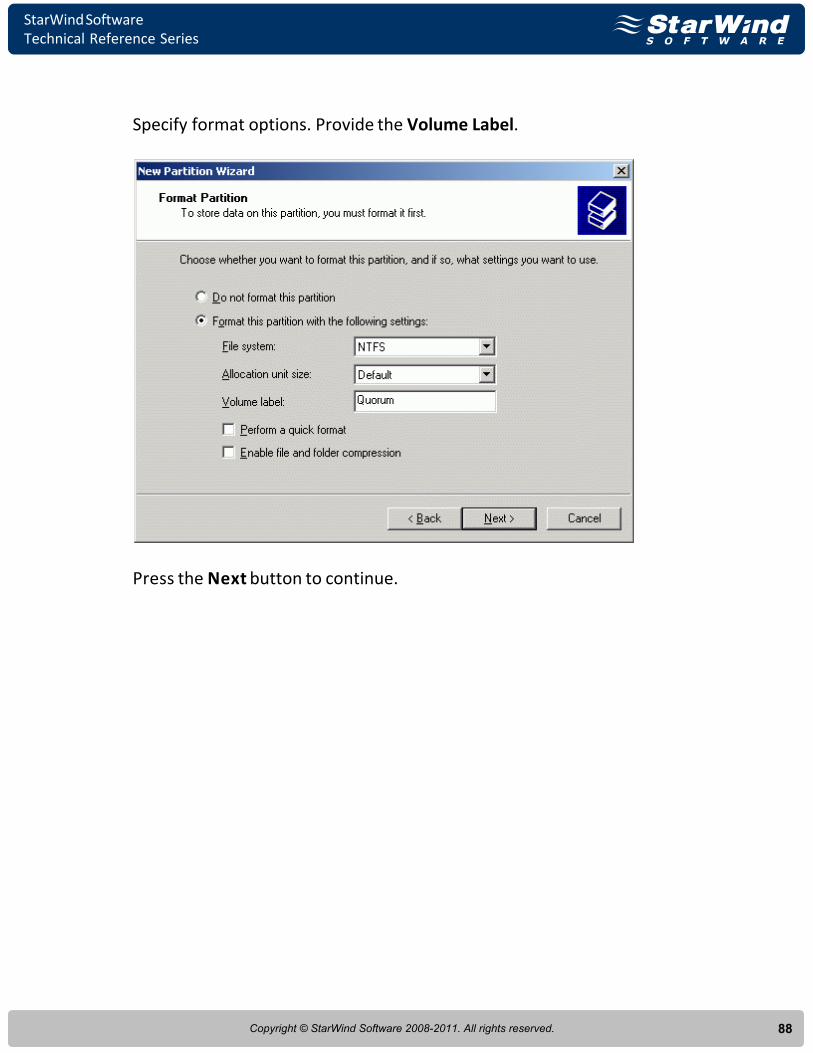
Specify format options. Provide the Volume Label.
Press the Next button to continue.

StarWind SoftwareTechnical Reference Series
89Copyright © StarWind Software 2008-2011. All rights reserved.
Check the settings are correct. Press the Back button should any changes berequired.
Press the Finish button to close the wizard.

StarWind SoftwareTechnical Reference Series
90Copyright © StarWind Software 2008-2011. All rights reserved.
If successful, a new volume will be created as shown in the example imagebelow. Repeat the same steps to create the second volume.
StarWind SoftwareTechnical Reference Series
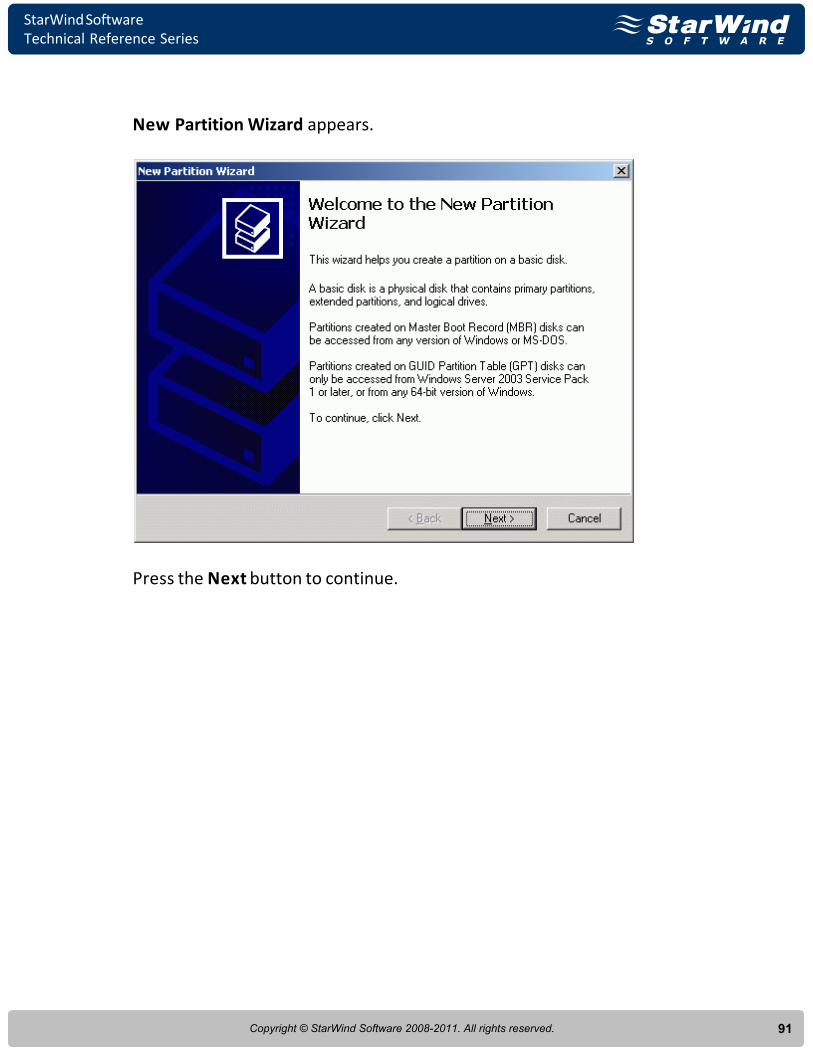
91Copyright © StarWind Software 2008-2011. All rights reserved.
New Partition Wizard appears.
Press the Next button to continue.

StarWind SoftwareTechnical Reference Series
92Copyright © StarWind Software 2008-2011. All rights reserved.
Select partition type to create.
Press the Next button to continue.

StarWind SoftwareTechnical Reference Series
93Copyright © StarWind Software 2008-2011. All rights reserved.
Specify new partition size in megabytes.
Press the Next button to continue.

StarWind SoftwareTechnical Reference Series
94Copyright © StarWind Software 2008-2011. All rights reserved.
Choose the Drive Letter to assign.
Press the Next button to continue.

StarWind SoftwareTechnical Reference Series
95Copyright © StarWind Software 2008-2011. All rights reserved.
Specify format options. Provide the Volume Label.
Press the Next button to continue.

StarWind SoftwareTechnical Reference Series
96Copyright © StarWind Software 2008-2011. All rights reserved.
Check the settings are correct. Press the Back button should any changes berequired.
Press the Finish button to close the wizard.
StarWind SoftwareTechnical Reference Series
97Copyright © StarWind Software 2008-2011. All rights reserved.
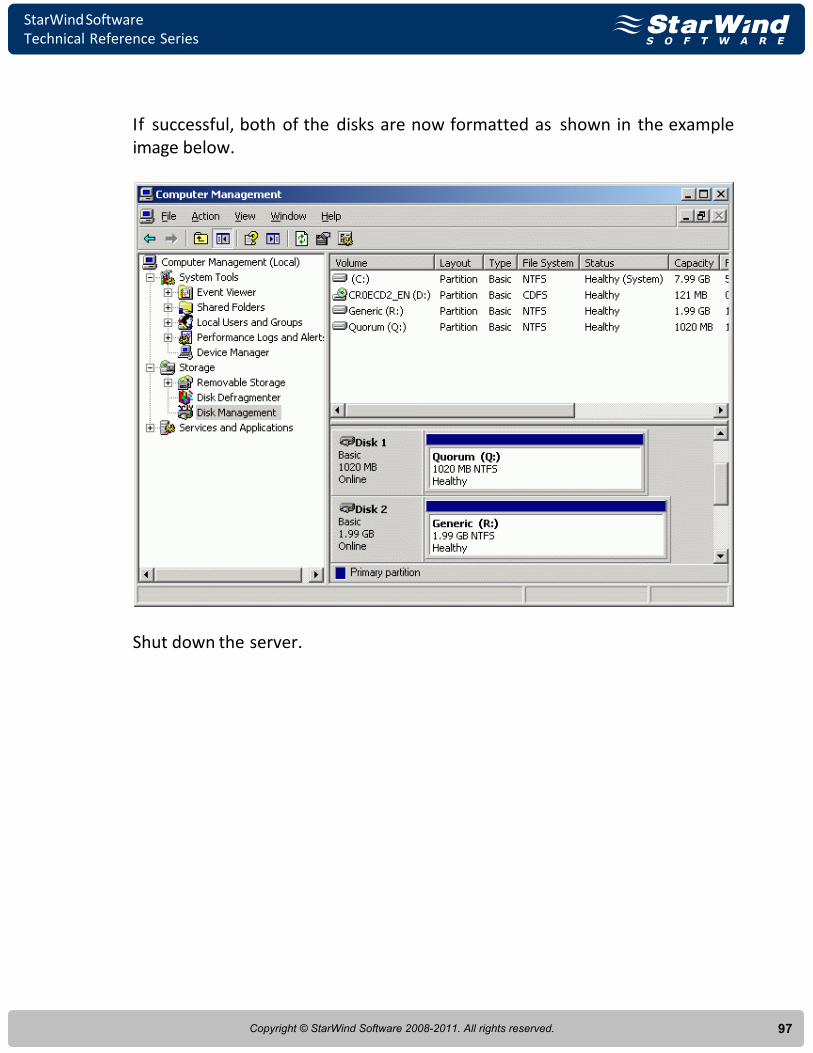
If successful, both of the disks are now formatted as shown in the exampleimage below.
Shut down the server.

StarWind SoftwareTechnical Reference Series
98Copyright © StarWind Software 2008-2011. All rights reserved.
Node 2
Configuring network interfaces
Each adapter will be assigned a static IP address. Select the Use the followingIP address option and type in the IP address you wish to use. The Subnet maskand DNS server address must also be provided. All the values must becorrectly chosen given the networking configuration of the Corporate LAN thatthe cluster will be a part of.
Press the OK button.

StarWind SoftwareTechnical Reference Series
99Copyright © StarWind Software 2008-2011. All rights reserved.
Just as was done for the first network adapter, assign appropriate values tothe TCP/IP configuration of the second network adapter using the followingexample image as guidance. This interface is used for iSCSI target storagecommunications and a default gateway need not be specified.
Press the OK button.
StarWind SoftwareTechnical Reference Series
100Copyright © StarWind Software 2008-2011. All rights reserved.
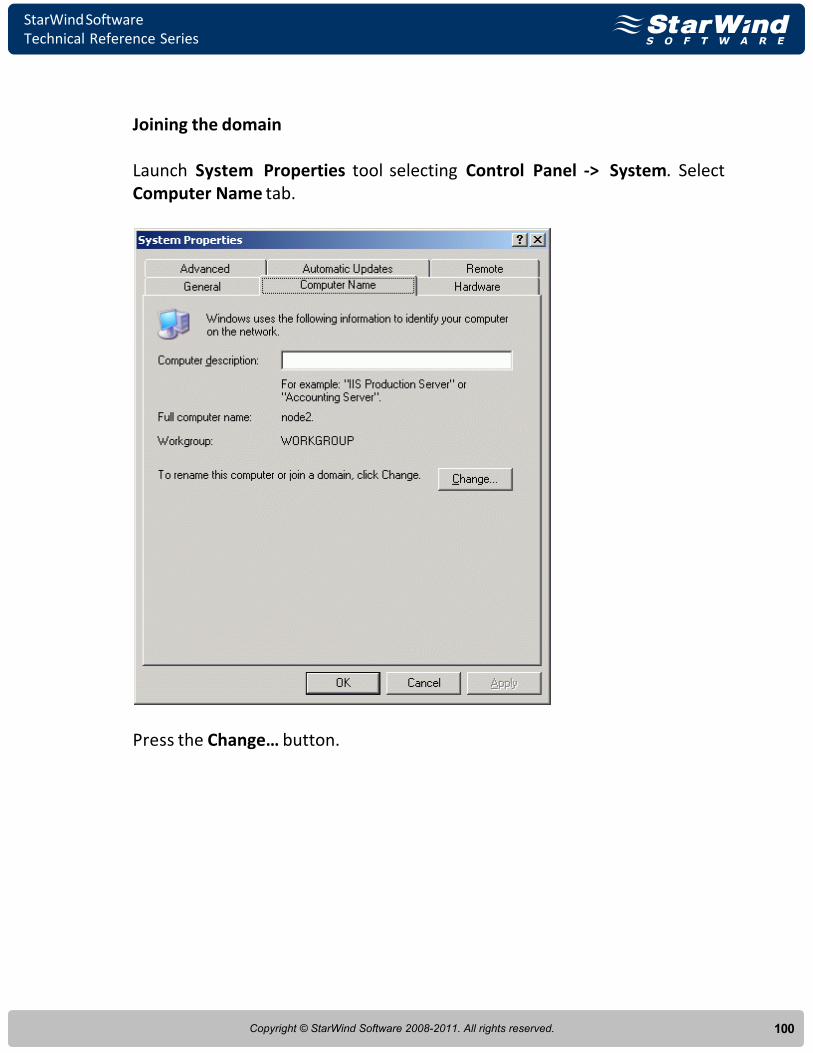
Joining the domain
Launch System Properties tool selecting Control Panel -> System. Select Computer Name tab.
Press the Change… button.

StarWind SoftwareTechnical Reference Series
101Copyright © StarWind Software 2008-2011. All rights reserved.
In the Computer Name Changes dialog enter domain to join.
Press the OK button.

StarWind SoftwareTechnical Reference Series
102Copyright © StarWind Software 2008-2011. All rights reserved.
Enter the name and password of an account with permission to join to thedomain (node2adm).
Press the OK button to join.

StarWind SoftwareTechnical Reference Series
103Copyright © StarWind Software 2008-2011. All rights reserved.
If successful, the notification dialog like the one on the image shown belowshould appear.
Press the OK button.
StarWind SoftwareTechnical Reference Series
104Copyright © StarWind Software 2008-2011. All rights reserved.
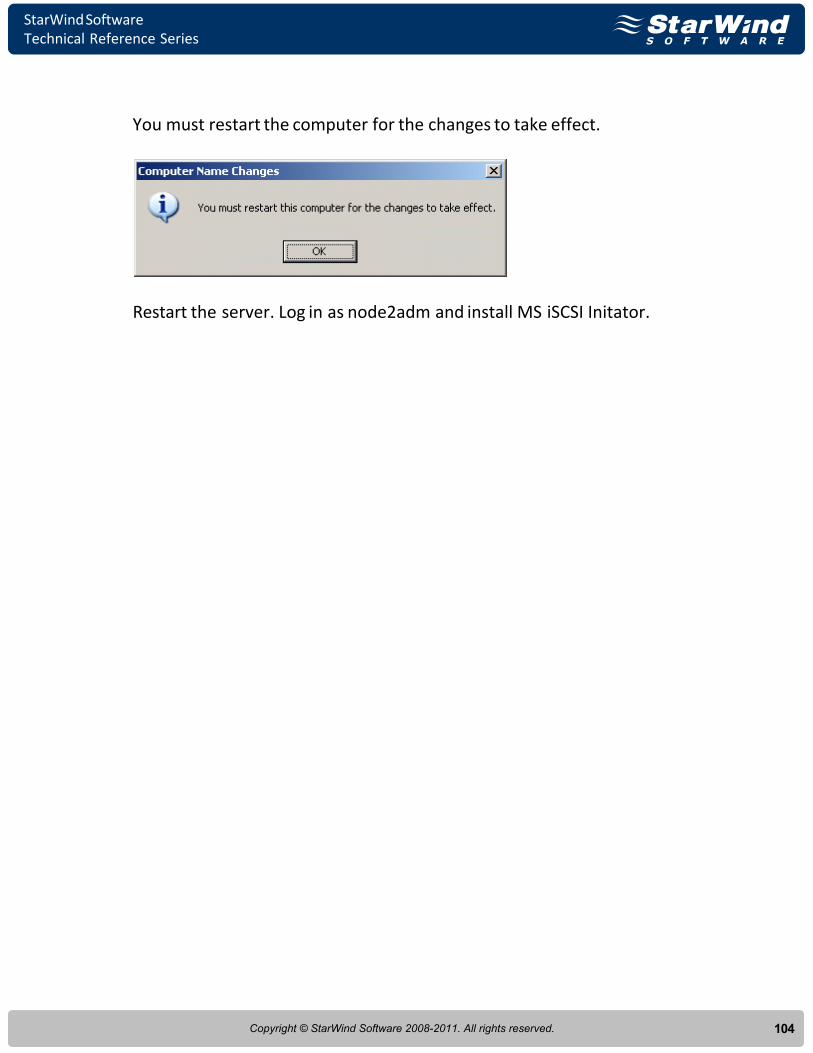
You must restart the computer for the changes to take effect.
Restart the server. Log in as node2adm and install MS iSCSI Initator.

StarWind SoftwareTechnical Reference Series
105Copyright © StarWind Software 2008-2011. All rights reserved.
Configuring iSCSI initiator
The MS iSCSI Initiator is a free application that is available for download fromthe Microsoft Web site http://www.microsoft.com/downloads/details.aspx?FamilyID=12cb3c1a-15d6-4585-b385-befd1319f825&displaylang=en. It is required to connect to the iSCSI devices. Before continuing, ensure thatthe MS iSCSI Initiator is installed.Launch the Microsoft iSCSI Software Initiator application Start->All Programs->Microsoft iSCSI Initiator-> Microsoft iSCSI Initiator.
Select the Discovery Tab.

StarWind SoftwareTechnical Reference Series
106Copyright © StarWind Software 2008-2011. All rights reserved.
In the Target Portals group, click the Add button.
Press the Add button.

StarWind SoftwareTechnical Reference Series
107Copyright © StarWind Software 2008-2011. All rights reserved.
In the Add Target Portal dialog enter IP address or DNS name of the StarWindtarget server.
Press the OK button to continue.

StarWind SoftwareTechnical Reference Series
108Copyright © StarWind Software 2008-2011. All rights reserved.
Click on the Targets tab. Select the IQN of the target just added.
Press the Log On… button.

StarWind SoftwareTechnical Reference Series
109Copyright © StarWind Software 2008-2011. All rights reserved.
The Log On to Target dialog now appears. In this dialog click on the checkboxAutomatically restore this connection when the system boots to make thisconnection persistent.
Press the OK button to continue.
Press the OK button to continue.

StarWind SoftwareTechnical Reference Series
110Copyright © StarWind Software 2008-2011. All rights reserved.
If successful, the initiator is now logged on to StarWind.

StarWind SoftwareTechnical Reference Series
111Copyright © StarWind Software 2008-2011. All rights reserved.
Assigning drive letters
When the StarWind Disks are connected, they show up on the initiatormachine as new disk devices. Before these devices can be used as clusterdisks, they have to be mounted. Launch the Computer Management console.
Select Disk Management.

StarWind SoftwareTechnical Reference Series
112Copyright © StarWind Software 2008-2011. All rights reserved.
The two disks that were formatted on the Cluster Node 1 Server should nowappear without any drive letter mounted. Assign the same letters to those thatwere used when these drives were formatted.

StarWind SoftwareTechnical Reference Series
113Copyright © StarWind Software 2008-2011. All rights reserved.
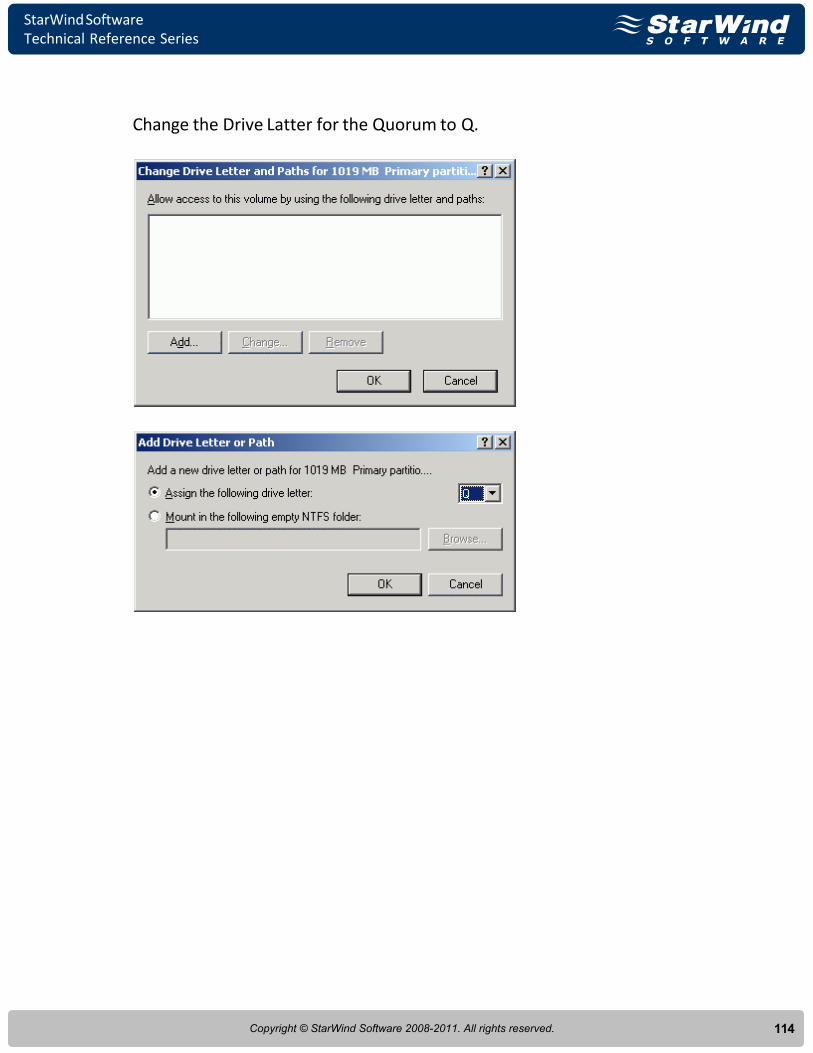
Press the right mouse button over the Quorum volume.
Select Change Drive Letter and Paths...
StarWind SoftwareTechnical Reference Series
114Copyright © StarWind Software 2008-2011. All rights reserved.
Change the Drive Latter for the Quorum to Q.

StarWind SoftwareTechnical Reference Series
115Copyright © StarWind Software 2008-2011. All rights reserved.
Press the right mouse button over the Generic volume.
Select Change Drive Letter and Paths...

StarWind SoftwareTechnical Reference Series
116Copyright © StarWind Software 2008-2011. All rights reserved.
Change the Drive Latter for the Generic to R.

StarWind SoftwareTechnical Reference Series
117Copyright © StarWind Software 2008-2011. All rights reserved.
If successful, the Computer Management console should look like the sampleimage provided below.
Shut down the server.

StarWind SoftwareTechnical Reference Series
118Copyright © StarWind Software 2008-2011. All rights reserved.
Configuring Microsoft Cluster Service
Node 1
Turn on the Cluster Node 1 Server. Log in to the server using an account withadministrative privileges (node1adm). Launch the Cluster Administratorconsole.Select Create new cluster item from the Action drop-down list of the OpenConnection to Cluster dialog box.
Press the OK button to continue.

StarWind SoftwareTechnical Reference Series
119Copyright © StarWind Software 2008-2011. All rights reserved.
New Server Cluster Wizard appears.
Press the Next button to continue.

StarWind SoftwareTechnical Reference Series
120Copyright © StarWind Software 2008-2011. All rights reserved.
On the Cluster Name and Domain page, specify the appropriate cluster anddomain names.
Press the Next button to continue.

StarWind SoftwareTechnical Reference Series
121Copyright © StarWind Software 2008-2011. All rights reserved.
On the Select Computer page of the wizard the computer name of the firstnode in the cluster should already be filled in. If not, specify the name of thecomputer in the edit box.
Press the Next button to continue.
StarWind SoftwareTechnical Reference Series
122Copyright © StarWind Software 2008-2011. All rights reserved.
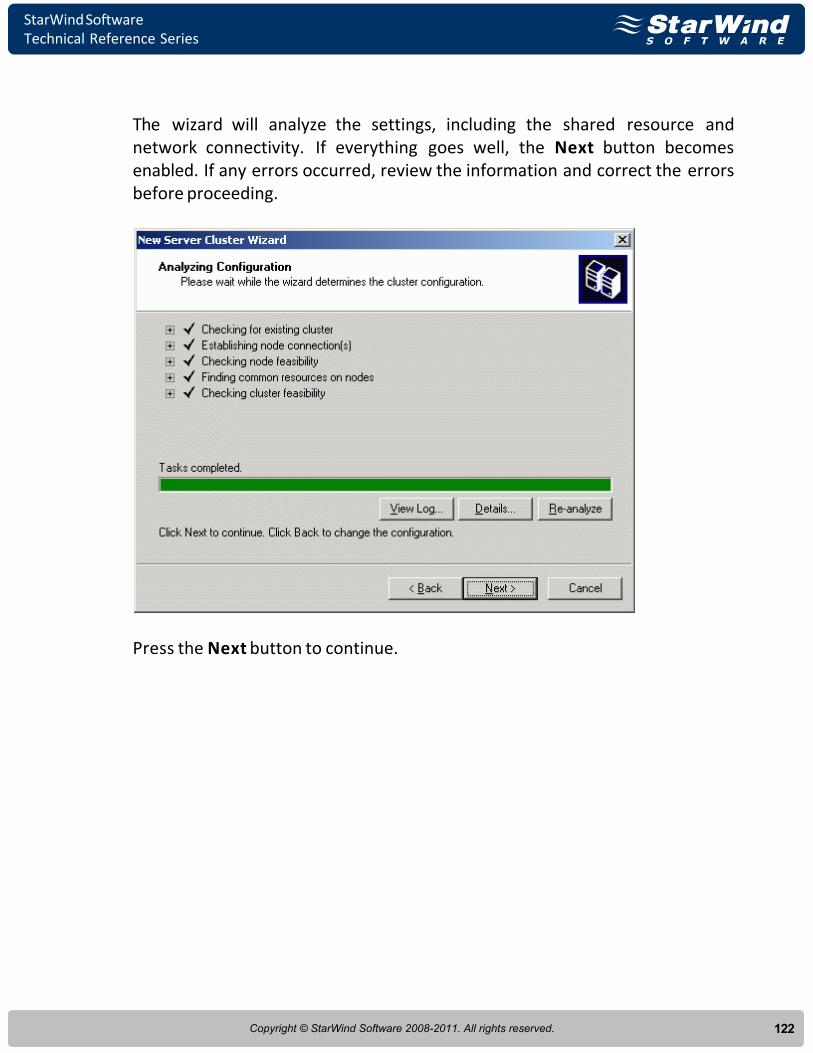
The wizard will analyze the settings, including the shared resource andnetwork connectivity. If everything goes well, the Next button becomesenabled. If any errors occurred, review the information and correct the errorsbefore proceeding.
Press the Next button to continue.

StarWind SoftwareTechnical Reference Series
123Copyright © StarWind Software 2008-2011. All rights reserved.
On the IP Address page, specify the IP address for the cluster. This addressmaps to the cluster name and should not be used by other computers.
Press the Next button to continue.

StarWind SoftwareTechnical Reference Series
124Copyright © StarWind Software 2008-2011. All rights reserved.
On the Cluster Service Account page specify the domain account that theservice will run under. This account must be a domain user.
Press the Next button to continue.

StarWind SoftwareTechnical Reference Series
125Copyright © StarWind Software 2008-2011. All rights reserved.
Verify that all information on the Proposed Cluster Configuration page iscorrect. Configure the quorum settings (Press the Quorum… button and selectthe disk to be used as quorum).
Press the OK button.Press the Next button to create the cluster.

StarWind SoftwareTechnical Reference Series
126Copyright © StarWind Software 2008-2011. All rights reserved.
The wizard will attempt to create the cluster. The process may take a fewminutes. If there any errors occurred, review the log and error messages tosolve the problem. When complete, the Next button becomes enabled.
Press the Next button to continue.

StarWind SoftwareTechnical Reference Series
127Copyright © StarWind Software 2008-2011. All rights reserved.
Completing the New Server Cluster Wizard page appears.
Press the Finish to complete the task. The cluster is now operational andadditional nodes can be added to the cluster.
StarWind SoftwareTechnical Reference Series
128Copyright © StarWind Software 2008-2011. All rights reserved.
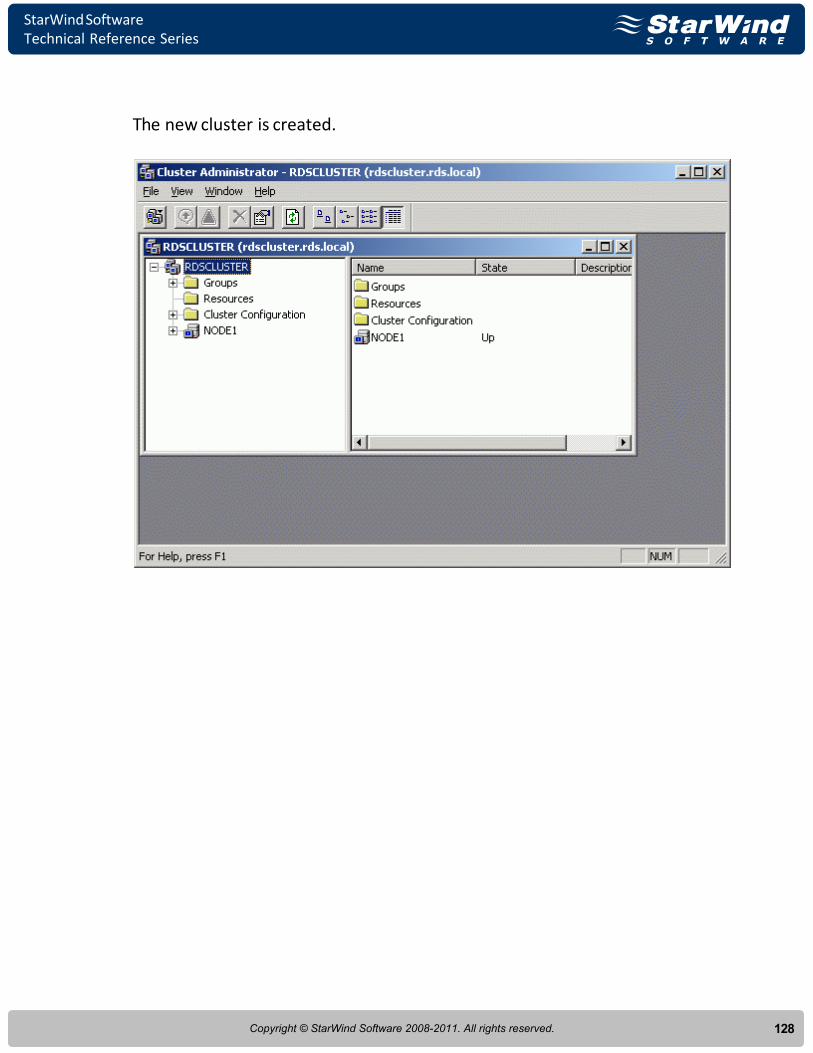
The new cluster is created.
StarWind SoftwareTechnical Reference Series
129Copyright © StarWind Software 2008-2011. All rights reserved.
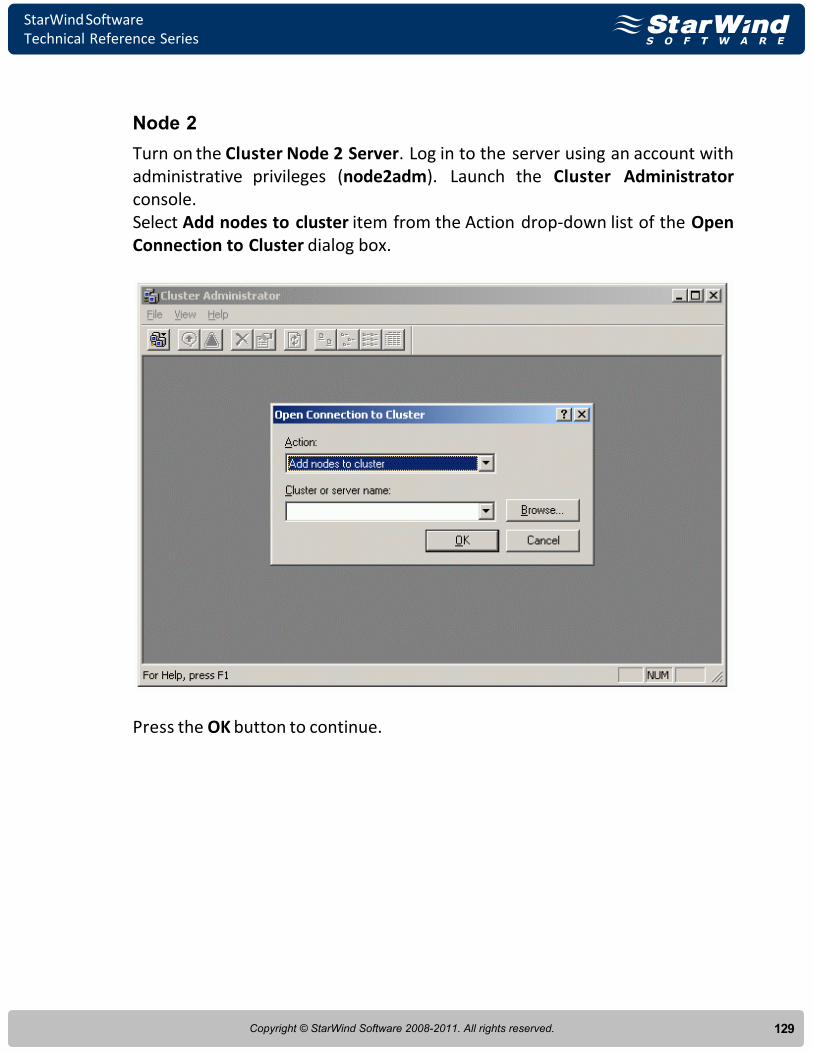
Node 2
Turn on the Cluster Node 2 Server. Log in to the server using an account withadministrative privileges (node2adm). Launch the Cluster Administratorconsole. Select Add nodes to cluster item from the Action drop-down list of the OpenConnection to Cluster dialog box.
Press the OK button to continue.

StarWind SoftwareTechnical Reference Series
130Copyright © StarWind Software 2008-2011. All rights reserved.
Press the Browse button and specify the name of the recently created clusterin the Cluster or server name list.
Press the OK button to add this server to the cluster.
StarWind SoftwareTechnical Reference Series
131Copyright © StarWind Software 2008-2011. All rights reserved.
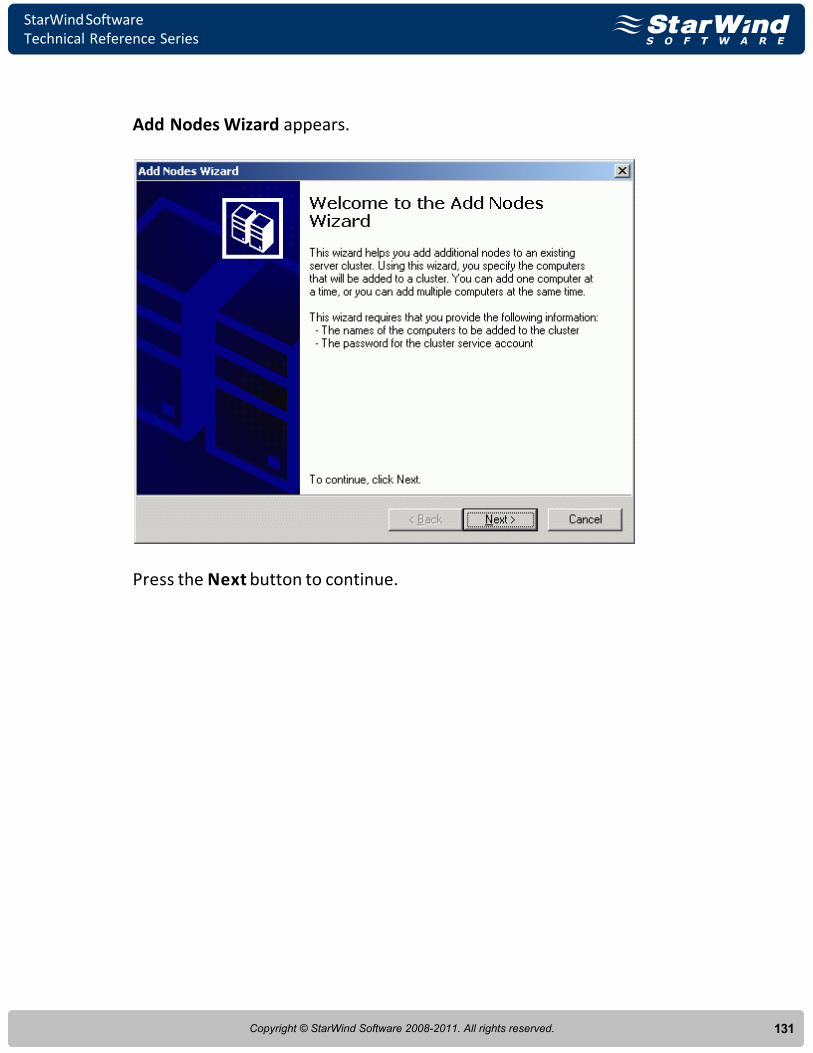
Add Nodes Wizard appears.
Press the Next button to continue.
StarWind SoftwareTechnical Reference Series
132Copyright © StarWind Software 2008-2011. All rights reserved.
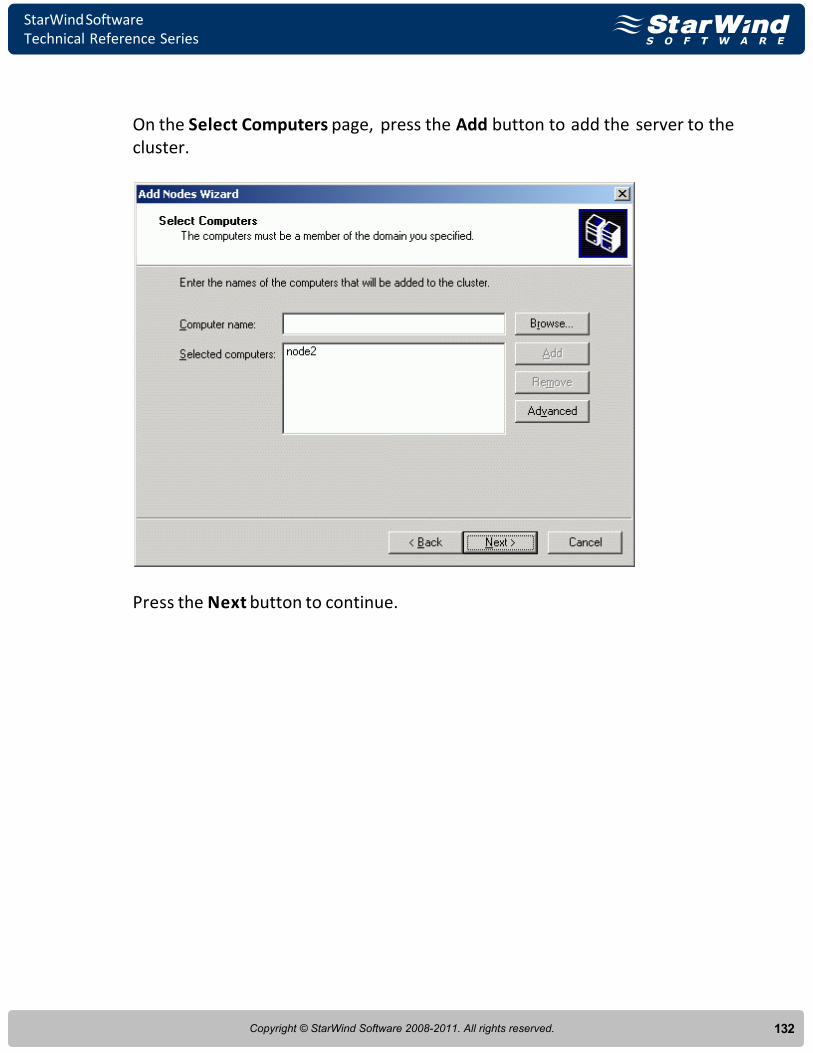
On the Select Computers page, press the Add button to add the server to thecluster.
Press the Next button to continue.

StarWind SoftwareTechnical Reference Series
133Copyright © StarWind Software 2008-2011. All rights reserved.
The wizard will start to analyze the configuration provided. If there are noerrors, the Next button becomes enabled. If any errors occurred, review thedetailed information and correct the errors before proceeding.
Press the Next button to continue.
StarWind SoftwareTechnical Reference Series
134Copyright © StarWind Software 2008-2011. All rights reserved.
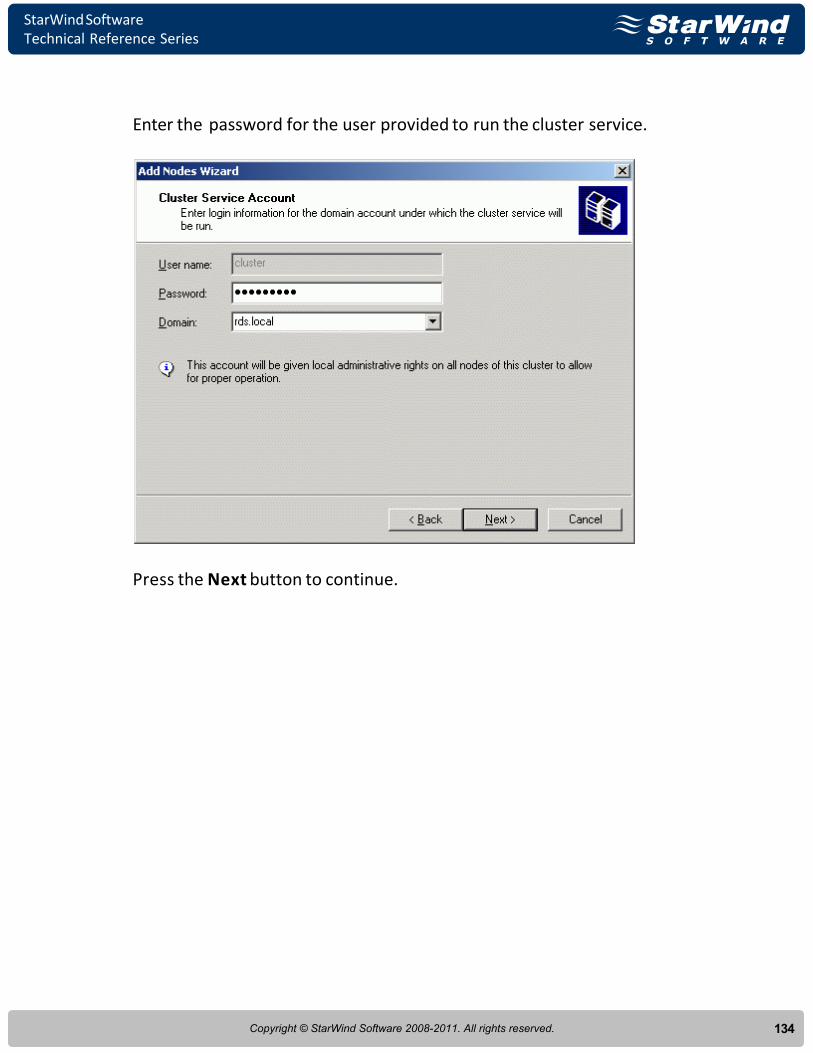
Enter the password for the user provided to run the cluster service.
Press the Next button to continue.
StarWind SoftwareTechnical Reference Series
135Copyright © StarWind Software 2008-2011. All rights reserved.
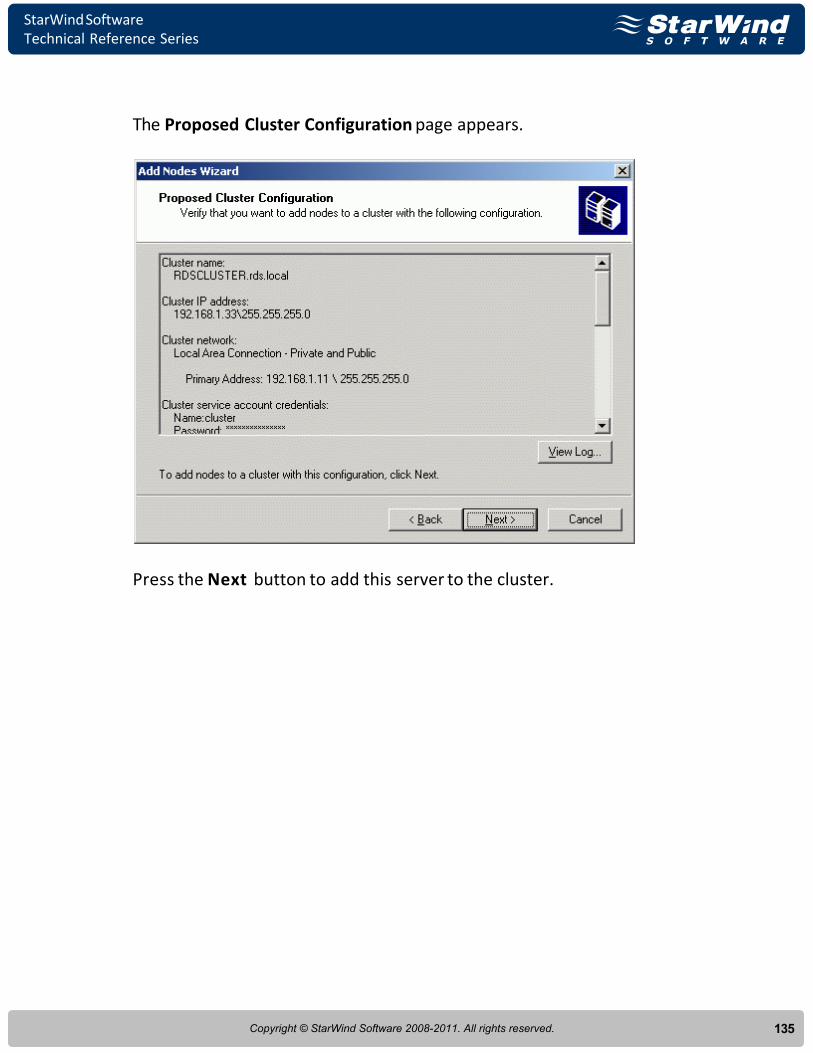
The Proposed Cluster Configuration page appears.
Press the Next button to add this server to the cluster.
StarWind SoftwareTechnical Reference Series
136Copyright © StarWind Software 2008-2011. All rights reserved.
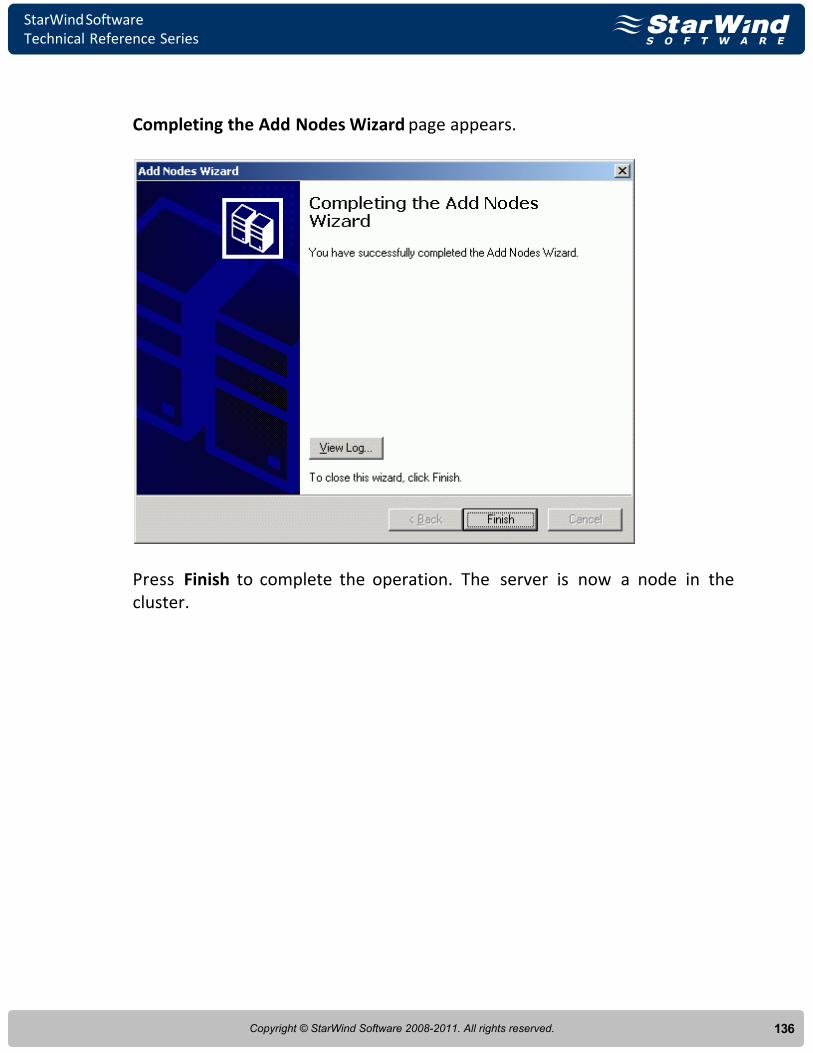
Completing the Add Nodes Wizard page appears.
Press Finish to complete the operation. The server is now a node in thecluster.

StarWind SoftwareTechnical Reference Series
137Copyright © StarWind Software 2008-2011. All rights reserved.
The new node is added to the cluster.

StarWind SoftwareTechnical Reference Series
138Copyright © StarWind Software 2008-2011. All rights reserved.
Adding New Shared Disk Resource
StarWind Target
Click the right mouse button over the host and select Add Target pop-up menuitem.In the wizard that appears, select a target name. The name must be a uniquename by which the device will be declared to the iSCSI initiators connecting toStarWind over an IP network.
Press the Next button to continue.
StarWind SoftwareTechnical Reference Series
139Copyright © StarWind Software 2008-2011. All rights reserved.
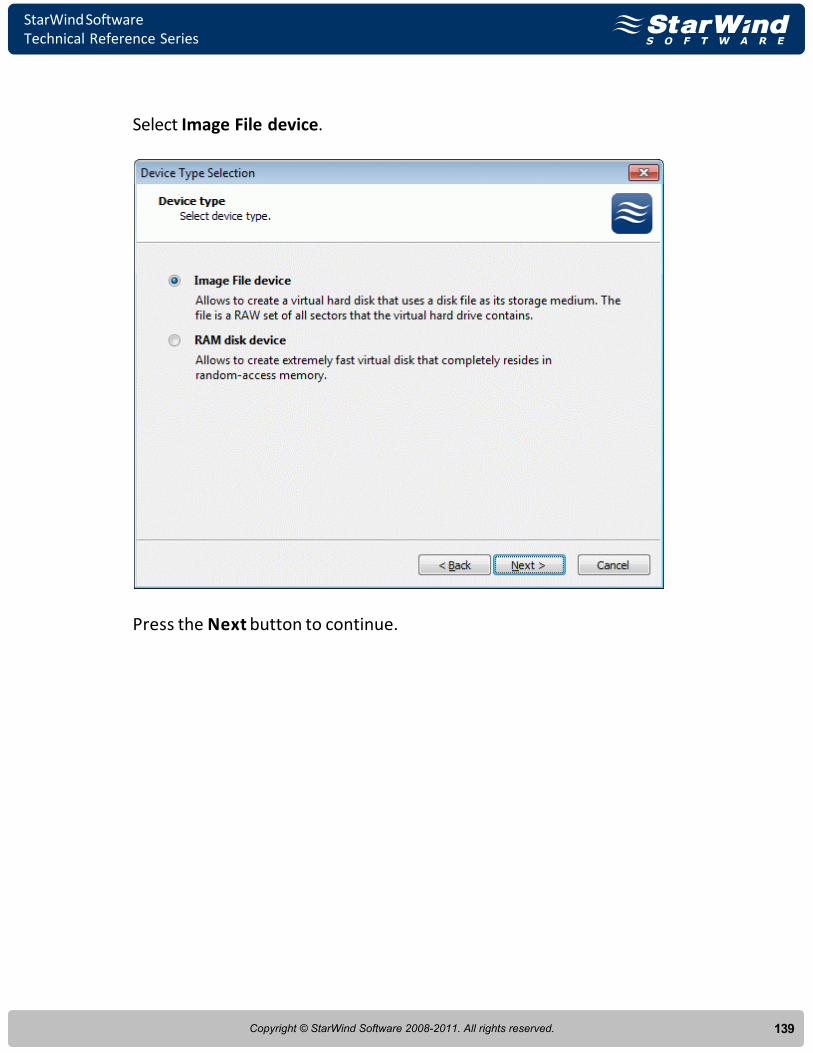
Select Image File device.
Press the Next button to continue.

StarWind SoftwareTechnical Reference Series
140Copyright © StarWind Software 2008-2011. All rights reserved.
Select Create new virtual disk to create a new virtual hard disk or Mountexisting virtual disk to mount an existing virtual disk that you’ve preparedbefore.
Press the Next button to continue.
StarWind SoftwareTechnical Reference Series
141Copyright © StarWind Software 2008-2011. All rights reserved.
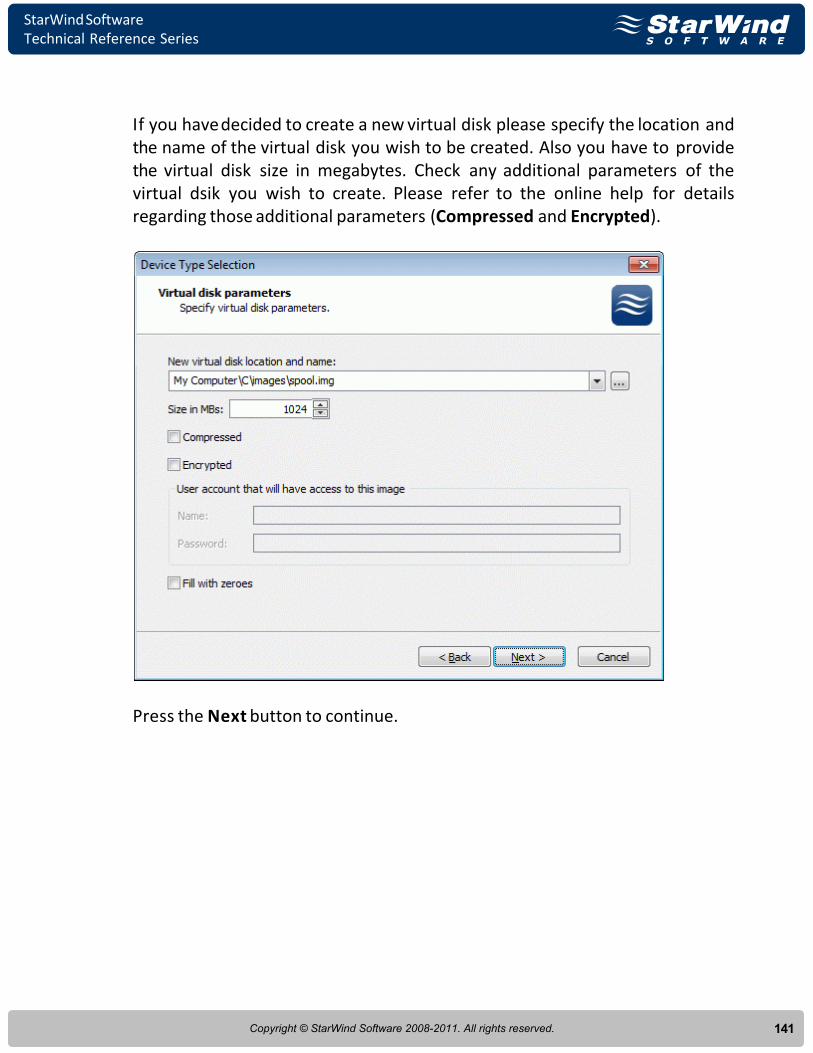
If you have decided to create a new virtual disk please specify the location andthe name of the virtual disk you wish to be created. Also you have to providethe virtual disk size in megabytes. Check any additional parameters of thevirtual dsik you wish to create. Please refer to the online help for detailsregarding those additional parameters (Compressed and Encrypted).
Press the Next button to continue.
StarWind SoftwareTechnical Reference Series
142Copyright © StarWind Software 2008-2011. All rights reserved.
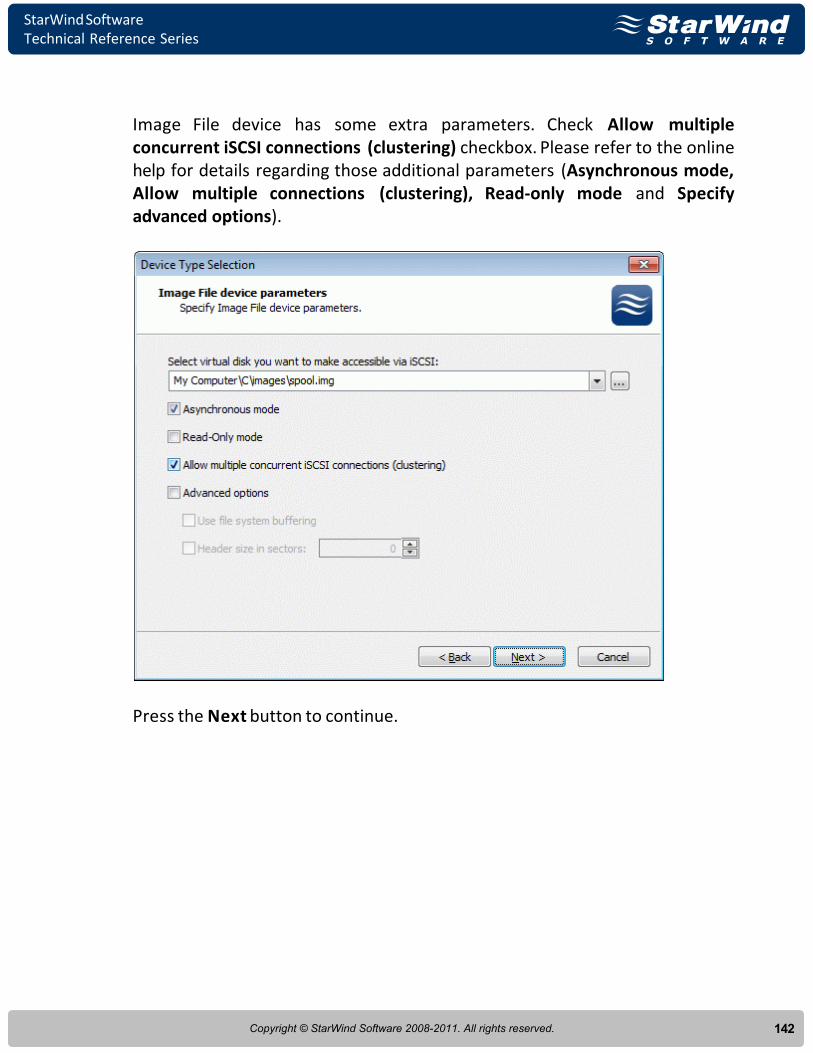
Image File device has some extra parameters. Check Allow multipleconcurrent iSCSI connections (clustering) checkbox. Please refer to the onlinehelp for details regarding those additional parameters (Asynchronous mode,Allow multiple connections (clustering), Read-only mode and Specifyadvanced options).
Press the Next button to continue.

StarWind SoftwareTechnical Reference Series
143Copyright © StarWind Software 2008-2011. All rights reserved.
Check the device parameters are correct. Press the Back button should anychanges be required.
Press the Next button to continue.
StarWind SoftwareTechnical Reference Series
144Copyright © StarWind Software 2008-2011. All rights reserved.
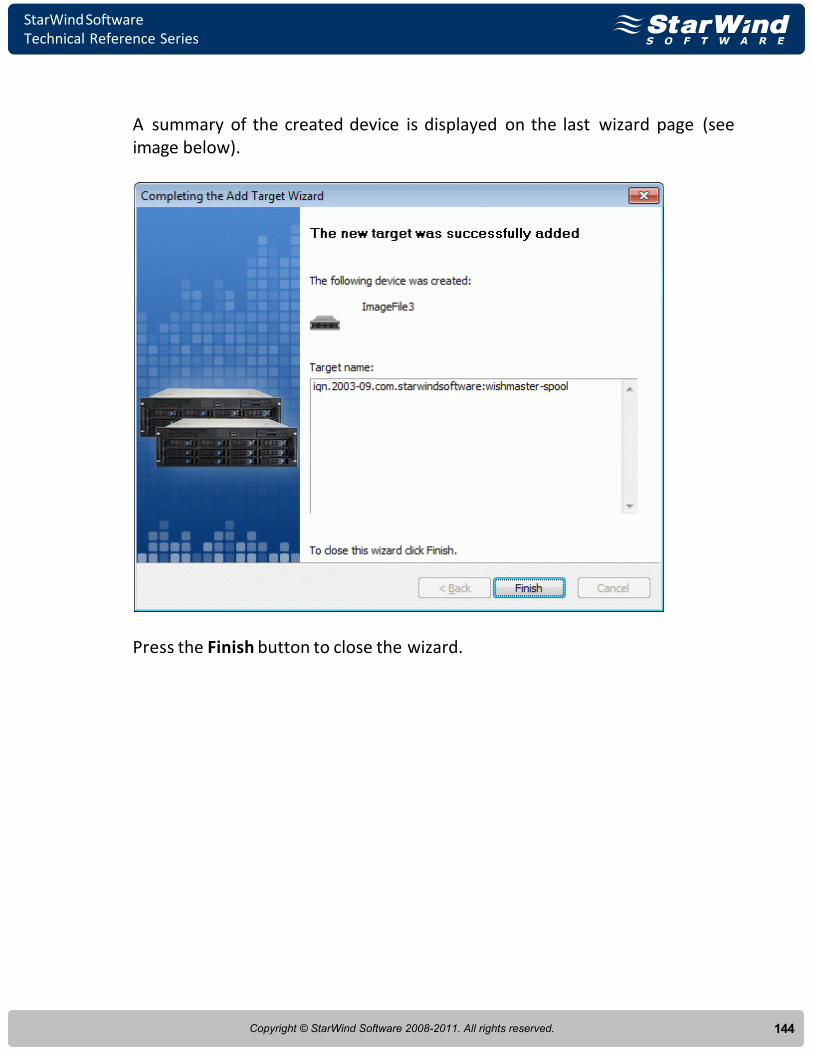
A summary of the created device is displayed on the last wizard page (seeimage below).
Press the Finish button to close the wizard.

StarWind SoftwareTechnical Reference Series
145Copyright © StarWind Software 2008-2011. All rights reserved.
Node 1
Launch the MS iSCSI Initiator. Click on the Targets tab. Select the IQN of thetarget just added.
Press the Log On… button.

StarWind SoftwareTechnical Reference Series
146Copyright © StarWind Software 2008-2011. All rights reserved.
The Log On to Target dialog now appears. In this dialog click on the checkboxAutomatically restore this connection when the system boots to make thisconnection persistent.
Press the OK button to continue.
StarWind SoftwareTechnical Reference Series
147Copyright © StarWind Software 2008-2011. All rights reserved.
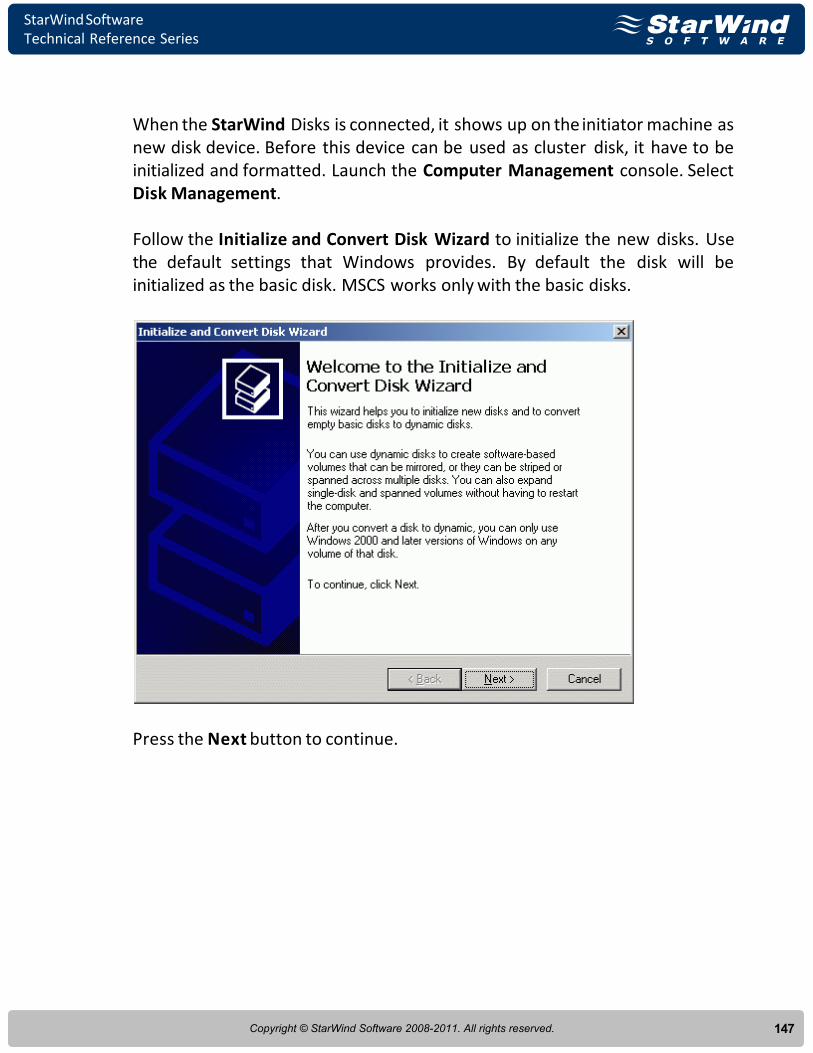
When the StarWind Disks is connected, it shows up on the initiator machine asnew disk device. Before this device can be used as cluster disk, it have to beinitialized and formatted. Launch the Computer Management console. SelectDisk Management.
Follow the Initialize and Convert Disk Wizard to initialize the new disks. Usethe default settings that Windows provides. By default the disk will beinitialized as the basic disk. MSCS works only with the basic disks.
Press the Next button to continue.

StarWind SoftwareTechnical Reference Series
148Copyright © StarWind Software 2008-2011. All rights reserved.
Press the Next button to continue.

StarWind SoftwareTechnical Reference Series
149Copyright © StarWind Software 2008-2011. All rights reserved.
Press the Next button to continue.

StarWind SoftwareTechnical Reference Series
150Copyright © StarWind Software 2008-2011. All rights reserved.
Press the Finish button to close the wizard.

StarWind SoftwareTechnical Reference Series
151Copyright © StarWind Software 2008-2011. All rights reserved.
After the Wizard completes initialization, press the right mouse button on theunallocated space and select New Partition popup menu item. Follow theinstructions of the wizard to create an NTFS partition for use as the quorumdisk. Use the default settings that Windows provides. (The default settings aresufficient for most environments.)

StarWind SoftwareTechnical Reference Series
152Copyright © StarWind Software 2008-2011. All rights reserved.
New Partition Wizard appears.
Press the Next button to continue.
StarWind SoftwareTechnical Reference Series
153Copyright © StarWind Software 2008-2011. All rights reserved.
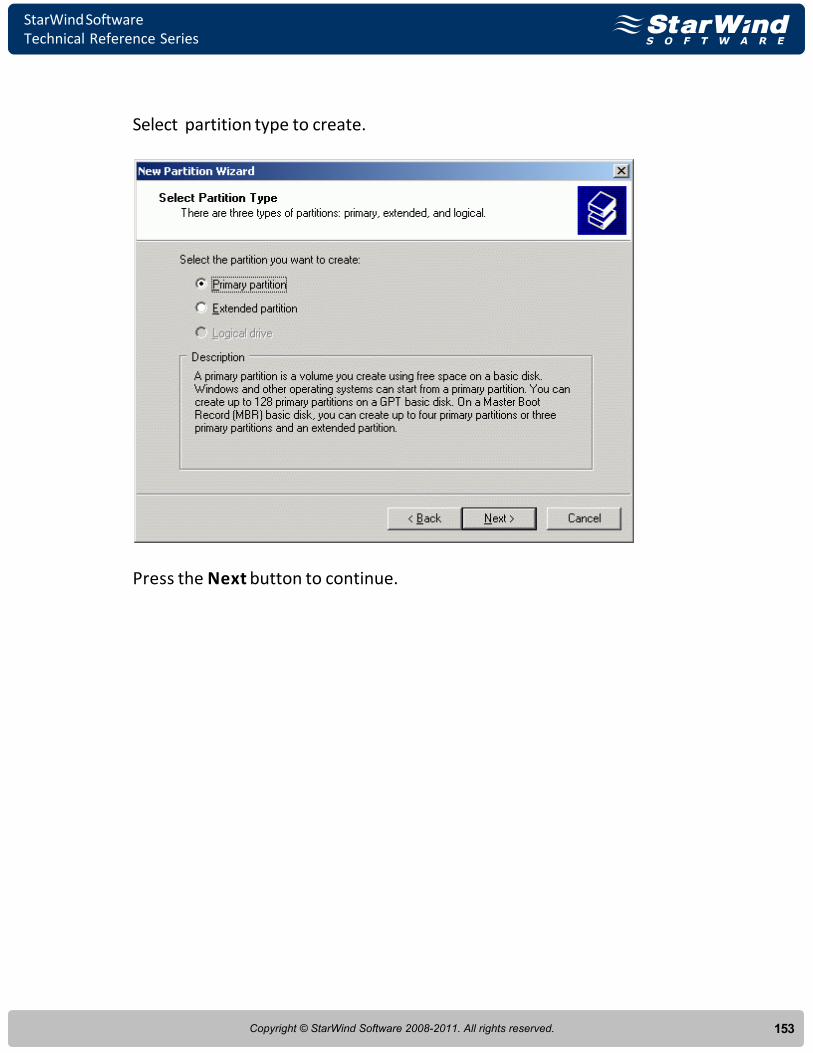
Select partition type to create.
Press the Next button to continue.
StarWind SoftwareTechnical Reference Series
154Copyright © StarWind Software 2008-2011. All rights reserved.
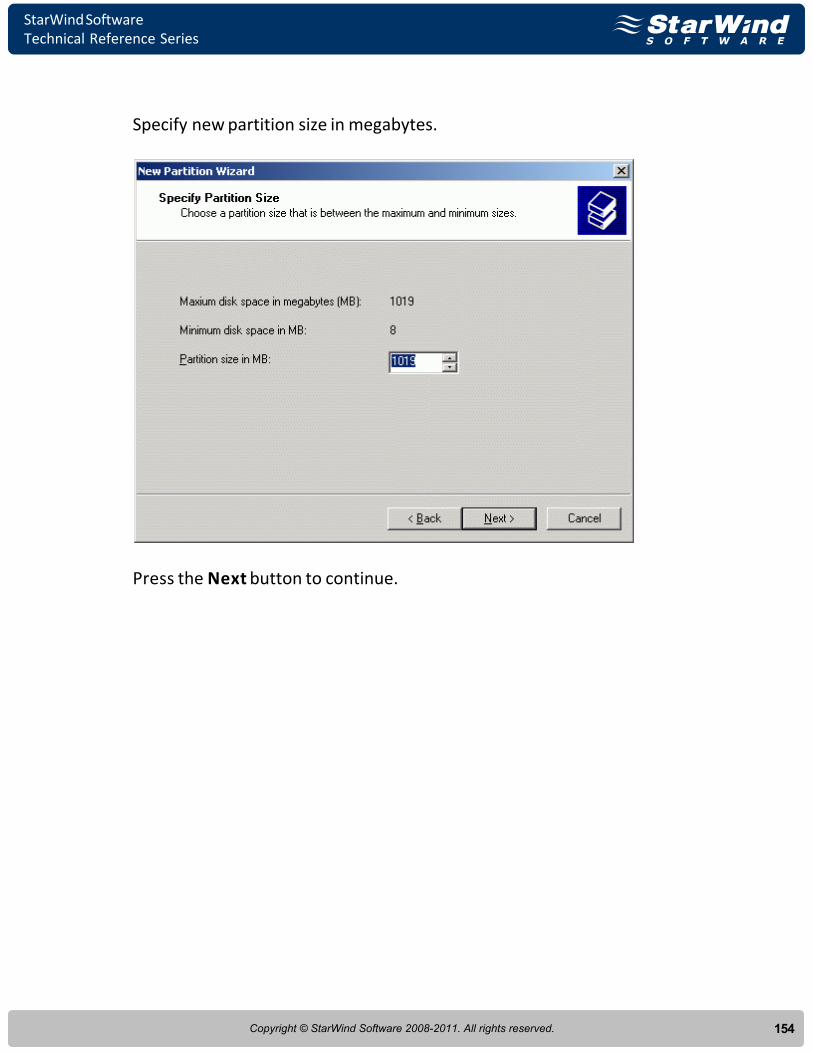
Specify new partition size in megabytes.
Press the Next button to continue.
StarWind SoftwareTechnical Reference Series
155Copyright © StarWind Software 2008-2011. All rights reserved.
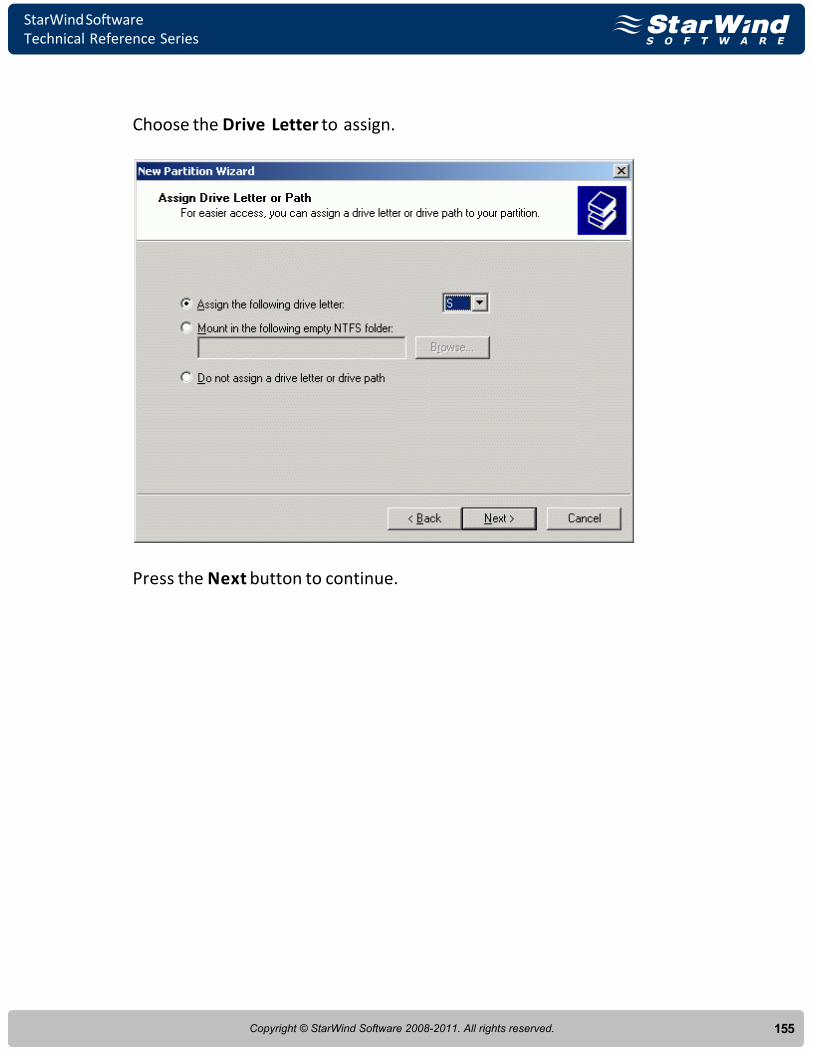
Choose the Drive Letter to assign.
Press the Next button to continue.

StarWind SoftwareTechnical Reference Series
156Copyright © StarWind Software 2008-2011. All rights reserved.
Specify format options. Provide the Volume Label.
Press the Next button to continue.

StarWind SoftwareTechnical Reference Series
157Copyright © StarWind Software 2008-2011. All rights reserved.
Check the settings are correct. Press the Back button should any changes berequired.
Press the Finish button to close the wizard.

StarWind SoftwareTechnical Reference Series
158Copyright © StarWind Software 2008-2011. All rights reserved.
If successful, the disk is now formatted as shown in the example image below.
Shut down the node.

StarWind SoftwareTechnical Reference Series
159Copyright © StarWind Software 2008-2011. All rights reserved.
Node 2
Launch the MS iSCSI Initiator. Click on the Targets tab. Select the IQN of thetarget just added.
Press the Log On… button.

StarWind SoftwareTechnical Reference Series
160Copyright © StarWind Software 2008-2011. All rights reserved.
The Log On to Target dialog now appears. In this dialog click on the checkboxAutomatically restore this connection when the system boots to make thisconnection persistent.
Press the OK button to continue.

StarWind SoftwareTechnical Reference Series
161Copyright © StarWind Software 2008-2011. All rights reserved.
If successful, the initiator is now logged on to StarWind.

StarWind SoftwareTechnical Reference Series
162Copyright © StarWind Software 2008-2011. All rights reserved.
When the StarWind Disk is connected, it shows up on the initiator machine asnew disk device. Before this devices can be used as cluster disk, it have to bemounted. Launch the Computer Management console.
Select Disk Management.The disk that was formatted on the Cluster Node 1 Server should now appearwithout any drive letter mounted. Assign the same letter to this that was usedwhen this drive was formatted.
StarWind SoftwareTechnical Reference Series
163Copyright © StarWind Software 2008-2011. All rights reserved.
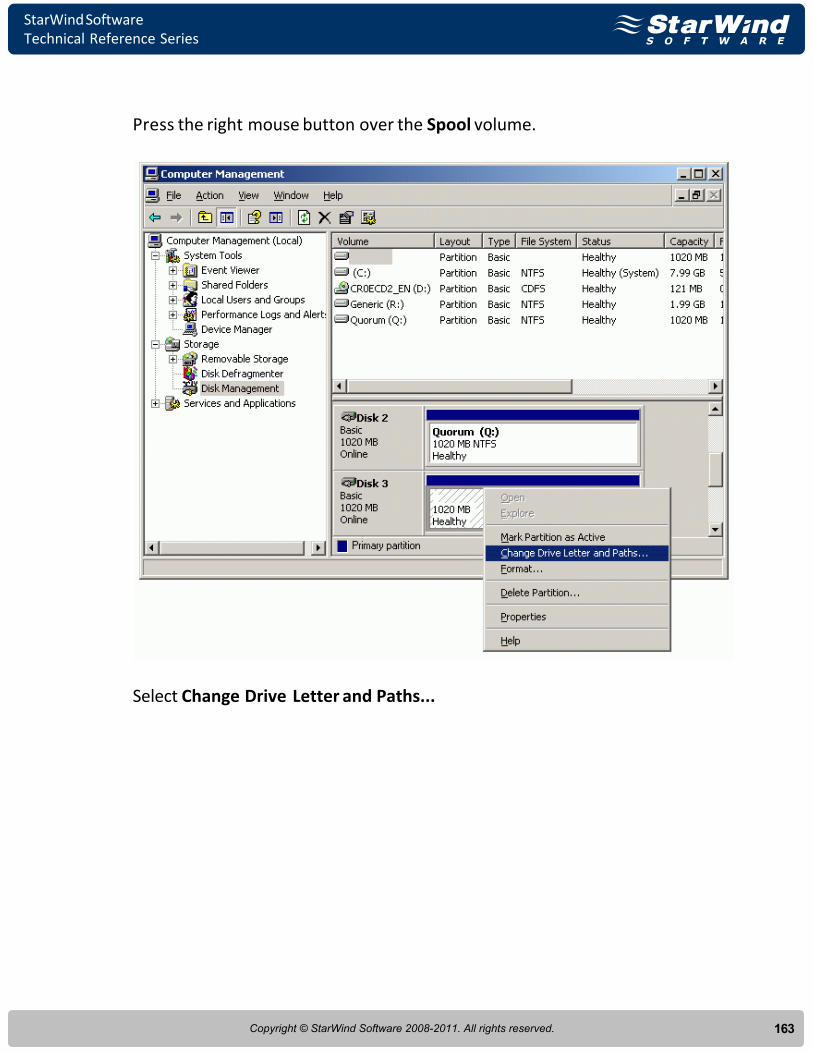
Press the right mouse button over the Spool volume.
Select Change Drive Letter and Paths...

StarWind SoftwareTechnical Reference Series
164Copyright © StarWind Software 2008-2011. All rights reserved.
Change the Drive Latter for the Spool to S.
StarWind SoftwareTechnical Reference Series
165Copyright © StarWind Software 2008-2011. All rights reserved.
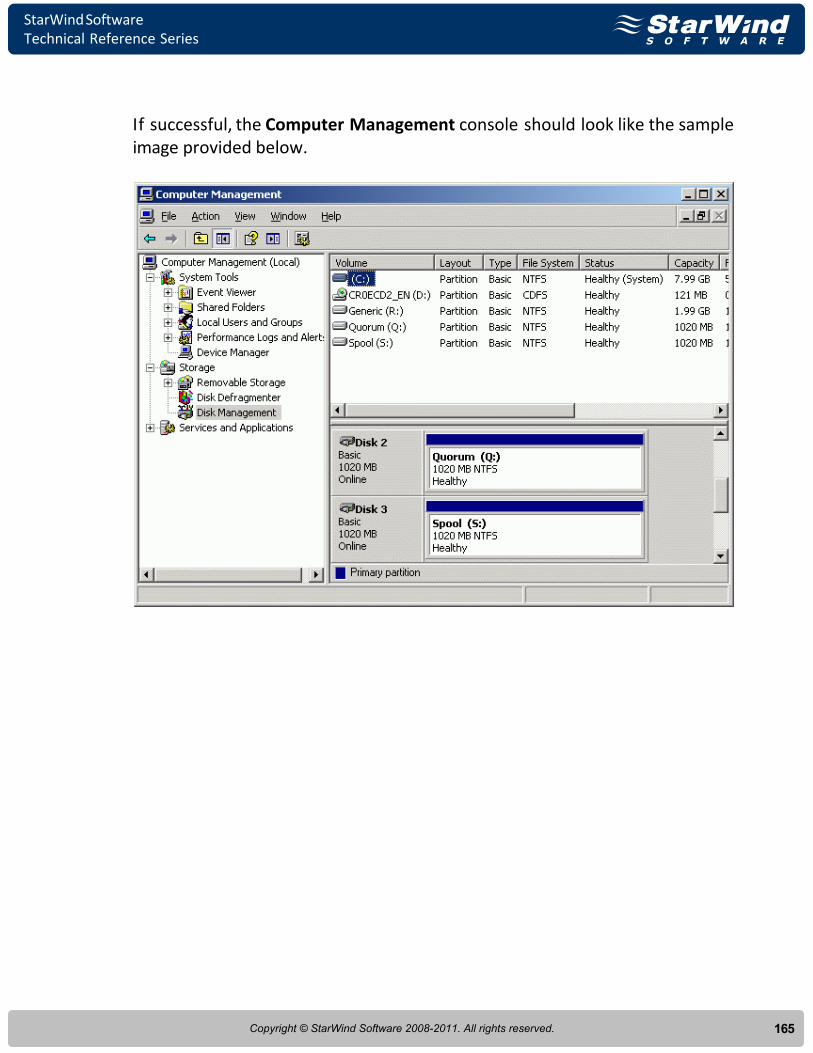
If successful, the Computer Management console should look like the sampleimage provided below.
StarWind SoftwareTechnical Reference Series
166Copyright © StarWind Software 2008-2011. All rights reserved.
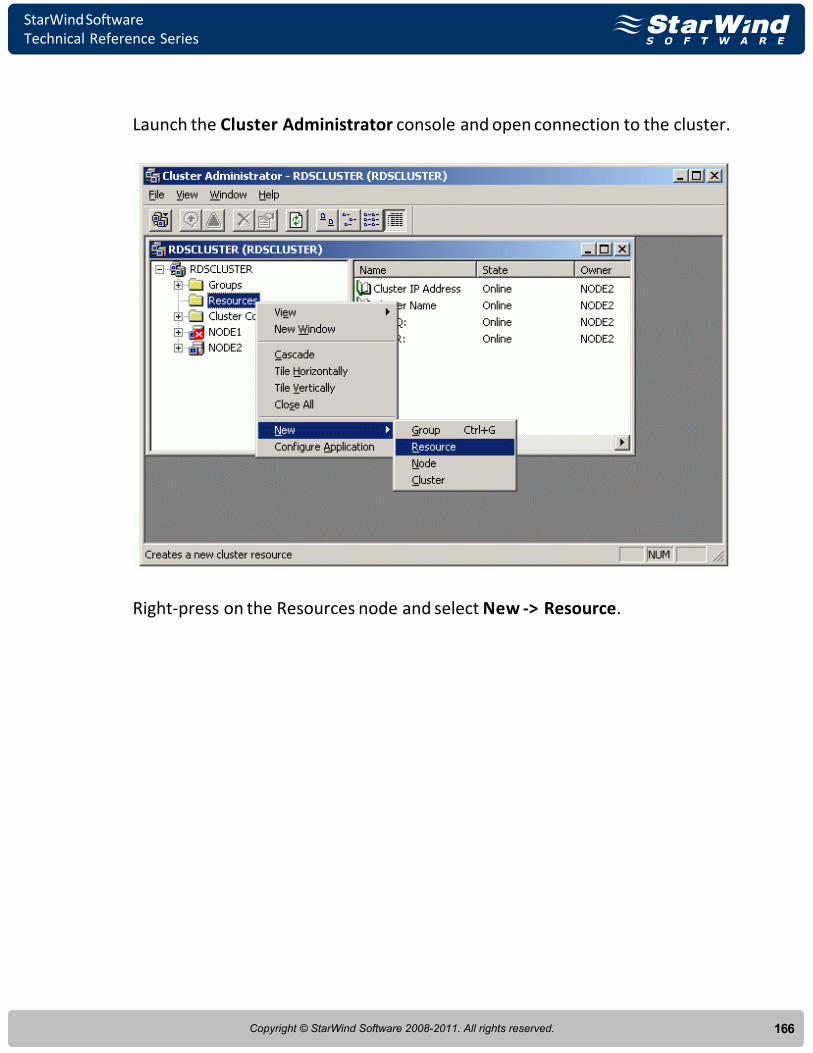
Launch the Cluster Administrator console and open connection to the cluster.
Right-press on the Resources node and select New -> Resource.
StarWind SoftwareTechnical Reference Series
167Copyright © StarWind Software 2008-2011. All rights reserved.
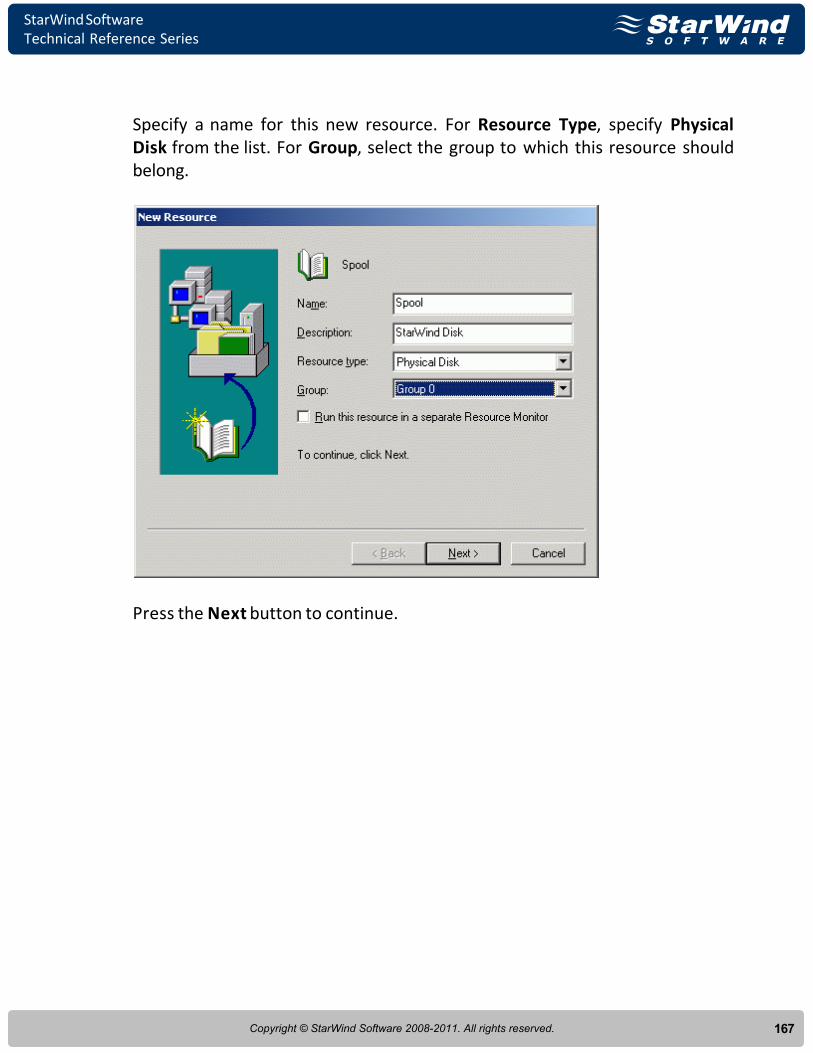
Specify a name for this new resource. For Resource Type, specify PhysicalDisk from the list. For Group, select the group to which this resource shouldbelong.
Press the Next button to continue.

StarWind SoftwareTechnical Reference Series
168Copyright © StarWind Software 2008-2011. All rights reserved.
On the Possible Owners page, specify all nodes in the cluster as the possibleowners.
Press the Next button to continue.

StarWind SoftwareTechnical Reference Series
169Copyright © StarWind Software 2008-2011. All rights reserved.
The disk resource should not require any dependencies.
Press the Next button to continue.

StarWind SoftwareTechnical Reference Series
170Copyright © StarWind Software 2008-2011. All rights reserved.
Select the recently created partition from the list of disks.
Press the Finish button to complete the operation.
StarWind SoftwareTechnical Reference Series
171Copyright © StarWind Software 2008-2011. All rights reserved.
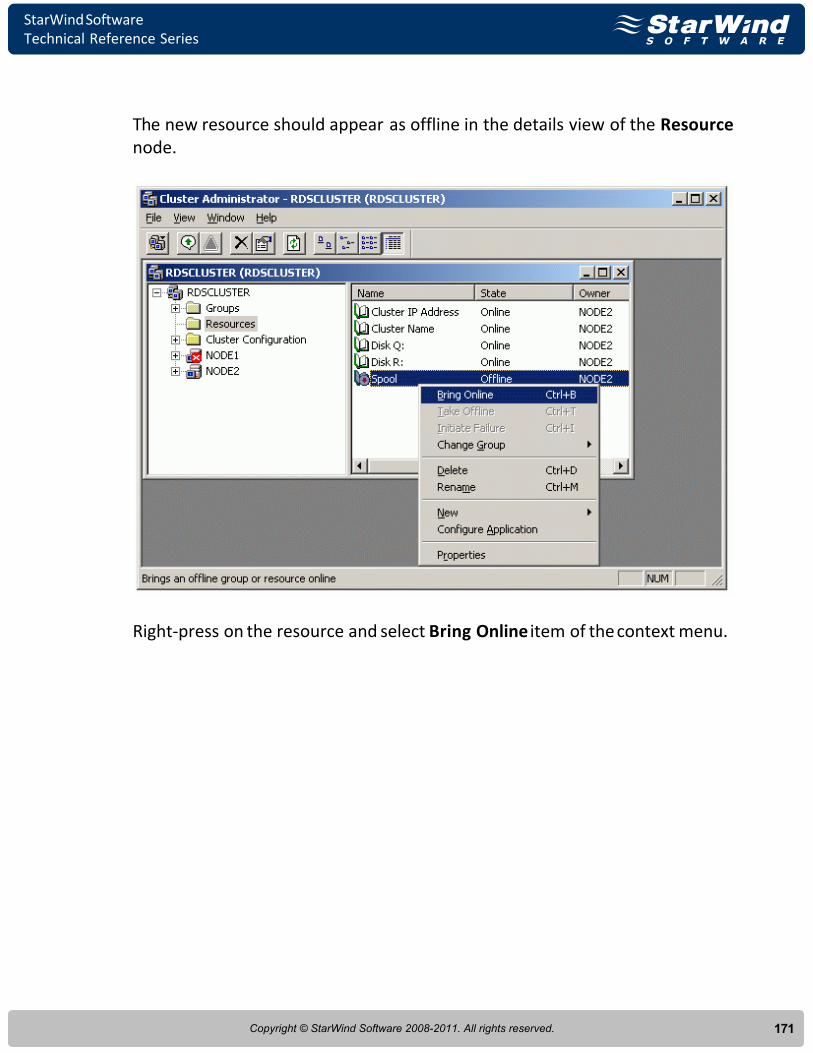
The new resource should appear as offline in the details view of the Resourcenode.
Right-press on the resource and select Bring Online item of the context menu.
StarWind SoftwareTechnical Reference Series
172Copyright © StarWind Software 2008-2011. All rights reserved.
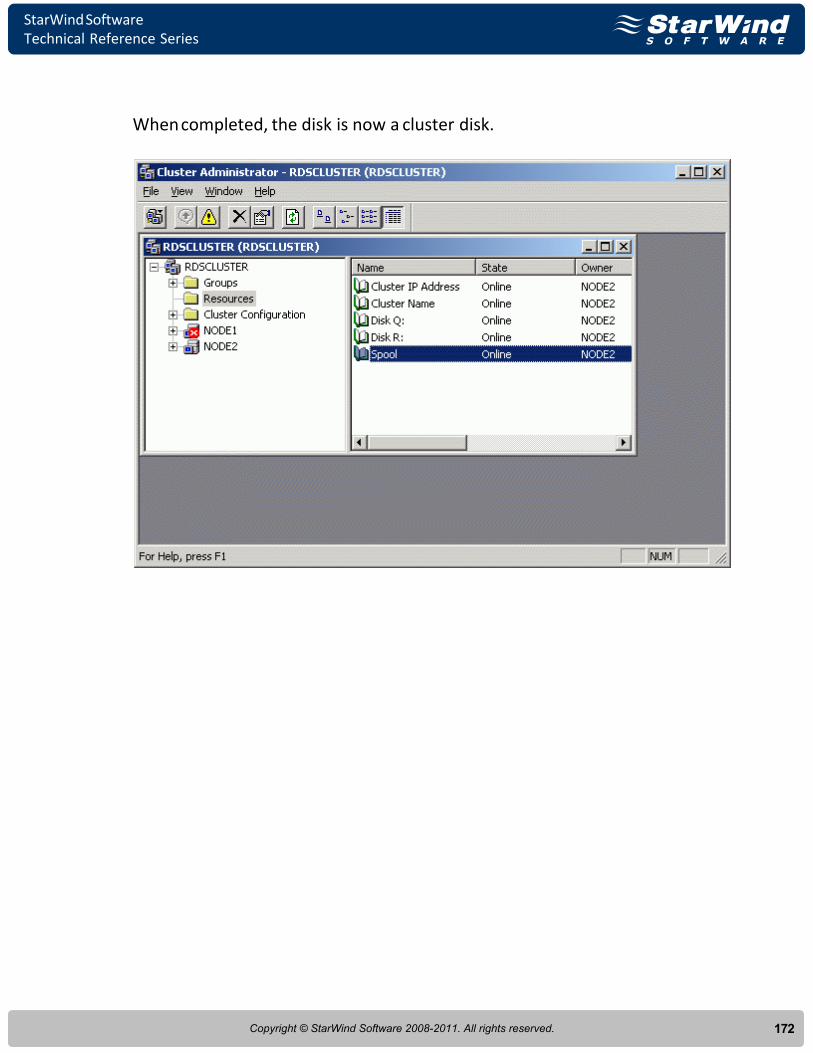
When completed, the disk is now a cluster disk.

StarWind SoftwareTechnical Reference Series
173Copyright © StarWind Software 2008-2011. All rights reserved.
Start the other servers in the cluster.

StarWind SoftwareTechnical Reference Series
Contacts
StarWind Software Inc.
40 Mall Rd., Burlington
MA 01803, USA
www.starwindsoftware.com
Support:
Support Forum:
Sales E-mail:
US Headquarters
EMEA, APAC
www.starwindsoftware.com/support
www.starwindsoftware.com/forums
Direct phone numbers: +44-0-2071936727
+44-0-2071936350
174Copyright © StarWind Software 2008-2011. All rights reserved.
Voice Mail: 1-866-790-2646
Direct phone number: 1-617-449-7717
Fax: 1-617-507-5845
Related Documents


