Start Here Quick Installation Guide F1D201u 2-Port Reverse KVM Switch ENGLISH FRANÇAIS DEUTSCH NEDERLANDS ESPAÑOL ITALIANO F1D201u_8820ea00071.indb 1 15/10/2009 09:00:14

Welcome message from author
This document is posted to help you gain knowledge. Please leave a comment to let me know what you think about it! Share it to your friends and learn new things together.
Transcript

Start Here
Quick Installation Guide F1D201u
2-Port Reverse KVM Switch
English
Français
DEutsch
nEDErlanDs
Español
italiano
F1D201u_8820ea00071.indb 1 15/10/2009 09:00:14

Package Contents
Introduction EN 1
Introduction This booklet will guide you through the basic steps needed to install the 2-Port Reverse KVM Switch.
2-Port Reverse KVM Switch
Quick Installation Guide
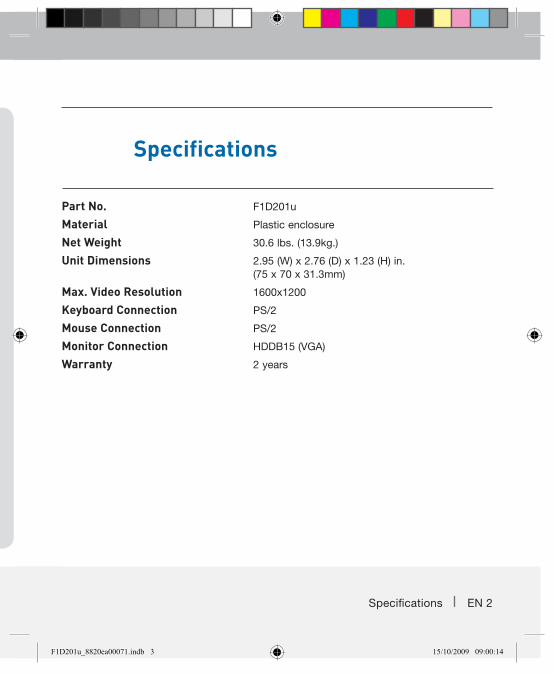
Specifications
Part No. F1D201u
Material Plastic enclosure
Net Weight 30.6 lbs. (13.9kg.)
Unit Dimensions 2.95 (W) x 2.76 (D) x 1.23 (H) in. (75 x 70 x 31.3mm)
Max. Video Resolution 1600x1200
Keyboard Connection PS/2
Mouse Connection PS/2
Monitor Connection HDDB15 (VGA)
Warranty 2 years
F1D201u_8820ea00071.indb 2 15/10/2009 09:00:14
Specifications EN 2
Specifications
Part No. F1D201u
Material Plastic enclosure
Net Weight 30.6 lbs. (13.9kg.)
Unit Dimensions 2.95 (W) x 2.76 (D) x 1.23 (H) in. (75 x 70 x 31.3mm)
Max. Video Resolution 1600x1200
Keyboard Connection PS/2
Mouse Connection PS/2
Monitor Connection HDDB15 (VGA)
Warranty 2 years
F1D201u_8820ea00071.indb 3 15/10/2009 09:00:14

Installation EN 3
Installation
Step 1 Power off your computer.
Step 2 Using the included KVM cable, connect the male VGA end to the VGA port on your computer.
Step 3 Connect the PS/2 ends of the included KVM cable to the keyboard and mouse ports, paying particular attention to which cable connects to which port. They are not interchangeable.
Step 4 Connect your monitors to the back of the Reverse KVM Switch.
Step 5 Connect your keyboards and mice to the console ports to the back of the Reverse KVM Switch.
Step 6 Turn on the connected monitors.
Step 7 Turn on the connected computer. The display LED will turn on User 1 or User 2, depending on the last lighted position of the LEDs.
You are now ready to use your 2-Port Reverse KVM Switch.
F1D201u_8820ea00071.indb 4 15/10/2009 09:00:14

Step 1 Power off your computer.
Step 2 Using the included KVM cable, connect the male VGA end to the VGA port on your computer.
Step 3 Connect the PS/2 ends of the included KVM cable to the keyboard and mouse ports, paying particular attention to which cable connects to which port. They are not interchangeable.
Step 4 Connect your monitors to the back of the Reverse KVM Switch.
Installation EN 4
Step 5 Connect your keyboards and mice to the console ports to the back of the Reverse KVM Switch.
Step 6 Turn on the connected monitors.
Step 7 Turn on the connected computer. The display LED will turn on User 1 or User 2, depending on the last lighted position of the LEDs.
You are now ready to use your 2-Port Reverse KVM Switch.
F1D201u_8820ea00071.indb 5 15/10/2009 09:00:16

Using your 2-Port Reverse KVM Switch EN 5
Using your 2-Port Reverse KVM Switch
Switch Between Two UsersPress “Ctrl” twice (within three seconds) to switch between users.
Switch the Beeping Sound ON/OFFPress the right “Shift” twice (within three seconds) to switch the beeping sound ON or OFF.
Hot-Key Setting Mode
1 To enter the hot-key setting mode, press “Scroll-Lock” twice (within three seconds).
2 The LED lights under “Num Lock”, “Caps Lock”, and “Scroll Lock” at the top right corner of the keyboard will be used as an indicator for the time-out setting.
4 Single Screen Display: To turn on or off the display on the other console, press “L” while in the hot-key setting mode.
5 Release control to the other user: While in the hot-key mode, press “SPACE” to give the usage to the other user.
6 Exit the hot-key setting mode: Press “ESC” to exit the hot-key setting mode.
Time-Out Period NUM LOCK CAPS LOCK SCROLL LOCK
30 sec. OFF OFF ON
1 min. ON OFF OFF
3 min. ON OFF ON
5 min. OFF ON OFF
10 min. OFF ON ON
20 min. ON ON OFF
3 Adjusting time-out setting:
a. Under the hot-key settings, press “-” to decrease the time-out period. b. Under the hot-key settings, press “+” to increase the time-out period. c. Time-out setting table.
F1D201u_8820ea00071.indb 6 15/10/2009 09:00:16

Switch Between Two UsersPress “Ctrl” twice (within three seconds) to switch between users.
Switch the Beeping Sound ON/OFFPress the right “Shift” twice (within three seconds) to switch the beeping sound ON or OFF.
1 To enter the hot-key setting mode, press “Scroll-Lock” twice (within three seconds).
2 The LED lights under “Num Lock”, “Caps Lock”, and “Scroll Lock” at the top right corner of the keyboard will be used as an indicator for the time-out setting.
Hot-Key Setting Mode EN 6
4 Single Screen Display: To turn on or off the display on the other console, press “L” while in the hot-key setting mode.
5 Release control to the other user: While in the hot-key mode, press “SPACE” to give the usage to the other user.
6 Exit the hot-key setting mode: Press “ESC” to exit the hot-key setting mode.
Time-Out Period NUM LOCK CAPS LOCK SCROLL LOCK
30 sec. OFF OFF ON
1 min. ON OFF OFF
3 min. ON OFF ON
5 min. OFF ON OFF
10 min. OFF ON ON
20 min. ON ON OFF
3 Adjusting time-out setting:
a. Under the hot-key settings, press “-” to decrease the time-out period. b. Under the hot-key settings, press “+” to increase the time-out period. c. Time-out setting table.
F1D201u_8820ea00071.indb 7 15/10/2009 09:00:16

© 2009 Belkin International, Inc. All rights reserved. All trade names are registered trademarks of respective manufacturers listed.
8820ea00071
2-Port Reverse KVM Switch
Belkin Ltd.Express Business ParkShipton Way, Rushden NN10 6GL, United Kingdom
Belkin IberiaC/ Anabel Segura, 10 planta baja, Of. 2 28108, Alcobendas, Madrid Spain
Belkin SAS130 rue de Silly92100 Boulogne-Billancourt, France
Belkin Italy & GreeceVia Carducci, 7Milano 20123Italy
Belkin GmbHHanebergstrasse 280637 MunichGermany
Belkin B.V.Boeing Avenue 3331119 PH Schiphol-Rijk, Netherlands
F1D201u_8820ea00071.indb 8 15/10/2009 09:00:16
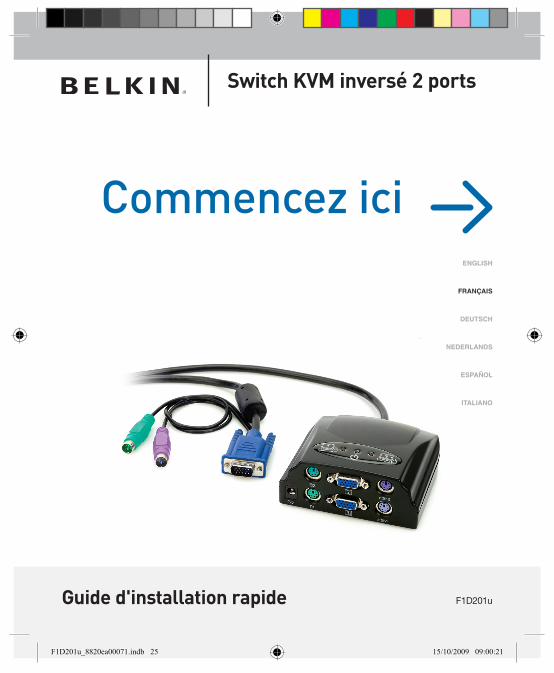
Commencez ici
Guide d'installation rapide F1D201u
Switch KVM inversé 2 ports
English
Français
DEutsch
nEDErlanDs
Español
italiano
F1D201u_8820ea00071.indb 25 15/10/2009 09:00:21

Contenu du coffret
Introduction FR 1
Introduction Ce document vous guidera à travers les étapes élémentaires nécessaires à l'installation du switch KVM inversé 2 ports.
Switch inversé 2 ports Switch KVM
Guide d'installation rapide
Spécifications
Référence F1D201u
Matériau Boîtier plastique
Poids net 13,9 kg
Unit Dimensions 75 x 70 x 31,3 mm
Résolution vidéo max. 1600 x 1200
Connectique clavier PS/2
Connectique souris PS/2
Connectique moniteur HDDB15 (VGA)
Garantie 2 ans
F1D201u_8820ea00071.indb 26 15/10/2009 09:00:21

Spécifications FR 2
Spécifications
Référence F1D201u
Matériau Boîtier plastique
Poids net 13,9 kg
Unit Dimensions 75 x 70 x 31,3 mm
Résolution vidéo max. 1600 x 1200
Connectique clavier PS/2
Connectique souris PS/2
Connectique moniteur HDDB15 (VGA)
Garantie 2 ans
F1D201u_8820ea00071.indb 27 15/10/2009 09:00:21

Installation FR 3
Installation
Étape 1 Mettez vos ordinateurs sous tension.
Étape 2 À l'aide du câble KVM inclus, branchez l'extrémité VGA mâle au port VGA de l'ordinateur.
Step 3 Branchez les extrémités PS/2 du câble KVM onclus aux ports clavier et souris. Veillez à brancher chaque câble au port adéquat. Ils ne sont pas interchangeables.
Étape 4 Branchez vos moniteurs au dos du Switch KVM inversé.
Étape 5 Branchez vos claviers et souris aux ports de console au dos du Switch KVM inversé.
Étape 6 Allumez les moniteurs connectés.
Étape 7 Allumez l'ordinateur connecté. Le voyant User 1 ou User 2 s'allume, en fonction du dernier voyant allumé avant l'arrêt.
Vous êtes maintenant prêt à utiliser votre Switch KVM inversé 2 ports.
F1D201u_8820ea00071.indb 28 15/10/2009 09:00:21

Étape 1 Mettez vos ordinateurs sous tension.
Étape 2 À l'aide du câble KVM inclus, branchez l'extrémité VGA mâle au port VGA de l'ordinateur.
Step 3 Branchez les extrémités PS/2 du câble KVM onclus aux ports clavier et souris. Veillez à brancher chaque câble au port adéquat. Ils ne sont pas interchangeables.
Étape 4 Branchez vos moniteurs au dos du Switch KVM inversé.
Installation FR 4
Étape 5 Branchez vos claviers et souris aux ports de console au dos du Switch KVM inversé.
Étape 6 Allumez les moniteurs connectés.
Étape 7 Allumez l'ordinateur connecté. Le voyant User 1 ou User 2 s'allume, en fonction du dernier voyant allumé avant l'arrêt.
Vous êtes maintenant prêt à utiliser votre Switch KVM inversé 2 ports.
F1D201u_8820ea00071.indb 29 15/10/2009 09:00:23

Installation du Switch KVM inversé 2 ports FR 5
Installation du Switch KVM inversé 2 ports
Commuter entre deux utilisateursPour commuter entre les utilisateurs, appuyez deux fois (en moins de trois secondes) sur « CTRL ».
Tonalité ON/OFFAppuyez deux fois (en moins de 3 secondes) sur « MAJ » pour commuter la tonalité ON/OFF.
Mode réglage de raccourcis au clavier
1 Pour passer en mode réglage de raccourcis au clavier, appuyez deux fois (en moins de 3 secondes) sur « Arrêt Défil ».
2 Les voyants sous « Verr Num », « Verr Maj » et « Arrêt Défil » au coin supérieur droit du clavier serviront d'indicateur pour le paramètre de temporisation.
4 Affichage sur un écran unique : Allumez ou éteignez l'écran de l'autre console, appuyez sur « L » en mode réglage de raccourcis au clavier.
5 Laisser le contrôle à l'autre utilisateur: En mode raccourcis au clavier, appuyez sur « ESPACE » pour laisser le contrôle à l'autre utilisateur.
6 Quitter le mode réglage de raccourcis au clavier : Appuyez sur « Échapp » pour quitter le mode réglage de raccourcis au clavier.
Délai de temporisation
VERR NUM VERR MAJ ARRÊT DÉFIL
30 s Éteint Éteint ON
1 min ON Éteint Éteint
3 min ON Éteint ON
5 min Éteint ON Éteint
10 min Éteint ON ON
20 min ON ON Éteint
3 Réglage du paramètre de temporisation :
a. Aux réglages de raccourcis au clavier, appuyez sur « - » pour diminuer le délai de temporisation.
b. Aux réglages de raccourcis au clavier, appuyez sur « - » pour augmenter le délai de temporisation.
c. Tableau du paramètre de temporisation.
F1D201u_8820ea00071.indb 30 15/10/2009 09:00:23

Commuter entre deux utilisateursPour commuter entre les utilisateurs, appuyez deux fois (en moins de trois secondes) sur « CTRL ».
Tonalité ON/OFFAppuyez deux fois (en moins de 3 secondes) sur « MAJ » pour commuter la tonalité ON/OFF.
1 Pour passer en mode réglage de raccourcis au clavier, appuyez deux fois (en moins de 3 secondes) sur « Arrêt Défil ».
2 Les voyants sous « Verr Num », « Verr Maj » et « Arrêt Défil » au coin supérieur droit du clavier serviront d'indicateur pour le paramètre de temporisation.
Mode réglage de raccourcis au clavier FR 6
4 Affichage sur un écran unique : Allumez ou éteignez l'écran de l'autre console, appuyez sur « L » en mode réglage de raccourcis au clavier.
5 Laisser le contrôle à l'autre utilisateur: En mode raccourcis au clavier, appuyez sur « ESPACE » pour laisser le contrôle à l'autre utilisateur.
6 Quitter le mode réglage de raccourcis au clavier : Appuyez sur « Échapp » pour quitter le mode réglage de raccourcis au clavier.
Délai de temporisation
VERR NUM VERR MAJ ARRÊT DÉFIL
30 s Éteint Éteint ON
1 min ON Éteint Éteint
3 min ON Éteint ON
5 min Éteint ON Éteint
10 min Éteint ON ON
20 min ON ON Éteint
3 Réglage du paramètre de temporisation :
a. Aux réglages de raccourcis au clavier, appuyez sur « - » pour diminuer le délai de temporisation.
b. Aux réglages de raccourcis au clavier, appuyez sur « - » pour augmenter le délai de temporisation.
c. Tableau du paramètre de temporisation.
F1D201u_8820ea00071.indb 31 15/10/2009 09:00:23

© 2009 Belkin International, Inc. Tous droits réservés. Toutes les raisons commerciales sont des marques déposées de leurs fabricants respectifs.
8820ea00071
Switch KVM inversé 2 ports
Belkin Ltd.Express Business ParkShipton Way, Rushden NN10 6GL, Royaume-Uni
Belkin IberiaC/ Anabel Segura, 10 planta baja, Of. 2 28108, Alcobendas, Madrid Espagne
Belkin SAS130 rue de Silly92100 Boulogne-Billancourt France
Belkin Italie & GrèceVia Carducci, 7Milan 20123Italie
Belkin GmbHHanebergstraße 280637 MunichAllemagne
Belkin B.V.Boeing Avenue 3331119 PH Schiphol-Rijk Pays-Bas
F1D201u_8820ea00071.indb 32 15/10/2009 09:00:23

Start
Installationsanleitung F1D201u
2-Port Reverse-KVM-Switch
English
Français
DEutsch
nEDErlanDs
Español
italiano
F1D201u_8820ea00071.indb 9 15/10/2009 09:00:28

Verpackungsinhalt
Einleitung DE 1
Einleitung Diese Kurzanleitung zeigt Ihnen Schritt für Schritt, wie Sie den 2-Port Reverse-KVM-Switch installieren.
2-Port Reverse- KVM-Switch
Installationsanleitung
Technische Daten
Artikelnr. F1D201u
Material Kunststoffgehäuse
Nettogewicht 13,9 kg
Geräteabmessungen 2,95 (B) x 2,76 (T) x 1,23 (H) in. (75 x 70 x 31,3 mm)
Max. Bildschirmauflösung 1600 x 1200
Tastaturanschluss PS/2
Mausanschluss PS/2
Bildschirmanschluss HDDB15 (VGA)
Herstellergarantie 2 Jahre
F1D201u_8820ea00071.indb 10 15/10/2009 09:00:28

Technische Daten DE 2
Technische Daten
Artikelnr. F1D201u
Material Kunststoffgehäuse
Nettogewicht 13,9 kg
Geräteabmessungen 2,95 (B) x 2,76 (T) x 1,23 (H) in. (75 x 70 x 31,3 mm)
Max. Bildschirmauflösung 1600 x 1200
Tastaturanschluss PS/2
Mausanschluss PS/2
Bildschirmanschluss HDDB15 (VGA)
Herstellergarantie 2 Jahre
F1D201u_8820ea00071.indb 11 15/10/2009 09:00:28

Installation DE 3
Installation
Schritt 1 Schalten Sie den Computer aus.
Schritt 2 Schließen Sie den VGA-Stecker des enthaltenen KVM-Kabels an den VGA-Anschluss des Computers an.
Schritt 3 Schließen Sie die PS/2-Stecker des enthaltenen KVM-Kabels an Tastatur- und Mausanschluss an. Achten Sie darauf, dass Sie den richtigen Stecker an den entsprechenden Anschluss anschließen. Sie sind nicht austauschbar.
Schritt 4 Schließen Sie die Bildschirme an die Rückseite des Reverse-KVM-Switch an.
Schritt 5 Schließen Sie Tastaturen und Mäuse an die Konsolenanschlüsse an der Rückseite des Reverse-KVM-Switch an.
Schritt 6 Schalten Sie die angeschlossenen Bildschirme ein.
Schritt 7 Schalten Sie den angeschlossenen Computer ein. Die LED-Anzeige zeigt Benutzer 1 oder Benutzer 2 an, je nachdem, welche LED-Anzeige als letzte an war.
Jetzt können Sie Ihren 2-Port Reverse-KVM-Switch benutzen.
F1D201u_8820ea00071.indb 12 15/10/2009 09:00:28

Schritt 1 Schalten Sie den Computer aus.
Schritt 2 Schließen Sie den VGA-Stecker des enthaltenen KVM-Kabels an den VGA-Anschluss des Computers an.
Schritt 3 Schließen Sie die PS/2-Stecker des enthaltenen KVM-Kabels an Tastatur- und Mausanschluss an. Achten Sie darauf, dass Sie den richtigen Stecker an den entsprechenden Anschluss anschließen. Sie sind nicht austauschbar.
Schritt 4 Schließen Sie die Bildschirme an die Rückseite des Reverse-KVM-Switch an.
Installation DE 4
Schritt 5 Schließen Sie Tastaturen und Mäuse an die Konsolenanschlüsse an der Rückseite des Reverse-KVM-Switch an.
Schritt 6 Schalten Sie die angeschlossenen Bildschirme ein.
Schritt 7 Schalten Sie den angeschlossenen Computer ein. Die LED-Anzeige zeigt Benutzer 1 oder Benutzer 2 an, je nachdem, welche LED-Anzeige als letzte an war.
Jetzt können Sie Ihren 2-Port Reverse-KVM-Switch benutzen.
F1D201u_8820ea00071.indb 13 15/10/2009 09:00:30

Verwenden des 2-Port Reverse-KVM-Switch DE 5
Verwenden des 2-Port Reverse-KVM-Switch
Zwischen zwei Benutzern umschaltenDrücken Sie innerhalb von drei Sekunden zweimal auf die Strg-Taste, um zwischen den Benutzern umzuschalten.
Den Signalton ein- oder ausschaltenDrücken Sie innerhalb von drei Sekunden zweimal auf die Umschalttaste, um den Signalton ein- oder auszuschalten.
Einstellungsmodus für Tastaturbefehle
1 Um den Einstellungsmodus für Tastaturbefehle einzugeben, drücken Sie innerhalb von drei Sekunden zweimal auf die Rollentaste.
2 Die LED-Anzeigen unter der Num-Taste, der Feststelltaste und der Rollentaste an der rechten oberen Seite der Tastatur werden verwendet, um das Zeitlimit anzuzeigen.
4 Wiedergabe auf einem Display: Um den Bildschirm der anderen Konsole ein- oder auszuschalten, drücken Sie im Einstellungsmodus für Tastaturbefehle auf „L”.
5 Geben Sie dem anderen Benutzer die Kontrolle: Drücken Sie im Einstellungsmodus für Tastaturbefehle auf die Leertaste, um die Kontrolle auf den anderen Benutzer zu übertragen.
6 Einstellungsmodus für Tastaturbefehle beenden: Drücken Sie auf „ESC”, um den Einstellungsmodus für Tastaturbefehle zu beenden.
Zeitlimit Num-Taste Feststelltaste Rollentaste
30 Sek. AUS AUS AN
1 Min. AN AUS AUS
3 Min. AN AUS AN
5 Min. AUS AN AUS
10 Min. AUS AN AN
20 Min. AN AN AUS
3 Einstellung für das Zeitlimit anpassen:
a. Drücken Sie unter den Einstellungen für die Tastaturbefehle auf „-” , um das Zeitlimit zu reduzieren.
b. Drücken Sie unter den Einstellungen für die Tastaturbefehle auf „+” , um das Zeitlimit zu erhöhen.
c. Übersicht über Einstellungen für das Zeitlimit.
F1D201u_8820ea00071.indb 14 15/10/2009 09:00:30

Zwischen zwei Benutzern umschaltenDrücken Sie innerhalb von drei Sekunden zweimal auf die Strg-Taste, um zwischen den Benutzern umzuschalten.
Den Signalton ein- oder ausschaltenDrücken Sie innerhalb von drei Sekunden zweimal auf die Umschalttaste, um den Signalton ein- oder auszuschalten.
1 Um den Einstellungsmodus für Tastaturbefehle einzugeben, drücken Sie innerhalb von drei Sekunden zweimal auf die Rollentaste.
2 Die LED-Anzeigen unter der Num-Taste, der Feststelltaste und der Rollentaste an der rechten oberen Seite der Tastatur werden verwendet, um das Zeitlimit anzuzeigen.
Einstellungsmodus für Tastaturbefehle DE 6
4 Wiedergabe auf einem Display: Um den Bildschirm der anderen Konsole ein- oder auszuschalten, drücken Sie im Einstellungsmodus für Tastaturbefehle auf „L”.
5 Geben Sie dem anderen Benutzer die Kontrolle: Drücken Sie im Einstellungsmodus für Tastaturbefehle auf die Leertaste, um die Kontrolle auf den anderen Benutzer zu übertragen.
6 Einstellungsmodus für Tastaturbefehle beenden: Drücken Sie auf „ESC”, um den Einstellungsmodus für Tastaturbefehle zu beenden.
Zeitlimit Num-Taste Feststelltaste Rollentaste
30 Sek. AUS AUS AN
1 Min. AN AUS AUS
3 Min. AN AUS AN
5 Min. AUS AN AUS
10 Min. AUS AN AN
20 Min. AN AN AUS
3 Einstellung für das Zeitlimit anpassen:
a. Drücken Sie unter den Einstellungen für die Tastaturbefehle auf „-” , um das Zeitlimit zu reduzieren.
b. Drücken Sie unter den Einstellungen für die Tastaturbefehle auf „+” , um das Zeitlimit zu erhöhen.
c. Übersicht über Einstellungen für das Zeitlimit.
F1D201u_8820ea00071.indb 15 15/10/2009 09:00:30

© 2009 Belkin International, Inc. Alle Rechte vorbehalten. Alle Produktnamen sind eingetragene Marken der angegebenen Hersteller.
8820ea00071
2-Port Reverse-KVM-Switch
Belkin Ltd.Express Business ParkShipton Way, Rushden NN10 6GL, Großbritannien
Belkin IberiaC/ Anabel Segura, 10 planta baja, Of. 2 28108, Alcobendas, Madrid Spanien
Belkin SAS130 rue de Silly92100 Boulogne-Billancourt, Frankreich
Belkin Italy & GreeceVia Carducci, 7Mailand 20123Italien
Belkin GmbHHanebergstraße 280637 MünchenDeutschland
Belkin B.V.Boeing Avenue 3331119 PH Schiphol-Rijk, Niederlande
F1D201u_8820ea00071.indb 16 15/10/2009 09:00:30
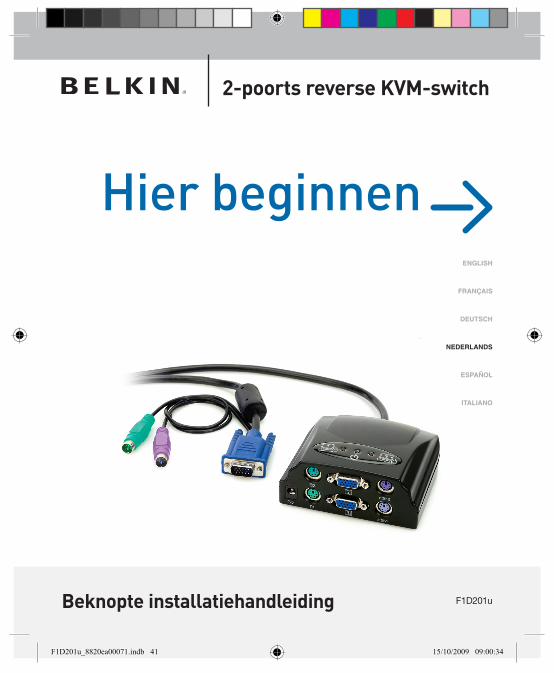
Hier beginnen
Beknopte installatiehandleiding F1D201u
2-poorts reverse KVM-switch
English
Français
DEutsch
nEDErlanDs
Español
italiano
F1D201u_8820ea00071.indb 41 15/10/2009 09:00:34

Inhoud van de verpakking
Inleiding NL1
Inleiding Dit boekje helpt u bij de belangrijkste stappen voor het installeren van de 2-poorts reverse KVM-switch.
2-poorts reverse KVM-switch
Beknopte installatiehandleiding
Technische gegevens
Artikelnummer F1D201u
Materiaal Behuizing van kunststof
Nettogewicht 13,9 kg (30,6 lbs)
Afmetingen 75 x 70 x 31,3 mm (bxdxh)
Max. videoresolutie 1.600 x 1.200
Toetsenbordaansluiting PS/2
Muisaansluiting PS/2
Monitoraansluiting HDDB15 (VGA)
Garantie 2 jaar
F1D201u_8820ea00071.indb 42 15/10/2009 09:00:35

Technische gegevens NL 2
Technische gegevens
Artikelnummer F1D201u
Materiaal Behuizing van kunststof
Nettogewicht 13,9 kg (30,6 lbs)
Afmetingen 75 x 70 x 31,3 mm (bxdxh)
Max. videoresolutie 1.600 x 1.200
Toetsenbordaansluiting PS/2
Muisaansluiting PS/2
Monitoraansluiting HDDB15 (VGA)
Garantie 2 jaar
F1D201u_8820ea00071.indb 43 15/10/2009 09:00:35
Installatie NL 3
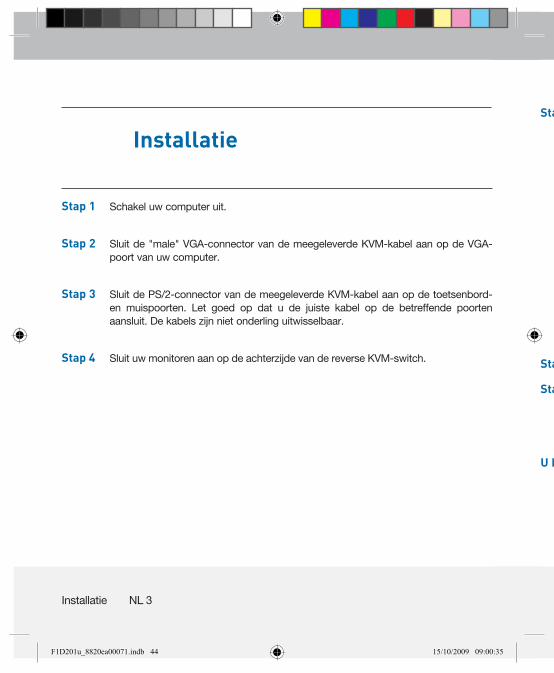
Installatie
Stap 1 Schakel uw computer uit.
Stap 2 Sluit de "male" VGA-connector van de meegeleverde KVM-kabel aan op de VGA-poort van uw computer.
Stap 3 Sluit de PS/2-connector van de meegeleverde KVM-kabel aan op de toetsenbord- en muispoorten. Let goed op dat u de juiste kabel op de betreffende poorten aansluit. De kabels zijn niet onderling uitwisselbaar.
Stap 4 Sluit uw monitoren aan op de achterzijde van de reverse KVM-switch.
Stap 5 Sluit uw toetsenborden en muizen aan op de consolepoorten aan de achterzijde van de reverse KVM-switch.
Stap 6 Schakel de aangesloten monitoren in.
Stap 7 Schakel de aangesloten computer in. Het weergavelampje van User 1 of User 2 (respectievelijk Gebruiker 1 of Gebruiker 2) gaat branden, afhankelijk van de LED's die het laatst brandden.
U kunt uw 2-poorts reverse KVM-switch nu in gebruik nemen.
F1D201u_8820ea00071.indb 44 15/10/2009 09:00:35

Stap 1 Schakel uw computer uit.
Stap 2 Sluit de "male" VGA-connector van de meegeleverde KVM-kabel aan op de VGA-poort van uw computer.
Stap 3 Sluit de PS/2-connector van de meegeleverde KVM-kabel aan op de toetsenbord- en muispoorten. Let goed op dat u de juiste kabel op de betreffende poorten aansluit. De kabels zijn niet onderling uitwisselbaar.
Stap 4 Sluit uw monitoren aan op de achterzijde van de reverse KVM-switch.
Installatie NL 4
Stap 5 Sluit uw toetsenborden en muizen aan op de consolepoorten aan de achterzijde van de reverse KVM-switch.
Stap 6 Schakel de aangesloten monitoren in.
Stap 7 Schakel de aangesloten computer in. Het weergavelampje van User 1 of User 2 (respectievelijk Gebruiker 1 of Gebruiker 2) gaat branden, afhankelijk van de LED's die het laatst brandden.
U kunt uw 2-poorts reverse KVM-switch nu in gebruik nemen.
F1D201u_8820ea00071.indb 45 15/10/2009 09:00:36

De 2-poorts reverse KVM-switch gebruiken NL 5
De 2-poorts reverse KVM-switch gebruiken
Schakelen tussen twee gebruikersDruk tweemaal op "Ctrl" (binnen drie seconden) om naar de andere gebruiker te schakelen.
Het geluidssignaal AAN-/UITzettenDruk tweemaal op de rechter "Shift"-toets (binnen drie seconden) om het geluidssignaal AAN of UIT te zetten.
Instelmodus voor sneltoetsen
1 Als u de instelmodus voor sneltoetsen wilt inschakelen, drukt u tweemaal (binnen drie seconden) op “Scroll Lock”.
2 De LED-lampjes onder “Num Lock”, “Caps Lock” en “Scroll Lock” rechtsboven op het toetsenbord worden gebruikt als indicatie voor de time-outinstelling.
4 Weergave op één scherm: Als u de weergave op de andere console wilt in- of uitschakelen, drukt u in de instelmodus voor sneltoetsen op "L".
5 Besturing overdragen aan de andere gebruiker: Druk in de sneltoetsmodus op de "SPATIEBALK" om het gebruik over te dragen aan de andere gebruiker.
6 De instelmodus voor sneltoetsen afsluiten: Druk op "ESC" om de instelmodus voor sneltoetsen af te sluiten.
Time-outperiode NUM LOCK CAPS LOCK SCROLL LOCK
30 sec. UIT UIT AAN
1 min. AAN UIT UIT
3 min. AAN UIT AAN
5 min. UIT AAN UIT
10 min. UIT AAN AAN
20 min. AAN AAN UIT
3 Time-outinstelling aanpassen:
a. Druk onder de sneltoetsinstellingen op “-” om de time-outperiode korter te maken. b. Druk onder de sneltoetsinstellingen op “+” om de time-outperiode langer te maken. c. Time-outinstellingentabel.
F1D201u_8820ea00071.indb 46 15/10/2009 09:00:37

Schakelen tussen twee gebruikersDruk tweemaal op "Ctrl" (binnen drie seconden) om naar de andere gebruiker te schakelen.
Het geluidssignaal AAN-/UITzettenDruk tweemaal op de rechter "Shift"-toets (binnen drie seconden) om het geluidssignaal AAN of UIT te zetten.
1 Als u de instelmodus voor sneltoetsen wilt inschakelen, drukt u tweemaal (binnen drie seconden) op “Scroll Lock”.
2 De LED-lampjes onder “Num Lock”, “Caps Lock” en “Scroll Lock” rechtsboven op het toetsenbord worden gebruikt als indicatie voor de time-outinstelling.
Instelmodus voor sneltoetsen NL 6
4 Weergave op één scherm: Als u de weergave op de andere console wilt in- of uitschakelen, drukt u in de instelmodus voor sneltoetsen op "L".
5 Besturing overdragen aan de andere gebruiker: Druk in de sneltoetsmodus op de "SPATIEBALK" om het gebruik over te dragen aan de andere gebruiker.
6 De instelmodus voor sneltoetsen afsluiten: Druk op "ESC" om de instelmodus voor sneltoetsen af te sluiten.
Time-outperiode NUM LOCK CAPS LOCK SCROLL LOCK
30 sec. UIT UIT AAN
1 min. AAN UIT UIT
3 min. AAN UIT AAN
5 min. UIT AAN UIT
10 min. UIT AAN AAN
20 min. AAN AAN UIT
3 Time-outinstelling aanpassen:
a. Druk onder de sneltoetsinstellingen op “-” om de time-outperiode korter te maken. b. Druk onder de sneltoetsinstellingen op “+” om de time-outperiode langer te maken. c. Time-outinstellingentabel.
F1D201u_8820ea00071.indb 47 15/10/2009 09:00:37
© 2009 Belkin International, Inc. Alle rechten voorbehouden. Alle handelsnamen zijn gedeponeerde handelsmerken van de betreffende rechthebbenden.
8820ea00071
2-poorts reverse KVM-switch
Belkin Ltd.Express Business ParkShipton Way, Rushden NN10 6GL, Verenigd Koninkrijk
Belkin IberiaC/ Anabel Segura, 10 planta baja, Of. 2 28108, Alcobendas, Madrid Spanje
Belkin SAS130 rue de Silly92100 Boulogne-Billancourt Frankrijk
Belkin Italy & GreeceVia Carducci, 720123 MilaanItalië
Belkin GmbHHanebergstraße 280637 MünchenDuitsland
Belkin B.V.Boeing Avenue 3331119 PH Schiphol-Rijk Nederland
F1D201u_8820ea00071.indb 48 15/10/2009 09:00:37
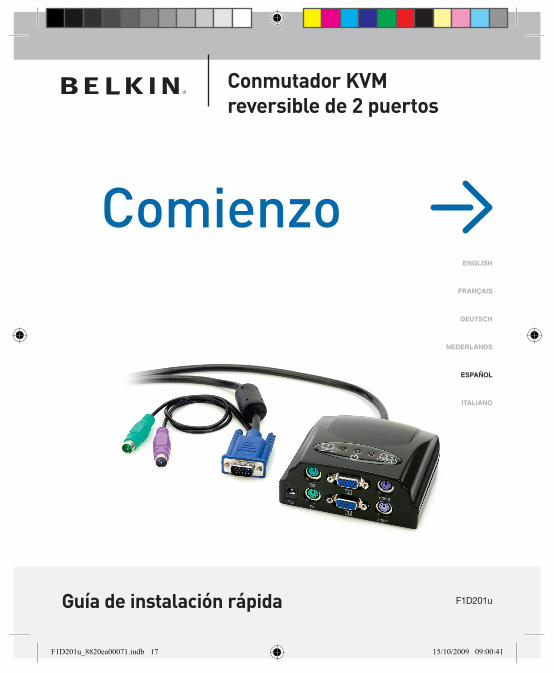
Comienzo
Guía de instalación rápida F1D201u
Conmutador KVM reversible de 2 puertos
English
Français
DEutsch
nEDErlanDs
Español
italiano
F1D201u_8820ea00071.indb 17 15/10/2009 09:00:41

Contenido de la caja
Introducción ES 1
Introducción Esta guía informativa detalla los pasos básicos necesarios para instalar el Conmutador KVM reversible de 2 puertos.
Conmutador KVM reversible de 2 puertos
Guía de instalación rápida
Especificaciones
N° de artículo F1D201u
Material: Carcasa de plástico
Peso neto 13,9 Kg.
Dimensiones de la unidad 75 x 70 x 31.3mm
Resolución máx de vídeo 1600x1200
Conexión del teclado PS/2
Conexión del ratón PS/2
Conexión del monitor HDDB15 (VGA)
Garantía 2 años
F1D201u_8820ea00071.indb 18 15/10/2009 09:00:41

Especificaciones ES 2
Especificaciones
N° de artículo F1D201u
Material: Carcasa de plástico
Peso neto 13,9 Kg.
Dimensiones de la unidad 75 x 70 x 31.3mm
Resolución máx de vídeo 1600x1200
Conexión del teclado PS/2
Conexión del ratón PS/2
Conexión del monitor HDDB15 (VGA)
Garantía 2 años
F1D201u_8820ea00071.indb 19 15/10/2009 09:00:41

Instalación ES 3
Instalación
Paso 1 Apague los ordenadores.
Paso 2 Con el cable KVM incluido, conecte el extremo VGA macho al puerto VGA de su ordenador.
Paso 3 Conecte los extremos PS7" del cable KVM incluido a los puertos de ratón y teclado; compruebe que los cables están conectados a los puertos correspondientes. No son intercambiables.
Paso 4 Conecte los monitores a la parte trasera del Conmutador KVM reversible.
Paso 5 Conecte los ratones y los teclados a la parte trasera del Conmutador KVM reversible.
Paso 6 Encienda los monitores.
Paso 7 Encienda el ordenador conectado. El indicador LED se encenderá en el usuario 1 o 2, en función de la última posición de los LED.
Ahora estará listo para utilizar su Conmutador KVM reversible de 2 puertos.
F1D201u_8820ea00071.indb 20 15/10/2009 09:00:42

Paso 1 Apague los ordenadores.
Paso 2 Con el cable KVM incluido, conecte el extremo VGA macho al puerto VGA de su ordenador.
Paso 3 Conecte los extremos PS7" del cable KVM incluido a los puertos de ratón y teclado; compruebe que los cables están conectados a los puertos correspondientes. No son intercambiables.
Paso 4 Conecte los monitores a la parte trasera del Conmutador KVM reversible.
Instalación ES 4
Paso 5 Conecte los ratones y los teclados a la parte trasera del Conmutador KVM reversible.
Paso 6 Encienda los monitores.
Paso 7 Encienda el ordenador conectado. El indicador LED se encenderá en el usuario 1 o 2, en función de la última posición de los LED.
Ahora estará listo para utilizar su Conmutador KVM reversible de 2 puertos.
F1D201u_8820ea00071.indb 21 15/10/2009 09:00:43

Cómo utilizar el Conmutador KVM reversible de 2 puertos. ES 5
Cómo utilizar el Conmutador KVM reversible de 2 puertos
Conmutar entre dos usuariosPulse “Ctrl” dos veces (en menos de 3 segundos) para pasar de un usuario a otro.
Apagar/encender el sonido bipPulse la tecla “Shift" derecha dos veces (en menos de tres segundo) para encender o apagar el bip.
Modo de configuración con las teclas de acceso directo.
1 Para entrar en el modo de configuración con las teclas de acceso directo, pulse Bloq Despl dos veces (en menos de tres segundos).
2 Los indicadores LED de Bloq Num, Bloq Mayús y Bloq Despl que hay en la esquina superior derecha del teclado se usan como indicador de la configuración del tiempo límite.
4 Pantalla en un único monitor: Para encender o apagar el monitor en la otra consola, pulse "L" en el modo de configuración con las teclas de acceso directo.
5 Ceder el control al otro usuario: En el modo de teclas de acceso directo, pulse "Espacio" para ceder el control al otro usuario.
6 Salir del modo de teclas de acceso directo: Pulse "Esc" para salir del modo de configuración con teclas de acceso directo.
Tiempo límite BLOQ NUM BLOQ MAYÚS BLOQ DESPL
30 seg. APAGADO APAGADO ENCENDIDO
1 min. ENCENDIDO APAGADO APAGADO
3 min. ENCENDIDO APAGADO ENCENDIDO
5 min. APAGADO ENCENDIDO APAGADO
10 min. APAGADO ENCENDIDO ENCENDIDO
20 min. ENCENDIDO ENCENDIDO APAGADO
3 Configurar el tiempo límite:
a. Dentro de la configuración con las teclas de acceso directo, pulse “-” pare reducir el tiempo límite.
b. Dentro de la configuración con las teclas de acceso directo, pulse “+” para aumentar el tiempo límite.
c. Tabla de configuración del tiempo límite.
F1D201u_8820ea00071.indb 22 15/10/2009 09:00:43

Conmutar entre dos usuariosPulse “Ctrl” dos veces (en menos de 3 segundos) para pasar de un usuario a otro.
Apagar/encender el sonido bipPulse la tecla “Shift" derecha dos veces (en menos de tres segundo) para encender o apagar el bip.
1 Para entrar en el modo de configuración con las teclas de acceso directo, pulse Bloq Despl dos veces (en menos de tres segundos).
2 Los indicadores LED de Bloq Num, Bloq Mayús y Bloq Despl que hay en la esquina superior derecha del teclado se usan como indicador de la configuración del tiempo límite.
Modo de configuración con las teclas de acceso directo ES 6
4 Pantalla en un único monitor: Para encender o apagar el monitor en la otra consola, pulse "L" en el modo de configuración con las teclas de acceso directo.
5 Ceder el control al otro usuario: En el modo de teclas de acceso directo, pulse "Espacio" para ceder el control al otro usuario.
6 Salir del modo de teclas de acceso directo: Pulse "Esc" para salir del modo de configuración con teclas de acceso directo.
Tiempo límite BLOQ NUM BLOQ MAYÚS BLOQ DESPL
30 seg. APAGADO APAGADO ENCENDIDO
1 min. ENCENDIDO APAGADO APAGADO
3 min. ENCENDIDO APAGADO ENCENDIDO
5 min. APAGADO ENCENDIDO APAGADO
10 min. APAGADO ENCENDIDO ENCENDIDO
20 min. ENCENDIDO ENCENDIDO APAGADO
3 Configurar el tiempo límite:
a. Dentro de la configuración con las teclas de acceso directo, pulse “-” pare reducir el tiempo límite.
b. Dentro de la configuración con las teclas de acceso directo, pulse “+” para aumentar el tiempo límite.
c. Tabla de configuración del tiempo límite.
F1D201u_8820ea00071.indb 23 15/10/2009 09:00:44

© 2009 Belkin International, Inc. Todos los derechos reservados. Todos los nombres comerciales son marcas registradas de los respectivos fabricantes mencionados.
8820ea00071
Conmutador KVM reversible de 2 puertos
Belkin Ltd.Express Business ParkShipton Way, Rushden NN10 6GL (Reino Unido)
Belkin IberiaC/ Anabel Segura, 10 planta baja, Of. 2 28108, Alcobendas, Madrid España
Belkin SAS130 rue de Silly92100 Boulogne-Billancourt Francia
Belkin Italy & GreeceVia Carducci, 7Milán 20123Italia
Belkin GmbHHanebergstrasse 280637 MúnichAlemania
Belkin B.V.Boeing Avenue 3331119 PH Schiphol-Rijk (Países Bajos)
F1D201u_8820ea00071.indb 24 15/10/2009 09:00:44

Inizio
Guida di installazione rapida F1D201u
Switch KVM Reverse a 2 porte
English
Français
DEutsch
nEDErlanDs
Español
italiano
F1D201u_8820ea00071.indb 33 15/10/2009 09:00:48

Contenuto della confezione
Introduzione IT 1
Introduzione Questo opuscolo vi illustrerà le operazioni necessarie per l'installazione dello Switch KVM Reverse a 2 porte.
Switch KVM Reverse a 2 porte
Guida di installazione rapida
Specifiche
Cod. prod. F1D201u
Materiale Rivestimento esterno in plastica
Peso netto 30,6 lbs. (13,9kg)
Dimensioni unità 2,95 (Larg) x 2,76 (Prof) x 1,23 (Alt) in. (75 x 70 x 31,3 mm)
Risoluzione video massima 1600 x 1200
Connessione tastiera PS/2
Connessione mouse PS/2
Connessione monitor HDDB15 (VGA)
Garanzia 2 anni
F1D201u_8820ea00071.indb 34 15/10/2009 09:00:48

Specifiche IT 2
Specifiche
Cod. prod. F1D201u
Materiale Rivestimento esterno in plastica
Peso netto 30,6 lbs. (13,9kg)
Dimensioni unità 2,95 (Larg) x 2,76 (Prof) x 1,23 (Alt) in. (75 x 70 x 31,3 mm)
Risoluzione video massima 1600 x 1200
Connessione tastiera PS/2
Connessione mouse PS/2
Connessione monitor HDDB15 (VGA)
Garanzia 2 anni
F1D201u_8820ea00071.indb 35 15/10/2009 09:00:48

Installazione IT 3
Installazione
Fase 1 Spegnere il computer.
Fase 2 Utilizzando il cavo KVM incluso, collegare il connettore maschio del cavo VGA alla porta VGA del computer.
Fase 3 Collegare il connettore PS/2 del cavo KVM incluso alle porte per la tastiera e il mouse, facendo attenzione a collegare i cavi corretti alle rispettive porte, poiché questi non sono intercambiabili.
Fase 4 Collegare i monitor alle porte situate sul retro dello Switch KVM Reverse.
Fase 5 Collegare le tastiere e i mouse alle porte console situate sul retro dello Switch KVM Reverse.
Fase 6 Accendere i monitor collegati.
Fase 7 Accendere i computer collegati. Il LED del display visualizzerà User 1 (Utente 1) o User 2 (Utente 2), a seconda dell'ultima posizione illuminata dai LED.
Ora lo switch KVM Reverse a 2 porte è pronto per l'uso.
F1D201u_8820ea00071.indb 36 15/10/2009 09:00:49

Fase 1 Spegnere il computer.
Fase 2 Utilizzando il cavo KVM incluso, collegare il connettore maschio del cavo VGA alla porta VGA del computer.
Fase 3 Collegare il connettore PS/2 del cavo KVM incluso alle porte per la tastiera e il mouse, facendo attenzione a collegare i cavi corretti alle rispettive porte, poiché questi non sono intercambiabili.
Fase 4 Collegare i monitor alle porte situate sul retro dello Switch KVM Reverse.
Installazione IT4
Fase 5 Collegare le tastiere e i mouse alle porte console situate sul retro dello Switch KVM Reverse.
Fase 6 Accendere i monitor collegati.
Fase 7 Accendere i computer collegati. Il LED del display visualizzerà User 1 (Utente 1) o User 2 (Utente 2), a seconda dell'ultima posizione illuminata dai LED.
Ora lo switch KVM Reverse a 2 porte è pronto per l'uso.
F1D201u_8820ea00071.indb 37 15/10/2009 09:00:50

Utilizzo dello Switch KVM Reverse a 2 porte IT 5
Utilizzo dello Switch KVM Reverse a 2 porte
Commutazione tra due utentiPremere "Ctrl" due volte (entro tre secondi) per passare da un utente all'altro.
Accensione e spegnimento del segnale acusticoPremere il tasto "Maiusc" destro (entro tre secondi) per accendere o spegnere il segnale acustico.
Modalità di scelta rapida
1 Per abilitare la modalità di scelta rapida, premere "Bloc scorr" due volte (entro tre secondi).
2 I LED sottostanti "Bloc Num", "Bloc Maiusc" e "Bloc Scorr", sull'angolo in alto a destra della tastiera, vengono utilizzati come indicatori per l'impostazione dell'intervallo di inattività.
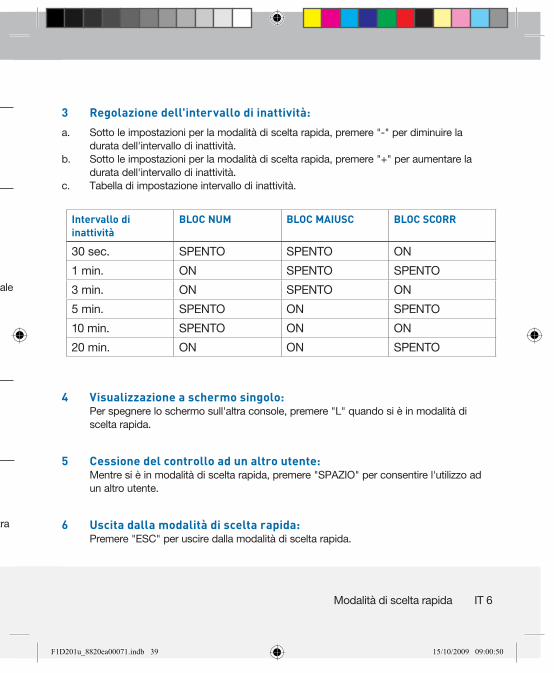
4 Visualizzazione a schermo singolo: Per spegnere lo schermo sull'altra console, premere "L" quando si è in modalità di scelta rapida.
5 Cessione del controllo ad un altro utente: Mentre si è in modalità di scelta rapida, premere "SPAZIO" per consentire l'utilizzo ad un altro utente.
6 Uscita dalla modalità di scelta rapida: Premere "ESC" per uscire dalla modalità di scelta rapida.
Intervallo di inattività
BLOC NUM BLOC MAIUSC BLOC SCORR
30 sec. SPENTO SPENTO ON
1 min. ON SPENTO SPENTO
3 min. ON SPENTO ON
5 min. SPENTO ON SPENTO
10 min. SPENTO ON ON
20 min. ON ON SPENTO
3 Regolazione dell'intervallo di inattività:
a. Sotto le impostazioni per la modalità di scelta rapida, premere "-" per diminuire la durata dell'intervallo di inattività.
b. Sotto le impostazioni per la modalità di scelta rapida, premere "+" per aumentare la durata dell'intervallo di inattività.
c. Tabella di impostazione intervallo di inattività.
F1D201u_8820ea00071.indb 38 15/10/2009 09:00:50
Commutazione tra due utentiPremere "Ctrl" due volte (entro tre secondi) per passare da un utente all'altro.
Accensione e spegnimento del segnale acusticoPremere il tasto "Maiusc" destro (entro tre secondi) per accendere o spegnere il segnale acustico.
1 Per abilitare la modalità di scelta rapida, premere "Bloc scorr" due volte (entro tre secondi).
2 I LED sottostanti "Bloc Num", "Bloc Maiusc" e "Bloc Scorr", sull'angolo in alto a destra della tastiera, vengono utilizzati come indicatori per l'impostazione dell'intervallo di inattività.
Modalità di scelta rapida IT 6
4 Visualizzazione a schermo singolo: Per spegnere lo schermo sull'altra console, premere "L" quando si è in modalità di scelta rapida.
5 Cessione del controllo ad un altro utente: Mentre si è in modalità di scelta rapida, premere "SPAZIO" per consentire l'utilizzo ad un altro utente.
6 Uscita dalla modalità di scelta rapida: Premere "ESC" per uscire dalla modalità di scelta rapida.
Intervallo di inattività
BLOC NUM BLOC MAIUSC BLOC SCORR
30 sec. SPENTO SPENTO ON
1 min. ON SPENTO SPENTO
3 min. ON SPENTO ON
5 min. SPENTO ON SPENTO
10 min. SPENTO ON ON
20 min. ON ON SPENTO
3 Regolazione dell'intervallo di inattività:
a. Sotto le impostazioni per la modalità di scelta rapida, premere "-" per diminuire la durata dell'intervallo di inattività.
b. Sotto le impostazioni per la modalità di scelta rapida, premere "+" per aumentare la durata dell'intervallo di inattività.
c. Tabella di impostazione intervallo di inattività.
F1D201u_8820ea00071.indb 39 15/10/2009 09:00:50

© 2009 Belkin International, Inc. Tutti i diritti riservati. Tutti i nomi commerciali sono marchi registrati dei rispettivi produttori indicati.
8820ea00071
Switch KVM Reverse a 2 porte
Belkin Ltd.Express Business ParkShipton Way, Rushden NN10 6GL, Regno Unito
Belkin IberiaC/ Anabel Segura, 10 planta baja, Of. 2 28108, Alcobendas, Madrid Spagna
Belkin SAS130 rue de Silly92100 Boulogne-Billancourt Francia
Belkin Italy & GreeceVia Carducci, 720123 MilanoItalia
Belkin GmbHHanebergstrasse 280637 Monaco di BavieraGermania
Belkin B.V.Boeing Avenue 3331119 PH Schiphol-Rijk Paesi Bassi
F1D201u_8820ea00071.indb 40 15/10/2009 09:00:51
Related Documents