SR-22 Training Guide Edition 2 Revision 1 Confidential Information This document contains confidential information and trade secrets of UND Aerospace, and may not be used, disclosed or reproduced, in whole or in part, without the express written consent of UND Aerospace.

Welcome message from author
This document is posted to help you gain knowledge. Please leave a comment to let me know what you think about it! Share it to your friends and learn new things together.
Transcript

SR-22 Training Guide Edition 2Revision 1
Confidential Information
This document contains confidential information and trade secrets of UND Aerospace, and may not be used, disclosed or reproduced, in whole or in part, without the express written consent of UND Aerospace.

Intentionally Left Blank

Table of Contents Page
Introduction ………………………………….….. 1Section 1 (General) ….………………………... 9Section 2 (Limitations) ………………..…….… 11Section 3 (Emergency Procedures) …………. 15Section 4 (Normal Procedures) .………………. 19Section 5 (Performance Data). ……………….. 23Section 6 (Weight and Balance).. ……………. 27Section 7 (Airplane Systems Description)…… 29Section 8 (Handling, Service, & Maintenance) 35Section 9 (Supplements)………………………. 39Section 10 (Safety Information)……….….…..… 51Section 11 Standard Operating Procedures ….. 53Section 12 Operational Guidelines for 71
Personal and Weather Risk Assessment
Appendix A Personal Minimums Work SheetAppendix B Personal Minimums ChecklistAppendix C Risk Assessment Chart
Cirrus Publications:Aircraft Checklist (For Reference Only)Aircraft POH (For Reference Only)

Record of Changes
No. Date of Change Nature of Change Initial
Original July ’04
Pg 28 Oct ’04 W&B table Corrected JW
Pg 59 Oct ’04 Precautionary note added JW
Pg 64 Oct ’04 Precautionary note added JW

© 2003 All Right Reserved 1UND Aerospace Foundation, Grand Forks, ND 58282 7/1/04(701) 777-4740
IntroductionHow to use this manual
This training manual is designed to serve as a companion to the Pilots Operating Handbook for your new SR22. It will be used before and during your new-owner transition training. It is a workbook designed to help you get the most from your training. Each section in the training manual corresponds to its section in the POH that is included at the end of this manual. In each section you will find: quiz questions, supplemental information, and operating tips.
This manual is designed to be a reference only, it does not constitute limitations. The official FAA approved POH for your aircraft is the only source for official aircraft information.
This manual is divided into 12 sections; the first 10 sections correspond to the same section that is in the provided POH. In every section you will find questions related to that section. The answers to the questions will be found in the provided generic POH. (unless otherwise noted) These questions are required to be completed prior to the beginning of your training. If you have problems with the workbook or would like clarification on a questionwithin it you may use the forum “Q & A Forum” at the following address: www.aero.und.edu/cirrus. Follow these links: “Training” –“Resources” – “Transition Training”.

© 2003 All Right Reserved 2UND Aerospace Foundation, Grand Forks, ND 58282 7/1/04(701) 777-4740
Schedule of Training
The estimated/recommended training times listed on page 4 reflects the average time for a proficient and current pilot who comes prepared for training. We strongly encourage you to schedule as many days as recommended. You will only be charged for the time you spend with your instructor. The advanced avionics in the Cirrus SR22 are one of the largest challenges for transitioning owners. If you have little or no experience with the Garmin GNS430 you will want to schedule additional training. Weather and maintenance can play a key role in the training schedule. Please build some flexibility into your personal schedule for any such delays. In the event of unforeseen delays such as weather or maintenance occur you will still be billed for any time you spend with the instructor.
The amount of training needed is dependent on the experience level of the pilot. Please use the guidelines below to determine the amount of training you should schedule. Many factors, including weather, maintenance, insurance requirements and customer proficiency may extend the training schedule. You can reduce the training time by coming prepared. Additional training resources are available on line at www.aero.und.edu/cirrus Follow these links: “Training” – “Resources” – “Transition Training”
Please note that the average pilot that comes for transition training spends more than three days to complete the transition training program, and each additional pilot that is being trained will take additional time to train as outlined in the table below. On the next page you will find a brief description of the transition training course.
If your flying experience includes: Plan for:1000+ hours total time (with at least 100 hours in last 12 months)50+ high performanceExperience with advanced avionics and GPSInstrument rated, instrument current and proficient
2 Days
1000-500 hours total time25-50 high performanceInstrument rated current and proficient
OR1000-500 hours total time25-50 high performanceExperience with advanced avionics and GPS
3 Days
Less than 500 hours total timeLess than 25 hours high performance No instrument rating orNo experience with advanced avionics and GPS
4 Days

© 2003 All Right Reserved 3UND Aerospace Foundation, Grand Forks, ND 58282 7/1/04(701) 777-4740
Transition Training Course
The Cirrus Transition Training Course is accepted by the FAA/Industry Training Standards. The course is comprised of 7 lessons and an optional biennial flight review and/or instrument proficiency check lesson after the transition training has been completed.
The amount of time it takes to complete the course is dependent onseveral factors:
Experience level of the pilot. Overall knowledge of the aircraft and avionics Insurance requirements
The course is a basic VFR course. Minimal instrument procedures are covered within these 7 lessons. If more emphasis on instrument operations is requested, more time will need to be scheduled.
Lesson 1: This lesson will cover the course briefing, detailing what will be covered during the next few days of training. During this lesson the operator must either correctly answer 70% of the training guide questions or complete a written quiz covering materials from the POH achieving at lease a 70% score.
If operator has satisfactory completed the training guide or quiz they may continue with the flight training. If not, extra time will be spent going over the deficient areas.
This is also the lesson where you may ask questions specific to avionics or systems of the Cirrus aircraft.
Lesson 2: This lesson will be the first introduction to SR22 covering normal operating procedures, introduction to avionics and basic flight maneuvers.

© 2003 All Right Reserved 4UND Aerospace Foundation, Grand Forks, ND 58282 7/1/04(701) 777-4740
Lesson 3: The operator will be asked to identify and correctsystems and system malfunctions in a scenario based format. These scenarios will be based on the certificate and ratings held by the pilot. This lesson will also look at ways to reduce risk and accident prevention associated with single pilot operations.
Lesson 4: The operator will review items learned in lesson 2 and develop increased proficiency in airport operations. Takeoffs, landings, go around and stabilized approach procedures will be the major emphasis.
Lesson 5: The pilot will be introduced to abnormal and emergency procedures in flight. He will also demonstrate automation competency in a Cirrus aircraft while conducting a cross country scenario. Automation and avionics interface will be the major emphasis.
Lesson 6: Pilot will review abnormal and emergency procedures and demonstrate an increased proficiency in conducting a cross country based scenario.
Lesson 7: This lesson is the final evaluation flight that will take into account previously learned material. Conducted on a planned cross country scenario, the pilot must be able to perform at a level where they can identify possible courses of action, evaluate risk inherent in each course of action, and make the appropriate decision.

© 2003 All Right Reserved 5UND Aerospace Foundation, Grand Forks, ND 58282 7/1/04(701) 777-4740
Note: Optional biennial flight review and/or instrument proficiency check training can only be conducted after satisfactorily completing the transition training course
Lesson 8 Optional biennial flight review in which an additional half day of training will be required to cover the required ground material.
Lesson 9 Optional instrument proficiency check in which an additional day of training will be needed to cover the required ground and flight lessons.

© 2003 All Right Reserved 6UND Aerospace Foundation, Grand Forks, ND 58282 7/1/04(701) 777-4740
Additional Services & Fees
In addition to regular transition training, UND Aerospace Foundationoffers the following additional services and training to Cirrus customers. Please contact us at (218)-788-3217 to schedule all your training needs or view our web site for more information.www.aero.und.edu/cirrus
Acceptance of your aircraft on your behalf (Power of Attorney)
Delivery of your aircraft to your home airport Flight home accompaniment Biennial Flight Review (BFR)
Extra ½ day required Instrument Proficiency Check (IPC)
Extra full day required Recurrent Training
One day structured course Accelerated Instrument Course Custom Training
Training to fit your needs and requirements Companion Course
Note:It is highly recommended that you come to Duluth to take delivery of your aircraft and complete the transition program. If you decide to take advantage of our additional services, you are responsible for fees associated with training outside of the factory which may include but is not limited to lodging, meals, airfare, transportation, aircraft fuel, charts, and unforeseen delays do to weather and/or mechanical issues.

© 2003 All Right Reserved 7UND Aerospace Foundation, Grand Forks, ND 58282 7/1/04(701) 777-4740
Internet Hyperlinks
Pilot operating handbooks and supplements can be downloaded from the following web pages listed below.
http://www.cirrusdesign.com/serviceandupgrades/pilotoperators/
www.aero.und.edu/cirrus UND AerospaceCirrus Factory Training Provider
www.cirrusdesign.com Cirrus Design Corporationwww.cirruspilots.org COPAwww.avidyne.com Avidyne Avionicswww.tcmlink.com Teledyne Continental Motorswww.garmin.com Garmin Avionicswww.as.l-3com.com L-3 Avionics Systemswww.s-tec.com S-Tec/Meggitwww.sandel.com Sandelwww.flightice.com/tks.html TKSwww.aopa.org AOPAwww.faa.gov Federal Aviation Administration

© 2003 All Right Reserved 8UND Aerospace Foundation, Grand Forks, ND 58282 7/1/04(701) 777-4740
Intentionally Left Blank

© 2003 All Right Reserved 9UND Aerospace Foundation, Grand Forks, ND 58282 7/1/04(701) 777-4740
Section 1 General
This section will cover Section 1 (General) of the SR22 Pilots Operating Handbook. Answers to all questions will be found in the appropriate section of the POH, unless otherwise noted.
1. What is the wing span of the Cirrus SR22?Tip: Consider this when hangering your aircraft.
2. What is the certified max gross weight of the aircraft?
3. In what ways does the weight of the aircraft effect the aircraft?
4. How much clearance is between the tip of the propeller and the ground?
5. What is your engine model?
6. What is the definition of reference datum?

© 2003 All Right Reserved 10UND Aerospace Foundation, Grand Forks, ND 58282 7/1/04(701) 777-4740
Intentionally Left Blank

© 2003 All Right Reserved 11UND Aerospace Foundation, Grand Forks, ND 58282 7/1/04(701) 777-4740
Section 2 LimitationsThis section will cover Section 2 (Limitations) of the Cirrus SR22 Pilots Operating Handbook. Answers to all questions will be found in the appropriate section of the POH, unless otherwise noted.
1. Fill in the speeds and definitions of the following:Vne _____KIAS _______________Vno _____KIAS _______________Vo _____KIAS _______________ 3400lbs.Vfe _____KIAS _______________ 50% FlapsVfe _____KIAS _______________ 100% FlapsVpd _____KIAS _______________Vso _____KIAS _______________Vs _____KIAS _______________
2. What is the significance of Vno and how does it differ from Vne?
3. What is the significance of Vo?
4. What is the significance of the green arc?
5. What two speeds define the green arc?
6. During the engine break-in period what type of oil should be used?
7. What is the max takeoff altitude for the aircraft?

© 2003 All Right Reserved 12UND Aerospace Foundation, Grand Forks, ND 58282 7/1/04(701) 777-4740
8. What is the max operating altitude of the aircraft?
9. Can you operate the aircraft at that altitude with out oxygen? (FAR 91.211)
10. Can you paint your airplane Navy Blue? Why?
11. Can you operate this aircraft out of un-paved runway surfaces?
12. Is the MFD approved as a primary navigation instrument?
13. Can you fly VFR with ALT 2 INOP?
14. Can you fly IFR with ALT 2 INOP?
15. Can you fly VFR with one of the strobe lights out?
16. What is the significance of Vpd and why do you not see this in other Aircraft?
17. Can you fly IFR with the NAV lights inoperative?

© 2003 All Right Reserved 13UND Aerospace Foundation, Grand Forks, ND 58282 7/1/04(701) 777-4740
18. Can you fly with any of the engine instruments inoperative?
19. Is the aircraft approved for acrobatics/spins?
20. Can you operate your aircraft without removing the CAPS safety pin? (FAR 91.9)
21. Indicate the following Fuel Limits
Approved Fuel ______________gals
Total Fuel Capacity ______________gals
Total Fuel Each Tank ______________gals
Total Usable Fuel ______________gals
Unusable Fuel ______________gals
Maximum Allowable Fuel Imbalance ______________gals
22. When does the BOOST pump need to be in operation?
23. What three caution lights are required to be operational for flight?Tip: It is important to remember to check the caution lightspanel each time. This item is not included in any other operational checklist.

© 2003 All Right Reserved 14UND Aerospace Foundation, Grand Forks, ND 58282 7/1/04(701) 777-4740
Intentionally Left Blank
© 2003 All Right Reserved 15UND Aerospace Foundation, Grand Forks, ND 58282 7/1/04(701) 777-4740
Section 3 Emergency Procedures
This section will cover Section 3 (Emergency Procedures) from the SR22 Pilots Operating Handbook. Answers to all questions will be found in the appropriate section of the POH, unless otherwise noted.
1. Fill in the speeds and definitions of the following:(best glide)Vg _____KIAS _______________ 3400 lbs.Vg _____KIAS _______________ 2900 lbs.
2. Emergency Landing Speeds:Flaps Up _____KIAS50% Flaps _____KIAS100% Flaps _____KIAS
3. In any emergency situation, what is the most important thing to remember and perform?
4. What is the procedure for a fire on engine start?
5. How many circuit breakers would you pull with runaway trim? What are these circuit breakers labeled?
6. What indicates the failure of an alternator?
7. Would you lose any equipment if you lost ALT1? (Electrical Distribution Diagram in Section 3) If yes, what?

© 2003 All Right Reserved 16UND Aerospace Foundation, Grand Forks, ND 58282 7/1/04(701) 777-4740
8. If taxiing at 1000RPMs, why is your ALT2 caution light on?
9. Would you lose any equipment if you lost ALT2? (Electrical Distribution Diagram in Section 3) If yes, what?
10. What is your aircraft glide ratio?
11. What is your best glide distance if you were at 6,000’ AGL?
12. A propeller governor failure can be the cause of what two situations?
13. Is it advisable to unlatch the cabin doors with smoke or fumes in the cabin?
14. What is the procedure for an emergency descent?What situation would you use an emergency descent?
15. What is the procedure if you have an engine failure in flight?
16. Is flight into known icing conditions prohibited?What is the procedure for an inadvertent icing encounter?

© 2003 All Right Reserved 17UND Aerospace Foundation, Grand Forks, ND 58282 7/1/04(701) 777-4740
17. In an engine failure situation with the prop wind milling, how can you gain additional glide distance?
18. What is the only approved and demonstrated method for spin recovery?
19. If only the airspeed indicator is giving erroneous information, what kind of malfunction can you expect?
20. Will the auxiliary fuel pump provide enough fuel to power the engine in the event of an engine driven fuel pump failure?
21. What two situations can you probably expect with a low oil pressure reading and a rise in temperature?
22. What is the procedure for a propeller overspeed?
23. What would your procedure be if you had a cabin fire in flight?
24. What procedure would you use to try and get ALT 1 back online in the case of an ALT1 failure? What would your next step be if you could not get the alternator back online?
© 2003 All Right Reserved 18UND Aerospace Foundation, Grand Forks, ND 58282 7/1/04(701) 777-4740
25. The expected impact from a parachute drop is approximately?
26. If activation of the CAPS system is necessary, what kind of motion do you want to use when pulling the handle?
27. With an engine out will full flaps increase or decrease your glide distance?
28. If landing without elevator control, what speed do you want to trim the aircraft for?
29. True or False? If you loose the audio panel you have lost all communications with ATC?
30. Your ALT1 light illuminates 30 minutes from your destination while in non-icing/IMC conditions at night. Would you want to reduce the loads on ALT1? What items would you pull the circuit breakers on?
31. What is the procedure for single and dual brake failure?

© 2003 All Right Reserved 19UND Aerospace Foundation, Grand Forks, ND 58282 7/1/04(701) 777-4740
Section 4 Normal Procedures
This section will cover Section 4 (Normal Procedures) from the SR22 Pilots Operating Handbook. Answers to all questions will be found in the appropriate section of the POH, unless otherwise noted.
1. Fill in the speeds and definitions of the following:Vr _____KIAS _______________ NormalVy _____KIAS _______________ S.L.Vy _____KIAS _______________ 10,000’Vx _____KIAS _______________ S.L.Vx _____KIAS _______________ 10,000’Vo _____KIAS _______________ 3400 lbs.Vo _____KIAS _______________ 2900 lbs.
Final Approach Flaps Up _____KIASFinal Approach 50% Flaps _____KIASFinal Approach 100% Flaps _____KIASVref Short Field 100% Flaps _____KIASMax Demonstrated X-Wind _____Knots
2. During the cabin preflight, what should be the normal voltage indication on the SR22?
3. How many points are you able to drain fuel from?
4. What items would you brief your passengers on during a passenger briefing?
5. True or False? You will start the engine with both Batteries and both Alternators on?
© 2003 All Right Reserved 20UND Aerospace Foundation, Grand Forks, ND 58282 7/1/04(701) 777-4740
6. After start up, how soon should you see a change in oil pressure?
7. What are the max cranking intervals for the starter?
8. During taxi, the taxi checklist has you check three pieces of equipment. What are these three pieces of equipment and what are you checking for?
9. Before doing your run-up you want the oil temperature to reach what temperature?
10. Within what RPM range should the ALT2 caution light turn off?
11. What is the procedure to lean for maximum power fuel flow
12. No drop in RPM is noted on the magneto check, what is the probable cause?
13. Normal takeoffs can be performed with what flap setting(s)? Short and Soft field takeoffs?
14. Flaps retraction from 50% to 0% is done at or above what minimum speed?

© 2003 All Right Reserved 21UND Aerospace Foundation, Grand Forks, ND 58282 7/1/04(701) 777-4740
15. Climb checklist should be completed no lower than what altitude? (Section 11, Standardization)
16. True or False? The fuel BOOST must be used when switching tanks?
17. The descent checklist should be completed by what point? (Section 11, Standardization)
18. True or False? Normal landings are not allowed with 0% flaps?
19. On a crosswind landing at what point will you keep the aircraft crabbed to?
20. Power goes to what setting on a balked landing/go-around?
21. When do you perform the after landing checklist? (Section 11, Standardization)
22. Why is the use of a paper checklist for shutdown necessary?
© 2003 All Right Reserved 22UND Aerospace Foundation, Grand Forks, ND 58282 7/1/04(701) 777-4740
23. At what point should you hear the stall warning horn when practicing maneuvers at or close to those speeds?
24. When priming the aircraft for start what are the differences between; normal, cold, and hot starts?
25. Below what temperature should external preheat or external power be used for start?
26. On start up the engine has intermittent firing and a small puffs of black smoke rise from under the aircraft. What is the probable cause and corrective action?
27. You have misjudged your approach to landing due to winds, and it appears you will land longer than you anticipated. What is your best course of action?

© 2003 All Right Reserved 23UND Aerospace Foundation, Grand Forks, ND 58282 7/1/04(701) 777-4740
Section 5 Performance
This section will cover Section 5 (Performance) from the SR22 Pilots Operating Handbook. Answers to all questions will be found in the appropriate section of the POH, unless otherwise noted.
Use the following information to answer the questions, for a flight from Duluth MN to Rapid City SD. Assume Max gross weight on takeoff, full fuel and 75% “best power” setting for cruise.
Distance 487 NMMagnetic Course 254 degrees
Weather ConditionsKDLH 101250Z 33020KT 10SM SCT010 15/10 A2982KRAP 101250Z 22026KTG35 10SM FEW010 SCT020 20/17 A2975
Winds aloft FD 3000 6000 9000DLH 2925 253415 253704GFK 302610 263309 253708FSD 2923 263214 272907RAP 283417 303309
Airport InformationKDLH Elevation 1420ft. RWY 27/09 10152ft.RWY 03/21 5699ft.
KRAP Elevation 3202ft.RWY 23/05 3600ft.RWY 32/14 8701ft.
1. What will be your takeoff distance departing KDLH?
2. What is your x-wind component for runway 27?
© 2003 All Right Reserved 24UND Aerospace Foundation, Grand Forks, ND 58282 7/1/04(701) 777-4740
3. What will be your average climb rate out of KDLH to your selected cruise altitude?
4. What altitude will you use and why?
5. Why is it recommended to fly at or below 8000ft on a new engine?
6. What will be your endurance for today’s flight?
7. What will be your calculated KTAS and fuel flow for cruise flight?
8. How much fuel will you have once you reach your destination?
9. Will you be able to make your destination non-stop? SAFELY? (Difference between FARs vs. personal minimums)
10. What will be your landing distance at KRAP?
11. What will your ground roll be upon arrival at KRAP?
12. What is the KCAS at 100KIAS with 100% flaps?

© 2003 All Right Reserved 25UND Aerospace Foundation, Grand Forks, ND 58282 7/1/04(701) 777-4740
13. What will your KIAS stall speed be on departure with 50% flaps and an AFT C.G.?
14. What is the difference between takeoff rate of climb vs. enroute rate of climb?

© 2003 All Right Reserved 26UND Aerospace Foundation, Grand Forks, ND 58282 7/1/04(701) 777-4740
Intentionally Left Blank
© 2003 All Right Reserved 27UND Aerospace Foundation, Grand Forks, ND 58282 7/1/04(701) 777-4740
Section 6 Weight and Balance
This section will cover Section 6 (Weight and Balance) from the SR22 Pilots Operating Handbook. Answers to all questions will be found in the appropriate section of the POH, unless otherwise noted.
Aircraft:BEW 2340lbs. Moment 326.563Hours on New Engine 15.2 hrsPayload
Pilot 160 lbs.Front Pax 160 lbs.Rear Pax 200 lbs.Baggage 130 lbs.Fuel 486 lbs.
Note You can not leave anyone or baggage behind.Use any of the following methods of calculation in the POH to come up with the appropriate answers.
1. What is your ramp weight?
2. What is your aircraft’s zero fuel weight?
3. What will be your aircraft’s gross takeoff weight?
4. How much fuel will you have on board before takeoff?
GALS. LBS.
5. Is unusable fuel and oil included in basic empty weight?

© 2003 All Right Reserved 28UND Aerospace Foundation, Grand Forks, ND 58282 7/1/04(701) 777-4740
6. Will your aircraft be within CG limitations?
7. Where is the aircraft Datum?
You may use the following table to aid in calculations. For Moment/1000, refer to loading table.
Description Weight Moment/10001. Empty Weight Includes unusable fuel & full oil2. Front Seats Occupants….Pilot and Passenger3. Rear Seats Occupants
4. Baggage 130 Lb maximum5. Zero Fuel Condition….Sub total items 1 thru 46. Fuel Load….81 Gallon @6.0 lb/gal. maximum
7. Ramp Weight Sub total items 5 and 68. Fuel for Start, taxi, and runup Normally 9 lb at average Moment of /1394
9. Takeoff Weight Subtract Item 8 for item 7

© 2003 All Right Reserved 29UND Aerospace Foundation, Grand Forks, ND 58282 7/1/04(701) 777-4740
Section 7 SystemsThis section will cover Section 7 (Systems) from the SR22 Pilots Operating Handbook. Answers to all questions will be found in the appropriate section of the POH, unless otherwise noted.
1. What are the three flap settings?_____________% _____________º_____________% _____________º_____________% _____________º
2. True or False? The horizontal stabilizer is a two piece unit attached at empennage.
3. The rudder-aileron interconnect does what to the aileron when full right rudder is inputted?
4. True or False? It is possible to have a asymmetrical flap deployment in a Cirrus aircraft?Hint: take a look at the Flap control diagram.
5. Why is the Cirrus not equipped with gust locks?
6. True or False? The autopilot also uses the electric roll trim?
7. The landing gear struts are made of what?

© 2003 All Right Reserved 30UND Aerospace Foundation, Grand Forks, ND 58282 7/1/04(701) 777-4740
8. How many master brake cylinders are there?
9. Below what temperature does the oil bypass the oil cooler?
10. What is the recommended extended flight oil level for the engine?
11. Where is the alternate air control knob?
12. What will cause the OIL warning light to illuminate?
13. Describe when oil is metered into and out of the prop hub.
14. What pulls the fuel from the collector tanks?
15. How much fuel is held in each collector tank? (power point slides on Training CD)
16. What is the FUEL caution light illuminated by?

© 2003 All Right Reserved 31UND Aerospace Foundation, Grand Forks, ND 58282 7/1/04(701) 777-4740
17. When will the FUEL caution light illuminate?
18. True or False? If one tank is at 10 gallons, and the other tank is at 17 gallons the FUEL caution light will illuminate?
19. Alternator #1 is rated for how many amps? How many volts?
20. Alternator #2 is rated for how many amps? How many volts?
21. Battery #1 is rated for how many amps? How many volts?
22. Battery #2 is rated for how many amps? How many volts?
23. Output from alternator #1 is connected to which bus?
24. Output from alternator #2 is connected to which bus?
25. How is the main distribution bus and essential distributionbus connected?

© 2003 All Right Reserved 32UND Aerospace Foundation, Grand Forks, ND 58282 7/1/04(701) 777-4740
26. What does the diode between the two distribution buses do?
27. You are on the ground with BAT #2 on. What indication do you get if the isolation diode has failed?
28. When battery #1 is turned on, which buses are energized?
29. When battery #2 is turned on which buses are energized?
30. A steady ALT 1/ AlLT2 light denotes?
31. A flashing alternator ALT 1/ ALT2 light denotes?
32. The back seat passengers are cold, how do you go aboutsetting the heat and ventilation knobs to direct the
maximum amount of warm air to your passengers? Hint: Look at the heating & ventilation diagram.
33. What kind of stall warning system is installed on the Cirrus?

© 2003 All Right Reserved 33UND Aerospace Foundation, Grand Forks, ND 58282 7/1/04(701) 777-4740
34. When practicing power off stalls with full flaps, at what IAS would you expect to hear the stall horn?
35. When would you see the “Pitot Heat” light on the annunciator panel? Is this a normal or abnormal condition?
36. How many square feet is the parachute?
37. What kind of pull on the handle works best when activatingthe CAPS system.
38. What kind of descent rate can you expect with a parachute deployment?

© 2003 All Right Reserved 34UND Aerospace Foundation, Grand Forks, ND 58282 7/1/04(701) 777-4740
Intentionally Left Blank
© 2003 All Right Reserved 35UND Aerospace Foundation, Grand Forks, ND 58282 7/1/04(701) 777-4740
Section 8 Service and Handling
This section will cover Section 8 (Service and Handling) from the SR22 Pilots Operating Handbook. Answers to all questions will be found in the appropriate section of the POH, unless otherwise noted.
1. What are the five documents required by the FAA to be onboard the aircraft at all times?
2. What are the two recommended procedures for you to verify if your airplane is compliant with all Airworthiness Directives?Hint: It is also possible to get this information from www.faa.gov on the web.
3. If an annual inspection was done on your aircraft November 19, 2003 the next inspection will be due?
4. After completing any of the work described as preventative maintenance in the POH, what are the required logbook entries you must make?
5. Should you use external power to start the airplane if it has a “dead” battery? Tip: In most cases you can’t even connect external power to the airplane unless there’s enough volts and amps remaining in battery 1 to energize the relay in the MCU.

© 2003 All Right Reserved 36UND Aerospace Foundation, Grand Forks, ND 58282 7/1/04(701) 777-4740
6. While taxiing, steering is accomplished through?
Tip: In the event of a brake failure it is possible to use rudder for directional control, however, this procedure will only work if you are carrying enough power on the engine to produce enough induced airflow over the rudder. This procedure should only be used in an emergency! When applying power you may gain directional control but you will also gain a considerable amount of groundspeed.
7. When moving your Cirrus around on the ground you should ALWAYS use a ____________.
Tip: When flying into an unfamiliar FBO that wants to move your aircraft with a mechanical tow bars be sure to check if the tow hook fits your aircraft. Some tow bars appear to fit but once any pressure is applied they will slip on the inside and all pressure is now being applied to the nose wheel faring causing damage to the fairing.
Mechanical dollies that lift the nose wheel off the ground should, also, be avoided due to the clearance of the nose wheel faring. Also, the strap used to secure the aircraft on these types of systems wraps around the nose wheel strut faring and will crack or possibly destroy the faring.
8. Where is the hydraulic brake fluid reservoir located?
9. What is the proper tire pressure?
Nose Gear –
Main Gear -

© 2003 All Right Reserved 37UND Aerospace Foundation, Grand Forks, ND 58282 7/1/04(701) 777-4740
10. After the engine break in period, what is the recommended time between oil changes?
11. The fuel filtration screen in the gascolator must be cleaned every ________-hours of operation.
Tip: In order to get the most accurate fuel readings, when flying a Cirrus with engine monitoring, make sure that the fuel tanks are “topped off”. Many times FBO’s will leave fuel levels an inch or two from the top and in the Cirrus that could equate to several gallons that may be used for reserve purposes.
12. True of False? A fuel sample is not required to be taken prior to each flight.
13. True or False? Battery 1 is located aft of the baggage compartment.
14. What should you use when washing the exterior of the aircraft?
15. When cleaning any of the windows, what do you not want to use?

© 2003 All Right Reserved 38UND Aerospace Foundation, Grand Forks, ND 58282 7/1/04(701) 777-4740
Intentionally Left Blank

© 2003 All Right Reserved 39UND Aerospace Foundation, Grand Forks, ND 58282 7/1/04(701) 777-4740
Section 9 Supplements/Avionics
This section will cover Section 9 (Supplements) from the SR22 Pilots Operating Handbook, unless otherwise noted.
We recommend that you download the specific information manual for each piece of equipment because of the diversity and complexity of the various avionics utilized in Cirrus aircraft.
Additional training information on specific avionics can be found on our web page at; www.aero.und.edu/cirrus.
Internet Hyperlinks
Pilot operating handbooks and supplements can be downloaded from the following web pages located on Page 7 of this guide.
NOTE: Only answer the questions for the avionics that are in your aircraft.

© 2003 All Right Reserved 40UND Aerospace Foundation, Grand Forks, ND 58282 7/1/04(701) 777-4740
Garmin GMA 340 Audio System
Before conducting your training you will need to know how to accomplish the following basic functions.
Volume and squelch adjustments Com/Nav selectivity transmit and receive functions Crew isolation features Operation of Marker Beacon Annunciator
1. What will happen if the audio panel fails?

© 2003 All Right Reserved 41UND Aerospace Foundation, Grand Forks, ND 58282 7/1/04(701) 777-4740
Garmin GTX 327 Transponder
Before conducting your training you will need to know how to accomplish the following basic functions.
Entering squawk codes Power on, off, and mode C operations Ident function Sub functions; Pressure Alt, flight time, count up timer,
count down timer, contrast
1. At what groundspeed does the transponder automatically cycle into “ALT” mode?
2. At what point will the transponder cycle out of “ALT” mode and into “STBY”
3. Define the following squawk codesa. 1200b. 7500c. 7600d. 7700

© 2003 All Right Reserved 42UND Aerospace Foundation, Grand Forks, ND 58282 7/1/04(701) 777-4740
Garmin GNS 430 Global Positioning System (GPS)Before conducting your training you will need to know how to accomplish the following basic functions. Please note this is the most difficult piece of avionics to operate please take the time to learn the basic functions listed below. We recommend purchasing a tutorial to aid in learning this system, such as V-flight, a free demo disk will be sent to you upon request. www.vflite.com
Turn ON and OFF the Garmin unit. Tune in communications frequencies (manually with knob
and frequency standby switch button) and adjust the volume.
Direct–To Function (D button) and input the airport name and/or identifier.
Select nearest airport and navigate GPS direct-to the desired airport.
Emergency frequency 121.5 MHz (communications standby switch held).
Clear (CLR) Button – Default to Nav 1 page. Should know how to create, save and activate a flight plan.
(not required)
Recommended forInstrument Rated Pilots (Required for IPC)
VOR/Localizer frequencies and how to identify them (manually with knob and the standby frequency switch) and adjust the volume.
How to load and activate an approach How to create and edit a flight plan Understand when and where to use the cursor and enter
buttons. Change the CDI between GPS and V/LOC mode and
understand when it is appropriate to do so. Understand and know what the function of the OBS button.

© 2003 All Right Reserved 43UND Aerospace Foundation, Grand Forks, ND 58282 7/1/04(701) 777-4740
1. True or False? The GNS 430 Pilot’s Guide and Reference can be stored outside the reach of the pilot during flight?

© 2003 All Right Reserved 44UND Aerospace Foundation, Grand Forks, ND 58282 7/1/04(701) 777-4740
S-Tec System 55X Autopilot
Before conducting your training you will need to know how to accomplish the following basic functions.
Knowledge of aircraft response after engaging; HDG, NAV, APR, ALT, and VS functions.
How to engage GPSS (GPS Steer mode) How to disengage autopilot. Limitations to the autopilot system. Knowledge of annunciator indications and appropriate
corrective action. Knowledge of altitude pre-select and how to set for climbs
and decent.
1. Name limitations for the S-Tec 55x.

© 2003 All Right Reserved 45UND Aerospace Foundation, Grand Forks, ND 58282 7/1/04(701) 777-4740
Approved Oxygen Systems
Training on Oxygen systems is not covered in the standard training. Questions regarding Oxygen systems should be directed to Cirrus design or the supplier indicated in the Pilots Operating Handbook.
Note: You will need to add this to your pre-flight briefing for your passengers.

© 2003 All Right Reserved 46UND Aerospace Foundation, Grand Forks, ND 58282 7/1/04(701) 777-4740
BF Goodrich AerospaceWX500 Stormscope Sensor
Before conducting training you will need to be familiar with the following:
How and where information is displayed for the stormscope Limitations of the system
1. To what range does the WX500 detect the electrical and magnetic fields/discharges?

© 2003 All Right Reserved 47UND Aerospace Foundation, Grand Forks, ND 58282 7/1/04(701) 777-4740
Goodrich SkyWatch SKY497 Traffic Advisory System
Before conducting training you will need to be familiar with the following:
How and where information is displayed for the SkyWatch system
Limitations of the system
1. True or False? If advised to disable your transponder by ATC, you need to turn off your Sky Watch System?

© 2003 All Right Reserved 48UND Aerospace Foundation, Grand Forks, ND 58282 7/1/04(701) 777-4740
Avidyne FlightMax Ex-Series Multifunction Flight Display
Before conducting training you will need to be familiar with the following:
Limitations of the system
1. Name the limitations of the MFD.

© 2003 All Right Reserved 49UND Aerospace Foundation, Grand Forks, ND 58282 7/1/04(701) 777-4740
Avidyne FlightMax Ex-Series Primary Flight Display
Before conducting training you will need to be familiar with the following:
Limitations of the system
1. True of False? Back course approaches are prohibited withuse of the PFD?
2. Name the limitations of the primary flight display.
© 2003 All Right Reserved 50UND Aerospace Foundation, Grand Forks, ND 58282 7/1/04(701) 777-4740
Ice Protection System
Before conducting training you will need to be familiar with the following:
Limitations of the system
1. Is flight into known icing approved for the Cirrus?
2. What does the NTSB define as “known icing”?
NOTE: This answer is not in the POH. If you don’t know your best guess is appreciated. There are plenty of news articles out there on this subject.

© 2003 All Right Reserved 51UND Aerospace Foundation, Grand Forks, ND 58282 7/1/04(701) 777-4740
Section 10 Safety Information
This section will cover Section 10 (Safety Information) from the SR22 Pilots Operating Handbook. Answers to all questions will be found in the appropriate section of the POH, unless otherwise noted.
The following section covers the intricacies of the (CAPS) Cirrus Airframe Parachute System.
1. What is the significance of the Vpd or max parachute deployment speed and what is the numerical value?
2. What factors do you need to take into account if the parachute is to be deployed?
3. List scenarios when activation of the CAPS might beappropriate?
Tip: There is no minimum deployment altitude. This is because the actual altitude loss during a particular deployment depends upon the airplane’s speed, altitude and attitude at deployment as well as other environmental factors. As a guideline, the demonstrated altitude loss from entry into a one-turn spin until under a stabilized parachute is 920ft. Altitude loss from level flight deployments has been demonstrated at less than 400ft. The recommended cut-off decision altitude is 2,000’ AGL.

© 2003 All Right Reserved 52UND Aerospace Foundation, Grand Forks, ND 58282 7/1/04(701) 777-4740
Intentionally Left Blank

© 2003 All Right Reserved 53UND Aerospace Foundation, Grand Forks, ND 58282 7/1/04(701) 777-4740
Section 11 Standard Operating Procedures
Introduction
This section describes the Standard Operating Procedures (SOP’s) recommended when operating the Cirrus SR22. These procedures serve as a framework for aircraft management and pilot decision making. The utilization of a standard set of procedures works to enhance the situational awareness of the flight crew, in both single pilot and crew situations. Adhering to these procedures allows the pilot to take full advantage of all of the aircrafts capabilities while maintaining a high level of safety.
Note: These operating procedures are advisory only and do not supersede the procedures in the basic POH. In the event of conflict the POH shall take precedence.
Checklists
SOP’s are heavily dependent on the effective use of checklists. When used properly, checklists serve several functions. Checklists enhance safety of flight by confirming the aircraft is appropriately configured for the flight condition. At the same time checklists expedite the completion of procedures that are necessary to transition to subsequent phases of flight.
Classification of Checklists
All checklist procedures can be assigned one of three classifications:
Normal Procedures: These procedures used during normal flight operations.
Abnormal Procedures: Procedures used in response to system failures and malfunctions that while not immediately threatening may effect safety of flight if not addressed
© 2003 All Right Reserved 54UND Aerospace Foundation, Grand Forks, ND 58282 7/1/04(701) 777-4740
Emergency Procedures: Procedures used in response to system failures and malfunctions that are an immediate threat to safety of flight. Emergencies require immediate action by the flight crew to ensure a safe outcome.

© 2003 All Right Reserved 55UND Aerospace Foundation, Grand Forks, ND 58282 7/1/04(701) 777-4740
Checklist Completion
Normal Procedures
Normal procedure checklists can be appropriately completed by using one of the following two methods. The appropriate method of checklist completion for each normal procedure is indicated in this section.
Do-List: A do-list is a checklist which is executed ina conventional manner of reading the checklist item and selecting the appropriate condition of the item. Do-lists are used when procedure sequence and/or item condition is critical to completion of the procedure.
Flow Pattern: Flow patterns take a do and verifyapproach to checklist completion. The term “flow pattern” refers to the path through the cockpit the pilot moves along during the execution of the checklist. The items and their condition are memorized and executed without reference to the writtenchecklist. Following completion of the flow pattern the checklist is immediately referenced to ensure procedure completion. UNDER NO CIRCUMSTANCE SHOULD A NORMAL PROCEDURE BE COMPLETED SOLELY FROM MEMORY!!! When used properly, flow patterns allow timely configuration of the aircraft for the appropriate flight condition. Flow patterns are used when procedure sequence and condition is not critical and there is an operational advantage to executing the checklist items and verifying with the written checklist when cockpit workload permits.

© 2003 All Right Reserved 56UND Aerospace Foundation, Grand Forks, ND 58282 7/1/04(701) 777-4740
Abnormal Procedures
Checklists which do not contain memory items are abnormal procedures. Completion of abnormal procedures should be done using the do-list method. The checklist should be directly referred to and each item should be completed in the order prescribed.
Emergency Procedures
Checklists which contain memory items are emergency procedures. Execution of these procedures are considered time critical and are done without reference to a checklist. The checklist should only be referenced during an emergency if time permits.
Single Pilot Operations
Single Pilot Resource Management (SRM) – The art and science of managing all the resources (both on-board the aircraft and from outside sources) available to a single-pilot (prior and during flight) to ensure that the successful outcome of the flight is never in doubt.
The majority of Cirrus aircraft operations are conducted single pilot. The workload associated with configuring and monitoring avionics, communicating with air traffic control, and decision making can be overwhelming at times. The following procedures have been adapted from cockpit procedures common to dual pilot transport category aircraft for use when operating as the sole crew member.
As a Part 91 operator a great deal of latitude exists for how you manage your cockpit and operate your aircraft. To ensure the highest levels of safety it is strongly recommended that these single pilot operating procedures be incorporated into how you operate your aircraft.
Cockpit Organization
The task of cockpit organization is a task which is constantly recurring in all phases of flight, from the preflight to the postflight. The following are guidelines to create an organized and efficient cockpit.

© 2003 All Right Reserved 57UND Aerospace Foundation, Grand Forks, ND 58282 7/1/04(701) 777-4740
Aeronautical Charts
The appropriate flight data should be organized in a way that will allow immediate access to the chart pertaining to the current flight condition, and also to any charts that may be needed should the need arise to proceed via alternate routing or to an alternate destination.
Users of electronic flight data systems should ensure that the chart data is current for the flight to be conducted and that the appropriate charts can be called from the database. Users of such systems should ensure that power will be available to the device for the duration of the flight. Battery power should only be used in the event of an onboard system malfunction.
Radio Tuning and Communication
To avoid confusion in flight with regard to radio frequencies the following frequency configuration is recommended:
Nav/Comm 1: Comm Airborne air traffic control frequencies
(Tower, Approach/Departure, Center)Nav Select appropriate VLOC or GPS course verify – CDI
Indications
Nav/Comm 2: Comm Ground air traffic control frequencies and supplemental
communications (Clearance Delivery, Ground, Flight Service, CTAF/UNICOM)
Nav Select appropriate VLOC or GPS course verify – CDI Indications

© 2003 All Right Reserved 58UND Aerospace Foundation, Grand Forks, ND 58282 7/1/04(701) 777-4740
Autopilot
The use of any automatic flight control system should not be substituted for pilot proficiency and currency. It is, however, a tool available to manage the workload associated with normal flight operations. When using the autopilot it is important to monitor the aircraft for any abnormal conditions which may develop and to ensure that the limitations associated with the operation of the automatic flight control system are observed.
Stabilized Approach Criteria
A stabilized approach is critical to a safe successful landing. If a stabilized approach is not attained by 200 ft. AGL a go-around must be conducted.
The criteria for a stabilized approach include: Proper airspeed Correct flight path Correct landing configuration Power setting appropriate for aircraft configuration Sink rate is not abnormal All checklists are complete
In-Flight Briefings
In-flight briefings are a conscious situational review of the operation which is about to be conducted and are also a planning tool for abnormalities and emergencies which may occur during high workload and time critical periods in the cockpit.

© 2003 All Right Reserved 59UND Aerospace Foundation, Grand Forks, ND 58282 7/1/04(701) 777-4740
Flight Profile
Before Start Do List
Engine Start Do List
Select the starting procedure appropriate to the current conditions (normal, hot, flooded)
Before Taxi Flow Pattern
Before Taxi Checklist completeObtain appropriate ATC clearanceAirport diagram visible
Taxi Flow Pattern
Instrument checkTaxi checklist complete
NOTE:Because Cirrus aircraft rely on differential braking for directional control while taxiing, proper braking practices are more critical.
BRAKE FAILURE WILL RESULT IN LOSS OF DIRECTIONAL CONTROL AND POSSIBLE AIRCRAFT DAMAGE OR PERSONAL INJURY.
The most common cause of brake failure is the creation of excessive heat through improper braking practices. Riding brakes while taxiing caused continuous build up of energy that would otherwise be moving the airplane. Excessive heat causes warped brake rotors, damaged or glazed linings, damaged o-rings, and vaporized brake fluid. To avoid brake failure, please observe the following operating and maintenance practices:
Use only as much power (throttle) as is necessary to achieve forward movement.
Avoid unnecessary high speed taxiing. High speed taxiing will result in excessive demands on the brakes, increased brake wear and the possibility of brake failure.

© 2003 All Right Reserved 60UND Aerospace Foundation, Grand Forks, ND 58282 7/1/04(701) 777-4740
Use the minimum necessary brake application to achieve directional control.
The rudder is effective for steering on the ground and should be used.
Do not ride the brakes. Pilots should consciously remove pressure from the brakes while taxiing. Failure to do so results in excessive heat, premature brake wear, and increased possibility of brake failure.
Refer to the maintenance manual or chapter 8 for recommended maintenance and inspection intervals for brakes.
Refer to chapter 4 for preflight inspection of wheels and brakes.
Before Takeoff Flow Pattern
Before Takeoff Checklist complete (activation of Transponder and Landing Light should be delayed until cleared for takeoff. Strobe Light activation should also be delayed until cleared for takeoff if operating at night.)
Takeoff Briefing: The takeoff briefing should include some of the following elements:
o Runway lengtho Runway conditionso Takeoff distanceo Initial headingo Initial altitudeo Departure procedures
Instrument DP’s Noise Abatement
o Emergency procedures

© 2003 All Right Reserved 61UND Aerospace Foundation, Grand Forks, ND 58282 7/1/04(701) 777-4740
Sample Takeoff Briefing: “We’re holding short of runway ___ for takeoff. The available takeoff distance for this runway is _____ and we have a takeoff distance of _____. Initial heading and altitude as assigned by ATC. In the event of a loss of directional control, annunciator illumination, engine failure or system malfunction prior to VR I will abort the takeoff. If an engine failure occurs after VR we will land the airplane straight ahead, maneuvering around obstacles as necessary. Any other malfunction after VR we will plan to return to runway ___ for a visual / instrument approach.”
The potential for an aborted takeoff should be considered before every takeoff, and the actions taken decided prior to beginning the takeoff roll.
Climb Flow Pattern
-1000 ft agl – Complete Climb checklist-Transition to cruise
Cruise Flow Pattern
-Top of climb – Complete cruise checklist

© 2003 All Right Reserved 62UND Aerospace Foundation, Grand Forks, ND 58282 7/1/04(701) 777-4740
Descent Flow Pattern
Descent Planning: Planning for the descent should be completed prior to the top of descent.
Approach Briefing: The approach briefing should include some of the following elements:
o Standard Terminal Arrival Procedure (STAR)o Approach procedure
- Type of procedure- Transition to final course (IAF or vectors)- Inbound course- Target airspeed- Flap setting- Stepdown fixes- Final approach fix- Missed approach point- DH/MDA Altitude- Missed approach procedure
o Configuration of avionics- Nav source (ILS/VOR/GPS)- Display configuration- Autopilot usage during procedure
Top of descent – Complete descent checklist Airspeed: as appropriate Power: Adjust MP as necessary to maintain appropriate
airspeed.
Before Landing Flow Pattern
This checklist should be completed prior to entering the traffic pattern. If on an instrument approach this checklist should be completed prior to the final approach fix or prior to beginning a decent on final.
After Landing Flow Pattern
Clear of active runway – After Landing Checklist complete (no items on the after landing checklist should be attempted until the aircraft is clear of the runway)

© 2003 All Right Reserved 63UND Aerospace Foundation, Grand Forks, ND 58282 7/1/04(701) 777-4740
Shutdown Do List
Be sure to remove keys from the ignition.
Post-flight Do List
-Verify that Magnetos are off and keys have been removed.-Conduct post flight inspection-Secure the aircraft with tie downs and chocks as necessary
© 2003 All Right Reserved 64UND Aerospace Foundation, Grand Forks, ND 58282 7/1/04(701) 777-4740
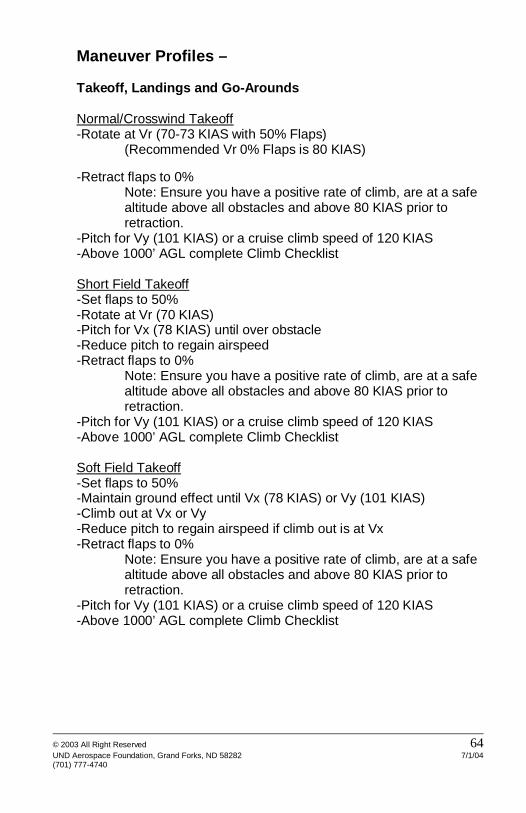
Maneuver Profiles –
Takeoff, Landings and Go-Arounds
Normal/Crosswind Takeoff-Rotate at Vr (70-73 KIAS with 50% Flaps)
(Recommended Vr 0% Flaps is 80 KIAS)
-Retract flaps to 0%Note: Ensure you have a positive rate of climb, are at a safe altitude above all obstacles and above 80 KIAS prior to retraction.
-Pitch for Vy (101 KIAS) or a cruise climb speed of 120 KIAS-Above 1000’ AGL complete Climb Checklist
Short Field Takeoff-Set flaps to 50%-Rotate at Vr (70 KIAS)-Pitch for Vx (78 KIAS) until over obstacle-Reduce pitch to regain airspeed-Retract flaps to 0%
Note: Ensure you have a positive rate of climb, are at a safe altitude above all obstacles and above 80 KIAS prior to retraction.
-Pitch for Vy (101 KIAS) or a cruise climb speed of 120 KIAS-Above 1000’ AGL complete Climb Checklist
Soft Field Takeoff-Set flaps to 50%-Maintain ground effect until Vx (78 KIAS) or Vy (101 KIAS)-Climb out at Vx or Vy-Reduce pitch to regain airspeed if climb out is at Vx-Retract flaps to 0%
Note: Ensure you have a positive rate of climb, are at a safe altitude above all obstacles and above 80 KIAS prior to retraction.
-Pitch for Vy (101 KIAS) or a cruise climb speed of 120 KIAS-Above 1000’ AGL complete Climb Checklist

© 2003 All Right Reserved 65UND Aerospace Foundation, Grand Forks, ND 58282 7/1/04(701) 777-4740
Traffic Patterns-Entry
110 KIASPower 18” MP (approximately)Before Landing Checklist Complete
-Downwind100 KIASPower: 15” MP (approximately)
-Abeam Touchdown Zone100 KIASPower: 11’ MP (approximately)Flaps: 50%
-Base90 KIASPower: 11” MP (approximately)Flaps: 100%
-FinalAirspeed: 80 knotsPower: 11” MP (approximately)
Note: Aircraft configuration may be adjusted for abnormal patterns or straight in approach to landing. Aircraft should be configured for landing no lower than 200ft AGL.
See stabilized approach criteria on page 58.
Normal/Crosswind Landing-Final Speed 100% Flaps 80 KIAS
50% Flaps 85 KIAS0% Flaps 90 KIAS
-Crab into the wind until in ground effect and avoid prolonged slips. Take out any crab angle with rudder once in ground effect.
Short Field Landing-Final Speed 100% Flaps 77 KIAS
Soft Field Landing-Follow normal/crosswind landing. Hold nose off to reduce pressure on the nose gear.

© 2003 All Right Reserved 66UND Aerospace Foundation, Grand Forks, ND 58282 7/1/04(701) 777-4740
Go-Around/Balked Landing-At any point during the approach a go around/balked landing may be executed-Smoothly apply maximum power, level the wings and transition to a pitch attitude that will slow or stop the descent. -After the descent has stopped reduce flaps 50%-Pitch for Vy-Retract flaps to 0%
Note: Ensure you have a positive rate of climb, are at a safe altitude above all obstacles and above 80 KIAS prior to retraction.
Precision Instrument Approach
Initial Approach Fix/Final Vector (3 Minutes Prior)-Descent Checklist Complete-Airspeed: 120 KIAS (max)-Flaps 0%-Power: 17”-19” MP (approximately)
Intermediate Section (IAF to Glide Slope interception)-Begin slowing for 100 KIAS-Flaps 0%-Power: 15” MP (approximately)
One Dot Below Glideslope-Airspeed: 100 KIAS (max)-Flaps: 50%
Glideslope Intercept -Before Landing Checklist Complete-Airspeed: 100 KIAS (max)-Flaps: 50%-Power: 10-12” MP (approximately)
Decision HeightVisual contact is established, continue for landing
-Autopilot: Disconnect-Flaps: As desired-Slow to appropriate final speed
Visual contact not established-Execute Missed Approach Procedure
© 2003 All Right Reserved 67UND Aerospace Foundation, Grand Forks, ND 58282 7/1/04(701) 777-4740
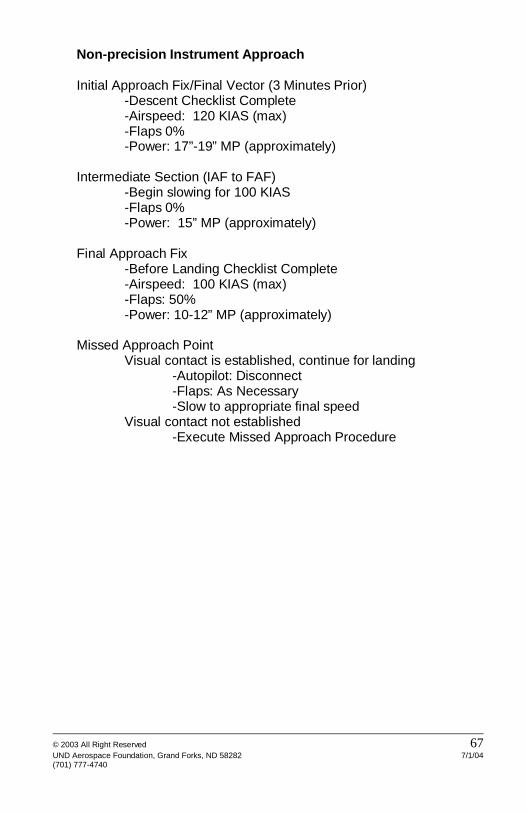
Non-precision Instrument Approach
Initial Approach Fix/Final Vector (3 Minutes Prior)-Descent Checklist Complete-Airspeed: 120 KIAS (max)-Flaps 0%-Power: 17”-19” MP (approximately)
Intermediate Section (IAF to FAF)-Begin slowing for 100 KIAS-Flaps 0%-Power: 15” MP (approximately)
Final Approach Fix-Before Landing Checklist Complete-Airspeed: 100 KIAS (max)-Flaps: 50%-Power: 10-12” MP (approximately)
Missed Approach PointVisual contact is established, continue for landing
-Autopilot: Disconnect-Flaps: As Necessary-Slow to appropriate final speed
Visual contact not established-Execute Missed Approach Procedure

© 2003 All Right Reserved 68UND Aerospace Foundation, Grand Forks, ND 58282 7/1/04(701) 777-4740
Circling Approach (Not recommended at night)
From Missed Approach PointVisual contact is established, continue for landing
-Autopilot: Disconnect-Airspeed: As Necessary-Flaps: As Desired
Visual contact not established-Execute Missed Approach Procedure
Final descent to landing-Airspeed: As Necessary-Flaps: As Desired
Missed Approach-Autopilot: Disconnect-Power: Full power-Pitch for Vy-Retract flaps to 0%Note: Ensure you have a positive rate of climb, are at a safe altitude above all obstacles and above 80 KIAS prior to retraction.
Holding
3 Minutes prior to holding fix-120 KIAS (max)-Power: 17”-19” (approximately)

© 2003 All Right Reserved 69UND Aerospace Foundation, Grand Forks, ND 58282 7/1/04(701) 777-4740
Maneuver Profiles – Certification Maneuvers
Power On Stalls
Minimum Recovery Altitude: 1,500 AGL
Execution-Execute clearing turns-Power 11” MP-Flaps: 0% or 50%, as necessary-Airspeed: Slow to VR
-Bank Angle: 20° maximum, as desired-Apply Full Power-Increase pitch angle to induce stall (approximate 25° pitch attitude)
Recovery-Reduce angle of attack-Verify full power-Accelerate to Vy-Retract flaps to 0%
Note: Ensure you have a positive rate of climb, are at a safe altitude above all obstacles and above 80 KIAS prior to retraction.
Power Off Stalls
Minimum Recovery Altitude: 1,500 AGL
Execution-Execute clearing turns-Power: 11” MP-Flaps: As necessary-Establish glide or gliding turn not to exceed 20º of bank
(Glide should be a descent at about 500 fpm)-Reduce throttle to idle and increase pitch to induce a stall

© 2003 All Right Reserved 70UND Aerospace Foundation, Grand Forks, ND 58282 7/1/04(701) 777-4740
Recovery-Reduce angle of attack-Apply full power-Flaps 50%-Accelerate to Vy-Retract flaps to 0%
Note: Ensure you have a positive rate of climb, are at a safe altitude above all obstacles and above 80 KIAS prior to retraction.
Maneuvering During Slow Flight
Minimum Recovery Altitude: 1,500 AGL
Execution-Execute clearing turns-Flaps: As necessary-Airspeed: An airspeed at which any further increase in angle of attack, increase in load factor, or reduction in power, would result in an immediate stall.
Steep Turns
Minimum Altitude: 1,500 AGL
Execution-Execute clearing turns-Airspeed: 120 KIAS-Power: 17”-19” MP (approximately)-Bank Angle: 45º(Private) or 50º(Commercial)

© 2003 All Right Reserved 71UND Aerospace Foundation, Grand Forks, ND 58282 7/1/04(701) 777-4740
Intentionally Left Blank

© 2003 All Right Reserved 72UND Aerospace Foundation, Grand Forks, ND 58282 7/1/04(701) 777-4740
Section 12Operational Guidelines forPersonal and Weather Risk Assessment
12.1 Introduction
As a general aviation (GA) pilot you are the head of your flight department, and as such have multiple roles. You are the organizational management selecting the proper airplane for the mission, ensuring adequate pilot training, and establishing personal weather minimums for the pilot (and if you are also the airplane owner, you are responsible for maintenance). You are the dispatcher: gathering weather and other flight information, planning the flight, and ensuring adequate fuel for the mission (and perhaps actually fueling the airplane). You are the pilot in command: responsible for the safety of the flight, including making in-flight weather decisions. In commercial air carrier operations and corporate flight departments, these responsibilities are assigned to different persons. Air carriers are required to have standardized procedures to aid the responsible persons in accomplishing their role, and corporate flight departments typically do the same. Adopting similar safety procedures for non-corporate GA operations could lead to similar safety results.
This Personal and Weather Risk Assessment Guide will assist you in developing your own standardized procedures for accomplishing the dispatch and pilot in command responsibilities of your flight department (you) and making sound preflight and in-flight weather decisions.
Section 12.2, Establishing Personal Minimums, provides guidance on establishing the pilot’s personal weather minimums. It should be completed first, and then reviewed and possibly revised whenever there is a significant change in the pilot’s certification, training, or experience, but at lease once a year. It contains a form for compiling the pilot’s certifications, training, and experience, which is assessed to determining appropriate personal weather minimums. The completed personal minimums form should be attached to the pilot’s logbook for quick reference.

© 2003 All Right Reserved 73UND Aerospace Foundation, Grand Forks, ND 58282 7/1/04(701) 777-4740
Section 12.3, Preflight Risk Assessment, provides guidance on assessing the risk of a particular flight and planning a safe flight given the weather conditions, and should be referenced before each flight. This section contains two established risk assessment tools which require the assessment of the pilot, the aircraft and the environment for the mission. The first tool, PAVE (Pilot-Aircraft-enVironment-External pressures), results in a detailed, but qualitative, analysis. The second tool, flight risk assessment form, applies a numeric factor to each relevant risk element, and produces a number that is used to make the decision to either: 1) go, 2) consult with a flight instructor or mentor, or 3) wait until later or cancel the flight. These different tools are presented because of the variety of pilots and their varied decision making. You should determine which best suits your decision making style and then incorporate it into your preflight planning process.
Section 12.4, Best Practices Weather Flight Planning, contains a Best Practices Weather Planning guide. This guide explains how to obtain a weather briefing and develop a plan to complete the flight safely given the weather conditions. This guide stresses the need to have a back up plan, “plan B,” before embarking on a flight.
The appendix contains a scenario flight for the pilot with a set of all of the above elements filled out to provide a model of how to use this guide. This information is also available on-line under the training section at www.aero.und.edu/cirrus.
© 2003 All Right Reserved 74UND Aerospace Foundation, Grand Forks, ND 58282 7/1/04(701) 777-4740
12.2 Establishing Personal Minimums
Each pilot should establish personal weather minimums, which may be, and often are, above FAA legal minimums for a VFR or IFR flight. Airlines and corporate flight departments have personal minimums above FAA weather minimums where pilot experience is limited, and have operations minimums that apply when the aircraft has less than full operation of all systems necessary for dealing with weather. Pilot personal minimums are based on an assessment of pilot certification, training, and experience. When you obtain new ratings or upgrade your certificate, or when your current experience level changes, you should review and, if appropriate, revise your personal minimums at least annually. The following forms may be used to assess your certification, training, and experience level, and to record your personal minimums. They should be cut, folded, and placed in the pilot’s logbook for ready reference.
Assessment of personal minimums should include but is not limited to:
Pilot Certification (e.g., commercial, instrument rating) Training (e.g., flight review - wings or annual training, IPC,
time since initial training, variation in equipment, and familiarity with that equipment)
Experience (total years flying, total flight time, time in type, number of landings in the last year, night time and night landings, experience with high density airports, experience with mountain flying, IFR hours last year, approaches -actual or simulated - last year)
Appendix A contains a Personal Minimums Worksheet that an individual is able to record and reference personal minimums.
This part contains recommended minimum flight conditions andconditional considerations for Cirrus operators. These numbers are derived from the policies and procedures used by both Cirrus Flight Operations and UND Aerospace – Duluth Factory Training Center. These guidelines are advisory only; pilot in command is the final authority to the operation of the aircraft.

© 2003 All Right Reserved 75UND Aerospace Foundation, Grand Forks, ND 58282 7/1/04(701) 777-4740
Pilot Minimums
Level 1 – Category A Conditions Professional pilot, commercial with instrument or ATP More than 100 hours in make and model Minimum 20 hours actual instrument experience and current
Level 2 – Category B Conditions Professional pilot, commercial with instrument or ATP Less than 100 hours in make and model Private pilot, instrument rated, and current More than 100 hours in make and model Minimum 10 hours actual instrument experience
Level 3 – Category C Conditions Private pilot, instrument rated, and current Less than 100 hours in make and model
Level 4 – Category D Conditions Private Pilot

© 2003 All Right Reserved 76UND Aerospace Foundation, Grand Forks, ND 58282 7/1/04(701) 777-4740
Operating Categories
Category A Ceilings: Published procedure minimums Visibility: Published procedure minimums Winds:
Maximum winds: 35 knotsMaximum crosswind: Maximum demonstrated
crosswind component Runway Length: 2.5 times computed takeoff or landing
distance
Category B Ceilings: No less than 500 feet or FAR minimums Visibility: No less than 1 mile Winds:
Maximum winds: 25 knotsMaximum crosswind: 75% of demonstrated crosswind
component Runway Length: 2.5 times computed takeoff or landing
distance
Category C Ceilings: No less than 1000 feet Visibility: No less than 3 miles Winds: Maximum winds: 20 knots Maximum crosswind: 50% of demonstrated crosswind
component Runway Length: 2.5 times computed takeoff or landing
distance
Category D Ceilings: Better than 3000 feet Visibility: Better than 5 miles Winds: Maximum winds: 20 knots Maximum crosswind: 50% of demonstrated crosswind
component Runway Length: 2.5 times the computed takeoff or landing
distance
See Appendix A for development of your own personal minimums.

© 2003 All Right Reserved 77UND Aerospace Foundation, Grand Forks, ND 58282 7/1/04(701) 777-4740
12.3 Preflight Risk Assessment
PAVE (Pilot-Aircraft-enViroment-External)The PAVE Checklist (Appendix B) works like any checklist that you would use in your aircraft; however, you should expand the use of the PAVE to your flight planning as well, and take special consideration to each line item before your final decision to fly. The PAVE checklist will give you a step by step approach to assessing your knowledge; but leaves the final go-no-go decision to the PIC.
Appendix B contains the FAA’s PAVE risk assessment form, which contains instructions for use. This form contains a larger number of risk factors. It can also be downloaded from the FAA’s web page.
Preflight Risk AssessmentThe flight assessment form (Appendix C) assigns a number to various risk factors regarding the pilot, aircraft, and environment. Each element is scored for the flight and the grand total is determined. Then the pilot is advised on the appropriate course of action depending on the grand total and whether the flight is VFR or IFR. These actions are: go for lowest grand total, consider alternate actions, consult experienced CFI or mentor, and do not go for the highest grand total.
Appendix C contains the preflight assessment form.

© 2003 All Right Reserved 78UND Aerospace Foundation, Grand Forks, ND 58282 7/1/04(701) 777-4740
12.4: Best Practices Weather Flight Planning
A. Sources of Information for Flight PlanningThere are many sources of weather information for flight planning. Telephone: FAA, FSS, 1-800-WX-BRIEF DUATS Association weather pages (e.g., AOPA, EAA) National Weather Service (NWS) Aviation Digital Data Service (ADDS) Private weather services Airline Dispatchers Federation Internet Television: weather channel, news
B. Review the information and your readiness for the flight. The quantity and quality of your weather information will have a direct affect on your weather planning. The factors that affect the adequacy of the quantity and quality of weather information for your decisions include:
The severity of the consequences of being wrong. For example, what will happen if you inadvertently encounter: IMC conditions? Icing conditions? Embedded thunderstorms? Other significant weather hazards?
Your degree of certainty about information may be affected by: FAA approved source (e.g., DUATS, FSS, NWS) The duration of your flight The distance between reporting points The proximity of the weather conditions to your personal
minimums Your degree of confidence that you understand the weather
situation

© 2003 All Right Reserved 79UND Aerospace Foundation, Grand Forks, ND 58282 7/1/04(701) 777-4740
C. Prepare Your Weather MapYou should develop a weather picture over your intended route of flight.
Using the information you obtained, state or visualize a picture, both in plan view (from above) and in cross section view (from the side, including terrain) of all the relevant weather on your flight/route, with other information, all of which are related to time. The information may include:
Terrain (topography that includes natural and man-made obstructions)
Cloud bases and tops Icing levels Winds aloft Areas of IMC Thunderstorm movement
Visualize your flight by drawing a “weather picture” of your flight.
Draw a straight line between your two points. Draw an ellipse (actually a rough boundary line of
either side of the straight line, the resulting lines will probably form a elliptical border around your intended route to show an area where you will need information about weather that may affect your route of flight)
Note the weather patterns with the elliptical area. Apply the information to your weather decisions.
Construct a route to avoid weather that is hazardous to you and your airplane (given the capabilities of you and your airplane).

© 2003 All Right Reserved 80UND Aerospace Foundation, Grand Forks, ND 58282 7/1/04(701) 777-4740
D. Develop a primary flight plan (Plan A) to conduct your flight safely using your weather picture by considering: What is the best plan to make the flight, within your
personal minimums, considering:Your aircraft and its capabilitiesThe environment, weather, and terrain External factors, such as security restrictions (e.g., Temporary Flight Restrictions (TFR’s) and Air Defense Identification Zones (ADIZs))
The plan is defined by:The routeThe altitudes en route and time of departure
E. Develop an alternate flight plan (Plan B) to be executed when the actual weather you find en-route is not what your weather picture was believed to be when you made Plan A. Determine under what conditions you abandon Plan A and execute Plan B, based on changing weather conditions en-route. Know your methods of execution from weather hazards when conditions deteriorate by activating Plan B in order to remain within your personal minimums. Plan B is defined by: The new route, Changes in altitude, or The new destination.

© 2003 All Right Reserved 81UND Aerospace Foundation, Grand Forks, ND 58282 7/1/04(701) 777-4740
Plan B: Proposed alternative action(s) to be taken
At Departure AirportUnplanned decision event ______________________
Action(s) to be taken ______________________
______________________
Expectation of Success ______________________
En RouteUnplanned decision event ______________________
Action(s) to be taken ______________________
______________________
Expectation of Success ______________________
At DestinationUnplanned decision event ______________________
Action(s) to be taken ______________________
______________________
Expectation of Success ______________________
A. Your decision whether to execute Plan A or to go to Plan B willbased on a risk assessment. This is a continuous process of evaluating the actual
weather against your picture and deciding if the actual weather still meets you personal minimums.
If you are within you personal minimums, you may stay with Plan A
If you are not within your personal minimums, or it looks like it is not developing as you expected, you should immediately go to Plan B.
Timely decisions are of the utmost importance because a large number of accidents are caused by pilots waiting too long to execute plan B.

© 2003 All Right Reserved 82UND Aerospace Foundation, Grand Forks, ND 58282 7/1/04(701) 777-4740
B. You must always have a safe “out.” If you are a relatively new VFR pilot and Plan A has failed and you have executed Plan B, and now it too is failing, you should realize that you may not have adequately assessed the weather conditions initially and that Plan C should be to land as soon as practical. You then can develop an entirely new set of plans in an environment where you have access to weather information from more detailed discussions with weather briefer on the phone and from computer graphics at the FBO. After plans A and B have not worked, you may not be able to construct a good plan C in the air and simultaneously cope with adverse weather conditions at the same time. In these circumstances, it is best to land and reassess the situation.
C. During preflight preparation, you should not be hesitant toinvolve outside evaluation of your risk assessment by using peer review by fellow pilots, or consulting with an instructor or mentor who is more experienced. Once you are en route, the only outside review is likely to be flight service or air traffic control personnel,

© 2003 All Right Reserved 83UND Aerospace Foundation, Grand Forks, ND 58282 7/1/04(701) 777-4740
Intentionally Left Blank

Appendix A: Personal Minimums Worksheet 84
© 2003 All Rights ReservedUND Aerospace Foundation, Grand Forks, ND 58202(701) 777-4740
Appendix A: Personal Minimums Worksheet
Using the above guidelines, the following worksheet should be used to formulate a comfortable set of personal minimums. These minimums should be numerical values that can be practically applied to flight operations.
Day VFR Night VFR Day IFR Night IFR
Ceiling
Visibility
Wind Condition
Runway Length/Width
Runway Condition
Rest Period(IM SAFEChecklist)
Fuel Reserves
Other(e.g., icing, thunder storms,mountain flying)

Appendix A: Personal Minimums Worksheet 85
© 2003 All Rights ReservedUND Aerospace Foundation, Grand Forks, ND 58202(701) 777-4740
Intentionally Left Blank
Appendix B: Personal Minimums Checklist 86
© 2003 All Rights ReservedUND Aerospace Foundation, Grand Forks, ND 58202(701) 777-4740
Appendix B: Personal Minimums Checklist
Pilot:
Date Revised:
Reviewed With:(if applicable)
Appendix B: Personal Minimums Checklist 87
© 2003 All Rights ReservedUND Aerospace Foundation, Grand Forks, ND 58202(701) 777-4740
Your Personal Minimums Checklist An easy-to-use, personal tool, tailored to your level of skill,
knowledge, and ability Helps you control and manage risk by identifying even
subtle risk factors Lets you fly with less stress and less risk
Practice “Conservatism without Guilt”Each item provides you with either a space to complete a personal minimum or a checklist item to think about. Spend some quiet time completing each blank and consider other items that apply to your personal minimums. Give yourself permission to choose higher minimums than those specified in the regulations, aircraft flight manuals, or other rules.
How to Use Your ChecklistUse this checklist just as you would one for your aircraft. Carry the checklist in your flight kit. Use it at home as you start planning a flight, and again just before you make your final decision to fly. Be wary if you have an item that is marginal in any single risk factor category. But if you have items in more than one category, you may be headed for trouble. IF YOU HAVE MARGINAL ITEMS IN TWO OR MORE RISK FACTORS/CATEGORIES, DON’T GO!
Periodically review and revise your checklist as your personal circumstances change, such as your proficiency, recency, or training. You should never make your minimums less restrictive unless a significant positive event has occurred; however, it is okay to make your minimums more restrictive at any time. Never make your minimums less restrictive when you are planning a specific flight, or else external pressures will influence you.

Appendix B: Personal Minimums Checklist 88
© 2003 All Rights ReservedUND Aerospace Foundation, Grand Forks, ND 58202(701) 777-4740
PILOTExperience/RecencyTakeoffs/Landings _____ in the last
_____ days
Hours in make/model _____ in the last_____ days
Instrument approaches _____ in the last(simulated or actual) _____ days
Instrument flight hours _____ in the last(simulated or actual) _____ days
Terrain and airspace familiar
Physical ConditionSleep _____ in the last
24 hours
Food and water _____ in the last_____ hours
Alcohol None in the last_____ hours
Drugs or medication None in the last_____ hours
Stressful events None in the last_____ days
Illnesses None in the last_____ days

Appendix B: Personal Minimums Checklist 89
© 2003 All Rights ReservedUND Aerospace Foundation, Grand Forks, ND 58202(701) 777-4740
AIRCRAFT Fuel Reserves (Cross-Country)VFR Day _____ hoursVFR Night _____ hoursIFR Day _____ hoursIFR Night _____ hours
Experience in TypeTakeoffs/landings _____ in the lastin aircraft type _____ days
Aircraft PerformanceEstablish that you have additional performanceavailable over that required. Consider the following:
Gross weight Load distribution Density altitude Performance charts
Aircraft EquipmentAvionics: Familiar with equipment
(including autopilot and GPS systems)
COM/NAV: Equipment appropriate to flight Charts current
Clothing: Suitable for preflight and flight
Survival gear: Appropriate for flight/terrain

Appendix B: Personal Minimums Checklist 90
© 2003 All Rights ReservedUND Aerospace Foundation, Grand Forks, ND 58202(701) 777-4740
ENVIRONMENTAirport ConditionsCrosswind _____ % of max POHRunway length _____ % more than POH
WeatherReports and forecasts not more than
_____ hours oldIcing conditions within aircraft/
pilot capabilities
Weather for VFRCeiling Day _____ feetCeiling Night _____ feetVisibility Day _____ milesVisibility Night _____ miles
Weather for IFRPrecision ApproachesCeiling _____ feet above min.Visibility _____ mile(s) above min.
Non-Precision ApproachesCeiling _____ feet above min.Visibility _____ mile(s) above min.
Missed ApproachesNo more than _____ before diverting
Takeoff MinimumsCeiling _____ feetVisibility _____ mile(s)

Appendix B: Personal Minimums Checklist 91
© 2003 All Rights ReservedUND Aerospace Foundation, Grand Forks, ND 58202(701) 777-4740
EXTERNALPRESSURESTrip PlanningAllowance for delays ______ minutes
Diversion or Cancellation — Alternate Plans Notification of person(s) you are meeting Passengers briefed on diversion or cancellation plans and
alternatives Modification or cancellation of car rental, restaurant, or hotel
reservations Arrangement of alternative transportation (airline, car, etc.)
Personal Equipment Credit card and telephone numbers available for alternate
plans Appropriate clothing or personal needs (eye wear,
medication…) in the event of an unexpected stay

Appendix C: Risk Assessment
©2003 “All Rights Reserved” 92The UND Aerospace Foundation, Grand Forks, ND 58202701-777-4740
Appendix C Risk Assessment Chart
1 2 3 4 5 Rating
Flight type VFR IFR
Dual/solo Dual Solo
Day/night Day Night
Rating CFI/ATP Comm/Inst PPL w/Inst PPL Student
Rest in last 24 hrs >8 6-7 3-5 < 3
Visibility >15 10-15 6-9 3-5 < 3
Ceiling 10,000 5,000-9,000 3,000-4,000 1,000-2,000 < 1,000
Crosswind departure 0-5 6-10 11-15 16-20 > 20
Crosswind destination 0-5 6-10 11-15 16-20 > 20
Weather stability Stable Slow Deterioration
Rapid deterioration
Destination airport familiarity
Yes No
Hours in aircraft type >200 151-199 100-150 50-99 < 50
Hours last 90 days >20 15-20 10-14 5-9 < 5
Total hrs >2000 501-2000 251-500 100-250 < 100

Appendix C: Risk Assessment
©2003 “All Rights Reserved” 93The UND Aerospace Foundation, Grand Forks, ND 58202701-777-4740
No unusual hazards. Use normal flight planning and establish personal minimums and operating procedures
14-30
Somewhat riskier than usual. Conduct flight planning with extra care. Review personal minimums and operating procedures to insure that all standards are being met. Consider alternatives to reduce risk.
31-47 ora 5 in any row
Conditions present much higher than normal risk. Conduct flight planning with extra care and review all elements to identify those that could be modified to reduce risk. If available, consult with more experienced pilot or instructor for guidance before flight. Develop contingency plans before flight to deal with high risk items. Decide beforehand on alternates and brief passengers and other crewmembers on special precautions to be taken during the flight. Consider delaying flight until conditions improve and risk is reduced.
48-63 ora 5 in any 2 rows
Related Documents