M1205 Interactivity Topic 06: Sound Spring 2010 SCM-CityU 1

SM1205 Interactivity Topic 06: Sound Spring 2010SCM-CityU1.
Dec 21, 2015
Welcome message from author
This document is posted to help you gain knowledge. Please leave a comment to let me know what you think about it! Share it to your friends and learn new things together.
Transcript

SM1205 Interactivity
Topic 06: Sound
Spring 2010 SCM-CityU 1

Review: Multiple Objects
• How to control multiple objects with similar behaviors?
Spring 2010 SCM-CityU 2
random particles flying
Particle System
• Create your particle– Open particle.fla– Make symbol circle accessible in
AS– Add code below and test it
Spring 2010 SCM-CityU 3
stop();
var p:Particle = new Particle();p.x = stage.stageWidth / 2;p.y = stage.stageHeight / 2;addChild(p);

Particle System
• Animate the particle
Spring 2010 SCM-CityU 4
stop();
var p:Particle = new Particle();p.x = stage.stageWidth / 2;p.y = stage.stageHeight / 2;addChild(p);
var timer:Timer = new Timer(50);timer.addEventListener(TimerEvent.TIMER, onTimer);timer.start();
function onTimer(e:TimerEvent) : void {
p.x += 3;p.y += 3;
} Test it !

Particle System
• How about random movement?
Spring 2010 SCM-CityU 5
stop();
var speedX = Math.random() * 10 - 5;var speedY = Math.random() * 10 - 5;var p:Particle = new Particle();p.x = stage.stageWidth / 2;p.y = stage.stageHeight / 2;addChild(p);
var timer:Timer = new Timer(50);timer.addEventListener(TimerEvent.TIMER, onTimer);timer.start();
function onTimer(e:TimerEvent) : void {
p.x += speedX ;p.y += speedY ;
} Test it !

Particle System
• How about more particles?– We use an array to store all particles
– Two functions for adding and moving particles– Modify the onTimer() function
Spring 2010 SCM-CityU 6
function onTimer(e:TimerEvent) : void {
addParticle();moveParticle();
}
var particleArray:Array = new Array();
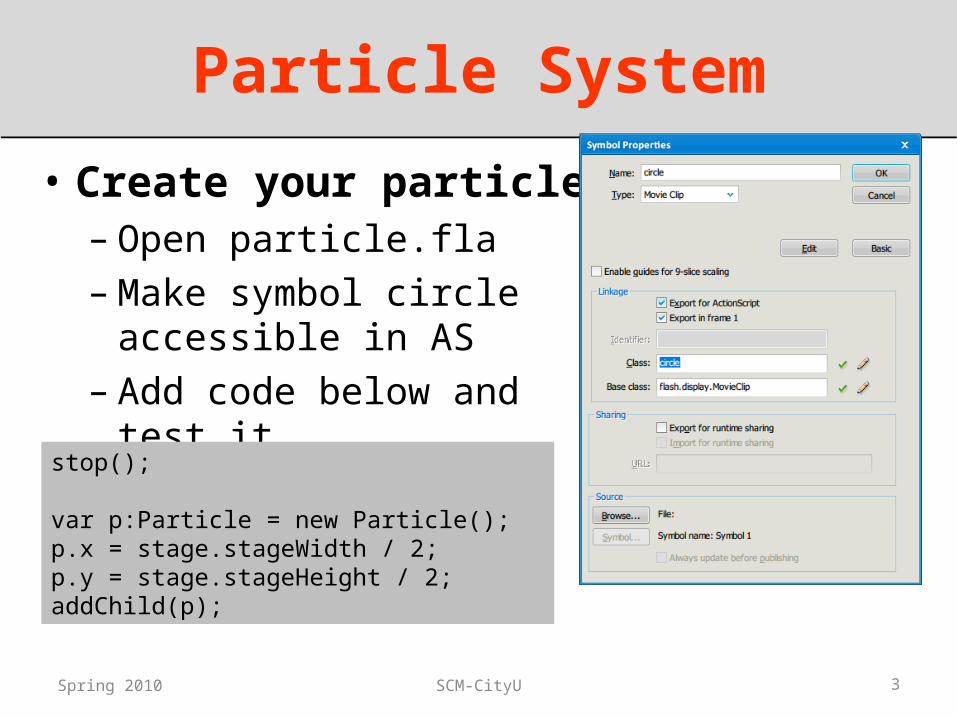
Particle System
How about more particles?
Spring 2010 SCM-CityU 7
function addParticle() {var p:Particle = new Particle();p.x = stage.stageWidth / 2;p.y = stage.stageHeight / 2;p.speedX = Math.random() * 10 - 5;p.speedY = Math.random() * 10 - 5;addChild(p);particleArray.push(p); // add to array
// remove from array if too manyif (particleArray.length > 100) {
var lastParticle = particleArray.shift();removeChild(lastParticle);
}}

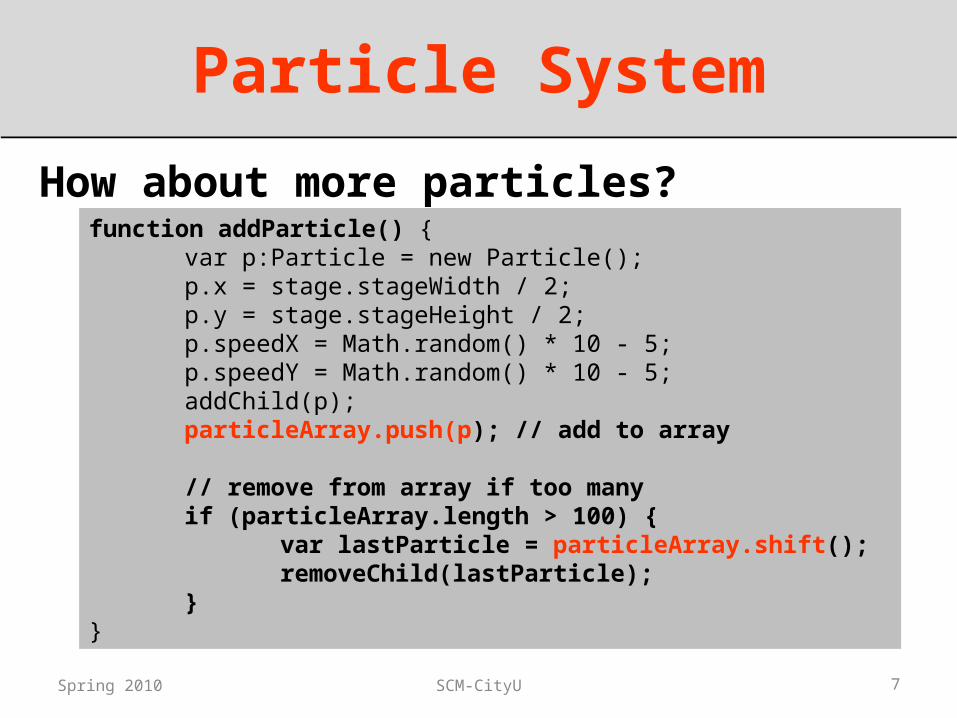
Particle System
How about more particles?
Spring 2010 SCM-CityU 8
function moveParticle(){
for (var i:int=0; i<particleArray.length; i++){
var p = particleArray[i];p.x += p.speedX;p.y += p.speedY;p.alpha -= 0.01;
}}

Particle System
Exercise1. Random size and transparent level
• Using scaleX, scaleY and alpha properties
2. Create the particles at the cursor position
• Using mouseX and mouseY
3. Add gravity to animation• Modify moveParticle function?
Spring 2010 SCM-CityU 9

Sound
How to play sound using AS3.0?
First of all, we need a sound files• Download “test.mp3” and “test2.mp3”• Open sound.fla
Spring 2010 SCM-CityU 10

Sound
How to play sound using AS3.0?
We need a sound object to play a sound file
Play the movie and listen!
Spring 2010 SCM-CityU 11
var mySound:Sound = new Sound(new URLRequest("test.mp3"));mySound.play();

Sound
How to control sound playback?
Play Button
How if you press the play buttons twice?How to fix it? Hint: Use a boolean variable
Spring 2010 SCM-CityU 12
var sc:SoundChannel = mySound.play();
playButton.addEventListener(MouseEvent.CLICK, onPlayButtonClick);function onPlayButtonClick(e:MouseEvent) : void{
sc = mySound.play();}
Sound Visualization Library
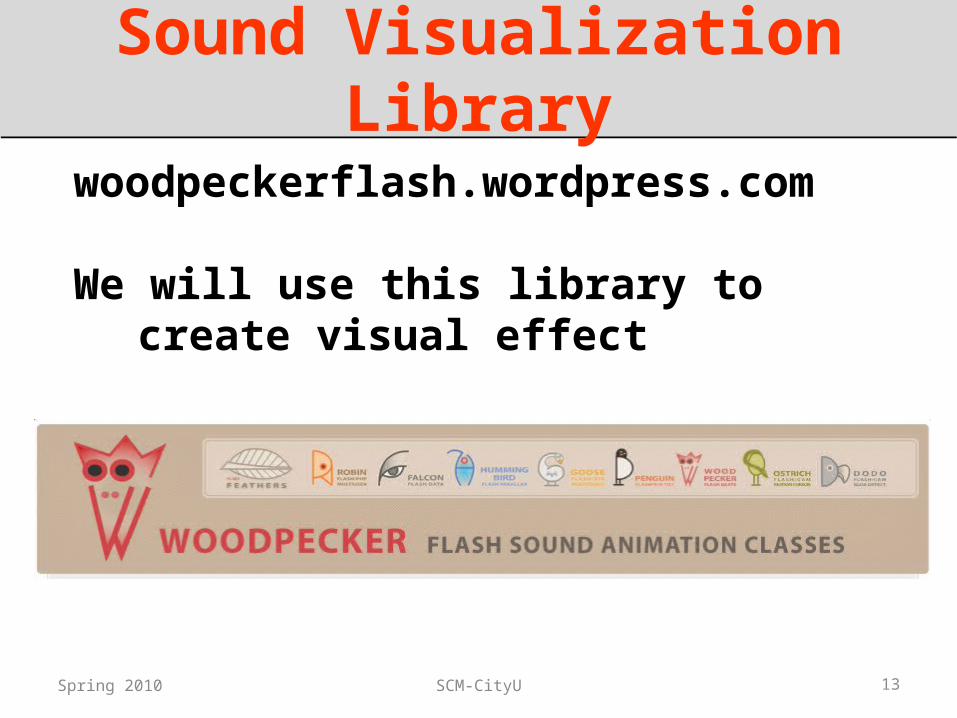
woodpeckerflash.wordpress.com
We will use this library to create visual effect
Spring 2010 SCM-CityU 13

Sound Visualization Library
Step 0. Download and install the library– Decompress and copy the folder “com” to the
folder containing you flash file
Spring 2010 SCM-CityU 14
Your folder
Decompressedfolder
Sound Visualization Library
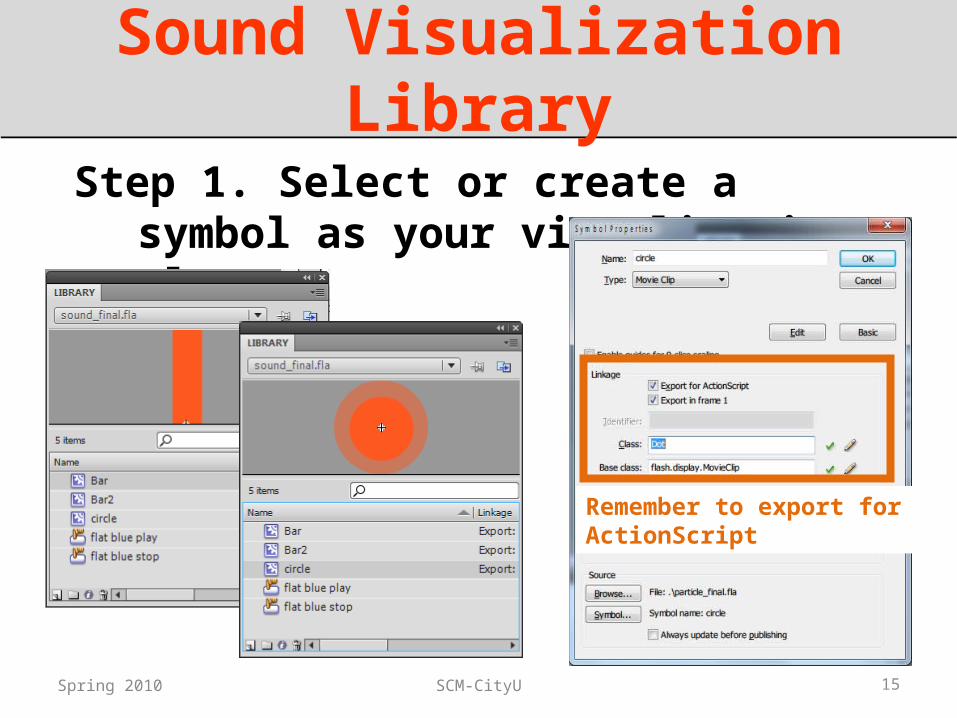
Step 1. Select or create a symbol as your visualization element
Spring 2010 SCM-CityU 15
Remember to export for ActionScript

Sound Visualization Library
Step 2. Load and play sound file
Step 3. Create visualization object
Spring 2010 SCM-CityU 16
var mySound:Sound=new Sound(new URLRequest("test.mp3"));var sc:SoundChannel=mySound.play();
var myBars:WoodPecker=new WoodPecker(Dot,[true,true,true],8,100,true,true);
myBars.x=20;myBars.y=200;addChild(myBars);
Test it !
Sound Visualization Library
Explanation
Spring 2010 SCM-CityU 17
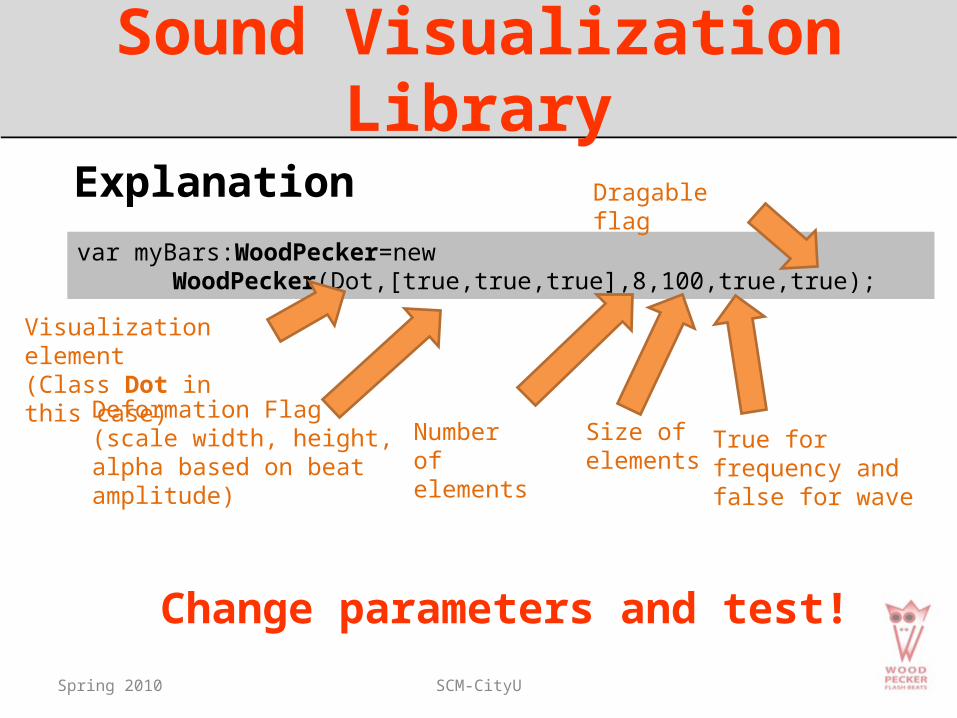
var myBars:WoodPecker=new WoodPecker(Dot,[true,true,true],8,100,true,true);
Visualization element(Class Dot in this case)
Deformation Flag(scale width, height, alpha based on beat amplitude)
Number of
elements
Size of elements
True for frequency and false for wave
Dragable flag
Change parameters and test!

Sound Visualization LibraryStep 4. Arrange visualization elements
Set draggable flag to trueSet displayOn flag to true
Add key down listener
Spring 2010 SCM-CityU 18
var myBars:WoodPecker=new WoodPecker(Dot,[true,true,true],8,100,true,true);
myBars.displayOn = true;
Dragable flag
stage.addEventListener(KeyboardEvent.KEY_DOWN, keyListener);function keyListener(e:KeyboardEvent) {
if (e.key == ‘ ‘) {myBars.recordBeat();
}}
Sound Visualization Library
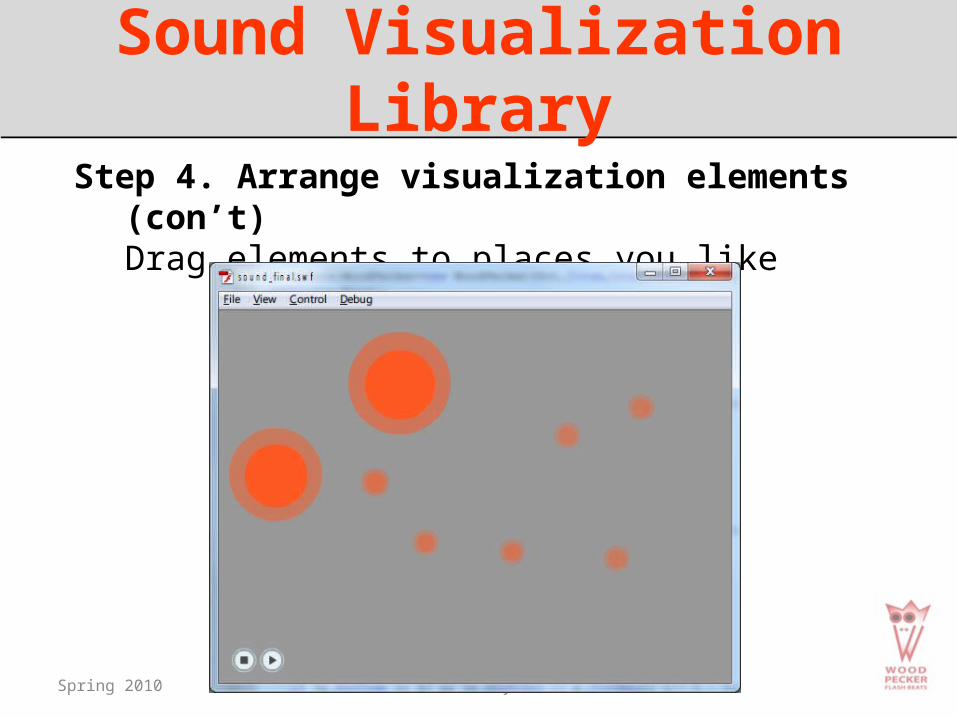
Step 4. Arrange visualization elements (con’t)Drag elements to places you like
Spring 2010 SCM-CityU 19

Sound Visualization LibraryStep 4. Arrange visualization elements (con’t)
Press “space” key to print construction code for new placement
Spring 2010 SCM-CityU 20
Sound Visualization Library
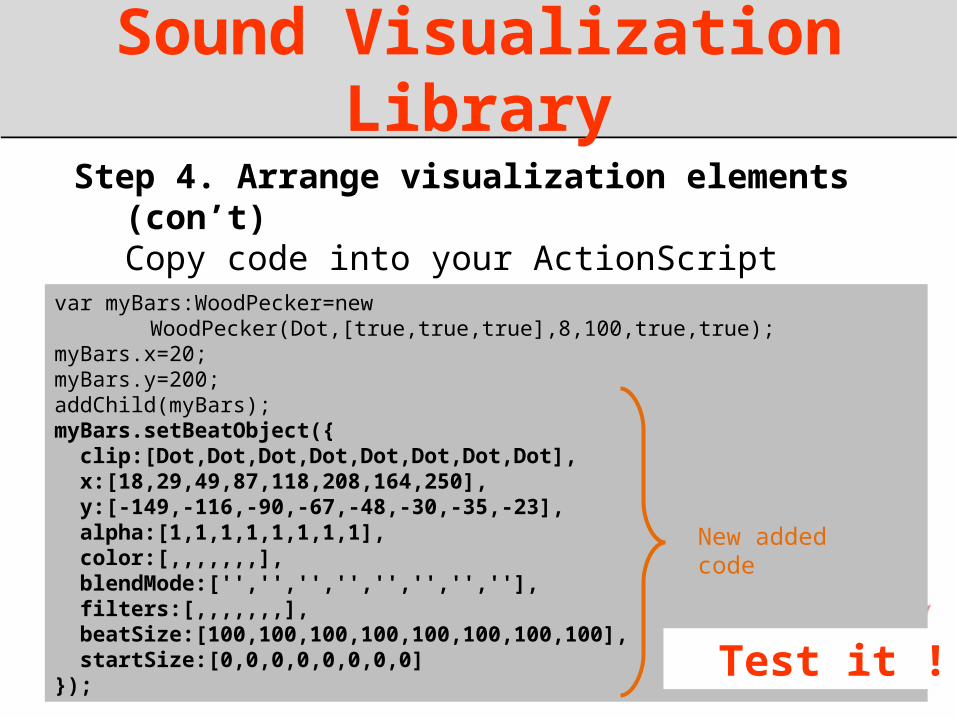
Step 4. Arrange visualization elements (con’t)Copy code into your ActionScript
Spring 2010 SCM-CityU 21
var myBars:WoodPecker=newWoodPecker(Dot,[true,true,true],8,100,true,true);
myBars.x=20;myBars.y=200;addChild(myBars);myBars.setBeatObject({ clip:[Dot,Dot,Dot,Dot,Dot,Dot,Dot,Dot], x:[18,29,49,87,118,208,164,250], y:[-149,-116,-90,-67,-48,-30,-35,-23], alpha:[1,1,1,1,1,1,1,1], color:[,,,,,,,], blendMode:['','','','','','','',''], filters:[,,,,,,,], beatSize:[100,100,100,100,100,100,100,100], startSize:[0,0,0,0,0,0,0,0]});
New added code
Test it !

Sound Visualization Library
Step 5. Replace visualization elementsReplace classes passed into the setBeatObject function
Spring 2010 SCM-CityU 22
var myBars:WoodPecker=newWoodPecker(Dot,[true,true,true],8,100,true,true);
myBars.x=20;myBars.y=200;addChild(myBars);myBars.setBeatObject({ clip:[Dot,Bar,Dot,Bar,Dot,Bar,Dot,Bar], x:[18,29,49,87,118,208,164,250], y:[-149,-116,-90,-67,-48,-30,-35,-23], alpha:[1,1,1,1,1,1,1,1], color:[,,,,,,,], blendMode:['','','','','','','',''], filters:[,,,,,,,], beatSize:[100,100,100,100,100,100,100,100], startSize:[0,0,0,0,0,0,0,0]});
Test it !

Sound Visualization Library
Replace steps 4 and 5 to make your own visualization !
Spring 2010 SCM-CityU 23
Related Documents