Setup of page size and bleed + Output to PDF with crop marks from MS Publisher. Firstly setup your size of document to the required print size, for example a business card as illustrated is 90x55mm. Go to “File” then “page setup” and enter your size here. As you can see above the green line illustrates the borders of the card. To create a 3mm Bleed you simply drag any graphic shapes or images approximately 3mm beyond the edge as shown above. NOTE: Make sure there is no text in the bleed area as they will be cut off when cards are trimmed.

Welcome message from author
This document is posted to help you gain knowledge. Please leave a comment to let me know what you think about it! Share it to your friends and learn new things together.
Transcript

Setup of page size and bleed
+ Output to PDF with crop marks from MS Publisher.
Firstly setup your size of document to the required print size, for example a business card as
illustrated is 90x55mm. Go to “File” then “page setup” and enter your size here.
As you can see above the green line illustrates the borders of the card. To create a 3mm Bleed you
simply drag any graphic shapes or images approximately 3mm beyond the edge as shown above.
NOTE: Make sure there is no text in the bleed area as they will be cut off when cards are trimmed.

Next create your PDF output file with crop marks.
Go “file” then “print”, select your PDF writer (download a free PDF writer here:
(http://www.printline.com.au/downloads/dloads.html)
Select “One per sheet”
Then click on the “printer details” tab and select “advanced printer setup”
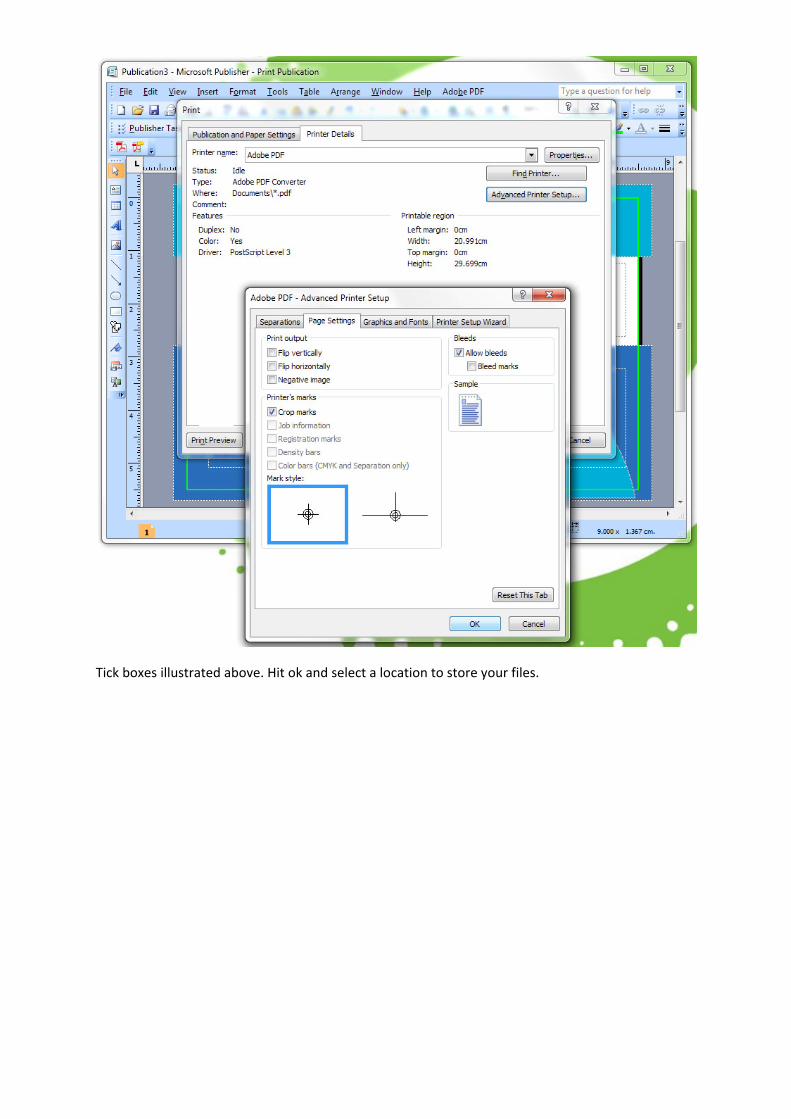
Tick boxes illustrated above. Hit ok and select a location to store your files.

When you open your PDF it should look like the sample above, check before you send it to Printline.
Note: The green line is there only to illustrate the borders of the sample card.
The END
Related Documents