Algebra 1 EOC Accommodated Computer-Based Practice Test Script 1 Script for Administering the Accommodated Computer-Based Algebra 1 EOC Practice Test This script should be used to administer the Algebra 1 EOC Practice Test to students who will take a computer-based practice test with text-to-speech and/or masking accommodations via the secure browser. Please note that text-to-speech is only available when using the secure browser; it is not available when taking a practice test with an Internet browser. If students will sign in with an Internet browser, you will need to make adjustments to the script to remove references to the secure browser. Students who are taking the Algebra 1 Retake can take the Algebra 1 EOC Practice Test and use this script. When reading the following script, please note that optional words (e.g., information related to Algebra 1 Retake) are italicized and in parentheses. Students must be assigned accommodations in TIDE prior to testing. This script directs test administrators to provide test tickets for students, and accommodations assigned in TIDE are automatically set when students sign in with test tickets. You may administer the practice test without test tickets. If students do not use tickets, you will need to modify this script to direct students to sign in as Guest Users and then assign accommodations in the TA Interface during the approval process. This script also includes instructions for test administrators to create a training session for students to log in to. FDOE strongly recommends that test administrators and schools use this method to conduct their practice tests to ensure a similar login process to what students will experience during operational testing. The login portion of this script will need to be modified to match the login process if a Guest Session is used instead of a training session. This script describes the presentation of items and tools in the secure browser for the Algebra 1 EOC practice test. This script is intended to provide instruction for all aspects of the practice test. However, test administrators may modify the script as appropriate to the needs of the participating students. Test administrators may, for instance, feel that it is unnecessary to describe each item type in great detail. In that case, they may consolidate the item type section of the script as they see fit, using the instructions in that part of the script to answer questions as needed. Test administrators may also find it helpful to project the practice test and walk through items along with students. Students who log in to the test with tickets will be displayed in the TA Training Site. To keep a record of students who have participated in the practice test, you can then print this page for your records. After ending Session 1, students will need to wait two minutes before logging in to Session 2, or they will be returned to Session 1. Before Beginning the Practice Test 1. Before students arrive, ensure that the testing room is prepared as it will be on the day of the test. 2. Ensure that each student has a pen or pencil and a piece of paper to work the problems. 3. If your school will be providing handheld scientific calculators on the day of the operational test, ensure all students receive a calculator to use for Session 2 of the practice test. 4. Ensure that you have received the correct test tickets from your school assessment coordinator for all students who will test in your room. Do not distribute test tickets until instructed to do so in the script. 5. Ensure that all software applications, including Internet browsers, are closed on all student computers or devices before testing begins.

Welcome message from author
This document is posted to help you gain knowledge. Please leave a comment to let me know what you think about it! Share it to your friends and learn new things together.
Transcript
Algebra 1 EOC Accommodated Computer-Based Practice Test Script 1
Script for Administering the Accommodated Computer-Based
Algebra 1 EOC Practice Test This script should be used to administer the Algebra 1 EOC Practice Test to students who will take a computer-based practice test with text-to-speech and/or masking accommodations via the secure browser. Please note that text-to-speech is only available when using the secure browser; it is not available when taking a practice test with an Internet browser. If students will sign in with an Internet browser, you will need to make adjustments to the script to remove references to the secure browser. Students who are taking the Algebra 1 Retake can take the Algebra 1 EOC Practice Test and use this script. When reading the following script, please note that optional words (e.g., information related to Algebra 1 Retake) are italicized and in parentheses.
Students must be assigned accommodations in TIDE prior to testing. This script directs test administrators to provide test tickets for students, and accommodations assigned in TIDE are automatically set when students sign in with test tickets. You may administer the practice test without test tickets. If students do not use tickets, you will need to modify this script to direct students to sign in as Guest Users and then assign accommodations in the TA Interface during the approval process.
This script also includes instructions for test administrators to create a training session for students to log in to. FDOE strongly recommends that test administrators and schools use this method to conduct their practice tests to ensure a similar login process to what students will experience during operational testing. The login portion of this script will need to be modified to match the login process if a Guest Session is used instead of a training session.
This script describes the presentation of items and tools in the secure browser for the Algebra 1 EOC practice test. This script is intended to provide instruction for all aspects of the practice test. However, test administrators may modify the script as appropriate to the needs of the participating students. Test administrators may, for instance, feel that it is unnecessary to describe each item type in great detail. In that case, they may consolidate the item type section of the script as they see fit, using the instructions in that part of the script to answer questions as needed. Test administrators may also find it helpful to project the practice test and walk through items along with students.
Students who log in to the test with tickets will be displayed in the TA Training Site. To keep a record of students who have participated in the practice test, you can then print this page for your records. After ending Session 1, students will need to wait two minutes before logging in to Session 2, or they will be returned to Session 1.
Before Beginning the Practice Test 1. Before students arrive, ensure that the testing room is prepared as it will be on the day of the test. 2. Ensure that each student has a pen or pencil and a piece of paper to work the problems. 3. If your school will be providing handheld scientific calculators on the day of the operational test,
ensure all students receive a calculator to use for Session 2 of the practice test. 4. Ensure that you have received the correct test tickets from your school assessment coordinator for
all students who will test in your room. Do not distribute test tickets until instructed to do so in the script.
5. Ensure that all software applications, including Internet browsers, are closed on all student computers or devices before testing begins.
Algebra 1 EOC Accommodated Computer-Based Practice Test Script 2
6. Ensure that each student using the text-to-speech accommodation has headphones or earbuds. Plug headphones or earbuds in and adjust volume prior to launching the secure browser.
7. Launch the secure browser on student computers or devices prior to beginning the practice test session.
8. Select Go to the Practice Test Site in the blue box in the lower left corner of the browser. 9. Ensure students have been assigned the correct accommodations in TIDE.
Create a Practice Test Session
1. Go to the Florida Statewide Assessments Portal, click Teachers and Test Administrators, and then click TA Training Site.
2. Log in using your email address and password. 3. Select Algebra 1 EOC Practice Test (End-of-Course > Algebra 1 EOC Practice Test), and then
start the session. 4. Record the Session ID, which students will use to log in to the practice test. The Session ID should
be displayed where it is visible to all students. The Session ID for the practice test will begin with TRAIN. If the Session ID does not begin with TRAIN, stop the session and follow steps 1–3 in this section again.
Note: As a security measure, test administrators are automatically logged out of the TA Training Site after 90 minutes of test administrator and student inactivity. A session will remain active if students are waiting for approval, if students are actively taking the test, or if the test administrator is interacting with the TA Training Site.
When reading the following script, please note that optional words are italicized and in parentheses.
Beginning the Practice Test
SAY Today, you are going to learn how to use the secure browser, the test platform you will use to take the computer-based Florida Statewide Assessments. This practice test is designed for students who will take the Algebra 1 EOC Assessment (Algebra 1 Retake) using the text-to-speech and/or masking accommodation(s).
You will be given a work folder on the day of the test to help you work the problems during each session of the assessment; however, today you may use your own paper.
Remove all materials from your desk except your pen or pencil and scratch paper. Your computer or device should be opened to the Please Sign In screen. Please follow my instructions, and do not change screens until I tell you to do so.
Now, look at the Please Sign In screen. If you do not see this screen, raise your hand.
If a computer or device does not display the Please Sign In screen, open the secure browser on that computer or device and navigate to the practice test Please Sign In screen.
Display the Session ID for students.
Distribute the test tickets.
SAY Look closely at your test ticket and make sure it has your correct name, date of birth, and ID number on it.
Algebra 1 EOC Accommodated Computer-Based Practice Test Script 3
SAY Do not sign in before I instruct you to do so.
Raise your hand if you do not have the correct ticket.
If a student has the wrong ticket, give the student the correct ticket. If you do not have the correct ticket, contact your school assessment coordinator.
SAY Make sure the box for Guest User is switched to OFF. Make sure that the box for Guest Session is switched to OFF. Now, log in by typing your First Name as it appears on your test ticket, your Username, and the Session ID TRAIN-______-____. The first box will already be entered for you. The Session ID is displayed for you.
Click Sign In. Raise your hand if you need assistance.
Pause and assist students with logging in as needed.
SAY Now, you will see a screen that says Is This You?. Verify that the information is correct. If your information is correct, select Yes to continue. If the information is not correct, then select No to return to the Please Sign In screen and raise your hand.
Assist any students who raise their hands.
SAY You will now see a screen that says Your Tests. Click the arrow to the left of Start Algebra 1 EOC Practice Test to proceed.
While you are waiting for your test to be approved, you will see a Waiting for Approval screen. This screen includes your first and last names, the Session ID, and the test you will take. If any information looks incorrect, please raise your hand.
Otherwise, please sit quietly while I approve your tests.
Assist any students who raise their hands. In the TA Training Site, click the Approvals button to review the list of students ready to begin testing.
Once you ensure that all students have logged in correctly, approve students to test by selecting Approve All Students and selecting Yes on the Important! pop-up window.
Read the following SAY box if you are administering tests to students using the text-to-speech accommodation. (If no students are using this accommodation, skip the following SAY box.)
SAY If you are taking the practice test using text-to-speech as an accommodation, you will now see a screen that says Audio Checks. This screen allows you to make sure the text-to-speech tool is working. You can also set Volume, Pitch, and Rate using the selectors on the screen. Put your headphones or earbuds on now. Click the speaker icon and listen to the audio. Choose the settings that work best for you and then select I heard the voice. The Before You Begin screen will display. Do not click Begin Test Now until I instruct you to do so. If you do not hear the voice, please raise your hand now.
Assist students with their headphones/earbuds setup and contact your school or technology coordinator for assistance, if needed. After all students have completed the text-to-speech setup,

Algebra 1 EOC Accommodated Computer-Based Practice Test Script 4
SAY On the Before You Begin screen, click View Test Settings. You should see a screen that says Review Test Settings.
This screen allows you to choose the print size, background color, and mouse pointer for your test. If you would like to change your selections, do so now. You should see your changes made on the screen once you select them. You can click Undo Changes to return to previously selected settings. If you have any questions, raise your hand. (Answer any questions.)
Click OK to save your changes and return to the Before You Begin screen.
Below the Test Settings, click View Help Guide. You should see a screen that says Help Guide. Take a moment to review this screen. These instructions show you how to navigate the test and how to use the tools and features of the testing site. We will discuss these tools in more detail on the next screen. These instructions are also available for you to reference in the practice test. (Pause.) Click Back to return to the Before You Begin screen.
If you have any questions, raise your hand.
Answer any questions.
SAY Now, select Begin Test Now, but do not begin yet.
Pause to make sure that all students have the first question on their screens. Help students if necessary.
SAY First, we will review the tools that are available to students with certain accommodations.
Read the appropriate instructions below and on the following page for accommodations applicable to students taking the practice test.
Text-to-Speech
SAY If you are using text-to-speech as an accommodation, listen as I review the tool for this practice test.
To access the Text-to-Speech tool, click the three horizontal lines above the response area to open the context menu.
Select Speak Question to have the question and options read aloud.
To have the voice read a single answer option, open the context menu and select Speak Option. You will then click the option you would like to have read aloud. You can also have an answer option read aloud by right-clicking on that answer option and selecting Speak Option.
If you wish to hear only a portion of an item, select the text you want to have read aloud and then open the context menu. Click Speak Selection to have the selected text read aloud.
To pause the voice while it is reading, select the context menu again. Click Pause Speaking. To restart the voice from the point at which you paused, click Resume Speaking. (Note: These tools are not available in Chrome.)

Algebra 1 EOC Accommodated Computer-Based Practice Test Script 5
SAY To stop the voice while it is speaking, open the context menu. Click Stop Speaking. To hear the question again from the beginning after you have stopped the voice, open the context menu and click Speak Question again.
To make adjustments to the text-to-speech settings, click on the System Settings tool, which is above the Zoom buttons and looks like a wheel. Here you can adjust the volume, pitch, and rate of the Text-to-Speech tool. When you have finished adjusting your text-to-speech settings, select OK to exit and save your changes or Cancel to exit without saving your changes. Note that if you adjust your volume settings while the Text-to-Speech tool is in use, the volume will not adjust until after you select OK.
You can practice using the Text-to-Speech tool when you begin the practice test. Raise your hand if you have any questions.
Answer any questions.
Masking
SAY If you will take this test using Masking as an accommodation, listen as I review the tool for this practice test.
The Masking tool allows you to hide portions of the screen. To access the Masking tool within an item, click the button labeled Masking in the upper right corner of your screen. The button has a picture of a shaded square on it. When you have selected the tool, the button will turn orange.
To mask a portion of the screen, click the left mouse button and drag until the gray square covers the portion of the screen that you would like to mask. Then, release the mouse button. The area will be masked.
To remove the masking, click the close button in the upper right corner of the masked area. The close button is a circle with an X in the center.
Now, practice using the Masking tool. Raise your hand if you have any questions. (Pause while students practice using the Masking tool.)
To turn the Masking tool off, click the Masking button again. The button will revert back to its original color.
Are there any questions?
Answer any questions.
SAY Listen as I describe the screen.
In the top left corner of your screen, you will see the navigation buttons.
The Back and Next buttons can be used to move to the previous or the next question. The Back button is currently deactivated because you are on the first question, but it will be available for later questions.

Algebra 1 EOC Accommodated Computer-Based Practice Test Script 6
SAY Click Next now. Because you have not yet entered an answer for this question, you will see a pop-up message that warns you that you have not entered a response to one or more items on the page. If you wanted to proceed without answering, you would select Yes. To remain on the page, you would select No. At this time, click Yes to proceed to the second question. (Pause while students move to the second question.)
To the right of the Next button, you will see the Save button. The Save button allows you to manually save your work. This is an optional feature. If you do not select this button, your answer will be saved automatically every two minutes or when you go to the next question.
Look to the right of the Save button, where you will see the Pause button. The Pause button allows you to pause and exit the test. Do not select Pause at this time.
Are there any questions?
Answer any questions.
SAY Now, I will describe several tools that may help you with this computer-based practice test, and you will practice using them.
At the top right corner of your screen, you will see the Formulas, Line Reader, and Zoom buttons. Select the Formulas tool. A pop-up window displaying the Algebra 1 EOC FSA Mathematics Reference Sheet will appear. You will need to scroll all the way down and, if necessary, use the horizontal scroll bar at the bottom of the screen to see all of the information on the reference sheet. Take a moment to scroll through the information presented in the Formulas window. (Pause.)
Move the Formulas window around the screen by clicking on the bar in the top of the window and dragging it to another part of the screen. (Pause.)
You can also maximize or minimize the window by selecting the double-sided arrow icon in the upper right corner. Click the icon to maximize the window. When maximized, the window covers the entire test page except for the navigation bar on top. Note that you cannot move the window to different parts of the test page when the window is maximized. Click the icon again to minimize the window.
Now, close the Formulas window by clicking the X in the circle at the top right corner of the window. (Pause while students close the Formulas window.)
Next to the Formulas button, you will see the Line Reader button. The Line Reader tool helps you track line by line as you read a question. Now, select Line Reader. When you have selected the tool, the button will turn orange. Select one of the answer options for this question and the line reader will move to that line. You can move the Line Reader on the screen with the up and down arrows on your keyboard or by clicking on a line of text with your mouse.
Practice using the Line Reader tool on the screen. (Pause while students practice using the Line Reader.) Now, select Line Reader again to turn off the tool. The button will revert to its original color. Note that the Line Reader tool will turn off when you use some of the tools, like zoom, or are answering certain item types on the test.

Algebra 1 EOC Accommodated Computer-Based Practice Test Script 7
SAY Next to the Line Reader button, you will see the Zoom Out and Zoom In buttons. You can use these buttons to decrease and increase the size of text within the test page. Four levels of magnification are available. Now, practice using the Zoom Out and Zoom In buttons to find the text size with which you are most comfortable. (Pause while students practice using the Zoom buttons.)
At the top right side of the page, above the zoom buttons, you will see a small question mark button. This is the Help button. Now, click the Help button. A pop-up window with the Help Guide, including Overview of the Test Site, Test Rules, and Accessing Context Menu Tools, will display.
Note that, as with the Formulas window, you can resize and drag this pop-up window around the page if needed. This is the same screen that you reviewed before beginning the practice test. These instructions remind you how to navigate from one item to the next and how to use the tools and features in the testing platform.
(If you are using the text-to-speech accommodation, you will see a small green square with a speaker icon inside and a small red square with a dark red circle inside above the Contents box. These are your text-to-speech tools for this page only. As the instructions at the bottom of the window indicate, you can select any of the text within the Help Guide screen that you want to hear and then select the green button to hear that text. To stop the text playback, select the red button. Remember that this is how you will use text-to-speech only for this page.)
Take a moment to scroll through these instructions. Raise your hand if you have any questions about the information in the Help Guide. (Pause. Answer any student questions.)
Now, close the Help Guide by clicking the X in the circle at the top right corner of the Help Guide. (Pause while students close the Help Guide.)
Are there any questions about any of the tools?
Answer any questions.
SAY Now, look to the right of the question number and find three horizontal lines in a circle. This is the context menu. Click the lines to open the context menu.
First, you will see a circle with a lowercase “i,” a flag icon, (speaker icons that say Speak Option and Speak Question,) a notepad, a grayed-out line that says Highlight Selection, and a set of letters with a line through them. Select the lowercase “i.” (Pause.) This is the Tutorial tool. A pop-up window will open that displays a video tutorial of this item type. There is no sound available for this tutorial. You can also access the tutorial by right-clicking, if available on your device, in the question and answer area and selecting Tutorial. Now, close the video tutorial by clicking the X in the circle at the top right corner of the pop-up window. (Pause while students close the tutorial.)
Now, select the context menu, and then click the flag icon for Mark for Review. This feature allows you to flag a question that you might want to review at a later time. You can mark an item for review by using the context menu or by right-clicking, if available on your device, in the question and answer area and selecting Mark for Review. Once you mark an item for review, the solid rectangle around the item number will show the top right corner folded over, a flag icon will appear next to the item number, and the item number in the drop-down list in the top left corner of the screen will have a flag icon next to the number.
Algebra 1 EOC Accommodated Computer-Based Practice Test Script 8
SAY After you finish reviewing a question, return to the context menu and select Unmark Review Item. You can also right-click, if available on your device, and select Unmark Review Item. The item number will revert to a solid rectangle without a folded corner, and the item number in the drop-down list will no longer have a flag icon. Now, practice selecting Mark for Review and Unmark Review Item. (Pause.) For now, leave this question marked for review.
Now, select the context menu and then click the notepad icon. The Notepad tool will display in a pop-up window. If you want to make notes for later reference, you can type them into this window. There is a new notepad for each question. To view your notes, you will need to return to the question where you typed the note and click the Notepad icon. As with other windows, you can resize and drag this pop-up window around the page if needed. The toolbar at the top left of the notepad offers options to cut, copy, or paste text within your notes. Now, practice typing text into the notepad and using the cut, copy, and paste features. These notes are not included as a part of your response, but they are monitored by the testing contractor. (Pause for students to practice using the notepad.)
Notes that you save in the notepad will be saved for the duration of this test. To close the notepad without saving the notes you have typed, click Cancel. To save the notes you have typed and close the notepad, click Save and Close. Now, close the notepad. (Pause.)
You can use the Highlight Selection tool to highlight portions of a question. To highlight, click and drag to select the text you want to highlight. Then, right-click in the highlighted area and select Highlight Selection. There are four colors available for highlighting: yellow, orange, mint green, and lavender. Select a color, and your text will be highlighted. You cannot highlight over previously highlighted text. To change the highlight color of your selection, you will need to remove or reset the highlighting and then highlight text in a different color.
To remove all highlighting, right-click and select Reset Highlighting from the context menu. To remove only certain portions of highlighting, select the text you want to remove highlighting from, right-click, and choose Remove Highlight. Practice highlighting and removing highlighting from words in the question. (Pause.)
Now, select the context menu, and then select the set of letters with a line through them, which is the Strikethrough tool. You can use the Strikethrough tool to cross out answer choices that you have eliminated as possible correct answers. Click on the first answer option. You should see a gray line through that answer option.
Note that using Strikethrough on an answer option you have previously chosen does not automatically remove your selection of that response. Strikethrough is only available for multiple-choice and multiselect item types. To remove a strikethrough, click on the eliminated option. Click anywhere outside the box around the answer choices to turn off the Strikethrough tool. Now, practice adding and removing strikethroughs. (Pause.)
In the top left corner of your screen, you will see a drop-down menu with the word “Items” and up and down arrows. This is the Item Summary drop-down list. Now, click to open this list. You will see the item numbers. The Item Summary allows you to quickly move to different questions. You can use this drop-down list to revisit questions you have already seen, or to see the next question. Items that are unanswered or marked for review are indicated in the drop-down.
Are there any questions about any of these tools?
Answer any questions, and make sure everyone can use the tools. Help students if necessary.
Algebra 1 EOC Accommodated Computer-Based Practice Test Script 9
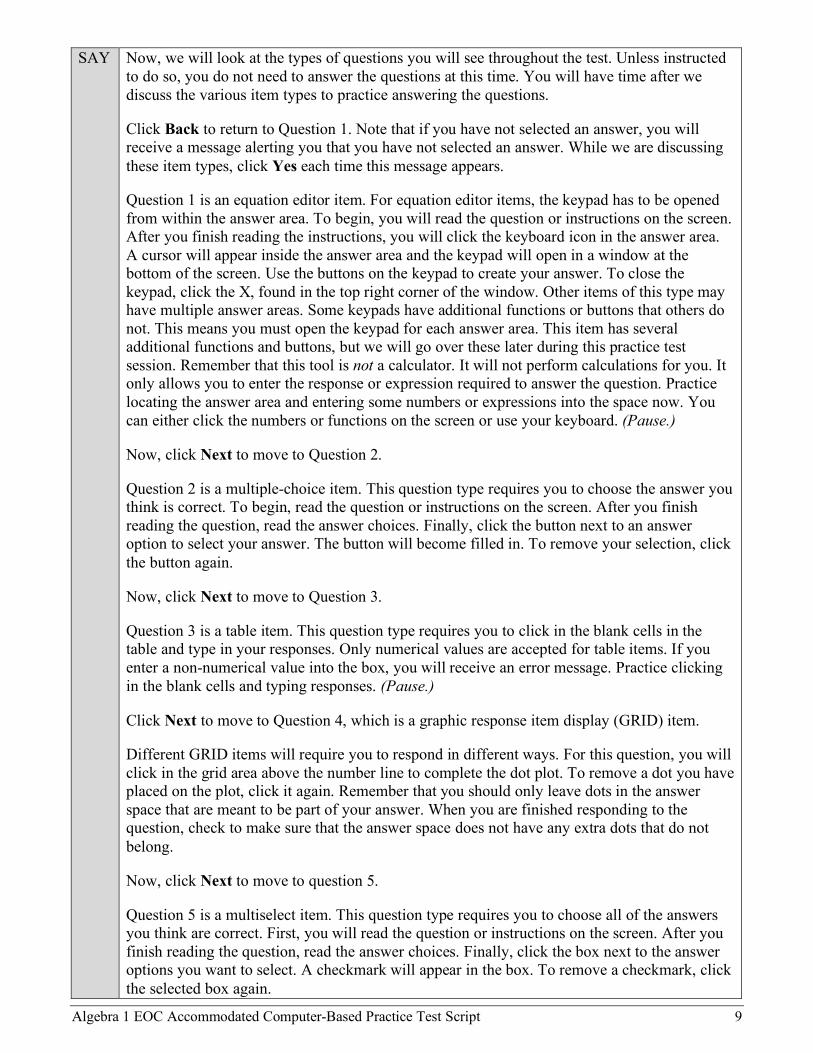
SAY Now, we will look at the types of questions you will see throughout the test. Unless instructed to do so, you do not need to answer the questions at this time. You will have time after we discuss the various item types to practice answering the questions.
Click Back to return to Question 1. Note that if you have not selected an answer, you will receive a message alerting you that you have not selected an answer. While we are discussing these item types, click Yes each time this message appears.
Question 1 is an equation editor item. For equation editor items, the keypad has to be opened from within the answer area. To begin, you will read the question or instructions on the screen. After you finish reading the instructions, you will click the keyboard icon in the answer area. A cursor will appear inside the answer area and the keypad will open in a window at the bottom of the screen. Use the buttons on the keypad to create your answer. To close the keypad, click the X, found in the top right corner of the window. Other items of this type may have multiple answer areas. Some keypads have additional functions or buttons that others do not. This means you must open the keypad for each answer area. This item has several additional functions and buttons, but we will go over these later during this practice test session. Remember that this tool is not a calculator. It will not perform calculations for you. It only allows you to enter the response or expression required to answer the question. Practice locating the answer area and entering some numbers or expressions into the space now. You can either click the numbers or functions on the screen or use your keyboard. (Pause.)
Now, click Next to move to Question 2.
Question 2 is a multiple-choice item. This question type requires you to choose the answer you think is correct. To begin, read the question or instructions on the screen. After you finish reading the question, read the answer choices. Finally, click the button next to an answer option to select your answer. The button will become filled in. To remove your selection, click the button again.
Now, click Next to move to Question 3.
Question 3 is a table item. This question type requires you to click in the blank cells in the table and type in your responses. Only numerical values are accepted for table items. If you enter a non-numerical value into the box, you will receive an error message. Practice clicking in the blank cells and typing responses. (Pause.)
Click Next to move to Question 4, which is a graphic response item display (GRID) item.
Different GRID items will require you to respond in different ways. For this question, you will click in the grid area above the number line to complete the dot plot. To remove a dot you have placed on the plot, click it again. Remember that you should only leave dots in the answer space that are meant to be part of your answer. When you are finished responding to the question, check to make sure that the answer space does not have any extra dots that do not belong.
Now, click Next to move to question 5.
Question 5 is a multiselect item. This question type requires you to choose all of the answers you think are correct. First, you will read the question or instructions on the screen. After you finish reading the question, read the answer choices. Finally, click the box next to the answer options you want to select. A checkmark will appear in the box. To remove a checkmark, click the selected box again.

Algebra 1 EOC Accommodated Computer-Based Practice Test Script 10
SAY Sometimes, this question type will tell you a specific number of items to select. Others, such as this question, ask you to select all correct options without specifying a number. You will have either five or six options to select from on a multiselect item.
This item has two panels. The left panel is the reading panel. For this item, the reading panel provides information to help answer all parts of the question. Some items with panels may include a question in the reading panel, so be sure to read both panels carefully. You will see the Expand/Collapse Panel tool, which looks like a double-sided arrow. This tool will expand the reading panel or the question and answer panel so that it takes up most of the screen. Now, click the right-facing arrow of the Expand/Collapse Panel tool to expand the reading panel. (Pause.)
Clicking the left-facing arrow will return the screen to normal. Now, click the left-facing arrow again. The reading panel will shrink and the question and answer panel will cover the screen. Click the right-facing arrow to see both the reading panel and question and answer panel. (Pause.)
Now, practice using the Expand/Collapse Panel tool and responding to this item. (Pause while students practice responding to Question 5.)
Now, click Next to move to Question 6, which is a hot text item. For this item type, you will select a phrase to answer the question. The phrase you select will become highlighted and marked with dotted lines around the outside. To remove your selection, click the selected phrase again. The highlighting and dotted lines will be removed, allowing you to choose a new phrase as your response. Now, click Next.
Question 7 is an equation editor item. For this equation editor item, the keypad is already displayed at the bottom of the screen. Similar to the first item, you may also use the keys on the keyboard to create an answer.
Begin by clicking in the answer space, which is the blank box below the instructions and above the equation buttons. Once you click in the answer space, you will see a cursor. Practice entering some numbers into the space now. You can either click the numbers on the screen or use your keyboard. (Pause.)
The arrows on the top left of the equation buttons panel allow you to move back and forth between characters you have typed into the answer space. You can also use the arrows on your keyboard or click on the space to which you want to move your cursor. Practice moving back and forth in the answer space now. (Pause.)
The arrows in the middle of the top row of the equation buttons panel allow you to undo and redo your last action. The square arrow with an “x” in the middle at the right side of the top row of equation buttons is the delete button. The delete button can be used to remove parts of the answer. You can also use the backspace or delete keys on your keyboard. Practice using undo, redo, and delete now. (Pause.)
For this question, you will see the numerical keypad, along with the decimal point and negative sign.
On other equation response items, the keypad may also include keys for additional functions and variables.
Practice responding to Question 7 now.

Algebra 1 EOC Accommodated Computer-Based Practice Test Script 11
SAY Are there any questions about equation editor items? (Pause.)
Answer any questions.
SAY Click Next to move to Question 8, which is another GRID item. This question requires you to place and move objects from an object bank to an answer space. To begin, you will read the directions that appear on the screen. Click on an item in the shaded object bank and drag it into an answer space. Answer spaces for this question are dotted rectangles. Read the instructions carefully to see how many of the items you should use and where you should place them. To change your response, drag the item back to the object bank and drag a new item to the answer space. When you are finished responding to the question, check to make sure that the answer space does not have any extra objects that do not belong. Now, click Next until you reach Question 10.
Question 10 is an open response item. This type of question requires you to type your answer into an answer space with your keyboard. Click in the answer space and practice typing a response. (Pause.)
Now, click Next until you reach Question 15, which is a two-part question. (Pause.) Part A is an edit task with choice item. You will select the best phrase or value from the drop-down list. Part B is a multiple-choice item. If an item has more than one part, you must complete each part of the item.
You may now begin Session 1 of the practice test. Return to Question 1 and read and respond to each question while practicing using the tools. There are 16 practice items in this session. Do not exit this session until instructed to do so.
Remember, if you need assistance understanding how to answer a question, you can select Tutorial, which is the lowercase “i” under the context menu. You may also raise your hand if you have any questions.
Walk around the room and assist students as necessary. After students have had sufficient time to practice using the tools and responding to the various item types, review the correct responses to Session 1 with the students. The answer key can be found on the portal at: https://fsassessments.org/en/resources/practice-tests/cbt-practice-test-answer-keys.
SAY When you have finished answering questions in Session 1, navigate to Question 16 by clicking Next or by using the Item Summary to select 16.
Now, we will practice how you will exit the test if you need to leave the room for an extended period of time during the actual test.
The Pause button allows you to pause and exit the test for an extended period of time. Now, select Pause. (Pause for students to select the button.) A pop-up window will appear and ask you to confirm that you want to pause the test and to ask your test administrator before pausing your test. You should then verify with your test administrator whether you should pause your test. For today, click No. On the day of the test, if you have your test administrator’s permission, you will click Yes.
Pause while students click No.
SAY Now, we will move to the next session to finish describing all item types in this practice test.

Algebra 1 EOC Accommodated Computer-Based Practice Test Script 12
SAY From Question 16, click the Next button to access the review screen. On this screen, you have the option to review any unanswered or flagged items or to complete Session 1.
If you marked any questions for review, you will see a flag icon next to the question number reminding you that you marked that item for review. If you wanted to review your response, you would click on the item number with the flag in it. You would then be taken back to the question you had marked for review. If you had left any questions unanswered, those questions would also be indicated on this screen with a triangle. Do not select a question number to review your answer at this time.
Click End Session. A message will appear, asking you if you want to pause the test. Click Yes.
You will now see the Please Sign In screen. You will use the information on your test ticket to log in as you did for Session 1. Do not select Sign In until instructed to do so or you may be logged in to the wrong session. Remember, the session ID is displayed for you. (Pause. Wait two minutes before students sign back in.)
You may now select Sign In. (Pause and assist students with logging in as needed.)
Now, you will see a screen that says Is This You?. Verify that the information is correct. If your information is correct, select Yes to continue. If the information is not correct, then select No to return to the Please Sign In screen and raise your hand.
Assist any students who raise their hands.
SAY You will now see a screen that says Your Tests. Click Resume Algebra 1 EOC Practice Test to proceed.
While you are waiting for your test to be approved, you will see a Waiting for Approval screen. This screen includes your first and last names, the Session ID, and the test you will take. If any information looks incorrect, please raise your hand.
Otherwise, please sit quietly while I approve your tests.
Assist any students who raise their hands.
In the TA Training Site, click the Approvals button to review the list of students ready to begin testing.
Once you ensure that all students have logged in correctly, approve students to test by selecting Approve All Students and selecting Yes on the Important! pop-up window.
Read the following SAY box if you are administering tests to students using the text-to-speech accommodation. (If no students are using this accommodation, skip the following SAY box.)
SAY If you are taking the practice test using text-to-speech as an accommodation, you will now see the Audio Checks screen again. Click the speaker icon and listen to the audio. Choose the settings that work best for you and then select I heard the voice. The Before You Begin screen will display again. If you do not hear the voice, please raise your hand now.
Assist students with their headphones/earbuds setup and contact your school or technology coordinator for assistance, if needed. After all students have completed the text-to-speech setup,

Algebra 1 EOC Accommodated Computer-Based Practice Test Script 13
SAY On the Before You Begin screen, click View Test Settings to go to the Review Test Settings screen.
Remember, this screen allows you to choose the print size, background color, and mouse pointer for your test. If you would like to change your selections, do so now. You should see your changes made on the screen once you select them. You can click Undo Changes to return to previously selected settings.
Click OK to save your changes and return to the Before You Begin screen.
Now, select Begin Test Now.
You should now see Question 17 on your screen. Do not start Session 2 until I tell you to do so. If you do not see Question 17 on your screen, please raise your hand.
Assist any students with accessing Session 2 of the practice test as needed. If your school is providing handheld scientific calculators to students, distribute the calculators now.
SAY We will now complete Session 2 of the practice test.
During Session 2, you will see the Calculator tool to the right of the Formulas tool. Now, open the Calculator tool. Like the Formulas window, you can click and drag the pop-up calculator window around your screen if needed. You can also resize the window using the blue resizing handle on the bottom right corner, as well as maximize or minimize the window by selecting the double-sided arrow icon in the upper right corner. Click the buttons of the calculator to enter numbers and functions. You can also use your keyboard. Practice using the calculator to solve a simple problem such as one plus two. (Pause.) You will have more time to practice using the calculator later in the practice test.
Now, close the calculator by clicking the X in the circle at the top right corner of the Calculator window. (Pause while students close the calculator.)
Now, click Next and then Yes on the pop-up message to move forward until you reach Question 21. (Pause.)
Question 21 is a matching item. For this question, you are required to read the item and use the information in the table. Click the boxes which match the answer. To remove a checkmark, click the box again.
Now, click Next until you reach Question 24, which is another equation editor item. However, this item contains additional features.
Look at the features on the right side of the equation buttons panel that are for special functions that will allow you to create equations or expressions. These buttons will vary based on the question. If your keyboard has the equivalent of these buttons, you may use your keyboard to use that function as well.
For this question, you will see the following special buttons: • On the first row are the variables n and a. • On the second row are the add, subtract, multiply, and divide buttons. • On the third row are the less than, less than or equal to, equal to, greater than or equal
to, and greater than buttons.

Algebra 1 EOC Accommodated Computer-Based Practice Test Script 14
SAY • On the fourth row are the fraction, exponent, subscript, parentheses, absolute value, square root, nth root, and pi buttons.
The fraction button will create two boxes to form a fraction, with one box for the numerator and the other for the denominator. When you click the fraction button, your cursor will automatically move to the numerator. You will enter in a number for the numerator and then click or use the down arrow to move to the denominator. Note that you can add multiple numbers and symbols in both the numerator and the denominator. To move outside the fraction, use the arrow buttons or click outside the fraction to move your cursor.
The exponent and subscript buttons will allow you to add an exponent or subscript to a previously entered numeral. Once you have entered the base number, click the exponent or subscript button. The cursor will move into a higher box for the exponent or a lower box for the subscript. Enter the exponent or subscript number. Use the right arrow, either on the screen or on your keyboard, to move out of the exponent or subscript function.
The parentheses button will create a pair of parentheses. The absolute value button will create a pair of bars. Once you click the parentheses or absolute value button, your cursor will automatically move inside the parentheses or bars. Move the cursor outside the parentheses or absolute value bars by clicking or using the arrows in order to continue your equation.
The square root button will create a box set as the active region under a square root. When you click the nth root button, your cursor will automatically move to the index. You will enter a number for the index and then use the right arrow on your keyboard or click in the radicand box to move to the radicand.
The pi button creates the pi symbol. Use the right arrow on your keyboard or click in the space to the right of the pi symbol to move the cursor.
Practice using the special function buttons for this equation editor item. Be sure to practice using all of the equation buttons. Raise your hand if you have any questions.
Pause. Give students sufficient time to practice using the special function buttons.
SAY Now, click Next until you reach Question 28. (Pause.)
Question 28 is an edit task with choice item. For this item type, you will click each highlighted blank, click the down arrow, and select the best answer from the drop-down list. You may need to scroll within the drop-down to see all answer options. Once you have selected an answer, click OK to apply that selection. Click Cancel to exit without selecting an answer. Repeat this process for each shaded blank in the item. Click Next.
Question 29 is a two-part GRID item. For GRID items like this, you will see a graphing answer space. For Part A, you will add a line to the graph.
The Add Point tool allows you to plot points onto the graph. Click the Add Point button. Then click on the graph where you want to add a point. To move a point after it has been placed, click the small circle arrow button at the top left of the graphing area. Then, click the point and drag it.

Algebra 1 EOC Accommodated Computer-Based Practice Test Script 15
SAY To add a line to the graph, first click the Add Arrow button and then click on the first point and drag the line to the second point. A double-sided arrow will appear between the two points. You can also add a line without first adding points. To delete a line, click the Delete button at the top of the graph and then click on the line you want to delete. You can also delete one of the points to which the line is connected by clicking on that point. Deleting a point to which a line is connected will delete that line.
For Part B, click the object, a star, from the object bank to the graph. To move an object, click and drag it to a new location. To delete an object, click the Delete button and then click the object you want to delete.
When you are finished responding to the question, check to make sure that the answer space does not have any extra objects that do not belong. Remember, if an item has more than one part, you must complete each part of the item. (Pause.)
Are there any questions about the GRID item?
Answer any questions.
SAY Now, you may begin Session 2 of the practice test. Return to Question 17 and read and respond to each question while practicing using the tools available for this session. Do not select the End Test button until instructed to do so.
Remember, if you need assistance understanding how to answer a question, you can click the Tutorial button, which is the lowercase “i” under the context menu. You may also raise your hand if you have any questions.
After students have had sufficient time to practice using the tools and answer the questions, review the correct responses to Session 2 with the students. The answer key can be found on the portal at: https://fsassessments.org/en/resources/practice-tests/cbt-practice-test-answer-keys.
SAY Now, we will practice how you will submit your test when you have completed Session 2.
From Question 31, click Next to access the review screen. Remember that the review screen will show you any Session 2 questions that are unanswered or marked for review and allow you to return to those questions by clicking on the question number. Do not select a question number to review your response at this time.
Click End Test. A pop-up message will appear. Make sure the message says, “You have reached the end of the test. Click Yes to submit your test. Click No to keep working on your test.” At this time, click Yes. (Pause.)
On the next screen, click Submit Test. A Warning message will appear. Click Yes on this message. (Pause.)
You will now see a message that says, “Practice Test Completed.” Click Log Out.
After students have logged out, check each computer or device and make sure that each student has exited the test properly. Help students as needed. Provide students with the practice test URL (https://fsassessments.org/families.html) so that they may access the practice test on their own.
Related Documents