www.it-ebooks.info

Welcome message from author
This document is posted to help you gain knowledge. Please leave a comment to let me know what you think about it! Share it to your friends and learn new things together.
Transcript
ptg8286261
Praise for Michael Hartl’sBooks and Videoson Ruby on RailsTM
‘‘My former company (CD Baby) was one of the first to loudly switch to Ruby onRails, and then even more loudly switch back to PHP (Google me to read about thedrama). This book by Michael Hartl came so highly recommended that I had to tryit, and the Ruby on RailsTM Tutorial is what I used to switch back to Rails again.’’
—From the Foreword by Derek Sivers (sivers.org)Formerly: Founder, CD BabyCurrently: Founder, Thoughts Ltd.
‘‘Michael Hartl’s Rails Tutorial book is the #1 (and only, in my opinion) place tostart when it comes to books about learning Rails. . . . It’s an amazing piece of workand, unusually, walks you through building a Rails app from start to finish withtesting. If you want to read just one book and feel like a Rails master by the end ofit, pick the Ruby on RailsTM Tutorial .’’
—Peter CooperEditor, Ruby Inside
www.it-ebooks.info
ptg8286261
‘‘Grounded in the real world.’’—I Programmer (www.i-programmer.info), by Ian Elliot
‘‘The book gives you the theory and practice, while the videos focus on showing youin person how its done. Highly recommended combo.’’
—Antonio Cangiano, Software Engineer, IBM
‘‘The author is clearly an expert at the Ruby language and the Rails framework, butmore than that, he is a working software engineer who introduces best practicesthroughout the text.’’
—Greg Charles, Senior Software Developer, Fairway Technologies
‘‘Overall, these video tutorials should be a great resource for anyone new to Rails.’’—Michael Morin, ruby.about.com
‘‘Hands-down, I would recommend this book to anyone wanting to get into Rubyon Rails development.’’
—Michael Crump, Microsoft MVP
www.it-ebooks.info

ptg8286261
Visit informit.com/ruby for a complete list of available products.
I he Addison-Wesley Professional Ruby Series provides readers
with practical, people-oriented, and in-depth information aboutTapplying the Ruby platform to create dynamic technology solutions.
The series is based on the premise that the need for expert reference
books, written by experienced practitioners, will never be satisfied solely
by blogs and the Internet.
www.it-ebooks.info
ptg8286261
RUBY ONRAILSTM TUTORIAL
Learn Web Developments with Rails
Second Edition
Michael Hartl
Upper Saddle River, NJ • Boston • Indianapolis • San FranciscoNew York • Toronto • Montreal • London • Munich • Paris • Madrid
Capetown • Sydney • Tokyo • Singapore • Mexico City
www.it-ebooks.info
ptg8286261
Many of the designations used by manufacturers and sellers to distinguish their products are claimedas trademarks. Where those designations appear in this book, and the publisher was aware of atrademark claim, the designations have been printed with initial capital letters or in all capitals.
The author and publisher have taken care in the preparation of this book, but make no expressed orimplied warranty of any kind and assume no responsibility for errors or omissions. No liability isassumed for incidental or consequential damages in connection with or arising out of the use of theinformation or programs contained herein.
The publisher offers excellent discounts on this book when ordered in quantity for bulk purchases orspecial sales, which may include electronic versions and/or custom covers and content particular toyour business, training goals, marketing focus, and branding interests. For more information, pleasecontact:
U.S. Corporate and Government Sales(800) [email protected]
For sales outside the United States please contact:International [email protected]
Visit us on the Web: informit.com/aw
Cataloging-in-Publication Data is on file with the Library of Congress.
Copyright © 2013 Michael Hartl
All rights reserved. Printed in the United States of America. This publication is protected bycopyright, and permission must be obtained from the publisher prior to any prohibited reproduction,storage in a retrieval system, or transmission in any form or by any means, electronic, mechanical,photocopying, recording, or likewise. To obtain permission to use material from this work, pleasesubmit a written request to Pearson Education, Inc., Permissions Department, One Lake Street,Upper Saddle River, New Jersey 07458, or you may fax your request to (201) 236-3290.
The source code in Ruby on Rails TM Tutorial is released under the MIT License.
ISBN 13: 978-0-321-83205-4ISBN 10: 0-321-83205-1Text printed in the United States on recycled paper at Edwards Brothers Malloy in Ann Arbor,Michigan.First printing, July 2012
Editor-in-ChiefMark Taub
Executive EditorDebra Williams Cauley
Managing EditorJohn Fuller
Full-Service ProductionManagerJulie B. Nahil
Project ManagerLaserwords
Copy EditorLaserwords
IndexerLaserwords
ProofreaderLaserwords
ReviewerJennifer Lindner
Publishing CoordinatorKim Boedigheimer
Cover DesignerChuti Prasertsith
CompositorLaserwords
www.it-ebooks.info
ptg8286261
Contents
Foreword to the First Edition by Derek Sivers xv
Foreword to the First Edition by Obie Fernandez xvii
Acknowledgments xix
About the Author xxi
Chapter 1 From Zero to Deploy 1
1.1 Introduction 31.1.1 Comments for Various Readers 41.1.2 ‘‘Scaling’’ Rails 71.1.3 Conventions in This Book 7
1.2 Up and Running 91.2.1 Development Environments 101.2.2 Ruby, RubyGems, Rails, and Git 121.2.3 The First Application 171.2.4 Bundler 191.2.5 rails server 231.2.6 Model-view-controller (MVC) 25
1.3 Version Control with Git 271.3.1 Installation and Setup 271.3.2 Adding and Committing 301.3.3 What Good Does Git Do You? 31
vii
www.it-ebooks.info
ptg8286261
viii Contents
1.3.4 GitHub 321.3.5 Branch, Edit, Commit, Merge 34
1.4 Deploying 391.4.1 Heroku Setup 391.4.2 Heroku Deployment, Step One 401.4.3 Heroku Deployment, Step Two 401.4.4 Heroku Commands 41
1.5 Conclusion 43
Chapter 2 A Demo App 45
2.1 Planning the Application 452.1.1 Modeling Demo Users 472.1.2 Modeling Demo Microposts 48
2.2 The Users Resource 492.2.1 A User Tour 512.2.2 MVC in Action 562.2.3 Weaknesses of this Users Resource 62
2.3 The Microposts Resource 632.3.1 A Micropost Microtour 632.3.2 Putting the micro in Microposts 662.3.3 A User has many Microposts 682.3.4 Inheritance Hierarchies 702.3.5 Deploying the Demo App 73
2.4 Conclusion 74
Chapter 3 Mostly Static Pages 77
3.1 Static Pages 823.1.1 Truly Static Pages 823.1.2 Static Pages with Rails 85
3.2 Our First Tests 933.2.1 Test-driven Development 933.2.2 Adding a Page 99
3.3 Slightly Dynamic Pages 1033.3.1 Testing a Title Change 1033.3.2 Passing Title Tests 1063.3.3 Embedded Ruby 1083.3.4 Eliminating Duplication with Layouts 111
3.4 Conclusion 114
www.it-ebooks.info

ptg8286261
Contents ix
3.5 Exercises 1143.6 Advanced Setup 117
3.6.1 Eliminating bundle exec 1183.6.2 Automated Tests with Guard 1203.6.3 Speeding up Tests with Spork 1233.6.4 Tests inside Sublime Text 127
Chapter 4 Rails-Flavored Ruby 129
4.1 Motivation 1294.2 Strings and Methods 134
4.2.1 Comments 1344.2.2 Strings 1354.2.3 Objects and Message Passing 1384.2.4 Method Definitions 1414.2.5 Back to the Title Helper 142
4.3 Other Data Structures 1424.3.1 Arrays and Ranges 1424.3.2 Blocks 1464.3.3 Hashes and Symbols 1484.3.4 CSS revisited 152
4.4 Ruby Classes 1534.4.1 Constructors 1534.4.2 Class Inheritance 1554.4.3 Modifying Built-in Classes 1584.4.4 A Controller Class 1594.4.5 A User Class 161
4.5 Conclusion 1644.6 Exercises 164
Chapter 5 Filling in the Layout 167
5.1 Adding Some Structure 1675.1.1 Site Navigation 1695.1.2 Bootstrap and Custom CSS 1755.1.3 Partials 181
5.2 Sass and the Asset Pipeline 1875.2.1 The Asset Pipeline 1875.2.2 Syntactically Awesome Stylesheets 190
www.it-ebooks.info
ptg8286261
x Contents
5.3 Layout Links 1975.3.1 Route Tests 2005.3.2 Rails Routes 2025.3.3 Named Routes 2055.3.4 Pretty RSpec 207
5.4 User Signup: A First Step 2115.4.1 Users Controller 2125.4.2 Signup URI 213
5.5 Conclusion 2155.6 Exercises 217
Chapter 6 Modeling Users 221
6.1 User Model 2226.1.1 Database Migrations 2236.1.2 The Model File 2286.1.3 Creating User Objects 2306.1.4 Finding User Objects 2336.1.5 Updating User Objects 235
6.2 User Validations 2366.2.1 Initial User Tests 2366.2.2 Validating Presence 2396.2.3 Length Validation 2436.2.4 Format Validation 2456.2.5 Uniqueness Validation 249
6.3 Adding a Secure Password 2546.3.1 An Encrypted Password 2556.3.2 Password and Confirmation 2576.3.3 User Authentication 2606.3.4 User Has Secure Password 2636.3.5 Creating a User 265
6.4 Conclusion 2676.5 Exercises 268
Chapter 7 Sign Up 271
7.1 Showing Users 2717.1.1 Debug and Rails Environments 2727.1.2 A Users Resource 278
www.it-ebooks.info
ptg8286261
Contents xi
7.1.3 Testing the User Show Page (with Factories) 2827.1.4 A Gravatar Image and a Sidebar 286
7.2 Signup Form 2927.2.1 Tests for User Signup 2937.2.2 Using form for 2977.2.3 The Form HTML 301
7.3 Signup Failure 3037.3.1 A Working Form 3037.3.2 Signup Error Messages 308
7.4 Signup Success 3127.4.1 The Finished Signup Form 3137.4.2 The Flash 3157.4.3 The First Signup 3177.4.4 Deploying to Production with SSL 317
7.5 Conclusion 3217.6 Exercises 321
Chapter 8 Sign In, Sign Out 325
8.1 Sessions and Signin Failure 3258.1.1 Sessions Controller 3268.1.2 Signin Tests 3308.1.3 Signin Form 3338.1.4 Reviewing Form Submission 3368.1.5 Rendering with a Flash Message 339
8.2 Signin Success 3438.2.1 Remember Me 3438.2.2 A Working sign in Method 3498.2.3 Current User 3518.2.4 Changing the Layout Links 3558.2.5 Signin upon Signup 3598.2.6 Signing Out 361
8.3 Introduction to Cucumber (Optional) 3638.3.1 Installation and Setup 3648.3.2 Features and Steps 3658.3.3 Counterpoint: RSpec Custom Matchers 368
8.4 Conclusion 3718.5 Exercises 372
www.it-ebooks.info
ptg8286261
xii Contents
Chapter 9 Updating, Showing, and Deleting Users 373
9.1 Updating Users 3739.1.1 Edit Form 3749.1.2 Unsuccessful Edits 3809.1.3 Successful Edits 382
9.2 Authorization 3859.2.1 Requiring Signed-in Users 3869.2.2 Requiring the Right User 3909.2.3 Friendly Forwarding 392
9.3 Showing All Users 3969.3.1 User Index 3969.3.2 Sample Users 4039.3.3 Pagination 4049.3.4 Partial Refactoring 410
9.4 Deleting Users 4139.4.1 Administrative Users 4139.4.2 The destroy Action 417
9.5 Conclusion 4229.6 Exercises 424
Chapter 10 User Microposts 429
10.1 A Micropost Model 42910.1.1 The Basic Model 43010.1.2 Accessible Attributes and the First Validation 43210.1.3 User/Micropost Associations 43310.1.4 Micropost Refinements 43910.1.5 Content Validations 443
10.2 Showing Microposts 44510.2.1 Augmenting the User Show Page 44610.2.2 Sample Microposts 450
10.3 Manipulating Microposts 45410.3.1 Access Control 45610.3.2 Creating Microposts 45910.3.3 A Proto-feed 46710.3.4 Destroying Microposts 475
10.4 Conclusion 47910.5 Exercises 480
www.it-ebooks.info
ptg8286261
Contents xiii
Chapter 11 Following Users 483
11.1 The Relationship Model 48411.1.1 A Problem with the Data Model (and a Solution) 48511.1.2 User/Relationship Associations 49111.1.3 Validations 49511.1.4 Followed users 49511.1.5 Followers 500
11.2 A Web Interface for Following Users 50311.2.1 Sample Following Data 50311.2.2 Stats and a Follow Form 50511.2.3 Following and Followers Pages 51511.2.4 A Working Follow Button the Standard Way 51911.2.5 A Working Follow Button with Ajax 524
11.3 The Status Feed 52911.3.1 Motivation and Strategy 53011.3.2 A First Feed Implementation 53211.3.3 Subselects 53511.3.4 The New Status Feed 538
11.4 Conclusion 53911.4.1 Extensions to the Sample Application 54011.4.2 Guide to Further Resources 542
11.5 Exercises 543
Index 545
www.it-ebooks.info

ptg8286261
Foreword to the First Edition
My former company (CD Baby) was one of the first to loudly switch to Ruby on Rails,and then even more loudly switch back to PHP (Google me to read about the drama).This book by Michael Hartl came so highly recommended that I had to try it, andRuby on RailsTM 3 Tutorial is what I used to switch back to Rails again.
Though I’ve worked my way through many Rails books, this is the one that finallymade me get it. Everything is done very much ‘‘the Rails way’’—a way that felt veryunnatural to me before, but now after doing this book finally feels natural. This is alsothe only Rails book that does test-driven development the entire time, an approachhighly recommended by the experts but which has never been so clearly demonstratedbefore. Finally, by including Git, GitHub, and Heroku in the demo examples, theauthor really gives you a feel for what it’s like to do a real-world project. The tutorial’scode examples are not in isolation.
The linear narrative is such a great format. Personally, I powered through the RailsTutorial in three long days, doing all the examples and challenges at the end of eachchapter. Do it from start to finish, without jumping around, and you’ll get the ultimatebenefit.
Enjoy!
—Derek Sivers (sivers.org)Formerly: Founder, CD Baby
Currently: Founder, Thoughts Ltd.
xv
www.it-ebooks.info

ptg8286261
Foreword to the First Edition
‘‘If you want to learn web development with Ruby on Rails, how should I start?’’ Foryears Michael Hartl has provided the answer as author of the RailsSpace tutorial in ourseries and now the new Ruby on RailsTM 3 Tutorial that you hold in your hands (or PDFreader, I guess).
I’m so proud of having Michael on the series roster. He is living, breathing proofthat us Rails folks are some of the luckiest in the wide world of technology. Beforegetting into Ruby, Michael taught theoretical and computational physics at Caltech forsix years, where he received the Lifetime Achievement Award for Excellence in Teachingin 2000. He is a Harvard graduate, has a Ph.D. in Physics from Caltech, and is analumnus of Paul Graham’s esteemed Y Combinator program for entrepreneurs. Andwhat does Michael apply his impressive experience and teaching prowess to? Teachingnew software developers all around the world how to use Ruby on Rails effectively!Lucky we are indeed!
The availability of this tutorial actually comes at a critical time for Rails adoption.We’re five years into the history of Rails and today’s version of the platform hasunprecedented power and flexibility. Experienced Rails folks can leverage that powereffectively, but we’re hearing growing cries of frustration from newcomers. The amountof information out there about Rails is fantastic if you know what you’re doingalready. However, if you’re new, the scope and mass of information about Rails can bemind-boggling.
Luckily, Michael takes the same approach as his first book in the series, buildinga sample application from scratch, and writes in a style that’s meant to be read fromstart to finish. Along the way, he explains all the little details that are likely to trip up
xvii
www.it-ebooks.info
ptg8286261
xviii Foreword to the First Edition
beginners. Impressively, he goes beyond just a straightforward explanation of what Railsdoes and ventures into prescriptive advice about good software development practices,such as test-driven development. Neither does Michael constrain himself to a boxdelineated by the extents of the Rails framework—he goes ahead and teaches the readerto use tools essential to existence in the Rails community, such as Git and GitHub.In a friendly style, he even provides copious contextual footnotes of benefit to newprogrammers, such as the pronunciation of SQL and pointers to the origins of loremipsum. Tying all the content together in a way that remains concise and usable is truly atour de force of dedication!
I tell you with all my heart that this book is one of the most significant titles inmy Professional Ruby Series, because it facilitates the continued growth of the Railsecosystem. By helping newcomers become productive members of the communityquickly, he ensures that Ruby on Rails continues its powerful and disruptive charge intothe mainstream. The Rails Tutorial is potent fuel for the fire that is powering growthand riches for so many of us, and for that we are forever grateful.
—Obie Fernandez, Series Editor
www.it-ebooks.info
ptg8286261
Acknowledgments
The Ruby on RailsTM Tutorial owes a lot to my previous Rails book, RailsSpace, andhence to my coauthor Aurelius Prochazka. I’d like to thank Aure both for the work hedid on that book and for his support of this one. I’d also like to thank Debra WilliamsCauley, my editor on both RailsSpace and the Ruby on RailsTM Tutorial ; as long as shekeeps taking me to baseball games, I’ll keep writing books for her.
I’d like to acknowledge a long list of Rubyists who have taught and inspired meover the years: David Heinemeier Hansson, Yehuda Katz, Carl Lerche, Jeremy Kemper,Xavier Noria, Ryan Bates, Geoffrey Grosenbach, Peter Cooper, Matt Aimonetti, GreggPollack, Wayne E. Seguin, Amy Hoy, Dave Chelimsky, Pat Maddox, Tom Preston-Werner, Chris Wanstrath, Chad Fowler, Josh Susser, Obie Fernandez, Ian McFarland,Steven Bristol, Wolfram Arnold, Alex Chaffee, Giles Bowkett, Evan Dorn, LongNguyen, James Lindenbaum, Adam Wiggins, Tikhon Bernstam, Ron Evans, WyattGreene, Miles Forrest, the good people at Pivotal Labs, the Heroku gang, the thoughtbotguys, and the GitHub crew. Thanks to Jen Lindner, Patty Donovan (Laserwords), andJulie Nahil and Michael Thurston from Pearson for their help with the book. Finally,many, many readers—far too many to list—have contributed a huge number of bugreports and suggestions during the writing of this book, and I gratefully acknowledgetheir help in making it as good as it can be.
xix
www.it-ebooks.info

ptg8286261
About the Author
Michael Hartl is the author of the Ruby on RailsTM Tutorial , the leading introductionto web development with Ruby on Rails. His prior experience includes writing anddeveloping RailsSpace, an extremely obsolete Rails tutorial book, and developing Insoshi,a once-popular and now-obsolete social networking platform in Ruby on Rails. In 2011,Michael received a Ruby Hero Award for his contributions to the Ruby community.He is a graduate of Harvard College, has a Ph.D. in physics from Caltech, and is analumnus of the Y Combinator entrepreneur program.
xxi
www.it-ebooks.info


ptg8286261
CHAPTER 1From Zero to Deploy
Welcome to Ruby on Rails™Tutorial . The goal of this book is to be the best answer to thequestion, ‘‘If I want to learn web development with Ruby on Rails, where should I start?’’By the time you finish the Rails Tutorial, you will have all the skills you need to developand deploy your own custom web applications with Rails. You will also be ready to benefitfrom the many more advanced books, blogs, and screencasts that are part of the thrivingRails educational ecosystem. Finally, since the Rails Tutorial uses Rails 3, the knowledgeyou gain here represents the state of the art in web development. (The most up-to-dateversion of the Rails Tutorial can be found on the book’s website at http://railstutorial.org;if you are reading this book offline, be sure to check the online version of the RailsTutorial book at http://railstutorial.org/book for the latest updates.)
Note that the goal of this book is not merely to teach Rails, but rather to teachweb development with Rails, which means acquiring (or expanding) the skills needed todevelop software for the World Wide Web. In addition to Ruby on Rails, this skillsetincludes HTML and CSS, databases, version control, testing, and deployment. Toaccomplish this goal, Rails Tutorial takes an integrated approach: You will learn Railsby example by building a substantial sample application from scratch. As Derek Siversnotes in the foreword, this book is structured as a linear narrative, designed to be readfrom start to finish. If you are used to skipping around in technical books, taking thislinear approach might require some adjustment, but I suggest giving it a try. You canthink of the Rails Tutorial as a video game where you are the main character and whereyou level up as a Rails developer in each chapter. (The exercises are the minibosses.)
1
www.it-ebooks.info
ptg8286261
2 Chapter 1: From Zero to Deploy
In this first chapter, we’ll get started with Ruby on Rails by installing all the necessarysoftware and by setting up our development environment (Section 1.2). We’ll thencreate our first Rails application, called (appropriately enough) first_app. The RailsTutorial emphasizes good software development practices, so immediately after creatingour fresh new Rails project we’ll put it under version control with Git (Section 1.3).And, believe it or not, in this chapter we’ll even put our first app on the wider web bydeploying it to production (Section 1.4).
In Chapter 2, we’ll make a second project, whose purpose is to demonstrate thebasic workings of a Rails application. To get up and running quickly, we’ll build thisdemo app (called demo_app) using scaffolding (Box 1.1) to generate code; since thiscode is both ugly and complex, Chapter 2 will focus on interacting with the demo appthrough its URIs (sometimes called URLs)1 using a web browser.
The rest of the tutorial focuses on developing a single large sample application (calledsample_app), writing all the code from scratch. We’ll develop the sample app usingtest-driven development (TDD), getting started in Chapter 3 by creating static pagesand then adding a little dynamic content. We’ll take a quick detour in Chapter 4 tolearn a little about the Ruby language underlying Rails. Then, in Chapter 5 throughChapter 9, we’ll complete the foundation for the sample application by making a sitelayout, a user data model, and a full registration and authentication system. Finally,in Chapter 10 and Chapter 11 we’ll add microblogging and social features to make aworking example site.
The final sample application will bear more than a passing resemblance to a certainpopular social microblogging site—a site that, coincidentally, was also originally writtenin Rails. Although of necessity our efforts will focus on this specific sample application,the emphasis throughout the Rails Tutorial will be on general principles, so that you willhave a solid foundation no matter what kinds of web applications you want to build.
Box 1.1 Scaffolding: Quicker, Easier, More Seductive
From the beginning, Rails has benefited from a palpable sense of excitement,starting with the famous 15-minute weblog video by Rails creator David HeinemeierHansson. That video and its successors are a great way to get a taste of Rails’ power,
1. URI stands for Uniform Resource Identifier, while the slightly less general URL stands for Uniform ResourceLocator. In practice, the URI is usually equivalent to ‘‘the thing you see in the address bar of your browser.’’
www.it-ebooks.info
ptg8286261
1.1 Introduction 3
and I recommend watching them. But be warned: They accomplish their amazing15-minute feat using a feature called scaffolding, which relies heavily on generatedcode, magically created by the Rails generate command.
When writing a Ruby on Rails tutorial, it is tempting to rely on the scaffoldingapproach—it’s quicker, easier, more seductive. But the complexity and sheer amountof code in the scaffolding can be utterly overwhelming to a beginning Rails developer;you may be able to use it, but you probably won’t understand it. Following thescaffolding approach risks turning you into a virtuoso script generator with little (andbrittle) actual knowledge of Rails.
In the Rails Tutorial, we’ll take the (nearly) polar opposite approach: AlthoughChapter 2 will develop a small demo app using scaffolding, the core of the RailsTutorial is the sample app, which we’ll start writing in Chapter 3. At each stage ofdeveloping the sample application, we will write small, bite-sized pieces of code—sim-ple enough to understand, yet novel enough to be challenging. The cumulative effectwill be a deeper, more flexible knowledge of Rails, giving you a good backgroundfor writing nearly any type of web application.
1.1 IntroductionSince its debut in 2004, Ruby on Rails has rapidly become one of the most powerfuland popular frameworks for building dynamic web applications. Everyone from scrappystartups to huge companies have used Rails: 37signals, GitHub, Shopify, Scribd, Twitter,LivingSocial, Groupon, Hulu, the Yellow Pages—the list of sites using Rails goes onand on. There are also many web development shops that specialize in Rails, suchas ENTP, thoughtbot, Pivotal Labs, and Hashrocket, plus innumerable independentconsultants, trainers, and contractors.
What makes Rails so great? First of all, Ruby on Rails is 100 percent open-source,available under the permissive MIT License, and as a result it also costs nothing todownload or use. Rails also owes much of its success to its elegant and compact design;by exploiting the malleability of the underlying Ruby language, Rails effectively createsa domain-specific language for writing web applications. As a result, many commonweb programming tasks—such as generating HTML, making data models, and routingURIs—are easy with Rails, and the resulting application code is concise and readable.
Rails also adapts rapidly to new developments in web technology and frameworkdesign. For example, Rails was one of the first frameworks to fully digest and implementthe REST architectural style for structuring web applications (which we’ll be learning
www.it-ebooks.info
ptg8286261
4 Chapter 1: From Zero to Deploy
about throughout this tutorial). And when other frameworks develop successful newtechniques, Rails creator David Heinemeier Hansson and the Rails core team don’thesitate to incorporate their ideas. Perhaps the most dramatic example is the merger ofRails and Merb, a rival Ruby web framework, so that Rails now benefits from Merb’smodular design, stable API, and improved performance.
Finally, Rails benefits from an unusually enthusiastic and diverse community. Theresults include hundreds of open-source contributors, well-attended conferences, a hugenumber of plugins and gems (self-contained solutions to specific problems such aspagination and image upload), a rich variety of informative blogs, and a cornucopiaof discussion forums and IRC channels. The large number of Rails programmers alsomakes it easier to handle the inevitable application errors: The ‘‘Google the errormessage’’ algorithm nearly always produces a relevant blog post or discussion-forumthread.
1.1.1 Comments for Various Readers
The Rails Tutorial contains integrated tutorials not only for Rails, but also for theunderlying Ruby language, the RSpec testing framework, HTML, CSS, a small amountof JavaScript, and even a little SQL. This means that, no matter where you currentlyare in your knowledge of web development, by the time you finish this tutorial youwill be ready for more advanced Rails resources, as well as for the more systematictreatments of the other subjects mentioned. It also means that there’s a lot of materialto cover; if you don’t already have experience programming computers, you might findit overwhelming. The comments below contain some suggestions for approaching theRails Tutorial depending on your background.
All readers: One common question when learning Rails is whether to learn Rubyfirst. The answer depends on your personal learning style and how much programmingexperience you already have. If you prefer to learn everything systematically from theground up, or if you have never programmed before, then learning Ruby first mightwork well for you, and in this case I recommend Beginning Ruby by Peter Cooper.On the other hand, many beginning Rails developers are excited about making webapplications, and would rather not slog through a 500-page book on pure Ruby beforeever writing a single web page. In this case, I recommend following the short interactive
www.it-ebooks.info
ptg8286261
1.1 Introduction 5
tutorial at TryRuby,2 and then optimally do the free tutorial at Rails for Zombies3 toget a taste of what Rails can do.
Another common question is whether to use tests from the start. As noted inthe introduction, the Rails Tutorial uses test-driven development (also called test-firstdevelopment), which in my view is the best way to develop Rails applications, but itdoes introduce a substantial amount of overhead and complexity. If you find yourselfgetting bogged down by the tests, I suggest either skipping them on a first reading or(even better) using them as a tool to verify your code’s correctness without worryingabout how they work. This latter strategy involves creating the necessary test files (calledspecs) and filling them with the test code exactly as it appears in the book. You can thenrun the test suite (as described in Chapter 5) to watch it fail, then write the applicationcode as described in the tutorial, and finally re-run the test suite to watch it pass.
Inexperienced programmers: The Rails Tutorial is not aimed principally at beginningprogrammers, and web applications, even relatively simple ones, are by their naturefairly complex. If you are completely new to web programming and find the RailsTutorial too difficult, I suggest learning the basics of HTML and CSS and thengiving the Rails Tutorial another go. (Unfortunately, I don’t have a personal recom-mendation here, but Head First HTML looks promising, and one reader recommendsCSS: The Missing Manual by David Sawyer McFarland.) You might also consider read-ing the first few chapters of Beginning Ruby by Peter Cooper, which starts with sampleapplications much smaller than a full-blown web app. That said, a surprising numberof beginners have used this tutorial to learn web development, so I suggest giving ita try, and I especially recommend the Rails Tutorial screencast series4 to give you an‘‘over-the-shoulder’’ look at Rails software development.
Experienced programmers new to web development: Your previous experience meansyou probably already understand ideas like classes, methods, data structures, and others,which is a big advantage. Be warned that if your background is in C/C++ or Java, you
2. http://tryruby.org
3. http://railsforzombies.org
4. http://railstutorial.org/screencasts
www.it-ebooks.info
ptg8286261
6 Chapter 1: From Zero to Deploy
may find Ruby a bit of an odd duck, and it might take time to get used to it; just stickwith it and eventually you’ll be fine. (Ruby even lets you put semicolons at the ends oflines if you miss them too much.) The Rails Tutorial covers all the web-specific ideasyou’ll need, so don’t worry if you don’t currently know a PUT from a POST.
Experienced web developers new to Rails: You have a great head start, especially ifyou have used a dynamic language such as PHP or (even better) Python. The basics ofwhat we cover will likely be familiar, but test-driven development may be new to you,as may be the structured REST style favored by Rails. Ruby has its own idiosyncrasies,so those will likely be new, too.
Experienced Ruby programmers: The set of Ruby programmers who don’t knowRails is a small one nowadays, but if you are a member of this elite group you can flythrough this book and then move on to The Rails 3 Way by Obie Fernandez.
Inexperienced Rails programmers: You’ve perhaps read some other tutorials and madea few small Rails apps yourself. Based on reader feedback, I’m confident that you canstill get a lot out of this book. Among other things, the techniques here may be moreup-to-date than the ones you picked up when you originally learned Rails.
Experienced Rails programmers: This book is unnecessary for you, but many expe-rienced Rails developers have expressed surprise at how much they learned from thisbook, and you might enjoy seeing Rails from a different perspective.
After finishing the Ruby on Rails Tutorial, I recommend that experienced program-mers read The Well-Grounded Rubyist by David A. Black, which is an excellent in-depthdiscussion of Ruby from the ground up, or The Ruby Way by Hal Fulton, which is alsofairly advanced but takes a more topical approach. Then move on to The Rails 3 Wayto deepen your Rails expertise.
At the end of this process, no matter where you started, you should be ready forthe many more intermediate-to-advanced Rails resources out there. Here are some Iparticularly recommend:
• RailsCasts by Ryan Bates: Excellent (mostly) free Rails screencasts
• PeepCode: Excellent commercial screencasts
www.it-ebooks.info
ptg8286261
1.1 Introduction 7
• Code School: Interactive programming courses
• Rails Guides: Good topical and up-to-date Rails references
• RailsCasts by Ryan Bates: Did I already mention RailsCasts? Seriously: RailsCasts.
1.1.2 ‘‘Scaling’’ Rails
Before moving on with the rest of the introduction, I’d like to take a moment toaddress the one issue that dogged the Rails framework the most in its early days: thesupposed inability of Rails to ‘‘scale’’—i.e., to handle large amounts of traffic. Partof this issue relied on a misconception; you scale a site, not a framework, and Rails, asawesome as it is, is only a framework. So the real question should have been, ‘‘Can asite built with Rails scale?’’ In any case, the question has now been definitively answeredin the affirmative: Some of the most heavily trafficked sites in the world use Rails.Actually doing the scaling is beyond the scope of just Rails, but rest assured that if yourapplication ever needs to handle the load of Hulu or the Yellow Pages, Rails won’t stopyou from taking over the world.
1.1.3 Conventions in This Book
The conventions in this book are mostly self-explanatory. In this section, I’ll mentionsome that may not be.
Both the HTML and PDF editions of this book are full of links, both to internalsections (such as Section 1.2) and to external sites (such as the main Ruby on Railsdownload page).5
Many examples in this book use command-line commands. For simplicity, allcommand line examples use a Unix-style command line prompt (a dollar sign), asfollows:
$ echo "hello, world"
hello, world
5. When reading the Rails Tutorial, you may find it convenient to follow an internal section link to look atthe reference and then immediately go back to where you were before. This is easy when reading the bookas a web page, since you can just use the Back button of your browser, but both Adobe Reader and OS X’sPreview allow you to do this with the PDF as well. In Reader, you can right-click on the document and select‘‘Previous View’’ to go back. In Preview, use the Go menu: Go > Back.
www.it-ebooks.info
ptg8286261
8 Chapter 1: From Zero to Deploy
Windows users should understand that their systems will use the analogous angleprompt >:
C:\Sites> echo "hello, world"
hello, world
On Unix systems, some commands should be executed with sudo, which standsfor ‘‘substitute user do.’’ By default, a command executed with sudo is run as anadministrative user, which has access to files and directories that normal users can’ttouch, such as in this example from Section 1.2.2:
$ sudo ruby setup.rb
Most Unix/Linux/OS X systems require sudo by default, unless you are using RubyVersion Manager as suggested in Section 1.2.2; in this case, you would type thisinstead:
$ ruby setup.rb
Rails comes with lots of commands that can be run at the command line. Forexample, in Section 1.2.5 we’ll run a local development web server as follows:
$ rails server
As with the command-line prompt, the Rails Tutorial uses the Unix convention fordirectory separators (i.e., a forward slash /). My Rails Tutorial sample application, forinstance, lives in
/Users/mhartl/rails projects/sample app
On Windows, the analogous directory would be
C:\Sites\sample app
The root directory for any given app is known as the Rails root, but this terminologyis confusing and many people mistakenly believe that the ‘‘Rails root’’ is the rootdirectory for Rails itself. For clarity, the Rails Tutorial will refer to the Rails root as
www.it-ebooks.info
ptg8286261
1.2 Up and Running 9
the application root, and henceforth all directories will be relative to this directory. Forexample, the config directory of my sample application is
/Users/mhartl/rails projects/sample app/config
The application root directory here is everything before config, that is,
/Users/mhartl/rails projects/sample app
For brevity, when referring to the file
/Users/mhartl/rails projects/sample app/config/routes.rb
I’ll omit the application root and simply write config/routes.rb.The Rails Tutorial often shows output from various programs (shell commands,
version control status, Ruby programs, etc.). Because of the innumerable small differ-ences between different computer systems, the output you see may not always agreeexactly with what is shown in the text, but this is not cause for concern.
Some commands may produce errors depending on your system; rather thanattempt the Sisyphean task of documenting all such errors in this tutorial, I willdelegate to the ‘‘Google the error message’’ algorithm, which among other things isgood practice for real-life software development. If you run into any problems whilefollowing the tutorial, I suggest consulting the resources listed on the Rails Tutorialhelp page.6
1.2 Up and RunningI think of Chapter 1 as the ‘‘weeding out phase’’ in law school—if you can get yourdev environment set up, the rest is easy to get through.
—Bob Cavezza, Rails Tutorial reader
It’s time now to get going with a Ruby on Rails development environment andour first application. There is quite a bit of overhead here, especially if you don’t have
6. http://railstutorial.org/help
www.it-ebooks.info
ptg8286261
10 Chapter 1: From Zero to Deploy
extensive programming experience, so don’t get discouraged if it takes a while to getstarted. It’s not just you; every developer goes through it (often more than once), butrest assured that the effort will be richly rewarded.
1.2.1 Development Environments
Considering various idiosyncratic customizations, there are probably as many devel-opment environments as there are Rails programmers, but there are at least twobroad types: text editor/command line environments, and integrated development envi-ronments (IDEs). Let’s consider the latter first.
IDEsThere is no shortage of Rails IDEs, including RadRails, RubyMine, and 3rd Rail.I’ve heard especially good things about RubyMine, and one reader (David Loeffler)has assembled notes on how to use RubyMine with this tutorial.7 If you’re comfortableusing an IDE, I suggest taking a look at the options mentioned to see what fits with theway you work.
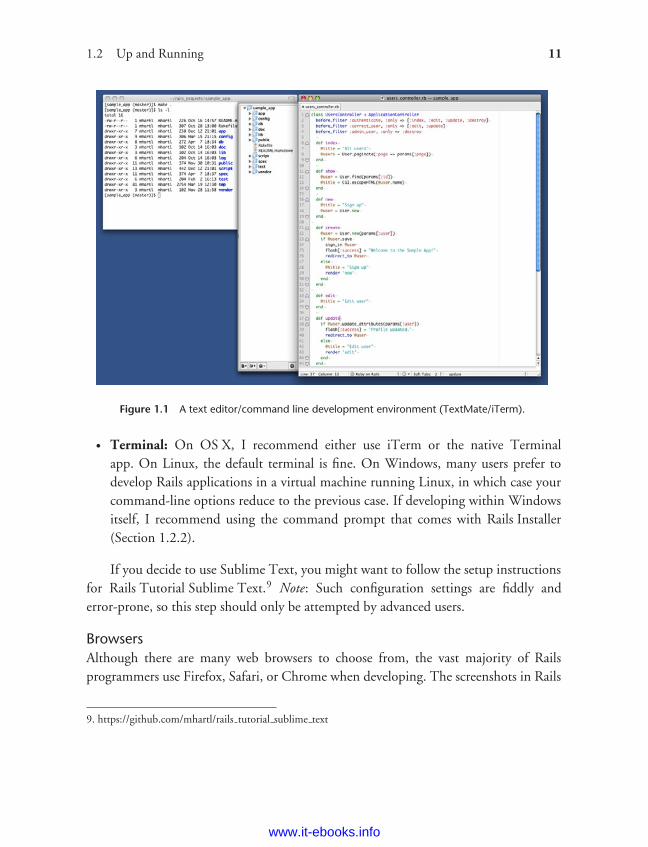
Text Editors and Command LinesInstead of using an IDE, I prefer to use a text editor to edit text, and a command line toissue commands (Figure 1.1). Which combination you use depends on your tastes andyour platform.
• Text editor: I recommend Sublime Text 2, an outstanding cross-platform texteditor that is in beta as of this writing but has already proven to be exceptionallypowerful. Sublime Text is heavily influenced by TextMate, and in fact is compatiblewith most TextMate customizations, such as snippets and color schemes. (TextMate,which is available only on OS X, is still a good choice if you use a Mac.) A secondexcellent choice is Vim,8 versions of which are available for all major platforms.Sublime Text is a commercial product, whereas Vim is free and open-source;both are industrial-strength editors, but Sublime Text is much more accessible tobeginners.
7. https://github.com/perfectionist/sample project/wiki
8. The vi editor is one of the most ancient yet powerful weapons in the Unix arsenal, and Vim is ‘‘vi improved.’’
www.it-ebooks.info
ptg8286261
1.2 Up and Running 11
Figure 1.1 A text editor/command line development environment (TextMate/iTerm).
• Terminal: On OS X, I recommend either use iTerm or the native Terminalapp. On Linux, the default terminal is fine. On Windows, many users prefer todevelop Rails applications in a virtual machine running Linux, in which case yourcommand-line options reduce to the previous case. If developing within Windowsitself, I recommend using the command prompt that comes with Rails Installer(Section 1.2.2).
If you decide to use Sublime Text, you might want to follow the setup instructionsfor Rails Tutorial Sublime Text.9 Note: Such configuration settings are fiddly anderror-prone, so this step should only be attempted by advanced users.
BrowsersAlthough there are many web browsers to choose from, the vast majority of Railsprogrammers use Firefox, Safari, or Chrome when developing. The screenshots in Rails
9. https://github.com/mhartl/rails tutorial sublime text
www.it-ebooks.info
ptg8286261
12 Chapter 1: From Zero to Deploy
Tutorial will generally be of a Firefox browser. If you use Firefox, I suggest usingthe Firebug add-on, which lets you perform all sorts of magic, such as dynamicallyinspecting (and even editing) the HTML structure and CSS rules on any page. Forthose not using Firefox, both Safari and Chrome have a built-in ‘‘Inspect element’’feature available by right-clicking on any part of the page.
A Note about ToolsIn the process of getting your development environment up and running, you mayfind that you spend a lot of time getting everything just right. The learning process foreditors and IDEs is particularly long; you can spend weeks on Sublime Text or Vimtutorials alone. If you’re new to this game, I want to assure you that spending timelearning tools is normal. Everyone goes through it. Sometimes it is frustrating, and it’seasy to get impatient when you have an awesome web app in your head and you justwant to learn Rails already, but have to spend a week learning some weird ancient Unixeditor just to get started. But a craftsman has to know his tools, and in the end thereward is worth the effort.
1.2.2 Ruby, RubyGems, Rails, and GitPractically all the software in the world is either broken or very difficult to use.So users dread software. They’ve been trained that whenever they try to installsomething, or even fill out a form online, it’s not going to work. I dread installingstuff, and I have a Ph.D. in computer science.
—Paul Graham, Founders at Work
Now it’s time to install Ruby and Rails. I’ve done my best to cover as many basesas possible, but systems vary, and many things can go wrong during these steps. Besure to Google the error message or consult the Rails Tutorial help page if you run intotrouble.
Unless otherwise noted, you should use the exact versions of all software usedin the tutorial, including Rails itself, if you want the same results. Sometimesminor version differences will yield identical results, but you shouldn’t count on this,especially with respect to Rails versions. The main exception is Ruby itself: 1.9.2and 1.9.3 are virtually identical for the purposes of this tutorial, so feel free to useeither one.
www.it-ebooks.info
ptg8286261
1.2 Up and Running 13
Rails Installer (Windows)Installing Rails on Windows used to be a real pain, but thanks to the efforts of the goodpeople at Engine Yard—especially Dr. Nic Williams and Wayne E. Seguin—installingRails and related software on Windows is now easy. If you are using Windows, goto Rails Installer and download the Rails Installer executable and view the excellentinstallation video. Double-click the executable and follow the instructions to installGit (so you can skip Section 1.2.2), Ruby (skip Section 1.2.2), RubyGems (skipSection 1.2.2), and Rails itself (skip Section 1.2.2). Once the installation has finished,you can skip right to the creation of the first application in Section 1.2.3.
Bear in mind that the Rails Installer might use a slightly different version of Railsfrom the one installed in Section 1.2.2, which might cause incompatibilities. To fix this,I am currently working with Nic and Wayne to create a list of Rails Installers orderedby Rails version number.
Install GitMuch of the Rails ecosystem depends in one way or another on a version control systemcalled Git (covered in more detail in Section 1.3). Because its use is ubiquitous, youshould install Git even at this early stage; I suggest following the installation instructionsfor your platform at the Installing Git section of Pro Git.
Install RubyThe next step is to install Ruby. It’s possible that your system already has it; tryrunning
$ ruby -v
ruby 1.9.3
to see the version number. Rails 3 requires Ruby 1.8.7 or later and works best withRuby 1.9.x. This tutorial assumes that most readers are using Ruby 1.9.2 or 1.9.3, butRuby 1.8.7 should work as well (although there is one syntax difference, covered inChapter 4, and assorted minor differences in output).
As part of installing Ruby, if you are using OS X or Linux, I strongly recom-mend using Ruby Version Manager (RVM), which allows you to install and managemultiple versions of Ruby on the same machine. (The Pik project accomplishes asimilar feat on Windows.) This is particularly important if you want to run different
www.it-ebooks.info
ptg8286261
14 Chapter 1: From Zero to Deploy
versions of Ruby or Rails on the same machine. If you run into any problems withRVM, you can often find its creator, Wayne E. Seguin, on the RVM IRC channel(#rvm on freenode.net).10 If you are running Linux, I particularly recommend theinstallation tutorial for Linux Ubuntu and Linux Mint by Mircea Goia.
After installing RVM, you can install Ruby as follows:11
$ rvm get head && rvm reload
$ rvm install 1.9.3
<wait a while>
Here the first command updates and reloads RVM itself, which is a good practice sinceRVM gets updated frequently. The second installs the 1.9.3 version of Ruby; dependingon your system, it might take a while to download and compile, so don’t worry if itseems to be taking forever.
Some Linux users report having to include the path to a library called OpenSSL:
$ rvm install 1.9.3 --with-openssl-dir=$HOME/.rvm.usr
On some older OS X systems, you might have to include the path to the readlinelibrary:
$ rvm install 1.9.3 --with-readline-dir=/opt/local
(Like I said, lots of things can go wrong. The only solution is web searches anddetermination.)
After installing Ruby, you should configure your system for the other softwareneeded to run Rails applications. This typically involves installing gems, which areself-contained packages of Ruby code. Since gems with different version numberssometimes conflict, it is often convenient to create separate gemsets, which are self-contained bundles of gems. For the purposes of this tutorial, I suggest creating a gemsetcalled rails3tutorial2ndEd:
$ rvm use 1.9.3@rails3tutorial2ndEd --create --default
Using /Users/mhartl/.rvm/gems/ruby-1.9.3 with gemset rails3tutorial2ndEd
10. If you haven’t used IRC before, I suggest you start by searching the web for ‘‘irc client <your platform>.’’Two good native clients for OS X are Colloquy and LimeChat. And of course there’s always the web interfaceat http://webchat.freenode.net/?channels=rvm.
11. You might have to install the Subversion version control system to get this to work.
www.it-ebooks.info
ptg8286261
1.2 Up and Running 15
This command creates (--create) the gemset rails3tutorial2ndEd associated withRuby 1.9.3 while arranging to start using it immediately (use) and setting it as thedefault (--default) gemset, so that any time we open a new terminal window the1.9.3@rails3tutorial2ndEd Ruby/gemset combination is automatically selected.RVM supports a large variety of commands for manipulating gemsets; see the docu-mentation at http://rvm.beginrescueend.com/gemsets. If you ever get stuck with RVM,running commands like these should help you get your bearings:
$ rvm --help
$ rvm gemset --help
Install RubyGemsRubyGems is a package manager for Ruby projects, and there are many useful libraries(including Rails) available as Ruby packages, or gems. Installing RubyGems shouldbe easy once you install Ruby. In fact, if you have installed RVM, you already haveRubyGems, since RVM includes it automatically:
$ which gem
/Users/mhartl/.rvm/rubies/ruby-1.9.3-p0/bin/gem
If you don’t already have it, you should download RubyGems, extract it, and then goto the rubygems directory and run the setup program:
$ ruby setup.rb
(If you get a permissions error here, recall from Section 1.1.3 that you may have to usesudo.)
If you already have RubyGems installed, you should make sure your system usesthe version used in this tutorial:
$ gem update --system 1.8.24
Freezing your system to this particular version will help prevent conflicts as RubyGemschanges in the future.
When installing gems, by default RubyGems generates two different kinds ofdocumentation (called ri and rdoc), but many Ruby and Rails developers find thatthe time to build them isn’t worth the benefit. (Many programmers rely on onlinedocumentation instead of the native ri and rdoc documents.) To prevent the automatic
www.it-ebooks.info
ptg8286261
16 Chapter 1: From Zero to Deploy
generation of the documentation, I recommend making a gem configuration file called.gemrc in your home directory as in Listing 1.1 with the line in Listing 1.2. (Thetilde ‘‘˜’’ means ‘‘home directory,’’ while the dot . in .gemrc makes the file hidden,which is a common convention for configuration files. )
Listing 1.1 Creating a gem configuration file.
$ subl ˜/.gemrc
Here subl is the command-line command to launch Sublime Text on OS X, whichyou can set up using the Sublime Text 2 documentation for the OS X command line.If you’re on a different platform, or if you’re using a different editor, you should replacethis command as necessary (i.e., by double-clicking the application icon or by using analternate command such as mate, vim, gvim, or mvim). For brevity, throughout the restof this tutorial I’ll use subl as a shorthand for ‘‘open with your favorite text editor.’’
Listing 1.2 Suppressing the ri and rdoc documentation in .gemrc.
install: --no-rdoc --no-ri
update: --no-rdoc --no-ri
Install RailsOnce you’ve installed RubyGems, installing Rails should be easy. This tutorial stan-dardizes on Rails 3.2, which we can install as follows:
$ gem install rails -v 3.2.3
To check your Rails installation, run the following command to print out the versionnumber:
$ rails -v
Rails 3.2.3
Note: If you installed Rails using the Rails Installer in Section 1.2.2, there might beslight version differences. As of this writing, those differences are not relevant, but inthe future, as the current Rails version diverges from the one used in this tutorial, thesedifferences may become significant. I am currently working with Engine Yard to createlinks to specific versions of the Rails Installer.
www.it-ebooks.info
ptg8286261
1.2 Up and Running 17
If you’re running Linux, you might have to install a couple of other packages atthis point:
$ sudo apt-get install libxslt-dev libxml2-dev libsqlite3-dev # Linux only
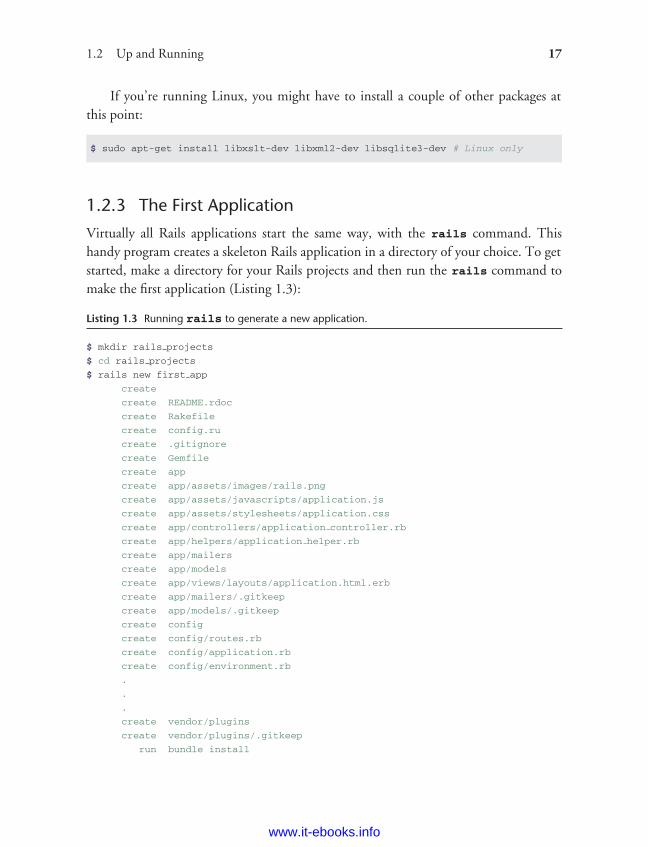
1.2.3 The First Application
Virtually all Rails applications start the same way, with the rails command. Thishandy program creates a skeleton Rails application in a directory of your choice. To getstarted, make a directory for your Rails projects and then run the rails command tomake the first application (Listing 1.3):
Listing 1.3 Running rails to generate a new application.
$ mkdir rails projects
$ cd rails projects
$ rails new first app
create
create README.rdoc
create Rakefile
create config.ru
create .gitignore
create Gemfile
create app
create app/assets/images/rails.png
create app/assets/javascripts/application.js
create app/assets/stylesheets/application.css
create app/controllers/application controller.rb
create app/helpers/application helper.rb
create app/mailers
create app/models
create app/views/layouts/application.html.erb
create app/mailers/.gitkeep
create app/models/.gitkeep
create config
create config/routes.rb
create config/application.rb
create config/environment.rb
.
.
.
create vendor/plugins
create vendor/plugins/.gitkeep
run bundle install
www.it-ebooks.info
ptg8286261
18 Chapter 1: From Zero to Deploy
Fetching source index for https://rubygems.org/
.
.
.
Your bundle is complete! Use 'bundle show [gemname]' to see where a bundled
gem is installed.
As seen at the end of Listing 1.3, running rails automatically runs the bundle
install command after the file creation is done. If that step doesn’t work right now,don’t worry; follow the steps in Section 1.2.4 and you should be able to get it to work.
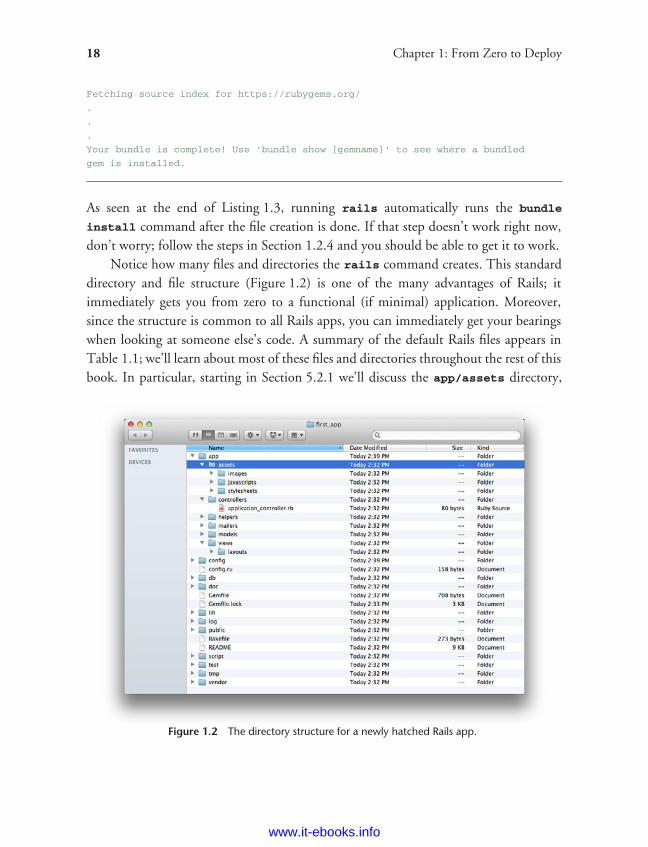
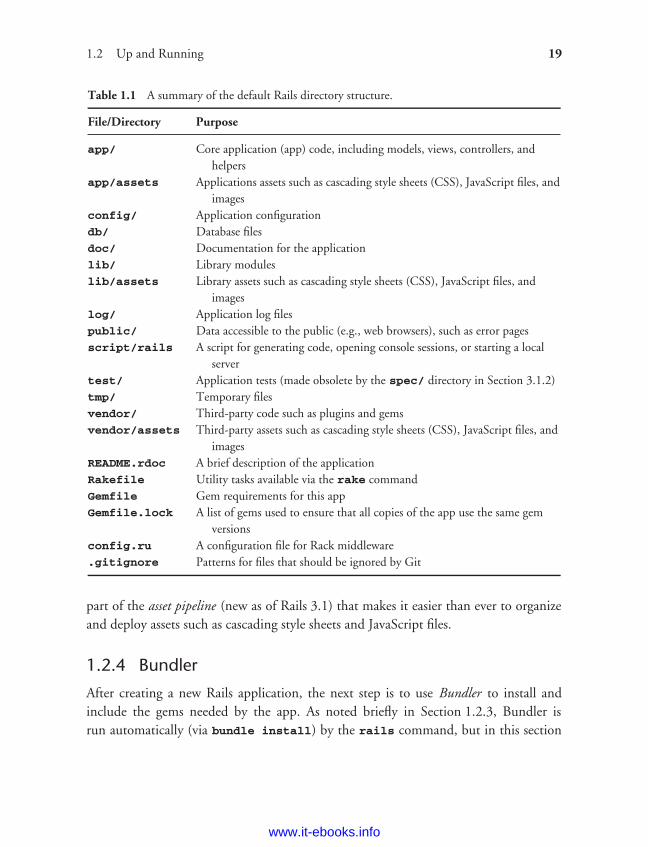
Notice how many files and directories the rails command creates. This standarddirectory and file structure (Figure 1.2) is one of the many advantages of Rails; itimmediately gets you from zero to a functional (if minimal) application. Moreover,since the structure is common to all Rails apps, you can immediately get your bearingswhen looking at someone else’s code. A summary of the default Rails files appears inTable 1.1; we’ll learn about most of these files and directories throughout the rest of thisbook. In particular, starting in Section 5.2.1 we’ll discuss the app/assets directory,
Figure 1.2 The directory structure for a newly hatched Rails app.
www.it-ebooks.info
ptg8286261
1.2 Up and Running 19
Table 1.1 A summary of the default Rails directory structure.
File/Directory Purpose
app/ Core application (app) code, including models, views, controllers, andhelpers
app/assets Applications assets such as cascading style sheets (CSS), JavaScript files, andimages
config/ Application configurationdb/ Database filesdoc/ Documentation for the applicationlib/ Library moduleslib/assets Library assets such as cascading style sheets (CSS), JavaScript files, and
imageslog/ Application log filespublic/ Data accessible to the public (e.g., web browsers), such as error pagesscript/rails A script for generating code, opening console sessions, or starting a local
servertest/ Application tests (made obsolete by the spec/ directory in Section 3.1.2)tmp/ Temporary filesvendor/ Third-party code such as plugins and gemsvendor/assets Third-party assets such as cascading style sheets (CSS), JavaScript files, and
imagesREADME.rdoc A brief description of the applicationRakefile Utility tasks available via the rake commandGemfile Gem requirements for this appGemfile.lock A list of gems used to ensure that all copies of the app use the same gem
versionsconfig.ru A configuration file for Rack middleware.gitignore Patterns for files that should be ignored by Git
part of the asset pipeline (new as of Rails 3.1) that makes it easier than ever to organizeand deploy assets such as cascading style sheets and JavaScript files.
1.2.4 Bundler
After creating a new Rails application, the next step is to use Bundler to install andinclude the gems needed by the app. As noted briefly in Section 1.2.3, Bundler isrun automatically (via bundle install) by the rails command, but in this section
www.it-ebooks.info
ptg8286261
20 Chapter 1: From Zero to Deploy
we’ll make some changes to the default application gems and run Bundler again. Thisinvolves opening the Gemfile with your favorite text editor:
$ cd first app/
$ subl Gemfile
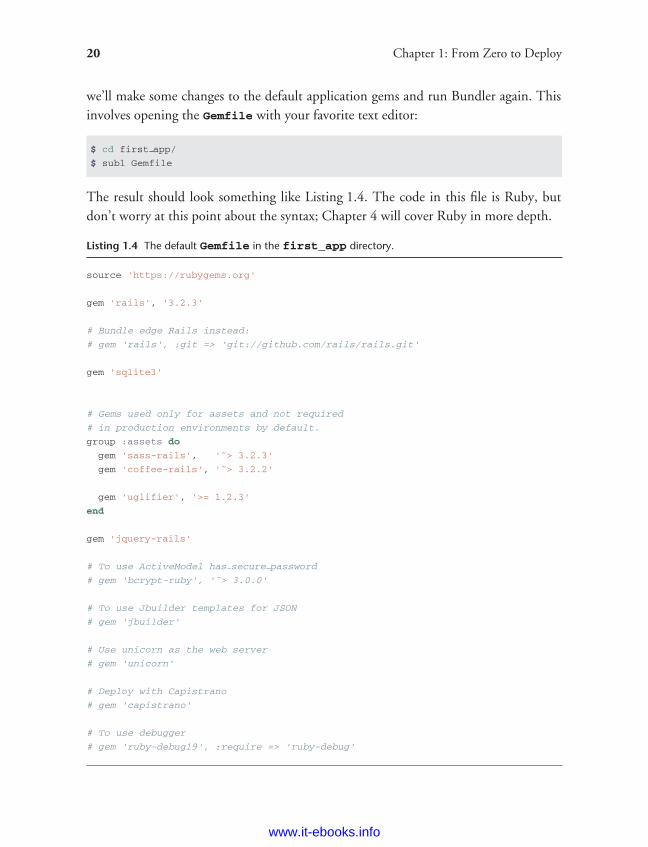
The result should look something like Listing 1.4. The code in this file is Ruby, butdon’t worry at this point about the syntax; Chapter 4 will cover Ruby in more depth.
Listing 1.4 The default Gemfile in the first_app directory.
source 'https://rubygems.org'
gem 'rails', '3.2.3'
# Bundle edge Rails instead:
# gem 'rails', :git => 'git://github.com/rails/rails.git'
gem 'sqlite3'
# Gems used only for assets and not required
# in production environments by default.
group :assets do
gem 'sass-rails', '˜> 3.2.3'
gem 'coffee-rails', '˜> 3.2.2'
gem 'uglifier', '>= 1.2.3'
end
gem 'jquery-rails'
# To use ActiveModel has secure password
# gem 'bcrypt-ruby', '˜> 3.0.0'
# To use Jbuilder templates for JSON
# gem 'jbuilder'
# Use unicorn as the web server
# gem 'unicorn'
# Deploy with Capistrano
# gem 'capistrano'
# To use debugger
# gem 'ruby-debug19', :require => 'ruby-debug'
www.it-ebooks.info
ptg8286261
1.2 Up and Running 21
Many of these lines are commented out with the hash symbol #; they are there to showyou some commonly needed gems and to give examples of the Bundler syntax. Fornow, we won’t need any gems other than the defaults: Rails itself, some gems relatedto the asset pipeline (Section 5.2.1), the gem for the jQuery JavaScript library, and thegem for the Ruby interface to the SQLite database.
Unless you specify a version number to the gem command, Bundler will automati-cally install the latest version of the gem. Unfortunately, gem updates often cause minorbut potentially confusing breakage, so in this tutorial we’ll include explicit versionnumbers known to work, as seen in Listing 1.5 (which also omits the commented-outlines from Listing 1.4).
Listing 1.5 A Gemfile with an explicit version of each Ruby gem.
source 'https://rubygems.org'
gem 'rails', '3.2.3'
group :development do
gem 'sqlite3', '1.3.5'
end
# Gems used only for assets and not required
# in production environments by default.
group :assets do
gem 'sass-rails', '3.2.4'
gem 'coffee-rails', '3.2.2'
gem 'uglifier', '1.2.3'
end
gem 'jquery-rails', '2.0.0'
Listing 1.5 changes the line for jQuery, the default JavaScript library used by Rails,from
gem 'jquery-rails'
to
gem 'jquery-rails', '2.0.0'
www.it-ebooks.info
ptg8286261
22 Chapter 1: From Zero to Deploy
We’ve also changed
gem 'sqlite3'
to
group :development do
gem 'sqlite3', '1.3.5'
end
which forces Bundler to install version 1.3.5 of the sqlite3 gem. Note that we’vealso taken this opportunity to arrange for SQLite to be included only in a developmentenvironment (Section 7.1.1), which prevents potential conflicts with the database usedby Heroku (Section 1.4).
Listing 1.5 also changes a few other lines, converting
group :assets do
gem 'sass-rails', '˜> 3.2.3'
gem 'coffee-rails', '˜> 3.2.2'
gem 'uglifier', '>= 1.2.3'
end
to
group :assets do
gem 'sass-rails', '3.2.4'
gem 'coffee-rails', '3.2.2'
gem 'uglifier', '1.2.3'
end
The syntax
gem 'uglifier', '>= 1.2.3'
installs the latest version of the uglifier gem (which handles file compression for theasset pipeline) as long as it’s greater than version 1.2.3—even if it’s, say, version 7.2.Meanwhile, the code
gem 'coffee-rails', '˜> 3.2.2'
installs the gem coffee-rails (also needed by the asset pipeline) as long as it’s lowerthan version 3.3. In other words, the >= notation always performs upgrades, whereas
www.it-ebooks.info
ptg8286261
1.2 Up and Running 23
the ˜> 3.2.2 notation only performs upgrades to minor point releases (e.g., from 3.1.1
to 3.1.2), but not to major point releases (e.g., from 3.1 to 3.2). Unfortunately,experience shows that even minor point releases often break things, so for the RailsTutorial we’ll err on the side of caution by including exact version numbers for virtuallyall gems. (The only exception is gems that are in release candidate or beta stage as ofthis writing; for those gems, we’ll use ˜> so that the final versions will be loaded oncethey’re done.)
Once you’ve assembled the proper Gemfile, install the gems using bundle
install:
$ bundle install
Fetching source index for https://rubygems.org/
.
.
.
(If you’re running OS X and you get an error about missing Ruby header files (e.g.,ruby.h) at this point, you may need to install Xcode. These are developer tools that camewith your OS X installation disk, but to avoid the full installation I recommend themuch smaller Command Line Tools for Xcode.12) The bundle install commandmight take a few moments, but when it’s done our application will be ready torun. Note: This setup is fine for the first app, but it isn’t ideal. Chapter 3 covers amore powerful (and slightly more advanced) method for installing Ruby gems withBundler.
1.2.5 rails server
Thanks to running rails new in Section 1.2.3 and bundle install in Section 1.2.4,we already have an application we can run—but how? Happily, Rails comes with acommand-line program, or script, that runs a local web server, visible only from yourdevelopment machine:13
$ rails server
=> Booting WEBrick
=> Rails application starting on http://0.0.0.0:3000
=> Call with -d to detach
=> Ctrl-C to shutdown server
12. https://developer.apple.com/downloads
13. Recall from Section 1.1.3 that Windows users might have to type ruby rails server instead.
www.it-ebooks.info
ptg8286261
24 Chapter 1: From Zero to Deploy
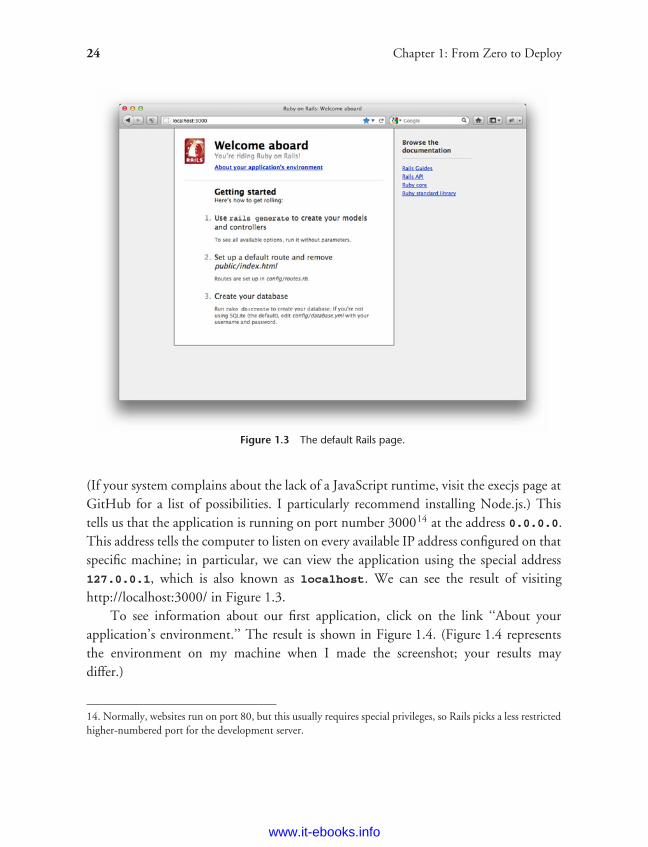
Figure 1.3 The default Rails page.
(If your system complains about the lack of a JavaScript runtime, visit the execjs page atGitHub for a list of possibilities. I particularly recommend installing Node.js.) Thistells us that the application is running on port number 300014 at the address 0.0.0.0.This address tells the computer to listen on every available IP address configured on thatspecific machine; in particular, we can view the application using the special address127.0.0.1, which is also known as localhost. We can see the result of visitinghttp://localhost:3000/ in Figure 1.3.
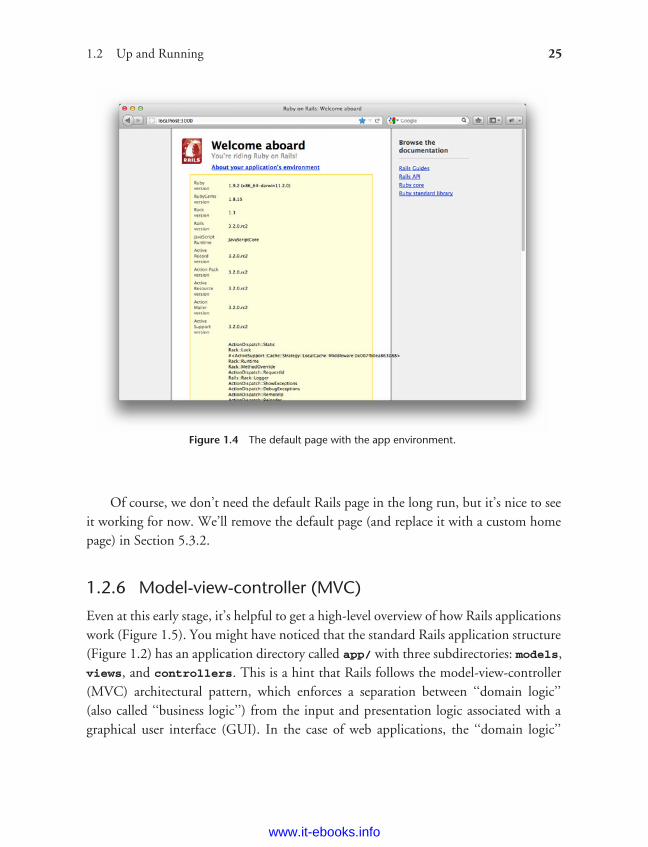
To see information about our first application, click on the link ‘‘About yourapplication’s environment.’’ The result is shown in Figure 1.4. (Figure 1.4 representsthe environment on my machine when I made the screenshot; your results maydiffer.)
14. Normally, websites run on port 80, but this usually requires special privileges, so Rails picks a less restrictedhigher-numbered port for the development server.
www.it-ebooks.info
ptg8286261
1.2 Up and Running 25
Figure 1.4 The default page with the app environment.
Of course, we don’t need the default Rails page in the long run, but it’s nice to seeit working for now. We’ll remove the default page (and replace it with a custom homepage) in Section 5.3.2.
1.2.6 Model-view-controller (MVC)
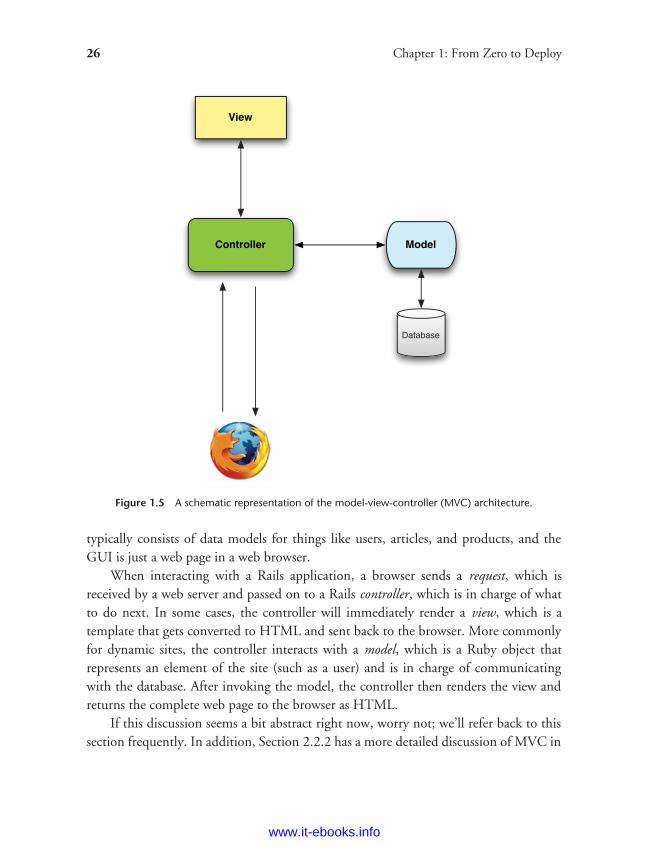
Even at this early stage, it’s helpful to get a high-level overview of how Rails applicationswork (Figure 1.5). You might have noticed that the standard Rails application structure(Figure 1.2) has an application directory called app/ with three subdirectories: models,views, and controllers. This is a hint that Rails follows the model-view-controller(MVC) architectural pattern, which enforces a separation between ‘‘domain logic’’(also called ‘‘business logic’’) from the input and presentation logic associated with agraphical user interface (GUI). In the case of web applications, the ‘‘domain logic’’
www.it-ebooks.info
ptg8286261
26 Chapter 1: From Zero to Deploy
Figure 1.5 A schematic representation of the model-view-controller (MVC) architecture.
typically consists of data models for things like users, articles, and products, and theGUI is just a web page in a web browser.
When interacting with a Rails application, a browser sends a request, which isreceived by a web server and passed on to a Rails controller, which is in charge of whatto do next. In some cases, the controller will immediately render a view, which is atemplate that gets converted to HTML and sent back to the browser. More commonlyfor dynamic sites, the controller interacts with a model, which is a Ruby object thatrepresents an element of the site (such as a user) and is in charge of communicatingwith the database. After invoking the model, the controller then renders the view andreturns the complete web page to the browser as HTML.
If this discussion seems a bit abstract right now, worry not; we’ll refer back to thissection frequently. In addition, Section 2.2.2 has a more detailed discussion of MVC in
www.it-ebooks.info
ptg8286261
1.3 Version Control with Git 27
the context of the demo app. Finally, the sample app will use all aspects of MVC; we’llcover controllers and views starting in Section 3.1.2, models starting in Section 6.1, andwe’ll see all three working together in Section 7.1.2.
1.3 Version Control with GitNow that we have a fresh and working Rails application, we’ll take a moment for astep that, while technically optional, would be viewed by many Rails developers aspractically essential, namely, placing our application source code under version control.Version control systems allow us to track changes to our project’s code, collaboratemore easily, and roll back any inadvertent errors (such as accidentally deleting files).Knowing how to use a version control system is a required skill for every softwaredeveloper.
There are many options for version control, but the Rails community has largelystandardized on Git, a distributed version control system originally developed by LinusTorvalds to host the Linux kernel. Git is a large subject, and we’ll only be scratchingthe surface in this book, but there are many good free resources online; I especiallyrecommend Pro Git by Scott Chacon (Apress, 2009). Putting your source code underversion control with Git is strongly recommended, not only because it’s nearly auniversal practice in the Rails world, but also because it will allow you to share your codemore easily (Section 1.3.4) and deploy your application right here in the first chapter(Section 1.4).
1.3.1 Installation and Setup
The first step is to install Git if you haven’t yet followed the steps in Section 1.2.2. (Asnoted in that section, this involves following the instructions in the Installing Git sectionof Pro Git.)
First-time System SetupAfter installing Git, you should perform a set of one-time setup steps. These are systemsetups, meaning you only have to do them once per computer:
$ git config --global user.name "Your Name"
$ git config --global user.email [email protected]
www.it-ebooks.info

ptg8286261
28 Chapter 1: From Zero to Deploy
I also like to use co in place of the more verbose checkout command, which we canarrange as follows:
$ git config --global alias.co checkout
This tutorial will usually use the full checkout command, which works for systemsthat don’t have co configured, but in real life I nearly always use git co.
As a final setup step, you can optionally set the editor Git will use for commitmessages. If you use a graphical editor such as Sublime Text, TextMate, gVim, orMacVim, you need to use a flag to make sure that the editor stays attached to the shellinstead of detaching immediately:15
$ git config --global core.editor "subl -w"
Replace "subl -w" with "mate -w" for TextMate, "gvim -f" for gVim, or "mvim-f" for MacVim.
First-time Repository SetupNow we come to some steps that are necessary each time you create a new repository.First, navigate to the root directory of the first app and initialize a new repository:
$ git init
Initialized empty Git repository in /Users/mhartl/rails projects/first app/.git/
The next step is to add the project files to the repository. There’s a minorcomplication, though: By default Git tracks the changes of all the files, but there aresome files we don’t want to track. For example, Rails creates log files to record thebehavior of the application; these files change frequently, and we don’t want our versioncontrol system to have to update them constantly. Git has a simple mechanism to ignoresuch files: Simply include a file called .gitignore in the application root directorywith some rules telling Git which files to ignore.16
15. Normally this is a feature, since it lets you continue to use the command line after launching your editor,but Git interprets the detachment as closing the file with an empty commit message, which prevents thecommit from going through. I only mention this point because it can be seriously confusing if you try to setyour editor to subl or gvim without the flag. If you find this note confusing, feel free to ignore it.
16. If you can’t see the .gitignore file in your directory, you may need to configure your directory viewer toshow hidden files.
www.it-ebooks.info
ptg8286261
1.3 Version Control with Git 29
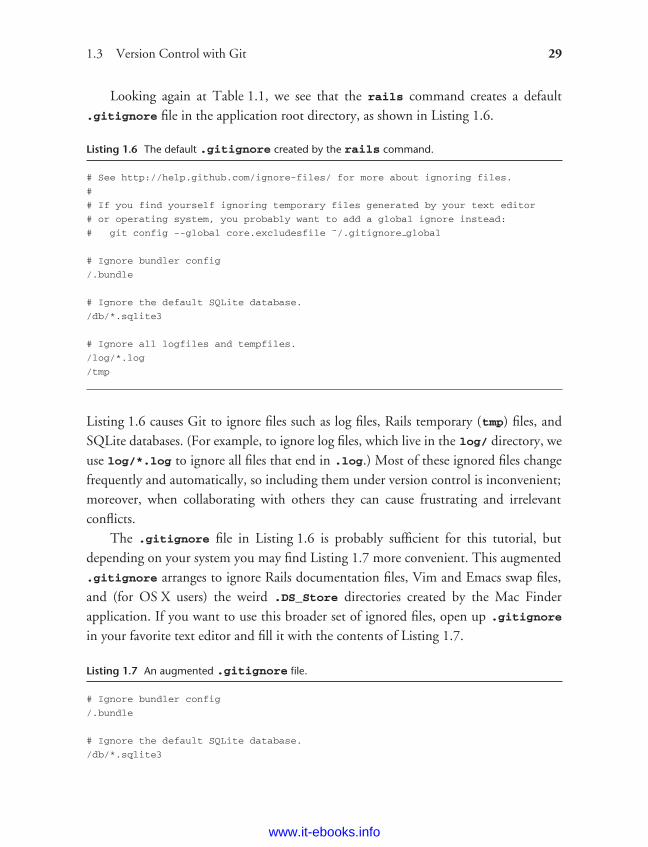
Looking again at Table 1.1, we see that the rails command creates a default.gitignore file in the application root directory, as shown in Listing 1.6.
Listing 1.6 The default .gitignore created by the rails command.
# See http://help.github.com/ignore-files/ for more about ignoring files.
#
# If you find yourself ignoring temporary files generated by your text editor
# or operating system, you probably want to add a global ignore instead:
# git config --global core.excludesfile ˜/.gitignore global
# Ignore bundler config
/.bundle
# Ignore the default SQLite database.
/db/*.sqlite3
# Ignore all logfiles and tempfiles.
/log/*.log
/tmp
Listing 1.6 causes Git to ignore files such as log files, Rails temporary (tmp) files, andSQLite databases. (For example, to ignore log files, which live in the log/ directory, weuse log/*.log to ignore all files that end in .log.) Most of these ignored files changefrequently and automatically, so including them under version control is inconvenient;moreover, when collaborating with others they can cause frustrating and irrelevantconflicts.
The .gitignore file in Listing 1.6 is probably sufficient for this tutorial, butdepending on your system you may find Listing 1.7 more convenient. This augmented.gitignore arranges to ignore Rails documentation files, Vim and Emacs swap files,and (for OS X users) the weird .DS_Store directories created by the Mac Finderapplication. If you want to use this broader set of ignored files, open up .gitignore
in your favorite text editor and fill it with the contents of Listing 1.7.
Listing 1.7 An augmented .gitignore file.
# Ignore bundler config
/.bundle
# Ignore the default SQLite database.
/db/*.sqlite3
www.it-ebooks.info
ptg8286261
30 Chapter 1: From Zero to Deploy
# Ignore all logfiles and tempfiles.
/log/*.log
/tmp
# Ignore other unneeded files.
doc/
*.swp
*˜
.project
.DS Store
1.3.2 Adding and Committing
Finally, we’ll add the files in your new Rails project to Git and then commit theresults. You can add all the files (apart from those that match the ignore patterns in.gitignore) as follows:
$ git add .
Here the dot ‘‘.’’ represents the current directory, and Git is smart enough to add thefiles recursively, so it automatically includes all the subdirectories. This command addsthe project files to a staging area, which contains pending changes to your project; youcan see which files are in the staging area using the status command:17
$ git status
# On branch master
#
# Initial commit
#
# Changes to be committed:
# (use "git rm --cached <file>..." to unstage)
#
# new file: README.rdoc
# new file: Rakefile
.
.
.
(The results are long, so I’ve used vertical dots to indicate omitted output.)
17. If in the future any unwanted files start showing up when you type git status, just add them to your.gitignore file from Listing 1.7.
www.it-ebooks.info
ptg8286261
1.3 Version Control with Git 31
To tell Git you want to keep the changes, use the commit command:
$ git commit -m "Initial commit"
[master (root-commit) df0a62f] Initial commit
42 files changed, 8461 insertions(+), 0 deletions(-)
create mode 100644 README.rdoc
create mode 100644 Rakefile
.
.
.
The -m flag lets you add a message for the commit; if you omit -m, Git will open theeditor you set in Section 1.3.1 and have you enter the message there.
It is important to note that Git commits are local, recorded only on the machineon which the commits occur. This is in contrast to the popular open-source versioncontrol system called Subversion, in which a commit necessarily makes changes on aremote repository. Git divides a Subversion-style commit into its two logical pieces: Alocal recording of the changes (git commit) and a push of the changes up to a remoterepository (git push). We’ll see an example of the push step in Section 1.3.5.
By the way, you can see a list of your commit messages using the log command:
$ git log
commit df0a62f3f091e53ffa799309b3e32c27b0b38eb4
Author: Michael Hartl <[email protected]>
Date: Thu Oct 15 11:36:21 2009 -0700
Initial commit
To exit git log, you may have to type q to quit.
1.3.3 What Good Does Git Do You?
It’s probably not entirely clear at this point why putting your source under versioncontrol does you any good, so let me give just one example. (We’ll see many othersin the chapters ahead.) Suppose you’ve made some accidental changes, such as (D’oh!)deleting the critical app/controllers/ directory:
$ ls app/controllers/
application controller.rb
$ rm -rf app/controllers/
$ ls app/controllers/
ls: app/controllers/: No such file or directory
www.it-ebooks.info
ptg8286261
32 Chapter 1: From Zero to Deploy
Here we’re using the Unix ls command to list the contents of the app/controllers/directory and the rm command to remove it. The -rf flag means ‘‘recursive force’’,which recursively removes all files, directories, subdirectories, and so on, without askingfor explicit confirmation of each deletion.
Let’s check the status to see what’s up:
$ git status
# On branch master
# Changed but not updated:
# (use "git add/rm <file>..." to update what will be committed)
# (use "git checkout -- <file>..." to discard changes in working directory)
#
# deleted: app/controllers/application controller.rb
#
no changes added to commit (use "git add" and/or "git commit -a")
We see here that a file has been deleted, but the changes are only on the ‘‘working tree’’;they haven’t been committed yet. This means we can still undo the changes easily byhaving Git check out the previous commit with the checkout command (and a -f flagto force overwriting the current changes):
$ git checkout -f
$ git status
# On branch master
nothing to commit (working directory clean)
$ ls app/controllers/
application controller.rb
The missing directory and file are back. That’s a relief!
1.3.4 GitHub
Now that you’ve put your project under version control with Git, it’s time to pushyour code up to GitHub, a social code site optimized for hosting and sharing Gitrepositories. Putting a copy of your Git repository at GitHub serves two purposes: It’sa full backup of your code (including the full history of commits), and it makes anyfuture collaboration much easier. This step is optional, but being a GitHub memberwill open the door to participating in a wide variety of open-source projects.
www.it-ebooks.info
ptg8286261
1.3 Version Control with Git 33
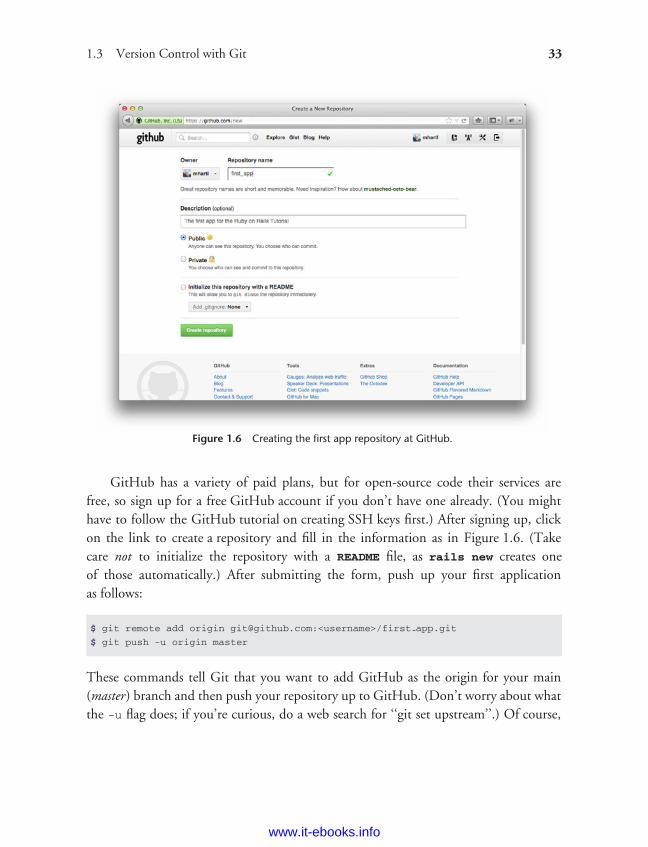
Figure 1.6 Creating the first app repository at GitHub.
GitHub has a variety of paid plans, but for open-source code their services arefree, so sign up for a free GitHub account if you don’t have one already. (You mighthave to follow the GitHub tutorial on creating SSH keys first.) After signing up, clickon the link to create a repository and fill in the information as in Figure 1.6. (Takecare not to initialize the repository with a README file, as rails new creates oneof those automatically.) After submitting the form, push up your first applicationas follows:
$ git remote add origin [email protected]:<username>/first app.git
$ git push -u origin master
These commands tell Git that you want to add GitHub as the origin for your main(master) branch and then push your repository up to GitHub. (Don’t worry about whatthe -u flag does; if you’re curious, do a web search for ‘‘git set upstream’’.) Of course,
www.it-ebooks.info

ptg8286261
34 Chapter 1: From Zero to Deploy
Figure 1.7 A GitHub repository page.
you should replace <username> with your actual username. For example, the commandI ran for the railstutorial user was
$ git remote add origin [email protected]:railstutorial/first app.git
The result is a page at GitHub for the first application repository, with file browsing,full commit history, and lots of other goodies (Figure 1.7).
1.3.5 Branch, Edit, Commit, Merge
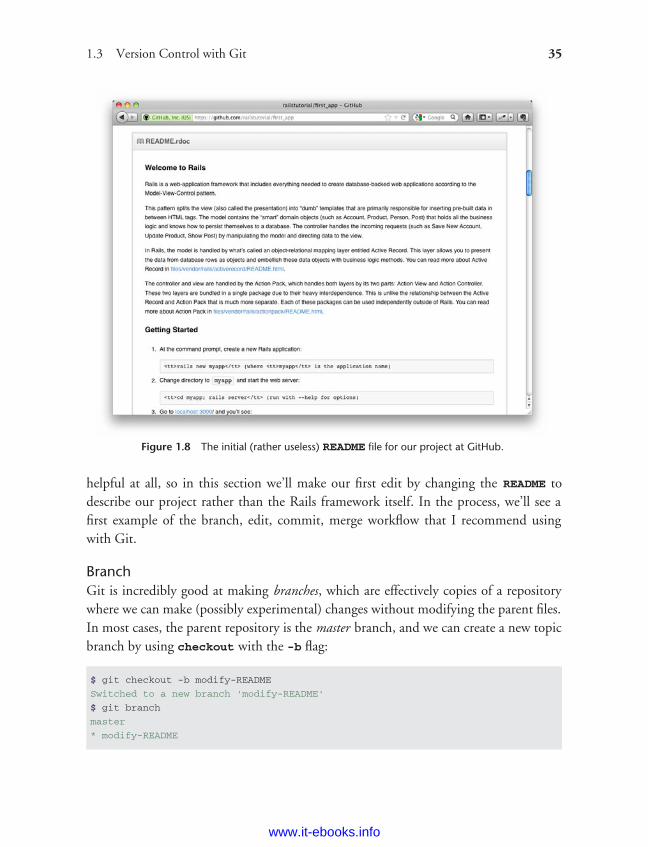
If you’ve followed the steps in Section 1.3.4, you might notice that GitHub auto-matically shows the contents of the README file on the main repository page. In ourcase, since the project is a Rails application generated using the rails command, theREADME file is the one that comes with Rails (Figure 1.8). Because of the .rdoc exten-sion on the file, GitHub ensures that it is formatted nicely, but the contents aren’t
www.it-ebooks.info
ptg8286261
1.3 Version Control with Git 35
Figure 1.8 The initial (rather useless) README file for our project at GitHub.
helpful at all, so in this section we’ll make our first edit by changing the README todescribe our project rather than the Rails framework itself. In the process, we’ll see afirst example of the branch, edit, commit, merge workflow that I recommend usingwith Git.
BranchGit is incredibly good at making branches, which are effectively copies of a repositorywhere we can make (possibly experimental) changes without modifying the parent files.In most cases, the parent repository is the master branch, and we can create a new topicbranch by using checkout with the -b flag:
$ git checkout -b modify-README
Switched to a new branch 'modify-README'
$ git branch
master
* modify-README
www.it-ebooks.info
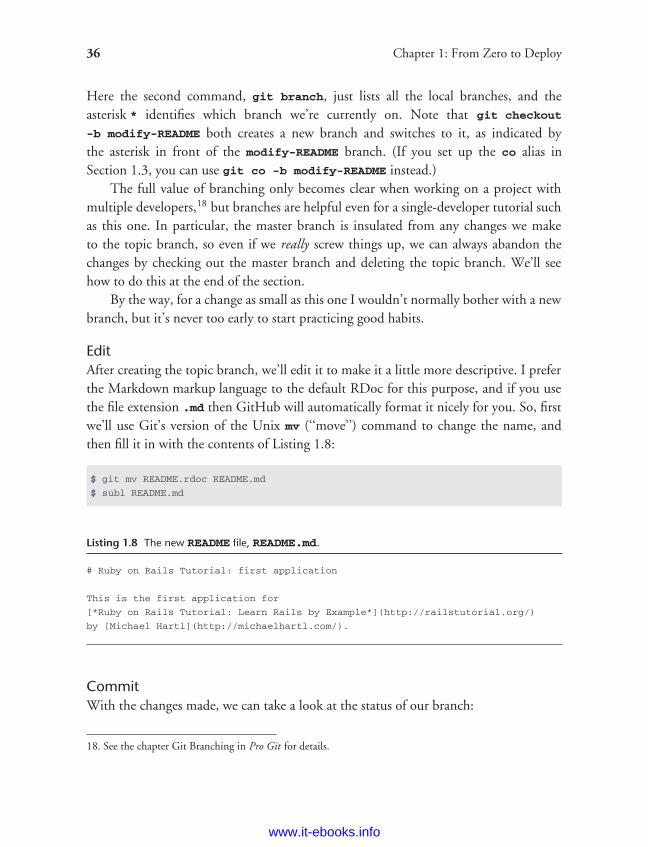
ptg8286261
36 Chapter 1: From Zero to Deploy
Here the second command, git branch, just lists all the local branches, and theasterisk * identifies which branch we’re currently on. Note that git checkout
-b modify-README both creates a new branch and switches to it, as indicated bythe asterisk in front of the modify-README branch. (If you set up the co alias inSection 1.3, you can use git co -b modify-README instead.)
The full value of branching only becomes clear when working on a project withmultiple developers,18 but branches are helpful even for a single-developer tutorial suchas this one. In particular, the master branch is insulated from any changes we maketo the topic branch, so even if we really screw things up, we can always abandon thechanges by checking out the master branch and deleting the topic branch. We’ll seehow to do this at the end of the section.
By the way, for a change as small as this one I wouldn’t normally bother with a newbranch, but it’s never too early to start practicing good habits.
EditAfter creating the topic branch, we’ll edit it to make it a little more descriptive. I preferthe Markdown markup language to the default RDoc for this purpose, and if you usethe file extension .md then GitHub will automatically format it nicely for you. So, firstwe’ll use Git’s version of the Unix mv (‘‘move’’) command to change the name, andthen fill it in with the contents of Listing 1.8:
$ git mv README.rdoc README.md
$ subl README.md
Listing 1.8 The new README file, README.md.
# Ruby on Rails Tutorial: first application
This is the first application for
[*Ruby on Rails Tutorial: Learn Rails by Example*](http://railstutorial.org/)
by [Michael Hartl](http://michaelhartl.com/).
CommitWith the changes made, we can take a look at the status of our branch:
18. See the chapter Git Branching in Pro Git for details.
www.it-ebooks.info
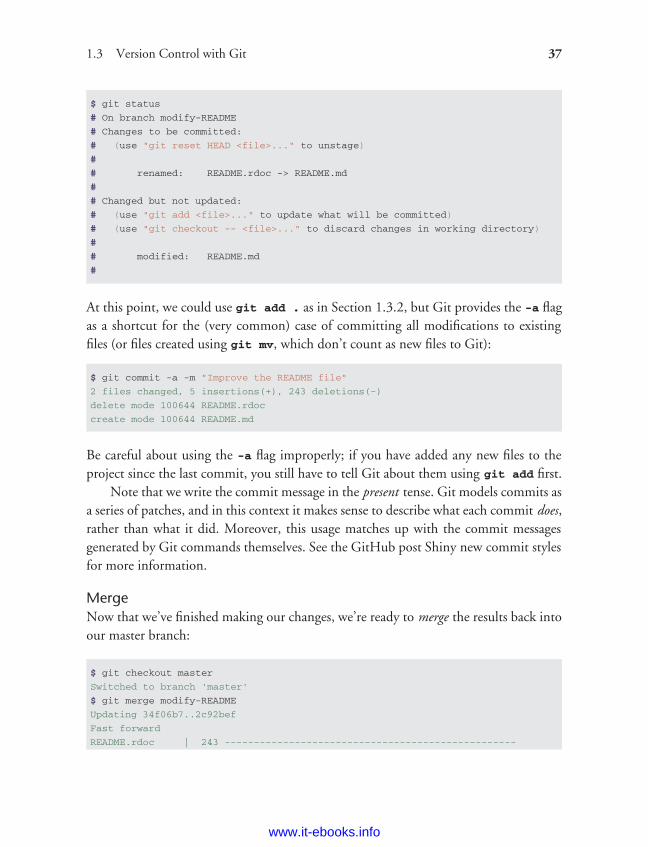
ptg8286261
1.3 Version Control with Git 37
$ git status
# On branch modify-README
# Changes to be committed:
# (use "git reset HEAD <file>..." to unstage)
#
# renamed: README.rdoc -> README.md
#
# Changed but not updated:
# (use "git add <file>..." to update what will be committed)
# (use "git checkout -- <file>..." to discard changes in working directory)
#
# modified: README.md
#
At this point, we could use git add . as in Section 1.3.2, but Git provides the -a flagas a shortcut for the (very common) case of committing all modifications to existingfiles (or files created using git mv, which don’t count as new files to Git):
$ git commit -a -m "Improve the README file"
2 files changed, 5 insertions(+), 243 deletions(-)
delete mode 100644 README.rdoc
create mode 100644 README.md
Be careful about using the -a flag improperly; if you have added any new files to theproject since the last commit, you still have to tell Git about them using git add first.
Note that we write the commit message in the present tense. Git models commits asa series of patches, and in this context it makes sense to describe what each commit does,rather than what it did. Moreover, this usage matches up with the commit messagesgenerated by Git commands themselves. See the GitHub post Shiny new commit stylesfor more information.
MergeNow that we’ve finished making our changes, we’re ready to merge the results back intoour master branch:
$ git checkout master
Switched to branch 'master'
$ git merge modify-README
Updating 34f06b7..2c92bef
Fast forward
README.rdoc | 243 --------------------------------------------------
www.it-ebooks.info
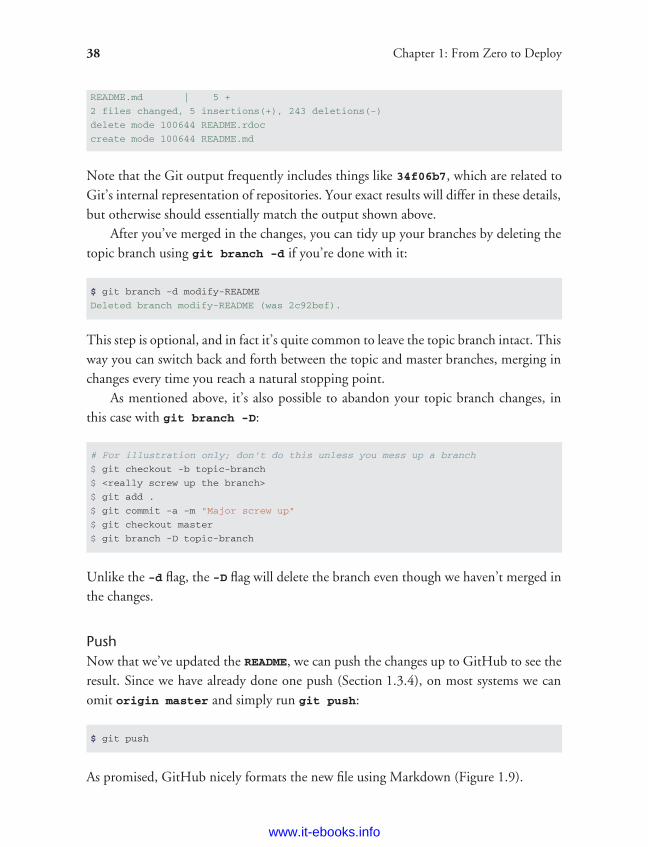
ptg8286261
38 Chapter 1: From Zero to Deploy
README.md | 5 +
2 files changed, 5 insertions(+), 243 deletions(-)
delete mode 100644 README.rdoc
create mode 100644 README.md
Note that the Git output frequently includes things like 34f06b7, which are related toGit’s internal representation of repositories. Your exact results will differ in these details,but otherwise should essentially match the output shown above.
After you’ve merged in the changes, you can tidy up your branches by deleting thetopic branch using git branch -d if you’re done with it:
$ git branch -d modify-README
Deleted branch modify-README (was 2c92bef).
This step is optional, and in fact it’s quite common to leave the topic branch intact. Thisway you can switch back and forth between the topic and master branches, merging inchanges every time you reach a natural stopping point.
As mentioned above, it’s also possible to abandon your topic branch changes, inthis case with git branch -D:
# For illustration only; don't do this unless you mess up a branch
$ git checkout -b topic-branch
$ <really screw up the branch>
$ git add .
$ git commit -a -m "Major screw up"
$ git checkout master
$ git branch -D topic-branch
Unlike the -d flag, the -D flag will delete the branch even though we haven’t merged inthe changes.
PushNow that we’ve updated the README, we can push the changes up to GitHub to see theresult. Since we have already done one push (Section 1.3.4), on most systems we canomit origin master and simply run git push:
$ git push
As promised, GitHub nicely formats the new file using Markdown (Figure 1.9).
www.it-ebooks.info
ptg8286261
1.4 Deploying 39
Figure 1.9 The improved README file formatted with Markdown.
1.4 DeployingEven at this early stage, we’re already going to deploy our (still-empty) Rails applicationto production. This step is optional, but deploying early and often allows us to catchany deployment problems early in our development cycle. The alternative—deployingonly after laborious effort sealed away in a development environment—often leads toterrible integration headaches when launch time comes.19
Deploying Rails applications used to be a pain, but the Rails deployment ecosystemhas matured rapidly in the past few years, and now there are several great options.These include shared hosts or virtual private servers running Phusion Passenger (amodule for the Apache and Nginx20 web servers), full-service deployment companiessuch as Engine Yard and Rails Machine, and cloud deployment services such asEngine Yard Cloud and Heroku.
My favorite Rails deployment option is Heroku, which is a hosted platform builtspecifically for deploying Rails and other Ruby web applications.21 Heroku makesdeploying Rails applications ridiculously easy—as long as your source code is underversion control with Git. (This is yet another reason to follow the Git setup steps inSection 1.3 if you haven’t already.) The rest of this section is dedicated to deployingour first application to Heroku.
1.4.1 Heroku Setup
After signing up for a Heroku account, install the Heroku gem:
$ gem install heroku
19. Though it shouldn’t matter for the example applications in the Rails Tutorial, if you’re worried aboutaccidentally making your app public too soon there are several options; see Section 1.4.4 for one.
20. Pronounced ‘‘Engine X.’’
21. Heroku works with any Ruby web platform that uses Rack middleware, which provides a standard interfacebetween web frameworks and web servers. Adoption of the Rack interface has been extraordinarily strong inthe Ruby community, including frameworks as varied as Sinatra, Ramaze, Camping, and Rails, which meansthat Heroku basically supports any Ruby web app.
www.it-ebooks.info
ptg8286261
40 Chapter 1: From Zero to Deploy
As with GitHub (Section 1.3.4), when using Heroku you will need to create SSH keysif you haven’t already, and then tell Heroku your public key so that you can use Git topush the sample application repository up to their servers:
$ heroku keys:add
Finally, use the heroku command to create a place on the Heroku servers for the sampleapp to live (Listing 1.9).
Listing 1.9 Creating a new application at Heroku.
$ heroku create --stack cedar
Created http://stormy-cloud-5881.herokuapp.com/ |
[email protected]:stormy-cloud-5881.herokuapp.com
Git remote heroku added
(The --stack cedar argument arranges to use the latest and greatest version ofHeroku, called the Celadon Cedar Stack.) Yes, that’s it. The heroku command createsa new subdomain just for our application, available for immediate viewing. There’snothing there yet, though, so let’s get busy deploying.
1.4.2 Heroku Deployment, Step One
To deploy to Heroku, the first step is to use Git to push the application to Heroku:
$ git push heroku master
1.4.3 Heroku Deployment, Step Two
There is no step two! We’re already done (Figure 1.10). To see your newly deployedapplication, you can visit the address that you saw when you ran heroku create (i.e.,Listing 1.9, but with the address for your app, not the address for mine). You can alsouse an argument to the heroku command that automatically opens your browser withthe right address:
$ heroku open
Because of the details of their setup, the ‘‘About your application’s environment’’ linkdoesn’t work on Heroku. Don’t worry; this is normal. The error will go away (in
www.it-ebooks.info
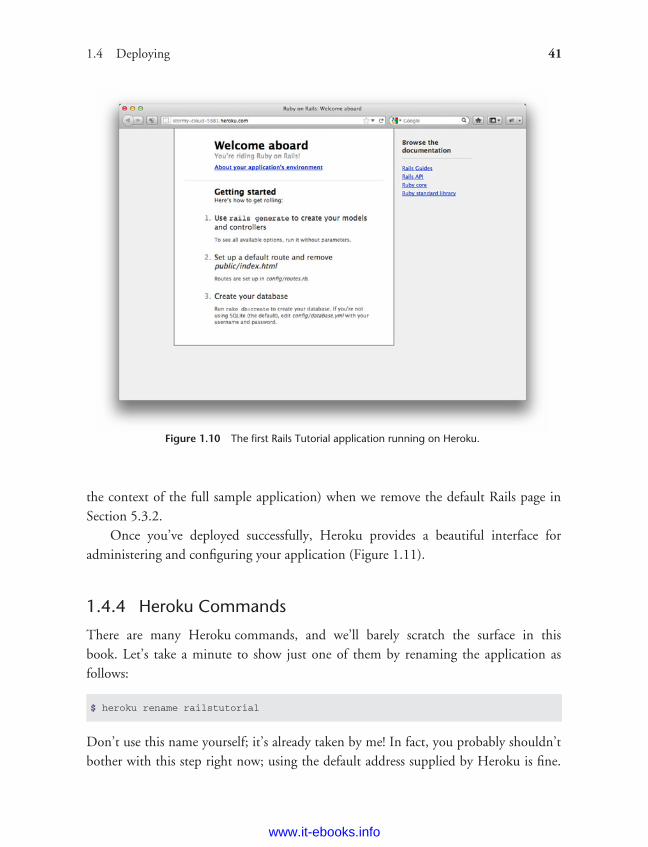
ptg8286261
1.4 Deploying 41
Figure 1.10 The first Rails Tutorial application running on Heroku.
the context of the full sample application) when we remove the default Rails page inSection 5.3.2.
Once you’ve deployed successfully, Heroku provides a beautiful interface foradministering and configuring your application (Figure 1.11).
1.4.4 Heroku Commands
There are many Heroku commands, and we’ll barely scratch the surface in thisbook. Let’s take a minute to show just one of them by renaming the application asfollows:
$ heroku rename railstutorial
Don’t use this name yourself; it’s already taken by me! In fact, you probably shouldn’tbother with this step right now; using the default address supplied by Heroku is fine.
www.it-ebooks.info
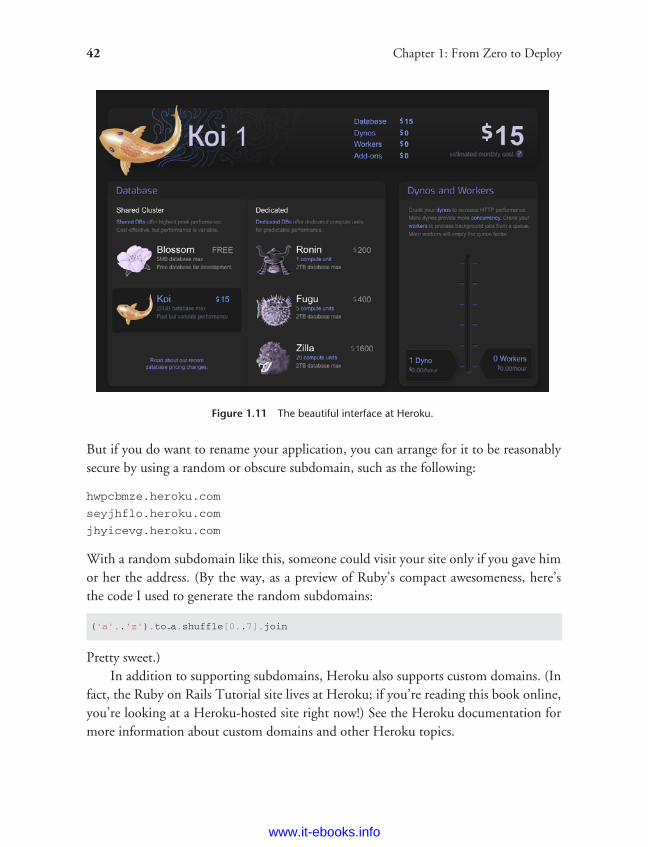
ptg8286261
42 Chapter 1: From Zero to Deploy
Figure 1.11 The beautiful interface at Heroku.
But if you do want to rename your application, you can arrange for it to be reasonablysecure by using a random or obscure subdomain, such as the following:
hwpcbmze.heroku.com
seyjhflo.heroku.com
jhyicevg.heroku.com
With a random subdomain like this, someone could visit your site only if you gave himor her the address. (By the way, as a preview of Ruby’s compact awesomeness, here’sthe code I used to generate the random subdomains:
('a'..'z').to a.shuffle[0..7].join
Pretty sweet.)In addition to supporting subdomains, Heroku also supports custom domains. (In
fact, the Ruby on Rails Tutorial site lives at Heroku; if you’re reading this book online,you’re looking at a Heroku-hosted site right now!) See the Heroku documentation formore information about custom domains and other Heroku topics.
www.it-ebooks.info
ptg8286261
1.5 Conclusion 43
1.5 ConclusionWe’ve come a long way in this chapter: installation, development environment setup,version control, and deployment. If you want to share your progress at this point, feelfree to send a tweet or Facebook status update with something like this:
I’m learning Ruby on Rails with @railstutorial! http://railstutorial.org
All that’s left is to actually start learning Rails! Let’s get to it.
www.it-ebooks.info


ptg8286261
CHAPTER 2A Demo App
In this chapter, we’ll develop a simple demonstration application to show off someof the power of Rails. The purpose is to get a high-level overview of Ruby on Railsprogramming (and web development in general) by rapidly generating an applicationusing scaffold generators. As discussed in Box 1.1, the rest of the book will take theopposite approach, developing a full application incrementally and explaining each newconcept as it arises, but for a quick overview (and some instant gratification) there isno substitute for scaffolding. The resulting demo app will allow us to interact with itthrough its URIs, giving us insight into the structure of a Rails application, including afirst example of the REST architecture favored by Rails.
As with the forthcoming sample application, the demo app will consist of usersand their associated microposts (thus constituting a minimalist Twitter-style app). Thefunctionality will be utterly underdeveloped, and many of the steps will seem likemagic, but worry not: The full sample app will develop a similar application from theground up starting in Chapter 3, and I will provide plentiful forward-references to latermaterial. In the meantime, have patience and a little faith—the whole point of thistutorial is to take you beyond this superficial, scaffold-driven approach to achieve adeeper understanding of Rails.
2.1 Planning the ApplicationIn this section, we’ll outline our plans for the demo application. As in Section 1.2.3,we’ll start by generating the application skeleton using the rails command:
$ cd ˜/rails projects
$ rails new demo app
$ cd demo app
45
www.it-ebooks.info

ptg8286261
46 Chapter 2: A Demo App
Next, we’ll use a text editor to update the Gemfile needed by Bundler with thecontents of Listing 2.1.
Listing 2.1 A Gemfile for the demo app.
source 'https://rubygems.org'
gem 'rails', '3.2.3'
group :development do
gem 'sqlite3', '1.3.5'
end
# Gems used only for assets and not required
# in production environments by default.
group :assets do
gem 'sass-rails', '3.2.4'
gem 'coffee-rails', '3.2.2'
gem 'uglifier', '1.2.3'
end
gem 'jquery-rails', '2.0.0'
group :production do
gem 'pg', '0.12.2'
end
Note that Listing 2.1 is identical to Listing 1.5 except for the addition of a gem neededin production at Heroku:
group :production do
gem 'pg', '0.12.2'
end
The pg gem is needed to access PostgreSQL (‘‘post-gres-cue-ell’’), the database used byHeroku.
We then install and include the gems using the bundle install command:
$ bundle install --without production
www.it-ebooks.info
ptg8286261
2.1 Planning the Application 47
The --without production option prevents the installation of the production gems,which in this case is just the PostgreSQL gem pg. (If Bundler complains about
no such file to load -- readline (LoadError)
try adding gem ’rb-readline’ to your Gemfile.)Finally, we’ll put the demo app under version control. Recall that the rails
command generates a default .gitignore file, but depending on your system you mayfind the augmented file from Listing 1.7 to be more convenient. Then initialize a Gitrepository and make the first commit:
$ git init
$ git add .
$ git commit -m "Initial commit"
You can also optionally create a new repository (Figure 2.1) and push it up toGitHub:
$ git remote add origin [email protected]:<username>/demo app.git
$ git push -u origin master
(As with the first app, take care not to initialize the GitHub repository with a README
file.)Now we’re ready to start making the app itself. The typical first step when making
a web application is to create a data model, which is a representation of the structuresneeded by our application. In our case, the demo app will be a microblog, with onlyusers and short (micro)posts. Thus, we’ll begin with a model for users of the app(Section 2.1.1), then we’ll add a model for microposts (Section 2.1.2).
2.1.1 Modeling Demo Users
There are as many choices for a user data model as there are different registration formson the web; we’ll go with a distinctly minimalist approach. Users of our demo app willhave a unique integer identifier called id, a publicly viewable name (of type string),and an email address (also a string) that will double as a username. A summary ofthe data model for users appears in Figure 2.2.
www.it-ebooks.info
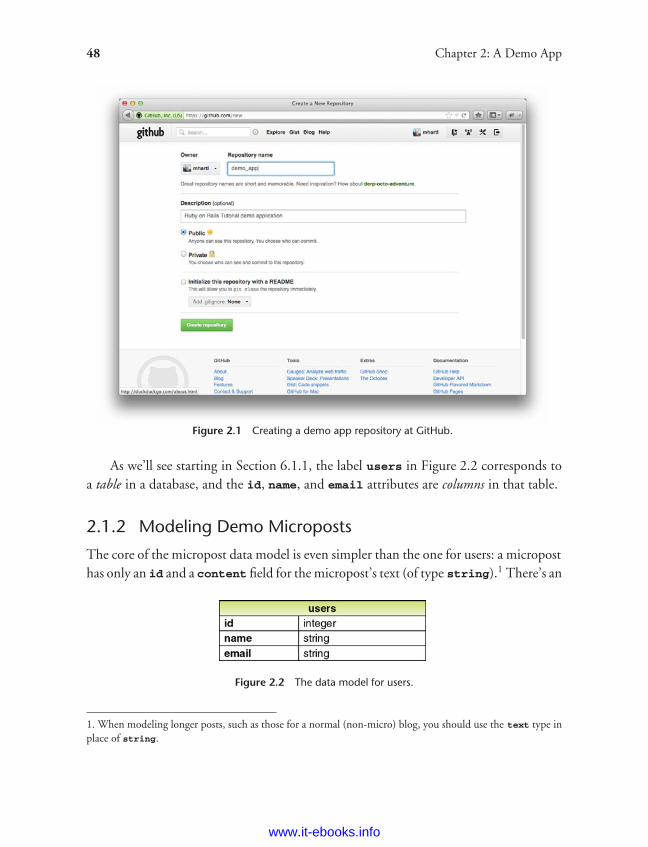
ptg8286261
48 Chapter 2: A Demo App
Figure 2.1 Creating a demo app repository at GitHub.
As we’ll see starting in Section 6.1.1, the label users in Figure 2.2 corresponds toa table in a database, and the id, name, and email attributes are columns in that table.
2.1.2 Modeling Demo Microposts
The core of the micropost data model is even simpler than the one for users: a microposthas only an id and a content field for the micropost’s text (of type string).1 There’s an
Figure 2.2 The data model for users.
1. When modeling longer posts, such as those for a normal (non-micro) blog, you should use the text type inplace of string.
www.it-ebooks.info
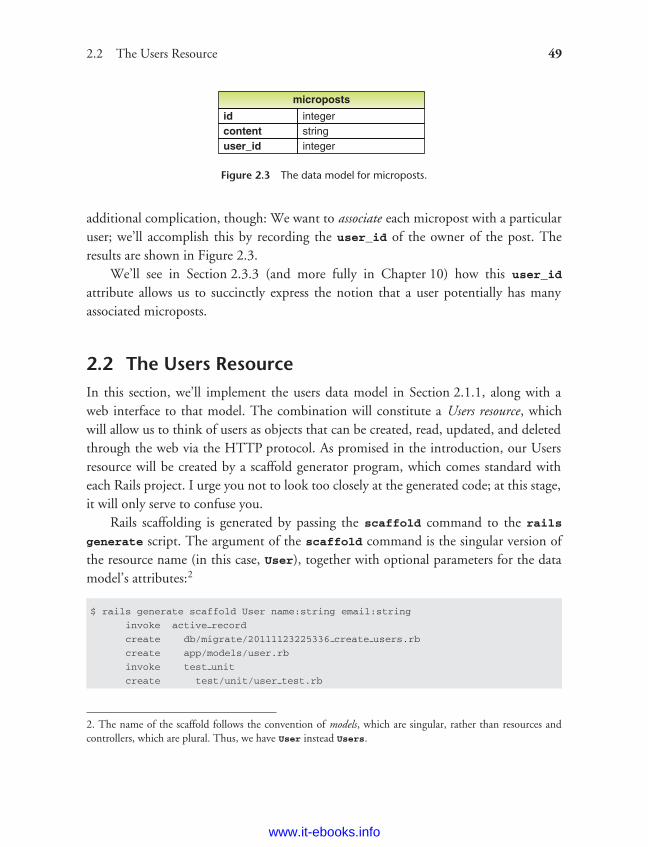
ptg8286261
2.2 The Users Resource 49
Figure 2.3 The data model for microposts.
additional complication, though: We want to associate each micropost with a particularuser; we’ll accomplish this by recording the user_id of the owner of the post. Theresults are shown in Figure 2.3.
We’ll see in Section 2.3.3 (and more fully in Chapter 10) how this user_id
attribute allows us to succinctly express the notion that a user potentially has manyassociated microposts.
2.2 The Users ResourceIn this section, we’ll implement the users data model in Section 2.1.1, along with aweb interface to that model. The combination will constitute a Users resource, whichwill allow us to think of users as objects that can be created, read, updated, and deletedthrough the web via the HTTP protocol. As promised in the introduction, our Usersresource will be created by a scaffold generator program, which comes standard witheach Rails project. I urge you not to look too closely at the generated code; at this stage,it will only serve to confuse you.
Rails scaffolding is generated by passing the scaffold command to the rails
generate script. The argument of the scaffold command is the singular version ofthe resource name (in this case, User), together with optional parameters for the datamodel’s attributes:2
$ rails generate scaffold User name:string email:string
invoke active record
create db/migrate/20111123225336 create users.rb
create app/models/user.rb
invoke test unit
create test/unit/user test.rb
2. The name of the scaffold follows the convention of models, which are singular, rather than resources andcontrollers, which are plural. Thus, we have User instead Users.
www.it-ebooks.info
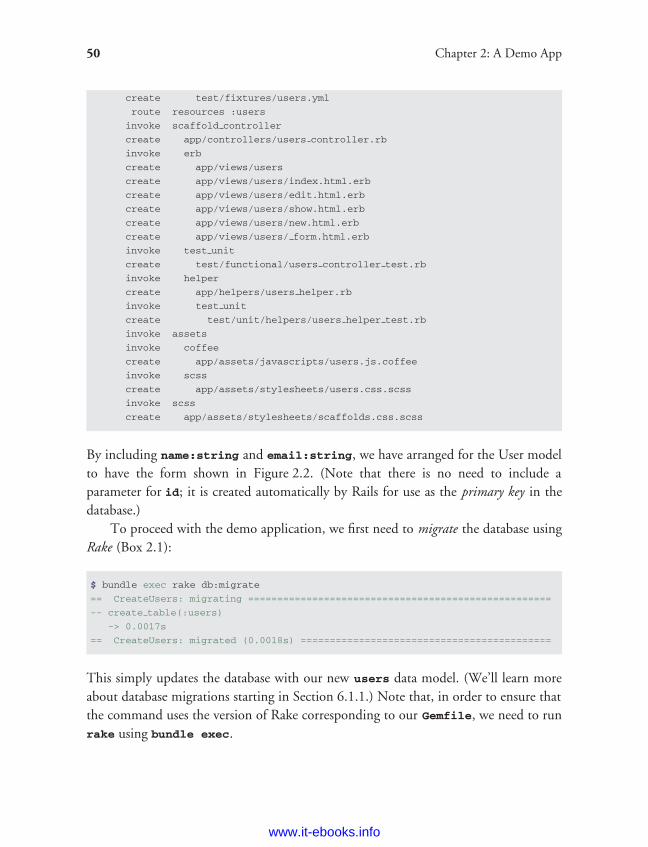
ptg8286261
50 Chapter 2: A Demo App
create test/fixtures/users.yml
route resources :users
invoke scaffold controller
create app/controllers/users controller.rb
invoke erb
create app/views/users
create app/views/users/index.html.erb
create app/views/users/edit.html.erb
create app/views/users/show.html.erb
create app/views/users/new.html.erb
create app/views/users/ form.html.erb
invoke test unit
create test/functional/users controller test.rb
invoke helper
create app/helpers/users helper.rb
invoke test unit
create test/unit/helpers/users helper test.rb
invoke assets
invoke coffee
create app/assets/javascripts/users.js.coffee
invoke scss
create app/assets/stylesheets/users.css.scss
invoke scss
create app/assets/stylesheets/scaffolds.css.scss
By including name:string and email:string, we have arranged for the User modelto have the form shown in Figure 2.2. (Note that there is no need to include aparameter for id; it is created automatically by Rails for use as the primary key in thedatabase.)
To proceed with the demo application, we first need to migrate the database usingRake (Box 2.1):
$ bundle exec rake db:migrate
== CreateUsers: migrating ====================================================
-- create table(:users)
-> 0.0017s
== CreateUsers: migrated (0.0018s) ===========================================
This simply updates the database with our new users data model. (We’ll learn moreabout database migrations starting in Section 6.1.1.) Note that, in order to ensure thatthe command uses the version of Rake corresponding to our Gemfile, we need to runrake using bundle exec.
www.it-ebooks.info
ptg8286261
2.2 The Users Resource 51
With that, we can run the local web server using rails s, which is a shortcut forrails server:
$ rails s
Now the demo application should be ready to go at http://localhost:3000/.
Box 2.1 Rake
In the Unix tradition, the make utility has played an important role in buildingexecutable programs from source code; many a computer hacker has committed tomuscle memory the line
$ ./configure && make && sudo make install
commonly used to compile code on Unix systems (including Linux and Mac OS X).Rake is Ruby make, a make-like language written in Ruby. Rails uses Rake
extensively, especially for the innumerable little administrative tasks necessary whendeveloping database-backed web applications. The rake db:migrate commandis probably the most common, but there are many others; you can see a list ofdatabase tasks using -T db:
$ bundle exec rake -T db
To see all the Rake tasks available, run
$ bundle exec rake -T
The list is likely to be overwhelming, but don’t worry, you don’t have to know all (oreven most) of these commands. By the end of the Rails Tutorial, you’ll know all themost important ones.
2.2.1 A User Tour
Visiting the root url http://localhost:3000 shows the same default Rails page shownin Figure 1.3, but in generating the Users resource scaffolding we have also createda large number of pages for manipulating users. For example, the page for listing allusers is at /users, and the page for making a new user is at /users/new. The rest of this
www.it-ebooks.info

ptg8286261
52 Chapter 2: A Demo App
Table 2.1 The correspondence between pages and URIs for the Users resource.
URI Action Purpose
/users index page to list all users/users/1 show page to show user with id 1
/users/new new page to make a new user/users/1/edit edit page to edit user with id 1
section is dedicated to taking a whirlwind tour through these user pages. As we proceed,it may help to refer to Table 2.1, which shows the correspondence between pagesand URIs.
We start with the page to show all the users in our application, called index; asyou might expect, initially there are no users at all (Figure 2.4).
To make a new user, we visit the new page, as shown in Figure 2.5. (Since thehttp://localhost:3000 part of the address is implicit whenever we are developing locally,I’ll usually omit it from now on.) In Chapter 7, this will become the user signup page.
Figure 2.4 The initial index page for the Users resource (/users).
www.it-ebooks.info
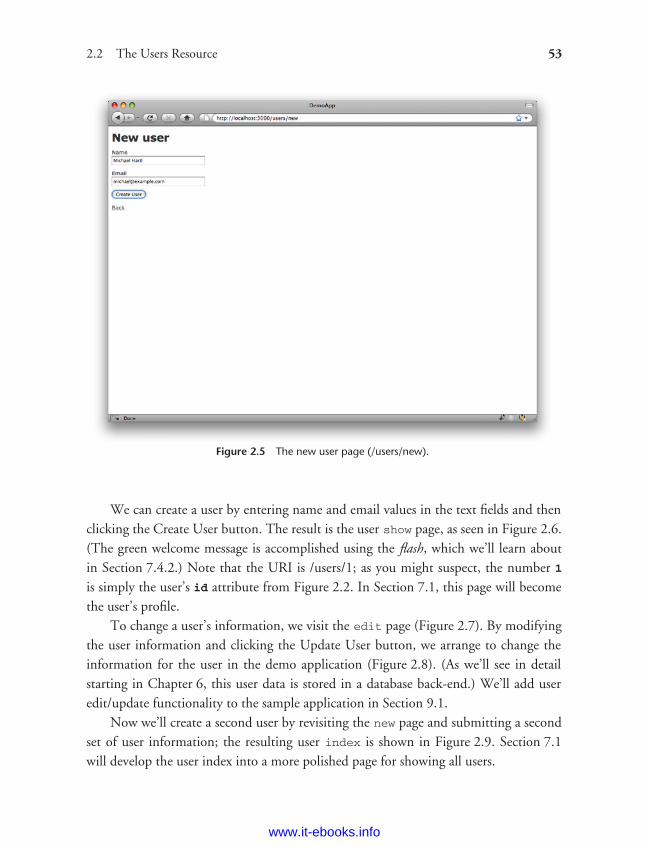
ptg8286261
2.2 The Users Resource 53
Figure 2.5 The new user page (/users/new).
We can create a user by entering name and email values in the text fields and thenclicking the Create User button. The result is the user show page, as seen in Figure 2.6.(The green welcome message is accomplished using the flash, which we’ll learn aboutin Section 7.4.2.) Note that the URI is /users/1; as you might suspect, the number 1is simply the user’s id attribute from Figure 2.2. In Section 7.1, this page will becomethe user’s profile.
To change a user’s information, we visit the edit page (Figure 2.7). By modifyingthe user information and clicking the Update User button, we arrange to change theinformation for the user in the demo application (Figure 2.8). (As we’ll see in detailstarting in Chapter 6, this user data is stored in a database back-end.) We’ll add useredit/update functionality to the sample application in Section 9.1.
Now we’ll create a second user by revisiting the new page and submitting a secondset of user information; the resulting user index is shown in Figure 2.9. Section 7.1will develop the user index into a more polished page for showing all users.
www.it-ebooks.info
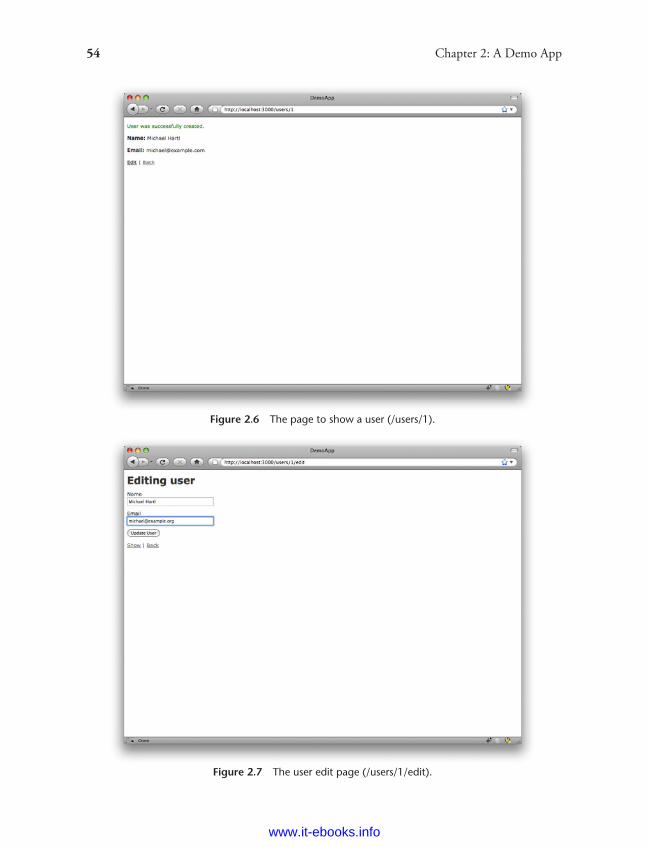
ptg8286261
54 Chapter 2: A Demo App
Figure 2.6 The page to show a user (/users/1).
Figure 2.7 The user edit page (/users/1/edit).
www.it-ebooks.info
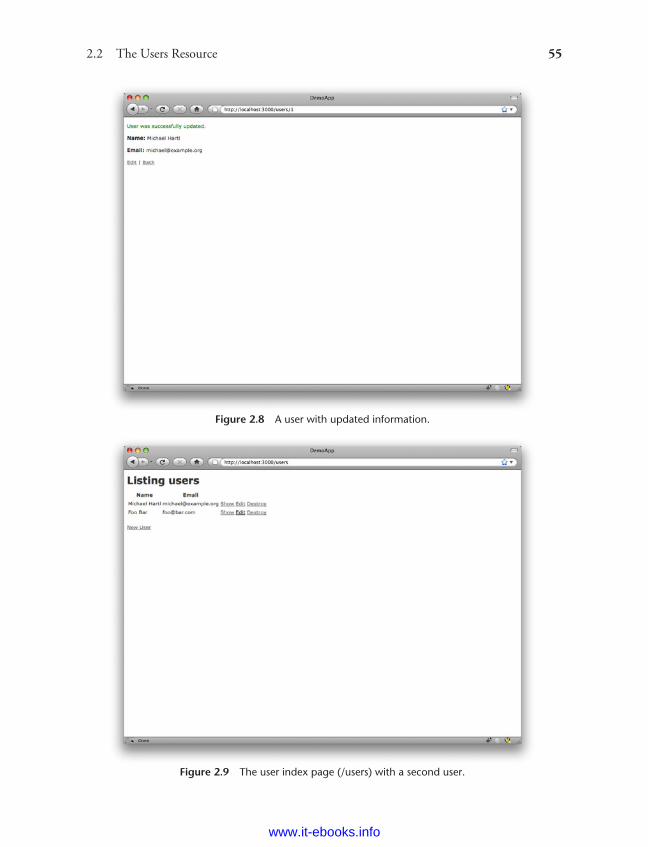
ptg8286261
2.2 The Users Resource 55
Figure 2.8 A user with updated information.
Figure 2.9 The user index page (/users) with a second user.
www.it-ebooks.info

ptg8286261
56 Chapter 2: A Demo App
Figure 2.10 Destroying a user.
Having shown how to create, show, and edit users, we come finally to destroyingthem (Figure 2.10). You should verify that clicking on the link in Figure 2.10 destroysthe second user, yielding an index page with only one user. (If it doesn’t work, be surethat JavaScript is enabled in your browser; Rails uses JavaScript to issue the requestneeded to destroy a user.) Section 9.4 adds user deletion to the sample app, taking careto restrict its use to a special class of administrative users.
2.2.2 MVC in Action
Now that we’ve completed a quick overview of the Users resource, let’s examine oneparticular part of it in the context of the Model-View-Controller (MVC) patternintroduced in Section 1.2.6. Our strategy will be to describe the results of a typicalbrowser hit—a visit to the user index page at /users—in terms of MVC (Figure 2.11).
1. The browser issues a request for the /users URI.2. Rails routes /users to the index action in the Users controller.
www.it-ebooks.info
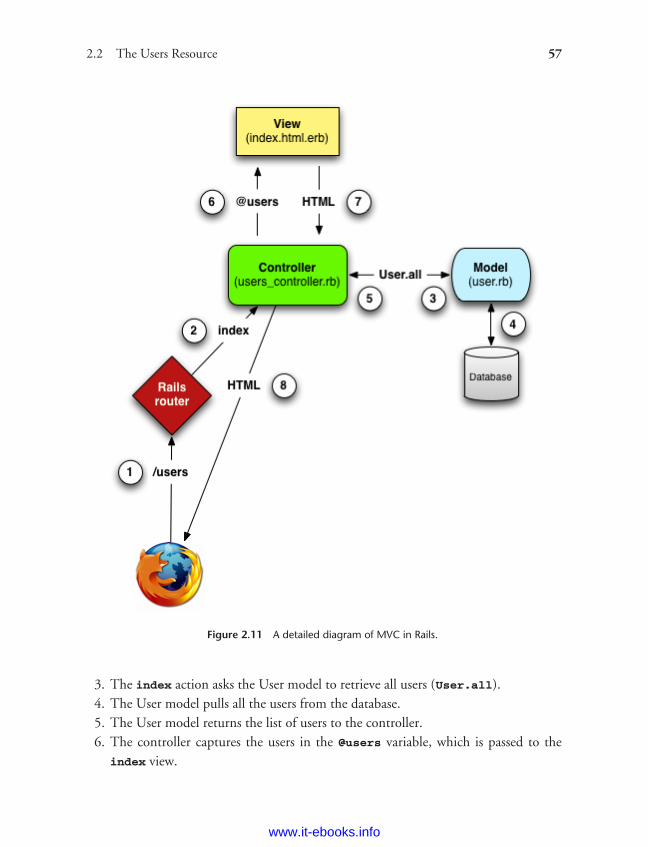
ptg8286261
2.2 The Users Resource 57
Figure 2.11 A detailed diagram of MVC in Rails.
3. The index action asks the User model to retrieve all users (User.all).4. The User model pulls all the users from the database.5. The User model returns the list of users to the controller.6. The controller captures the users in the @users variable, which is passed to the
index view.
www.it-ebooks.info
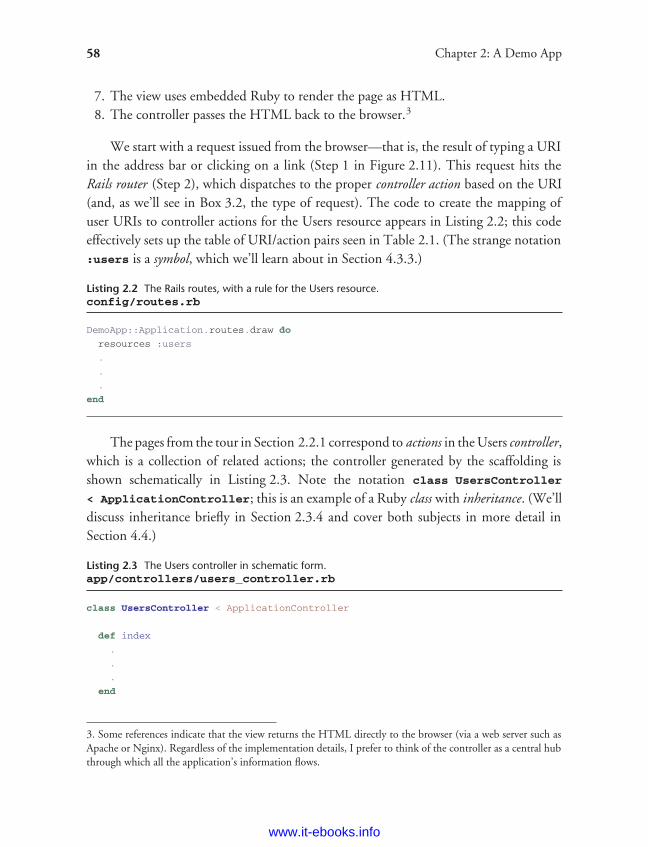
ptg8286261
58 Chapter 2: A Demo App
7. The view uses embedded Ruby to render the page as HTML.8. The controller passes the HTML back to the browser.3
We start with a request issued from the browser—that is, the result of typing a URIin the address bar or clicking on a link (Step 1 in Figure 2.11). This request hits theRails router (Step 2), which dispatches to the proper controller action based on the URI(and, as we’ll see in Box 3.2, the type of request). The code to create the mapping ofuser URIs to controller actions for the Users resource appears in Listing 2.2; this codeeffectively sets up the table of URI/action pairs seen in Table 2.1. (The strange notation:users is a symbol, which we’ll learn about in Section 4.3.3.)
Listing 2.2 The Rails routes, with a rule for the Users resource.config/routes.rb
DemoApp::Application.routes.draw do
resources :users
.
.
.
end
The pages from the tour in Section 2.2.1 correspond to actions in the Users controller,which is a collection of related actions; the controller generated by the scaffolding isshown schematically in Listing 2.3. Note the notation class UsersController
< ApplicationController; this is an example of a Ruby class with inheritance. (We’lldiscuss inheritance briefly in Section 2.3.4 and cover both subjects in more detail inSection 4.4.)
Listing 2.3 The Users controller in schematic form.app/controllers/users_controller.rb
class UsersController < ApplicationController
def index
.
.
.
end
3. Some references indicate that the view returns the HTML directly to the browser (via a web server such asApache or Nginx). Regardless of the implementation details, I prefer to think of the controller as a central hubthrough which all the application’s information flows.
www.it-ebooks.info
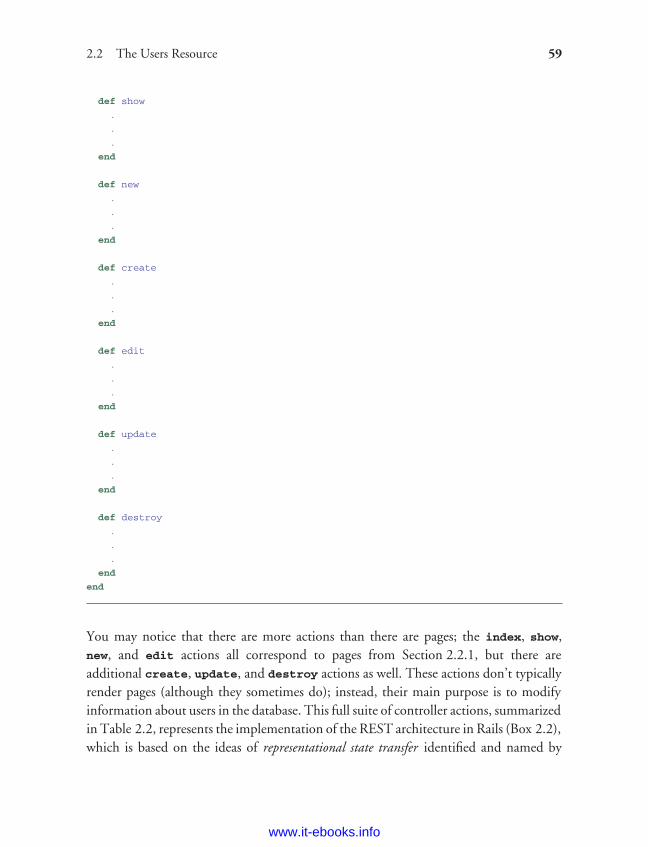
ptg8286261
2.2 The Users Resource 59
def show
.
.
.
end
def new
.
.
.
end
def create
.
.
.
end
def edit
.
.
.
end
def update
.
.
.
end
def destroy
.
.
.
end
end
You may notice that there are more actions than there are pages; the index, show,new, and edit actions all correspond to pages from Section 2.2.1, but there areadditional create, update, and destroy actions as well. These actions don’t typicallyrender pages (although they sometimes do); instead, their main purpose is to modifyinformation about users in the database. This full suite of controller actions, summarizedin Table 2.2, represents the implementation of the REST architecture in Rails (Box 2.2),which is based on the ideas of representational state transfer identified and named by
www.it-ebooks.info
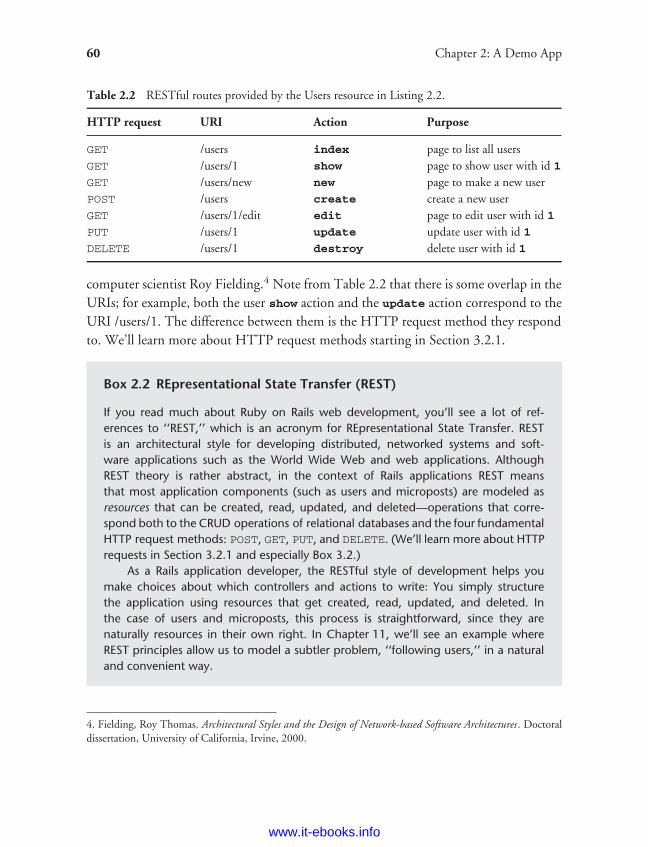
ptg8286261
60 Chapter 2: A Demo App
Table 2.2 RESTful routes provided by the Users resource in Listing 2.2.
HTTP request URI Action Purpose
GET /users index page to list all usersGET /users/1 show page to show user with id 1
GET /users/new new page to make a new userPOST /users create create a new userGET /users/1/edit edit page to edit user with id 1
PUT /users/1 update update user with id 1
DELETE /users/1 destroy delete user with id 1
computer scientist Roy Fielding.4 Note from Table 2.2 that there is some overlap in theURIs; for example, both the user show action and the update action correspond to theURI /users/1. The difference between them is the HTTP request method they respondto. We’ll learn more about HTTP request methods starting in Section 3.2.1.
Box 2.2 REpresentational State Transfer (REST)
If you read much about Ruby on Rails web development, you’ll see a lot of ref-erences to ‘‘REST,’’ which is an acronym for REpresentational State Transfer. RESTis an architectural style for developing distributed, networked systems and soft-ware applications such as the World Wide Web and web applications. AlthoughREST theory is rather abstract, in the context of Rails applications REST meansthat most application components (such as users and microposts) are modeled asresources that can be created, read, updated, and deleted—operations that corre-spond both to the CRUD operations of relational databases and the four fundamentalHTTP request methods: POST, GET, PUT, and DELETE. (We’ll learn more about HTTPrequests in Section 3.2.1 and especially Box 3.2.)
As a Rails application developer, the RESTful style of development helps youmake choices about which controllers and actions to write: You simply structurethe application using resources that get created, read, updated, and deleted. Inthe case of users and microposts, this process is straightforward, since they arenaturally resources in their own right. In Chapter 11, we’ll see an example whereREST principles allow us to model a subtler problem, ‘‘following users,’’ in a naturaland convenient way.
4. Fielding, Roy Thomas. Architectural Styles and the Design of Network-based Software Architectures. Doctoraldissertation, University of California, Irvine, 2000.
www.it-ebooks.info
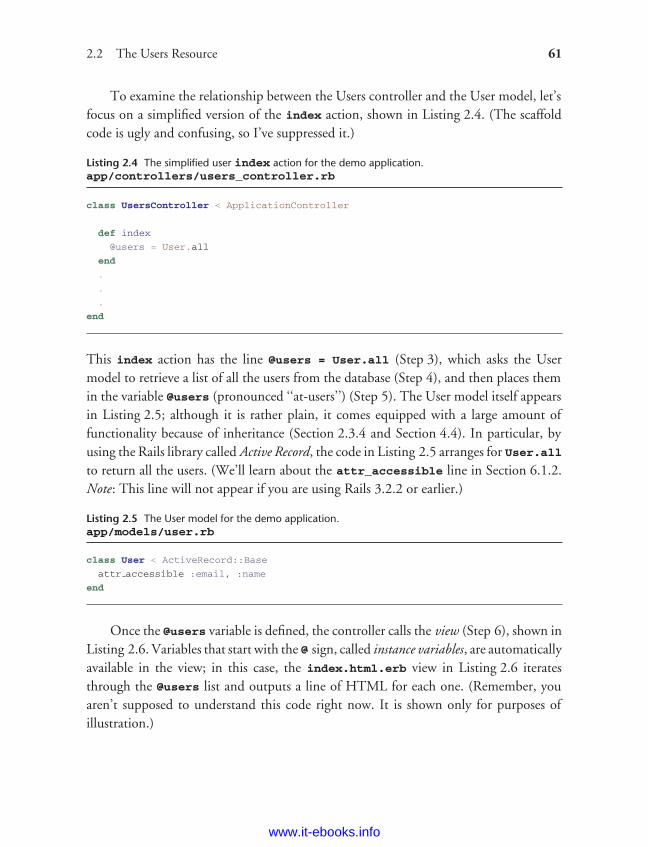
ptg8286261
2.2 The Users Resource 61
To examine the relationship between the Users controller and the User model, let’sfocus on a simplified version of the index action, shown in Listing 2.4. (The scaffoldcode is ugly and confusing, so I’ve suppressed it.)
Listing 2.4 The simplified user index action for the demo application.app/controllers/users_controller.rb
class UsersController < ApplicationController
def index
@users = User.all
end
.
.
.
end
This index action has the line @users = User.all (Step 3), which asks the Usermodel to retrieve a list of all the users from the database (Step 4), and then places themin the variable @users (pronounced ‘‘at-users’’) (Step 5). The User model itself appearsin Listing 2.5; although it is rather plain, it comes equipped with a large amount offunctionality because of inheritance (Section 2.3.4 and Section 4.4). In particular, byusing the Rails library called Active Record, the code in Listing 2.5 arranges for User.allto return all the users. (We’ll learn about the attr_accessible line in Section 6.1.2.Note: This line will not appear if you are using Rails 3.2.2 or earlier.)
Listing 2.5 The User model for the demo application.app/models/user.rb
class User < ActiveRecord::Base
attr accessible :email, :name
end
Once the @users variable is defined, the controller calls the view (Step 6), shown inListing 2.6. Variables that start with the @ sign, called instance variables, are automaticallyavailable in the view; in this case, the index.html.erb view in Listing 2.6 iteratesthrough the @users list and outputs a line of HTML for each one. (Remember, youaren’t supposed to understand this code right now. It is shown only for purposes ofillustration.)
www.it-ebooks.info
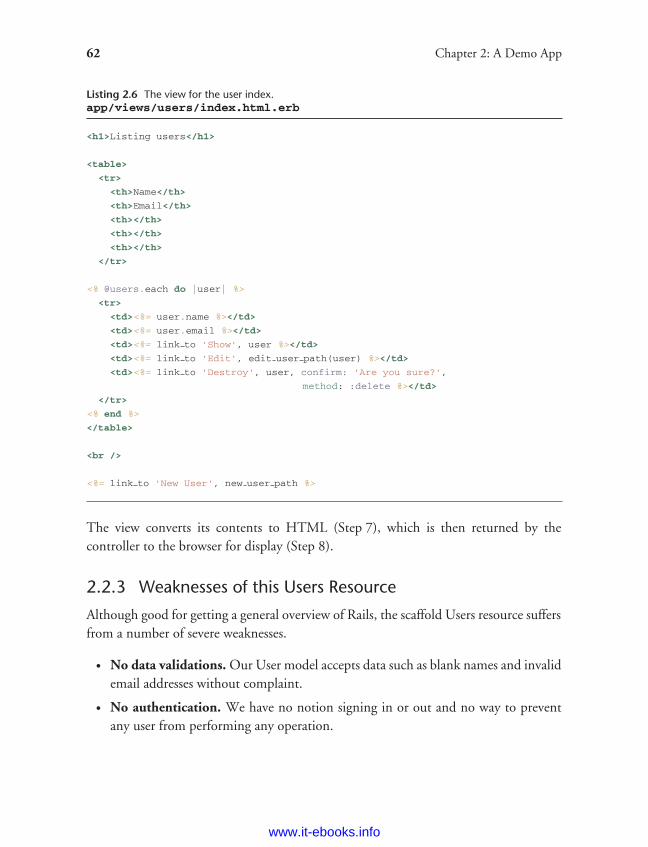
ptg8286261
62 Chapter 2: A Demo App
Listing 2.6 The view for the user index.app/views/users/index.html.erb
<h1>Listing users</h1>
<table>
<tr>
<th>Name</th>
<th>Email</th>
<th></th>
<th></th>
<th></th>
</tr>
<% @users.each do |user| %>
<tr>
<td><%= user.name %></td>
<td><%= user.email %></td>
<td><%= link to 'Show', user %></td>
<td><%= link to 'Edit', edit user path(user) %></td>
<td><%= link to 'Destroy', user, confirm: 'Are you sure?',
method: :delete %></td>
</tr>
<% end %>
</table>
<br />
<%= link to 'New User', new user path %>
The view converts its contents to HTML (Step 7), which is then returned by thecontroller to the browser for display (Step 8).
2.2.3 Weaknesses of this Users Resource
Although good for getting a general overview of Rails, the scaffold Users resource suffersfrom a number of severe weaknesses.
• No data validations. Our User model accepts data such as blank names and invalidemail addresses without complaint.
• No authentication. We have no notion signing in or out and no way to preventany user from performing any operation.
www.it-ebooks.info
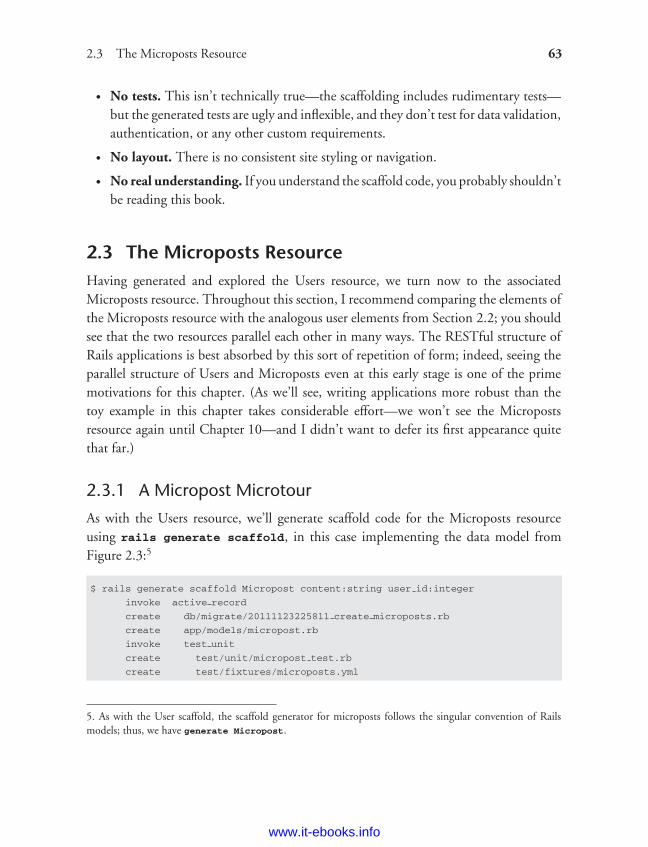
ptg8286261
2.3 The Microposts Resource 63
• No tests. This isn’t technically true—the scaffolding includes rudimentary tests—but the generated tests are ugly and inflexible, and they don’t test for data validation,authentication, or any other custom requirements.
• No layout. There is no consistent site styling or navigation.
• No real understanding. If you understand the scaffold code, you probably shouldn’tbe reading this book.
2.3 The Microposts ResourceHaving generated and explored the Users resource, we turn now to the associatedMicroposts resource. Throughout this section, I recommend comparing the elements ofthe Microposts resource with the analogous user elements from Section 2.2; you shouldsee that the two resources parallel each other in many ways. The RESTful structure ofRails applications is best absorbed by this sort of repetition of form; indeed, seeing theparallel structure of Users and Microposts even at this early stage is one of the primemotivations for this chapter. (As we’ll see, writing applications more robust than thetoy example in this chapter takes considerable effort—we won’t see the Micropostsresource again until Chapter 10—and I didn’t want to defer its first appearance quitethat far.)
2.3.1 A Micropost Microtour
As with the Users resource, we’ll generate scaffold code for the Microposts resourceusing rails generate scaffold, in this case implementing the data model fromFigure 2.3:5
$ rails generate scaffold Micropost content:string user id:integer
invoke active record
create db/migrate/20111123225811 create microposts.rb
create app/models/micropost.rb
invoke test unit
create test/unit/micropost test.rb
create test/fixtures/microposts.yml
5. As with the User scaffold, the scaffold generator for microposts follows the singular convention of Railsmodels; thus, we have generate Micropost.
www.it-ebooks.info
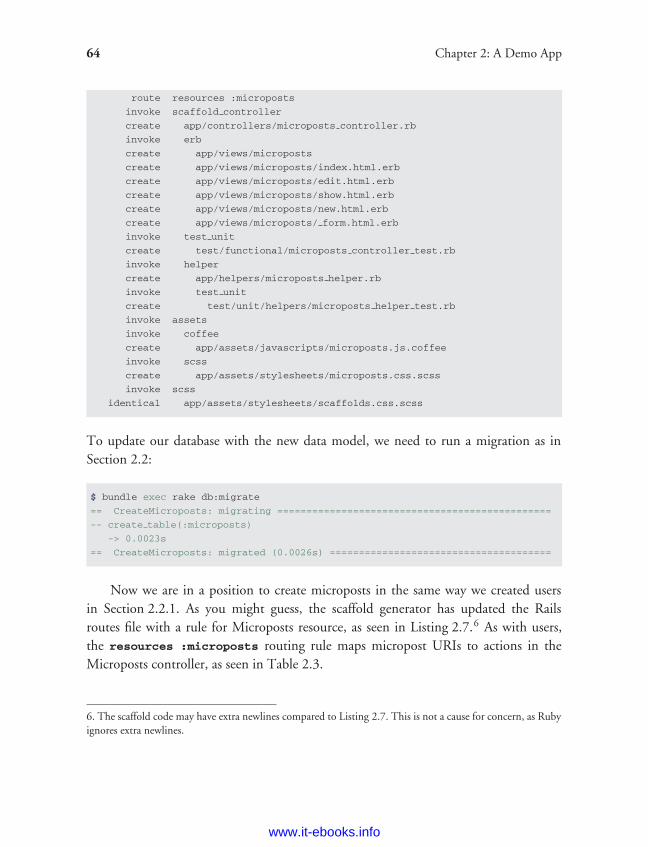
ptg8286261
64 Chapter 2: A Demo App
route resources :microposts
invoke scaffold controller
create app/controllers/microposts controller.rb
invoke erb
create app/views/microposts
create app/views/microposts/index.html.erb
create app/views/microposts/edit.html.erb
create app/views/microposts/show.html.erb
create app/views/microposts/new.html.erb
create app/views/microposts/ form.html.erb
invoke test unit
create test/functional/microposts controller test.rb
invoke helper
create app/helpers/microposts helper.rb
invoke test unit
create test/unit/helpers/microposts helper test.rb
invoke assets
invoke coffee
create app/assets/javascripts/microposts.js.coffee
invoke scss
create app/assets/stylesheets/microposts.css.scss
invoke scss
identical app/assets/stylesheets/scaffolds.css.scss
To update our database with the new data model, we need to run a migration as inSection 2.2:
$ bundle exec rake db:migrate
== CreateMicroposts: migrating ===============================================
-- create table(:microposts)
-> 0.0023s
== CreateMicroposts: migrated (0.0026s) ======================================
Now we are in a position to create microposts in the same way we created usersin Section 2.2.1. As you might guess, the scaffold generator has updated the Railsroutes file with a rule for Microposts resource, as seen in Listing 2.7.6 As with users,the resources :microposts routing rule maps micropost URIs to actions in theMicroposts controller, as seen in Table 2.3.
6. The scaffold code may have extra newlines compared to Listing 2.7. This is not a cause for concern, as Rubyignores extra newlines.
www.it-ebooks.info
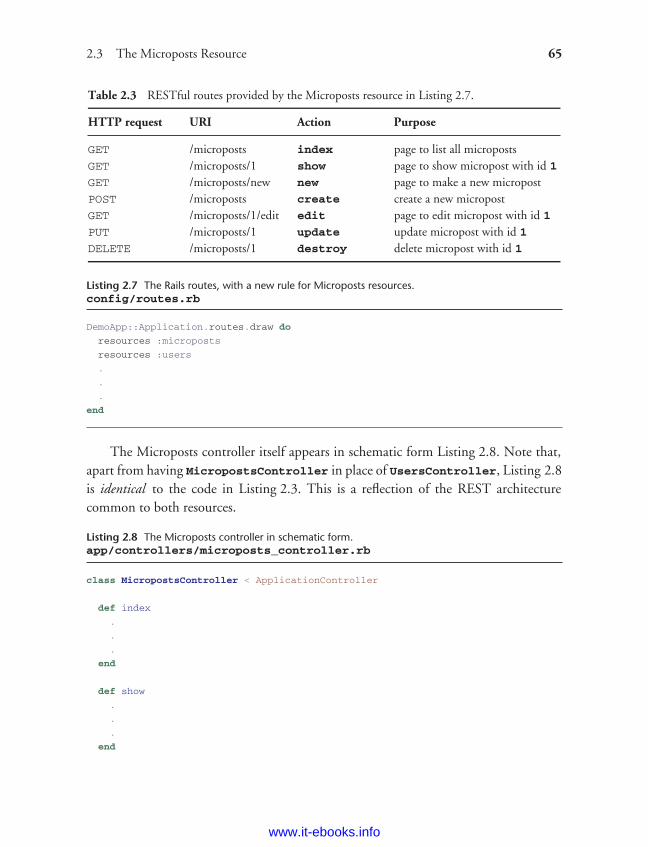
ptg8286261
2.3 The Microposts Resource 65
Table 2.3 RESTful routes provided by the Microposts resource in Listing 2.7.
HTTP request URI Action Purpose
GET /microposts index page to list all micropostsGET /microposts/1 show page to show micropost with id 1
GET /microposts/new new page to make a new micropostPOST /microposts create create a new micropostGET /microposts/1/edit edit page to edit micropost with id 1
PUT /microposts/1 update update micropost with id 1
DELETE /microposts/1 destroy delete micropost with id 1
Listing 2.7 The Rails routes, with a new rule for Microposts resources.config/routes.rb
DemoApp::Application.routes.draw do
resources :microposts
resources :users
.
.
.
end
The Microposts controller itself appears in schematic form Listing 2.8. Note that,apart from having MicropostsController in place of UsersController, Listing 2.8is identical to the code in Listing 2.3. This is a reflection of the REST architecturecommon to both resources.
Listing 2.8 The Microposts controller in schematic form.app/controllers/microposts_controller.rb
class MicropostsController < ApplicationController
def index
.
.
.
end
def show
.
.
.
end
www.it-ebooks.info
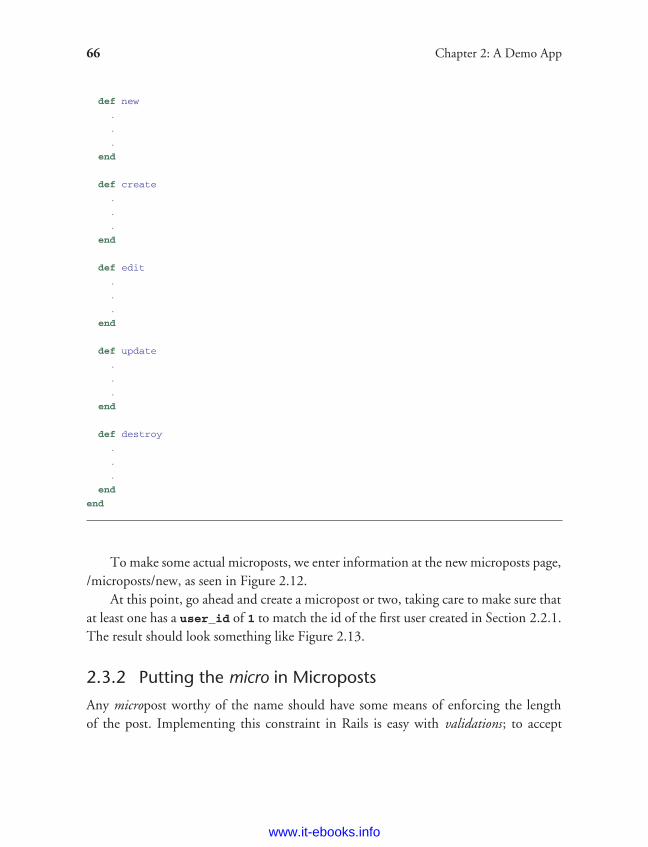
ptg8286261
66 Chapter 2: A Demo App
def new
.
.
.
end
def create
.
.
.
end
def edit
.
.
.
end
def update
.
.
.
end
def destroy
.
.
.
end
end
To make some actual microposts, we enter information at the new microposts page,/microposts/new, as seen in Figure 2.12.
At this point, go ahead and create a micropost or two, taking care to make sure thatat least one has a user_id of 1 to match the id of the first user created in Section 2.2.1.The result should look something like Figure 2.13.
2.3.2 Putting the micro in Microposts
Any micropost worthy of the name should have some means of enforcing the lengthof the post. Implementing this constraint in Rails is easy with validations; to accept
www.it-ebooks.info
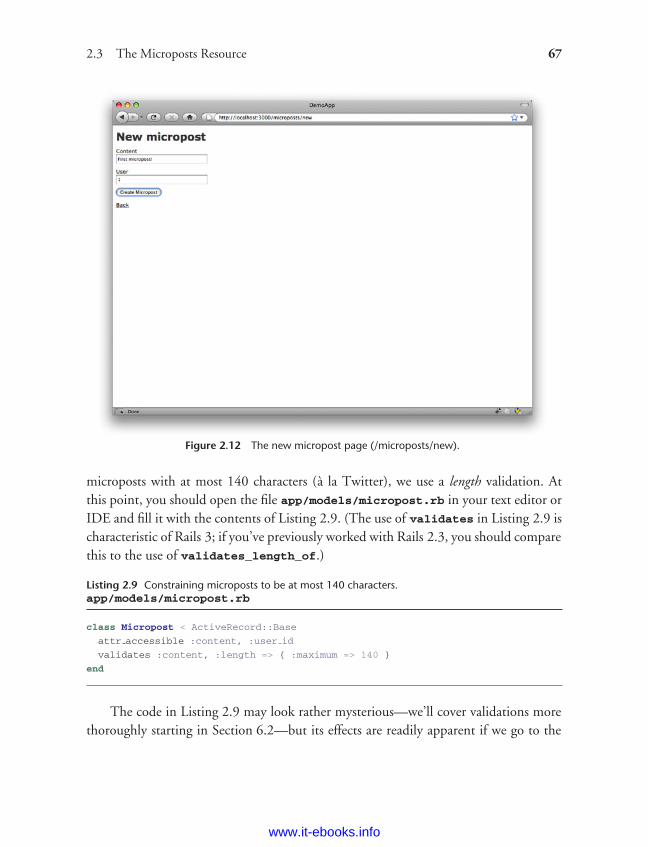
ptg8286261
2.3 The Microposts Resource 67
Figure 2.12 The new micropost page (/microposts/new).
`microposts with at most 140 characters (a la Twitter), we use a length validation. Atthis point, you should open the file app/models/micropost.rb in your text editor orIDE and fill it with the contents of Listing 2.9. (The use of validates in Listing 2.9 ischaracteristic of Rails 3; if you’ve previously worked with Rails 2.3, you should comparethis to the use of validates_length_of.)
Listing 2.9 Constraining microposts to be at most 140 characters.app/models/micropost.rb
class Micropost < ActiveRecord::Base
attr accessible :content, :user id
validates :content, :length => { :maximum => 140 }
end
The code in Listing 2.9 may look rather mysterious—we’ll cover validations morethoroughly starting in Section 6.2—but its effects are readily apparent if we go to the
www.it-ebooks.info
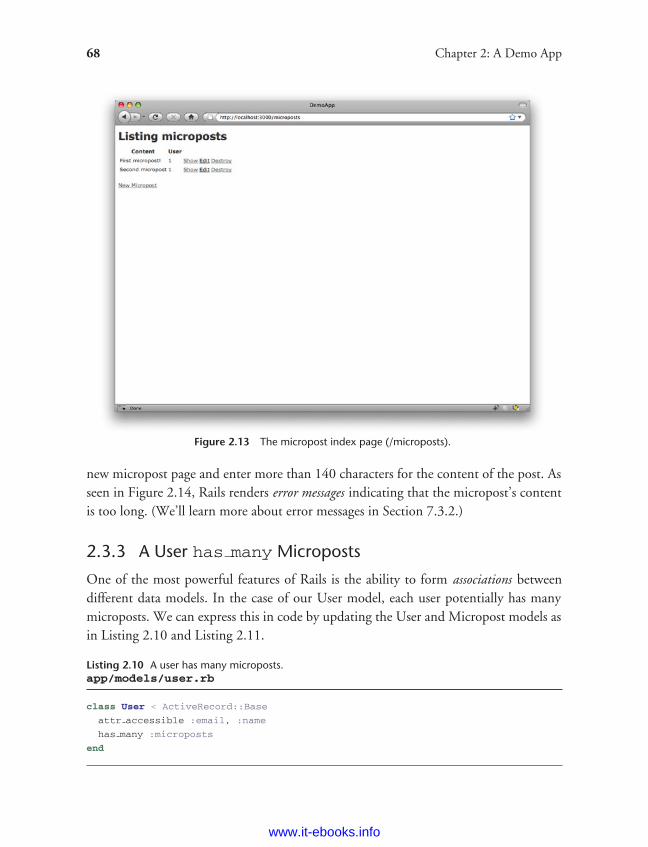
ptg8286261
68 Chapter 2: A Demo App
Figure 2.13 The micropost index page (/microposts).
new micropost page and enter more than 140 characters for the content of the post. Asseen in Figure 2.14, Rails renders error messages indicating that the micropost’s contentis too long. (We’ll learn more about error messages in Section 7.3.2.)
2.3.3 A User has many Microposts
One of the most powerful features of Rails is the ability to form associations betweendifferent data models. In the case of our User model, each user potentially has manymicroposts. We can express this in code by updating the User and Micropost models asin Listing 2.10 and Listing 2.11.
Listing 2.10 A user has many microposts.app/models/user.rb
class User < ActiveRecord::Base
attr accessible :email, :name
has many :microposts
end
www.it-ebooks.info
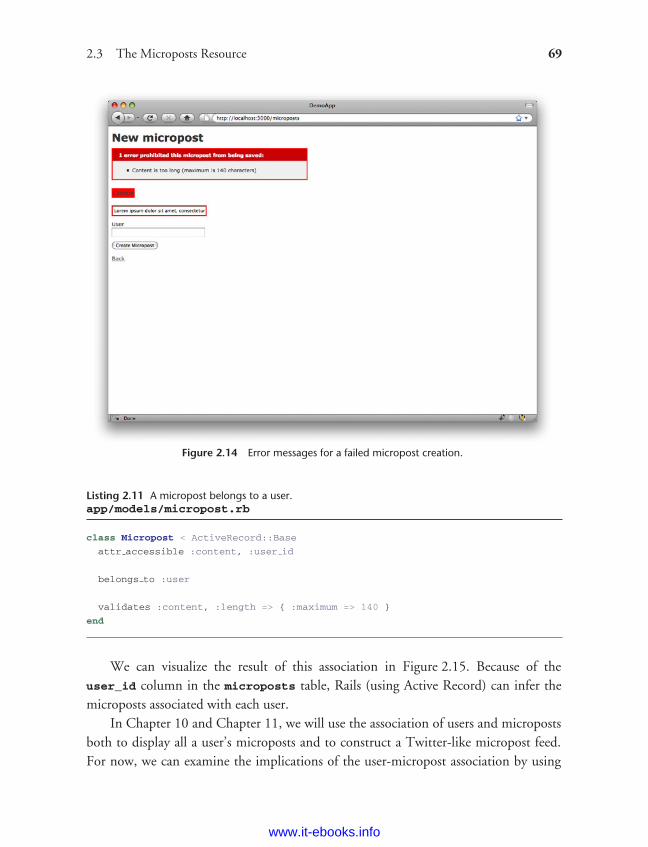
ptg8286261
2.3 The Microposts Resource 69
Figure 2.14 Error messages for a failed micropost creation.
Listing 2.11 A micropost belongs to a user.app/models/micropost.rb
class Micropost < ActiveRecord::Base
attr accessible :content, :user id
belongs to :user
validates :content, :length => { :maximum => 140 }
end
We can visualize the result of this association in Figure 2.15. Because of theuser_id column in the microposts table, Rails (using Active Record) can infer themicroposts associated with each user.
In Chapter 10 and Chapter 11, we will use the association of users and micropostsboth to display all a user’s microposts and to construct a Twitter-like micropost feed.For now, we can examine the implications of the user-micropost association by using
www.it-ebooks.info
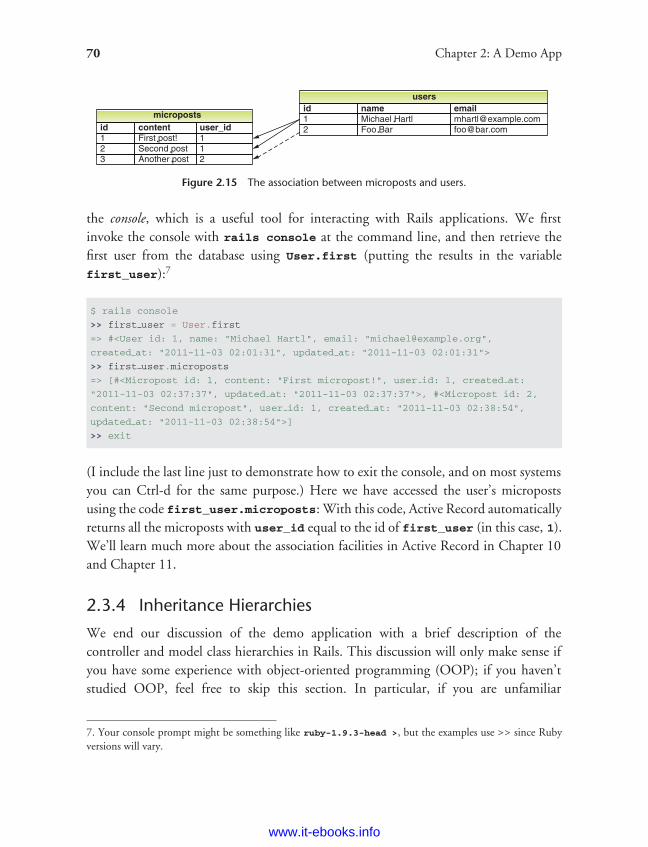
ptg8286261
70 Chapter 2: A Demo App
Figure 2.15 The association between microposts and users.
the console, which is a useful tool for interacting with Rails applications. We firstinvoke the console with rails console at the command line, and then retrieve thefirst user from the database using User.first (putting the results in the variablefirst_user):7
$ rails console
>> first user = User.first
=> #<User id: 1, name: "Michael Hartl", email: "[email protected]",
created at: "2011-11-03 02:01:31", updated at: "2011-11-03 02:01:31">
>> first user.microposts
=> [#<Micropost id: 1, content: "First micropost!", user id: 1, created at:
"2011-11-03 02:37:37", updated at: "2011-11-03 02:37:37">, #<Micropost id: 2,
content: "Second micropost", user id: 1, created at: "2011-11-03 02:38:54",
updated at: "2011-11-03 02:38:54">]
>> exit
(I include the last line just to demonstrate how to exit the console, and on most systemsyou can Ctrl-d for the same purpose.) Here we have accessed the user’s micropostsusing the code first_user.microposts: With this code, Active Record automaticallyreturns all the microposts with user_id equal to the id of first_user (in this case, 1).We’ll learn much more about the association facilities in Active Record in Chapter 10and Chapter 11.
2.3.4 Inheritance Hierarchies
We end our discussion of the demo application with a brief description of thecontroller and model class hierarchies in Rails. This discussion will only make sense ifyou have some experience with object-oriented programming (OOP); if you haven’tstudied OOP, feel free to skip this section. In particular, if you are unfamiliar
7. Your console prompt might be something like ruby-1.9.3-head >, but the examples use >> since Rubyversions will vary.
www.it-ebooks.info
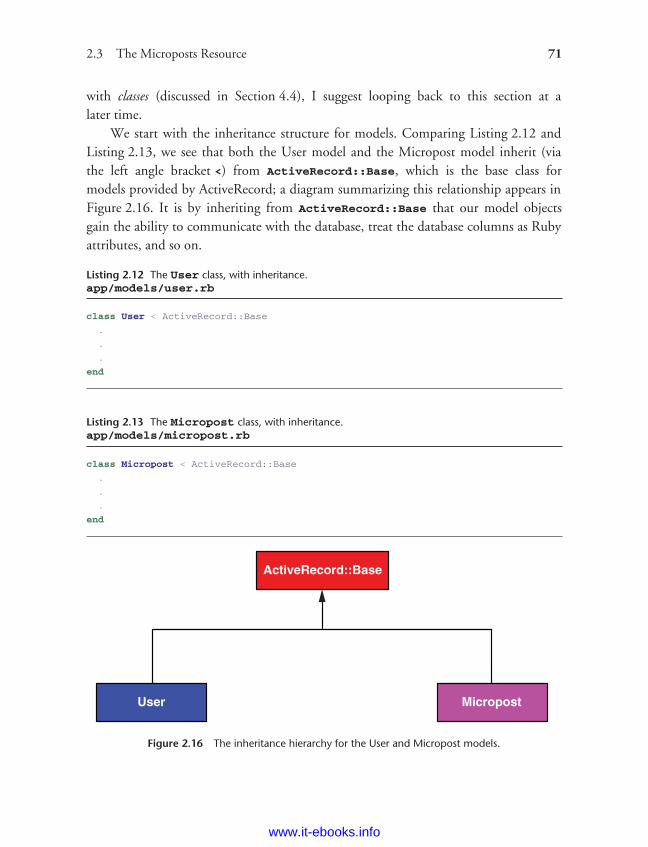
ptg8286261
2.3 The Microposts Resource 71
with classes (discussed in Section 4.4), I suggest looping back to this section at alater time.
We start with the inheritance structure for models. Comparing Listing 2.12 andListing 2.13, we see that both the User model and the Micropost model inherit (viathe left angle bracket <) from ActiveRecord::Base, which is the base class formodels provided by ActiveRecord; a diagram summarizing this relationship appears inFigure 2.16. It is by inheriting from ActiveRecord::Base that our model objectsgain the ability to communicate with the database, treat the database columns as Rubyattributes, and so on.
Listing 2.12 The User class, with inheritance.app/models/user.rb
class User < ActiveRecord::Base
.
.
.
end
Listing 2.13 The Micropost class, with inheritance.app/models/micropost.rb
class Micropost < ActiveRecord::Base
.
.
.
end
Figure 2.16 The inheritance hierarchy for the User and Micropost models.
www.it-ebooks.info
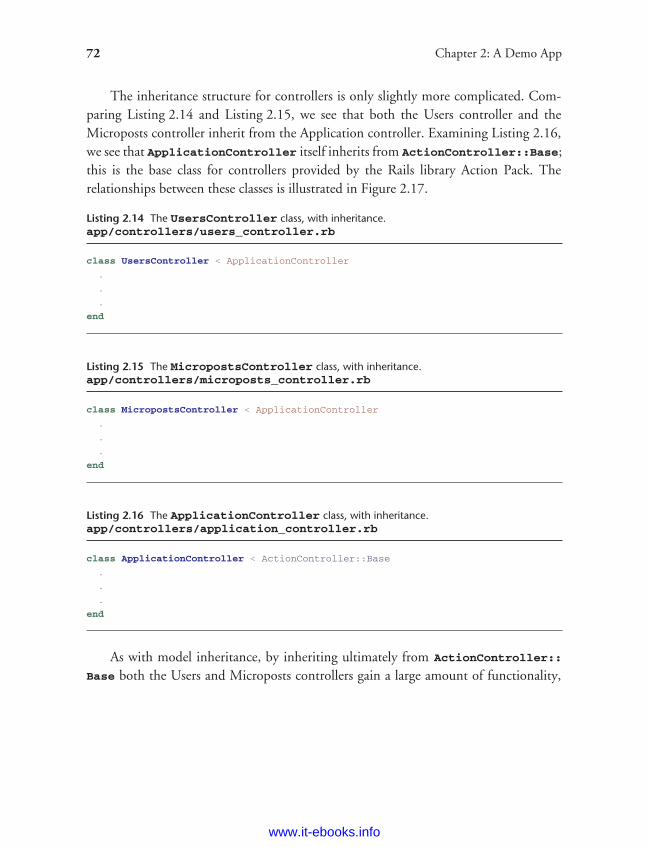
ptg8286261
72 Chapter 2: A Demo App
The inheritance structure for controllers is only slightly more complicated. Com-paring Listing 2.14 and Listing 2.15, we see that both the Users controller and theMicroposts controller inherit from the Application controller. Examining Listing 2.16,we see that ApplicationController itself inherits from ActionController::Base;this is the base class for controllers provided by the Rails library Action Pack. Therelationships between these classes is illustrated in Figure 2.17.
Listing 2.14 The UsersController class, with inheritance.app/controllers/users_controller.rb
class UsersController < ApplicationController
.
.
.
end
Listing 2.15 The MicropostsController class, with inheritance.app/controllers/microposts_controller.rb
class MicropostsController < ApplicationController
.
.
.
end
Listing 2.16 The ApplicationController class, with inheritance.app/controllers/application_controller.rb
class ApplicationController < ActionController::Base
.
.
.
end
As with model inheritance, by inheriting ultimately from ActionController::
Base both the Users and Microposts controllers gain a large amount of functionality,
www.it-ebooks.info
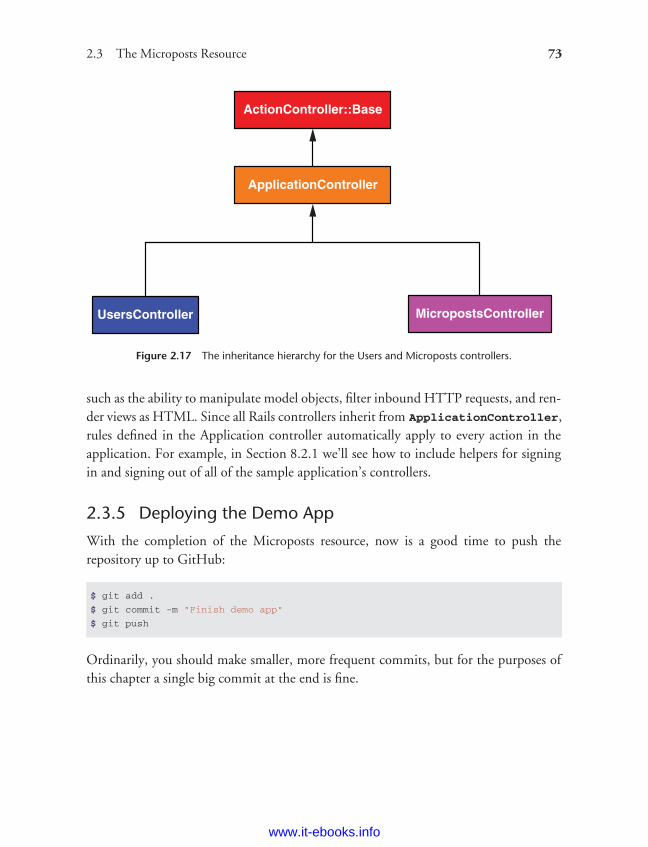
ptg8286261
2.3 The Microposts Resource 73
Figure 2.17 The inheritance hierarchy for the Users and Microposts controllers.
such as the ability to manipulate model objects, filter inbound HTTP requests, and ren-der views as HTML. Since all Rails controllers inherit from ApplicationController,rules defined in the Application controller automatically apply to every action in theapplication. For example, in Section 8.2.1 we’ll see how to include helpers for signingin and signing out of all of the sample application’s controllers.
2.3.5 Deploying the Demo App
With the completion of the Microposts resource, now is a good time to push therepository up to GitHub:
$ git add .
$ git commit -m "Finish demo app"
$ git push
Ordinarily, you should make smaller, more frequent commits, but for the purposes ofthis chapter a single big commit at the end is fine.
www.it-ebooks.info
ptg8286261
74 Chapter 2: A Demo App
At this point, you can also deploy the demo app to Heroku as in Section 1.4:
$ heroku create --stack cedar
$ git push heroku master
Finally, migrate the production database (see below if you get a deprecationwarning):
$ heroku run rake db:migrate
This updates the database at Heroku with the necessary user/micropost data model.You may get a deprecation warning regarding assets in vendor/plugins, which youshould ignore since there aren’t any plugins in that directory.
2.4 ConclusionWe’ve come now to the end of the 30,000-foot view of a Rails application. The demoapp developed in this chapter has several strengths and a host of weaknesses.
Strengths
• High-level overview of Rails
• Introduction to MVC
• First taste of the REST architecture
• Beginning data modeling
• A live, database-backed web application in production
Weaknesses
• No custom layout or styling
• No static pages (like ‘‘Home’’ or ‘‘About’’)
• No user passwords
• No user images
• No signing in
www.it-ebooks.info
ptg8286261
2.4 Conclusion 75
• No security
• No automatic user/micropost association
• No notion of ‘‘following’’ or ‘‘followed’’
• No micropost feed
• No test-driven development
• No real understanding
The rest of this tutorial is dedicated to building on the strengths and eliminating theweaknesses.
www.it-ebooks.info

ptg8286261
CHAPTER 3Mostly Static Pages
In this chapter, we will begin developing the sample application that will serve as ourexample throughout the rest of this tutorial. Although the sample app will eventuallyhave users, microposts, and a full login and authentication framework, we will begin witha seemingly limited topic: the creation of static pages. Despite its apparent simplicity,making static pages is a highly instructive exercise, rich in implications—a perfect startfor our nascent application.
Although Rails is designed for making database-backed dynamic websites, it alsoexcels at making the kind of static pages we might make with raw HTML files. In fact,using Rails even for static pages yields a distinct advantage: We can easily add just asmall amount of dynamic content. In this chapter we’ll learn how. Along the way, we’llget our first taste of automated testing, which will help us be more confident that ourcode is correct. Moreover, having a good test suite will allow us to refactor our codewith confidence, changing its form without changing its function.
There’s a lot of code in this chapter, especially in Section 3.2 and Section 3.3, andif you’re new to Ruby you shouldn’t worry about understanding the details right now.As noted in Section 1.1.1, one strategy is to copy-and-paste the tests and use them toverify the application code, without worrying at this point how they work. In addition,Chapter 4 covers Ruby in more depth, so there is plenty of opportunity for these ideasto sink in. Finally, RSpec tests will recur throughout the tutorial, so if you get stucknow I recommend forging ahead; you’ll be amazed how, after just a few more chapters,initially inscrutable code will suddenly look simple.
As in Chapter 2, before getting started we need to create a new Rails project, thistime called sample_app:
$ cd ˜/rails projects
$ rails new sample app --skip-test-unit
$ cd sample app
77
www.it-ebooks.info
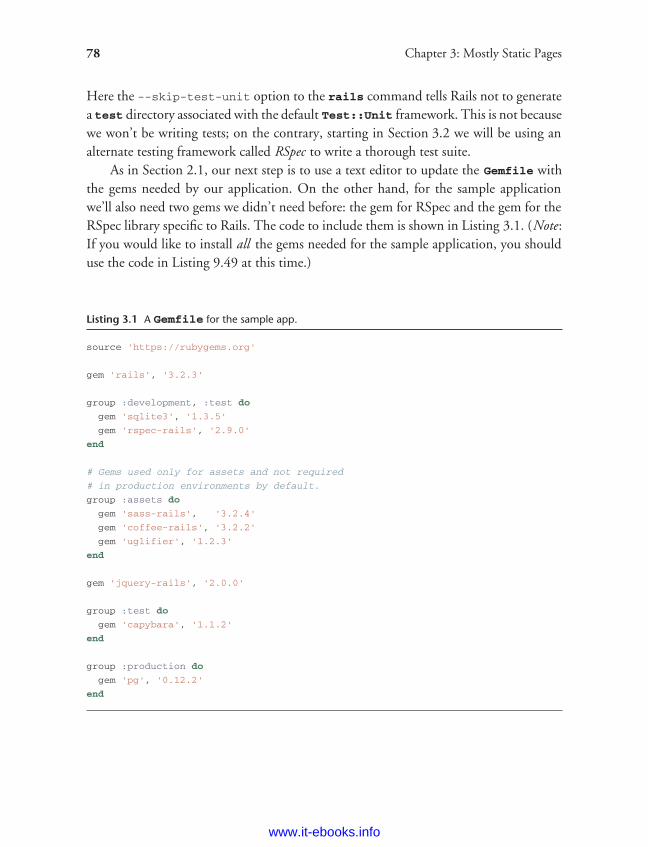
ptg8286261
78 Chapter 3: Mostly Static Pages
Here the --skip-test-unit option to the rails command tells Rails not to generatea test directory associated with the default Test::Unit framework. This is not becausewe won’t be writing tests; on the contrary, starting in Section 3.2 we will be using analternate testing framework called RSpec to write a thorough test suite.
As in Section 2.1, our next step is to use a text editor to update the Gemfile withthe gems needed by our application. On the other hand, for the sample applicationwe’ll also need two gems we didn’t need before: the gem for RSpec and the gem for theRSpec library specific to Rails. The code to include them is shown in Listing 3.1. (Note:If you would like to install all the gems needed for the sample application, you shoulduse the code in Listing 9.49 at this time.)
Listing 3.1 A Gemfile for the sample app.
source 'https://rubygems.org'
gem 'rails', '3.2.3'
group :development, :test do
gem 'sqlite3', '1.3.5'
gem 'rspec-rails', '2.9.0'
end
# Gems used only for assets and not required
# in production environments by default.
group :assets do
gem 'sass-rails', '3.2.4'
gem 'coffee-rails', '3.2.2'
gem 'uglifier', '1.2.3'
end
gem 'jquery-rails', '2.0.0'
group :test do
gem 'capybara', '1.1.2'
end
group :production do
gem 'pg', '0.12.2'
end
www.it-ebooks.info
ptg8286261
Mostly Static Pages 79
This includes rspec-rails in development mode so that we have access to RSpec-specific generators, and it includes it in test mode in order to run the tests. We don’thave to install RSpec itself because it is a dependency of rspec-rails and will thus beinstalled automatically. We also include the Capybara gem, which allows us to simulatea user’s interaction with the sample application using a natural English-like syntax.1 Asin Chapter 2, we also must include the PostgreSQL gem in production for deploymentto Heroku:
group :production do
gem 'pg', '0.12.2'
end
Heroku recommends against using different databases in development and production,but for the sample application it won’t make any difference, and SQLite is much easierthan PostgreSQL to install and configure. Installing and configuring PostgreSQL onyour local machine is left as an exercise (Section 3.5).
To install and include the new gems, we run bundle install:
$ bundle install --without production
As in Chapter 2, we suppress the installation of production gems using the option--without production. This is a ‘‘remembered option,’’ which means that we don’thave to include it in future invocations of Bundler. Instead, we can write simply bundle
install.2
Next, we need to configure Rails to use RSpec in place of Test::Unit. This canbe accomplished with rails generate rspec:install:
$ rails generate rspec:install
If your system complains about the lack of a JavaScript runtime, visit the execjs page atGitHub for a list of possibilities. I particularly recommend installing Node.js.
1. The successor to Webrat, Capybara is named after the world’s largest rodent.
2. In fact, you can even leave off install. The bundle command by itself is an alias for bundle install.
www.it-ebooks.info
ptg8286261
80 Chapter 3: Mostly Static Pages
With that, all we have left is to initialize the Git repository:3
$ git init
$ git add .
$ git commit -m "Initial commit"
As with the first application, I suggest updating the README file (located in the rootdirectory of the application) to be more helpful and descriptive, as shown in Listing 3.2.
Listing 3.2 An improved README file for the sample app.
# Ruby on Rails Tutorial: sample application
This is the sample application for
[*Ruby on Rails Tutorial: Learn Rails by Example*](http://railstutorial.org/)
by [Michael Hartl](http://michaelhartl.com/).
Then change it to use the Markdown extension .md and commit the changes:
$ git mv README.rdoc README.md
$ git commit -a -m "Improve the README"
Since we’ll be using this sample app throughout the rest of the book, it’s a goodidea to make a repository at GitHub (Figure 3.1) and push it up:
$ git remote add origin [email protected]:<username>/sample app.git
$ git push -u origin master
As a result of my performing this step, you can find the Rails Tutorial sample applicationcode on GitHub (under a slightly different name).4
Of course, we can optionally deploy the app to Heroku even at this early stage:
$ heroku create --stack cedar
$ git push heroku master
3. As before, you may find the augmented file from Listing 1.7 to be more convenient depending on yoursystem.
4. https://github.com/railstutorial/sample app 2nd ed
www.it-ebooks.info
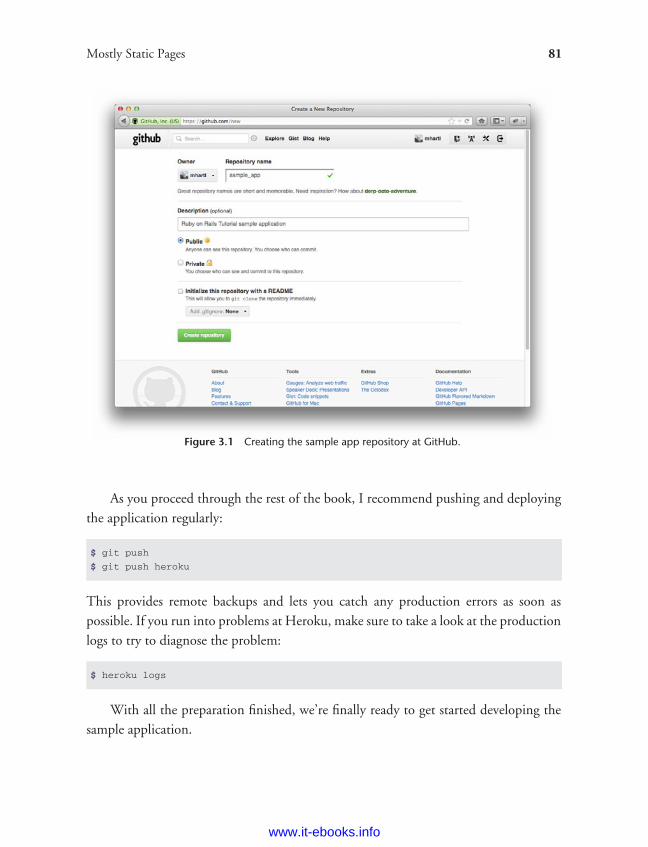
ptg8286261
Mostly Static Pages 81
Figure 3.1 Creating the sample app repository at GitHub.
As you proceed through the rest of the book, I recommend pushing and deployingthe application regularly:
$ git push
$ git push heroku
This provides remote backups and lets you catch any production errors as soon aspossible. If you run into problems at Heroku, make sure to take a look at the productionlogs to try to diagnose the problem:
$ heroku logs
With all the preparation finished, we’re finally ready to get started developing thesample application.
www.it-ebooks.info
ptg8286261
82 Chapter 3: Mostly Static Pages
3.1 Static PagesRails has two main ways of making static web pages. First, Rails can handle trulystatic pages consisting of raw HTML files. Second, Rails allows us to define viewscontaining raw HTML, which Rails can render so that the web server can send it to thebrowser.
In order to get our bearings, it’s helpful to recall the Rails directory structurefrom Section 1.2.3 (Figure 1.2). In this section, we’ll be working mainly in theapp/controllers and app/views directories. (In Section 3.2, we’ll even add a newdirectory of our own.)
This is the first section where it’s useful to be able to open the entire Rails directoryin your text editor or IDE. Unfortunately, how to do this is system-dependent, but inmany cases you can open the current application directory, represented in Unix by adot ., using the command-line command for your editor of choice:
$ cd ˜/rails projects/sample app
$ <editor name> .
For example, to open the sample app in Sublime Text, you type
$ subl .
For Vim, you type vim ., gvim ., or mvim ., depending on which flavor of Vimyou use.
3.1.1 Truly Static Pages
We start with truly static pages. Recall from Section 1.2.5 that every Rails applicationcomes with a minimal working application thanks to the rails script, with a defaultwelcome page at the address http://localhost:3000 (Figure 1.3).
To learn where this page comes from, take a look at the file public/index.html
(Figure 3.2). Because the file contains its own stylesheet information, it’s a little messy,but it gets the job done: By default, Rails serves any files in the public directory directlyto the browser.5 In the case of the special index.html file, you don’t even have toindicate the file in the URI, as index.html is the default. You can include it if you
5. In fact, Rails ensures that requests for such files never hit the main Rails stack; they are delivered directlyfrom the filesystem. (See The Rails 3 Way for more details.)
www.it-ebooks.info
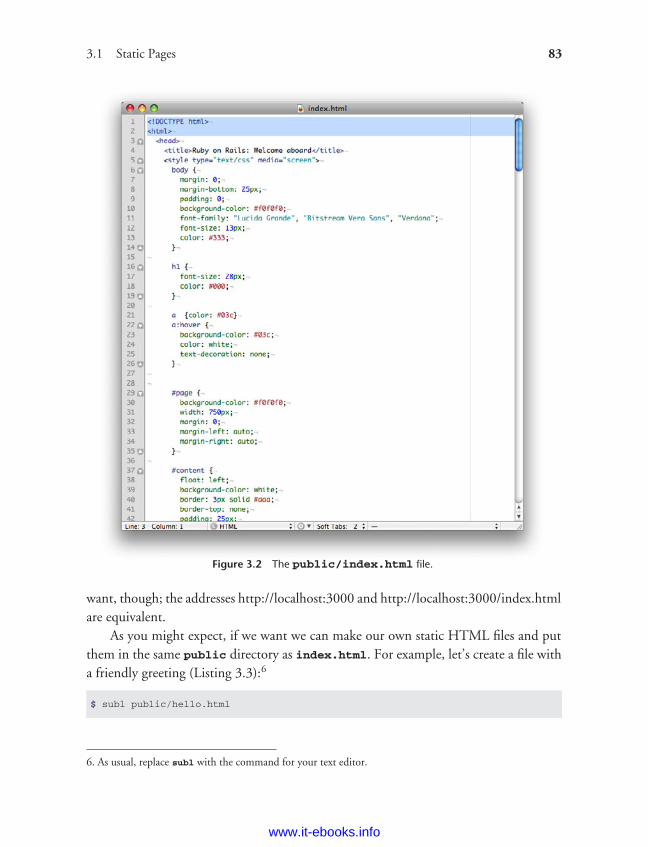
ptg8286261
3.1 Static Pages 83
Figure 3.2 The public/index.html file.
want, though; the addresses http://localhost:3000 and http://localhost:3000/index.htmlare equivalent.
As you might expect, if we want we can make our own static HTML files and putthem in the same public directory as index.html. For example, let’s create a file witha friendly greeting (Listing 3.3):6
$ subl public/hello.html
6. As usual, replace subl with the command for your text editor.
www.it-ebooks.info
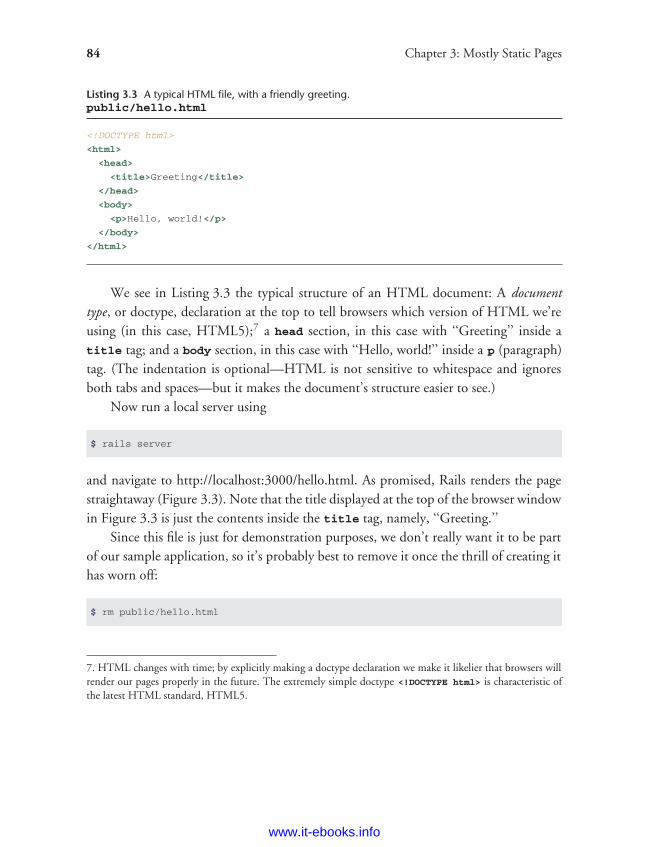
ptg8286261
84 Chapter 3: Mostly Static Pages
Listing 3.3 A typical HTML file, with a friendly greeting.public/hello.html
<!DOCTYPE html>
<html>
<head>
<title>Greeting</title>
</head>
<body>
<p>Hello, world!</p>
</body>
</html>
We see in Listing 3.3 the typical structure of an HTML document: A documenttype, or doctype, declaration at the top to tell browsers which version of HTML we’reusing (in this case, HTML5);7 a head section, in this case with ‘‘Greeting’’ inside atitle tag; and a body section, in this case with ‘‘Hello, world!’’ inside a p (paragraph)tag. (The indentation is optional—HTML is not sensitive to whitespace and ignoresboth tabs and spaces—but it makes the document’s structure easier to see.)
Now run a local server using
$ rails server
and navigate to http://localhost:3000/hello.html. As promised, Rails renders the pagestraightaway (Figure 3.3). Note that the title displayed at the top of the browser windowin Figure 3.3 is just the contents inside the title tag, namely, ‘‘Greeting.’’
Since this file is just for demonstration purposes, we don’t really want it to be partof our sample application, so it’s probably best to remove it once the thrill of creating ithas worn off:
$ rm public/hello.html
7. HTML changes with time; by explicitly making a doctype declaration we make it likelier that browsers willrender our pages properly in the future. The extremely simple doctype <!DOCTYPE html> is characteristic ofthe latest HTML standard, HTML5.
www.it-ebooks.info
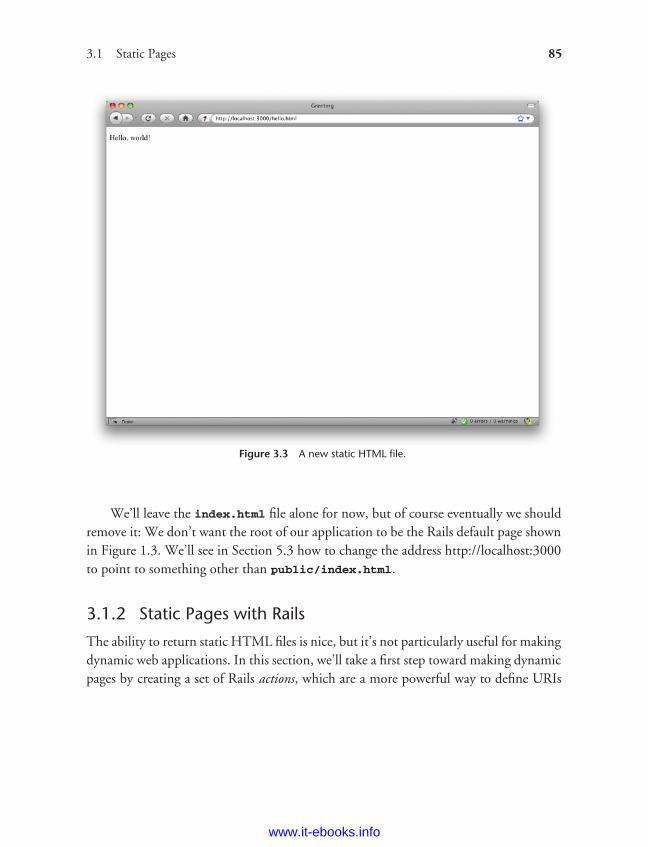
ptg8286261
3.1 Static Pages 85
Figure 3.3 A new static HTML file.
We’ll leave the index.html file alone for now, but of course eventually we shouldremove it: We don’t want the root of our application to be the Rails default page shownin Figure 1.3. We’ll see in Section 5.3 how to change the address http://localhost:3000to point to something other than public/index.html.
3.1.2 Static Pages with Rails
The ability to return static HTML files is nice, but it’s not particularly useful for makingdynamic web applications. In this section, we’ll take a first step toward making dynamicpages by creating a set of Rails actions, which are a more powerful way to define URIs
www.it-ebooks.info
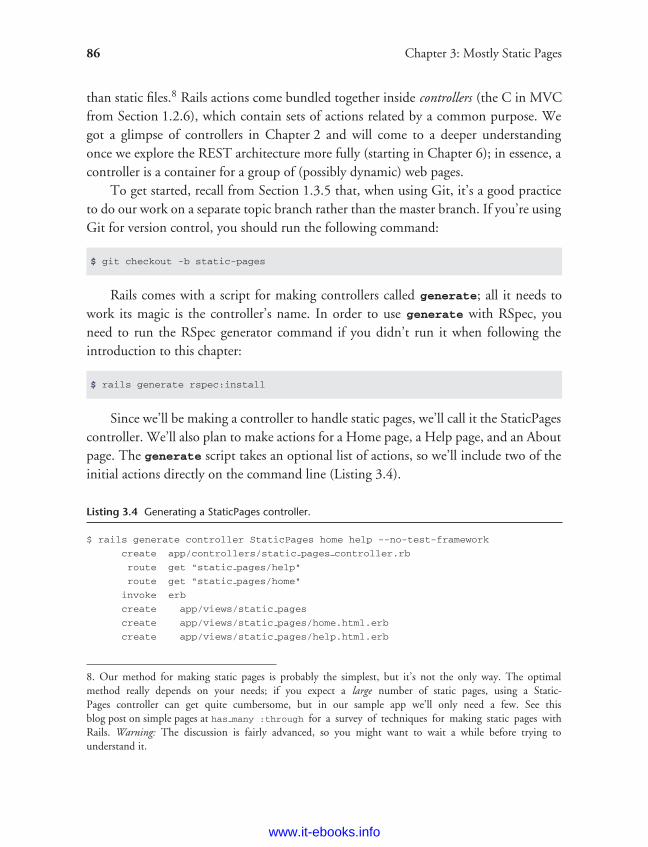
ptg8286261
86 Chapter 3: Mostly Static Pages
than static files.8 Rails actions come bundled together inside controllers (the C in MVCfrom Section 1.2.6), which contain sets of actions related by a common purpose. Wegot a glimpse of controllers in Chapter 2 and will come to a deeper understandingonce we explore the REST architecture more fully (starting in Chapter 6); in essence, acontroller is a container for a group of (possibly dynamic) web pages.
To get started, recall from Section 1.3.5 that, when using Git, it’s a good practiceto do our work on a separate topic branch rather than the master branch. If you’re usingGit for version control, you should run the following command:
$ git checkout -b static-pages
Rails comes with a script for making controllers called generate; all it needs towork its magic is the controller’s name. In order to use generate with RSpec, youneed to run the RSpec generator command if you didn’t run it when following theintroduction to this chapter:
$ rails generate rspec:install
Since we’ll be making a controller to handle static pages, we’ll call it the StaticPagescontroller. We’ll also plan to make actions for a Home page, a Help page, and an Aboutpage. The generate script takes an optional list of actions, so we’ll include two of theinitial actions directly on the command line (Listing 3.4).
Listing 3.4 Generating a StaticPages controller.
$ rails generate controller StaticPages home help --no-test-framework
create app/controllers/static pages controller.rb
route get "static pages/help"
route get "static pages/home"
invoke erb
create app/views/static pages
create app/views/static pages/home.html.erb
create app/views/static pages/help.html.erb
8. Our method for making static pages is probably the simplest, but it’s not the only way. The optimalmethod really depends on your needs; if you expect a large number of static pages, using a Static-Pages controller can get quite cumbersome, but in our sample app we’ll only need a few. See thisblog post on simple pages at has many :through for a survey of techniques for making static pages withRails. Warning: The discussion is fairly advanced, so you might want to wait a while before trying tounderstand it.
www.it-ebooks.info
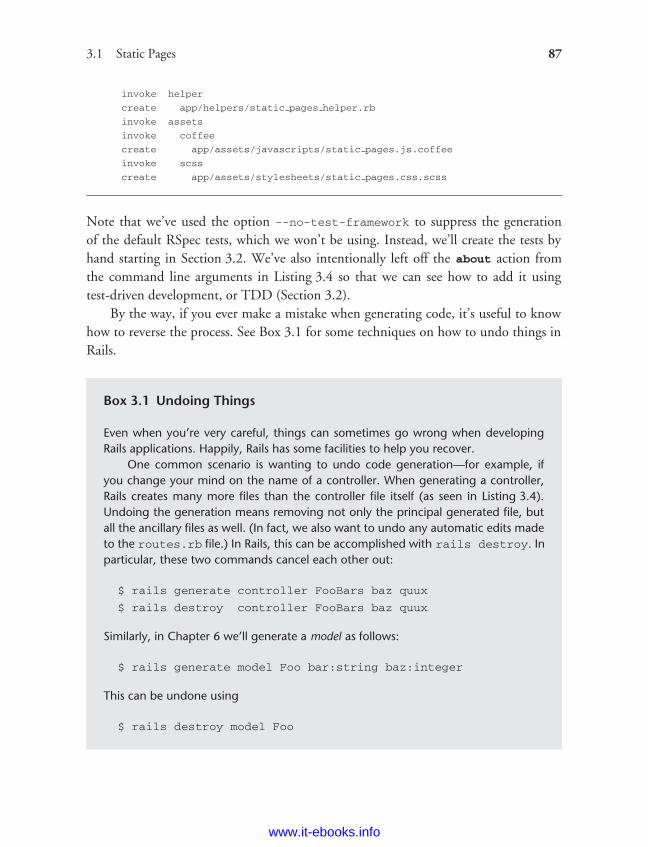
ptg8286261
3.1 Static Pages 87
invoke helper
create app/helpers/static pages helper.rb
invoke assets
invoke coffee
create app/assets/javascripts/static pages.js.coffee
invoke scss
create app/assets/stylesheets/static pages.css.scss
Note that we’ve used the option --no-test-framework to suppress the generationof the default RSpec tests, which we won’t be using. Instead, we’ll create the tests byhand starting in Section 3.2. We’ve also intentionally left off the about action fromthe command line arguments in Listing 3.4 so that we can see how to add it usingtest-driven development, or TDD (Section 3.2).
By the way, if you ever make a mistake when generating code, it’s useful to knowhow to reverse the process. See Box 3.1 for some techniques on how to undo things inRails.
Box 3.1 Undoing Things
Even when you’re very careful, things can sometimes go wrong when developingRails applications. Happily, Rails has some facilities to help you recover.
One common scenario is wanting to undo code generation—for example, ifyou change your mind on the name of a controller. When generating a controller,Rails creates many more files than the controller file itself (as seen in Listing 3.4).Undoing the generation means removing not only the principal generated file, butall the ancillary files as well. (In fact, we also want to undo any automatic edits madeto the routes.rb file.) In Rails, this can be accomplished with rails destroy. Inparticular, these two commands cancel each other out:
$ rails generate controller FooBars baz quux
$ rails destroy controller FooBars baz quux
Similarly, in Chapter 6 we’ll generate a model as follows:
$ rails generate model Foo bar:string baz:integer
This can be undone using
$ rails destroy model Foo
www.it-ebooks.info
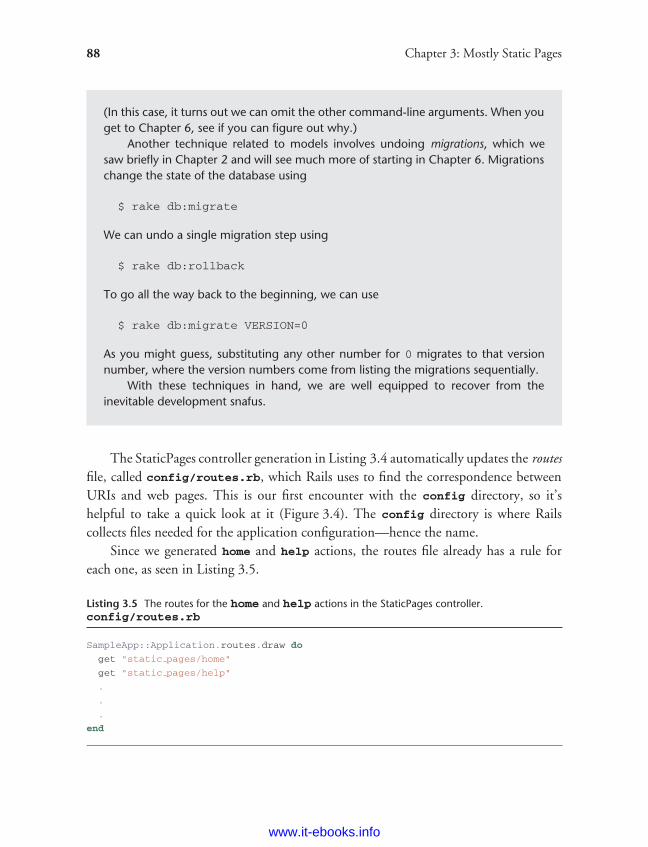
ptg8286261
88 Chapter 3: Mostly Static Pages
(In this case, it turns out we can omit the other command-line arguments. When youget to Chapter 6, see if you can figure out why.)
Another technique related to models involves undoing migrations, which wesaw briefly in Chapter 2 and will see much more of starting in Chapter 6. Migrationschange the state of the database using
$ rake db:migrate
We can undo a single migration step using
$ rake db:rollback
To go all the way back to the beginning, we can use
$ rake db:migrate VERSION=0
As you might guess, substituting any other number for 0 migrates to that versionnumber, where the version numbers come from listing the migrations sequentially.
With these techniques in hand, we are well equipped to recover from theinevitable development snafus.
The StaticPages controller generation in Listing 3.4 automatically updates the routesfile, called config/routes.rb, which Rails uses to find the correspondence betweenURIs and web pages. This is our first encounter with the config directory, so it’shelpful to take a quick look at it (Figure 3.4). The config directory is where Railscollects files needed for the application configuration—hence the name.
Since we generated home and help actions, the routes file already has a rule foreach one, as seen in Listing 3.5.
Listing 3.5 The routes for the home and help actions in the StaticPages controller.config/routes.rb
SampleApp::Application.routes.draw do
get "static pages/home"
get "static pages/help"
.
.
.
end
www.it-ebooks.info
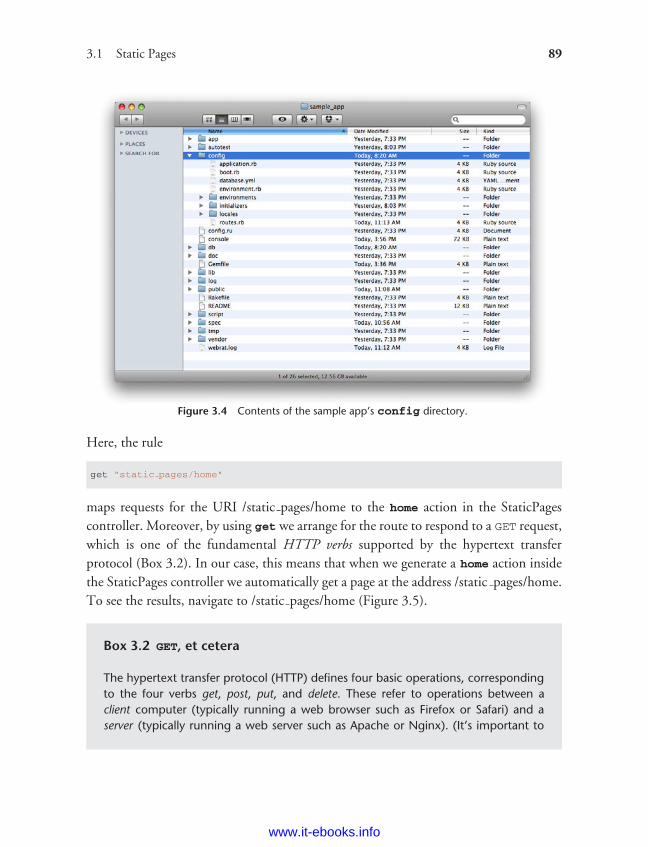
ptg8286261
3.1 Static Pages 89
Figure 3.4 Contents of the sample app’s config directory.
Here, the rule
get "static pages/home"
maps requests for the URI /static pages/home to the home action in the StaticPagescontroller. Moreover, by using get we arrange for the route to respond to a GET request,which is one of the fundamental HTTP verbs supported by the hypertext transferprotocol (Box 3.2). In our case, this means that when we generate a home action insidethe StaticPages controller we automatically get a page at the address /static pages/home.To see the results, navigate to /static pages/home (Figure 3.5).
Box 3.2 GET, et cetera
The hypertext transfer protocol (HTTP) defines four basic operations, correspondingto the four verbs get, post, put, and delete. These refer to operations between aclient computer (typically running a web browser such as Firefox or Safari) and aserver (typically running a web server such as Apache or Nginx). (It’s important to
www.it-ebooks.info
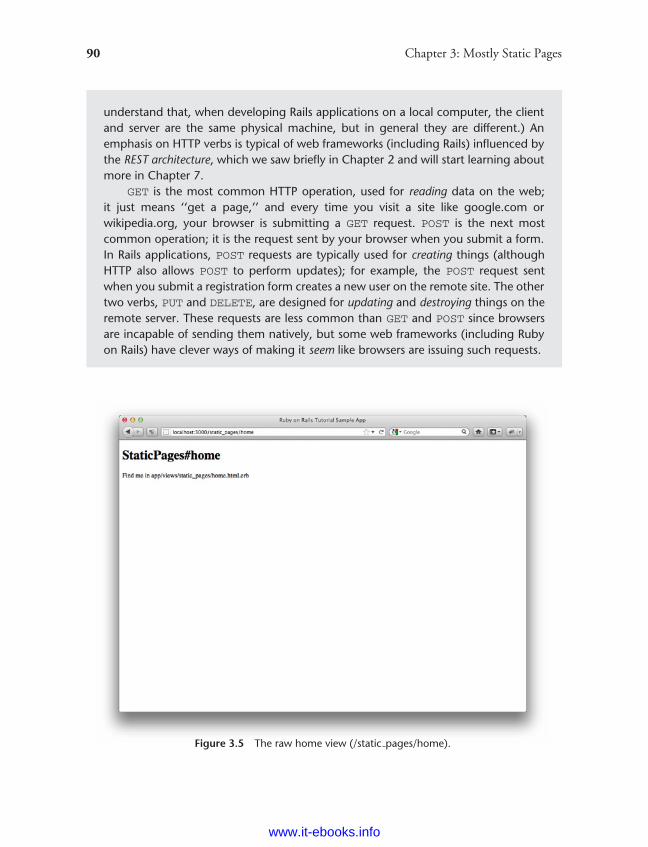
ptg8286261
90 Chapter 3: Mostly Static Pages
understand that, when developing Rails applications on a local computer, the clientand server are the same physical machine, but in general they are different.) Anemphasis on HTTP verbs is typical of web frameworks (including Rails) influenced bythe REST architecture, which we saw briefly in Chapter 2 and will start learning aboutmore in Chapter 7.
GET is the most common HTTP operation, used for reading data on the web;it just means ‘‘get a page,’’ and every time you visit a site like google.com orwikipedia.org, your browser is submitting a GET request. POST is the next mostcommon operation; it is the request sent by your browser when you submit a form.In Rails applications, POST requests are typically used for creating things (althoughHTTP also allows POST to perform updates); for example, the POST request sentwhen you submit a registration form creates a new user on the remote site. The othertwo verbs, PUT and DELETE, are designed for updating and destroying things on theremote server. These requests are less common than GET and POST since browsersare incapable of sending them natively, but some web frameworks (including Rubyon Rails) have clever ways of making it seem like browsers are issuing such requests.
Figure 3.5 The raw home view (/static pages/home).
www.it-ebooks.info
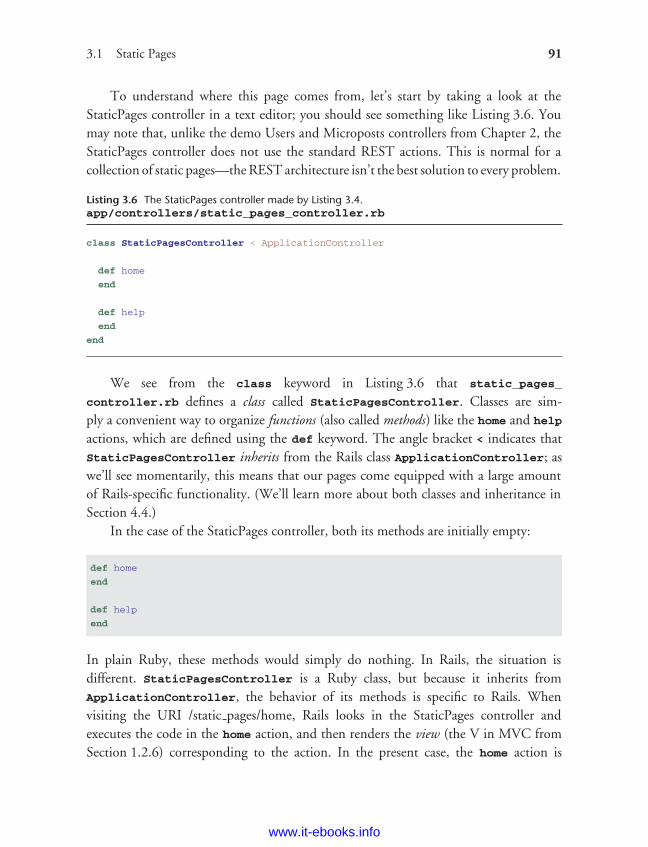
ptg8286261
3.1 Static Pages 91
To understand where this page comes from, let’s start by taking a look at theStaticPages controller in a text editor; you should see something like Listing 3.6. Youmay note that, unlike the demo Users and Microposts controllers from Chapter 2, theStaticPages controller does not use the standard REST actions. This is normal for acollection of static pages—the REST architecture isn’t the best solution to every problem.
Listing 3.6 The StaticPages controller made by Listing 3.4.app/controllers/static_pages_controller.rb
class StaticPagesController < ApplicationController
def home
end
def help
end
end
We see from the class keyword in Listing 3.6 that static_pages_
controller.rb defines a class called StaticPagesController. Classes are sim-ply a convenient way to organize functions (also called methods) like the home and help
actions, which are defined using the def keyword. The angle bracket < indicates thatStaticPagesController inherits from the Rails class ApplicationController; aswe’ll see momentarily, this means that our pages come equipped with a large amountof Rails-specific functionality. (We’ll learn more about both classes and inheritance inSection 4.4.)
In the case of the StaticPages controller, both its methods are initially empty:
def home
end
def help
end
In plain Ruby, these methods would simply do nothing. In Rails, the situation isdifferent. StaticPagesController is a Ruby class, but because it inherits fromApplicationController, the behavior of its methods is specific to Rails. Whenvisiting the URI /static pages/home, Rails looks in the StaticPages controller andexecutes the code in the home action, and then renders the view (the V in MVC fromSection 1.2.6) corresponding to the action. In the present case, the home action is
www.it-ebooks.info
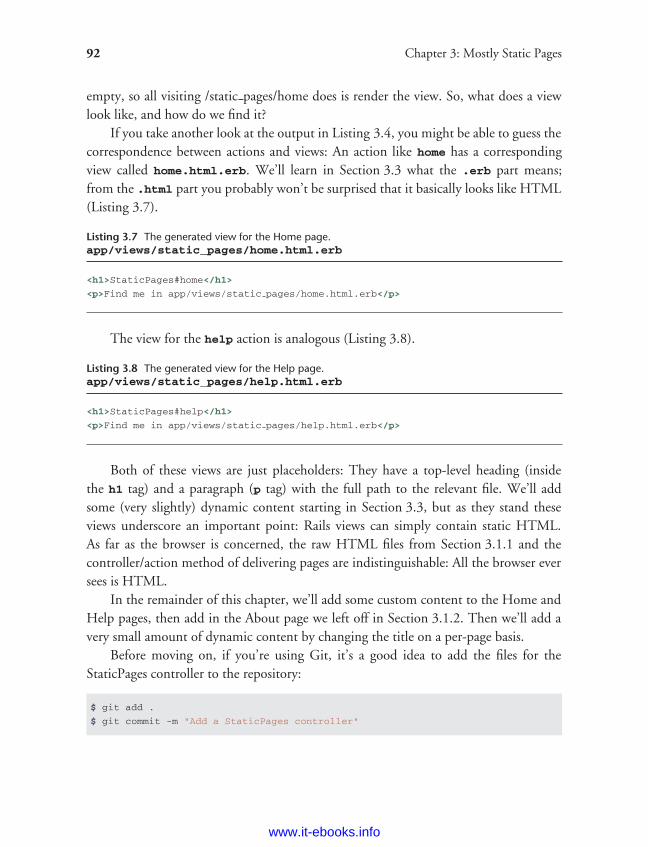
ptg8286261
92 Chapter 3: Mostly Static Pages
empty, so all visiting /static pages/home does is render the view. So, what does a viewlook like, and how do we find it?
If you take another look at the output in Listing 3.4, you might be able to guess thecorrespondence between actions and views: An action like home has a correspondingview called home.html.erb. We’ll learn in Section 3.3 what the .erb part means;from the .html part you probably won’t be surprised that it basically looks like HTML(Listing 3.7).
Listing 3.7 The generated view for the Home page.app/views/static_pages/home.html.erb
<h1>StaticPages#home</h1>
<p>Find me in app/views/static pages/home.html.erb</p>
The view for the help action is analogous (Listing 3.8).
Listing 3.8 The generated view for the Help page.app/views/static_pages/help.html.erb
<h1>StaticPages#help</h1>
<p>Find me in app/views/static pages/help.html.erb</p>
Both of these views are just placeholders: They have a top-level heading (insidethe h1 tag) and a paragraph (p tag) with the full path to the relevant file. We’ll addsome (very slightly) dynamic content starting in Section 3.3, but as they stand theseviews underscore an important point: Rails views can simply contain static HTML.As far as the browser is concerned, the raw HTML files from Section 3.1.1 and thecontroller/action method of delivering pages are indistinguishable: All the browser eversees is HTML.
In the remainder of this chapter, we’ll add some custom content to the Home andHelp pages, then add in the About page we left off in Section 3.1.2. Then we’ll add avery small amount of dynamic content by changing the title on a per-page basis.
Before moving on, if you’re using Git, it’s a good idea to add the files for theStaticPages controller to the repository:
$ git add .
$ git commit -m "Add a StaticPages controller"
www.it-ebooks.info
ptg8286261
3.2 Our First Tests 93
3.2 Our First TestsThe Rails Tutorial takes an intuitive approach to testing that emphasizes the behaviorof the application rather than its precise implementation, a variant of test-drivendevelopment (TDD) known as behavior-driven development (BDD). Our main toolswill be integration tests (starting in this section) and unit tests (starting in Chapter 6).Integration tests, known as request specs in the context of RSpec, allow us to simulate theactions of a user interacting with our application using a web browser. Together withthe natural-language syntax provided by Capybara, integration tests provide a powerfulmethod to test our application’s functionality without having to manually check eachpage with a browser. (Another popular choice for BDD, called Cucumber, is introducedin Section 8.3.)
The defining quality of TDD is writing tests first, before the application code.Initially, this might take some getting used to, but the benefits are significant. By writinga failing test first and then implementing the application code to get it to pass, weincrease our confidence that the test is actually covering the functionality we think itis. Moreover, the fail-implement-pass development cycle induces a flow state, leadingto enjoyable coding and high productivity. Finally, the tests act as a client for theapplication code, often leading to more elegant software designs.
It’s important to understand that TDD is not always the right tool for the job.There’s no reason to dogmatically insist that tests always should be written first, thatthey should cover every single feature, or that there should necessarily be any tests at all.For example, when you aren’t at all sure how to solve a given programming problem,it’s often useful to skip the tests and write only application code, just to get a sense ofwhat the solution will look like. (In the language of Extreme Programming [XP], thisexploratory step is called a spike.) Once you see the general shape of the solution, youcan then use TDD to implement a more polished version.
In this section, we’ll be running the tests using the rspec command supplied bythe RSpec gem. This practice is straightforward but not ideal, and if you are a moreadvanced user I suggest setting up your system as described in Section 3.6.
3.2.1 Test-driven Development
In test-driven development, we first write a failing test, represented in many testing toolsby the color red. We then implement code to get the test to pass, represented by thecolor green. Finally, if necessary, we refactor the code, changing its form (by eliminating
www.it-ebooks.info
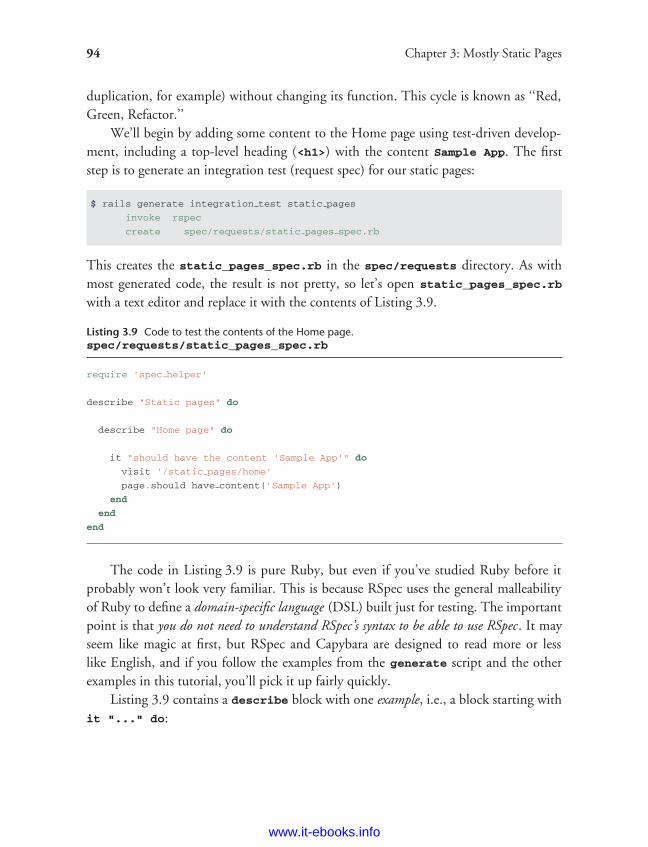
ptg8286261
94 Chapter 3: Mostly Static Pages
duplication, for example) without changing its function. This cycle is known as ‘‘Red,Green, Refactor.’’
We’ll begin by adding some content to the Home page using test-driven develop-ment, including a top-level heading (<h1>) with the content Sample App. The firststep is to generate an integration test (request spec) for our static pages:
$ rails generate integration test static pages
invoke rspec
create spec/requests/static pages spec.rb
This creates the static_pages_spec.rb in the spec/requests directory. As withmost generated code, the result is not pretty, so let’s open static_pages_spec.rb
with a text editor and replace it with the contents of Listing 3.9.
Listing 3.9 Code to test the contents of the Home page.spec/requests/static_pages_spec.rb
require 'spec helper'
describe "Static pages" do
describe "Home page" do
it "should have the content 'Sample App'" do
visit '/static pages/home'
page.should have content('Sample App')
end
end
end
The code in Listing 3.9 is pure Ruby, but even if you’ve studied Ruby before itprobably won’t look very familiar. This is because RSpec uses the general malleabilityof Ruby to define a domain-specific language (DSL) built just for testing. The importantpoint is that you do not need to understand RSpec’s syntax to be able to use RSpec. It mayseem like magic at first, but RSpec and Capybara are designed to read more or lesslike English, and if you follow the examples from the generate script and the otherexamples in this tutorial, you’ll pick it up fairly quickly.
Listing 3.9 contains a describe block with one example, i.e., a block starting withit "..." do:
www.it-ebooks.info
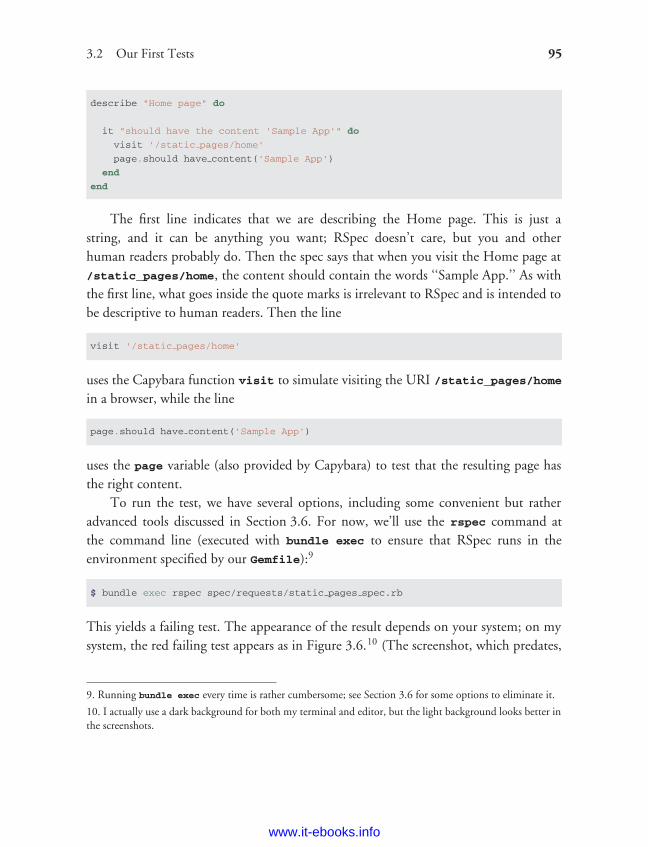
ptg8286261
3.2 Our First Tests 95
describe "Home page" do
it "should have the content 'Sample App'" do
visit '/static pages/home'
page.should have content('Sample App')
end
end
The first line indicates that we are describing the Home page. This is just astring, and it can be anything you want; RSpec doesn’t care, but you and otherhuman readers probably do. Then the spec says that when you visit the Home page at/static_pages/home, the content should contain the words ‘‘Sample App.’’ As withthe first line, what goes inside the quote marks is irrelevant to RSpec and is intended tobe descriptive to human readers. Then the line
visit '/static pages/home'
uses the Capybara function visit to simulate visiting the URI /static_pages/homein a browser, while the line
page.should have content('Sample App')
uses the page variable (also provided by Capybara) to test that the resulting page hasthe right content.
To run the test, we have several options, including some convenient but ratheradvanced tools discussed in Section 3.6. For now, we’ll use the rspec command atthe command line (executed with bundle exec to ensure that RSpec runs in theenvironment specified by our Gemfile):9
$ bundle exec rspec spec/requests/static pages spec.rb
This yields a failing test. The appearance of the result depends on your system; on mysystem, the red failing test appears as in Figure 3.6.10 (The screenshot, which predates,
9. Running bundle exec every time is rather cumbersome; see Section 3.6 for some options to eliminate it.
10. I actually use a dark background for both my terminal and editor, but the light background looks better inthe screenshots.
www.it-ebooks.info
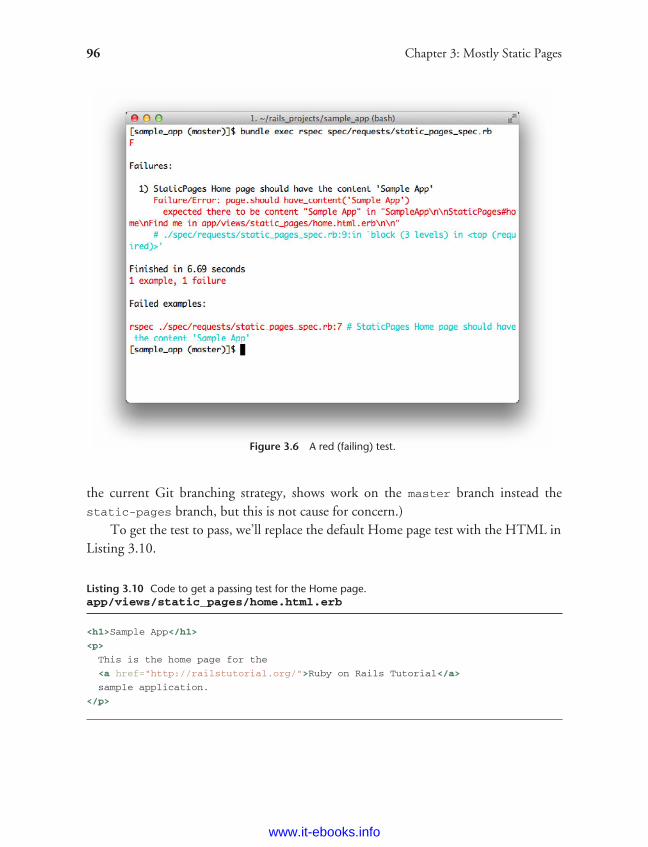
ptg8286261
96 Chapter 3: Mostly Static Pages
Figure 3.6 A red (failing) test.
the current Git branching strategy, shows work on the master branch instead thestatic-pages branch, but this is not cause for concern.)
To get the test to pass, we’ll replace the default Home page test with the HTML inListing 3.10.
Listing 3.10 Code to get a passing test for the Home page.app/views/static_pages/home.html.erb
<h1>Sample App</h1>
<p>
This is the home page for the
<a href="http://railstutorial.org/">Ruby on Rails Tutorial</a>
sample application.
</p>
www.it-ebooks.info
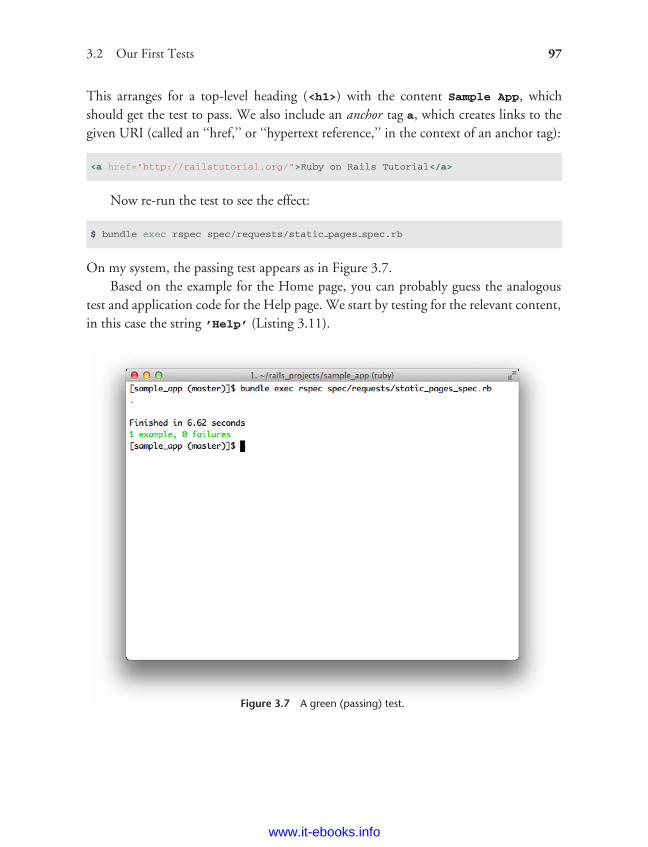
ptg8286261
3.2 Our First Tests 97
This arranges for a top-level heading (<h1>) with the content Sample App, whichshould get the test to pass. We also include an anchor tag a, which creates links to thegiven URI (called an ‘‘href,’’ or ‘‘hypertext reference,’’ in the context of an anchor tag):
<a href="http://railstutorial.org/">Ruby on Rails Tutorial</a>
Now re-run the test to see the effect:
$ bundle exec rspec spec/requests/static pages spec.rb
On my system, the passing test appears as in Figure 3.7.Based on the example for the Home page, you can probably guess the analogous
test and application code for the Help page. We start by testing for the relevant content,in this case the string ’Help’ (Listing 3.11).
Figure 3.7 A green (passing) test.
www.it-ebooks.info
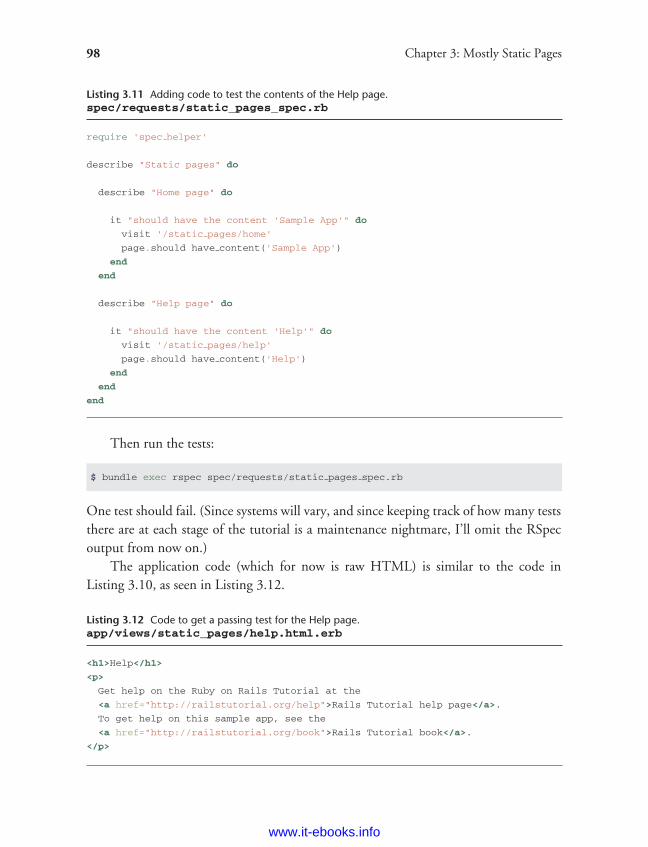
ptg8286261
98 Chapter 3: Mostly Static Pages
Listing 3.11 Adding code to test the contents of the Help page.spec/requests/static_pages_spec.rb
require 'spec helper'
describe "Static pages" do
describe "Home page" do
it "should have the content 'Sample App'" do
visit '/static pages/home'
page.should have content('Sample App')
end
end
describe "Help page" do
it "should have the content 'Help'" do
visit '/static pages/help'
page.should have content('Help')
end
end
end
Then run the tests:
$ bundle exec rspec spec/requests/static pages spec.rb
One test should fail. (Since systems will vary, and since keeping track of how many teststhere are at each stage of the tutorial is a maintenance nightmare, I’ll omit the RSpecoutput from now on.)
The application code (which for now is raw HTML) is similar to the code inListing 3.10, as seen in Listing 3.12.
Listing 3.12 Code to get a passing test for the Help page.app/views/static_pages/help.html.erb
<h1>Help</h1>
<p>
Get help on the Ruby on Rails Tutorial at the
<a href="http://railstutorial.org/help">Rails Tutorial help page</a>.
To get help on this sample app, see the
<a href="http://railstutorial.org/book">Rails Tutorial book</a>.
</p>
www.it-ebooks.info
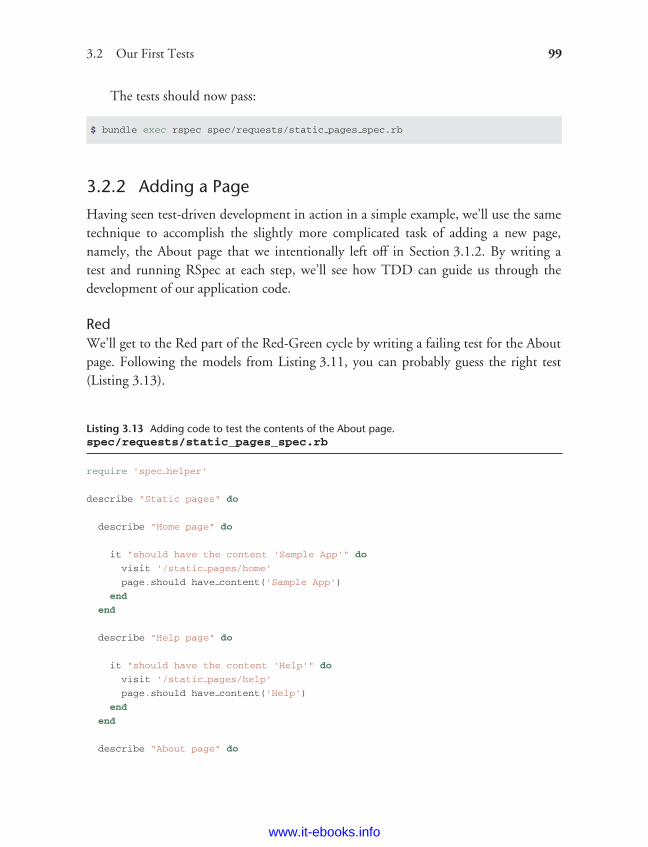
ptg8286261
3.2 Our First Tests 99
The tests should now pass:
$ bundle exec rspec spec/requests/static pages spec.rb
3.2.2 Adding a Page
Having seen test-driven development in action in a simple example, we’ll use the sametechnique to accomplish the slightly more complicated task of adding a new page,namely, the About page that we intentionally left off in Section 3.1.2. By writing atest and running RSpec at each step, we’ll see how TDD can guide us through thedevelopment of our application code.
RedWe’ll get to the Red part of the Red-Green cycle by writing a failing test for the Aboutpage. Following the models from Listing 3.11, you can probably guess the right test(Listing 3.13).
Listing 3.13 Adding code to test the contents of the About page.spec/requests/static_pages_spec.rb
require 'spec helper'
describe "Static pages" do
describe "Home page" do
it "should have the content 'Sample App'" do
visit '/static pages/home'
page.should have content('Sample App')
end
end
describe "Help page" do
it "should have the content 'Help'" do
visit '/static pages/help'
page.should have content('Help')
end
end
describe "About page" do
www.it-ebooks.info

ptg8286261
100 Chapter 3: Mostly Static Pages
it "should have the content 'About Us'" do
visit '/static pages/about'
page.should have content('About Us')
end
end
end
GreenRecall from Section 3.1.2 that we can generate a static page in Rails by creating anaction and corresponding view with the page’s name. In our case, the About page willfirst need an action called about in the StaticPages controller. Having written a failingtest, we can now be confident that, in getting it to pass, we will actually have created aworking About page.
If you run the RSpec example using
$ bundle exec rspec spec/requests/static pages spec.rb
the output includes the following complaint:
No route matches [GET] "/static pages/about"
This is a hint that we need to add /static_pages/about to the routes file,which we can accomplish by following the pattern in Listing 3.5, as shown inListing 3.14.
Listing 3.14 Adding the about route.config/routes.rb
SampleApp::Application.routes.draw do
get "static pages/home"
get "static pages/help"
get "static pages/about"
.
.
.
end
www.it-ebooks.info
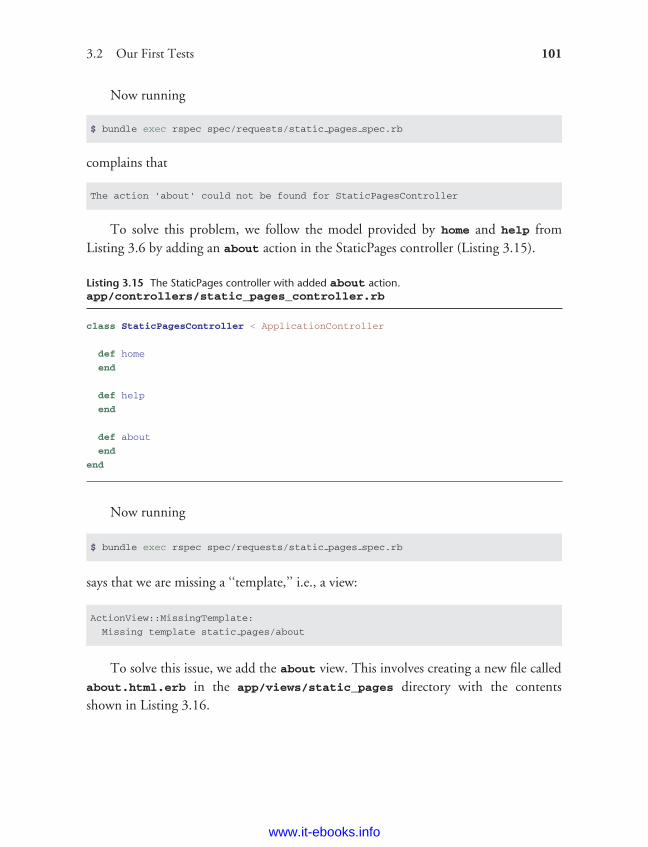
ptg8286261
3.2 Our First Tests 101
Now running
$ bundle exec rspec spec/requests/static pages spec.rb
complains that
The action 'about' could not be found for StaticPagesController
To solve this problem, we follow the model provided by home and help fromListing 3.6 by adding an about action in the StaticPages controller (Listing 3.15).
Listing 3.15 The StaticPages controller with added about action.app/controllers/static_pages_controller.rb
class StaticPagesController < ApplicationController
def home
end
def help
end
def about
end
end
Now running
$ bundle exec rspec spec/requests/static pages spec.rb
says that we are missing a ‘‘template,’’ i.e., a view:
ActionView::MissingTemplate:
Missing template static pages/about
To solve this issue, we add the about view. This involves creating a new file calledabout.html.erb in the app/views/static_pages directory with the contentsshown in Listing 3.16.
www.it-ebooks.info

ptg8286261
102 Chapter 3: Mostly Static Pages
Listing 3.16 Code for the About page.app/views/static_pages/about.html.erb
<h1>About Us</h1>
<p>
The <a href="http://railstutorial.org/">Ruby on Rails Tutorial</a>
is a project to make a book and screencasts to teach web development
with <a href="http://rubyonrails.org/">Ruby on Rails</a>. This
is the sample application for the tutorial.
</p>
Running RSpec should now get us back to Green:
$ bundle exec rspec spec/requests/static pages spec.rb
Of course, it’s never a bad idea to take a look at the page in a browser to make sureour tests aren’t completely crazy (Figure 3.8).
Figure 3.8 The new About page (/static pages/about).
www.it-ebooks.info
ptg8286261
3.3 Slightly Dynamic Pages 103
RefactorNow that we’ve gotten to Green, we are free to refactor our code with confidence.Oftentimes code will start to ‘‘smell,’’ meaning that it gets ugly, bloated, or filled withrepetition. The computer doesn’t care, of course, but humans do, so it is importantto keep the code base clean by refactoring frequently. Having a good test suite isan invaluable tool in this regard, because it dramatically lowers the probability ofintroducing bugs while refactoring.
Our sample app is a little too small to refactor right now, but code smell seepsin at every crack, so we won’t have to wait long: We’ll already get busy refactoring inSection 3.3.4.
3.3 Slightly Dynamic PagesNow that we’ve created the actions and views for some static pages, we’ll make them veryslightly dynamic by adding some content that changes on a per-page basis: We’ll havethe title of each page change to reflect its content. Whether a changing title representstruly dynamic content is debatable, but in any case it lays the necessary foundation forunambiguously dynamic content in Chapter 7.
If you skipped the TDD material in Section 3.2, be sure to create an About page atthis point using the code from Listing 3.14, Listing 3.15, and Listing 3.16.
3.3.1 Testing a Title Change
Our plan is to edit the Home, Help, and About pages to make page titles that changeon each page. This will involve using the <title> tag in our page views. Most browsersdisplay the contents of the title tag at the top of the browser window (Google Chromeis an odd exception), and it is also important for search-engine optimization. We’ll startby writing tests for the titles, then add the titles themselves, and then use a layout file torefactor the resulting pages and eliminate duplication.
You may have noticed that the rails new command already created a layout file.We’ll learn its purpose shortly, but for now you should rename it before proceeding:
$ mv app/views/layouts/application.html.erb foobar # temporary change
(mv is a Unix command; on Windows you may need to rename the file using the filebrowser or the rename command.) You wouldn’t normally do this in a real application,but it’s easier to understand the purpose of the layout file if we start by disabling it.
www.it-ebooks.info
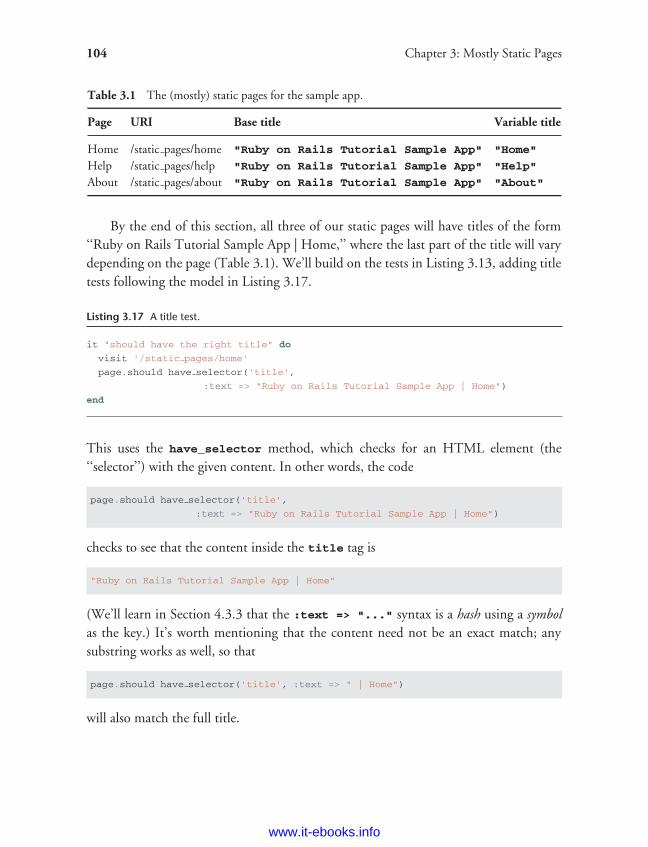
ptg8286261
104 Chapter 3: Mostly Static Pages
Table 3.1 The (mostly) static pages for the sample app.
Page URI Base title Variable title
Home /static pages/home "Ruby on Rails Tutorial Sample App" "Home"
Help /static pages/help "Ruby on Rails Tutorial Sample App" "Help"
About /static pages/about "Ruby on Rails Tutorial Sample App" "About"
By the end of this section, all three of our static pages will have titles of the form‘‘Ruby on Rails Tutorial Sample App | Home,’’ where the last part of the title will varydepending on the page (Table 3.1). We’ll build on the tests in Listing 3.13, adding titletests following the model in Listing 3.17.
Listing 3.17 A title test.
it "should have the right title" do
visit '/static pages/home'
page.should have selector('title',
:text => "Ruby on Rails Tutorial Sample App | Home")
end
This uses the have_selector method, which checks for an HTML element (the‘‘selector’’) with the given content. In other words, the code
page.should have selector('title',
:text => "Ruby on Rails Tutorial Sample App | Home")
checks to see that the content inside the title tag is
"Ruby on Rails Tutorial Sample App | Home"
(We’ll learn in Section 4.3.3 that the :text => "..." syntax is a hash using a symbolas the key.) It’s worth mentioning that the content need not be an exact match; anysubstring works as well, so that
page.should have selector('title', :text => " | Home")
will also match the full title.
www.it-ebooks.info

ptg8286261
3.3 Slightly Dynamic Pages 105
Note that in Listing 3.17 we’ve broken the material inside have_selector intotwo lines; this tells you something important about Ruby syntax: Ruby doesn’t careabout newlines.11 The reason I chose to break the code into pieces is that I prefer tokeep lines of source code under 80 characters for legibility.12 As it stands, this codeformatting is still rather ugly; Section 3.5 has a refactoring exercise that makes themprettier, and Section 5.3.4 completely rewrites the StaticPages tests to take advantage ofthe latest features in RSpec.
Adding new tests for each of our three static pages, following the model ofListing 3.17, gives us our new StaticPages test (Listing 3.18).
Listing 3.18 The StaticPages controller spec with title tests.spec/requests/static_pages_spec.rb
require 'spec helper'
describe "Static pages" do
describe "Home page" do
it "should have the h1 'Sample App'" do
visit '/static pages/home'
page.should have selector('h1', :text => 'Sample App')
end
it "should have the title 'Home'" do
visit '/static pages/home'
page.should have selector('title',
:text => "Ruby on Rails Tutorial Sample App | Home")
end
end
11. A newline is what comes at the end of a line, thereby starting a new line. In code, it is represented by thecharacter \n.
12. Actually counting columns could drive you crazy, which is why many text editors have a visual aid to helpyou. For example, if you take a look back at Figure 1.1, you’ll see a small vertical line on the right to help keepcode under 80 characters. (It’s actually at 78 columns, which gives you a little margin for error.) If you useTextMate, you can find this feature under View > Wrap Column > 78. In Sublime Text, you can use View
> Ruler > 78 or View > Ruler > 80.
www.it-ebooks.info
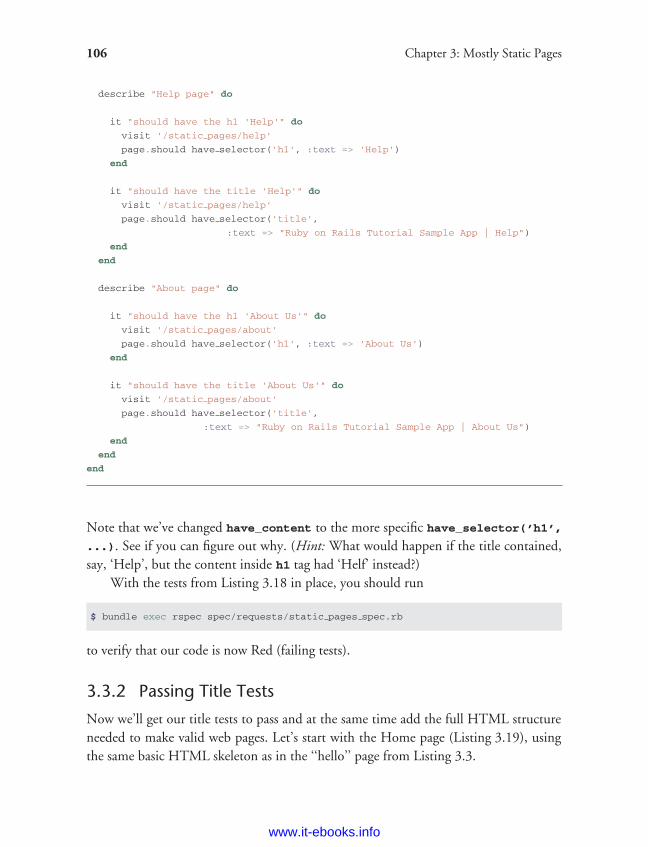
ptg8286261
106 Chapter 3: Mostly Static Pages
describe "Help page" do
it "should have the h1 'Help'" do
visit '/static pages/help'
page.should have selector('h1', :text => 'Help')
end
it "should have the title 'Help'" do
visit '/static pages/help'
page.should have selector('title',
:text => "Ruby on Rails Tutorial Sample App | Help")
end
end
describe "About page" do
it "should have the h1 'About Us'" do
visit '/static pages/about'
page.should have selector('h1', :text => 'About Us')
end
it "should have the title 'About Us'" do
visit '/static pages/about'
page.should have selector('title',
:text => "Ruby on Rails Tutorial Sample App | About Us")
end
end
end
Note that we’ve changed have_content to the more specific have_selector(’h1’,...). See if you can figure out why. (Hint: What would happen if the title contained,say, ‘Help’, but the content inside h1 tag had ‘Helf’ instead?)
With the tests from Listing 3.18 in place, you should run
$ bundle exec rspec spec/requests/static pages spec.rb
to verify that our code is now Red (failing tests).
3.3.2 Passing Title Tests
Now we’ll get our title tests to pass and at the same time add the full HTML structureneeded to make valid web pages. Let’s start with the Home page (Listing 3.19), usingthe same basic HTML skeleton as in the ‘‘hello’’ page from Listing 3.3.
www.it-ebooks.info
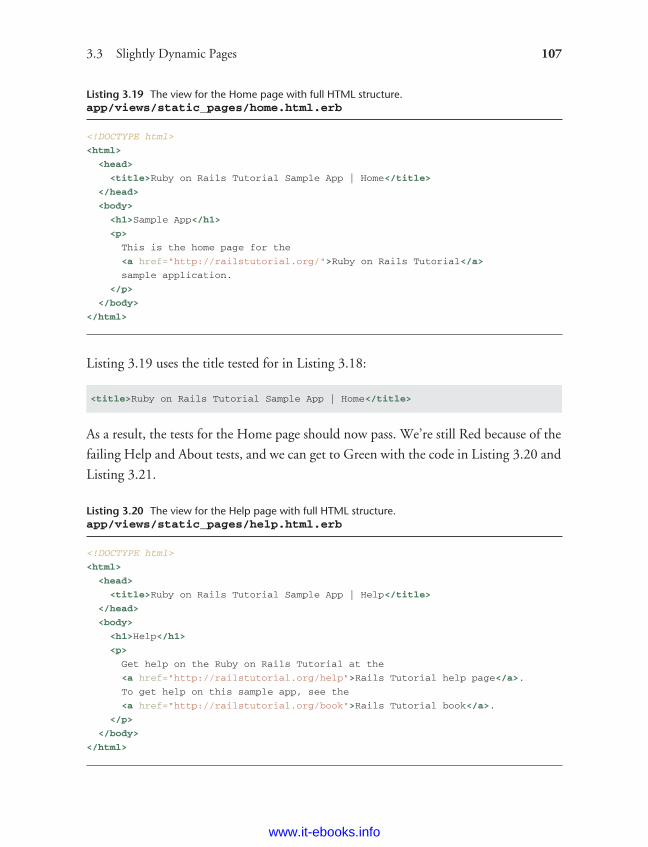
ptg8286261
3.3 Slightly Dynamic Pages 107
Listing 3.19 The view for the Home page with full HTML structure.app/views/static_pages/home.html.erb
<!DOCTYPE html>
<html>
<head>
<title>Ruby on Rails Tutorial Sample App | Home</title>
</head>
<body>
<h1>Sample App</h1>
<p>
This is the home page for the
<a href="http://railstutorial.org/">Ruby on Rails Tutorial</a>
sample application.
</p>
</body>
</html>
Listing 3.19 uses the title tested for in Listing 3.18:
<title>Ruby on Rails Tutorial Sample App | Home</title>
As a result, the tests for the Home page should now pass. We’re still Red because of the
failing Help and About tests, and we can get to Green with the code in Listing 3.20 and
Listing 3.21.
Listing 3.20 The view for the Help page with full HTML structure.app/views/static_pages/help.html.erb
<!DOCTYPE html>
<html>
<head>
<title>Ruby on Rails Tutorial Sample App | Help</title>
</head>
<body>
<h1>Help</h1>
<p>
Get help on the Ruby on Rails Tutorial at the
<a href="http://railstutorial.org/help">Rails Tutorial help page</a>.
To get help on this sample app, see the
<a href="http://railstutorial.org/book">Rails Tutorial book</a>.
</p>
</body>
</html>
www.it-ebooks.info
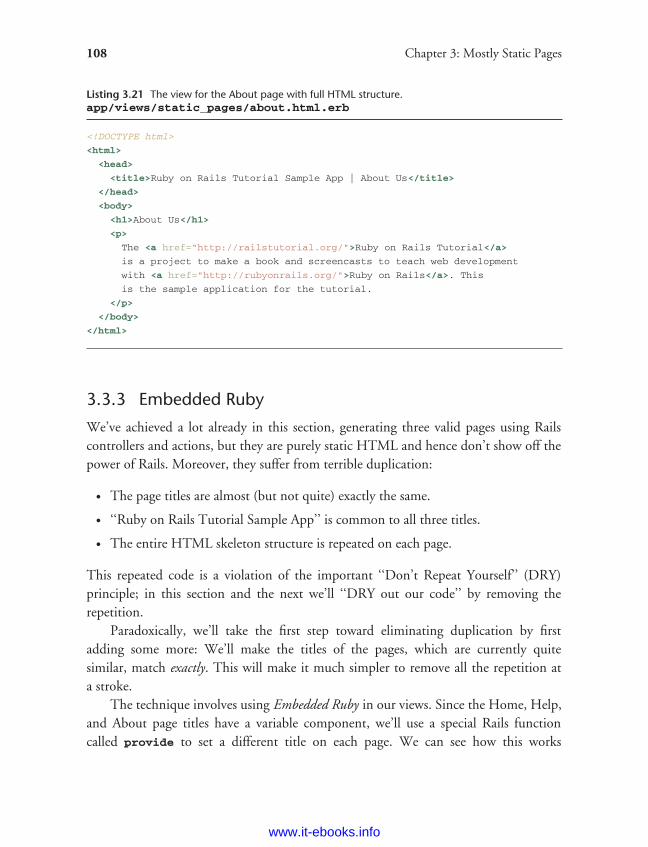
ptg8286261
108 Chapter 3: Mostly Static Pages
Listing 3.21 The view for the About page with full HTML structure.app/views/static_pages/about.html.erb
<!DOCTYPE html>
<html>
<head>
<title>Ruby on Rails Tutorial Sample App | About Us</title>
</head>
<body>
<h1>About Us</h1>
<p>
The <a href="http://railstutorial.org/">Ruby on Rails Tutorial</a>
is a project to make a book and screencasts to teach web development
with <a href="http://rubyonrails.org/">Ruby on Rails</a>. This
is the sample application for the tutorial.
</p>
</body>
</html>
3.3.3 Embedded Ruby
We’ve achieved a lot already in this section, generating three valid pages using Railscontrollers and actions, but they are purely static HTML and hence don’t show off thepower of Rails. Moreover, they suffer from terrible duplication:
• The page titles are almost (but not quite) exactly the same.
• ‘‘Ruby on Rails Tutorial Sample App’’ is common to all three titles.
• The entire HTML skeleton structure is repeated on each page.
This repeated code is a violation of the important ‘‘Don’t Repeat Yourself’’ (DRY)principle; in this section and the next we’ll ‘‘DRY out our code’’ by removing therepetition.
Paradoxically, we’ll take the first step toward eliminating duplication by firstadding some more: We’ll make the titles of the pages, which are currently quitesimilar, match exactly. This will make it much simpler to remove all the repetition ata stroke.
The technique involves using Embedded Ruby in our views. Since the Home, Help,and About page titles have a variable component, we’ll use a special Rails functioncalled provide to set a different title on each page. We can see how this works
www.it-ebooks.info
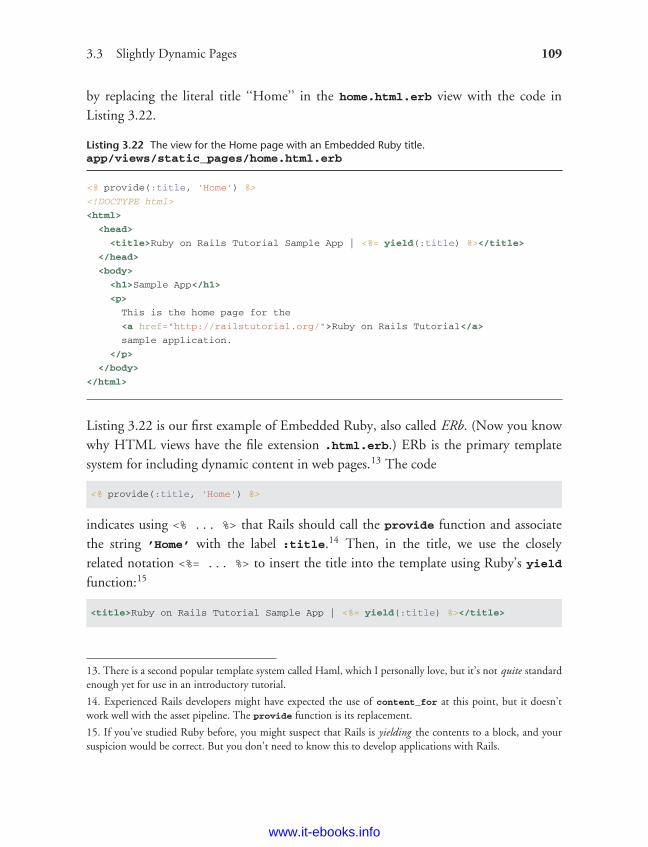
ptg8286261
3.3 Slightly Dynamic Pages 109
by replacing the literal title ‘‘Home’’ in the home.html.erb view with the code inListing 3.22.
Listing 3.22 The view for the Home page with an Embedded Ruby title.app/views/static_pages/home.html.erb
<% provide(:title, 'Home') %>
<!DOCTYPE html>
<html>
<head>
<title>Ruby on Rails Tutorial Sample App | <%= yield(:title) %></title>
</head>
<body>
<h1>Sample App</h1>
<p>
This is the home page for the
<a href="http://railstutorial.org/">Ruby on Rails Tutorial</a>
sample application.
</p>
</body>
</html>
Listing 3.22 is our first example of Embedded Ruby, also called ERb. (Now you knowwhy HTML views have the file extension .html.erb.) ERb is the primary templatesystem for including dynamic content in web pages.13 The code
<% provide(:title, 'Home') %>
indicates using <% ... %> that Rails should call the provide function and associatethe string ’Home’ with the label :title.14 Then, in the title, we use the closelyrelated notation <%= ... %> to insert the title into the template using Ruby’s yieldfunction:15
<title>Ruby on Rails Tutorial Sample App | <%= yield(:title) %></title>
13. There is a second popular template system called Haml, which I personally love, but it’s not quite standardenough yet for use in an introductory tutorial.
14. Experienced Rails developers might have expected the use of content_for at this point, but it doesn’twork well with the asset pipeline. The provide function is its replacement.
15. If you’ve studied Ruby before, you might suspect that Rails is yielding the contents to a block, and yoursuspicion would be correct. But you don’t need to know this to develop applications with Rails.
www.it-ebooks.info
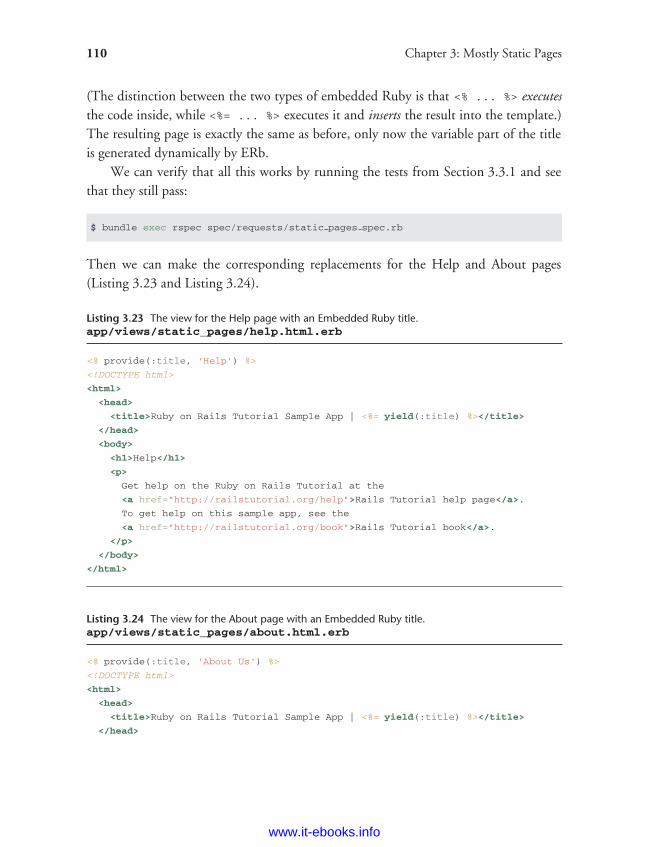
ptg8286261
110 Chapter 3: Mostly Static Pages
(The distinction between the two types of embedded Ruby is that <% ... %> executesthe code inside, while <%= ... %> executes it and inserts the result into the template.)The resulting page is exactly the same as before, only now the variable part of the titleis generated dynamically by ERb.
We can verify that all this works by running the tests from Section 3.3.1 and seethat they still pass:
$ bundle exec rspec spec/requests/static pages spec.rb
Then we can make the corresponding replacements for the Help and About pages(Listing 3.23 and Listing 3.24).
Listing 3.23 The view for the Help page with an Embedded Ruby title.app/views/static_pages/help.html.erb
<% provide(:title, 'Help') %>
<!DOCTYPE html>
<html>
<head>
<title>Ruby on Rails Tutorial Sample App | <%= yield(:title) %></title>
</head>
<body>
<h1>Help</h1>
<p>
Get help on the Ruby on Rails Tutorial at the
<a href="http://railstutorial.org/help">Rails Tutorial help page</a>.
To get help on this sample app, see the
<a href="http://railstutorial.org/book">Rails Tutorial book</a>.
</p>
</body>
</html>
Listing 3.24 The view for the About page with an Embedded Ruby title.app/views/static_pages/about.html.erb
<% provide(:title, 'About Us') %>
<!DOCTYPE html>
<html>
<head>
<title>Ruby on Rails Tutorial Sample App | <%= yield(:title) %></title>
</head>
www.it-ebooks.info
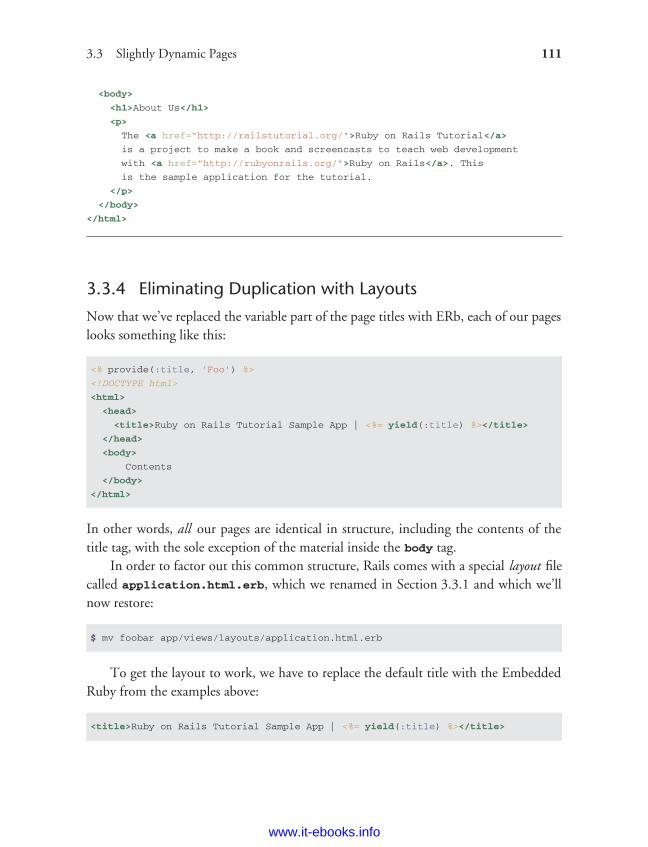
ptg8286261
3.3 Slightly Dynamic Pages 111
<body>
<h1>About Us</h1>
<p>
The <a href="http://railstutorial.org/">Ruby on Rails Tutorial</a>
is a project to make a book and screencasts to teach web development
with <a href="http://rubyonrails.org/">Ruby on Rails</a>. This
is the sample application for the tutorial.
</p>
</body>
</html>
3.3.4 Eliminating Duplication with Layouts
Now that we’ve replaced the variable part of the page titles with ERb, each of our pageslooks something like this:
<% provide(:title, 'Foo') %>
<!DOCTYPE html>
<html>
<head>
<title>Ruby on Rails Tutorial Sample App | <%= yield(:title) %></title>
</head>
<body>
Contents
</body>
</html>
In other words, all our pages are identical in structure, including the contents of thetitle tag, with the sole exception of the material inside the body tag.
In order to factor out this common structure, Rails comes with a special layout filecalled application.html.erb, which we renamed in Section 3.3.1 and which we’llnow restore:
$ mv foobar app/views/layouts/application.html.erb
To get the layout to work, we have to replace the default title with the EmbeddedRuby from the examples above:
<title>Ruby on Rails Tutorial Sample App | <%= yield(:title) %></title>
www.it-ebooks.info
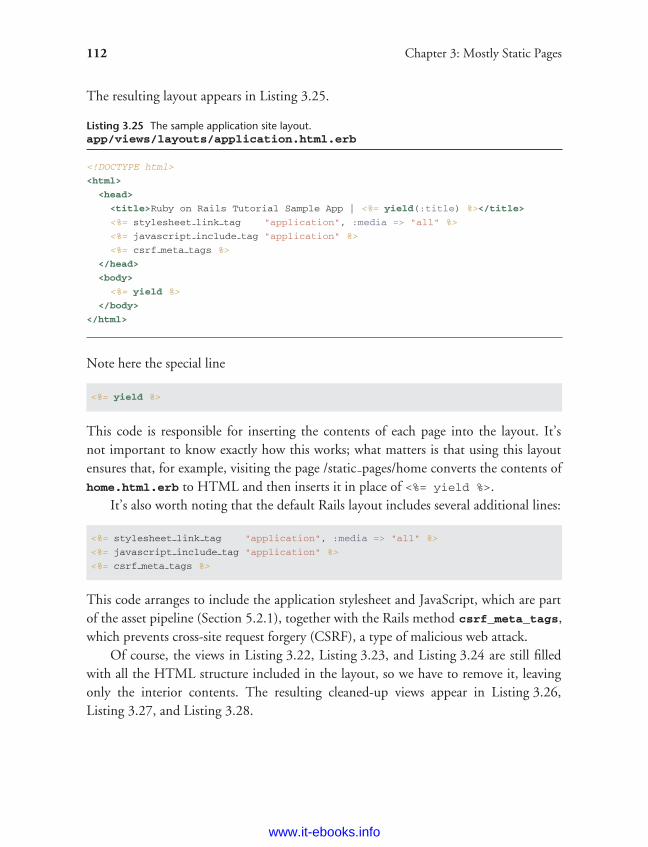
ptg8286261
112 Chapter 3: Mostly Static Pages
The resulting layout appears in Listing 3.25.
Listing 3.25 The sample application site layout.app/views/layouts/application.html.erb
<!DOCTYPE html>
<html>
<head>
<title>Ruby on Rails Tutorial Sample App | <%= yield(:title) %></title>
<%= stylesheet link tag "application", :media => "all" %>
<%= javascript include tag "application" %>
<%= csrf meta tags %>
</head>
<body>
<%= yield %>
</body>
</html>
Note here the special line
<%= yield %>
This code is responsible for inserting the contents of each page into the layout. It’snot important to know exactly how this works; what matters is that using this layoutensures that, for example, visiting the page /static pages/home converts the contents ofhome.html.erb to HTML and then inserts it in place of <%= yield %>.
It’s also worth noting that the default Rails layout includes several additional lines:
<%= stylesheet link tag "application", :media => "all" %>
<%= javascript include tag "application" %>
<%= csrf meta tags %>
This code arranges to include the application stylesheet and JavaScript, which are partof the asset pipeline (Section 5.2.1), together with the Rails method csrf_meta_tags,which prevents cross-site request forgery (CSRF), a type of malicious web attack.
Of course, the views in Listing 3.22, Listing 3.23, and Listing 3.24 are still filledwith all the HTML structure included in the layout, so we have to remove it, leavingonly the interior contents. The resulting cleaned-up views appear in Listing 3.26,Listing 3.27, and Listing 3.28.
www.it-ebooks.info
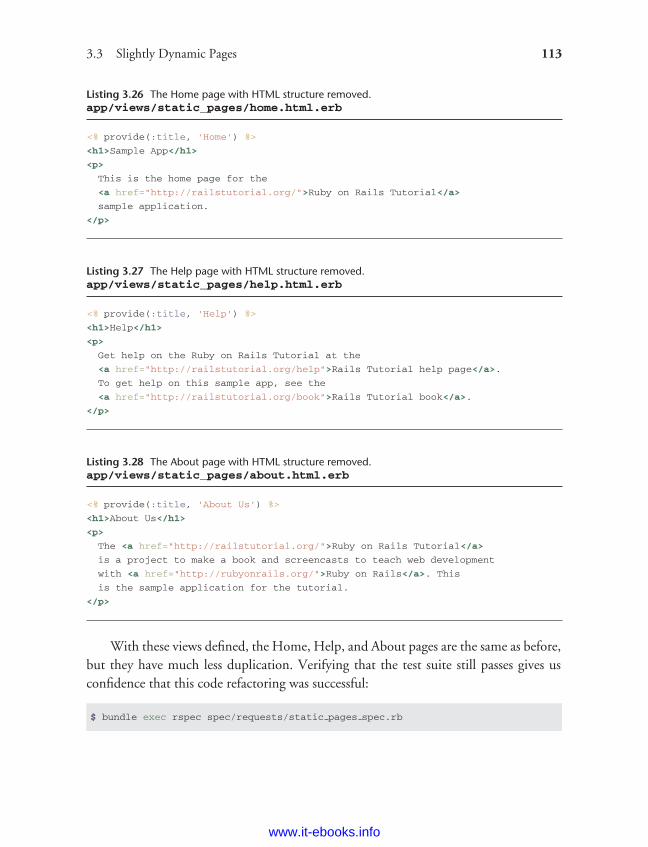
ptg8286261
3.3 Slightly Dynamic Pages 113
Listing 3.26 The Home page with HTML structure removed.app/views/static_pages/home.html.erb
<% provide(:title, 'Home') %>
<h1>Sample App</h1>
<p>
This is the home page for the
<a href="http://railstutorial.org/">Ruby on Rails Tutorial</a>
sample application.
</p>
Listing 3.27 The Help page with HTML structure removed.app/views/static_pages/help.html.erb
<% provide(:title, 'Help') %>
<h1>Help</h1>
<p>
Get help on the Ruby on Rails Tutorial at the
<a href="http://railstutorial.org/help">Rails Tutorial help page</a>.
To get help on this sample app, see the
<a href="http://railstutorial.org/book">Rails Tutorial book</a>.
</p>
Listing 3.28 The About page with HTML structure removed.app/views/static_pages/about.html.erb
<% provide(:title, 'About Us') %>
<h1>About Us</h1>
<p>
The <a href="http://railstutorial.org/">Ruby on Rails Tutorial</a>
is a project to make a book and screencasts to teach web development
with <a href="http://rubyonrails.org/">Ruby on Rails</a>. This
is the sample application for the tutorial.
</p>
With these views defined, the Home, Help, and About pages are the same as before,but they have much less duplication. Verifying that the test suite still passes gives usconfidence that this code refactoring was successful:
$ bundle exec rspec spec/requests/static pages spec.rb
www.it-ebooks.info
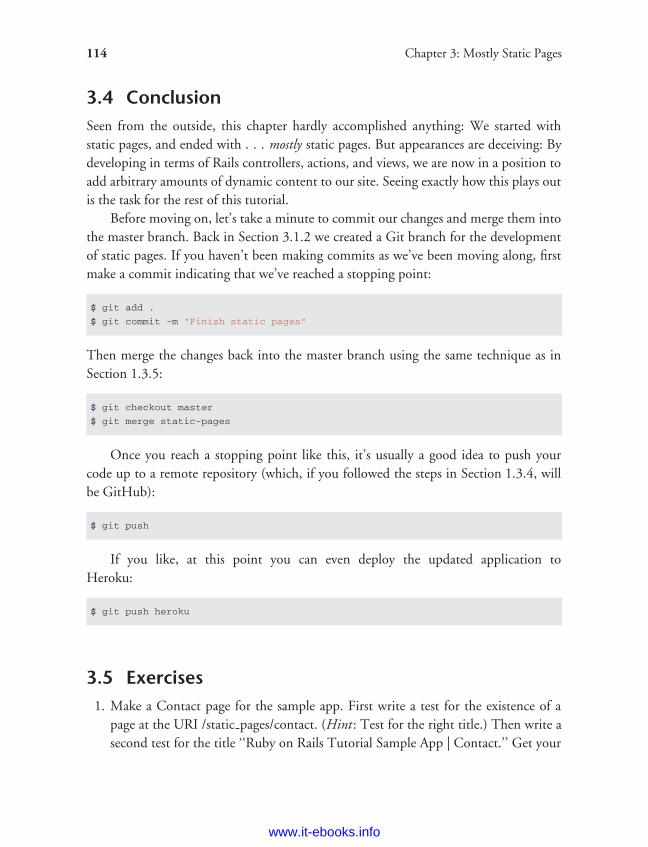
ptg8286261
114 Chapter 3: Mostly Static Pages
3.4 ConclusionSeen from the outside, this chapter hardly accomplished anything: We started withstatic pages, and ended with . . . mostly static pages. But appearances are deceiving: Bydeveloping in terms of Rails controllers, actions, and views, we are now in a position toadd arbitrary amounts of dynamic content to our site. Seeing exactly how this plays outis the task for the rest of this tutorial.
Before moving on, let’s take a minute to commit our changes and merge them intothe master branch. Back in Section 3.1.2 we created a Git branch for the developmentof static pages. If you haven’t been making commits as we’ve been moving along, firstmake a commit indicating that we’ve reached a stopping point:
$ git add .
$ git commit -m "Finish static pages"
Then merge the changes back into the master branch using the same technique as inSection 1.3.5:
$ git checkout master
$ git merge static-pages
Once you reach a stopping point like this, it’s usually a good idea to push yourcode up to a remote repository (which, if you followed the steps in Section 1.3.4, willbe GitHub):
$ git push
If you like, at this point you can even deploy the updated application toHeroku:
$ git push heroku
3.5 Exercises1. Make a Contact page for the sample app. First write a test for the existence of a
page at the URI /static pages/contact. (Hint: Test for the right title.) Then write asecond test for the title ‘‘Ruby on Rails Tutorial Sample App | Contact.’’ Get your
www.it-ebooks.info
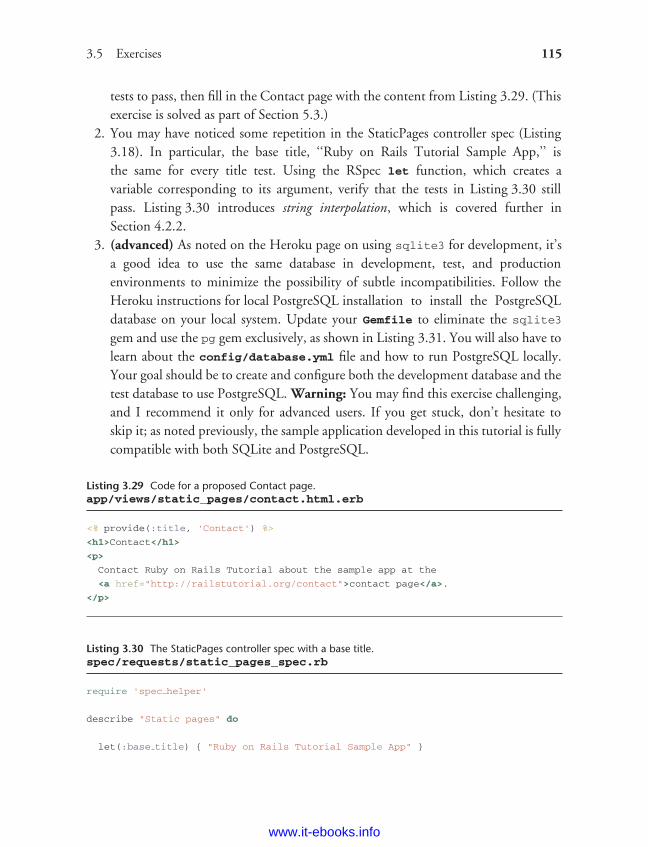
ptg8286261
3.5 Exercises 115
tests to pass, then fill in the Contact page with the content from Listing 3.29. (Thisexercise is solved as part of Section 5.3.)
2. You may have noticed some repetition in the StaticPages controller spec (Listing3.18). In particular, the base title, ‘‘Ruby on Rails Tutorial Sample App,’’ isthe same for every title test. Using the RSpec let function, which creates avariable corresponding to its argument, verify that the tests in Listing 3.30 stillpass. Listing 3.30 introduces string interpolation, which is covered further inSection 4.2.2.
3. (advanced) As noted on the Heroku page on using sqlite3 for development, it’sa good idea to use the same database in development, test, and productionenvironments to minimize the possibility of subtle incompatibilities. Follow theHeroku instructions for local PostgreSQL installation to install the PostgreSQLdatabase on your local system. Update your Gemfile to eliminate the sqlite3
gem and use the pg gem exclusively, as shown in Listing 3.31. You will also have tolearn about the config/database.yml file and how to run PostgreSQL locally.Your goal should be to create and configure both the development database and thetest database to use PostgreSQL. Warning: You may find this exercise challenging,and I recommend it only for advanced users. If you get stuck, don’t hesitate toskip it; as noted previously, the sample application developed in this tutorial is fullycompatible with both SQLite and PostgreSQL.
Listing 3.29 Code for a proposed Contact page.app/views/static_pages/contact.html.erb
<% provide(:title, 'Contact') %>
<h1>Contact</h1>
<p>
Contact Ruby on Rails Tutorial about the sample app at the
<a href="http://railstutorial.org/contact">contact page</a>.
</p>
Listing 3.30 The StaticPages controller spec with a base title.spec/requests/static_pages_spec.rb
require 'spec helper'
describe "Static pages" do
let(:base title) { "Ruby on Rails Tutorial Sample App" }
www.it-ebooks.info
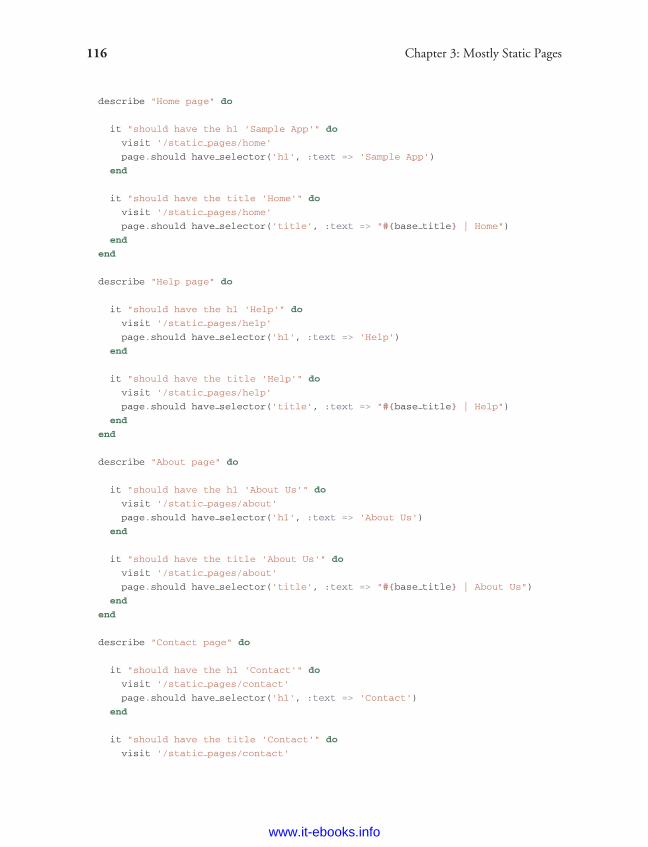
ptg8286261
116 Chapter 3: Mostly Static Pages
describe "Home page" do
it "should have the h1 'Sample App'" do
visit '/static pages/home'
page.should have selector('h1', :text => 'Sample App')
end
it "should have the title 'Home'" do
visit '/static pages/home'
page.should have selector('title', :text => "#{base title} | Home")
end
end
describe "Help page" do
it "should have the h1 'Help'" do
visit '/static pages/help'
page.should have selector('h1', :text => 'Help')
end
it "should have the title 'Help'" do
visit '/static pages/help'
page.should have selector('title', :text => "#{base title} | Help")
end
end
describe "About page" do
it "should have the h1 'About Us'" do
visit '/static pages/about'
page.should have selector('h1', :text => 'About Us')
end
it "should have the title 'About Us'" do
visit '/static pages/about'
page.should have selector('title', :text => "#{base title} | About Us")
end
end
describe "Contact page" do
it "should have the h1 'Contact'" do
visit '/static pages/contact'
page.should have selector('h1', :text => 'Contact')
end
it "should have the title 'Contact'" do
visit '/static pages/contact'
www.it-ebooks.info
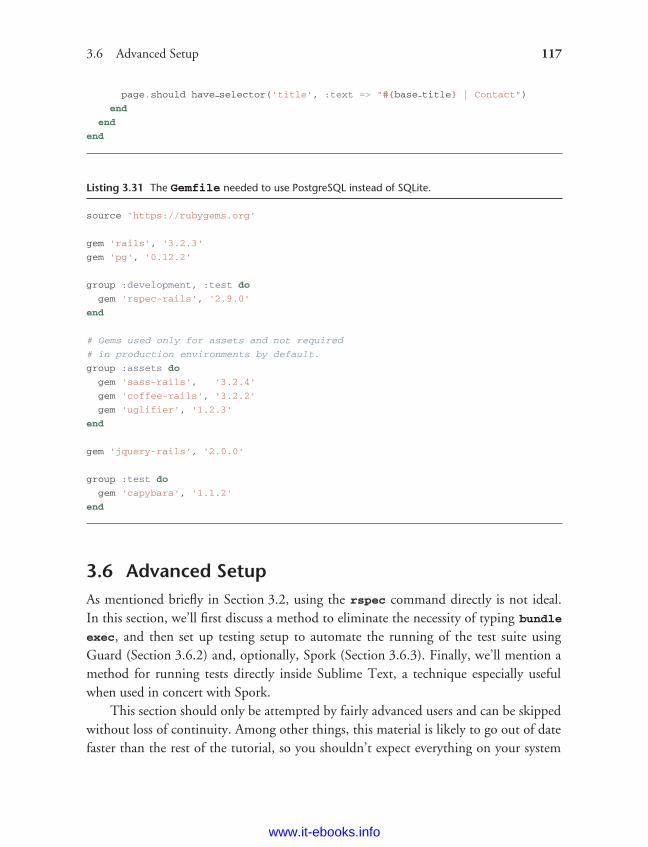
ptg8286261
3.6 Advanced Setup 117
page.should have selector('title', :text => "#{base title} | Contact")
end
end
end
Listing 3.31 The Gemfile needed to use PostgreSQL instead of SQLite.
source 'https://rubygems.org'
gem 'rails', '3.2.3'
gem 'pg', '0.12.2'
group :development, :test do
gem 'rspec-rails', '2.9.0'
end
# Gems used only for assets and not required
# in production environments by default.
group :assets do
gem 'sass-rails', '3.2.4'
gem 'coffee-rails', '3.2.2'
gem 'uglifier', '1.2.3'
end
gem 'jquery-rails', '2.0.0'
group :test do
gem 'capybara', '1.1.2'
end
3.6 Advanced SetupAs mentioned briefly in Section 3.2, using the rspec command directly is not ideal.In this section, we’ll first discuss a method to eliminate the necessity of typing bundle
exec, and then set up testing setup to automate the running of the test suite usingGuard (Section 3.6.2) and, optionally, Spork (Section 3.6.3). Finally, we’ll mention amethod for running tests directly inside Sublime Text, a technique especially usefulwhen used in concert with Spork.
This section should only be attempted by fairly advanced users and can be skippedwithout loss of continuity. Among other things, this material is likely to go out of datefaster than the rest of the tutorial, so you shouldn’t expect everything on your system
www.it-ebooks.info
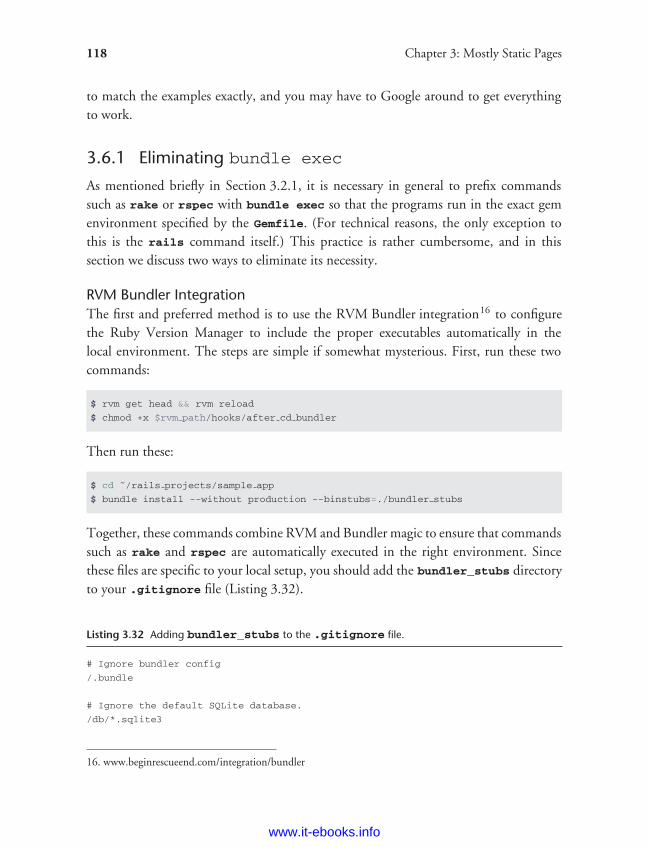
ptg8286261
118 Chapter 3: Mostly Static Pages
to match the examples exactly, and you may have to Google around to get everythingto work.
3.6.1 Eliminating bundle exec
As mentioned briefly in Section 3.2.1, it is necessary in general to prefix commandssuch as rake or rspec with bundle exec so that the programs run in the exact gemenvironment specified by the Gemfile. (For technical reasons, the only exception tothis is the rails command itself.) This practice is rather cumbersome, and in thissection we discuss two ways to eliminate its necessity.
RVM Bundler IntegrationThe first and preferred method is to use the RVM Bundler integration16 to configurethe Ruby Version Manager to include the proper executables automatically in thelocal environment. The steps are simple if somewhat mysterious. First, run these twocommands:
$ rvm get head && rvm reload
$ chmod +x $rvm path/hooks/after cd bundler
Then run these:
$ cd ˜/rails projects/sample app
$ bundle install --without production --binstubs=./bundler stubs
Together, these commands combine RVM and Bundler magic to ensure that commandssuch as rake and rspec are automatically executed in the right environment. Sincethese files are specific to your local setup, you should add the bundler_stubs directoryto your .gitignore file (Listing 3.32).
Listing 3.32 Adding bundler_stubs to the .gitignore file.
# Ignore bundler config
/.bundle
# Ignore the default SQLite database.
/db/*.sqlite3
16. www.beginrescueend.com/integration/bundler
www.it-ebooks.info
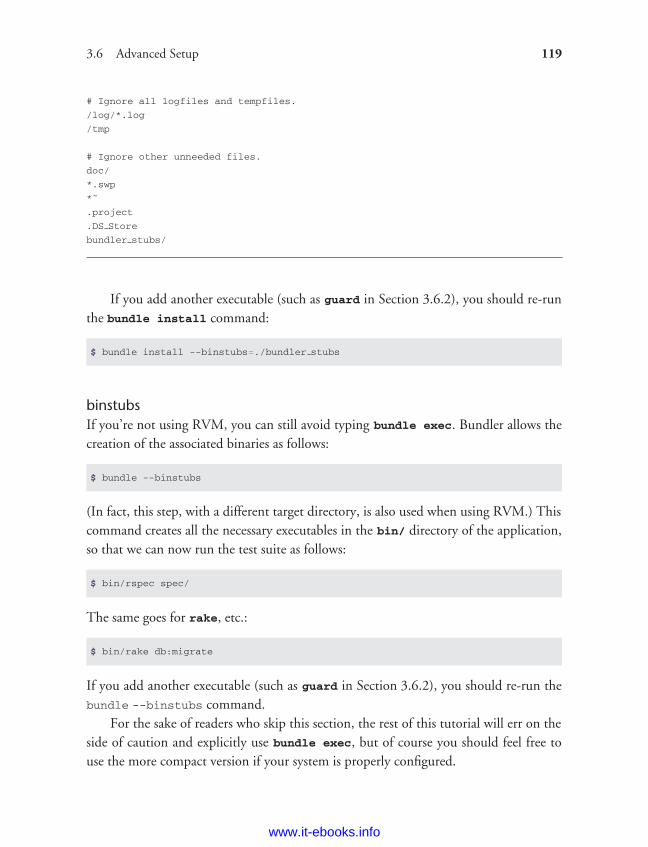
ptg8286261
3.6 Advanced Setup 119
# Ignore all logfiles and tempfiles.
/log/*.log
/tmp
# Ignore other unneeded files.
doc/
*.swp
*˜
.project
.DS Store
bundler stubs/
If you add another executable (such as guard in Section 3.6.2), you should re-runthe bundle install command:
$ bundle install --binstubs=./bundler stubs
binstubsIf you’re not using RVM, you can still avoid typing bundle exec. Bundler allows thecreation of the associated binaries as follows:
$ bundle --binstubs
(In fact, this step, with a different target directory, is also used when using RVM.) Thiscommand creates all the necessary executables in the bin/ directory of the application,so that we can now run the test suite as follows:
$ bin/rspec spec/
The same goes for rake, etc.:
$ bin/rake db:migrate
If you add another executable (such as guard in Section 3.6.2), you should re-run thebundle --binstubs command.
For the sake of readers who skip this section, the rest of this tutorial will err on theside of caution and explicitly use bundle exec, but of course you should feel free touse the more compact version if your system is properly configured.
www.it-ebooks.info
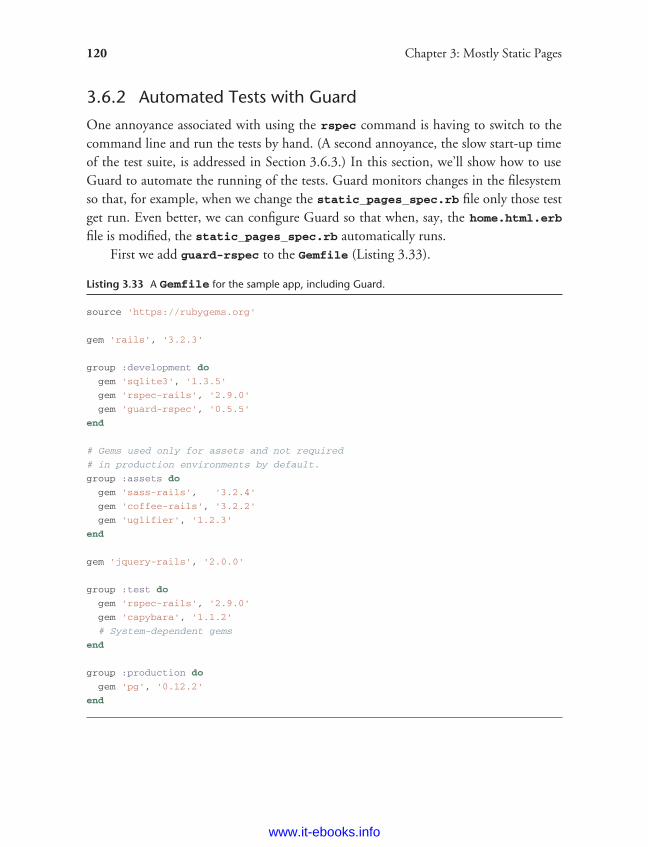
ptg8286261
120 Chapter 3: Mostly Static Pages
3.6.2 Automated Tests with Guard
One annoyance associated with using the rspec command is having to switch to thecommand line and run the tests by hand. (A second annoyance, the slow start-up timeof the test suite, is addressed in Section 3.6.3.) In this section, we’ll show how to useGuard to automate the running of the tests. Guard monitors changes in the filesystemso that, for example, when we change the static_pages_spec.rb file only those testget run. Even better, we can configure Guard so that when, say, the home.html.erb
file is modified, the static_pages_spec.rb automatically runs.First we add guard-rspec to the Gemfile (Listing 3.33).
Listing 3.33 A Gemfile for the sample app, including Guard.
source 'https://rubygems.org'
gem 'rails', '3.2.3'
group :development do
gem 'sqlite3', '1.3.5'
gem 'rspec-rails', '2.9.0'
gem 'guard-rspec', '0.5.5'
end
# Gems used only for assets and not required
# in production environments by default.
group :assets do
gem 'sass-rails', '3.2.4'
gem 'coffee-rails', '3.2.2'
gem 'uglifier', '1.2.3'
end
gem 'jquery-rails', '2.0.0'
group :test do
gem 'rspec-rails', '2.9.0'
gem 'capybara', '1.1.2'
# System-dependent gems
end
group :production do
gem 'pg', '0.12.2'
end
www.it-ebooks.info
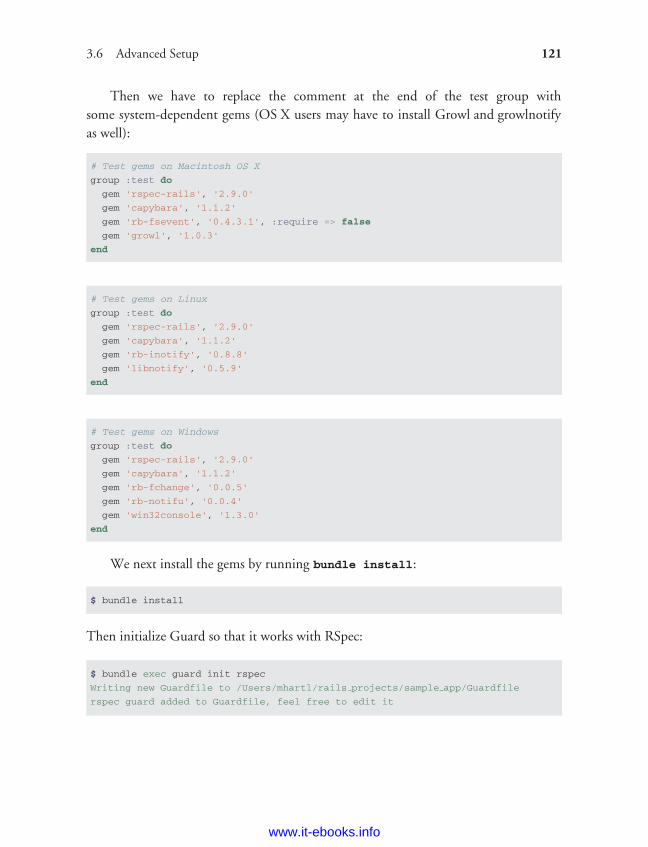
ptg8286261
3.6 Advanced Setup 121
Then we have to replace the comment at the end of the test group withsome system-dependent gems (OS X users may have to install Growl and growlnotifyas well):
# Test gems on Macintosh OS X
group :test do
gem 'rspec-rails', '2.9.0'
gem 'capybara', '1.1.2'
gem 'rb-fsevent', '0.4.3.1', :require => false
gem 'growl', '1.0.3'
end
# Test gems on Linux
group :test do
gem 'rspec-rails', '2.9.0'
gem 'capybara', '1.1.2'
gem 'rb-inotify', '0.8.8'
gem 'libnotify', '0.5.9'
end
# Test gems on Windows
group :test do
gem 'rspec-rails', '2.9.0'
gem 'capybara', '1.1.2'
gem 'rb-fchange', '0.0.5'
gem 'rb-notifu', '0.0.4'
gem 'win32console', '1.3.0'
end
We next install the gems by running bundle install:
$ bundle install
Then initialize Guard so that it works with RSpec:
$ bundle exec guard init rspec
Writing new Guardfile to /Users/mhartl/rails projects/sample app/Guardfile
rspec guard added to Guardfile, feel free to edit it
www.it-ebooks.info

ptg8286261
122 Chapter 3: Mostly Static Pages
Now edit the resulting Guardfile so that Guard will run the right tests when theintegration tests and views are updated (Listing 3.34).
Listing 3.34 Additions to the default Guardfile.
require 'active support/core ext'
guard 'rspec', :version => 2, :all after pass => false do
.
.
.
watch(%r{ˆapp/controllers/(.+) (controller)\.rb$}) do |m|
["spec/routing/#{m[1]} routing spec.rb",
"spec/#{m[2]}s/#{m[1]} #{m[2]} spec.rb",
"spec/acceptance/#{m[1]} spec.rb",
(m[1][/ pages/] ? "spec/requests/#{m[1]} spec.rb" :
"spec/requests/#{m[1].singularize} pages spec.rb")]
end
watch(%r{ˆapp/views/(.+)/}) do |m|
"spec/requests/#{m[1].singularize} pages spec.rb"
end
.
.
.
end
Here the line
guard 'rspec', :version => 2, :all after pass => false do
ensures that Guard doesn’t run all the tests after a failing test passes (to speed up theRed-Green-Refactor cycle).
We can now start guard as follows:
$ bundle exec guard
To eliminate the need to prefix the command with bundle exec, re-follow the stepsin Section 3.6.1.
www.it-ebooks.info
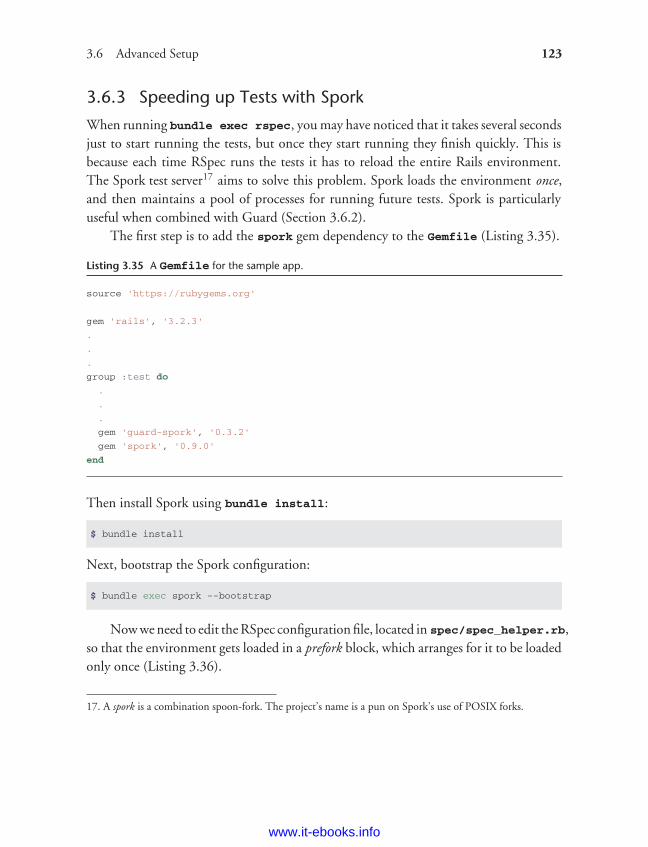
ptg8286261
3.6 Advanced Setup 123
3.6.3 Speeding up Tests with Spork
When running bundle exec rspec, you may have noticed that it takes several secondsjust to start running the tests, but once they start running they finish quickly. This isbecause each time RSpec runs the tests it has to reload the entire Rails environment.The Spork test server17 aims to solve this problem. Spork loads the environment once,and then maintains a pool of processes for running future tests. Spork is particularlyuseful when combined with Guard (Section 3.6.2).
The first step is to add the spork gem dependency to the Gemfile (Listing 3.35).
Listing 3.35 A Gemfile for the sample app.
source 'https://rubygems.org'
gem 'rails', '3.2.3'
.
.
.
group :test do
.
.
.
gem 'guard-spork', '0.3.2'
gem 'spork', '0.9.0'
end
Then install Spork using bundle install:
$ bundle install
Next, bootstrap the Spork configuration:
$ bundle exec spork --bootstrap
Now we need to edit the RSpec configuration file, located in spec/spec_helper.rb,so that the environment gets loaded in a prefork block, which arranges for it to be loadedonly once (Listing 3.36).
17. A spork is a combination spoon-fork. The project’s name is a pun on Spork’s use of POSIX forks.
www.it-ebooks.info
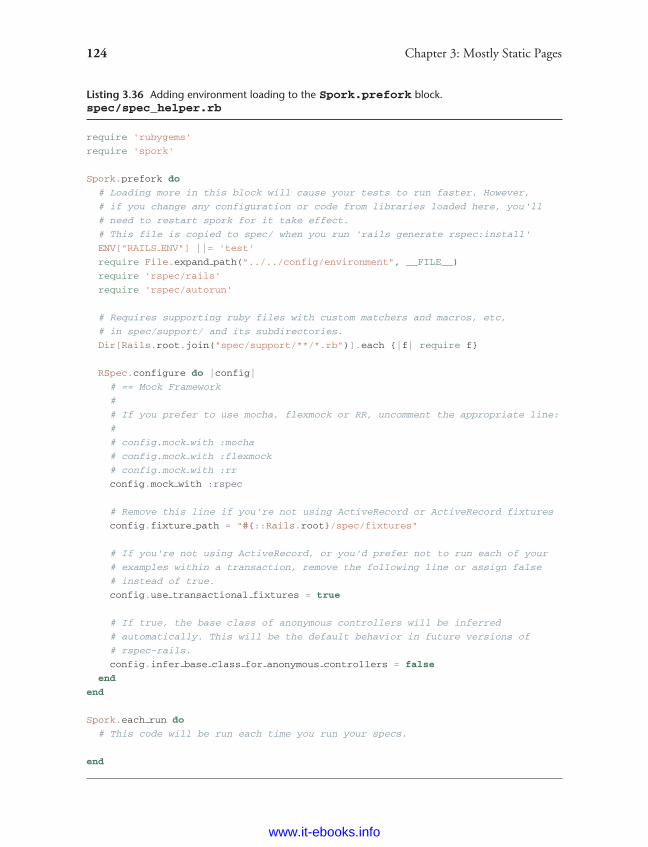
ptg8286261
124 Chapter 3: Mostly Static Pages
Listing 3.36 Adding environment loading to the Spork.prefork block.spec/spec_helper.rb
require 'rubygems'
require 'spork'
Spork.prefork do
# Loading more in this block will cause your tests to run faster. However,
# if you change any configuration or code from libraries loaded here, you'll
# need to restart spork for it take effect.
# This file is copied to spec/ when you run 'rails generate rspec:install'
ENV["RAILS ENV"] ||= 'test'
require File.expand path("../../config/environment", __FILE__)
require 'rspec/rails'
require 'rspec/autorun'
# Requires supporting ruby files with custom matchers and macros, etc,
# in spec/support/ and its subdirectories.
Dir[Rails.root.join("spec/support/**/*.rb")].each {|f| require f}
RSpec.configure do |config|
# == Mock Framework
#
# If you prefer to use mocha, flexmock or RR, uncomment the appropriate line:
#
# config.mock with :mocha
# config.mock with :flexmock
# config.mock with :rr
config.mock with :rspec
# Remove this line if you're not using ActiveRecord or ActiveRecord fixtures
config.fixture path = "#{::Rails.root}/spec/fixtures"
# If you're not using ActiveRecord, or you'd prefer not to run each of your
# examples within a transaction, remove the following line or assign false
# instead of true.
config.use transactional fixtures = true
# If true, the base class of anonymous controllers will be inferred
# automatically. This will be the default behavior in future versions of
# rspec-rails.
config.infer base class for anonymous controllers = false
end
end
Spork.each run do
# This code will be run each time you run your specs.
end
www.it-ebooks.info
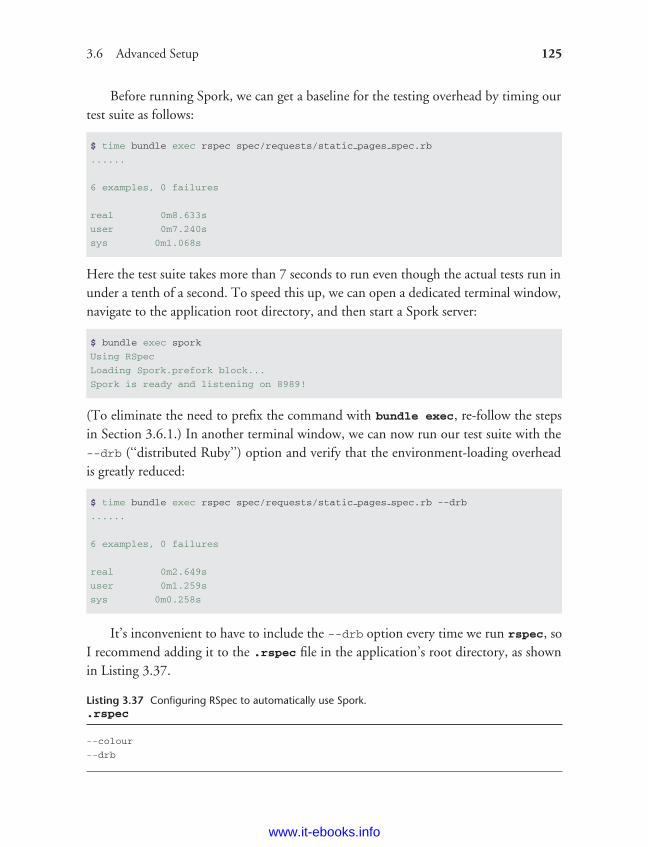
ptg8286261
3.6 Advanced Setup 125
Before running Spork, we can get a baseline for the testing overhead by timing ourtest suite as follows:
$ time bundle exec rspec spec/requests/static pages spec.rb
......
6 examples, 0 failures
real 0m8.633s
user 0m7.240s
sys 0m1.068s
Here the test suite takes more than 7 seconds to run even though the actual tests run inunder a tenth of a second. To speed this up, we can open a dedicated terminal window,navigate to the application root directory, and then start a Spork server:
$ bundle exec spork
Using RSpec
Loading Spork.prefork block...
Spork is ready and listening on 8989!
(To eliminate the need to prefix the command with bundle exec, re-follow the stepsin Section 3.6.1.) In another terminal window, we can now run our test suite with the--drb (‘‘distributed Ruby’’) option and verify that the environment-loading overheadis greatly reduced:
$ time bundle exec rspec spec/requests/static pages spec.rb --drb
......
6 examples, 0 failures
real 0m2.649s
user 0m1.259s
sys 0m0.258s
It’s inconvenient to have to include the --drb option every time we run rspec, soI recommend adding it to the .rspec file in the application’s root directory, as shownin Listing 3.37.
Listing 3.37 Configuring RSpec to automatically use Spork..rspec
--colour
--drb
www.it-ebooks.info
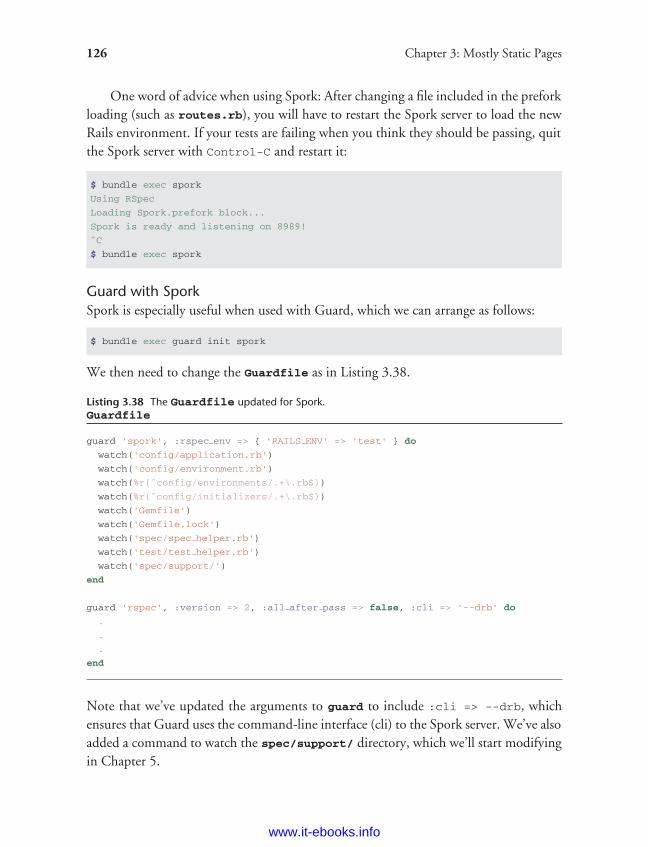
ptg8286261
126 Chapter 3: Mostly Static Pages
One word of advice when using Spork: After changing a file included in the preforkloading (such as routes.rb), you will have to restart the Spork server to load the newRails environment. If your tests are failing when you think they should be passing, quitthe Spork server with Control-C and restart it:
$ bundle exec spork
Using RSpec
Loading Spork.prefork block...
Spork is ready and listening on 8989!
ˆC
$ bundle exec spork
Guard with SporkSpork is especially useful when used with Guard, which we can arrange as follows:
$ bundle exec guard init spork
We then need to change the Guardfile as in Listing 3.38.
Listing 3.38 The Guardfile updated for Spork.Guardfile
guard 'spork', :rspec env => { 'RAILS ENV' => 'test' } do
watch('config/application.rb')
watch('config/environment.rb')
watch(%r{ˆconfig/environments/.+\.rb$})
watch(%r{ˆconfig/initializers/.+\.rb$})
watch('Gemfile')
watch('Gemfile.lock')
watch('spec/spec helper.rb')
watch('test/test helper.rb')
watch('spec/support/')
end
guard 'rspec', :version => 2, :all after pass => false, :cli => '--drb' do
.
.
.
end
Note that we’ve updated the arguments to guard to include :cli => --drb, whichensures that Guard uses the command-line interface (cli) to the Spork server. We’ve alsoadded a command to watch the spec/support/ directory, which we’ll start modifyingin Chapter 5.
www.it-ebooks.info
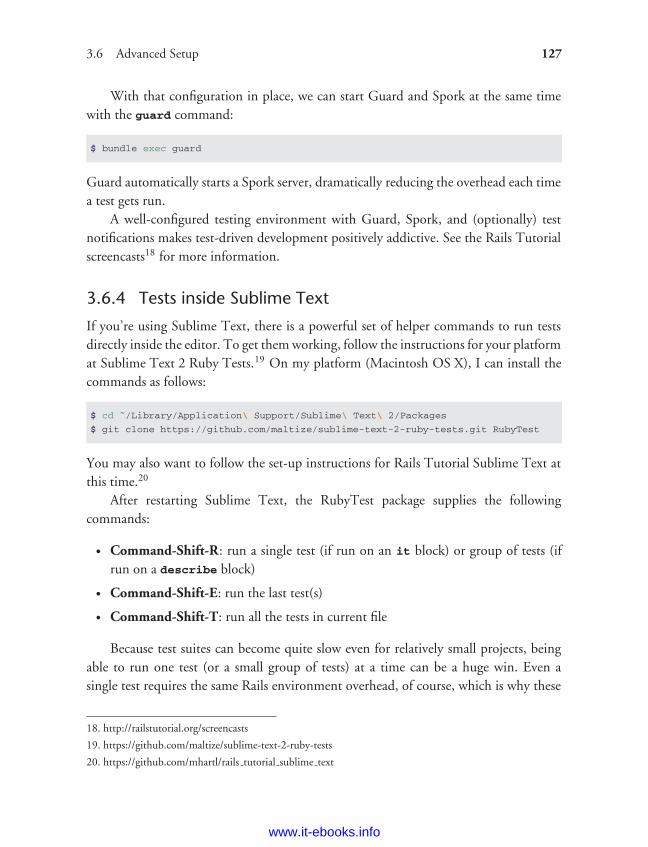
ptg8286261
3.6 Advanced Setup 127
With that configuration in place, we can start Guard and Spork at the same timewith the guard command:
$ bundle exec guard
Guard automatically starts a Spork server, dramatically reducing the overhead each timea test gets run.
A well-configured testing environment with Guard, Spork, and (optionally) testnotifications makes test-driven development positively addictive. See the Rails Tutorialscreencasts18 for more information.
3.6.4 Tests inside Sublime Text
If you’re using Sublime Text, there is a powerful set of helper commands to run testsdirectly inside the editor. To get them working, follow the instructions for your platformat Sublime Text 2 Ruby Tests.19 On my platform (Macintosh OS X), I can install thecommands as follows:
$ cd ˜/Library/Application\ Support/Sublime\ Text\ 2/Packages
$ git clone https://github.com/maltize/sublime-text-2-ruby-tests.git RubyTest
You may also want to follow the set-up instructions for Rails Tutorial Sublime Text atthis time.20
After restarting Sublime Text, the RubyTest package supplies the followingcommands:
• Command-Shift-R: run a single test (if run on an it block) or group of tests (ifrun on a describe block)
• Command-Shift-E: run the last test(s)
• Command-Shift-T: run all the tests in current file
Because test suites can become quite slow even for relatively small projects, beingable to run one test (or a small group of tests) at a time can be a huge win. Even asingle test requires the same Rails environment overhead, of course, which is why these
18. http://railstutorial.org/screencasts
19. https://github.com/maltize/sublime-text-2-ruby-tests
20. https://github.com/mhartl/rails tutorial sublime text
www.it-ebooks.info
ptg8286261
128 Chapter 3: Mostly Static Pages
commands are perfectly complemented by Spork: Running a single test eliminates theoverhead of running the entire test file, while running Spork eliminates the overhead ofstarting the test environment. Here is the sequence I recommend:
1. Start Spork in a terminal window.2. Write a single test or small group of tests.3. Run Command-Shift-R to verify that the test or test group is red.4. Write the corresponding application code.5. Run Command-Shift-E to run the same test/group again, verifying that it’s green.6. Repeat steps 2–5 as necessary.7. When reaching a natural stopping point (such as before a commit), run rspec
spec/ at the command line to confirm that the entire test suite is still green.
Even with the ability to run tests inside of Sublime Text, I still sometimesprefer using Guard, but at this point my bread-and-butter TDD technique is the oneenumerated above.
www.it-ebooks.info
ptg8286261
CHAPTER 4Rails-Flavored Ruby
Grounded in examples from Chapter 3, this chapter explores some elements of Rubyimportant for Rails. Ruby is a big language, but fortunately the subset needed to beproductive as a Rails developer is relatively small. Moreover, this subset is differentfrom the usual approaches to learning Ruby, which is why, if your goal is makingdynamic web applications, I recommend learning Rails first, picking up bits of Rubyalong the way. To become a Rails expert, you need to understand Ruby more deeply,and this book gives you a good foundation for developing that expertise. As noted inSection 1.1.1, after finishing the Rails Tutorial I suggest reading a pure Ruby book suchas Beginning Ruby, The Well-Grounded Rubyist , or The Ruby Way.
This chapter covers a lot of material, and it’s OK not to get it all on the first pass.I’ll refer back to it frequently in future chapters.
4.1 MotivationAs we saw in the last chapter, it’s possible to develop the skeleton of a Rails application,and even start testing it, with essentially no knowledge of the underlying Ruby language.We did this by relying on the test code provided by the tutorial and addressing eacherror message until the test suite was passing. This situation can’t last forever, though,and we’ll open this chapter with an addition to the site that bring us face-to-face withour Ruby limitations.
When we last saw our new application, we had just updated our mostly static pagesto use Rails layouts to eliminate duplication in our views (Listing 4.1).
Let’s focus on one particular line in Listing 4.1:
<%= stylesheet link tag "application", :media => "all" %>
129
www.it-ebooks.info
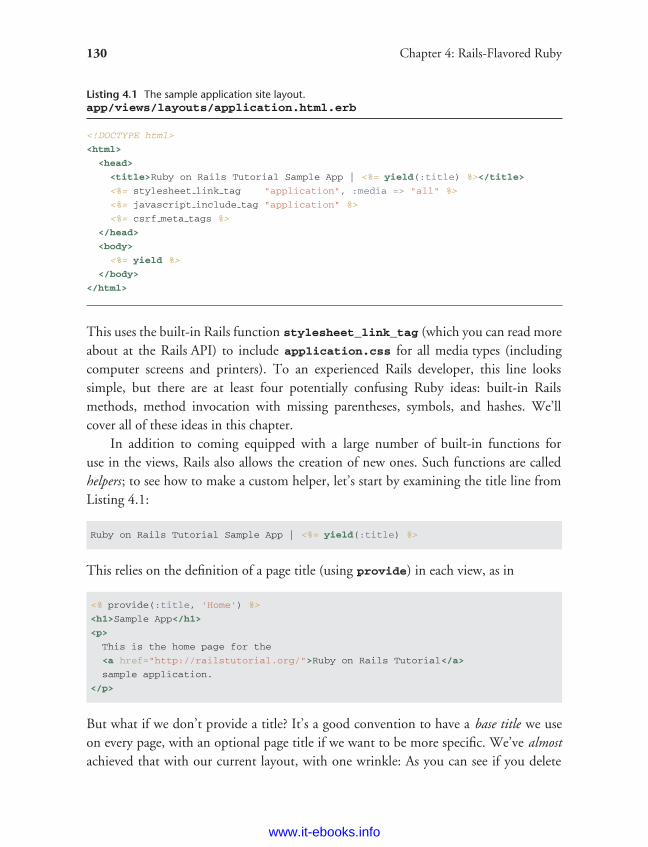
ptg8286261
130 Chapter 4: Rails-Flavored Ruby
Listing 4.1 The sample application site layout.app/views/layouts/application.html.erb
<!DOCTYPE html>
<html>
<head>
<title>Ruby on Rails Tutorial Sample App | <%= yield(:title) %></title>
<%= stylesheet link tag "application", :media => "all" %>
<%= javascript include tag "application" %>
<%= csrf meta tags %>
</head>
<body>
<%= yield %>
</body>
</html>
This uses the built-in Rails function stylesheet_link_tag (which you can read moreabout at the Rails API) to include application.css for all media types (includingcomputer screens and printers). To an experienced Rails developer, this line lookssimple, but there are at least four potentially confusing Ruby ideas: built-in Railsmethods, method invocation with missing parentheses, symbols, and hashes. We’llcover all of these ideas in this chapter.
In addition to coming equipped with a large number of built-in functions foruse in the views, Rails also allows the creation of new ones. Such functions are calledhelpers; to see how to make a custom helper, let’s start by examining the title line fromListing 4.1:
Ruby on Rails Tutorial Sample App | <%= yield(:title) %>
This relies on the definition of a page title (using provide) in each view, as in
<% provide(:title, 'Home') %>
<h1>Sample App</h1>
<p>
This is the home page for the
<a href="http://railstutorial.org/">Ruby on Rails Tutorial</a>
sample application.
</p>
But what if we don’t provide a title? It’s a good convention to have a base title we useon every page, with an optional page title if we want to be more specific. We’ve almostachieved that with our current layout, with one wrinkle: As you can see if you delete
www.it-ebooks.info
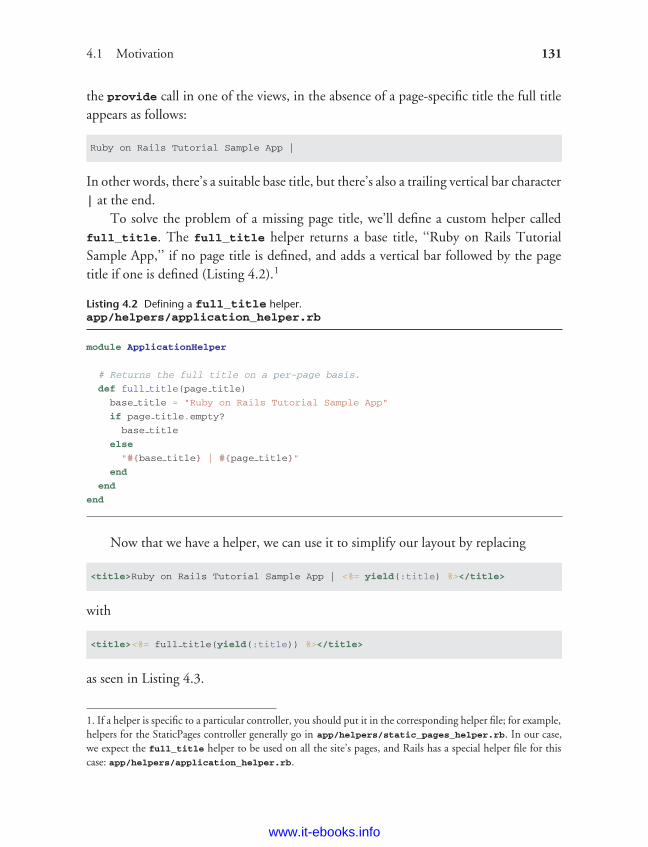
ptg8286261
4.1 Motivation 131
the provide call in one of the views, in the absence of a page-specific title the full titleappears as follows:
Ruby on Rails Tutorial Sample App |
In other words, there’s a suitable base title, but there’s also a trailing vertical bar character| at the end.
To solve the problem of a missing page title, we’ll define a custom helper calledfull_title. The full_title helper returns a base title, ‘‘Ruby on Rails TutorialSample App,’’ if no page title is defined, and adds a vertical bar followed by the pagetitle if one is defined (Listing 4.2).1
Listing 4.2 Defining a full_title helper.app/helpers/application_helper.rb
module ApplicationHelper
# Returns the full title on a per-page basis.
def full title(page title)
base title = "Ruby on Rails Tutorial Sample App"
if page title.empty?
base title
else
"#{base title} | #{page title}"
end
end
end
Now that we have a helper, we can use it to simplify our layout by replacing
<title>Ruby on Rails Tutorial Sample App | <%= yield(:title) %></title>
with
<title><%= full title(yield(:title)) %></title>
as seen in Listing 4.3.
1. If a helper is specific to a particular controller, you should put it in the corresponding helper file; for example,helpers for the StaticPages controller generally go in app/helpers/static_pages_helper.rb. In our case,we expect the full_title helper to be used on all the site’s pages, and Rails has a special helper file for thiscase: app/helpers/application_helper.rb.
www.it-ebooks.info
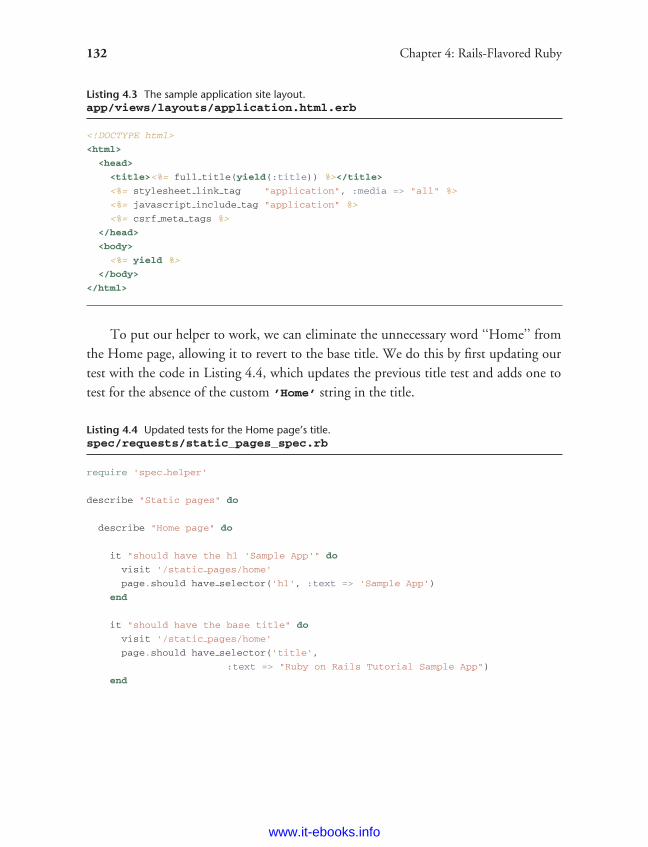
ptg8286261
132 Chapter 4: Rails-Flavored Ruby
Listing 4.3 The sample application site layout.app/views/layouts/application.html.erb
<!DOCTYPE html>
<html>
<head>
<title><%= full title(yield(:title)) %></title>
<%= stylesheet link tag "application", :media => "all" %>
<%= javascript include tag "application" %>
<%= csrf meta tags %>
</head>
<body>
<%= yield %>
</body>
</html>
To put our helper to work, we can eliminate the unnecessary word ‘‘Home’’ fromthe Home page, allowing it to revert to the base title. We do this by first updating ourtest with the code in Listing 4.4, which updates the previous title test and adds one totest for the absence of the custom ’Home’ string in the title.
Listing 4.4 Updated tests for the Home page’s title.spec/requests/static_pages_spec.rb
require 'spec helper'
describe "Static pages" do
describe "Home page" do
it "should have the h1 'Sample App'" do
visit '/static pages/home'
page.should have selector('h1', :text => 'Sample App')
end
it "should have the base title" do
visit '/static pages/home'
page.should have selector('title',
:text => "Ruby on Rails Tutorial Sample App")
end
www.it-ebooks.info
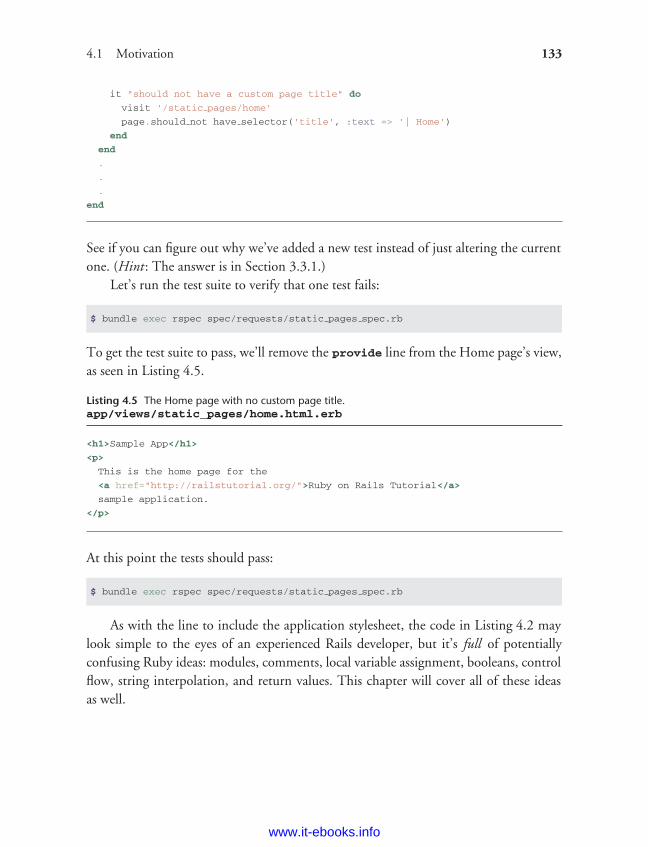
ptg8286261
4.1 Motivation 133
it "should not have a custom page title" do
visit '/static pages/home'
page.should not have selector('title', :text => '| Home')
end
end
.
.
.
end
See if you can figure out why we’ve added a new test instead of just altering the currentone. (Hint: The answer is in Section 3.3.1.)
Let’s run the test suite to verify that one test fails:
$ bundle exec rspec spec/requests/static pages spec.rb
To get the test suite to pass, we’ll remove the provide line from the Home page’s view,as seen in Listing 4.5.
Listing 4.5 The Home page with no custom page title.app/views/static_pages/home.html.erb
<h1>Sample App</h1>
<p>
This is the home page for the
<a href="http://railstutorial.org/">Ruby on Rails Tutorial</a>
sample application.
</p>
At this point the tests should pass:
$ bundle exec rspec spec/requests/static pages spec.rb
As with the line to include the application stylesheet, the code in Listing 4.2 maylook simple to the eyes of an experienced Rails developer, but it’s full of potentiallyconfusing Ruby ideas: modules, comments, local variable assignment, booleans, controlflow, string interpolation, and return values. This chapter will cover all of these ideasas well.
www.it-ebooks.info
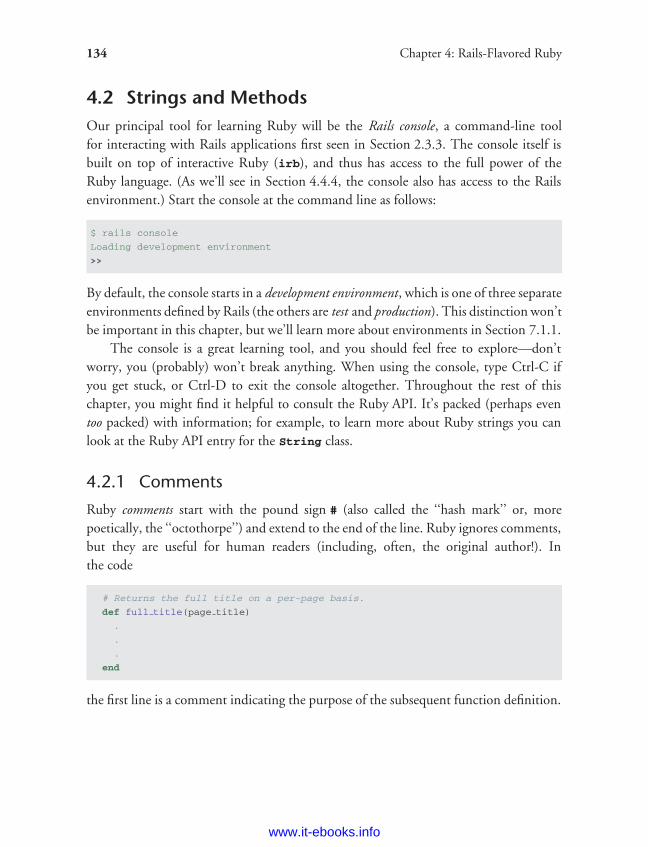
ptg8286261
134 Chapter 4: Rails-Flavored Ruby
4.2 Strings and MethodsOur principal tool for learning Ruby will be the Rails console, a command-line toolfor interacting with Rails applications first seen in Section 2.3.3. The console itself isbuilt on top of interactive Ruby (irb), and thus has access to the full power of theRuby language. (As we’ll see in Section 4.4.4, the console also has access to the Railsenvironment.) Start the console at the command line as follows:
$ rails console
Loading development environment
>>
By default, the console starts in a development environment, which is one of three separateenvironments defined by Rails (the others are test and production). This distinction won’tbe important in this chapter, but we’ll learn more about environments in Section 7.1.1.
The console is a great learning tool, and you should feel free to explore—don’tworry, you (probably) won’t break anything. When using the console, type Ctrl-C ifyou get stuck, or Ctrl-D to exit the console altogether. Throughout the rest of thischapter, you might find it helpful to consult the Ruby API. It’s packed (perhaps eventoo packed) with information; for example, to learn more about Ruby strings you canlook at the Ruby API entry for the String class.
4.2.1 Comments
Ruby comments start with the pound sign # (also called the ‘‘hash mark’’ or, morepoetically, the ‘‘octothorpe’’) and extend to the end of the line. Ruby ignores comments,but they are useful for human readers (including, often, the original author!). Inthe code
# Returns the full title on a per-page basis.
def full title(page title)
.
.
.
end
the first line is a comment indicating the purpose of the subsequent function definition.
www.it-ebooks.info
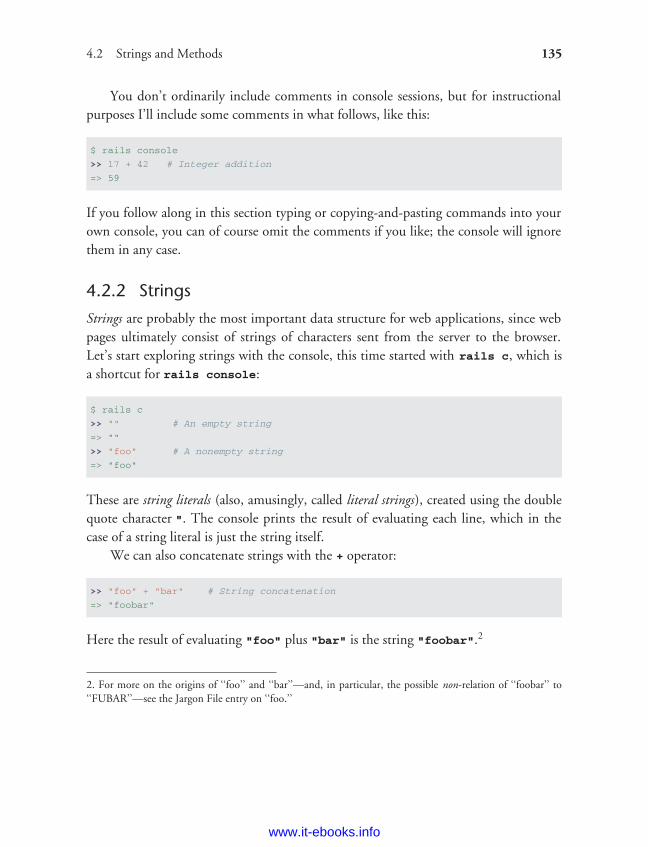
ptg8286261
4.2 Strings and Methods 135
You don’t ordinarily include comments in console sessions, but for instructionalpurposes I’ll include some comments in what follows, like this:
$ rails console
>> 17 + 42 # Integer addition
=> 59
If you follow along in this section typing or copying-and-pasting commands into yourown console, you can of course omit the comments if you like; the console will ignorethem in any case.
4.2.2 Strings
Strings are probably the most important data structure for web applications, since webpages ultimately consist of strings of characters sent from the server to the browser.Let’s start exploring strings with the console, this time started with rails c, which isa shortcut for rails console:
$ rails c
>> "" # An empty string
=> ""
>> "foo" # A nonempty string
=> "foo"
These are string literals (also, amusingly, called literal strings), created using the doublequote character ". The console prints the result of evaluating each line, which in thecase of a string literal is just the string itself.
We can also concatenate strings with the + operator:
>> "foo" + "bar" # String concatenation
=> "foobar"
Here the result of evaluating "foo" plus "bar" is the string "foobar".2
2. For more on the origins of ‘‘foo’’ and ‘‘bar’’—and, in particular, the possible non-relation of ‘‘foobar’’ to‘‘FUBAR’’—see the Jargon File entry on ‘‘foo.’’
www.it-ebooks.info
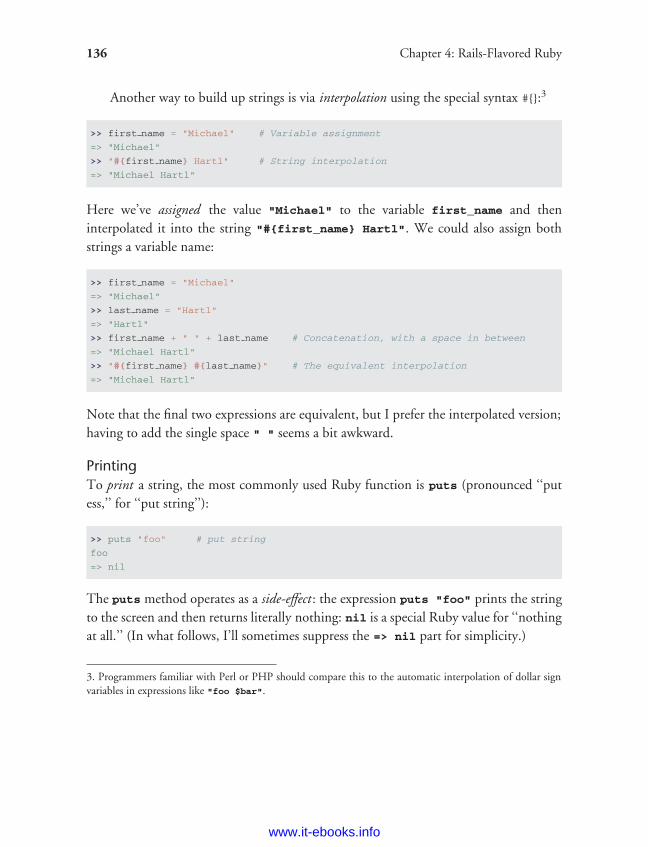
ptg8286261
136 Chapter 4: Rails-Flavored Ruby
Another way to build up strings is via interpolation using the special syntax #{}:3
>> first name = "Michael" # Variable assignment
=> "Michael"
>> "#{first name} Hartl" # String interpolation
=> "Michael Hartl"
Here we’ve assigned the value "Michael" to the variable first_name and theninterpolated it into the string "#{first_name} Hartl". We could also assign bothstrings a variable name:
>> first name = "Michael"
=> "Michael"
>> last name = "Hartl"
=> "Hartl"
>> first name + " " + last name # Concatenation, with a space in between
=> "Michael Hartl"
>> "#{first name} #{last name}" # The equivalent interpolation
=> "Michael Hartl"
Note that the final two expressions are equivalent, but I prefer the interpolated version;having to add the single space " " seems a bit awkward.
PrintingTo print a string, the most commonly used Ruby function is puts (pronounced ‘‘putess,’’ for ‘‘put string’’):
>> puts "foo" # put string
foo
=> nil
The puts method operates as a side-effect : the expression puts "foo" prints the stringto the screen and then returns literally nothing: nil is a special Ruby value for ‘‘nothingat all.’’ (In what follows, I’ll sometimes suppress the => nil part for simplicity.)
3. Programmers familiar with Perl or PHP should compare this to the automatic interpolation of dollar signvariables in expressions like "foo $bar".
www.it-ebooks.info
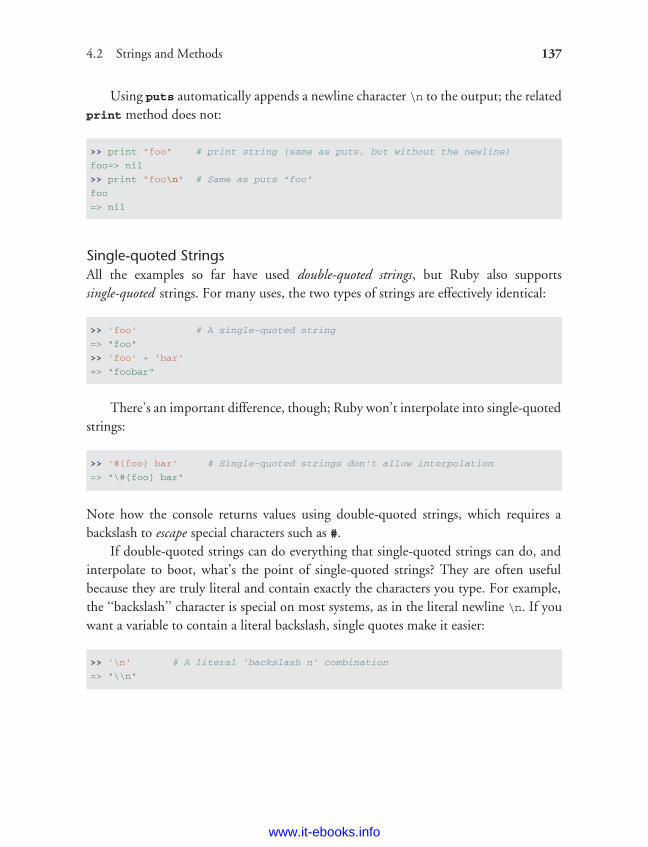
ptg8286261
4.2 Strings and Methods 137
Using puts automatically appends a newline character \n to the output; the relatedprint method does not:
>> print "foo" # print string (same as puts, but without the newline)
foo=> nil
>> print "foo\n" # Same as puts "foo"
foo
=> nil
Single-quoted StringsAll the examples so far have used double-quoted strings, but Ruby also supportssingle-quoted strings. For many uses, the two types of strings are effectively identical:
>> 'foo' # A single-quoted string
=> "foo"
>> 'foo' + 'bar'
=> "foobar"
There’s an important difference, though; Ruby won’t interpolate into single-quotedstrings:
>> '#{foo} bar' # Single-quoted strings don't allow interpolation
=> "\#{foo} bar"
Note how the console returns values using double-quoted strings, which requires abackslash to escape special characters such as #.
If double-quoted strings can do everything that single-quoted strings can do, andinterpolate to boot, what’s the point of single-quoted strings? They are often usefulbecause they are truly literal and contain exactly the characters you type. For example,the ‘‘backslash’’ character is special on most systems, as in the literal newline \n. If youwant a variable to contain a literal backslash, single quotes make it easier:
>> '\n' # A literal 'backslash n' combination
=> "\\n"
www.it-ebooks.info
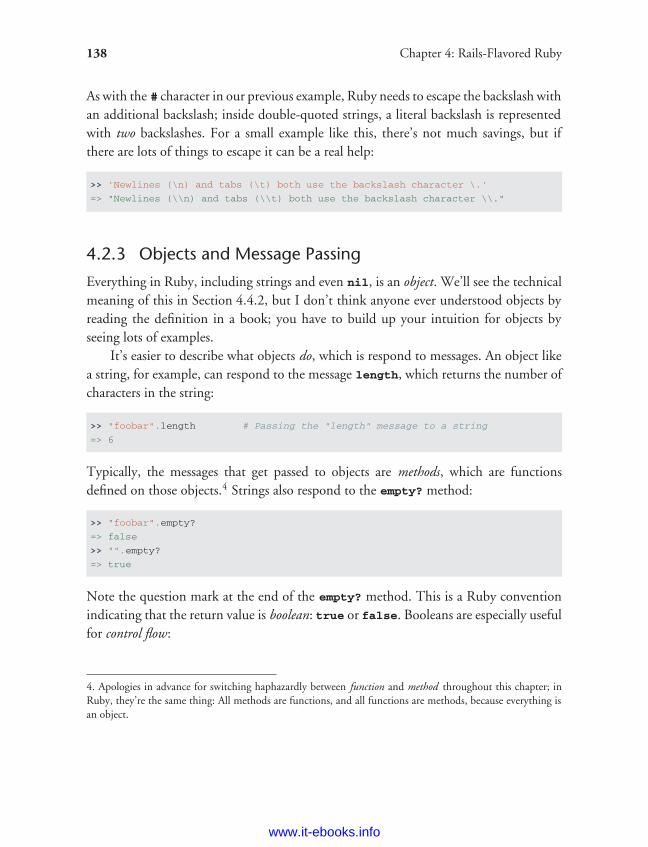
ptg8286261
138 Chapter 4: Rails-Flavored Ruby
As with the # character in our previous example, Ruby needs to escape the backslash withan additional backslash; inside double-quoted strings, a literal backslash is representedwith two backslashes. For a small example like this, there’s not much savings, but ifthere are lots of things to escape it can be a real help:
>> 'Newlines (\n) and tabs (\t) both use the backslash character \.'
=> "Newlines (\\n) and tabs (\\t) both use the backslash character \\."
4.2.3 Objects and Message Passing
Everything in Ruby, including strings and even nil, is an object. We’ll see the technicalmeaning of this in Section 4.4.2, but I don’t think anyone ever understood objects byreading the definition in a book; you have to build up your intuition for objects byseeing lots of examples.
It’s easier to describe what objects do, which is respond to messages. An object likea string, for example, can respond to the message length, which returns the number ofcharacters in the string:
>> "foobar".length # Passing the "length" message to a string
=> 6
Typically, the messages that get passed to objects are methods, which are functionsdefined on those objects.4 Strings also respond to the empty? method:
>> "foobar".empty?
=> false
>> "".empty?
=> true
Note the question mark at the end of the empty? method. This is a Ruby conventionindicating that the return value is boolean: true or false. Booleans are especially usefulfor control flow:
4. Apologies in advance for switching haphazardly between function and method throughout this chapter; inRuby, they’re the same thing: All methods are functions, and all functions are methods, because everything isan object.
www.it-ebooks.info
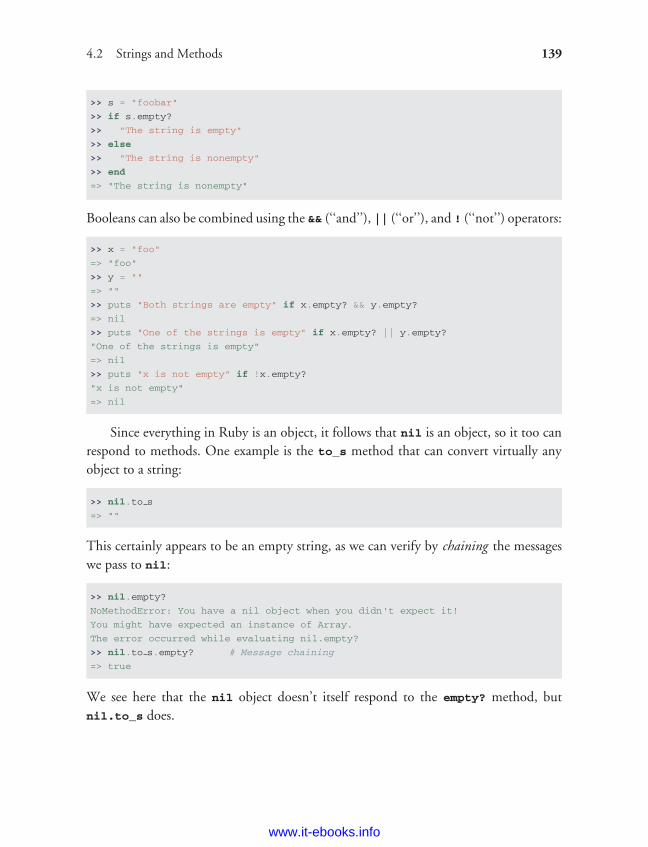
ptg8286261
4.2 Strings and Methods 139
>> s = "foobar"
>> if s.empty?
>> "The string is empty"
>> else
>> "The string is nonempty"
>> end
=> "The string is nonempty"
Booleans can also be combined using the && (‘‘and’’), || (‘‘or’’), and ! (‘‘not’’) operators:
>> x = "foo"
=> "foo"
>> y = ""
=> ""
>> puts "Both strings are empty" if x.empty? && y.empty?
=> nil
>> puts "One of the strings is empty" if x.empty? || y.empty?
"One of the strings is empty"
=> nil
>> puts "x is not empty" if !x.empty?
"x is not empty"
=> nil
Since everything in Ruby is an object, it follows that nil is an object, so it too canrespond to methods. One example is the to_s method that can convert virtually anyobject to a string:
>> nil.to s
=> ""
This certainly appears to be an empty string, as we can verify by chaining the messageswe pass to nil:
>> nil.empty?
NoMethodError: You have a nil object when you didn't expect it!
You might have expected an instance of Array.
The error occurred while evaluating nil.empty?
>> nil.to s.empty? # Message chaining
=> true
We see here that the nil object doesn’t itself respond to the empty? method, butnil.to_s does.
www.it-ebooks.info
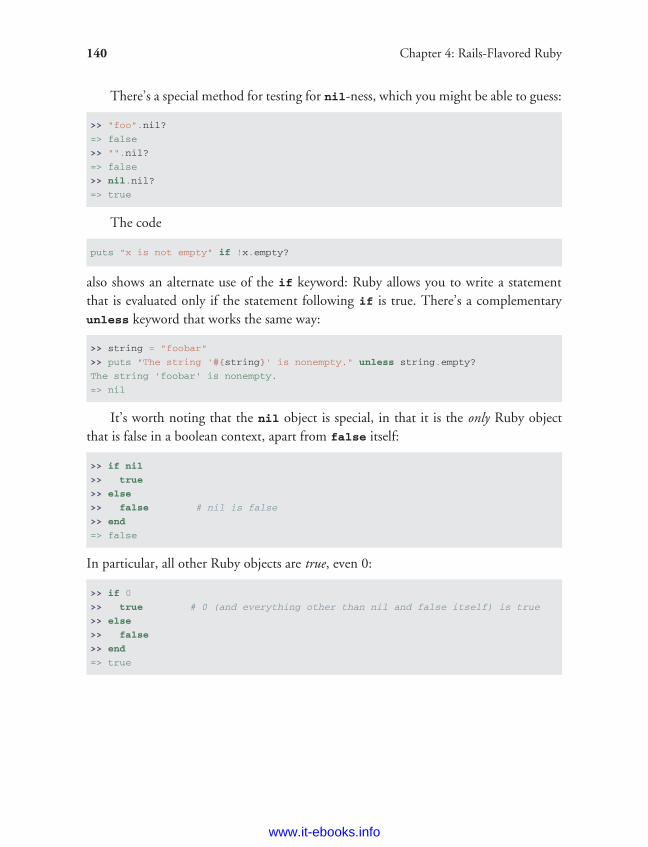
ptg8286261
140 Chapter 4: Rails-Flavored Ruby
There’s a special method for testing for nil-ness, which you might be able to guess:
>> "foo".nil?
=> false
>> "".nil?
=> false
>> nil.nil?
=> true
The code
puts "x is not empty" if !x.empty?
also shows an alternate use of the if keyword: Ruby allows you to write a statementthat is evaluated only if the statement following if is true. There’s a complementaryunless keyword that works the same way:
>> string = "foobar"
>> puts "The string '#{string}' is nonempty." unless string.empty?
The string 'foobar' is nonempty.
=> nil
It’s worth noting that the nil object is special, in that it is the only Ruby objectthat is false in a boolean context, apart from false itself:
>> if nil
>> true
>> else
>> false # nil is false
>> end
=> false
In particular, all other Ruby objects are true, even 0:
>> if 0
>> true # 0 (and everything other than nil and false itself) is true
>> else
>> false
>> end
=> true
www.it-ebooks.info
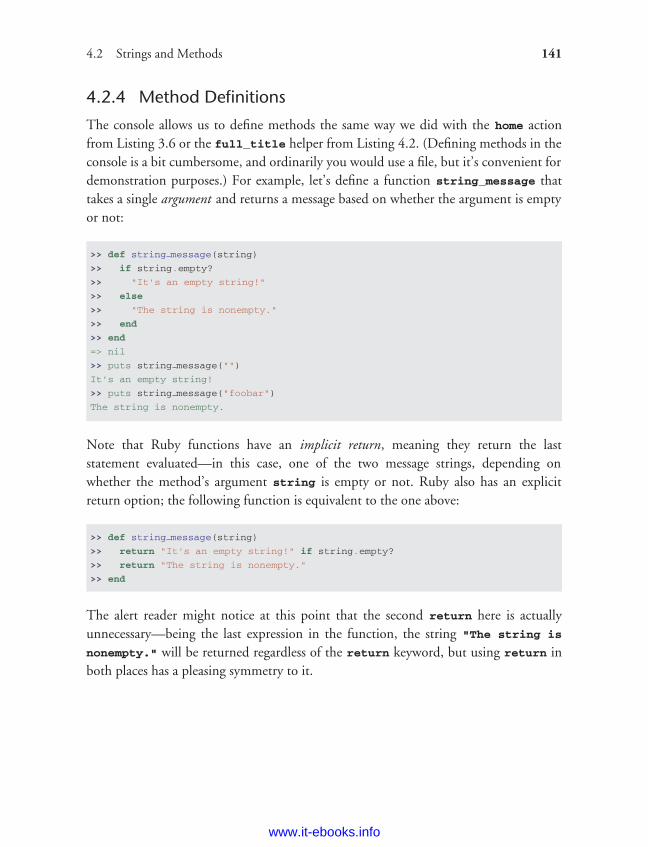
ptg8286261
4.2 Strings and Methods 141
4.2.4 Method Definitions
The console allows us to define methods the same way we did with the home actionfrom Listing 3.6 or the full_title helper from Listing 4.2. (Defining methods in theconsole is a bit cumbersome, and ordinarily you would use a file, but it’s convenient fordemonstration purposes.) For example, let’s define a function string_message thattakes a single argument and returns a message based on whether the argument is emptyor not:
>> def string message(string)
>> if string.empty?
>> "It's an empty string!"
>> else
>> "The string is nonempty."
>> end
>> end
=> nil
>> puts string message("")
It's an empty string!
>> puts string message("foobar")
The string is nonempty.
Note that Ruby functions have an implicit return, meaning they return the laststatement evaluated—in this case, one of the two message strings, depending onwhether the method’s argument string is empty or not. Ruby also has an explicitreturn option; the following function is equivalent to the one above:
>> def string message(string)
>> return "It's an empty string!" if string.empty?
>> return "The string is nonempty."
>> end
The alert reader might notice at this point that the second return here is actuallyunnecessary—being the last expression in the function, the string "The string is
nonempty." will be returned regardless of the return keyword, but using return inboth places has a pleasing symmetry to it.
www.it-ebooks.info
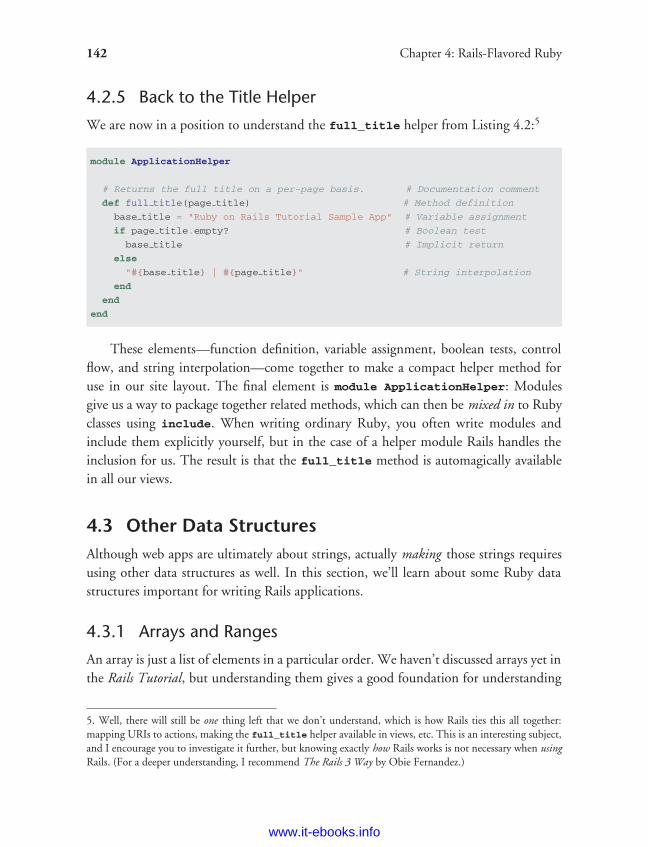
ptg8286261
142 Chapter 4: Rails-Flavored Ruby
4.2.5 Back to the Title Helper
We are now in a position to understand the full_title helper from Listing 4.2:5
module ApplicationHelper
# Returns the full title on a per-page basis. # Documentation comment
def full title(page title) # Method definition
base title = "Ruby on Rails Tutorial Sample App" # Variable assignment
if page title.empty? # Boolean test
base title # Implicit return
else
"#{base title} | #{page title}" # String interpolation
end
end
end
These elements—function definition, variable assignment, boolean tests, controlflow, and string interpolation—come together to make a compact helper method foruse in our site layout. The final element is module ApplicationHelper: Modulesgive us a way to package together related methods, which can then be mixed in to Rubyclasses using include. When writing ordinary Ruby, you often write modules andinclude them explicitly yourself, but in the case of a helper module Rails handles theinclusion for us. The result is that the full_title method is automagically availablein all our views.
4.3 Other Data StructuresAlthough web apps are ultimately about strings, actually making those strings requiresusing other data structures as well. In this section, we’ll learn about some Ruby datastructures important for writing Rails applications.
4.3.1 Arrays and Ranges
An array is just a list of elements in a particular order. We haven’t discussed arrays yet inthe Rails Tutorial, but understanding them gives a good foundation for understanding
5. Well, there will still be one thing left that we don’t understand, which is how Rails ties this all together:mapping URIs to actions, making the full_title helper available in views, etc. This is an interesting subject,and I encourage you to investigate it further, but knowing exactly how Rails works is not necessary when usingRails. (For a deeper understanding, I recommend The Rails 3 Way by Obie Fernandez.)
www.it-ebooks.info
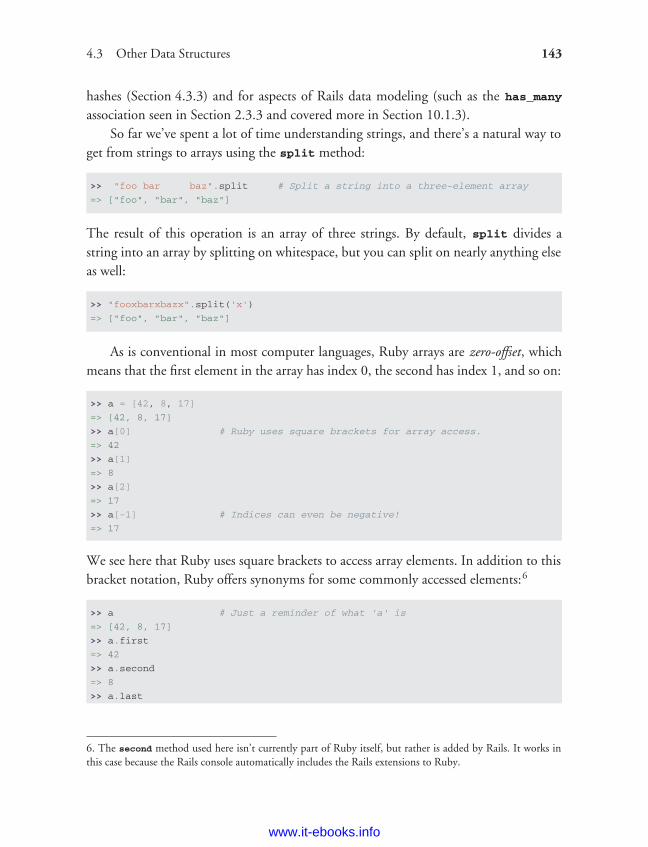
ptg8286261
4.3 Other Data Structures 143
hashes (Section 4.3.3) and for aspects of Rails data modeling (such as the has_many
association seen in Section 2.3.3 and covered more in Section 10.1.3).So far we’ve spent a lot of time understanding strings, and there’s a natural way to
get from strings to arrays using the split method:
>> "foo bar baz".split # Split a string into a three-element array
=> ["foo", "bar", "baz"]
The result of this operation is an array of three strings. By default, split divides astring into an array by splitting on whitespace, but you can split on nearly anything elseas well:
>> "fooxbarxbazx".split('x')
=> ["foo", "bar", "baz"]
As is conventional in most computer languages, Ruby arrays are zero-offset, whichmeans that the first element in the array has index 0, the second has index 1, and so on:
>> a = [42, 8, 17]
=> [42, 8, 17]
>> a[0] # Ruby uses square brackets for array access.
=> 42
>> a[1]
=> 8
>> a[2]
=> 17
>> a[-1] # Indices can even be negative!
=> 17
We see here that Ruby uses square brackets to access array elements. In addition to thisbracket notation, Ruby offers synonyms for some commonly accessed elements:6
>> a # Just a reminder of what 'a' is
=> [42, 8, 17]
>> a.first
=> 42
>> a.second
=> 8
>> a.last
6. The second method used here isn’t currently part of Ruby itself, but rather is added by Rails. It works inthis case because the Rails console automatically includes the Rails extensions to Ruby.
www.it-ebooks.info
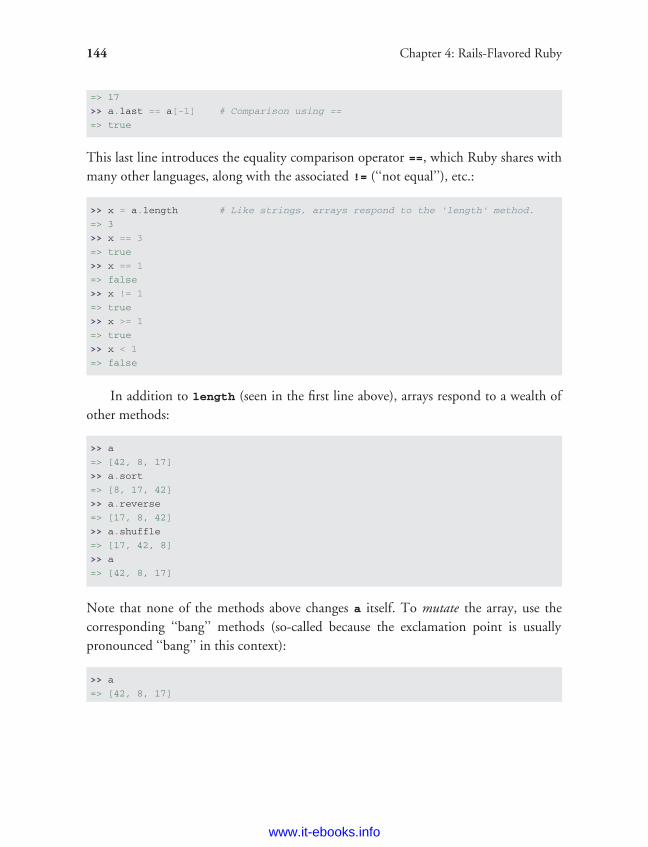
ptg8286261
144 Chapter 4: Rails-Flavored Ruby
=> 17
>> a.last == a[-1] # Comparison using ==
=> true
This last line introduces the equality comparison operator ==, which Ruby shares withmany other languages, along with the associated != (‘‘not equal’’), etc.:
>> x = a.length # Like strings, arrays respond to the 'length' method.
=> 3
>> x == 3
=> true
>> x == 1
=> false
>> x != 1
=> true
>> x >= 1
=> true
>> x < 1
=> false
In addition to length (seen in the first line above), arrays respond to a wealth ofother methods:
>> a
=> [42, 8, 17]
>> a.sort
=> [8, 17, 42]
>> a.reverse
=> [17, 8, 42]
>> a.shuffle
=> [17, 42, 8]
>> a
=> [42, 8, 17]
Note that none of the methods above changes a itself. To mutate the array, use thecorresponding ‘‘bang’’ methods (so-called because the exclamation point is usuallypronounced ‘‘bang’’ in this context):
>> a
=> [42, 8, 17]
www.it-ebooks.info

ptg8286261
4.3 Other Data Structures 145
>> a.sort!
=> [8, 17, 42]
>> a
=> [8, 17, 42]
You can also add to arrays with the push method or its equivalent operator, <<:
>> a.push(6) # Pushing 6 onto an array
=> [42, 8, 17, 6]
>> a << 7 # Pushing 7 onto an array
=> [42, 8, 17, 6, 7]
>> a << "foo" << "bar" # Chaining array pushes
=> [42, 8, 17, 6, 7, "foo", "bar"]
This last example shows that you can chain pushes together and also that, unlike arraysin many other languages, Ruby arrays can contain a mixture of different types (in thiscase, integers and strings).
Before we saw split convert a string to an array. We can also go the other waywith the join method:
>> a
=> [42, 8, 17, 7, "foo", "bar"]
>> a.join # Join on nothing
=> "428177foobar"
>> a.join(', ') # Join on comma-space
=> "42, 8, 17, 7, foo, bar"
Closely related to arrays are ranges, which can probably most easily be understoodby converting them to arrays using the to_a method:
>> 0..9
=> 0..9
>> 0..9.to a # Oops, call to a on 9
NoMethodError: undefined method `to a' for 9:Fixnum
>> (0..9).to a # Use parentheses to call to a on the range
=> [0, 1, 2, 3, 4, 5, 6, 7, 8, 9]
Although 0..9 is a valid range, the second expression above shows that we need to addparentheses to call a method on it.
www.it-ebooks.info
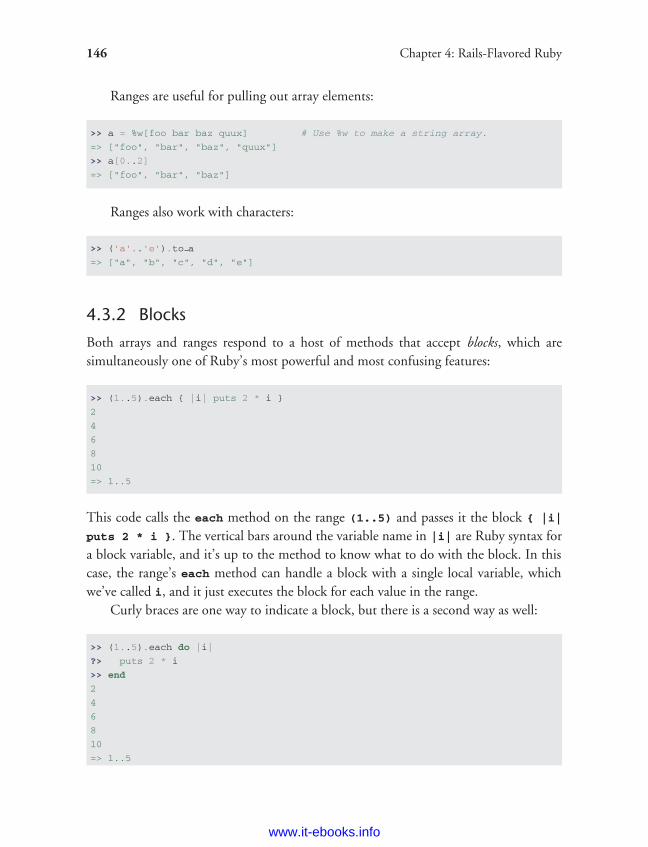
ptg8286261
146 Chapter 4: Rails-Flavored Ruby
Ranges are useful for pulling out array elements:
>> a = %w[foo bar baz quux] # Use %w to make a string array.
=> ["foo", "bar", "baz", "quux"]
>> a[0..2]
=> ["foo", "bar", "baz"]
Ranges also work with characters:
>> ('a'..'e').to a
=> ["a", "b", "c", "d", "e"]
4.3.2 Blocks
Both arrays and ranges respond to a host of methods that accept blocks, which aresimultaneously one of Ruby’s most powerful and most confusing features:
>> (1..5).each { |i| puts 2 * i }
2
4
6
8
10
=> 1..5
This code calls the each method on the range (1..5) and passes it the block { |i|
puts 2 * i }. The vertical bars around the variable name in |i| are Ruby syntax fora block variable, and it’s up to the method to know what to do with the block. In thiscase, the range’s each method can handle a block with a single local variable, whichwe’ve called i, and it just executes the block for each value in the range.
Curly braces are one way to indicate a block, but there is a second way as well:
>> (1..5).each do |i|
?> puts 2 * i
>> end
2
4
6
8
10
=> 1..5
www.it-ebooks.info

ptg8286261
4.3 Other Data Structures 147
Blocks can be more than one line, and often are. In the Rails Tutorial we’ll followthe common convention of using curly braces only for short one-line blocks and thedo..end syntax for longer one-liners and for multi-line blocks:
>> (1..5).each do |number|
?> puts 2 * number
>> puts '--'
>> end
2
--
4
--
6
--
8
--
10
--
=> 1..5
Here I’ve used number in place of i just to emphasize that any variable namewill do.
Unless you already have a substantial programming background, there is no shortcutto understanding blocks; you just have to see them a lot, and eventually you’ll get usedto them.7 Luckily, humans are quite good at making generalizations from concreteexamples; here are a few more, including a couple using the map method:
>> 3.times { puts "Betelgeuse!" } # 3.times takes a block with no variables.
"Betelgeuse!"
"Betelgeuse!"
"Betelgeuse!"
=> 3
>> (1..5).map { |i| i**2 } # The ** notation is for 'power'.
=> [1, 4, 9, 16, 25]
>> %w[a b c] # Recall that %w makes string arrays.
=> ["a", "b", "c"]
>> %w[a b c].map { |char| char.upcase }
=> ["A", "B", "C"]
>> %w[A B C].map { |char| char.downcase }
=> ["a", "b", "c"]
7. Programming experts, on the other hand, might benefit from knowing that blocks are closures, which areone-shot anonymous functions with data attached.
www.it-ebooks.info
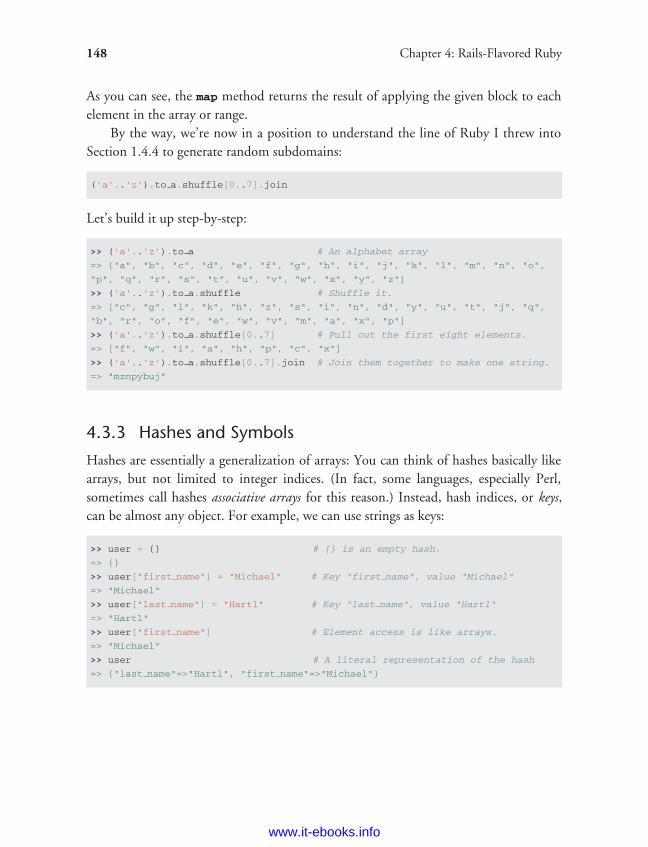
ptg8286261
148 Chapter 4: Rails-Flavored Ruby
As you can see, the map method returns the result of applying the given block to eachelement in the array or range.
By the way, we’re now in a position to understand the line of Ruby I threw intoSection 1.4.4 to generate random subdomains:
('a'..'z').to a.shuffle[0..7].join
Let’s build it up step-by-step:
>> ('a'..'z').to a # An alphabet array
=> ["a", "b", "c", "d", "e", "f", "g", "h", "i", "j", "k", "l", "m", "n", "o",
"p", "q", "r", "s", "t", "u", "v", "w", "x", "y", "z"]
>> ('a'..'z').to a.shuffle # Shuffle it.
=> ["c", "g", "l", "k", "h", "z", "s", "i", "n", "d", "y", "u", "t", "j", "q",
"b", "r", "o", "f", "e", "w", "v", "m", "a", "x", "p"]
>> ('a'..'z').to a.shuffle[0..7] # Pull out the first eight elements.
=> ["f", "w", "i", "a", "h", "p", "c", "x"]
>> ('a'..'z').to a.shuffle[0..7].join # Join them together to make one string.
=> "mznpybuj"
4.3.3 Hashes and Symbols
Hashes are essentially a generalization of arrays: You can think of hashes basically likearrays, but not limited to integer indices. (In fact, some languages, especially Perl,sometimes call hashes associative arrays for this reason.) Instead, hash indices, or keys,can be almost any object. For example, we can use strings as keys:
>> user = {} # {} is an empty hash.
=> {}
>> user["first name"] = "Michael" # Key "first name", value "Michael"
=> "Michael"
>> user["last name"] = "Hartl" # Key "last name", value "Hartl"
=> "Hartl"
>> user["first name"] # Element access is like arrays.
=> "Michael"
>> user # A literal representation of the hash
=> {"last name"=>"Hartl", "first name"=>"Michael"}
www.it-ebooks.info
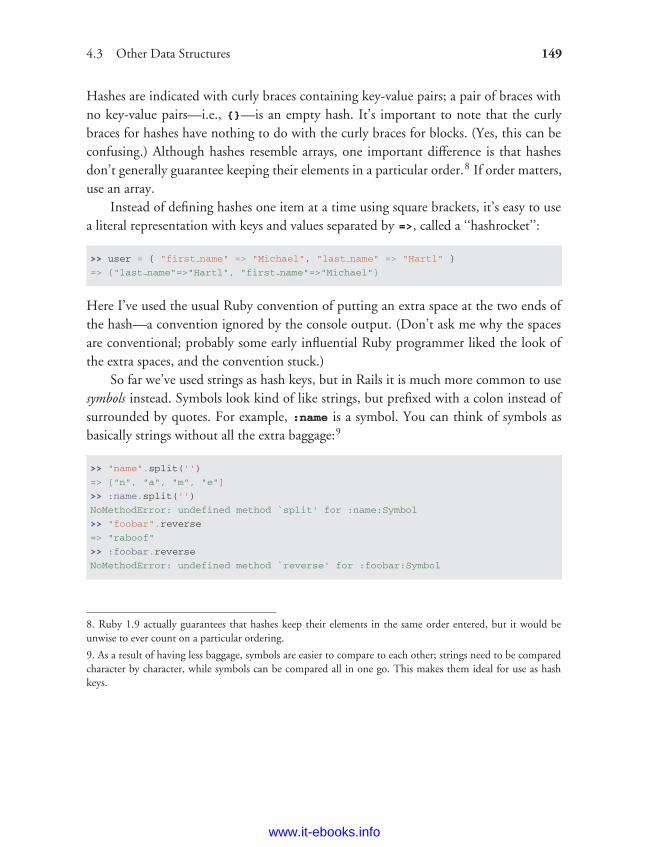
ptg8286261
4.3 Other Data Structures 149
Hashes are indicated with curly braces containing key-value pairs; a pair of braces withno key-value pairs—i.e., {}—is an empty hash. It’s important to note that the curlybraces for hashes have nothing to do with the curly braces for blocks. (Yes, this can beconfusing.) Although hashes resemble arrays, one important difference is that hashesdon’t generally guarantee keeping their elements in a particular order.8 If order matters,use an array.
Instead of defining hashes one item at a time using square brackets, it’s easy to usea literal representation with keys and values separated by =>, called a ‘‘hashrocket’’:
>> user = { "first name" => "Michael", "last name" => "Hartl" }
=> {"last name"=>"Hartl", "first name"=>"Michael"}
Here I’ve used the usual Ruby convention of putting an extra space at the two ends ofthe hash—a convention ignored by the console output. (Don’t ask me why the spacesare conventional; probably some early influential Ruby programmer liked the look ofthe extra spaces, and the convention stuck.)
So far we’ve used strings as hash keys, but in Rails it is much more common to usesymbols instead. Symbols look kind of like strings, but prefixed with a colon instead ofsurrounded by quotes. For example, :name is a symbol. You can think of symbols asbasically strings without all the extra baggage:9
>> "name".split('')
=> ["n", "a", "m", "e"]
>> :name.split('')
NoMethodError: undefined method `split' for :name:Symbol
>> "foobar".reverse
=> "raboof"
>> :foobar.reverse
NoMethodError: undefined method `reverse' for :foobar:Symbol
8. Ruby 1.9 actually guarantees that hashes keep their elements in the same order entered, but it would beunwise to ever count on a particular ordering.
9. As a result of having less baggage, symbols are easier to compare to each other; strings need to be comparedcharacter by character, while symbols can be compared all in one go. This makes them ideal for use as hashkeys.
www.it-ebooks.info
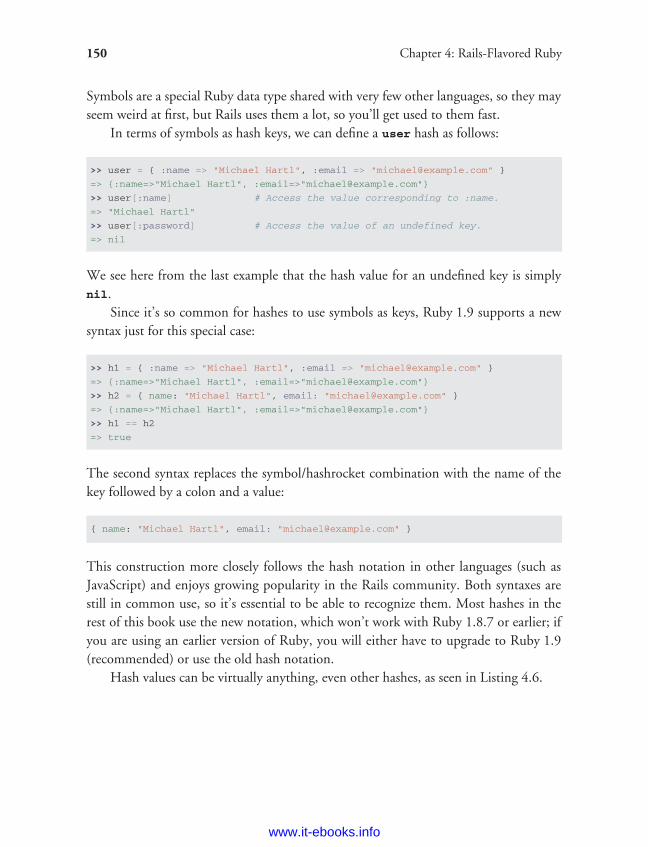
ptg8286261
150 Chapter 4: Rails-Flavored Ruby
Symbols are a special Ruby data type shared with very few other languages, so they mayseem weird at first, but Rails uses them a lot, so you’ll get used to them fast.
In terms of symbols as hash keys, we can define a user hash as follows:
>> user = { :name => "Michael Hartl", :email => "[email protected]" }
=> {:name=>"Michael Hartl", :email=>"[email protected]"}
>> user[:name] # Access the value corresponding to :name.
=> "Michael Hartl"
>> user[:password] # Access the value of an undefined key.
=> nil
We see here from the last example that the hash value for an undefined key is simplynil.
Since it’s so common for hashes to use symbols as keys, Ruby 1.9 supports a newsyntax just for this special case:
>> h1 = { :name => "Michael Hartl", :email => "[email protected]" }
=> {:name=>"Michael Hartl", :email=>"[email protected]"}
>> h2 = { name: "Michael Hartl", email: "[email protected]" }
=> {:name=>"Michael Hartl", :email=>"[email protected]"}
>> h1 == h2
=> true
The second syntax replaces the symbol/hashrocket combination with the name of thekey followed by a colon and a value:
{ name: "Michael Hartl", email: "[email protected]" }
This construction more closely follows the hash notation in other languages (such asJavaScript) and enjoys growing popularity in the Rails community. Both syntaxes arestill in common use, so it’s essential to be able to recognize them. Most hashes in therest of this book use the new notation, which won’t work with Ruby 1.8.7 or earlier; ifyou are using an earlier version of Ruby, you will either have to upgrade to Ruby 1.9(recommended) or use the old hash notation.
Hash values can be virtually anything, even other hashes, as seen in Listing 4.6.
www.it-ebooks.info
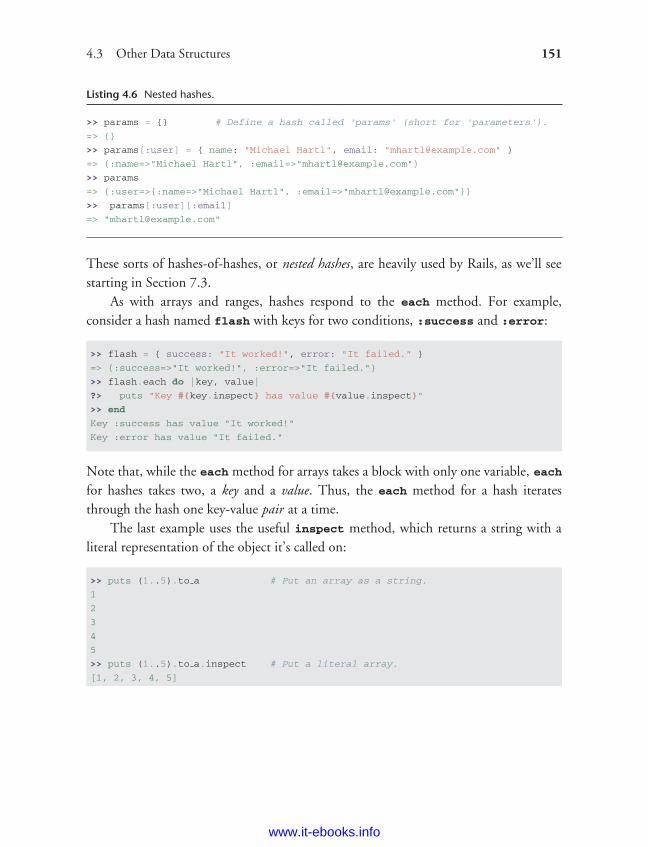
ptg8286261
4.3 Other Data Structures 151
Listing 4.6 Nested hashes.
>> params = {} # Define a hash called 'params' (short for 'parameters').
=> {}
>> params[:user] = { name: "Michael Hartl", email: "[email protected]" }
=> {:name=>"Michael Hartl", :email=>"[email protected]"}
>> params
=> {:user=>{:name=>"Michael Hartl", :email=>"[email protected]"}}
>> params[:user][:email]
=> "[email protected]"
These sorts of hashes-of-hashes, or nested hashes, are heavily used by Rails, as we’ll seestarting in Section 7.3.
As with arrays and ranges, hashes respond to the each method. For example,consider a hash named flash with keys for two conditions, :success and :error:
>> flash = { success: "It worked!", error: "It failed." }
=> {:success=>"It worked!", :error=>"It failed."}
>> flash.each do |key, value|
?> puts "Key #{key.inspect} has value #{value.inspect}"
>> end
Key :success has value "It worked!"
Key :error has value "It failed."
Note that, while the each method for arrays takes a block with only one variable, eachfor hashes takes two, a key and a value. Thus, the each method for a hash iteratesthrough the hash one key-value pair at a time.
The last example uses the useful inspect method, which returns a string with aliteral representation of the object it’s called on:
>> puts (1..5).to a # Put an array as a string.
1
2
3
4
5
>> puts (1..5).to a.inspect # Put a literal array.
[1, 2, 3, 4, 5]
www.it-ebooks.info
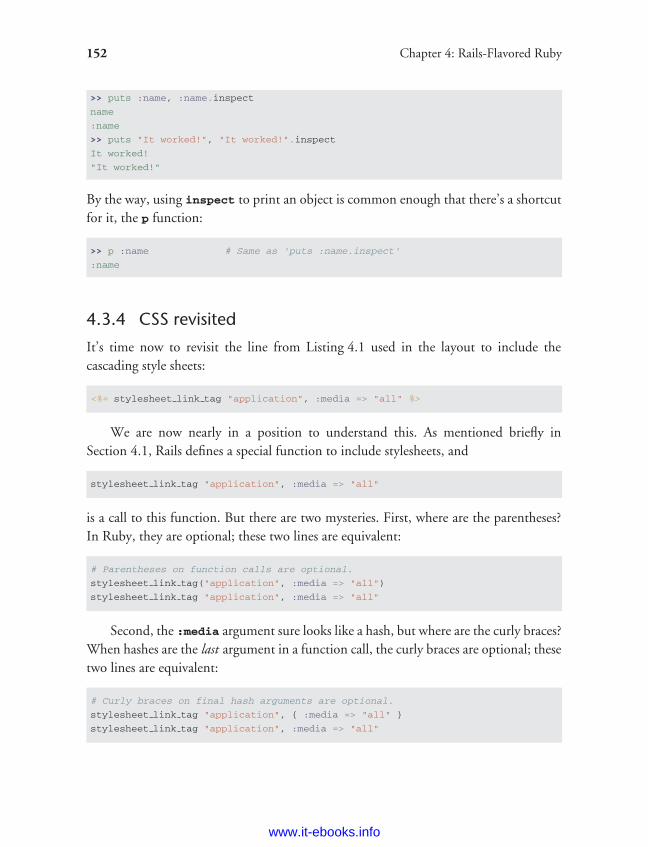
ptg8286261
152 Chapter 4: Rails-Flavored Ruby
>> puts :name, :name.inspect
name
:name
>> puts "It worked!", "It worked!".inspect
It worked!
"It worked!"
By the way, using inspect to print an object is common enough that there’s a shortcutfor it, the p function:
>> p :name # Same as 'puts :name.inspect'
:name
4.3.4 CSS revisited
It’s time now to revisit the line from Listing 4.1 used in the layout to include thecascading style sheets:
<%= stylesheet link tag "application", :media => "all" %>
We are now nearly in a position to understand this. As mentioned briefly inSection 4.1, Rails defines a special function to include stylesheets, and
stylesheet link tag "application", :media => "all"
is a call to this function. But there are two mysteries. First, where are the parentheses?In Ruby, they are optional; these two lines are equivalent:
# Parentheses on function calls are optional.
stylesheet link tag("application", :media => "all")
stylesheet link tag "application", :media => "all"
Second, the :media argument sure looks like a hash, but where are the curly braces?When hashes are the last argument in a function call, the curly braces are optional; thesetwo lines are equivalent:
# Curly braces on final hash arguments are optional.
stylesheet link tag "application", { :media => "all" }
stylesheet link tag "application", :media => "all"
www.it-ebooks.info
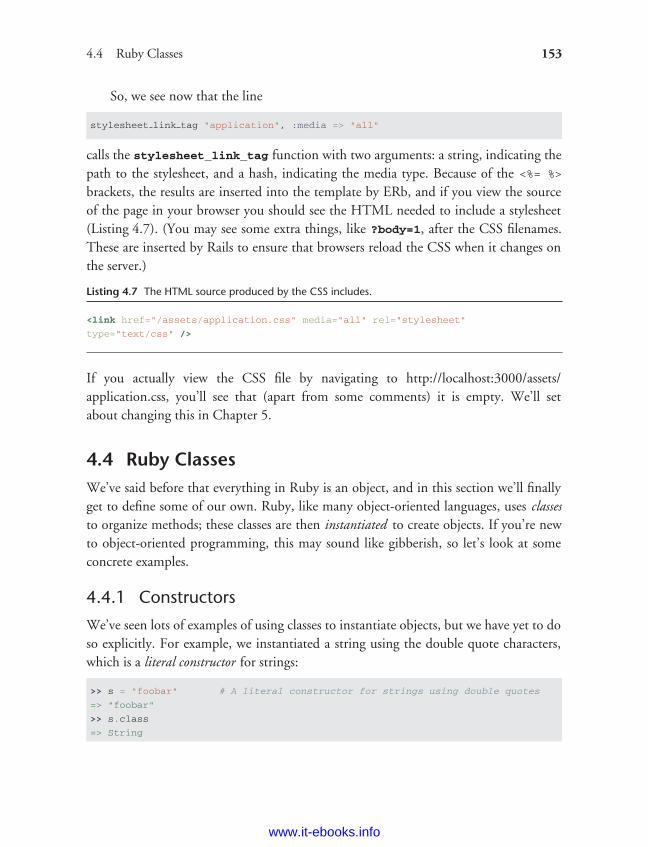
ptg8286261
4.4 Ruby Classes 153
So, we see now that the line
stylesheet link tag "application", :media => "all"
calls the stylesheet_link_tag function with two arguments: a string, indicating thepath to the stylesheet, and a hash, indicating the media type. Because of the <%= %>
brackets, the results are inserted into the template by ERb, and if you view the sourceof the page in your browser you should see the HTML needed to include a stylesheet(Listing 4.7). (You may see some extra things, like ?body=1, after the CSS filenames.These are inserted by Rails to ensure that browsers reload the CSS when it changes onthe server.)
Listing 4.7 The HTML source produced by the CSS includes.
<link href="/assets/application.css" media="all" rel="stylesheet"
type="text/css" />
If you actually view the CSS file by navigating to http://localhost:3000/assets/application.css, you’ll see that (apart from some comments) it is empty. We’ll setabout changing this in Chapter 5.
4.4 Ruby ClassesWe’ve said before that everything in Ruby is an object, and in this section we’ll finallyget to define some of our own. Ruby, like many object-oriented languages, uses classesto organize methods; these classes are then instantiated to create objects. If you’re newto object-oriented programming, this may sound like gibberish, so let’s look at someconcrete examples.
4.4.1 Constructors
We’ve seen lots of examples of using classes to instantiate objects, but we have yet to doso explicitly. For example, we instantiated a string using the double quote characters,which is a literal constructor for strings:
>> s = "foobar" # A literal constructor for strings using double quotes
=> "foobar"
>> s.class
=> String
www.it-ebooks.info
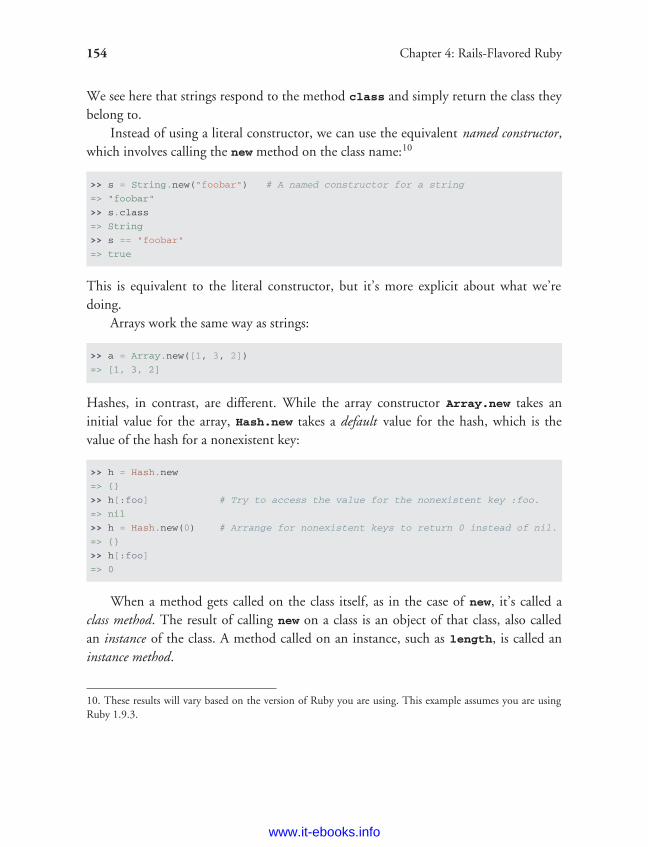
ptg8286261
154 Chapter 4: Rails-Flavored Ruby
We see here that strings respond to the method class and simply return the class theybelong to.
Instead of using a literal constructor, we can use the equivalent named constructor,which involves calling the new method on the class name:10
>> s = String.new("foobar") # A named constructor for a string
=> "foobar"
>> s.class
=> String
>> s == "foobar"
=> true
This is equivalent to the literal constructor, but it’s more explicit about what we’redoing.
Arrays work the same way as strings:
>> a = Array.new([1, 3, 2])
=> [1, 3, 2]
Hashes, in contrast, are different. While the array constructor Array.new takes aninitial value for the array, Hash.new takes a default value for the hash, which is thevalue of the hash for a nonexistent key:
>> h = Hash.new
=> {}
>> h[:foo] # Try to access the value for the nonexistent key :foo.
=> nil
>> h = Hash.new(0) # Arrange for nonexistent keys to return 0 instead of nil.
=> {}
>> h[:foo]
=> 0
When a method gets called on the class itself, as in the case of new, it’s called aclass method. The result of calling new on a class is an object of that class, also calledan instance of the class. A method called on an instance, such as length, is called aninstance method.
10. These results will vary based on the version of Ruby you are using. This example assumes you are usingRuby 1.9.3.
www.it-ebooks.info
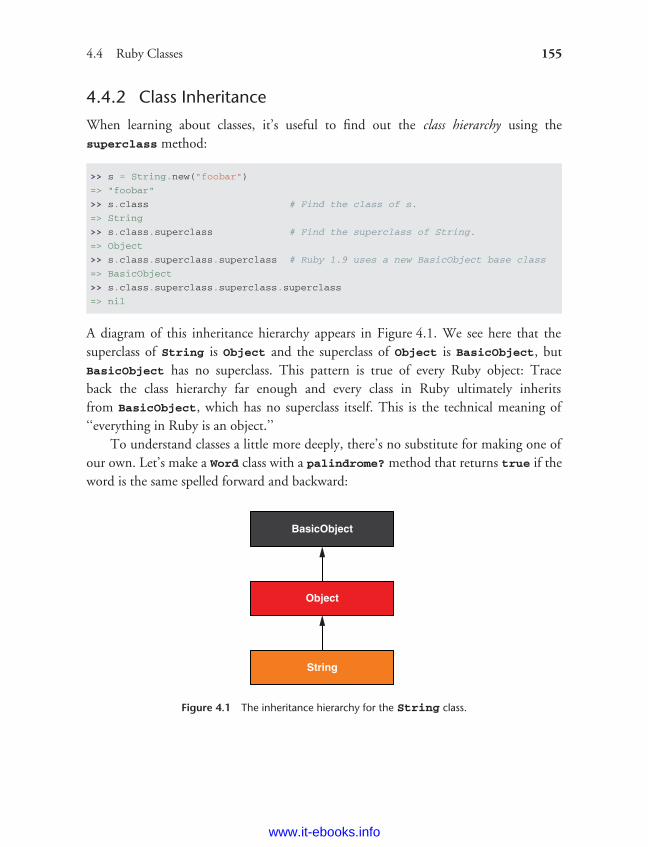
ptg8286261
4.4 Ruby Classes 155
4.4.2 Class Inheritance
When learning about classes, it’s useful to find out the class hierarchy using thesuperclass method:
>> s = String.new("foobar")
=> "foobar"
>> s.class # Find the class of s.
=> String
>> s.class.superclass # Find the superclass of String.
=> Object
>> s.class.superclass.superclass # Ruby 1.9 uses a new BasicObject base class
=> BasicObject
>> s.class.superclass.superclass.superclass
=> nil
A diagram of this inheritance hierarchy appears in Figure 4.1. We see here that thesuperclass of String is Object and the superclass of Object is BasicObject, butBasicObject has no superclass. This pattern is true of every Ruby object: Traceback the class hierarchy far enough and every class in Ruby ultimately inheritsfrom BasicObject, which has no superclass itself. This is the technical meaning of‘‘everything in Ruby is an object.’’
To understand classes a little more deeply, there’s no substitute for making one ofour own. Let’s make a Word class with a palindrome? method that returns true if theword is the same spelled forward and backward:
Figure 4.1 The inheritance hierarchy for the String class.
www.it-ebooks.info
ptg8286261
156 Chapter 4: Rails-Flavored Ruby
>> class Word
>> def palindrome?(string)
>> string == string.reverse
>> end
>> end
=> nil
We can use it as follows:
>> w = Word.new # Make a new Word object.
=> #<Word:0x22d0b20>
>> w.palindrome?("foobar")
=> false
>> w.palindrome?("level")
=> true
If this example strikes you as a bit contrived, good; this is by design. It’s odd tocreate a new class just to create a method that takes a string as an argument. Since aword is a string, it’s more natural to have our Word class inherit from String, as seen inListing 4.8. (You should exit the console and re-enter it to clear out the old definitionof Word.)
Listing 4.8 Defining a Word class in the console.
>> class Word < String # Word inherits from String.
>> # Returns true if the string is its own reverse.
>> def palindrome?
>> self == self.reverse # self is the string itself.
>> end
>> end
=> nil
Here Word < String is the Ruby syntax for inheritance (discussed briefly inSection 3.1.2), which ensures that, in addition to the new palindrome? method,words also have all the same methods as strings:
>> s = Word.new("level") # Make a new Word, initialized with "level".
=> "level"
>> s.palindrome? # Words have the palindrome? method.
=> true
>> s.length # Words also inherit all the normal string methods.
=> 5
www.it-ebooks.info
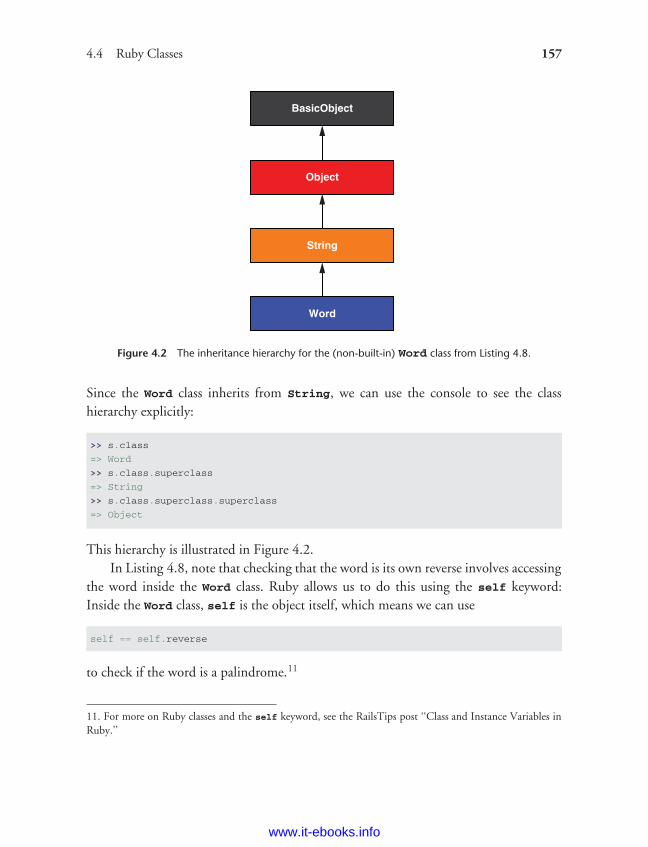
ptg8286261
4.4 Ruby Classes 157
Figure 4.2 The inheritance hierarchy for the (non-built-in) Word class from Listing 4.8.
Since the Word class inherits from String, we can use the console to see the classhierarchy explicitly:
>> s.class
=> Word
>> s.class.superclass
=> String
>> s.class.superclass.superclass
=> Object
This hierarchy is illustrated in Figure 4.2.In Listing 4.8, note that checking that the word is its own reverse involves accessing
the word inside the Word class. Ruby allows us to do this using the self keyword:Inside the Word class, self is the object itself, which means we can use
self == self.reverse
to check if the word is a palindrome.11
11. For more on Ruby classes and the self keyword, see the RailsTips post ‘‘Class and Instance Variables inRuby.’’
www.it-ebooks.info
ptg8286261
158 Chapter 4: Rails-Flavored Ruby
4.4.3 Modifying Built-in Classes
While inheritance is a powerful idea, in the case of palindromes it might be evenmore natural to add the palindrome? method to the String class itself, so that(among other things) we can call palindrome? on a string literal, which we currentlycan’t do:
>> "level".palindrome?
NoMethodError: undefined method `palindrome?' for "level":String
Somewhat amazingly, Ruby lets you do just this; Ruby classes can be opened andmodified, allowing ordinary mortals such as ourselves to add methods to them:12
>> class String
>> # Returns true if the string is its own reverse.
>> def palindrome?
>> self == self.reverse
>> end
>> end
=> nil
>> "deified".palindrome?
=> true
(I don’t know which is cooler: that Ruby lets you add methods to built-in classes orthat "deified" is a palindrome.)
Modifying built-in classes is a powerful technique, but with great power comesgreat responsibility, and it’s considered bad form to add methods to built-in classeswithout having a really good reason for doing so. Rails does have some good reasons; forexample, in web applications we often want to prevent variables from being blank—e.g.,a user’s name should be something other than spaces and other whitespace—so Railsadds a blank? method to Ruby. Since the Rails console automatically includes the Railsextensions, we can see an example here (this won’t work in plain irb):
>> "".blank?
=> true
>> " ".empty?
=> false
>> " ".blank?
12. For those familiar with JavaScript, this functionality is comparable to using a built-in class prototype objectto augment the class. (Thanks to reader Erik Eldridge for pointing this out.)
www.it-ebooks.info

ptg8286261
4.4 Ruby Classes 159
=> true
>> nil.blank?
=> true
We see that a string of spaces is not empty, but it is blank. Note also that nil is blank;since nil isn’t a string, this is a hint that Rails actually adds blank? to String’s baseclass, which (as we saw at the beginning of this section) is Object itself. We’ll see someother examples of Rails additions to Ruby classes in Section 8.2.1.
4.4.4 A Controller Class
All this talk about classes and inheritance may have triggered a flash of recognition,because we have seen both before, in the StaticPages controller (Listing 3.15):
class StaticPagesController < ApplicationController
def home
end
def help
end
def about
end
end
You’re now in a position to appreciate, at least vaguely, what this code means:StaticPagesController is a class that inherits from ApplicationController andcomes equipped with home, help, and about methods. Since each Rails console sessionloads the local Rails environment, we can even create a controller explicitly and examineits class hierarchy:13
>> controller = StaticPagesController.new
=> #<StaticPagesController:0x22855d0>
>> controller.class
=> StaticPagesController
>> controller.class.superclass
=> ApplicationController
13. You don’t have to know what each class in this hierarchy does. I don’t know what they all do, and I’vebeen programming in Ruby on Rails since 2005. This means either that (a) I’m grossly incompetent or (b) youcan be a skilled Rails developer without knowing all its innards. I hope for both our sakes that it’s the latter.
www.it-ebooks.info
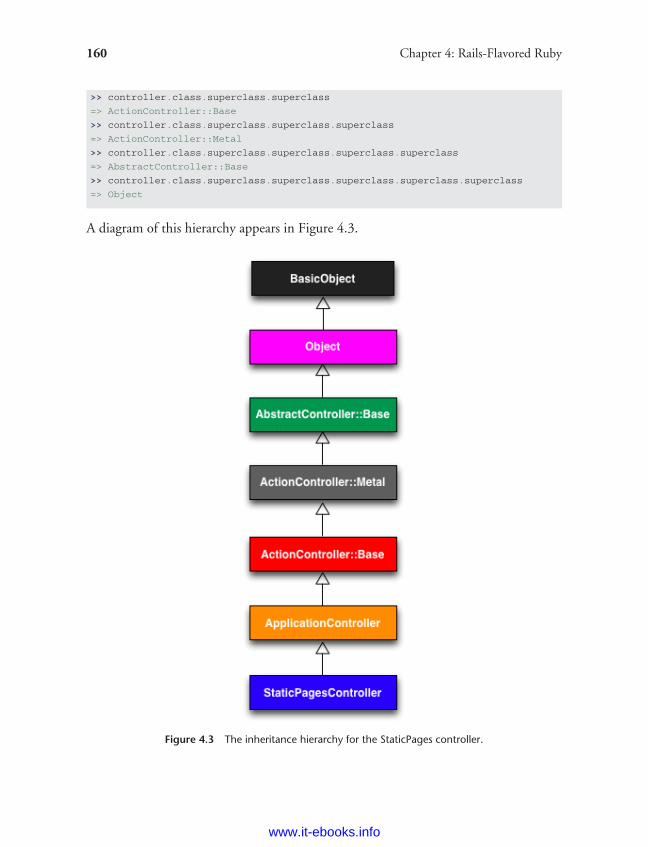
ptg8286261
160 Chapter 4: Rails-Flavored Ruby
>> controller.class.superclass.superclass
=> ActionController::Base
>> controller.class.superclass.superclass.superclass
=> ActionController::Metal
>> controller.class.superclass.superclass.superclass.superclass
=> AbstractController::Base
>> controller.class.superclass.superclass.superclass.superclass.superclass
=> Object
A diagram of this hierarchy appears in Figure 4.3.
Figure 4.3 The inheritance hierarchy for the StaticPages controller.
www.it-ebooks.info
ptg8286261
4.4 Ruby Classes 161
We can even call the controller actions inside the console, which are justmethods:
>> controller.home
=> nil
Here the return value is nil because the home action is blank.But wait—actions don’t have return values, at least not ones that matter. The
point of the home action, as we saw in Chapter 3, is to render a web page, not toreturn a value. And I sure don’t remember ever calling StaticPagesController.new
anywhere. What’s going on?What’s going on is that Rails is written in Ruby, but Rails isn’t Ruby. Some Rails
classes are used like ordinary Ruby objects, but some are just grist for Rails’ magic mill.Rails is sui generis and should be studied and understood separately from Ruby. This iswhy, if your principal programming interest is writing web applications, I recommendlearning Rails first, then learning Ruby, then looping back to Rails.
4.4.5 A User Class
We end our tour of Ruby with a complete class of our own, a User class that anticipatesthe User model coming up in Chapter 6.
So far we’ve entered class definitions at the console, but this quickly becomestiresome; instead, create the file example_user.rb in your application root directoryand fill it with the contents of Listing 4.9.
Listing 4.9 Code for an example user.example_user.rb
class User
attr accessor :name, :email
def initialize(attributes = {})
@name = attributes[:name]
@email = attributes[:email]
end
def formatted email
"#{@name} <#{@email}>"
end
end
www.it-ebooks.info
ptg8286261
162 Chapter 4: Rails-Flavored Ruby
There’s quite a bit going on here, so let’s take it step by step. The first line,
attr accessor :name, :email
creates attribute accessors corresponding to a user’s name and email address. This creates‘‘getter’’ and ‘‘setter’’ methods that allow us to retrieve (get) and assign (set) @name and@email instance variables, which were mentioned briefly in Section 2.2.2. In Rails, theprincipal importance of instance variables is that they are automatically available in theviews, but in general they are used for variables that need to be available throughout aRuby class. (We’ll have more to say about this in a moment.) Instance variables alwaysbegin with an @ sign, and are nil when undefined.
The first method, initialize, is special in Ruby: It’s the method calledwhen we execute User.new. This particular initialize takes one argument,attributes:
def initialize(attributes = {})
@name = attributes[:name]
@email = attributes[:email]
end
Here the attributes variable has a default value equal to the empty hash, so that wecan define a user with no name or email address (recall from Section 4.3.3 that hashesreturn nil for nonexistent keys, so attributes[:name] will be nil if there is no:name key, and similarly for attributes[:email]).
Finally, our class defines a method called formatted_email that uses the valuesof the assigned @name and @email variables to build up a nicely formatted version ofthe user’s email address using string interpolation (Section 4.2.2):
def formatted email
"#{@name} <#{@email}>"
end
Because @name and @email are both instance variables (as indicated with the @ sign),they are automatically available in the formatted_email method.
www.it-ebooks.info
ptg8286261
4.4 Ruby Classes 163
Let’s fire up the console, require the example user code, and take our User classout for a spin:
>> require './example user' # This is how you load the example user code.
=> ["User"]
>> example = User.new
=> #<User:0x224ceec @email=nil, @name=nil>
>> example.name # nil since attributes[:name] is nil
=> nil
>> example.name = "Example User" # Assign a non-nil name
=> "Example User"
>> example.email = "[email protected]" # and a non-nil email address
=> "[email protected]"
>> example.formatted email
=> "Example User <[email protected]>"
Here the ’.’ is Unix for ‘‘current directory,’’ and ’./example_user’ tells Ruby tolook for an example user file relative to that location. The subsequent code creates anempty example user and then fills in the name and email address by assigning directlyto the corresponding attributes (assignments made possible by the attr_accessor linein Listing 4.9). When we write
example.name = "Example User"
Ruby is setting the @name variable to "Example User" (and similarly for the email
attribute), which we then use in the formatted_email method.Recalling from Section 4.3.4 that we can omit the curly braces for final hash
arguments, we can create another user by passing a hash to the initialize method tocreate a user with predefined attributes:
>> user = User.new(name: "Michael Hartl", email: "[email protected]")
=> #<User:0x225167c @email="[email protected]", @name="Michael Hartl">
>> user.formatted email
=> "Michael Hartl <[email protected]>"
We will see starting in Chapter 7 that initializing objects using a hash argument iscommon in Rails applications.
www.it-ebooks.info
ptg8286261
164 Chapter 4: Rails-Flavored Ruby
4.5 ConclusionThis concludes our overview of the Ruby language. In Chapter 5, we’ll start putting itto good use in developing the sample application.
We won’t be using the example_user.rb file from Section 4.4.5, so I suggestremoving it:
$ rm example user.rb
Then commit the other changes to the main source code repository:
$ git add .
$ git commit -m "Add a full_title helper"
4.6 Exercises1. By replacing the question marks in Listing 4.10 with the appropriate methods,
combine split, shuffle, and join to write a function that shuffles the letters ina given string.
2. Using Listing 4.11 as a guide, add a shuffle method to the String class.3. Create three hashes called person1, person2, and person3, with first and last
names under the keys :first and :last. Then create a params hash so that params[:father] is person1, params[:mother] is person2, and params[:child]
is person3. Verify that, for example, params[:father][:first] has the rightvalue.
4. Find an online version of the Ruby API and read about the Hash method merge.5. Find and follow the Ruby Koans to reach Ruby enlightenment.
Listing 4.10 Skeleton for a string shuffle function.
>> def string shuffle(s)
>> s.split('').?.?
>> end
=> nil
>> string shuffle("foobar")
www.it-ebooks.info
ptg8286261
4.6 Exercises 165
Listing 4.11 Skeleton for a shuffle method attached to the String class.
>> class String
>> def shuffle
>> self.split('').?.?
>> end
>> end
=> nil
>> "foobar".shuffle
www.it-ebooks.info

ptg8286261
CHAPTER 5Filling in the Layout
In the process of taking a brief tour of Ruby in Chapter 4, we learned about includingthe application stylesheet into the sample application—but, as noted in Section 4.3.4,this stylesheet is currently empty. In this chapter, we’ll change this by incorporating theBootstrap framework into our application, and then we’ll add some custom styles of ourown.1 We’ll also start filling in the layout with links to the pages (such as Home andAbout) that we’ve created so far (Section 5.1). Along the way, we’ll learn about partials,Rails routes, and the asset pipeline, including an introduction to Sass (Section 5.2).We’ll also refactor the tests from Chapter 3 using the latest RSpec techniques. We’llend by taking a first important step toward letting users sign up to our site.
5.1 Adding Some StructureRails Tutorial is a book on web development, not web design, but it would be depressingto work on an application that looks like complete crap, so in this section we’ll addsome structure to the layout and give it some minimal styling with CSS. In additionto using some custom CSS rules, we’ll make use of Bootstrap, an open-source webdesign framework from Twitter. We’ll also give our code some styling, so to speak, usingpartials to tidy up the layout once it gets a little cluttered.
When building web applications, it is often useful to get a high-level overview ofthe user interface as early as possible. Throughout the rest of this book, I will thus ofteninclude mockups (in a web context often called wireframes), which are rough sketches
1. Thanks to reader Colm Tuite for his excellent work in helping to convert the sample application over toBootstrap.
167
www.it-ebooks.info
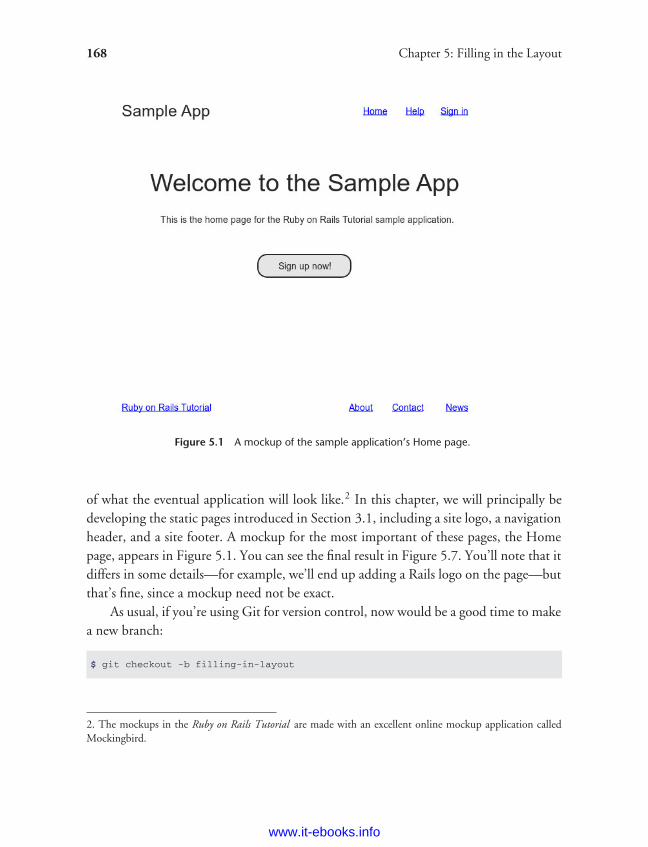
ptg8286261
168 Chapter 5: Filling in the Layout
Figure 5.1 A mockup of the sample application’s Home page.
of what the eventual application will look like.2 In this chapter, we will principally bedeveloping the static pages introduced in Section 3.1, including a site logo, a navigationheader, and a site footer. A mockup for the most important of these pages, the Homepage, appears in Figure 5.1. You can see the final result in Figure 5.7. You’ll note that itdiffers in some details—for example, we’ll end up adding a Rails logo on the page—butthat’s fine, since a mockup need not be exact.
As usual, if you’re using Git for version control, now would be a good time to makea new branch:
$ git checkout -b filling-in-layout
2. The mockups in the Ruby on Rails Tutorial are made with an excellent online mockup application calledMockingbird.
www.it-ebooks.info
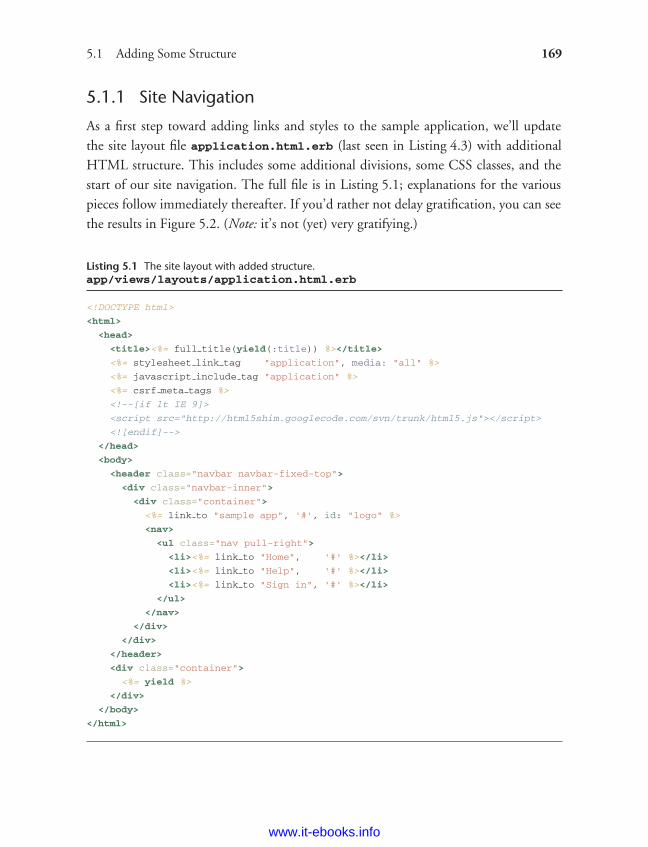
ptg8286261
5.1 Adding Some Structure 169
5.1.1 Site Navigation
As a first step toward adding links and styles to the sample application, we’ll updatethe site layout file application.html.erb (last seen in Listing 4.3) with additionalHTML structure. This includes some additional divisions, some CSS classes, and thestart of our site navigation. The full file is in Listing 5.1; explanations for the variouspieces follow immediately thereafter. If you’d rather not delay gratification, you can seethe results in Figure 5.2. (Note: it’s not (yet) very gratifying.)
Listing 5.1 The site layout with added structure.app/views/layouts/application.html.erb
<!DOCTYPE html>
<html>
<head>
<title><%= full title(yield(:title)) %></title>
<%= stylesheet link tag "application", media: "all" %>
<%= javascript include tag "application" %>
<%= csrf meta tags %>
<!--[if lt IE 9]>
<script src="http://html5shim.googlecode.com/svn/trunk/html5.js"></script>
<![endif]-->
</head>
<body>
<header class="navbar navbar-fixed-top">
<div class="navbar-inner">
<div class="container">
<%= link to "sample app", '#', id: "logo" %>
<nav>
<ul class="nav pull-right">
<li><%= link to "Home", '#' %></li>
<li><%= link to "Help", '#' %></li>
<li><%= link to "Sign in", '#' %></li>
</ul>
</nav>
</div>
</div>
</header>
<div class="container">
<%= yield %>
</div>
</body>
</html>
www.it-ebooks.info
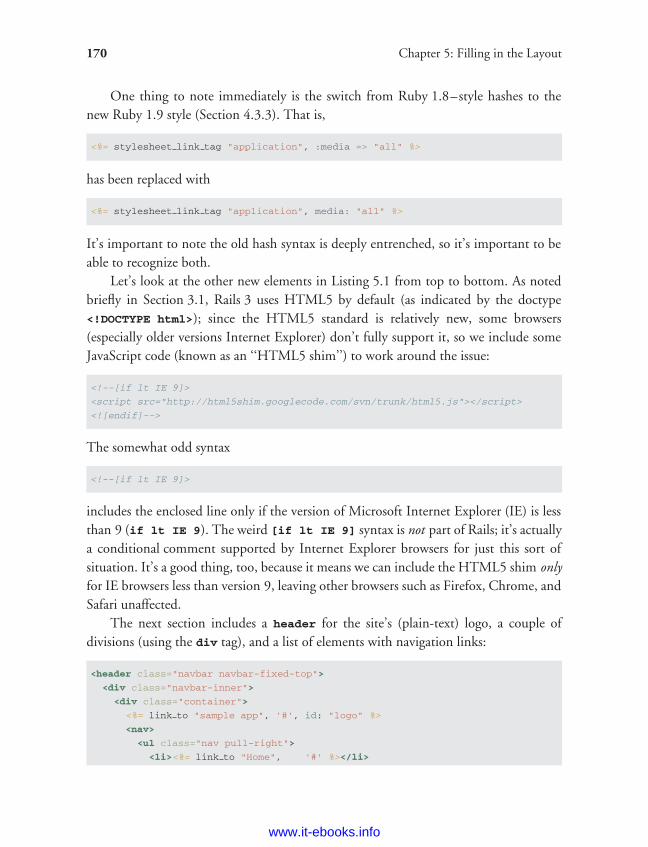
ptg8286261
170 Chapter 5: Filling in the Layout
One thing to note immediately is the switch from Ruby 1.8–style hashes to thenew Ruby 1.9 style (Section 4.3.3). That is,
<%= stylesheet link tag "application", :media => "all" %>
has been replaced with
<%= stylesheet link tag "application", media: "all" %>
It’s important to note the old hash syntax is deeply entrenched, so it’s important to beable to recognize both.
Let’s look at the other new elements in Listing 5.1 from top to bottom. As notedbriefly in Section 3.1, Rails 3 uses HTML5 by default (as indicated by the doctype<!DOCTYPE html>); since the HTML5 standard is relatively new, some browsers(especially older versions Internet Explorer) don’t fully support it, so we include someJavaScript code (known as an ‘‘HTML5 shim’’) to work around the issue:
<!--[if lt IE 9]>
<script src="http://html5shim.googlecode.com/svn/trunk/html5.js"></script>
<![endif]-->
The somewhat odd syntax
<!--[if lt IE 9]>
includes the enclosed line only if the version of Microsoft Internet Explorer (IE) is lessthan 9 (if lt IE 9). The weird [if lt IE 9] syntax is not part of Rails; it’s actuallya conditional comment supported by Internet Explorer browsers for just this sort ofsituation. It’s a good thing, too, because it means we can include the HTML5 shim onlyfor IE browsers less than version 9, leaving other browsers such as Firefox, Chrome, andSafari unaffected.
The next section includes a header for the site’s (plain-text) logo, a couple ofdivisions (using the div tag), and a list of elements with navigation links:
<header class="navbar navbar-fixed-top">
<div class="navbar-inner">
<div class="container">
<%= link to "sample app", '#', id: "logo" %>
<nav>
<ul class="nav pull-right">
<li><%= link to "Home", '#' %></li>
www.it-ebooks.info
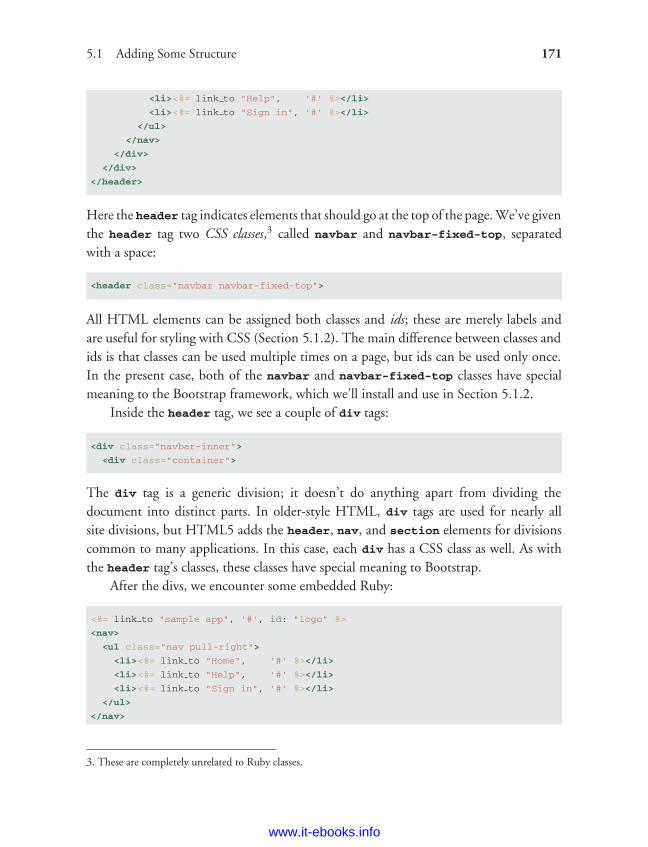
ptg8286261
5.1 Adding Some Structure 171
<li><%= link to "Help", '#' %></li>
<li><%= link to "Sign in", '#' %></li>
</ul>
</nav>
</div>
</div>
</header>
Here the header tag indicates elements that should go at the top of the page. We’ve giventhe header tag two CSS classes,3 called navbar and navbar-fixed-top, separatedwith a space:
<header class="navbar navbar-fixed-top">
All HTML elements can be assigned both classes and ids; these are merely labels andare useful for styling with CSS (Section 5.1.2). The main difference between classes andids is that classes can be used multiple times on a page, but ids can be used only once.In the present case, both of the navbar and navbar-fixed-top classes have specialmeaning to the Bootstrap framework, which we’ll install and use in Section 5.1.2.
Inside the header tag, we see a couple of div tags:
<div class="navbar-inner">
<div class="container">
The div tag is a generic division; it doesn’t do anything apart from dividing thedocument into distinct parts. In older-style HTML, div tags are used for nearly allsite divisions, but HTML5 adds the header, nav, and section elements for divisionscommon to many applications. In this case, each div has a CSS class as well. As withthe header tag’s classes, these classes have special meaning to Bootstrap.
After the divs, we encounter some embedded Ruby:
<%= link to "sample app", '#', id: "logo" %>
<nav>
<ul class="nav pull-right">
<li><%= link to "Home", '#' %></li>
<li><%= link to "Help", '#' %></li>
<li><%= link to "Sign in", '#' %></li>
</ul>
</nav>
3. These are completely unrelated to Ruby classes.
www.it-ebooks.info
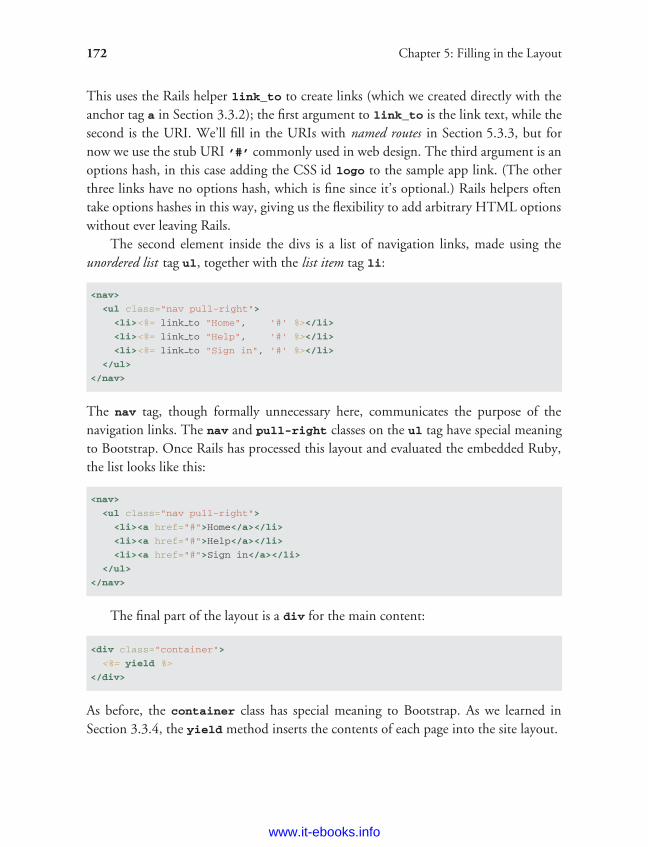
ptg8286261
172 Chapter 5: Filling in the Layout
This uses the Rails helper link_to to create links (which we created directly with theanchor tag a in Section 3.3.2); the first argument to link_to is the link text, while thesecond is the URI. We’ll fill in the URIs with named routes in Section 5.3.3, but fornow we use the stub URI ’#’ commonly used in web design. The third argument is anoptions hash, in this case adding the CSS id logo to the sample app link. (The otherthree links have no options hash, which is fine since it’s optional.) Rails helpers oftentake options hashes in this way, giving us the flexibility to add arbitrary HTML optionswithout ever leaving Rails.
The second element inside the divs is a list of navigation links, made using theunordered list tag ul, together with the list item tag li:
<nav>
<ul class="nav pull-right">
<li><%= link to "Home", '#' %></li>
<li><%= link to "Help", '#' %></li>
<li><%= link to "Sign in", '#' %></li>
</ul>
</nav>
The nav tag, though formally unnecessary here, communicates the purpose of thenavigation links. The nav and pull-right classes on the ul tag have special meaningto Bootstrap. Once Rails has processed this layout and evaluated the embedded Ruby,the list looks like this:
<nav>
<ul class="nav pull-right">
<li><a href="#">Home</a></li>
<li><a href="#">Help</a></li>
<li><a href="#">Sign in</a></li>
</ul>
</nav>
The final part of the layout is a div for the main content:
<div class="container">
<%= yield %>
</div>
As before, the container class has special meaning to Bootstrap. As we learned inSection 3.3.4, the yield method inserts the contents of each page into the site layout.
www.it-ebooks.info
ptg8286261
5.1 Adding Some Structure 173
Apart from the site footer, which we’ll add in Section 5.1.3, our layout is nowcomplete, and we can look at the results by visiting the Home page. To take advantageof the upcoming style elements, we’ll add some extra elements to the home.html.erb
view (Listing 5.2).
Listing 5.2 The Home page with a link to the signup page.app/views/static_pages/home.html.erb
<div class="center hero-unit">
<h1>Welcome to the Sample App</h1>
<h2>
This is the home page for the
<a href="http://railstutorial.org/">Ruby on Rails Tutorial</a>
sample application.
</h2>
<%= link to "Sign up now!", '#', class: "btn btn-large btn-primary" %>
</div>
<%= link to image tag("rails.png", alt: "Rails"), 'http://rubyonrails.org/' %>
In preparation for adding users to our site in Chapter 7, the first link_to creates a stublink of the form
<a href="#" class="btn btn-large btn-primary">Sign up now!</a>
In the div tag, the hero-unit CSS class has a special meaning to Bootstrap, as do thebtn, btn-large, and btn-primary classes in the signup button.
The second link_to shows off the image_tag helper, which takes as argumentsthe path to an image and an optional options hash, in this case setting the alt attributeof the image tag using symbols. To make this clearer, let’s look at the HTML this tagproduces:4
<img alt="Rails" src="/assets/rails.png" />
4. You might notice that the img tag, rather than looking like <img>...</img>, instead looks like<img ... />. Tags that follow this form are known as self-closing tags.
www.it-ebooks.info
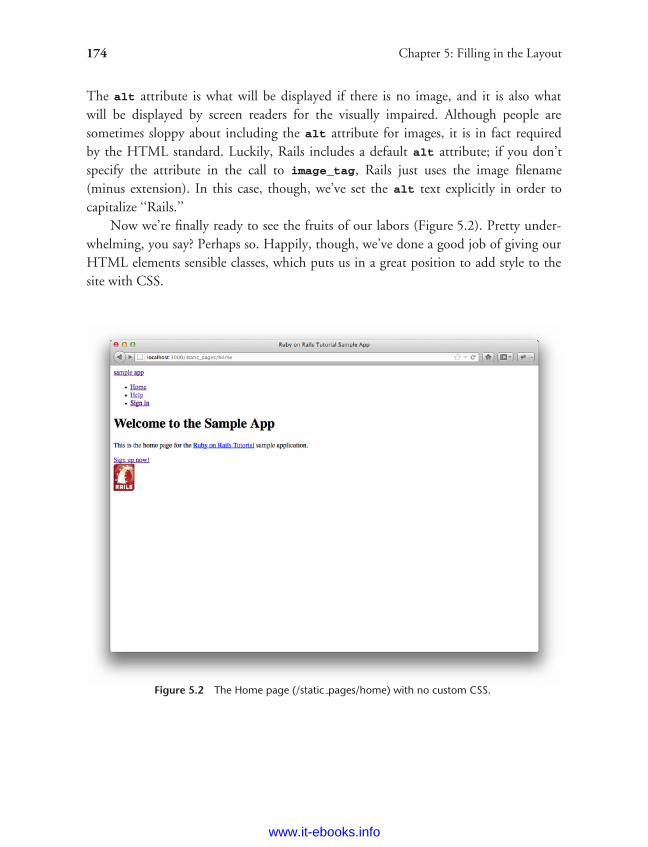
ptg8286261
174 Chapter 5: Filling in the Layout
The alt attribute is what will be displayed if there is no image, and it is also whatwill be displayed by screen readers for the visually impaired. Although people aresometimes sloppy about including the alt attribute for images, it is in fact requiredby the HTML standard. Luckily, Rails includes a default alt attribute; if you don’tspecify the attribute in the call to image_tag, Rails just uses the image filename(minus extension). In this case, though, we’ve set the alt text explicitly in order tocapitalize ‘‘Rails.’’
Now we’re finally ready to see the fruits of our labors (Figure 5.2). Pretty under-whelming, you say? Perhaps so. Happily, though, we’ve done a good job of giving ourHTML elements sensible classes, which puts us in a great position to add style to thesite with CSS.
Figure 5.2 The Home page (/static pages/home) with no custom CSS.
www.it-ebooks.info
ptg8286261
5.1 Adding Some Structure 175
By the way, you might be surprised to discover that the rails.png imageactually exists. Where did it come from? It’s included for free with every new Railsapplication, and you will find it in app/assets/images/rails.png. Because we usedthe image_tag helper, Rails finds it automatically using the asset pipeline (Section 5.2).
5.1.2 Bootstrap and Custom CSS
In Section 5.1.1, we associated many of the HTML elements with CSS classes, whichgives us considerable flexibility in constructing a layout based on CSS. As noted inSection 5.1.1, many of these classes are specific to Bootstrap, a framework from Twitterthat makes it easy to add nice web design and user interface elements to an HTML5application. In this section, we’ll combine Bootstrap with some custom CSS rules tostart adding some style to the sample application.
Our first step is to add Bootstrap, which in Rails applications can be accomplishedwith the bootstrap-sass gem, as shown in Listing 5.3. The Bootstrap frameworknatively uses the LESS CSS language for making dynamic stylesheets, but the Railsasset pipeline supports the (very similar) Sass language by default (Section 5.2), sobootstrap-sass converts LESS to Sass and makes all the necessary Bootstrap filesavailable to the current application.5
Listing 5.3 Adding the bootstrap-sass gem to the Gemfile.
source 'https://rubygems.org'
gem 'rails', '3.2.3'
gem 'bootstrap-sass', '2.0.0'
.
.
.
To install Bootstrap, we run bundle install as usual:
$ bundle install
5. It is also possible to use LESS with the asset pipeline; see the less-rails-bootstrap gem for details.
www.it-ebooks.info
ptg8286261
176 Chapter 5: Filling in the Layout
Then restart the web server to incorporate the changes into the developmentapplication.
The first step in adding custom CSS to our application is to create a file tocontain it:
app/assets/stylesheets/custom.css.scss
(Use you text editor or IDE to create the new file.) Here both the directory name andfilename are important. The directory
app/assets/stylesheets
is part of the asset pipeline (Section 5.2), and any stylesheets in this directory willautomatically be included as part of the application.css file included in the sitelayout. Furthermore, the filename custom.css.scss includes the .css extension,which indicates a CSS file, and the .scss extension, which indicates a ‘‘Sassy CSS’’ fileand arranges for the asset pipeline to process the file using Sass. (We won’t be usingSass until Section 5.2.2, but it’s needed now for the bootstrap-sass gem to workits magic.)
After creating the file for custom CSS, we can use the @import function to includeBootstrap, as shown in Listing 5.4.
Listing 5.4 Adding Bootstrap CSS.app/assets/stylesheets/custom.css.scss
@import "bootstrap";
This one line includes the entire Bootstrap CSS framework, with the result shown in inFigure 5.3. The placement of the text isn’t good and the logo doesn’t have any style,but the colors and signup button look promising.
Next we’ll add some CSS that will be used site-wide for styling the layout and eachindividual page, as shown in Listing 5.5. There are quite a few rules in Listing 5.5; toget a sense of what a CSS rule does, it’s often helpful to comment it out using CSScomments, i.e., by putting it inside /* ... */, and seeing what changes. The result ofthe CSS in Listing 5.5 is shown in Figure 5.4.
www.it-ebooks.info
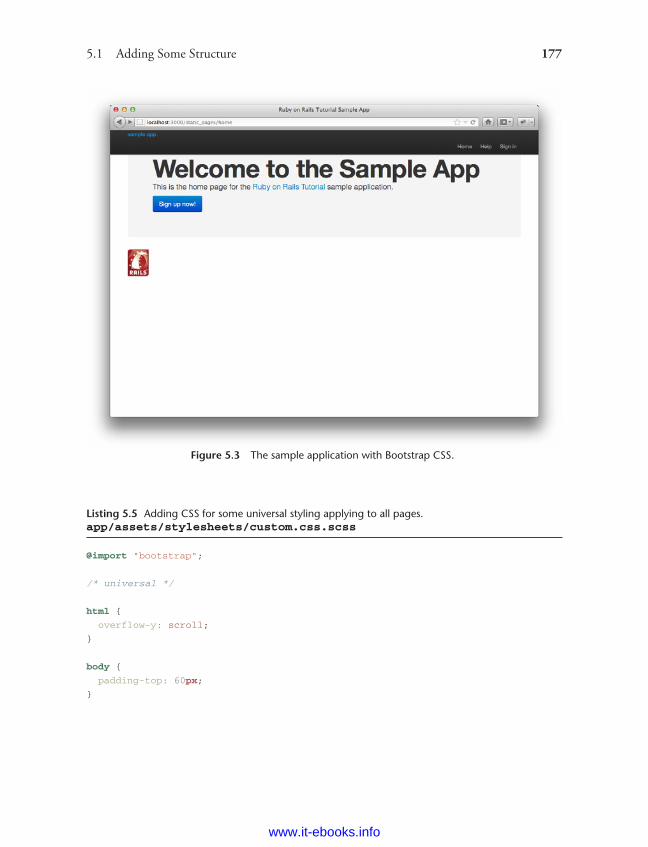
ptg8286261
5.1 Adding Some Structure 177
Figure 5.3 The sample application with Bootstrap CSS.
Listing 5.5 Adding CSS for some universal styling applying to all pages.app/assets/stylesheets/custom.css.scss
@import "bootstrap";
/* universal */
html {
overflow-y: scroll;
}
body {
padding-top: 60px;
}
www.it-ebooks.info
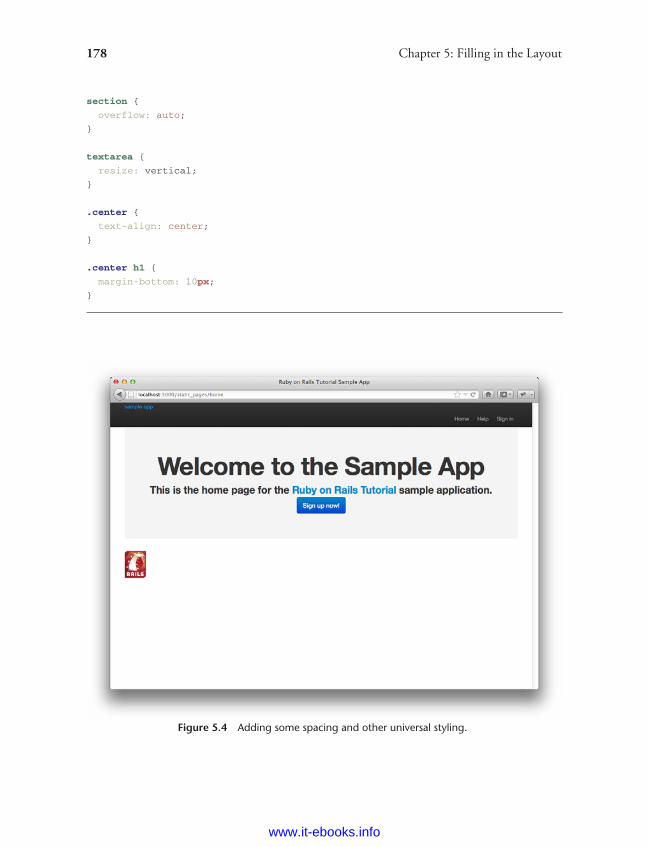
ptg8286261
178 Chapter 5: Filling in the Layout
section {
overflow: auto;
}
textarea {
resize: vertical;
}
.center {
text-align: center;
}
.center h1 {
margin-bottom: 10px;
}
Figure 5.4 Adding some spacing and other universal styling.
www.it-ebooks.info
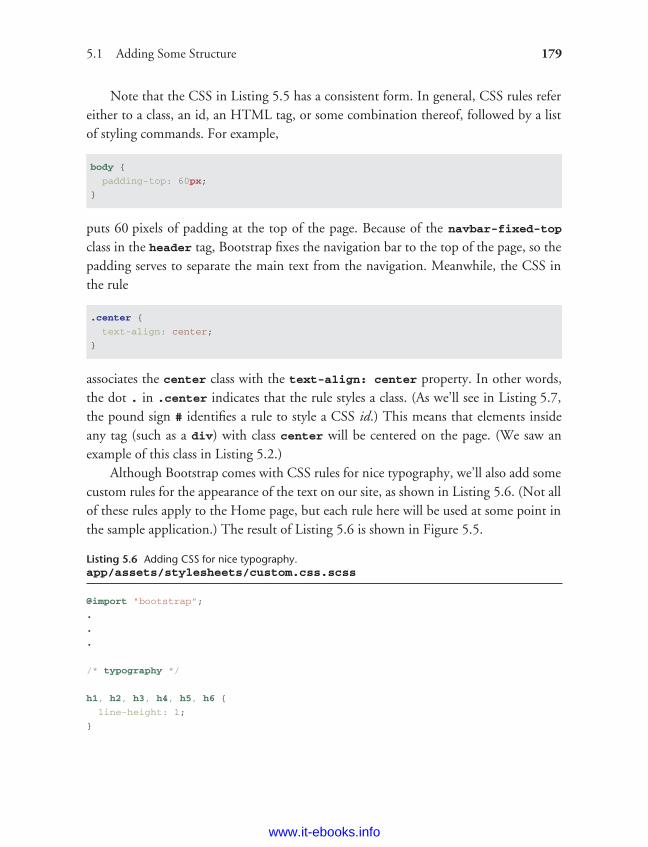
ptg8286261
5.1 Adding Some Structure 179
Note that the CSS in Listing 5.5 has a consistent form. In general, CSS rules refereither to a class, an id, an HTML tag, or some combination thereof, followed by a listof styling commands. For example,
body {
padding-top: 60px;
}
puts 60 pixels of padding at the top of the page. Because of the navbar-fixed-top
class in the header tag, Bootstrap fixes the navigation bar to the top of the page, so thepadding serves to separate the main text from the navigation. Meanwhile, the CSS inthe rule
.center {
text-align: center;
}
associates the center class with the text-align: center property. In other words,the dot . in .center indicates that the rule styles a class. (As we’ll see in Listing 5.7,the pound sign # identifies a rule to style a CSS id.) This means that elements insideany tag (such as a div) with class center will be centered on the page. (We saw anexample of this class in Listing 5.2.)
Although Bootstrap comes with CSS rules for nice typography, we’ll also add somecustom rules for the appearance of the text on our site, as shown in Listing 5.6. (Not allof these rules apply to the Home page, but each rule here will be used at some point inthe sample application.) The result of Listing 5.6 is shown in Figure 5.5.
Listing 5.6 Adding CSS for nice typography.app/assets/stylesheets/custom.css.scss
@import "bootstrap";
.
.
.
/* typography */
h1, h2, h3, h4, h5, h6 {
line-height: 1;
}
www.it-ebooks.info
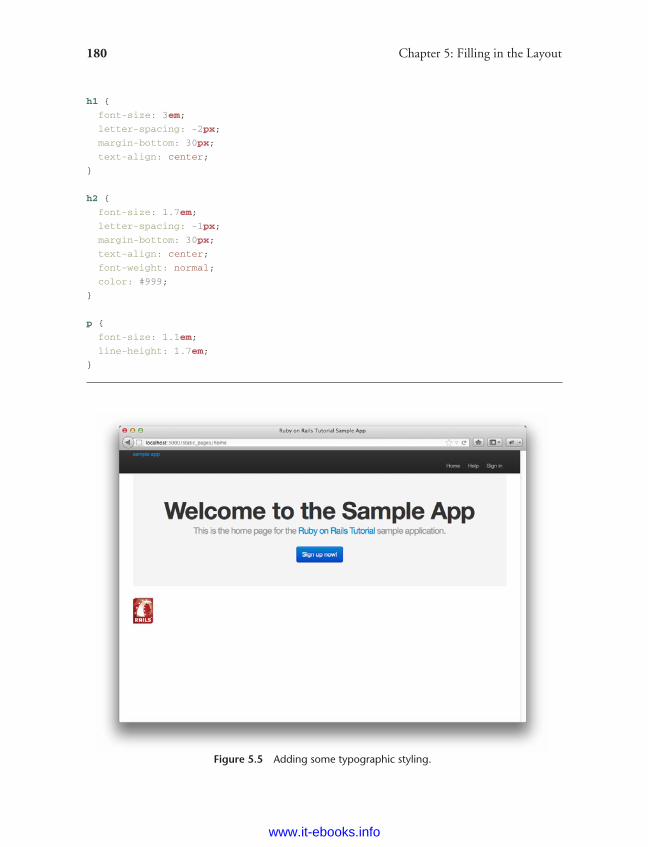
ptg8286261
180 Chapter 5: Filling in the Layout
h1 {
font-size: 3em;
letter-spacing: -2px;
margin-bottom: 30px;
text-align: center;
}
h2 {
font-size: 1.7em;
letter-spacing: -1px;
margin-bottom: 30px;
text-align: center;
font-weight: normal;
color: #999;
}
p {
font-size: 1.1em;
line-height: 1.7em;
}
Figure 5.5 Adding some typographic styling.
www.it-ebooks.info
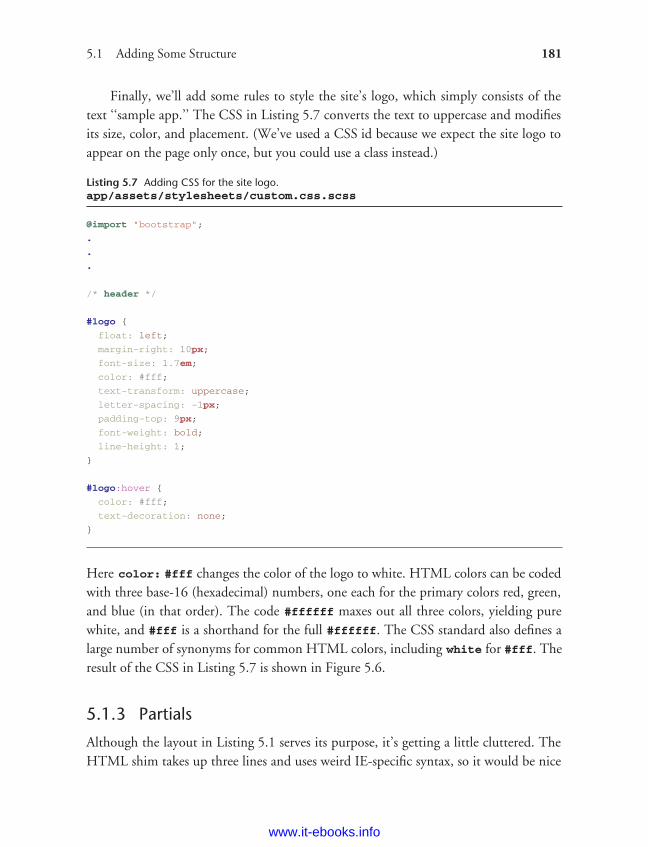
ptg8286261
5.1 Adding Some Structure 181
Finally, we’ll add some rules to style the site’s logo, which simply consists of thetext ‘‘sample app.’’ The CSS in Listing 5.7 converts the text to uppercase and modifiesits size, color, and placement. (We’ve used a CSS id because we expect the site logo toappear on the page only once, but you could use a class instead.)
Listing 5.7 Adding CSS for the site logo.app/assets/stylesheets/custom.css.scss
@import "bootstrap";
.
.
.
/* header */
#logo {
float: left;
margin-right: 10px;
font-size: 1.7em;
color: #fff;
text-transform: uppercase;
letter-spacing: -1px;
padding-top: 9px;
font-weight: bold;
line-height: 1;
}
#logo:hover {
color: #fff;
text-decoration: none;
}
Here color: #fff changes the color of the logo to white. HTML colors can be codedwith three base-16 (hexadecimal) numbers, one each for the primary colors red, green,and blue (in that order). The code #ffffff maxes out all three colors, yielding purewhite, and #fff is a shorthand for the full #ffffff. The CSS standard also defines alarge number of synonyms for common HTML colors, including white for #fff. Theresult of the CSS in Listing 5.7 is shown in Figure 5.6.
5.1.3 Partials
Although the layout in Listing 5.1 serves its purpose, it’s getting a little cluttered. TheHTML shim takes up three lines and uses weird IE-specific syntax, so it would be nice
www.it-ebooks.info
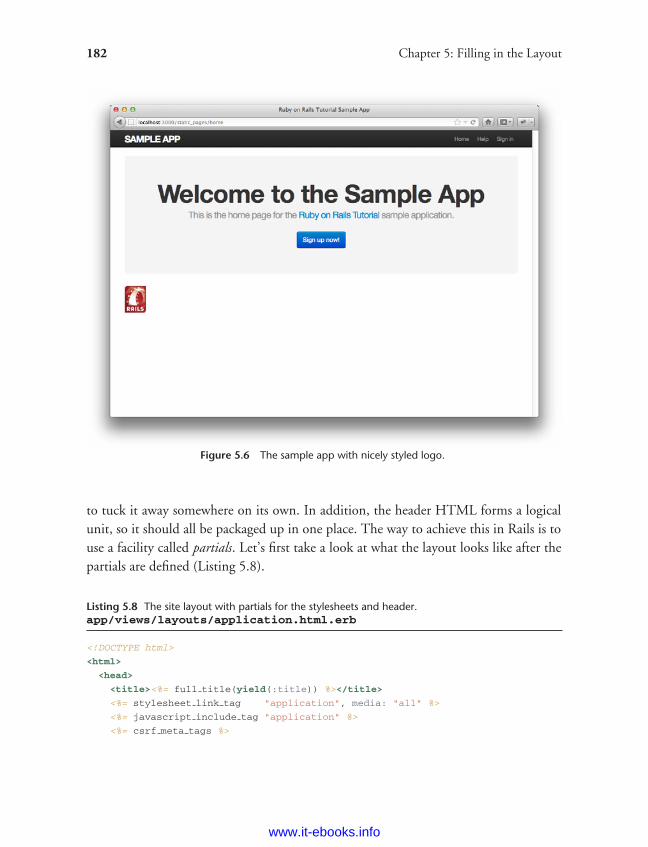
ptg8286261
182 Chapter 5: Filling in the Layout
Figure 5.6 The sample app with nicely styled logo.
to tuck it away somewhere on its own. In addition, the header HTML forms a logicalunit, so it should all be packaged up in one place. The way to achieve this in Rails is touse a facility called partials. Let’s first take a look at what the layout looks like after thepartials are defined (Listing 5.8).
Listing 5.8 The site layout with partials for the stylesheets and header.app/views/layouts/application.html.erb
<!DOCTYPE html>
<html>
<head>
<title><%= full title(yield(:title)) %></title>
<%= stylesheet link tag "application", media: "all" %>
<%= javascript include tag "application" %>
<%= csrf meta tags %>
www.it-ebooks.info
ptg8286261
5.1 Adding Some Structure 183
<%= render 'layouts/shim' %>
</head>
<body>
<%= render 'layouts/header' %>
<div class="container">
<%= yield %>
</div>
</body>
</html>
In Listing 5.8, we’ve replaced the HTML shim stylesheet lines with a single call toa Rails helper called render:
<%= render 'layouts/shim' %>
The effect of this line is to look for a file called app/views/layouts/_shim.html.erb,evaluate its contents, and insert the results into the view.6 (Recall that <%= ... %> is theembedded Ruby syntax needed to evaluate a Ruby expression and then insert the resultsinto the template.) Note the leading underscore on the filename _shim.html.erb; thisunderscore is the universal convention for naming partials and, among other things,makes it possible to identify all the partials in a directory at a glance.
Of course, to get the partial to work, we have to fill it with some content; in thecase of the shim partial, this is just the three lines of shim code from Listing 5.1; theresult appears in Listing 5.9.
Listing 5.9 A partial for the HTML shim.app/views/layouts/_shim.html.erb
<!--[if lt IE 9]>
<script src="http://html5shim.googlecode.com/svn/trunk/html5.js"></script>
<![endif]-->
Similarly, we can move the header material into the partial shown in Listing 5.10and insert it into the layout with another call to render.
6. Many Rails developers use a shared directory for partials shared across different views. I prefer to use theshared folder for utility partials that are useful on multiple views, while putting partials that are literally onevery page (as part of the site layout) in the layouts directory. (We’ll create the shared directory starting inChapter 7.) That seems to me a logical division, but putting them all in the shared folder certainly works fine,too.
www.it-ebooks.info
ptg8286261
184 Chapter 5: Filling in the Layout
Listing 5.10 A partial for the site header.app/views/layouts/_header.html.erb
<header class="navbar navbar-fixed-top">
<div class="navbar-inner">
<div class="container">
<%= link to "sample app", '#', id: "logo" %>
<nav>
<ul class="nav pull-right">
<li><%= link to "Home", '#' %></li>
<li><%= link to "Help", '#' %></li>
<li><%= link to "Sign in", '#' %></li>
</ul>
</nav>
</div>
</div>
</header>
Now that we know how to make partials, let’s add a site footer to go along with theheader. By now you can probably guess that we’ll call it _footer.html.erb and put itin the layouts directory (Listing 5.11).7
Listing 5.11 A partial for the site footer.app/views/layouts/_footer.html.erb
<footer class="footer">
<small>
<a href="http://railstutorial.org/">Rails Tutorial</a>
by Michael Hartl
</small>
<nav>
<ul>
<li><%= link to "About", '#' %></li>
<li><%= link to "Contact", '#' %></li>
<li><a href="http://news.railstutorial.org/">News</a></li>
</ul>
</nav>
</footer>
As with the header, in the footer we’ve used link_to for the internal links to the Aboutand Contact pages and stubbed out the URIs with ’#’ for now. (As with header, thefooter tag is new in HTML5.)
7. You may wonder why we use both the footer tag and .footer class. The answer is that the tag has a clearmeaning to human readers, and the class is used by Bootstrap. Using a div tag in place of footer would workas well.
www.it-ebooks.info
ptg8286261
5.1 Adding Some Structure 185
We can render the footer partial in the layout by following the same pattern as the
stylesheets and header partials (Listing 5.12).
Listing 5.12 The site layout with a footer partial.app/views/layouts/application.html.erb
<!DOCTYPE html>
<html>
<head>
<title><%= full title(yield(:title)) %></title>
<%= stylesheet link tag "application", media: "all" %>
<%= javascript include tag "application" %>
<%= csrf meta tags %>
<%= render 'layouts/shim' %>
</head>
<body>
<%= render 'layouts/header' %>
<div class="container">
<%= yield %>
<%= render 'layouts/footer' %>
</div>
</body>
</html>
Of course, the footer will be ugly without some styling (Listing 5.13). The results
appear in Figure 5.7.
Listing 5.13 Adding the CSS for the site footer.app/assets/stylesheets/custom.css.scss
.
.
.
/* footer */
footer {
margin-top: 45px;
padding-top: 5px;
border-top: 1px solid #eaeaea;
color: #999;
}
footer a {
color: #555;
}
www.it-ebooks.info
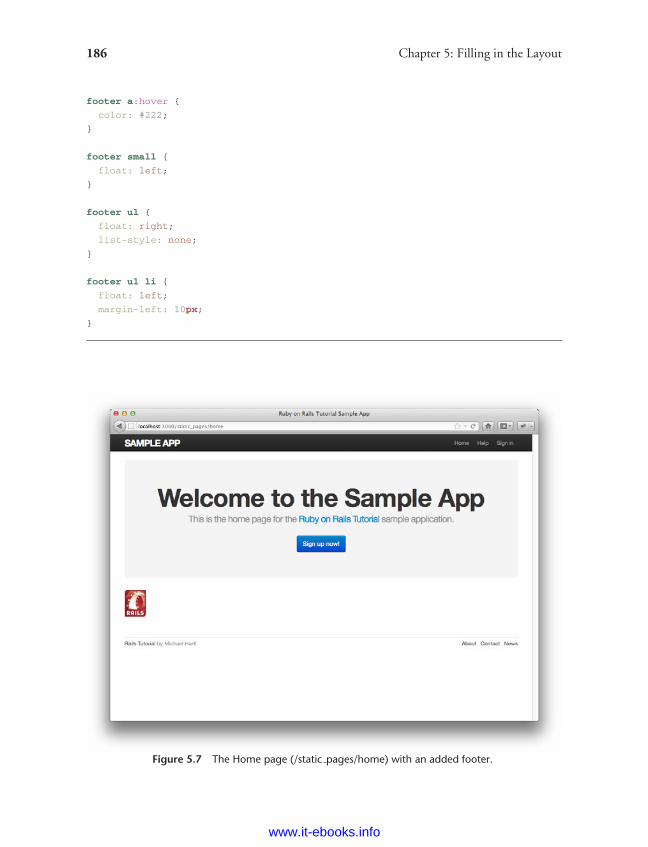
ptg8286261
186 Chapter 5: Filling in the Layout
footer a:hover {
color: #222;
}
footer small {
float: left;
}
footer ul {
float: right;
list-style: none;
}
footer ul li {
float: left;
margin-left: 10px;
}
Figure 5.7 The Home page (/static pages/home) with an added footer.
www.it-ebooks.info
ptg8286261
5.2 Sass and the Asset Pipeline 187
5.2 Sass and the Asset PipelineOne of the most notable differences between Rails 3.0 and more recent versions is theasset pipeline, which significantly improves the production and management of staticassets such as CSS, JavaScript, and images. This section gives a high-level overview ofthe asset pipeline and then shows how to use a remarkable tool for making CSS calledSass, now included by default as part of the asset pipeline.
5.2.1 The Asset Pipeline
The asset pipeline involves lots of changes under Rails’ hood, but from the perspectiveof a typical Rails developer there are three principal features to understand: assetdirectories, manifest files, and preprocessor engines.8 Let’s consider each in turn.
Asset DirectoriesIn versions of Rails before 3.0 (including 3.0 itself), static assets lived in the public/
directory, as follows:
• public/stylesheets
• public/javascripts
• public/images
Files in these directories are (even post-3.0) automatically served up via requests tohttp://example.com/stylesheets, etc.
Starting in Rails 3.1, there are three canonical directories for static assets, each withits own purpose:
• app/assets: assets specific to the present application
• lib/assets: assets for libraries written by your dev team
• vendor/assets: assets from third-party vendors
As you might guess, each of these directories has a subdirectory for each asset class, e.g.,
$ ls app/assets/
images javascripts stylesheets
8. The structure of this section is based on the excellent blog post The Rails 3 Asset Pipeline in (about) 5Minutes by Michael Erasmus. For more details, see the Rails Guide on the Asset Pipeline.
www.it-ebooks.info
ptg8286261
188 Chapter 5: Filling in the Layout
At this point, we’re in a position to understand the motivation behind the locationof the custom.css.scss file in Section 5.1.2: custom.css.scss is specific to thesample application, so it goes in app/assets/stylesheets.
Manifest FilesOnce you’ve placed your assets in their logical locations, you can use manifest files to tellRails (via the Sprockets gem) how to combine them to form single files. (This appliesto CSS and JavaScript but not to images.) As an example, let’s take a look at the defaultmanifest file for app stylesheets (Listing 5.14).
Listing 5.14 The manifest file for app-specific CSS.app/assets/stylesheets/application.css
/*
* This is a manifest file that'll automatically include all the stylesheets
* available in this directory and any sub-directories. You're free to add
* application-wide styles to this file and they'll appear at the top of the
* compiled file, but it's generally better to create a new file per style
* scope.
*= require self
*= require tree .
*/
The key lines here are actually CSS comments, but they are used by Sprockets to includethe proper files:
/*
.
.
.
*= require self
*= require tree .
*/
Here
*= require tree .
www.it-ebooks.info
ptg8286261
5.2 Sass and the Asset Pipeline 189
ensures that all CSS files in the app/assets/stylesheets directory (including thetree subdirectories) are included into the application CSS. The line
*= require self
ensures that CSS in application.css is also included.Rails comes with sensible default manifest files, and in the Rails Tutorial we won’t
need to make any changes, but the Rails Guides entry on the asset pipeline has moredetail if you need it.
Preprocessor EnginesAfter you’ve assembled your assets, Rails prepares them for the site template by runningthem through several preprocessing engines and using the manifest files to combinethem for delivery to the browser. We tell Rails which processor to use using filenameextensions; the three most common cases are .scss for Sass, .coffee for CoffeeScript,and .erb for embedded Ruby (ERb). We first covered ERb in Section 3.3.3, and coverSass in Section 5.2.2. We won’t be needing CoffeeScript in this tutorial, but it’s anelegant little language that compiles to JavaScript. (The RailsCast on CoffeeScript basicsis a good place to start.)
The preprocessor engines can be chained, so that
foobar.js.coffee
gets run through the CoffeeScript processor, and
foobar.js.erb.coffee
gets run through both CoffeeScript and ERb (with the code running from right to left,i.e., CoffeeScript first).
Efficiency in ProductionOne of the best things about the asset pipeline is that it automatically results in assetsthat are optimized to be efficient in a production application. Traditional methods fororganizing CSS and JavaScript involve splitting functionality into separate files andusing nice formatting (with lots of indentation). While convenient for the programmer,this is inefficient in production; including multiple full-sized files can significantly slowpage-load times (one of the most important factors affecting the quality of the userexperience). With the asset pipeline, in production all the application stylesheets get
www.it-ebooks.info
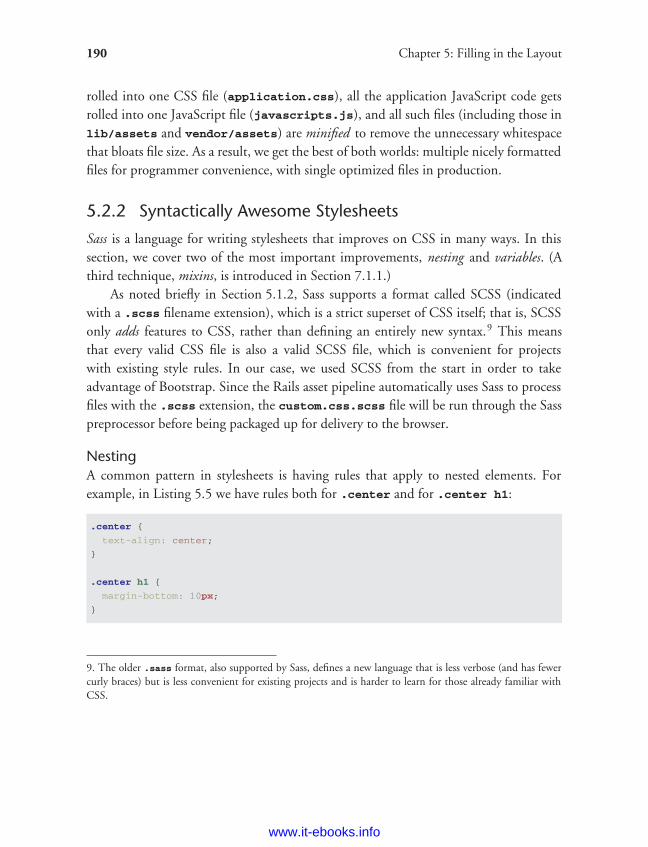
ptg8286261
190 Chapter 5: Filling in the Layout
rolled into one CSS file (application.css), all the application JavaScript code getsrolled into one JavaScript file (javascripts.js), and all such files (including those inlib/assets and vendor/assets) are minified to remove the unnecessary whitespacethat bloats file size. As a result, we get the best of both worlds: multiple nicely formattedfiles for programmer convenience, with single optimized files in production.
5.2.2 Syntactically Awesome Stylesheets
Sass is a language for writing stylesheets that improves on CSS in many ways. In thissection, we cover two of the most important improvements, nesting and variables. (Athird technique, mixins, is introduced in Section 7.1.1.)
As noted briefly in Section 5.1.2, Sass supports a format called SCSS (indicatedwith a .scss filename extension), which is a strict superset of CSS itself; that is, SCSSonly adds features to CSS, rather than defining an entirely new syntax.9 This meansthat every valid CSS file is also a valid SCSS file, which is convenient for projectswith existing style rules. In our case, we used SCSS from the start in order to takeadvantage of Bootstrap. Since the Rails asset pipeline automatically uses Sass to processfiles with the .scss extension, the custom.css.scss file will be run through the Sasspreprocessor before being packaged up for delivery to the browser.
NestingA common pattern in stylesheets is having rules that apply to nested elements. Forexample, in Listing 5.5 we have rules both for .center and for .center h1:
.center {
text-align: center;
}
.center h1 {
margin-bottom: 10px;
}
9. The older .sass format, also supported by Sass, defines a new language that is less verbose (and has fewercurly braces) but is less convenient for existing projects and is harder to learn for those already familiar withCSS.
www.it-ebooks.info
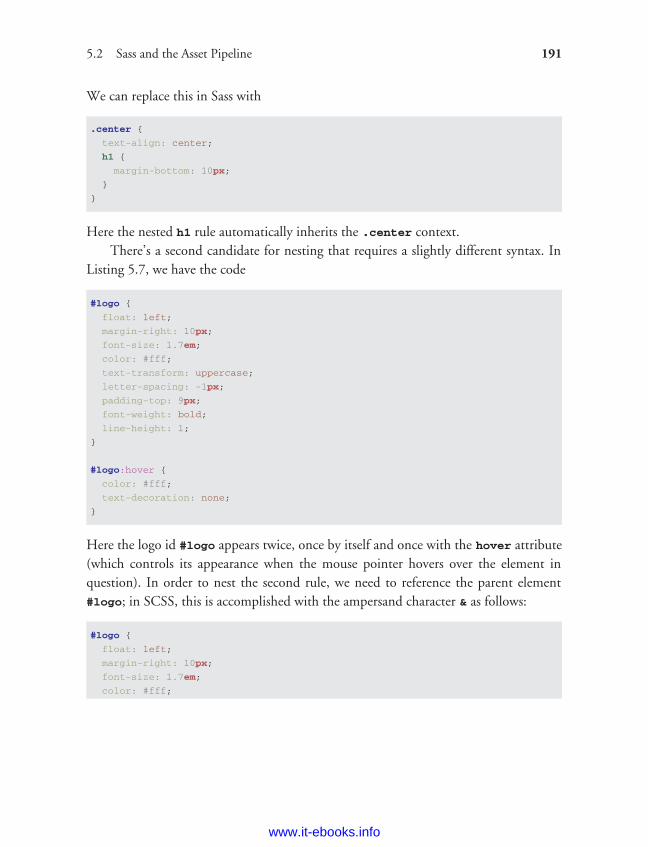
ptg8286261
5.2 Sass and the Asset Pipeline 191
We can replace this in Sass with
.center {
text-align: center;
h1 {
margin-bottom: 10px;
}
}
Here the nested h1 rule automatically inherits the .center context.There’s a second candidate for nesting that requires a slightly different syntax. In
Listing 5.7, we have the code
#logo {
float: left;
margin-right: 10px;
font-size: 1.7em;
color: #fff;
text-transform: uppercase;
letter-spacing: -1px;
padding-top: 9px;
font-weight: bold;
line-height: 1;
}
#logo:hover {
color: #fff;
text-decoration: none;
}
Here the logo id #logo appears twice, once by itself and once with the hover attribute(which controls its appearance when the mouse pointer hovers over the element inquestion). In order to nest the second rule, we need to reference the parent element#logo; in SCSS, this is accomplished with the ampersand character & as follows:
#logo {
float: left;
margin-right: 10px;
font-size: 1.7em;
color: #fff;
www.it-ebooks.info
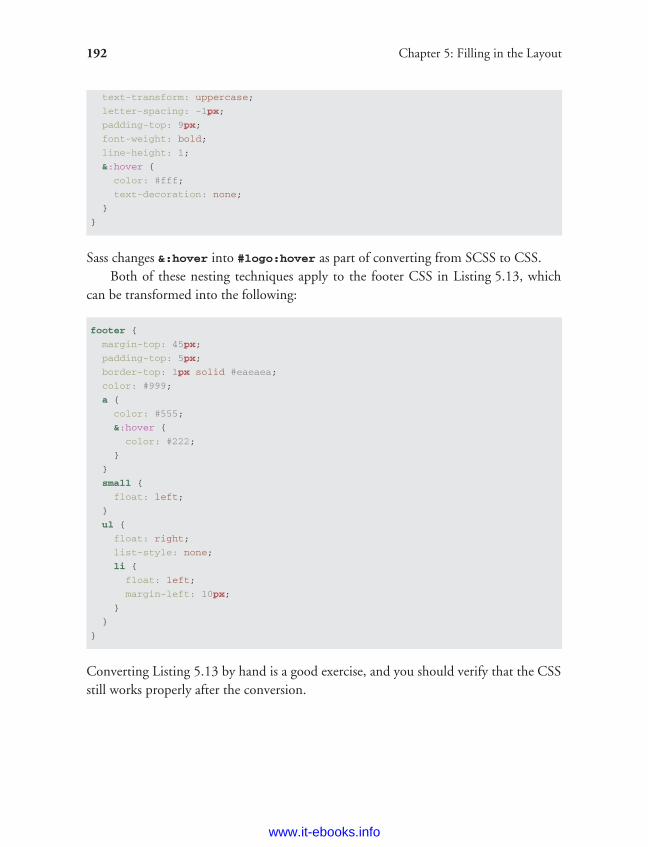
ptg8286261
192 Chapter 5: Filling in the Layout
text-transform: uppercase;
letter-spacing: -1px;
padding-top: 9px;
font-weight: bold;
line-height: 1;
&:hover {
color: #fff;
text-decoration: none;
}
}
Sass changes &:hover into #logo:hover as part of converting from SCSS to CSS.Both of these nesting techniques apply to the footer CSS in Listing 5.13, which
can be transformed into the following:
footer {
margin-top: 45px;
padding-top: 5px;
border-top: 1px solid #eaeaea;
color: #999;
a {
color: #555;
&:hover {
color: #222;
}
}
small {
float: left;
}
ul {
float: right;
list-style: none;
li {
float: left;
margin-left: 10px;
}
}
}
Converting Listing 5.13 by hand is a good exercise, and you should verify that the CSSstill works properly after the conversion.
www.it-ebooks.info

ptg8286261
5.2 Sass and the Asset Pipeline 193
VariablesSass allows us to define variables to eliminate duplication and write more expressivecode. For example, looking at Listing 5.6 and Listing 5.13, we see that there are repeatedreferences to the same color:
h2 {
.
.
.
color: #999;
}
.
.
.
footer {
.
.
.
color: #999;
}
In this case, #999 is a light gray, and we can give it a name by defining a variable asfollows:
$lightGray: #999;
This allows us to rewrite our SCSS like this:
$lightGray: #999;
.
.
.
h2 {
.
.
.
color: $lightGray;
}
.
.
.
www.it-ebooks.info
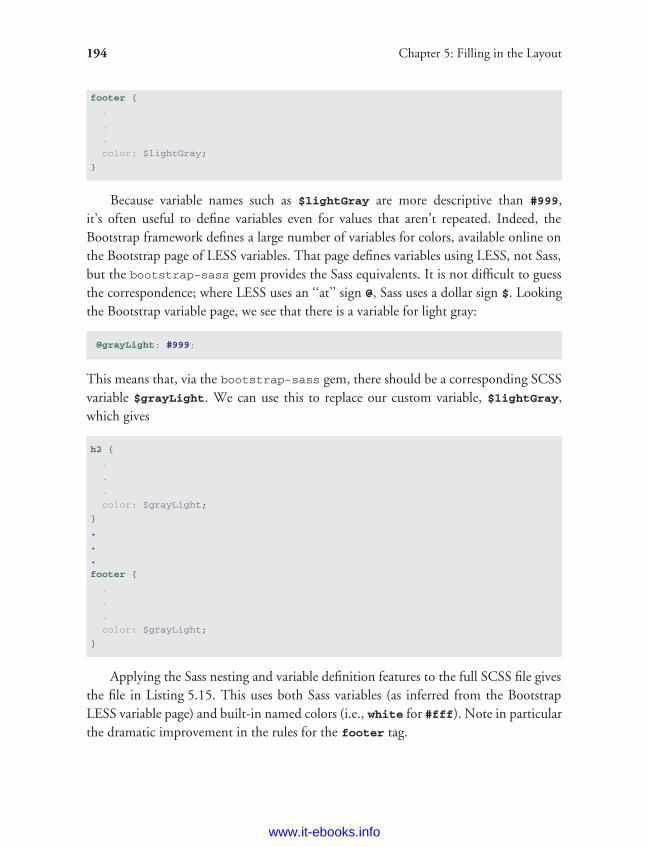
ptg8286261
194 Chapter 5: Filling in the Layout
footer {
.
.
.
color: $lightGray;
}
Because variable names such as $lightGray are more descriptive than #999,it’s often useful to define variables even for values that aren’t repeated. Indeed, theBootstrap framework defines a large number of variables for colors, available online onthe Bootstrap page of LESS variables. That page defines variables using LESS, not Sass,but the bootstrap-sass gem provides the Sass equivalents. It is not difficult to guessthe correspondence; where LESS uses an ‘‘at’’ sign @, Sass uses a dollar sign $. Lookingthe Bootstrap variable page, we see that there is a variable for light gray:
@grayLight: #999;
This means that, via the bootstrap-sass gem, there should be a corresponding SCSSvariable $grayLight. We can use this to replace our custom variable, $lightGray,which gives
h2 {
.
.
.
color: $grayLight;
}
.
.
.
footer {
.
.
.
color: $grayLight;
}
Applying the Sass nesting and variable definition features to the full SCSS file givesthe file in Listing 5.15. This uses both Sass variables (as inferred from the BootstrapLESS variable page) and built-in named colors (i.e., white for #fff). Note in particularthe dramatic improvement in the rules for the footer tag.
www.it-ebooks.info
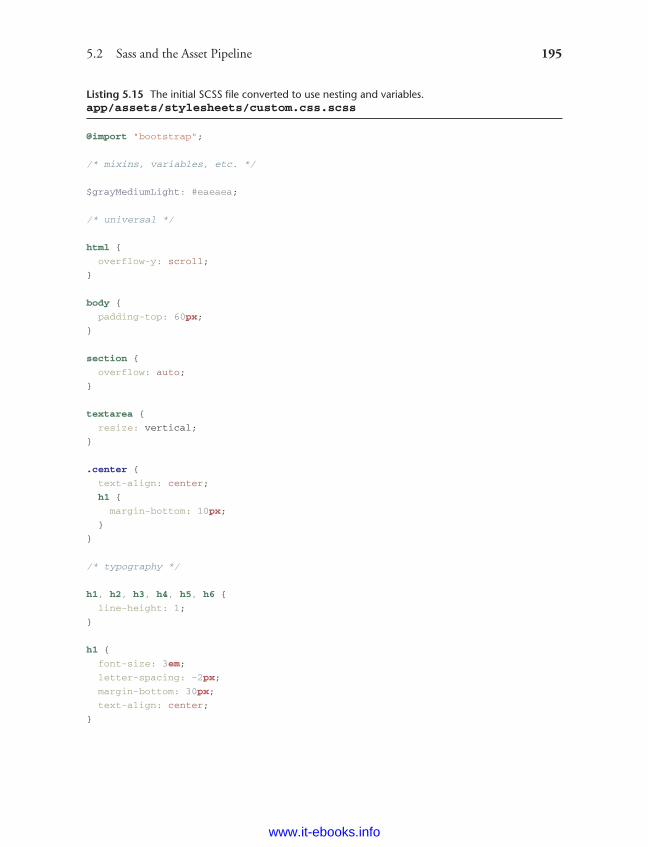
ptg8286261
5.2 Sass and the Asset Pipeline 195
Listing 5.15 The initial SCSS file converted to use nesting and variables.app/assets/stylesheets/custom.css.scss
@import "bootstrap";
/* mixins, variables, etc. */
$grayMediumLight: #eaeaea;
/* universal */
html {
overflow-y: scroll;
}
body {
padding-top: 60px;
}
section {
overflow: auto;
}
textarea {
resize: vertical;
}
.center {
text-align: center;
h1 {
margin-bottom: 10px;
}
}
/* typography */
h1, h2, h3, h4, h5, h6 {
line-height: 1;
}
h1 {
font-size: 3em;
letter-spacing: -2px;
margin-bottom: 30px;
text-align: center;
}
www.it-ebooks.info
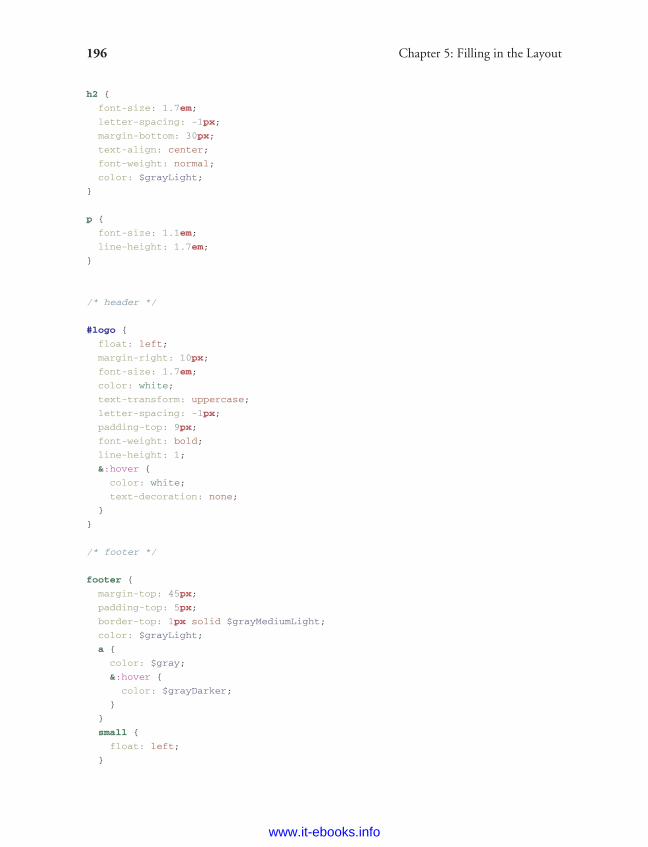
ptg8286261
196 Chapter 5: Filling in the Layout
h2 {
font-size: 1.7em;
letter-spacing: -1px;
margin-bottom: 30px;
text-align: center;
font-weight: normal;
color: $grayLight;
}
p {
font-size: 1.1em;
line-height: 1.7em;
}
/* header */
#logo {
float: left;
margin-right: 10px;
font-size: 1.7em;
color: white;
text-transform: uppercase;
letter-spacing: -1px;
padding-top: 9px;
font-weight: bold;
line-height: 1;
&:hover {
color: white;
text-decoration: none;
}
}
/* footer */
footer {
margin-top: 45px;
padding-top: 5px;
border-top: 1px solid $grayMediumLight;
color: $grayLight;
a {
color: $gray;
&:hover {
color: $grayDarker;
}
}
small {
float: left;
}
www.it-ebooks.info
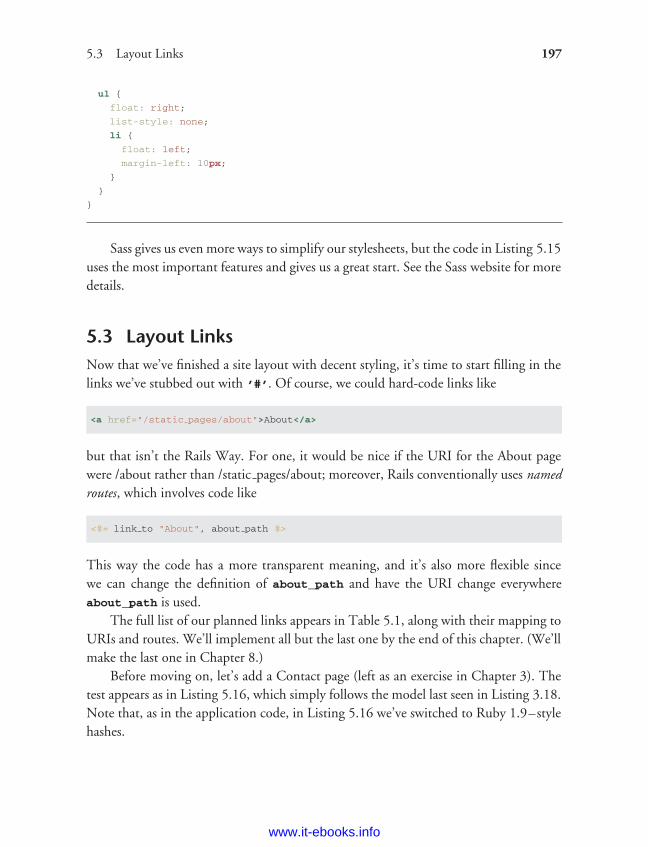
ptg8286261
5.3 Layout Links 197
ul {
float: right;
list-style: none;
li {
float: left;
margin-left: 10px;
}
}
}
Sass gives us even more ways to simplify our stylesheets, but the code in Listing 5.15uses the most important features and gives us a great start. See the Sass website for moredetails.
5.3 Layout LinksNow that we’ve finished a site layout with decent styling, it’s time to start filling in thelinks we’ve stubbed out with ’#’. Of course, we could hard-code links like
<a href="/static pages/about">About</a>
but that isn’t the Rails Way. For one, it would be nice if the URI for the About pagewere /about rather than /static pages/about; moreover, Rails conventionally uses namedroutes, which involves code like
<%= link to "About", about path %>
This way the code has a more transparent meaning, and it’s also more flexible sincewe can change the definition of about_path and have the URI change everywhereabout_path is used.
The full list of our planned links appears in Table 5.1, along with their mapping toURIs and routes. We’ll implement all but the last one by the end of this chapter. (We’llmake the last one in Chapter 8.)
Before moving on, let’s add a Contact page (left as an exercise in Chapter 3). Thetest appears as in Listing 5.16, which simply follows the model last seen in Listing 3.18.Note that, as in the application code, in Listing 5.16 we’ve switched to Ruby 1.9–stylehashes.
www.it-ebooks.info
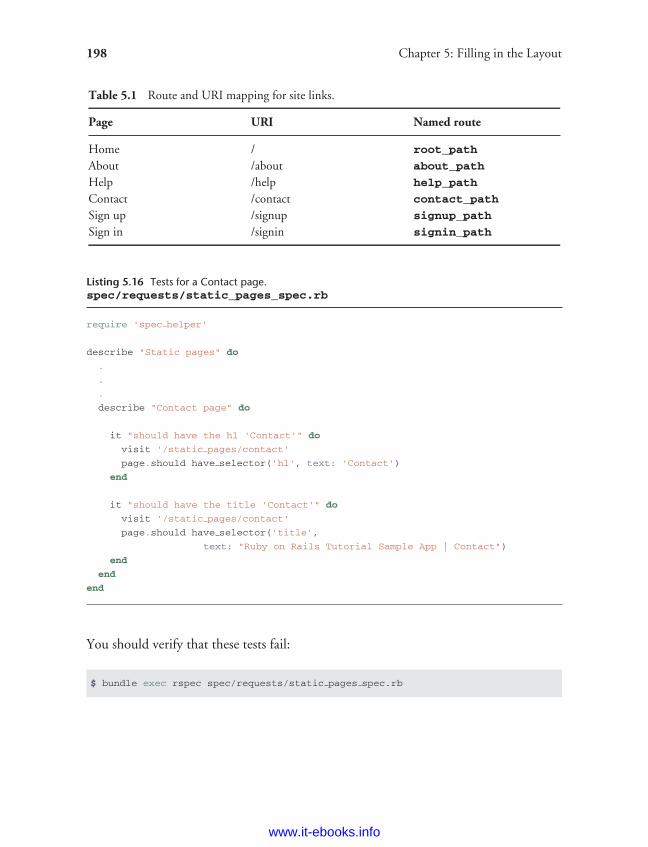
ptg8286261
198 Chapter 5: Filling in the Layout
Table 5.1 Route and URI mapping for site links.
Page URI Named route
Home / root_path
About /about about_path
Help /help help_path
Contact /contact contact_path
Sign up /signup signup_path
Sign in /signin signin_path
Listing 5.16 Tests for a Contact page.spec/requests/static_pages_spec.rb
require 'spec helper'
describe "Static pages" do
.
.
.
describe "Contact page" do
it "should have the h1 'Contact'" do
visit '/static pages/contact'
page.should have selector('h1', text: 'Contact')
end
it "should have the title 'Contact'" do
visit '/static pages/contact'
page.should have selector('title',
text: "Ruby on Rails Tutorial Sample App | Contact")
end
end
end
You should verify that these tests fail:
$ bundle exec rspec spec/requests/static pages spec.rb
www.it-ebooks.info

ptg8286261
5.3 Layout Links 199
The application code parallels the addition of the About page in Section 3.2.2: firstwe update the routes (Listing 5.17), then we add a contact action to the StaticPagescontroller (Listing 5.18), and finally we create a Contact view (Listing 5.19).
Listing 5.17 Adding a route for the Contact page.config/routes.rb
SampleApp::Application.routes.draw do
get "static pages/home"
get "static pages/help"
get "static pages/about"
get "static pages/contact"
.
.
.
end
Listing 5.18 Adding an action for the Contact page.app/controllers/static_pages_controller.rb
class StaticPagesController < ApplicationController
.
.
.
def contact
end
end
Listing 5.19 The view for the Contact page.app/views/static_pages/contact.html.erb
<% provide(:title, 'Contact') %>
<h1>Contact</h1>
<p>
Contact Ruby on Rails Tutorial about the sample app at the
<a href="http://railstutorial.org/contact">contact page</a>.
</p>
Now make sure that the tests pass:
$ bundle exec rspec spec/requests/static pages spec.rb
www.it-ebooks.info
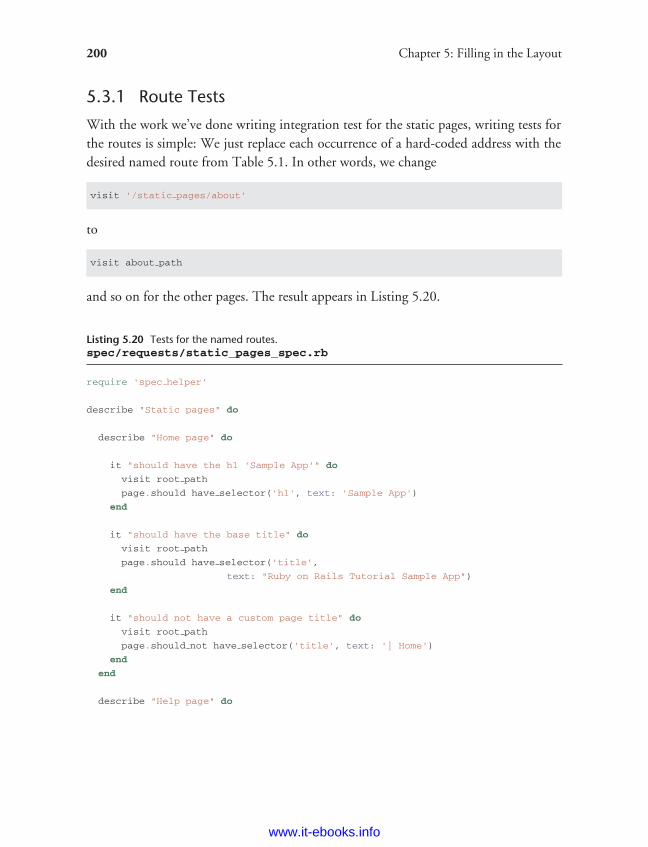
ptg8286261
200 Chapter 5: Filling in the Layout
5.3.1 Route Tests
With the work we’ve done writing integration test for the static pages, writing tests forthe routes is simple: We just replace each occurrence of a hard-coded address with thedesired named route from Table 5.1. In other words, we change
visit '/static pages/about'
to
visit about path
and so on for the other pages. The result appears in Listing 5.20.
Listing 5.20 Tests for the named routes.spec/requests/static_pages_spec.rb
require 'spec helper'
describe "Static pages" do
describe "Home page" do
it "should have the h1 'Sample App'" do
visit root path
page.should have selector('h1', text: 'Sample App')
end
it "should have the base title" do
visit root path
page.should have selector('title',
text: "Ruby on Rails Tutorial Sample App")
end
it "should not have a custom page title" do
visit root path
page.should not have selector('title', text: '| Home')
end
end
describe "Help page" do
www.it-ebooks.info
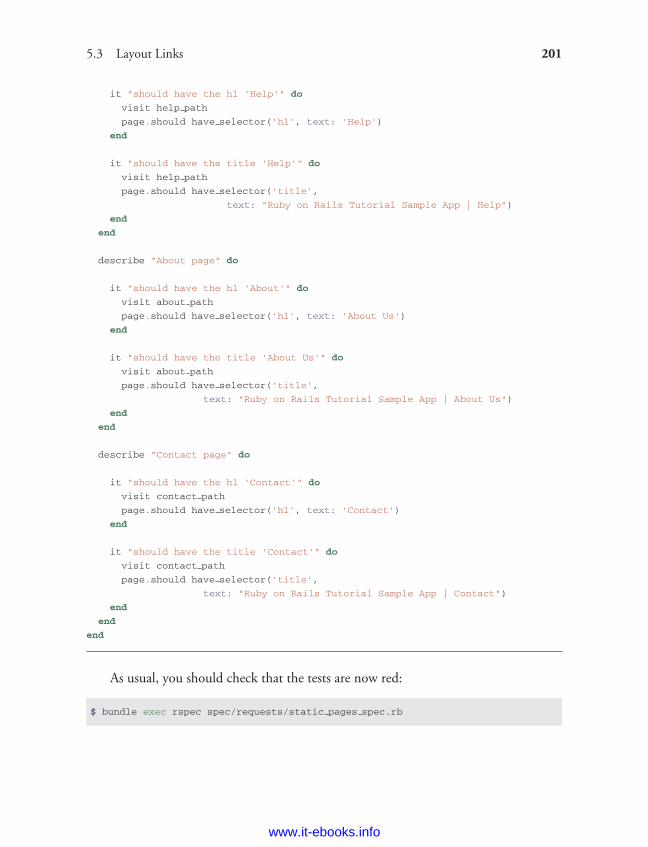
ptg8286261
5.3 Layout Links 201
it "should have the h1 'Help'" do
visit help path
page.should have selector('h1', text: 'Help')
end
it "should have the title 'Help'" do
visit help path
page.should have selector('title',
text: "Ruby on Rails Tutorial Sample App | Help")
end
end
describe "About page" do
it "should have the h1 'About'" do
visit about path
page.should have selector('h1', text: 'About Us')
end
it "should have the title 'About Us'" do
visit about path
page.should have selector('title',
text: "Ruby on Rails Tutorial Sample App | About Us")
end
end
describe "Contact page" do
it "should have the h1 'Contact'" do
visit contact path
page.should have selector('h1', text: 'Contact')
end
it "should have the title 'Contact'" do
visit contact path
page.should have selector('title',
text: "Ruby on Rails Tutorial Sample App | Contact")
end
end
end
As usual, you should check that the tests are now red:
$ bundle exec rspec spec/requests/static pages spec.rb
www.it-ebooks.info
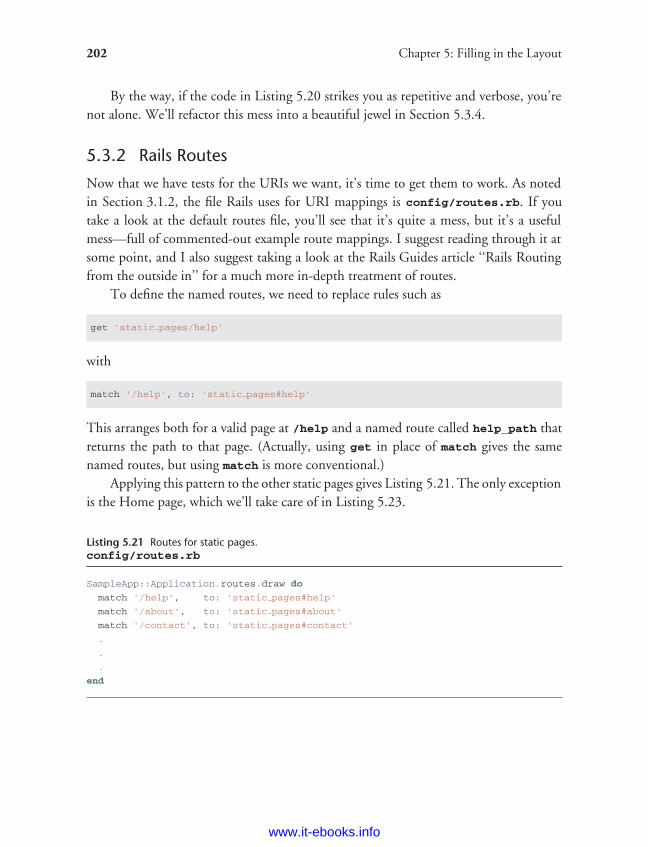
ptg8286261
202 Chapter 5: Filling in the Layout
By the way, if the code in Listing 5.20 strikes you as repetitive and verbose, you’renot alone. We’ll refactor this mess into a beautiful jewel in Section 5.3.4.
5.3.2 Rails Routes
Now that we have tests for the URIs we want, it’s time to get them to work. As notedin Section 3.1.2, the file Rails uses for URI mappings is config/routes.rb. If youtake a look at the default routes file, you’ll see that it’s quite a mess, but it’s a usefulmess—full of commented-out example route mappings. I suggest reading through it atsome point, and I also suggest taking a look at the Rails Guides article ‘‘Rails Routingfrom the outside in’’ for a much more in-depth treatment of routes.
To define the named routes, we need to replace rules such as
get 'static pages/help'
with
match '/help', to: 'static pages#help'
This arranges both for a valid page at /help and a named route called help_path thatreturns the path to that page. (Actually, using get in place of match gives the samenamed routes, but using match is more conventional.)
Applying this pattern to the other static pages gives Listing 5.21. The only exceptionis the Home page, which we’ll take care of in Listing 5.23.
Listing 5.21 Routes for static pages.config/routes.rb
SampleApp::Application.routes.draw do
match '/help', to: 'static pages#help'
match '/about', to: 'static pages#about'
match '/contact', to: 'static pages#contact'
.
.
.
end
www.it-ebooks.info

ptg8286261
5.3 Layout Links 203
If you read the code in Listing 5.21 carefully, you can probably figure out what itdoes; for example, you can see that
match '/about', to: 'static pages#about'
matches ’/about’ and routes it to the about action in the StaticPages controller.Before, this was more explicit: We used
get 'static pages/about'
to get to the same place, but /about is more succinct. In addition, as mentionedabove, the code match ’/about’ also automatically creates named routes for use in thecontrollers and views:
about path => '/about'
about url => 'http://localhost:3000/about'
Note that about_url is the full URI http://localhost:3000/about (with localhost:
3000 being replaced with the domain name, such as example.com, for a fully deployedsite). As discussed in Section 5.3, to get just /about, you use about_path. (The RailsTutorial uses the path form for consistency, but the difference rarely matters inpractice.)
With these routes now defined, the tests for the Help, About, and Contact pagesshould pass:
$ bundle exec rspec spec/requests/static pages spec.rb
This leaves the test for the Home page as the last one to fail.To establish the route mapping for the Home page, we could use code like this:
match '/', to: 'static pages#home'
This is unnecessary, though; Rails has special instructions for the root URI / (‘‘slash’’)located lower down in the file (Listing 5.22).
www.it-ebooks.info
ptg8286261
204 Chapter 5: Filling in the Layout
Listing 5.22 The commented-out hint for defining the root route.config/routes.rb
SampleApp::Application.routes.draw do
.
.
.
# You can have the root of your site routed with "root"
# just remember to delete public/index.html.
# root :to => "welcome#index"
.
.
.
end
Using Listing 5.22 as a model, we arrive at Listing 5.23 to route the root URI / tothe Home page.
Listing 5.23 Adding a mapping for the root route.config/routes.rb
SampleApp::Application.routes.draw do
root to: 'static pages#home'
match '/help', to: 'static pages#help'
match '/about', to: 'static pages#about'
match '/contact', to: 'static pages#contact'
.
.
.
end
This code maps the root URI / to /static pages/home, and also gives URI helpers asfollows:
root path => '/'
root url => 'http://localhost:3000/'
We should also heed the comment in Listing 5.22 and delete public/index.htmlto prevent Rails from rendering the default page (Figure 1.3) when we visit /. You can
www.it-ebooks.info
ptg8286261
5.3 Layout Links 205
of course simply remove the file by trashing it, but if you’re using Git for version controlthere’s a way to tell Git about the removal at the same time using git rm:
$ git rm public/index.html
With that, all of the routes for static pages are working, and the tests should pass:
$ bundle exec rspec spec/requests/static pages spec.rb
Now we just have to fill in the links in the layout.
5.3.3 Named Routes
Let’s put the named routes created in Section 5.3.2 to work in our layout. This willentail filling in the second arguments of the link_to functions with the proper namedroutes. For example, we’ll convert
<%= link to "About", '#' %>
to
<%= link to "About", about path %>
and so on.We’ll start in the header partial, _header.html.erb (Listing 5.24), which has
links to the Home and Help pages. While we’re at it, we’ll follow a common webconvention and link the logo to the Home page as well.
Listing 5.24 Header partial with links.app/views/layouts/_header.html.erb
<header class="navbar navbar-fixed-top">
<div class="navbar-inner">
<div class="container">
www.it-ebooks.info
ptg8286261
206 Chapter 5: Filling in the Layout
<%= link to "sample app", root path, id: "logo" %>
<nav>
<ul class="nav pull-right">
<li><%= link to "Home", root path %></li>
<li><%= link to "Help", help path %></li>
<li><%= link to "Sign in", '#' %></li>
</ul>
</nav>
</div>
</div>
</header>
We won’t have a named route for the ‘‘Sign in’’ link until Chapter 8, so we’ve left it as’#’ for now.
The other place with links is the footer partial, _footer.html.erb, which haslinks for the About and Contact pages (Listing 5.25).
Listing 5.25 Footer partial with links.app/views/layouts/_footer.html.erb
<footer class="footer">
<small>
<a href="http://railstutorial.org/">Rails Tutorial</a>
by Michael Hartl
</small>
<nav>
<ul>
<li><%= link to "About", about path %></li>
<li><%= link to "Contact", contact path %></li>
<li><a href="http://news.railstutorial.org/">News</a></li>
</ul>
</nav>
</footer>
With that, our layout has links to all the static pages created in Chapter 3, so that,for example, /about goes to the About page (Figure 5.8).
By the way, it’s worth noting that, although we haven’t actually tested for thepresence of the links on the layout, our tests will fail if the routes aren’t defined. Youcan check this by commenting out the routes in Listing 5.21 and running your testsuite. For a testing method that actually makes sure the links go to the right places, seeSection 5.6.
www.it-ebooks.info
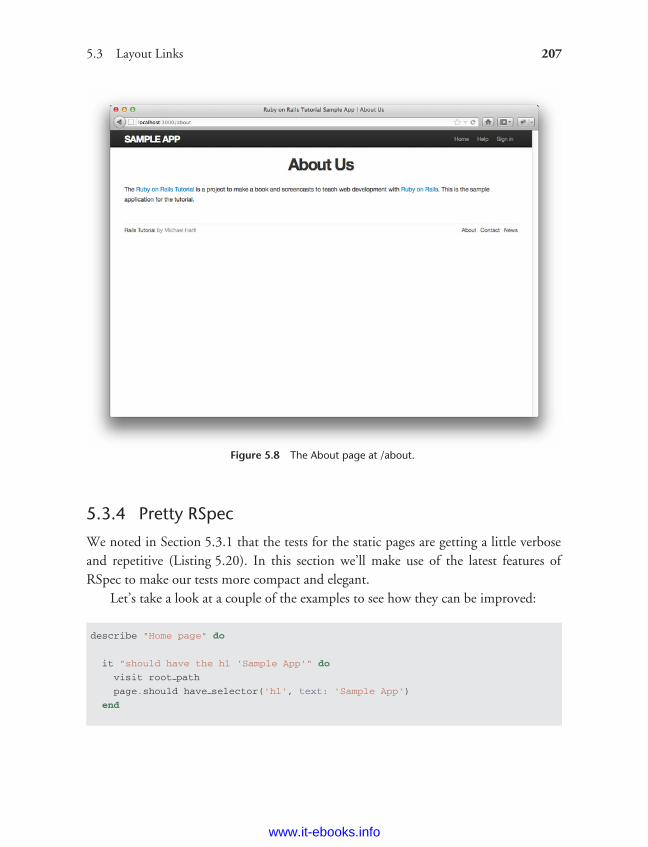
ptg8286261
5.3 Layout Links 207
Figure 5.8 The About page at /about.
5.3.4 Pretty RSpec
We noted in Section 5.3.1 that the tests for the static pages are getting a little verboseand repetitive (Listing 5.20). In this section we’ll make use of the latest features ofRSpec to make our tests more compact and elegant.
Let’s take a look at a couple of the examples to see how they can be improved:
describe "Home page" do
it "should have the h1 'Sample App'" do
visit root path
page.should have selector('h1', text: 'Sample App')
end
www.it-ebooks.info
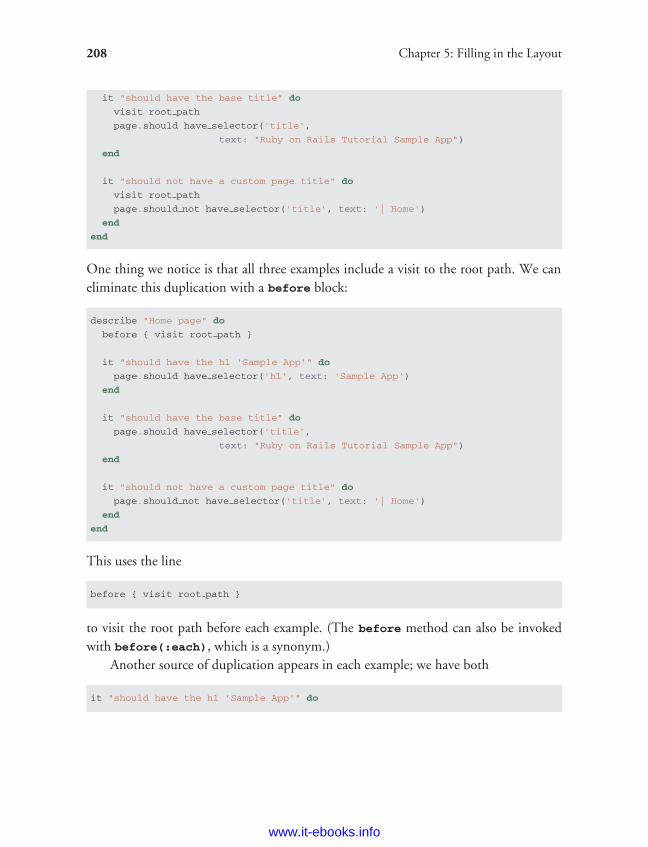
ptg8286261
208 Chapter 5: Filling in the Layout
it "should have the base title" do
visit root path
page.should have selector('title',
text: "Ruby on Rails Tutorial Sample App")
end
it "should not have a custom page title" do
visit root path
page.should not have selector('title', text: '| Home')
end
end
One thing we notice is that all three examples include a visit to the root path. We caneliminate this duplication with a before block:
describe "Home page" do
before { visit root path }
it "should have the h1 'Sample App'" do
page.should have selector('h1', text: 'Sample App')
end
it "should have the base title" do
page.should have selector('title',
text: "Ruby on Rails Tutorial Sample App")
end
it "should not have a custom page title" do
page.should not have selector('title', text: '| Home')
end
end
This uses the line
before { visit root path }
to visit the root path before each example. (The before method can also be invokedwith before(:each), which is a synonym.)
Another source of duplication appears in each example; we have both
it "should have the h1 'Sample App'" do
www.it-ebooks.info
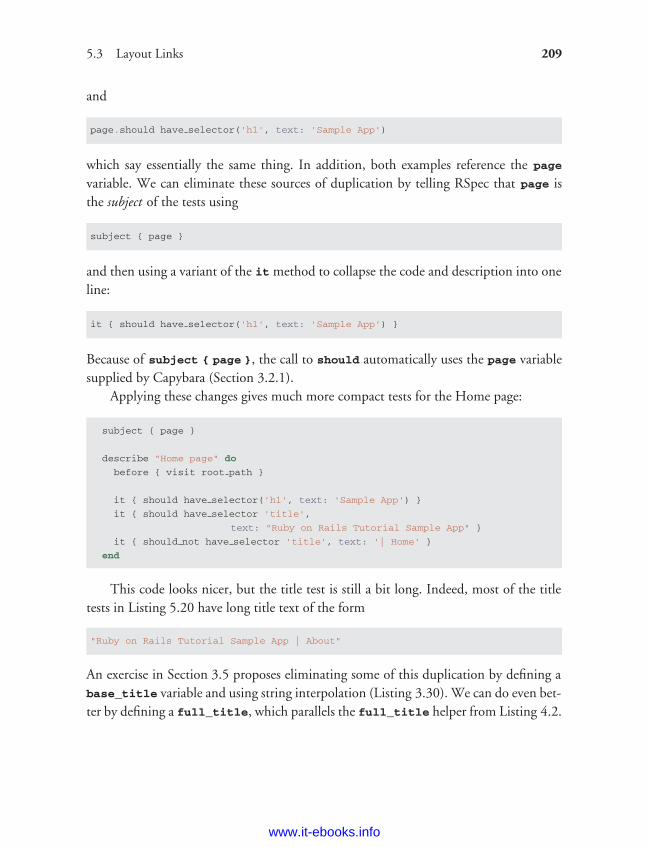
ptg8286261
5.3 Layout Links 209
and
page.should have selector('h1', text: 'Sample App')
which say essentially the same thing. In addition, both examples reference the page
variable. We can eliminate these sources of duplication by telling RSpec that page isthe subject of the tests using
subject { page }
and then using a variant of the it method to collapse the code and description into oneline:
it { should have selector('h1', text: 'Sample App') }
Because of subject { page }, the call to should automatically uses the page variablesupplied by Capybara (Section 3.2.1).
Applying these changes gives much more compact tests for the Home page:
subject { page }
describe "Home page" do
before { visit root path }
it { should have selector('h1', text: 'Sample App') }
it { should have selector 'title',
text: "Ruby on Rails Tutorial Sample App" }
it { should not have selector 'title', text: '| Home' }
end
This code looks nicer, but the title test is still a bit long. Indeed, most of the titletests in Listing 5.20 have long title text of the form
"Ruby on Rails Tutorial Sample App | About"
An exercise in Section 3.5 proposes eliminating some of this duplication by defining abase_title variable and using string interpolation (Listing 3.30). We can do even bet-ter by defining a full_title, which parallels the full_title helper from Listing 4.2.
www.it-ebooks.info
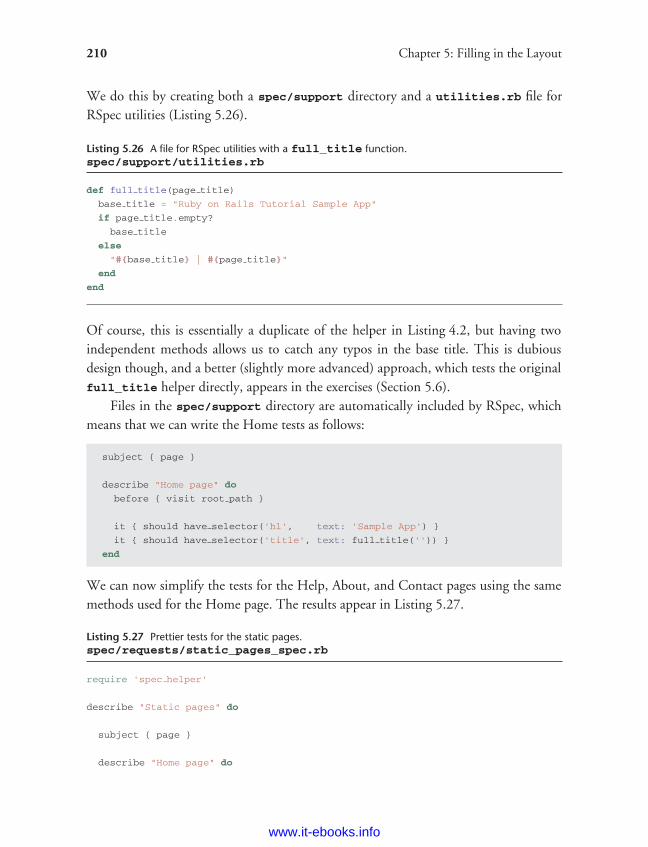
ptg8286261
210 Chapter 5: Filling in the Layout
We do this by creating both a spec/support directory and a utilities.rb file forRSpec utilities (Listing 5.26).
Listing 5.26 A file for RSpec utilities with a full_title function.spec/support/utilities.rb
def full title(page title)
base title = "Ruby on Rails Tutorial Sample App"
if page title.empty?
base title
else
"#{base title} | #{page title}"
end
end
Of course, this is essentially a duplicate of the helper in Listing 4.2, but having twoindependent methods allows us to catch any typos in the base title. This is dubiousdesign though, and a better (slightly more advanced) approach, which tests the originalfull_title helper directly, appears in the exercises (Section 5.6).
Files in the spec/support directory are automatically included by RSpec, whichmeans that we can write the Home tests as follows:
subject { page }
describe "Home page" do
before { visit root path }
it { should have selector('h1', text: 'Sample App') }
it { should have selector('title', text: full title('')) }
end
We can now simplify the tests for the Help, About, and Contact pages using the samemethods used for the Home page. The results appear in Listing 5.27.
Listing 5.27 Prettier tests for the static pages.spec/requests/static_pages_spec.rb
require 'spec helper'
describe "Static pages" do
subject { page }
describe "Home page" do
www.it-ebooks.info
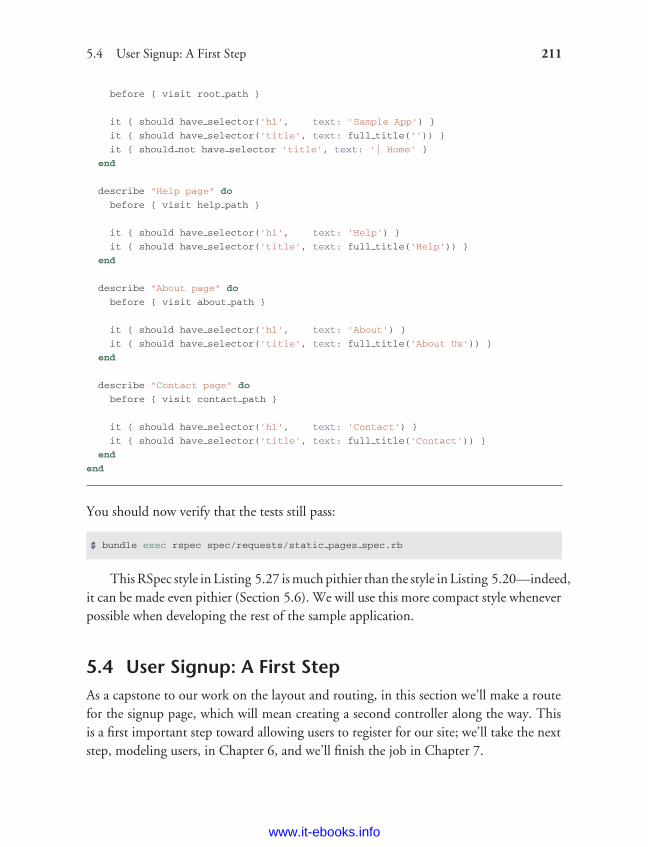
ptg8286261
5.4 User Signup: A First Step 211
before { visit root path }
it { should have selector('h1', text: 'Sample App') }
it { should have selector('title', text: full title('')) }
it { should not have selector 'title', text: '| Home' }
end
describe "Help page" do
before { visit help path }
it { should have selector('h1', text: 'Help') }
it { should have selector('title', text: full title('Help')) }
end
describe "About page" do
before { visit about path }
it { should have selector('h1', text: 'About') }
it { should have selector('title', text: full title('About Us')) }
end
describe "Contact page" do
before { visit contact path }
it { should have selector('h1', text: 'Contact') }
it { should have selector('title', text: full title('Contact')) }
end
end
You should now verify that the tests still pass:
$ bundle exec rspec spec/requests/static pages spec.rb
This RSpec style in Listing 5.27 is much pithier than the style in Listing 5.20—indeed,it can be made even pithier (Section 5.6). We will use this more compact style wheneverpossible when developing the rest of the sample application.
5.4 User Signup: A First StepAs a capstone to our work on the layout and routing, in this section we’ll make a routefor the signup page, which will mean creating a second controller along the way. Thisis a first important step toward allowing users to register for our site; we’ll take the nextstep, modeling users, in Chapter 6, and we’ll finish the job in Chapter 7.
www.it-ebooks.info
ptg8286261
212 Chapter 5: Filling in the Layout
5.4.1 Users Controller
It’s been a while since we created our first controller, the StaticPages controller, way backin Section 3.1.2. It’s time to create a second one, the Users controller. As before, we’lluse generate to make the simplest controller that meets our present needs, namely, onewith a stub signup page for new users. Following the conventional REST architecturefavored by Rails, we’ll call the action for new users new and pass it as an argument togenerate controller to create it automatically (Listing 5.28).
Listing 5.28 Generating a Users controller (with a new action).
$ rails generate controller Users new --no-test-framework
create app/controllers/users controller.rb
route get "users/new"
invoke erb
create app/views/users
create app/views/users/new.html.erb
invoke helper
create app/helpers/users helper.rb
invoke assets
invoke coffee
create app/assets/javascripts/users.js.coffee
invoke scss
create app/assets/stylesheets/users.css.scss
This creates a Users controller with a new action (Listing 5.29) and a stub user view(Listing 5.30).
Listing 5.29 The initial Users controller, with a new action.app/controllers/users_controller.rb
class UsersController < ApplicationController
def new
end
end
Listing 5.30 The initial new action for Users.app/views/users/new.html.erb
<h1>Users#new</h1>
<p>Find me in app/views/users/new.html.erb</p>
www.it-ebooks.info
ptg8286261
5.4 User Signup: A First Step 213
5.4.2 Signup URI
With the code from Section 5.4.1, we already have a working page for new users at/users/new, but recall from Table 5.1 that we want the URI to be /signup instead. As inSection 5.3, we’ll first write some integration tests, which we’ll now generate:
$ rails generate integration test user pages
Then, following the model of the static pages spec in Listing 5.27, we’ll fill in theuser pages test with code to test for the contents of the h1 and title tags, as seen inListing 5.31.
Listing 5.31 The initial spec for users, with a test for the signup page.spec/requests/user_pages_spec.rb
require 'spec helper'
describe "User pages" do
subject { page }
describe "signup page" do
before { visit signup path }
it { should have selector('h1', text: 'Sign up') }
it { should have selector('title', text: full title('Sign up')) }
end
end
We can run these tests using the rspec command as usual:
$ bundle exec rspec spec/requests/user pages spec.rb
It’s worth noting that we can also run all the request specs by passing the whole directoryinstead of just one file:
$ bundle exec rspec spec/requests/
Based on this pattern, you may be able to guess how to run all the specs:
$ bundle exec rspec spec/
www.it-ebooks.info
ptg8286261
214 Chapter 5: Filling in the Layout
For completeness, we’ll usually use this method to run the tests through the rest of thetutorial. By the way, it’s worth noting (since you may see other people use it) that youcan also run the test suite using the spec Rake task:
$ bundle exec rake spec
(In fact, you can just type rake by itself; the default behavior of rake is to run the testsuite.)
By construction, the Users controller already has a new action, so to get the test topass all we need is the right route and the right view content. We’ll follow the examplesfrom Listing 5.21 and add a match ’/signup’ rule for the signup URI (Listing 5.32).
Listing 5.32 A route for the signup page.config/routes.rb
SampleApp::Application.routes.draw do
get "users/new"
root to: 'static pages#home'
match '/signup', to: 'users#new'
match '/help', to: 'static pages#help'
match '/about', to: 'static pages#about'
match '/contact', to: 'static pages#contact'
.
.
.
end
Note that we have kept the rule get "users/new", which was generated automaticallyby the Users controller generation in Listing 5.28. Currently, this rule is necessary forthe ’users/new’ routing to work, but it doesn’t follow the proper REST conventions(Table 2.2), and we will eliminate it in Section 7.1.2.
To get the tests to pass, all we need now is a view with the title and heading ‘‘Signup’’ (Listing 5.33).
Listing 5.33 The initial (stub) signup page.app/views/users/new.html.erb
<% provide(:title, 'Sign up') %>
<h1>Sign up</h1>
<p>Find me in app/views/users/new.html.erb</p>
www.it-ebooks.info

ptg8286261
5.5 Conclusion 215
At this point, the signup test in Listing 5.31 should pass. All that’s left is to addthe proper link to the button on the Home page. As with the other routes, match
’/signup’ gives us the named route signup_path, which we put to use in Listing 5.34.
Listing 5.34 Linking the button to the Signup page.app/views/static_pages/home.html.erb
<div class="center hero-unit">
<h1>Welcome to the Sample App</h1>
<h2>
This is the home page for the
<a href="http://railstutorial.org/">Ruby on Rails Tutorial</a>
sample application.
</h2>
<%= link to "Sign up now!", signup path, class: "btn btn-large btn-primary" %>
</div>
<%= link to image tag("rails.png", alt: "Rails"), 'http://rubyonrails.org/' %>
With that, we’re done with the links and named routes, at least until we add a routefor signing in (Chapter 8). The resulting new user page (at the URI /signup) appears inFigure 5.9.
At this point the tests should pass:
$ bundle exec rspec spec/
5.5 ConclusionIn this chapter, we’ve hammered our application layout into shape and polished up theroutes. The rest of the book is dedicated to fleshing out the sample application: first, byadding users who can sign up, sign in, and sign out; next, by adding user microposts;and, finally, by adding the ability to follow other users.
At this point, if you are using Git you should merge the changes back into themaster branch:
$ git add .
$ git commit -m "Finish layout and routes"
$ git checkout master
$ git merge filling-in-layout
www.it-ebooks.info
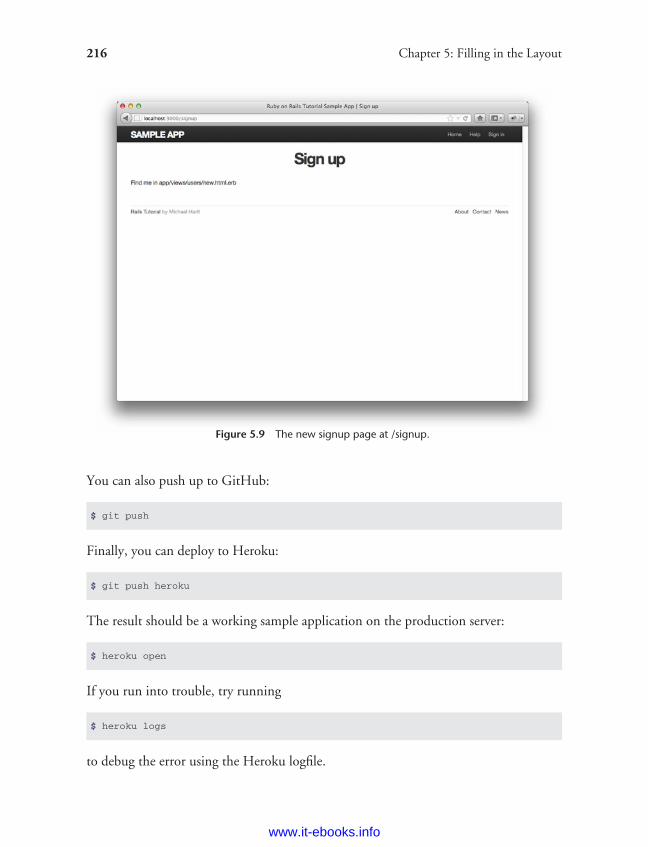
ptg8286261
216 Chapter 5: Filling in the Layout
Figure 5.9 The new signup page at /signup.
You can also push up to GitHub:
$ git push
Finally, you can deploy to Heroku:
$ git push heroku
The result should be a working sample application on the production server:
$ heroku open
If you run into trouble, try running
$ heroku logs
to debug the error using the Heroku logfile.
www.it-ebooks.info
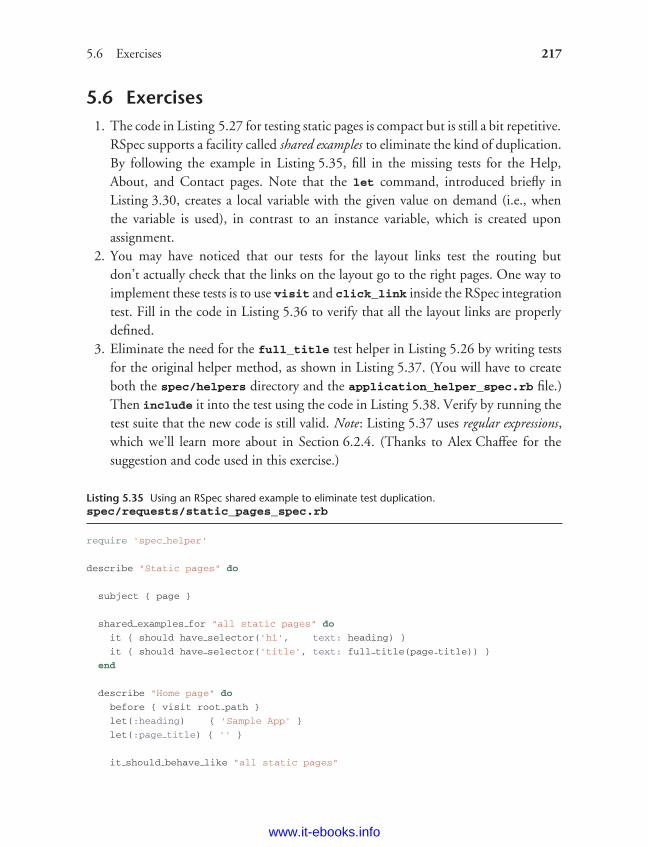
ptg8286261
5.6 Exercises 217
5.6 Exercises1. The code in Listing 5.27 for testing static pages is compact but is still a bit repetitive.
RSpec supports a facility called shared examples to eliminate the kind of duplication.By following the example in Listing 5.35, fill in the missing tests for the Help,About, and Contact pages. Note that the let command, introduced briefly inListing 3.30, creates a local variable with the given value on demand (i.e., whenthe variable is used), in contrast to an instance variable, which is created uponassignment.
2. You may have noticed that our tests for the layout links test the routing butdon’t actually check that the links on the layout go to the right pages. One way toimplement these tests is to use visit and click_link inside the RSpec integrationtest. Fill in the code in Listing 5.36 to verify that all the layout links are properlydefined.
3. Eliminate the need for the full_title test helper in Listing 5.26 by writing testsfor the original helper method, as shown in Listing 5.37. (You will have to createboth the spec/helpers directory and the application_helper_spec.rb file.)Then include it into the test using the code in Listing 5.38. Verify by running thetest suite that the new code is still valid. Note: Listing 5.37 uses regular expressions,which we’ll learn more about in Section 6.2.4. (Thanks to Alex Chaffee for thesuggestion and code used in this exercise.)
Listing 5.35 Using an RSpec shared example to eliminate test duplication.spec/requests/static_pages_spec.rb
require 'spec helper'
describe "Static pages" do
subject { page }
shared examples for "all static pages" do
it { should have selector('h1', text: heading) }
it { should have selector('title', text: full title(page title)) }
end
describe "Home page" do
before { visit root path }
let(:heading) { 'Sample App' }
let(:page title) { '' }
it should behave like "all static pages"
www.it-ebooks.info
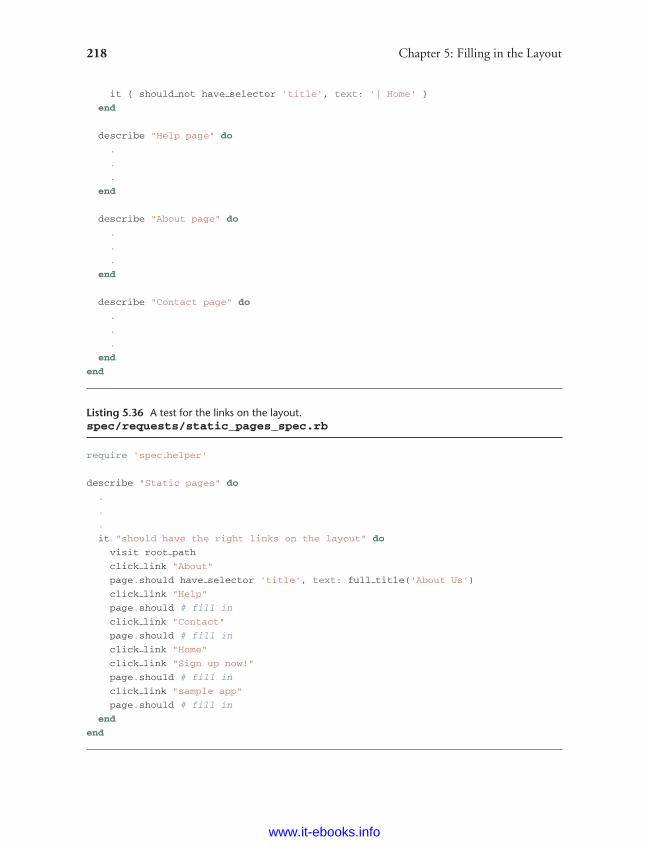
ptg8286261
218 Chapter 5: Filling in the Layout
it { should not have selector 'title', text: '| Home' }
end
describe "Help page" do
.
.
.
end
describe "About page" do
.
.
.
end
describe "Contact page" do
.
.
.
end
end
Listing 5.36 A test for the links on the layout.spec/requests/static_pages_spec.rb
require 'spec helper'
describe "Static pages" do
.
.
.
it "should have the right links on the layout" do
visit root path
click link "About"
page.should have selector 'title', text: full title('About Us')
click link "Help"
page.should # fill in
click link "Contact"
page.should # fill in
click link "Home"
click link "Sign up now!"
page.should # fill in
click link "sample app"
page.should # fill in
end
end
www.it-ebooks.info
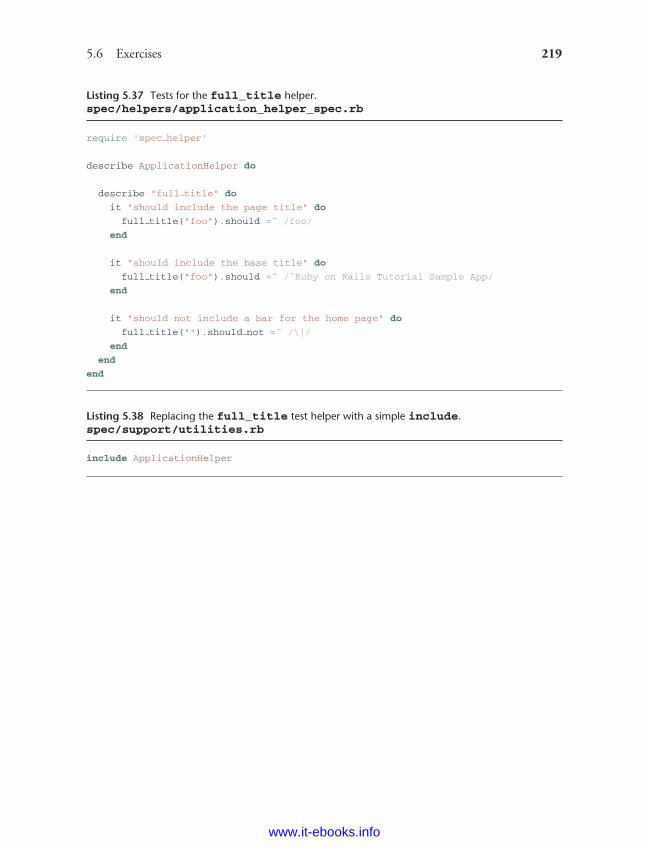
ptg8286261
5.6 Exercises 219
Listing 5.37 Tests for the full_title helper.spec/helpers/application_helper_spec.rb
require 'spec helper'
describe ApplicationHelper do
describe "full title" do
it "should include the page title" do
full title("foo").should =˜ /foo/
end
it "should include the base title" do
full title("foo").should =˜ /ˆRuby on Rails Tutorial Sample App/
end
it "should not include a bar for the home page" do
full title("").should not =˜ /\|/
end
end
end
Listing 5.38 Replacing the full_title test helper with a simple include.spec/support/utilities.rb
include ApplicationHelper
www.it-ebooks.info

ptg8286261
CHAPTER 6Modeling Users
In Chapter 5, we ended with a stub page for creating new users (Section 5.4); overthe course of the next four chapters, we’ll fulfill the promise implicit in this incipientsignup page. The first critical step is to create a data model for users of our site, togetherwith a way to store that data. In Chapter 7, we’ll give users the ability to sign up forour site and create a user profile page. Once users can sign up, we’ll let them sign inand sign out as well (Chapter 8), and in Chapter 9 (Section 9.2.1) we’ll learn how toprotect pages from improper access. Taken together, the material in Chapter 6 throughChapter 9 develops a full Rails login and authentication system. As you may know,there are various pre-built authentication solutions for Rails; Box 6.1 explains why, atleast at first, it’s probably a better idea to roll your own.
This is a long and action-packed chapter, and you may find it unusually challenging,especially if you are new to data modeling. By the end of it, though, we will have createdan industrial-strength system for validating, storing, and retrieving user information.
Box 6.1 Roll Your Own Authentication System
Virtually all web applications require a login and authentication system of some sort.As a result, most web frameworks have a plethora of options for implementing suchsystems, and Rails is no exception. Examples of authentication and authorizationsystems include Clearance, Authlogic, Devise, and CanCan (as well as non-Rails-specific solutions built on top of OpenID or OAuth). It’s reasonable to ask why weshould reinvent the wheel. Why not just use an off-the-shelf solution instead of rollingour own?
For one, practical experience that authentication on most sites requires extensivecustomization and modifying a third-party product is often more work than writing
221
www.it-ebooks.info
ptg8286261
222 Chapter 6: Modeling Users
the system from scratch. In addition, off-the-shelf systems are ‘‘black boxes,’’ withpotentially mysterious innards; when you write your own system, you are far morelikely to understand it. Moreover, recent additions to Rails (Section 6.3) make it easyto write a custom authentication system. Finally, if you do end up using a third-partysystem later on, you’ll be in a much better position to understand and modify it ifyou’ve first built one yourself.
As usual, if you’re following along using Git for version control, now would be agood time to make a topic branch for modeling users:
$ git checkout master
$ git checkout -b modeling-users
(The first line here is just to make sure that you start on the master branch, so thatthe modeling-users topic branch is based on master. You can skip that command ifyou’re already on the master branch.)
6.1 User ModelAlthough the ultimate goal of the next three chapters is to make a signup page for oursite (mocked up in Figure 6.1), it would do little good now to accept information fornew users: We don’t currently have any place to put it. Thus, the first step in signingup users is to make a data structure to capture and store their information.
In Rails, the default data structure for a data model is called, naturally enough,a model (the M in MVC from Section 1.2.6). The default Rails solution to the problemof persistence is to use a database for long-term data storage, and the default libraryfor interacting with the database is called Active Record.1 Active Record comes with ahost of methods for creating, saving, and finding data objects, all without having touse the structured query language (SQL)2 used by relational databases. Moreover, Railshas a feature called migrations to allow data definitions to be written in pure Ruby,without having to learn an SQL data definition language (DDL). The effect is that Rails
1. The name comes from the ‘‘active record pattern,’’ identified and named in Patterns of Enterprise ApplicationArchitecture by Martin Fowler.
2. Pronounced ‘‘ess-cue-ell,’’ although the alternate pronunciation ‘‘sequel’’ is also common.
www.it-ebooks.info
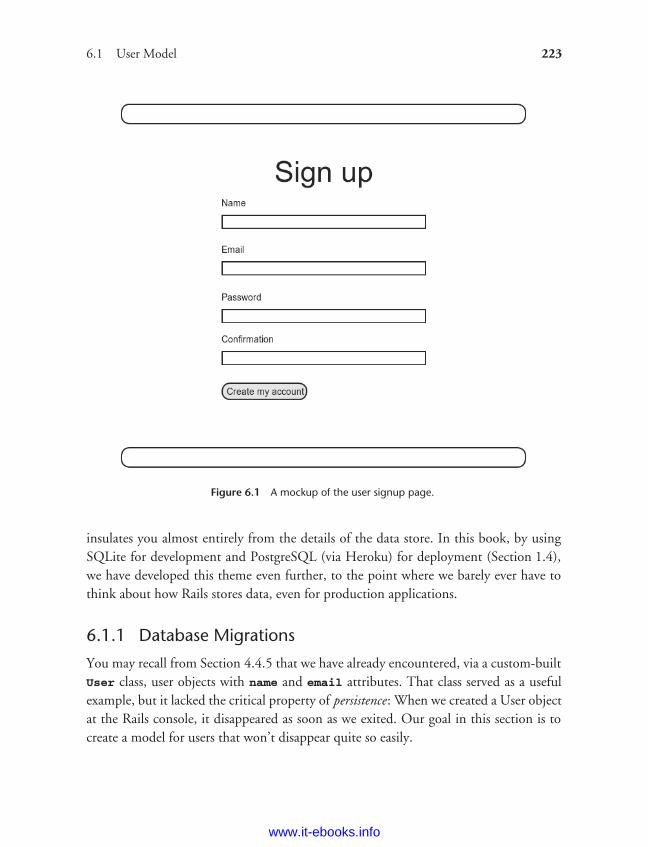
ptg8286261
6.1 User Model 223
Figure 6.1 A mockup of the user signup page.
insulates you almost entirely from the details of the data store. In this book, by usingSQLite for development and PostgreSQL (via Heroku) for deployment (Section 1.4),we have developed this theme even further, to the point where we barely ever have tothink about how Rails stores data, even for production applications.
6.1.1 Database Migrations
You may recall from Section 4.4.5 that we have already encountered, via a custom-builtUser class, user objects with name and email attributes. That class served as a usefulexample, but it lacked the critical property of persistence: When we created a User objectat the Rails console, it disappeared as soon as we exited. Our goal in this section is tocreate a model for users that won’t disappear quite so easily.
www.it-ebooks.info
ptg8286261
224 Chapter 6: Modeling Users
As with the User class in Section 4.4.5, we’ll start by modeling a user with twoattributes, a name and an email address, the latter of which we’ll use as a uniqueusername.3 (We’ll add an attribute for passwords in Section 6.3.) In Listing 4.9, we didthis with Ruby’s attr_accessor method:
class User
attr accessor :name, :email
.
.
.
end
In contrast, when using Rails to model users, we don’t need to identify the attributesexplicitly. As noted briefly above, to store data Rails uses a relational database by default,which consists of tables composed of data rows, where each row has columns of dataattributes. For example, to store users with names and email addresses, we’ll create ausers table with name and email columns (with each row corresponding to one user).By naming the columns in this way, we’ll let Active Record figure out the User objectattributes for us.
Let’s see how this works. (If this discussion gets too abstract for your taste, be patient;the console examples starting in Section 6.1.3 and the database browser screenshots inFigure 6.3 and Figure 6.6 should make things clearer.) You may recall from Listing 5.28that we created a Users controller (along with a new action) using the command
$ rails generate controller Users new --no-test-framework
There is an analogous command for making a model: generate model. Listing 6.1shows the command to generate a User model with two attributes, name and email.
Listing 6.1 Generating a User model.
$ rails generate model User name:string email:string
invoke active record
create db/migrate/[timestamp] create users.rb
create app/models/user.rb
invoke rspec
create spec/models/user spec.rb
3. By using an email address as the username, we open the theoretical possibility of communicating with ourusers at a future date.
www.it-ebooks.info
ptg8286261
6.1 User Model 225
(Note that, in contrast to the plural convention for controller names, model namesare singular: a Users controller, but a User model.) By passing the optional parametersname:string and email:string, we tell Rails about the two attributes we want,along with what types those attributes should be (in this case, string). Compare thiswith including the action names in Listing 3.4 and Listing 5.28.
One of the results of the generate command in Listing 6.1 is a new filecalled a migration. Migrations provide a way to alter the structure of the databaseincrementally, so that our data model can adapt to changing requirements. In the caseof the User model, the migration is created automatically by the model generationscript; it creates a users table with two columns, name and email, as shown inListing 6.2. (We’ll see in Section 6.2.5 and again in Section 6.3 how to make a migrationfrom scratch.)
Listing 6.2 Migration for the User model (to create a users table).db/migrate/[timestamp]_create_users.rb
class CreateUsers < ActiveRecord::Migration
def change
create table :users do |t|
t.string :name
t.string :email
t.timestamps
end
end
end
Note that the name of the migration file is prefixed by a timestamp based on when themigration was generated. In the early days of migrations, the filenames were prefixedwith incrementing integers, which caused conflicts for collaborating teams if multipleprogrammers had migrations with the same number. Barring the improbable scenarioof migrations generated the same second, using timestamps conveniently avoids suchcollisions.
The migration itself consists of a change method that determines the change tobe made to the database. In the case of Listing 6.2, change uses a Rails method calledcreate_table to create a table in the database for storing users. The create_table
method accepts a block (Section 4.3.2) with one block variable, in this case called t (for‘‘table’’). Inside the block, the create_table method uses the t object to create name
www.it-ebooks.info
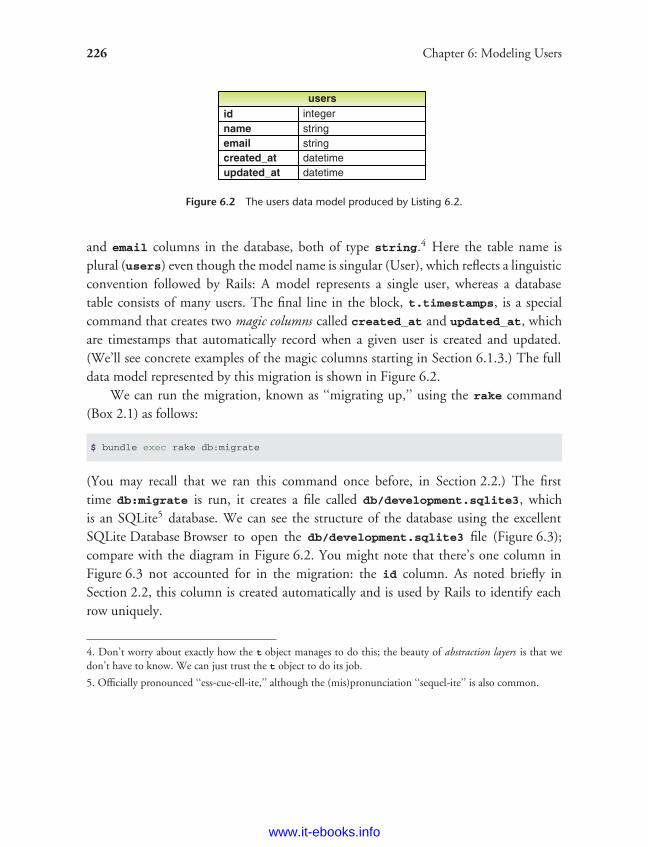
ptg8286261
226 Chapter 6: Modeling Users
Figure 6.2 The users data model produced by Listing 6.2.
and email columns in the database, both of type string.4 Here the table name isplural (users) even though the model name is singular (User), which reflects a linguisticconvention followed by Rails: A model represents a single user, whereas a databasetable consists of many users. The final line in the block, t.timestamps, is a specialcommand that creates two magic columns called created_at and updated_at, whichare timestamps that automatically record when a given user is created and updated.(We’ll see concrete examples of the magic columns starting in Section 6.1.3.) The fulldata model represented by this migration is shown in Figure 6.2.
We can run the migration, known as ‘‘migrating up,’’ using the rake command(Box 2.1) as follows:
$ bundle exec rake db:migrate
(You may recall that we ran this command once before, in Section 2.2.) The firsttime db:migrate is run, it creates a file called db/development.sqlite3, whichis an SQLite5 database. We can see the structure of the database using the excellentSQLite Database Browser to open the db/development.sqlite3 file (Figure 6.3);compare with the diagram in Figure 6.2. You might note that there’s one column inFigure 6.3 not accounted for in the migration: the id column. As noted briefly inSection 2.2, this column is created automatically and is used by Rails to identify eachrow uniquely.
4. Don’t worry about exactly how the t object manages to do this; the beauty of abstraction layers is that wedon’t have to know. We can just trust the t object to do its job.
5. Officially pronounced ‘‘ess-cue-ell-ite,’’ although the (mis)pronunciation ‘‘sequel-ite’’ is also common.
www.it-ebooks.info
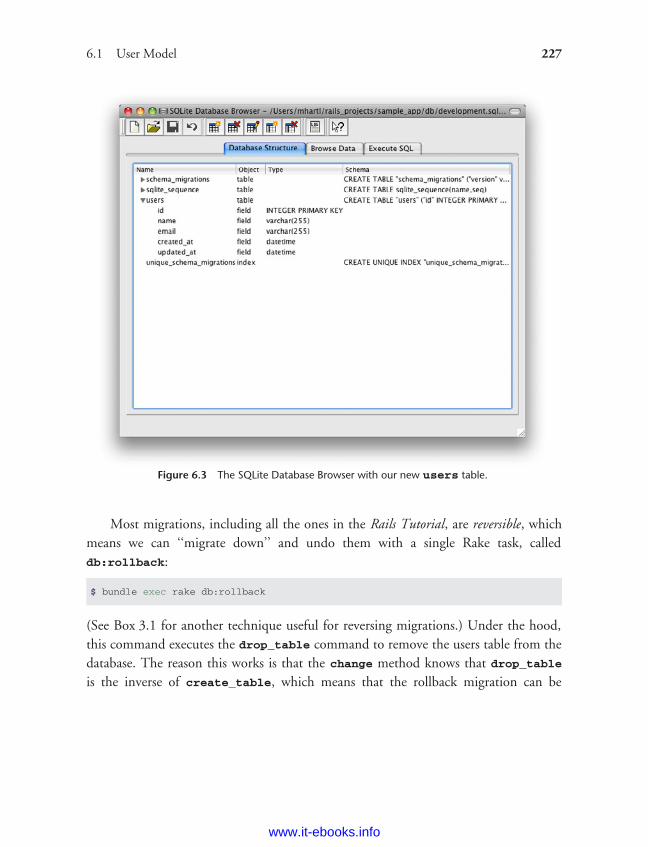
ptg8286261
6.1 User Model 227
Figure 6.3 The SQLite Database Browser with our new users table.
Most migrations, including all the ones in the Rails Tutorial, are reversible, whichmeans we can ‘‘migrate down’’ and undo them with a single Rake task, calleddb:rollback:
$ bundle exec rake db:rollback
(See Box 3.1 for another technique useful for reversing migrations.) Under the hood,this command executes the drop_table command to remove the users table from thedatabase. The reason this works is that the change method knows that drop_tableis the inverse of create_table, which means that the rollback migration can be
www.it-ebooks.info
ptg8286261
228 Chapter 6: Modeling Users
easily inferred. In the case of an irreversible migration, such as one to remove adatabase column, it is necessary to define separate up and down methods in placeof the single change method. Read about migrations in the Rails Guides for moreinformation.
If you rolled back the database, migrate up again before proceeding:
$ bundle exec rake db:migrate
6.1.2 The Model File
We’ve seen how the User model generation in Listing 6.1 generated a migration file(Listing 6.2), and we saw in Figure 6.3 the results of running this migration: It updateda file called development.sqlite3 by creating a table users with columns id, name,email, created_at, and updated_at. Listing 6.1 also created the model itself; therest of this section is dedicated to understanding it.
We begin by looking at the code for the User model, which lives in the file user.rbinside the app/models/ directory. It is, to put it mildly, very compact (Listing 6.3).(Note: The attr_accessible line will not appear if you are using Rails 3.2.2 or earlier.In this case, you should add it in Section 6.1.2.)
Listing 6.3 The brand new User model.app/models/user.rb
class User < ActiveRecord::Base
attr accessible :name, :email
end
Recall from Section 4.4.2 that the syntax class User < ActiveRecord::Base
means that the User class inherits from ActiveRecord::Base, so that the Usermodel automatically has all the functionality of the ActiveRecord::Base class. Ofcourse, knowledge of this inheritance doesn’t do any good unless we know whatActiveRecord::Base contains, and we’ll get a first look momentarily. Before wemove on, though, there are two tasks to complete.
Model AnnotationAlthough it’s not strictly necessary, you might find it convenient to annotate your Railsmodels using the annotate gem (Listing 6.4).
www.it-ebooks.info
ptg8286261
6.1 User Model 229
Listing 6.4 Adding the annotate gem to the Gemfile.
source 'https://rubygems.org'
.
.
.
group :development do
gem 'sqlite3', '1.3.5'
gem 'rspec-rails', '2.9.0'
gem 'annotate', '˜> 2.4.1.beta'
group :test do
.
.
.
end
(We place the annotate gem in a group :development block (analogous to group
:test) because the annotations aren’t needed in production applications.) We next
install it with bundle install:
$ bundle install
This gives us a command called annotate, which simply adds comments containing
the data model to the model file:
$ bundle exec annotate --position before
Annotated (1): User
The results appear in Listing 6.5.
Listing 6.5 The annotated User model.app/models/user.rb
# == Schema Information
#
# Table name: users
#
# id :integer not null, primary key
# name :string(255)
# email :string(255)
# created at :datetime
www.it-ebooks.info
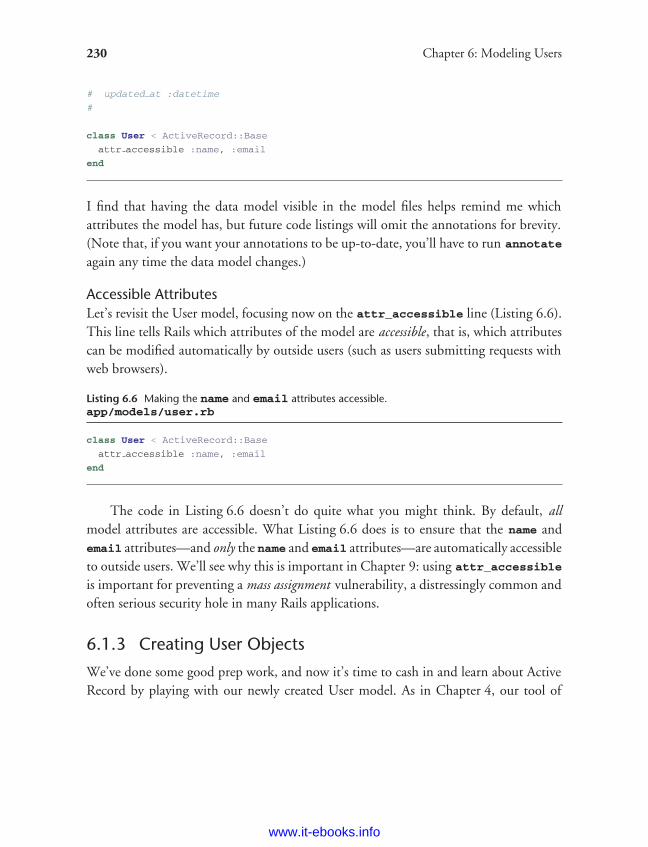
ptg8286261
230 Chapter 6: Modeling Users
# updated at :datetime
#
class User < ActiveRecord::Base
attr accessible :name, :email
end
I find that having the data model visible in the model files helps remind me whichattributes the model has, but future code listings will omit the annotations for brevity.(Note that, if you want your annotations to be up-to-date, you’ll have to run annotate
again any time the data model changes.)
Accessible AttributesLet’s revisit the User model, focusing now on the attr_accessible line (Listing 6.6).This line tells Rails which attributes of the model are accessible, that is, which attributescan be modified automatically by outside users (such as users submitting requests withweb browsers).
Listing 6.6 Making the name and email attributes accessible.app/models/user.rb
class User < ActiveRecord::Base
attr accessible :name, :email
end
The code in Listing 6.6 doesn’t do quite what you might think. By default, allmodel attributes are accessible. What Listing 6.6 does is to ensure that the name andemail attributes—and only the name and email attributes—are automatically accessibleto outside users. We’ll see why this is important in Chapter 9: using attr_accessible
is important for preventing a mass assignment vulnerability, a distressingly common andoften serious security hole in many Rails applications.
6.1.3 Creating User Objects
We’ve done some good prep work, and now it’s time to cash in and learn about ActiveRecord by playing with our newly created User model. As in Chapter 4, our tool of
www.it-ebooks.info
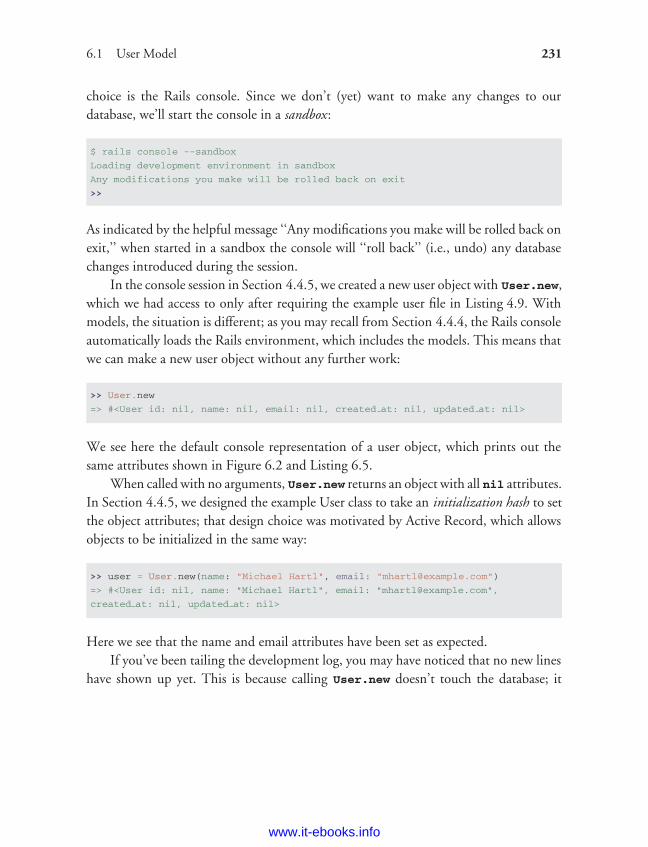
ptg8286261
6.1 User Model 231
choice is the Rails console. Since we don’t (yet) want to make any changes to ourdatabase, we’ll start the console in a sandbox:
$ rails console --sandbox
Loading development environment in sandbox
Any modifications you make will be rolled back on exit
>>
As indicated by the helpful message ‘‘Any modifications you make will be rolled back onexit,’’ when started in a sandbox the console will ‘‘roll back’’ (i.e., undo) any databasechanges introduced during the session.
In the console session in Section 4.4.5, we created a new user object with User.new,which we had access to only after requiring the example user file in Listing 4.9. Withmodels, the situation is different; as you may recall from Section 4.4.4, the Rails consoleautomatically loads the Rails environment, which includes the models. This means thatwe can make a new user object without any further work:
>> User.new
=> #<User id: nil, name: nil, email: nil, created at: nil, updated at: nil>
We see here the default console representation of a user object, which prints out thesame attributes shown in Figure 6.2 and Listing 6.5.
When called with no arguments, User.new returns an object with all nil attributes.In Section 4.4.5, we designed the example User class to take an initialization hash to setthe object attributes; that design choice was motivated by Active Record, which allowsobjects to be initialized in the same way:
>> user = User.new(name: "Michael Hartl", email: "[email protected]")
=> #<User id: nil, name: "Michael Hartl", email: "[email protected]",
created at: nil, updated at: nil>
Here we see that the name and email attributes have been set as expected.If you’ve been tailing the development log, you may have noticed that no new lines
have shown up yet. This is because calling User.new doesn’t touch the database; it
www.it-ebooks.info
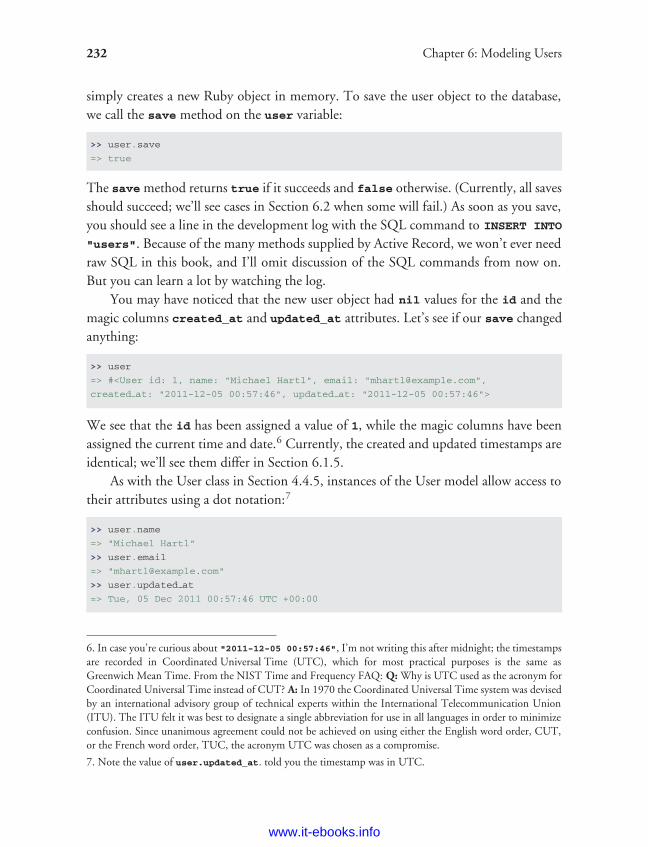
ptg8286261
232 Chapter 6: Modeling Users
simply creates a new Ruby object in memory. To save the user object to the database,we call the save method on the user variable:
>> user.save
=> true
The save method returns true if it succeeds and false otherwise. (Currently, all savesshould succeed; we’ll see cases in Section 6.2 when some will fail.) As soon as you save,you should see a line in the development log with the SQL command to INSERT INTO
"users". Because of the many methods supplied by Active Record, we won’t ever needraw SQL in this book, and I’ll omit discussion of the SQL commands from now on.But you can learn a lot by watching the log.
You may have noticed that the new user object had nil values for the id and themagic columns created_at and updated_at attributes. Let’s see if our save changedanything:
>> user
=> #<User id: 1, name: "Michael Hartl", email: "[email protected]",
created at: "2011-12-05 00:57:46", updated at: "2011-12-05 00:57:46">
We see that the id has been assigned a value of 1, while the magic columns have beenassigned the current time and date.6 Currently, the created and updated timestamps areidentical; we’ll see them differ in Section 6.1.5.
As with the User class in Section 4.4.5, instances of the User model allow access totheir attributes using a dot notation:7
>> user.name
=> "Michael Hartl"
>> user.email
=> "[email protected]"
>> user.updated at
=> Tue, 05 Dec 2011 00:57:46 UTC +00:00
6. In case you’re curious about "2011-12-05 00:57:46", I’m not writing this after midnight; the timestampsare recorded in Coordinated Universal Time (UTC), which for most practical purposes is the same asGreenwich Mean Time. From the NIST Time and Frequency FAQ: Q: Why is UTC used as the acronym forCoordinated Universal Time instead of CUT? A: In 1970 the Coordinated Universal Time system was devisedby an international advisory group of technical experts within the International Telecommunication Union(ITU). The ITU felt it was best to designate a single abbreviation for use in all languages in order to minimizeconfusion. Since unanimous agreement could not be achieved on using either the English word order, CUT,or the French word order, TUC, the acronym UTC was chosen as a compromise.
7. Note the value of user.updated_at. told you the timestamp was in UTC.
www.it-ebooks.info
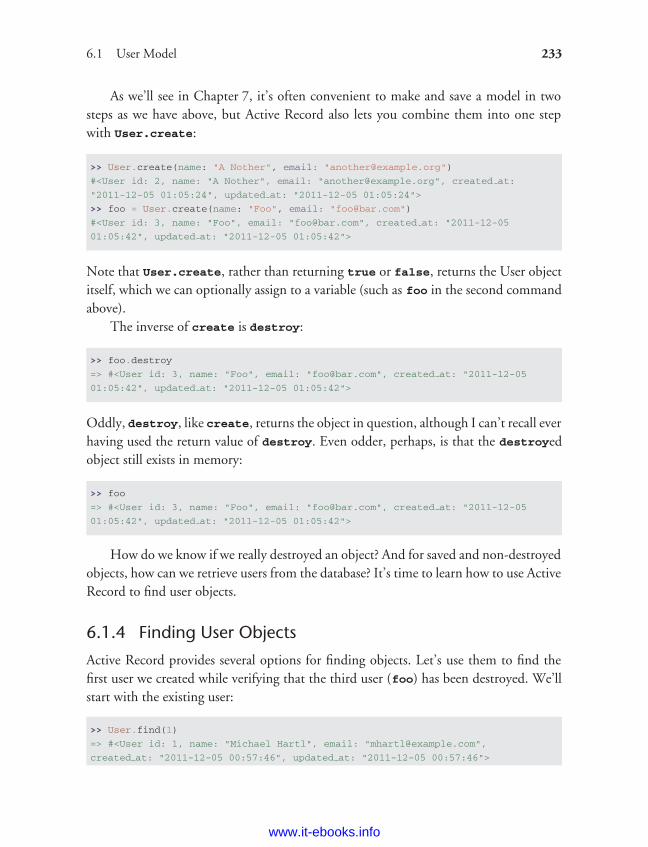
ptg8286261
6.1 User Model 233
As we’ll see in Chapter 7, it’s often convenient to make and save a model in twosteps as we have above, but Active Record also lets you combine them into one stepwith User.create:
>> User.create(name: "A Nother", email: "[email protected]")
#<User id: 2, name: "A Nother", email: "[email protected]", created at:
"2011-12-05 01:05:24", updated at: "2011-12-05 01:05:24">
>> foo = User.create(name: "Foo", email: "[email protected]")
#<User id: 3, name: "Foo", email: "[email protected]", created at: "2011-12-05
01:05:42", updated at: "2011-12-05 01:05:42">
Note that User.create, rather than returning true or false, returns the User objectitself, which we can optionally assign to a variable (such as foo in the second commandabove).
The inverse of create is destroy:
>> foo.destroy
=> #<User id: 3, name: "Foo", email: "[email protected]", created at: "2011-12-05
01:05:42", updated at: "2011-12-05 01:05:42">
Oddly, destroy, like create, returns the object in question, although I can’t recall everhaving used the return value of destroy. Even odder, perhaps, is that the destroyedobject still exists in memory:
>> foo
=> #<User id: 3, name: "Foo", email: "[email protected]", created at: "2011-12-05
01:05:42", updated at: "2011-12-05 01:05:42">
How do we know if we really destroyed an object? And for saved and non-destroyedobjects, how can we retrieve users from the database? It’s time to learn how to use ActiveRecord to find user objects.
6.1.4 Finding User Objects
Active Record provides several options for finding objects. Let’s use them to find thefirst user we created while verifying that the third user (foo) has been destroyed. We’llstart with the existing user:
>> User.find(1)
=> #<User id: 1, name: "Michael Hartl", email: "[email protected]",
created at: "2011-12-05 00:57:46", updated at: "2011-12-05 00:57:46">
www.it-ebooks.info
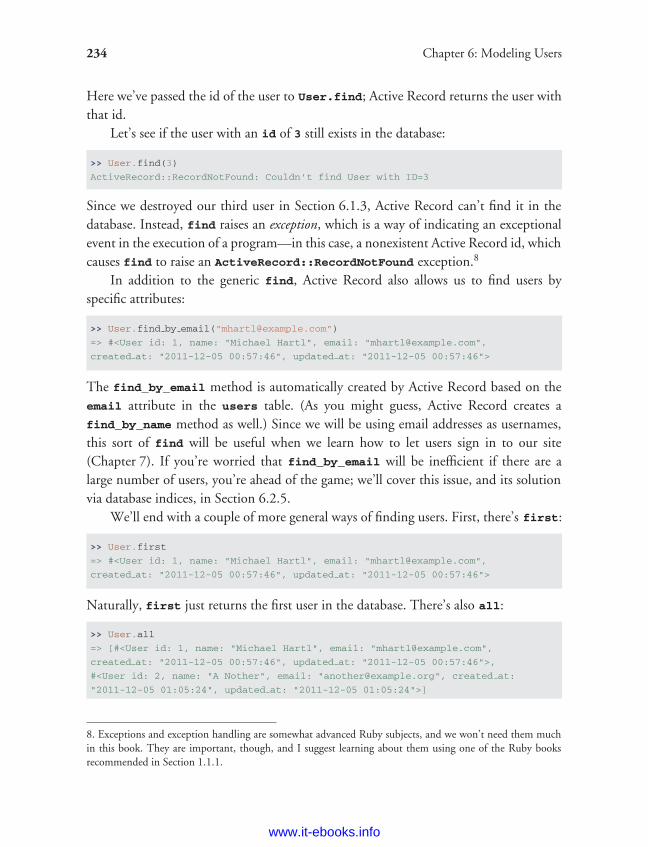
ptg8286261
234 Chapter 6: Modeling Users
Here we’ve passed the id of the user to User.find; Active Record returns the user withthat id.
Let’s see if the user with an id of 3 still exists in the database:
>> User.find(3)
ActiveRecord::RecordNotFound: Couldn't find User with ID=3
Since we destroyed our third user in Section 6.1.3, Active Record can’t find it in thedatabase. Instead, find raises an exception, which is a way of indicating an exceptionalevent in the execution of a program—in this case, a nonexistent Active Record id, whichcauses find to raise an ActiveRecord::RecordNotFound exception.8
In addition to the generic find, Active Record also allows us to find users byspecific attributes:
>> User.find by email("[email protected]")
=> #<User id: 1, name: "Michael Hartl", email: "[email protected]",
created at: "2011-12-05 00:57:46", updated at: "2011-12-05 00:57:46">
The find_by_email method is automatically created by Active Record based on theemail attribute in the users table. (As you might guess, Active Record creates afind_by_name method as well.) Since we will be using email addresses as usernames,this sort of find will be useful when we learn how to let users sign in to our site(Chapter 7). If you’re worried that find_by_email will be inefficient if there are alarge number of users, you’re ahead of the game; we’ll cover this issue, and its solutionvia database indices, in Section 6.2.5.
We’ll end with a couple of more general ways of finding users. First, there’s first:
>> User.first
=> #<User id: 1, name: "Michael Hartl", email: "[email protected]",
created at: "2011-12-05 00:57:46", updated at: "2011-12-05 00:57:46">
Naturally, first just returns the first user in the database. There’s also all:
>> User.all
=> [#<User id: 1, name: "Michael Hartl", email: "[email protected]",
created at: "2011-12-05 00:57:46", updated at: "2011-12-05 00:57:46">,
#<User id: 2, name: "A Nother", email: "[email protected]", created at:
"2011-12-05 01:05:24", updated at: "2011-12-05 01:05:24">]
8. Exceptions and exception handling are somewhat advanced Ruby subjects, and we won’t need them muchin this book. They are important, though, and I suggest learning about them using one of the Ruby booksrecommended in Section 1.1.1.
www.it-ebooks.info
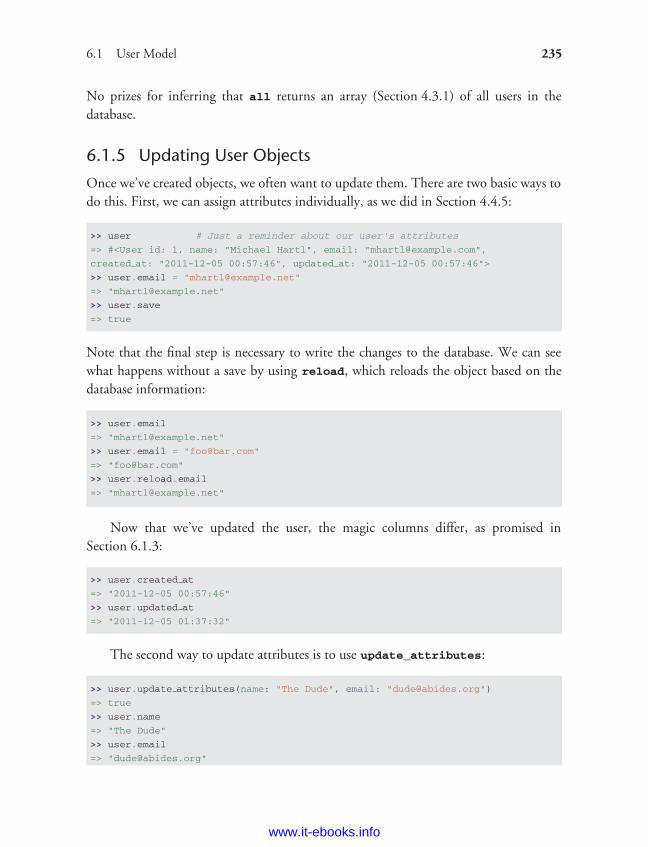
ptg8286261
6.1 User Model 235
No prizes for inferring that all returns an array (Section 4.3.1) of all users in thedatabase.
6.1.5 Updating User Objects
Once we’ve created objects, we often want to update them. There are two basic ways todo this. First, we can assign attributes individually, as we did in Section 4.4.5:
>> user # Just a reminder about our user's attributes
=> #<User id: 1, name: "Michael Hartl", email: "[email protected]",
created at: "2011-12-05 00:57:46", updated at: "2011-12-05 00:57:46">
>> user.email = "[email protected]"
=> "[email protected]"
>> user.save
=> true
Note that the final step is necessary to write the changes to the database. We can seewhat happens without a save by using reload, which reloads the object based on thedatabase information:
>> user.email
=> "[email protected]"
>> user.email = "[email protected]"
=> "[email protected]"
>> user.reload.email
=> "[email protected]"
Now that we’ve updated the user, the magic columns differ, as promised inSection 6.1.3:
>> user.created at
=> "2011-12-05 00:57:46"
>> user.updated at
=> "2011-12-05 01:37:32"
The second way to update attributes is to use update_attributes:
>> user.update attributes(name: "The Dude", email: "[email protected]")
=> true
>> user.name
=> "The Dude"
>> user.email
=> "[email protected]"
www.it-ebooks.info
ptg8286261
236 Chapter 6: Modeling Users
The update_attributes method accepts a hash of attributes, and on success performsboth the update and the save in one step (returning true to indicate that the save wentthrough). It’s worth noting that, once you have defined some attributes as accessibleusing attr_accessible (Section 6.1.2), only those attributes can be modified usingupdate_attributes. If you ever find that your models mysteriously start refusing toupdate certain columns, check to make sure that those columns are included in the callto attr_accessible.
6.2 User ValidationsThe User model we created in Section 6.1 now has working name and email attributes,but they are completely generic: Any string (including an empty one) is currentlyvalid in either case. And yet, names and email addresses are more specific thanthis. For example, name should be non-blank, and email should match the specificformat characteristic of email addresses. Moreover, since we’ll be using email addressesas unique usernames when users sign in, we shouldn’t allow email duplicates inthe database.
In short, we shouldn’t allow name and email to be just any strings; we shouldenforce certain constraints on their values. Active Record allows us to impose suchconstraints using validations. In this section, we’ll cover several of the most com-mon cases, validating presence, length, format, and uniqueness. In Section 6.3.4 we’lladd a final common validation, confirmation. And we’ll see in Section 7.3 howvalidations give us convenient error messages when users make submissions thatviolate them.
6.2.1 Initial User Tests
As with the other features of our sample app, we’ll add User model validations usingtest-driven development. Because we didn’t pass the
--no-test-framework
flag when we generated the User model (unlike, e.g., Listing 5.28), the command inListing 6.1 produces an initial spec for testing users, but in this case it’s practically blank(Listing 6.7).
www.it-ebooks.info
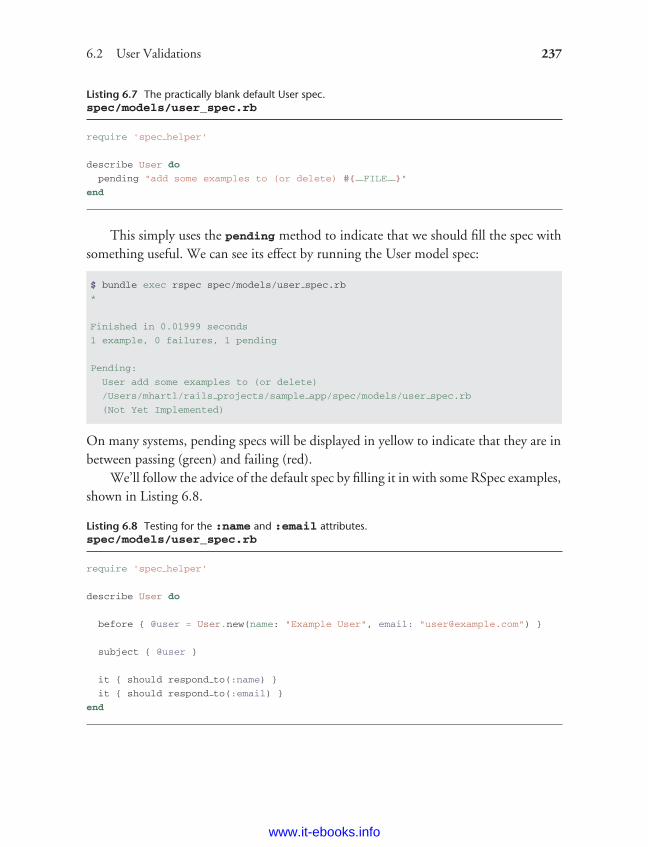
ptg8286261
6.2 User Validations 237
Listing 6.7 The practically blank default User spec.spec/models/user_spec.rb
require 'spec helper'
describe User do
pending "add some examples to (or delete) #{ FILE }"
end
This simply uses the pending method to indicate that we should fill the spec withsomething useful. We can see its effect by running the User model spec:
$ bundle exec rspec spec/models/user spec.rb
*
Finished in 0.01999 seconds
1 example, 0 failures, 1 pending
Pending:
User add some examples to (or delete)
/Users/mhartl/rails projects/sample app/spec/models/user spec.rb
(Not Yet Implemented)
On many systems, pending specs will be displayed in yellow to indicate that they are inbetween passing (green) and failing (red).
We’ll follow the advice of the default spec by filling it in with some RSpec examples,shown in Listing 6.8.
Listing 6.8 Testing for the :name and :email attributes.spec/models/user_spec.rb
require 'spec helper'
describe User do
before { @user = User.new(name: "Example User", email: "[email protected]") }
subject { @user }
it { should respond to(:name) }
it { should respond to(:email) }
end
www.it-ebooks.info
ptg8286261
238 Chapter 6: Modeling Users
The before block, which we saw in Listing 5.27, runs the code inside the block beforeeach example—in this case, creating a new @user instance variable using User.new
and a valid initialization hash. Then
subject { @user }
makes @user the default subject of the test example, as seen before in the context of thepage variable in Section 5.3.4.
The two examples in Listing 6.8 test for the existence of name and email attributes:
it { should respond to(:name) }
it { should respond to(:email) }
These examples implicitly use the Ruby method respond_to?, which accepts a symboland returns true if the object responds to the given method or attribute and false
otherwise:
$ rails console --sandbox
>> user = User.new
>> user.respond to?(:name)
=> true
>> user.respond to?(:foobar)
=> false
(Recall from Section 4.2.3 that Ruby uses a question mark to indicate such true/falseboolean methods.) The tests themselves rely on the boolean convention used by RSpec:the code
@user.respond to?(:name)
can be tested using the RSpec code
@user.should respond to(:name)
Because of subject { @user }, we can leave off @user in the test, yielding
it { should respond to(:name) }
www.it-ebooks.info
ptg8286261
6.2 User Validations 239
These kinds of tests allow us to use TDD to add new attributes and methods to ourUser model, and as a side effect we get a nice specification for the methods that all Userobjects should respond to.
You should verify at this point that the tests fail:
$ bundle exec rspec spec/
Even though we created a development database with rake db:migrate in Section6.1.1, the tests fail because the test database doesn’t yet know about the data model(indeed, it doesn’t yet exist at all). We can create a test database with the correctstructure, and thereby get the tests to pass, using the db:test:prepare Rake task:
$ bundle exec rake db:test:prepare
This just ensures that the data model from the development database, db/development.sqlite3, is reflected in the test database, db/test.sqlite3. Failure to run this Raketask after a migration is a common source of confusion. In addition, sometimes thetest database gets corrupted and needs to be reset. If your test suite is mysteriouslybreaking, be sure to try running rake db:test:prepare to see if that fixes theproblem.
6.2.2 Validating Presence
Perhaps the most elementary validation is presence, which simply verifies that a givenattribute is present. For example, in this section we’ll ensure that both the name andemail fields are present before a user gets saved to the database. In Section 7.3.2, we’llsee how to propagate this requirement up to the signup form for creating new users.
We’ll start with a test for the presence of a name attribute. Although the first stepin TDD is to write a failing test (Section 3.2.1), in this case we don’t yet know enoughabout validations to write the proper test, so we’ll write the validation first, using theconsole to understand it. Then we’ll comment out the validation, write a failing test, andverify that uncommenting the validation gets the test to pass. This procedure may seempedantic for such a simple test, but I have seen many ‘‘simple’’ tests that actually testthe wrong thing; being meticulous about TDD is simply the only way to be confidentthat we’re testing the right thing. (This comment-out technique is also useful when
www.it-ebooks.info
ptg8286261
240 Chapter 6: Modeling Users
rescuing an application whose application code is already written but—quelle horreur!—has no tests.)
The way to validate the presence of the name attribute is to use the validates
method with argument presence: true, as shown in Listing 6.9. The presence:
true argument is a one-element options hash; recall from Section 4.3.4 that curly bracesare optional when passing hashes as the final argument in a method. (As noted inSection 5.1.1, the use of options hashes is a recurring theme in Rails.)
Listing 6.9 Validating the presence of a name attribute.app/models/user.rb
class User < ActiveRecord::Base
attr accessible :name, :email
validates :name, presence: true
end
Listing 6.9 may look like magic, but validates is just a method, as indeed isattr_accessible. An equivalent formulation of Listing 6.9 using parentheses is asfollows:
class User < ActiveRecord::Base
attr accessible(:name, :email)
validates(:name, presence: true)
end
Let’s drop into the console to see the effects of adding a validation to our Usermodel:9
$ rails console --sandbox
>> user = User.new(name: "", email: "[email protected]")
>> user.save
=> false
>> user.valid?
=> false
Here user.save returns false, indicating a failed save. In the final command, we usethe valid? method, which returns false when the object fails one or more validations,
9. I’ll omit the output of console commands when they are not particularly instructive—for example, theresults of User.new.
www.it-ebooks.info
ptg8286261
6.2 User Validations 241
and true when all validations pass. In this case, we only have one validation, so weknow which one failed, but it can still be helpful to check using the errors objectgenerated on failure:
>> user.errors.full messages
=> ["Name can't be blank"]
(The error message is a hint that Rails validates the presence of an attribute using theblank? method, which we saw at the end of Section 4.4.3.)
Now for the failing test. To ensure that our incipient test will fail, let’s commentout the validation at this point (Listing 6.10).
Listing 6.10 Commenting out a validation to ensure a failing test.app/models/user.rb
class User < ActiveRecord::Base
attr accessible :name, :email
# validates :name, presence: true
end
The initial validation tests then appear as in Listing 6.11.
Listing 6.11 A failing test for validation of the name attribute.spec/models/user_spec.rb
require 'spec helper'
describe User do
before do
@user = User.new(name: "Example User", email: "[email protected]")
end
subject { @user }
it { should respond to(:name) }
it { should respond to(:email) }
it { should be valid }
describe "when name is not present" do
before { @user.name = " " }
it { should not be valid }
end
end
www.it-ebooks.info
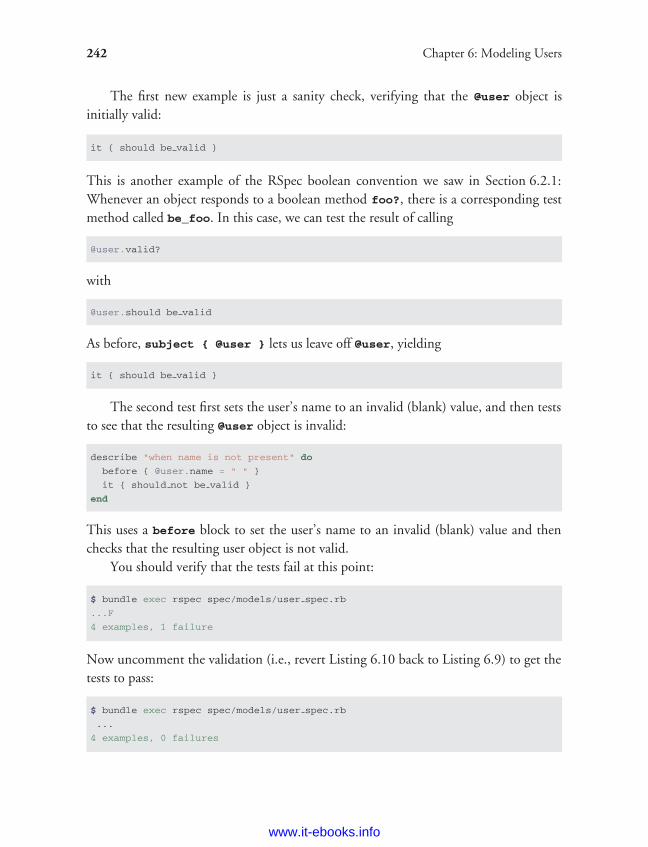
ptg8286261
242 Chapter 6: Modeling Users
The first new example is just a sanity check, verifying that the @user object isinitially valid:
it { should be valid }
This is another example of the RSpec boolean convention we saw in Section 6.2.1:Whenever an object responds to a boolean method foo?, there is a corresponding testmethod called be_foo. In this case, we can test the result of calling
@user.valid?
with
@user.should be valid
As before, subject { @user } lets us leave off @user, yielding
it { should be valid }
The second test first sets the user’s name to an invalid (blank) value, and then teststo see that the resulting @user object is invalid:
describe "when name is not present" do
before { @user.name = " " }
it { should not be valid }
end
This uses a before block to set the user’s name to an invalid (blank) value and thenchecks that the resulting user object is not valid.
You should verify that the tests fail at this point:
$ bundle exec rspec spec/models/user spec.rb
...F
4 examples, 1 failure
Now uncomment the validation (i.e., revert Listing 6.10 back to Listing 6.9) to get thetests to pass:
$ bundle exec rspec spec/models/user spec.rb
...
4 examples, 0 failures
www.it-ebooks.info

ptg8286261
6.2 User Validations 243
Of course, we also want to validate the presence of email addresses. The test(Listing 6.12) is analogous to the one for the name attribute.
Listing 6.12 A test for presence of the email attribute.spec/models/user_spec.rb
require 'spec helper'
describe User do
before do
@user = User.new(name: "Example User", email: "[email protected]")
end
.
.
.
describe "when email is not present" do
before { @user.email = " " }
it { should not be valid }
end
end
The implementation is also virtually the same, as seen in Listing 6.13.
Listing 6.13 Validating the presence of the name and email attributes.app/models/user.rb
class User < ActiveRecord::Base
attr accessible :name, :email
validates :name, presence: true
validates :email, presence: true
end
Now all the tests should pass, and the presence validations are complete.
6.2.3 Length Validation
We’ve constrained our User model to require a name for each user, but we should gofurther: The users’ names will be displayed on the sample site, so we should enforcesome limit on their length. With all the work we did in Section 6.2.2, this step is easy.
We start with a test. There’s no science to picking a maximum length; we’ll justpull 50 out of thin air as a reasonable upper bound, which means verifying that namesof 51 characters are too long (Listing 6.14).
www.it-ebooks.info
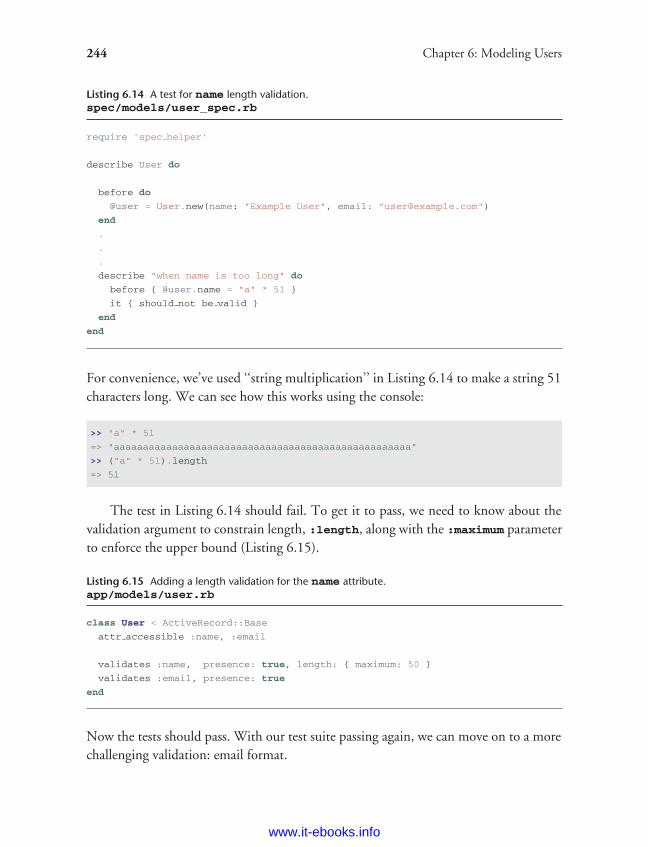
ptg8286261
244 Chapter 6: Modeling Users
Listing 6.14 A test for name length validation.spec/models/user_spec.rb
require 'spec helper'
describe User do
before do
@user = User.new(name: "Example User", email: "[email protected]")
end
.
.
.
describe "when name is too long" do
before { @user.name = "a" * 51 }
it { should not be valid }
end
end
For convenience, we’ve used ‘‘string multiplication’’ in Listing 6.14 to make a string 51characters long. We can see how this works using the console:
>> "a" * 51
=> "aaaaaaaaaaaaaaaaaaaaaaaaaaaaaaaaaaaaaaaaaaaaaaaaaaa"
>> ("a" * 51).length
=> 51
The test in Listing 6.14 should fail. To get it to pass, we need to know about thevalidation argument to constrain length, :length, along with the :maximum parameterto enforce the upper bound (Listing 6.15).
Listing 6.15 Adding a length validation for the name attribute.app/models/user.rb
class User < ActiveRecord::Base
attr accessible :name, :email
validates :name, presence: true, length: { maximum: 50 }
validates :email, presence: true
end
Now the tests should pass. With our test suite passing again, we can move on to a morechallenging validation: email format.
www.it-ebooks.info
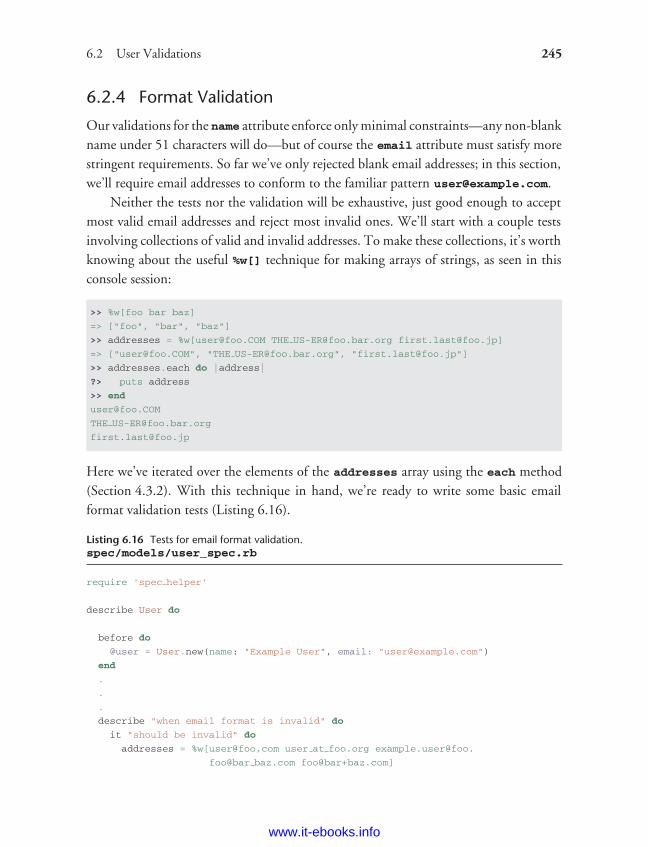
ptg8286261
6.2 User Validations 245
6.2.4 Format Validation
Our validations for the name attribute enforce only minimal constraints—any non-blankname under 51 characters will do—but of course the email attribute must satisfy morestringent requirements. So far we’ve only rejected blank email addresses; in this section,we’ll require email addresses to conform to the familiar pattern [email protected].
Neither the tests nor the validation will be exhaustive, just good enough to acceptmost valid email addresses and reject most invalid ones. We’ll start with a couple testsinvolving collections of valid and invalid addresses. To make these collections, it’s worthknowing about the useful %w[] technique for making arrays of strings, as seen in thisconsole session:
>> %w[foo bar baz]
=> ["foo", "bar", "baz"]
>> addresses = %w[[email protected] THE [email protected] [email protected]]
=> ["[email protected]", "THE [email protected]", "[email protected]"]
>> addresses.each do |address|
?> puts address
>> end
Here we’ve iterated over the elements of the addresses array using the each method(Section 4.3.2). With this technique in hand, we’re ready to write some basic emailformat validation tests (Listing 6.16).
Listing 6.16 Tests for email format validation.spec/models/user_spec.rb
require 'spec helper'
describe User do
before do
@user = User.new(name: "Example User", email: "[email protected]")
end
.
.
.
describe "when email format is invalid" do
it "should be invalid" do
addresses = %w[user@foo,com user at foo.org example.user@foo.
foo@bar baz.com foo@bar+baz.com]
www.it-ebooks.info
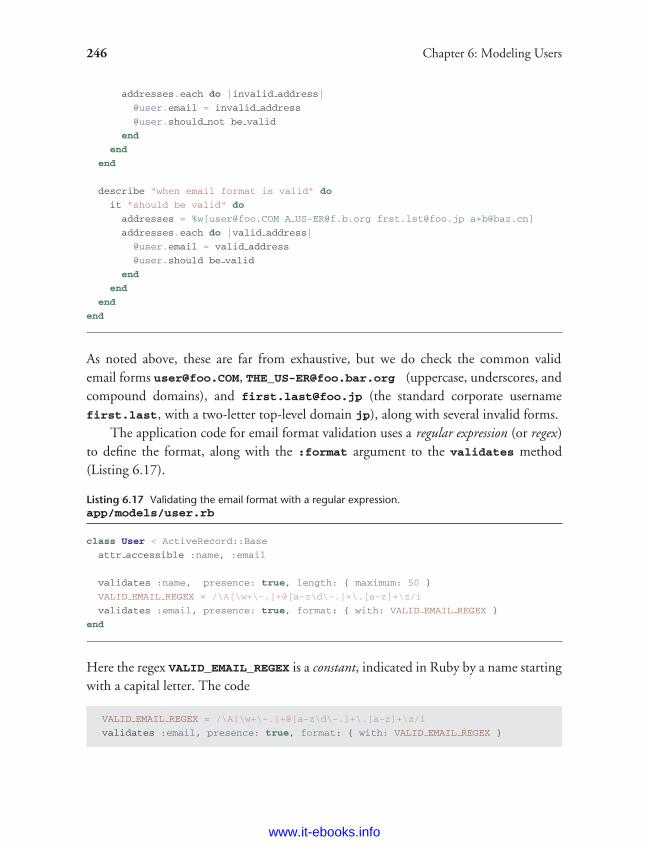
ptg8286261
246 Chapter 6: Modeling Users
addresses.each do |invalid address|
@user.email = invalid address
@user.should not be valid
end
end
end
describe "when email format is valid" do
it "should be valid" do
addresses = %w[[email protected] A [email protected] [email protected] [email protected]]
addresses.each do |valid address|
@user.email = valid address
@user.should be valid
end
end
end
end
As noted above, these are far from exhaustive, but we do check the common validemail forms [email protected], [email protected] (uppercase, underscores, andcompound domains), and [email protected] (the standard corporate usernamefirst.last, with a two-letter top-level domain jp), along with several invalid forms.
The application code for email format validation uses a regular expression (or regex)to define the format, along with the :format argument to the validates method(Listing 6.17).
Listing 6.17 Validating the email format with a regular expression.app/models/user.rb
class User < ActiveRecord::Base
attr accessible :name, :email
validates :name, presence: true, length: { maximum: 50 }
VALID EMAIL REGEX = /\A[\w+\-.]+@[a-z\d\-.]+\.[a-z]+\z/i
validates :email, presence: true, format: { with: VALID EMAIL REGEX }
end
Here the regex VALID_EMAIL_REGEX is a constant, indicated in Ruby by a name startingwith a capital letter. The code
VALID EMAIL REGEX = /\A[\w+\-.]+@[a-z\d\-.]+\.[a-z]+\z/i
validates :email, presence: true, format: { with: VALID EMAIL REGEX }
www.it-ebooks.info
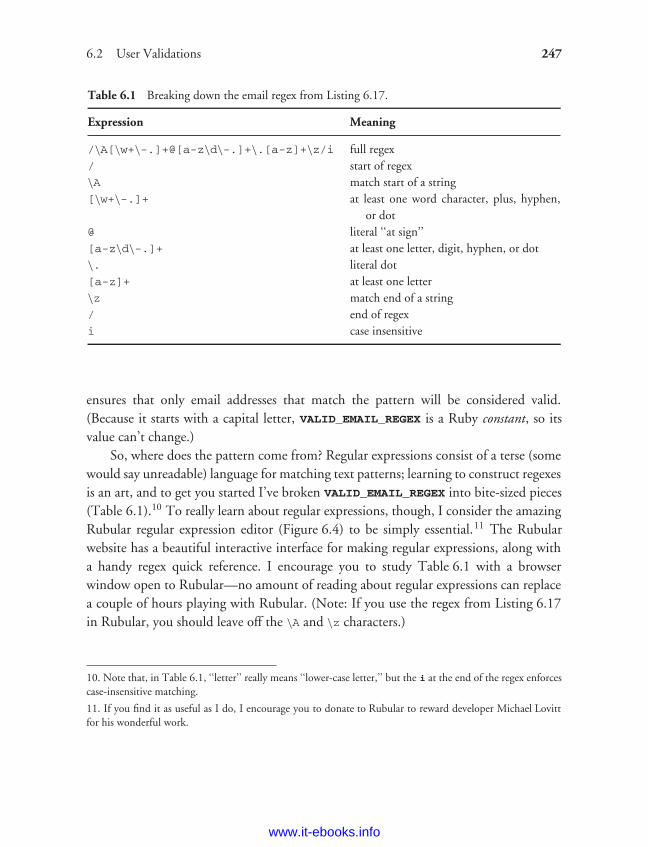
ptg8286261
6.2 User Validations 247
Table 6.1 Breaking down the email regex from Listing 6.17.
Expression Meaning
/\A[\w+\-.]+@[a-z\d\-.]+\.[a-z]+\z/i full regex/ start of regex\A match start of a string[\w+\-.]+ at least one word character, plus, hyphen,
or dot@ literal ‘‘at sign’’[a-z\d\-.]+ at least one letter, digit, hyphen, or dot\. literal dot[a-z]+ at least one letter\z match end of a string/ end of regexi case insensitive
ensures that only email addresses that match the pattern will be considered valid.(Because it starts with a capital letter, VALID_EMAIL_REGEX is a Ruby constant, so itsvalue can’t change.)
So, where does the pattern come from? Regular expressions consist of a terse (somewould say unreadable) language for matching text patterns; learning to construct regexesis an art, and to get you started I’ve broken VALID_EMAIL_REGEX into bite-sized pieces(Table 6.1).10 To really learn about regular expressions, though, I consider the amazingRubular regular expression editor (Figure 6.4) to be simply essential.11 The Rubularwebsite has a beautiful interactive interface for making regular expressions, along witha handy regex quick reference. I encourage you to study Table 6.1 with a browserwindow open to Rubular—no amount of reading about regular expressions can replacea couple of hours playing with Rubular. (Note: If you use the regex from Listing 6.17in Rubular, you should leave off the \A and \z characters.)
10. Note that, in Table 6.1, ‘‘letter’’ really means ‘‘lower-case letter,’’ but the i at the end of the regex enforcescase-insensitive matching.
11. If you find it as useful as I do, I encourage you to donate to Rubular to reward developer Michael Lovittfor his wonderful work.
www.it-ebooks.info
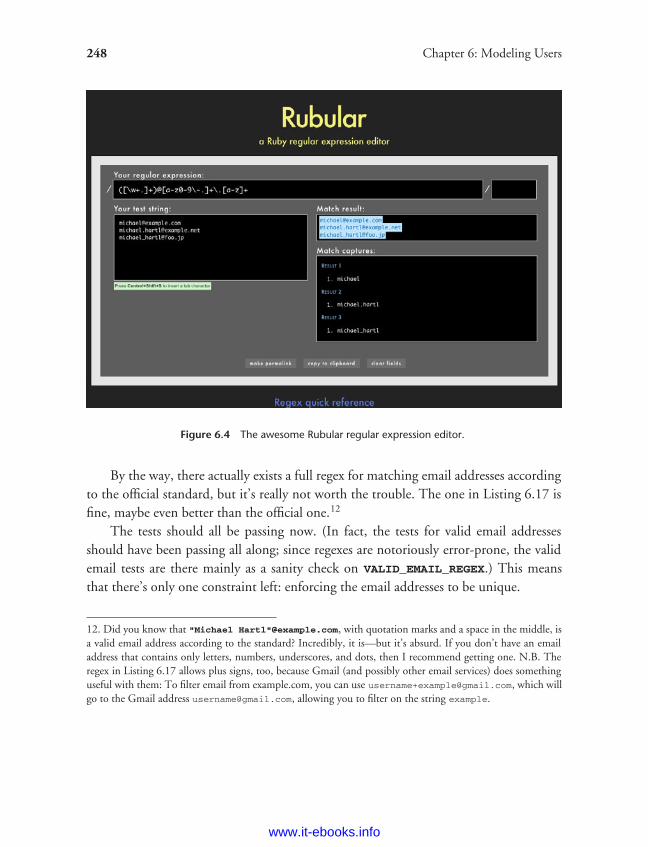
ptg8286261
248 Chapter 6: Modeling Users
Figure 6.4 The awesome Rubular regular expression editor.
By the way, there actually exists a full regex for matching email addresses accordingto the official standard, but it’s really not worth the trouble. The one in Listing 6.17 isfine, maybe even better than the official one.12
The tests should all be passing now. (In fact, the tests for valid email addressesshould have been passing all along; since regexes are notoriously error-prone, the validemail tests are there mainly as a sanity check on VALID_EMAIL_REGEX.) This meansthat there’s only one constraint left: enforcing the email addresses to be unique.
12. Did you know that "Michael Hartl"@example.com, with quotation marks and a space in the middle, isa valid email address according to the standard? Incredibly, it is—but it’s absurd. If you don’t have an emailaddress that contains only letters, numbers, underscores, and dots, then I recommend getting one. N.B. Theregex in Listing 6.17 allows plus signs, too, because Gmail (and possibly other email services) does somethinguseful with them: To filter email from example.com, you can use [email protected], which willgo to the Gmail address [email protected], allowing you to filter on the string example.
www.it-ebooks.info
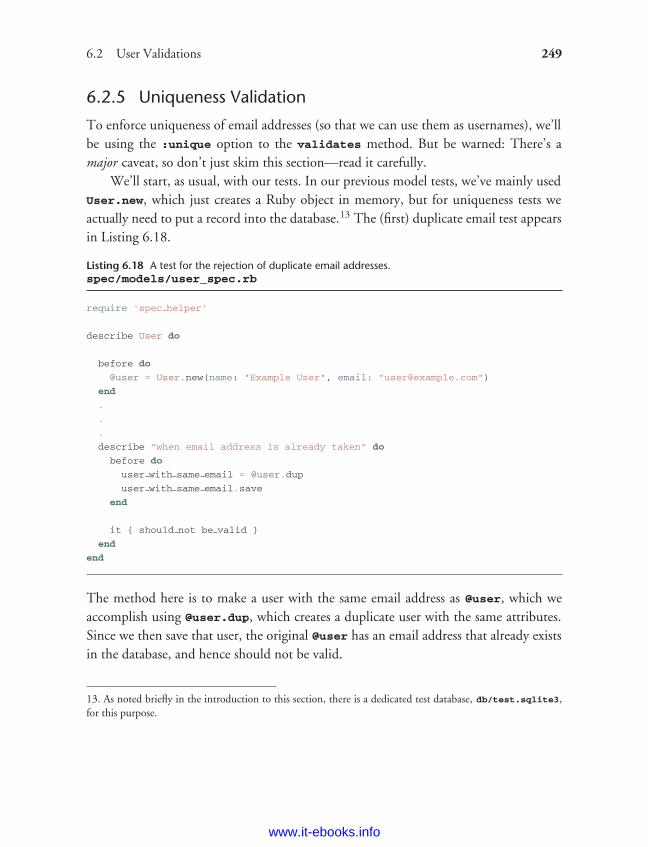
ptg8286261
6.2 User Validations 249
6.2.5 Uniqueness Validation
To enforce uniqueness of email addresses (so that we can use them as usernames), we’llbe using the :unique option to the validates method. But be warned: There’s amajor caveat, so don’t just skim this section—read it carefully.
We’ll start, as usual, with our tests. In our previous model tests, we’ve mainly usedUser.new, which just creates a Ruby object in memory, but for uniqueness tests weactually need to put a record into the database.13 The (first) duplicate email test appearsin Listing 6.18.
Listing 6.18 A test for the rejection of duplicate email addresses.spec/models/user_spec.rb
require 'spec helper'
describe User do
before do
@user = User.new(name: "Example User", email: "[email protected]")
end
.
.
.
describe "when email address is already taken" do
before do
user with same email = @user.dup
user with same email.save
end
it { should not be valid }
end
end
The method here is to make a user with the same email address as @user, which weaccomplish using @user.dup, which creates a duplicate user with the same attributes.Since we then save that user, the original @user has an email address that already existsin the database, and hence should not be valid.
13. As noted briefly in the introduction to this section, there is a dedicated test database, db/test.sqlite3,for this purpose.
www.it-ebooks.info
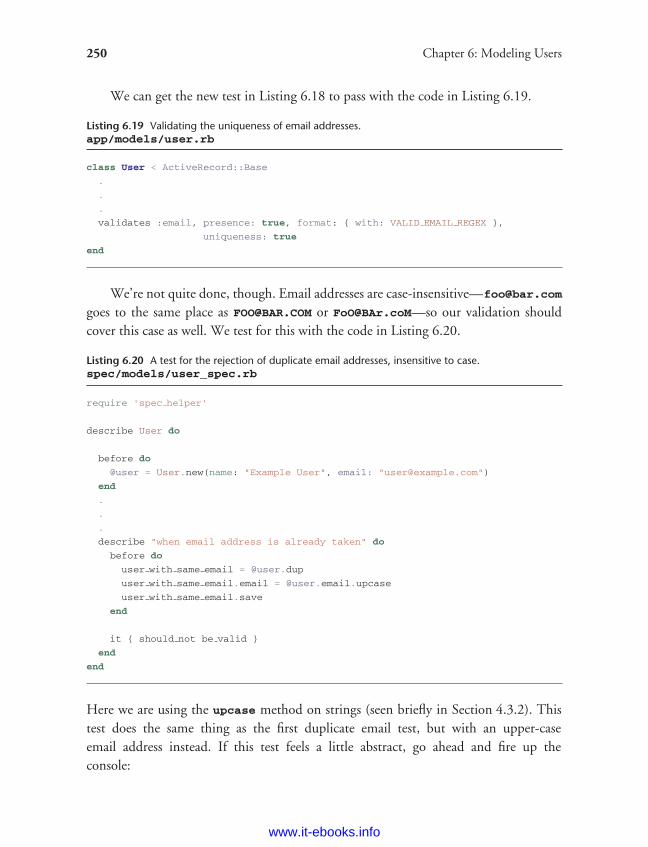
ptg8286261
250 Chapter 6: Modeling Users
We can get the new test in Listing 6.18 to pass with the code in Listing 6.19.
Listing 6.19 Validating the uniqueness of email addresses.app/models/user.rb
class User < ActiveRecord::Base
.
.
.
validates :email, presence: true, format: { with: VALID EMAIL REGEX },
uniqueness: true
end
We’re not quite done, though. Email addresses are case-insensitive—[email protected]
goes to the same place as [email protected] or [email protected]—so our validation shouldcover this case as well. We test for this with the code in Listing 6.20.
Listing 6.20 A test for the rejection of duplicate email addresses, insensitive to case.spec/models/user_spec.rb
require 'spec helper'
describe User do
before do
@user = User.new(name: "Example User", email: "[email protected]")
end
.
.
.
describe "when email address is already taken" do
before do
user with same email = @user.dup
user with same email.email = @user.email.upcase
user with same email.save
end
it { should not be valid }
end
end
Here we are using the upcase method on strings (seen briefly in Section 4.3.2). Thistest does the same thing as the first duplicate email test, but with an upper-caseemail address instead. If this test feels a little abstract, go ahead and fire up theconsole:
www.it-ebooks.info
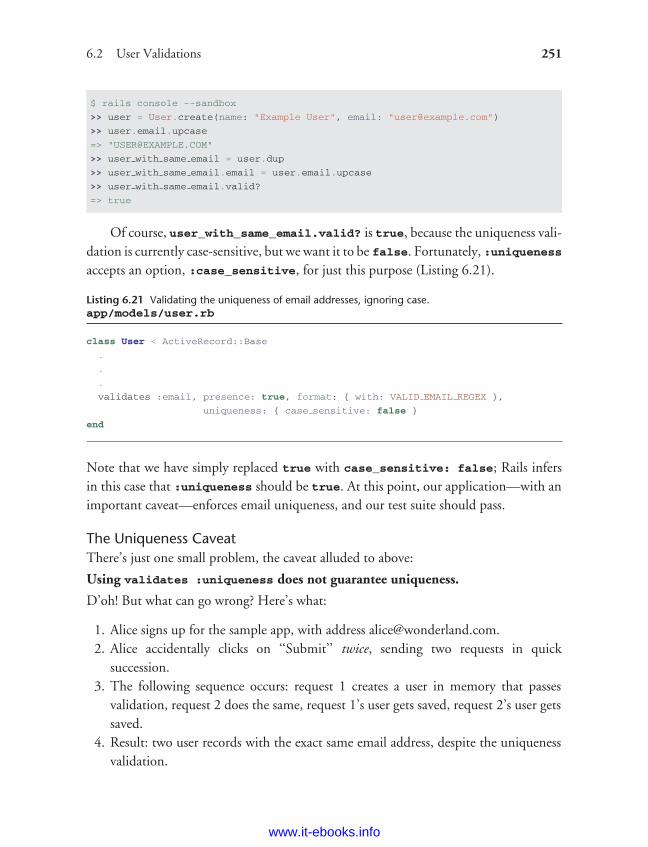
ptg8286261
6.2 User Validations 251
$ rails console --sandbox
>> user = User.create(name: "Example User", email: "[email protected]")
>> user.email.upcase
=> "[email protected]"
>> user with same email = user.dup
>> user with same email.email = user.email.upcase
>> user with same email.valid?
=> true
Of course, user_with_same_email.valid? is true, because the uniqueness vali-dation is currently case-sensitive, but we want it to be false. Fortunately, :uniquenessaccepts an option, :case_sensitive, for just this purpose (Listing 6.21).
Listing 6.21 Validating the uniqueness of email addresses, ignoring case.app/models/user.rb
class User < ActiveRecord::Base
.
.
.
validates :email, presence: true, format: { with: VALID EMAIL REGEX },
uniqueness: { case sensitive: false }
end
Note that we have simply replaced true with case_sensitive: false; Rails infersin this case that :uniqueness should be true. At this point, our application—with animportant caveat—enforces email uniqueness, and our test suite should pass.
The Uniqueness CaveatThere’s just one small problem, the caveat alluded to above:
Using validates :uniqueness does not guarantee uniqueness.
D’oh! But what can go wrong? Here’s what:
1. Alice signs up for the sample app, with address [email protected]. Alice accidentally clicks on ‘‘Submit’’ twice, sending two requests in quick
succession.3. The following sequence occurs: request 1 creates a user in memory that passes
validation, request 2 does the same, request 1’s user gets saved, request 2’s user getssaved.
4. Result: two user records with the exact same email address, despite the uniquenessvalidation.
www.it-ebooks.info
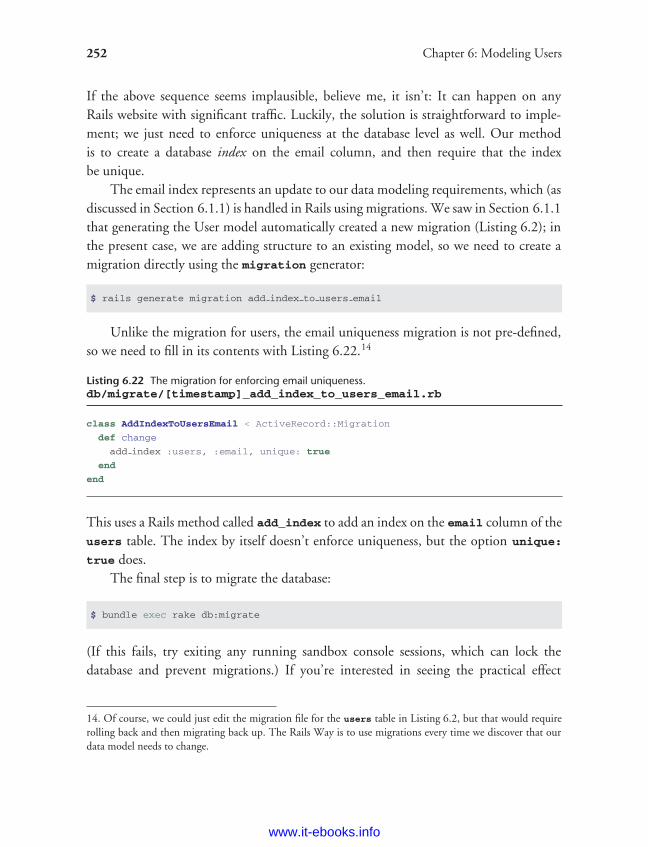
ptg8286261
252 Chapter 6: Modeling Users
If the above sequence seems implausible, believe me, it isn’t: It can happen on anyRails website with significant traffic. Luckily, the solution is straightforward to imple-ment; we just need to enforce uniqueness at the database level as well. Our methodis to create a database index on the email column, and then require that the indexbe unique.
The email index represents an update to our data modeling requirements, which (asdiscussed in Section 6.1.1) is handled in Rails using migrations. We saw in Section 6.1.1that generating the User model automatically created a new migration (Listing 6.2); inthe present case, we are adding structure to an existing model, so we need to create amigration directly using the migration generator:
$ rails generate migration add index to users email
Unlike the migration for users, the email uniqueness migration is not pre-defined,so we need to fill in its contents with Listing 6.22.14
Listing 6.22 The migration for enforcing email uniqueness.db/migrate/[timestamp]_add_index_to_users_email.rb
class AddIndexToUsersEmail < ActiveRecord::Migration
def change
add index :users, :email, unique: true
end
end
This uses a Rails method called add_index to add an index on the email column of theusers table. The index by itself doesn’t enforce uniqueness, but the option unique:
true does.The final step is to migrate the database:
$ bundle exec rake db:migrate
(If this fails, try exiting any running sandbox console sessions, which can lock thedatabase and prevent migrations.) If you’re interested in seeing the practical effect
14. Of course, we could just edit the migration file for the users table in Listing 6.2, but that would requirerolling back and then migrating back up. The Rails Way is to use migrations every time we discover that ourdata model needs to change.
www.it-ebooks.info
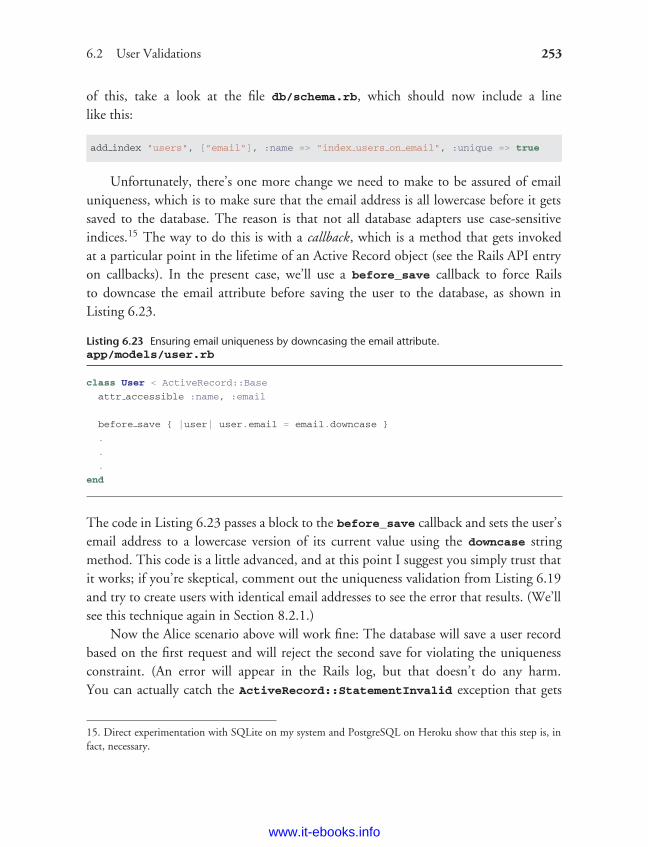
ptg8286261
6.2 User Validations 253
of this, take a look at the file db/schema.rb, which should now include a linelike this:
add index "users", ["email"], :name => "index users on email", :unique => true
Unfortunately, there’s one more change we need to make to be assured of emailuniqueness, which is to make sure that the email address is all lowercase before it getssaved to the database. The reason is that not all database adapters use case-sensitiveindices.15 The way to do this is with a callback, which is a method that gets invokedat a particular point in the lifetime of an Active Record object (see the Rails API entryon callbacks). In the present case, we’ll use a before_save callback to force Railsto downcase the email attribute before saving the user to the database, as shown inListing 6.23.
Listing 6.23 Ensuring email uniqueness by downcasing the email attribute.app/models/user.rb
class User < ActiveRecord::Base
attr accessible :name, :email
before save { |user| user.email = email.downcase }
.
.
.
end
The code in Listing 6.23 passes a block to the before_save callback and sets the user’semail address to a lowercase version of its current value using the downcase stringmethod. This code is a little advanced, and at this point I suggest you simply trust thatit works; if you’re skeptical, comment out the uniqueness validation from Listing 6.19and try to create users with identical email addresses to see the error that results. (We’llsee this technique again in Section 8.2.1.)
Now the Alice scenario above will work fine: The database will save a user recordbased on the first request and will reject the second save for violating the uniquenessconstraint. (An error will appear in the Rails log, but that doesn’t do any harm.You can actually catch the ActiveRecord::StatementInvalid exception that gets
15. Direct experimentation with SQLite on my system and PostgreSQL on Heroku show that this step is, infact, necessary.
www.it-ebooks.info
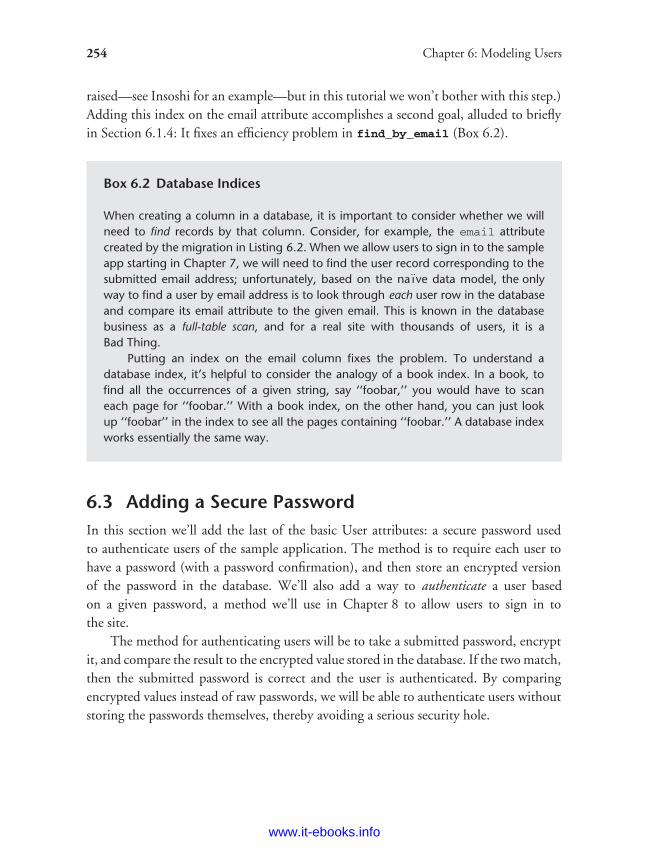
ptg8286261
254 Chapter 6: Modeling Users
raised—see Insoshi for an example—but in this tutorial we won’t bother with this step.)Adding this index on the email attribute accomplishes a second goal, alluded to brieflyin Section 6.1.4: It fixes an efficiency problem in find_by_email (Box 6.2).
Box 6.2 Database Indices
When creating a column in a database, it is important to consider whether we willneed to find records by that column. Consider, for example, the email attributecreated by the migration in Listing 6.2. When we allow users to sign in to the sampleapp starting in Chapter 7, we will need to find the user record corresponding to thesubmitted email address; unfortunately, based on the na ı̈ve data model, the onlyway to find a user by email address is to look through each user row in the databaseand compare its email attribute to the given email. This is known in the databasebusiness as a full-table scan, and for a real site with thousands of users, it is aBad Thing.
Putting an index on the email column fixes the problem. To understand adatabase index, it’s helpful to consider the analogy of a book index. In a book, tofind all the occurrences of a given string, say ‘‘foobar,’’ you would have to scaneach page for ‘‘foobar.’’ With a book index, on the other hand, you can just lookup ‘‘foobar’’ in the index to see all the pages containing ‘‘foobar.’’ A database indexworks essentially the same way.
6.3 Adding a Secure PasswordIn this section we’ll add the last of the basic User attributes: a secure password usedto authenticate users of the sample application. The method is to require each user tohave a password (with a password confirmation), and then store an encrypted versionof the password in the database. We’ll also add a way to authenticate a user basedon a given password, a method we’ll use in Chapter 8 to allow users to sign in tothe site.
The method for authenticating users will be to take a submitted password, encryptit, and compare the result to the encrypted value stored in the database. If the two match,then the submitted password is correct and the user is authenticated. By comparingencrypted values instead of raw passwords, we will be able to authenticate users withoutstoring the passwords themselves, thereby avoiding a serious security hole.
www.it-ebooks.info
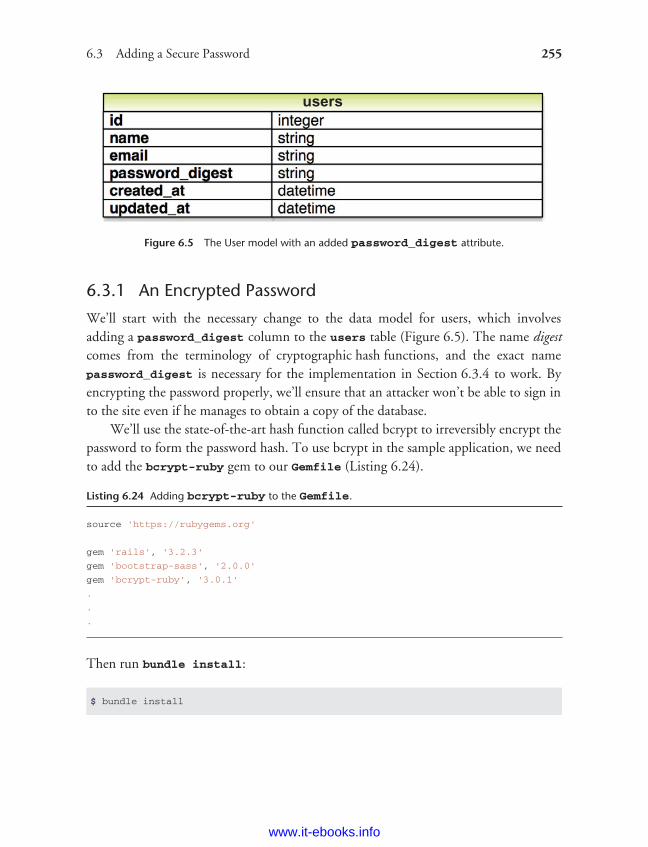
ptg8286261
6.3 Adding a Secure Password 255
Figure 6.5 The User model with an added password_digest attribute.
6.3.1 An Encrypted Password
We’ll start with the necessary change to the data model for users, which involvesadding a password_digest column to the users table (Figure 6.5). The name digestcomes from the terminology of cryptographic hash functions, and the exact namepassword_digest is necessary for the implementation in Section 6.3.4 to work. Byencrypting the password properly, we’ll ensure that an attacker won’t be able to sign into the site even if he manages to obtain a copy of the database.
We’ll use the state-of-the-art hash function called bcrypt to irreversibly encrypt thepassword to form the password hash. To use bcrypt in the sample application, we needto add the bcrypt-ruby gem to our Gemfile (Listing 6.24).
Listing 6.24 Adding bcrypt-ruby to the Gemfile.
source 'https://rubygems.org'
gem 'rails', '3.2.3'
gem 'bootstrap-sass', '2.0.0'
gem 'bcrypt-ruby', '3.0.1'
.
.
.
Then run bundle install:
$ bundle install
www.it-ebooks.info
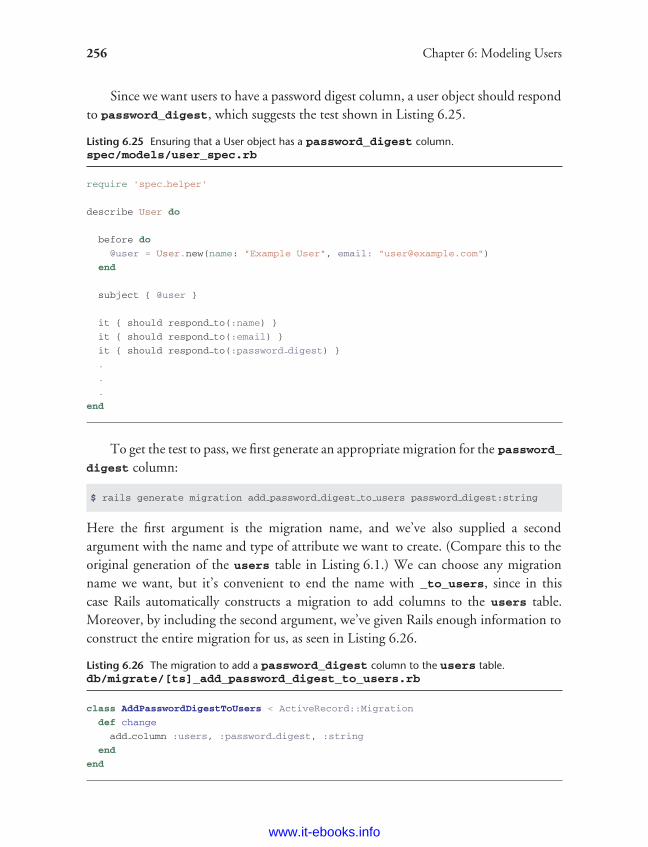
ptg8286261
256 Chapter 6: Modeling Users
Since we want users to have a password digest column, a user object should respondto password_digest, which suggests the test shown in Listing 6.25.
Listing 6.25 Ensuring that a User object has a password_digest column.spec/models/user_spec.rb
require 'spec helper'
describe User do
before do
@user = User.new(name: "Example User", email: "[email protected]")
end
subject { @user }
it { should respond to(:name) }
it { should respond to(:email) }
it { should respond to(:password digest) }
.
.
.
end
To get the test to pass, we first generate an appropriate migration for the password_digest column:
$ rails generate migration add password digest to users password digest:string
Here the first argument is the migration name, and we’ve also supplied a secondargument with the name and type of attribute we want to create. (Compare this to theoriginal generation of the users table in Listing 6.1.) We can choose any migrationname we want, but it’s convenient to end the name with _to_users, since in thiscase Rails automatically constructs a migration to add columns to the users table.Moreover, by including the second argument, we’ve given Rails enough information toconstruct the entire migration for us, as seen in Listing 6.26.
Listing 6.26 The migration to add a password_digest column to the users table.db/migrate/[ts]_add_password_digest_to_users.rb
class AddPasswordDigestToUsers < ActiveRecord::Migration
def change
add column :users, :password digest, :string
end
end
www.it-ebooks.info
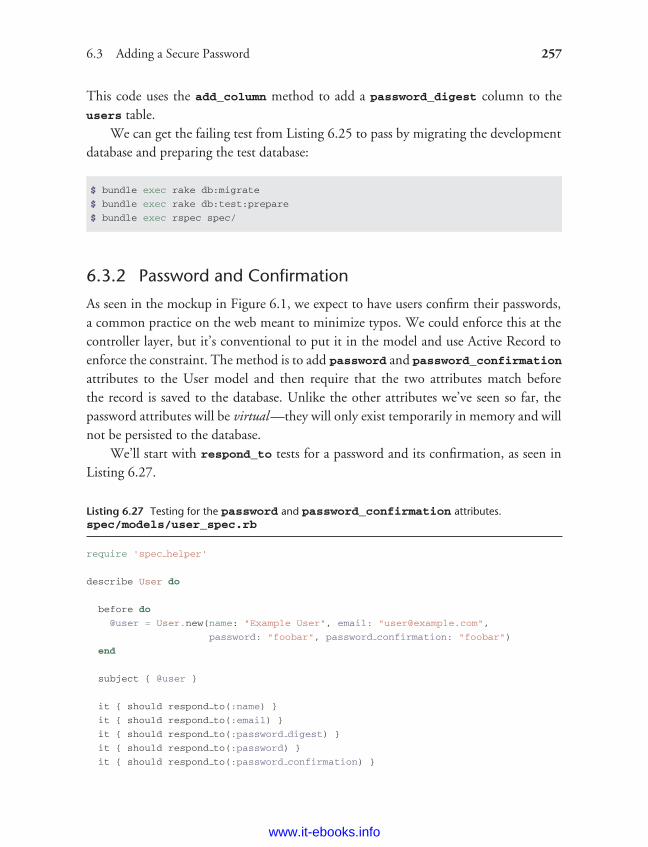
ptg8286261
6.3 Adding a Secure Password 257
This code uses the add_column method to add a password_digest column to theusers table.
We can get the failing test from Listing 6.25 to pass by migrating the developmentdatabase and preparing the test database:
$ bundle exec rake db:migrate
$ bundle exec rake db:test:prepare
$ bundle exec rspec spec/
6.3.2 Password and Confirmation
As seen in the mockup in Figure 6.1, we expect to have users confirm their passwords,a common practice on the web meant to minimize typos. We could enforce this at thecontroller layer, but it’s conventional to put it in the model and use Active Record toenforce the constraint. The method is to add password and password_confirmation
attributes to the User model and then require that the two attributes match beforethe record is saved to the database. Unlike the other attributes we’ve seen so far, thepassword attributes will be virtual—they will only exist temporarily in memory and willnot be persisted to the database.
We’ll start with respond_to tests for a password and its confirmation, as seen inListing 6.27.
Listing 6.27 Testing for the password and password_confirmation attributes.spec/models/user_spec.rb
require 'spec helper'
describe User do
before do
@user = User.new(name: "Example User", email: "[email protected]",
password: "foobar", password confirmation: "foobar")
end
subject { @user }
it { should respond to(:name) }
it { should respond to(:email) }
it { should respond to(:password digest) }
it { should respond to(:password) }
it { should respond to(:password confirmation) }
www.it-ebooks.info
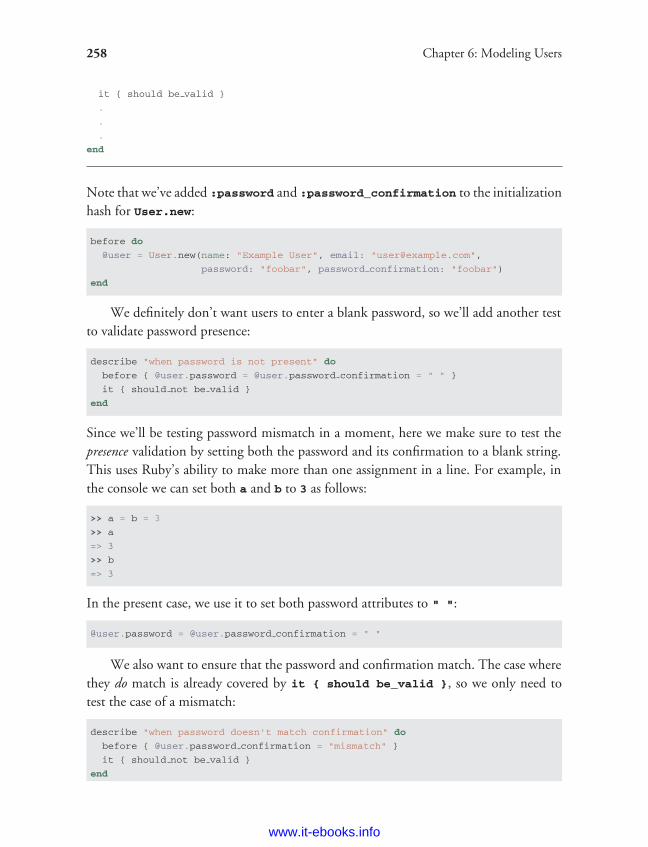
ptg8286261
258 Chapter 6: Modeling Users
it { should be valid }
.
.
.
end
Note that we’ve added :password and :password_confirmation to the initializationhash for User.new:
before do
@user = User.new(name: "Example User", email: "[email protected]",
password: "foobar", password confirmation: "foobar")
end
We definitely don’t want users to enter a blank password, so we’ll add another testto validate password presence:
describe "when password is not present" do
before { @user.password = @user.password confirmation = " " }
it { should not be valid }
end
Since we’ll be testing password mismatch in a moment, here we make sure to test thepresence validation by setting both the password and its confirmation to a blank string.This uses Ruby’s ability to make more than one assignment in a line. For example, inthe console we can set both a and b to 3 as follows:
>> a = b = 3
>> a
=> 3
>> b
=> 3
In the present case, we use it to set both password attributes to " ":
@user.password = @user.password confirmation = " "
We also want to ensure that the password and confirmation match. The case wherethey do match is already covered by it { should be_valid }, so we only need totest the case of a mismatch:
describe "when password doesn't match confirmation" do
before { @user.password confirmation = "mismatch" }
it { should not be valid }
end
www.it-ebooks.info
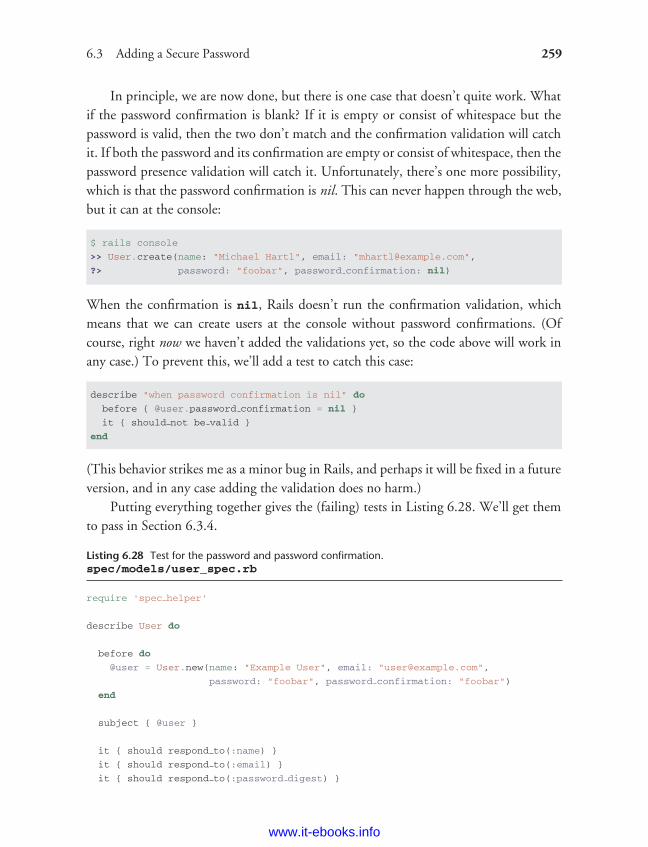
ptg8286261
6.3 Adding a Secure Password 259
In principle, we are now done, but there is one case that doesn’t quite work. Whatif the password confirmation is blank? If it is empty or consist of whitespace but thepassword is valid, then the two don’t match and the confirmation validation will catchit. If both the password and its confirmation are empty or consist of whitespace, then thepassword presence validation will catch it. Unfortunately, there’s one more possibility,which is that the password confirmation is nil. This can never happen through the web,but it can at the console:
$ rails console
>> User.create(name: "Michael Hartl", email: "[email protected]",
?> password: "foobar", password confirmation: nil)
When the confirmation is nil, Rails doesn’t run the confirmation validation, whichmeans that we can create users at the console without password confirmations. (Ofcourse, right now we haven’t added the validations yet, so the code above will work inany case.) To prevent this, we’ll add a test to catch this case:
describe "when password confirmation is nil" do
before { @user.password confirmation = nil }
it { should not be valid }
end
(This behavior strikes me as a minor bug in Rails, and perhaps it will be fixed in a futureversion, and in any case adding the validation does no harm.)
Putting everything together gives the (failing) tests in Listing 6.28. We’ll get themto pass in Section 6.3.4.
Listing 6.28 Test for the password and password confirmation.spec/models/user_spec.rb
require 'spec helper'
describe User do
before do
@user = User.new(name: "Example User", email: "[email protected]",
password: "foobar", password confirmation: "foobar")
end
subject { @user }
it { should respond to(:name) }
it { should respond to(:email) }
it { should respond to(:password digest) }
www.it-ebooks.info
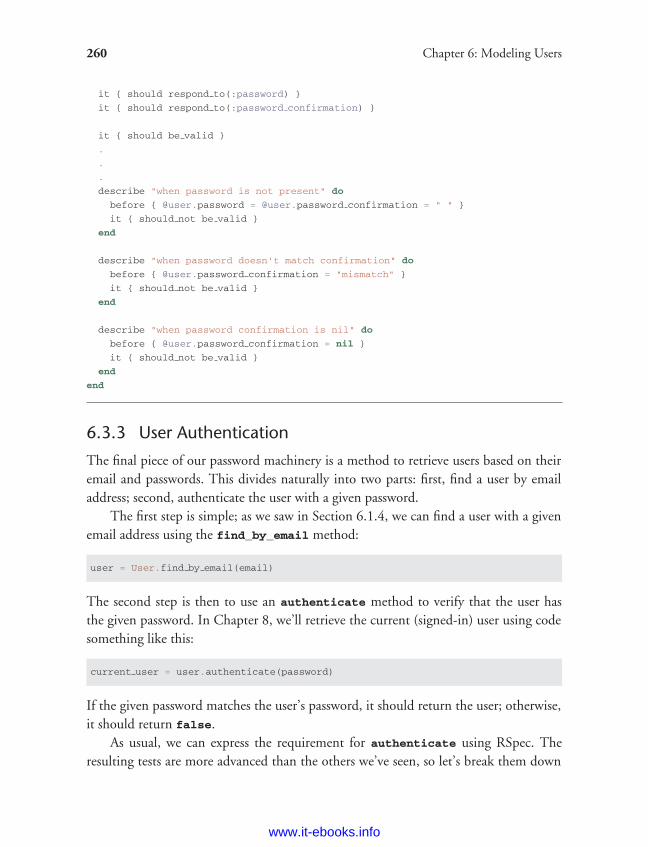
ptg8286261
260 Chapter 6: Modeling Users
it { should respond to(:password) }
it { should respond to(:password confirmation) }
it { should be valid }
.
.
.
describe "when password is not present" do
before { @user.password = @user.password confirmation = " " }
it { should not be valid }
end
describe "when password doesn't match confirmation" do
before { @user.password confirmation = "mismatch" }
it { should not be valid }
end
describe "when password confirmation is nil" do
before { @user.password confirmation = nil }
it { should not be valid }
end
end
6.3.3 User Authentication
The final piece of our password machinery is a method to retrieve users based on theiremail and passwords. This divides naturally into two parts: first, find a user by emailaddress; second, authenticate the user with a given password.
The first step is simple; as we saw in Section 6.1.4, we can find a user with a givenemail address using the find_by_email method:
user = User.find by email(email)
The second step is then to use an authenticate method to verify that the user hasthe given password. In Chapter 8, we’ll retrieve the current (signed-in) user using codesomething like this:
current user = user.authenticate(password)
If the given password matches the user’s password, it should return the user; otherwise,it should return false.
As usual, we can express the requirement for authenticate using RSpec. Theresulting tests are more advanced than the others we’ve seen, so let’s break them down
www.it-ebooks.info
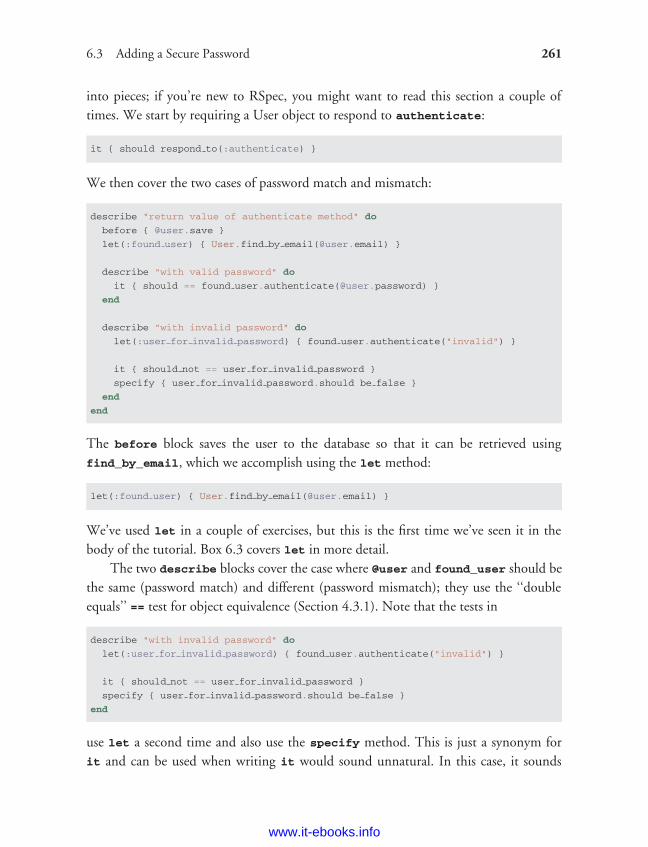
ptg8286261
6.3 Adding a Secure Password 261
into pieces; if you’re new to RSpec, you might want to read this section a couple oftimes. We start by requiring a User object to respond to authenticate:
it { should respond to(:authenticate) }
We then cover the two cases of password match and mismatch:
describe "return value of authenticate method" do
before { @user.save }
let(:found user) { User.find by email(@user.email) }
describe "with valid password" do
it { should == found user.authenticate(@user.password) }
end
describe "with invalid password" do
let(:user for invalid password) { found user.authenticate("invalid") }
it { should not == user for invalid password }
specify { user for invalid password.should be false }
end
end
The before block saves the user to the database so that it can be retrieved usingfind_by_email, which we accomplish using the let method:
let(:found user) { User.find by email(@user.email) }
We’ve used let in a couple of exercises, but this is the first time we’ve seen it in thebody of the tutorial. Box 6.3 covers let in more detail.
The two describe blocks cover the case where @user and found_user should bethe same (password match) and different (password mismatch); they use the ‘‘doubleequals’’ == test for object equivalence (Section 4.3.1). Note that the tests in
describe "with invalid password" do
let(:user for invalid password) { found user.authenticate("invalid") }
it { should not == user for invalid password }
specify { user for invalid password.should be false }
end
use let a second time and also use the specify method. This is just a synonym forit and can be used when writing it would sound unnatural. In this case, it sounds
www.it-ebooks.info
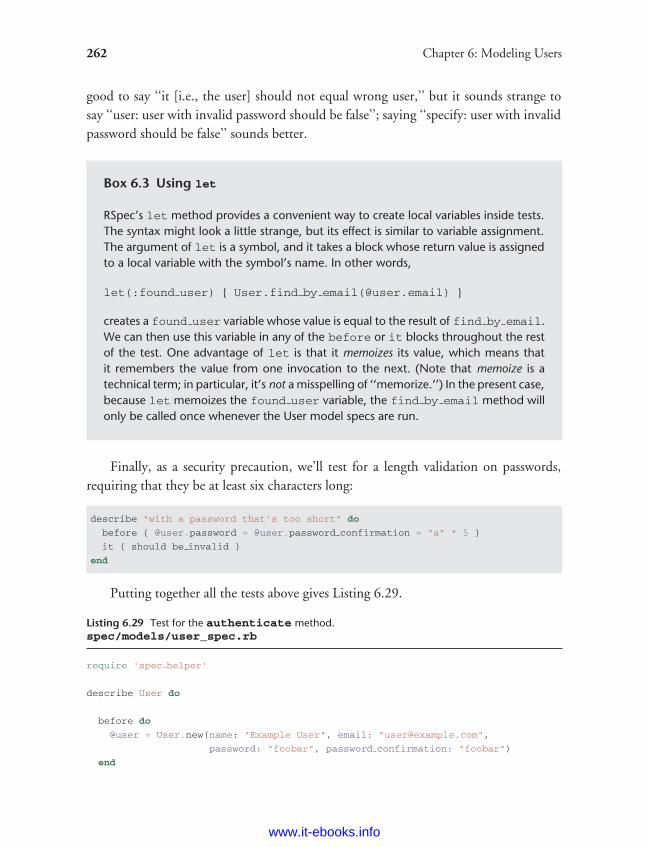
ptg8286261
262 Chapter 6: Modeling Users
good to say ‘‘it [i.e., the user] should not equal wrong user,’’ but it sounds strange tosay ‘‘user: user with invalid password should be false’’; saying ‘‘specify: user with invalidpassword should be false’’ sounds better.
Box 6.3 Using let
RSpec’s let method provides a convenient way to create local variables inside tests.The syntax might look a little strange, but its effect is similar to variable assignment.The argument of let is a symbol, and it takes a block whose return value is assignedto a local variable with the symbol’s name. In other words,
let(:found user) { User.find by email(@user.email) }
creates a found user variable whose value is equal to the result of find by email.We can then use this variable in any of the before or it blocks throughout the restof the test. One advantage of let is that it memoizes its value, which means thatit remembers the value from one invocation to the next. (Note that memoize is atechnical term; in particular, it’s not a misspelling of ‘‘memorize.’’) In the present case,because let memoizes the found user variable, the find by email method willonly be called once whenever the User model specs are run.
Finally, as a security precaution, we’ll test for a length validation on passwords,requiring that they be at least six characters long:
describe "with a password that's too short" do
before { @user.password = @user.password confirmation = "a" * 5 }
it { should be invalid }
end
Putting together all the tests above gives Listing 6.29.
Listing 6.29 Test for the authenticate method.spec/models/user_spec.rb
require 'spec helper'
describe User do
before do
@user = User.new(name: "Example User", email: "[email protected]",
password: "foobar", password confirmation: "foobar")
end
www.it-ebooks.info

ptg8286261
6.3 Adding a Secure Password 263
subject { @user }
.
.
.
it { should respond to(:authenticate) }
.
.
.
describe "with a password that's too short" do
before { @user.password = @user.password confirmation = "a" * 5 }
it { should be invalid }
end
describe "return value of authenticate method" do
before { @user.save }
let(:found user) { User.find by email(@user.email) }
describe "with valid password" do
it { should == found user.authenticate(@user.password) }
end
describe "with invalid password" do
let(:user for invalid password) { found user.authenticate("invalid") }
it { should not == user for invalid password }
specify { user for invalid password.should be false }
end
end
end
As noted in Box 6.3, let memoizes its value, so that the first nested describe block inListing 6.29 invokes let to retrieve the user from the database using find_by_email,but the second describe block doesn’t hit the database a second time.
6.3.4 User Has Secure Password
In previous versions of Rails, adding a secure password was difficult and time-consuming,as seen in the Rails 3.0 version of the Rails Tutorial ,16 which covers the creation of anauthentication system from scratch. But web developers’ understanding of how bestto authenticate users has matured enough that it now comes bundled with the latestversion of Rails. As a result, we’ll complete the implementation of secure passwords(and get to a green test suite) using only a few lines of code.
16. http://railstutorial.org/book?version=3.0
www.it-ebooks.info
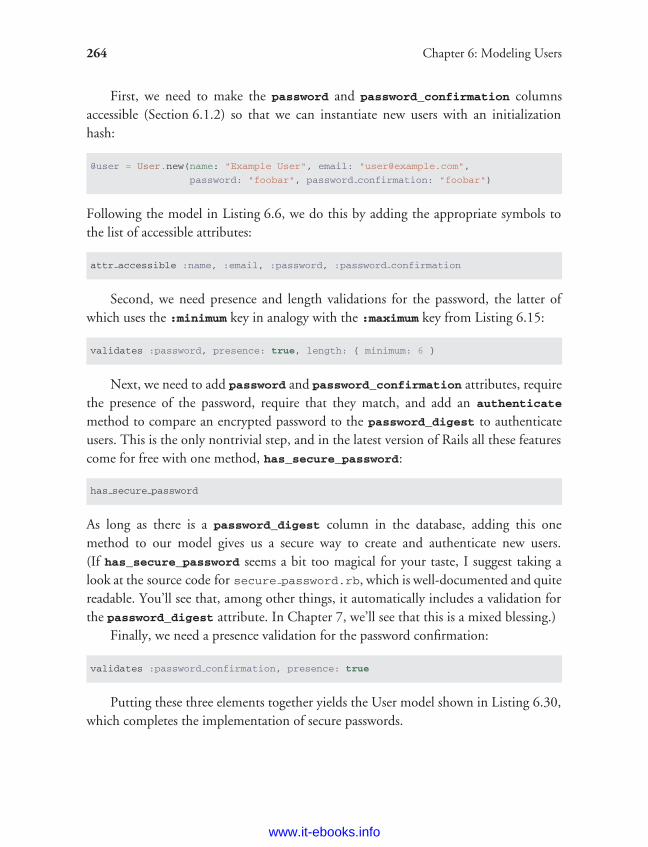
ptg8286261
264 Chapter 6: Modeling Users
First, we need to make the password and password_confirmation columnsaccessible (Section 6.1.2) so that we can instantiate new users with an initializationhash:
@user = User.new(name: "Example User", email: "[email protected]",
password: "foobar", password confirmation: "foobar")
Following the model in Listing 6.6, we do this by adding the appropriate symbols tothe list of accessible attributes:
attr accessible :name, :email, :password, :password confirmation
Second, we need presence and length validations for the password, the latter ofwhich uses the :minimum key in analogy with the :maximum key from Listing 6.15:
validates :password, presence: true, length: { minimum: 6 }
Next, we need to add password and password_confirmation attributes, requirethe presence of the password, require that they match, and add an authenticate
method to compare an encrypted password to the password_digest to authenticateusers. This is the only nontrivial step, and in the latest version of Rails all these featurescome for free with one method, has_secure_password:
has secure password
As long as there is a password_digest column in the database, adding this onemethod to our model gives us a secure way to create and authenticate new users.(If has_secure_password seems a bit too magical for your taste, I suggest taking alook at the source code for secure password.rb, which is well-documented and quitereadable. You’ll see that, among other things, it automatically includes a validation forthe password_digest attribute. In Chapter 7, we’ll see that this is a mixed blessing.)
Finally, we need a presence validation for the password confirmation:
validates :password confirmation, presence: true
Putting these three elements together yields the User model shown in Listing 6.30,which completes the implementation of secure passwords.
www.it-ebooks.info
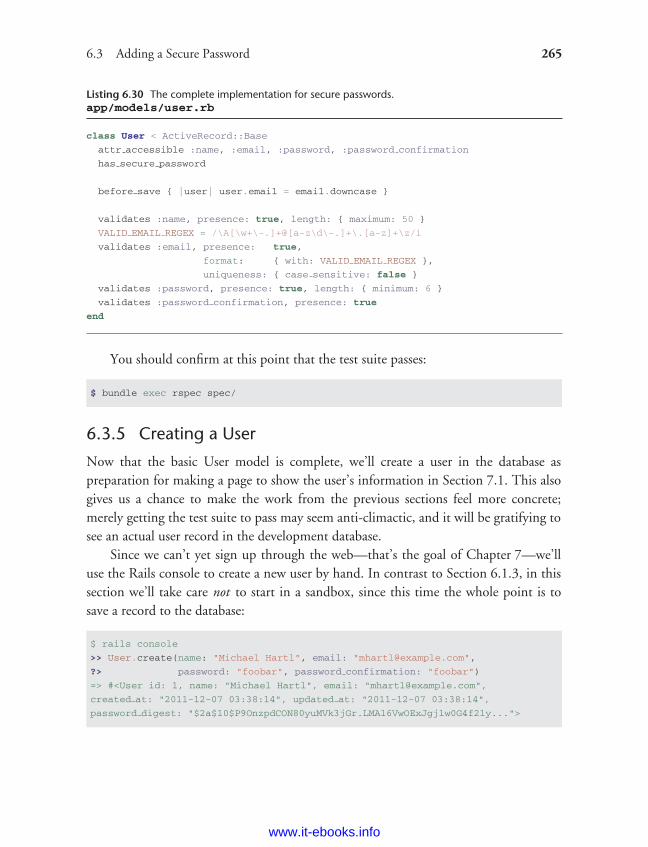
ptg8286261
6.3 Adding a Secure Password 265
Listing 6.30 The complete implementation for secure passwords.app/models/user.rb
class User < ActiveRecord::Base
attr accessible :name, :email, :password, :password confirmation
has secure password
before save { |user| user.email = email.downcase }
validates :name, presence: true, length: { maximum: 50 }
VALID EMAIL REGEX = /\A[\w+\-.]+@[a-z\d\-.]+\.[a-z]+\z/i
validates :email, presence: true,
format: { with: VALID EMAIL REGEX },
uniqueness: { case sensitive: false }
validates :password, presence: true, length: { minimum: 6 }
validates :password confirmation, presence: true
end
You should confirm at this point that the test suite passes:
$ bundle exec rspec spec/
6.3.5 Creating a User
Now that the basic User model is complete, we’ll create a user in the database aspreparation for making a page to show the user’s information in Section 7.1. This alsogives us a chance to make the work from the previous sections feel more concrete;merely getting the test suite to pass may seem anti-climactic, and it will be gratifying tosee an actual user record in the development database.
Since we can’t yet sign up through the web—that’s the goal of Chapter 7—we’lluse the Rails console to create a new user by hand. In contrast to Section 6.1.3, in thissection we’ll take care not to start in a sandbox, since this time the whole point is tosave a record to the database:
$ rails console
>> User.create(name: "Michael Hartl", email: "[email protected]",
?> password: "foobar", password confirmation: "foobar")
=> #<User id: 1, name: "Michael Hartl", email: "[email protected]",
created at: "2011-12-07 03:38:14", updated at: "2011-12-07 03:38:14",
password digest: "$2a$10$P9OnzpdCON80yuMVk3jGr.LMA16VwOExJgjlw0G4f21y...">
www.it-ebooks.info
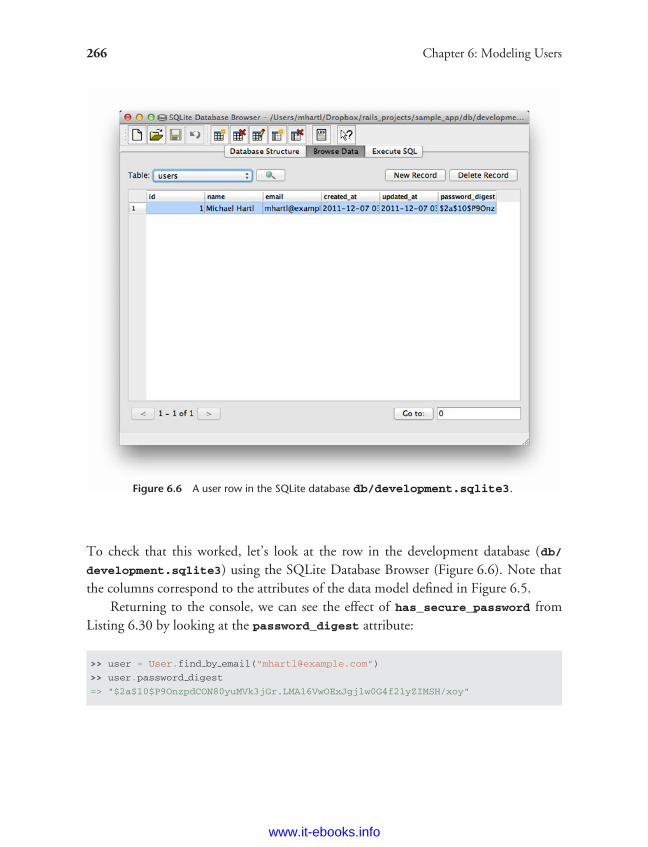
ptg8286261
266 Chapter 6: Modeling Users
Figure 6.6 A user row in the SQLite database db/development.sqlite3.
To check that this worked, let’s look at the row in the development database (db/development.sqlite3) using the SQLite Database Browser (Figure 6.6). Note thatthe columns correspond to the attributes of the data model defined in Figure 6.5.
Returning to the console, we can see the effect of has_secure_password fromListing 6.30 by looking at the password_digest attribute:
>> user = User.find by email("[email protected]")
>> user.password digest
=> "$2a$10$P9OnzpdCON80yuMVk3jGr.LMA16VwOExJgjlw0G4f21yZIMSH/xoy"
www.it-ebooks.info
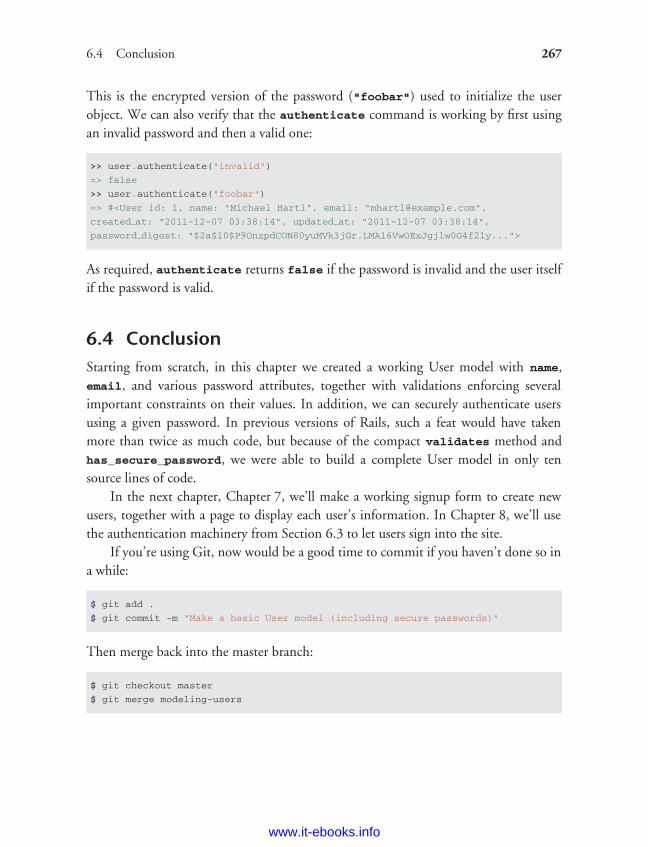
ptg8286261
6.4 Conclusion 267
This is the encrypted version of the password ("foobar") used to initialize the userobject. We can also verify that the authenticate command is working by first usingan invalid password and then a valid one:
>> user.authenticate("invalid")
=> false
>> user.authenticate("foobar")
=> #<User id: 1, name: "Michael Hartl", email: "[email protected]",
created at: "2011-12-07 03:38:14", updated at: "2011-12-07 03:38:14",
password digest: "$2a$10$P9OnzpdCON80yuMVk3jGr.LMA16VwOExJgjlw0G4f21y...">
As required, authenticate returns false if the password is invalid and the user itselfif the password is valid.
6.4 ConclusionStarting from scratch, in this chapter we created a working User model with name,email, and various password attributes, together with validations enforcing severalimportant constraints on their values. In addition, we can securely authenticate usersusing a given password. In previous versions of Rails, such a feat would have takenmore than twice as much code, but because of the compact validates method andhas_secure_password, we were able to build a complete User model in only tensource lines of code.
In the next chapter, Chapter 7, we’ll make a working signup form to create newusers, together with a page to display each user’s information. In Chapter 8, we’ll usethe authentication machinery from Section 6.3 to let users sign into the site.
If you’re using Git, now would be a good time to commit if you haven’t done so ina while:
$ git add .
$ git commit -m "Make a basic User model (including secure passwords)"
Then merge back into the master branch:
$ git checkout master
$ git merge modeling-users
www.it-ebooks.info
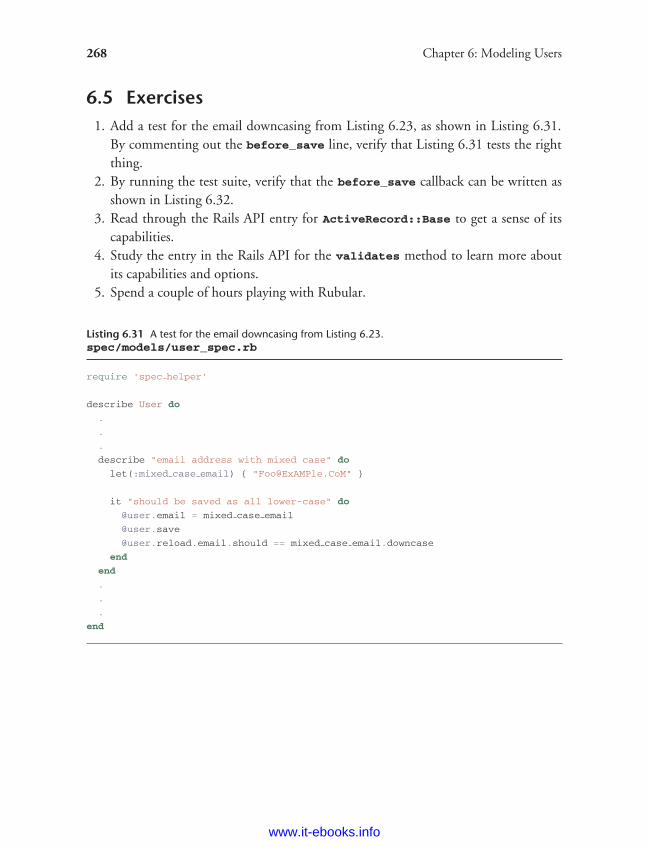
ptg8286261
268 Chapter 6: Modeling Users
6.5 Exercises1. Add a test for the email downcasing from Listing 6.23, as shown in Listing 6.31.
By commenting out the before_save line, verify that Listing 6.31 tests the rightthing.
2. By running the test suite, verify that the before_save callback can be written asshown in Listing 6.32.
3. Read through the Rails API entry for ActiveRecord::Base to get a sense of itscapabilities.
4. Study the entry in the Rails API for the validates method to learn more aboutits capabilities and options.
5. Spend a couple of hours playing with Rubular.
Listing 6.31 A test for the email downcasing from Listing 6.23.spec/models/user_spec.rb
require 'spec helper'
describe User do
.
.
.
describe "email address with mixed case" do
let(:mixed case email) { "[email protected]" }
it "should be saved as all lower-case" do
@user.email = mixed case email
@user.save
@user.reload.email.should == mixed case email.downcase
end
end
.
.
.
end
www.it-ebooks.info
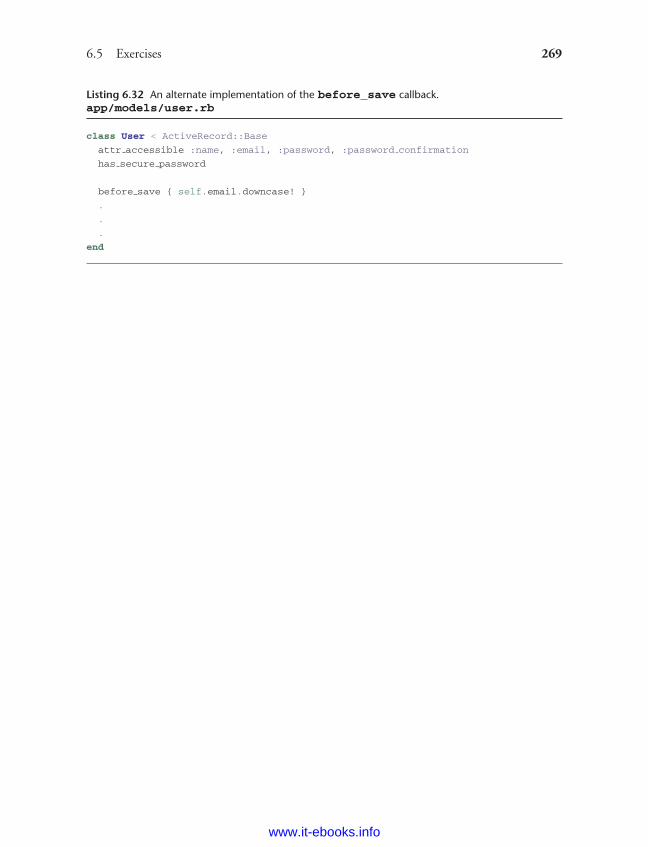
ptg8286261
6.5 Exercises 269
Listing 6.32 An alternate implementation of the before_save callback.app/models/user.rb
class User < ActiveRecord::Base
attr accessible :name, :email, :password, :password confirmation
has secure password
before save { self.email.downcase! }
.
.
.
end
www.it-ebooks.info

ptg8286261
CHAPTER 7Sign Up
Now that we have a working User model, it’s time to add an ability few websites canlive without: letting users sign up for the site. We’ll use an HTML form to submituser signup information to our application in Section 7.2, which will then be used tocreate a new user and save its attributes to the database in Section 7.4. At the end ofthe signup process, it’s important to render a profile page with the newly created user’sinformation, so we’ll begin by making a page for showing users, which will serve asthe first step toward implementing the REST architecture for users (Section 2.2.2). Asusual, we’ll write tests as we develop, extending the theme of using RSpec and Capybarato write succinct and expressive integration tests.
In order to make a user profile page, we need to have a user in the database, whichintroduces a chicken-and-egg problem: How can the site have a user before there is aworking signup page? Happily, this problem has already been solved: In Section 6.3.5,we created a User record by hand using the Rails console. If you skipped that section,you should go there now and complete it before proceeding.
If you’re following along with version control, make a topic branch as usual:
$ git checkout master
$ git checkout -b sign-up
7.1 Showing UsersIn this section, we’ll take the first steps toward the final profile by making a page todisplay a user’s name and profile photo, as indicated by the mockup in Figure 7.1.1 Our
1. Mockingbird doesn’t support custom images like the profile photo in Figure 7.1; I put that in by hand usingAdobe Fireworks.
271
www.it-ebooks.info
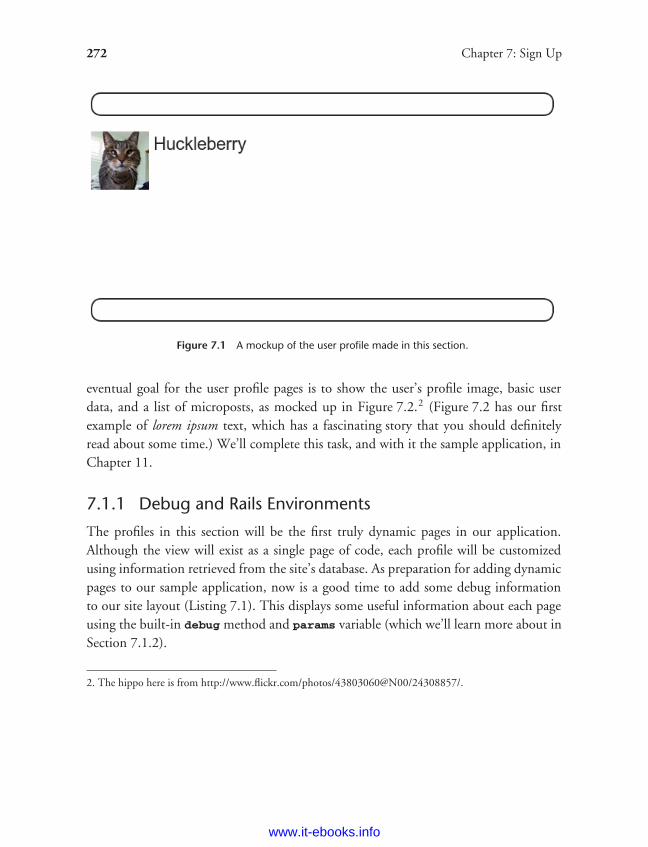
ptg8286261
272 Chapter 7: Sign Up
Figure 7.1 A mockup of the user profile made in this section.
eventual goal for the user profile pages is to show the user’s profile image, basic userdata, and a list of microposts, as mocked up in Figure 7.2.2 (Figure 7.2 has our firstexample of lorem ipsum text, which has a fascinating story that you should definitelyread about some time.) We’ll complete this task, and with it the sample application, inChapter 11.
7.1.1 Debug and Rails Environments
The profiles in this section will be the first truly dynamic pages in our application.Although the view will exist as a single page of code, each profile will be customizedusing information retrieved from the site’s database. As preparation for adding dynamicpages to our sample application, now is a good time to add some debug informationto our site layout (Listing 7.1). This displays some useful information about each pageusing the built-in debug method and params variable (which we’ll learn more about inSection 7.1.2).
2. The hippo here is from http://www.flickr.com/photos/43803060@N00/24308857/.
www.it-ebooks.info
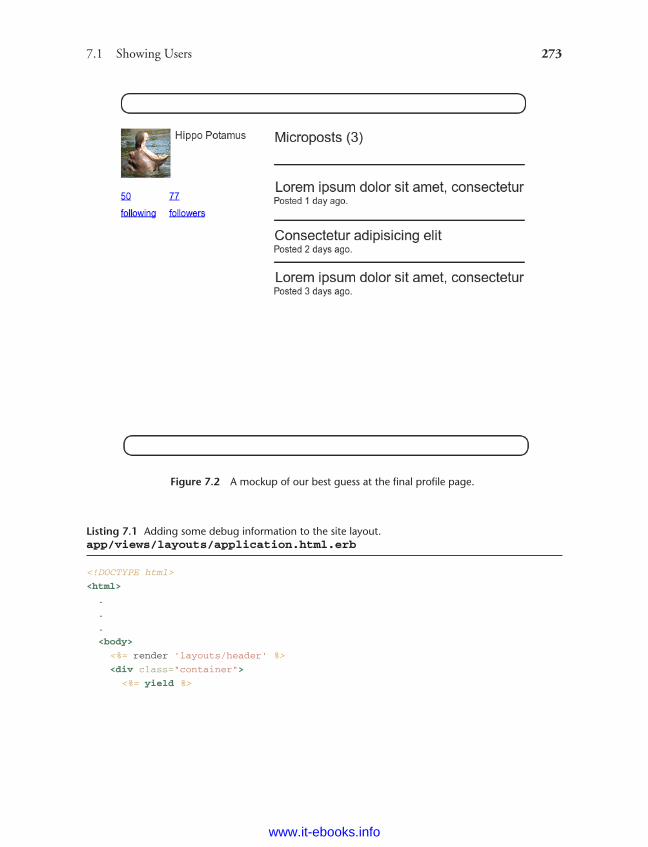
ptg8286261
7.1 Showing Users 273
Figure 7.2 A mockup of our best guess at the final profile page.
Listing 7.1 Adding some debug information to the site layout.app/views/layouts/application.html.erb
<!DOCTYPE html>
<html>
.
.
.
<body>
<%= render 'layouts/header' %>
<div class="container">
<%= yield %>
www.it-ebooks.info
ptg8286261
274 Chapter 7: Sign Up
<%= render 'layouts/footer' %>
<%= debug(params) if Rails.env.development? %>
</div>
</body>
</html>
To make the debug output look nice, we’ll add some rules to the custom stylesheetcreated in Chapter 5, as shown in Listing 7.2.
Listing 7.2 Adding code for a pretty debug box, including a Sass mixin.app/assets/stylesheets/custom.css.scss
@import "bootstrap";
/* mixins, variables, etc. */
$grayMediumLight: #eaeaea;
@mixin box sizing {
-moz-box-sizing: border-box;
-webkit-box-sizing: border-box;
box-sizing: border-box;
}
.
.
.
/* miscellaneous */
.debug dump {
clear: both;
float: left;
width: 100%;
margin-top: 45px;
@include box sizing;
}
This introduces the Sass mixin facility, in this case called box_sizing. A mixin allowsa group of CSS rules to be packaged up and used for multiple elements, converting
.debug dump {
.
.
.
@include box sizing;
}
www.it-ebooks.info
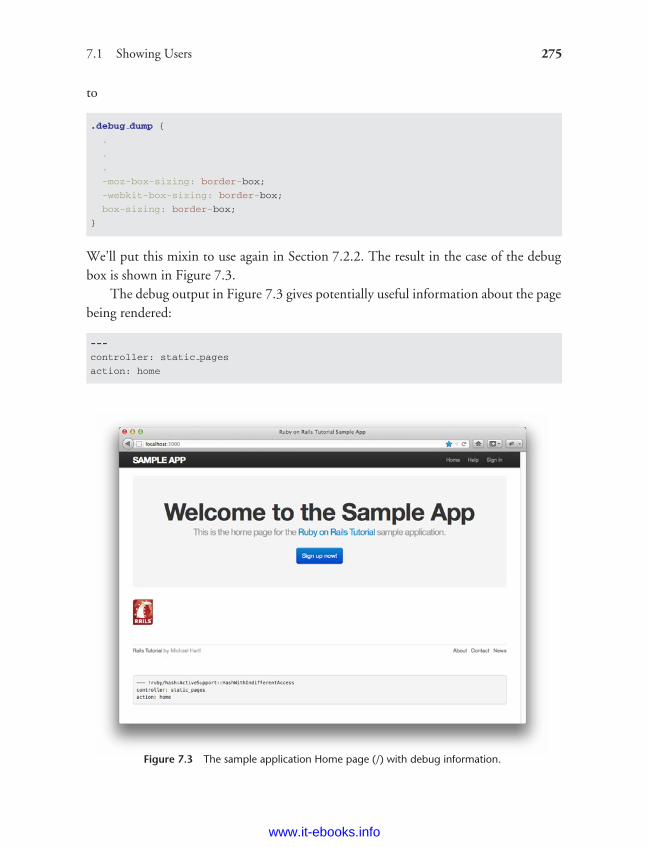
ptg8286261
7.1 Showing Users 275
to
.debug dump {
.
.
.
-moz-box-sizing: border-box;
-webkit-box-sizing: border-box;
box-sizing: border-box;
}
We’ll put this mixin to use again in Section 7.2.2. The result in the case of the debugbox is shown in Figure 7.3.
The debug output in Figure 7.3 gives potentially useful information about the pagebeing rendered:
---
controller: static pages
action: home
Figure 7.3 The sample application Home page (/) with debug information.
www.it-ebooks.info
ptg8286261
276 Chapter 7: Sign Up
This is a YAML3 representation of params, which is basically a hash, and in thiscase identifies the controller and action for the page. We’ll see another example inSection 7.1.2
Since we don’t want to display debug information to users of a deployed application,Listing 7.1 uses
if Rails.env.development?
to restrict the debug information to the development environment, which is one of threeenvironments defined by default in Rails (Box 7.1).4 In particular, Rails.env.devel-opment? is true only in a development environment, so the Embedded Ruby
<%= debug(params) if Rails.env.development? %>
won’t be inserted into production applications or tests. (Inserting the debug informationinto tests probably wouldn’t do any harm, but it probably wouldn’t do any good, either,so it’s best to restrict the debug display to development only.)
Box 7.1 Rails Environments
Rails comes equipped with three environments: test, development, and produc-
tion. The default environment for the Rails console is development:
$ rails console
Loading development environment
>> Rails.env
=> "development"
>> Rails.env.development?
=> true
>> Rails.env.test?
=> false
3. The Rails debug information is shown as YAML (a recursive acronym standing for ‘‘YAML Ain’t MarkupLanguage’’), which is a friendly data format designed to be both machine- and human-readable.
4. You can define your own custom environments as well; see the RailsCast on adding an environment fordetails.
www.it-ebooks.info
ptg8286261
7.1 Showing Users 277
As you can see, Rails provides a Rails object with an env attribute and associatedenvironment boolean methods, so that, for example, Rails.env.test? returnstrue in a test environment and false otherwise.
If you ever need to run a console in a different environment (to debug a test, forexample), you can pass the environment as a parameter to the console script:
$ rails console test
Loading test environment
>> Rails.env
=> "test"
>> Rails.env.test?
=> true
As with the console, development is the default environment for the local Railsserver, but you can also run it in a different environment:
$ rails server --environment production
If you view your app running in production, it won’t work without a productiondatabase, which we can create by running rake db:migrate in production:
$ bundle exec rake db:migrate RAILS ENV=production
(I find it confusing that the console, server, and migrate commands specify non-default environments in three mutually incompatible ways, which is why I botheredshowing all three.)
By the way, if you have deployed your sample app to Heroku, you can see itsenvironment using the heroku command, which provides its own (remote) console:
$ heroku run console
Ruby console for yourapp.herokuapp.com
>> Rails.env
=> "production"
>> Rails.env.production?
=> true
Naturally, since Heroku is a platform for production sites, it runs each application ina production environment.
www.it-ebooks.info
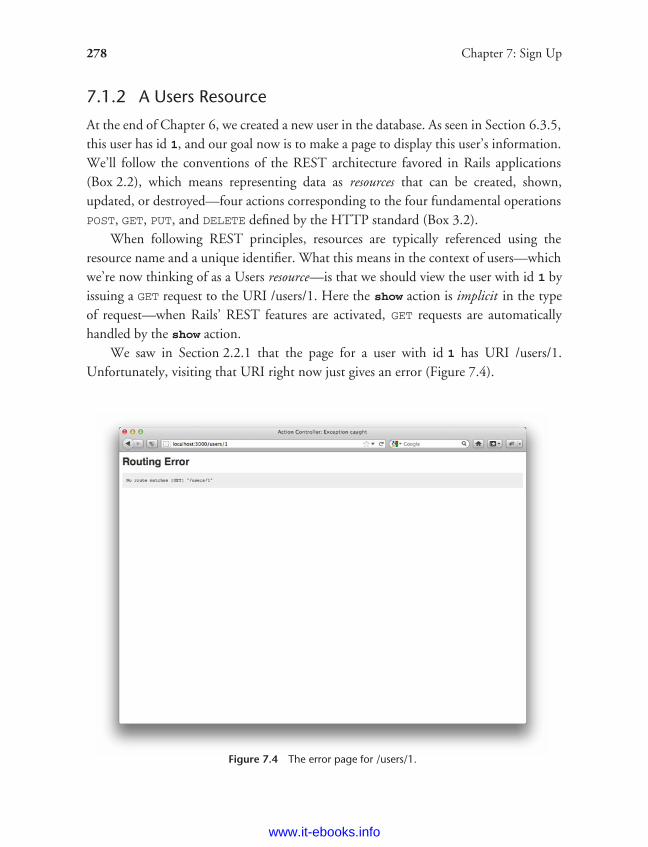
ptg8286261
278 Chapter 7: Sign Up
7.1.2 A Users Resource
At the end of Chapter 6, we created a new user in the database. As seen in Section 6.3.5,this user has id 1, and our goal now is to make a page to display this user’s information.We’ll follow the conventions of the REST architecture favored in Rails applications(Box 2.2), which means representing data as resources that can be created, shown,updated, or destroyed—four actions corresponding to the four fundamental operationsPOST, GET, PUT, and DELETE defined by the HTTP standard (Box 3.2).
When following REST principles, resources are typically referenced using theresource name and a unique identifier. What this means in the context of users—whichwe’re now thinking of as a Users resource—is that we should view the user with id 1 byissuing a GET request to the URI /users/1. Here the show action is implicit in the typeof request—when Rails’ REST features are activated, GET requests are automaticallyhandled by the show action.
We saw in Section 2.2.1 that the page for a user with id 1 has URI /users/1.Unfortunately, visiting that URI right now just gives an error (Figure 7.4).
Figure 7.4 The error page for /users/1.
www.it-ebooks.info
ptg8286261
7.1 Showing Users 279
We can get the REST-style URI to work by adding a single line to our routes file(config/routes.rb):
resources :users
The result appears in Listing 7.3.
Listing 7.3 Adding a Users resource to the routes file.config/routes.rb
SampleApp::Application.routes.draw do
resources :users
root to: 'static pages#home'
.
.
.
end
You might have noticed that Listing 7.3 removes the line
get "users/new"
last seen in Listing 5.32. This is because resources :users doesn’t just add a working/users/1 URI; it endows our sample application with all the actions needed for aRESTful Users resource,5 along with a large number of named routes (Section 5.3.3)for generating user URIs. The resulting correspondence of URIs, actions, and namedroutes is shown in Table 7.1. (Compare to Table 2.2.) Over the course of the next threechapters, we’ll cover all of the other entries in Table 7.1 as we fill in all the actionsnecessary to make Users a fully RESTful resource.
With the code in Listing 7.3, the routing works, but there’s still no page there(Figure 7.5). To fix this, we’ll begin with a minimalist version of the profile page, whichwe’ll flesh out in Section 7.1.4.
We’ll use the standard Rails location for showing a user, which is app/views/
users/show.html.erb. Unlike the new.html.erb view, which we created with thegenerator in Listing 5.28, the show.html.erb file doesn’t currently exist, so you’ll haveto create it by hand, filling it with the content shown in Listing 7.4.
5. This means that the routing works, but the corresponding pages don’t necessarily work at this point. Forexample, /users/1/edit gets routed properly to the edit action of the Users controller, but since the edit actiondoesn’t exist yet actually hitting that URI will return an error.
www.it-ebooks.info
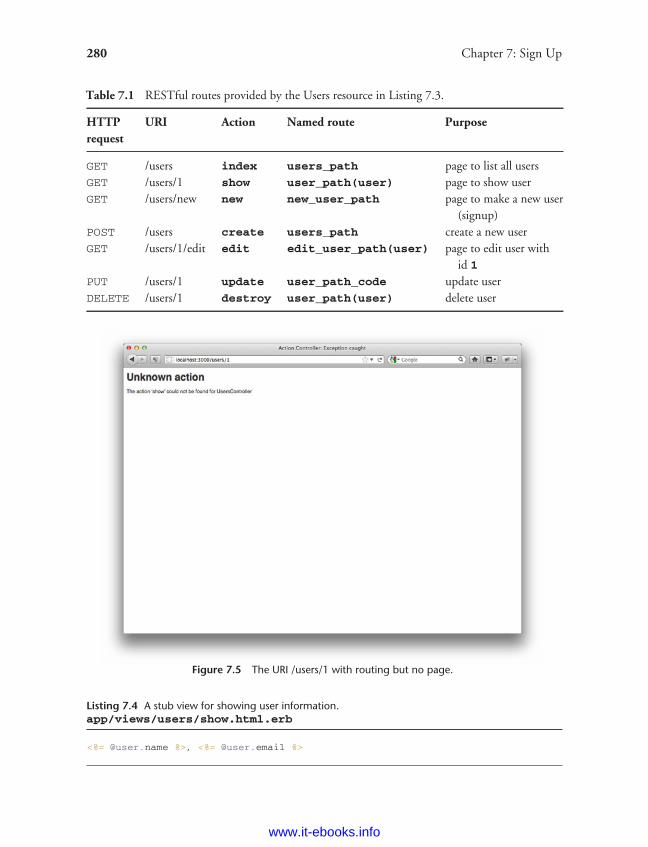
ptg8286261
280 Chapter 7: Sign Up
Table 7.1 RESTful routes provided by the Users resource in Listing 7.3.
HTTP URI Action Named route Purposerequest
GET /users index users_path page to list all usersGET /users/1 show user_path(user) page to show userGET /users/new new new_user_path page to make a new user
(signup)POST /users create users_path create a new userGET /users/1/edit edit edit_user_path(user) page to edit user with
id 1PUT /users/1 update user_path_code update userDELETE /users/1 destroy user_path(user) delete user
Figure 7.5 The URI /users/1 with routing but no page.
Listing 7.4 A stub view for showing user information.app/views/users/show.html.erb
<%= @user.name %>, <%= @user.email %>
www.it-ebooks.info
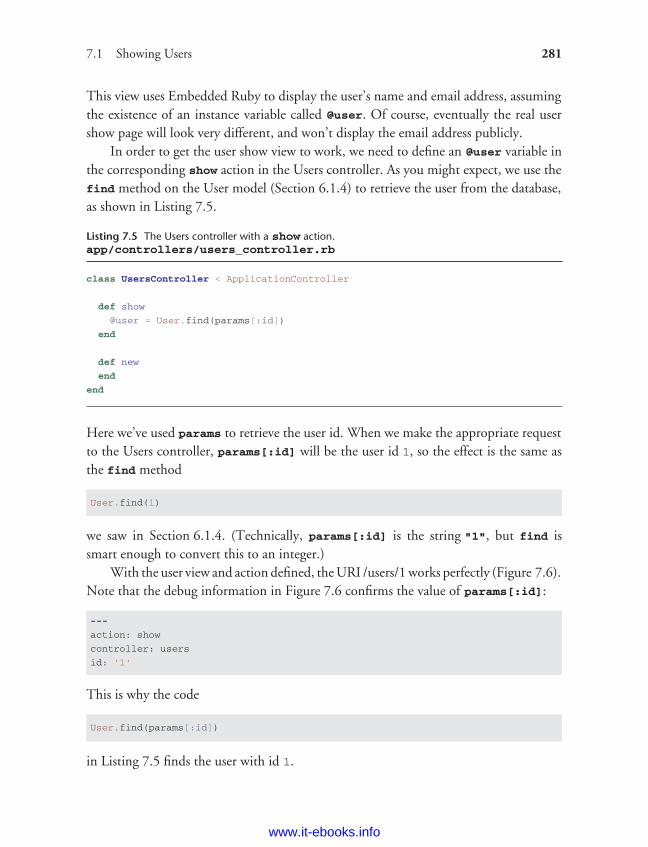
ptg8286261
7.1 Showing Users 281
This view uses Embedded Ruby to display the user’s name and email address, assumingthe existence of an instance variable called @user. Of course, eventually the real usershow page will look very different, and won’t display the email address publicly.
In order to get the user show view to work, we need to define an @user variable inthe corresponding show action in the Users controller. As you might expect, we use thefind method on the User model (Section 6.1.4) to retrieve the user from the database,as shown in Listing 7.5.
Listing 7.5 The Users controller with a show action.app/controllers/users_controller.rb
class UsersController < ApplicationController
def show
@user = User.find(params[:id])
end
def new
end
end
Here we’ve used params to retrieve the user id. When we make the appropriate requestto the Users controller, params[:id] will be the user id 1, so the effect is the same asthe find method
User.find(1)
we saw in Section 6.1.4. (Technically, params[:id] is the string "1", but find issmart enough to convert this to an integer.)
With the user view and action defined, the URI /users/1 works perfectly (Figure 7.6).Note that the debug information in Figure 7.6 confirms the value of params[:id]:
---
action: show
controller: users
id: '1'
This is why the code
User.find(params[:id])
in Listing 7.5 finds the user with id 1.
www.it-ebooks.info
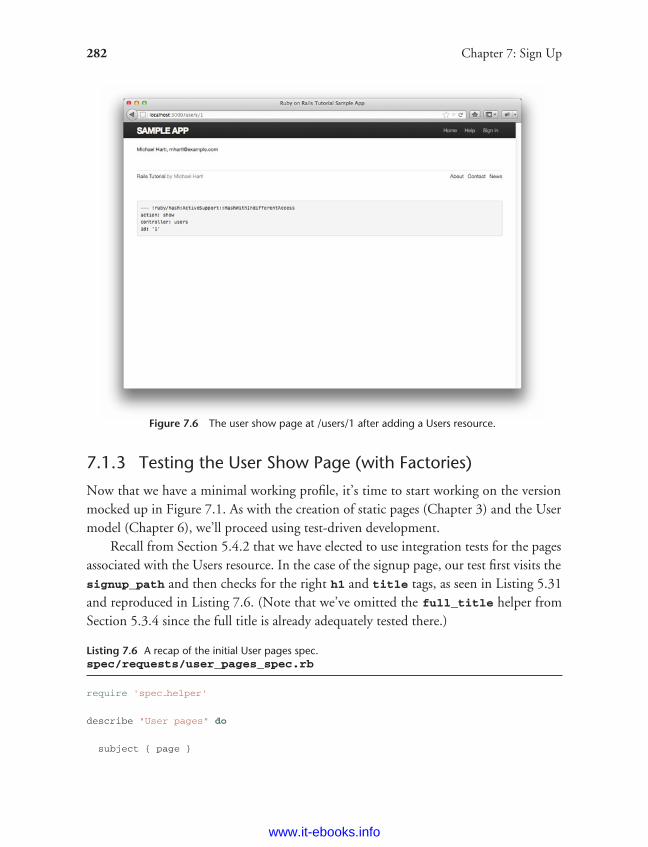
ptg8286261
282 Chapter 7: Sign Up
Figure 7.6 The user show page at /users/1 after adding a Users resource.
7.1.3 Testing the User Show Page (with Factories)
Now that we have a minimal working profile, it’s time to start working on the versionmocked up in Figure 7.1. As with the creation of static pages (Chapter 3) and the Usermodel (Chapter 6), we’ll proceed using test-driven development.
Recall from Section 5.4.2 that we have elected to use integration tests for the pagesassociated with the Users resource. In the case of the signup page, our test first visits thesignup_path and then checks for the right h1 and title tags, as seen in Listing 5.31and reproduced in Listing 7.6. (Note that we’ve omitted the full_title helper fromSection 5.3.4 since the full title is already adequately tested there.)
Listing 7.6 A recap of the initial User pages spec.spec/requests/user_pages_spec.rb
require 'spec helper'
describe "User pages" do
subject { page }
www.it-ebooks.info
ptg8286261
7.1 Showing Users 283
describe "signup page" do
before { visit signup path }
it { should have selector('h1', text: 'Sign up') }
it { should have selector('title', text: 'Sign up') }
end
end
To test the user show page, we’ll need a User model object so that the code in theshow action (Listing 7.5) has something to find:
describe "profile page" do
# Code to make a user variable
before { visit user path(user) }
it { should have selector('h1', text: user.name) }
it { should have selector('title', text: user.name) }
end
where we need to fill in the comment with the appropriate code. This uses theuser_path named route (Table 7.1) to generate the path to the show page for the givenuser. It then tests that the h1 and title tags both contain the user’s name.
In order to make the necessary User model object, we could use Active Record tocreate a user with User.create, but experience shows that user factories are a moreconvenient way to define user objects and insert them in the database. We’ll be usingthe factories generated by Factory Girl,6 a Ruby gem produced by the good people atthoughtbot. As with RSpec, Factory Girl defines a domain-specific language in Ruby,in this case specialized for defining Active Record objects. The syntax is simple, relyingon Ruby blocks and custom methods to define the attributes of the desired object.For cases such as the one in this chapter, the advantage over Active Record may notbe obvious, but we’ll use more advanced features of factories in future chapters. Forexample, in Section 9.3.3 it will be important to create a sequence of users with uniqueemail addresses, and factories make it easy to do this.
As with other Ruby gems, we can install Factory Girl by adding a line to theGemfile used by Bundler (Listing 7.7). (Since Factory Girl is only needed in the tests,we’ve put it in the :test group.)
6. Presumably ‘‘Factory Girl’’ is a reference to the movie of the same name.
www.it-ebooks.info
ptg8286261
284 Chapter 7: Sign Up
Listing 7.7 Adding Factory Girl to the Gemfile.
source 'https://rubygems.org'
.
.
.
group :test do
.
.
.
gem 'factory girl rails', '1.4.0'
end
.
.
.
end
Then install as usual:
$ bundle install
We’ll put all our Factory Girl factories in the file spec/factories.rb, whichautomatically gets loaded by RSpec. The code needed to make a User factory appears inListing 7.8.
Listing 7.8 A factory to simulate User model objects.spec/factories.rb
FactoryGirl.define do
factory :user do
name "Michael Hartl"
email "[email protected]"
password "foobar"
password confirmation "foobar"
end
end
By passing the symbol :user to the factory command, we tell Factory Girl that thesubsequent definition is for a User model object.
With the definition in Listing 7.8, we can create a User factory in the tests usingthe let command (Box 6.3) and the FactoryGirl method supplied by Factory Girl:
let(:user) { FactoryGirl.create(:user) }
The final result appears in Listing 7.9.
www.it-ebooks.info
ptg8286261
7.1 Showing Users 285
Listing 7.9 A test for the user show page.spec/requests/user_pages_spec.rb
require 'spec helper'
describe "User pages" do
subject { page }
describe "profile page" do
let(:user) { FactoryGirl.create(:user) }
before { visit user path(user) }
it { should have selector('h1', text: user.name) }
it { should have selector('title', text: user.name) }
end
.
.
.
end
You should verify at this point that the test suite is red:
$ bundle exec rspec spec/
We can get the tests to green with the code in Listing 7.10.
Listing 7.10 Adding a title and heading for the user profile page.app/views/users/show.html.erb
<% provide(:title, @user.name) %>
<h1><%= @user.name %></h1>
Running the tests again should confirm that the test in Listing 7.9 is passing:
$ bundle exec rspec spec/
One thing you will quickly notice when running tests with Factory Girl is that they areslow. The reason is not Factory Girl’s fault, and in fact it is a feature, not a bug. Theissue is that the BCrypt algorithm used in Section 6.3.1 to create a secure passwordhash is slow by design: BCrypt’s slow speed is part of what makes it so hard to attack.Unfortunately, this means that creating users can bog down the test suite; happily, thereis an easy fix. BCrypt uses a cost factor to control how computationally costly it is tocreate the secure hash. The default value is designed for security, not for speed, which is
www.it-ebooks.info
ptg8286261
286 Chapter 7: Sign Up
perfect for production applications, but in tests our needs are reversed: We want fast testsand don’t care at all about the security of the test users’ password hashes. The solutionis to add a few lines to the test configuration file, config/environments/test.rb,redefining the cost factor from its secure default value to its fast minimum value, asshown in Listing 7.11. Even for a small test suite, the gains in speed from this step canbe considerable, and I strongly recommend including Listing 7.11 in your test.rb.
Listing 7.11 Redefining the BCrypt cost factor in a test environment.config/environments/test.rb
SampleApp::Application.configure do
.
.
.
# Speed up tests by lowering BCrypt's cost function.
require 'bcrypt'
silence warnings do
BCrypt::Engine::DEFAULT COST = BCrypt::Engine::MIN COST
end
end
7.1.4 A Gravatar Image and a Sidebar
Having defined a basic user page in the previous section, we’ll now flesh it out a littlewith a profile image for each user and the first cut of the user sidebar. When makingviews, we’ll focus on the visual appearance and not worry too much about the exactstructure of the page, which means that (at least for now) we won’t be writing tests.When we come to more error-prone aspects of view, such as pagination (Section 9.3.3),we’ll resume test-driven development.
We’ll start by adding a ‘‘globally recognized avatar,’’ or Gravatar, to the userprofile.7 Originally created by Tom Preston-Werner (cofounder of GitHub) and lateracquired by Automattic (the makers of WordPress), Gravatar is a free service thatallows users to upload images and associate them with email addresses they control.Gravatars are a convenient way to include user profile images without going through thetrouble of managing image upload, cropping, and storage; all we need to do is construct
7. In Hinduism, an avatar is the manifestation of a deity in human or animal form. By extension, the termavatar is commonly used to mean some kind of personal representation, especially in a virtual environment.But you’ve seen the movie, so you already knew this.
www.it-ebooks.info
ptg8286261
7.1 Showing Users 287
the proper Gravatar image URI using the user’s email address and the correspondingGravatar image will automatically appear.8
Our plan is to define a gravatar_for helper function to return a Gravatar imagefor a given user, as shown in Listing 7.12.
Listing 7.12 The user show view with name and Gravatar.app/views/users/show.html.erb
<% provide(:title, @user.name) %>
<h1>
<%= gravatar for @user %>
<%= @user.name %>
</h1>
You can verify at this point that the test suite is failing:
$ bundle exec rspec spec/
Because the gravatar_for method is undefined, the user show view is currentlybroken. (Catching errors of this nature is perhaps the most useful aspect of view specs.This is why having some test of the view, even a minimalist one, is so important.)
By default, methods defined in any helper file are automatically available in anyview, but for convenience we’ll put the gravatar_for method in the file for helpersassociated with the Users controller. As noted at the Gravatar home page, GravatarURIs are based on an MD5 hash of the user’s email address. In Ruby, the MD5 hashingalgorithm is implemented using the hexdigest method, which is part of the Digest
library:
>> email = "[email protected]".
>> Digest::MD5::hexdigest(email.downcase)
=> "1fda4469bcbec3badf5418269ffc5968"
Since email addresses are case-insensitive (Section 6.2.4) but MD5 hashes are not, we’veused the downcase method to ensure that the argument to hexdigest is all lower-case.The resulting gravatar_for helper appears in Listing 7.13.
8. If your application does need to handle custom images or other file uploads, I recommend the Paperclipgem.
www.it-ebooks.info

ptg8286261
288 Chapter 7: Sign Up
Listing 7.13 Defining a gravatar_for helper method.app/helpers/users_helper.rb
module UsersHelper
# Returns the Gravatar (http://gravatar.com/) for the given user.
def gravatar for(user)
gravatar id = Digest::MD5::hexdigest(user.email.downcase)
gravatar url = "https://secure.gravatar.com/avatars/#{gravatar id}.png"
image tag(gravatar url, alt: user.name, class: "gravatar")
end
end
The code in Listing 7.13 returns an image tag for the Gravatar with a "gravatar" classand alt text equal to the user’s name (which is especially convenient for sight-impairedbrowsers using a screen reader). You can confirm that the test suite is now passing:
$ bundle exec rspec spec/
The profile page appears as in Figure 7.7, which shows the default Gravatar image,which appears because [email protected] is an invalid email address (the example.comdomain is reserved for examples).
To get our application to display a custom Gravatar, we’ll use update_attributes(Section 6.1.5) to update the user in the database:
$ rails console
>> user = User.first
>> user.update attributes(name: "Example User",
?> email: "[email protected]",
?> password: "foobar",
?> password confirmation: "foobar")
=> true
Here we’ve assigned the user the email address [email protected], whichI’ve associated with the Rails Tutorial logo, as seen in Figure 7.8.
The last element needed to complete the mockup from Figure 7.1 is the initialversion of the user sidebar. We’ll implement it using the aside tag, which is used for
www.it-ebooks.info
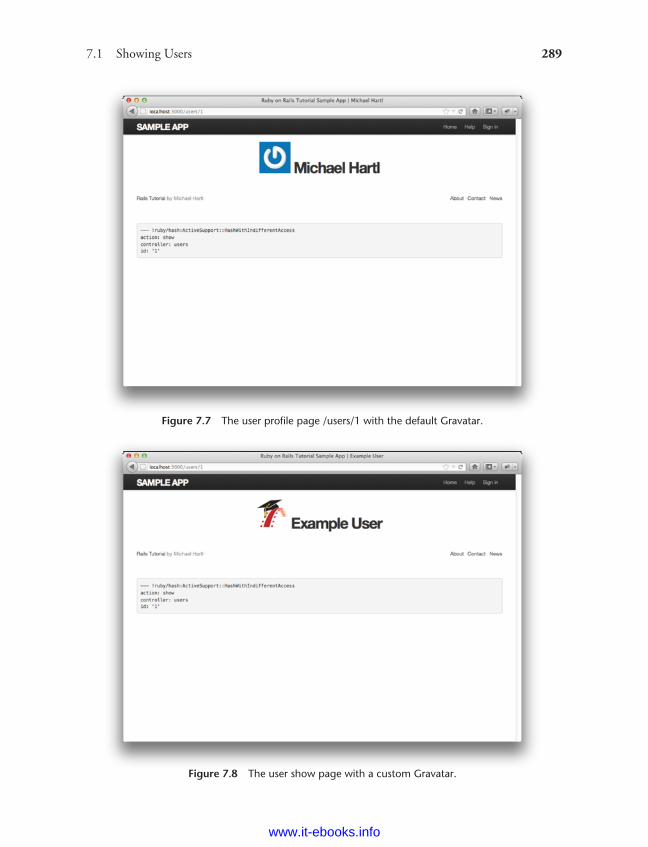
ptg8286261
7.1 Showing Users 289
Figure 7.7 The user profile page /users/1 with the default Gravatar.
Figure 7.8 The user show page with a custom Gravatar.
www.it-ebooks.info
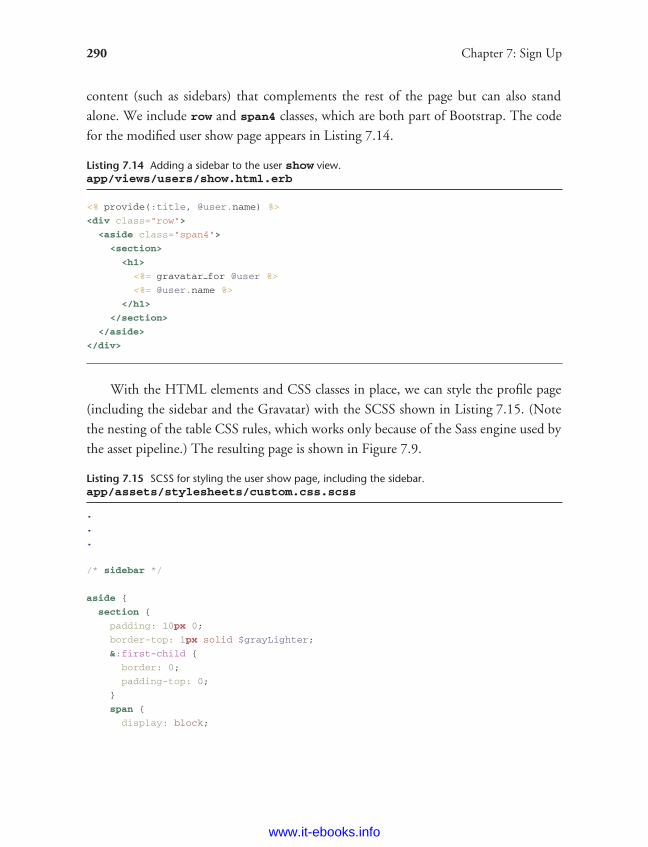
ptg8286261
290 Chapter 7: Sign Up
content (such as sidebars) that complements the rest of the page but can also standalone. We include row and span4 classes, which are both part of Bootstrap. The codefor the modified user show page appears in Listing 7.14.
Listing 7.14 Adding a sidebar to the user show view.app/views/users/show.html.erb
<% provide(:title, @user.name) %>
<div class="row">
<aside class="span4">
<section>
<h1>
<%= gravatar for @user %>
<%= @user.name %>
</h1>
</section>
</aside>
</div>
With the HTML elements and CSS classes in place, we can style the profile page(including the sidebar and the Gravatar) with the SCSS shown in Listing 7.15. (Notethe nesting of the table CSS rules, which works only because of the Sass engine used bythe asset pipeline.) The resulting page is shown in Figure 7.9.
Listing 7.15 SCSS for styling the user show page, including the sidebar.app/assets/stylesheets/custom.css.scss
.
.
.
/* sidebar */
aside {
section {
padding: 10px 0;
border-top: 1px solid $grayLighter;
&:first-child {
border: 0;
padding-top: 0;
}
span {
display: block;
www.it-ebooks.info
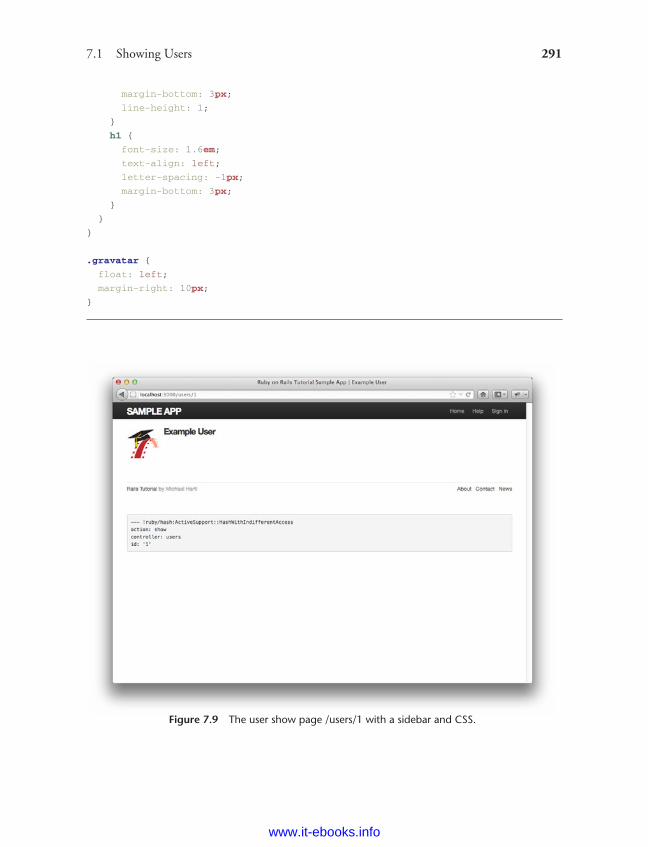
ptg8286261
7.1 Showing Users 291
margin-bottom: 3px;
line-height: 1;
}
h1 {
font-size: 1.6em;
text-align: left;
letter-spacing: -1px;
margin-bottom: 3px;
}
}
}
.gravatar {
float: left;
margin-right: 10px;
}
Figure 7.9 The user show page /users/1 with a sidebar and CSS.
www.it-ebooks.info
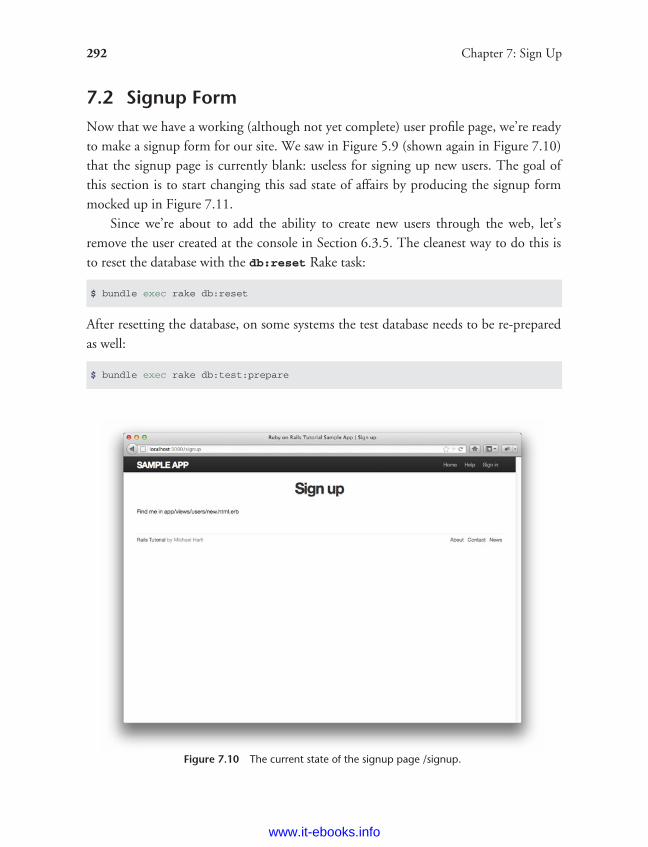
ptg8286261
292 Chapter 7: Sign Up
7.2 Signup FormNow that we have a working (although not yet complete) user profile page, we’re readyto make a signup form for our site. We saw in Figure 5.9 (shown again in Figure 7.10)that the signup page is currently blank: useless for signing up new users. The goal ofthis section is to start changing this sad state of affairs by producing the signup formmocked up in Figure 7.11.
Since we’re about to add the ability to create new users through the web, let’sremove the user created at the console in Section 6.3.5. The cleanest way to do this isto reset the database with the db:reset Rake task:
$ bundle exec rake db:reset
After resetting the database, on some systems the test database needs to be re-preparedas well:
$ bundle exec rake db:test:prepare
Figure 7.10 The current state of the signup page /signup.
www.it-ebooks.info
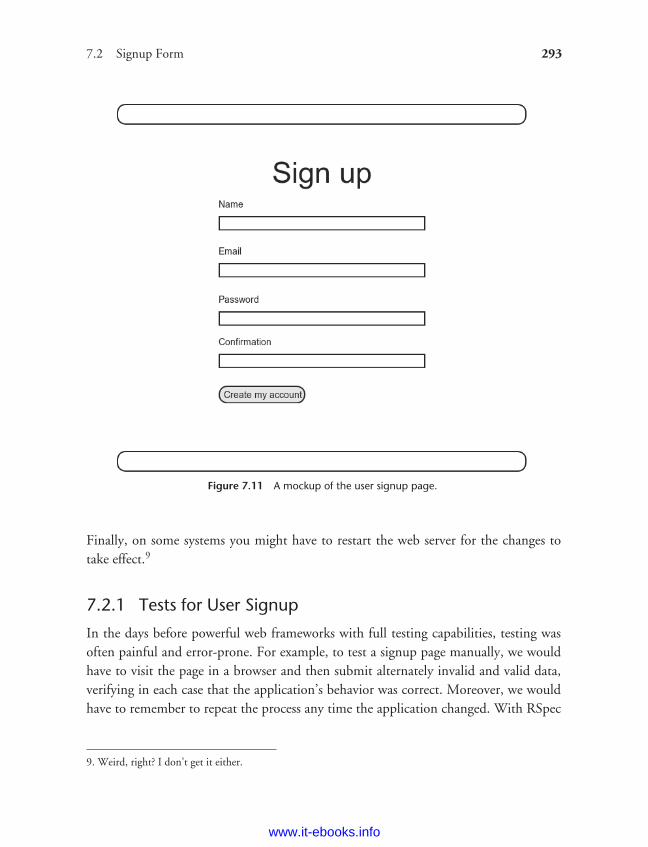
ptg8286261
7.2 Signup Form 293
Figure 7.11 A mockup of the user signup page.
Finally, on some systems you might have to restart the web server for the changes totake effect.9
7.2.1 Tests for User Signup
In the days before powerful web frameworks with full testing capabilities, testing wasoften painful and error-prone. For example, to test a signup page manually, we wouldhave to visit the page in a browser and then submit alternately invalid and valid data,verifying in each case that the application’s behavior was correct. Moreover, we wouldhave to remember to repeat the process any time the application changed. With RSpec
9. Weird, right? I don’t get it either.
www.it-ebooks.info
ptg8286261
294 Chapter 7: Sign Up
and Capybara, we will be able to write expressive tests to automate tasks that used tohave to be done by hand.
We’ve already seen how Capybara supports an intuitive web-navigation syntax. Sofar, we’ve mostly used visit to visit particular pages, but Capybara can do a lot more,including filling in the kind of fields we see in Figure 7.11 and clicking on the button.The syntax looks like this:
visit signup path
fill in "Name", with: "Example User"
.
.
.
click button "Create my account"
Our goal now is to write tests for the right behavior given invalid and valid signupinformation. Because these tests are fairly advanced, we’ll build them up piece by piece.If you want to see how they work (including which file to put them in), you can skipahead to Listing 7.16.
Our first task is to test for a failing signup form, and we can simulate the submissionof invalid data by visiting the page and clicking the button using click_button:
visit signup path
click button "Create my account"
This is equivalent to visiting the signup page and submitting blank signup information(which is invalid). Similarly, to simulate the submission of valid data, we fill in validinformation using fill_in:
visit signup path
fill in "Name", with: "Example User"
fill in "Email", with: "[email protected]"
fill in "Password", with: "foobar"
fill in "Confirmation", with: "foobar"
click button "Create my account"
The purpose of our tests is to verify that clicking the ‘‘Create my account’’ buttonresults in the correct behavior, creating a new user when the information is valid and notcreating a user when it’s invalid. The way to do this is to check the count of users, and
www.it-ebooks.info
ptg8286261
7.2 Signup Form 295
under the hood our tests will use the count method available on every Active Recordclass, including User:
$ rails console
>> User.count
=> 0
Here User.count is 0 because we reset the database at the beginning of this section.When submitting invalid data, we expect the user count not to change; when
submitting valid data, we expect it to change by 1. We can express this in RSpec bycombining the expect method with either the to method or the not_to method.We’ll start with the invalid case since it is simpler; we visit the signup path and click thebutton, and we expect it not to change the user count:
visit signup path
expect { click button "Create my account" }.not to change(User, :count)
Note that, as indicated by the curly braces, expect wraps click_button in a block(Section 4.3.2). This is for the benefit of the change method, which takes as argumentsan object and a symbol and then calculates the result of calling that symbol as a methodon the object both before and after the block. In other words, the code
expect { click button "Create my account" }.not to change(User, :count)
calculates
User.count
before and after the execution of
click button "Create my account"
In the present case, we want the given code not to change the count, which we expressusing the not_to method. In effect, by enclosing the button click in a block we are ableto replace
initial = User.count
click button "Create my account"
final = User.count
initial.should == final
www.it-ebooks.info
ptg8286261
296 Chapter 7: Sign Up
with the single line
expect { click button "Create my account" }.not to change(User, :count)
which reads like natural language and is much more compact.The case of valid data is similar, but instead of verifying that the user count doesn’t
change, we check that clicking the button changes the count by 1:
visit signup path
fill in "Name", with: "Example User"
fill in "Email", with: "[email protected]"
fill in "Password", with: "foobar"
fill in "Confirmation", with: "foobar"
expect do
click button "Create my account"
end.to change(User, :count).by(1)
This uses the to method because we expect a click on the signup button with valid datato change the user count by one.
Combining the two cases with the appropriate describe blocks and pulling thecommon code into before blocks yields good basic tests for signing up users, as shownin Listing 7.16. Here we’ve factored out the common text for the submit button usingthe let method to define a submit variable.
Listing 7.16 Good basic tests for signing up users.spec/requests/user_pages_spec.rb
require 'spec helper'
describe "User pages" do
subject { page }
.
.
.
describe "signup" do
before { visit signup path }
let(:submit) { "Create my account" }
www.it-ebooks.info
ptg8286261
7.2 Signup Form 297
describe "with invalid information" do
it "should not create a user" do
expect { click button submit }.not to change(User, :count)
end
end
describe "with valid information" do
before do
fill in "Name", with: "Example User"
fill in "Email", with: "[email protected]"
fill in "Password", with: "foobar"
fill in "Confirmation", with: "foobar"
end
it "should create a user" do
expect { click button submit }.to change(User, :count).by(1)
end
end
end
end
We’ll add a few more tests as needed in the sections that follow, but the basic testsin Listing 7.16 already cover an impressive amount of functionality. To get them topass, we have to create a signup page with just the right elements, arrange for the page’ssubmission to be routed to the right place, and successfully create a new user in thedatabase only if the resulting user data is valid.
Of course, at this point the tests should fail:
$ bundle exec rspec spec/
7.2.2 Using form for
Now that we have good failing tests for user signup, we’ll start getting them to pass bymaking a form for signing up users. We can accomplish this in Rails with the form_forhelper method, which takes in an Active Record object and constructs a form using theobject’s attributes. The result appears in Listing 7.17. (Readers familiar with Rails 2.xshould note that form_for uses the ‘‘percent-equals’’ ERb syntax for inserting content;that is, where Rails 2.x used <% form for ... %>, Rails 3 uses <%= form for ...
%> instead.)
www.it-ebooks.info
ptg8286261
298 Chapter 7: Sign Up
Listing 7.17 A form to sign up new users.app/views/users/new.html.erb
<% provide(:title, 'Sign up') %>
<h1>Sign up</h1>
<div class="row">
<div class="span6 offset3">
<%= form for(@user) do |f| %>
<%= f.label :name %>
<%= f.text field :name %>
<%= f.label :email %>
<%= f.text field :email %>
<%= f.label :password %>
<%= f.password field :password %>
<%= f.label :password confirmation, "Confirmation" %>
<%= f.password field :password confirmation %>
<%= f.submit "Create my account", class: "btn btn-large btn-primary" %>
<% end %>
</div>
</div>
Let’s break this down into pieces. The presence of the do keyword indicates thatform_for takes a block with one variable, which we’ve called f for ‘‘form’’:
<%= form for(@user) do |f| %>
.
.
.
<% end %>
As is usually the case with Rails helpers, we don’t need to know any details about theimplementation, but what we do need to know is what the f object does: When calledwith a method corresponding to an HTML form element—such as a text field, radiobutton, or password field—it returns code for that element specifically designed to setan attribute of the @user object. In other words,
<%= f.label :name %>
<%= f.text field :name %>
www.it-ebooks.info
ptg8286261
7.2 Signup Form 299
creates the HTML needed to make a labeled text field element appropriate for settingthe name attribute of a User model. (We’ll take a look at the HTML itself inSection 7.2.3.)
To see this in action, we need to drill down and look at the actual HTML producedby this form, but here we have a problem: The page currently breaks, because we havenot set the @user variable—like all undefined instance variables (Section 4.4.5), @useris currently nil. Appropriately, if you run your test suite at this point, you’ll see that thetests for the structure of the signup page from Listing 7.6 (i.e., the h1 and the title)now fail:
$ bundle exec rspec spec/requests/user pages spec.rb -e "signup page"
(The -e here arranges to run just the examples whose description strings match "signup
page". Note in particular that this is not the substring "signup", which would runall the test in Listing 7.16.) To get these tests to pass again and to get our form torender, we must define an @user variable in the controller action corresponding tonew.html.erb, i.e., the new action in the Users controller. The form_for helperexpects @user to be a User object, and since we’re creating a new user we simply useUser.new, as seen in Listing 7.18.
Listing 7.18 Adding an @user variable to the new action.app/controllers/users_controller.rb
class UsersController < ApplicationController
.
.
.
def new
@user = User.new
end
end
With the @user variable so defined, the test for the signup page should be passingagain:
$ bundle exec rspec spec/requests/user pages spec.rb -e "signup page"
At this point, the form (with the styling from Listing 7.19) appears as in Figure 7.12.Note the reuse of the box_sizing mixin from Listing 7.2.
www.it-ebooks.info
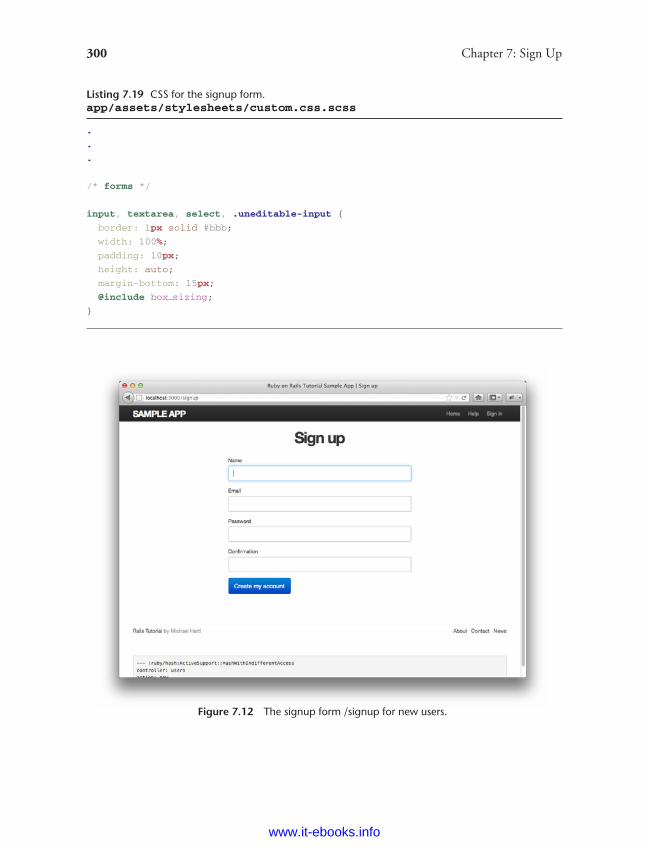
ptg8286261
300 Chapter 7: Sign Up
Listing 7.19 CSS for the signup form.app/assets/stylesheets/custom.css.scss
.
.
.
/* forms */
input, textarea, select, .uneditable-input {
border: 1px solid #bbb;
width: 100%;
padding: 10px;
height: auto;
margin-bottom: 15px;
@include box sizing;
}
Figure 7.12 The signup form /signup for new users.
www.it-ebooks.info
ptg8286261
7.2 Signup Form 301
7.2.3 The Form HTML
As indicated by Figure 7.12, the signup page now renders properly, indicating that theform_for code in Listing 7.17 is producing valid HTML. If you look at the HTMLfor the generated form (using either Firebug or the ‘‘view page source’’ feature of yourbrowser), you should see markup as in Listing 7.20. Although many of the details areirrelevant for our purposes, let’s take a moment to highlight the most important partsof its structure.
Listing 7.20 The HTML for the form in Figure 7.12.
<form accept-charset="UTF-8" action="/users" class="new user"
id="new user" method="post">
<label for="user name">Name</label>
<input id="user name" name="user[name]" size="30" type="text" />
<label for="user email">Email</label>
<input id="user email" name="user[email]" size="30" type="text" />
<label for="user password">Password</label>
<input id="user password" name="user[password]" size="30"
type="password" />
<label for="user password confirmation">Confirmation</label>
<input id="user password confirmation"
name="user[password confirmation]" size="30" type="password" />
<input class="btn btn-large btn-primary" name="commit" type="submit"
value="Create my account" />
</form>
(Here I’ve omitted some HTML related to the authenticity token, which Rails automati-cally includes to thwart a particular kind of attack called a cross-site request forgery (CSRF).See the Stack Overflow entry on the Rails authenticity token if you’re interested in thedetails of how this works and why it’s important.)
We’ll start with the internal structure of the document. Comparing Listing 7.17with Listing 7.20, we see that the Embedded Ruby
<%= f.label :name %>
<%= f.text field :name %>
www.it-ebooks.info
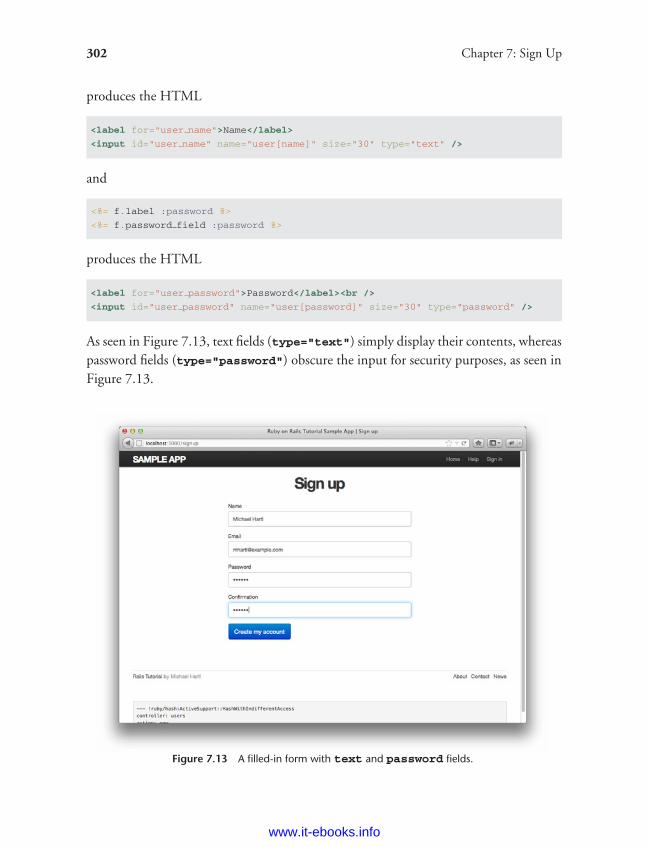
ptg8286261
302 Chapter 7: Sign Up
produces the HTML
<label for="user name">Name</label>
<input id="user name" name="user[name]" size="30" type="text" />
and
<%= f.label :password %>
<%= f.password field :password %>
produces the HTML
<label for="user password">Password</label><br />
<input id="user password" name="user[password]" size="30" type="password" />
As seen in Figure 7.13, text fields (type="text") simply display their contents, whereaspassword fields (type="password") obscure the input for security purposes, as seen inFigure 7.13.
Figure 7.13 A filled-in form with text and password fields.
www.it-ebooks.info
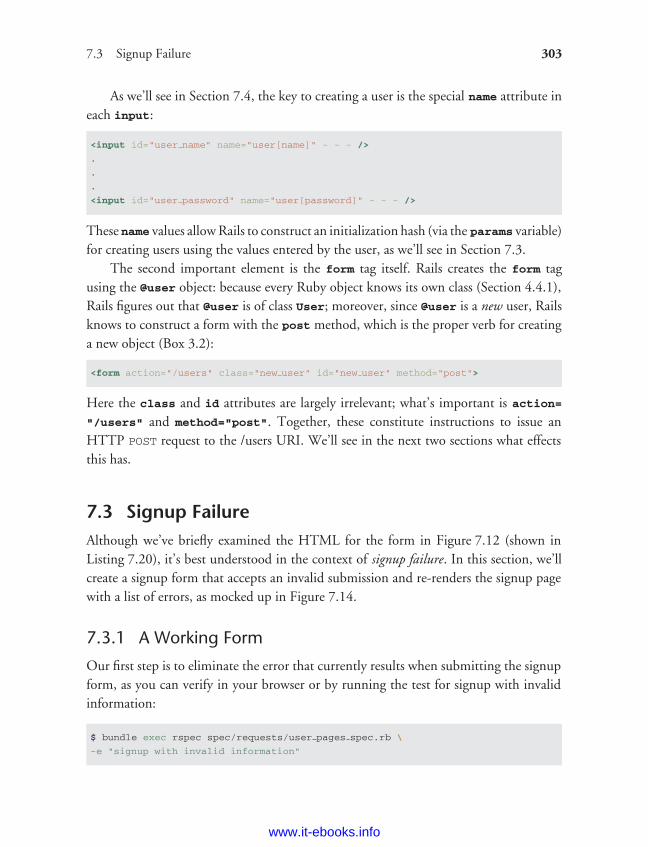
ptg8286261
7.3 Signup Failure 303
As we’ll see in Section 7.4, the key to creating a user is the special name attribute ineach input:
<input id="user name" name="user[name]" - - - />
.
.
.
<input id="user password" name="user[password]" - - - />
These name values allow Rails to construct an initialization hash (via the params variable)for creating users using the values entered by the user, as we’ll see in Section 7.3.
The second important element is the form tag itself. Rails creates the form tagusing the @user object: because every Ruby object knows its own class (Section 4.4.1),Rails figures out that @user is of class User; moreover, since @user is a new user, Railsknows to construct a form with the post method, which is the proper verb for creatinga new object (Box 3.2):
<form action="/users" class="new user" id="new user" method="post">
Here the class and id attributes are largely irrelevant; what’s important is action="/users" and method="post". Together, these constitute instructions to issue anHTTP POST request to the /users URI. We’ll see in the next two sections what effectsthis has.
7.3 Signup FailureAlthough we’ve briefly examined the HTML for the form in Figure 7.12 (shown inListing 7.20), it’s best understood in the context of signup failure. In this section, we’llcreate a signup form that accepts an invalid submission and re-renders the signup pagewith a list of errors, as mocked up in Figure 7.14.
7.3.1 A Working Form
Our first step is to eliminate the error that currently results when submitting the signupform, as you can verify in your browser or by running the test for signup with invalidinformation:
$ bundle exec rspec spec/requests/user pages spec.rb \
-e "signup with invalid information"
www.it-ebooks.info
ptg8286261
304 Chapter 7: Sign Up
Figure 7.14 A mockup of the signup failure page.
Recall from Section 7.1.2 that adding resources :users to the routes.rb file(Listing 7.3) automatically ensures that our Rails application responds to the RESTfulURIs from Table 7.1. In particular, it ensures that a POST request to /users is handledby the create action. Our strategy for the create action is to use the form submissionto make a new user object using User.new, try (and fail) to save that user, then renderthe signup page for possible resubmission. Let’s get started by reviewing the code forthe signup form:
<form action="/users" class="new user" id="new user" method="post">
As noted in Section 7.2.3, this HTML issues a POST request to the /users URI.We can get the test for invalid information from Listing 7.16 to pass with the
code in Listing 7.21. This listing includes a second use of the render method, which
www.it-ebooks.info
ptg8286261
7.3 Signup Failure 305
we first saw in the context of partials (Section 5.1.3); as you can see, render worksin controller actions as well. Note that we’ve taken this opportunity to introduce anif-else branching structure, which allows us to handle the cases of failure and successseparately based on the value of @user.save, which (as we saw in Section 6.1.3) iseither true or false depending on whether the save succeeds.
Listing 7.21 A create action that can handle signup failure (but not success).app/controllers/users_controller.rb
class UsersController < ApplicationController
.
.
.
def create
@user = User.new(params[:user])
if @user.save
# Handle a successful save.
else
render 'new'
end
end
end
The best way to understand how the code in Listing 7.21 works is to submit theform with some invalid signup data; the result appears in Figure 7.15, and the fulldebug information appears in Figure 7.16.
To get a clearer picture of how Rails handles the submission, let’s take a closer lookat the params hash from the debug information (Figure 7.16):
---
user:
name: Foo Bar
password confirmation: foo
password: bar
email: foo@invalid
commit: Create my account
action: create
controller: users
We saw starting in Section 7.1.2 that the params hash contains information abouteach request; in the case of a URI like /users/1, the value of params[:id] is the id ofthe corresponding user (1 in this example). In the case of posting to the signup form,
www.it-ebooks.info
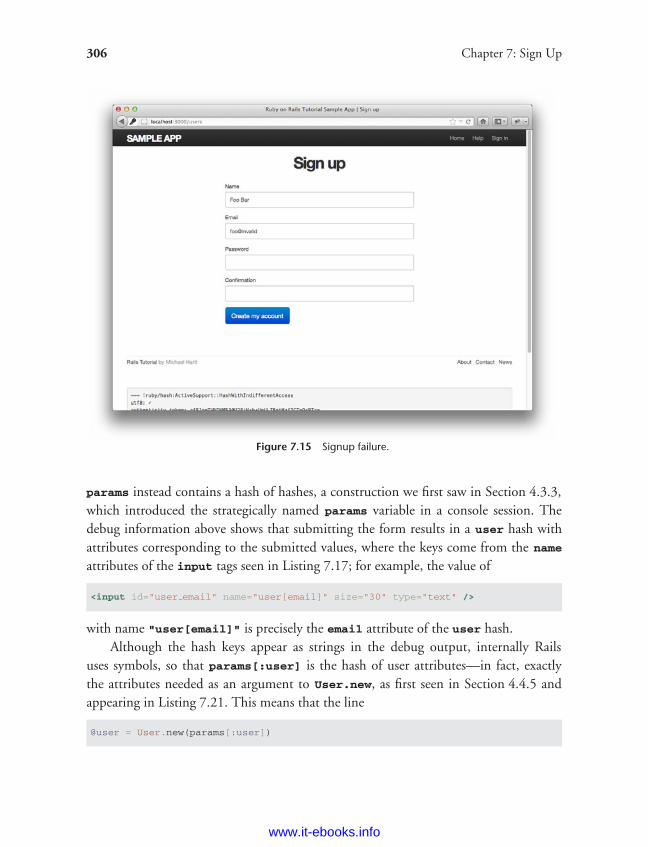
ptg8286261
306 Chapter 7: Sign Up
Figure 7.15 Signup failure.
params instead contains a hash of hashes, a construction we first saw in Section 4.3.3,which introduced the strategically named params variable in a console session. Thedebug information above shows that submitting the form results in a user hash withattributes corresponding to the submitted values, where the keys come from the name
attributes of the input tags seen in Listing 7.17; for example, the value of
<input id="user email" name="user[email]" size="30" type="text" />
with name "user[email]" is precisely the email attribute of the user hash.Although the hash keys appear as strings in the debug output, internally Rails
uses symbols, so that params[:user] is the hash of user attributes—in fact, exactlythe attributes needed as an argument to User.new, as first seen in Section 4.4.5 andappearing in Listing 7.21. This means that the line
@user = User.new(params[:user])
www.it-ebooks.info
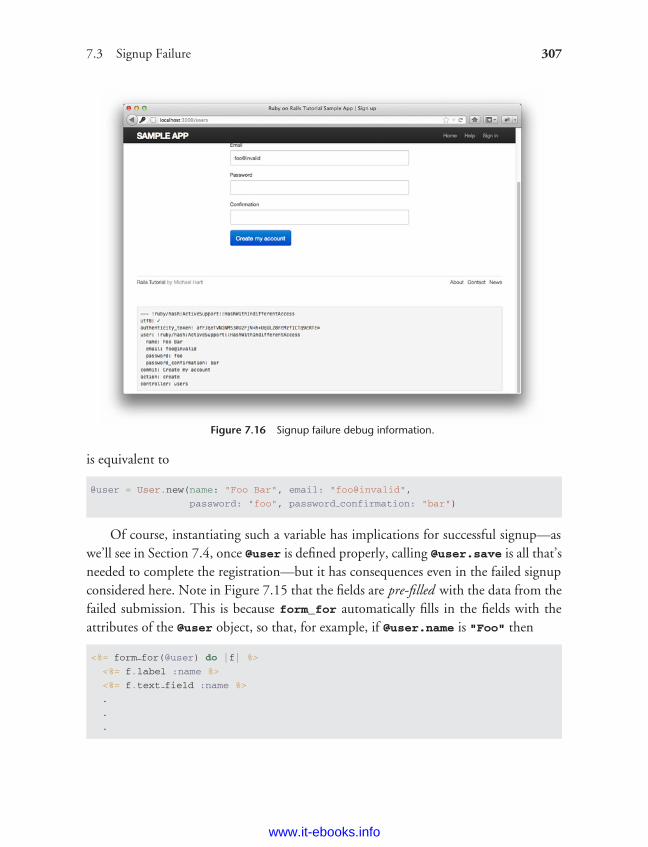
ptg8286261
7.3 Signup Failure 307
Figure 7.16 Signup failure debug information.
is equivalent to
@user = User.new(name: "Foo Bar", email: "foo@invalid",
password: "foo", password confirmation: "bar")
Of course, instantiating such a variable has implications for successful signup—aswe’ll see in Section 7.4, once @user is defined properly, calling @user.save is all that’sneeded to complete the registration—but it has consequences even in the failed signupconsidered here. Note in Figure 7.15 that the fields are pre-filled with the data from thefailed submission. This is because form_for automatically fills in the fields with theattributes of the @user object, so that, for example, if @user.name is "Foo" then
<%= form for(@user) do |f| %>
<%= f.label :name %>
<%= f.text field :name %>
.
.
.
www.it-ebooks.info
ptg8286261
308 Chapter 7: Sign Up
will produce the HTML
<form action="/users" class="new user" id="new user" method="post">
<label for="user name">Name</label><br />
<input id="user name" name="user[name]" size="30" type="text" value="Foo"/>
.
.
.
Here the value of the input tag is "Foo", so that’s what appears in the text field.As you might guess, now that we can submit a form without generating an error,
the test for invalid submission should pass:
$ bundle exec rspec spec/requests/user pages spec.rb \
-e "signup with invalid information"
7.3.2 Signup Error Messages
Although not strictly necessary, it’s helpful to output error messages on failed signupto indicate the problems that prevented successful user registration. Rails provides justsuch messages based on the User model validations. For example, consider trying tosave a user with an invalid email address and with a password that’s too short:
$ rails console
>> user = User.new(name: "Foo Bar", email: "foo@invalid",
?> password: "dude", password confirmation: "dude")
>> user.save
=> false
>> user.errors.full messages
=> ["Email is invalid", "Password is too short (minimum is 6 characters)"]
Here the errors.full_messages object (which we saw briefly in Section 6.2.2)contains an array of error messages.
As in the console session above, the failed save in Listing 7.21 generates a list oferror messages associated with the @user object. To display the messages in the browser,we’ll render an error-messages partial on the user new page, as shown in Listing 7.22.(Writing a test for the error messages first is a good idea and is left as an exercise; seeSection 7.6.) It’s worth noting that this error messages partial is only a first attempt; thefinal version appears in Section 10.3.2.
www.it-ebooks.info
ptg8286261
7.3 Signup Failure 309
Listing 7.22 Code to display error messages on the signup form.app/views/users/new.html.erb
<% provide(:title, 'Sign up') %>
<h1>Sign up</h1>
<%= form for(@user) do |f| %>
<%= render 'shared/error messages' %>
.
.
.
<% end %>
Notice here that we render a partial called ’shared/error_messages’; this reflectsthe common Rails convention of using a dedicated shared/ directory for partialsexpected to be used in views across multiple controllers. (We’ll see this expecta-tion fulfilled in Section 9.1.1.) This means that we have to create both the newapp/views/shared directory and the _error_messages.html.erb partial file. Thepartial itself appears in Listing 7.23.
Listing 7.23 A partial for displaying form submission error messages.app/views/shared/_error_messages.html.erb
<% if @user.errors.any? %>
<div id="error explanation">
<div class="alert alert-error">
The form contains <%= pluralize(@user.errors.count, "error") %>.
</div>
<ul>
<% @user.errors.full messages.each do |msg| %>
<li>* <%= msg %></li>
<% end %>
</ul>
</div>
<% end %>
This partial introduces several new Rails and Ruby constructs, including two methodsfor Rails objects. The first method is count, which simply returns the numberof errors:
>> user.errors.count
=> 2
www.it-ebooks.info
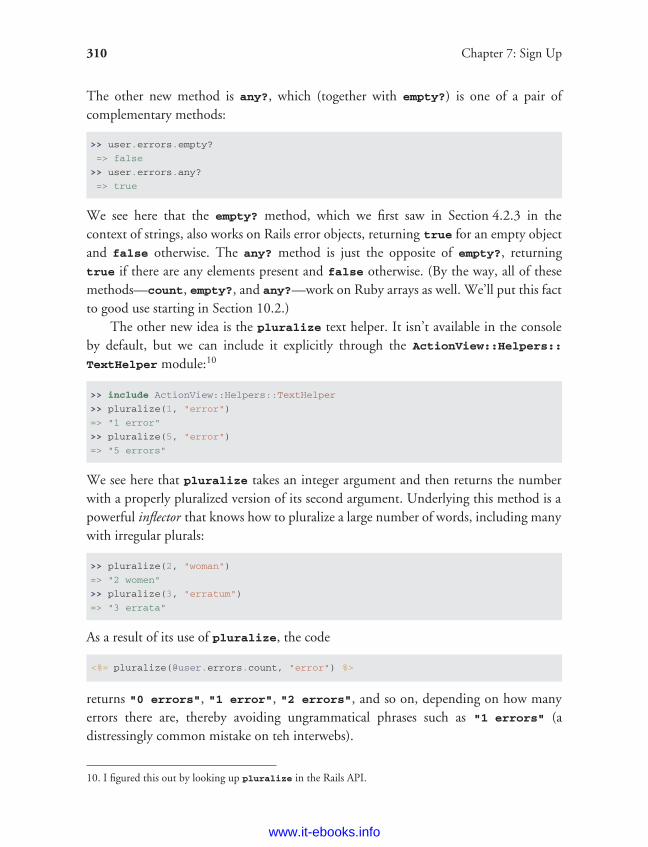
ptg8286261
310 Chapter 7: Sign Up
The other new method is any?, which (together with empty?) is one of a pair ofcomplementary methods:
>> user.errors.empty?
=> false
>> user.errors.any?
=> true
We see here that the empty? method, which we first saw in Section 4.2.3 in thecontext of strings, also works on Rails error objects, returning true for an empty objectand false otherwise. The any? method is just the opposite of empty?, returningtrue if there are any elements present and false otherwise. (By the way, all of thesemethods—count, empty?, and any?—work on Ruby arrays as well. We’ll put this factto good use starting in Section 10.2.)
The other new idea is the pluralize text helper. It isn’t available in the consoleby default, but we can include it explicitly through the ActionView::Helpers::
TextHelper module:10
>> include ActionView::Helpers::TextHelper
>> pluralize(1, "error")
=> "1 error"
>> pluralize(5, "error")
=> "5 errors"
We see here that pluralize takes an integer argument and then returns the numberwith a properly pluralized version of its second argument. Underlying this method is apowerful inflector that knows how to pluralize a large number of words, including manywith irregular plurals:
>> pluralize(2, "woman")
=> "2 women"
>> pluralize(3, "erratum")
=> "3 errata"
As a result of its use of pluralize, the code
<%= pluralize(@user.errors.count, "error") %>
returns "0 errors", "1 error", "2 errors", and so on, depending on how manyerrors there are, thereby avoiding ungrammatical phrases such as "1 errors" (adistressingly common mistake on teh interwebs).
10. I figured this out by looking up pluralize in the Rails API.
www.it-ebooks.info

ptg8286261
7.3 Signup Failure 311
Note that Listing 7.23 includes the CSS id error_explanation for use in stylingthe error messages. (Recall from Section 5.1.2 that CSS uses the pound sign # to styleids.) In addition, on error pages Rails automatically wraps the fields with errors in divswith the CSS class field_with_errors. These labels then allow us to style the errormessages with the SCSS shown in Listing 7.24, which makes use of Sass’s @extend
function to include the functionality of two Bootstrap classes control-group anderror. As a result, on failed submission the error messages appear surrounded by red,as seen in Figure 7.17. Because the messages are generated by the model validations,they will automatically change if you ever change your mind about, say, the format ofemail addresses, or the minimum length of passwords.
Listing 7.24 CSS for styling error messages.app/assets/stylesheets/custom.css.scss
.
.
.
/* forms */
.
.
.
#error explanation {
color: #f00;
ul {
list-style: none;
margin: 0 0 18px 0;
}
}
.field with errors {
@extend .control-group;
@extend .error;
}
To see the results of our work in this section, we’ll recapitulate the steps in thefailed signup test from Listing 7.16 by visiting the signup page and clicking ‘‘Createmy account’’ with blank input fields. The result is shown in Figure 7.18. As you mightguess from the working page, at this point the corresponding test should also pass:
$ bundle exec rspec spec/requests/user pages spec.rb \
> -e "signup with invalid information"
www.it-ebooks.info
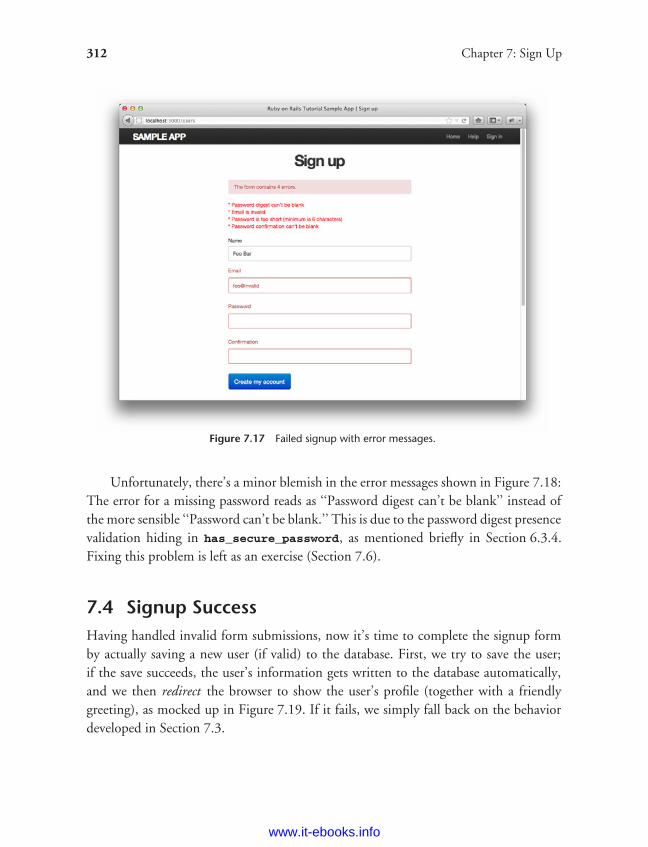
ptg8286261
312 Chapter 7: Sign Up
Figure 7.17 Failed signup with error messages.
Unfortunately, there’s a minor blemish in the error messages shown in Figure 7.18:The error for a missing password reads as ‘‘Password digest can’t be blank’’ instead ofthe more sensible ‘‘Password can’t be blank.’’ This is due to the password digest presencevalidation hiding in has_secure_password, as mentioned briefly in Section 6.3.4.Fixing this problem is left as an exercise (Section 7.6).
7.4 Signup SuccessHaving handled invalid form submissions, now it’s time to complete the signup formby actually saving a new user (if valid) to the database. First, we try to save the user;if the save succeeds, the user’s information gets written to the database automatically,and we then redirect the browser to show the user’s profile (together with a friendlygreeting), as mocked up in Figure 7.19. If it fails, we simply fall back on the behaviordeveloped in Section 7.3.
www.it-ebooks.info
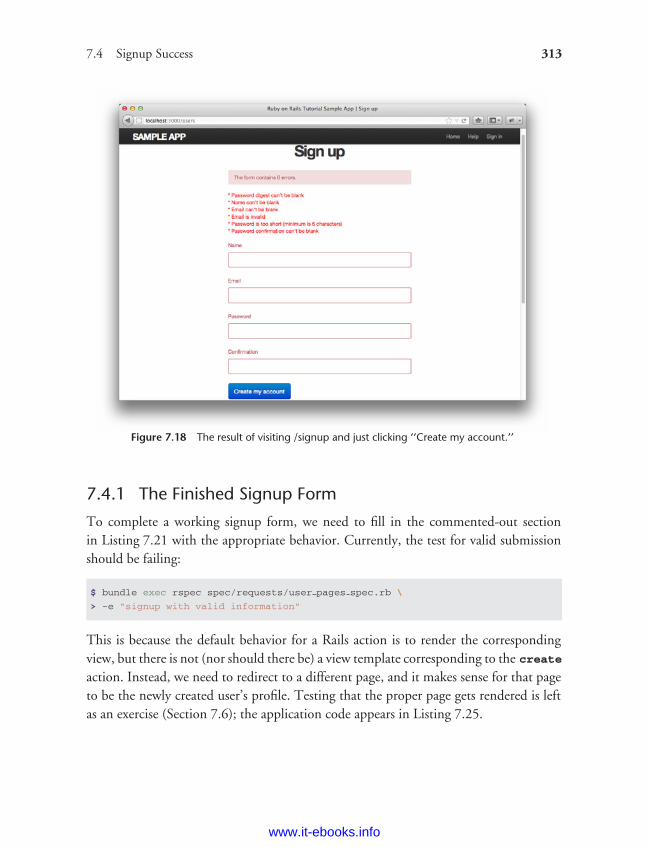
ptg8286261
7.4 Signup Success 313
Figure 7.18 The result of visiting /signup and just clicking ‘‘Create my account.’’
7.4.1 The Finished Signup Form
To complete a working signup form, we need to fill in the commented-out sectionin Listing 7.21 with the appropriate behavior. Currently, the test for valid submissionshould be failing:
$ bundle exec rspec spec/requests/user pages spec.rb \
> -e "signup with valid information"
This is because the default behavior for a Rails action is to render the correspondingview, but there is not (nor should there be) a view template corresponding to the createaction. Instead, we need to redirect to a different page, and it makes sense for that pageto be the newly created user’s profile. Testing that the proper page gets rendered is leftas an exercise (Section 7.6); the application code appears in Listing 7.25.
www.it-ebooks.info
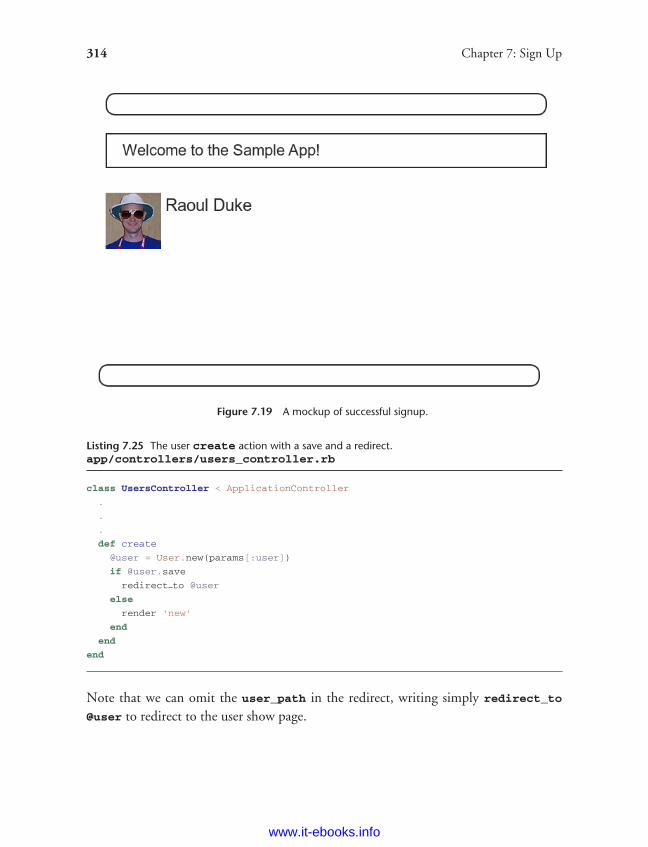
ptg8286261
314 Chapter 7: Sign Up
Figure 7.19 A mockup of successful signup.
Listing 7.25 The user create action with a save and a redirect.app/controllers/users_controller.rb
class UsersController < ApplicationController
.
.
.
def create
@user = User.new(params[:user])
if @user.save
redirect to @user
else
render 'new'
end
end
end
Note that we can omit the user_path in the redirect, writing simply redirect_to
@user to redirect to the user show page.
www.it-ebooks.info
ptg8286261
7.4 Signup Success 315
With the code in Listing 7.25, our signup form is working, as you can verify byrunning the test suite:
$ bundle exec rspec spec/
7.4.2 The Flash
Before submitting a valid registration in a browser, we’re going to add a bit of polishcommon in web applications: a message that appears on the subsequent page (in thiscase, welcoming our new user to the application) and then disappears upon visiting asecond page or on page reload. The Rails way to accomplish this is to use a special variablecalled the flash, which operates like flash memory in that it stores its data temporarily.The flash variable is effectively a hash; you may even recall the console example inSection 4.3.3, where we saw how to iterate through a hash using a strategically namedflash hash:
$ rails console
>> flash = { success: "It worked!", error: "It failed." }
=> {:success=>"It worked!", error: "It failed."}
>> flash.each do |key, value|
?> puts "#{key}"
?> puts "#{value}"
>> end
success
It worked!
error
It failed.
We can arrange to display the contents of the flash site-wide by including it in ourapplication layout, as in Listing 7.26. (This code is a particularly ugly combination ofHTML and ERb; an exercise in Section 7.6 shows how to make it prettier.)
Listing 7.26 Adding the contents of the flash variable to the site layout.app/views/layouts/application.html.erb
<!DOCTYPE html>
<html>
.
.
.
www.it-ebooks.info
ptg8286261
316 Chapter 7: Sign Up
<body>
<%= render 'layouts/header' %>
<div class="container">
<% flash.each do |key, value| %>
<div class="alert alert-<%= key %>"><%= value %></div>
<% end %>
<%= yield %>
<%= render 'layouts/footer' %>
<%= debug(params) if Rails.env.development? %>
</div>
.
.
.
</body>
</html>
The code in Listing 7.26 arranges to insert a div tag for each element in the flash,with a CSS class indicating the type of message. For example, if flash[:success] =
"Welcome to the Sample App!", then the code
<% flash.each do |key, value| %>
<div class="alert alert-<%= key %>"><%= value %></div>
<% end %>
will produce this HTML:
<div class="alert alert-success">Welcome to the Sample App!</div>
(Note that the key :success is a symbol, but Embedded Ruby automatically convertsit to the string "success" before inserting it into the template.) The reason we iteratethrough all possible key/value pairs is so that we can include other kinds of flashmessages. For example, in Section 8.1.5 we’ll see flash[:error] used to indicate afailed signin attempt.11
Writing a test for the right flash message is left as an exercise (Section 7.6), andwe can get the test to pass by assigning flash[:success] a welcome message in thecreate action, as shown in Listing 7.27.
11. Actually, we’ll use the closely related flash.now, but we’ll defer that subtlety until we need it.
www.it-ebooks.info
ptg8286261
7.4 Signup Success 317
Listing 7.27 Adding a flash message to user signup.app/controllers/users_controller.rb
class UsersController < ApplicationController
.
.
.
def create
@user = User.new(params[:user])
if @user.save
flash[:success] = "Welcome to the Sample App!"
redirect to @user
else
render 'new'
end
end
end
7.4.3 The First Signup
We can see the result of all this work by signing up our first user under the name‘‘Rails Tutorial’’ and email address ‘‘[email protected]’’. The resultingpage (Figure 7.20) shows a friendly message upon successful signup, including nicegreen styling for the success class, which comes included with the Bootstrap CSSframework from Section 5.1.2. (If instead you get an error message indicating thatthe email address has already been taken, be sure to run the db:reset Rake task asindicated in Section 7.2.) Then, upon reloading the user show page, the flash messagedisappears as promised (Figure 7.21).
We can now check our database just to be double sure that the new user wasactually created:
$ rails console
>> User.find by email("[email protected]")
=> #<User id: 1, name: "Rails Tutorial", email: "[email protected]",
created at: "2011-12-13 05:51:34", updated at: "2011-12-13 05:51:34",
password digest: "$2a$10$A58/j7wwh3aAffGkMAO9Q.jjh3jshd.6akhDKtchAz/R...">
7.4.4 Deploying to Production with SSL
Having developed the User model and the signup functionality, now is a good time todeploy the sample application to production. (If you didn’t follow the setup steps in the
www.it-ebooks.info
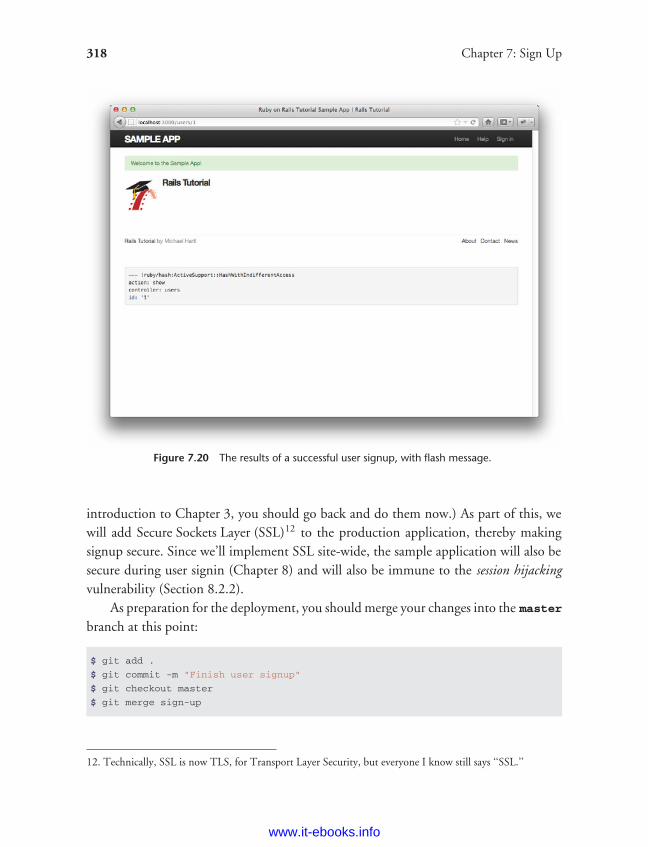
ptg8286261
318 Chapter 7: Sign Up
Figure 7.20 The results of a successful user signup, with flash message.
introduction to Chapter 3, you should go back and do them now.) As part of this, wewill add Secure Sockets Layer (SSL)12 to the production application, thereby makingsignup secure. Since we’ll implement SSL site-wide, the sample application will also besecure during user signin (Chapter 8) and will also be immune to the session hijackingvulnerability (Section 8.2.2).
As preparation for the deployment, you should merge your changes into the masterbranch at this point:
$ git add .
$ git commit -m "Finish user signup"
$ git checkout master
$ git merge sign-up
12. Technically, SSL is now TLS, for Transport Layer Security, but everyone I know still says ‘‘SSL.’’
www.it-ebooks.info
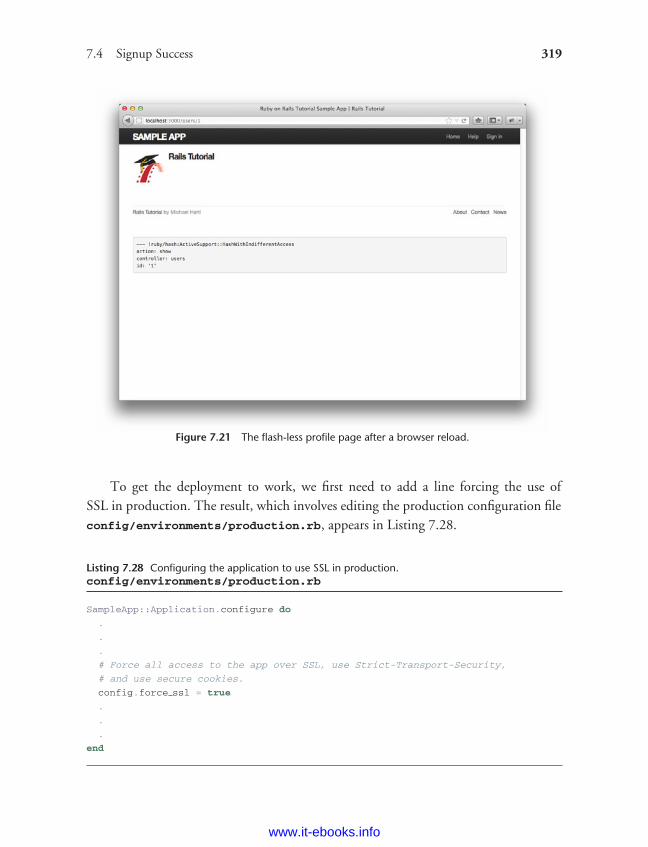
ptg8286261
7.4 Signup Success 319
Figure 7.21 The flash-less profile page after a browser reload.
To get the deployment to work, we first need to add a line forcing the use ofSSL in production. The result, which involves editing the production configuration fileconfig/environments/production.rb, appears in Listing 7.28.
Listing 7.28 Configuring the application to use SSL in production.config/environments/production.rb
SampleApp::Application.configure do
.
.
.
# Force all access to the app over SSL, use Strict-Transport-Security,
# and use secure cookies.
config.force ssl = true
.
.
.
end
www.it-ebooks.info
ptg8286261
320 Chapter 7: Sign Up
To get the production site working, we have to commit the change to theconfiguration file and push the result up to Heroku:
$ git commit -a -m "Add SSL in production"
$ git push heroku
Next, we need to run the migration on the production database to tell Herokuabout the User data model:13
$ heroku run rake db:migrate
(You might see some deprecation warnings at this point, which you should ignore.)Finally, we need to set up SSL on the remote server. Configuring a production site
to use SSL is painful and error-prone, and among other things it involves purchasingan SSL certificate for your domain. Luckily, for an application running on a Herokudomain (such as the sample application), we can piggyback on Heroku’s SSL certificate,a feature that is included automatically as part of the Heroku platform. If you wantto run SSL on a custom domain, such as example.com, you’ll have no choice but toendure some pain, which you can read about on Heroku’s page on SSL.
The result of all this work is a working signup form on the production server(Figure 7.22):
$ heroku open
Note in Figure 7.22 the https:// in place of the usual http://. The extra ‘‘s’’ is anindication that SSL is working.
You should feel free to visit the signup page and create a new user at this time. Ifyou have trouble, try running
$ heroku logs
to debug the error using the Heroku logfile.
13. Readers interested in using Heroku for real-life production applications might be interested in Kumade,which handles things like database migrations automatically.
www.it-ebooks.info
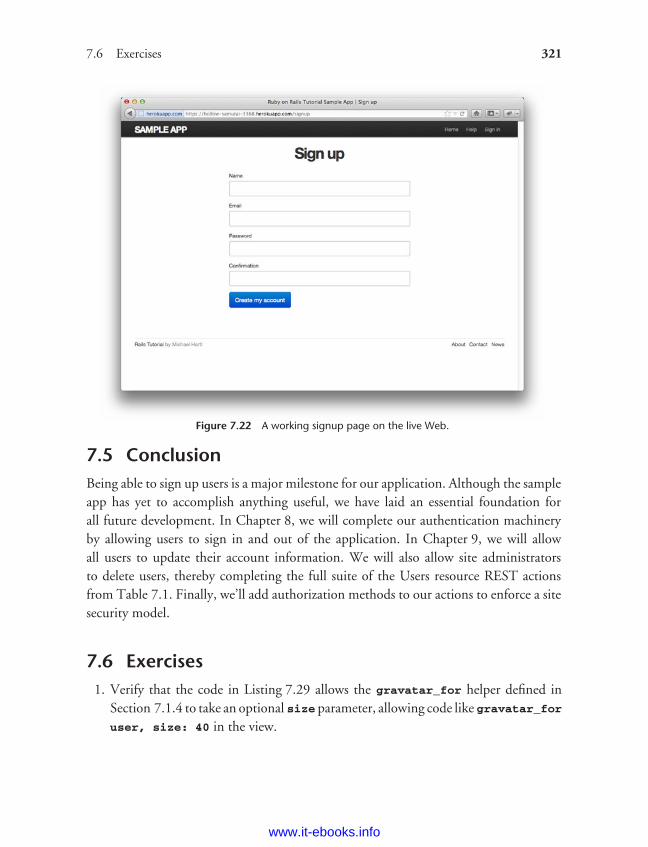
ptg8286261
7.6 Exercises 321
Figure 7.22 A working signup page on the live Web.
7.5 ConclusionBeing able to sign up users is a major milestone for our application. Although the sampleapp has yet to accomplish anything useful, we have laid an essential foundation forall future development. In Chapter 8, we will complete our authentication machineryby allowing users to sign in and out of the application. In Chapter 9, we will allowall users to update their account information. We will also allow site administratorsto delete users, thereby completing the full suite of the Users resource REST actionsfrom Table 7.1. Finally, we’ll add authorization methods to our actions to enforce a sitesecurity model.
7.6 Exercises1. Verify that the code in Listing 7.29 allows the gravatar_for helper defined in
Section 7.1.4 to take an optional size parameter, allowing code like gravatar_foruser, size: 40 in the view.
www.it-ebooks.info
ptg8286261
322 Chapter 7: Sign Up
2. Write tests for the error messages implemented in Listing 7.22. A suggested startappears in Listing 7.31.
3. Using the code in Listing 7.30, replace the error message for a missing password,currently ‘‘Password digest can’t be blank’’, with the more understandable ‘‘Pass-word can’t be blank’’. (This uses Rails’ internationalization support to producea functional but rather hacky solution.) Note that, to avoid duplication of errormessages, you should also remove the password’s presence: true validation inthe User model.
4. By writing the test first or by intentionally breaking and then fixing the applicationcode, verify that the tests in Listing 7.32 correctly specify the desired behavior aftersaving the user in the create action.
5. As noted before, the flash HTML in Listing 7.26 is ugly. Verify by running thetest suite that the cleaner code in Listing 7.33, which uses the Rails content_taghelper, also works.
Listing 7.29 Defining an optional :size parameter for the gravatar_for helper.app/helpers/users_helper.rb
module UsersHelper
# Returns the Gravatar (http://gravatar.com/) for the given user.
def gravatar for(user, options = { size: 50 })
gravatar id = Digest::MD5::hexdigest(user.email.downcase)
size = options[:size]
gravatar url = "https://secure.gravatar.com/avatars/#{gravatar id}.png?s=
#{size}"
image tag(gravatar url, alt: user.name, class: "gravatar")
end
end
Listing 7.30 Hacking a better error message for missing passwords.config/locales/en.yml
en:
activerecord:
attributes:
user:
password digest: "Password"
www.it-ebooks.info
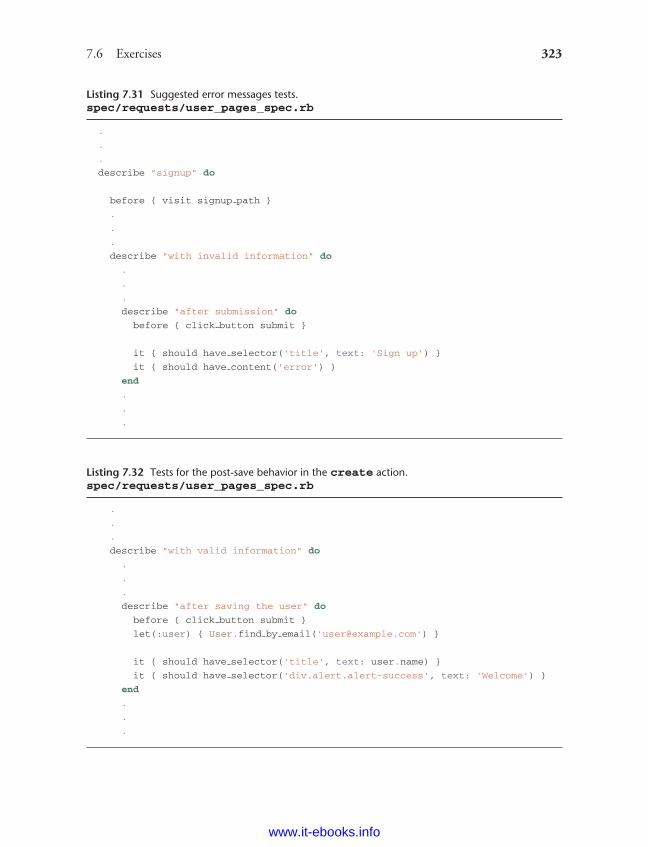
ptg8286261
7.6 Exercises 323
Listing 7.31 Suggested error messages tests.spec/requests/user_pages_spec.rb
.
.
.
describe "signup" do
before { visit signup path }
.
.
.
describe "with invalid information" do
.
.
.
describe "after submission" do
before { click button submit }
it { should have selector('title', text: 'Sign up') }
it { should have content('error') }
end
.
.
.
Listing 7.32 Tests for the post-save behavior in the create action.spec/requests/user_pages_spec.rb
.
.
.
describe "with valid information" do
.
.
.
describe "after saving the user" do
before { click button submit }
let(:user) { User.find by email('[email protected]') }
it { should have selector('title', text: user.name) }
it { should have selector('div.alert.alert-success', text: 'Welcome') }
end
.
.
.
www.it-ebooks.info
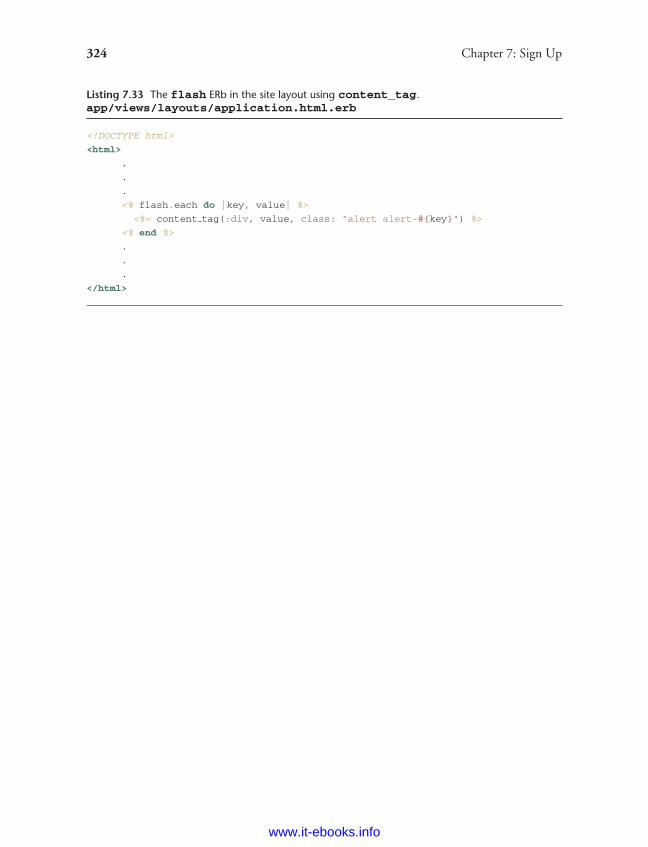
ptg8286261
324 Chapter 7: Sign Up
Listing 7.33 The flash ERb in the site layout using content_tag.app/views/layouts/application.html.erb
<!DOCTYPE html>
<html>
.
.
.
<% flash.each do |key, value| %>
<%= content tag(:div, value, class: "alert alert-#{key}") %>
<% end %>
.
.
.
</html>
www.it-ebooks.info
ptg8286261
CHAPTER 8Sign In, Sign Out
Now that new users can sign up for our site (Chapter 7), it’s time to give registered usersthe ability to sign in and sign out. This will allow us to add customizations based onsignin status and based on the identity of the current user. For example, in this chapterwe’ll update the site header with signin/signout links and a profile link. In Chapter 10,we’ll use the identity of a signed-in user to create microposts associated with that user,and in Chapter 11 we’ll allow the current user to follow other users of the application(thereby receiving a feed of their microposts).
Having users sign in will also allow us to implement a security model, restrictingaccess to particular pages based on the identity of the signed-in user. For instance,as we’ll see in Chapter 9, only signed-in users will be able to access the page used toedit user information. The signin system will also make possible special privileges foradministrative users, such as the ability (also introduced in Chapter 9) to delete usersfrom the database.
After implementing the core authentication machinery, we’ll take a short detour toinvestigate Cucumber, a popular system for behavior-driven development (Section 8.3).In particular, we’ll re-implement a couple of the RSpec integration tests in Cucumberto see how the two methods compare.
As in previous chapters, we’ll do our work on a topic branch and merge in thechanges at the end:
$ git checkout -b sign-in-out
8.1 Sessions and Signin FailureA session is a semi-permanent connection between two computers, such as a clientcomputer running a web browser and a server running Rails. We’ll be using sessions
325
www.it-ebooks.info
ptg8286261
326 Chapter 8: Sign In, Sign Out
to implement the common pattern of signing in, and in this context there are severaldifferent models for session behavior common on the web: ‘‘forgetting’’ the session onbrowser close, using an optional ‘‘remember me’’ checkbox for persistent sessions, andautomatically remembering sessions until the user explicitly signs out.1 We’ll opt forthe final of these options: When users sign in, we will remember their signin status‘‘forever,’’ clearing the session only when the user explicitly signs out. (We’ll see inSection 8.2.1 just how long ‘‘forever’’ is.)
It’s convenient to model sessions as a RESTful resource: We’ll have a signin pagefor new sessions, signing in will create a session, and signing out will destroy it. Unlikethe Users resource, which uses a database back-end (via the User model) to persistdata, the Sessions resource will use a cookie, which is a small piece of text placed onthe user’s browser. Much of the work involved in signin comes from building thiscookie-based authentication machinery. In this section and the next, we’ll preparefor this work by constructing a Sessions controller, a signin form, and the relevantcontroller actions. We’ll then complete user signin in Section 8.2 by adding the necessarycookie-manipulation code.
8.1.1 Sessions Controller
The elements of signing in and out correspond to particular REST actions of theSessions controller: The signin form is handled by the new action (covered in thissection), actually signing in is handled by sending a POST request to the create action(Section 8.1 and Section 8.2), and signing out is handled by sending a DELETE requestto the destroy action (Section 8.2.6). (Recall the association of HTTP verbs withREST actions from Table 7.1.) To get started, we’ll generate a Sessions controller andan integration test for the authentication machinery:
$ rails generate controller Sessions --no-test-framework
$ rails generate integration test authentication pages
Following the model from Section 7.2 for the signup page, we’ll create a signinform for creating new sessions, as mocked up in Figure 8.1.
The signin page will live at the URI given by signin_path (defined momentarily),and as usual we’ll start with a minimalist test, as shown in Listing 8.1. (Compare to theanalogous code for the signup page in Listing 7.6.)
1. Another common model is to expire the session after a certain amount of time. This is especially appropriateon sites containing sensitive information, such as banking and financial trading accounts.
www.it-ebooks.info
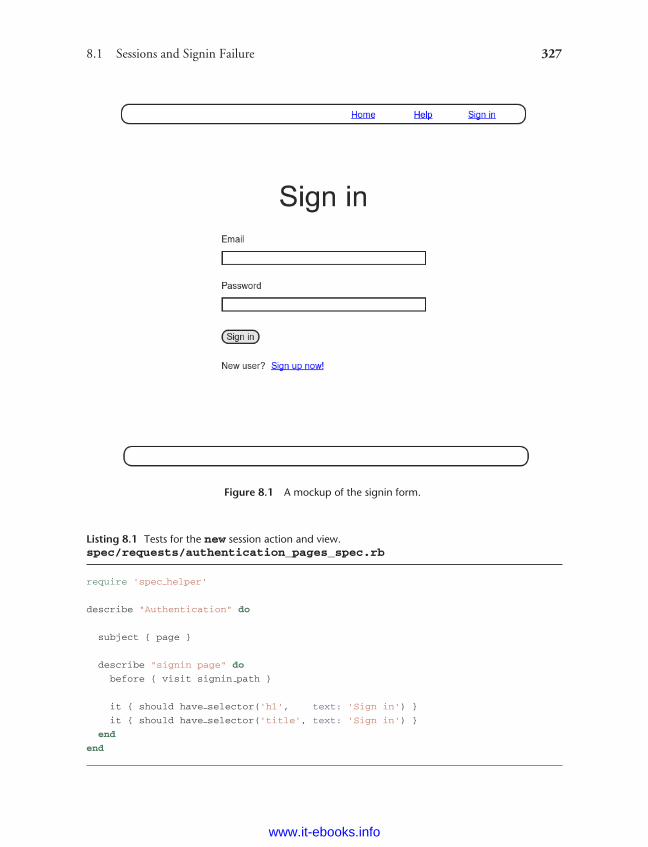
ptg8286261
8.1 Sessions and Signin Failure 327
Figure 8.1 A mockup of the signin form.
Listing 8.1 Tests for the new session action and view.spec/requests/authentication_pages_spec.rb
require 'spec helper'
describe "Authentication" do
subject { page }
describe "signin page" do
before { visit signin path }
it { should have selector('h1', text: 'Sign in') }
it { should have selector('title', text: 'Sign in') }
end
end
www.it-ebooks.info
ptg8286261
328 Chapter 8: Sign In, Sign Out
The tests initially fail, as required:
$ bundle exec rspec spec/
To get the tests in Listing 8.1 to pass, we first need to define routes for the Sessionsresource, together with a custom named route for the signin page (which we’ll mapto the Session controller’s new action). As with the Users resource, we can use theresources method to define the standard RESTful routes:
resources :sessions, only: [:new, :create, :destroy]
Since we have no need to show or edit sessions, we’ve restricted the actions to new,create, and destroy using the :only option accepted by resources. The full result,including named routes for signin and signout, appears in Listing 8.2.
Listing 8.2 Adding a resource to get the standard RESTful actions for sessions.config/routes.rb
SampleApp::Application.routes.draw do
resources :users
resources :sessions, only: [:new, :create, :destroy]
match '/signup', to: 'users#new'
match '/signin', to: 'sessions#new'
match '/signout', to: 'sessions#destroy', via: :delete
.
.
.
end
Note the use of via: :delete for the signout route, which indicated that it should beinvoked using an HTTP DELETE request.
The resources defined in Listing 8.2 provide URIs and actions similar to those forusers (Table 7.1), as shown in Table 8.1. Note that the routes for signin and signoutare custom, but the route for creating a session is simply the default (i.e., [resourcename]_path).
The next step to get the tests in Listing 8.1 to pass is to add a new action tothe Sessions controller, as shown in Listing 8.3 (which also defines the create anddestroy actions for future reference).
www.it-ebooks.info
ptg8286261
8.1 Sessions and Signin Failure 329
Table 8.1 RESTful routes provided by the sessions rules in Listing 8.2.
HTTP request URI Named route Action Purpose
GET /signin signin_path new page for a new session (signin)POST /sessions sessions_path create create a new sessionDELETE /signout signout_path destroy delete a session (sign out)
Listing 8.3 The initial Sessions controller.app/controllers/sessions_controller.rb
class SessionsController < ApplicationController
def new
end
def create
end
def destroy
end
end
The final step is to define the initial version of the signin page. Note that, since itis the page for a new session, the signin page lives in the file app/views/sessions/
new.html.erb, which we have to create. The contents, which for now only define thepage title and top-level heading, appear as in Listing 8.4.
Listing 8.4 The initial signin view.app/views/sessions/new.html.erb
<% provide(:title, "Sign in") %>
<h1>Sign in</h1>
With that, the tests in Listing 8.1 should be passing, and we’re ready to make theactual signin form.
$ bundle exec rspec spec/
www.it-ebooks.info
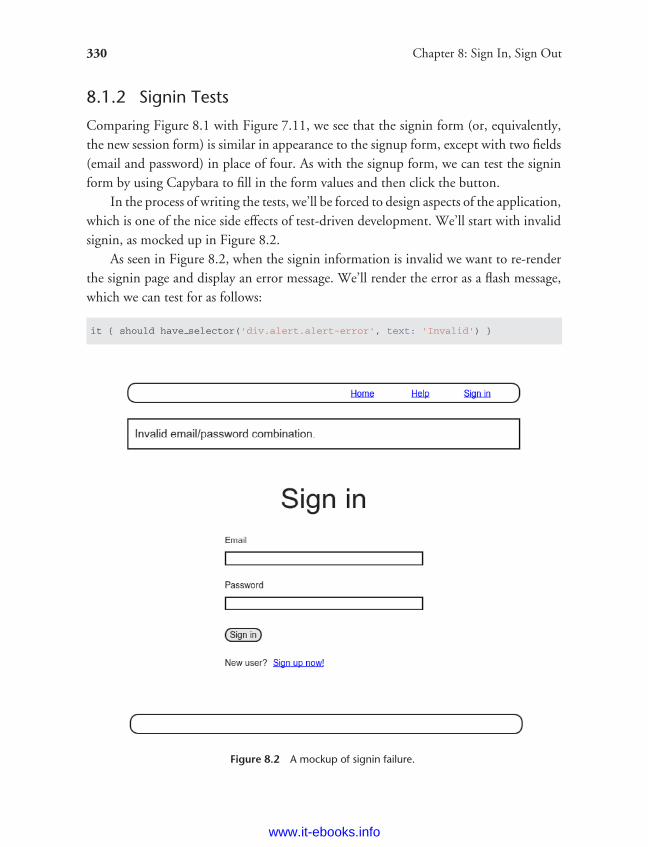
ptg8286261
330 Chapter 8: Sign In, Sign Out
8.1.2 Signin Tests
Comparing Figure 8.1 with Figure 7.11, we see that the signin form (or, equivalently,the new session form) is similar in appearance to the signup form, except with two fields(email and password) in place of four. As with the signup form, we can test the signinform by using Capybara to fill in the form values and then click the button.
In the process of writing the tests, we’ll be forced to design aspects of the application,which is one of the nice side effects of test-driven development. We’ll start with invalidsignin, as mocked up in Figure 8.2.
As seen in Figure 8.2, when the signin information is invalid we want to re-renderthe signin page and display an error message. We’ll render the error as a flash message,which we can test for as follows:
it { should have selector('div.alert.alert-error', text: 'Invalid') }
Figure 8.2 A mockup of signin failure.
www.it-ebooks.info
ptg8286261
8.1 Sessions and Signin Failure 331
(We saw similar code in Listing 7.32 from the exercises in Chapter 7.) Here the selectorelement (i.e., the tag) we’re looking for is
div.alert.alert-error
Recalling that the dot means ‘‘class’’ in CSS (Section 5.1.2), you might be able to guessthat this tests for a div tag with the classes "alert" and "alert-error". We alsotest that the error message contains the text "Invalid". Putting these together, the testlooks for an element of the following form:
<div class="alert alert-error">Invalid...</div>
Combining the title and flash tests gives the code in Listing 8.5. As we’ll see, thesetests miss an important subtlety, which we’ll address in Section 8.1.5.
Listing 8.5 The tests for signin failure.spec/requests/authentication_pages_spec.rb
require 'spec helper'
describe "Authentication" do
.
.
.
describe "signin" do
before { visit signin path }
describe "with invalid information" do
before { click button "Sign in" }
it { should have selector('title', text: 'Sign in') }
it { should have selector('div.alert.alert-error', text: 'Invalid') }
end
end
end
Having written tests for signin failure, we now turn to signin success. The changeswe’ll test for are the rendering of the user’s profile page (as determined by the pagetitle, which should be the user’s name), together with three planned changes to the sitenavigation:
1. The appearance of a link to the profile page2. The appearance of a ‘‘Sign out’’ link3. The disappearance of the ‘‘Sign in’’ link
www.it-ebooks.info
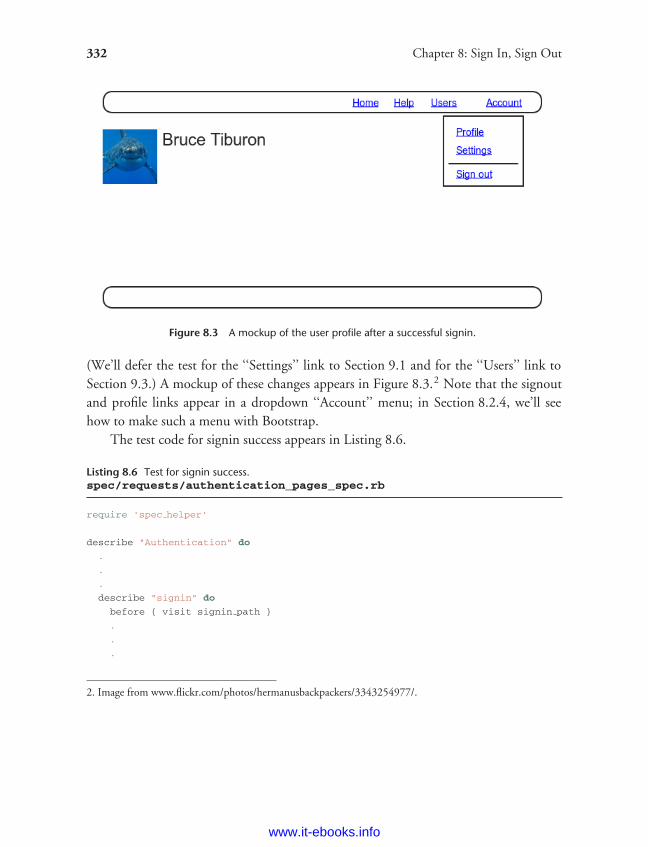
ptg8286261
332 Chapter 8: Sign In, Sign Out
Figure 8.3 A mockup of the user profile after a successful signin.
(We’ll defer the test for the ‘‘Settings’’ link to Section 9.1 and for the ‘‘Users’’ link toSection 9.3.) A mockup of these changes appears in Figure 8.3.2 Note that the signoutand profile links appear in a dropdown ‘‘Account’’ menu; in Section 8.2.4, we’ll seehow to make such a menu with Bootstrap.
The test code for signin success appears in Listing 8.6.
Listing 8.6 Test for signin success.spec/requests/authentication_pages_spec.rb
require 'spec helper'
describe "Authentication" do
.
.
.
describe "signin" do
before { visit signin path }
.
.
.
2. Image from www.flickr.com/photos/hermanusbackpackers/3343254977/.
www.it-ebooks.info
ptg8286261
8.1 Sessions and Signin Failure 333
describe "with valid information" do
let(:user) { FactoryGirl.create(:user) }
before do
fill in "Email", with: user.email
fill in "Password", with: user.password
click button "Sign in"
end
it { should have selector('title', text: user.name) }
it { should have link('Profile', href: user path(user)) }
it { should have link('Sign out', href: signout path) }
it { should not have link('Sign in', href: signin path) }
end
end
end
Here we’ve used the have_link method. It takes as arguments the text of the link andan optional :href parameter, so that
it { should have link('Profile', href: user path(user)) }
ensures that the anchor tag a has the right href (URI) attribute—in this case, a link tothe user’s profile page.
8.1.3 Signin Form
With our tests in place, we’re ready to start developing the signin form. Recall fromListing 7.17 that the signup form uses the form_for helper, taking as an argument theuser instance variable @user:
<%= form for(@user) do |f| %>
.
.
.
<% end %>
The main difference between this and the signin form is that we have no Sessionmodel, hence no analogue for the @user variable. This means that, in constructing the
www.it-ebooks.info
ptg8286261
334 Chapter 8: Sign In, Sign Out
new session form, we have to give form_for slightly more information; in particular,whereas
form for(@user)
allows Rails to infer that the action of the form should be to POST to the URI /users, inthe case of sessions we need to indicate the name of the resource and the correspondingURI:
form for(:session, url: sessions path)
(A second option is to use form_tag in place of form_for; this might be more evenidiomatically correct Rails, but it has less in common with the signup form, and at thisstage I want to emphasize the parallel structure. Making a working form with form_tag
is left as an exercise [Section 8.5].)With the proper form_for in hand, it’s easy to make a signin form to match the
mockup in Figure 8.1 using the signup form (Listing 7.17) as a model, as shown inListing 8.7.
Listing 8.7 Code for the signin form.app/views/sessions/new.html.erb
<% provide(:title, "Sign in") %>
<h1>Sign in</h1>
<div class="row">
<div class="span6 offset3">
<%= form for(:session, url: sessions path) do |f| %>
<%= f.label :email %>
<%= f.text field :email %>
<%= f.label :password %>
<%= f.password field :password %>
<%= f.submit "Sign in", class: "btn btn-large btn-primary" %>
<% end %>
<p>New user? <%= link to "Sign up now!", signup path %></p>
</div>
</div>
www.it-ebooks.info
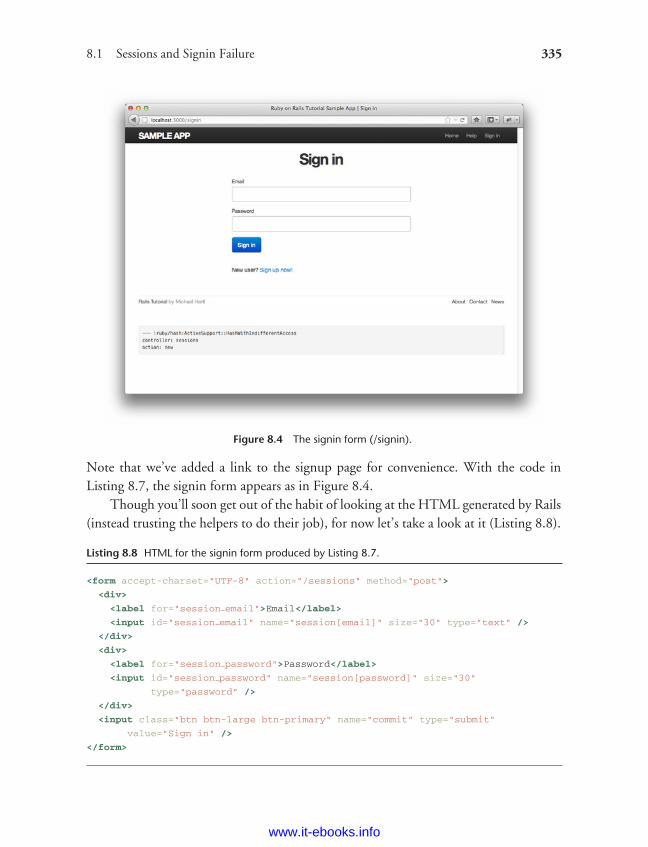
ptg8286261
8.1 Sessions and Signin Failure 335
Figure 8.4 The signin form (/signin).
Note that we’ve added a link to the signup page for convenience. With the code inListing 8.7, the signin form appears as in Figure 8.4.
Though you’ll soon get out of the habit of looking at the HTML generated by Rails(instead trusting the helpers to do their job), for now let’s take a look at it (Listing 8.8).
Listing 8.8 HTML for the signin form produced by Listing 8.7.
<form accept-charset="UTF-8" action="/sessions" method="post">
<div>
<label for="session email">Email</label>
<input id="session email" name="session[email]" size="30" type="text" />
</div>
<div>
<label for="session password">Password</label>
<input id="session password" name="session[password]" size="30"
type="password" />
</div>
<input class="btn btn-large btn-primary" name="commit" type="submit"
value="Sign in" />
</form>
www.it-ebooks.info
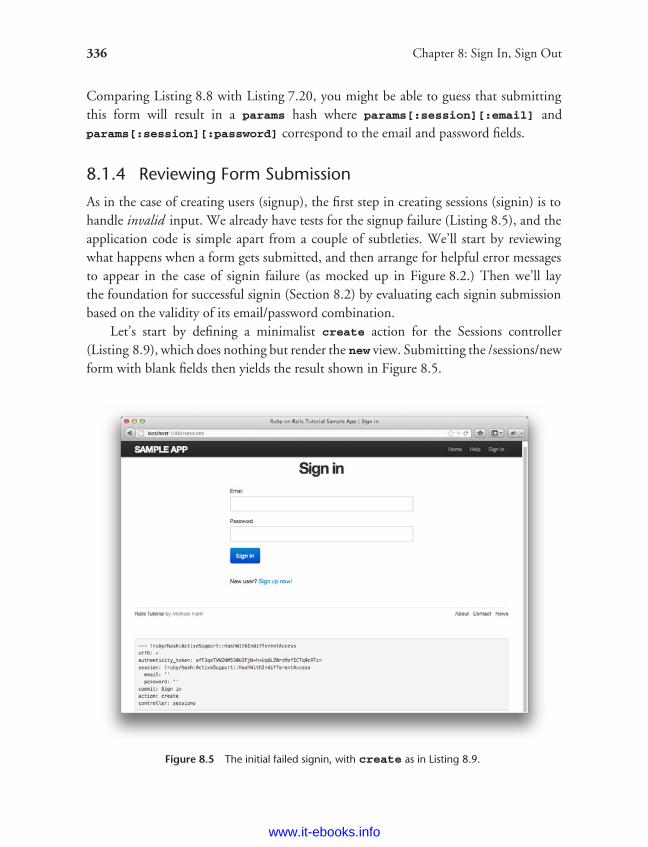
ptg8286261
336 Chapter 8: Sign In, Sign Out
Comparing Listing 8.8 with Listing 7.20, you might be able to guess that submittingthis form will result in a params hash where params[:session][:email] andparams[:session][:password] correspond to the email and password fields.
8.1.4 Reviewing Form Submission
As in the case of creating users (signup), the first step in creating sessions (signin) is tohandle invalid input. We already have tests for the signup failure (Listing 8.5), and theapplication code is simple apart from a couple of subtleties. We’ll start by reviewingwhat happens when a form gets submitted, and then arrange for helpful error messagesto appear in the case of signin failure (as mocked up in Figure 8.2.) Then we’ll laythe foundation for successful signin (Section 8.2) by evaluating each signin submissionbased on the validity of its email/password combination.
Let’s start by defining a minimalist create action for the Sessions controller(Listing 8.9), which does nothing but render the new view. Submitting the /sessions/newform with blank fields then yields the result shown in Figure 8.5.
Figure 8.5 The initial failed signin, with create as in Listing 8.9.
www.it-ebooks.info
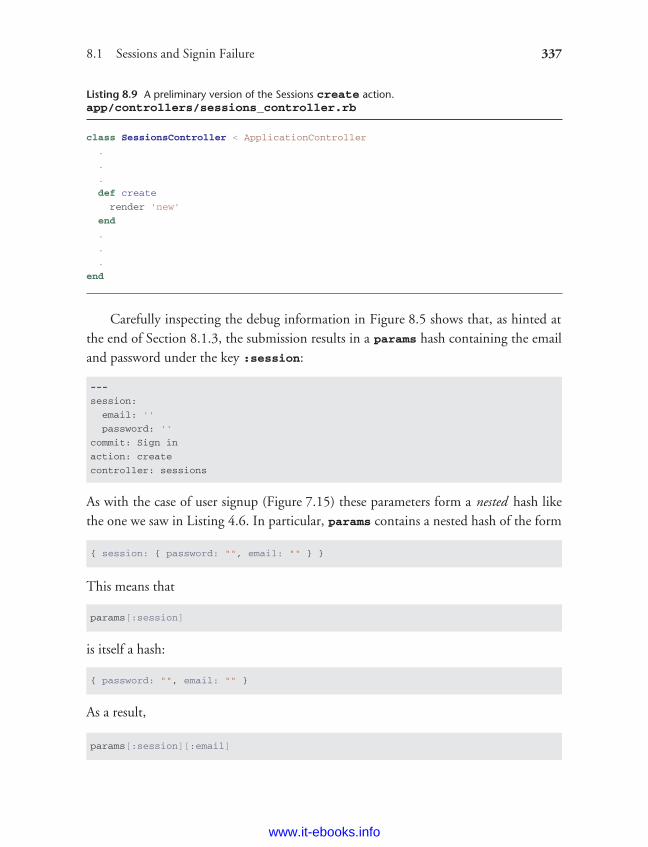
ptg8286261
8.1 Sessions and Signin Failure 337
Listing 8.9 A preliminary version of the Sessions create action.app/controllers/sessions_controller.rb
class SessionsController < ApplicationController
.
.
.
def create
render 'new'
end
.
.
.
end
Carefully inspecting the debug information in Figure 8.5 shows that, as hinted atthe end of Section 8.1.3, the submission results in a params hash containing the emailand password under the key :session:
---
session:
email: ''
password: ''
commit: Sign in
action: create
controller: sessions
As with the case of user signup (Figure 7.15) these parameters form a nested hash likethe one we saw in Listing 4.6. In particular, params contains a nested hash of the form
{ session: { password: "", email: "" } }
This means that
params[:session]
is itself a hash:
{ password: "", email: "" }
As a result,
params[:session][:email]
www.it-ebooks.info
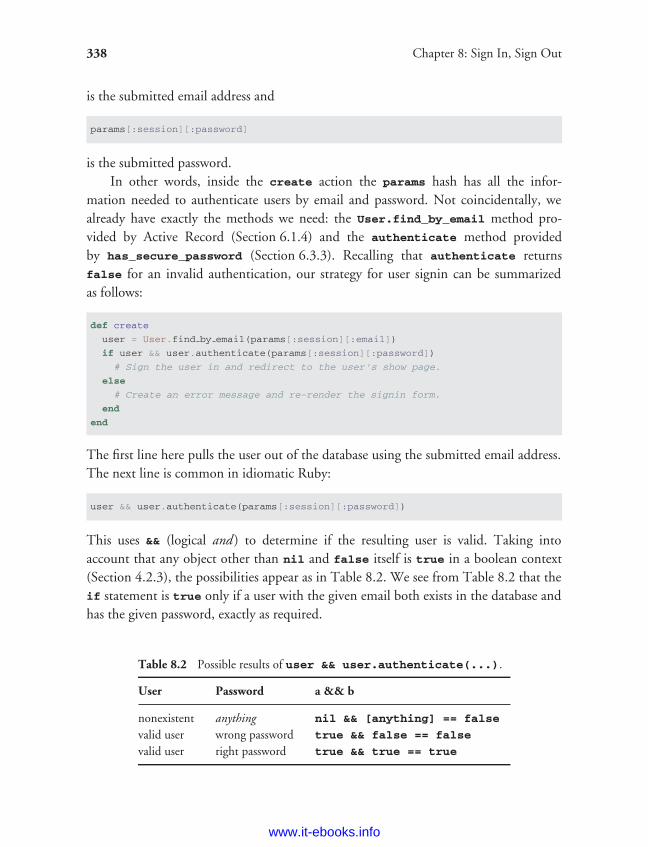
ptg8286261
338 Chapter 8: Sign In, Sign Out
is the submitted email address and
params[:session][:password]
is the submitted password.In other words, inside the create action the params hash has all the infor-
mation needed to authenticate users by email and password. Not coincidentally, wealready have exactly the methods we need: the User.find_by_email method pro-vided by Active Record (Section 6.1.4) and the authenticate method providedby has_secure_password (Section 6.3.3). Recalling that authenticate returnsfalse for an invalid authentication, our strategy for user signin can be summarizedas follows:
def create
user = User.find by email(params[:session][:email])
if user && user.authenticate(params[:session][:password])
# Sign the user in and redirect to the user's show page.
else
# Create an error message and re-render the signin form.
end
end
The first line here pulls the user out of the database using the submitted email address.The next line is common in idiomatic Ruby:
user && user.authenticate(params[:session][:password])
This uses && (logical and ) to determine if the resulting user is valid. Taking intoaccount that any object other than nil and false itself is true in a boolean context(Section 4.2.3), the possibilities appear as in Table 8.2. We see from Table 8.2 that theif statement is true only if a user with the given email both exists in the database andhas the given password, exactly as required.
Table 8.2 Possible results of user && user.authenticate(...).
User Password a && b
nonexistent anything nil && [anything] == false
valid user wrong password true && false == false
valid user right password true && true == true
www.it-ebooks.info
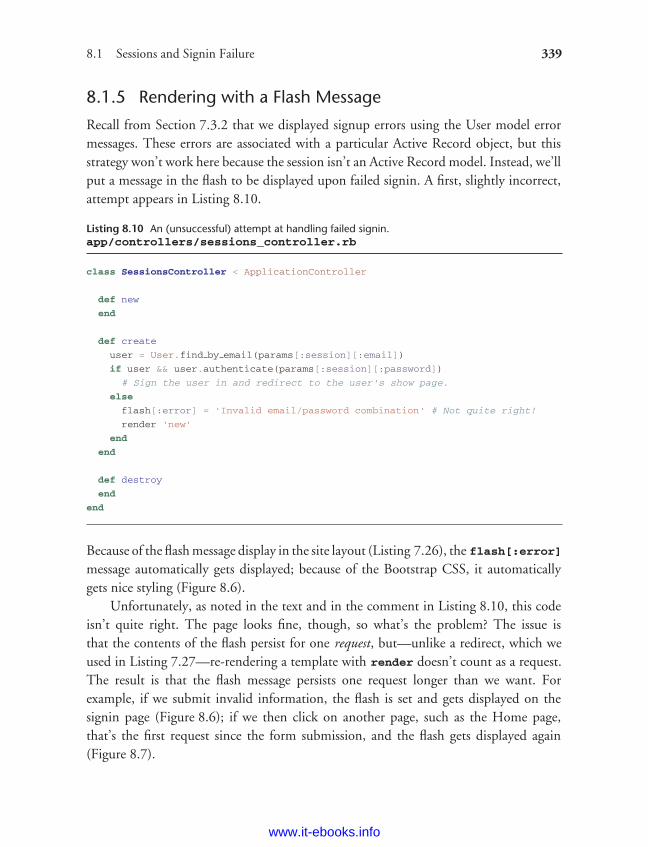
ptg8286261
8.1 Sessions and Signin Failure 339
8.1.5 Rendering with a Flash Message
Recall from Section 7.3.2 that we displayed signup errors using the User model errormessages. These errors are associated with a particular Active Record object, but thisstrategy won’t work here because the session isn’t an Active Record model. Instead, we’llput a message in the flash to be displayed upon failed signin. A first, slightly incorrect,attempt appears in Listing 8.10.
Listing 8.10 An (unsuccessful) attempt at handling failed signin.app/controllers/sessions_controller.rb
class SessionsController < ApplicationController
def new
end
def create
user = User.find by email(params[:session][:email])
if user && user.authenticate(params[:session][:password])
# Sign the user in and redirect to the user's show page.
else
flash[:error] = 'Invalid email/password combination' # Not quite right!
render 'new'
end
end
def destroy
end
end
Because of the flash message display in the site layout (Listing 7.26), the flash[:error]message automatically gets displayed; because of the Bootstrap CSS, it automaticallygets nice styling (Figure 8.6).
Unfortunately, as noted in the text and in the comment in Listing 8.10, this codeisn’t quite right. The page looks fine, though, so what’s the problem? The issue isthat the contents of the flash persist for one request, but—unlike a redirect, which weused in Listing 7.27—re-rendering a template with render doesn’t count as a request.The result is that the flash message persists one request longer than we want. Forexample, if we submit invalid information, the flash is set and gets displayed on thesignin page (Figure 8.6); if we then click on another page, such as the Home page,that’s the first request since the form submission, and the flash gets displayed again(Figure 8.7).
www.it-ebooks.info
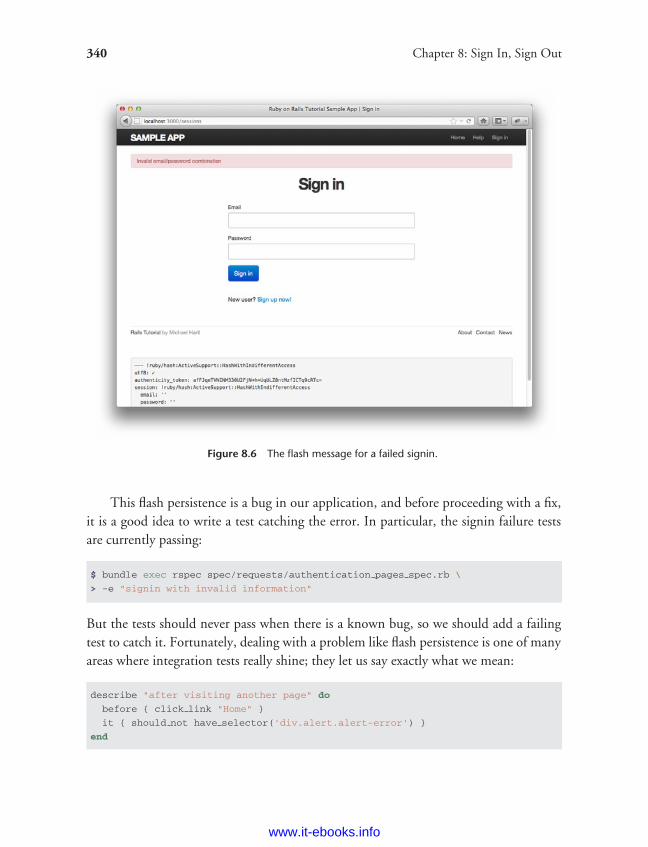
ptg8286261
340 Chapter 8: Sign In, Sign Out
Figure 8.6 The flash message for a failed signin.
This flash persistence is a bug in our application, and before proceeding with a fix,it is a good idea to write a test catching the error. In particular, the signin failure testsare currently passing:
$ bundle exec rspec spec/requests/authentication pages spec.rb \
> -e "signin with invalid information"
But the tests should never pass when there is a known bug, so we should add a failingtest to catch it. Fortunately, dealing with a problem like flash persistence is one of manyareas where integration tests really shine; they let us say exactly what we mean:
describe "after visiting another page" do
before { click link "Home" }
it { should not have selector('div.alert.alert-error') }
end
www.it-ebooks.info

ptg8286261
8.1 Sessions and Signin Failure 341
Figure 8.7 An example of the flash persisting.
After submitting invalid signin data, this test follows the Home link in the site layoutand then requires that the flash error message not appear. The updated code, with themodified flash test, is shown in Listing 8.11.
Listing 8.11 Correct tests for signin failure.spec/requests/authentication_pages_spec.rb
require 'spec helper'
describe "Authentication" do
.
.
.
describe "signin" do
before { visit signin path }
describe "with invalid information" do
before { click button "Sign in" }
www.it-ebooks.info
ptg8286261
342 Chapter 8: Sign In, Sign Out
it { should have selector('title', text: 'Sign in') }
it { should have selector('div.alert.alert-error', text: 'Invalid') }
describe "after visiting another page" do
before { click link "Home" }
it { should not have selector('div.alert.alert-error') }
end
end
.
.
.
end
end
The new test fails, as required:
$ bundle exec rspec spec/requests/authentication pages spec.rb \
> -e "signin with invalid information"
To get the failing test to pass, instead of flash we use flash.now, whichis specifically designed for displaying flash messages on rendered pages; unlike thecontents of flash, its contents disappear as soon as there is an additional request. Thecorrected application code appears in Listing 8.12.
Listing 8.12 Correct code for failed signin.app/controllers/sessions_controller.rb
class SessionsController < ApplicationController
def new
end
def create
user = User.find by email(params[:session][:email])
if user && user.authenticate(params[:session][:password])
# Sign the user in and redirect to the user's show page.
else
flash.now[:error] = 'Invalid email/password combination'
render 'new'
end
end
def destroy
end
end
www.it-ebooks.info
ptg8286261
8.2 Signin Success 343
Now the test suite for users with invalid information should be green:
$ bundle exec rspec spec/requests/authentication pages spec.rb \
> -e "with invalid information"
8.2 Signin SuccessHaving handled a failed signin, we now need to actually sign a user in. Getting there willrequire some of the most challenging Ruby programming so far in this tutorial, so hangin there through the end and be prepared for a little heavy lifting. Happily, the first stepis easy—completing the Sessions controller create action is a snap. Unfortunately, it’salso a cheat.
Filling in the area now occupied by the signin comment (Listing 8.12) is simple:Upon successful signin, we sign the user in using the sign_in function, and thenredirect to the profile page (Listing 8.13). We see now why this is a cheat: Alas,sign_in doesn’t currently exist. Writing it will occupy the rest of this section.
Listing 8.13 The completed Sessions controller create action (not yet working).app/controllers/sessions_controller.rb
class SessionsController < ApplicationController
.
.
.
def create
user = User.find by email(params[:session][:email])
if user && user.authenticate(params[:session][:password])
sign in user
redirect to user
else
flash.now[:error] = 'Invalid email/password combination'
render 'new'
end
end
.
.
.
end
8.2.1 Remember Me
We’re now in a position to start implementing our signin model, namely, rememberinguser signin status ‘‘forever’’ and clearing the session only when the user explicitly signs
www.it-ebooks.info
ptg8286261
344 Chapter 8: Sign In, Sign Out
out. The signin functions themselves will end up crossing the traditional Model-View-Controller lines; in particular, several signin functions will need to be available in bothcontrollers and views. You may recall from Section 4.2.5 that Ruby provides a modulefacility for packaging functions together and including them in multiple places, andthat’s the plan for the authentication functions. We could make an entirely new modulefor authentication, but the Sessions controller already comes equipped with a module,namely, SessionsHelper. Moreover, such helpers are automatically included in Railsviews, so all we need to do to use the Sessions helper functions in controllers is toinclude the module into the Application controller (Listing 8.14).
Listing 8.14 Including the Sessions helper module into the Application controller.app/controllers/application_controller.rb
class ApplicationController < ActionController::Base
protect from forgery
include SessionsHelper
end
By default, all the helpers are available in the views but not in the controllers. We needthe methods from the Sessions helper in both places, so we have to include it explicitly.
Because HTTP is a stateless protocol , web applications requiring user signin mustimplement a way to track each user’s progress from page to page. One technique formaintaining the user signin status is to use a traditional Rails session (via the specialsession function) to store a remember token equal to the user’s id:
session[:remember token] = user.id
This session object makes the user id available from page to page by storing it in acookie that expires upon browser close. On each page, the application could simply call
User.find(session[:remember token])
to retrieve the user. Because of the way Rails handles sessions, this process is secure; if amalicious user tries to spoof the user id, Rails will detect a mismatch based on a specialsession id generated for each session.
For our application’s design choice, which involves persistent sessions—that is,signin status that lasts even after browser close—we need to use a permanent identifierfor the signed-in user. To accomplish this, we’ll generate a unique, secure remember
www.it-ebooks.info
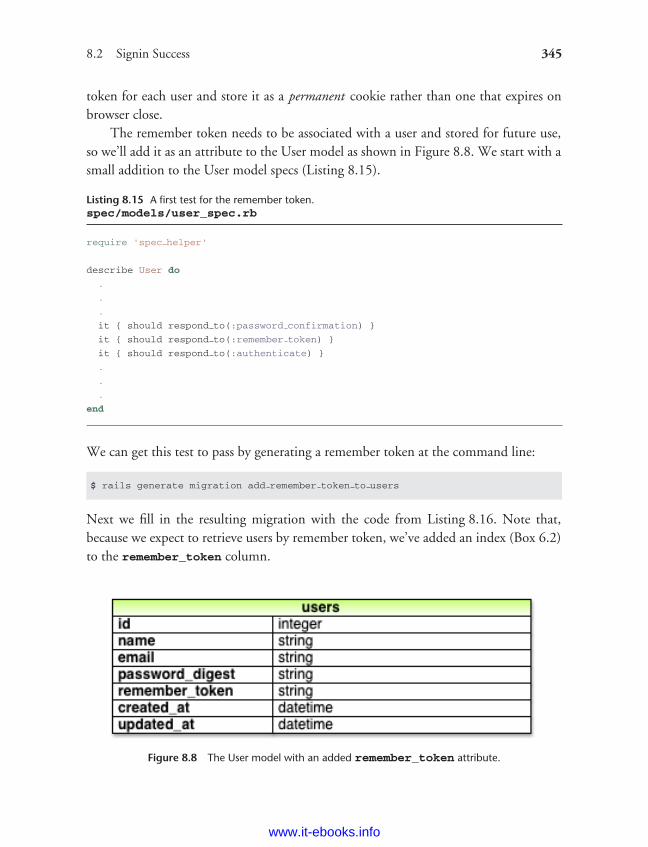
ptg8286261
8.2 Signin Success 345
token for each user and store it as a permanent cookie rather than one that expires onbrowser close.
The remember token needs to be associated with a user and stored for future use,so we’ll add it as an attribute to the User model as shown in Figure 8.8. We start with asmall addition to the User model specs (Listing 8.15).
Listing 8.15 A first test for the remember token.spec/models/user_spec.rb
require 'spec helper'
describe User do
.
.
.
it { should respond to(:password confirmation) }
it { should respond to(:remember token) }
it { should respond to(:authenticate) }
.
.
.
end
We can get this test to pass by generating a remember token at the command line:
$ rails generate migration add remember token to users
Next we fill in the resulting migration with the code from Listing 8.16. Note that,because we expect to retrieve users by remember token, we’ve added an index (Box 6.2)to the remember_token column.
Figure 8.8 The User model with an added remember_token attribute.
www.it-ebooks.info
ptg8286261
346 Chapter 8: Sign In, Sign Out
Listing 8.16 A migration to add a remember_token to the users table.db/migrate/[timestamp]_add_remember_token_to_users.rb
class AddRememberTokenToUsers < ActiveRecord::Migration
def change
add column :users, :remember token, :string
add index :users, :remember token
end
end
Next we update the development and test databases as usual:
$ bundle exec rake db:migrate
$ bundle exec rake db:test:prepare
At this point the User model specs should be passing:
$ bundle exec rspec spec/models/user spec.rb
Now we have to decide what to use as a remember token. There are manymostly equivalent possibilities—essentially, any large random string will do just fine.In principle, since the user passwords are securely encrypted, we could use eachuser’s password_hash attribute, but it seems like a terrible idea to unnecessarilyexpose our users’ passwords to potential attackers. We’ll err on the side of cautionand make a custom remember token using the urlsafe_base64 method from theSecureRandom module in the Ruby standard library, which creates a Base64 stringsafe for use in URIs (and hence safe for use in cookies as well).3 As of this writing,SecureRandom.urlsafe_base64 returns a random string of length 16 composed ofthe characters A–Z, a–z, 0–9, ‘‘-’’, and ‘‘ ’’ (for a total of 64 possibilities). This meansthat the probability of two remember tokens being the same is 1/6416 = 2−96 ≈ 10−29,which is negligible.
We’ll create a remember token using a callback, a technique introduced inSection 6.2.5 in the context of email uniqueness. As in that section, we’ll use a before_save callback, this time to create remember_token just before the user is saved.4 To
3. This choice is based on the RailsCast on remember me.
4. For more details on the kind of callbacks supported by Active Record, see the discussion of callbacks at theRails Guides.
www.it-ebooks.info
ptg8286261
8.2 Signin Success 347
test for this, we first save the test user and then check that the user’s remember_tokenattribute isn’t blank. This gives us sufficient flexibility to change the random string ifwe ever need to. The result appears in Listing 8.17.
Listing 8.17 A test for a valid (nonblank) remember token.spec/models/user_spec.rb
require 'spec helper'
describe User do
before do
@user = User.new(name: "Example User", email: "[email protected]",
password: "foobar", password confirmation: "foobar")
end
subject { @user }
.
.
.
describe "remember token" do
before { @user.save }
its(:remember token) { should not be blank }
end
end
Listing 8.17 introduces the its method, which is like it but applies the subsequenttest to the given attribute rather than the subject of the test. In other words,
its(:remember token) { should not be blank }
is equivalent to
it { @user.remember token.should not be blank }
The application code introduces several new elements. First, we add a callbackmethod to create the remember token:
before save :create remember token
This arranges for Rails to look for a method called create_remember_token and runit before saving the user. Second, the method itself is only used internally by the User
www.it-ebooks.info
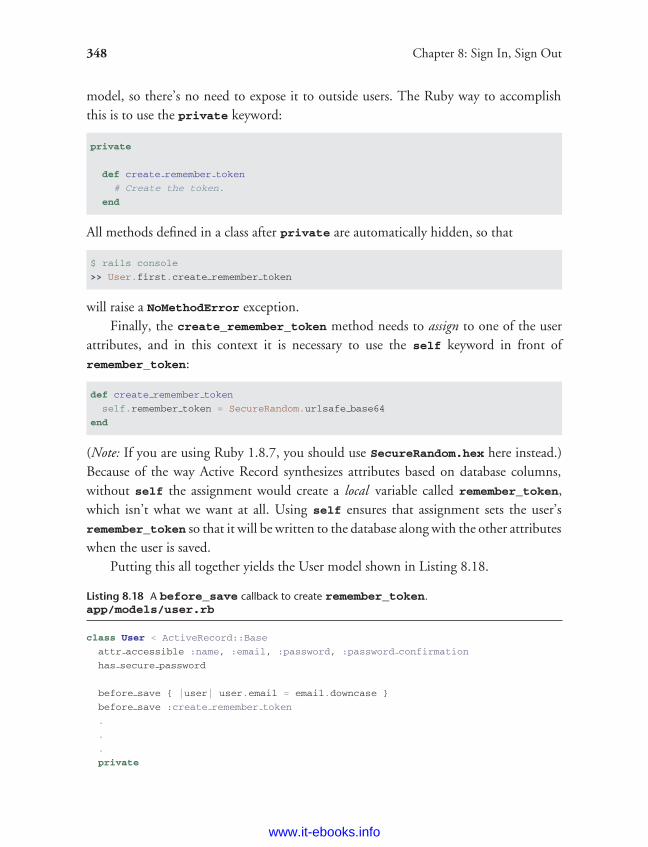
ptg8286261
348 Chapter 8: Sign In, Sign Out
model, so there’s no need to expose it to outside users. The Ruby way to accomplishthis is to use the private keyword:
private
def create remember token
# Create the token.
end
All methods defined in a class after private are automatically hidden, so that
$ rails console
>> User.first.create remember token
will raise a NoMethodError exception.Finally, the create_remember_token method needs to assign to one of the user
attributes, and in this context it is necessary to use the self keyword in front ofremember_token:
def create remember token
self.remember token = SecureRandom.urlsafe base64
end
(Note: If you are using Ruby 1.8.7, you should use SecureRandom.hex here instead.)Because of the way Active Record synthesizes attributes based on database columns,without self the assignment would create a local variable called remember_token,which isn’t what we want at all. Using self ensures that assignment sets the user’sremember_token so that it will be written to the database along with the other attributeswhen the user is saved.
Putting this all together yields the User model shown in Listing 8.18.
Listing 8.18 A before_save callback to create remember_token.app/models/user.rb
class User < ActiveRecord::Base
attr accessible :name, :email, :password, :password confirmation
has secure password
before save { |user| user.email = email.downcase }
before save :create remember token
.
.
.
private
www.it-ebooks.info

ptg8286261
8.2 Signin Success 349
def create remember token
self.remember token = SecureRandom.urlsafe base64
end
end
By the way, the extra level of indentation on create_remember_token is there tomake it visually apparent which methods are defined after private.
Since the SecureRandom.urlsafe_base64 string is definitely not blank, the testsfor the User model should now be passing:
$ bundle exec rspec spec/models/user spec.rb
8.2.2 A Working sign in Method
Now we’re ready to write the first signin element, the sign_in function itself. As notedabove, our desired authentication method is to place a remember token as a cookie onthe user’s browser, and then use the token to find the user record in the database as theuser moves from page to page (implemented in Section 8.2.3). The result, Listing 8.19,introduces two new ideas: the cookies hash and current_user.
Listing 8.19 The complete (but not-yet-working) sign_in function.app/helpers/sessions_helper.rb
module SessionsHelper
def sign in(user)
cookies.permanent[:remember token] = user.remember token
self.current user = user
end
end
Listing 8.19 introduces the cookies utility supplied by Rails. We can use cookiesas if it were a hash; each element in the cookie is itself a hash of two elements, a value
and an optional expires date. For example, we could implement user signin by placinga cookie with value equal to the user’s remember token that expires 20 years from now:
cookies[:remember token] = { value: user.remember token,
expires: 20.years.from now.utc }
(This uses one of the convenient Rails time helpers, as discussed in Box 8.1.)
www.it-ebooks.info
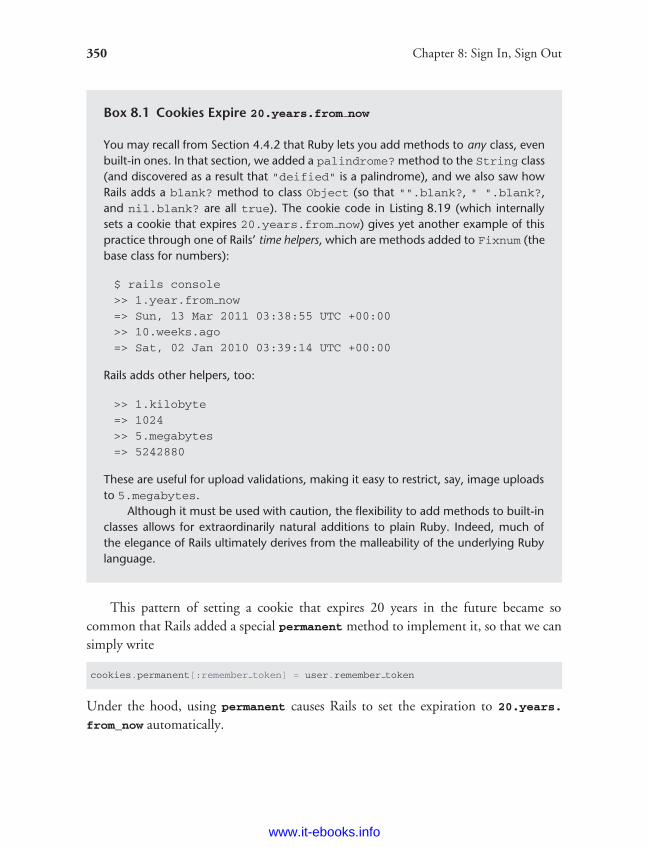
ptg8286261
350 Chapter 8: Sign In, Sign Out
Box 8.1 Cookies Expire 20.years.from now
You may recall from Section 4.4.2 that Ruby lets you add methods to any class, evenbuilt-in ones. In that section, we added a palindrome? method to the String class(and discovered as a result that "deified" is a palindrome), and we also saw howRails adds a blank? method to class Object (so that "".blank?, " ".blank?,and nil.blank? are all true). The cookie code in Listing 8.19 (which internallysets a cookie that expires 20.years.from now) gives yet another example of thispractice through one of Rails’ time helpers, which are methods added to Fixnum (thebase class for numbers):
$ rails console
>> 1.year.from now
=> Sun, 13 Mar 2011 03:38:55 UTC +00:00
>> 10.weeks.ago
=> Sat, 02 Jan 2010 03:39:14 UTC +00:00
Rails adds other helpers, too:
>> 1.kilobyte
=> 1024
>> 5.megabytes
=> 5242880
These are useful for upload validations, making it easy to restrict, say, image uploadsto 5.megabytes.
Although it must be used with caution, the flexibility to add methods to built-inclasses allows for extraordinarily natural additions to plain Ruby. Indeed, much ofthe elegance of Rails ultimately derives from the malleability of the underlying Rubylanguage.
This pattern of setting a cookie that expires 20 years in the future became socommon that Rails added a special permanent method to implement it, so that we cansimply write
cookies.permanent[:remember token] = user.remember token
Under the hood, using permanent causes Rails to set the expiration to 20.years.
from_now automatically.
www.it-ebooks.info
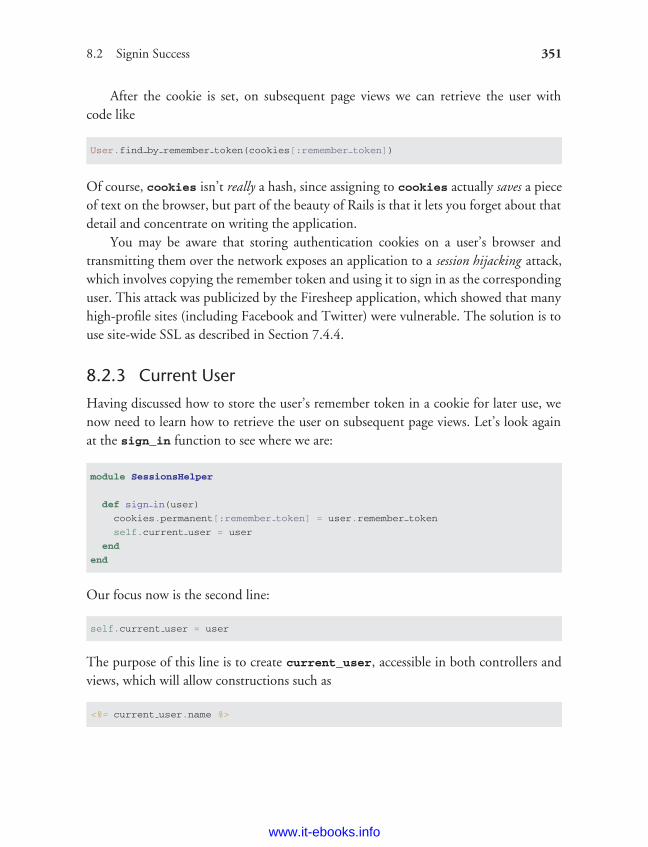
ptg8286261
8.2 Signin Success 351
After the cookie is set, on subsequent page views we can retrieve the user withcode like
User.find by remember token(cookies[:remember token])
Of course, cookies isn’t really a hash, since assigning to cookies actually saves a pieceof text on the browser, but part of the beauty of Rails is that it lets you forget about thatdetail and concentrate on writing the application.
You may be aware that storing authentication cookies on a user’s browser andtransmitting them over the network exposes an application to a session hijacking attack,which involves copying the remember token and using it to sign in as the correspondinguser. This attack was publicized by the Firesheep application, which showed that manyhigh-profile sites (including Facebook and Twitter) were vulnerable. The solution is touse site-wide SSL as described in Section 7.4.4.
8.2.3 Current User
Having discussed how to store the user’s remember token in a cookie for later use, wenow need to learn how to retrieve the user on subsequent page views. Let’s look againat the sign_in function to see where we are:
module SessionsHelper
def sign in(user)
cookies.permanent[:remember token] = user.remember token
self.current user = user
end
end
Our focus now is the second line:
self.current user = user
The purpose of this line is to create current_user, accessible in both controllers andviews, which will allow constructions such as
<%= current user.name %>
www.it-ebooks.info
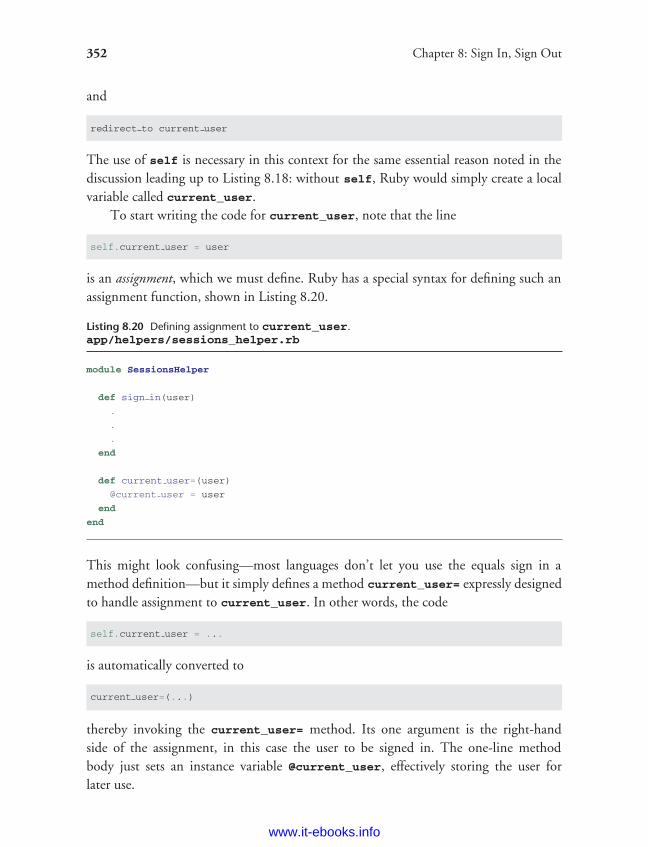
ptg8286261
352 Chapter 8: Sign In, Sign Out
and
redirect to current user
The use of self is necessary in this context for the same essential reason noted in thediscussion leading up to Listing 8.18: without self, Ruby would simply create a localvariable called current_user.
To start writing the code for current_user, note that the line
self.current user = user
is an assignment, which we must define. Ruby has a special syntax for defining such anassignment function, shown in Listing 8.20.
Listing 8.20 Defining assignment to current_user.app/helpers/sessions_helper.rb
module SessionsHelper
def sign in(user)
.
.
.
end
def current user=(user)
@current user = user
end
end
This might look confusing—most languages don’t let you use the equals sign in amethod definition—but it simply defines a method current_user= expressly designedto handle assignment to current_user. In other words, the code
self.current user = ...
is automatically converted to
current user=(...)
thereby invoking the current_user= method. Its one argument is the right-handside of the assignment, in this case the user to be signed in. The one-line methodbody just sets an instance variable @current_user, effectively storing the user forlater use.
www.it-ebooks.info
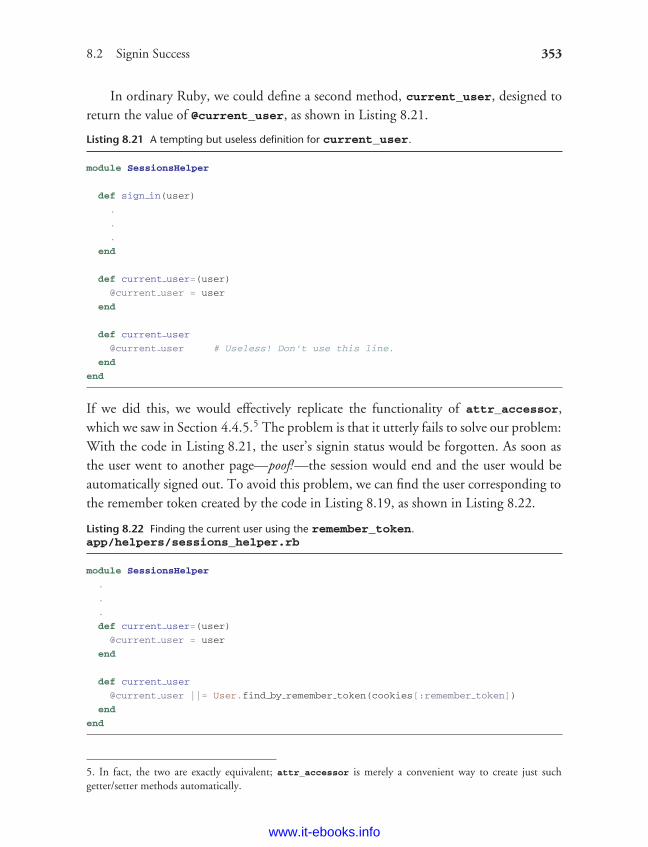
ptg8286261
8.2 Signin Success 353
In ordinary Ruby, we could define a second method, current_user, designed toreturn the value of @current_user, as shown in Listing 8.21.
Listing 8.21 A tempting but useless definition for current_user.
module SessionsHelper
def sign in(user)
.
.
.
end
def current user=(user)
@current user = user
end
def current user
@current user # Useless! Don't use this line.
end
end
If we did this, we would effectively replicate the functionality of attr_accessor,which we saw in Section 4.4.5.5 The problem is that it utterly fails to solve our problem:With the code in Listing 8.21, the user’s signin status would be forgotten. As soon asthe user went to another page—poof!—the session would end and the user would beautomatically signed out. To avoid this problem, we can find the user corresponding tothe remember token created by the code in Listing 8.19, as shown in Listing 8.22.
Listing 8.22 Finding the current user using the remember_token.app/helpers/sessions_helper.rb
module SessionsHelper
.
.
.
def current user=(user)
@current user = user
end
def current user
@current user ||= User.find by remember token(cookies[:remember token])
end
end
5. In fact, the two are exactly equivalent; attr_accessor is merely a convenient way to create just suchgetter/setter methods automatically.
www.it-ebooks.info
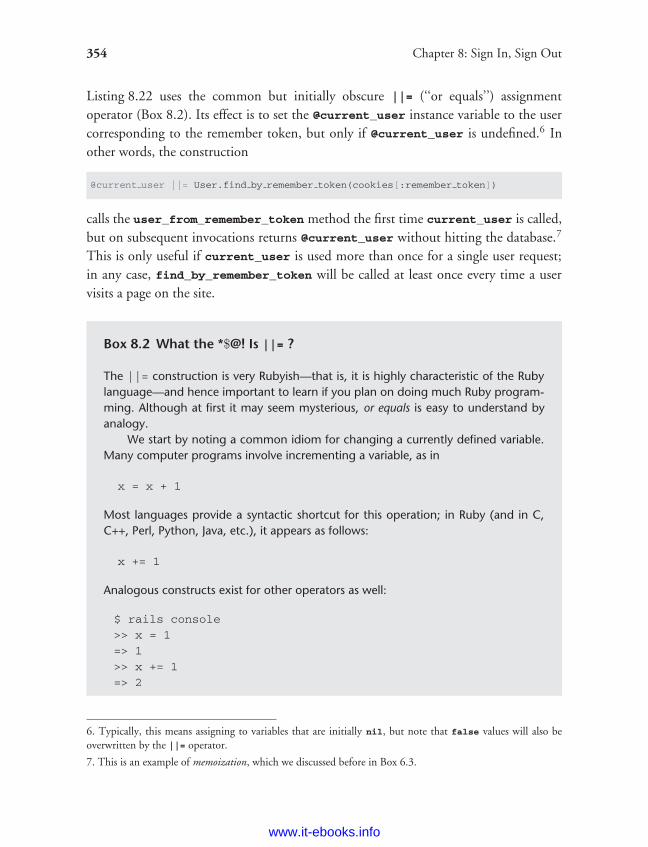
ptg8286261
354 Chapter 8: Sign In, Sign Out
Listing 8.22 uses the common but initially obscure ||= (‘‘or equals’’) assignmentoperator (Box 8.2). Its effect is to set the @current_user instance variable to the usercorresponding to the remember token, but only if @current_user is undefined.6 Inother words, the construction
@current user ||= User.find by remember token(cookies[:remember token])
calls the user_from_remember_token method the first time current_user is called,but on subsequent invocations returns @current_user without hitting the database.7
This is only useful if current_user is used more than once for a single user request;in any case, find_by_remember_token will be called at least once every time a uservisits a page on the site.
Box 8.2 What the *$@! Is ||= ?
The ||= construction is very Rubyish—that is, it is highly characteristic of the Rubylanguage—and hence important to learn if you plan on doing much Ruby program-ming. Although at first it may seem mysterious, or equals is easy to understand byanalogy.
We start by noting a common idiom for changing a currently defined variable.Many computer programs involve incrementing a variable, as in
x = x + 1
Most languages provide a syntactic shortcut for this operation; in Ruby (and in C,C++, Perl, Python, Java, etc.), it appears as follows:
x += 1
Analogous constructs exist for other operators as well:
$ rails console
>> x = 1
=> 1
>> x += 1
=> 2
6. Typically, this means assigning to variables that are initially nil, but note that false values will also beoverwritten by the ||= operator.
7. This is an example of memoization, which we discussed before in Box 6.3.
www.it-ebooks.info
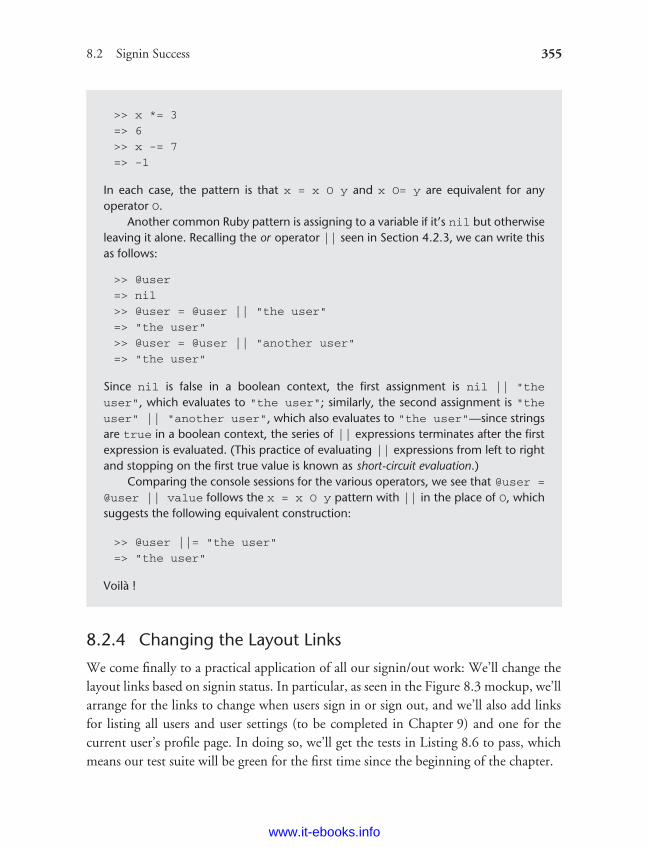
ptg8286261
8.2 Signin Success 355
`
>> x *= 3
=> 6
>> x -= 7
=> -1
In each case, the pattern is that x = x O y and x O= y are equivalent for anyoperator O.
Another common Ruby pattern is assigning to a variable if it’s nil but otherwiseleaving it alone. Recalling the or operator || seen in Section 4.2.3, we can write thisas follows:
>> @user
=> nil
>> @user = @user || "the user"
=> "the user"
>> @user = @user || "another user"
=> "the user"
Since nil is false in a boolean context, the first assignment is nil || "the
user", which evaluates to "the user"; similarly, the second assignment is "theuser" || "another user", which also evaluates to "the user"—since stringsare true in a boolean context, the series of || expressions terminates after the firstexpression is evaluated. (This practice of evaluating || expressions from left to rightand stopping on the first true value is known as short-circuit evaluation.)
Comparing the console sessions for the various operators, we see that @user =
@user || value follows the x = x O y pattern with || in the place of O, whichsuggests the following equivalent construction:
>> @user ||= "the user"
=> "the user"
Voila !
8.2.4 Changing the Layout Links
We come finally to a practical application of all our signin/out work: We’ll change thelayout links based on signin status. In particular, as seen in the Figure 8.3 mockup, we’llarrange for the links to change when users sign in or sign out, and we’ll also add linksfor listing all users and user settings (to be completed in Chapter 9) and one for thecurrent user’s profile page. In doing so, we’ll get the tests in Listing 8.6 to pass, whichmeans our test suite will be green for the first time since the beginning of the chapter.
www.it-ebooks.info
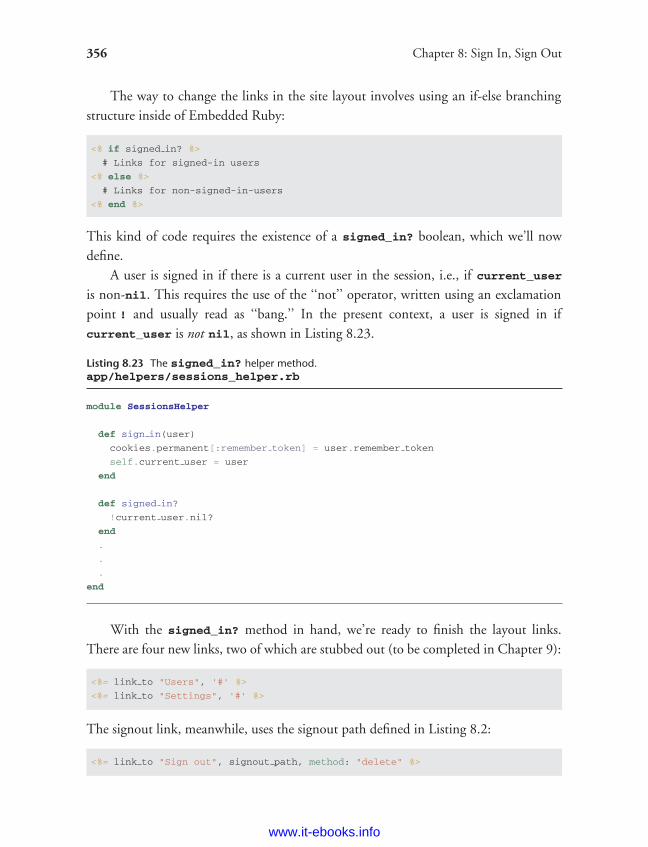
ptg8286261
356 Chapter 8: Sign In, Sign Out
The way to change the links in the site layout involves using an if-else branchingstructure inside of Embedded Ruby:
<% if signed in? %>
# Links for signed-in users
<% else %>
# Links for non-signed-in-users
<% end %>
This kind of code requires the existence of a signed_in? boolean, which we’ll nowdefine.
A user is signed in if there is a current user in the session, i.e., if current_useris non-nil. This requires the use of the ‘‘not’’ operator, written using an exclamationpoint ! and usually read as ‘‘bang.’’ In the present context, a user is signed in ifcurrent_user is not nil, as shown in Listing 8.23.
Listing 8.23 The signed_in? helper method.app/helpers/sessions_helper.rb
module SessionsHelper
def sign in(user)
cookies.permanent[:remember token] = user.remember token
self.current user = user
end
def signed in?
!current user.nil?
end
.
.
.
end
With the signed_in? method in hand, we’re ready to finish the layout links.There are four new links, two of which are stubbed out (to be completed in Chapter 9):
<%= link to "Users", '#' %>
<%= link to "Settings", '#' %>
The signout link, meanwhile, uses the signout path defined in Listing 8.2:
<%= link to "Sign out", signout path, method: "delete" %>
www.it-ebooks.info
ptg8286261
8.2 Signin Success 357
(Notice that the signout link passes a hash argument indicating that it should submitwith an HTTP DELETE request.8) Finally, we’ll add a profile link as follows:
<%= link to "Profile", current user %>
Here we could write
<%= link to "Profile", user path(current user) %>
but Rails allows us to link directly to the user, in this context automatically convertingcurrent_user into user_path(current_user).
In the process of putting the new links into the layout, we’ll take advantage ofBootstrap’s ability to make dropdown menus, which you can read more about on theBootstrap components page. The full result appears in Listing 8.24. Note in particularthe CSS ids and classes related to the Bootstrap dropdown menu.
Listing 8.24 Changing the layout links for signed-in users.app/views/layouts/_header.html.erb
<header class="navbar navbar-fixed-top">
<div class="navbar-inner">
<div class="container">
<%= link to "sample app", root path, id: "logo" %>
<nav>
<ul class="nav pull-right">
<li><%= link to "Home", root path %></li>
<li><%= link to "Help", help path %></li>
<% if signed in? %>
<li><%= link to "Users", '#' %></li>
<li id="fat-menu" class="dropdown">
<a href="#" class="dropdown-toggle" data-toggle="dropdown">
Account <b class="caret"></b>
</a>
<ul class="dropdown-menu">
<li><%= link to "Profile", current user %></li>
<li><%= link to "Settings", '#' %></li>
<li class="divider"></li>
<li>
<%= link to "Sign out", signout path, method: "delete" %>
</li>
</ul>
</li>
8. Web browsers can’t actually issue DELETE requests; Rails fakes it with JavaScript.
www.it-ebooks.info
ptg8286261
358 Chapter 8: Sign In, Sign Out
<% else %>
<li><%= link to "Sign in", signin path %></li>
<% end %>
</ul>
</nav>
</div>
</div>
</header>
The dropdown menu requires the use of Bootstrap’s JavaScript library, which wecan include using the Rails asset pipeline by editing the application JavaScript file, asshown in Listing 8.25.
Listing 8.25 Adding the Bootstrap JavaScript library to application.js.app/assets/javascripts/application.js
//= require jquery
//= require jquery ujs
//= require bootstrap
//= require tree .
This uses the Sprockets library to include the Bootstrap JavaScript, which in turn isavailable thanks to the bootstrap-sass gem from Section 5.1.2.
With the code in Listing 8.24, all the tests should be passing:
$ bundle exec rspec spec/
Unfortunately, if you actually examine the application in the browser, you’ll see that itdoesn’t yet work. This is because the ‘‘remember me’’ functionality requires the user tohave a remember token, but the current user doesn’t have one: We created the first userback in Section 7.4.3, long before implementing the callback that sets the remembertoken. To fix this, we need to save each user to invoke the before_save callbackdefined in Listing 8.18, which creates a remember token as a side effect:
$ rails console
>> User.first.remember token
=> nil
>> User.all.each { |user| user.save(validate: false) }
>> User.first.remember token
=> "Im9P0kWtZvD0RdyiK9UHtg"
www.it-ebooks.info
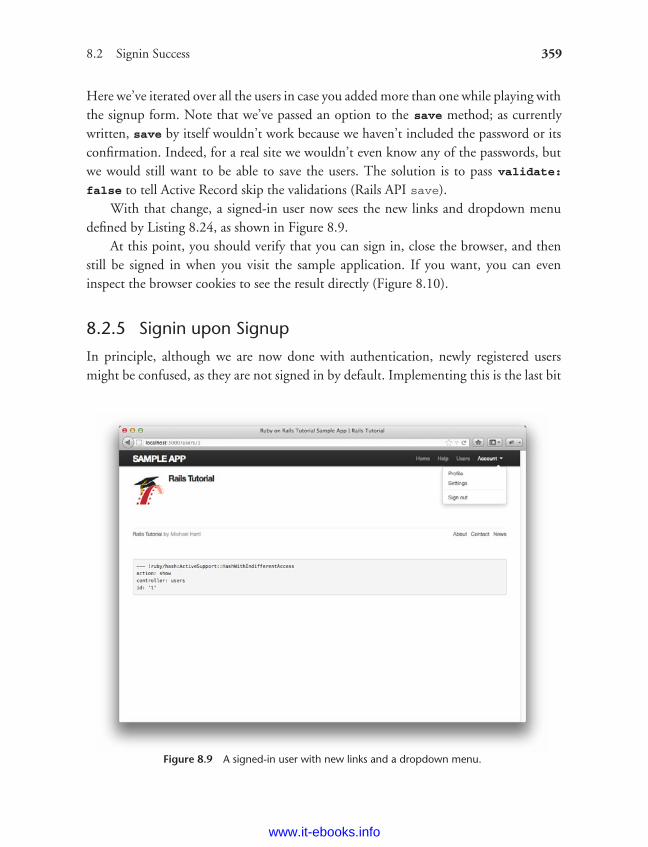
ptg8286261
8.2 Signin Success 359
Here we’ve iterated over all the users in case you added more than one while playing withthe signup form. Note that we’ve passed an option to the save method; as currentlywritten, save by itself wouldn’t work because we haven’t included the password or itsconfirmation. Indeed, for a real site we wouldn’t even know any of the passwords, butwe would still want to be able to save the users. The solution is to pass validate:
false to tell Active Record skip the validations (Rails API save).With that change, a signed-in user now sees the new links and dropdown menu
defined by Listing 8.24, as shown in Figure 8.9.At this point, you should verify that you can sign in, close the browser, and then
still be signed in when you visit the sample application. If you want, you can eveninspect the browser cookies to see the result directly (Figure 8.10).
8.2.5 Signin upon Signup
In principle, although we are now done with authentication, newly registered usersmight be confused, as they are not signed in by default. Implementing this is the last bit
Figure 8.9 A signed-in user with new links and a dropdown menu.
www.it-ebooks.info
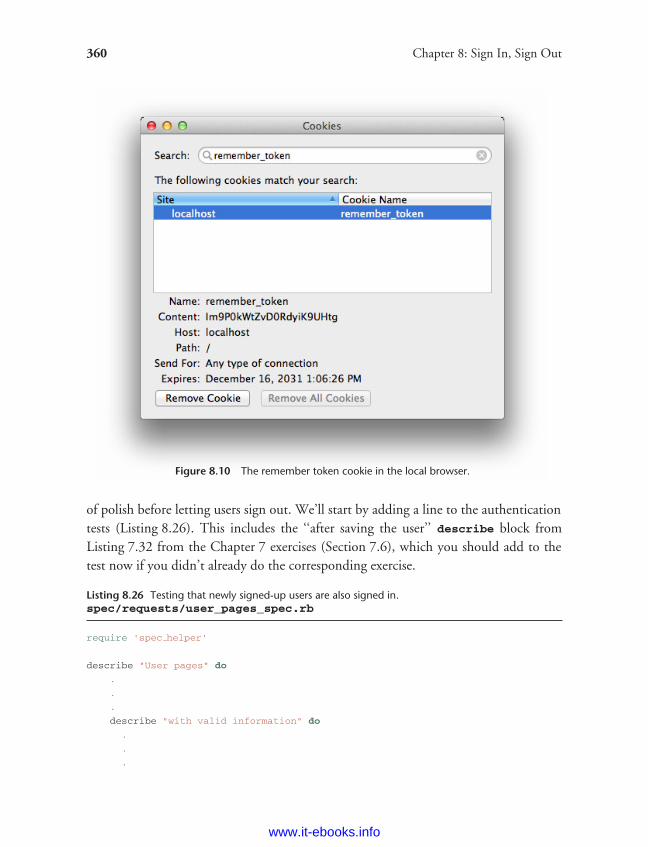
ptg8286261
360 Chapter 8: Sign In, Sign Out
Figure 8.10 The remember token cookie in the local browser.
of polish before letting users sign out. We’ll start by adding a line to the authenticationtests (Listing 8.26). This includes the ‘‘after saving the user’’ describe block fromListing 7.32 from the Chapter 7 exercises (Section 7.6), which you should add to thetest now if you didn’t already do the corresponding exercise.
Listing 8.26 Testing that newly signed-up users are also signed in.spec/requests/user_pages_spec.rb
require 'spec helper'
describe "User pages" do
.
.
.
describe "with valid information" do
.
.
.
www.it-ebooks.info
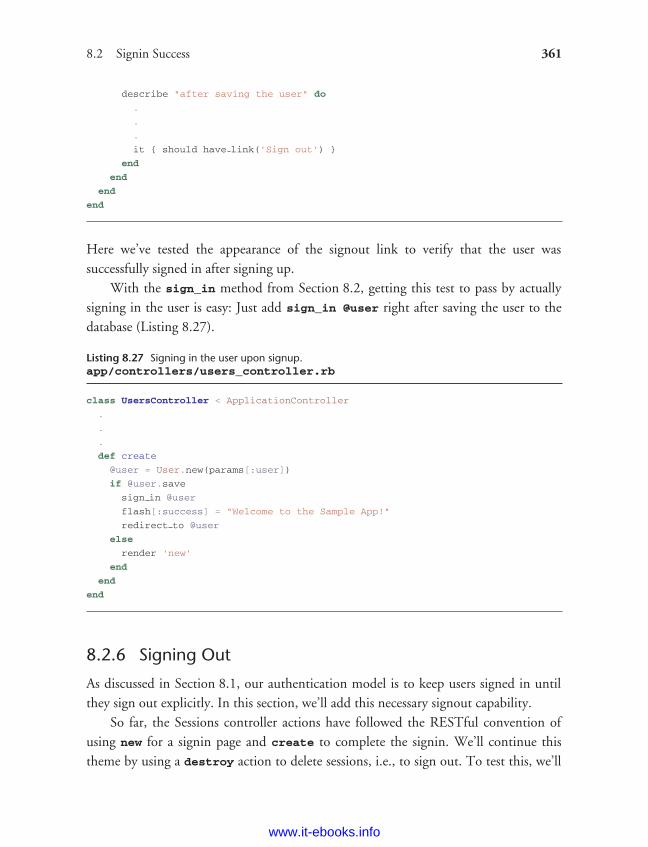
ptg8286261
8.2 Signin Success 361
describe "after saving the user" do
.
.
.
it { should have link('Sign out') }
end
end
end
end
Here we’ve tested the appearance of the signout link to verify that the user wassuccessfully signed in after signing up.
With the sign_in method from Section 8.2, getting this test to pass by actuallysigning in the user is easy: Just add sign_in @user right after saving the user to thedatabase (Listing 8.27).
Listing 8.27 Signing in the user upon signup.app/controllers/users_controller.rb
class UsersController < ApplicationController
.
.
.
def create
@user = User.new(params[:user])
if @user.save
sign in @user
flash[:success] = "Welcome to the Sample App!"
redirect to @user
else
render 'new'
end
end
end
8.2.6 Signing Out
As discussed in Section 8.1, our authentication model is to keep users signed in untilthey sign out explicitly. In this section, we’ll add this necessary signout capability.
So far, the Sessions controller actions have followed the RESTful convention ofusing new for a signin page and create to complete the signin. We’ll continue thistheme by using a destroy action to delete sessions, i.e., to sign out. To test this, we’ll
www.it-ebooks.info
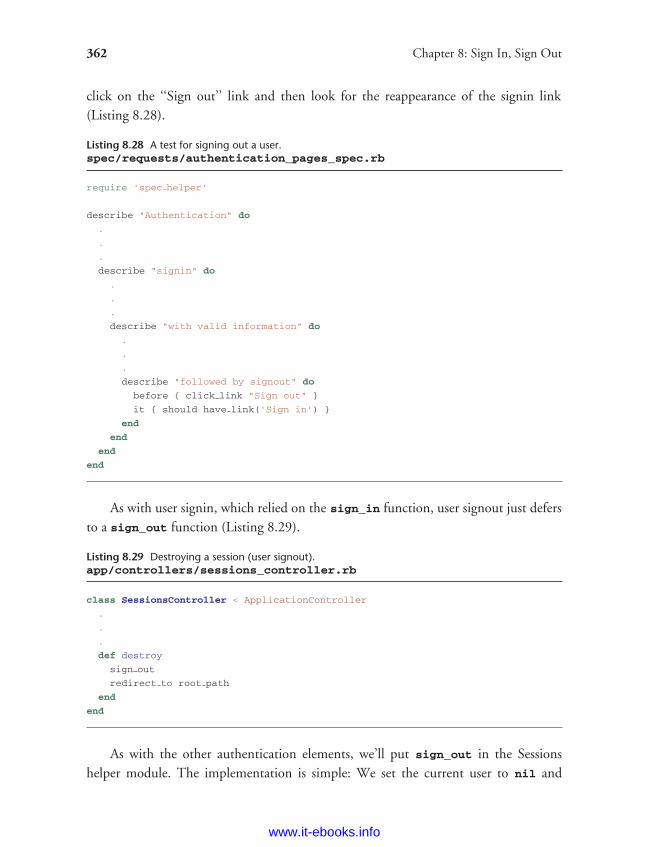
ptg8286261
362 Chapter 8: Sign In, Sign Out
click on the ‘‘Sign out’’ link and then look for the reappearance of the signin link(Listing 8.28).
Listing 8.28 A test for signing out a user.spec/requests/authentication_pages_spec.rb
require 'spec helper'
describe "Authentication" do
.
.
.
describe "signin" do
.
.
.
describe "with valid information" do
.
.
.
describe "followed by signout" do
before { click link "Sign out" }
it { should have link('Sign in') }
end
end
end
end
As with user signin, which relied on the sign_in function, user signout just defersto a sign_out function (Listing 8.29).
Listing 8.29 Destroying a session (user signout).app/controllers/sessions_controller.rb
class SessionsController < ApplicationController
.
.
.
def destroy
sign out
redirect to root path
end
end
As with the other authentication elements, we’ll put sign_out in the Sessionshelper module. The implementation is simple: We set the current user to nil and
www.it-ebooks.info
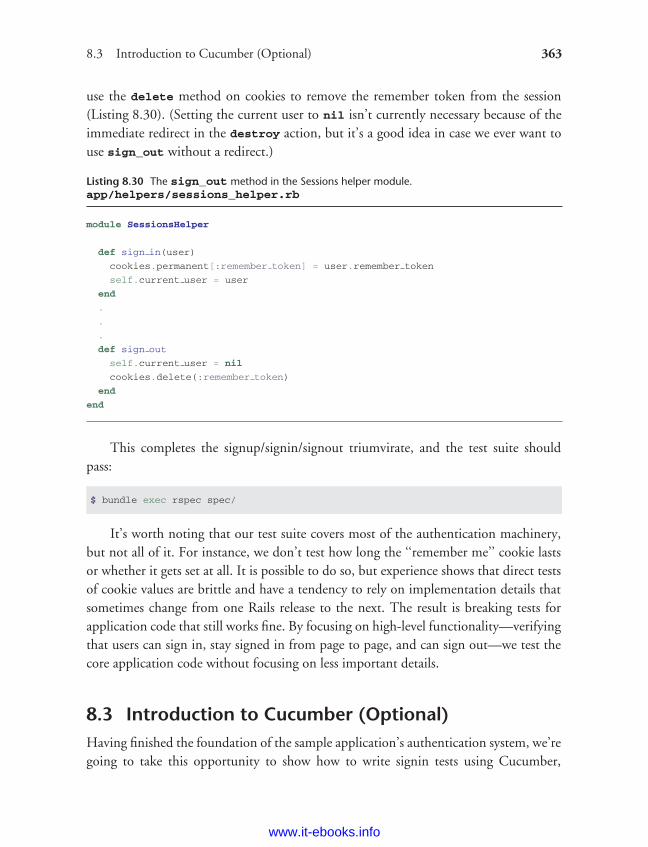
ptg8286261
8.3 Introduction to Cucumber (Optional) 363
use the delete method on cookies to remove the remember token from the session(Listing 8.30). (Setting the current user to nil isn’t currently necessary because of theimmediate redirect in the destroy action, but it’s a good idea in case we ever want touse sign_out without a redirect.)
Listing 8.30 The sign_out method in the Sessions helper module.app/helpers/sessions_helper.rb
module SessionsHelper
def sign in(user)
cookies.permanent[:remember token] = user.remember token
self.current user = user
end
.
.
.
def sign out
self.current user = nil
cookies.delete(:remember token)
end
end
This completes the signup/signin/signout triumvirate, and the test suite shouldpass:
$ bundle exec rspec spec/
It’s worth noting that our test suite covers most of the authentication machinery,but not all of it. For instance, we don’t test how long the ‘‘remember me’’ cookie lastsor whether it gets set at all. It is possible to do so, but experience shows that direct testsof cookie values are brittle and have a tendency to rely on implementation details thatsometimes change from one Rails release to the next. The result is breaking tests forapplication code that still works fine. By focusing on high-level functionality—verifyingthat users can sign in, stay signed in from page to page, and can sign out—we test thecore application code without focusing on less important details.
8.3 Introduction to Cucumber (Optional)Having finished the foundation of the sample application’s authentication system, we’regoing to take this opportunity to show how to write signin tests using Cucumber,
www.it-ebooks.info
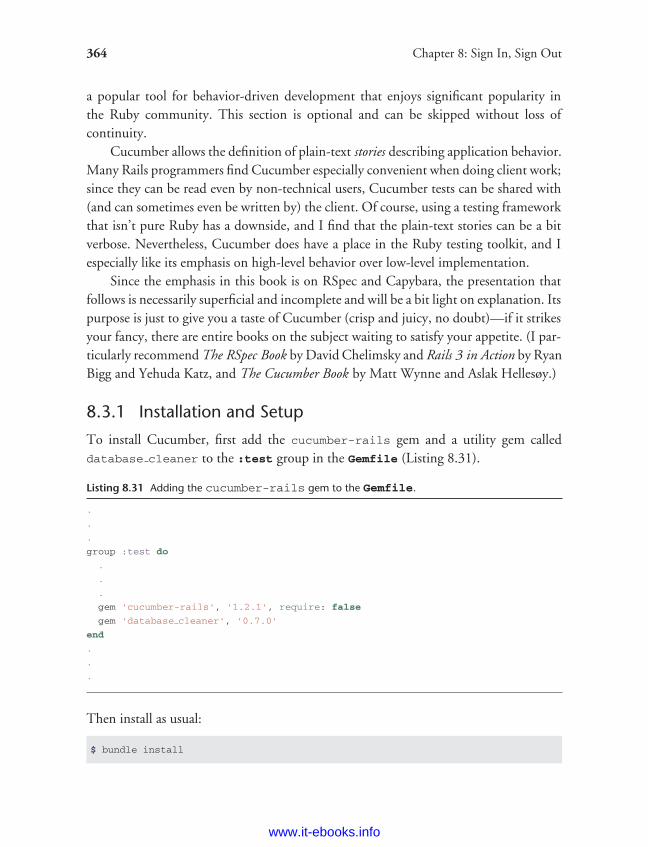
ptg8286261
364 Chapter 8: Sign In, Sign Out
a popular tool for behavior-driven development that enjoys significant popularity inthe Ruby community. This section is optional and can be skipped without loss ofcontinuity.
Cucumber allows the definition of plain-text stories describing application behavior.Many Rails programmers find Cucumber especially convenient when doing client work;since they can be read even by non-technical users, Cucumber tests can be shared with(and can sometimes even be written by) the client. Of course, using a testing frameworkthat isn’t pure Ruby has a downside, and I find that the plain-text stories can be a bitverbose. Nevertheless, Cucumber does have a place in the Ruby testing toolkit, and Iespecially like its emphasis on high-level behavior over low-level implementation.
Since the emphasis in this book is on RSpec and Capybara, the presentation thatfollows is necessarily superficial and incomplete and will be a bit light on explanation. Itspurpose is just to give you a taste of Cucumber (crisp and juicy, no doubt)—if it strikesyour fancy, there are entire books on the subject waiting to satisfy your appetite. (I par-ticularly recommend The RSpec Book by David Chelimsky and Rails 3 in Action by RyanBigg and Yehuda Katz, and The Cucumber Book by Matt Wynne and Aslak Hellesøy.)
8.3.1 Installation and Setup
To install Cucumber, first add the cucumber-rails gem and a utility gem calleddatabase cleaner to the :test group in the Gemfile (Listing 8.31).
Listing 8.31 Adding the cucumber-rails gem to the Gemfile.
.
.
.
group :test do
.
.
.
gem 'cucumber-rails', '1.2.1', require: false
gem 'database cleaner', '0.7.0'
end
.
.
.
Then install as usual:
$ bundle install
www.it-ebooks.info
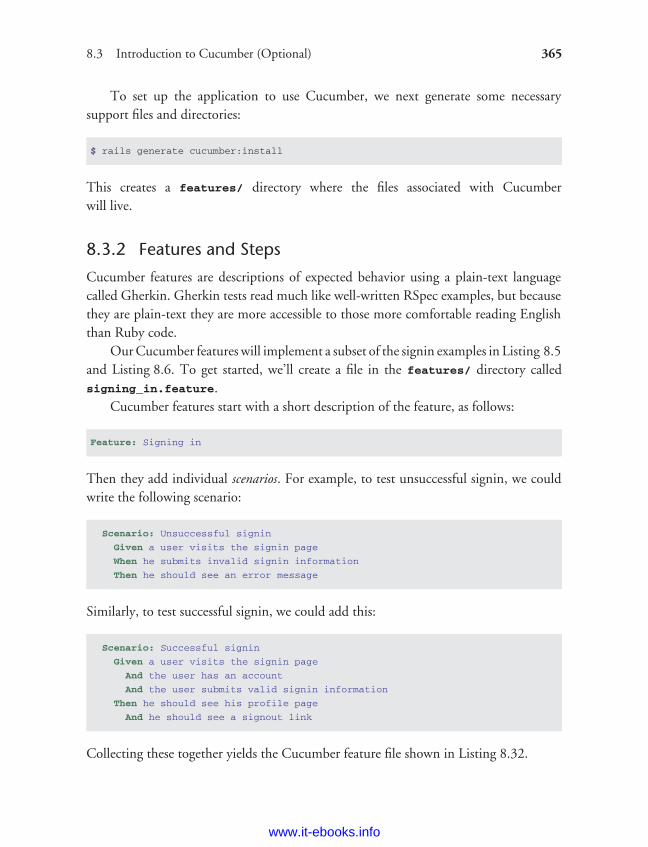
ptg8286261
8.3 Introduction to Cucumber (Optional) 365
To set up the application to use Cucumber, we next generate some necessarysupport files and directories:
$ rails generate cucumber:install
This creates a features/ directory where the files associated with Cucumberwill live.
8.3.2 Features and Steps
Cucumber features are descriptions of expected behavior using a plain-text languagecalled Gherkin. Gherkin tests read much like well-written RSpec examples, but becausethey are plain-text they are more accessible to those more comfortable reading Englishthan Ruby code.
Our Cucumber features will implement a subset of the signin examples in Listing 8.5and Listing 8.6. To get started, we’ll create a file in the features/ directory calledsigning_in.feature.
Cucumber features start with a short description of the feature, as follows:
Feature: Signing in
Then they add individual scenarios. For example, to test unsuccessful signin, we couldwrite the following scenario:
Scenario: Unsuccessful signin
Given a user visits the signin page
When he submits invalid signin information
Then he should see an error message
Similarly, to test successful signin, we could add this:
Scenario: Successful signin
Given a user visits the signin page
And the user has an account
And the user submits valid signin information
Then he should see his profile page
And he should see a signout link
Collecting these together yields the Cucumber feature file shown in Listing 8.32.
www.it-ebooks.info
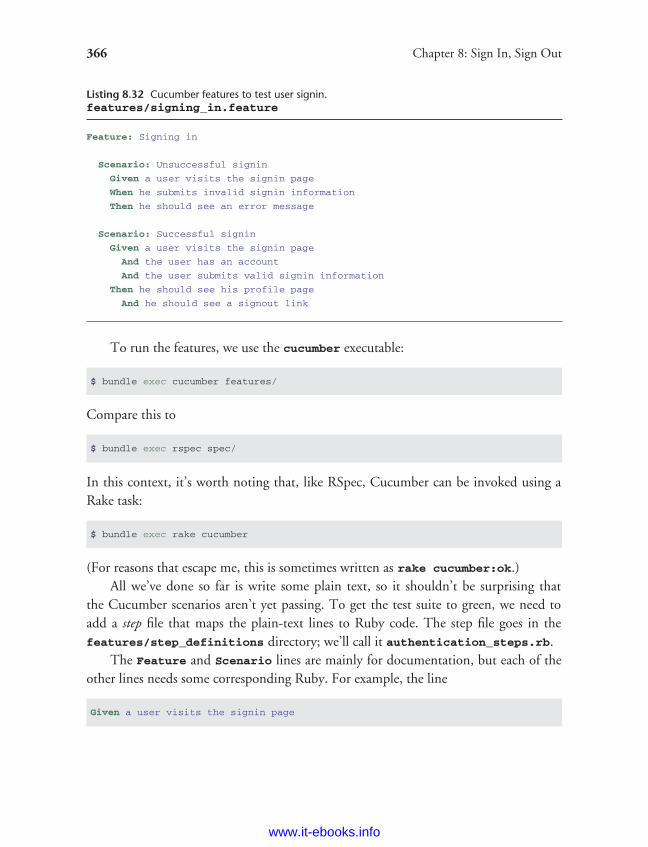
ptg8286261
366 Chapter 8: Sign In, Sign Out
Listing 8.32 Cucumber features to test user signin.features/signing_in.feature
Feature: Signing in
Scenario: Unsuccessful signin
Given a user visits the signin page
When he submits invalid signin information
Then he should see an error message
Scenario: Successful signin
Given a user visits the signin page
And the user has an account
And the user submits valid signin information
Then he should see his profile page
And he should see a signout link
To run the features, we use the cucumber executable:
$ bundle exec cucumber features/
Compare this to
$ bundle exec rspec spec/
In this context, it’s worth noting that, like RSpec, Cucumber can be invoked using aRake task:
$ bundle exec rake cucumber
(For reasons that escape me, this is sometimes written as rake cucumber:ok.)All we’ve done so far is write some plain text, so it shouldn’t be surprising that
the Cucumber scenarios aren’t yet passing. To get the test suite to green, we need toadd a step file that maps the plain-text lines to Ruby code. The step file goes in thefeatures/step_definitions directory; we’ll call it authentication_steps.rb.
The Feature and Scenario lines are mainly for documentation, but each of theother lines needs some corresponding Ruby. For example, the line
Given a user visits the signin page
www.it-ebooks.info
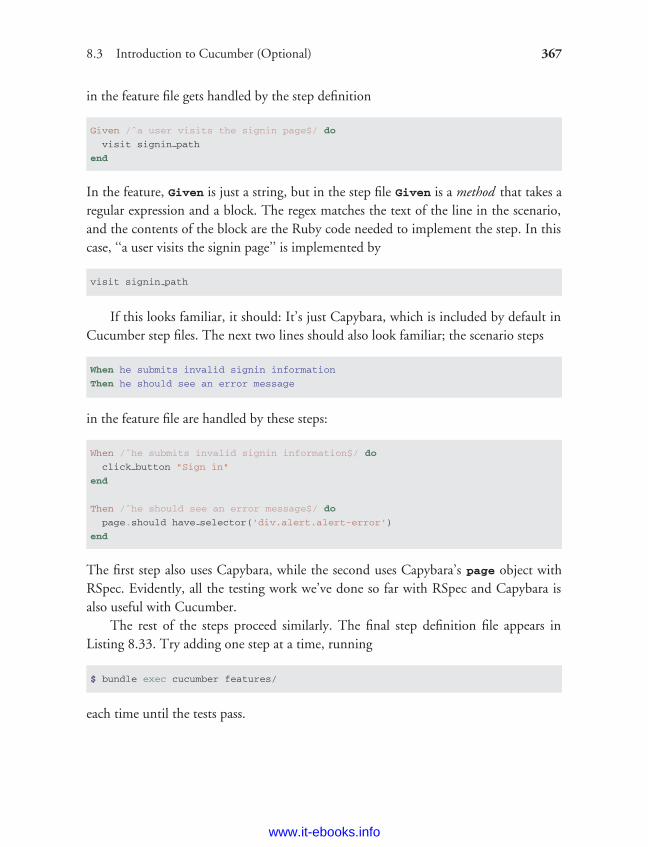
ptg8286261
8.3 Introduction to Cucumber (Optional) 367
in the feature file gets handled by the step definition
Given /ˆa user visits the signin page$/ do
visit signin path
end
In the feature, Given is just a string, but in the step file Given is a method that takes aregular expression and a block. The regex matches the text of the line in the scenario,and the contents of the block are the Ruby code needed to implement the step. In thiscase, ‘‘a user visits the signin page’’ is implemented by
visit signin path
If this looks familiar, it should: It’s just Capybara, which is included by default inCucumber step files. The next two lines should also look familiar; the scenario steps
When he submits invalid signin information
Then he should see an error message
in the feature file are handled by these steps:
When /ˆhe submits invalid signin information$/ do
click button "Sign in"
end
Then /ˆhe should see an error message$/ do
page.should have selector('div.alert.alert-error')
end
The first step also uses Capybara, while the second uses Capybara’s page object withRSpec. Evidently, all the testing work we’ve done so far with RSpec and Capybara isalso useful with Cucumber.
The rest of the steps proceed similarly. The final step definition file appears inListing 8.33. Try adding one step at a time, running
$ bundle exec cucumber features/
each time until the tests pass.
www.it-ebooks.info
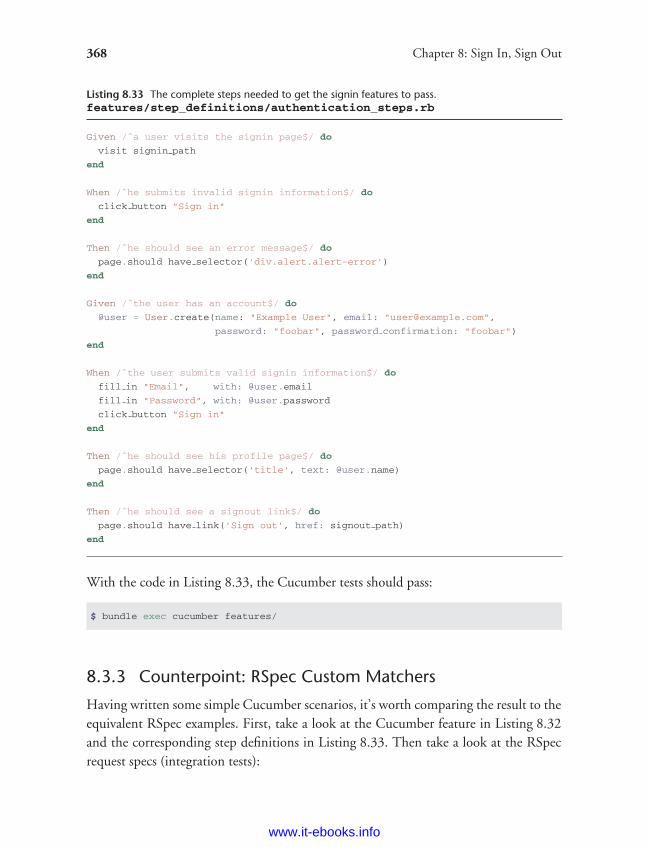
ptg8286261
368 Chapter 8: Sign In, Sign Out
Listing 8.33 The complete steps needed to get the signin features to pass.features/step_definitions/authentication_steps.rb
Given /ˆa user visits the signin page$/ do
visit signin path
end
When /ˆhe submits invalid signin information$/ do
click button "Sign in"
end
Then /ˆhe should see an error message$/ do
page.should have selector('div.alert.alert-error')
end
Given /ˆthe user has an account$/ do
@user = User.create(name: "Example User", email: "[email protected]",
password: "foobar", password confirmation: "foobar")
end
When /ˆthe user submits valid signin information$/ do
fill in "Email", with: @user.email
fill in "Password", with: @user.password
click button "Sign in"
end
Then /ˆhe should see his profile page$/ do
page.should have selector('title', text: @user.name)
end
Then /ˆhe should see a signout link$/ do
page.should have link('Sign out', href: signout path)
end
With the code in Listing 8.33, the Cucumber tests should pass:
$ bundle exec cucumber features/
8.3.3 Counterpoint: RSpec Custom Matchers
Having written some simple Cucumber scenarios, it’s worth comparing the result to theequivalent RSpec examples. First, take a look at the Cucumber feature in Listing 8.32and the corresponding step definitions in Listing 8.33. Then take a look at the RSpecrequest specs (integration tests):
www.it-ebooks.info
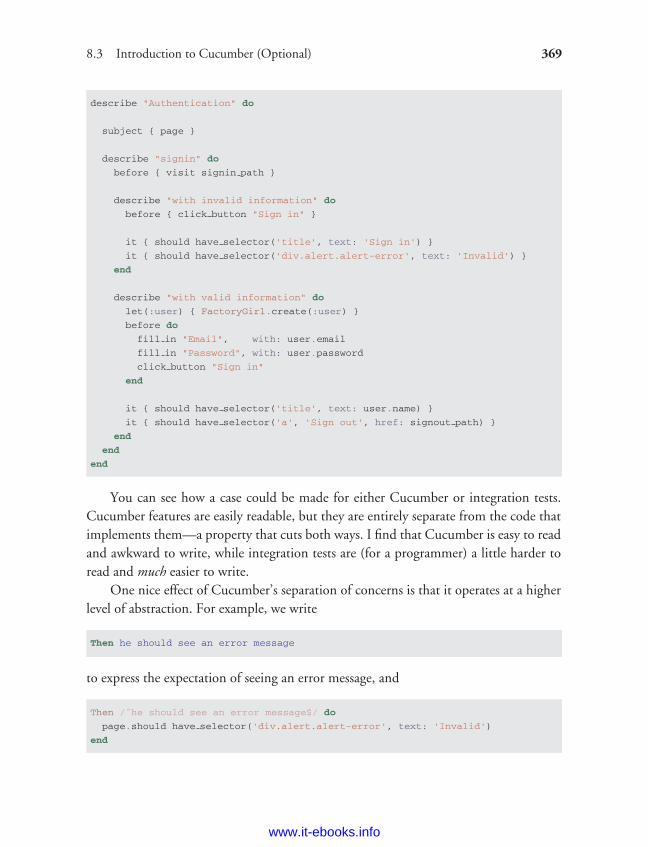
ptg8286261
8.3 Introduction to Cucumber (Optional) 369
describe "Authentication" do
subject { page }
describe "signin" do
before { visit signin path }
describe "with invalid information" do
before { click button "Sign in" }
it { should have selector('title', text: 'Sign in') }
it { should have selector('div.alert.alert-error', text: 'Invalid') }
end
describe "with valid information" do
let(:user) { FactoryGirl.create(:user) }
before do
fill in "Email", with: user.email
fill in "Password", with: user.password
click button "Sign in"
end
it { should have selector('title', text: user.name) }
it { should have selector('a', 'Sign out', href: signout path) }
end
end
end
You can see how a case could be made for either Cucumber or integration tests.Cucumber features are easily readable, but they are entirely separate from the code thatimplements them—a property that cuts both ways. I find that Cucumber is easy to readand awkward to write, while integration tests are (for a programmer) a little harder toread and much easier to write.
One nice effect of Cucumber’s separation of concerns is that it operates at a higherlevel of abstraction. For example, we write
Then he should see an error message
to express the expectation of seeing an error message, and
Then /ˆhe should see an error message$/ do
page.should have selector('div.alert.alert-error', text: 'Invalid')
end
www.it-ebooks.info
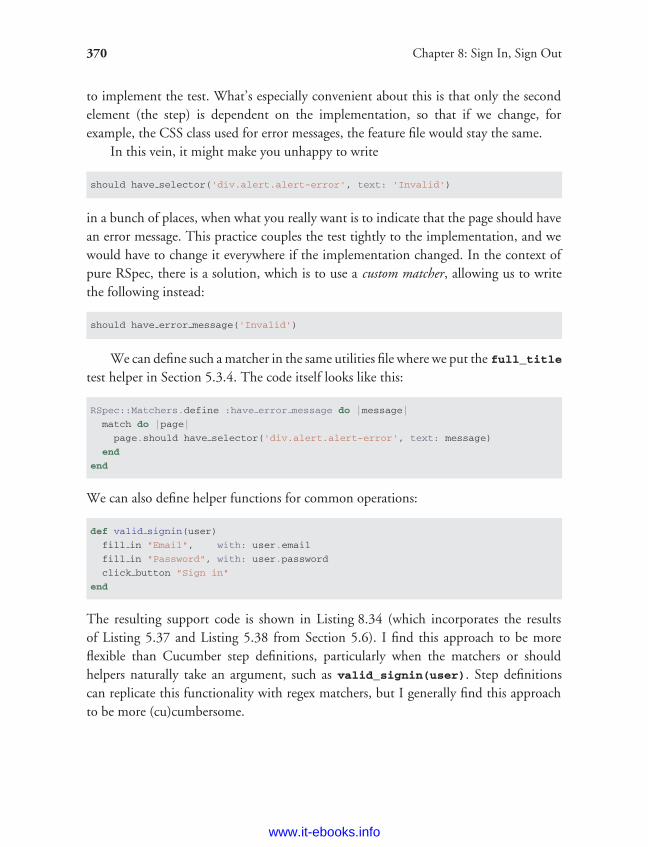
ptg8286261
370 Chapter 8: Sign In, Sign Out
to implement the test. What’s especially convenient about this is that only the secondelement (the step) is dependent on the implementation, so that if we change, forexample, the CSS class used for error messages, the feature file would stay the same.
In this vein, it might make you unhappy to write
should have selector('div.alert.alert-error', text: 'Invalid')
in a bunch of places, when what you really want is to indicate that the page should havean error message. This practice couples the test tightly to the implementation, and wewould have to change it everywhere if the implementation changed. In the context ofpure RSpec, there is a solution, which is to use a custom matcher, allowing us to writethe following instead:
should have error message('Invalid')
We can define such a matcher in the same utilities file where we put the full_titletest helper in Section 5.3.4. The code itself looks like this:
RSpec::Matchers.define :have error message do |message|
match do |page|
page.should have selector('div.alert.alert-error', text: message)
end
end
We can also define helper functions for common operations:
def valid signin(user)
fill in "Email", with: user.email
fill in "Password", with: user.password
click button "Sign in"
end
The resulting support code is shown in Listing 8.34 (which incorporates the resultsof Listing 5.37 and Listing 5.38 from Section 5.6). I find this approach to be moreflexible than Cucumber step definitions, particularly when the matchers or shouldhelpers naturally take an argument, such as valid_signin(user). Step definitionscan replicate this functionality with regex matchers, but I generally find this approachto be more (cu)cumbersome.
www.it-ebooks.info
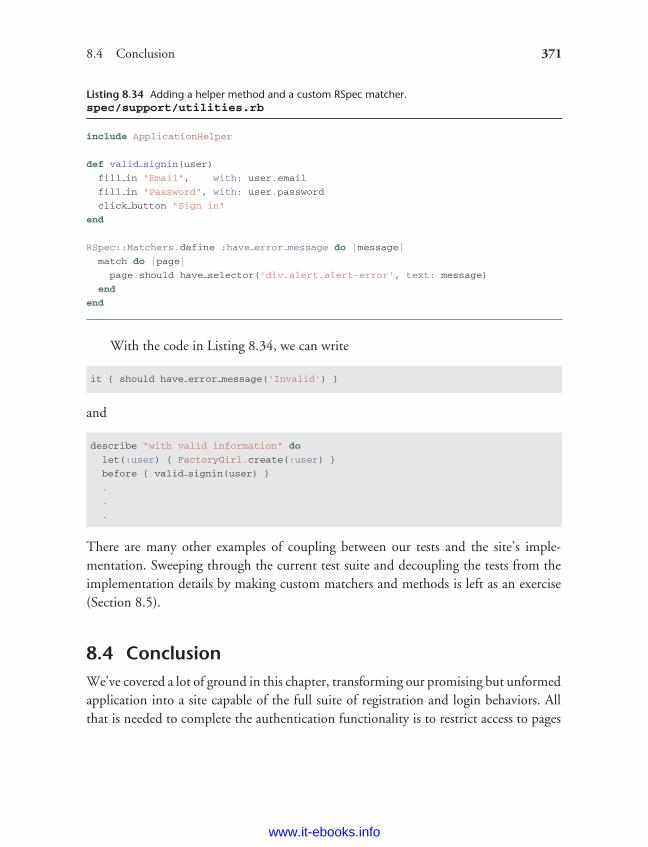
ptg8286261
8.4 Conclusion 371
Listing 8.34 Adding a helper method and a custom RSpec matcher.spec/support/utilities.rb
include ApplicationHelper
def valid signin(user)
fill in "Email", with: user.email
fill in "Password", with: user.password
click button "Sign in"
end
RSpec::Matchers.define :have error message do |message|
match do |page|
page.should have selector('div.alert.alert-error', text: message)
end
end
With the code in Listing 8.34, we can write
it { should have error message('Invalid') }
and
describe "with valid information" do
let(:user) { FactoryGirl.create(:user) }
before { valid signin(user) }
.
.
.
There are many other examples of coupling between our tests and the site’s imple-mentation. Sweeping through the current test suite and decoupling the tests from theimplementation details by making custom matchers and methods is left as an exercise(Section 8.5).
8.4 ConclusionWe’ve covered a lot of ground in this chapter, transforming our promising but unformedapplication into a site capable of the full suite of registration and login behaviors. Allthat is needed to complete the authentication functionality is to restrict access to pages
www.it-ebooks.info
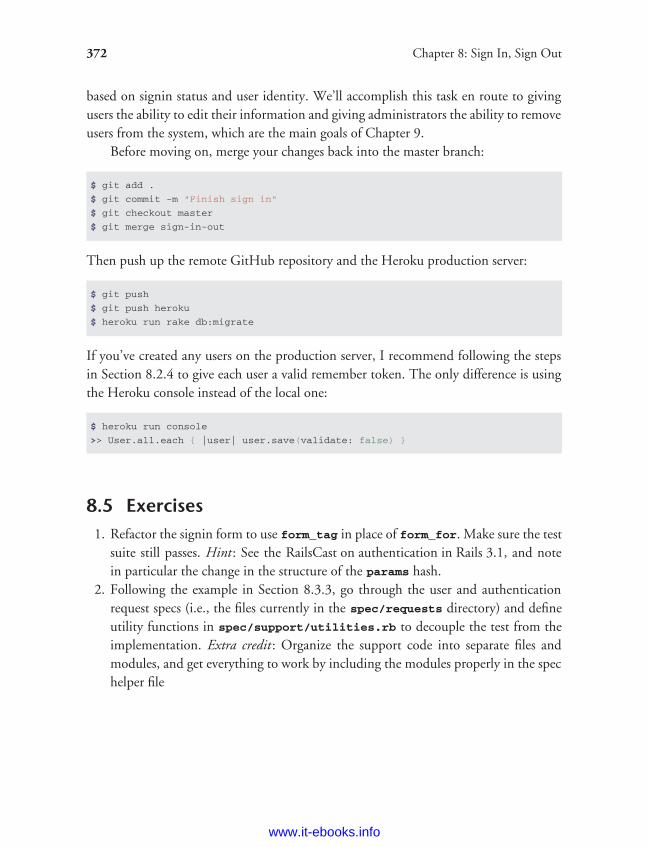
ptg8286261
372 Chapter 8: Sign In, Sign Out
based on signin status and user identity. We’ll accomplish this task en route to givingusers the ability to edit their information and giving administrators the ability to removeusers from the system, which are the main goals of Chapter 9.
Before moving on, merge your changes back into the master branch:
$ git add .
$ git commit -m "Finish sign in"
$ git checkout master
$ git merge sign-in-out
Then push up the remote GitHub repository and the Heroku production server:
$ git push
$ git push heroku
$ heroku run rake db:migrate
If you’ve created any users on the production server, I recommend following the stepsin Section 8.2.4 to give each user a valid remember token. The only difference is usingthe Heroku console instead of the local one:
$ heroku run console
>> User.all.each { |user| user.save(validate: false) }
8.5 Exercises1. Refactor the signin form to use form_tag in place of form_for. Make sure the test
suite still passes. Hint: See the RailsCast on authentication in Rails 3.1, and notein particular the change in the structure of the params hash.
2. Following the example in Section 8.3.3, go through the user and authenticationrequest specs (i.e., the files currently in the spec/requests directory) and defineutility functions in spec/support/utilities.rb to decouple the test from theimplementation. Extra credit : Organize the support code into separate files andmodules, and get everything to work by including the modules properly in the spechelper file
www.it-ebooks.info
ptg8286261
CHAPTER 9Updating, Showing,and Deleting Users
In this chapter, we will complete the REST actions for the Users resource (Table 7.1)by adding edit, update, index, and destroy actions. We’ll start by giving usersthe ability to update their profiles, which will also provide a natural opportunity toenforce a security model (made possible by the authorization code in Chapter 8). Thenwe’ll make a listing of all users (also requiring authorization), which will motivate theintroduction of sample data and pagination. Finally, we’ll add the ability to destroyusers, wiping them clear from the database. Since we can’t allow just any user to havesuch dangerous powers, we’ll take care to create a privileged class of administrative users(admins) authorized to delete other users.
To get started, let’s start work on an updating-users topic branch:
$ git checkout -b updating-users
9.1 Updating UsersThe pattern for editing user information closely parallels that for creating new users(Chapter 7). Instead of a new action rendering a view for new users, we have an edit
action rendering a view to edit users; instead of create responding to a POST request,we have an update action responding to a PUT request (Box 3.2). The biggest differenceis that, while anyone can sign up, only the current user should be able to update hisinformation. This means that we need to enforce access control so that only authorizedusers can edit and update; the authentication machinery from Chapter 8 will allow usto use a before filter to ensure that this is the case.
373
www.it-ebooks.info
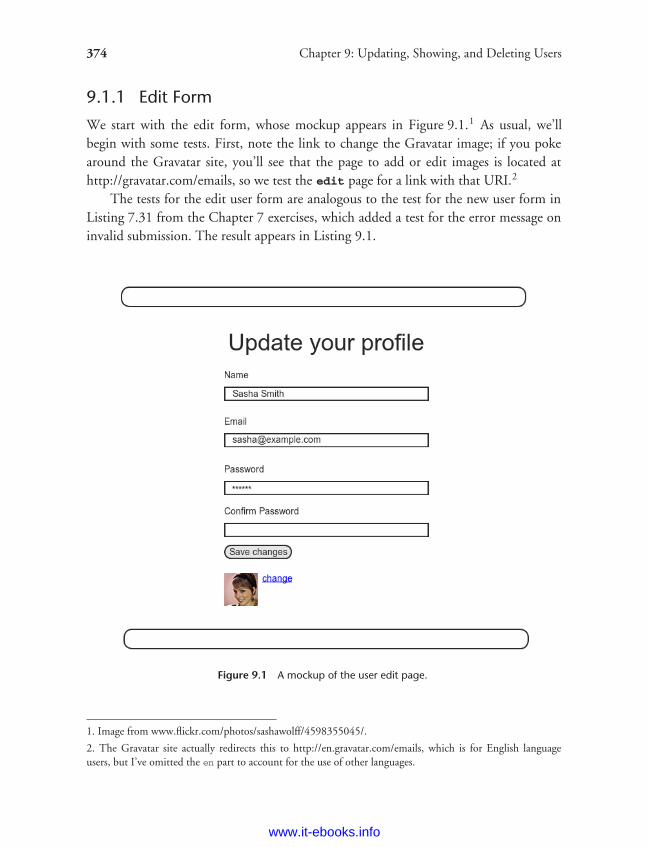
ptg8286261
374 Chapter 9: Updating, Showing, and Deleting Users
9.1.1 Edit Form
We start with the edit form, whose mockup appears in Figure 9.1.1 As usual, we’llbegin with some tests. First, note the link to change the Gravatar image; if you pokearound the Gravatar site, you’ll see that the page to add or edit images is located athttp://gravatar.com/emails, so we test the edit page for a link with that URI.2
The tests for the edit user form are analogous to the test for the new user form inListing 7.31 from the Chapter 7 exercises, which added a test for the error message oninvalid submission. The result appears in Listing 9.1.
Figure 9.1 A mockup of the user edit page.
1. Image from www.flickr.com/photos/sashawolff/4598355045/.
2. The Gravatar site actually redirects this to http://en.gravatar.com/emails, which is for English languageusers, but I’ve omitted the en part to account for the use of other languages.
www.it-ebooks.info
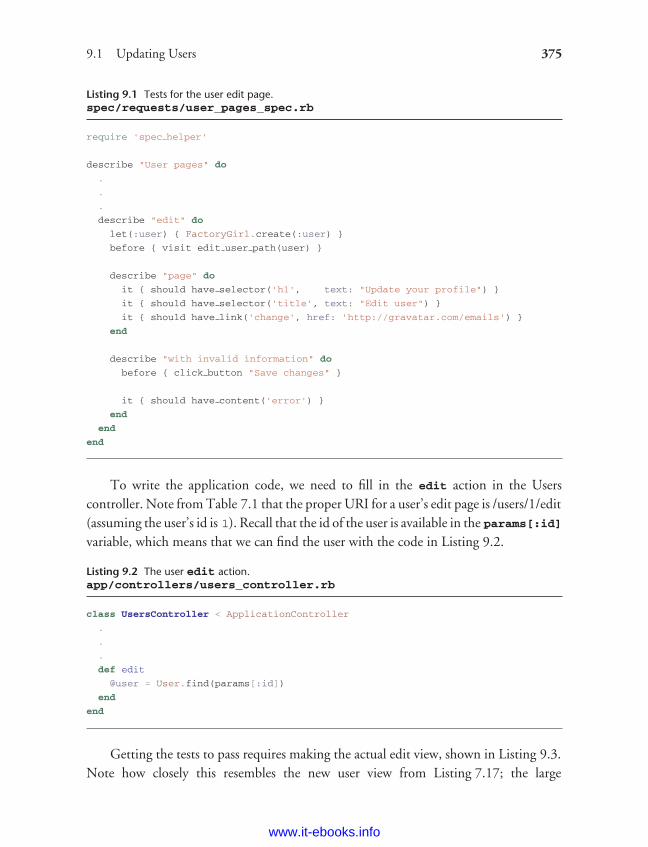
ptg8286261
9.1 Updating Users 375
Listing 9.1 Tests for the user edit page.spec/requests/user_pages_spec.rb
require 'spec helper'
describe "User pages" do
.
.
.
describe "edit" do
let(:user) { FactoryGirl.create(:user) }
before { visit edit user path(user) }
describe "page" do
it { should have selector('h1', text: "Update your profile") }
it { should have selector('title', text: "Edit user") }
it { should have link('change', href: 'http://gravatar.com/emails') }
end
describe "with invalid information" do
before { click button "Save changes" }
it { should have content('error') }
end
end
end
To write the application code, we need to fill in the edit action in the Userscontroller. Note from Table 7.1 that the proper URI for a user’s edit page is /users/1/edit(assuming the user’s id is 1). Recall that the id of the user is available in the params[:id]variable, which means that we can find the user with the code in Listing 9.2.
Listing 9.2 The user edit action.app/controllers/users_controller.rb
class UsersController < ApplicationController
.
.
.
def edit
@user = User.find(params[:id])
end
end
Getting the tests to pass requires making the actual edit view, shown in Listing 9.3.Note how closely this resembles the new user view from Listing 7.17; the large
www.it-ebooks.info
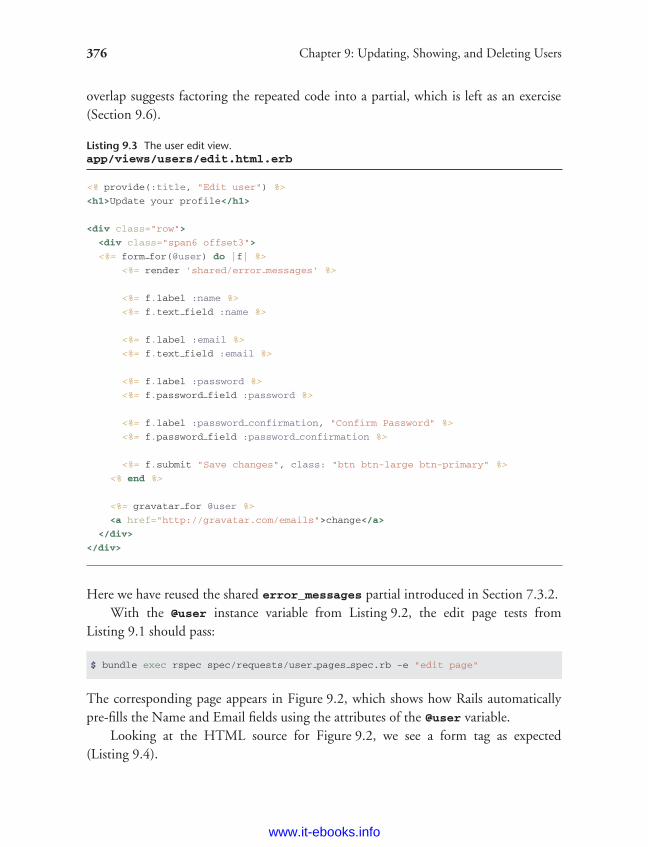
ptg8286261
376 Chapter 9: Updating, Showing, and Deleting Users
overlap suggests factoring the repeated code into a partial, which is left as an exercise(Section 9.6).
Listing 9.3 The user edit view.app/views/users/edit.html.erb
<% provide(:title, "Edit user") %>
<h1>Update your profile</h1>
<div class="row">
<div class="span6 offset3">
<%= form for(@user) do |f| %>
<%= render 'shared/error messages' %>
<%= f.label :name %>
<%= f.text field :name %>
<%= f.label :email %>
<%= f.text field :email %>
<%= f.label :password %>
<%= f.password field :password %>
<%= f.label :password confirmation, "Confirm Password" %>
<%= f.password field :password confirmation %>
<%= f.submit "Save changes", class: "btn btn-large btn-primary" %>
<% end %>
<%= gravatar for @user %>
<a href="http://gravatar.com/emails">change</a>
</div>
</div>
Here we have reused the shared error_messages partial introduced in Section 7.3.2.With the @user instance variable from Listing 9.2, the edit page tests from
Listing 9.1 should pass:
$ bundle exec rspec spec/requests/user pages spec.rb -e "edit page"
The corresponding page appears in Figure 9.2, which shows how Rails automaticallypre-fills the Name and Email fields using the attributes of the @user variable.
Looking at the HTML source for Figure 9.2, we see a form tag as expected(Listing 9.4).
www.it-ebooks.info
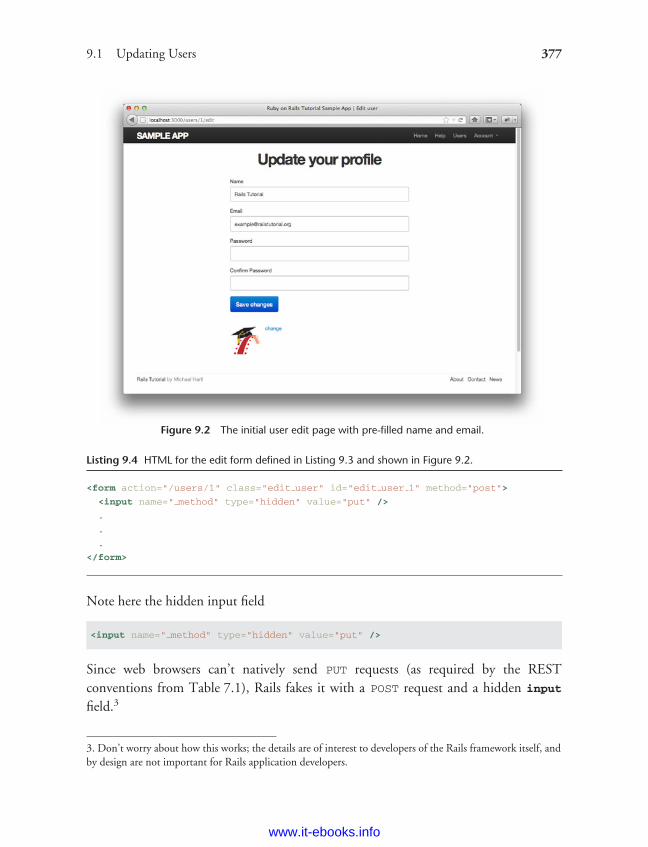
ptg8286261
9.1 Updating Users 377
Figure 9.2 The initial user edit page with pre-filled name and email.
Listing 9.4 HTML for the edit form defined in Listing 9.3 and shown in Figure 9.2.
<form action="/users/1" class="edit user" id="edit user 1" method="post">
<input name=" method" type="hidden" value="put" />
.
.
.
</form>
Note here the hidden input field
<input name=" method" type="hidden" value="put" />
Since web browsers can’t natively send PUT requests (as required by the RESTconventions from Table 7.1), Rails fakes it with a POST request and a hidden input
field.3
3. Don’t worry about how this works; the details are of interest to developers of the Rails framework itself, andby design are not important for Rails application developers.
www.it-ebooks.info
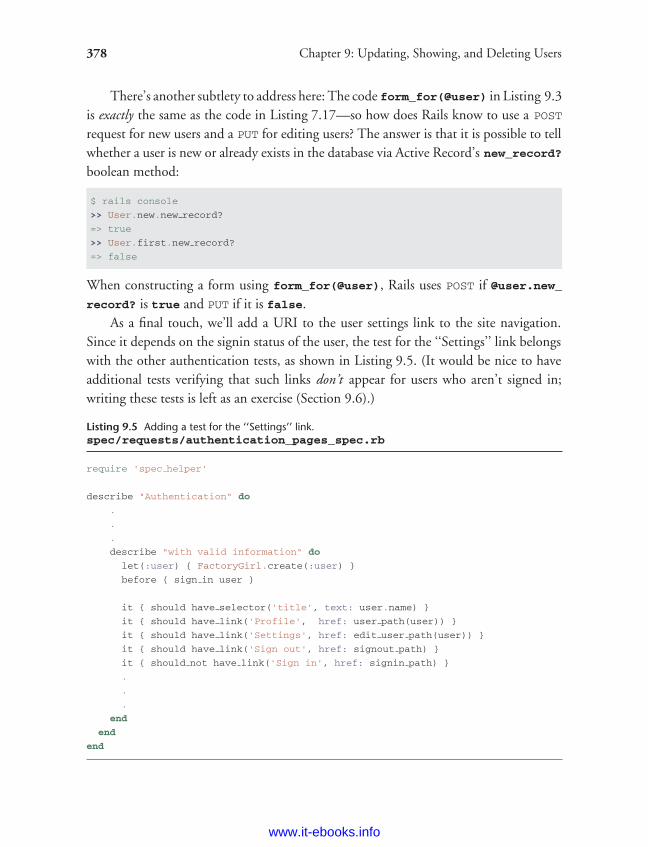
ptg8286261
378 Chapter 9: Updating, Showing, and Deleting Users
There’s another subtlety to address here: The code form_for(@user) in Listing 9.3is exactly the same as the code in Listing 7.17—so how does Rails know to use a POST
request for new users and a PUT for editing users? The answer is that it is possible to tellwhether a user is new or already exists in the database via Active Record’s new_record?boolean method:
$ rails console
>> User.new.new record?
=> true
>> User.first.new record?
=> false
When constructing a form using form_for(@user), Rails uses POST if @user.new_record? is true and PUT if it is false.
As a final touch, we’ll add a URI to the user settings link to the site navigation.Since it depends on the signin status of the user, the test for the ‘‘Settings’’ link belongswith the other authentication tests, as shown in Listing 9.5. (It would be nice to haveadditional tests verifying that such links don’t appear for users who aren’t signed in;writing these tests is left as an exercise (Section 9.6).)
Listing 9.5 Adding a test for the ‘‘Settings’’ link.spec/requests/authentication_pages_spec.rb
require 'spec helper'
describe "Authentication" do
.
.
.
describe "with valid information" do
let(:user) { FactoryGirl.create(:user) }
before { sign in user }
it { should have selector('title', text: user.name) }
it { should have link('Profile', href: user path(user)) }
it { should have link('Settings', href: edit user path(user)) }
it { should have link('Sign out', href: signout path) }
it { should not have link('Sign in', href: signin path) }
.
.
.
end
end
end
www.it-ebooks.info
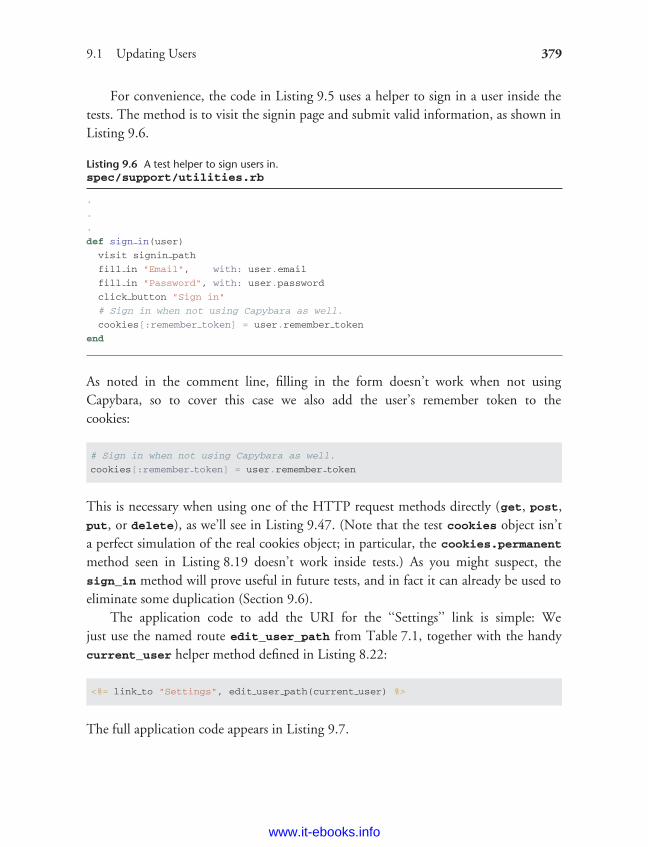
ptg8286261
9.1 Updating Users 379
For convenience, the code in Listing 9.5 uses a helper to sign in a user inside thetests. The method is to visit the signin page and submit valid information, as shown inListing 9.6.
Listing 9.6 A test helper to sign users in.spec/support/utilities.rb
.
.
.
def sign in(user)
visit signin path
fill in "Email", with: user.email
fill in "Password", with: user.password
click button "Sign in"
# Sign in when not using Capybara as well.
cookies[:remember token] = user.remember token
end
As noted in the comment line, filling in the form doesn’t work when not usingCapybara, so to cover this case we also add the user’s remember token to thecookies:
# Sign in when not using Capybara as well.
cookies[:remember token] = user.remember token
This is necessary when using one of the HTTP request methods directly (get, post,put, or delete), as we’ll see in Listing 9.47. (Note that the test cookies object isn’ta perfect simulation of the real cookies object; in particular, the cookies.permanent
method seen in Listing 8.19 doesn’t work inside tests.) As you might suspect, thesign_in method will prove useful in future tests, and in fact it can already be used toeliminate some duplication (Section 9.6).
The application code to add the URI for the ‘‘Settings’’ link is simple: Wejust use the named route edit_user_path from Table 7.1, together with the handycurrent_user helper method defined in Listing 8.22:
<%= link to "Settings", edit user path(current user) %>
The full application code appears in Listing 9.7.
www.it-ebooks.info
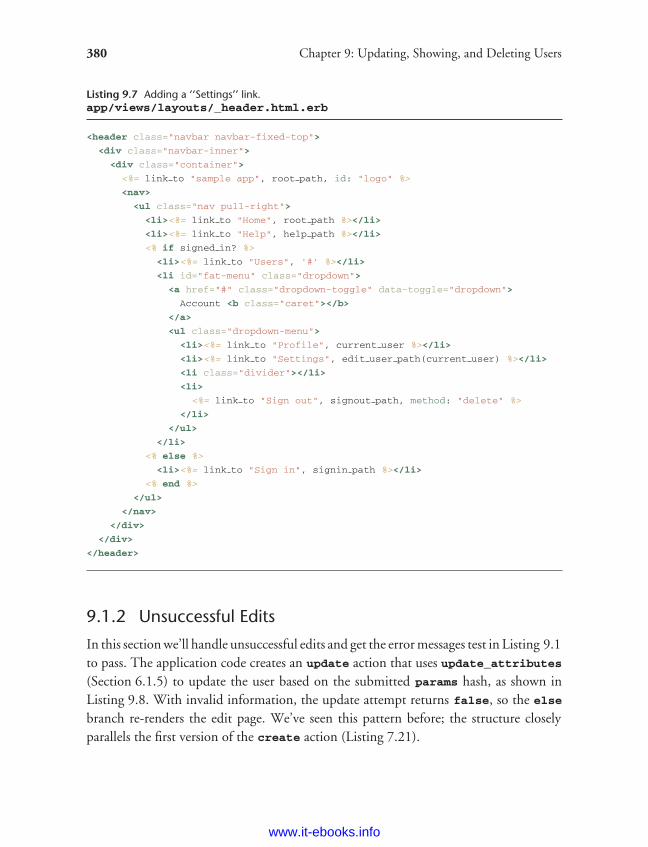
ptg8286261
380 Chapter 9: Updating, Showing, and Deleting Users
Listing 9.7 Adding a ‘‘Settings’’ link.app/views/layouts/_header.html.erb
<header class="navbar navbar-fixed-top">
<div class="navbar-inner">
<div class="container">
<%= link to "sample app", root path, id: "logo" %>
<nav>
<ul class="nav pull-right">
<li><%= link to "Home", root path %></li>
<li><%= link to "Help", help path %></li>
<% if signed in? %>
<li><%= link to "Users", '#' %></li>
<li id="fat-menu" class="dropdown">
<a href="#" class="dropdown-toggle" data-toggle="dropdown">
Account <b class="caret"></b>
</a>
<ul class="dropdown-menu">
<li><%= link to "Profile", current user %></li>
<li><%= link to "Settings", edit user path(current user) %></li>
<li class="divider"></li>
<li>
<%= link to "Sign out", signout path, method: "delete" %>
</li>
</ul>
</li>
<% else %>
<li><%= link to "Sign in", signin path %></li>
<% end %>
</ul>
</nav>
</div>
</div>
</header>
9.1.2 Unsuccessful Edits
In this section we’ll handle unsuccessful edits and get the error messages test in Listing 9.1to pass. The application code creates an update action that uses update_attributes(Section 6.1.5) to update the user based on the submitted params hash, as shown inListing 9.8. With invalid information, the update attempt returns false, so the elsebranch re-renders the edit page. We’ve seen this pattern before; the structure closelyparallels the first version of the create action (Listing 7.21).
www.it-ebooks.info
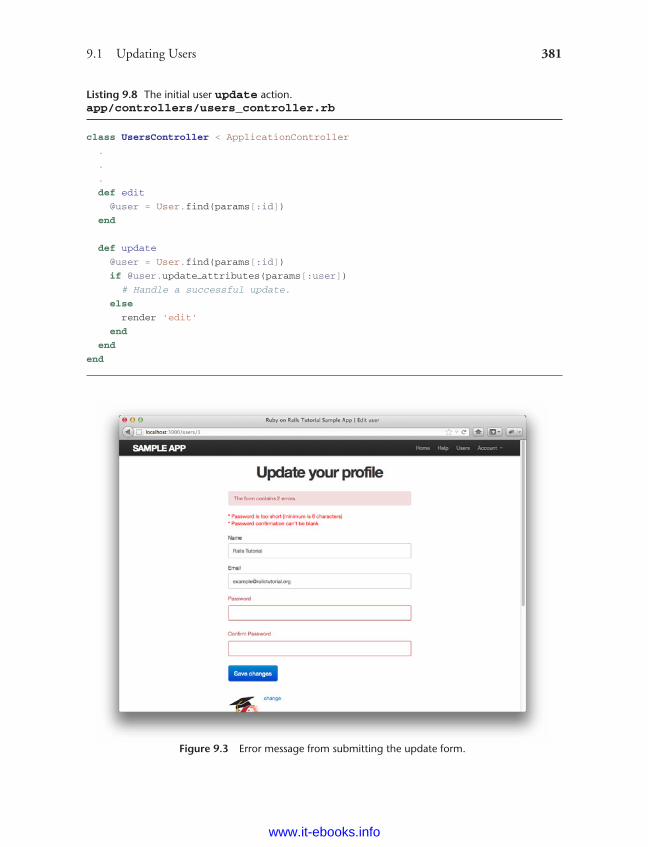
ptg8286261
9.1 Updating Users 381
Listing 9.8 The initial user update action.app/controllers/users_controller.rb
class UsersController < ApplicationController
.
.
.
def edit
@user = User.find(params[:id])
end
def update
@user = User.find(params[:id])
if @user.update attributes(params[:user])
# Handle a successful update.
else
render 'edit'
end
end
end
Figure 9.3 Error message from submitting the update form.
www.it-ebooks.info
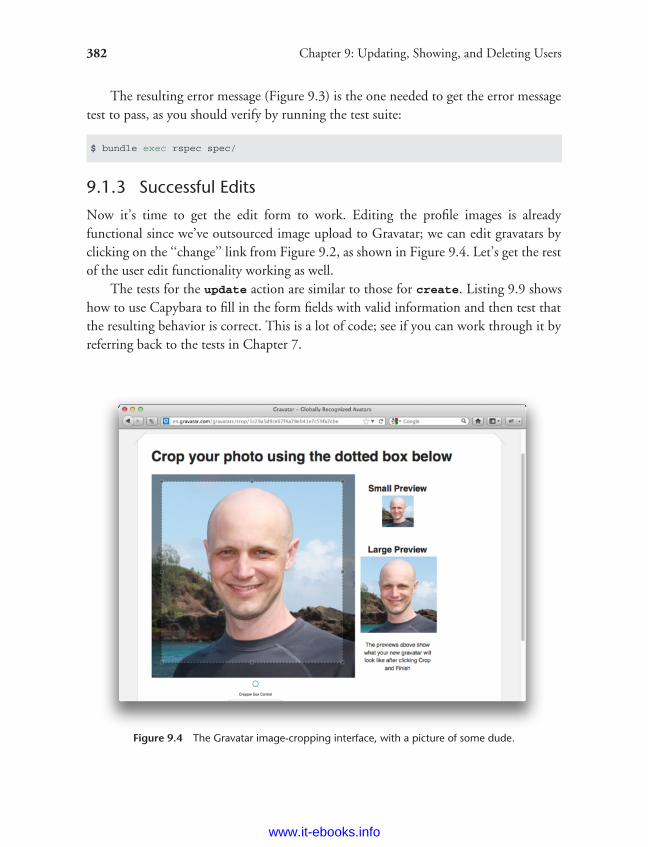
ptg8286261
382 Chapter 9: Updating, Showing, and Deleting Users
The resulting error message (Figure 9.3) is the one needed to get the error messagetest to pass, as you should verify by running the test suite:
$ bundle exec rspec spec/
9.1.3 Successful Edits
Now it’s time to get the edit form to work. Editing the profile images is alreadyfunctional since we’ve outsourced image upload to Gravatar; we can edit gravatars byclicking on the ‘‘change’’ link from Figure 9.2, as shown in Figure 9.4. Let’s get the restof the user edit functionality working as well.
The tests for the update action are similar to those for create. Listing 9.9 showshow to use Capybara to fill in the form fields with valid information and then test thatthe resulting behavior is correct. This is a lot of code; see if you can work through it byreferring back to the tests in Chapter 7.
Figure 9.4 The Gravatar image-cropping interface, with a picture of some dude.
www.it-ebooks.info
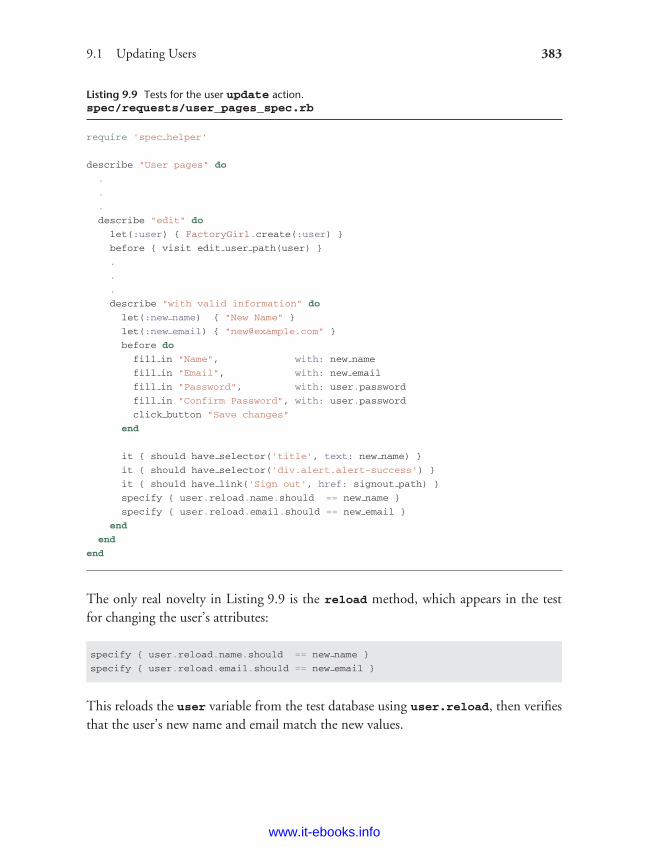
ptg8286261
9.1 Updating Users 383
Listing 9.9 Tests for the user update action.spec/requests/user_pages_spec.rb
require 'spec helper'
describe "User pages" do
.
.
.
describe "edit" do
let(:user) { FactoryGirl.create(:user) }
before { visit edit user path(user) }
.
.
.
describe "with valid information" do
let(:new name) { "New Name" }
let(:new email) { "[email protected]" }
before do
fill in "Name", with: new name
fill in "Email", with: new email
fill in "Password", with: user.password
fill in "Confirm Password", with: user.password
click button "Save changes"
end
it { should have selector('title', text: new name) }
it { should have selector('div.alert.alert-success') }
it { should have link('Sign out', href: signout path) }
specify { user.reload.name.should == new name }
specify { user.reload.email.should == new email }
end
end
end
The only real novelty in Listing 9.9 is the reload method, which appears in the testfor changing the user’s attributes:
specify { user.reload.name.should == new name }
specify { user.reload.email.should == new email }
This reloads the user variable from the test database using user.reload, then verifiesthat the user’s new name and email match the new values.
www.it-ebooks.info
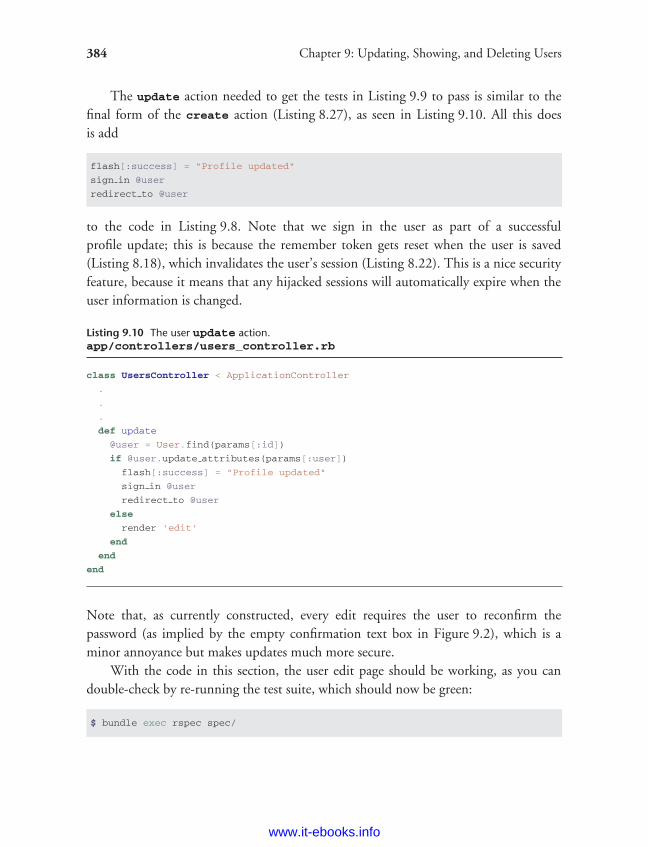
ptg8286261
384 Chapter 9: Updating, Showing, and Deleting Users
The update action needed to get the tests in Listing 9.9 to pass is similar to thefinal form of the create action (Listing 8.27), as seen in Listing 9.10. All this doesis add
flash[:success] = "Profile updated"
sign in @user
redirect to @user
to the code in Listing 9.8. Note that we sign in the user as part of a successfulprofile update; this is because the remember token gets reset when the user is saved(Listing 8.18), which invalidates the user’s session (Listing 8.22). This is a nice securityfeature, because it means that any hijacked sessions will automatically expire when theuser information is changed.
Listing 9.10 The user update action.app/controllers/users_controller.rb
class UsersController < ApplicationController
.
.
.
def update
@user = User.find(params[:id])
if @user.update attributes(params[:user])
flash[:success] = "Profile updated"
sign in @user
redirect to @user
else
render 'edit'
end
end
end
Note that, as currently constructed, every edit requires the user to reconfirm thepassword (as implied by the empty confirmation text box in Figure 9.2), which is aminor annoyance but makes updates much more secure.
With the code in this section, the user edit page should be working, as you candouble-check by re-running the test suite, which should now be green:
$ bundle exec rspec spec/
www.it-ebooks.info
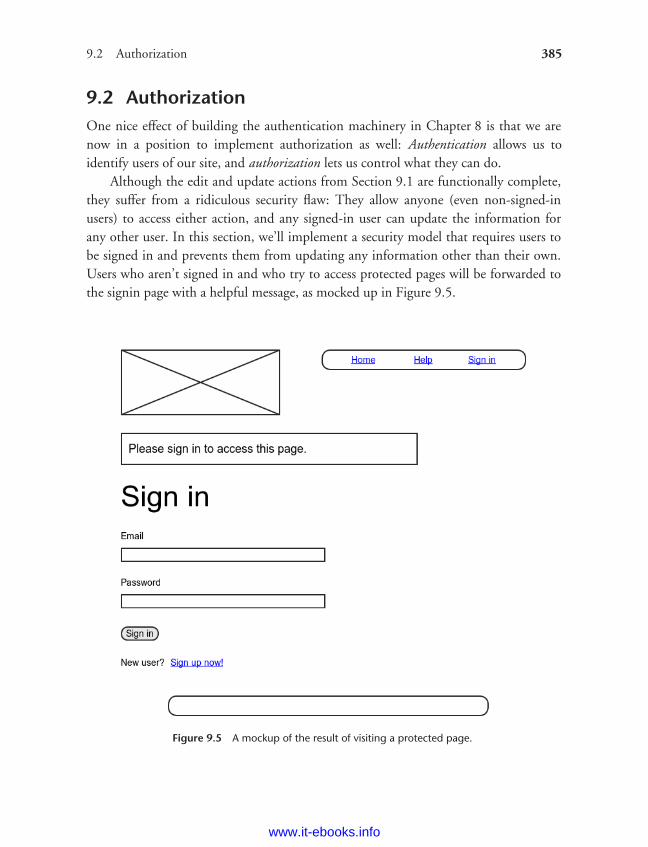
ptg8286261
9.2 Authorization 385
9.2 AuthorizationOne nice effect of building the authentication machinery in Chapter 8 is that we arenow in a position to implement authorization as well: Authentication allows us toidentify users of our site, and authorization lets us control what they can do.
Although the edit and update actions from Section 9.1 are functionally complete,they suffer from a ridiculous security flaw: They allow anyone (even non-signed-inusers) to access either action, and any signed-in user can update the information forany other user. In this section, we’ll implement a security model that requires users tobe signed in and prevents them from updating any information other than their own.Users who aren’t signed in and who try to access protected pages will be forwarded tothe signin page with a helpful message, as mocked up in Figure 9.5.
Figure 9.5 A mockup of the result of visiting a protected page.
www.it-ebooks.info

ptg8286261
386 Chapter 9: Updating, Showing, and Deleting Users
9.2.1 Requiring Signed-in Users
Since the security restrictions for the edit and update actions are identical, we’llhandle them in a single RSpec describe block. Starting with the sign-in requirement,our initial tests verify that non-signed-in users attempting to access either action aresimply sent to the signin page, as seen in Listing 9.11.
Listing 9.11 Testing that the edit and update actions are protected.spec/requests/authentication_pages_spec.rb
require 'spec helper'
describe "Authentication" do
.
.
.
describe "authorization" do
describe "for non-signed-in users" do
let(:user) { FactoryGirl.create(:user) }
describe "in the Users controller" do
describe "visiting the edit page" do
before { visit edit user path(user) }
it { should have selector('title', text: 'Sign in') }
end
describe "submitting to the update action" do
before { put user path(user) }
specify { response.should redirect to(signin path) }
end
end
end
end
end
The code in Listing 9.11 introduces a second way, apart from Capybara’s visit
method, to access a controller action: By issuing the appropriate HTTP request directly,in this case using the put method to issue a PUT request:
describe "submitting to the update action" do
before { put user path(user) }
specify { response.should redirect to(signin path) }
end
www.it-ebooks.info
ptg8286261
9.2 Authorization 387
This issues a PUT request directly to /users/1, which gets routed to the update
action of the Users controller (Table 7.1). This is necessary because there is no wayfor a browser to visit the update action directly—it can only get there indirectly bysubmitting the edit form—so Capybara can’t do it either. But visiting the edit pageonly tests the authorization for the edit action, not for update. As a result, the onlyway to test the proper authorization for the update action itself is to issue a directrequest. (As you might guess, in addition to put Rails tests support get, post, anddelete as well.)
When using one of the methods to issue HTTP requests directly, we get access tothe low-level response object. Unlike the Capybara page object, response lets us testfor the server response itself, in this case verifying that the update action responds byredirecting to the signin page:
specify { response.should redirect to(signin path) }
The authorization application code uses a before filter, which arranges for a particularmethod to be called before the given actions. To require users to be signed in, we definea signed_in_user method and invoke it using before_filter :signed_in_user,as shown in Listing 9.12.
Listing 9.12 Adding a signed_in_user before filter.app/controllers/users_controller.rb
class UsersController < ApplicationController
before filter :signed in user, only: [:edit, :update]
.
.
.
private
def signed in user
redirect to signin path, notice: "Please sign in." unless signed in?
end
end
By default, before filters apply to every action in a controller, so here we restrict thefilter to act only on the :edit and :update actions by passing the appropriate :only
options hash.
www.it-ebooks.info
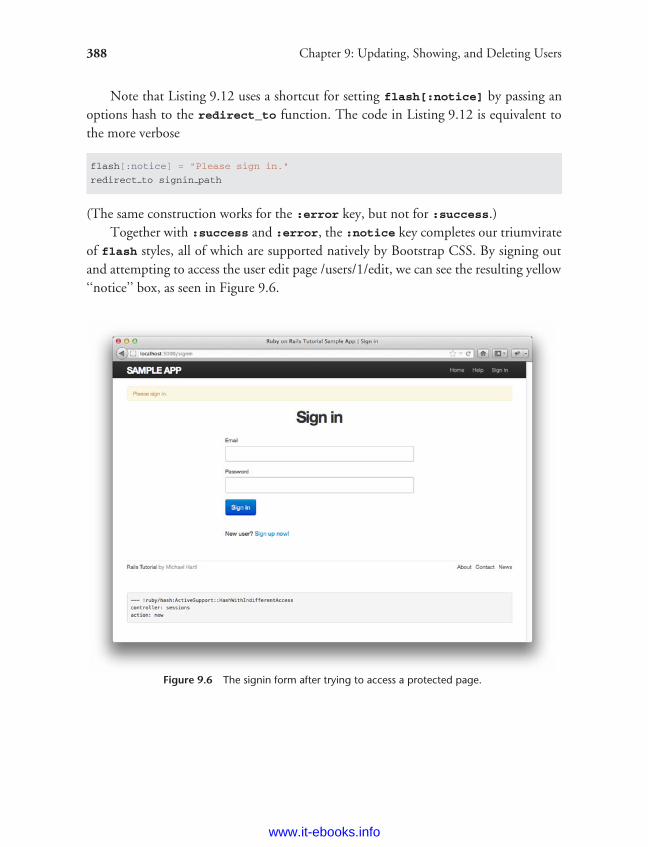
ptg8286261
388 Chapter 9: Updating, Showing, and Deleting Users
Note that Listing 9.12 uses a shortcut for setting flash[:notice] by passing anoptions hash to the redirect_to function. The code in Listing 9.12 is equivalent tothe more verbose
flash[:notice] = "Please sign in."
redirect to signin path
(The same construction works for the :error key, but not for :success.)Together with :success and :error, the :notice key completes our triumvirate
of flash styles, all of which are supported natively by Bootstrap CSS. By signing outand attempting to access the user edit page /users/1/edit, we can see the resulting yellow‘‘notice’’ box, as seen in Figure 9.6.
Figure 9.6 The signin form after trying to access a protected page.
www.it-ebooks.info
ptg8286261
9.2 Authorization 389
Unfortunately, in the process of getting the authorization tests from Listing 9.11to pass, we’ve broken the tests in Listing 9.1. Code like
describe "edit" do
let(:user) { FactoryGirl.create(:user) }
before { visit edit user path(user) }
.
.
.
no longer works because visiting the edit user path requires a signed-in user. Thesolution is to sign in the user with the sign_in utility from Listing 9.6, as shown inListing 9.13.
Listing 9.13 Adding a signin step to the edit and update tests.spec/requests/user_pages_spec.rb
require 'spec helper'
describe "User pages" do
.
.
.
describe "edit" do
let(:user) { FactoryGirl.create(:user) }
before do
sign in user
visit edit user path(user)
end
.
.
.
end
end
At this point our test suite should be green:
$ bundle exec rspec spec/
www.it-ebooks.info
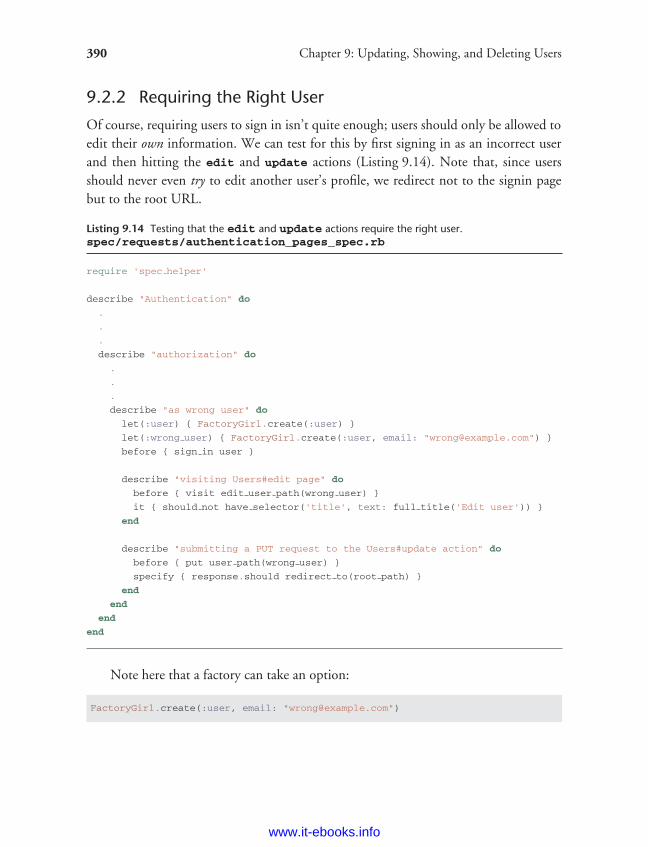
ptg8286261
390 Chapter 9: Updating, Showing, and Deleting Users
9.2.2 Requiring the Right User
Of course, requiring users to sign in isn’t quite enough; users should only be allowed toedit their own information. We can test for this by first signing in as an incorrect userand then hitting the edit and update actions (Listing 9.14). Note that, since usersshould never even try to edit another user’s profile, we redirect not to the signin pagebut to the root URL.
Listing 9.14 Testing that the edit and update actions require the right user.spec/requests/authentication_pages_spec.rb
require 'spec helper'
describe "Authentication" do
.
.
.
describe "authorization" do
.
.
.
describe "as wrong user" do
let(:user) { FactoryGirl.create(:user) }
let(:wrong user) { FactoryGirl.create(:user, email: "[email protected]") }
before { sign in user }
describe "visiting Users#edit page" do
before { visit edit user path(wrong user) }
it { should not have selector('title', text: full title('Edit user')) }
end
describe "submitting a PUT request to the Users#update action" do
before { put user path(wrong user) }
specify { response.should redirect to(root path) }
end
end
end
end
Note here that a factory can take an option:
FactoryGirl.create(:user, email: "[email protected]")
www.it-ebooks.info

ptg8286261
9.2 Authorization 391
This creates a user with a different email address from the default. The tests specify thatthis wrong user should not have access to the original user’s edit or update actions.
The application code adds a second before filter to call the correct_user method,as shown in Listing 9.15.
Listing 9.15 A correct_user before filter to protect the edit/update pages.app/controllers/users_controller.rb
class UsersController < ApplicationController
before filter :signed in user, only: [:edit, :update]
before filter :correct user, only: [:edit, :update]
.
.
.
def edit
end
def update
if @user.update attributes(params[:user])
flash[:success] = "Profile updated"
sign in @user
redirect to @user
else
render 'edit'
end
end
.
.
.
private
def signed in user
redirect to signin path, notice: "Please sign in." unless signed in?
end
def correct user
@user = User.find(params[:id])
redirect to(root path) unless current user?(@user)
end
end
The correct_user filter uses the current_user? boolean method, which wedefine in the Sessions helper (Listing 9.16).
www.it-ebooks.info
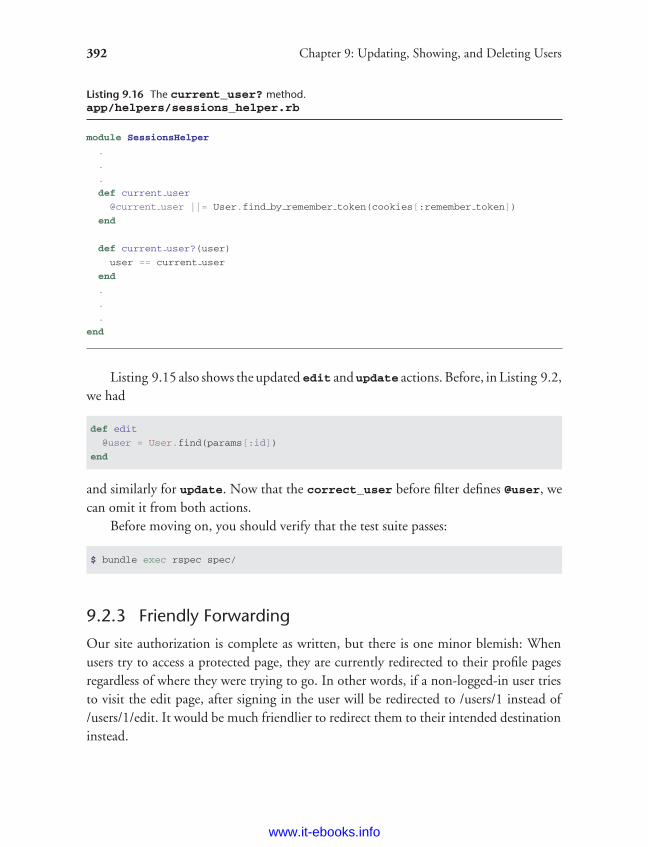
ptg8286261
392 Chapter 9: Updating, Showing, and Deleting Users
Listing 9.16 The current_user? method.app/helpers/sessions_helper.rb
module SessionsHelper
.
.
.
def current user
@current user ||= User.find by remember token(cookies[:remember token])
end
def current user?(user)
user == current user
end
.
.
.
end
Listing 9.15 also shows the updated edit and update actions. Before, in Listing 9.2,we had
def edit
@user = User.find(params[:id])
end
and similarly for update. Now that the correct_user before filter defines @user, wecan omit it from both actions.
Before moving on, you should verify that the test suite passes:
$ bundle exec rspec spec/
9.2.3 Friendly Forwarding
Our site authorization is complete as written, but there is one minor blemish: Whenusers try to access a protected page, they are currently redirected to their profile pagesregardless of where they were trying to go. In other words, if a non-logged-in user triesto visit the edit page, after signing in the user will be redirected to /users/1 instead of/users/1/edit. It would be much friendlier to redirect them to their intended destinationinstead.
www.it-ebooks.info
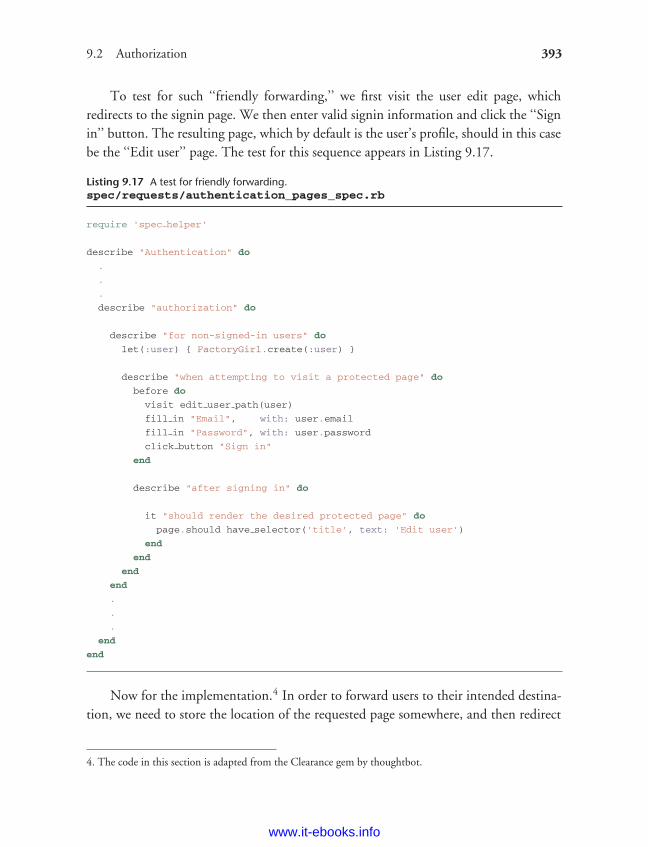
ptg8286261
9.2 Authorization 393
To test for such ‘‘friendly forwarding,’’ we first visit the user edit page, whichredirects to the signin page. We then enter valid signin information and click the ‘‘Signin’’ button. The resulting page, which by default is the user’s profile, should in this casebe the ‘‘Edit user’’ page. The test for this sequence appears in Listing 9.17.
Listing 9.17 A test for friendly forwarding.spec/requests/authentication_pages_spec.rb
require 'spec helper'
describe "Authentication" do
.
.
.
describe "authorization" do
describe "for non-signed-in users" do
let(:user) { FactoryGirl.create(:user) }
describe "when attempting to visit a protected page" do
before do
visit edit user path(user)
fill in "Email", with: user.email
fill in "Password", with: user.password
click button "Sign in"
end
describe "after signing in" do
it "should render the desired protected page" do
page.should have selector('title', text: 'Edit user')
end
end
end
end
.
.
.
end
end
Now for the implementation.4 In order to forward users to their intended destina-tion, we need to store the location of the requested page somewhere, and then redirect
4. The code in this section is adapted from the Clearance gem by thoughtbot.
www.it-ebooks.info
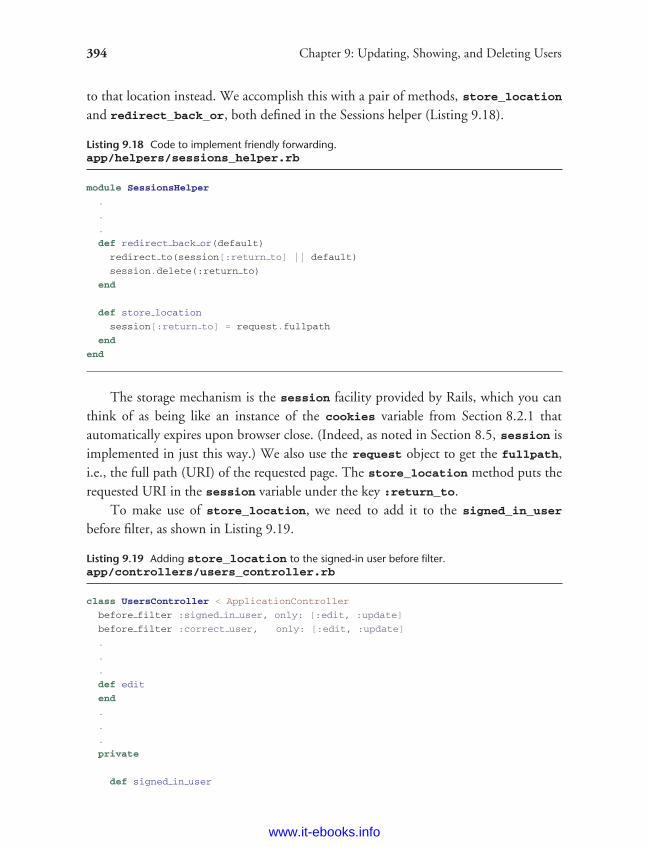
ptg8286261
394 Chapter 9: Updating, Showing, and Deleting Users
to that location instead. We accomplish this with a pair of methods, store_locationand redirect_back_or, both defined in the Sessions helper (Listing 9.18).
Listing 9.18 Code to implement friendly forwarding.app/helpers/sessions_helper.rb
module SessionsHelper
.
.
.
def redirect back or(default)
redirect to(session[:return to] || default)
session.delete(:return to)
end
def store location
session[:return to] = request.fullpath
end
end
The storage mechanism is the session facility provided by Rails, which you canthink of as being like an instance of the cookies variable from Section 8.2.1 thatautomatically expires upon browser close. (Indeed, as noted in Section 8.5, session isimplemented in just this way.) We also use the request object to get the fullpath,i.e., the full path (URI) of the requested page. The store_location method puts therequested URI in the session variable under the key :return_to.
To make use of store_location, we need to add it to the signed_in_user
before filter, as shown in Listing 9.19.
Listing 9.19 Adding store_location to the signed-in user before filter.app/controllers/users_controller.rb
class UsersController < ApplicationController
before filter :signed in user, only: [:edit, :update]
before filter :correct user, only: [:edit, :update]
.
.
.
def edit
end
.
.
.
private
def signed in user
www.it-ebooks.info
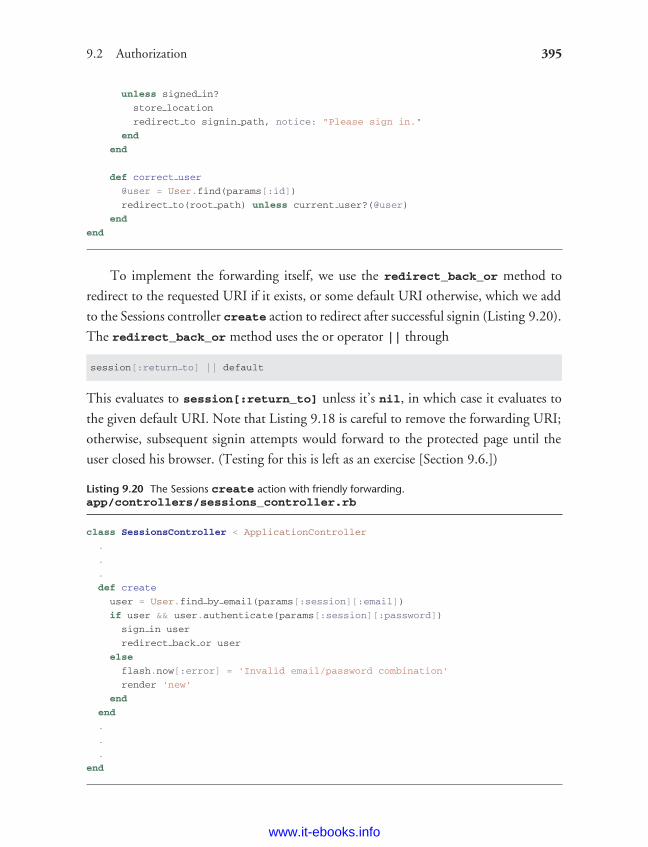
ptg8286261
9.2 Authorization 395
unless signed in?
store location
redirect to signin path, notice: "Please sign in."
end
end
def correct user
@user = User.find(params[:id])
redirect to(root path) unless current user?(@user)
end
end
To implement the forwarding itself, we use the redirect_back_or method to
redirect to the requested URI if it exists, or some default URI otherwise, which we add
to the Sessions controller create action to redirect after successful signin (Listing 9.20).
The redirect_back_or method uses the or operator || through
session[:return to] || default
This evaluates to session[:return_to] unless it’s nil, in which case it evaluates to
the given default URI. Note that Listing 9.18 is careful to remove the forwarding URI;
otherwise, subsequent signin attempts would forward to the protected page until the
user closed his browser. (Testing for this is left as an exercise [Section 9.6.])
Listing 9.20 The Sessions create action with friendly forwarding.app/controllers/sessions_controller.rb
class SessionsController < ApplicationController
.
.
.
def create
user = User.find by email(params[:session][:email])
if user && user.authenticate(params[:session][:password])
sign in user
redirect back or user
else
flash.now[:error] = 'Invalid email/password combination'
render 'new'
end
end
.
.
.
end
www.it-ebooks.info
ptg8286261
396 Chapter 9: Updating, Showing, and Deleting Users
With that, the friendly forwarding integration test in Listing 9.17 should pass, andthe basic user authentication and page protection implementation is complete. As usual,it’s a good idea to verify that the test suite is green before proceeding:
$ bundle exec rspec spec/
9.3 Showing All UsersIn this section, we’ll add the penultimate user action, the index action, which isdesigned to display all the users instead of just one. Along the way, we’ll learn aboutpopulating the database with sample users and paginating the user output so that theindex page can scale up to display a potentially large number of users. A mockup of theresult—users, pagination links, and a ‘‘Users’’ navigation link—appears in Figure 9.7.5
In Section 9.4, we’ll add an administrative interface to the user index so that (presumablytroublesome) users can be destroyed.
9.3.1 User Index
Although we’ll keep individual user show pages visible to all site visitors, the user indexwill be restricted to signed-in users so that there’s a limit to how much unregisteredusers can see by default. We’ll start by testing that the index action is protected byvisiting the users_path (Table 7.1) and verifying that we are redirected to the signinpage. As with other authorization tests, we’ll put this example in the authenticationintegration test, as shown in Listing 9.21.
Listing 9.21 Testing that the index action is protected.spec/requests/authentication_pages_spec.rb
require 'spec helper'
describe "Authentication" do
.
.
.
describe "authorization" do
describe "for non-signed-in users" do
.
5. Baby photo from www.flickr.com/photos/glasgows/338937124/.
www.it-ebooks.info
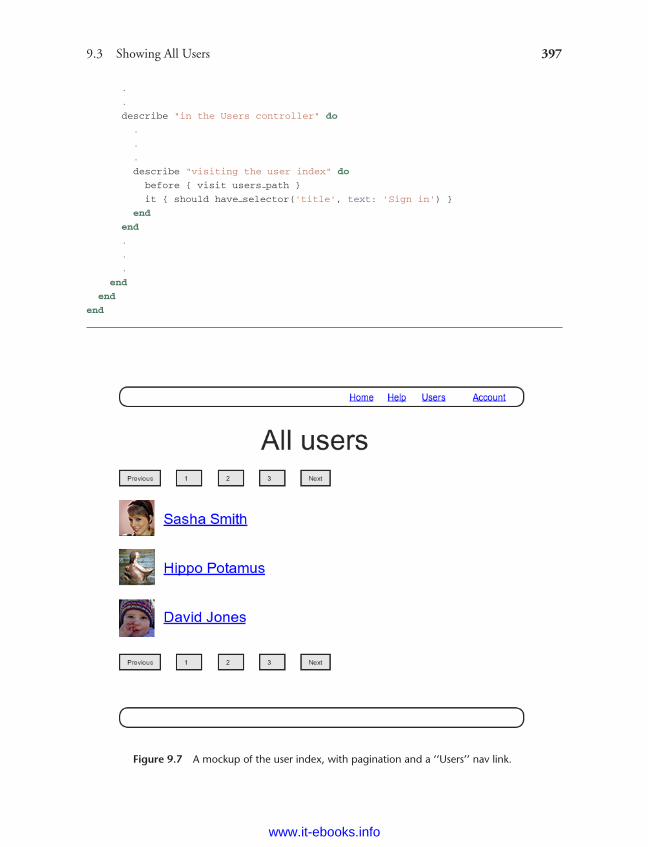
ptg8286261
9.3 Showing All Users 397
.
.
describe "in the Users controller" do
.
.
.
describe "visiting the user index" do
before { visit users path }
it { should have selector('title', text: 'Sign in') }
end
end
.
.
.
end
end
end
Figure 9.7 A mockup of the user index, with pagination and a ‘‘Users’’ nav link.
www.it-ebooks.info
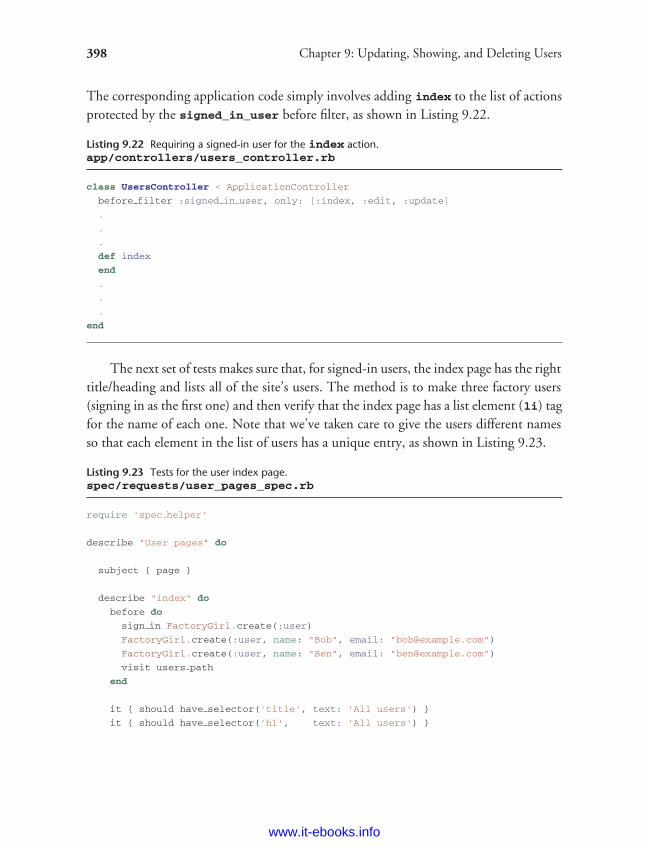
ptg8286261
398 Chapter 9: Updating, Showing, and Deleting Users
The corresponding application code simply involves adding index to the list of actionsprotected by the signed_in_user before filter, as shown in Listing 9.22.
Listing 9.22 Requiring a signed-in user for the index action.app/controllers/users_controller.rb
class UsersController < ApplicationController
before filter :signed in user, only: [:index, :edit, :update]
.
.
.
def index
end
.
.
.
end
The next set of tests makes sure that, for signed-in users, the index page has the righttitle/heading and lists all of the site’s users. The method is to make three factory users(signing in as the first one) and then verify that the index page has a list element (li) tagfor the name of each one. Note that we’ve taken care to give the users different namesso that each element in the list of users has a unique entry, as shown in Listing 9.23.
Listing 9.23 Tests for the user index page.spec/requests/user_pages_spec.rb
require 'spec helper'
describe "User pages" do
subject { page }
describe "index" do
before do
sign in FactoryGirl.create(:user)
FactoryGirl.create(:user, name: "Bob", email: "[email protected]")
FactoryGirl.create(:user, name: "Ben", email: "[email protected]")
visit users path
end
it { should have selector('title', text: 'All users') }
it { should have selector('h1', text: 'All users') }
www.it-ebooks.info
ptg8286261
9.3 Showing All Users 399
it "should list each user" do
User.all.each do |user|
page.should have selector('li', text: user.name)
end
end
end
.
.
.
end
As you may recall from the corresponding action in the demo app (Listing 2.4), theapplication code uses User.all to pull all the users out of the database, assigning themto an @users instance variable for use in the view, as seen in Listing 9.24. (If displayingall the users at once seems like a bad idea, you’re right, and we’ll remove this blemish inSection 9.3.3.)
Listing 9.24 The user index action.app/controllers/users_controller.rb
class UsersController < ApplicationController
before filter :signed in user, only: [:index, :edit, :update]
.
.
.
def index
@users = User.all
end
.
.
.
end
To make the actual index page, we need to make a view that iterates through theusers and wraps each one in an li tag. We do this with the each method, displayingeach user’s Gravatar and name, while wrapping the whole thing in an unordered list(ul) tag (Listing 9.25). The code in Listing 9.25 uses the result of Listing 7.29 fromSection 7.6, which allows us to pass an option to the Gravatar helper specifying a sizeother than the default. If you didn’t do that exercise, update your Users helper file withthe contents of Listing 7.29 before proceeding.
www.it-ebooks.info
ptg8286261
400 Chapter 9: Updating, Showing, and Deleting Users
Listing 9.25 The user index view.app/views/users/index.html.erb
<% provide(:title, 'All users') %>
<h1>All users</h1>
<ul class="users">
<% @users.each do |user| %>
<li>
<%= gravatar for user, size: 52 %>
<%= link to user.name, user %>
</li>
<% end %>
</ul>
Let’s also add a little CSS (or, rather, SCSS) for style (Listing 9.26).
Listing 9.26 CSS for the user index.app/assets/stylesheets/custom.css.scss
.
.
.
/* users index */
.users {
list-style: none;
margin: 0;
li {
overflow: auto;
padding: 10px 0;
border-top: 1px solid $grayLighter;
&:last-child {
border-bottom: 1px solid $grayLighter;
}
}
}
Finally, we’ll add the URI to the users link in the site’s navigation header usingusers_path, thereby using the last of the unused named routes in Table 7.1. The test(Listing 9.27) and application code (Listing 9.28) are both straightforward.
www.it-ebooks.info
ptg8286261
9.3 Showing All Users 401
Listing 9.27 A test for the ‘‘Users’’ link URI.spec/requests/authentication_pages_spec.rb
require 'spec helper'
describe "Authentication" do
.
.
.
describe "with valid information" do
let(:user) { FactoryGirl.create(:user) }
before { sign in user }
it { should have selector('title', text: user.name) }
it { should have link('Users', href: users path) }
it { should have link('Profile', href: user path(user)) }
it { should have link('Settings', href: edit user path(user)) }
it { should have link('Sign out', href: signout path) }
it { should not have link('Sign in', href: signin path) }
.
.
.
end
end
end
Listing 9.28 Adding the URI to the users link.app/views/layouts/_header.html.erb
<header class="navbar navbar-fixed-top">
<div class="navbar-inner">
<div class="container">
<%= link to "sample app", root path, id: "logo" %>
<nav>
<ul class="nav pull-right">
<li><%= link to "Home", root path %></li>
<li><%= link to "Help", help path %></li>
<% if signed in? %>
<li><%= link to "Users", users path %></li>
<li id="fat-menu" class="dropdown">
<a href="#" class="dropdown-toggle" data-toggle="dropdown">
Account <b class="caret"></b>
www.it-ebooks.info
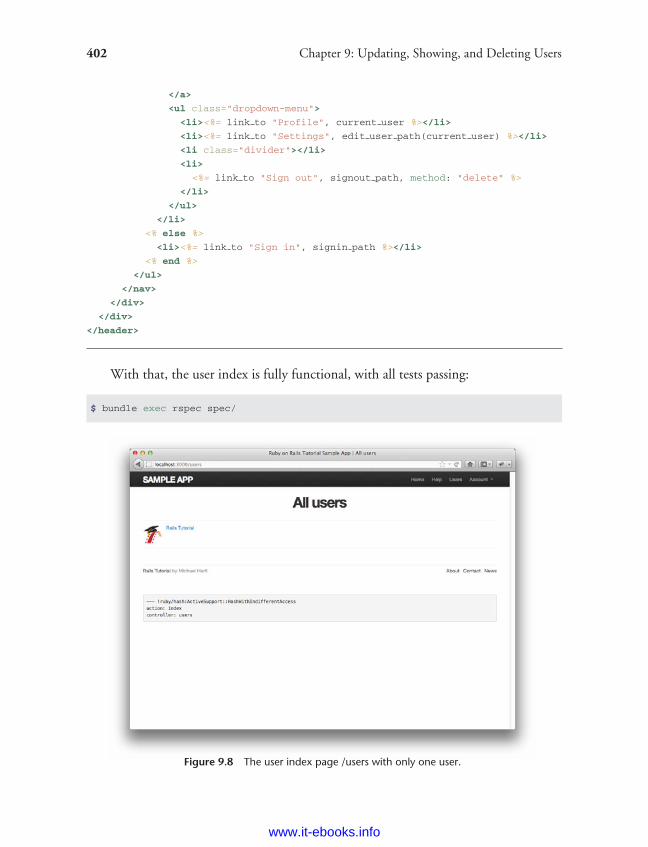
ptg8286261
402 Chapter 9: Updating, Showing, and Deleting Users
</a>
<ul class="dropdown-menu">
<li><%= link to "Profile", current user %></li>
<li><%= link to "Settings", edit user path(current user) %></li>
<li class="divider"></li>
<li>
<%= link to "Sign out", signout path, method: "delete" %>
</li>
</ul>
</li>
<% else %>
<li><%= link to "Sign in", signin path %></li>
<% end %>
</ul>
</nav>
</div>
</div>
</header>
With that, the user index is fully functional, with all tests passing:
$ bundle exec rspec spec/
Figure 9.8 The user index page /users with only one user.
www.it-ebooks.info
ptg8286261
9.3 Showing All Users 403
On the other hand, as seen in Figure 9.8, it is a bit . . . lonely. Let’s remedy this sadsituation.
9.3.2 Sample Users
In this section, we’ll give our lonely sample user some company. Of course, to createenough users to make a decent user index, we could use our web browser to visit thesignup page and make the new users one by one, but far a better solution is to use Ruby(and Rake) to make the users for us.
First, we’ll add the Faker gem to the Gemfile, which will allow us to make sampleusers with semi-realistic names and email addresses (Listing 9.29).
Listing 9.29 Adding the Faker gem to the Gemfile.
source 'https://rubygems.org'
gem 'rails', '3.2.3'
gem 'bootstrap-sass', '2.0.0'
gem 'bcrypt-ruby', '3.0.1'
gem 'faker', '1.0.1'
.
.
.
Then install as usual:
$ bundle install
Next, we’ll add a Rake task to create sample users. Rake tasks live in the lib/tasksdirectory, and are defined using namespaces (in this case, :db), as seen in Listing 9.30.(This is a bit advanced, so don’t worry too much about the details.)
Listing 9.30 A Rake task for populating the database with sample users.lib/tasks/sample_data.rake
namespace :db do
desc "Fill database with sample data"
task populate: :environment do
User.create!(name: "Example User",
email: "[email protected]",
password: "foobar",
password confirmation: "foobar")
99.times do |n|
name = Faker::Name.name
www.it-ebooks.info
ptg8286261
404 Chapter 9: Updating, Showing, and Deleting Users
email = "example-#{n+1}@railstutorial.org"
password = "password"
User.create!(name: name,
email: email,
password: password,
password confirmation: password)
end
end
end
This defines a task db:populate that creates an example user with name and emailaddress replicating our previous one, and then makes 99 more. The line
task populate: :environment do
ensures that the Rake task has access to the local Rails environment, including the Usermodel (and hence User.create!). Here create! is just like the create method,except it raises an exception (Section 6.1.4) for an invalid user rather than returningfalse. This noisier construction makes debugging easier by avoiding silent errors.
With the :db namespace as in Listing 9.30, we can invoke the Rake task as follows:
$ bundle exec rake db:reset
$ bundle exec rake db:populate
$ bundle exec rake db:test:prepare
After running the Rake task, our application has 100 sample users, as seen inFigure 9.9. (I’ve taken the liberty of associating the first few sample addresses withphotos so that they’re not all the default Gravatar image.)
9.3.3 Pagination
Our original user doesn’t suffer from loneliness any more, but now we have the oppositeproblem: Our user has too many companions, and they all appear on the same page.Right now there are a hundred, which is already a reasonably large number, and on areal site it could be thousands. The solution is to paginate the users, so that (for example)only 30 show up on a page at any one time.
There are several pagination methods in Rails; we’ll use one of the simplest and mostrobust, called will paginate. To use it, we need to include both the will paginate gemand bootstrap-will paginate, which configures will paginate to use Bootstrap’spagination styles. The updated Gemfile appears in Listing 9.31.
www.it-ebooks.info
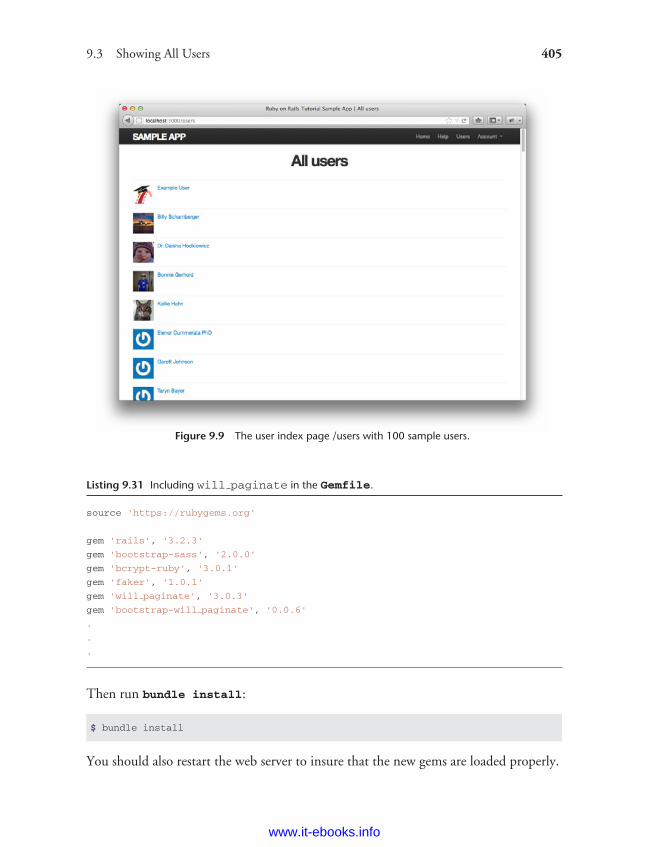
ptg8286261
9.3 Showing All Users 405
Figure 9.9 The user index page /users with 100 sample users.
Listing 9.31 Including will paginate in the Gemfile.
source 'https://rubygems.org'
gem 'rails', '3.2.3'
gem 'bootstrap-sass', '2.0.0'
gem 'bcrypt-ruby', '3.0.1'
gem 'faker', '1.0.1'
gem 'will paginate', '3.0.3'
gem 'bootstrap-will paginate', '0.0.6'
.
.
.
Then run bundle install:
$ bundle install
You should also restart the web server to insure that the new gems are loaded properly.
www.it-ebooks.info
ptg8286261
406 Chapter 9: Updating, Showing, and Deleting Users
Because the will paginate gem is in wide use, there’s no need to test itthoroughly, so we’ll take a lightweight approach. First, we’ll test for a div with CSSclass ‘‘pagination’’, which is what gets output by will paginate. Then we’ll verifythat the correct users appear on the first page of results. This requires the use of thepaginate method, which we’ll cover shortly.
As before, we’ll use Factory Girl to simulate users, but immediately we have aproblem: User email addresses must be unique, which would appear to require creatingmore than 30 users by hand—a terribly cumbersome job. In addition, when testing foruser listings it would be convenient for them all to have different names. Fortunately,Factory Girl anticipates this issue, and provides sequences to solve it. Our original factory(Listing 7.8) hard-coded the name and email address:
FactoryGirl.define do
factory :user do
name "Michael Hartl"
email "[email protected]"
password "foobar"
password confirmation "foobar"
end
end
Instead, we can arrange for a sequence of names and email addresses using the sequencemethod:
factory :user do
sequence(:name) { |n| "Person #{n}" }
sequence(:email) { |n| "person #{n}@example.com"}
.
.
.
Here sequence takes a symbol corresponding to the desired attribute (such as :name)and a block with one variable, which we have called n. Upon successive invocations ofthe FactoryGirl method,
FactoryGirl.create(:user)
The block variable n is automatically incremented, so that the first user has name‘‘Person 1’’ and email address ‘‘person [email protected]’’, the second user has name‘‘Person 2’’ and email address ‘‘person [email protected]’’, and so on. The full codeappears in Listing 9.32.
www.it-ebooks.info
ptg8286261
9.3 Showing All Users 407
Listing 9.32 Defining a Factory Girl sequence.spec/factories.rb
FactoryGirl.define do
factory :user do
sequence(:name) { |n| "Person #{n}" }
sequence(:email) { |n| "person #{n}@example.com"}
password "foobar"
password confirmation "foobar"
end
end
Applying the idea of factory sequences, we can make 30 users in our test, which (aswe will see) will be sufficient to invoke pagination:
before(:all) { 30.times { FactoryGirl.create(:user) } }
after(:all) { User.delete all }
Note here the use of before(:all), which ensures that the sample users are createdonce, before all the tests in the block. This is an optimization for speed, as creating 30users can be slow on some systems. We use the complementary method after(:all)
to delete the users once we’re done.The tests for the appearance of the pagination div and the right users appears
in Listing 9.33. Note the replacement of the User.all array from Listing 9.23 withUser.paginate(page: 1), which (as we’ll see momentarily) is how to pull out thefirst page of users from the database. Note also that Listing 9.33 uses before(:each)to emphasize the contrast with before(:all).
Listing 9.33 Tests for pagination.spec/requests/user_pages_spec.rb
require 'spec helper'
describe "User pages" do
subject { page }
describe "index" do
let(:user) { FactoryGirl.create(:user) }
before(:each) do
sign in user
visit users path
end
www.it-ebooks.info
ptg8286261
408 Chapter 9: Updating, Showing, and Deleting Users
it { should have selector('title', text: 'All users') }
it { should have selector('h1', text: 'All users') }
describe "pagination" do
it { should have selector('div.pagination') }
it "should list each user" do
User.paginate(page: 1).each do |user|
page.should have selector('li', text: user.name)
end
end
end
end
.
.
.
end
To get pagination working, we need to add some code to the index view telling Railsto paginate the users, and we need to replace User.all in the index action with anobject that knows about pagination. We’ll start by adding the special will_paginatemethod in the view (Listing 9.34); we’ll see in a moment why the code appears bothabove and below the user list.
Listing 9.34 The user index with pagination.app/views/users/index.html.erb
<% provide(:title, 'All users') %>
<h1>All users</h1>
<%= will paginate %>
<ul class="users">
<% @users.each do |user| %>
<li>
<%= gravatar for user, size: 52 %>
<%= link to user.name, user %>
</li>
<% end %>
</ul>
<%= will paginate %>
www.it-ebooks.info
ptg8286261
9.3 Showing All Users 409
The will_paginatemethod is a little magical; inside a users view, it automaticallylooks for an @users object, then displays pagination links to access other pages. Theview in Listing 9.34 doesn’t work yet, though, because currently @users contains theresults of User.all (Listing 9.24), which is of class Array, whereas will_paginateexpects an object of class ActiveRecord::Relation. Happily, this is just the kindof object returned by the paginate method added by the will paginate gem to allActive Record objects:
$ rails console
>> User.all.class
=> Array
>> User.paginate(page: 1).class
=> ActiveRecord::Relation
Note that paginate takes a hash argument with key :page and value equal to thepage requested. User.paginate pulls the users out of the database one chunk at a time(30 by default), based on the :page parameter. So, for example, page 1 is users 1–30,page 2 is users 31–60, etc. If the page is nil, paginate simply returns the first page.
Using the paginate method, we can paginate the users in the sample applicationby using paginate in place of all in the index action (Listing 9.35). Here the:page parameter comes from params[:page], which is generated automatically bywill_paginate.
Listing 9.35 Paginating the users in the index action.app/controllers/users_controller.rb
class UsersController < ApplicationController
before filter :signed in user, only: [:index, :edit, :update]
.
.
.
def index
@users = User.paginate(page: params[:page])
end
.
.
.
end
The user index page should now be working, appearing as in Figure 9.10. (On somesystems, you may have to restart the Rails server at this point.) Because we included
www.it-ebooks.info

ptg8286261
410 Chapter 9: Updating, Showing, and Deleting Users
Figure 9.10 The user index page /users with pagination.
will_paginate both above and below the user list, the pagination links appear in bothplaces.
If you now click on either the 2 link or Next link, you’ll get the second page ofresults, as shown in Figure 9.11.
You should also verify that the tests are passing:
$ bundle exec rspec spec/
9.3.4 Partial Refactoring
The paginated user index is now complete, but there’s one improvement I can’t resistincluding: Rails has some incredibly slick tools for making compact views, and inthis section we’ll refactor the index page to use them. Because our code is well-tested,we can refactor with confidence, assured that we are unlikely to break our site’sfunctionality.
www.it-ebooks.info
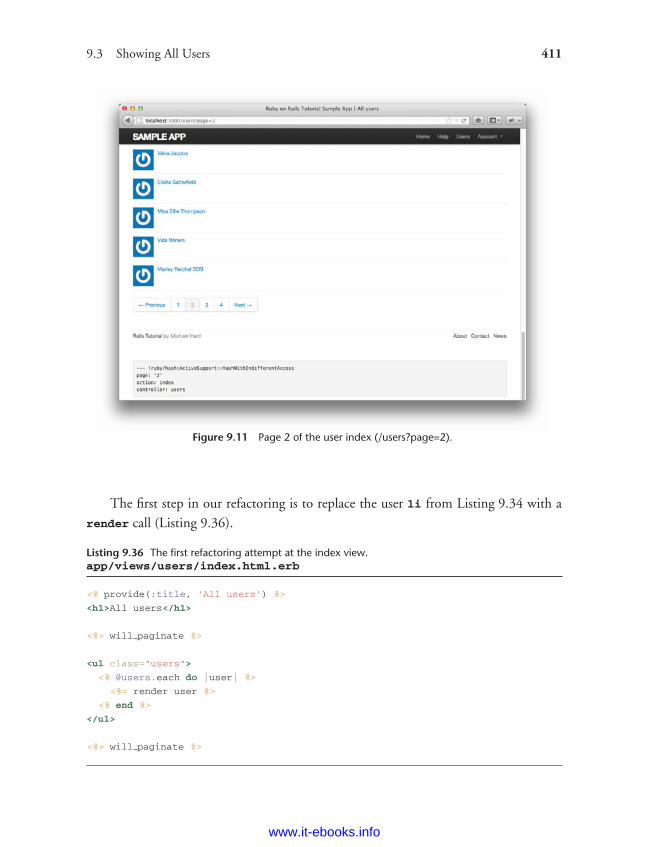
ptg8286261
9.3 Showing All Users 411
Figure 9.11 Page 2 of the user index (/users?page=2).
The first step in our refactoring is to replace the user li from Listing 9.34 with arender call (Listing 9.36).
Listing 9.36 The first refactoring attempt at the index view.app/views/users/index.html.erb
<% provide(:title, 'All users') %>
<h1>All users</h1>
<%= will paginate %>
<ul class="users">
<% @users.each do |user| %>
<%= render user %>
<% end %>
</ul>
<%= will paginate %>
www.it-ebooks.info
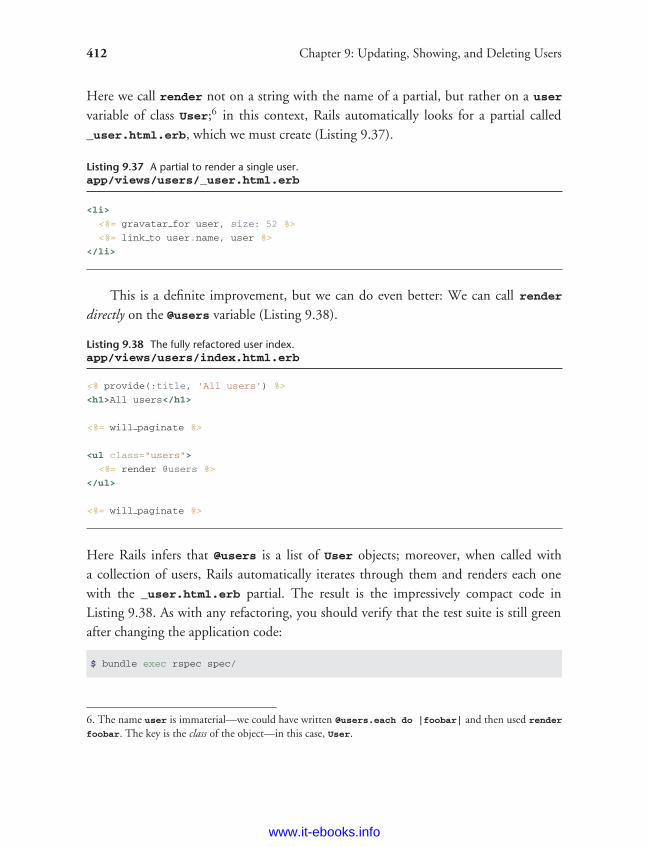
ptg8286261
412 Chapter 9: Updating, Showing, and Deleting Users
Here we call render not on a string with the name of a partial, but rather on a user
variable of class User;6 in this context, Rails automatically looks for a partial called_user.html.erb, which we must create (Listing 9.37).
Listing 9.37 A partial to render a single user.app/views/users/_user.html.erb
<li>
<%= gravatar for user, size: 52 %>
<%= link to user.name, user %>
</li>
This is a definite improvement, but we can do even better: We can call renderdirectly on the @users variable (Listing 9.38).
Listing 9.38 The fully refactored user index.app/views/users/index.html.erb
<% provide(:title, 'All users') %>
<h1>All users</h1>
<%= will paginate %>
<ul class="users">
<%= render @users %>
</ul>
<%= will paginate %>
Here Rails infers that @users is a list of User objects; moreover, when called witha collection of users, Rails automatically iterates through them and renders each onewith the _user.html.erb partial. The result is the impressively compact code inListing 9.38. As with any refactoring, you should verify that the test suite is still greenafter changing the application code:
$ bundle exec rspec spec/
6. The name user is immaterial—we could have written @users.each do |foobar| and then used render
foobar. The key is the class of the object—in this case, User.
www.it-ebooks.info
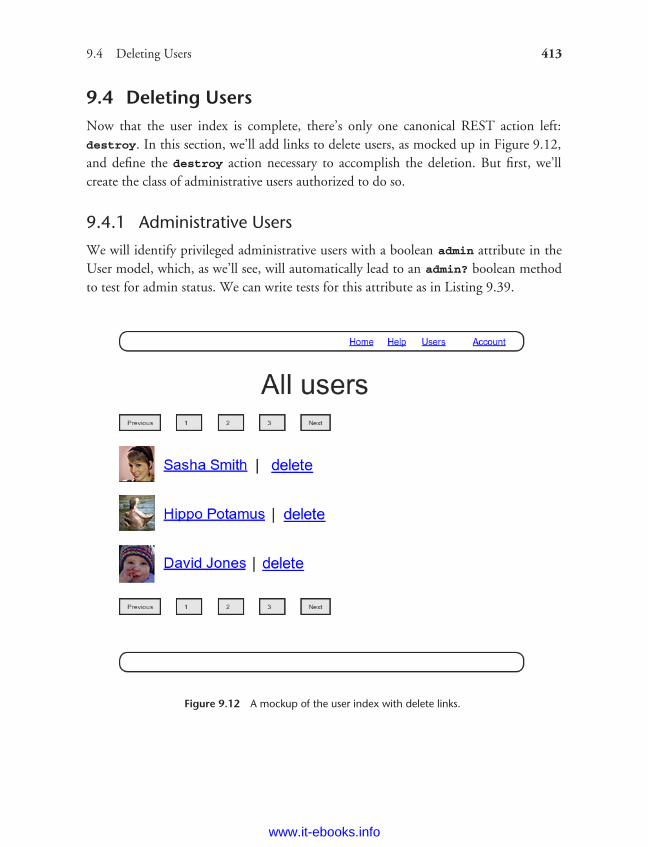
ptg8286261
9.4 Deleting Users 413
9.4 Deleting UsersNow that the user index is complete, there’s only one canonical REST action left:destroy. In this section, we’ll add links to delete users, as mocked up in Figure 9.12,and define the destroy action necessary to accomplish the deletion. But first, we’llcreate the class of administrative users authorized to do so.
9.4.1 Administrative Users
We will identify privileged administrative users with a boolean admin attribute in theUser model, which, as we’ll see, will automatically lead to an admin? boolean methodto test for admin status. We can write tests for this attribute as in Listing 9.39.
Figure 9.12 A mockup of the user index with delete links.
www.it-ebooks.info
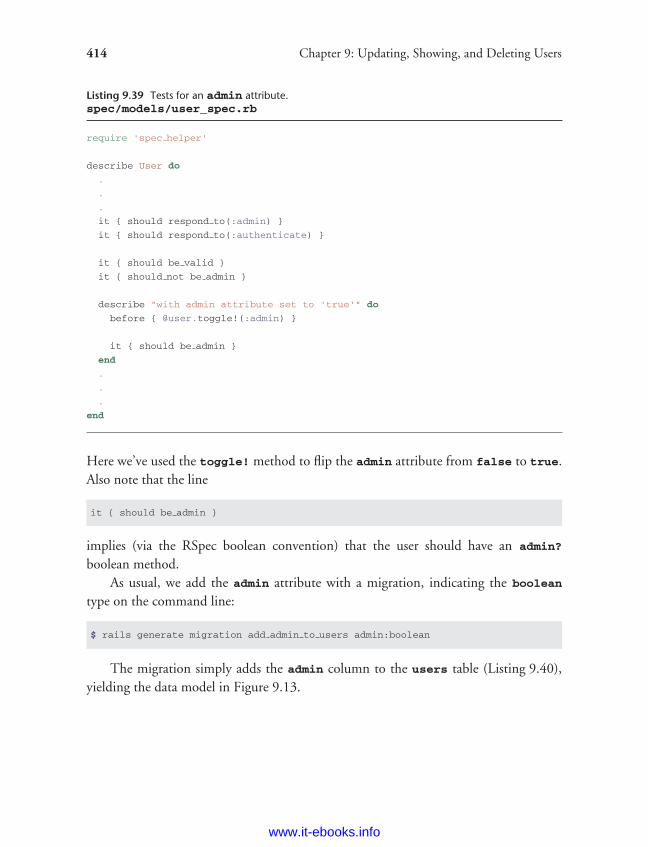
ptg8286261
414 Chapter 9: Updating, Showing, and Deleting Users
Listing 9.39 Tests for an admin attribute.spec/models/user_spec.rb
require 'spec helper'
describe User do
.
.
.
it { should respond to(:admin) }
it { should respond to(:authenticate) }
it { should be valid }
it { should not be admin }
describe "with admin attribute set to 'true'" do
before { @user.toggle!(:admin) }
it { should be admin }
end
.
.
.
end
Here we’ve used the toggle! method to flip the admin attribute from false to true.Also note that the line
it { should be admin }
implies (via the RSpec boolean convention) that the user should have an admin?
boolean method.As usual, we add the admin attribute with a migration, indicating the boolean
type on the command line:
$ rails generate migration add admin to users admin:boolean
The migration simply adds the admin column to the users table (Listing 9.40),yielding the data model in Figure 9.13.
www.it-ebooks.info
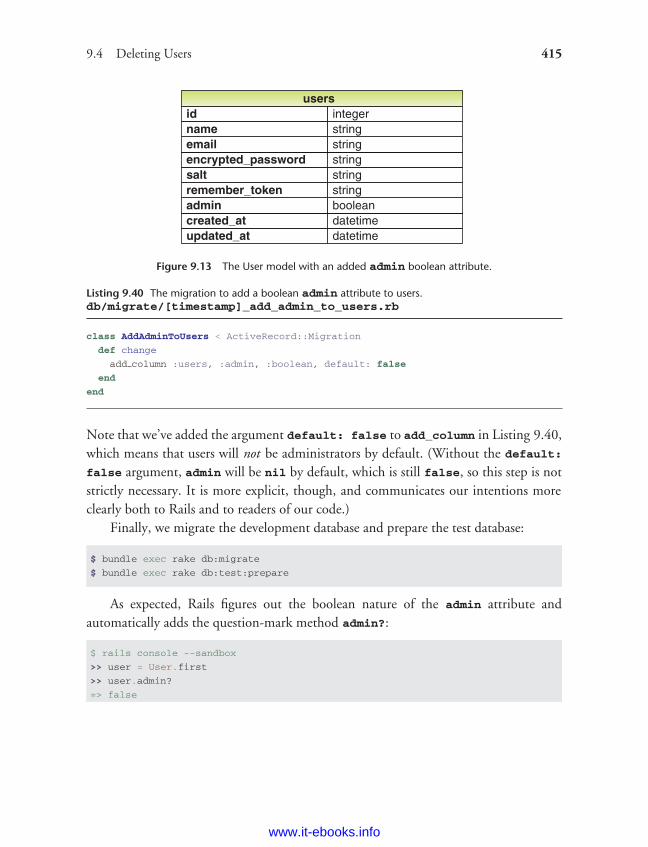
ptg8286261
9.4 Deleting Users 415
Figure 9.13 The User model with an added admin boolean attribute.
Listing 9.40 The migration to add a boolean admin attribute to users.db/migrate/[timestamp]_add_admin_to_users.rb
class AddAdminToUsers < ActiveRecord::Migration
def change
add column :users, :admin, :boolean, default: false
end
end
Note that we’ve added the argument default: false to add_column in Listing 9.40,which means that users will not be administrators by default. (Without the default:
false argument, admin will be nil by default, which is still false, so this step is notstrictly necessary. It is more explicit, though, and communicates our intentions moreclearly both to Rails and to readers of our code.)
Finally, we migrate the development database and prepare the test database:
$ bundle exec rake db:migrate
$ bundle exec rake db:test:prepare
As expected, Rails figures out the boolean nature of the admin attribute andautomatically adds the question-mark method admin?:
$ rails console --sandbox
>> user = User.first
>> user.admin?
=> false
www.it-ebooks.info
ptg8286261
416 Chapter 9: Updating, Showing, and Deleting Users
>> user.toggle!(:admin)
=> true
>> user.admin?
=> true
As a result, the admin tests should pass:
$ bundle exec rspec spec/models/user spec.rb
As a final step, let’s update our sample data populator to make the first user anadmin by default (Listing 9.41).
Listing 9.41 The sample data populator code with an admin user.lib/tasks/sample_data.rake
namespace :db do
desc "Fill database with sample data"
task populate: :environment do
admin = User.create!(name: "Example User",
email: "[email protected]",
password: "foobar",
password confirmation: "foobar")
admin.toggle!(:admin)
.
.
.
end
end
Then reset the database and re-populate the sample data:
$ bundle exec rake db:reset
$ bundle exec rake db:populate
$ bundle exec rake db:test:prepare
Revisiting attr accessibleYou might have noticed that Listing 9.41 makes the user an admin withtoggle!(:admin), but why not just add admin: true to the initialization hash?The answer is, it won’t work, and this is by design: Only attr_accessible attributescan be assigned through mass assignment, and the admin attribute isn’t accessible.Listing 9.42 reproduces the most recent list of attr_accessible attributes—note that:admin is not on the list.
www.it-ebooks.info
ptg8286261
9.4 Deleting Users 417
Listing 9.42 The attr_accessible attributes for the User model without an :admin attribute.app/models/user.rb
class User < ActiveRecord::Base
attr accessible :name, :email, :password, :password confirmation
.
.
.
end
Explicitly defining accessible attributes is crucial for good site security. If we omittedthe attr_accessible list in the User model (or foolishly added :admin to the list), amalicious user could send a PUT request as follows:7
put /users/17?admin=1
This request would make user 17 an admin, which would be a potentially serioussecurity breach, to say the least. Because of this danger, it is a good practice to defineattr_accessible for every model. In fact, it’s a good idea to write a test for anyattribute that isn’t accessible; writing such a test for the admin attribute is left as anexercise (Section 9.6).
9.4.2 The destroy Action
The final step needed to complete the Users resource is to add delete links and adestroy action. We’ll start by adding a delete link for each user on the user index page,restricting access to administrative users.
To write tests for the delete functionality, it’s helpful to be able to have a factory tocreate admins. We can accomplish this by adding an :admin block to our factories, asshown in Listing 9.43.
Listing 9.43 Adding a factory for administrative users.spec/factories.rb
FactoryGirl.define do
factory :user do
sequence(:name) { |n| "Person #{n}" }
sequence(:email) { |n| "person #{n}@example.com"}
password "foobar"
password confirmation "foobar"
7. Command-line tools such as curl can issue PUT requests of this form.
www.it-ebooks.info
ptg8286261
418 Chapter 9: Updating, Showing, and Deleting Users
factory :admin do
admin true
end
end
end
With the code in Listing 9.43, we can now use FactoryGirl.create(:admin) tocreate an administrative user in our tests.
Our security model requires that ordinary users not see delete links:
it { should not have link('delete') }
But administrative users should see such links, and by clicking on a delete link we expectan admin to delete the user, i.e., to change the User count by -1:
it { should have link('delete', href: user path(User.first)) }
it "should be able to delete another user" do
expect { click link('delete') }.to change(User, :count).by(-1)
end
it { should not have link('delete', href: user path(admin)) }
Note that we have added a test to verify that the admin does not see a link to deletehimself. The full set of delete link tests appears in Listing 9.44.
Listing 9.44 Tests for delete links.spec/requests/user_pages_spec.rb
require 'spec helper'
describe "User pages" do
subject { page }
describe "index" do
let(:user) { FactoryGirl.create(:user) }
before do
sign in user
visit users path
end
it { should have selector('title', text: 'All users') }
it { should have selector('h1', text: 'All users') }
www.it-ebooks.info
ptg8286261
9.4 Deleting Users 419
describe "pagination" do
.
.
.
end
describe "delete links" do
it { should not have link('delete') }
describe "as an admin user" do
let(:admin) { FactoryGirl.create(:admin) }
before do
sign in admin
visit users path
end
it { should have link('delete', href: user path(User.first)) }
it "should be able to delete another user" do
expect { click link('delete') }.to change(User, :count).by(-1)
end
it { should not have link('delete', href: user path(admin)) }
end
end
end
end
The application code links to "delete" if the current user is an admin(Listing 9.45). Note the method: :delete argument, which arranges for the linkto issue the necessary DELETE request. We’ve also wrapped each link inside an if
statement so that only admins can see them. The result for our admin user appears inFigure 9.14.
Listing 9.45 User delete links (viewable only by admins).app/views/users/_user.html.erb
<li>
<%= gravatar for user, size: 52 %>
<%= link to user.name, user %>
<% if current user.admin? && !current user?(user) %>
| <%= link to "delete", user, method: :delete, confirm: "You sure?" %>
<% end %>
</li>
Web browsers can’t send DELETE requests natively, so Rails fakes them withJavaScript. This means that the delete links won’t work if the user has JavaScript
www.it-ebooks.info
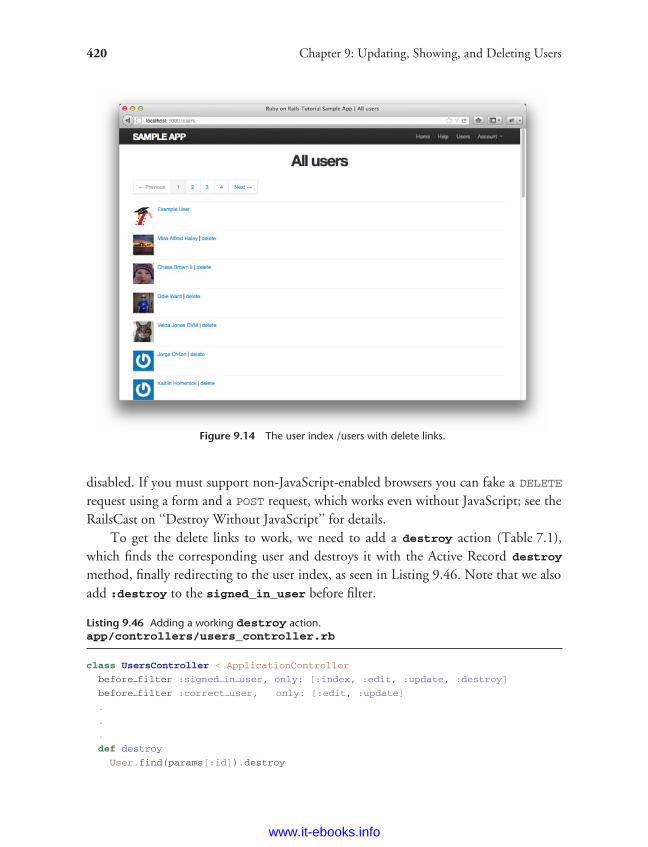
ptg8286261
420 Chapter 9: Updating, Showing, and Deleting Users
Figure 9.14 The user index /users with delete links.
disabled. If you must support non-JavaScript-enabled browsers you can fake a DELETE
request using a form and a POST request, which works even without JavaScript; see theRailsCast on ‘‘Destroy Without JavaScript’’ for details.
To get the delete links to work, we need to add a destroy action (Table 7.1),which finds the corresponding user and destroys it with the Active Record destroy
method, finally redirecting to the user index, as seen in Listing 9.46. Note that we alsoadd :destroy to the signed_in_user before filter.
Listing 9.46 Adding a working destroy action.app/controllers/users_controller.rb
class UsersController < ApplicationController
before filter :signed in user, only: [:index, :edit, :update, :destroy]
before filter :correct user, only: [:edit, :update]
.
.
.
def destroy
User.find(params[:id]).destroy
www.it-ebooks.info
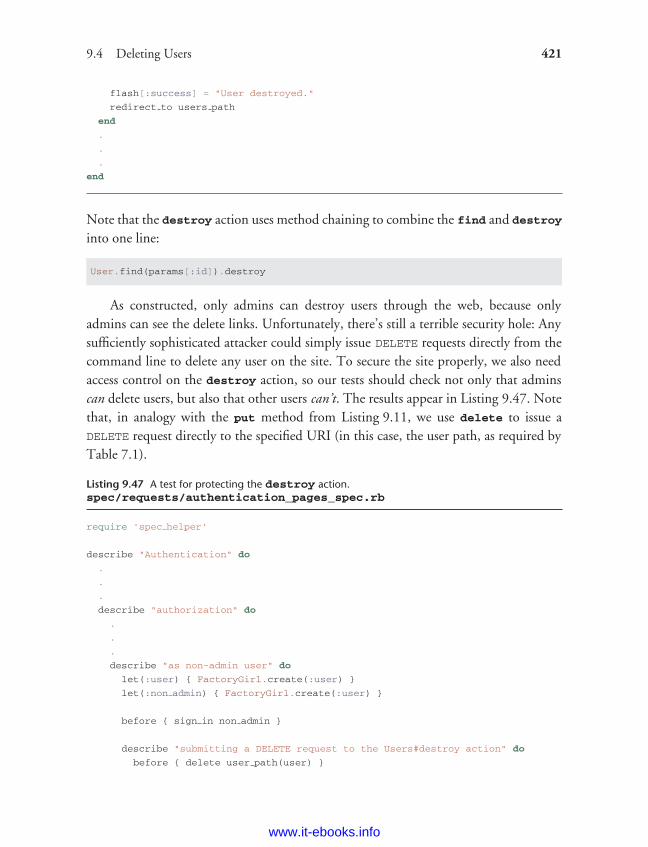
ptg8286261
9.4 Deleting Users 421
flash[:success] = "User destroyed."
redirect to users path
end
.
.
.
end
Note that the destroy action uses method chaining to combine the find and destroy
into one line:
User.find(params[:id]).destroy
As constructed, only admins can destroy users through the web, because onlyadmins can see the delete links. Unfortunately, there’s still a terrible security hole: Anysufficiently sophisticated attacker could simply issue DELETE requests directly from thecommand line to delete any user on the site. To secure the site properly, we also needaccess control on the destroy action, so our tests should check not only that adminscan delete users, but also that other users can’t. The results appear in Listing 9.47. Notethat, in analogy with the put method from Listing 9.11, we use delete to issue aDELETE request directly to the specified URI (in this case, the user path, as required byTable 7.1).
Listing 9.47 A test for protecting the destroy action.spec/requests/authentication_pages_spec.rb
require 'spec helper'
describe "Authentication" do
.
.
.
describe "authorization" do
.
.
.
describe "as non-admin user" do
let(:user) { FactoryGirl.create(:user) }
let(:non admin) { FactoryGirl.create(:user) }
before { sign in non admin }
describe "submitting a DELETE request to the Users#destroy action" do
before { delete user path(user) }
www.it-ebooks.info
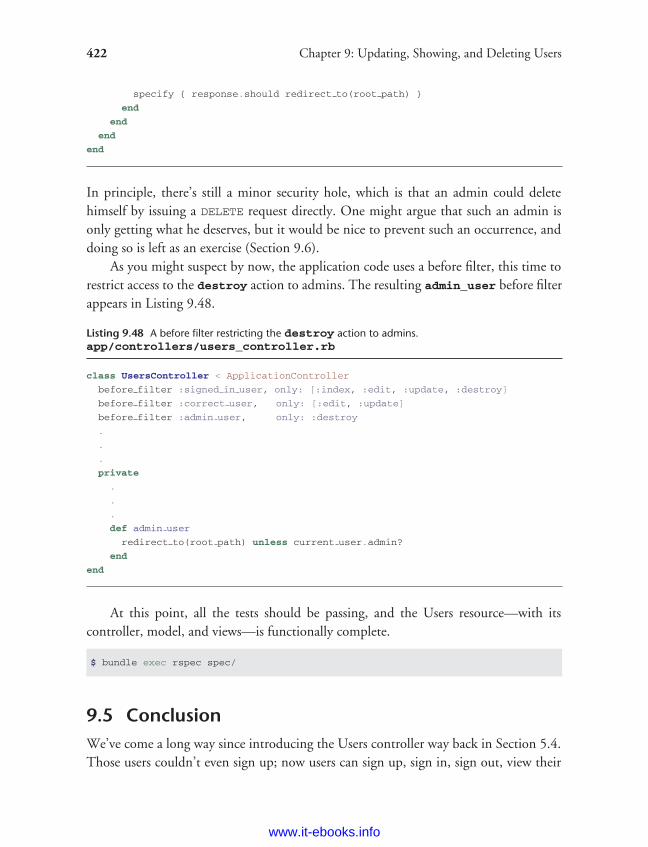
ptg8286261
422 Chapter 9: Updating, Showing, and Deleting Users
specify { response.should redirect to(root path) }
end
end
end
end
In principle, there’s still a minor security hole, which is that an admin could deletehimself by issuing a DELETE request directly. One might argue that such an admin isonly getting what he deserves, but it would be nice to prevent such an occurrence, anddoing so is left as an exercise (Section 9.6).
As you might suspect by now, the application code uses a before filter, this time torestrict access to the destroy action to admins. The resulting admin_user before filterappears in Listing 9.48.
Listing 9.48 A before filter restricting the destroy action to admins.app/controllers/users_controller.rb
class UsersController < ApplicationController
before filter :signed in user, only: [:index, :edit, :update, :destroy]
before filter :correct user, only: [:edit, :update]
before filter :admin user, only: :destroy
.
.
.
private
.
.
.
def admin user
redirect to(root path) unless current user.admin?
end
end
At this point, all the tests should be passing, and the Users resource—with itscontroller, model, and views—is functionally complete.
$ bundle exec rspec spec/
9.5 ConclusionWe’ve come a long way since introducing the Users controller way back in Section 5.4.Those users couldn’t even sign up; now users can sign up, sign in, sign out, view their
www.it-ebooks.info
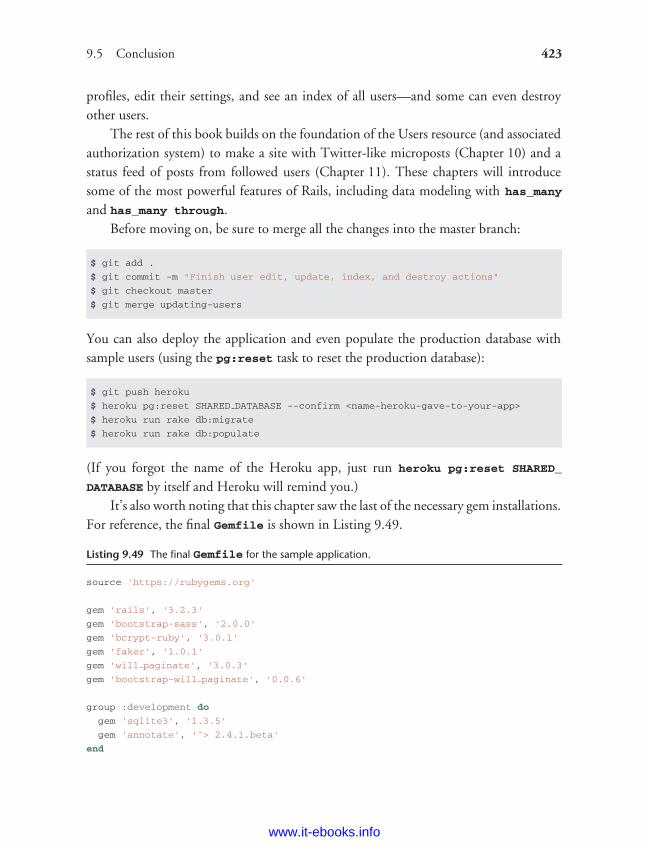
ptg8286261
9.5 Conclusion 423
profiles, edit their settings, and see an index of all users—and some can even destroyother users.
The rest of this book builds on the foundation of the Users resource (and associatedauthorization system) to make a site with Twitter-like microposts (Chapter 10) and astatus feed of posts from followed users (Chapter 11). These chapters will introducesome of the most powerful features of Rails, including data modeling with has_many
and has_many through.Before moving on, be sure to merge all the changes into the master branch:
$ git add .
$ git commit -m "Finish user edit, update, index, and destroy actions"
$ git checkout master
$ git merge updating-users
You can also deploy the application and even populate the production database withsample users (using the pg:reset task to reset the production database):
$ git push heroku
$ heroku pg:reset SHARED DATABASE --confirm <name-heroku-gave-to-your-app>
$ heroku run rake db:migrate
$ heroku run rake db:populate
(If you forgot the name of the Heroku app, just run heroku pg:reset SHARED_
DATABASE by itself and Heroku will remind you.)It’s also worth noting that this chapter saw the last of the necessary gem installations.
For reference, the final Gemfile is shown in Listing 9.49.
Listing 9.49 The final Gemfile for the sample application.
source 'https://rubygems.org'
gem 'rails', '3.2.3'
gem 'bootstrap-sass', '2.0.0'
gem 'bcrypt-ruby', '3.0.1'
gem 'faker', '1.0.1'
gem 'will paginate', '3.0.3'
gem 'bootstrap-will paginate', '0.0.6'
group :development do
gem 'sqlite3', '1.3.5'
gem 'annotate', '˜> 2.4.1.beta'
end
www.it-ebooks.info
ptg8286261
424 Chapter 9: Updating, Showing, and Deleting Users
# Gems used only for assets and not required
# in production environments by default.
group :assets do
gem 'sass-rails', '3.2.4'
gem 'coffee-rails', '3.2.2'
gem 'uglifier', '1.2.3'
end
gem 'jquery-rails', '2.0.0'
group :test, :development do
gem 'rspec-rails', '2.10.0'
gem 'guard-rspec', '0.5.5'
gem 'guard-spork', '0.3.2'
gem 'spork', '0.9.0'
end
group :test do
gem 'capybara', '1.1.2'
gem 'factory girl rails', '1.4.0'
gem 'cucumber-rails', '1.2.1', require: false
gem 'database cleaner', '0.7.0'
end
group :production do
gem 'pg', '0.12.2'
end
9.6 Exercises1. Following the model in Listing 10.8, add a test to verify that the User admin
attribute isn’t accessible. Be sure to get first to Red, and then to Green. (Hint: Yourfirst step should be to add admin to the accessible list.)
2. Arrange for the Gravatar ‘‘change’’ link in Listing 9.3 to open in a new window(or tab). Hint: Search the web; you should find one particularly robust methodinvolving something called _blank.
3. The current authentication tests check that navigation links such as ‘‘Profile’’ and‘‘Settings’’ appear when a user is signed in. Add tests to make sure that these linksdon’t appear when a user isn’t signed in.
4. Use the sign_in test helper from Listing 9.6 in as many places as you can find.5. Remove the duplicated form code by refactoring the new.html.erb and edit.
html.erb views to use the partial in Listing 9.50. Note that you will have to passthe form variable f explicitly as a local variable, as shown in Listing 9.51. You will
www.it-ebooks.info
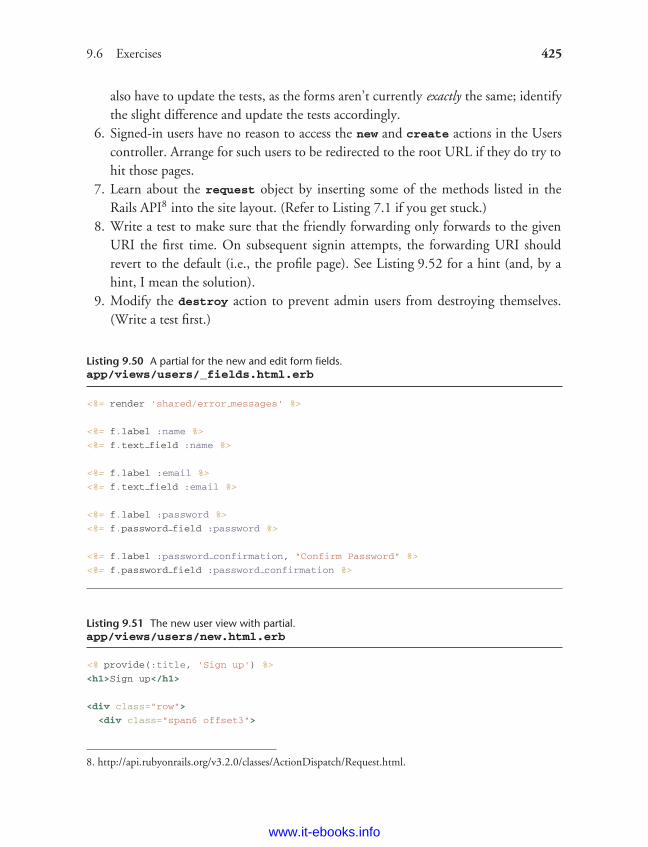
ptg8286261
9.6 Exercises 425
also have to update the tests, as the forms aren’t currently exactly the same; identifythe slight difference and update the tests accordingly.
6. Signed-in users have no reason to access the new and create actions in the Userscontroller. Arrange for such users to be redirected to the root URL if they do try tohit those pages.
7. Learn about the request object by inserting some of the methods listed in theRails API8 into the site layout. (Refer to Listing 7.1 if you get stuck.)
8. Write a test to make sure that the friendly forwarding only forwards to the givenURI the first time. On subsequent signin attempts, the forwarding URI shouldrevert to the default (i.e., the profile page). See Listing 9.52 for a hint (and, by ahint, I mean the solution).
9. Modify the destroy action to prevent admin users from destroying themselves.(Write a test first.)
Listing 9.50 A partial for the new and edit form fields.app/views/users/_fields.html.erb
<%= render 'shared/error messages' %>
<%= f.label :name %>
<%= f.text field :name %>
<%= f.label :email %>
<%= f.text field :email %>
<%= f.label :password %>
<%= f.password field :password %>
<%= f.label :password confirmation, "Confirm Password" %>
<%= f.password field :password confirmation %>
Listing 9.51 The new user view with partial.app/views/users/new.html.erb
<% provide(:title, 'Sign up') %>
<h1>Sign up</h1>
<div class="row">
<div class="span6 offset3">
8. http://api.rubyonrails.org/v3.2.0/classes/ActionDispatch/Request.html.
www.it-ebooks.info
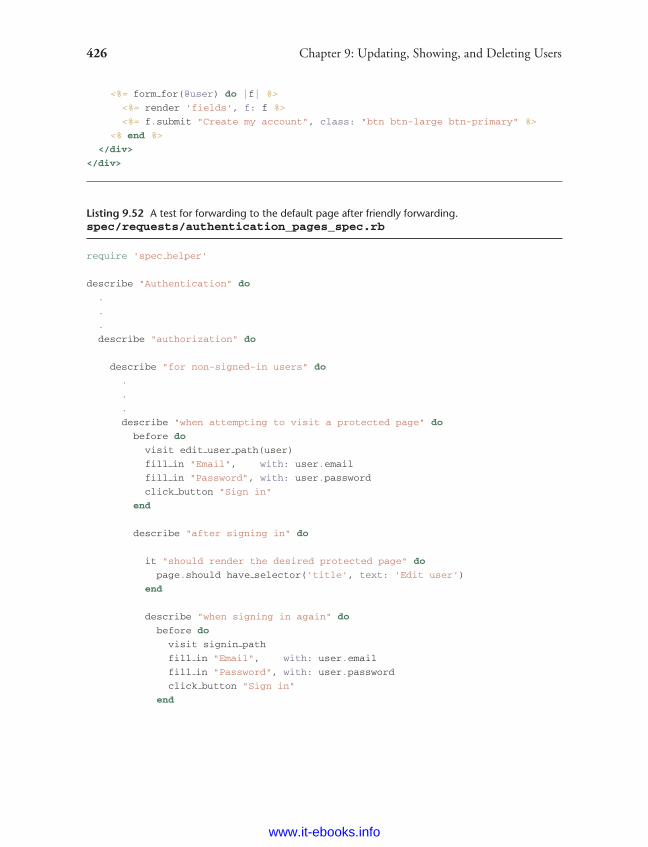
ptg8286261
426 Chapter 9: Updating, Showing, and Deleting Users
<%= form for(@user) do |f| %>
<%= render 'fields', f: f %>
<%= f.submit "Create my account", class: "btn btn-large btn-primary" %>
<% end %>
</div>
</div>
Listing 9.52 A test for forwarding to the default page after friendly forwarding.spec/requests/authentication_pages_spec.rb
require 'spec helper'
describe "Authentication" do
.
.
.
describe "authorization" do
describe "for non-signed-in users" do
.
.
.
describe "when attempting to visit a protected page" do
before do
visit edit user path(user)
fill in "Email", with: user.email
fill in "Password", with: user.password
click button "Sign in"
end
describe "after signing in" do
it "should render the desired protected page" do
page.should have selector('title', text: 'Edit user')
end
describe "when signing in again" do
before do
visit signin path
fill in "Email", with: user.email
fill in "Password", with: user.password
click button "Sign in"
end
www.it-ebooks.info

ptg8286261
9.6 Exercises 427
it "should render the default (profile) page" do
page.should have selector('title', text: user.name)
end
end
end
end
end
.
.
.
end
end
www.it-ebooks.info

ptg8286261
CHAPTER 10User Microposts
Chapter 9 saw the completion of the REST actions for the Users resource, so the timehas finally come to add a second full resource: user microposts.1 These are short messagesassociated with a particular user, first seen in larval form in Chapter 2. In this chapter,we will make a full-strength version of the sketch from Section 2.3 by constructing theMicropost data model, associating it with the User model using the has_many andbelongs_to methods, and then making the forms and partials needed to manipulateand display the results. In Chapter 11, we’ll complete our tiny Twitter clone by addingthe notion of following users in order to receive a feed of their microposts.
If you’re using Git for version control, I suggest making a topic branch as usual:
$ git checkout -b user-microposts
10.1 A Micropost ModelWe begin the Microposts resource by creating a Micropost model, which capturesthe essential characteristics of microposts. What follows builds on the work fromSection 2.3; as with the model in that section, our new Micropost model will includedata validations and an association with the User model. Unlike that model, the presentMicropost model will be fully tested and will also have a default ordering and automaticdestruction if its parent user is destroyed.
1. Technically, we treated sessions as a resource in Chapter 8, but sessions are not saved to the database theway users and microposts are.
429
www.it-ebooks.info
ptg8286261
430 Chapter 10: User Microposts
10.1.1 The Basic Model
The Micropost model needs only two attributes: a content attribute to hold themicropost’s content,2 and a user_id to associate a micropost with a particular user.As with the case of the User model (Listing 6.1), we generate it using generate
model:
$ rails generate model Micropost content:string user id:integer
This produces a migration to create a microposts table in the database (List-ing 10.1); compare it to the analogous migration for the users table from Listing 6.2.
Listing 10.1 The Micropost migration. (Note the index on user_id and created_at.)db/migrate/[timestamp]_create_microposts.rb
class CreateMicroposts < ActiveRecord::Migration
def change
create table :microposts do |t|
t.string :content
t.integer :user id
t.timestamps
end
add index :microposts, [:user id, :created at]
end
end
Note that, since we expect to retrieve all the microposts associated with a given user idin reverse order of creation, Listing 10.1 adds an index (Box 6.2) on the user_id andcreated_at columns:
add index :microposts, [:user id, :created at]
By including both the user_id and created_at columns as an array, we arrange forRails to create a multiple key index, which means that Active Record uses both keys at thesame time. Note also the t.timestamps line, which (as mentioned in Section 6.1.1)adds the magic created_at and updated_at columns. We’ll put the created_at
column to work in Section 10.1.4 and Section 10.2.1.
2. The content attribute will be a string, but, as noted briefly in Section 2.1.2, for longer text fields youshould use the text data type.
www.it-ebooks.info
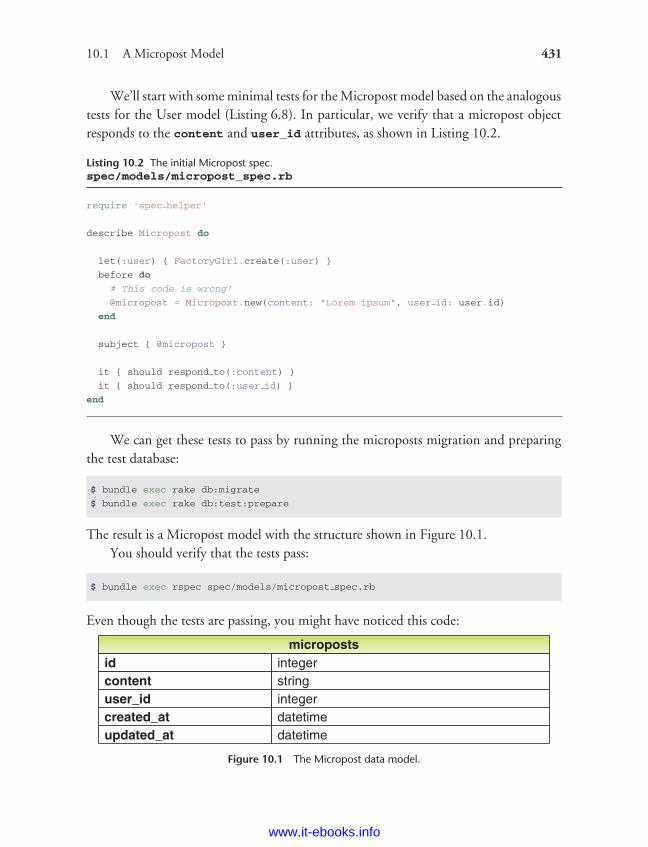
ptg8286261
10.1 A Micropost Model 431
We’ll start with some minimal tests for the Micropost model based on the analogoustests for the User model (Listing 6.8). In particular, we verify that a micropost objectresponds to the content and user_id attributes, as shown in Listing 10.2.
Listing 10.2 The initial Micropost spec.spec/models/micropost_spec.rb
require 'spec helper'
describe Micropost do
let(:user) { FactoryGirl.create(:user) }
before do
# This code is wrong!
@micropost = Micropost.new(content: "Lorem ipsum", user id: user.id)
end
subject { @micropost }
it { should respond to(:content) }
it { should respond to(:user id) }
end
We can get these tests to pass by running the microposts migration and preparingthe test database:
$ bundle exec rake db:migrate
$ bundle exec rake db:test:prepare
The result is a Micropost model with the structure shown in Figure 10.1.You should verify that the tests pass:
$ bundle exec rspec spec/models/micropost spec.rb
Even though the tests are passing, you might have noticed this code:
Figure 10.1 The Micropost data model.
www.it-ebooks.info
ptg8286261
432 Chapter 10: User Microposts
let(:user) { FactoryGirl.create(:user) }
before do
# This code is wrong!
@micropost = Micropost.new(content: "Lorem ipsum", user id: user.id)
end
The comment indicates that the code in the before block is wrong. See if you canguess why. We’ll see the answer in the next section.
10.1.2 Accessible Attributes and the First Validation
To see why the code in the before block is wrong, we first start with validationtests for the Micropost model (Listing 10.3). (Compare with the User model tests inListing 6.11.)
Listing 10.3 Tests for the validity of a new micropost.spec/models/micropost_spec.rb
require 'spec helper'
describe Micropost do
let(:user) { FactoryGirl.create(:user) }
before do
# This code is wrong!
@micropost = Micropost.new(content: "Lorem ipsum", user id: user.id)
end
subject { @micropost }
it { should respond to(:content) }
it { should respond to(:user id) }
it { should be valid }
describe "when user id is not present" do
before { @micropost.user id = nil }
it { should not be valid }
end
end
This code requires that the micropost be valid and tests for the presence of the user_id
attribute. We can get these tests to pass with the simple presence validation shown inListing 10.4.
www.it-ebooks.info
ptg8286261
10.1 A Micropost Model 433
Listing 10.4 A validation for the micropost’s user_id.app/models/micropost.rb
class Micropost < ActiveRecord::Base
attr accessible :content, :user id
validates :user id, presence: true
end
Now we’re prepared to see why
@micropost = Micropost.new(content: "Lorem ipsum", user id: user.id)
is wrong. The problem is that by default (as of Rails 3.2.3) all of the attributes for ourMicropost model are accessible. As discussed in Section 6.1.2 and Section 9.4.1, thismeans that anyone could change any aspect of a micropost object simply by using acommand-line client to issue malicious requests. For example, a malicious user couldchange the user_id attributes on microposts, thereby associating microposts with thewrong users. This means that we should remove :user_id from the attr_accessiblelist, and once we do, the code above will fail. We’ll fix this issue in Section 10.1.3.
10.1.3 User/Micropost Associations
When constructing data models for web applications, it is essential to be able tomake associations between individual models. In the present case, each micropostis associated with one user, and each user is associated with (potentially) manymicroposts—a relationship seen briefly in Section 2.3.3 and shown schematically inFigure 10.2 and Figure 10.3. As part of implementing these associations, we’ll writetests for the Micropost model that, unlike Listing 10.2, are compatible with the use ofattr_accessible in Listing 10.7.
Figure 10.2 The belongs_to relationship between a micropost and its user.
www.it-ebooks.info
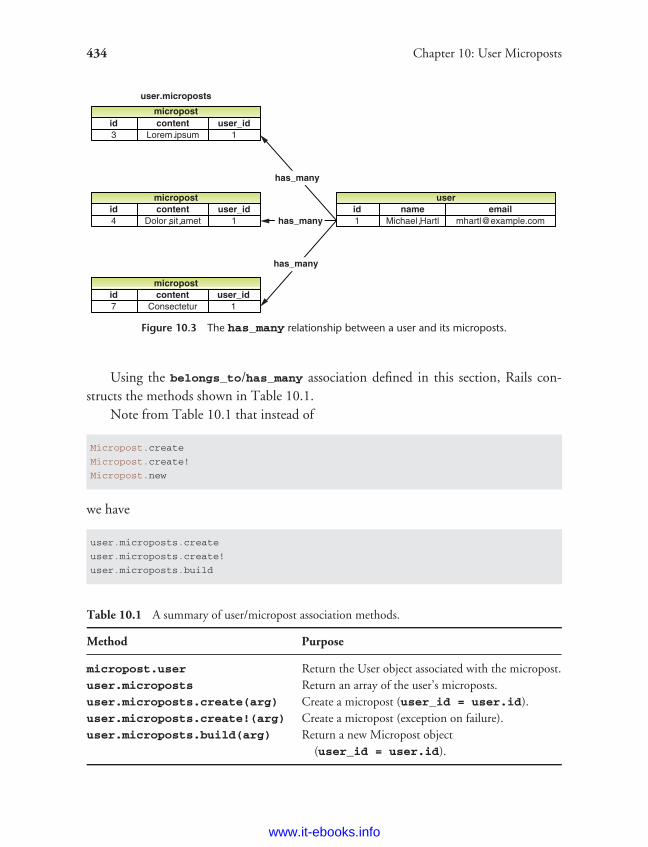
ptg8286261
434 Chapter 10: User Microposts
Figure 10.3 The has_many relationship between a user and its microposts.
Using the belongs_to/has_many association defined in this section, Rails con-structs the methods shown in Table 10.1.
Note from Table 10.1 that instead of
Micropost.create
Micropost.create!
Micropost.new
we have
user.microposts.create
user.microposts.create!
user.microposts.build
Table 10.1 A summary of user/micropost association methods.
Method Purpose
micropost.user Return the User object associated with the micropost.user.microposts Return an array of the user’s microposts.user.microposts.create(arg) Create a micropost (user_id = user.id).user.microposts.create!(arg) Create a micropost (exception on failure).user.microposts.build(arg) Return a new Micropost object
(user_id = user.id).
www.it-ebooks.info
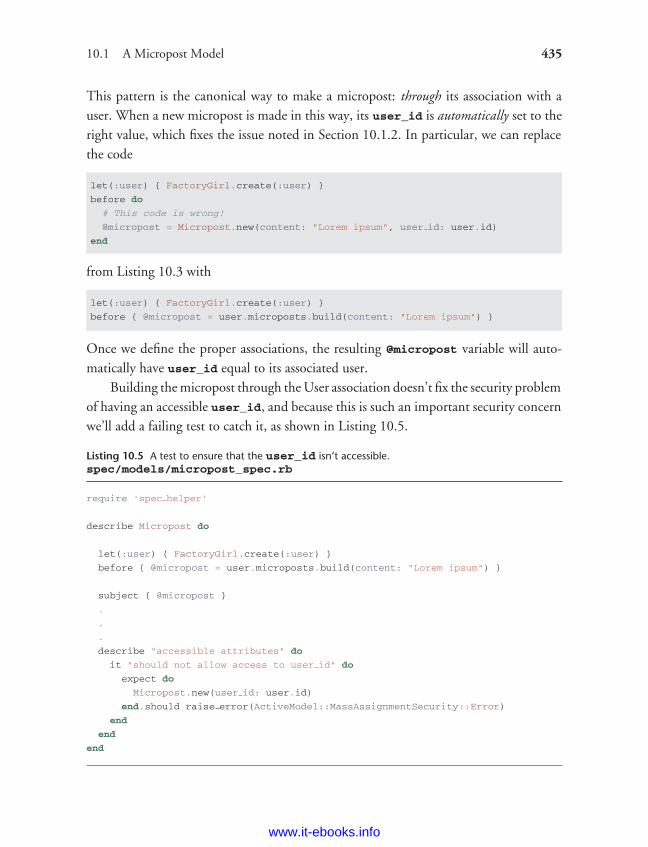
ptg8286261
10.1 A Micropost Model 435
This pattern is the canonical way to make a micropost: through its association with auser. When a new micropost is made in this way, its user_id is automatically set to theright value, which fixes the issue noted in Section 10.1.2. In particular, we can replacethe code
let(:user) { FactoryGirl.create(:user) }
before do
# This code is wrong!
@micropost = Micropost.new(content: "Lorem ipsum", user id: user.id)
end
from Listing 10.3 with
let(:user) { FactoryGirl.create(:user) }
before { @micropost = user.microposts.build(content: "Lorem ipsum") }
Once we define the proper associations, the resulting @micropost variable will auto-matically have user_id equal to its associated user.
Building the micropost through the User association doesn’t fix the security problemof having an accessible user_id, and because this is such an important security concernwe’ll add a failing test to catch it, as shown in Listing 10.5.
Listing 10.5 A test to ensure that the user_id isn’t accessible.spec/models/micropost_spec.rb
require 'spec helper'
describe Micropost do
let(:user) { FactoryGirl.create(:user) }
before { @micropost = user.microposts.build(content: "Lorem ipsum") }
subject { @micropost }
.
.
.
describe "accessible attributes" do
it "should not allow access to user id" do
expect do
Micropost.new(user id: user.id)
end.should raise error(ActiveModel::MassAssignmentSecurity::Error)
end
end
end
www.it-ebooks.info
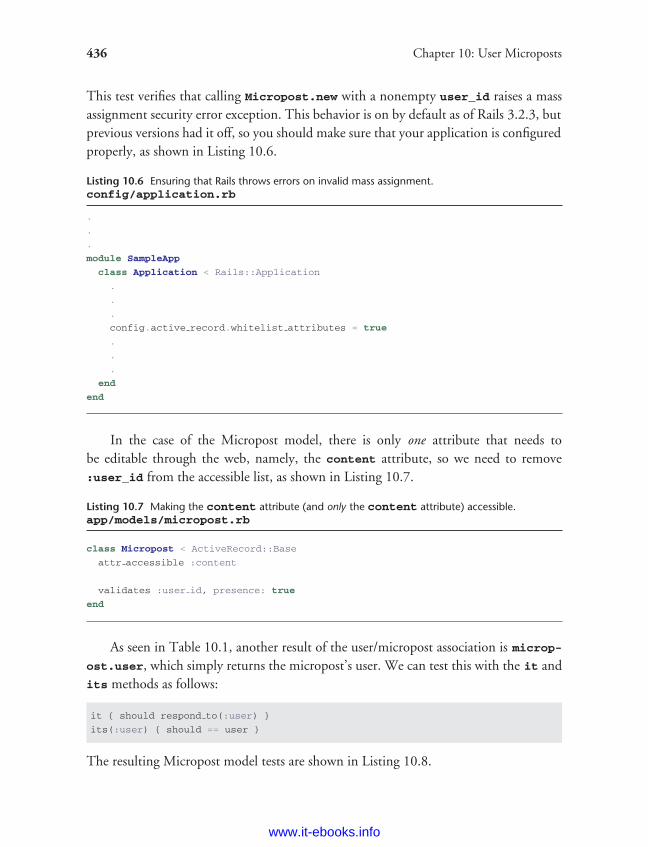
ptg8286261
436 Chapter 10: User Microposts
This test verifies that calling Micropost.new with a nonempty user_id raises a massassignment security error exception. This behavior is on by default as of Rails 3.2.3, butprevious versions had it off, so you should make sure that your application is configuredproperly, as shown in Listing 10.6.
Listing 10.6 Ensuring that Rails throws errors on invalid mass assignment.config/application.rb
.
.
.
module SampleApp
class Application < Rails::Application
.
.
.
config.active record.whitelist attributes = true
.
.
.
end
end
In the case of the Micropost model, there is only one attribute that needs tobe editable through the web, namely, the content attribute, so we need to remove:user_id from the accessible list, as shown in Listing 10.7.
Listing 10.7 Making the content attribute (and only the content attribute) accessible.app/models/micropost.rb
class Micropost < ActiveRecord::Base
attr accessible :content
validates :user id, presence: true
end
As seen in Table 10.1, another result of the user/micropost association is microp-ost.user, which simply returns the micropost’s user. We can test this with the it andits methods as follows:
it { should respond to(:user) }
its(:user) { should == user }
The resulting Micropost model tests are shown in Listing 10.8.
www.it-ebooks.info
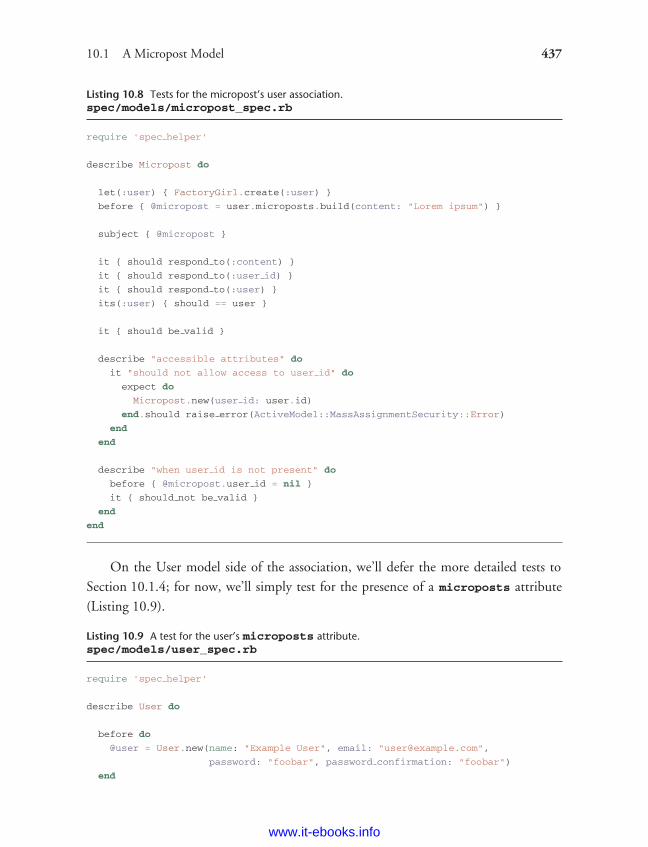
ptg8286261
10.1 A Micropost Model 437
Listing 10.8 Tests for the micropost’s user association.spec/models/micropost_spec.rb
require 'spec helper'
describe Micropost do
let(:user) { FactoryGirl.create(:user) }
before { @micropost = user.microposts.build(content: "Lorem ipsum") }
subject { @micropost }
it { should respond to(:content) }
it { should respond to(:user id) }
it { should respond to(:user) }
its(:user) { should == user }
it { should be valid }
describe "accessible attributes" do
it "should not allow access to user id" do
expect do
Micropost.new(user id: user.id)
end.should raise error(ActiveModel::MassAssignmentSecurity::Error)
end
end
describe "when user id is not present" do
before { @micropost.user id = nil }
it { should not be valid }
end
end
On the User model side of the association, we’ll defer the more detailed tests toSection 10.1.4; for now, we’ll simply test for the presence of a microposts attribute(Listing 10.9).
Listing 10.9 A test for the user’s microposts attribute.spec/models/user_spec.rb
require 'spec helper'
describe User do
before do
@user = User.new(name: "Example User", email: "[email protected]",
password: "foobar", password confirmation: "foobar")
end
www.it-ebooks.info
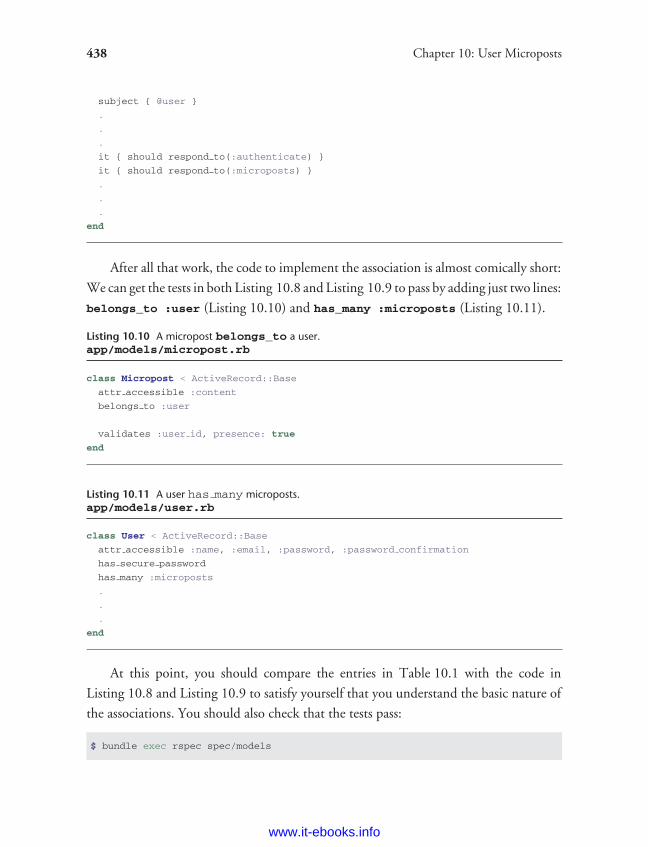
ptg8286261
438 Chapter 10: User Microposts
subject { @user }
.
.
.
it { should respond to(:authenticate) }
it { should respond to(:microposts) }
.
.
.
end
After all that work, the code to implement the association is almost comically short:
We can get the tests in both Listing 10.8 and Listing 10.9 to pass by adding just two lines:
belongs_to :user (Listing 10.10) and has_many :microposts (Listing 10.11).
Listing 10.10 A micropost belongs_to a user.app/models/micropost.rb
class Micropost < ActiveRecord::Base
attr accessible :content
belongs to :user
validates :user id, presence: true
end
Listing 10.11 A user has many microposts.app/models/user.rb
class User < ActiveRecord::Base
attr accessible :name, :email, :password, :password confirmation
has secure password
has many :microposts
.
.
.
end
At this point, you should compare the entries in Table 10.1 with the code in
Listing 10.8 and Listing 10.9 to satisfy yourself that you understand the basic nature of
the associations. You should also check that the tests pass:
$ bundle exec rspec spec/models
www.it-ebooks.info
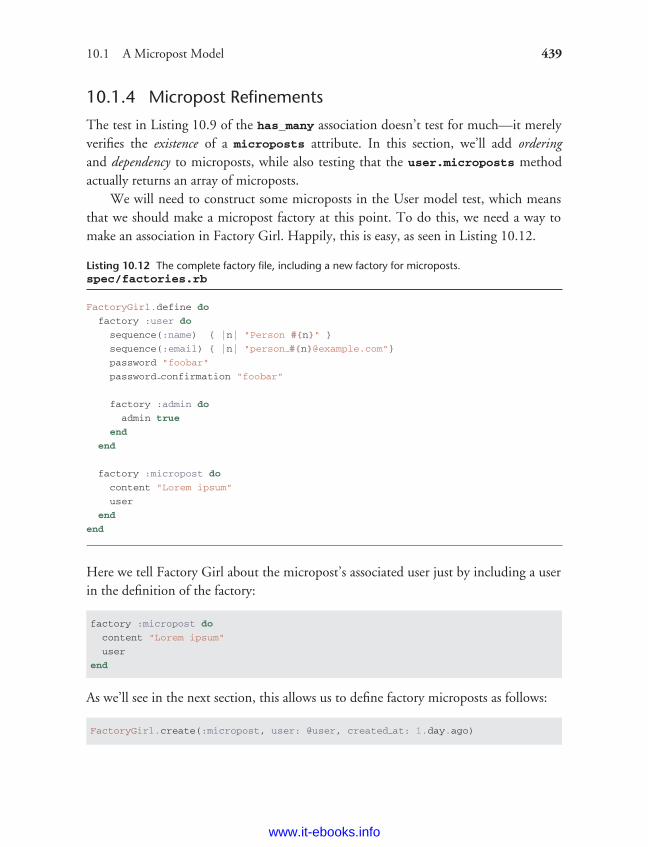
ptg8286261
10.1 A Micropost Model 439
10.1.4 Micropost Refinements
The test in Listing 10.9 of the has_many association doesn’t test for much—it merelyverifies the existence of a microposts attribute. In this section, we’ll add orderingand dependency to microposts, while also testing that the user.microposts methodactually returns an array of microposts.
We will need to construct some microposts in the User model test, which meansthat we should make a micropost factory at this point. To do this, we need a way tomake an association in Factory Girl. Happily, this is easy, as seen in Listing 10.12.
Listing 10.12 The complete factory file, including a new factory for microposts.spec/factories.rb
FactoryGirl.define do
factory :user do
sequence(:name) { |n| "Person #{n}" }
sequence(:email) { |n| "person #{n}@example.com"}
password "foobar"
password confirmation "foobar"
factory :admin do
admin true
end
end
factory :micropost do
content "Lorem ipsum"
user
end
end
Here we tell Factory Girl about the micropost’s associated user just by including a userin the definition of the factory:
factory :micropost do
content "Lorem ipsum"
user
end
As we’ll see in the next section, this allows us to define factory microposts as follows:
FactoryGirl.create(:micropost, user: @user, created at: 1.day.ago)
www.it-ebooks.info
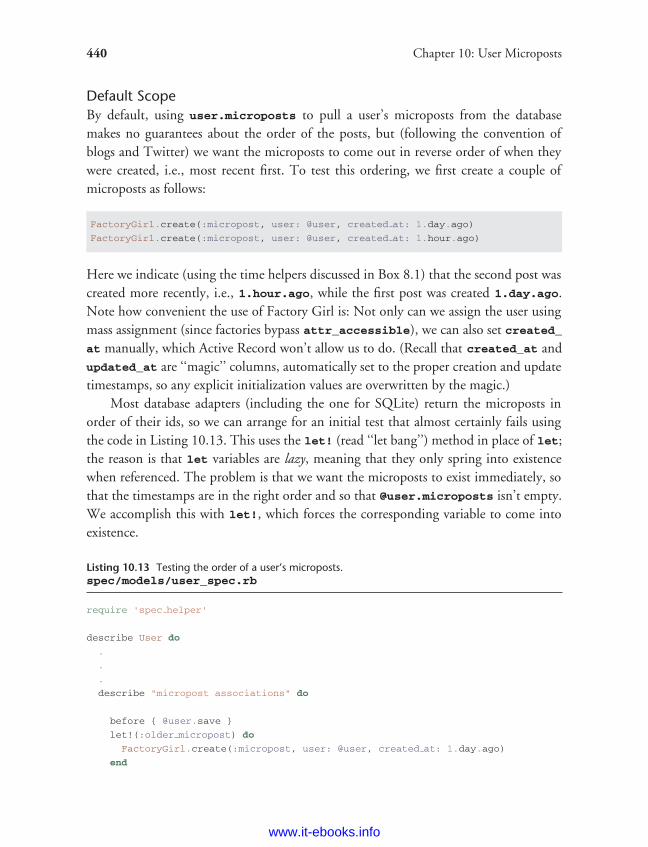
ptg8286261
440 Chapter 10: User Microposts
Default ScopeBy default, using user.microposts to pull a user’s microposts from the databasemakes no guarantees about the order of the posts, but (following the convention ofblogs and Twitter) we want the microposts to come out in reverse order of when theywere created, i.e., most recent first. To test this ordering, we first create a couple ofmicroposts as follows:
FactoryGirl.create(:micropost, user: @user, created at: 1.day.ago)
FactoryGirl.create(:micropost, user: @user, created at: 1.hour.ago)
Here we indicate (using the time helpers discussed in Box 8.1) that the second post wascreated more recently, i.e., 1.hour.ago, while the first post was created 1.day.ago.Note how convenient the use of Factory Girl is: Not only can we assign the user usingmass assignment (since factories bypass attr_accessible), we can also set created_at manually, which Active Record won’t allow us to do. (Recall that created_at andupdated_at are ‘‘magic’’ columns, automatically set to the proper creation and updatetimestamps, so any explicit initialization values are overwritten by the magic.)
Most database adapters (including the one for SQLite) return the microposts inorder of their ids, so we can arrange for an initial test that almost certainly fails usingthe code in Listing 10.13. This uses the let! (read ‘‘let bang’’) method in place of let;the reason is that let variables are lazy, meaning that they only spring into existencewhen referenced. The problem is that we want the microposts to exist immediately, sothat the timestamps are in the right order and so that @user.microposts isn’t empty.We accomplish this with let!, which forces the corresponding variable to come intoexistence.
Listing 10.13 Testing the order of a user’s microposts.spec/models/user_spec.rb
require 'spec helper'
describe User do
.
.
.
describe "micropost associations" do
before { @user.save }
let!(:older micropost) do
FactoryGirl.create(:micropost, user: @user, created at: 1.day.ago)
end
www.it-ebooks.info
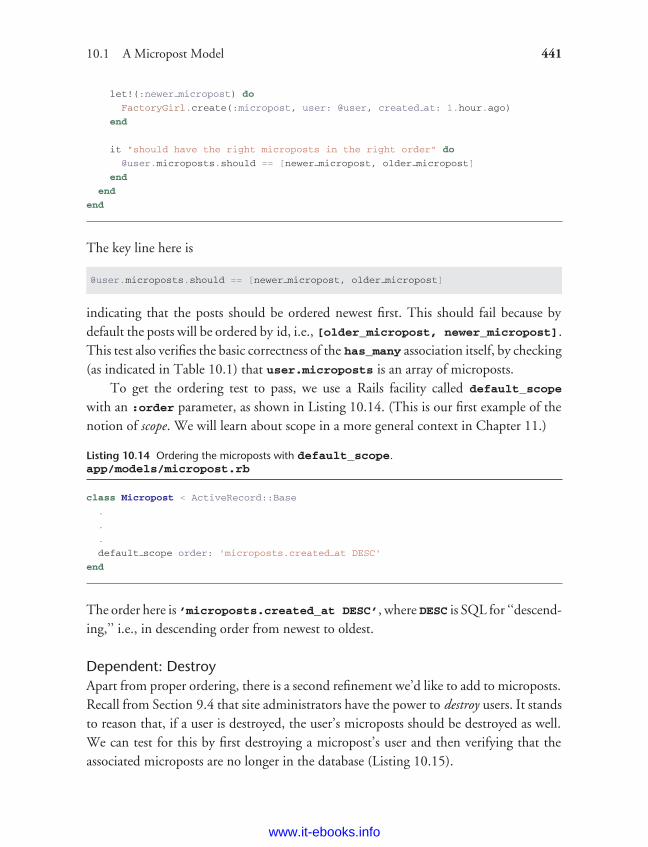
ptg8286261
10.1 A Micropost Model 441
let!(:newer micropost) do
FactoryGirl.create(:micropost, user: @user, created at: 1.hour.ago)
end
it "should have the right microposts in the right order" do
@user.microposts.should == [newer micropost, older micropost]
end
end
end
The key line here is
@user.microposts.should == [newer micropost, older micropost]
indicating that the posts should be ordered newest first. This should fail because bydefault the posts will be ordered by id, i.e., [older_micropost, newer_micropost].This test also verifies the basic correctness of the has_many association itself, by checking(as indicated in Table 10.1) that user.microposts is an array of microposts.
To get the ordering test to pass, we use a Rails facility called default_scope
with an :order parameter, as shown in Listing 10.14. (This is our first example of thenotion of scope. We will learn about scope in a more general context in Chapter 11.)
Listing 10.14 Ordering the microposts with default_scope.app/models/micropost.rb
class Micropost < ActiveRecord::Base
.
.
.
default scope order: 'microposts.created at DESC'
end
The order here is ’microposts.created_at DESC’, where DESC is SQL for ‘‘descend-ing,’’ i.e., in descending order from newest to oldest.
Dependent: DestroyApart from proper ordering, there is a second refinement we’d like to add to microposts.Recall from Section 9.4 that site administrators have the power to destroy users. It standsto reason that, if a user is destroyed, the user’s microposts should be destroyed as well.We can test for this by first destroying a micropost’s user and then verifying that theassociated microposts are no longer in the database (Listing 10.15).
www.it-ebooks.info
ptg8286261
442 Chapter 10: User Microposts
Listing 10.15 Testing that microposts are destroyed when users are.spec/models/user_spec.rb
require 'spec helper'
describe User do
.
.
.
describe "micropost associations" do
before { @user.save }
let!(:older micropost) do
FactoryGirl.create(:micropost, user: @user, created at: 1.day.ago)
end
let!(:newer micropost) do
FactoryGirl.create(:micropost, user: @user, created at: 1.hour.ago)
end
.
.
.
it "should destroy associated microposts" do
microposts = @user.microposts
@user.destroy
microposts.each do |micropost|
Micropost.find by id(micropost.id).should be nil
end
end
end
.
.
.
end
Here we have used Micropost.find_by_id, which returns nil if the record is not
found, whereas Micropost.find raises an exception on failure, which is a bit harder
to test for. (In case you’re curious,
lambda do
Micropost.find(micropost.id)
end.should raise error(ActiveRecord::RecordNotFound)
does the trick in this case.)
The application code to get Listing 10.15 to pass is less than one line; in fact, it’s
just an option to the has_many association method, as shown in Listing 10.16.
www.it-ebooks.info

ptg8286261
10.1 A Micropost Model 443
Listing 10.16 Ensuring that a user’s microposts are destroyed along with the user.app/models/user.rb
class User < ActiveRecord::Base
attr accessible :name, :email, :password, :password confirmation
has secure password
has many :microposts, dependent: :destroy
.
.
.
end
Here the option dependent: :destroy in
has many :microposts, dependent: :destroy
arranges for the dependent microposts (i.e., the ones belonging to the given user) tobe destroyed when the user itself is destroyed. This prevents userless microposts frombeing stranded in the database when admins choose to remove users from the system.
With that, the final form of the user/micropost association is in place, and all thetests should be passing:
$ bundle exec rspec spec/
10.1.5 Content Validations
Before leaving the Micropost model, we’ll add validations for the micropost content(following the example from Section 2.3.2). Like the user_id, the content attributemust be present, and it is further constrained to be no longer than 140 characters,making it an honest micropost. The tests generally follow the examples from the Usermodel validation tests in Section 6.2, as shown in Listing 10.17.
Listing 10.17 Tests for the Micropost model validations.spec/models/micropost_spec.rb
require 'spec helper'
describe Micropost do
let(:user) { FactoryGirl.create(:user) }
before { @micropost = user.microposts.build(content: "Lorem ipsum") }
.
.
.
www.it-ebooks.info
ptg8286261
444 Chapter 10: User Microposts
describe "when user id is not present" do
before { @micropost.user id = nil }
it { should not be valid }
end
describe "with blank content" do
before { @micropost.content = " " }
it { should not be valid }
end
describe "with content that is too long" do
before { @micropost.content = "a" * 141 }
it { should not be valid }
end
end
As in Section 6.2, the code in Listing 10.17 uses string multiplication to test themicropost length validation:
$ rails console
>> "a" * 10
=> "aaaaaaaaaa"
>> "a" * 141
=> "aaaaaaaaaaaaaaaaaaaaaaaaaaaaaaaaaaaaaaaaaaaaaaaaaaaaaaaaaaaaaaaaaaaaaaa
aaaaaaaaaaaaaaaaaaaaaaaaaaaaaaaaaaaaaaaaaaaaaaaaaaaaaaaaaaaaaaaaaaaaaa"
The application code is a one-liner:
validates :content, presence: true, length: { maximum: 140 }
The resulting Micropost model is shown in Listing 10.18.
Listing 10.18 The Micropost model validations.app/models/micropost.rb
class Micropost < ActiveRecord::Base
attr accessible :content
belongs to :user
validates :content, presence: true, length: { maximum: 140 }
validates :user id, presence: true
default scope order: 'microposts.created at DESC'
end
www.it-ebooks.info
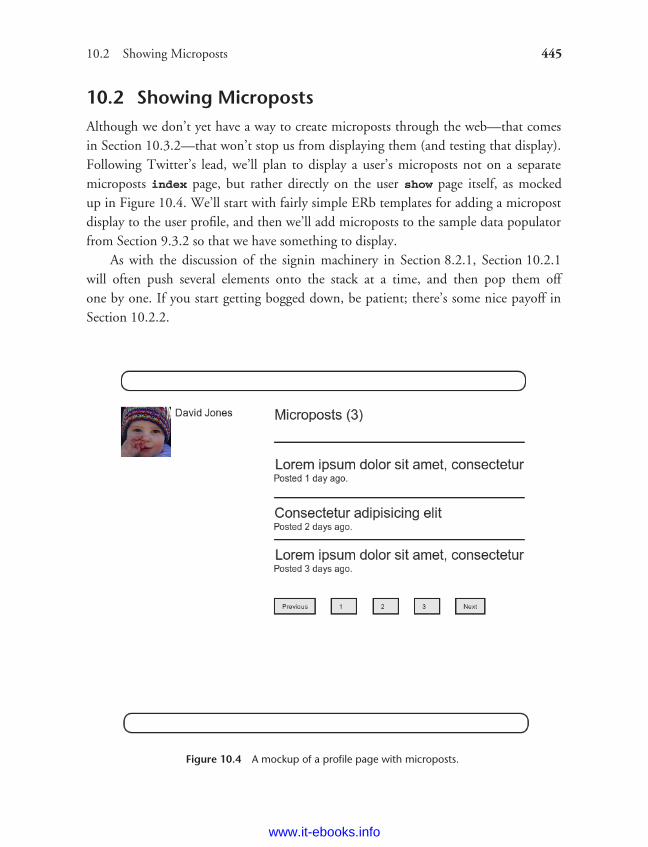
ptg8286261
10.2 Showing Microposts 445
10.2 Showing MicropostsAlthough we don’t yet have a way to create microposts through the web—that comesin Section 10.3.2—that won’t stop us from displaying them (and testing that display).Following Twitter’s lead, we’ll plan to display a user’s microposts not on a separatemicroposts index page, but rather directly on the user show page itself, as mockedup in Figure 10.4. We’ll start with fairly simple ERb templates for adding a micropostdisplay to the user profile, and then we’ll add microposts to the sample data populatorfrom Section 9.3.2 so that we have something to display.
As with the discussion of the signin machinery in Section 8.2.1, Section 10.2.1will often push several elements onto the stack at a time, and then pop them offone by one. If you start getting bogged down, be patient; there’s some nice payoff inSection 10.2.2.
Figure 10.4 A mockup of a profile page with microposts.
www.it-ebooks.info
ptg8286261
446 Chapter 10: User Microposts
10.2.1 Augmenting the User Show Page
We begin with tests for displaying the user’s microposts, which we’ll create in therequest spec for Users. Our strategy is to create a couple of factory microposts asso-ciated with the user, and then verify that the show page contains each post’s content.We’ll also verify that, as in Figure 10.4, the total number of microposts also getsdisplayed.
We can create the posts with the let method, but as in Listing 10.13 we want theassociation to exist immediately so that the posts appear on the user show page. Toaccomplish this, we use the let! variant:
let(:user) { FactoryGirl.create(:user) }
let!(:m1) { FactoryGirl.create(:micropost, user: user, content: "Foo") }
let!(:m2) { FactoryGirl.create(:micropost, user: user, content: "Bar") }
before { visit user path(user) }
With the microposts so defined, we can test for their appearance on the profile pageusing the code in Listing 10.19.
Listing 10.19 A test for showing microposts on the user show page.spec/requests/user_pages_spec.rb
require 'spec helper'
describe "User pages" do
.
.
.
describe "profile page" do
let(:user) { FactoryGirl.create(:user) }
let!(:m1) { FactoryGirl.create(:micropost, user: user, content: "Foo") }
let!(:m2) { FactoryGirl.create(:micropost, user: user, content: "Bar") }
before { visit user path(user) }
it { should have selector('h1', text: user.name) }
it { should have selector('title', text: user.name) }
describe "microposts" do
it { should have content(m1.content) }
it { should have content(m2.content) }
it { should have content(user.microposts.count) }
end
www.it-ebooks.info
ptg8286261
10.2 Showing Microposts 447
end
.
.
.
end
Note here that we can use the count method through the association:
user.microposts.count
The association count method is smart and performs the count directly in the database.In particular, it does not pull all the microposts out of the database and then call lengthon the resulting array, as this could become inefficient as the number of micropostsgrew. Instead, it asks the database to count the microposts with the given user_id. Inthe unlikely event that finding the count is still a bottleneck in your application, youcan make it even faster with a counter cache.
Although the tests in Listing 10.19 won’t pass until Listing 10.21, we’ll get startedon the application code by inserting a list of microposts into the user profile page, asshown in Listing 10.20.
Listing 10.20 Adding microposts to the user show page.app/views/users/show.html.erb
<% provide(:title, @user.name) %>
<div class="row">
.
.
.
<aside>
.
.
.
</aside>
<div class="span8">
<% if @user.microposts.any? %>
<h3>Microposts (<%= @user.microposts.count %>)</h3>
<ol class="microposts">
<%= render @microposts %>
</ol>
<%= will paginate @microposts %>
<% end %>
</div>
</div>
www.it-ebooks.info
ptg8286261
448 Chapter 10: User Microposts
We will deal with the microposts list momentarily, but there are several other thingsto note first. In Listing 10.20, the use of if @user.microposts.any? (a constructionwe saw before in Listing 7.23) makes sure that an empty list won’t be displayed whenthe user has no microposts.
Also note from Listing 10.20 that we’ve preemptively added pagination for micro-posts through
<%= will paginate @microposts %>
If you compare this with the analogous line on the user index page, Listing 9.34, you’llsee that before we had just
<%= will paginate %>
This worked because, in the context of the Users controller, will_paginate assumesthe existence of an instance variable called @users (which, as we saw in Section 9.3.3,should be of class ActiveRecord::Relation). In the present case, since we are stillin the Users controller but want to paginate microposts instead, we pass an explicit@microposts variable to will_paginate. Of course, this means that we will have todefine such a variable in the user show action (Listing 10.22).
Finally, note that we have taken this opportunity to add a count of the currentnumber of microposts:
<h3>Microposts (<%= @user.microposts.count %>)</h3>
As noted, @user.microposts.count is the analogue of the User.count method,except that it counts the microposts belonging to a given user through the user/micropostassociation.
We come finally to the micropost list itself:
<ol class="microposts">
<%= render @microposts %>
</ol>
This code, which uses the ordered list tag ol, is responsible for generating the list ofmicroposts, but you can see that it just defers the heavy lifting to a micropost partial.We saw in Section 9.3.4 that the code
<%= render @users %>
www.it-ebooks.info
ptg8286261
10.2 Showing Microposts 449
automatically renders each of the users in the @users variable using the _user
.html.erb partial. Similarly, the code
<%= render @microposts %>
does exactly the same thing for microposts. This means that we must define a_micropost.html.erb partial (along with a micropost views directory), as shown inListing 10.21.
Listing 10.21 A partial for showing a single micropost.app/views/microposts/_micropost.html.erb
<li>
<span class="content"><%= micropost.content %></span>
<span class="timestamp">
Posted <%= time ago in words(micropost.created at) %> ago.
</span>
</li>
This uses the awesome time_ago_in_words helper method, whose effect we will seein Section 10.2.2.
Thus far, despite defining all the relevant ERb templates, the test in Listing 10.19should have been failing for want of an @microposts variable. We can get it to passwith Listing 10.22.
Listing 10.22 Adding an @microposts instance variable to the user show action.app/controllers/users_controller.rb
class UsersController < ApplicationController
.
.
.
def show
@user = User.find(params[:id])
@microposts = @user.microposts.paginate(page: params[:page])
end
end
Notice here how clever paginate is—it even works through the microposts association,reaching into the microposts table and pulling out the desired page of microposts.
At this point, we can get a look at our new user profile page in Figure 10.5.It’s rather . . . disappointing. Of course, this is because there are not currently anymicroposts. It’s time to change that.
www.it-ebooks.info
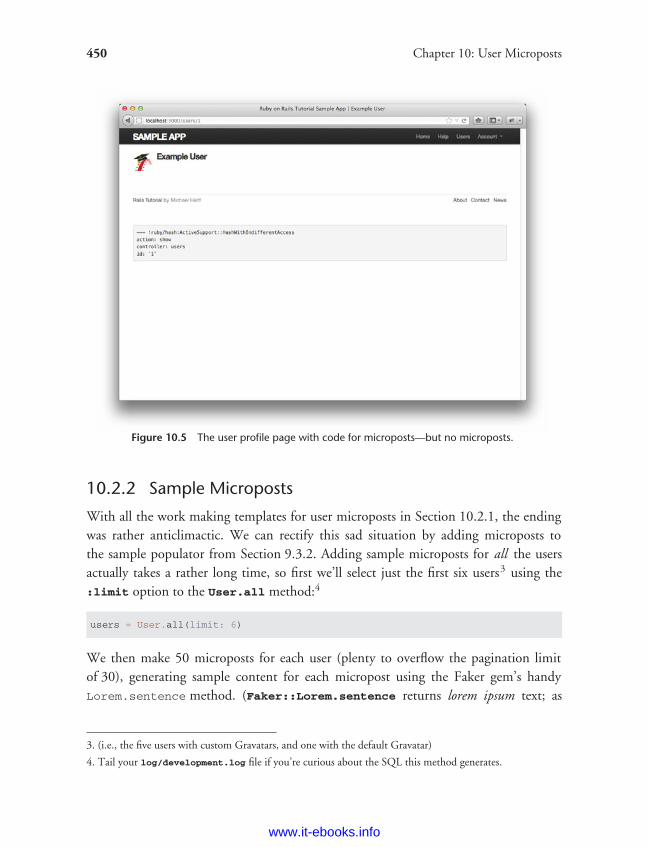
ptg8286261
450 Chapter 10: User Microposts
Figure 10.5 The user profile page with code for microposts—but no microposts.
10.2.2 Sample Microposts
With all the work making templates for user microposts in Section 10.2.1, the endingwas rather anticlimactic. We can rectify this sad situation by adding microposts tothe sample populator from Section 9.3.2. Adding sample microposts for all the usersactually takes a rather long time, so first we’ll select just the first six users3 using the:limit option to the User.all method:4
users = User.all(limit: 6)
We then make 50 microposts for each user (plenty to overflow the pagination limitof 30), generating sample content for each micropost using the Faker gem’s handyLorem.sentence method. (Faker::Lorem.sentence returns lorem ipsum text; as
3. (i.e., the five users with custom Gravatars, and one with the default Gravatar)
4. Tail your log/development.log file if you’re curious about the SQL this method generates.
www.it-ebooks.info
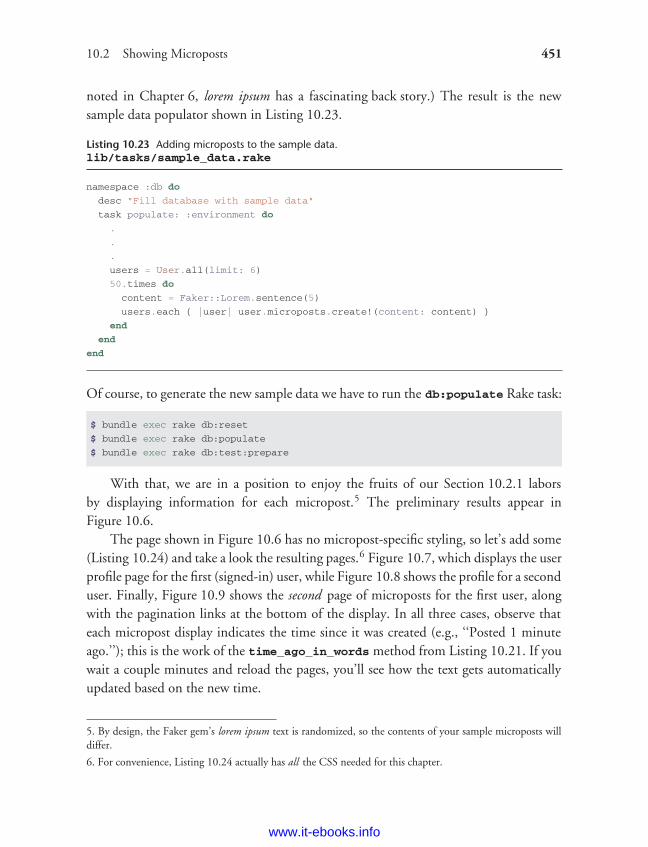
ptg8286261
10.2 Showing Microposts 451
noted in Chapter 6, lorem ipsum has a fascinating back story.) The result is the newsample data populator shown in Listing 10.23.
Listing 10.23 Adding microposts to the sample data.lib/tasks/sample_data.rake
namespace :db do
desc "Fill database with sample data"
task populate: :environment do
.
.
.
users = User.all(limit: 6)
50.times do
content = Faker::Lorem.sentence(5)
users.each { |user| user.microposts.create!(content: content) }
end
end
end
Of course, to generate the new sample data we have to run the db:populate Rake task:
$ bundle exec rake db:reset
$ bundle exec rake db:populate
$ bundle exec rake db:test:prepare
With that, we are in a position to enjoy the fruits of our Section 10.2.1 laborsby displaying information for each micropost.5 The preliminary results appear inFigure 10.6.
The page shown in Figure 10.6 has no micropost-specific styling, so let’s add some(Listing 10.24) and take a look the resulting pages.6 Figure 10.7, which displays the userprofile page for the first (signed-in) user, while Figure 10.8 shows the profile for a seconduser. Finally, Figure 10.9 shows the second page of microposts for the first user, alongwith the pagination links at the bottom of the display. In all three cases, observe thateach micropost display indicates the time since it was created (e.g., ‘‘Posted 1 minuteago.’’); this is the work of the time_ago_in_words method from Listing 10.21. If youwait a couple minutes and reload the pages, you’ll see how the text gets automaticallyupdated based on the new time.
5. By design, the Faker gem’s lorem ipsum text is randomized, so the contents of your sample microposts willdiffer.
6. For convenience, Listing 10.24 actually has all the CSS needed for this chapter.
www.it-ebooks.info
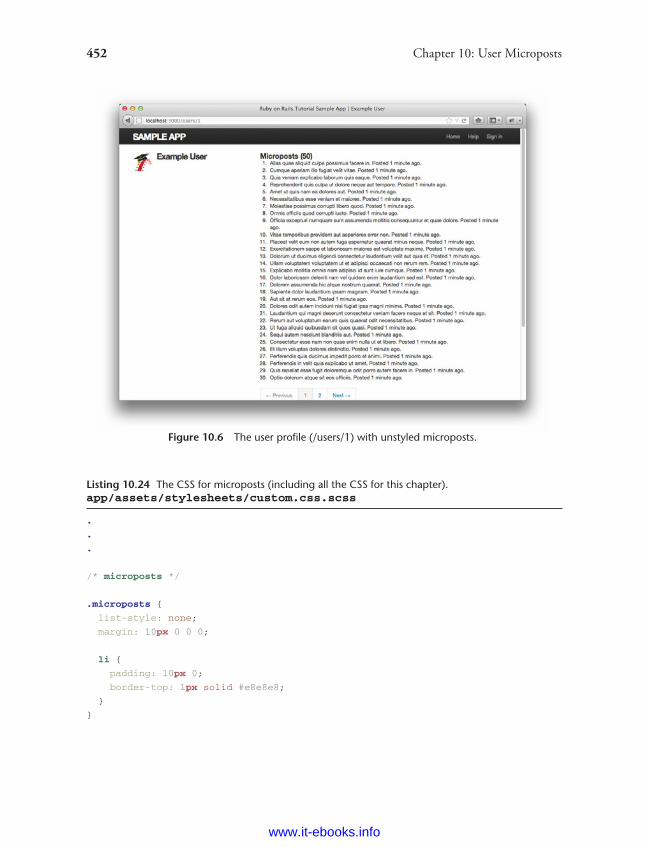
ptg8286261
452 Chapter 10: User Microposts
Figure 10.6 The user profile (/users/1) with unstyled microposts.
Listing 10.24 The CSS for microposts (including all the CSS for this chapter).app/assets/stylesheets/custom.css.scss
.
.
.
/* microposts */
.microposts {
list-style: none;
margin: 10px 0 0 0;
li {
padding: 10px 0;
border-top: 1px solid #e8e8e8;
}
}
www.it-ebooks.info
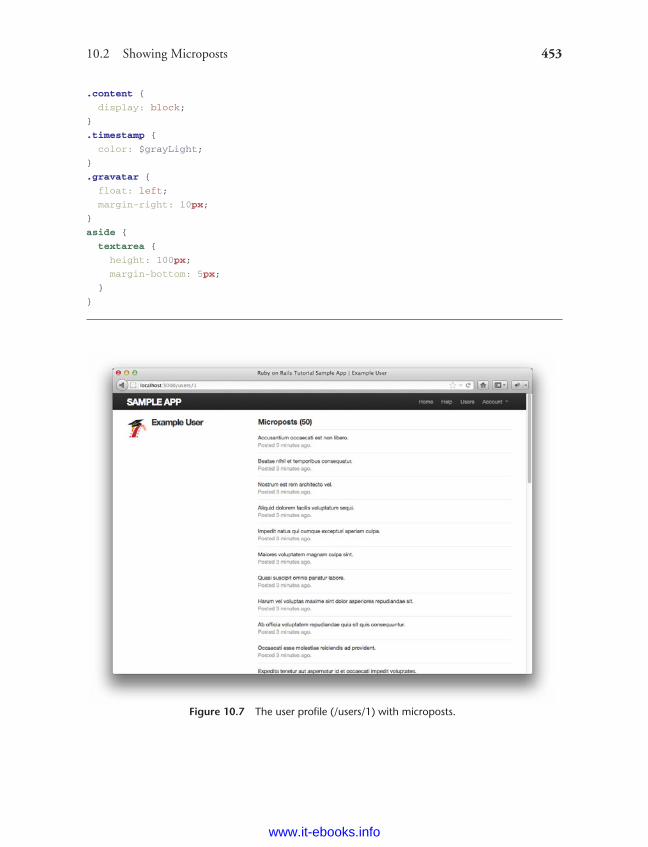
ptg8286261
10.2 Showing Microposts 453
.content {
display: block;
}
.timestamp {
color: $grayLight;
}
.gravatar {
float: left;
margin-right: 10px;
}
aside {
textarea {
height: 100px;
margin-bottom: 5px;
}
}
Figure 10.7 The user profile (/users/1) with microposts.
www.it-ebooks.info
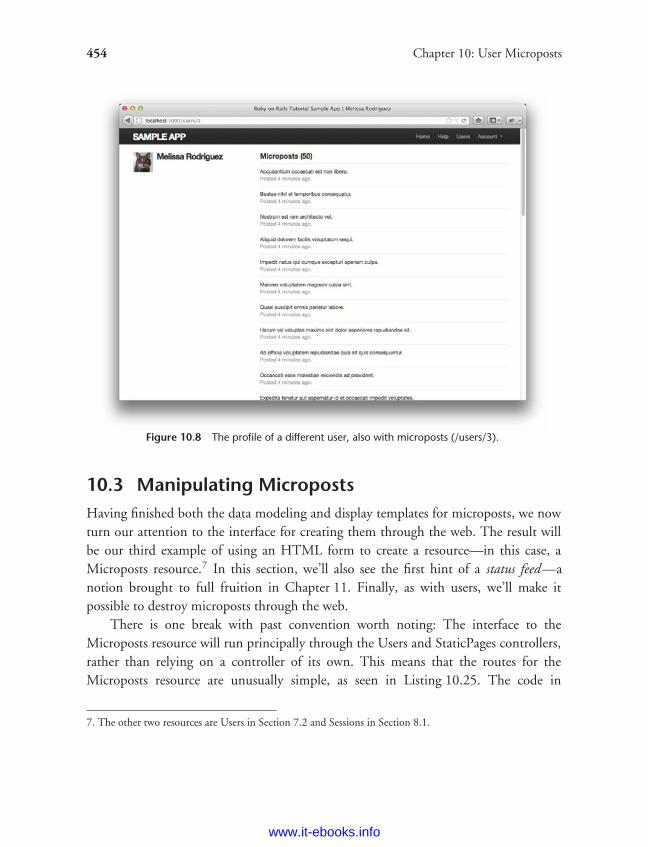
ptg8286261
454 Chapter 10: User Microposts
Figure 10.8 The profile of a different user, also with microposts (/users/3).
10.3 Manipulating MicropostsHaving finished both the data modeling and display templates for microposts, we nowturn our attention to the interface for creating them through the web. The result willbe our third example of using an HTML form to create a resource—in this case, aMicroposts resource.7 In this section, we’ll also see the first hint of a status feed—anotion brought to full fruition in Chapter 11. Finally, as with users, we’ll make itpossible to destroy microposts through the web.
There is one break with past convention worth noting: The interface to theMicroposts resource will run principally through the Users and StaticPages controllers,rather than relying on a controller of its own. This means that the routes for theMicroposts resource are unusually simple, as seen in Listing 10.25. The code in
7. The other two resources are Users in Section 7.2 and Sessions in Section 8.1.
www.it-ebooks.info
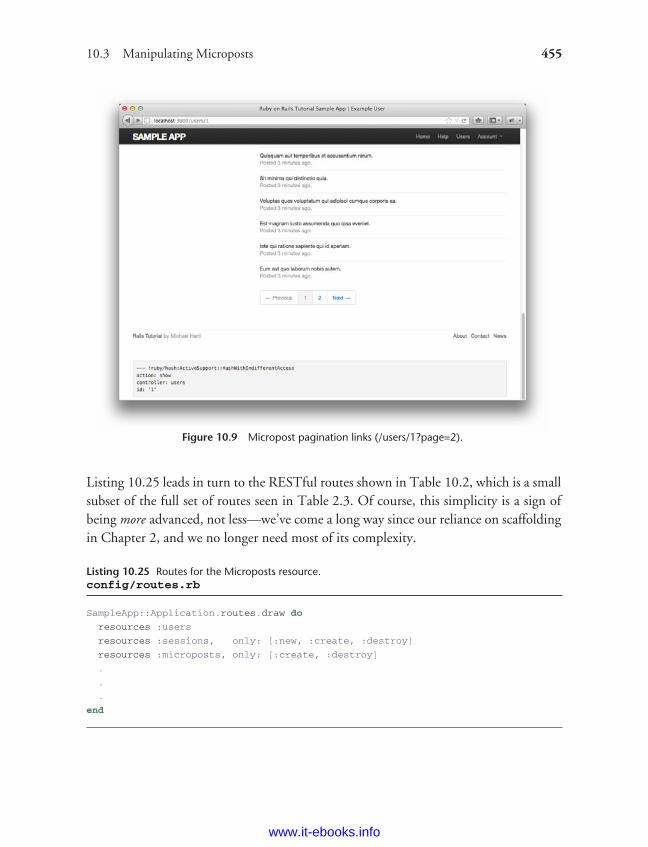
ptg8286261
10.3 Manipulating Microposts 455
Figure 10.9 Micropost pagination links (/users/1?page=2).
Listing 10.25 leads in turn to the RESTful routes shown in Table 10.2, which is a smallsubset of the full set of routes seen in Table 2.3. Of course, this simplicity is a sign ofbeing more advanced, not less—we’ve come a long way since our reliance on scaffoldingin Chapter 2, and we no longer need most of its complexity.
Listing 10.25 Routes for the Microposts resource.config/routes.rb
SampleApp::Application.routes.draw do
resources :users
resources :sessions, only: [:new, :create, :destroy]
resources :microposts, only: [:create, :destroy]
.
.
.
end
www.it-ebooks.info
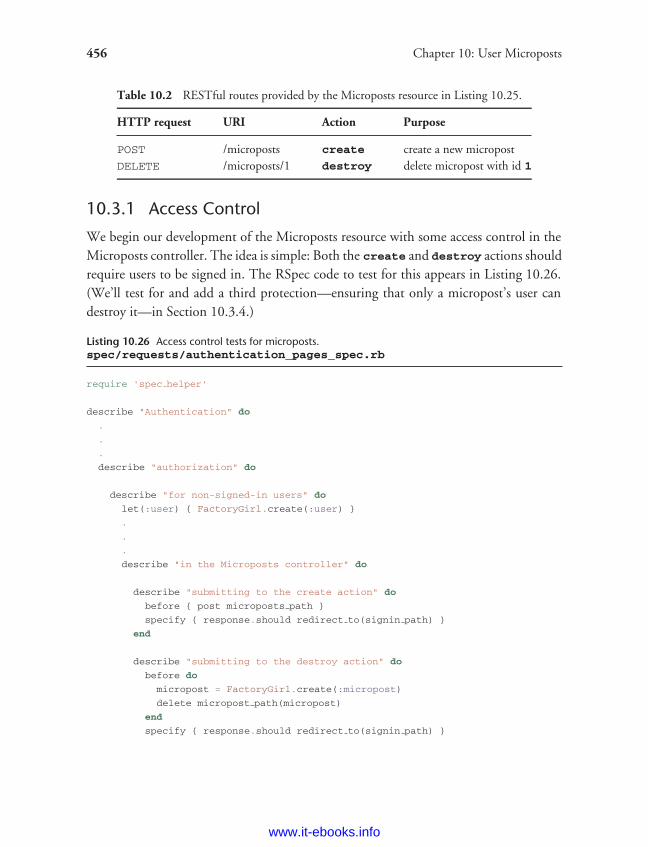
ptg8286261
456 Chapter 10: User Microposts
Table 10.2 RESTful routes provided by the Microposts resource in Listing 10.25.
HTTP request URI Action Purpose
POST /microposts create create a new micropostDELETE /microposts/1 destroy delete micropost with id 1
10.3.1 Access Control
We begin our development of the Microposts resource with some access control in theMicroposts controller. The idea is simple: Both the create and destroy actions shouldrequire users to be signed in. The RSpec code to test for this appears in Listing 10.26.(We’ll test for and add a third protection—ensuring that only a micropost’s user candestroy it—in Section 10.3.4.)
Listing 10.26 Access control tests for microposts.spec/requests/authentication_pages_spec.rb
require 'spec helper'
describe "Authentication" do
.
.
.
describe "authorization" do
describe "for non-signed-in users" do
let(:user) { FactoryGirl.create(:user) }
.
.
.
describe "in the Microposts controller" do
describe "submitting to the create action" do
before { post microposts path }
specify { response.should redirect to(signin path) }
end
describe "submitting to the destroy action" do
before do
micropost = FactoryGirl.create(:micropost)
delete micropost path(micropost)
end
specify { response.should redirect to(signin path) }
www.it-ebooks.info
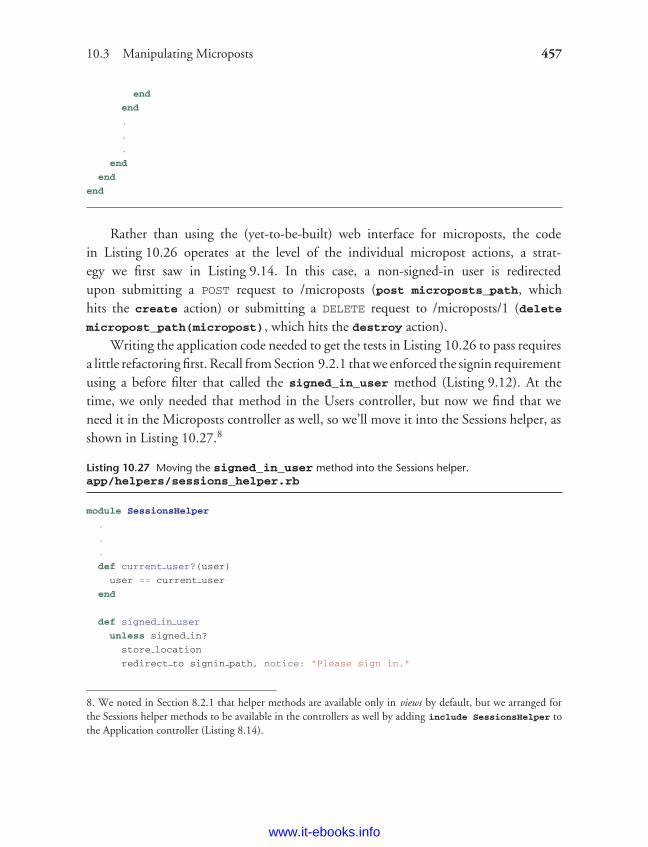
ptg8286261
10.3 Manipulating Microposts 457
end
end
.
.
.
end
end
end
Rather than using the (yet-to-be-built) web interface for microposts, the codein Listing 10.26 operates at the level of the individual micropost actions, a strat-egy we first saw in Listing 9.14. In this case, a non-signed-in user is redirectedupon submitting a POST request to /microposts (post microposts_path, whichhits the create action) or submitting a DELETE request to /microposts/1 (deletemicropost_path(micropost), which hits the destroy action).
Writing the application code needed to get the tests in Listing 10.26 to pass requiresa little refactoring first. Recall from Section 9.2.1 that we enforced the signin requirementusing a before filter that called the signed_in_user method (Listing 9.12). At thetime, we only needed that method in the Users controller, but now we find that weneed it in the Microposts controller as well, so we’ll move it into the Sessions helper, asshown in Listing 10.27.8
Listing 10.27 Moving the signed_in_user method into the Sessions helper.app/helpers/sessions_helper.rb
module SessionsHelper
.
.
.
def current user?(user)
user == current user
end
def signed in user
unless signed in?
store location
redirect to signin path, notice: "Please sign in."
8. We noted in Section 8.2.1 that helper methods are available only in views by default, but we arranged forthe Sessions helper methods to be available in the controllers as well by adding include SessionsHelper tothe Application controller (Listing 8.14).
www.it-ebooks.info
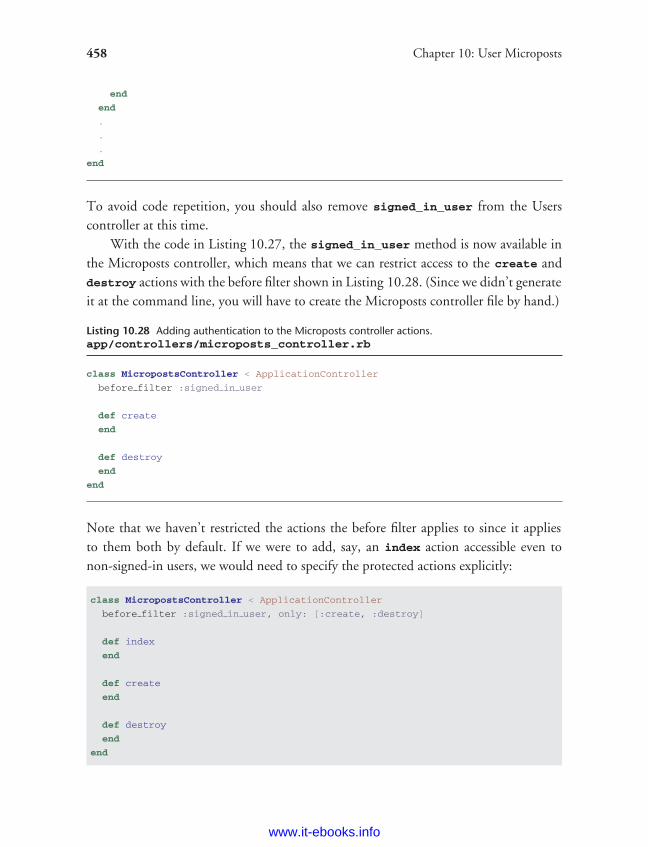
ptg8286261
458 Chapter 10: User Microposts
end
end
.
.
.
end
To avoid code repetition, you should also remove signed_in_user from the Userscontroller at this time.
With the code in Listing 10.27, the signed_in_user method is now available inthe Microposts controller, which means that we can restrict access to the create anddestroy actions with the before filter shown in Listing 10.28. (Since we didn’t generateit at the command line, you will have to create the Microposts controller file by hand.)
Listing 10.28 Adding authentication to the Microposts controller actions.app/controllers/microposts_controller.rb
class MicropostsController < ApplicationController
before filter :signed in user
def create
end
def destroy
end
end
Note that we haven’t restricted the actions the before filter applies to since it appliesto them both by default. If we were to add, say, an index action accessible even tonon-signed-in users, we would need to specify the protected actions explicitly:
class MicropostsController < ApplicationController
before filter :signed in user, only: [:create, :destroy]
def index
end
def create
end
def destroy
end
end
www.it-ebooks.info
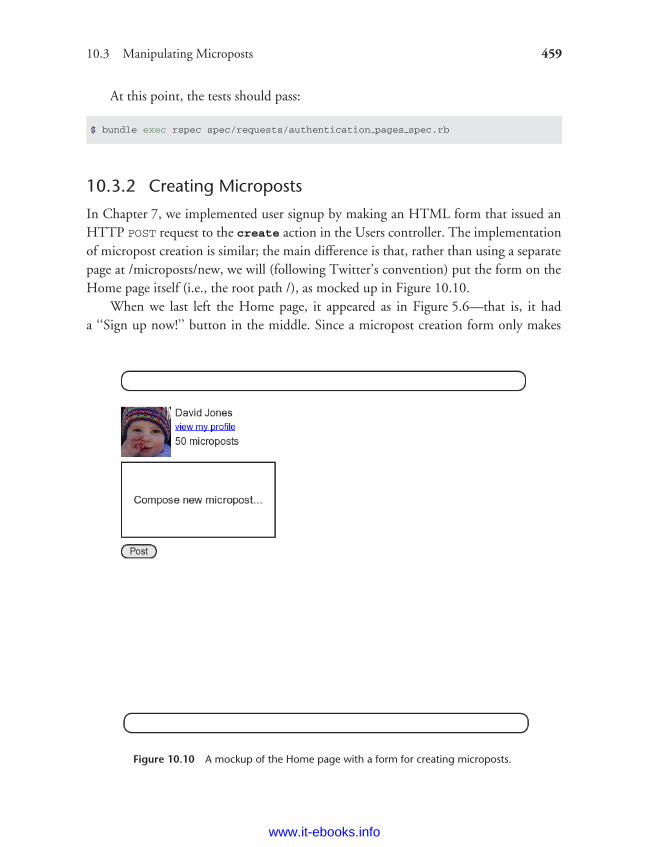
ptg8286261
10.3 Manipulating Microposts 459
At this point, the tests should pass:
$ bundle exec rspec spec/requests/authentication pages spec.rb
10.3.2 Creating Microposts
In Chapter 7, we implemented user signup by making an HTML form that issued anHTTP POST request to the create action in the Users controller. The implementationof micropost creation is similar; the main difference is that, rather than using a separatepage at /microposts/new, we will (following Twitter’s convention) put the form on theHome page itself (i.e., the root path /), as mocked up in Figure 10.10.
When we last left the Home page, it appeared as in Figure 5.6—that is, it hada ‘‘Sign up now!’’ button in the middle. Since a micropost creation form only makes
Figure 10.10 A mockup of the Home page with a form for creating microposts.
www.it-ebooks.info
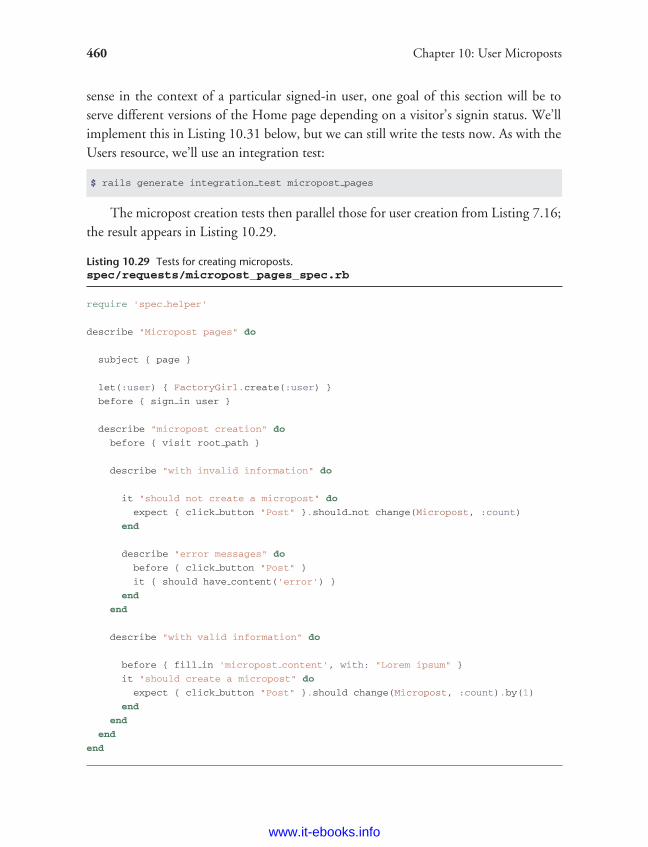
ptg8286261
460 Chapter 10: User Microposts
sense in the context of a particular signed-in user, one goal of this section will be toserve different versions of the Home page depending on a visitor’s signin status. We’llimplement this in Listing 10.31 below, but we can still write the tests now. As with theUsers resource, we’ll use an integration test:
$ rails generate integration test micropost pages
The micropost creation tests then parallel those for user creation from Listing 7.16;the result appears in Listing 10.29.
Listing 10.29 Tests for creating microposts.spec/requests/micropost_pages_spec.rb
require 'spec helper'
describe "Micropost pages" do
subject { page }
let(:user) { FactoryGirl.create(:user) }
before { sign in user }
describe "micropost creation" do
before { visit root path }
describe "with invalid information" do
it "should not create a micropost" do
expect { click button "Post" }.should not change(Micropost, :count)
end
describe "error messages" do
before { click button "Post" }
it { should have content('error') }
end
end
describe "with valid information" do
before { fill in 'micropost content', with: "Lorem ipsum" }
it "should create a micropost" do
expect { click button "Post" }.should change(Micropost, :count).by(1)
end
end
end
end
www.it-ebooks.info
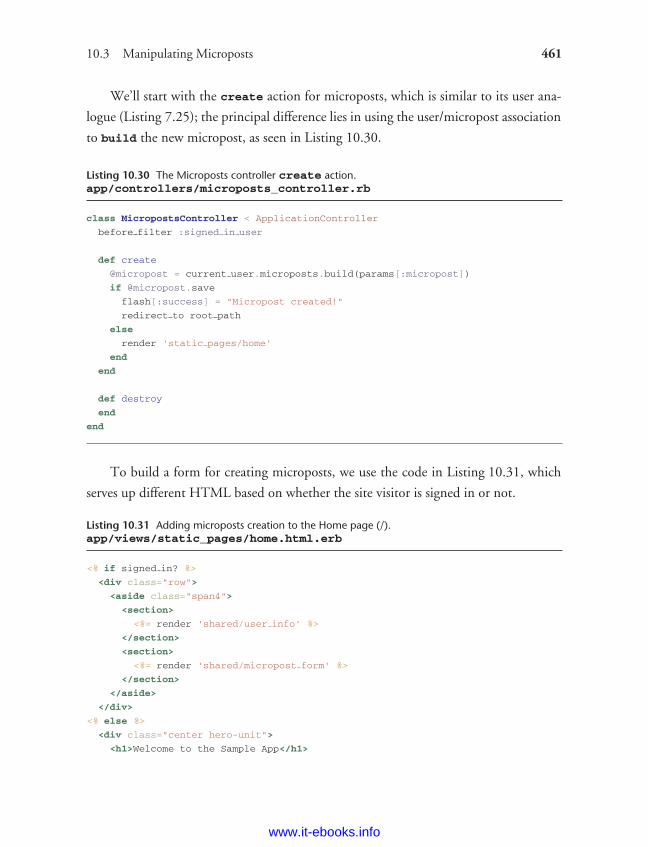
ptg8286261
10.3 Manipulating Microposts 461
We’ll start with the create action for microposts, which is similar to its user ana-
logue (Listing 7.25); the principal difference lies in using the user/micropost association
to build the new micropost, as seen in Listing 10.30.
Listing 10.30 The Microposts controller create action.app/controllers/microposts_controller.rb
class MicropostsController < ApplicationController
before filter :signed in user
def create
@micropost = current user.microposts.build(params[:micropost])
if @micropost.save
flash[:success] = "Micropost created!"
redirect to root path
else
render 'static pages/home'
end
end
def destroy
end
end
To build a form for creating microposts, we use the code in Listing 10.31, which
serves up different HTML based on whether the site visitor is signed in or not.
Listing 10.31 Adding microposts creation to the Home page (/).app/views/static_pages/home.html.erb
<% if signed in? %>
<div class="row">
<aside class="span4">
<section>
<%= render 'shared/user info' %>
</section>
<section>
<%= render 'shared/micropost form' %>
</section>
</aside>
</div>
<% else %>
<div class="center hero-unit">
<h1>Welcome to the Sample App</h1>
www.it-ebooks.info
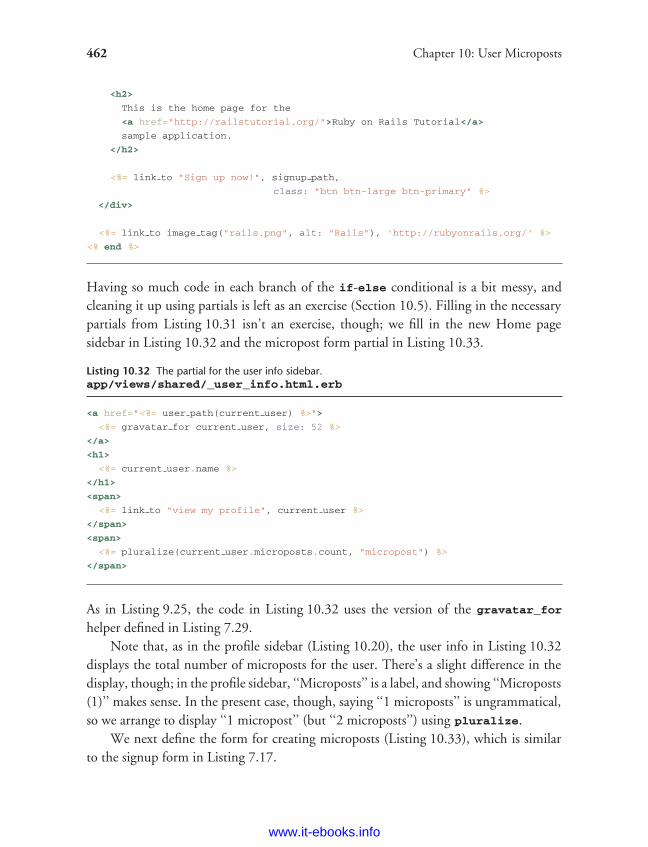
ptg8286261
462 Chapter 10: User Microposts
<h2>
This is the home page for the
<a href="http://railstutorial.org/">Ruby on Rails Tutorial</a>
sample application.
</h2>
<%= link to "Sign up now!", signup path,
class: "btn btn-large btn-primary" %>
</div>
<%= link to image tag("rails.png", alt: "Rails"), 'http://rubyonrails.org/' %>
<% end %>
Having so much code in each branch of the if-else conditional is a bit messy, andcleaning it up using partials is left as an exercise (Section 10.5). Filling in the necessarypartials from Listing 10.31 isn’t an exercise, though; we fill in the new Home pagesidebar in Listing 10.32 and the micropost form partial in Listing 10.33.
Listing 10.32 The partial for the user info sidebar.app/views/shared/_user_info.html.erb
<a href="<%= user path(current user) %>">
<%= gravatar for current user, size: 52 %>
</a>
<h1>
<%= current user.name %>
</h1>
<span>
<%= link to "view my profile", current user %>
</span>
<span>
<%= pluralize(current user.microposts.count, "micropost") %>
</span>
As in Listing 9.25, the code in Listing 10.32 uses the version of the gravatar_for
helper defined in Listing 7.29.Note that, as in the profile sidebar (Listing 10.20), the user info in Listing 10.32
displays the total number of microposts for the user. There’s a slight difference in thedisplay, though; in the profile sidebar, ‘‘Microposts’’ is a label, and showing ‘‘Microposts(1)’’ makes sense. In the present case, though, saying ‘‘1 microposts’’ is ungrammatical,so we arrange to display ‘‘1 micropost’’ (but ‘‘2 microposts’’) using pluralize.
We next define the form for creating microposts (Listing 10.33), which is similarto the signup form in Listing 7.17.
www.it-ebooks.info
ptg8286261
10.3 Manipulating Microposts 463
Listing 10.33 The form partial for creating microposts.app/views/shared/_micropost_form.html.erb
<%= form for(@micropost) do |f| %>
<%= render 'shared/error messages', object: f.object %>
<div class="field">
<%= f.text area :content, placeholder: "Compose new micropost..." %>
</div>
<%= f.submit "Post", class: "btn btn-large btn-primary" %>
<% end %>
We need to make two changes before the form in Listing 10.33 will work. First, weneed to define @micropost, which (as before) we do through the association:
@micropost = current user.microposts.build
The result appears in Listing 10.34.
Listing 10.34 Adding a micropost instance variable to the home action.app/controllers/static_pages_controller.rb
class StaticPagesController < ApplicationController
def home
@micropost = current user.microposts.build if signed in?
end
.
.
.
end
The code in Listing 10.34 has the advantage that it will break the test suite if we forgetto require the user to sign in.
The second change needed to get Listing 10.33 to work is to redefine the errormessages partial so that
<%= render 'shared/error messages', object: f.object %>
works. You may recall from Listing 7.22 that the error messages partial references the@user variable explicitly, but in the present case we have an @micropost variableinstead. We should define an error messages partial that works regardless of the kind of
www.it-ebooks.info
ptg8286261
464 Chapter 10: User Microposts
object passed to it. Happily, the form variable f can access the associated object throughf.object, so that in
form for(@user) do |f|
f.object is @user, and in
form for(@micropost) do |f|
f.object is @micropost.To pass the object to the partial, we use a hash with value equal to the object and
key equal to the desired name of the variable in the partial, which is what this codeaccomplishes:
<%= render 'shared/error messages', object: f.object %>
In other words, object: f.object creates a variable called object in the error_mes-sages partial. We can use this object to construct a customized error message, as shownin Listing 10.35.
Listing 10.35 Updating the error-messages partial from Listing 7.23 to work with other objects.app/views/shared/_error_messages.html.erb
<% if object.errors.any? %>
<div id="error explanation">
<div class="alert alert-error">
The form contains <%= pluralize(object.errors.count, "error") %>.
</div>
<ul>
<% object.errors.full messages.each do |msg| %>
<li>* <%= msg %></li>
<% end %>
</ul>
</div>
<% end %>
As this point, the tests in Listing 10.29 should be passing:
$ bundle exec rspec spec/requests/micropost pages spec.rb
www.it-ebooks.info
ptg8286261
10.3 Manipulating Microposts 465
Unfortunately, the User request spec is now broken because the signup and edit formsuse the old version of the error messages partial. To fix them, we’ll update them withthe more general version, as shown in Listing 10.36 and Listing 10.37. (Note: Yourcode will differ if you implemented Listing 9.50 and Listing 9.51 from the exercises inSection 9.6. Mutatis mutandis.)
Listing 10.36 Updating the rendering of user signup errors.app/views/users/new.html.erb
<% provide(:title, 'Sign up') %>
<h1>Sign up</h1>
<%= form for(@user) do |f| %>
<%= render 'shared/error messages', object: f.object %>
.
.
.
<% end %>
Listing 10.37 Updating the errors for editing users.app/views/users/edit.html.erb
<% provide(:title, "Edit user") %>
<h1>Update your profile</h1>
<%= form for(@user) do |f| %>
<%= render 'shared/error messages', object: f.object %>
.
.
.
<% end %>
<%= gravatar for(@user) %>
<a href="http://gravatar.com/emails">change</a>
At this point, all the tests should be passing:
$ bundle exec rspec spec/
Additionally, all the HTML in this section should render properly, showing the form asin Figure 10.11, and a form with a submission error as in Figure 10.12. You are invited
www.it-ebooks.info
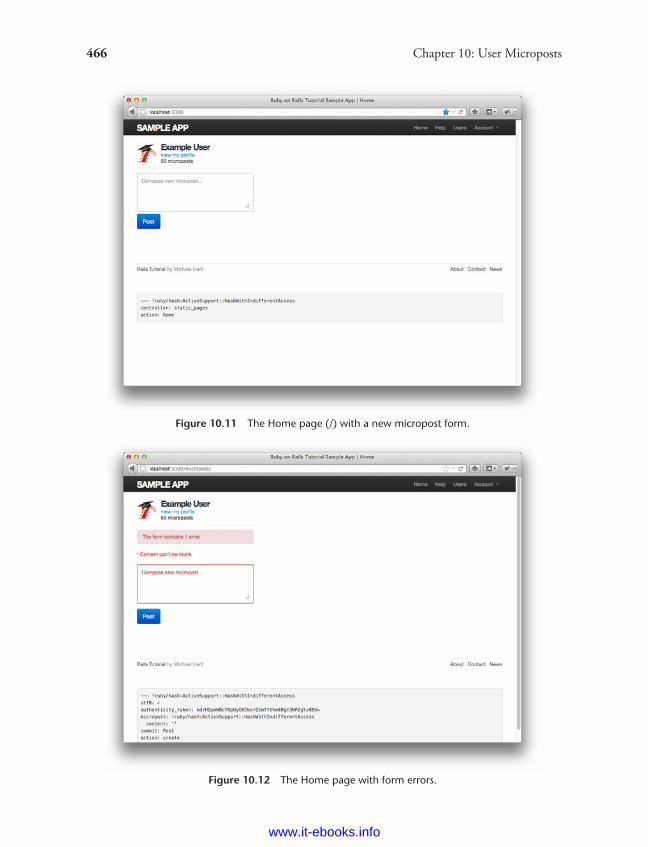
ptg8286261
466 Chapter 10: User Microposts
Figure 10.11 The Home page (/) with a new micropost form.
Figure 10.12 The Home page with form errors.
www.it-ebooks.info
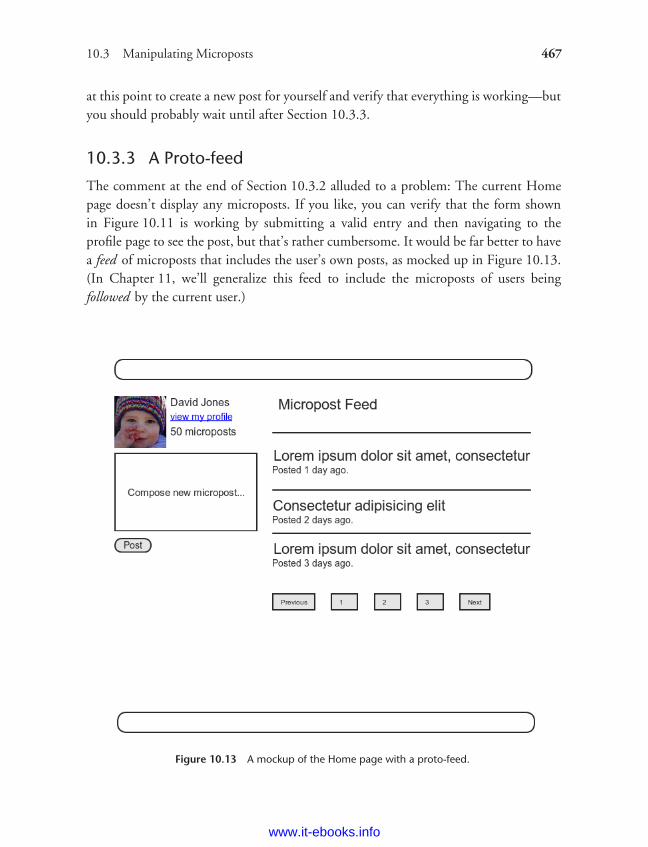
ptg8286261
10.3 Manipulating Microposts 467
at this point to create a new post for yourself and verify that everything is working—butyou should probably wait until after Section 10.3.3.
10.3.3 A Proto-feed
The comment at the end of Section 10.3.2 alluded to a problem: The current Homepage doesn’t display any microposts. If you like, you can verify that the form shownin Figure 10.11 is working by submitting a valid entry and then navigating to theprofile page to see the post, but that’s rather cumbersome. It would be far better to havea feed of microposts that includes the user’s own posts, as mocked up in Figure 10.13.(In Chapter 11, we’ll generalize this feed to include the microposts of users beingfollowed by the current user.)
Figure 10.13 A mockup of the Home page with a proto-feed.
www.it-ebooks.info
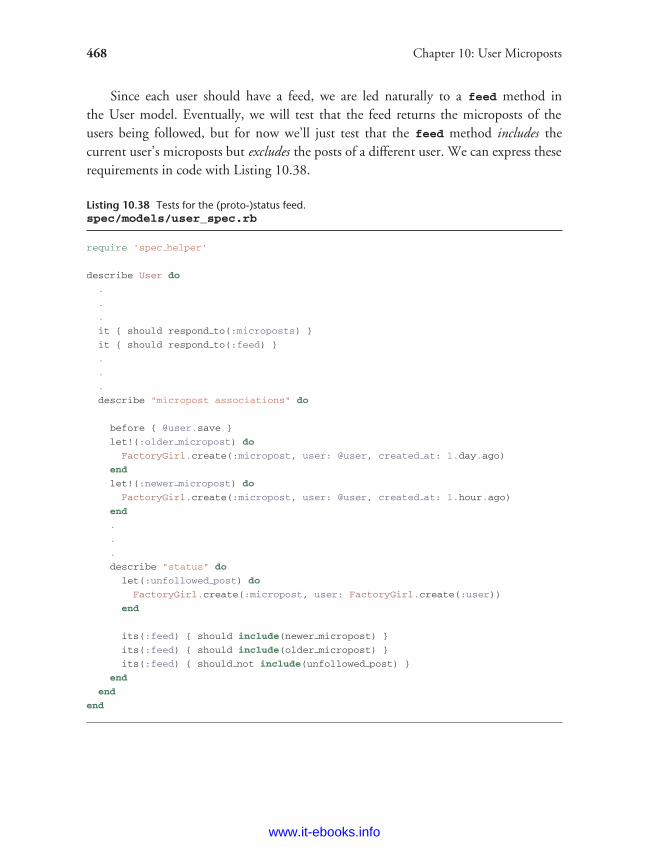
ptg8286261
468 Chapter 10: User Microposts
Since each user should have a feed, we are led naturally to a feed method inthe User model. Eventually, we will test that the feed returns the microposts of theusers being followed, but for now we’ll just test that the feed method includes thecurrent user’s microposts but excludes the posts of a different user. We can express theserequirements in code with Listing 10.38.
Listing 10.38 Tests for the (proto-)status feed.spec/models/user_spec.rb
require 'spec helper'
describe User do
.
.
.
it { should respond to(:microposts) }
it { should respond to(:feed) }
.
.
.
describe "micropost associations" do
before { @user.save }
let!(:older micropost) do
FactoryGirl.create(:micropost, user: @user, created at: 1.day.ago)
end
let!(:newer micropost) do
FactoryGirl.create(:micropost, user: @user, created at: 1.hour.ago)
end
.
.
.
describe "status" do
let(:unfollowed post) do
FactoryGirl.create(:micropost, user: FactoryGirl.create(:user))
end
its(:feed) { should include(newer micropost) }
its(:feed) { should include(older micropost) }
its(:feed) { should not include(unfollowed post) }
end
end
end
www.it-ebooks.info

ptg8286261
10.3 Manipulating Microposts 469
These tests introduce (via the RSpec boolean convention) the array include? method,which simply checks if an array includes the given element:9
$ rails console
>> a = [1, "foo", :bar]
>> a.include?("foo")
=> true
>> a.include?(:bar)
=> true
>> a.include?("baz")
=> false
This example shows just how flexible the RSpec boolean convention is; even thoughinclude is already a Ruby keyword (used to include a module, as seen in, e.g.,Listing 8.14), in this context RSpec correctly guesses that we want to test arrayinclusion.
We can arrange for an appropriate micropost feed method by selecting all themicroposts with user_id equal to the current user’s id, which we accomplish using thewhere method on the Micropost model, as shown in Listing 10.39.10
Listing 10.39 A preliminary implementation for the micropost status feed.app/models/user.rb
class User < ActiveRecord::Base
.
.
.
def feed
# This is preliminary. See "Following users" for the full implementation.
Micropost.where("user id = ?", id)
end
.
.
.
end
9. Learning about methods such as include? is one reason why, as noted in Section 1.1.1, I recommendreading a pure Ruby book after finishing this one.
10. See the Rails Guide on the Active Record Query Interface for more on where and the like.
www.it-ebooks.info
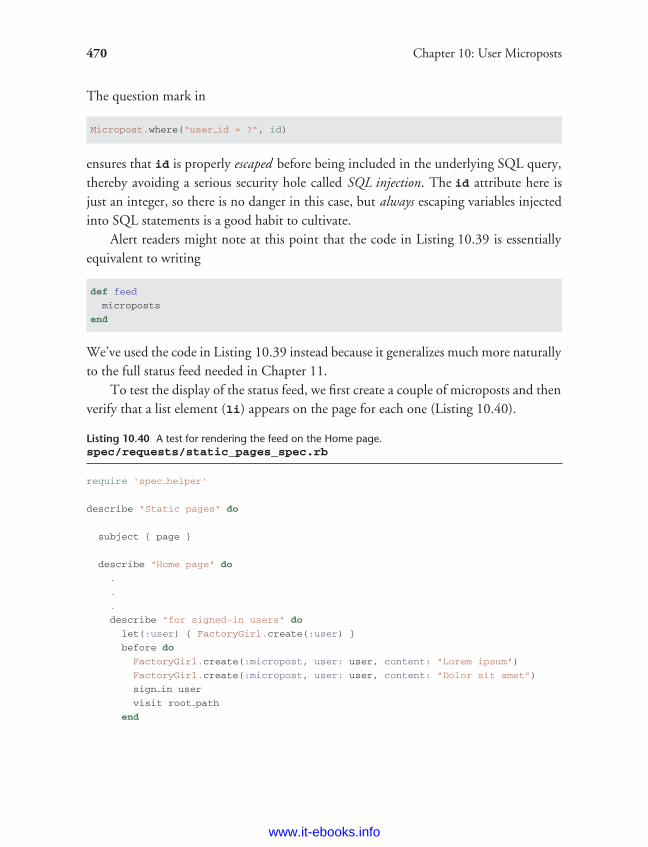
ptg8286261
470 Chapter 10: User Microposts
The question mark in
Micropost.where("user id = ?", id)
ensures that id is properly escaped before being included in the underlying SQL query,thereby avoiding a serious security hole called SQL injection. The id attribute here isjust an integer, so there is no danger in this case, but always escaping variables injectedinto SQL statements is a good habit to cultivate.
Alert readers might note at this point that the code in Listing 10.39 is essentiallyequivalent to writing
def feed
microposts
end
We’ve used the code in Listing 10.39 instead because it generalizes much more naturallyto the full status feed needed in Chapter 11.
To test the display of the status feed, we first create a couple of microposts and thenverify that a list element (li) appears on the page for each one (Listing 10.40).
Listing 10.40 A test for rendering the feed on the Home page.spec/requests/static_pages_spec.rb
require 'spec helper'
describe "Static pages" do
subject { page }
describe "Home page" do
.
.
.
describe "for signed-in users" do
let(:user) { FactoryGirl.create(:user) }
before do
FactoryGirl.create(:micropost, user: user, content: "Lorem ipsum")
FactoryGirl.create(:micropost, user: user, content: "Dolor sit amet")
sign in user
visit root path
end
www.it-ebooks.info
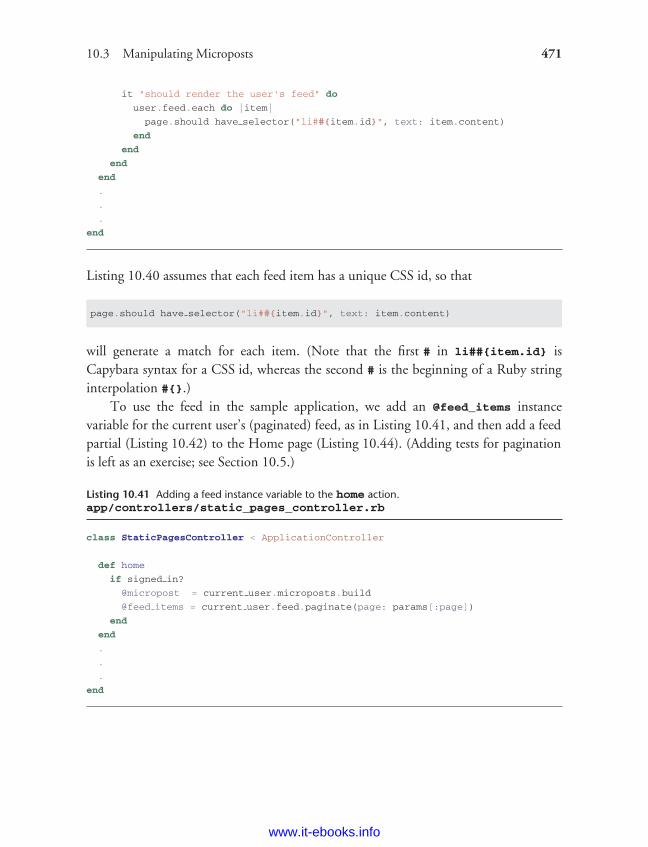
ptg8286261
10.3 Manipulating Microposts 471
it "should render the user's feed" do
user.feed.each do |item|
page.should have selector("li##{item.id}", text: item.content)
end
end
end
end
.
.
.
end
Listing 10.40 assumes that each feed item has a unique CSS id, so that
page.should have selector("li##{item.id}", text: item.content)
will generate a match for each item. (Note that the first # in li##{item.id} isCapybara syntax for a CSS id, whereas the second # is the beginning of a Ruby stringinterpolation #{}.)
To use the feed in the sample application, we add an @feed_items instancevariable for the current user’s (paginated) feed, as in Listing 10.41, and then add a feedpartial (Listing 10.42) to the Home page (Listing 10.44). (Adding tests for paginationis left as an exercise; see Section 10.5.)
Listing 10.41 Adding a feed instance variable to the home action.app/controllers/static_pages_controller.rb
class StaticPagesController < ApplicationController
def home
if signed in?
@micropost = current user.microposts.build
@feed items = current user.feed.paginate(page: params[:page])
end
end
.
.
.
end
www.it-ebooks.info
ptg8286261
472 Chapter 10: User Microposts
Listing 10.42 The status feed partial.app/views/shared/_feed.html.erb
<% if @feed items.any? %>
<ol class="microposts">
<%= render partial: 'shared/feed item', collection: @feed items %>
</ol>
<%= will paginate @feed items %>
<% end %>
The status feed partial defers the feed item rendering to a feed item partial usingthe code
<%= render partial: 'shared/feed item', collection: @feed items %>
Here we pass a :collection parameter with the feed items, which causes render to usethe given partial (’feed_item’ in this case) to render each item in the collection. (Wehave omitted the :partial parameter in previous renderings, writing, e.g., render’shared/micropost’, but with a :collection parameter that syntax doesn’t work.)The feed item partial itself appears in Listing 10.43.
Listing 10.43 A partial for a single feed item.app/views/shared/_feed_item.html.erb
<li id="<%= feed item.id %>">
<%= link to gravatar for(feed item.user), feed item.user %>
<span class="user">
<%= link to feed item.user.name, feed item.user %>
</span>
<span class="content"><%= feed item.content %></span>
<span class="timestamp">
Posted <%= time ago in words(feed item.created at) %> ago.
</span>
</li>
Listing 10.43 also adds a CSS id for each feed item using
<li id="<%= feed item.id %>">
as required by the test in Listing 10.40.We can then add the feed to the Home page by rendering the feed partial as
usual (Listing 10.44). The result is a display of the feed on the Home page, as required(Figure 10.14).
www.it-ebooks.info
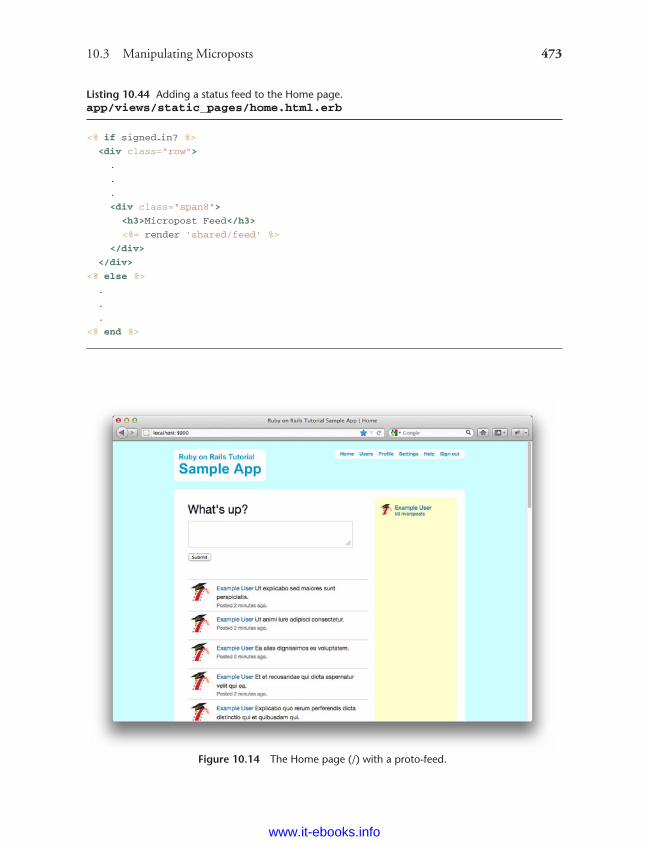
ptg8286261
10.3 Manipulating Microposts 473
Listing 10.44 Adding a status feed to the Home page.app/views/static_pages/home.html.erb
<% if signed in? %>
<div class="row">
.
.
.
<div class="span8">
<h3>Micropost Feed</h3>
<%= render 'shared/feed' %>
</div>
</div>
<% else %>
.
.
.
<% end %>
Figure 10.14 The Home page (/) with a proto-feed.
www.it-ebooks.info
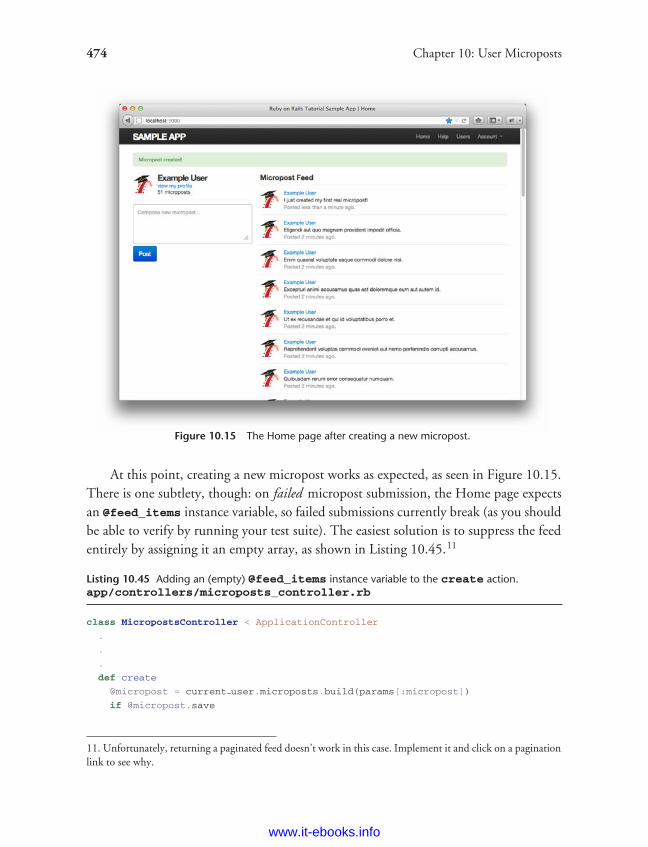
ptg8286261
474 Chapter 10: User Microposts
Figure 10.15 The Home page after creating a new micropost.
At this point, creating a new micropost works as expected, as seen in Figure 10.15.There is one subtlety, though: on failed micropost submission, the Home page expectsan @feed_items instance variable, so failed submissions currently break (as you shouldbe able to verify by running your test suite). The easiest solution is to suppress the feedentirely by assigning it an empty array, as shown in Listing 10.45.11
Listing 10.45 Adding an (empty) @feed_items instance variable to the create action.app/controllers/microposts_controller.rb
class MicropostsController < ApplicationController
.
.
.
def create
@micropost = current user.microposts.build(params[:micropost])
if @micropost.save
11. Unfortunately, returning a paginated feed doesn’t work in this case. Implement it and click on a paginationlink to see why.
www.it-ebooks.info
ptg8286261
10.3 Manipulating Microposts 475
flash[:success] = "Micropost created!"
redirect to root path
else
@feed items = []
render 'static pages/home'
end
end
.
.
.
end
At this point, the proto-feed should be working, and the test suite should pass:
$ bundle exec rspec spec/
10.3.4 Destroying Microposts
The last piece of functionality to add to the Microposts resource is the ability to destroyposts. As with user deletion (Section 9.4.2), we accomplish this with ‘‘delete’’ links,as mocked up in Figure 10.16. Unlike that case, which restricted user destruction toadmin users, the delete links will work only for microposts created by the current user.
Our first step is to add a delete link to the micropost partial as in Listing 10.43, andwhile we’re at it we’ll add a similar link to the feed item partial from Listing 10.43. Theresults appear in Listing 10.46 and Listing 10.47. (The two cases are almost identical,and eliminating this duplication is left as an exercise (Section 10.5).)
Listing 10.46 Adding a delete link to the micropost partial.app/views/microposts/_micropost.html.erb
<li>
<span class="content"><%= micropost.content %></span>
<span class="timestamp">
Posted <%= time ago in words(micropost.created at) %> ago.
</span>
<% if current user?(micropost.user) %>
<%= link to "delete", micropost, method: :delete,
confirm: "You sure?",
title: micropost.content %>
<% end %>
</li>
www.it-ebooks.info
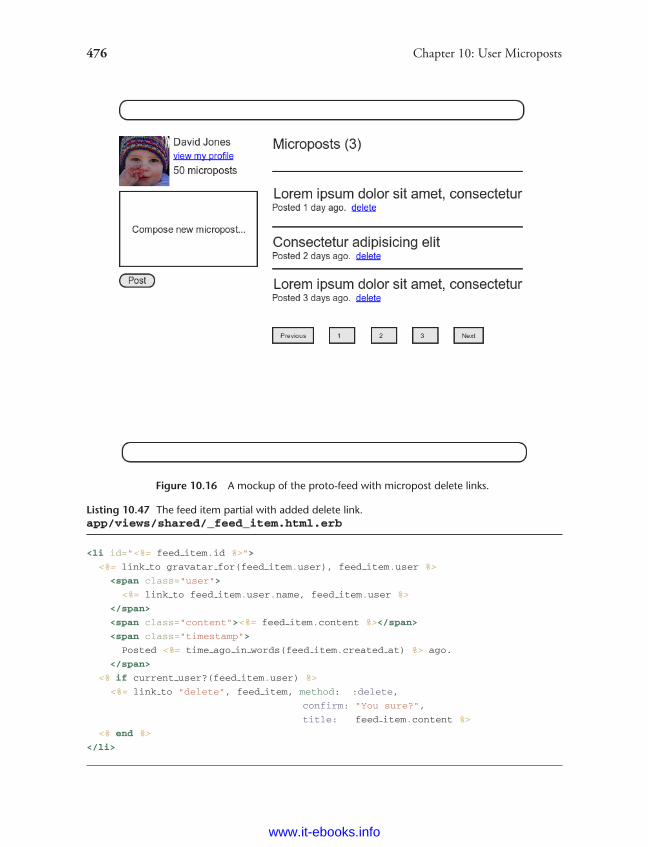
ptg8286261
476 Chapter 10: User Microposts
Figure 10.16 A mockup of the proto-feed with micropost delete links.
Listing 10.47 The feed item partial with added delete link.app/views/shared/_feed_item.html.erb
<li id="<%= feed item.id %>">
<%= link to gravatar for(feed item.user), feed item.user %>
<span class="user">
<%= link to feed item.user.name, feed item.user %>
</span>
<span class="content"><%= feed item.content %></span>
<span class="timestamp">
Posted <%= time ago in words(feed item.created at) %> ago.
</span>
<% if current user?(feed item.user) %>
<%= link to "delete", feed item, method: :delete,
confirm: "You sure?",
title: feed item.content %>
<% end %>
</li>
www.it-ebooks.info
ptg8286261
10.3 Manipulating Microposts 477
The test for destroying microposts uses Capybara to click the ‘‘delete’’ link andexpects the Micropost count to decrease by 1 (Listing 10.48).
Listing 10.48 Tests for the Microposts controller destroy action.spec/requests/micropost_pages_spec.rb
require 'spec helper'
describe "Micropost pages" do
.
.
.
describe "micropost destruction" do
before { FactoryGirl.create(:micropost, user: user) }
describe "as correct user" do
before { visit root path }
it "should delete a micropost" do
expect { click link "delete" }.should change(Micropost, :count).by(-1)
end
end
end
end
The application code is also analogous to the user case in Listing 9.48; the maindifference is that, rather than using an admin_user before filter, in the case ofmicroposts we have a correct_user before filter to check that the current user actuallyhas a micropost with the given id. The code appears in Listing 10.49, and the result ofdestroying the second-most-recent post appears in Figure 10.17.
Listing 10.49 The Microposts controller destroy action.app/controllers/microposts_controller.rb
class MicropostsController < ApplicationController
before filter :signed in user, only: [:create, :destroy]
before filter :correct user, only: :destroy
.
.
.
def destroy
@micropost.destroy
redirect back or root path
end
www.it-ebooks.info
ptg8286261
478 Chapter 10: User Microposts
private
def correct user
@micropost = current user.microposts.find by id(params[:id])
redirect to root path if @micropost.nil?
end
end
In the correct_user before filter, note that we find microposts through the association:
current user.microposts.find by id(params[:id])
This automatically ensures that we find only microposts belonging to the current user.In this case, we use find_by_id instead of find because the latter raises an exceptionwhen the micropost doesn’t exist instead of returning nil. By the way, if you’recomfortable with exceptions in Ruby, you could also write the correct_user filterlike this:
def correct user
@micropost = current user.microposts.find(params[:id])
rescue
redirect to root path
end
It might occur to you that we could implement the correct_user filter using theMicropost model directly, like this:
@micropost = Micropost.find by id(params[:id])
redirect to root path unless current user?(@micropost.user)
This would be equivalent to the code in Listing 10.49, but, as explained by WolframArnold in the blog post Access Control 101 in Rails and the Citibank Hack, for securitypurposes it is a good practice always to run lookups through the association.
With the code in this section, our Micropost model and interface are complete,and the test suite should pass:
$ bundle exec rspec spec/
www.it-ebooks.info
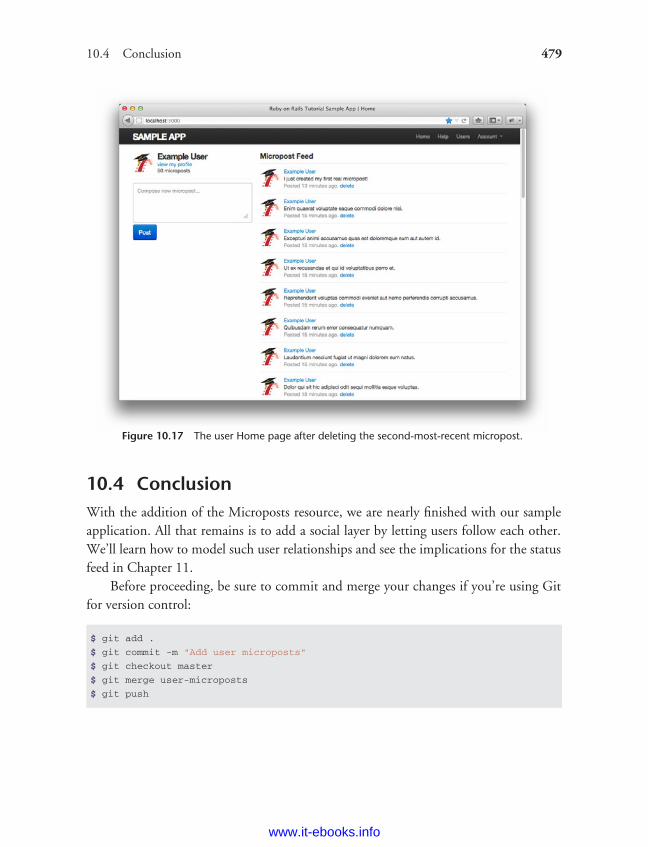
ptg8286261
10.4 Conclusion 479
Figure 10.17 The user Home page after deleting the second-most-recent micropost.
10.4 ConclusionWith the addition of the Microposts resource, we are nearly finished with our sampleapplication. All that remains is to add a social layer by letting users follow each other.We’ll learn how to model such user relationships and see the implications for the statusfeed in Chapter 11.
Before proceeding, be sure to commit and merge your changes if you’re using Gitfor version control:
$ git add .
$ git commit -m "Add user microposts"
$ git checkout master
$ git merge user-microposts
$ git push
www.it-ebooks.info
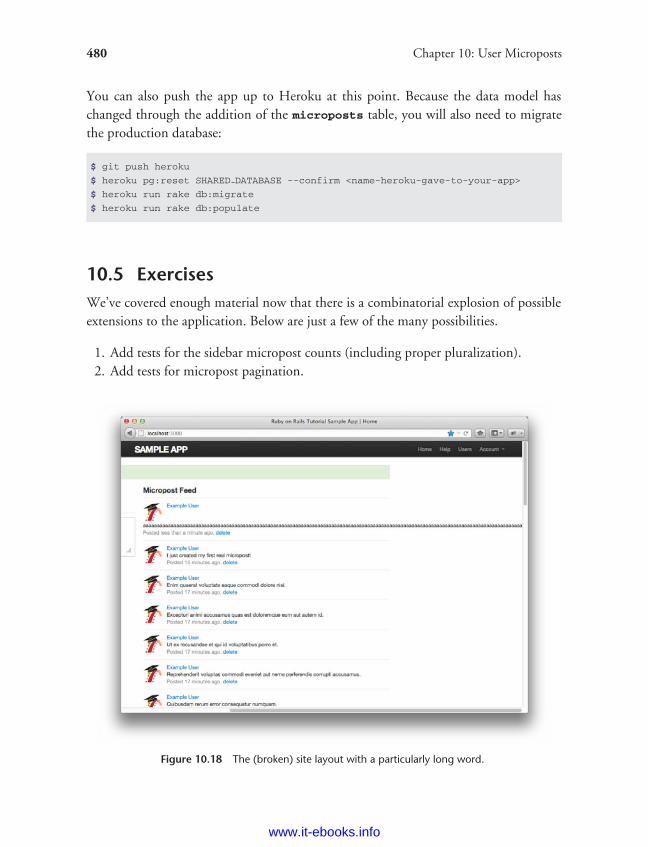
ptg8286261
480 Chapter 10: User Microposts
You can also push the app up to Heroku at this point. Because the data model haschanged through the addition of the microposts table, you will also need to migratethe production database:
$ git push heroku
$ heroku pg:reset SHARED DATABASE --confirm <name-heroku-gave-to-your-app>
$ heroku run rake db:migrate
$ heroku run rake db:populate
10.5 ExercisesWe’ve covered enough material now that there is a combinatorial explosion of possibleextensions to the application. Below are just a few of the many possibilities.
1. Add tests for the sidebar micropost counts (including proper pluralization).2. Add tests for micropost pagination.
Figure 10.18 The (broken) site layout with a particularly long word.
www.it-ebooks.info
ptg8286261
10.5 Exercises 481
3. Refactor the Home page to use separate partials for the two branches of the if-elsestatement.
4. Write a test to make sure delete links do not appear for microposts not created bythe current user.
5. Using partials, eliminate the duplication in the delete links from Listing 10.46 andListing 10.47.
6. Very long words currently break our layout, as shown in Figure 10.18. Fix thisproblem using the wrap helper defined in Listing 10.50. Note the use of the raw
method to prevent Rails from escaping the resulting HTML, together with thesanitize method needed to prevent cross-site scripting. This code also uses thestrange-looking but useful ternary operator (Box 10.1).
7. (challenging) Add a JavaScript display to the Home page to count down from 140characters.
Listing 10.50 A helper to wrap long words.app/helpers/microposts_helper.rb
module MicropostsHelper
def wrap(content)
sanitize(raw(content.split.map{ |s| wrap long string(s) }.join(' ')))
end
private
def wrap long string(text, max width = 30)
zero width space = "​"
regex = /.{1,#{max width}}/
(text.length < max width) ? text :
text.scan(regex).join(zero width space)
end
end
Box 10.1 Ten Types of People
There are ten kinds of people in the world: Those who like the ternary operator,those who don’t, and those who don’t know about it. (If you happen to be in thethird category, soon you won’t be any longer.)
www.it-ebooks.info
ptg8286261
482 Chapter 10: User Microposts
When you do a lot of programming, you quickly learn that one of the mostcommon bits of control flow goes something like this:
if boolean?
do one thing
else
do something else end
Ruby, like many other languages (including C/C++, Perl, PHP, and Java), allows youto replace this with a much more compact expression using the ternary operator (socalled because it consists of three parts):
boolean? ? do one thing : do something else
You can also use the ternary operator to replace assignment:
if boolean?
var = foo
else
var = bar
end
becomes
var = boolean? ? foo : bar
Another common use is in a function’s return value:
def foo
do stuff
boolean? ? "bar" : "baz" end
Since Ruby implicitly returns the value of the last expression in a function, here thefoo method returns "bar" or "baz" depending on the value of boolean?. It isthis final construction that appears in Listing 10.50.
www.it-ebooks.info
ptg8286261
CHAPTER 11Following Users
In this chapter, we will complete the core sample application by adding a social layerthat allows users to follow (and unfollow) other users, resulting in each user’s Homepage displaying a status feed of the followed users’ microposts. We will also make viewsto display both a user’s followers and the users each user is following. We will learnhow to model relationships between users in Section 11.1, then make the web interfacein Section 11.2 (including an introduction to Ajax). Finally, we’ll end by developing afully functional status feed in Section 11.3.
This final chapter contains some of the most challenging material in the tutorial,including some Ruby/SQL trickery to make the status feed. Through these examples,you will see how Rails can handle even rather intricate data models, which shouldserve you well as you go on to develop your own applications with their own specificrequirements. To help with the transition from tutorial to independent development,Section 11.4 contains suggested extensions to the core sample application, along withpointers to more advanced resources.
As usual, Git users should create a new topic branch:
$ git checkout -b following-users
Because the material in this chapter is particularly challenging, before writing anycode, we’ll pause for a moment and take a tour of the interface. As in previous chapters,at this early stage we’ll represent pages using mockups.1 The full page flow runs asfollows: A user (John Calvin) starts at his profile page (Figure 11.1) and navigates to
1. The photographs in the mockup tour are from www.flickr.com/photos/john lustig/2518452221 andwww.flickr.com/photos/30775272@N05/2884963755.
483
www.it-ebooks.info
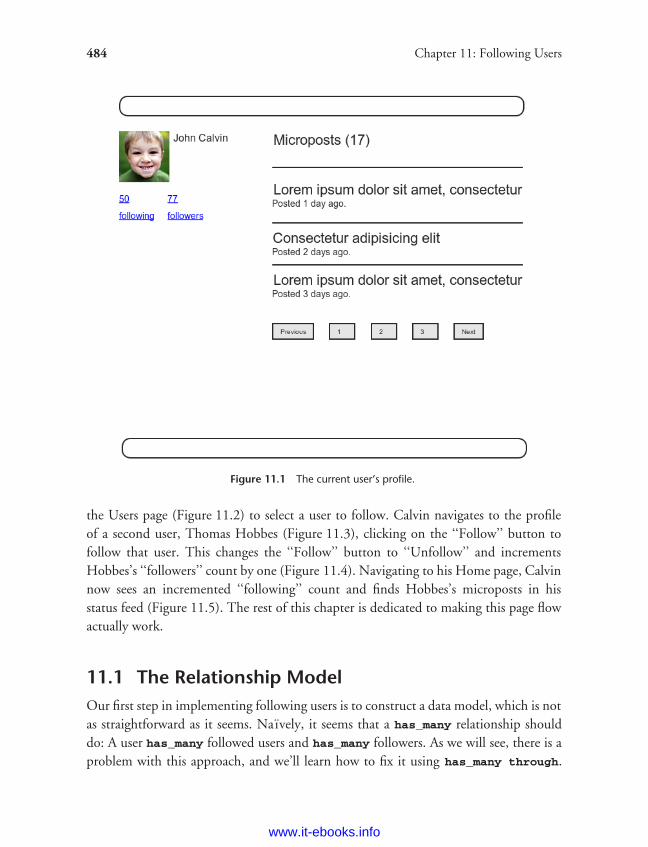
ptg8286261
484 Chapter 11: Following Users
Figure 11.1 The current user’s profile.
the Users page (Figure 11.2) to select a user to follow. Calvin navigates to the profileof a second user, Thomas Hobbes (Figure 11.3), clicking on the ‘‘Follow’’ button tofollow that user. This changes the ‘‘Follow’’ button to ‘‘Unfollow’’ and incrementsHobbes’s ‘‘followers’’ count by one (Figure 11.4). Navigating to his Home page, Calvinnow sees an incremented ‘‘following’’ count and finds Hobbes’s microposts in hisstatus feed (Figure 11.5). The rest of this chapter is dedicated to making this page flowactually work.
11.1 The Relationship ModelOur first step in implementing following users is to construct a data model, which is notas straightforward as it seems. Naı̈vely, it seems that a has_many relationship shoulddo: A user has_many followed users and has_many followers. As we will see, there is aproblem with this approach, and we’ll learn how to fix it using has_many through.
www.it-ebooks.info
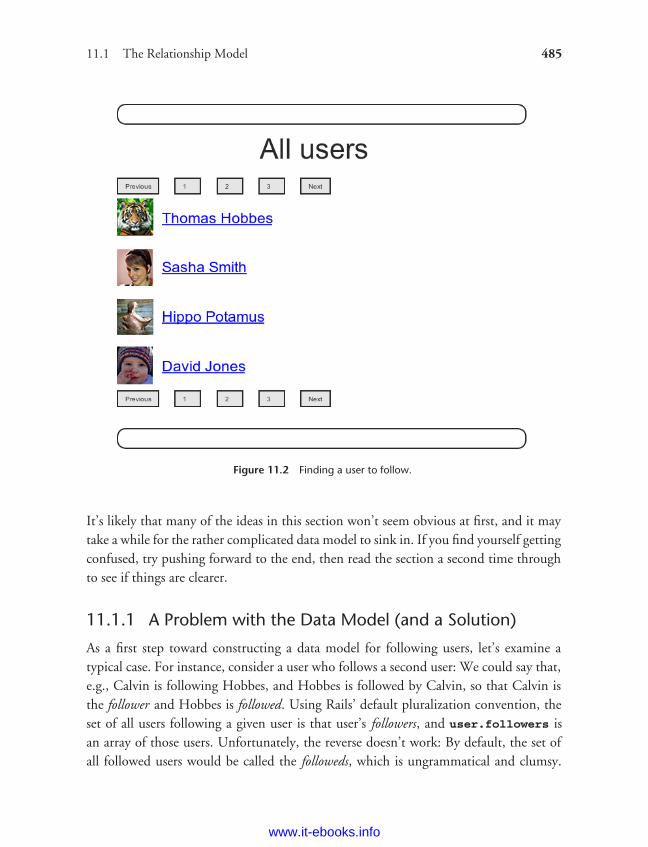
ptg8286261
11.1 The Relationship Model 485
Figure 11.2 Finding a user to follow.
It’s likely that many of the ideas in this section won’t seem obvious at first, and it maytake a while for the rather complicated data model to sink in. If you find yourself gettingconfused, try pushing forward to the end, then read the section a second time throughto see if things are clearer.
11.1.1 A Problem with the Data Model (and a Solution)
As a first step toward constructing a data model for following users, let’s examine atypical case. For instance, consider a user who follows a second user: We could say that,e.g., Calvin is following Hobbes, and Hobbes is followed by Calvin, so that Calvin isthe follower and Hobbes is followed. Using Rails’ default pluralization convention, theset of all users following a given user is that user’s followers, and user.followers isan array of those users. Unfortunately, the reverse doesn’t work: By default, the set ofall followed users would be called the followeds, which is ungrammatical and clumsy.
www.it-ebooks.info
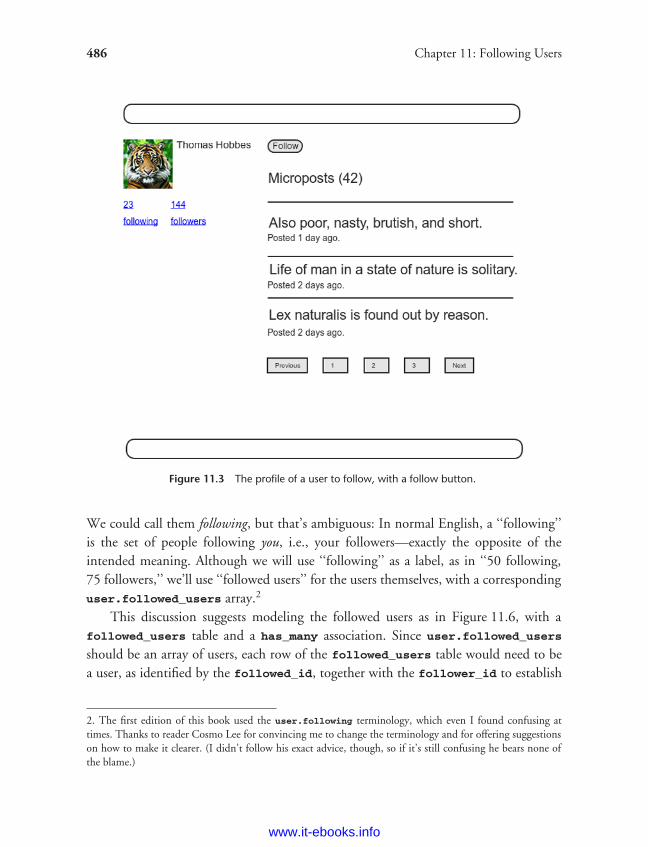
ptg8286261
486 Chapter 11: Following Users
Figure 11.3 The profile of a user to follow, with a follow button.
We could call them following, but that’s ambiguous: In normal English, a ‘‘following’’is the set of people following you, i.e., your followers—exactly the opposite of theintended meaning. Although we will use ‘‘following’’ as a label, as in ‘‘50 following,75 followers,’’ we’ll use ‘‘followed users’’ for the users themselves, with a correspondinguser.followed_users array.2
This discussion suggests modeling the followed users as in Figure 11.6, with afollowed_users table and a has_many association. Since user.followed_users
should be an array of users, each row of the followed_users table would need to bea user, as identified by the followed_id, together with the follower_id to establish
2. The first edition of this book used the user.following terminology, which even I found confusing attimes. Thanks to reader Cosmo Lee for convincing me to change the terminology and for offering suggestionson how to make it clearer. (I didn’t follow his exact advice, though, so if it’s still confusing he bears none ofthe blame.)
www.it-ebooks.info
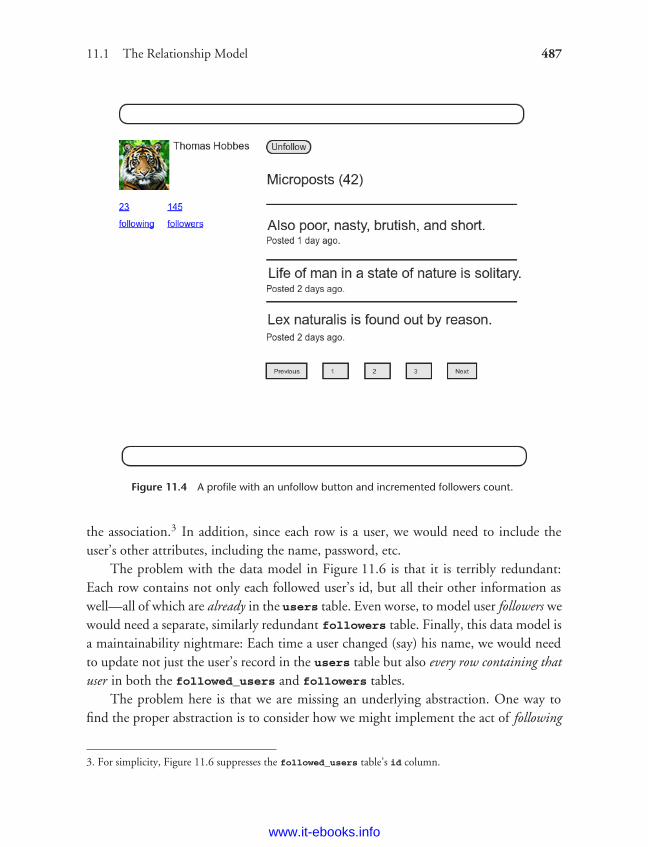
ptg8286261
11.1 The Relationship Model 487
Figure 11.4 A profile with an unfollow button and incremented followers count.
the association.3 In addition, since each row is a user, we would need to include theuser’s other attributes, including the name, password, etc.
The problem with the data model in Figure 11.6 is that it is terribly redundant:Each row contains not only each followed user’s id, but all their other information aswell—all of which are already in the users table. Even worse, to model user followers wewould need a separate, similarly redundant followers table. Finally, this data model isa maintainability nightmare: Each time a user changed (say) his name, we would needto update not just the user’s record in the users table but also every row containing thatuser in both the followed_users and followers tables.
The problem here is that we are missing an underlying abstraction. One way tofind the proper abstraction is to consider how we might implement the act of following
3. For simplicity, Figure 11.6 suppresses the followed_users table’s id column.
www.it-ebooks.info
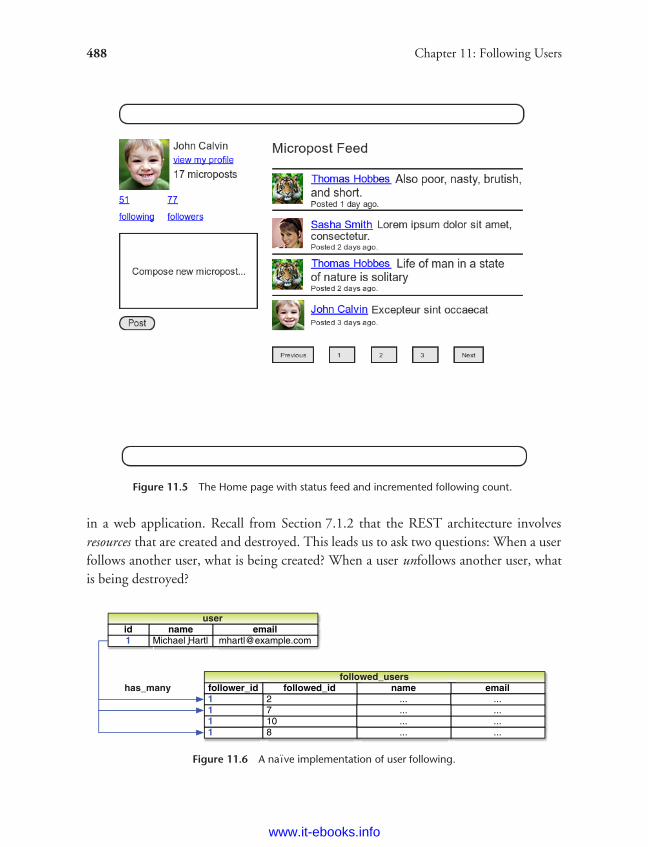
ptg8286261
488 Chapter 11: Following Users
Figure 11.5 The Home page with status feed and incremented following count.
in a web application. Recall from Section 7.1.2 that the REST architecture involvesresources that are created and destroyed. This leads us to ask two questions: When a userfollows another user, what is being created? When a user unfollows another user, whatis being destroyed?
Figure 11.6 A naı̈ve implementation of user following.
www.it-ebooks.info
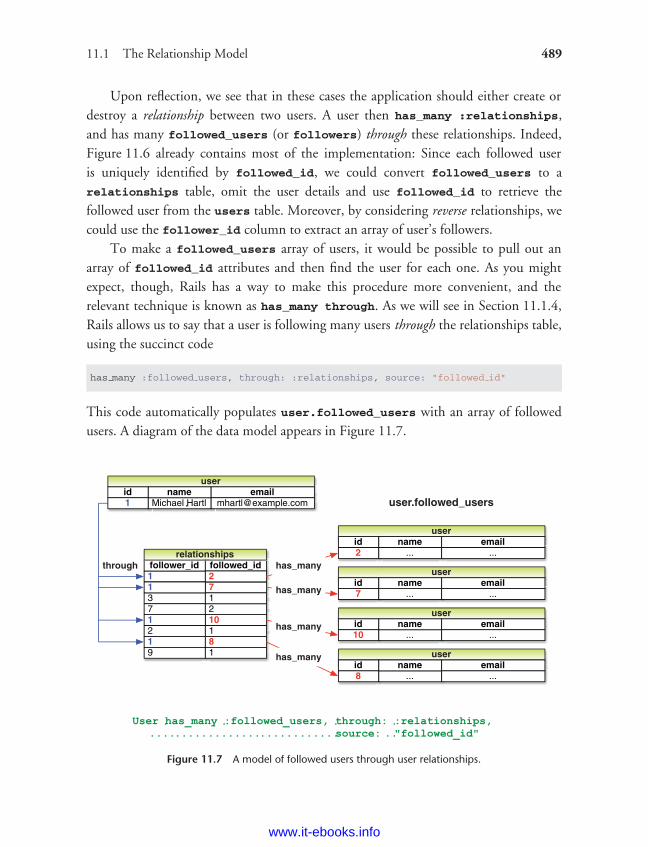
ptg8286261
11.1 The Relationship Model 489
Upon reflection, we see that in these cases the application should either create ordestroy a relationship between two users. A user then has_many :relationships,and has many followed_users (or followers) through these relationships. Indeed,Figure 11.6 already contains most of the implementation: Since each followed useris uniquely identified by followed_id, we could convert followed_users to arelationships table, omit the user details and use followed_id to retrieve thefollowed user from the users table. Moreover, by considering reverse relationships, wecould use the follower_id column to extract an array of user’s followers.
To make a followed_users array of users, it would be possible to pull out anarray of followed_id attributes and then find the user for each one. As you mightexpect, though, Rails has a way to make this procedure more convenient, and therelevant technique is known as has_many through. As we will see in Section 11.1.4,Rails allows us to say that a user is following many users through the relationships table,using the succinct code
has many :followed users, through: :relationships, source: "followed id"
This code automatically populates user.followed_users with an array of followedusers. A diagram of the data model appears in Figure 11.7.
Figure 11.7 A model of followed users through user relationships.
www.it-ebooks.info
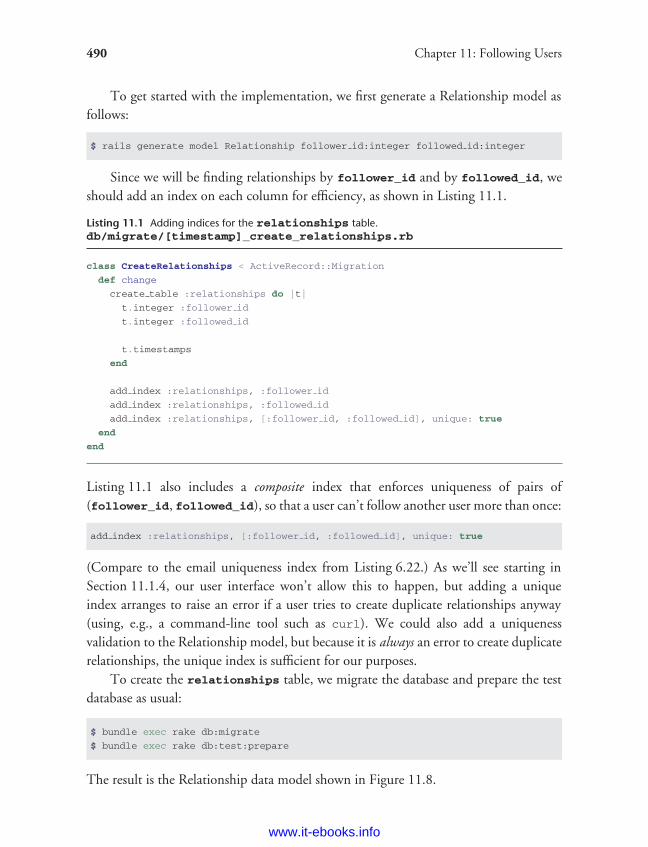
ptg8286261
490 Chapter 11: Following Users
To get started with the implementation, we first generate a Relationship model asfollows:
$ rails generate model Relationship follower id:integer followed id:integer
Since we will be finding relationships by follower_id and by followed_id, weshould add an index on each column for efficiency, as shown in Listing 11.1.
Listing 11.1 Adding indices for the relationships table.db/migrate/[timestamp]_create_relationships.rb
class CreateRelationships < ActiveRecord::Migration
def change
create table :relationships do |t|
t.integer :follower id
t.integer :followed id
t.timestamps
end
add index :relationships, :follower id
add index :relationships, :followed id
add index :relationships, [:follower id, :followed id], unique: true
end
end
Listing 11.1 also includes a composite index that enforces uniqueness of pairs of(follower_id, followed_id), so that a user can’t follow another user more than once:
add index :relationships, [:follower id, :followed id], unique: true
(Compare to the email uniqueness index from Listing 6.22.) As we’ll see starting inSection 11.1.4, our user interface won’t allow this to happen, but adding a uniqueindex arranges to raise an error if a user tries to create duplicate relationships anyway(using, e.g., a command-line tool such as curl). We could also add a uniquenessvalidation to the Relationship model, but because it is always an error to create duplicaterelationships, the unique index is sufficient for our purposes.
To create the relationships table, we migrate the database and prepare the testdatabase as usual:
$ bundle exec rake db:migrate
$ bundle exec rake db:test:prepare
The result is the Relationship data model shown in Figure 11.8.
www.it-ebooks.info
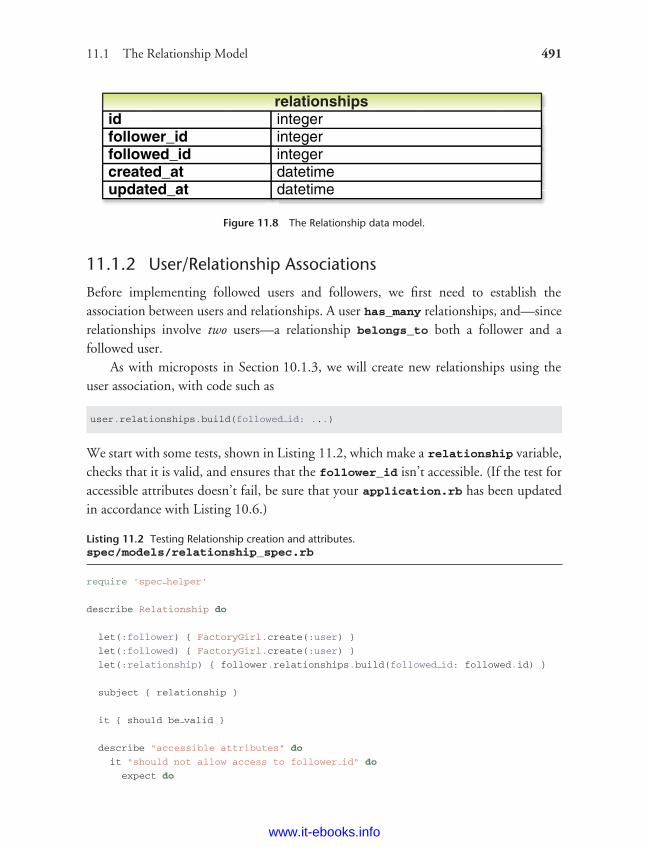
ptg8286261
11.1 The Relationship Model 491
Figure 11.8 The Relationship data model.
11.1.2 User/Relationship Associations
Before implementing followed users and followers, we first need to establish theassociation between users and relationships. A user has_many relationships, and—sincerelationships involve two users—a relationship belongs_to both a follower and afollowed user.
As with microposts in Section 10.1.3, we will create new relationships using theuser association, with code such as
user.relationships.build(followed id: ...)
We start with some tests, shown in Listing 11.2, which make a relationship variable,checks that it is valid, and ensures that the follower_id isn’t accessible. (If the test foraccessible attributes doesn’t fail, be sure that your application.rb has been updatedin accordance with Listing 10.6.)
Listing 11.2 Testing Relationship creation and attributes.spec/models/relationship_spec.rb
require 'spec helper'
describe Relationship do
let(:follower) { FactoryGirl.create(:user) }
let(:followed) { FactoryGirl.create(:user) }
let(:relationship) { follower.relationships.build(followed id: followed.id) }
subject { relationship }
it { should be valid }
describe "accessible attributes" do
it "should not allow access to follower id" do
expect do
www.it-ebooks.info
ptg8286261
492 Chapter 11: Following Users
Relationship.new(follower id: follower.id)
end.should raise error(ActiveModel::MassAssignmentSecurity::Error)
end
end
end
Note that, unlike the tests for the User and Micropost models, which use @user and@micropost, respectively, Listing 11.2 uses let in preference to an instance variable.The differences rarely matter,4 but I consider let to be cleaner than using an instancevariable. We originally used instance variables both because instance variables areimportant to introduce early and because let is a little more advanced.
We should also test the User model for a relationships attribute, as shown inListing 11.3.
Listing 11.3 Testing for the user.relationships attribute.spec/models/user_spec.rb
require 'spec helper'
describe User do
.
.
.
it { should respond to(:feed) }
it { should respond to(:relationships) }
.
.
.
end
At this point, you might expect application code as in Section 10.1.3, and it’ssimilar, but there is one critical difference: In the case of the Micropost model, wecould say
class Micropost < ActiveRecord::Base
belongs to :user
.
.
.
end
4. See the discussion on when to use let at Stack Overflow for more information.
www.it-ebooks.info

ptg8286261
11.1 The Relationship Model 493
and
class User < ActiveRecord::Base
has many :microposts
.
.
.
end
because the microposts table has a user_id attribute to identify the user (Section10.1.1). An id used in this manner to connect two database tables is known as aforeign key, and when the foreign key for a User model object is user_id, Railsinfers the association automatically: By default, Rails expects a foreign key of the form<class>_id, where <class> is the lowercase version of the class name.5 In the presentcase, although we are still dealing with users, they are now identified with the foreignkey follower_id, so we have to tell that to Rails, as shown in Listing 11.4.6
Listing 11.4 Implementing the user/relationships has_many association.app/models/user.rb
class User < ActiveRecord::Base
.
.
.
has many :microposts, dependent: :destroy
has many :relationships, foreign key: "follower id", dependent: :destroy
.
.
.
end
Since destroying a user should also destroy that user’s relationships, we’ve goneahead and added dependent: :destroy to the association; writing a test for this isleft as an exercise (Section 11.5).
As with the Micropost model, the Relationship model has a belongs_to relation-ship with users; in this case, a relationship object belongs to both a follower and afollowed user, which we test for in Listing 11.5.
5. Technically, Rails uses the underscore method to convert the class name to an id. For example,"FooBar".underscore is "foo_bar", so the foreign key for a FooBar object would be foo_bar_id.(Incidentally, the inverse of underscore is camelize, which converts "camel_case" to "CamelCase".)
6. If you’ve noticed that followed_id also identifies a user and are concerned about the asymmetric treatmentof followed and follower, you’re ahead of the game. We’ll deal with this issue in Section 11.1.5.
www.it-ebooks.info
ptg8286261
494 Chapter 11: Following Users
Listing 11.5 Testing the user/relationships belongs_to association.spec/models/relationship_spec.rb
describe Relationship do
.
.
.
describe "follower methods" do
it { should respond to(:follower) }
it { should respond to(:followed) }
its(:follower) { should == follower }
its(:followed) { should == followed }
end
end
To write the application code, we define the belongs_to relationship as usual. Railsinfers the names of the foreign keys from the corresponding symbols (i.e., follower_idfrom :follower, and followed_id from :followed), but since there is neither aFollowed nor a Follower model we need to supply the class name User. The result isshown in Listing 11.6. Note that, unlike the default generate Relationship model, inthis case only the followed_id is accessible.
Listing 11.6 Adding the belongs_to associations to the Relationship model.app/models/relationship.rb
class Relationship < ActiveRecord::Base
attr accessible :followed id
belongs to :follower, class name: "User"
belongs to :followed, class name: "User"
end
The followed association isn’t actually needed until Section 11.1.5, but the parallelfollower/followed structure is clearer if we implement them both at the same time.
At this point, the tests in Listing 11.2 and Listing 11.3 should pass.
$ bundle exec rspec spec/
www.it-ebooks.info
ptg8286261
11.1 The Relationship Model 495
11.1.3 Validations
Before moving on, we’ll add a couple of Relationship model validations for completeness.The tests (Listing 11.7) and application code (Listing 11.8) are straightforward.
Listing 11.7 Testing the Relationship model validations.spec/models/relationship_spec.rb
describe Relationship do
.
.
.
describe "when followed id is not present" do
before { relationship.followed id = nil }
it { should not be valid }
end
describe "when follower id is not present" do
before { relationship.follower id = nil }
it { should not be valid }
end
end
Listing 11.8 Adding the Relationship model validations.app/models/relationship.rb
class Relationship < ActiveRecord::Base
attr accessible :followed id
belongs to :follower, class name: "User"
belongs to :followed, class name: "User"
validates :follower id, presence: true
validates :followed id, presence: true
end
11.1.4 Followed users
We come now to the heart of the Relationship associations: followed_users andfollowers. We start with followed_users, as shown Listing 11.9.
www.it-ebooks.info
ptg8286261
496 Chapter 11: Following Users
Listing 11.9 A test for the user.followed_users attribute.spec/models/user_spec.rb
require 'spec helper'
describe User do
.
.
.
it { should respond to(:relationships) }
it { should respond to(:followed users) }
.
.
.
end
The implementation uses has_many through for the first time: A user has manyfollowing through relationships, as illustrated in Figure 11.7. By default, in a has_many
through association Rails looks for a foreign key corresponding to the singular versionof the association; in other words, code like
has many :followeds, through: :relationships
would assemble an array using the followed_id in the relationships table. But, asnoted in Section 11.1.1, user.followeds is rather awkward; far more natural is to use‘‘followed users’’ as a plural of ‘‘followed,’’ and write instead user.followed_users
for the array of followed users. Naturally, Rails allows us to override the default, in thiscase using the :source parameter (Listing 11.10), which explicitly tells Rails that thesource of the followed_users array is the set of followed ids.
Listing 11.10 Adding the User model followed_users association.app/models/user.rb
class User < ActiveRecord::Base
.
.
.
has many :microposts, dependent: :destroy
has many :relationships, foreign key: "follower id", dependent: :destroy
has many :followed users, through: :relationships, source: :followed
.
.
.
end
www.it-ebooks.info
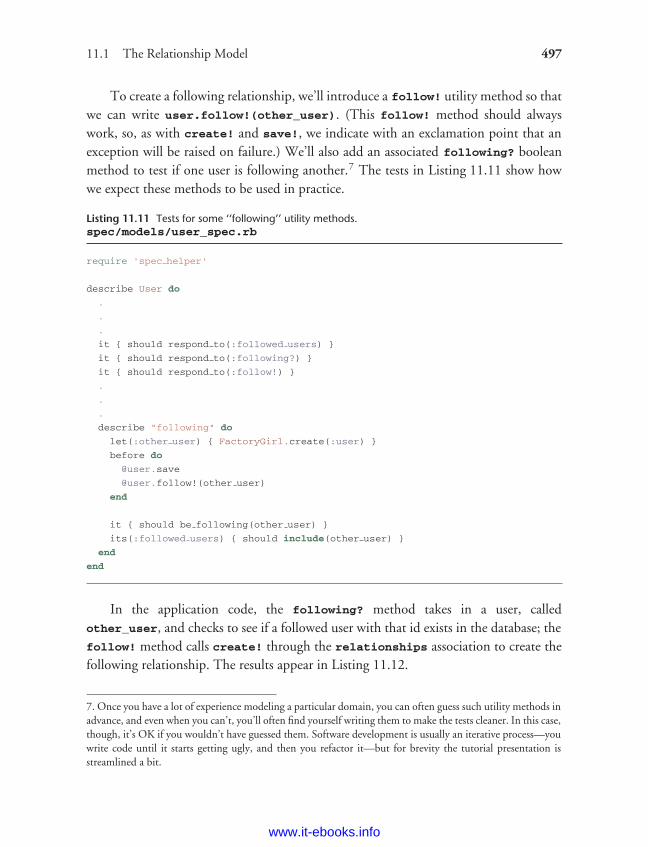
ptg8286261
11.1 The Relationship Model 497
To create a following relationship, we’ll introduce a follow! utility method so thatwe can write user.follow!(other_user). (This follow! method should alwayswork, so, as with create! and save!, we indicate with an exclamation point that anexception will be raised on failure.) We’ll also add an associated following? booleanmethod to test if one user is following another.7 The tests in Listing 11.11 show howwe expect these methods to be used in practice.
Listing 11.11 Tests for some ‘‘following’’ utility methods.spec/models/user_spec.rb
require 'spec helper'
describe User do
.
.
.
it { should respond to(:followed users) }
it { should respond to(:following?) }
it { should respond to(:follow!) }
.
.
.
describe "following" do
let(:other user) { FactoryGirl.create(:user) }
before do
@user.save
@user.follow!(other user)
end
it { should be following(other user) }
its(:followed users) { should include(other user) }
end
end
In the application code, the following? method takes in a user, calledother_user, and checks to see if a followed user with that id exists in the database; thefollow! method calls create! through the relationships association to create thefollowing relationship. The results appear in Listing 11.12.
7. Once you have a lot of experience modeling a particular domain, you can often guess such utility methods inadvance, and even when you can’t, you’ll often find yourself writing them to make the tests cleaner. In this case,though, it’s OK if you wouldn’t have guessed them. Software development is usually an iterative process—youwrite code until it starts getting ugly, and then you refactor it—but for brevity the tutorial presentation isstreamlined a bit.
www.it-ebooks.info
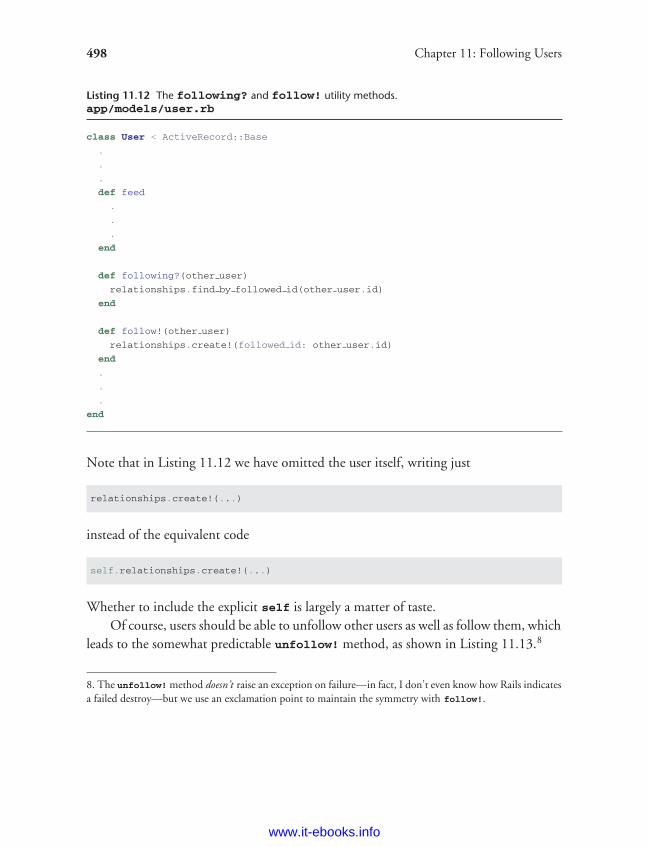
ptg8286261
498 Chapter 11: Following Users
Listing 11.12 The following? and follow! utility methods.app/models/user.rb
class User < ActiveRecord::Base
.
.
.
def feed
.
.
.
end
def following?(other user)
relationships.find by followed id(other user.id)
end
def follow!(other user)
relationships.create!(followed id: other user.id)
end
.
.
.
end
Note that in Listing 11.12 we have omitted the user itself, writing just
relationships.create!(...)
instead of the equivalent code
self.relationships.create!(...)
Whether to include the explicit self is largely a matter of taste.Of course, users should be able to unfollow other users as well as follow them, which
leads to the somewhat predictable unfollow! method, as shown in Listing 11.13.8
8. The unfollow! method doesn’t raise an exception on failure—in fact, I don’t even know how Rails indicatesa failed destroy—but we use an exclamation point to maintain the symmetry with follow!.
www.it-ebooks.info
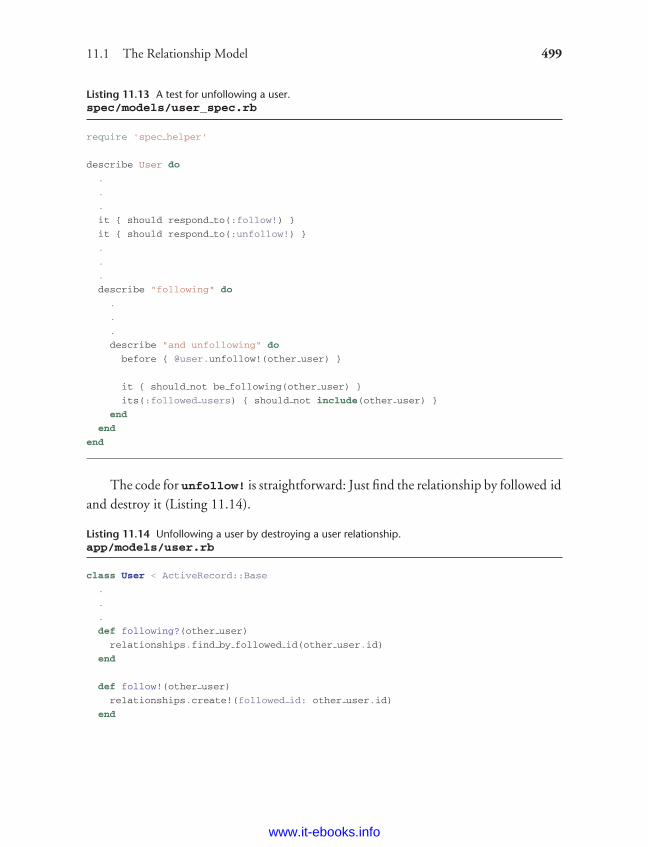
ptg8286261
11.1 The Relationship Model 499
Listing 11.13 A test for unfollowing a user.spec/models/user_spec.rb
require 'spec helper'
describe User do
.
.
.
it { should respond to(:follow!) }
it { should respond to(:unfollow!) }
.
.
.
describe "following" do
.
.
.
describe "and unfollowing" do
before { @user.unfollow!(other user) }
it { should not be following(other user) }
its(:followed users) { should not include(other user) }
end
end
end
The code for unfollow! is straightforward: Just find the relationship by followed idand destroy it (Listing 11.14).
Listing 11.14 Unfollowing a user by destroying a user relationship.app/models/user.rb
class User < ActiveRecord::Base
.
.
.
def following?(other user)
relationships.find by followed id(other user.id)
end
def follow!(other user)
relationships.create!(followed id: other user.id)
end
www.it-ebooks.info

ptg8286261
500 Chapter 11: Following Users
def unfollow!(other user)
relationships.find by followed id(other user.id).destroy
end
.
.
.
end
11.1.5 Followers
The final piece of the relationships puzzle is to add a user.followers methodto go with user.followed_users. You may have noticed from Figure 11.7 thatall the information needed to extract an array of followers is already present in therelationships table. Indeed, the technique is exactly the same as for user following,with the roles of follower_id and followed_id reversed. This suggests that, if wecould somehow arrange for a reverse_relationships table with those two columnsreversed (Figure 11.9), we could implement user.followers with little effort.
We begin with the tests, having faith that the magic of Rails will come to the rescue(Listing 11.15).
Figure 11.9 A model for user followers using a reverse Relationship model.
www.it-ebooks.info
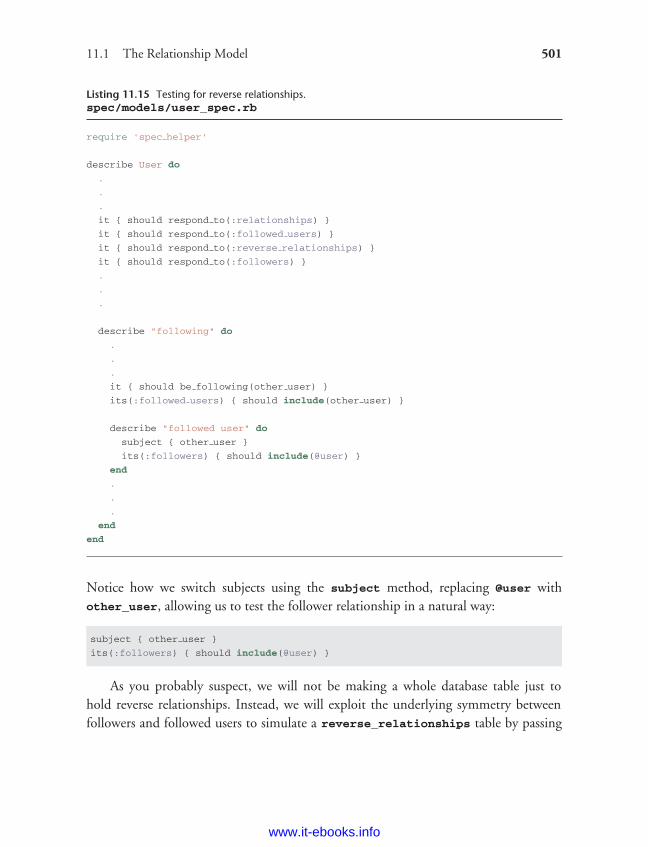
ptg8286261
11.1 The Relationship Model 501
Listing 11.15 Testing for reverse relationships.spec/models/user_spec.rb
require 'spec helper'
describe User do
.
.
.
it { should respond to(:relationships) }
it { should respond to(:followed users) }
it { should respond to(:reverse relationships) }
it { should respond to(:followers) }
.
.
.
describe "following" do
.
.
.
it { should be following(other user) }
its(:followed users) { should include(other user) }
describe "followed user" do
subject { other user }
its(:followers) { should include(@user) }
end
.
.
.
end
end
Notice how we switch subjects using the subject method, replacing @user withother_user, allowing us to test the follower relationship in a natural way:
subject { other user }
its(:followers) { should include(@user) }
As you probably suspect, we will not be making a whole database table just tohold reverse relationships. Instead, we will exploit the underlying symmetry betweenfollowers and followed users to simulate a reverse_relationships table by passing
www.it-ebooks.info
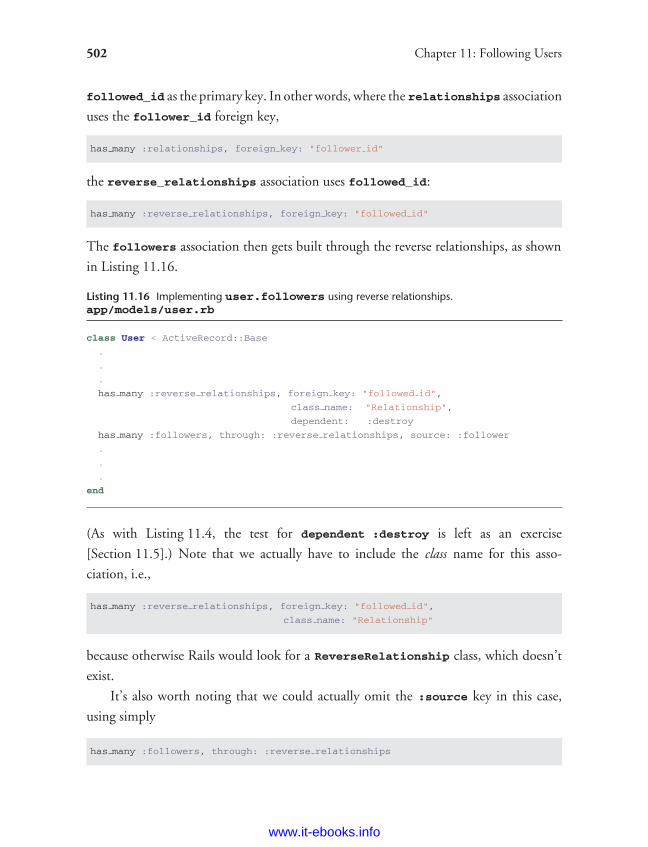
ptg8286261
502 Chapter 11: Following Users
followed_id as the primary key. In other words, where the relationships association
uses the follower_id foreign key,
has many :relationships, foreign key: "follower id"
the reverse_relationships association uses followed_id:
has many :reverse relationships, foreign key: "followed id"
The followers association then gets built through the reverse relationships, as shown
in Listing 11.16.
Listing 11.16 Implementing user.followers using reverse relationships.app/models/user.rb
class User < ActiveRecord::Base
.
.
.
has many :reverse relationships, foreign key: "followed id",
class name: "Relationship",
dependent: :destroy
has many :followers, through: :reverse relationships, source: :follower
.
.
.
end
(As with Listing 11.4, the test for dependent :destroy is left as an exercise
[Section 11.5].) Note that we actually have to include the class name for this asso-
ciation, i.e.,
has many :reverse relationships, foreign key: "followed id",
class name: "Relationship"
because otherwise Rails would look for a ReverseRelationship class, which doesn’t
exist.
It’s also worth noting that we could actually omit the :source key in this case,
using simply
has many :followers, through: :reverse relationships
www.it-ebooks.info
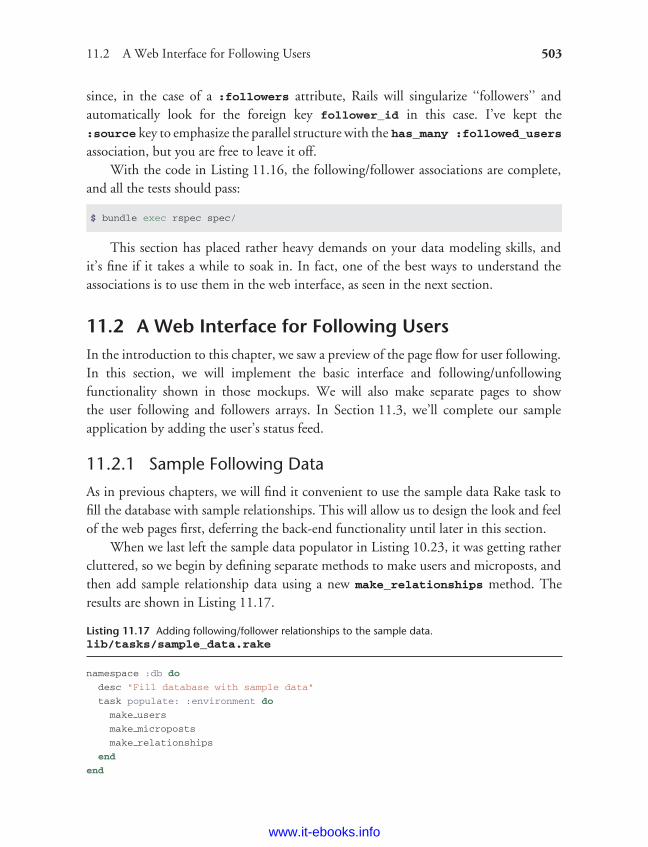
ptg8286261
11.2 A Web Interface for Following Users 503
since, in the case of a :followers attribute, Rails will singularize ‘‘followers’’ andautomatically look for the foreign key follower_id in this case. I’ve kept the:source key to emphasize the parallel structure with the has_many :followed_users
association, but you are free to leave it off.With the code in Listing 11.16, the following/follower associations are complete,
and all the tests should pass:
$ bundle exec rspec spec/
This section has placed rather heavy demands on your data modeling skills, andit’s fine if it takes a while to soak in. In fact, one of the best ways to understand theassociations is to use them in the web interface, as seen in the next section.
11.2 A Web Interface for Following UsersIn the introduction to this chapter, we saw a preview of the page flow for user following.In this section, we will implement the basic interface and following/unfollowingfunctionality shown in those mockups. We will also make separate pages to showthe user following and followers arrays. In Section 11.3, we’ll complete our sampleapplication by adding the user’s status feed.
11.2.1 Sample Following Data
As in previous chapters, we will find it convenient to use the sample data Rake task tofill the database with sample relationships. This will allow us to design the look and feelof the web pages first, deferring the back-end functionality until later in this section.
When we last left the sample data populator in Listing 10.23, it was getting rathercluttered, so we begin by defining separate methods to make users and microposts, andthen add sample relationship data using a new make_relationships method. Theresults are shown in Listing 11.17.
Listing 11.17 Adding following/follower relationships to the sample data.lib/tasks/sample_data.rake
namespace :db do
desc "Fill database with sample data"
task populate: :environment do
make users
make microposts
make relationships
end
end
www.it-ebooks.info
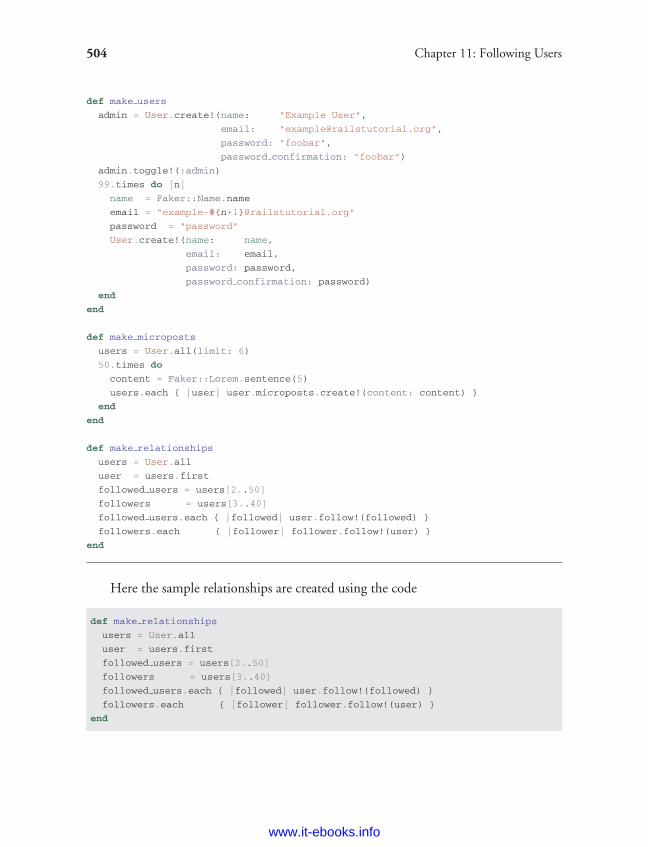
ptg8286261
504 Chapter 11: Following Users
def make users
admin = User.create!(name: "Example User",
email: "[email protected]",
password: "foobar",
password confirmation: "foobar")
admin.toggle!(:admin)
99.times do |n|
name = Faker::Name.name
email = "example-#{n+1}@railstutorial.org"
password = "password"
User.create!(name: name,
email: email,
password: password,
password confirmation: password)
end
end
def make microposts
users = User.all(limit: 6)
50.times do
content = Faker::Lorem.sentence(5)
users.each { |user| user.microposts.create!(content: content) }
end
end
def make relationships
users = User.all
user = users.first
followed users = users[2..50]
followers = users[3..40]
followed users.each { |followed| user.follow!(followed) }
followers.each { |follower| follower.follow!(user) }
end
Here the sample relationships are created using the code
def make relationships
users = User.all
user = users.first
followed users = users[2..50]
followers = users[3..40]
followed users.each { |followed| user.follow!(followed) }
followers.each { |follower| follower.follow!(user) }
end
www.it-ebooks.info
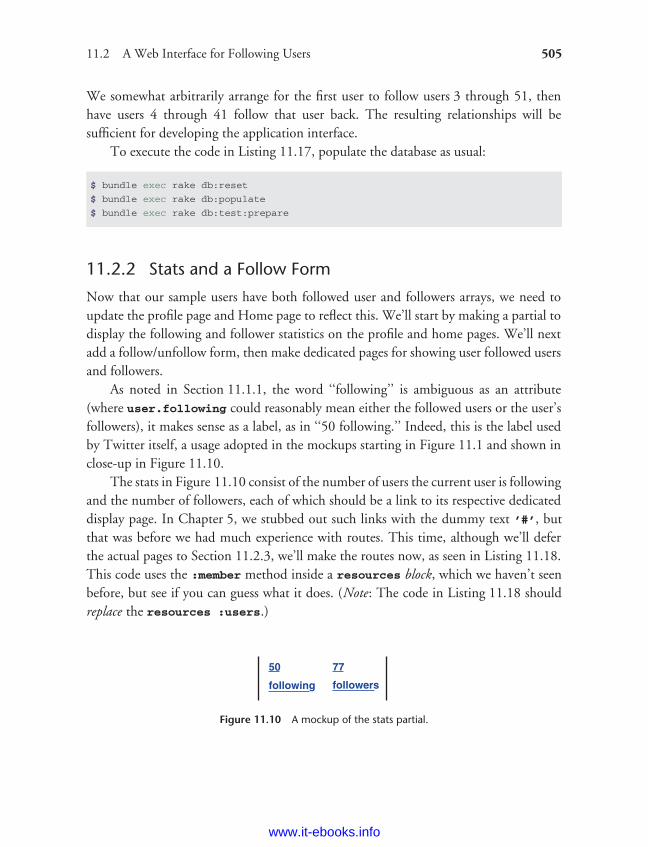
ptg8286261
11.2 A Web Interface for Following Users 505
We somewhat arbitrarily arrange for the first user to follow users 3 through 51, thenhave users 4 through 41 follow that user back. The resulting relationships will besufficient for developing the application interface.
To execute the code in Listing 11.17, populate the database as usual:
$ bundle exec rake db:reset
$ bundle exec rake db:populate
$ bundle exec rake db:test:prepare
11.2.2 Stats and a Follow Form
Now that our sample users have both followed user and followers arrays, we need toupdate the profile page and Home page to reflect this. We’ll start by making a partial todisplay the following and follower statistics on the profile and home pages. We’ll nextadd a follow/unfollow form, then make dedicated pages for showing user followed usersand followers.
As noted in Section 11.1.1, the word ‘‘following’’ is ambiguous as an attribute(where user.following could reasonably mean either the followed users or the user’sfollowers), it makes sense as a label, as in ‘‘50 following.’’ Indeed, this is the label usedby Twitter itself, a usage adopted in the mockups starting in Figure 11.1 and shown inclose-up in Figure 11.10.
The stats in Figure 11.10 consist of the number of users the current user is followingand the number of followers, each of which should be a link to its respective dedicateddisplay page. In Chapter 5, we stubbed out such links with the dummy text ’#’, butthat was before we had much experience with routes. This time, although we’ll deferthe actual pages to Section 11.2.3, we’ll make the routes now, as seen in Listing 11.18.This code uses the :member method inside a resources block, which we haven’t seenbefore, but see if you can guess what it does. (Note: The code in Listing 11.18 shouldreplace the resources :users.)
Figure 11.10 A mockup of the stats partial.
www.it-ebooks.info

ptg8286261
506 Chapter 11: Following Users
Listing 11.18 Adding followed_users and followers actions to the Users controller.config/routes.rb
SampleApp::Application.routes.draw do
resources :users do
member do
get :following, :followers
end
end
.
.
.
end
You might suspect that the URIs will look like /users/1/following and /users/1/followers,and that is exactly what the code in Listing 11.18 does. Since both pages will be showingdata, we use get to arrange for the URIs to respond to GET requests (as required bythe REST convention for such pages), and the member method means that the routesrespond to URIs containing the user id. The other possibility, collection, workswithout the id, so that
resources :users do
collection do
get :tigers
end
end
would respond to the URI /users/tigers (presumably to display all the tigers in ourapplication). For more details on such routing options, see the Rails Guides articleentitled ‘‘Rails Routing from the Outside In.’’ A table of the routes generated byListing 11.18 appears in Table 11.1; note the named routes for the followed user andfollowers pages, which we’ll put to use shortly. The unfortunate hybrid usage in the‘‘following’’ route is forced by our choice to use the unambiguous ‘‘followed users’’terminology along with the ‘‘following’’ usage from Twitter. Since the former wouldlead to routes of the form followed_users_user_path, which sounds strange, we’veopted for the latter in the context of Table 11.1, yielding following_user_path.
Table 11.1 RESTful routes provided by the custom rules in resource in Listing 11.18.
HTTP request URI Action Named route
GET /users/1/following following following_user_path(1)
GET /users/1/followers followers followers_user_path(1)
www.it-ebooks.info
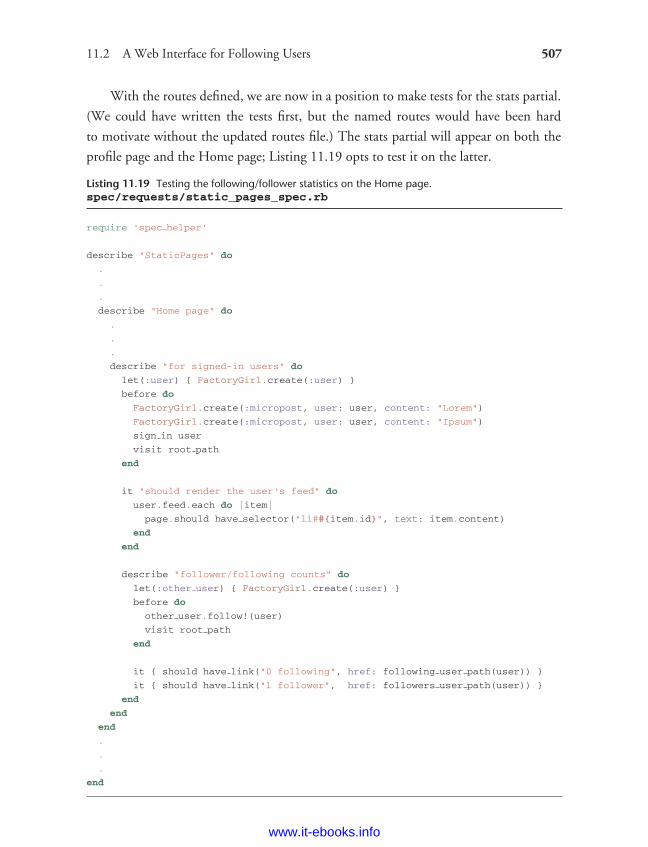
ptg8286261
11.2 A Web Interface for Following Users 507
With the routes defined, we are now in a position to make tests for the stats partial.
(We could have written the tests first, but the named routes would have been hard
to motivate without the updated routes file.) The stats partial will appear on both the
profile page and the Home page; Listing 11.19 opts to test it on the latter.
Listing 11.19 Testing the following/follower statistics on the Home page.spec/requests/static_pages_spec.rb
require 'spec helper'
describe "StaticPages" do
.
.
.
describe "Home page" do
.
.
.
describe "for signed-in users" do
let(:user) { FactoryGirl.create(:user) }
before do
FactoryGirl.create(:micropost, user: user, content: "Lorem")
FactoryGirl.create(:micropost, user: user, content: "Ipsum")
sign in user
visit root path
end
it "should render the user's feed" do
user.feed.each do |item|
page.should have selector("li##{item.id}", text: item.content)
end
end
describe "follower/following counts" do
let(:other user) { FactoryGirl.create(:user) }
before do
other user.follow!(user)
visit root path
end
it { should have link("0 following", href: following user path(user)) }
it { should have link("1 follower", href: followers user path(user)) }
end
end
end
.
.
.
end
www.it-ebooks.info
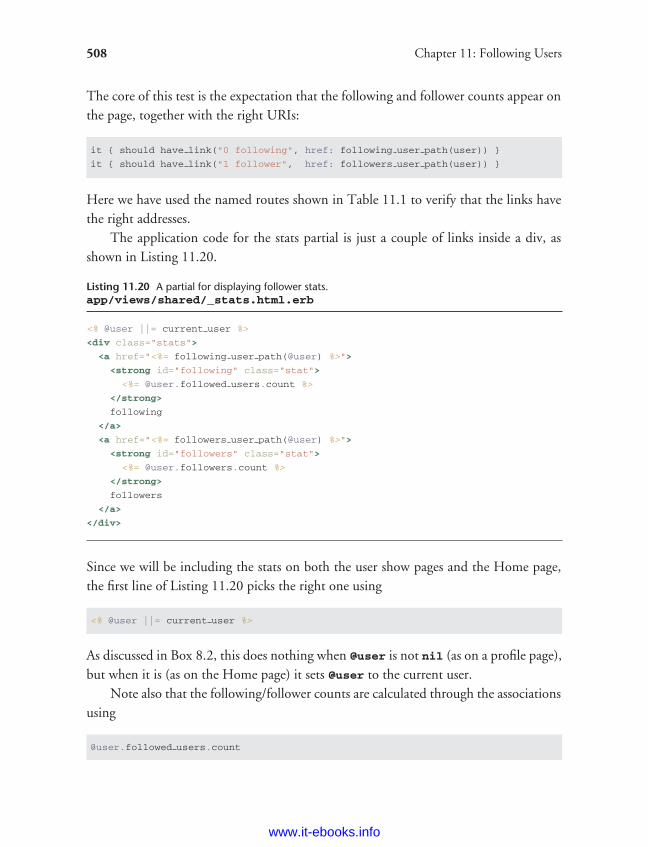
ptg8286261
508 Chapter 11: Following Users
The core of this test is the expectation that the following and follower counts appear onthe page, together with the right URIs:
it { should have link("0 following", href: following user path(user)) }
it { should have link("1 follower", href: followers user path(user)) }
Here we have used the named routes shown in Table 11.1 to verify that the links havethe right addresses.
The application code for the stats partial is just a couple of links inside a div, asshown in Listing 11.20.
Listing 11.20 A partial for displaying follower stats.app/views/shared/_stats.html.erb
<% @user ||= current user %>
<div class="stats">
<a href="<%= following user path(@user) %>">
<strong id="following" class="stat">
<%= @user.followed users.count %>
</strong>
following
</a>
<a href="<%= followers user path(@user) %>">
<strong id="followers" class="stat">
<%= @user.followers.count %>
</strong>
followers
</a>
</div>
Since we will be including the stats on both the user show pages and the Home page,the first line of Listing 11.20 picks the right one using
<% @user ||= current user %>
As discussed in Box 8.2, this does nothing when @user is not nil (as on a profile page),but when it is (as on the Home page) it sets @user to the current user.
Note also that the following/follower counts are calculated through the associationsusing
@user.followed users.count
www.it-ebooks.info
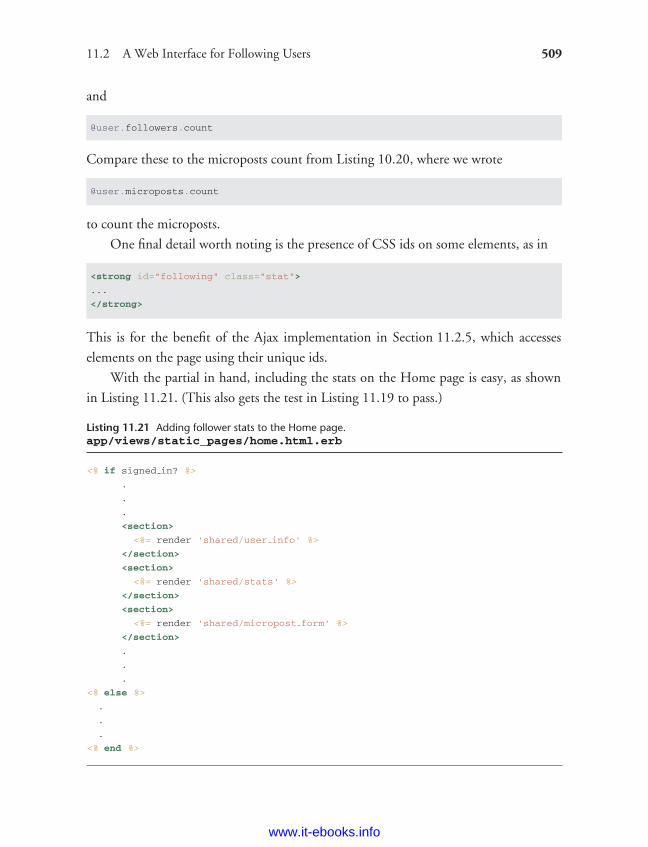
ptg8286261
11.2 A Web Interface for Following Users 509
and
@user.followers.count
Compare these to the microposts count from Listing 10.20, where we wrote
@user.microposts.count
to count the microposts.
One final detail worth noting is the presence of CSS ids on some elements, as in
<strong id="following" class="stat">
...
</strong>
This is for the benefit of the Ajax implementation in Section 11.2.5, which accesses
elements on the page using their unique ids.
With the partial in hand, including the stats on the Home page is easy, as shown
in Listing 11.21. (This also gets the test in Listing 11.19 to pass.)
Listing 11.21 Adding follower stats to the Home page.app/views/static_pages/home.html.erb
<% if signed in? %>
.
.
.
<section>
<%= render 'shared/user info' %>
</section>
<section>
<%= render 'shared/stats' %>
</section>
<section>
<%= render 'shared/micropost form' %>
</section>
.
.
.
<% else %>
.
.
.
<% end %>
www.it-ebooks.info
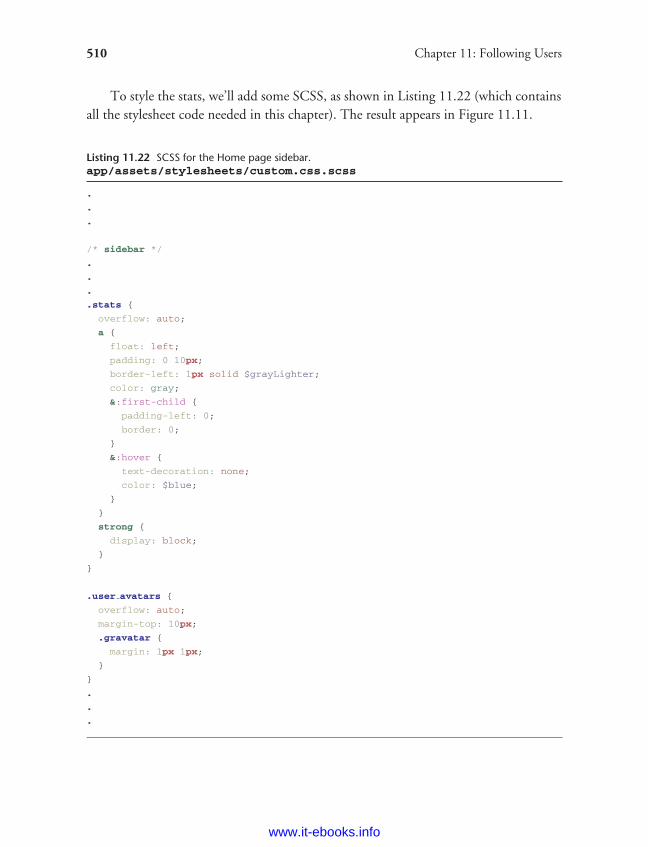
ptg8286261
510 Chapter 11: Following Users
To style the stats, we’ll add some SCSS, as shown in Listing 11.22 (which containsall the stylesheet code needed in this chapter). The result appears in Figure 11.11.
Listing 11.22 SCSS for the Home page sidebar.app/assets/stylesheets/custom.css.scss
.
.
.
/* sidebar */
.
.
.
.stats {
overflow: auto;
a {
float: left;
padding: 0 10px;
border-left: 1px solid $grayLighter;
color: gray;
&:first-child {
padding-left: 0;
border: 0;
}
&:hover {
text-decoration: none;
color: $blue;
}
}
strong {
display: block;
}
}
.user avatars {
overflow: auto;
margin-top: 10px;
.gravatar {
margin: 1px 1px;
}
}
.
.
.
www.it-ebooks.info
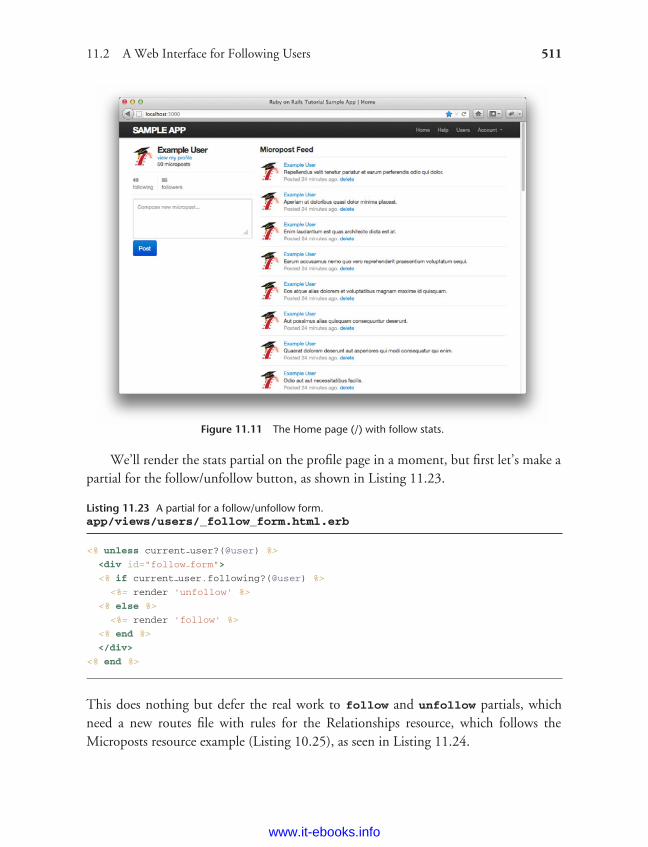
ptg8286261
11.2 A Web Interface for Following Users 511
Figure 11.11 The Home page (/) with follow stats.
We’ll render the stats partial on the profile page in a moment, but first let’s make apartial for the follow/unfollow button, as shown in Listing 11.23.
Listing 11.23 A partial for a follow/unfollow form.app/views/users/_follow_form.html.erb
<% unless current user?(@user) %>
<div id="follow form">
<% if current user.following?(@user) %>
<%= render 'unfollow' %>
<% else %>
<%= render 'follow' %>
<% end %>
</div>
<% end %>
This does nothing but defer the real work to follow and unfollow partials, whichneed a new routes file with rules for the Relationships resource, which follows theMicroposts resource example (Listing 10.25), as seen in Listing 11.24.
www.it-ebooks.info
ptg8286261
512 Chapter 11: Following Users
Listing 11.24 Adding the routes for user relationships.config/routes.rb
SampleApp::Application.routes.draw do
.
.
.
resources :sessions, only: [:new, :create, :destroy]
resources :microposts, only: [:create, :destroy]
resources :relationships, only: [:create, :destroy]
.
.
.
end
The follow/unfollow partials themselves are shown in Listing 11.25 and Listing 11.26.
Listing 11.25 A form for following a user.app/views/users/_follow.html.erb
<%= form for(current user.relationships.build(followed id: @user.id)) do |f| %>
<div><%= f.hidden field :followed id %></div>
<%= f.submit "Follow", class: "btn btn-large btn-primary" %>
<% end %>
Listing 11.26 A form for unfollowing a user.app/views/users/_unfollow.html.erb
<%= form for(current user.relationships.find by followed id(@user),
html: { method: :delete }) do |f| %>
<%= f.submit "Unfollow", class: "btn btn-large" %>
<% end %>
These two forms both use form_for to manipulate a Relationship model object;the main difference between the two is that Listing 11.25 builds a new relationship,whereas Listing 11.26 finds the existing relationship. Naturally, the former sends a POSTrequest to the Relationships controller to create a relationship, while the latter sends aDELETE request to destroy a relationship. (We’ll write these actions in Section 11.2.4.)Finally, you’ll note that the follow/unfollow form doesn’t have any content other than
www.it-ebooks.info
ptg8286261
11.2 A Web Interface for Following Users 513
the button, but it still needs to send the followed_id, which we accomplish with thehidden_field method, which produces HTML of the form
<input id="followed relationship followed id"
name="followed relationship[followed id]"
type="hidden" value="3" />
The ‘‘hidden’’ input tag puts the relevant information on the page without displayingit in the browser.
We can now include the follow form and the following statistics on the user profilepage simply by rendering the partials, as shown in Listing 11.27. Profiles with followand unfollow buttons, respectively, appear in Figure 11.12 and Figure 11.13.
Listing 11.27 Adding the follow form and follower stats to the user profile page.app/views/users/show.html.erb
<% provide(:title, @user.name) %>
<div class="row">
<aside class="span4">
<section>
<h1>
<%= gravatar for @user %>
<%= @user.name %>
</h1>
</section>
<section>
<%= render 'shared/stats' %>
</section>
</aside>
<div class="span8">
<%= render 'follow form' if signed in? %>
.
.
.
</div>
</div>
We’ll get these buttons working soon enough—in fact, we’ll do it two ways, thestandard way (Section 11.2.4) and using Ajax (Section 11.2.5)—but first we’ll finishthe HTML interface by making the following and followers pages.
www.it-ebooks.info
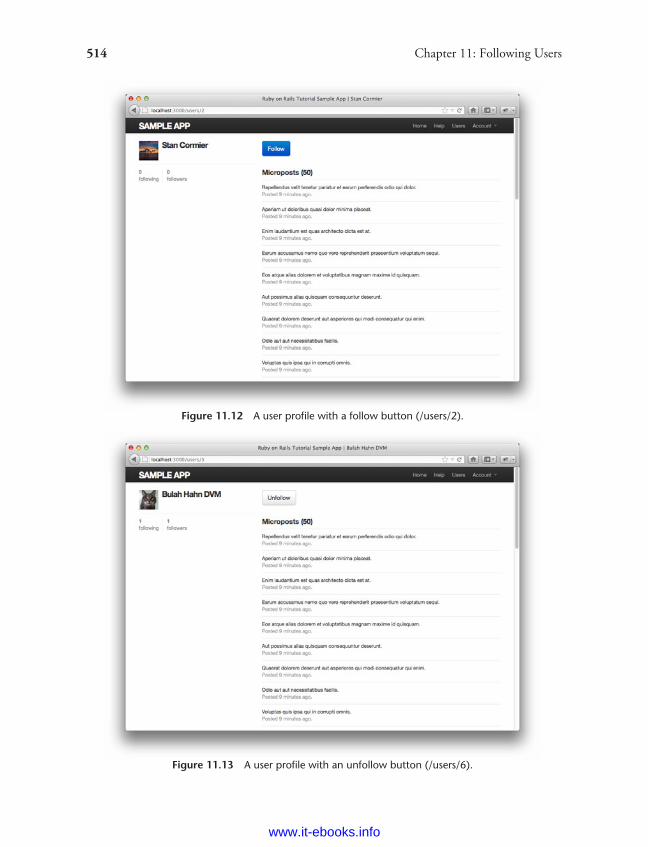
ptg8286261
514 Chapter 11: Following Users
Figure 11.12 A user profile with a follow button (/users/2).
Figure 11.13 A user profile with an unfollow button (/users/6).
www.it-ebooks.info
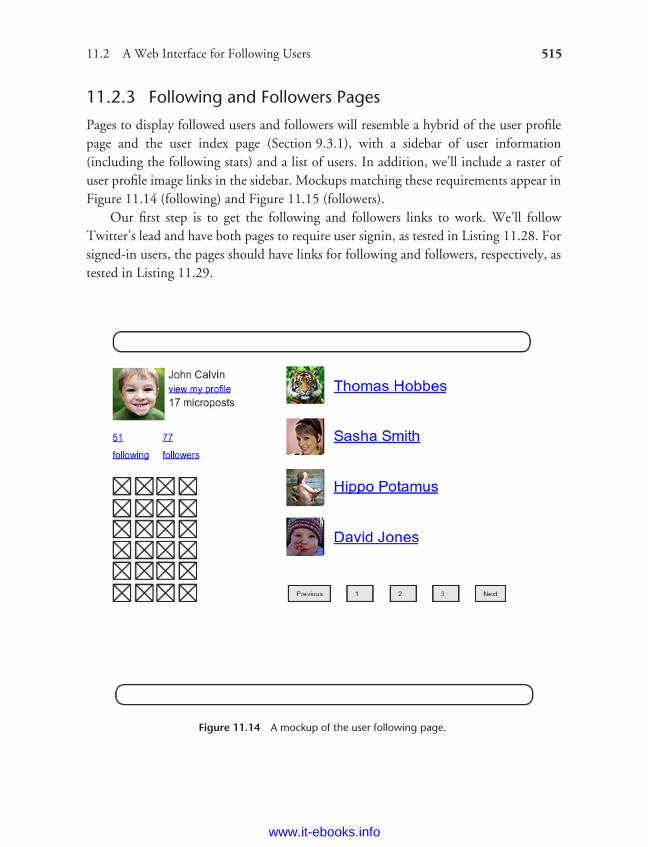
ptg8286261
11.2 A Web Interface for Following Users 515
11.2.3 Following and Followers Pages
Pages to display followed users and followers will resemble a hybrid of the user profilepage and the user index page (Section 9.3.1), with a sidebar of user information(including the following stats) and a list of users. In addition, we’ll include a raster ofuser profile image links in the sidebar. Mockups matching these requirements appear inFigure 11.14 (following) and Figure 11.15 (followers).
Our first step is to get the following and followers links to work. We’ll followTwitter’s lead and have both pages to require user signin, as tested in Listing 11.28. Forsigned-in users, the pages should have links for following and followers, respectively, astested in Listing 11.29.
Figure 11.14 A mockup of the user following page.
www.it-ebooks.info
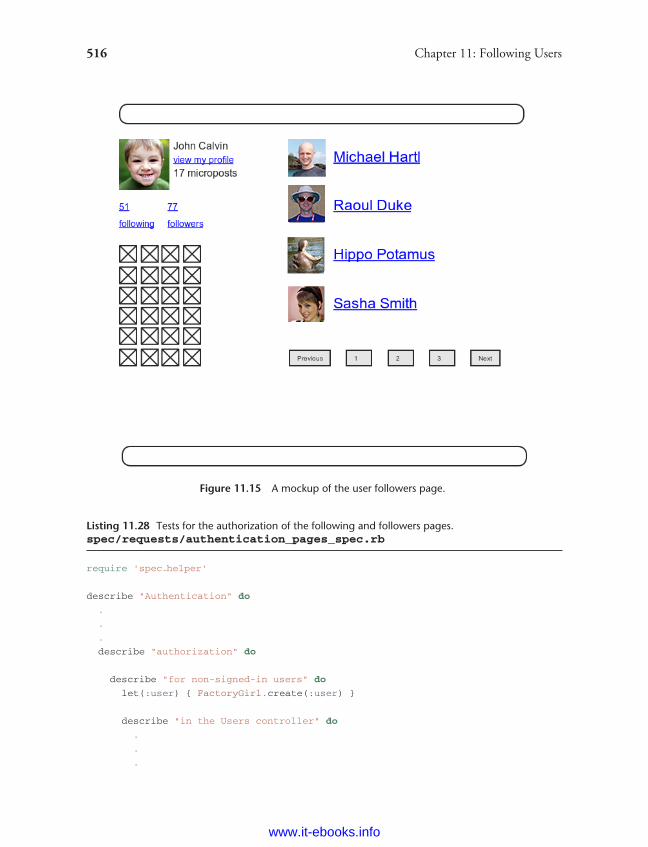
ptg8286261
516 Chapter 11: Following Users
Figure 11.15 A mockup of the user followers page.
Listing 11.28 Tests for the authorization of the following and followers pages.spec/requests/authentication_pages_spec.rb
require 'spec helper'
describe "Authentication" do
.
.
.
describe "authorization" do
describe "for non-signed-in users" do
let(:user) { FactoryGirl.create(:user) }
describe "in the Users controller" do
.
.
.
www.it-ebooks.info
ptg8286261
11.2 A Web Interface for Following Users 517
describe "visiting the following page" do
before { visit following user path(user) }
it { should have selector('title', text: 'Sign in') }
end
describe "visiting the followers page" do
before { visit followers user path(user) }
it { should have selector('title', text: 'Sign in') }
end
end
.
.
.
end
.
.
.
end
.
.
.
end
Listing 11.29 Test for the followed_users and followers pages.spec/requests/user_pages_spec.rb
require 'spec helper'
describe "User pages" do
.
.
.
describe "following/followers" do
let(:user) { FactoryGirl.create(:user) }
let(:other user) { FactoryGirl.create(:user) }
before { user.follow!(other user) }
describe "followed users" do
before do
sign in user
visit following user path(user)
end
it { should have selector('title', text: full title('Following')) }
it { should have selector('h3', text: 'Following') }
it { should have link(other user.name, href: user path(other user)) }
end
www.it-ebooks.info
ptg8286261
518 Chapter 11: Following Users
describe "followers" do
before do
sign in other user
visit followers user path(other user)
end
it { should have selector('title', text: full title('Followers')) }
it { should have selector('h3', text: 'Followers') }
it { should have link(user.name, href: user path(user)) }
end
end
end
The only tricky part of the implementation is realizing that we need to add twonew actions to the Users controller; based on the routes defined in Listing 11.18, weneed to call them following and followers. Each action needs to set a title, findthe user, retrieve either @user.followed_users or @user.followers (in paginatedform), and then render the page. The result appears in Listing 11.30.
Listing 11.30 The following and followers actions.app/controllers/users_controller.rb
class UsersController < ApplicationController
before filter :signed in user,
only: [:index, :edit, :update, :destroy, :following, :followers]
.
.
.
def following
@title = "Following"
@user = User.find(params[:id])
@users = @user.followed users.paginate(page: params[:page])
render 'show follow'
end
def followers
@title = "Followers"
@user = User.find(params[:id])
@users = @user.followers.paginate(page: params[:page])
render 'show follow'
end
.
.
.
end
www.it-ebooks.info
ptg8286261
11.2 A Web Interface for Following Users 519
Note here that both actions make an explicit call to render, in this case rendering aview called show_follow, which we must create. The reason for the common view isthat the ERb is nearly identical for the two cases, and Listing 11.31 covers them both.
Listing 11.31 The show_follow view used to render following and followers.app/views/users/show_follow.html.erb
<% provide(:title, @title) %>
<div class="row">
<aside class="span4">
<section>
<%= gravatar for @user %>
<h1><%= @user.name %></h1>
<span><%= link to "view my profile", @user %></span>
<span><b>Microposts:</b> <%= @user.microposts.count %></span>
</section>
<section>
<%= render 'shared/stats' %>
<% if @users.any? %>
<div class="user avatars">
<% @users.each do |user| %>
<%= link to gravatar for(user, size: 30), user %>
<% end %>
</div>
<% end %>
</section>
</aside>
<div class="span8">
<h3><%= @title %></h3>
<% if @users.any? %>
<ul class="users">
<%= render @users %>
</ul>
<%= will paginate %>
<% end %>
</div>
</div>
With that, the tests should now be passing, and the pages should render as shownin Figure 11.16 (following) and Figure 11.17 (followers).
11.2.4 A Working Follow Button the Standard Way
Now that our views are in order, it’s time to get the follow/unfollow buttons working.The tests for these buttons combine many of the testing techniques covered throughout
www.it-ebooks.info
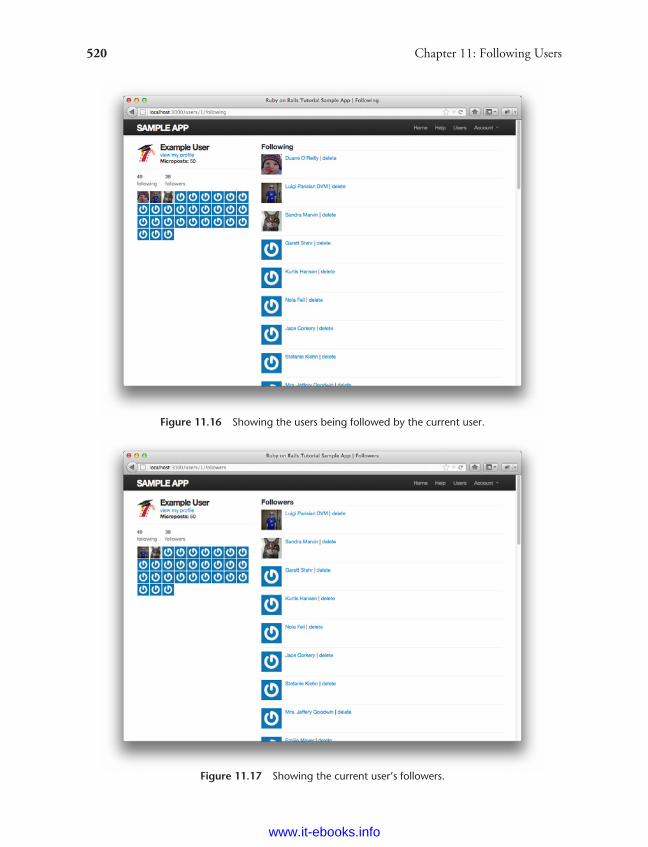
ptg8286261
520 Chapter 11: Following Users
Figure 11.16 Showing the users being followed by the current user.
Figure 11.17 Showing the current user’s followers.
www.it-ebooks.info
ptg8286261
11.2 A Web Interface for Following Users 521
this tutorial and make for a good exercise in reading code. Study Listing 11.32 untilyou are convinced that you understand what it’s testing and why. (There’s one minorsecurity omission as well; see if you can spot it. We’ll cover it momentarily.)
Listing 11.32 Tests for the Follow/Unfollow button.spec/requests/user_pages_spec.rb
require 'spec helper'
describe "User pages" do
.
.
.
describe "profile page" do
let(:user) { FactoryGirl.create(:user) }
.
.
.
describe "follow/unfollow buttons" do
let(:other user) { FactoryGirl.create(:user) }
before { sign in user }
describe "following a user" do
before { visit user path(other user) }
it "should increment the followed user count" do
expect do
click button "Follow"
end.to change(user.followed users, :count).by(1)
end
it "should increment the other user's followers count" do
expect do
click button "Follow"
end.to change(other user.followers, :count).by(1)
end
describe "toggling the button" do
before { click button "Follow" }
it { should have selector('input', value: 'Unfollow') }
end
end
describe "unfollowing a user" do
before do
user.follow!(other user)
visit user path(other user)
end
www.it-ebooks.info
ptg8286261
522 Chapter 11: Following Users
it "should decrement the followed user count" do
expect do
click button "Unfollow"
end.to change(user.followed users, :count).by(-1)
end
it "should decrement the other user's followers count" do
expect do
click button "Unfollow"
end.to change(other user.followers, :count).by(-1)
end
describe "toggling the button" do
before { click button "Unfollow" }
it { should have selector('input', value: 'Follow') }
end
end
end
end
.
.
.
end
Listing 11.32 tests the following buttons by clicking on them and specifying theproper behavior. Writing the implementation involves digging a little deeper: Followingand unfollowing involve creating and destroying relationships, which means definingcreate and destroy actions in a Relationships controller (which we must create).Although the following buttons only appear for signed-in users, giving us a superficiallayer of security, the tests in Listing 11.32 miss a lower-level issue, namely, the create
and destroy actions themselves should only be accessible to signed-in users. (This isthe security hole alluded to above.) Listing 11.33 expresses this requirement using thepost and delete methods to hit those actions directly.
Listing 11.33 Tests for the Relationships controller authorization.spec/requests/authentication_pages_spec.rb
require 'spec helper'
describe "Authentication" do
.
.
.
describe "authorization" do
www.it-ebooks.info
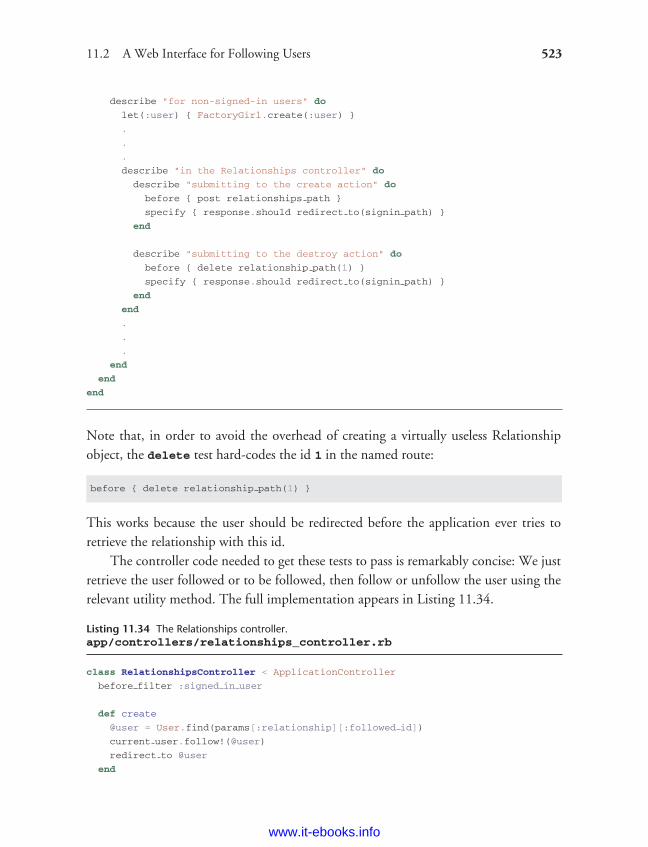
ptg8286261
11.2 A Web Interface for Following Users 523
describe "for non-signed-in users" do
let(:user) { FactoryGirl.create(:user) }
.
.
.
describe "in the Relationships controller" do
describe "submitting to the create action" do
before { post relationships path }
specify { response.should redirect to(signin path) }
end
describe "submitting to the destroy action" do
before { delete relationship path(1) }
specify { response.should redirect to(signin path) }
end
end
.
.
.
end
end
end
Note that, in order to avoid the overhead of creating a virtually useless Relationshipobject, the delete test hard-codes the id 1 in the named route:
before { delete relationship path(1) }
This works because the user should be redirected before the application ever tries toretrieve the relationship with this id.
The controller code needed to get these tests to pass is remarkably concise: We justretrieve the user followed or to be followed, then follow or unfollow the user using therelevant utility method. The full implementation appears in Listing 11.34.
Listing 11.34 The Relationships controller.app/controllers/relationships_controller.rb
class RelationshipsController < ApplicationController
before filter :signed in user
def create
@user = User.find(params[:relationship][:followed id])
current user.follow!(@user)
redirect to @user
end
www.it-ebooks.info
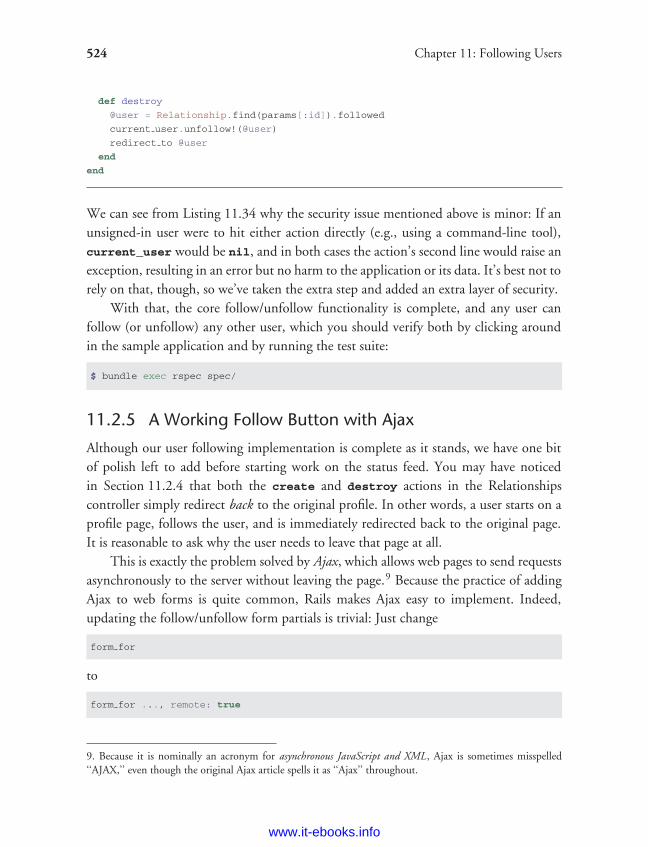
ptg8286261
524 Chapter 11: Following Users
def destroy
@user = Relationship.find(params[:id]).followed
current user.unfollow!(@user)
redirect to @user
end
end
We can see from Listing 11.34 why the security issue mentioned above is minor: If anunsigned-in user were to hit either action directly (e.g., using a command-line tool),current_user would be nil, and in both cases the action’s second line would raise anexception, resulting in an error but no harm to the application or its data. It’s best not torely on that, though, so we’ve taken the extra step and added an extra layer of security.
With that, the core follow/unfollow functionality is complete, and any user canfollow (or unfollow) any other user, which you should verify both by clicking aroundin the sample application and by running the test suite:
$ bundle exec rspec spec/
11.2.5 A Working Follow Button with Ajax
Although our user following implementation is complete as it stands, we have one bitof polish left to add before starting work on the status feed. You may have noticedin Section 11.2.4 that both the create and destroy actions in the Relationshipscontroller simply redirect back to the original profile. In other words, a user starts on aprofile page, follows the user, and is immediately redirected back to the original page.It is reasonable to ask why the user needs to leave that page at all.
This is exactly the problem solved by Ajax, which allows web pages to send requestsasynchronously to the server without leaving the page.9 Because the practice of addingAjax to web forms is quite common, Rails makes Ajax easy to implement. Indeed,updating the follow/unfollow form partials is trivial: Just change
form for
to
form for ..., remote: true
9. Because it is nominally an acronym for asynchronous JavaScript and XML, Ajax is sometimes misspelled‘‘AJAX,’’ even though the original Ajax article spells it as ‘‘Ajax’’ throughout.
www.it-ebooks.info
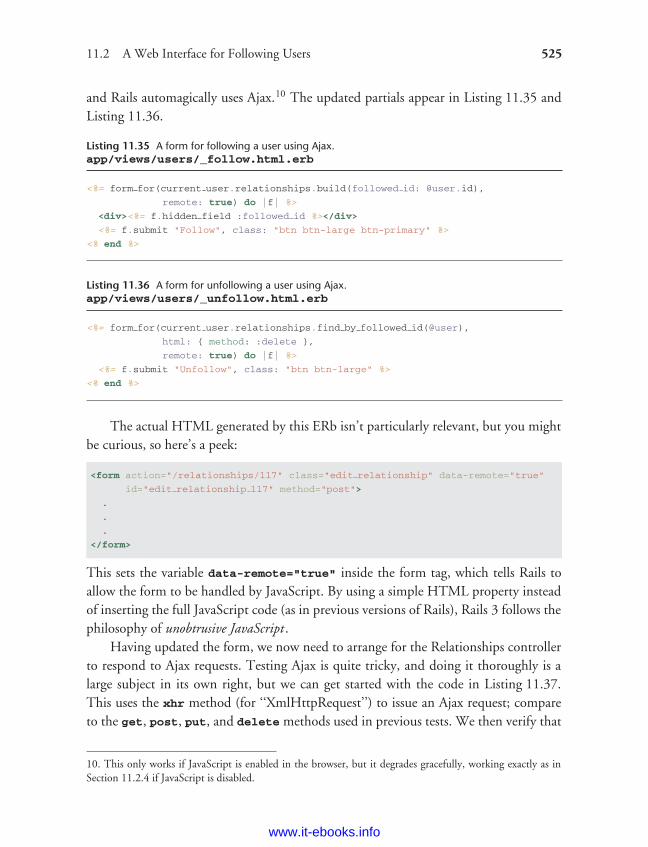
ptg8286261
11.2 A Web Interface for Following Users 525
and Rails automagically uses Ajax.10 The updated partials appear in Listing 11.35 andListing 11.36.
Listing 11.35 A form for following a user using Ajax.app/views/users/_follow.html.erb
<%= form for(current user.relationships.build(followed id: @user.id),
remote: true) do |f| %>
<div><%= f.hidden field :followed id %></div>
<%= f.submit "Follow", class: "btn btn-large btn-primary" %>
<% end %>
Listing 11.36 A form for unfollowing a user using Ajax.app/views/users/_unfollow.html.erb
<%= form for(current user.relationships.find by followed id(@user),
html: { method: :delete },
remote: true) do |f| %>
<%= f.submit "Unfollow", class: "btn btn-large" %>
<% end %>
The actual HTML generated by this ERb isn’t particularly relevant, but you mightbe curious, so here’s a peek:
<form action="/relationships/117" class="edit relationship" data-remote="true"
id="edit relationship 117" method="post">
.
.
.
</form>
This sets the variable data-remote="true" inside the form tag, which tells Rails toallow the form to be handled by JavaScript. By using a simple HTML property insteadof inserting the full JavaScript code (as in previous versions of Rails), Rails 3 follows thephilosophy of unobtrusive JavaScript .
Having updated the form, we now need to arrange for the Relationships controllerto respond to Ajax requests. Testing Ajax is quite tricky, and doing it thoroughly is alarge subject in its own right, but we can get started with the code in Listing 11.37.This uses the xhr method (for ‘‘XmlHttpRequest’’) to issue an Ajax request; compareto the get, post, put, and delete methods used in previous tests. We then verify that
10. This only works if JavaScript is enabled in the browser, but it degrades gracefully, working exactly as inSection 11.2.4 if JavaScript is disabled.
www.it-ebooks.info
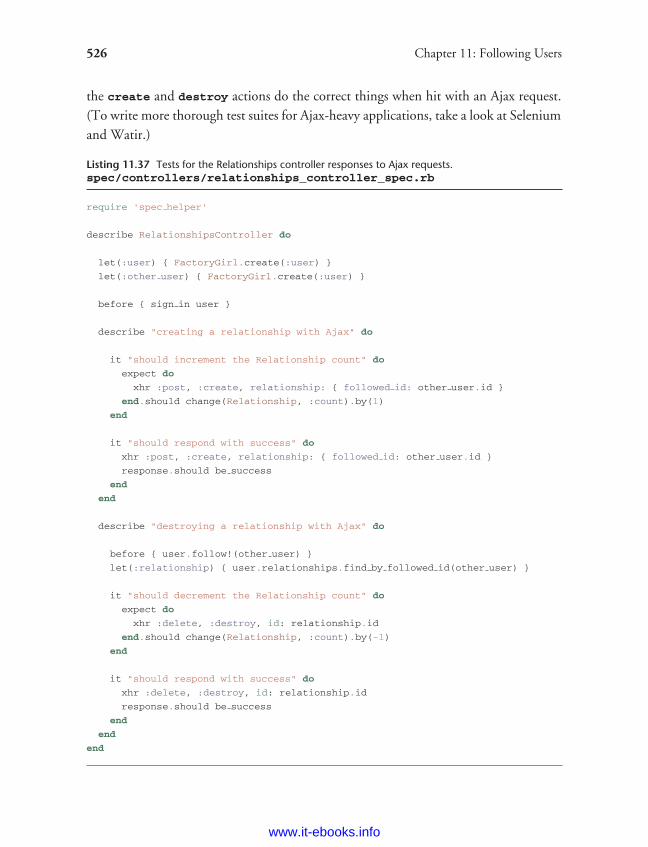
ptg8286261
526 Chapter 11: Following Users
the create and destroy actions do the correct things when hit with an Ajax request.(To write more thorough test suites for Ajax-heavy applications, take a look at Seleniumand Watir.)
Listing 11.37 Tests for the Relationships controller responses to Ajax requests.spec/controllers/relationships_controller_spec.rb
require 'spec helper'
describe RelationshipsController do
let(:user) { FactoryGirl.create(:user) }
let(:other user) { FactoryGirl.create(:user) }
before { sign in user }
describe "creating a relationship with Ajax" do
it "should increment the Relationship count" do
expect do
xhr :post, :create, relationship: { followed id: other user.id }
end.should change(Relationship, :count).by(1)
end
it "should respond with success" do
xhr :post, :create, relationship: { followed id: other user.id }
response.should be success
end
end
describe "destroying a relationship with Ajax" do
before { user.follow!(other user) }
let(:relationship) { user.relationships.find by followed id(other user) }
it "should decrement the Relationship count" do
expect do
xhr :delete, :destroy, id: relationship.id
end.should change(Relationship, :count).by(-1)
end
it "should respond with success" do
xhr :delete, :destroy, id: relationship.id
response.should be success
end
end
end
www.it-ebooks.info
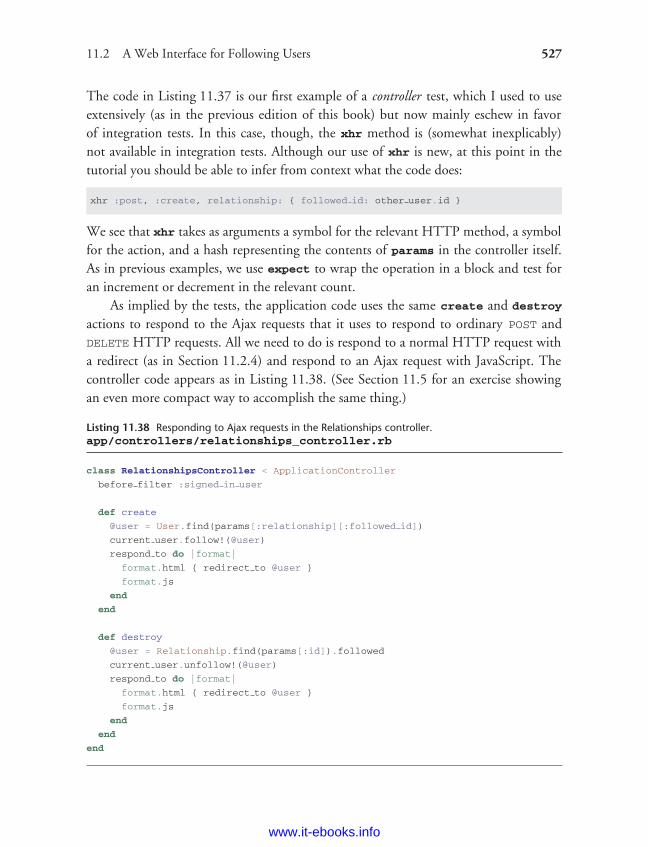
ptg8286261
11.2 A Web Interface for Following Users 527
The code in Listing 11.37 is our first example of a controller test, which I used to useextensively (as in the previous edition of this book) but now mainly eschew in favorof integration tests. In this case, though, the xhr method is (somewhat inexplicably)not available in integration tests. Although our use of xhr is new, at this point in thetutorial you should be able to infer from context what the code does:
xhr :post, :create, relationship: { followed id: other user.id }
We see that xhr takes as arguments a symbol for the relevant HTTP method, a symbolfor the action, and a hash representing the contents of params in the controller itself.As in previous examples, we use expect to wrap the operation in a block and test foran increment or decrement in the relevant count.
As implied by the tests, the application code uses the same create and destroy
actions to respond to the Ajax requests that it uses to respond to ordinary POST andDELETE HTTP requests. All we need to do is respond to a normal HTTP request witha redirect (as in Section 11.2.4) and respond to an Ajax request with JavaScript. Thecontroller code appears as in Listing 11.38. (See Section 11.5 for an exercise showingan even more compact way to accomplish the same thing.)
Listing 11.38 Responding to Ajax requests in the Relationships controller.app/controllers/relationships_controller.rb
class RelationshipsController < ApplicationController
before filter :signed in user
def create
@user = User.find(params[:relationship][:followed id])
current user.follow!(@user)
respond to do |format|
format.html { redirect to @user }
format.js
end
end
def destroy
@user = Relationship.find(params[:id]).followed
current user.unfollow!(@user)
respond to do |format|
format.html { redirect to @user }
format.js
end
end
end
www.it-ebooks.info
ptg8286261
528 Chapter 11: Following Users
This code uses respond_to to take the appropriate action depending on the kindof request. (There is no relationship between this respond_to and the respond_to
used in the RSpec examples.) The syntax is potentially confusing, and it’s important tounderstand that in
respond to do |format|
format.html { redirect to @user }
format.js
end
only one of the lines gets executed (based on the nature of the request).In the case of an Ajax request, Rails automatically calls a JavaScript Embedded
Ruby (.js.erb) file with the same name as the action, i.e., create.js.erb ordestroy.js.erb. As you might guess, the files allow us to mix JavaScript andEmbedded Ruby to perform actions on the current page. It is these files that we needto create and edit in order to update the user profile page upon being followed orunfollowed.
Inside a JS-ERb file, Rails automatically provides the jQuery JavaScript helpers tomanipulate the page using the Document Object Model (DOM). The jQuery libraryprovides a large number of methods for manipulating the DOM, but here we will needonly two. First, we will need to know about the dollar-sign syntax to access a DOMelement based in its unique CSS id. For example, to manipulate the follow_form
element, we will use the syntax
$("#follow form")
(Recall from Listing 11.23 that this is a div that wraps the form, not the form itself.)This syntax, inspired by CSS, uses the # symbol to indicate a CSS id. As you mightguess, jQuery, like CSS, uses a dot . to manipulate CSS classes.
The second method we’ll need is html, which updates the HTML inside therelevant element with the contents of its argument. For example, to replace the entirefollow form with the string "foobar", we would write
$("#follow form").html("foobar")
Unlike plain JavaScript files, JS-ERb files also allow the use of Embedded Ruby,which we apply in the create.js.erb file to update the follow form with the unfollowpartial (which is what should show after a successful following) and update the follower
www.it-ebooks.info
ptg8286261
11.3 The Status Feed 529
count. The result is shown in Listing 11.39. This uses the escape_javascript
function, which is needed to escape out the result when inserting HTML in aJavaScript file.
Listing 11.39 The JavaScript Embedded Ruby to create a following relationship.app/views/relationships/create.js.erb
$("#follow form").html("<%= escape javascript(render('users/unfollow')) %>")
$("#followers").html('<%= @user.followers.count %>')
The destroy.js.erb file is analogous (Listing 11.40).
Listing 11.40 The Ruby JavaScript (RJS) to destroy a following relationship.app/views/relationships/destroy.js.erb
$("#follow form").html("<%= escape javascript(render('users/follow')) %>")
$("#followers").html('<%= @user.followers.count %>')
With that, you should navigate to a user profile page and verify that you can follow andunfollow without a page refresh, and the test suite should also pass:
$ bundle exec rspec spec/
Using Ajax in Rails is a large and fast-moving subject, so we’ve only been ableto scratch the surface here, but (as with the rest of the material in this tutorial) ourtreatment should give you a good foundation for more advanced resources.
11.3 The Status FeedWe come now to the pinnacle of our sample application: the status feed. Appropriately,this section contains some of the most advanced material in the entire tutorial. The fullstatus feed builds on the proto-feed from Section 10.3.3 by assembling an array of themicroposts from the users being followed by the current user, along with the currentuser’s own microposts. To accomplish this feat, we will need some fairly advanced Rails,Ruby, and even SQL programming techniques.
Because of the heavy lifting ahead, it’s especially important to review where we’regoing. A recap of the final user status feed, shown in Figure 11.5, appears again inFigure 11.18.
www.it-ebooks.info
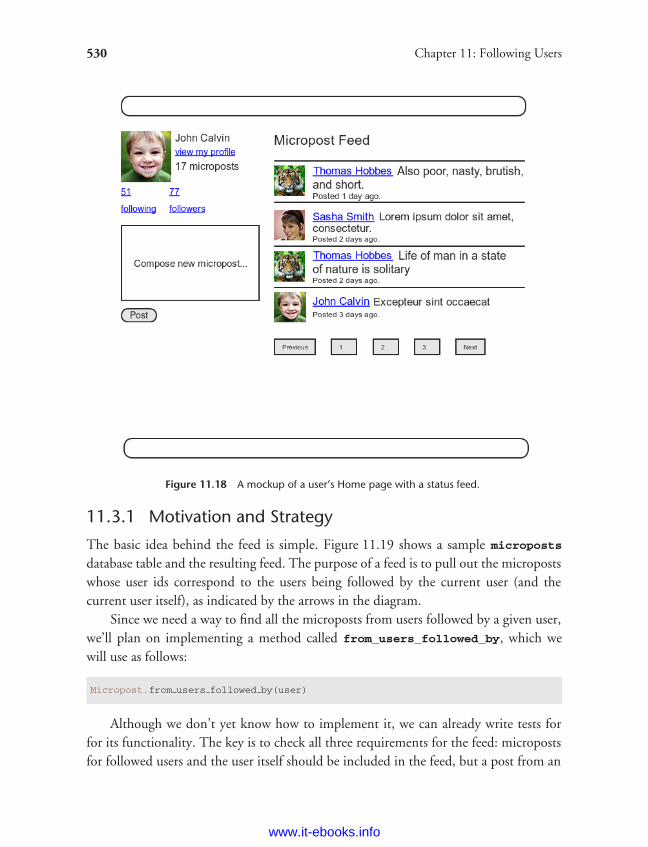
ptg8286261
530 Chapter 11: Following Users
Figure 11.18 A mockup of a user’s Home page with a status feed.
11.3.1 Motivation and Strategy
The basic idea behind the feed is simple. Figure 11.19 shows a sample microposts
database table and the resulting feed. The purpose of a feed is to pull out the micropostswhose user ids correspond to the users being followed by the current user (and thecurrent user itself), as indicated by the arrows in the diagram.
Since we need a way to find all the microposts from users followed by a given user,we’ll plan on implementing a method called from_users_followed_by, which wewill use as follows:
Micropost.from users followed by(user)
Although we don’t yet know how to implement it, we can already write tests forfor its functionality. The key is to check all three requirements for the feed: micropostsfor followed users and the user itself should be included in the feed, but a post from an
www.it-ebooks.info
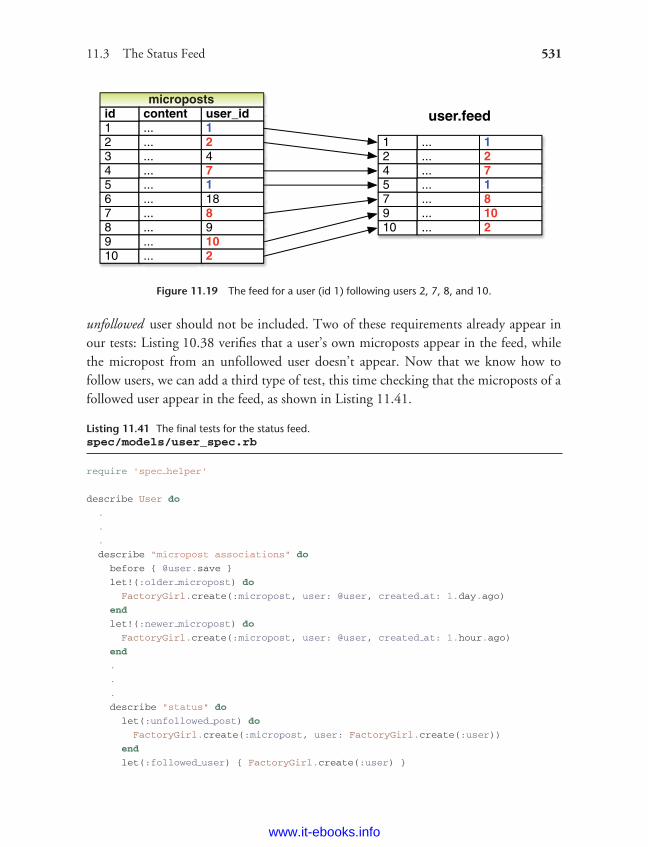
ptg8286261
11.3 The Status Feed 531
Figure 11.19 The feed for a user (id 1) following users 2, 7, 8, and 10.
unfollowed user should not be included. Two of these requirements already appear inour tests: Listing 10.38 verifies that a user’s own microposts appear in the feed, whilethe micropost from an unfollowed user doesn’t appear. Now that we know how tofollow users, we can add a third type of test, this time checking that the microposts of afollowed user appear in the feed, as shown in Listing 11.41.
Listing 11.41 The final tests for the status feed.spec/models/user_spec.rb
require 'spec helper'
describe User do
.
.
.
describe "micropost associations" do
before { @user.save }
let!(:older micropost) do
FactoryGirl.create(:micropost, user: @user, created at: 1.day.ago)
end
let!(:newer micropost) do
FactoryGirl.create(:micropost, user: @user, created at: 1.hour.ago)
end
.
.
.
describe "status" do
let(:unfollowed post) do
FactoryGirl.create(:micropost, user: FactoryGirl.create(:user))
end
let(:followed user) { FactoryGirl.create(:user) }
www.it-ebooks.info
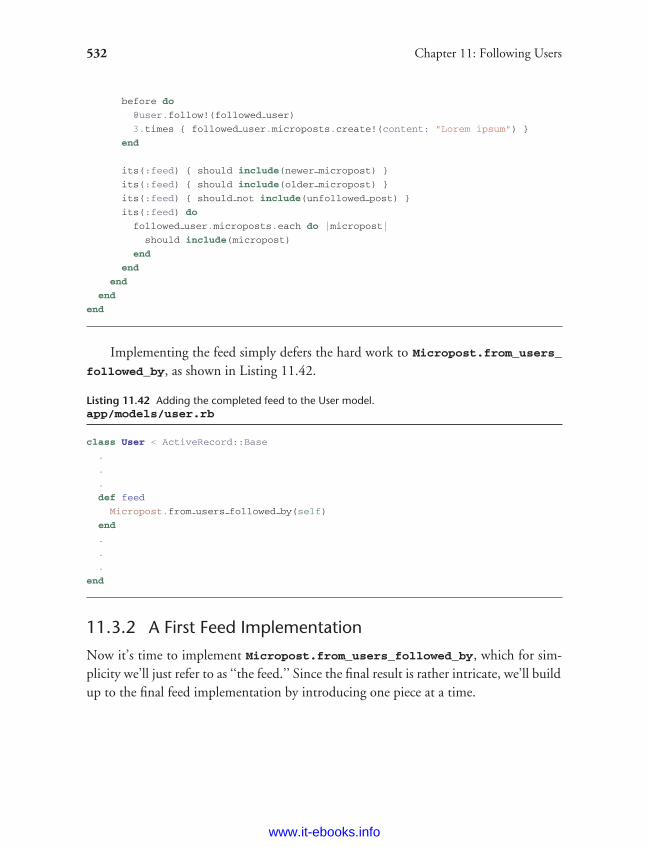
ptg8286261
532 Chapter 11: Following Users
before do
@user.follow!(followed user)
3.times { followed user.microposts.create!(content: "Lorem ipsum") }
end
its(:feed) { should include(newer micropost) }
its(:feed) { should include(older micropost) }
its(:feed) { should not include(unfollowed post) }
its(:feed) do
followed user.microposts.each do |micropost|
should include(micropost)
end
end
end
end
end
Implementing the feed simply defers the hard work to Micropost.from_users_
followed_by, as shown in Listing 11.42.
Listing 11.42 Adding the completed feed to the User model.app/models/user.rb
class User < ActiveRecord::Base
.
.
.
def feed
Micropost.from users followed by(self)
end
.
.
.
end
11.3.2 A First Feed Implementation
Now it’s time to implement Micropost.from_users_followed_by, which for sim-plicity we’ll just refer to as ‘‘the feed.’’ Since the final result is rather intricate, we’ll buildup to the final feed implementation by introducing one piece at a time.
www.it-ebooks.info
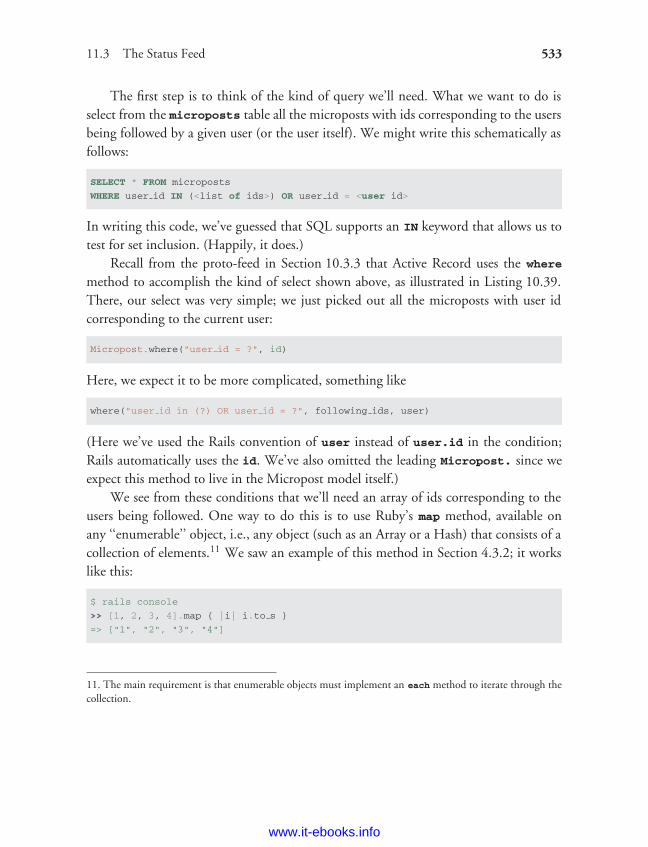
ptg8286261
11.3 The Status Feed 533
The first step is to think of the kind of query we’ll need. What we want to do isselect from the microposts table all the microposts with ids corresponding to the usersbeing followed by a given user (or the user itself). We might write this schematically asfollows:
SELECT * FROM microposts
WHERE user id IN (<list of ids>) OR user id = <user id>
In writing this code, we’ve guessed that SQL supports an IN keyword that allows us totest for set inclusion. (Happily, it does.)
Recall from the proto-feed in Section 10.3.3 that Active Record uses the where
method to accomplish the kind of select shown above, as illustrated in Listing 10.39.There, our select was very simple; we just picked out all the microposts with user idcorresponding to the current user:
Micropost.where("user id = ?", id)
Here, we expect it to be more complicated, something like
where("user id in (?) OR user id = ?", following ids, user)
(Here we’ve used the Rails convention of user instead of user.id in the condition;Rails automatically uses the id. We’ve also omitted the leading Micropost. since weexpect this method to live in the Micropost model itself.)
We see from these conditions that we’ll need an array of ids corresponding to theusers being followed. One way to do this is to use Ruby’s map method, available onany ‘‘enumerable’’ object, i.e., any object (such as an Array or a Hash) that consists of acollection of elements.11 We saw an example of this method in Section 4.3.2; it workslike this:
$ rails console
>> [1, 2, 3, 4].map { |i| i.to s }
=> ["1", "2", "3", "4"]
11. The main requirement is that enumerable objects must implement an each method to iterate through thecollection.
www.it-ebooks.info

ptg8286261
534 Chapter 11: Following Users
Situations like the one illustrated above, where the same method (e.g., to_s) getscalled on each element, are common enough that there’s a shorthand notation using anampersand & and a symbol corresponding to the method:12
>> [1, 2, 3, 4].map(&:to s)
=> ["1", "2", "3", "4"]
Using the join method (Section 4.3.1), we can create a string composed of the ids byjoining them on comma-space :
>> [1, 2, 3, 4].map(&:to s).join(', ')
=> "1, 2, 3, 4"
We can use the above method to construct the necessary array of followed user idsby calling id on each element in user.followed_users. For example, for the firstuser in the database this array appears as follows:
>> User.first.followed users.map(&:id)
=> [4, 5, 6, 7, 8, 9, 10, 11, 12, 13, 14, 15, 16, 17, 18, 19, 20, 21, 22, 23,
24, 25, 26, 27, 28, 29, 30, 31, 32, 33, 34, 35, 36, 37, 38, 39, 40, 41, 42,
43, 44, 45, 46, 47, 48, 49, 50, 51]
In fact, because this sort of construction is so useful, Active Record provides it bydefault:
>> User.first.followed user ids
=> [4, 5, 6, 7, 8, 9, 10, 11, 12, 13, 14, 15, 16, 17, 18, 19, 20, 21, 22, 23,
24, 25, 26, 27, 28, 29, 30, 31, 32, 33, 34, 35, 36, 37, 38, 39, 40, 41, 42,
43, 44, 45, 46, 47, 48, 49, 50, 51]
Here the followed_user_ids method is synthesized by Active Record based onthe has_many :followed_users association (Listing 11.10); the result is that weneed only append _ids to the association name to get the ids corresponding to theuser.followed_users collection. A string of followed user ids then appears as follows:
>> User.first.followed user ids.join(', ')
=> "4, 5, 6, 7, 8, 9, 10, 11, 12, 13, 14, 15, 16, 17, 18, 19, 20, 21, 22, 23,
24, 25, 26, 27, 28, 29, 30, 31, 32, 33, 34, 35, 36, 37, 38, 39, 40, 41, 42,
43, 44, 45, 46, 47, 48, 49, 50, 51"
12. This notation actually started as an extension Rails made to the core Ruby language; it was so useful that ithas now been incorporated into Ruby itself. How cool is that?
www.it-ebooks.info
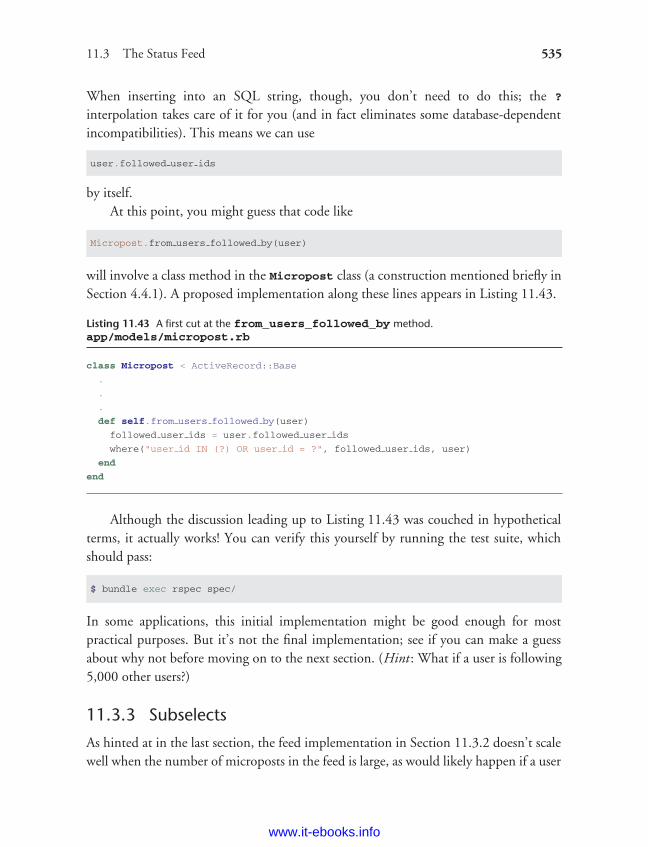
ptg8286261
11.3 The Status Feed 535
When inserting into an SQL string, though, you don’t need to do this; the ?
interpolation takes care of it for you (and in fact eliminates some database-dependentincompatibilities). This means we can use
user.followed user ids
by itself.At this point, you might guess that code like
Micropost.from users followed by(user)
will involve a class method in the Micropost class (a construction mentioned briefly inSection 4.4.1). A proposed implementation along these lines appears in Listing 11.43.
Listing 11.43 A first cut at the from_users_followed_by method.app/models/micropost.rb
class Micropost < ActiveRecord::Base
.
.
.
def self.from users followed by(user)
followed user ids = user.followed user ids
where("user id IN (?) OR user id = ?", followed user ids, user)
end
end
Although the discussion leading up to Listing 11.43 was couched in hypotheticalterms, it actually works! You can verify this yourself by running the test suite, whichshould pass:
$ bundle exec rspec spec/
In some applications, this initial implementation might be good enough for mostpractical purposes. But it’s not the final implementation; see if you can make a guessabout why not before moving on to the next section. (Hint: What if a user is following5,000 other users?)
11.3.3 Subselects
As hinted at in the last section, the feed implementation in Section 11.3.2 doesn’t scalewell when the number of microposts in the feed is large, as would likely happen if a user
www.it-ebooks.info
ptg8286261
536 Chapter 11: Following Users
were following, say, 5000 other users. In this section, we’ll reimplement the status feedin a way that scales better with the number of followed users.
The problem with the code in Section 11.3.2 is that
followed user ids = user.followed user ids
pulls all the followed users’ ids into memory and creates an array the full length of thefollowed users array. Since the condition in Listing 11.43 actually just checks inclusionin a set, there must be a more efficient way to do this, and indeed SQL is optimized forjust such set operations. The solution involves pushing the finding of followed user idsinto the database using a subselect.
We’ll start by refactoring the feed with the slightly modified code in Listing 11.44
Listing 11.44 Improving from_users_followed_by.app/models/micropost.rb
class Micropost < ActiveRecord::Base
.
.
.
# Returns microposts from the users being followed by the given user.
def self.from users followed by(user)
followed user ids = user.followed user ids
where("user id IN (:followed user ids) OR user id = :user id",
followed user ids: followed user ids, user id: user)
end
end
As preparation for the next step, we have replaced
where("user id IN (?) OR user id = ?", followed user ids, user)
with the equivalent
where("user id IN (:followed user ids) OR user id = :user id",
followed user ids: followed user ids, user id: user)
The question mark syntax is fine, but when we want the same variable inserted in morethan one place the second syntax is more convenient.
www.it-ebooks.info
ptg8286261
11.3 The Status Feed 537
The above discussion mentions that we will be adding a second occurrence ofuser_id in the SQL query. In particular, we can replace the Ruby code
followed user ids = user.followed user ids
with the SQL snippet
followed user ids = "SELECT followed id FROM relationships
WHERE follower id = :user id"
This code contains a SQL subselect, and internally the entire select for user 1 would looksomething like this:
SELECT * FROM microposts
WHERE user id IN (SELECT followed id FROM relationships
WHERE follower id = 1)
OR user id = 1
This subselect arranges for all the set logic to be pushed into the database, which is moreefficient.13
With this foundation, we are ready for an efficient feed implementation, as seenin Listing 11.45. Note that, because it is now raw SQL, followed_user_ids isinterpolated, not escaped. (It actually works either way, but logically it makes more senseto interpolate in this context.)
Listing 11.45 The final implementation of from_users_followed_by.app/models/micropost.rb
class Micropost < ActiveRecord::Base
attr accessible :content
belongs to :user
validates :user id, presence: true
validates :content, presence: true, length: { maximum: 140 }
default scope order: 'microposts.created at DESC'
13. For a more advanced way to create the necessary subselect, see the blog post ‘‘Hacking a subselect inActiveRecord.’’
www.it-ebooks.info
ptg8286261
538 Chapter 11: Following Users
def self.from users followed by(user)
followed user ids = "SELECT followed id FROM relationships
WHERE follower id = :user id"
where("user id IN (#{followed user ids}) OR user id = :user id",
user id: user.id)
end
end
This code has a formidable combination of Rails, Ruby, and SQL, but it does the job,and does it well. (Of course, even the subselect won’t scale forever. For bigger sites, youwould probably need to generate the feed asynchronously using a background job. Suchscaling subtleties are beyond the scope of this tutorial, but the Scaling Rails screencastsare a good place to start.)
11.3.4 The New Status Feed
With the code in Listing 11.45, our status feed is complete. As a reminder, the codefor the Home page appears in Listing 11.46; this code creates a paginated feed ofthe relevant microposts for use in the view, as seen in Figure 11.20.14 Note that thepaginate method actually reaches all the way into the Micropost model method inListing 11.45, arranging to pull out only 30 microposts at a time from the database.(You can verify this by examining the SQL statements in the development serverlog file.)
Listing 11.46 The home action with a paginated feed.app/controllers/static_pages_controller.rb
class StaticPagesController < ApplicationController
def home
if signed in?
@micropost = current user.microposts.build
@feed items = current user.feed.paginate(page: params[:page])
end
end
.
.
.
end
14. In order to make a prettier feed for Figure 11.20, I’ve added a few extra microposts by hand using the Railsconsole.
www.it-ebooks.info
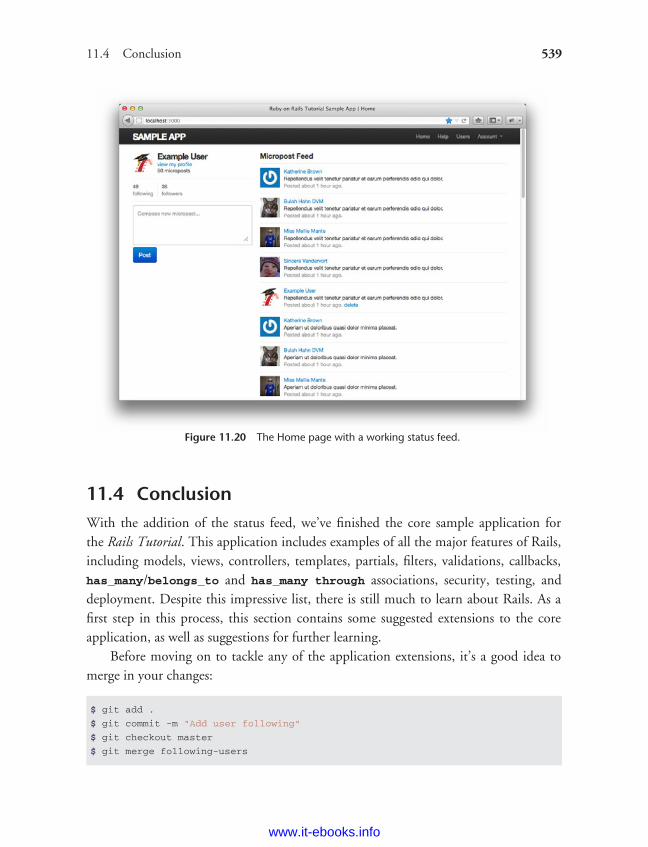
ptg8286261
11.4 Conclusion 539
Figure 11.20 The Home page with a working status feed.
11.4 ConclusionWith the addition of the status feed, we’ve finished the core sample application forthe Rails Tutorial. This application includes examples of all the major features of Rails,including models, views, controllers, templates, partials, filters, validations, callbacks,has_many/belongs_to and has_many through associations, security, testing, anddeployment. Despite this impressive list, there is still much to learn about Rails. As afirst step in this process, this section contains some suggested extensions to the coreapplication, as well as suggestions for further learning.
Before moving on to tackle any of the application extensions, it’s a good idea tomerge in your changes:
$ git add .
$ git commit -m "Add user following"
$ git checkout master
$ git merge following-users
www.it-ebooks.info
ptg8286261
540 Chapter 11: Following Users
As usual, you can also push the code and deploy the application if you want:
$ git push
$ git push heroku
$ heroku pg:reset SHARED DATABASE --confirm <name-heroku-gave-to-your-app>
$ heroku run rake db:migrate
$ heroku run rake db:populate
11.4.1 Extensions to the Sample Application
The proposed extensions in this section are mostly inspired either by general featurescommon to web applications, such as password reminders and email confirmation, orfeatures specific to our type of sample application, such as search, replies, and messaging.Implementing one or more of these application extensions will help you make thetransition from following a tutorial to writing original applications of your own.
Don’t be surprised if it’s tough going at first; the blank slate of a new featurecan be quite intimidating. To help get you started, I can give two pieces of generaladvice. First, before adding any feature to a Rails application, take a look at theRailsCasts archive to see if Ryan Bates has already covered the subject.15 If he has,watching the relevant RailsCast first will often save you a ton of time. Second, alwaysdo extensive Google searches on your proposed feature to find relevant blog posts andtutorials. Web application development is hard, and it helps to learn from the experience(and mistakes) of others.
Many of the following features are quite challenging, and I have given some hintsabout the tools you might need to implement them. Even with hints, they are muchmore difficult than the book’s end-of-chapter exercises, so don’t be discouraged if youcan’t solve them without considerable effort. Due to time constraints, I am not availablefor one-on-one assistance, but if there is sufficient interest I might release standalonearticle/screencast bundles on some of these extensions in the future; go to the mainRails Tutorial website at http://railstutorial.org and subscribe to the news feed to getthe latest updates.
15. Note that RailsCasts usually omit the tests, which is probably necessary to keep the episodes nice and short,but you could get the wrong idea about the importance of testing. Once you’ve watched the relevant RailsCastto get a basic idea of how to proceed, I suggest writing the new feature using test-driven development. (In thiscontext, I recommend taking a look at the RailsCast on ‘‘How I test.’’ You’ll see that Ryan Bates himself oftenuses TDD for real-life development, and in fact his testing style is similar to style used in this tutorial.)
www.it-ebooks.info
ptg8286261
11.4 Conclusion 541
RepliesTwitter allows users to make ‘‘@replies’’, which are microposts whose first charactersare the user’s login preceded by the @ sign. These posts only appear in the feed of theuser in question or users following that user. Implement a simplified version of this,restricting @replies to appear only in the feeds of the recipient and the sender. Thismight involve adding an in_reply_to column in the microposts table and an extraincluding_replies scope to the Micropost model.
Since our application lacks unique user logins, you will also have to decide on a wayto represent users. One option is to use a combination of the id and the name, such as@1-michael-hartl. Another is to add a unique username to the signup process andthen use it in @replies.
MessagingTwitter supports direct (private) messaging by prefixing a micropost with the letter ‘‘d.’’Implement this feature for the sample application. The solution will probably involve aMessage model and a regular expression match on new microposts.
Follower NotificationsImplement a feature to send each user an email notification when they gain a newfollower. Then make the notification optional, so that users can opt out if desired.Among other things, adding this feature requires learning how to send mail with Rails.To get started, I suggest viewing the RailsCast on Action Mailer in Rails 3.
Password RemindersCurrently, if our application’s users forget their passwords, they have no way to retrievethem. Because of the one-way secure password hashing in Chapter 6, our applicationcan’t email the user’s password, but it can send a link to a reset form. Follow the stepsin the RailsCast on Remember Me & Reset Password to fix this omission.
Signup ConfirmationApart from an email regular expression, the sample application currently has no wayto verify the validity of a user’s email address. Add an email address verification stepto confirm a user’s signup. The new feature should create users in an inactive state,email the user an activation URI, then change the user to an active state when the URIgets hit. You might want to read up on state machines in Rails to help you with theinactive/active transition.
www.it-ebooks.info
ptg8286261
542 Chapter 11: Following Users
RSS FeedFor each user, implement an RSS feed for their microposts. Then implement an RSSfeed for each status feed, optionally restricting access to that feed using an authenticationscheme. The RailsCast on generating RSS feeds will help get you started.
REST APIMany websites expose an Application Programmer Interface (API) so that third-partyapplications can get, post, put, and delete the application’s resources. Implement sucha REST API for the sample application. The solution will involve adding respond_to
blocks (Section 11.2.5) to many of the application’s controller actions; these shouldrespond to requests for XML. Be careful about security; the API should only be accessibleto authorized users.
SearchCurrently, there is no way for users to find each other, apart from paging throughthe user index or viewing the feeds of other users. Implement a search feature toremedy this. Then add another search feature for microposts. The RailsCast onsimple search forms will help get you started. If you deploy using a shared host or adedicated server, I suggest using Thinking Sphinx (following the RailsCast on ThinkingSphinx). If you deploy on Heroku, you should follow the Heroku full text searchinstructions.
11.4.2 Guide to Further Resources
There are a wealth of Rails resources in stores and on the web—indeed, the supply isso rich that it can be overwhelming. The good news is that, having gotten this far,you’re ready for almost anything else out there. Here are some suggestions for furtherlearning:
• The Rails Tutorial screencasts: I have prepared a full-length screencast course basedon this book. In addition to covering all the material in the book, the screencastsare filled with tips, tricks, and the kind of see-how-it’s-done demos that are hard tocapture in print. They are available for purchase through the Rails Tutorial website.(Note: The screencasts for the second edition are currently in preparation.They will be a paid upgrade, but current customers will receive a substantialdiscount.)
www.it-ebooks.info
ptg8286261
11.5 Exercises 543
• RailsCasts: It’s hard to overemphasize what a great resource the RailsCasts are. Isuggest starting by visiting the RailsCasts episode archive and clicking on subjectsthat catch your eye.
• Scaling Rails: One topic we’ve hardly covered in the Rails Tutorial book isperformance, optimization, and scaling. Luckily, most sites will never run intoserious scaling issues, and using anything beyond plain Rails is probably prematureoptimization. If you do run into performance issues, the Scaling Rails series fromGregg Pollack of Envy Labs is a good place to start. I also recommend investigatingthe site monitoring applications Scout and New Relic.16 And, as you might suspectby now, there are RailsCasts on many scaling subjects, including profiling, caching,and background jobs.
• Ruby and Rails books: As mentioned in Chapter 1, I recommend Beginning Ruby byPeter Cooper, The Well-Grounded Rubyist by David A. Black, and The Ruby Wayby Hal Fulton for further Ruby learning, and The Rails 3 Way by Obie Fernandezand Rails 3 in Action (wait for the second edition) by Ryan Bigg and Yehuda Katzfor more about Rails.
• PeepCode and Code School: The screencasts at PeepCode and interactive coursesat Code School are consistently high-quality, and I warmly recommend them.
11.5 Exercises1. Add tests for destroying relationships associated with a given user (i.e., as imple-
mented by dependent :destroy in Listing 11.4 and Listing 11.16). Hint: Followthe example in Listing 10.15.
2. The respond_to method seen in Listing 11.38 can actually be hoisted out of theactions into the Relationships controller itself, and the respond_to blocks can bereplaced with a Rails method called respond_with. Prove that the resulting code,shown in Listing 11.47, is correct by verifying that the test suite still passes. (Fordetails on this method, do a Google search on ‘‘rails respond with’’.)
3. Refactor Listing 11.31 by adding partials for the code common to the following/followers pages, the Home page, and the user show page.
4. Following the model in Listing 11.19, write tests for the stats on the profile page.
16. In addition to being a clever phrase—new relic being a contradiction in terms—New Relic is also ananagram for the name of the company’s founder, Lew Cirne.
www.it-ebooks.info
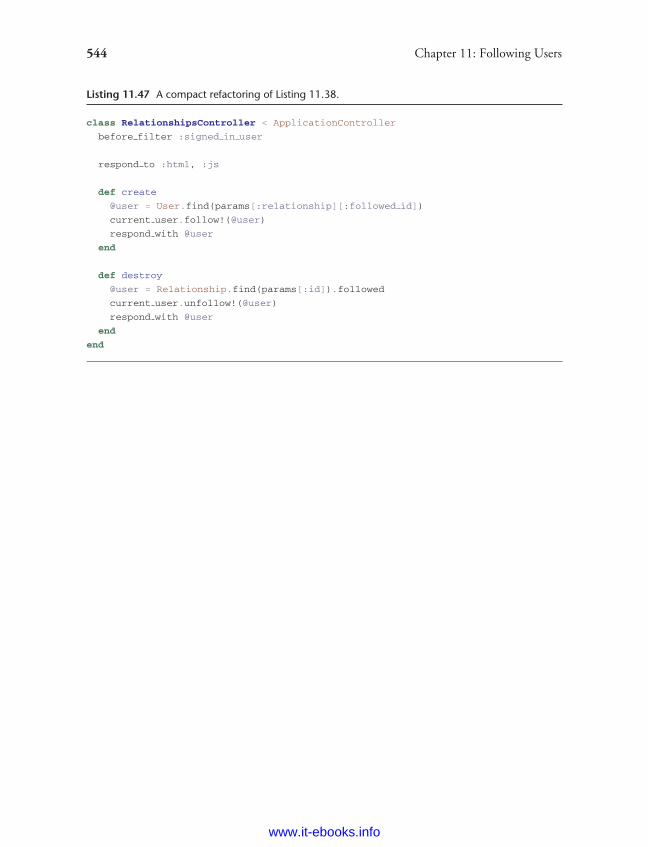
ptg8286261
544 Chapter 11: Following Users
Listing 11.47 A compact refactoring of Listing 11.38.
class RelationshipsController < ApplicationController
before filter :signed in user
respond to :html, :js
def create
@user = User.find(params[:relationship][:followed id])
current user.follow!(@user)
respond with @user
end
def destroy
@user = Relationship.find(params[:id]).followed
current user.unfollow!(@user)
respond with @user
end
end
www.it-ebooks.info
ptg8286261
Index
Note: Page numbers in italics indicate figures, those with t indicate tables, and thosewith n indicate footnotes.
Symbols" (double quote character), 135# (hash symbol), 21/ (forward slash), 8|| = construction, 354–355! (not) operator, 139&& (and) operator, 139+ (plus) operator, 135|| (or) operator, 139
AAbout page
about route, adding (Listing 3.14), 100–101about view, adding, 101–102adding, 99–103adding code to test contents of (Listing 3.13),
99code for (Listing 3.16), 102footer partial with links for (Listing 5.25), 206with HTML structure (Listing 3.21), 108with HTML structure removed (Listing 3.28),
113new, 102refactoring, 103StaticPages controller with added about action
(Listing 3.15), 101
tests for static pages (Listing 5.27), 210view for, with Embedded Ruby title
(Listing 3.24), 110–111writing a failing test for, 99–100
abstraction layers, 226n4access control, 456–459access control in manipulating Microposts,
456–459accessible attributes and first validation, 432–433accessible attributes in model file, 230actions, 85–86Active Record, 222
callback, 253count method, 295creating user objects, 230–233finding user objects, 233–235updating user objects, 235–236See also Validations
adding files, in Git, 30–31administrative users, 413–417
attr accessible, 416–417attr accessible attributes for User model
without :admin attribute (Listing 9.42),417
deleting, 413–417migration to add boolean admin attribute to
users (Listing 9.40), 415
545
www.it-ebooks.info
ptg8286261
546 Index
administrative users (continued )sample data populator code with admin user
(Listing 9.41), 416tests for admin attribute (Listing 9.39), 414user delete links (viewable by admins)
(Listing 9.45), 419User model with admin boolean attribute, 415
administrative users, deleting, 413–417Ajax
follow button with, 524–529form for following a user using (Listing 11.35),
525form for unfollowing a user using
(Listing 11.36), 525JavaScript Embedded Ruby to create following
relationship (Listing 11.39), 529problem solved by, 524Ruby JavaScript to destroy following
relationship (Listing 11.40), 529Ajax requests, responding to, 525–529
JS-ERb, 528–529in Relationships controller (Listing 11.38), 527tests for Relationships controller
(Listing 11.37), 526ampersand (&), 534anchor tag, 97annotate, 229–230annotated User model (Listing 6.5), 229–230ApplicationController class with inheritance
(Listing 2.16), 72Application Programmer Interface (API), 542application root, 9, 28–29, 125, 161Architectural Styles and the Design of Network-based
Software Architectures (Fielding), 60n4arrays, in Ruby data structures, 142–145asset directory in asset pipeline, 187–188asset pipeline, Sass and, 187–190
asset directory, 187–188efficiency in production, 189–190manifest files, 188–189preprocessor engines, 189
assignment, 352See also Mass assignment
associationsMicropost resource, 68–70user/micropost, 433–438user/relationship, 491–494
associative arrays, 148asynchronous JavaScript and XML. See Ajaxattr accessible
administrative users, 416–417attributes for User model without :admin
attribute (Listing 9.42), 417making name and email attributes accessible
(Listing 6.6), 230to prevent mass assignment, 230, 416–417
attribute accessors, 162authenticate method
has secure password, 264, 338moving the authenticate method into the
Sessions helper (Listing 10.27), 457–458test for (Listing 6.29), 262–263
authentication, 260–263adding authentication to Microposts controller
actions (Listing 10.28), 458vs. authorization, 385sessions and, 325–326signin failure, 325–343signin success, 343–363See also Authenticate method
authenticity token, 301authorization, 385–396
vs. authentication, 385of following and followers pages, tests for
(Listing 11.28), 516–517friendly forwarding, 392–396for relationships controller, tests for
(Listing 11.33), 522–523requiring right user, 390–392requiring signed-in users, 386–389
automated testing, 77Automattic, 286avatar, 286n7
BBates, Ryan, 6, 7, 540BCrypt cost factor in test environment, redefining
(Listing 7.11), 286before filters, 373
adding a signed in user before filter(Listing 9.12), 387
applied to every action in controller, 387correct user before filter in microposts,
477–478
www.it-ebooks.info

ptg8286261
Index 547
correct user before filter to protect edit/updatepages (Listing 9.15), 391
current user boolean method, 391–392in requiring right user, 390–392restricting destroy action to admins
(Listing 9.48), 422Beginning Ruby (Cooper), 4, 5, 129, 543Black, David A., 6, 543blocks, in Ruby data structures, 146–148Booleans, 133, 138–139, 142Bootstrap
adding bootstrap-sass gem to (Listing 5.3), 175adding to application.js (Listing 8.25), 358and custom CSS in layout structure, 175–186framework, 176, 317
browsers, 11–12built-in Ruby classes, modifying, 158–159bundle exec, eliminating, 118–119
binstubs, 119RVM Bundler integration, 118–119
Bundler, 19–23business logic, 25
Ccallback, 253, 346–348Capybara, 79
in Cucumber step files, 367integration tests, 93signin tests, 330signup tests, 294syntax for CSS id, 471in test-driven development, 94–95test for destroying microposts, 477tests for user update action (Listing 9.9), 383
cascading style sheets (CSS), 152–153, 190–197asset directory, 187–188Bootstrap framework, 176, 317Capybara syntax for CSS id, 471custom CSS, 175–186efficiency in production, 189–190HTML source produced by CSS includes
(Listing 4.7), 153layout links, 197–211manifest files, 188–189for microposts (Listing 10.24), 452–453mixins, 274–275nesting, 190–192
partials, 181–186preprocessor engines, 189in Ruby data structures, 152–153Sass, 187–197site navigation, 169–175structure, adding, 167–186for styling error messages (Listing 7.24), 311for user index (Listing 9.26), 400user signup, 211–215variables, 193–197
Celadon Cedar Stack, 40chaining, 139, 421checkout command, 28, 32Chrome, 11–12, 103, 170classes, 153–163
built-in, modifying, 158–159code for example user (Listing 4.9), 161constructor, 153–154container class, 172controller, 159–161defining Word class in console (Listing 4.8),
156inheritance, 155–157user, 161–163
class methods, 154–155class name converted to id, 493n5Code School, 6, 543command lines, 10, 11comments, 134–135commit command, in Git, 31config directory, 9, 88, 89constructor classes, 153–154Contact page
action for (Listing 5.18), 199adding, 197–199adding route for (Listing 5.17), 199footer partial with links for (Listing 5.25), 206for sample app, 114–117tests for (Listing 5.16), 198tests for static pages (Listing 5.27), 210view for (Listing 5.19), 199
container class, 172content validations, Micropost model, 443–444controller classes, 159–161cookies, 349–351
expiring 20 years in the future, 350remember token added to, 379
www.it-ebooks.info
ptg8286261
548 Index
cookies (continued )remember token removed from, 363used as a hash, 349–351
Cooper, Peter, 4, 5, 543correct user before filter
in microposts, 477–478to protect edit/update pages (Listing 9.15), 391
counting columns, 105n12count method, 295create action
adding (empty) @feed items instance variableto (Listing 10.45), 474–475
completed, 313completed Sessions controller create action (not
yet working) (Listing 8.13), 343handling signup failure (but not success)
(Listing 7.21), 305for microposts, 461Microposts controller create action
(Listing 10.30), 461preliminary version of sessions create action
(Listing 8.9), 337for Sessions controller, 326, 336–338, 343,
395Sessions create action with friendly forwarding
(Listing 9.20), 395in signup failure, 304–305strategy for using, 304tests for post-save behavior in (Listing 7.32),
323user create action with save and redirect
(Listing 7.25), 314for Users controller, 425, 459
creating microposts, 459–467adding micropost instance variable to home
action (Listing 10.34), 463adding microposts creation to Home page
(Listing 10.31), 461form partial for creating microposts
(Listing 10.33), 463Microposts controller create action
(Listing 10.30), 461partial for user info sidebar (Listing 10.32), 462tests for (Listing 10.29), 460updating error-messages partial from
Listing 7.23 to work with other objects(Listing 10.35), 464
updating errors for editing users(Listing 10.37), 465
updating rendering of user signup errors(Listing 10.36), 465
cross-site request forgery (CSRF), 301cross-site scripting attack, 481CSS. See Cascading style sheets (CSS)CSS: The Missing Manual (McFarland), 5Cucumber, 363–371
adding cucumber-rails gem to Gemfile(Listing 8.31), 364
adding helper method and custom RSpecmatcher (Listing 8.34), 371
features and steps, 365–368features to test user signin (Listing 8.32), 366installation and setup, 364–365RSpec examples, equivalent, 368–371signin tests using, 363–371steps needed to get signin features to pass
(Listing 8.33), 368current user, 351–355
defining assignment to (Listing 8.20), 352definition for (Listing 8.21), 353finding, using remember token (Listing 8.22),
353non-nil, 356in signin success, 351–355
current user? boolean method, 391–392
Ddatabase indices, 254database migration. See Migrationdata model
defined, 47micropost, 48–49user, 47–48
debugadding code for debug box, including Sass
mixin (Listing 7.2), 274information, adding to site layout (Listing 7.1),
273–274information, restricting to development
environment, 276information in sign up, 271–276output, 275in Rails environments, 276
default Rails directory structure, 19t
www.it-ebooks.info
ptg8286261
Index 549
default Rails page, 24with the app environment, 25
default scope in Micropost model refinements,440–441
demo app, 45–75conclusion, 74–75Microposts resource, 63–74planning the application, 45–49Users resource, 49–63
demo app, deploying, 73–74dependent refinements in Micropost model,
441–443deploying Rails, 39–42destroy action
adding factory for administrative users(Listing 9.43), 417–418
adding working destroy action (Listing 9.46),420–421
in deleting users, 417–422before filter restricting destroy action to admins
(Listing 9.48), 422test for protecting destroy action (Listing 9.47),
421–422tests for delete links (Listing 9.44), 418–419user index /users with delete links, 420
destroying micropostsensuring that user’s microposts are destroyed
along with user (Listing 10.16), 443feed item partial with added delete link
(Listing 10.47), 476Microposts controller destroy action
(Listing 10.49), 477–478mockup of proto-feed with micropost delete
links, 476testing that microposts are destroyed when
users are (Listing 10.15), 442tests for Microposts controller destroy action
(Listing 10.48), 477user home page after deleting
second-most-recent micropost, 479development environment, 9–27
browsers, 11–12command lines, 10, 11IDEs, 10terminals, 11text editors, 10, 11time learning tools, 12
development log, 231–232, 450n4directories
standard directory and file structure, 18summary of default Rails directory structure,
19tdiv tags, 171doctype, 84Document Object Model (DOM), 528domain logic, 25domain-specific language (DSL), 3, 94, 283drb option, 125duplication, eliminating, 103, 111–113dynamic pages. See Slightly dynamic pages
Eeach method, 146, 151, 245, 399, 533n11edit form, in updating users, 374–380edits in updating users, successful, 382–384edits in updating users, unsuccessful, 380–382Emacs, 29Embedded Ruby
instance variables and, 162JavaScript, to create following relationship
(Listing 11.39), 529slightly dynamic pages, 108–111
Embedded Ruby titleview for About page with (Listing 3.24),
110–111view for Help page with (Listing 3.23), 110view for Home page with (Listing 3.22), 109
empty? method, 138, 139, 310encrypted passwords, 255–257Engine Yard, 13, 16Engine Yard Cloud, 39environment loading, adding to Spork.prefork
block (Listing 3.36), 124equality comparison operator, 144ERb. See Embedded Rubyerror messages, signup, 308–312
code to display error messages on signup form(Listing 7.22), 309
CSS for styling error messages (Listing 7.24),311
failed signup with error messages, 312partial for displaying form submission error
messages (Listing 7.23), 309exceptions, 234n8
www.it-ebooks.info
ptg8286261
550 Index
Ffactories
complete factory file, including new factory formicroposts (Listing 10.12), 439
to simulate User model objects (Listing 7.8),284
test for user show page (Listing 7.9),285
testing user show page with, 282–286Factory Girl, 283–286
adding to Gemfile (Listing 7.7), 284in micropost refinements, 439–440sequence, defining (Listing 9.32),
407sequence, solving problems in, 406slow nature of running, 285–286
Faker gem, 403adding to Gemfile (Listing 9.29), 403lorem ipsum text, 450–451, 451n5
feed, 429proto-, 467–475RSS, 542status, 529–539
Fernandez, Obie, 6, 142n5, 543Fielding, Roy, 60Files
standard directory and file structure, 18summary of default Rails directory structure,
19tFirebug, 12, 301Firefox, 11–12, 89, 170first feed implementation, 532–535flash, 315–317
adding contents of flash variable to site layout(Listing 7.26), 315–316
adding flash message to user signup(Listing 7.27), 317
ERb in site layout using content tag(Listing 7.33), 324
vs. flash.now, 316n11message for failed signin, 339–343, 340
flash.now, 316n11, 342follow and unfollow buttons, 519–529
with Ajax, 524–529current user’s followers, 520profile of user to follow, with follow button,
486
profile with unfollow button and incrementedfollowers count, 487
Relationships controller (Listing 11.34),523–524
tests for (Listing 11.32), 521–522tests for relationships controller authorization
(Listing 11.33), 522–523user profile with follow button, 514users being followed by current user, 520working follow button, 519–524
followed users in relationship model, 495–500follower notifications, 541followers, 500–503
implementing user.followers using reverserelationships (Listing 11.16), 502
model for user followers using reverseRelationship model, 500
testing for reverse relationships (Listing 11.15),501
followers relationship model, 500–503follow form, 505–514
adding followed users and followers actionsto Users controller (Listing 11.18),506
adding follow form and follower stats to userprofile page (Listing 11.27), 513
for following a user using (Listing 11.35), 525form for following user (Listing 11.25), 512form for unfollowing user (Listing 11.26), 512partial for follow/unfollow form
(Listing 11.23), 511RESTful routes provided by custom rules in
resource, 506troutes added for user relationships
(Listing 11.24), 512for unfollowing a user using (Listing 11.36),
525following
adding following/follower relationships tosample data (Listing 11.17), 503–504
following? and follow! utility methods(Listing 11.12), 498
problem with the data model (and a solution),485–490
relationship model, 484–503sample following data, 503–505user/relationship associations, 491–494
www.it-ebooks.info
ptg8286261
Index 551
users, 503–544utility methods, tests for (Listing 11.11), 497
following and followers pages, 515–519following and followers actions (Listing 11.30),
518mockups of, 515–516show follow view used to render following and
followers (Listing 11.31), 519test for followed users and followers pages
(Listing 11.29), 517–518tests for authorization of (Listing 11.28),
516–517following data, sample, 503–505following? method, 497–500follow! method, 497–500forgery, 112format, validating, 245–248form for, 297–300form tag, 303, 334, 372forward slash (/), 8Fowler, Martin, 222n1friendly forwarding, 392–396
adding store location to signed-in user beforefilter (Listing 9.19), 394–395
code to implement (Listing 9.18), 394Sessions create action with (Listing 9.20), 395test for friendly forwarding (Listing 9.17), 393
full-table scan, 254Fulton, Hal, 6, 543functions, 91
Ggem configuration file
creating (Listing 1.1), 16suppressing ri and rdoc documentation in
(Listing 1.2), 16Gemfile
adding annotate gem to (Listing 6.4), 229adding bcrypt-ruby to (Listing 6.24), 255adding bootstrap-sass gem to (Listing 5.3), 175adding cucumber-rails gem to (Listing 8.31),
364adding Factory Girl to (Listing 7.7), 284adding Faker gem to (Listing 9.29), 403default, in the first app directory (Listing 1.4),
20
default Gemfile in the first app directory(Listing 1.4), 20
for demo app (Listing 2.1), 46with explicit version of each Ruby gem
(Listing 1.5), 21–22including will paginate in (Listing 9.31),
405needed to use PostgreSQL instead of SQLite
(Listing 3.31), 117for sample app (Listing 3.1), 78for sample app (Listing 3.35), 123for sample app, final (Listing 9.49), 423–424for sample app including Guard (Listing 3.33),
120gems, 14gemsets, 14–15generated code, scaffolding and, 3generate script, 49, 86, 94GET, 89–90Git, 27–39
adding files in, 30–31benefit of using, 31–32branches, 35–36commit command, 31committing, 36–37editing, 36first-time repository setup, 28–30first-time setup, 27–28installing, 13merging, 37–38pushing, 38–39README file, 34–35, 35README file, README.md (Listing 1.8),
36README file formatted with Markdown, 39status command, 30
GitHub, 32–34creating first app repository at, 33creating sample app repository at, 81initial README file for project at, 35repository page, 34
.gitignoreaugmented .gitignore file (Listing 1.7),
29–30default .gitignore created by rails command
(Listing 1.6), 29Goia, Mircea, 14
www.it-ebooks.info
ptg8286261
552 Index
Gravatar, 286–291adding sidebar to user show view (Listing 7.14),
290defining gravatar for helper method
(Listing 7.13), 288editing, 382–384SCSS for styling user show page, including
sidebar (Listing 7.15), 290–291in sign up, 286–291user profile page /users/1 with default Gravatar,
289user show page /users/1 with sidebar and CSS,
291user show page with custom Gravatar, 289user show view with name and (Listing 7.12),
287Guard
automated tests with, 120–122Gemfile for sample app including
(Listing 3.33), 120Spork with Guard, 126–127
gVim, 28
HHansson, David Heinemeier, 2, 4hashes, 337
nested (Listing 4.6), 151in Ruby data structures, 148–152
hash symbol, 21has secure password
authenticate method, 264, 338User, 263–265
have selector method, 104Head First HTML, 5Help page
code added to test (Listing 3.11), 98generated view for (Listing 3.8), 92with HTML structure (Listing 3.20), 107with HTML structure removed (Listing 3.27),
113tests for static pages (Listing 5.27), 210view for, with Embedded Ruby title
(Listing 3.23), 110Heroku
commands, 41–42creating a new application at (Listing 1.9), 40deployment, 40–41setup, 39–40
hierarchies, inheritance, 70–73, 73Home page
adding follower stats to (Listing 11.21), 509adding microposts creation to (Listing 10.31),
461–462with follow stats, 511generated view for (Listing 3.7), 92with HTML structure (Listing 3.19), 107with HTML structure removed (Listing 3.26),
113with link to signup page (Listing 5.2), 173mockup with form for creating microposts,
459mockup with proto-feed, 467SCSS for Home page sidebar (Listing 11.22),
510with status feed, mockup of, 530with status feed and incremented following
count, 488testing following/follower statistics on
(Listing 11.19), 507view for, with Embedded Ruby title
(Listing 3.22), 109view for, with HTML structure (Listing 3.19),
107with working status feed, 539
href, 97HTML
About page with HTML structure removed(Listing 3.28), 113
About page with structure (Listing 3.21), 108code for signin form (Listing 8.7), 334for edit form defined in Listing 9.3 and shown
in Figure 9.2. (Listing 9.4), 377for form in Figure 7.12 (Listing 7.20), 301initial user edit page with pre-filled name and
email, 377produced by CSS includes (Listing 4.7), 153for signin form produced by Listing 8.7, 335signup form, 301–303, 335for signup form/signup for new users, 300typical, with friendly greeting (Listing 3.3), 84user edit action (Listing 9.2), 375for user edit form (Listing 9.2), 377
HTTP, 89–90HTTP verbs, 89, 90hypertext reference (href), 97hypertext transfer protocol. See HTTP
www.it-ebooks.info
ptg8286261
Index 553
IIDEs, 10implicit return, 141index, user. See User indexindex action, simplified for demo app
(Listing 2.4), 61index.html file, 82–84, 83index page
with 100 sample users, 405correspondence between pages and URIs for
Users resource, 52tinitial, for Users resource, 52micropost, 68with one user, 402with second user, 55tests for (Listing 9.23), 398–399users with pagination, 410
inheritanceApplicationController class with (Listing 2.16),
72class, 155–157classes, 155–157hierarchies, 70–73, 73Micropost class with (Listing 2.13), 71MicropostsController class with (Listing 2.15),
72User class with (Listing 2.12), 71UsersController class with (Listing 2.14), 72
inheritance class, 155–157inheritance hierarchies, 70–73, 73initialization hash, 231inspect method, 151installing Rails, 16–17instance variables, 61, 162
adding (empty) @feed items to create action(Listing10.45), 474–475
adding to home action (Listing 10.41), 471adding to the home action (Listing 10.34),
463adding to user show action (Listing 10.22),
449integrated development environments (IDEs), 10integration tests, 93
See also Testsinterpolation, 136–137
string, 115, 133, 142, 162, 209IRC client, 14n10iTerm, 11
JJavaScript
adding Bootstrap to application.js(Listing 8.25), 358
to create following relationship (Listing 11.39),529
to destroy following relationship(Listing 11.40), 529
unobtrusive, 525JavaScript Embedded Ruby (JS-ERb), 528–529
to create a following relationship(Listing 11.39), 529
join method, 145, 534JS-ERb. See JavaScript Embedded Ruby
(JS-ERb)
KKatz, Yehuda, 364, 543
Llayout, filling in, 167–219
adding structure, 167–186asset pipeline, Sass and, 187–190conclusion, 215–216exercises, 217–219layout links, 197–211stylesheets and, improving with Sass, 190–197user signup, 211–215
layout filesduplication eliminated with, 103, 111–113sample application site layout (Listing 3.25),
112sample application site layout (Listing 4.1), 130sample application site layout (Listing 4.3),
132site layout with added structure (Listing 5.1),
169layout links, 197–211
changing for signed-in users (Listing 8.24),357–358
named routes, 205–207Rails routes, 202–205route tests, 200–202RSpec, 207–211test for links on layout (Listing 5.36), 218
layout links, changing, 355–359adding Bootstrap JavaScript library to
application.js (Listing 8.25), 358
www.it-ebooks.info
ptg8286261
554 Index
layout links, changing (continued )the signed in? helper method (Listing 8.23),
356for signed-in users (Listing 8.24), 357–358signin success and, 355–359
length validations, 243–244adding for name attribute (Listing 6.15), 244constraining micropost characters (Listing 2.9),
67test name for (Listing 6.14), 244
Linux, 13–14Linux Mint, 14Linux Ubuntu, 14lists, unordered, 172literal constructor, 153–154literal strings, 135Loeffler, David, 10log, development, 231–232log files, ignoring, 29
MMacintosh OS X, 11MacVim, 28magic columns, 226, 232manifest files in asset pipeline, 188–189map method, 147–148, 533mapping for site links, 198tmass assignment
attr accessible used to prevent, 230, 416invalid, ensuring Rails throws errors on
(Listing 10.6), 436memoization, 354n7Merb, merger with Rails, 4message passing in Ruby, objects and, 138–141messaging, 541method chaining, 139, 421method definitions, 141micropost associations, 433–438Micropost class with inheritance (Listing 2.13), 71micropost data model, 48–49micropost migration (Listing 10.1), 430Micropost model, 429–444, 431
accessible attributes and first validation,432–433
basic model, 430–432content validations, 443–444initial Micropost spec (Listing 10.2), 431
micropost migration (Listing 10.1), 430refinements, 439–443tests for (Listing 10.17), 443–444tests for validity of new micropost
(Listing 10.3), 432user has many microposts (Listing 10.11), 438user/micropost associations, 433–438validation for user (Listing 10.4), 433validations (Listing 10.18), 444
micropostsadding to sample data (Listing 10.23), 451CSS for (Listing 10.24), 452–453destroying along with user (Listing 10.16), 443form partial for creating (Listing 10.33), 463ordering with default scope (Listing 10.14), 441partial for showing single micropost
(Listing 10.21), 449sample microposts, 450–454summary of user/micropost association
methods, 434ttesting that microposts are destroyed when
users are (Listing 10.15), 442testing the order of a user’s microposts
(Listing 10.13), 440–441Microposts, manipulating, 454–479
access control, 456–459creating microposts, 459–467destroying microposts, 475–479micropost pagination links, 455proto-feed, 467–475
Microposts, showing, 445–454profile page with microposts, mockup of, 445sample microposts, 450–454user show page, augmenting, 446–450
Microposts controllercreate action (Listing 10.30), 461destroy action (Listing 10.49), 477–478in schematic form (Listing 2.8), 65–66tests for destroy action (Listing 10.48), 477
MicropostsController class with inheritance(Listing 2.15), 72
Microposts resource, 63–75access control, 456–459associations, 68–70demo app, deploying, 73–74error messages for failed micropost creation, 69inheritance hierarchies, 70–73, 73
www.it-ebooks.info

ptg8286261
Index 555
length validations, 243–244micropost belonging to user (Listing 2.11), 69between microposts and users, 70microtour, 63–66Rails routes with new rule (Listing 2.7), 65RESTful routes provided by, 65troutes for (Listing 10.25), 455user has many microposts (Listing 2.10), 68validations, 66–68
microtour, 63–66migration
to add boolean admin attribute to users(Listing 9.40), 415
micropost (Listing 10.1), 430password, 256–257Rake used in, 50user model, 223–228for User model (to create users table)
(Listing 6.2), 225mockups, 167–168model annotation in model file, 228–230model file, 228–230
accessible attributes, 230model annotation, 228–230
modeling demo microposts, 48–49modeling demo users, 47–48modeling users, 221–269
conclusion, 267exercises, 268–269passwords, 254–267user model, 222–236user validations, 236–254
model-view-controller (MVC), 25–27in action, 56–62in Rails, diagram of, 57schematic representation of, 26
motivationin Ruby, 129–133in status feed, 529–532
MVC. See Model-view-controller (MVC)
Nname attribute
adding length validation for (Listing 6.15), 244failing test for validation of (Listing 6.11), 241validating presence of (Listing 6.9), 240
named routes
footer partial with links (Listing 5.25), 206header partial with links (Listing 5.24),
205–206namespaces, 403nested hashes (Listing 4.6), 151nesting, 190–192newline, 105n11new status feed, 538–539nil, 136non-nil current user, 356
Oobjects and message passing, in Ruby, 138–141OS X. See Macintosh OS X
PPagesController. See StaticPages controllerpagination, for showing all users, 404–410
paginating users in index action (Listing 9.35),409
tests for pagination (Listing 9.33), 407–408pagination links, micropost, 455palindrome? method, 155–156, 158Paperclip gem, 287n8partial refactoring, for showing all users, 410–412partials, 181–186
adding CSS for site footer (Listing 5.13),185–186
for displaying form submission error messages(Listing 7.23), 309
for HTML shim (Listing 5.9), 183for the site footer (Listing 5.11), 184for the site header (Listing 5.10), 184site layout with footer partial (Listing 5.12),
185site layout with partials for stylesheets and
header (Listing 5.8), 182–183updating error-messages (Listing 10.35), 464
passwords, 254–267adding bcrypt-ruby to Gemfile (Listing 6.24),
255and confirmation, 257–260creating a user, 265–267encrypted, 255–257ensuring that User object has password digest
column (Listing 6.25), 256
www.it-ebooks.info
ptg8286261
556 Index
passwords (continued )migration, 256–257migration to add password digest column to
users table (Listing 6.26), 256reminders, 540, 541secure, adding, 254–260test for password and password confirmation
(Listing 6.28), 259–260testing for password and password confirmation
attributes (Listing 6.27), 257user authentication, 260–263user has secure password, 263–265User model with added password digest
attribute, 255See also Authenticate method
Patterns of Enterprise Application Architecture(Fowler), 222n1
PeepCode, 6, 543pending spec, 237persistence, 223Phusion Passenger, 39Pik project, 13pluralize text helper, 310PostgreSQLn, 46–47, 115, 117, 223, 253n15pound sign. See Hash symbolpreprocessor engines in asset pipeline, 189presence, validating, 239–243Preston-Werner, Tom, 286private keyword, 348production in asset pipeline, efficiency in,
189–190profile images, 286, 382profile links, 332protected page
mockup of, 385signin form after trying to access, 388
proto-feed, 467–475adding feed instance variable to home action
(Listing 10.41), 471adding (empty) @feed items instance
variable to create action (Listing10.45),474–475
adding status feed to Home page(Listing 10.44), 473
Home page after creating micropost, 474Home page with, 473mockup of Home page with, 467
preliminary implementation for micropoststatus feed (Listing 10.39), 469
single feed item partial (Listing 10.43), 472status feed partial (Listing 10.42), 472test for rendering feed on Home page
(Listing 10.40), 470–471tests for (Listing 10.38), 468
public/index.html file, 83puts method, 136
RRails
approach to learning, 4–6deploying, 39–42development environment setup, 9–27environments, 276–277intermediate-to-advanced resources, 6–7introduction, 3–9Merb merger and, 4Ruby and, importance of, 129–165 (See also
Ruby)running to generate new application
(Listing 1.3), 17–18scaling, 7version control with Git, 27–39
Rails, installingGit, installing, 13Rails, installing (Windows), 13, 16–17Ruby, installing, 13–15RubyGems, installing, 15–16
The Rails 3 Way (Fernandez), 6, 82n5, 142n5, 543RailsCasts, 6, 7, 540, 543Rails command, 17–19
default .gitignore created by (Listing 1.6), 29to generate new application (Listing 1.3),
17–18Rails console, 134Rails Guides, 6, 189, 202, 228, 506, 543Rails Machine, 39Rails root, 8–9Rails routes, 202–205
adding mapping for the (Listing 5.23), 204adding Users resource to (Listing 7.3), 279commented-out hint for defining
(Listing 5.22), 204with new rule for Microposts resource
(Listing 2.7), 65
www.it-ebooks.info

ptg8286261
Index 557
with rule for Users resource (Listing 2.2), 58for static pages (Listing 5.21), 202
Rails server, 23–25The Rails 3 Way (Fernandez), 6, 142n5, 543Rails Tutorial help page, 9n6Rake, 50, 51
task for populating database with sample users(Listing 9.30), 403–404
ranges, 145–146README file
Git, 34–35, 35improved, formatted with Markdown (Listing),
39improved, for sample app (Listing 3.2), 80initial, for project at GitHub, 35new README file, README.md
(Listing 1.8), 36updating, 80
Red, Green, Refactor, 94Green, 100–102Red, 99–100Refactor, 103
refactoringin adding static pages, 103compact, of Listing 11.38 (Listing 11.47),
544first attempt at index view (Listing 9.36), 411partial, 410–412refactored following and followers actions
(Listing 11.30), 518refinements in Micropost model, 439–443
default scope, 440–441dependent: destroy, 441–443
regular expression (regex), 246relationship model, 484–503, 491
adding belongs to associations to (Listing 11.6),494
adding indices for relationships table(Listing 11.1), 490
adding User model followed users association(Listing 11.10), 496
followed users, 495–500of followed users through user relationships,
489followers, 500–503following? and follow! utility methods
(Listing 11.12), 498
implementing user.followers using reverserelationships (Listing 11.16), 502
implementing user/relationships has manyassociation (Listing 11.4), 493
problem with, 485–491for reverse relationships, 500–503test for unfollowing a user (Listing 11.12), 499test for user.followed users attribute
(Listing 11.9), 496testing for reverse relationships (Listing 11.15),
501testing for user.relationships attribute
(Listing 11.3), 492testing Relationship creation and attributes
(Listing 11.2), 491–492testing Relationship model validations
(Listing 11.7), 495testing user/relationships belongs to association
(Listing 11.5), 494tests for ‘‘following’’ utility methods
(Listing 11.11), 497unfollowing user by destroying user
relationship (Listing 11.14), 499–500for user followers using reverse relationship
model, 500user/relationship associations, 491–494validations, 495
relationships attribute, 492Relationships controller
Ajax requests in, responding to (Listing 11.38),527
follow and unfollow buttons (Listing 11.34),523–524
responses to Ajax requests, tests for(Listing 11.37), 526
reload method, 383remember token, 344
added to cookies, 379before save callback to create (Listing 8.18),
348–349cookie in local browser, 360current user found by using (Listing 8.22), 353first test for (Listing 8.15), 345migration to add to users table (Listing 8.16),
346removed from cookies, 363test for valid (nonblank) (Listing 8.17), 347
www.it-ebooks.info
ptg8286261
558 Index
remember token (continued )User model with added remember token
attribute, 345render, 183replies, 541repository setup, 28–30request specs. See Testsresources
advanced Rails, 4, 6guide to further, 542–543
REST API, 542REST architecture, 45, 59, 65, 86, 90RESTful routes
provided by Microposts resource, 65tprovided by Users resource, 65t
reverse relationships, 500–503followers using reverse relationship model, 500implementing user.followers using reverse
relationships (Listing 11.16), 502testing for reverse relationships (Listing 11.15),
501root, 8–9routes in layout links
named, 205–207Rails, 202–205tests, 200–202
RSpecadding helper method and custom RSpec
matcher (Listing 8.34), 371Cucumber equivalent, 368–371custom matchers, 368–371layout links, 207–211request specs, 93, 368
RSS feed, 542Rubular, 247, 248Ruby, 129–165
comments, 134–135conclusion, 164exercises, 164–165gems, 14gemsets, 14–15installing, 13–15method defintions, 141motivation, 129–133objects and message passing, 138–141strings, 135–138title helper, 142
Ruby classes. See ClassesRuby data structures, 142–153
arrays, 142–145blocks, 146–148cascading style sheets, 152–153hashes and symbols, 148–152ranges, 145–146
RubyGems, installing, 15–16Ruby JavaScript (RJS)
to create following relationship (Listing 11.39),529
to destroy following relationship(Listing 11.40), 529
RubyMine, 10Ruby on Rails. See RailsRuby Version Manager (RVM), 8, 13, 118The Ruby Way (Fulton), 6, 129, 543
SSafari, 11–12, 89, 170sample application, extensions to, 540–542
follower notifications, 541messaging, 541password reminders, 541replies, 541REST API, 542RSS feed, 542search, 542signup confirmation, 541
sample users, showing all, 403–404sandbox, 231, 252, 265Sass, 187–197
asset pipeline and, 187–190improving stylesheets with, 190–197
save!, 497scaffolding, 2–3scaling Rails, 7scope, 440–441screencasts, 538, 542SCSS
converting to CSS, 192error messages styled with, 311for Home page sidebar (Listing 11.22), 510initial SCSS file converted to use nesting and
variables (Listing 5.15), 195–197rewriting, 193–194Sass supported by, 190
www.it-ebooks.info
ptg8286261
Index 559
for styling user show page, including sidebar(Listing 7.15), 290–291
search, 542Secure Sockets Layer (SSL), 318
deploying production with, in signup success,317–321
Seguin, Wayne E., 13, 14self, 157, 348session hijacking attack, 318, 351sessions
authentication and, 325–326defined, 325–326destroying a session (user signout)
(Listing 8.29), 362preliminary version of sessions create action
(Listing 8.9), 337sessions create action with friendly forwarding
(Listing 9.20), 395signin failure and, 325–326sign out method in Sessions helper module
(Listing 8.30), 363Sessions controller
adding resource to get standard RESTfulactions for sessions (Listing 8.2), 328
completed Sessions controller create action (notyet working) (Listing 8.13), 343
create action for, 326, 336–338, 343, 395signin failure and, 326–329tests for new session action and view
(Listing 8.1), 327short-circuit evaluation, 355showing microposts. See Microposts, showingsidebar
partial for the user info sidebar (Listing 10.32),462
SCSS for Home page (Listing 11.22), 510in SCSS for styling user show page
(Listing 7.15), 290–291in sign up, 288–291
signed in? helper method (Listing 8.23), 356signed-in users
authorization of, 386–389requiring, 386–389
sign in, 325–372conclusion, 371–372Cucumber, signin tests using, 363–371exercises, 372
signin failure, 325–343flash message, rendering with, 339–343reviewing from submission, 336–338sessions, 325–326Sessions controller, 326–329signin form, 333–336, 335signin tests, 330–333
signin form, 333–336, 335code for (Listing 8.7), 334HTML for signin form produced by Listing 8.7
(Listing 8.8), 335initial failed signin, with create as in
Listing 8.9., 336signin failure and, 333–336
signing out, 361–363destroying a session (user signout)
(Listing 8.29), 362sign out method in Sessions helper module
(Listing 8.30), 363sign in method, signin success and, 349–351signin success, 343–363
current user, 351–355layout links, changing, 355–359remembering user signin status, 343–349signing out, 361–363sign in method, 349–351signin upon signup, 359–361
signin testssignin failure and, 330–333using Cucumber, 363–371
signin upon signup, 359–361sign up, 271–324
conclusion, 321exercises, 321–324failure in (See Signup failure)Rails environments in, 276–277showing users, 271–291success in (See Signup success)
signup confirmation, 541signup failure, 303–312, 306
apartial for displaying form submissionerror messages (Listing 7.23),309
code to display error messages on signup form(Listing 7.23), 309
create action that can handle (but not success)(Listing 7.21), 305
www.it-ebooks.info
ptg8286261
560 Index
signup failure (continued )CSS for styling error messages (Listing 7.24),
311debug information, 307mockup of signup failure page, 304signup error messages, 308–312, 312working form, 303–308
signup form, 292–303adding @user variable to the new action
(Listing 7.18), 299CSS for (Listing 7.19), 300filled-in form with text and password fields, 302form for, using, 297–300form to sign up new users (Listing 7.17), 298HTML, 301–303HTML for form in figure 7.12 (Listing 7.20),
301for new users, 300tests for signing up users (Listing 7.16),
296–297tests for user signup, 293–297using form for, 297–300
signup pageinitial (stub) (Listing 5.33), 214linking the button to (Listing 5.34), 215route for (Listing 5.32), 214signing in user upon signup (Listing 8.27), 361signin upon signup, 359–361testing that newly signed-up users are also
signed in (Listing 8.26), 360–361Users controller, 212
signup success, 312–321deploying production with SSL, 317–321finished signup form, 313–315first signup, 317flash, 315–319mockup of, 314
signup URI, in user signup, 213–215site navigation in filling in layout, 169–175
Home page with link to signup page(Listing 5.2), 173
site layout with added structure (Listing 5.1),169
skeleton for a shuffle method attached to theString class (Listing 4.11), 165
skeleton for a string shuffle function(Listing 4.10), 164
slightly dynamic pages, 103–113duplication, eliminating with layouts, 103,
111–113Embedded Ruby, 108–111instance variables and Embedded Ruby, 162passing title tests, 106–108testing a title change, 103–107testing title page, 103–106
spike, 93split method, 143Spork, 123–127
adding environment loading to Spork.preforkblock (Listing 3.36), 124
configuring RSpec to automatically use(Listing 3.37), 125
Gemfile for sample app (Listing 3.35), 123Guardfile updated for Spork (Listing 3.38),
126Guard with Spork, 126–127speeding up tests with, 123–127
SQL injection, 470SQLite Database Browser, 226, 227, 266Stack Overflow, 301, 492n4staging area, 30static pages, 77–128
conclusion, 114exercises, 114–117test-driven development, 93–99testing, 93–103See also Slightly dynamic pages
static pages, adding, 99–103green, 100–102red, 99–100refactor, 103
static pages, advanced setup, 117–128bundle exec, eliminating, 118–119Guard, automated tests with, 120–122Spork, speeding up tests with, 123–127Sublime Text, tests inside, 127–128
static pages, making, 82–92with Rails, 85–92truly static pages, 82–85undoing things, 87–88
StaticPages controllerwith about action (Listing 3.15), 101generating (Listing 3.4), 86inheritance hierarchy for, 160
www.it-ebooks.info
ptg8286261
Index 561
made by Listing 3.4 (Listing 3.6), 91routes for home and help actions in
(Listing 3.5), 88spec with base title (Listing 3.29), 115–116spec with title tests (Listing 3.18), 105
stats, 505–514adding follower stats to Home page
(Listing 11.21), 509adding follow form and follower stats to user
profile page (Listing 11.27), 513Home page with follow stats, 511mockup of stats partial, 505a partial for displaying follower stats
(Listing 11.20), 508SCSS for Home page sidebar (Listing 11.22),
510testing following/follower statistics on the
Home page (Listing 11.19), 507stats form, 505–514status command, in Git, 30status feed, 529–539
adding completed feed to User model(Listing 11.42), 532
final implementation of from users followed by(Listing 11.45), 537–538
final tests for (Listing 11.41), 531–532first cut at from users followed by
(Listing 11.43), 535first feed implementation, 532–535home action with paginated feed
(Listing 11.46), 538Home page with working status feed, 539improving from users followed by
(Listing 11.44), 536mockup of a user’s Home page with, 530motivation and strategy, 529–532new, 538–539partial for a single feed item (Listing 10.43),
472preliminary implementation for micropost
(Listing 10.39), 469subselects, 535–538for user following users, 531
strategy in status feed, 529–532string interpolation, 115, 133, 142, 162,
209string literals, 135
stringsdouble-quoted, 137–138printing, 136–137in Ruby, 135–138single-quoted, 137–138
structure in filling in layout, 167–186bootstrap and custom CSS, 175–186partials, 181–186site navigation, 169–175
stylesheets. See Cascading style sheets (CSS)Sublime Text, tests inside, 127–128Sublime Text 2, 10, 16, 127subselects in status feed, 535–538sudo, 8superclass method, 155symbols, 148–152system setups, 27
TTDD. See Test-driven development (TDD)terminals, 11ternary operator, 481, 482test-driven development (TDD), 5
Green, 100–102Red, 99–100Red, Green, Refactor, 94Refactor, 103Spork, 123–127in testing static pages, 93–99
testing tools, 93tests
for admin attribute (Listing 9.39), 414for authorization of following and followers
pages (Listing 11.28), 516–517automated tests with Guard, 120–122for Contact page (Listing 5.16), 198for creating microposts (Listing 10.29), 460for delete links (Listing 9.44), 418–419for destroy action in Microposts controller
(Listing 10.48), 477for email format validation (Listing 6.16),
245–246for follow and unfollow buttons
(Listing 11.32), 521–522for ‘‘following’’ utility methods (Listing 11.11),
497for friendly forwarding (Listing 9.17), 393
www.it-ebooks.info
ptg8286261
562 Index
tests (continued )for full title helper (Listing 5.37), 219Guard, automated tests with, 120–122for index page (Listing 9.23), 398–399integration tests, 93for Micropost model (Listing 10.17), 443–444for Microposts controller destroy action
(Listing 10.48), 477for micropost’s user association (Listing 10.8),
437for new session action and view (Listing 8.1),
327for pagination (Listing 9.33), 407–408passing title, 106–108for post-save behavior in (Listing 7.32), 323for proto-feed (Listing 10.38), 468for Relationships controller (Listing 11.37),
526for relationships controller authorization
(Listing 11.33), 522–523for Relationships controller authorization
(Listing 11.33), 522–523for responses to Ajax requests (Listing 11.37),
526for reverse relationships (Listing 11.15),
501for routes in layout links, 200–202for showing microposts on user show page
(Listing 10.19), 446signin, using Cucumber, 363–371for signin failure, 330–333for signing up users (Listing 7.16), 296–297signin tests using Capybara, 294, 330signin tests using Cucumber, 363–371spec with title tests (Listing 3.18), 105speeding up with Spork, 123–127static pages (Listing 5.27), 210for static pages, 93–99for static pages (Listing 5.27), 210for status feed, final (Listing 11.41), 531–532Sublime Text, tests inside, 127–128for title change, 103–106title test (Listing 3.17), 104user, initial, 236–239for user index page (Listing 9.23), 398–399for user show page (Listing 7.9), 285for user signup, 293–297
for user’s microposts attribute (Listing 10.9),437–438
for user update action (Listing 9.9), 383for user validations, initial, 236–239for utility methods, (Listing 11.11), 497for validity of new micropost (Listing 10.3),
432text editors, 10, 11TextMate, 10, 28, 105n12time helpers, 350timestamps, 225title change
passing title tests, 106–107testing, 103–106
title helper, 142tests for full title helper (Listing 5.37), 219
title test (Listing 3.17), 104toggle method, 414tools, learning, 12Torvalds, Linus, 27
Uunderscore method, 493n5unfollow and follow buttons. See Follow and
unfollow buttonsunfollow form, using Ajax (Listing 11.36),
525unfollowing a user
by destroying a user relationship(Listing 11.14), 499–500
test for (Listing 11.13), 499uniqueness, validating, 249–254Unix-style command line, 7unobtrusive JavaScript, 525unordered list tag, 172update action. See User update actionupdating users, 373–384
edit form, 374–380successful edits, 382–384unsuccessful edits, 380–382
URIsadding to users link (Listing 9.28), 401–402correspondence between pages and URIs for
Users resource, 52tdefined, 2n1signup, in user signup, 213–215test for ‘‘Users’’ link (Listing 9.27), 401
www.it-ebooks.info
ptg8286261
Index 563
URLscorrespondence between pages and Users
resource, 52tdefined, 2n1
useradministrative, 413–417creating, 265–267current user? method (Listing 9.16), 392destroying, 499–500has secure password, 263–265new user view with partial (Listing 9.51), 425paginating, 404–410requiring signed-in users, 386–389requiring the right user, 390–392sample users, 403–404showing, 271–291signin status, remembering, 343–349stub view for showing user information
(Listing 7.4), 280summary of user/micropost association
methods/updating, 434ttests, initial, 236–239
user authentication. See Authenticationuser authorization. See Authorizationuser class, 161–163User class with inheritance (Listing 2.12), 71user data model, 47–48user edit form
adding test for Settings link (Listing 9.5), 378HTML for (Listing 9.2), 377mockup of, 374partial for new and edit form fields
(Listing 9.50), 425tests for user update action (Listing 9.9), 383updating error-messages partial from
Listing 7.23 to work with other objects(Listing 10.35), 464
updating trendering of user signup errors(Listing 10.36), 465
user edit action (Listing 9.2), 375user edit view (Listing 9.3), 376user update action (Listing 9.10), 384
user.followers method, 500user has many microposts (Listing 10.11), 438
micropost belongs to user (Listing 2.11), 69relationship between a user and its microposts,
434
user index, 396–403adding URI to users link (Listing 9.28),
401–402CSS for (Listing 9.26), 400first refactoring attempt at index view
(Listing 9.36), 411including will paginate in Gemfile
(Listing 9.31), 405mockup of, 397paginating users in index action (Listing
9.35), 409pagination, 404–410with pagination (Listing 9.34), 408partial refactoring, 410–412partial to render single user (Listing 9.37), 412refactored (Listing 9.38), 412requiring signed-in user for index action
(Listing 9.22), 398for showing all users, 396–403test for ‘‘Users’’ link URI (Listing 9.27), 401testing that index action is protected
(Listing 9.21), 396–397tests for pagination (Listing 9.33), 407–408user index action (Listing 9.24), 399user index view (Listing 9.25), 400view (Listing 9.25), 400
user index pagepage 2 of, 411tests for (Listing 9.23), 398–399users with 100 sample users, 405users with only one user, 402users with pagination, 410
user info sidebar, partial for (Listing 10.32),462
user/micropost associations, 433–438User microposts, 429–482
conclusion, 479–480exercises, 480–482manipulating, 454–479model, 429–444, 431resources, 63–74showing, 445–454
User model, 222–236accessible attributes, 230with added password digest attribute, 255adding annotate gem to Gemfile (Listing 6.4),
229
www.it-ebooks.info
ptg8286261
564 Index
User model (continued )annotated User model (Listing 6.5), 229–230brand new (Listing 6.3), 228for demo application (Listing 2.5), 61generating (Listing 6.1), 224making name and email attributes accessible
(Listing 6.6), 230migration for (to create a users table)
(Listing 6.2), 225migrations, 223–228model file, 228–230user objects, 230–236
user objectscreating, 230–233finding, 233–235updating, 235–236
user profile page, mockup of, 445user/relationship associations, 491–494
implementing has many association(Listing 11.4), 493
See also Relationship modelusers, deleting, 413–422
administrative users, 413–417destroy action, 417–422
users, following, 483–544conclusion, 539–543current user’s profile, 484exercises, 543–544finding a user to follow, 485Home page with status feed and incremented
following count, 488implementation of user following, 488model of followed users through user
relationships, 489profile of user to follow, with follow button,
486profile with unfollow button and incremented
followers count, 487resources, guide to further, 542–543sample application, extensions to, 540–542status feed, 529–539test for unfollowing (Listing 11.13), 499web interface for, 503–529See also Relationship model
users, showing all, 396–412pagination, 404–410partial refactoring, 410–412
sample users, 403–404user index, 396–403
users, showing in sign up, 271–291debug information, 272–276Gravatar, 286–291Rails environments, 276–277sidebar, 288–291user show page, testing, 282–286Users resource, 278–281
users, updating, 373–385edit form, 374–380successful edits, 382–384unsuccessful edits, 380–382
Users controller, 212adding followed users and followers
actions to Users controller (Listing 11.18),506
class with inheritance (Listing 2.14), 72create action for, 425, 459initial, with new action (Listing 5.29), 212in schematic form (Listing 2.3), 58with show action (Listing 7.5), 281testing the user show page with factories,
282–286in user signup, 212
user show page, 53, 282–286adding sidebar to user show view (Listing 7.14),
290adding title and heading for user profile page
(Listing 7.10), 285defining gravatar for helper method
(Listing 7.13), 288factories to simulate User model objects
(Listing 7.8), 284Factory Girl added to Gemfile (Listing 7.7),
284in Microposts, augmenting, 446–450recap of initial User pages spec (Listing 7.6),
282–283redefining BCrypt cost factor in test
environment (Listing 7.11), 286SCSS for styling, including sidebar
(Listing 7.15), 290–291tests for (Listing 7.9), 285user profile page /users/1 with default
Gravatar, 289at /users/1 after adding Users resource, 282
www.it-ebooks.info

ptg8286261
Index 565
Users controller with show action(Listing 7.5), 281
user show page /users/1 with sidebar and CSS,291
user show page with custom Gravatar, 289user show view with name and (Listing 7.12),
287user signup, 211–215
adding flash message to (Listing 7.27), 317errors, updating rendering of (Listing 10.36),
465signup URI, 213–215tests for, 293–297users controller, 212
Users resource, 49–63adding to the routes file (Listing 7.3), 279correspondence between pages and URLs, 52tMVC in action, 56–62Rails routes with rule for (Listing 2.2), 58RESTful routes provided by, 65tin sign up, 278–281weaknesses of, 62–63
Users resource tour, 51–56user update action (Listing 9.10), 384
initial (Listing 9.8), 381tests for (Listing 9.9), 383
user validations, 236–254format, 245–248length, 243–244presence, 239–243uniqueness, 249–254user tests, initial, 236–239
Vvalidations
commenting out a validation to ensure a failingtest (Listing 6.10), 241
email format with regular expression(Listing 6.17), 246
format, 245–248initial user pages spec (Listing 7.6), 282length, 243–244length, adding for name attribute
(Listing 6.15), 244Microposts resource, 66–68migration for enforcing email uniqueness
(Listing 6.22), 252
of name attribute, failing test for (Listing 6.11),241
for password attribute (Listing 6.27), 257practically blank default User spec (Listing 6.7),
237of presence, 239–243of presence of name and email attributes
(Listing 6.13), 243of presence of name attribute (Listing 6.9), 240Relationship data model, 495Relationship model, adding (Listing 11.8), 495in relationship model, 495test for name length (Listing 6.14), 244test for presence of email attribute
(Listing 6.12), 243test for rejection of duplicate email addresses
(Listing 6.18), 249test for rejection of duplicate email addresses,
insensitive to case (Listing 6.20), 250testing Relationship model validations
(Listing 11.7), 495tests for email format validation (Listing 6.16),
245–246of uniqueness, 249–254of uniqueness of email addresses
(Listing 6.19), 250of uniqueness of email addresses, ignoring
case (Listing 6.21), 251user, 236–254
validations, Micropost model, 432–444accessible attributes and first, 432–433content validations, 443–444first validation, accessible attributes and,
432–433tests for validity of new micropost
(Listing 10.3), 432for user (Listing 10.4), 433
variables in improving stylesheets, 193–197version control. See GitVim, 10, 12, 29, 82virtual attributes, 257
Wweb interface for following users, 503–529
adding following/follower relationships tosample data (Listing 11.17), 503–504
follow button with Ajax, working, 524–529
www.it-ebooks.info
ptg8286261
566 Index
web interface for following users (continued )follow form, 505–514following and followers pages, 515–519follow/unfollow buttons, working, 519–524sample following data, 503–505stats, 505–514
Webrat, 79n1The Well-Grounded Rubyist (Black), 6, 129, 543will paginate method, 408Windows, 11
wireframes, 167wrapping long words, helper for (Listing 10.50),
481
YYAML, 276n3
Zzero-offset, 143
www.it-ebooks.info
Related Documents