Rogue System FireArc Prototype Operations Manual

Welcome message from author
This document is posted to help you gain knowledge. Please leave a comment to let me know what you think about it! Share it to your friends and learn new things together.
Transcript

Rogue System
FireArc Prototype
Operations Manual

This page should have the version crap on it.
The version of the doc is Alpha 3.3
The version of the game this doc goes with is 0.1.7.15.15
Version historyAlpha 1
Rough testAlpha 2
Proper layout with page numbers and everythingAlpha 2.1
Did you know the MFD was called the HMD?Added some of the HMD panels
Alpha 3Added Tuturial 3 checklist (Style 1)
Alpha 3.1Added Tutorial 5 checklist (Style 2)Added Version history like a dork
Alpha 3.2Changed Tutorial 3 to single columnSplit Forward panel into F1-F3
Alpha 3.3Added Tutorial 4 checklistsAdded panel and button information to tutorial 5
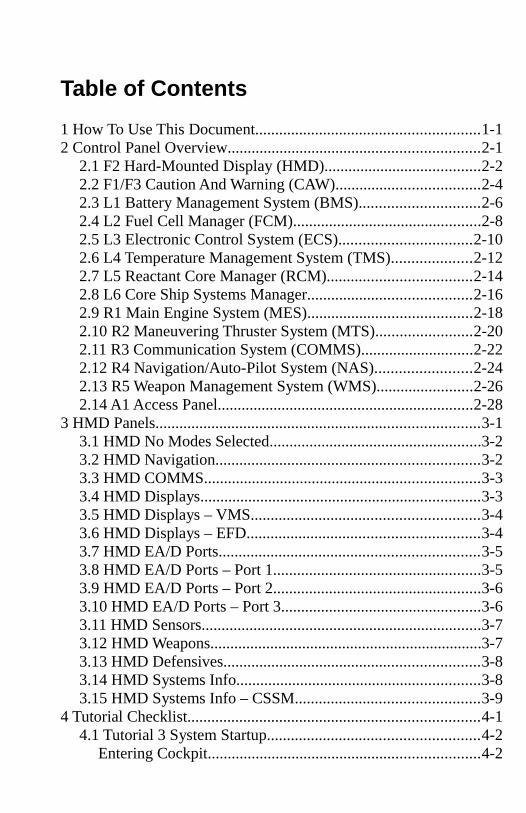
Table of Contents
1 How To Use This Document........................................................1-12 Control Panel Overview...............................................................2-1
2.1 F2 Hard-Mounted Display (HMD).......................................2-22.2 F1/F3 Caution And Warning (CAW)....................................2-42.3 L1 Battery Management System (BMS)..............................2-62.4 L2 Fuel Cell Manager (FCM)...............................................2-82.5 L3 Electronic Control System (ECS).................................2-102.6 L4 Temperature Management System (TMS)....................2-122.7 L5 Reactant Core Manager (RCM)....................................2-142.8 L6 Core Ship Systems Manager.........................................2-162.9 R1 Main Engine System (MES).........................................2-182.10 R2 Maneuvering Thruster System (MTS)........................2-202.11 R3 Communication System (COMMS)............................2-222.12 R4 Navigation/Auto-Pilot System (NAS)........................2-242.13 R5 Weapon Management System (WMS)........................2-262.14 A1 Access Panel................................................................2-28
3 HMD Panels.................................................................................3-13.1 HMD No Modes Selected.....................................................3-23.2 HMD Navigation..................................................................3-23.3 HMD COMMS.....................................................................3-33.4 HMD Displays......................................................................3-33.5 HMD Displays – VMS.........................................................3-43.6 HMD Displays – EFD..........................................................3-43.7 HMD EA/D Ports.................................................................3-53.8 HMD EA/D Ports – Port 1....................................................3-53.9 HMD EA/D Ports – Port 2....................................................3-63.10 HMD EA/D Ports – Port 3..................................................3-63.11 HMD Sensors......................................................................3-73.12 HMD Weapons....................................................................3-73.13 HMD Defensives................................................................3-83.14 HMD Systems Info.............................................................3-83.15 HMD Systems Info – CSSM..............................................3-9
4 Tutorial Checklist.........................................................................4-14.1 Tutorial 3 System Startup.....................................................4-2
Entering Cockpit....................................................................4-2

Table of Contents
Switch Check.........................................................................4-2Primary Bus Enable...............................................................4-3Secondary Bus Enable...........................................................4-3Fuel Cell Preheat....................................................................4-3COMMS Enable.....................................................................4-4Check in with STC.................................................................4-4RCM Enable...........................................................................4-4MES Preliminary Enable.......................................................4-5HMD Enable..........................................................................4-5TMS Enable...........................................................................4-6LENR Pre Enable Check........................................................4-6Request LENR activation from STC.....................................4-7Enable LENR and Main System Bus.....................................4-7Enable NAS............................................................................4-7MTS Enable...........................................................................4-8FCM Enable...........................................................................4-8Undock Check List.................................................................4-8Request to Undock from STC................................................4-9Configure COMMS Channels before release......................4-10After Station Release...........................................................4-10When Clear of the Station Deploy Radiators.......................4-11When beyond STC Limiter range – 200 meters...................4-11
4.2 Tutorial 4 External Docking...............................................4-12Docking HUD......................................................................4-12Note: About Tutorial 3.........................................................4-13Entering Cockpit..................................................................4-13HMD Enable........................................................................4-13Contact the Local STC.........................................................4-14Configure ST Approach Channel.........................................4-14Check In With ST Approach and Request Docking.............4-15Configure STC Docking Channel........................................4-15Configure HUD for Docking...............................................4-16Enable NAS..........................................................................4-16Maneuvering in Space..........................................................4-16STC Requirements by Distance...........................................4-17

Table of Contents
That's Great But How Do I Do That?..................................4-19What to do if you are far from the target.............................4-19What to do if you are near the target....................................4-21FireArc Dimensions.............................................................4-23
4.3 Tutorial 5 System Shutdown...............................................4-24If you are doing the tutorial, you need to do this part first. .4-24If you are in the seat start from HERE.................................4-25

This page left blank

1 HOW TO USE THIS
DOCUMENT

How To Use This Document 1-2
In order to make everyone's lives easier this document is designed toprovide a standard control panel scheme.
The panels are labeled forward to aft, top to bottom.F= ForwardL=LeftR=RightA=Aft
The buttons are labeled top to bottom, left to right.The labels I am using for the buttons are from the tool tip hoover text.
An example of how I would use this is the first few steps of the docking tutorial
(The tutorial chunk that was here previously has been deleted because I wrote the whole thing in a later section)
You can be all NASA with their cool checklists and tack on some useful information at the same time.
Sherpa

2 CONTROL PANEL
OVERVIEW

Control Panel Overview 2-2
2.1 F2 Hard-Mounted Display (HMD)

Control Panel Overview 2-3
This is where I put something about the HMD panel but right now I got nothing

Control Panel Overview 2-4
2.2 F1/F3 Caution And Warning (CAW)

Control Panel Overview 2-5
01) Fault Ack

Control Panel Overview 2-6
2.3 L1 Battery Management System (BMS)

Control Panel Overview 2-7
01) BMS Battery Enable02) BMS Battery Select03) BMS Battery Recharge04) BMS Battery Output Select05) BMS Acid Neutralizer
D1) BMS DisplayThe display will be covered in section XX

Control Panel Overview 2-8
2.4 L2 Fuel Cell Manager (FCM)

Control Panel Overview 2-9
01) FCS Cell Enable *02) FCS Cell Select *03) FCS Shut-Off Valve *04) FCS Reactant Source Select *05) FCS Fuel Select *06) FCS Power Output Select *07) FCS Bi-Product Disposal *08) FCS Contamination Purge *
D2) FCM DisplayThe display will be covered in section XX
NOTE:
* The tool tips use FCS however on the F1 HMD Systems Info page the sub system is called FCM so….yeah. That's a thing that should probably be changed one way or the other.

Control Panel Overview 2-10
2.5 L3 Electronic Control System (ECS)

Control Panel Overview 2-11
01) ECS Bus Select02) ECS Bus Distribution Mode03) ECS Bus Enable04) ECS Maintenance Cut-Off
D6) ECS DisplayThe display will be covered in section XX

Control Panel Overview 2-12
2.6 L4 Temperature Management System (TMS)

Control Panel Overview 2-13
01) TMS Loop Enable02) TMS Loop Pressurize03) TMS Loop Depressurize04) TMS Flash Cool (Vent) Loop05) TMS Loop Select06) TMS Loop Radiator Deploy07) TMS Loop Power *08) TMS TMS Loop Radiator Enable09) TMS Enable All Pumps10) TMS Loop Laser Cooling Enable
D8) TMS DisplayThe display will be covered in section XX
NOTE:
* The TMS Loop Power button is a three position toggle.If anyone has a good suggestion on how I can draw that, I'm listening.

Control Panel Overview 2-14
2.7 L5 Reactant Core Manager (RCM)

Control Panel Overview 2-15
01) RCM System Enable02) RCM Enable All Pumps03) RCM Tank Pump Power04) RCM Tank Select05) RCM Tank Emergency Overboard Dump06) RCM Tank Shut-Off Valve
D9) RCM DisplayThe display will be covered in section XX

Control Panel Overview 2-16
2.8 L6 Core Ship Systems Manager

Control Panel Overview 2-17
01) Seat Flight Mode Select02) Seat Anti-G Enable03) Seat Safe For Flight04) CSSM Skids Deploy *05) CSSM Exterior Flood Lighting06) CSSM Navigation/Formation Lighting07) CSSM Docking Port Lighting08) CSSM Strobe Beacon Lighting09) CSSM Cabin Flood Lighting10) CSSM Instrument Lighting
NOTE:
* The tool tip for Skids Deploy incorrectly shows asCSSM Navigation/Formation Lighting. Be careful which one you click on when internally docked.
This panel has been rotated clockwise from its actual orientationIt seemed like a good idea at the time?

Control Panel Overview 2-18
2.9 R1 Main Engine System (MES)

Control Panel Overview 2-19
01) MES Engine Select02) MES Flux Drive Enable03) MES Accumulator (Left) Lock04) MES Accumulator Auto Balance05) MES Accumulator (Right) Lock06) MES Accumulator Charge07) MES System Enable08) MES LENR Enable09) MES Chamber Pre-Heater10) MES Throttle Lock11) MES Fuel Cut-Off12) MES LENR Fuse Enable13) MES Extinguisher14) MES Temperature Cut-Off Override15) MES Engine Jettison16) MES LENR Fuel Source Select
D3 MES Flux Drive DisplayThe display will be covered in section XX
D4 MES LEN Reactor DisplayThe display will be covered in section XX
D5 MES DisplayThe display will be covered in section XX

Control Panel Overview 2-20
2.10 R2 Maneuvering Thruster System (MTS)

Control Panel Overview 2-21
01) MTS System Enable *02) MTS Fuel Source Select03) MTS Fuel Cut-Off Valve04) MTS Fuel Injector Enable **05) MTS Helicon Ionize-Enable *06) MTS ICH Cyclotron Enable07) MTS Superconductor Enable *08) MTS Boost Deflector09) MTS Thrust Mode Select10) MTS Cold Gas Override11) MTS Nozzle All Enable12) MTS Core Ignitor/Thrust Provide ***
NOTE:
* These switches have safety covers on them. It is probably for a good reason
** Insert VTEC Kicked in Yo joke here
*** This is a press and hold button. If anyone has a good suggestion on how I can draw that, I'm listening.

Control Panel Overview 2-22
2.11 R3 Communication System (COMMS)

Control Panel Overview 2-23
01) COMMS System Enable02) COMMS Transmitter Enable03) COMMS Transmission Power Select
I bet some lore fluff would fit nicely here. Or Comms war stories, whatever. I'm easy.

Control Panel Overview 2-24
2.12 R4 Navigation/Auto-Pilot System (NAS)

Control Panel Overview 2-25
01) NAS System Enable02) NAS Auto Pilot Allow03) NAS Attitude Reference Select04) NAS Attitude Mode Select05) NAS Align Initiate06) NAS Yaw Hold07) NAS Pitch Hold08) NAS Roll Hold

Control Panel Overview 2-26
2.13 R5 Weapon Management System (WMS)

Control Panel Overview 2-27
01) WMS Weapon Select02) WMS Weapon Capacitor Enable/Charge03) WMS Weapon Capacitor Isolate04) WMS Weapon Capacitor Discharge05) Weapon Arm All *06) Weapon Enable All *07) Weapon Jettison Selected08) Weapon Selected
NOTE:
* None of these switches have a cover so watch your step when entering or exiting the seat when the ship is operational
This panel has been rotated counterclockwise from its actual orientationIt seemed like a good idea at the time?

Control Panel Overview 2-28
2.14 A1 Access Panel

Control Panel Overview 2-29
01) CSM Cabin Flood Lights*
02) SEAT Safe/Unsafe
Note:
* I think we're missing an S from CSSM here.

This page left blank

3 HMD PANELS

HMD Panels 3-2
3.1 HMD No Modes Selected
3.2 HMD Navigation

HMD Panels 3-3
3.3 HMD COMMS
3.4 HMD Displays

HMD Panels 3-4
3.5 HMD Displays – VMS
3.6 HMD Displays – EFD

HMD Panels 3-5
3.7 HMD EA/D Ports
3.8 HMD EA/D Ports – Port 1

HMD Panels 3-6
3.9 HMD EA/D Ports – Port 2
3.10 HMD EA/D Ports – Port 3

HMD Panels 3-7
3.11 HMD Sensors
3.12 HMD Weapons

HMD Panels 3-8
3.13 HMD Defensives
3.14 HMD Systems Info

HMD Panels 3-9
3.15 HMD Systems Info – CSSM
Other Systems Info pages similar.

This page left blank

4 TUTORIAL CHECKLIST

Tutorial Checklist 4-2
4.1 Tutorial 3 System Startup
Entering Cockpit
There is a panel right (HA! Sorry, panel joke.) outside the cockpithatch but I haven't drawn it yet CSM: cockpit hatch Open MDR1-01
A1 Panel SEAT: safe/unsafe to Unsecure A1-02
Enter Pilot's Seat
L6 CSSM SEAT: safe for flight to Enable L6-03 CSSM: cabin flood lighting to Disable L6-09 CSSM: instrument lighting to Enable L6-10
Switch Check
a All Panels Powered Down
L5 RCM RCM tank select SYS 1 L5-04
L4 TMS TMS loop select SYS 1 L4-05
L3 ECS ECS bus select PRI L3-01 ECS bus distribution mode NORM L3-02
L2 FCM FCS cell select SYS 1 L2-02
L1 BMS BMS battery select SYS 1 L1-02
R1 MES MES engine select SYS 1 R1-01
R2 MTS MTS thrust mode select RCS ONLY R2-09
R3 COMMS COMMS transmission power select XMIT NORM R3-03

Tutorial Checklist 4-3
Primary Bus Enable
L1 BMS BATTERY: enable to On L1-01
L3 ECS ECS: bus enable to On L3-03
F1 CAW CAW: fault acknowledge F1-01
L3 ECS ECS: maintenance cut-off to Disable (green) L3-04D6 ECS Display a AVAILABLE power is green
a F1 CAW SYS BUS 1 lights out
L1 BMS BATTERY: recharge to On L1-03D1 BMS Displaya RECHARGE RATE is rising
Secondary Bus Enable
L1 BMS BATTERY: select to SYS 2 L1-02 BATTERY: Enable to On L1-01 BATTERY: recharge to On L1-03
L3 ECS ECS: bus select to SEC L3-01 ECS: bus enable to On L3-03 ECS: distribution mode to BAL L3-02
a F1 CAW SYS BUS 2 lights out
There will be a delay on SYS BUS 2 OVERLOAD This is expected
Fuel Cell Preheat
L2 FCM FCS: cell enable to On L2-01 FCS: cell select to SYS 2 L2-02 FCS: cell enable to On L2-01

Tutorial Checklist 4-4
COMMS Enable
R3 COMMS COMMS: system enable to On R3-01 COMMS: transmitter enable to On R3-02
Check in with STC
TAB5) Space Traffic Control1) Check In
Control this is 10-3889 (YOU) checking in.
10-3889 (YOU), this is Control. We have you checked in. Over.
TAB5) Space Traffic Control2) Request Departure Clearance
Control, this is 10-3889 (YOU). Requesting departure clearance.
10-3889 (YOU), this is Control. Departure approved. Notify Control before LENR initiation. Over.
RCM Enable
L5 RCM RCM: system enable to On L5-01 RCM: enable all pumps to Enable L5-02
SYS BUS 2 OVERLOAD will illuminate. This is expected
RCM: tank select cycle SYS 1 - SYS 4 L5-03
D9 RCM display a Tank Levela RCM: tank pump power is On L5-03a RCM: tank shut-off valve is SOV OPEN L5-06

Tutorial Checklist 4-5
MES Preliminary Enable
R1 MES MES: system enable to On R1-07 MES: LENR enable to Enable R1-08D4 MES LENR Display a EM Field is orangeMES: chamber pre-heater to Enable R1-09MES LENR Display D4 a CORE Temp is orangeMES: LENR fuel source select to SET R1-16
HMD Enable
F2 HMD HMD DISPLAYS VMS SYSTEM POWER wait for screen to power on EXTERNAL DOCK MODE

Tutorial Checklist 4-6
TMS Enable
L4 TMS TMS: loop enable to On L4-01 TMS: loop pressurize to CS L4-02 TMS: loop pump power to On L4-07
CAUTION L4-07 is a three position switchavoid running pumps in HIGH mode
D8 TMS Displaya coolant level is risinga coolant pressure is rising
a TMS: loop pressurize is disabled TMS: loop select to SYS 2 L4-05 TMS: loop pressurize to CS L4-02 TMS: loop pump power to On L4-07
CAUTION L4-07 is a three position switchavoid running pumps in HIGH mode
D8 TMS Display a coolant level is rising a coolant pressure is risinga TMS: loop pressurize is disableda TMS: Enable All Pumps is On
a F1 CAW TMS lights out
LENR Pre Enable Check
R1 MTSD4 LENR Displaya Core Temp is orangea EM Shield is greena PRE-HEAT is green

Tutorial Checklist 4-7
Request LENR activation from STC
TAB5) Space Traffic Control1) Ready for LENR Initiation
Control, this is XX-XXXX (YOU). Requesting LENR reaction.
XX-XXXX (YOU) Control. Copy. You are cleared to initiate LENR. Notify Control when ready for departure. Over.
Enable LENR and Main System Bus
R1 MES MES: fuel cut-off to On R1-11 MES: LENR fuse enable to Enable R1-12D4 LENR Displaya CORE TEMP is green
L3 ECS ECS: bus select to Main L3-01 ECS: bus enable to On L3-03D6 ECS Display a AVAILABLE is rising
ECS: bus select cycle PRI, SEC, MAIN L3-01
D6 ECS Displaya AVAILABLEa LOAD
a F1 CAW Main Bus lights out
Enable NAS
R4 NAS NAS: system enable to On R4-01

Tutorial Checklist 4-8
MTS Enable
R2 MTS MTS: power safety toggle R2-01 Safety MTS: system enable to On R2-01 MTS: fuel source select to Enable R2-02 MTS: fuel cut-off valve to Enable R2-03 MTS: fuel injector enable to Enable R2-04 MTS: nozzle all enable to all On R2-11
FCM Enable
L2 FCM FCS: cell select cycle SYS 1 – SYS 2 L2-02
D2 FCM displaya CORE Temp is green
a Shut-Off Valve is yellow
CAUTION you can damage the fuel cells by allowing flow when the core temp is low.
FCS: fuel source select to On L2-05 FCS: reactant source select to On L2-04 FCS: cell select to SYS 1 L2-02 FCS: fuel source select to On L2-05 FCS: reactant source select to On L2-04
Undock Check List
L6 CSSM SEAT: flight mode select to NORM FLIGHT L6-01
F2 HMD HMD COMMS
L3 ESC ECS: maintenance cut-off to Enable (yellow) L3-04

Tutorial Checklist 4-9
Request to Undock from STC
TAB5) Space Traffic Control2) Ready for departure
Control, this is XX-XXXX (YOU). Ready to depart.
XX-XXXX (YOU) this is Control. Clearance granted. Over.
XX-XXXX (YOU), Control. Maintenance power disabled. Stand by for departure frequencies.
XX-XXXX (YOU), Control. Tune ST Departure on 45.2.3
XX-XXXX YOU), Control. Tune localizer for exterior collar 3 using 45.2.202
XX-XXXX (YOU), Control. Umbilicals disconnected. Stand by for release.
All previous transmissions can be viewed using 'XMISSION LOG' from the COMMS sub-menu.

Tutorial Checklist 4-10
Configure COMMS Channels before release
F2 HMD HMD COMMS CHNL 3 select Left Channel Box 45 select Center Channel Box 2 select Right Channel Box 3 SET CHNL 4 select Left Channel Box 45 (if unset) select Center Channel Box 2 (if unset) select Right Channel Box 202 SET SET LOC
After Station Release
F2 HMD HMD NAVIGATION
Maneuver away from station.The tutorial suggests Aft Translation (Down Arrow)

Tutorial Checklist 4-11
When Clear of the Station Deploy Radiators
a F2 or cycle F4 to verify Station ClearL4 TMS TMS: loop radiator deploy to Deploy L4-06a deploy indicator is greenD8 TMS Displaya CLNT TEMP is falling TMS: loop select to SYS 1 L4-05 TMS: loop radiator deploy to Deploy L4-06a deploy indicator is greenD8 TMS Displaya CLNT TEMP is falling
When beyond STC Limiter range – 200 meters
R2 MTS MTS: superconductor safety toggle R2-07 Safety MTS: superconductor enable to Enable R2-07D7 MTS LDisplaya EM Field
a MTS: helicon ionizer is white
a F3 CAW MTS lights
R2 MTS MTS: helicon safety toggle R2-05 Safety MTS: helicon ionizer enable to Enable R2-05D7 MTS Display
a EM Field MTS: core igniter / thrust provider R2-12
HOLD until burn indicator turns green MTS: ICH cyclotron enable R2-06

Tutorial Checklist 4-12
4.2 Tutorial 4 External Docking
Docking HUD

Tutorial Checklist 4-13
Note: About Tutorial 3
Because this tutorial involves flying to the test platform and docking, most of this section will be generalities and my own bad habits. I will include as many facts as possible but ultimately your personal flying style will determine how useful this section of the manual becomes. At the end of the day, all that matters is a safe and successful dock. Sherpa
Entering Cockpit
MDR1 CSM: cockpit hatch Open MDR1-01
The first thing I do after entering the cockpit is listen for clicks from the proximity sensor. I have had the tutorial start me between 200m and 5km. The proximity sensor has a range of 500m so if you hear clicking it is important to get the spacecraft under control ASAP.
A1 Panel SECURE SEAT – UNSECURE A1-02
Enter Pilot's Seat
L6 CSSM SEAT SAFE – ENABLE L6-03 INST LIGHT – ENABLE L6-10 CABIN FLOOD LIGHT – DISABLE L6-09
HMD Enable
F2 HMD HMD DISPLAYS VMS SYSTEM POWER EXTERNAL DOCK MODE
While waiting for the VMS to power on, use the external cameras(F2) and try and locate the station. This is especially important ifyou are within 500m. You will not have accurate positional data until you have comms set up with the station but you can use the translational controls (The arrow keys and [ ] ) to slow your approach or departure. F1 will return you to the cockpit view.

Tutorial Checklist 4-14
Contact the Local STC
TAB1) Open Chanel3) Local STC1) Announce
Control, this is XX-XXXX (YOU). Come in. Over.XX-XXXX (YOU) this is control. We copy you, Over.
TAB1)Open Chanel3)Local STC2) On Approach
Control, this is XX-XXXX (YOU). On approach. Over.XX-XXXX (YOU), Control. Copy. Continue inbound and contact ST Approach on 45.2.2
NOTE:You can review all communications by checking the COMMS
recorderF2 HMD HMD COMMS XMISSION LOG
Configure ST Approach Channel
F2 HMD HMD COMMS CHNL 3 select Left channel box 45 select Center channel box 2 select Right channel box 2 SET

Tutorial Checklist 4-15
Check In With ST Approach and Request Docking
TAB2) Private Channel2) 45.2.21) STC1) Check In: ST Approach
ST Approach, this is XX-XXXX (YOU). Checking in.XX-XXXX (YOU), this is ST Approach. We have you checked in. Over.
Note:Docking requests should be made within 100km of the station
TAB2) Private Channel2) 45.2.21) STC1) Request Docking
ST Approach, this is XX-XXXX (YOU). Request docking with you. OverXX-XXXX (YOU), this is Control, Clearance granted. Over.XX-XXXX (YOU), Control. Tune localizer for exterior collar 1 using 45.2.200
Configure STC Docking Channel
F2 HMD HMD COMMS (if unset) CHNL 4 select Left channel box 45 (if unset) select Center channel box 2 (if unset) select Right channel box 200 SET SET LOC

Tutorial Checklist 4-16
Configure HUD for Docking
F2 HMD HMD EA/D PORTS PORT 2 (Amidships Dorsal) SET AS DOCKING TARGET
a HUD *VALID*
Enable NAS
R4 NAS a POWER – ON R4-01 A/P ALLOW – ENABLE R4-02 YAW HOLD – ENABLE R4-06 PITCH HOLD – ENABLE R4-07 ROLL HOLD – ENABLE R4-08
Maneuvering in Space
There are four systems on the spacecraft for maneuvering. FLUX Drive MTS Booster Hot Plasma Maneuvering Jets Cold Plasma Maneuvering Jets
Note:This tutorial will not be covering FLUX Drive operation
The MTS Booster system will provide ~.8m/s per throttle “click” Forward (normal operation) or Aft (Thrust Deflection Enabled R2-08) of acceleration.
The Hot Plasma Maneuvering Jets can provide ~ 1.3m/s of translational or rotational velocity.
The Cold Plasma Maneuvering Jets can provide ~ .1m/s of translational or rotational velocity.
Which of these systems you use will depend on the distances involved and your ability to ensure the safety of your spacecraft and any other vessels in the area.
Rule of thumb: No faster than .04m/s per 100m from the target

Tutorial Checklist 4-17
Translational Velocity moves the spacecraft in any of the six cardinal directions (Up, Down, Left, Right, Forward, Aft) regardless of the current orientation. You can think of this in terms of the WASD keys used in most first or third person video games.
Rotational Velocity changes the orientation of the spacecraft with out affecting its current Translational Velocity (Roll, Pitch, Yaw). You can think of this in terms of mouse-look as used in most first or third person video games.
Note:Auto Pilot (NAS) will only help you control your rotational velocity at this time. You will have to manually correct your flight to control your translational velocities.
STC Requirements by Distance
Greater than 1500m (1.5km) Distance Meter will read FAR APPROACH and be GREEN No special considerations
1500m (1.5km) Distance Meter will read FAR APPROACH and be GREEN STC will ask you to reduce velocity to under 40m/s
1000m (1km) Distance Meter will read FAR APPROACH and be GREEN At 100m the Distance Meter will begin to decrease
800m Distnace Meter will read FAR APPROACH and be GREEN STC will ask you to reduce velocity to under 20m/s
500m Distance Meter will read NEAR APPROACH and be GREEN At 500m the proximity sensor will begin to click. The faster the clicking to closer you are to the target

Tutorial Checklist 4-18
300m
XX-XXXX (YOU), this is Control. You're under 300 meters. Cease closure and shut-down your MTS CORE. Over.
R2 MTS ICH COUPLER – DISABLE R2-06a D7 PLASMA TEMP – COLD PLASMA LEVEL
TOGGLE HELICON COUPLER SAFETY R2-05 SAFETY HELICON COUPLER – DISABLE R2-05
200m Distance Meter will read COURSE ALIGN and be ORANGE
100m STC will ask you to stow any radiators that may be damaged while docking
XX-XXX (YOU), this is Control. You're within 100 meters. Stow all obstructions immediately. Over.
50m Distance Meter will read FINE ALIGN and be ORANGE
5m Distance Meter will read PRECISE ALIGN and be RED Height Meter will Reset
2.5m Distance Meter will read FOR CAPTURE and be RED Height Meter will Reset
0.0mCONNECTED
In order to successfully dock your spacecraft must: Be within +/- 4 degrees in Roll, Pitch and Yaw Be within +/- .05m in the Z and X axis and .03 in the Y axis Be moving no faster than .08m/s
XX-XXXX (YOU), Control. Reading solid contact. Stand by one… Over.XX-XXXX (YOU) Control. Connection locked and stable. Engaging umbilical. OverThere is more but I can't scroll down :(

Tutorial Checklist 4-19
That's Great But How Do I Do That?
Some of this will depend on your distance from the target. Onceyou have channel 4 localized to the docking port (which you can do at any time during the tutorial however you need to talk to STC before you can dock) you can see how far from the station you are and what directions you are moving in. Typically when I start I'm within 500m of the station so I don't have to worry about firing up the engines but your kilometerage(?) may vary.
What to do if you are far from the target
The first thing I do is zero out my velocities in the Z, Y and Z axis
The orientation of your spacecraft probably doesn't line up with the test platform so I wouldn't worry about the O half of the three O V combinations (xO, yO and zO).
xV (Left / Right) if X is positive translate Right (Right Arrow) to bring it to 0.0 if X is negative translate Left (Left Arrow) to bring it to 0.0zV (Forward / Aft) if Z is positive translate Aft (Down Arrow) to bring it to 0.0 if Z is negative translate Forward (Up Arrow) to bring it to 0.0yV (Up / Down) if Y is positive translate Down ([) to bring it to 0.0 if Y is negative translate Up (]) to bring it to 0.0
If you are having a difficult time zeroing out your velocities enabling Cold Gas Override (R2-10) should help.
Note:If you need to use the main engines to close distance remember to disable Cold Gas Override (R2-10) and switch Thrust Mode Select (R2-09) to BSTR ENBL
Point the spacecraft towards to test platform using the rotationalcontrols
Yaw Left (Insert) Yaw Right (PgUp)Pitch Up (End) Pitch Down (Home)
Note:The x, y and z V indicators will bounce around as you add rotational forces to the spacecraft. This is expected behavior.

Tutorial Checklist 4-20
The Pitch, Roll and Yaw indicators will be corrected when closer to the station.
Accelerate towards the test platform with a few clicks of the throttle (=) until vZ is ~ 40m/s then throttle back down to zero (-).
Note:If you cross the 1Km boundary throttle back to zero regardless ofspeed.
Enable Boost Defl Enable (yuck R2-08)and slow the spacecraft down as STC calls out your speed at distance.1500m 40m/s or less800m 20m/s or less300m STC will call for you to stop300-200m disable ICH and Helicon CouplersR2 MTS ICH COUPLER – DISABLE R2-06a D7 PLASMA TEMP – COLD PLASMA LEVEL
TOGGLE HELICON COUPLER SAFETY R2-05 SAFETY HELICON COUPLER – DISABLE R2-05
Note:This will put the spacecraft into Cold Gas Override mode. You should be moving slower than 3 m/s in all three axis before you disable hot plasma production.

Tutorial Checklist 4-21
What to do if you are near the target
Now that the spacecraft is in a stable position it is time to align the Pitch, Yaw and Roll indicators for docking
The spacecraft needs to be within +/- 4 degrees to successfully dock. The indicators will shift from Red to Orange to Green as your alignment improves.
Pitch If Pitch is positive pitch down (Home) if Pitch is negative pitch up (End)Yaw if Yaw is positive yaw left (Insert) if Yaw is negative yaw right (PgUp)Roll if Roll is < 180 roll left (Delete) if Roll is <180 roll right (PgDn)
Alignment Tones:As you change your alignment you will hear two tones. Tone one is position relative to the two intended docking ports. Tone two isrelative to rotational orientation. As you improve alignment bothtones will rise. When you are aligned they will harmonize
Now that you are aligned with the docking port check the Heightindicator (Z Axis) to insure you are arriving below the target. The indicator should be Green and read a positive number of meters. +10m will insure you do not collide with the training platform regardless of radiator deployment.
yO (Up / Down) if Y is positive translate Up (]) if Y is negative translate Down ([)xO (Left / Right) If X is positive translate Left (Left Arrow) if X is negative translate Right (Right Arrow)zO (Forward / Aft) if Z is positive translate Forward (Up Arrow) if Z is negative translate Aft (Down Arrow)
Note:I prefer to set my Y (Up/ Down) height, correct my X (Left/Right) axis, correct my Z (Forward/Aft) axis and finally reduce Y height until docked

Tutorial Checklist 4-22
Once you are below the station correct the X and Z axis with the translation controls to within +/- .05m. Check for traffic and docking orientation using the external cameras (F2) to insure you close safely with the station.
Note:The distance indicators are relative to the docking port
and not the edges of the spacecraft!
The FireArc is 30m long and 16m wide with the dorsal docking port centered left to right (8m from each side) and 16m from thefront of the spacecraft(14m aft).
You should now be sitting 10m below the docking port with xV, yV and zV reading 0.00m/s and yO and xO reading 0.00mIf you have not already stowed the radiator on cooling loop one do so now.
L4 TMS a LOOP SELECT – SYS 1 L4-05 RADIATOR DEPLOY – STOW L4-06
Translate upward to complete the docking maneuver (]) while checking that the spacecraft does not drift in the X and Z axis.
Note:Docking ports are rated to handle closing speeds up to .08m/s however the nominal closing speed is.03m/s
At .03m in the Y axis, assuming nominal deviation in translation and rotation the spacecraft should dock with the station.
Yay?

Tutorial Checklist 4-23
FireArc Dimensions

Tutorial Checklist 4-24
4.3 Tutorial 5 System Shutdown
If you are doing the tutorial, you need to do this part first
MDR1 COCKPIT HATCH – OPEN MDR1-01
A1 SECURE SEAT – UNSECURE A1-02
enter the seat
L6 SEAT SAFE – ENABLE L6-03 SWITCH – NORM FLIGHT L6-01 CABIN FLOOD LIGHT – DISABLE L6-09 INST LIGHT – ENABLE L6-10

Tutorial Checklist 4-25
If you are in the seat start from HERE
R2 ICH COUPLER – DISABLE R2-06a D7 PLASMA TEMP – COLD PLASMA LEVEL
TOGGLE HELICON COUPLER SAFETY R2-05 SAFETY HELICON COUPLER – DISABLE R2-05a D7 PLASMA TEMP – ZERO
TOGGLE SUPER-CNDCTR SAFETY R2-07 SAFETY SUPER-CNDCTR – DISABLE R2-07
F3 FAULT ACK F3-01
R2 INJCTR ENABLE – DISABLE R2-04 FUEL CUT-OFF – DISABLE R2-03 TOGGLE POWER SAFETY R2-01 SAFETY POWER OFF R2-01
R4 POWER – OFF R4-01
L3 MAINT CUT-OFF – DISABLE (GREEN) L3-04
R1 FUSE ENABLE – DISABLE R1-12
L2 CYCLE ALL L2-02 a SHUT-OFF VALVE – DISABLE L2-03 SHUT-OFF VALVE – DISABLE L2-03 POWER – OFF L2-01
R1 FUEL CUT-OFF – OFF R1-11
L5 CYCLE ALL L5-04 SHUT-OFF VALVE – DISABLE L5-06 PUMP POWER – OFF L5-03
F1 FAULT ACK F1-01

Tutorial Checklist 4-26
R1 PRE-HEAT – DISABLE R1-09
L3 SELECT MAIN L3-01 POWER – OFF L3-03
F2 HMD DISPLAY VMS SYSTEM POWER – DISABLED
L1 SELECT – SYS 2 L1-02 RECHARGE – DISABLE L1-03 POWER – OFF L1-01
R1 a D4 CORE TEMP – ZERO LENR ENABLE – DISABLE R1-08 a D4 EM SHIELD – FALLING POWER – OFF R1-07
R3 XMIT ENABLE – OFF R3-02 POWER – OFF R3-01
L4 CYCLE ALL L4-05 LOOP DEPR – ENABLE L4-03 a D8 CLNT PRESS – FALLING a PUMP POWER – OFF L4-07
L3 SELECT – SEC L3-01 POWER – OFF L3-03
L1 SELECT – SYS 1 L1-02 RECHARGE – DISABLE L1-03 POWER – OFF L1-01
L3 SELECT – PRI L3-01 POWER – OFF L3-03 MAINT CUT-OFF – ENABLE (YELLOW) L3-04
L6 INST LIGHT – DISABLE L6-10 CABIN FLOOD LIGHT – ENABLE L6-09 SEAT SAFE – DISABLE L6-03 SELECT TO/LAND L6-01
A1 SECURE SEAT – SECURE A1-02
MDR1 COCKPIT HATCH – SEAL MDR1-01
Related Documents