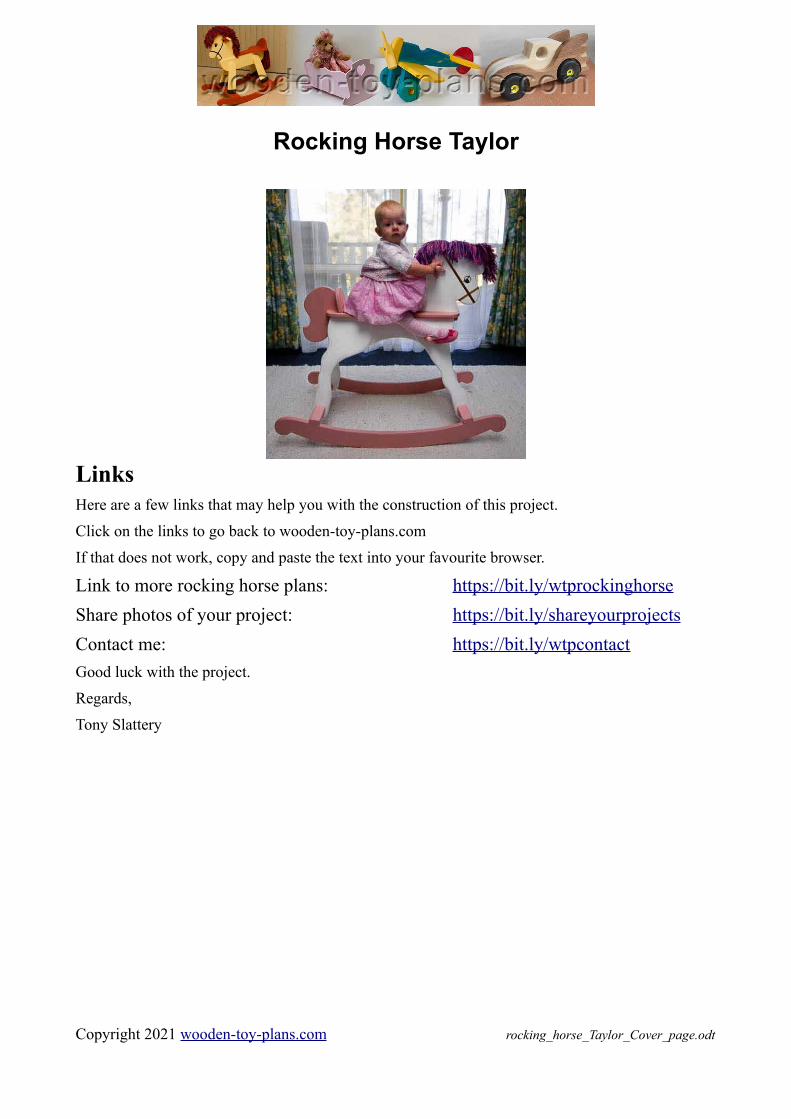
Rocking Horse Taylor Links Here are a few links that may help you with the construction of this project. Click on the links to go back to wooden-toy-plans.com If that does not work, copy and paste the text into your favourite browser. Link to more rocking horse plans: https://bit.ly/wtprockinghorse Share photos of your project: https://bit.ly/shareyourprojects Contact me: https://bit.ly/wtpcontact Good luck with the project. Regards, Tony Slattery Copyright 2021 wooden-toy-plans.com rocking_horse_Taylor_Cover_page.odt

Welcome message from author
This document is posted to help you gain knowledge. Please leave a comment to let me know what you think about it! Share it to your friends and learn new things together.
Transcript
Rocking Horse Taylor
LinksHere are a few links that may help you with the construction of this project.
Click on the links to go back to wooden-toy-plans.com
If that does not work, copy and paste the text into your favourite browser.
Link to more rocking horse plans: https://bit.ly/wtprockinghorse
Share photos of your project: https://bit.ly/shareyourprojects
Contact me: https://bit.ly/wtpcontact
Good luck with the project.
Regards,
Tony Slattery
Copyright 2021 wooden-toy-plans.com rocking_horse_Taylor_Cover_page.odt


wooden-toy-plans.com

wooden-toy-plans.com


wooden-toy-plans.com

wooden-toy-plans.com

wooden-toy-plans.com
wooden-toy-plans.com
wooden-toy-plans.com

wooden-toy-plans.com
wooden-toy-plans.com
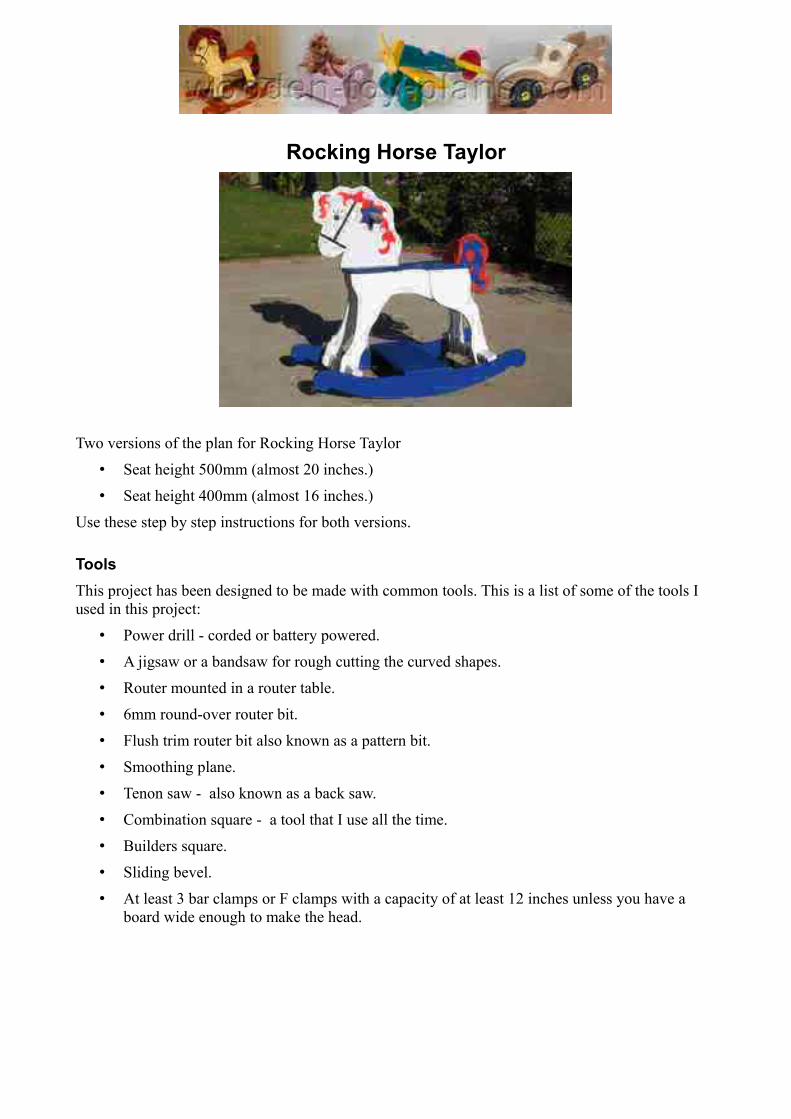
Rocking Horse Taylor
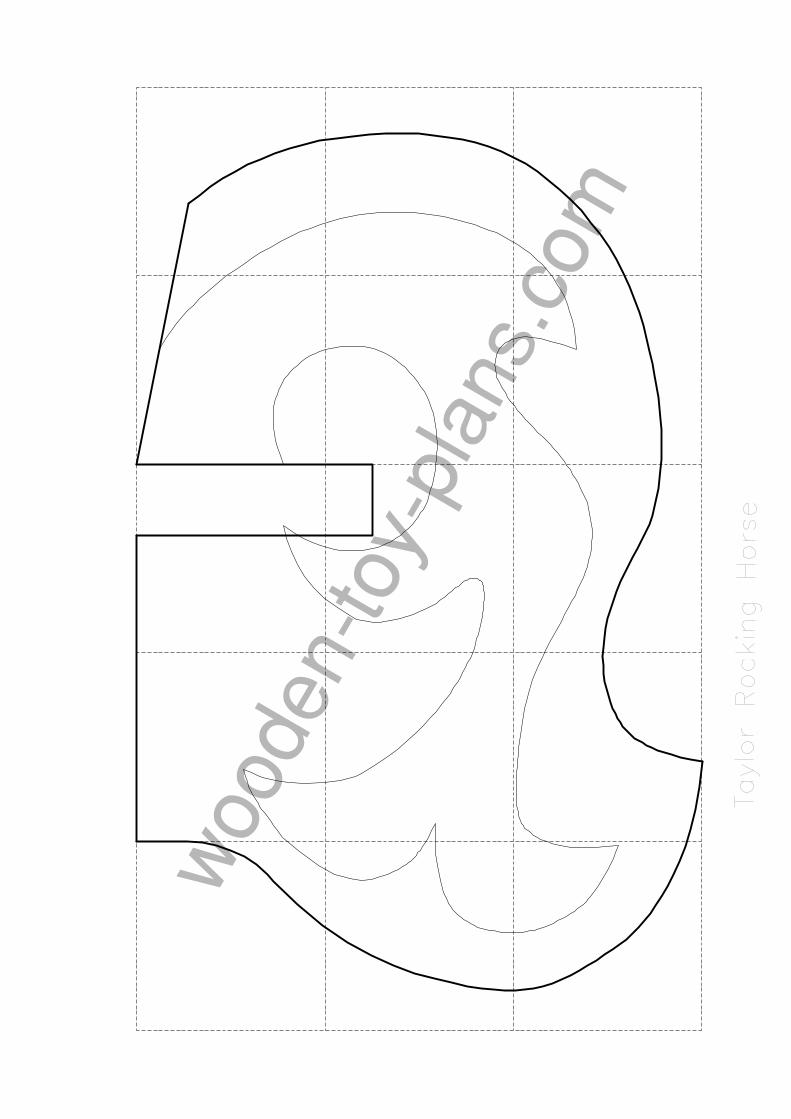
Two versions of the plan for Rocking Horse Taylor
• Seat height 500mm (almost 20 inches.)
• Seat height 400mm (almost 16 inches.)
Use these step by step instructions for both versions.
Tools
This project has been designed to be made with common tools. This is a list of some of the tools I used in this project:
• Power drill - corded or battery powered.
• A jigsaw or a bandsaw for rough cutting the curved shapes.
• Router mounted in a router table.
• 6mm round-over router bit.
• Flush trim router bit also known as a pattern bit.
• Smoothing plane.
• Tenon saw - also known as a back saw.
• Combination square - a tool that I use all the time.
• Builders square.
• Sliding bevel.
• At least 3 bar clamps or F clamps with a capacity of at least 12 inches unless you have a board wide enough to make the head.
Materials
This project has been designed to use wood that is easily obtained from your local hardware or home depot store. I used 19mm pine wood, sometimes called white wood or one inch timber. It is generally the kind of timber that is ready to use for the home handyman in that it has already been planed and sanded to a standard thickness of around 19mm or ¾ inch.
For the head, you may want to use plywood or MDF (Meduim Density Fibreboard) also known as Custom wood.
To provide extra thickness for the handle attached to the head, make a six pointed star shape.
For the templates, use hardboard or MDF at least 6mm thick for the templates.
Preparation.
The first step is to read through the instructions. This is not a particularly complicated project, and I have no doubt you will be very pleased with the results.
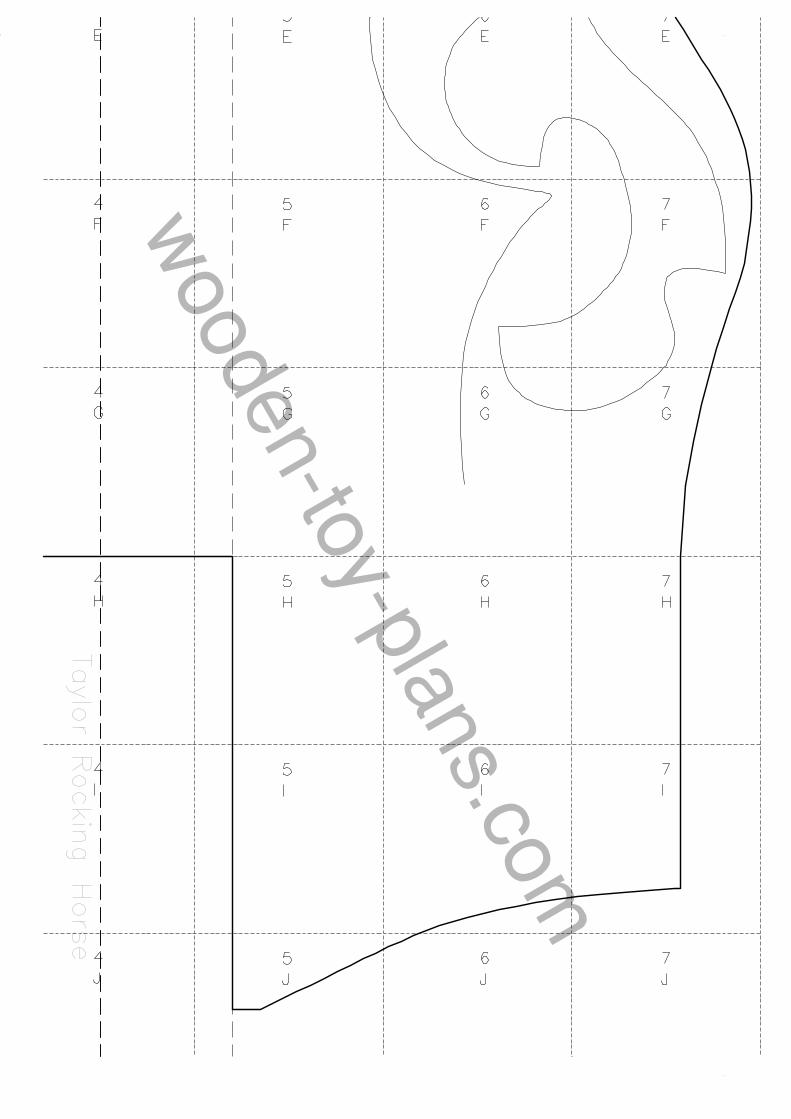
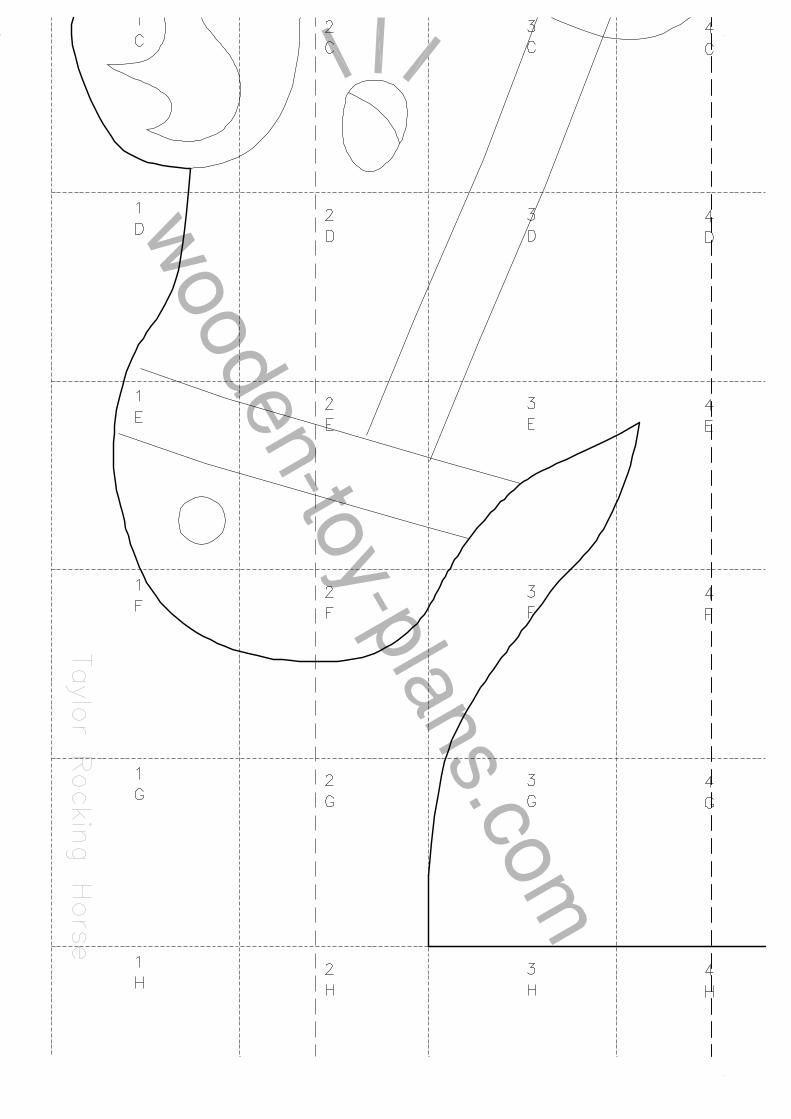
Templates are a great way to make multiple parts.
Start by pasting the paper plan templates onto a sheet of hardboard or MDF and cut out the shapes with a jigsaw.
There are any number of ways to attach a template to the work-piece.
• Cover the work-piece with masking tape and glue the paper template to the masking tape.
• Use double sided sticky tape such as removable sticky dots or 3M Remount.
• Foam backed double sided tape works best for MDF templates onto the work-piece.
Attaching templates to a work-piece can be tricky because you want the template to stay in place but not be permanent, and the tape may leave a residue that is difficult to remove. So masking tape and glue may work well for paper templates, it may not work too well for using the router and pattern cutting bit.
No doubt as an experienced woodworker, you may well have your own technique.
Copyright 2019 wooden-toy-plans.com Page 2 of 13
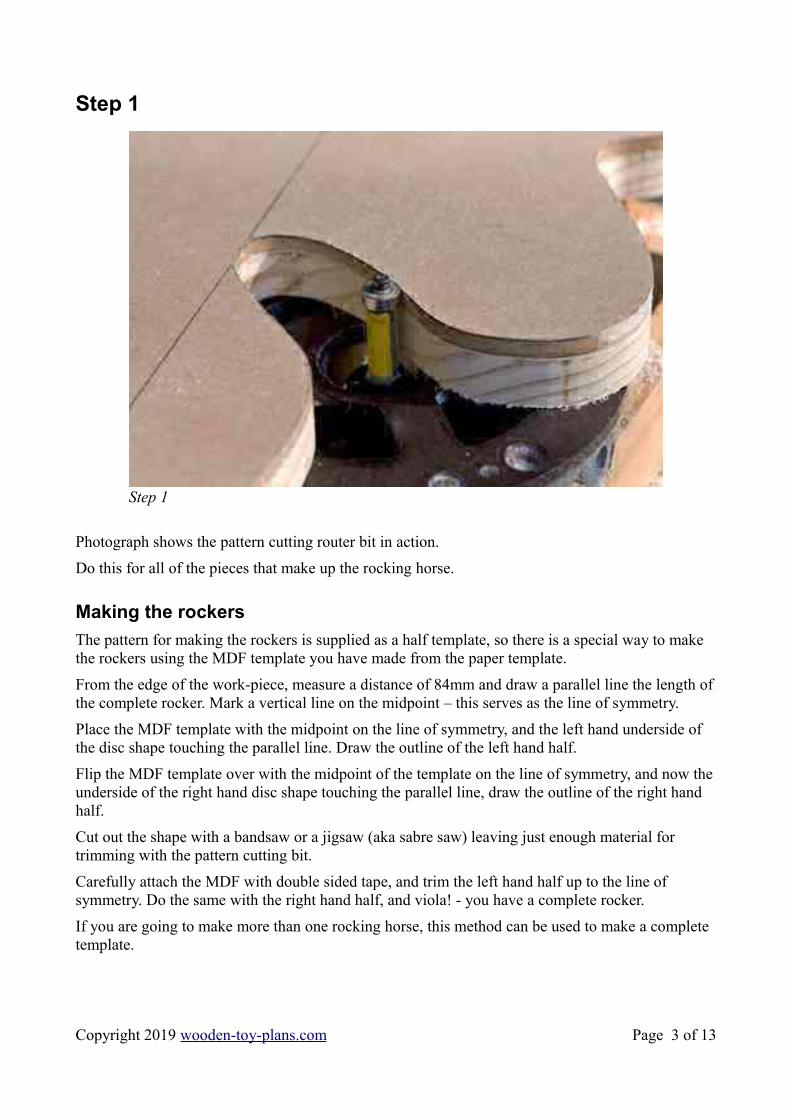
Step 1
Photograph shows the pattern cutting router bit in action.
Do this for all of the pieces that make up the rocking horse.
Making the rockers
The pattern for making the rockers is supplied as a half template, so there is a special way to make the rockers using the MDF template you have made from the paper template.
From the edge of the work-piece, measure a distance of 84mm and draw a parallel line the length ofthe complete rocker. Mark a vertical line on the midpoint – this serves as the line of symmetry.
Place the MDF template with the midpoint on the line of symmetry, and the left hand underside of the disc shape touching the parallel line. Draw the outline of the left hand half.
Flip the MDF template over with the midpoint of the template on the line of symmetry, and now theunderside of the right hand disc shape touching the parallel line, draw the outline of the right hand half.
Cut out the shape with a bandsaw or a jigsaw (aka sabre saw) leaving just enough material for trimming with the pattern cutting bit.
Carefully attach the MDF with double sided tape, and trim the left hand half up to the line of symmetry. Do the same with the right hand half, and viola! - you have a complete rocker.
If you are going to make more than one rocking horse, this method can be used to make a complete template.
Copyright 2019 wooden-toy-plans.com Page 3 of 13
Step 1

Step 2
Fix the front and back legs to the body, using the body outline on the legs shown in the plans as a reference. Be sure to make a left hand & right hand version.
Copyright 2019 wooden-toy-plans.com Page 4 of 13
Step 2
Step 3
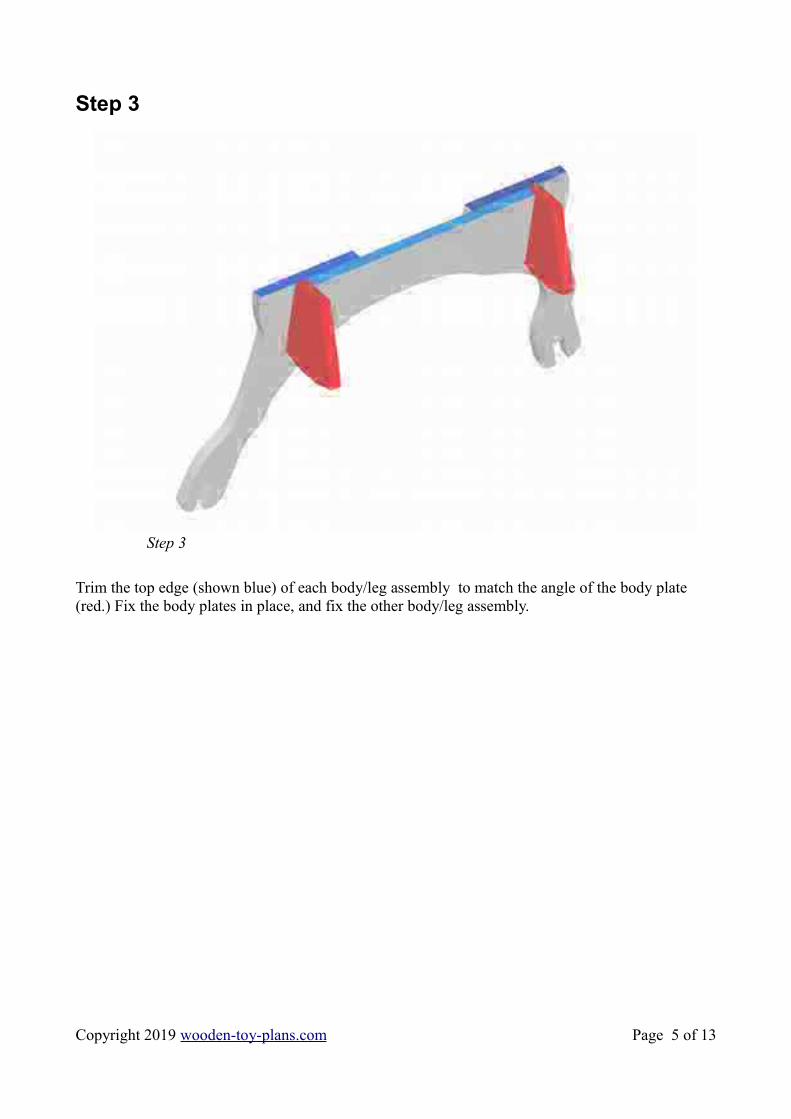
Trim the top edge (shown blue) of each body/leg assembly to match the angle of the body plate (red.) Fix the body plates in place, and fix the other body/leg assembly.
Copyright 2019 wooden-toy-plans.com Page 5 of 13
Step 3

Step 4
Fix the head and tail in place.
Copyright 2019 wooden-toy-plans.com Page 6 of 13
Step 4

Step 5
Fix the seat and backrest in place, shown red and blue respectively.
Copyright 2019 wooden-toy-plans.com Page 7 of 13
Step 5
Step 6
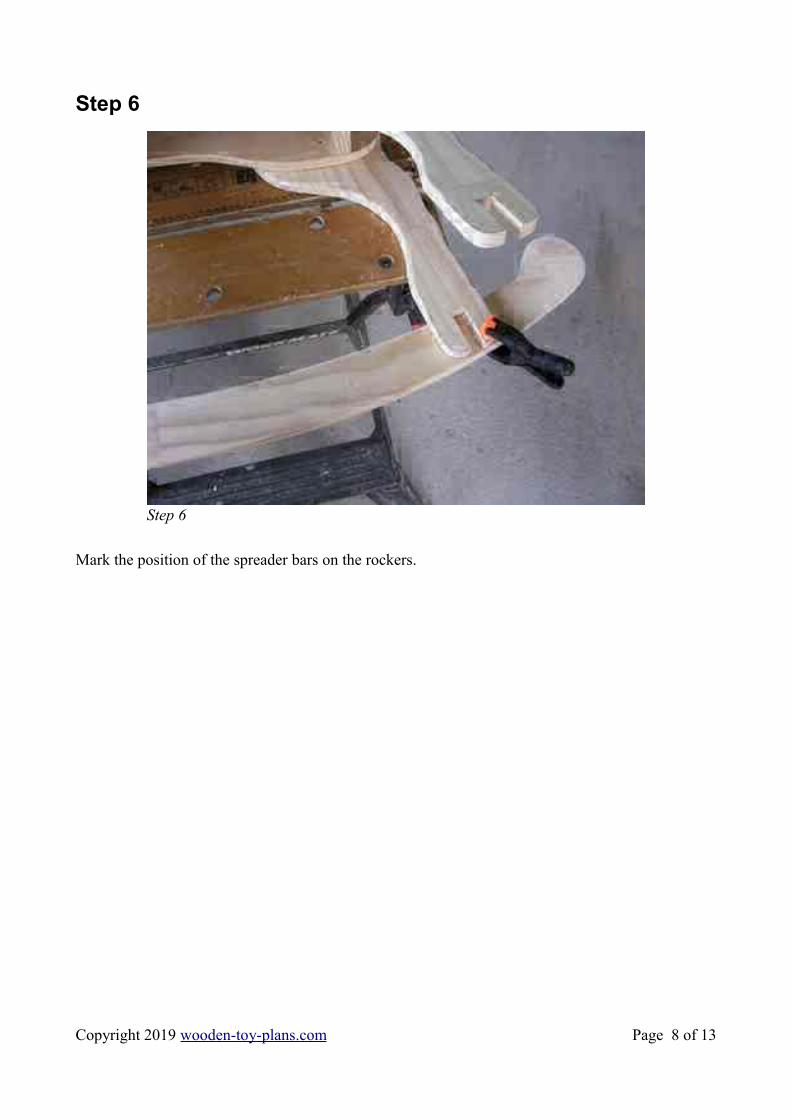
Mark the position of the spreader bars on the rockers.
Copyright 2019 wooden-toy-plans.com Page 8 of 13
Step 6
Step 7
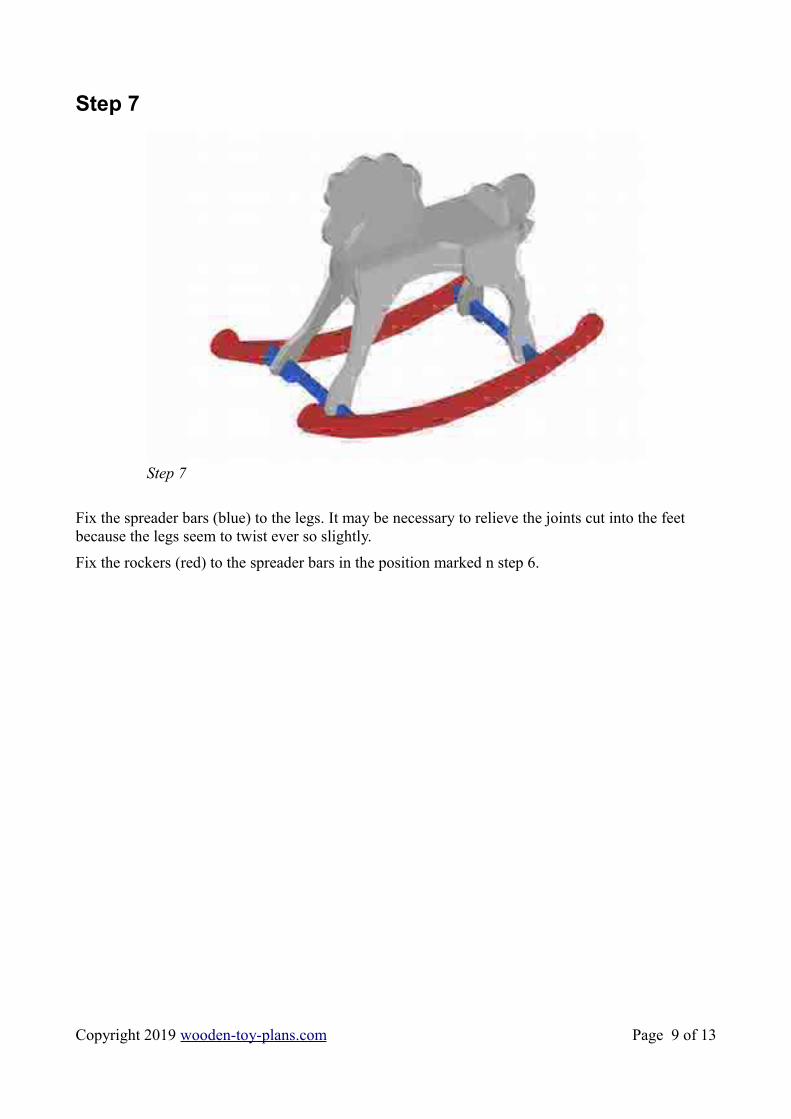
Fix the spreader bars (blue) to the legs. It may be necessary to relieve the joints cut into the feet because the legs seem to twist ever so slightly.
Fix the rockers (red) to the spreader bars in the position marked n step 6.
Copyright 2019 wooden-toy-plans.com Page 9 of 13
Step 7
Step 8
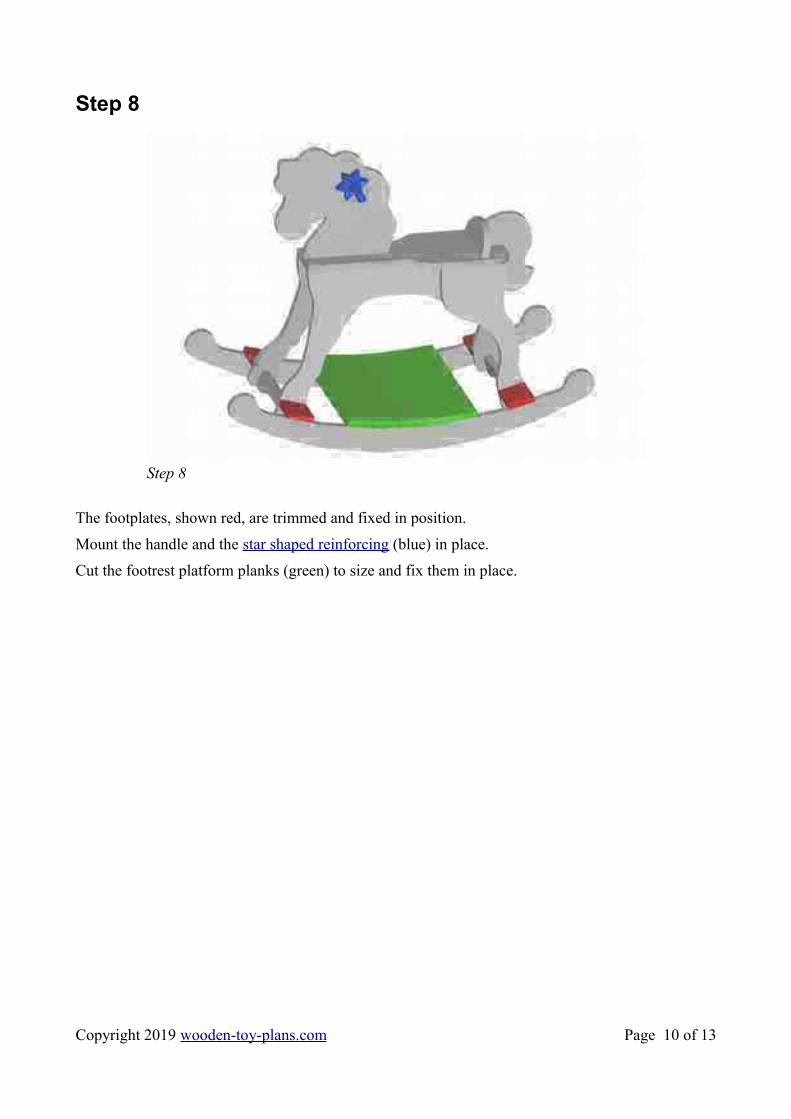
The footplates, shown red, are trimmed and fixed in position.
Mount the handle and the star shaped reinforcing (blue) in place.
Cut the footrest platform planks (green) to size and fix them in place.
Copyright 2019 wooden-toy-plans.com Page 10 of 13
Step 8
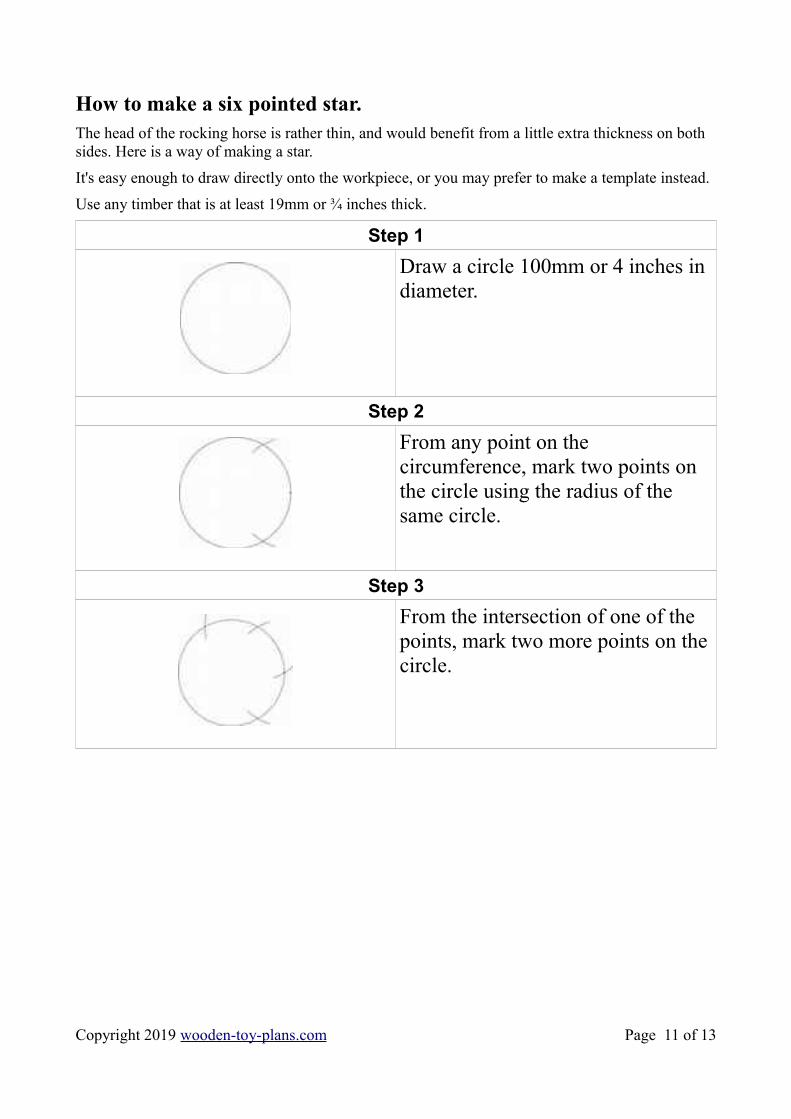
How to make a six pointed star.The head of the rocking horse is rather thin, and would benefit from a little extra thickness on both sides. Here is a way of making a star.
It's easy enough to draw directly onto the workpiece, or you may prefer to make a template instead.
Use any timber that is at least 19mm or ¾ inches thick.
Step 1
Draw a circle 100mm or 4 inches in diameter.
Step 2
From any point on the circumference, mark two points on the circle using the radius of the same circle.
Step 3
From the intersection of one of the points, mark two more points on the circle.
Copyright 2019 wooden-toy-plans.com Page 11 of 13

Step 4
Repeat the process until there are sixpoints of equal distance marked on the circle.
Step 5
Join 3 points with a straight line to form a triangle.
Step 6
Join the other three points and you have a six pointed star.
Step 7
Drill the hole for the handle before cutting out the shape.
Copyright 2019 wooden-toy-plans.com Page 12 of 13
Painting and finishingFill all holes with wood filler and let dry. Apply additional coats of wood filler as needed. When wood filler is completely dry, sand the project in the direction of the wood grain with 120 grit sandpaper. Vacuum sand the project to remove sanding residue. Remove all sanding residue on work surfaces as well. Wipe project clean with damp cloth. It is always recommended to apply a test coat on a hidden area or scrap piece to ensure color evenness and adhesion. Use primer or woodconditioner as needed.
Conclusion
I certainly hope you have enjoyed making this project.
Use this contact me form if you would like to submit your project to the photo gallery.
Copyright 2019 wooden-toy-plans.com Page 13 of 13
Related Documents