Rubrix Release 0.6.1.dev0+gf48c265.d20211104 Recognai Nov 04, 2021

Welcome message from author
This document is posted to help you gain knowledge. Please leave a comment to let me know what you think about it! Share it to your friends and learn new things together.
Transcript
RubrixRelease 0.6.1.dev0+gf48c265.d20211104
Recognai
Nov 04, 2021

GETTING STARTED
1 What’s Rubrix? 1
2 Quickstart 3
3 Use cases 5
4 Next steps 7
5 Community 95.1 Setup and installation . . . . . . . . . . . . . . . . . . . . . . . . . . . . . . . . . . . . . . . . . . 9
5.1.1 1. Install the Rubrix Python client . . . . . . . . . . . . . . . . . . . . . . . . . . . . . . . 95.1.2 2. Launch the web app . . . . . . . . . . . . . . . . . . . . . . . . . . . . . . . . . . . . . 95.1.3 3. Start logging data . . . . . . . . . . . . . . . . . . . . . . . . . . . . . . . . . . . . . . 105.1.4 Next steps . . . . . . . . . . . . . . . . . . . . . . . . . . . . . . . . . . . . . . . . . . . . 11
5.2 Concepts . . . . . . . . . . . . . . . . . . . . . . . . . . . . . . . . . . . . . . . . . . . . . . . . . 115.2.1 Rubrix data model . . . . . . . . . . . . . . . . . . . . . . . . . . . . . . . . . . . . . . . 115.2.2 Methods . . . . . . . . . . . . . . . . . . . . . . . . . . . . . . . . . . . . . . . . . . . . . 14
5.3 Tasks . . . . . . . . . . . . . . . . . . . . . . . . . . . . . . . . . . . . . . . . . . . . . . . . . . . 145.3.1 Supported tasks . . . . . . . . . . . . . . . . . . . . . . . . . . . . . . . . . . . . . . . . . 145.3.2 Tasks on the roadmap . . . . . . . . . . . . . . . . . . . . . . . . . . . . . . . . . . . . . . 15
5.4 Advanced setup guides . . . . . . . . . . . . . . . . . . . . . . . . . . . . . . . . . . . . . . . . . . 155.4.1 Using docker . . . . . . . . . . . . . . . . . . . . . . . . . . . . . . . . . . . . . . . . . . 155.4.2 Configure elasticsearch role/users . . . . . . . . . . . . . . . . . . . . . . . . . . . . . . . 165.4.3 Deploy to aws instance using docker-machine . . . . . . . . . . . . . . . . . . . . . . . . . 165.4.4 User management . . . . . . . . . . . . . . . . . . . . . . . . . . . . . . . . . . . . . . . . 185.4.5 Install from master . . . . . . . . . . . . . . . . . . . . . . . . . . . . . . . . . . . . . . . 20
5.5 Rubrix Cookbook . . . . . . . . . . . . . . . . . . . . . . . . . . . . . . . . . . . . . . . . . . . . 205.5.1 Hugging Face Transformers . . . . . . . . . . . . . . . . . . . . . . . . . . . . . . . . . . 205.5.2 spaCy . . . . . . . . . . . . . . . . . . . . . . . . . . . . . . . . . . . . . . . . . . . . . . 235.5.3 Flair . . . . . . . . . . . . . . . . . . . . . . . . . . . . . . . . . . . . . . . . . . . . . . . 245.5.4 Stanza . . . . . . . . . . . . . . . . . . . . . . . . . . . . . . . . . . . . . . . . . . . . . . 35
5.6 Tasks Templates . . . . . . . . . . . . . . . . . . . . . . . . . . . . . . . . . . . . . . . . . . . . . 385.6.1 Text Classification . . . . . . . . . . . . . . . . . . . . . . . . . . . . . . . . . . . . . . . 385.6.2 Token Classification . . . . . . . . . . . . . . . . . . . . . . . . . . . . . . . . . . . . . . . 465.6.3 Text2Text (Experimental) . . . . . . . . . . . . . . . . . . . . . . . . . . . . . . . . . . . . 51
5.7 Weak supervision . . . . . . . . . . . . . . . . . . . . . . . . . . . . . . . . . . . . . . . . . . . . . 525.7.1 Rubrix weak supervision in a nutshell . . . . . . . . . . . . . . . . . . . . . . . . . . . . . 535.7.2 Workflow . . . . . . . . . . . . . . . . . . . . . . . . . . . . . . . . . . . . . . . . . . . . 545.7.3 Example dataset . . . . . . . . . . . . . . . . . . . . . . . . . . . . . . . . . . . . . . . . . 545.7.4 1. Create a Rubrix dataset with unlabelled data and test data . . . . . . . . . . . . . . . . . 54
i
5.7.5 2. Defining rules . . . . . . . . . . . . . . . . . . . . . . . . . . . . . . . . . . . . . . . . 555.7.6 3. Building and analizing weak labels . . . . . . . . . . . . . . . . . . . . . . . . . . . . . 575.7.7 4. Using the weak labels . . . . . . . . . . . . . . . . . . . . . . . . . . . . . . . . . . . . 585.7.8 Joint Model with Weasel . . . . . . . . . . . . . . . . . . . . . . . . . . . . . . . . . . . . 61
5.8 Monitoring and collecting data from third-party apps . . . . . . . . . . . . . . . . . . . . . . . . . . 615.8.1 What does our streamlit app do? . . . . . . . . . . . . . . . . . . . . . . . . . . . . . . . . 615.8.2 How to run the app . . . . . . . . . . . . . . . . . . . . . . . . . . . . . . . . . . . . . . . 615.8.3 Rubrix integration . . . . . . . . . . . . . . . . . . . . . . . . . . . . . . . . . . . . . . . . 62
5.9 Metrics . . . . . . . . . . . . . . . . . . . . . . . . . . . . . . . . . . . . . . . . . . . . . . . . . . 625.9.1 Install dependencies . . . . . . . . . . . . . . . . . . . . . . . . . . . . . . . . . . . . . . . 635.9.2 Load dataset and spaCy model . . . . . . . . . . . . . . . . . . . . . . . . . . . . . . . . . 635.9.3 Log records into a Rubrix dataset . . . . . . . . . . . . . . . . . . . . . . . . . . . . . . . . 635.9.4 Explore the metrics for the dataset . . . . . . . . . . . . . . . . . . . . . . . . . . . . . . . 64
5.10 How to label your data and fine-tune a sentiment classifier . . . . . . . . . . . . . . . . . . . . . . 655.10.1 TL;DR . . . . . . . . . . . . . . . . . . . . . . . . . . . . . . . . . . . . . . . . . . . . . . 655.10.2 Introduction . . . . . . . . . . . . . . . . . . . . . . . . . . . . . . . . . . . . . . . . . . . 665.10.3 Setup Rubrix . . . . . . . . . . . . . . . . . . . . . . . . . . . . . . . . . . . . . . . . . . 665.10.4 Install tutorial dependencies . . . . . . . . . . . . . . . . . . . . . . . . . . . . . . . . . . 665.10.5 Preliminaries . . . . . . . . . . . . . . . . . . . . . . . . . . . . . . . . . . . . . . . . . . 665.10.6 1. Run the pre-trained model over the dataset and log the predictions . . . . . . . . . . . . 685.10.7 2. Explore and label data with the pretrained model . . . . . . . . . . . . . . . . . . . . . . 695.10.8 3. Fine-tune the pre-trained model . . . . . . . . . . . . . . . . . . . . . . . . . . . . . . . 705.10.9 4. Testing the fine-tuned model . . . . . . . . . . . . . . . . . . . . . . . . . . . . . . . . . 735.10.10 5. Run our fine-tuned model over the dataset and log the predictions . . . . . . . . . . . . . 745.10.11 6. Explore and label data with the fine-tuned model . . . . . . . . . . . . . . . . . . . . . . 745.10.12 7. Fine-tuning with the extended training dataset . . . . . . . . . . . . . . . . . . . . . . . 755.10.13 Wrap-up . . . . . . . . . . . . . . . . . . . . . . . . . . . . . . . . . . . . . . . . . . . . . 775.10.14 Next steps . . . . . . . . . . . . . . . . . . . . . . . . . . . . . . . . . . . . . . . . . . . . 77
5.11 Explore and analyze spaCy NER pipelines . . . . . . . . . . . . . . . . . . . . . . . . . . . . . . . 775.11.1 Introduction . . . . . . . . . . . . . . . . . . . . . . . . . . . . . . . . . . . . . . . . . . . 775.11.2 Setup Rubrix . . . . . . . . . . . . . . . . . . . . . . . . . . . . . . . . . . . . . . . . . . 785.11.3 Install tutorial dependencies . . . . . . . . . . . . . . . . . . . . . . . . . . . . . . . . . . 785.11.4 Our dataset . . . . . . . . . . . . . . . . . . . . . . . . . . . . . . . . . . . . . . . . . . . 785.11.5 Logging spaCy NER entities into Rubrix . . . . . . . . . . . . . . . . . . . . . . . . . . . . 785.11.6 Exploring and comparing en_core_web_sm and en_core_web_trf models . . . . . . . . 805.11.7 Extra: Explore the IMDB dataset . . . . . . . . . . . . . . . . . . . . . . . . . . . . . . . . 815.11.8 Summary . . . . . . . . . . . . . . . . . . . . . . . . . . . . . . . . . . . . . . . . . . . . 825.11.9 Next steps . . . . . . . . . . . . . . . . . . . . . . . . . . . . . . . . . . . . . . . . . . . . 82
5.12 Node classification with kglab and PyTorch Geometric . . . . . . . . . . . . . . . . . . . . . . . . 825.12.1 Our use case in a nutshell . . . . . . . . . . . . . . . . . . . . . . . . . . . . . . . . . . . . 835.12.2 Install kglab and Pytorch Geometric . . . . . . . . . . . . . . . . . . . . . . . . . . . . 835.12.3 1. Loading and exploring the recipes knowledge graph . . . . . . . . . . . . . . . . . . . . 835.12.4 2. Representing our knowledge graph as a PyTorch Tensor . . . . . . . . . . . . . . . . . . 845.12.5 3. Building a training set with Rubrix . . . . . . . . . . . . . . . . . . . . . . . . . . . . . 855.12.6 4. Creating a Subgraph of recipe and ingredient nodes . . . . . . . . . . . . . . . . . . . . 895.12.7 5. Semi-supervised node classification with PyTorch Geometric . . . . . . . . . . . . . . . 895.12.8 6. Using our model and analyzing its predictions with Rubrix . . . . . . . . . . . . . . . . . 955.12.9 Exercise 1: Training experiments with PyTorch Lightning . . . . . . . . . . . . . . . . . . . 965.12.10 Exercise 2: Bootstrapping annotation with a zeroshot-classifier . . . . . . . . . . . . . . . . 985.12.11 Next steps . . . . . . . . . . . . . . . . . . . . . . . . . . . . . . . . . . . . . . . . . . . . 99
5.13 Human-in-the-loop weak supervision with snorkel . . . . . . . . . . . . . . . . . . . . . . . . . . 995.13.1 Introduction . . . . . . . . . . . . . . . . . . . . . . . . . . . . . . . . . . . . . . . . . . . 995.13.2 Install Snorkel, Textblob and spaCy . . . . . . . . . . . . . . . . . . . . . . . . . . . . . . 995.13.3 Setup Rubrix . . . . . . . . . . . . . . . . . . . . . . . . . . . . . . . . . . . . . . . . . . 100
ii
5.13.4 1. Spam classification with Snorkel . . . . . . . . . . . . . . . . . . . . . . . . . . . . . . 1005.13.5 2. Extending and finding labeling functions with Rubrix . . . . . . . . . . . . . . . . . . . 1055.13.6 3. Checking and curating programatically created data . . . . . . . . . . . . . . . . . . . . 1095.13.7 4. Training and evaluating a classifier . . . . . . . . . . . . . . . . . . . . . . . . . . . . . 1115.13.8 Summary . . . . . . . . . . . . . . . . . . . . . . . . . . . . . . . . . . . . . . . . . . . . 1125.13.9 Next steps . . . . . . . . . . . . . . . . . . . . . . . . . . . . . . . . . . . . . . . . . . . . 112
5.14 Active learning with ModAL and scikit-learn . . . . . . . . . . . . . . . . . . . . . . . . . . . . . . 1125.14.1 Introduction . . . . . . . . . . . . . . . . . . . . . . . . . . . . . . . . . . . . . . . . . . . 1135.14.2 Setup Rubrix . . . . . . . . . . . . . . . . . . . . . . . . . . . . . . . . . . . . . . . . . . 1145.14.3 Setup . . . . . . . . . . . . . . . . . . . . . . . . . . . . . . . . . . . . . . . . . . . . . . 1145.14.4 1. Loading and preparing data . . . . . . . . . . . . . . . . . . . . . . . . . . . . . . . . . 1145.14.5 2. Defining our classifier and Active Learner . . . . . . . . . . . . . . . . . . . . . . . . . . 1155.14.6 3. Active Learning loop . . . . . . . . . . . . . . . . . . . . . . . . . . . . . . . . . . . . . 1165.14.7 Summary . . . . . . . . . . . . . . . . . . . . . . . . . . . . . . . . . . . . . . . . . . . . 1185.14.8 Next steps . . . . . . . . . . . . . . . . . . . . . . . . . . . . . . . . . . . . . . . . . . . . 1195.14.9 Appendix: Compare query strategies, random vs max uncertainty . . . . . . . . . . . . . . 1195.14.10 Appendix: How did we obtain the train/test data? . . . . . . . . . . . . . . . . . . . . . . . 120
5.15 Find label errors with cleanlab . . . . . . . . . . . . . . . . . . . . . . . . . . . . . . . . . . . . . 1215.15.1 Introduction . . . . . . . . . . . . . . . . . . . . . . . . . . . . . . . . . . . . . . . . . . . 1215.15.2 Setup Rubrix . . . . . . . . . . . . . . . . . . . . . . . . . . . . . . . . . . . . . . . . . . 1225.15.3 1. Load model and data set . . . . . . . . . . . . . . . . . . . . . . . . . . . . . . . . . . . 1225.15.4 2. Make predictions . . . . . . . . . . . . . . . . . . . . . . . . . . . . . . . . . . . . . . . 1235.15.5 3. Get label error candidates . . . . . . . . . . . . . . . . . . . . . . . . . . . . . . . . . . 1235.15.6 4. Uncover label errors in Rubrix . . . . . . . . . . . . . . . . . . . . . . . . . . . . . . . . 1245.15.7 5. Correct label errors . . . . . . . . . . . . . . . . . . . . . . . . . . . . . . . . . . . . . 1255.15.8 Summary . . . . . . . . . . . . . . . . . . . . . . . . . . . . . . . . . . . . . . . . . . . . 1265.15.9 Next steps . . . . . . . . . . . . . . . . . . . . . . . . . . . . . . . . . . . . . . . . . . . . 126
5.16 Zero-shot Named Entity Recognition with Flair . . . . . . . . . . . . . . . . . . . . . . . . . . . . 1275.16.1 TL;DR: . . . . . . . . . . . . . . . . . . . . . . . . . . . . . . . . . . . . . . . . . . . . . 1275.16.2 Install dependencies . . . . . . . . . . . . . . . . . . . . . . . . . . . . . . . . . . . . . . . 1275.16.3 Setup Rubrix . . . . . . . . . . . . . . . . . . . . . . . . . . . . . . . . . . . . . . . . . . 1275.16.4 Load the wnut_17 dataset . . . . . . . . . . . . . . . . . . . . . . . . . . . . . . . . . . . 1275.16.5 Configure Flair TARSTagger . . . . . . . . . . . . . . . . . . . . . . . . . . . . . . . . . . 1285.16.6 Predict over wnut_17 and log into rubrix . . . . . . . . . . . . . . . . . . . . . . . . . . 128
5.17 Clean labels using your model loss . . . . . . . . . . . . . . . . . . . . . . . . . . . . . . . . . . . 1295.17.1 TL;DR . . . . . . . . . . . . . . . . . . . . . . . . . . . . . . . . . . . . . . . . . . . . . . 1295.17.2 Introduction . . . . . . . . . . . . . . . . . . . . . . . . . . . . . . . . . . . . . . . . . . . 1295.17.3 Ingredients . . . . . . . . . . . . . . . . . . . . . . . . . . . . . . . . . . . . . . . . . . . 1295.17.4 Steps . . . . . . . . . . . . . . . . . . . . . . . . . . . . . . . . . . . . . . . . . . . . . . . 1305.17.5 Why it’s important . . . . . . . . . . . . . . . . . . . . . . . . . . . . . . . . . . . . . . . 1305.17.6 Setup Rubrix . . . . . . . . . . . . . . . . . . . . . . . . . . . . . . . . . . . . . . . . . . 1305.17.7 Tutorial dependencies . . . . . . . . . . . . . . . . . . . . . . . . . . . . . . . . . . . . . . 1305.17.8 1. Load the fine-tuned model and the training dataset . . . . . . . . . . . . . . . . . . . . . 1315.17.9 2. Computing the loss . . . . . . . . . . . . . . . . . . . . . . . . . . . . . . . . . . . . . . 1315.17.10 3. Log high loss examples into Rubrix . . . . . . . . . . . . . . . . . . . . . . . . . . . . . 1335.17.11 4. Using Rubrix Webapp for inspection and relabeling . . . . . . . . . . . . . . . . . . . . 1345.17.12 Next steps . . . . . . . . . . . . . . . . . . . . . . . . . . . . . . . . . . . . . . . . . . . . 134
5.18 Monitor predictions in HTTP API endpoints . . . . . . . . . . . . . . . . . . . . . . . . . . . . . . 1345.18.1 Setup Rubrix . . . . . . . . . . . . . . . . . . . . . . . . . . . . . . . . . . . . . . . . . . 1355.18.2 Install tutorial dependencies . . . . . . . . . . . . . . . . . . . . . . . . . . . . . . . . . . 1355.18.3 Loading models . . . . . . . . . . . . . . . . . . . . . . . . . . . . . . . . . . . . . . . . . 1355.18.4 Convert output to Rubrix format . . . . . . . . . . . . . . . . . . . . . . . . . . . . . . . . 1365.18.5 Create prediction endpoint . . . . . . . . . . . . . . . . . . . . . . . . . . . . . . . . . . . 1365.18.6 Add Rubrix logging middleware to the application . . . . . . . . . . . . . . . . . . . . . . . 137
iii
5.18.7 Do the same for spaCy . . . . . . . . . . . . . . . . . . . . . . . . . . . . . . . . . . . . . 1375.18.8 Putting it all together . . . . . . . . . . . . . . . . . . . . . . . . . . . . . . . . . . . . . . 1385.18.9 Transformers demo . . . . . . . . . . . . . . . . . . . . . . . . . . . . . . . . . . . . . . . 1385.18.10 spaCy demo . . . . . . . . . . . . . . . . . . . . . . . . . . . . . . . . . . . . . . . . . . . 1395.18.11 Summary . . . . . . . . . . . . . . . . . . . . . . . . . . . . . . . . . . . . . . . . . . . . 1395.18.12 Next steps . . . . . . . . . . . . . . . . . . . . . . . . . . . . . . . . . . . . . . . . . . . . 139
5.19 Faster data annotation with a zero-shot text classifier . . . . . . . . . . . . . . . . . . . . . . . . . 1395.19.1 TL;DR . . . . . . . . . . . . . . . . . . . . . . . . . . . . . . . . . . . . . . . . . . . . . . 1395.19.2 Why . . . . . . . . . . . . . . . . . . . . . . . . . . . . . . . . . . . . . . . . . . . . . . . 1395.19.3 Setup Rubrix . . . . . . . . . . . . . . . . . . . . . . . . . . . . . . . . . . . . . . . . . . 1405.19.4 Install dependencies . . . . . . . . . . . . . . . . . . . . . . . . . . . . . . . . . . . . . . . 1405.19.5 1. Load the Spanish zero-shot classifier: Selectra . . . . . . . . . . . . . . . . . . . . . . 1405.19.6 2. Loading the MLSum dataset . . . . . . . . . . . . . . . . . . . . . . . . . . . . . . . . . . 1405.19.7 3. Making zero-shot predictions . . . . . . . . . . . . . . . . . . . . . . . . . . . . . . . . 1405.19.8 4. Logging predictions in Rubrix . . . . . . . . . . . . . . . . . . . . . . . . . . . . . . . . 1415.19.9 5. Hand-labeling session . . . . . . . . . . . . . . . . . . . . . . . . . . . . . . . . . . . . 1415.19.10 Next steps . . . . . . . . . . . . . . . . . . . . . . . . . . . . . . . . . . . . . . . . . . . . 142
5.20 Python . . . . . . . . . . . . . . . . . . . . . . . . . . . . . . . . . . . . . . . . . . . . . . . . . . 1425.20.1 Client . . . . . . . . . . . . . . . . . . . . . . . . . . . . . . . . . . . . . . . . . . . . . . 1425.20.2 Metrics (Experimental) . . . . . . . . . . . . . . . . . . . . . . . . . . . . . . . . . . . . . 1485.20.3 Labeling (Experimental) . . . . . . . . . . . . . . . . . . . . . . . . . . . . . . . . . . . . 151
5.21 Web App UI . . . . . . . . . . . . . . . . . . . . . . . . . . . . . . . . . . . . . . . . . . . . . . . 1545.21.1 Home page . . . . . . . . . . . . . . . . . . . . . . . . . . . . . . . . . . . . . . . . . . . 1545.21.2 Dataset page . . . . . . . . . . . . . . . . . . . . . . . . . . . . . . . . . . . . . . . . . . . 154
5.22 Developer documentation . . . . . . . . . . . . . . . . . . . . . . . . . . . . . . . . . . . . . . . . 1605.22.1 Development setup . . . . . . . . . . . . . . . . . . . . . . . . . . . . . . . . . . . . . . . 1605.22.2 Building the documentation . . . . . . . . . . . . . . . . . . . . . . . . . . . . . . . . . . 161
Python Module Index 163
Index 165
iv
CHAPTER
ONE
WHAT’S RUBRIX?
Rubrix is a production-ready Python framework for exploring, annotating, and managing data in NLP projects.
Key features:
• Open: Rubrix is free, open-source, and 100% compatible with major NLP libraries (Hugging Face transform-ers, spaCy, Stanford Stanza, Flair, etc.). In fact, you can use and combine your preferred libraries withoutimplementing any specific interface.
• End-to-end: Most annotation tools treat data collection as a one-off activity at the beginning of each project. Inreal-world projects, data collection is a key activity of the iterative process of ML model development. Once amodel goes into production, you want to monitor and analyze its predictions, and collect more data to improveyour model over time. Rubrix is designed to close this gap, enabling you to iterate as much as you need.
• User and Developer Experience: The key to sustainable NLP solutions is to make it easier for everyone tocontribute to projects. Domain experts should feel comfortable interpreting and annotating data. Data scientistsshould feel free to experiment and iterate. Engineers should feel in control of data pipelines. Rubrix optimizesthe experience for these core users to make your teams more productive.
• Beyond hand-labeling: Classical hand labeling workflows are costly and inefficient, but having humans-in-the-loop is essential. Easily combine hand-labeling with active learning, bulk-labeling, zero-shot models, andweak-supervision in novel data annotation workflows.
Rubrix currently supports several natural language processing and knowledge graph use cases but we’ll beadding support for speech recognition and computer vision soon.
1
Rubrix, Release 0.6.1.dev0+gf48c265.d20211104
2 Chapter 1. What’s Rubrix?
CHAPTER
TWO
QUICKSTART
Getting started with Rubrix is easy, let’s see a quick example using the transformers and datasets libraries:
Make sure you have Docker installed and run (check the setup and installation section for a more detailed installationprocess):
mkdir rubrix && cd rubrix
And then run:
wget -O docker-compose.yml https://git.io/rb-docker && docker-compose up
Install Rubrix python library (and transformers, pytorch and datasets libraries for this example):
pip install rubrix==0.6.0 transformers datasets torch
Now, let’s see an example: Bootstraping data annotation with a zero-shot classifier
Why:
• The availability of pre-trained language models with zero-shot capabilities means you can, sometimes, accelerateyour data annotation tasks by pre-annotating your corpus with a pre-trained zeroshot model.
• The same workflow can be applied if there is a pre-trained “supervised” model that fits your categories but needsfine-tuning for your own use case. For example, fine-tuning a sentiment classifier for a very specific type ofmessage.
Ingredients:
• A zero-shot classifier from the Hub: typeform/distilbert-base-uncased-mnli
• A dataset containing news
• A set of target categories: Business, Sports, etc.
What are we going to do:
1. Make predictions and log them into a Rubrix dataset.
2. Use the Rubrix web app to explore, filter, and annotate some examples.
3. Load the annotated examples and create a training set, which you can then use to train a supervised classifier.
Use your favourite editor or a Jupyter notebook to run the following:
from transformers import pipelinefrom datasets import load_datasetimport rubrix as rb
(continues on next page)
3
Rubrix, Release 0.6.1.dev0+gf48c265.d20211104
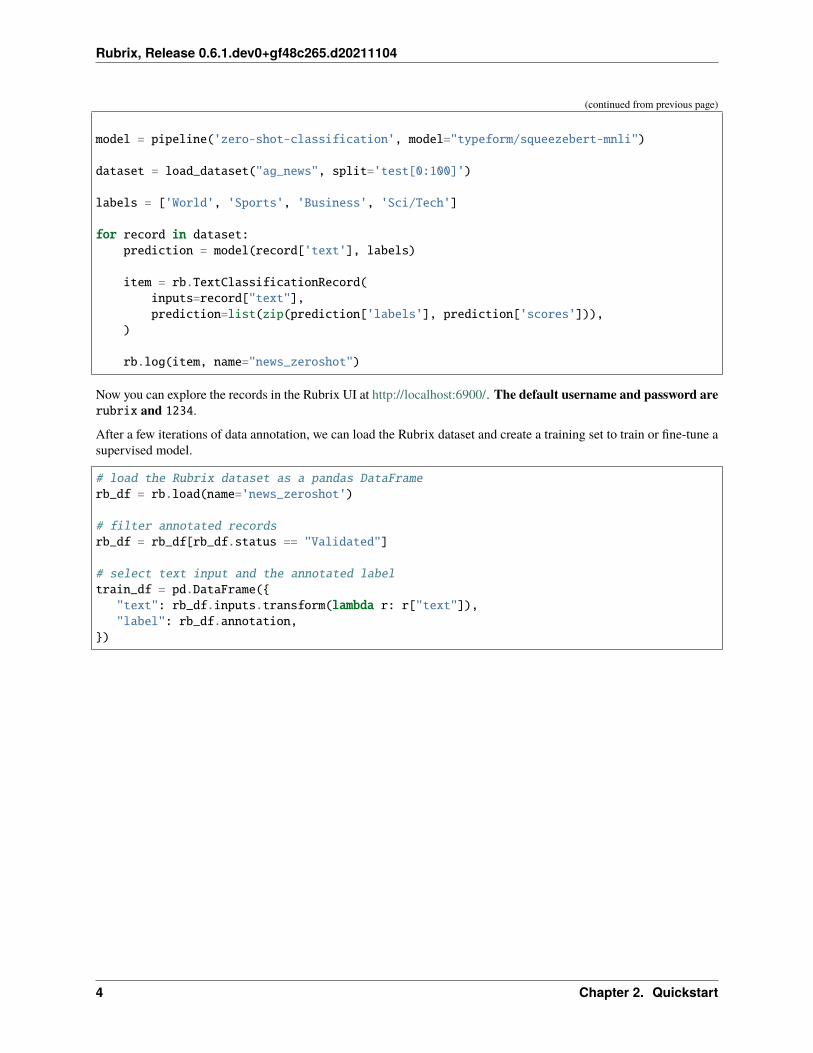
(continued from previous page)
model = pipeline('zero-shot-classification', model="typeform/squeezebert-mnli")
dataset = load_dataset("ag_news", split='test[0:100]')
labels = ['World', 'Sports', 'Business', 'Sci/Tech']
for record in dataset:prediction = model(record['text'], labels)
item = rb.TextClassificationRecord(inputs=record["text"],prediction=list(zip(prediction['labels'], prediction['scores'])),
)
rb.log(item, name="news_zeroshot")
Now you can explore the records in the Rubrix UI at http://localhost:6900/. The default username and password arerubrix and 1234.
After a few iterations of data annotation, we can load the Rubrix dataset and create a training set to train or fine-tune asupervised model.
# load the Rubrix dataset as a pandas DataFramerb_df = rb.load(name='news_zeroshot')
# filter annotated recordsrb_df = rb_df[rb_df.status == "Validated"]
# select text input and the annotated labeltrain_df = pd.DataFrame({
"text": rb_df.inputs.transform(lambda r: r["text"]),"label": rb_df.annotation,
})
4 Chapter 2. Quickstart
CHAPTER
THREE
USE CASES
• Model monitoring and observability: log and observe predictions of live models.
• Ground-truth data collection: collect labels to start a project from scratch or from existing live models.
• Evaluation: easily compute “live” metrics from models in production, and slice evaluation datasets to test yoursystem under specific conditions.
• Model debugging: log predictions during the development process to visually spot issues.
• Explainability: log things like token attributions to understand your model predictions.
5
Rubrix, Release 0.6.1.dev0+gf48c265.d20211104
6 Chapter 3. Use cases

CHAPTER
FOUR
NEXT STEPS
The documentation is divided into different sections, which explore different aspects of Rubrix:
• Setup and installation
• Concepts
• Tutorials
• Guides
• Reference
7
Rubrix, Release 0.6.1.dev0+gf48c265.d20211104
8 Chapter 4. Next steps
CHAPTER
FIVE
COMMUNITY
You can join the conversation on our Github page and our Github forum.
• Github page
• Github forum
5.1 Setup and installation
In this guide, we will help you to get up and running with Rubrix. Basically, you need to:
1. Install the Python client
2. Launch the web app
3. Start logging data
5.1.1 1. Install the Rubrix Python client
First, make sure you have Python 3.6 or above installed.
Then you can install Rubrix with pip:
pip install rubrix==0.6.0
5.1.2 2. Launch the web app
There are two ways to launch the webapp:
a. Using docker-compose (recommended).
b. Executing the server code manually
9
Rubrix, Release 0.6.1.dev0+gf48c265.d20211104
a) Using docker-compose (recommended)
For this method you first need to install Docker Compose.
Then, create a folder:
mkdir rubrix && cd rubrix
and launch the docker-contained web app with the following command:
wget -O docker-compose.yml https://raw.githubusercontent.com/recognai/rubrix/master/→˓docker-compose.yaml && docker-compose up
This is the recommended way because it automatically includes an Elasticsearch instance, Rubrix’s main persistentlayer.
b) Executing the server code manually
When executing the server code manually you need to provide an Elasticsearch instance yourself. This method may bepreferred if you (1) want to avoid or cannot use Docker, (2) have an existing Elasticsearch service, or (3) want to havefull control over your Elasticsearch configuration.
1. First you need to install Elasticsearch (we recommend version 7.10) and launch an Elasticsearch instance. ForMacOS and Windows there are Homebrew formulae and a msi package, respectively.
2. Install the Rubrix Python library together with its server dependencies:
pip install rubrix[server]==0.6.0
3. Launch a local instance of the Rubrix web app
python -m rubrix.server
By default, the Rubrix server will look for your Elasticsearch endpoint at http://localhost:9200. But you cancustomize this by setting the ELASTICSEARCH environment variable.
If you are already running an Elasticsearch instance for other applications and want to share it with Rubrix,please refer to our advanced setup guide.
5.1.3 3. Start logging data
The following code will log one record into a data set called example-dataset :
import rubrix as rb
rb.log(rb.TextClassificationRecord(inputs="My first Rubrix example"),name='example-dataset'
)
If you now go to your Rubrix app at http://localhost:6900/ , you will find your first data set. The default usernameand password are rubrix and 1234 (see the user management guide to configure this). You can also check the RESTAPI docs at http://localhost:6900/api/docs.
Congratulations! You are ready to start working with Rubrix.
Please refer to our advanced setup guides if you want to:
10 Chapter 5. Community
Rubrix, Release 0.6.1.dev0+gf48c265.d20211104
• setup Rubrix using docker
• share the Elasticsearch instance with other applications
• deploy Rubrix on an AWS instance
• manage users in Rubrix
5.1.4 Next steps
To continue learning we recommend you to:
• Check our Guides and Tutorials.
• Read about Rubrix’s main Concepts
5.2 Concepts
In this section, we introduce the core concepts of Rubrix. These concepts are important for understanding how tointeract with the tool and its core Python client.
We have two main sections: Rubrix data model and Python client API methods.
5.2.1 Rubrix data model
The Python library and the web app are built around a few simple concepts. This section aims to clarify what thoseconcepts are and to show you the main constructs for using Rubrix with your own models and data. Let’s take a lookat Rubrix’s components and methods:
Dataset
A dataset is a collection of records stored in Rubrix. The main things you can do with a Dataset are to log records andto load the records of a Dataset into a Pandas.Dataframe from a Python app, script, or a Jupyter/Colab notebook.
Record
A record is a data item composed of inputs and, optionally, predictions and annotations. Usually, inputs arethe information your model receives (for example: ‘Macbeth’).
Think of predictions as the classification that your system made over that input (for example: ‘Virginia Woolf’), andthink of annotations as the ground truth that you manually assign to that input (because you know that, in this case, itwould be ‘William Shakespeare’). Records are defined by the type of Taskthey are related to. Let’s see three differentexamples:
5.2. Concepts 11
Rubrix, Release 0.6.1.dev0+gf48c265.d20211104
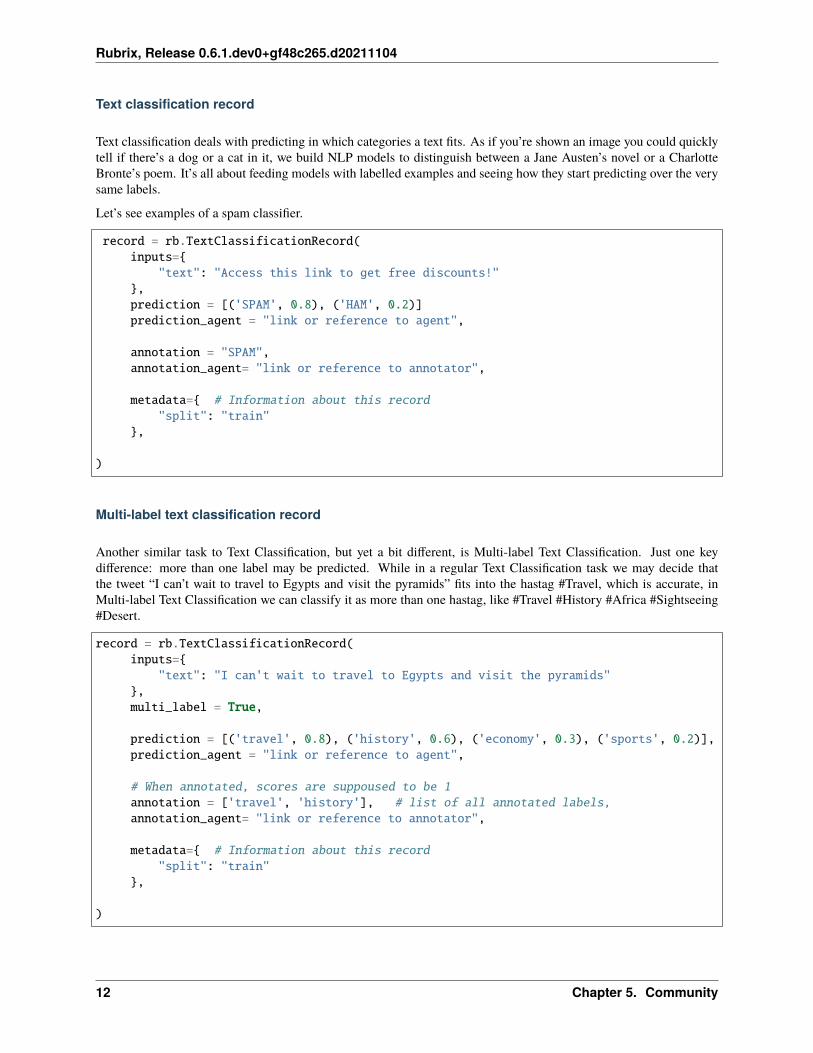
Text classification record
Text classification deals with predicting in which categories a text fits. As if you’re shown an image you could quicklytell if there’s a dog or a cat in it, we build NLP models to distinguish between a Jane Austen’s novel or a CharlotteBronte’s poem. It’s all about feeding models with labelled examples and seeing how they start predicting over the verysame labels.
Let’s see examples of a spam classifier.
record = rb.TextClassificationRecord(inputs={
"text": "Access this link to get free discounts!"},prediction = [('SPAM', 0.8), ('HAM', 0.2)]prediction_agent = "link or reference to agent",
annotation = "SPAM",annotation_agent= "link or reference to annotator",
metadata={ # Information about this record"split": "train"
},
)
Multi-label text classification record
Another similar task to Text Classification, but yet a bit different, is Multi-label Text Classification. Just one keydifference: more than one label may be predicted. While in a regular Text Classification task we may decide thatthe tweet “I can’t wait to travel to Egypts and visit the pyramids” fits into the hastag #Travel, which is accurate, inMulti-label Text Classification we can classify it as more than one hastag, like #Travel #History #Africa #Sightseeing#Desert.
record = rb.TextClassificationRecord(inputs={
"text": "I can't wait to travel to Egypts and visit the pyramids"},multi_label = True,
prediction = [('travel', 0.8), ('history', 0.6), ('economy', 0.3), ('sports', 0.2)],prediction_agent = "link or reference to agent",
# When annotated, scores are suppoused to be 1annotation = ['travel', 'history'], # list of all annotated labels,annotation_agent= "link or reference to annotator",
metadata={ # Information about this record"split": "train"
},
)
12 Chapter 5. Community
Rubrix, Release 0.6.1.dev0+gf48c265.d20211104
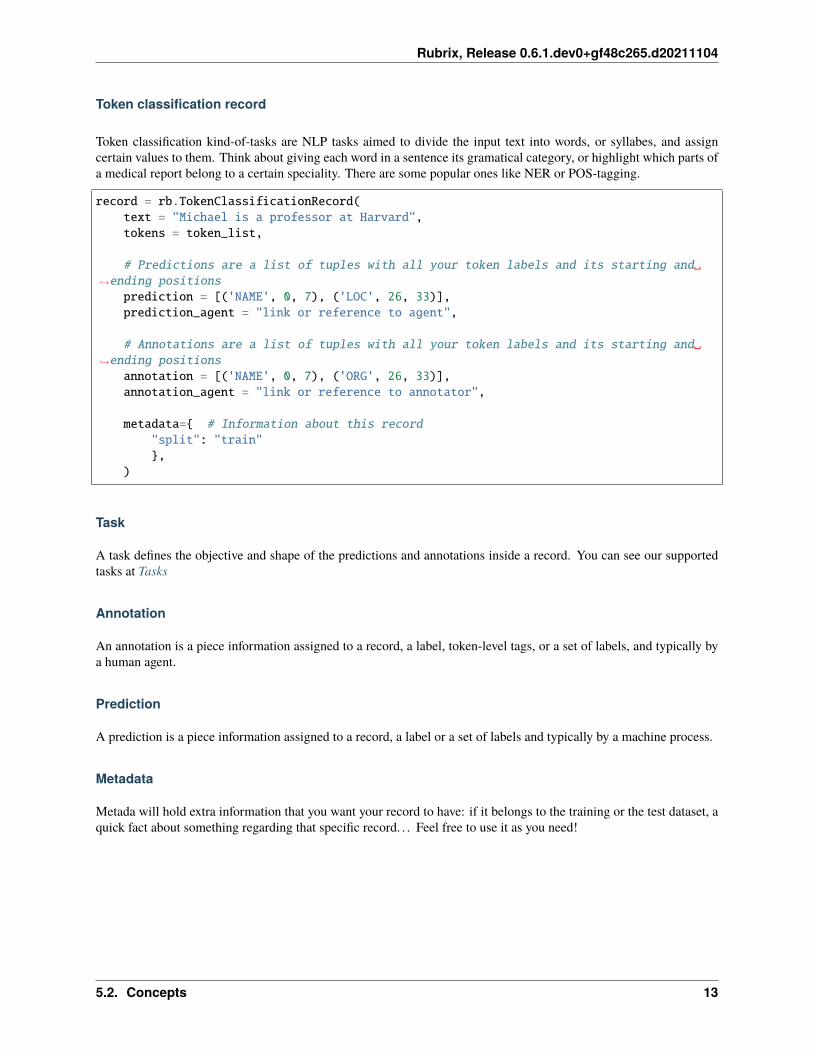
Token classification record
Token classification kind-of-tasks are NLP tasks aimed to divide the input text into words, or syllabes, and assigncertain values to them. Think about giving each word in a sentence its gramatical category, or highlight which parts ofa medical report belong to a certain speciality. There are some popular ones like NER or POS-tagging.
record = rb.TokenClassificationRecord(text = "Michael is a professor at Harvard",tokens = token_list,
# Predictions are a list of tuples with all your token labels and its starting and␣→˓ending positions
prediction = [('NAME', 0, 7), ('LOC', 26, 33)],prediction_agent = "link or reference to agent",
# Annotations are a list of tuples with all your token labels and its starting and␣→˓ending positions
annotation = [('NAME', 0, 7), ('ORG', 26, 33)],annotation_agent = "link or reference to annotator",
metadata={ # Information about this record"split": "train"},
)
Task
A task defines the objective and shape of the predictions and annotations inside a record. You can see our supportedtasks at Tasks
Annotation
An annotation is a piece information assigned to a record, a label, token-level tags, or a set of labels, and typically bya human agent.
Prediction
A prediction is a piece information assigned to a record, a label or a set of labels and typically by a machine process.
Metadata
Metada will hold extra information that you want your record to have: if it belongs to the training or the test dataset, aquick fact about something regarding that specific record. . . Feel free to use it as you need!
5.2. Concepts 13
Rubrix, Release 0.6.1.dev0+gf48c265.d20211104
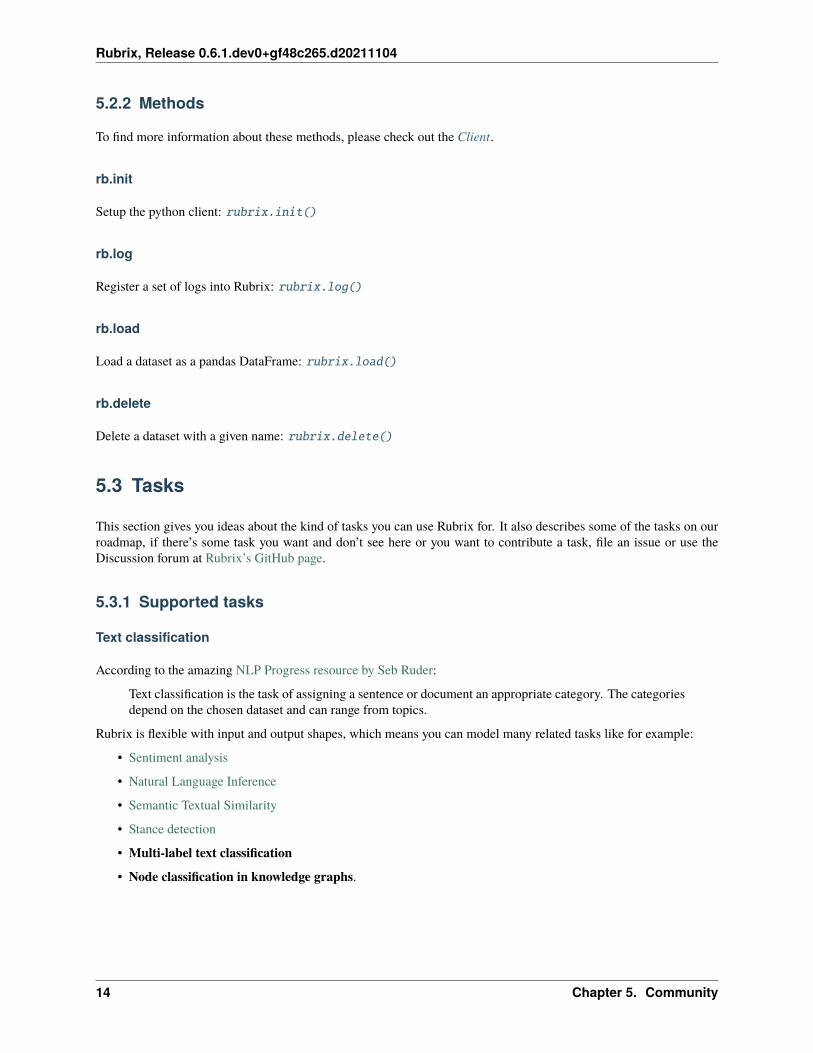
5.2.2 Methods
To find more information about these methods, please check out the Client.
rb.init
Setup the python client: rubrix.init()
rb.log
Register a set of logs into Rubrix: rubrix.log()
rb.load
Load a dataset as a pandas DataFrame: rubrix.load()
rb.delete
Delete a dataset with a given name: rubrix.delete()
5.3 Tasks
This section gives you ideas about the kind of tasks you can use Rubrix for. It also describes some of the tasks on ourroadmap, if there’s some task you want and don’t see here or you want to contribute a task, file an issue or use theDiscussion forum at Rubrix’s GitHub page.
5.3.1 Supported tasks
Text classification
According to the amazing NLP Progress resource by Seb Ruder:
Text classification is the task of assigning a sentence or document an appropriate category. The categoriesdepend on the chosen dataset and can range from topics.
Rubrix is flexible with input and output shapes, which means you can model many related tasks like for example:
• Sentiment analysis
• Natural Language Inference
• Semantic Textual Similarity
• Stance detection
• Multi-label text classification
• Node classification in knowledge graphs.
14 Chapter 5. Community
Rubrix, Release 0.6.1.dev0+gf48c265.d20211104
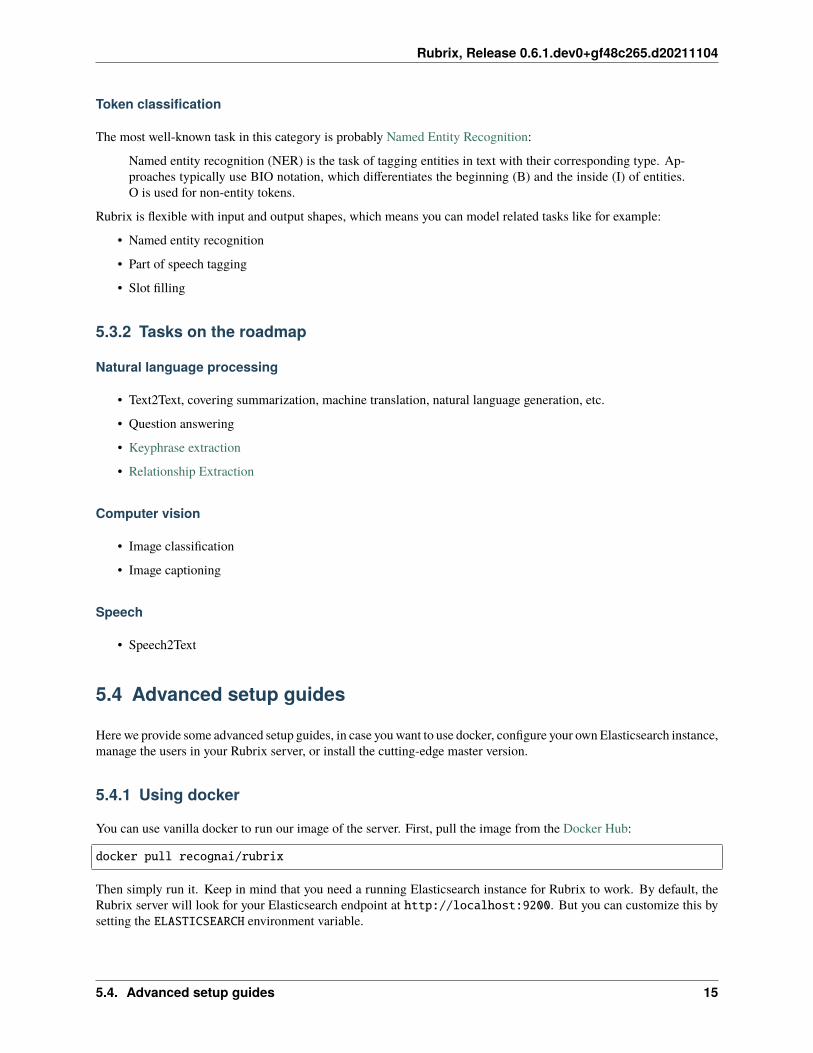
Token classification
The most well-known task in this category is probably Named Entity Recognition:
Named entity recognition (NER) is the task of tagging entities in text with their corresponding type. Ap-proaches typically use BIO notation, which differentiates the beginning (B) and the inside (I) of entities.O is used for non-entity tokens.
Rubrix is flexible with input and output shapes, which means you can model related tasks like for example:
• Named entity recognition
• Part of speech tagging
• Slot filling
5.3.2 Tasks on the roadmap
Natural language processing
• Text2Text, covering summarization, machine translation, natural language generation, etc.
• Question answering
• Keyphrase extraction
• Relationship Extraction
Computer vision
• Image classification
• Image captioning
Speech
• Speech2Text
5.4 Advanced setup guides
Here we provide some advanced setup guides, in case you want to use docker, configure your own Elasticsearch instance,manage the users in your Rubrix server, or install the cutting-edge master version.
5.4.1 Using docker
You can use vanilla docker to run our image of the server. First, pull the image from the Docker Hub:
docker pull recognai/rubrix
Then simply run it. Keep in mind that you need a running Elasticsearch instance for Rubrix to work. By default, theRubrix server will look for your Elasticsearch endpoint at http://localhost:9200. But you can customize this bysetting the ELASTICSEARCH environment variable.
5.4. Advanced setup guides 15
Rubrix, Release 0.6.1.dev0+gf48c265.d20211104
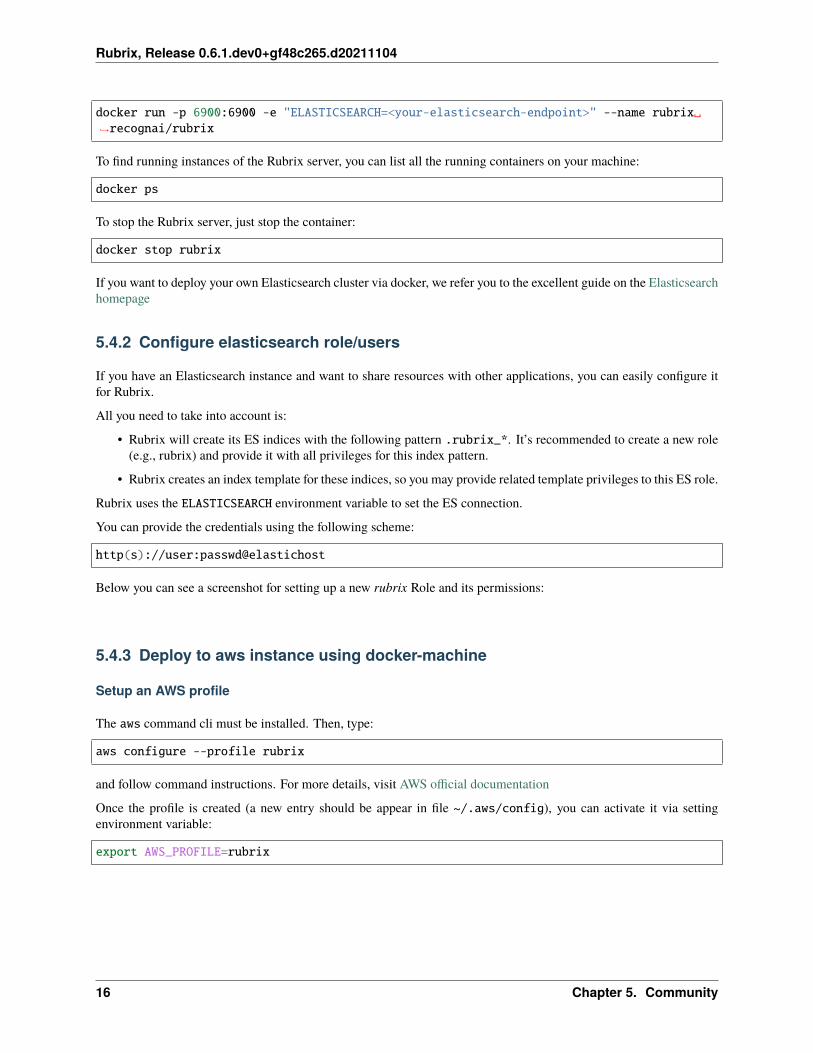
docker run -p 6900:6900 -e "ELASTICSEARCH=<your-elasticsearch-endpoint>" --name rubrix␣→˓recognai/rubrix
To find running instances of the Rubrix server, you can list all the running containers on your machine:
docker ps
To stop the Rubrix server, just stop the container:
docker stop rubrix
If you want to deploy your own Elasticsearch cluster via docker, we refer you to the excellent guide on the Elasticsearchhomepage
5.4.2 Configure elasticsearch role/users
If you have an Elasticsearch instance and want to share resources with other applications, you can easily configure itfor Rubrix.
All you need to take into account is:
• Rubrix will create its ES indices with the following pattern .rubrix_*. It’s recommended to create a new role(e.g., rubrix) and provide it with all privileges for this index pattern.
• Rubrix creates an index template for these indices, so you may provide related template privileges to this ES role.
Rubrix uses the ELASTICSEARCH environment variable to set the ES connection.
You can provide the credentials using the following scheme:
http(s)://user:passwd@elastichost
Below you can see a screenshot for setting up a new rubrix Role and its permissions:
5.4.3 Deploy to aws instance using docker-machine
Setup an AWS profile
The aws command cli must be installed. Then, type:
aws configure --profile rubrix
and follow command instructions. For more details, visit AWS official documentation
Once the profile is created (a new entry should be appear in file ~/.aws/config), you can activate it via settingenvironment variable:
export AWS_PROFILE=rubrix
16 Chapter 5. Community
Rubrix, Release 0.6.1.dev0+gf48c265.d20211104
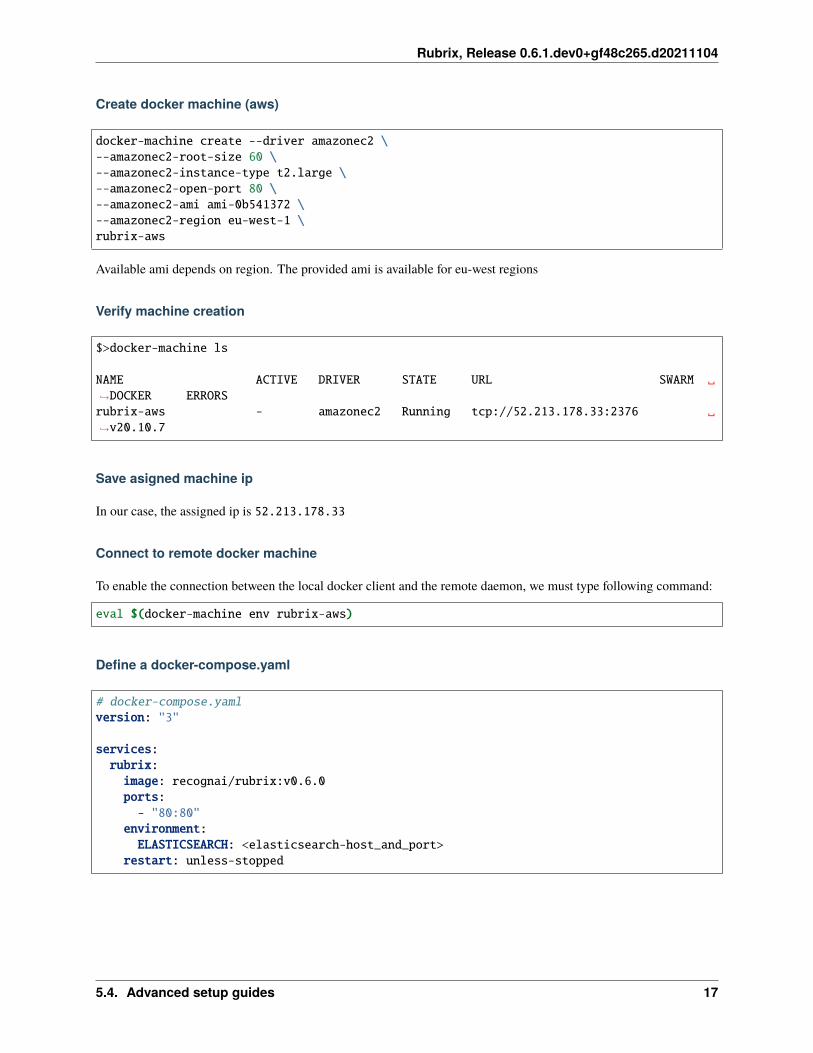
Create docker machine (aws)
docker-machine create --driver amazonec2 \--amazonec2-root-size 60 \--amazonec2-instance-type t2.large \--amazonec2-open-port 80 \--amazonec2-ami ami-0b541372 \--amazonec2-region eu-west-1 \rubrix-aws
Available ami depends on region. The provided ami is available for eu-west regions
Verify machine creation
$>docker-machine ls
NAME ACTIVE DRIVER STATE URL SWARM ␣→˓DOCKER ERRORSrubrix-aws - amazonec2 Running tcp://52.213.178.33:2376 ␣→˓v20.10.7
Save asigned machine ip
In our case, the assigned ip is 52.213.178.33
Connect to remote docker machine
To enable the connection between the local docker client and the remote daemon, we must type following command:
eval $(docker-machine env rubrix-aws)
Define a docker-compose.yaml
# docker-compose.yamlversion: "3"
services:rubrix:image: recognai/rubrix:v0.6.0ports:- "80:80"
environment:ELASTICSEARCH: <elasticsearch-host_and_port>
restart: unless-stopped
5.4. Advanced setup guides 17

Rubrix, Release 0.6.1.dev0+gf48c265.d20211104
Pull image
docker-compose pull
Launch docker container
docker-compose up -d
Accessing Rubrix
In our case http://52.213.178.33
5.4.4 User management
The Rubrix server allows you to manage various users, which helps you to keep track of the annotation agents.
The default user
By default, Rubrix is only configured for the following user:
• username: rubrix
• password: 1234
• api key: rubrix.apikey
How to override the default api key
To override the default api key you can set the following environment variable before launching the server:
export RUBRIX_LOCAL_AUTH_DEFAULT_APIKEY=new-apikey
How to override the default user password
To override the password, you must set an environment variable that contains an already hashed password. You canuse htpasswd to generate a hashed password:
%> htpasswd -nbB "" my-new-password:$2y$05$T5mHt/TfRHPPYwbeN2.q7e11QqhgvsHbhvQQ1c/pdap.xPZM2axje
Then set the environment variable omitting the first : character (in our case $2y$05$T5...):
export RUBRIX_LOCAL_AUTH_DEFAULT_PASSWORD="<generated_user_password>"
18 Chapter 5. Community
Rubrix, Release 0.6.1.dev0+gf48c265.d20211104
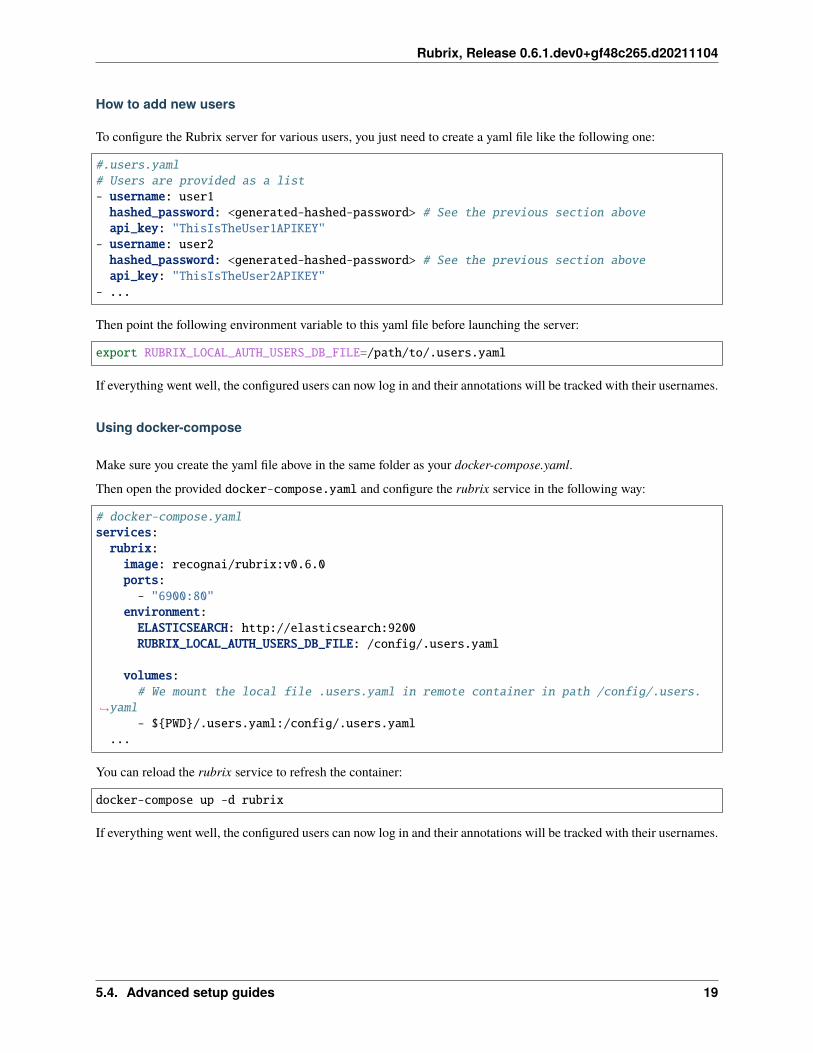
How to add new users
To configure the Rubrix server for various users, you just need to create a yaml file like the following one:
#.users.yaml# Users are provided as a list- username: user1hashed_password: <generated-hashed-password> # See the previous section aboveapi_key: "ThisIsTheUser1APIKEY"
- username: user2hashed_password: <generated-hashed-password> # See the previous section aboveapi_key: "ThisIsTheUser2APIKEY"
- ...
Then point the following environment variable to this yaml file before launching the server:
export RUBRIX_LOCAL_AUTH_USERS_DB_FILE=/path/to/.users.yaml
If everything went well, the configured users can now log in and their annotations will be tracked with their usernames.
Using docker-compose
Make sure you create the yaml file above in the same folder as your docker-compose.yaml.
Then open the provided docker-compose.yaml and configure the rubrix service in the following way:
# docker-compose.yamlservices:rubrix:image: recognai/rubrix:v0.6.0ports:- "6900:80"
environment:ELASTICSEARCH: http://elasticsearch:9200RUBRIX_LOCAL_AUTH_USERS_DB_FILE: /config/.users.yaml
volumes:# We mount the local file .users.yaml in remote container in path /config/.users.
→˓yaml- ${PWD}/.users.yaml:/config/.users.yaml
...
You can reload the rubrix service to refresh the container:
docker-compose up -d rubrix
If everything went well, the configured users can now log in and their annotations will be tracked with their usernames.
5.4. Advanced setup guides 19
Rubrix, Release 0.6.1.dev0+gf48c265.d20211104
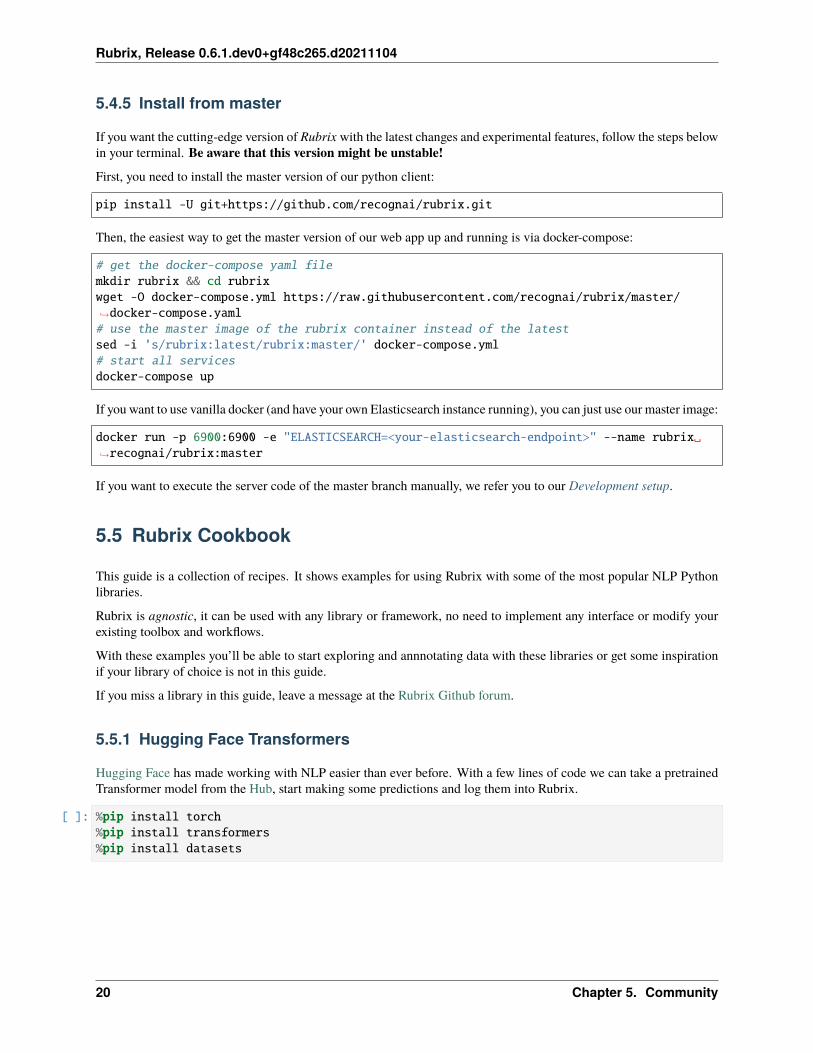
5.4.5 Install from master
If you want the cutting-edge version of Rubrix with the latest changes and experimental features, follow the steps belowin your terminal. Be aware that this version might be unstable!
First, you need to install the master version of our python client:
pip install -U git+https://github.com/recognai/rubrix.git
Then, the easiest way to get the master version of our web app up and running is via docker-compose:
# get the docker-compose yaml filemkdir rubrix && cd rubrixwget -O docker-compose.yml https://raw.githubusercontent.com/recognai/rubrix/master/→˓docker-compose.yaml# use the master image of the rubrix container instead of the latestsed -i 's/rubrix:latest/rubrix:master/' docker-compose.yml# start all servicesdocker-compose up
If you want to use vanilla docker (and have your own Elasticsearch instance running), you can just use our master image:
docker run -p 6900:6900 -e "ELASTICSEARCH=<your-elasticsearch-endpoint>" --name rubrix␣→˓recognai/rubrix:master
If you want to execute the server code of the master branch manually, we refer you to our Development setup.
5.5 Rubrix Cookbook
This guide is a collection of recipes. It shows examples for using Rubrix with some of the most popular NLP Pythonlibraries.
Rubrix is agnostic, it can be used with any library or framework, no need to implement any interface or modify yourexisting toolbox and workflows.
With these examples you’ll be able to start exploring and annnotating data with these libraries or get some inspirationif your library of choice is not in this guide.
If you miss a library in this guide, leave a message at the Rubrix Github forum.
5.5.1 Hugging Face Transformers
Hugging Face has made working with NLP easier than ever before. With a few lines of code we can take a pretrainedTransformer model from the Hub, start making some predictions and log them into Rubrix.
[ ]: %pip install torch%pip install transformers%pip install datasets
20 Chapter 5. Community
Rubrix, Release 0.6.1.dev0+gf48c265.d20211104
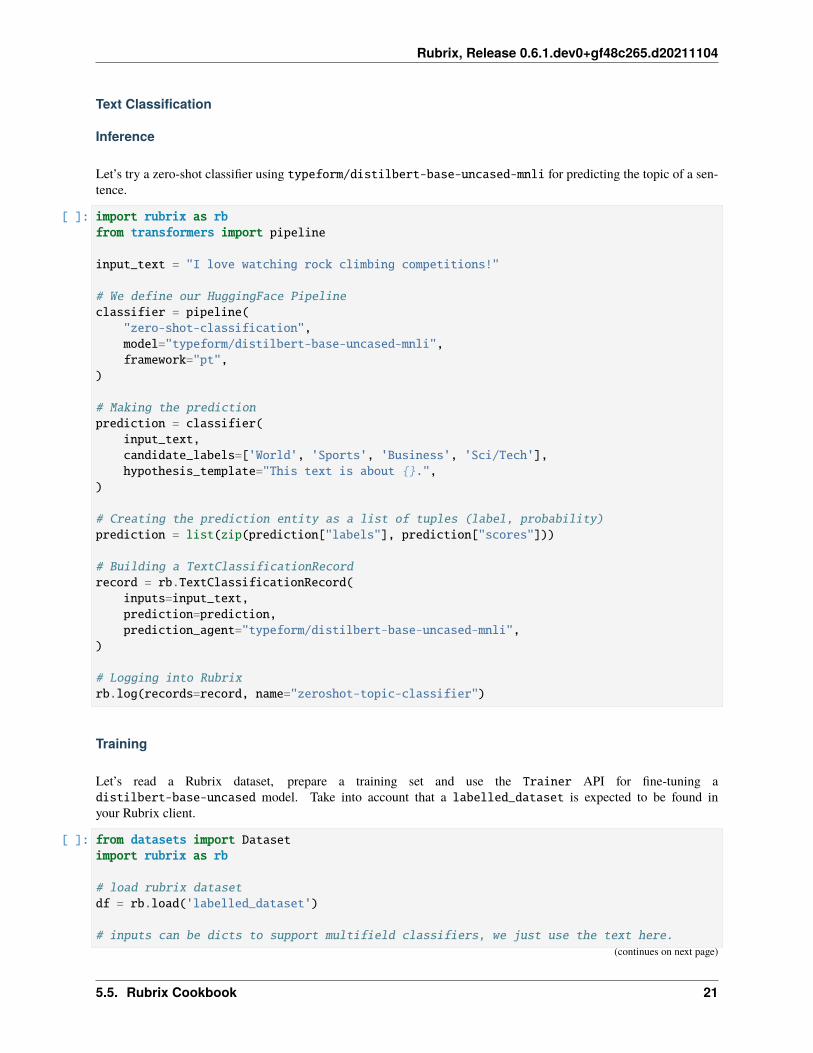
Text Classification
Inference
Let’s try a zero-shot classifier using typeform/distilbert-base-uncased-mnli for predicting the topic of a sen-tence.
[ ]: import rubrix as rbfrom transformers import pipeline
input_text = "I love watching rock climbing competitions!"
# We define our HuggingFace Pipelineclassifier = pipeline(
"zero-shot-classification",model="typeform/distilbert-base-uncased-mnli",framework="pt",
)
# Making the predictionprediction = classifier(
input_text,candidate_labels=['World', 'Sports', 'Business', 'Sci/Tech'],hypothesis_template="This text is about {}.",
)
# Creating the prediction entity as a list of tuples (label, probability)prediction = list(zip(prediction["labels"], prediction["scores"]))
# Building a TextClassificationRecordrecord = rb.TextClassificationRecord(
inputs=input_text,prediction=prediction,prediction_agent="typeform/distilbert-base-uncased-mnli",
)
# Logging into Rubrixrb.log(records=record, name="zeroshot-topic-classifier")
Training
Let’s read a Rubrix dataset, prepare a training set and use the Trainer API for fine-tuning adistilbert-base-uncased model. Take into account that a labelled_dataset is expected to be found inyour Rubrix client.
[ ]: from datasets import Datasetimport rubrix as rb
# load rubrix datasetdf = rb.load('labelled_dataset')
# inputs can be dicts to support multifield classifiers, we just use the text here.(continues on next page)
5.5. Rubrix Cookbook 21
Rubrix, Release 0.6.1.dev0+gf48c265.d20211104
(continued from previous page)
df['text'] = df.inputs.transform(lambda r: r['text'])
# we create a dict for turning our annotations (labels) into numeric idslabel2id = {label: id for id, label in enumerate(df.annotation.unique())}
# create dataset from pandas with labels as numeric idsdataset = Dataset.from_pandas(df[['text', 'annotation']])dataset = dataset.map(lambda example: {'labels': label2id[example['annotation']]})
[ ]: from transformers import AutoModelForSequenceClassificationfrom transformers import AutoTokenizerfrom transformers import Trainer
# from here, it's just regular fine-tuning with transformerstokenizer = AutoTokenizer.from_pretrained("distilbert-base-uncased")model = AutoModelForSequenceClassification.from_pretrained("distilbert-base-uncased",␣→˓num_labels=4)
def tokenize_function(examples):return tokenizer(examples["text"], padding="max_length", truncation=True)
train_dataset = dataset.map(tokenize_function, batched=True).shuffle(seed=42)
trainer = Trainer(model=model, train_dataset=train_dataset)
trainer.train()
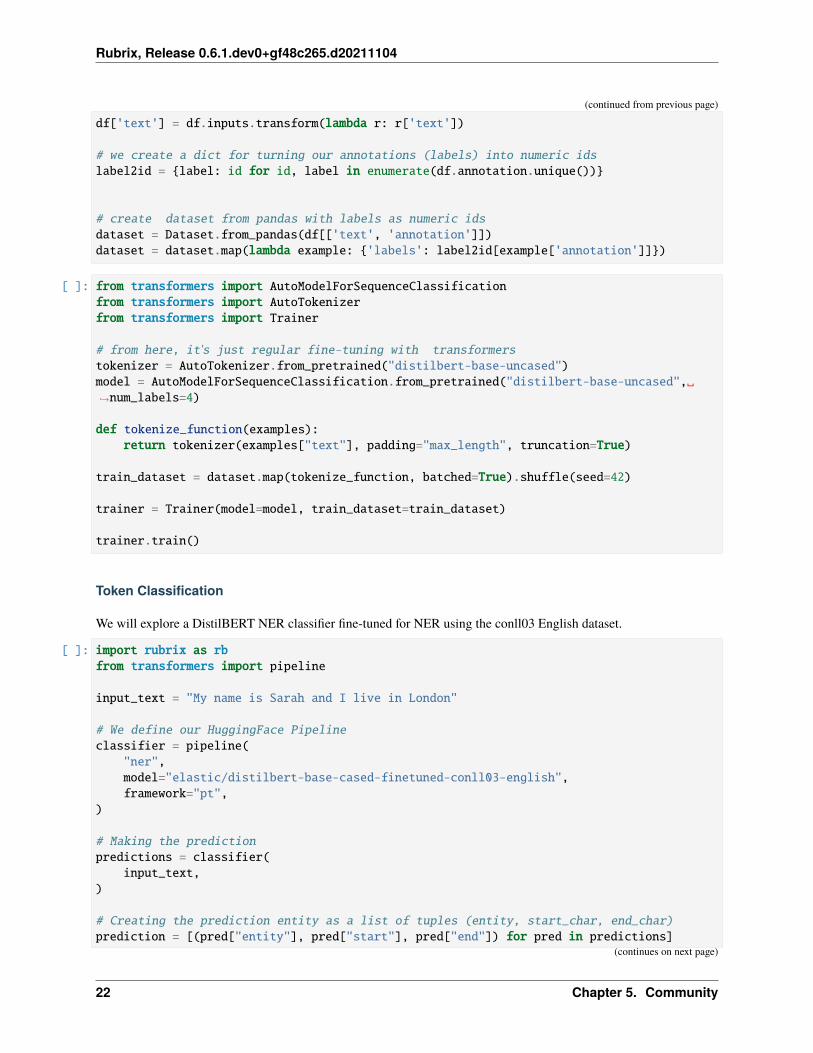
Token Classification
We will explore a DistilBERT NER classifier fine-tuned for NER using the conll03 English dataset.
[ ]: import rubrix as rbfrom transformers import pipeline
input_text = "My name is Sarah and I live in London"
# We define our HuggingFace Pipelineclassifier = pipeline(
"ner",model="elastic/distilbert-base-cased-finetuned-conll03-english",framework="pt",
)
# Making the predictionpredictions = classifier(
input_text,)
# Creating the prediction entity as a list of tuples (entity, start_char, end_char)prediction = [(pred["entity"], pred["start"], pred["end"]) for pred in predictions]
(continues on next page)
22 Chapter 5. Community

Rubrix, Release 0.6.1.dev0+gf48c265.d20211104
(continued from previous page)
# Building a TokenClassificationRecordrecord = rb.TokenClassificationRecord(
text=input_text,tokens=input_text.split(),prediction=prediction,prediction_agent="https://huggingface.co/elastic/distilbert-base-cased-finetuned-
→˓conll03-english",)
# Logging into Rubrixrb.log(records=record, name="zeroshot-ner")
5.5.2 spaCy
spaCy offers industrial-strength Natural Language Processing, with support for 64+ languages, trained pipelines, multi-task learning with pretrained Transformers, pretrained word vectors and much more.
[ ]: %pip install spacy
Token Classification
We will focus our spaCy recipes into Token Classification tasks, showing you how to log data from NER and POStagging.
NER
For this recipe, we are going to try the French language model to extract NER entities from some sentences.
[ ]: !python -m spacy download fr_core_news_sm
[ ]: import rubrix as rbimport spacy
input_text = "Paris a un enfant et la for^et a un oiseau ; l’oiseau s’appelle le moineau␣→˓; l’enfant s’appelle le gamin"
# Loading spaCy modelnlp = spacy.load("fr_core_news_sm")
# Creating spaCy docdoc = nlp(input_text)
# Creating the prediction entity as a list of tuples (entity, start_char, end_char)prediction = [(ent.label_, ent.start_char, ent.end_char) for ent in doc.ents]
# Building TokenClassificationRecordrecord = rb.TokenClassificationRecord(
(continues on next page)
5.5. Rubrix Cookbook 23
Rubrix, Release 0.6.1.dev0+gf48c265.d20211104
(continued from previous page)
text=input_text,tokens=[token.text for token in doc],prediction=prediction,prediction_agent="spacy.fr_core_news_sm",
)
# Logging into Rubrixrb.log(records=record, name="lesmiserables-ner")
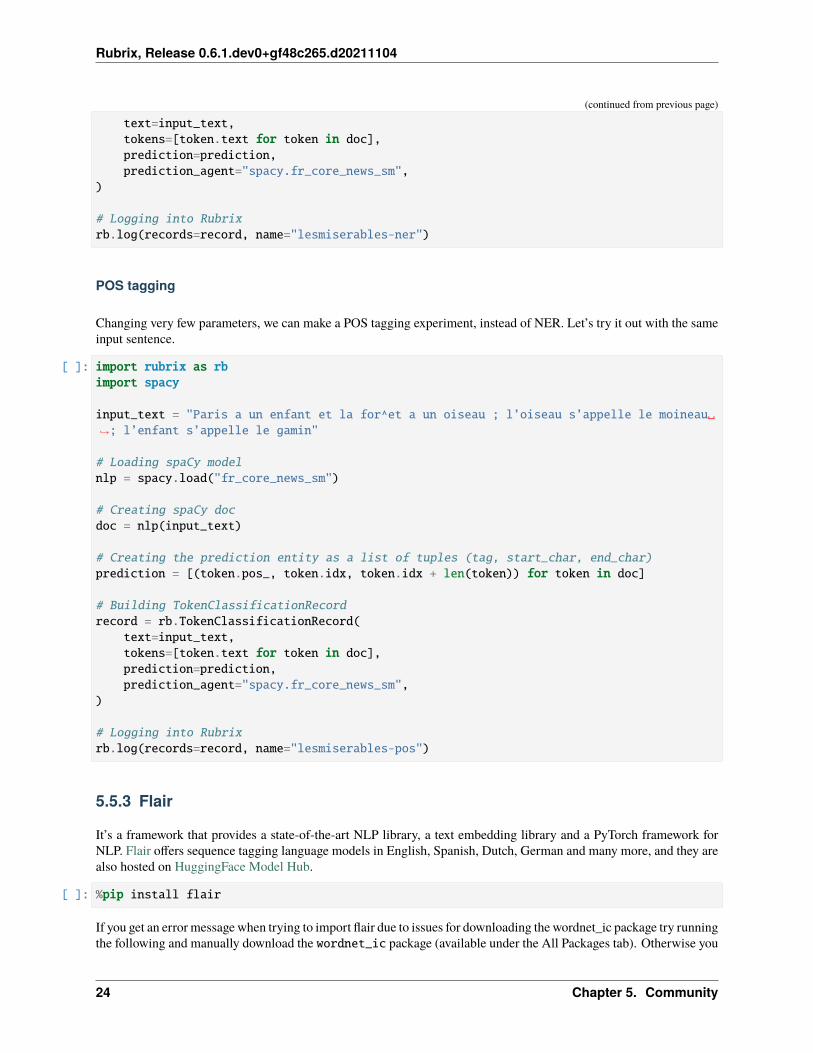
POS tagging
Changing very few parameters, we can make a POS tagging experiment, instead of NER. Let’s try it out with the sameinput sentence.
[ ]: import rubrix as rbimport spacy
input_text = "Paris a un enfant et la for^et a un oiseau ; l’oiseau s’appelle le moineau␣→˓; l’enfant s’appelle le gamin"
# Loading spaCy modelnlp = spacy.load("fr_core_news_sm")
# Creating spaCy docdoc = nlp(input_text)
# Creating the prediction entity as a list of tuples (tag, start_char, end_char)prediction = [(token.pos_, token.idx, token.idx + len(token)) for token in doc]
# Building TokenClassificationRecordrecord = rb.TokenClassificationRecord(
text=input_text,tokens=[token.text for token in doc],prediction=prediction,prediction_agent="spacy.fr_core_news_sm",
)
# Logging into Rubrixrb.log(records=record, name="lesmiserables-pos")
5.5.3 Flair
It’s a framework that provides a state-of-the-art NLP library, a text embedding library and a PyTorch framework forNLP. Flair offers sequence tagging language models in English, Spanish, Dutch, German and many more, and they arealso hosted on HuggingFace Model Hub.
[ ]: %pip install flair
If you get an error message when trying to import flair due to issues for downloading the wordnet_ic package try runningthe following and manually download the wordnet_ic package (available under the All Packages tab). Otherwise you
24 Chapter 5. Community
Rubrix, Release 0.6.1.dev0+gf48c265.d20211104
can skip this cell.
[ ]: import nltkimport ssl
try:_create_unverified_https_context = ssl._create_unverified_context
except AttributeError:pass
else:ssl._create_default_https_context = _create_unverified_https_context
nltk.download()
Text Classification
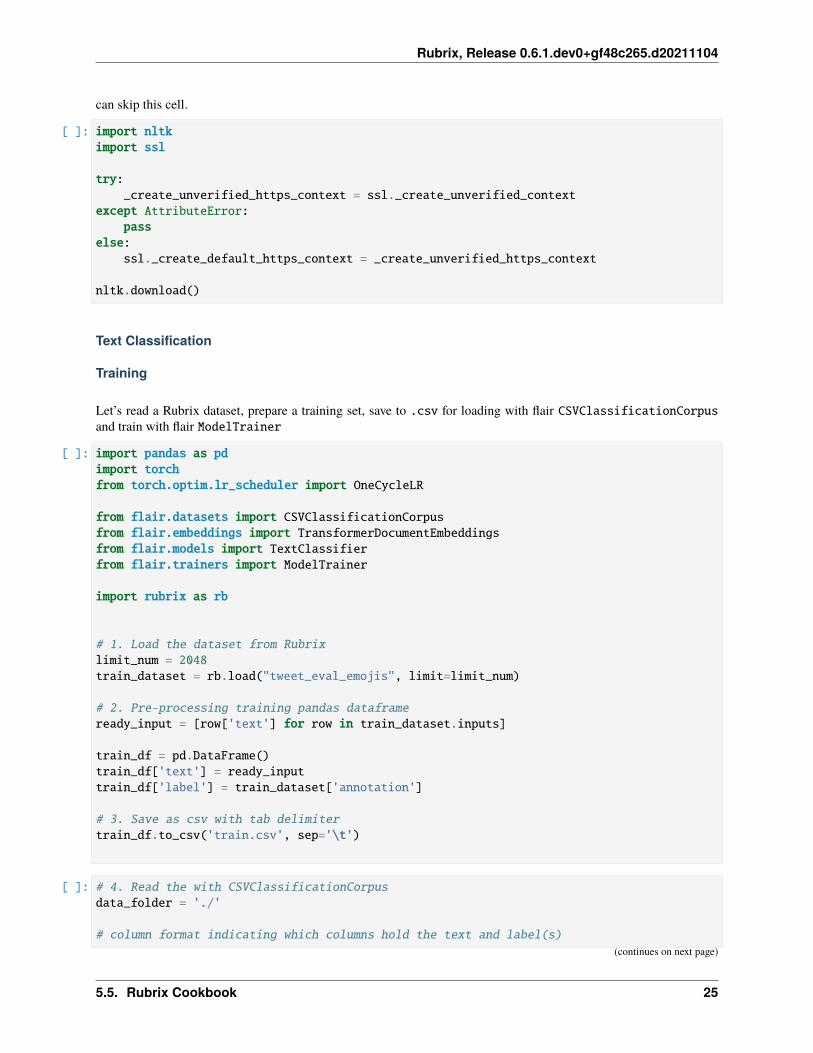
Training
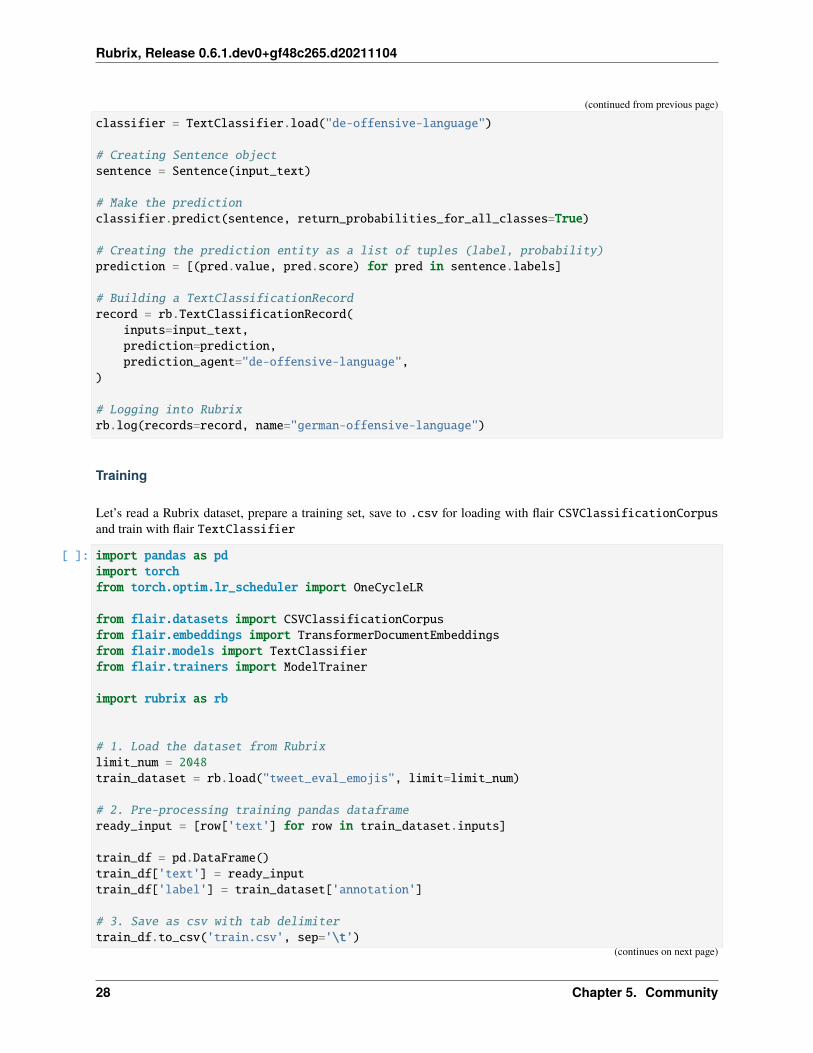
Let’s read a Rubrix dataset, prepare a training set, save to .csv for loading with flair CSVClassificationCorpusand train with flair ModelTrainer
[ ]: import pandas as pdimport torchfrom torch.optim.lr_scheduler import OneCycleLR
from flair.datasets import CSVClassificationCorpusfrom flair.embeddings import TransformerDocumentEmbeddingsfrom flair.models import TextClassifierfrom flair.trainers import ModelTrainer
import rubrix as rb
# 1. Load the dataset from Rubrixlimit_num = 2048train_dataset = rb.load("tweet_eval_emojis", limit=limit_num)
# 2. Pre-processing training pandas dataframeready_input = [row['text'] for row in train_dataset.inputs]
train_df = pd.DataFrame()train_df['text'] = ready_inputtrain_df['label'] = train_dataset['annotation']
# 3. Save as csv with tab delimitertrain_df.to_csv('train.csv', sep='\t')
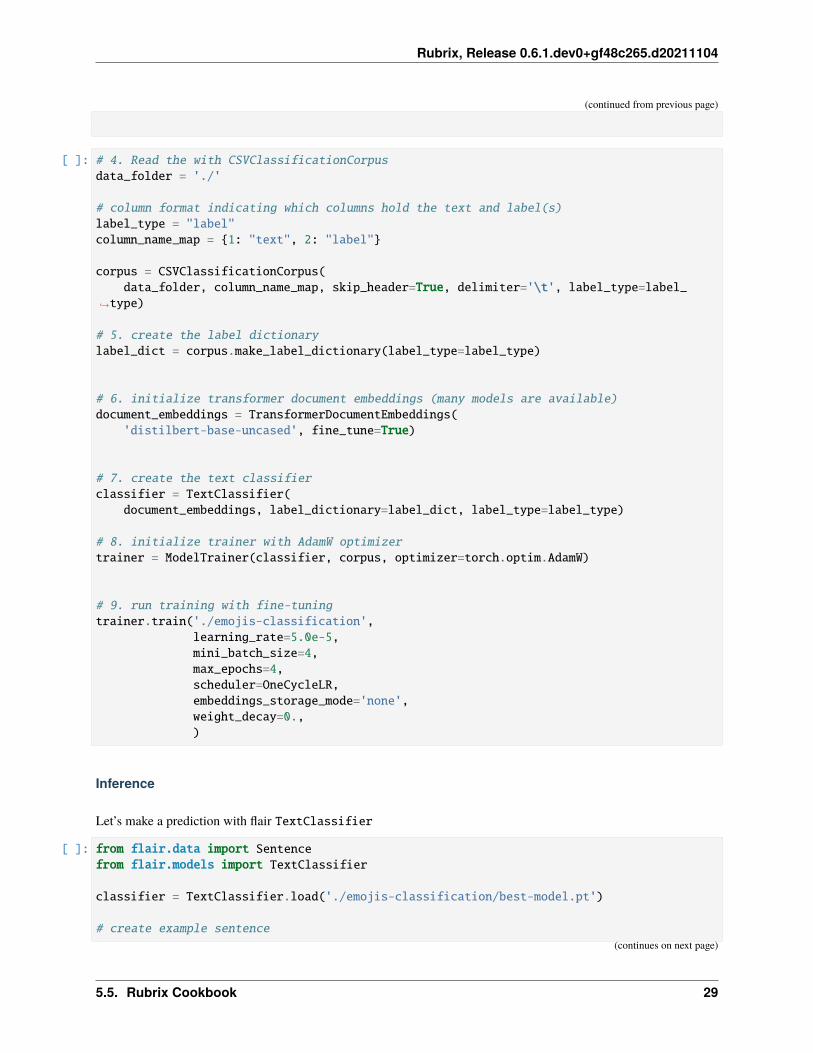
[ ]: # 4. Read the with CSVClassificationCorpusdata_folder = './'
# column format indicating which columns hold the text and label(s)(continues on next page)
5.5. Rubrix Cookbook 25
Rubrix, Release 0.6.1.dev0+gf48c265.d20211104
(continued from previous page)
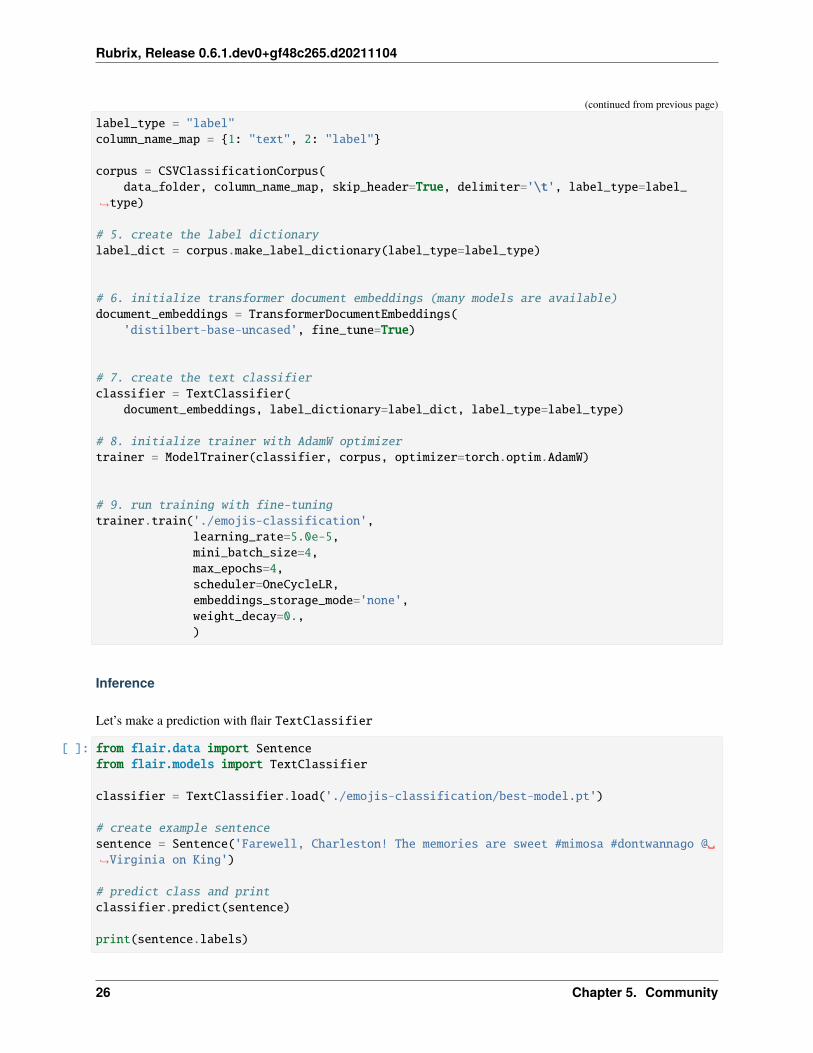
label_type = "label"column_name_map = {1: "text", 2: "label"}
corpus = CSVClassificationCorpus(data_folder, column_name_map, skip_header=True, delimiter='\t', label_type=label_
→˓type)
# 5. create the label dictionarylabel_dict = corpus.make_label_dictionary(label_type=label_type)
# 6. initialize transformer document embeddings (many models are available)document_embeddings = TransformerDocumentEmbeddings(
'distilbert-base-uncased', fine_tune=True)
# 7. create the text classifierclassifier = TextClassifier(
document_embeddings, label_dictionary=label_dict, label_type=label_type)
# 8. initialize trainer with AdamW optimizertrainer = ModelTrainer(classifier, corpus, optimizer=torch.optim.AdamW)
# 9. run training with fine-tuningtrainer.train('./emojis-classification',
learning_rate=5.0e-5,mini_batch_size=4,max_epochs=4,scheduler=OneCycleLR,embeddings_storage_mode='none',weight_decay=0.,)
Inference
Let’s make a prediction with flair TextClassifier
[ ]: from flair.data import Sentencefrom flair.models import TextClassifier
classifier = TextClassifier.load('./emojis-classification/best-model.pt')
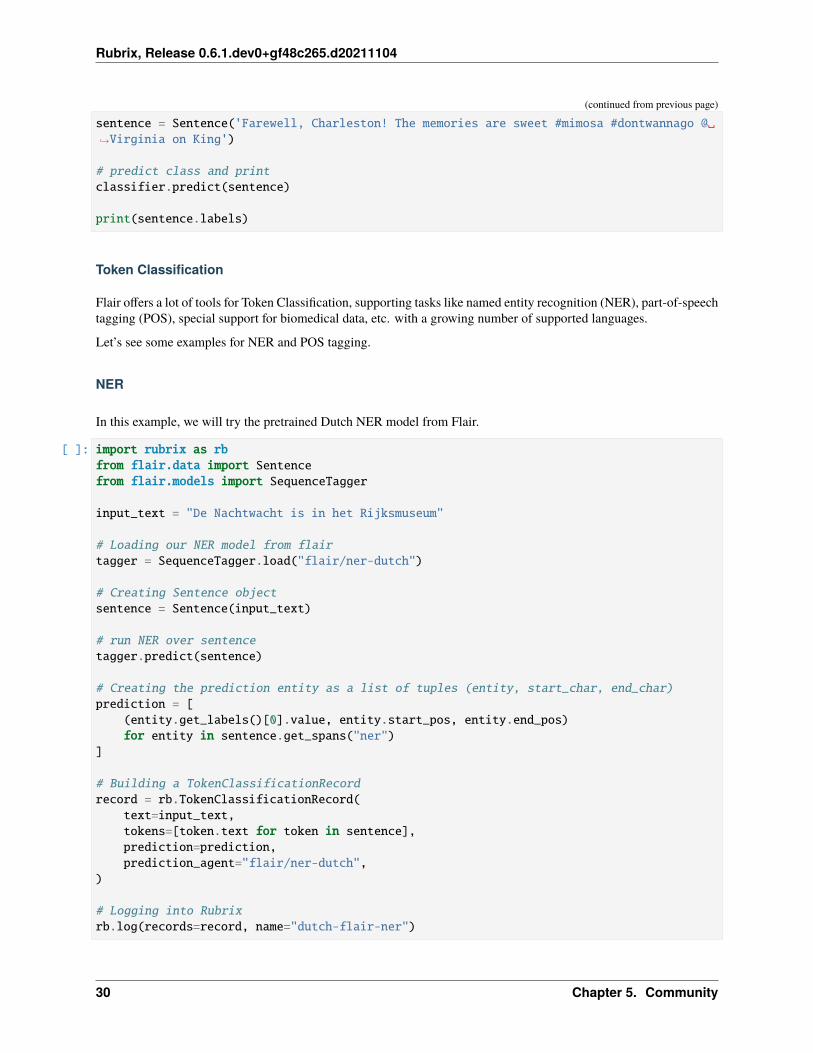
# create example sentencesentence = Sentence('Farewell, Charleston! The memories are sweet #mimosa #dontwannago @␣→˓Virginia on King')
# predict class and printclassifier.predict(sentence)
print(sentence.labels)
26 Chapter 5. Community

Rubrix, Release 0.6.1.dev0+gf48c265.d20211104
Text Classification
Zero-shot and Few-shot classifiers
Flair enables you to use few-shot and zero-shot learning for text classification with Task-aware representation of sen-tences (TARS), introduced by Halder et al. (2020), see Flair’s documentation for more details.
Let’s see an example of the base zero-shot TARS model:
[ ]: import rubrix as rbfrom flair.models import TARSClassifierfrom flair.data import Sentence
# Load our pre-trained TARS model for Englishtars = TARSClassifier.load('tars-base')
# Define labelslabels = ["happy", "sad"]
# Create a sentenceinput_text = "I am so glad you liked it!"sentence = Sentence(input_text)
# Predict for these labelstars.predict_zero_shot(sentence, labels)
# Creating the prediction entity as a list of tuples (label, probability)prediction = [(pred.value, pred.score) for pred in sentence.labels]
# Building a TextClassificationRecordrecord = rb.TextClassificationRecord(
inputs=input_text,prediction=prediction,prediction_agent="tars-base",
)
# Logging into Rubrixrb.log(records=record, name="en-emotion-zeroshot")
Custom and pre-trained classifiers
Let’s see an example with Deutch offensive language model.
[ ]: import rubrix as rbfrom flair.models import TextClassifierfrom flair.data import Sentence
input_text = "Du erzählst immer Quatsch." # something like: "You are always narrating␣→˓silliness."
# Load our pre-trained classifier(continues on next page)
5.5. Rubrix Cookbook 27
Rubrix, Release 0.6.1.dev0+gf48c265.d20211104
(continued from previous page)
classifier = TextClassifier.load("de-offensive-language")
# Creating Sentence objectsentence = Sentence(input_text)
# Make the predictionclassifier.predict(sentence, return_probabilities_for_all_classes=True)
# Creating the prediction entity as a list of tuples (label, probability)prediction = [(pred.value, pred.score) for pred in sentence.labels]
# Building a TextClassificationRecordrecord = rb.TextClassificationRecord(
inputs=input_text,prediction=prediction,prediction_agent="de-offensive-language",
)
# Logging into Rubrixrb.log(records=record, name="german-offensive-language")
Training
Let’s read a Rubrix dataset, prepare a training set, save to .csv for loading with flair CSVClassificationCorpusand train with flair TextClassifier
[ ]: import pandas as pdimport torchfrom torch.optim.lr_scheduler import OneCycleLR
from flair.datasets import CSVClassificationCorpusfrom flair.embeddings import TransformerDocumentEmbeddingsfrom flair.models import TextClassifierfrom flair.trainers import ModelTrainer
import rubrix as rb
# 1. Load the dataset from Rubrixlimit_num = 2048train_dataset = rb.load("tweet_eval_emojis", limit=limit_num)
# 2. Pre-processing training pandas dataframeready_input = [row['text'] for row in train_dataset.inputs]
train_df = pd.DataFrame()train_df['text'] = ready_inputtrain_df['label'] = train_dataset['annotation']
# 3. Save as csv with tab delimitertrain_df.to_csv('train.csv', sep='\t')
(continues on next page)
28 Chapter 5. Community
Rubrix, Release 0.6.1.dev0+gf48c265.d20211104
(continued from previous page)
[ ]: # 4. Read the with CSVClassificationCorpusdata_folder = './'
# column format indicating which columns hold the text and label(s)label_type = "label"column_name_map = {1: "text", 2: "label"}
corpus = CSVClassificationCorpus(data_folder, column_name_map, skip_header=True, delimiter='\t', label_type=label_
→˓type)
# 5. create the label dictionarylabel_dict = corpus.make_label_dictionary(label_type=label_type)
# 6. initialize transformer document embeddings (many models are available)document_embeddings = TransformerDocumentEmbeddings(
'distilbert-base-uncased', fine_tune=True)
# 7. create the text classifierclassifier = TextClassifier(
document_embeddings, label_dictionary=label_dict, label_type=label_type)
# 8. initialize trainer with AdamW optimizertrainer = ModelTrainer(classifier, corpus, optimizer=torch.optim.AdamW)
# 9. run training with fine-tuningtrainer.train('./emojis-classification',
learning_rate=5.0e-5,mini_batch_size=4,max_epochs=4,scheduler=OneCycleLR,embeddings_storage_mode='none',weight_decay=0.,)
Inference
Let’s make a prediction with flair TextClassifier
[ ]: from flair.data import Sentencefrom flair.models import TextClassifier
classifier = TextClassifier.load('./emojis-classification/best-model.pt')
# create example sentence(continues on next page)
5.5. Rubrix Cookbook 29
Rubrix, Release 0.6.1.dev0+gf48c265.d20211104
(continued from previous page)
sentence = Sentence('Farewell, Charleston! The memories are sweet #mimosa #dontwannago @␣→˓Virginia on King')
# predict class and printclassifier.predict(sentence)
print(sentence.labels)
Token Classification
Flair offers a lot of tools for Token Classification, supporting tasks like named entity recognition (NER), part-of-speechtagging (POS), special support for biomedical data, etc. with a growing number of supported languages.
Let’s see some examples for NER and POS tagging.
NER
In this example, we will try the pretrained Dutch NER model from Flair.
[ ]: import rubrix as rbfrom flair.data import Sentencefrom flair.models import SequenceTagger
input_text = "De Nachtwacht is in het Rijksmuseum"
# Loading our NER model from flairtagger = SequenceTagger.load("flair/ner-dutch")
# Creating Sentence objectsentence = Sentence(input_text)
# run NER over sentencetagger.predict(sentence)
# Creating the prediction entity as a list of tuples (entity, start_char, end_char)prediction = [
(entity.get_labels()[0].value, entity.start_pos, entity.end_pos)for entity in sentence.get_spans("ner")
]
# Building a TokenClassificationRecordrecord = rb.TokenClassificationRecord(
text=input_text,tokens=[token.text for token in sentence],prediction=prediction,prediction_agent="flair/ner-dutch",
)
# Logging into Rubrixrb.log(records=record, name="dutch-flair-ner")
30 Chapter 5. Community
Rubrix, Release 0.6.1.dev0+gf48c265.d20211104
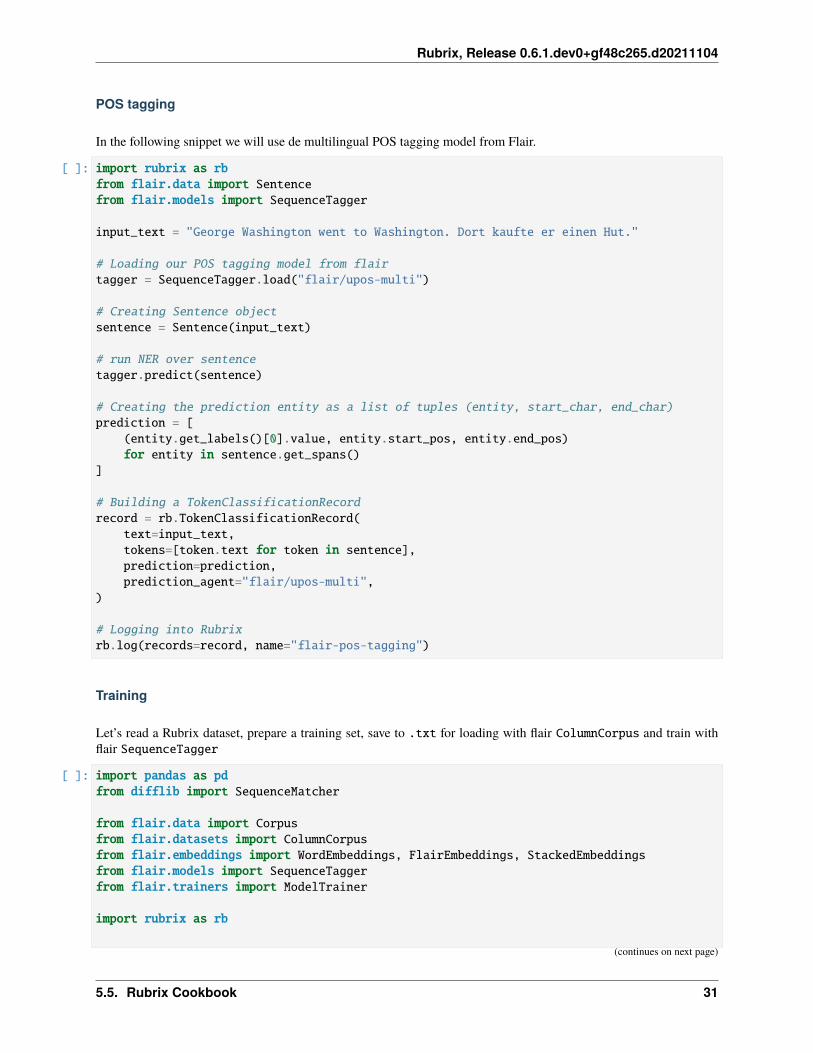
POS tagging
In the following snippet we will use de multilingual POS tagging model from Flair.
[ ]: import rubrix as rbfrom flair.data import Sentencefrom flair.models import SequenceTagger
input_text = "George Washington went to Washington. Dort kaufte er einen Hut."
# Loading our POS tagging model from flairtagger = SequenceTagger.load("flair/upos-multi")
# Creating Sentence objectsentence = Sentence(input_text)
# run NER over sentencetagger.predict(sentence)
# Creating the prediction entity as a list of tuples (entity, start_char, end_char)prediction = [
(entity.get_labels()[0].value, entity.start_pos, entity.end_pos)for entity in sentence.get_spans()
]
# Building a TokenClassificationRecordrecord = rb.TokenClassificationRecord(
text=input_text,tokens=[token.text for token in sentence],prediction=prediction,prediction_agent="flair/upos-multi",
)
# Logging into Rubrixrb.log(records=record, name="flair-pos-tagging")
Training
Let’s read a Rubrix dataset, prepare a training set, save to .txt for loading with flair ColumnCorpus and train withflair SequenceTagger
[ ]: import pandas as pdfrom difflib import SequenceMatcher
from flair.data import Corpusfrom flair.datasets import ColumnCorpusfrom flair.embeddings import WordEmbeddings, FlairEmbeddings, StackedEmbeddingsfrom flair.models import SequenceTaggerfrom flair.trainers import ModelTrainer
import rubrix as rb
(continues on next page)
5.5. Rubrix Cookbook 31

Rubrix, Release 0.6.1.dev0+gf48c265.d20211104
(continued from previous page)
# 1. Load the dataset from Rubrix (your own NER/token classification task)# Note: we initiate the 'tars_ner_wnut_17' from " Zero-shot Named Entity Recognition␣→˓with Flair" tutorial# (reference: https://rubrix.readthedocs.io/en/stable/tutorials/08-zeroshot_ner.html)train_dataset = rb.load("tars_ner_wnut_17")
[ ]: # 2. Pre-processing to BIO scheme before saving as .txt file
# Use original predictions as annotations for demonstration purposes, in a real use case␣→˓you would use the `annotations` insteadprediction_list = train_dataset.predictiontext_list = train_dataset.text
annotation_list = []idx = 0for ner_list in prediction_list:
new_ner_list = []for val in ner_list:
new_ner_list.append((text_list[idx][val[1]:val[2]], val[0]))annotation_list.append(new_ner_list)idx += 1
ready_data = pd.DataFrame()ready_data['text'] = text_listready_data['annotation'] = annotation_list
def matcher(string, pattern):'''Return the start and end index of any pattern present in the text.'''match_list = []pattern = pattern.strip()seqMatch = SequenceMatcher(None, string, pattern, autojunk=False)match = seqMatch.find_longest_match(0, len(string), 0, len(pattern))if (match.size == len(pattern)):
start = match.aend = match.a + match.sizematch_tup = (start, end)string = string.replace(pattern, "X" * len(pattern), 1)match_list.append(match_tup)
return match_list, string
def mark_sentence(s, match_list):'''Marks all the entities in the sentence as per the BIO scheme.'''word_dict = {}
(continues on next page)
32 Chapter 5. Community
Rubrix, Release 0.6.1.dev0+gf48c265.d20211104
(continued from previous page)
for word in s.split():word_dict[word] = 'O'
for start, end, e_type in match_list:temp_str = s[start:end]tmp_list = temp_str.split()if len(tmp_list) > 1:
word_dict[tmp_list[0]] = 'B-' + e_typefor w in tmp_list[1:]:
word_dict[w] = 'I-' + e_typeelse:
word_dict[temp_str] = 'B-' + e_typereturn word_dict
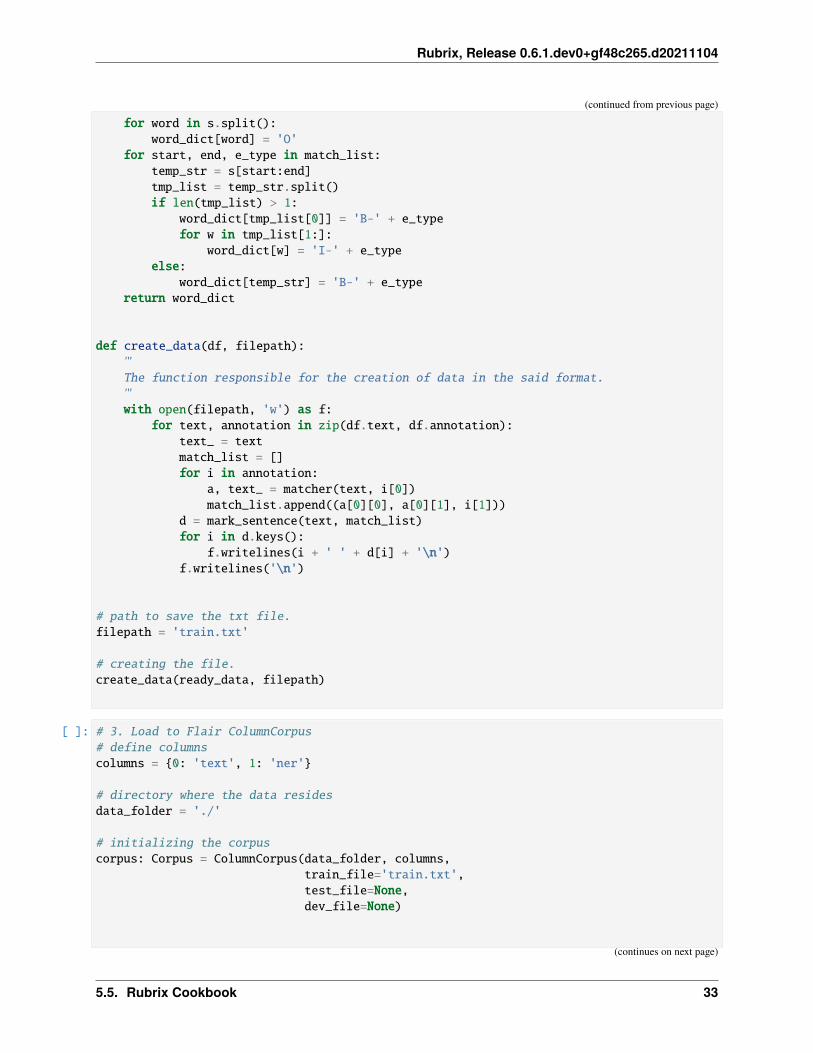
def create_data(df, filepath):'''The function responsible for the creation of data in the said format.'''with open(filepath, 'w') as f:
for text, annotation in zip(df.text, df.annotation):text_ = textmatch_list = []for i in annotation:
a, text_ = matcher(text, i[0])match_list.append((a[0][0], a[0][1], i[1]))
d = mark_sentence(text, match_list)for i in d.keys():
f.writelines(i + ' ' + d[i] + '\n')f.writelines('\n')
# path to save the txt file.filepath = 'train.txt'
# creating the file.create_data(ready_data, filepath)
[ ]: # 3. Load to Flair ColumnCorpus# define columnscolumns = {0: 'text', 1: 'ner'}
# directory where the data residesdata_folder = './'
# initializing the corpuscorpus: Corpus = ColumnCorpus(data_folder, columns,
train_file='train.txt',test_file=None,dev_file=None)
(continues on next page)
5.5. Rubrix Cookbook 33
Rubrix, Release 0.6.1.dev0+gf48c265.d20211104
(continued from previous page)
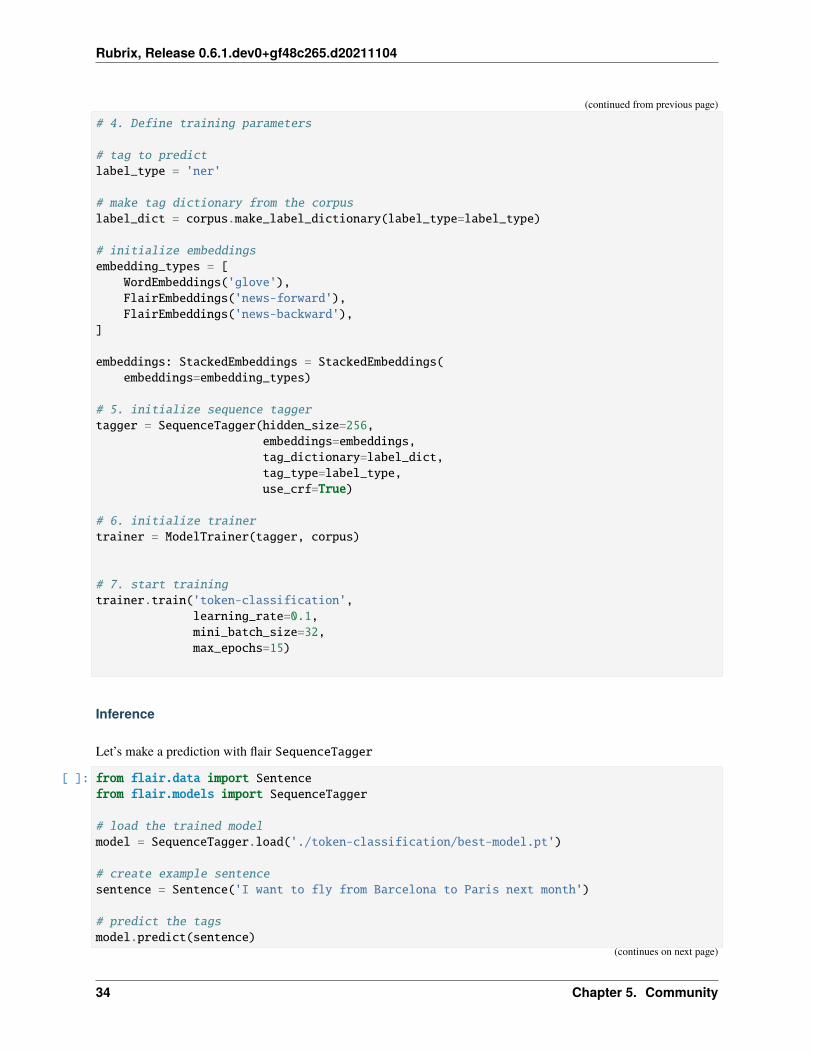
# 4. Define training parameters
# tag to predictlabel_type = 'ner'
# make tag dictionary from the corpuslabel_dict = corpus.make_label_dictionary(label_type=label_type)
# initialize embeddingsembedding_types = [
WordEmbeddings('glove'),FlairEmbeddings('news-forward'),FlairEmbeddings('news-backward'),
]
embeddings: StackedEmbeddings = StackedEmbeddings(embeddings=embedding_types)
# 5. initialize sequence taggertagger = SequenceTagger(hidden_size=256,
embeddings=embeddings,tag_dictionary=label_dict,tag_type=label_type,use_crf=True)
# 6. initialize trainertrainer = ModelTrainer(tagger, corpus)
# 7. start trainingtrainer.train('token-classification',
learning_rate=0.1,mini_batch_size=32,max_epochs=15)
Inference
Let’s make a prediction with flair SequenceTagger
[ ]: from flair.data import Sentencefrom flair.models import SequenceTagger
# load the trained modelmodel = SequenceTagger.load('./token-classification/best-model.pt')
# create example sentencesentence = Sentence('I want to fly from Barcelona to Paris next month')
# predict the tagsmodel.predict(sentence)
(continues on next page)
34 Chapter 5. Community
Rubrix, Release 0.6.1.dev0+gf48c265.d20211104
(continued from previous page)
print(sentence.to_tagged_string())
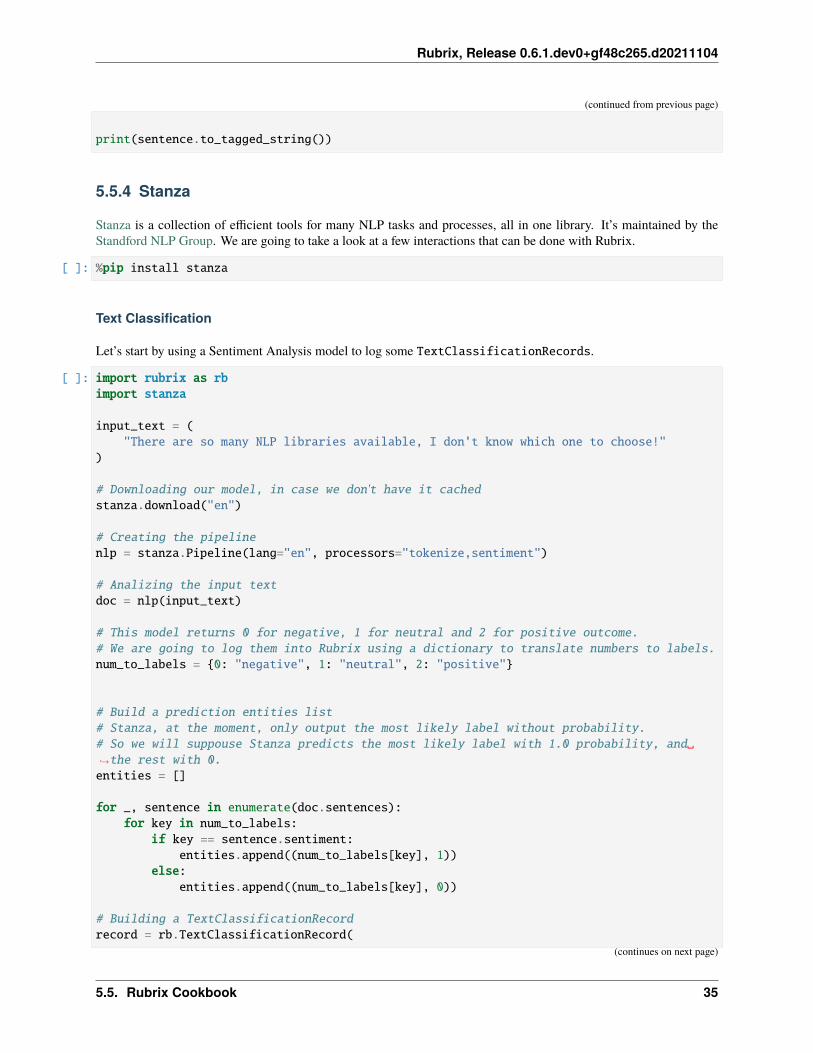
5.5.4 Stanza
Stanza is a collection of efficient tools for many NLP tasks and processes, all in one library. It’s maintained by theStandford NLP Group. We are going to take a look at a few interactions that can be done with Rubrix.
[ ]: %pip install stanza
Text Classification
Let’s start by using a Sentiment Analysis model to log some TextClassificationRecords.
[ ]: import rubrix as rbimport stanza
input_text = ("There are so many NLP libraries available, I don't know which one to choose!"
)
# Downloading our model, in case we don't have it cachedstanza.download("en")
# Creating the pipelinenlp = stanza.Pipeline(lang="en", processors="tokenize,sentiment")
# Analizing the input textdoc = nlp(input_text)
# This model returns 0 for negative, 1 for neutral and 2 for positive outcome.# We are going to log them into Rubrix using a dictionary to translate numbers to labels.num_to_labels = {0: "negative", 1: "neutral", 2: "positive"}
# Build a prediction entities list# Stanza, at the moment, only output the most likely label without probability.# So we will suppouse Stanza predicts the most likely label with 1.0 probability, and␣→˓the rest with 0.entities = []
for _, sentence in enumerate(doc.sentences):for key in num_to_labels:
if key == sentence.sentiment:entities.append((num_to_labels[key], 1))
else:entities.append((num_to_labels[key], 0))
# Building a TextClassificationRecordrecord = rb.TextClassificationRecord(
(continues on next page)
5.5. Rubrix Cookbook 35
Rubrix, Release 0.6.1.dev0+gf48c265.d20211104
(continued from previous page)
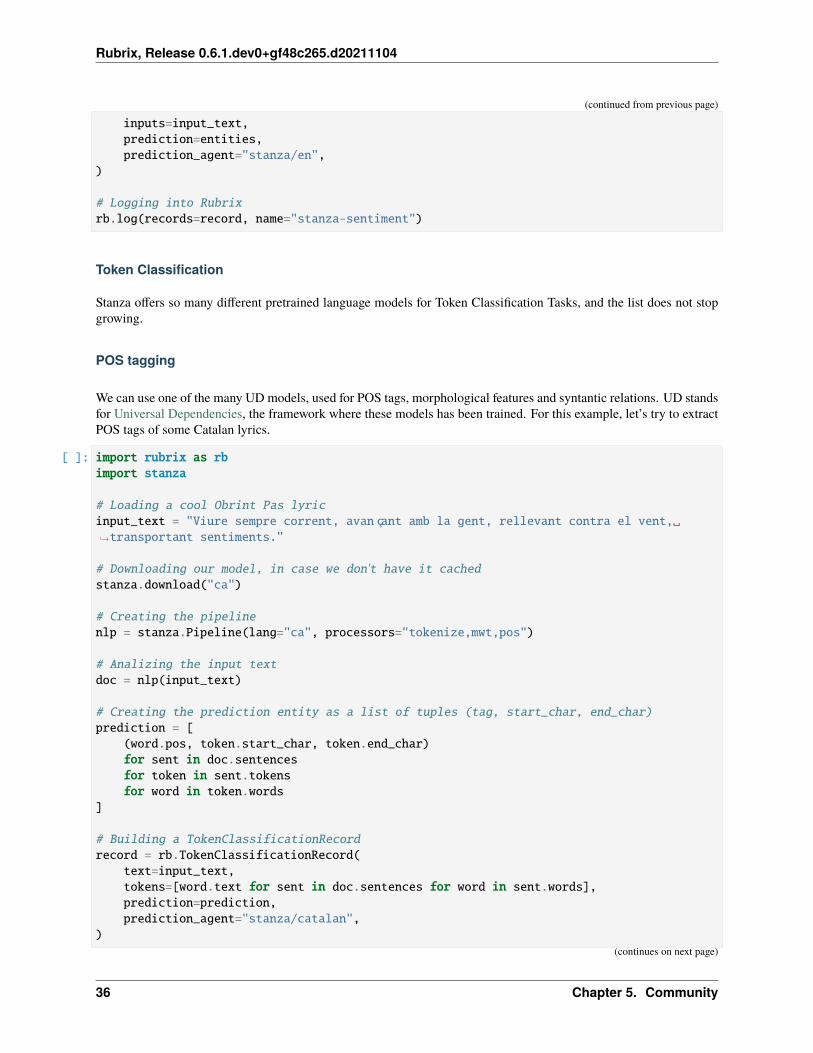
inputs=input_text,prediction=entities,prediction_agent="stanza/en",
)
# Logging into Rubrixrb.log(records=record, name="stanza-sentiment")
Token Classification
Stanza offers so many different pretrained language models for Token Classification Tasks, and the list does not stopgrowing.
POS tagging
We can use one of the many UD models, used for POS tags, morphological features and syntantic relations. UD standsfor Universal Dependencies, the framework where these models has been trained. For this example, let’s try to extractPOS tags of some Catalan lyrics.
[ ]: import rubrix as rbimport stanza
# Loading a cool Obrint Pas lyricinput_text = "Viure sempre corrent, avançant amb la gent, rellevant contra el vent,␣→˓transportant sentiments."
# Downloading our model, in case we don't have it cachedstanza.download("ca")
# Creating the pipelinenlp = stanza.Pipeline(lang="ca", processors="tokenize,mwt,pos")
# Analizing the input textdoc = nlp(input_text)
# Creating the prediction entity as a list of tuples (tag, start_char, end_char)prediction = [
(word.pos, token.start_char, token.end_char)for sent in doc.sentencesfor token in sent.tokensfor word in token.words
]
# Building a TokenClassificationRecordrecord = rb.TokenClassificationRecord(
text=input_text,tokens=[word.text for sent in doc.sentences for word in sent.words],prediction=prediction,prediction_agent="stanza/catalan",
)(continues on next page)
36 Chapter 5. Community
Rubrix, Release 0.6.1.dev0+gf48c265.d20211104
(continued from previous page)
# Logging into Rubrixrb.log(records=record, name="stanza-catalan-pos")
NER
Stanza also offers a list of available pretrained models for NER tasks. So, let’s try Russian
[ ]: import rubrix as rbimport stanza
input_text = ("-- - " # War and Peace is one my favourite books
)
# Downloading our model, in case we don't have it cachedstanza.download("ru")
# Creating the pipelinenlp = stanza.Pipeline(lang="ru", processors="tokenize,ner")
# Analizing the input textdoc = nlp(input_text)
# Creating the prediction entity as a list of tuples (entity, start_char, end_char)prediction = [
(token.ner, token.start_char, token.end_char)for sent in doc.sentencesfor token in sent.tokens
]
# Building a TokenClassificationRecordrecord = rb.TokenClassificationRecord(
text=input_text,tokens=[word.text for sent in doc.sentences for word in sent.words],prediction=prediction,prediction_agent="flair/russian",
)
# Logging into Rubrixrb.log(records=record, name="stanza-russian-ner")
5.5. Rubrix Cookbook 37
Rubrix, Release 0.6.1.dev0+gf48c265.d20211104
5.6 Tasks Templates
Hi there! In this article we wanted to share some examples of our supported tasks, so you can go from zero to hero asfast as possible. We are going to cover those tasks present in our supported tasks list, so don’t forget to stop by and takea look.
The tasks are divided into their different category, from text classification to token classification. We will update thisarticle, as well as the supported task list when a new task gets added to Rubrix.
5.6.1 Text Classification
Text classification deals with predicting in which categories a text fits. As if you’re shown an image you could quicklytell if there’s a dog or a cat in it, we build NLP models to distinguish between a Jane Austen’s novel or a CharlotteBronte’s poem. It’s all about feeding models with labelled examples and seeing how they start predicting over the verysame labels.
Text Categorization
This is a general example of the Text Classification family of tasks. Here, we will try to assign pre-defined categoriesto sentences and texts. The possibilities are endless! Topic categorization, spam detection, and a vast etcétera.
For our example, we are using the SequeezeBERT zero-shot classifier for predicting the topic of a given text, in threedifferent labels: politics, sports and technology. We are also using AG, a collection of news, as our dataset.
[ ]: import rubrix as rbfrom transformers import pipelinefrom datasets import load_dataset
# Loading our datasetdataset = load_dataset("ag_news", split="train[0:20]")
# Define our HuggingFace Pipelineclassifier = pipeline(
"zero-shot-classification",model="typeform/squeezebert-mnli",framework="pt",
)
records = []
for record in dataset:
# Making the predictionprediction = classifier(
record["text"],candidate_labels=[
"politics","sports","technology",
],)
(continues on next page)
38 Chapter 5. Community
Rubrix, Release 0.6.1.dev0+gf48c265.d20211104
(continued from previous page)
# Creating the prediction entity as a list of tuples (label, probability)prediction = list(zip(prediction["labels"], prediction["scores"]))
# Appending to the record listrecords.append(
rb.TextClassificationRecord(inputs=record["text"],prediction=prediction,prediction_agent="https://huggingface.co/typeform/squeezebert-mnli",metadata={"split": "train"},
))
# Logging into Rubrixrb.log(
records=records,name="text-categorization",tags={
"task": "text-categorization","phase": "data-analysis","family": "text-classification","dataset": "ag_news",
},)
Sentiment Analysis
In this kind of project, we want our models to be able to detect the polarity of the input. Categories like positive,negative or neutral are often used.
For this example, we are going to use an Amazon review polarity dataset, and a sentiment analysis roBERTa model,which returns LABEL 0 for positive, LABEL 1 for neutral and LABEL 2 for negative. We will handle that in the code.
[ ]: import rubrix as rbfrom transformers import pipelinefrom datasets import load_dataset
# Loading our datasetdataset = load_dataset("amazon_polarity", split="train[0:20]")
# Define our HuggingFace Pipelineclassifier = pipeline(
"text-classification",model="cardiffnlp/twitter-roberta-base-sentiment",framework="pt",return_all_scores=True,
)
# Make a dictionary to translate labels to a friendly-languagetranslate_labels = {
"LABEL_0": "positive",(continues on next page)
5.6. Tasks Templates 39
Rubrix, Release 0.6.1.dev0+gf48c265.d20211104
(continued from previous page)
"LABEL_1": "neutral","LABEL_2": "negative",
}
records = []
for record in dataset:
# Making the predictionpredictions = classifier(
record["content"],)
# Creating the prediction entity as a list of tuples (label, probability)prediction = [
(translate_labels[prediction["label"]], prediction["score"])for prediction in predictions[0]
]
# Appending to the record listrecords.append(
rb.TextClassificationRecord(inputs=record["content"],prediction=prediction,prediction_agent="https://huggingface.co/cardiffnlp/twitter-roberta-base-
→˓sentiment",metadata={"split": "train"},
))
# Logging into Rubrixrb.log(
records=records,name="sentiment-analysis",tags={
"task": "sentiment-analysis","phase": "data-annotation","family": "text-classification","dataset": "amazon-polarity",
},)
40 Chapter 5. Community
Rubrix, Release 0.6.1.dev0+gf48c265.d20211104
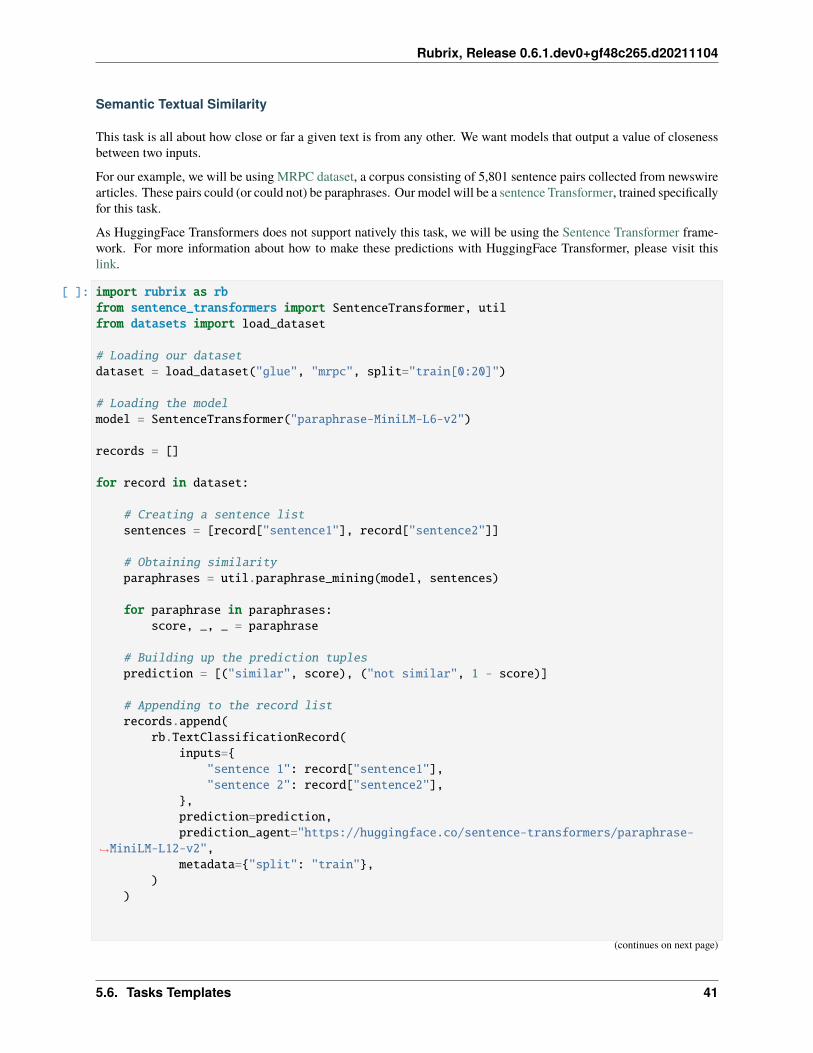
Semantic Textual Similarity
This task is all about how close or far a given text is from any other. We want models that output a value of closenessbetween two inputs.
For our example, we will be using MRPC dataset, a corpus consisting of 5,801 sentence pairs collected from newswirearticles. These pairs could (or could not) be paraphrases. Our model will be a sentence Transformer, trained specificallyfor this task.
As HuggingFace Transformers does not support natively this task, we will be using the Sentence Transformer frame-work. For more information about how to make these predictions with HuggingFace Transformer, please visit thislink.
[ ]: import rubrix as rbfrom sentence_transformers import SentenceTransformer, utilfrom datasets import load_dataset
# Loading our datasetdataset = load_dataset("glue", "mrpc", split="train[0:20]")
# Loading the modelmodel = SentenceTransformer("paraphrase-MiniLM-L6-v2")
records = []
for record in dataset:
# Creating a sentence listsentences = [record["sentence1"], record["sentence2"]]
# Obtaining similarityparaphrases = util.paraphrase_mining(model, sentences)
for paraphrase in paraphrases:score, _, _ = paraphrase
# Building up the prediction tuplesprediction = [("similar", score), ("not similar", 1 - score)]
# Appending to the record listrecords.append(
rb.TextClassificationRecord(inputs={
"sentence 1": record["sentence1"],"sentence 2": record["sentence2"],
},prediction=prediction,prediction_agent="https://huggingface.co/sentence-transformers/paraphrase-
→˓MiniLM-L12-v2",metadata={"split": "train"},
))
(continues on next page)
5.6. Tasks Templates 41
Rubrix, Release 0.6.1.dev0+gf48c265.d20211104
(continued from previous page)
# Logging into Rubrixrb.log(
records=records,name="semantic-textual-similarity",tags={
"task": "similarity","type": "paraphrasing","family": "text-classification","dataset": "mrpc",
},)
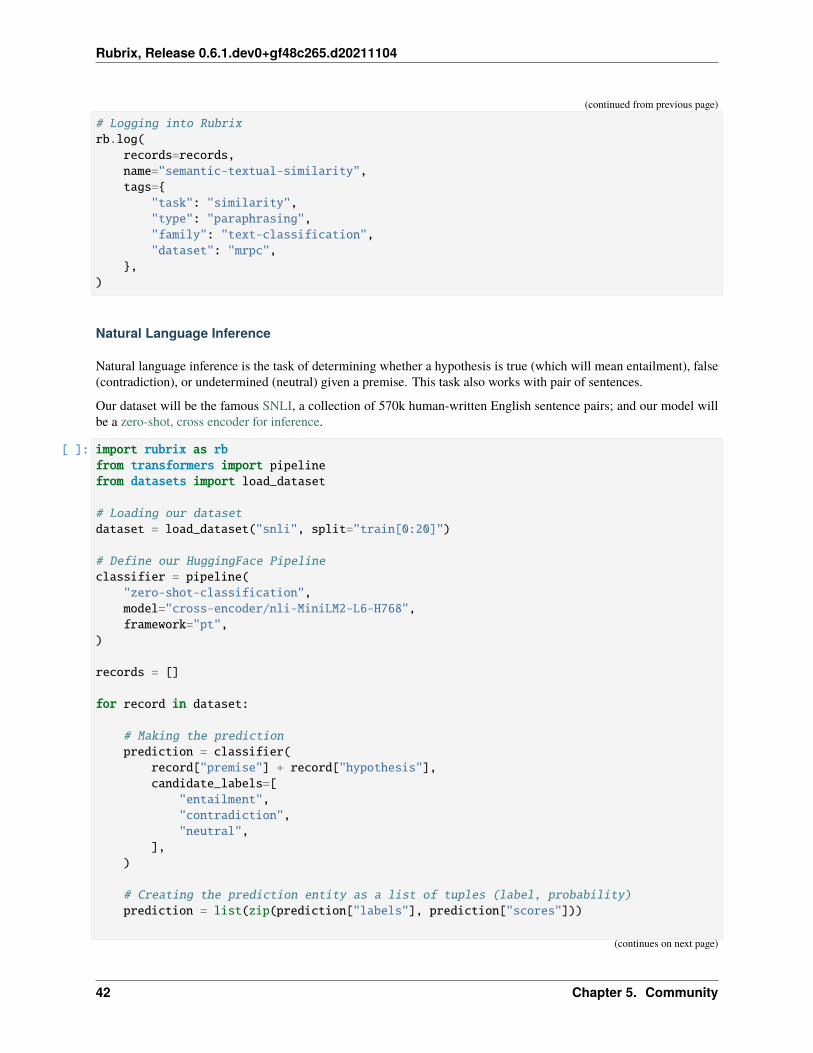
Natural Language Inference
Natural language inference is the task of determining whether a hypothesis is true (which will mean entailment), false(contradiction), or undetermined (neutral) given a premise. This task also works with pair of sentences.
Our dataset will be the famous SNLI, a collection of 570k human-written English sentence pairs; and our model willbe a zero-shot, cross encoder for inference.
[ ]: import rubrix as rbfrom transformers import pipelinefrom datasets import load_dataset
# Loading our datasetdataset = load_dataset("snli", split="train[0:20]")
# Define our HuggingFace Pipelineclassifier = pipeline(
"zero-shot-classification",model="cross-encoder/nli-MiniLM2-L6-H768",framework="pt",
)
records = []
for record in dataset:
# Making the predictionprediction = classifier(
record["premise"] + record["hypothesis"],candidate_labels=[
"entailment","contradiction","neutral",
],)
# Creating the prediction entity as a list of tuples (label, probability)prediction = list(zip(prediction["labels"], prediction["scores"]))
(continues on next page)
42 Chapter 5. Community
Rubrix, Release 0.6.1.dev0+gf48c265.d20211104
(continued from previous page)
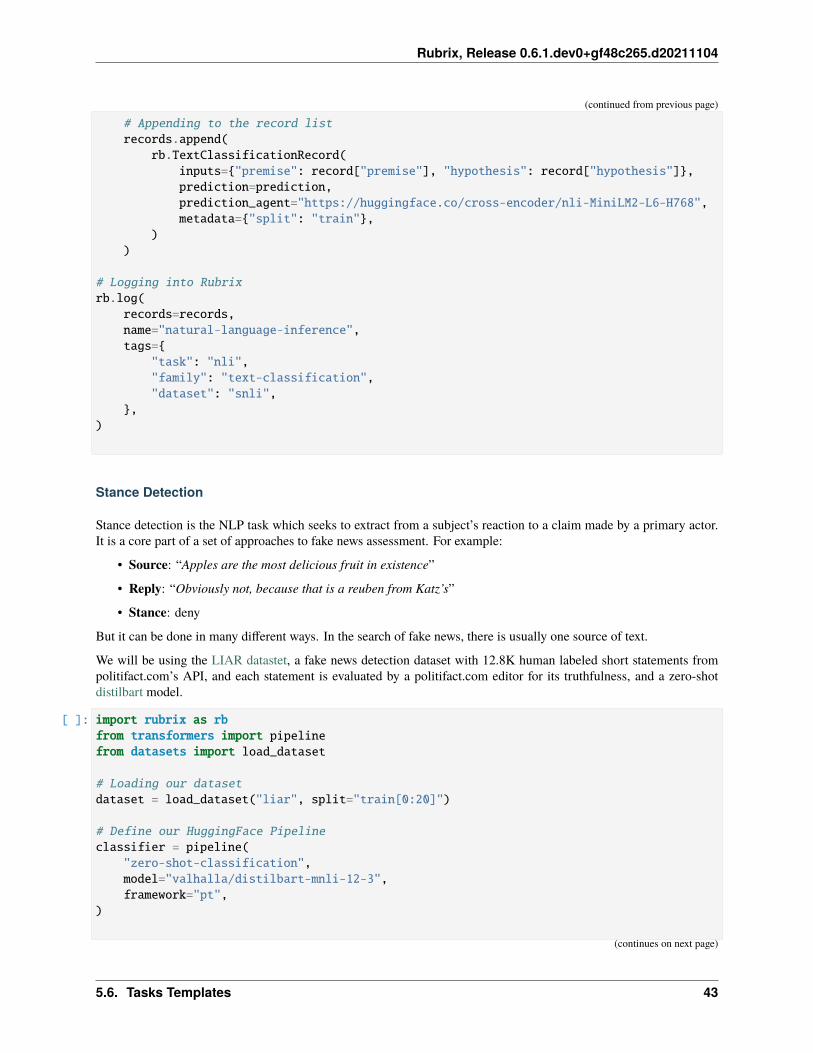
# Appending to the record listrecords.append(
rb.TextClassificationRecord(inputs={"premise": record["premise"], "hypothesis": record["hypothesis"]},prediction=prediction,prediction_agent="https://huggingface.co/cross-encoder/nli-MiniLM2-L6-H768",metadata={"split": "train"},
))
# Logging into Rubrixrb.log(
records=records,name="natural-language-inference",tags={
"task": "nli","family": "text-classification","dataset": "snli",
},)
Stance Detection
Stance detection is the NLP task which seeks to extract from a subject’s reaction to a claim made by a primary actor.It is a core part of a set of approaches to fake news assessment. For example:
• Source: “Apples are the most delicious fruit in existence”
• Reply: “Obviously not, because that is a reuben from Katz’s”
• Stance: deny
But it can be done in many different ways. In the search of fake news, there is usually one source of text.
We will be using the LIAR datastet, a fake news detection dataset with 12.8K human labeled short statements frompolitifact.com’s API, and each statement is evaluated by a politifact.com editor for its truthfulness, and a zero-shotdistilbart model.
[ ]: import rubrix as rbfrom transformers import pipelinefrom datasets import load_dataset
# Loading our datasetdataset = load_dataset("liar", split="train[0:20]")
# Define our HuggingFace Pipelineclassifier = pipeline(
"zero-shot-classification",model="valhalla/distilbart-mnli-12-3",framework="pt",
)
(continues on next page)
5.6. Tasks Templates 43
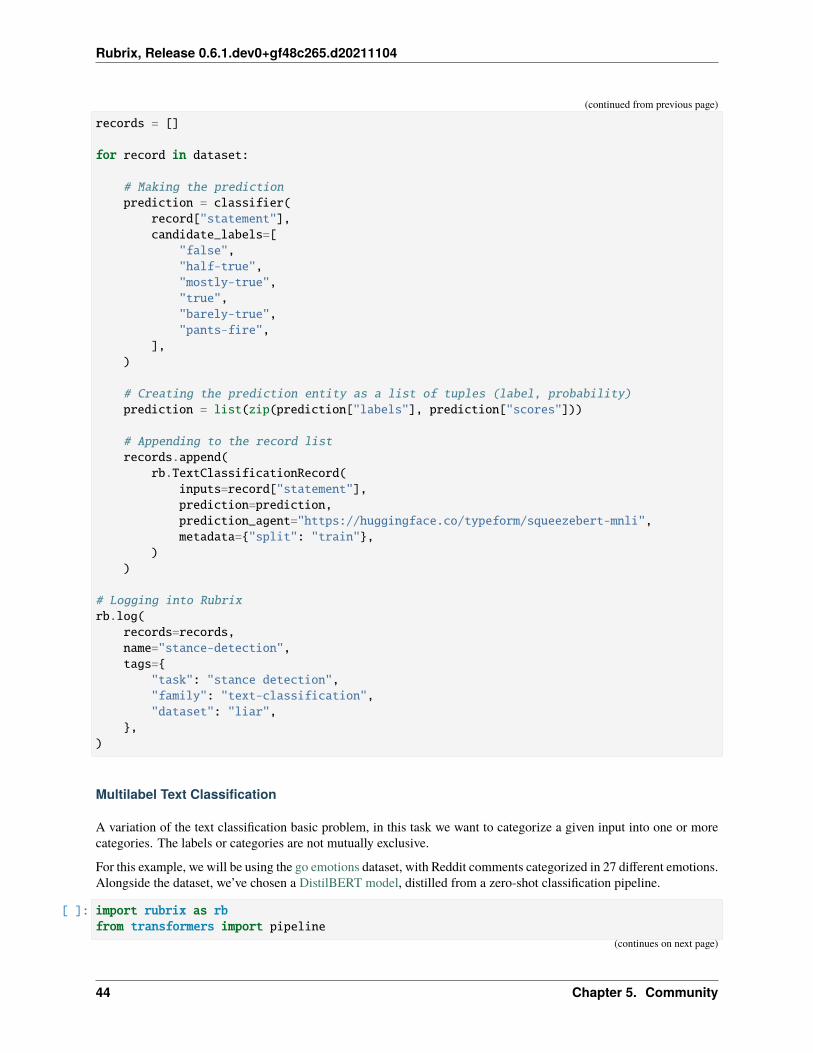
Rubrix, Release 0.6.1.dev0+gf48c265.d20211104
(continued from previous page)
records = []
for record in dataset:
# Making the predictionprediction = classifier(
record["statement"],candidate_labels=[
"false","half-true","mostly-true","true","barely-true","pants-fire",
],)
# Creating the prediction entity as a list of tuples (label, probability)prediction = list(zip(prediction["labels"], prediction["scores"]))
# Appending to the record listrecords.append(
rb.TextClassificationRecord(inputs=record["statement"],prediction=prediction,prediction_agent="https://huggingface.co/typeform/squeezebert-mnli",metadata={"split": "train"},
))
# Logging into Rubrixrb.log(
records=records,name="stance-detection",tags={
"task": "stance detection","family": "text-classification","dataset": "liar",
},)
Multilabel Text Classification
A variation of the text classification basic problem, in this task we want to categorize a given input into one or morecategories. The labels or categories are not mutually exclusive.
For this example, we will be using the go emotions dataset, with Reddit comments categorized in 27 different emotions.Alongside the dataset, we’ve chosen a DistilBERT model, distilled from a zero-shot classification pipeline.
[ ]: import rubrix as rbfrom transformers import pipeline
(continues on next page)
44 Chapter 5. Community
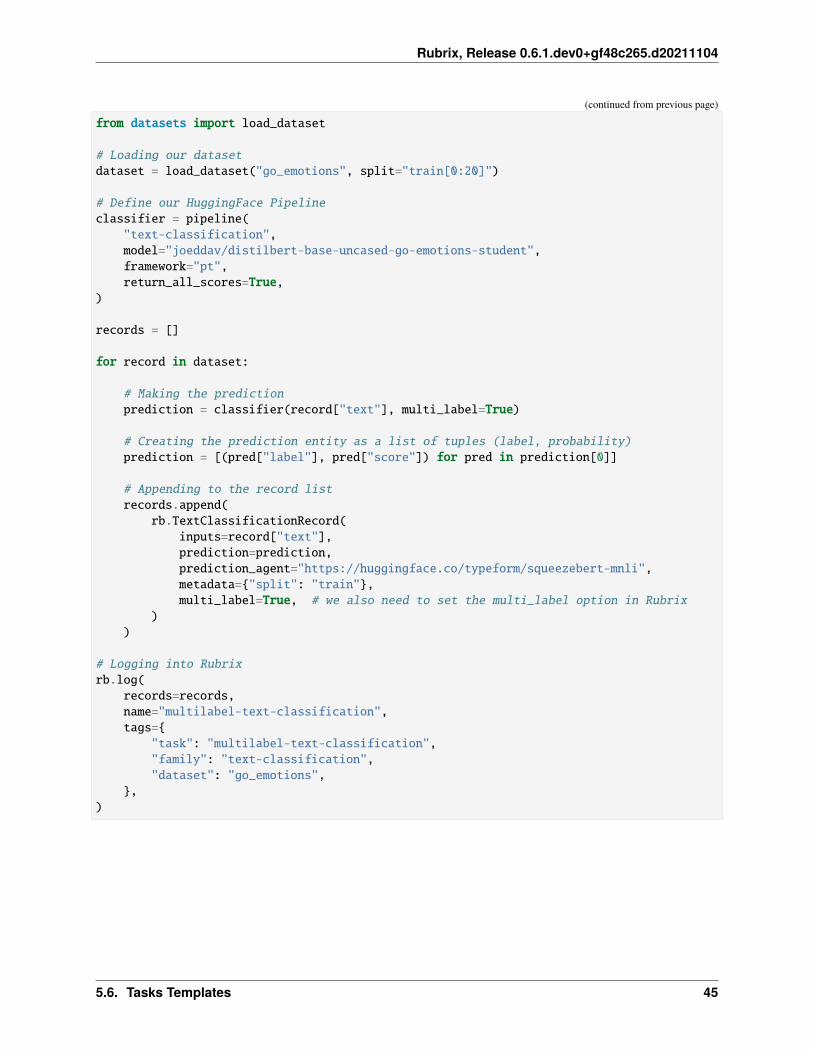
Rubrix, Release 0.6.1.dev0+gf48c265.d20211104
(continued from previous page)
from datasets import load_dataset
# Loading our datasetdataset = load_dataset("go_emotions", split="train[0:20]")
# Define our HuggingFace Pipelineclassifier = pipeline(
"text-classification",model="joeddav/distilbert-base-uncased-go-emotions-student",framework="pt",return_all_scores=True,
)
records = []
for record in dataset:
# Making the predictionprediction = classifier(record["text"], multi_label=True)
# Creating the prediction entity as a list of tuples (label, probability)prediction = [(pred["label"], pred["score"]) for pred in prediction[0]]
# Appending to the record listrecords.append(
rb.TextClassificationRecord(inputs=record["text"],prediction=prediction,prediction_agent="https://huggingface.co/typeform/squeezebert-mnli",metadata={"split": "train"},multi_label=True, # we also need to set the multi_label option in Rubrix
))
# Logging into Rubrixrb.log(
records=records,name="multilabel-text-classification",tags={
"task": "multilabel-text-classification","family": "text-classification","dataset": "go_emotions",
},)
5.6. Tasks Templates 45
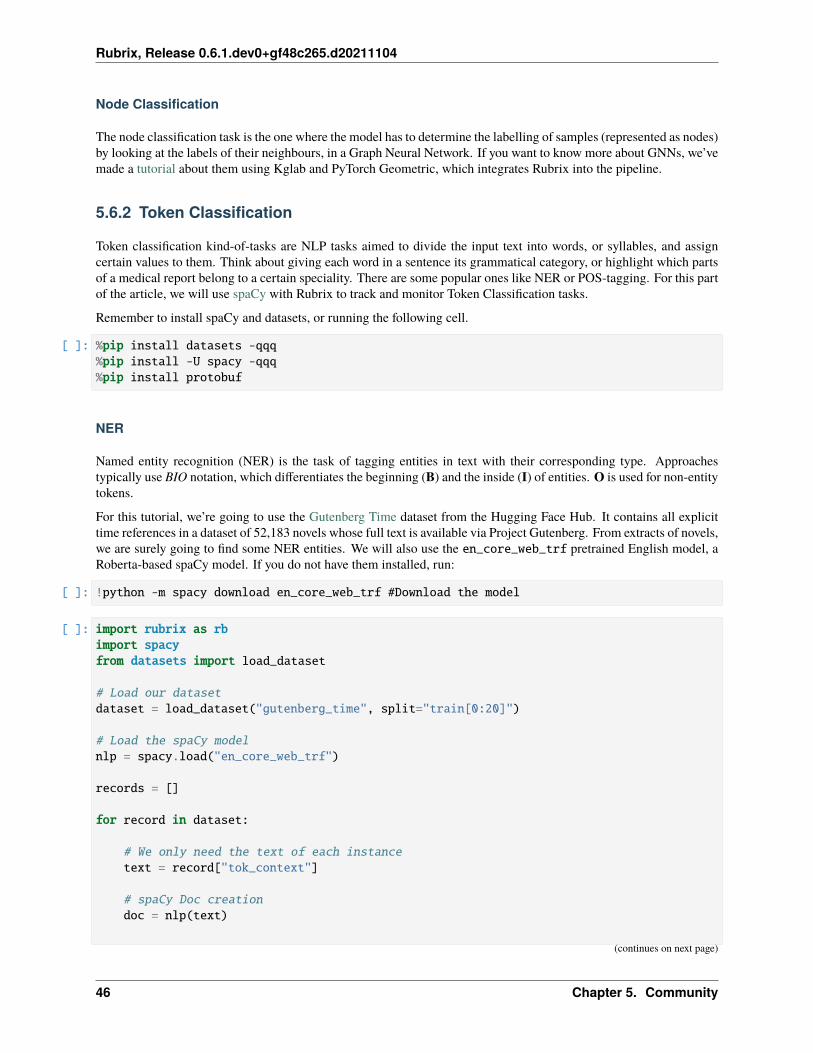
Rubrix, Release 0.6.1.dev0+gf48c265.d20211104
Node Classification
The node classification task is the one where the model has to determine the labelling of samples (represented as nodes)by looking at the labels of their neighbours, in a Graph Neural Network. If you want to know more about GNNs, we’vemade a tutorial about them using Kglab and PyTorch Geometric, which integrates Rubrix into the pipeline.
5.6.2 Token Classification
Token classification kind-of-tasks are NLP tasks aimed to divide the input text into words, or syllables, and assigncertain values to them. Think about giving each word in a sentence its grammatical category, or highlight which partsof a medical report belong to a certain speciality. There are some popular ones like NER or POS-tagging. For this partof the article, we will use spaCy with Rubrix to track and monitor Token Classification tasks.
Remember to install spaCy and datasets, or running the following cell.
[ ]: %pip install datasets -qqq%pip install -U spacy -qqq%pip install protobuf
NER
Named entity recognition (NER) is the task of tagging entities in text with their corresponding type. Approachestypically use BIO notation, which differentiates the beginning (B) and the inside (I) of entities. O is used for non-entitytokens.
For this tutorial, we’re going to use the Gutenberg Time dataset from the Hugging Face Hub. It contains all explicittime references in a dataset of 52,183 novels whose full text is available via Project Gutenberg. From extracts of novels,we are surely going to find some NER entities. We will also use the en_core_web_trf pretrained English model, aRoberta-based spaCy model. If you do not have them installed, run:
[ ]: !python -m spacy download en_core_web_trf #Download the model
[ ]: import rubrix as rbimport spacyfrom datasets import load_dataset
# Load our datasetdataset = load_dataset("gutenberg_time", split="train[0:20]")
# Load the spaCy modelnlp = spacy.load("en_core_web_trf")
records = []
for record in dataset:
# We only need the text of each instancetext = record["tok_context"]
# spaCy Doc creationdoc = nlp(text)
(continues on next page)
46 Chapter 5. Community
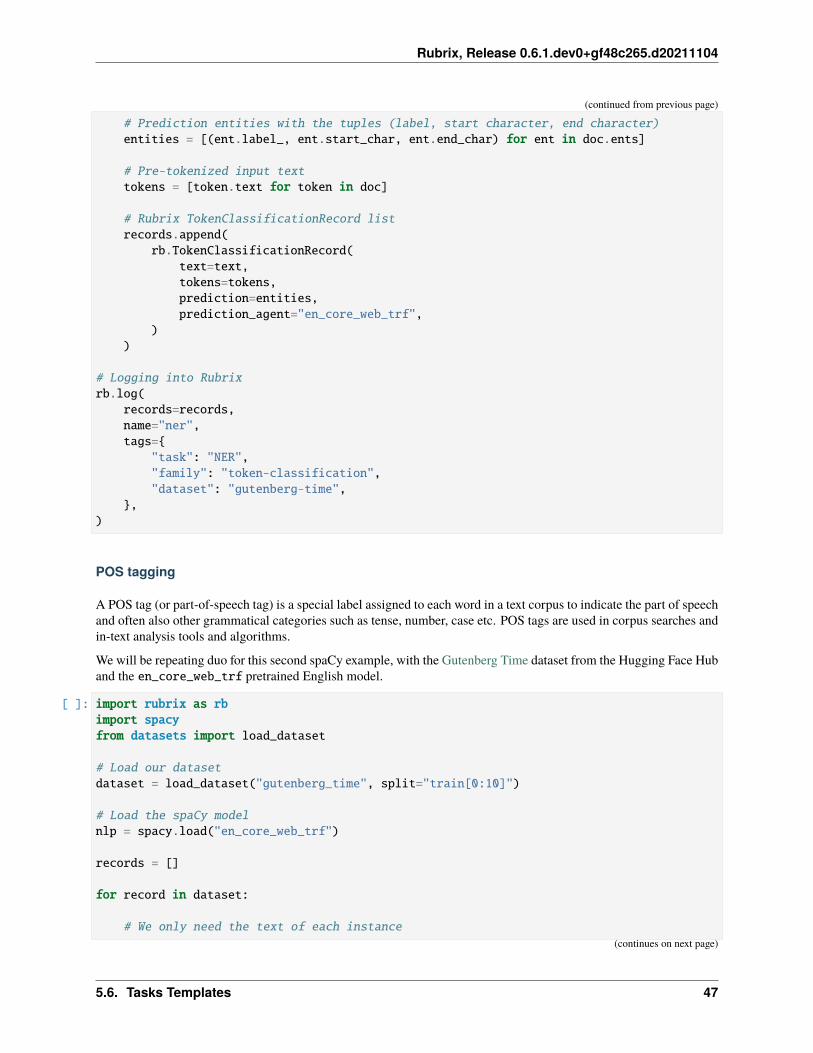
Rubrix, Release 0.6.1.dev0+gf48c265.d20211104
(continued from previous page)
# Prediction entities with the tuples (label, start character, end character)entities = [(ent.label_, ent.start_char, ent.end_char) for ent in doc.ents]
# Pre-tokenized input texttokens = [token.text for token in doc]
# Rubrix TokenClassificationRecord listrecords.append(
rb.TokenClassificationRecord(text=text,tokens=tokens,prediction=entities,prediction_agent="en_core_web_trf",
))
# Logging into Rubrixrb.log(
records=records,name="ner",tags={
"task": "NER","family": "token-classification","dataset": "gutenberg-time",
},)
POS tagging
A POS tag (or part-of-speech tag) is a special label assigned to each word in a text corpus to indicate the part of speechand often also other grammatical categories such as tense, number, case etc. POS tags are used in corpus searches andin-text analysis tools and algorithms.
We will be repeating duo for this second spaCy example, with the Gutenberg Time dataset from the Hugging Face Huband the en_core_web_trf pretrained English model.
[ ]: import rubrix as rbimport spacyfrom datasets import load_dataset
# Load our datasetdataset = load_dataset("gutenberg_time", split="train[0:10]")
# Load the spaCy modelnlp = spacy.load("en_core_web_trf")
records = []
for record in dataset:
# We only need the text of each instance(continues on next page)
5.6. Tasks Templates 47
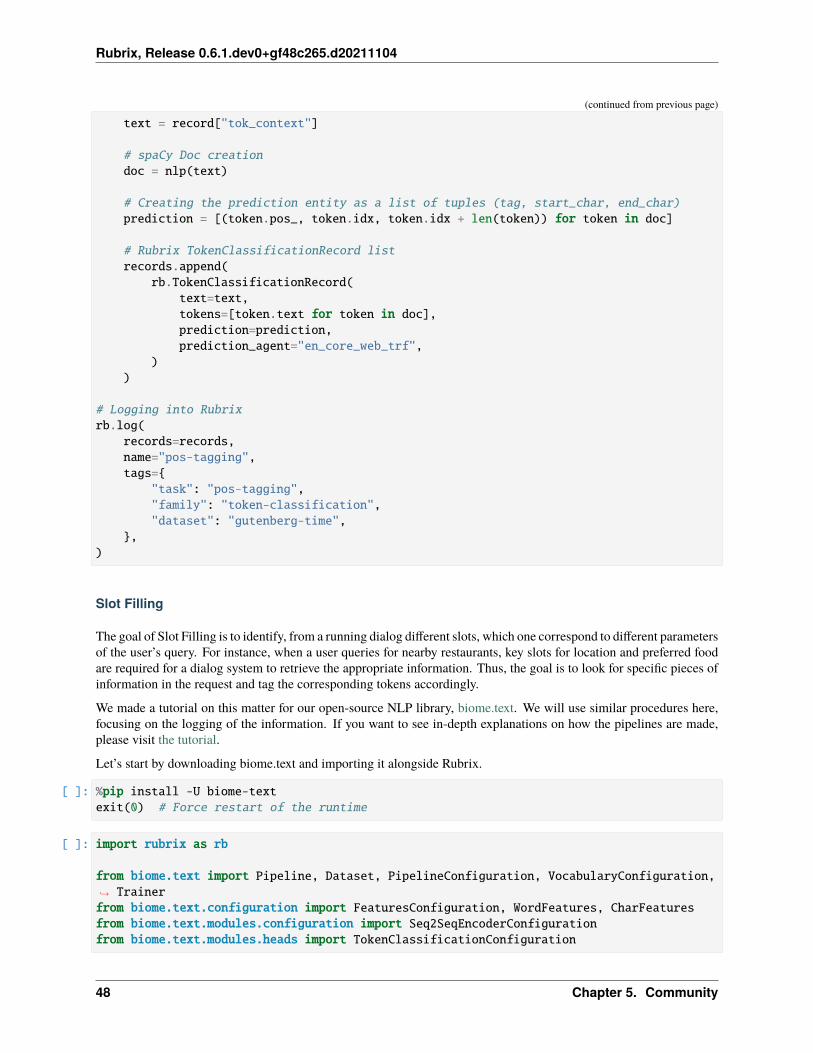
Rubrix, Release 0.6.1.dev0+gf48c265.d20211104
(continued from previous page)
text = record["tok_context"]
# spaCy Doc creationdoc = nlp(text)
# Creating the prediction entity as a list of tuples (tag, start_char, end_char)prediction = [(token.pos_, token.idx, token.idx + len(token)) for token in doc]
# Rubrix TokenClassificationRecord listrecords.append(
rb.TokenClassificationRecord(text=text,tokens=[token.text for token in doc],prediction=prediction,prediction_agent="en_core_web_trf",
))
# Logging into Rubrixrb.log(
records=records,name="pos-tagging",tags={
"task": "pos-tagging","family": "token-classification","dataset": "gutenberg-time",
},)
Slot Filling
The goal of Slot Filling is to identify, from a running dialog different slots, which one correspond to different parametersof the user’s query. For instance, when a user queries for nearby restaurants, key slots for location and preferred foodare required for a dialog system to retrieve the appropriate information. Thus, the goal is to look for specific pieces ofinformation in the request and tag the corresponding tokens accordingly.
We made a tutorial on this matter for our open-source NLP library, biome.text. We will use similar procedures here,focusing on the logging of the information. If you want to see in-depth explanations on how the pipelines are made,please visit the tutorial.
Let’s start by downloading biome.text and importing it alongside Rubrix.
[ ]: %pip install -U biome-textexit(0) # Force restart of the runtime
[ ]: import rubrix as rb
from biome.text import Pipeline, Dataset, PipelineConfiguration, VocabularyConfiguration,→˓ Trainerfrom biome.text.configuration import FeaturesConfiguration, WordFeatures, CharFeaturesfrom biome.text.modules.configuration import Seq2SeqEncoderConfigurationfrom biome.text.modules.heads import TokenClassificationConfiguration
48 Chapter 5. Community
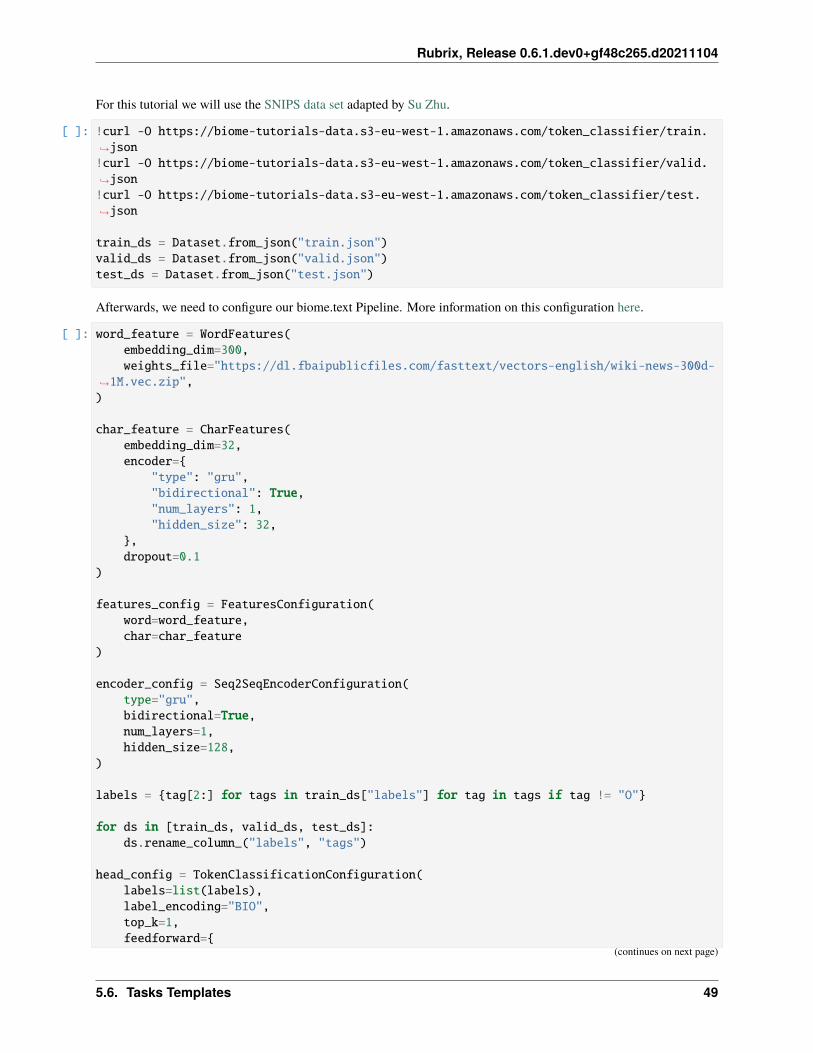
Rubrix, Release 0.6.1.dev0+gf48c265.d20211104
For this tutorial we will use the SNIPS data set adapted by Su Zhu.
[ ]: !curl -O https://biome-tutorials-data.s3-eu-west-1.amazonaws.com/token_classifier/train.→˓json!curl -O https://biome-tutorials-data.s3-eu-west-1.amazonaws.com/token_classifier/valid.→˓json!curl -O https://biome-tutorials-data.s3-eu-west-1.amazonaws.com/token_classifier/test.→˓json
train_ds = Dataset.from_json("train.json")valid_ds = Dataset.from_json("valid.json")test_ds = Dataset.from_json("test.json")
Afterwards, we need to configure our biome.text Pipeline. More information on this configuration here.
[ ]: word_feature = WordFeatures(embedding_dim=300,weights_file="https://dl.fbaipublicfiles.com/fasttext/vectors-english/wiki-news-300d-
→˓1M.vec.zip",)
char_feature = CharFeatures(embedding_dim=32,encoder={
"type": "gru","bidirectional": True,"num_layers": 1,"hidden_size": 32,
},dropout=0.1
)
features_config = FeaturesConfiguration(word=word_feature,char=char_feature
)
encoder_config = Seq2SeqEncoderConfiguration(type="gru",bidirectional=True,num_layers=1,hidden_size=128,
)
labels = {tag[2:] for tags in train_ds["labels"] for tag in tags if tag != "O"}
for ds in [train_ds, valid_ds, test_ds]:ds.rename_column_("labels", "tags")
head_config = TokenClassificationConfiguration(labels=list(labels),label_encoding="BIO",top_k=1,feedforward={
(continues on next page)
5.6. Tasks Templates 49
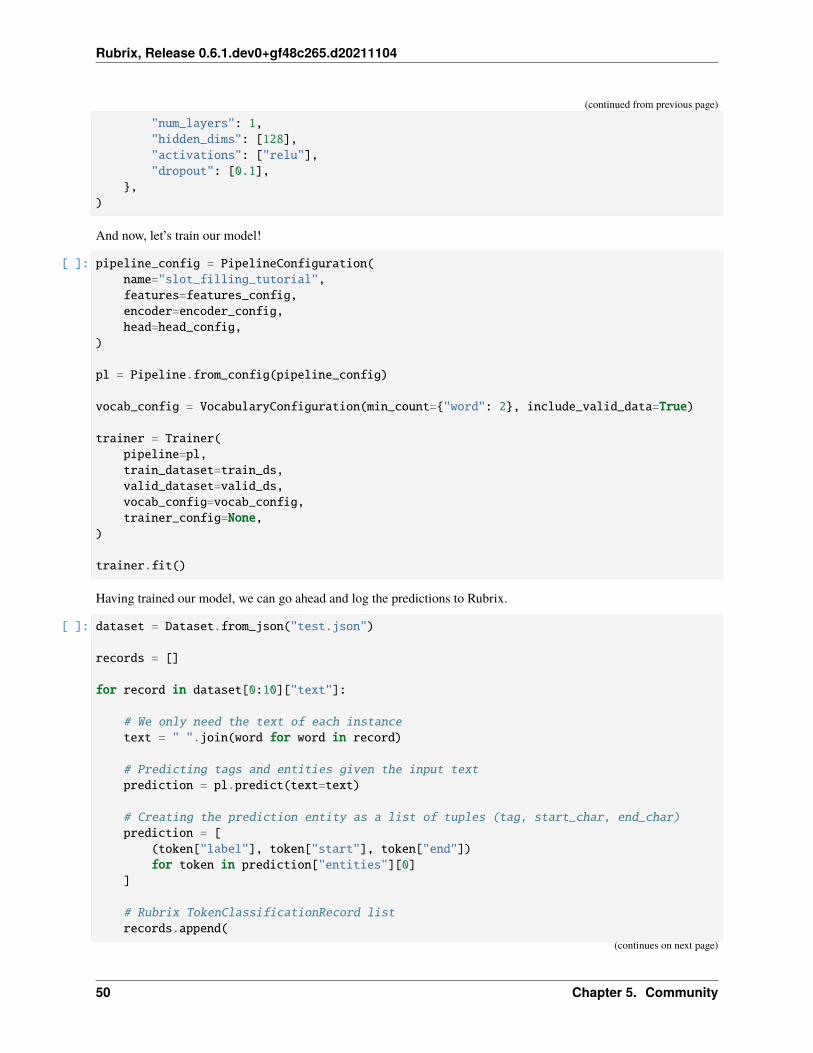
Rubrix, Release 0.6.1.dev0+gf48c265.d20211104
(continued from previous page)
"num_layers": 1,"hidden_dims": [128],"activations": ["relu"],"dropout": [0.1],
},)
And now, let’s train our model!
[ ]: pipeline_config = PipelineConfiguration(name="slot_filling_tutorial",features=features_config,encoder=encoder_config,head=head_config,
)
pl = Pipeline.from_config(pipeline_config)
vocab_config = VocabularyConfiguration(min_count={"word": 2}, include_valid_data=True)
trainer = Trainer(pipeline=pl,train_dataset=train_ds,valid_dataset=valid_ds,vocab_config=vocab_config,trainer_config=None,
)
trainer.fit()
Having trained our model, we can go ahead and log the predictions to Rubrix.
[ ]: dataset = Dataset.from_json("test.json")
records = []
for record in dataset[0:10]["text"]:
# We only need the text of each instancetext = " ".join(word for word in record)
# Predicting tags and entities given the input textprediction = pl.predict(text=text)
# Creating the prediction entity as a list of tuples (tag, start_char, end_char)prediction = [
(token["label"], token["start"], token["end"])for token in prediction["entities"][0]
]
# Rubrix TokenClassificationRecord listrecords.append(
(continues on next page)
50 Chapter 5. Community
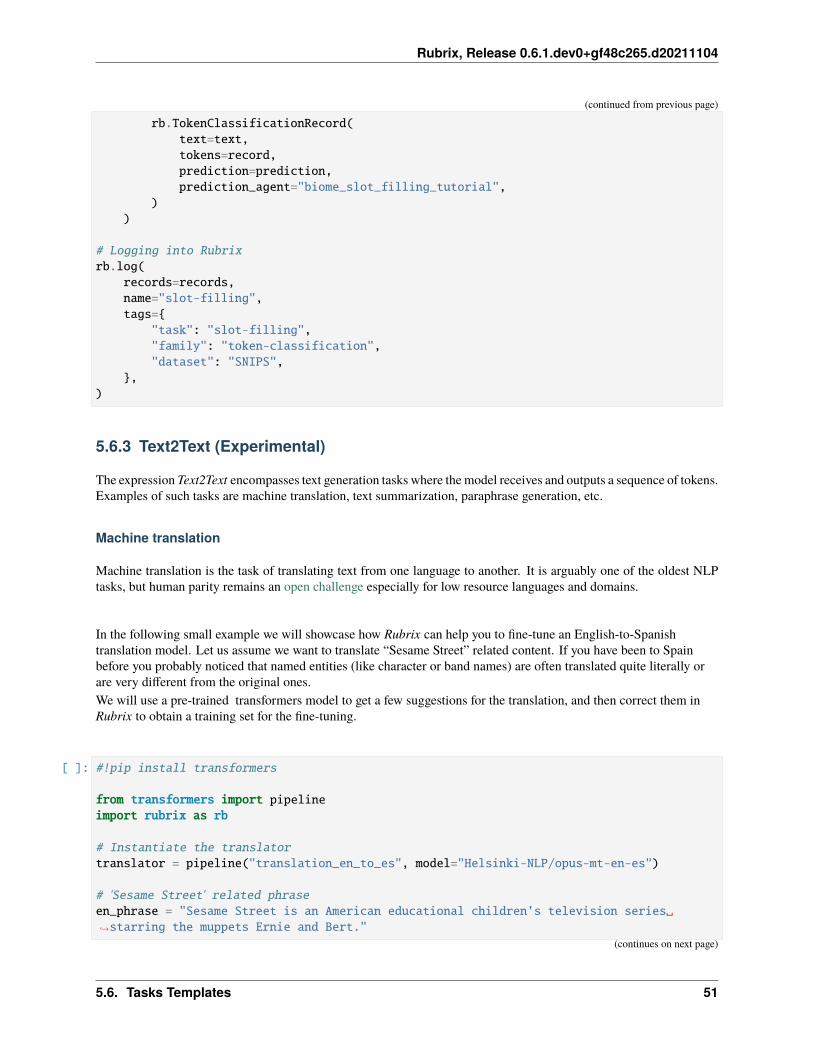
Rubrix, Release 0.6.1.dev0+gf48c265.d20211104
(continued from previous page)
rb.TokenClassificationRecord(text=text,tokens=record,prediction=prediction,prediction_agent="biome_slot_filling_tutorial",
))
# Logging into Rubrixrb.log(
records=records,name="slot-filling",tags={
"task": "slot-filling","family": "token-classification","dataset": "SNIPS",
},)
5.6.3 Text2Text (Experimental)
The expression Text2Text encompasses text generation tasks where the model receives and outputs a sequence of tokens.Examples of such tasks are machine translation, text summarization, paraphrase generation, etc.
Machine translation
Machine translation is the task of translating text from one language to another. It is arguably one of the oldest NLPtasks, but human parity remains an open challenge especially for low resource languages and domains.
In the following small example we will showcase how Rubrix can help you to fine-tune an English-to-Spanishtranslation model. Let us assume we want to translate “Sesame Street” related content. If you have been to Spainbefore you probably noticed that named entities (like character or band names) are often translated quite literally orare very different from the original ones.We will use a pre-trained transformers model to get a few suggestions for the translation, and then correct them inRubrix to obtain a training set for the fine-tuning.
[ ]: #!pip install transformers
from transformers import pipelineimport rubrix as rb
# Instantiate the translatortranslator = pipeline("translation_en_to_es", model="Helsinki-NLP/opus-mt-en-es")
# 'Sesame Street' related phraseen_phrase = "Sesame Street is an American educational children's television series␣→˓starring the muppets Ernie and Bert."
(continues on next page)
5.6. Tasks Templates 51
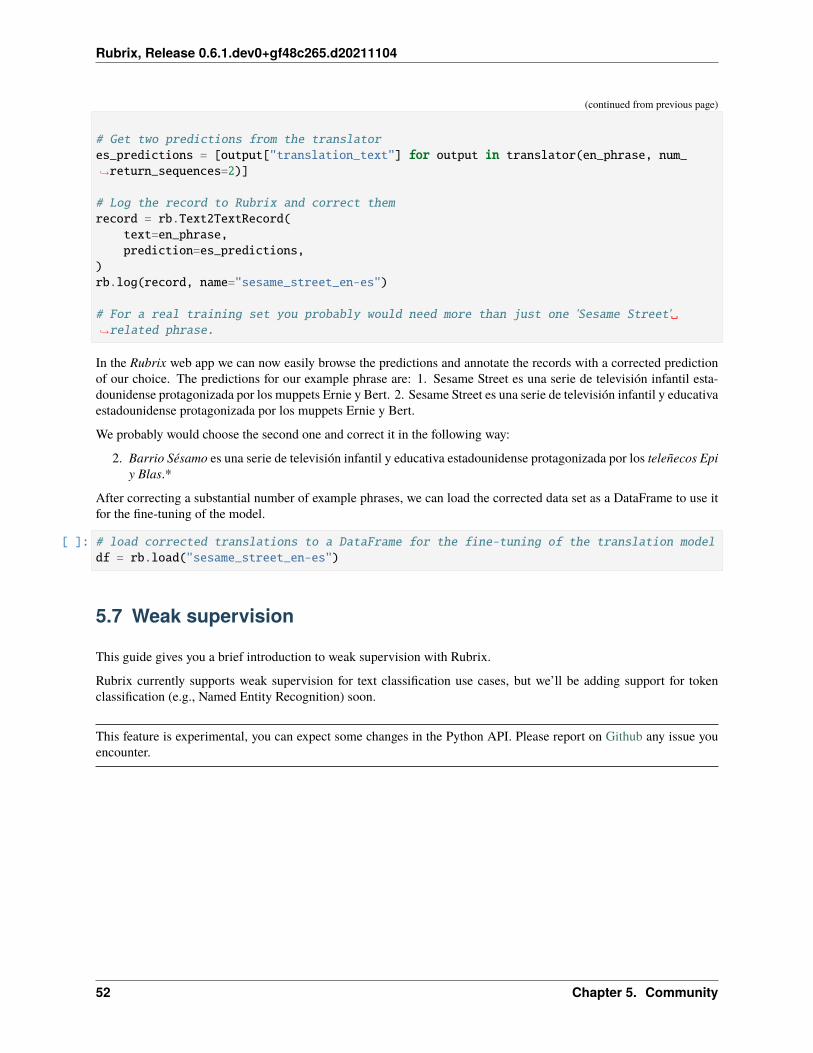
Rubrix, Release 0.6.1.dev0+gf48c265.d20211104
(continued from previous page)
# Get two predictions from the translatores_predictions = [output["translation_text"] for output in translator(en_phrase, num_→˓return_sequences=2)]
# Log the record to Rubrix and correct themrecord = rb.Text2TextRecord(
text=en_phrase,prediction=es_predictions,
)rb.log(record, name="sesame_street_en-es")
# For a real training set you probably would need more than just one 'Sesame Street'␣→˓related phrase.
In the Rubrix web app we can now easily browse the predictions and annotate the records with a corrected predictionof our choice. The predictions for our example phrase are: 1. Sesame Street es una serie de televisión infantil esta-dounidense protagonizada por los muppets Ernie y Bert. 2. Sesame Street es una serie de televisión infantil y educativaestadounidense protagonizada por los muppets Ernie y Bert.
We probably would choose the second one and correct it in the following way:
2. Barrio Sésamo es una serie de televisión infantil y educativa estadounidense protagonizada por los teleñecos Epiy Blas.*
After correcting a substantial number of example phrases, we can load the corrected data set as a DataFrame to use itfor the fine-tuning of the model.
[ ]: # load corrected translations to a DataFrame for the fine-tuning of the translation modeldf = rb.load("sesame_street_en-es")
5.7 Weak supervision
This guide gives you a brief introduction to weak supervision with Rubrix.
Rubrix currently supports weak supervision for text classification use cases, but we’ll be adding support for tokenclassification (e.g., Named Entity Recognition) soon.
This feature is experimental, you can expect some changes in the Python API. Please report on Github any issue youencounter.
52 Chapter 5. Community
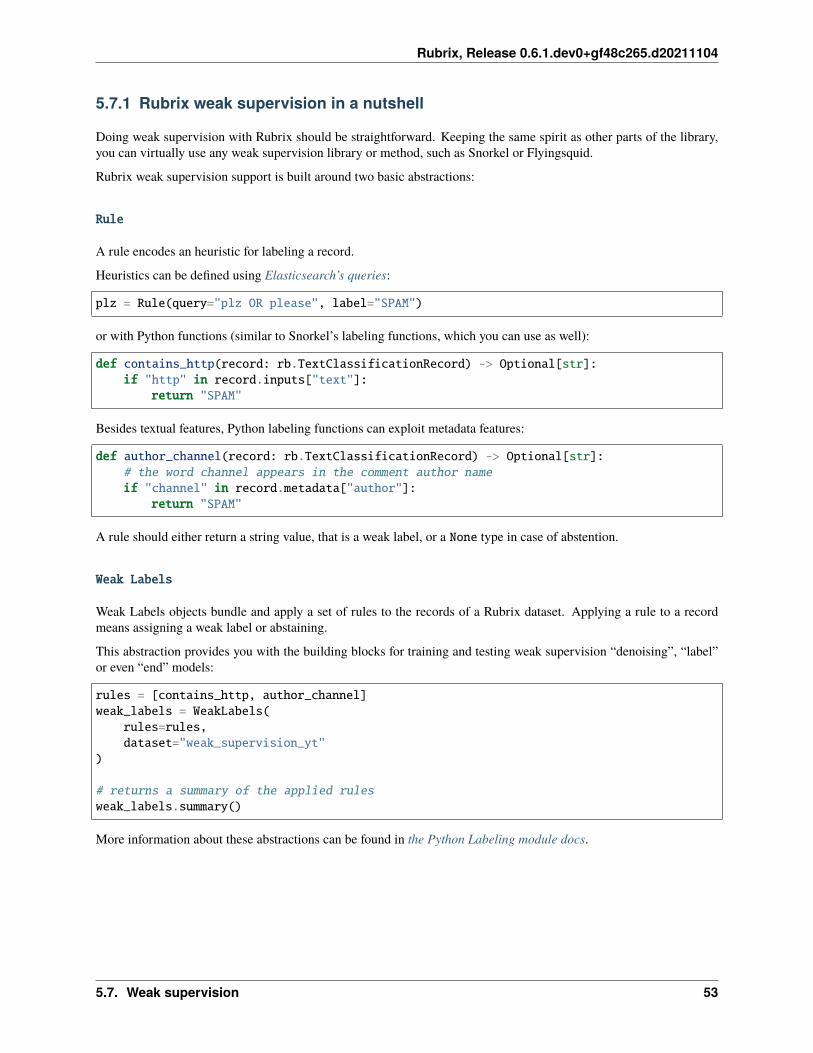
Rubrix, Release 0.6.1.dev0+gf48c265.d20211104
5.7.1 Rubrix weak supervision in a nutshell
Doing weak supervision with Rubrix should be straightforward. Keeping the same spirit as other parts of the library,you can virtually use any weak supervision library or method, such as Snorkel or Flyingsquid.
Rubrix weak supervision support is built around two basic abstractions:
Rule
A rule encodes an heuristic for labeling a record.
Heuristics can be defined using Elasticsearch’s queries:
plz = Rule(query="plz OR please", label="SPAM")
or with Python functions (similar to Snorkel’s labeling functions, which you can use as well):
def contains_http(record: rb.TextClassificationRecord) -> Optional[str]:if "http" in record.inputs["text"]:
return "SPAM"
Besides textual features, Python labeling functions can exploit metadata features:
def author_channel(record: rb.TextClassificationRecord) -> Optional[str]:# the word channel appears in the comment author nameif "channel" in record.metadata["author"]:
return "SPAM"
A rule should either return a string value, that is a weak label, or a None type in case of abstention.
Weak Labels
Weak Labels objects bundle and apply a set of rules to the records of a Rubrix dataset. Applying a rule to a recordmeans assigning a weak label or abstaining.
This abstraction provides you with the building blocks for training and testing weak supervision “denoising”, “label”or even “end” models:
rules = [contains_http, author_channel]weak_labels = WeakLabels(
rules=rules,dataset="weak_supervision_yt"
)
# returns a summary of the applied rulesweak_labels.summary()
More information about these abstractions can be found in the Python Labeling module docs.
5.7. Weak supervision 53
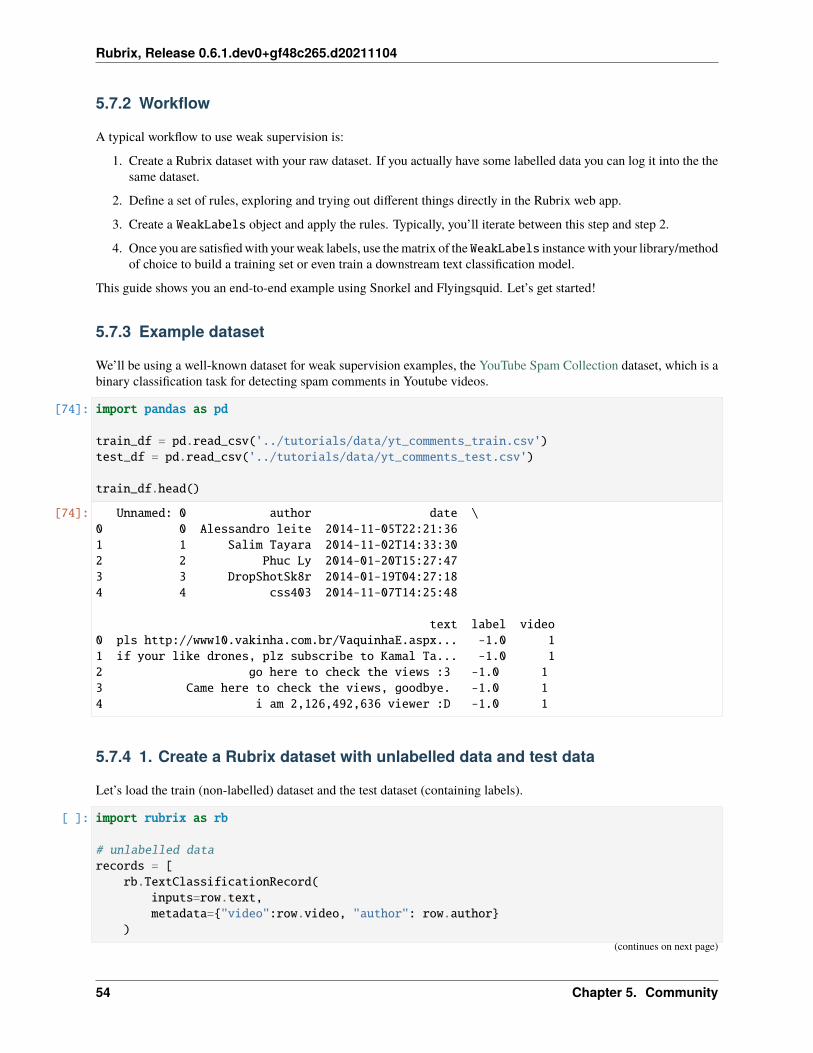
Rubrix, Release 0.6.1.dev0+gf48c265.d20211104
5.7.2 Workflow
A typical workflow to use weak supervision is:
1. Create a Rubrix dataset with your raw dataset. If you actually have some labelled data you can log it into the thesame dataset.
2. Define a set of rules, exploring and trying out different things directly in the Rubrix web app.
3. Create a WeakLabels object and apply the rules. Typically, you’ll iterate between this step and step 2.
4. Once you are satisfied with your weak labels, use the matrix of the WeakLabels instance with your library/methodof choice to build a training set or even train a downstream text classification model.
This guide shows you an end-to-end example using Snorkel and Flyingsquid. Let’s get started!
5.7.3 Example dataset
We’ll be using a well-known dataset for weak supervision examples, the YouTube Spam Collection dataset, which is abinary classification task for detecting spam comments in Youtube videos.
[74]: import pandas as pd
train_df = pd.read_csv('../tutorials/data/yt_comments_train.csv')test_df = pd.read_csv('../tutorials/data/yt_comments_test.csv')
train_df.head()
[74]: Unnamed: 0 author date \0 0 Alessandro leite 2014-11-05T22:21:361 1 Salim Tayara 2014-11-02T14:33:302 2 Phuc Ly 2014-01-20T15:27:473 3 DropShotSk8r 2014-01-19T04:27:184 4 css403 2014-11-07T14:25:48
text label video0 pls http://www10.vakinha.com.br/VaquinhaE.aspx... -1.0 11 if your like drones, plz subscribe to Kamal Ta... -1.0 12 go here to check the views :3 -1.0 13 Came here to check the views, goodbye. -1.0 14 i am 2,126,492,636 viewer :D -1.0 1
5.7.4 1. Create a Rubrix dataset with unlabelled data and test data
Let’s load the train (non-labelled) dataset and the test dataset (containing labels).
[ ]: import rubrix as rb
# unlabelled datarecords = [
rb.TextClassificationRecord(inputs=row.text,metadata={"video":row.video, "author": row.author}
)(continues on next page)
54 Chapter 5. Community
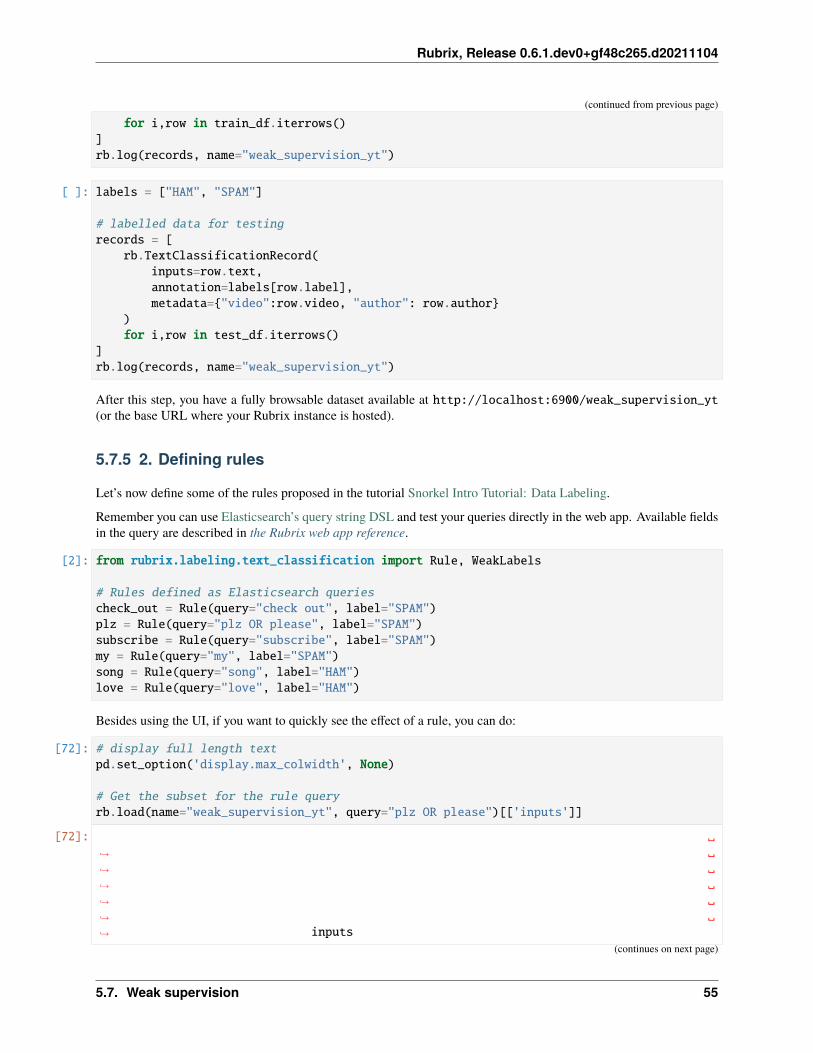
Rubrix, Release 0.6.1.dev0+gf48c265.d20211104
(continued from previous page)
for i,row in train_df.iterrows()]rb.log(records, name="weak_supervision_yt")
[ ]: labels = ["HAM", "SPAM"]
# labelled data for testingrecords = [
rb.TextClassificationRecord(inputs=row.text,annotation=labels[row.label],metadata={"video":row.video, "author": row.author}
)for i,row in test_df.iterrows()
]rb.log(records, name="weak_supervision_yt")
After this step, you have a fully browsable dataset available at http://localhost:6900/weak_supervision_yt(or the base URL where your Rubrix instance is hosted).
5.7.5 2. Defining rules
Let’s now define some of the rules proposed in the tutorial Snorkel Intro Tutorial: Data Labeling.
Remember you can use Elasticsearch’s query string DSL and test your queries directly in the web app. Available fieldsin the query are described in the Rubrix web app reference.
[2]: from rubrix.labeling.text_classification import Rule, WeakLabels
# Rules defined as Elasticsearch queriescheck_out = Rule(query="check out", label="SPAM")plz = Rule(query="plz OR please", label="SPAM")subscribe = Rule(query="subscribe", label="SPAM")my = Rule(query="my", label="SPAM")song = Rule(query="song", label="HAM")love = Rule(query="love", label="HAM")
Besides using the UI, if you want to quickly see the effect of a rule, you can do:
[72]: # display full length textpd.set_option('display.max_colwidth', None)
# Get the subset for the rule queryrb.load(name="weak_supervision_yt", query="plz OR please")[['inputs']]
[72]: ␣→˓ ␣→˓ ␣→˓ ␣→˓ ␣→˓ ␣→˓ inputs
(continues on next page)
5.7. Weak supervision 55
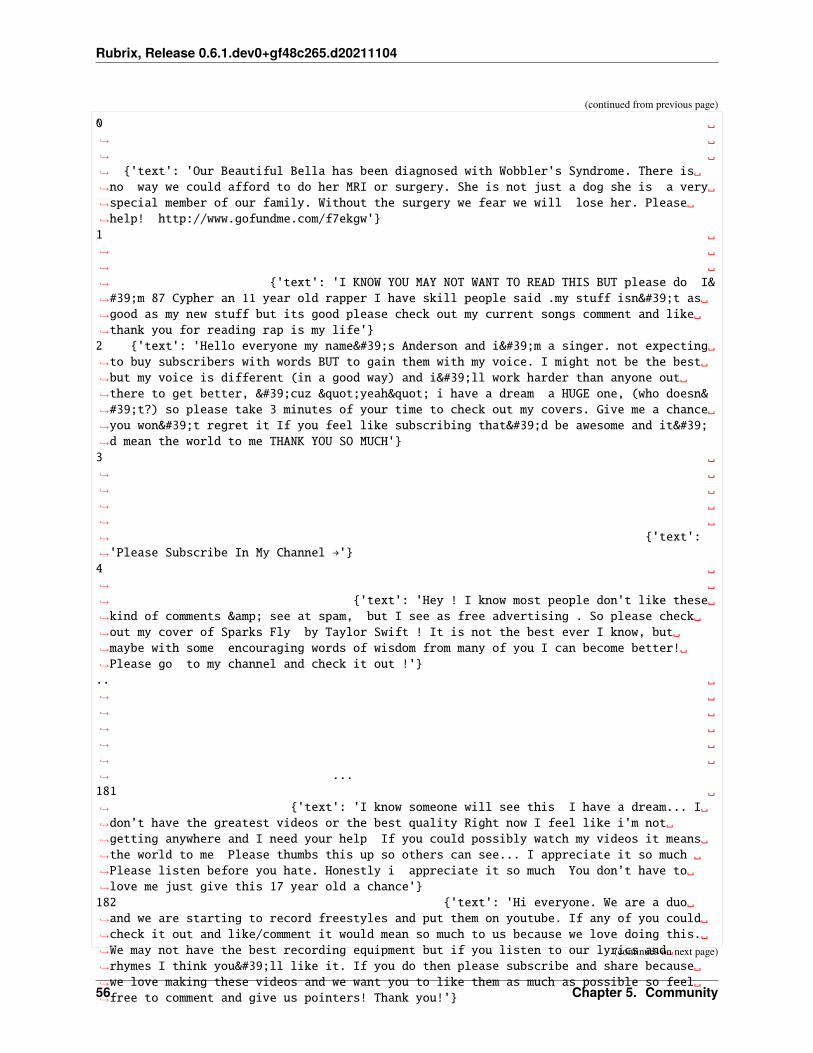
Rubrix, Release 0.6.1.dev0+gf48c265.d20211104
(continued from previous page)
0 ␣→˓ ␣→˓ ␣→˓ {'text': 'Our Beautiful Bella has been diagnosed with Wobbler's Syndrome. There is␣→˓no way we could afford to do her MRI or surgery. She is not just a dog she is a very␣→˓special member of our family. Without the surgery we fear we will lose her. Please␣→˓help! http://www.gofundme.com/f7ekgw'}1 ␣→˓ ␣→˓ ␣→˓ {'text': 'I KNOW YOU MAY NOT WANT TO READ THIS BUT please do I&→˓#39;m 87 Cypher an 11 year old rapper I have skill people said .my stuff isn't as␣→˓good as my new stuff but its good please check out my current songs comment and like␣→˓thank you for reading rap is my life'}2 {'text': 'Hello everyone my name's Anderson and i'm a singer. not expecting␣→˓to buy subscribers with words BUT to gain them with my voice. I might not be the best␣→˓but my voice is different (in a good way) and i'll work harder than anyone out␣→˓there to get better, 'cuz "yeah" i have a dream a HUGE one, (who doesn&→˓#39;t?) so please take 3 minutes of your time to check out my covers. Give me a chance␣→˓you won't regret it If you feel like subscribing that'd be awesome and it'→˓d mean the world to me THANK YOU SO MUCH'}3 ␣→˓ ␣→˓ ␣→˓ ␣→˓ ␣→˓ {'text':→˓'Please Subscribe In My Channel →'}4 ␣→˓ ␣→˓ {'text': 'Hey ! I know most people don't like these␣→˓kind of comments & see at spam, but I see as free advertising . So please check␣→˓out my cover of Sparks Fly by Taylor Swift ! It is not the best ever I know, but␣→˓maybe with some encouraging words of wisdom from many of you I can become better!␣→˓Please go to my channel and check it out !'}.. ␣→˓ ␣→˓ ␣→˓ ␣→˓ ␣→˓ ␣→˓ ...181 ␣→˓ {'text': 'I know someone will see this I have a dream... I␣→˓don’t have the greatest videos or the best quality Right now I feel like i'm not␣→˓getting anywhere and I need your help If you could possibly watch my videos it means␣→˓the world to me Please thumbs this up so others can see... I appreciate it so much ␣→˓Please listen before you hate. Honestly i appreciate it so much You don’t have to␣→˓love me just give this 17 year old a chance'}182 {'text': 'Hi everyone. We are a duo␣→˓and we are starting to record freestyles and put them on youtube. If any of you could␣→˓check it out and like/comment it would mean so much to us because we love doing this.␣→˓We may not have the best recording equipment but if you listen to our lyrics and␣→˓rhymes I think you'll like it. If you do then please subscribe and share because␣→˓we love making these videos and we want you to like them as much as possible so feel␣→˓free to comment and give us pointers! Thank you!'}
(continues on next page)
56 Chapter 5. Community
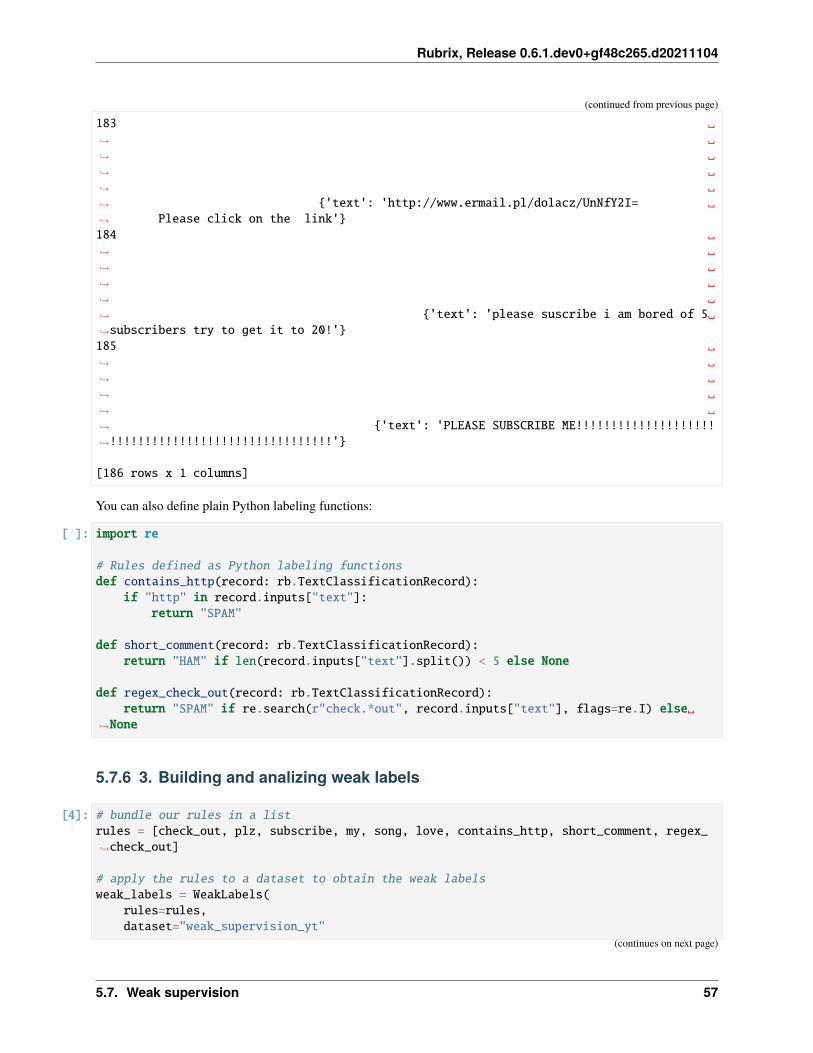
Rubrix, Release 0.6.1.dev0+gf48c265.d20211104
(continued from previous page)
183 ␣→˓ ␣→˓ ␣→˓ ␣→˓ ␣→˓ {'text': 'http://www.ermail.pl/dolacz/UnNfY2I= ␣→˓ Please click on the link'}184 ␣→˓ ␣→˓ ␣→˓ ␣→˓ ␣→˓ {'text': 'please suscribe i am bored of 5␣→˓subscribers try to get it to 20!'}185 ␣→˓ ␣→˓ ␣→˓ ␣→˓ ␣→˓ {'text': 'PLEASE SUBSCRIBE ME!!!!!!!!!!!!!!!!!!!!→˓!!!!!!!!!!!!!!!!!!!!!!!!!!!!!!!!'}
[186 rows x 1 columns]
You can also define plain Python labeling functions:
[ ]: import re
# Rules defined as Python labeling functionsdef contains_http(record: rb.TextClassificationRecord):
if "http" in record.inputs["text"]:return "SPAM"
def short_comment(record: rb.TextClassificationRecord):return "HAM" if len(record.inputs["text"].split()) < 5 else None
def regex_check_out(record: rb.TextClassificationRecord):return "SPAM" if re.search(r"check.*out", record.inputs["text"], flags=re.I) else␣
→˓None
5.7.6 3. Building and analizing weak labels
[4]: # bundle our rules in a listrules = [check_out, plz, subscribe, my, song, love, contains_http, short_comment, regex_→˓check_out]
# apply the rules to a dataset to obtain the weak labelsweak_labels = WeakLabels(
rules=rules,dataset="weak_supervision_yt"
(continues on next page)
5.7. Weak supervision 57
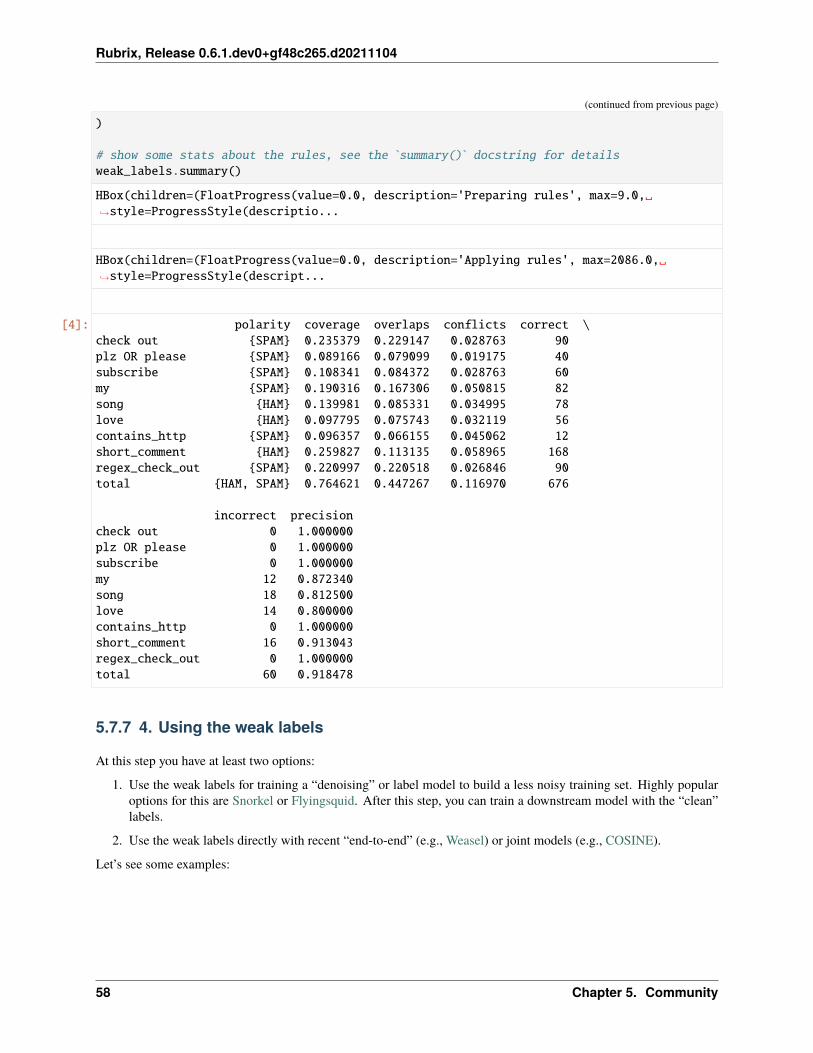
Rubrix, Release 0.6.1.dev0+gf48c265.d20211104
(continued from previous page)
)
# show some stats about the rules, see the `summary()` docstring for detailsweak_labels.summary()
HBox(children=(FloatProgress(value=0.0, description='Preparing rules', max=9.0,␣→˓style=ProgressStyle(descriptio...
HBox(children=(FloatProgress(value=0.0, description='Applying rules', max=2086.0,␣→˓style=ProgressStyle(descript...
[4]: polarity coverage overlaps conflicts correct \check out {SPAM} 0.235379 0.229147 0.028763 90plz OR please {SPAM} 0.089166 0.079099 0.019175 40subscribe {SPAM} 0.108341 0.084372 0.028763 60my {SPAM} 0.190316 0.167306 0.050815 82song {HAM} 0.139981 0.085331 0.034995 78love {HAM} 0.097795 0.075743 0.032119 56contains_http {SPAM} 0.096357 0.066155 0.045062 12short_comment {HAM} 0.259827 0.113135 0.058965 168regex_check_out {SPAM} 0.220997 0.220518 0.026846 90total {HAM, SPAM} 0.764621 0.447267 0.116970 676
incorrect precisioncheck out 0 1.000000plz OR please 0 1.000000subscribe 0 1.000000my 12 0.872340song 18 0.812500love 14 0.800000contains_http 0 1.000000short_comment 16 0.913043regex_check_out 0 1.000000total 60 0.918478
5.7.7 4. Using the weak labels
At this step you have at least two options:
1. Use the weak labels for training a “denoising” or label model to build a less noisy training set. Highly popularoptions for this are Snorkel or Flyingsquid. After this step, you can train a downstream model with the “clean”labels.
2. Use the weak labels directly with recent “end-to-end” (e.g., Weasel) or joint models (e.g., COSINE).
Let’s see some examples:
58 Chapter 5. Community
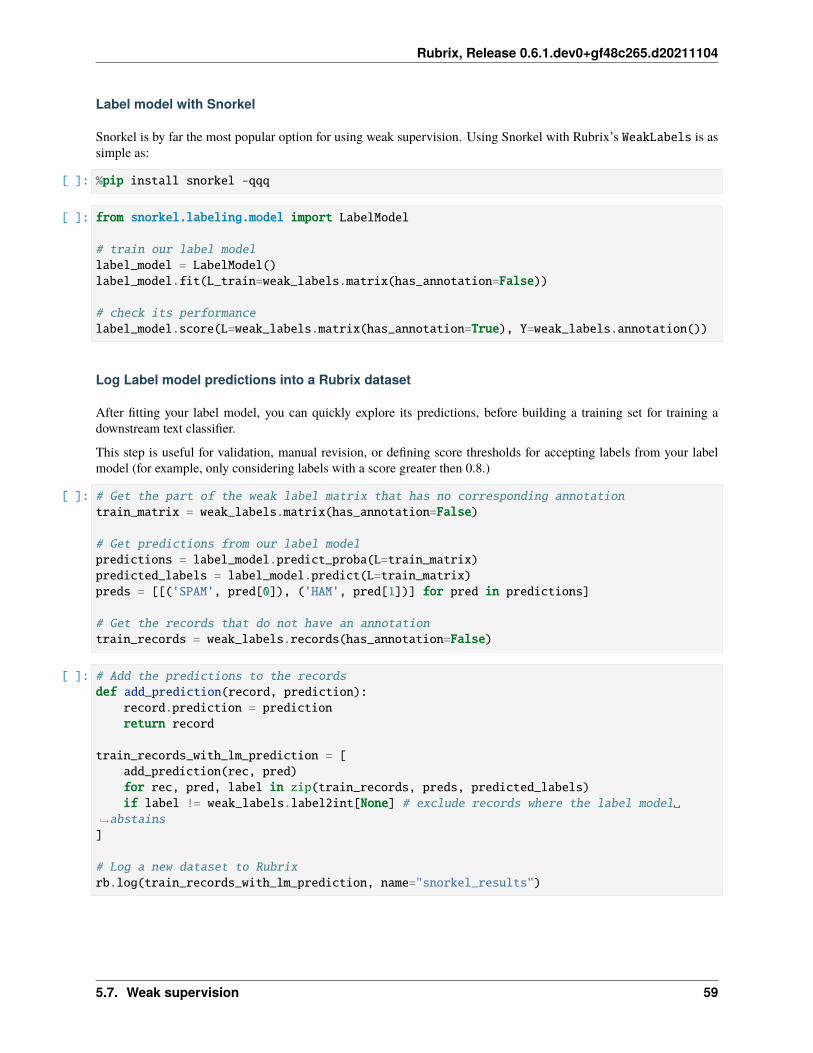
Rubrix, Release 0.6.1.dev0+gf48c265.d20211104
Label model with Snorkel
Snorkel is by far the most popular option for using weak supervision. Using Snorkel with Rubrix’s WeakLabels is assimple as:
[ ]: %pip install snorkel -qqq
[ ]: from snorkel.labeling.model import LabelModel
# train our label modellabel_model = LabelModel()label_model.fit(L_train=weak_labels.matrix(has_annotation=False))
# check its performancelabel_model.score(L=weak_labels.matrix(has_annotation=True), Y=weak_labels.annotation())
Log Label model predictions into a Rubrix dataset
After fitting your label model, you can quickly explore its predictions, before building a training set for training adownstream text classifier.
This step is useful for validation, manual revision, or defining score thresholds for accepting labels from your labelmodel (for example, only considering labels with a score greater then 0.8.)
[ ]: # Get the part of the weak label matrix that has no corresponding annotationtrain_matrix = weak_labels.matrix(has_annotation=False)
# Get predictions from our label modelpredictions = label_model.predict_proba(L=train_matrix)predicted_labels = label_model.predict(L=train_matrix)preds = [[('SPAM', pred[0]), ('HAM', pred[1])] for pred in predictions]
# Get the records that do not have an annotationtrain_records = weak_labels.records(has_annotation=False)
[ ]: # Add the predictions to the recordsdef add_prediction(record, prediction):
record.prediction = predictionreturn record
train_records_with_lm_prediction = [add_prediction(rec, pred)for rec, pred, label in zip(train_records, preds, predicted_labels)if label != weak_labels.label2int[None] # exclude records where the label model␣
→˓abstains]
# Log a new dataset to Rubrixrb.log(train_records_with_lm_prediction, name="snorkel_results")
5.7. Weak supervision 59
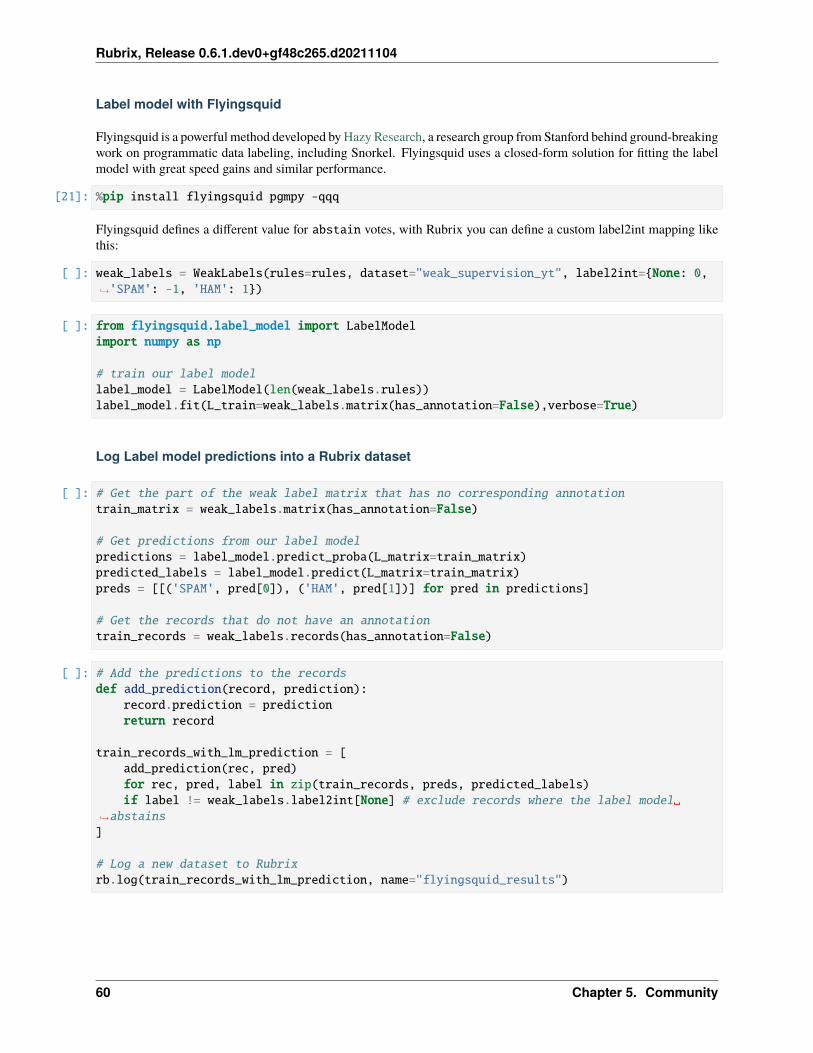
Rubrix, Release 0.6.1.dev0+gf48c265.d20211104
Label model with Flyingsquid
Flyingsquid is a powerful method developed by Hazy Research, a research group from Stanford behind ground-breakingwork on programmatic data labeling, including Snorkel. Flyingsquid uses a closed-form solution for fitting the labelmodel with great speed gains and similar performance.
[21]: %pip install flyingsquid pgmpy -qqq
Flyingsquid defines a different value for abstain votes, with Rubrix you can define a custom label2int mapping likethis:
[ ]: weak_labels = WeakLabels(rules=rules, dataset="weak_supervision_yt", label2int={None: 0,→˓'SPAM': -1, 'HAM': 1})
[ ]: from flyingsquid.label_model import LabelModelimport numpy as np
# train our label modellabel_model = LabelModel(len(weak_labels.rules))label_model.fit(L_train=weak_labels.matrix(has_annotation=False),verbose=True)
Log Label model predictions into a Rubrix dataset
[ ]: # Get the part of the weak label matrix that has no corresponding annotationtrain_matrix = weak_labels.matrix(has_annotation=False)
# Get predictions from our label modelpredictions = label_model.predict_proba(L_matrix=train_matrix)predicted_labels = label_model.predict(L_matrix=train_matrix)preds = [[('SPAM', pred[0]), ('HAM', pred[1])] for pred in predictions]
# Get the records that do not have an annotationtrain_records = weak_labels.records(has_annotation=False)
[ ]: # Add the predictions to the recordsdef add_prediction(record, prediction):
record.prediction = predictionreturn record
train_records_with_lm_prediction = [add_prediction(rec, pred)for rec, pred, label in zip(train_records, preds, predicted_labels)if label != weak_labels.label2int[None] # exclude records where the label model␣
→˓abstains]
# Log a new dataset to Rubrixrb.log(train_records_with_lm_prediction, name="flyingsquid_results")
60 Chapter 5. Community
Rubrix, Release 0.6.1.dev0+gf48c265.d20211104
5.7.8 Joint Model with Weasel
Weasel lets you train downstream models end-to-end using directly weak labels.
Coming soon.
5.8 Monitoring and collecting data from third-party apps
This guide will show you how can Rubrix be integrated into third-party applications to collect predictions and userfeedback. To do this, we are going to use streamlit, an amazing tool to turn Python scripts into beautiful web-apps.
Let’s make a quick tour of the app, how you can run it locally and how to integrate Rubrix into other apps.
5.8.1 What does our streamlit app do?
In our streamlit app we are working on a use case of multilabel text classification, including the inference processto make predictions and the annotations over those predictions. The NLP model is a zero-shot classifier based onSqueezeBERT, used to predict text categories. These predictions are mutilabel, which means that more than onecategory can be predicted for a given text, thus the sum of the probabilities of all the candidate labels can be greaterthan 1. For this reasons, we let the user pick a threshold, showing which labels will be included in the prediction whenchanging its value.
After the threshold is selected, the user can make its own annotation, whether or not she or he thinks the predictionsare correct. This is where the human-in-the-loop comes into play, by responding to a model made prediction with auser made annotation, that could eventually be used to provide feedback to the model or to make retrainings.
Once the annotated labels are selected, the user can press the log button. A TextClassificationRecord will becreated and logged into Rubrix with all the information about the process: the input text, the prediction and the anno-tation. This data is also displayed in the streamlit app, as the process ends. But you could always change the input text,the threshold or the annotated labels and log again!
5.8.2 How to run the app
We’ve created a standalone repository for this streamlit app, for you to clone and play around. To run the app, followthese steps:
1. Install the requirements into a fresh environment (or into your system, but take care with the dependency prob-lems!) with Python 3, via pip install -r requirements.txt.
2. Run streamlit run app.py.
3. In the response prompt, streamlit will give you the localhost direction where your app will be running. You cannow open it in your browser.
5.8. Monitoring and collecting data from third-party apps 61
Rubrix, Release 0.6.1.dev0+gf48c265.d20211104
5.8.3 Rubrix integration
Rubrix can be used alongside any third-party apps via its REST API or its Python client. In our case, the logging ofthe record is made when the log button is pressed. In that moment, two lists will be populated:
• labels, with the predicted labels by the zero-shot classifier
• selected_labels, with the annotated labels, selected by the user.
Then, using the Python client we log instances of rubrix.TextClassificationRecord as follows:
import rubrix as rb
item = rb.TextClassificationRecord(inputs={"text": text_input},prediction=labels,prediction_agent="typeform/squeezebert-mnli",annotation=selected_labels,annotation_agent="streamlit-user",multi_label=True,event_timestamp=datetime.datetime.now(),metadata={"model": "typeform/squeezebert-mnli"}
)
dataset_name = "multilabel_text_classification"
rb.log(name=dataset_name, records=item)
5.9 Metrics
This guide gives you a brief introduction to Rubrix Metrics. Rubrix Metrics enable you to perform fine-grained analysesof your models and training datasets. Rubrix Metrics are inspired by a a number of seminal works such as Explain-aboard.
The main goal is to make it easier to build more robust models and training data, going beyond single-number metrics(e.g., F1).
This guide gives a brief overview of currently supported metrics. For the full API documentation see the Python APIreference
This feature is experimental, you can expect some changes in the Python API. Please report on Github any issue youencounter.
62 Chapter 5. Community
Rubrix, Release 0.6.1.dev0+gf48c265.d20211104
5.9.1 Install dependencies
Verify you have already installed Jupyter Widgets in order to properly visualize the plots. See https://ipywidgets.readthedocs.io/en/latest/user_install.html
For running this guide you need to install the following dependencies:
[ ]: %pip install datasets spacy plotly -qqq
and the spacy model:
[ ]: !python -m spacy download en_core_web_sm
5.9.2 Load dataset and spaCy model
We’ll be using spaCy for this guide, but all the metrics we’ll see are computed for any other framework (Flair, Stanza,Hugging Face, etc.). As an example will use the WNUT17 NER dataset.
[ ]: import rubrix as rbimport spacyfrom datasets import load_dataset
nlp = spacy.load("en_core_web_sm")dataset = load_dataset("wnut_17", split="train")
5.9.3 Log records into a Rubrix dataset
[ ]: from tqdm.auto import tqdm
records = []
for record in tqdm(dataset, total=len(dataset)):# We only need the text of each instancetext = " ".join(record["tokens"])
# spaCy Doc creationdoc = nlp(text)
# Entity annotationsentities = [
(ent.label_, ent.start_char, ent.end_char)for ent in doc.ents
]
# Pre-tokenized input texttokens = [token.text for token in doc]
# Rubrix TokenClassificationRecord listrecords.append(
(continues on next page)
5.9. Metrics 63
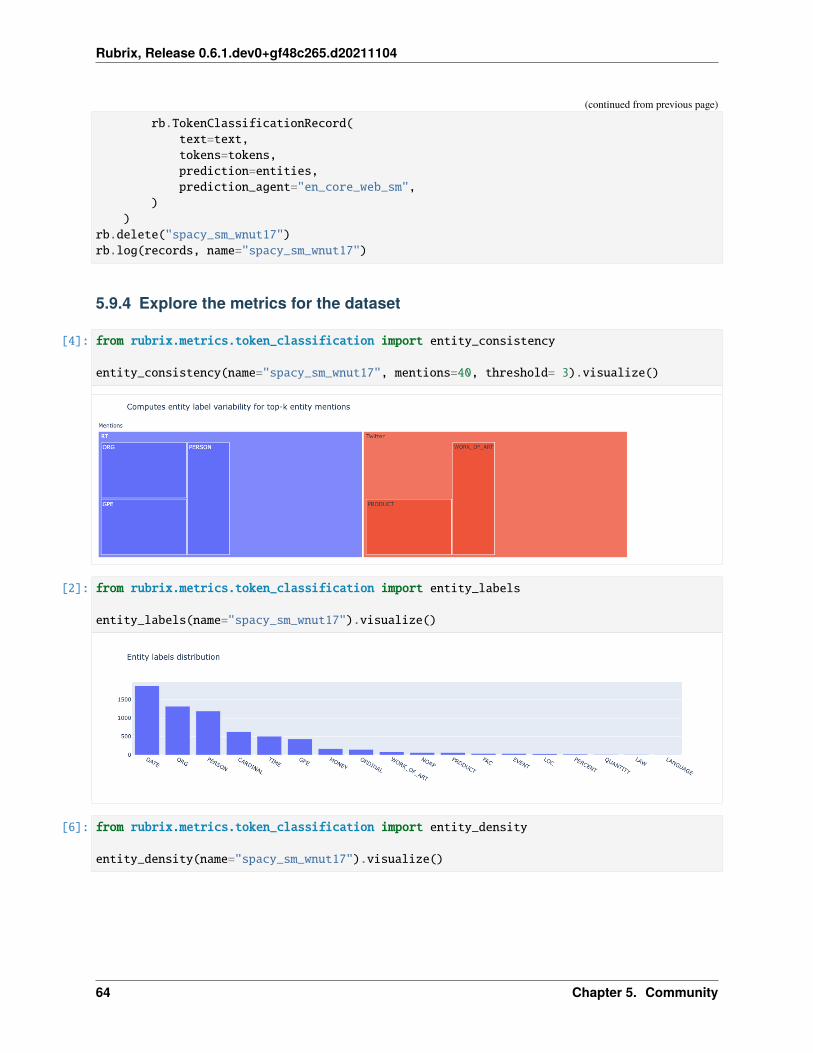
Rubrix, Release 0.6.1.dev0+gf48c265.d20211104
(continued from previous page)
rb.TokenClassificationRecord(text=text,tokens=tokens,prediction=entities,prediction_agent="en_core_web_sm",
))
rb.delete("spacy_sm_wnut17")rb.log(records, name="spacy_sm_wnut17")
5.9.4 Explore the metrics for the dataset
[4]: from rubrix.metrics.token_classification import entity_consistency
entity_consistency(name="spacy_sm_wnut17", mentions=40, threshold= 3).visualize()
[2]: from rubrix.metrics.token_classification import entity_labels
entity_labels(name="spacy_sm_wnut17").visualize()
[6]: from rubrix.metrics.token_classification import entity_density
entity_density(name="spacy_sm_wnut17").visualize()
64 Chapter 5. Community
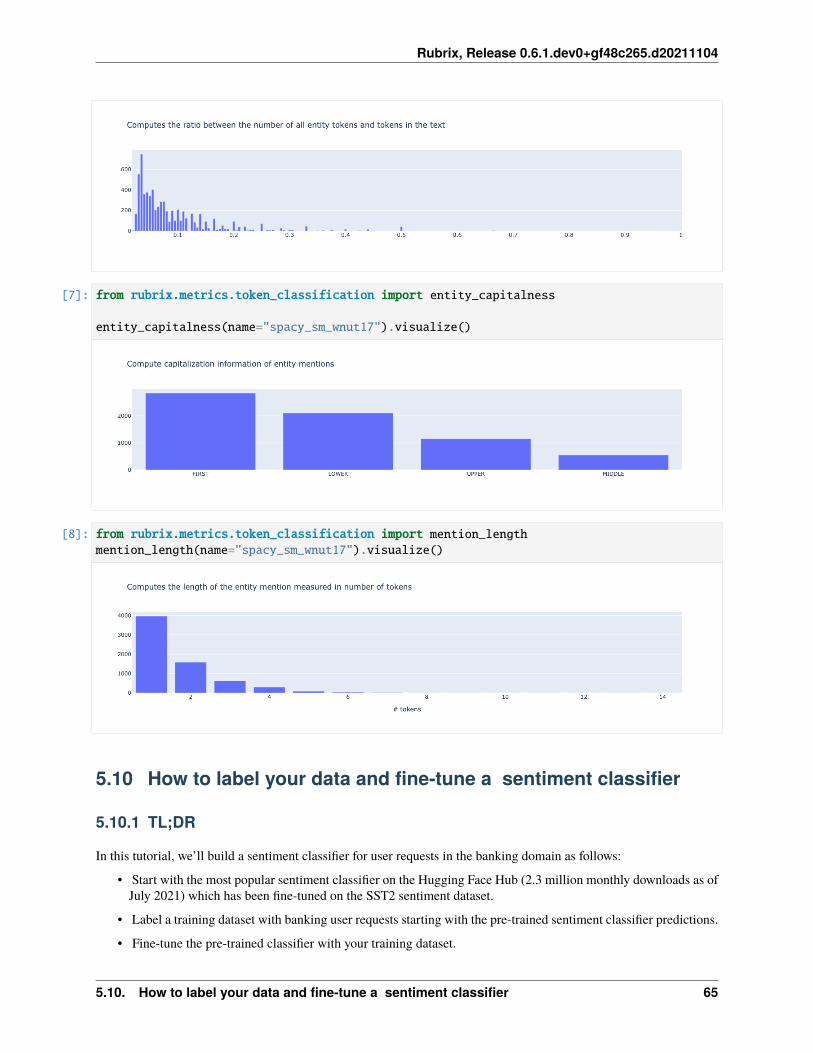
Rubrix, Release 0.6.1.dev0+gf48c265.d20211104
[7]: from rubrix.metrics.token_classification import entity_capitalness
entity_capitalness(name="spacy_sm_wnut17").visualize()
[8]: from rubrix.metrics.token_classification import mention_lengthmention_length(name="spacy_sm_wnut17").visualize()
5.10 How to label your data and fine-tune a sentiment classifier
5.10.1 TL;DR
In this tutorial, we’ll build a sentiment classifier for user requests in the banking domain as follows:
• Start with the most popular sentiment classifier on the Hugging Face Hub (2.3 million monthly downloads as ofJuly 2021) which has been fine-tuned on the SST2 sentiment dataset.
• Label a training dataset with banking user requests starting with the pre-trained sentiment classifier predictions.
• Fine-tune the pre-trained classifier with your training dataset.
5.10. How to label your data and fine-tune a sentiment classifier 65
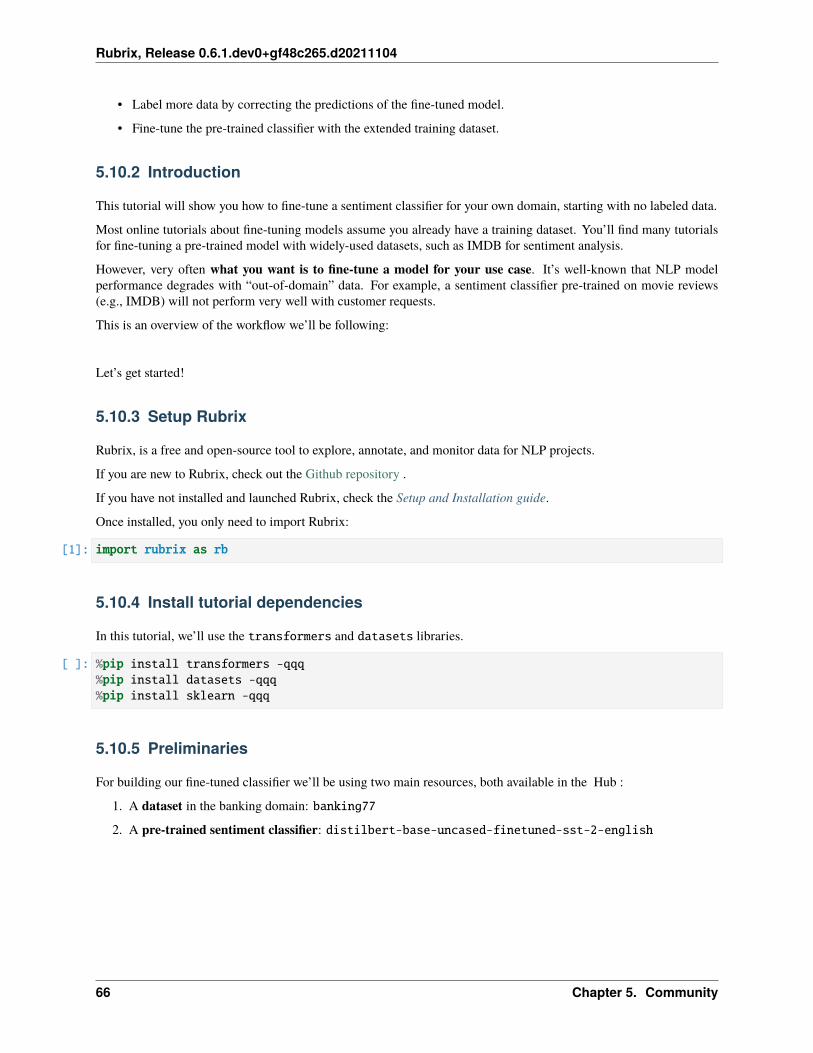
Rubrix, Release 0.6.1.dev0+gf48c265.d20211104
• Label more data by correcting the predictions of the fine-tuned model.
• Fine-tune the pre-trained classifier with the extended training dataset.
5.10.2 Introduction
This tutorial will show you how to fine-tune a sentiment classifier for your own domain, starting with no labeled data.
Most online tutorials about fine-tuning models assume you already have a training dataset. You’ll find many tutorialsfor fine-tuning a pre-trained model with widely-used datasets, such as IMDB for sentiment analysis.
However, very often what you want is to fine-tune a model for your use case. It’s well-known that NLP modelperformance degrades with “out-of-domain” data. For example, a sentiment classifier pre-trained on movie reviews(e.g., IMDB) will not perform very well with customer requests.
This is an overview of the workflow we’ll be following:
Let’s get started!
5.10.3 Setup Rubrix
Rubrix, is a free and open-source tool to explore, annotate, and monitor data for NLP projects.
If you are new to Rubrix, check out the Github repository .
If you have not installed and launched Rubrix, check the Setup and Installation guide.
Once installed, you only need to import Rubrix:
[1]: import rubrix as rb
5.10.4 Install tutorial dependencies
In this tutorial, we’ll use the transformers and datasets libraries.
[ ]: %pip install transformers -qqq%pip install datasets -qqq%pip install sklearn -qqq
5.10.5 Preliminaries
For building our fine-tuned classifier we’ll be using two main resources, both available in the Hub :
1. A dataset in the banking domain: banking77
2. A pre-trained sentiment classifier: distilbert-base-uncased-finetuned-sst-2-english
66 Chapter 5. Community
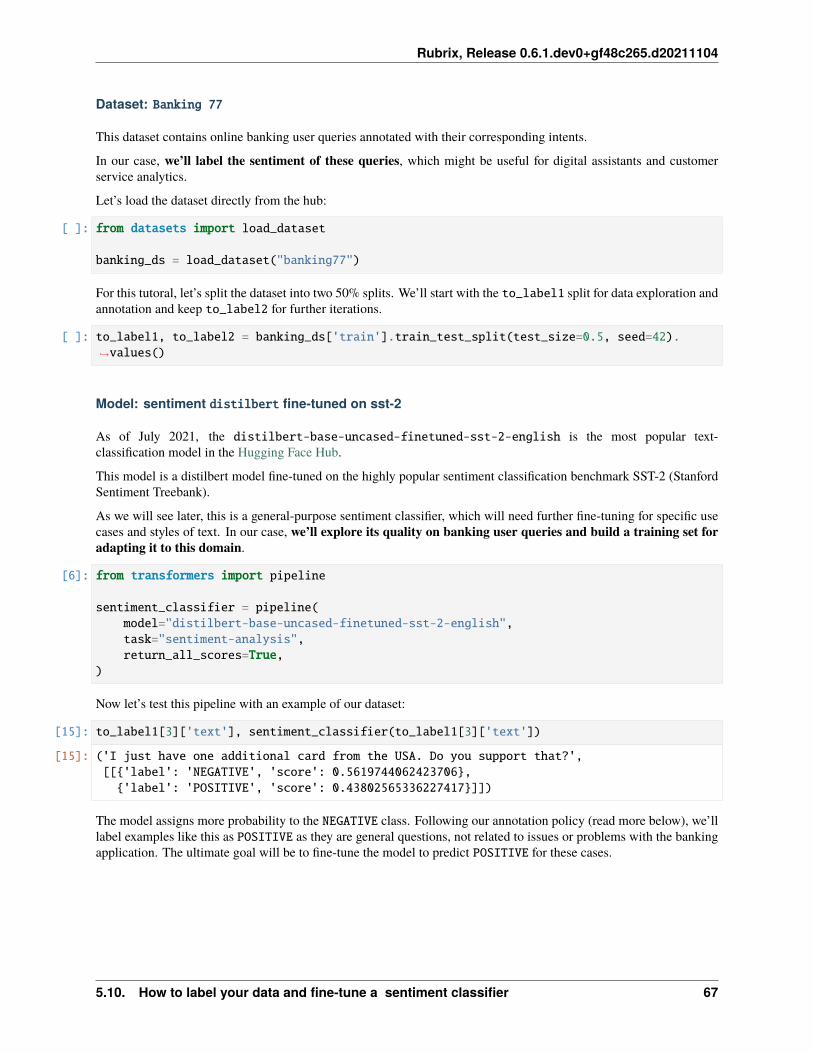
Rubrix, Release 0.6.1.dev0+gf48c265.d20211104
Dataset: Banking 77
This dataset contains online banking user queries annotated with their corresponding intents.
In our case, we’ll label the sentiment of these queries, which might be useful for digital assistants and customerservice analytics.
Let’s load the dataset directly from the hub:
[ ]: from datasets import load_dataset
banking_ds = load_dataset("banking77")
For this tutoral, let’s split the dataset into two 50% splits. We’ll start with the to_label1 split for data exploration andannotation and keep to_label2 for further iterations.
[ ]: to_label1, to_label2 = banking_ds['train'].train_test_split(test_size=0.5, seed=42).→˓values()
Model: sentiment distilbert fine-tuned on sst-2
As of July 2021, the distilbert-base-uncased-finetuned-sst-2-english is the most popular text-classification model in the Hugging Face Hub.
This model is a distilbert model fine-tuned on the highly popular sentiment classification benchmark SST-2 (StanfordSentiment Treebank).
As we will see later, this is a general-purpose sentiment classifier, which will need further fine-tuning for specific usecases and styles of text. In our case, we’ll explore its quality on banking user queries and build a training set foradapting it to this domain.
[6]: from transformers import pipeline
sentiment_classifier = pipeline(model="distilbert-base-uncased-finetuned-sst-2-english",task="sentiment-analysis",return_all_scores=True,
)
Now let’s test this pipeline with an example of our dataset:
[15]: to_label1[3]['text'], sentiment_classifier(to_label1[3]['text'])
[15]: ('I just have one additional card from the USA. Do you support that?',[[{'label': 'NEGATIVE', 'score': 0.5619744062423706},
{'label': 'POSITIVE', 'score': 0.43802565336227417}]])
The model assigns more probability to the NEGATIVE class. Following our annotation policy (read more below), we’lllabel examples like this as POSITIVE as they are general questions, not related to issues or problems with the bankingapplication. The ultimate goal will be to fine-tune the model to predict POSITIVE for these cases.
5.10. How to label your data and fine-tune a sentiment classifier 67
Rubrix, Release 0.6.1.dev0+gf48c265.d20211104
A note on sentiment analysis and data annotation
Sentiment analysis is one of the most subjective tasks in NLP. What we understand by sentiment will vary from oneapplication to another and depend on the business objectives of the project. Also, sentiment can be modeled in differentways, leading to different labeling schemes. For example, sentiment can be modeled as real value (going from -1 to 1,from 0 to 1.0, etc.) or with 2 or more labels (including different degrees such as positive, negative, neutral, etc.)
For this tutorial, we’ll use the original labeling scheme defined by the pre-trained model which is composed of twolabels: POSITIVE and NEGATIVE. We could have added the NEUTRAL label, but let’s keep it simple.
Another important issue when approaching a data annotaion project are the annotation guidelines, which explain howto assign the labels to specific examples. As we’ll see later, the messages we’ll be labeling are mostly questions with aneutral sentiment, which we’ll label with the POSITIVE label, and some other are negative questions which we’ll labelwith the NEGATIVE label. Later on, we’ll show some examples of each label.
5.10.6 1. Run the pre-trained model over the dataset and log the predictions
As a first step, let’s use the pre-trained model for predicting over our raw dataset. For this will use the handy dataset.map method from the datasets library.
Predict
[16]: def predict(examples):return {"predictions": sentiment_classifier(examples['text'], truncation=True)}
[ ]: to_label1 = to_label1.map(predict, batched=True, batch_size=4)
Log
The following code builds a list of Rubrix records with the predictions and logs them into a Rubrix Dataset. We’ll usethis dataset to explore and label our first training set.
[18]: records = []for example in to_label1.shuffle():
record = rb.TextClassificationRecord(inputs=example["text"],metadata={'category': example['label']}, # log the intents for exploration of␣
→˓specific intentsprediction=[(pred['label'], pred['score']) for pred in example['predictions']],prediction_agent="distilbert-base-uncased-finetuned-sst-2-english"
)records.append(record)
[ ]: rb.log(name='labeling_with_pretrained', records=records)
68 Chapter 5. Community
Rubrix, Release 0.6.1.dev0+gf48c265.d20211104
5.10.7 2. Explore and label data with the pretrained model
In this step, we’ll start by exploring how the pre-trained model is performing with our dataset.
At first sight:
• The pre-trained sentiment classifier tends to label most of the examples as NEGATIVE (4.835 of 5.001 records).You can see this yourself using the Predictions / Predicted as: filter
• Using this filter and filtering by predicted as POSITIVE, we see that examples like “I didn’t withdraw the amountof cash that is showing up in the app.” are not predicted as expected (according to our basic “annotation policy”described in the preliminaries).
Taking into account this analysis, we can start labeling our data.
Rubrix provides you with a search-driven UI to annotated data, using free-text search, search filters and the Elastic-search query DSL for advanced queries. This is most useful for sparse datasets, tasks with a high number of labels orunbalanced classes. In the standard case, we recommend you to follow the workflow below:
1. Start labeling examples sequentially, without using search features. This way you’ll annotate a fraction of yourdata which will be aligned with the dataset distribution.
2. Once you have a sense of the data, you can start using filters and search features to annotate examples withspecific labels. In our case, we’ll label examples predicted as POSITIVE by our pre-trained model, and then afew examples predicted as NEGATIVE.
Labeling random examples
Labeling POSITIVE examples
After spending some minutes, we’ve labelled almost 5% of our raw dataset with more than 200 annotated examples,which is a small dataset but should be enough for a first fine-tuning of our banking sentiment classifier:
5.10. How to label your data and fine-tune a sentiment classifier 69
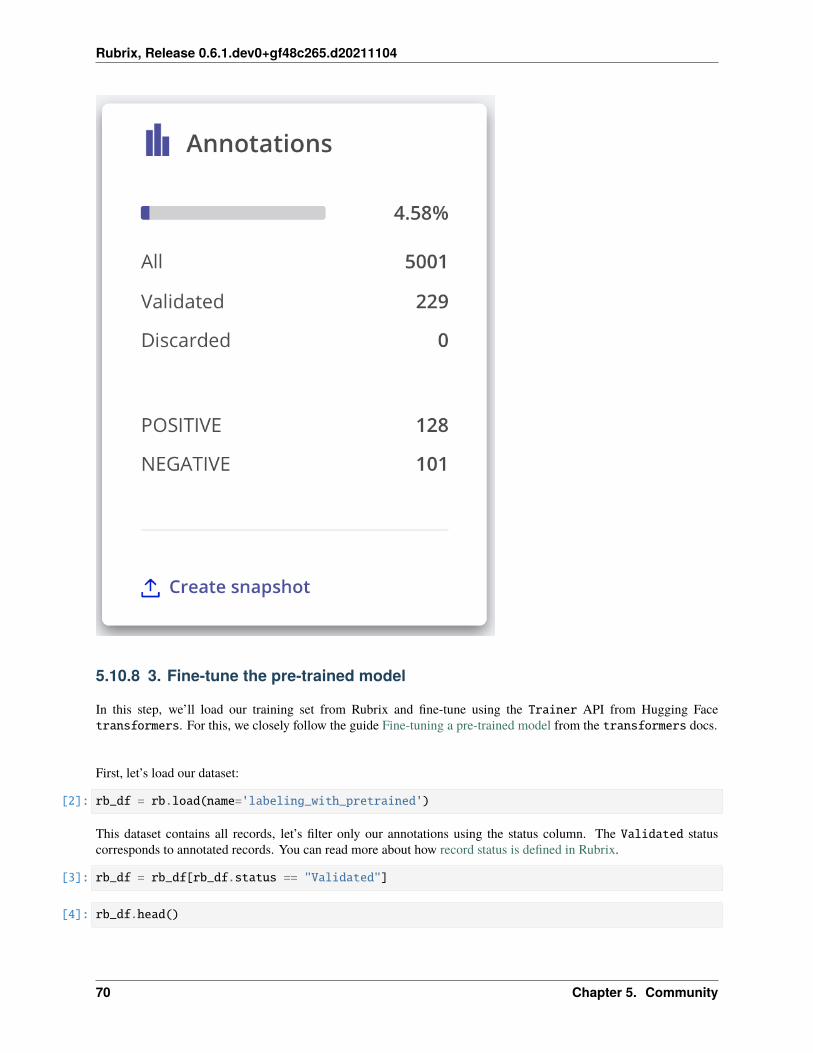
Rubrix, Release 0.6.1.dev0+gf48c265.d20211104
5.10.8 3. Fine-tune the pre-trained model
In this step, we’ll load our training set from Rubrix and fine-tune using the Trainer API from Hugging Facetransformers. For this, we closely follow the guide Fine-tuning a pre-trained model from the transformers docs.
First, let’s load our dataset:
[2]: rb_df = rb.load(name='labeling_with_pretrained')
This dataset contains all records, let’s filter only our annotations using the status column. The Validated statuscorresponds to annotated records. You can read more about how record status is defined in Rubrix.
[3]: rb_df = rb_df[rb_df.status == "Validated"]
[4]: rb_df.head()
70 Chapter 5. Community
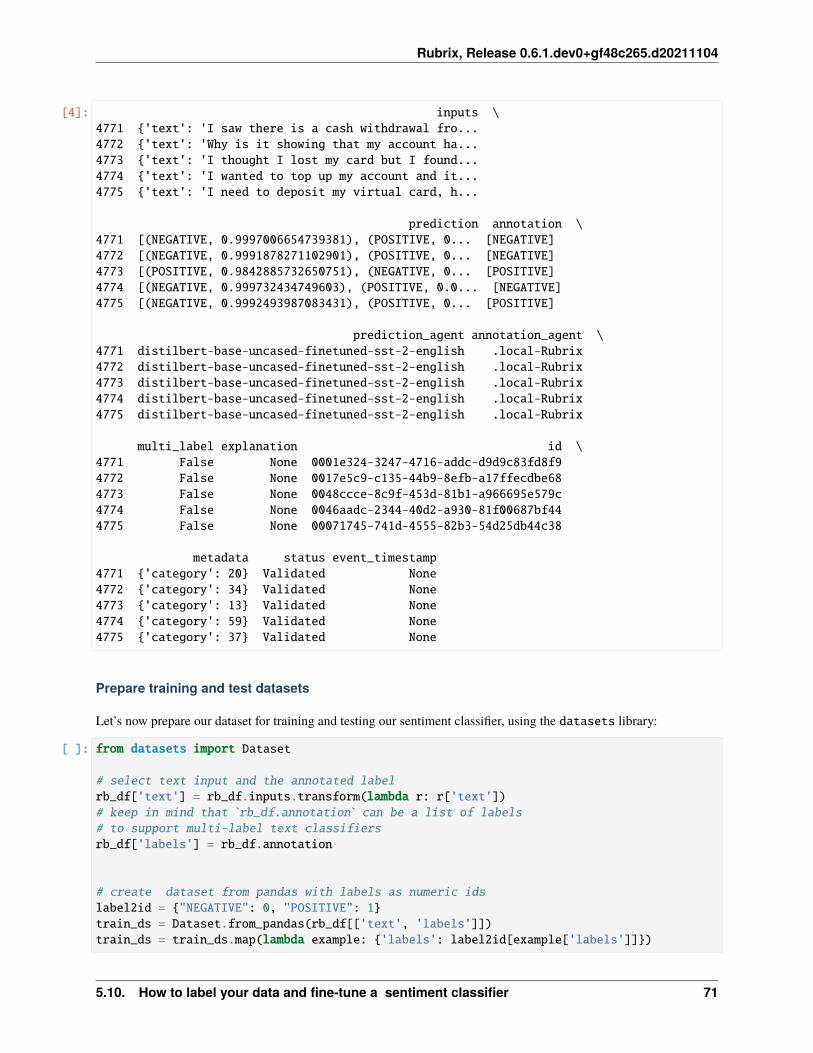
Rubrix, Release 0.6.1.dev0+gf48c265.d20211104
[4]: inputs \4771 {'text': 'I saw there is a cash withdrawal fro...4772 {'text': 'Why is it showing that my account ha...4773 {'text': 'I thought I lost my card but I found...4774 {'text': 'I wanted to top up my account and it...4775 {'text': 'I need to deposit my virtual card, h...
prediction annotation \4771 [(NEGATIVE, 0.9997006654739381), (POSITIVE, 0... [NEGATIVE]4772 [(NEGATIVE, 0.9991878271102901), (POSITIVE, 0... [NEGATIVE]4773 [(POSITIVE, 0.9842885732650751), (NEGATIVE, 0... [POSITIVE]4774 [(NEGATIVE, 0.999732434749603), (POSITIVE, 0.0... [NEGATIVE]4775 [(NEGATIVE, 0.9992493987083431), (POSITIVE, 0... [POSITIVE]
prediction_agent annotation_agent \4771 distilbert-base-uncased-finetuned-sst-2-english .local-Rubrix4772 distilbert-base-uncased-finetuned-sst-2-english .local-Rubrix4773 distilbert-base-uncased-finetuned-sst-2-english .local-Rubrix4774 distilbert-base-uncased-finetuned-sst-2-english .local-Rubrix4775 distilbert-base-uncased-finetuned-sst-2-english .local-Rubrix
multi_label explanation id \4771 False None 0001e324-3247-4716-addc-d9d9c83fd8f94772 False None 0017e5c9-c135-44b9-8efb-a17ffecdbe684773 False None 0048ccce-8c9f-453d-81b1-a966695e579c4774 False None 0046aadc-2344-40d2-a930-81f00687bf444775 False None 00071745-741d-4555-82b3-54d25db44c38
metadata status event_timestamp4771 {'category': 20} Validated None4772 {'category': 34} Validated None4773 {'category': 13} Validated None4774 {'category': 59} Validated None4775 {'category': 37} Validated None
Prepare training and test datasets
Let’s now prepare our dataset for training and testing our sentiment classifier, using the datasets library:
[ ]: from datasets import Dataset
# select text input and the annotated labelrb_df['text'] = rb_df.inputs.transform(lambda r: r['text'])# keep in mind that `rb_df.annotation` can be a list of labels# to support multi-label text classifiersrb_df['labels'] = rb_df.annotation
# create dataset from pandas with labels as numeric idslabel2id = {"NEGATIVE": 0, "POSITIVE": 1}train_ds = Dataset.from_pandas(rb_df[['text', 'labels']])train_ds = train_ds.map(lambda example: {'labels': label2id[example['labels']]})
5.10. How to label your data and fine-tune a sentiment classifier 71
Rubrix, Release 0.6.1.dev0+gf48c265.d20211104
[6]: train_ds = train_ds.train_test_split(test_size=0.2) ; train_ds
[6]: DatasetDict({train: Dataset({
features: ['__index_level_0__', 'labels', 'text'],num_rows: 183
})test: Dataset({
features: ['__index_level_0__', 'labels', 'text'],num_rows: 46
})})
[ ]: from transformers import AutoTokenizer
tokenizer = AutoTokenizer.from_pretrained("distilbert-base-uncased-finetuned-sst-2-→˓english")
def tokenize_function(examples):return tokenizer(examples["text"], padding="max_length", truncation=True)
train_dataset = train_ds['train'].map(tokenize_function, batched=True).shuffle(seed=42)eval_dataset = train_ds['test'].map(tokenize_function, batched=True).shuffle(seed=42)
Train our sentiment classifier
As we mentioned before, we’re going to fine-tune the distilbert-base-uncased-finetuned-sst-2-englishmodel. Another option will be fine-tuning a distilbert masked language model from scratch, we leave this experimentto you.
Let’s load the model:
[1]: from transformers import AutoModelForSequenceClassification
model = AutoModelForSequenceClassification.from_pretrained("distilbert-base-uncased-→˓finetuned-sst-2-english")
Let’s configure the Trainer:
[ ]: import numpy as npfrom transformers import Trainerfrom datasets import load_metricfrom transformers import TrainingArguments
training_args = TrainingArguments("distilbert-base-uncased-sentiment-banking",evaluation_strategy="epoch",logging_steps=30
)
metric = load_metric("accuracy")
def compute_metrics(eval_pred):(continues on next page)
72 Chapter 5. Community
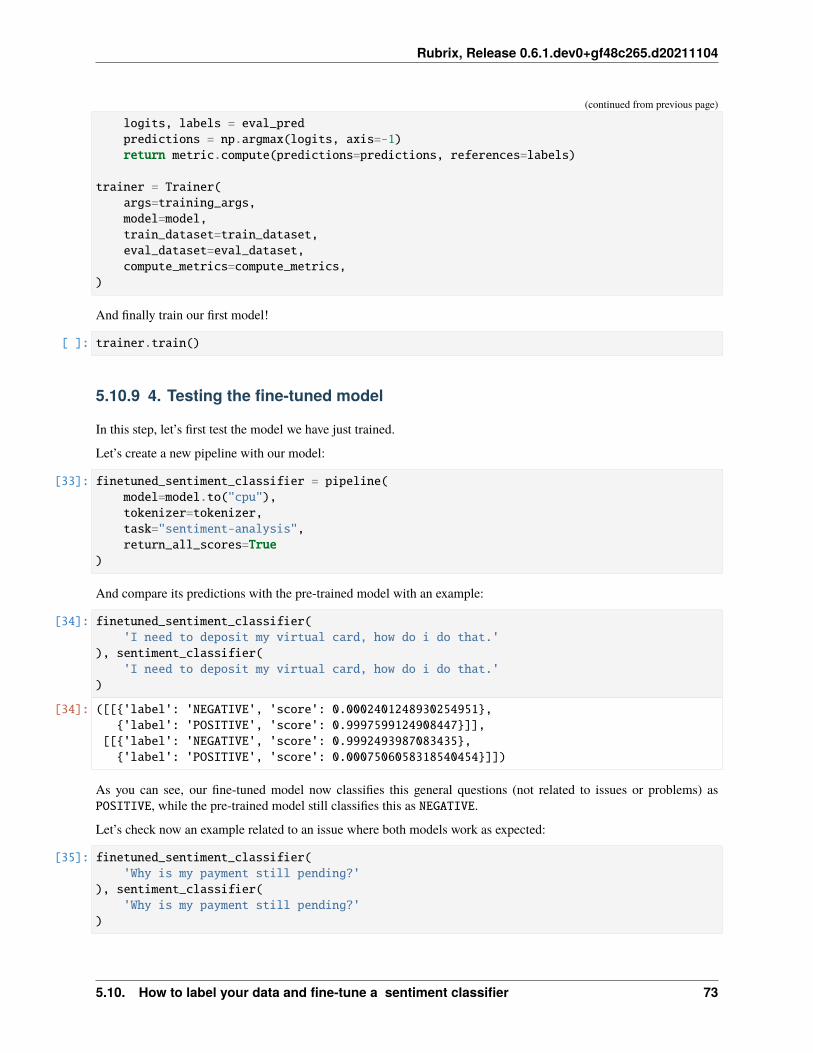
Rubrix, Release 0.6.1.dev0+gf48c265.d20211104
(continued from previous page)
logits, labels = eval_predpredictions = np.argmax(logits, axis=-1)return metric.compute(predictions=predictions, references=labels)
trainer = Trainer(args=training_args,model=model,train_dataset=train_dataset,eval_dataset=eval_dataset,compute_metrics=compute_metrics,
)
And finally train our first model!
[ ]: trainer.train()
5.10.9 4. Testing the fine-tuned model
In this step, let’s first test the model we have just trained.
Let’s create a new pipeline with our model:
[33]: finetuned_sentiment_classifier = pipeline(model=model.to("cpu"),tokenizer=tokenizer,task="sentiment-analysis",return_all_scores=True
)
And compare its predictions with the pre-trained model with an example:
[34]: finetuned_sentiment_classifier('I need to deposit my virtual card, how do i do that.'
), sentiment_classifier('I need to deposit my virtual card, how do i do that.'
)
[34]: ([[{'label': 'NEGATIVE', 'score': 0.0002401248930254951},{'label': 'POSITIVE', 'score': 0.9997599124908447}]],
[[{'label': 'NEGATIVE', 'score': 0.9992493987083435},{'label': 'POSITIVE', 'score': 0.0007506058318540454}]])
As you can see, our fine-tuned model now classifies this general questions (not related to issues or problems) asPOSITIVE, while the pre-trained model still classifies this as NEGATIVE.
Let’s check now an example related to an issue where both models work as expected:
[35]: finetuned_sentiment_classifier('Why is my payment still pending?'
), sentiment_classifier('Why is my payment still pending?'
)
5.10. How to label your data and fine-tune a sentiment classifier 73
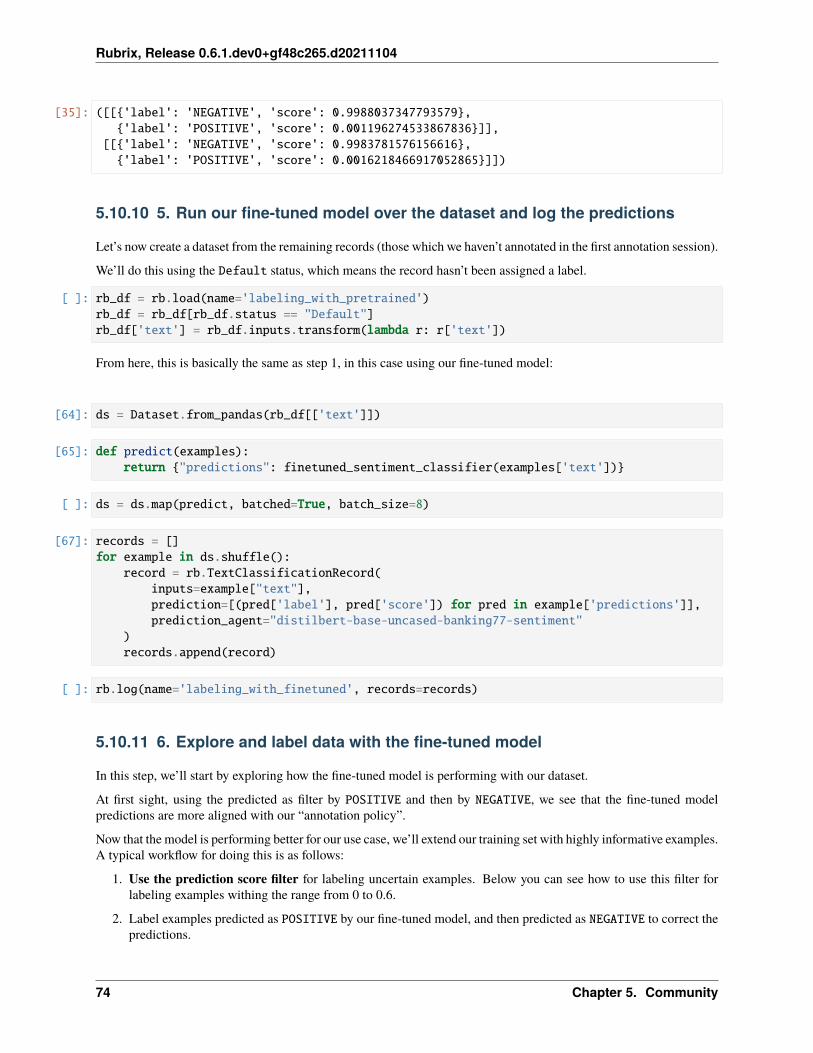
Rubrix, Release 0.6.1.dev0+gf48c265.d20211104
[35]: ([[{'label': 'NEGATIVE', 'score': 0.9988037347793579},{'label': 'POSITIVE', 'score': 0.001196274533867836}]],
[[{'label': 'NEGATIVE', 'score': 0.9983781576156616},{'label': 'POSITIVE', 'score': 0.0016218466917052865}]])
5.10.10 5. Run our fine-tuned model over the dataset and log the predictions
Let’s now create a dataset from the remaining records (those which we haven’t annotated in the first annotation session).
We’ll do this using the Default status, which means the record hasn’t been assigned a label.
[ ]: rb_df = rb.load(name='labeling_with_pretrained')rb_df = rb_df[rb_df.status == "Default"]rb_df['text'] = rb_df.inputs.transform(lambda r: r['text'])
From here, this is basically the same as step 1, in this case using our fine-tuned model:
[64]: ds = Dataset.from_pandas(rb_df[['text']])
[65]: def predict(examples):return {"predictions": finetuned_sentiment_classifier(examples['text'])}
[ ]: ds = ds.map(predict, batched=True, batch_size=8)
[67]: records = []for example in ds.shuffle():
record = rb.TextClassificationRecord(inputs=example["text"],prediction=[(pred['label'], pred['score']) for pred in example['predictions']],prediction_agent="distilbert-base-uncased-banking77-sentiment"
)records.append(record)
[ ]: rb.log(name='labeling_with_finetuned', records=records)
5.10.11 6. Explore and label data with the fine-tuned model
In this step, we’ll start by exploring how the fine-tuned model is performing with our dataset.
At first sight, using the predicted as filter by POSITIVE and then by NEGATIVE, we see that the fine-tuned modelpredictions are more aligned with our “annotation policy”.
Now that the model is performing better for our use case, we’ll extend our training set with highly informative examples.A typical workflow for doing this is as follows:
1. Use the prediction score filter for labeling uncertain examples. Below you can see how to use this filter forlabeling examples withing the range from 0 to 0.6.
2. Label examples predicted as POSITIVE by our fine-tuned model, and then predicted as NEGATIVE to correct thepredictions.
74 Chapter 5. Community
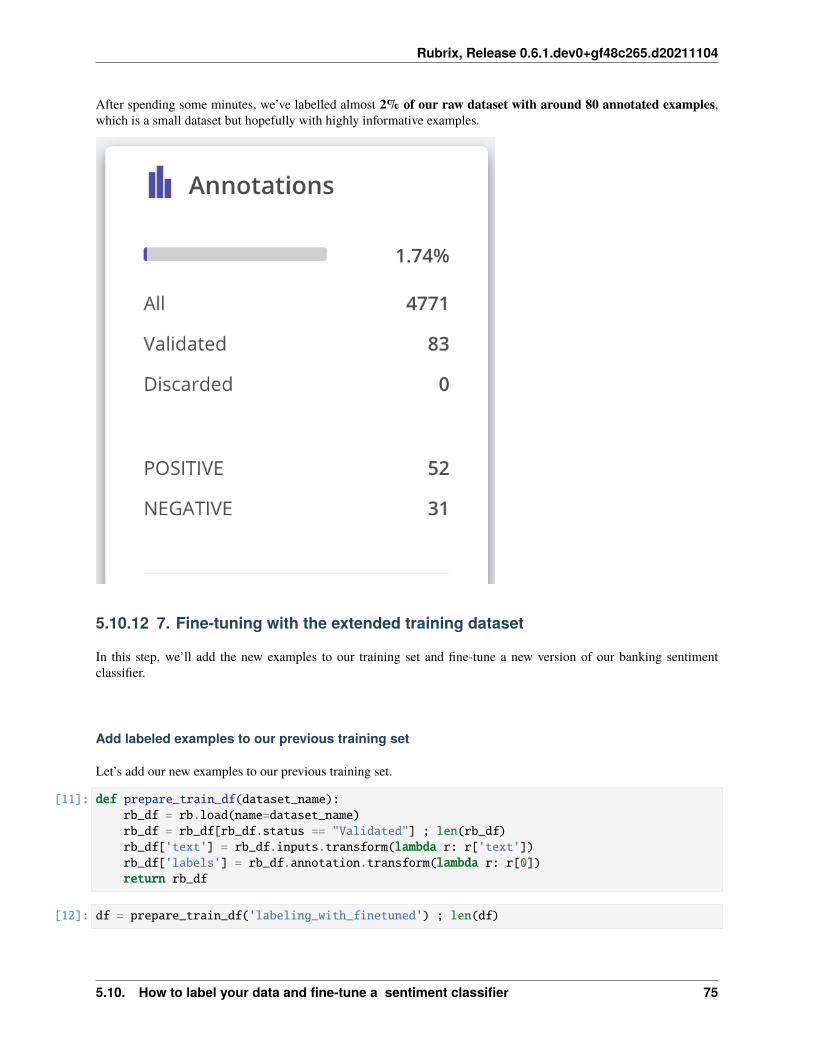
Rubrix, Release 0.6.1.dev0+gf48c265.d20211104
After spending some minutes, we’ve labelled almost 2% of our raw dataset with around 80 annotated examples,which is a small dataset but hopefully with highly informative examples.
5.10.12 7. Fine-tuning with the extended training dataset
In this step, we’ll add the new examples to our training set and fine-tune a new version of our banking sentimentclassifier.
Add labeled examples to our previous training set
Let’s add our new examples to our previous training set.
[11]: def prepare_train_df(dataset_name):rb_df = rb.load(name=dataset_name)rb_df = rb_df[rb_df.status == "Validated"] ; len(rb_df)rb_df['text'] = rb_df.inputs.transform(lambda r: r['text'])rb_df['labels'] = rb_df.annotation.transform(lambda r: r[0])return rb_df
[12]: df = prepare_train_df('labeling_with_finetuned') ; len(df)
5.10. How to label your data and fine-tune a sentiment classifier 75
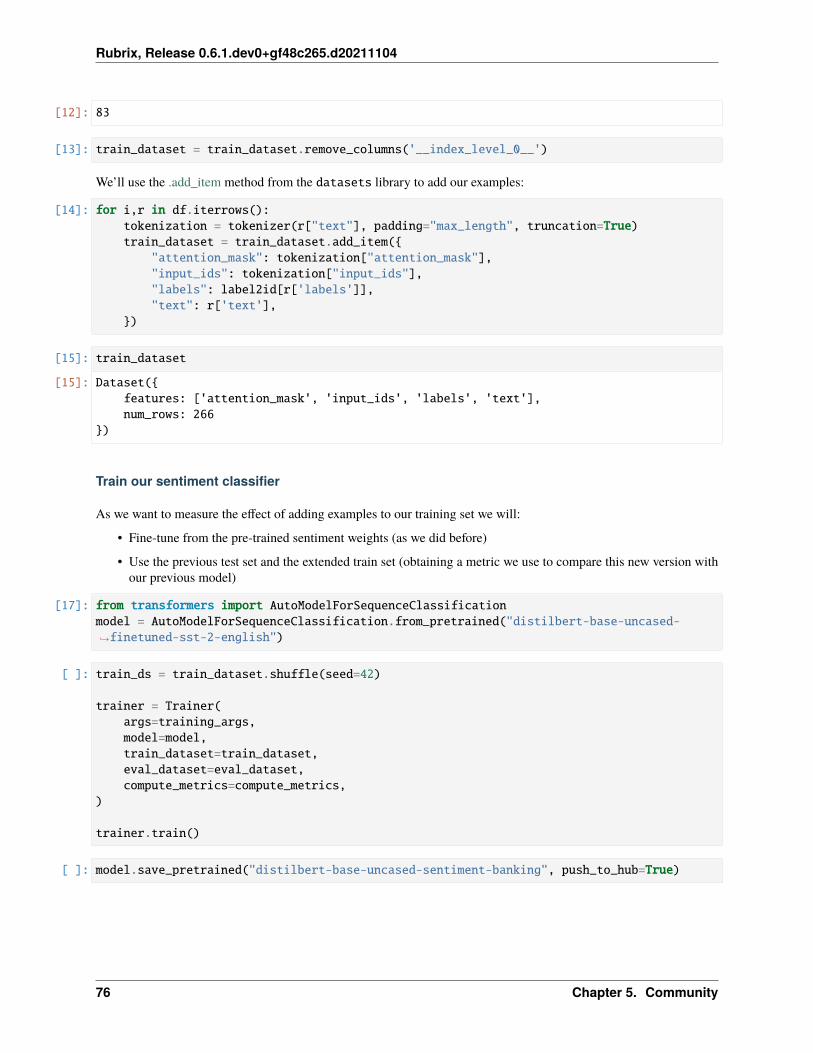
Rubrix, Release 0.6.1.dev0+gf48c265.d20211104
[12]: 83
[13]: train_dataset = train_dataset.remove_columns('__index_level_0__')
We’ll use the .add_item method from the datasets library to add our examples:
[14]: for i,r in df.iterrows():tokenization = tokenizer(r["text"], padding="max_length", truncation=True)train_dataset = train_dataset.add_item({
"attention_mask": tokenization["attention_mask"],"input_ids": tokenization["input_ids"],"labels": label2id[r['labels']],"text": r['text'],
})
[15]: train_dataset
[15]: Dataset({features: ['attention_mask', 'input_ids', 'labels', 'text'],num_rows: 266
})
Train our sentiment classifier
As we want to measure the effect of adding examples to our training set we will:
• Fine-tune from the pre-trained sentiment weights (as we did before)
• Use the previous test set and the extended train set (obtaining a metric we use to compare this new version withour previous model)
[17]: from transformers import AutoModelForSequenceClassificationmodel = AutoModelForSequenceClassification.from_pretrained("distilbert-base-uncased-→˓finetuned-sst-2-english")
[ ]: train_ds = train_dataset.shuffle(seed=42)
trainer = Trainer(args=training_args,model=model,train_dataset=train_dataset,eval_dataset=eval_dataset,compute_metrics=compute_metrics,
)
trainer.train()
[ ]: model.save_pretrained("distilbert-base-uncased-sentiment-banking", push_to_hub=True)
76 Chapter 5. Community
Rubrix, Release 0.6.1.dev0+gf48c265.d20211104
5.10.13 Wrap-up
In this tutorial, you’ve learnt to build a training set from scratch with the help of a pre-trained model, performing twoiterations of predict > log > label.
Although this is somehow a toy example, you could apply this workflow to your own projects to adapt existing modelsor building them from scratch.
In this tutorial, we’ve covered one way of building training sets: hand labeling. If you are interested in other methods,which could be combined witth hand labeling, checkout the following tutorials:
• Active learning with modAL
• Weak supervision with Snorkel
5.10.14 Next steps
Star Rubrix Github repo to stay updated.
Rubrix documentation for more guides and tutorials.
Join the Rubrix community! A good place to start is the discussion forum.
5.11 Explore and analyze spaCy NER pipelines
In this tutorial, you’ll learn to log spaCy Name Entity Recognition (NER) predictions.
This is useful for:
• Evaluating pre-trained models.
• Spotting frequent errors both during development and production.
• Improve your pipelines over time using Rubrix annotation mode.
• Monitor your model predictions using Rubrix integration with Kibana
Let’s get started!
5.11.1 Introduction
In this tutorial we will:
• Load the Gutenberg Time dataset from the Hugging Face Hub.
• Use a transformer-based spaCy model for detecting entities in this dataset and log the detected entities into aRubrix dataset. This dataset can be used for exploring the quality of predictions and for creating a new trainingset, by correcting, adding and validating entities.
• Use a smaller spaCy model for detecting entities and log the detected entities into the same Rubrix dataset forcomparing its predictions with the previous model.
• As a bonus, we will use Rubrix and spaCy on a more challenging dataset: IMDB.
5.11. Explore and analyze spaCy NER pipelines 77
Rubrix, Release 0.6.1.dev0+gf48c265.d20211104
5.11.2 Setup Rubrix
If you are new to Rubrix, visit and star Rubrix for more materials like and detailed docs: Github repo
If you have not installed and launched Rubrix, check the Setup and Installation guide.
Once installed, you only need to import Rubrix:
[ ]: import rubrix as rb
5.11.3 Install tutorial dependencies
In this tutorial, we’ll use the datasets and spaCy libraries and the en_core_web_trf pretrained English model, aRoberta-based spaCy model . If you do not have them installed, run:
[ ]: %pip install datasets spacy~=3.0 protobuf -qqq
5.11.4 Our dataset
For this tutorial, we’re going to use the Gutenberg Time dataset from the Hugging Face Hub. It contains all explicittime references in a dataset of 52,183 novels whose full text is available via Project Gutenberg. From extracts of novels,we are surely going to find some NER entities.
[ ]: from datasets import load_dataset
dataset = load_dataset("gutenberg_time", split="train")
Let’s take a look at our dataset!
[ ]: train, test = dataset.train_test_split(test_size=0.002, seed=42).values() ; test
5.11.5 Logging spaCy NER entities into Rubrix
Using a Transformer-based pipeline
Let’s install and load our roberta-based pretrained pipeline and apply it to one of our dataset records:
[ ]: !python -m spacy download en_core_web_trf
[ ]: import spacy
nlp = spacy.load("en_core_web_trf")doc = nlp(dataset[0]["tok_context"])doc
Now let’s apply the nlp pipeline to our dataset records, collecting the tokens and NER entities.
[ ]: from tqdm.auto import tqdm
records = []
(continues on next page)
78 Chapter 5. Community
Rubrix, Release 0.6.1.dev0+gf48c265.d20211104
(continued from previous page)
for record in tqdm(test, total=len(test)):# We only need the text of each instancetext = record["tok_context"]
# spaCy Doc creationdoc = nlp(text)
# Entity annotationsentities = [
(ent.label_, ent.start_char, ent.end_char)for ent in doc.ents
]
# Pre-tokenized input texttokens = [token.text for token in doc]
# Rubrix TokenClassificationRecord listrecords.append(
rb.TokenClassificationRecord(text=text,tokens=tokens,prediction=entities,prediction_agent="en_core_web_trf",
))
[ ]: records[0]
[ ]: rb.log(records=records, name="gutenberg_spacy_ner")
If you go to the gutenberg_spacy_ner dataset in Rubrix you can explore the predictions of this model:
• You can filter records containing specific entity types.
• You can see the most frequent “mentions” or surface forms for each entity. Mentions are the string values ofspecific entity types, such as for example “1 month” can be the mention of a duration entity. This is useful forerror analysis, to quickly see potential issues and problematic entity types.
• You can use the free-text search to find records containing specific words.
• You could validate, include or reject specific entity annotations to build a new training set.
Using a smaller but more efficient pipeline
Now let’s compare with a smaller, but more efficient pre-trained model. Let’s first download it
[ ]: !python -m spacy download en_core_web_sm
[ ]: import spacy
nlp = spacy.load("en_core_web_sm")doc = nlp(dataset[0]["tok_context"])
5.11. Explore and analyze spaCy NER pipelines 79
Rubrix, Release 0.6.1.dev0+gf48c265.d20211104
[ ]: records = [] # Creating and empty record list to save all the records
for record in tqdm(test, total=len(test)):
text = record["tok_context"] # We only need the text of each instancedoc = nlp(text) # spaCy Doc creation
# Entity annotationsentities = [
(ent.label_, ent.start_char, ent.end_char)for ent in doc.ents
]
# Pre-tokenized input texttokens = [token.text for token in doc]
# Rubrix TokenClassificationRecord listrecords.append(
rb.TokenClassificationRecord(text=text,tokens=tokens,prediction=entities,prediction_agent="en_core_web_sm",
))
[ ]: rb.log(records=records, name="gutenberg_spacy_ner")
5.11.6 Exploring and comparing en_core_web_sm and en_core_web_trf models
If you go to your gutenberg_spacy_ner you can explore and compare the results of both models.
You can use the predicted by filter, which comes from the prediction_agent parameter of yourTextClassificationRecord to only see predictions of a specific model:
80 Chapter 5. Community
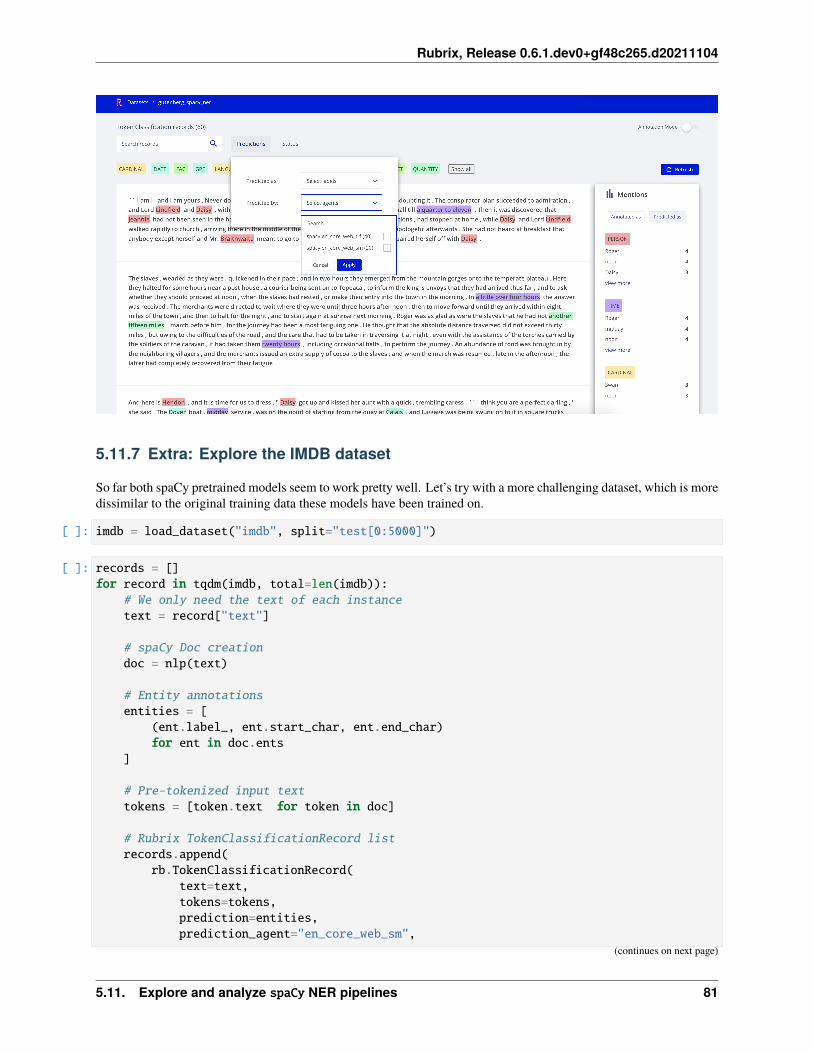
Rubrix, Release 0.6.1.dev0+gf48c265.d20211104
5.11.7 Extra: Explore the IMDB dataset
So far both spaCy pretrained models seem to work pretty well. Let’s try with a more challenging dataset, which is moredissimilar to the original training data these models have been trained on.
[ ]: imdb = load_dataset("imdb", split="test[0:5000]")
[ ]: records = []for record in tqdm(imdb, total=len(imdb)):
# We only need the text of each instancetext = record["text"]
# spaCy Doc creationdoc = nlp(text)
# Entity annotationsentities = [
(ent.label_, ent.start_char, ent.end_char)for ent in doc.ents
]
# Pre-tokenized input texttokens = [token.text for token in doc]
# Rubrix TokenClassificationRecord listrecords.append(
rb.TokenClassificationRecord(text=text,tokens=tokens,prediction=entities,prediction_agent="en_core_web_sm",
(continues on next page)
5.11. Explore and analyze spaCy NER pipelines 81
Rubrix, Release 0.6.1.dev0+gf48c265.d20211104
(continued from previous page)
))
[ ]: rb.log(records=records, name="imdb_spacy_ner")
Exploring this dataset highlights the need of fine-tuning for specific domains.
For example, if we check the most frequent mentions for Person, we find two highly frequent missclassified entities:gore (the film genre) and Oscar (the prize). You can check yourself each an every example by using the filters andsearch-box.
5.11.8 Summary
In this tutorial, we have learnt to log and explore differnt spaCy NER models with Rubrix. Using what we´ve learnthere you can:
• Build custom dashboards using Kibana to monitor and visualize spaCy models.
• Build training sets using pre-trained spaCy models.
5.11.9 Next steps
Rubrix documentation for more guides and tutorials.
Join the Rubrix community! A good place to start is the discussion forum.
Rubrix Github repo to stay updated.
5.12 Node classification with kglab and PyTorch Geometric
We introduce the application of neural networks on knowledge graphs using kglab and pytorch_geometric.
Graph Neural networks (GNNs) have gained popularity in a number of practical applications, including knowledgegraphs, social networks and recommender systems. In the context of knowledge graphs, GNNs are being used for taskssuch as link prediction, node classification or knowledge graph embeddings. Many use cases for these tasks are relatedto Automatic Knowledge Base Construction (AKBC) and completion.
In this tutorial, we will learn to:
• use kglab to represent a knowledge graph as a Pytorch Tensor, a suitable structure for working with neural nets
• use the widely known pytorch_geometric (PyG) GNN library together with kglab.
• train a GNN with pytorch_geometric and PyTorch Lightning for semi-supervised node classification ofthe recipes knowledge graph.
• build and iterate on training data using rubrix with a Human-in-the-loop (HITL) approach.
82 Chapter 5. Community
Rubrix, Release 0.6.1.dev0+gf48c265.d20211104
5.12.1 Our use case in a nutshell
Our goal in this notebook will be to build a semi-supervised node classifier of recipes and ingredients from scratchusing kglab, PyG and Rubrix.
Our classifier will be able to classify the nodes in our 15K nodes knowledge graph according to a set of pre-definedflavour related categories: sweet, salty, piquant, sour, etc. To account for mixed flavours (e.g., sweet chili sauce),our model will be multi-class (we have several target labels), multi-label (a node can be labelled as with 0 or severalcategories).
5.12.2 Install kglab and Pytorch Geometric
[ ]: %pip install torch-scatter -f https://pytorch-geometric.com/whl/torch-1.8.0+cpu.html -qqq%pip install torch-sparse -f https://pytorch-geometric.com/whl/torch-1.8.0+cpu.html -qqq%pip install torch-cluster -f https://pytorch-geometric.com/whl/torch-1.8.0+cpu.html -qqq%pip install torch-spline-conv -f https://pytorch-geometric.com/whl/torch-1.8.0+cpu.html␣→˓-qqq%pip install torch-geometric -qqq%pip install torch==1.8.0 -qqq
%pip install kglab -qqq
%pip install pytorch_lightning -qqq
5.12.3 1. Loading and exploring the recipes knowledge graph
We’ll be working with the “recipes” knowledge graph, which is used throughout the kglab tutorial (see the Syllabus).
This version of the recipes kg contains around ~15K recipes linked to their respective ingredients, as well as some otherproperties such as cooking time, labels and descriptions.
Let’s load the knowledge graph into a kg object by reading from an RDF file (in Turtle):
[ ]: import kglab
NAMESPACES = {"wtm": "http://purl.org/heals/food/","ind": "http://purl.org/heals/ingredient/","recipe": "https://www.food.com/recipe/",}
kg = kglab.KnowledgeGraph(namespaces = NAMESPACES)
_ = kg.load_rdf("data/recipe_lg.ttl")
Let’s take a look at our graph structure using the Measure class:
[ ]: measure = kglab.Measure()measure.measure_graph(kg)
f"Nodes: {measure.get_node_count()} ; Edges: {measure.get_edge_count()}"
5.12. Node classification with kglab and PyTorch Geometric 83
Rubrix, Release 0.6.1.dev0+gf48c265.d20211104
[ ]: measure.p_gen.get_tally() # tallies the counts of predicates
[ ]: measure.s_gen.get_tally() # tallies the counts of predicates
[ ]: measure.o_gen.get_tally() # tallies the counts of predicates
[ ]: measure.l_gen.get_tally() # tallies the counts of literals
From the above exploration, we can extract some conclusions to guide the next steps:
• We have a limited number of relationships, being hasIngredient the most frequent.
• We have rather unique literals for labels and descriptions, but a certain amount of repetition for hasCookTime.
• As we would have expected, most frequently referenced objects are ingredients such as Salt, ChikenEgg andso on.
Now, let’s move into preparing our knowledge graph for PyTorch.
5.12.4 2. Representing our knowledge graph as a PyTorch Tensor
Let’s now represent our kg as a PyTorch tensor using the kglab.SubgraphTensor class.
[ ]: sg = kglab.SubgraphTensor(kg)
[ ]: def to_edge_list(g, sg, excludes):def exclude(rel):
return sg.n3fy(rel) in excludes
relations = sorted(set(g.predicates()))subjects = set(g.subjects())objects = set(g.objects())nodes = list(subjects.union(objects))
relations_dict = {rel: i for i, rel in enumerate(list(relations)) if not␣→˓exclude(rel)}
# this offset enables consecutive indices in our final vectoroffset = len(relations_dict.keys())
nodes_dict = {node: i+offset for i, node in enumerate(nodes)}
edge_list = []
for s, p, o in g.triples((None, None, None)):if p in relations_dict.keys(): # this means is not excluded
src, dst, rel = nodes_dict[s], nodes_dict[o], relations_dict[p]edge_list.append([src, dst, 2 * rel])edge_list.append([dst, src, 2 * rel + 1])
# turn into str keys and concat(continues on next page)
84 Chapter 5. Community
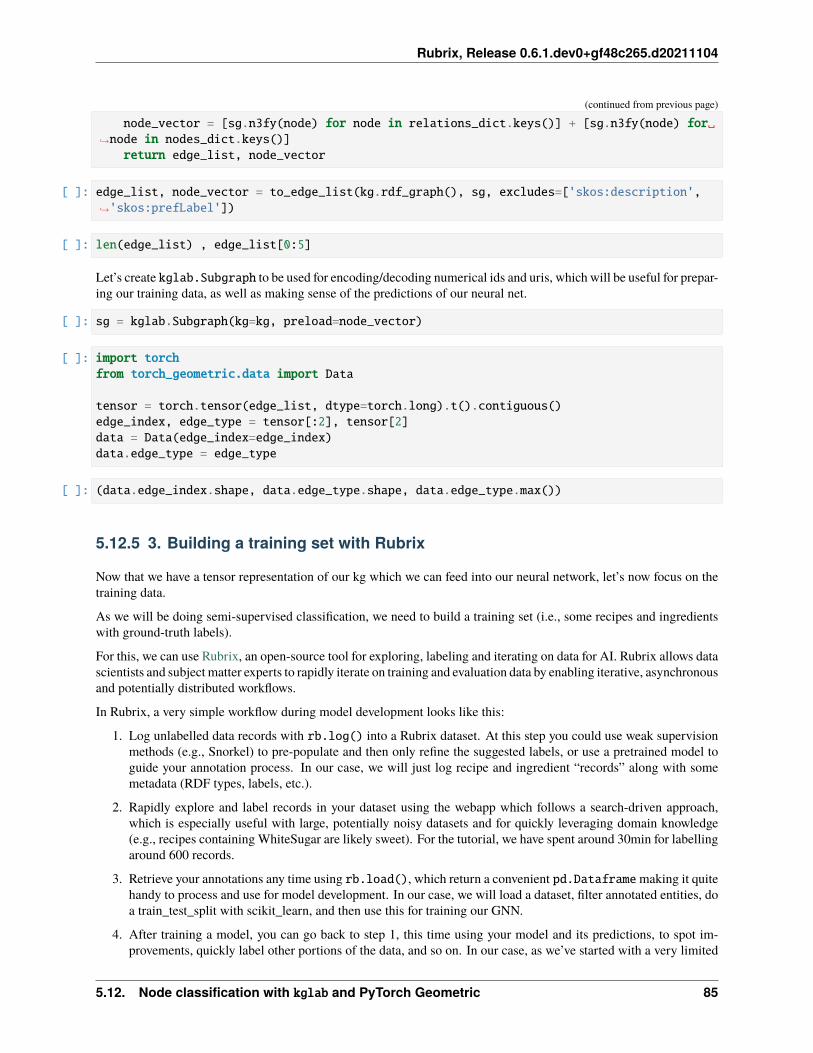
Rubrix, Release 0.6.1.dev0+gf48c265.d20211104
(continued from previous page)
node_vector = [sg.n3fy(node) for node in relations_dict.keys()] + [sg.n3fy(node) for␣→˓node in nodes_dict.keys()]return edge_list, node_vector
[ ]: edge_list, node_vector = to_edge_list(kg.rdf_graph(), sg, excludes=['skos:description',→˓'skos:prefLabel'])
[ ]: len(edge_list) , edge_list[0:5]
Let’s create kglab.Subgraph to be used for encoding/decoding numerical ids and uris, which will be useful for prepar-ing our training data, as well as making sense of the predictions of our neural net.
[ ]: sg = kglab.Subgraph(kg=kg, preload=node_vector)
[ ]: import torchfrom torch_geometric.data import Data
tensor = torch.tensor(edge_list, dtype=torch.long).t().contiguous()edge_index, edge_type = tensor[:2], tensor[2]data = Data(edge_index=edge_index)data.edge_type = edge_type
[ ]: (data.edge_index.shape, data.edge_type.shape, data.edge_type.max())
5.12.5 3. Building a training set with Rubrix
Now that we have a tensor representation of our kg which we can feed into our neural network, let’s now focus on thetraining data.
As we will be doing semi-supervised classification, we need to build a training set (i.e., some recipes and ingredientswith ground-truth labels).
For this, we can use Rubrix, an open-source tool for exploring, labeling and iterating on data for AI. Rubrix allows datascientists and subject matter experts to rapidly iterate on training and evaluation data by enabling iterative, asynchronousand potentially distributed workflows.
In Rubrix, a very simple workflow during model development looks like this:
1. Log unlabelled data records with rb.log() into a Rubrix dataset. At this step you could use weak supervisionmethods (e.g., Snorkel) to pre-populate and then only refine the suggested labels, or use a pretrained model toguide your annotation process. In our case, we will just log recipe and ingredient “records” along with somemetadata (RDF types, labels, etc.).
2. Rapidly explore and label records in your dataset using the webapp which follows a search-driven approach,which is especially useful with large, potentially noisy datasets and for quickly leveraging domain knowledge(e.g., recipes containing WhiteSugar are likely sweet). For the tutorial, we have spent around 30min for labellingaround 600 records.
3. Retrieve your annotations any time using rb.load(), which return a convenient pd.Dataframe making it quitehandy to process and use for model development. In our case, we will load a dataset, filter annotated entities, doa train_test_split with scikit_learn, and then use this for training our GNN.
4. After training a model, you can go back to step 1, this time using your model and its predictions, to spot im-provements, quickly label other portions of the data, and so on. In our case, as we’ve started with a very limited
5.12. Node classification with kglab and PyTorch Geometric 85
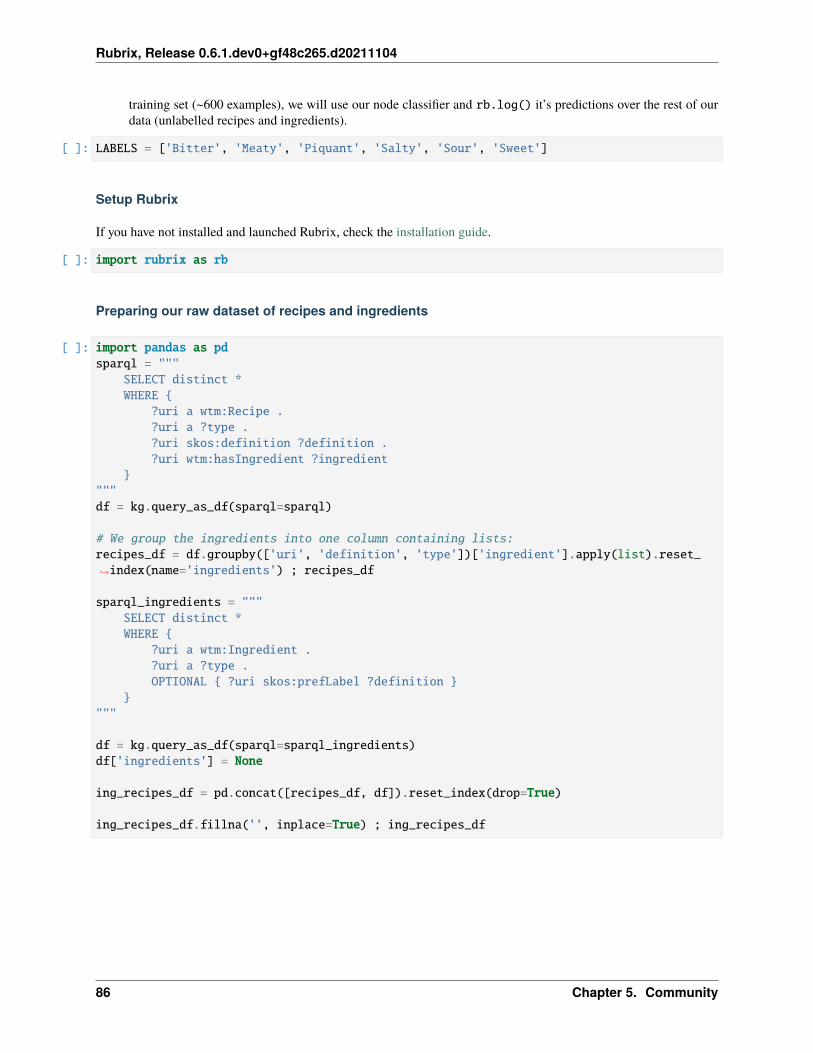
Rubrix, Release 0.6.1.dev0+gf48c265.d20211104
training set (~600 examples), we will use our node classifier and rb.log() it’s predictions over the rest of ourdata (unlabelled recipes and ingredients).
[ ]: LABELS = ['Bitter', 'Meaty', 'Piquant', 'Salty', 'Sour', 'Sweet']
Setup Rubrix
If you have not installed and launched Rubrix, check the installation guide.
[ ]: import rubrix as rb
Preparing our raw dataset of recipes and ingredients
[ ]: import pandas as pdsparql = """
SELECT distinct *WHERE {
?uri a wtm:Recipe .?uri a ?type .?uri skos:definition ?definition .?uri wtm:hasIngredient ?ingredient
}"""df = kg.query_as_df(sparql=sparql)
# We group the ingredients into one column containing lists:recipes_df = df.groupby(['uri', 'definition', 'type'])['ingredient'].apply(list).reset_→˓index(name='ingredients') ; recipes_df
sparql_ingredients = """SELECT distinct *WHERE {
?uri a wtm:Ingredient .?uri a ?type .OPTIONAL { ?uri skos:prefLabel ?definition }
}"""
df = kg.query_as_df(sparql=sparql_ingredients)df['ingredients'] = None
ing_recipes_df = pd.concat([recipes_df, df]).reset_index(drop=True)
ing_recipes_df.fillna('', inplace=True) ; ing_recipes_df
86 Chapter 5. Community
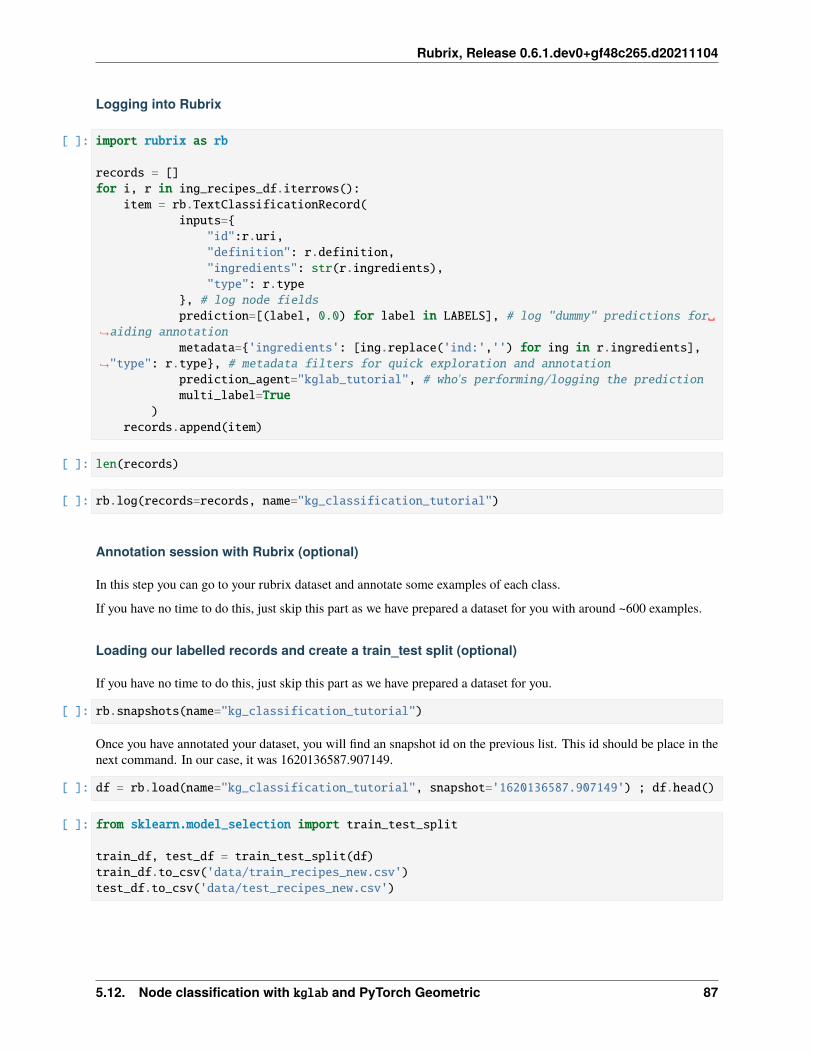
Rubrix, Release 0.6.1.dev0+gf48c265.d20211104
Logging into Rubrix
[ ]: import rubrix as rb
records = []for i, r in ing_recipes_df.iterrows():
item = rb.TextClassificationRecord(inputs={
"id":r.uri,"definition": r.definition,"ingredients": str(r.ingredients),"type": r.type
}, # log node fieldsprediction=[(label, 0.0) for label in LABELS], # log "dummy" predictions for␣
→˓aiding annotationmetadata={'ingredients': [ing.replace('ind:','') for ing in r.ingredients],
→˓"type": r.type}, # metadata filters for quick exploration and annotationprediction_agent="kglab_tutorial", # who's performing/logging the predictionmulti_label=True
)records.append(item)
[ ]: len(records)
[ ]: rb.log(records=records, name="kg_classification_tutorial")
Annotation session with Rubrix (optional)
In this step you can go to your rubrix dataset and annotate some examples of each class.
If you have no time to do this, just skip this part as we have prepared a dataset for you with around ~600 examples.
Loading our labelled records and create a train_test split (optional)
If you have no time to do this, just skip this part as we have prepared a dataset for you.
[ ]: rb.snapshots(name="kg_classification_tutorial")
Once you have annotated your dataset, you will find an snapshot id on the previous list. This id should be place in thenext command. In our case, it was 1620136587.907149.
[ ]: df = rb.load(name="kg_classification_tutorial", snapshot='1620136587.907149') ; df.head()
[ ]: from sklearn.model_selection import train_test_split
train_df, test_df = train_test_split(df)train_df.to_csv('data/train_recipes_new.csv')test_df.to_csv('data/test_recipes_new.csv')
5.12. Node classification with kglab and PyTorch Geometric 87
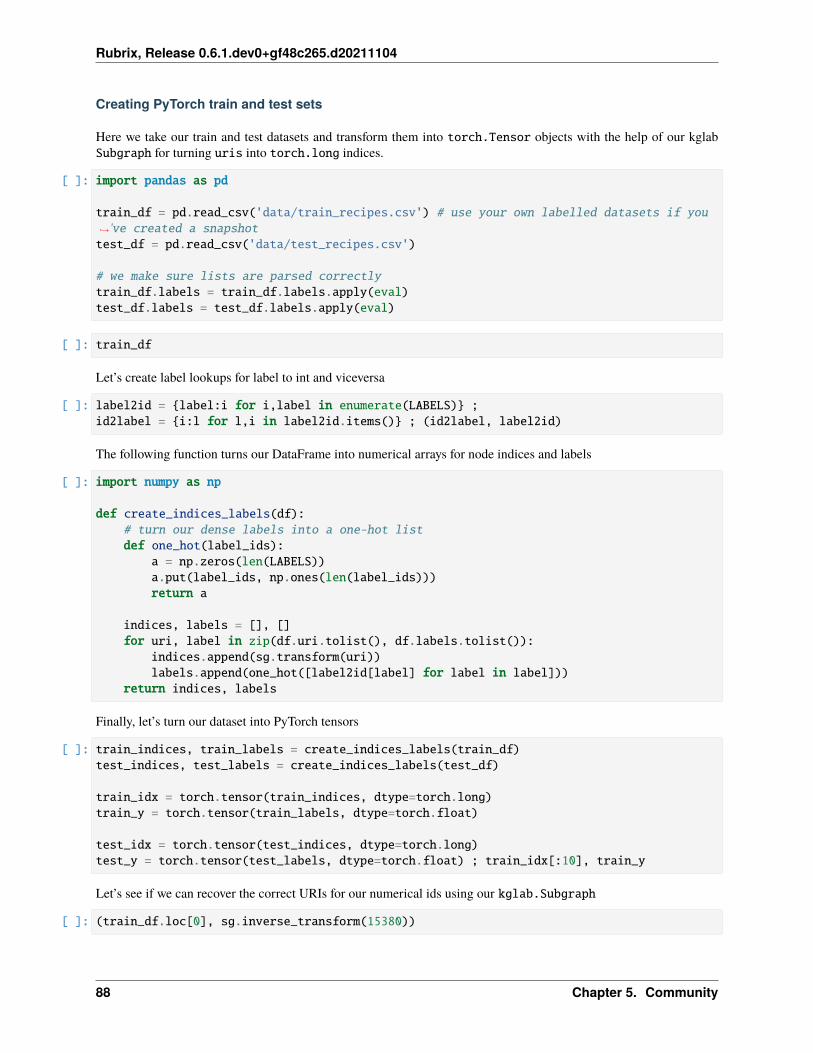
Rubrix, Release 0.6.1.dev0+gf48c265.d20211104
Creating PyTorch train and test sets
Here we take our train and test datasets and transform them into torch.Tensor objects with the help of our kglabSubgraph for turning uris into torch.long indices.
[ ]: import pandas as pd
train_df = pd.read_csv('data/train_recipes.csv') # use your own labelled datasets if you→˓'ve created a snapshottest_df = pd.read_csv('data/test_recipes.csv')
# we make sure lists are parsed correctlytrain_df.labels = train_df.labels.apply(eval)test_df.labels = test_df.labels.apply(eval)
[ ]: train_df
Let’s create label lookups for label to int and viceversa
[ ]: label2id = {label:i for i,label in enumerate(LABELS)} ;id2label = {i:l for l,i in label2id.items()} ; (id2label, label2id)
The following function turns our DataFrame into numerical arrays for node indices and labels
[ ]: import numpy as np
def create_indices_labels(df):# turn our dense labels into a one-hot listdef one_hot(label_ids):
a = np.zeros(len(LABELS))a.put(label_ids, np.ones(len(label_ids)))return a
indices, labels = [], []for uri, label in zip(df.uri.tolist(), df.labels.tolist()):
indices.append(sg.transform(uri))labels.append(one_hot([label2id[label] for label in label]))
return indices, labels
Finally, let’s turn our dataset into PyTorch tensors
[ ]: train_indices, train_labels = create_indices_labels(train_df)test_indices, test_labels = create_indices_labels(test_df)
train_idx = torch.tensor(train_indices, dtype=torch.long)train_y = torch.tensor(train_labels, dtype=torch.float)
test_idx = torch.tensor(test_indices, dtype=torch.long)test_y = torch.tensor(test_labels, dtype=torch.float) ; train_idx[:10], train_y
Let’s see if we can recover the correct URIs for our numerical ids using our kglab.Subgraph
[ ]: (train_df.loc[0], sg.inverse_transform(15380))
88 Chapter 5. Community
Rubrix, Release 0.6.1.dev0+gf48c265.d20211104
5.12.6 4. Creating a Subgraph of recipe and ingredient nodes
Here we create a node list to be used as a seed for building our PyG subgraph (using k-hops as we will see in the nextsection). Our goal will be to start only with recipes and ingredients, as all nodes passed through the GNN will beclassified and those are our main target.
[ ]: node_idx = torch.LongTensor([sg.transform(i) for i in ing_recipes_df.uri.values
])
[ ]: node_idx.max(), node_idx.shape
[ ]: ing_recipes_df.iloc[1]
[ ]: sg.inverse_transform(node_idx[1])
[ ]: node_idx[0:10]
5.12.7 5. Semi-supervised node classification with PyTorch Geometric
For the node classification task we are given the ground-truth labels (our recipes and ingredients training set) for asmall subset of nodes, and we want to predict the labels for all the remaining nodes (our recipes and ingredientstest set and unlabelled nodes).
Graph Convolutional Networks
To get a great intro to GCNs we recommend you to check Kipf’s blog post on the topic.
In a nutshell, GCNs are multi-layer neural works which apply “convolutions” to nodes in graphs by sharing and applyingthe same filter parameters over all locations in the graph.
Additionally, modern GCNs such as those implemented in PyG use message passing mechanisms, where verticesexchange information with their neighbors, and send messages to each other.
5.12. Node classification with kglab and PyTorch Geometric 89
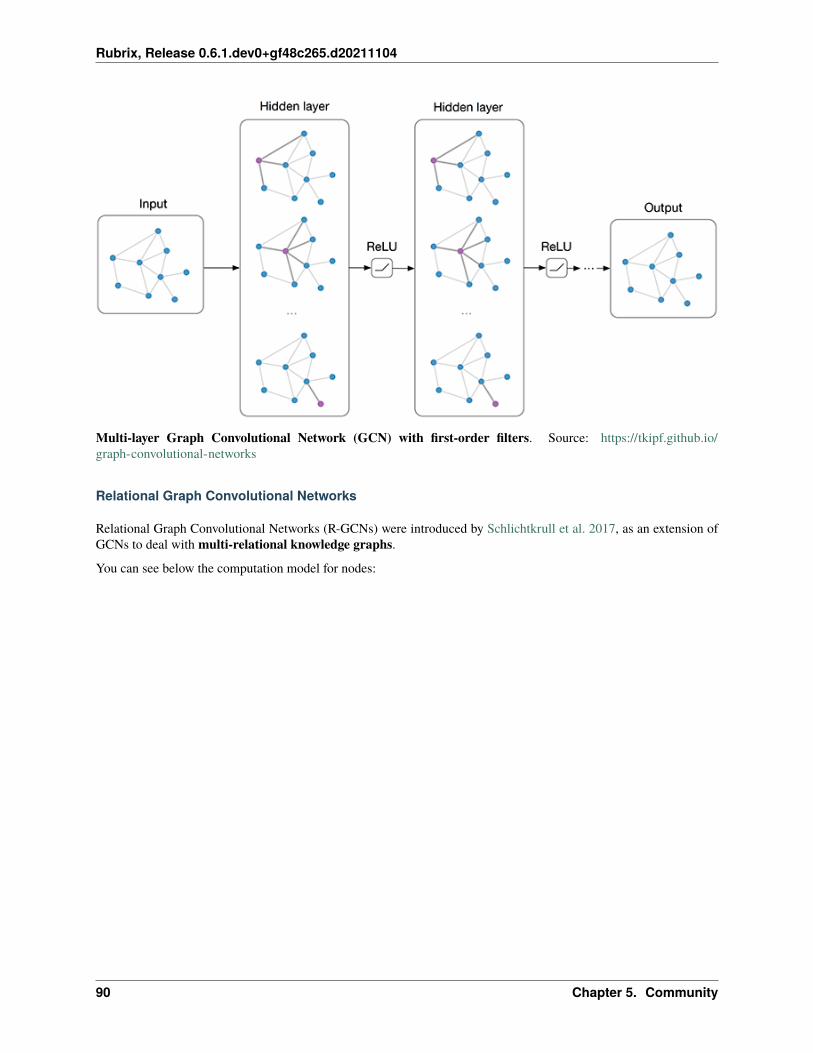
Rubrix, Release 0.6.1.dev0+gf48c265.d20211104
Multi-layer Graph Convolutional Network (GCN) with first-order filters. Source: https://tkipf.github.io/graph-convolutional-networks
Relational Graph Convolutional Networks
Relational Graph Convolutional Networks (R-GCNs) were introduced by Schlichtkrull et al. 2017, as an extension ofGCNs to deal with multi-relational knowledge graphs.
You can see below the computation model for nodes:
90 Chapter 5. Community
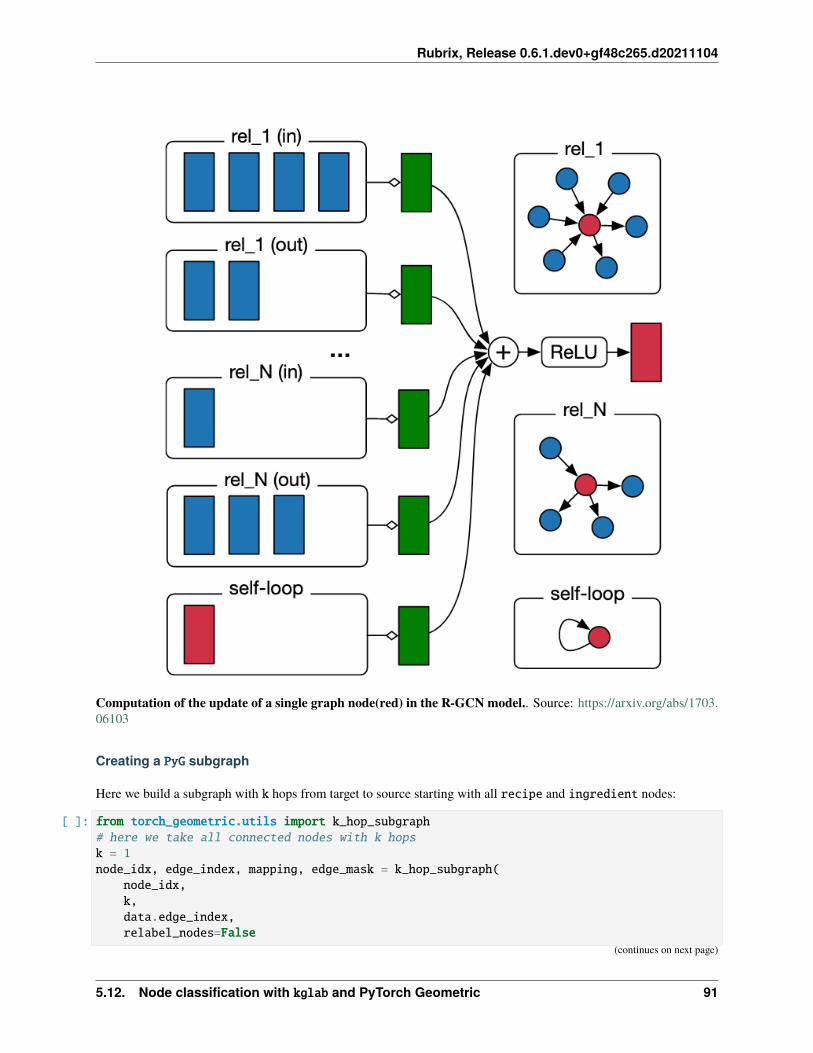
Rubrix, Release 0.6.1.dev0+gf48c265.d20211104
Computation of the update of a single graph node(red) in the R-GCN model.. Source: https://arxiv.org/abs/1703.06103
Creating a PyG subgraph
Here we build a subgraph with k hops from target to source starting with all recipe and ingredient nodes:
[ ]: from torch_geometric.utils import k_hop_subgraph# here we take all connected nodes with k hopsk = 1node_idx, edge_index, mapping, edge_mask = k_hop_subgraph(
node_idx,k,data.edge_index,relabel_nodes=False
(continues on next page)
5.12. Node classification with kglab and PyTorch Geometric 91
Rubrix, Release 0.6.1.dev0+gf48c265.d20211104
(continued from previous page)
)
We have increased the size of our node set:
[ ]: node_idx.shape
[ ]: data.edge_index.shape
Here we compute some measures needed for defining the size of our layers
[ ]: data.edge_index = edge_index
data.num_nodes = data.edge_index.max().item() + 1
data.num_relations = data.edge_type.max().item() + 1
data.edge_type = data.edge_type[edge_mask]
data.num_classes = len(LABELS)
data.num_nodes, data.num_relations, data.num_classes
Defining a basic Relational Graph Convolutional Network
[ ]: from torch_geometric.nn import FastRGCNConv, RGCNConvimport torch.nn.functional as F
[ ]: RGCNConv?
[ ]: class RGCN(torch.nn.Module):def __init__(self, num_nodes, num_relations, num_classes, out_channels=16, num_
→˓bases=30, dropout=0.0, layer_type=FastRGCNConv, ):
super(RGCN, self).__init__()
self.conv1 = layer_type(num_nodes,out_channels,num_relations,num_bases=num_bases
)self.conv2 = layer_type(
out_channels,num_classes,num_relations,num_bases=num_bases
)self.dropout = torch.nn.Dropout(dropout)
def forward(self, edge_index, edge_type):(continues on next page)
92 Chapter 5. Community
Rubrix, Release 0.6.1.dev0+gf48c265.d20211104
(continued from previous page)
x = F.relu(self.conv1(None, edge_index, edge_type))x = self.dropout(x)x = self.conv2(x, edge_index, edge_type)return torch.sigmoid(x)
Create and visualizing our model
[ ]: model = RGCN(num_nodes=data.num_nodes,num_relations=data.num_relations,num_classes=data.num_classes,#out_channels=64,dropout=0.2,layer_type=RGCNConv
) ; model
[ ]: # code adapted from https://colab.research.google.com/drive/→˓14OvFnAXggxB8vM4e8vSURUp1TaKnovzX%matplotlib inlineimport matplotlib.pyplot as pltfrom sklearn.manifold import TSNEfrom pytorch_lightning.metrics.utils import to_categorical
def visualize(h, color, labels):z = TSNE(n_components=2).fit_transform(h.detach().cpu().numpy())
plt.figure(figsize=(10,10))plt.xticks([])plt.yticks([])
scatter = plt.scatter(z[:, 0], z[:, 1], s=70, c=color, cmap="Set2")legend = plt.legend(scatter.legend_elements()[0],labels, loc="upper right", title=
→˓"Labels",) #*scatter.legend_elements()plt.show()
[ ]: pred = model(edge_index, edge_type)
[ ]: visualize(pred[train_idx], color=to_categorical(train_y), labels=LABELS)
[ ]: visualize(pred[test_idx], color=to_categorical(test_y), labels=LABELS)
5.12. Node classification with kglab and PyTorch Geometric 93
Rubrix, Release 0.6.1.dev0+gf48c265.d20211104
Training our RGCN
[ ]: device = torch.device('cpu') # ('cuda')data = data.to(device)model = model.to(device)optimizer = torch.optim.AdamW(model.parameters())loss_module = torch.nn.BCELoss()
def train():model.train()optimizer.zero_grad()out = model(data.edge_index, data.edge_type)loss = loss_module(out[train_idx], train_y)loss.backward()optimizer.step()return loss.item()
def accuracy(predictions, y):predictions = np.round(predictions)return predictions.eq(y).to(torch.float).mean()
@torch.no_grad()def test():
model.eval()pred = model(data.edge_index, data.edge_type)train_acc = accuracy(pred[train_idx], train_y)test_acc = accuracy(pred[test_idx], test_y)return train_acc.item(), test_acc.item()
[ ]: for epoch in range(1, 50):loss = train()train_acc, test_acc = test()print(f'Epoch: {epoch:02d}, Loss: {loss:.4f}, Train: {train_acc:.4f} '
f'Test: {test_acc:.4f}')
Model visualization
[ ]: pred = model(edge_index, edge_type)
[ ]: visualize(pred[train_idx], color=to_categorical(train_y), labels=LABELS)
[ ]: visualize(pred[test_idx], color=to_categorical(test_y), labels=LABELS)
94 Chapter 5. Community
Rubrix, Release 0.6.1.dev0+gf48c265.d20211104
5.12.8 6. Using our model and analyzing its predictions with Rubrix
Let’s see the shape of our model predictions
[ ]: pred = model(edge_index, edge_type) ; pred
[ ]: def find(tensor, values):return torch.nonzero(tensor[..., None] == values)
Analizing predictions over the test set
[ ]: test_idx = find(node_idx,test_idx)[:,0] ; len(test_idx)
[ ]: index = torch.zeros(node_idx.shape[0], dtype=bool)index[test_idx] = Trueidx = node_idx[index]
[ ]: uris = [sg.inverse_transform(i) for i in idx]predicted_labels = [l for l in pred[idx]]
[ ]: predictions = list(zip(uris,predicted_labels)) ; predictions[0:2]
[ ]: import rubrix as rb
records = []for uri,predicted_labels in predictions:
ids = ing_recipes_df.index[ing_recipes_df.uri == uri]if len(ids) > 0:
r = ing_recipes_df.iloc[ids]# get the gold labels from our test setgold_labels = test_df.iloc[test_df.index[test_df.uri == uri]].labels.values[0]
item = rb.TextClassificationRecord(inputs={"id":r.uri.values[0], "definition": r.definition.values[0],
→˓"ingredients": str(r.ingredients.values[0]), "type": r.type.values[0]},prediction=[(id2label[i], score) for i,score in enumerate(predicted_
→˓labels)],annotation=gold_labels,metadata={'ingredients': r.ingredients.values[0], "type": r.type.
→˓values[0]},prediction_agent="node_classifier_v1",multi_label=True
)records.append(item)
[ ]: rb.log(records, name="kg_classification_test_analysis")
5.12. Node classification with kglab and PyTorch Geometric 95

Rubrix, Release 0.6.1.dev0+gf48c265.d20211104
Analizing predictions over unseen nodes (and potentially relabeling them)
Let’s find the ids for the nodes in our training and test sets
[ ]: train_test_idx = find(node_idx,torch.cat((test_idx, train_idx)))[:,0] ; len(train_test_→˓idx)
Let’s get the ids, uris and labels of the nodes which were not in our train/test datasets
[ ]: index = torch.ones(node_idx.shape[0], dtype=bool)index[train_test_idx] = Falseidx = node_idx[index]
We use our SubgraphTensor for getting back our URIs and build uri,predicted_labels pairs:
[ ]: uris = [sg.inverse_transform(i) for i in idx]predicted_labels = [l for l in pred[idx]]
[ ]: predictions = list(zip(uris,predicted_labels)) ; predictions[0:2]
[ ]: import rubrix as rb
records = []for uri,predicted_labels in predictions:
ids = ing_recipes_df.index[ing_recipes_df.uri == uri]if len(ids) > 0:
r = ing_recipes_df.iloc[ids]item = rb.TextClassificationRecord(
inputs={"id":r.uri.values[0], "definition": r.definition.values[0],→˓"ingredients": str(r.ingredients.values[0]), "type": r.type.values[0]},
prediction=[(id2label[i], score) for i,score in enumerate(predicted_→˓labels)],
metadata={'ingredients': r.ingredients.values[0], "type": r.type.→˓values[0]},
prediction_agent="node_classifier_v1",multi_label=True
)records.append(item)
[ ]: rb.log(records, name="kg_node_classification_unseen_nodes_v3")
5.12.9 Exercise 1: Training experiments with PyTorch Lightning
[ ]: #!pip install wandb -qqq # optional
[ ]: !wandb login #optional
[ ]: from torch_geometric.data import Data, DataLoader
data.train_idx = train_idxdata.train_y = train_y
(continues on next page)
96 Chapter 5. Community
Rubrix, Release 0.6.1.dev0+gf48c265.d20211104
(continued from previous page)
data.test_idx = test_idxdata.test_y = test_y
dataloader = DataLoader([data], batch_size=1); dataloader
[ ]: import torchimport pytorch_lightning as plfrom pytorch_lightning.callbacks import EarlyStopping, ModelCheckpointfrom pytorch_lightning.loggers import WandbLogger
class RGCNNodeClassification(pl.LightningModule):
def __init__(self, **model_kwargs):super().__init__()
self.model = RGCN(**model_kwargs)self.loss_module = torch.nn.BCELoss()
def forward(self, edge_index, edge_type):return self.model(edge_index, edge_type)
def configure_optimizers(self):optimizer = torch.optim.Adam(self.parameters(), lr=0.01, weight_decay=0.001)return optimizer
def training_step(self, batch, batch_idx):idx, y = data.train_idx, data.train_yedge_index, edge_type = data.edge_index, data.edge_typex = self.forward(edge_index, edge_type)loss = self.loss_module(x[idx], y)x = x.detach()self.log('train_acc', accuracy(x[idx], y), prog_bar=True)self.log('train_loss', loss)return loss
def validation_step(self, batch, batch_idx):idx, y = data.test_idx, data.test_yedge_index, edge_type = data.edge_index, data.edge_typex = self.forward(edge_index, edge_type)loss = self.loss_module(x[idx], y)x = x.detach()self.log('val_acc', accuracy(x[idx], y), prog_bar=True)self.log('val_loss', loss)
[ ]: pl.seed_everything()
[ ]: model_pl = RGCNNodeClassification(num_nodes=data.num_nodes,num_relations=data.num_relations,num_classes=data.num_classes,#out_channels=64,
(continues on next page)
5.12. Node classification with kglab and PyTorch Geometric 97
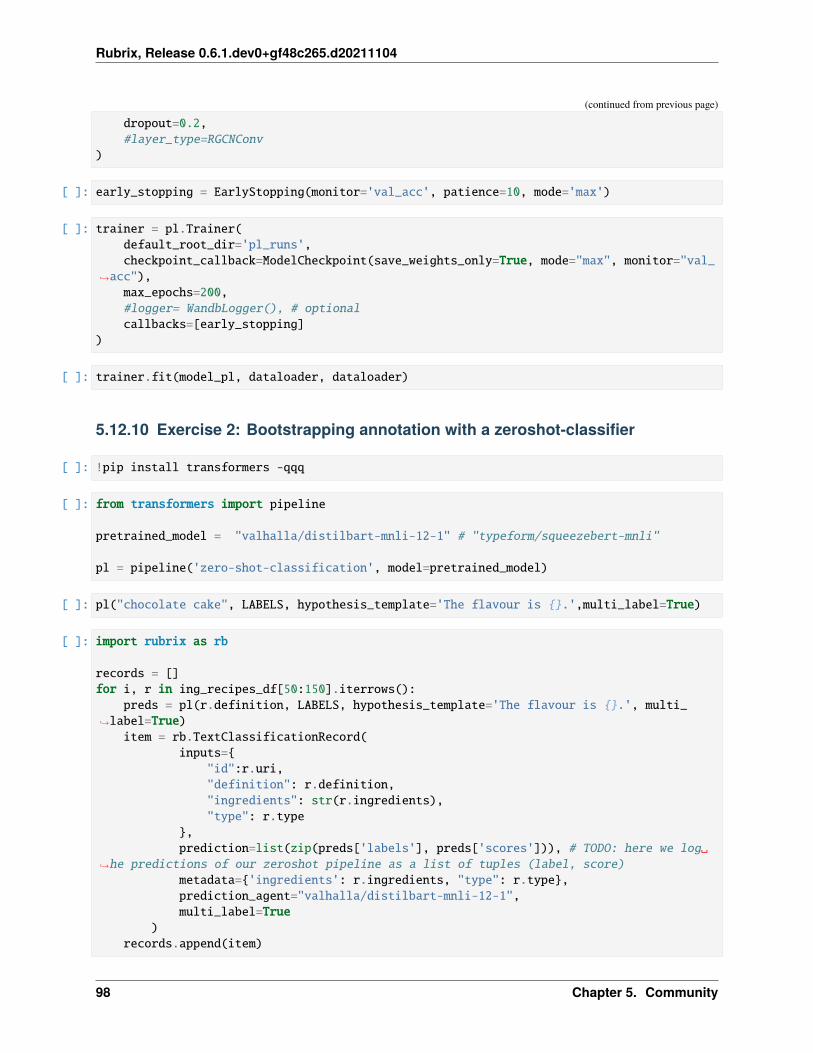
Rubrix, Release 0.6.1.dev0+gf48c265.d20211104
(continued from previous page)
dropout=0.2,#layer_type=RGCNConv
)
[ ]: early_stopping = EarlyStopping(monitor='val_acc', patience=10, mode='max')
[ ]: trainer = pl.Trainer(default_root_dir='pl_runs',checkpoint_callback=ModelCheckpoint(save_weights_only=True, mode="max", monitor="val_
→˓acc"),max_epochs=200,#logger= WandbLogger(), # optionalcallbacks=[early_stopping]
)
[ ]: trainer.fit(model_pl, dataloader, dataloader)
5.12.10 Exercise 2: Bootstrapping annotation with a zeroshot-classifier
[ ]: !pip install transformers -qqq
[ ]: from transformers import pipeline
pretrained_model = "valhalla/distilbart-mnli-12-1" # "typeform/squeezebert-mnli"
pl = pipeline('zero-shot-classification', model=pretrained_model)
[ ]: pl("chocolate cake", LABELS, hypothesis_template='The flavour is {}.',multi_label=True)
[ ]: import rubrix as rb
records = []for i, r in ing_recipes_df[50:150].iterrows():
preds = pl(r.definition, LABELS, hypothesis_template='The flavour is {}.', multi_→˓label=True)
item = rb.TextClassificationRecord(inputs={
"id":r.uri,"definition": r.definition,"ingredients": str(r.ingredients),"type": r.type
},prediction=list(zip(preds['labels'], preds['scores'])), # TODO: here we log␣
→˓he predictions of our zeroshot pipeline as a list of tuples (label, score)metadata={'ingredients': r.ingredients, "type": r.type},prediction_agent="valhalla/distilbart-mnli-12-1",multi_label=True
)records.append(item)
98 Chapter 5. Community

Rubrix, Release 0.6.1.dev0+gf48c265.d20211104
[ ]: rb.log(records, name='kg_zeroshot')
5.12.11 Next steps
Rubrix documentation for more guides and tutorials.
Join the Rubrix community! A good place to start is the discussion forum.
Rubrix Github repo to stay updated.
5.13 Human-in-the-loop weak supervision with snorkel
This tutorial will walk you through the process of using Rubrix to improve weak supervision and data programmingworkflows with the amazing Snorkel library.
5.13.1 Introduction
Our goal is to show you how you can incorporate Rubrix into data programming workflows to programaticallybuild training data with a human-in-the-loop approach. We will use the widely-known Snorkel library, but a similarapproach can be used with other data augmentation libraries such as Textattack or nlpaug.
What is weak supervision? and Snorkel?
Weak supervision is a branch of machine learning based on getting lower quality labels more efficiently. We can achievethis by using Snorkel, a library for programmatically building and managing training datasets without manual labeling.
This tutorial
In this tutorial, we’ll follow the Spam classification tutorial from Snorkel’s documentation and show you how to extendweak supervision workflows with Rubrix.
The tutorial is organized into:
1. Spam classification with Snorkel: we provide a brief overview of the tutorial
2. Extending and finding labeling functions with Rubrix: we analyze different strategies for extending the pro-posed labeling functions and for exploring new labeling functions
5.13.2 Install Snorkel, Textblob and spaCy
[ ]: %pip install snorkel textblob spacy -qqq
[ ]: !python -m spacy download en_core_web_sm -qqq
5.13. Human-in-the-loop weak supervision with snorkel 99
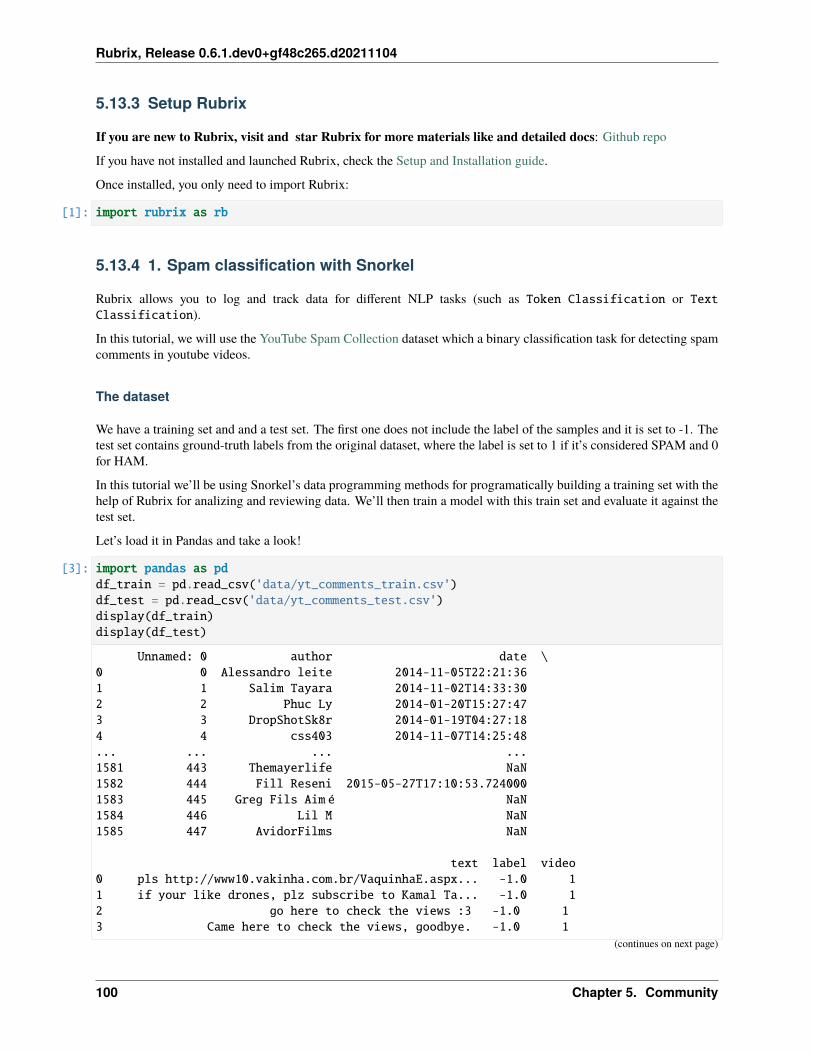
Rubrix, Release 0.6.1.dev0+gf48c265.d20211104
5.13.3 Setup Rubrix
If you are new to Rubrix, visit and star Rubrix for more materials like and detailed docs: Github repo
If you have not installed and launched Rubrix, check the Setup and Installation guide.
Once installed, you only need to import Rubrix:
[1]: import rubrix as rb
5.13.4 1. Spam classification with Snorkel
Rubrix allows you to log and track data for different NLP tasks (such as Token Classification or TextClassification).
In this tutorial, we will use the YouTube Spam Collection dataset which a binary classification task for detecting spamcomments in youtube videos.
The dataset
We have a training set and and a test set. The first one does not include the label of the samples and it is set to -1. Thetest set contains ground-truth labels from the original dataset, where the label is set to 1 if it’s considered SPAM and 0for HAM.
In this tutorial we’ll be using Snorkel’s data programming methods for programatically building a training set with thehelp of Rubrix for analizing and reviewing data. We’ll then train a model with this train set and evaluate it against thetest set.
Let’s load it in Pandas and take a look!
[3]: import pandas as pddf_train = pd.read_csv('data/yt_comments_train.csv')df_test = pd.read_csv('data/yt_comments_test.csv')display(df_train)display(df_test)
Unnamed: 0 author date \0 0 Alessandro leite 2014-11-05T22:21:361 1 Salim Tayara 2014-11-02T14:33:302 2 Phuc Ly 2014-01-20T15:27:473 3 DropShotSk8r 2014-01-19T04:27:184 4 css403 2014-11-07T14:25:48... ... ... ...1581 443 Themayerlife NaN1582 444 Fill Reseni 2015-05-27T17:10:53.7240001583 445 Greg Fils Aimé NaN1584 446 Lil M NaN1585 447 AvidorFilms NaN
text label video0 pls http://www10.vakinha.com.br/VaquinhaE.aspx... -1.0 11 if your like drones, plz subscribe to Kamal Ta... -1.0 12 go here to check the views :3 -1.0 13 Came here to check the views, goodbye. -1.0 1
(continues on next page)
100 Chapter 5. Community
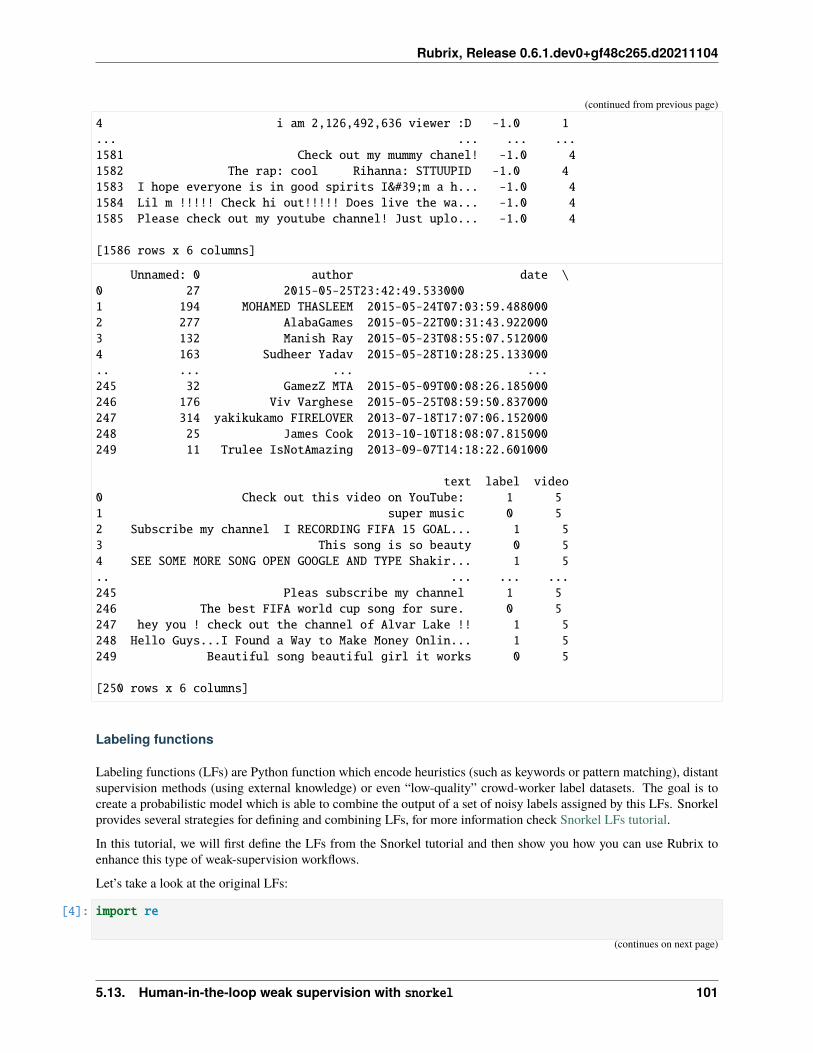
Rubrix, Release 0.6.1.dev0+gf48c265.d20211104
(continued from previous page)
4 i am 2,126,492,636 viewer :D -1.0 1... ... ... ...1581 Check out my mummy chanel! -1.0 41582 The rap: cool Rihanna: STTUUPID -1.0 41583 I hope everyone is in good spirits I'm a h... -1.0 41584 Lil m !!!!! Check hi out!!!!! Does live the wa... -1.0 41585 Please check out my youtube channel! Just uplo... -1.0 4
[1586 rows x 6 columns]
Unnamed: 0 author date \0 27 2015-05-25T23:42:49.5330001 194 MOHAMED THASLEEM 2015-05-24T07:03:59.4880002 277 AlabaGames 2015-05-22T00:31:43.9220003 132 Manish Ray 2015-05-23T08:55:07.5120004 163 Sudheer Yadav 2015-05-28T10:28:25.133000.. ... ... ...245 32 GamezZ MTA 2015-05-09T00:08:26.185000246 176 Viv Varghese 2015-05-25T08:59:50.837000247 314 yakikukamo FIRELOVER 2013-07-18T17:07:06.152000248 25 James Cook 2013-10-10T18:08:07.815000249 11 Trulee IsNotAmazing 2013-09-07T14:18:22.601000
text label video0 Check out this video on YouTube: 1 51 super music 0 52 Subscribe my channel I RECORDING FIFA 15 GOAL... 1 53 This song is so beauty 0 54 SEE SOME MORE SONG OPEN GOOGLE AND TYPE Shakir... 1 5.. ... ... ...245 Pleas subscribe my channel 1 5246 The best FIFA world cup song for sure. 0 5247 hey you ! check out the channel of Alvar Lake !! 1 5248 Hello Guys...I Found a Way to Make Money Onlin... 1 5249 Beautiful song beautiful girl it works 0 5
[250 rows x 6 columns]
Labeling functions
Labeling functions (LFs) are Python function which encode heuristics (such as keywords or pattern matching), distantsupervision methods (using external knowledge) or even “low-quality” crowd-worker label datasets. The goal is tocreate a probabilistic model which is able to combine the output of a set of noisy labels assigned by this LFs. Snorkelprovides several strategies for defining and combining LFs, for more information check Snorkel LFs tutorial.
In this tutorial, we will first define the LFs from the Snorkel tutorial and then show you how you can use Rubrix toenhance this type of weak-supervision workflows.
Let’s take a look at the original LFs:
[4]: import re
(continues on next page)
5.13. Human-in-the-loop weak supervision with snorkel 101

Rubrix, Release 0.6.1.dev0+gf48c265.d20211104
(continued from previous page)
from snorkel.labeling import labeling_function, LabelingFunctionfrom snorkel.labeling.lf.nlp import nlp_labeling_functionfrom snorkel.preprocess import preprocessorfrom snorkel.preprocess.nlp import SpacyPreprocessor
from textblob import TextBlob
ABSTAIN = -1HAM = 0SPAM = 1
# Keyword searches@labeling_function()def check(x):
return SPAM if "check" in x.text.lower() else ABSTAIN
@labeling_function()def check_out(x):
return SPAM if "check out" in x.text.lower() else ABSTAIN
# Heuristics@labeling_function()def short_comment(x):
"""Ham comments are often short, such as 'cool video!'"""return HAM if len(x.text.split()) < 5 else ABSTAIN
# List of keywordsdef keyword_lookup(x, keywords, label):
if any(word in x.text.lower() for word in keywords):return label
return ABSTAIN
def make_keyword_lf(keywords, label=SPAM):return LabelingFunction(
name=f"keyword_{keywords[0]}",f=keyword_lookup,resources=dict(keywords=keywords, label=label),
)
"""Spam comments talk about 'my channel', 'my video', etc."""keyword_my = make_keyword_lf(keywords=["my"])
"""Spam comments ask users to subscribe to their channels."""keyword_subscribe = make_keyword_lf(keywords=["subscribe"])
"""Spam comments post links to other channels."""keyword_link = make_keyword_lf(keywords=["http"])
"""Spam comments make requests rather than commenting."""keyword_please = make_keyword_lf(keywords=["please", "plz"])
(continues on next page)
102 Chapter 5. Community
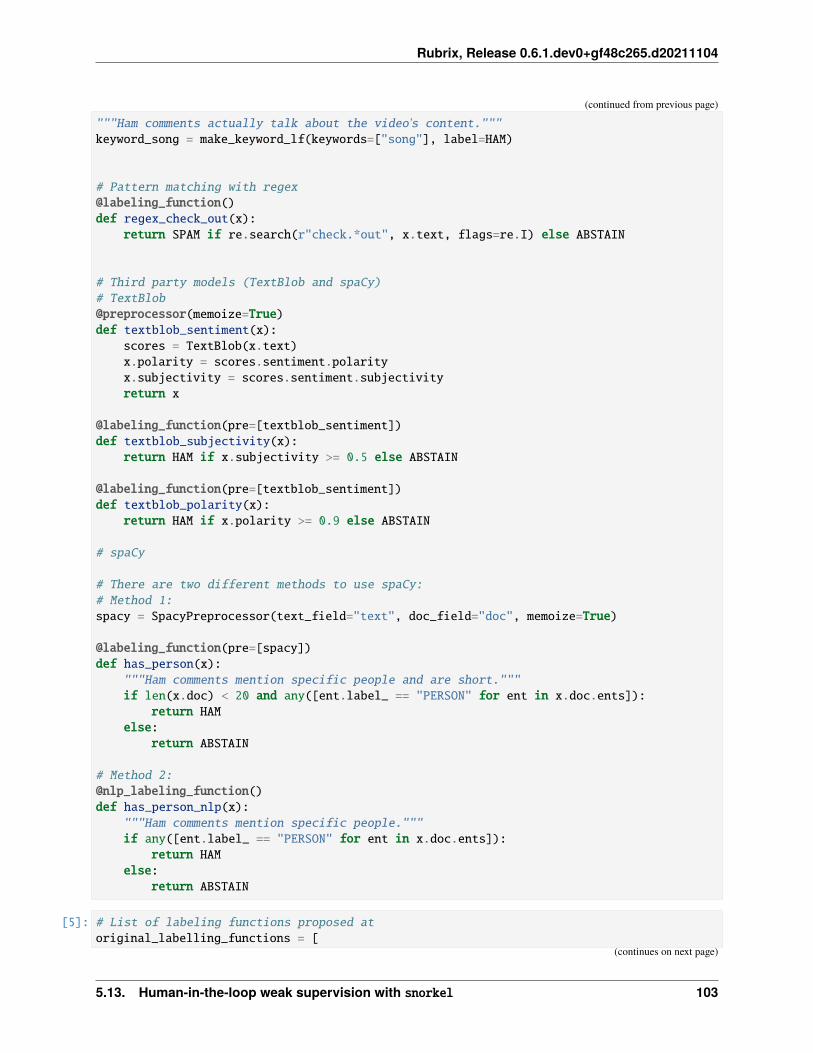
Rubrix, Release 0.6.1.dev0+gf48c265.d20211104
(continued from previous page)
"""Ham comments actually talk about the video's content."""keyword_song = make_keyword_lf(keywords=["song"], label=HAM)
# Pattern matching with regex@labeling_function()def regex_check_out(x):
return SPAM if re.search(r"check.*out", x.text, flags=re.I) else ABSTAIN
# Third party models (TextBlob and spaCy)# TextBlob@preprocessor(memoize=True)def textblob_sentiment(x):
scores = TextBlob(x.text)x.polarity = scores.sentiment.polarityx.subjectivity = scores.sentiment.subjectivityreturn x
@labeling_function(pre=[textblob_sentiment])def textblob_subjectivity(x):
return HAM if x.subjectivity >= 0.5 else ABSTAIN
@labeling_function(pre=[textblob_sentiment])def textblob_polarity(x):
return HAM if x.polarity >= 0.9 else ABSTAIN
# spaCy
# There are two different methods to use spaCy:# Method 1:spacy = SpacyPreprocessor(text_field="text", doc_field="doc", memoize=True)
@labeling_function(pre=[spacy])def has_person(x):
"""Ham comments mention specific people and are short."""if len(x.doc) < 20 and any([ent.label_ == "PERSON" for ent in x.doc.ents]):
return HAMelse:
return ABSTAIN
# Method 2:@nlp_labeling_function()def has_person_nlp(x):
"""Ham comments mention specific people."""if any([ent.label_ == "PERSON" for ent in x.doc.ents]):
return HAMelse:
return ABSTAIN
[5]: # List of labeling functions proposed atoriginal_labelling_functions = [
(continues on next page)
5.13. Human-in-the-loop weak supervision with snorkel 103
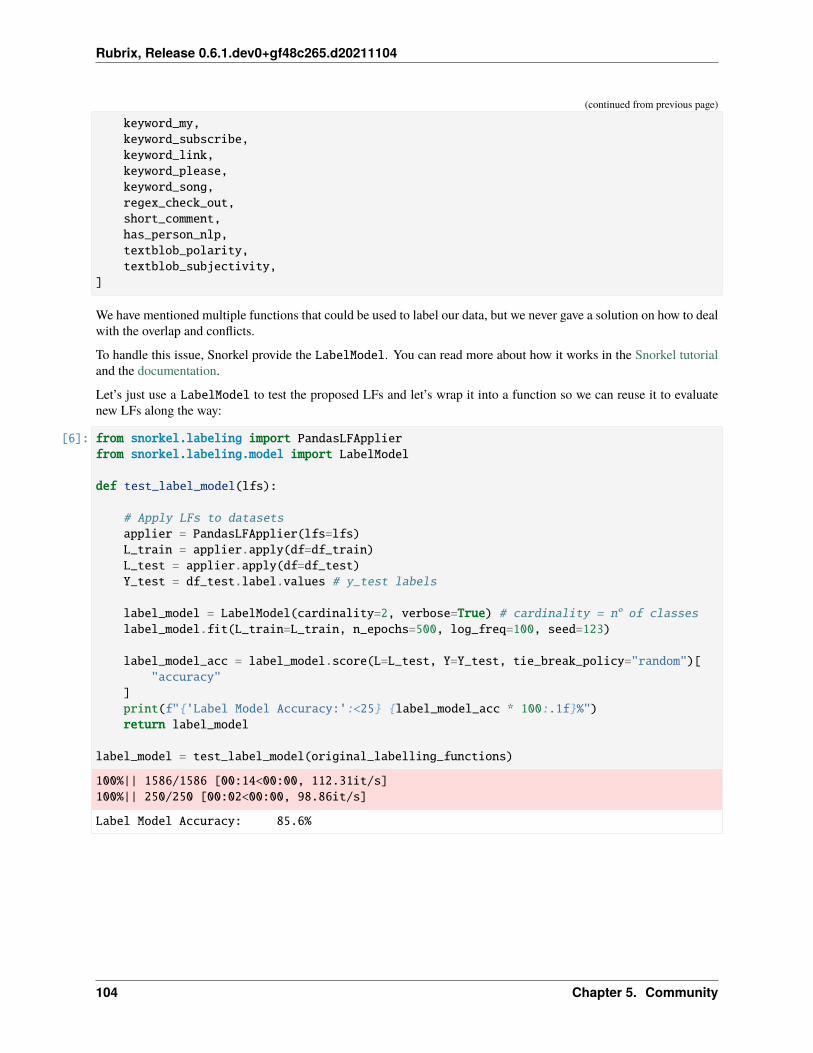
Rubrix, Release 0.6.1.dev0+gf48c265.d20211104
(continued from previous page)
keyword_my,keyword_subscribe,keyword_link,keyword_please,keyword_song,regex_check_out,short_comment,has_person_nlp,textblob_polarity,textblob_subjectivity,
]
We have mentioned multiple functions that could be used to label our data, but we never gave a solution on how to dealwith the overlap and conflicts.
To handle this issue, Snorkel provide the LabelModel. You can read more about how it works in the Snorkel tutorialand the documentation.
Let’s just use a LabelModel to test the proposed LFs and let’s wrap it into a function so we can reuse it to evaluatenew LFs along the way:
[6]: from snorkel.labeling import PandasLFApplierfrom snorkel.labeling.model import LabelModel
def test_label_model(lfs):
# Apply LFs to datasetsapplier = PandasLFApplier(lfs=lfs)L_train = applier.apply(df=df_train)L_test = applier.apply(df=df_test)Y_test = df_test.label.values # y_test labels
label_model = LabelModel(cardinality=2, verbose=True) # cardinality = nº of classeslabel_model.fit(L_train=L_train, n_epochs=500, log_freq=100, seed=123)
label_model_acc = label_model.score(L=L_test, Y=Y_test, tie_break_policy="random")["accuracy"
]print(f"{'Label Model Accuracy:':<25} {label_model_acc * 100:.1f}%")return label_model
label_model = test_label_model(original_labelling_functions)
100%|| 1586/1586 [00:14<00:00, 112.31it/s]100%|| 250/250 [00:02<00:00, 98.86it/s]
Label Model Accuracy: 85.6%
104 Chapter 5. Community
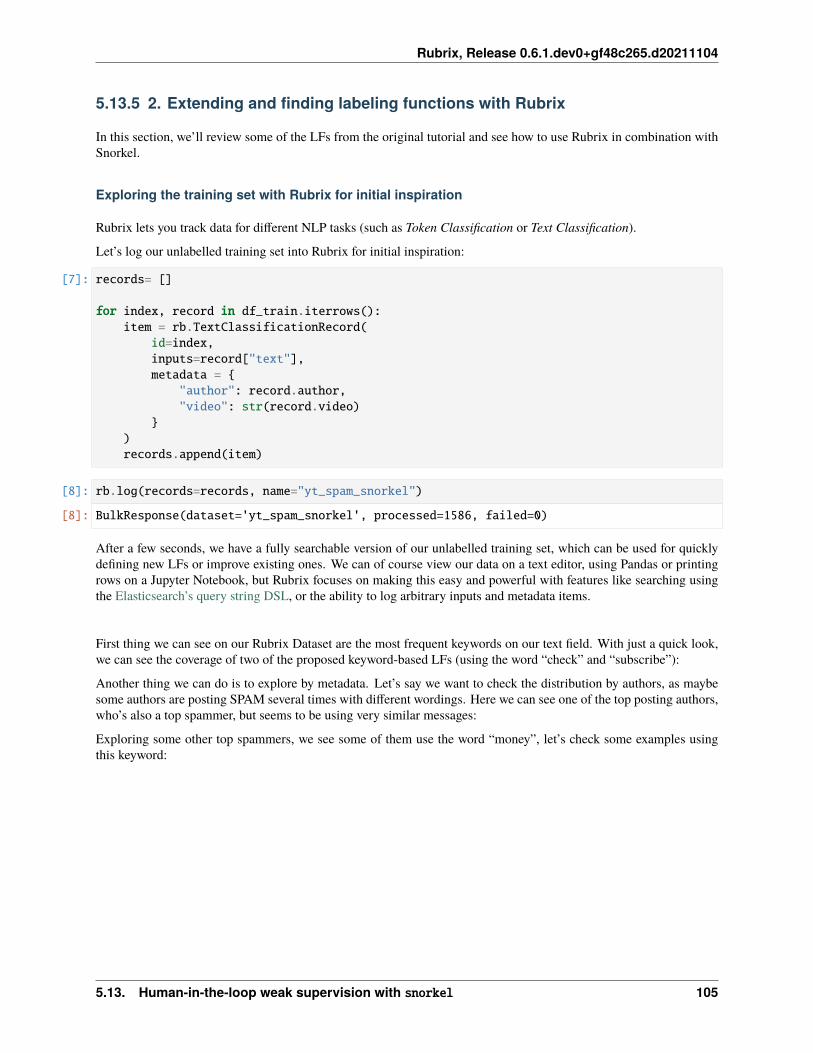
Rubrix, Release 0.6.1.dev0+gf48c265.d20211104
5.13.5 2. Extending and finding labeling functions with Rubrix
In this section, we’ll review some of the LFs from the original tutorial and see how to use Rubrix in combination withSnorkel.
Exploring the training set with Rubrix for initial inspiration
Rubrix lets you track data for different NLP tasks (such as Token Classification or Text Classification).
Let’s log our unlabelled training set into Rubrix for initial inspiration:
[7]: records= []
for index, record in df_train.iterrows():item = rb.TextClassificationRecord(
id=index,inputs=record["text"],metadata = {
"author": record.author,"video": str(record.video)
})records.append(item)
[8]: rb.log(records=records, name="yt_spam_snorkel")
[8]: BulkResponse(dataset='yt_spam_snorkel', processed=1586, failed=0)
After a few seconds, we have a fully searchable version of our unlabelled training set, which can be used for quicklydefining new LFs or improve existing ones. We can of course view our data on a text editor, using Pandas or printingrows on a Jupyter Notebook, but Rubrix focuses on making this easy and powerful with features like searching usingthe Elasticsearch’s query string DSL, or the ability to log arbitrary inputs and metadata items.
First thing we can see on our Rubrix Dataset are the most frequent keywords on our text field. With just a quick look,we can see the coverage of two of the proposed keyword-based LFs (using the word “check” and “subscribe”):
Another thing we can do is to explore by metadata. Let’s say we want to check the distribution by authors, as maybesome authors are posting SPAM several times with different wordings. Here we can see one of the top posting authors,who’s also a top spammer, but seems to be using very similar messages:
Exploring some other top spammers, we see some of them use the word “money”, let’s check some examples usingthis keyword:
5.13. Human-in-the-loop weak supervision with snorkel 105
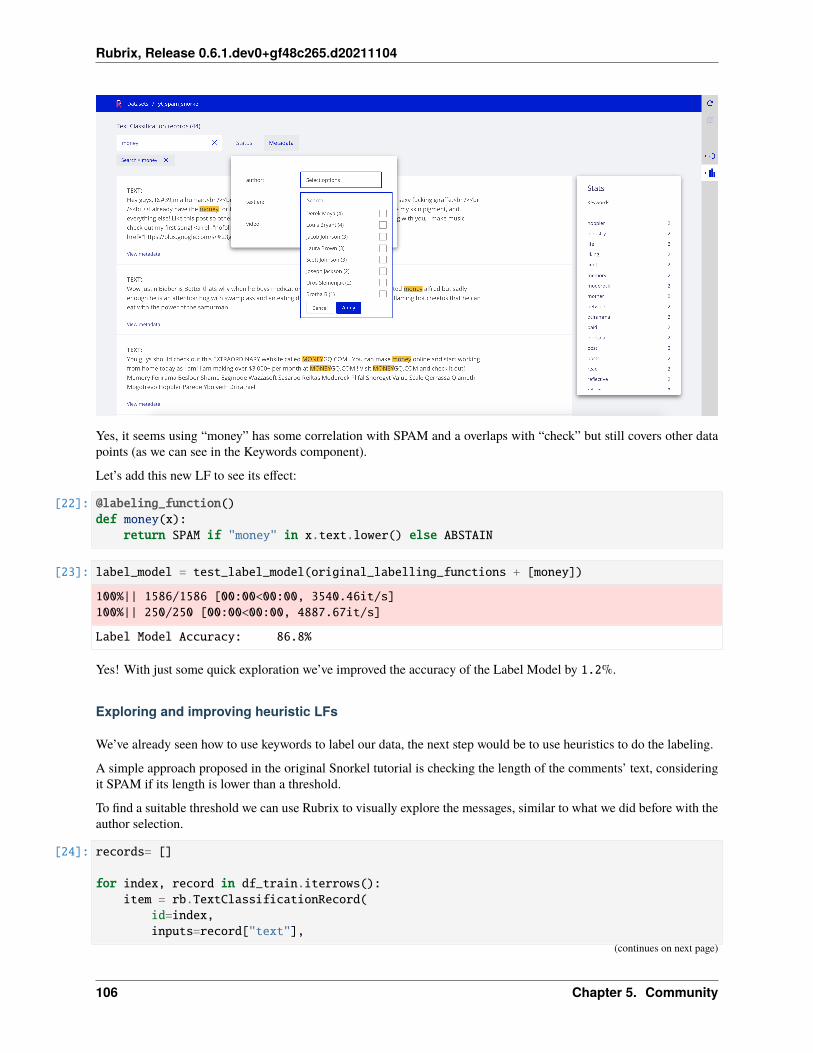
Rubrix, Release 0.6.1.dev0+gf48c265.d20211104
Yes, it seems using “money” has some correlation with SPAM and a overlaps with “check” but still covers other datapoints (as we can see in the Keywords component).
Let’s add this new LF to see its effect:
[22]: @labeling_function()def money(x):
return SPAM if "money" in x.text.lower() else ABSTAIN
[23]: label_model = test_label_model(original_labelling_functions + [money])
100%|| 1586/1586 [00:00<00:00, 3540.46it/s]100%|| 250/250 [00:00<00:00, 4887.67it/s]
Label Model Accuracy: 86.8%
Yes! With just some quick exploration we’ve improved the accuracy of the Label Model by 1.2%.
Exploring and improving heuristic LFs
We’ve already seen how to use keywords to label our data, the next step would be to use heuristics to do the labeling.
A simple approach proposed in the original Snorkel tutorial is checking the length of the comments’ text, consideringit SPAM if its length is lower than a threshold.
To find a suitable threshold we can use Rubrix to visually explore the messages, similar to what we did before with theauthor selection.
[24]: records= []
for index, record in df_train.iterrows():item = rb.TextClassificationRecord(
id=index,inputs=record["text"],
(continues on next page)
106 Chapter 5. Community
Rubrix, Release 0.6.1.dev0+gf48c265.d20211104
(continued from previous page)
metadata = {"textlen": str(len(record.text.split())), # Nº of 'words' in the sample
})records.append(item)
[25]: rb.log(records=records, name="yt_spam_snorkel_heuristic")
[25]: BulkResponse(dataset='yt_spam_snorkel_heuristic', processed=1586, failed=0)
In the original tutorial, a threshold of 5 words is used, by exploring in Rubrix, we see we can go above that threshold.Let’s try with 20 words:
[26]: @labeling_function()def short_comment_2(x):
"""Ham comments are often short, such as 'cool video!'"""return HAM if len(x.text.split()) < 20 else ABSTAIN
[27]: # let's replace the original short comment functionoriginal_labelling_functions[6]
[27]: LabelingFunction short_comment, Preprocessors: []
[28]: original_labelling_functions[6] = short_comment_2
[29]: label_model = test_label_model(original_labelling_functions + [money])
100%|| 1586/1586 [00:00<00:00, 5388.84it/s]100%|| 250/250 [00:00<00:00, 5542.86it/s]
Label Model Accuracy: 90.8%
Yes! With some additional exploration we’ve improved the accuracy of the Label Model by 5.2%.
[30]: current_lfs = original_labelling_functions + [money]
5.13. Human-in-the-loop weak supervision with snorkel 107
Rubrix, Release 0.6.1.dev0+gf48c265.d20211104
Exploring third-party models LFs with Rubrix
Another class of Snorkel LFs are those third-party models, which can be combined with the Label Model.
Rubrix can be used for exploring how these models work with unlabelled data in order to define more precise LFs.
Let’s see this with the original Textblob’s based labelling functions.
Textblob
Let’s explore Textblob predictions on the training set with Rubrix:
[31]: from textblob import TextBlob
records= []for index, record in df_train.iterrows():
scores = TextBlob(record["text"])item = rb.TextClassificationRecord(
id=str(index),inputs=record["text"],multi_label= False,prediction=[("subjectivity", max(0.0, scores.sentiment.subjectivity))],prediction_agent="TextBlob",metadata = {
"author": record.author,"video": str(record.video)
})
records.append(item)
[32]: rb.log(records=records, name="yt_spam_snorkel_textblob")
[32]: BulkResponse(dataset='yt_spam_snorkel_textblob', processed=1586, failed=0)
Checking the dataset, we can filter our data based on the prediction score of our classifier. This can help us since thepredictions of our TextBlob tend to be SPAM the lower the subjectivity is. We can take advantage of this and filter thepredictions by their score:
108 Chapter 5. Community

Rubrix, Release 0.6.1.dev0+gf48c265.d20211104
5.13.6 3. Checking and curating programatically created data
In this section, we’re going to analyse the training set we’re able to generate using our data programming model (theLabel Model).
First thing, we need to do is to remove the unlabeled data. Remember we’re only labeling a subset using our model:
[ ]: from snorkel.labeling import filter_unlabeled_dataframe
applier = PandasLFApplier(lfs=current_lfs)L_train = applier.apply(df=df_train)L_test = applier.apply(df=df_test)
df_train_filtered, probs_train_filtered = filter_unlabeled_dataframe(X=df_train,y=label_model.predict_proba(L_train), # Probabilities of each data point for each␣
→˓classL=L_train
)
Now that we have our data, we can explore the results in Rubrix and manually relabel those cases that have been wronglyclassified or keep exploring the performance of our LFs.
[38]: records = []for i, (index, record) in enumerate(df_train_filtered.iterrows()):
item = rb.TextClassificationRecord(inputs=record["text"],# our scores come from probs_train_filtered# probs_train_filtered[i][j] is the probability the sample i belongs to class jprediction=[("HAM", probs_train_filtered[i][0]), # 0 for HAM
("SPAM", probs_train_filtered[i][1])], # 1 for SPAMprediction_agent="LabelModel",
(continues on next page)
5.13. Human-in-the-loop weak supervision with snorkel 109
Rubrix, Release 0.6.1.dev0+gf48c265.d20211104
(continued from previous page)
)records.append(item)
[40]: rb.log(records=records, name="yt_filtered_classified_sample")
[40]: BulkResponse(dataset='yt_filtered_classified_sample_2', processed=1568, failed=0)
With this Rubrix Dataset, we can explore the predictions of our label model. We could add the label model output asannotations to create a training set and share it subject matter experts for review e.g., for relabelling problematicdata points.
To do this, simply adding the max. probability class as annotation:
[36]: records = []for i, (index, record) in enumerate(df_train_filtered.iterrows()):
gold_label = "SPAM" if probs_train_filtered[i][1] > probs_train_filtered[i][0] else→˓"HAM"
item = rb.TextClassificationRecord(inputs=record["text"],# our scores come from probs_train_filtered# probs_train_filtered[i][j] is the probability the sample i belongs to class jprediction=[("HAM", probs_train_filtered[i][0]), # 0 for HAM
("SPAM", probs_train_filtered[i][1])], # 1 for SPAMprediction_agent="LabelModel",annotation=[gold_label]
)records.append(item)
[37]: rb.log(records=records, name="yt_filtered_classified_sample_with_annotation")
[37]: BulkResponse(dataset='yt_filtered_classified_sample_with_annotation', processed=1568,␣→˓failed=0)
Using the Annotation mode, you and other users could review the labels proposed by the Snorkel model and refine thetraining set, with a similar exploration pattern as we used for defining LFs.
110 Chapter 5. Community
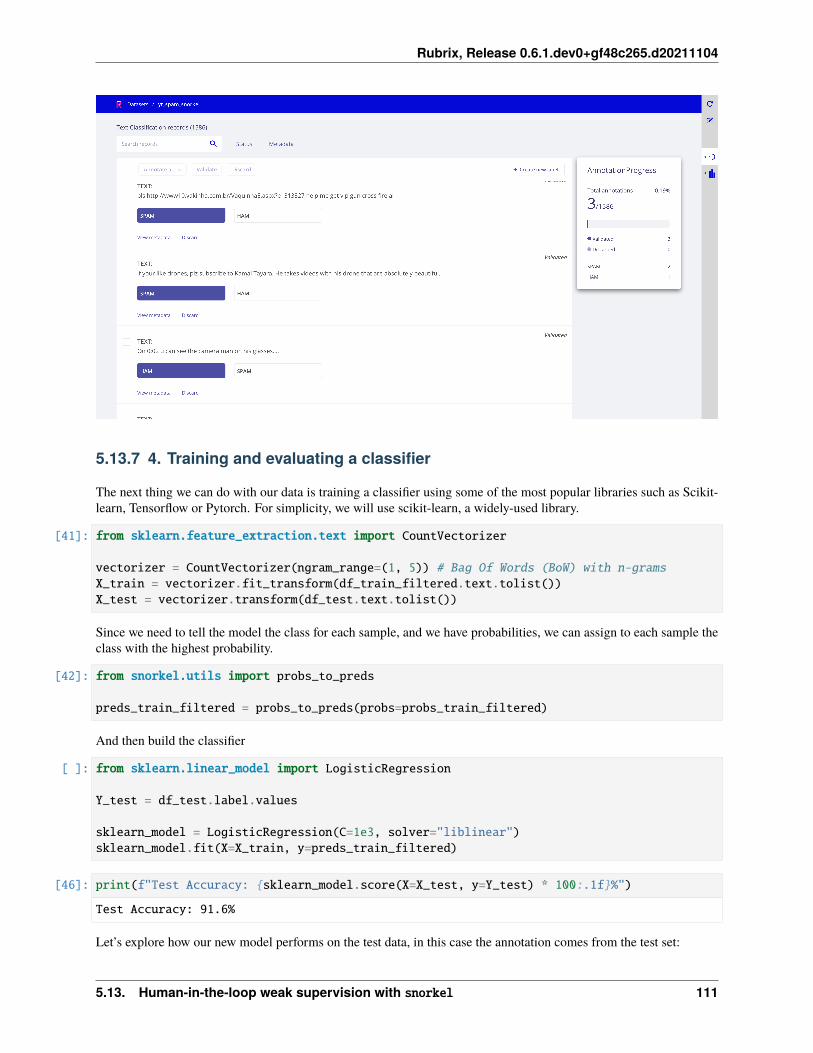
Rubrix, Release 0.6.1.dev0+gf48c265.d20211104
5.13.7 4. Training and evaluating a classifier
The next thing we can do with our data is training a classifier using some of the most popular libraries such as Scikit-learn, Tensorflow or Pytorch. For simplicity, we will use scikit-learn, a widely-used library.
[41]: from sklearn.feature_extraction.text import CountVectorizer
vectorizer = CountVectorizer(ngram_range=(1, 5)) # Bag Of Words (BoW) with n-gramsX_train = vectorizer.fit_transform(df_train_filtered.text.tolist())X_test = vectorizer.transform(df_test.text.tolist())
Since we need to tell the model the class for each sample, and we have probabilities, we can assign to each sample theclass with the highest probability.
[42]: from snorkel.utils import probs_to_preds
preds_train_filtered = probs_to_preds(probs=probs_train_filtered)
And then build the classifier
[ ]: from sklearn.linear_model import LogisticRegression
Y_test = df_test.label.values
sklearn_model = LogisticRegression(C=1e3, solver="liblinear")sklearn_model.fit(X=X_train, y=preds_train_filtered)
[46]: print(f"Test Accuracy: {sklearn_model.score(X=X_test, y=Y_test) * 100:.1f}%")
Test Accuracy: 91.6%
Let’s explore how our new model performs on the test data, in this case the annotation comes from the test set:
5.13. Human-in-the-loop weak supervision with snorkel 111
Rubrix, Release 0.6.1.dev0+gf48c265.d20211104
[47]: records = []for index, record in df_test.iterrows():
preds = sklearn_model.predict_proba(vectorizer.transform([record["text"]]))preds = preds[0]item = rb.TextClassificationRecord(
inputs=record["text"],prediction=[("HAM", preds[0]), # 0 for HAM
("SPAM", preds[1])], # 1 for SPAMprediction_agent="MyModel",annotation=["SPAM" if record.label == 1 else "HAM"]
)records.append(item)
[48]: rb.log(records=records, name="yt_my_model_test")
[48]: BulkResponse(dataset='yt_my_model_test', processed=250, failed=0)
This exploration is useful for error analysis and debugging, for example we can check all incorrectly classified examplesusing the Prediction filters.
5.13.8 Summary
In this tutorial, we have learnt to use Snorkel in combination with Rubrix for data programming workflows.
5.13.9 Next steps
Rubrix documentation for more guides and tutorials.
Join the Rubrix community! A good place to start is the discussion forum.
Rubrix Github repo to stay updated.
5.14 Active learning with ModAL and scikit-learn
In this tutorial, we will walk through the process of building an active learning prototype with Rubrix, the active learningframework ModAL and scikit-learn
112 Chapter 5. Community
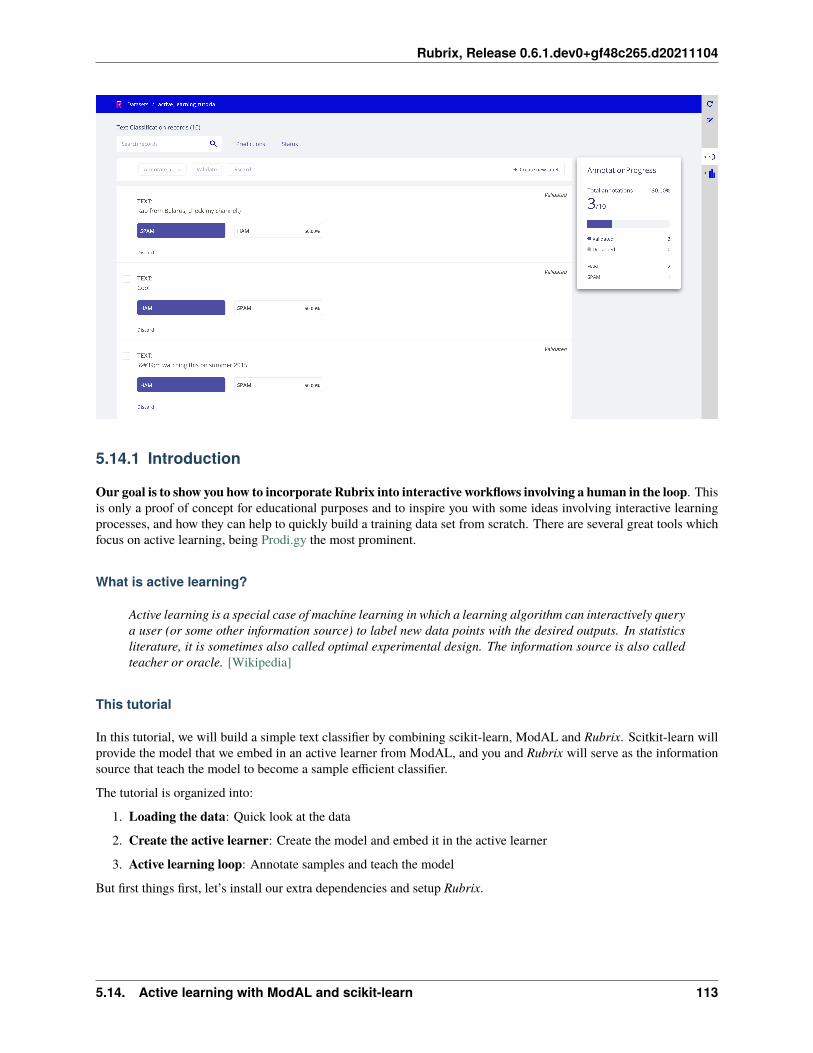
Rubrix, Release 0.6.1.dev0+gf48c265.d20211104
5.14.1 Introduction
Our goal is to show you how to incorporate Rubrix into interactive workflows involving a human in the loop. Thisis only a proof of concept for educational purposes and to inspire you with some ideas involving interactive learningprocesses, and how they can help to quickly build a training data set from scratch. There are several great tools whichfocus on active learning, being Prodi.gy the most prominent.
What is active learning?
Active learning is a special case of machine learning in which a learning algorithm can interactively querya user (or some other information source) to label new data points with the desired outputs. In statisticsliterature, it is sometimes also called optimal experimental design. The information source is also calledteacher or oracle. [Wikipedia]
This tutorial
In this tutorial, we will build a simple text classifier by combining scikit-learn, ModAL and Rubrix. Scitkit-learn willprovide the model that we embed in an active learner from ModAL, and you and Rubrix will serve as the informationsource that teach the model to become a sample efficient classifier.
The tutorial is organized into:
1. Loading the data: Quick look at the data
2. Create the active learner: Create the model and embed it in the active learner
3. Active learning loop: Annotate samples and teach the model
But first things first, let’s install our extra dependencies and setup Rubrix.
5.14. Active learning with ModAL and scikit-learn 113
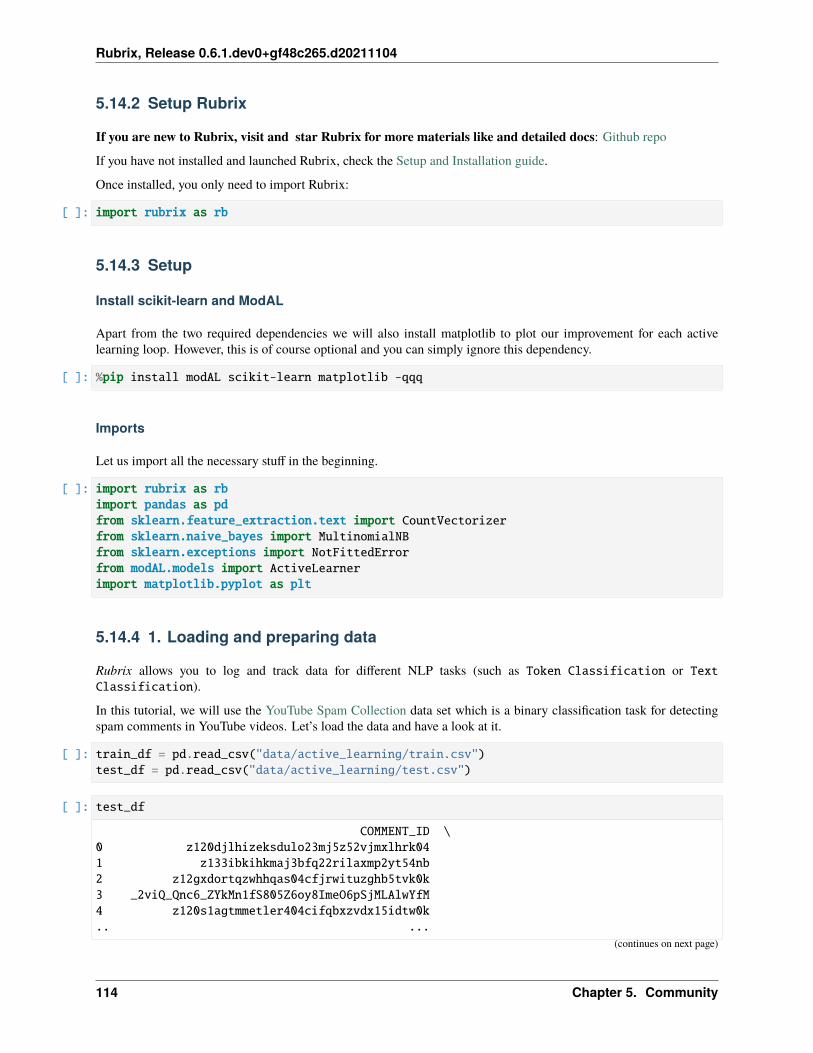
Rubrix, Release 0.6.1.dev0+gf48c265.d20211104
5.14.2 Setup Rubrix
If you are new to Rubrix, visit and star Rubrix for more materials like and detailed docs: Github repo
If you have not installed and launched Rubrix, check the Setup and Installation guide.
Once installed, you only need to import Rubrix:
[ ]: import rubrix as rb
5.14.3 Setup
Install scikit-learn and ModAL
Apart from the two required dependencies we will also install matplotlib to plot our improvement for each activelearning loop. However, this is of course optional and you can simply ignore this dependency.
[ ]: %pip install modAL scikit-learn matplotlib -qqq
Imports
Let us import all the necessary stuff in the beginning.
[ ]: import rubrix as rbimport pandas as pdfrom sklearn.feature_extraction.text import CountVectorizerfrom sklearn.naive_bayes import MultinomialNBfrom sklearn.exceptions import NotFittedErrorfrom modAL.models import ActiveLearnerimport matplotlib.pyplot as plt
5.14.4 1. Loading and preparing data
Rubrix allows you to log and track data for different NLP tasks (such as Token Classification or TextClassification).
In this tutorial, we will use the YouTube Spam Collection data set which is a binary classification task for detectingspam comments in YouTube videos. Let’s load the data and have a look at it.
[ ]: train_df = pd.read_csv("data/active_learning/train.csv")test_df = pd.read_csv("data/active_learning/test.csv")
[ ]: test_df
COMMENT_ID \0 z120djlhizeksdulo23mj5z52vjmxlhrk041 z133ibkihkmaj3bfq22rilaxmp2yt54nb2 z12gxdortqzwhhqas04cfjrwituzghb5tvk0k3 _2viQ_Qnc6_ZYkMn1fS805Z6oy8ImeO6pSjMLAlwYfM4 z120s1agtmmetler404cifqbxzvdx15idtw0k.. ...
(continues on next page)
114 Chapter 5. Community

Rubrix, Release 0.6.1.dev0+gf48c265.d20211104
(continued from previous page)
387 z13pup2w2k3rz1lxl04cf1a5qzavgvv51vg0k388 z13psdarpuzbjp1hh04cjfwgzonextlhf1w389 z131xnwierifxxkj204cgvjxyo3oydb42r40k390 z12pwrxj0kfrwnxye04cjxtqntycd1yia44391 z13oxvzqrzvyit00322jwtjo2tzqylhof04
AUTHOR DATE \0 Murlock Nightcrawler 2015-05-24T07:04:29.8440001 Debora Favacho (Debora Sparkle) 2015-05-21T14:08:41.3380002 Muhammad Asim Mansha NaN3 mile panika 2013-11-03T14:39:42.2480004 Sheila Cenabre 2014-08-19T12:33:11.. ... ...387 geraldine lopez 2015-05-20T23:44:25.920000388 bilal bilo 2015-05-22T20:36:36.926000389 YULIOR ZAMORA 2014-09-10T01:35:54390 2015-05-15T19:46:53.719000391 Octavia W 2015-05-22T02:33:26.041000
CONTENT CLASS VIDEO0 Charlie from LOST? 0 31 BEST SONG EVER X3333333333 0 42 Aslamu Lykum... From Pakistan 1 33 I absolutely adore watching football plus I’ve... 1 44 I really love this video.. http://www.bubblews... 1 1.. ... ... ...387 love the you lie the good 0 3388 I liked<br /> 0 4389 I loved it so much ... 0 1390 good party 0 2391 Waka waka 0 4
[392 rows x 6 columns]
As we can see the data contains the comment id, the author of the comment, the date, the content (the comment itself)and a class column that indicates if a comment is spam or ham. We will use the class column only in the test data set toillustrate the effectiveness of the active learning approach with Rubrix. For the training data set we simply ignore thecolumn and assume that we are gathering training data from scratch.
5.14.5 2. Defining our classifier and Active Learner
For this tutorial we will use a multinomial Naive Bayes classifier that is suitable for classification with discrete features(e.g., word counts for text classification).
[ ]: # Define our classification modelclassifier = MultinomialNB()
Then we define our active learner that uses the classifier as an estimator of the most uncertain predictions.
[ ]: # Define active learnerlearner = ActiveLearner(
(continues on next page)
5.14. Active learning with ModAL and scikit-learn 115
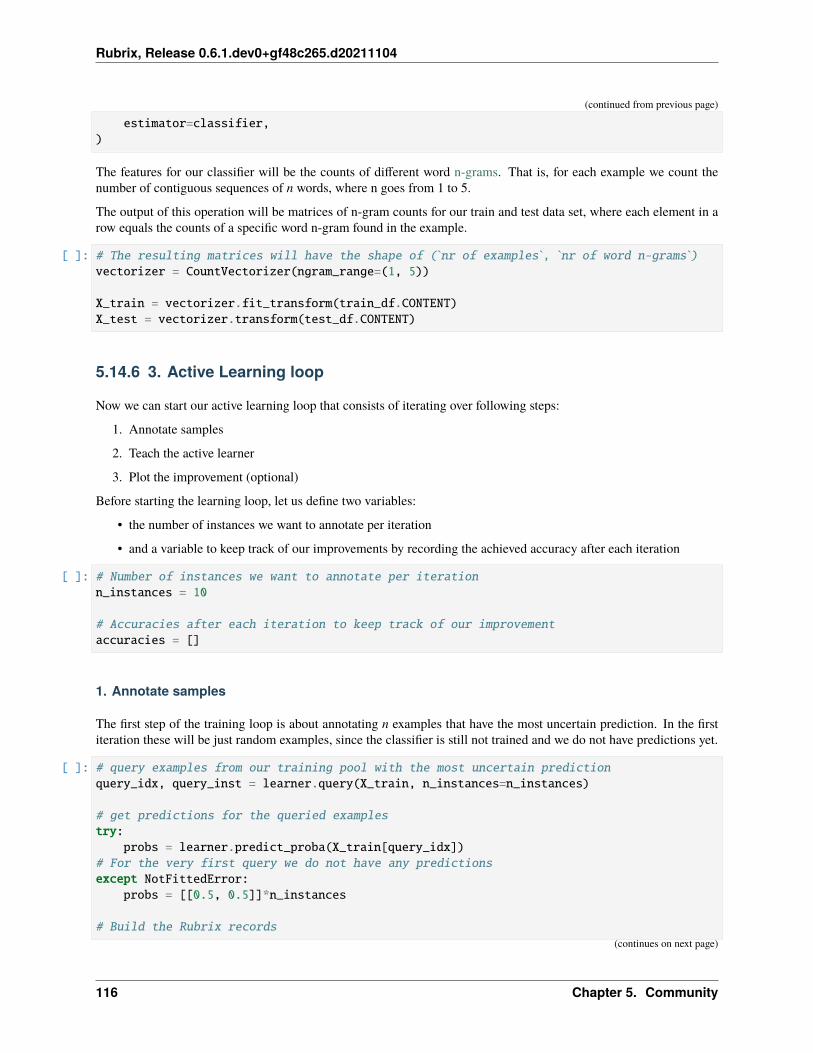
Rubrix, Release 0.6.1.dev0+gf48c265.d20211104
(continued from previous page)
estimator=classifier,)
The features for our classifier will be the counts of different word n-grams. That is, for each example we count thenumber of contiguous sequences of n words, where n goes from 1 to 5.
The output of this operation will be matrices of n-gram counts for our train and test data set, where each element in arow equals the counts of a specific word n-gram found in the example.
[ ]: # The resulting matrices will have the shape of (`nr of examples`, `nr of word n-grams`)vectorizer = CountVectorizer(ngram_range=(1, 5))
X_train = vectorizer.fit_transform(train_df.CONTENT)X_test = vectorizer.transform(test_df.CONTENT)
5.14.6 3. Active Learning loop
Now we can start our active learning loop that consists of iterating over following steps:
1. Annotate samples
2. Teach the active learner
3. Plot the improvement (optional)
Before starting the learning loop, let us define two variables:
• the number of instances we want to annotate per iteration
• and a variable to keep track of our improvements by recording the achieved accuracy after each iteration
[ ]: # Number of instances we want to annotate per iterationn_instances = 10
# Accuracies after each iteration to keep track of our improvementaccuracies = []
1. Annotate samples
The first step of the training loop is about annotating n examples that have the most uncertain prediction. In the firstiteration these will be just random examples, since the classifier is still not trained and we do not have predictions yet.
[ ]: # query examples from our training pool with the most uncertain predictionquery_idx, query_inst = learner.query(X_train, n_instances=n_instances)
# get predictions for the queried examplestry:
probs = learner.predict_proba(X_train[query_idx])# For the very first query we do not have any predictionsexcept NotFittedError:
probs = [[0.5, 0.5]]*n_instances
# Build the Rubrix records(continues on next page)
116 Chapter 5. Community
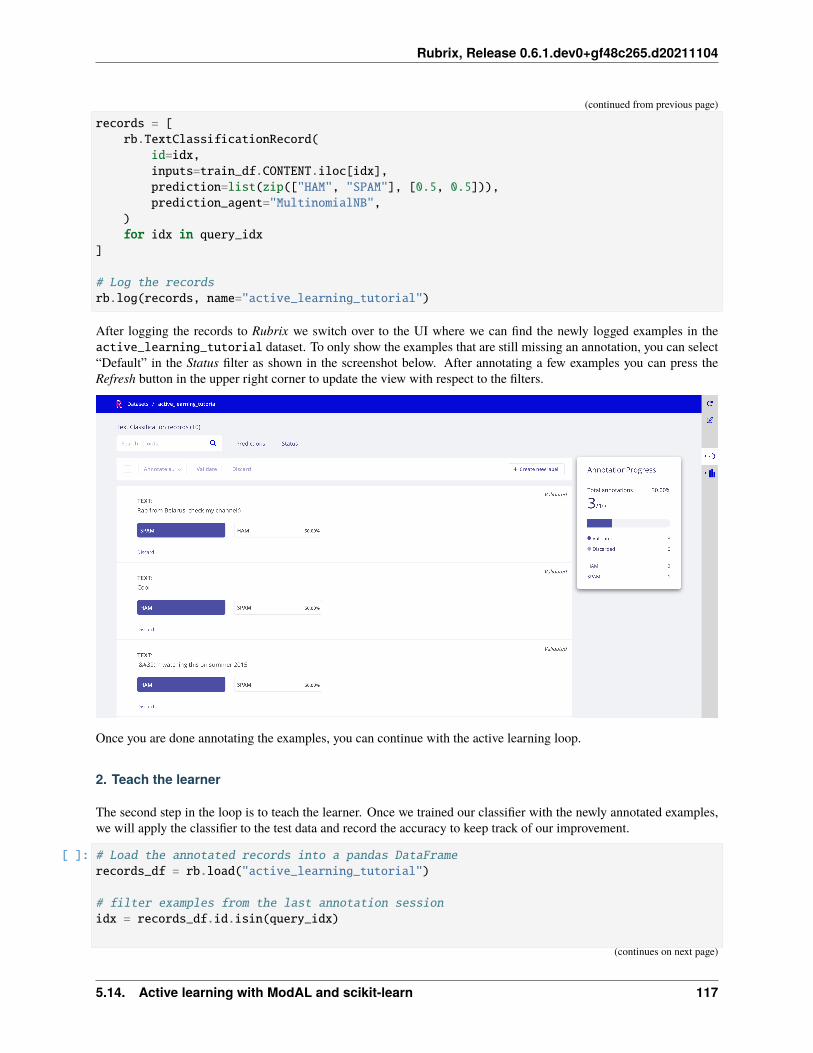
Rubrix, Release 0.6.1.dev0+gf48c265.d20211104
(continued from previous page)
records = [rb.TextClassificationRecord(
id=idx,inputs=train_df.CONTENT.iloc[idx],prediction=list(zip(["HAM", "SPAM"], [0.5, 0.5])),prediction_agent="MultinomialNB",
)for idx in query_idx
]
# Log the recordsrb.log(records, name="active_learning_tutorial")
After logging the records to Rubrix we switch over to the UI where we can find the newly logged examples in theactive_learning_tutorial dataset. To only show the examples that are still missing an annotation, you can select“Default” in the Status filter as shown in the screenshot below. After annotating a few examples you can press theRefresh button in the upper right corner to update the view with respect to the filters.
Once you are done annotating the examples, you can continue with the active learning loop.
2. Teach the learner
The second step in the loop is to teach the learner. Once we trained our classifier with the newly annotated examples,we will apply the classifier to the test data and record the accuracy to keep track of our improvement.
[ ]: # Load the annotated records into a pandas DataFramerecords_df = rb.load("active_learning_tutorial")
# filter examples from the last annotation sessionidx = records_df.id.isin(query_idx)
(continues on next page)
5.14. Active learning with ModAL and scikit-learn 117
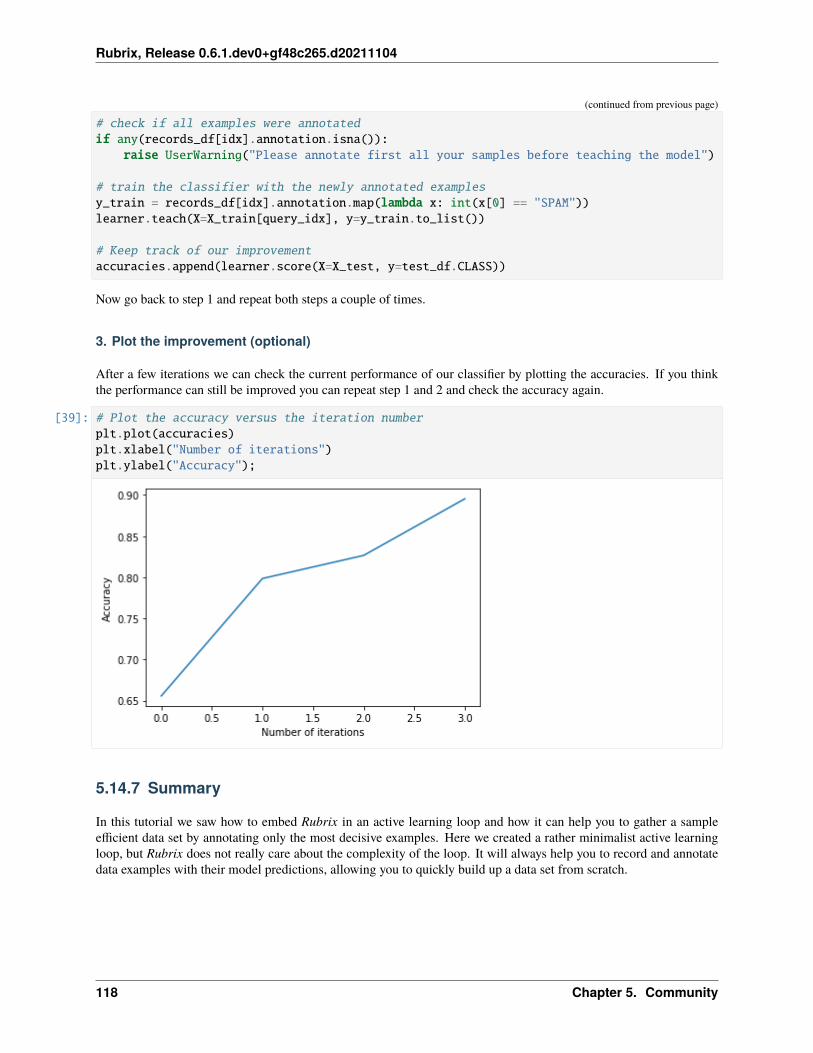
Rubrix, Release 0.6.1.dev0+gf48c265.d20211104
(continued from previous page)
# check if all examples were annotatedif any(records_df[idx].annotation.isna()):
raise UserWarning("Please annotate first all your samples before teaching the model")
# train the classifier with the newly annotated examplesy_train = records_df[idx].annotation.map(lambda x: int(x[0] == "SPAM"))learner.teach(X=X_train[query_idx], y=y_train.to_list())
# Keep track of our improvementaccuracies.append(learner.score(X=X_test, y=test_df.CLASS))
Now go back to step 1 and repeat both steps a couple of times.
3. Plot the improvement (optional)
After a few iterations we can check the current performance of our classifier by plotting the accuracies. If you thinkthe performance can still be improved you can repeat step 1 and 2 and check the accuracy again.
[39]: # Plot the accuracy versus the iteration numberplt.plot(accuracies)plt.xlabel("Number of iterations")plt.ylabel("Accuracy");
5.14.7 Summary
In this tutorial we saw how to embed Rubrix in an active learning loop and how it can help you to gather a sampleefficient data set by annotating only the most decisive examples. Here we created a rather minimalist active learningloop, but Rubrix does not really care about the complexity of the loop. It will always help you to record and annotatedata examples with their model predictions, allowing you to quickly build up a data set from scratch.
118 Chapter 5. Community
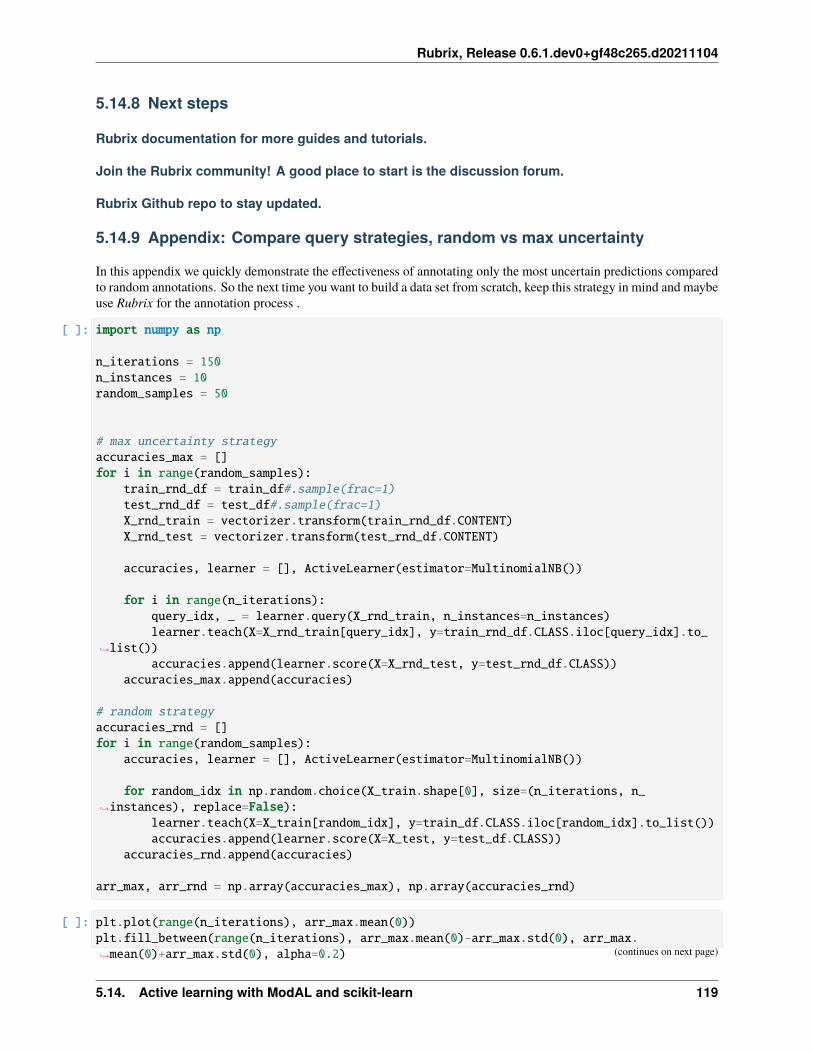
Rubrix, Release 0.6.1.dev0+gf48c265.d20211104
5.14.8 Next steps
Rubrix documentation for more guides and tutorials.
Join the Rubrix community! A good place to start is the discussion forum.
Rubrix Github repo to stay updated.
5.14.9 Appendix: Compare query strategies, random vs max uncertainty
In this appendix we quickly demonstrate the effectiveness of annotating only the most uncertain predictions comparedto random annotations. So the next time you want to build a data set from scratch, keep this strategy in mind and maybeuse Rubrix for the annotation process .
[ ]: import numpy as np
n_iterations = 150n_instances = 10random_samples = 50
# max uncertainty strategyaccuracies_max = []for i in range(random_samples):
train_rnd_df = train_df#.sample(frac=1)test_rnd_df = test_df#.sample(frac=1)X_rnd_train = vectorizer.transform(train_rnd_df.CONTENT)X_rnd_test = vectorizer.transform(test_rnd_df.CONTENT)
accuracies, learner = [], ActiveLearner(estimator=MultinomialNB())
for i in range(n_iterations):query_idx, _ = learner.query(X_rnd_train, n_instances=n_instances)learner.teach(X=X_rnd_train[query_idx], y=train_rnd_df.CLASS.iloc[query_idx].to_
→˓list())accuracies.append(learner.score(X=X_rnd_test, y=test_rnd_df.CLASS))
accuracies_max.append(accuracies)
# random strategyaccuracies_rnd = []for i in range(random_samples):
accuracies, learner = [], ActiveLearner(estimator=MultinomialNB())
for random_idx in np.random.choice(X_train.shape[0], size=(n_iterations, n_→˓instances), replace=False):
learner.teach(X=X_train[random_idx], y=train_df.CLASS.iloc[random_idx].to_list())accuracies.append(learner.score(X=X_test, y=test_df.CLASS))
accuracies_rnd.append(accuracies)
arr_max, arr_rnd = np.array(accuracies_max), np.array(accuracies_rnd)
[ ]: plt.plot(range(n_iterations), arr_max.mean(0))plt.fill_between(range(n_iterations), arr_max.mean(0)-arr_max.std(0), arr_max.→˓mean(0)+arr_max.std(0), alpha=0.2) (continues on next page)
5.14. Active learning with ModAL and scikit-learn 119
Rubrix, Release 0.6.1.dev0+gf48c265.d20211104
(continued from previous page)
plt.plot(range(n_iterations), arr_rnd.mean(0))plt.fill_between(range(n_iterations), arr_rnd.mean(0)-arr_rnd.std(0), arr_rnd.→˓mean(0)+arr_rnd.std(0), alpha=0.2)
plt.xlim(0,15)plt.title("Sampling strategies: Max uncertainty vs random")plt.xlabel("Number of annotation iterations")plt.ylabel("Accuracy")plt.legend(["max uncertainty", "random sampling"], loc=4)
<matplotlib.legend.Legend at 0x7fa38aaaab20>
5.14.10 Appendix: How did we obtain the train/test data?
[ ]: import pandas as pdfrom urllib import requestfrom sklearn.model_selection import train_test_splitfrom pathlib import Pathfrom tempfile import TemporaryDirectory
def load_data() -> pd.DataFrame:"""Downloads the [YouTube Spam Collection](http://www.dt.fee.unicamp.br/~tiago//
→˓youtubespamcollection/)and returns the data as a tuple with a train and test DataFrame."""links, data_df = [
"http://lasid.sor.ufscar.br/labeling/datasets/9/download/","http://lasid.sor.ufscar.br/labeling/datasets/10/download/","http://lasid.sor.ufscar.br/labeling/datasets/11/download/","http://lasid.sor.ufscar.br/labeling/datasets/12/download/","http://lasid.sor.ufscar.br/labeling/datasets/13/download/",
(continues on next page)
120 Chapter 5. Community
Rubrix, Release 0.6.1.dev0+gf48c265.d20211104
(continued from previous page)
], None
with TemporaryDirectory() as tmpdirname:dfs = []for i, link in enumerate(links):
file = Path(tmpdirname) / f"{i}.csv"request.urlretrieve(link, file)df = pd.read_csv(file)df["VIDEO"] = idfs.append(df)
data_df = pd.concat(dfs).reset_index(drop=True)
train_df, test_df = train_test_split(data_df, test_size=0.2, random_state=42)
return train_df, test_df
train_df, test_df = load_data()train_df.to_csv("data/active_learning/train.csv", index=False)test_df.to_csv("data/active_learning/test.csv", index=False)
5.15 Find label errors with cleanlab
In this tutorial, we will show you how you can find possible labeling errors in your data set with the help of cleanlaband Rubrix.
5.15.1 Introduction
As shown recently by Curtis G. Northcutt et al. label errors are pervasive even in the most-cited test sets used tobenchmark the progress of the field of machine learning. In the worst-case scenario, these label errors can destabilizebenchmarks and tend to favor more complex models with a higher capacity over lower capacity models.
They introduce a new principled framework to “identify label errors, characterize label noise, and learn with noisylabels” called confident learning. It is open-sourced as the cleanlab Python package that supports finding, quantifying,and learning with label errors in data sets.
This tutorial walks you through 5 basic steps to find and correct label errors in your data set:
1. Load the data set you want to check, and a model trained on it;
2. Make predictions for the test split of your data set;
3. Get label error candidates with cleanlab;
4. Uncover label errors with Rubrix;
5. Correct label errors and load the corrected data set;
5.15. Find label errors with cleanlab 121
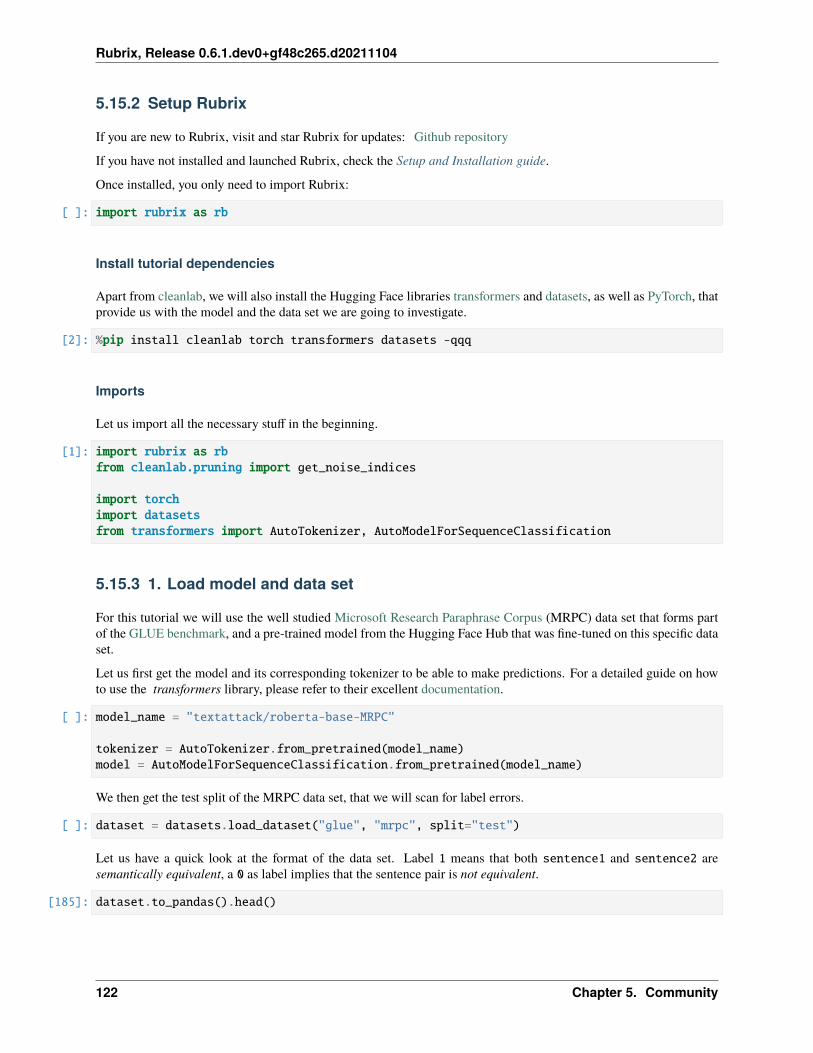
Rubrix, Release 0.6.1.dev0+gf48c265.d20211104
5.15.2 Setup Rubrix
If you are new to Rubrix, visit and star Rubrix for updates: Github repository
If you have not installed and launched Rubrix, check the Setup and Installation guide.
Once installed, you only need to import Rubrix:
[ ]: import rubrix as rb
Install tutorial dependencies
Apart from cleanlab, we will also install the Hugging Face libraries transformers and datasets, as well as PyTorch, thatprovide us with the model and the data set we are going to investigate.
[2]: %pip install cleanlab torch transformers datasets -qqq
Imports
Let us import all the necessary stuff in the beginning.
[1]: import rubrix as rbfrom cleanlab.pruning import get_noise_indices
import torchimport datasetsfrom transformers import AutoTokenizer, AutoModelForSequenceClassification
5.15.3 1. Load model and data set
For this tutorial we will use the well studied Microsoft Research Paraphrase Corpus (MRPC) data set that forms partof the GLUE benchmark, and a pre-trained model from the Hugging Face Hub that was fine-tuned on this specific dataset.
Let us first get the model and its corresponding tokenizer to be able to make predictions. For a detailed guide on howto use the transformers library, please refer to their excellent documentation.
[ ]: model_name = "textattack/roberta-base-MRPC"
tokenizer = AutoTokenizer.from_pretrained(model_name)model = AutoModelForSequenceClassification.from_pretrained(model_name)
We then get the test split of the MRPC data set, that we will scan for label errors.
[ ]: dataset = datasets.load_dataset("glue", "mrpc", split="test")
Let us have a quick look at the format of the data set. Label 1 means that both sentence1 and sentence2 aresemantically equivalent, a 0 as label implies that the sentence pair is not equivalent.
[185]: dataset.to_pandas().head()
122 Chapter 5. Community
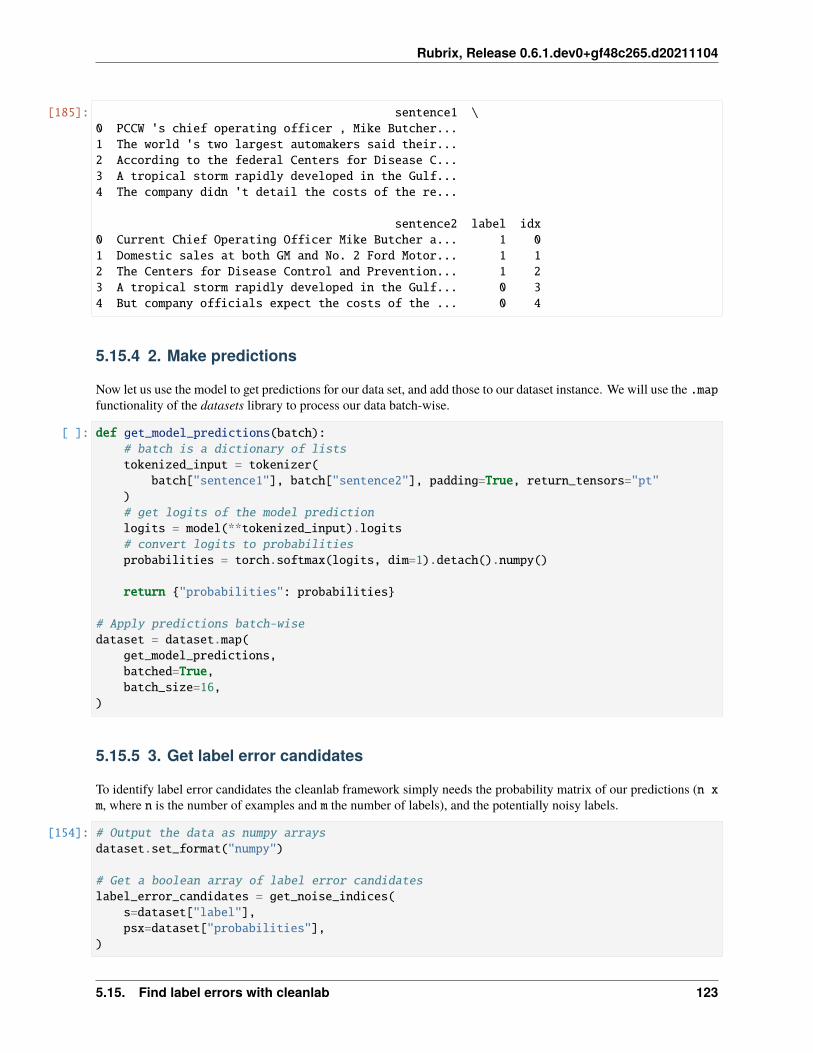
Rubrix, Release 0.6.1.dev0+gf48c265.d20211104
[185]: sentence1 \0 PCCW 's chief operating officer , Mike Butcher...1 The world 's two largest automakers said their...2 According to the federal Centers for Disease C...3 A tropical storm rapidly developed in the Gulf...4 The company didn 't detail the costs of the re...
sentence2 label idx0 Current Chief Operating Officer Mike Butcher a... 1 01 Domestic sales at both GM and No. 2 Ford Motor... 1 12 The Centers for Disease Control and Prevention... 1 23 A tropical storm rapidly developed in the Gulf... 0 34 But company officials expect the costs of the ... 0 4
5.15.4 2. Make predictions
Now let us use the model to get predictions for our data set, and add those to our dataset instance. We will use the .mapfunctionality of the datasets library to process our data batch-wise.
[ ]: def get_model_predictions(batch):# batch is a dictionary of liststokenized_input = tokenizer(
batch["sentence1"], batch["sentence2"], padding=True, return_tensors="pt")# get logits of the model predictionlogits = model(**tokenized_input).logits# convert logits to probabilitiesprobabilities = torch.softmax(logits, dim=1).detach().numpy()
return {"probabilities": probabilities}
# Apply predictions batch-wisedataset = dataset.map(
get_model_predictions,batched=True,batch_size=16,
)
5.15.5 3. Get label error candidates
To identify label error candidates the cleanlab framework simply needs the probability matrix of our predictions (n xm, where n is the number of examples and m the number of labels), and the potentially noisy labels.
[154]: # Output the data as numpy arraysdataset.set_format("numpy")
# Get a boolean array of label error candidateslabel_error_candidates = get_noise_indices(
s=dataset["label"],psx=dataset["probabilities"],
)
5.15. Find label errors with cleanlab 123
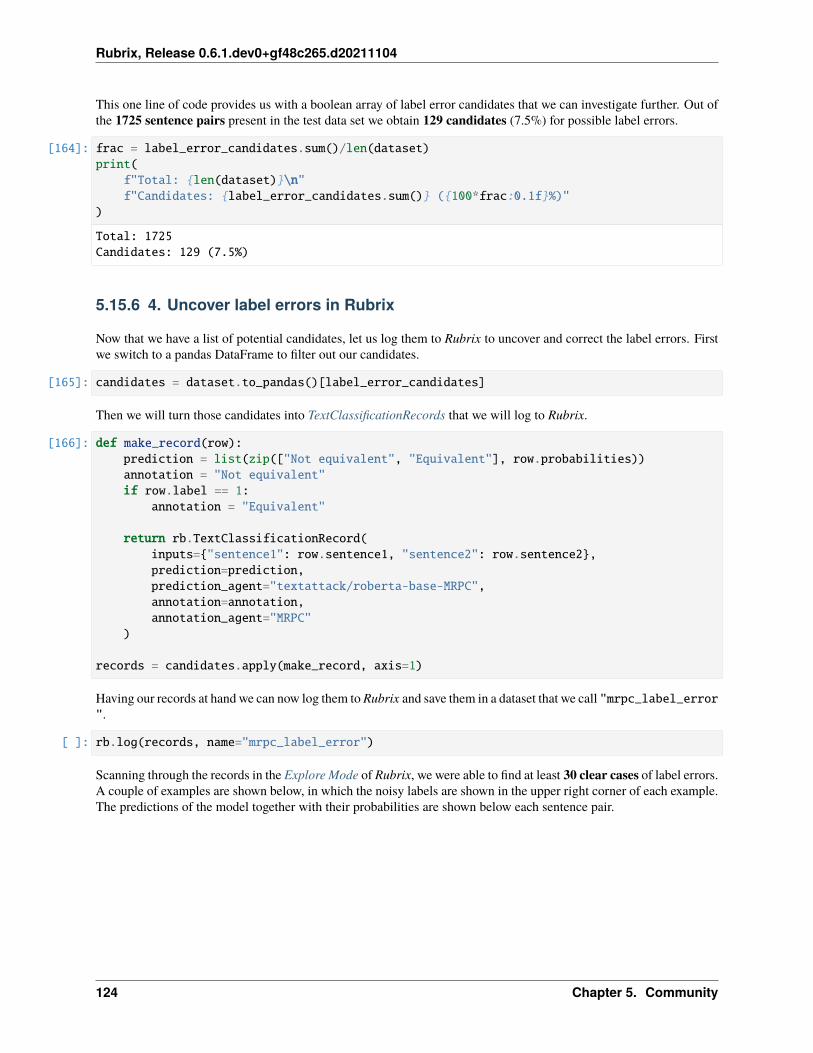
Rubrix, Release 0.6.1.dev0+gf48c265.d20211104
This one line of code provides us with a boolean array of label error candidates that we can investigate further. Out ofthe 1725 sentence pairs present in the test data set we obtain 129 candidates (7.5%) for possible label errors.
[164]: frac = label_error_candidates.sum()/len(dataset)print(
f"Total: {len(dataset)}\n"f"Candidates: {label_error_candidates.sum()} ({100*frac:0.1f}%)"
)
Total: 1725Candidates: 129 (7.5%)
5.15.6 4. Uncover label errors in Rubrix
Now that we have a list of potential candidates, let us log them to Rubrix to uncover and correct the label errors. Firstwe switch to a pandas DataFrame to filter out our candidates.
[165]: candidates = dataset.to_pandas()[label_error_candidates]
Then we will turn those candidates into TextClassificationRecords that we will log to Rubrix.
[166]: def make_record(row):prediction = list(zip(["Not equivalent", "Equivalent"], row.probabilities))annotation = "Not equivalent"if row.label == 1:
annotation = "Equivalent"
return rb.TextClassificationRecord(inputs={"sentence1": row.sentence1, "sentence2": row.sentence2},prediction=prediction,prediction_agent="textattack/roberta-base-MRPC",annotation=annotation,annotation_agent="MRPC"
)
records = candidates.apply(make_record, axis=1)
Having our records at hand we can now log them to Rubrix and save them in a dataset that we call "mrpc_label_error".
[ ]: rb.log(records, name="mrpc_label_error")
Scanning through the records in the Explore Mode of Rubrix, we were able to find at least 30 clear cases of label errors.A couple of examples are shown below, in which the noisy labels are shown in the upper right corner of each example.The predictions of the model together with their probabilities are shown below each sentence pair.
124 Chapter 5. Community
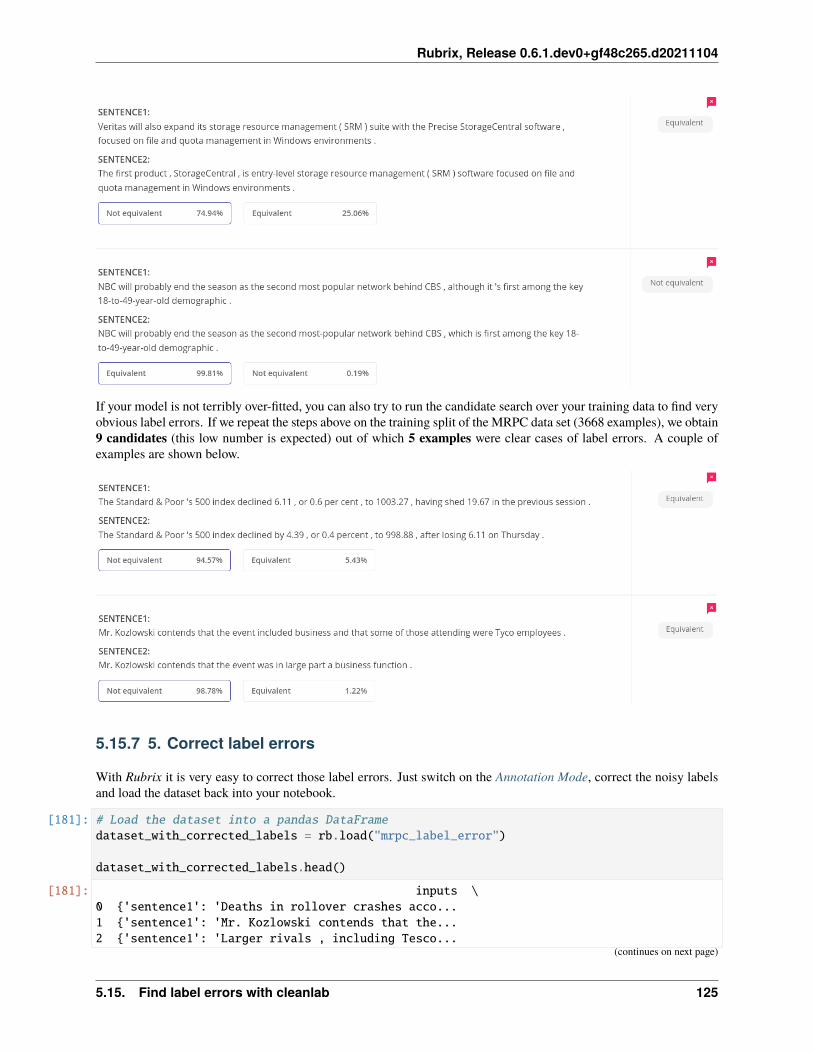
Rubrix, Release 0.6.1.dev0+gf48c265.d20211104
If your model is not terribly over-fitted, you can also try to run the candidate search over your training data to find veryobvious label errors. If we repeat the steps above on the training split of the MRPC data set (3668 examples), we obtain9 candidates (this low number is expected) out of which 5 examples were clear cases of label errors. A couple ofexamples are shown below.
5.15.7 5. Correct label errors
With Rubrix it is very easy to correct those label errors. Just switch on the Annotation Mode, correct the noisy labelsand load the dataset back into your notebook.
[181]: # Load the dataset into a pandas DataFramedataset_with_corrected_labels = rb.load("mrpc_label_error")
dataset_with_corrected_labels.head()
[181]: inputs \0 {'sentence1': 'Deaths in rollover crashes acco...1 {'sentence1': 'Mr. Kozlowski contends that the...2 {'sentence1': 'Larger rivals , including Tesco...
(continues on next page)
5.15. Find label errors with cleanlab 125
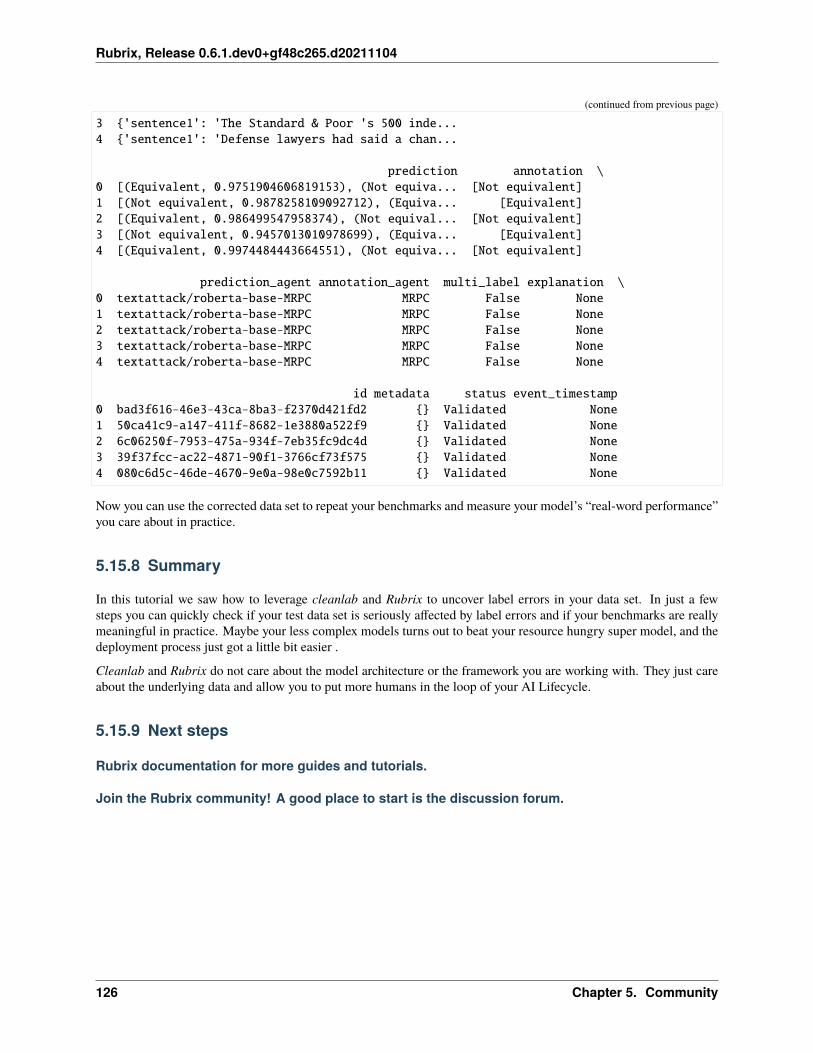
Rubrix, Release 0.6.1.dev0+gf48c265.d20211104
(continued from previous page)
3 {'sentence1': 'The Standard & Poor 's 500 inde...4 {'sentence1': 'Defense lawyers had said a chan...
prediction annotation \0 [(Equivalent, 0.9751904606819153), (Not equiva... [Not equivalent]1 [(Not equivalent, 0.9878258109092712), (Equiva... [Equivalent]2 [(Equivalent, 0.986499547958374), (Not equival... [Not equivalent]3 [(Not equivalent, 0.9457013010978699), (Equiva... [Equivalent]4 [(Equivalent, 0.9974484443664551), (Not equiva... [Not equivalent]
prediction_agent annotation_agent multi_label explanation \0 textattack/roberta-base-MRPC MRPC False None1 textattack/roberta-base-MRPC MRPC False None2 textattack/roberta-base-MRPC MRPC False None3 textattack/roberta-base-MRPC MRPC False None4 textattack/roberta-base-MRPC MRPC False None
id metadata status event_timestamp0 bad3f616-46e3-43ca-8ba3-f2370d421fd2 {} Validated None1 50ca41c9-a147-411f-8682-1e3880a522f9 {} Validated None2 6c06250f-7953-475a-934f-7eb35fc9dc4d {} Validated None3 39f37fcc-ac22-4871-90f1-3766cf73f575 {} Validated None4 080c6d5c-46de-4670-9e0a-98e0c7592b11 {} Validated None
Now you can use the corrected data set to repeat your benchmarks and measure your model’s “real-word performance”you care about in practice.
5.15.8 Summary
In this tutorial we saw how to leverage cleanlab and Rubrix to uncover label errors in your data set. In just a fewsteps you can quickly check if your test data set is seriously affected by label errors and if your benchmarks are reallymeaningful in practice. Maybe your less complex models turns out to beat your resource hungry super model, and thedeployment process just got a little bit easier .
Cleanlab and Rubrix do not care about the model architecture or the framework you are working with. They just careabout the underlying data and allow you to put more humans in the loop of your AI Lifecycle.
5.15.9 Next steps
Rubrix documentation for more guides and tutorials.
Join the Rubrix community! A good place to start is the discussion forum.
126 Chapter 5. Community
Rubrix, Release 0.6.1.dev0+gf48c265.d20211104
Rubrix Github repo to stay updated.
5.16 Zero-shot Named Entity Recognition with Flair
5.16.1 TL;DR:
You can use Rubrix for analizing and validating the NER predictions from the new zero-shot model provided by theFlair NLP library.
This is useful for quickly bootstrapping a training set (using Rubrix Annotation Mode) as well as integrating withweak-supervision workflows.
5.16.2 Install dependencies
[ ]: %pip install datasets flair -qqq
5.16.3 Setup Rubrix
Rubrix, is a free and open-source tool to explore, annotate, and monitor data for NLP projects.
If you are new to Rubrix, check out the Github repository .
If you have not installed and launched Rubrix, check the Setup and Installation guide.
Once installed, you only need to import Rubrix:
[1]: import rubrix as rb
5.16.4 Load the wnut_17 dataset
In this example, we’ll use a challenging NER dataset, the “WNUT 17: Emerging and Rare entity recognition” dataset,which focuses on unusual, previously-unseen entities in the context of emerging discussions. This dataset is useful forgetting a sense of the quality of our zero-shot predictions.
Let’s load the test set from the Hugging Face Hub:
[ ]: from datasets import load_dataset
dataset = load_dataset("wnut_17", split="test")
[7]: wnut_labels = ['corporation', 'creative-work', 'group', 'location', 'person', 'product']
5.16. Zero-shot Named Entity Recognition with Flair 127
Rubrix, Release 0.6.1.dev0+gf48c265.d20211104
5.16.5 Configure Flair TARSTagger
Now let’s configure our NER model, following Flair’s documentation.
[ ]: from flair.models import TARSTaggerfrom flair.data import Sentence
# Load zero-shot NER taggertars = TARSTagger.load('tars-ner')
# Define labels for named entities using wnut labelslabels = wnut_labelstars.add_and_switch_to_new_task('task 1', labels, label_type='ner')
Let’s test it with one example!
[9]: sentence = Sentence(" ".join(dataset[0]['tokens']))
[10]: tars.predict(sentence)
# Creating the prediction entity as a list of tuples (entity, start_char, end_char)prediction = [
(entity.get_labels()[0].value, entity.start_pos, entity.end_pos)for entity in sentence.get_spans("ner")
]prediction
[10]: [('location', 100, 107)]
5.16.6 Predict over wnut_17 and log into rubrix
Now, let’s log the predictions in rubrix
[ ]: records = []for record in dataset.select(range(100)):
input_text = " ".join(record["tokens"])
sentence = Sentence(input_text)tars.predict(sentence)prediction = [
(entity.get_labels()[0].value, entity.start_pos, entity.end_pos)for entity in sentence.get_spans("ner")
]
# Building TokenClassificationRecordrecords.append(
rb.TokenClassificationRecord(text=input_text,tokens=[token.text for token in sentence],prediction=prediction,prediction_agent="tars-ner",
))
(continues on next page)
128 Chapter 5. Community
Rubrix, Release 0.6.1.dev0+gf48c265.d20211104
(continued from previous page)
rb.log(records, name='tars_ner_wnut_17', metadata={"split": "test"})
5.17 Clean labels using your model loss
5.17.1 TL;DR
1. A simple technique for error analysis is introduced: using model loss to find potential training data errors.
2. The technique is shown using a fine-tuned text classifier from the Hugging Face Hub on the AG News dataset.
3. Using Rubrix, we verify more than 100 mislabelled examples on the training set of this well-known NLPbenchmark.
4. This trick is useful during model training with small and noisy datasets.
5. This trick is complementary with other “data-centric” ML methods such as cleanlab (see the Rubrix tutorialon cleanlab).
5.17.2 Introduction
This tutorial explains a simple trick for finding potential errors in training data: using your model loss to identify labelerrors or ambiguous examples. This trick is inspired by the following tweet:
When you sort your dataset descending by loss you are guaranteed to find something unexpected, strange and helpful.
— Andrej Karpathy (@karpathy) October 2, 2020
The technique is really simple: if you are training a model with a training set, train your model, and you apply yourmodel to the training set to compute the loss for each example in the training set. If you sort your dataset examplesby loss, examples with the highest loss are the most ambiguous and difficult to learn.
This very simple technique can be used for error analysis during model development (e.g., identifying tokeniza-tion problems), but it turns out is also a really simple technique for cleaning up your training data, during modeldevelopment or after training data collection activities.
In this tutorial, we’ll use this technique with a well-known text classification benchmark, the AG News dataset. Aftercomputing the losses, we’ll use Rubrix to analyse the highest loss examples. In less than 10 minutes, we manuallycheck and relabel the first 100 examples. In fact, the first 100 examples with the highest loss, are all incorrect in theoriginal training set. If we visually inspect further examples, we still find label errors in the top 500 examples.
5.17.3 Ingredients
• A model fine-tuned with the AG News dataset (you could train your own model if you wish).
• The AG News train split (the same trick could and should be applied to validation and test splits).
• Rubrix for logging, exploring, and relabeling wrong examples.
5.17. Clean labels using your model loss 129
Rubrix, Release 0.6.1.dev0+gf48c265.d20211104
5.17.4 Steps
1. Load the fine-tuned model and the AG News train split.
2. Compute the loss for each example and sort examples by descending loss.
3. Log the first 500 example into a Rubrix dataset. We provide you with the processed dataset if you want to skipthe first two steps.
4. Use Rubrix webapp for inspecting the examples ordered by loss. In the following video, we show you the fullprocess for manually correcting the first 100 examples (all incorrect in the original dataset, the original video is8 minutes long):
5.17.5 Why it’s important
1. Machine learning models are only as good as the data they’re trained on. Almost all training data sourcecan be considered “noisy” (e.g., crowd-workers, annotator errors, weak supervision sources, data augmentation,etc.)
2. With this simple technique we’re able to find more than 100 label errors on a widely-used benchmark in lessthan 10 minutes. Your dataset will probably be noisier.
3. With advanced model architectures widely-available, managing, cleaning, and curating data is becoming akey step for making robust ML applications. A good summary of the current situation can be found in thewebsite of the Data-centric AI NeurIPS Workshop.
4. This simple trick can be used accross the whole ML life-cyle and not only for finding label errors. With thistrick you can improve data preprocessing, tokenization, and even your model architecture.
5.17.6 Setup Rubrix
Rubrix, is a free and open-source tool to explore, annotate, and monitor data for NLP projects.
If you are new to Rubrix, check out the Github repository.
If you have not installed and launched Rubrix, check the Setup and Installation guide.
Once installed, you only need to import Rubrix:
[3]: import rubrix as rb
5.17.7 Tutorial dependencies
We’ll install the Hugging Face libraries transformers and datasets, as well as PyTorch, for the model and data set we’lluse in the next steps.
[ ]: %pip install transformers datasets torch
130 Chapter 5. Community
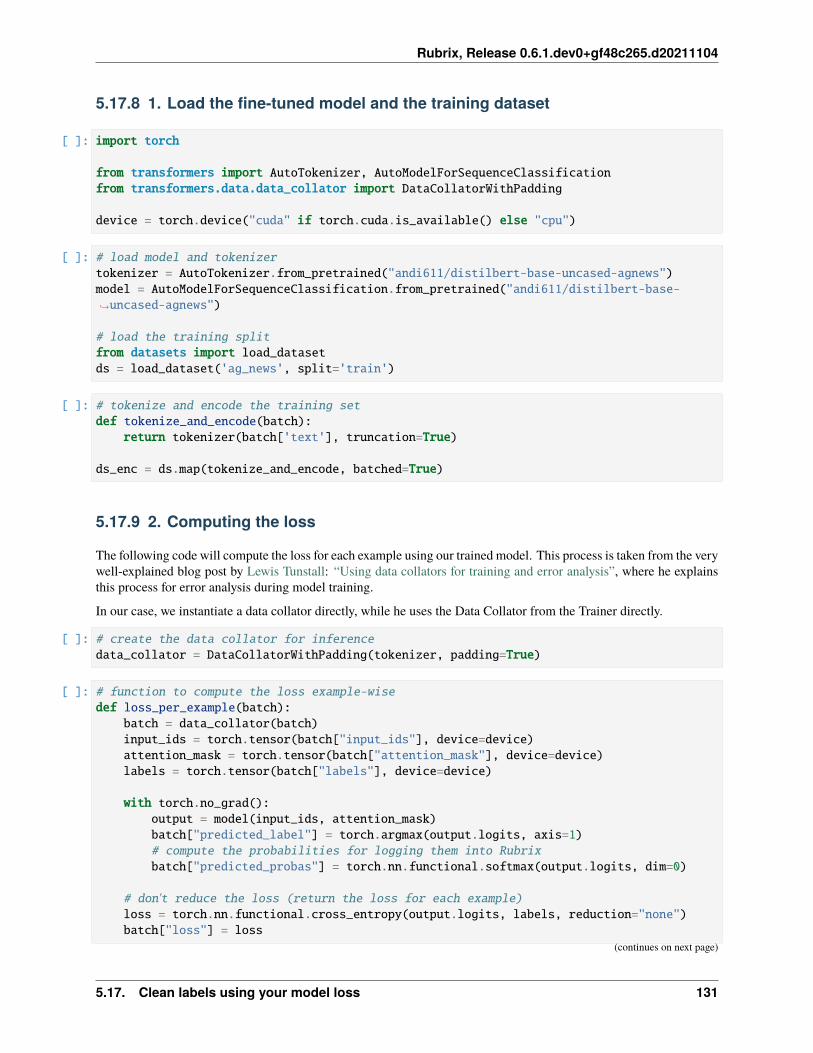
Rubrix, Release 0.6.1.dev0+gf48c265.d20211104
5.17.8 1. Load the fine-tuned model and the training dataset
[ ]: import torch
from transformers import AutoTokenizer, AutoModelForSequenceClassificationfrom transformers.data.data_collator import DataCollatorWithPadding
device = torch.device("cuda" if torch.cuda.is_available() else "cpu")
[ ]: # load model and tokenizertokenizer = AutoTokenizer.from_pretrained("andi611/distilbert-base-uncased-agnews")model = AutoModelForSequenceClassification.from_pretrained("andi611/distilbert-base-→˓uncased-agnews")
# load the training splitfrom datasets import load_datasetds = load_dataset('ag_news', split='train')
[ ]: # tokenize and encode the training setdef tokenize_and_encode(batch):
return tokenizer(batch['text'], truncation=True)
ds_enc = ds.map(tokenize_and_encode, batched=True)
5.17.9 2. Computing the loss
The following code will compute the loss for each example using our trained model. This process is taken from the verywell-explained blog post by Lewis Tunstall: “Using data collators for training and error analysis”, where he explainsthis process for error analysis during model training.
In our case, we instantiate a data collator directly, while he uses the Data Collator from the Trainer directly.
[ ]: # create the data collator for inferencedata_collator = DataCollatorWithPadding(tokenizer, padding=True)
[ ]: # function to compute the loss example-wisedef loss_per_example(batch):
batch = data_collator(batch)input_ids = torch.tensor(batch["input_ids"], device=device)attention_mask = torch.tensor(batch["attention_mask"], device=device)labels = torch.tensor(batch["labels"], device=device)
with torch.no_grad():output = model(input_ids, attention_mask)batch["predicted_label"] = torch.argmax(output.logits, axis=1)# compute the probabilities for logging them into Rubrixbatch["predicted_probas"] = torch.nn.functional.softmax(output.logits, dim=0)
# don't reduce the loss (return the loss for each example)loss = torch.nn.functional.cross_entropy(output.logits, labels, reduction="none")batch["loss"] = loss
(continues on next page)
5.17. Clean labels using your model loss 131
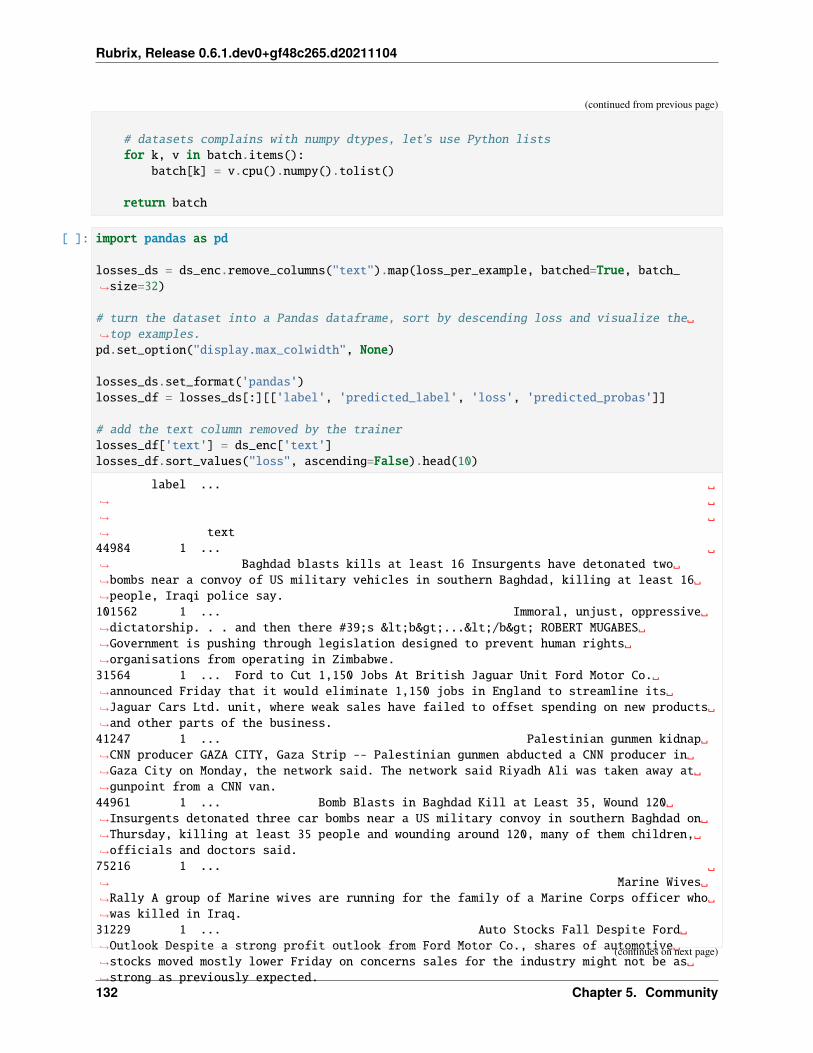
Rubrix, Release 0.6.1.dev0+gf48c265.d20211104
(continued from previous page)
# datasets complains with numpy dtypes, let's use Python listsfor k, v in batch.items():
batch[k] = v.cpu().numpy().tolist()
return batch
[ ]: import pandas as pd
losses_ds = ds_enc.remove_columns("text").map(loss_per_example, batched=True, batch_→˓size=32)
# turn the dataset into a Pandas dataframe, sort by descending loss and visualize the␣→˓top examples.pd.set_option("display.max_colwidth", None)
losses_ds.set_format('pandas')losses_df = losses_ds[:][['label', 'predicted_label', 'loss', 'predicted_probas']]
# add the text column removed by the trainerlosses_df['text'] = ds_enc['text']losses_df.sort_values("loss", ascending=False).head(10)
label ... ␣→˓ ␣→˓ ␣→˓ text44984 1 ... ␣→˓ Baghdad blasts kills at least 16 Insurgents have detonated two␣→˓bombs near a convoy of US military vehicles in southern Baghdad, killing at least 16␣→˓people, Iraqi police say.101562 1 ... Immoral, unjust, oppressive␣→˓dictatorship. . . and then there #39;s <b>...</b> ROBERT MUGABES␣→˓Government is pushing through legislation designed to prevent human rights␣→˓organisations from operating in Zimbabwe.31564 1 ... Ford to Cut 1,150 Jobs At British Jaguar Unit Ford Motor Co.␣→˓announced Friday that it would eliminate 1,150 jobs in England to streamline its␣→˓Jaguar Cars Ltd. unit, where weak sales have failed to offset spending on new products␣→˓and other parts of the business.41247 1 ... Palestinian gunmen kidnap␣→˓CNN producer GAZA CITY, Gaza Strip -- Palestinian gunmen abducted a CNN producer in␣→˓Gaza City on Monday, the network said. The network said Riyadh Ali was taken away at␣→˓gunpoint from a CNN van.44961 1 ... Bomb Blasts in Baghdad Kill at Least 35, Wound 120␣→˓Insurgents detonated three car bombs near a US military convoy in southern Baghdad on␣→˓Thursday, killing at least 35 people and wounding around 120, many of them children,␣→˓officials and doctors said.75216 1 ... ␣→˓ Marine Wives␣→˓Rally A group of Marine wives are running for the family of a Marine Corps officer who␣→˓was killed in Iraq.31229 1 ... Auto Stocks Fall Despite Ford␣→˓Outlook Despite a strong profit outlook from Ford Motor Co., shares of automotive␣→˓stocks moved mostly lower Friday on concerns sales for the industry might not be as␣→˓strong as previously expected.
(continues on next page)
132 Chapter 5. Community
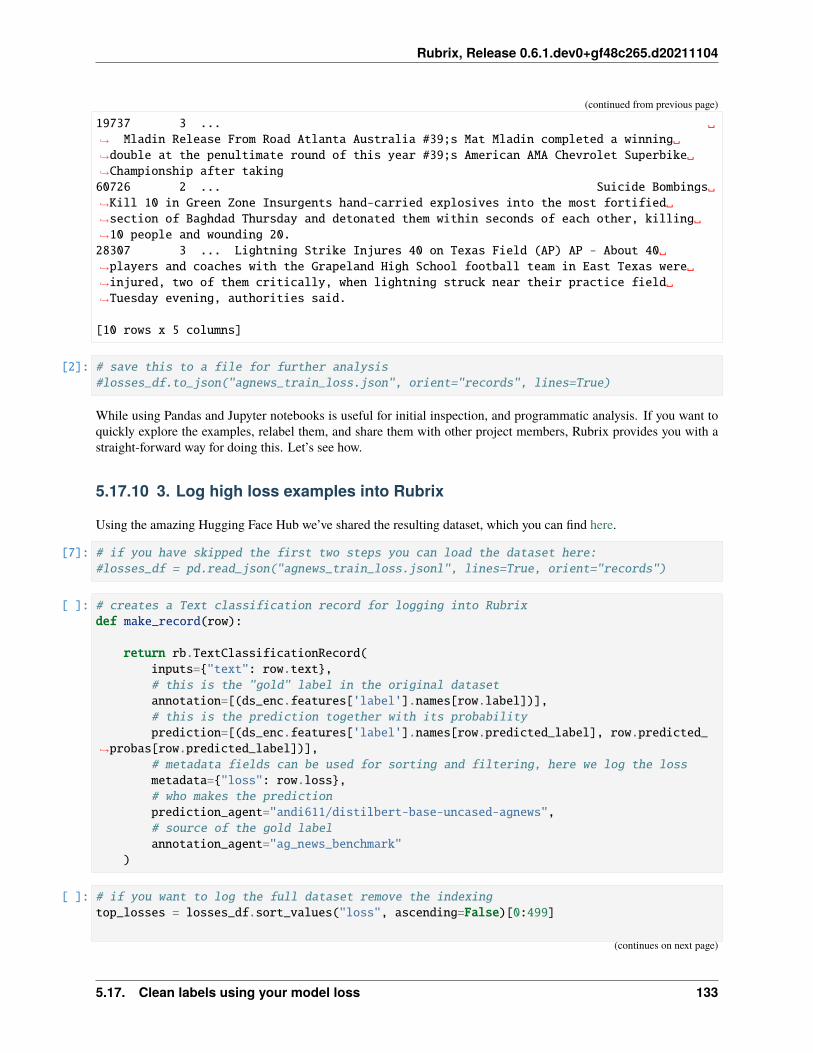
Rubrix, Release 0.6.1.dev0+gf48c265.d20211104
(continued from previous page)
19737 3 ... ␣→˓ Mladin Release From Road Atlanta Australia #39;s Mat Mladin completed a winning␣→˓double at the penultimate round of this year #39;s American AMA Chevrolet Superbike␣→˓Championship after taking60726 2 ... Suicide Bombings␣→˓Kill 10 in Green Zone Insurgents hand-carried explosives into the most fortified␣→˓section of Baghdad Thursday and detonated them within seconds of each other, killing␣→˓10 people and wounding 20.28307 3 ... Lightning Strike Injures 40 on Texas Field (AP) AP - About 40␣→˓players and coaches with the Grapeland High School football team in East Texas were␣→˓injured, two of them critically, when lightning struck near their practice field␣→˓Tuesday evening, authorities said.
[10 rows x 5 columns]
[2]: # save this to a file for further analysis#losses_df.to_json("agnews_train_loss.json", orient="records", lines=True)
While using Pandas and Jupyter notebooks is useful for initial inspection, and programmatic analysis. If you want toquickly explore the examples, relabel them, and share them with other project members, Rubrix provides you with astraight-forward way for doing this. Let’s see how.
5.17.10 3. Log high loss examples into Rubrix
Using the amazing Hugging Face Hub we’ve shared the resulting dataset, which you can find here.
[7]: # if you have skipped the first two steps you can load the dataset here:#losses_df = pd.read_json("agnews_train_loss.jsonl", lines=True, orient="records")
[ ]: # creates a Text classification record for logging into Rubrixdef make_record(row):
return rb.TextClassificationRecord(inputs={"text": row.text},# this is the "gold" label in the original datasetannotation=[(ds_enc.features['label'].names[row.label])],# this is the prediction together with its probabilityprediction=[(ds_enc.features['label'].names[row.predicted_label], row.predicted_
→˓probas[row.predicted_label])],# metadata fields can be used for sorting and filtering, here we log the lossmetadata={"loss": row.loss},# who makes the predictionprediction_agent="andi611/distilbert-base-uncased-agnews",# source of the gold labelannotation_agent="ag_news_benchmark"
)
[ ]: # if you want to log the full dataset remove the indexingtop_losses = losses_df.sort_values("loss", ascending=False)[0:499]
(continues on next page)
5.17. Clean labels using your model loss 133
Rubrix, Release 0.6.1.dev0+gf48c265.d20211104
(continued from previous page)
# build Rubrix recordsrecords = top_losses.apply(make_record, axis=1)
[ ]: rb.log(records, name="ag_news_error_analysis")
5.17.11 4. Using Rubrix Webapp for inspection and relabeling
In this step, we have a Rubrix Dataset available for exploration and annotation. A useful feature for this use case isSorting. With Rubrix you can sort your examples by combining different fields, both from the standard fields (suchas score) and custom fields (via the metadata fields). In this case, we’ve logged the loss so we can order our trainingexamples by loss in descending order (showing higher loss examples first).
For preparing this tutorial, we have manually checked and relabelled the first 100 examples. You can watch the fullsession (with high-speed during the last part) here. In the video we use Rubrix annotation mode to change the labelof mislabelled examples (the first label correspond to the original “gold” label and the second corresponds to thepredictions of the model).
We’ve also randomly checked the next 400 examples finding many potential errors. If you are interested you can repeatour experiment or even help validate the next 100 examples, we’d love to know about your results! We plan to sharethe 100 relabeled examples with the community in the Hugging Face Hub.
5.17.12 Next steps
If you are interested in the topic of training data curation and denoising datasets, check out the tutorial for using Rubrixwith cleanlab.
Rubrix documentation for more guides and tutorials.
Join the Rubrix community! A good place to start is the discussion forum.
Rubrix Github repo to stay updated.
[ ]:
5.18 Monitor predictions in HTTP API endpoints
In this tutorial, you’ll learn to monitor the predictions of a FastAPI inference endpoint and log model predictions in aRubrix dataset.
This tutorial walks you through 4 basic steps:
• Load the model you want to use.
• Convert model output to Rubrix format.
• Create a FastAPI endpoint.
• Add middleware to automate logging to Rubrix
Let’s get started!
134 Chapter 5. Community
Rubrix, Release 0.6.1.dev0+gf48c265.d20211104
5.18.1 Setup Rubrix
Rubrix, is a free and open-source tool to explore, annotate, and monitor data for NLP projects.
If you are new to Rubrix, check out the Github repository.
If you have not installed and launched Rubrix, check the Setup and Installation guide.
Once installed, you only need to import Rubrix:
5.18.2 Install tutorial dependencies
Apart from Rubrix, we’ll need the following libraries: - transformers - spaCy - uvicorn - FastAPI
And the following models: - distilbert-base-uncased-finetuned-sst-2-english : a sentiment-analysismodel - en_core_web_sm : spaCy’s trained pipeline for English
To install all requirements, run the following commands :
[ ]: # spaCy!pip install spacy# spaCy pipeline!python -m spacy download en_core_web_sm# FastAPI!pip install fastapi# transformers!pip install transformers# uvicorn!pip install uvicorn[standard]
The transformer’s pipeline will be downloaded in the next step.
5.18.3 Loading models
Let’s get and load our model pretrained pipeline and apply it to one of our dataset records:
[ ]: from transformers import pipelineimport spacy
transformers_pipeline = pipeline("sentiment-analysis", return_all_scores=True)spacy_pipeline = spacy.load("en_core_web_sm")
For more informations about using the transformers library with Rubrix, check the tutorial How to label your dataand fine-tune a sentiment classifier
5.18. Monitor predictions in HTTP API endpoints 135
Rubrix, Release 0.6.1.dev0+gf48c265.d20211104
Model output
Let’s try the transformer’s pipeline in this example:
[ ]: from pprint import pprint
batch = ['I really like rubrix!']predictions = transformers_pipeline(batch)pprint(predictions)
Looks like the predictions is a list containing lists of two elements : - The first dictionnary containing the NEGATIVEsentiment label and its score. - The second dictionnary containing the same data but for POSITIVE sentiment.
5.18.4 Convert output to Rubrix format
To log the output to rubrix we should supply a list of dictionnaries, each dictonnary containing two keys: - labels :value is a list of strings, each string being the label of the sentiment. - scores : value is a list of floats, each float beingthe probability of the sentiment.
[ ]: rubrix_format = [{
"labels": [p["label"] for p in prediction],"scores": [p["score"] for p in prediction],
}for prediction in predictions
]pprint(rubrix_format)
5.18.5 Create prediction endpoint
[ ]: from fastapi import FastAPIfrom typing import List
app_transformers = FastAPI()
# prediction endpoint using transformers pipeline@app_transformers.post("/")def predict_transformers(batch: List[str]):
predictions = transformers_pipeline(batch)return [
{"labels": [p["label"] for p in prediction],"scores": [p["score"] for p in prediction],
}for prediction in predictions
]
136 Chapter 5. Community
Rubrix, Release 0.6.1.dev0+gf48c265.d20211104
5.18.6 Add Rubrix logging middleware to the application
[ ]: from rubrix.client.asgi import RubrixLogHTTPMiddleware
app_transformers.add_middleware(RubrixLogHTTPMiddleware,api_endpoint="/transformers/", #the endpoint that will be loggeddataset="monitoring_transformers", #your dataset name# you could post-process the predict output with a custom record_mapper function# record_mapper=custom_text_classification_mapper,
)
5.18.7 Do the same for spaCy
We’ll add a custom mapper to convert spaCy’s output to TokenClassificationRecord format
Mapper
[ ]: import reimport datetime
from rubrix.client.models import TokenClassificationRecord
def custom_mapper(inputs, outputs):spaces_regex = re.compile(r"\s+")text = inputsreturn TokenClassificationRecord(
text=text,tokens=spaces_regex.split(text),prediction=[
(entity["label"], entity["start"], entity["end"])for entity in (
outputs.get("entities") if isinstance(outputs, dict) else␣→˓outputs
)],event_timestamp=datetime.datetime.now(),
)
FastAPI application
[ ]: app_spacy = FastAPI()
app_spacy.add_middleware(RubrixLogHTTPMiddleware,api_endpoint="/spacy/",dataset="monitoring_spacy",records_mapper=custom_mapper
)(continues on next page)
5.18. Monitor predictions in HTTP API endpoints 137
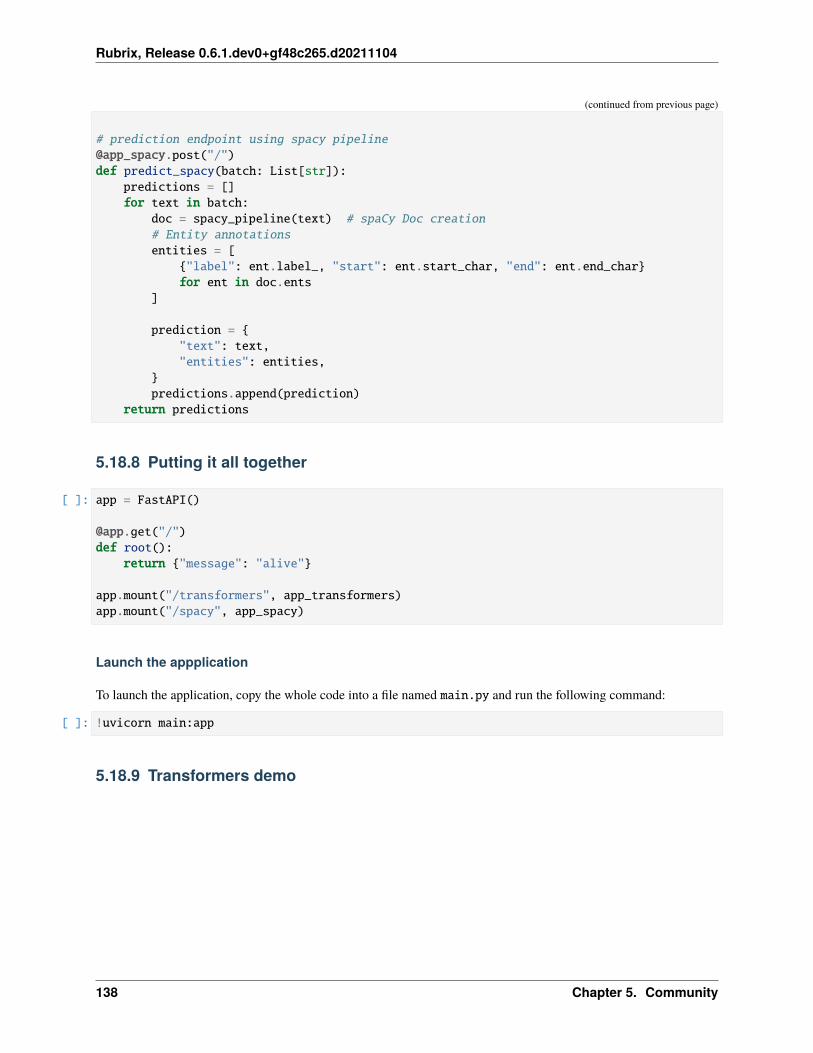
Rubrix, Release 0.6.1.dev0+gf48c265.d20211104
(continued from previous page)
# prediction endpoint using spacy pipeline@app_spacy.post("/")def predict_spacy(batch: List[str]):
predictions = []for text in batch:
doc = spacy_pipeline(text) # spaCy Doc creation# Entity annotationsentities = [
{"label": ent.label_, "start": ent.start_char, "end": ent.end_char}for ent in doc.ents
]
prediction = {"text": text,"entities": entities,
}predictions.append(prediction)
return predictions
5.18.8 Putting it all together
[ ]: app = FastAPI()
@app.get("/")def root():
return {"message": "alive"}
app.mount("/transformers", app_transformers)app.mount("/spacy", app_spacy)
Launch the appplication
To launch the application, copy the whole code into a file named main.py and run the following command:
[ ]: !uvicorn main:app
5.18.9 Transformers demo
138 Chapter 5. Community
Rubrix, Release 0.6.1.dev0+gf48c265.d20211104
5.18.10 spaCy demo
5.18.11 Summary
In this tutorial, we have learnt to automatically log model outputs into Rubrix, this can be used to continuosly andtransparently monitor HTTP inference endpoints.
5.18.12 Next steps
Rubrix documentation for more guides and tutorials.
Join the Rubrix community! A good place to start is the discussion forum.
Rubrix Github repo to stay updated.
5.19 Faster data annotation with a zero-shot text classifier
5.19.1 TL;DR
1. A simple example for data annotation with Rubrix is shown: using a zero-shot classification model to pre-annotate and hand-label data more efficiently.
2. We use the new SELECTRA zero-shot classifier and the Spanish part of the MLSum, a multilingual datasetfor text summarization.
3. Two data annotation rounds are performed: (1) labeling random examples, and (2) bulk labeling high scoreexamples.
4. Besides boosting the labeling process, this workflow lets you evaluate the performance of zero-shot classifi-cation for a specific use case. In this example use case, we observe the pre-trained zero-shot classifier providespretty decent results, which might be enough for general news categorization.
5.19.2 Why
• The availability of pre-trained language models with zero-shot capabilities means you can, sometimes, accelerateyour data annotation tasks by pre-annotating your corpus with a pre-trained zeroshot model.
• The same workflow can be applied if there is a pre-trained “supervised” model that fits your categories but needsfine-tuning for your own use case. For example, fine-tuning a sentiment classifier for a very specific type ofmessage.
5.19. Faster data annotation with a zero-shot text classifier 139
Rubrix, Release 0.6.1.dev0+gf48c265.d20211104
5.19.3 Setup Rubrix
Rubrix, is a free and open-source tool to explore, annotate, and monitor data for NLP projects.
If you are new to Rubrix, check out the Github repository.
If you have not installed and launched Rubrix, check the Setup and Installation guide.
Once installed, you only need to import Rubrix:
[ ]: import rubrix as rb
5.19.4 Install dependencies
For this tutorial we only need to install a few additional dependencies:
[ ]: %pip install transformers datasets torch -qqq
5.19.5 1. Load the Spanish zero-shot classifier: Selectra
We will use the recently released SELECTRA zero-shot classifier model, a zero-shot classifier for Spanish language.
[ ]: from transformers import pipeline
classifier = pipeline("zero-shot-classification",model="Recognai/zeroshot_selectra_medium")
5.19.6 2. Loading the MLSum dataset
MLSUM, is a large scale multilingual text summarization dataset. Obtained from online newspapers, it contains 1.5M+article/summary pairs in five different languages – namely, French, German, Spanish, Russian and Turkish. To illustratethe labeling process, in this tutorial we will only use the first 500 examples of its Spanish test set.
[ ]: from datasets import load_dataset
mlsum = load_dataset("mlsum", "es", split="test[0:500]")
5.19.7 3. Making zero-shot predictions
The zero-shot classifier allows you to provide arbitrary candidate labels, which it will use for its predictions. Sinceunder the hood, this zero-shot classifier is based on natural language inference (NLI), we need to convert the candidatelabels into a “hypothesis”. For this we use a hypothesis_template, in which the {} will be replaced by each one of ourcandidate label. This template can have a big effect on the scores of your predictions and should be adopted to youruse case.
[ ]: # We adopted the hypothesis to our use case of predicting the topic of news articleshypothesis_template = "Esta noticia habla de {}."# The candidate labels for our zero-shot classifiercandidate_labels = ["política", "cultura", "sociedad", "economia", "deportes", "ciencia␣→˓y tecnología"]
(continues on next page)
140 Chapter 5. Community
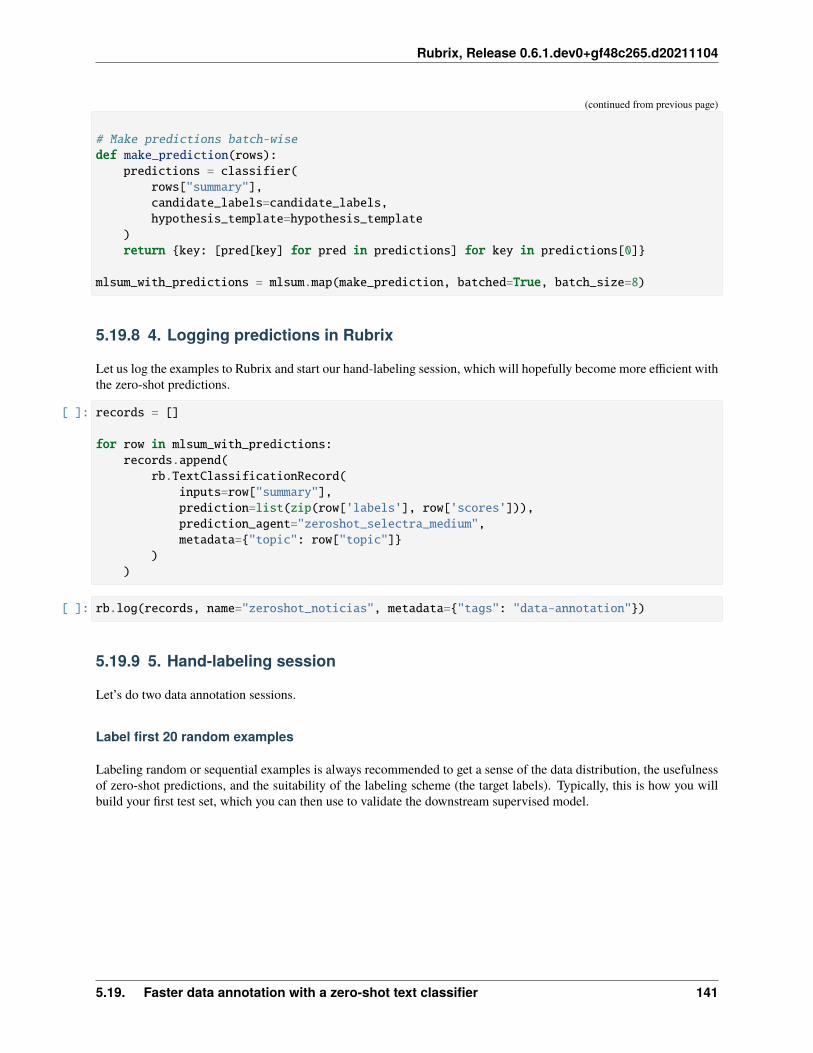
Rubrix, Release 0.6.1.dev0+gf48c265.d20211104
(continued from previous page)
# Make predictions batch-wisedef make_prediction(rows):
predictions = classifier(rows["summary"],candidate_labels=candidate_labels,hypothesis_template=hypothesis_template
)return {key: [pred[key] for pred in predictions] for key in predictions[0]}
mlsum_with_predictions = mlsum.map(make_prediction, batched=True, batch_size=8)
5.19.8 4. Logging predictions in Rubrix
Let us log the examples to Rubrix and start our hand-labeling session, which will hopefully become more efficient withthe zero-shot predictions.
[ ]: records = []
for row in mlsum_with_predictions:records.append(
rb.TextClassificationRecord(inputs=row["summary"],prediction=list(zip(row['labels'], row['scores'])),prediction_agent="zeroshot_selectra_medium",metadata={"topic": row["topic"]}
))
[ ]: rb.log(records, name="zeroshot_noticias", metadata={"tags": "data-annotation"})
5.19.9 5. Hand-labeling session
Let’s do two data annotation sessions.
Label first 20 random examples
Labeling random or sequential examples is always recommended to get a sense of the data distribution, the usefulnessof zero-shot predictions, and the suitability of the labeling scheme (the target labels). Typically, this is how you willbuild your first test set, which you can then use to validate the downstream supervised model.
5.19. Faster data annotation with a zero-shot text classifier 141
Rubrix, Release 0.6.1.dev0+gf48c265.d20211104
Label records with high score predictions
In this case, we will use bulk-labeling (labeling a set of records with a few clicks) after quickly reviewing high scorepredictions from our zero-shot model. The main idea is that above a certain score, the predictions from this model aremore likely to be correct.
5.19.10 Next steps
If you are interested in the topic of zero-shot models, check out the tutorial for using Rubrix with Flair’s zero-shot NER.
Rubrix documentation for more guides and tutorials.
Join the Rubrix community! A good place to start is the discussion forum.
Rubrix Github repo to stay updated.
[ ]:
5.20 Python
The python reference guide for Rubrix. This section contains:
• Client: The base client module
• Metrics (Experimental): The module for dataset metrics
• Labeling (Experimental): A toolbox to enhance your labeling workflow (weak labels, noisy labels, etc.)
5.20.1 Client
Here we describe the Python client of Rubrix that we divide into two basic modules:
• Methods: These methods make up the interface to interact with Rubrix’s REST API.
• Models: You need to wrap your data in these data models for Rubrix to understand it.
Methods
This module contains the interface to access Rubrix’s REST API.
rubrix.copy(dataset, name_of_copy)Creates a copy of a dataset including its tags and metadata
Parameters
• dataset (str) – Name of the source dataset
• name_of_copy (str) – Name of the copied dataset
142 Chapter 5. Community
Rubrix, Release 0.6.1.dev0+gf48c265.d20211104
Examples
>>> import rubrix as rb>>> rb.copy("my_dataset", name_of_copy="new_dataset")>>> dataframe = rb.load("new_dataset")
rubrix.delete(name)Delete a dataset.
Parameters name (str) – The dataset name.
Return type None
Examples
>>> import rubrix as rb>>> rb.delete(name="example-dataset")
rubrix.init(api_url=None, api_key=None, timeout=60)Init the python client.
Passing an api_url disables environment variable reading, which will provide default values.
Parameters
• api_url (Optional[str]) – Address of the REST API. If None (default) and the env vari-able RUBRIX_API_URL is not set, it will default to http://localhost:6900.
• api_key (Optional[str]) – Authentification key for the REST API. If None (default) andthe env variable RUBRIX_API_KEY is not set, it will default to rubrix.apikey.
• timeout (int) – Wait timeout seconds for the connection to timeout. Default: 60.
Return type None
Examples
>>> import rubrix as rb>>> rb.init(api_url="http://localhost:9090", api_key="4AkeAPIk3Y")
rubrix.load(name, query=None, ids=None, limit=None, as_pandas=True)Load dataset data to a pandas DataFrame.
Parameters
• name (str) – The dataset name.
• query (Optional[str]) – An ElasticSearch query with the [query string syntax](https://rubrix.readthedocs.io/en/stable/reference/rubrix_webapp_reference.html#search-input)
• ids (Optional[List[Union[int, str]]]) – If provided, load dataset records withgiven ids.
• limit (Optional[int]) – The number of records to retrieve.
• as_pandas (bool) – If True, return a pandas DataFrame. If False, return a list of records.
Returns The dataset as a pandas Dataframe.
5.20. Python 143
Rubrix, Release 0.6.1.dev0+gf48c265.d20211104
Return type Union[pandas.core.frame.DataFrame, List[Union[rubrix.client.models.TextClassificationRecord,rubrix.client.models.TokenClassificationRecord, rubrix.client.models.Text2TextRecord]]]
Examples
>>> import rubrix as rb>>> dataframe = rb.load(name="example-dataset")
rubrix.log(records, name, tags=None, metadata=None, chunk_size=500)Log Records to Rubrix.
Parameters
• records (Union[rubrix.client.models.TextClassificationRecord,rubrix.client.models.TokenClassificationRecord, rubrix.client.models.Text2TextRecord, Iterable[Union[rubrix.client.models.TextClassificationRecord, rubrix.client.models.TokenClassificationRecord, rubrix.client.models.Text2TextRecord]]])– The record or an iterable of records.
• name (str) – The dataset name.
• tags (Optional[Dict[str, str]]) – A dictionary of tags related to the dataset.
• metadata (Optional[Dict[str, Any]]) – A dictionary of extra info for the dataset.
• chunk_size (int) – The chunk size for a data bulk.
Returns Summary of the response from the REST API
Return type rubrix.client.models.BulkResponse
Examples
>>> import rubrix as rb>>> record = rb.TextClassificationRecord(... inputs={"text": "my first rubrix example"},... prediction=[('spam', 0.8), ('ham', 0.2)]... )>>> response = rb.log(record, name="example-dataset")
Models
This module contains the data models for the interface
class rubrix.client.models.BulkResponse(*, dataset, processed, failed=0)Summary response when logging records to the Rubrix server.
Parameters
• dataset (str) – The dataset name.
• processed (int) – Number of records in bulk.
• failed (Optional[int]) – Number of failed records.
Return type None
144 Chapter 5. Community
Rubrix, Release 0.6.1.dev0+gf48c265.d20211104
class rubrix.client.models.Text2TextRecord(*args, text, prediction=None, annotation=None,prediction_agent=None, annotation_agent=None, id=None,metadata=None, status=None, event_timestamp=None)
Record for a text to text task
Parameters
• text (str) – The input of the record
• prediction (Optional[List[Union[str, Tuple[str, float]]]]) – A list ofstrings or tuples containing predictions for the input text. If tuples, the first entry is thepredicted text, the second entry is its corresponding score.
• annotation (Optional[str]) – A string representing the expected output text for thegiven input text.
• prediction_agent (Optional[str]) – Name of the prediction agent. By default, this isset to the hostname of your machine.
• annotation_agent (Optional[str]) – Name of the prediction agent. By default, this isset to the hostname of your machine.
• id (Optional[Union[int, str]]) – The id of the record. By default (None), we willgenerate a unique ID for you.
• metadata (Dict[str, Any]) – Meta data for the record. Defaults to {}.
• status (Optional[str]) – The status of the record. Options: ‘Default’, ‘Edited’, ‘Dis-carded’, ‘Validated’. If an annotation is provided, this defaults to ‘Validated’, otherwise ‘De-fault’.
• event_timestamp (Optional[datetime.datetime]) – The timestamp of the record.
Return type None
Examples
>>> import rubrix as rb>>> record = rb.Text2TextRecord(... text="My name is Sarah and I love my dog.",... prediction=["Je m'appelle Sarah et j'aime mon chien."]... )
classmethod prediction_as_tuples(prediction)Preprocess the predictions and wraps them in a tuple if needed
Parameters prediction (Optional[List[Union[str, Tuple[str, float]]]]) –
class rubrix.client.models.TextClassificationRecord(*args, inputs, prediction=None,annotation=None, prediction_agent=None,annotation_agent=None, multi_label=False,explanation=None, id=None, metadata=None,status=None, event_timestamp=None)
Record for text classification
Parameters
• inputs (Union[str, List[str], Dict[str, Union[str, List[str]]]]) – Theinputs of the record
5.20. Python 145
Rubrix, Release 0.6.1.dev0+gf48c265.d20211104
• prediction (Optional[List[Tuple[str, float]]]) – A list of tuples containing thepredictions for the record. The first entry of the tuple is the predicted label, the second entryis its corresponding score.
• annotation (Optional[Union[str, List[str]]]) – A string or a list of strings (mul-tilabel) corresponding to the annotation (gold label) for the record.
• prediction_agent (Optional[str]) – Name of the prediction agent. By default, this isset to the hostname of your machine.
• annotation_agent (Optional[str]) – Name of the prediction agent. By default, this isset to the hostname of your machine.
• multi_label (bool) – Is the prediction/annotation for a multi label classification task?Defaults to False.
• explanation (Optional[Dict[str, List[rubrix.client.models.TokenAttributions]]]) – A dictionary containing the attributions of each token tothe prediction. The keys map the input of the record (see inputs) to the TokenAttributions.
• id (Optional[Union[int, str]]) – The id of the record. By default (None), we willgenerate a unique ID for you.
• metadata (Dict[str, Any]) – Meta data for the record. Defaults to {}.
• status (Optional[str]) – The status of the record. Options: ‘Default’, ‘Edited’, ‘Dis-carded’, ‘Validated’. If an annotation is provided, this defaults to ‘Validated’, otherwise ‘De-fault’.
• event_timestamp (Optional[datetime.datetime]) – The timestamp of the record.
Return type None
Examples
>>> import rubrix as rb>>> record = rb.TextClassificationRecord(... inputs={"text": "my first rubrix example"},... prediction=[('spam', 0.8), ('ham', 0.2)]... )
classmethod input_as_dict(inputs)Preprocess record inputs and wraps as dictionary if needed
class rubrix.client.models.TokenAttributions(*, token, attributions=None)Attribution of the token to the predicted label.
In the Rubrix app this is only supported for TextClassificationRecord and the multi_label=False case.
Parameters
• token (str) – The input token.
• attributions (Dict[str, float]) – A dictionary containing label-attribution pairs.
Return type None
146 Chapter 5. Community
Rubrix, Release 0.6.1.dev0+gf48c265.d20211104
class rubrix.client.models.TokenClassificationRecord(*args, text, tokens, prediction=None,annotation=None, prediction_agent=None,annotation_agent=None, id=None,metadata=None, status=None,event_timestamp=None)
Record for a token classification task
Parameters
• text (str) – The input of the record
• tokens (List[str]) – The tokenized input of the record. We use this to guide the annota-tion process and to cross-check the spans of your prediction/annotation.
• prediction (Optional[List[Union[Tuple[str, int, int], Tuple[str, int,int, float]]]]) – A list of tuples containing the predictions for the record. The first entryof the tuple is the name of predicted entity, the second and third entry correspond to the startand stop character index of the entity. EXPERIMENTAL: The fourth entry is optional andcorresponds to the score of the entity.
• annotation (Optional[List[Tuple[str, int, int]]]) – A list of tuples containingannotations (gold labels) for the record. The first entry of the tuple is the name of the entity,the second and third entry correspond to the start and stop char index of the entity.
• prediction_agent (Optional[str]) – Name of the prediction agent. By default, this isset to the hostname of your machine.
• annotation_agent (Optional[str]) – Name of the prediction agent. By default, this isset to the hostname of your machine.
• id (Optional[Union[int, str]]) – The id of the record. By default (None), we willgenerate a unique ID for you.
• metadata (Dict[str, Any]) – Meta data for the record. Defaults to {}.
• status (Optional[str]) – The status of the record. Options: ‘Default’, ‘Edited’, ‘Dis-carded’, ‘Validated’. If an annotation is provided, this defaults to ‘Validated’, otherwise ‘De-fault’.
• event_timestamp (Optional[datetime.datetime]) – The timestamp of the record.
Return type None
Examples
>>> import rubrix as rb>>> record = rb.TokenClassificationRecord(... text = "Michael is a professor at Harvard",... tokens = ["Michael", "is", "a", "professor", "at", "Harvard"],... prediction = [('NAME', 0, 7), ('LOC', 26, 33)]... )
5.20. Python 147
Rubrix, Release 0.6.1.dev0+gf48c265.d20211104
5.20.2 Metrics (Experimental)
Here we describe the available metrics in Rubrix:
• Text classification: Metrics for text classification
• Token classification: Metrics for token classification
Text classification
rubrix.metrics.text_classification.metrics.f1(name)Computes the single label f1 metric for a dataset
Parameters name (str) – The dataset name.
Returns The f1 metric summary
Return type rubrix.metrics.models.MetricSummary
Examples
>>> from rubrix.metrics.text_classification import f1>>> summary = f1(name="example-dataset")>>> summary.visualize() # will plot a bar chart with results>>> summary.data # returns the raw result data
rubrix.metrics.text_classification.metrics.f1_multilabel(name)Computes the multi-label label f1 metric for a dataset
Parameters name (str) – The dataset name.
Returns The f1 metric summary
Return type rubrix.metrics.models.MetricSummary
Examples
>>> from rubrix.metrics.text_classification import f1_multilabel>>> summary = f1_multilabel(name="example-dataset")>>> summary.visualize() # will plot a bar chart with results>>> summary.data # returns the raw result data
Token classification
rubrix.metrics.token_classification.metrics.entity_capitalness(name)Computes the entity capitalness. The entity capitalness splits the entity mention shape in 4 groups:
UPPER: All charactes in entity mention are upper case
LOWER: All charactes in entity mention are lower case
FIRST: The mention is capitalized
MIDDLE: Some character in mention between first and last is capitalized
Parameters name (str) – The dataset name.
148 Chapter 5. Community
Rubrix, Release 0.6.1.dev0+gf48c265.d20211104
Returns The summary entity capitalness distribution
Return type rubrix.metrics.models.MetricSummary
Examples
>>> from rubrix.metrics.token_classification import entity_capitalness>>> summary = entity_capitalness(name="example-dataset")>>> summary.visualize()
rubrix.metrics.token_classification.metrics.entity_consistency(name, mentions=10, threshold=2)Computes the consistency for top entity mentions in the dataset.
Entity consistency defines the label variability for a given mention. For example, a mention first identified in thewhole dataset as Cardinal, Person and Time is less consistent than a mention Peter identified as Person in thedataset.
Parameters
• name (str) – The dataset name.
• mentions (int) – The number of top mentions to retrieve
• threshold (int) – The entity variability threshold (Must be greater or equal to 2)
Returns The summary entity capitalness distribution
Examples
>>> from rubrix.metrics.token_classification import entity_consistency>>> summary = entity_consistency(name="example-dataset")>>> summary.visualize()
rubrix.metrics.token_classification.metrics.entity_density(name, interval=0.005)Computes the entity density distribution. Then entity density is calculated at record level for each mention asmention_length/tokens_length
Parameters
• name (str) – The dataset name.
• interval (float) – The interval for histogram. The entity density is defined in the range0-1
Returns The summary entity density distribution
Return type rubrix.metrics.models.MetricSummary
5.20. Python 149
Rubrix, Release 0.6.1.dev0+gf48c265.d20211104
Examples
>>> from rubrix.metrics.token_classification import entity_density>>> summary = entity_density(name="example-dataset")>>> summary.visualize()
rubrix.metrics.token_classification.metrics.entity_labels(name, labels=50)Computes the entity labels distribution
Parameters
• name (str) – The dataset name.
• labels (int) – The number of top entities to retrieve. Lower numbers will be better perfor-mants
Returns The summary for entity tags distribution
Return type rubrix.metrics.models.MetricSummary
Examples
>>> from rubrix.metrics.token_classification import entity_labels>>> summary = entity_labels(name="example-dataset", labels=10)>>> summary.visualize() # will plot a bar chart with results>>> summary.data # The top-20 entity tags
rubrix.metrics.token_classification.metrics.mention_length(name, interval=1)Computes mentions length distribution (in number of tokens)
Parameters
• name (str) – The dataset name.
• interval (int) – The bins or bucket for result histogram
Returns The summary for mention token distribution
Return type rubrix.metrics.models.MetricSummary
Examples
>>> from rubrix.metrics.token_classification import mention_length>>> summary = mention_length(name="example-dataset", interval=2)>>> summary.visualize() # will plot a histogram chart with results>>> summary.data # the raw histogram data with bins of size 2
rubrix.metrics.token_classification.metrics.tokens_length(name, interval=1)Computes the tokens length distribution
Parameters
• name (str) – The dataset name.
• interval (int) – The bins or bucket for result histogram
Returns The summary for token distribution
Return type rubrix.metrics.models.MetricSummary
150 Chapter 5. Community
Rubrix, Release 0.6.1.dev0+gf48c265.d20211104
Examples
>>> from rubrix.metrics.token_classification import tokens_length>>> summary = tokens_length(name="example-dataset", interval=5)>>> summary.visualize() # will plot a histogram with results>>> summary.data # the raw histogram data with bins of size 5
5.20.3 Labeling (Experimental)
The rubrix.labeling module aims at providing tools to enhance your labeling workflow.
Text classification
Labeling tools for the text classification task.
class rubrix.labeling.text_classification.weak_labels.WeakLabels(rules, dataset, ids=None,query=None, label2int=None)
Computes the weak labels of a dataset by applying a given list of rules.
Parameters
• rules (List[Callable]) – A list of rules (labeling functions). They must return a string,or None in case of abstention.
• dataset (str) – Name of the dataset to which the rules will be applied.
• ids (Optional[List[Union[int, str]]]) – An optional list of record ids to filter thedataset before applying the rules.
• query (Optional[str]) – An optional ElasticSearch query with the query string syntax tofilter the dataset before applying the rules.
• label2int (Optional[Dict[Optional[str], int]]) – An optional dict, mapping thelabels to integers. Remember that the return type Nonemeans abstention (e.g. {None: -1}).By default, we will build a mapping on the fly when applying the rules.
Raises
• MultiLabelError – When trying to get weak labels for a multi-label text classification task.
• MissingLabelError – When provided with a label2int dict, and a weak label or anno-tation label is not present in its keys.
Examples
Get the weak label matrix and a summary of the applied rules:
>>> def awesome_rule(record: TextClassificationRecord) -> str:... return "Positive" if "awesome" in record.inputs["text"] else None>>> another_rule = Rule(query="good OR best", label="Positive")>>> weak_labels = WeakLabels(rules=[awesome_rule, another_rule], dataset="my_dataset→˓")>>> weak_labels.matrix()>>> weak_labels.summary()
Use snorkel’s LabelModel:
5.20. Python 151
Rubrix, Release 0.6.1.dev0+gf48c265.d20211104
>>> from snorkel.labeling.model import LabelModel>>> label_model = LabelModel()>>> label_model.fit(L_train=weak_labels.matrix(has_annotation=False))>>> label_model.score(L=weak_labels.matrix(has_annotation=True), Y=weak_labels.→˓annotation())>>> label_model.predict(L=weak_labels.matrix(has_annotation=False))
annotation(exclude_missing_annotations=True)Returns the annotation labels as an array of integers.
Parameters exclude_missing_annotations (bool) – If True, excludes missing annotations,that is all entries with the self.label2int[None] integer.
Returns The annotation array of integers.
Return type numpy.ndarray
property int2label: Dict[int, Optional[str]]The dictionary that maps integers to weak/annotation labels.
property label2int: Dict[Optional[str], int]The dictionary that maps weak/annotation labels to integers.
matrix(has_annotation=None)Returns the weak label matrix, or optionally just a part of it.
Parameters has_annotation (Optional[bool]) – If True, return only the part of the matrixthat has a corresponding annotation. If False, return only the part of the matrix that has NOTa corresponding annotation. By default, we return the whole weak label matrix.
Returns The weak label matrix, or optionally just a part of it.
Return type numpy.ndarray
records(has_annotation=None)Returns the records corresponding to the weak label matrix.
Parameters has_annotation (Optional[bool]) – If True, return only the records that havean annotation. If False, return only the records that have NO annotation. By default, we returnall the records.
Returns A list of records, or optionally just a part of them.
Return type List[rubrix.client.models.TextClassificationRecord]
property rules: List[Callable]The rules (labeling functions) that were used to produce the weak labels.
show_records(labels=None, rules=None)Shows records in a pandas DataFrame, optionally filtered by weak labels and non-abstaining rules.
If you provide both labels and rules, we take the intersection of both filters.
Parameters
• labels (Optional[List[str]]) – All of these labels are in the record’s weak labels. IfNone, do not filter by labels.
• rules (Optional[List[Union[int, str]]]) – All of these rules did not abstain forthe record. If None, do not filter by rules. You can refer to the rules by their (function)name or by their index in the self.rules list.
Returns The optionally filtered records as a pandas DataFrame.
152 Chapter 5. Community
Rubrix, Release 0.6.1.dev0+gf48c265.d20211104
Return type pandas.core.frame.DataFrame
summary(normalize_by_coverage=False, annotation=None)Returns following summary statistics for each rule:
• polarity: Set of unique labels returned by the rule, excluding “None” (abstain).
• coverage: Fraction of the records labeled by the rule.
• overlaps: Fraction of the records labeled by the rule together with at least one other rule.
• conflicts: Fraction of the records where the rule disagrees with at least one other rule.
• correct: Number of records the rule labeled correctly (if annotations are available).
• incorrect: Number of records the rule labels incorrectly (if annotations are available).
• precision: Fraction of correct labels given by the rule (if annotations are available). The precisiondoes not penalize the rule for abstains.
Parameters
• normalize_by_coverage (bool) – Normalize the overlaps and conflicts by the respectivecoverage.
• annotation (Optional[numpy.ndarray]) – An optional arraywith ints holding the annotations. By default we will use self.annotation(exclude_missing_annotations=False).
Returns The summary statistics for each rule in a pandas DataFrame.
Return type pandas.core.frame.DataFrame
class rubrix.labeling.text_classification.rule.Rule(query, label, name=None)A rule (labeling function) in form of an ElasticSearch query.
Parameters
• query (str) – An ElasticSearch query with the query string syntax.
• label (str) – The label associated to the query.
• name (Optional[str]) – An optional name for the rule to be used as identifier in therubrix.labeling.text_classification.WeakLabels class. By default, we will use the querystring.
Examples
>>> import rubrix as rb>>> urgent_rule = Rule(query="inputs.text:(urgent AND immediately)", label="urgent",→˓ name="urgent_rule")>>> not_urgent_rule = Rule(query="inputs.text:(NOT urgent) AND metadata.title_→˓length>20", label="not urgent")>>> not_urgent_rule.apply("my_dataset")>>> my_dataset_records = rb.load(name="my_dataset", as_pandas=False)>>> not_urgent_rule(my_dataset_records[0])"not urgent"
__call__(record)Check if the given record is among the matching ids from the self.apply call.
5.20. Python 153
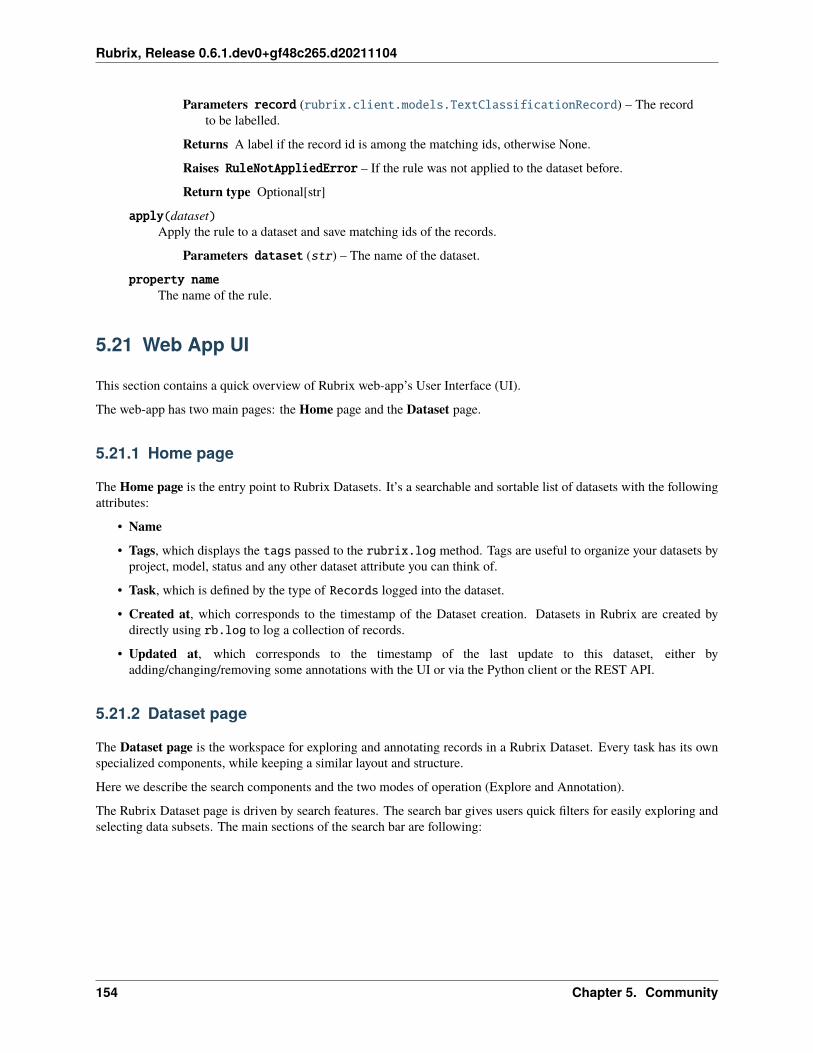
Rubrix, Release 0.6.1.dev0+gf48c265.d20211104
Parameters record (rubrix.client.models.TextClassificationRecord) – The recordto be labelled.
Returns A label if the record id is among the matching ids, otherwise None.
Raises RuleNotAppliedError – If the rule was not applied to the dataset before.
Return type Optional[str]
apply(dataset)Apply the rule to a dataset and save matching ids of the records.
Parameters dataset (str) – The name of the dataset.
property nameThe name of the rule.
5.21 Web App UI
This section contains a quick overview of Rubrix web-app’s User Interface (UI).
The web-app has two main pages: the Home page and the Dataset page.
5.21.1 Home page
The Home page is the entry point to Rubrix Datasets. It’s a searchable and sortable list of datasets with the followingattributes:
• Name
• Tags, which displays the tags passed to the rubrix.log method. Tags are useful to organize your datasets byproject, model, status and any other dataset attribute you can think of.
• Task, which is defined by the type of Records logged into the dataset.
• Created at, which corresponds to the timestamp of the Dataset creation. Datasets in Rubrix are created bydirectly using rb.log to log a collection of records.
• Updated at, which corresponds to the timestamp of the last update to this dataset, either byadding/changing/removing some annotations with the UI or via the Python client or the REST API.
5.21.2 Dataset page
The Dataset page is the workspace for exploring and annotating records in a Rubrix Dataset. Every task has its ownspecialized components, while keeping a similar layout and structure.
Here we describe the search components and the two modes of operation (Explore and Annotation).
The Rubrix Dataset page is driven by search features. The search bar gives users quick filters for easily exploring andselecting data subsets. The main sections of the search bar are following:
154 Chapter 5. Community
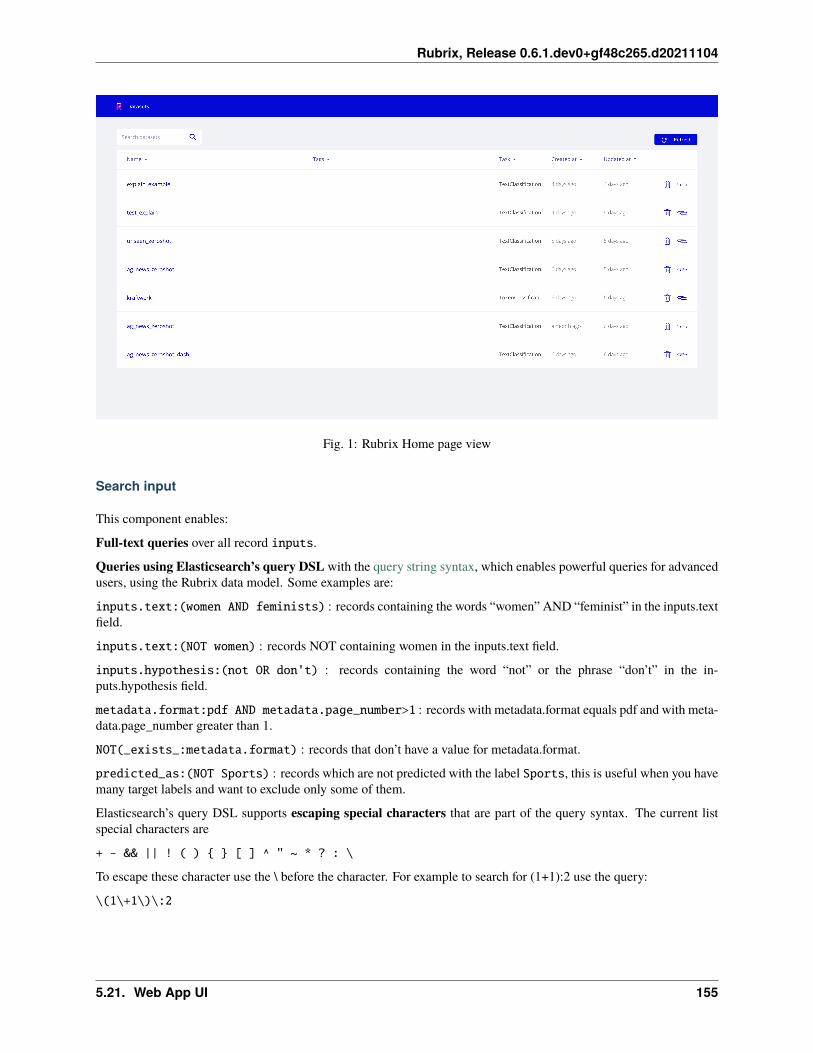
Rubrix, Release 0.6.1.dev0+gf48c265.d20211104
Fig. 1: Rubrix Home page view
Search input
This component enables:
Full-text queries over all record inputs.
Queries using Elasticsearch’s query DSL with the query string syntax, which enables powerful queries for advancedusers, using the Rubrix data model. Some examples are:
inputs.text:(women AND feminists) : records containing the words “women” AND “feminist” in the inputs.textfield.
inputs.text:(NOT women) : records NOT containing women in the inputs.text field.
inputs.hypothesis:(not OR don't) : records containing the word “not” or the phrase “don’t” in the in-puts.hypothesis field.
metadata.format:pdf AND metadata.page_number>1 : records with metadata.format equals pdf and with meta-data.page_number greater than 1.
NOT(_exists_:metadata.format) : records that don’t have a value for metadata.format.
predicted_as:(NOT Sports) : records which are not predicted with the label Sports, this is useful when you havemany target labels and want to exclude only some of them.
Elasticsearch’s query DSL supports escaping special characters that are part of the query syntax. The current listspecial characters are
+ - && || ! ( ) { } [ ] ^ " ~ * ? : \
To escape these character use the \ before the character. For example to search for (1+1):2 use the query:
\(1\+1\)\:2
5.21. Web App UI 155
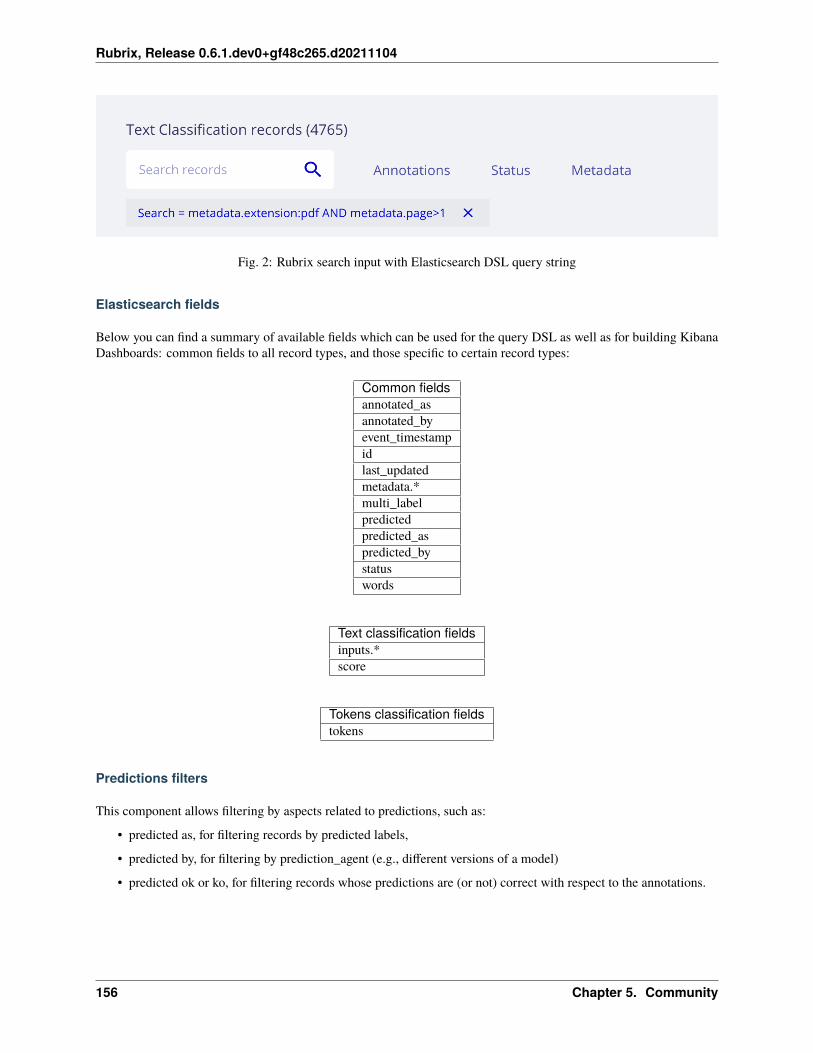
Rubrix, Release 0.6.1.dev0+gf48c265.d20211104
Fig. 2: Rubrix search input with Elasticsearch DSL query string
Elasticsearch fields
Below you can find a summary of available fields which can be used for the query DSL as well as for building KibanaDashboards: common fields to all record types, and those specific to certain record types:
Common fieldsannotated_asannotated_byevent_timestampidlast_updatedmetadata.*multi_labelpredictedpredicted_aspredicted_bystatuswords
Text classification fieldsinputs.*score
Tokens classification fieldstokens
Predictions filters
This component allows filtering by aspects related to predictions, such as:
• predicted as, for filtering records by predicted labels,
• predicted by, for filtering by prediction_agent (e.g., different versions of a model)
• predicted ok or ko, for filtering records whose predictions are (or not) correct with respect to the annotations.
156 Chapter 5. Community
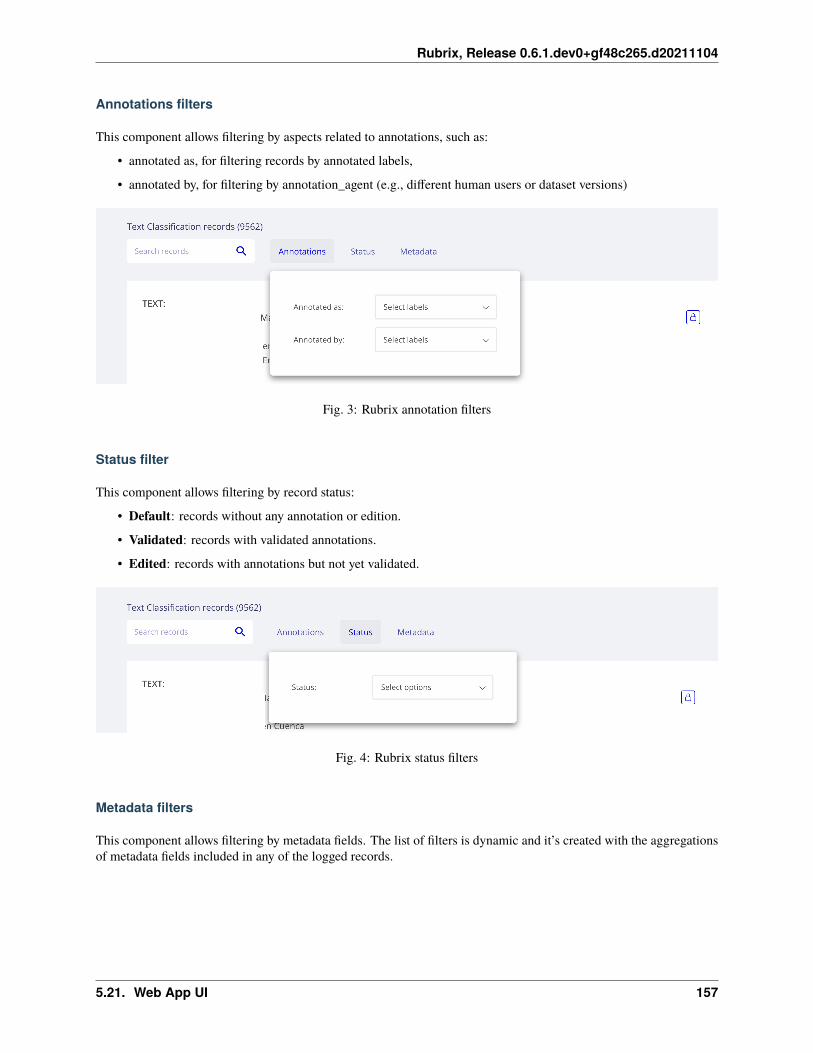
Rubrix, Release 0.6.1.dev0+gf48c265.d20211104
Annotations filters
This component allows filtering by aspects related to annotations, such as:
• annotated as, for filtering records by annotated labels,
• annotated by, for filtering by annotation_agent (e.g., different human users or dataset versions)
Fig. 3: Rubrix annotation filters
Status filter
This component allows filtering by record status:
• Default: records without any annotation or edition.
• Validated: records with validated annotations.
• Edited: records with annotations but not yet validated.
Fig. 4: Rubrix status filters
Metadata filters
This component allows filtering by metadata fields. The list of filters is dynamic and it’s created with the aggregationsof metadata fields included in any of the logged records.
5.21. Web App UI 157
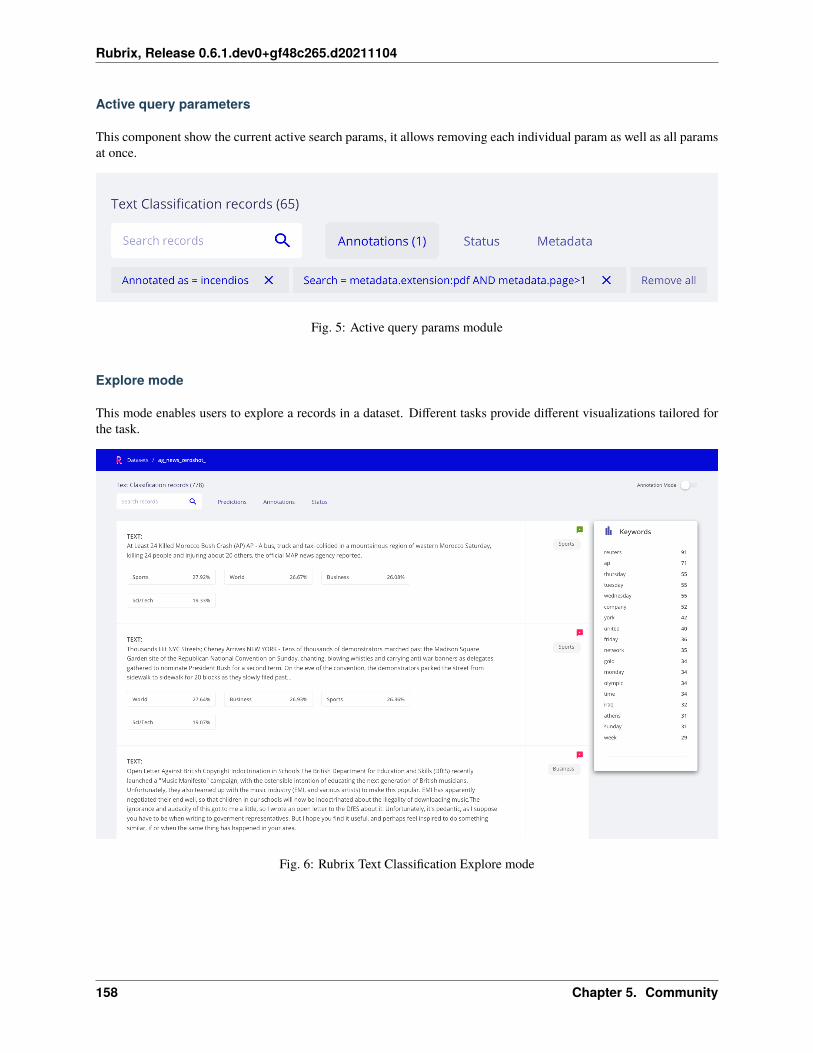
Rubrix, Release 0.6.1.dev0+gf48c265.d20211104
Active query parameters
This component show the current active search params, it allows removing each individual param as well as all paramsat once.
Fig. 5: Active query params module
Explore mode
This mode enables users to explore a records in a dataset. Different tasks provide different visualizations tailored forthe task.
Fig. 6: Rubrix Text Classification Explore mode
158 Chapter 5. Community
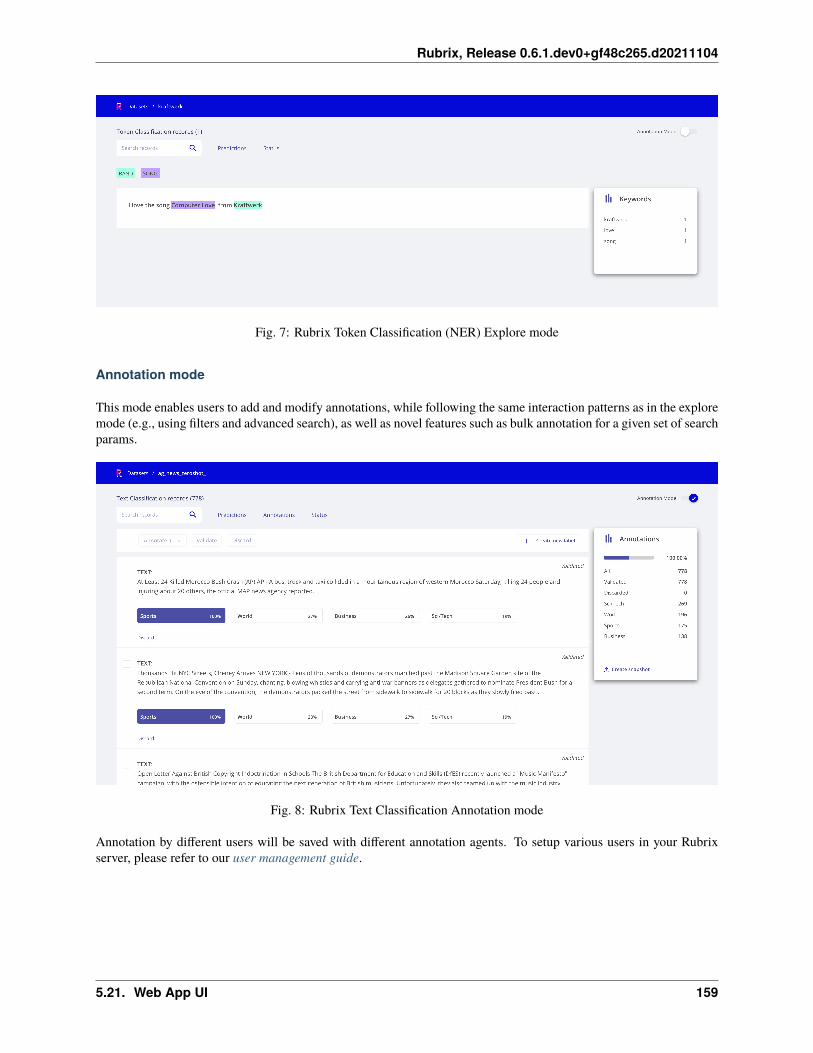
Rubrix, Release 0.6.1.dev0+gf48c265.d20211104
Fig. 7: Rubrix Token Classification (NER) Explore mode
Annotation mode
This mode enables users to add and modify annotations, while following the same interaction patterns as in the exploremode (e.g., using filters and advanced search), as well as novel features such as bulk annotation for a given set of searchparams.
Fig. 8: Rubrix Text Classification Annotation mode
Annotation by different users will be saved with different annotation agents. To setup various users in your Rubrixserver, please refer to our user management guide.
5.21. Web App UI 159
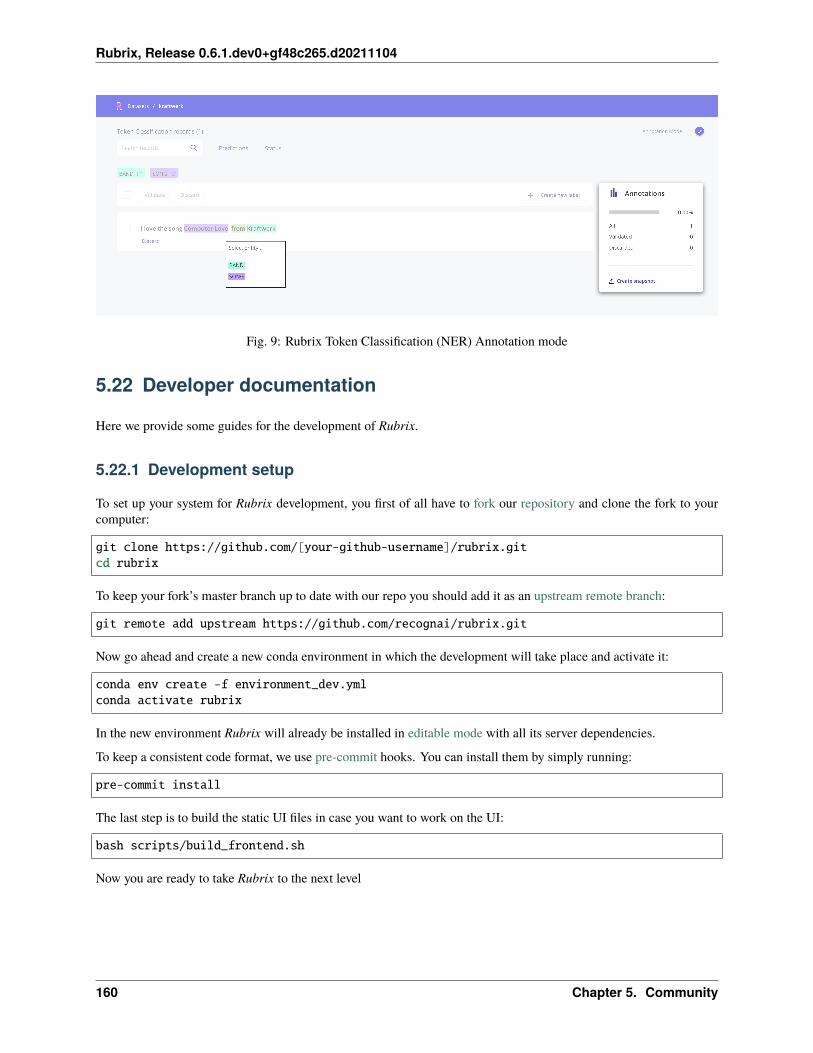
Rubrix, Release 0.6.1.dev0+gf48c265.d20211104
Fig. 9: Rubrix Token Classification (NER) Annotation mode
5.22 Developer documentation
Here we provide some guides for the development of Rubrix.
5.22.1 Development setup
To set up your system for Rubrix development, you first of all have to fork our repository and clone the fork to yourcomputer:
git clone https://github.com/[your-github-username]/rubrix.gitcd rubrix
To keep your fork’s master branch up to date with our repo you should add it as an upstream remote branch:
git remote add upstream https://github.com/recognai/rubrix.git
Now go ahead and create a new conda environment in which the development will take place and activate it:
conda env create -f environment_dev.ymlconda activate rubrix
In the new environment Rubrix will already be installed in editable mode with all its server dependencies.
To keep a consistent code format, we use pre-commit hooks. You can install them by simply running:
pre-commit install
The last step is to build the static UI files in case you want to work on the UI:
bash scripts/build_frontend.sh
Now you are ready to take Rubrix to the next level
160 Chapter 5. Community
Rubrix, Release 0.6.1.dev0+gf48c265.d20211104
5.22.2 Building the documentation
To build the documentation, make sure you set up your system for Rubrix development. Then go to the docs folder inyour cloned repo and execute the make command:
cd docsmake html
This will create a _build/html folder in which you can find the index.html file of the documentation.
5.22. Developer documentation 161
Rubrix, Release 0.6.1.dev0+gf48c265.d20211104
162 Chapter 5. Community
PYTHON MODULE INDEX
rrubrix, 142rubrix.client.models, 144rubrix.labeling.text_classification.rule, 153rubrix.labeling.text_classification.weak_labels,
151rubrix.metrics.text_classification.metrics,
148rubrix.metrics.token_classification.metrics,
148
163
Rubrix, Release 0.6.1.dev0+gf48c265.d20211104
164 Python Module Index
INDEX
Symbols__call__() (rubrix.labeling.text_classification.rule.Rule
method), 153
Aannotation() (rubrix.labeling.text_classification.weak_labels.WeakLabels
method), 152apply() (rubrix.labeling.text_classification.rule.Rule
method), 154
BBulkResponse (class in rubrix.client.models), 144
Ccopy() (in module rubrix), 142
Ddelete() (in module rubrix), 143
Eentity_capitalness() (in module
rubrix.metrics.token_classification.metrics),148
entity_consistency() (in modulerubrix.metrics.token_classification.metrics),149
entity_density() (in modulerubrix.metrics.token_classification.metrics),149
entity_labels() (in modulerubrix.metrics.token_classification.metrics),150
Ff1() (in module rubrix.metrics.text_classification.metrics),
148f1_multilabel() (in module
rubrix.metrics.text_classification.metrics),148
Iinit() (in module rubrix), 143
input_as_dict() (rubrix.client.models.TextClassificationRecordclass method), 146
int2label (rubrix.labeling.text_classification.weak_labels.WeakLabelsproperty), 152
Llabel2int (rubrix.labeling.text_classification.weak_labels.WeakLabels
property), 152load() (in module rubrix), 143log() (in module rubrix), 144
Mmatrix() (rubrix.labeling.text_classification.weak_labels.WeakLabels
method), 152mention_length() (in module
rubrix.metrics.token_classification.metrics),150
modulerubrix, 142rubrix.client.models, 144rubrix.labeling.text_classification.rule,
153rubrix.labeling.text_classification.weak_labels,
151rubrix.metrics.text_classification.metrics,
148rubrix.metrics.token_classification.metrics,
148
Nname (rubrix.labeling.text_classification.rule.Rule prop-
erty), 154
Pprediction_as_tuples()
(rubrix.client.models.Text2TextRecord classmethod), 145
Rrecords() (rubrix.labeling.text_classification.weak_labels.WeakLabels
method), 152rubrix
165
Rubrix, Release 0.6.1.dev0+gf48c265.d20211104
module, 142rubrix.client.models
module, 144rubrix.labeling.text_classification.rule
module, 153rubrix.labeling.text_classification.weak_labels
module, 151rubrix.metrics.text_classification.metrics
module, 148rubrix.metrics.token_classification.metrics
module, 148Rule (class in rubrix.labeling.text_classification.rule),
153rules (rubrix.labeling.text_classification.weak_labels.WeakLabels
property), 152
Sshow_records() (rubrix.labeling.text_classification.weak_labels.WeakLabels
method), 152summary() (rubrix.labeling.text_classification.weak_labels.WeakLabels
method), 153
TText2TextRecord (class in rubrix.client.models), 144TextClassificationRecord (class in
rubrix.client.models), 145TokenAttributions (class in rubrix.client.models), 146TokenClassificationRecord (class in
rubrix.client.models), 146tokens_length() (in module
rubrix.metrics.token_classification.metrics),150
WWeakLabels (class in rubrix.labeling.text_classification.weak_labels),
151
166 Index
Related Documents


