1 Registration with Schedule Planner 1. Before you begin, check for any holds in MyCSU. 2. Once all holds have been cleared click on: Click on the link to see holds

Welcome message from author
This document is posted to help you gain knowledge. Please leave a comment to let me know what you think about it! Share it to your friends and learn new things together.
Transcript

1
Registration with Schedule Planner
1. Before you begin, check for any holds in MyCSU.
2. Once all holds have been cleared click on:
Click on the link to see holds

2
You will be redirected to Schedule Planner:
3. Select the term, save and continue:
Click here to open in a new tab

3
Plan and Generate Schedules
Search for only open classes or open classes and full classes with an open waitlist.
You can change options to narrow your search.

4
Narrow your search by Parts of Term:

5
Narrow by instruction mode:
You can check select all if you want to take classes in any format. Check “In Person Only” if you only want to take face to face classes. Check “100% Entirely at a distance” if you only want to take classes online.

6
Add classes and breaks:
Click here to add the classes you want to take. You are only choosing the specific courses you want to take, not the sections you want to take.
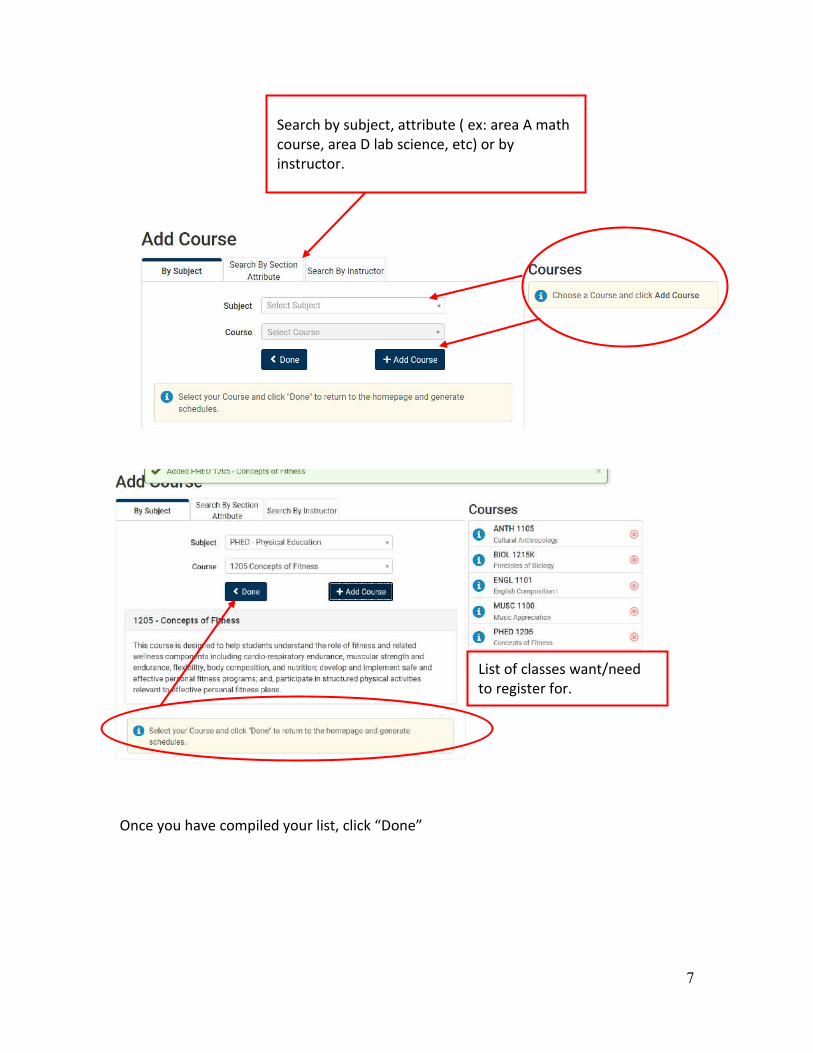
7
List of classes want/need to register for.
Once you have compiled your list, click “Done”
Search by subject, attribute ( ex: area A math course, area D lab science, etc) or by instructor.

8
You can check prerequisites or look at any additional information for a course (if applicable).
Dashboard with the all the selected classes:

9
Add any breaks you may need for work, activities, lunch, etc
Back to the Dashboard
10
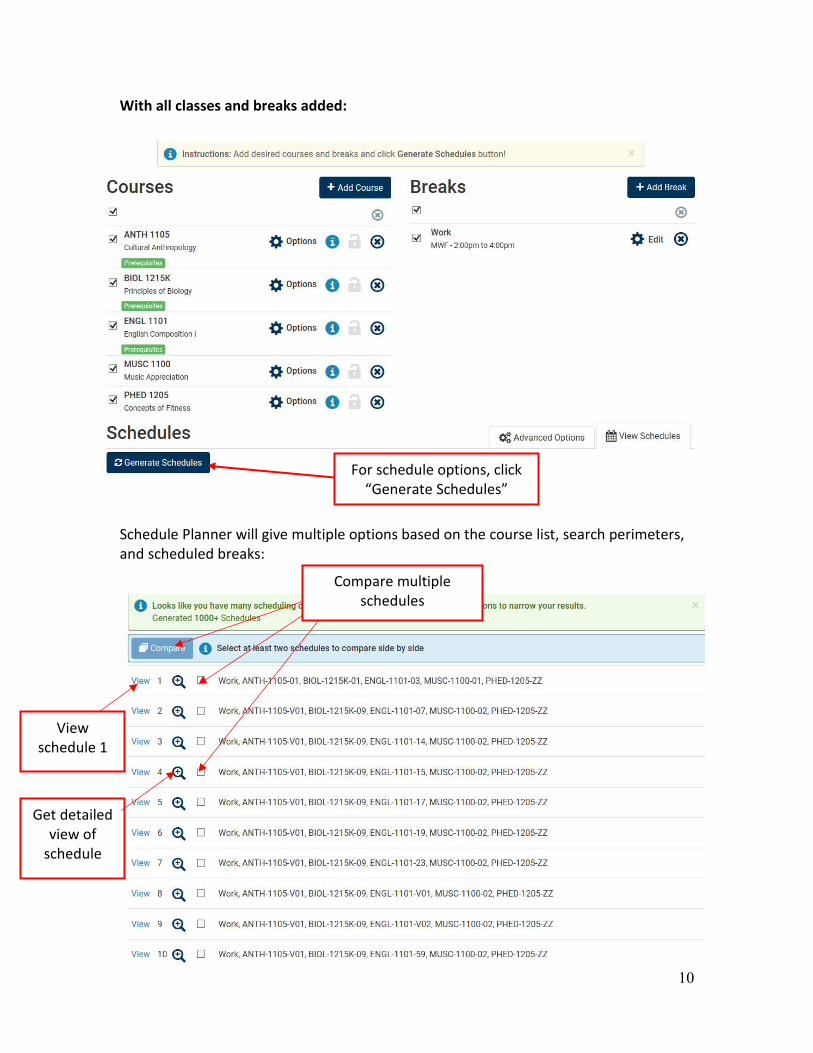
With all classes and breaks added:
Schedule Planner will give multiple options based on the course list, search perimeters, and scheduled breaks:
For schedule options, click “Generate Schedules”
View schedule 1
Get detailed view of
schedule
Compare multiple schedules

11

12
Go back to the Dashboard and modify courses to make up for the ones that are closed:
No seats available for the last two classes, but the first 3 classes fit so they can be locked and schedule planner will build a schedule with any added classes around these three classes and the break.
Delete course from the list. In this case PHED 1205 since all sections are closed.

13
Click “Generate Schedules” again to get new results based on the changes made:
Original three courses wanted locked
Absolutely want/need to take this class, but the original section is closed. Lock the course so scheduler can look for other sections that will fit with other three classes and breaks.
Once the schedule is set, send it to the shopping cart. NOTE: Sending your schedule to the shopping cart does not register you for classes.

14
To register, click on the shopping chart tab and click register.
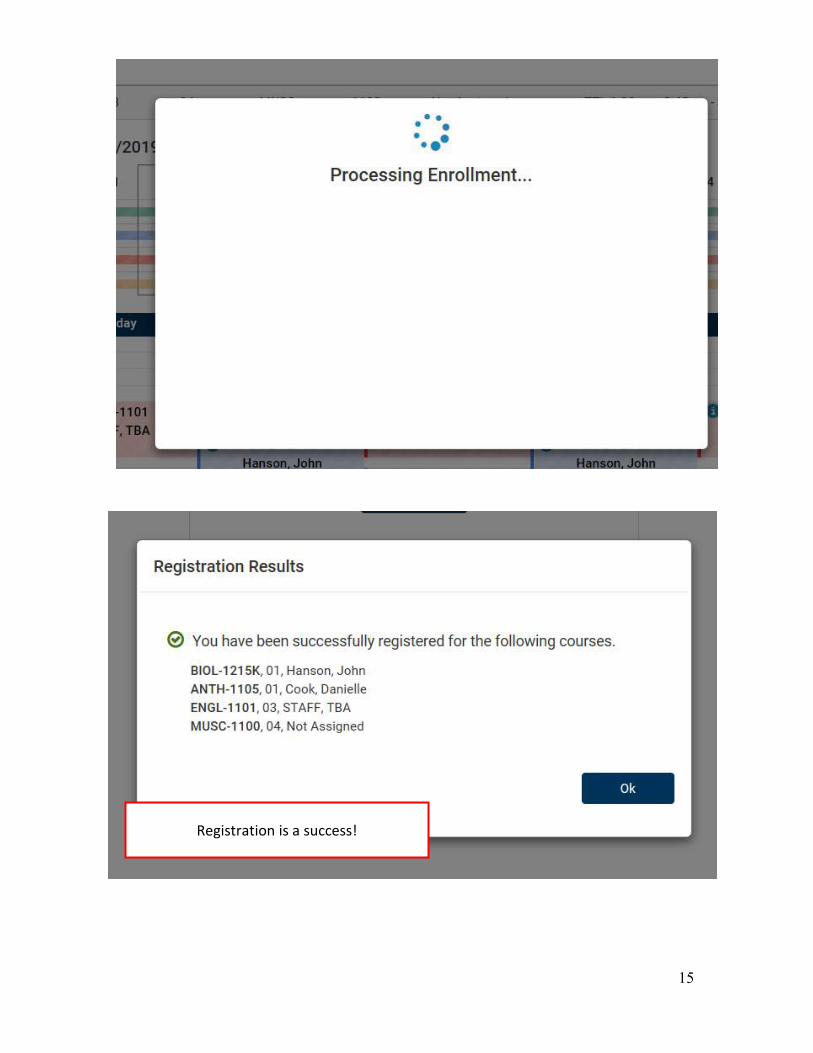
15
Registration is a success!

16
Click here if you need to modify your current schedule.
Related Documents