RECEIPTED COUNTY MAIL ON-LINE TRACKING Mail Services Section Updated 12/2015

Welcome message from author
This document is posted to help you gain knowledge. Please leave a comment to let me know what you think about it! Share it to your friends and learn new things together.
Transcript
RECEIPTED COUNTY MAIL ON-LINE TRACKING
Mail Services Section
Updated 12/2015
Table of Contents
Log in Screen .............................................................................................................. 1-2
Create Label Screen .................................................................................................... 3-5
Verification Screen ..................................................................................................... 6-8
Print Screen .............................................................................................................. 9-11
Label Look Up Screen ............................................................................................. 12-14
Packages Screen ..................................................................................................... 15-17
Sign Out ........................................................................................................................ 18
1 | P a g e
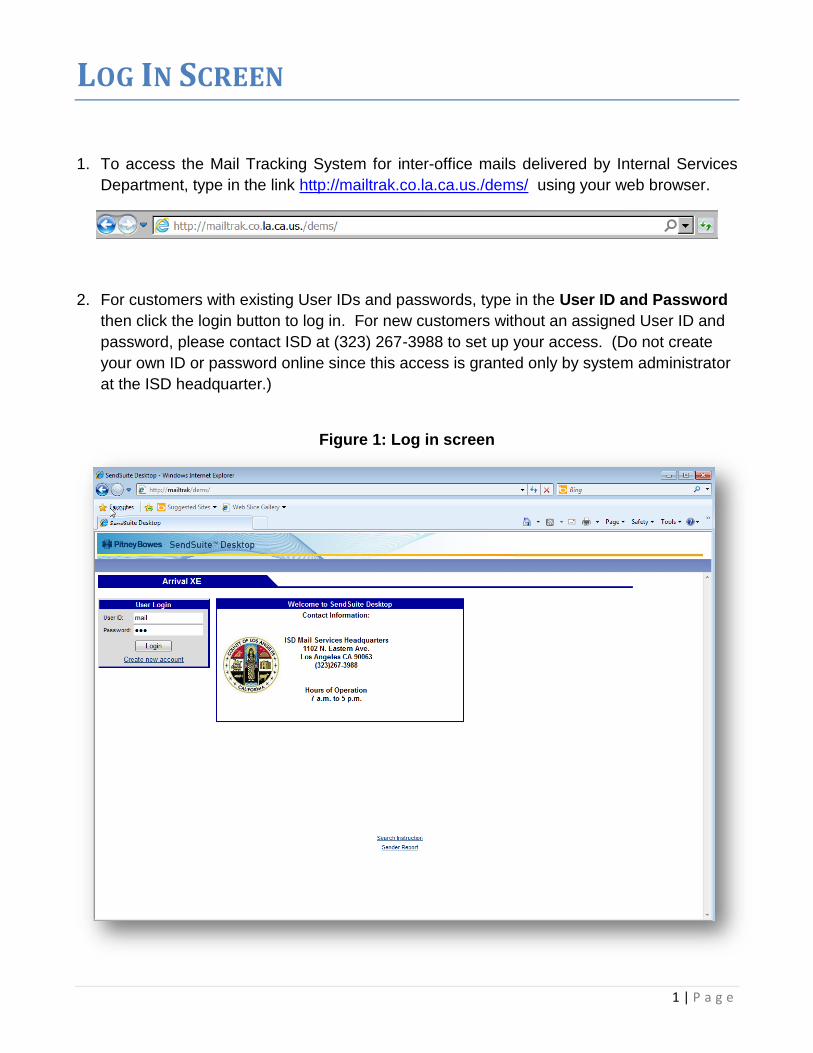
LOG IN SCREEN
1. To access the Mail Tracking System for inter-office mails delivered by Internal Services
Department, type in the link http://mailtrak.co.la.ca.us./dems/ using your web browser.
2. For customers with existing User IDs and passwords, type in the User ID and Password
then click the login button to log in. For new customers without an assigned User ID and
password, please contact ISD at (323) 267-3988 to set up your access. (Do not create
your own ID or password online since this access is granted only by system administrator
at the ISD headquarter.)
Figure 1: Log in screen
2 | P a g e
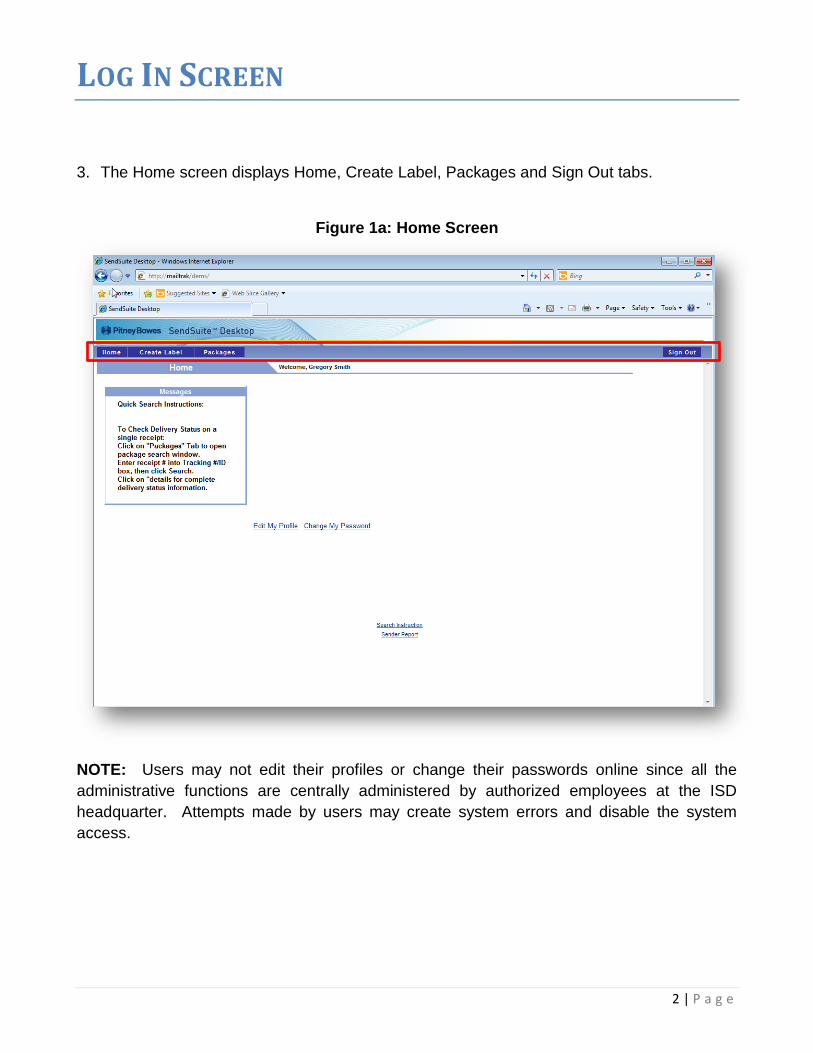
LOG IN SCREEN
3. The Home screen displays Home, Create Label, Packages and Sign Out tabs.
Figure 1a: Home Screen
NOTE: Users may not edit their profiles or change their passwords online since all the
administrative functions are centrally administered by authorized employees at the ISD
headquarter. Attempts made by users may create system errors and disable the system
access.
3 | P a g e
CREATE LABEL SCREEN
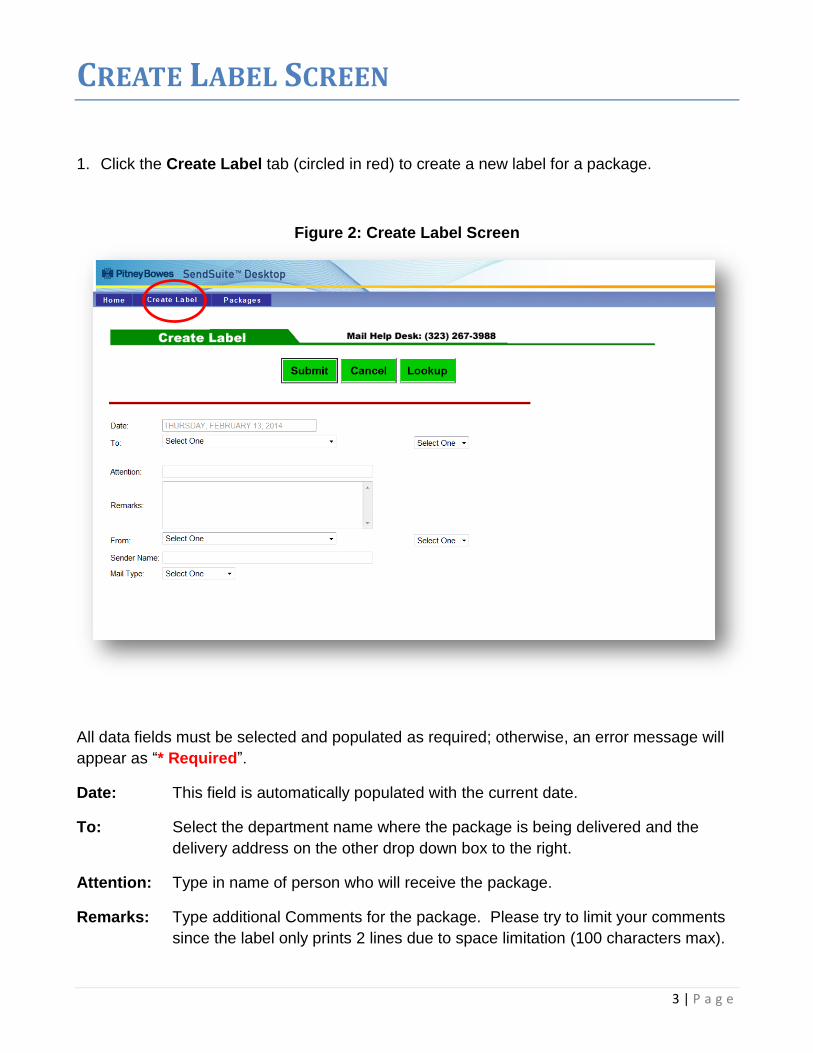
1. Click the Create Label tab (circled in red) to create a new label for a package.
Figure 2: Create Label Screen
All data fields must be selected and populated as required; otherwise, an error message will
appear as “* Required”.
Date: This field is automatically populated with the current date.
To: Select the department name where the package is being delivered and the
delivery address on the other drop down box to the right.
Attention: Type in name of person who will receive the package.
Remarks: Type additional Comments for the package. Please try to limit your comments
since the label only prints 2 lines due to space limitation (100 characters max).
4 | P a g e
CREATE LABEL SCREEN
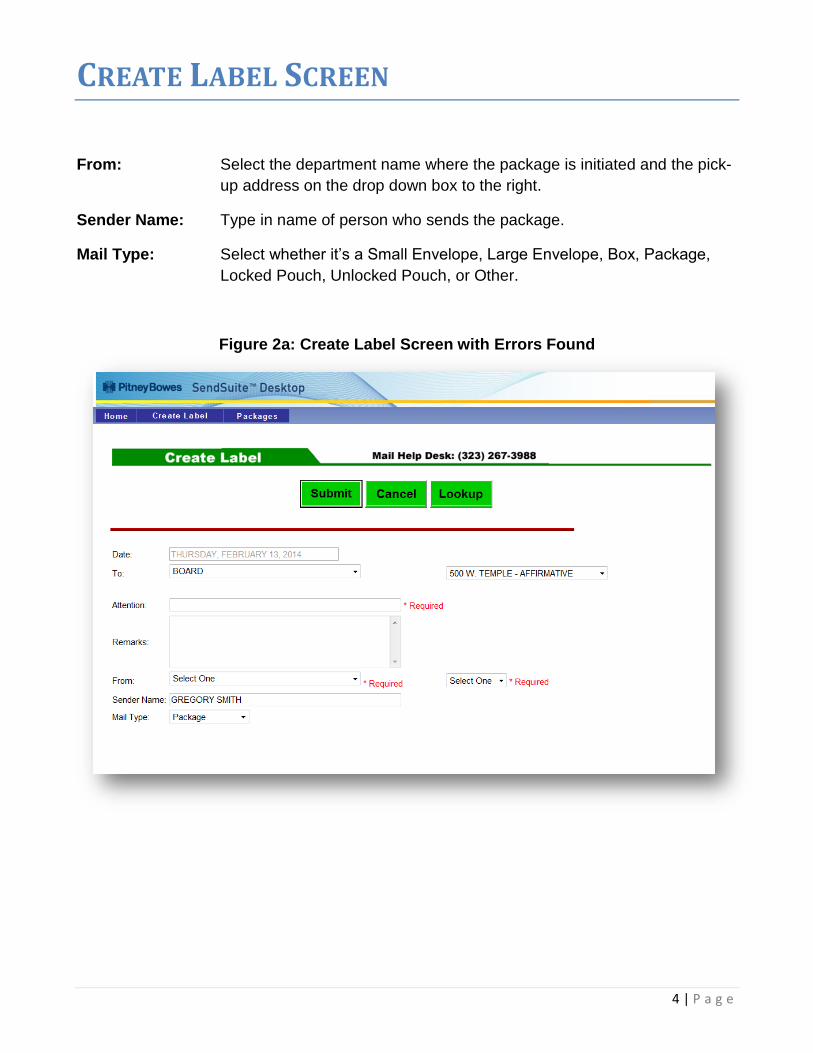
From: Select the department name where the package is initiated and the pick-
up address on the drop down box to the right.
Sender Name: Type in name of person who sends the package.
Mail Type: Select whether it’s a Small Envelope, Large Envelope, Box, Package,
Locked Pouch, Unlocked Pouch, or Other.
Figure 2a: Create Label Screen with Errors Found
5 | P a g e
CREATE LABEL SCREEN
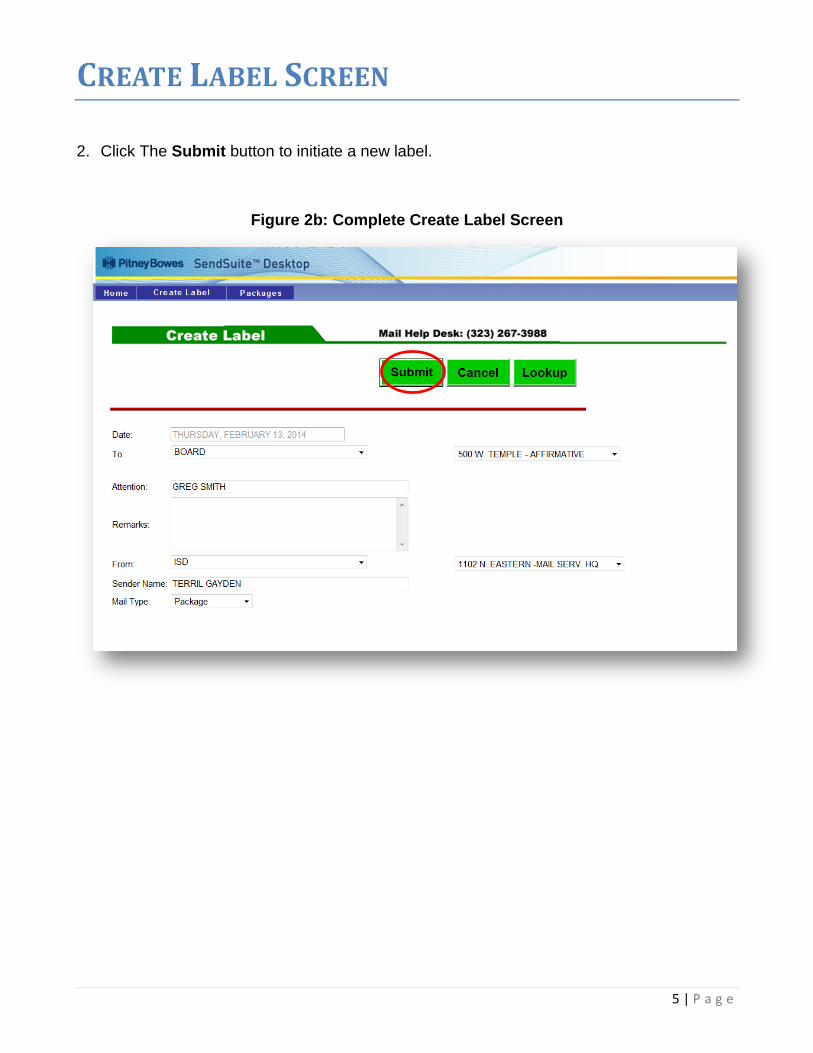
2. Click The Submit button to initiate a new label.
Figure 2b: Complete Create Label Screen
6 | P a g e
VERIFICATION SCREEN
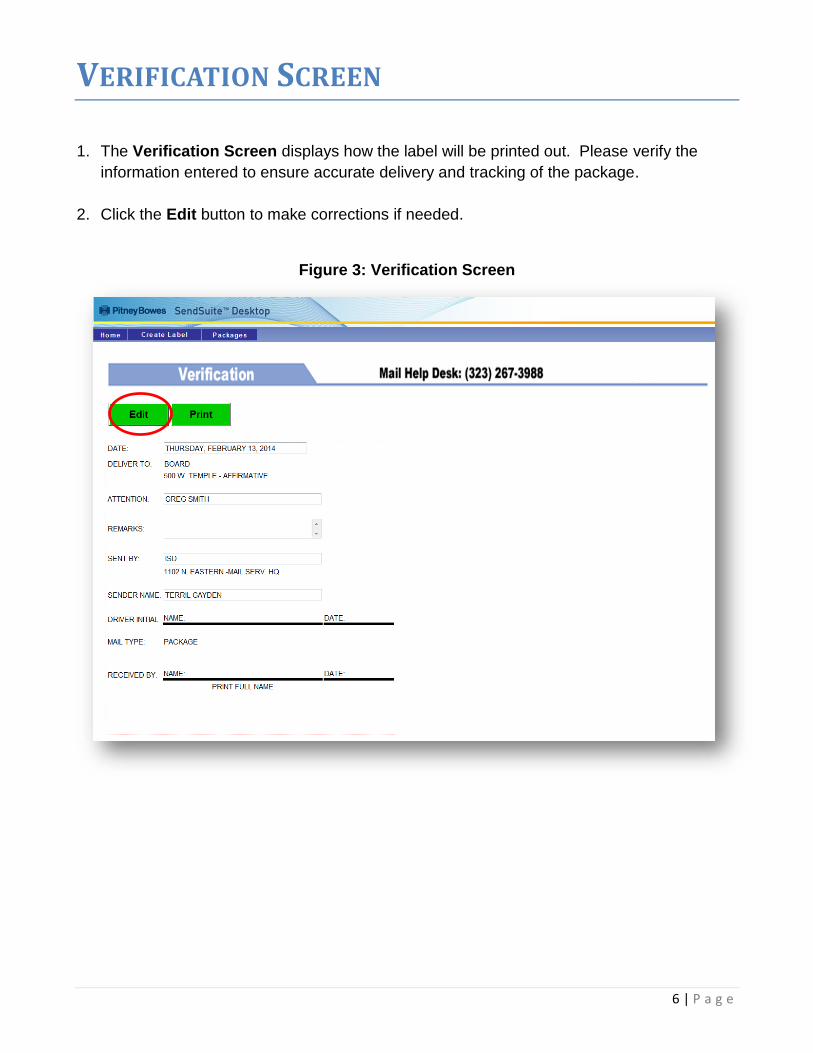
1. The Verification Screen displays how the label will be printed out. Please verify the
information entered to ensure accurate delivery and tracking of the package.
2. Click the Edit button to make corrections if needed.
Figure 3: Verification Screen
7 | P a g e
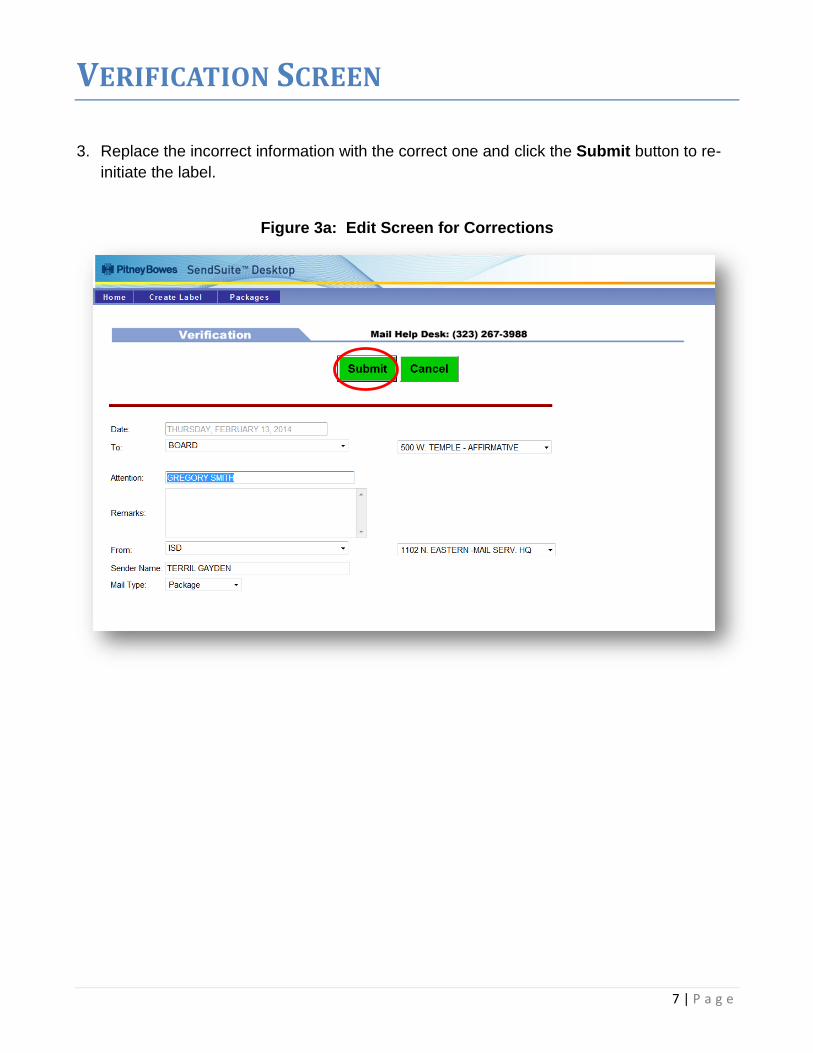
VERIFICATION SCREEN
3. Replace the incorrect information with the correct one and click the Submit button to re-
initiate the label.
Figure 3a: Edit Screen for Corrections
8 | P a g e
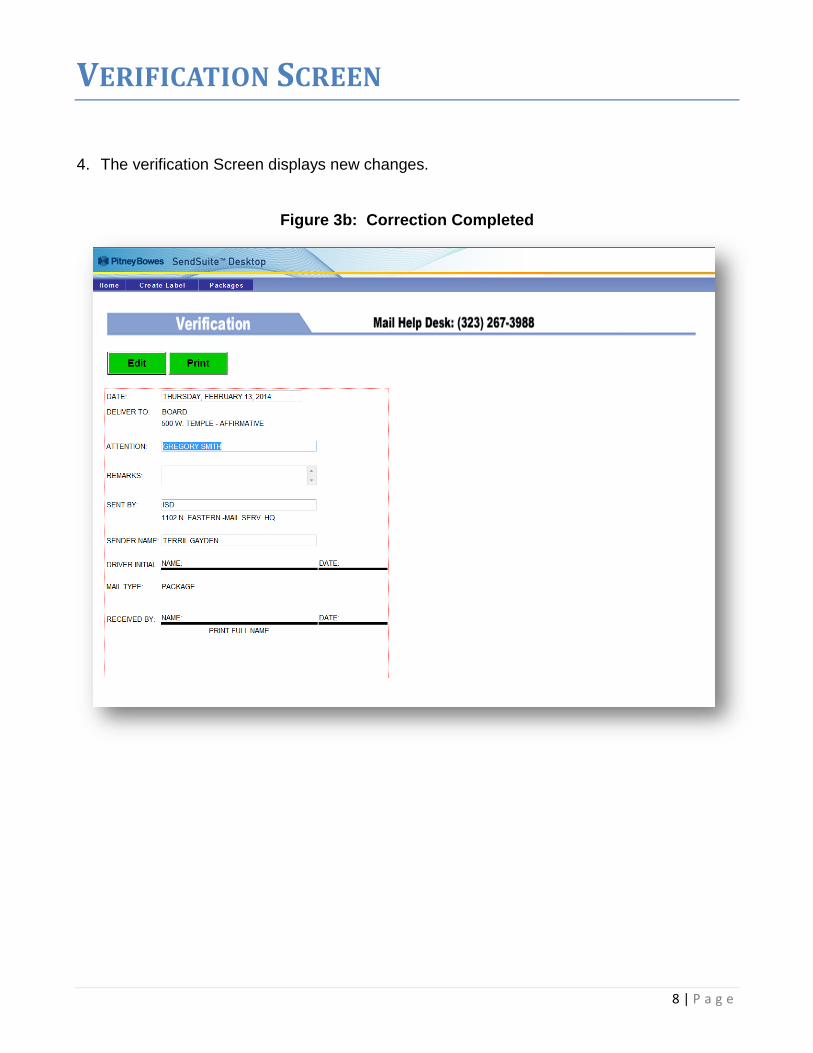
VERIFICATION SCREEN
4. The verification Screen displays new changes.
Figure 3b: Correction Completed

9 | P a g e
PRINT SCREEN
1. Click the Print button to preview the label.
Figure 4: Print from Verification Screen
10 | P a g e
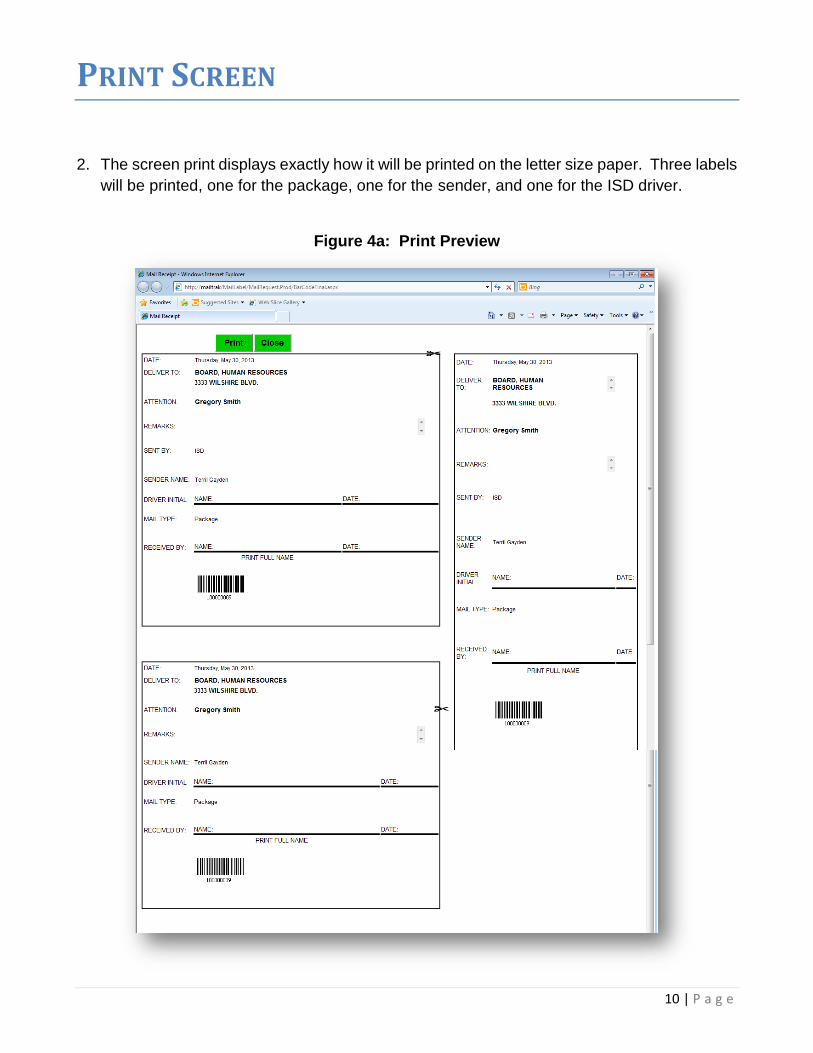
PRINT SCREEN
2. The screen print displays exactly how it will be printed on the letter size paper. Three labels
will be printed, one for the package, one for the sender, and one for the ISD driver.
Figure 4a: Print Preview
11 | P a g e
PRINT SCREEN
3. Click the Print button to send Label to printer.
4. Cut the labels off and attach one to the package, one for the sender, and other one for
the ISD driver.
5. Click the Close button to close the print preview screen.
12 | P a g e
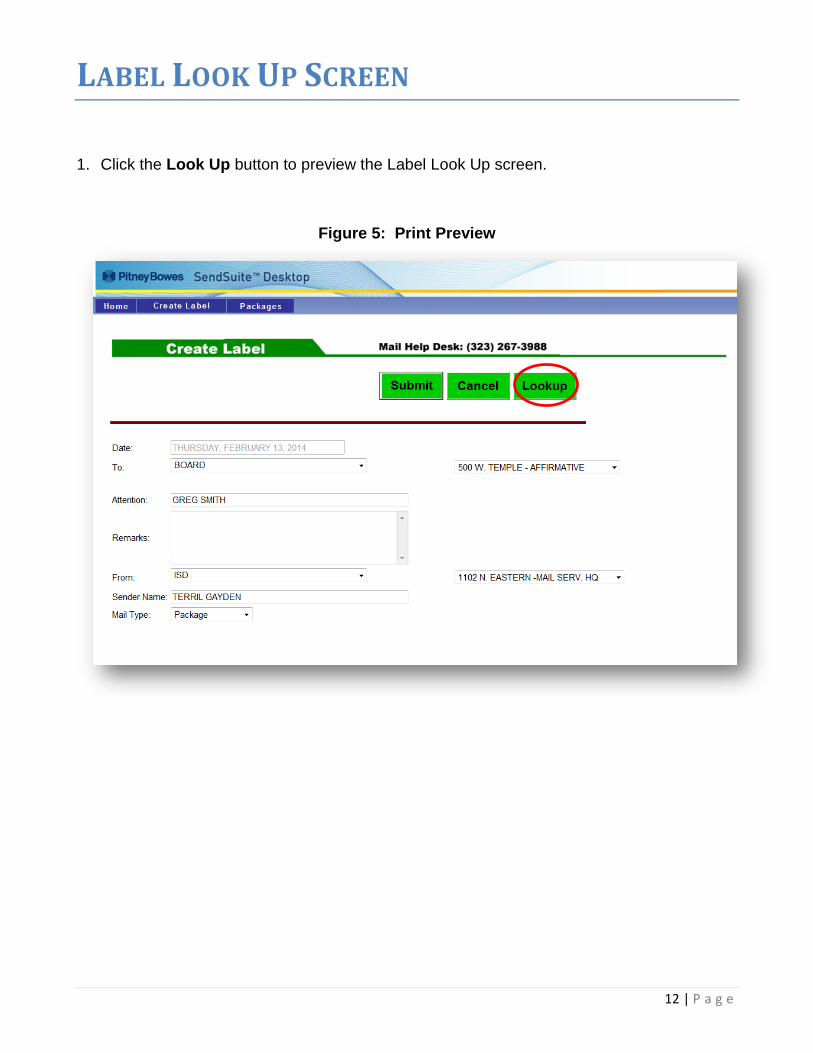
LABEL LOOK UP SCREEN
1. Click the Look Up button to preview the Label Look Up screen.
Figure 5: Print Preview
13 | P a g e
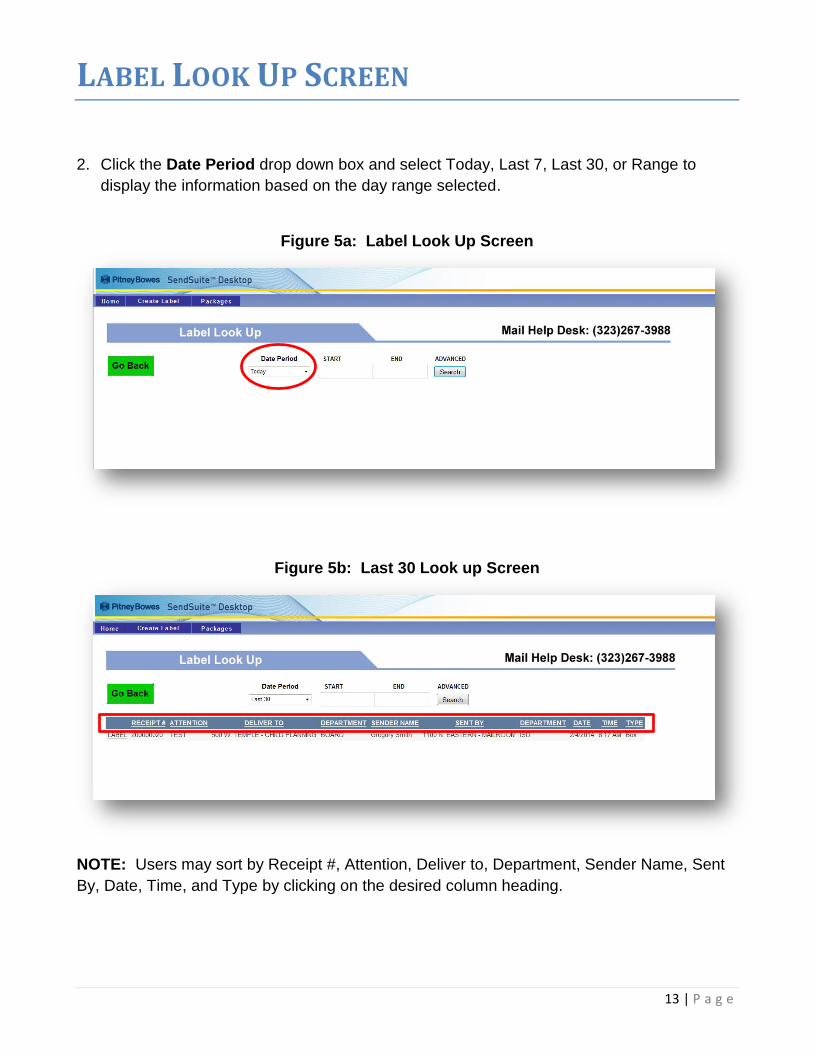
LABEL LOOK UP SCREEN
2. Click the Date Period drop down box and select Today, Last 7, Last 30, or Range to
display the information based on the day range selected.
Figure 5a: Label Look Up Screen
Figure 5b: Last 30 Look up Screen
NOTE: Users may sort by Receipt #, Attention, Deliver to, Department, Sender Name, Sent
By, Date, Time, and Type by clicking on the desired column heading.
14 | P a g e
LABEL LOOK UP SCREEN
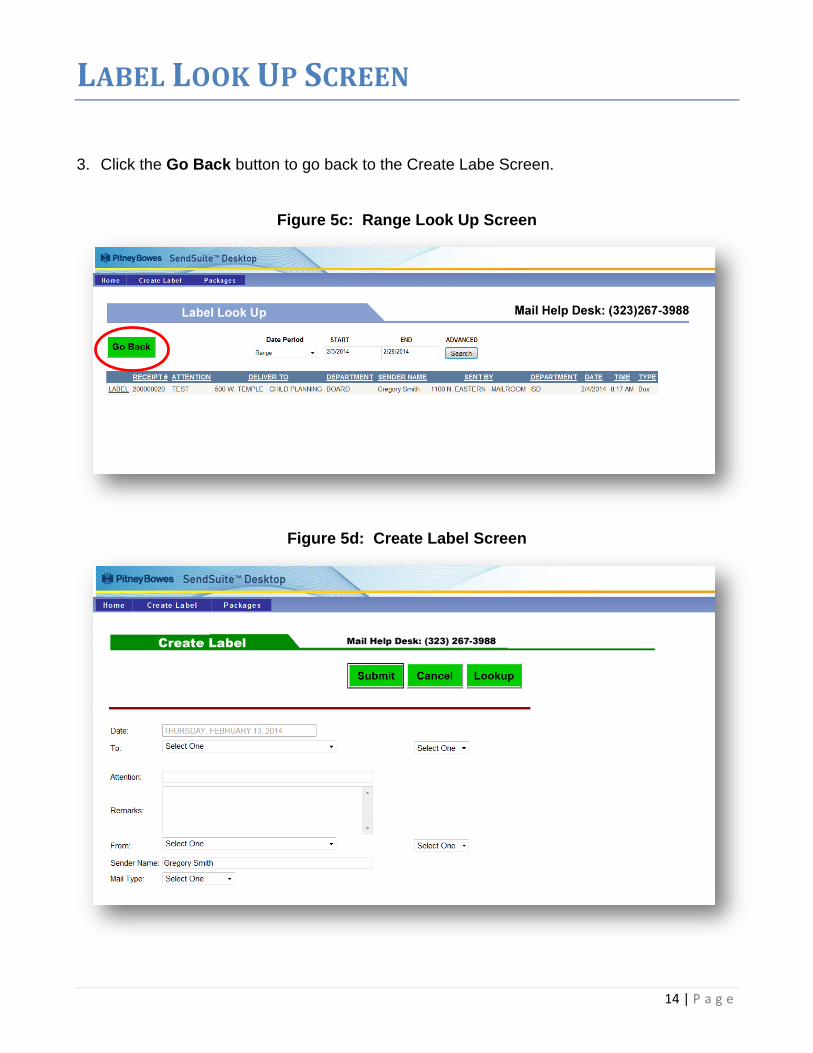
3. Click the Go Back button to go back to the Create Labe Screen.
Figure 5c: Range Look Up Screen
Figure 5d: Create Label Screen
15 | P a g e
PACKAGES SCREEN
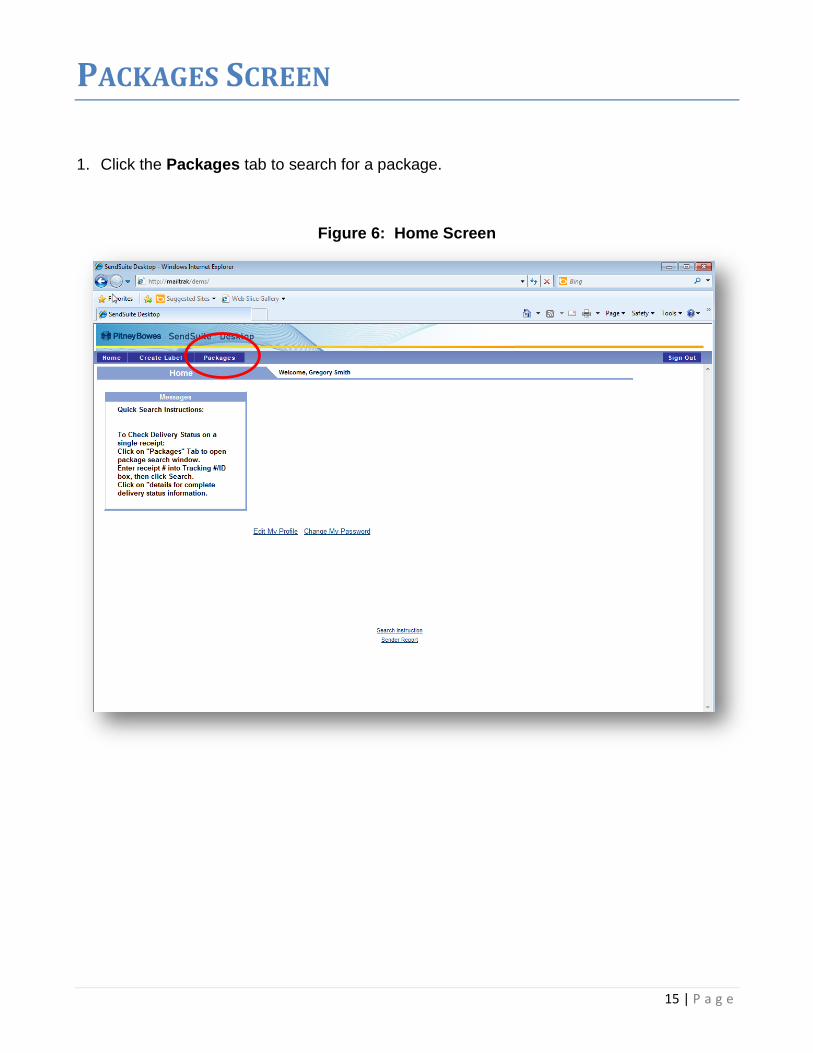
1. Click the Packages tab to search for a package.
Figure 6: Home Screen
16 | P a g e
PACKAGES SCREEN
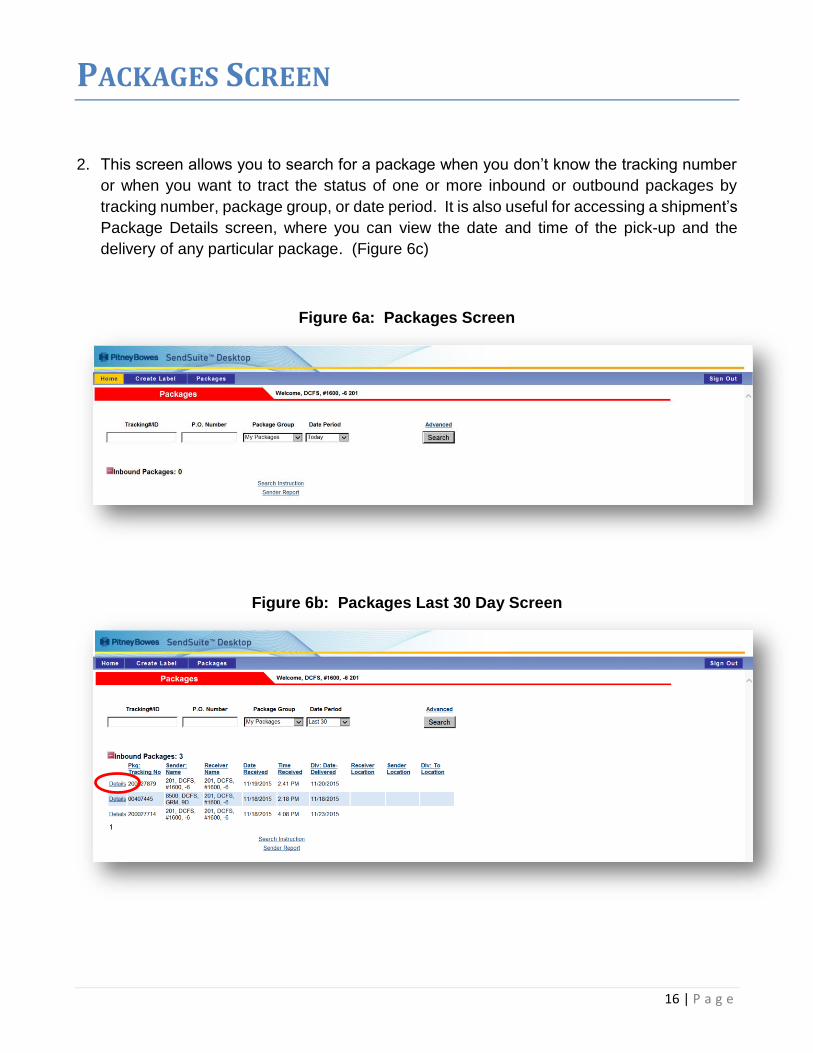
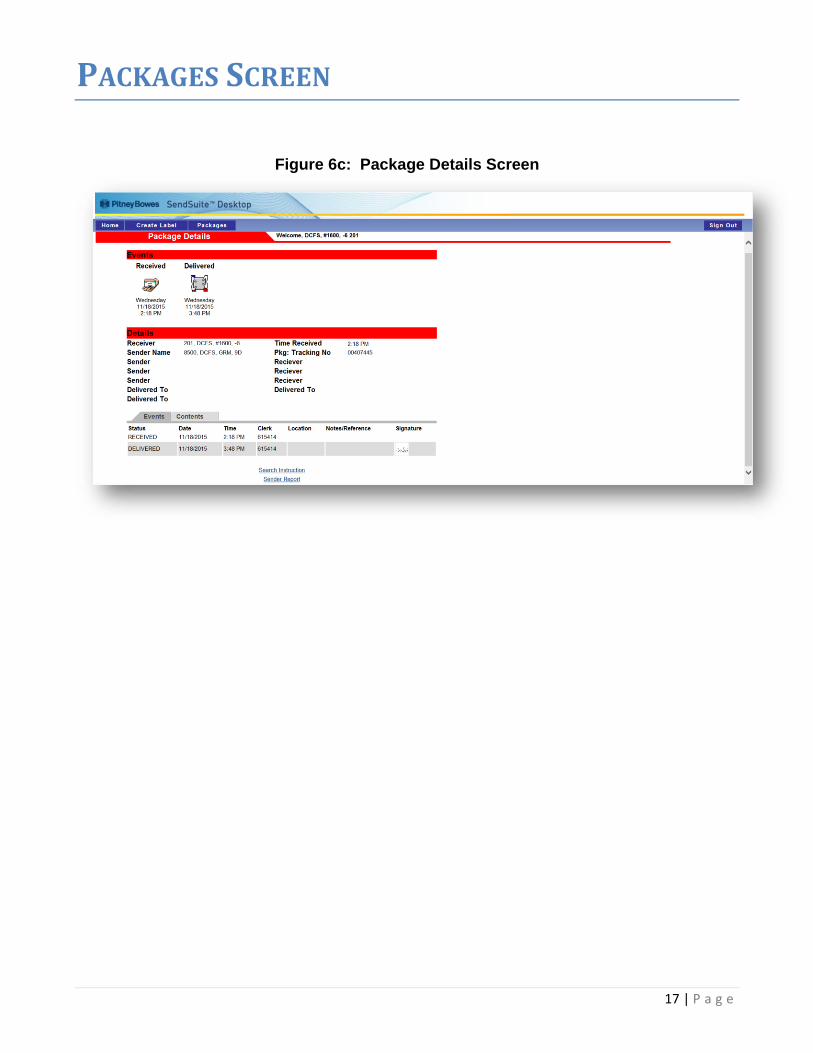
2. This screen allows you to search for a package when you don’t know the tracking number
or when you want to tract the status of one or more inbound or outbound packages by
tracking number, package group, or date period. It is also useful for accessing a shipment’s
Package Details screen, where you can view the date and time of the pick-up and the
delivery of any particular package. (Figure 6c)
Figure 6a: Packages Screen
Figure 6b: Packages Last 30 Day Screen
17 | P a g e
PACKAGES SCREEN
Figure 6c: Package Details Screen
18 | P a g e
SIGN OUT
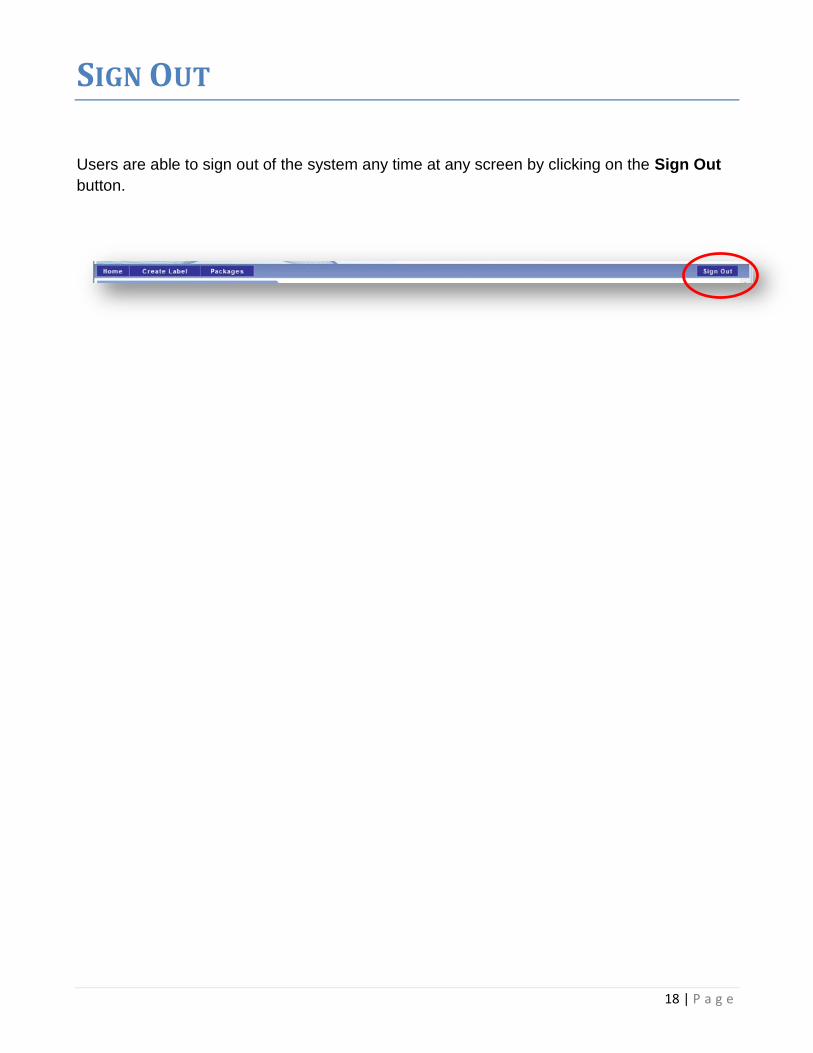
Users are able to sign out of the system any time at any screen by clicking on the Sign Out
button.
Related Documents


