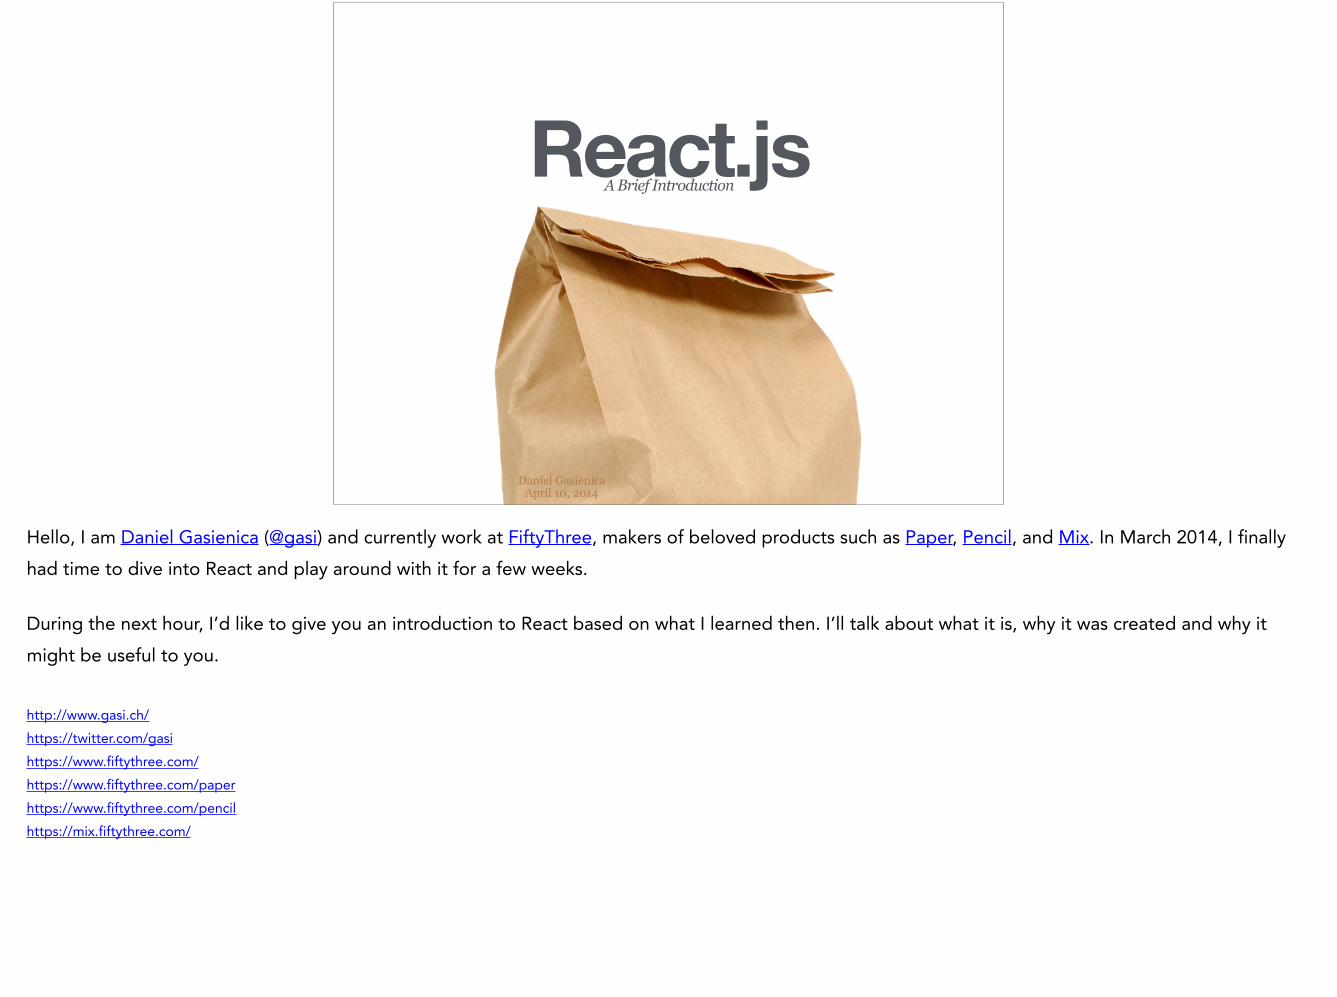
React.js A Brief Introduction Daniel Gasienica April 10, 2014 Hello, I am Daniel Gasienica (@gasi) and currently work at FiftyThree, makers of beloved products such as Paper , Pencil, and Mix. In March 2014, I finally had time to dive into React and play around with it for a few weeks. During the next hour, I’d like to give you an introduction to React based on what I learned then. I’ll talk about what it is, why it was created and why it might be useful to you. http://www.gasi.ch/ https://twitter.com/gasi https://www.fiftythree.com/ https://www.fiftythree.com/paper https://www.fiftythree.com/pencil https://mix.fiftythree.com/

Welcome message from author
This document is posted to help you gain knowledge. Please leave a comment to let me know what you think about it! Share it to your friends and learn new things together.
Transcript
React.jsA Brief Introduction
Daniel Gasienica April 10, 2014
Hello, I am Daniel Gasienica (@gasi) and currently work at FiftyThree, makers of beloved products such as Paper, Pencil, and Mix. In March 2014, I finally had time to dive into React and play around with it for a few weeks. !During the next hour, I’d like to give you an introduction to React based on what I learned then. I’ll talk about what it is, why it was created and why it might be useful to you. !http://www.gasi.ch/ https://twitter.com/gasi https://www.fiftythree.com/ https://www.fiftythree.com/paper https://www.fiftythree.com/pencil https://mix.fiftythree.com/

React is a JavaScript library for creating user interfaces by Facebook and Instagram.
What is React?
!http://facebook.github.io/react/docs/why-react.html

“Building large applications with data that changes over time.”
What problem is React trying to solve?
!http://facebook.github.io/react/docs/why-react.html

Hello, WorldA simple component
I will walk you through how a simple component is built.

var HelloMessage = React.createClass({ displayName: 'HelloMessage', render: function() { return React.DOM.div(null, "Hello ", this.props.name); }});
This the code for the HelloMessage component. !http://facebook.github.io/react/index.html#helloExample

var HelloMessage = React.createClass({ displayName: 'HelloMessage', render: function() { return React.DOM.div(null, "Hello ", this.props.name); }});
This call creates a React component. FYI, createClass might be a bit misleading because as you’ll later see, React components are not instantiated with
the new keyword and are actually more like a function in the mathematical sense: They take input and generate one output, in this case a DOM tree.

var HelloMessage = React.createClass({ displayName: 'HelloMessage', render: function() { return React.DOM.div(null, "Hello ", this.props.name); }});
It’s best practice to give your component a displayName. This is only used during debugging, when the displayName will be used to tell you where a
problem occurred.

var HelloMessage = React.createClass({ displayName: 'HelloMessage', render: function() { return React.DOM.div(null, "Hello ", this.props.name); }});
React components only have to expose one function which is render.

var HelloMessage = React.createClass({ displayName: 'HelloMessage', render: function() { return React.DOM.div(null, "Hello ", this.props.name); }});
render is a function that should return the DOM representation of your component at any point in time.
var HelloMessage = React.createClass({ displayName: 'HelloMessage', render: function() { return React.DOM.div(null, "Hello ", this.props.name); }});
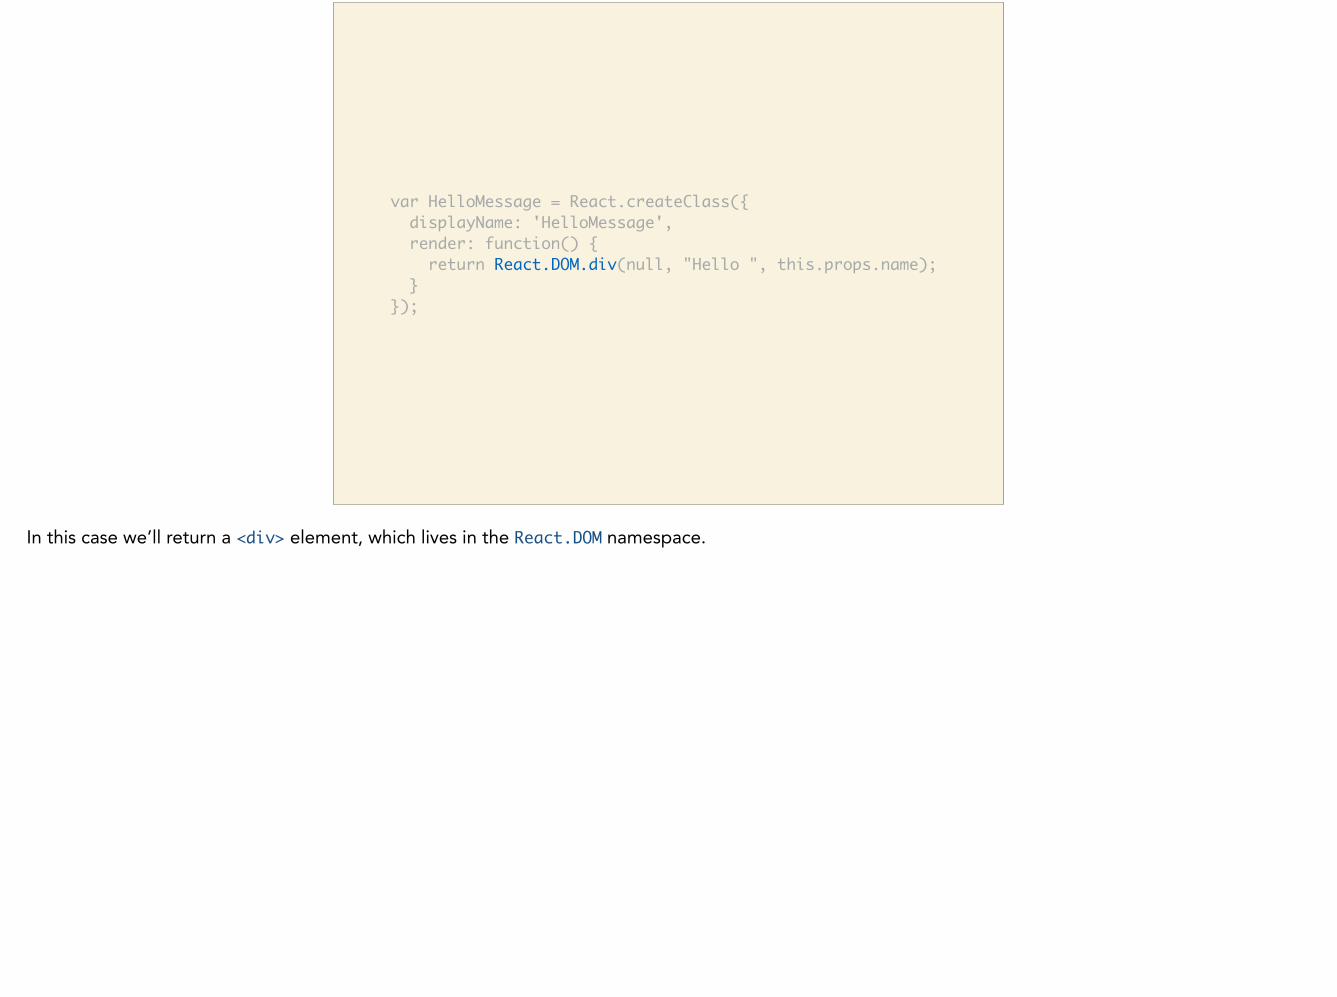
In this case we’ll return a <div> element, which lives in the React.DOM namespace.

var HelloMessage = React.createClass({ displayName: 'HelloMessage', render: function() { return React.DOM.div(null, "Hello ", this.props.name); }});
{id: 'message', className: 'hidden'}
The first argument is where you can add element attributes such as ID or class name, in this case we simply omit them using null.

var HelloMessage = React.createClass({ displayName: 'HelloMessage', render: function() { return React.DOM.div(null, "Hello ", this.props.name); }});
The remaining arguments are the children of that component, in this case a simple string "Hello " and the property name.

var HelloMessage = React.createClass({ displayName: 'HelloMessage', render: function() { return React.DOM.div(null, "Hello ", this.props.name); }});
<div data-reactid=".dbuc1iytj4" data-react-checksum="-695455966"> <span data-reactid=".dbuc1iytj4.0">Hello </span> <span data-reactid=".dbuc1iytj4.1">FiftyThree</span></div>
React.renderComponent( HelloMessage({name: "FiftyThree"}), mountNode);
Let’s look at how a component is rendered…

var HelloMessage = React.createClass({ displayName: 'HelloMessage', render: function() { return React.DOM.div(null, "Hello ", this.props.name); }});
<div data-reactid=".dbuc1iytj4" data-react-checksum="-695455966"> <span data-reactid=".dbuc1iytj4.0">Hello </span> <span data-reactid=".dbuc1iytj4.1">FiftyThree</span></div>
React.renderComponent( HelloMessage({name: "FiftyThree"}), mountNode);
React provides several rendering functions. The main one is renderComponent which renders a component into the browser DOM. It takes two
arguments…

var HelloMessage = React.createClass({ displayName: 'HelloMessage', render: function() { return React.DOM.div(null, "Hello ", this.props.name); }});
<div data-reactid=".dbuc1iytj4" data-react-checksum="-695455966"> <span data-reactid=".dbuc1iytj4.0">Hello </span> <span data-reactid=".dbuc1iytj4.1">FiftyThree</span></div>
React.renderComponent( HelloMessage({name: "FiftyThree"}), mountNode);
…the first is a reference to the component itself…

var HelloMessage = React.createClass({ displayName: 'HelloMessage', render: function() { return React.DOM.div(null, "Hello ", this.props.name); }});
<div data-reactid=".dbuc1iytj4" data-react-checksum="-695455966"> <span data-reactid=".dbuc1iytj4.0">Hello </span> <span data-reactid=".dbuc1iytj4.1">FiftyThree</span></div>
React.renderComponent( HelloMessage({name: "FiftyThree"}), mountNode /* e.g. `document.body` */);
…and the second is which DOM node to mount into or to render into. For example, we could render directly into the body using document.body.

var HelloMessage = React.createClass({ displayName: 'HelloMessage', render: function() { return React.DOM.div(null, "Hello ", this.props.name); }});
<div data-reactid=".dbuc1iytj4" data-react-checksum="-695455966"> <span data-reactid=".dbuc1iytj4.0">Hello </span> <span data-reactid=".dbuc1iytj4.1">FiftyThree</span></div>
React.renderComponent( HelloMessage({name: "FiftyThree"}), mountNode);
Now you can also see how the result of render is reflected in the browser, in this case the div element. It’s a one-to-one mapping of React DOM
components to actual DOM elements. For now, please ignore the data-reactid and data-react-checksum attributes. I’ll explain later what they are used
for.

var HelloMessage = React.createClass({ displayName: 'HelloMessage', render: function() { return React.DOM.div(null, "Hello ", this.props.name); }});
<div data-reactid=".dbuc1iytj4" data-react-checksum="-695455966"> <span data-reactid=".dbuc1iytj4.0">Hello </span> <span data-reactid=".dbuc1iytj4.1">FiftyThree</span></div>
React.renderComponent( HelloMessage({name: "FiftyThree"}), mountNode);
The dynamic properties are passed into the React component during rendering and are reflected in the browser.

var HelloMessage = React.createClass({ displayName: 'HelloMessage', render: function() { return React.DOM.div(null, "Hello ", this.props.name); }});
<div data-reactid=".dbuc1iytj4" data-react-checksum="-695455966"> <span data-reactid=".dbuc1iytj4.0">Hello </span> <span data-reactid=".dbuc1iytj4.1">FiftyThree</span></div>
React.renderComponent( HelloMessage({name: "FiftyThree"}), mountNode);
Hmm, if you’ve worked with other frameworks and toolkits before, you will probably feel that this is harder to read than regular HTML templates.

React.renderComponent( HelloMessage({name: "FiftyThree"}), mountNode);
var HelloMessage = React.createClass({ displayName: 'HelloMessage', render: function() { return React.DOM.div(null, "Hello ", this.props.name); }});
<div data-reactid=".dbuc1iytj4" data-react-checksum="-695455966"> <span data-reactid=".dbuc1iytj4.0">Hello </span> <span data-reactid=".dbuc1iytj4.1">FiftyThree</span></div>
You’re not alone thinking that. The designers of React thought the same and that’s why they created an alternate syntax for React components.

React.renderComponent( <HelloMessage name="FiftyThree" />, mountNode);
/** @jsx React.DOM */var HelloMessage = React.createClass({ render: function() { return <div>Hello {this.props.name}</div>; }});
<div data-reactid=".dbuc1iytj4" data-react-checksum="-695455966"> <span data-reactid=".dbuc1iytj4.0">Hello </span> <span data-reactid=".dbuc1iytj4.1">FiftyThree</span></div>
var HelloMessage = React.createClass({ displayName: 'HelloMessage', render: function() { return React.DOM.div(null, "Hello ", this.props.name); }});
It’s called JSX and is an XML-like syntax for creating React components. It is inspired by the now abandoned E4X standard for those of you who remember the ECMAScript 4 spec or have worked with ActionScript 3. Let’s look at it a bit more closely.

React.renderComponent( <HelloMessage name="FiftyThree" />, mountNode);
/** @jsx React.DOM */var HelloMessage = React.createClass({ render: function() { return <div>Hello {this.props.name}</div>; }});
<div data-reactid=".dbuc1iytj4" data-react-checksum="-695455966"> <span data-reactid=".dbuc1iytj4.0">Hello </span> <span data-reactid=".dbuc1iytj4.1">FiftyThree</span></div>
var HelloMessage = React.createClass({ displayName: 'HelloMessage', render: function() { return React.DOM.div(null, "Hello ", this.props.name); }});
You write your components as usual but instead of calls to React.DOM.* you simply write HTML tags as you would in a template. The @jsx directive at the
top tells the JSX compiler where to look up components, in this case div is looked up in React.DOM.

React.renderComponent( <HelloMessage name="FiftyThree" />, mountNode);
/** @jsx React.DOM */var HelloMessage = React.createClass({ render: function() { return <div>Hello {this.props.name}</div>; }});
<div data-reactid=".dbuc1iytj4" data-react-checksum="-695455966"> <span data-reactid=".dbuc1iytj4.0">Hello </span> <span data-reactid=".dbuc1iytj4.1">FiftyThree</span></div>
var HelloMessage = React.createClass({ displayName: 'HelloMessage', render: function() { return React.DOM.div(null, "Hello ", this.props.name); }});
The same way you can use JSX inside your components, you can also use it to render your own components.

React.renderComponent( <HelloMessage name="FiftyThree" />, mountNode);
/** @jsx React.DOM */var HelloMessage = React.createClass({ render: function() { return <div>Hello {this.props.name}</div>; }});
<div data-reactid=".dbuc1iytj4" data-react-checksum="-695455966"> <span data-reactid=".dbuc1iytj4.0">Hello </span> <span data-reactid=".dbuc1iytj4.1">FiftyThree</span></div>
var HelloMessage = React.createClass({ displayName: 'HelloMessage', render: function() { return React.DOM.div(null, "Hello ", this.props.name); }});
JSX has a special syntax for declaring and using dynamic properties, in this case name.

React.renderComponent( <HelloMessage name="FiftyThree" />, mountNode);
/** @jsx React.DOM */var HelloMessage = React.createClass({ render: function() { return <div>Hello {this.props.name}</div>; }});
<div data-reactid=".dbuc1iytj4" data-react-checksum="-695455966"> <span data-reactid=".dbuc1iytj4.0">Hello </span> <span data-reactid=".dbuc1iytj4.1">FiftyThree</span></div>
var HelloMessage = React.createClass({ displayName: 'HelloMessage', render: function() { return React.DOM.div(null, "Hello ", this.props.name); }});
Unfortunately, this is not very helpful for those of us who found bliss in CoffeeScript as there is no JSX equivalent for CoffeeScript.

React.renderComponent( <HelloMessage name="FiftyThree" />, mountNode);
/** @jsx React.DOM */var HelloMessage = React.createClass({ render: function() { return <div>Hello {this.props.name}</div>; }});
<div data-reactid=".dbuc1iytj4" data-react-checksum="-695455966"> <span data-reactid=".dbuc1iytj4.0">Hello </span> <span data-reactid=".dbuc1iytj4.1">FiftyThree</span></div>
var HelloMessage = React.createClass({ displayName: 'HelloMessage', render: function() { return React.DOM.div(null, "Hello ", this.props.name); }});
The good news is that it doesn’t matter because…

React.renderComponent( HelloMessage({name: "FiftyThree"}), mountNode)
HelloMessage = React.createClass displayName: 'HelloMessage' render: -> React.DOM.div null, "Hello", @props.name
<div data-reactid=".dbuc1iytj4" data-react-checksum="-695455966"> <span data-reactid=".dbuc1iytj4.0">Hello </span> <span data-reactid=".dbuc1iytj4.1">FiftyThree</span></div>
…the same component written in CoffeeScript is very easy to read, hat tip Tara (@tfeener) for helping me get rid of most parentheses and curly braces :)
!https://twitter.com/tfeener

Dummy ImageA stateful component
Let’s look at a slightly more powerful component that keeps track of state. We will use the Dummy Image service to make it more fun. !http://dummyimage.com/

Basically, it lets you type in text and a color and it returns you an image with that text and background color. When you click on the image, it’ll pick a random background color. Demo: http://jsfiddle.net/gasi/vj9wG/

Here’s another example if you didn’t bother clicking on the demo link ;) !Demo: http://jsfiddle.net/gasi/vj9wG/

DummyImage = React.createClass displayName: 'DummyImage'! getInitialState: -> keyword: ‘Dummy Image' color: 'f00'! handleKeywordChange: (event) -> @setState {keyword: event.target.value}! handleColorChange: (event) -> {value} = event.target return unless value.match /// ^[A-Fa-f0-9]{0, 6}$ /// @setState {color: value}! handleImageClick: (event) -> @setState {color: Math.random().toString(16)[2...8]}! render: -> React.DOM.div null, [ React.DOM.input value: @state.keyword onChange: @handleKeywordChange! React.DOM.input value: @state.color onChange: @handleColorChange! React.DOM.br null! React.DOM.img onClick: @handleImageClick src: "http://dummyimage.com/600x400/#{@state.color}/ffffff&\ text=#{encodeURIComponent @state.keyword}" ]!React.renderComponent DummyImage(), document.body
This is the entire code for this component. I know the type is small and don’t expect you to read it all, so let’s look at it step by step.

DummyImage = React.createClass displayName: 'DummyImage'! getInitialState: -> keyword: ‘Dummy Image' color: 'f00'! handleKeywordChange: (event) -> @setState {keyword: event.target.value}! handleColorChange: (event) -> {value} = event.target return unless value.match /// ^[A-Fa-f0-9]{0, 6}$ /// @setState {color: value}! handleImageClick: (event) -> @setState {color: Math.random().toString(16)[2...8]}! render: -> React.DOM.div null, [ React.DOM.input value: @state.keyword onChange: @handleKeywordChange! React.DOM.input value: @state.color onChange: @handleColorChange! React.DOM.br null! React.DOM.img onClick: @handleImageClick src: "http://dummyimage.com/600x400/#{@state.color}/ffffff&\ text=#{encodeURIComponent @state.keyword}" ]!React.renderComponent DummyImage(), document.body
First step: Component definition.

DummyImage = React.createClass
displayName: 'DummyImage'
We define the component using React.createClass including displayName which makes debugging easier.

DummyImage = React.createClass displayName: 'DummyImage'! getInitialState: -> keyword: ‘Dummy Image' color: 'f00'! handleKeywordChange: (event) -> @setState {keyword: event.target.value}! handleColorChange: (event) -> {value} = event.target return unless value.match /// ^[A-Fa-f0-9]{0, 6}$ /// @setState {color: value}! handleImageClick: (event) -> @setState {color: Math.random().toString(16)[2...8]}! render: -> React.DOM.div null, [ React.DOM.input value: @state.keyword onChange: @handleKeywordChange! React.DOM.input value: @state.color onChange: @handleColorChange! React.DOM.br null! React.DOM.img onClick: @handleImageClick src: "http://dummyimage.com/600x400/#{@state.color}/ffffff&\ text=#{encodeURIComponent @state.keyword}" ]!React.renderComponent DummyImage(), document.body
Let’s have a look at rendering.

render: -> React.DOM.div null, [ React.DOM.input value: @state.keyword onChange: @handleKeywordChange! React.DOM.input value: @state.color onChange: @handleColorChange! React.DOM.br null! React.DOM.img onClick: @handleImageClick src: "http://dummyimage.com/600x400/#{@state.color}/ffffff&\ text=#{encodeURIComponent @state.keyword}" ]
We define the render function which is responsible for describing the DOM we want.

render: -> React.DOM.div null, [ React.DOM.input value: @state.keyword onChange: @handleKeywordChange! React.DOM.input value: @state.color onChange: @handleColorChange! React.DOM.br null! React.DOM.img onClick: @handleImageClick src: "http://dummyimage.com/600x400/#{@state.color}/ffffff&\ text=#{encodeURIComponent @state.keyword}" ]
React (currently) requires render to always return a single root DOM element, hence we create a wrapper div here. It has an array of child components
which means they will be siblings in the DOM.

render: -> React.DOM.div null, [ React.DOM.input value: @state.keyword onChange: @handleKeywordChange! React.DOM.input value: @state.color onChange: @handleColorChange! React.DOM.br null! React.DOM.img onClick: @handleImageClick src: "http://dummyimage.com/600x400/#{@state.color}/ffffff&\ text=#{encodeURIComponent @state.keyword}" ]
First, we have the text input where we can type in keywords.

render: -> React.DOM.div null, [ React.DOM.input value: @state.keyword onChange: @handleKeywordChange! React.DOM.input value: @state.color onChange: @handleColorChange! React.DOM.br null! React.DOM.img onClick: @handleImageClick src: "http://dummyimage.com/600x400/#{@state.color}/ffffff&\ text=#{encodeURIComponent @state.keyword}" ]
Dummy Image
Its current value is defined by @state.keyword. In a minute, I’ll show you where the state comes from.

render: -> React.DOM.div null, [ React.DOM.input value: @state.keyword onChange: @handleKeywordChange! React.DOM.input value: @state.color onChange: @handleColorChange! React.DOM.br null! React.DOM.img onClick: @handleImageClick src: "http://dummyimage.com/600x400/#{@state.color}/ffffff&\ text=#{encodeURIComponent @state.keyword}" ]
Additionally, we define an event handler for whenever the contents of the text input change. We’ll look at how to implement an event handler.

render: -> React.DOM.div null, [ React.DOM.input value: @state.keyword onChange: @handleKeywordChange! React.DOM.input value: @state.color onChange: @handleColorChange! React.DOM.br null! React.DOM.img onClick: @handleImageClick src: "http://dummyimage.com/600x400/#{@state.color}/ffffff&\ text=#{encodeURIComponent @state.keyword}" ]
The same goes for the input to change your color.

render: -> React.DOM.div null, [ React.DOM.input value: @state.keyword onChange: @handleKeywordChange! React.DOM.input value: @state.color onChange: @handleColorChange! React.DOM.br null! React.DOM.img onClick: @handleImageClick src: "http://dummyimage.com/600x400/#{@state.color}/ffffff&\ text=#{encodeURIComponent @state.keyword}" ]
f00
The value comes from @state.color…

render: -> React.DOM.div null, [ React.DOM.input value: @state.keyword onChange: @handleKeywordChange! React.DOM.input value: @state.color onChange: @handleColorChange! React.DOM.br null! React.DOM.img onClick: @handleImageClick src: "http://dummyimage.com/600x400/#{@state.color}/ffffff&\ text=#{encodeURIComponent @state.keyword}" ]
…and we handle changes to the value with the @handleColorChange event handler.

render: -> React.DOM.div null, [ React.DOM.input value: @state.keyword onChange: @handleKeywordChange! React.DOM.input value: @state.color onChange: @handleColorChange! React.DOM.br null! React.DOM.img onClick: @handleImageClick src: "http://dummyimage.com/600x400/#{@state.color}/ffffff&\ text=#{encodeURIComponent @state.keyword}" ]
The break here is a quick and dirty way to wrap the image onto the next line.

render: -> React.DOM.div null, [ React.DOM.input value: @state.keyword onChange: @handleKeywordChange! React.DOM.input value: @state.color onChange: @handleColorChange! React.DOM.br null! React.DOM.img onClick: @handleImageClick src: "http://dummyimage.com/600x400/#{@state.color}/ffffff&\ text=#{encodeURIComponent @state.keyword}" ]
Next: the image.

render: -> React.DOM.div null, [ React.DOM.input value: @state.keyword onChange: @handleKeywordChange! React.DOM.input value: @state.color onChange: @handleColorChange! React.DOM.br null! React.DOM.img onClick: @handleImageClick src: "http://dummyimage.com/600x400/#{@state.color}/ffffff&\ text=#{encodeURIComponent @state.keyword}" ]
Every time you click on an image it’ll randomize the background color. This is achieved through the @handleImageClick event handler.

render: -> React.DOM.div null, [ React.DOM.input value: @state.keyword onChange: @handleKeywordChange! React.DOM.input value: @state.color onChange: @handleColorChange! React.DOM.br null! React.DOM.img onClick: @handleImageClick src: "http://dummyimage.com/600x400/#{@state.color}/ffffff&\ text=#{encodeURIComponent @state.keyword}" ]
Next up we define the src of the image. We can use the Dummy Image service that returns placeholder images with a text and background color defined
through their URL. !http://dummyimage.com/

render: -> React.DOM.div null, [ React.DOM.input value: @state.keyword onChange: @handleKeywordChange! React.DOM.input value: @state.color onChange: @handleColorChange! React.DOM.br null! React.DOM.img onClick: @handleImageClick src: "http://dummyimage.com/600x400/#{@state.color}/ffffff&\ text=#{encodeURIComponent @state.keyword}" ]
The size is defined here. We simply hardcode it to 600x400 pixels.

render: -> React.DOM.div null, [ React.DOM.input value: @state.keyword onChange: @handleKeywordChange! React.DOM.input value: @state.color onChange: @handleColorChange! React.DOM.br null! React.DOM.img onClick: @handleImageClick src: "http://dummyimage.com/600x400/#{@state.color}/ffffff&\ text=#{encodeURIComponent @state.keyword}" ]
Then we define the background color we get from @state.color.

render: -> React.DOM.div null, [ React.DOM.input value: @state.keyword onChange: @handleKeywordChange! React.DOM.input value: @state.color onChange: @handleColorChange! React.DOM.br null! React.DOM.img onClick: @handleImageClick src: "http://dummyimage.com/600x400/#{@state.color}/ffffff&\ text=#{encodeURIComponent @state.keyword}" ]
We hardcode the text color to always be white.

render: -> React.DOM.div null, [ React.DOM.input value: @state.keyword onChange: @handleKeywordChange! React.DOM.input value: @state.color onChange: @handleColorChange! React.DOM.br null! React.DOM.img onClick: @handleImageClick src: "http://dummyimage.com/600x400/#{@state.color}/ffffff&\ text=#{encodeURIComponent @state.keyword}" ]
Then we define the text query parameter to be latest keyword we wrote, again from @state.keyword.

render: -> React.DOM.div null, [ React.DOM.input value: @state.keyword onChange: @handleKeywordChange! React.DOM.input value: @state.color onChange: @handleColorChange! React.DOM.br null! React.DOM.img onClick: @handleImageClick src: "http://dummyimage.com/600x400/#{@state.color}/ffffff&\ text=#{encodeURIComponent @state.keyword}" ]
And this is the how rendering is handled.

DummyImage = React.createClass displayName: 'DummyImage'! getInitialState: -> keyword: 'Dummy Image' color: 'f00'! handleKeywordChange: (event) -> @setState {keyword: event.target.value}! handleColorChange: (event) -> {value} = event.target return unless value.match /// ^[A-Fa-f0-9]{0, 6}$ /// @setState {color: value}! handleImageClick: (event) -> @setState {color: Math.random().toString(16)[2...8]}! render: -> React.DOM.div null, [ React.DOM.input value: @state.keyword onChange: @handleKeywordChange! React.DOM.input value: @state.color onChange: @handleColorChange! React.DOM.br null! React.DOM.img onClick: @handleImageClick src: "http://dummyimage.com/600x400/#{@state.color}/ffffff&\ text=#{encodeURIComponent @state.keyword}" ]!React.renderComponent DummyImage(), document.body
Next: Let’s look at how state changes are handled.

getInitialState: -> keyword: 'Dummy Image' color: 'f00'! handleKeywordChange: (event) -> @setState {keyword: event.target.value}! handleColorChange: (event) -> {value} = event.target return unless value.match /// ^[A-Fa-f0-9]{0, 6}$ /// @setState {color: value}! handleImageClick: (event) -> @setState {color: Math.random().toString(16)[2...8]}
This section defines the state the component uses and how it manipulates it based on events.

getInitialState: -> keyword: 'Dummy Image' color: 'f00' # red! handleKeywordChange: (event) -> @setState {keyword: event.target.value}! handleColorChange: (event) -> {value} = event.target return unless value.match /// ^[A-Fa-f0-9]{0, 6}$ /// @setState {color: value}! handleImageClick: (event) -> @setState {color: Math.random().toString(16)[2...8]}
React let’s us define the initial state of the component using getInitialState. We set keyword to be 'Dummy Image' and this is what will show up first.
The same goes for color; we’ll make the background color red initially.

getInitialState: -> keyword: 'Dummy Image' color: 'f00'! handleKeywordChange: (event) -> @setState {keyword: event.target.value}! handleColorChange: (event) -> {value} = event.target return unless value.match /// ^[A-Fa-f0-9]{0, 6}$ /// @setState {color: value}! handleImageClick: (event) -> @setState {color: Math.random().toString(16)[2...8]}
handleKeywordChange is the event handler for whenever we type into the keyword text input. It simply assigns the current value of the input field to the
keyword state variable.

getInitialState: -> keyword: 'Dummy Image' color: 'f00'! handleKeywordChange: (event) -> @setState {keyword: event.target.value}! handleColorChange: (event) -> {value} = event.target return unless value.match /// ^[A-Fa-f0-9]{0, 6}$ /// @setState {color: value}! handleImageClick: (event) -> @setState {color: Math.random().toString(16)[2...8]}
handleColorChange is the event handler for the color text input. It first gets the value of the text input and checks it against a regular expression that only
matches valid RGB hex values. If we don’t have a valid RGB hex value, the function returns and the color state variable is never updated. This is an
example of basic validation. React allows us to fully control what gets rendered and in this case, we simply won’t allow it to render invalid RGB hex values.

getInitialState: -> keyword: 'Dummy Image' color: 'f00'! handleKeywordChange: (event) -> @setState {keyword: event.target.value}! handleColorChange: (event) -> {value} = event.target return unless value.match /// ^[A-Fa-f0-9]{0, 6}$ /// @setState {color: value}! handleImageClick: (event) -> @setState {color: Math.random().toString(16)[2...8]}
Last but not least, every time we click the image, we assign the color state variable a random RGB color using a nifty trick I learned from Aseem
(@aseemk) who got it from Andrew (@andhedrew). !https://twitter.com/aseemk https://twitter.com/andhedrew

DummyImage = React.createClass displayName: 'DummyImage'! getInitialState: -> keyword: 'Dummy Image' color: 'f00'! handleKeywordChange: (event) -> @setState {keyword: event.target.value}! handleColorChange: (event) -> {value} = event.target return unless value.match /// ^[A-Fa-f0-9]{0, 6}$ /// @setState {color: value}! handleImageClick: (event) -> @setState {color: Math.random().toString(16)[2...8]}! render: -> React.DOM.div null, [ React.DOM.input value: @state.keyword onChange: @handleKeywordChange! React.DOM.input value: @state.color onChange: @handleColorChange! React.DOM.br null! React.DOM.img onClick: @handleImageClick src: "http://dummyimage.com/600x400/#{@state.color}/ffffff&\ text=#{encodeURIComponent @state.keyword}" ]!React.renderComponent DummyImage(), document.body
The final step is the initial render of the component.

React.renderComponent DummyImage(), document.body
The call for rendering the component.

React.renderComponent DummyImage(), document.body
We use `React.renderComponent` to render…

React.renderComponent DummyImage(), document.body
…`DummyImage` into…
React.renderComponent DummyImage(), document.body
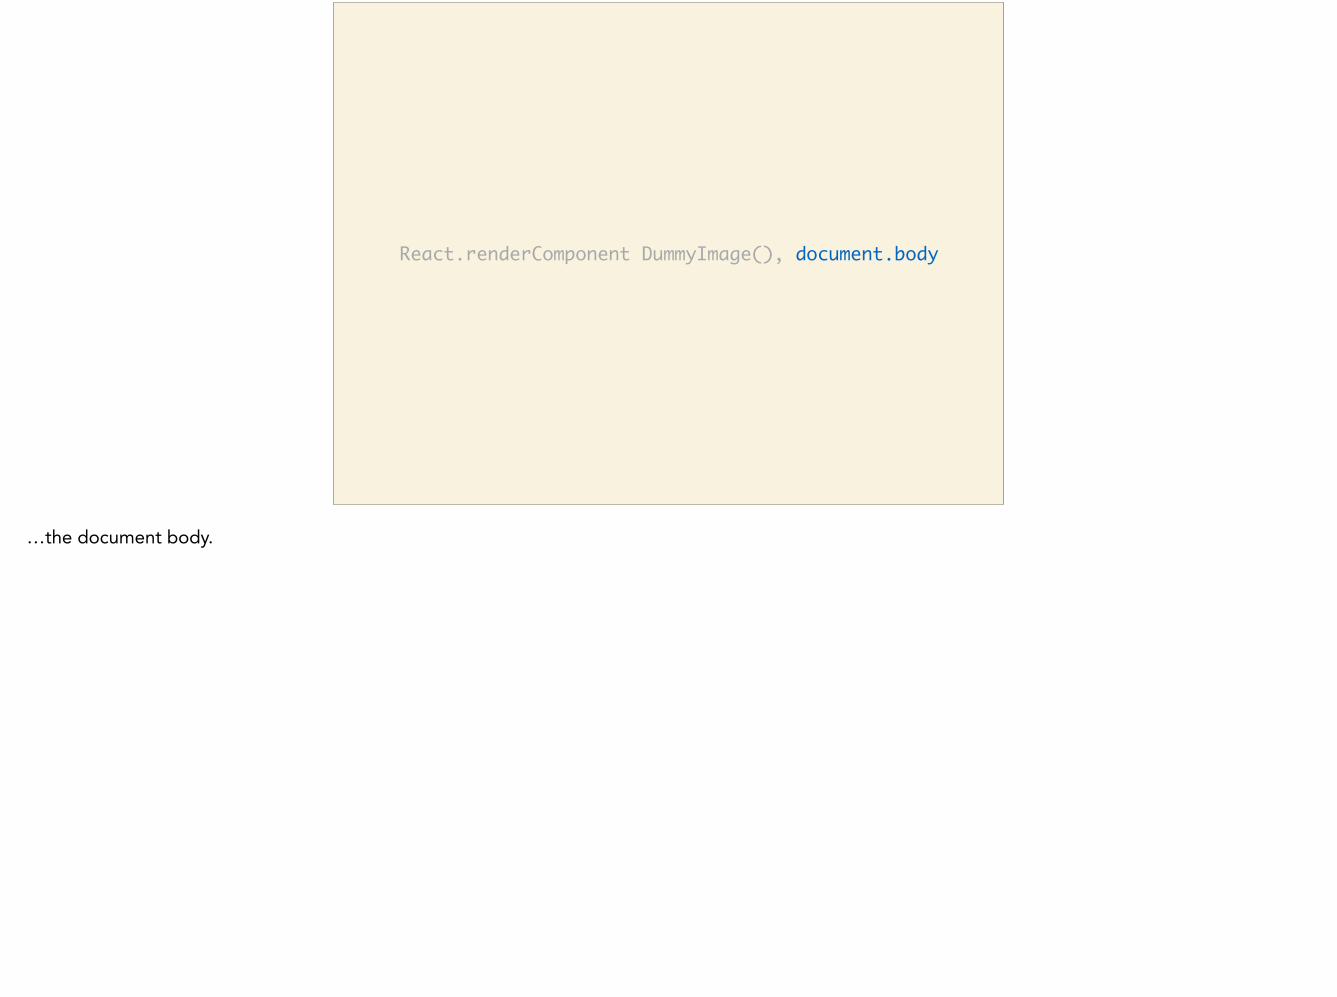
…the document body.

Behind the Scenes
Let’s have a look at what actually happens behind the scenes.

In-Memory DOM
When React calls your component’s render function, it uses its return value to construct an in-memory representation of the DOM. Then this virtual DOM
is rendered from memory into the actual DOM. On the initial render, this is not very different from regular template rendering, except we’re dealing with objects and trees in memory instead of just a string.

In-Memory DOM
Old State New State
Diff
Where it gets interesting is when we have subsequent updates, for example when you call setState or when you call renderComponent again, React
creates a new virtual representation of the DOM based on the current inputs (props and state) as seen in tree marked New State in the left panel. In this
case, we changed the left leaf of the right node (square box) and removed the other leaf. Since React didn’t actually throw away the previous representation of the DOM (Old State), it can run an efficient diff of the the two trees in memory, which is far faster than accessing the real DOM. Once the minimal set of changes in your virtual DOM are identified (based on heuristics), they are applied to the actual DOM as a batch. This leaves us with the latest state of our app in the browser. !http://facebook.github.io/react/docs/reconciliation.html

Benefits
Let’s look at benefits of this rendering mechanism.

simple
It’s simple because from a developer’s point of view, you simply trigger a re-render of your app on every update just like you would in a server-rendered app. React makes sure the changes are applied correctly…

fast
…and efficiently. React is fast because operations happen in-memory without accessing the actual DOM which is usually the major performance bottleneck.

synthetic events
Because React has a virtual DOM, it also implements synthetic events. They look, smell and feel like real events, except that they behave the same across all browsers that React supports. In case you need to, you can still access the native event using event.nativeEvent.

Goodies
Let me present some goodness I found in React and its add-ons.

PropTypes
PropTypes let us validate input properties.
React.createClass displayName: 'Avatar'! propTypes: # Required user: React.PropTypes.object.isRequired! # Optional includeLink: React.PropTypes.bool size: React.PropTypes.oneOf ['micro', 'small', 'medium', 'large']
Avatar includeLink: 'http://gasi.ch/' size: 'medium'
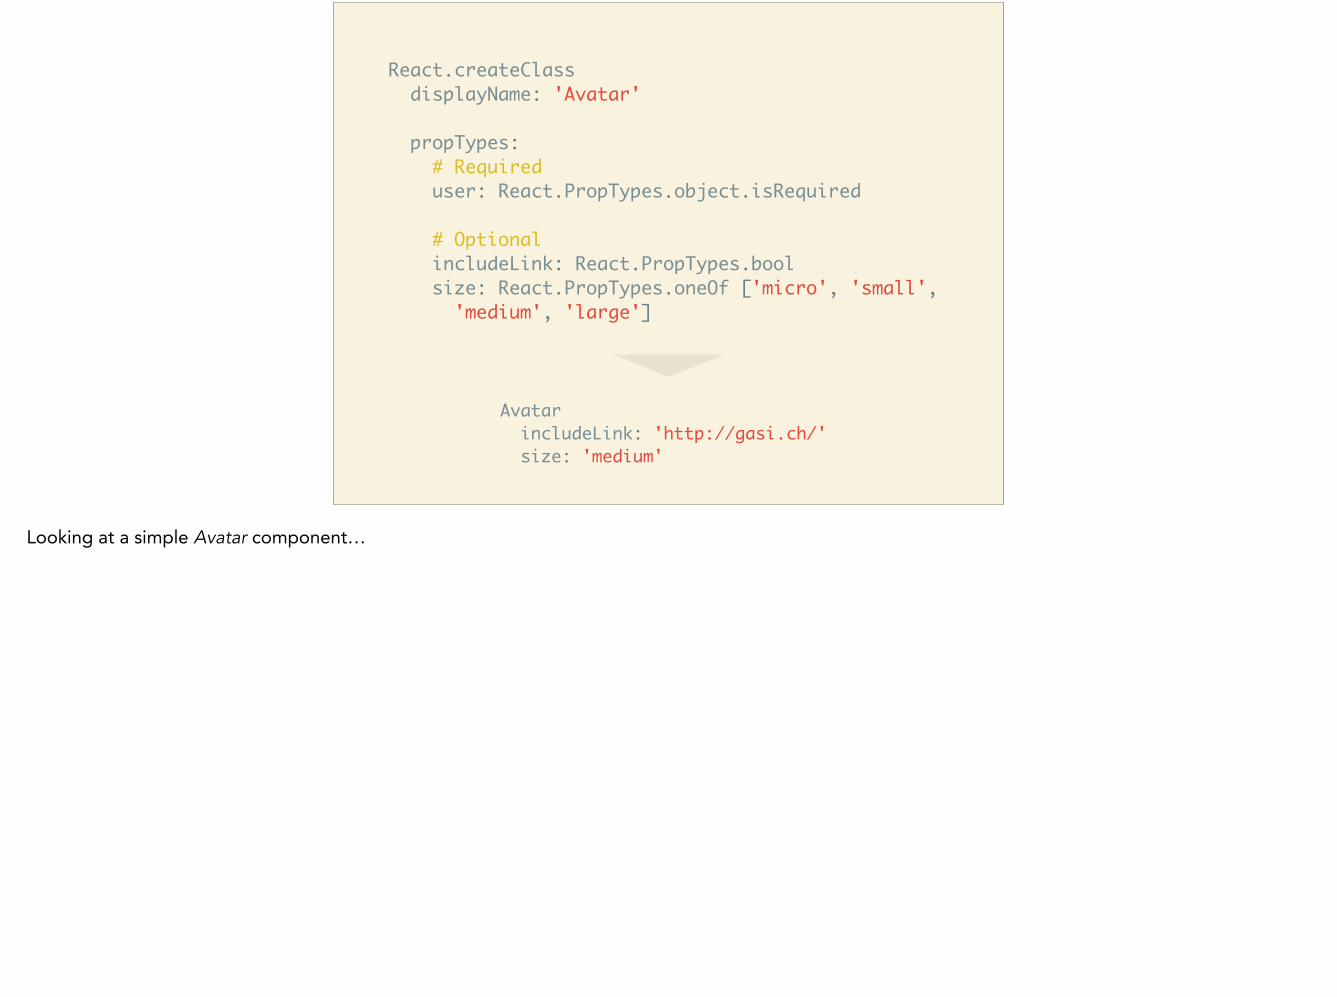
Looking at a simple Avatar component…

React.createClass displayName: 'Avatar'! propTypes: # Required user: React.PropTypes.object.isRequired! # Optional includeLink: React.PropTypes.bool size: React.PropTypes.oneOf ['micro', 'small', 'medium', 'large']
Avatar includeLink: 'http://gasi.ch/' size: 'medium'
…we can define propTypes which will check properties we pass into the component when it is created.

React.createClass displayName: 'Avatar'! propTypes: # Required user: React.PropTypes.object.isRequired! # Optional includeLink: React.PropTypes.bool size: React.PropTypes.oneOf ['micro', 'small', 'medium', 'large']
Avatar includeLink: 'http://gasi.ch/' size: 'medium'
Required properties can be defined by adding isRequired to the property definition. Here we require user to be of type object and always be present. In
this case, React would give us a warning during development because we didn’t include it.

React.createClass displayName: 'Avatar'! propTypes: # Required user: React.PropTypes.object.isRequired! # Optional includeLink: React.PropTypes.bool size: React.PropTypes.oneOf ['micro', 'small', 'medium', 'large']
Avatar includeLink: 'http://gasi.ch/' size: 'medium'
Optional properties are simply defined without isRequired.

React.createClass displayName: 'Avatar'! propTypes: # Required user: React.PropTypes.object.isRequired! # Optional includeLink: React.PropTypes.bool size: React.PropTypes.oneOf ['micro', 'small', 'medium', 'large']
Avatar includeLink: 'http://gasi.ch/' size: 'medium'
includeLink must be a boolean but we are passing in a string.

React.createClass displayName: 'Avatar'! propTypes: # Required user: React.PropTypes.object.isRequired! # Optional includeLink: React.PropTypes.bool size: React.PropTypes.oneOf ['micro', 'small', 'medium', 'large']
Avatar includeLink: 'http://gasi.ch/' size: 'medium'
size passes validation because it corresponds to one of the predefined values.

Server-Side Rendering
…or how to (hopefully) make your initial page loads faster and your Google ranking go up.

app.get '/', (req, res) -> props = currentUser: firstName: 'Daniel' lastName: 'Gasienica' content = React.renderComponentToString App props res.render 'app.toffee', {content, props}
<!doctype html><html><body> #{raw content} <script src="http://fb.me/react-0.10.0.js"></script> <script src="/scripts/app.js"></script> <script> React.renderComponent(App(#{props}), document.body); </script></body></html>
Once you write your app in React, turning on server-side rendering is fairly straightforward. !Toffee (templating language): https://github.com/malgorithms/toffee

app.get '/', (req, res) -> props = currentUser: firstName: 'Daniel' lastName: 'Gasienica' content = React.renderComponentToString App props res.render 'app.toffee', {content, props}
<!doctype html><html><body> #{raw content} <script src="http://fb.me/react-0.10.0.js"></script> <script src="/scripts/app.js"></script> <script> React.renderComponent(App(#{props}), document.body); </script></body></html>
You take your props and create your app top-level component…

app.get '/', (req, res) -> props = currentUser: firstName: 'Daniel' lastName: 'Gasienica' content = React.renderComponentToString App props res.render 'app.toffee', {content, props}
<!doctype html><html><body> #{raw content} <script src="http://fb.me/react-0.10.0.js"></script> <script src="/scripts/app.js"></script> <script> React.renderComponent(App(#{props}), document.body); </script></body></html>
…then you use one React’s alternative rendering functions—renderComponentToString—to create a string representation of the DOM.

app.get '/', (req, res) -> props = currentUser: firstName: 'Daniel' lastName: 'Gasienica' content = React.renderComponentToString App props res.render 'app.toffee', {content, props}
<!doctype html><html><body> #{raw content} <script src="http://fb.me/react-0.10.0.js"></script> <script src="/scripts/app.js"></script> <script> React.renderComponent(App(#{props}), document.body); </script></body></html>
Next you render your HTML and properties into your server-side template.

app.get '/', (req, res) -> props = currentUser: firstName: 'Daniel' lastName: 'Gasienica' content = React.renderComponentToString App props res.render 'app.toffee', {content, props}
<!doctype html><html><body> #{raw content} <script src="http://fb.me/react-0.10.0.js"></script> <script src="/scripts/app.js"></script> <script> React.renderComponent(App(#{props}), document.body); </script></body></html>
Include React.js.

app.get '/', (req, res) -> props = currentUser: firstName: 'Daniel' lastName: 'Gasienica' content = React.renderComponentToString App props res.render 'app.toffee', {content, props}
<!doctype html><html><body> #{raw content} <script src="http://fb.me/react-0.10.0.js"></script> <script src="/scripts/app.js"></script> <script> React.renderComponent(App(#{props}), document.body); </script></body></html>
Include your app script.

app.get '/', (req, res) -> props = currentUser: firstName: 'Daniel' lastName: 'Gasienica' content = React.renderComponentToString App props res.render 'app.toffee', {content, props}
<!doctype html><html><body> #{raw content} <script src="http://fb.me/react-0.10.0.js"></script> <script src="/scripts/app.js"></script> <script> React.renderComponent(App(#{props}), document.body); </script></body></html>
Finally, we make a client-side React render call, using the renderComponent. This is were the magic happens.

<div data-reactid=".dbuc1iytj4" data-react-checksum="-695455966"> <span data-reactid=".dbuc1iytj4.0">Hello </span> <span data-reactid=".dbuc1iytj4.1">FiftyThree</span></div>
Remember that first HTML snippet that React generated for us in the HelloMessage component? Back then I asked you to ignore the data-reactid and
data-react-checksum attributes.

<div data-reactid=".dbuc1iytj4" data-react-checksum="-695455966"> <span data-reactid=".dbuc1iytj4.0">Hello </span> <span data-reactid=".dbuc1iytj4.1">FiftyThree</span></div>
I’d like to now explain what they’re good for. The data-reactid attribute is for React to look up the child components of your app and register the client-
side event handlers that the server simply ignores.

<div data-reactid=".dbuc1iytj4" data-react-checksum="-695455966"> <span data-reactid=".dbuc1iytj4.0">Hello </span> <span data-reactid=".dbuc1iytj4.1">FiftyThree</span></div>
The data-react-checksum attribute is used to verify that the HTML the server generated is valid on the client-side. You might ask yourself, how could it be
invalid? I originally asked myself the same thing but then ran into a quirky case. !The component was working with was Retina aware and rendered certain images in the UI with higher resolution if the client had a high DPI screen. We used window.devicePixelRatio on the client-side but when this rendered on the server, it evaluated to undefined and the fallback was the value 1 which
means the UI was rendered assuming the client didn’t have a high DPI screen. Turns out, when the user does have a high DPI screen, React re-renders the entire component and notices the checksum doesn’t match because window.devicePixelRatio is 2 and not 1, so the server-side render was wasted. A
workaround to this problem would be to use heuristics based on user agent and other factors to determine if the client has a high DPI screen.
CSSTransitionGroup
How to animate stuff in React.

render: -> React.addons.CSSTransitionGroup transitionName: 'notification' , if @state.notification Notification {message: @state.notification} else []
.notification &-enter opacity: 0.01 transition: opacity 0.2s ease-in! &-active opacity: 1
.notification &-leave opacity: 1 transition: opacity 0.1s ease-in! &-active opacity: 0.01
Component
Enter Styles* Leave Styles*
* Stylus
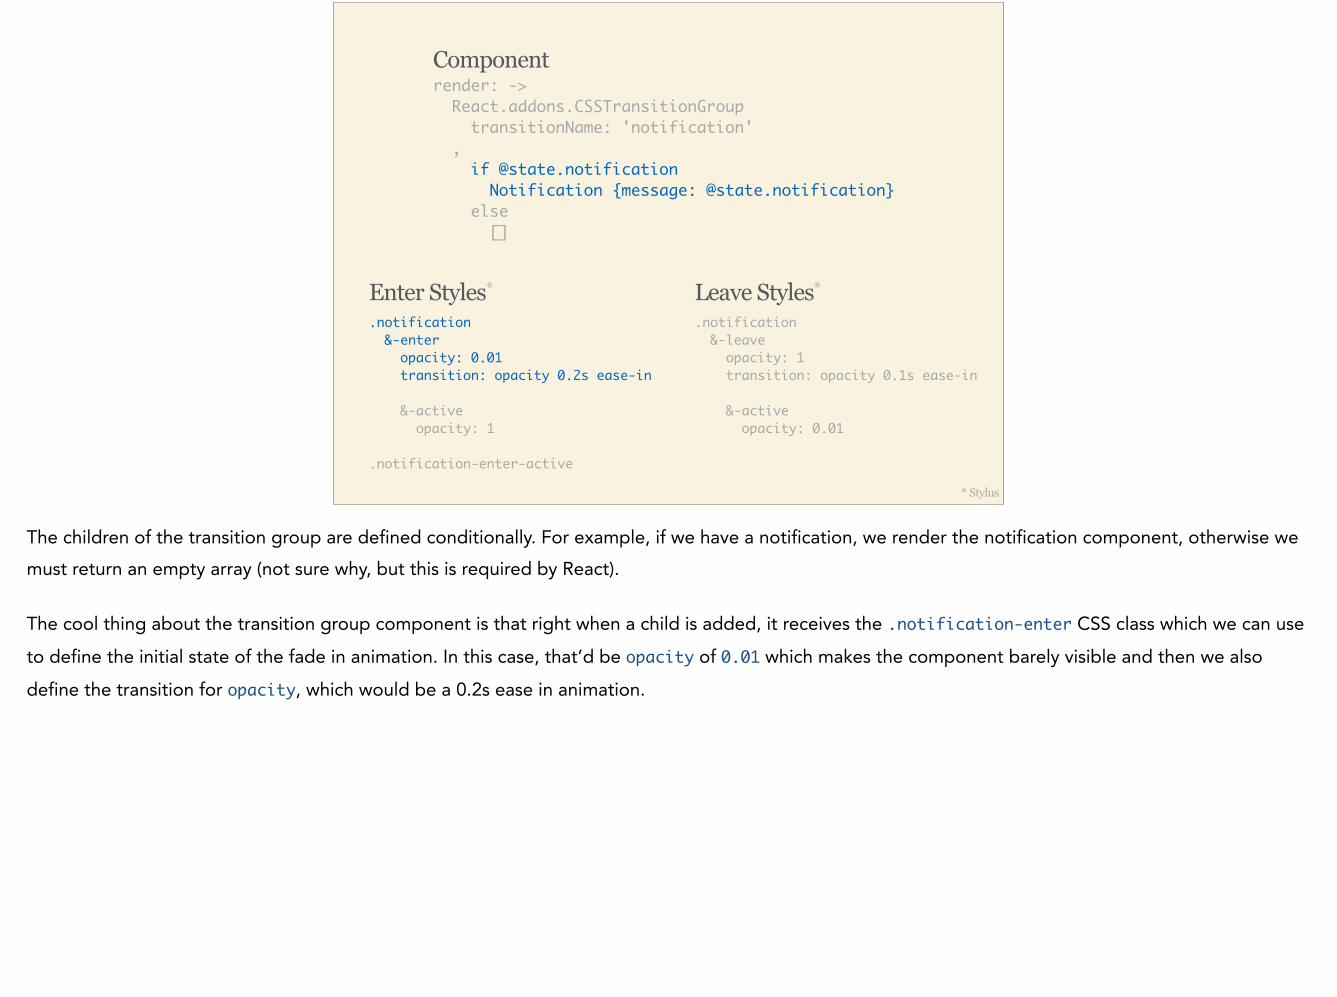
Imagine a simple notification component that fades in when there is a new notification and quickly fades out when the notification disappears. !Stylus: http://learnboost.github.io/stylus/

render: -> React.addons.CSSTransitionGroup transitionName: 'notification' , if @state.notification Notification {message: @state.notification} else []
.notification &-enter opacity: 0.01 transition: opacity 0.2s ease-in! &-active opacity: 1
.notification &-leave opacity: 1 transition: opacity 0.1s ease-in! &-active opacity: 0.01
Component
Enter Styles* Leave Styles*
* Stylus
Inside the render function, we wrap our component in CSSTransitionGroup that is provided as a React add-on.
!http://facebook.github.io/react/docs/animation.html
render: -> React.addons.CSSTransitionGroup transitionName: 'notification' , if @state.notification Notification {message: @state.notification} else []
.notification &-enter opacity: 0.01 transition: opacity 0.2s ease-in! &-active opacity: 1!.notification-enter-active
.notification &-leave opacity: 1 transition: opacity 0.1s ease-in! &-active opacity: 0.01
Component
Enter Styles* Leave Styles*
* Stylus
The children of the transition group are defined conditionally. For example, if we have a notification, we render the notification component, otherwise we must return an empty array (not sure why, but this is required by React). !The cool thing about the transition group component is that right when a child is added, it receives the .notification-enter CSS class which we can use
to define the initial state of the fade in animation. In this case, that’d be opacity of 0.01 which makes the component barely visible and then we also
define the transition for opacity, which would be a 0.2s ease in animation.

render: -> React.addons.CSSTransitionGroup transitionName: 'notification' , if @state.notification Notification {message: @state.notification} else []
.notification &-enter opacity: 0.01 transition: opacity 0.2s ease-in! &-active opacity: 1
.notification &-leave opacity: 1 transition: opacity 0.1s ease-in! &-active opacity: 0.01
Component
Enter Styles* Leave Styles*
* Stylus
A tick later, React adds the .notification-enter-active CSS class which defines the final state of our animation, in this case making the notification
component fully opaque.

render: -> React.addons.CSSTransitionGroup transitionName: 'notification' , if @state.notification Notification {message: @state.notification} else []
.notification &-enter opacity: 0.01 transition: opacity 0.2s ease-in! &-active opacity: 1
.notification &-leave opacity: 1 transition: opacity 0.1s ease-in! &-active opacity: 0.01
Component
Enter Styles* Leave Styles*
* Stylus
The opposite happens for the leave animation. Before removing the child from the DOM, React adds the .notification-leave CSS class which defines
the initial state of the animation, in this case full opacity and a quicker 0.1s ease in transition.

render: -> React.addons.CSSTransitionGroup transitionName: 'notification' , if @state.notification Notification {message: @state.notification} else []
.notification &-enter opacity: 0.01 transition: opacity 0.2s ease-in! &-active opacity: 1
.notification &-leave opacity: 1 transition: opacity 0.1s ease-in! &-active opacity: 0.01
Enter Styles* Leave Styles*
Component
* Stylus
Again, in the next tick, React adds the .notification-leave-active CSS class which defines the final state of the animation. In this case making the
notification component barely visible again before it’s finally removed from the DOM.

Why am I excited about
React?

simple
React is really easy to understand. You tell it what your app looks like at any given point in time and it will make sure your UI automatically reflects that.

declarative
React is declarative: You express what your app should look like and not how it is rendered.

composable
React is composable: Every component is encapsulated, managing its own behavior and state. Components can be expressed as simple CommonJS modules that can be composed into bigger components while allowing you to test and reason about them independently.

encourages good practices
By default, React encourages good practices: It encourages you to build small, easy to understand components by making it very simple to do so. It encourages you be very explicit about which way data flows. It encourages you to treat state very deliberately, e.g. how much state do I need and where does it belong? It forces you treat your properties from your parent as immutable. It makes it easy to validate your inputs (properties).

React.jsNeo4j
CoffeeScript
Node.js
Streamline.js
Every once in a while you discover a tool that makes your life easier and makes the tools you used before look somewhat clunky. !This is exactly what happened when Aseem (@aseemk) and I left Microsoft to build Thingdom. He showed me Node.js which allowed me to write servers myself without having to rely on tools such as Google App Engine. CoffeeScript is what made JavaScript fun for me. By expressing everything as nodes and relationships, Neo4j made it much easier for me to build data driven apps compared to using traditional databases with tables and foreign keys, etc. Streamline.js allowed me to write async code without going insane. !I have used jQuery and Backbone to build single page apps before, but I feel that React could be another one of those gems, simply making life easier, in this case building rich and dynamic UIs. In fact, it reminds me of the good ol’ days of building Rich Internet Applications using Flex but now finally something that works without plugins and on all devices. !https://twitter.com/aseemk http://www.thethingdom.com/ http://nodejs.org/ https://cloud.google.com/appengine/docs http://coffeescript.org/ http://neo4j.com/

Give It Five Minutesor: write one component
I know this was a lot to digest in a short period of time and it probably contradicts a lot of what you learned about building UIs, but I all I ask you is to “give it five minutes”, or more concretely, build one React component, sleep over it and let me (@gasi) know what you think then. !https://signalvnoise.com/posts/3124-give-it-five-minutes !http://www.gasi.ch/

Questions?
Thanks for reading this far. You can reach me at @gasi. !https://twitter.com/gasi
Related Documents