TOPAZ ADJUST V5 QUICK START GUIDE

Quick Start 1
Dec 24, 2015
Quick Start 1 TopazLabs
Welcome message from author
This document is posted to help you gain knowledge. Please leave a comment to let me know what you think about it! Share it to your friends and learn new things together.
Transcript

TOPAZ ADJUST V5QUICK START GUIDE

Adjust 5
For more Adjust tutorials and resources please visit: http://www.topazlabs.com/tutorials/adjust
IntroductionTopaz Adjust makes it quick and easy to create stunning and dynamic enhancements that will instantly make your images pop with added depth, detail and dynamic color effects.
Here are some of the new features found in Topaz Adjust V5:
• Apply button. Stack multiple effects and presets during the same workflow.
• My Collection. Users can now save their presets under My Collection.
• Preset Collections. Presets are organized into 5 unique collections.
• Local Adjustments. Intuitive selective adjustment brush for burning, dodging, smoothing, and brushing out (erasing) added adjustments - plus edge-aware options. • Histogram. Shows the tonal range of your image.
• Curve Tool. Easily adjust image tonality to help emphasize tones, contrast and brightness.
• Finishing Touches Tab. Features options for diffusion, grain, borders, vignettes, tone adjustments and overall transparency adjustment.
• Effect enable/disable. Clickable preview options that allow you to hide or view a set of adjustments for easy comparison.
• Split Screen. Use the 2-screen split view for easy before and after comparison.

Adjust 5
For more Adjust tutorials and resources please visit: http://www.topazlabs.com/tutorials/adjust
Introduction
1. Presets/Effects Preview 5. Settings & Parameters2. Presets Panel 4. Preview NavigatorDisplays previews of presets & effects.
Sliders to adjust the various effects.Also includes the Apply button used to stack effects.
Provides “snapshots” of pre-defined effects.
Displays the region of thepreview image you are currently focused on. Also displays histogram.
1 34
2
3. Preview WindowDisplays the preview of the original and adjusted image.
5

Adjust 5
For more Adjust tutorials and resources please visit: http://www.topazlabs.com/tutorials/adjust
ToolsTools
You will use the various tools in the tool panel during your workflow to make your image adjustments.
1. Preview Navigator/ Histogram tabs - The Navigate tab displays the region of the preview image you are currently focused on. You can drag the pre-view navigator box around to pan your image. The Histogram tab displays the tonal range of your image.
2. Zoom Buttons - Use the zoom buttons to zoom in and out of your image. You can also set your image to fit the preview window or to view it at 100%.
3. Undo and Redo buttons - move back and forward through previous adjustments.
4. Snap and Recall buttons - Save up to 99 snapshot settings for easycomparison.
5. Sliders and Parameters - Controls the editing process using sliders to adjust the various effects.
6. Local Reset - Resets all of the slider values in this sub-category back to the default value.
7. Apply - Allows you to stack multiple effects and presets during the same workflow.
8. Reset All - Resets all of the slider values back to the default value.
9. I Feel Lucky! - Applies a set of randomized parameters.
1
5
2
4
6
3
98
7

Adjust 5
For more Adjust tutorials and resources please visit: http://www.topazlabs.com/tutorials/adjust
Presets
1. Effects & Presets Preview
Provides “snapshots” of the available pre-defined parameter settings included in the presets list below.
3. Presets List
Lists all of the available presets for the selected Effect.
4. Preset Options
The preset options allow you to save your presets, delete presets (default presents cannot be deleted), import new presets and export your saved presets to share with your friends.
Presets are pre-defined settings that you can recall and reapply to any im-age at any time. They are a great way to speed up and simplify your work-flow, and offer creative ideas.
We’ve included some default presets for you, and although they won’t work for every single photograph, they serve as excellent starting points.
2. Effects List
Lists all of the included effect collections that can be applied to your images.
2
1
3
4

Adjust 5
For more Adjust tutorials and resources please visit: http://www.topazlabs.com/tutorials/adjust
Workflow
Sample ProjectIn this project, we will walk you through a quick example workflow to help you get acquainted with the tools and setup of Topaz Adjust. This example will show you a basic workflow and introduce you to the layout of the program.
As you begin, you can choose a Collection type from the Effectsmenu and then apply one of the included presets or you can startyour work manually using the tabs and sliders in the tool panel. Whether you decide to work with presets, manual adjustmentsor both, you will be able to customize your enhancements using the tools in the three adjustment tabs.
So let’s take a quick look at the purpose of each tab and what tools and features are inlcuded in each.
1. This step includes basic tools (original Topaz Adjust tabs) for adjusting exposure, detail, color and noise. It also includes the new curve tool.
2. This step allows you to selectively apply image adjustments using an intuitive brush. Adjustments include burning, dodging smoothing anderasing/brushing out applied adjustments.
3. This final step is for applying important finishing touches to your image.It includes toning, vignettes, grain and more.
Important: Next to each sub-adjustment tab is a small checkbox. To enable the effects in this tab be sure that the check box is Checked. You can also uncheck it at anytime to disable the effects.
Each sub-tab also includes a local reset button. Clicking this button will reset all of the sliders in that tab to their default values.

Adjust 5
For more Adjust tutorials and resources please visit: http://www.topazlabs.com/tutorials/adjust
Workflow
So let’s get started...
1. Click on the Global Adjustments tab to reveal the individual adjustment tabs and then click on the Exposure tab.
Adaptive Exposure is a very unique tool which makes it easy to add detail and depth to your image. The Adaptive Exposure tab uses an adaptive technique to enhance the dynamic range of your image...giving it that WOW factor.
Here you can apply a variety of tone mapped effects using the unique sliders to adjust the range of the highest and lowest luminance regions where detail is visible. You can also correct exposure, balance lighting and redefine tonal values.
The Regions tool offers added flexibility for your Adaptive Exposure Adjustments. The Regions slider determines how your Adaptive Exposure selection is disbursed across your image.
The value of the Regions slider determines how many regions to divide your image into. The Adaptive Processing settings will then be applied locally to each of these regions.
The larger this number is, the more localized tonal balancing your image will have.
Adjust 5
For more Adjust tutorials and resources please visit: http://www.topazlabs.com/tutorials/adjust
Workflow
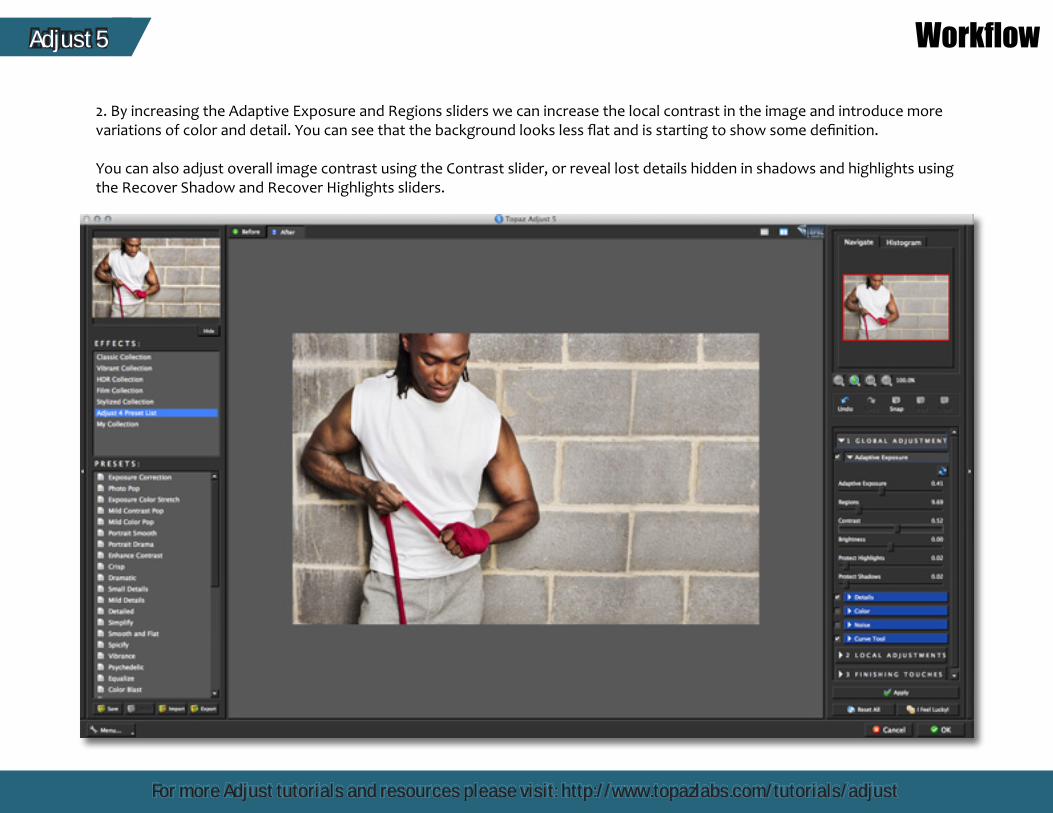
2. By increasing the Adaptive Exposure and Regions sliders we can increase the local contrast in the image and introduce more variations of color and detail. You can see that the background looks less flat and is starting to show some definition.
You can also adjust overall image contrast using the Contrast slider, or reveal lost details hidden in shadows and highlights using the Recover Shadow and Recover Highlights sliders.

Adjust 5
For more Adjust tutorials and resources please visit: http://www.topazlabs.com/tutorials/adjust
Workflow
3. Moving to the Detail tab, we can increase the detail in the image and aslo use the small boost slider to give it more texture. Be sure not to over use the Detail Boost slider as it can often create an unwanted noise-like effect.
Process Details Independently: Adjusts exposure and details separately. When enabled, only underlying exposure will be adjust-ed through the Exposure tab. The details will only be adjusted through the Details tab. This tends to reduce the overall noise and amount of “gritt” in the final image.

Adjust 5
For more Adjust tutorials and resources please visit: http://www.topazlabs.com/tutorials/adjust
For this example we will not be making any adjustments in the Noise Tab or the Curve Tool Tab, however you are welcome to use these tools in your workflow.
The Noise tab offers basic noise reduction capabilities. This tool often comes in handy because Adjust can enhance the noise that is already there or sometimes create noise as a side effect of the adjustments made. It is best used as a mid-workflow tool specifically for eliminating the noisy effects that can occur while working in Adjust.
The Curve Tool offers additional control and flexibility over image contrast, brightness and tone. You can make adjustments here manually or use any of the pre-loaded curves presets. There is also a built-in histogram for added convenience.
If you look at the boxer’s face and arms you may notice that the applied effects are too harsh on his skin. We can use the brush in the new local adjustment tab to fix this. By brushing out some of the effects we can create a more pleasing effect and detail balance. I’ll show you how to do that shortly.
Before After
Workflow

Adjust 5
For more Adjust tutorials and resources please visit: http://www.topazlabs.com/tutorials/adjust
Workflow
The Local Adjustments tab allows you to selectively apply adjustments using an advanced, yet very intuitive brush. Adjustments include burning, dodging, smoothing and brushing out applied effects.
4. Click on the Local Adjustment tab to reveal the slider tools.
The Dodge and Burn adjustment types are used to lighten (dodge) or darken (burn) specific areas of your image by increasing or limiting the exposure in those areas. Use the Overall Strength slider to determine how strong or weak the dodge/burn is applied to your image.
The Brush Out tool allows you to selectively taper or erase applied adjustments anywhere in your image.
The Smooth tool allows you to smooth out areas of your image. It is great for cleaning up skin and sky.
Edge Aware controls how edge aware the brush is. Higher values indicate an increase in awareness, which is good for precise selections. Lower values indicate less awareness, allowing for a more natural brush stroke and transition.
5. Select the Brush Out option. This will allow us to brush out (or erase) the applied effect in any area. Be sure to set the brush parameters.
Brush Size - Sets the brush size
Opacity - Controls how much of the effect is removed.
Hardness - Determines the hardness of the brush.
Edge Aware - Controls how edge aware the brush is.

Adjust 5
For more Adjust tutorials and resources please visit: http://www.topazlabs.com/tutorials/adjust
Workflow
6. Once the brush settings are made we can go ahead and brush over the boxer’s face and arms. If you make a mistake or erase too much detail then you can use the local Undo/Redo buttons to move backwards and forwards through your brush strokes or you can select the Eraser button which will bring back that brushed out detail. There is also a reset all button that will reset any adjustments made in this tab.
Adjust 5
For more Adjust tutorials and resources please visit: http://www.topazlabs.com/tutorials/adjust
Workflow
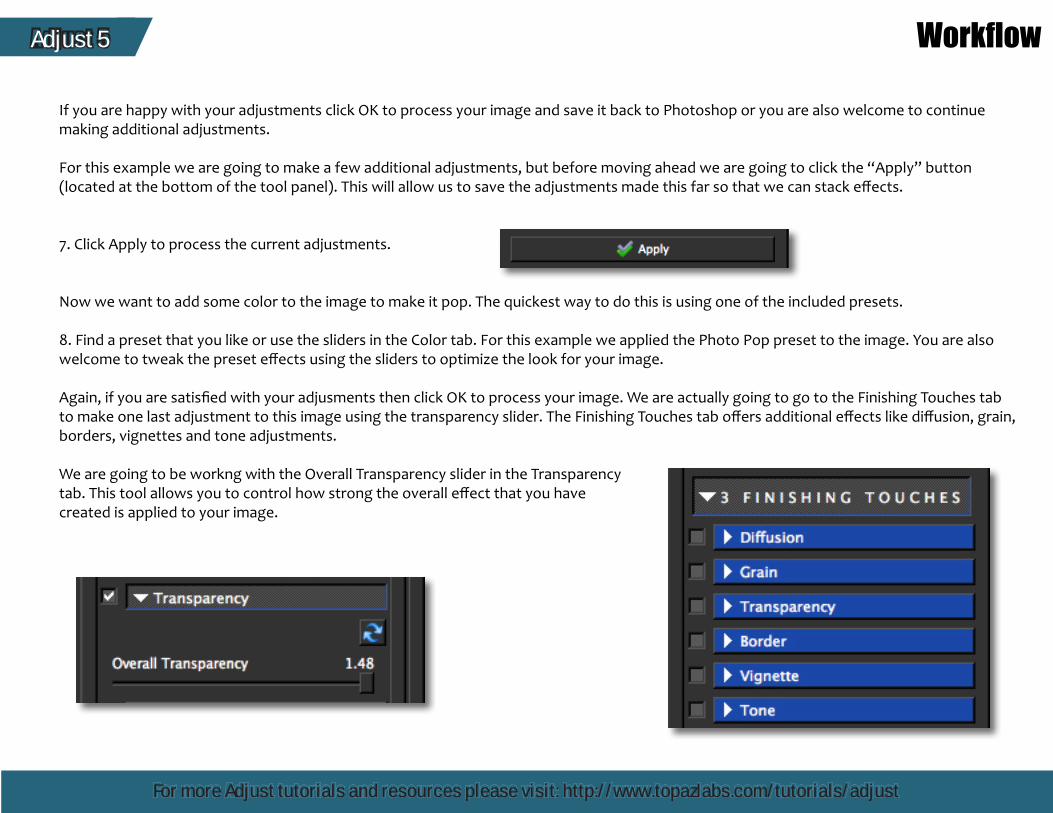
If you are happy with your adjustments click OK to process your image and save it back to Photoshop or you are also welcome to continue making additional adjustments.
For this example we are going to make a few additional adjustments, but before moving ahead we are going to click the “Apply” button(located at the bottom of the tool panel). This will allow us to save the adjustments made this far so that we can stack effects.
7. Click Apply to process the current adjustments.
Now we want to add some color to the image to make it pop. The quickest way to do this is using one of the included presets.
8. Find a preset that you like or use the sliders in the Color tab. For this example we applied the Photo Pop preset to the image. You are also welcome to tweak the preset effects using the sliders to optimize the look for your image.
Again, if you are satisfied with your adjusments then click OK to process your image. We are actually going to go to the Finishing Touches tab to make one last adjustment to this image using the transparency slider. The Finishing Touches tab offers additional effects like diffusion, grain, borders, vignettes and tone adjustments.
We are going to be workng with the Overall Transparency slider in the Transparency tab. This tool allows you to control how strong the overall effect that you havecreated is applied to your image.
Adjust 5
For more Adjust tutorials and resources please visit: http://www.topazlabs.com/tutorials/adjust
Workflow
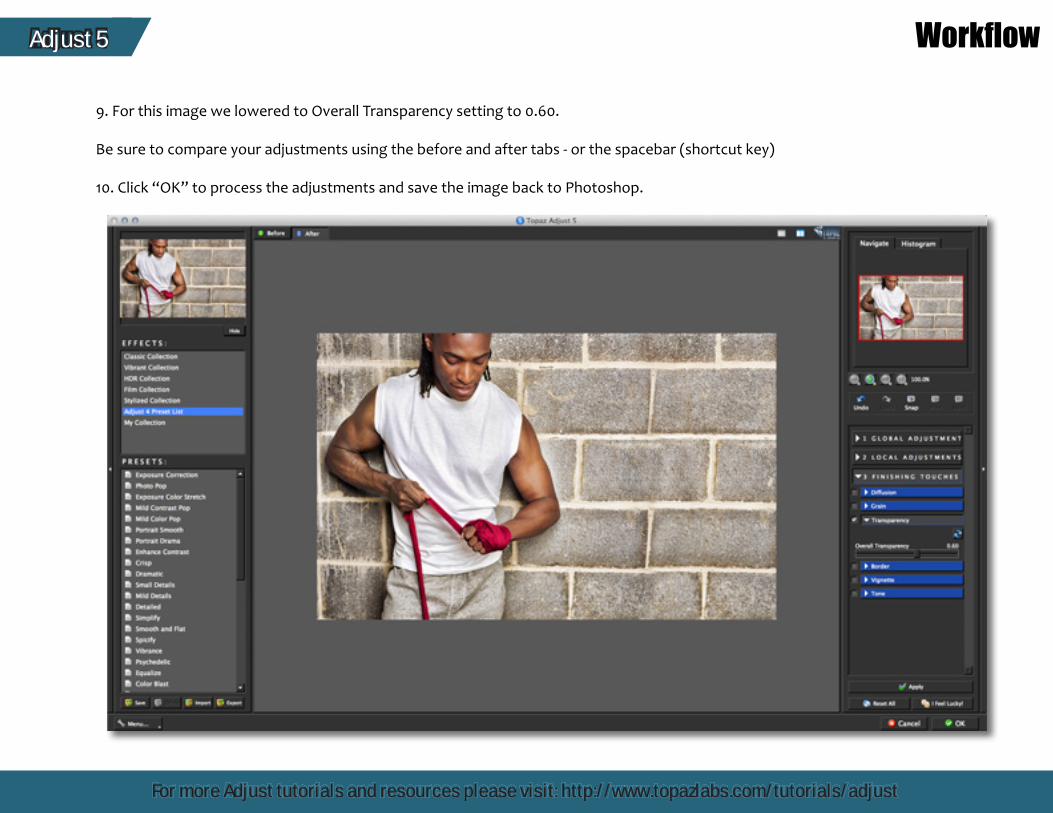
9. For this image we lowered to Overall Transparency setting to 0.60.
Be sure to compare your adjustments using the before and after tabs - or the spacebar (shortcut key)
10. Click “OK” to process the adjustments and save the image back to Photoshop.
Adjust 5
For more Adjust tutorials and resources please visit: http://www.topazlabs.com/tutorials/adjust
Workflow
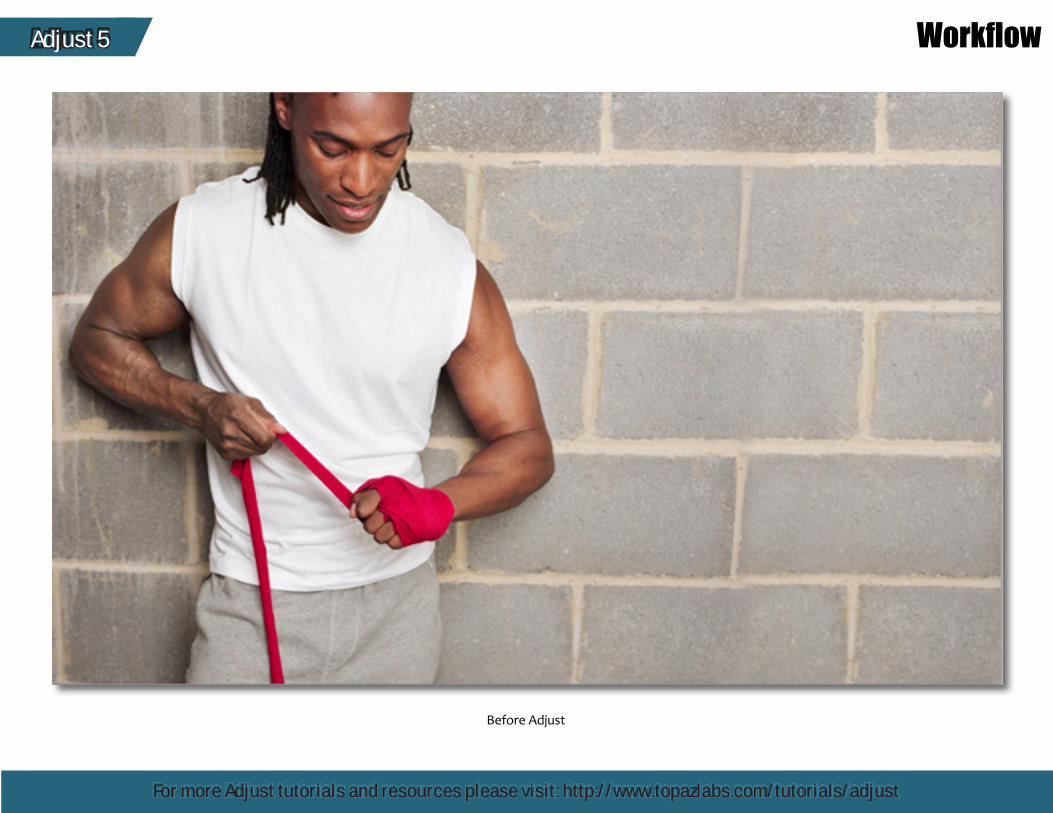
Before Adjust
Adjust 5
For more Adjust tutorials and resources please visit: http://www.topazlabs.com/tutorials/adjust
Workflow
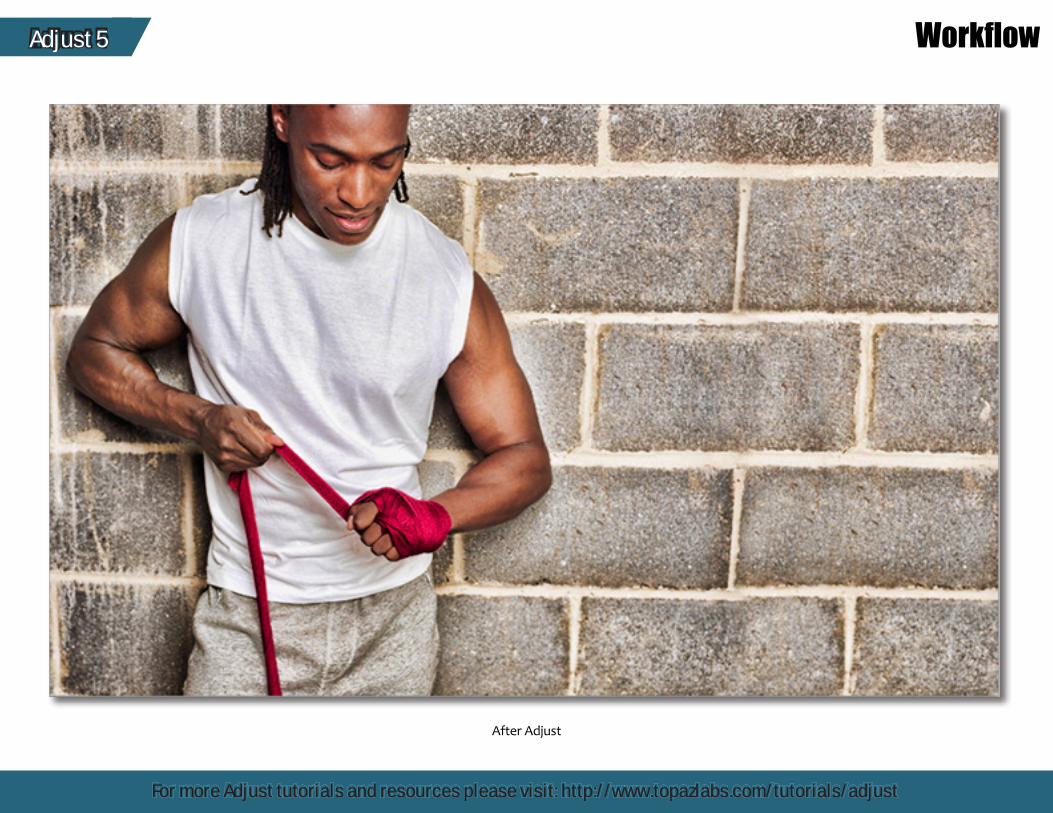
After Adjust
Adjust 5
For more Adjust tutorials and resources please visit: http://www.topazlabs.com/tutorials/adjust
Quick Start Use
This Topaz Adjust 5 Quick Start Guide is for users who are familiar with the image enhancement process and who
want to jump straight into using Topaz Adjust.
For a more in-depth and comprehensive break down of using Topaz Adjust 5 please view the Topaz Adjust User
Guide.
The User Guide was automatically installed on your computer when you installed Topaz Adjust 5.
Here is how to access it:
MAC: HD -> Library -> Application Support -> Topaz Labs -> Adjust 5 -> Docs
WINDOWS: Computer -> C:/ -> Program Files -> Topaz Labs -> Topaz Adjust 5 -> Docs
You can also watch video tutorials online at: http://www.topazlabs.com/tutorials/adjust
Adjust 5
For more Adjust tutorials and resources please visit: http://www.topazlabs.com/tutorials/adjust
Shortcut Keys
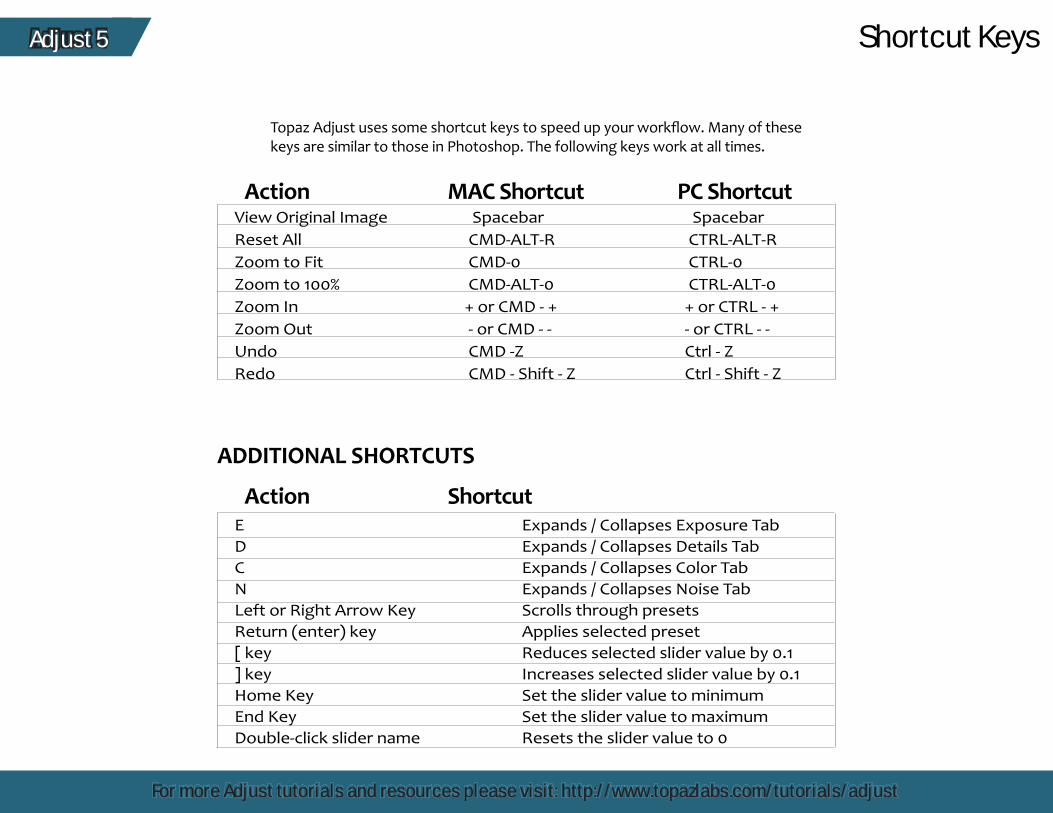
Topaz Adjust uses some shortcut keys to speed up your workflow. Many of these keys are similar to those in Photoshop. The following keys work at all times.
ADDITIONAL SHORTCUTS
View Original Image Spacebar Spacebar Reset All CMD-ALT-R CTRL-ALT-RZoom to Fit CMD-0 CTRL-0Zoom to 100% CMD-ALT-0 CTRL-ALT-0Zoom In + or CMD - + + or CTRL - +Zoom Out - or CMD - - - or CTRL - -Undo CMD -Z Ctrl - Z Redo CMD - Shift - Z Ctrl - Shift - Z
Action MAC Shortcut PC Shortcut
E Expands / Collapses Exposure Tab D Expands / Collapses Details TabC Expands / Collapses Color TabN Expands / Collapses Noise TabLeft or Right Arrow Key Scrolls through presetsReturn (enter) key Applies selected preset[ key Reduces selected slider value by 0.1] key Increases selected slider value by 0.1Home Key Set the slider value to minimumEnd Key Set the slider value to maximumDouble-click slider name Resets the slider value to 0
Action Shortcut

Adjust 5
For more Adjust tutorials and resources please visit: http://www.topazlabs.com/tutorials/adjust
Connect with Topaz
Follow us on Twitter for notifications of recent news and easily get in touch with us
whenever you feel like it!
Find us on our Facebook page and network with other Topaz users!
Participate in the entirely user-led Topaz Flickr group for a helpful and highly active community for Topaz Photoshop plug-ins!
Subscribe to our YouTube channel to keep up with any newly released product video
tutorials!
Check out our new Forum and our blog for tutorials, tips and updates from Topaz Labs!
Related Documents

![Quick Start - SPU(V100R003C00_02)[1]](https://static.cupdf.com/doc/110x72/577d2a531a28ab4e1ea8fdbf/quick-start-spuv100r003c00021.jpg)


![TeSys T Quick Start[1]](https://static.cupdf.com/doc/110x72/5535e59a5503464f658b47c5/tesys-t-quick-start1.jpg)