How did you use media technologies in the construction and research planning and evaluation stages? Niamh Reilly

Welcome message from author
This document is posted to help you gain knowledge. Please leave a comment to let me know what you think about it! Share it to your friends and learn new things together.
Transcript

How did you use media technologies in the construction
and research planning and evaluation stages?
Niamh Reilly
Technologies
All the technologies we used no matter howsophisticated were extremely important in theconstruction of all of our products.
We used both software and hardware to createour products.
Hardware
The hardware that we used throughout all ofour products included; cameras, headphones,microphones and computers. Without thisequipment we wouldn’t have been able to evenstart creating any products.
Software
The software we used included a variety of different programs.
These included photoshop, indesign, final cut pro, paint, powerpoint, blogger, and social
media.
Planning our Documentary using SOCIAL MEDIA
We thought that lessons were not enough time for us to plan and research our documentary therefore we took it upon ourselves to use social media sites in a productive way in order to achieve the best grade possible we made a group Facebook chat. This was especially useful as we all have smart phones so we could keep in constant contact and if we had any questions one of us could answer instantly.

Planning our Documentary using BLOGGER
Another way we planned our documentary was through the use of Blogger where we could upload all our work. This was especially useful as it meant things were always backed up on our group blog which everyone had access to constantly. The constant access meant that we were able to upload work as we went along and all members of the group were able to access it, learn from it and also improve and expand on it. Blogger was extremely helpful as none of our work got lost. We also uploaded a calendar on the blog which meant that everyone knew what we were doing and when, it also allowed us to set ourselves and each other deadlines.
All the work was easily accessible all you had to do was click a link
Planning our Documentary using PREZI
As a group we planned out our documentary using programmes such as preziwhich allowed us to take previous hand drawn mind maps and make them electronic and accessible to everyone. This was also a creative way of displaying out ideas.
Construction
The construction of our products required anabundance of different programmes designed to tackledifferent ideas and goals we had decided upon.
These different programs were used to edit ourdocumentary, radio trailer and magazine article.
Construction using FINAL CUT PRO
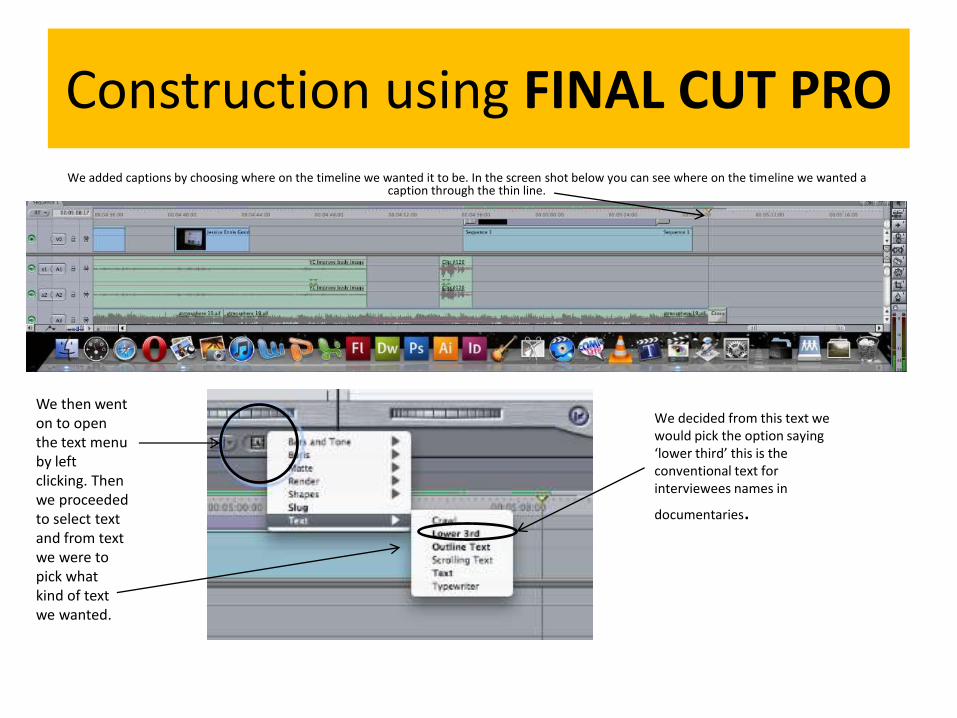
We added captions by choosing where on the timeline we wanted it to be. In the screen shot below you can see where on the timeline we wanted a caption through the thin line.
We then went on to open the text menu by left clicking. Then we proceeded to select text and from text we were to pick what kind of text we wanted.
We decided from this text we would pick the option saying ‘lower third’ this is the conventional text for interviewees names in
documentaries.

Construction using FINAL CUT PRO
Following the previous steps we were then able to edit features such as font, colour and alignment.
We changed the font to Lucida Grande, and decided on the effects and size on the font face.
From just under ‘style’ there was a small circular colour icon which enabled us to change the colour of the background of the font face. We chose to fill the background with ‘orchid’ as it was purple which is the college colour, it is also bright and eye catching.

Construction using FINAL CUT PRO
Finally we inputted the text to read the interviewees name and underneath job title. We aligned it to the left and chose the colour white to stand out against the purple back drop. We also added a transition. The transition we chose was called ‘Band Wipe’ and it ensured the caption appeared and disappeared smoothly.

Construction using PHOTOSHOP
We used Photoshop in order to edit the main image for our magazine. The image we chose was pulled directly from a scene in our documentary.Once we’d uploaded the picture to Photoshop we selected the ‘polygon lasso’ tool found on the toolbar.
Using this tool we carefully selected around the edges of the main image we wanted to use for the main image for the article.

Construction using PHOTOSHOP
Once the previous steps were complete the whole image was highlighted.
We then right clicked the image and selected ‘select inverse’.
Then right clicking a second time we selected ‘layer via cut’ which made our cut image into a layer.
Then from the action bar we selected ‘delete layer’ and once confirming it left us with a cut image of just Jake, the contents of the polygon lasso.

Construction using PHOTOSHOPThe image we are left with is cut so its just an image of Jake. This was an image but we wanted to flip it so we went to the menu image then
rotate canvas then flip canvas horizontal.
The final image in the magazine article

Construction using INDESIGN
This is the InDesign toolbar.
This tool is the ‘text tool’ it allowed us to add text boxes to our InDesign page of different sizes.
This tool allowed us to import pictures into specific areas, we used this when inserting the drop box and the other pictures.
This tool allowed us to create boxes that we could fill with blocks of colour this was particularly useful for when we used the red page breakers before and after pull quotes and pictures.
The eye dropper tool was a valuable asset as it meant that we could keep the house style consistent throughout the magazine article as we could pick a colour we had previously used and use it again some where else.
Evaluation using YOUTUBE
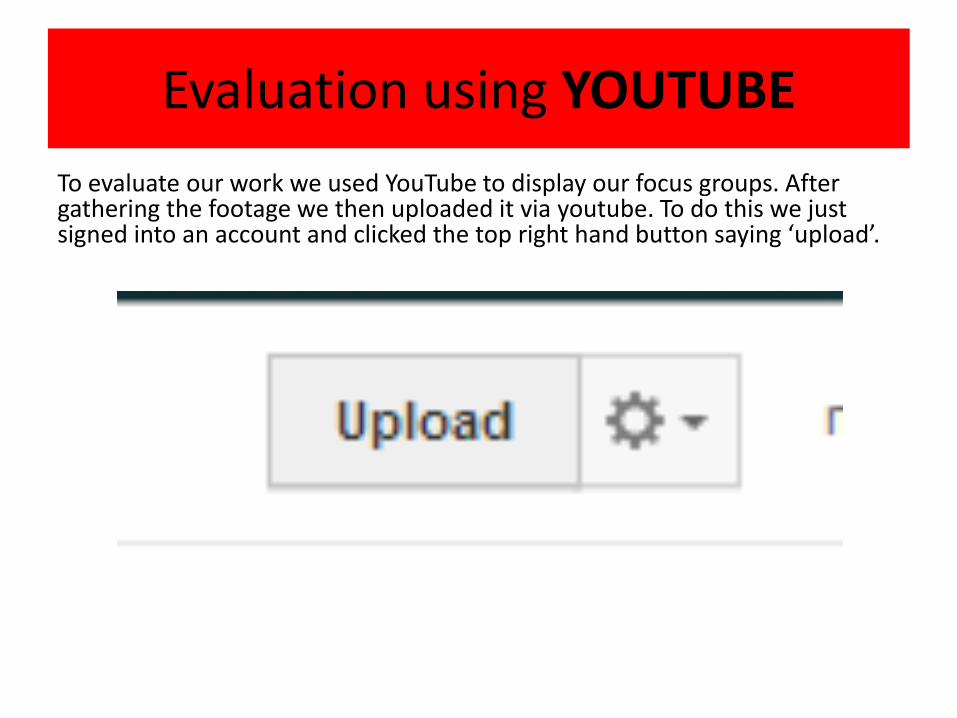
To evaluate our work we used YouTube to display our focus groups. After gathering the footage we then uploaded it via youtube. To do this we just signed into an account and clicked the top right hand button saying ‘upload’.
Evaluation using YOUTUBE
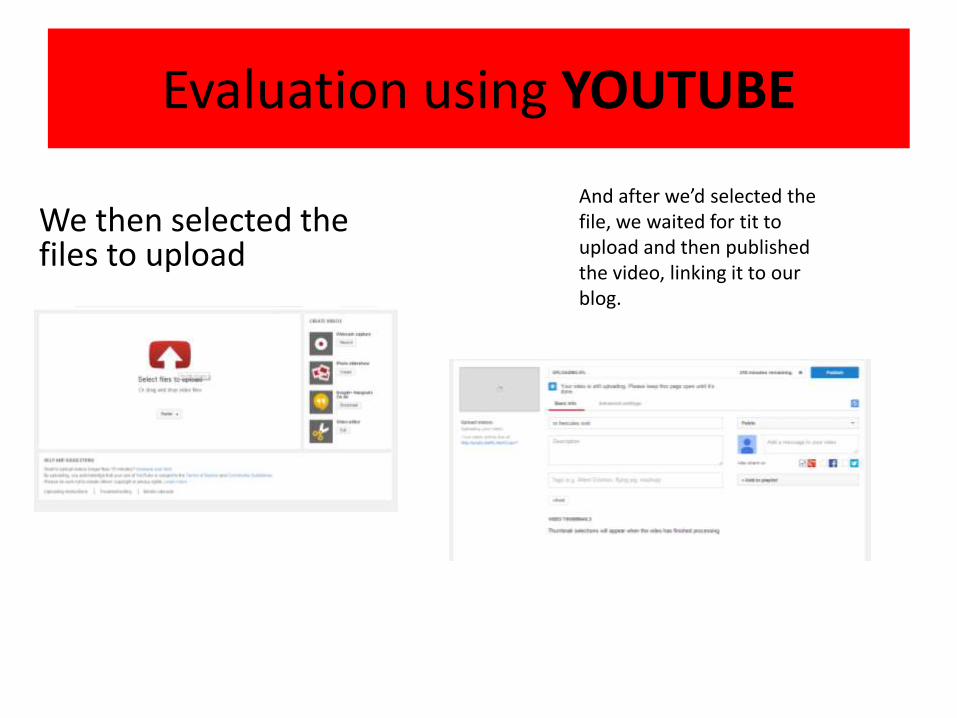
We then selected the files to upload
And after we’d selected the file, we waited for tit to upload and then published the video, linking it to our blog.
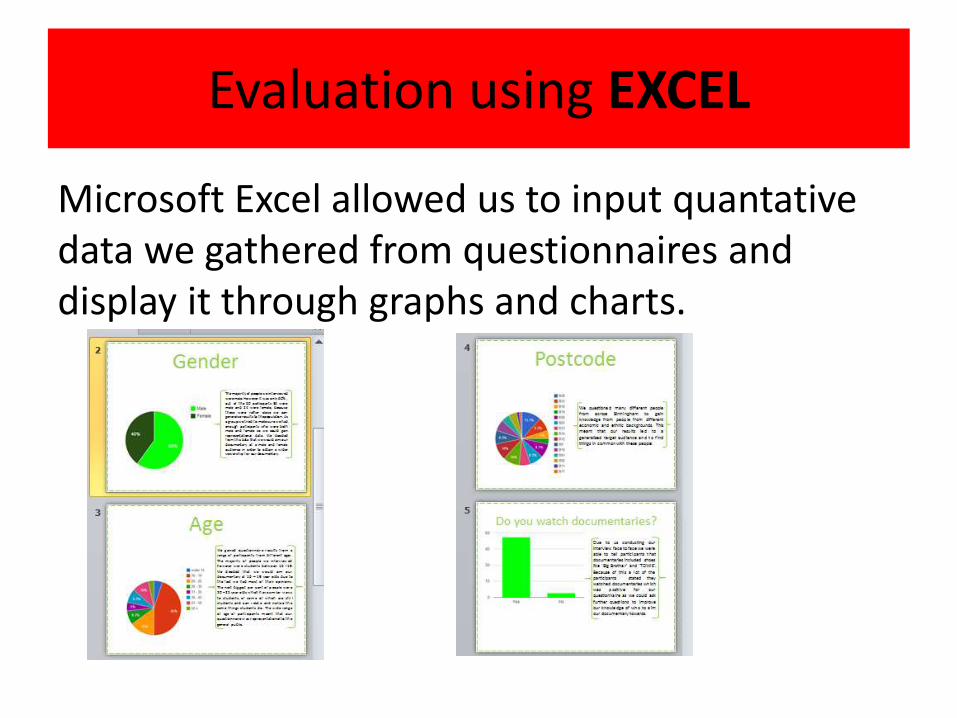
Evaluation using EXCEL
Microsoft Excel allowed us to input quantativedata we gathered from questionnaires and display it through graphs and charts.
Related Documents