6.9 ActiveRoles ® Web Interface User Guide

Welcome message from author
This document is posted to help you gain knowledge. Please leave a comment to let me know what you think about it! Share it to your friends and learn new things together.
Transcript
6.9ActiveRoles®
Web Interface User Guide
© 2013 Quest Software, Inc. ALL RIGHTS RESERVED.
This guide contains proprietary information protected by copyright. The software described in this guide is furnished under a software license or nondisclosure agreement. This software may be used or copied only in accordance with the terms of the applicable agreement. No part of this guide may be reproduced or transmitted in any form or by any means, electronic or mechanical, including photocopying and recording for any purpose other than the purchaser's personal use without the written permission of Quest Software, Inc.
The information in this document is provided in connection with Quest products. No license, express or implied, by estoppel or otherwise, to any intellectual property right is granted by this document or in connection with the sale of Quest products. EXCEPT AS SET FORTH IN QUEST'S TERMS AND CONDITIONS AS SPECIFIED IN THE LICENSE AGREEMENT FOR THIS PRODUCT, QUEST ASSUMES NO LIABILITY WHATSOEVER AND DISCLAIMS ANY EXPRESS, IMPLIED OR STATUTORY WARRANTY RELATING TO ITS PRODUCTS INCLUDING, BUT NOT LIMITED TO, THE IMPLIED WARRANTY OF MERCHANTABILITY, FITNESS FOR A PARTICULAR PURPOSE, OR NON-INFRINGEMENT. IN NO EVENT SHALL QUEST BE LIABLE FOR ANY DIRECT, INDIRECT, CONSEQUENTIAL, PUNITIVE, SPECIAL OR INCIDENTAL DAMAGES (INCLUDING, WITHOUT LIMITATION, DAMAGES FOR LOSS OF PROFITS, BUSINESS INTERRUPTION OR LOSS OF INFORMATION) ARISING OUT OF THE USE OR INABILITY TO USE THIS DOCUMENT, EVEN IF QUEST HAS BEEN ADVISED OF THE POSSIBILITY OF SUCH DAMAGES. Quest makes no representations or warranties with respect to the accuracy or completeness of the contents of this document and reserves the right to make changes to specifications and product descriptions at any time without notice. Quest does not make any commitment to update the information contained in this document.
If you have any questions regarding your potential use of this material, contact:
Quest Software World HeadquartersLEGAL Dept5 Polaris WayAliso Viejo, CA 92656email: [email protected]
Refer to our Web site (www.quest.com) for regional and international office information.
Trademarks
Quest, Quest Software, the Quest Software logo, Simplicity at Work, and ActiveRoles are trademarks and registered trademarks of Quest Software, Inc. For a complete list of Quest Software's trademarks, see http://www.quest.com/legal/trademarks.aspx. Other trademarks are property of their respective owners.
Third Party Contributions
This product contains some third party components (listed below). Copies of their licenses may be found at http://www.quest.com/legal/third-party-licenses.aspx. Source code for components marked with an asterisk (*) is available at http://rc.quest.com.
Quest One ActiveRoles - Web Interface User GuideUpdated - September 17, 2013Software Version - 6.9
COMPONENT LICENSE OR ACKNOWLEDGEMENT
.NET logging library 1.0 BSD 4.4 license
JQuery 1.7.1 MIT 1.0 license
JQuery UI 1.8.14 MIT 1.0 license
ObjectBuilder 2.2.0.0 Contains software or other content adapted from Microsoft patterns & practices ObjectBuilder, © 2006 Microsoft Corporation. All rights reserved.
iii
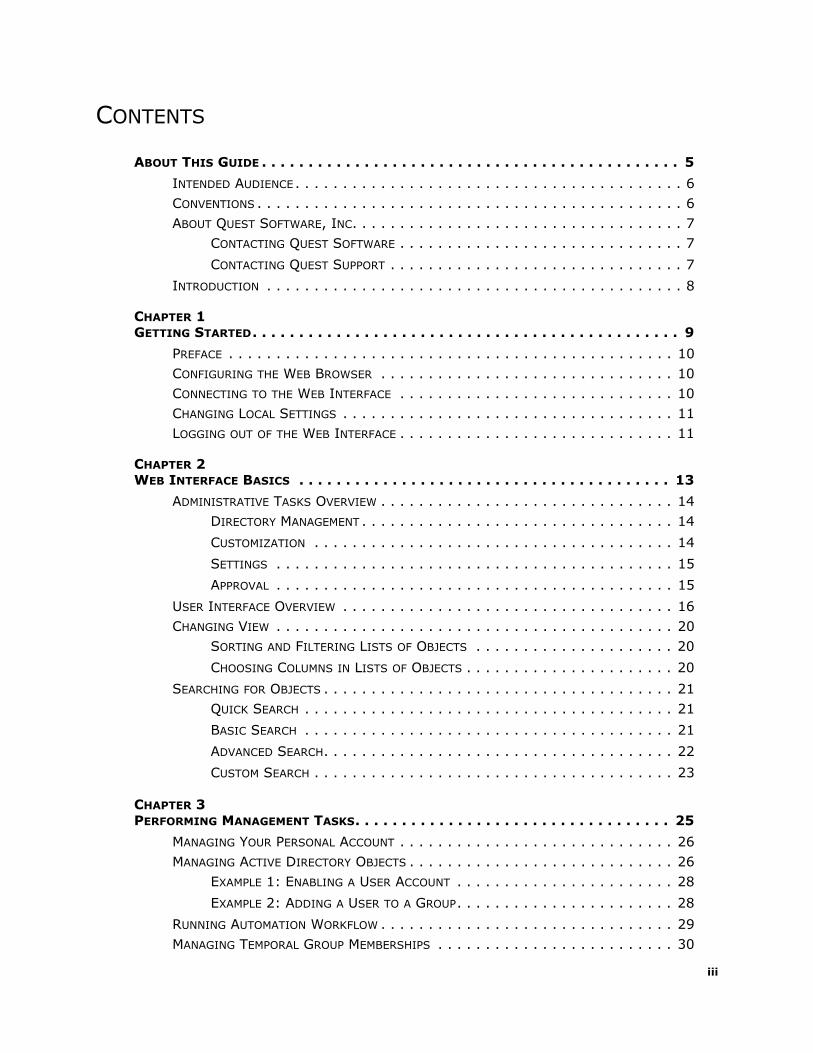
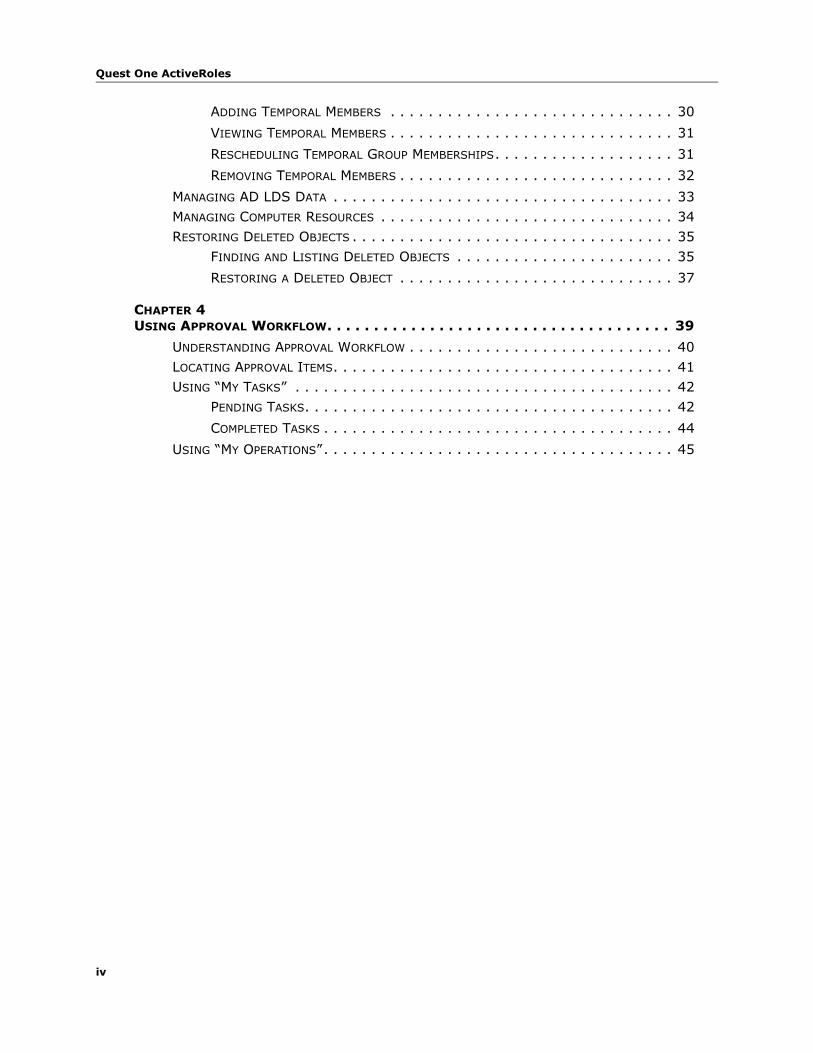
CONTENTS
ABOUT THIS GUIDE . . . . . . . . . . . . . . . . . . . . . . . . . . . . . . . . . . . . . . . . . . . . . 5
INTENDED AUDIENCE. . . . . . . . . . . . . . . . . . . . . . . . . . . . . . . . . . . . . . . . . 6CONVENTIONS . . . . . . . . . . . . . . . . . . . . . . . . . . . . . . . . . . . . . . . . . . . . . 6ABOUT QUEST SOFTWARE, INC. . . . . . . . . . . . . . . . . . . . . . . . . . . . . . . . . . . 7
CONTACTING QUEST SOFTWARE . . . . . . . . . . . . . . . . . . . . . . . . . . . . . . 7
CONTACTING QUEST SUPPORT . . . . . . . . . . . . . . . . . . . . . . . . . . . . . . . 7
INTRODUCTION . . . . . . . . . . . . . . . . . . . . . . . . . . . . . . . . . . . . . . . . . . . . 8
CHAPTER 1GETTING STARTED. . . . . . . . . . . . . . . . . . . . . . . . . . . . . . . . . . . . . . . . . . . . . . 9
PREFACE . . . . . . . . . . . . . . . . . . . . . . . . . . . . . . . . . . . . . . . . . . . . . . . 10CONFIGURING THE WEB BROWSER . . . . . . . . . . . . . . . . . . . . . . . . . . . . . . . 10CONNECTING TO THE WEB INTERFACE . . . . . . . . . . . . . . . . . . . . . . . . . . . . . 10CHANGING LOCAL SETTINGS . . . . . . . . . . . . . . . . . . . . . . . . . . . . . . . . . . . 11LOGGING OUT OF THE WEB INTERFACE . . . . . . . . . . . . . . . . . . . . . . . . . . . . . 11
CHAPTER 2WEB INTERFACE BASICS . . . . . . . . . . . . . . . . . . . . . . . . . . . . . . . . . . . . . . . . 13
ADMINISTRATIVE TASKS OVERVIEW . . . . . . . . . . . . . . . . . . . . . . . . . . . . . . . 14DIRECTORY MANAGEMENT . . . . . . . . . . . . . . . . . . . . . . . . . . . . . . . . . 14
CUSTOMIZATION . . . . . . . . . . . . . . . . . . . . . . . . . . . . . . . . . . . . . . 14
SETTINGS . . . . . . . . . . . . . . . . . . . . . . . . . . . . . . . . . . . . . . . . . . 15
APPROVAL . . . . . . . . . . . . . . . . . . . . . . . . . . . . . . . . . . . . . . . . . . 15
USER INTERFACE OVERVIEW . . . . . . . . . . . . . . . . . . . . . . . . . . . . . . . . . . . 16CHANGING VIEW . . . . . . . . . . . . . . . . . . . . . . . . . . . . . . . . . . . . . . . . . . 20
SORTING AND FILTERING LISTS OF OBJECTS . . . . . . . . . . . . . . . . . . . . . 20
CHOOSING COLUMNS IN LISTS OF OBJECTS . . . . . . . . . . . . . . . . . . . . . . 20
SEARCHING FOR OBJECTS . . . . . . . . . . . . . . . . . . . . . . . . . . . . . . . . . . . . . 21QUICK SEARCH . . . . . . . . . . . . . . . . . . . . . . . . . . . . . . . . . . . . . . . 21
BASIC SEARCH . . . . . . . . . . . . . . . . . . . . . . . . . . . . . . . . . . . . . . . 21
ADVANCED SEARCH. . . . . . . . . . . . . . . . . . . . . . . . . . . . . . . . . . . . . 22
CUSTOM SEARCH . . . . . . . . . . . . . . . . . . . . . . . . . . . . . . . . . . . . . . 23
CHAPTER 3PERFORMING MANAGEMENT TASKS. . . . . . . . . . . . . . . . . . . . . . . . . . . . . . . . . . 25
MANAGING YOUR PERSONAL ACCOUNT . . . . . . . . . . . . . . . . . . . . . . . . . . . . . 26MANAGING ACTIVE DIRECTORY OBJECTS . . . . . . . . . . . . . . . . . . . . . . . . . . . . 26
EXAMPLE 1: ENABLING A USER ACCOUNT . . . . . . . . . . . . . . . . . . . . . . . 28
EXAMPLE 2: ADDING A USER TO A GROUP. . . . . . . . . . . . . . . . . . . . . . . 28
RUNNING AUTOMATION WORKFLOW . . . . . . . . . . . . . . . . . . . . . . . . . . . . . . . 29MANAGING TEMPORAL GROUP MEMBERSHIPS . . . . . . . . . . . . . . . . . . . . . . . . . 30
Quest One ActiveRoles
iv
ADDING TEMPORAL MEMBERS . . . . . . . . . . . . . . . . . . . . . . . . . . . . . . 30
VIEWING TEMPORAL MEMBERS . . . . . . . . . . . . . . . . . . . . . . . . . . . . . . 31
RESCHEDULING TEMPORAL GROUP MEMBERSHIPS. . . . . . . . . . . . . . . . . . . 31
REMOVING TEMPORAL MEMBERS . . . . . . . . . . . . . . . . . . . . . . . . . . . . . 32
MANAGING AD LDS DATA . . . . . . . . . . . . . . . . . . . . . . . . . . . . . . . . . . . . 33MANAGING COMPUTER RESOURCES . . . . . . . . . . . . . . . . . . . . . . . . . . . . . . . 34RESTORING DELETED OBJECTS . . . . . . . . . . . . . . . . . . . . . . . . . . . . . . . . . . 35
FINDING AND LISTING DELETED OBJECTS . . . . . . . . . . . . . . . . . . . . . . . 35
RESTORING A DELETED OBJECT . . . . . . . . . . . . . . . . . . . . . . . . . . . . . 37
CHAPTER 4USING APPROVAL WORKFLOW. . . . . . . . . . . . . . . . . . . . . . . . . . . . . . . . . . . . . 39
UNDERSTANDING APPROVAL WORKFLOW . . . . . . . . . . . . . . . . . . . . . . . . . . . . 40LOCATING APPROVAL ITEMS. . . . . . . . . . . . . . . . . . . . . . . . . . . . . . . . . . . . 41USING “MY TASKS” . . . . . . . . . . . . . . . . . . . . . . . . . . . . . . . . . . . . . . . . 42
PENDING TASKS. . . . . . . . . . . . . . . . . . . . . . . . . . . . . . . . . . . . . . . 42
COMPLETED TASKS . . . . . . . . . . . . . . . . . . . . . . . . . . . . . . . . . . . . . 44
USING “MY OPERATIONS”. . . . . . . . . . . . . . . . . . . . . . . . . . . . . . . . . . . . . 45
About This Guide
• Intended Audience
• Conventions
• About Quest Software, Inc.
• Contacting Quest Software
• Contacting Quest Support
• Introduction

Quest One ActiveRoles
6
Intended AudienceThis document has been prepared to assist you in becoming familiar with the Quest® One ActiveRoles®. The Web Interface User Guide contains the information required to configure and use the Quest One ActiveRoles. It is intended for network administrators, consultants, analysts, and any other IT professionals using the product.
ConventionsIn order to help you get the most out of this guide, we have used specific formatting conventions. These conventions apply to procedures, icons, keystrokes and cross-references.
ELEMENT CONVENTION
Select This word refers to actions such as choosing or highlighting various interface elements, such as files and radio buttons.
Bolded text Interface elements that appear in Quest Software products, such as menus and commands.
Italic text Used for comments.
Bold Italic text Used for emphasis.
Blue text Indicates a cross-reference. When viewed in Adobe® Reader®, this format can be used as a hyperlink.
Used to highlight additional information pertinent to the process being described.
Used to provide Best Practice information. A best practice details the recommended course of action for the best result.
Used to highlight processes that should be performed with care.
+ A plus sign between two keystrokes means that you must press them at the same time.
| A pipe sign between elements means that you must select the elements in that particular sequence.
Web Interface User Guide
7
About Quest Software, Inc.Established in 1987, Quest Software (Nasdaq: QSFT) provides simple and innovative IT management solutions that enable more than 100,000 global customers to save time and money across physical and virtual environments. Quest products solve complex IT challenges ranging from database management, data protection, identity and access management, monitoring, user workspace management to Windows management. For more information, visit www.quest.com.
Contacting Quest SoftwareEmail [email protected]
Mail Quest Software, Inc.World Headquarters5 Polaris WayAliso Viejo, CA 92656USA
Web site www.quest.com
Refer to our Web site for regional and international office information.
Contacting Quest Support
Quest Support is available to customers who have a trial version of a Quest product or who have purchased a Quest product and have a valid maintenance contract. Quest Support provides unlimited 24x7 access to our Support Portal at www.quest.com/support.
From our Support Portal, you can do the following:
• Retrieve thousands of solutions from our Knowledge Base
• Download the latest releases and service packs
• Create, update and review Support cases
View the Global Support Guide for a detailed explanation of support programs, online services, contact information, policies and procedures. The guide is available at: www.quest.com/support.
Quest One ActiveRoles
8
IntroductionQuest® One ActiveRoles® offers a convenient, easy-to-use, customizable Web Interface that enables authorized users to perform day-to-day administrative tasks, including user management tasks such as modifying personal data or adding users to groups. Via the Web Interface, an intranet user can connect to Quest One ActiveRoles using a Web browser. A user sees only the commands, directory objects, and object properties to which the user’s role provides administrative access.
By default, the Web Interface includes three different sites—the site for Administrators, the site for Help Desk, and the site for self-administration. The site for Administrators supports a rich variety of administrative tasks, while the site for Help Desk supports a simplified set of tasks to expedite the resolution of trouble tickets. The site for self-administration is indented for managing personal accounts.
The Web Interface also allows setting the user interface language according to your preferences. The language setting has effect on all menus, commands, and forms that come with the Web Interface, as well as the tool tips and help. Thus, users can work with the Web Interface in their own language.
The Web Interface delivers a reliable, comprehensive solution for users who have administrative access to Quest One ActiveRoles to modify commands that the Web Interface provides for without writing a single line of code, and enables such users to add and remove commands on menus, and modify command pages by adding and removing fields that display property values. For information on how to customize the Web interface, refer to the Quest One ActiveRoles Web Interface Administrator Guide.
The Quest One ActiveRoles Web Interface User Guide is for individuals who are responsible for performing day-to-day administrative tasks. This document provides a brief overview of the Web Interface, and includes step-by-step instructions on how to perform administrative tasks.

Getting Started
• Preface
• Configuring the Web Browser
• Connecting to the Web Interface
• Changing Local Settings
• Logging out of the Web Interface
1

Quest One ActiveRoles
10
PrefaceThe following sections describe the procedures for connecting to the Web Interface.
First, you must configure your Web browser to display the Web Interface pages properly. Then, connect to the Web Interface. Finally, you may specify personal settings such as the user interface language.
Configuring the Web BrowserBefore connecting to the Web Interface, you should verify that your Web browser is configured properly. Use the following instructions to configure Microsoft’s Internet Explorer to meet the requirements of the Quest One ActiveRoles Web Interface.
To configure Internet Explorer
1. Start Internet Explorer.
2. On the Tools menu, click Internet Options.
3. In the Internet Options dialog box, click the Security tab.
4. On the Security tab, click Local intranet, and then click Custom Level.
5. In the Security Settings dialog box, make sure that the Enable option is selected for Scripting | Scripting of Java applets.
6. Click OK to close the Security Settings dialog box.
7. In the Internet Options dialog box, click the Privacy tab.
8. In the Settings area, move the slider to select the Medium privacy setting, or click the Default button if the button is available.
9. Click OK to close the Internet Options dialog box.
Connecting to the Web InterfaceTo connect to the Web Interface
1. Start your Web browser
2. In the address field, type the address of the Web Interface site. Then, press ENTER.
For example, you might type http://comp/ARServerHelpDesk if the Web Interface site for Help Desk is installed to the default Web site on the computer comp in the directory ARServerHelpDesk.
Once the Web browser has established a connection to the Web Interface, it displays the Web Interface home page.
3. On the Web Interface home page, click Directory Management to get started.
Web Interface User Guide
11
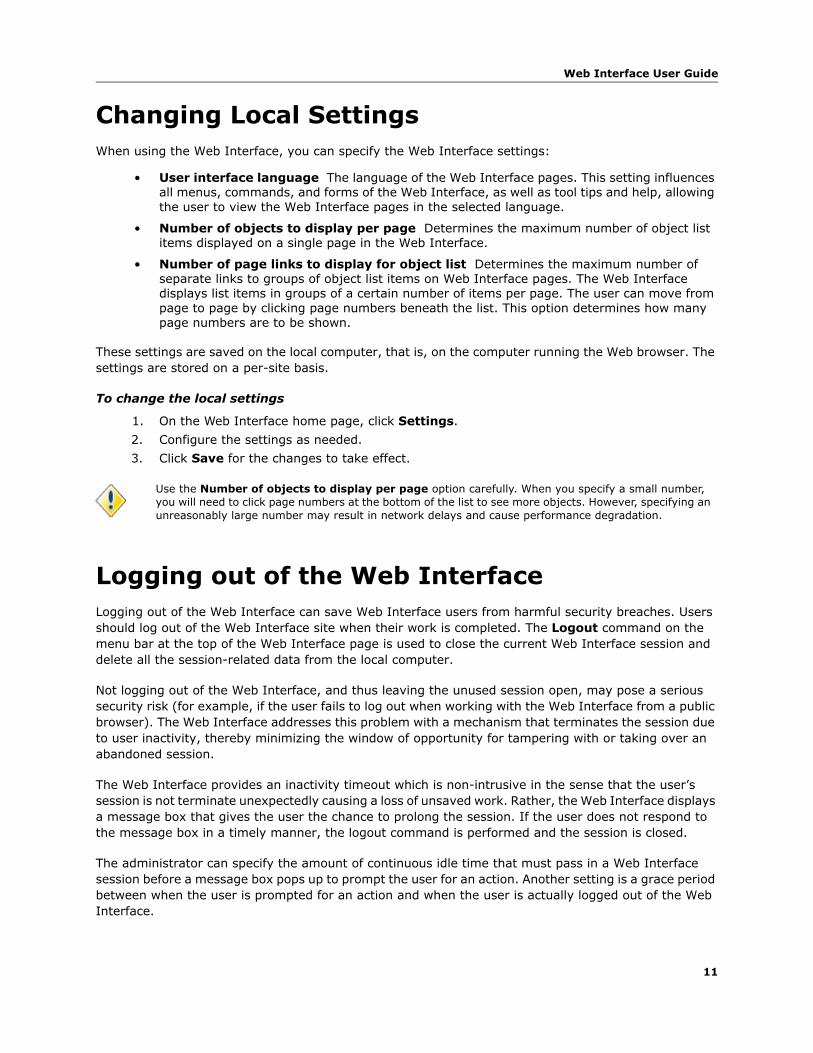
Changing Local SettingsWhen using the Web Interface, you can specify the Web Interface settings:
• User interface language The language of the Web Interface pages. This setting influences all menus, commands, and forms of the Web Interface, as well as tool tips and help, allowing the user to view the Web Interface pages in the selected language.
• Number of objects to display per page Determines the maximum number of object list items displayed on a single page in the Web Interface.
• Number of page links to display for object list Determines the maximum number of separate links to groups of object list items on Web Interface pages. The Web Interface displays list items in groups of a certain number of items per page. The user can move from page to page by clicking page numbers beneath the list. This option determines how many page numbers are to be shown.
These settings are saved on the local computer, that is, on the computer running the Web browser. The settings are stored on a per-site basis.
To change the local settings
1. On the Web Interface home page, click Settings.
2. Configure the settings as needed.
3. Click Save for the changes to take effect.
Logging out of the Web InterfaceLogging out of the Web Interface can save Web Interface users from harmful security breaches. Users should log out of the Web Interface site when their work is completed. The Logout command on the menu bar at the top of the Web Interface page is used to close the current Web Interface session and delete all the session-related data from the local computer.
Not logging out of the Web Interface, and thus leaving the unused session open, may pose a serious security risk (for example, if the user fails to log out when working with the Web Interface from a public browser). The Web Interface addresses this problem with a mechanism that terminates the session due to user inactivity, thereby minimizing the window of opportunity for tampering with or taking over an abandoned session.
The Web Interface provides an inactivity timeout which is non-intrusive in the sense that the user’s session is not terminate unexpectedly causing a loss of unsaved work. Rather, the Web Interface displays a message box that gives the user the chance to prolong the session. If the user does not respond to the message box in a timely manner, the logout command is performed and the session is closed.
The administrator can specify the amount of continuous idle time that must pass in a Web Interface session before a message box pops up to prompt the user for an action. Another setting is a grace period between when the user is prompted for an action and when the user is actually logged out of the Web Interface.
Use the Number of objects to display per page option carefully. When you specify a small number, you will need to click page numbers at the bottom of the list to see more objects. However, specifying an unreasonably large number may result in network delays and cause performance degradation.

Quest One ActiveRoles
12
Web Interface Basics
• Administrative Tasks Overview
• User Interface Overview
• Changing View
• Searching for Objects
2
Quest One ActiveRoles
14
Administrative Tasks OverviewThe Web Interface home page displays categories of administrative tasks supported by the Web Interface. The same categories are displayed along the upper part of the Web Interface pages. Click a category to perform one of the following administrative tasks:
• Directory Management Manage directory data, such as users and groups. The scope of your authority depends upon permissions you are granted in the Quest One ActiveRoles environment.
• Customization Add, remove, or modify user interface elements, such as menu items (commands) and pages (forms), intended to manage directory data.
• Settings Set up your personal options that control the display of the Web Interface pages.
• Approval Perform the tasks related to approval of administrative operations. The scope of your responsibilities depends upon your role in the approval workflow processes.
The Help command is used to display Web Interface Help and technical information on the Web Interface. The Logout command is used to disconnect your Web Interface session.
Directory Management
Directory Management allows you to administer directory objects in your organization. Your Quest One ActiveRoles permissions determine which tasks you can perform.
Directory Management includes the following tasks:
• Active Directory Locate and administer directory objects, such as user accounts, groups, and computer accounts, using the directory tree.
• Managed Units Locate and administer directory objects using administrative views provided by Managed Units.
• Search Find directory objects to administer.
For information on how to administer Active Directory objects, see Managing Active Directory Objects later in this document.
For information on how to perform a search, see Searching for Objects later in this chapter.
Customization
Customization allows you to tailor the Web Interface to suit the specific needs of your organization. Customization is only displayed if you are logged on as an ActiveRoles Admin (a Quest One ActiveRoles administrator). The ActiveRoles Admin account is specified during installation of the Quest One ActiveRoles Administration Service.
Customization includes the following tasks:
• Directory Objects Modify menus, commands, and forms used for administering directory objects. View or change global settings, such as the logo image and color scheme.
• Restore Default Restore the original (default) menus, commands, and forms, discarding all previous customizations.
• Reload Put into effect the menus, commands, and forms that you have customized.
Web Interface User Guide
15
As the customization settings are saved in the Quest One ActiveRoles database, they determine the configuration of the Web Interface site for all users. For information on how to customize the Web Interface, see “Customizing the Web Interface” in the Quest One ActiveRoles Web Interface Administrator Guide.
Settings
By using Settings you can specify:
• User interface language.
• Maximum number of items to include in a list at a time.
• Maximum number of page links to display for a list at a time.
The settings are saved locally, on the computer running the Web browser.
Approval
The Approval section provides you with tools for performing the tasks related to approval workflow. This section allows you to complete approval tasks assigned to you as an Approver, and to monitor the status of the operations that you initiated, if those require approval. For details on how to perform approval-related tasks, see Using Approval Workflow in the Quest One ActiveRoles Web Interface User Guide.
Quest One ActiveRoles
16
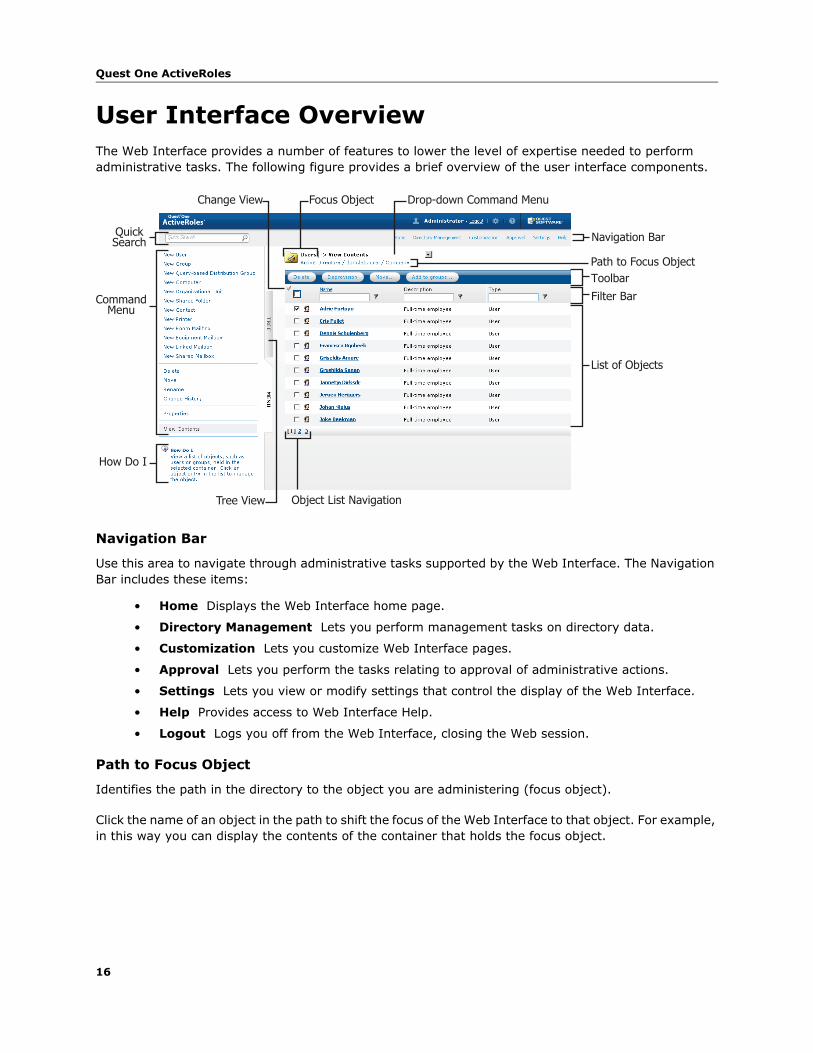
User Interface OverviewThe Web Interface provides a number of features to lower the level of expertise needed to perform administrative tasks. The following figure provides a brief overview of the user interface components.
Navigation Bar
Use this area to navigate through administrative tasks supported by the Web Interface. The Navigation Bar includes these items:
• Home Displays the Web Interface home page.
• Directory Management Lets you perform management tasks on directory data.
• Customization Lets you customize Web Interface pages.
• Approval Lets you perform the tasks relating to approval of administrative actions.
• Settings Lets you view or modify settings that control the display of the Web Interface.
• Help Provides access to Web Interface Help.
• Logout Logs you off from the Web Interface, closing the Web session.
Path to Focus Object
Identifies the path in the directory to the object you are administering (focus object).
Click the name of an object in the path to shift the focus of the Web Interface to that object. For example, in this way you can display the contents of the container that holds the focus object.
Change View
Tree View
QuickSearch
CommandMenu
How Do I
Focus Object Drop-down Command Menu
Filter Bar
Toolbar
List of Objects
Navigation Bar
Path to Focus Object
Object List Navigation
Web Interface User Guide
17
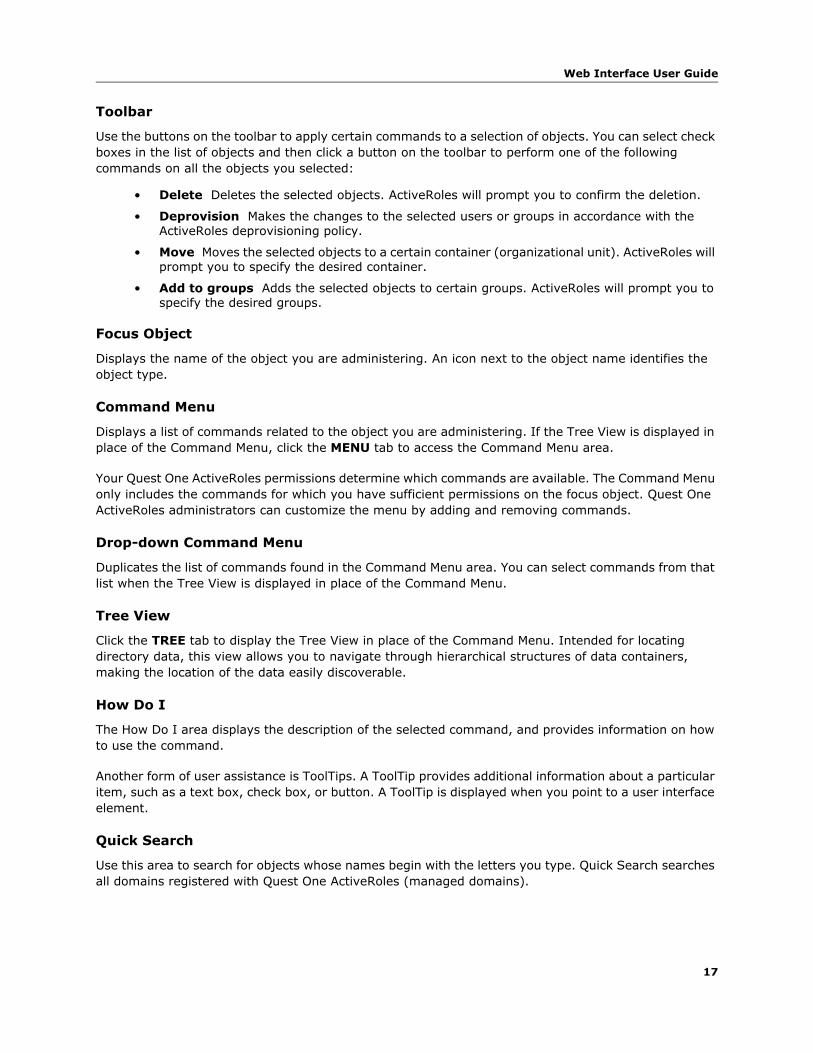
Toolbar
Use the buttons on the toolbar to apply certain commands to a selection of objects. You can select check boxes in the list of objects and then click a button on the toolbar to perform one of the following commands on all the objects you selected:
• Delete Deletes the selected objects. ActiveRoles will prompt you to confirm the deletion.
• Deprovision Makes the changes to the selected users or groups in accordance with the ActiveRoles deprovisioning policy.
• Move Moves the selected objects to a certain container (organizational unit). ActiveRoles will prompt you to specify the desired container.
• Add to groups Adds the selected objects to certain groups. ActiveRoles will prompt you to specify the desired groups.
Focus Object
Displays the name of the object you are administering. An icon next to the object name identifies the object type.
Command Menu
Displays a list of commands related to the object you are administering. If the Tree View is displayed in place of the Command Menu, click the MENU tab to access the Command Menu area.
Your Quest One ActiveRoles permissions determine which commands are available. The Command Menu only includes the commands for which you have sufficient permissions on the focus object. Quest One ActiveRoles administrators can customize the menu by adding and removing commands.
Drop-down Command Menu
Duplicates the list of commands found in the Command Menu area. You can select commands from that list when the Tree View is displayed in place of the Command Menu.
Tree View
Click the TREE tab to display the Tree View in place of the Command Menu. Intended for locating directory data, this view allows you to navigate through hierarchical structures of data containers, making the location of the data easily discoverable.
How Do I
The How Do I area displays the description of the selected command, and provides information on how to use the command.
Another form of user assistance is ToolTips. A ToolTip provides additional information about a particular item, such as a text box, check box, or button. A ToolTip is displayed when you point to a user interface element.
Quick Search
Use this area to search for objects whose names begin with the letters you type. Quick Search searches all domains registered with Quest One ActiveRoles (managed domains).
Quest One ActiveRoles
18
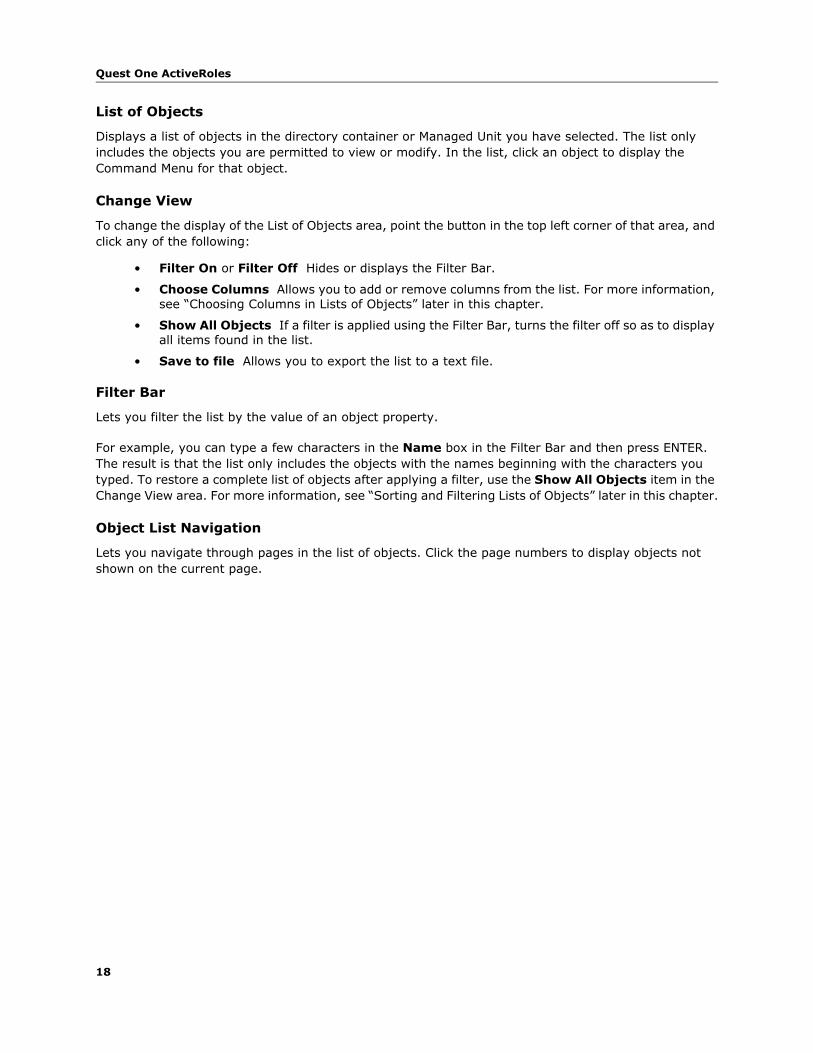
List of Objects
Displays a list of objects in the directory container or Managed Unit you have selected. The list only includes the objects you are permitted to view or modify. In the list, click an object to display the Command Menu for that object.
Change View
To change the display of the List of Objects area, point the button in the top left corner of that area, and click any of the following:
• Filter On or Filter Off Hides or displays the Filter Bar.
• Choose Columns Allows you to add or remove columns from the list. For more information, see “Choosing Columns in Lists of Objects” later in this chapter.
• Show All Objects If a filter is applied using the Filter Bar, turns the filter off so as to display all items found in the list.
• Save to file Allows you to export the list to a text file.
Filter Bar
Lets you filter the list by the value of an object property.
For example, you can type a few characters in the Name box in the Filter Bar and then press ENTER. The result is that the list only includes the objects with the names beginning with the characters you typed. To restore a complete list of objects after applying a filter, use the Show All Objects item in the Change View area. For more information, see “Sorting and Filtering Lists of Objects” later in this chapter.
Object List Navigation
Lets you navigate through pages in the list of objects. Click the page numbers to display objects not shown on the current page.
Web Interface User Guide
19
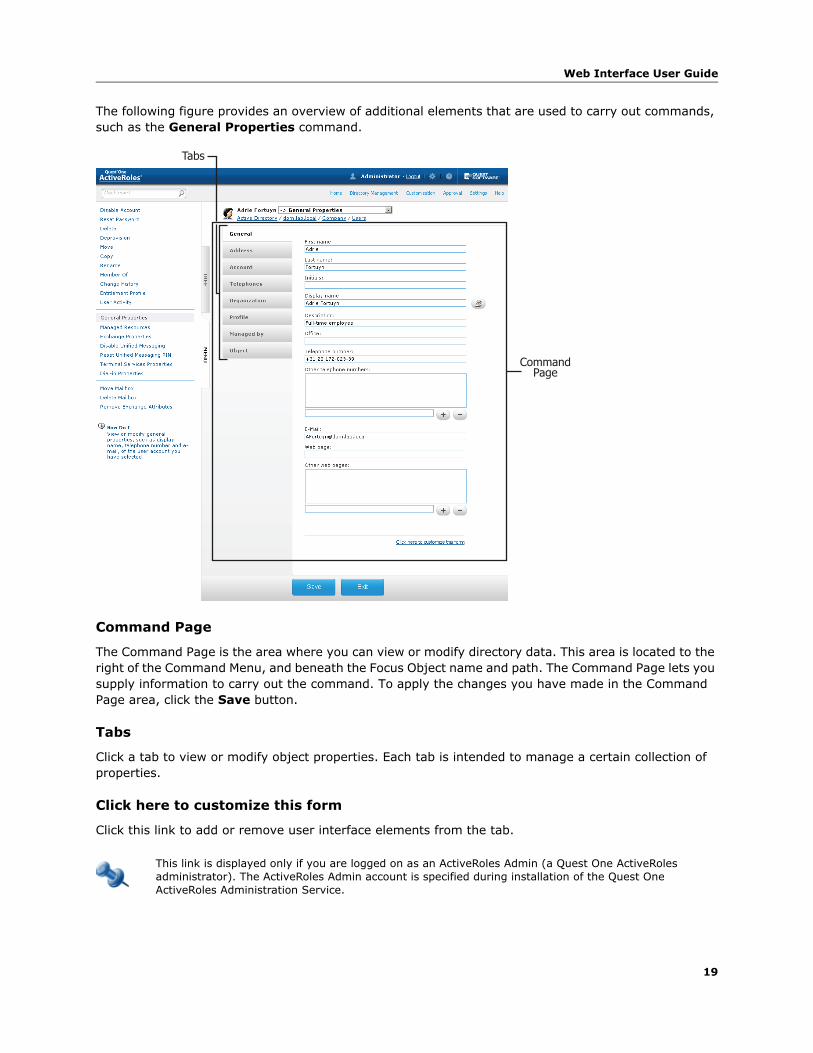
The following figure provides an overview of additional elements that are used to carry out commands, such as the General Properties command.
Command Page
The Command Page is the area where you can view or modify directory data. This area is located to the right of the Command Menu, and beneath the Focus Object name and path. The Command Page lets you supply information to carry out the command. To apply the changes you have made in the Command Page area, click the Save button.
Tabs
Click a tab to view or modify object properties. Each tab is intended to manage a certain collection of properties.
Click here to customize this form
Click this link to add or remove user interface elements from the tab.
This link is displayed only if you are logged on as an ActiveRoles Admin (a Quest One ActiveRoles administrator). The ActiveRoles Admin account is specified during installation of the Quest One ActiveRoles Administration Service.
Tabs
CommandPage
Quest One ActiveRoles
20
Changing ViewA list of objects in the Web Interface has a number of features that help you locate the object you want to manage. Thus, you can sort objects in a list and apply a filter to a list. You can also display or hide columns in a list of objects.
Sorting and Filtering Lists of Objects
The Web Interface allows you to set a sort order and apply a filter in a list of objects.
To sort a list of objects by name
• Click the Name column heading once or twice to sort the list by object name in ascending or descending order.
An arrow next to the column heading indicates the sort order.
To apply a filter to a list of objects
1. Ensure that the Filter Bar is displayed: Point to the Change View button in the top left corner of the List of Objects area to see if Filter On is present on the shortcut menu. If so, click Filter On.
2. In the text box beneath a column heading, type a few characters, and then click the icon next to the text box or press ENTER.
After you have applied a filter, the list only includes objects that match your filtering criteria. For example, you can type a few characters in the Name box and then press ENTER to display objects with the names beginning with the characters you typed. To restore a complete list of objects after applying a filter, point to the Change View button and click Show All Objects. You can hide the Filter Bar by pointing to the Change View button and then clicking Filter Off.
Choosing Columns in Lists of Objects
The Web Interface allows you to display or hide columns in a list of objects. Each column is intended to display a certain property of objects in the list, and can be used to set a sort order or apply a filter.
To display or hide columns in a list of objects
1. Point to the Change View button in the top left corner of the List of Objects area and click Choose Columns.
2. To display a column for a certain property, click the name of the property in the Hidden Columns list and click Add.
3. To hide a column for a certain property, click the name of the property in the Displayed Columns list and click Remove.
You can sort a list by any indexed property. The column headings for such properties are underlined. Click any underlined heading to change the sort order. For information on how to add or remove columns, see “Choosing Columns in Lists of Objects” later in this chapter.
Filtering object lists by object type requires that the object type be fully specified in the Type filter box. For example, to display all contacts, you must specify “contact”, not “cont” or “cont*”.

Web Interface User Guide
21
Searching for ObjectsSearch pages provide an alternative way for locating directory data. The search pages, in the advanced or basic mode, allow you to build very specific searches that produce concentrated and precise lists of search results.
Quick Search
The Web Interface supports a quick search for directory objects.
To perform a Quick Search
• In the Quick Search box, type a few characters and press ENTER.
The Web Interface searches for objects whose names begin with the characters you typed, and displays a list of search results.
The Quick Search function performs a search in all the Active Directory domains that are registered with Quest One ActiveRoles (managed domains), regardless of which object you are currently administering. The search results only include the objects that you are permitted to view or modify.
The behavior of an item in a list of search results depends on the type of the object represented by that item:
• Clicking a leaf object, such as a user account, displays a page intended to view or modify object properties
• Clicking a container object, such as an organizational unit, displays a list of objects held in the container
Basic Search
The Web Interface includes search pages to locate objects of a certain type. The following figure shows a Basic Search page.
SearchCategory
Search Mode

Quest One ActiveRoles
22
The Basic Search mode is mainly intended to find directory objects of a certain type by using the object name or description.
To perform a Basic Search
1. Point to Directory Management on the Navigation Bar and click Search.
2. In the Search Category area, click the type of objects you want to find.
3. In the Search Mode area, click the Basic tab.
4. Click the Browse button next to the Find in box to select the container or Managed Unit you want to search.
5. On the Basic Search tab, specify properties, such as the name or description, of the object you want to find.
You do not need to specify an entire name or description. For example, you can type a part of a name to find all objects that have names beginning with the characters you typed.
6. Click Search.
Once your search is completed, the search results are listed at the bottom of the page. You can manage the list as follows:
• Click an object in the list to administer the object.
• Add and remove columns (see “Choosing Columns in Lists of Objects” earlier in this chapter).
• Set a sort order and apply a filter (see “Sorting and Filtering Lists of Objects” earlier in this chapter).
Advanced Search
In the Advanced Search mode, the Web Interface retains all characteristics that it exhibits in the Basic Search mode, plus the Advanced Search mode allows you to configure additional search criteria.
To perform an Advanced Search
1. Point to Directory Management on the Navigation Bar and click Search.
2. In the Search Category area, click the type of objects you want to find.
3. In the Search Mode area, click the Advanced tab.
4. Click the Browse button next to the Find in box to select the container or Managed Unit you want to search.
5. From the Field list, select the object property by which you want to search.
6. From the Condition list, select an operator to further define the search.
7. In the Value box, type the variable to use.
8. Click Add.
9. Repeat Steps 4–8 until you have entered your search criteria.
10. Click AND or OR, depending on whether you want to find objects that match all the search criteria or at least one of them.
11. Click Search.
You can hide or display the Search Options area by clicking Search Options.
Web Interface User Guide
23
Once your search is completed, the search results are listed at the bottom of the page.
Custom Search
The Web Interface also provides a powerful Custom Search, which combines search criteria for different objects into one search query, and enables an Advanced Search using an LDAP query.
To perform a Basic Custom Search
1. Point to Directory Management on the Navigation Bar and click Search.
2. In the Search Category area, click Custom Search.
3. Click the Browse button next to the Find in box to select the container or Managed Unit you want to search.
4. In the area under the Field label, do the following:
5. Click the type of objects you want to find.
6. Select the object property by which you want to search.
7. From the Condition list, select an operator to further define the search.
8. In the Value box, type the variable to use.
9. Click Add.
10. Repeat Steps 3–7 until you have entered your search criteria.
11. Click AND or OR depending on whether you want to find objects that match all the search criteria or at least one of them.
12. Click Search.
To perform an Advanced Custom Search
1. Point to Directory Management on the Navigation Bar and click Search.
2. In the Search Category area, click Custom Search.
3. In the Search Mode area, click the Advanced tab.
4. Click the Browse button next to the Find in box to select the container or Managed Unit you want to search.
5. In the Enter LDAP query box, type a query that meets the Lightweight Directory Access Protocol (LDAP) standard.
6. Click Search.
Once your search is completed, the search results are listed at the bottom of the page.
You can hide or display the Search Options area by clicking Search Options.

Quest One ActiveRoles
24
Performing Management Tasks
• Managing Your Personal Account
• Managing Active Directory Objects
• Running Automation Workflow
• Managing Temporal Group Memberships
• Managing AD LDS Data
• Managing Computer Resources
• Restoring Deleted Objects
3
Quest One ActiveRoles
26
Managing Your Personal AccountThe User Profile Editor section in the Web Interface site for self-administration gives you a convenient way to display and update your own identity information, such as your telephone numbers or mail address in your user account. The contents of the pages in the User Profile Editor section can be customized by the Quest One ActiveRoles administrator, who can add new elements to the pages, modify or remove existing elements, and regroup related elements on different tabbed pages.
To view or modify your user account
1. In your Web browser, go to the address (URL) for the Web Interface site for self-administration.
By default, the address is http://<server>/ARServerSelfService where <server> stands for the name of the server running the Web Interface.
2. On the Web Interface Home page, click User Profile Editor.
3. Use the page provided by the Web Interface to view or modify your user account.
4. Click the Save button to apply your changes.
It’s up to the Quest One ActiveRoles administrator to determine what information you are authorized to view or modify on the User Profile Editor page. Some fields on the page might not be editable. The fields that you are not permitted to modify appear on the page as read-only text. The properties that you are not permitted to view are not displayed on the User Profile Editor page.
Managing Active Directory ObjectsThe Directory Management section of the Web Interface allows you to administer directory objects in your organization, and includes the following task categories:
• Active Directory Administer Active Directory objects, such as user accounts, groups, and computer accounts.
• Managed Units Manage Active Directory objects located in Managed Units.
• Search Find objects in the directory.
Whether you can perform a certain management task depends on permissions granted to your user account, and the Web Interface customization settings.
A general procedure for performing a Directory Management task is as follows.
To perform a management task
1. Open your Web browser and connect to the Web Interface.
2. On the Web Interface home page, click Directory Management.
This displays a page to administer directory objects.
3. On the Navigation Bar, point to Directory Management and do one of the following:
• To manage objects in Active Directory containers, such as domains or organizational units, click Active Directory. This displays a list of Active Directory domains.
• To manage directory objects in a certain Managed Unit, click Managed Units. This displays a list of Managed Units.
Web Interface User Guide
27
4. In the List of Objects area, click the object you want to administer.
5. In the Command Menu area, click the command you want to use.
6. Complete the operation. For information about the command you selected, refer to the How Do I area.
When performing management tasks, the Web Interface supplements and restricts the user input based on policies and permissions defined in Quest One ActiveRoles. The Web Interface displays property values generated according to the policies, and prohibits the input of data that breaks policy constraints. Thus, the Web Interface exhibits the following behavior:
• If a policy requires that a value be specified for a certain property (required property), that property is marked with an asterisk (*).
• If a policy imposes any restrictions on a property, a special icon is displayed next to the field for that property. Click the icon to view policy information, which you can use to enter an acceptable value.
• When you specify a property value that breaks policy constraints and click Save, an error message is displayed. Examine the error message and correct your input.
• The forms used to create an object must include the entries for all required properties. Otherwise, the Web Interface fails to create the object. For information on how to configure forms, see “Configuring Forms” in the Quest One ActiveRoles Web Interface Administrator Guide.
• The forms used to modify an object only display the values of the properties for which you have the Read permission. You can modify only those properties for which you have the Write permission. The properties for which you only have the Read permission are displayed as read-only.
• The Command Menu area includes only the commands that you are permitted to use.
• The List of Objects and Search Results areas display only the objects that you are permitted to view or modify.
Batch Operations
In the Web Interface, you can select multiple objects (such as users, groups and computers), and then apply a certain command to your selection of objects. This allows you to perform a batch operation on all the selected objects at a time instead of executing the command on each object separately. The Web Interface supports the following batch operations:
• Delete Allows you to delete multiple objects at a time.
• Deprovision Allows you to deprovision multiple users or groups at a time.
• Move Allows you to move a batch of objects to a different Organizational Unit or container.
• Add to groups Allows you to add a batch of objects to one or more groups of your choice.
In the List of Objects area, clicking a leaf object such as a user or group, displays a page intended to view or modify object properties; clicking a container object such as a domain or an organizational unit, displays a list of objects held in that container.
Quest One ActiveRoles
28
Batch operations are available in the list of objects on the following Web Interface pages:
• Quick Search This page appears when you use the Quick Search field to search for objects by name.
• Search This page lists the search results when you use the Search command.
• View Contents This page displays the objects held in a given Organizational Unit, Managed Unit or container.
To perform a batch operation, select the check box next to each of the desired objects in the list, and then click a button on the toolbar at the top of the list view. This executes the button's command on each object within your selection. It is possible to select all objects on the page at a time by selecting the check box in the header of the list.
Example 1: Enabling a User Account
This walkthrough shows you how to enable a disabled user account.
To enable a user account
1. Open your Web browser and connect to the Web Interface.
2. On the Navigation Bar, point to Directory Management and click one of these items:
• Active Directory, to locate the user account in an Active Directory container (Organizational Unit)
• Managed Units, to locate the user account in a Managed Unit
3. Locate the user account you want to enable.
4. In the List of Objects area, click the user account.
5. In the Command Menu area, click Enable Account.
Example 2: Adding a User to a Group
This walkthrough shows you how to add a user account to a group.
To add a user account to a group
1. In the Web Interface locate and select the user account.
2. In the Command Menu area, click Member Of.
3. On the Member Of page, click Add.
4. In the Select Object dialog box, click the group to which you want to add the selected user account, and then click Add.
Quest One ActiveRoles administrators can customize the Web Interface pages by adding and removing commands, and modifying forms associated with commands. For more information, see “Customizing the Web Interface” in the Quest One ActiveRoles Web Interface Administrator Guide.
If the user account is not disabled, the Command Menu area displays the Disable Account command instead of the Enable Account command.
Web Interface User Guide
29
Running Automation WorkflowWorkflow refers to a sequence of actions that leads to the completion of a certain task. ActiveRoles allows administrators to configure various workflows that can be started on a scheduled basis or user demand. This workflow type is called automation workflow. For more information, see “Automation Workflow” in the Quest One ActiveRoles Administrator Guide.
If an automation workflow is configured so that running it on demand is allowed, then such a workflow can be run from the Web Interface.
To run an automation workflow from the Web Interface
1. On the Home page in the Web Interface, click Directory Management.
2. In the TREE pane, expand the Workflow branch and click the container that holds the desired workflow.
3. In the list of the workflow names, to the right of the TREE pane, click the name of the desired workflow.
4. Choose the Run command from the menu.
– OR –
Click the Run Workflow button on the Properties | General page.
5. If prompted, examine or change the values of the workflow parameters.
6. Click OK in the confirmation message box.
ActiveRoles prompts you for parameter values if the workflow has any parameters that need to be supplied by the user running the workflow on demand. If the workflow has no parameters that require user input, then ActiveRoles starts the workflow without prompting you for parameter values.
Once you have started an automation workflow, ActiveRoles opens a run history report allowing you to examine the progress of workflow execution. The report displays the workflow execution status along with information about the activities performed during workflow run. For a workflow that is in progress you have the option to cancel execution of the workflow by clicking the Terminate button.
After the workflow is completed, the report retains history information about the workflow run. For each completed run of the workflow, the report allows you to identify when and by whom the workflow was started, when the workflow was completed, and what parameter values were used.
The report also lists the workflow activities that were executed during the workflow run. For each activity, you can determine whether the activity was completed successfully or returned an error. In case of error, the report provides an error description. For activities requesting changes to directory data (for example, activities that create new objects or modify existing objects), you can examine the requested changes in detail by clicking the Operation ID number in the run history report.
To view run history of an automation workflow in the Web Interface
1. On the Home page in the Web Interface, click Directory Management.
2. In the TREE pane, expand the Workflow branch and click the container that holds the desired workflow.
3. In the list of the workflow names, to the right of the TREE pane, click the name of the desired workflow.
4. Choose the Run History command from the menu.
Quest One ActiveRoles
30
Managing Temporal Group MembershipsBy using temporal group memberships, you can manage group memberships of objects such as user or computer accounts that need to be members of particular groups for only a certain time period. This feature of Quest One ActiveRoles gives you flexibility in deciding and tracking what objects need group memberships and for how long.
This section guides you through the tasks of managing temporal group memberships in the Quest One ActiveRoles Web Interface. If you are authorized to view and modify group membership lists, then you can add, view and remove temporal group members as well as view and modify temporal membership settings on group members.
Adding Temporal Members
A temporal member of a group is an object, such as a user, computer or group, scheduled to be added or removed from the group. You can add and configure temporal members using the Web Interface.
To add temporal members of a group
1. In the Web Interface, click the group, and then choose the Members command.
2. On the Members page, click Add.
3. In the Select Object dialog box find and select the objects that you want to make temporal members of the group, and then click Temporary Access.
4. In the Temporal Membership Settings dialog box, choose the appropriate options, and then click OK:
• To have the temporal members added to the group on a certain date in the future, select On this date under Add to the group, and choose the date and time you want.
• To have the temporal members added to the group at once, select Now under Add to the group.
• To have the temporal members removed from the group on a certain date, select On this date under Remove from the group, and choose the date and time you want.
• To retain the temporal members in the group for indefinite time, select Never under Remove from the group.
You can make an object a temporal member of particular groups by managing the object rather than the groups. Click the object, and then choose the Member Of command. On the Member Of page, click Add. In the Select Object dialog box, find and select the groups, and specify the temporal membership settings as appropriate for your situation.

Web Interface User Guide
31
Viewing Temporal Members
The list of group members displayed by the Web Interface makes it possible to distinguish between regular group members and temporal group members. It is also possible to hide or display so-called pending members, the temporal members that are scheduled to be added to the group in the future but are not actual members of the group so far.
To view temporal members of a group
1. In the Web Interface, click the group, and then choose the Members command.
2. Examine the list on the Members page:
• An icon of a small clock overlays the icon for the temporal members.
• If the Show pending members check box is selected, the list also includes the temporal members that are not yet added to the group. The icons identifying such members are shown in orange.
The list of group memberships for a particular object makes it possible to distinguish between the groups in which the object is a regular member and the groups in which the object is a temporal member. It is also possible to hide or display so-called pending group memberships, the groups to which the object is scheduled to be added in the future.
To view groups in which an object is a temporal member
1. In the Web Interface, click the object, and then choose the Member Of command.
2. Examine the list on the Member Of page:
• An icon of a small clock overlays the icon for the groups in which the object is a temporal member.
• If the Show pending group memberships check box is selected, the list also includes the groups to which the object is scheduled to be added in the future. The icons identifying such groups are shown in orange.
Rescheduling Temporal Group Memberships
The temporal membership settings on a group member include the start time and end time settings.
The start time setting specifies when the object is to be actually added to the group. This can be specific date and time or an indication that the object should be added to the group right away.
The end time setting specifies when the object is to be removed from the group. This can be specific date and time or an indication that the object should not be removed from the group.
You can view or modify both the start time and end time settings using the Web Interface.
To view or modify the start or end time setting for a member of a group
1. In the Web Interface, click the group, and then choose the Members command.
2. In the list on the Members page, select the member and then click the Temporary Access button.
3. Use the Temporal Membership Settings dialog box to view or modify the start or end time settings.

Quest One ActiveRoles
32
The Temporal Membership Settings dialog box provides the following options:
• Add to the group | Now Indicates that the object should be added to the group at once.
• Add to the group | On this date Indicates the date and time when the object should be added to the group.
• Remove from the group | Never Indicates that the object should not be removed from the group.
• Remove from the group | On this date Indicates the date and time when the object should be removed from the group.
Regular members have the Add to group and Remove from group options set to Already added and Never, respectively. You can set a particular date for any of these options in order to convert a regular member to a temporal member.
Removing Temporal Members
You can remove temporal group members in the same way as regular group members. Removing a temporal member of a group deletes the temporal membership settings for that object with respect to that group. As a result, the object will not be added to the group. If the object already belongs to the group at the time of removal, then it is removed from the group.
To remove a temporal member of a group
1. In the Web Interface, click the group, and then choose the Members command.
2. On the Members page, select the member, and click Remove.
• You can view or modify the start time and end time settings by managing an object rather than groups in which the object has memberships. Click the object, and then choose the Member Of command. On the Member Of page, select the group for which you want to manage the object’s start or end time setting and click Temporary Access.
• On the Members or Member Of page, you can change the start or end time setting for multiple members or groups at a time. In the list on the page, select two or more items and click Temporary Access. Then, in the Temporal Membership Settings dialog box, select check boxes to indicate the settings to change and make the changes you want.
You can remove an object that is a temporal member of a group by managing the object rather than the group. Click the object, and then choose the Member Of command. On the Member Of page, select the group from the list and click Remove.
Web Interface User Guide
33
Managing AD LDS DataThe Web Interface provides the ability to manage directory data in Microsoft Active Directory Lightweight Directory Services (AD LDS)—an independent mode of Active Directory formerly known as Active Directory Application Mode (ADAM). Similarly to Active Directory domains, directory data can be managed in only the AD LDS instances that are registered with Quest One ActiveRoles (managed AD LDS instances).
The application directory partitions found on the managed AD LDS instances are grouped together in the AD LDS (ADAM) container, thus making it easy to locate the AD LDS data. Each directory partition is represented by a separate container (node) so you can browse the partition tree the same way you do for a managed Active Directory domain.
The Web Interface supports a wide range of administrative operations on AD LDS users, groups and other objects, so you can create, view, modify, and delete directory objects, such as users, groups, containers and organizational units, in AD LDS the same way you do when managing data in Active Directory.
To browse the directory tree in AD LDS directory partitions
1. On the Navigation Bar, click Directory Management.
2. In the left pane of the Web Interface page, click the TREE tab to display the Tree View area.
3. In the Tree View area, do the following:
a) Expand the AD LDS (ADAM) container: Click the plus sign (+) next to the name of the container.
b) Under AD LDS (ADAM), expand a directory partition object to view its top-level containers: Click the plus sign (+) next to the name of the directory partition.
c) Expand a top-level container to view the next level of objects in that container: Click the plus sign (+) next to the name of the container.
4. Do one of the following:
• To move down a directory tree branch, continue expanding the next lowest container level in the Tree View area.
• To administer a directory object at the current directory level, click a container in the Tree View area, and use the instructions that follow.
To manage directory data in AD LDS
1. In the Tree View area, under AD LDS (ADAM), click the container that holds the data you want to manage.
2. In the Drop-down Command Menu area, click View Contents.
3. In the List of Objects area, click the object that represents the directory data you want to manage.
4. Use commands in the Drop-down Command Menu area to perform management tasks.
In the List of Objects area, clicking a leaf object, such as a user or group, displays a page intended to view or modify object properties; clicking a container object, such as a partition or an organizational unit, displays a list of objects held in that container.
Quest One ActiveRoles
34
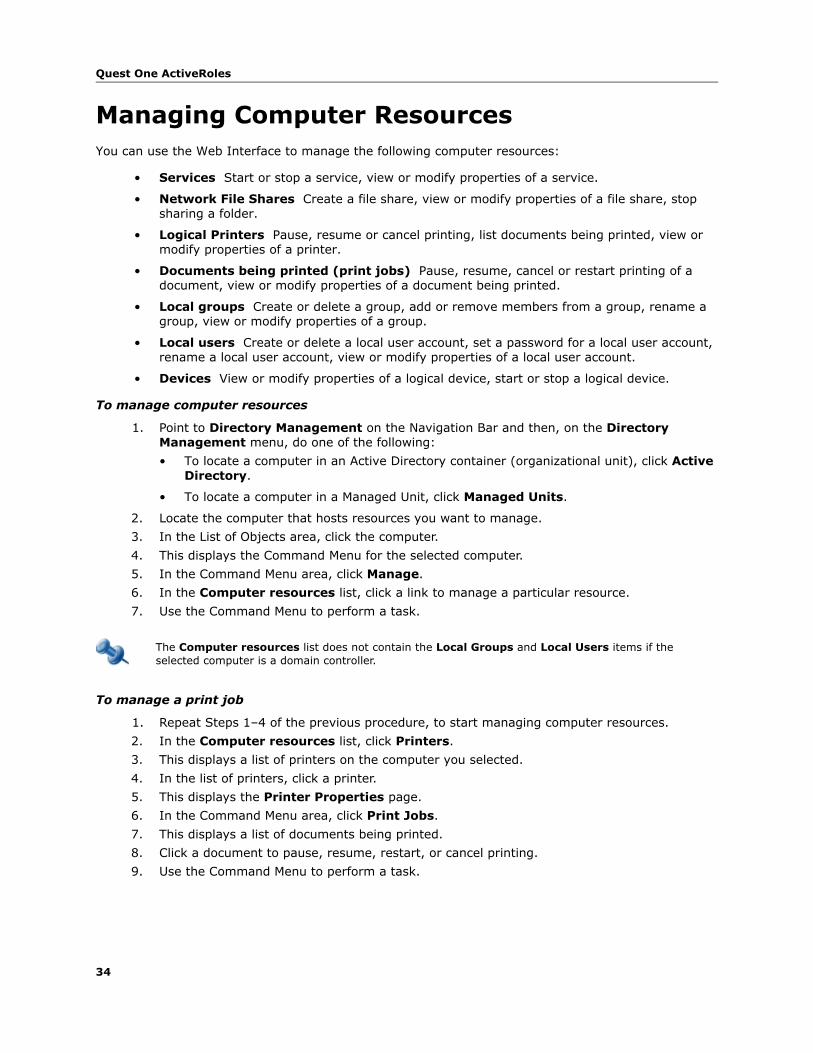
Managing Computer ResourcesYou can use the Web Interface to manage the following computer resources:
• Services Start or stop a service, view or modify properties of a service.
• Network File Shares Create a file share, view or modify properties of a file share, stop sharing a folder.
• Logical Printers Pause, resume or cancel printing, list documents being printed, view or modify properties of a printer.
• Documents being printed (print jobs) Pause, resume, cancel or restart printing of a document, view or modify properties of a document being printed.
• Local groups Create or delete a group, add or remove members from a group, rename a group, view or modify properties of a group.
• Local users Create or delete a local user account, set a password for a local user account, rename a local user account, view or modify properties of a local user account.
• Devices View or modify properties of a logical device, start or stop a logical device.
To manage computer resources
1. Point to Directory Management on the Navigation Bar and then, on the Directory Management menu, do one of the following:
• To locate a computer in an Active Directory container (organizational unit), click Active Directory.
• To locate a computer in a Managed Unit, click Managed Units.
2. Locate the computer that hosts resources you want to manage.
3. In the List of Objects area, click the computer.
4. This displays the Command Menu for the selected computer.
5. In the Command Menu area, click Manage.
6. In the Computer resources list, click a link to manage a particular resource.
7. Use the Command Menu to perform a task.
To manage a print job
1. Repeat Steps 1–4 of the previous procedure, to start managing computer resources.
2. In the Computer resources list, click Printers.
3. This displays a list of printers on the computer you selected.
4. In the list of printers, click a printer.
5. This displays the Printer Properties page.
6. In the Command Menu area, click Print Jobs.
7. This displays a list of documents being printed.
8. Click a document to pause, resume, restart, or cancel printing.
9. Use the Command Menu to perform a task.
The Computer resources list does not contain the Local Groups and Local Users items if the selected computer is a domain controller.

Web Interface User Guide
35
Restoring Deleted ObjectsAdministrators can use the Web Interface to restore deleted objects in any managed domain that is configured to enable Active Directory Recycle Bin - a feature of Active Directory Domain Services introduced in Microsoft Windows Server 2008 R2 (see What's New in AD DS: Active Directory Recycle Bin at http://go.microsoft.com/fwlink/?LinkId=141392).
To undo deletions, Quest One ActiveRoles relies on the ability of Active Directory Recycle Bin to preserve all attributes, including the link-valued attributes, of the deleted objects. This makes it possible to restore deleted objects to the same state they were in immediately before deletion. For example, restored user accounts regain all group memberships that they had at the time of deletion.
This section provides instructions on how to restore deleted objects by using the Web Interface. More information can be found in the “Recycle Bin” chapter in the Quest One ActiveRoles Administrator Guide.
Finding and Listing Deleted Objects
Once Active Directory Recycle Bin is enabled in a managed domain, Quest One ActiveRoles provides access to the Deleted Objects container that holds the deleted objects from that domain. In the Web Interface tree view, the container appears at the same level as the domain itself, under the Active Directory node. If multiple managed domains have Active Directory Recycle Bin enabled, then a separate container is displayed for each domain. To tell one container from another, the name of the container includes the domain name (for example, MyDomain.MyCompany.com - Deleted Objects).
When you select the Deleted Objects container in the tree view, the Web Interface lists all the deleted objects that exist in the corresponding domain. The list can be sorted or filtered as appropriate to locate particular objects (see “Changing View” earlier in this document). If you click an object in the list, a menu appears that displays all actions you can perform on that object.
Searching the Deleted Objects Container
The Web Interface offers the Deleted Objects search category on the Search pages, which is intended to perform a search in the Deleted Objects container of any managed domain where Active Directory Recycle Bin is enabled.
To search the Deleted Objects container
1. On the Navigation Bar, point to Directory Management and click Search.
2. From the drop-down list at the top of the page, select Deleted Objects.
The Deleted Objects item is not displayed unless there is at least one managed domain that has Active Directory Recycle Bin enabled.
3. Optionally, click Browse next to the Find in field and select the Deleted Objects container to search.
The Find in field is automatically populated with the name of the Deleted Objects container for one of the managed domains in which Active Directory Recycle Bin is enabled. By clicking Browse you can choose the Deleted Objects container for a different domain, if multiple managed domains have Active Directory Recycle Bin enabled.
Quest One ActiveRoles
36
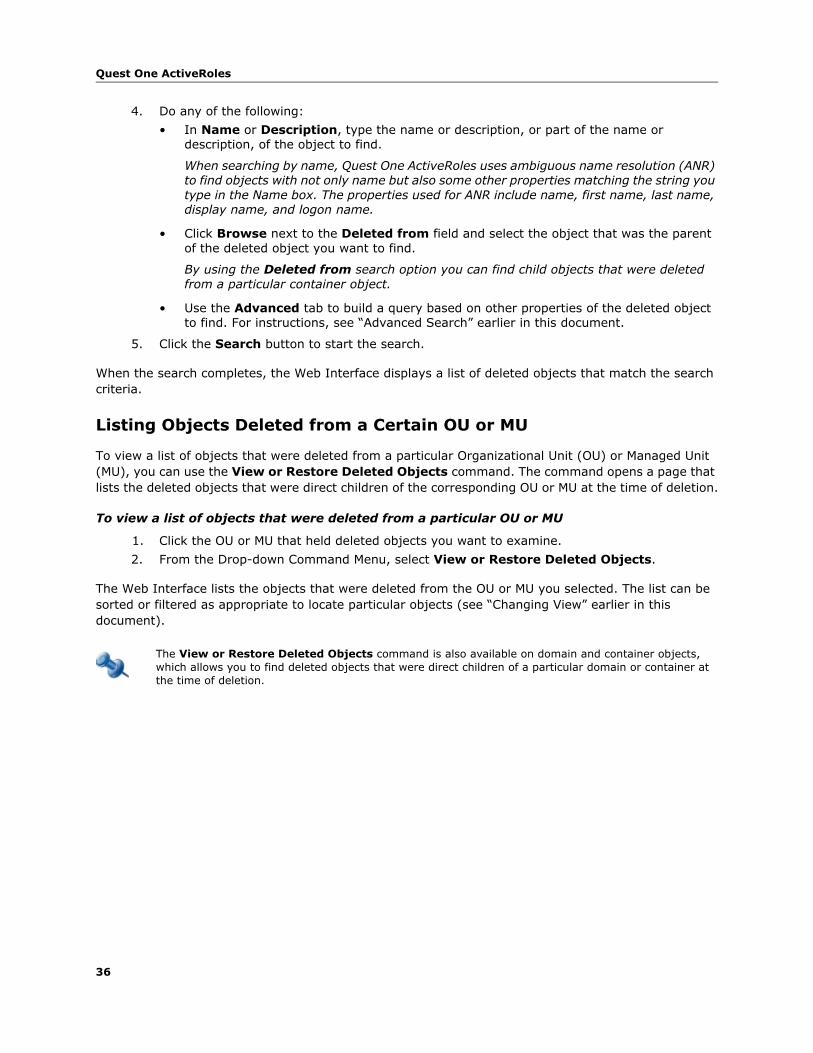
4. Do any of the following:
• In Name or Description, type the name or description, or part of the name or description, of the object to find.
When searching by name, Quest One ActiveRoles uses ambiguous name resolution (ANR) to find objects with not only name but also some other properties matching the string you type in the Name box. The properties used for ANR include name, first name, last name, display name, and logon name.
• Click Browse next to the Deleted from field and select the object that was the parent of the deleted object you want to find.
By using the Deleted from search option you can find child objects that were deleted from a particular container object.
• Use the Advanced tab to build a query based on other properties of the deleted object to find. For instructions, see “Advanced Search” earlier in this document.
5. Click the Search button to start the search.
When the search completes, the Web Interface displays a list of deleted objects that match the search criteria.
Listing Objects Deleted from a Certain OU or MU
To view a list of objects that were deleted from a particular Organizational Unit (OU) or Managed Unit (MU), you can use the View or Restore Deleted Objects command. The command opens a page that lists the deleted objects that were direct children of the corresponding OU or MU at the time of deletion.
To view a list of objects that were deleted from a particular OU or MU
1. Click the OU or MU that held deleted objects you want to examine.
2. From the Drop-down Command Menu, select View or Restore Deleted Objects.
The Web Interface lists the objects that were deleted from the OU or MU you selected. The list can be sorted or filtered as appropriate to locate particular objects (see “Changing View” earlier in this document).
The View or Restore Deleted Objects command is also available on domain and container objects, which allows you to find deleted objects that were direct children of a particular domain or container at the time of deletion.
Web Interface User Guide
37
Restoring a Deleted Object
For restoring deleted objects you can use the Restore command that is available on the menu when you click a deleted object in the Web Interface.
To restore a deleted object
1. In a list of deleted objects, click the object you want to un-delete, and then select the Restore command from the Drop-down Command Menu.
A list of deleted objects can be created: by using the View or Restore Deleted Objects command; by using the Deleted Objects search category; or by selecting the Deleted Objects container in the tree view.
2. Review and, if necessary, change the settings in the Restore Object dialog box, and then click OK to start the restore process.
The Restore Object dialog box prompts you to choose whether deleted child objects (descendants) of the deleted object should also be restored. The Restore child objects check box is selected by default, which ensures that the Restore command applied on a deleted container object restores the entire contents of the container.
To clarify, consider an example in which an administrator accidentally deletes an Organizational Unit (OU) called Sales_Department that contains a number of user accounts for sales persons along with another OU called Admins that, in turn, contains a user account for an administrative assistant. When applying the Restore command on the Sales_Department OU, with the option to restore child objects, Quest One ActiveRoles performs the following sequence of steps:
1. Restore the Sales_Department OU
2. Restore all the deleted user accounts that were direct children of the Sales_Department OU
3. Restore the Admins OU in the Sales_Department OU
4. Restore all the deleted user accounts that were direct children of the Admins OU
If you clear the Restore child objects check box, Quest One ActiveRoles performs only the first step, so the restored Sales_Department OU is empty.
When restoring a deleted object, ensure that its parent object is not deleted. You can identify the parent object by viewing properties of the deleted object: the canonical name of the parent object, preceded with the "deleted from:" label, is displayed beneath the name of the deleted object on the property pages for that object. If the parent object is deleted, you need to restore it prior to restoring its children because deleted objects must be restored to a live parent.

Quest One ActiveRoles
38
Using Approval Workflow
• Understanding Approval Workflow
• Locating Approval Items
• Using “My Tasks”
• Using “My Operations”
4
Quest One ActiveRoles
40
Understanding Approval WorkflowThe approval workflow system included with Quest One ActiveRoles provides:
• A point-and-click interface to configure approval rules, available from the Quest One ActiveRoles console. The approval rules are stored and put into action by the Quest One ActiveRoles Administration Service.
• The directory management section of the Web Interface for submitting operation requests for approval. For example, approval rules could be configured so that creation of a user account starts an approval workflow instead of immediately executing the user creation operation. For information on how to use the directory management section, see Managing Active Directory Objects earlier in this document.
• The Approval area of the Web Interface to manage operation requests and approvals. This area includes a “to-do” list of the approval tasks the designated user has to carry out, allowing the user to approve or reject operation requests.
The Approval area provides a way to perform change approval actions, allowing you to control changes to directory data that require your approval and monitor your operations that require approval by other persons. Thus, you can use this area to:
• Perform approval tasks—approve or reject operations so as to allow or deny the requested changes to directory data. Examples of operations include (but not limited to) creation and modification of user accounts or groups.
• Check the status of your operations—examine whether the changes to directory data you requested are approved and applied, or rejected.
When a Web Interface user makes changes to directory data that require permission from other individuals in an organization, the changes are not applied immediately. Instead, an operation is initiated and submitted for approval. This starts a workflow that coordinates the approvals needed to complete the operation. The operation is performed and the requested changes are applied only after approval. An operation may require approval from one person or from multiple persons.
When an operation is submitted for approval, Quest One ActiveRoles tracks the initiator and the approver or approvers. The initiator is the person who requested the changes. Approvers are those who are authorized to allow or deny the changes. An operation that requires approval generates one or more approval tasks, with each approval task being assigned to the appropriate approver.
To configure approval workflow, the Quest One ActiveRoles administrator creates approval rules to specify what changes require approval and who is authorized to approve or deny change requests. You can find more information about approval workflow in the Quest One ActiveRoles Administrator Guide.
In the Approval area, you can work with the operations for which you are assigned to the approver role. As an approver, you are expected to take appropriate actions on your approval tasks.
To access the Approval area
• On the Web Interface Home page, click in the Approval box.
Web Interface User Guide
41
Locating Approval ItemsThe Approval area provides a number of views to help you locate approval items—tasks and operations:
• My Tasks Contains detailed entries representing the approval tasks assigned to you. Depending on their status, the approval tasks are distributed into two views. The Pending view allows you to manage the approval tasks awaiting your response. The Completed view lists your approval tasks that have been completed.
• My Operations The Recent view lists your recent operations that required approval, and allows you to examine the status and details pertinent to each operation.
In addition to using the pre-defined views, you can locate operations and tasks by using the search function.
To search for an operation or task by ID
1. In the left pane of the Web Interface page, under the Search label, type the ID number of the operation or task in the Search by ID box.
2. Click the button next to the Search by ID box to start the search.
You can also search for approval items (operations and tasks) by properties other than ID. For instance, you can find the operations that were initiated by a specific user. Another example is the ability to locate approval tasks generated within a specific time period. To access the advanced search function, click Advanced Search under the Search label. Then, use the Advanced Search page to configure your search settings and start a search.
Advanced search is the most comprehensive way to search for approval items such as operations and tasks. Use it to find approval items based on their properties. You do this by creating queries, which are sets of one or more rules that must be true for an item to be found. An example of a query for operations is “Initiator is (exactly) John Smith.” This specifies that you are searching for operations that have the Initiator property set to John Smith’s use account.
With advanced search, you can use conditions and values to search for approval items based on item properties (referred to as “fields” on the search page). Conditions are limitations you set on the value of a field to make the search more specific. Each type of item has a set of relevant fields and each type of field has a set of relevant conditions that advanced search displays automatically.
Some fields, such as “Target object property,” require that you select a property to further define your search. In this case, you configure a query to search for operations or tasks specific to the approval of changes to the objects based on a certain property of those objects. For example, to find the operations that request any changes to the “Description” property, you could select the “Target object property” field, select the “Description” property, and then choose the “Modified” condition.
Some conditions require a value. For example, if you select a Date field, the “Is between” condition requires a date range value so you have to select a start date and an end date to specify a date range. Another example is the Initiator field, which requires that you select a user account of the Initiator role holder.
In some cases, a value is not required. For example, if you select the “Modified” condition, value is not necessary since this condition means that you want your search to be based on any changes to a certain property, without considering what changes were actually requested or made to the property value.
The following topics cover the pre-defined views of the Approval section.
Quest One ActiveRoles
42
Using “My Tasks”You can use the My Tasks area to work with the approval tasks assigned to you as an approver. According to their status, the tasks are distributed into two views: Pending and Completed.
For information about the Pending view, see Pending Tasks.
For information about the Completed view, see Completed Tasks.
Pending Tasks
The Pending view contains a list of your approval tasks to be completed. Each task in the list is identified by a header area that provides basic information about the task such as a unique ID number of the task, who requested the operation that is subject to approval, when the task was created, the time limit of the task (if any), and the target object of the operation. In the middle of a task’s header area is a section that contains the title of the task (Approve operation by default), a label indicating the status of the task, and summary information about the operation that is subject to approval.
The task’s header area contains the action buttons you can use to apply the appropriate resolution to the approval task. The action buttons are displayed at the bottom of the header area. Which buttons are displayed depends upon configuration of the approval rule. You may encounter the following action buttons there:
• Approve Click this button to allow the requested operation.
Depending on configuration of the approval and policy rules, ActiveRoles may request you to enter additional information that must be added to the operation request. For example, when you approve the operation of creating a user account, you may have to supply certain properties of the user account in addition to those supplied by the administrator who requested creation of that user account. If additional information is required, clicking Approve displays a page where you can supply the required information. You can also access that page by clicking the Examine task button.
• Reject Click this button to deny the requested operation.
• Escalate Click this button to assign the approval task to an approver of a higher level.
This button is displayed if the approval rule has one or more approver levels (referred to as escalation levels) configured in addition to the initial approver level. Escalation levels are normally used to assign (escalate) the approval task automatically to the approver of a higher level if the task is not completed in time. The approval rule may be configured to allow approvers to escalate approval tasks as needed, in which case the task’s header area contains the Escalate button.
• Delegate Click this button to assign the approval task to a different person. You can select the user account of the person to whom you want to assign the task.
This button is displayed if the approval rule is configured with the option to allow approvers to reassign (delegate) their approval tasks to others.
• Custom buttons The approval rule may add custom buttons to the task’s header area. The action that ActiveRoles performs when you click a custom button depends upon configuration of the workflow containing the approval rule. The administrator who configures the workflow should normally supply an instruction on the use of custom action buttons. To view the instruction, click the Examine task button. This opens a page containing the same action buttons that you see in the task’s header area. The instruction text is displayed above the action buttons on that page.
Web Interface User Guide
43
The task’s header area contains the Examine task button allowing you to get detailed information about the task, review the object properties submitted for approval, and supply or change additional properties. Clicking the Examine task button displays a page containing a replica of the task’s header area, the action buttons, and a number of information sections. Review the information on the page, supply or change the object properties for which the task requests your input, and then click the appropriate action button.
The page that appears when you click the Examine task button includes the following information sections:
• Object properties
The contents of this section heavily depends upon configuration of the approval rule. Thus the approval rule may request you to enter additional information that must be added to the operation request. For example, when you approve the operation of creating a user account, you may have to supply certain properties of the user account in addition to those supplied by the administrator who requested creation of that user account. In this case, enter the requested properties in the fields under Supply or change the following properties.
Normally, the approval rule is configured so that the approver is allowed to review the values of the object properties that were supplied or changed by the operation that is subject to approval. The approval rule may also be configured to allow the approver to change those property values. In either case, you can view or change them in the fields under Review the properties submitted for approval.
• Approvers
This section displays a list of the user accounts or groups to which the approval task is currently assigned. Any of the listed users or members of the listed groups can act as an approver on the task in question.
• Approval progress
This section provides information on the date and time that the task was created and whether the task was escalated to a higher approver level or reassigned (delegated) to other persons. If the task was escalated, you can view when escalation occurred and what caused escalation. If the task was reassigned (delegated), you can view who and when delegated the task and to whom the task was delegated.
• Details
In this section you can view aggregated information about the approval task properties and configuration, and some details of the operation that the task is intended to allow or deny. The Operation ID filed provides a link to a page where you can examine the operation in more detail.
To complete a pending task
1. Click Examine task in the task’s header area.
2. On the Object properties page, review, supply or change the object properties for which the task requests your input, and then click the appropriate action button.
You can also complete a task by clicking the appropriate action button in the task’s header area. However, if the current policy and approval rules require the approver to supply some additional information, ActiveRoles would open the Object properties page, prompting you to configure the required properties.
Quest One ActiveRoles
44
Completed Tasks
The Completed view contains a list of your approval tasks that are completed and do not require approver action. Each task in the list is identified by a header area that provides basic information about the task such as a unique ID number of the task, who requested the operation that is subject to approval, when the task was created, and the target object of the operation. In the middle of a task’s header area is a section that contains the title of the task (Approve operation by default), a label indicating the status of the task, and summary information about the operation that was subject to approval. The header area also identifies the approver action that was applied to complete the task and the completion reason, if any, specified by the approver who completed the task.
The task’s header area contains the Examine task button allowing you to get detailed information about the task and review the object properties that were submitted for approval or changed by the approver who completed the task. Clicking the Examine task button displays a page containing a replica of the task’s header area and the following information sections:
• Object properties
The contents of this section heavily depends upon configuration of the approval rule. Thus the approval rule may request the approver to enter additional information that must be added to the operation request. For example, when you approve the operation of creating a user account, you may have to supply certain properties of the user account in addition to those supplied by the administrator who requested creation of that user account. The values of the properties supplied by the approver are displayed in the fields under Supply or change the following properties.
Normally, the approval rule is configured so that the approver is allowed to review the values of the object properties that were supplied or changed by the operation that is subject to approval. The approval rule may also be configured to allow the approver to change those property values. In either case, you can view them in the fields under Review the properties submitted for approval.
• Approvers
This section displays a list of the user accounts or groups to which the approval task was assigned.
• Approval progress
This section provides information on the date and time that the task was created, and whether the task was escalated to a higher approver level or reassigned (delegated) to other persons. If the task was escalated, you can view when escalation occurred and what caused escalation. If the task was reassigned (delegated), you can view who and when delegated the task and to whom the task was delegated.
The Task completed sub-section indicates the date and time that the task was completed, identifies the approver who completed the task and the approver action that was applied to complete the task, and lists the values of the object properties that were supplied or changed by the approver.
• Details
In this section you can view aggregated information about the approval task properties and configuration, and some details of the operation that was allowed or denied by the completed task. The Operation ID filed provides a link to a page where you can examine the operation in more detail.
Web Interface User Guide
45
Using “My Operations”In the My Operations area, the Recent view lists your operation requests that are waiting for approval from other individuals, as well as those allowed (approved) or denied (rejected) by the approver. You can use this view to monitor the status of your requests. You also have the option to cancel any of your requests that are not yet approved or rejected.
Each operation listed in the Recent view is identified by a header area that provides basic information about the operation such as a unique ID number of the operation, when and by whom the operation was requested, and the target object of the operation. A section in the middle of the operation header contains a summary of the operation, operation status and an operation reason that was supplied when the operation was submitted for approval.
The operation summary identifies the operation type (such as Create user or Change user) and may provide information about the changes to the object properties that result from the operation. From the operation status you can tell whether the operation is waiting for approval (pending), allowed (completed), denied (rejected) or canceled. If a given operation is waiting for approval, you can remove the operation request by clicking the Cancel operation button.
The operation header contains the View operation details button allowing you to get detailed information about the operation and review the object properties that were submitted for approval or changed by the approver who allowed the operation. Clicking the Examine task button displays a page that contains a replica of the operation header and the following information sections under the operation header:
• Properties changed during this operation
This section lists the object property values that were changed as a result of the operation, new values assigned to the properties, and identifies who made the changes.
• Workflow activities and policy actions
This section provides detailed information about all policies and workflows that ActiveRoles performed when processing the operation request, including information about the approval tasks created as a result of approval workflow activities. For each approval task, you can view the status of the task along with aggregated information about the properties and configuration of the task.
From the task status you can tell whether the task is waiting for completion (pending), completed to allow the operation or rejected to deny the operation. From the additional information about a task, you can identify, for instance, the approvers to whom the task is assigned, the due date of the task, the approver who allowed or denied the operation and what changes, if any, the approver made to the original operation request.
• Operation details
This section contains additional information about the operation, including when and by whom the operation was requested, the target object of the operation, the current status of the operation, and the date and time that the record of the operation was last updated.
To view the information section headings, click within the operation header area. To view the contents of a given information section, click the title of that section.

Quest One ActiveRoles
46
Related Documents


![)( CORNELL REPORTS - [email protected] - Cornell University](https://static.cupdf.com/doc/110x72/6206299f8c2f7b17300506a0/-cornell-reports-emailprotected-cornell-university.jpg)