Welcome message from author
This document is posted to help you gain knowledge. Please leave a comment to let me know what you think about it! Share it to your friends and learn new things together.
Transcript
David Beazley and Brian K. Jones
THIRD EDITION
Python Cookbook
Dow
nlo
ad fro
m W
ow
! eBook
<w
ww
.wow
ebook.
com
>
Python Cookbook, Third Editionby David Beazley and Brian K. Jones
Copyright © 2013 David Beazley and Brian Jones. All rights reserved.
Printed in the United States of America.
Published by O’Reilly Media, Inc., 1005 Gravenstein Highway North, Sebastopol, CA 95472.
O’Reilly books may be purchased for educational, business, or sales promotional use. Online editions arealso available for most titles (http://my.safaribooksonline.com). For more information, contact our corporate/institutional sales department: 800-998-9938 or [email protected].
Editors: Meghan Blanchette and Rachel RoumeliotisProduction Editor: Kristen BorgCopyeditor: Jasmine KwitynProofreader: BIM Proofreading Services
Indexer: WordCo Indexing ServicesCover Designer: Karen MontgomeryInterior Designer: David FutatoIllustrator: Robert Romano
May 2013: Third Edition
Revision History for the Third Edition:
2013-05-08: First release
See http://oreilly.com/catalog/errata.csp?isbn=9781449340377 for release details.
Nutshell Handbook, the Nutshell Handbook logo, and the O’Reilly logo are registered trademarks of O’ReillyMedia, Inc. Python Cookbook, the image of a springhaas, and related trade dress are trademarks of O’ReillyMedia, Inc.
Many of the designations used by manufacturers and sellers to distinguish their products are claimed astrademarks. Where those designations appear in this book, and O’Reilly Media, Inc., was aware of a trade‐mark claim, the designations have been printed in caps or initial caps.
While every precaution has been taken in the preparation of this book, the publisher and authors assumeno responsibility for errors or omissions, or for damages resulting from the use of the information containedherein.
ISBN: 978-1-449-34037-7
[LSI]
Table of Contents
Preface. . . . . . . . . . . . . . . . . . . . . . . . . . . . . . . . . . . . . . . . . . . . . . . . . . . . . . . . . . . . . . . . . . . . . . . xi
1. Data Structures and Algorithms. . . . . . . . . . . . . . . . . . . . . . . . . . . . . . . . . . . . . . . . . . . . . . . 11.1. Unpacking a Sequence into Separate Variables 11.2. Unpacking Elements from Iterables of Arbitrary Length 31.3. Keeping the Last N Items 51.4. Finding the Largest or Smallest N Items 71.5. Implementing a Priority Queue 81.6. Mapping Keys to Multiple Values in a Dictionary 111.7. Keeping Dictionaries in Order 121.8. Calculating with Dictionaries 131.9. Finding Commonalities in Two Dictionaries 151.10. Removing Duplicates from a Sequence while Maintaining Order 171.11. Naming a Slice 181.12. Determining the Most Frequently Occurring Items in a Sequence 201.13. Sorting a List of Dictionaries by a Common Key 211.14. Sorting Objects Without Native Comparison Support 231.15. Grouping Records Together Based on a Field 241.16. Filtering Sequence Elements 261.17. Extracting a Subset of a Dictionary 281.18. Mapping Names to Sequence Elements 291.19. Transforming and Reducing Data at the Same Time 321.20. Combining Multiple Mappings into a Single Mapping 33
2. Strings and Text. . . . . . . . . . . . . . . . . . . . . . . . . . . . . . . . . . . . . . . . . . . . . . . . . . . . . . . . . . . . 372.1. Splitting Strings on Any of Multiple Delimiters 372.2. Matching Text at the Start or End of a String 382.3. Matching Strings Using Shell Wildcard Patterns 402.4. Matching and Searching for Text Patterns 42
iii
2.5. Searching and Replacing Text 452.6. Searching and Replacing Case-Insensitive Text 462.7. Specifying a Regular Expression for the Shortest Match 472.8. Writing a Regular Expression for Multiline Patterns 482.9. Normalizing Unicode Text to a Standard Representation 502.10. Working with Unicode Characters in Regular Expressions 522.11. Stripping Unwanted Characters from Strings 532.12. Sanitizing and Cleaning Up Text 542.13. Aligning Text Strings 572.14. Combining and Concatenating Strings 582.15. Interpolating Variables in Strings 612.16. Reformatting Text to a Fixed Number of Columns 642.17. Handling HTML and XML Entities in Text 652.18. Tokenizing Text 662.19. Writing a Simple Recursive Descent Parser 692.20. Performing Text Operations on Byte Strings 78
3. Numbers, Dates, and Times. . . . . . . . . . . . . . . . . . . . . . . . . . . . . . . . . . . . . . . . . . . . . . . . . . 833.1. Rounding Numerical Values 833.2. Performing Accurate Decimal Calculations 843.3. Formatting Numbers for Output 873.4. Working with Binary, Octal, and Hexadecimal Integers 893.5. Packing and Unpacking Large Integers from Bytes 903.6. Performing Complex-Valued Math 923.7. Working with Infinity and NaNs 943.8. Calculating with Fractions 963.9. Calculating with Large Numerical Arrays 973.10. Performing Matrix and Linear Algebra Calculations 1003.11. Picking Things at Random 1023.12. Converting Days to Seconds, and Other Basic Time Conversions 1043.13. Determining Last Friday’s Date 1063.14. Finding the Date Range for the Current Month 1073.15. Converting Strings into Datetimes 1093.16. Manipulating Dates Involving Time Zones 110
4. Iterators and Generators. . . . . . . . . . . . . . . . . . . . . . . . . . . . . . . . . . . . . . . . . . . . . . . . . . . 1134.1. Manually Consuming an Iterator 1134.2. Delegating Iteration 1144.3. Creating New Iteration Patterns with Generators 1154.4. Implementing the Iterator Protocol 1174.5. Iterating in Reverse 1194.6. Defining Generator Functions with Extra State 120
iv | Table of Contents
4.7. Taking a Slice of an Iterator 1224.8. Skipping the First Part of an Iterable 1234.9. Iterating Over All Possible Combinations or Permutations 1254.10. Iterating Over the Index-Value Pairs of a Sequence 1274.11. Iterating Over Multiple Sequences Simultaneously 1294.12. Iterating on Items in Separate Containers 1314.13. Creating Data Processing Pipelines 1324.14. Flattening a Nested Sequence 1354.15. Iterating in Sorted Order Over Merged Sorted Iterables 1364.16. Replacing Infinite while Loops with an Iterator 138
5. Files and I/O. . . . . . . . . . . . . . . . . . . . . . . . . . . . . . . . . . . . . . . . . . . . . . . . . . . . . . . . . . . . . . 1415.1. Reading and Writing Text Data 1415.2. Printing to a File 1445.3. Printing with a Different Separator or Line Ending 1445.4. Reading and Writing Binary Data 1455.5. Writing to a File That Doesn’t Already Exist 1475.6. Performing I/O Operations on a String 1485.7. Reading and Writing Compressed Datafiles 1495.8. Iterating Over Fixed-Sized Records 1515.9. Reading Binary Data into a Mutable Buffer 1525.10. Memory Mapping Binary Files 1535.11. Manipulating Pathnames 1565.12. Testing for the Existence of a File 1575.13. Getting a Directory Listing 1585.14. Bypassing Filename Encoding 1605.15. Printing Bad Filenames 1615.16. Adding or Changing the Encoding of an Already Open File 1635.17. Writing Bytes to a Text File 1655.18. Wrapping an Existing File Descriptor As a File Object 1665.19. Making Temporary Files and Directories 1675.20. Communicating with Serial Ports 1705.21. Serializing Python Objects 171
6. Data Encoding and Processing. . . . . . . . . . . . . . . . . . . . . . . . . . . . . . . . . . . . . . . . . . . . . . . 1756.1. Reading and Writing CSV Data 1756.2. Reading and Writing JSON Data 1796.3. Parsing Simple XML Data 1836.4. Parsing Huge XML Files Incrementally 1866.5. Turning a Dictionary into XML 1896.6. Parsing, Modifying, and Rewriting XML 1916.7. Parsing XML Documents with Namespaces 193
Table of Contents | v
6.8. Interacting with a Relational Database 1956.9. Decoding and Encoding Hexadecimal Digits 1976.10. Decoding and Encoding Base64 1996.11. Reading and Writing Binary Arrays of Structures 1996.12. Reading Nested and Variable-Sized Binary Structures 2036.13. Summarizing Data and Performing Statistics 214
7. Functions. . . . . . . . . . . . . . . . . . . . . . . . . . . . . . . . . . . . . . . . . . . . . . . . . . . . . . . . . . . . . . . . 2177.1. Writing Functions That Accept Any Number of Arguments 2177.2. Writing Functions That Only Accept Keyword Arguments 2197.3. Attaching Informational Metadata to Function Arguments 2207.4. Returning Multiple Values from a Function 2217.5. Defining Functions with Default Arguments 2227.6. Defining Anonymous or Inline Functions 2247.7. Capturing Variables in Anonymous Functions 2257.8. Making an N-Argument Callable Work As a Callable with FewerArguments 2277.9. Replacing Single Method Classes with Functions 2317.10. Carrying Extra State with Callback Functions 2327.11. Inlining Callback Functions 2357.12. Accessing Variables Defined Inside a Closure 238
8. Classes and Objects. . . . . . . . . . . . . . . . . . . . . . . . . . . . . . . . . . . . . . . . . . . . . . . . . . . . . . . . 2438.1. Changing the String Representation of Instances 2438.2. Customizing String Formatting 2458.3. Making Objects Support the Context-Management Protocol 2468.4. Saving Memory When Creating a Large Number of Instances 2488.5. Encapsulating Names in a Class 2508.6. Creating Managed Attributes 2518.7. Calling a Method on a Parent Class 2568.8. Extending a Property in a Subclass 2608.9. Creating a New Kind of Class or Instance Attribute 2648.10. Using Lazily Computed Properties 2678.11. Simplifying the Initialization of Data Structures 2708.12. Defining an Interface or Abstract Base Class 2748.13. Implementing a Data Model or Type System 2778.14. Implementing Custom Containers 2838.15. Delegating Attribute Access 2878.16. Defining More Than One Constructor in a Class 2918.17. Creating an Instance Without Invoking init 2938.18. Extending Classes with Mixins 2948.19. Implementing Stateful Objects or State Machines 299
vi | Table of Contents
8.20. Calling a Method on an Object Given the Name As a String 3058.21. Implementing the Visitor Pattern 3068.22. Implementing the Visitor Pattern Without Recursion 3118.23. Managing Memory in Cyclic Data Structures 3178.24. Making Classes Support Comparison Operations 3218.25. Creating Cached Instances 323
9. Metaprogramming. . . . . . . . . . . . . . . . . . . . . . . . . . . . . . . . . . . . . . . . . . . . . . . . . . . . . . . . 3299.1. Putting a Wrapper Around a Function 3299.2. Preserving Function Metadata When Writing Decorators 3319.3. Unwrapping a Decorator 3339.4. Defining a Decorator That Takes Arguments 3349.5. Defining a Decorator with User Adjustable Attributes 3369.6. Defining a Decorator That Takes an Optional Argument 3399.7. Enforcing Type Checking on a Function Using a Decorator 3419.8. Defining Decorators As Part of a Class 3459.9. Defining Decorators As Classes 3479.10. Applying Decorators to Class and Static Methods 3509.11. Writing Decorators That Add Arguments to Wrapped Functions 3529.12. Using Decorators to Patch Class Definitions 3559.13. Using a Metaclass to Control Instance Creation 3569.14. Capturing Class Attribute Definition Order 3599.15. Defining a Metaclass That Takes Optional Arguments 3629.16. Enforcing an Argument Signature on *args and **kwargs 3649.17. Enforcing Coding Conventions in Classes 3679.18. Defining Classes Programmatically 3709.19. Initializing Class Members at Definition Time 3749.20. Implementing Multiple Dispatch with Function Annotations 3769.21. Avoiding Repetitive Property Methods 3829.22. Defining Context Managers the Easy Way 3849.23. Executing Code with Local Side Effects 3869.24. Parsing and Analyzing Python Source 3889.25. Disassembling Python Byte Code 392
10. Modules and Packages. . . . . . . . . . . . . . . . . . . . . . . . . . . . . . . . . . . . . . . . . . . . . . . . . . . . . 39710.1. Making a Hierarchical Package of Modules 39710.2. Controlling the Import of Everything 39810.3. Importing Package Submodules Using Relative Names 39910.4. Splitting a Module into Multiple Files 40110.5. Making Separate Directories of Code Import Under a CommonNamespace 40410.6. Reloading Modules 406
Table of Contents | vii
10.7. Making a Directory or Zip File Runnable As a Main Script 40710.8. Reading Datafiles Within a Package 40810.9. Adding Directories to sys.path 40910.10. Importing Modules Using a Name Given in a String 41110.11. Loading Modules from a Remote Machine Using Import Hooks 41210.12. Patching Modules on Import 42810.13. Installing Packages Just for Yourself 43110.14. Creating a New Python Environment 43210.15. Distributing Packages 433
11. Network and Web Programming. . . . . . . . . . . . . . . . . . . . . . . . . . . . . . . . . . . . . . . . . . . . . 43711.1. Interacting with HTTP Services As a Client 43711.2. Creating a TCP Server 44111.3. Creating a UDP Server 44511.4. Generating a Range of IP Addresses from a CIDR Address 44711.5. Creating a Simple REST-Based Interface 44911.6. Implementing a Simple Remote Procedure Call with XML-RPC 45411.7. Communicating Simply Between Interpreters 45611.8. Implementing Remote Procedure Calls 45811.9. Authenticating Clients Simply 46111.10. Adding SSL to Network Services 46411.11. Passing a Socket File Descriptor Between Processes 47011.12. Understanding Event-Driven I/O 47511.13. Sending and Receiving Large Arrays 481
12. Concurrency. . . . . . . . . . . . . . . . . . . . . . . . . . . . . . . . . . . . . . . . . . . . . . . . . . . . . . . . . . . . . . 48512.1. Starting and Stopping Threads 48512.2. Determining If a Thread Has Started 48812.3. Communicating Between Threads 49112.4. Locking Critical Sections 49712.5. Locking with Deadlock Avoidance 50012.6. Storing Thread-Specific State 50412.7. Creating a Thread Pool 50512.8. Performing Simple Parallel Programming 50912.9. Dealing with the GIL (and How to Stop Worrying About It) 51312.10. Defining an Actor Task 51612.11. Implementing Publish/Subscribe Messaging 52012.12. Using Generators As an Alternative to Threads 52412.13. Polling Multiple Thread Queues 53112.14. Launching a Daemon Process on Unix 534
13. Utility Scripting and System Administration. . . . . . . . . . . . . . . . . . . . . . . . . . . . . . . . . . . 539
viii | Table of Contents
13.1. Accepting Script Input via Redirection, Pipes, or Input Files 53913.2. Terminating a Program with an Error Message 54013.3. Parsing Command-Line Options 54113.4. Prompting for a Password at Runtime 54413.5. Getting the Terminal Size 54513.6. Executing an External Command and Getting Its Output 54513.7. Copying or Moving Files and Directories 54713.8. Creating and Unpacking Archives 54913.9. Finding Files by Name 55013.10. Reading Configuration Files 55213.11. Adding Logging to Simple Scripts 55513.12. Adding Logging to Libraries 55813.13. Making a Stopwatch Timer 55913.14. Putting Limits on Memory and CPU Usage 56113.15. Launching a Web Browser 563
14. Testing, Debugging, and Exceptions. . . . . . . . . . . . . . . . . . . . . . . . . . . . . . . . . . . . . . . . . . 56514.1. Testing Output Sent to stdout 56514.2. Patching Objects in Unit Tests 56714.3. Testing for Exceptional Conditions in Unit Tests 57014.4. Logging Test Output to a File 57214.5. Skipping or Anticipating Test Failures 57314.6. Handling Multiple Exceptions 57414.7. Catching All Exceptions 57614.8. Creating Custom Exceptions 57814.9. Raising an Exception in Response to Another Exception 58014.10. Reraising the Last Exception 58214.11. Issuing Warning Messages 58314.12. Debugging Basic Program Crashes 58514.13. Profiling and Timing Your Program 58714.14. Making Your Programs Run Faster 590
15. C Extensions. . . . . . . . . . . . . . . . . . . . . . . . . . . . . . . . . . . . . . . . . . . . . . . . . . . . . . . . . . . . . . 59715.1. Accessing C Code Using ctypes 59915.2. Writing a Simple C Extension Module 60515.3. Writing an Extension Function That Operates on Arrays 60915.4. Managing Opaque Pointers in C Extension Modules 61215.5. Defining and Exporting C APIs from Extension Modules 61415.6. Calling Python from C 61915.7. Releasing the GIL in C Extensions 62515.8. Mixing Threads from C and Python 62515.9. Wrapping C Code with Swig 627
Table of Contents | ix
15.10. Wrapping Existing C Code with Cython 63215.11. Using Cython to Write High-Performance Array Operations 63815.12. Turning a Function Pointer into a Callable 64315.13. Passing NULL-Terminated Strings to C Libraries 64415.14. Passing Unicode Strings to C Libraries 64815.15. Converting C Strings to Python 65315.16. Working with C Strings of Dubious Encoding 65415.17. Passing Filenames to C Extensions 65715.18. Passing Open Files to C Extensions 65815.19. Reading File-Like Objects from C 65915.20. Consuming an Iterable from C 66215.21. Diagnosing Segmentation Faults 663
A. Further Reading. . . . . . . . . . . . . . . . . . . . . . . . . . . . . . . . . . . . . . . . . . . . . . . . . . . . . . . . . . . 665
Index. . . . . . . . . . . . . . . . . . . . . . . . . . . . . . . . . . . . . . . . . . . . . . . . . . . . . . . . . . . . . . . . . . . . . . . 667
x | Table of Contents
Preface
Since 2008, the Python world has been watching the slow evolution of Python 3. It wasalways known that the adoption of Python 3 would likely take a long time. In fact, evenat the time of this writing (2013), most working Python programmers continue to usePython 2 in production. A lot has been made about the fact that Python 3 is not backwardcompatible with past versions. To be sure, backward compatibility is an issue for anyonewith an existing code base. However, if you shift your view toward the future, you’ll findthat Python 3 offers much more than meets the eye.
Just as Python 3 is about the future, this edition of the Python Cookbook represents amajor change over past editions. First and foremost, this is meant to be a very forwardlooking book. All of the recipes have been written and tested with Python 3.3 withoutregard to past Python versions or the “old way” of doing things. In fact, many of therecipes will only work with Python 3.3 and above. Doing so may be a calculated risk,but the ultimate goal is to write a book of recipes based on the most modern tools andidioms possible. It is hoped that the recipes can serve as a guide for people writing newcode in Python 3 or those who hope to modernize existing code.
Needless to say, writing a book of recipes in this style presents a certain editorial chal‐lenge. An online search for Python recipes returns literally thousands of useful recipeson sites such as ActiveState’s Python recipes or Stack Overflow. However, most of theserecipes are steeped in history and the past. Besides being written almost exclusively forPython 2, they often contain workarounds and hacks related to differences between oldversions of Python (e.g., version 2.3 versus 2.4). Moreover, they often use outdatedtechniques that have simply become a built-in feature of Python 3.3. Finding recipesexclusively focused on Python 3 can be a bit more difficult.
Rather than attempting to seek out Python 3-specific recipes, the topics of this book aremerely inspired by existing code and techniques. Using these ideas as a springboard,the writing is an original work that has been deliberately written with the most modernPython programming techniques possible. Thus, it can serve as a reference for anyonewho wants to write their code in a modern style.
xi
In choosing which recipes to include, there is a certain realization that it is simplyimpossible to write a book that covers every possible thing that someone might do withPython. Thus, a priority has been given to topics that focus on the core Python languageas well as tasks that are common to a wide variety of application domains. In addition,many of the recipes aim to illustrate features that are new to Python 3 and more likelyto be unknown to even experienced programmers using older versions. There is also acertain preference to recipes that illustrate a generally applicable programming tech‐nique (i.e., programming patterns) as opposed to those that narrowly try to address avery specific practical problem. Although certain third-party packages get coverage, amajority of the recipes focus on the core language and standard library.
Who This Book Is ForThis book is aimed at more experienced Python programmers who are looking todeepen their understanding of the language and modern programming idioms. Muchof the material focuses on some of the more advanced techniques used by libraries,frameworks, and applications. Throughout the book, the recipes generally assume thatthe reader already has the necessary background to understand the topic at hand (e.g.,general knowledge of computer science, data structures, complexity, systems program‐ming, concurrency, C programming, etc.). Moreover, the recipes are often just skeletonsthat aim to provide essential information for getting started, but which require thereader to do more research to fill in the details. As such, it is assumed that the readerknows how to use search engines and Python’s excellent online documentation.
Many of the more advanced recipes will reward the reader’s patience with a much greaterinsight into how Python actually works under the covers. You will learn new tricks andtechniques that can be applied to your own code.
Who This Book Is Not ForThis is not a book designed for beginners trying to learn Python for the first time. Infact, it already assumes that you know the basics that might be taught in a Python tutorialor more introductory book. This book is also not designed to serve as a quick referencemanual (e.g., quickly looking up the functions in a specific module). Instead, the bookaims to focus on specific programming topics, show possible solutions, and serve as aspringboard for jumping into more advanced material you might find online or in areference.
xii | Preface
Dow
nlo
ad fro
m W
ow
! eBook
<w
ww
.wow
ebook.
com
>
Conventions Used in This BookThe following typographical conventions are used in this book:Italic
Indicates new terms, URLs, email addresses, filenames, and file extensions.
Constant width
Used for program listings, as well as within paragraphs to refer to program elementssuch as variable or function names, databases, data types, environment variables,statements, and keywords.
Constant width bold
Shows commands or other text that should be typed literally by the user.
Constant width italicShows text that should be replaced with user-supplied values or by values deter‐mined by context.
This icon signifies a tip, suggestion, or general note.
This icon indicates a warning or caution.
Online Code ExamplesAlmost all of the code examples in this book are available online at http://github.com/dabeaz/python-cookbook. The authors welcome bug fixes, improvements, and com‐ments.
Using Code ExamplesThis book is here to help you get your job done. In general, if this book includes codeexamples, you may use the code in this book in your programs and documentation. Youdo not need to contact us for permission unless you’re reproducing a significant portionof the code. For example, writing a program that uses several chunks of code from thisbook does not require permission. Selling or distributing a CD-ROM of examples fromO’Reilly books does require permission. Answering a question by citing this book andquoting example code does not require permission. Incorporating a significant amount
Preface | xiii

of example code from this book into your product’s documentation does require per‐mission.
We appreciate, but do not require, attribution. An attribution usually includes the title,author, publisher, and ISBN. For example: Python Cookbook, 3rd edition, by DavidBeazley and Brian K. Jones (O’Reilly). Copyright 2013 David Beazley and Brian Jones,978-1-449-34037-7.
If you feel your use of code examples falls outside fair use or the permission given here,feel free to contact us at [email protected].
Safari® Books OnlineSafari Books Online is an on-demand digital library that delivers ex‐pert content in both book and video form from the world’s leadingauthors in technology and business.
Technology professionals, software developers, web designers, and business and crea‐tive professionals use Safari Books Online as their primary resource for research, prob‐lem solving, learning, and certification training.
Safari Books Online offers a range of product mixes and pricing programs for organi‐zations, government agencies, and individuals. Subscribers have access to thousands ofbooks, training videos, and prepublication manuscripts in one fully searchable databasefrom publishers like O’Reilly Media, Prentice Hall Professional, Addison-Wesley Pro‐fessional, Microsoft Press, Sams, Que, Peachpit Press, Focal Press, Cisco Press, JohnWiley & Sons, Syngress, Morgan Kaufmann, IBM Redbooks, Packt, Adobe Press, FTPress, Apress, Manning, New Riders, McGraw-Hill, Jones & Bartlett, Course Technol‐ogy, and dozens more. For more information about Safari Books Online, please visit usonline.
How to Contact UsPlease address comments and questions concerning this book to the publisher:
O’Reilly Media, Inc.1005 Gravenstein Highway NorthSebastopol, CA 95472800-998-9938 (in the United States or Canada)707-829-0515 (international or local)707-829-0104 (fax)
We have a web page for this book, where we list errata, examples, and any additionalinformation. You can access this page at http://oreil.ly/python_cookbook_3e.
xiv | Preface
To comment or ask technical questions about this book, send email to [email protected].
For more information about our books, courses, conferences, and news, see our websiteat http://www.oreilly.com.
Find us on Facebook: http://facebook.com/oreilly
Follow us on Twitter: http://twitter.com/oreillymedia
Watch us on YouTube: http://www.youtube.com/oreillymedia
AcknowledgmentsWe would like to acknowledge the technical reviewers, Jake Vanderplas, Robert Kern,and Andrea Crotti, for their very helpful comments, as well as the general Python com‐munity for their support and encouragement. We would also like to thank the editorsof the prior edition, Alex Martelli, Anna Ravenscroft, and David Ascher. Although thisedition is newly written, the previous edition provided an initial framework for selectingthe topics and recipes of interest. Last, but not least, we would like to thank readers ofthe early release editions for their comments and suggestions for improvement.
David Beazley’s AcknowledgmentsWriting a book is no small task. As such, I would like to thank my wife Paula and mytwo boys for their patience and support during this project. Much of the material in thisbook was derived from content I developed teaching Python-related training classesover the last six years. Thus, I’d like to thank all of the students who have taken mycourses and ultimately made this book possible. I’d also like to thank Ned Batchelder,Travis Oliphant, Peter Wang, Brian Van de Ven, Hugo Shi, Raymond Hettinger, MichaelFoord, and Daniel Klein for traveling to the four corners of the world to teach thesecourses while I stayed home in Chicago to work on this project. Meghan Blanchette andRachel Roumeliotis of O’Reilly were also instrumental in seeing this project through tocompletion despite the drama of several false starts and unforeseen delays. Last, but notleast, I’d like to thank the Python community for their continued support and puttingup with my flights of diabolical fancy.
David M. Beazley
http://www.dabeaz.com
https://twitter.com/dabeaz
Preface | xv

Brian Jones’ AcknowledgmentsI would like to thank both my coauthor, David Beazley, as well as Meghan Blanchetteand Rachel Roumeliotis of O’Reilly, for working with me on this project. I would alsolike to thank my amazing wife, Natasha, for her patience and encouragement in thisproject, and her support in all of my ambitions. Most of all, I’d like to thank the Pythoncommunity at large. Though I have contributed to the support of various open sourceprojects, languages, clubs, and the like, no work has been so gratifying and rewardingas that which has been in the service of the Python community.
Brian K. Jones
http://www.protocolostomy.com
https://twitter.com/bkjones
xvi | Preface
CHAPTER 1
Data Structures and Algorithms
Python provides a variety of useful built-in data structures, such as lists, sets, and dic‐tionaries. For the most part, the use of these structures is straightforward. However,common questions concerning searching, sorting, ordering, and filtering often arise.Thus, the goal of this chapter is to discuss common data structures and algorithmsinvolving data. In addition, treatment is given to the various data structures containedin the collections module.
1.1. Unpacking a Sequence into Separate VariablesProblemYou have an N-element tuple or sequence that you would like to unpack into a collectionof N variables.
SolutionAny sequence (or iterable) can be unpacked into variables using a simple assignmentoperation. The only requirement is that the number of variables and structure matchthe sequence. For example:
>>> p = (4, 5)>>> x, y = p>>> x4>>> y5>>>
>>> data = [ 'ACME', 50, 91.1, (2012, 12, 21) ]>>> name, shares, price, date = data>>> name
1

'ACME'>>> date(2012, 12, 21)
>>> name, shares, price, (year, mon, day) = data>>> name'ACME'>>> year2012>>> mon12>>> day21>>>
If there is a mismatch in the number of elements, you’ll get an error. For example:
>>> p = (4, 5)>>> x, y, z = pTraceback (most recent call last): File "<stdin>", line 1, in <module>ValueError: need more than 2 values to unpack>>>
DiscussionUnpacking actually works with any object that happens to be iterable, not just tuples orlists. This includes strings, files, iterators, and generators. For example:
>>> s = 'Hello'>>> a, b, c, d, e = s>>> a'H'>>> b'e'>>> e'o'>>>
When unpacking, you may sometimes want to discard certain values. Python has nospecial syntax for this, but you can often just pick a throwaway variable name for it. Forexample:
>>> data = [ 'ACME', 50, 91.1, (2012, 12, 21) ]>>> _, shares, price, _ = data>>> shares50>>> price91.1>>>
However, make sure that the variable name you pick isn’t being used for something elsealready.
2 | Chapter 1: Data Structures and Algorithms
1.2. Unpacking Elements from Iterables of ArbitraryLengthProblemYou need to unpack N elements from an iterable, but the iterable may be longer than Nelements, causing a “too many values to unpack” exception.
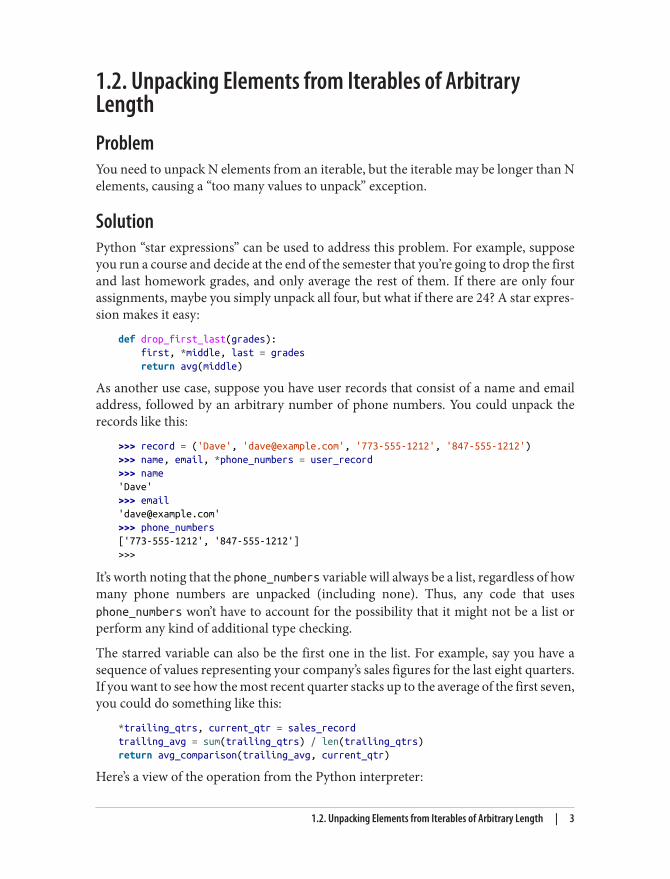
SolutionPython “star expressions” can be used to address this problem. For example, supposeyou run a course and decide at the end of the semester that you’re going to drop the firstand last homework grades, and only average the rest of them. If there are only fourassignments, maybe you simply unpack all four, but what if there are 24? A star expres‐sion makes it easy:
def drop_first_last(grades): first, *middle, last = grades return avg(middle)
As another use case, suppose you have user records that consist of a name and emailaddress, followed by an arbitrary number of phone numbers. You could unpack therecords like this:
>>> record = ('Dave', '[email protected]', '773-555-1212', '847-555-1212')>>> name, email, *phone_numbers = user_record>>> name'Dave'>>> email'[email protected]'>>> phone_numbers['773-555-1212', '847-555-1212']>>>
It’s worth noting that the phone_numbers variable will always be a list, regardless of howmany phone numbers are unpacked (including none). Thus, any code that usesphone_numbers won’t have to account for the possibility that it might not be a list orperform any kind of additional type checking.
The starred variable can also be the first one in the list. For example, say you have asequence of values representing your company’s sales figures for the last eight quarters.If you want to see how the most recent quarter stacks up to the average of the first seven,you could do something like this:
*trailing_qtrs, current_qtr = sales_recordtrailing_avg = sum(trailing_qtrs) / len(trailing_qtrs)return avg_comparison(trailing_avg, current_qtr)
Here’s a view of the operation from the Python interpreter:
1.2. Unpacking Elements from Iterables of Arbitrary Length | 3
>>> *trailing, current = [10, 8, 7, 1, 9, 5, 10, 3]>>> trailing[10, 8, 7, 1, 9, 5, 10]>>> current3
DiscussionExtended iterable unpacking is tailor-made for unpacking iterables of unknown or ar‐bitrary length. Oftentimes, these iterables have some known component or pattern intheir construction (e.g. “everything after element 1 is a phone number”), and star un‐packing lets the developer leverage those patterns easily instead of performing acro‐batics to get at the relevant elements in the iterable.
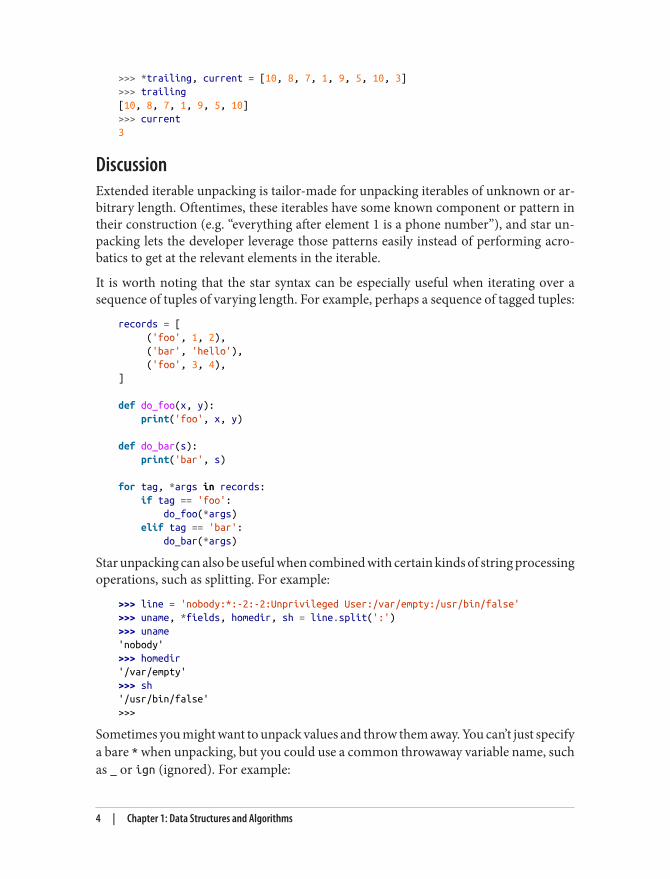
It is worth noting that the star syntax can be especially useful when iterating over asequence of tuples of varying length. For example, perhaps a sequence of tagged tuples:
records = [ ('foo', 1, 2), ('bar', 'hello'), ('foo', 3, 4),]
def do_foo(x, y): print('foo', x, y)
def do_bar(s): print('bar', s)
for tag, *args in records: if tag == 'foo': do_foo(*args) elif tag == 'bar': do_bar(*args)
Star unpacking can also be useful when combined with certain kinds of string processingoperations, such as splitting. For example:
>>> line = 'nobody:*:-2:-2:Unprivileged User:/var/empty:/usr/bin/false'>>> uname, *fields, homedir, sh = line.split(':')>>> uname'nobody'>>> homedir'/var/empty'>>> sh'/usr/bin/false'>>>
Sometimes you might want to unpack values and throw them away. You can’t just specifya bare * when unpacking, but you could use a common throwaway variable name, suchas _ or ign (ignored). For example:
4 | Chapter 1: Data Structures and Algorithms

>>> record = ('ACME', 50, 123.45, (12, 18, 2012))>>> name, *_, (*_, year) = record>>> name'ACME'>>> year2012>>>
There is a certain similarity between star unpacking and list-processing features of var‐ious functional languages. For example, if you have a list, you can easily split it into headand tail components like this:
>>> items = [1, 10, 7, 4, 5, 9]>>> head, *tail = items>>> head1>>> tail[10, 7, 4, 5, 9]>>>
One could imagine writing functions that perform such splitting in order to carry outsome kind of clever recursive algorithm. For example:
>>> def sum(items):... head, *tail = items... return head + sum(tail) if tail else head...>>> sum(items)36>>>
However, be aware that recursion really isn’t a strong Python feature due to the inherentrecursion limit. Thus, this last example might be nothing more than an academic cu‐riosity in practice.
1.3. Keeping the Last N ItemsProblemYou want to keep a limited history of the last few items seen during iteration or duringsome other kind of processing.
SolutionKeeping a limited history is a perfect use for a collections.deque. For example, thefollowing code performs a simple text match on a sequence of lines and yields thematching line along with the previous N lines of context when found:
1.3. Keeping the Last N Items | 5
Dow
nlo
ad fro
m W
ow
! eBook
<w
ww
.wow
ebook.
com
>
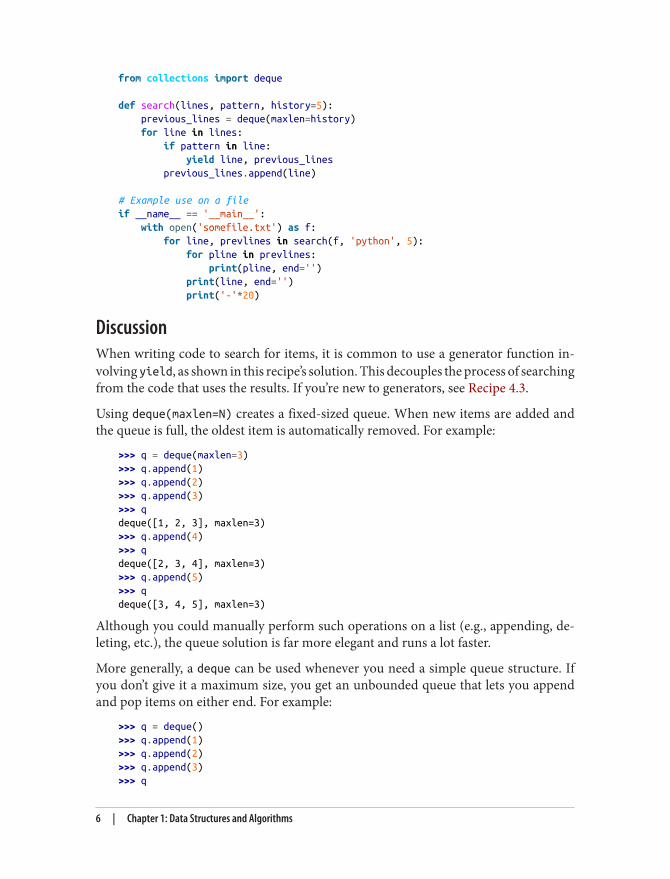
from collections import deque
def search(lines, pattern, history=5): previous_lines = deque(maxlen=history) for line in lines: if pattern in line: yield line, previous_lines previous_lines.append(line)
# Example use on a fileif __name__ == '__main__': with open('somefile.txt') as f: for line, prevlines in search(f, 'python', 5): for pline in prevlines: print(pline, end='') print(line, end='') print('-'*20)
DiscussionWhen writing code to search for items, it is common to use a generator function in‐volving yield, as shown in this recipe’s solution. This decouples the process of searchingfrom the code that uses the results. If you’re new to generators, see Recipe 4.3.
Using deque(maxlen=N) creates a fixed-sized queue. When new items are added andthe queue is full, the oldest item is automatically removed. For example:
>>> q = deque(maxlen=3)>>> q.append(1)>>> q.append(2)>>> q.append(3)>>> qdeque([1, 2, 3], maxlen=3)>>> q.append(4)>>> qdeque([2, 3, 4], maxlen=3)>>> q.append(5)>>> qdeque([3, 4, 5], maxlen=3)
Although you could manually perform such operations on a list (e.g., appending, de‐leting, etc.), the queue solution is far more elegant and runs a lot faster.
More generally, a deque can be used whenever you need a simple queue structure. Ifyou don’t give it a maximum size, you get an unbounded queue that lets you appendand pop items on either end. For example:
>>> q = deque()>>> q.append(1)>>> q.append(2)>>> q.append(3)>>> q
6 | Chapter 1: Data Structures and Algorithms
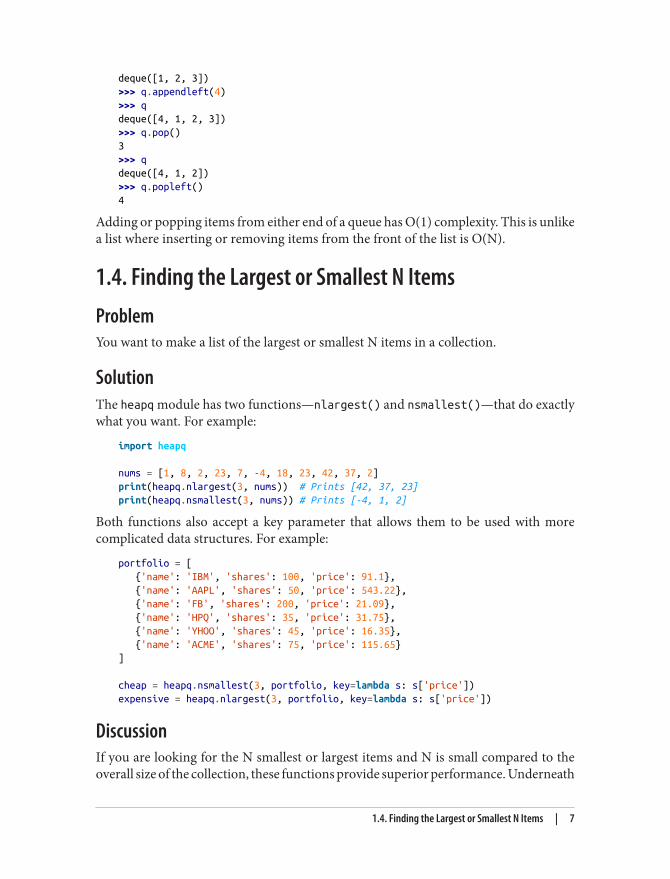
deque([1, 2, 3])>>> q.appendleft(4)>>> qdeque([4, 1, 2, 3])>>> q.pop()3>>> qdeque([4, 1, 2])>>> q.popleft()4
Adding or popping items from either end of a queue has O(1) complexity. This is unlikea list where inserting or removing items from the front of the list is O(N).
1.4. Finding the Largest or Smallest N ItemsProblemYou want to make a list of the largest or smallest N items in a collection.
SolutionThe heapq module has two functions—nlargest() and nsmallest()—that do exactlywhat you want. For example:
import heapq
nums = [1, 8, 2, 23, 7, -4, 18, 23, 42, 37, 2]print(heapq.nlargest(3, nums)) # Prints [42, 37, 23]print(heapq.nsmallest(3, nums)) # Prints [-4, 1, 2]
Both functions also accept a key parameter that allows them to be used with morecomplicated data structures. For example:
portfolio = [ {'name': 'IBM', 'shares': 100, 'price': 91.1}, {'name': 'AAPL', 'shares': 50, 'price': 543.22}, {'name': 'FB', 'shares': 200, 'price': 21.09}, {'name': 'HPQ', 'shares': 35, 'price': 31.75}, {'name': 'YHOO', 'shares': 45, 'price': 16.35}, {'name': 'ACME', 'shares': 75, 'price': 115.65}]
cheap = heapq.nsmallest(3, portfolio, key=lambda s: s['price'])expensive = heapq.nlargest(3, portfolio, key=lambda s: s['price'])
DiscussionIf you are looking for the N smallest or largest items and N is small compared to theoverall size of the collection, these functions provide superior performance. Underneath
1.4. Finding the Largest or Smallest N Items | 7
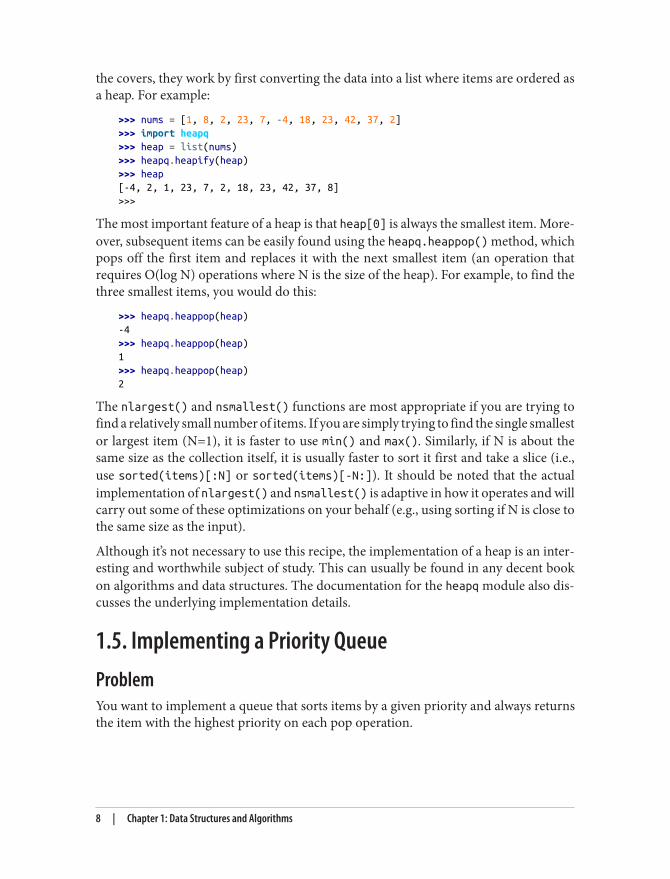
the covers, they work by first converting the data into a list where items are ordered asa heap. For example:
>>> nums = [1, 8, 2, 23, 7, -4, 18, 23, 42, 37, 2]>>> import heapq>>> heap = list(nums)>>> heapq.heapify(heap)>>> heap[-4, 2, 1, 23, 7, 2, 18, 23, 42, 37, 8]>>>
The most important feature of a heap is that heap[0] is always the smallest item. More‐over, subsequent items can be easily found using the heapq.heappop() method, whichpops off the first item and replaces it with the next smallest item (an operation thatrequires O(log N) operations where N is the size of the heap). For example, to find thethree smallest items, you would do this:
>>> heapq.heappop(heap)-4>>> heapq.heappop(heap)1>>> heapq.heappop(heap)2
The nlargest() and nsmallest() functions are most appropriate if you are trying tofind a relatively small number of items. If you are simply trying to find the single smallestor largest item (N=1), it is faster to use min() and max(). Similarly, if N is about thesame size as the collection itself, it is usually faster to sort it first and take a slice (i.e.,use sorted(items)[:N] or sorted(items)[-N:]). It should be noted that the actualimplementation of nlargest() and nsmallest() is adaptive in how it operates and willcarry out some of these optimizations on your behalf (e.g., using sorting if N is close tothe same size as the input).
Although it’s not necessary to use this recipe, the implementation of a heap is an inter‐esting and worthwhile subject of study. This can usually be found in any decent bookon algorithms and data structures. The documentation for the heapq module also dis‐cusses the underlying implementation details.
1.5. Implementing a Priority QueueProblemYou want to implement a queue that sorts items by a given priority and always returnsthe item with the highest priority on each pop operation.
8 | Chapter 1: Data Structures and Algorithms
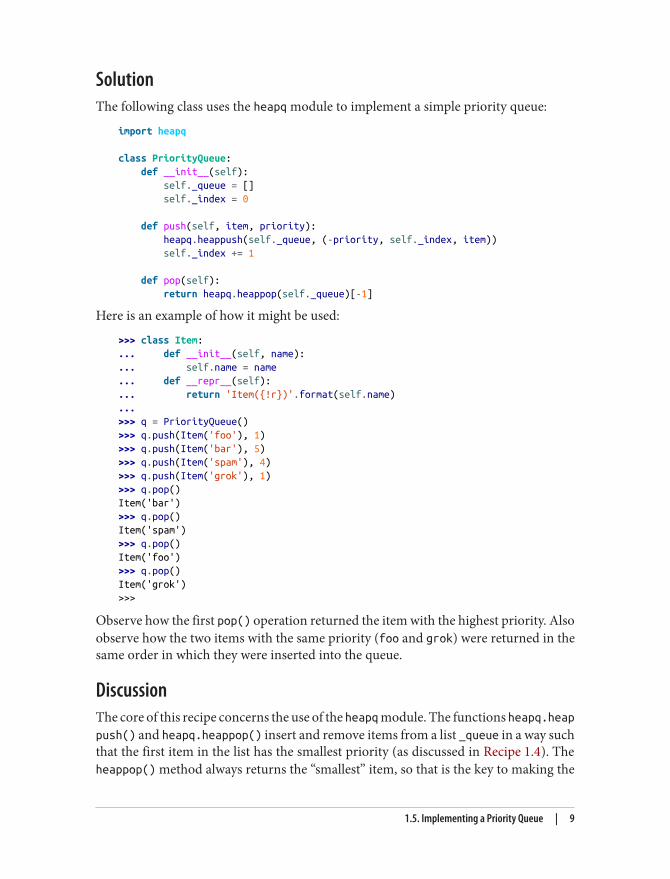
SolutionThe following class uses the heapq module to implement a simple priority queue:
import heapq
class PriorityQueue: def __init__(self): self._queue = [] self._index = 0
def push(self, item, priority): heapq.heappush(self._queue, (-priority, self._index, item)) self._index += 1
def pop(self): return heapq.heappop(self._queue)[-1]
Here is an example of how it might be used:
>>> class Item:... def __init__(self, name):... self.name = name... def __repr__(self):... return 'Item({!r})'.format(self.name)...>>> q = PriorityQueue()>>> q.push(Item('foo'), 1)>>> q.push(Item('bar'), 5)>>> q.push(Item('spam'), 4)>>> q.push(Item('grok'), 1)>>> q.pop()Item('bar')>>> q.pop()Item('spam')>>> q.pop()Item('foo')>>> q.pop()Item('grok')>>>
Observe how the first pop() operation returned the item with the highest priority. Alsoobserve how the two items with the same priority (foo and grok) were returned in thesame order in which they were inserted into the queue.
DiscussionThe core of this recipe concerns the use of the heapq module. The functions heapq.heappush() and heapq.heappop() insert and remove items from a list _queue in a way suchthat the first item in the list has the smallest priority (as discussed in Recipe 1.4). Theheappop() method always returns the “smallest” item, so that is the key to making the
1.5. Implementing a Priority Queue | 9
queue pop the correct items. Moreover, since the push and pop operations have O(logN) complexity where N is the number of items in the heap, they are fairly efficient evenfor fairly large values of N.
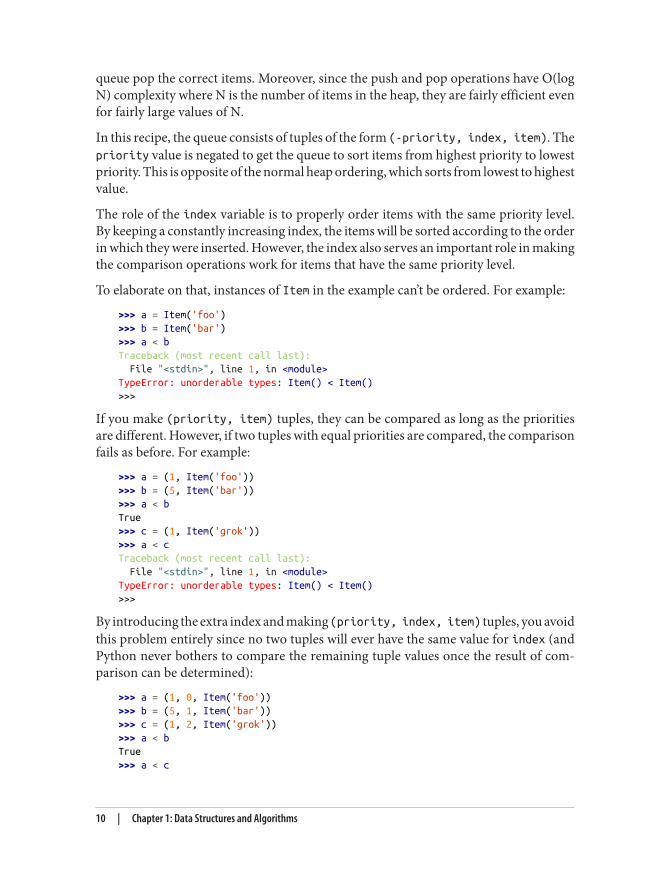
In this recipe, the queue consists of tuples of the form (-priority, index, item). Thepriority value is negated to get the queue to sort items from highest priority to lowestpriority. This is opposite of the normal heap ordering, which sorts from lowest to highestvalue.
The role of the index variable is to properly order items with the same priority level.By keeping a constantly increasing index, the items will be sorted according to the orderin which they were inserted. However, the index also serves an important role in makingthe comparison operations work for items that have the same priority level.
To elaborate on that, instances of Item in the example can’t be ordered. For example:
>>> a = Item('foo')>>> b = Item('bar')>>> a < bTraceback (most recent call last): File "<stdin>", line 1, in <module>TypeError: unorderable types: Item() < Item()>>>
If you make (priority, item) tuples, they can be compared as long as the prioritiesare different. However, if two tuples with equal priorities are compared, the comparisonfails as before. For example:
>>> a = (1, Item('foo'))>>> b = (5, Item('bar'))>>> a < bTrue>>> c = (1, Item('grok'))>>> a < cTraceback (most recent call last): File "<stdin>", line 1, in <module>TypeError: unorderable types: Item() < Item()>>>
By introducing the extra index and making (priority, index, item) tuples, you avoidthis problem entirely since no two tuples will ever have the same value for index (andPython never bothers to compare the remaining tuple values once the result of com‐parison can be determined):
>>> a = (1, 0, Item('foo'))>>> b = (5, 1, Item('bar'))>>> c = (1, 2, Item('grok'))>>> a < bTrue>>> a < c
10 | Chapter 1: Data Structures and Algorithms
True>>>
If you want to use this queue for communication between threads, you need to addappropriate locking and signaling. See Recipe 12.3 for an example of how to do this.
The documentation for the heapq module has further examples and discussion con‐cerning the theory and implementation of heaps.
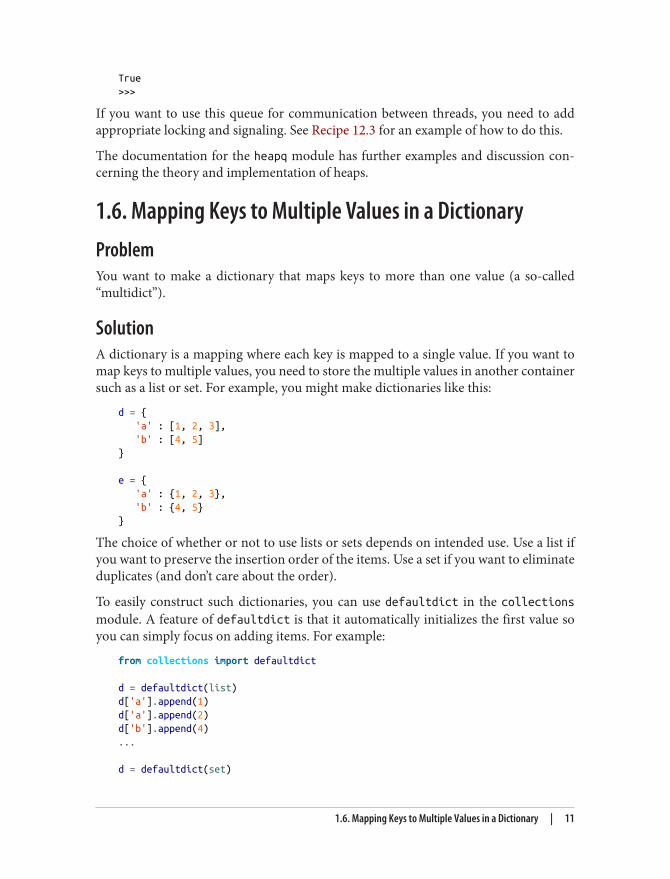
1.6. Mapping Keys to Multiple Values in a DictionaryProblemYou want to make a dictionary that maps keys to more than one value (a so-called“multidict”).
SolutionA dictionary is a mapping where each key is mapped to a single value. If you want tomap keys to multiple values, you need to store the multiple values in another containersuch as a list or set. For example, you might make dictionaries like this:
d = { 'a' : [1, 2, 3], 'b' : [4, 5]}
e = { 'a' : {1, 2, 3}, 'b' : {4, 5}}
The choice of whether or not to use lists or sets depends on intended use. Use a list ifyou want to preserve the insertion order of the items. Use a set if you want to eliminateduplicates (and don’t care about the order).
To easily construct such dictionaries, you can use defaultdict in the collectionsmodule. A feature of defaultdict is that it automatically initializes the first value soyou can simply focus on adding items. For example:
from collections import defaultdict
d = defaultdict(list)d['a'].append(1)d['a'].append(2)d['b'].append(4)...
d = defaultdict(set)
1.6. Mapping Keys to Multiple Values in a Dictionary | 11
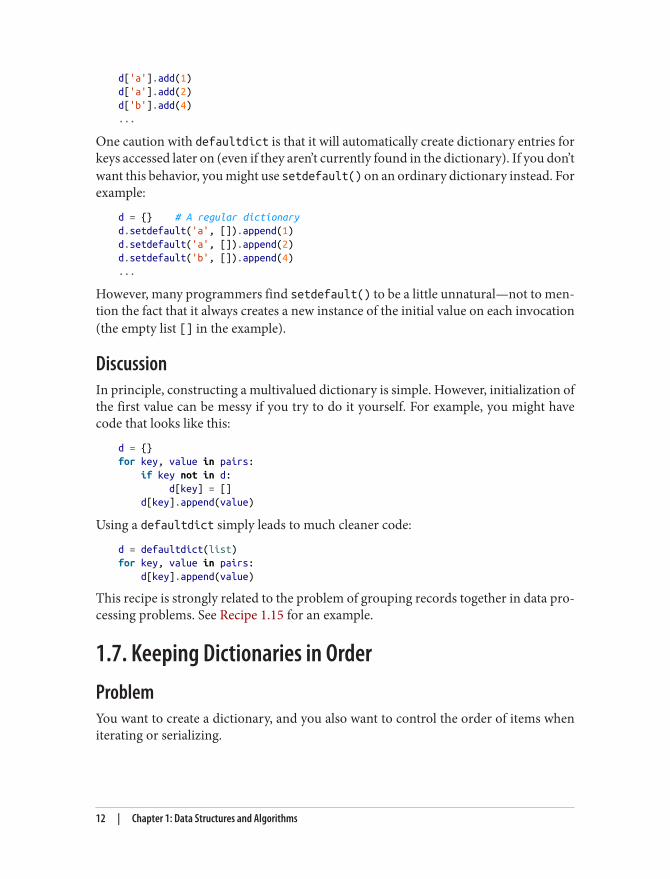
d['a'].add(1)d['a'].add(2)d['b'].add(4)...
One caution with defaultdict is that it will automatically create dictionary entries forkeys accessed later on (even if they aren’t currently found in the dictionary). If you don’twant this behavior, you might use setdefault() on an ordinary dictionary instead. Forexample:
d = {} # A regular dictionaryd.setdefault('a', []).append(1)d.setdefault('a', []).append(2)d.setdefault('b', []).append(4)...
However, many programmers find setdefault() to be a little unnatural—not to men‐tion the fact that it always creates a new instance of the initial value on each invocation(the empty list [] in the example).
DiscussionIn principle, constructing a multivalued dictionary is simple. However, initialization ofthe first value can be messy if you try to do it yourself. For example, you might havecode that looks like this:
d = {}for key, value in pairs: if key not in d: d[key] = [] d[key].append(value)
Using a defaultdict simply leads to much cleaner code:
d = defaultdict(list)for key, value in pairs: d[key].append(value)
This recipe is strongly related to the problem of grouping records together in data pro‐cessing problems. See Recipe 1.15 for an example.
1.7. Keeping Dictionaries in OrderProblemYou want to create a dictionary, and you also want to control the order of items wheniterating or serializing.
12 | Chapter 1: Data Structures and Algorithms
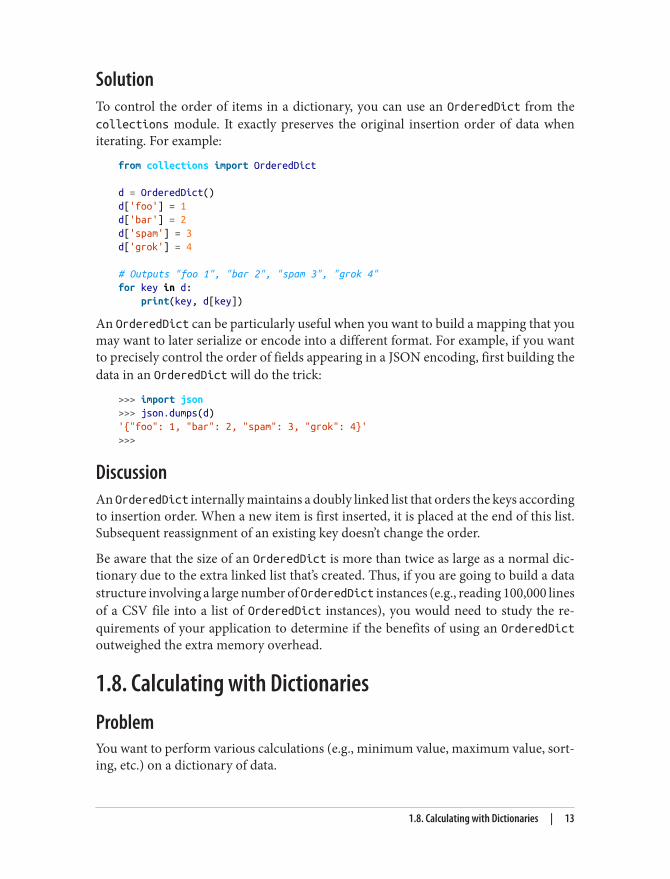
SolutionTo control the order of items in a dictionary, you can use an OrderedDict from thecollections module. It exactly preserves the original insertion order of data wheniterating. For example:
from collections import OrderedDict
d = OrderedDict()d['foo'] = 1d['bar'] = 2d['spam'] = 3d['grok'] = 4
# Outputs "foo 1", "bar 2", "spam 3", "grok 4"for key in d: print(key, d[key])
An OrderedDict can be particularly useful when you want to build a mapping that youmay want to later serialize or encode into a different format. For example, if you wantto precisely control the order of fields appearing in a JSON encoding, first building thedata in an OrderedDict will do the trick:
>>> import json>>> json.dumps(d)'{"foo": 1, "bar": 2, "spam": 3, "grok": 4}'>>>
DiscussionAn OrderedDict internally maintains a doubly linked list that orders the keys accordingto insertion order. When a new item is first inserted, it is placed at the end of this list.Subsequent reassignment of an existing key doesn’t change the order.
Be aware that the size of an OrderedDict is more than twice as large as a normal dic‐tionary due to the extra linked list that’s created. Thus, if you are going to build a datastructure involving a large number of OrderedDict instances (e.g., reading 100,000 linesof a CSV file into a list of OrderedDict instances), you would need to study the re‐quirements of your application to determine if the benefits of using an OrderedDictoutweighed the extra memory overhead.
1.8. Calculating with DictionariesProblemYou want to perform various calculations (e.g., minimum value, maximum value, sort‐ing, etc.) on a dictionary of data.
1.8. Calculating with Dictionaries | 13
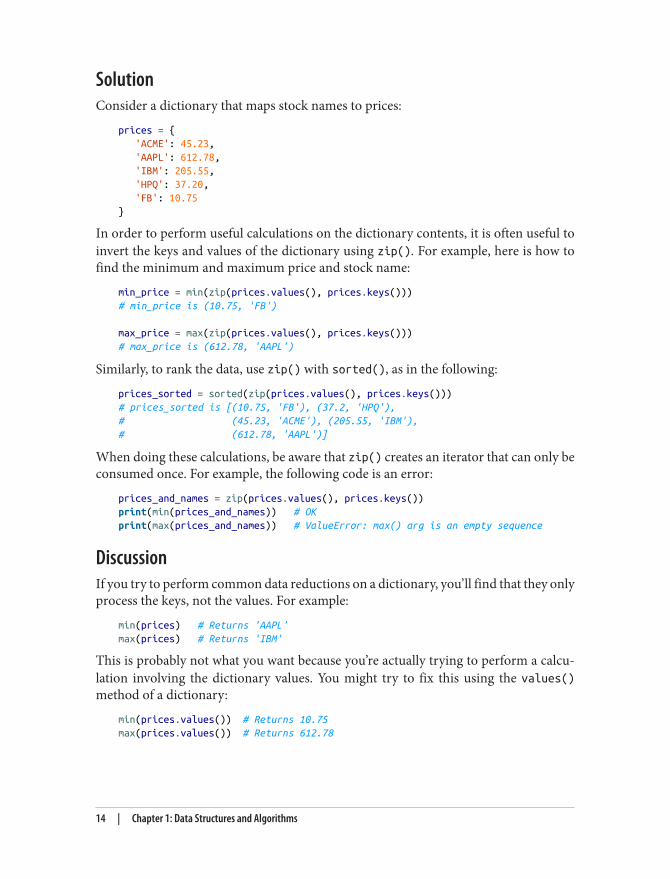
SolutionConsider a dictionary that maps stock names to prices:
prices = { 'ACME': 45.23, 'AAPL': 612.78, 'IBM': 205.55, 'HPQ': 37.20, 'FB': 10.75}
In order to perform useful calculations on the dictionary contents, it is often useful toinvert the keys and values of the dictionary using zip(). For example, here is how tofind the minimum and maximum price and stock name:
min_price = min(zip(prices.values(), prices.keys()))# min_price is (10.75, 'FB')
max_price = max(zip(prices.values(), prices.keys()))# max_price is (612.78, 'AAPL')
Similarly, to rank the data, use zip() with sorted(), as in the following:
prices_sorted = sorted(zip(prices.values(), prices.keys()))# prices_sorted is [(10.75, 'FB'), (37.2, 'HPQ'),# (45.23, 'ACME'), (205.55, 'IBM'),# (612.78, 'AAPL')]
When doing these calculations, be aware that zip() creates an iterator that can only beconsumed once. For example, the following code is an error:
prices_and_names = zip(prices.values(), prices.keys())print(min(prices_and_names)) # OKprint(max(prices_and_names)) # ValueError: max() arg is an empty sequence
DiscussionIf you try to perform common data reductions on a dictionary, you’ll find that they onlyprocess the keys, not the values. For example:
min(prices) # Returns 'AAPL'max(prices) # Returns 'IBM'
This is probably not what you want because you’re actually trying to perform a calcu‐lation involving the dictionary values. You might try to fix this using the values()method of a dictionary:
min(prices.values()) # Returns 10.75max(prices.values()) # Returns 612.78
14 | Chapter 1: Data Structures and Algorithms
Unfortunately, this is often not exactly what you want either. For example, you may wantto know information about the corresponding keys (e.g., which stock has the lowestprice?).
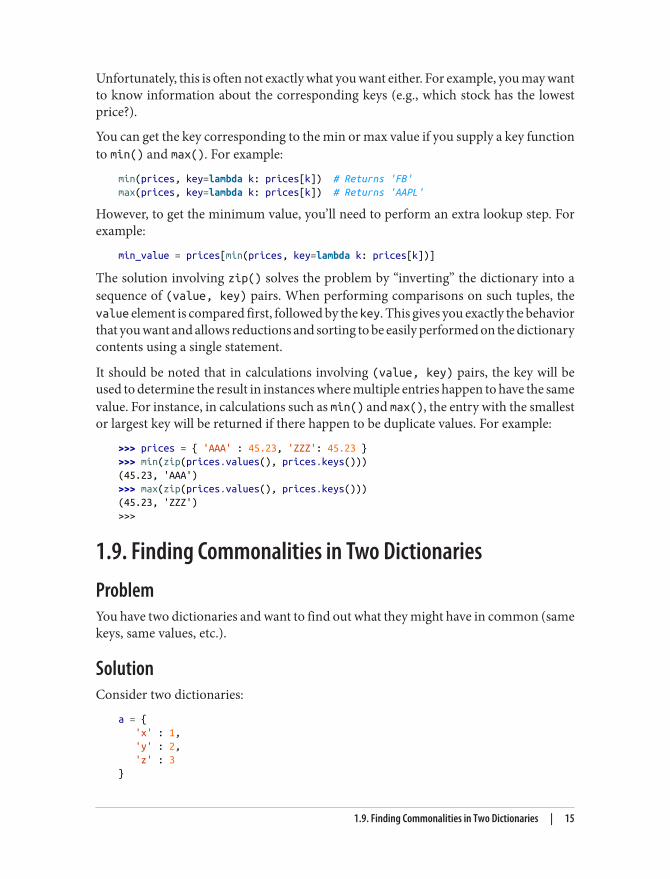
You can get the key corresponding to the min or max value if you supply a key functionto min() and max(). For example:
min(prices, key=lambda k: prices[k]) # Returns 'FB'max(prices, key=lambda k: prices[k]) # Returns 'AAPL'
However, to get the minimum value, you’ll need to perform an extra lookup step. Forexample:
min_value = prices[min(prices, key=lambda k: prices[k])]
The solution involving zip() solves the problem by “inverting” the dictionary into asequence of (value, key) pairs. When performing comparisons on such tuples, thevalue element is compared first, followed by the key. This gives you exactly the behaviorthat you want and allows reductions and sorting to be easily performed on the dictionarycontents using a single statement.
It should be noted that in calculations involving (value, key) pairs, the key will beused to determine the result in instances where multiple entries happen to have the samevalue. For instance, in calculations such as min() and max(), the entry with the smallestor largest key will be returned if there happen to be duplicate values. For example:
>>> prices = { 'AAA' : 45.23, 'ZZZ': 45.23 }>>> min(zip(prices.values(), prices.keys()))(45.23, 'AAA')>>> max(zip(prices.values(), prices.keys()))(45.23, 'ZZZ')>>>
1.9. Finding Commonalities in Two DictionariesProblemYou have two dictionaries and want to find out what they might have in common (samekeys, same values, etc.).
SolutionConsider two dictionaries:
a = { 'x' : 1, 'y' : 2, 'z' : 3}
1.9. Finding Commonalities in Two Dictionaries | 15
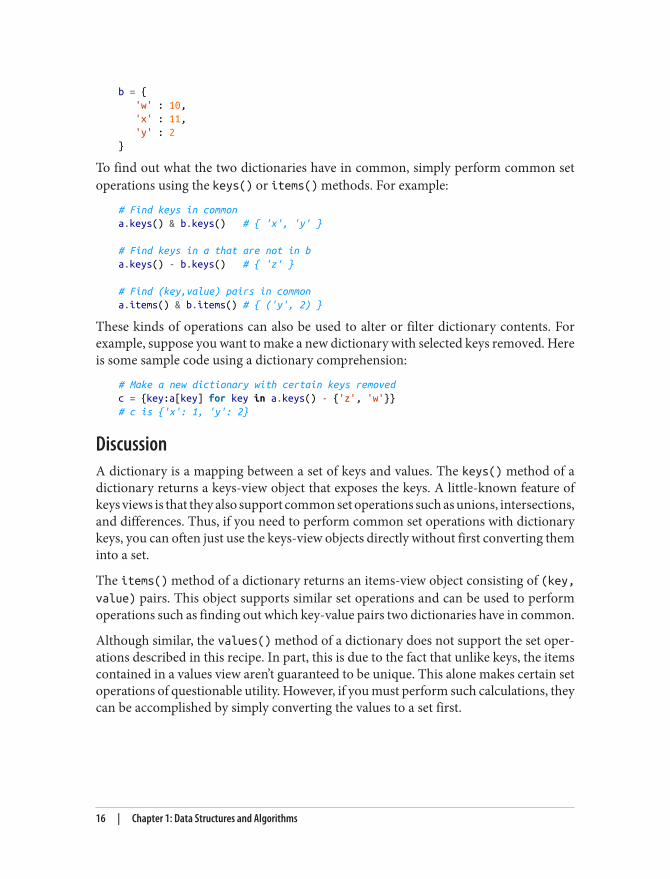
b = { 'w' : 10, 'x' : 11, 'y' : 2}
To find out what the two dictionaries have in common, simply perform common setoperations using the keys() or items() methods. For example:
# Find keys in commona.keys() & b.keys() # { 'x', 'y' }
# Find keys in a that are not in ba.keys() - b.keys() # { 'z' }
# Find (key,value) pairs in commona.items() & b.items() # { ('y', 2) }
These kinds of operations can also be used to alter or filter dictionary contents. Forexample, suppose you want to make a new dictionary with selected keys removed. Hereis some sample code using a dictionary comprehension:
# Make a new dictionary with certain keys removedc = {key:a[key] for key in a.keys() - {'z', 'w'}}# c is {'x': 1, 'y': 2}
DiscussionA dictionary is a mapping between a set of keys and values. The keys() method of adictionary returns a keys-view object that exposes the keys. A little-known feature ofkeys views is that they also support common set operations such as unions, intersections,and differences. Thus, if you need to perform common set operations with dictionarykeys, you can often just use the keys-view objects directly without first converting theminto a set.
The items() method of a dictionary returns an items-view object consisting of (key,value) pairs. This object supports similar set operations and can be used to performoperations such as finding out which key-value pairs two dictionaries have in common.
Although similar, the values() method of a dictionary does not support the set oper‐ations described in this recipe. In part, this is due to the fact that unlike keys, the itemscontained in a values view aren’t guaranteed to be unique. This alone makes certain setoperations of questionable utility. However, if you must perform such calculations, theycan be accomplished by simply converting the values to a set first.
16 | Chapter 1: Data Structures and Algorithms
1.10. Removing Duplicates from a Sequence whileMaintaining OrderProblemYou want to eliminate the duplicate values in a sequence, but preserve the order of theremaining items.
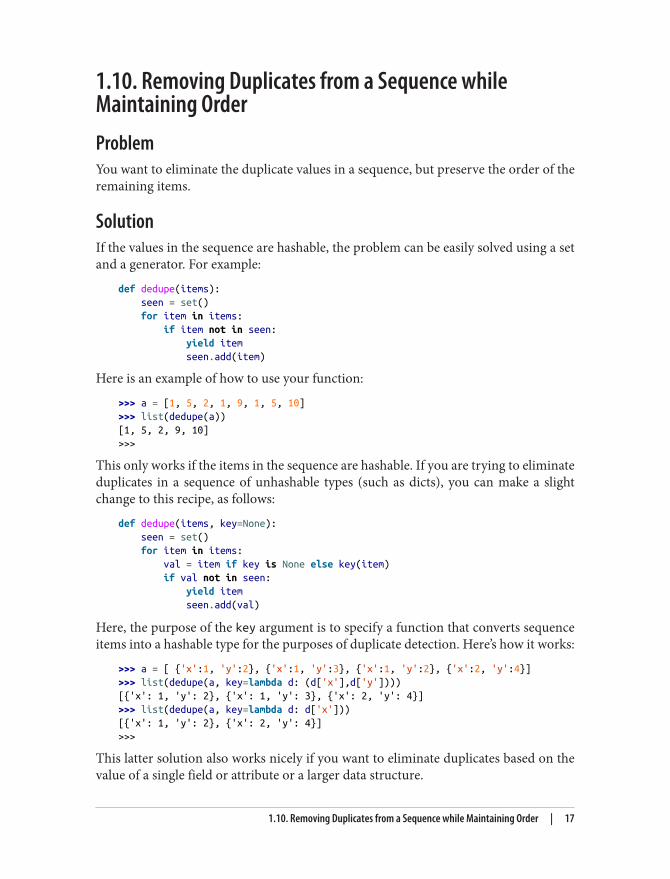
SolutionIf the values in the sequence are hashable, the problem can be easily solved using a setand a generator. For example:
def dedupe(items): seen = set() for item in items: if item not in seen: yield item seen.add(item)
Here is an example of how to use your function:
>>> a = [1, 5, 2, 1, 9, 1, 5, 10]>>> list(dedupe(a))[1, 5, 2, 9, 10]>>>
This only works if the items in the sequence are hashable. If you are trying to eliminateduplicates in a sequence of unhashable types (such as dicts), you can make a slightchange to this recipe, as follows:
def dedupe(items, key=None): seen = set() for item in items: val = item if key is None else key(item) if val not in seen: yield item seen.add(val)
Here, the purpose of the key argument is to specify a function that converts sequenceitems into a hashable type for the purposes of duplicate detection. Here’s how it works:
>>> a = [ {'x':1, 'y':2}, {'x':1, 'y':3}, {'x':1, 'y':2}, {'x':2, 'y':4}]>>> list(dedupe(a, key=lambda d: (d['x'],d['y'])))[{'x': 1, 'y': 2}, {'x': 1, 'y': 3}, {'x': 2, 'y': 4}]>>> list(dedupe(a, key=lambda d: d['x']))[{'x': 1, 'y': 2}, {'x': 2, 'y': 4}]>>>
This latter solution also works nicely if you want to eliminate duplicates based on thevalue of a single field or attribute or a larger data structure.
1.10. Removing Duplicates from a Sequence while Maintaining Order | 17
DiscussionIf all you want to do is eliminate duplicates, it is often easy enough to make a set. Forexample:
>>> a[1, 5, 2, 1, 9, 1, 5, 10]>>> set(a){1, 2, 10, 5, 9}>>>
However, this approach doesn’t preserve any kind of ordering. So, the resulting data willbe scrambled afterward. The solution shown avoids this.
The use of a generator function in this recipe reflects the fact that you might want thefunction to be extremely general purpose—not necessarily tied directly to list process‐ing. For example, if you want to read a file, eliminating duplicate lines, you could simplydo this:
with open(somefile,'r') as f: for line in dedupe(f): ...
The specification of a key function mimics similar functionality in built-in functionssuch as sorted(), min(), and max(). For instance, see Recipes 1.8 and 1.13.
1.11. Naming a SliceProblemYour program has become an unreadable mess of hardcoded slice indices and you wantto clean it up.
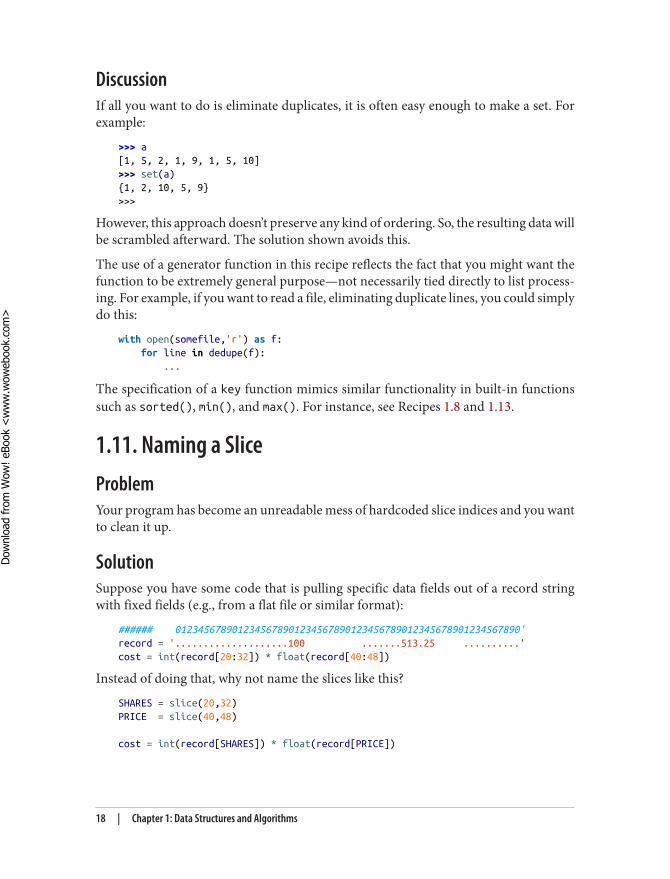
SolutionSuppose you have some code that is pulling specific data fields out of a record stringwith fixed fields (e.g., from a flat file or similar format):
###### 0123456789012345678901234567890123456789012345678901234567890'record = '....................100 .......513.25 ..........'cost = int(record[20:32]) * float(record[40:48])
Instead of doing that, why not name the slices like this?
SHARES = slice(20,32)PRICE = slice(40,48)
cost = int(record[SHARES]) * float(record[PRICE])
18 | Chapter 1: Data Structures and Algorithms
Dow
nlo
ad fro
m W
ow
! eBook
<w
ww
.wow
ebook.
com
>
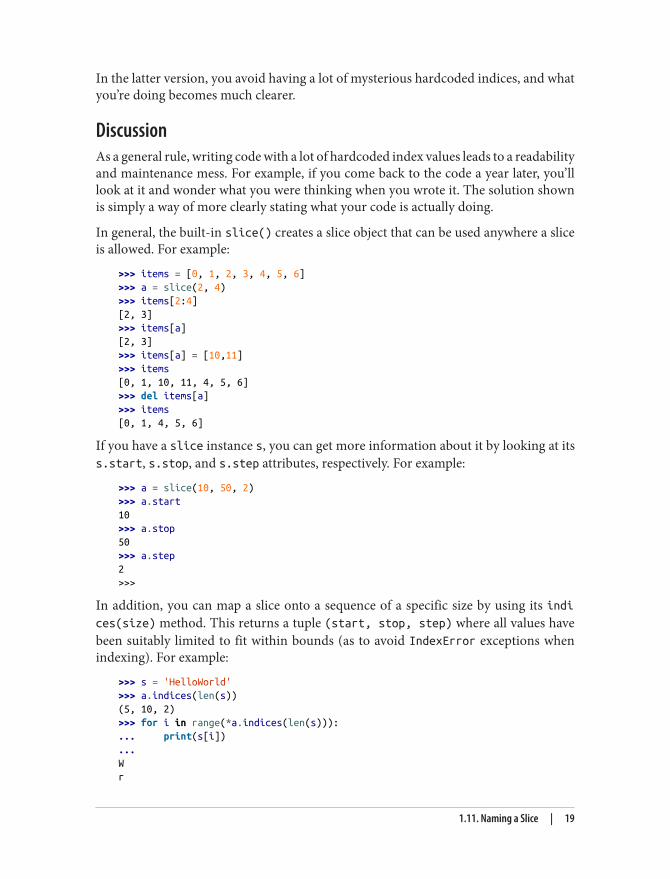
In the latter version, you avoid having a lot of mysterious hardcoded indices, and whatyou’re doing becomes much clearer.
DiscussionAs a general rule, writing code with a lot of hardcoded index values leads to a readabilityand maintenance mess. For example, if you come back to the code a year later, you’lllook at it and wonder what you were thinking when you wrote it. The solution shownis simply a way of more clearly stating what your code is actually doing.
In general, the built-in slice() creates a slice object that can be used anywhere a sliceis allowed. For example:
>>> items = [0, 1, 2, 3, 4, 5, 6]>>> a = slice(2, 4)>>> items[2:4][2, 3]>>> items[a][2, 3]>>> items[a] = [10,11]>>> items[0, 1, 10, 11, 4, 5, 6]>>> del items[a]>>> items[0, 1, 4, 5, 6]
If you have a slice instance s, you can get more information about it by looking at itss.start, s.stop, and s.step attributes, respectively. For example:
>>> a = slice(10, 50, 2)>>> a.start10>>> a.stop50>>> a.step2>>>
In addition, you can map a slice onto a sequence of a specific size by using its indices(size) method. This returns a tuple (start, stop, step) where all values havebeen suitably limited to fit within bounds (as to avoid IndexError exceptions whenindexing). For example:
>>> s = 'HelloWorld'>>> a.indices(len(s))(5, 10, 2)>>> for i in range(*a.indices(len(s))):... print(s[i])...Wr
1.11. Naming a Slice | 19
d>>>
1.12. Determining the Most Frequently Occurring Items ina SequenceProblemYou have a sequence of items, and you’d like to determine the most frequently occurringitems in the sequence.
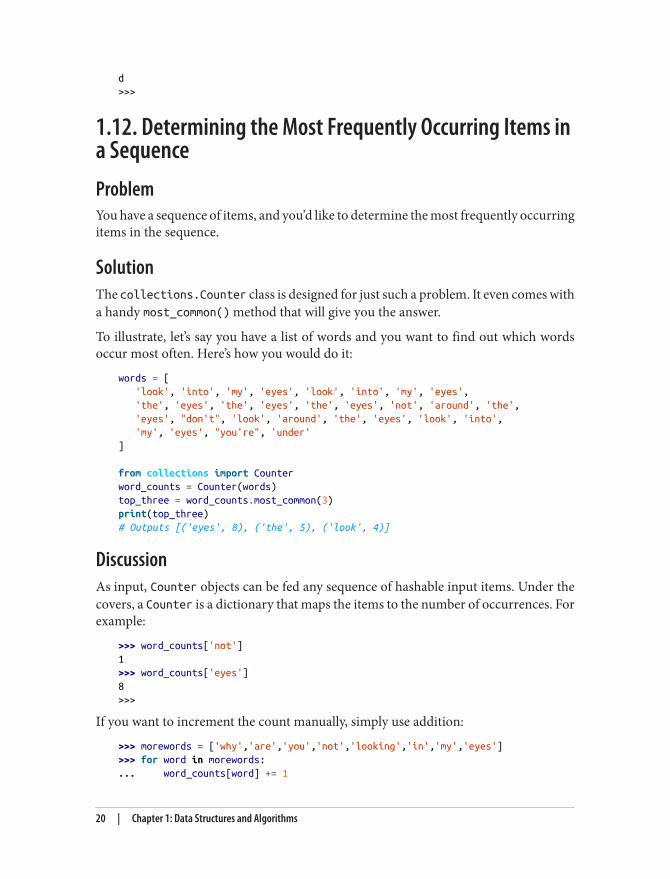
SolutionThe collections.Counter class is designed for just such a problem. It even comes witha handy most_common() method that will give you the answer.
To illustrate, let’s say you have a list of words and you want to find out which wordsoccur most often. Here’s how you would do it:
words = [ 'look', 'into', 'my', 'eyes', 'look', 'into', 'my', 'eyes', 'the', 'eyes', 'the', 'eyes', 'the', 'eyes', 'not', 'around', 'the', 'eyes', "don't", 'look', 'around', 'the', 'eyes', 'look', 'into', 'my', 'eyes', "you're", 'under']
from collections import Counterword_counts = Counter(words)top_three = word_counts.most_common(3)print(top_three)# Outputs [('eyes', 8), ('the', 5), ('look', 4)]
DiscussionAs input, Counter objects can be fed any sequence of hashable input items. Under thecovers, a Counter is a dictionary that maps the items to the number of occurrences. Forexample:
>>> word_counts['not']1>>> word_counts['eyes']8>>>
If you want to increment the count manually, simply use addition:
>>> morewords = ['why','are','you','not','looking','in','my','eyes']>>> for word in morewords:... word_counts[word] += 1
20 | Chapter 1: Data Structures and Algorithms
...>>> word_counts['eyes']9>>>
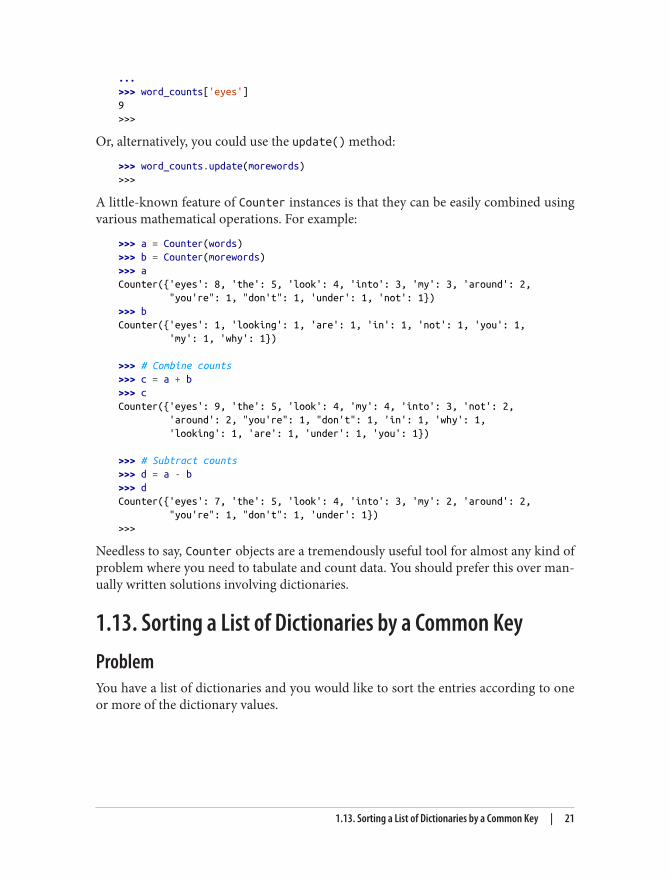
Or, alternatively, you could use the update() method:
>>> word_counts.update(morewords)>>>
A little-known feature of Counter instances is that they can be easily combined usingvarious mathematical operations. For example:
>>> a = Counter(words)>>> b = Counter(morewords)>>> aCounter({'eyes': 8, 'the': 5, 'look': 4, 'into': 3, 'my': 3, 'around': 2, "you're": 1, "don't": 1, 'under': 1, 'not': 1})>>> bCounter({'eyes': 1, 'looking': 1, 'are': 1, 'in': 1, 'not': 1, 'you': 1, 'my': 1, 'why': 1})
>>> # Combine counts>>> c = a + b>>> cCounter({'eyes': 9, 'the': 5, 'look': 4, 'my': 4, 'into': 3, 'not': 2, 'around': 2, "you're": 1, "don't": 1, 'in': 1, 'why': 1, 'looking': 1, 'are': 1, 'under': 1, 'you': 1})
>>> # Subtract counts>>> d = a - b>>> dCounter({'eyes': 7, 'the': 5, 'look': 4, 'into': 3, 'my': 2, 'around': 2, "you're": 1, "don't": 1, 'under': 1})>>>
Needless to say, Counter objects are a tremendously useful tool for almost any kind ofproblem where you need to tabulate and count data. You should prefer this over man‐ually written solutions involving dictionaries.
1.13. Sorting a List of Dictionaries by a Common KeyProblemYou have a list of dictionaries and you would like to sort the entries according to oneor more of the dictionary values.
1.13. Sorting a List of Dictionaries by a Common Key | 21
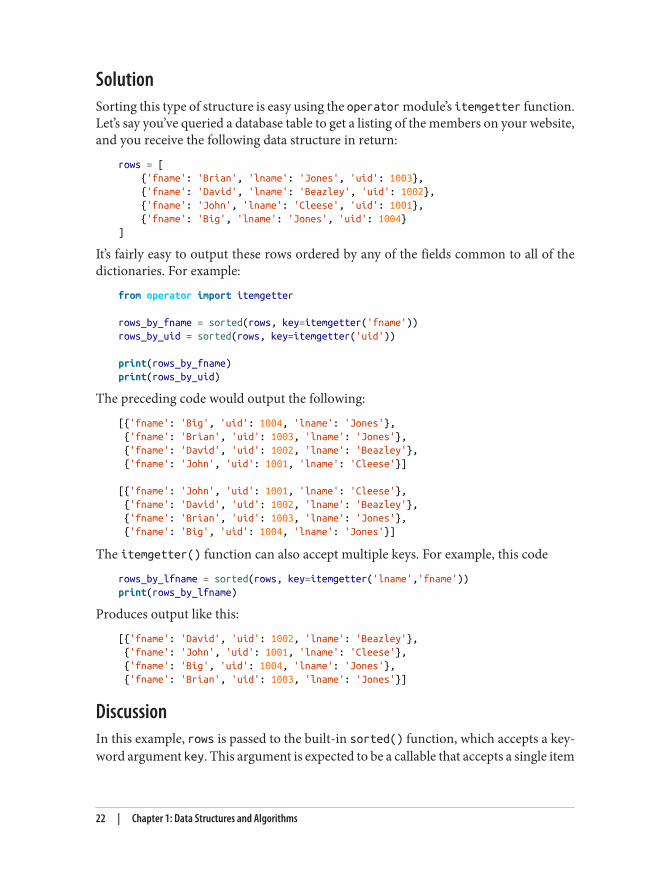
SolutionSorting this type of structure is easy using the operator module’s itemgetter function.Let’s say you’ve queried a database table to get a listing of the members on your website,and you receive the following data structure in return:
rows = [ {'fname': 'Brian', 'lname': 'Jones', 'uid': 1003}, {'fname': 'David', 'lname': 'Beazley', 'uid': 1002}, {'fname': 'John', 'lname': 'Cleese', 'uid': 1001}, {'fname': 'Big', 'lname': 'Jones', 'uid': 1004}]
It’s fairly easy to output these rows ordered by any of the fields common to all of thedictionaries. For example:
from operator import itemgetter
rows_by_fname = sorted(rows, key=itemgetter('fname'))rows_by_uid = sorted(rows, key=itemgetter('uid'))
print(rows_by_fname)print(rows_by_uid)
The preceding code would output the following:
[{'fname': 'Big', 'uid': 1004, 'lname': 'Jones'}, {'fname': 'Brian', 'uid': 1003, 'lname': 'Jones'}, {'fname': 'David', 'uid': 1002, 'lname': 'Beazley'}, {'fname': 'John', 'uid': 1001, 'lname': 'Cleese'}]
[{'fname': 'John', 'uid': 1001, 'lname': 'Cleese'}, {'fname': 'David', 'uid': 1002, 'lname': 'Beazley'}, {'fname': 'Brian', 'uid': 1003, 'lname': 'Jones'}, {'fname': 'Big', 'uid': 1004, 'lname': 'Jones'}]
The itemgetter() function can also accept multiple keys. For example, this code
rows_by_lfname = sorted(rows, key=itemgetter('lname','fname'))print(rows_by_lfname)
Produces output like this:
[{'fname': 'David', 'uid': 1002, 'lname': 'Beazley'}, {'fname': 'John', 'uid': 1001, 'lname': 'Cleese'}, {'fname': 'Big', 'uid': 1004, 'lname': 'Jones'}, {'fname': 'Brian', 'uid': 1003, 'lname': 'Jones'}]
DiscussionIn this example, rows is passed to the built-in sorted() function, which accepts a key‐word argument key. This argument is expected to be a callable that accepts a single item
22 | Chapter 1: Data Structures and Algorithms
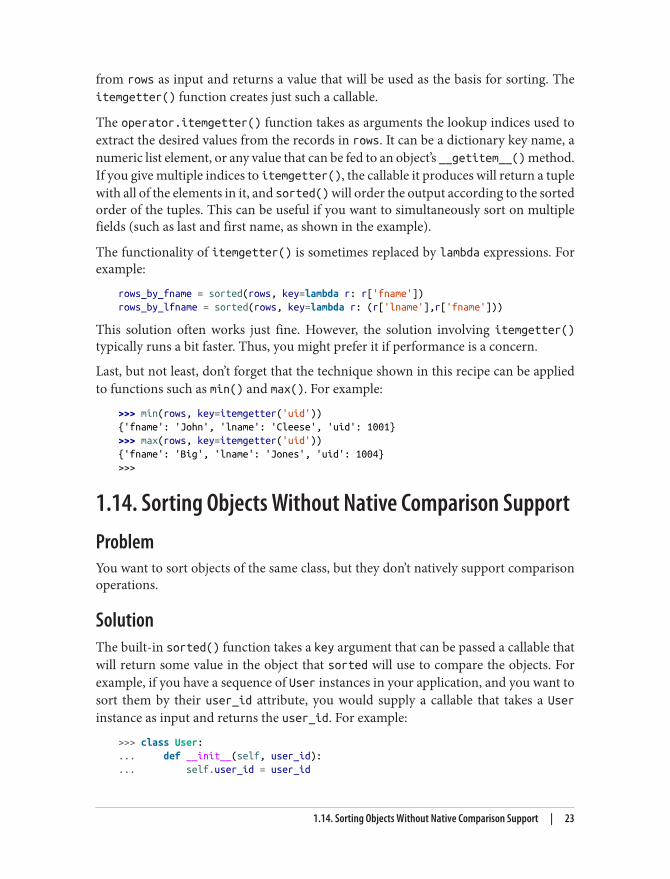
from rows as input and returns a value that will be used as the basis for sorting. Theitemgetter() function creates just such a callable.
The operator.itemgetter() function takes as arguments the lookup indices used toextract the desired values from the records in rows. It can be a dictionary key name, anumeric list element, or any value that can be fed to an object’s __getitem__() method.If you give multiple indices to itemgetter(), the callable it produces will return a tuplewith all of the elements in it, and sorted() will order the output according to the sortedorder of the tuples. This can be useful if you want to simultaneously sort on multiplefields (such as last and first name, as shown in the example).
The functionality of itemgetter() is sometimes replaced by lambda expressions. Forexample:
rows_by_fname = sorted(rows, key=lambda r: r['fname'])rows_by_lfname = sorted(rows, key=lambda r: (r['lname'],r['fname']))
This solution often works just fine. However, the solution involving itemgetter()typically runs a bit faster. Thus, you might prefer it if performance is a concern.
Last, but not least, don’t forget that the technique shown in this recipe can be appliedto functions such as min() and max(). For example:
>>> min(rows, key=itemgetter('uid')){'fname': 'John', 'lname': 'Cleese', 'uid': 1001}>>> max(rows, key=itemgetter('uid')){'fname': 'Big', 'lname': 'Jones', 'uid': 1004}>>>
1.14. Sorting Objects Without Native Comparison SupportProblemYou want to sort objects of the same class, but they don’t natively support comparisonoperations.
SolutionThe built-in sorted() function takes a key argument that can be passed a callable thatwill return some value in the object that sorted will use to compare the objects. Forexample, if you have a sequence of User instances in your application, and you want tosort them by their user_id attribute, you would supply a callable that takes a Userinstance as input and returns the user_id. For example:
>>> class User:... def __init__(self, user_id):... self.user_id = user_id
1.14. Sorting Objects Without Native Comparison Support | 23
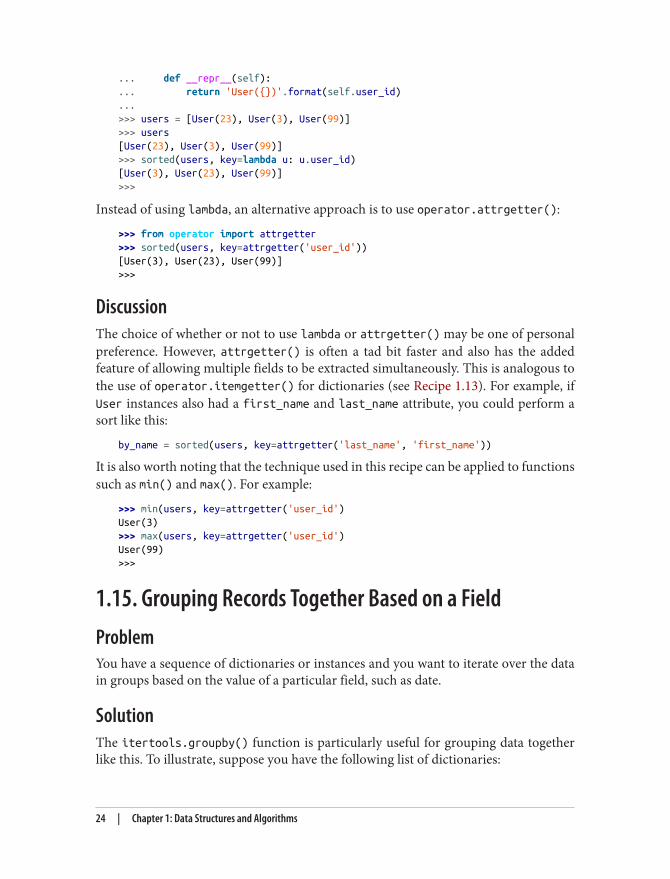
... def __repr__(self):
... return 'User({})'.format(self.user_id)
...>>> users = [User(23), User(3), User(99)]>>> users[User(23), User(3), User(99)]>>> sorted(users, key=lambda u: u.user_id)[User(3), User(23), User(99)]>>>
Instead of using lambda, an alternative approach is to use operator.attrgetter():
>>> from operator import attrgetter>>> sorted(users, key=attrgetter('user_id'))[User(3), User(23), User(99)]>>>
DiscussionThe choice of whether or not to use lambda or attrgetter() may be one of personalpreference. However, attrgetter() is often a tad bit faster and also has the addedfeature of allowing multiple fields to be extracted simultaneously. This is analogous tothe use of operator.itemgetter() for dictionaries (see Recipe 1.13). For example, ifUser instances also had a first_name and last_name attribute, you could perform asort like this:
by_name = sorted(users, key=attrgetter('last_name', 'first_name'))
It is also worth noting that the technique used in this recipe can be applied to functionssuch as min() and max(). For example:
>>> min(users, key=attrgetter('user_id')User(3)>>> max(users, key=attrgetter('user_id')User(99)>>>
1.15. Grouping Records Together Based on a FieldProblemYou have a sequence of dictionaries or instances and you want to iterate over the datain groups based on the value of a particular field, such as date.
SolutionThe itertools.groupby() function is particularly useful for grouping data togetherlike this. To illustrate, suppose you have the following list of dictionaries:
24 | Chapter 1: Data Structures and Algorithms
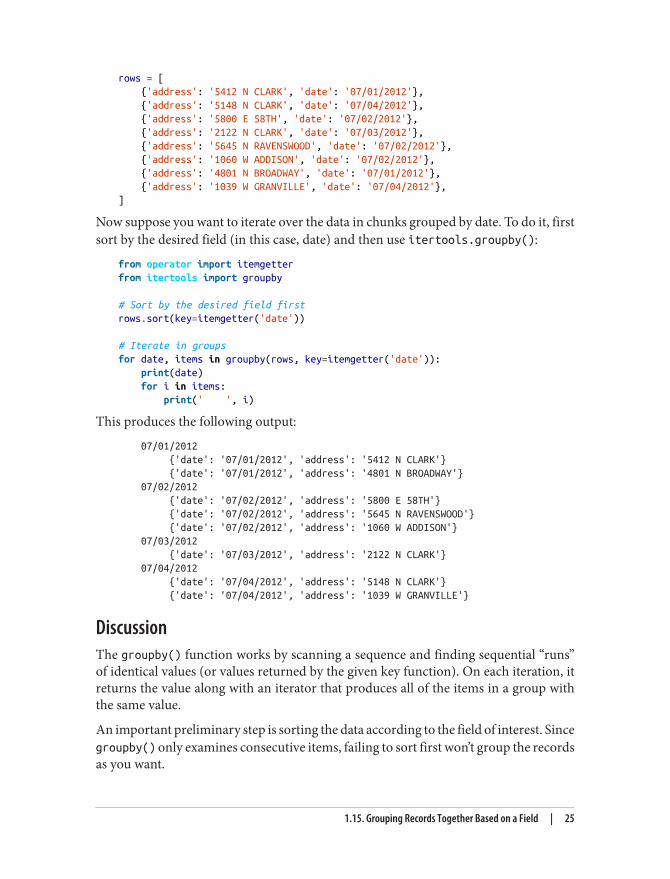
rows = [ {'address': '5412 N CLARK', 'date': '07/01/2012'}, {'address': '5148 N CLARK', 'date': '07/04/2012'}, {'address': '5800 E 58TH', 'date': '07/02/2012'}, {'address': '2122 N CLARK', 'date': '07/03/2012'}, {'address': '5645 N RAVENSWOOD', 'date': '07/02/2012'}, {'address': '1060 W ADDISON', 'date': '07/02/2012'}, {'address': '4801 N BROADWAY', 'date': '07/01/2012'}, {'address': '1039 W GRANVILLE', 'date': '07/04/2012'},]
Now suppose you want to iterate over the data in chunks grouped by date. To do it, firstsort by the desired field (in this case, date) and then use itertools.groupby():
from operator import itemgetterfrom itertools import groupby
# Sort by the desired field firstrows.sort(key=itemgetter('date'))
# Iterate in groupsfor date, items in groupby(rows, key=itemgetter('date')): print(date) for i in items: print(' ', i)
This produces the following output:
07/01/2012 {'date': '07/01/2012', 'address': '5412 N CLARK'} {'date': '07/01/2012', 'address': '4801 N BROADWAY'} 07/02/2012 {'date': '07/02/2012', 'address': '5800 E 58TH'} {'date': '07/02/2012', 'address': '5645 N RAVENSWOOD'} {'date': '07/02/2012', 'address': '1060 W ADDISON'} 07/03/2012 {'date': '07/03/2012', 'address': '2122 N CLARK'} 07/04/2012 {'date': '07/04/2012', 'address': '5148 N CLARK'} {'date': '07/04/2012', 'address': '1039 W GRANVILLE'}
DiscussionThe groupby() function works by scanning a sequence and finding sequential “runs”of identical values (or values returned by the given key function). On each iteration, itreturns the value along with an iterator that produces all of the items in a group withthe same value.
An important preliminary step is sorting the data according to the field of interest. Sincegroupby() only examines consecutive items, failing to sort first won’t group the recordsas you want.
1.15. Grouping Records Together Based on a Field | 25
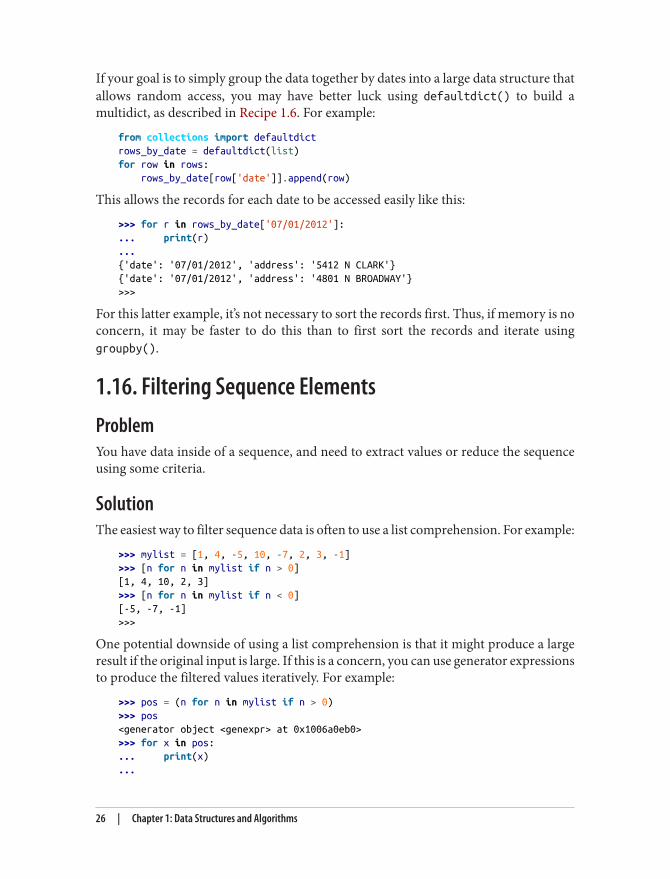
If your goal is to simply group the data together by dates into a large data structure thatallows random access, you may have better luck using defaultdict() to build amultidict, as described in Recipe 1.6. For example:
from collections import defaultdictrows_by_date = defaultdict(list)for row in rows: rows_by_date[row['date']].append(row)
This allows the records for each date to be accessed easily like this:
>>> for r in rows_by_date['07/01/2012']:... print(r)...{'date': '07/01/2012', 'address': '5412 N CLARK'}{'date': '07/01/2012', 'address': '4801 N BROADWAY'}>>>
For this latter example, it’s not necessary to sort the records first. Thus, if memory is noconcern, it may be faster to do this than to first sort the records and iterate usinggroupby().
1.16. Filtering Sequence ElementsProblemYou have data inside of a sequence, and need to extract values or reduce the sequenceusing some criteria.
SolutionThe easiest way to filter sequence data is often to use a list comprehension. For example:
>>> mylist = [1, 4, -5, 10, -7, 2, 3, -1]>>> [n for n in mylist if n > 0][1, 4, 10, 2, 3]>>> [n for n in mylist if n < 0][-5, -7, -1]>>>
One potential downside of using a list comprehension is that it might produce a largeresult if the original input is large. If this is a concern, you can use generator expressionsto produce the filtered values iteratively. For example:
>>> pos = (n for n in mylist if n > 0)>>> pos<generator object <genexpr> at 0x1006a0eb0>>>> for x in pos:... print(x)...
26 | Chapter 1: Data Structures and Algorithms
141023>>>
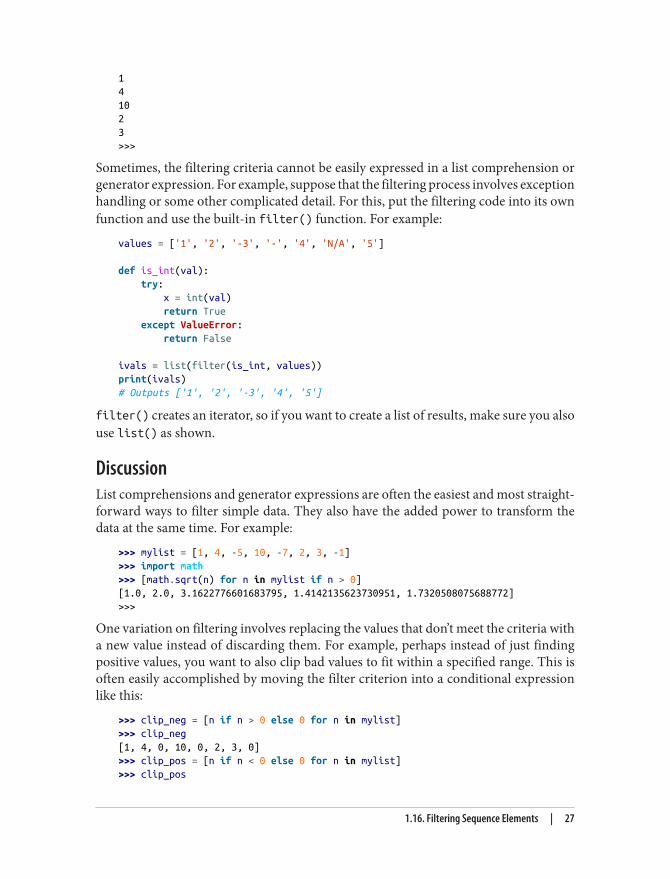
Sometimes, the filtering criteria cannot be easily expressed in a list comprehension orgenerator expression. For example, suppose that the filtering process involves exceptionhandling or some other complicated detail. For this, put the filtering code into its ownfunction and use the built-in filter() function. For example:
values = ['1', '2', '-3', '-', '4', 'N/A', '5']
def is_int(val): try: x = int(val) return True except ValueError: return False
ivals = list(filter(is_int, values))print(ivals)# Outputs ['1', '2', '-3', '4', '5']
filter() creates an iterator, so if you want to create a list of results, make sure you alsouse list() as shown.
DiscussionList comprehensions and generator expressions are often the easiest and most straight‐forward ways to filter simple data. They also have the added power to transform thedata at the same time. For example:
>>> mylist = [1, 4, -5, 10, -7, 2, 3, -1]>>> import math>>> [math.sqrt(n) for n in mylist if n > 0][1.0, 2.0, 3.1622776601683795, 1.4142135623730951, 1.7320508075688772]>>>
One variation on filtering involves replacing the values that don’t meet the criteria witha new value instead of discarding them. For example, perhaps instead of just findingpositive values, you want to also clip bad values to fit within a specified range. This isoften easily accomplished by moving the filter criterion into a conditional expressionlike this:
>>> clip_neg = [n if n > 0 else 0 for n in mylist]>>> clip_neg[1, 4, 0, 10, 0, 2, 3, 0]>>> clip_pos = [n if n < 0 else 0 for n in mylist]>>> clip_pos
1.16. Filtering Sequence Elements | 27

[0, 0, -5, 0, -7, 0, 0, -1]>>>
Another notable filtering tool is itertools.compress(), which takes an iterable andan accompanying Boolean selector sequence as input. As output, it gives you all of theitems in the iterable where the corresponding element in the selector is True. This canbe useful if you’re trying to apply the results of filtering one sequence to another relatedsequence. For example, suppose you have the following two columns of data:
addresses = [ '5412 N CLARK', '5148 N CLARK', '5800 E 58TH', '2122 N CLARK' '5645 N RAVENSWOOD', '1060 W ADDISON', '4801 N BROADWAY', '1039 W GRANVILLE',]
counts = [ 0, 3, 10, 4, 1, 7, 6, 1]
Now suppose you want to make a list of all addresses where the corresponding countvalue was greater than 5. Here’s how you could do it:
>>> from itertools import compress>>> more5 = [n > 5 for n in counts]>>> more5[False, False, True, False, False, True, True, False]>>> list(compress(addresses, more5))['5800 E 58TH', '4801 N BROADWAY', '1039 W GRANVILLE']>>>
The key here is to first create a sequence of Booleans that indicates which elementssatisfy the desired condition. The compress() function then picks out the items corre‐sponding to True values.
Like filter(), compress() normally returns an iterator. Thus, you need to use list()to turn the results into a list if desired.
1.17. Extracting a Subset of a DictionaryProblemYou want to make a dictionary that is a subset of another dictionary.
28 | Chapter 1: Data Structures and Algorithms
SolutionThis is easily accomplished using a dictionary comprehension. For example:
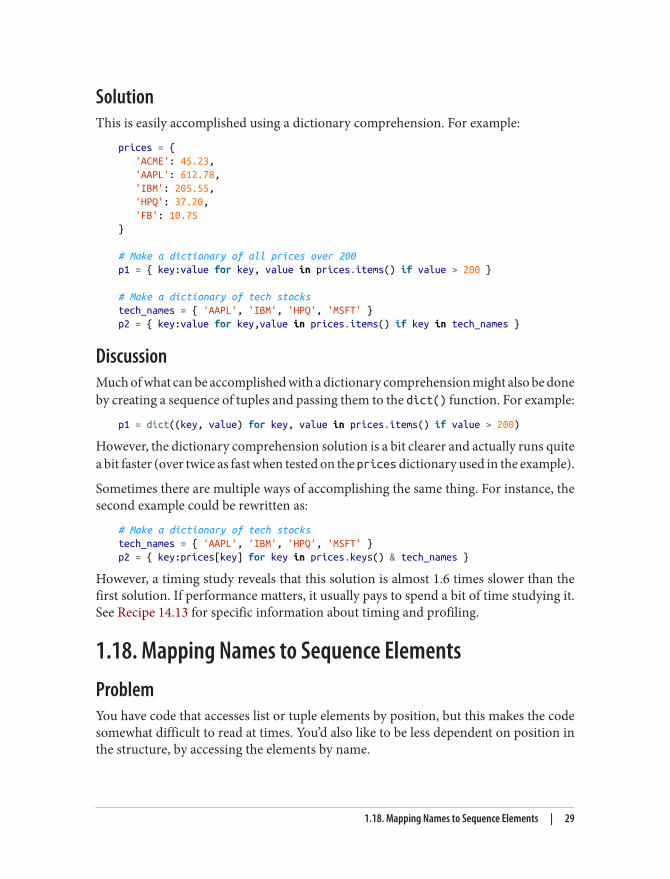
prices = { 'ACME': 45.23, 'AAPL': 612.78, 'IBM': 205.55, 'HPQ': 37.20, 'FB': 10.75}
# Make a dictionary of all prices over 200p1 = { key:value for key, value in prices.items() if value > 200 }
# Make a dictionary of tech stockstech_names = { 'AAPL', 'IBM', 'HPQ', 'MSFT' }p2 = { key:value for key,value in prices.items() if key in tech_names }
DiscussionMuch of what can be accomplished with a dictionary comprehension might also be doneby creating a sequence of tuples and passing them to the dict() function. For example:
p1 = dict((key, value) for key, value in prices.items() if value > 200)
However, the dictionary comprehension solution is a bit clearer and actually runs quitea bit faster (over twice as fast when tested on the prices dictionary used in the example).
Sometimes there are multiple ways of accomplishing the same thing. For instance, thesecond example could be rewritten as:
# Make a dictionary of tech stockstech_names = { 'AAPL', 'IBM', 'HPQ', 'MSFT' }p2 = { key:prices[key] for key in prices.keys() & tech_names }
However, a timing study reveals that this solution is almost 1.6 times slower than thefirst solution. If performance matters, it usually pays to spend a bit of time studying it.See Recipe 14.13 for specific information about timing and profiling.
1.18. Mapping Names to Sequence ElementsProblemYou have code that accesses list or tuple elements by position, but this makes the codesomewhat difficult to read at times. You’d also like to be less dependent on position inthe structure, by accessing the elements by name.
1.18. Mapping Names to Sequence Elements | 29
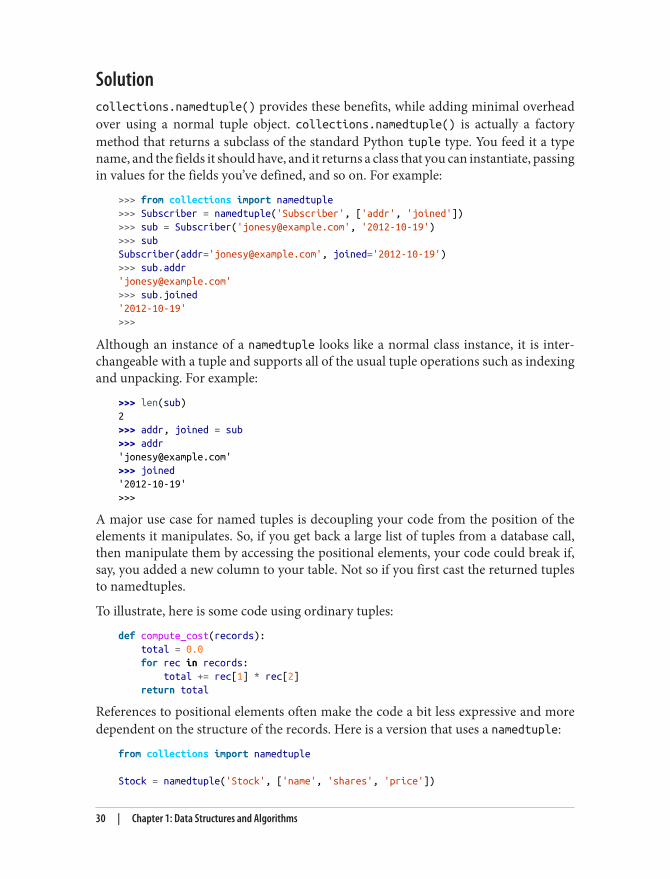
Solutioncollections.namedtuple() provides these benefits, while adding minimal overheadover using a normal tuple object. collections.namedtuple() is actually a factorymethod that returns a subclass of the standard Python tuple type. You feed it a typename, and the fields it should have, and it returns a class that you can instantiate, passingin values for the fields you’ve defined, and so on. For example:
>>> from collections import namedtuple>>> Subscriber = namedtuple('Subscriber', ['addr', 'joined'])>>> sub = Subscriber('[email protected]', '2012-10-19')>>> subSubscriber(addr='[email protected]', joined='2012-10-19')>>> sub.addr'[email protected]'>>> sub.joined'2012-10-19'>>>
Although an instance of a namedtuple looks like a normal class instance, it is inter‐changeable with a tuple and supports all of the usual tuple operations such as indexingand unpacking. For example:
>>> len(sub)2>>> addr, joined = sub>>> addr'[email protected]'>>> joined'2012-10-19'>>>
A major use case for named tuples is decoupling your code from the position of theelements it manipulates. So, if you get back a large list of tuples from a database call,then manipulate them by accessing the positional elements, your code could break if,say, you added a new column to your table. Not so if you first cast the returned tuplesto namedtuples.
To illustrate, here is some code using ordinary tuples:
def compute_cost(records): total = 0.0 for rec in records: total += rec[1] * rec[2] return total
References to positional elements often make the code a bit less expressive and moredependent on the structure of the records. Here is a version that uses a namedtuple:
from collections import namedtuple
Stock = namedtuple('Stock', ['name', 'shares', 'price'])
30 | Chapter 1: Data Structures and Algorithms
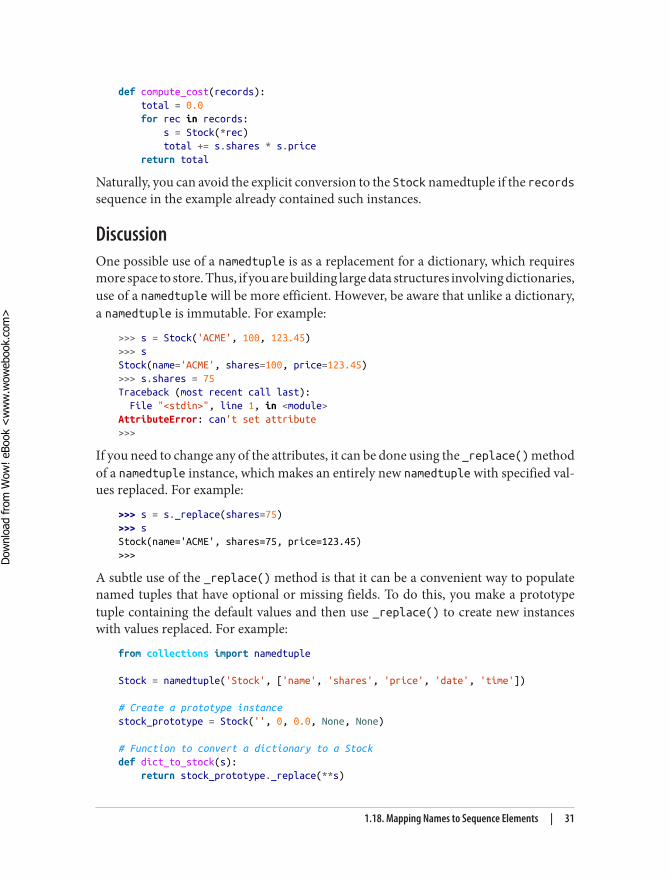
def compute_cost(records): total = 0.0 for rec in records: s = Stock(*rec) total += s.shares * s.price return total
Naturally, you can avoid the explicit conversion to the Stock namedtuple if the recordssequence in the example already contained such instances.
DiscussionOne possible use of a namedtuple is as a replacement for a dictionary, which requiresmore space to store. Thus, if you are building large data structures involving dictionaries,use of a namedtuple will be more efficient. However, be aware that unlike a dictionary,a namedtuple is immutable. For example:
>>> s = Stock('ACME', 100, 123.45)>>> sStock(name='ACME', shares=100, price=123.45)>>> s.shares = 75Traceback (most recent call last): File "<stdin>", line 1, in <module>AttributeError: can't set attribute>>>
If you need to change any of the attributes, it can be done using the _replace() methodof a namedtuple instance, which makes an entirely new namedtuple with specified val‐ues replaced. For example:
>>> s = s._replace(shares=75)>>> sStock(name='ACME', shares=75, price=123.45)>>>
A subtle use of the _replace() method is that it can be a convenient way to populatenamed tuples that have optional or missing fields. To do this, you make a prototypetuple containing the default values and then use _replace() to create new instanceswith values replaced. For example:
from collections import namedtuple
Stock = namedtuple('Stock', ['name', 'shares', 'price', 'date', 'time'])
# Create a prototype instancestock_prototype = Stock('', 0, 0.0, None, None)
# Function to convert a dictionary to a Stockdef dict_to_stock(s): return stock_prototype._replace(**s)
1.18. Mapping Names to Sequence Elements | 31
Dow
nlo
ad fro
m W
ow
! eBook
<w
ww
.wow
ebook.
com
>
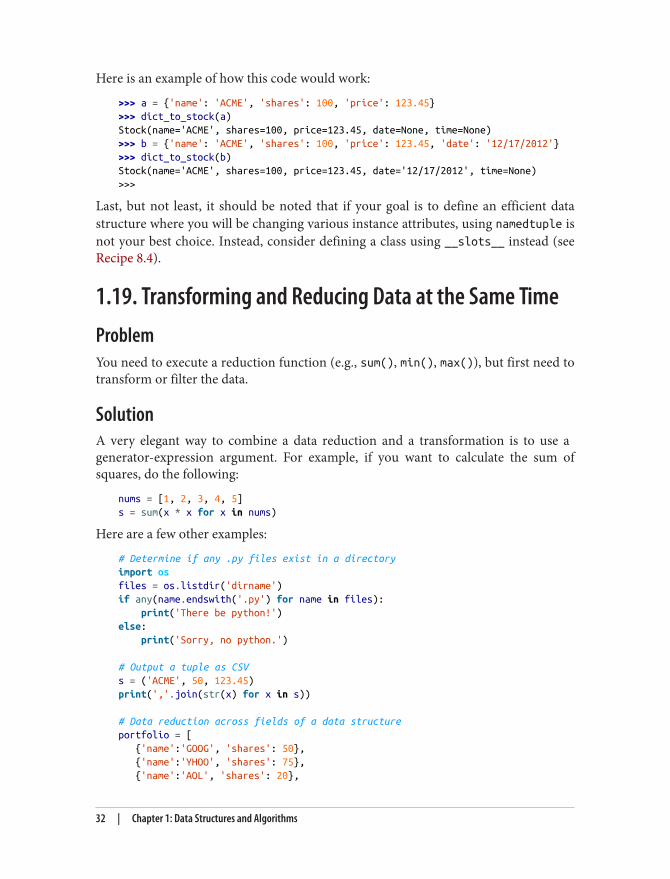
Here is an example of how this code would work:
>>> a = {'name': 'ACME', 'shares': 100, 'price': 123.45}>>> dict_to_stock(a)Stock(name='ACME', shares=100, price=123.45, date=None, time=None)>>> b = {'name': 'ACME', 'shares': 100, 'price': 123.45, 'date': '12/17/2012'}>>> dict_to_stock(b)Stock(name='ACME', shares=100, price=123.45, date='12/17/2012', time=None)>>>
Last, but not least, it should be noted that if your goal is to define an efficient datastructure where you will be changing various instance attributes, using namedtuple isnot your best choice. Instead, consider defining a class using __slots__ instead (seeRecipe 8.4).
1.19. Transforming and Reducing Data at the Same TimeProblemYou need to execute a reduction function (e.g., sum(), min(), max()), but first need totransform or filter the data.
SolutionA very elegant way to combine a data reduction and a transformation is to use a generator-expression argument. For example, if you want to calculate the sum ofsquares, do the following:
nums = [1, 2, 3, 4, 5]s = sum(x * x for x in nums)
Here are a few other examples:
# Determine if any .py files exist in a directoryimport osfiles = os.listdir('dirname')if any(name.endswith('.py') for name in files): print('There be python!')else: print('Sorry, no python.')
# Output a tuple as CSVs = ('ACME', 50, 123.45)print(','.join(str(x) for x in s))
# Data reduction across fields of a data structureportfolio = [ {'name':'GOOG', 'shares': 50}, {'name':'YHOO', 'shares': 75}, {'name':'AOL', 'shares': 20},
32 | Chapter 1: Data Structures and Algorithms
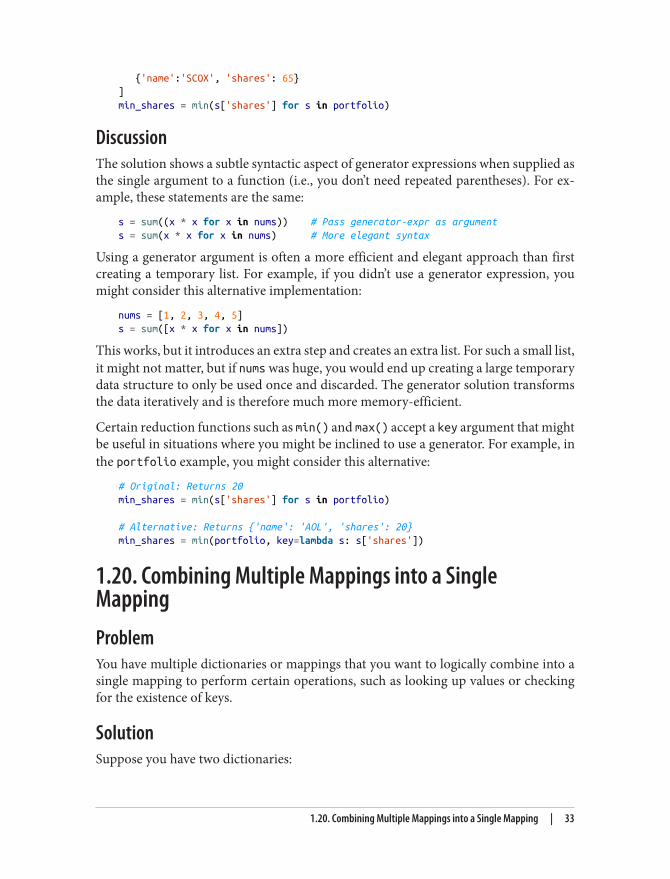
{'name':'SCOX', 'shares': 65}]min_shares = min(s['shares'] for s in portfolio)
DiscussionThe solution shows a subtle syntactic aspect of generator expressions when supplied asthe single argument to a function (i.e., you don’t need repeated parentheses). For ex‐ample, these statements are the same:
s = sum((x * x for x in nums)) # Pass generator-expr as arguments = sum(x * x for x in nums) # More elegant syntax
Using a generator argument is often a more efficient and elegant approach than firstcreating a temporary list. For example, if you didn’t use a generator expression, youmight consider this alternative implementation:
nums = [1, 2, 3, 4, 5]s = sum([x * x for x in nums])
This works, but it introduces an extra step and creates an extra list. For such a small list,it might not matter, but if nums was huge, you would end up creating a large temporarydata structure to only be used once and discarded. The generator solution transformsthe data iteratively and is therefore much more memory-efficient.
Certain reduction functions such as min() and max() accept a key argument that mightbe useful in situations where you might be inclined to use a generator. For example, inthe portfolio example, you might consider this alternative:
# Original: Returns 20min_shares = min(s['shares'] for s in portfolio)
# Alternative: Returns {'name': 'AOL', 'shares': 20}min_shares = min(portfolio, key=lambda s: s['shares'])
1.20. Combining Multiple Mappings into a SingleMappingProblemYou have multiple dictionaries or mappings that you want to logically combine into asingle mapping to perform certain operations, such as looking up values or checkingfor the existence of keys.
SolutionSuppose you have two dictionaries:
1.20. Combining Multiple Mappings into a Single Mapping | 33
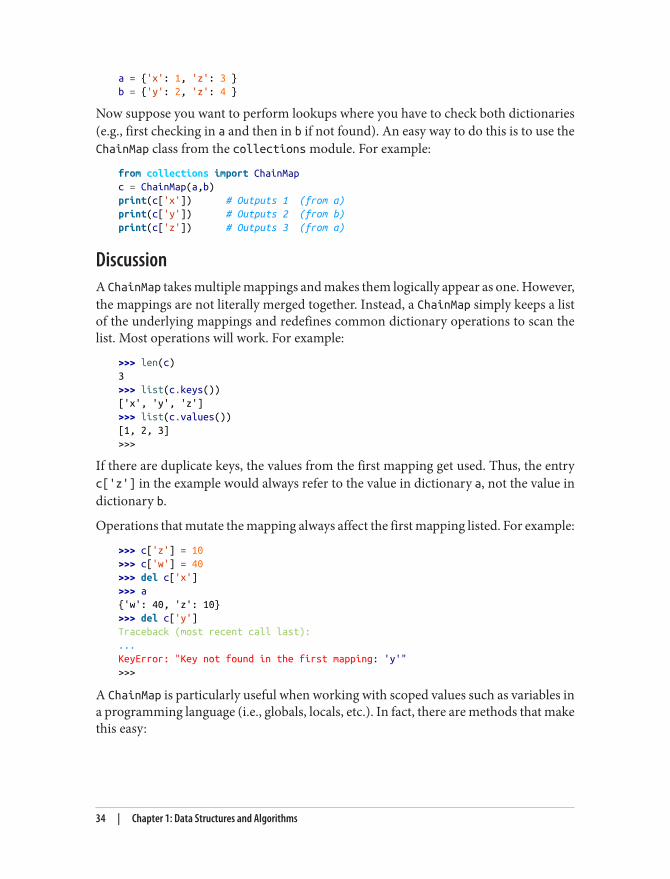
a = {'x': 1, 'z': 3 }b = {'y': 2, 'z': 4 }
Now suppose you want to perform lookups where you have to check both dictionaries(e.g., first checking in a and then in b if not found). An easy way to do this is to use theChainMap class from the collections module. For example:
from collections import ChainMapc = ChainMap(a,b)print(c['x']) # Outputs 1 (from a)print(c['y']) # Outputs 2 (from b)print(c['z']) # Outputs 3 (from a)
DiscussionA ChainMap takes multiple mappings and makes them logically appear as one. However,the mappings are not literally merged together. Instead, a ChainMap simply keeps a listof the underlying mappings and redefines common dictionary operations to scan thelist. Most operations will work. For example:
>>> len(c)3>>> list(c.keys())['x', 'y', 'z']>>> list(c.values())[1, 2, 3]>>>
If there are duplicate keys, the values from the first mapping get used. Thus, the entryc['z'] in the example would always refer to the value in dictionary a, not the value indictionary b.
Operations that mutate the mapping always affect the first mapping listed. For example:
>>> c['z'] = 10>>> c['w'] = 40>>> del c['x']>>> a{'w': 40, 'z': 10}>>> del c['y']Traceback (most recent call last):...KeyError: "Key not found in the first mapping: 'y'">>>
A ChainMap is particularly useful when working with scoped values such as variables ina programming language (i.e., globals, locals, etc.). In fact, there are methods that makethis easy:
34 | Chapter 1: Data Structures and Algorithms
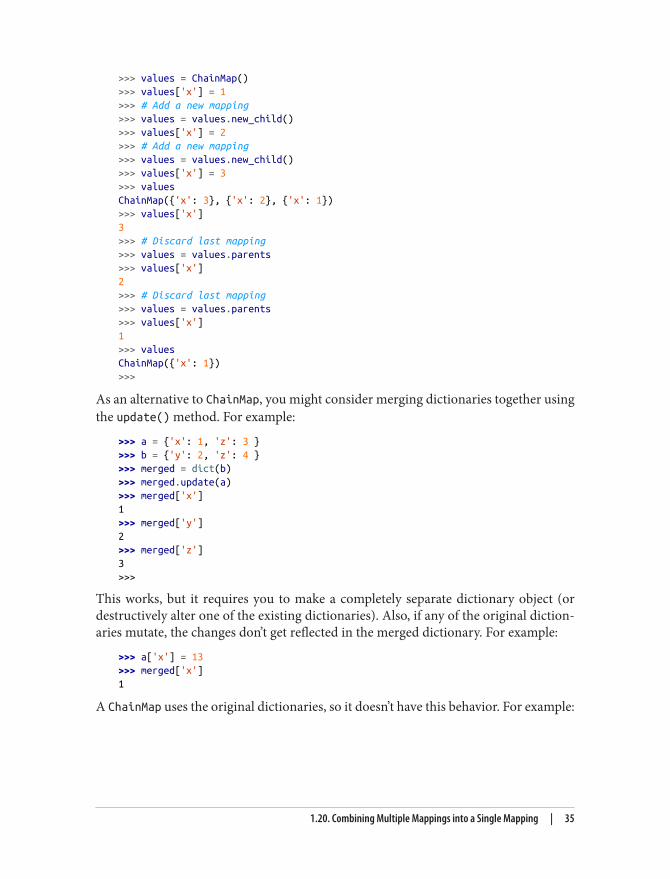
>>> values = ChainMap()>>> values['x'] = 1>>> # Add a new mapping>>> values = values.new_child()>>> values['x'] = 2>>> # Add a new mapping>>> values = values.new_child()>>> values['x'] = 3>>> valuesChainMap({'x': 3}, {'x': 2}, {'x': 1})>>> values['x']3>>> # Discard last mapping>>> values = values.parents>>> values['x']2>>> # Discard last mapping>>> values = values.parents>>> values['x']1>>> valuesChainMap({'x': 1})>>>
As an alternative to ChainMap, you might consider merging dictionaries together usingthe update() method. For example:
>>> a = {'x': 1, 'z': 3 }>>> b = {'y': 2, 'z': 4 }>>> merged = dict(b)>>> merged.update(a)>>> merged['x']1>>> merged['y']2>>> merged['z']3>>>
This works, but it requires you to make a completely separate dictionary object (ordestructively alter one of the existing dictionaries). Also, if any of the original diction‐aries mutate, the changes don’t get reflected in the merged dictionary. For example:
>>> a['x'] = 13>>> merged['x']1
A ChainMap uses the original dictionaries, so it doesn’t have this behavior. For example:
1.20. Combining Multiple Mappings into a Single Mapping | 35
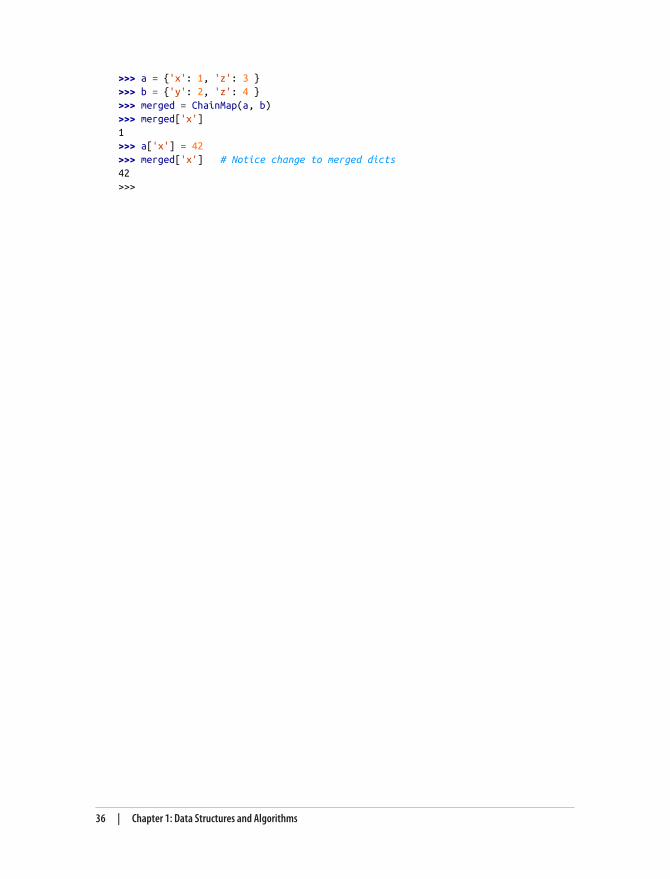
>>> a = {'x': 1, 'z': 3 }>>> b = {'y': 2, 'z': 4 }>>> merged = ChainMap(a, b)>>> merged['x']1>>> a['x'] = 42>>> merged['x'] # Notice change to merged dicts42>>>
36 | Chapter 1: Data Structures and Algorithms
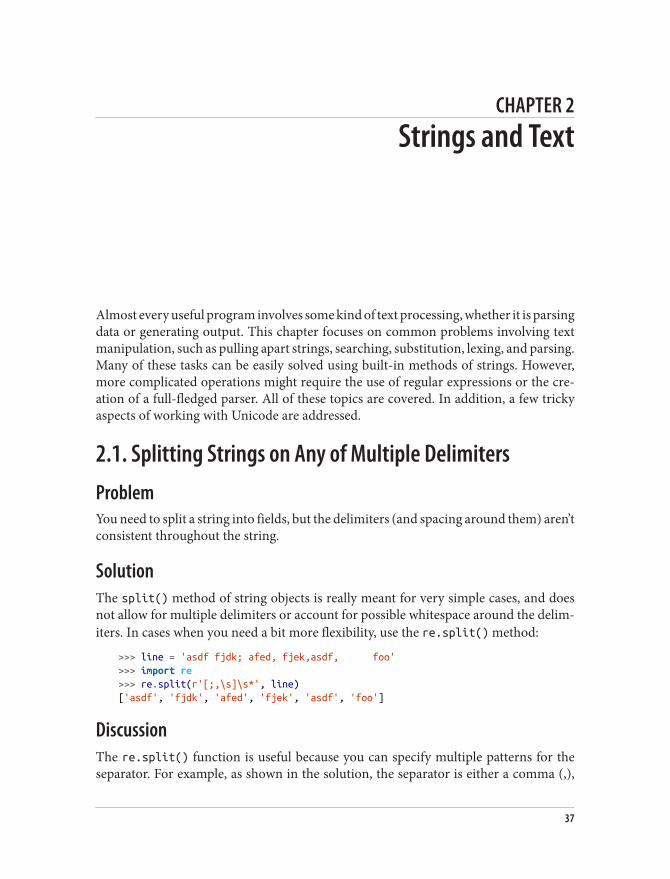
CHAPTER 2
Strings and Text
Almost every useful program involves some kind of text processing, whether it is parsingdata or generating output. This chapter focuses on common problems involving textmanipulation, such as pulling apart strings, searching, substitution, lexing, and parsing.Many of these tasks can be easily solved using built-in methods of strings. However,more complicated operations might require the use of regular expressions or the cre‐ation of a full-fledged parser. All of these topics are covered. In addition, a few trickyaspects of working with Unicode are addressed.
2.1. Splitting Strings on Any of Multiple DelimitersProblemYou need to split a string into fields, but the delimiters (and spacing around them) aren’tconsistent throughout the string.
SolutionThe split() method of string objects is really meant for very simple cases, and doesnot allow for multiple delimiters or account for possible whitespace around the delim‐iters. In cases when you need a bit more flexibility, use the re.split() method:
>>> line = 'asdf fjdk; afed, fjek,asdf, foo'>>> import re>>> re.split(r'[;,\s]\s*', line)['asdf', 'fjdk', 'afed', 'fjek', 'asdf', 'foo']
DiscussionThe re.split() function is useful because you can specify multiple patterns for theseparator. For example, as shown in the solution, the separator is either a comma (,),
37
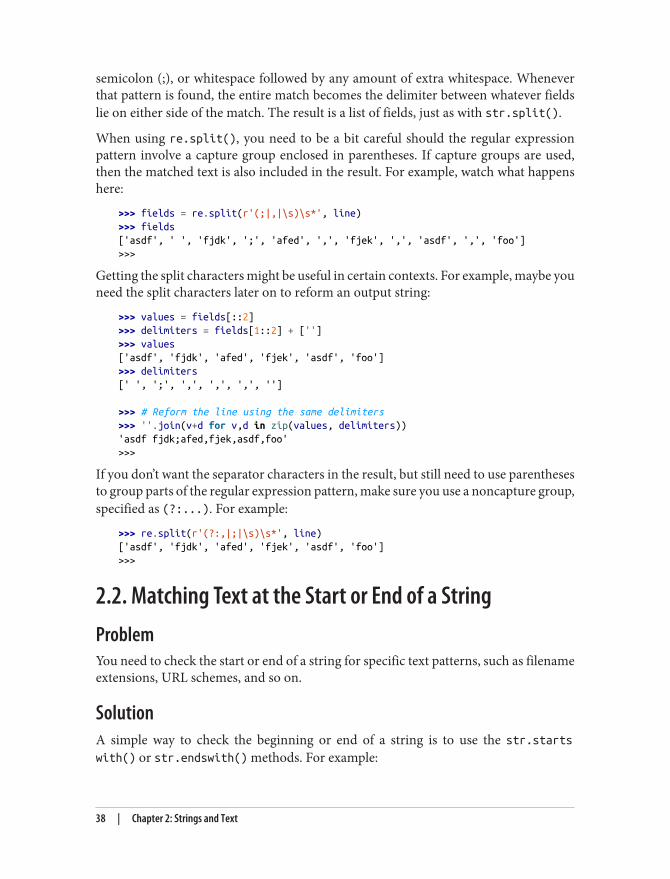
semicolon (;), or whitespace followed by any amount of extra whitespace. Wheneverthat pattern is found, the entire match becomes the delimiter between whatever fieldslie on either side of the match. The result is a list of fields, just as with str.split().
When using re.split(), you need to be a bit careful should the regular expressionpattern involve a capture group enclosed in parentheses. If capture groups are used,then the matched text is also included in the result. For example, watch what happenshere:
>>> fields = re.split(r'(;|,|\s)\s*', line)>>> fields['asdf', ' ', 'fjdk', ';', 'afed', ',', 'fjek', ',', 'asdf', ',', 'foo']>>>
Getting the split characters might be useful in certain contexts. For example, maybe youneed the split characters later on to reform an output string:
>>> values = fields[::2]>>> delimiters = fields[1::2] + ['']>>> values['asdf', 'fjdk', 'afed', 'fjek', 'asdf', 'foo']>>> delimiters[' ', ';', ',', ',', ',', '']
>>> # Reform the line using the same delimiters>>> ''.join(v+d for v,d in zip(values, delimiters))'asdf fjdk;afed,fjek,asdf,foo'>>>
If you don’t want the separator characters in the result, but still need to use parenthesesto group parts of the regular expression pattern, make sure you use a noncapture group,specified as (?:...). For example:
>>> re.split(r'(?:,|;|\s)\s*', line)['asdf', 'fjdk', 'afed', 'fjek', 'asdf', 'foo']>>>
2.2. Matching Text at the Start or End of a StringProblemYou need to check the start or end of a string for specific text patterns, such as filenameextensions, URL schemes, and so on.
SolutionA simple way to check the beginning or end of a string is to use the str.startswith() or str.endswith() methods. For example:
38 | Chapter 2: Strings and Text
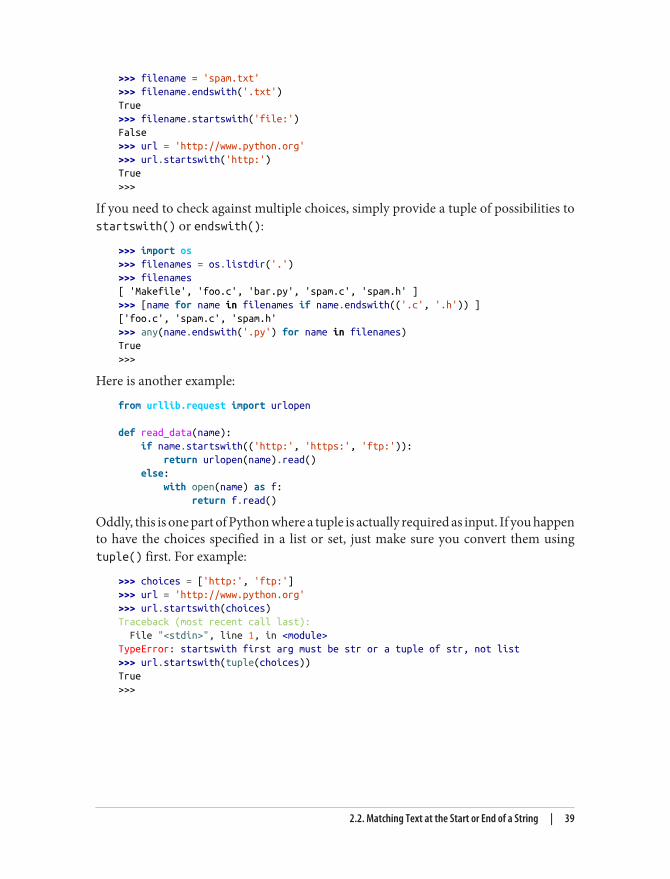
>>> filename = 'spam.txt'>>> filename.endswith('.txt')True>>> filename.startswith('file:')False>>> url = 'http://www.python.org'>>> url.startswith('http:')True>>>
If you need to check against multiple choices, simply provide a tuple of possibilities tostartswith() or endswith():
>>> import os>>> filenames = os.listdir('.')>>> filenames[ 'Makefile', 'foo.c', 'bar.py', 'spam.c', 'spam.h' ]>>> [name for name in filenames if name.endswith(('.c', '.h')) ]['foo.c', 'spam.c', 'spam.h'>>> any(name.endswith('.py') for name in filenames)True>>>
Here is another example:
from urllib.request import urlopen
def read_data(name): if name.startswith(('http:', 'https:', 'ftp:')): return urlopen(name).read() else: with open(name) as f: return f.read()
Oddly, this is one part of Python where a tuple is actually required as input. If you happento have the choices specified in a list or set, just make sure you convert them usingtuple() first. For example:
>>> choices = ['http:', 'ftp:']>>> url = 'http://www.python.org'>>> url.startswith(choices)Traceback (most recent call last): File "<stdin>", line 1, in <module>TypeError: startswith first arg must be str or a tuple of str, not list>>> url.startswith(tuple(choices))True>>>
2.2. Matching Text at the Start or End of a String | 39
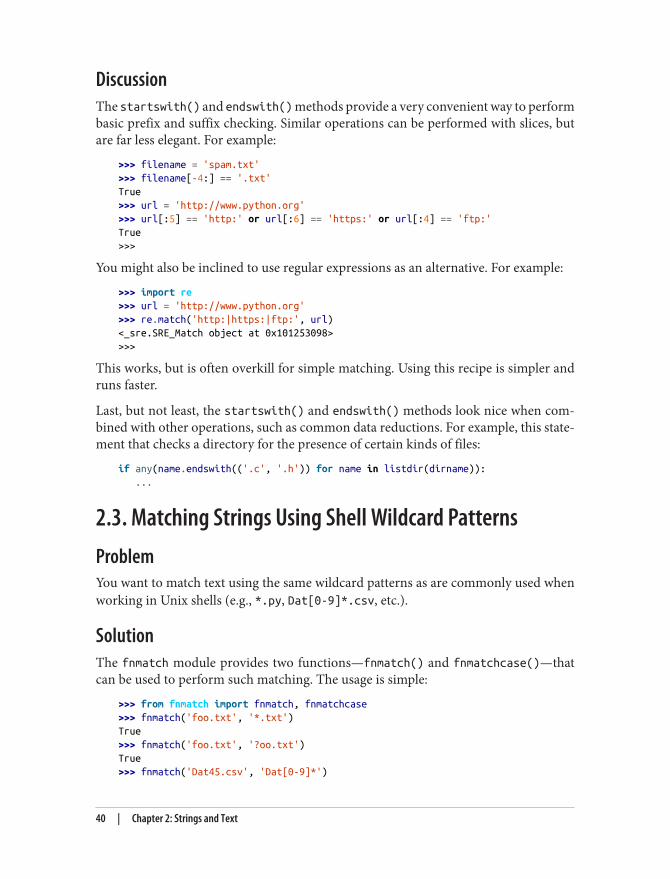
DiscussionThe startswith() and endswith() methods provide a very convenient way to performbasic prefix and suffix checking. Similar operations can be performed with slices, butare far less elegant. For example:
>>> filename = 'spam.txt'>>> filename[-4:] == '.txt'True>>> url = 'http://www.python.org'>>> url[:5] == 'http:' or url[:6] == 'https:' or url[:4] == 'ftp:'True>>>
You might also be inclined to use regular expressions as an alternative. For example:
>>> import re>>> url = 'http://www.python.org'>>> re.match('http:|https:|ftp:', url)<_sre.SRE_Match object at 0x101253098>>>>
This works, but is often overkill for simple matching. Using this recipe is simpler andruns faster.
Last, but not least, the startswith() and endswith() methods look nice when com‐bined with other operations, such as common data reductions. For example, this state‐ment that checks a directory for the presence of certain kinds of files:
if any(name.endswith(('.c', '.h')) for name in listdir(dirname)): ...
2.3. Matching Strings Using Shell Wildcard PatternsProblemYou want to match text using the same wildcard patterns as are commonly used whenworking in Unix shells (e.g., *.py, Dat[0-9]*.csv, etc.).
SolutionThe fnmatch module provides two functions—fnmatch() and fnmatchcase()—thatcan be used to perform such matching. The usage is simple:
>>> from fnmatch import fnmatch, fnmatchcase>>> fnmatch('foo.txt', '*.txt')True>>> fnmatch('foo.txt', '?oo.txt')True>>> fnmatch('Dat45.csv', 'Dat[0-9]*')
40 | Chapter 2: Strings and Text
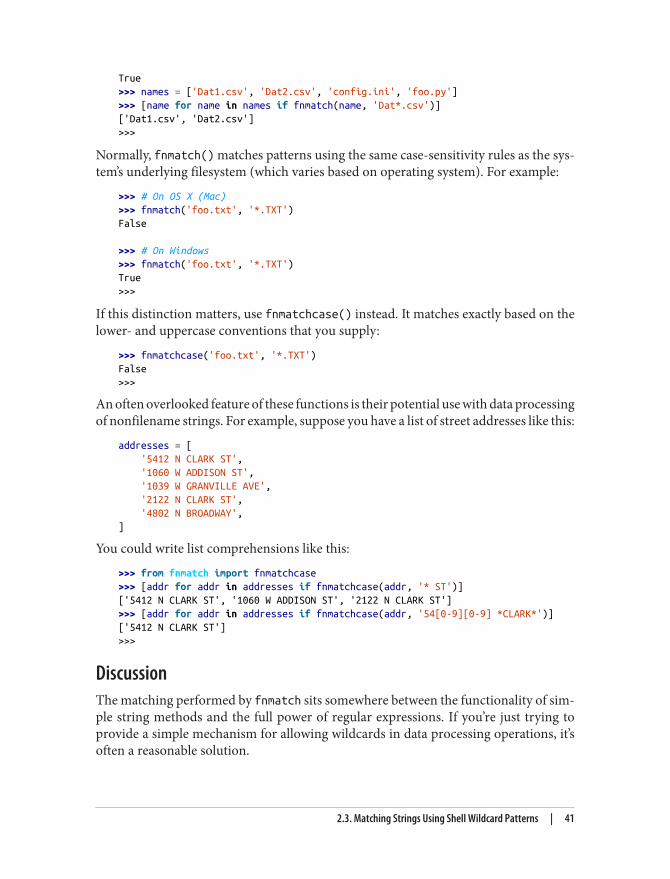
True>>> names = ['Dat1.csv', 'Dat2.csv', 'config.ini', 'foo.py']>>> [name for name in names if fnmatch(name, 'Dat*.csv')]['Dat1.csv', 'Dat2.csv']>>>
Normally, fnmatch() matches patterns using the same case-sensitivity rules as the sys‐tem’s underlying filesystem (which varies based on operating system). For example:
>>> # On OS X (Mac)>>> fnmatch('foo.txt', '*.TXT')False
>>> # On Windows>>> fnmatch('foo.txt', '*.TXT')True>>>
If this distinction matters, use fnmatchcase() instead. It matches exactly based on thelower- and uppercase conventions that you supply:
>>> fnmatchcase('foo.txt', '*.TXT')False>>>
An often overlooked feature of these functions is their potential use with data processingof nonfilename strings. For example, suppose you have a list of street addresses like this:
addresses = [ '5412 N CLARK ST', '1060 W ADDISON ST', '1039 W GRANVILLE AVE', '2122 N CLARK ST', '4802 N BROADWAY',]
You could write list comprehensions like this:
>>> from fnmatch import fnmatchcase>>> [addr for addr in addresses if fnmatchcase(addr, '* ST')]['5412 N CLARK ST', '1060 W ADDISON ST', '2122 N CLARK ST']>>> [addr for addr in addresses if fnmatchcase(addr, '54[0-9][0-9] *CLARK*')]['5412 N CLARK ST']>>>
DiscussionThe matching performed by fnmatch sits somewhere between the functionality of sim‐ple string methods and the full power of regular expressions. If you’re just trying toprovide a simple mechanism for allowing wildcards in data processing operations, it’soften a reasonable solution.
2.3. Matching Strings Using Shell Wildcard Patterns | 41

If you’re actually trying to write code that matches filenames, use the glob moduleinstead. See Recipe 5.13.
2.4. Matching and Searching for Text PatternsProblemYou want to match or search text for a specific pattern.
SolutionIf the text you’re trying to match is a simple literal, you can often just use the basic stringmethods, such as str.find(), str.endswith(), str.startswith(), or similar. Forexample:
>>> text = 'yeah, but no, but yeah, but no, but yeah'
>>> # Exact match>>> text == 'yeah'False
>>> # Match at start or end>>> text.startswith('yeah')True>>> text.endswith('no')False
>>> # Search for the location of the first occurrence>>> text.find('no')10>>>
For more complicated matching, use regular expressions and the re module. To illus‐trate the basic mechanics of using regular expressions, suppose you want to match datesspecified as digits, such as “11/27/2012.” Here is a sample of how you would do it:
>>> text1 = '11/27/2012'>>> text2 = 'Nov 27, 2012'>>>>>> import re>>> # Simple matching: \d+ means match one or more digits>>> if re.match(r'\d+/\d+/\d+', text1):... print('yes')... else:... print('no')...yes>>> if re.match(r'\d+/\d+/\d+', text2):... print('yes')... else:
42 | Chapter 2: Strings and Text
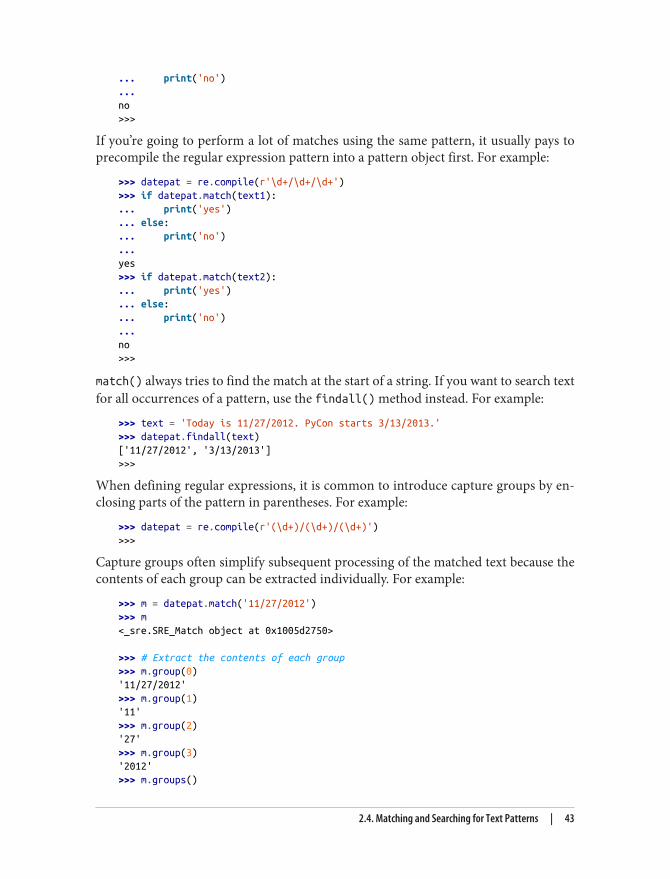
... print('no')
...no>>>
If you’re going to perform a lot of matches using the same pattern, it usually pays toprecompile the regular expression pattern into a pattern object first. For example:
>>> datepat = re.compile(r'\d+/\d+/\d+')>>> if datepat.match(text1):... print('yes')... else:... print('no')...yes>>> if datepat.match(text2):... print('yes')... else:... print('no')...no>>>
match() always tries to find the match at the start of a string. If you want to search textfor all occurrences of a pattern, use the findall() method instead. For example:
>>> text = 'Today is 11/27/2012. PyCon starts 3/13/2013.'>>> datepat.findall(text)['11/27/2012', '3/13/2013']>>>
When defining regular expressions, it is common to introduce capture groups by en‐closing parts of the pattern in parentheses. For example:
>>> datepat = re.compile(r'(\d+)/(\d+)/(\d+)')>>>
Capture groups often simplify subsequent processing of the matched text because thecontents of each group can be extracted individually. For example:
>>> m = datepat.match('11/27/2012')>>> m<_sre.SRE_Match object at 0x1005d2750>
>>> # Extract the contents of each group>>> m.group(0)'11/27/2012'>>> m.group(1)'11'>>> m.group(2)'27'>>> m.group(3)'2012'>>> m.groups()
2.4. Matching and Searching for Text Patterns | 43
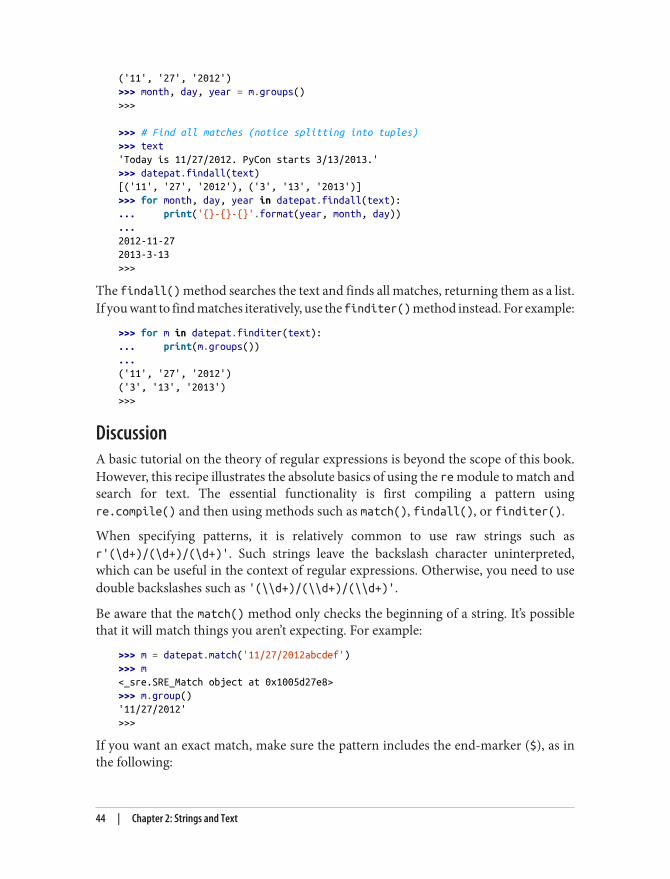
('11', '27', '2012')>>> month, day, year = m.groups()>>>
>>> # Find all matches (notice splitting into tuples)>>> text'Today is 11/27/2012. PyCon starts 3/13/2013.'>>> datepat.findall(text)[('11', '27', '2012'), ('3', '13', '2013')]>>> for month, day, year in datepat.findall(text):... print('{}-{}-{}'.format(year, month, day))...2012-11-272013-3-13>>>
The findall() method searches the text and finds all matches, returning them as a list.If you want to find matches iteratively, use the finditer() method instead. For example:
>>> for m in datepat.finditer(text):... print(m.groups())...('11', '27', '2012')('3', '13', '2013')>>>
DiscussionA basic tutorial on the theory of regular expressions is beyond the scope of this book.However, this recipe illustrates the absolute basics of using the re module to match andsearch for text. The essential functionality is first compiling a pattern usingre.compile() and then using methods such as match(), findall(), or finditer().
When specifying patterns, it is relatively common to use raw strings such asr'(\d+)/(\d+)/(\d+)'. Such strings leave the backslash character uninterpreted,which can be useful in the context of regular expressions. Otherwise, you need to usedouble backslashes such as '(\\d+)/(\\d+)/(\\d+)'.
Be aware that the match() method only checks the beginning of a string. It’s possiblethat it will match things you aren’t expecting. For example:
>>> m = datepat.match('11/27/2012abcdef')>>> m<_sre.SRE_Match object at 0x1005d27e8>>>> m.group()'11/27/2012'>>>
If you want an exact match, make sure the pattern includes the end-marker ($), as inthe following:
44 | Chapter 2: Strings and Text
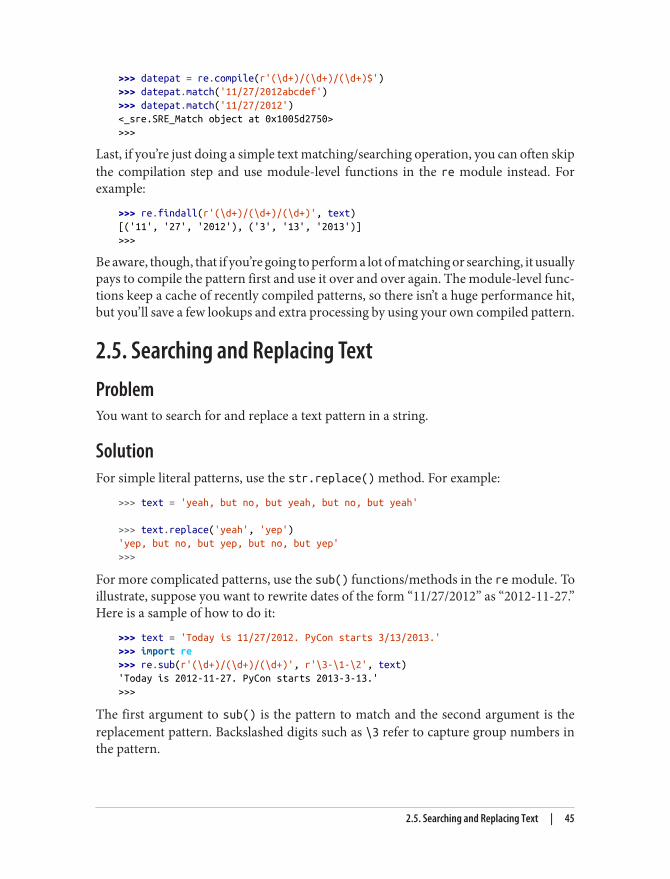
>>> datepat = re.compile(r'(\d+)/(\d+)/(\d+)$')>>> datepat.match('11/27/2012abcdef')>>> datepat.match('11/27/2012')<_sre.SRE_Match object at 0x1005d2750>>>>
Last, if you’re just doing a simple text matching/searching operation, you can often skipthe compilation step and use module-level functions in the re module instead. Forexample:
>>> re.findall(r'(\d+)/(\d+)/(\d+)', text)[('11', '27', '2012'), ('3', '13', '2013')]>>>
Be aware, though, that if you’re going to perform a lot of matching or searching, it usuallypays to compile the pattern first and use it over and over again. The module-level func‐tions keep a cache of recently compiled patterns, so there isn’t a huge performance hit,but you’ll save a few lookups and extra processing by using your own compiled pattern.
2.5. Searching and Replacing TextProblemYou want to search for and replace a text pattern in a string.
SolutionFor simple literal patterns, use the str.replace() method. For example:
>>> text = 'yeah, but no, but yeah, but no, but yeah'
>>> text.replace('yeah', 'yep')'yep, but no, but yep, but no, but yep'>>>
For more complicated patterns, use the sub() functions/methods in the re module. Toillustrate, suppose you want to rewrite dates of the form “11/27/2012” as “2012-11-27.”Here is a sample of how to do it:
>>> text = 'Today is 11/27/2012. PyCon starts 3/13/2013.'>>> import re>>> re.sub(r'(\d+)/(\d+)/(\d+)', r'\3-\1-\2', text)'Today is 2012-11-27. PyCon starts 2013-3-13.'>>>
The first argument to sub() is the pattern to match and the second argument is thereplacement pattern. Backslashed digits such as \3 refer to capture group numbers inthe pattern.
2.5. Searching and Replacing Text | 45

If you’re going to perform repeated substitutions of the same pattern, consider compil‐ing it first for better performance. For example:
>>> import re>>> datepat = re.compile(r'(\d+)/(\d+)/(\d+)')>>> datepat.sub(r'\3-\1-\2', text)'Today is 2012-11-27. PyCon starts 2013-3-13.'>>>
For more complicated substitutions, it’s possible to specify a substitution callback func‐tion instead. For example:
>>> from calendar import month_abbr>>> def change_date(m):... mon_name = month_abbr[int(m.group(1))]... return '{} {} {}'.format(m.group(2), mon_name, m.group(3))...>>> datepat.sub(change_date, text)'Today is 27 Nov 2012. PyCon starts 13 Mar 2013.'>>>
As input, the argument to the substitution callback is a match object, as returned by match() or find(). Use the .group() method to extract specific parts of the match. Thefunction should return the replacement text.
If you want to know how many substitutions were made in addition to getting thereplacement text, use re.subn() instead. For example:
>>> newtext, n = datepat.subn(r'\3-\1-\2', text)>>> newtext'Today is 2012-11-27. PyCon starts 2013-3-13.'>>> n2>>>
DiscussionThere isn’t much more to regular expression search and replace than the sub() methodshown. The trickiest part is specifying the regular expression pattern—something that’sbest left as an exercise to the reader.
2.6. Searching and Replacing Case-Insensitive TextProblemYou need to search for and possibly replace text in a case-insensitive manner.
46 | Chapter 2: Strings and Text
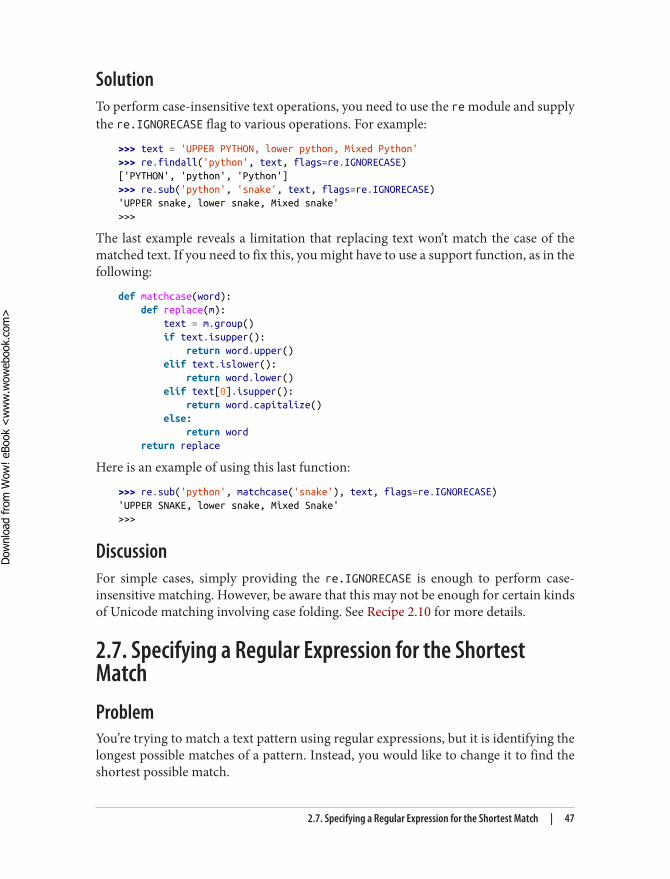
SolutionTo perform case-insensitive text operations, you need to use the re module and supplythe re.IGNORECASE flag to various operations. For example:
>>> text = 'UPPER PYTHON, lower python, Mixed Python'>>> re.findall('python', text, flags=re.IGNORECASE)['PYTHON', 'python', 'Python']>>> re.sub('python', 'snake', text, flags=re.IGNORECASE)'UPPER snake, lower snake, Mixed snake'>>>
The last example reveals a limitation that replacing text won’t match the case of thematched text. If you need to fix this, you might have to use a support function, as in thefollowing:
def matchcase(word): def replace(m): text = m.group() if text.isupper(): return word.upper() elif text.islower(): return word.lower() elif text[0].isupper(): return word.capitalize() else: return word return replace
Here is an example of using this last function:
>>> re.sub('python', matchcase('snake'), text, flags=re.IGNORECASE)'UPPER SNAKE, lower snake, Mixed Snake'>>>
DiscussionFor simple cases, simply providing the re.IGNORECASE is enough to perform case-insensitive matching. However, be aware that this may not be enough for certain kindsof Unicode matching involving case folding. See Recipe 2.10 for more details.
2.7. Specifying a Regular Expression for the ShortestMatchProblemYou’re trying to match a text pattern using regular expressions, but it is identifying thelongest possible matches of a pattern. Instead, you would like to change it to find theshortest possible match.
2.7. Specifying a Regular Expression for the Shortest Match | 47
Dow
nlo
ad fro
m W
ow
! eBook
<w
ww
.wow
ebook.
com
>
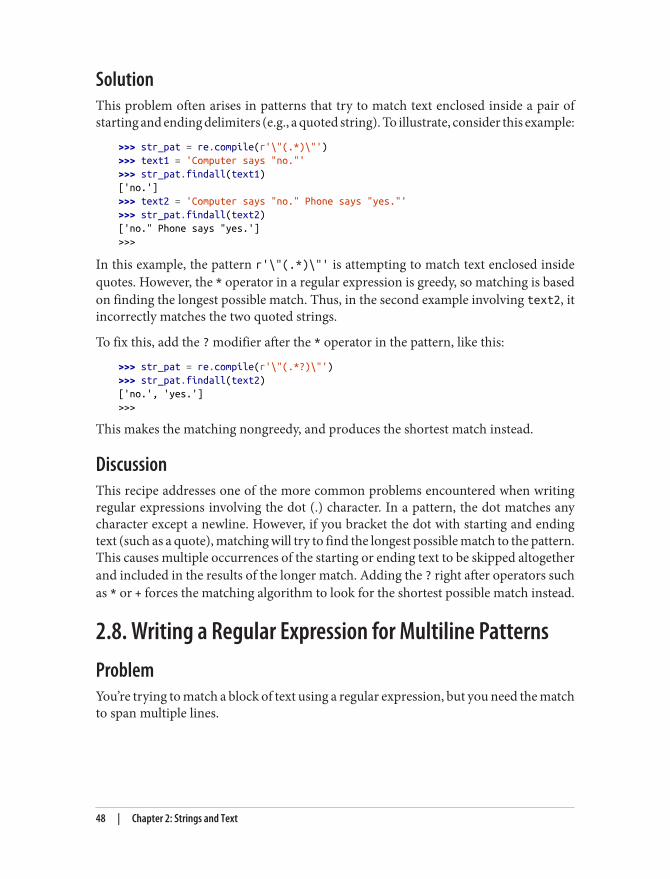
SolutionThis problem often arises in patterns that try to match text enclosed inside a pair ofstarting and ending delimiters (e.g., a quoted string). To illustrate, consider this example:
>>> str_pat = re.compile(r'\"(.*)\"')>>> text1 = 'Computer says "no."'>>> str_pat.findall(text1)['no.']>>> text2 = 'Computer says "no." Phone says "yes."'>>> str_pat.findall(text2)['no." Phone says "yes.']>>>
In this example, the pattern r'\"(.*)\"' is attempting to match text enclosed insidequotes. However, the * operator in a regular expression is greedy, so matching is basedon finding the longest possible match. Thus, in the second example involving text2, itincorrectly matches the two quoted strings.
To fix this, add the ? modifier after the * operator in the pattern, like this:
>>> str_pat = re.compile(r'\"(.*?)\"')>>> str_pat.findall(text2)['no.', 'yes.']>>>
This makes the matching nongreedy, and produces the shortest match instead.
DiscussionThis recipe addresses one of the more common problems encountered when writingregular expressions involving the dot (.) character. In a pattern, the dot matches anycharacter except a newline. However, if you bracket the dot with starting and endingtext (such as a quote), matching will try to find the longest possible match to the pattern.This causes multiple occurrences of the starting or ending text to be skipped altogetherand included in the results of the longer match. Adding the ? right after operators suchas * or + forces the matching algorithm to look for the shortest possible match instead.
2.8. Writing a Regular Expression for Multiline PatternsProblemYou’re trying to match a block of text using a regular expression, but you need the matchto span multiple lines.
48 | Chapter 2: Strings and Text
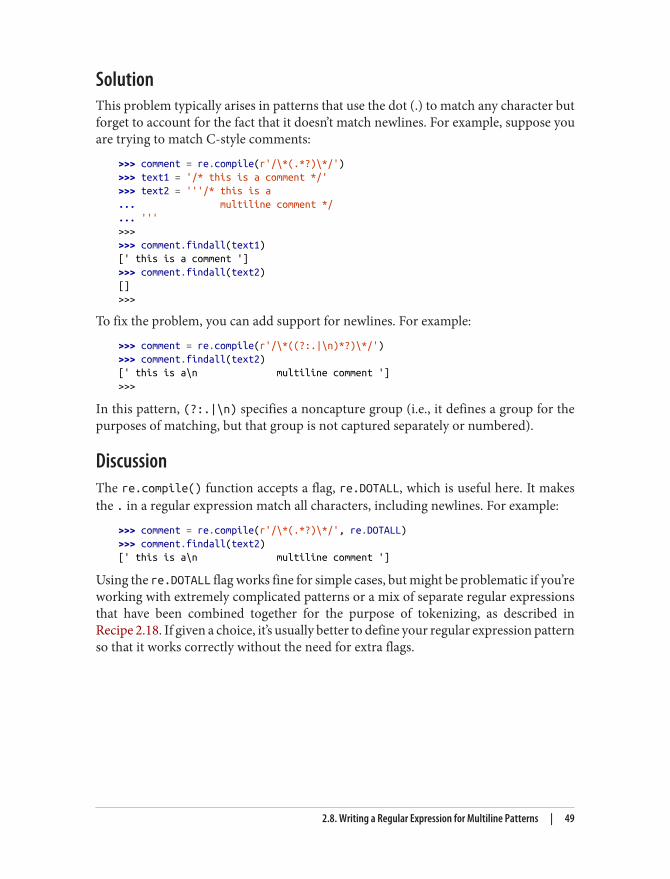
SolutionThis problem typically arises in patterns that use the dot (.) to match any character butforget to account for the fact that it doesn’t match newlines. For example, suppose youare trying to match C-style comments:
>>> comment = re.compile(r'/\*(.*?)\*/')>>> text1 = '/* this is a comment */'>>> text2 = '''/* this is a... multiline comment */... '''>>>>>> comment.findall(text1)[' this is a comment ']>>> comment.findall(text2)[]>>>
To fix the problem, you can add support for newlines. For example:
>>> comment = re.compile(r'/\*((?:.|\n)*?)\*/')>>> comment.findall(text2)[' this is a\n multiline comment ']>>>
In this pattern, (?:.|\n) specifies a noncapture group (i.e., it defines a group for thepurposes of matching, but that group is not captured separately or numbered).
DiscussionThe re.compile() function accepts a flag, re.DOTALL, which is useful here. It makesthe . in a regular expression match all characters, including newlines. For example:
>>> comment = re.compile(r'/\*(.*?)\*/', re.DOTALL)>>> comment.findall(text2)[' this is a\n multiline comment ']
Using the re.DOTALL flag works fine for simple cases, but might be problematic if you’reworking with extremely complicated patterns or a mix of separate regular expressionsthat have been combined together for the purpose of tokenizing, as described inRecipe 2.18. If given a choice, it’s usually better to define your regular expression patternso that it works correctly without the need for extra flags.
2.8. Writing a Regular Expression for Multiline Patterns | 49
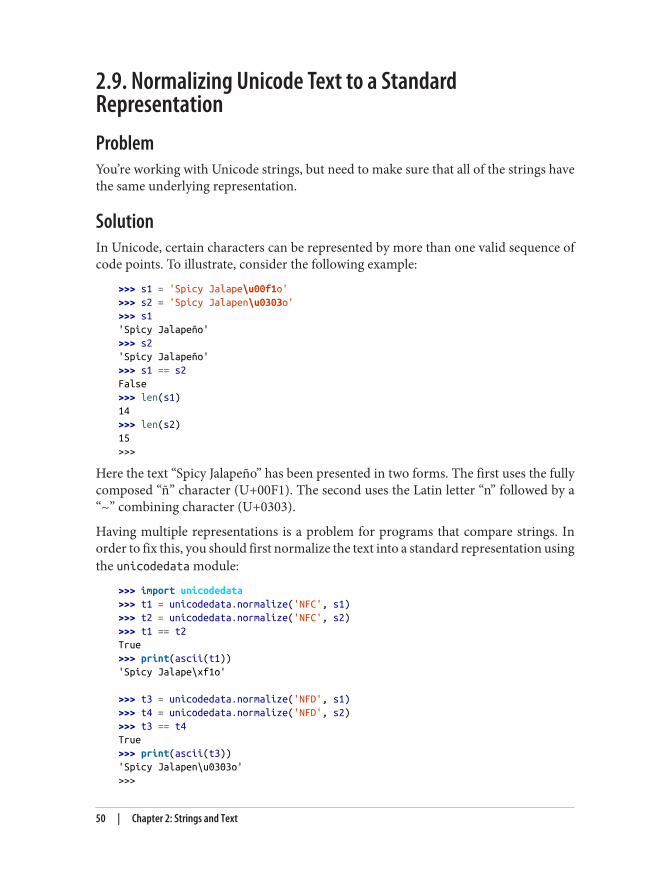
2.9. Normalizing Unicode Text to a StandardRepresentationProblemYou’re working with Unicode strings, but need to make sure that all of the strings havethe same underlying representation.
SolutionIn Unicode, certain characters can be represented by more than one valid sequence ofcode points. To illustrate, consider the following example:
>>> s1 = 'Spicy Jalape\u00f1o'>>> s2 = 'Spicy Jalapen\u0303o'>>> s1'Spicy Jalapeño'>>> s2'Spicy Jalapeño'>>> s1 == s2False>>> len(s1)14>>> len(s2)15>>>
Here the text “Spicy Jalapeño” has been presented in two forms. The first uses the fullycomposed “ñ” character (U+00F1). The second uses the Latin letter “n” followed by a“~” combining character (U+0303).
Having multiple representations is a problem for programs that compare strings. Inorder to fix this, you should first normalize the text into a standard representation usingthe unicodedata module:
>>> import unicodedata>>> t1 = unicodedata.normalize('NFC', s1)>>> t2 = unicodedata.normalize('NFC', s2)>>> t1 == t2True>>> print(ascii(t1))'Spicy Jalape\xf1o'
>>> t3 = unicodedata.normalize('NFD', s1)>>> t4 = unicodedata.normalize('NFD', s2)>>> t3 == t4True>>> print(ascii(t3))'Spicy Jalapen\u0303o'>>>
50 | Chapter 2: Strings and Text
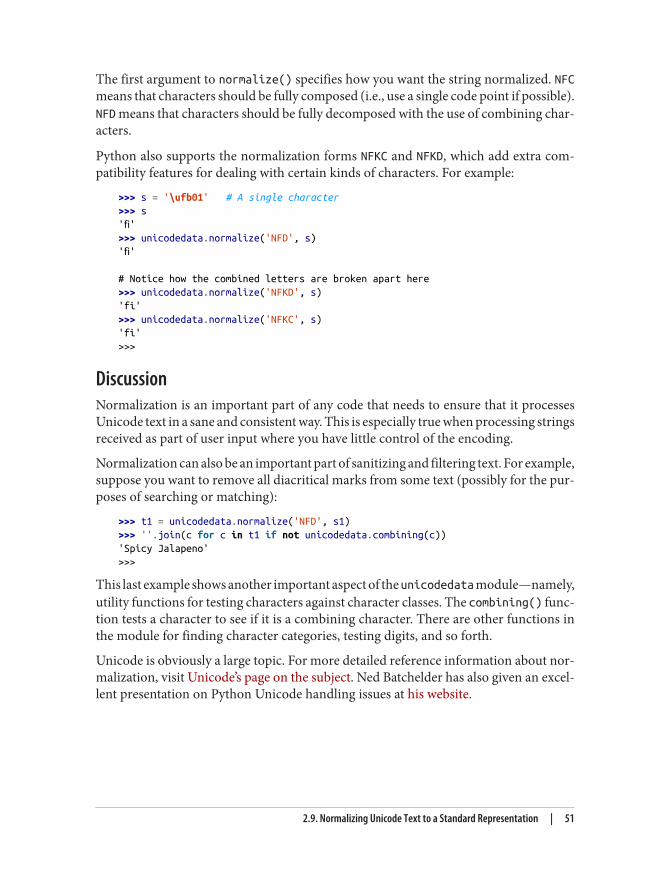
The first argument to normalize() specifies how you want the string normalized. NFCmeans that characters should be fully composed (i.e., use a single code point if possible).NFD means that characters should be fully decomposed with the use of combining char‐acters.
Python also supports the normalization forms NFKC and NFKD, which add extra com‐patibility features for dealing with certain kinds of characters. For example:
>>> s = '\ufb01' # A single character>>> s'fi'>>> unicodedata.normalize('NFD', s)'fi'
# Notice how the combined letters are broken apart here>>> unicodedata.normalize('NFKD', s)'fi'>>> unicodedata.normalize('NFKC', s)'fi'>>>
DiscussionNormalization is an important part of any code that needs to ensure that it processesUnicode text in a sane and consistent way. This is especially true when processing stringsreceived as part of user input where you have little control of the encoding.
Normalization can also be an important part of sanitizing and filtering text. For example,suppose you want to remove all diacritical marks from some text (possibly for the pur‐poses of searching or matching):
>>> t1 = unicodedata.normalize('NFD', s1)>>> ''.join(c for c in t1 if not unicodedata.combining(c))'Spicy Jalapeno'>>>
This last example shows another important aspect of the unicodedata module—namely,utility functions for testing characters against character classes. The combining() func‐tion tests a character to see if it is a combining character. There are other functions inthe module for finding character categories, testing digits, and so forth.
Unicode is obviously a large topic. For more detailed reference information about nor‐malization, visit Unicode’s page on the subject. Ned Batchelder has also given an excel‐lent presentation on Python Unicode handling issues at his website.
2.9. Normalizing Unicode Text to a Standard Representation | 51
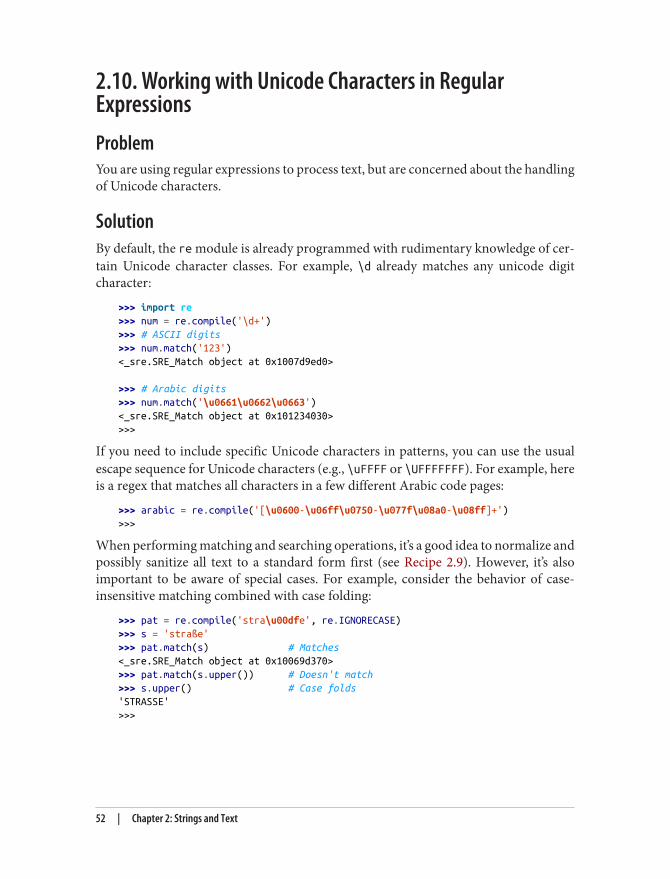
2.10. Working with Unicode Characters in RegularExpressionsProblemYou are using regular expressions to process text, but are concerned about the handlingof Unicode characters.
SolutionBy default, the re module is already programmed with rudimentary knowledge of cer‐tain Unicode character classes. For example, \d already matches any unicode digitcharacter:
>>> import re>>> num = re.compile('\d+')>>> # ASCII digits>>> num.match('123')<_sre.SRE_Match object at 0x1007d9ed0>
>>> # Arabic digits>>> num.match('\u0661\u0662\u0663')<_sre.SRE_Match object at 0x101234030>>>>
If you need to include specific Unicode characters in patterns, you can use the usualescape sequence for Unicode characters (e.g., \uFFFF or \UFFFFFFF). For example, hereis a regex that matches all characters in a few different Arabic code pages:
>>> arabic = re.compile('[\u0600-\u06ff\u0750-\u077f\u08a0-\u08ff]+')>>>
When performing matching and searching operations, it’s a good idea to normalize andpossibly sanitize all text to a standard form first (see Recipe 2.9). However, it’s alsoimportant to be aware of special cases. For example, consider the behavior of case-insensitive matching combined with case folding:
>>> pat = re.compile('stra\u00dfe', re.IGNORECASE)>>> s = 'straße'>>> pat.match(s) # Matches<_sre.SRE_Match object at 0x10069d370>>>> pat.match(s.upper()) # Doesn't match>>> s.upper() # Case folds'STRASSE'>>>
52 | Chapter 2: Strings and Text
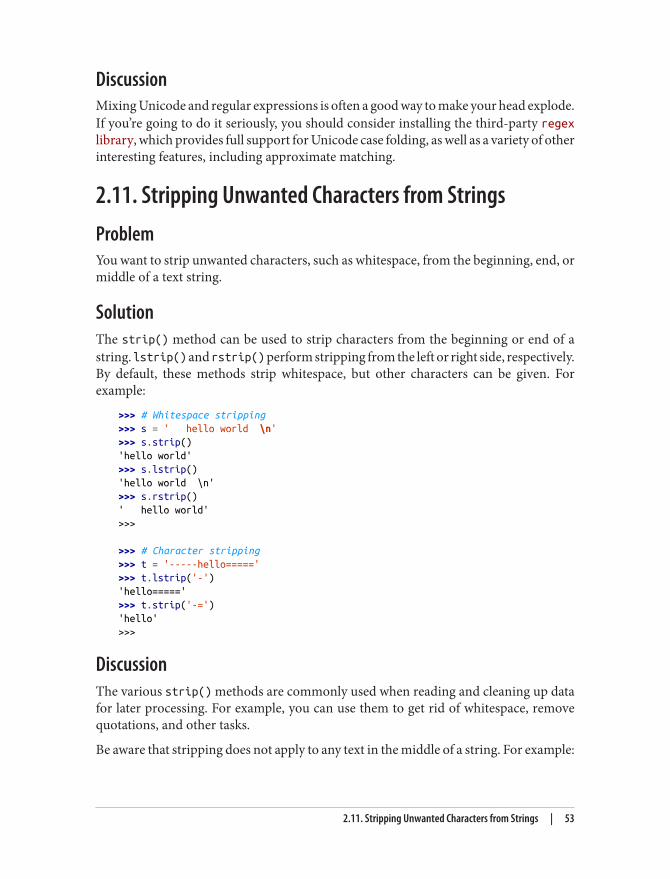
DiscussionMixing Unicode and regular expressions is often a good way to make your head explode.If you’re going to do it seriously, you should consider installing the third-party regexlibrary, which provides full support for Unicode case folding, as well as a variety of otherinteresting features, including approximate matching.
2.11. Stripping Unwanted Characters from StringsProblemYou want to strip unwanted characters, such as whitespace, from the beginning, end, ormiddle of a text string.
SolutionThe strip() method can be used to strip characters from the beginning or end of astring. lstrip() and rstrip() perform stripping from the left or right side, respectively.By default, these methods strip whitespace, but other characters can be given. Forexample:
>>> # Whitespace stripping>>> s = ' hello world \n'>>> s.strip()'hello world'>>> s.lstrip()'hello world \n'>>> s.rstrip()' hello world'>>>
>>> # Character stripping>>> t = '-----hello====='>>> t.lstrip('-')'hello====='>>> t.strip('-=')'hello'>>>
DiscussionThe various strip() methods are commonly used when reading and cleaning up datafor later processing. For example, you can use them to get rid of whitespace, removequotations, and other tasks.
Be aware that stripping does not apply to any text in the middle of a string. For example:
2.11. Stripping Unwanted Characters from Strings | 53
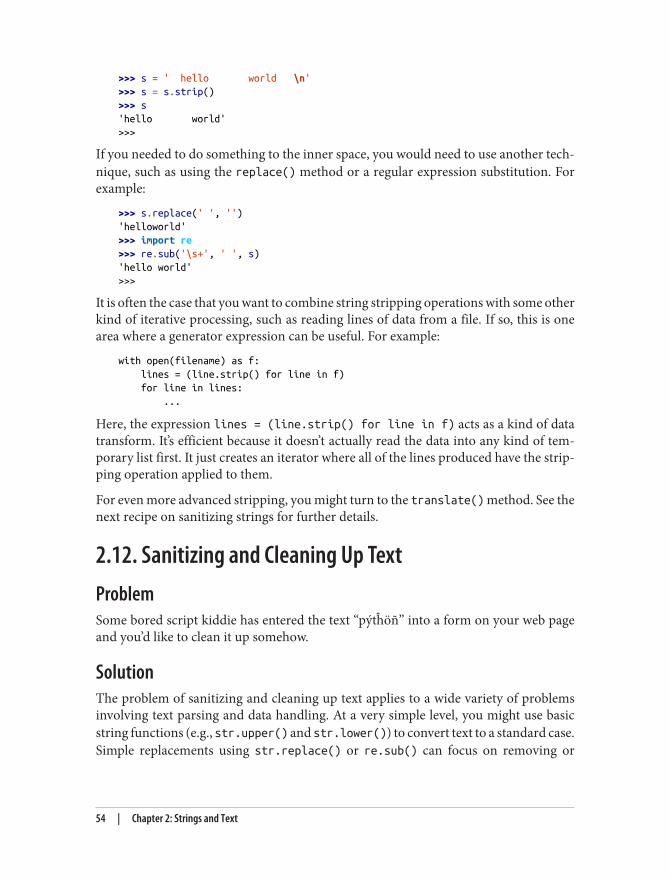
>>> s = ' hello world \n'>>> s = s.strip()>>> s'hello world'>>>
If you needed to do something to the inner space, you would need to use another tech‐nique, such as using the replace() method or a regular expression substitution. Forexample:
>>> s.replace(' ', '')'helloworld'>>> import re>>> re.sub('\s+', ' ', s)'hello world'>>>
It is often the case that you want to combine string stripping operations with some otherkind of iterative processing, such as reading lines of data from a file. If so, this is onearea where a generator expression can be useful. For example:
with open(filename) as f: lines = (line.strip() for line in f) for line in lines: ...
Here, the expression lines = (line.strip() for line in f) acts as a kind of datatransform. It’s efficient because it doesn’t actually read the data into any kind of tem‐porary list first. It just creates an iterator where all of the lines produced have the strip‐ping operation applied to them.
For even more advanced stripping, you might turn to the translate() method. See thenext recipe on sanitizing strings for further details.
2.12. Sanitizing and Cleaning Up TextProblemSome bored script kiddie has entered the text “pýtĥöñ” into a form on your web pageand you’d like to clean it up somehow.
SolutionThe problem of sanitizing and cleaning up text applies to a wide variety of problemsinvolving text parsing and data handling. At a very simple level, you might use basicstring functions (e.g., str.upper() and str.lower()) to convert text to a standard case.Simple replacements using str.replace() or re.sub() can focus on removing or
54 | Chapter 2: Strings and Text
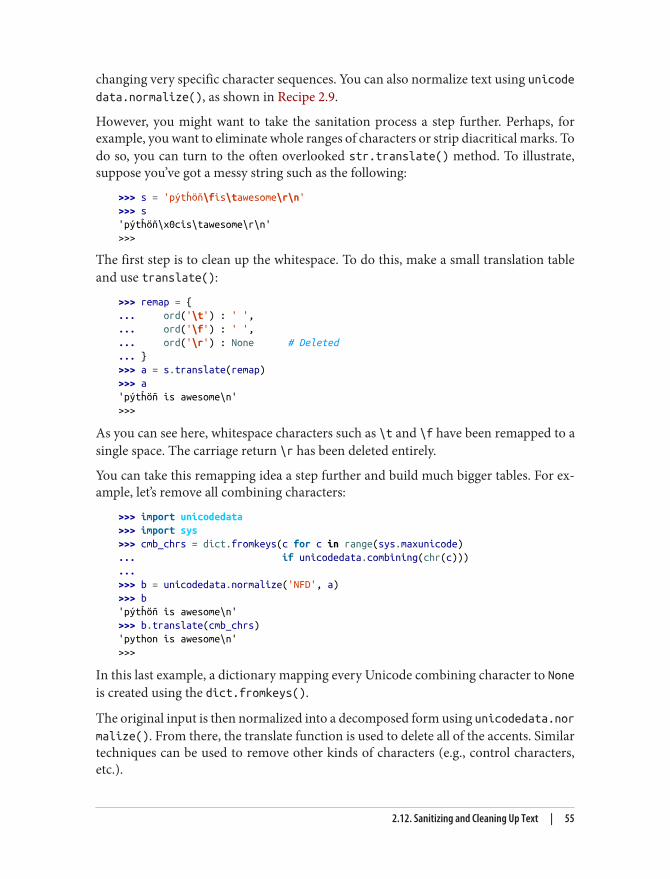
changing very specific character sequences. You can also normalize text using unicodedata.normalize(), as shown in Recipe 2.9.
However, you might want to take the sanitation process a step further. Perhaps, forexample, you want to eliminate whole ranges of characters or strip diacritical marks. Todo so, you can turn to the often overlooked str.translate() method. To illustrate,suppose you’ve got a messy string such as the following:
>>> s = 'pýtĥöñ\fis\tawesome\r\n'>>> s'pýtĥöñ\x0cis\tawesome\r\n'>>>
The first step is to clean up the whitespace. To do this, make a small translation tableand use translate():
>>> remap = {... ord('\t') : ' ',... ord('\f') : ' ',... ord('\r') : None # Deleted... }>>> a = s.translate(remap)>>> a'pýtĥöñ is awesome\n'>>>
As you can see here, whitespace characters such as \t and \f have been remapped to asingle space. The carriage return \r has been deleted entirely.
You can take this remapping idea a step further and build much bigger tables. For ex‐ample, let’s remove all combining characters:
>>> import unicodedata>>> import sys>>> cmb_chrs = dict.fromkeys(c for c in range(sys.maxunicode)... if unicodedata.combining(chr(c)))...>>> b = unicodedata.normalize('NFD', a)>>> b'pýtĥöñ is awesome\n'>>> b.translate(cmb_chrs)'python is awesome\n'>>>
In this last example, a dictionary mapping every Unicode combining character to Noneis created using the dict.fromkeys().
The original input is then normalized into a decomposed form using unicodedata.normalize(). From there, the translate function is used to delete all of the accents. Similartechniques can be used to remove other kinds of characters (e.g., control characters,etc.).
2.12. Sanitizing and Cleaning Up Text | 55
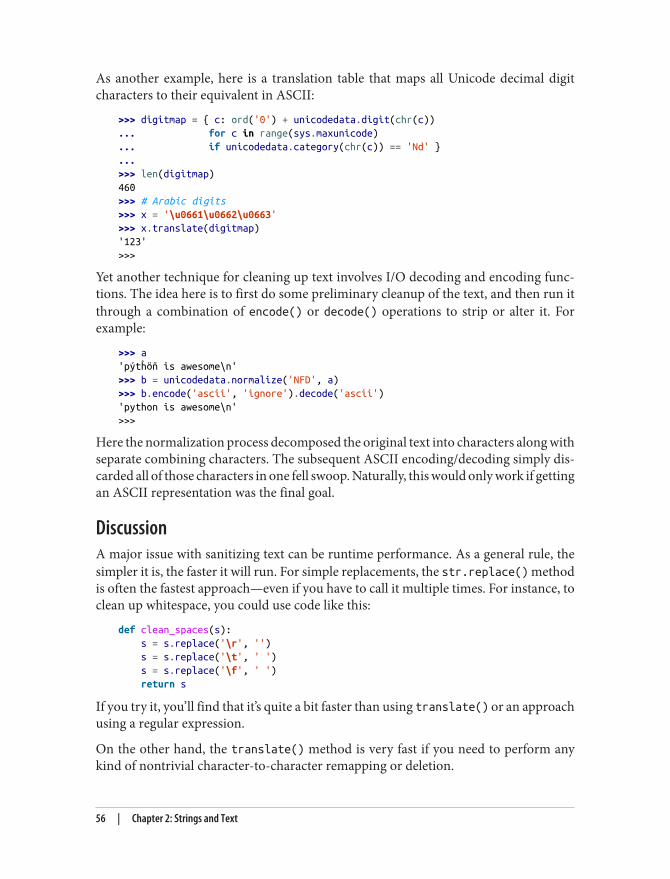
As another example, here is a translation table that maps all Unicode decimal digitcharacters to their equivalent in ASCII:
>>> digitmap = { c: ord('0') + unicodedata.digit(chr(c))... for c in range(sys.maxunicode)... if unicodedata.category(chr(c)) == 'Nd' }...>>> len(digitmap)460>>> # Arabic digits>>> x = '\u0661\u0662\u0663'>>> x.translate(digitmap)'123'>>>
Yet another technique for cleaning up text involves I/O decoding and encoding func‐tions. The idea here is to first do some preliminary cleanup of the text, and then run itthrough a combination of encode() or decode() operations to strip or alter it. Forexample:
>>> a'pýtĥöñ is awesome\n'>>> b = unicodedata.normalize('NFD', a)>>> b.encode('ascii', 'ignore').decode('ascii')'python is awesome\n'>>>
Here the normalization process decomposed the original text into characters along withseparate combining characters. The subsequent ASCII encoding/decoding simply dis‐carded all of those characters in one fell swoop. Naturally, this would only work if gettingan ASCII representation was the final goal.
DiscussionA major issue with sanitizing text can be runtime performance. As a general rule, thesimpler it is, the faster it will run. For simple replacements, the str.replace() methodis often the fastest approach—even if you have to call it multiple times. For instance, toclean up whitespace, you could use code like this:
def clean_spaces(s): s = s.replace('\r', '') s = s.replace('\t', ' ') s = s.replace('\f', ' ') return s
If you try it, you’ll find that it’s quite a bit faster than using translate() or an approachusing a regular expression.
On the other hand, the translate() method is very fast if you need to perform anykind of nontrivial character-to-character remapping or deletion.
56 | Chapter 2: Strings and Text
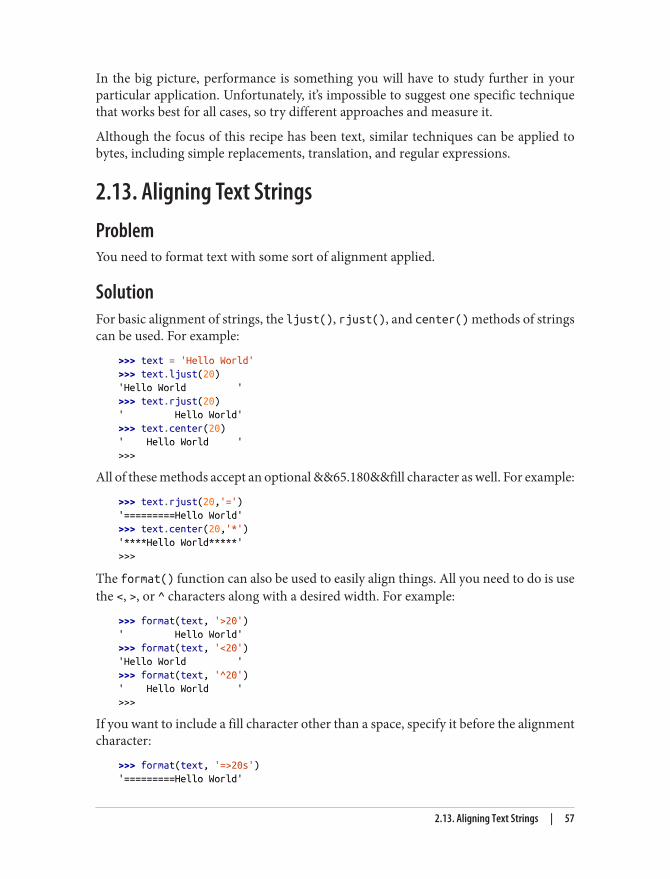
In the big picture, performance is something you will have to study further in yourparticular application. Unfortunately, it’s impossible to suggest one specific techniquethat works best for all cases, so try different approaches and measure it.
Although the focus of this recipe has been text, similar techniques can be applied tobytes, including simple replacements, translation, and regular expressions.
2.13. Aligning Text StringsProblemYou need to format text with some sort of alignment applied.
SolutionFor basic alignment of strings, the ljust(), rjust(), and center() methods of stringscan be used. For example:
>>> text = 'Hello World'>>> text.ljust(20)'Hello World '>>> text.rjust(20)' Hello World'>>> text.center(20)' Hello World '>>>
All of these methods accept an optional &&65.180&&fill character as well. For example:
>>> text.rjust(20,'=')'=========Hello World'>>> text.center(20,'*')'****Hello World*****'>>>
The format() function can also be used to easily align things. All you need to do is usethe <, >, or ^ characters along with a desired width. For example:
>>> format(text, '>20')' Hello World'>>> format(text, '<20')'Hello World '>>> format(text, '^20')' Hello World '>>>
If you want to include a fill character other than a space, specify it before the alignmentcharacter:
>>> format(text, '=>20s')'=========Hello World'
2.13. Aligning Text Strings | 57
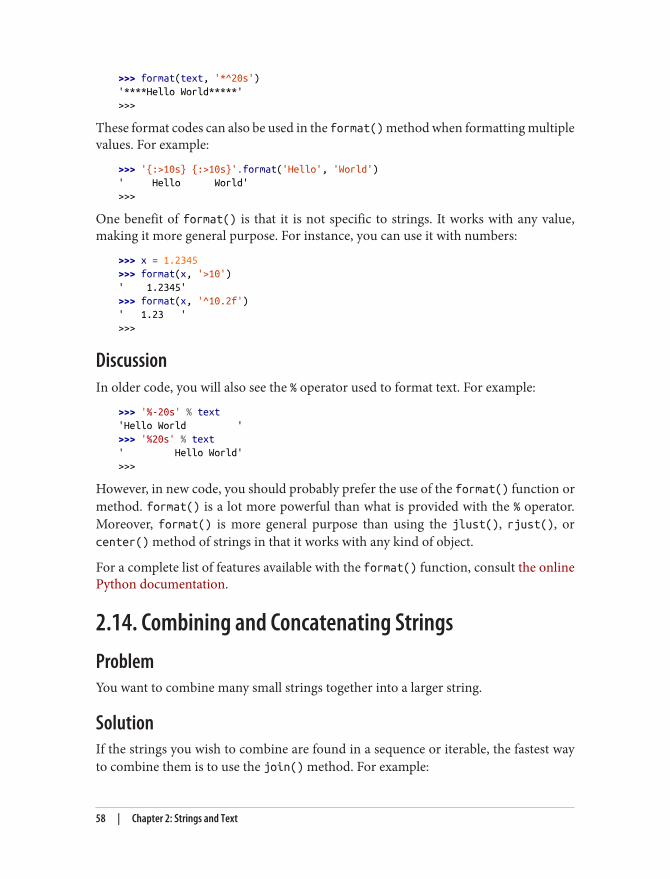
>>> format(text, '*^20s')'****Hello World*****'>>>
These format codes can also be used in the format() method when formatting multiplevalues. For example:
>>> '{:>10s} {:>10s}'.format('Hello', 'World')' Hello World'>>>
One benefit of format() is that it is not specific to strings. It works with any value,making it more general purpose. For instance, you can use it with numbers:
>>> x = 1.2345>>> format(x, '>10')' 1.2345'>>> format(x, '^10.2f')' 1.23 '>>>
DiscussionIn older code, you will also see the % operator used to format text. For example:
>>> '%-20s' % text'Hello World '>>> '%20s' % text' Hello World'>>>
However, in new code, you should probably prefer the use of the format() function ormethod. format() is a lot more powerful than what is provided with the % operator.Moreover, format() is more general purpose than using the jlust(), rjust(), orcenter() method of strings in that it works with any kind of object.
For a complete list of features available with the format() function, consult the onlinePython documentation.
2.14. Combining and Concatenating StringsProblemYou want to combine many small strings together into a larger string.
SolutionIf the strings you wish to combine are found in a sequence or iterable, the fastest wayto combine them is to use the join() method. For example:
58 | Chapter 2: Strings and Text
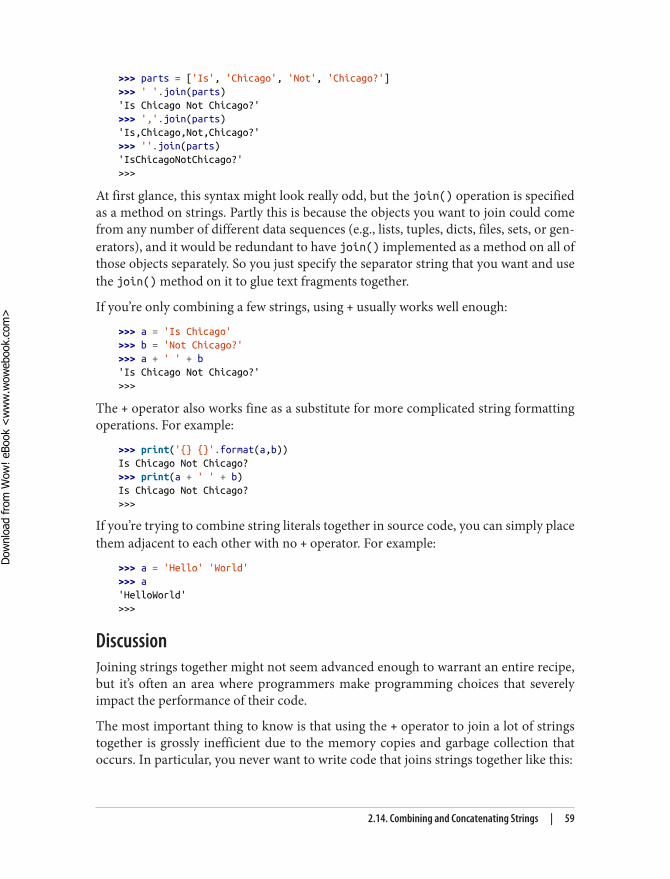
>>> parts = ['Is', 'Chicago', 'Not', 'Chicago?']>>> ' '.join(parts)'Is Chicago Not Chicago?'>>> ','.join(parts)'Is,Chicago,Not,Chicago?'>>> ''.join(parts)'IsChicagoNotChicago?'>>>
At first glance, this syntax might look really odd, but the join() operation is specifiedas a method on strings. Partly this is because the objects you want to join could comefrom any number of different data sequences (e.g., lists, tuples, dicts, files, sets, or gen‐erators), and it would be redundant to have join() implemented as a method on all ofthose objects separately. So you just specify the separator string that you want and usethe join() method on it to glue text fragments together.
If you’re only combining a few strings, using + usually works well enough:
>>> a = 'Is Chicago'>>> b = 'Not Chicago?'>>> a + ' ' + b'Is Chicago Not Chicago?'>>>
The + operator also works fine as a substitute for more complicated string formattingoperations. For example:
>>> print('{} {}'.format(a,b))Is Chicago Not Chicago?>>> print(a + ' ' + b)Is Chicago Not Chicago?>>>
If you’re trying to combine string literals together in source code, you can simply placethem adjacent to each other with no + operator. For example:
>>> a = 'Hello' 'World'>>> a'HelloWorld'>>>
DiscussionJoining strings together might not seem advanced enough to warrant an entire recipe,but it’s often an area where programmers make programming choices that severelyimpact the performance of their code.
The most important thing to know is that using the + operator to join a lot of stringstogether is grossly inefficient due to the memory copies and garbage collection thatoccurs. In particular, you never want to write code that joins strings together like this:
2.14. Combining and Concatenating Strings | 59
Dow
nlo
ad fro
m W
ow
! eBook
<w
ww
.wow
ebook.
com
>
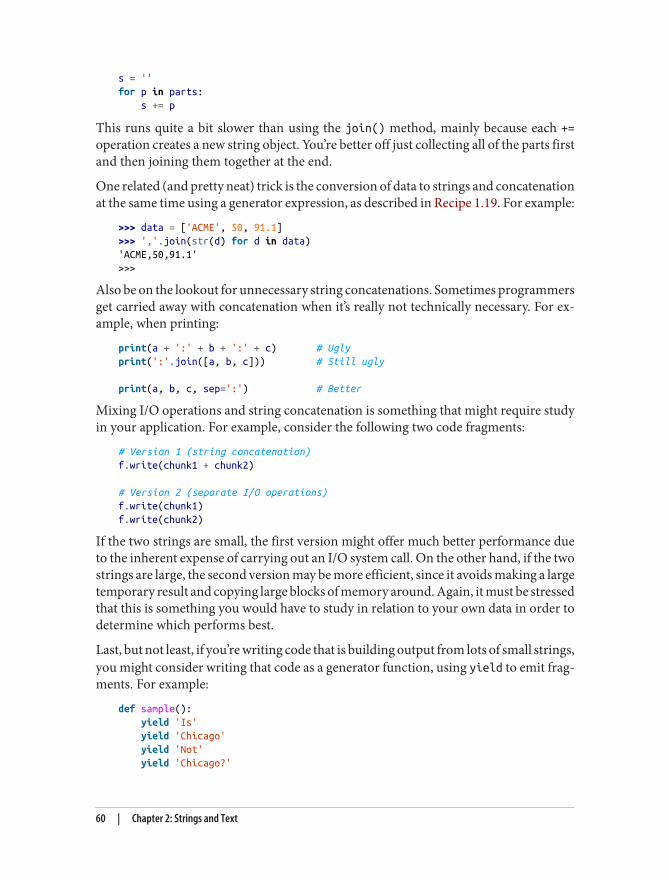
s = ''for p in parts: s += p
This runs quite a bit slower than using the join() method, mainly because each +=operation creates a new string object. You’re better off just collecting all of the parts firstand then joining them together at the end.
One related (and pretty neat) trick is the conversion of data to strings and concatenationat the same time using a generator expression, as described in Recipe 1.19. For example:
>>> data = ['ACME', 50, 91.1]>>> ','.join(str(d) for d in data)'ACME,50,91.1'>>>
Also be on the lookout for unnecessary string concatenations. Sometimes programmersget carried away with concatenation when it’s really not technically necessary. For ex‐ample, when printing:
print(a + ':' + b + ':' + c) # Uglyprint(':'.join([a, b, c])) # Still ugly
print(a, b, c, sep=':') # Better
Mixing I/O operations and string concatenation is something that might require studyin your application. For example, consider the following two code fragments:
# Version 1 (string concatenation)f.write(chunk1 + chunk2)
# Version 2 (separate I/O operations)f.write(chunk1)f.write(chunk2)
If the two strings are small, the first version might offer much better performance dueto the inherent expense of carrying out an I/O system call. On the other hand, if the twostrings are large, the second version may be more efficient, since it avoids making a largetemporary result and copying large blocks of memory around. Again, it must be stressedthat this is something you would have to study in relation to your own data in order todetermine which performs best.
Last, but not least, if you’re writing code that is building output from lots of small strings,you might consider writing that code as a generator function, using yield to emit frag‐ments. For example:
def sample(): yield 'Is' yield 'Chicago' yield 'Not' yield 'Chicago?'
60 | Chapter 2: Strings and Text
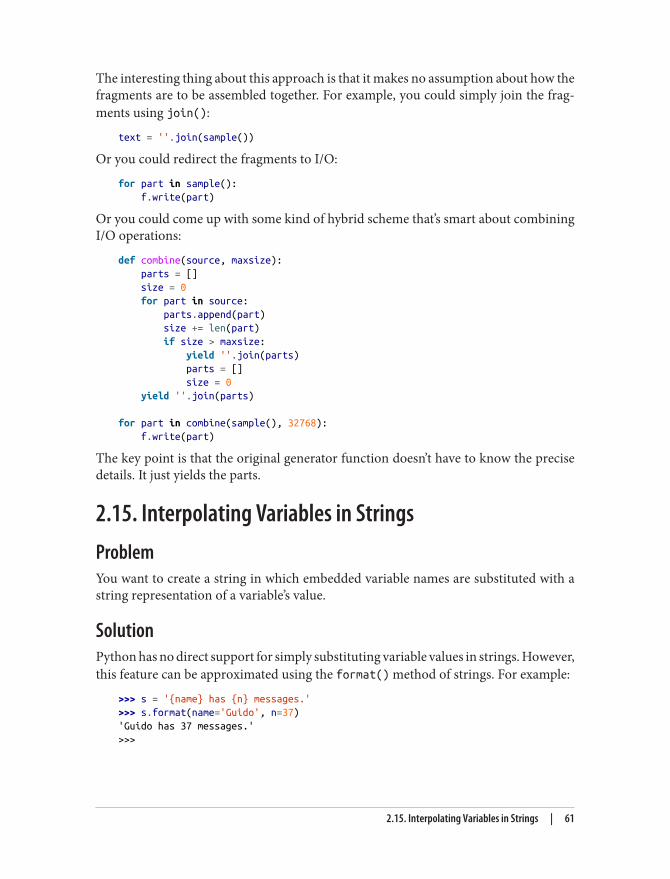
The interesting thing about this approach is that it makes no assumption about how thefragments are to be assembled together. For example, you could simply join the frag‐ments using join():
text = ''.join(sample())
Or you could redirect the fragments to I/O:
for part in sample(): f.write(part)
Or you could come up with some kind of hybrid scheme that’s smart about combiningI/O operations:
def combine(source, maxsize): parts = [] size = 0 for part in source: parts.append(part) size += len(part) if size > maxsize: yield ''.join(parts) parts = [] size = 0 yield ''.join(parts)
for part in combine(sample(), 32768): f.write(part)
The key point is that the original generator function doesn’t have to know the precisedetails. It just yields the parts.
2.15. Interpolating Variables in StringsProblemYou want to create a string in which embedded variable names are substituted with astring representation of a variable’s value.
SolutionPython has no direct support for simply substituting variable values in strings. However,this feature can be approximated using the format() method of strings. For example:
>>> s = '{name} has {n} messages.'>>> s.format(name='Guido', n=37)'Guido has 37 messages.'>>>
2.15. Interpolating Variables in Strings | 61
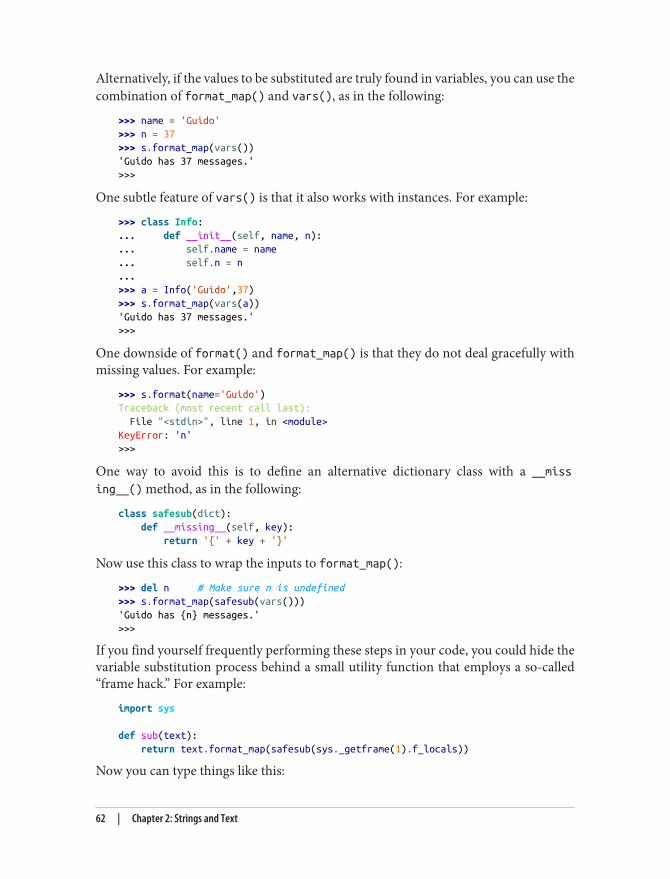
Alternatively, if the values to be substituted are truly found in variables, you can use thecombination of format_map() and vars(), as in the following:
>>> name = 'Guido'>>> n = 37>>> s.format_map(vars())'Guido has 37 messages.'>>>
One subtle feature of vars() is that it also works with instances. For example:
>>> class Info:... def __init__(self, name, n):... self.name = name... self.n = n...>>> a = Info('Guido',37)>>> s.format_map(vars(a))'Guido has 37 messages.'>>>
One downside of format() and format_map() is that they do not deal gracefully withmissing values. For example:
>>> s.format(name='Guido')Traceback (most recent call last): File "<stdin>", line 1, in <module>KeyError: 'n'>>>
One way to avoid this is to define an alternative dictionary class with a __missing__() method, as in the following:
class safesub(dict): def __missing__(self, key): return '{' + key + '}'
Now use this class to wrap the inputs to format_map():
>>> del n # Make sure n is undefined>>> s.format_map(safesub(vars()))'Guido has {n} messages.'>>>
If you find yourself frequently performing these steps in your code, you could hide thevariable substitution process behind a small utility function that employs a so-called“frame hack.” For example:
import sys
def sub(text): return text.format_map(safesub(sys._getframe(1).f_locals))
Now you can type things like this:
62 | Chapter 2: Strings and Text
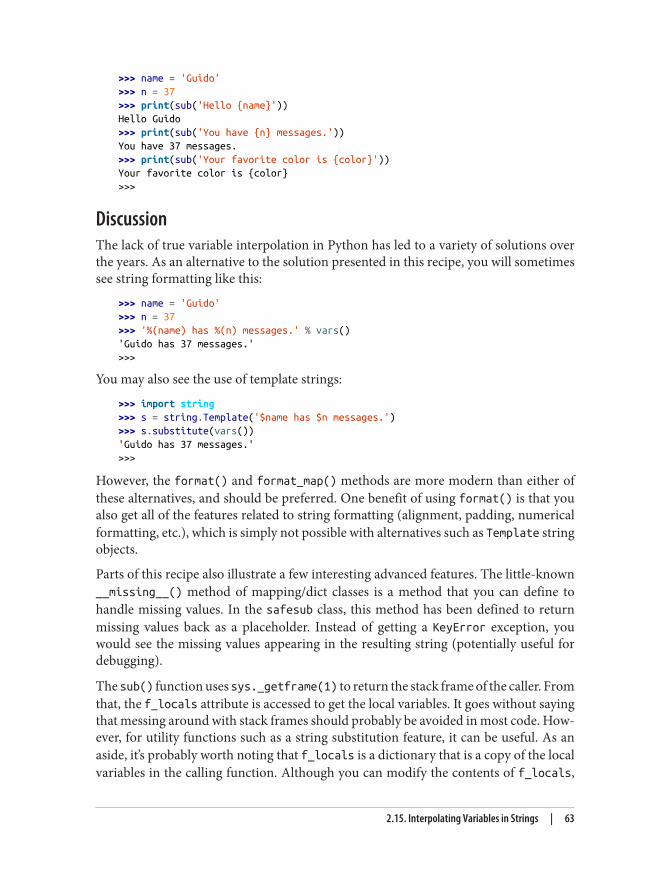
>>> name = 'Guido'>>> n = 37>>> print(sub('Hello {name}'))Hello Guido>>> print(sub('You have {n} messages.'))You have 37 messages.>>> print(sub('Your favorite color is {color}'))Your favorite color is {color}>>>
DiscussionThe lack of true variable interpolation in Python has led to a variety of solutions overthe years. As an alternative to the solution presented in this recipe, you will sometimessee string formatting like this:
>>> name = 'Guido'>>> n = 37>>> '%(name) has %(n) messages.' % vars()'Guido has 37 messages.'>>>
You may also see the use of template strings:
>>> import string>>> s = string.Template('$name has $n messages.')>>> s.substitute(vars())'Guido has 37 messages.'>>>
However, the format() and format_map() methods are more modern than either ofthese alternatives, and should be preferred. One benefit of using format() is that youalso get all of the features related to string formatting (alignment, padding, numericalformatting, etc.), which is simply not possible with alternatives such as Template stringobjects.
Parts of this recipe also illustrate a few interesting advanced features. The little-known__missing__() method of mapping/dict classes is a method that you can define tohandle missing values. In the safesub class, this method has been defined to returnmissing values back as a placeholder. Instead of getting a KeyError exception, youwould see the missing values appearing in the resulting string (potentially useful fordebugging).
The sub() function uses sys._getframe(1) to return the stack frame of the caller. Fromthat, the f_locals attribute is accessed to get the local variables. It goes without sayingthat messing around with stack frames should probably be avoided in most code. How‐ever, for utility functions such as a string substitution feature, it can be useful. As anaside, it’s probably worth noting that f_locals is a dictionary that is a copy of the localvariables in the calling function. Although you can modify the contents of f_locals,
2.15. Interpolating Variables in Strings | 63
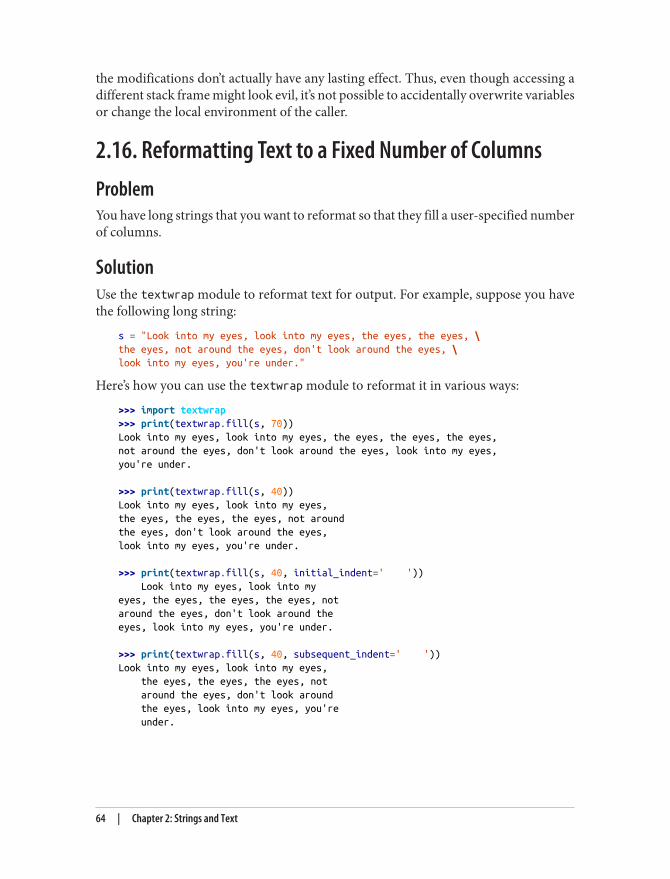
the modifications don’t actually have any lasting effect. Thus, even though accessing adifferent stack frame might look evil, it’s not possible to accidentally overwrite variablesor change the local environment of the caller.
2.16. Reformatting Text to a Fixed Number of ColumnsProblemYou have long strings that you want to reformat so that they fill a user-specified numberof columns.
SolutionUse the textwrap module to reformat text for output. For example, suppose you havethe following long string:
s = "Look into my eyes, look into my eyes, the eyes, the eyes, \the eyes, not around the eyes, don't look around the eyes, \look into my eyes, you're under."
Here’s how you can use the textwrap module to reformat it in various ways:
>>> import textwrap>>> print(textwrap.fill(s, 70))Look into my eyes, look into my eyes, the eyes, the eyes, the eyes,not around the eyes, don't look around the eyes, look into my eyes,you're under.
>>> print(textwrap.fill(s, 40))Look into my eyes, look into my eyes,the eyes, the eyes, the eyes, not aroundthe eyes, don't look around the eyes,look into my eyes, you're under.
>>> print(textwrap.fill(s, 40, initial_indent=' ')) Look into my eyes, look into myeyes, the eyes, the eyes, the eyes, notaround the eyes, don't look around theeyes, look into my eyes, you're under.
>>> print(textwrap.fill(s, 40, subsequent_indent=' '))Look into my eyes, look into my eyes, the eyes, the eyes, the eyes, not around the eyes, don't look around the eyes, look into my eyes, you're under.
64 | Chapter 2: Strings and Text
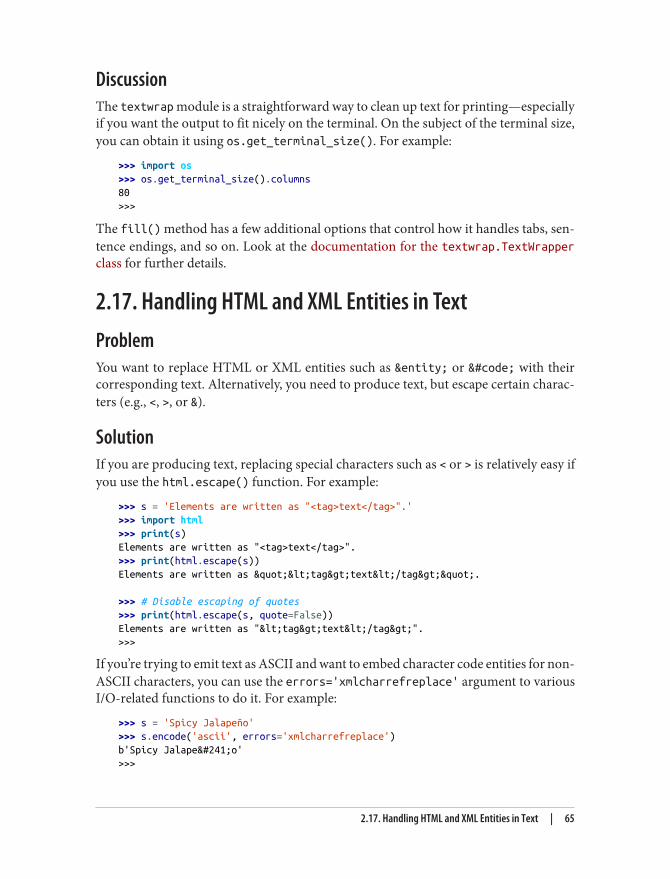
DiscussionThe textwrap module is a straightforward way to clean up text for printing—especiallyif you want the output to fit nicely on the terminal. On the subject of the terminal size,you can obtain it using os.get_terminal_size(). For example:
>>> import os>>> os.get_terminal_size().columns80>>>
The fill() method has a few additional options that control how it handles tabs, sen‐tence endings, and so on. Look at the documentation for the textwrap.TextWrapperclass for further details.
2.17. Handling HTML and XML Entities in TextProblemYou want to replace HTML or XML entities such as &entity; or &#code; with theircorresponding text. Alternatively, you need to produce text, but escape certain charac‐ters (e.g., <, >, or &).
SolutionIf you are producing text, replacing special characters such as < or > is relatively easy ifyou use the html.escape() function. For example:
>>> s = 'Elements are written as "<tag>text</tag>".'>>> import html>>> print(s)Elements are written as "<tag>text</tag>".>>> print(html.escape(s))Elements are written as "<tag>text</tag>".
>>> # Disable escaping of quotes>>> print(html.escape(s, quote=False))Elements are written as "<tag>text</tag>".>>>
If you’re trying to emit text as ASCII and want to embed character code entities for non-ASCII characters, you can use the errors='xmlcharrefreplace' argument to variousI/O-related functions to do it. For example:
>>> s = 'Spicy Jalapeño'>>> s.encode('ascii', errors='xmlcharrefreplace')b'Spicy Jalapeño'>>>
2.17. Handling HTML and XML Entities in Text | 65
To replace entities in text, a different approach is needed. If you’re actually processingHTML or XML, try using a proper HTML or XML parser first. Normally, these toolswill automatically take care of replacing the values for you during parsing and you don’tneed to worry about it.
If, for some reason, you’ve received bare text with some entities in it and you want themreplaced manually, you can usually do it using various utility functions/methods asso‐ciated with HTML or XML parsers. For example:
>>> s = 'Spicy "Jalapeño".'>>> from html.parser import HTMLParser>>> p = HTMLParser()>>> p.unescape(s)'Spicy "Jalapeño".'>>>
>>> t = 'The prompt is >>>'>>> from xml.sax.saxutils import unescape>>> unescape(t)'The prompt is >>>'>>>
DiscussionProper escaping of special characters is an easily overlooked detail of generating HTMLor XML. This is especially true if you’re generating such output yourself using print()or other basic string formatting features. Using a utility function such as html.escape() is an easy solution.
If you need to process text in the other direction, various utility functions, such asxml.sax.saxutils.unescape(), can help. However, you really need to investigate theuse of a proper parser. For example, if processing HTML or XML, using a parsing mod‐ule such as html.parser or xml.etree.ElementTree should already take care of detailsrelated to replacing entities in the input text for you.
2.18. Tokenizing TextProblemYou have a string that you want to parse left to right into a stream of tokens.
SolutionSuppose you have a string of text such as this:
text = 'foo = 23 + 42 * 10'
66 | Chapter 2: Strings and Text
To tokenize the string, you need to do more than merely match patterns. You need tohave some way to identify the kind of pattern as well. For instance, you might want toturn the string into a sequence of pairs like this:
tokens = [('NAME', 'foo'), ('EQ','='), ('NUM', '23'), ('PLUS','+'), ('NUM', '42'), ('TIMES', '*'), ('NUM', 10')]
To do this kind of splitting, the first step is to define all of the possible tokens, includingwhitespace, by regular expression patterns using named capture groups such as this:
import reNAME = r'(?P<NAME>[a-zA-Z_][a-zA-Z_0-9]*)'NUM = r'(?P<NUM>\d+)'PLUS = r'(?P<PLUS>\+)'TIMES = r'(?P<TIMES>\*)'EQ = r'(?P<EQ>=)'WS = r'(?P<WS>\s+)'
master_pat = re.compile('|'.join([NAME, NUM, PLUS, TIMES, EQ, WS]))
In these re patterns, the ?P<TOKENNAME> convention is used to assign a name to thepattern. This will be used later.
Next, to tokenize, use the little-known scanner() method of pattern objects. Thismethod creates a scanner object in which repeated calls to match() step through thesupplied text one match at a time. Here is an interactive example of how a scanner objectworks:
>>> scanner = master_pat.scanner('foo = 42')>>> scanner.match()<_sre.SRE_Match object at 0x100677738>>>> _.lastgroup, _.group()('NAME', 'foo')>>> scanner.match()<_sre.SRE_Match object at 0x100677738>>>> _.lastgroup, _.group()('WS', ' ')>>> scanner.match()<_sre.SRE_Match object at 0x100677738>>>> _.lastgroup, _.group()('EQ', '=')>>> scanner.match()<_sre.SRE_Match object at 0x100677738>>>> _.lastgroup, _.group()('WS', ' ')>>> scanner.match()<_sre.SRE_Match object at 0x100677738>>>> _.lastgroup, _.group()('NUM', '42')>>> scanner.match()>>>
2.18. Tokenizing Text | 67
To take this technique and put it into code, it can be cleaned up and easily packagedinto a generator like this:
from collections import namedtuple
Token = namedtuple('Token', ['type','value'])
def generate_tokens(pat, text): scanner = pat.scanner(text) for m in iter(scanner.match, None): yield Token(m.lastgroup, m.group())
# Example usefor tok in generate_tokens(master_pat, 'foo = 42'): print(tok)
# Produces output# Token(type='NAME', value='foo')# Token(type='WS', value=' ')# Token(type='EQ', value='=')# Token(type='WS', value=' ')# Token(type='NUM', value='42')
If you want to filter the token stream in some way, you can either define more generatorfunctions or use a generator expression. For example, here is how you might filter outall whitespace tokens.
tokens = (tok for tok in generate_tokens(master_pat, text) if tok.type != 'WS')for tok in tokens: print(tok)
DiscussionTokenizing is often the first step for more advanced kinds of text parsing and handling.To use the scanning technique shown, there are a few important details to keep in mind.First, you must make sure that you identify every possible text sequence that mightappear in the input with a correponding re pattern. If any nonmatching text is found,scanning simply stops. This is why it was necessary to specify the whitespace (WS) tokenin the example.
The order of tokens in the master regular expression also matters. When matching, retries to match pattens in the order specified. Thus, if a pattern happens to be a substringof a longer pattern, you need to make sure the longer pattern goes first. For example:
LT = r'(?P<LT><)'LE = r'(?P<LE><=)'EQ = r'(?P<EQ>=)'
master_pat = re.compile('|'.join([LE, LT, EQ])) # Correct# master_pat = re.compile('|'.join([LT, LE, EQ])) # Incorrect
68 | Chapter 2: Strings and Text
The second pattern is wrong because it would match the text <= as the token LT followedby the token EQ, not the single token LE, as was probably desired.
Last, but not least, you need to watch out for patterns that form substrings. For example,suppose you have two pattens like this:
PRINT = r'(P<PRINT>print)'NAME = r'(P<NAME>[a-zA-Z_][a-zA-Z_0-9]*)'
master_pat = re.compile('|'.join([PRINT, NAME]))
for tok in generate_tokens(master_pat, 'printer'): print(tok)
# Outputs :# Token(type='PRINT', value='print')# Token(type='NAME', value='er')
For more advanced kinds of tokenizing, you may want to check out packages such as PyParsing or PLY. An example involving PLY appears in the next recipe.
2.19. Writing a Simple Recursive Descent ParserProblemYou need to parse text according to a set of grammar rules and perform actions or buildan abstract syntax tree representing the input. The grammar is small, so you’d prefer tojust write the parser yourself as opposed to using some kind of framework.
SolutionIn this problem, we’re focused on the problem of parsing text according to a particulargrammar. In order to do this, you should probably start by having a formal specificationof the grammar in the form of a BNF or EBNF. For example, a grammar for simplearithmetic expressions might look like this:
expr ::= expr + term | expr - term | term
term ::= term * factor | term / factor | factor
factor ::= ( expr ) | NUM
Or, alternatively, in EBNF form:
2.19. Writing a Simple Recursive Descent Parser | 69
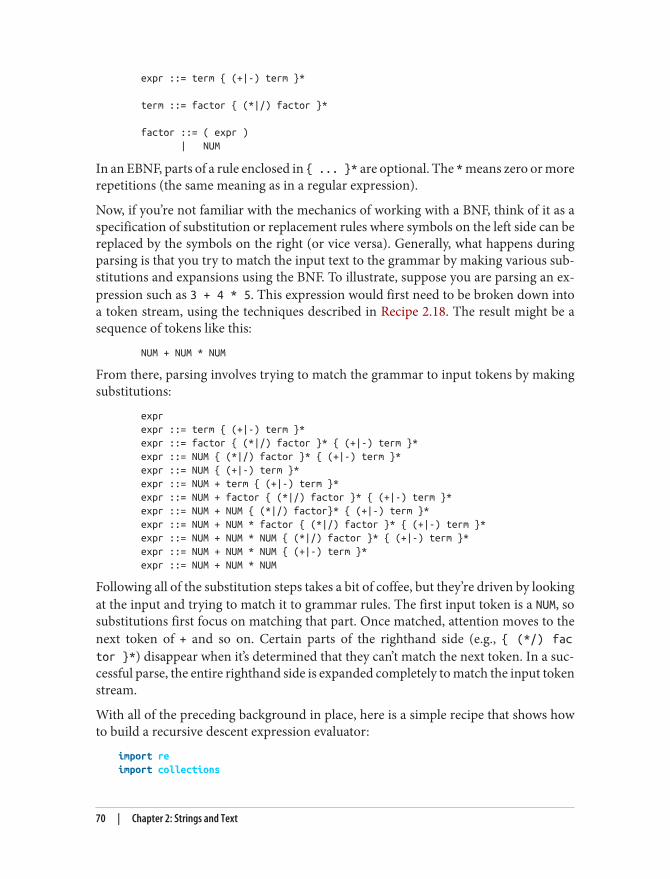
expr ::= term { (+|-) term }*
term ::= factor { (*|/) factor }*
factor ::= ( expr ) | NUM
In an EBNF, parts of a rule enclosed in { ... }* are optional. The * means zero or morerepetitions (the same meaning as in a regular expression).
Now, if you’re not familiar with the mechanics of working with a BNF, think of it as aspecification of substitution or replacement rules where symbols on the left side can bereplaced by the symbols on the right (or vice versa). Generally, what happens duringparsing is that you try to match the input text to the grammar by making various sub‐stitutions and expansions using the BNF. To illustrate, suppose you are parsing an ex‐pression such as 3 + 4 * 5. This expression would first need to be broken down intoa token stream, using the techniques described in Recipe 2.18. The result might be asequence of tokens like this:
NUM + NUM * NUM
From there, parsing involves trying to match the grammar to input tokens by makingsubstitutions:
expr expr ::= term { (+|-) term }* expr ::= factor { (*|/) factor }* { (+|-) term }* expr ::= NUM { (*|/) factor }* { (+|-) term }* expr ::= NUM { (+|-) term }* expr ::= NUM + term { (+|-) term }* expr ::= NUM + factor { (*|/) factor }* { (+|-) term }* expr ::= NUM + NUM { (*|/) factor}* { (+|-) term }* expr ::= NUM + NUM * factor { (*|/) factor }* { (+|-) term }* expr ::= NUM + NUM * NUM { (*|/) factor }* { (+|-) term }* expr ::= NUM + NUM * NUM { (+|-) term }* expr ::= NUM + NUM * NUM
Following all of the substitution steps takes a bit of coffee, but they’re driven by lookingat the input and trying to match it to grammar rules. The first input token is a NUM, sosubstitutions first focus on matching that part. Once matched, attention moves to thenext token of + and so on. Certain parts of the righthand side (e.g., { (*/) factor }*) disappear when it’s determined that they can’t match the next token. In a suc‐cessful parse, the entire righthand side is expanded completely to match the input tokenstream.
With all of the preceding background in place, here is a simple recipe that shows howto build a recursive descent expression evaluator:
import reimport collections
70 | Chapter 2: Strings and Text
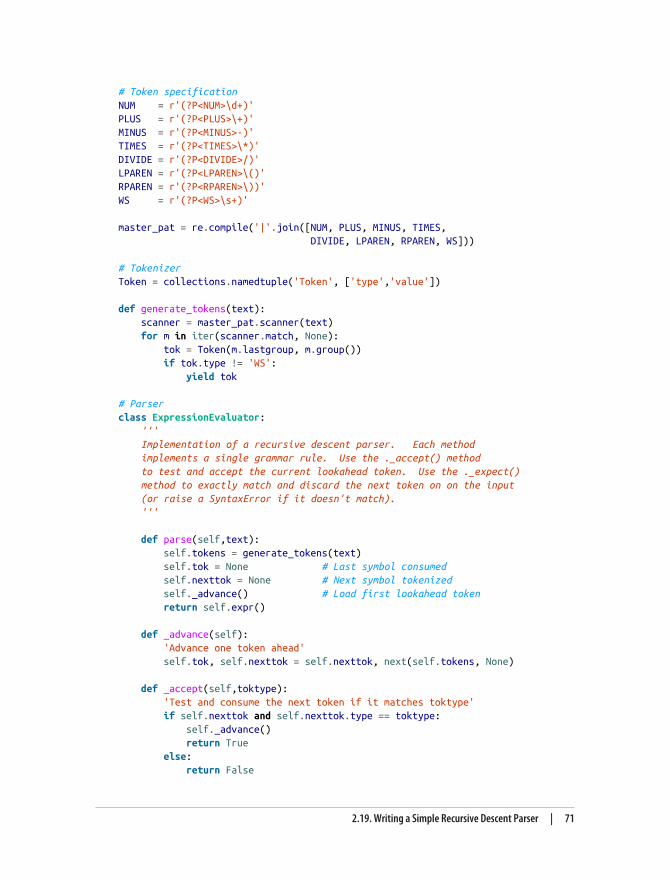
# Token specificationNUM = r'(?P<NUM>\d+)'PLUS = r'(?P<PLUS>\+)'MINUS = r'(?P<MINUS>-)'TIMES = r'(?P<TIMES>\*)'DIVIDE = r'(?P<DIVIDE>/)'LPAREN = r'(?P<LPAREN>\()'RPAREN = r'(?P<RPAREN>\))'WS = r'(?P<WS>\s+)'
master_pat = re.compile('|'.join([NUM, PLUS, MINUS, TIMES, DIVIDE, LPAREN, RPAREN, WS]))
# TokenizerToken = collections.namedtuple('Token', ['type','value'])
def generate_tokens(text): scanner = master_pat.scanner(text) for m in iter(scanner.match, None): tok = Token(m.lastgroup, m.group()) if tok.type != 'WS': yield tok
# Parserclass ExpressionEvaluator: ''' Implementation of a recursive descent parser. Each method implements a single grammar rule. Use the ._accept() method to test and accept the current lookahead token. Use the ._expect() method to exactly match and discard the next token on on the input (or raise a SyntaxError if it doesn't match). '''
def parse(self,text): self.tokens = generate_tokens(text) self.tok = None # Last symbol consumed self.nexttok = None # Next symbol tokenized self._advance() # Load first lookahead token return self.expr()
def _advance(self): 'Advance one token ahead' self.tok, self.nexttok = self.nexttok, next(self.tokens, None)
def _accept(self,toktype): 'Test and consume the next token if it matches toktype' if self.nexttok and self.nexttok.type == toktype: self._advance() return True else: return False
2.19. Writing a Simple Recursive Descent Parser | 71
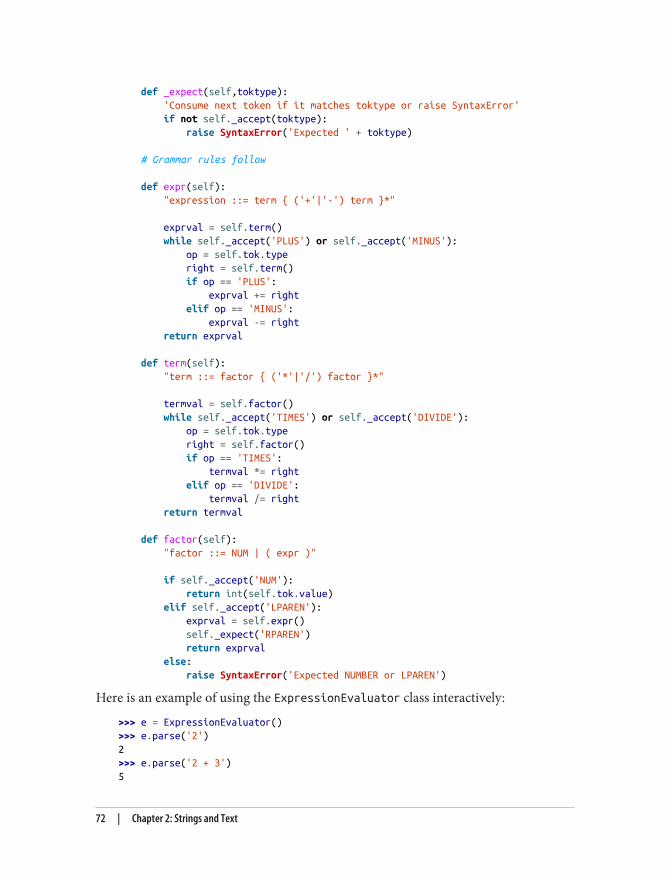
def _expect(self,toktype): 'Consume next token if it matches toktype or raise SyntaxError' if not self._accept(toktype): raise SyntaxError('Expected ' + toktype)
# Grammar rules follow
def expr(self): "expression ::= term { ('+'|'-') term }*"
exprval = self.term() while self._accept('PLUS') or self._accept('MINUS'): op = self.tok.type right = self.term() if op == 'PLUS': exprval += right elif op == 'MINUS': exprval -= right return exprval
def term(self): "term ::= factor { ('*'|'/') factor }*"
termval = self.factor() while self._accept('TIMES') or self._accept('DIVIDE'): op = self.tok.type right = self.factor() if op == 'TIMES': termval *= right elif op == 'DIVIDE': termval /= right return termval
def factor(self): "factor ::= NUM | ( expr )"
if self._accept('NUM'): return int(self.tok.value) elif self._accept('LPAREN'): exprval = self.expr() self._expect('RPAREN') return exprval else: raise SyntaxError('Expected NUMBER or LPAREN')
Here is an example of using the ExpressionEvaluator class interactively:
>>> e = ExpressionEvaluator()>>> e.parse('2')2>>> e.parse('2 + 3')5
72 | Chapter 2: Strings and Text
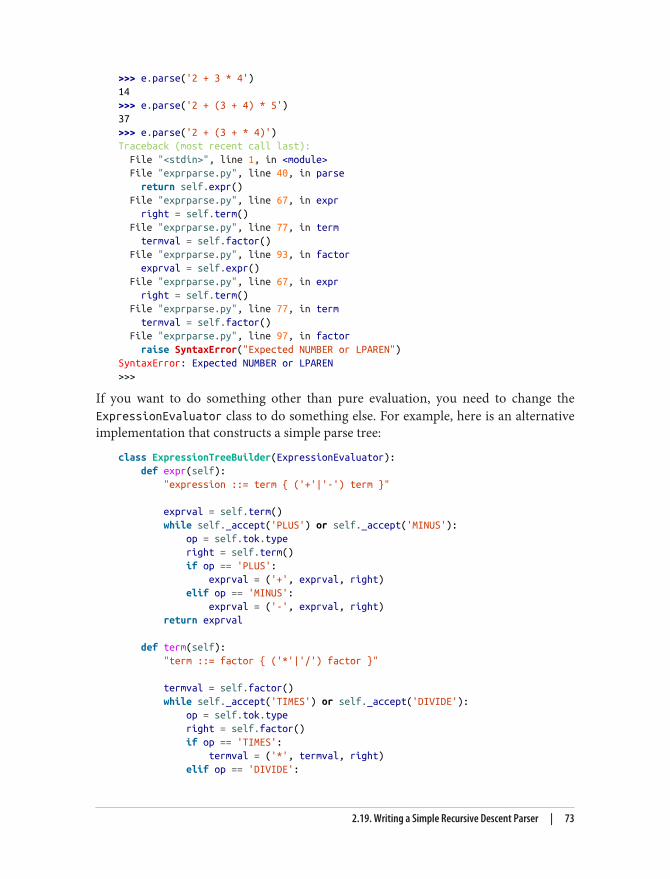
>>> e.parse('2 + 3 * 4')14>>> e.parse('2 + (3 + 4) * 5')37>>> e.parse('2 + (3 + * 4)')Traceback (most recent call last): File "<stdin>", line 1, in <module> File "exprparse.py", line 40, in parse return self.expr() File "exprparse.py", line 67, in expr right = self.term() File "exprparse.py", line 77, in term termval = self.factor() File "exprparse.py", line 93, in factor exprval = self.expr() File "exprparse.py", line 67, in expr right = self.term() File "exprparse.py", line 77, in term termval = self.factor() File "exprparse.py", line 97, in factor raise SyntaxError("Expected NUMBER or LPAREN")SyntaxError: Expected NUMBER or LPAREN>>>
If you want to do something other than pure evaluation, you need to change theExpressionEvaluator class to do something else. For example, here is an alternativeimplementation that constructs a simple parse tree:
class ExpressionTreeBuilder(ExpressionEvaluator): def expr(self): "expression ::= term { ('+'|'-') term }"
exprval = self.term() while self._accept('PLUS') or self._accept('MINUS'): op = self.tok.type right = self.term() if op == 'PLUS': exprval = ('+', exprval, right) elif op == 'MINUS': exprval = ('-', exprval, right) return exprval
def term(self): "term ::= factor { ('*'|'/') factor }"
termval = self.factor() while self._accept('TIMES') or self._accept('DIVIDE'): op = self.tok.type right = self.factor() if op == 'TIMES': termval = ('*', termval, right) elif op == 'DIVIDE':
2.19. Writing a Simple Recursive Descent Parser | 73
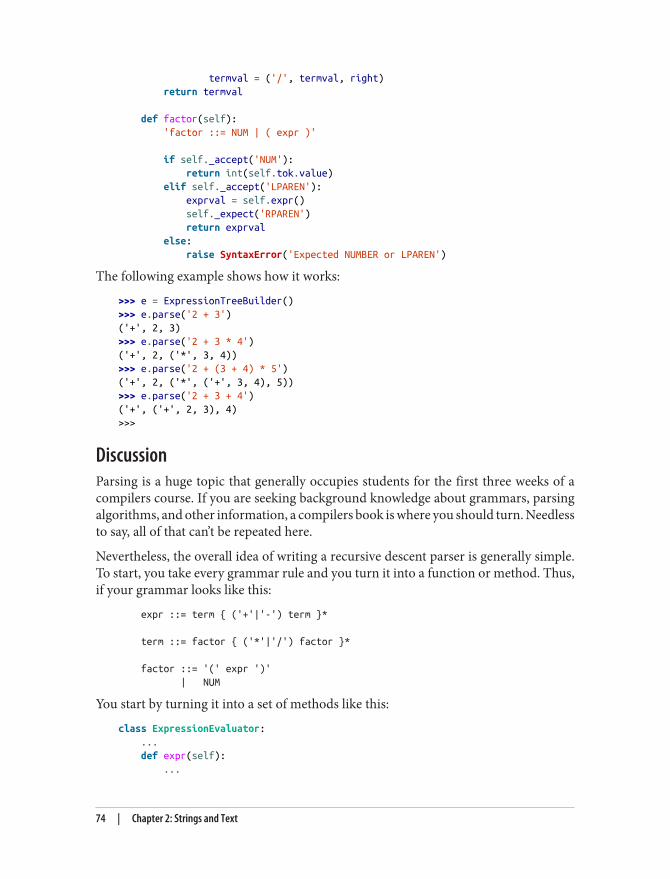
termval = ('/', termval, right) return termval
def factor(self): 'factor ::= NUM | ( expr )'
if self._accept('NUM'): return int(self.tok.value) elif self._accept('LPAREN'): exprval = self.expr() self._expect('RPAREN') return exprval else: raise SyntaxError('Expected NUMBER or LPAREN')
The following example shows how it works:
>>> e = ExpressionTreeBuilder()>>> e.parse('2 + 3')('+', 2, 3)>>> e.parse('2 + 3 * 4')('+', 2, ('*', 3, 4))>>> e.parse('2 + (3 + 4) * 5')('+', 2, ('*', ('+', 3, 4), 5))>>> e.parse('2 + 3 + 4')('+', ('+', 2, 3), 4)>>>
DiscussionParsing is a huge topic that generally occupies students for the first three weeks of acompilers course. If you are seeking background knowledge about grammars, parsingalgorithms, and other information, a compilers book is where you should turn. Needlessto say, all of that can’t be repeated here.
Nevertheless, the overall idea of writing a recursive descent parser is generally simple.To start, you take every grammar rule and you turn it into a function or method. Thus,if your grammar looks like this:
expr ::= term { ('+'|'-') term }*
term ::= factor { ('*'|'/') factor }*
factor ::= '(' expr ')' | NUM
You start by turning it into a set of methods like this:
class ExpressionEvaluator: ... def expr(self): ...
74 | Chapter 2: Strings and Text
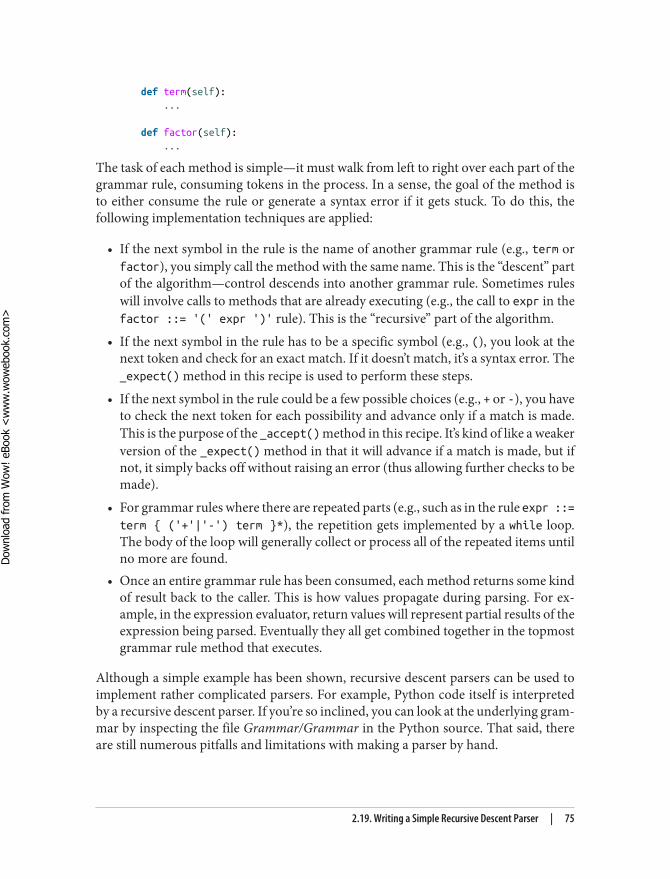
def term(self): ...
def factor(self): ...
The task of each method is simple—it must walk from left to right over each part of thegrammar rule, consuming tokens in the process. In a sense, the goal of the method isto either consume the rule or generate a syntax error if it gets stuck. To do this, thefollowing implementation techniques are applied:
• If the next symbol in the rule is the name of another grammar rule (e.g., term orfactor), you simply call the method with the same name. This is the “descent” partof the algorithm—control descends into another grammar rule. Sometimes ruleswill involve calls to methods that are already executing (e.g., the call to expr in thefactor ::= '(' expr ')' rule). This is the “recursive” part of the algorithm.
• If the next symbol in the rule has to be a specific symbol (e.g., (), you look at thenext token and check for an exact match. If it doesn’t match, it’s a syntax error. The_expect() method in this recipe is used to perform these steps.
• If the next symbol in the rule could be a few possible choices (e.g., + or -), you haveto check the next token for each possibility and advance only if a match is made.This is the purpose of the _accept() method in this recipe. It’s kind of like a weakerversion of the _expect() method in that it will advance if a match is made, but ifnot, it simply backs off without raising an error (thus allowing further checks to bemade).
• For grammar rules where there are repeated parts (e.g., such as in the rule expr ::=term { ('+'|'-') term }*), the repetition gets implemented by a while loop.The body of the loop will generally collect or process all of the repeated items untilno more are found.
• Once an entire grammar rule has been consumed, each method returns some kindof result back to the caller. This is how values propagate during parsing. For ex‐ample, in the expression evaluator, return values will represent partial results of theexpression being parsed. Eventually they all get combined together in the topmostgrammar rule method that executes.
Although a simple example has been shown, recursive descent parsers can be used toimplement rather complicated parsers. For example, Python code itself is interpretedby a recursive descent parser. If you’re so inclined, you can look at the underlying gram‐mar by inspecting the file Grammar/Grammar in the Python source. That said, thereare still numerous pitfalls and limitations with making a parser by hand.
2.19. Writing a Simple Recursive Descent Parser | 75
Dow
nlo
ad fro
m W
ow
! eBook
<w
ww
.wow
ebook.
com
>
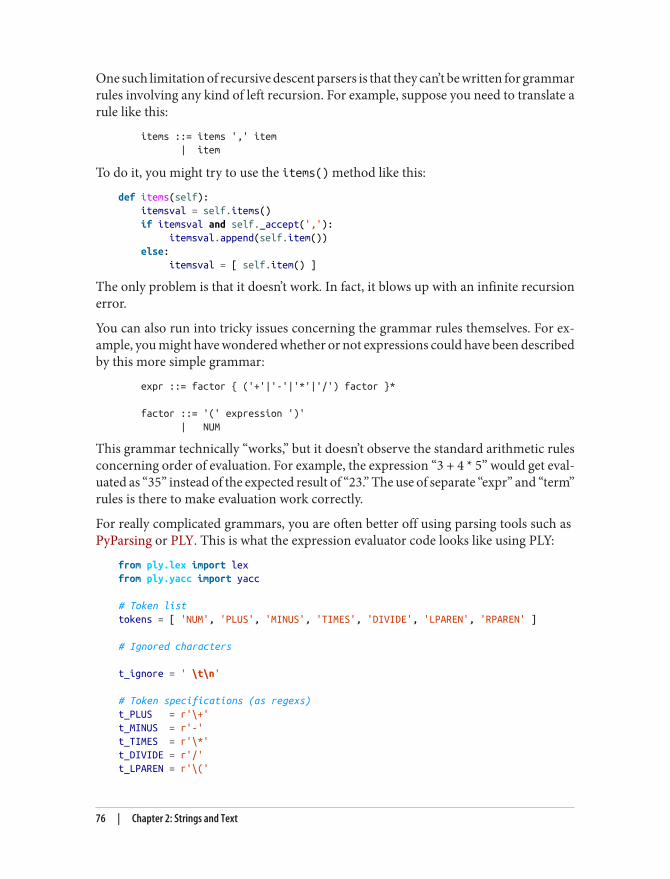
One such limitation of recursive descent parsers is that they can’t be written for grammarrules involving any kind of left recursion. For example, suppose you need to translate arule like this:
items ::= items ',' item | item
To do it, you might try to use the items() method like this:
def items(self): itemsval = self.items() if itemsval and self._accept(','): itemsval.append(self.item()) else: itemsval = [ self.item() ]
The only problem is that it doesn’t work. In fact, it blows up with an infinite recursionerror.
You can also run into tricky issues concerning the grammar rules themselves. For ex‐ample, you might have wondered whether or not expressions could have been describedby this more simple grammar:
expr ::= factor { ('+'|'-'|'*'|'/') factor }*
factor ::= '(' expression ')' | NUM
This grammar technically “works,” but it doesn’t observe the standard arithmetic rulesconcerning order of evaluation. For example, the expression “3 + 4 * 5” would get eval‐uated as “35” instead of the expected result of “23.” The use of separate “expr” and “term”rules is there to make evaluation work correctly.
For really complicated grammars, you are often better off using parsing tools such as PyParsing or PLY. This is what the expression evaluator code looks like using PLY:
from ply.lex import lexfrom ply.yacc import yacc
# Token listtokens = [ 'NUM', 'PLUS', 'MINUS', 'TIMES', 'DIVIDE', 'LPAREN', 'RPAREN' ]
# Ignored characters
t_ignore = ' \t\n'
# Token specifications (as regexs)t_PLUS = r'\+'t_MINUS = r'-'t_TIMES = r'\*'t_DIVIDE = r'/'t_LPAREN = r'\('
76 | Chapter 2: Strings and Text
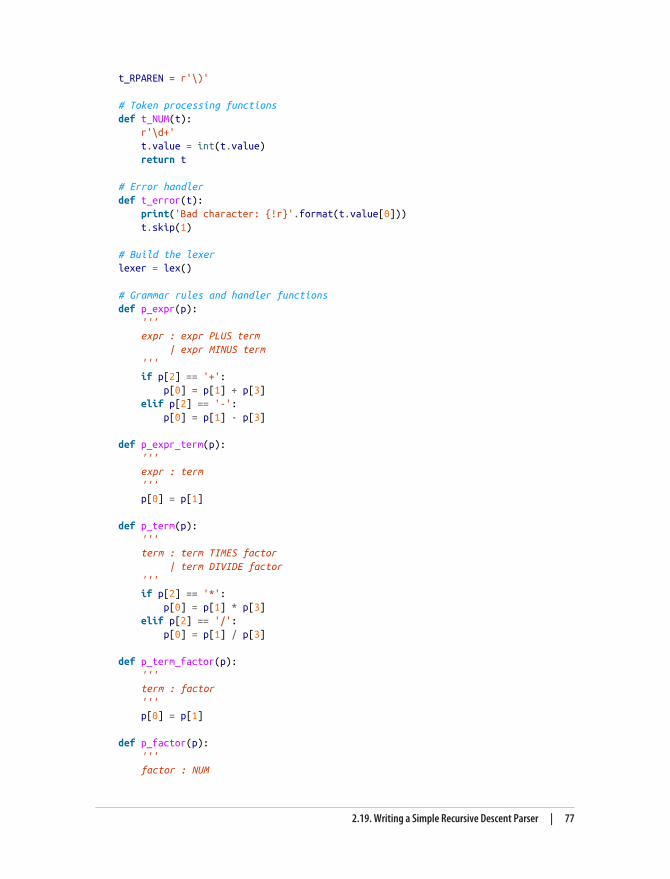
t_RPAREN = r'\)'
# Token processing functionsdef t_NUM(t): r'\d+' t.value = int(t.value) return t
# Error handlerdef t_error(t): print('Bad character: {!r}'.format(t.value[0])) t.skip(1)
# Build the lexerlexer = lex()
# Grammar rules and handler functionsdef p_expr(p): ''' expr : expr PLUS term | expr MINUS term ''' if p[2] == '+': p[0] = p[1] + p[3] elif p[2] == '-': p[0] = p[1] - p[3]
def p_expr_term(p): ''' expr : term ''' p[0] = p[1]
def p_term(p): ''' term : term TIMES factor | term DIVIDE factor ''' if p[2] == '*': p[0] = p[1] * p[3] elif p[2] == '/': p[0] = p[1] / p[3]
def p_term_factor(p): ''' term : factor ''' p[0] = p[1]
def p_factor(p): ''' factor : NUM
2.19. Writing a Simple Recursive Descent Parser | 77
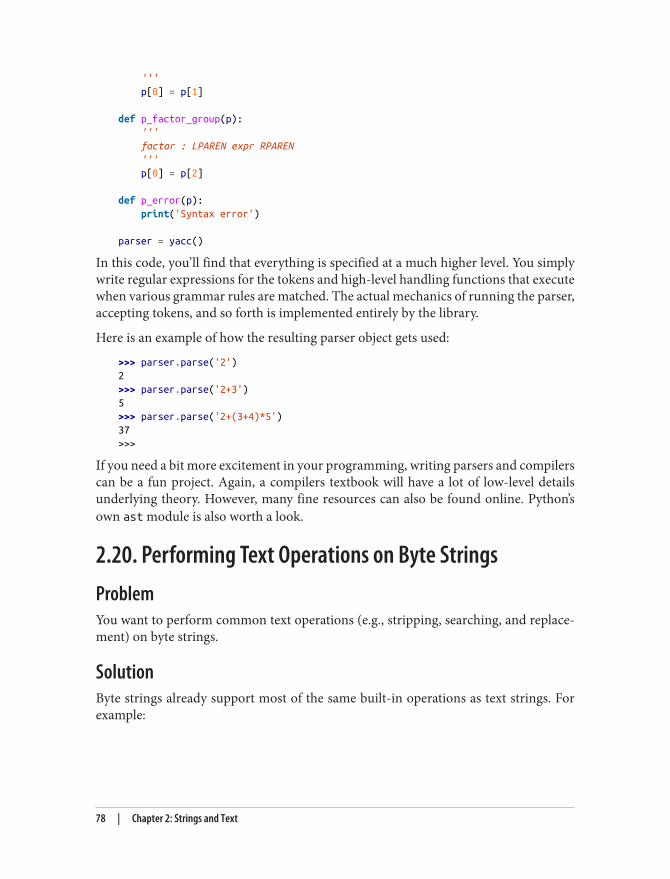
''' p[0] = p[1]
def p_factor_group(p): ''' factor : LPAREN expr RPAREN ''' p[0] = p[2]
def p_error(p): print('Syntax error')
parser = yacc()
In this code, you’ll find that everything is specified at a much higher level. You simplywrite regular expressions for the tokens and high-level handling functions that executewhen various grammar rules are matched. The actual mechanics of running the parser,accepting tokens, and so forth is implemented entirely by the library.
Here is an example of how the resulting parser object gets used:
>>> parser.parse('2')2>>> parser.parse('2+3')5>>> parser.parse('2+(3+4)*5')37>>>
If you need a bit more excitement in your programming, writing parsers and compilerscan be a fun project. Again, a compilers textbook will have a lot of low-level detailsunderlying theory. However, many fine resources can also be found online. Python’sown ast module is also worth a look.
2.20. Performing Text Operations on Byte StringsProblemYou want to perform common text operations (e.g., stripping, searching, and replace‐ment) on byte strings.
SolutionByte strings already support most of the same built-in operations as text strings. Forexample:
78 | Chapter 2: Strings and Text
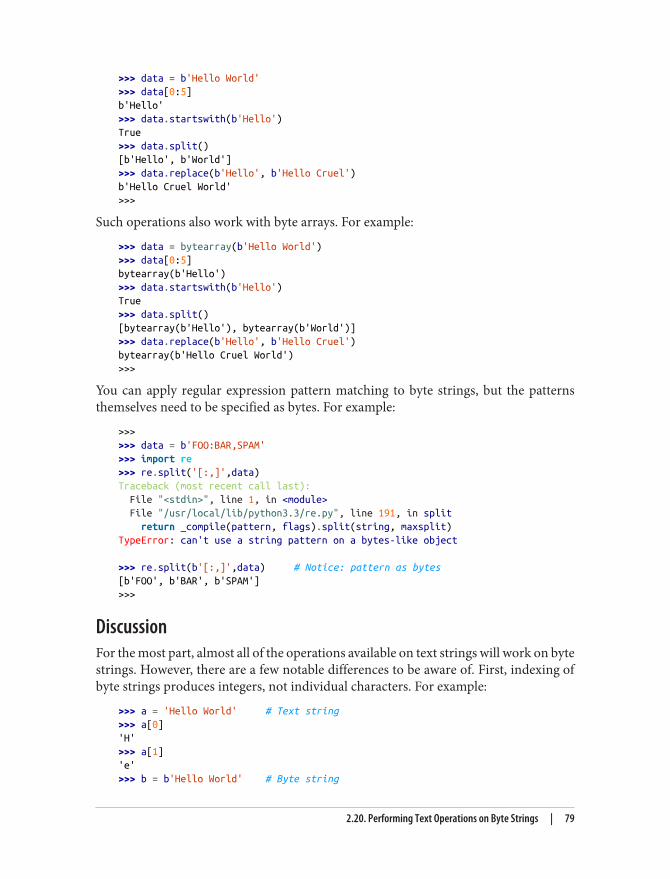
>>> data = b'Hello World'>>> data[0:5]b'Hello'>>> data.startswith(b'Hello')True>>> data.split()[b'Hello', b'World']>>> data.replace(b'Hello', b'Hello Cruel')b'Hello Cruel World'>>>
Such operations also work with byte arrays. For example:
>>> data = bytearray(b'Hello World')>>> data[0:5]bytearray(b'Hello')>>> data.startswith(b'Hello')True>>> data.split()[bytearray(b'Hello'), bytearray(b'World')]>>> data.replace(b'Hello', b'Hello Cruel')bytearray(b'Hello Cruel World')>>>
You can apply regular expression pattern matching to byte strings, but the patternsthemselves need to be specified as bytes. For example:
>>>>>> data = b'FOO:BAR,SPAM'>>> import re>>> re.split('[:,]',data)Traceback (most recent call last): File "<stdin>", line 1, in <module> File "/usr/local/lib/python3.3/re.py", line 191, in split return _compile(pattern, flags).split(string, maxsplit)TypeError: can't use a string pattern on a bytes-like object
>>> re.split(b'[:,]',data) # Notice: pattern as bytes[b'FOO', b'BAR', b'SPAM']>>>
DiscussionFor the most part, almost all of the operations available on text strings will work on bytestrings. However, there are a few notable differences to be aware of. First, indexing ofbyte strings produces integers, not individual characters. For example:
>>> a = 'Hello World' # Text string>>> a[0]'H'>>> a[1]'e'>>> b = b'Hello World' # Byte string
2.20. Performing Text Operations on Byte Strings | 79
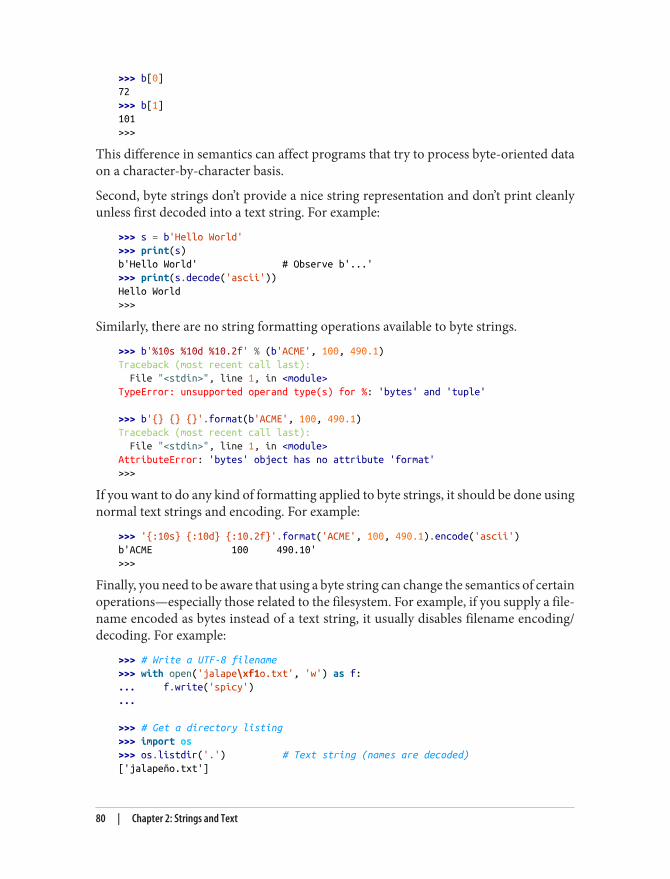
>>> b[0]72>>> b[1]101>>>
This difference in semantics can affect programs that try to process byte-oriented dataon a character-by-character basis.
Second, byte strings don’t provide a nice string representation and don’t print cleanlyunless first decoded into a text string. For example:
>>> s = b'Hello World'>>> print(s)b'Hello World' # Observe b'...'>>> print(s.decode('ascii'))Hello World>>>
Similarly, there are no string formatting operations available to byte strings.
>>> b'%10s %10d %10.2f' % (b'ACME', 100, 490.1)Traceback (most recent call last): File "<stdin>", line 1, in <module>TypeError: unsupported operand type(s) for %: 'bytes' and 'tuple'
>>> b'{} {} {}'.format(b'ACME', 100, 490.1)Traceback (most recent call last): File "<stdin>", line 1, in <module>AttributeError: 'bytes' object has no attribute 'format'>>>
If you want to do any kind of formatting applied to byte strings, it should be done usingnormal text strings and encoding. For example:
>>> '{:10s} {:10d} {:10.2f}'.format('ACME', 100, 490.1).encode('ascii')b'ACME 100 490.10'>>>
Finally, you need to be aware that using a byte string can change the semantics of certainoperations—especially those related to the filesystem. For example, if you supply a file‐name encoded as bytes instead of a text string, it usually disables filename encoding/decoding. For example:
>>> # Write a UTF-8 filename>>> with open('jalape\xf1o.txt', 'w') as f:... f.write('spicy')...
>>> # Get a directory listing>>> import os>>> os.listdir('.') # Text string (names are decoded)['jalapeño.txt']
80 | Chapter 2: Strings and Text
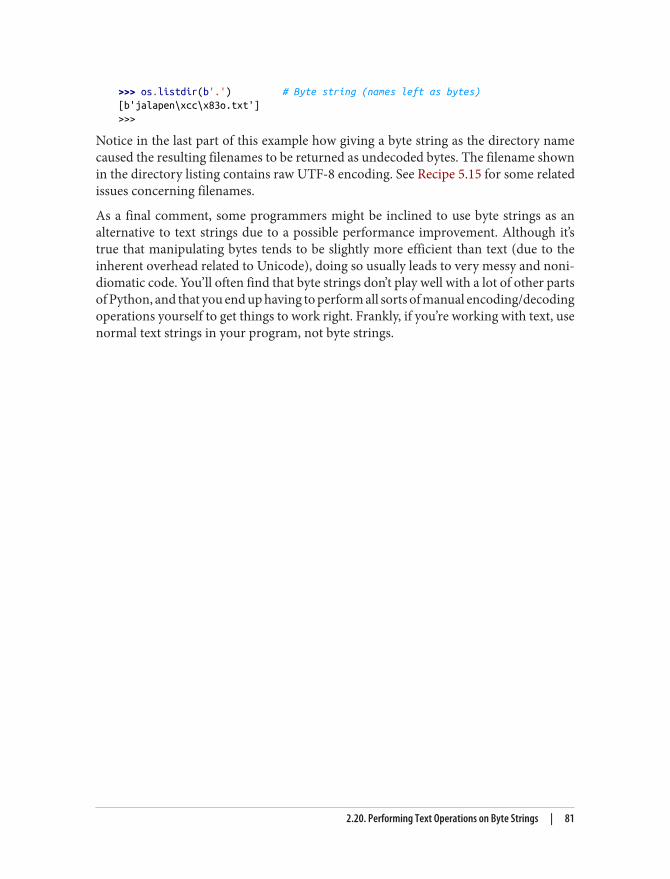
>>> os.listdir(b'.') # Byte string (names left as bytes)[b'jalapen\xcc\x83o.txt']>>>
Notice in the last part of this example how giving a byte string as the directory namecaused the resulting filenames to be returned as undecoded bytes. The filename shownin the directory listing contains raw UTF-8 encoding. See Recipe 5.15 for some relatedissues concerning filenames.
As a final comment, some programmers might be inclined to use byte strings as analternative to text strings due to a possible performance improvement. Although it’strue that manipulating bytes tends to be slightly more efficient than text (due to theinherent overhead related to Unicode), doing so usually leads to very messy and noni‐diomatic code. You’ll often find that byte strings don’t play well with a lot of other partsof Python, and that you end up having to perform all sorts of manual encoding/decodingoperations yourself to get things to work right. Frankly, if you’re working with text, usenormal text strings in your program, not byte strings.
2.20. Performing Text Operations on Byte Strings | 81


CHAPTER 3
Numbers, Dates, and Times
Performing mathematical calculations with integers and floating-point numbers is easyin Python. However, if you need to perform calculations with fractions, arrays, or datesand times, a bit more work is required. The focus of this chapter is on such topics.
3.1. Rounding Numerical ValuesProblemYou want to round a floating-point number to a fixed number of decimal places.
SolutionFor simple rounding, use the built-in round(value, ndigits) function. For example:
>>> round(1.23, 1)1.2>>> round(1.27, 1)1.3>>> round(-1.27, 1)-1.3>>> round(1.25361,3)1.254>>>
When a value is exactly halfway between two choices, the behavior of round is to roundto the nearest even digit. That is, values such as 1.5 or 2.5 both get rounded to 2.
The number of digits given to round() can be negative, in which case rounding takesplace for tens, hundreds, thousands, and so on. For example:
>>> a = 1627731>>> round(a, -1)1627730
83
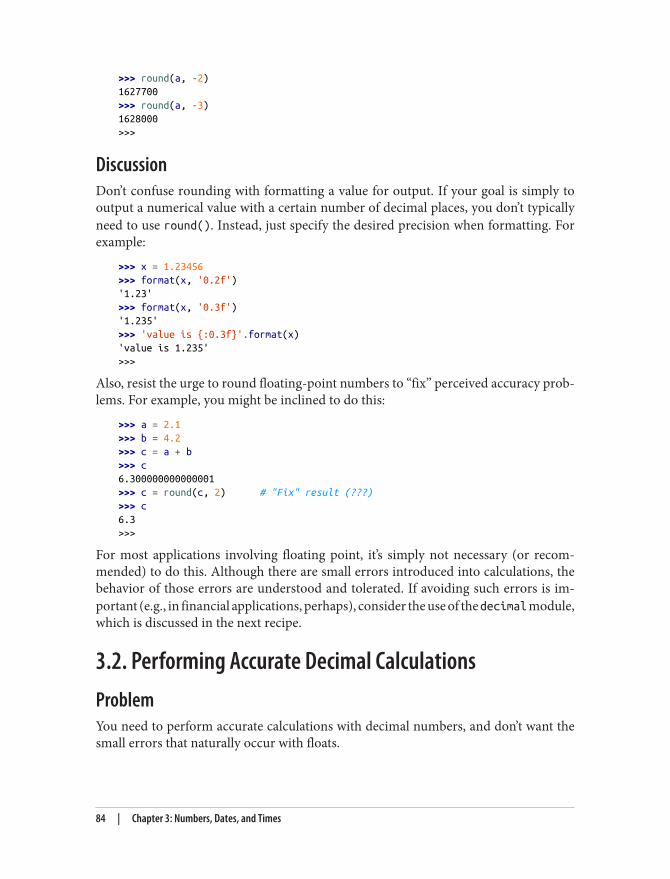
>>> round(a, -2)1627700>>> round(a, -3)1628000>>>
DiscussionDon’t confuse rounding with formatting a value for output. If your goal is simply tooutput a numerical value with a certain number of decimal places, you don’t typicallyneed to use round(). Instead, just specify the desired precision when formatting. Forexample:
>>> x = 1.23456>>> format(x, '0.2f')'1.23'>>> format(x, '0.3f')'1.235'>>> 'value is {:0.3f}'.format(x)'value is 1.235'>>>
Also, resist the urge to round floating-point numbers to “fix” perceived accuracy prob‐lems. For example, you might be inclined to do this:
>>> a = 2.1>>> b = 4.2>>> c = a + b>>> c6.300000000000001>>> c = round(c, 2) # "Fix" result (???)>>> c6.3>>>
For most applications involving floating point, it’s simply not necessary (or recom‐mended) to do this. Although there are small errors introduced into calculations, thebehavior of those errors are understood and tolerated. If avoiding such errors is im‐portant (e.g., in financial applications, perhaps), consider the use of the decimal module,which is discussed in the next recipe.
3.2. Performing Accurate Decimal CalculationsProblemYou need to perform accurate calculations with decimal numbers, and don’t want thesmall errors that naturally occur with floats.
84 | Chapter 3: Numbers, Dates, and Times
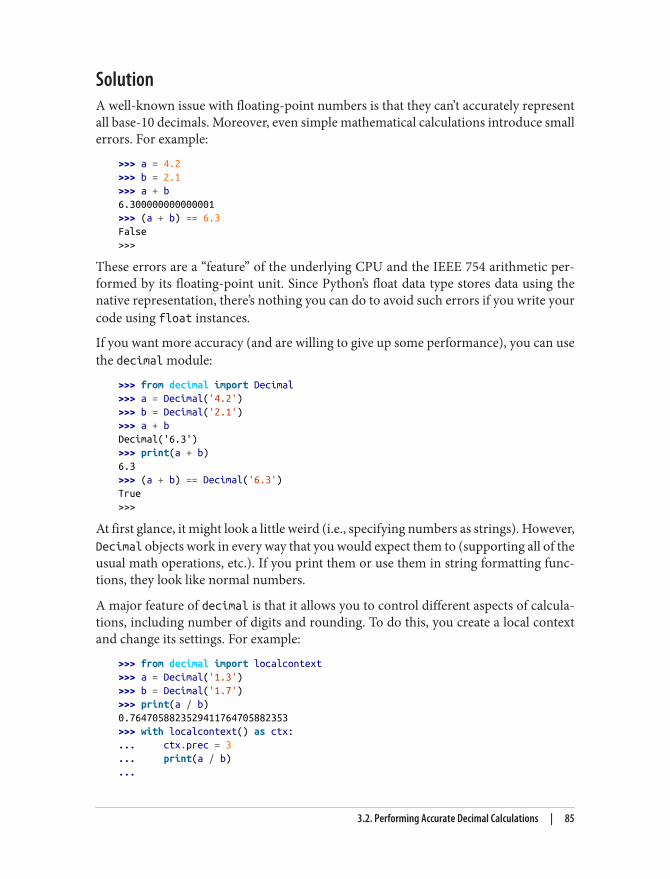
SolutionA well-known issue with floating-point numbers is that they can’t accurately representall base-10 decimals. Moreover, even simple mathematical calculations introduce smallerrors. For example:
>>> a = 4.2>>> b = 2.1>>> a + b6.300000000000001>>> (a + b) == 6.3False>>>
These errors are a “feature” of the underlying CPU and the IEEE 754 arithmetic per‐formed by its floating-point unit. Since Python’s float data type stores data using thenative representation, there’s nothing you can do to avoid such errors if you write yourcode using float instances.
If you want more accuracy (and are willing to give up some performance), you can usethe decimal module:
>>> from decimal import Decimal>>> a = Decimal('4.2')>>> b = Decimal('2.1')>>> a + bDecimal('6.3')>>> print(a + b)6.3>>> (a + b) == Decimal('6.3')True>>>
At first glance, it might look a little weird (i.e., specifying numbers as strings). However,Decimal objects work in every way that you would expect them to (supporting all of theusual math operations, etc.). If you print them or use them in string formatting func‐tions, they look like normal numbers.
A major feature of decimal is that it allows you to control different aspects of calcula‐tions, including number of digits and rounding. To do this, you create a local contextand change its settings. For example:
>>> from decimal import localcontext>>> a = Decimal('1.3')>>> b = Decimal('1.7')>>> print(a / b)0.7647058823529411764705882353>>> with localcontext() as ctx:... ctx.prec = 3... print(a / b)...
3.2. Performing Accurate Decimal Calculations | 85
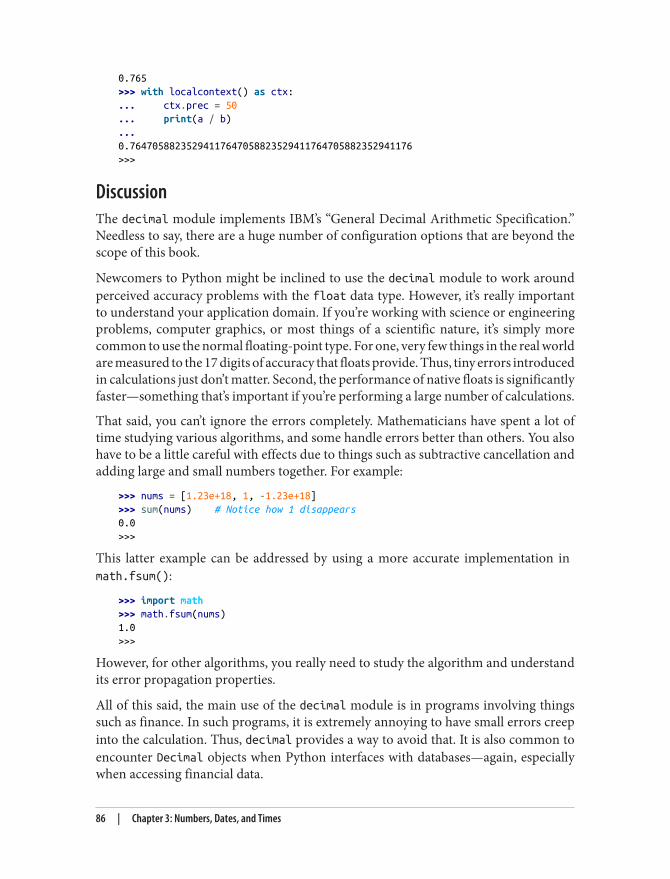
0.765>>> with localcontext() as ctx:... ctx.prec = 50... print(a / b)...0.76470588235294117647058823529411764705882352941176>>>
DiscussionThe decimal module implements IBM’s “General Decimal Arithmetic Specification.”Needless to say, there are a huge number of configuration options that are beyond thescope of this book.
Newcomers to Python might be inclined to use the decimal module to work aroundperceived accuracy problems with the float data type. However, it’s really importantto understand your application domain. If you’re working with science or engineeringproblems, computer graphics, or most things of a scientific nature, it’s simply morecommon to use the normal floating-point type. For one, very few things in the real worldare measured to the 17 digits of accuracy that floats provide. Thus, tiny errors introducedin calculations just don’t matter. Second, the performance of native floats is significantlyfaster—something that’s important if you’re performing a large number of calculations.
That said, you can’t ignore the errors completely. Mathematicians have spent a lot oftime studying various algorithms, and some handle errors better than others. You alsohave to be a little careful with effects due to things such as subtractive cancellation andadding large and small numbers together. For example:
>>> nums = [1.23e+18, 1, -1.23e+18]>>> sum(nums) # Notice how 1 disappears0.0>>>
This latter example can be addressed by using a more accurate implementation in math.fsum():
>>> import math>>> math.fsum(nums)1.0>>>
However, for other algorithms, you really need to study the algorithm and understandits error propagation properties.
All of this said, the main use of the decimal module is in programs involving thingssuch as finance. In such programs, it is extremely annoying to have small errors creepinto the calculation. Thus, decimal provides a way to avoid that. It is also common toencounter Decimal objects when Python interfaces with databases—again, especiallywhen accessing financial data.
86 | Chapter 3: Numbers, Dates, and Times
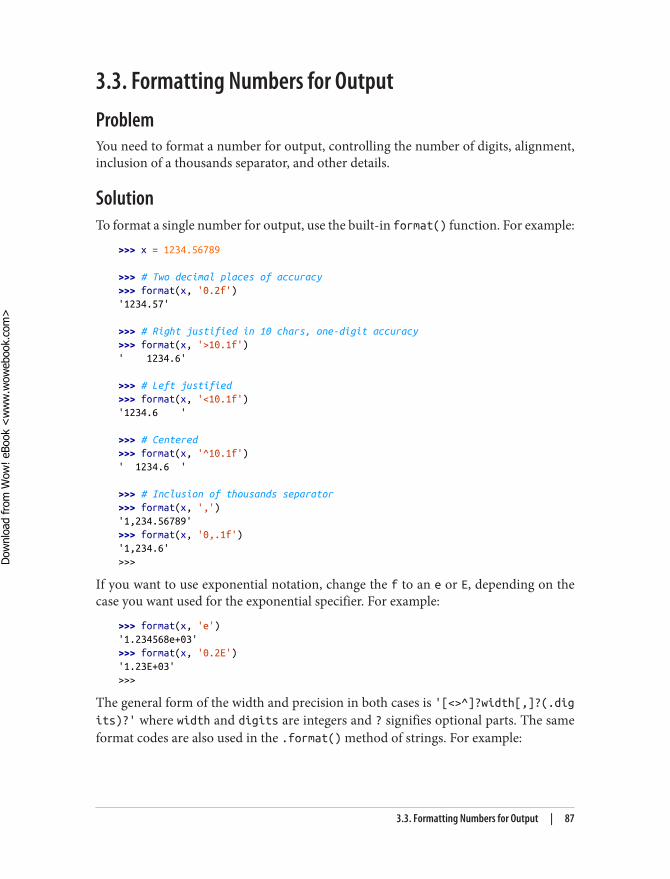
3.3. Formatting Numbers for OutputProblemYou need to format a number for output, controlling the number of digits, alignment,inclusion of a thousands separator, and other details.
SolutionTo format a single number for output, use the built-in format() function. For example:
>>> x = 1234.56789
>>> # Two decimal places of accuracy>>> format(x, '0.2f')'1234.57'
>>> # Right justified in 10 chars, one-digit accuracy>>> format(x, '>10.1f')' 1234.6'
>>> # Left justified>>> format(x, '<10.1f')'1234.6 '
>>> # Centered>>> format(x, '^10.1f')' 1234.6 '
>>> # Inclusion of thousands separator>>> format(x, ',')'1,234.56789'>>> format(x, '0,.1f')'1,234.6'>>>
If you want to use exponential notation, change the f to an e or E, depending on thecase you want used for the exponential specifier. For example:
>>> format(x, 'e')'1.234568e+03'>>> format(x, '0.2E')'1.23E+03'>>>
The general form of the width and precision in both cases is '[<>^]?width[,]?(.digits)?' where width and digits are integers and ? signifies optional parts. The sameformat codes are also used in the .format() method of strings. For example:
3.3. Formatting Numbers for Output | 87
Dow
nlo
ad fro
m W
ow
! eBook
<w
ww
.wow
ebook.
com
>
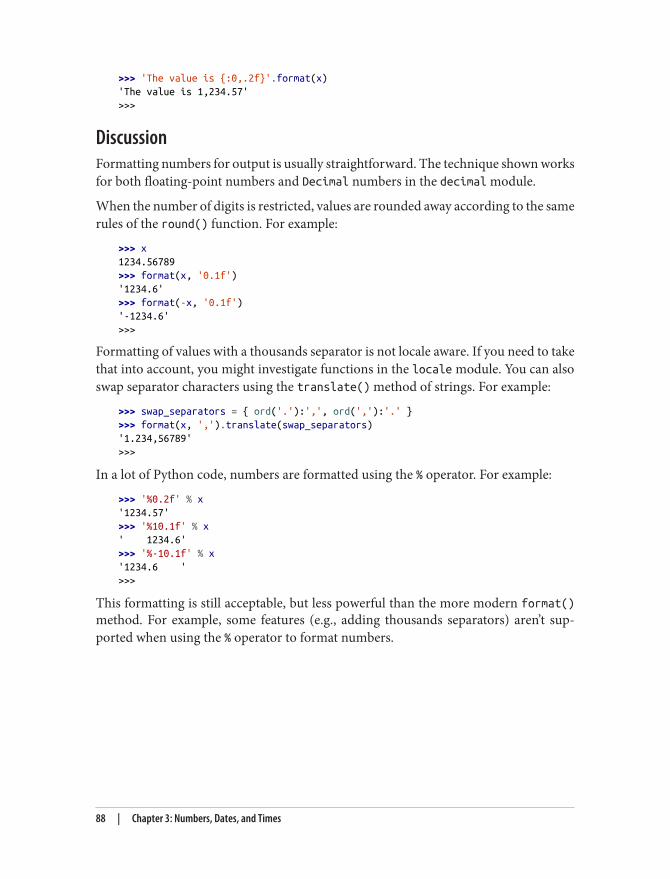
>>> 'The value is {:0,.2f}'.format(x)'The value is 1,234.57'>>>
DiscussionFormatting numbers for output is usually straightforward. The technique shown worksfor both floating-point numbers and Decimal numbers in the decimal module.
When the number of digits is restricted, values are rounded away according to the samerules of the round() function. For example:
>>> x1234.56789>>> format(x, '0.1f')'1234.6'>>> format(-x, '0.1f')'-1234.6'>>>
Formatting of values with a thousands separator is not locale aware. If you need to takethat into account, you might investigate functions in the locale module. You can alsoswap separator characters using the translate() method of strings. For example:
>>> swap_separators = { ord('.'):',', ord(','):'.' }>>> format(x, ',').translate(swap_separators)'1.234,56789'>>>
In a lot of Python code, numbers are formatted using the % operator. For example:
>>> '%0.2f' % x'1234.57'>>> '%10.1f' % x' 1234.6'>>> '%-10.1f' % x'1234.6 '>>>
This formatting is still acceptable, but less powerful than the more modern format()method. For example, some features (e.g., adding thousands separators) aren’t sup‐ported when using the % operator to format numbers.
88 | Chapter 3: Numbers, Dates, and Times
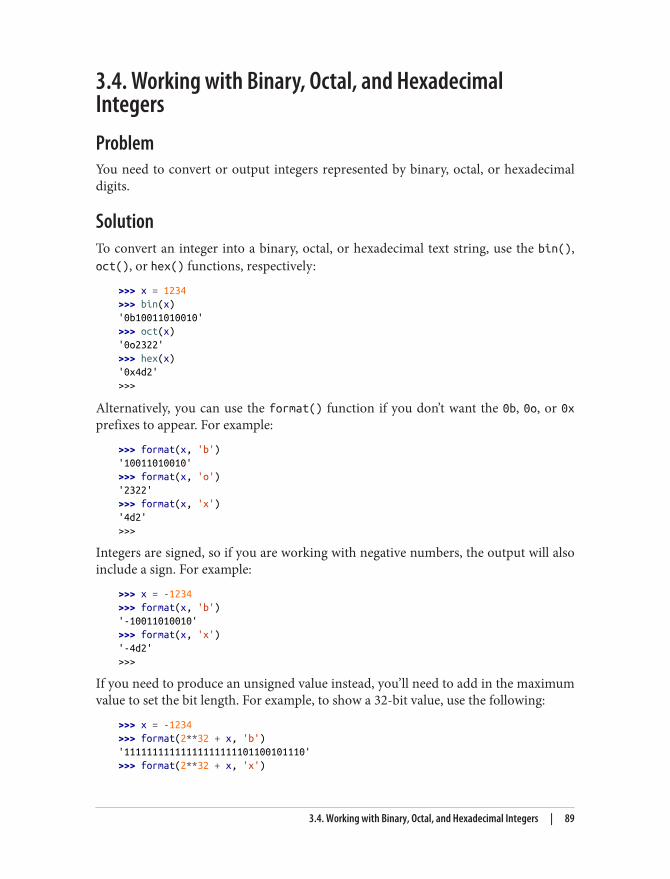
3.4. Working with Binary, Octal, and HexadecimalIntegersProblemYou need to convert or output integers represented by binary, octal, or hexadecimaldigits.
SolutionTo convert an integer into a binary, octal, or hexadecimal text string, use the bin(),oct(), or hex() functions, respectively:
>>> x = 1234>>> bin(x)'0b10011010010'>>> oct(x)'0o2322'>>> hex(x)'0x4d2'>>>
Alternatively, you can use the format() function if you don’t want the 0b, 0o, or 0xprefixes to appear. For example:
>>> format(x, 'b')'10011010010'>>> format(x, 'o')'2322'>>> format(x, 'x')'4d2'>>>
Integers are signed, so if you are working with negative numbers, the output will alsoinclude a sign. For example:
>>> x = -1234>>> format(x, 'b')'-10011010010'>>> format(x, 'x')'-4d2'>>>
If you need to produce an unsigned value instead, you’ll need to add in the maximumvalue to set the bit length. For example, to show a 32-bit value, use the following:
>>> x = -1234>>> format(2**32 + x, 'b')'11111111111111111111101100101110'>>> format(2**32 + x, 'x')
3.4. Working with Binary, Octal, and Hexadecimal Integers | 89
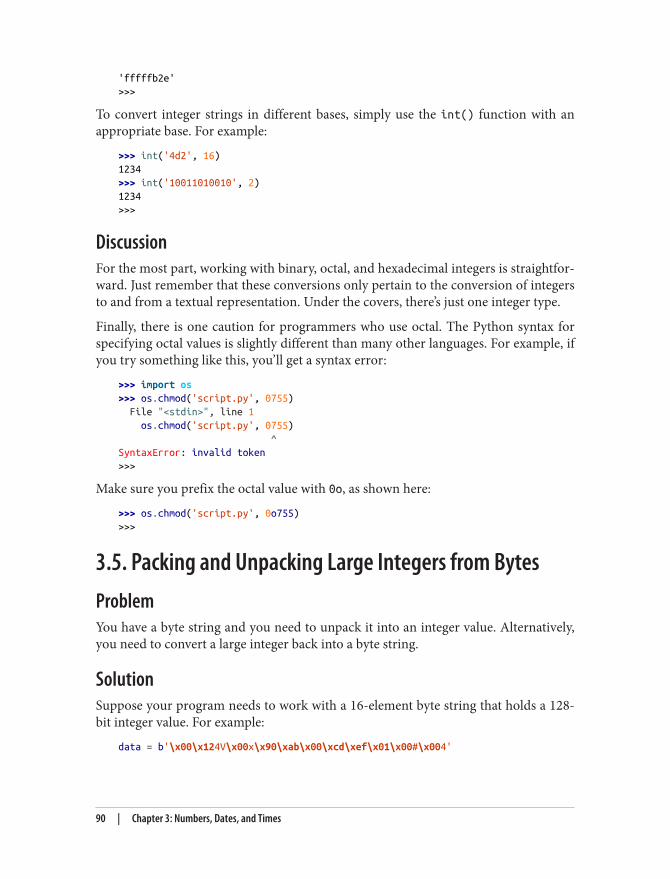
'fffffb2e'>>>
To convert integer strings in different bases, simply use the int() function with anappropriate base. For example:
>>> int('4d2', 16)1234>>> int('10011010010', 2)1234>>>
DiscussionFor the most part, working with binary, octal, and hexadecimal integers is straightfor‐ward. Just remember that these conversions only pertain to the conversion of integersto and from a textual representation. Under the covers, there’s just one integer type.
Finally, there is one caution for programmers who use octal. The Python syntax forspecifying octal values is slightly different than many other languages. For example, ifyou try something like this, you’ll get a syntax error:
>>> import os>>> os.chmod('script.py', 0755) File "<stdin>", line 1 os.chmod('script.py', 0755) ^SyntaxError: invalid token>>>
Make sure you prefix the octal value with 0o, as shown here:
>>> os.chmod('script.py', 0o755)>>>
3.5. Packing and Unpacking Large Integers from BytesProblemYou have a byte string and you need to unpack it into an integer value. Alternatively,you need to convert a large integer back into a byte string.
SolutionSuppose your program needs to work with a 16-element byte string that holds a 128-bit integer value. For example:
data = b'\x00\x124V\x00x\x90\xab\x00\xcd\xef\x01\x00#\x004'
90 | Chapter 3: Numbers, Dates, and Times
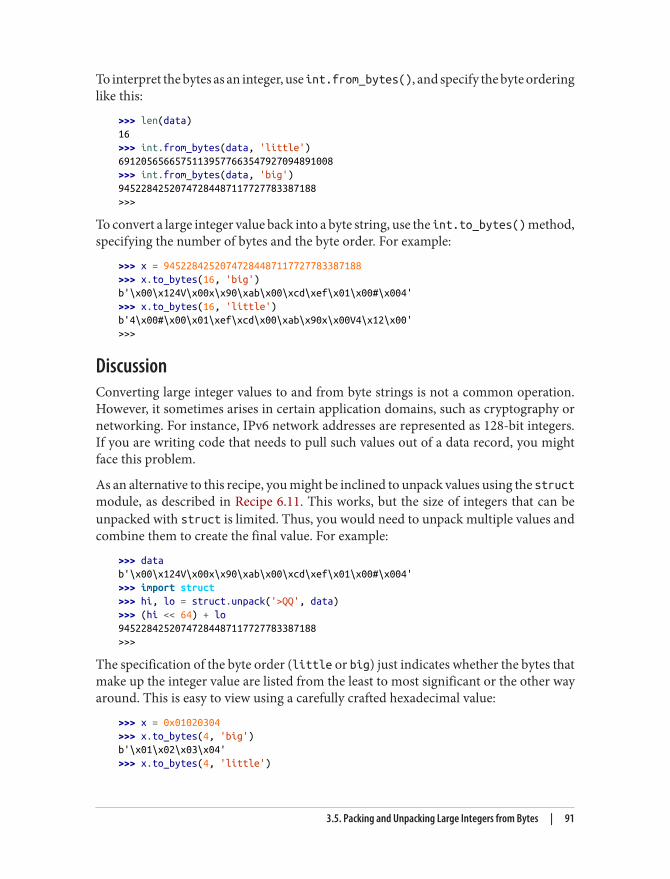
To interpret the bytes as an integer, use int.from_bytes(), and specify the byte orderinglike this:
>>> len(data)16>>> int.from_bytes(data, 'little')69120565665751139577663547927094891008>>> int.from_bytes(data, 'big')94522842520747284487117727783387188>>>
To convert a large integer value back into a byte string, use the int.to_bytes() method,specifying the number of bytes and the byte order. For example:
>>> x = 94522842520747284487117727783387188>>> x.to_bytes(16, 'big')b'\x00\x124V\x00x\x90\xab\x00\xcd\xef\x01\x00#\x004'>>> x.to_bytes(16, 'little')b'4\x00#\x00\x01\xef\xcd\x00\xab\x90x\x00V4\x12\x00'>>>
DiscussionConverting large integer values to and from byte strings is not a common operation.However, it sometimes arises in certain application domains, such as cryptography ornetworking. For instance, IPv6 network addresses are represented as 128-bit integers.If you are writing code that needs to pull such values out of a data record, you mightface this problem.
As an alternative to this recipe, you might be inclined to unpack values using the structmodule, as described in Recipe 6.11. This works, but the size of integers that can beunpacked with struct is limited. Thus, you would need to unpack multiple values andcombine them to create the final value. For example:
>>> datab'\x00\x124V\x00x\x90\xab\x00\xcd\xef\x01\x00#\x004'>>> import struct>>> hi, lo = struct.unpack('>QQ', data)>>> (hi << 64) + lo94522842520747284487117727783387188>>>
The specification of the byte order (little or big) just indicates whether the bytes thatmake up the integer value are listed from the least to most significant or the other wayaround. This is easy to view using a carefully crafted hexadecimal value:
>>> x = 0x01020304>>> x.to_bytes(4, 'big')b'\x01\x02\x03\x04'>>> x.to_bytes(4, 'little')
3.5. Packing and Unpacking Large Integers from Bytes | 91
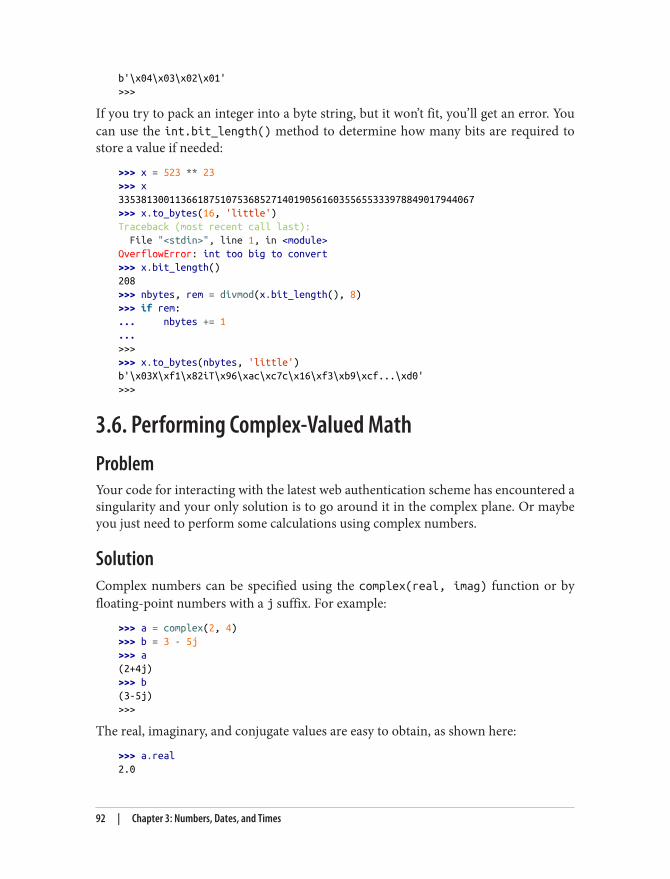
b'\x04\x03\x02\x01'>>>
If you try to pack an integer into a byte string, but it won’t fit, you’ll get an error. Youcan use the int.bit_length() method to determine how many bits are required tostore a value if needed:
>>> x = 523 ** 23>>> x335381300113661875107536852714019056160355655333978849017944067>>> x.to_bytes(16, 'little')Traceback (most recent call last): File "<stdin>", line 1, in <module>OverflowError: int too big to convert>>> x.bit_length()208>>> nbytes, rem = divmod(x.bit_length(), 8)>>> if rem:... nbytes += 1...>>>>>> x.to_bytes(nbytes, 'little')b'\x03X\xf1\x82iT\x96\xac\xc7c\x16\xf3\xb9\xcf...\xd0'>>>
3.6. Performing Complex-Valued MathProblemYour code for interacting with the latest web authentication scheme has encountered asingularity and your only solution is to go around it in the complex plane. Or maybeyou just need to perform some calculations using complex numbers.
SolutionComplex numbers can be specified using the complex(real, imag) function or byfloating-point numbers with a j suffix. For example:
>>> a = complex(2, 4)>>> b = 3 - 5j>>> a(2+4j)>>> b(3-5j)>>>
The real, imaginary, and conjugate values are easy to obtain, as shown here:
>>> a.real2.0
92 | Chapter 3: Numbers, Dates, and Times
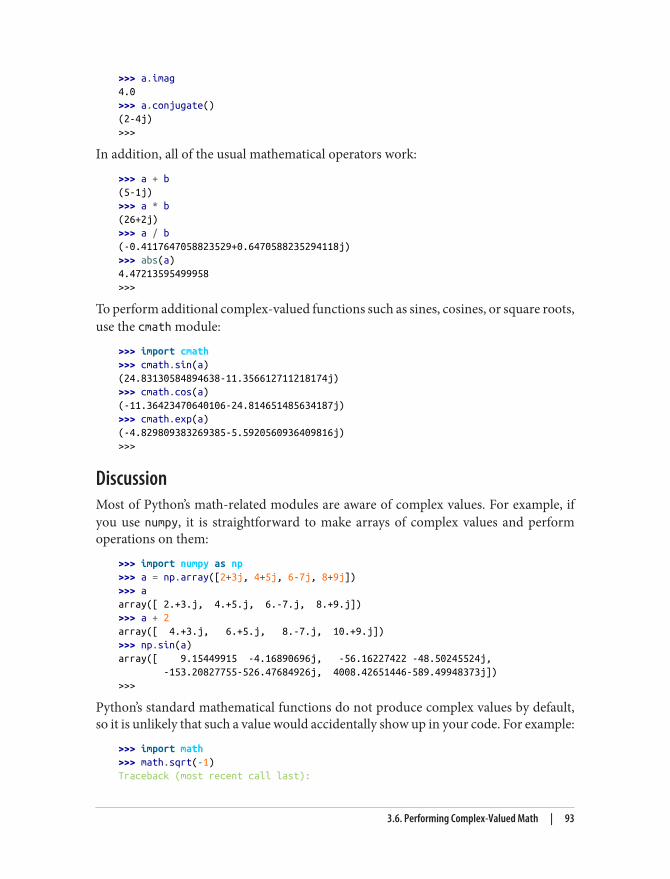
>>> a.imag4.0>>> a.conjugate()(2-4j)>>>
In addition, all of the usual mathematical operators work:
>>> a + b(5-1j)>>> a * b(26+2j)>>> a / b(-0.4117647058823529+0.6470588235294118j)>>> abs(a)4.47213595499958>>>
To perform additional complex-valued functions such as sines, cosines, or square roots,use the cmath module:
>>> import cmath>>> cmath.sin(a)(24.83130584894638-11.356612711218174j)>>> cmath.cos(a)(-11.36423470640106-24.814651485634187j)>>> cmath.exp(a)(-4.829809383269385-5.5920560936409816j)>>>
DiscussionMost of Python’s math-related modules are aware of complex values. For example, ifyou use numpy, it is straightforward to make arrays of complex values and performoperations on them:
>>> import numpy as np>>> a = np.array([2+3j, 4+5j, 6-7j, 8+9j])>>> aarray([ 2.+3.j, 4.+5.j, 6.-7.j, 8.+9.j])>>> a + 2array([ 4.+3.j, 6.+5.j, 8.-7.j, 10.+9.j])>>> np.sin(a)array([ 9.15449915 -4.16890696j, -56.16227422 -48.50245524j, -153.20827755-526.47684926j, 4008.42651446-589.49948373j])>>>
Python’s standard mathematical functions do not produce complex values by default,so it is unlikely that such a value would accidentally show up in your code. For example:
>>> import math>>> math.sqrt(-1)Traceback (most recent call last):
3.6. Performing Complex-Valued Math | 93
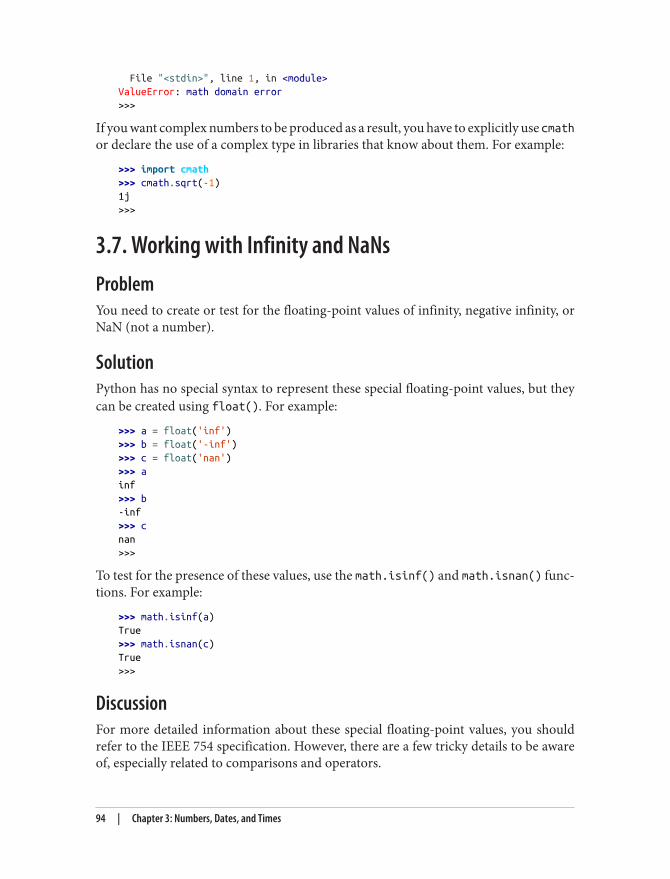
File "<stdin>", line 1, in <module>ValueError: math domain error>>>
If you want complex numbers to be produced as a result, you have to explicitly use cmathor declare the use of a complex type in libraries that know about them. For example:
>>> import cmath>>> cmath.sqrt(-1)1j>>>
3.7. Working with Infinity and NaNsProblemYou need to create or test for the floating-point values of infinity, negative infinity, orNaN (not a number).
SolutionPython has no special syntax to represent these special floating-point values, but theycan be created using float(). For example:
>>> a = float('inf')>>> b = float('-inf')>>> c = float('nan')>>> ainf>>> b-inf>>> cnan>>>
To test for the presence of these values, use the math.isinf() and math.isnan() func‐tions. For example:
>>> math.isinf(a)True>>> math.isnan(c)True>>>
DiscussionFor more detailed information about these special floating-point values, you shouldrefer to the IEEE 754 specification. However, there are a few tricky details to be awareof, especially related to comparisons and operators.
94 | Chapter 3: Numbers, Dates, and Times
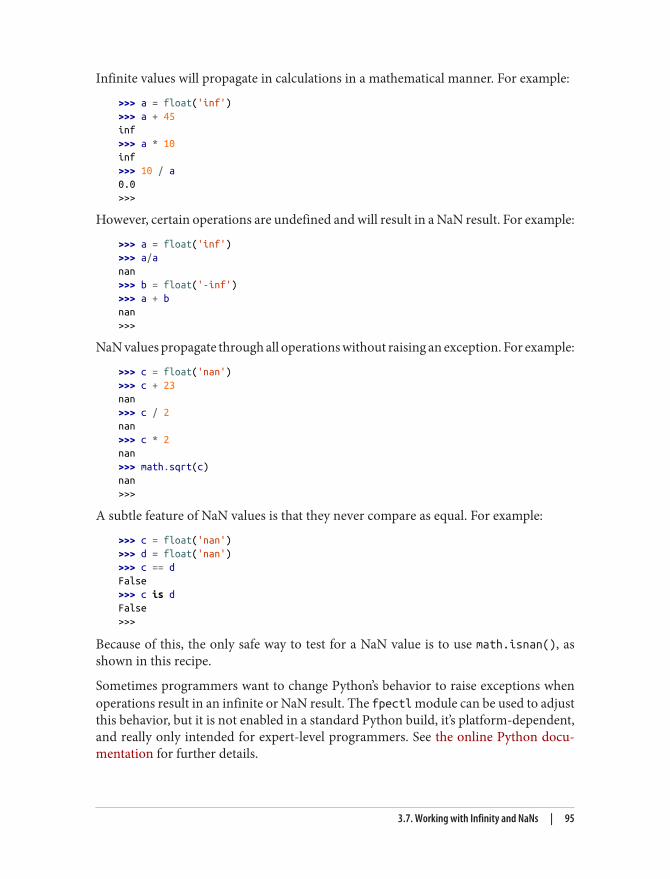
Infinite values will propagate in calculations in a mathematical manner. For example:
>>> a = float('inf')>>> a + 45inf>>> a * 10inf>>> 10 / a0.0>>>
However, certain operations are undefined and will result in a NaN result. For example:
>>> a = float('inf')>>> a/anan>>> b = float('-inf')>>> a + bnan>>>
NaN values propagate through all operations without raising an exception. For example:
>>> c = float('nan')>>> c + 23nan>>> c / 2nan>>> c * 2nan>>> math.sqrt(c)nan>>>
A subtle feature of NaN values is that they never compare as equal. For example:
>>> c = float('nan')>>> d = float('nan')>>> c == dFalse>>> c is dFalse>>>
Because of this, the only safe way to test for a NaN value is to use math.isnan(), asshown in this recipe.
Sometimes programmers want to change Python’s behavior to raise exceptions whenoperations result in an infinite or NaN result. The fpectl module can be used to adjustthis behavior, but it is not enabled in a standard Python build, it’s platform-dependent,and really only intended for expert-level programmers. See the online Python docu‐mentation for further details.
3.7. Working with Infinity and NaNs | 95
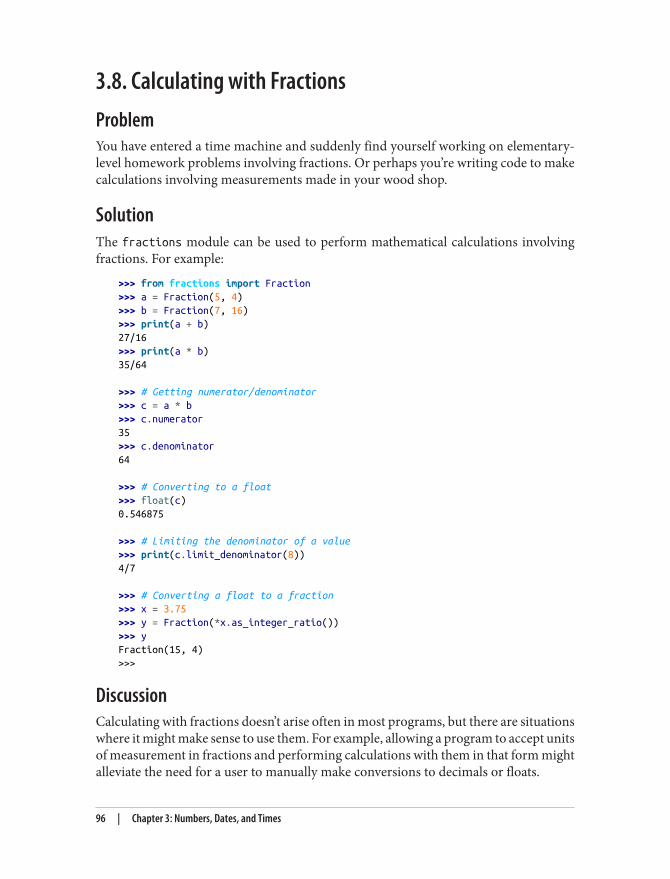
3.8. Calculating with FractionsProblemYou have entered a time machine and suddenly find yourself working on elementary-level homework problems involving fractions. Or perhaps you’re writing code to makecalculations involving measurements made in your wood shop.
SolutionThe fractions module can be used to perform mathematical calculations involvingfractions. For example:
>>> from fractions import Fraction>>> a = Fraction(5, 4)>>> b = Fraction(7, 16)>>> print(a + b)27/16>>> print(a * b)35/64
>>> # Getting numerator/denominator>>> c = a * b>>> c.numerator35>>> c.denominator64
>>> # Converting to a float>>> float(c)0.546875
>>> # Limiting the denominator of a value>>> print(c.limit_denominator(8))4/7
>>> # Converting a float to a fraction>>> x = 3.75>>> y = Fraction(*x.as_integer_ratio())>>> yFraction(15, 4)>>>
DiscussionCalculating with fractions doesn’t arise often in most programs, but there are situationswhere it might make sense to use them. For example, allowing a program to accept unitsof measurement in fractions and performing calculations with them in that form mightalleviate the need for a user to manually make conversions to decimals or floats.
96 | Chapter 3: Numbers, Dates, and Times
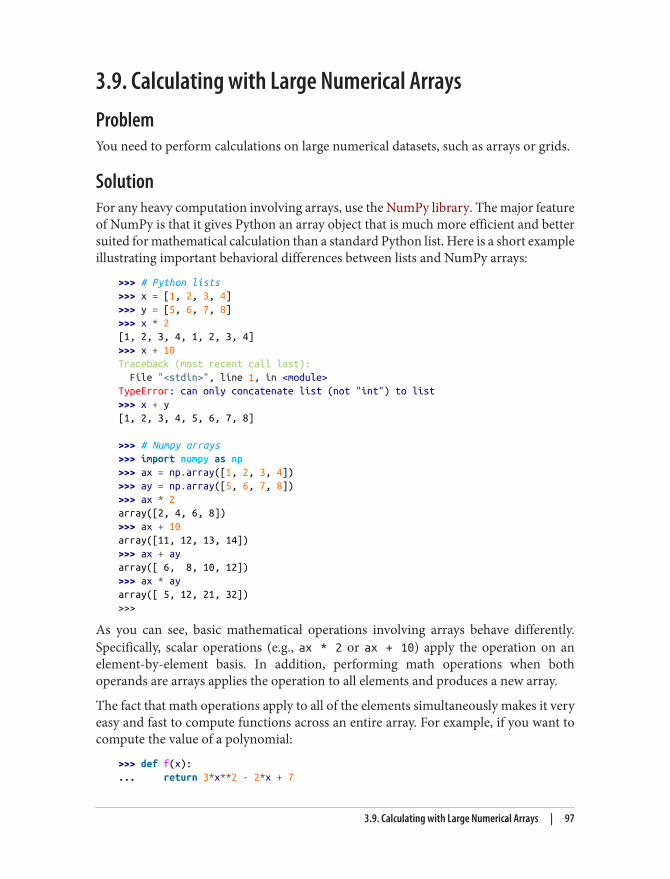
3.9. Calculating with Large Numerical ArraysProblemYou need to perform calculations on large numerical datasets, such as arrays or grids.
SolutionFor any heavy computation involving arrays, use the NumPy library. The major featureof NumPy is that it gives Python an array object that is much more efficient and bettersuited for mathematical calculation than a standard Python list. Here is a short exampleillustrating important behavioral differences between lists and NumPy arrays:
>>> # Python lists>>> x = [1, 2, 3, 4]>>> y = [5, 6, 7, 8]>>> x * 2[1, 2, 3, 4, 1, 2, 3, 4]>>> x + 10Traceback (most recent call last): File "<stdin>", line 1, in <module>TypeError: can only concatenate list (not "int") to list>>> x + y[1, 2, 3, 4, 5, 6, 7, 8]
>>> # Numpy arrays>>> import numpy as np>>> ax = np.array([1, 2, 3, 4])>>> ay = np.array([5, 6, 7, 8])>>> ax * 2array([2, 4, 6, 8])>>> ax + 10array([11, 12, 13, 14])>>> ax + ayarray([ 6, 8, 10, 12])>>> ax * ayarray([ 5, 12, 21, 32])>>>
As you can see, basic mathematical operations involving arrays behave differently.Specifically, scalar operations (e.g., ax * 2 or ax + 10) apply the operation on anelement-by-element basis. In addition, performing math operations when bothoperands are arrays applies the operation to all elements and produces a new array.
The fact that math operations apply to all of the elements simultaneously makes it veryeasy and fast to compute functions across an entire array. For example, if you want tocompute the value of a polynomial:
>>> def f(x):... return 3*x**2 - 2*x + 7
3.9. Calculating with Large Numerical Arrays | 97

...>>> f(ax)array([ 8, 15, 28, 47])>>>
NumPy provides a collection of “universal functions” that also allow for array opera‐tions. These are replacements for similar functions normally found in the math module.For example:
>>> np.sqrt(ax)array([ 1. , 1.41421356, 1.73205081, 2. ])>>> np.cos(ax)array([ 0.54030231, -0.41614684, -0.9899925 , -0.65364362])>>>
Using universal functions can be hundreds of times faster than looping over the arrayelements one at a time and performing calculations using functions in the math module.Thus, you should prefer their use whenever possible.
Under the covers, NumPy arrays are allocated in the same manner as in C or Fortran.Namely, they are large, contiguous memory regions consisting of a homogenous datatype. Because of this, it’s possible to make arrays much larger than anything you wouldnormally put into a Python list. For example, if you want to make a two-dimensionalgrid of 10,000 by 10,000 floats, it’s not an issue:
>>> grid = np.zeros(shape=(10000,10000), dtype=float)>>> gridarray([[ 0., 0., 0., ..., 0., 0., 0.], [ 0., 0., 0., ..., 0., 0., 0.], [ 0., 0., 0., ..., 0., 0., 0.], ..., [ 0., 0., 0., ..., 0., 0., 0.], [ 0., 0., 0., ..., 0., 0., 0.], [ 0., 0., 0., ..., 0., 0., 0.]])>>>
All of the usual operations still apply to all of the elements simultaneously:
>>> grid += 10>>> gridarray([[ 10., 10., 10., ..., 10., 10., 10.], [ 10., 10., 10., ..., 10., 10., 10.], [ 10., 10., 10., ..., 10., 10., 10.], ..., [ 10., 10., 10., ..., 10., 10., 10.], [ 10., 10., 10., ..., 10., 10., 10.], [ 10., 10., 10., ..., 10., 10., 10.]])>>> np.sin(grid)array([[-0.54402111, -0.54402111, -0.54402111, ..., -0.54402111, -0.54402111, -0.54402111], [-0.54402111, -0.54402111, -0.54402111, ..., -0.54402111, -0.54402111, -0.54402111],
98 | Chapter 3: Numbers, Dates, and Times

[-0.54402111, -0.54402111, -0.54402111, ..., -0.54402111, -0.54402111, -0.54402111], ..., [-0.54402111, -0.54402111, -0.54402111, ..., -0.54402111, -0.54402111, -0.54402111], [-0.54402111, -0.54402111, -0.54402111, ..., -0.54402111, -0.54402111, -0.54402111], [-0.54402111, -0.54402111, -0.54402111, ..., -0.54402111, -0.54402111, -0.54402111]])>>>
One extremely notable aspect of NumPy is the manner in which it extends Python’s listindexing functionality—especially with multidimensional arrays. To illustrate, make asimple two-dimensional array and try some experiments:
>>> a = np.array([[1, 2, 3, 4], [5, 6, 7, 8], [9, 10, 11, 12]])>>> aarray([[ 1, 2, 3, 4], [ 5, 6, 7, 8], [ 9, 10, 11, 12]])
>>> # Select row 1>>> a[1]array([5, 6, 7, 8])
>>> # Select column 1>>> a[:,1]array([ 2, 6, 10])
>>> # Select a subregion and change it>>> a[1:3, 1:3]array([[ 6, 7], [10, 11]])>>> a[1:3, 1:3] += 10>>> aarray([[ 1, 2, 3, 4], [ 5, 16, 17, 8], [ 9, 20, 21, 12]])
>>> # Broadcast a row vector across an operation on all rows>>> a + [100, 101, 102, 103]array([[101, 103, 105, 107], [105, 117, 119, 111], [109, 121, 123, 115]])>>> aarray([[ 1, 2, 3, 4], [ 5, 16, 17, 8], [ 9, 20, 21, 12]])
>>> # Conditional assignment on an array>>> np.where(a < 10, a, 10)array([[ 1, 2, 3, 4],
3.9. Calculating with Large Numerical Arrays | 99
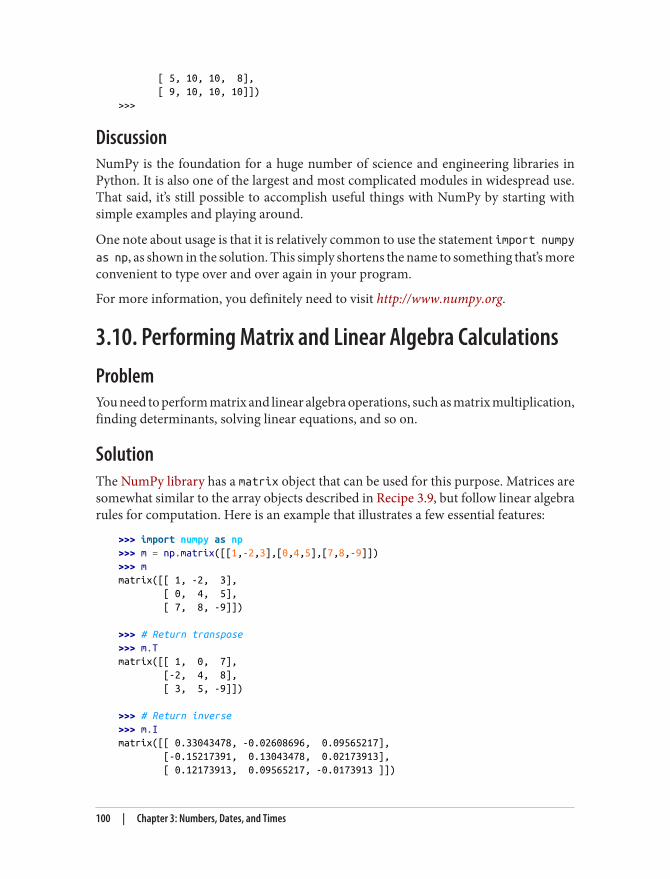
[ 5, 10, 10, 8], [ 9, 10, 10, 10]])>>>
DiscussionNumPy is the foundation for a huge number of science and engineering libraries inPython. It is also one of the largest and most complicated modules in widespread use.That said, it’s still possible to accomplish useful things with NumPy by starting withsimple examples and playing around.
One note about usage is that it is relatively common to use the statement import numpyas np, as shown in the solution. This simply shortens the name to something that’s moreconvenient to type over and over again in your program.
For more information, you definitely need to visit http://www.numpy.org.
3.10. Performing Matrix and Linear Algebra CalculationsProblemYou need to perform matrix and linear algebra operations, such as matrix multiplication,finding determinants, solving linear equations, and so on.
SolutionThe NumPy library has a matrix object that can be used for this purpose. Matrices aresomewhat similar to the array objects described in Recipe 3.9, but follow linear algebrarules for computation. Here is an example that illustrates a few essential features:
>>> import numpy as np>>> m = np.matrix([[1,-2,3],[0,4,5],[7,8,-9]])>>> mmatrix([[ 1, -2, 3], [ 0, 4, 5], [ 7, 8, -9]])
>>> # Return transpose>>> m.Tmatrix([[ 1, 0, 7], [-2, 4, 8], [ 3, 5, -9]])
>>> # Return inverse>>> m.Imatrix([[ 0.33043478, -0.02608696, 0.09565217], [-0.15217391, 0.13043478, 0.02173913], [ 0.12173913, 0.09565217, -0.0173913 ]])
100 | Chapter 3: Numbers, Dates, and Times
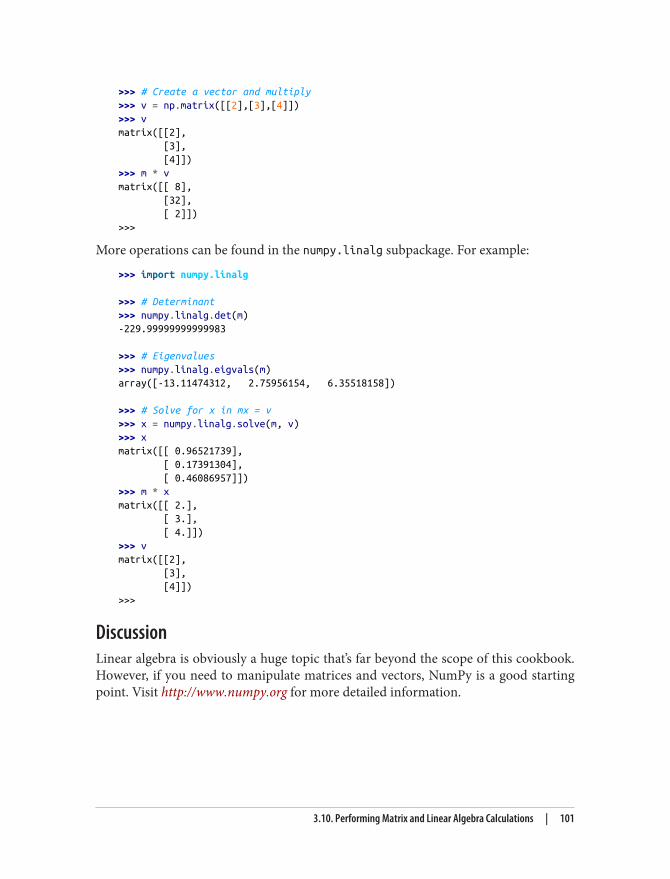
>>> # Create a vector and multiply>>> v = np.matrix([[2],[3],[4]])>>> vmatrix([[2], [3], [4]])>>> m * vmatrix([[ 8], [32], [ 2]])>>>
More operations can be found in the numpy.linalg subpackage. For example:
>>> import numpy.linalg
>>> # Determinant>>> numpy.linalg.det(m)-229.99999999999983
>>> # Eigenvalues>>> numpy.linalg.eigvals(m)array([-13.11474312, 2.75956154, 6.35518158])
>>> # Solve for x in mx = v>>> x = numpy.linalg.solve(m, v)>>> xmatrix([[ 0.96521739], [ 0.17391304], [ 0.46086957]])>>> m * xmatrix([[ 2.], [ 3.], [ 4.]])>>> vmatrix([[2], [3], [4]])>>>
DiscussionLinear algebra is obviously a huge topic that’s far beyond the scope of this cookbook.However, if you need to manipulate matrices and vectors, NumPy is a good startingpoint. Visit http://www.numpy.org for more detailed information.
3.10. Performing Matrix and Linear Algebra Calculations | 101
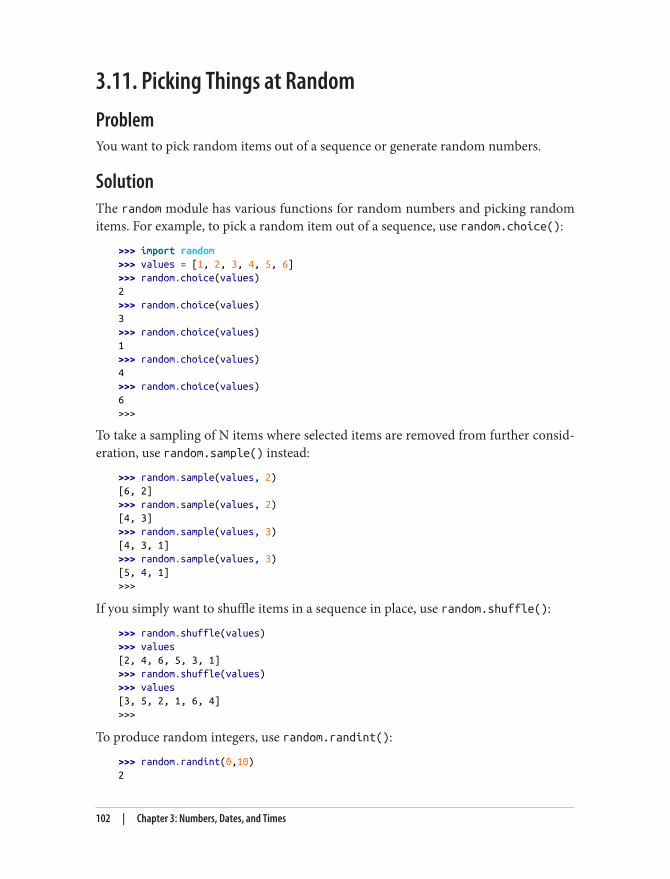
3.11. Picking Things at RandomProblemYou want to pick random items out of a sequence or generate random numbers.
SolutionThe random module has various functions for random numbers and picking randomitems. For example, to pick a random item out of a sequence, use random.choice():
>>> import random>>> values = [1, 2, 3, 4, 5, 6]>>> random.choice(values)2>>> random.choice(values)3>>> random.choice(values)1>>> random.choice(values)4>>> random.choice(values)6>>>
To take a sampling of N items where selected items are removed from further consid‐eration, use random.sample() instead:
>>> random.sample(values, 2)[6, 2]>>> random.sample(values, 2)[4, 3]>>> random.sample(values, 3)[4, 3, 1]>>> random.sample(values, 3)[5, 4, 1]>>>
If you simply want to shuffle items in a sequence in place, use random.shuffle():
>>> random.shuffle(values)>>> values[2, 4, 6, 5, 3, 1]>>> random.shuffle(values)>>> values[3, 5, 2, 1, 6, 4]>>>
To produce random integers, use random.randint():
>>> random.randint(0,10)2
102 | Chapter 3: Numbers, Dates, and Times
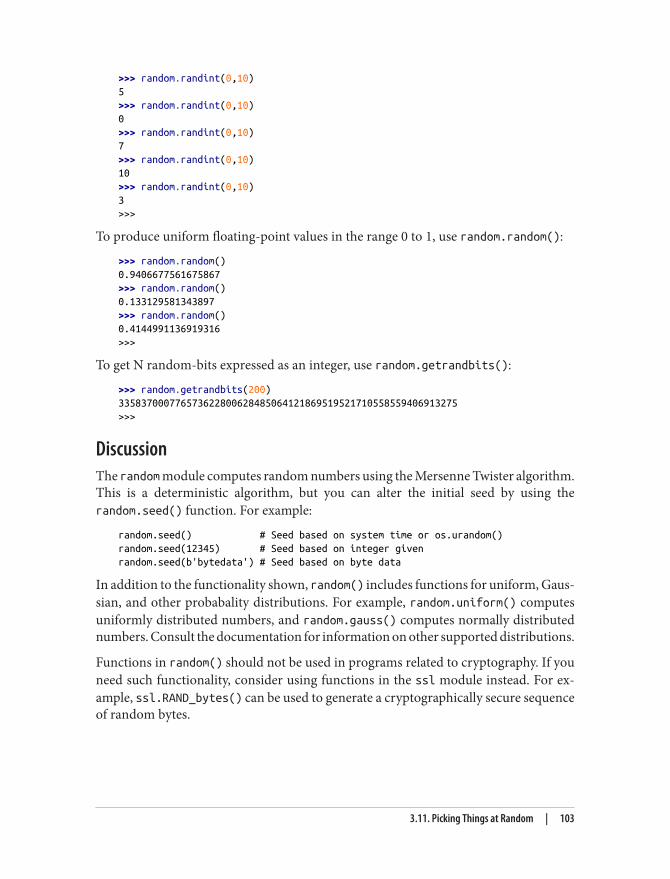
>>> random.randint(0,10)5>>> random.randint(0,10)0>>> random.randint(0,10)7>>> random.randint(0,10)10>>> random.randint(0,10)3>>>
To produce uniform floating-point values in the range 0 to 1, use random.random():
>>> random.random()0.9406677561675867>>> random.random()0.133129581343897>>> random.random()0.4144991136919316>>>
To get N random-bits expressed as an integer, use random.getrandbits():
>>> random.getrandbits(200)335837000776573622800628485064121869519521710558559406913275>>>
DiscussionThe random module computes random numbers using the Mersenne Twister algorithm.This is a deterministic algorithm, but you can alter the initial seed by using therandom.seed() function. For example:
random.seed() # Seed based on system time or os.urandom()random.seed(12345) # Seed based on integer givenrandom.seed(b'bytedata') # Seed based on byte data
In addition to the functionality shown, random() includes functions for uniform, Gaus‐sian, and other probabality distributions. For example, random.uniform() computesuniformly distributed numbers, and random.gauss() computes normally distributednumbers. Consult the documentation for information on other supported distributions.
Functions in random() should not be used in programs related to cryptography. If youneed such functionality, consider using functions in the ssl module instead. For ex‐ample, ssl.RAND_bytes() can be used to generate a cryptographically secure sequenceof random bytes.
3.11. Picking Things at Random | 103
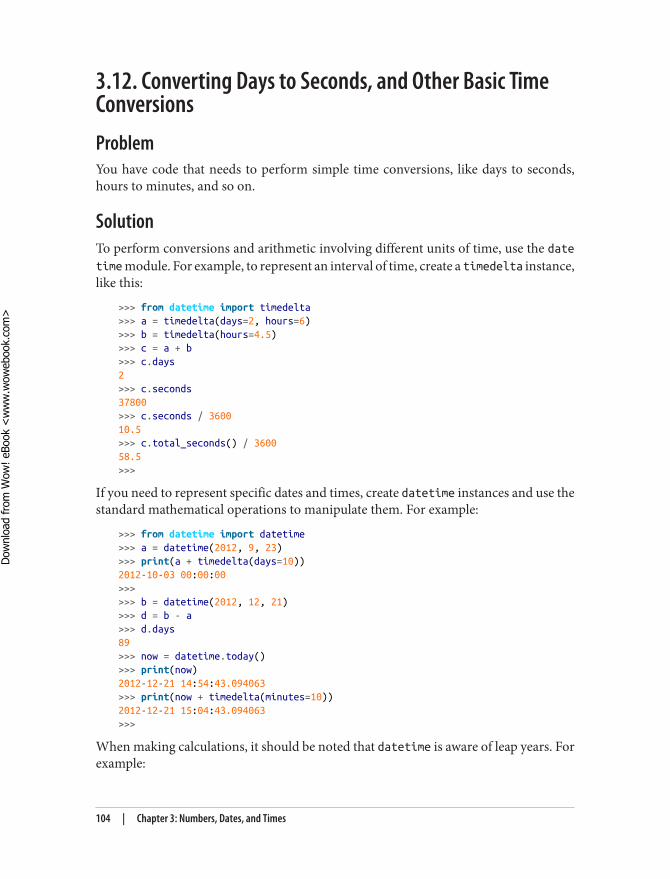
3.12. Converting Days to Seconds, and Other Basic TimeConversionsProblemYou have code that needs to perform simple time conversions, like days to seconds,hours to minutes, and so on.
SolutionTo perform conversions and arithmetic involving different units of time, use the datetime module. For example, to represent an interval of time, create a timedelta instance,like this:
>>> from datetime import timedelta>>> a = timedelta(days=2, hours=6)>>> b = timedelta(hours=4.5)>>> c = a + b>>> c.days2>>> c.seconds37800>>> c.seconds / 360010.5>>> c.total_seconds() / 360058.5>>>
If you need to represent specific dates and times, create datetime instances and use thestandard mathematical operations to manipulate them. For example:
>>> from datetime import datetime>>> a = datetime(2012, 9, 23)>>> print(a + timedelta(days=10))2012-10-03 00:00:00>>>>>> b = datetime(2012, 12, 21)>>> d = b - a>>> d.days89>>> now = datetime.today()>>> print(now)2012-12-21 14:54:43.094063>>> print(now + timedelta(minutes=10))2012-12-21 15:04:43.094063>>>
When making calculations, it should be noted that datetime is aware of leap years. Forexample:
104 | Chapter 3: Numbers, Dates, and Times
Dow
nlo
ad fro
m W
ow
! eBook
<w
ww
.wow
ebook.
com
>
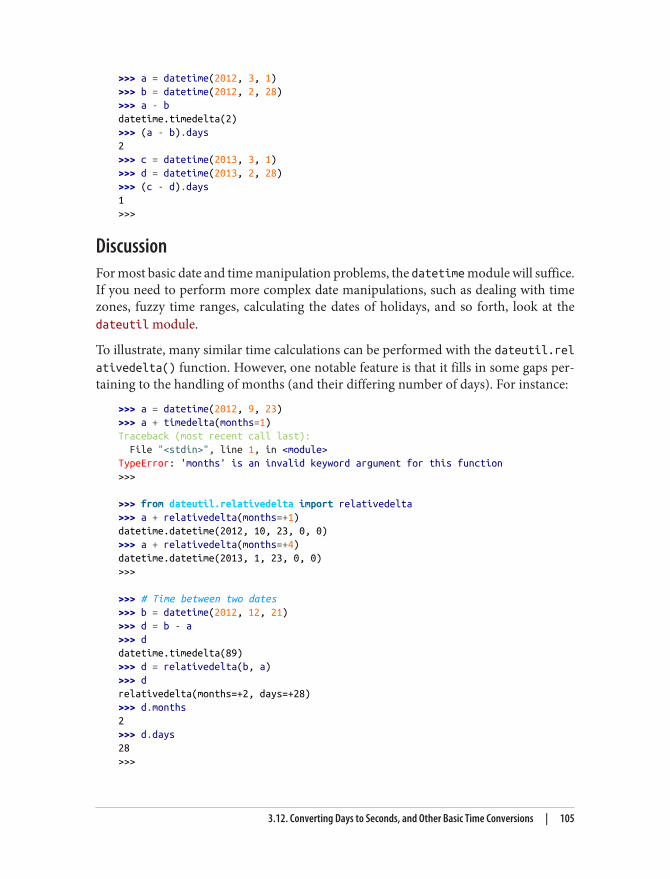
>>> a = datetime(2012, 3, 1)>>> b = datetime(2012, 2, 28)>>> a - bdatetime.timedelta(2)>>> (a - b).days2>>> c = datetime(2013, 3, 1)>>> d = datetime(2013, 2, 28)>>> (c - d).days1>>>
DiscussionFor most basic date and time manipulation problems, the datetime module will suffice.If you need to perform more complex date manipulations, such as dealing with timezones, fuzzy time ranges, calculating the dates of holidays, and so forth, look at thedateutil module.
To illustrate, many similar time calculations can be performed with the dateutil.relativedelta() function. However, one notable feature is that it fills in some gaps per‐taining to the handling of months (and their differing number of days). For instance:
>>> a = datetime(2012, 9, 23)>>> a + timedelta(months=1)Traceback (most recent call last): File "<stdin>", line 1, in <module>TypeError: 'months' is an invalid keyword argument for this function>>>
>>> from dateutil.relativedelta import relativedelta>>> a + relativedelta(months=+1)datetime.datetime(2012, 10, 23, 0, 0)>>> a + relativedelta(months=+4)datetime.datetime(2013, 1, 23, 0, 0)>>>
>>> # Time between two dates>>> b = datetime(2012, 12, 21)>>> d = b - a>>> ddatetime.timedelta(89)>>> d = relativedelta(b, a)>>> drelativedelta(months=+2, days=+28)>>> d.months2>>> d.days28>>>
3.12. Converting Days to Seconds, and Other Basic Time Conversions | 105
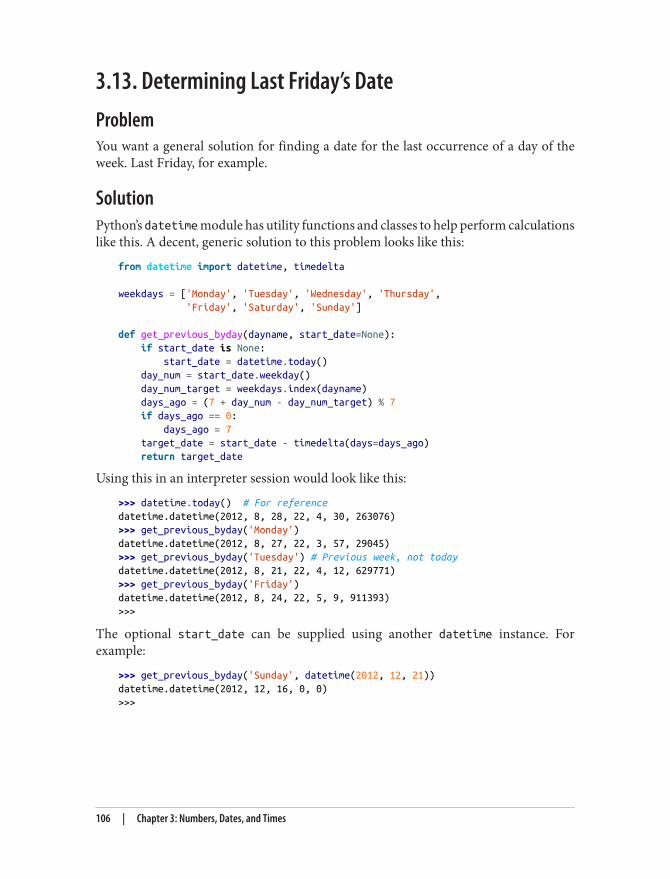
3.13. Determining Last Friday’s DateProblemYou want a general solution for finding a date for the last occurrence of a day of theweek. Last Friday, for example.
SolutionPython’s datetime module has utility functions and classes to help perform calculationslike this. A decent, generic solution to this problem looks like this:
from datetime import datetime, timedelta
weekdays = ['Monday', 'Tuesday', 'Wednesday', 'Thursday', 'Friday', 'Saturday', 'Sunday']
def get_previous_byday(dayname, start_date=None): if start_date is None: start_date = datetime.today() day_num = start_date.weekday() day_num_target = weekdays.index(dayname) days_ago = (7 + day_num - day_num_target) % 7 if days_ago == 0: days_ago = 7 target_date = start_date - timedelta(days=days_ago) return target_date
Using this in an interpreter session would look like this:
>>> datetime.today() # For referencedatetime.datetime(2012, 8, 28, 22, 4, 30, 263076)>>> get_previous_byday('Monday')datetime.datetime(2012, 8, 27, 22, 3, 57, 29045)>>> get_previous_byday('Tuesday') # Previous week, not todaydatetime.datetime(2012, 8, 21, 22, 4, 12, 629771)>>> get_previous_byday('Friday')datetime.datetime(2012, 8, 24, 22, 5, 9, 911393)>>>
The optional start_date can be supplied using another datetime instance. Forexample:
>>> get_previous_byday('Sunday', datetime(2012, 12, 21))datetime.datetime(2012, 12, 16, 0, 0)>>>
106 | Chapter 3: Numbers, Dates, and Times
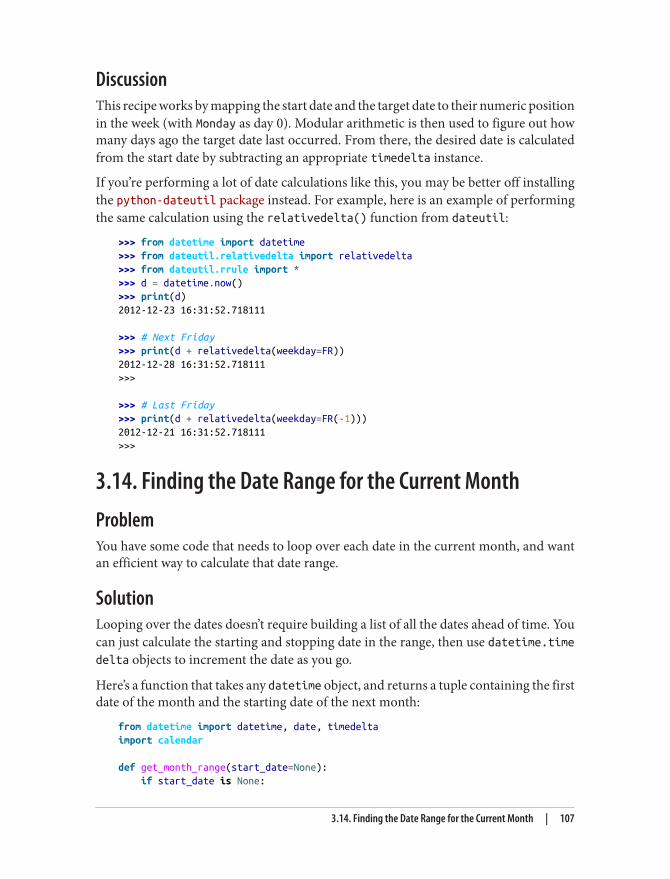
DiscussionThis recipe works by mapping the start date and the target date to their numeric positionin the week (with Monday as day 0). Modular arithmetic is then used to figure out howmany days ago the target date last occurred. From there, the desired date is calculatedfrom the start date by subtracting an appropriate timedelta instance.
If you’re performing a lot of date calculations like this, you may be better off installingthe python-dateutil package instead. For example, here is an example of performingthe same calculation using the relativedelta() function from dateutil:
>>> from datetime import datetime>>> from dateutil.relativedelta import relativedelta>>> from dateutil.rrule import *>>> d = datetime.now()>>> print(d)2012-12-23 16:31:52.718111
>>> # Next Friday>>> print(d + relativedelta(weekday=FR))2012-12-28 16:31:52.718111>>>
>>> # Last Friday>>> print(d + relativedelta(weekday=FR(-1)))2012-12-21 16:31:52.718111>>>
3.14. Finding the Date Range for the Current MonthProblemYou have some code that needs to loop over each date in the current month, and wantan efficient way to calculate that date range.
SolutionLooping over the dates doesn’t require building a list of all the dates ahead of time. Youcan just calculate the starting and stopping date in the range, then use datetime.timedelta objects to increment the date as you go.
Here’s a function that takes any datetime object, and returns a tuple containing the firstdate of the month and the starting date of the next month:
from datetime import datetime, date, timedeltaimport calendar
def get_month_range(start_date=None): if start_date is None:
3.14. Finding the Date Range for the Current Month | 107
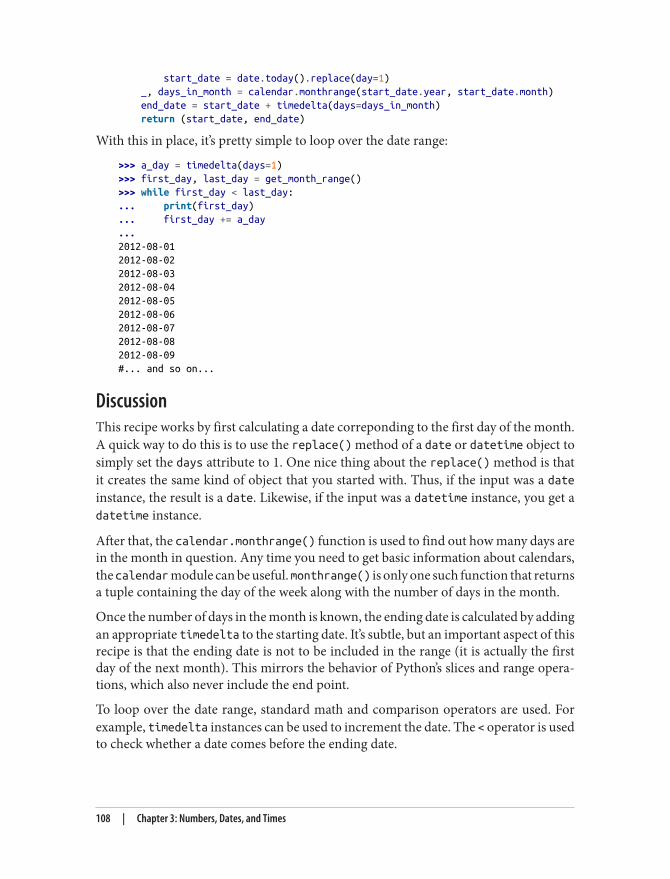
start_date = date.today().replace(day=1) _, days_in_month = calendar.monthrange(start_date.year, start_date.month) end_date = start_date + timedelta(days=days_in_month) return (start_date, end_date)
With this in place, it’s pretty simple to loop over the date range:
>>> a_day = timedelta(days=1)>>> first_day, last_day = get_month_range()>>> while first_day < last_day:... print(first_day)... first_day += a_day...2012-08-012012-08-022012-08-032012-08-042012-08-052012-08-062012-08-072012-08-082012-08-09#... and so on...
DiscussionThis recipe works by first calculating a date correponding to the first day of the month.A quick way to do this is to use the replace() method of a date or datetime object tosimply set the days attribute to 1. One nice thing about the replace() method is thatit creates the same kind of object that you started with. Thus, if the input was a dateinstance, the result is a date. Likewise, if the input was a datetime instance, you get adatetime instance.
After that, the calendar.monthrange() function is used to find out how many days arein the month in question. Any time you need to get basic information about calendars,the calendar module can be useful. monthrange() is only one such function that returnsa tuple containing the day of the week along with the number of days in the month.
Once the number of days in the month is known, the ending date is calculated by addingan appropriate timedelta to the starting date. It’s subtle, but an important aspect of thisrecipe is that the ending date is not to be included in the range (it is actually the firstday of the next month). This mirrors the behavior of Python’s slices and range opera‐tions, which also never include the end point.
To loop over the date range, standard math and comparison operators are used. Forexample, timedelta instances can be used to increment the date. The < operator is usedto check whether a date comes before the ending date.
108 | Chapter 3: Numbers, Dates, and Times
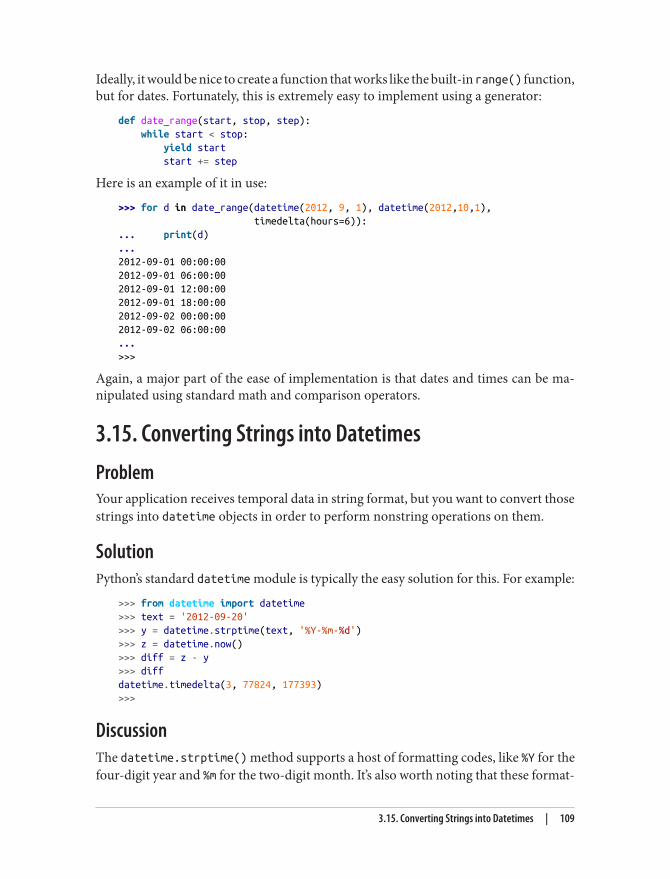
Ideally, it would be nice to create a function that works like the built-in range() function,but for dates. Fortunately, this is extremely easy to implement using a generator:
def date_range(start, stop, step): while start < stop: yield start start += step
Here is an example of it in use:
>>> for d in date_range(datetime(2012, 9, 1), datetime(2012,10,1), timedelta(hours=6)):... print(d)...2012-09-01 00:00:002012-09-01 06:00:002012-09-01 12:00:002012-09-01 18:00:002012-09-02 00:00:002012-09-02 06:00:00...>>>
Again, a major part of the ease of implementation is that dates and times can be ma‐nipulated using standard math and comparison operators.
3.15. Converting Strings into DatetimesProblemYour application receives temporal data in string format, but you want to convert thosestrings into datetime objects in order to perform nonstring operations on them.
SolutionPython’s standard datetime module is typically the easy solution for this. For example:
>>> from datetime import datetime>>> text = '2012-09-20'>>> y = datetime.strptime(text, '%Y-%m-%d')>>> z = datetime.now()>>> diff = z - y>>> diffdatetime.timedelta(3, 77824, 177393)>>>
DiscussionThe datetime.strptime() method supports a host of formatting codes, like %Y for thefour-digit year and %m for the two-digit month. It’s also worth noting that these format‐
3.15. Converting Strings into Datetimes | 109
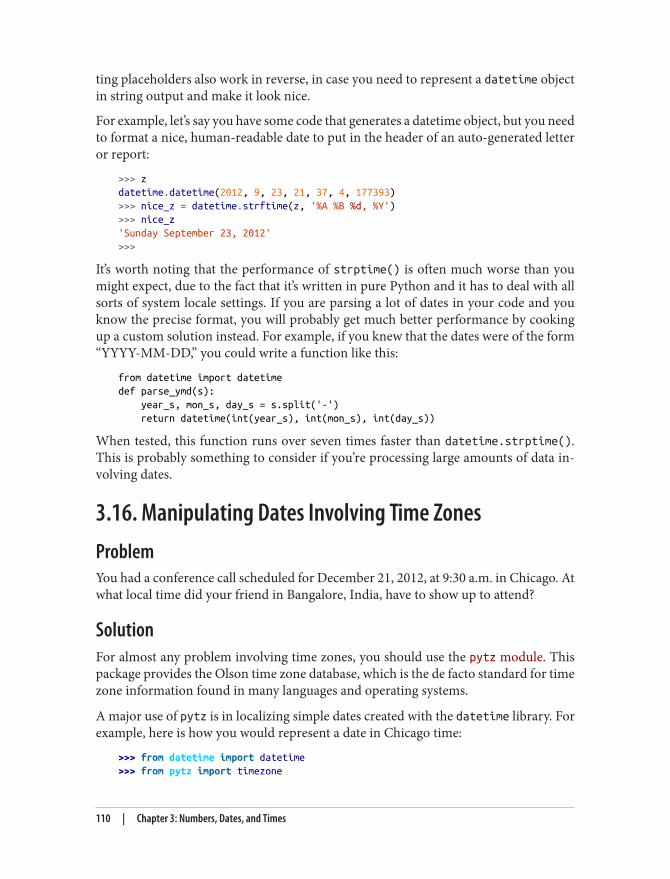
ting placeholders also work in reverse, in case you need to represent a datetime objectin string output and make it look nice.
For example, let’s say you have some code that generates a datetime object, but you needto format a nice, human-readable date to put in the header of an auto-generated letteror report:
>>> zdatetime.datetime(2012, 9, 23, 21, 37, 4, 177393)>>> nice_z = datetime.strftime(z, '%A %B %d, %Y')>>> nice_z'Sunday September 23, 2012'>>>
It’s worth noting that the performance of strptime() is often much worse than youmight expect, due to the fact that it’s written in pure Python and it has to deal with allsorts of system locale settings. If you are parsing a lot of dates in your code and youknow the precise format, you will probably get much better performance by cookingup a custom solution instead. For example, if you knew that the dates were of the form“YYYY-MM-DD,” you could write a function like this:
from datetime import datetimedef parse_ymd(s): year_s, mon_s, day_s = s.split('-') return datetime(int(year_s), int(mon_s), int(day_s))
When tested, this function runs over seven times faster than datetime.strptime().This is probably something to consider if you’re processing large amounts of data in‐volving dates.
3.16. Manipulating Dates Involving Time ZonesProblemYou had a conference call scheduled for December 21, 2012, at 9:30 a.m. in Chicago. Atwhat local time did your friend in Bangalore, India, have to show up to attend?
SolutionFor almost any problem involving time zones, you should use the pytz module. Thispackage provides the Olson time zone database, which is the de facto standard for timezone information found in many languages and operating systems.
A major use of pytz is in localizing simple dates created with the datetime library. Forexample, here is how you would represent a date in Chicago time:
>>> from datetime import datetime>>> from pytz import timezone
110 | Chapter 3: Numbers, Dates, and Times
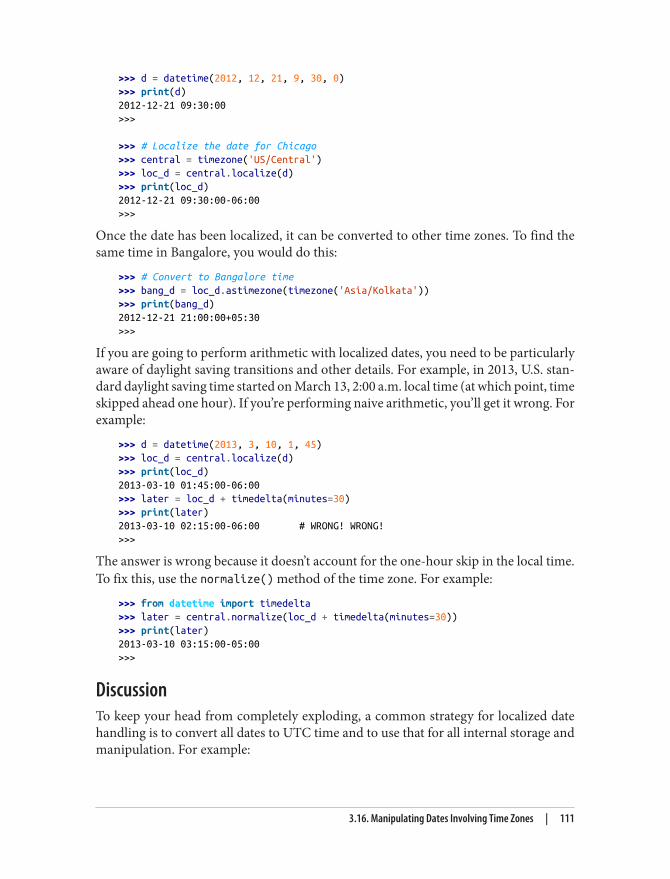
>>> d = datetime(2012, 12, 21, 9, 30, 0)>>> print(d)2012-12-21 09:30:00>>>
>>> # Localize the date for Chicago>>> central = timezone('US/Central')>>> loc_d = central.localize(d)>>> print(loc_d)2012-12-21 09:30:00-06:00>>>
Once the date has been localized, it can be converted to other time zones. To find thesame time in Bangalore, you would do this:
>>> # Convert to Bangalore time>>> bang_d = loc_d.astimezone(timezone('Asia/Kolkata'))>>> print(bang_d)2012-12-21 21:00:00+05:30>>>
If you are going to perform arithmetic with localized dates, you need to be particularlyaware of daylight saving transitions and other details. For example, in 2013, U.S. stan‐dard daylight saving time started on March 13, 2:00 a.m. local time (at which point, timeskipped ahead one hour). If you’re performing naive arithmetic, you’ll get it wrong. Forexample:
>>> d = datetime(2013, 3, 10, 1, 45)>>> loc_d = central.localize(d)>>> print(loc_d)2013-03-10 01:45:00-06:00>>> later = loc_d + timedelta(minutes=30)>>> print(later)2013-03-10 02:15:00-06:00 # WRONG! WRONG!>>>
The answer is wrong because it doesn’t account for the one-hour skip in the local time.To fix this, use the normalize() method of the time zone. For example:
>>> from datetime import timedelta>>> later = central.normalize(loc_d + timedelta(minutes=30))>>> print(later)2013-03-10 03:15:00-05:00>>>
DiscussionTo keep your head from completely exploding, a common strategy for localized datehandling is to convert all dates to UTC time and to use that for all internal storage andmanipulation. For example:
3.16. Manipulating Dates Involving Time Zones | 111
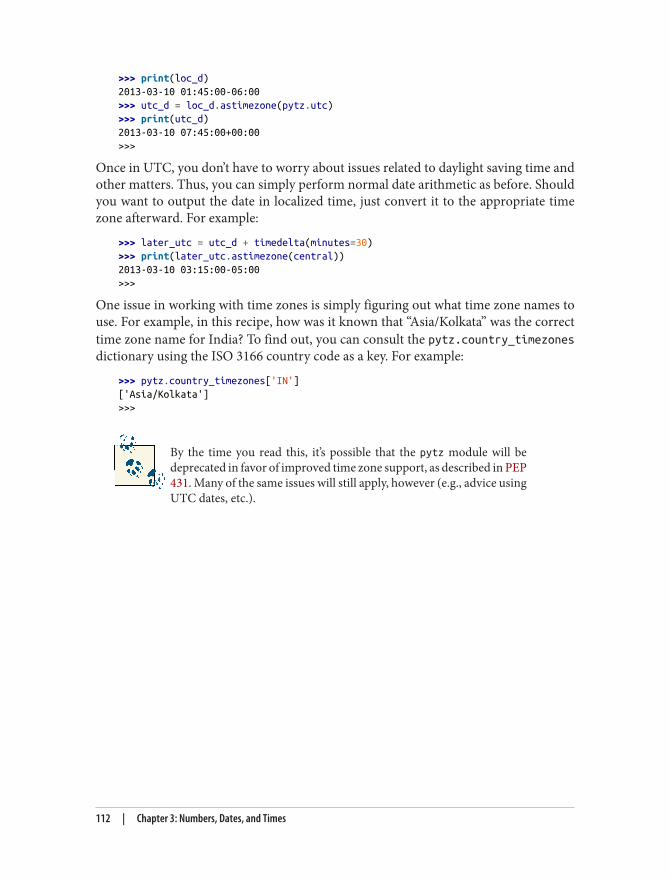
>>> print(loc_d)2013-03-10 01:45:00-06:00>>> utc_d = loc_d.astimezone(pytz.utc)>>> print(utc_d)2013-03-10 07:45:00+00:00>>>
Once in UTC, you don’t have to worry about issues related to daylight saving time andother matters. Thus, you can simply perform normal date arithmetic as before. Shouldyou want to output the date in localized time, just convert it to the appropriate timezone afterward. For example:
>>> later_utc = utc_d + timedelta(minutes=30)>>> print(later_utc.astimezone(central))2013-03-10 03:15:00-05:00>>>
One issue in working with time zones is simply figuring out what time zone names touse. For example, in this recipe, how was it known that “Asia/Kolkata” was the correcttime zone name for India? To find out, you can consult the pytz.country_timezonesdictionary using the ISO 3166 country code as a key. For example:
>>> pytz.country_timezones['IN']['Asia/Kolkata']>>>
By the time you read this, it’s possible that the pytz module will bedeprecated in favor of improved time zone support, as described in PEP431. Many of the same issues will still apply, however (e.g., advice usingUTC dates, etc.).
112 | Chapter 3: Numbers, Dates, and Times

CHAPTER 4
Iterators and Generators
Iteration is one of Python’s strongest features. At a high level, you might simply viewiteration as a way to process items in a sequence. However, there is so much more thatis possible, such as creating your own iterator objects, applying useful iteration patternsin the itertools module, making generator functions, and so forth. This chapter aimsto address common problems involving iteration.
4.1. Manually Consuming an IteratorProblemYou need to process items in an iterable, but for whatever reason, you can’t or don’t wantto use a for loop.
SolutionTo manually consume an iterable, use the next() function and write your code to catchthe StopIteration exception. For example, this example manually reads lines from afile:
with open('/etc/passwd') as f: try: while True: line = next(f) print(line, end='') except StopIteration: pass
Normally, StopIteration is used to signal the end of iteration. However, if you’re usingnext() manually (as shown), you can also instruct it to return a terminating value, suchas None, instead. For example:
113
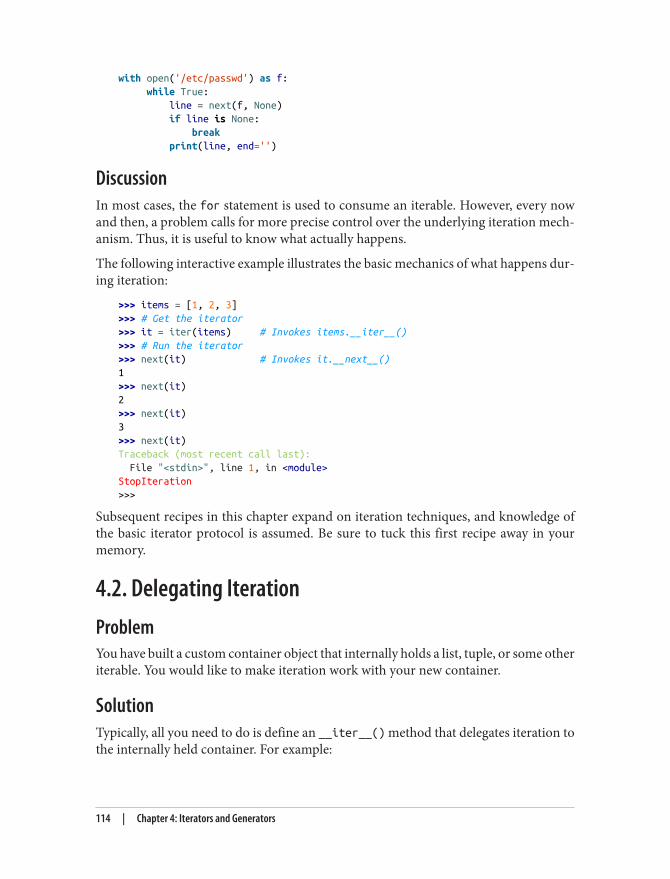
with open('/etc/passwd') as f: while True: line = next(f, None) if line is None: break print(line, end='')
DiscussionIn most cases, the for statement is used to consume an iterable. However, every nowand then, a problem calls for more precise control over the underlying iteration mech‐anism. Thus, it is useful to know what actually happens.
The following interactive example illustrates the basic mechanics of what happens dur‐ing iteration:
>>> items = [1, 2, 3]>>> # Get the iterator>>> it = iter(items) # Invokes items.__iter__()>>> # Run the iterator>>> next(it) # Invokes it.__next__()1>>> next(it)2>>> next(it)3>>> next(it)Traceback (most recent call last): File "<stdin>", line 1, in <module>StopIteration>>>
Subsequent recipes in this chapter expand on iteration techniques, and knowledge ofthe basic iterator protocol is assumed. Be sure to tuck this first recipe away in yourmemory.
4.2. Delegating IterationProblemYou have built a custom container object that internally holds a list, tuple, or some otheriterable. You would like to make iteration work with your new container.
SolutionTypically, all you need to do is define an __iter__() method that delegates iteration tothe internally held container. For example:
114 | Chapter 4: Iterators and Generators

class Node: def __init__(self, value): self._value = value self._children = []
def __repr__(self): return 'Node({!r})'.format(self._value)
def add_child(self, node): self._children.append(node)
def __iter__(self): return iter(self._children)
# Exampleif __name__ == '__main__': root = Node(0) child1 = Node(1) child2 = Node(2) root.add_child(child1) root.add_child(child2) for ch in root: print(ch) # Outputs Node(1), Node(2)
In this code, the __iter__() method simply forwards the iteration request to the in‐ternally held _children attribute.
DiscussionPython’s iterator protocol requires __iter__() to return a special iterator object thatimplements a __next__() method to carry out the actual iteration. If all you are doingis iterating over the contents of another container, you don’t really need to worry aboutthe underlying details of how it works. All you need to do is to forward the iterationrequest along.
The use of the iter() function here is a bit of a shortcut that cleans up the code. iter(s)simply returns the underlying iterator by calling s.__iter__(), much in the same waythat len(s) invokes s.__len__().
4.3. Creating New Iteration Patterns with GeneratorsProblemYou want to implement a custom iteration pattern that’s different than the usual built-in functions (e.g., range(), reversed(), etc.).
4.3. Creating New Iteration Patterns with Generators | 115
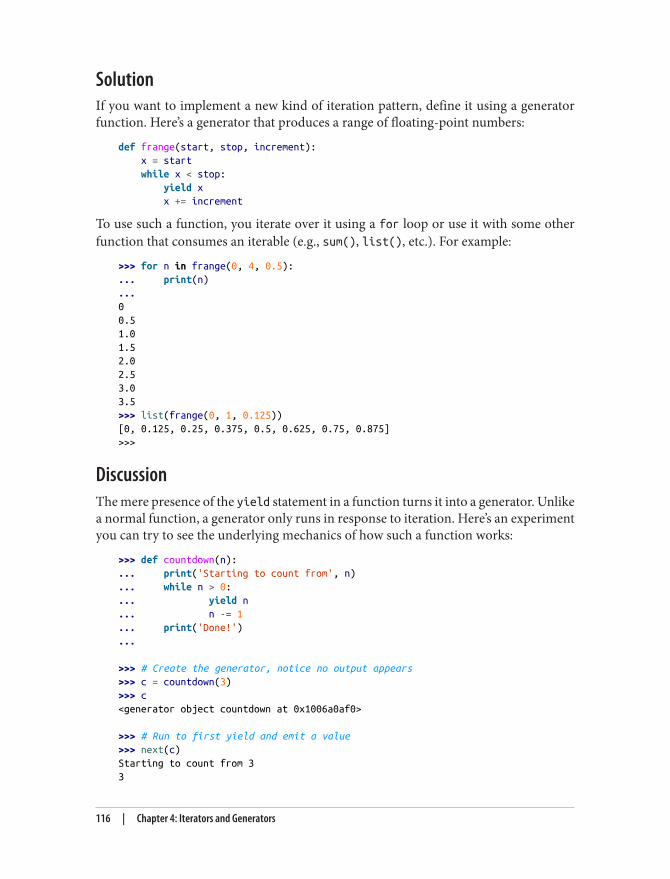
SolutionIf you want to implement a new kind of iteration pattern, define it using a generatorfunction. Here’s a generator that produces a range of floating-point numbers:
def frange(start, stop, increment): x = start while x < stop: yield x x += increment
To use such a function, you iterate over it using a for loop or use it with some otherfunction that consumes an iterable (e.g., sum(), list(), etc.). For example:
>>> for n in frange(0, 4, 0.5):... print(n)...00.51.01.52.02.53.03.5>>> list(frange(0, 1, 0.125))[0, 0.125, 0.25, 0.375, 0.5, 0.625, 0.75, 0.875]>>>
DiscussionThe mere presence of the yield statement in a function turns it into a generator. Unlikea normal function, a generator only runs in response to iteration. Here’s an experimentyou can try to see the underlying mechanics of how such a function works:
>>> def countdown(n):... print('Starting to count from', n)... while n > 0:... yield n... n -= 1... print('Done!')...
>>> # Create the generator, notice no output appears>>> c = countdown(3)>>> c<generator object countdown at 0x1006a0af0>
>>> # Run to first yield and emit a value>>> next(c)Starting to count from 33
116 | Chapter 4: Iterators and Generators
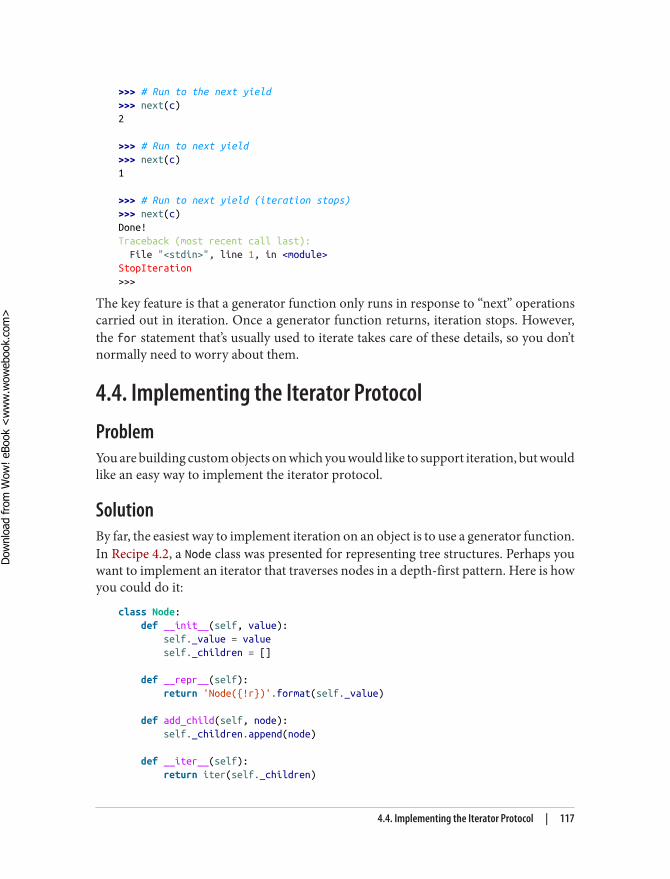
>>> # Run to the next yield>>> next(c)2
>>> # Run to next yield>>> next(c)1
>>> # Run to next yield (iteration stops)>>> next(c)Done!Traceback (most recent call last): File "<stdin>", line 1, in <module>StopIteration>>>
The key feature is that a generator function only runs in response to “next” operationscarried out in iteration. Once a generator function returns, iteration stops. However,the for statement that’s usually used to iterate takes care of these details, so you don’tnormally need to worry about them.
4.4. Implementing the Iterator ProtocolProblemYou are building custom objects on which you would like to support iteration, but wouldlike an easy way to implement the iterator protocol.
SolutionBy far, the easiest way to implement iteration on an object is to use a generator function.In Recipe 4.2, a Node class was presented for representing tree structures. Perhaps youwant to implement an iterator that traverses nodes in a depth-first pattern. Here is howyou could do it:
class Node: def __init__(self, value): self._value = value self._children = []
def __repr__(self): return 'Node({!r})'.format(self._value)
def add_child(self, node): self._children.append(node)
def __iter__(self): return iter(self._children)
4.4. Implementing the Iterator Protocol | 117
Dow
nlo
ad fro
m W
ow
! eBook
<w
ww
.wow
ebook.
com
>
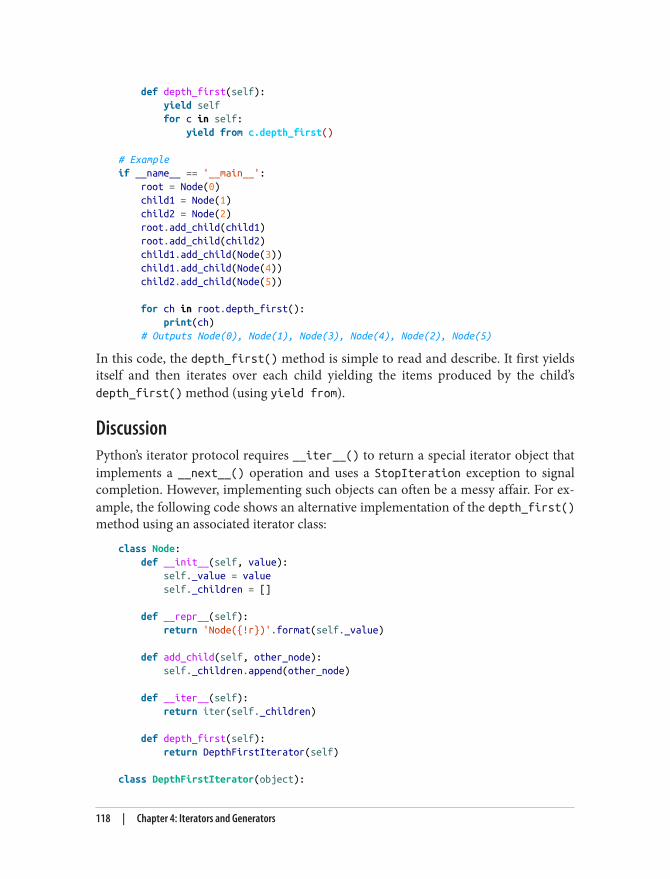
def depth_first(self): yield self for c in self: yield from c.depth_first()
# Exampleif __name__ == '__main__': root = Node(0) child1 = Node(1) child2 = Node(2) root.add_child(child1) root.add_child(child2) child1.add_child(Node(3)) child1.add_child(Node(4)) child2.add_child(Node(5))
for ch in root.depth_first(): print(ch) # Outputs Node(0), Node(1), Node(3), Node(4), Node(2), Node(5)
In this code, the depth_first() method is simple to read and describe. It first yieldsitself and then iterates over each child yielding the items produced by the child’sdepth_first() method (using yield from).
DiscussionPython’s iterator protocol requires __iter__() to return a special iterator object thatimplements a __next__() operation and uses a StopIteration exception to signalcompletion. However, implementing such objects can often be a messy affair. For ex‐ample, the following code shows an alternative implementation of the depth_first()method using an associated iterator class:
class Node: def __init__(self, value): self._value = value self._children = []
def __repr__(self): return 'Node({!r})'.format(self._value)
def add_child(self, other_node): self._children.append(other_node)
def __iter__(self): return iter(self._children)
def depth_first(self): return DepthFirstIterator(self)
class DepthFirstIterator(object):
118 | Chapter 4: Iterators and Generators
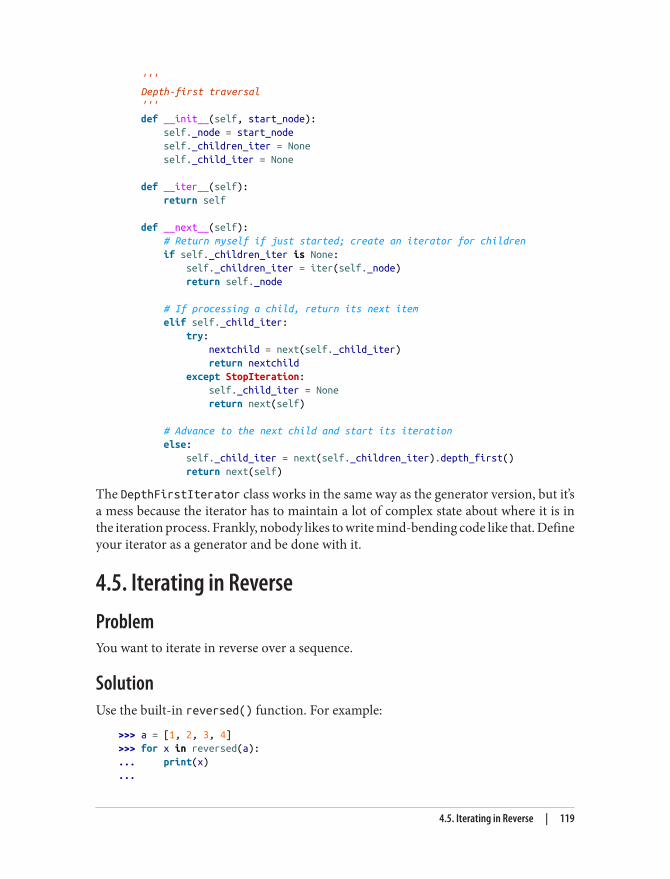
''' Depth-first traversal ''' def __init__(self, start_node): self._node = start_node self._children_iter = None self._child_iter = None
def __iter__(self): return self
def __next__(self): # Return myself if just started; create an iterator for children if self._children_iter is None: self._children_iter = iter(self._node) return self._node
# If processing a child, return its next item elif self._child_iter: try: nextchild = next(self._child_iter) return nextchild except StopIteration: self._child_iter = None return next(self)
# Advance to the next child and start its iteration else: self._child_iter = next(self._children_iter).depth_first() return next(self)
The DepthFirstIterator class works in the same way as the generator version, but it’sa mess because the iterator has to maintain a lot of complex state about where it is inthe iteration process. Frankly, nobody likes to write mind-bending code like that. Defineyour iterator as a generator and be done with it.
4.5. Iterating in ReverseProblemYou want to iterate in reverse over a sequence.
SolutionUse the built-in reversed() function. For example:
>>> a = [1, 2, 3, 4]>>> for x in reversed(a):... print(x)...
4.5. Iterating in Reverse | 119
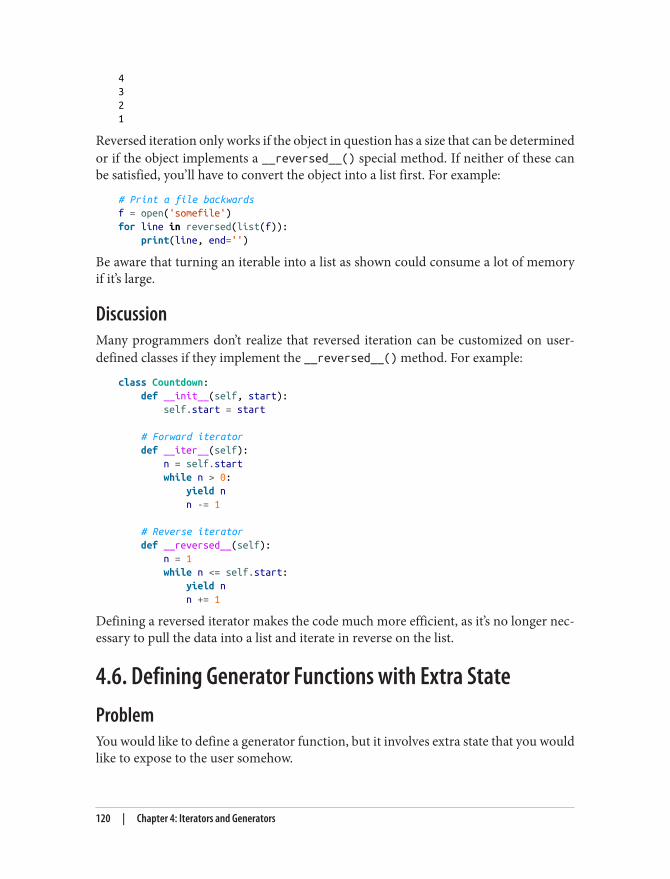
4321
Reversed iteration only works if the object in question has a size that can be determinedor if the object implements a __reversed__() special method. If neither of these canbe satisfied, you’ll have to convert the object into a list first. For example:
# Print a file backwardsf = open('somefile')for line in reversed(list(f)): print(line, end='')
Be aware that turning an iterable into a list as shown could consume a lot of memoryif it’s large.
DiscussionMany programmers don’t realize that reversed iteration can be customized on user-defined classes if they implement the __reversed__() method. For example:
class Countdown: def __init__(self, start): self.start = start
# Forward iterator def __iter__(self): n = self.start while n > 0: yield n n -= 1
# Reverse iterator def __reversed__(self): n = 1 while n <= self.start: yield n n += 1
Defining a reversed iterator makes the code much more efficient, as it’s no longer nec‐essary to pull the data into a list and iterate in reverse on the list.
4.6. Defining Generator Functions with Extra StateProblemYou would like to define a generator function, but it involves extra state that you wouldlike to expose to the user somehow.
120 | Chapter 4: Iterators and Generators
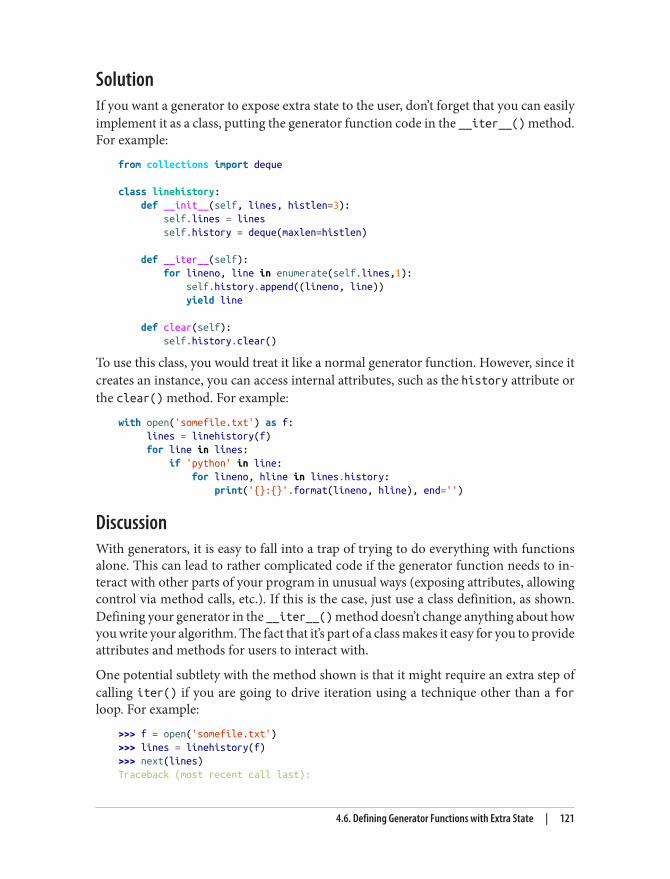
SolutionIf you want a generator to expose extra state to the user, don’t forget that you can easilyimplement it as a class, putting the generator function code in the __iter__() method.For example:
from collections import deque
class linehistory: def __init__(self, lines, histlen=3): self.lines = lines self.history = deque(maxlen=histlen)
def __iter__(self): for lineno, line in enumerate(self.lines,1): self.history.append((lineno, line)) yield line
def clear(self): self.history.clear()
To use this class, you would treat it like a normal generator function. However, since itcreates an instance, you can access internal attributes, such as the history attribute orthe clear() method. For example:
with open('somefile.txt') as f: lines = linehistory(f) for line in lines: if 'python' in line: for lineno, hline in lines.history: print('{}:{}'.format(lineno, hline), end='')
DiscussionWith generators, it is easy to fall into a trap of trying to do everything with functionsalone. This can lead to rather complicated code if the generator function needs to in‐teract with other parts of your program in unusual ways (exposing attributes, allowingcontrol via method calls, etc.). If this is the case, just use a class definition, as shown.Defining your generator in the __iter__() method doesn’t change anything about howyou write your algorithm. The fact that it’s part of a class makes it easy for you to provideattributes and methods for users to interact with.
One potential subtlety with the method shown is that it might require an extra step ofcalling iter() if you are going to drive iteration using a technique other than a forloop. For example:
>>> f = open('somefile.txt')>>> lines = linehistory(f)>>> next(lines)Traceback (most recent call last):
4.6. Defining Generator Functions with Extra State | 121
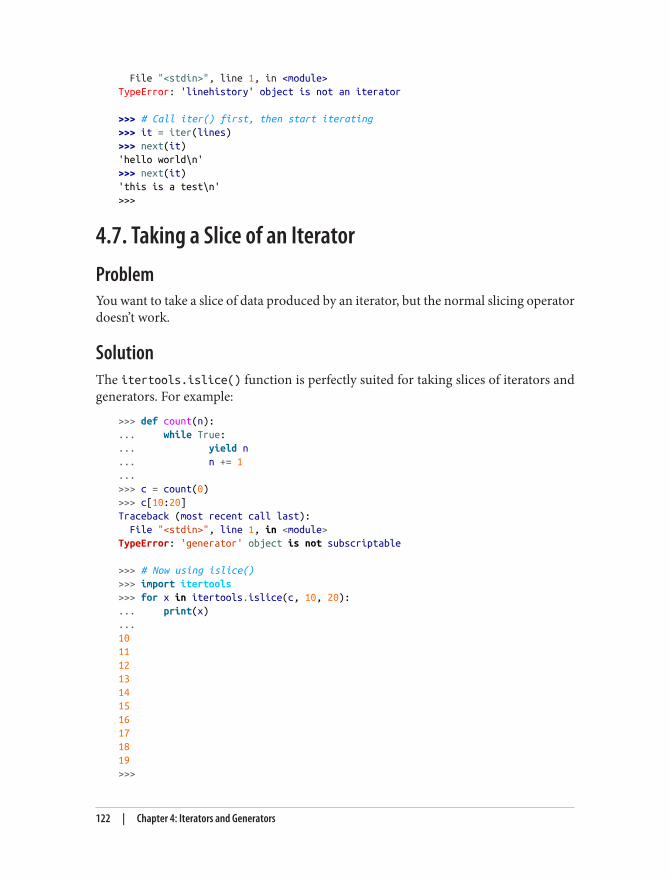
File "<stdin>", line 1, in <module>TypeError: 'linehistory' object is not an iterator
>>> # Call iter() first, then start iterating>>> it = iter(lines)>>> next(it)'hello world\n'>>> next(it)'this is a test\n'>>>
4.7. Taking a Slice of an IteratorProblemYou want to take a slice of data produced by an iterator, but the normal slicing operatordoesn’t work.
SolutionThe itertools.islice() function is perfectly suited for taking slices of iterators andgenerators. For example:
>>> def count(n):... while True:... yield n... n += 1...>>> c = count(0)>>> c[10:20]Traceback (most recent call last): File "<stdin>", line 1, in <module>TypeError: 'generator' object is not subscriptable
>>> # Now using islice()>>> import itertools>>> for x in itertools.islice(c, 10, 20):... print(x)...10111213141516171819>>>
122 | Chapter 4: Iterators and Generators
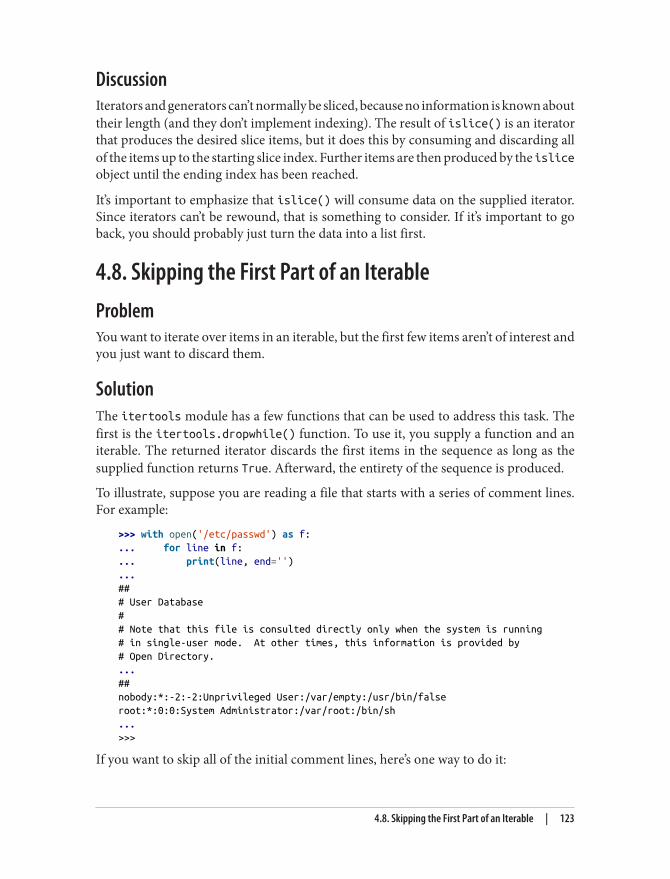
DiscussionIterators and generators can’t normally be sliced, because no information is known abouttheir length (and they don’t implement indexing). The result of islice() is an iteratorthat produces the desired slice items, but it does this by consuming and discarding allof the items up to the starting slice index. Further items are then produced by the isliceobject until the ending index has been reached.
It’s important to emphasize that islice() will consume data on the supplied iterator.Since iterators can’t be rewound, that is something to consider. If it’s important to goback, you should probably just turn the data into a list first.
4.8. Skipping the First Part of an IterableProblemYou want to iterate over items in an iterable, but the first few items aren’t of interest andyou just want to discard them.
SolutionThe itertools module has a few functions that can be used to address this task. Thefirst is the itertools.dropwhile() function. To use it, you supply a function and aniterable. The returned iterator discards the first items in the sequence as long as thesupplied function returns True. Afterward, the entirety of the sequence is produced.
To illustrate, suppose you are reading a file that starts with a series of comment lines.For example:
>>> with open('/etc/passwd') as f:... for line in f:... print(line, end='')...### User Database## Note that this file is consulted directly only when the system is running# in single-user mode. At other times, this information is provided by# Open Directory....##nobody:*:-2:-2:Unprivileged User:/var/empty:/usr/bin/falseroot:*:0:0:System Administrator:/var/root:/bin/sh...>>>
If you want to skip all of the initial comment lines, here’s one way to do it:
4.8. Skipping the First Part of an Iterable | 123
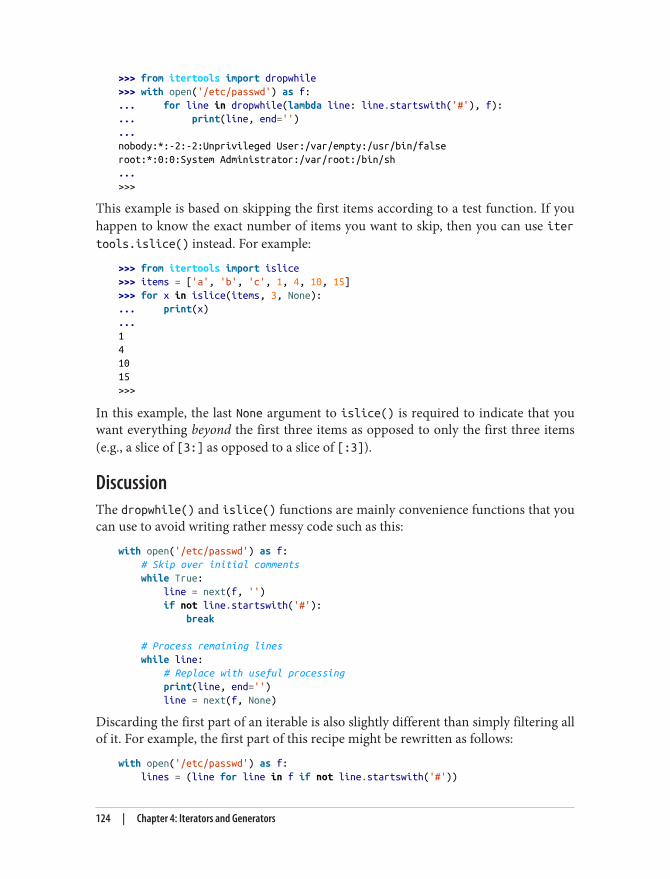
>>> from itertools import dropwhile>>> with open('/etc/passwd') as f:... for line in dropwhile(lambda line: line.startswith('#'), f):... print(line, end='')...nobody:*:-2:-2:Unprivileged User:/var/empty:/usr/bin/falseroot:*:0:0:System Administrator:/var/root:/bin/sh...>>>
This example is based on skipping the first items according to a test function. If youhappen to know the exact number of items you want to skip, then you can use itertools.islice() instead. For example:
>>> from itertools import islice>>> items = ['a', 'b', 'c', 1, 4, 10, 15]>>> for x in islice(items, 3, None):... print(x)...141015>>>
In this example, the last None argument to islice() is required to indicate that youwant everything beyond the first three items as opposed to only the first three items(e.g., a slice of [3:] as opposed to a slice of [:3]).
DiscussionThe dropwhile() and islice() functions are mainly convenience functions that youcan use to avoid writing rather messy code such as this:
with open('/etc/passwd') as f: # Skip over initial comments while True: line = next(f, '') if not line.startswith('#'): break
# Process remaining lines while line: # Replace with useful processing print(line, end='') line = next(f, None)
Discarding the first part of an iterable is also slightly different than simply filtering allof it. For example, the first part of this recipe might be rewritten as follows:
with open('/etc/passwd') as f: lines = (line for line in f if not line.startswith('#'))
124 | Chapter 4: Iterators and Generators
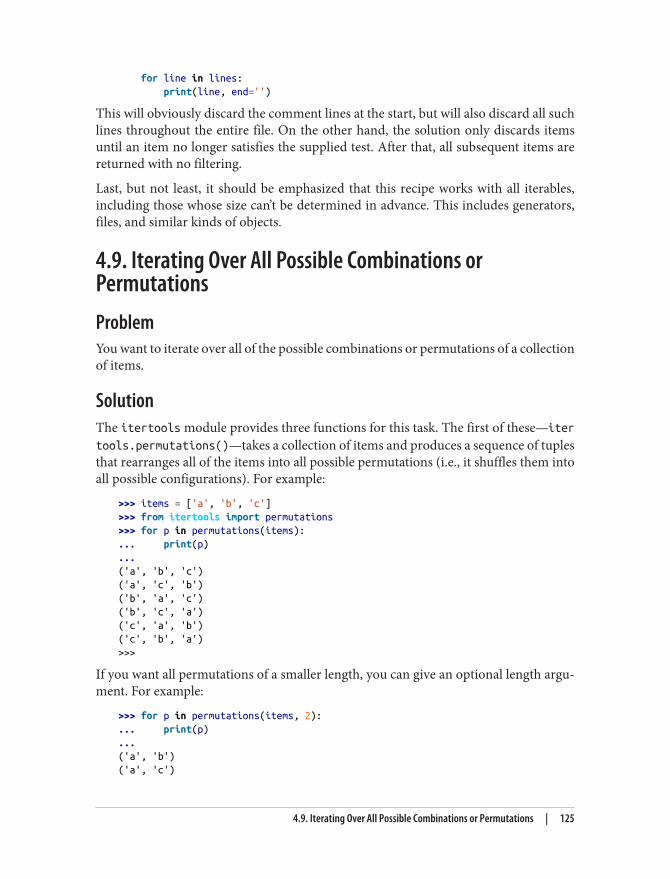
for line in lines: print(line, end='')
This will obviously discard the comment lines at the start, but will also discard all suchlines throughout the entire file. On the other hand, the solution only discards itemsuntil an item no longer satisfies the supplied test. After that, all subsequent items arereturned with no filtering.
Last, but not least, it should be emphasized that this recipe works with all iterables,including those whose size can’t be determined in advance. This includes generators,files, and similar kinds of objects.
4.9. Iterating Over All Possible Combinations orPermutationsProblemYou want to iterate over all of the possible combinations or permutations of a collectionof items.
SolutionThe itertools module provides three functions for this task. The first of these—iter
tools.permutations()—takes a collection of items and produces a sequence of tuplesthat rearranges all of the items into all possible permutations (i.e., it shuffles them intoall possible configurations). For example:
>>> items = ['a', 'b', 'c']>>> from itertools import permutations>>> for p in permutations(items):... print(p)...('a', 'b', 'c')('a', 'c', 'b')('b', 'a', 'c')('b', 'c', 'a')('c', 'a', 'b')('c', 'b', 'a')>>>
If you want all permutations of a smaller length, you can give an optional length argu‐ment. For example:
>>> for p in permutations(items, 2):... print(p)...('a', 'b')('a', 'c')
4.9. Iterating Over All Possible Combinations or Permutations | 125
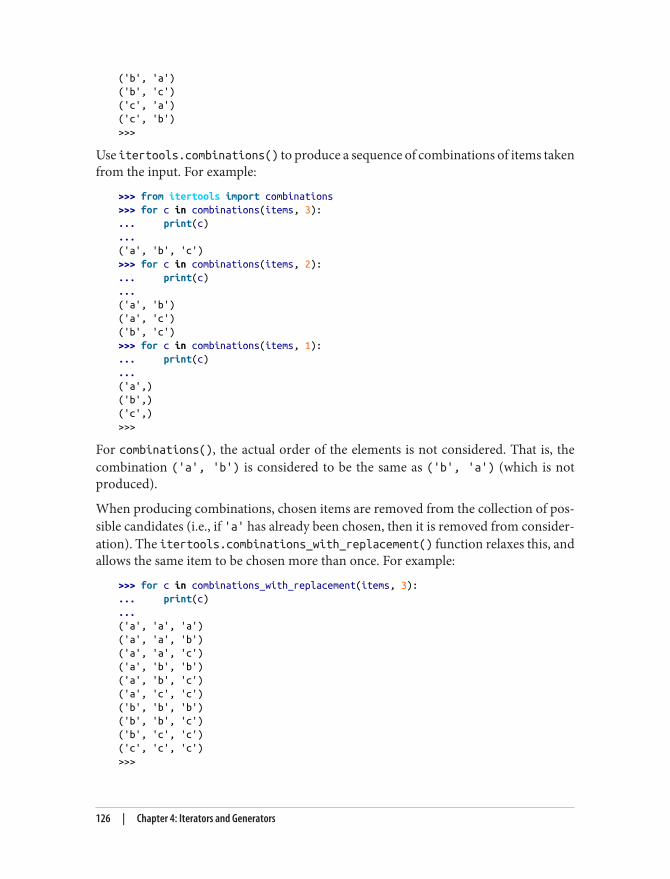
('b', 'a')('b', 'c')('c', 'a')('c', 'b')>>>
Use itertools.combinations() to produce a sequence of combinations of items takenfrom the input. For example:
>>> from itertools import combinations>>> for c in combinations(items, 3):... print(c)...('a', 'b', 'c')>>> for c in combinations(items, 2):... print(c)...('a', 'b')('a', 'c')('b', 'c')>>> for c in combinations(items, 1):... print(c)...('a',)('b',)('c',)>>>
For combinations(), the actual order of the elements is not considered. That is, thecombination ('a', 'b') is considered to be the same as ('b', 'a') (which is notproduced).
When producing combinations, chosen items are removed from the collection of pos‐sible candidates (i.e., if 'a' has already been chosen, then it is removed from consider‐ation). The itertools.combinations_with_replacement() function relaxes this, andallows the same item to be chosen more than once. For example:
>>> for c in combinations_with_replacement(items, 3):... print(c)...('a', 'a', 'a')('a', 'a', 'b')('a', 'a', 'c')('a', 'b', 'b')('a', 'b', 'c')('a', 'c', 'c')('b', 'b', 'b')('b', 'b', 'c')('b', 'c', 'c')('c', 'c', 'c')>>>
126 | Chapter 4: Iterators and Generators
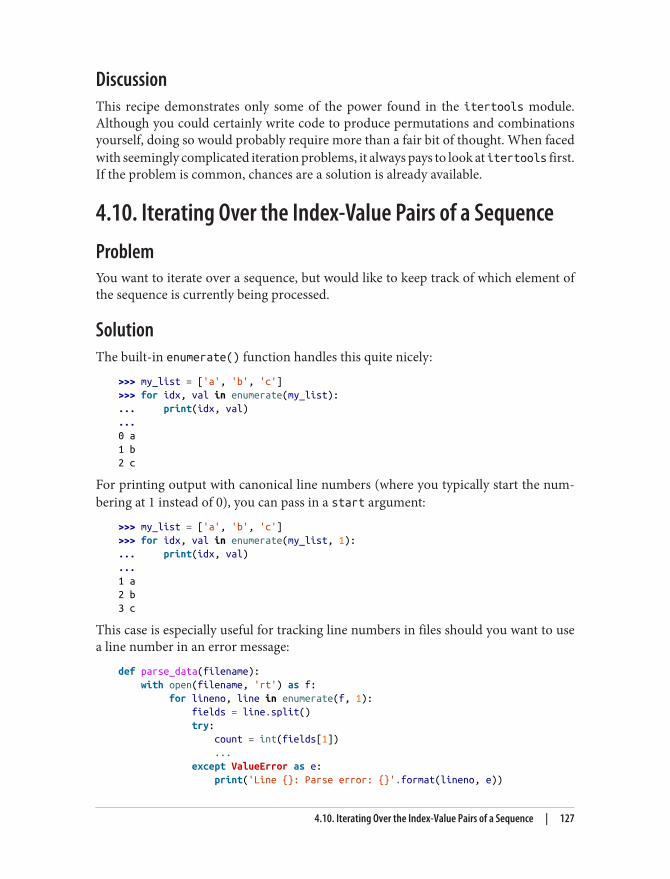
DiscussionThis recipe demonstrates only some of the power found in the itertools module.Although you could certainly write code to produce permutations and combinationsyourself, doing so would probably require more than a fair bit of thought. When facedwith seemingly complicated iteration problems, it always pays to look at itertools first.If the problem is common, chances are a solution is already available.
4.10. Iterating Over the Index-Value Pairs of a SequenceProblemYou want to iterate over a sequence, but would like to keep track of which element ofthe sequence is currently being processed.
SolutionThe built-in enumerate() function handles this quite nicely:
>>> my_list = ['a', 'b', 'c']>>> for idx, val in enumerate(my_list):... print(idx, val)...0 a1 b2 c
For printing output with canonical line numbers (where you typically start the num‐bering at 1 instead of 0), you can pass in a start argument:
>>> my_list = ['a', 'b', 'c']>>> for idx, val in enumerate(my_list, 1):... print(idx, val)...1 a2 b3 c
This case is especially useful for tracking line numbers in files should you want to usea line number in an error message:
def parse_data(filename): with open(filename, 'rt') as f: for lineno, line in enumerate(f, 1): fields = line.split() try: count = int(fields[1]) ... except ValueError as e: print('Line {}: Parse error: {}'.format(lineno, e))
4.10. Iterating Over the Index-Value Pairs of a Sequence | 127
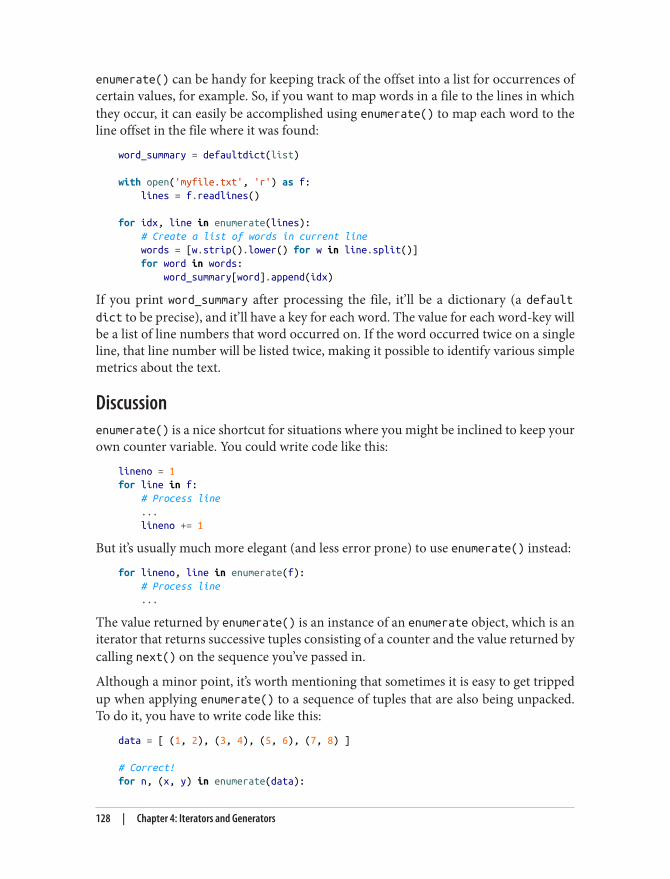
enumerate() can be handy for keeping track of the offset into a list for occurrences ofcertain values, for example. So, if you want to map words in a file to the lines in whichthey occur, it can easily be accomplished using enumerate() to map each word to theline offset in the file where it was found:
word_summary = defaultdict(list)
with open('myfile.txt', 'r') as f: lines = f.readlines()
for idx, line in enumerate(lines): # Create a list of words in current line words = [w.strip().lower() for w in line.split()] for word in words: word_summary[word].append(idx)
If you print word_summary after processing the file, it’ll be a dictionary (a defaultdict to be precise), and it’ll have a key for each word. The value for each word-key willbe a list of line numbers that word occurred on. If the word occurred twice on a singleline, that line number will be listed twice, making it possible to identify various simplemetrics about the text.
Discussionenumerate() is a nice shortcut for situations where you might be inclined to keep yourown counter variable. You could write code like this:
lineno = 1for line in f: # Process line ... lineno += 1
But it’s usually much more elegant (and less error prone) to use enumerate() instead:
for lineno, line in enumerate(f): # Process line ...
The value returned by enumerate() is an instance of an enumerate object, which is aniterator that returns successive tuples consisting of a counter and the value returned bycalling next() on the sequence you’ve passed in.
Although a minor point, it’s worth mentioning that sometimes it is easy to get trippedup when applying enumerate() to a sequence of tuples that are also being unpacked.To do it, you have to write code like this:
data = [ (1, 2), (3, 4), (5, 6), (7, 8) ]
# Correct!for n, (x, y) in enumerate(data):
128 | Chapter 4: Iterators and Generators
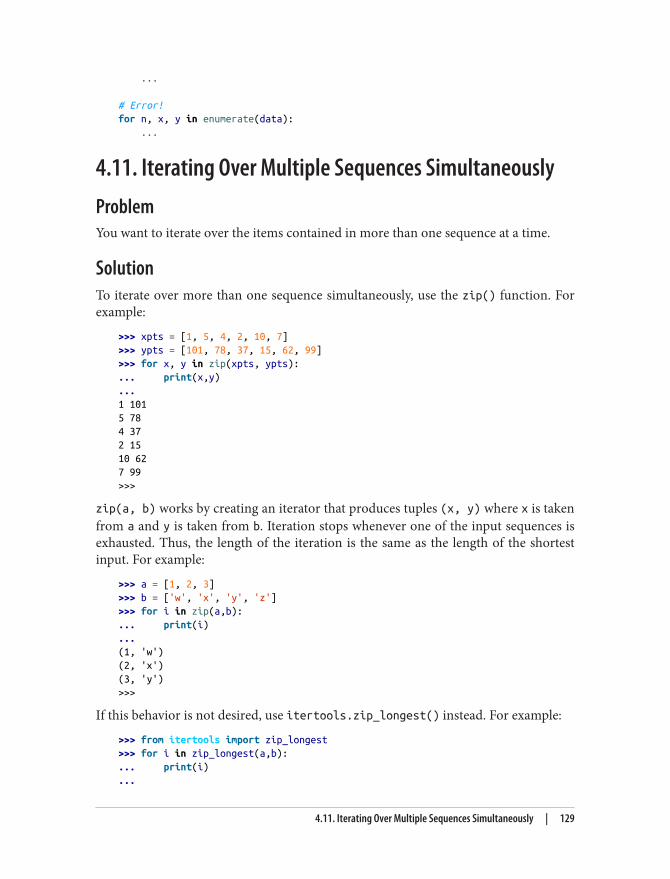
...
# Error!for n, x, y in enumerate(data): ...
4.11. Iterating Over Multiple Sequences SimultaneouslyProblemYou want to iterate over the items contained in more than one sequence at a time.
SolutionTo iterate over more than one sequence simultaneously, use the zip() function. Forexample:
>>> xpts = [1, 5, 4, 2, 10, 7]>>> ypts = [101, 78, 37, 15, 62, 99]>>> for x, y in zip(xpts, ypts):... print(x,y)...1 1015 784 372 1510 627 99>>>
zip(a, b) works by creating an iterator that produces tuples (x, y) where x is takenfrom a and y is taken from b. Iteration stops whenever one of the input sequences isexhausted. Thus, the length of the iteration is the same as the length of the shortestinput. For example:
>>> a = [1, 2, 3]>>> b = ['w', 'x', 'y', 'z']>>> for i in zip(a,b):... print(i)...(1, 'w')(2, 'x')(3, 'y')>>>
If this behavior is not desired, use itertools.zip_longest() instead. For example:
>>> from itertools import zip_longest>>> for i in zip_longest(a,b):... print(i)...
4.11. Iterating Over Multiple Sequences Simultaneously | 129
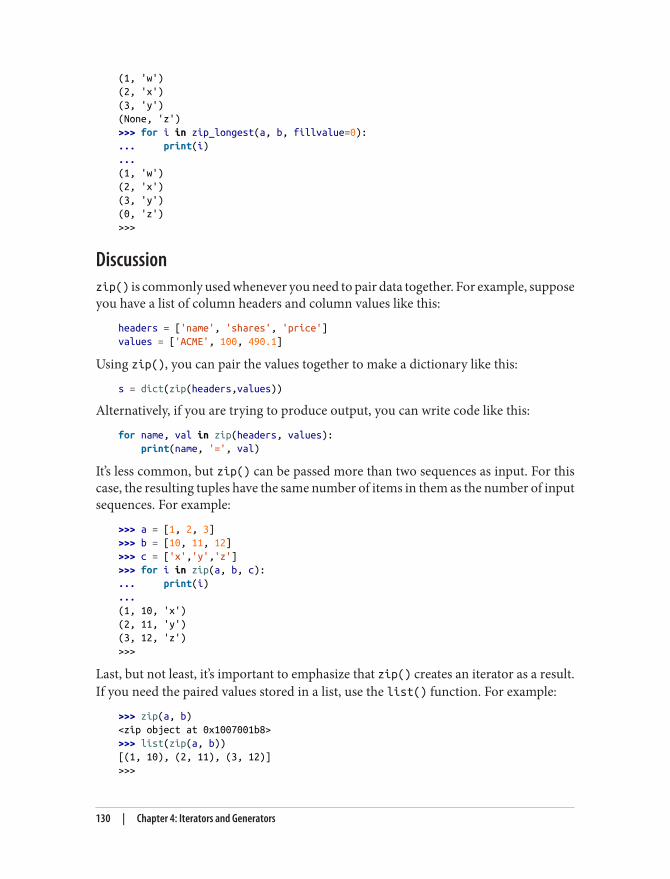
(1, 'w')(2, 'x')(3, 'y')(None, 'z')>>> for i in zip_longest(a, b, fillvalue=0):... print(i)...(1, 'w')(2, 'x')(3, 'y')(0, 'z')>>>
Discussionzip() is commonly used whenever you need to pair data together. For example, supposeyou have a list of column headers and column values like this:
headers = ['name', 'shares', 'price']values = ['ACME', 100, 490.1]
Using zip(), you can pair the values together to make a dictionary like this:
s = dict(zip(headers,values))
Alternatively, if you are trying to produce output, you can write code like this:
for name, val in zip(headers, values): print(name, '=', val)
It’s less common, but zip() can be passed more than two sequences as input. For thiscase, the resulting tuples have the same number of items in them as the number of inputsequences. For example:
>>> a = [1, 2, 3]>>> b = [10, 11, 12]>>> c = ['x','y','z']>>> for i in zip(a, b, c):... print(i)...(1, 10, 'x')(2, 11, 'y')(3, 12, 'z')>>>
Last, but not least, it’s important to emphasize that zip() creates an iterator as a result.If you need the paired values stored in a list, use the list() function. For example:
>>> zip(a, b)<zip object at 0x1007001b8>>>> list(zip(a, b))[(1, 10), (2, 11), (3, 12)]>>>
130 | Chapter 4: Iterators and Generators
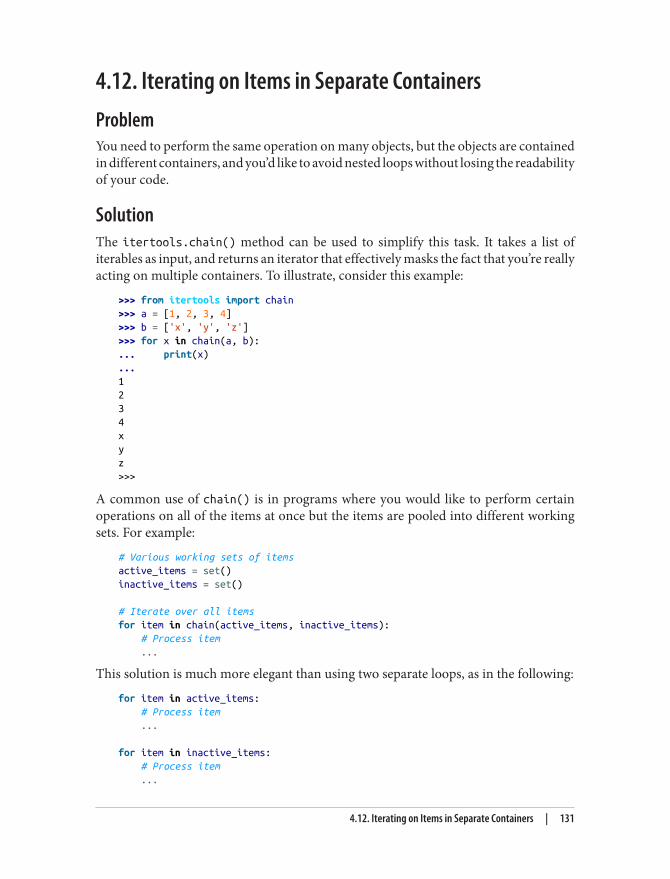
4.12. Iterating on Items in Separate ContainersProblemYou need to perform the same operation on many objects, but the objects are containedin different containers, and you’d like to avoid nested loops without losing the readabilityof your code.
SolutionThe itertools.chain() method can be used to simplify this task. It takes a list ofiterables as input, and returns an iterator that effectively masks the fact that you’re reallyacting on multiple containers. To illustrate, consider this example:
>>> from itertools import chain>>> a = [1, 2, 3, 4]>>> b = ['x', 'y', 'z']>>> for x in chain(a, b):... print(x)...1234xyz>>>
A common use of chain() is in programs where you would like to perform certainoperations on all of the items at once but the items are pooled into different workingsets. For example:
# Various working sets of itemsactive_items = set()inactive_items = set()
# Iterate over all itemsfor item in chain(active_items, inactive_items): # Process item ...
This solution is much more elegant than using two separate loops, as in the following:
for item in active_items: # Process item ...
for item in inactive_items: # Process item ...
4.12. Iterating on Items in Separate Containers | 131
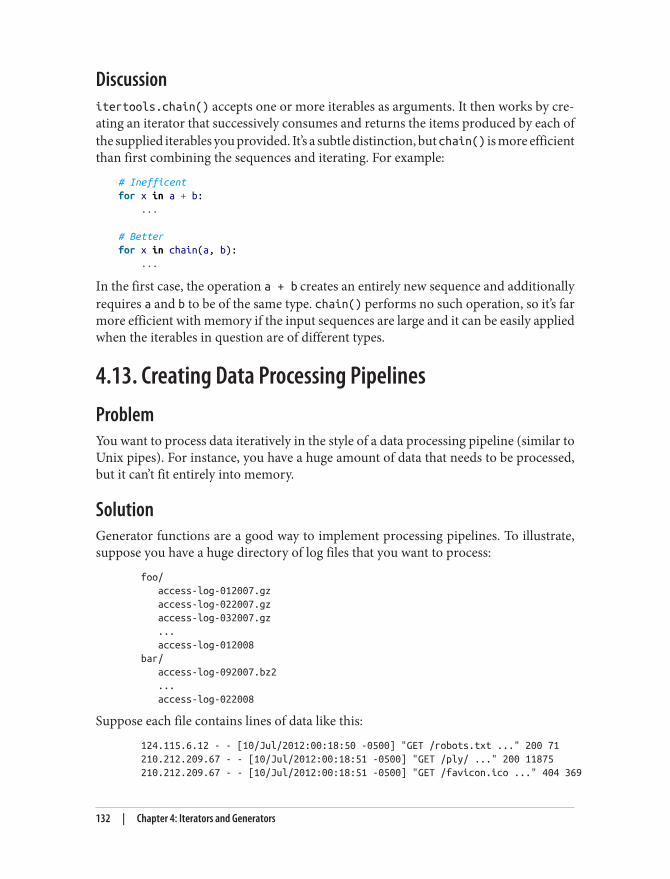
Discussionitertools.chain() accepts one or more iterables as arguments. It then works by cre‐ating an iterator that successively consumes and returns the items produced by each ofthe supplied iterables you provided. It’s a subtle distinction, but chain() is more efficientthan first combining the sequences and iterating. For example:
# Inefficentfor x in a + b: ...
# Betterfor x in chain(a, b): ...
In the first case, the operation a + b creates an entirely new sequence and additionallyrequires a and b to be of the same type. chain() performs no such operation, so it’s farmore efficient with memory if the input sequences are large and it can be easily appliedwhen the iterables in question are of different types.
4.13. Creating Data Processing PipelinesProblemYou want to process data iteratively in the style of a data processing pipeline (similar toUnix pipes). For instance, you have a huge amount of data that needs to be processed,but it can’t fit entirely into memory.
SolutionGenerator functions are a good way to implement processing pipelines. To illustrate,suppose you have a huge directory of log files that you want to process:
foo/ access-log-012007.gz access-log-022007.gz access-log-032007.gz ... access-log-012008 bar/ access-log-092007.bz2 ... access-log-022008
Suppose each file contains lines of data like this:
124.115.6.12 - - [10/Jul/2012:00:18:50 -0500] "GET /robots.txt ..." 200 71 210.212.209.67 - - [10/Jul/2012:00:18:51 -0500] "GET /ply/ ..." 200 11875 210.212.209.67 - - [10/Jul/2012:00:18:51 -0500] "GET /favicon.ico ..." 404 369
132 | Chapter 4: Iterators and Generators
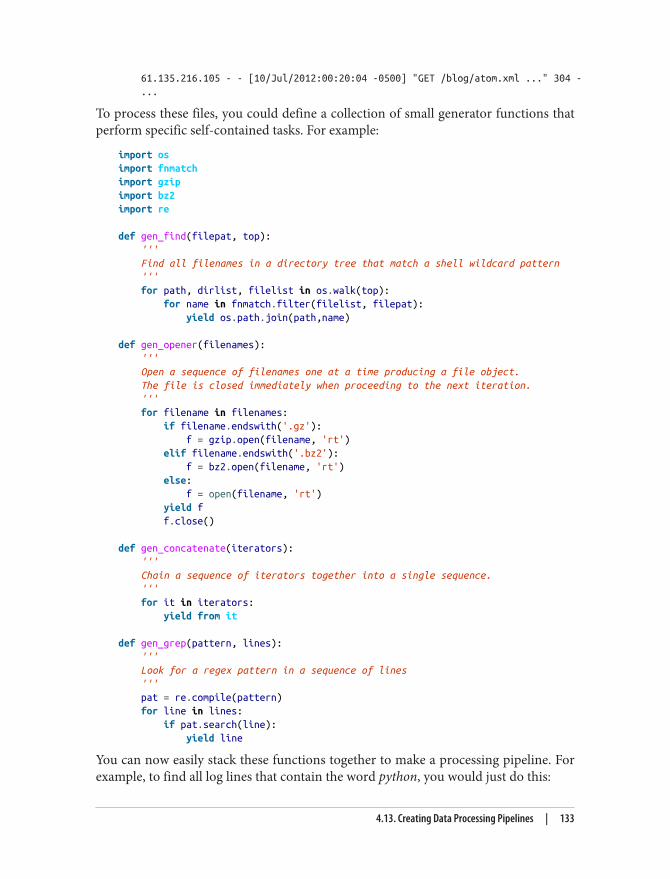
61.135.216.105 - - [10/Jul/2012:00:20:04 -0500] "GET /blog/atom.xml ..." 304 - ...
To process these files, you could define a collection of small generator functions thatperform specific self-contained tasks. For example:
import osimport fnmatchimport gzipimport bz2import re
def gen_find(filepat, top): ''' Find all filenames in a directory tree that match a shell wildcard pattern ''' for path, dirlist, filelist in os.walk(top): for name in fnmatch.filter(filelist, filepat): yield os.path.join(path,name)
def gen_opener(filenames): ''' Open a sequence of filenames one at a time producing a file object. The file is closed immediately when proceeding to the next iteration. ''' for filename in filenames: if filename.endswith('.gz'): f = gzip.open(filename, 'rt') elif filename.endswith('.bz2'): f = bz2.open(filename, 'rt') else: f = open(filename, 'rt') yield f f.close()
def gen_concatenate(iterators): ''' Chain a sequence of iterators together into a single sequence. ''' for it in iterators: yield from it
def gen_grep(pattern, lines): ''' Look for a regex pattern in a sequence of lines ''' pat = re.compile(pattern) for line in lines: if pat.search(line): yield line
You can now easily stack these functions together to make a processing pipeline. Forexample, to find all log lines that contain the word python, you would just do this:
4.13. Creating Data Processing Pipelines | 133
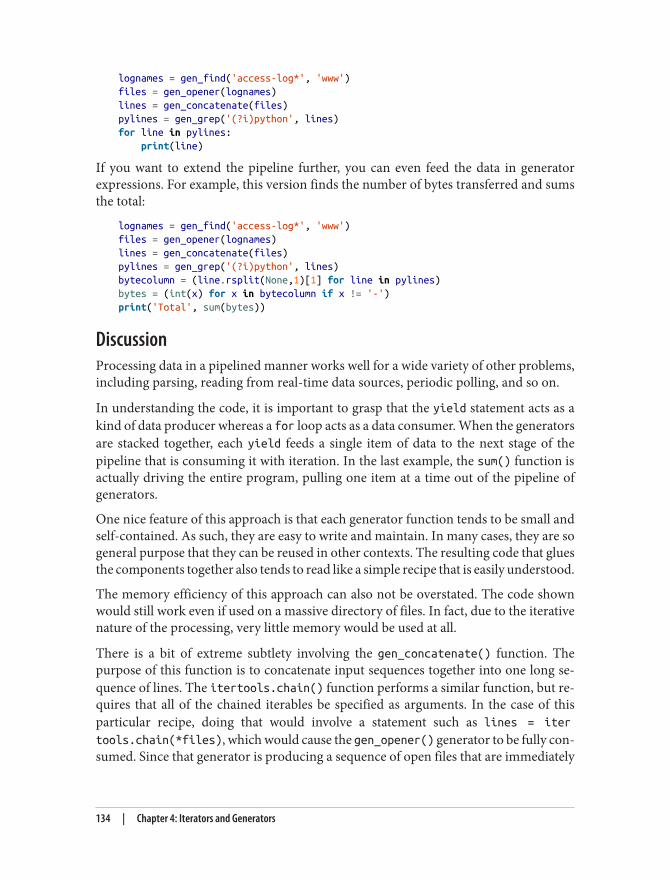
lognames = gen_find('access-log*', 'www')files = gen_opener(lognames)lines = gen_concatenate(files)pylines = gen_grep('(?i)python', lines)for line in pylines: print(line)
If you want to extend the pipeline further, you can even feed the data in generatorexpressions. For example, this version finds the number of bytes transferred and sumsthe total:
lognames = gen_find('access-log*', 'www')files = gen_opener(lognames)lines = gen_concatenate(files)pylines = gen_grep('(?i)python', lines)bytecolumn = (line.rsplit(None,1)[1] for line in pylines)bytes = (int(x) for x in bytecolumn if x != '-')print('Total', sum(bytes))
DiscussionProcessing data in a pipelined manner works well for a wide variety of other problems,including parsing, reading from real-time data sources, periodic polling, and so on.
In understanding the code, it is important to grasp that the yield statement acts as akind of data producer whereas a for loop acts as a data consumer. When the generatorsare stacked together, each yield feeds a single item of data to the next stage of thepipeline that is consuming it with iteration. In the last example, the sum() function isactually driving the entire program, pulling one item at a time out of the pipeline ofgenerators.
One nice feature of this approach is that each generator function tends to be small andself-contained. As such, they are easy to write and maintain. In many cases, they are sogeneral purpose that they can be reused in other contexts. The resulting code that gluesthe components together also tends to read like a simple recipe that is easily understood.
The memory efficiency of this approach can also not be overstated. The code shownwould still work even if used on a massive directory of files. In fact, due to the iterativenature of the processing, very little memory would be used at all.
There is a bit of extreme subtlety involving the gen_concatenate() function. Thepurpose of this function is to concatenate input sequences together into one long se‐quence of lines. The itertools.chain() function performs a similar function, but re‐quires that all of the chained iterables be specified as arguments. In the case of thisparticular recipe, doing that would involve a statement such as lines = iter
tools.chain(*files), which would cause the gen_opener() generator to be fully con‐sumed. Since that generator is producing a sequence of open files that are immediately
134 | Chapter 4: Iterators and Generators
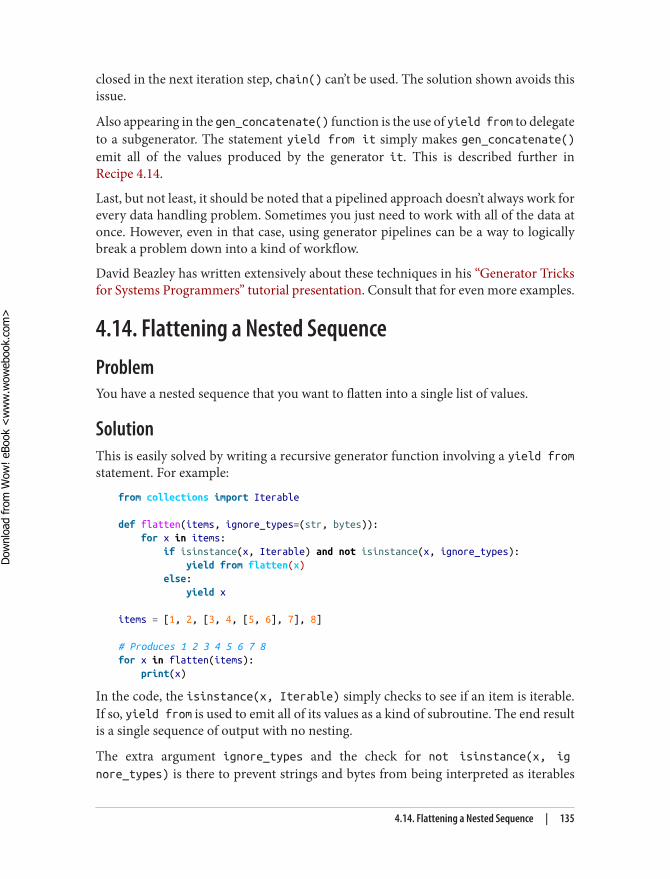
closed in the next iteration step, chain() can’t be used. The solution shown avoids thisissue.
Also appearing in the gen_concatenate() function is the use of yield from to delegateto a subgenerator. The statement yield from it simply makes gen_concatenate()emit all of the values produced by the generator it. This is described further inRecipe 4.14.
Last, but not least, it should be noted that a pipelined approach doesn’t always work forevery data handling problem. Sometimes you just need to work with all of the data atonce. However, even in that case, using generator pipelines can be a way to logicallybreak a problem down into a kind of workflow.
David Beazley has written extensively about these techniques in his “Generator Tricksfor Systems Programmers” tutorial presentation. Consult that for even more examples.
4.14. Flattening a Nested SequenceProblemYou have a nested sequence that you want to flatten into a single list of values.
SolutionThis is easily solved by writing a recursive generator function involving a yield fromstatement. For example:
from collections import Iterable
def flatten(items, ignore_types=(str, bytes)): for x in items: if isinstance(x, Iterable) and not isinstance(x, ignore_types): yield from flatten(x) else: yield x
items = [1, 2, [3, 4, [5, 6], 7], 8]
# Produces 1 2 3 4 5 6 7 8for x in flatten(items): print(x)
In the code, the isinstance(x, Iterable) simply checks to see if an item is iterable.If so, yield from is used to emit all of its values as a kind of subroutine. The end resultis a single sequence of output with no nesting.
The extra argument ignore_types and the check for not isinstance(x, ig
nore_types) is there to prevent strings and bytes from being interpreted as iterables
4.14. Flattening a Nested Sequence | 135
Dow
nlo
ad fro
m W
ow
! eBook
<w
ww
.wow
ebook.
com
>
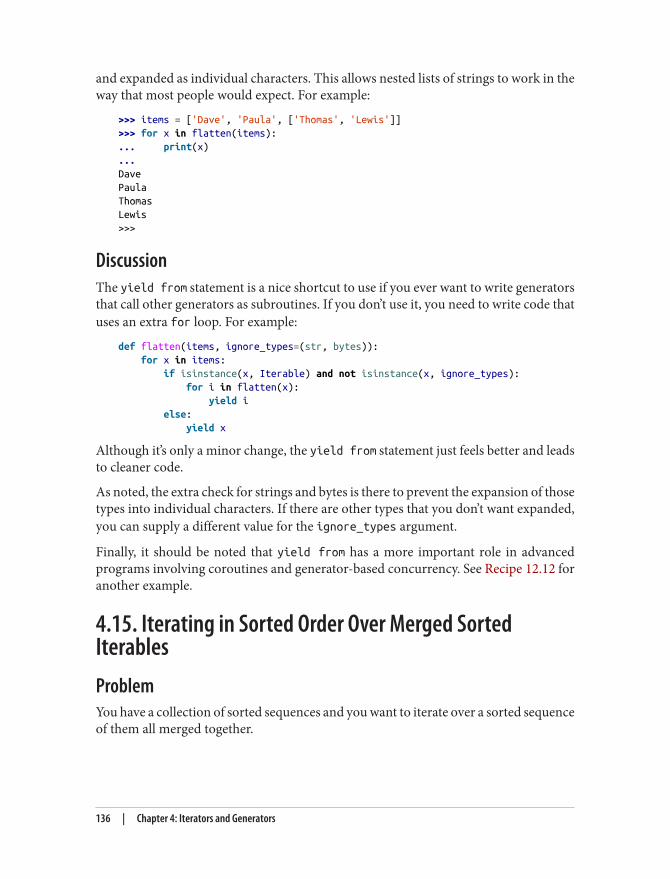
and expanded as individual characters. This allows nested lists of strings to work in theway that most people would expect. For example:
>>> items = ['Dave', 'Paula', ['Thomas', 'Lewis']]>>> for x in flatten(items):... print(x)...DavePaulaThomasLewis>>>
DiscussionThe yield from statement is a nice shortcut to use if you ever want to write generatorsthat call other generators as subroutines. If you don’t use it, you need to write code thatuses an extra for loop. For example:
def flatten(items, ignore_types=(str, bytes)): for x in items: if isinstance(x, Iterable) and not isinstance(x, ignore_types): for i in flatten(x): yield i else: yield x
Although it’s only a minor change, the yield from statement just feels better and leadsto cleaner code.
As noted, the extra check for strings and bytes is there to prevent the expansion of thosetypes into individual characters. If there are other types that you don’t want expanded,you can supply a different value for the ignore_types argument.
Finally, it should be noted that yield from has a more important role in advancedprograms involving coroutines and generator-based concurrency. See Recipe 12.12 foranother example.
4.15. Iterating in Sorted Order Over Merged SortedIterablesProblemYou have a collection of sorted sequences and you want to iterate over a sorted sequenceof them all merged together.
136 | Chapter 4: Iterators and Generators
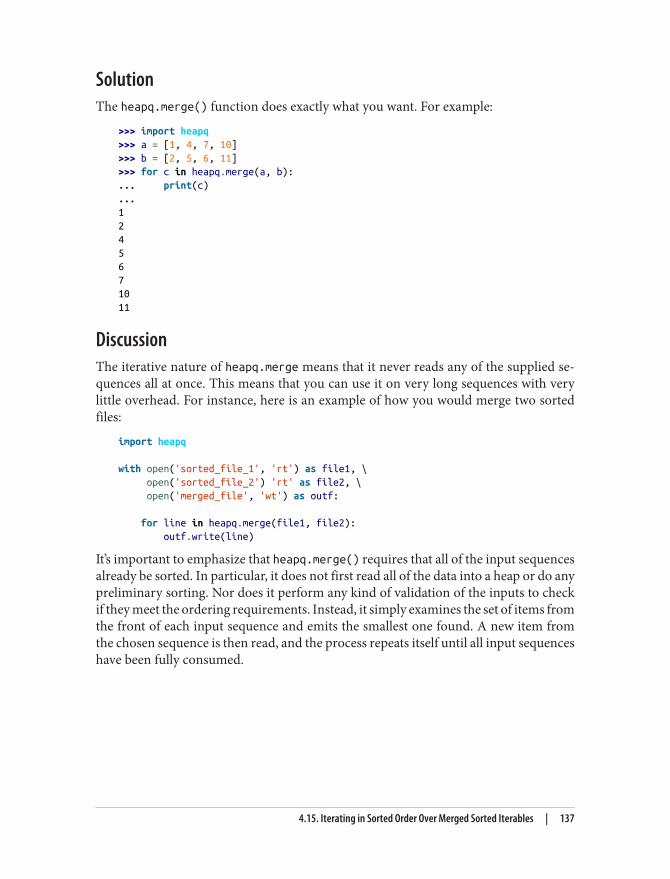
SolutionThe heapq.merge() function does exactly what you want. For example:
>>> import heapq>>> a = [1, 4, 7, 10]>>> b = [2, 5, 6, 11]>>> for c in heapq.merge(a, b):... print(c)...1245671011
DiscussionThe iterative nature of heapq.merge means that it never reads any of the supplied se‐quences all at once. This means that you can use it on very long sequences with verylittle overhead. For instance, here is an example of how you would merge two sortedfiles:
import heapq
with open('sorted_file_1', 'rt') as file1, \ open('sorted_file_2') 'rt' as file2, \ open('merged_file', 'wt') as outf:
for line in heapq.merge(file1, file2): outf.write(line)
It’s important to emphasize that heapq.merge() requires that all of the input sequencesalready be sorted. In particular, it does not first read all of the data into a heap or do anypreliminary sorting. Nor does it perform any kind of validation of the inputs to checkif they meet the ordering requirements. Instead, it simply examines the set of items fromthe front of each input sequence and emits the smallest one found. A new item fromthe chosen sequence is then read, and the process repeats itself until all input sequenceshave been fully consumed.
4.15. Iterating in Sorted Order Over Merged Sorted Iterables | 137
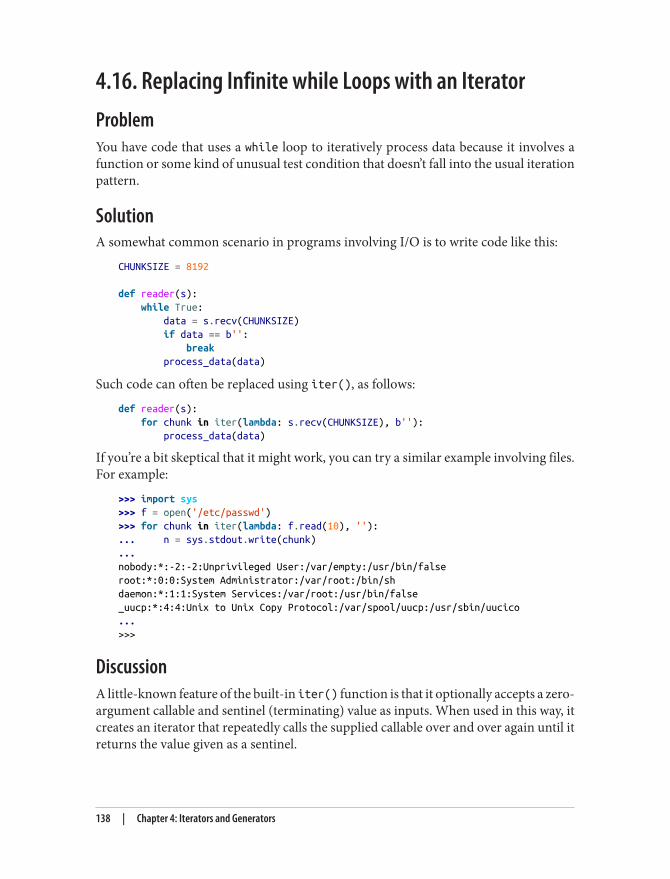
4.16. Replacing Infinite while Loops with an IteratorProblemYou have code that uses a while loop to iteratively process data because it involves afunction or some kind of unusual test condition that doesn’t fall into the usual iterationpattern.
SolutionA somewhat common scenario in programs involving I/O is to write code like this:
CHUNKSIZE = 8192
def reader(s): while True: data = s.recv(CHUNKSIZE) if data == b'': break process_data(data)
Such code can often be replaced using iter(), as follows:
def reader(s): for chunk in iter(lambda: s.recv(CHUNKSIZE), b''): process_data(data)
If you’re a bit skeptical that it might work, you can try a similar example involving files.For example:
>>> import sys>>> f = open('/etc/passwd')>>> for chunk in iter(lambda: f.read(10), ''):... n = sys.stdout.write(chunk)...nobody:*:-2:-2:Unprivileged User:/var/empty:/usr/bin/falseroot:*:0:0:System Administrator:/var/root:/bin/shdaemon:*:1:1:System Services:/var/root:/usr/bin/false_uucp:*:4:4:Unix to Unix Copy Protocol:/var/spool/uucp:/usr/sbin/uucico...>>>
DiscussionA little-known feature of the built-in iter() function is that it optionally accepts a zero-argument callable and sentinel (terminating) value as inputs. When used in this way, itcreates an iterator that repeatedly calls the supplied callable over and over again until itreturns the value given as a sentinel.
138 | Chapter 4: Iterators and Generators

This particular approach works well with certain kinds of repeatedly called functions,such as those involving I/O. For example, if you want to read data in chunks from socketsor files, you usually have to repeatedly execute read() or recv() calls followed by anend-of-file test. This recipe simply takes these two features and combines them togetherinto a single iter() call. The use of lambda in the solution is needed to create a callablethat takes no arguments, yet still supplies the desired size argument to recv() or read().
4.16. Replacing Infinite while Loops with an Iterator | 139

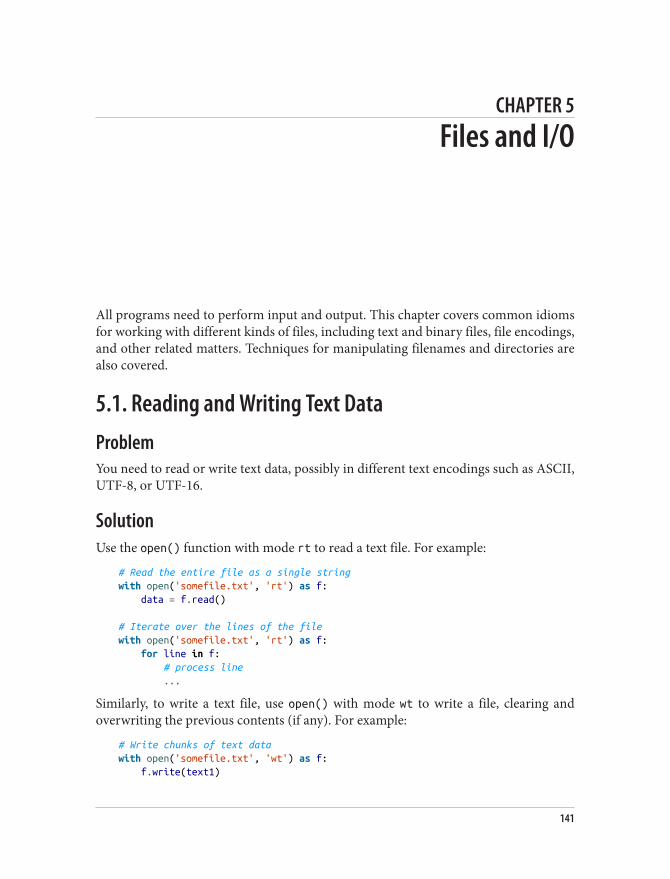
CHAPTER 5
Files and I/O
All programs need to perform input and output. This chapter covers common idiomsfor working with different kinds of files, including text and binary files, file encodings,and other related matters. Techniques for manipulating filenames and directories arealso covered.
5.1. Reading and Writing Text DataProblemYou need to read or write text data, possibly in different text encodings such as ASCII,UTF-8, or UTF-16.
SolutionUse the open() function with mode rt to read a text file. For example:
# Read the entire file as a single stringwith open('somefile.txt', 'rt') as f: data = f.read()
# Iterate over the lines of the filewith open('somefile.txt', 'rt') as f: for line in f: # process line ...
Similarly, to write a text file, use open() with mode wt to write a file, clearing andoverwriting the previous contents (if any). For example:
# Write chunks of text datawith open('somefile.txt', 'wt') as f: f.write(text1)
141
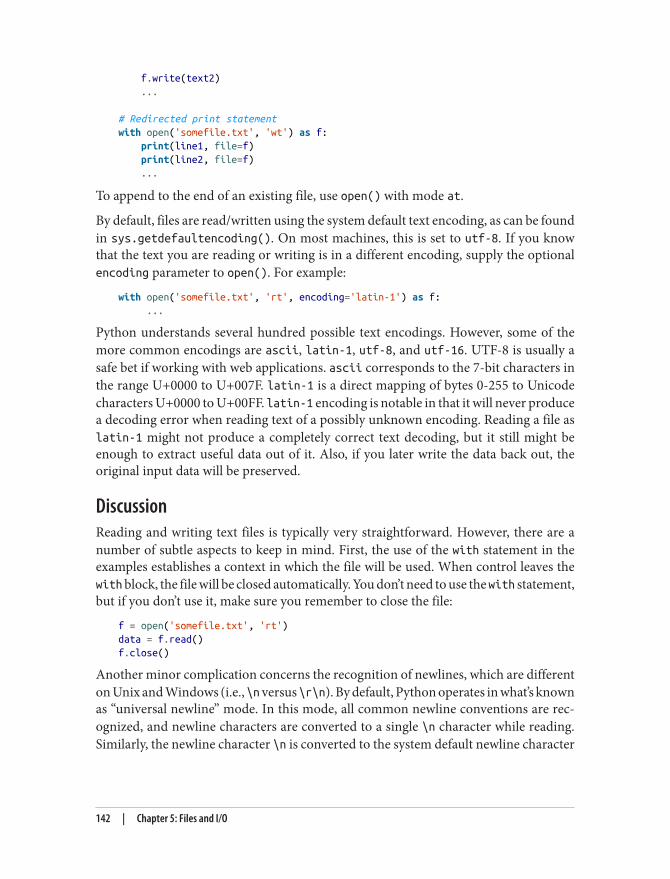
f.write(text2) ...
# Redirected print statementwith open('somefile.txt', 'wt') as f: print(line1, file=f) print(line2, file=f) ...
To append to the end of an existing file, use open() with mode at.
By default, files are read/written using the system default text encoding, as can be foundin sys.getdefaultencoding(). On most machines, this is set to utf-8. If you knowthat the text you are reading or writing is in a different encoding, supply the optionalencoding parameter to open(). For example:
with open('somefile.txt', 'rt', encoding='latin-1') as f: ...
Python understands several hundred possible text encodings. However, some of themore common encodings are ascii, latin-1, utf-8, and utf-16. UTF-8 is usually asafe bet if working with web applications. ascii corresponds to the 7-bit characters inthe range U+0000 to U+007F. latin-1 is a direct mapping of bytes 0-255 to Unicodecharacters U+0000 to U+00FF. latin-1 encoding is notable in that it will never producea decoding error when reading text of a possibly unknown encoding. Reading a file aslatin-1 might not produce a completely correct text decoding, but it still might beenough to extract useful data out of it. Also, if you later write the data back out, theoriginal input data will be preserved.
DiscussionReading and writing text files is typically very straightforward. However, there are anumber of subtle aspects to keep in mind. First, the use of the with statement in theexamples establishes a context in which the file will be used. When control leaves thewith block, the file will be closed automatically. You don’t need to use the with statement,but if you don’t use it, make sure you remember to close the file:
f = open('somefile.txt', 'rt')data = f.read()f.close()
Another minor complication concerns the recognition of newlines, which are differenton Unix and Windows (i.e., \n versus \r\n). By default, Python operates in what’s knownas “universal newline” mode. In this mode, all common newline conventions are rec‐ognized, and newline characters are converted to a single \n character while reading.Similarly, the newline character \n is converted to the system default newline character
142 | Chapter 5: Files and I/O
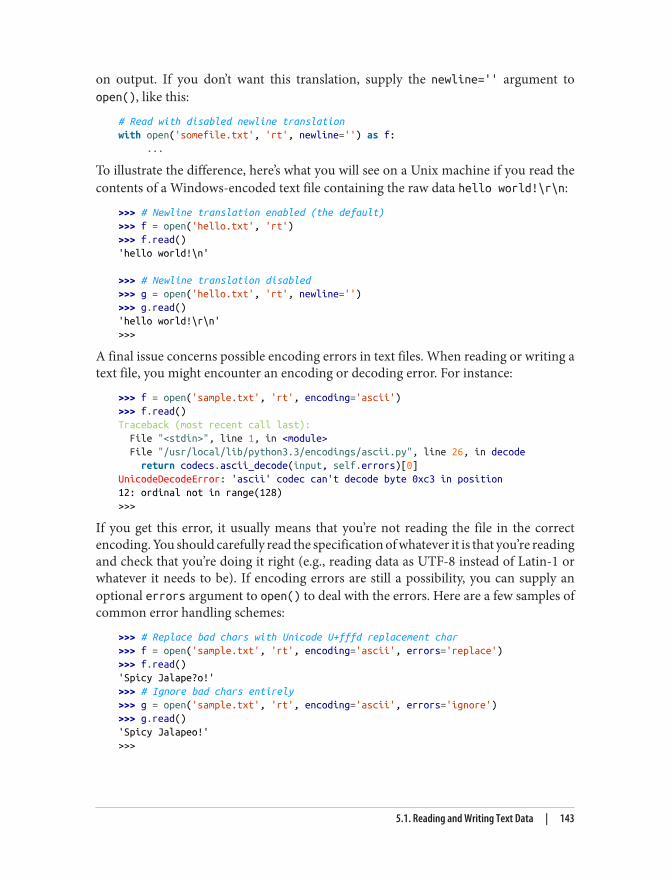
on output. If you don’t want this translation, supply the newline='' argument toopen(), like this:
# Read with disabled newline translationwith open('somefile.txt', 'rt', newline='') as f: ...
To illustrate the difference, here’s what you will see on a Unix machine if you read thecontents of a Windows-encoded text file containing the raw data hello world!\r\n:
>>> # Newline translation enabled (the default)>>> f = open('hello.txt', 'rt')>>> f.read()'hello world!\n'
>>> # Newline translation disabled>>> g = open('hello.txt', 'rt', newline='')>>> g.read()'hello world!\r\n'>>>
A final issue concerns possible encoding errors in text files. When reading or writing atext file, you might encounter an encoding or decoding error. For instance:
>>> f = open('sample.txt', 'rt', encoding='ascii')>>> f.read()Traceback (most recent call last): File "<stdin>", line 1, in <module> File "/usr/local/lib/python3.3/encodings/ascii.py", line 26, in decode return codecs.ascii_decode(input, self.errors)[0]UnicodeDecodeError: 'ascii' codec can't decode byte 0xc3 in position12: ordinal not in range(128)>>>
If you get this error, it usually means that you’re not reading the file in the correctencoding. You should carefully read the specification of whatever it is that you’re readingand check that you’re doing it right (e.g., reading data as UTF-8 instead of Latin-1 orwhatever it needs to be). If encoding errors are still a possibility, you can supply anoptional errors argument to open() to deal with the errors. Here are a few samples ofcommon error handling schemes:
>>> # Replace bad chars with Unicode U+fffd replacement char>>> f = open('sample.txt', 'rt', encoding='ascii', errors='replace')>>> f.read()'Spicy Jalape?o!'>>> # Ignore bad chars entirely>>> g = open('sample.txt', 'rt', encoding='ascii', errors='ignore')>>> g.read()'Spicy Jalapeo!'>>>
5.1. Reading and Writing Text Data | 143
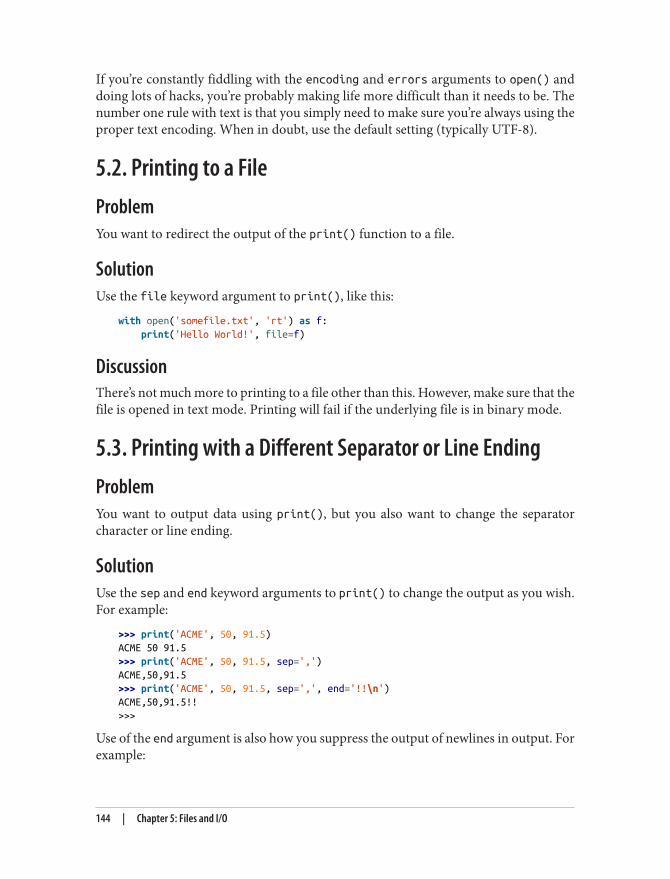
If you’re constantly fiddling with the encoding and errors arguments to open() anddoing lots of hacks, you’re probably making life more difficult than it needs to be. Thenumber one rule with text is that you simply need to make sure you’re always using theproper text encoding. When in doubt, use the default setting (typically UTF-8).
5.2. Printing to a FileProblemYou want to redirect the output of the print() function to a file.
SolutionUse the file keyword argument to print(), like this:
with open('somefile.txt', 'rt') as f: print('Hello World!', file=f)
DiscussionThere’s not much more to printing to a file other than this. However, make sure that thefile is opened in text mode. Printing will fail if the underlying file is in binary mode.
5.3. Printing with a Different Separator or Line EndingProblemYou want to output data using print(), but you also want to change the separatorcharacter or line ending.
SolutionUse the sep and end keyword arguments to print() to change the output as you wish.For example:
>>> print('ACME', 50, 91.5)ACME 50 91.5>>> print('ACME', 50, 91.5, sep=',')ACME,50,91.5>>> print('ACME', 50, 91.5, sep=',', end='!!\n')ACME,50,91.5!!>>>
Use of the end argument is also how you suppress the output of newlines in output. Forexample:
144 | Chapter 5: Files and I/O
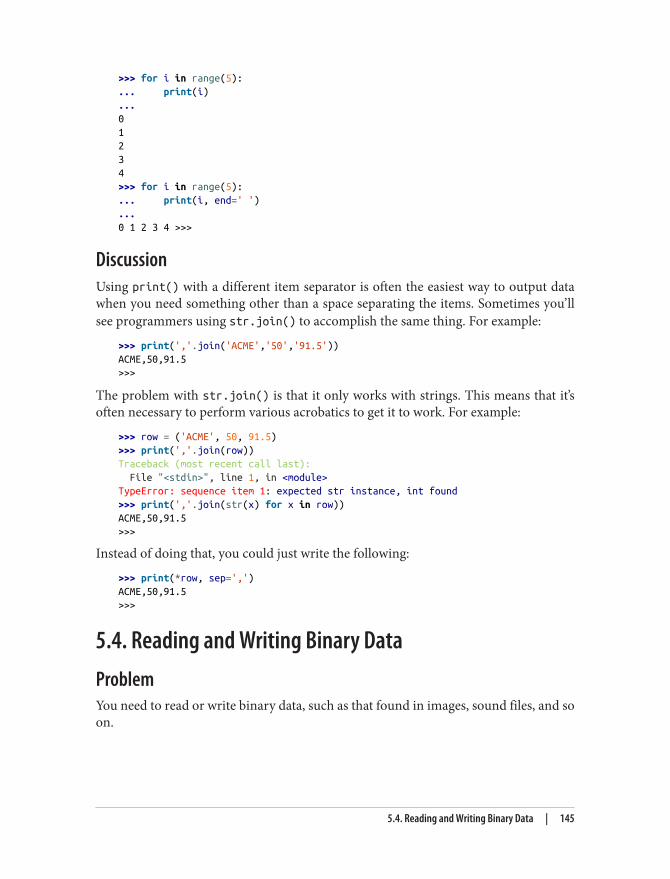
>>> for i in range(5):... print(i)...01234>>> for i in range(5):... print(i, end=' ')...0 1 2 3 4 >>>
DiscussionUsing print() with a different item separator is often the easiest way to output datawhen you need something other than a space separating the items. Sometimes you’llsee programmers using str.join() to accomplish the same thing. For example:
>>> print(','.join('ACME','50','91.5'))ACME,50,91.5>>>
The problem with str.join() is that it only works with strings. This means that it’soften necessary to perform various acrobatics to get it to work. For example:
>>> row = ('ACME', 50, 91.5)>>> print(','.join(row))Traceback (most recent call last): File "<stdin>", line 1, in <module>TypeError: sequence item 1: expected str instance, int found>>> print(','.join(str(x) for x in row))ACME,50,91.5>>>
Instead of doing that, you could just write the following:
>>> print(*row, sep=',')ACME,50,91.5>>>
5.4. Reading and Writing Binary DataProblemYou need to read or write binary data, such as that found in images, sound files, and soon.
5.4. Reading and Writing Binary Data | 145
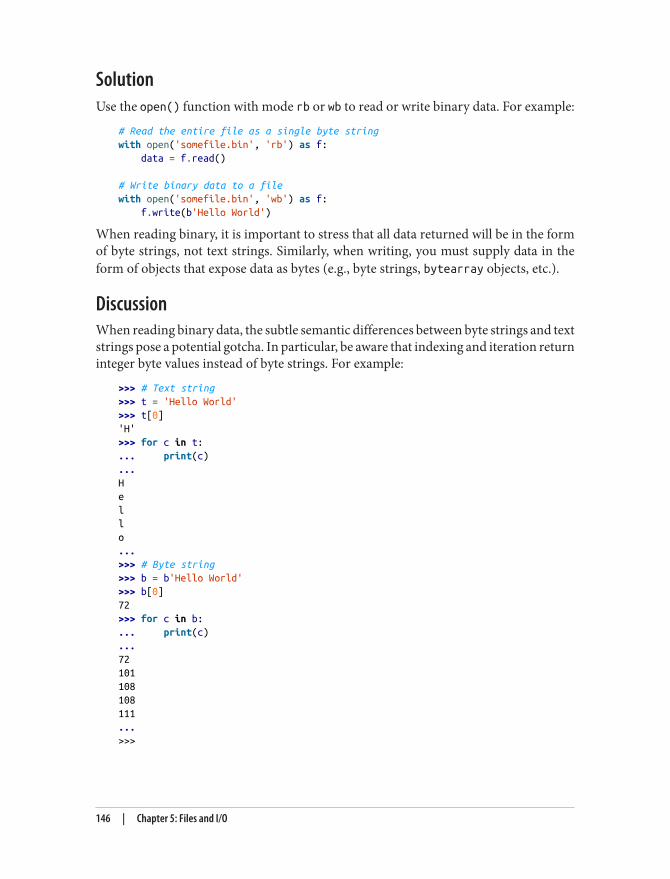
SolutionUse the open() function with mode rb or wb to read or write binary data. For example:
# Read the entire file as a single byte stringwith open('somefile.bin', 'rb') as f: data = f.read()
# Write binary data to a filewith open('somefile.bin', 'wb') as f: f.write(b'Hello World')
When reading binary, it is important to stress that all data returned will be in the formof byte strings, not text strings. Similarly, when writing, you must supply data in theform of objects that expose data as bytes (e.g., byte strings, bytearray objects, etc.).
DiscussionWhen reading binary data, the subtle semantic differences between byte strings and textstrings pose a potential gotcha. In particular, be aware that indexing and iteration returninteger byte values instead of byte strings. For example:
>>> # Text string>>> t = 'Hello World'>>> t[0]'H'>>> for c in t:... print(c)...Hello...>>> # Byte string>>> b = b'Hello World'>>> b[0]72>>> for c in b:... print(c)...72101108108111...>>>
146 | Chapter 5: Files and I/O

If you ever need to read or write text from a binary-mode file, make sure you rememberto decode or encode it. For example:
with open('somefile.bin', 'rb') as f: data = f.read(16) text = data.decode('utf-8')
with open('somefile.bin', 'wb') as f: text = 'Hello World' f.write(text.encode('utf-8'))
A lesser-known aspect of binary I/O is that objects such as arrays and C structures canbe used for writing without any kind of intermediate conversion to a bytes object. Forexample:
import arraynums = array.array('i', [1, 2, 3, 4])with open('data.bin','wb') as f: f.write(nums)
This applies to any object that implements the so-called “buffer interface,” which directlyexposes an underlying memory buffer to operations that can work with it. Writingbinary data is one such operation.
Many objects also allow binary data to be directly read into their underlying memoryusing the readinto() method of files. For example:
>>> import array>>> a = array.array('i', [0, 0, 0, 0, 0, 0, 0, 0])>>> with open('data.bin', 'rb') as f:... f.readinto(a)...16>>> aarray('i', [1, 2, 3, 4, 0, 0, 0, 0])>>>
However, great care should be taken when using this technique, as it is often platformspecific and may depend on such things as the word size and byte ordering (i.e., bigendian versus little endian). See Recipe 5.9 for another example of reading binary datainto a mutable buffer.
5.5. Writing to a File That Doesn’t Already ExistProblemYou want to write data to a file, but only if it doesn’t already exist on the filesystem.
5.5. Writing to a File That Doesn’t Already Exist | 147
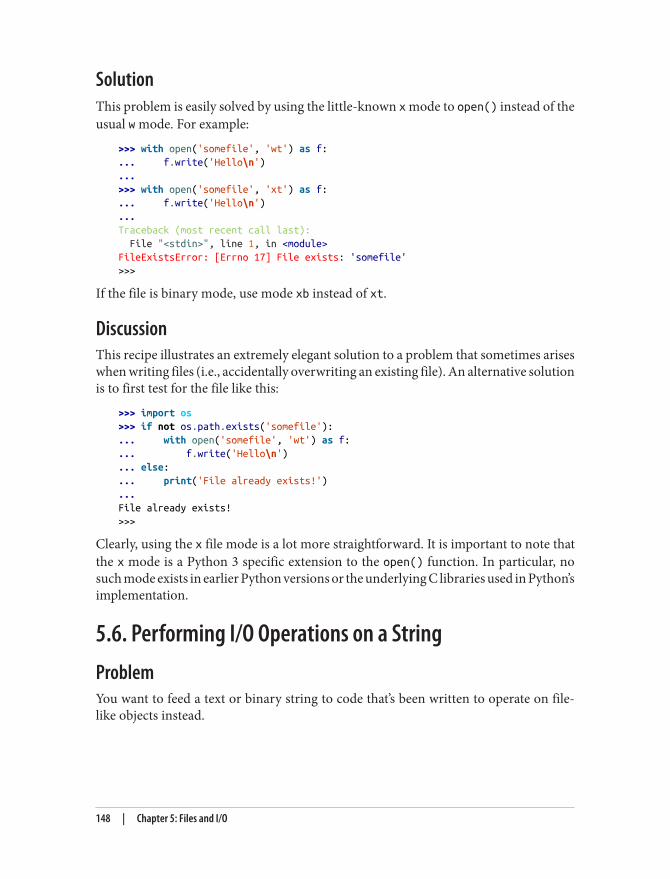
SolutionThis problem is easily solved by using the little-known x mode to open() instead of theusual w mode. For example:
>>> with open('somefile', 'wt') as f:... f.write('Hello\n')...>>> with open('somefile', 'xt') as f:... f.write('Hello\n')...Traceback (most recent call last): File "<stdin>", line 1, in <module>FileExistsError: [Errno 17] File exists: 'somefile'>>>
If the file is binary mode, use mode xb instead of xt.
DiscussionThis recipe illustrates an extremely elegant solution to a problem that sometimes ariseswhen writing files (i.e., accidentally overwriting an existing file). An alternative solutionis to first test for the file like this:
>>> import os>>> if not os.path.exists('somefile'):... with open('somefile', 'wt') as f:... f.write('Hello\n')... else:... print('File already exists!')...File already exists!>>>
Clearly, using the x file mode is a lot more straightforward. It is important to note thatthe x mode is a Python 3 specific extension to the open() function. In particular, nosuch mode exists in earlier Python versions or the underlying C libraries used in Python’simplementation.
5.6. Performing I/O Operations on a StringProblemYou want to feed a text or binary string to code that’s been written to operate on file-like objects instead.
148 | Chapter 5: Files and I/O
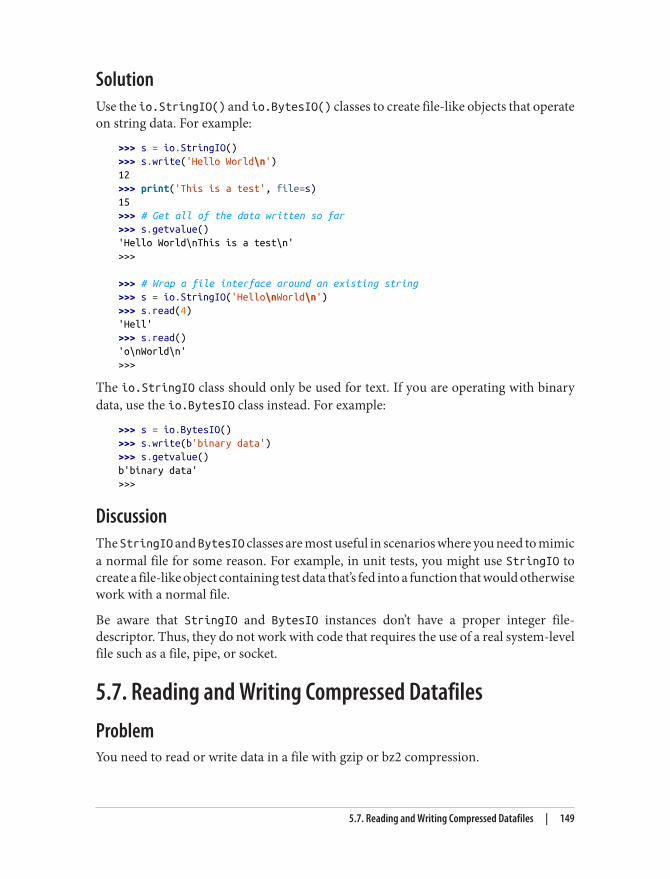
SolutionUse the io.StringIO() and io.BytesIO() classes to create file-like objects that operateon string data. For example:
>>> s = io.StringIO()>>> s.write('Hello World\n')12>>> print('This is a test', file=s)15>>> # Get all of the data written so far>>> s.getvalue()'Hello World\nThis is a test\n'>>>
>>> # Wrap a file interface around an existing string>>> s = io.StringIO('Hello\nWorld\n')>>> s.read(4)'Hell'>>> s.read()'o\nWorld\n'>>>
The io.StringIO class should only be used for text. If you are operating with binarydata, use the io.BytesIO class instead. For example:
>>> s = io.BytesIO()>>> s.write(b'binary data')>>> s.getvalue()b'binary data'>>>
DiscussionThe StringIO and BytesIO classes are most useful in scenarios where you need to mimica normal file for some reason. For example, in unit tests, you might use StringIO tocreate a file-like object containing test data that’s fed into a function that would otherwisework with a normal file.
Be aware that StringIO and BytesIO instances don’t have a proper integer file-descriptor. Thus, they do not work with code that requires the use of a real system-levelfile such as a file, pipe, or socket.
5.7. Reading and Writing Compressed DatafilesProblemYou need to read or write data in a file with gzip or bz2 compression.
5.7. Reading and Writing Compressed Datafiles | 149
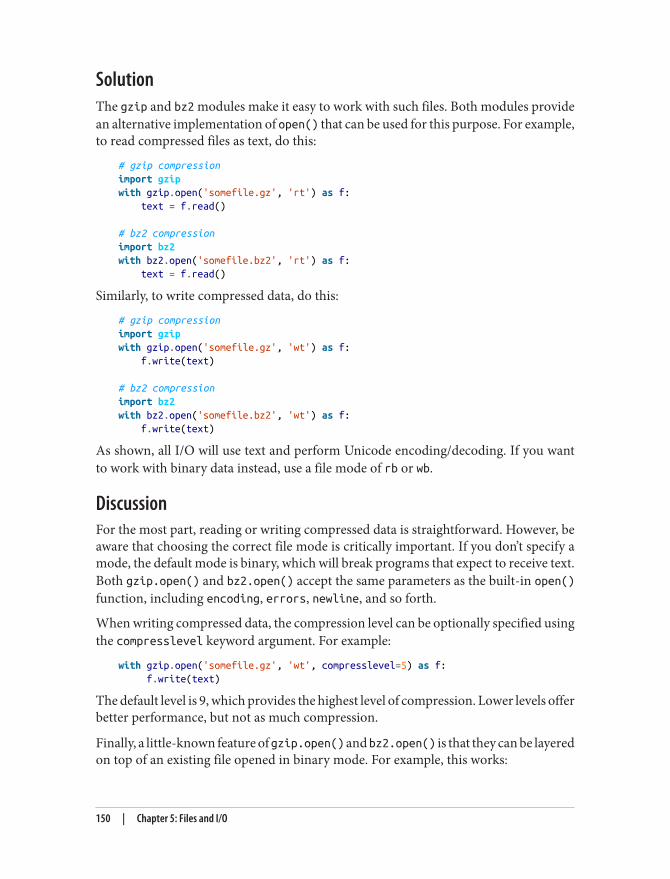
SolutionThe gzip and bz2 modules make it easy to work with such files. Both modules providean alternative implementation of open() that can be used for this purpose. For example,to read compressed files as text, do this:
# gzip compressionimport gzipwith gzip.open('somefile.gz', 'rt') as f: text = f.read()
# bz2 compressionimport bz2with bz2.open('somefile.bz2', 'rt') as f: text = f.read()
Similarly, to write compressed data, do this:
# gzip compressionimport gzipwith gzip.open('somefile.gz', 'wt') as f: f.write(text)
# bz2 compressionimport bz2with bz2.open('somefile.bz2', 'wt') as f: f.write(text)
As shown, all I/O will use text and perform Unicode encoding/decoding. If you wantto work with binary data instead, use a file mode of rb or wb.
DiscussionFor the most part, reading or writing compressed data is straightforward. However, beaware that choosing the correct file mode is critically important. If you don’t specify amode, the default mode is binary, which will break programs that expect to receive text.Both gzip.open() and bz2.open() accept the same parameters as the built-in open()function, including encoding, errors, newline, and so forth.
When writing compressed data, the compression level can be optionally specified usingthe compresslevel keyword argument. For example:
with gzip.open('somefile.gz', 'wt', compresslevel=5) as f: f.write(text)
The default level is 9, which provides the highest level of compression. Lower levels offerbetter performance, but not as much compression.
Finally, a little-known feature of gzip.open() and bz2.open() is that they can be layeredon top of an existing file opened in binary mode. For example, this works:
150 | Chapter 5: Files and I/O
import gzip
f = open('somefile.gz', 'rb')with gzip.open(f, 'rt') as g: text = g.read()
This allows the gzip and bz2 modules to work with various file-like objects such assockets, pipes, and in-memory files.
5.8. Iterating Over Fixed-Sized RecordsProblemInstead of iterating over a file by lines, you want to iterate over a collection of fixed-sized records or chunks.
SolutionUse the iter() function and functools.partial() using this neat trick:
from functools import partial
RECORD_SIZE = 32
with open('somefile.data', 'rb') as f: records = iter(partial(f.read, RECORD_SIZE), b'') for r in records: ...
The records object in this example is an iterable that will produce fixed-sized chunksuntil the end of the file is reached. However, be aware that the last item may have fewerbytes than expected if the file size is not an exact multiple of the record size.
DiscussionA little-known feature of the iter() function is that it can create an iterator if you passit a callable and a sentinel value. The resulting iterator simply calls the supplied callableover and over again until it returns the sentinel, at which point iteration stops.
In the solution, the functools.partial is used to create a callable that reads a fixednumber of bytes from a file each time it’s called. The sentinel of b'' is what gets returnedwhen a file is read but the end of file has been reached.
Last, but not least, the solution shows the file being opened in binary mode. For readingfixed-sized records, this would probably be the most common case. For text files, readingline by line (the default iteration behavior) is more common.
5.8. Iterating Over Fixed-Sized Records | 151
Dow
nlo
ad fro
m W
ow
! eBook
<w
ww
.wow
ebook.
com
>
5.9. Reading Binary Data into a Mutable BufferProblemYou want to read binary data directly into a mutable buffer without any intermediatecopying. Perhaps you want to mutate the data in-place and write it back out to a file.
SolutionTo read data into a mutable array, use the readinto() method of files. For example:
import os.path
def read_into_buffer(filename): buf = bytearray(os.path.getsize(filename)) with open(filename, 'rb') as f: f.readinto(buf) return buf
Here is an example that illustrates the usage:
>>> # Write a sample file>>> with open('sample.bin', 'wb') as f:... f.write(b'Hello World')...>>> buf = read_into_buffer('sample.bin')>>> bufbytearray(b'Hello World')>>> buf[0:5] = b'Hallo'>>> bufbytearray(b'Hallo World')>>> with open('newsample.bin', 'wb') as f:... f.write(buf)...11>>>
DiscussionThe readinto() method of files can be used to fill any preallocated array with data. Thiseven includes arrays created from the array module or libraries such as numpy. Unlikethe normal read() method, readinto() fills the contents of an existing buffer ratherthan allocating new objects and returning them. Thus, you might be able to use it toavoid making extra memory allocations. For example, if you are reading a binary fileconsisting of equally sized records, you can write code like this:
record_size = 32 # Size of each record (adjust value)
buf = bytearray(record_size)with open('somefile', 'rb') as f:
152 | Chapter 5: Files and I/O
while True: n = f.readinto(buf) if n < record_size: break # Use the contents of buf ...
Another interesting feature to use here might be a memoryview, which lets you makezero-copy slices of an existing buffer and even change its contents. For example:
>>> bufbytearray(b'Hello World')>>> m1 = memoryview(buf)>>> m2 = m1[-5:]>>> m2<memory at 0x100681390>>>> m2[:] = b'WORLD'>>> bufbytearray(b'Hello WORLD')>>>
One caution with using f.readinto() is that you must always make sure to check itsreturn code, which is the number of bytes actually read.
If the number of bytes is smaller than the size of the supplied buffer, it might indicatetruncated or corrupted data (e.g., if you were expecting an exact number of bytes to beread).
Finally, be on the lookout for other “into” related functions in various library modules(e.g., recv_into(), pack_into(), etc.). Many other parts of Python have support fordirect I/O or data access that can be used to fill or alter the contents of arrays and buffers.
See Recipe 6.12 for a significantly more advanced example of interpreting binary struc‐tures and usage of memoryviews.
5.10. Memory Mapping Binary FilesProblemYou want to memory map a binary file into a mutable byte array, possibly for randomaccess to its contents or to make in-place modifications.
SolutionUse the mmap module to memory map files. Here is a utility function that shows how toopen a file and memory map it in a portable manner:
import osimport mmap
5.10. Memory Mapping Binary Files | 153
def memory_map(filename, access=mmap.ACCESS_WRITE): size = os.path.getsize(filename) fd = os.open(filename, os.O_RDWR) return mmap.mmap(fd, size, access=access)
To use this function, you would need to have a file already created and filled with data.Here is an example of how you could initially create a file and expand it to a desiredsize:
>>> size = 1000000>>> with open('data', 'wb') as f:... f.seek(size-1)... f.write(b'\x00')...>>>
Now here is an example of memory mapping the contents using the memory_map()function:
>>> m = memory_map('data')>>> len(m)1000000>>> m[0:10]b'\x00\x00\x00\x00\x00\x00\x00\x00\x00\x00'>>> m[0]0>>> # Reassign a slice>>> m[0:11] = b'Hello World'>>> m.close()
>>> # Verify that changes were made>>> with open('data', 'rb') as f:... print(f.read(11))...b'Hello World'>>>
The mmap object returned by mmap() can also be used as a context manager, in whichcase the underlying file is closed automatically. For example:
>>> with memory_map('data') as m:... print(len(m))... print(m[0:10])...1000000b'Hello World'>>> m.closedTrue>>>
By default, the memory_map() function shown opens a file for both reading and writing.Any modifications made to the data are copied back to the original file. If read-only
154 | Chapter 5: Files and I/O
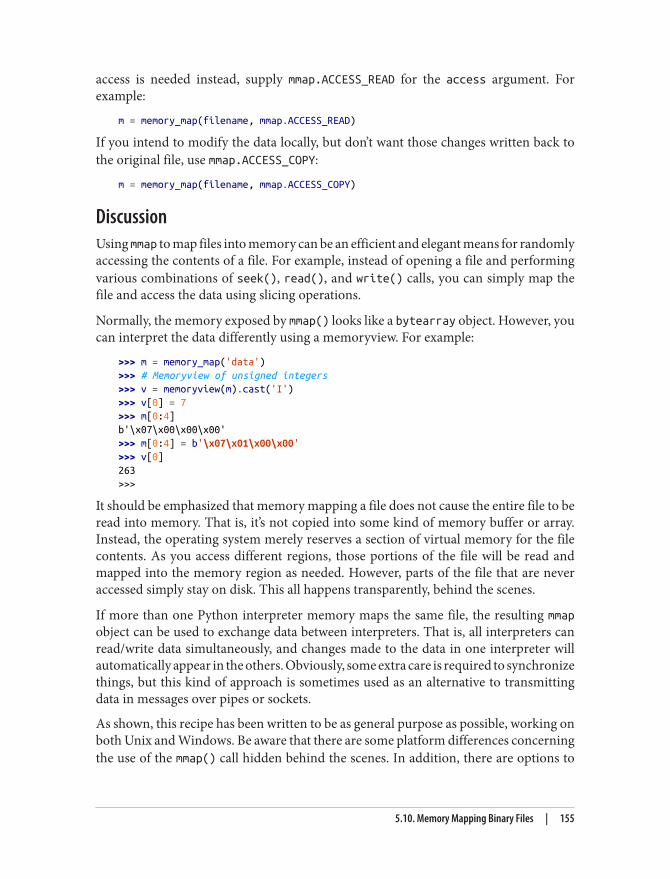
access is needed instead, supply mmap.ACCESS_READ for the access argument. Forexample:
m = memory_map(filename, mmap.ACCESS_READ)
If you intend to modify the data locally, but don’t want those changes written back tothe original file, use mmap.ACCESS_COPY:
m = memory_map(filename, mmap.ACCESS_COPY)
DiscussionUsing mmap to map files into memory can be an efficient and elegant means for randomlyaccessing the contents of a file. For example, instead of opening a file and performingvarious combinations of seek(), read(), and write() calls, you can simply map thefile and access the data using slicing operations.
Normally, the memory exposed by mmap() looks like a bytearray object. However, youcan interpret the data differently using a memoryview. For example:
>>> m = memory_map('data')>>> # Memoryview of unsigned integers>>> v = memoryview(m).cast('I')>>> v[0] = 7>>> m[0:4]b'\x07\x00\x00\x00'>>> m[0:4] = b'\x07\x01\x00\x00'>>> v[0]263>>>
It should be emphasized that memory mapping a file does not cause the entire file to beread into memory. That is, it’s not copied into some kind of memory buffer or array.Instead, the operating system merely reserves a section of virtual memory for the filecontents. As you access different regions, those portions of the file will be read andmapped into the memory region as needed. However, parts of the file that are neveraccessed simply stay on disk. This all happens transparently, behind the scenes.
If more than one Python interpreter memory maps the same file, the resulting mmapobject can be used to exchange data between interpreters. That is, all interpreters canread/write data simultaneously, and changes made to the data in one interpreter willautomatically appear in the others. Obviously, some extra care is required to synchronizethings, but this kind of approach is sometimes used as an alternative to transmittingdata in messages over pipes or sockets.
As shown, this recipe has been written to be as general purpose as possible, working onboth Unix and Windows. Be aware that there are some platform differences concerningthe use of the mmap() call hidden behind the scenes. In addition, there are options to
5.10. Memory Mapping Binary Files | 155
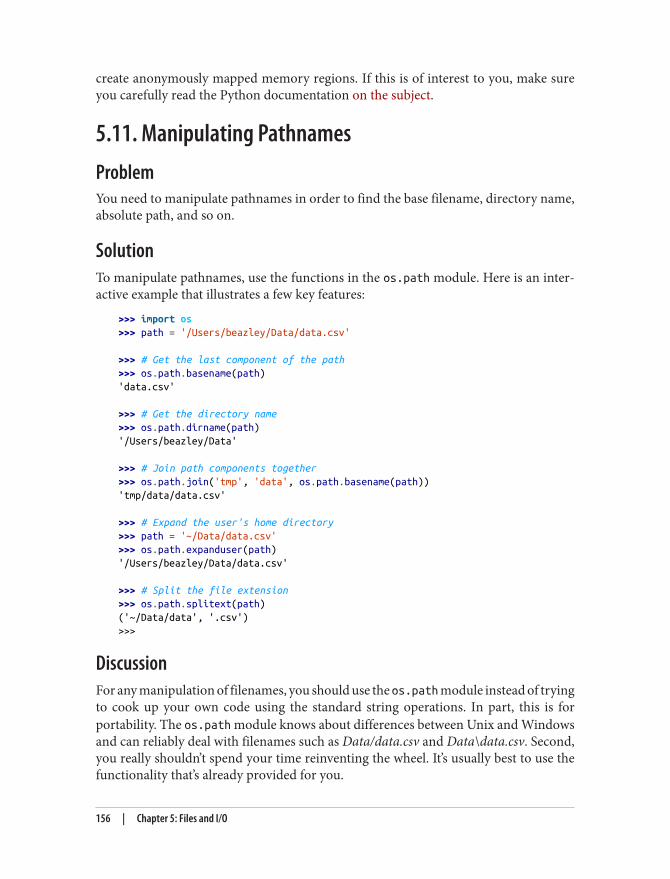
create anonymously mapped memory regions. If this is of interest to you, make sureyou carefully read the Python documentation on the subject.
5.11. Manipulating PathnamesProblemYou need to manipulate pathnames in order to find the base filename, directory name,absolute path, and so on.
SolutionTo manipulate pathnames, use the functions in the os.path module. Here is an inter‐active example that illustrates a few key features:
>>> import os>>> path = '/Users/beazley/Data/data.csv'
>>> # Get the last component of the path>>> os.path.basename(path)'data.csv'
>>> # Get the directory name>>> os.path.dirname(path)'/Users/beazley/Data'
>>> # Join path components together>>> os.path.join('tmp', 'data', os.path.basename(path))'tmp/data/data.csv'
>>> # Expand the user's home directory>>> path = '~/Data/data.csv'>>> os.path.expanduser(path)'/Users/beazley/Data/data.csv'
>>> # Split the file extension>>> os.path.splitext(path)('~/Data/data', '.csv')>>>
DiscussionFor any manipulation of filenames, you should use the os.path module instead of tryingto cook up your own code using the standard string operations. In part, this is forportability. The os.path module knows about differences between Unix and Windowsand can reliably deal with filenames such as Data/data.csv and Data\data.csv. Second,you really shouldn’t spend your time reinventing the wheel. It’s usually best to use thefunctionality that’s already provided for you.
156 | Chapter 5: Files and I/O
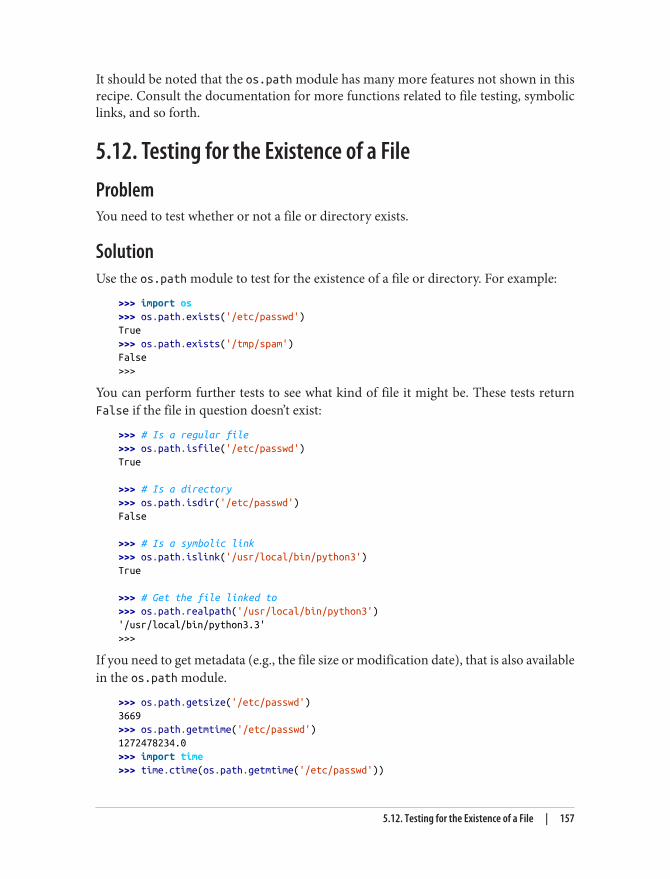
It should be noted that the os.path module has many more features not shown in thisrecipe. Consult the documentation for more functions related to file testing, symboliclinks, and so forth.
5.12. Testing for the Existence of a FileProblemYou need to test whether or not a file or directory exists.
SolutionUse the os.path module to test for the existence of a file or directory. For example:
>>> import os>>> os.path.exists('/etc/passwd')True>>> os.path.exists('/tmp/spam')False>>>
You can perform further tests to see what kind of file it might be. These tests returnFalse if the file in question doesn’t exist:
>>> # Is a regular file>>> os.path.isfile('/etc/passwd')True
>>> # Is a directory>>> os.path.isdir('/etc/passwd')False
>>> # Is a symbolic link>>> os.path.islink('/usr/local/bin/python3')True
>>> # Get the file linked to>>> os.path.realpath('/usr/local/bin/python3')'/usr/local/bin/python3.3'>>>
If you need to get metadata (e.g., the file size or modification date), that is also availablein the os.path module.
>>> os.path.getsize('/etc/passwd')3669>>> os.path.getmtime('/etc/passwd')1272478234.0>>> import time>>> time.ctime(os.path.getmtime('/etc/passwd'))
5.12. Testing for the Existence of a File | 157

'Wed Apr 28 13:10:34 2010'>>>
DiscussionFile testing is a straightforward operation using os.path. Probably the only thing to beaware of when writing scripts is that you might need to worry about permissions—especially for operations that get metadata. For example:
>>> os.path.getsize('/Users/guido/Desktop/foo.txt')Traceback (most recent call last): File "<stdin>", line 1, in <module> File "/usr/local/lib/python3.3/genericpath.py", line 49, in getsize return os.stat(filename).st_sizePermissionError: [Errno 13] Permission denied: '/Users/guido/Desktop/foo.txt'>>>
5.13. Getting a Directory ListingProblemYou want to get a list of the files contained in a directory on the filesystem.
SolutionUse the os.listdir() function to obtain a list of files in a directory:
import osnames = os.listdir('somedir')
This will give you the raw directory listing, including all files, subdirectories, symboliclinks, and so forth. If you need to filter the data in some way, consider using a listcomprehension combined with various functions in the os.path library. For example:
import os.path# Get all regular filesnames = [name for name in os.listdir('somedir') if os.path.isfile(os.path.join('somedir', name))]
# Get all dirsdirnames = [name for name in os.listdir('somedir') if os.path.isdir(os.path.join('somedir', name))]
The startswith() and endswith() methods of strings can be useful for filtering thecontents of a directory as well. For example:
pyfiles = [name for name in os.listdir('somedir') if name.endswith('.py')]
158 | Chapter 5: Files and I/O
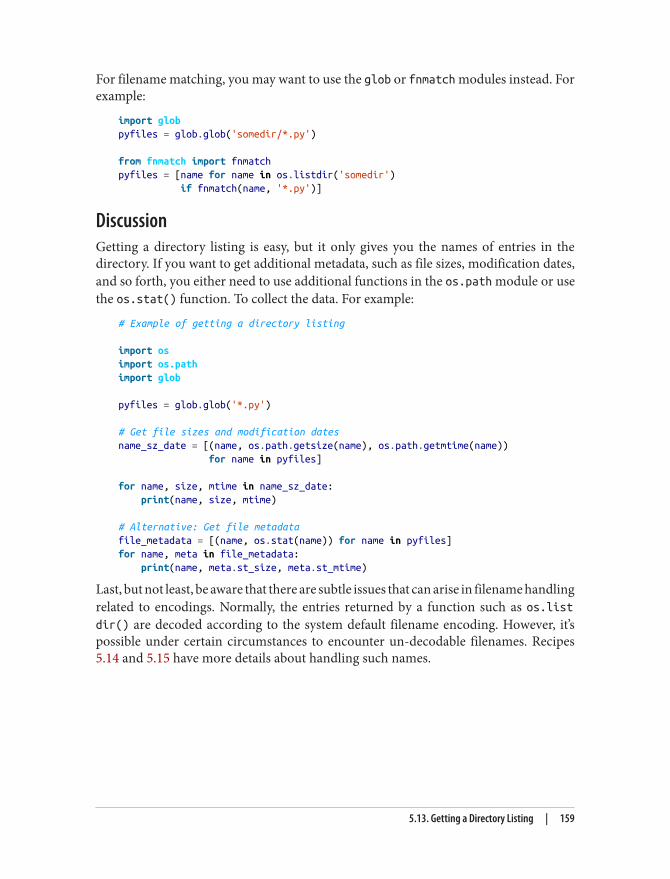
For filename matching, you may want to use the glob or fnmatch modules instead. Forexample:
import globpyfiles = glob.glob('somedir/*.py')
from fnmatch import fnmatchpyfiles = [name for name in os.listdir('somedir') if fnmatch(name, '*.py')]
DiscussionGetting a directory listing is easy, but it only gives you the names of entries in thedirectory. If you want to get additional metadata, such as file sizes, modification dates,and so forth, you either need to use additional functions in the os.path module or usethe os.stat() function. To collect the data. For example:
# Example of getting a directory listing
import osimport os.pathimport glob
pyfiles = glob.glob('*.py')
# Get file sizes and modification datesname_sz_date = [(name, os.path.getsize(name), os.path.getmtime(name)) for name in pyfiles]
for name, size, mtime in name_sz_date: print(name, size, mtime)
# Alternative: Get file metadatafile_metadata = [(name, os.stat(name)) for name in pyfiles]for name, meta in file_metadata: print(name, meta.st_size, meta.st_mtime)
Last, but not least, be aware that there are subtle issues that can arise in filename handlingrelated to encodings. Normally, the entries returned by a function such as os.listdir() are decoded according to the system default filename encoding. However, it’spossible under certain circumstances to encounter un-decodable filenames. Recipes5.14 and 5.15 have more details about handling such names.
5.13. Getting a Directory Listing | 159
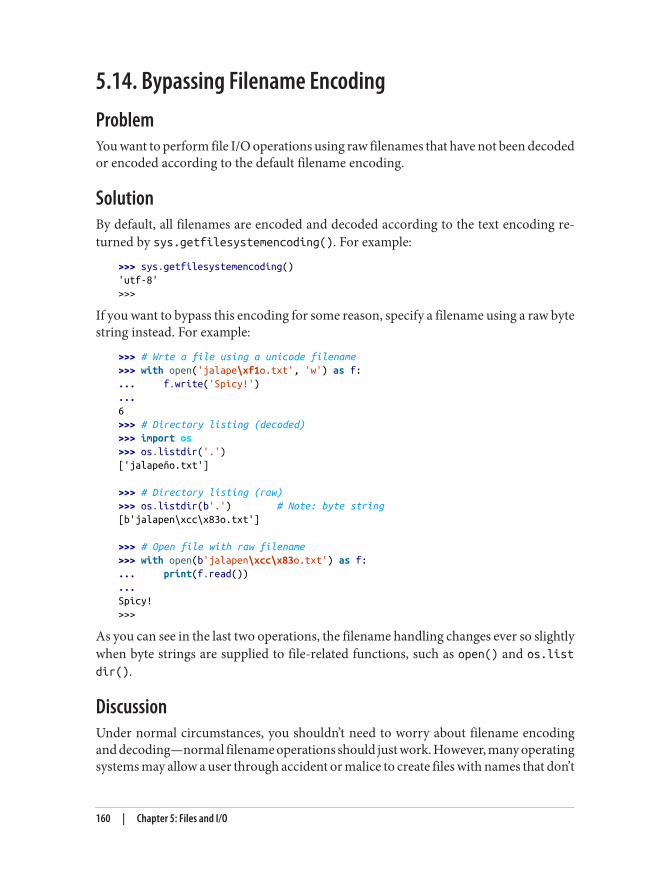
5.14. Bypassing Filename EncodingProblemYou want to perform file I/O operations using raw filenames that have not been decodedor encoded according to the default filename encoding.
SolutionBy default, all filenames are encoded and decoded according to the text encoding re‐turned by sys.getfilesystemencoding(). For example:
>>> sys.getfilesystemencoding()'utf-8'>>>
If you want to bypass this encoding for some reason, specify a filename using a raw bytestring instead. For example:
>>> # Wrte a file using a unicode filename>>> with open('jalape\xf1o.txt', 'w') as f:... f.write('Spicy!')...6>>> # Directory listing (decoded)>>> import os>>> os.listdir('.')['jalapeño.txt']
>>> # Directory listing (raw)>>> os.listdir(b'.') # Note: byte string[b'jalapen\xcc\x83o.txt']
>>> # Open file with raw filename>>> with open(b'jalapen\xcc\x83o.txt') as f:... print(f.read())...Spicy!>>>
As you can see in the last two operations, the filename handling changes ever so slightlywhen byte strings are supplied to file-related functions, such as open() and os.listdir().
DiscussionUnder normal circumstances, you shouldn’t need to worry about filename encodingand decoding—normal filename operations should just work. However, many operatingsystems may allow a user through accident or malice to create files with names that don’t
160 | Chapter 5: Files and I/O
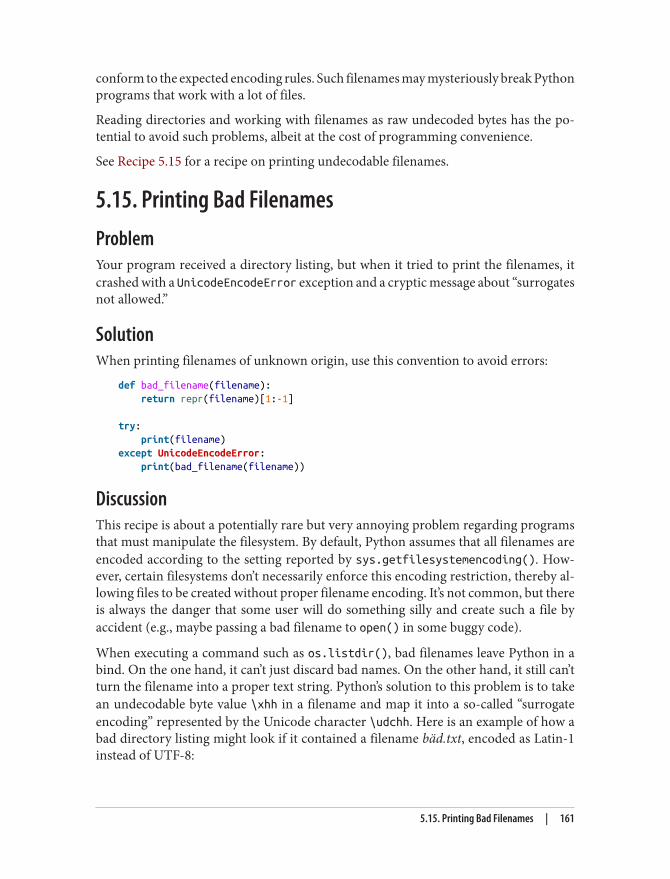
conform to the expected encoding rules. Such filenames may mysteriously break Pythonprograms that work with a lot of files.
Reading directories and working with filenames as raw undecoded bytes has the po‐tential to avoid such problems, albeit at the cost of programming convenience.
See Recipe 5.15 for a recipe on printing undecodable filenames.
5.15. Printing Bad FilenamesProblemYour program received a directory listing, but when it tried to print the filenames, itcrashed with a UnicodeEncodeError exception and a cryptic message about “surrogatesnot allowed.”
SolutionWhen printing filenames of unknown origin, use this convention to avoid errors:
def bad_filename(filename): return repr(filename)[1:-1]
try: print(filename)except UnicodeEncodeError: print(bad_filename(filename))
DiscussionThis recipe is about a potentially rare but very annoying problem regarding programsthat must manipulate the filesystem. By default, Python assumes that all filenames areencoded according to the setting reported by sys.getfilesystemencoding(). How‐ever, certain filesystems don’t necessarily enforce this encoding restriction, thereby al‐lowing files to be created without proper filename encoding. It’s not common, but thereis always the danger that some user will do something silly and create such a file byaccident (e.g., maybe passing a bad filename to open() in some buggy code).
When executing a command such as os.listdir(), bad filenames leave Python in abind. On the one hand, it can’t just discard bad names. On the other hand, it still can’tturn the filename into a proper text string. Python’s solution to this problem is to takean undecodable byte value \xhh in a filename and map it into a so-called “surrogateencoding” represented by the Unicode character \udchh. Here is an example of how abad directory listing might look if it contained a filename bäd.txt, encoded as Latin-1instead of UTF-8:
5.15. Printing Bad Filenames | 161
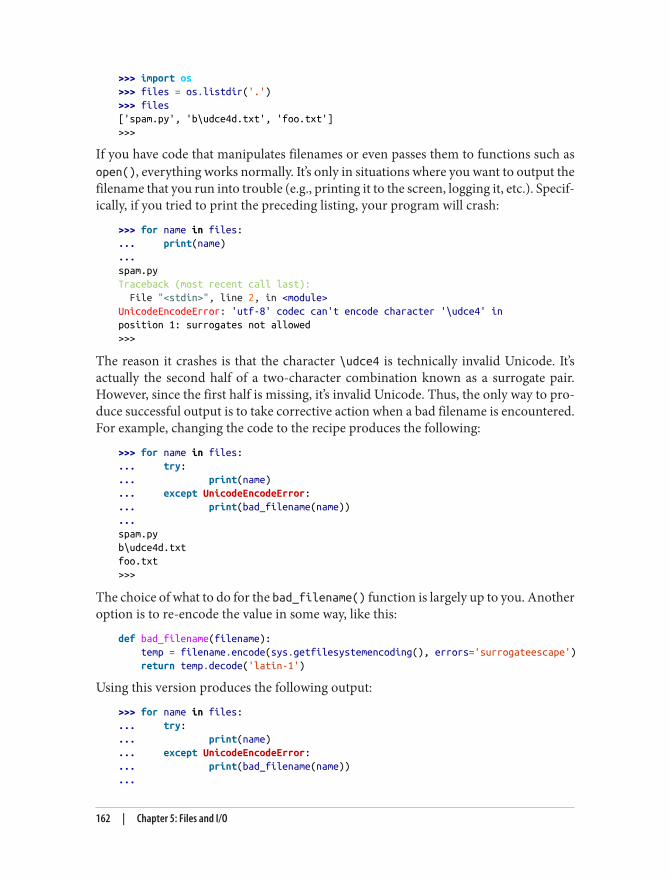
>>> import os>>> files = os.listdir('.')>>> files['spam.py', 'b\udce4d.txt', 'foo.txt']>>>
If you have code that manipulates filenames or even passes them to functions such asopen(), everything works normally. It’s only in situations where you want to output thefilename that you run into trouble (e.g., printing it to the screen, logging it, etc.). Specif‐ically, if you tried to print the preceding listing, your program will crash:
>>> for name in files:... print(name)...spam.pyTraceback (most recent call last): File "<stdin>", line 2, in <module>UnicodeEncodeError: 'utf-8' codec can't encode character '\udce4' inposition 1: surrogates not allowed>>>
The reason it crashes is that the character \udce4 is technically invalid Unicode. It’sactually the second half of a two-character combination known as a surrogate pair.However, since the first half is missing, it’s invalid Unicode. Thus, the only way to pro‐duce successful output is to take corrective action when a bad filename is encountered.For example, changing the code to the recipe produces the following:
>>> for name in files:... try:... print(name)... except UnicodeEncodeError:... print(bad_filename(name))...spam.pyb\udce4d.txtfoo.txt>>>
The choice of what to do for the bad_filename() function is largely up to you. Anotheroption is to re-encode the value in some way, like this:
def bad_filename(filename): temp = filename.encode(sys.getfilesystemencoding(), errors='surrogateescape') return temp.decode('latin-1')
Using this version produces the following output:
>>> for name in files:... try:... print(name)... except UnicodeEncodeError:... print(bad_filename(name))...
162 | Chapter 5: Files and I/O
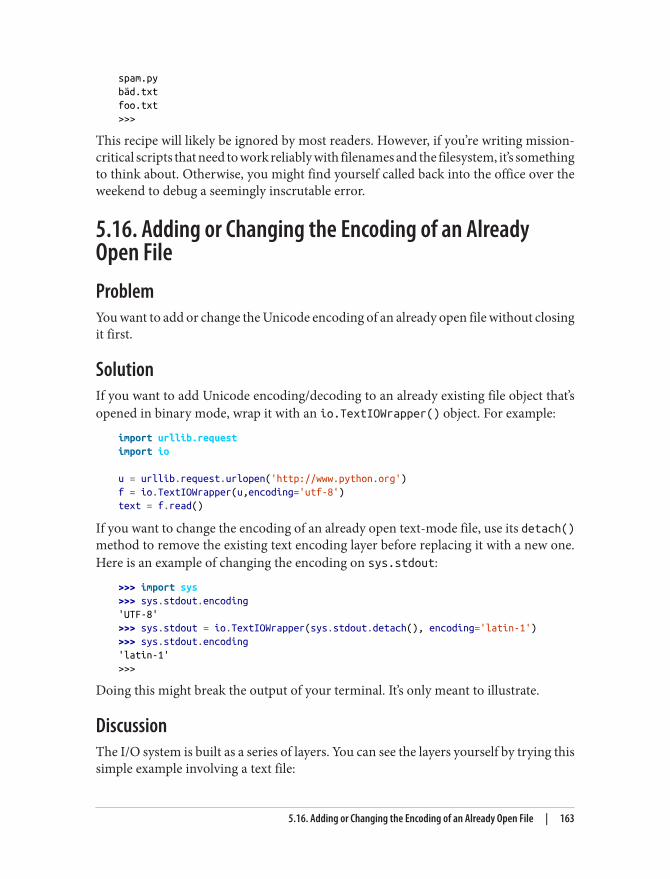
spam.pybäd.txtfoo.txt>>>
This recipe will likely be ignored by most readers. However, if you’re writing mission-critical scripts that need to work reliably with filenames and the filesystem, it’s somethingto think about. Otherwise, you might find yourself called back into the office over theweekend to debug a seemingly inscrutable error.
5.16. Adding or Changing the Encoding of an AlreadyOpen FileProblemYou want to add or change the Unicode encoding of an already open file without closingit first.
SolutionIf you want to add Unicode encoding/decoding to an already existing file object that’sopened in binary mode, wrap it with an io.TextIOWrapper() object. For example:
import urllib.requestimport io
u = urllib.request.urlopen('http://www.python.org')f = io.TextIOWrapper(u,encoding='utf-8')text = f.read()
If you want to change the encoding of an already open text-mode file, use its detach()method to remove the existing text encoding layer before replacing it with a new one.Here is an example of changing the encoding on sys.stdout:
>>> import sys>>> sys.stdout.encoding'UTF-8'>>> sys.stdout = io.TextIOWrapper(sys.stdout.detach(), encoding='latin-1')>>> sys.stdout.encoding'latin-1'>>>
Doing this might break the output of your terminal. It’s only meant to illustrate.
DiscussionThe I/O system is built as a series of layers. You can see the layers yourself by trying thissimple example involving a text file:
5.16. Adding or Changing the Encoding of an Already Open File | 163
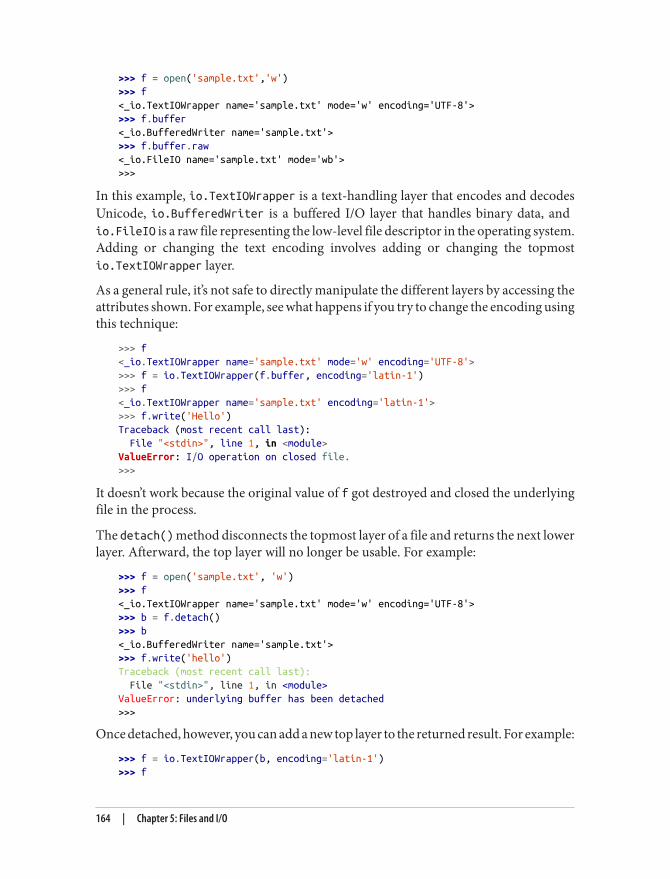
>>> f = open('sample.txt','w')>>> f<_io.TextIOWrapper name='sample.txt' mode='w' encoding='UTF-8'>>>> f.buffer<_io.BufferedWriter name='sample.txt'>>>> f.buffer.raw<_io.FileIO name='sample.txt' mode='wb'>>>>
In this example, io.TextIOWrapper is a text-handling layer that encodes and decodesUnicode, io.BufferedWriter is a buffered I/O layer that handles binary data, and io.FileIO is a raw file representing the low-level file descriptor in the operating system.Adding or changing the text encoding involves adding or changing the topmostio.TextIOWrapper layer.
As a general rule, it’s not safe to directly manipulate the different layers by accessing theattributes shown. For example, see what happens if you try to change the encoding usingthis technique:
>>> f<_io.TextIOWrapper name='sample.txt' mode='w' encoding='UTF-8'>>>> f = io.TextIOWrapper(f.buffer, encoding='latin-1')>>> f<_io.TextIOWrapper name='sample.txt' encoding='latin-1'>>>> f.write('Hello')Traceback (most recent call last): File "<stdin>", line 1, in <module>ValueError: I/O operation on closed file.>>>
It doesn’t work because the original value of f got destroyed and closed the underlyingfile in the process.
The detach() method disconnects the topmost layer of a file and returns the next lowerlayer. Afterward, the top layer will no longer be usable. For example:
>>> f = open('sample.txt', 'w')>>> f<_io.TextIOWrapper name='sample.txt' mode='w' encoding='UTF-8'>>>> b = f.detach()>>> b<_io.BufferedWriter name='sample.txt'>>>> f.write('hello')Traceback (most recent call last): File "<stdin>", line 1, in <module>ValueError: underlying buffer has been detached>>>
Once detached, however, you can add a new top layer to the returned result. For example:
>>> f = io.TextIOWrapper(b, encoding='latin-1')>>> f
164 | Chapter 5: Files and I/O
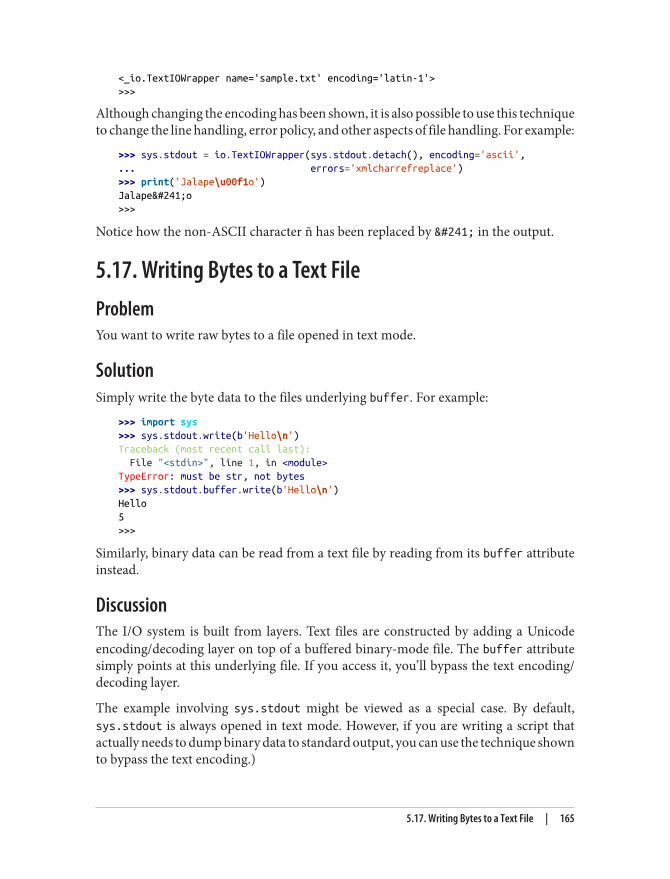
<_io.TextIOWrapper name='sample.txt' encoding='latin-1'>>>>
Although changing the encoding has been shown, it is also possible to use this techniqueto change the line handling, error policy, and other aspects of file handling. For example:
>>> sys.stdout = io.TextIOWrapper(sys.stdout.detach(), encoding='ascii',... errors='xmlcharrefreplace')>>> print('Jalape\u00f1o')Jalapeño>>>
Notice how the non-ASCII character ñ has been replaced by ñ in the output.
5.17. Writing Bytes to a Text FileProblemYou want to write raw bytes to a file opened in text mode.
SolutionSimply write the byte data to the files underlying buffer. For example:
>>> import sys>>> sys.stdout.write(b'Hello\n')Traceback (most recent call last): File "<stdin>", line 1, in <module>TypeError: must be str, not bytes>>> sys.stdout.buffer.write(b'Hello\n')Hello5>>>
Similarly, binary data can be read from a text file by reading from its buffer attributeinstead.
DiscussionThe I/O system is built from layers. Text files are constructed by adding a Unicodeencoding/decoding layer on top of a buffered binary-mode file. The buffer attributesimply points at this underlying file. If you access it, you’ll bypass the text encoding/decoding layer.
The example involving sys.stdout might be viewed as a special case. By default,sys.stdout is always opened in text mode. However, if you are writing a script thatactually needs to dump binary data to standard output, you can use the technique shownto bypass the text encoding.)
5.17. Writing Bytes to a Text File | 165

5.18. Wrapping an Existing File Descriptor As a File ObjectProblemYou have an integer file descriptor correponding to an already open I/O channel on theoperating system (e.g., file, pipe, socket, etc.), and you want to wrap a higher-levelPython file object around it.
SolutionA file descriptor is different than a normal open file in that it is simply an integer handleassigned by the operating system to refer to some kind of system I/O channel. If youhappen to have such a file descriptor, you can wrap a Python file object around it usingthe open() function. However, you simply supply the integer file descriptor as the firstargument instead of the filename. For example:
# Open a low-level file descriptorimport osfd = os.open('somefile.txt', os.O_WRONLY | os.O_CREAT)
# Turn into a proper filef = open(fd, 'wt')f.write('hello world\n')f.close()
When the high-level file object is closed or destroyed, the underlying file descriptor willalso be closed. If this is not desired, supply the optional closefd=False argument toopen(). For example:
# Create a file object, but don't close underlying fd when donef = open(fd, 'wt', closefd=False)...
DiscussionOn Unix systems, this technique of wrapping a file descriptor can be a convenient meansfor putting a file-like interface on an existing I/O channel that was opened in a differentway (e.g., pipes, sockets, etc.). For instance, here is an example involving sockets:
from socket import socket, AF_INET, SOCK_STREAM
def echo_client(client_sock, addr): print('Got connection from', addr)
# Make text-mode file wrappers for socket reading/writing client_in = open(client_sock.fileno(), 'rt', encoding='latin-1', closefd=False) client_out = open(client_sock.fileno(), 'wt', encoding='latin-1', closefd=False)
166 | Chapter 5: Files and I/O
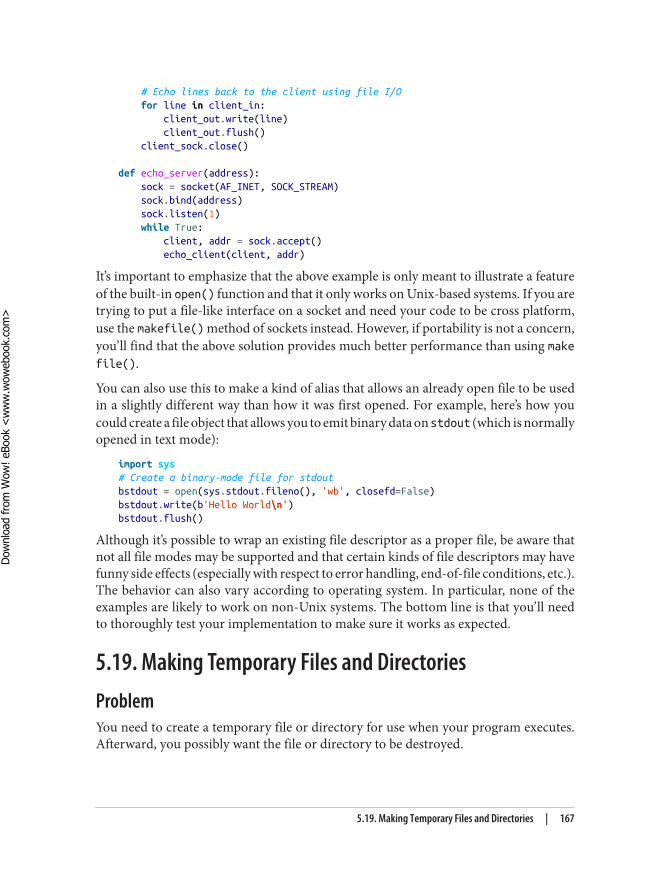
# Echo lines back to the client using file I/O for line in client_in: client_out.write(line) client_out.flush() client_sock.close()
def echo_server(address): sock = socket(AF_INET, SOCK_STREAM) sock.bind(address) sock.listen(1) while True: client, addr = sock.accept() echo_client(client, addr)
It’s important to emphasize that the above example is only meant to illustrate a featureof the built-in open() function and that it only works on Unix-based systems. If you aretrying to put a file-like interface on a socket and need your code to be cross platform,use the makefile() method of sockets instead. However, if portability is not a concern,you’ll find that the above solution provides much better performance than using makefile().
You can also use this to make a kind of alias that allows an already open file to be usedin a slightly different way than how it was first opened. For example, here’s how youcould create a file object that allows you to emit binary data on stdout (which is normallyopened in text mode):
import sys# Create a binary-mode file for stdoutbstdout = open(sys.stdout.fileno(), 'wb', closefd=False)bstdout.write(b'Hello World\n')bstdout.flush()
Although it’s possible to wrap an existing file descriptor as a proper file, be aware thatnot all file modes may be supported and that certain kinds of file descriptors may havefunny side effects (especially with respect to error handling, end-of-file conditions, etc.).The behavior can also vary according to operating system. In particular, none of theexamples are likely to work on non-Unix systems. The bottom line is that you’ll needto thoroughly test your implementation to make sure it works as expected.
5.19. Making Temporary Files and DirectoriesProblemYou need to create a temporary file or directory for use when your program executes.Afterward, you possibly want the file or directory to be destroyed.
5.19. Making Temporary Files and Directories | 167
Dow
nlo
ad fro
m W
ow
! eBook
<w
ww
.wow
ebook.
com
>
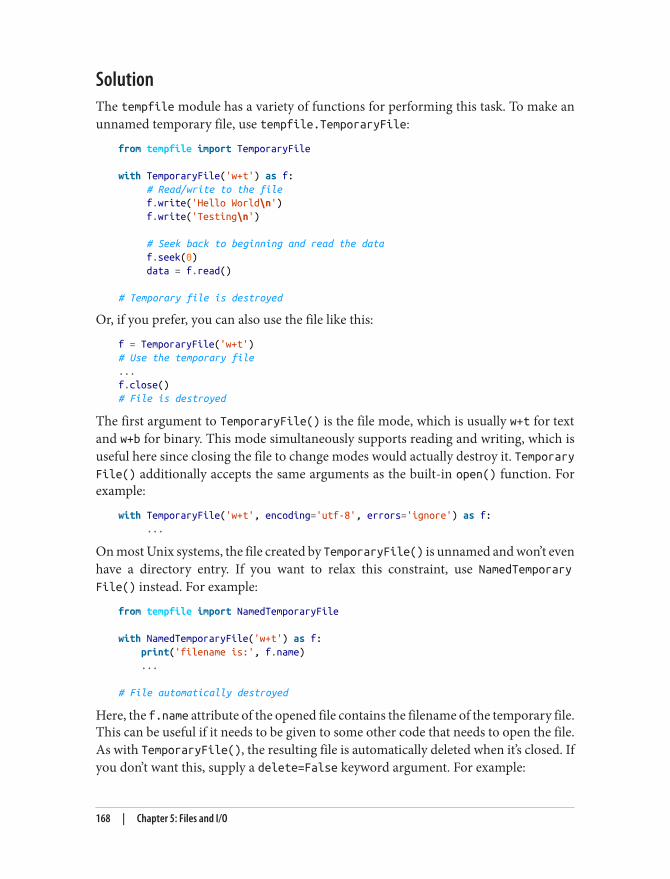
SolutionThe tempfile module has a variety of functions for performing this task. To make anunnamed temporary file, use tempfile.TemporaryFile:
from tempfile import TemporaryFile
with TemporaryFile('w+t') as f: # Read/write to the file f.write('Hello World\n') f.write('Testing\n')
# Seek back to beginning and read the data f.seek(0) data = f.read()
# Temporary file is destroyed
Or, if you prefer, you can also use the file like this:
f = TemporaryFile('w+t')# Use the temporary file...f.close()# File is destroyed
The first argument to TemporaryFile() is the file mode, which is usually w+t for textand w+b for binary. This mode simultaneously supports reading and writing, which isuseful here since closing the file to change modes would actually destroy it. TemporaryFile() additionally accepts the same arguments as the built-in open() function. Forexample:
with TemporaryFile('w+t', encoding='utf-8', errors='ignore') as f: ...
On most Unix systems, the file created by TemporaryFile() is unnamed and won’t evenhave a directory entry. If you want to relax this constraint, use NamedTemporaryFile() instead. For example:
from tempfile import NamedTemporaryFile
with NamedTemporaryFile('w+t') as f: print('filename is:', f.name) ...
# File automatically destroyed
Here, the f.name attribute of the opened file contains the filename of the temporary file.This can be useful if it needs to be given to some other code that needs to open the file.As with TemporaryFile(), the resulting file is automatically deleted when it’s closed. Ifyou don’t want this, supply a delete=False keyword argument. For example:
168 | Chapter 5: Files and I/O

with NamedTemporaryFile('w+t', delete=False) as f: print('filename is:', f.name) ...
To make a temporary directory, use tempfile.TemporaryDirectory(). For example:
from tempfile import TemporaryDirectorywith TemporaryDirectory() as dirname: print('dirname is:', dirname) # Use the directory ...# Directory and all contents destroyed
DiscussionThe TemporaryFile(), NamedTemporaryFile(), and TemporaryDirectory() functionsare probably the most convenient way to work with temporary files and directories,because they automatically handle all of the steps of creation and subsequent cleanup.At a lower level, you can also use the mkstemp() and mkdtemp() to create temporaryfiles and directories. For example:
>>> import tempfile>>> tempfile.mkstemp()(3, '/var/folders/7W/7WZl5sfZEF0pljrEB1UMWE+++TI/-Tmp-/tmp7fefhv')>>> tempfile.mkdtemp()'/var/folders/7W/7WZl5sfZEF0pljrEB1UMWE+++TI/-Tmp-/tmp5wvcv6'>>>
However, these functions don’t really take care of further management. For example,the mkstemp() function simply returns a raw OS file descriptor and leaves it up to youto turn it into a proper file. Similarly, it’s up to you to clean up the files if you want.
Normally, temporary files are created in the system’s default location, suchas /var/tmp or similar. To find out the actual location, use the tempfile.gettempdir() function. For example:
>>> tempfile.gettempdir()'/var/folders/7W/7WZl5sfZEF0pljrEB1UMWE+++TI/-Tmp-'>>>
All of the temporary-file-related functions allow you to override this directory as wellas the naming conventions using the prefix, suffix, and dir keyword arguments. Forexample:
>>> f = NamedTemporaryFile(prefix='mytemp', suffix='.txt', dir='/tmp')>>> f.name'/tmp/mytemp8ee899.txt'>>>
Last, but not least, to the extent possible, the tempfile() module creates temporaryfiles in the most secure manner possible. This includes only giving access permission
5.19. Making Temporary Files and Directories | 169
to the current user and taking steps to avoid race conditions in file creation. Be awarethat there can be differences between platforms. Thus, you should make sure to checkthe official documentation for the finer points.
5.20. Communicating with Serial PortsProblemYou want to read and write data over a serial port, typically to interact with some kindof hardware device (e.g., a robot or sensor).
SolutionAlthough you can probably do this directly using Python’s built-in I/O primitives, yourbest bet for serial communication is to use the pySerial package. Getting started withthe package is very easy. You simply open up a serial port using code like this:
import serialser = serial.Serial('/dev/tty.usbmodem641', # Device name varies baudrate=9600, bytesize=8, parity='N', stopbits=1)
The device name will vary according to the kind of device and operating system. Forinstance, on Windows, you can use a device of 0, 1, and so on, to open up the commu‐nication ports such as “COM0” and “COM1.” Once open, you can read and write datausing read(), readline(), and write() calls. For example:
ser.write(b'G1 X50 Y50\r\n')resp = ser.readline()
For the most part, simple serial communication should be pretty simple from this pointforward.
DiscussionAlthough simple on the surface, serial communication can sometimes get rather messy.One reason you should use a package such as pySerial is that it provides support foradvanced features (e.g., timeouts, control flow, buffer flushing, handshaking, etc.). Forinstance, if you want to enable RTS-CTS handshaking, you simply provide artscts=True argument to Serial(). The provided documentation is excellent, sothere’s little benefit to paraphrasing it here.
Keep in mind that all I/O involving serial ports is binary. Thus, make sure you writeyour code to use bytes instead of text (or perform proper text encoding/decoding as
170 | Chapter 5: Files and I/O
needed). The struct module may also be useful should you need to create binary-codedcommands or packets.
5.21. Serializing Python ObjectsProblemYou need to serialize a Python object into a byte stream so that you can do things suchas save it to a file, store it in a database, or transmit it over a network connection.
SolutionThe most common approach for serializing data is to use the pickle module. To dumpan object to a file, you do this:
import pickle
data = ... # Some Python objectf = open('somefile', 'wb')pickle.dump(data, f)
To dump an object to a string, use pickle.dumps():
s = pickle.dumps(data)
To re-create an object from a byte stream, use either the pickle.load() or pickle.loads() functions. For example:
# Restore from a filef = open('somefile', 'rb')data = pickle.load(f)
# Restore from a stringdata = pickle.loads(s)
DiscussionFor most programs, usage of the dump() and load() function is all you need to effectivelyuse pickle. It simply works with most Python data types and instances of user-definedclasses. If you’re working with any kind of library that lets you do things such as save/restore Python objects in databases or transmit objects over the network, there’s a prettygood chance that pickle is being used.
pickle is a Python-specific self-describing data encoding. By self-describing, the seri‐alized data contains information related to the start and end of each object as well asinformation about its type. Thus, you don’t need to worry about defining records—itsimply works. For example, if working with multiple objects, you can do this:
5.21. Serializing Python Objects | 171
>>> import pickle>>> f = open('somedata', 'wb')>>> pickle.dump([1, 2, 3, 4], f)>>> pickle.dump('hello', f)>>> pickle.dump({'Apple', 'Pear', 'Banana'}, f)>>> f.close()>>> f = open('somedata', 'rb')>>> pickle.load(f)[1, 2, 3, 4]>>> pickle.load(f)'hello'>>> pickle.load(f){'Apple', 'Pear', 'Banana'}>>>
You can pickle functions, classes, and instances, but the resulting data only encodesname references to the associated code objects. For example:
>>> import math>>> import pickle.>>> pickle.dumps(math.cos)b'\x80\x03cmath\ncos\nq\x00.'>>>
When the data is unpickled, it is assumed that all of the required source is available.Modules, classes, and functions will automatically be imported as needed. For applica‐tions where Python data is being shared between interpreters on different machines,this is a potential maintenance issue, as all machines must have access to the same sourcecode.
pickle.load() should never be used on untrusted data. As a side effectof loading, pickle will automatically load modules and make instances.However, an evildoer who knows how pickle works can create “mal‐formed” data that causes Python to execute arbitrary system com‐mands. Thus, it’s essential that pickle only be used internally with in‐terpreters that have some ability to authenticate one another.
Certain kinds of objects can’t be pickled. These are typically objects that involve somesort of external system state, such as open files, open network connections, threads,processes, stack frames, and so forth. User-defined classes can sometimes work aroundthese limitations by providing __getstate__() and __setstate__() methods. If de‐fined, pickle.dump() will call __getstate__() to get an object that can be pickled.Similarly, __setstate__() will be invoked on unpickling. To illustrate what’s possible,here is a class that internally defines a thread but can still be pickled/unpickled:
# countdown.pyimport timeimport threading
172 | Chapter 5: Files and I/O
class Countdown: def __init__(self, n): self.n = n self.thr = threading.Thread(target=self.run) self.thr.daemon = True self.thr.start()
def run(self): while self.n > 0: print('T-minus', self.n) self.n -= 1 time.sleep(5)
def __getstate__(self): return self.n
def __setstate__(self, n): self.__init__(n)
Try the following experiment involving pickling:
>>> import countdown>>> c = countdown.Countdown(30)>>> T-minus 30T-minus 29T-minus 28...
>>> # After a few moments>>> f = open('cstate.p', 'wb')>>> import pickle>>> pickle.dump(c, f)>>> f.close()
Now quit Python and try this after restart:
>>> f = open('cstate.p', 'rb')>>> pickle.load(f)countdown.Countdown object at 0x10069e2d0>T-minus 19T-minus 18...
You should see the thread magically spring to life again, picking up where it left off whenyou first pickled it.
pickle is not a particularly efficient encoding for large data structures such as binaryarrays created by libraries like the array module or numpy. If you’re moving largeamounts of array data around, you may be better off simply saving bulk array data in afile or using a more standardized encoding, such as HDF5 (supported by third-partylibraries).
5.21. Serializing Python Objects | 173
Because of its Python-specific nature and attachment to source code, you probablyshouldn’t use pickle as a format for long-term storage. For example, if the source codechanges, all of your stored data might break and become unreadable. Frankly, for storingdata in databases and archival storage, you’re probably better off using a more standarddata encoding, such as XML, CSV, or JSON. These encodings are more standardized,supported by many different languages, and more likely to be better adapted to changesin your source code.
Last, but not least, be aware that pickle has a huge variety of options and tricky cornercases. For the most common uses, you don’t need to worry about them, but a look atthe official documentation should be required if you’re going to build a signficant ap‐plication that uses pickle for serialization.
174 | Chapter 5: Files and I/O
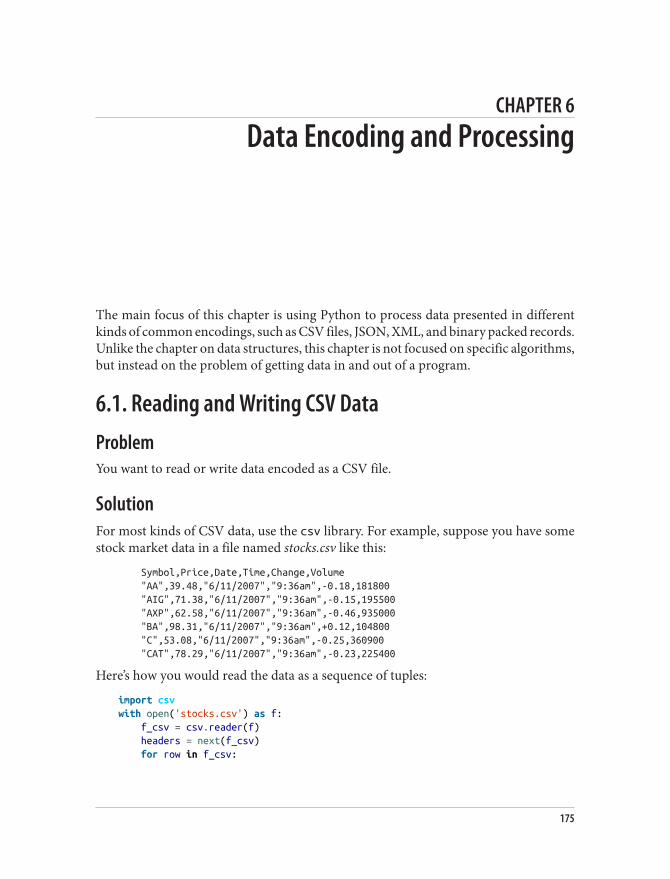
CHAPTER 6
Data Encoding and Processing
The main focus of this chapter is using Python to process data presented in differentkinds of common encodings, such as CSV files, JSON, XML, and binary packed records.Unlike the chapter on data structures, this chapter is not focused on specific algorithms,but instead on the problem of getting data in and out of a program.
6.1. Reading and Writing CSV DataProblemYou want to read or write data encoded as a CSV file.
SolutionFor most kinds of CSV data, use the csv library. For example, suppose you have somestock market data in a file named stocks.csv like this:
Symbol,Price,Date,Time,Change,Volume "AA",39.48,"6/11/2007","9:36am",-0.18,181800 "AIG",71.38,"6/11/2007","9:36am",-0.15,195500 "AXP",62.58,"6/11/2007","9:36am",-0.46,935000 "BA",98.31,"6/11/2007","9:36am",+0.12,104800 "C",53.08,"6/11/2007","9:36am",-0.25,360900 "CAT",78.29,"6/11/2007","9:36am",-0.23,225400
Here’s how you would read the data as a sequence of tuples:
import csvwith open('stocks.csv') as f: f_csv = csv.reader(f) headers = next(f_csv) for row in f_csv:
175
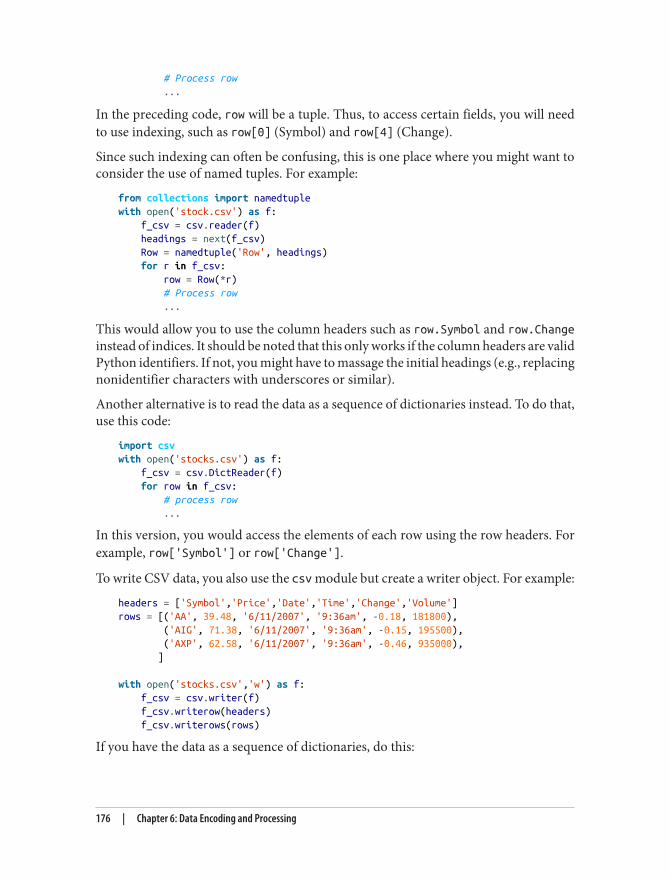
# Process row ...
In the preceding code, row will be a tuple. Thus, to access certain fields, you will needto use indexing, such as row[0] (Symbol) and row[4] (Change).
Since such indexing can often be confusing, this is one place where you might want toconsider the use of named tuples. For example:
from collections import namedtuplewith open('stock.csv') as f: f_csv = csv.reader(f) headings = next(f_csv) Row = namedtuple('Row', headings) for r in f_csv: row = Row(*r) # Process row ...
This would allow you to use the column headers such as row.Symbol and row.Changeinstead of indices. It should be noted that this only works if the column headers are validPython identifiers. If not, you might have to massage the initial headings (e.g., replacingnonidentifier characters with underscores or similar).
Another alternative is to read the data as a sequence of dictionaries instead. To do that,use this code:
import csvwith open('stocks.csv') as f: f_csv = csv.DictReader(f) for row in f_csv: # process row ...
In this version, you would access the elements of each row using the row headers. Forexample, row['Symbol'] or row['Change'].
To write CSV data, you also use the csv module but create a writer object. For example:
headers = ['Symbol','Price','Date','Time','Change','Volume']rows = [('AA', 39.48, '6/11/2007', '9:36am', -0.18, 181800), ('AIG', 71.38, '6/11/2007', '9:36am', -0.15, 195500), ('AXP', 62.58, '6/11/2007', '9:36am', -0.46, 935000), ]
with open('stocks.csv','w') as f: f_csv = csv.writer(f) f_csv.writerow(headers) f_csv.writerows(rows)
If you have the data as a sequence of dictionaries, do this:
176 | Chapter 6: Data Encoding and Processing
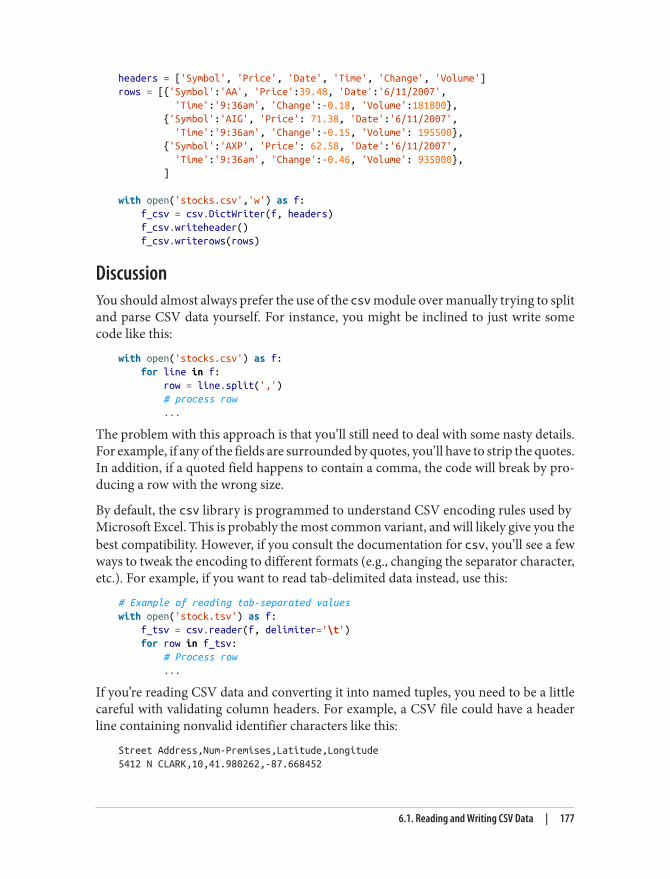
headers = ['Symbol', 'Price', 'Date', 'Time', 'Change', 'Volume']rows = [{'Symbol':'AA', 'Price':39.48, 'Date':'6/11/2007', 'Time':'9:36am', 'Change':-0.18, 'Volume':181800}, {'Symbol':'AIG', 'Price': 71.38, 'Date':'6/11/2007', 'Time':'9:36am', 'Change':-0.15, 'Volume': 195500}, {'Symbol':'AXP', 'Price': 62.58, 'Date':'6/11/2007', 'Time':'9:36am', 'Change':-0.46, 'Volume': 935000}, ]
with open('stocks.csv','w') as f: f_csv = csv.DictWriter(f, headers) f_csv.writeheader() f_csv.writerows(rows)
DiscussionYou should almost always prefer the use of the csv module over manually trying to splitand parse CSV data yourself. For instance, you might be inclined to just write somecode like this:
with open('stocks.csv') as f: for line in f: row = line.split(',') # process row ...
The problem with this approach is that you’ll still need to deal with some nasty details.For example, if any of the fields are surrounded by quotes, you’ll have to strip the quotes.In addition, if a quoted field happens to contain a comma, the code will break by pro‐ducing a row with the wrong size.
By default, the csv library is programmed to understand CSV encoding rules used by Microsoft Excel. This is probably the most common variant, and will likely give you thebest compatibility. However, if you consult the documentation for csv, you’ll see a fewways to tweak the encoding to different formats (e.g., changing the separator character,etc.). For example, if you want to read tab-delimited data instead, use this:
# Example of reading tab-separated valueswith open('stock.tsv') as f: f_tsv = csv.reader(f, delimiter='\t') for row in f_tsv: # Process row ...
If you’re reading CSV data and converting it into named tuples, you need to be a littlecareful with validating column headers. For example, a CSV file could have a headerline containing nonvalid identifier characters like this:
Street Address,Num-Premises,Latitude,Longitude5412 N CLARK,10,41.980262,-87.668452
6.1. Reading and Writing CSV Data | 177
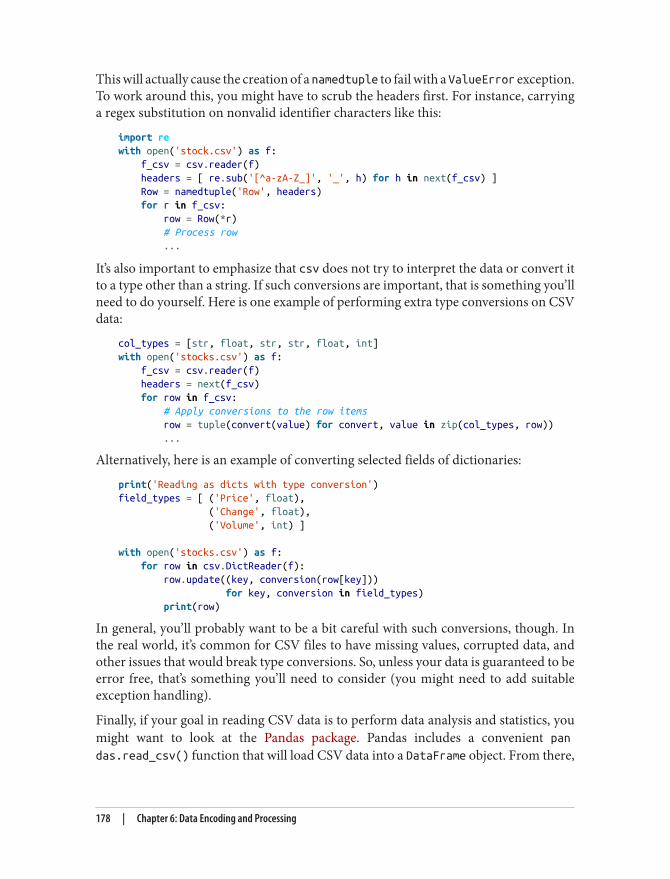
This will actually cause the creation of a namedtuple to fail with a ValueError exception.To work around this, you might have to scrub the headers first. For instance, carryinga regex substitution on nonvalid identifier characters like this:
import rewith open('stock.csv') as f: f_csv = csv.reader(f) headers = [ re.sub('[^a-zA-Z_]', '_', h) for h in next(f_csv) ] Row = namedtuple('Row', headers) for r in f_csv: row = Row(*r) # Process row ...
It’s also important to emphasize that csv does not try to interpret the data or convert itto a type other than a string. If such conversions are important, that is something you’llneed to do yourself. Here is one example of performing extra type conversions on CSVdata:
col_types = [str, float, str, str, float, int]with open('stocks.csv') as f: f_csv = csv.reader(f) headers = next(f_csv) for row in f_csv: # Apply conversions to the row items row = tuple(convert(value) for convert, value in zip(col_types, row)) ...
Alternatively, here is an example of converting selected fields of dictionaries:
print('Reading as dicts with type conversion')field_types = [ ('Price', float), ('Change', float), ('Volume', int) ]
with open('stocks.csv') as f: for row in csv.DictReader(f): row.update((key, conversion(row[key])) for key, conversion in field_types) print(row)
In general, you’ll probably want to be a bit careful with such conversions, though. Inthe real world, it’s common for CSV files to have missing values, corrupted data, andother issues that would break type conversions. So, unless your data is guaranteed to beerror free, that’s something you’ll need to consider (you might need to add suitableexception handling).
Finally, if your goal in reading CSV data is to perform data analysis and statistics, youmight want to look at the Pandas package. Pandas includes a convenient pandas.read_csv() function that will load CSV data into a DataFrame object. From there,
178 | Chapter 6: Data Encoding and Processing
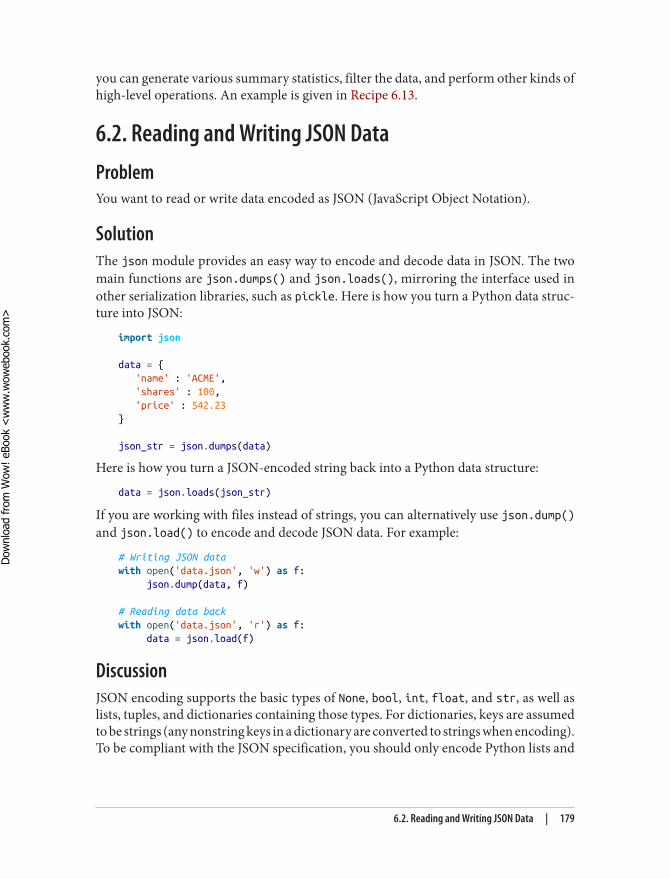
you can generate various summary statistics, filter the data, and perform other kinds ofhigh-level operations. An example is given in Recipe 6.13.
6.2. Reading and Writing JSON DataProblemYou want to read or write data encoded as JSON (JavaScript Object Notation).
SolutionThe json module provides an easy way to encode and decode data in JSON. The twomain functions are json.dumps() and json.loads(), mirroring the interface used inother serialization libraries, such as pickle. Here is how you turn a Python data struc‐ture into JSON:
import json
data = { 'name' : 'ACME', 'shares' : 100, 'price' : 542.23}
json_str = json.dumps(data)
Here is how you turn a JSON-encoded string back into a Python data structure:
data = json.loads(json_str)
If you are working with files instead of strings, you can alternatively use json.dump()and json.load() to encode and decode JSON data. For example:
# Writing JSON datawith open('data.json', 'w') as f: json.dump(data, f)
# Reading data backwith open('data.json', 'r') as f: data = json.load(f)
DiscussionJSON encoding supports the basic types of None, bool, int, float, and str, as well aslists, tuples, and dictionaries containing those types. For dictionaries, keys are assumedto be strings (any nonstring keys in a dictionary are converted to strings when encoding).To be compliant with the JSON specification, you should only encode Python lists and
6.2. Reading and Writing JSON Data | 179
Dow
nlo
ad fro
m W
ow
! eBook
<w
ww
.wow
ebook.
com
>
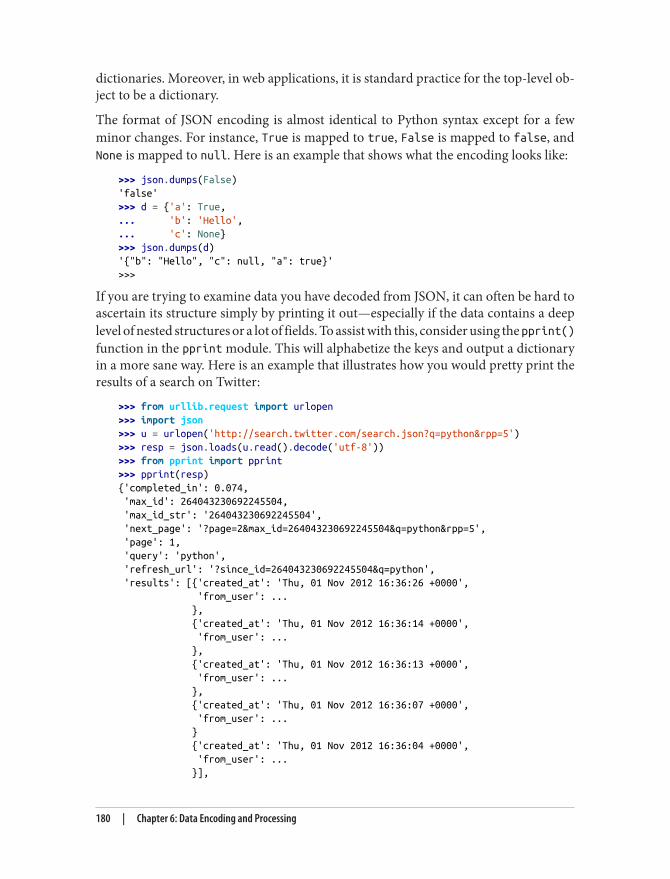
dictionaries. Moreover, in web applications, it is standard practice for the top-level ob‐ject to be a dictionary.
The format of JSON encoding is almost identical to Python syntax except for a fewminor changes. For instance, True is mapped to true, False is mapped to false, andNone is mapped to null. Here is an example that shows what the encoding looks like:
>>> json.dumps(False)'false'>>> d = {'a': True,... 'b': 'Hello',... 'c': None}>>> json.dumps(d)'{"b": "Hello", "c": null, "a": true}'>>>
If you are trying to examine data you have decoded from JSON, it can often be hard toascertain its structure simply by printing it out—especially if the data contains a deeplevel of nested structures or a lot of fields. To assist with this, consider using the pprint()function in the pprint module. This will alphabetize the keys and output a dictionaryin a more sane way. Here is an example that illustrates how you would pretty print theresults of a search on Twitter:
>>> from urllib.request import urlopen>>> import json>>> u = urlopen('http://search.twitter.com/search.json?q=python&rpp=5')>>> resp = json.loads(u.read().decode('utf-8'))>>> from pprint import pprint>>> pprint(resp){'completed_in': 0.074, 'max_id': 264043230692245504, 'max_id_str': '264043230692245504', 'next_page': '?page=2&max_id=264043230692245504&q=python&rpp=5', 'page': 1, 'query': 'python', 'refresh_url': '?since_id=264043230692245504&q=python', 'results': [{'created_at': 'Thu, 01 Nov 2012 16:36:26 +0000', 'from_user': ... }, {'created_at': 'Thu, 01 Nov 2012 16:36:14 +0000', 'from_user': ... }, {'created_at': 'Thu, 01 Nov 2012 16:36:13 +0000', 'from_user': ... }, {'created_at': 'Thu, 01 Nov 2012 16:36:07 +0000', 'from_user': ... } {'created_at': 'Thu, 01 Nov 2012 16:36:04 +0000', 'from_user': ... }],
180 | Chapter 6: Data Encoding and Processing
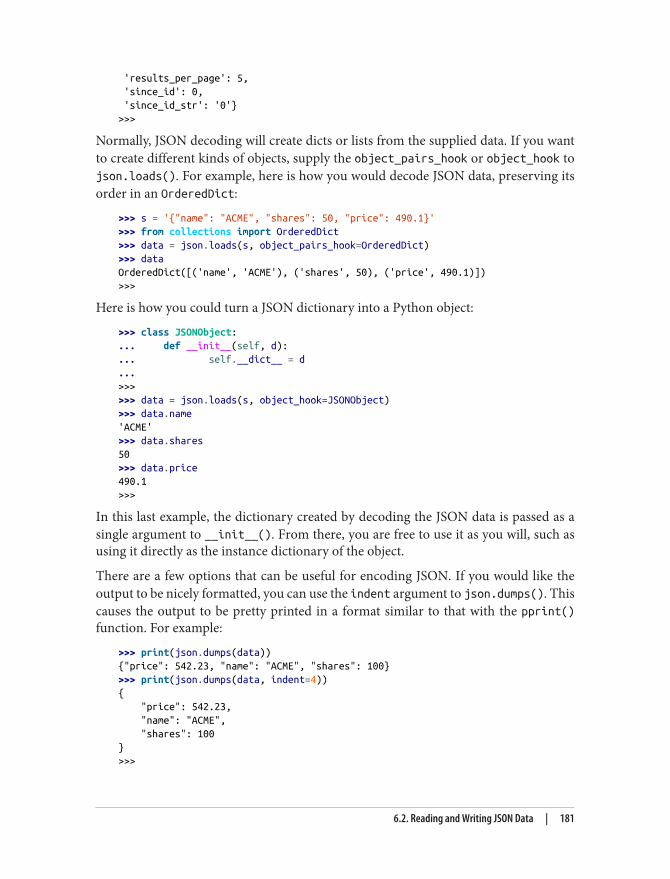
'results_per_page': 5, 'since_id': 0, 'since_id_str': '0'}>>>
Normally, JSON decoding will create dicts or lists from the supplied data. If you wantto create different kinds of objects, supply the object_pairs_hook or object_hook tojson.loads(). For example, here is how you would decode JSON data, preserving itsorder in an OrderedDict:
>>> s = '{"name": "ACME", "shares": 50, "price": 490.1}'>>> from collections import OrderedDict>>> data = json.loads(s, object_pairs_hook=OrderedDict)>>> dataOrderedDict([('name', 'ACME'), ('shares', 50), ('price', 490.1)])>>>
Here is how you could turn a JSON dictionary into a Python object:
>>> class JSONObject:... def __init__(self, d):... self.__dict__ = d...>>>>>> data = json.loads(s, object_hook=JSONObject)>>> data.name'ACME'>>> data.shares50>>> data.price490.1>>>
In this last example, the dictionary created by decoding the JSON data is passed as asingle argument to __init__(). From there, you are free to use it as you will, such asusing it directly as the instance dictionary of the object.
There are a few options that can be useful for encoding JSON. If you would like theoutput to be nicely formatted, you can use the indent argument to json.dumps(). Thiscauses the output to be pretty printed in a format similar to that with the pprint()function. For example:
>>> print(json.dumps(data)){"price": 542.23, "name": "ACME", "shares": 100}>>> print(json.dumps(data, indent=4)){ "price": 542.23, "name": "ACME", "shares": 100}>>>
6.2. Reading and Writing JSON Data | 181
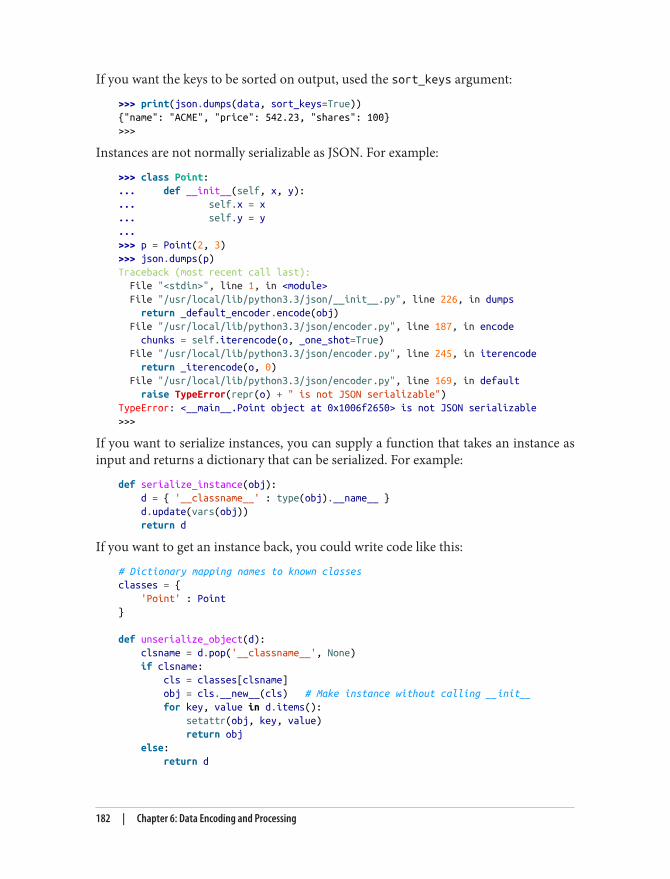
If you want the keys to be sorted on output, used the sort_keys argument:
>>> print(json.dumps(data, sort_keys=True)){"name": "ACME", "price": 542.23, "shares": 100}>>>
Instances are not normally serializable as JSON. For example:
>>> class Point:... def __init__(self, x, y):... self.x = x... self.y = y...>>> p = Point(2, 3)>>> json.dumps(p)Traceback (most recent call last): File "<stdin>", line 1, in <module> File "/usr/local/lib/python3.3/json/__init__.py", line 226, in dumps return _default_encoder.encode(obj) File "/usr/local/lib/python3.3/json/encoder.py", line 187, in encode chunks = self.iterencode(o, _one_shot=True) File "/usr/local/lib/python3.3/json/encoder.py", line 245, in iterencode return _iterencode(o, 0) File "/usr/local/lib/python3.3/json/encoder.py", line 169, in default raise TypeError(repr(o) + " is not JSON serializable")TypeError: <__main__.Point object at 0x1006f2650> is not JSON serializable>>>
If you want to serialize instances, you can supply a function that takes an instance asinput and returns a dictionary that can be serialized. For example:
def serialize_instance(obj): d = { '__classname__' : type(obj).__name__ } d.update(vars(obj)) return d
If you want to get an instance back, you could write code like this:
# Dictionary mapping names to known classesclasses = { 'Point' : Point}
def unserialize_object(d): clsname = d.pop('__classname__', None) if clsname: cls = classes[clsname] obj = cls.__new__(cls) # Make instance without calling __init__ for key, value in d.items(): setattr(obj, key, value) return obj else: return d
182 | Chapter 6: Data Encoding and Processing
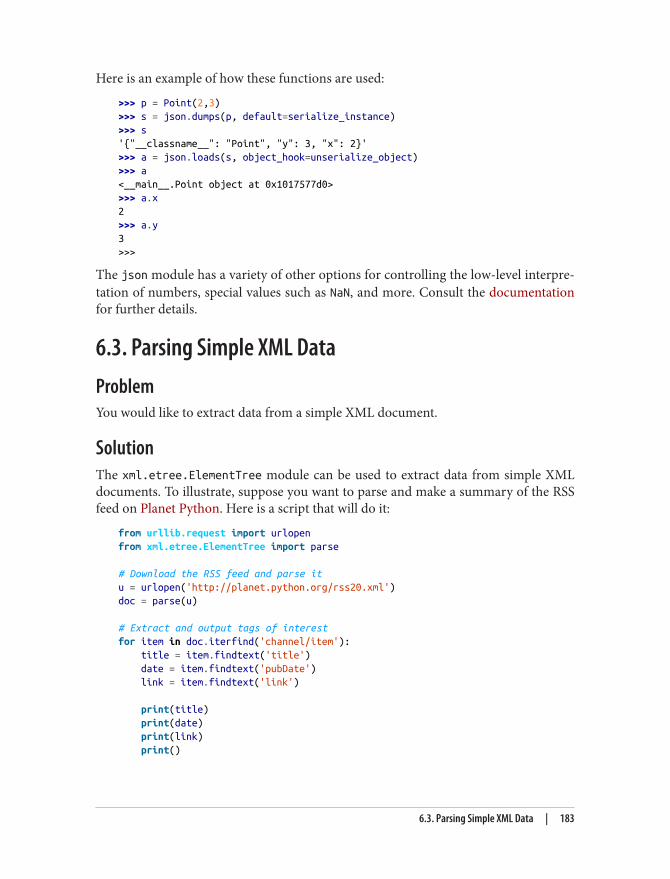
Here is an example of how these functions are used:
>>> p = Point(2,3)>>> s = json.dumps(p, default=serialize_instance)>>> s'{"__classname__": "Point", "y": 3, "x": 2}'>>> a = json.loads(s, object_hook=unserialize_object)>>> a<__main__.Point object at 0x1017577d0>>>> a.x2>>> a.y3>>>
The json module has a variety of other options for controlling the low-level interpre‐tation of numbers, special values such as NaN, and more. Consult the documentationfor further details.
6.3. Parsing Simple XML DataProblemYou would like to extract data from a simple XML document.
SolutionThe xml.etree.ElementTree module can be used to extract data from simple XMLdocuments. To illustrate, suppose you want to parse and make a summary of the RSSfeed on Planet Python. Here is a script that will do it:
from urllib.request import urlopenfrom xml.etree.ElementTree import parse
# Download the RSS feed and parse itu = urlopen('http://planet.python.org/rss20.xml')doc = parse(u)
# Extract and output tags of interestfor item in doc.iterfind('channel/item'): title = item.findtext('title') date = item.findtext('pubDate') link = item.findtext('link')
print(title) print(date) print(link) print()
6.3. Parsing Simple XML Data | 183
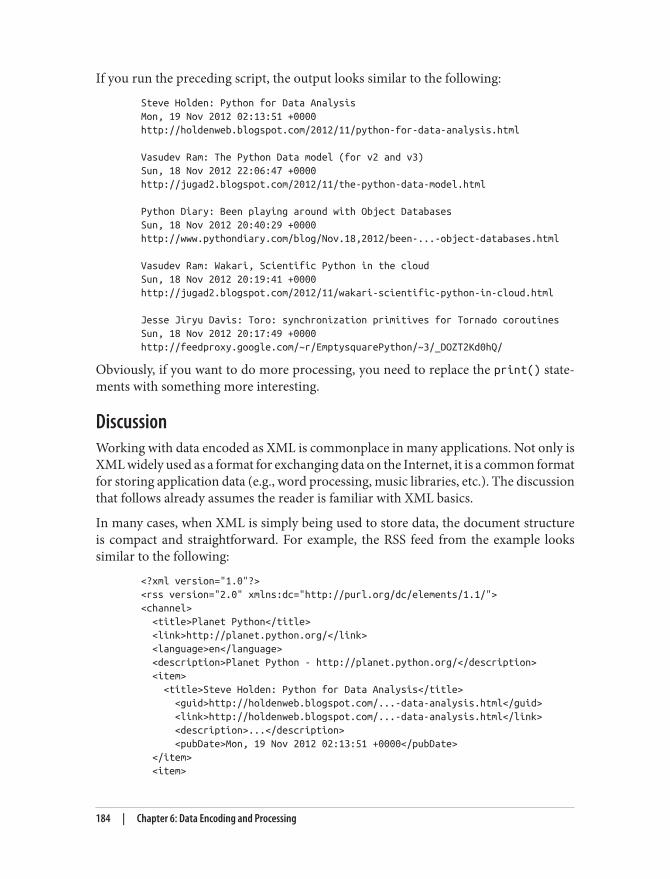
If you run the preceding script, the output looks similar to the following:
Steve Holden: Python for Data Analysis Mon, 19 Nov 2012 02:13:51 +0000 http://holdenweb.blogspot.com/2012/11/python-for-data-analysis.html
Vasudev Ram: The Python Data model (for v2 and v3) Sun, 18 Nov 2012 22:06:47 +0000 http://jugad2.blogspot.com/2012/11/the-python-data-model.html
Python Diary: Been playing around with Object Databases Sun, 18 Nov 2012 20:40:29 +0000 http://www.pythondiary.com/blog/Nov.18,2012/been-...-object-databases.html
Vasudev Ram: Wakari, Scientific Python in the cloud Sun, 18 Nov 2012 20:19:41 +0000 http://jugad2.blogspot.com/2012/11/wakari-scientific-python-in-cloud.html
Jesse Jiryu Davis: Toro: synchronization primitives for Tornado coroutines Sun, 18 Nov 2012 20:17:49 +0000 http://feedproxy.google.com/~r/EmptysquarePython/~3/_DOZT2Kd0hQ/
Obviously, if you want to do more processing, you need to replace the print() state‐ments with something more interesting.
DiscussionWorking with data encoded as XML is commonplace in many applications. Not only isXML widely used as a format for exchanging data on the Internet, it is a common formatfor storing application data (e.g., word processing, music libraries, etc.). The discussionthat follows already assumes the reader is familiar with XML basics.
In many cases, when XML is simply being used to store data, the document structureis compact and straightforward. For example, the RSS feed from the example lookssimilar to the following:
<?xml version="1.0"?> <rss version="2.0" xmlns:dc="http://purl.org/dc/elements/1.1/"> <channel> <title>Planet Python</title> <link>http://planet.python.org/</link> <language>en</language> <description>Planet Python - http://planet.python.org/</description> <item> <title>Steve Holden: Python for Data Analysis</title> <guid>http://holdenweb.blogspot.com/...-data-analysis.html</guid> <link>http://holdenweb.blogspot.com/...-data-analysis.html</link> <description>...</description> <pubDate>Mon, 19 Nov 2012 02:13:51 +0000</pubDate> </item> <item>
184 | Chapter 6: Data Encoding and Processing
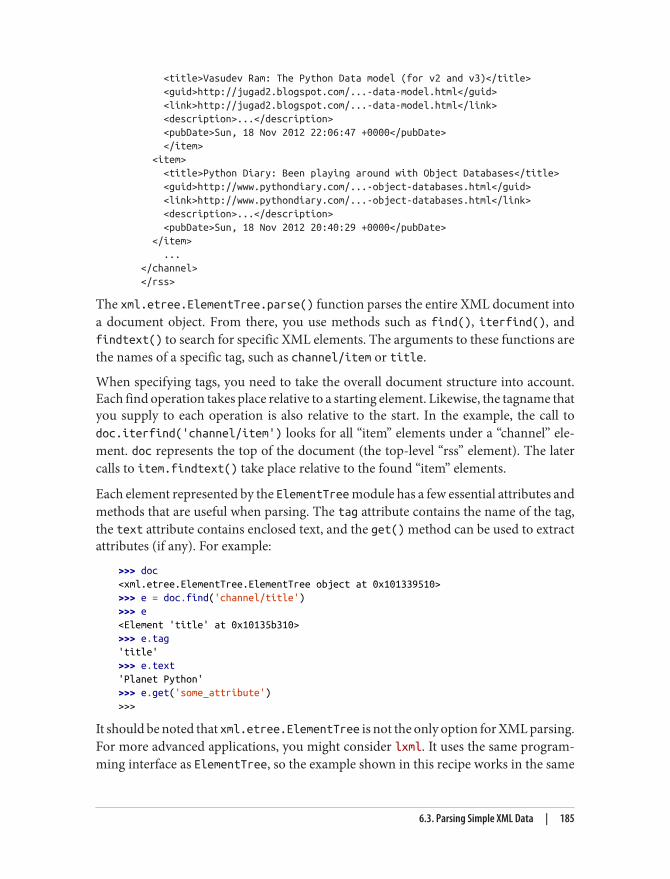
<title>Vasudev Ram: The Python Data model (for v2 and v3)</title> <guid>http://jugad2.blogspot.com/...-data-model.html</guid> <link>http://jugad2.blogspot.com/...-data-model.html</link> <description>...</description> <pubDate>Sun, 18 Nov 2012 22:06:47 +0000</pubDate> </item> <item> <title>Python Diary: Been playing around with Object Databases</title> <guid>http://www.pythondiary.com/...-object-databases.html</guid> <link>http://www.pythondiary.com/...-object-databases.html</link> <description>...</description> <pubDate>Sun, 18 Nov 2012 20:40:29 +0000</pubDate> </item> ... </channel> </rss>
The xml.etree.ElementTree.parse() function parses the entire XML document intoa document object. From there, you use methods such as find(), iterfind(), andfindtext() to search for specific XML elements. The arguments to these functions arethe names of a specific tag, such as channel/item or title.
When specifying tags, you need to take the overall document structure into account.Each find operation takes place relative to a starting element. Likewise, the tagname thatyou supply to each operation is also relative to the start. In the example, the call todoc.iterfind('channel/item') looks for all “item” elements under a “channel” ele‐ment. doc represents the top of the document (the top-level “rss” element). The latercalls to item.findtext() take place relative to the found “item” elements.
Each element represented by the ElementTree module has a few essential attributes andmethods that are useful when parsing. The tag attribute contains the name of the tag,the text attribute contains enclosed text, and the get() method can be used to extractattributes (if any). For example:
>>> doc<xml.etree.ElementTree.ElementTree object at 0x101339510>>>> e = doc.find('channel/title')>>> e<Element 'title' at 0x10135b310>>>> e.tag'title'>>> e.text'Planet Python'>>> e.get('some_attribute')>>>
It should be noted that xml.etree.ElementTree is not the only option for XML parsing.For more advanced applications, you might consider lxml. It uses the same program‐ming interface as ElementTree, so the example shown in this recipe works in the same
6.3. Parsing Simple XML Data | 185
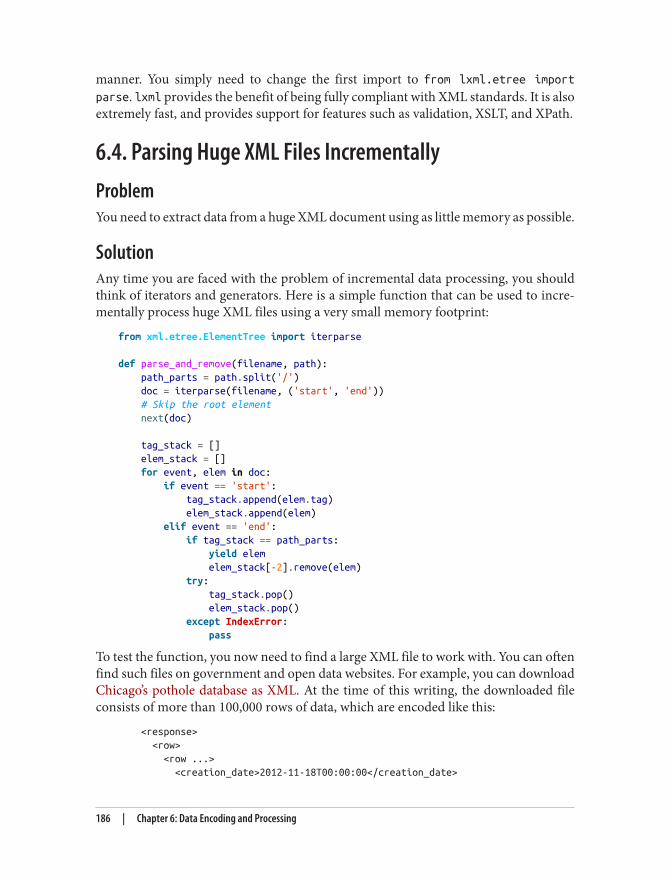
manner. You simply need to change the first import to from lxml.etree importparse. lxml provides the benefit of being fully compliant with XML standards. It is alsoextremely fast, and provides support for features such as validation, XSLT, and XPath.
6.4. Parsing Huge XML Files IncrementallyProblemYou need to extract data from a huge XML document using as little memory as possible.
SolutionAny time you are faced with the problem of incremental data processing, you shouldthink of iterators and generators. Here is a simple function that can be used to incre‐mentally process huge XML files using a very small memory footprint:
from xml.etree.ElementTree import iterparse
def parse_and_remove(filename, path): path_parts = path.split('/') doc = iterparse(filename, ('start', 'end')) # Skip the root element next(doc)
tag_stack = [] elem_stack = [] for event, elem in doc: if event == 'start': tag_stack.append(elem.tag) elem_stack.append(elem) elif event == 'end': if tag_stack == path_parts: yield elem elem_stack[-2].remove(elem) try: tag_stack.pop() elem_stack.pop() except IndexError: pass
To test the function, you now need to find a large XML file to work with. You can oftenfind such files on government and open data websites. For example, you can downloadChicago’s pothole database as XML. At the time of this writing, the downloaded fileconsists of more than 100,000 rows of data, which are encoded like this:
<response> <row> <row ...> <creation_date>2012-11-18T00:00:00</creation_date>
186 | Chapter 6: Data Encoding and Processing
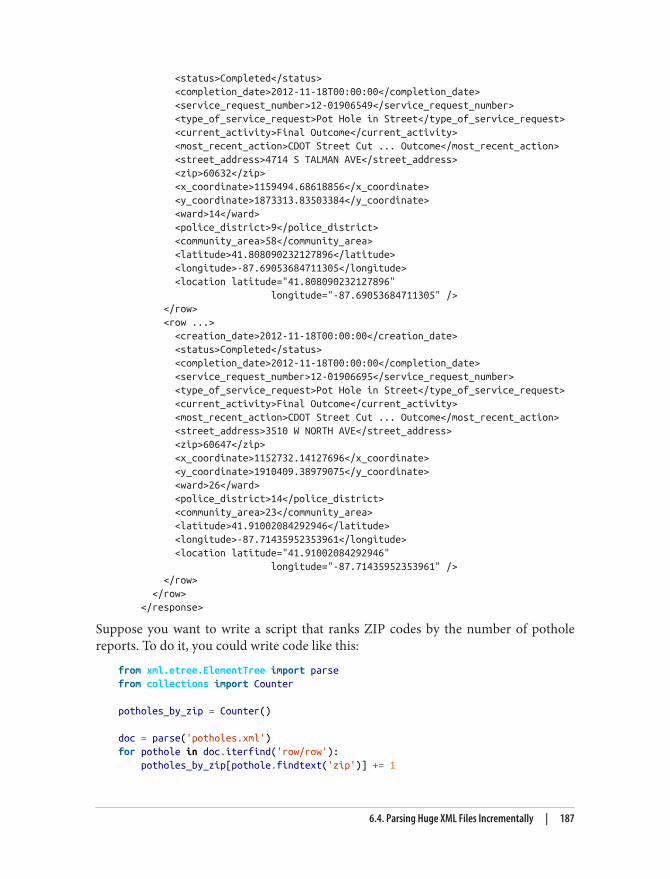
<status>Completed</status> <completion_date>2012-11-18T00:00:00</completion_date> <service_request_number>12-01906549</service_request_number> <type_of_service_request>Pot Hole in Street</type_of_service_request> <current_activity>Final Outcome</current_activity> <most_recent_action>CDOT Street Cut ... Outcome</most_recent_action> <street_address>4714 S TALMAN AVE</street_address> <zip>60632</zip> <x_coordinate>1159494.68618856</x_coordinate> <y_coordinate>1873313.83503384</y_coordinate> <ward>14</ward> <police_district>9</police_district> <community_area>58</community_area> <latitude>41.808090232127896</latitude> <longitude>-87.69053684711305</longitude> <location latitude="41.808090232127896" longitude="-87.69053684711305" /> </row> <row ...> <creation_date>2012-11-18T00:00:00</creation_date> <status>Completed</status> <completion_date>2012-11-18T00:00:00</completion_date> <service_request_number>12-01906695</service_request_number> <type_of_service_request>Pot Hole in Street</type_of_service_request> <current_activity>Final Outcome</current_activity> <most_recent_action>CDOT Street Cut ... Outcome</most_recent_action> <street_address>3510 W NORTH AVE</street_address> <zip>60647</zip> <x_coordinate>1152732.14127696</x_coordinate> <y_coordinate>1910409.38979075</y_coordinate> <ward>26</ward> <police_district>14</police_district> <community_area>23</community_area> <latitude>41.91002084292946</latitude> <longitude>-87.71435952353961</longitude> <location latitude="41.91002084292946" longitude="-87.71435952353961" /> </row> </row> </response>
Suppose you want to write a script that ranks ZIP codes by the number of potholereports. To do it, you could write code like this:
from xml.etree.ElementTree import parsefrom collections import Counter
potholes_by_zip = Counter()
doc = parse('potholes.xml')for pothole in doc.iterfind('row/row'): potholes_by_zip[pothole.findtext('zip')] += 1
6.4. Parsing Huge XML Files Incrementally | 187
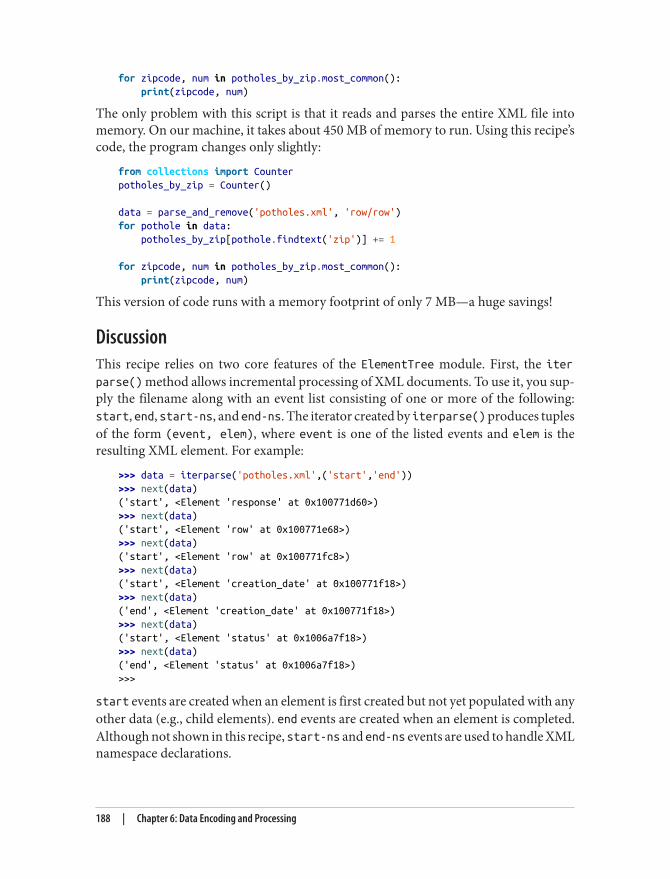
for zipcode, num in potholes_by_zip.most_common(): print(zipcode, num)
The only problem with this script is that it reads and parses the entire XML file intomemory. On our machine, it takes about 450 MB of memory to run. Using this recipe’scode, the program changes only slightly:
from collections import Counterpotholes_by_zip = Counter()
data = parse_and_remove('potholes.xml', 'row/row')for pothole in data: potholes_by_zip[pothole.findtext('zip')] += 1
for zipcode, num in potholes_by_zip.most_common(): print(zipcode, num)
This version of code runs with a memory footprint of only 7 MB—a huge savings!
DiscussionThis recipe relies on two core features of the ElementTree module. First, the iterparse() method allows incremental processing of XML documents. To use it, you sup‐ply the filename along with an event list consisting of one or more of the following:start, end, start-ns, and end-ns. The iterator created by iterparse() produces tuplesof the form (event, elem), where event is one of the listed events and elem is theresulting XML element. For example:
>>> data = iterparse('potholes.xml',('start','end'))>>> next(data)('start', <Element 'response' at 0x100771d60>)>>> next(data)('start', <Element 'row' at 0x100771e68>)>>> next(data)('start', <Element 'row' at 0x100771fc8>)>>> next(data)('start', <Element 'creation_date' at 0x100771f18>)>>> next(data)('end', <Element 'creation_date' at 0x100771f18>)>>> next(data)('start', <Element 'status' at 0x1006a7f18>)>>> next(data)('end', <Element 'status' at 0x1006a7f18>)>>>
start events are created when an element is first created but not yet populated with anyother data (e.g., child elements). end events are created when an element is completed.Although not shown in this recipe, start-ns and end-ns events are used to handle XMLnamespace declarations.
188 | Chapter 6: Data Encoding and Processing

In this recipe, the start and end events are used to manage stacks of elements and tags.The stacks represent the current hierarchical structure of the document as it’s beingparsed, and are also used to determine if an element matches the requested path givento the parse_and_remove() function. If a match is made, yield is used to emit it backto the caller.
The following statement after the yield is the core feature of ElementTree that makesthis recipe save memory:
elem_stack[-2].remove(elem)
This statement causes the previously yielded element to be removed from its parent.Assuming that no references are left to it anywhere else, the element is destroyed andmemory reclaimed.
The end effect of the iterative parse and the removal of nodes is a highly efficient in‐cremental sweep over the document. At no point is a complete document tree everconstructed. Yet, it is still possible to write code that processes the XML data in astraightforward manner.
The primary downside to this recipe is its runtime performance. When tested, the ver‐sion of code that reads the entire document into memory first runs approximately twiceas fast as the version that processes it incrementally. However, it requires more than 60times as much memory. So, if memory use is a greater concern, the incremental versionis a big win.
6.5. Turning a Dictionary into XMLProblemYou want to take the data in a Python dictionary and turn it into XML.
SolutionAlthough the xml.etree.ElementTree library is commonly used for parsing, it can alsobe used to create XML documents. For example, consider this function:
from xml.etree.ElementTree import Element
def dict_to_xml(tag, d): ''' Turn a simple dict of key/value pairs into XML ''' elem = Element(tag) for key, val in d.items(): child = Element(key) child.text = str(val)
6.5. Turning a Dictionary into XML | 189
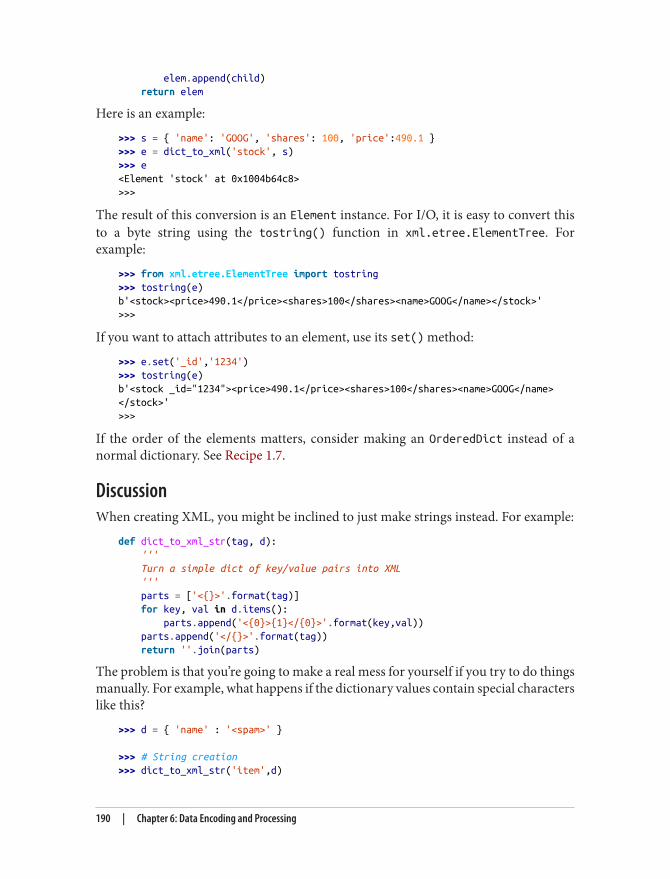
elem.append(child) return elem
Here is an example:
>>> s = { 'name': 'GOOG', 'shares': 100, 'price':490.1 }>>> e = dict_to_xml('stock', s)>>> e<Element 'stock' at 0x1004b64c8>>>>
The result of this conversion is an Element instance. For I/O, it is easy to convert thisto a byte string using the tostring() function in xml.etree.ElementTree. Forexample:
>>> from xml.etree.ElementTree import tostring>>> tostring(e)b'<stock><price>490.1</price><shares>100</shares><name>GOOG</name></stock>'>>>
If you want to attach attributes to an element, use its set() method:
>>> e.set('_id','1234')>>> tostring(e)b'<stock _id="1234"><price>490.1</price><shares>100</shares><name>GOOG</name></stock>'>>>
If the order of the elements matters, consider making an OrderedDict instead of anormal dictionary. See Recipe 1.7.
DiscussionWhen creating XML, you might be inclined to just make strings instead. For example:
def dict_to_xml_str(tag, d): ''' Turn a simple dict of key/value pairs into XML ''' parts = ['<{}>'.format(tag)] for key, val in d.items(): parts.append('<{0}>{1}</{0}>'.format(key,val)) parts.append('</{}>'.format(tag)) return ''.join(parts)
The problem is that you’re going to make a real mess for yourself if you try to do thingsmanually. For example, what happens if the dictionary values contain special characterslike this?
>>> d = { 'name' : '<spam>' }
>>> # String creation>>> dict_to_xml_str('item',d)
190 | Chapter 6: Data Encoding and Processing
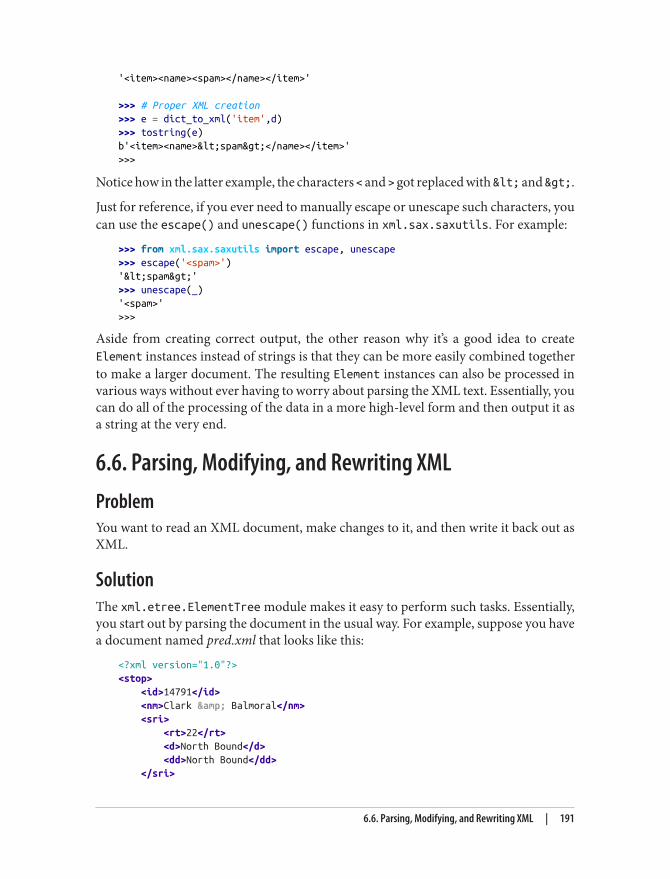
'<item><name><spam></name></item>'
>>> # Proper XML creation>>> e = dict_to_xml('item',d)>>> tostring(e)b'<item><name><spam></name></item>'>>>
Notice how in the latter example, the characters < and > got replaced with < and >.
Just for reference, if you ever need to manually escape or unescape such characters, youcan use the escape() and unescape() functions in xml.sax.saxutils. For example:
>>> from xml.sax.saxutils import escape, unescape>>> escape('<spam>')'<spam>'>>> unescape(_)'<spam>'>>>
Aside from creating correct output, the other reason why it’s a good idea to createElement instances instead of strings is that they can be more easily combined togetherto make a larger document. The resulting Element instances can also be processed invarious ways without ever having to worry about parsing the XML text. Essentially, youcan do all of the processing of the data in a more high-level form and then output it asa string at the very end.
6.6. Parsing, Modifying, and Rewriting XMLProblemYou want to read an XML document, make changes to it, and then write it back out asXML.
SolutionThe xml.etree.ElementTree module makes it easy to perform such tasks. Essentially,you start out by parsing the document in the usual way. For example, suppose you havea document named pred.xml that looks like this:
<?xml version="1.0"?><stop> <id>14791</id> <nm>Clark & Balmoral</nm> <sri> <rt>22</rt> <d>North Bound</d> <dd>North Bound</dd> </sri>
6.6. Parsing, Modifying, and Rewriting XML | 191
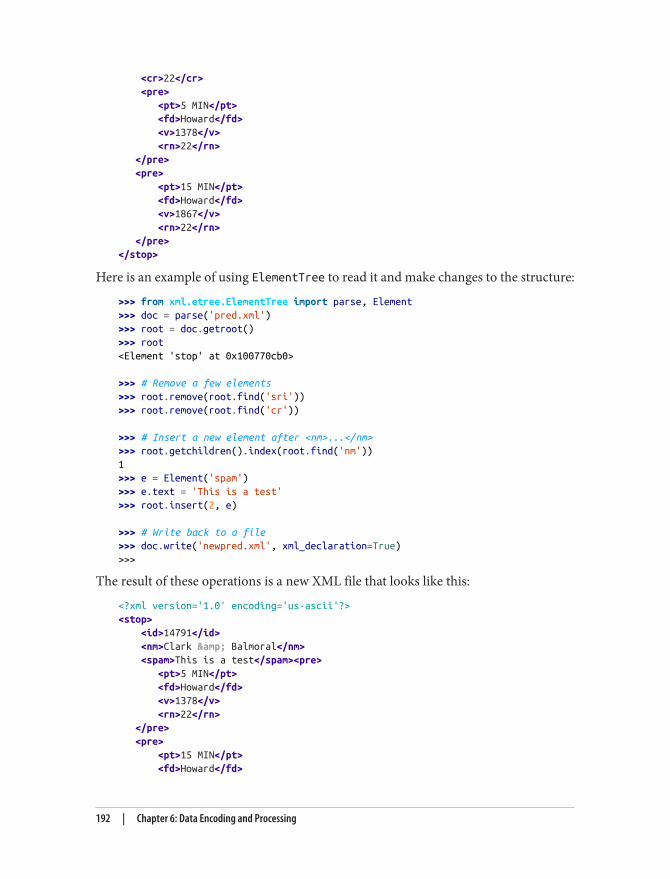
<cr>22</cr> <pre> <pt>5 MIN</pt> <fd>Howard</fd> <v>1378</v> <rn>22</rn> </pre> <pre> <pt>15 MIN</pt> <fd>Howard</fd> <v>1867</v> <rn>22</rn> </pre></stop>
Here is an example of using ElementTree to read it and make changes to the structure:
>>> from xml.etree.ElementTree import parse, Element>>> doc = parse('pred.xml')>>> root = doc.getroot()>>> root<Element 'stop' at 0x100770cb0>
>>> # Remove a few elements>>> root.remove(root.find('sri'))>>> root.remove(root.find('cr'))
>>> # Insert a new element after <nm>...</nm>>>> root.getchildren().index(root.find('nm'))1>>> e = Element('spam')>>> e.text = 'This is a test'>>> root.insert(2, e)
>>> # Write back to a file>>> doc.write('newpred.xml', xml_declaration=True)>>>
The result of these operations is a new XML file that looks like this:
<?xml version='1.0' encoding='us-ascii'?><stop> <id>14791</id> <nm>Clark & Balmoral</nm> <spam>This is a test</spam><pre> <pt>5 MIN</pt> <fd>Howard</fd> <v>1378</v> <rn>22</rn> </pre> <pre> <pt>15 MIN</pt> <fd>Howard</fd>
192 | Chapter 6: Data Encoding and Processing
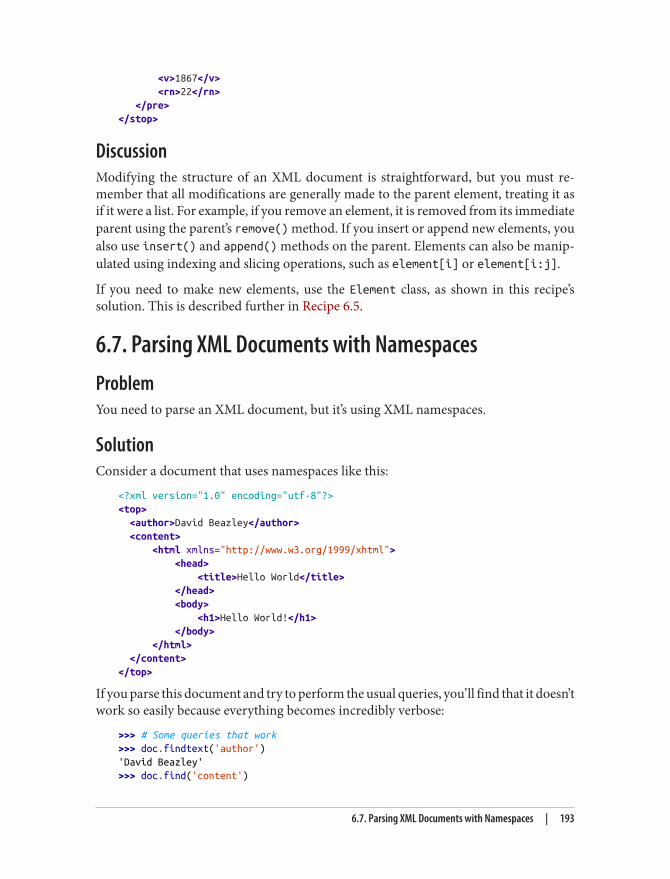
<v>1867</v> <rn>22</rn> </pre></stop>
DiscussionModifying the structure of an XML document is straightforward, but you must re‐member that all modifications are generally made to the parent element, treating it asif it were a list. For example, if you remove an element, it is removed from its immediateparent using the parent’s remove() method. If you insert or append new elements, youalso use insert() and append() methods on the parent. Elements can also be manip‐ulated using indexing and slicing operations, such as element[i] or element[i:j].
If you need to make new elements, use the Element class, as shown in this recipe’ssolution. This is described further in Recipe 6.5.
6.7. Parsing XML Documents with NamespacesProblemYou need to parse an XML document, but it’s using XML namespaces.
SolutionConsider a document that uses namespaces like this:
<?xml version="1.0" encoding="utf-8"?><top> <author>David Beazley</author> <content> <html xmlns="http://www.w3.org/1999/xhtml"> <head> <title>Hello World</title> </head> <body> <h1>Hello World!</h1> </body> </html> </content></top>
If you parse this document and try to perform the usual queries, you’ll find that it doesn’twork so easily because everything becomes incredibly verbose:
>>> # Some queries that work>>> doc.findtext('author')'David Beazley'>>> doc.find('content')
6.7. Parsing XML Documents with Namespaces | 193
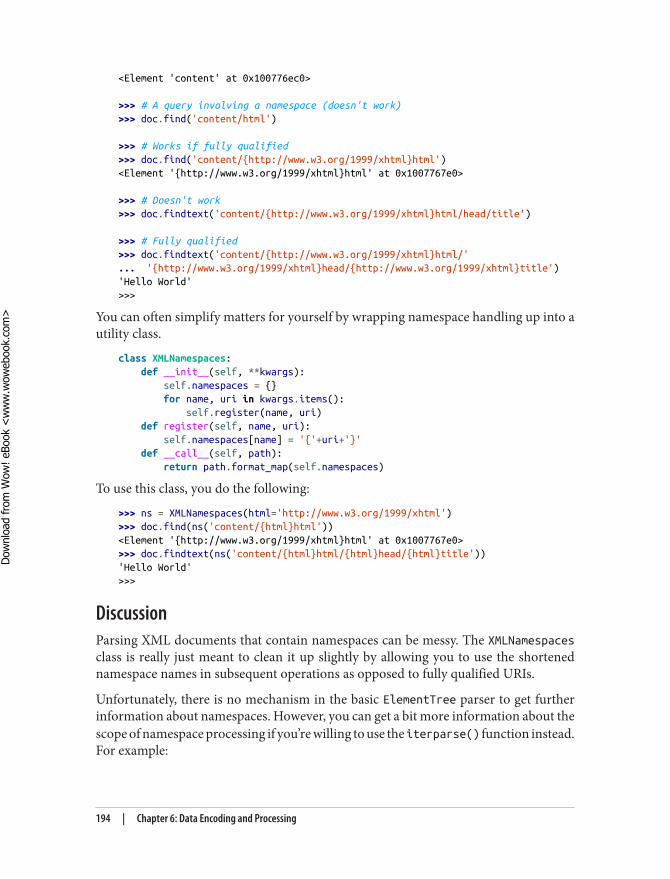
<Element 'content' at 0x100776ec0>
>>> # A query involving a namespace (doesn't work)>>> doc.find('content/html')
>>> # Works if fully qualified>>> doc.find('content/{http://www.w3.org/1999/xhtml}html')<Element '{http://www.w3.org/1999/xhtml}html' at 0x1007767e0>
>>> # Doesn't work>>> doc.findtext('content/{http://www.w3.org/1999/xhtml}html/head/title')
>>> # Fully qualified>>> doc.findtext('content/{http://www.w3.org/1999/xhtml}html/'... '{http://www.w3.org/1999/xhtml}head/{http://www.w3.org/1999/xhtml}title')'Hello World'>>>
You can often simplify matters for yourself by wrapping namespace handling up into autility class.
class XMLNamespaces: def __init__(self, **kwargs): self.namespaces = {} for name, uri in kwargs.items(): self.register(name, uri) def register(self, name, uri): self.namespaces[name] = '{'+uri+'}' def __call__(self, path): return path.format_map(self.namespaces)
To use this class, you do the following:
>>> ns = XMLNamespaces(html='http://www.w3.org/1999/xhtml')>>> doc.find(ns('content/{html}html'))<Element '{http://www.w3.org/1999/xhtml}html' at 0x1007767e0>>>> doc.findtext(ns('content/{html}html/{html}head/{html}title'))'Hello World'>>>
DiscussionParsing XML documents that contain namespaces can be messy. The XMLNamespacesclass is really just meant to clean it up slightly by allowing you to use the shortenednamespace names in subsequent operations as opposed to fully qualified URIs.
Unfortunately, there is no mechanism in the basic ElementTree parser to get furtherinformation about namespaces. However, you can get a bit more information about thescope of namespace processing if you’re willing to use the iterparse() function instead.For example:
194 | Chapter 6: Data Encoding and Processing
Dow
nlo
ad fro
m W
ow
! eBook
<w
ww
.wow
ebook.
com
>
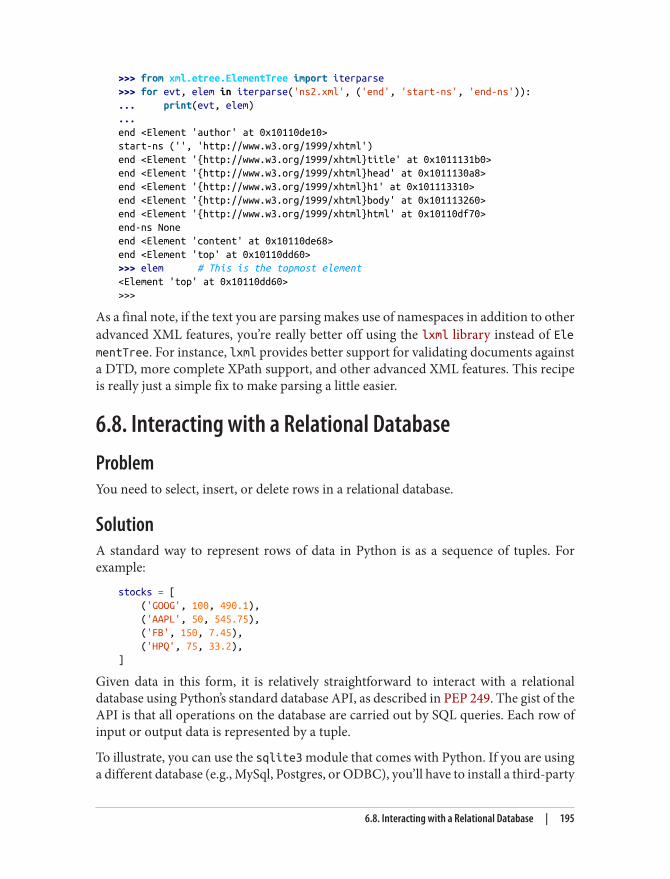
>>> from xml.etree.ElementTree import iterparse>>> for evt, elem in iterparse('ns2.xml', ('end', 'start-ns', 'end-ns')):... print(evt, elem)...end <Element 'author' at 0x10110de10>start-ns ('', 'http://www.w3.org/1999/xhtml')end <Element '{http://www.w3.org/1999/xhtml}title' at 0x1011131b0>end <Element '{http://www.w3.org/1999/xhtml}head' at 0x1011130a8>end <Element '{http://www.w3.org/1999/xhtml}h1' at 0x101113310>end <Element '{http://www.w3.org/1999/xhtml}body' at 0x101113260>end <Element '{http://www.w3.org/1999/xhtml}html' at 0x10110df70>end-ns Noneend <Element 'content' at 0x10110de68>end <Element 'top' at 0x10110dd60>>>> elem # This is the topmost element<Element 'top' at 0x10110dd60>>>>
As a final note, if the text you are parsing makes use of namespaces in addition to otheradvanced XML features, you’re really better off using the lxml library instead of ElementTree. For instance, lxml provides better support for validating documents againsta DTD, more complete XPath support, and other advanced XML features. This recipeis really just a simple fix to make parsing a little easier.
6.8. Interacting with a Relational DatabaseProblemYou need to select, insert, or delete rows in a relational database.
SolutionA standard way to represent rows of data in Python is as a sequence of tuples. Forexample:
stocks = [ ('GOOG', 100, 490.1), ('AAPL', 50, 545.75), ('FB', 150, 7.45), ('HPQ', 75, 33.2),]
Given data in this form, it is relatively straightforward to interact with a relationaldatabase using Python’s standard database API, as described in PEP 249. The gist of theAPI is that all operations on the database are carried out by SQL queries. Each row ofinput or output data is represented by a tuple.
To illustrate, you can use the sqlite3 module that comes with Python. If you are usinga different database (e.g., MySql, Postgres, or ODBC), you’ll have to install a third-party
6.8. Interacting with a Relational Database | 195
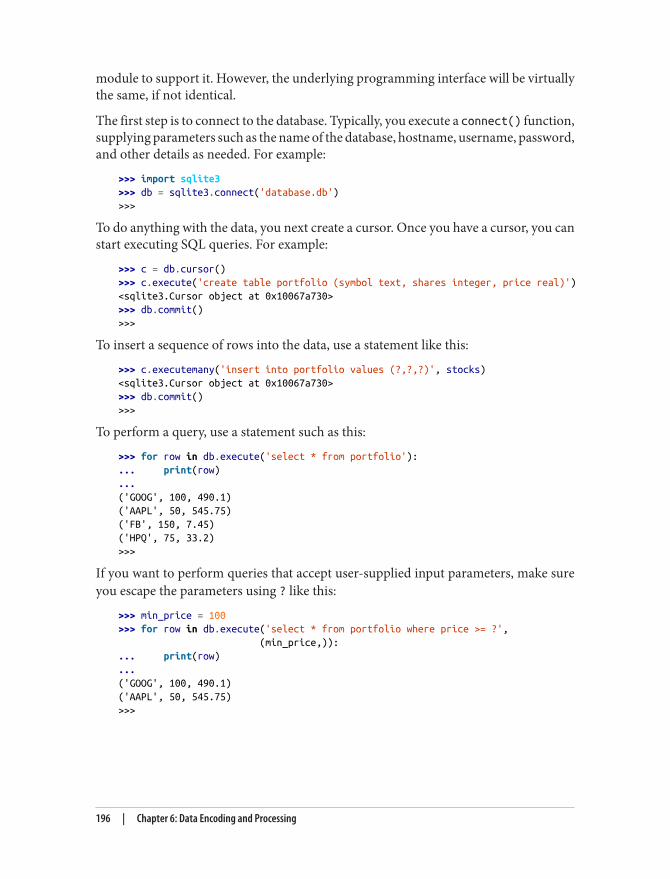
module to support it. However, the underlying programming interface will be virtuallythe same, if not identical.
The first step is to connect to the database. Typically, you execute a connect() function,supplying parameters such as the name of the database, hostname, username, password,and other details as needed. For example:
>>> import sqlite3>>> db = sqlite3.connect('database.db')>>>
To do anything with the data, you next create a cursor. Once you have a cursor, you canstart executing SQL queries. For example:
>>> c = db.cursor()>>> c.execute('create table portfolio (symbol text, shares integer, price real)')<sqlite3.Cursor object at 0x10067a730>>>> db.commit()>>>
To insert a sequence of rows into the data, use a statement like this:
>>> c.executemany('insert into portfolio values (?,?,?)', stocks)<sqlite3.Cursor object at 0x10067a730>>>> db.commit()>>>
To perform a query, use a statement such as this:
>>> for row in db.execute('select * from portfolio'):... print(row)...('GOOG', 100, 490.1)('AAPL', 50, 545.75)('FB', 150, 7.45)('HPQ', 75, 33.2)>>>
If you want to perform queries that accept user-supplied input parameters, make sureyou escape the parameters using ? like this:
>>> min_price = 100>>> for row in db.execute('select * from portfolio where price >= ?', (min_price,)):... print(row)...('GOOG', 100, 490.1)('AAPL', 50, 545.75)>>>
196 | Chapter 6: Data Encoding and Processing
DiscussionAt a low level, interacting with a database is an extremely straightforward thing to do.You simply form SQL statements and feed them to the underlying module to eitherupdate the database or retrieve data. That said, there are still some tricky details you’llneed to sort out on a case-by-case basis.
One complication is the mapping of data from the database into Python types. Forentries such as dates, it is most common to use datetime instances from the datetime module, or possibly system timestamps, as used in the time module. For numericaldata, especially financial data involving decimals, numbers may be represented as Decimal instances from the decimal module. Unfortunately, the exact mapping varies bydatabase backend so you’ll have to read the associated documentation.
Another extremely critical complication concerns the formation of SQL statementstrings. You should never use Python string formatting operators (e.g., %) or the .format() method to create such strings. If the values provided to such formatting operatorsare derived from user input, this opens up your program to an SQL-injection attack (seehttp://xkcd.com/327). The special ? wildcard in queries instructs the database backendto use its own string substitution mechanism, which (hopefully) will do it safely.
Sadly, there is some inconsistency across database backends with respect to the wildcard.Many modules use ? or %s, while others may use a different symbol, such as :0 or :1,to refer to parameters. Again, you’ll have to consult the documentation for the databasemodule you’re using. The paramstyle attribute of a database module also contains in‐formation about the quoting style.
For simply pulling data in and out of a database table, using the database API is usuallysimple enough. If you’re doing something more complicated, it may make sense to usea higher-level interface, such as that provided by an object-relational mapper. Librariessuch as SQLAlchemy allow database tables to be described as Python classes and fordatabase operations to be carried out while hiding most of the underlying SQL.
6.9. Decoding and Encoding Hexadecimal DigitsProblemYou need to decode a string of hexadecimal digits into a byte string or encode a bytestring as hex.
SolutionIf you simply need to decode or encode a raw string of hex digits, use the binasciimodule. For example:
6.9. Decoding and Encoding Hexadecimal Digits | 197
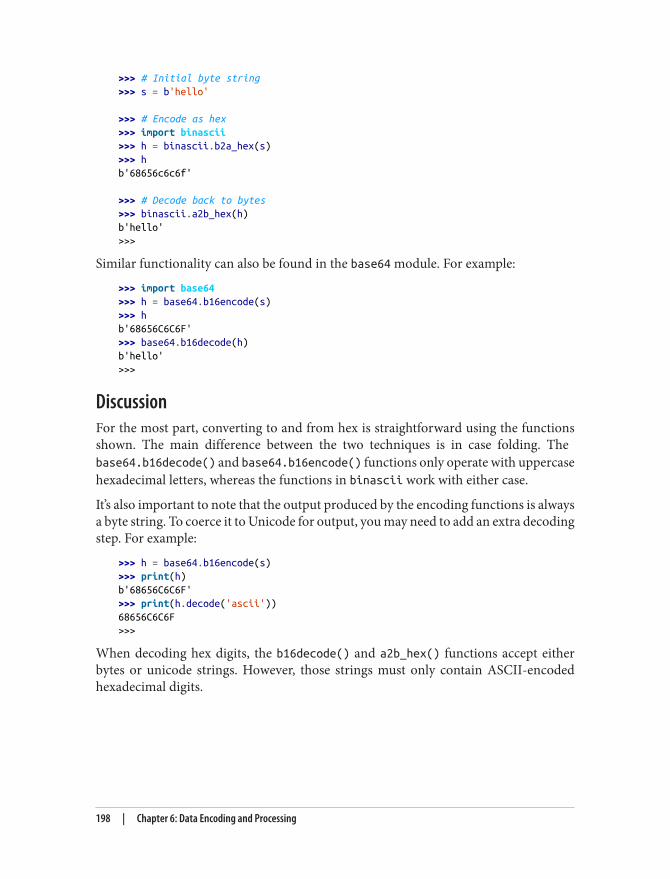
>>> # Initial byte string>>> s = b'hello'
>>> # Encode as hex>>> import binascii>>> h = binascii.b2a_hex(s)>>> hb'68656c6c6f'
>>> # Decode back to bytes>>> binascii.a2b_hex(h)b'hello'>>>
Similar functionality can also be found in the base64 module. For example:
>>> import base64>>> h = base64.b16encode(s)>>> hb'68656C6C6F'>>> base64.b16decode(h)b'hello'>>>
DiscussionFor the most part, converting to and from hex is straightforward using the functionsshown. The main difference between the two techniques is in case folding. The base64.b16decode() and base64.b16encode() functions only operate with uppercasehexadecimal letters, whereas the functions in binascii work with either case.
It’s also important to note that the output produced by the encoding functions is alwaysa byte string. To coerce it to Unicode for output, you may need to add an extra decodingstep. For example:
>>> h = base64.b16encode(s)>>> print(h)b'68656C6C6F'>>> print(h.decode('ascii'))68656C6C6F>>>
When decoding hex digits, the b16decode() and a2b_hex() functions accept eitherbytes or unicode strings. However, those strings must only contain ASCII-encodedhexadecimal digits.
198 | Chapter 6: Data Encoding and Processing
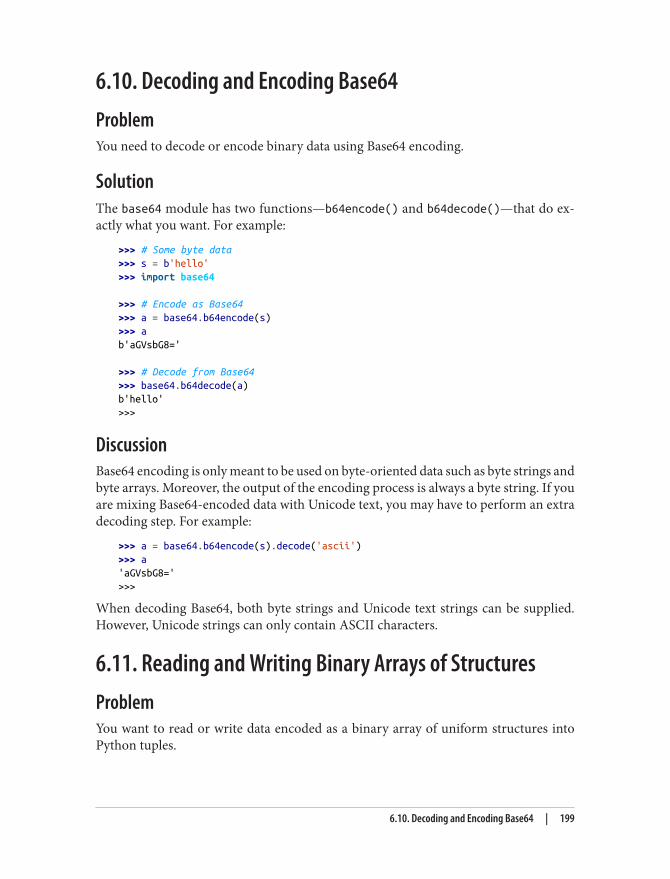
6.10. Decoding and Encoding Base64ProblemYou need to decode or encode binary data using Base64 encoding.
SolutionThe base64 module has two functions—b64encode() and b64decode()—that do ex‐actly what you want. For example:
>>> # Some byte data>>> s = b'hello'>>> import base64
>>> # Encode as Base64>>> a = base64.b64encode(s)>>> ab'aGVsbG8='
>>> # Decode from Base64>>> base64.b64decode(a)b'hello'>>>
DiscussionBase64 encoding is only meant to be used on byte-oriented data such as byte strings andbyte arrays. Moreover, the output of the encoding process is always a byte string. If youare mixing Base64-encoded data with Unicode text, you may have to perform an extradecoding step. For example:
>>> a = base64.b64encode(s).decode('ascii')>>> a'aGVsbG8='>>>
When decoding Base64, both byte strings and Unicode text strings can be supplied.However, Unicode strings can only contain ASCII characters.
6.11. Reading and Writing Binary Arrays of StructuresProblemYou want to read or write data encoded as a binary array of uniform structures intoPython tuples.
6.10. Decoding and Encoding Base64 | 199
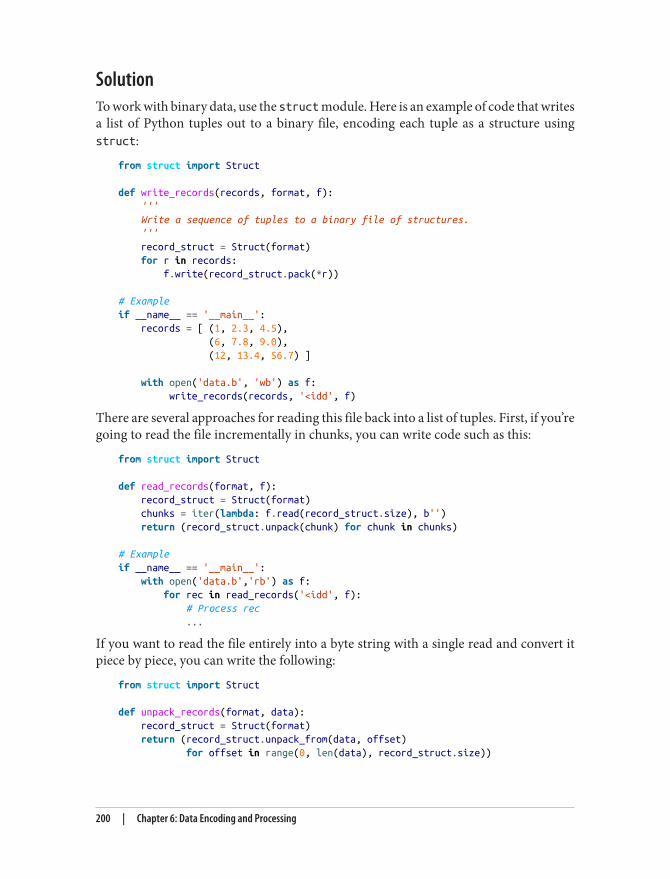
SolutionTo work with binary data, use the struct module. Here is an example of code that writesa list of Python tuples out to a binary file, encoding each tuple as a structure usingstruct:
from struct import Struct
def write_records(records, format, f): ''' Write a sequence of tuples to a binary file of structures. ''' record_struct = Struct(format) for r in records: f.write(record_struct.pack(*r))
# Exampleif __name__ == '__main__': records = [ (1, 2.3, 4.5), (6, 7.8, 9.0), (12, 13.4, 56.7) ]
with open('data.b', 'wb') as f: write_records(records, '<idd', f)
There are several approaches for reading this file back into a list of tuples. First, if you’regoing to read the file incrementally in chunks, you can write code such as this:
from struct import Struct
def read_records(format, f): record_struct = Struct(format) chunks = iter(lambda: f.read(record_struct.size), b'') return (record_struct.unpack(chunk) for chunk in chunks)
# Exampleif __name__ == '__main__': with open('data.b','rb') as f: for rec in read_records('<idd', f): # Process rec ...
If you want to read the file entirely into a byte string with a single read and convert itpiece by piece, you can write the following:
from struct import Struct
def unpack_records(format, data): record_struct = Struct(format) return (record_struct.unpack_from(data, offset) for offset in range(0, len(data), record_struct.size))
200 | Chapter 6: Data Encoding and Processing
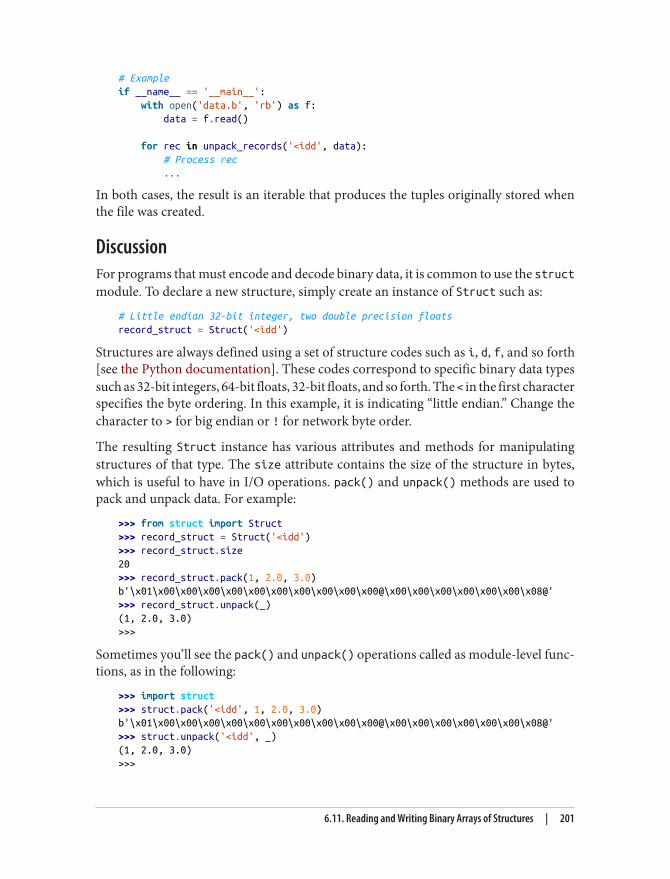
# Exampleif __name__ == '__main__': with open('data.b', 'rb') as f: data = f.read()
for rec in unpack_records('<idd', data): # Process rec ...
In both cases, the result is an iterable that produces the tuples originally stored whenthe file was created.
DiscussionFor programs that must encode and decode binary data, it is common to use the structmodule. To declare a new structure, simply create an instance of Struct such as:
# Little endian 32-bit integer, two double precision floatsrecord_struct = Struct('<idd')
Structures are always defined using a set of structure codes such as i, d, f, and so forth[see the Python documentation]. These codes correspond to specific binary data typessuch as 32-bit integers, 64-bit floats, 32-bit floats, and so forth. The < in the first characterspecifies the byte ordering. In this example, it is indicating “little endian.” Change thecharacter to > for big endian or ! for network byte order.
The resulting Struct instance has various attributes and methods for manipulatingstructures of that type. The size attribute contains the size of the structure in bytes,which is useful to have in I/O operations. pack() and unpack() methods are used topack and unpack data. For example:
>>> from struct import Struct>>> record_struct = Struct('<idd')>>> record_struct.size20>>> record_struct.pack(1, 2.0, 3.0)b'\x01\x00\x00\x00\x00\x00\x00\x00\x00\x00\x00@\x00\x00\x00\x00\x00\x00\x08@'>>> record_struct.unpack(_)(1, 2.0, 3.0)>>>
Sometimes you’ll see the pack() and unpack() operations called as module-level func‐tions, as in the following:
>>> import struct>>> struct.pack('<idd', 1, 2.0, 3.0)b'\x01\x00\x00\x00\x00\x00\x00\x00\x00\x00\x00@\x00\x00\x00\x00\x00\x00\x08@'>>> struct.unpack('<idd', _)(1, 2.0, 3.0)>>>
6.11. Reading and Writing Binary Arrays of Structures | 201
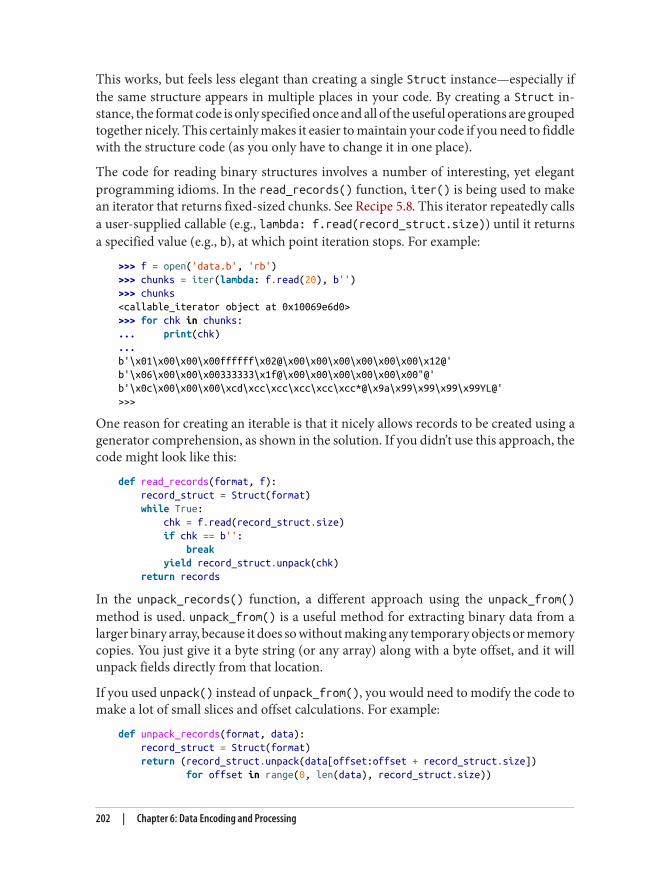
This works, but feels less elegant than creating a single Struct instance—especially ifthe same structure appears in multiple places in your code. By creating a Struct in‐stance, the format code is only specified once and all of the useful operations are groupedtogether nicely. This certainly makes it easier to maintain your code if you need to fiddlewith the structure code (as you only have to change it in one place).
The code for reading binary structures involves a number of interesting, yet elegantprogramming idioms. In the read_records() function, iter() is being used to makean iterator that returns fixed-sized chunks. See Recipe 5.8. This iterator repeatedly callsa user-supplied callable (e.g., lambda: f.read(record_struct.size)) until it returnsa specified value (e.g., b), at which point iteration stops. For example:
>>> f = open('data.b', 'rb')>>> chunks = iter(lambda: f.read(20), b'')>>> chunks<callable_iterator object at 0x10069e6d0>>>> for chk in chunks:... print(chk)...b'\x01\x00\x00\x00ffffff\x02@\x00\x00\x00\x00\x00\x00\x12@'b'\x06\x00\x00\x00333333\x1f@\x00\x00\x00\x00\x00\x00"@'b'\x0c\x00\x00\x00\xcd\xcc\xcc\xcc\xcc\xcc*@\x9a\x99\x99\x99\x99YL@'>>>
One reason for creating an iterable is that it nicely allows records to be created using agenerator comprehension, as shown in the solution. If you didn’t use this approach, thecode might look like this:
def read_records(format, f): record_struct = Struct(format) while True: chk = f.read(record_struct.size) if chk == b'': break yield record_struct.unpack(chk) return records
In the unpack_records() function, a different approach using the unpack_from()method is used. unpack_from() is a useful method for extracting binary data from alarger binary array, because it does so without making any temporary objects or memorycopies. You just give it a byte string (or any array) along with a byte offset, and it willunpack fields directly from that location.
If you used unpack() instead of unpack_from(), you would need to modify the code tomake a lot of small slices and offset calculations. For example:
def unpack_records(format, data): record_struct = Struct(format) return (record_struct.unpack(data[offset:offset + record_struct.size]) for offset in range(0, len(data), record_struct.size))
202 | Chapter 6: Data Encoding and Processing
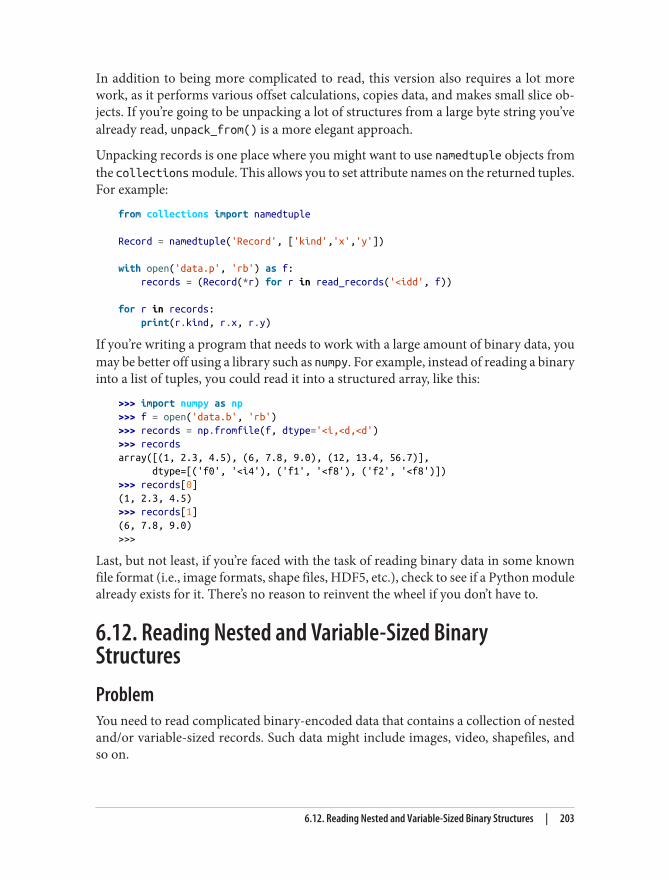
In addition to being more complicated to read, this version also requires a lot morework, as it performs various offset calculations, copies data, and makes small slice ob‐jects. If you’re going to be unpacking a lot of structures from a large byte string you’vealready read, unpack_from() is a more elegant approach.
Unpacking records is one place where you might want to use namedtuple objects fromthe collections module. This allows you to set attribute names on the returned tuples.For example:
from collections import namedtuple
Record = namedtuple('Record', ['kind','x','y'])
with open('data.p', 'rb') as f: records = (Record(*r) for r in read_records('<idd', f))
for r in records: print(r.kind, r.x, r.y)
If you’re writing a program that needs to work with a large amount of binary data, youmay be better off using a library such as numpy. For example, instead of reading a binaryinto a list of tuples, you could read it into a structured array, like this:
>>> import numpy as np>>> f = open('data.b', 'rb')>>> records = np.fromfile(f, dtype='<i,<d,<d')>>> recordsarray([(1, 2.3, 4.5), (6, 7.8, 9.0), (12, 13.4, 56.7)], dtype=[('f0', '<i4'), ('f1', '<f8'), ('f2', '<f8')])>>> records[0](1, 2.3, 4.5)>>> records[1](6, 7.8, 9.0)>>>
Last, but not least, if you’re faced with the task of reading binary data in some knownfile format (i.e., image formats, shape files, HDF5, etc.), check to see if a Python modulealready exists for it. There’s no reason to reinvent the wheel if you don’t have to.
6.12. Reading Nested and Variable-Sized BinaryStructuresProblemYou need to read complicated binary-encoded data that contains a collection of nestedand/or variable-sized records. Such data might include images, video, shapefiles, andso on.
6.12. Reading Nested and Variable-Sized Binary Structures | 203
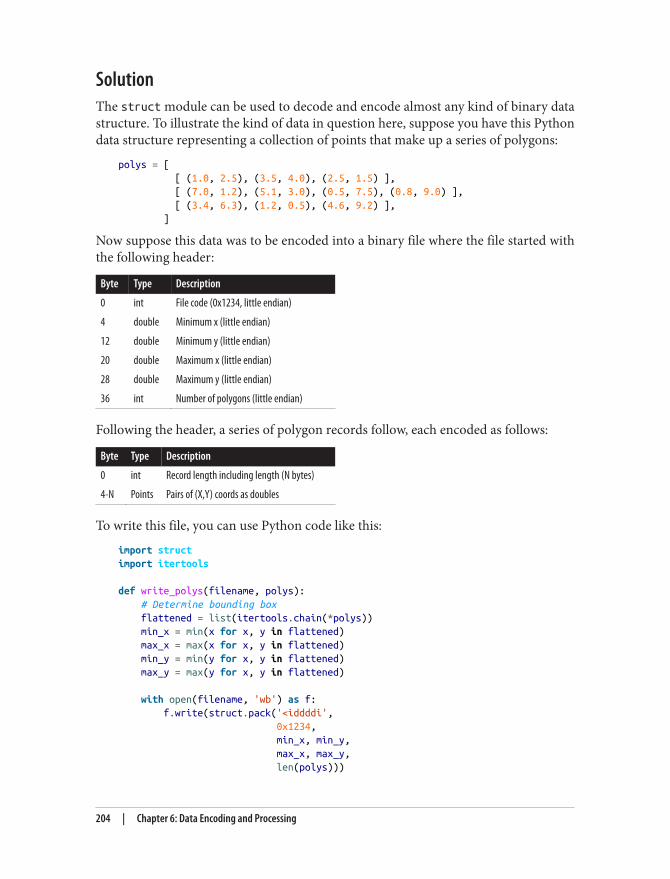
SolutionThe struct module can be used to decode and encode almost any kind of binary datastructure. To illustrate the kind of data in question here, suppose you have this Pythondata structure representing a collection of points that make up a series of polygons:
polys = [ [ (1.0, 2.5), (3.5, 4.0), (2.5, 1.5) ], [ (7.0, 1.2), (5.1, 3.0), (0.5, 7.5), (0.8, 9.0) ], [ (3.4, 6.3), (1.2, 0.5), (4.6, 9.2) ], ]
Now suppose this data was to be encoded into a binary file where the file started withthe following header:
Byte Type Description
0 int File code (0x1234, little endian)
4 double Minimum x (little endian)
12 double Minimum y (little endian)
20 double Maximum x (little endian)
28 double Maximum y (little endian)
36 int Number of polygons (little endian)
Following the header, a series of polygon records follow, each encoded as follows:
Byte Type Description
0 int Record length including length (N bytes)
4-N Points Pairs of (X,Y) coords as doubles
To write this file, you can use Python code like this:
import structimport itertools
def write_polys(filename, polys): # Determine bounding box flattened = list(itertools.chain(*polys)) min_x = min(x for x, y in flattened) max_x = max(x for x, y in flattened) min_y = min(y for x, y in flattened) max_y = max(y for x, y in flattened)
with open(filename, 'wb') as f: f.write(struct.pack('<iddddi', 0x1234, min_x, min_y, max_x, max_y, len(polys)))
204 | Chapter 6: Data Encoding and Processing
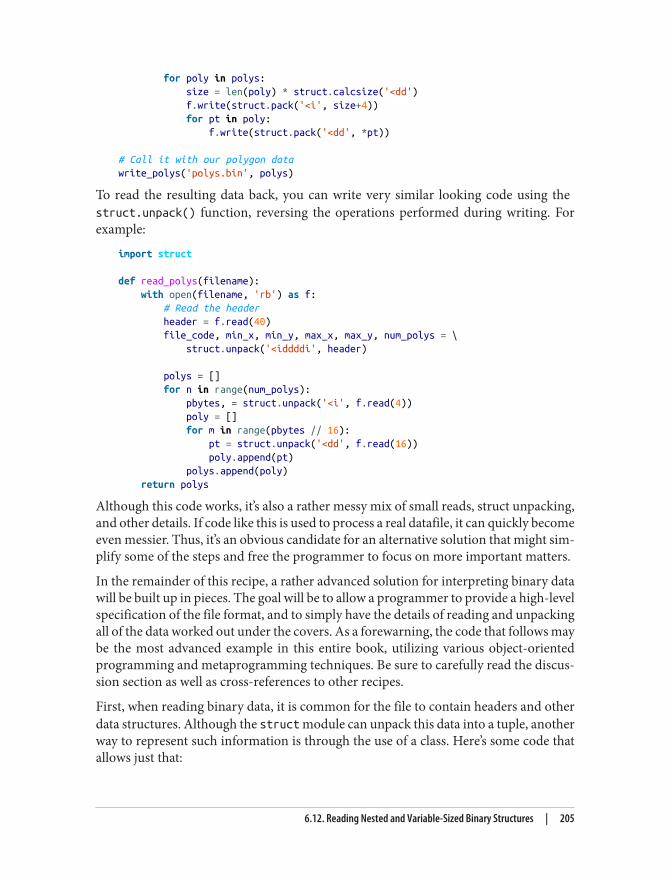
for poly in polys: size = len(poly) * struct.calcsize('<dd') f.write(struct.pack('<i', size+4)) for pt in poly: f.write(struct.pack('<dd', *pt))
# Call it with our polygon datawrite_polys('polys.bin', polys)
To read the resulting data back, you can write very similar looking code using the struct.unpack() function, reversing the operations performed during writing. Forexample:
import struct
def read_polys(filename): with open(filename, 'rb') as f: # Read the header header = f.read(40) file_code, min_x, min_y, max_x, max_y, num_polys = \ struct.unpack('<iddddi', header)
polys = [] for n in range(num_polys): pbytes, = struct.unpack('<i', f.read(4)) poly = [] for m in range(pbytes // 16): pt = struct.unpack('<dd', f.read(16)) poly.append(pt) polys.append(poly) return polys
Although this code works, it’s also a rather messy mix of small reads, struct unpacking,and other details. If code like this is used to process a real datafile, it can quickly becomeeven messier. Thus, it’s an obvious candidate for an alternative solution that might sim‐plify some of the steps and free the programmer to focus on more important matters.
In the remainder of this recipe, a rather advanced solution for interpreting binary datawill be built up in pieces. The goal will be to allow a programmer to provide a high-levelspecification of the file format, and to simply have the details of reading and unpackingall of the data worked out under the covers. As a forewarning, the code that follows maybe the most advanced example in this entire book, utilizing various object-orientedprogramming and metaprogramming techniques. Be sure to carefully read the discus‐sion section as well as cross-references to other recipes.
First, when reading binary data, it is common for the file to contain headers and otherdata structures. Although the struct module can unpack this data into a tuple, anotherway to represent such information is through the use of a class. Here’s some code thatallows just that:
6.12. Reading Nested and Variable-Sized Binary Structures | 205

import struct
class StructField: ''' Descriptor representing a simple structure field ''' def __init__(self, format, offset): self.format = format self.offset = offset def __get__(self, instance, cls): if instance is None: return self else: r = struct.unpack_from(self.format, instance._buffer, self.offset) return r[0] if len(r) == 1 else r
class Structure: def __init__(self, bytedata): self._buffer = memoryview(bytedata)
This code uses a descriptor to represent each structure field. Each descriptor containsa struct-compatible format code along with a byte offset into an underlying memorybuffer. In the __get__() method, the struct.unpack_from() function is used to unpacka value from the buffer without having to make extra slices or copies.
The Structure class just serves as a base class that accepts some byte data and stores itas the underlying memory buffer used by the StructField descriptor. The use of a memoryview() in this class serves a purpose that will become clear later.
Using this code, you can now define a structure as a high-level class that mirrors theinformation found in the tables that described the expected file format. For example:
class PolyHeader(Structure): file_code = StructField('<i', 0) min_x = StructField('<d', 4) min_y = StructField('<d', 12) max_x = StructField('<d', 20) max_y = StructField('<d', 28) num_polys = StructField('<i', 36)
Here is an example of using this class to read the header from the polygon data writtenearlier:
>>> f = open('polys.bin', 'rb')>>> phead = PolyHeader(f.read(40))>>> phead.file_code == 0x1234True>>> phead.min_x0.5>>> phead.min_y0.5
206 | Chapter 6: Data Encoding and Processing
Dow
nlo
ad fro
m W
ow
! eBook
<w
ww
.wow
ebook.
com
>
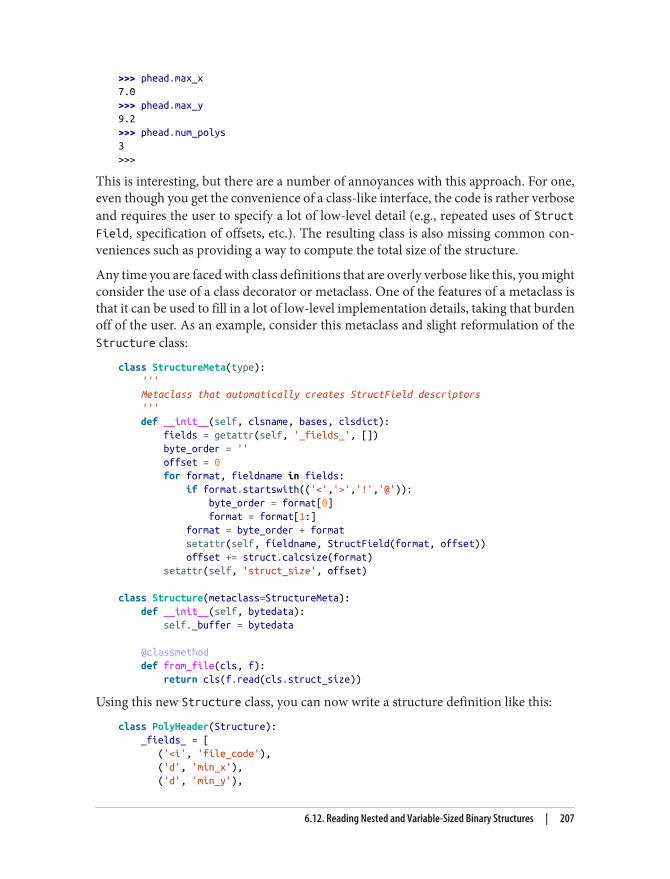
>>> phead.max_x7.0>>> phead.max_y9.2>>> phead.num_polys3>>>
This is interesting, but there are a number of annoyances with this approach. For one,even though you get the convenience of a class-like interface, the code is rather verboseand requires the user to specify a lot of low-level detail (e.g., repeated uses of StructField, specification of offsets, etc.). The resulting class is also missing common con‐veniences such as providing a way to compute the total size of the structure.
Any time you are faced with class definitions that are overly verbose like this, you mightconsider the use of a class decorator or metaclass. One of the features of a metaclass isthat it can be used to fill in a lot of low-level implementation details, taking that burdenoff of the user. As an example, consider this metaclass and slight reformulation of theStructure class:
class StructureMeta(type): ''' Metaclass that automatically creates StructField descriptors ''' def __init__(self, clsname, bases, clsdict): fields = getattr(self, '_fields_', []) byte_order = '' offset = 0 for format, fieldname in fields: if format.startswith(('<','>','!','@')): byte_order = format[0] format = format[1:] format = byte_order + format setattr(self, fieldname, StructField(format, offset)) offset += struct.calcsize(format) setattr(self, 'struct_size', offset)
class Structure(metaclass=StructureMeta): def __init__(self, bytedata): self._buffer = bytedata
@classmethod def from_file(cls, f): return cls(f.read(cls.struct_size))
Using this new Structure class, you can now write a structure definition like this:
class PolyHeader(Structure): _fields_ = [ ('<i', 'file_code'), ('d', 'min_x'), ('d', 'min_y'),
6.12. Reading Nested and Variable-Sized Binary Structures | 207
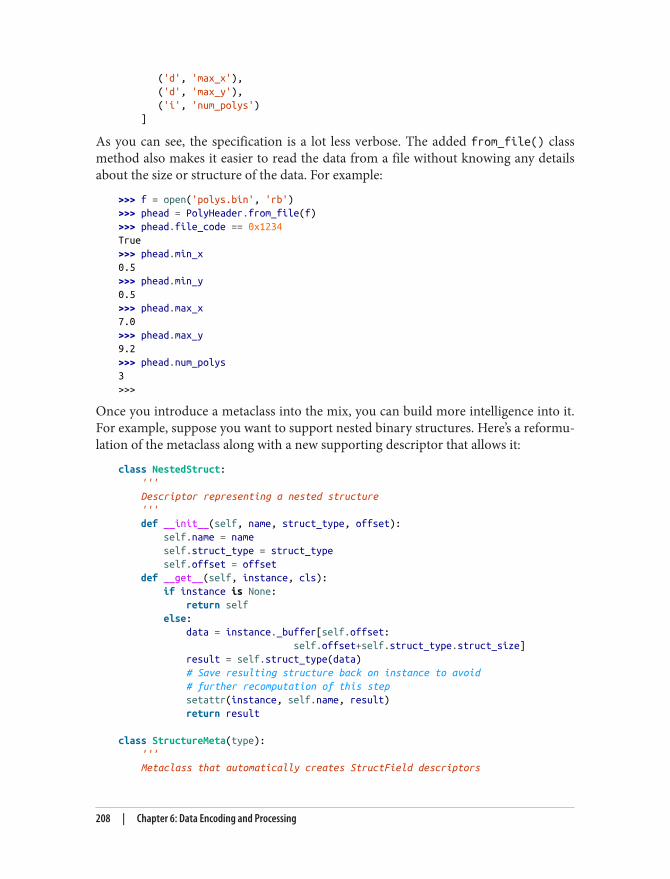
('d', 'max_x'), ('d', 'max_y'), ('i', 'num_polys') ]
As you can see, the specification is a lot less verbose. The added from_file() classmethod also makes it easier to read the data from a file without knowing any detailsabout the size or structure of the data. For example:
>>> f = open('polys.bin', 'rb')>>> phead = PolyHeader.from_file(f)>>> phead.file_code == 0x1234True>>> phead.min_x0.5>>> phead.min_y0.5>>> phead.max_x7.0>>> phead.max_y9.2>>> phead.num_polys3>>>
Once you introduce a metaclass into the mix, you can build more intelligence into it.For example, suppose you want to support nested binary structures. Here’s a reformu‐lation of the metaclass along with a new supporting descriptor that allows it:
class NestedStruct: ''' Descriptor representing a nested structure ''' def __init__(self, name, struct_type, offset): self.name = name self.struct_type = struct_type self.offset = offset def __get__(self, instance, cls): if instance is None: return self else: data = instance._buffer[self.offset: self.offset+self.struct_type.struct_size] result = self.struct_type(data) # Save resulting structure back on instance to avoid # further recomputation of this step setattr(instance, self.name, result) return result
class StructureMeta(type): ''' Metaclass that automatically creates StructField descriptors
208 | Chapter 6: Data Encoding and Processing
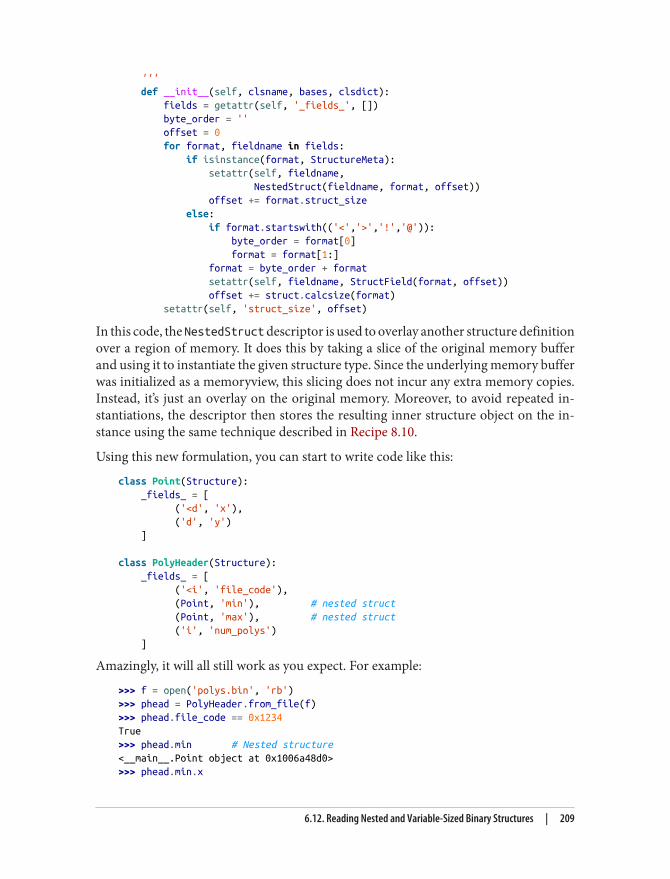
''' def __init__(self, clsname, bases, clsdict): fields = getattr(self, '_fields_', []) byte_order = '' offset = 0 for format, fieldname in fields: if isinstance(format, StructureMeta): setattr(self, fieldname, NestedStruct(fieldname, format, offset)) offset += format.struct_size else: if format.startswith(('<','>','!','@')): byte_order = format[0] format = format[1:] format = byte_order + format setattr(self, fieldname, StructField(format, offset)) offset += struct.calcsize(format) setattr(self, 'struct_size', offset)
In this code, the NestedStruct descriptor is used to overlay another structure definitionover a region of memory. It does this by taking a slice of the original memory bufferand using it to instantiate the given structure type. Since the underlying memory bufferwas initialized as a memoryview, this slicing does not incur any extra memory copies.Instead, it’s just an overlay on the original memory. Moreover, to avoid repeated in‐stantiations, the descriptor then stores the resulting inner structure object on the in‐stance using the same technique described in Recipe 8.10.
Using this new formulation, you can start to write code like this:
class Point(Structure): _fields_ = [ ('<d', 'x'), ('d', 'y') ]
class PolyHeader(Structure): _fields_ = [ ('<i', 'file_code'), (Point, 'min'), # nested struct (Point, 'max'), # nested struct ('i', 'num_polys') ]
Amazingly, it will all still work as you expect. For example:
>>> f = open('polys.bin', 'rb')>>> phead = PolyHeader.from_file(f)>>> phead.file_code == 0x1234True>>> phead.min # Nested structure<__main__.Point object at 0x1006a48d0>>>> phead.min.x
6.12. Reading Nested and Variable-Sized Binary Structures | 209
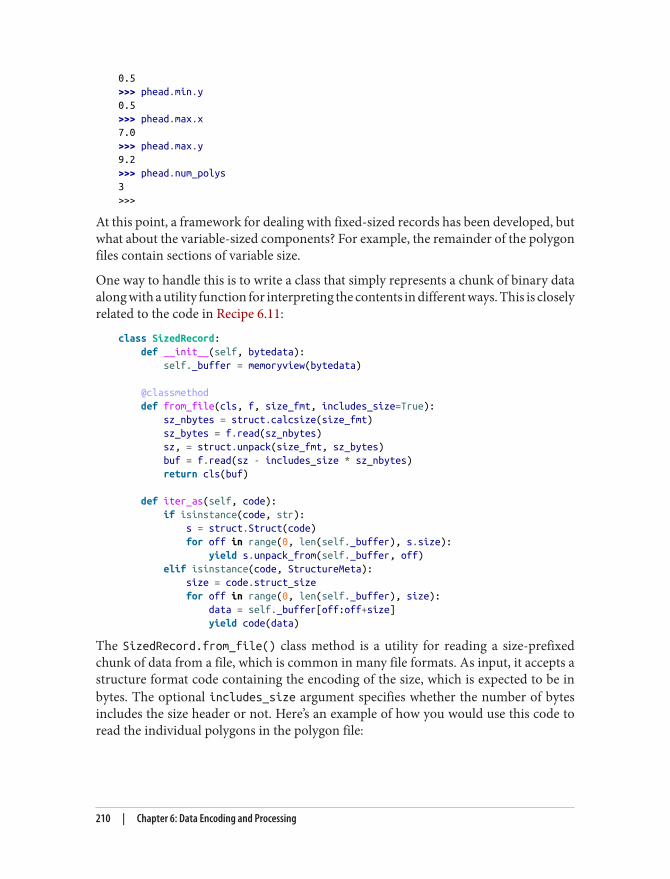
0.5>>> phead.min.y0.5>>> phead.max.x7.0>>> phead.max.y9.2>>> phead.num_polys3>>>
At this point, a framework for dealing with fixed-sized records has been developed, butwhat about the variable-sized components? For example, the remainder of the polygonfiles contain sections of variable size.
One way to handle this is to write a class that simply represents a chunk of binary dataalong with a utility function for interpreting the contents in different ways. This is closelyrelated to the code in Recipe 6.11:
class SizedRecord: def __init__(self, bytedata): self._buffer = memoryview(bytedata)
@classmethod def from_file(cls, f, size_fmt, includes_size=True): sz_nbytes = struct.calcsize(size_fmt) sz_bytes = f.read(sz_nbytes) sz, = struct.unpack(size_fmt, sz_bytes) buf = f.read(sz - includes_size * sz_nbytes) return cls(buf)
def iter_as(self, code): if isinstance(code, str): s = struct.Struct(code) for off in range(0, len(self._buffer), s.size): yield s.unpack_from(self._buffer, off) elif isinstance(code, StructureMeta): size = code.struct_size for off in range(0, len(self._buffer), size): data = self._buffer[off:off+size] yield code(data)
The SizedRecord.from_file() class method is a utility for reading a size-prefixedchunk of data from a file, which is common in many file formats. As input, it accepts astructure format code containing the encoding of the size, which is expected to be inbytes. The optional includes_size argument specifies whether the number of bytesincludes the size header or not. Here’s an example of how you would use this code toread the individual polygons in the polygon file:
210 | Chapter 6: Data Encoding and Processing
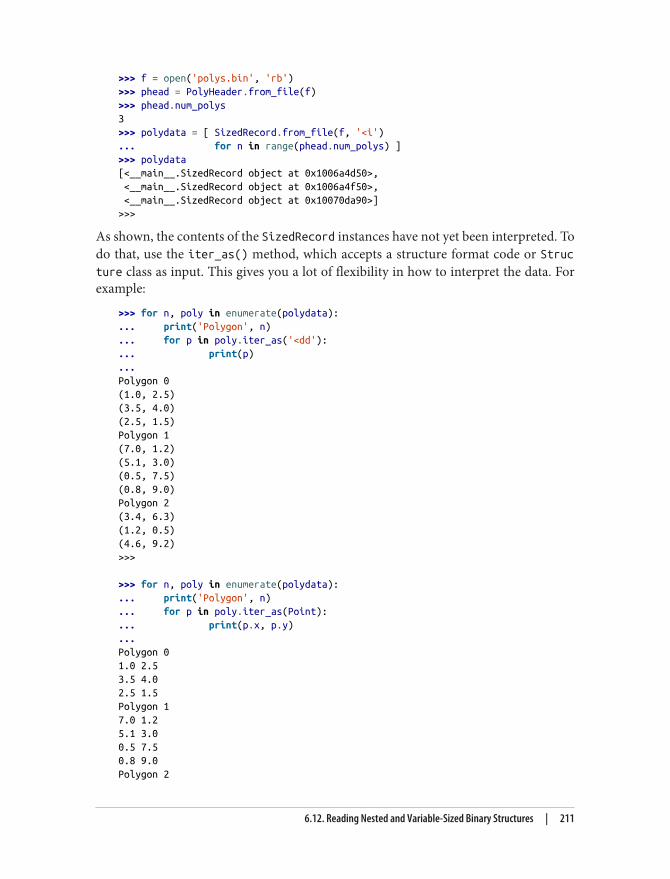
>>> f = open('polys.bin', 'rb')>>> phead = PolyHeader.from_file(f)>>> phead.num_polys3>>> polydata = [ SizedRecord.from_file(f, '<i')... for n in range(phead.num_polys) ]>>> polydata[<__main__.SizedRecord object at 0x1006a4d50>, <__main__.SizedRecord object at 0x1006a4f50>, <__main__.SizedRecord object at 0x10070da90>]>>>
As shown, the contents of the SizedRecord instances have not yet been interpreted. Todo that, use the iter_as() method, which accepts a structure format code or Structure class as input. This gives you a lot of flexibility in how to interpret the data. Forexample:
>>> for n, poly in enumerate(polydata):... print('Polygon', n)... for p in poly.iter_as('<dd'):... print(p)...Polygon 0(1.0, 2.5)(3.5, 4.0)(2.5, 1.5)Polygon 1(7.0, 1.2)(5.1, 3.0)(0.5, 7.5)(0.8, 9.0)Polygon 2(3.4, 6.3)(1.2, 0.5)(4.6, 9.2)>>>
>>> for n, poly in enumerate(polydata):... print('Polygon', n)... for p in poly.iter_as(Point):... print(p.x, p.y)...Polygon 01.0 2.53.5 4.02.5 1.5Polygon 17.0 1.25.1 3.00.5 7.50.8 9.0Polygon 2
6.12. Reading Nested and Variable-Sized Binary Structures | 211
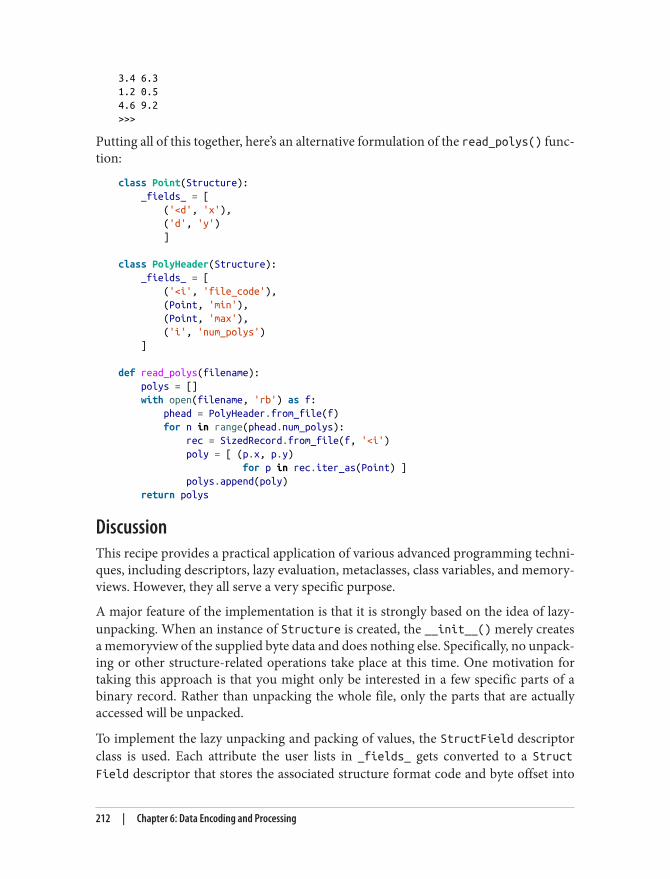
3.4 6.31.2 0.54.6 9.2>>>
Putting all of this together, here’s an alternative formulation of the read_polys() func‐tion:
class Point(Structure): _fields_ = [ ('<d', 'x'), ('d', 'y') ]
class PolyHeader(Structure): _fields_ = [ ('<i', 'file_code'), (Point, 'min'), (Point, 'max'), ('i', 'num_polys') ]
def read_polys(filename): polys = [] with open(filename, 'rb') as f: phead = PolyHeader.from_file(f) for n in range(phead.num_polys): rec = SizedRecord.from_file(f, '<i') poly = [ (p.x, p.y) for p in rec.iter_as(Point) ] polys.append(poly) return polys
DiscussionThis recipe provides a practical application of various advanced programming techni‐ques, including descriptors, lazy evaluation, metaclasses, class variables, and memory‐views. However, they all serve a very specific purpose.
A major feature of the implementation is that it is strongly based on the idea of lazy-unpacking. When an instance of Structure is created, the __init__() merely createsa memoryview of the supplied byte data and does nothing else. Specifically, no unpack‐ing or other structure-related operations take place at this time. One motivation fortaking this approach is that you might only be interested in a few specific parts of abinary record. Rather than unpacking the whole file, only the parts that are actuallyaccessed will be unpacked.
To implement the lazy unpacking and packing of values, the StructField descriptorclass is used. Each attribute the user lists in _fields_ gets converted to a StructField descriptor that stores the associated structure format code and byte offset into
212 | Chapter 6: Data Encoding and Processing
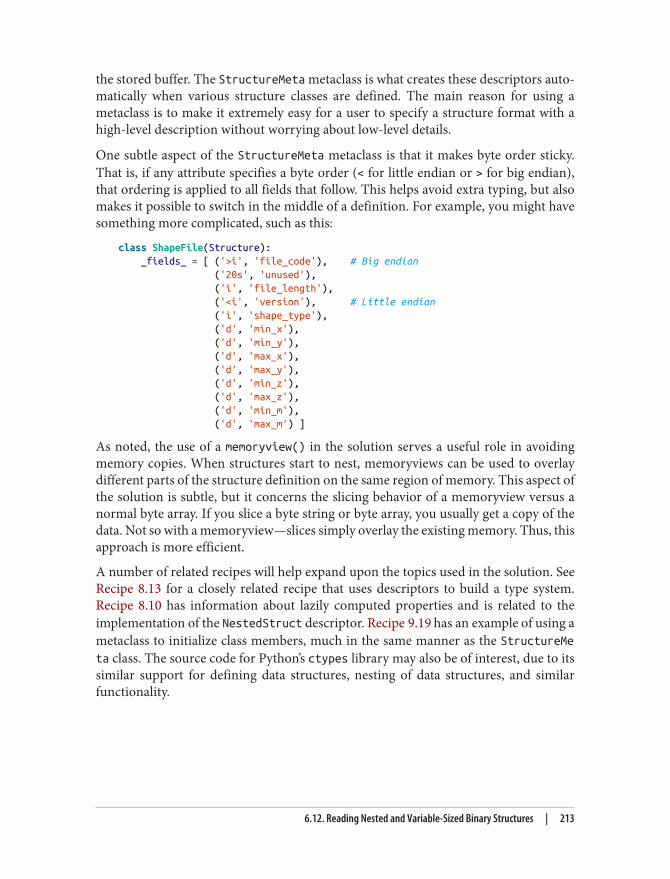
the stored buffer. The StructureMeta metaclass is what creates these descriptors auto‐matically when various structure classes are defined. The main reason for using ametaclass is to make it extremely easy for a user to specify a structure format with ahigh-level description without worrying about low-level details.
One subtle aspect of the StructureMeta metaclass is that it makes byte order sticky.That is, if any attribute specifies a byte order (< for little endian or > for big endian),that ordering is applied to all fields that follow. This helps avoid extra typing, but alsomakes it possible to switch in the middle of a definition. For example, you might havesomething more complicated, such as this:
class ShapeFile(Structure): _fields_ = [ ('>i', 'file_code'), # Big endian ('20s', 'unused'), ('i', 'file_length'), ('<i', 'version'), # Little endian ('i', 'shape_type'), ('d', 'min_x'), ('d', 'min_y'), ('d', 'max_x'), ('d', 'max_y'), ('d', 'min_z'), ('d', 'max_z'), ('d', 'min_m'), ('d', 'max_m') ]
As noted, the use of a memoryview() in the solution serves a useful role in avoidingmemory copies. When structures start to nest, memoryviews can be used to overlaydifferent parts of the structure definition on the same region of memory. This aspect ofthe solution is subtle, but it concerns the slicing behavior of a memoryview versus anormal byte array. If you slice a byte string or byte array, you usually get a copy of thedata. Not so with a memoryview—slices simply overlay the existing memory. Thus, thisapproach is more efficient.
A number of related recipes will help expand upon the topics used in the solution. SeeRecipe 8.13 for a closely related recipe that uses descriptors to build a type system.Recipe 8.10 has information about lazily computed properties and is related to theimplementation of the NestedStruct descriptor. Recipe 9.19 has an example of using ametaclass to initialize class members, much in the same manner as the StructureMeta class. The source code for Python’s ctypes library may also be of interest, due to itssimilar support for defining data structures, nesting of data structures, and similarfunctionality.
6.12. Reading Nested and Variable-Sized Binary Structures | 213
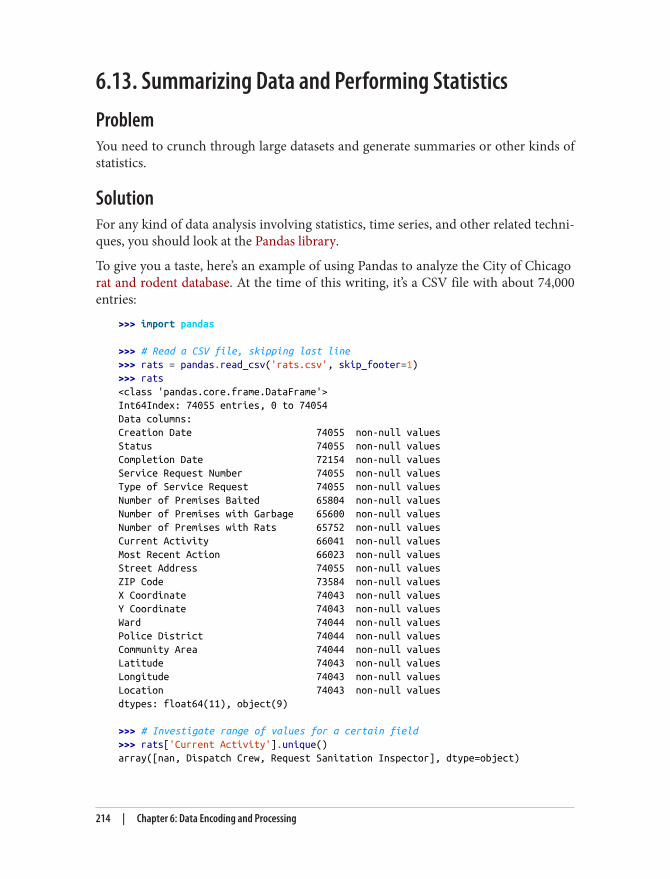
6.13. Summarizing Data and Performing StatisticsProblemYou need to crunch through large datasets and generate summaries or other kinds ofstatistics.
SolutionFor any kind of data analysis involving statistics, time series, and other related techni‐ques, you should look at the Pandas library.
To give you a taste, here’s an example of using Pandas to analyze the City of Chicago rat and rodent database. At the time of this writing, it’s a CSV file with about 74,000entries:
>>> import pandas
>>> # Read a CSV file, skipping last line>>> rats = pandas.read_csv('rats.csv', skip_footer=1)>>> rats<class 'pandas.core.frame.DataFrame'>Int64Index: 74055 entries, 0 to 74054Data columns:Creation Date 74055 non-null valuesStatus 74055 non-null valuesCompletion Date 72154 non-null valuesService Request Number 74055 non-null valuesType of Service Request 74055 non-null valuesNumber of Premises Baited 65804 non-null valuesNumber of Premises with Garbage 65600 non-null valuesNumber of Premises with Rats 65752 non-null valuesCurrent Activity 66041 non-null valuesMost Recent Action 66023 non-null valuesStreet Address 74055 non-null valuesZIP Code 73584 non-null valuesX Coordinate 74043 non-null valuesY Coordinate 74043 non-null valuesWard 74044 non-null valuesPolice District 74044 non-null valuesCommunity Area 74044 non-null valuesLatitude 74043 non-null valuesLongitude 74043 non-null valuesLocation 74043 non-null valuesdtypes: float64(11), object(9)
>>> # Investigate range of values for a certain field>>> rats['Current Activity'].unique()array([nan, Dispatch Crew, Request Sanitation Inspector], dtype=object)
214 | Chapter 6: Data Encoding and Processing
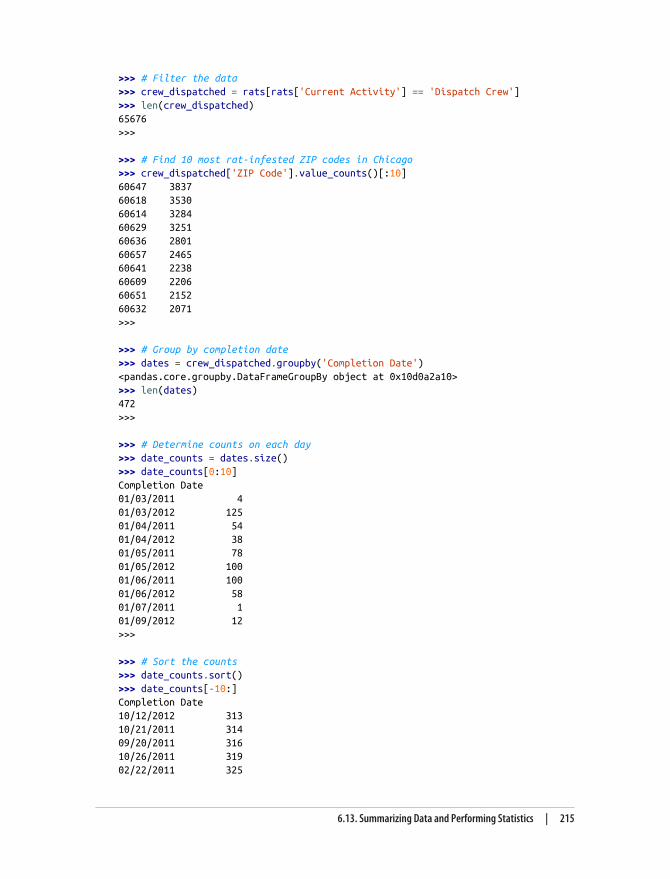
>>> # Filter the data>>> crew_dispatched = rats[rats['Current Activity'] == 'Dispatch Crew']>>> len(crew_dispatched)65676>>>
>>> # Find 10 most rat-infested ZIP codes in Chicago>>> crew_dispatched['ZIP Code'].value_counts()[:10]60647 383760618 353060614 328460629 325160636 280160657 246560641 223860609 220660651 215260632 2071>>>
>>> # Group by completion date>>> dates = crew_dispatched.groupby('Completion Date')<pandas.core.groupby.DataFrameGroupBy object at 0x10d0a2a10>>>> len(dates)472>>>
>>> # Determine counts on each day>>> date_counts = dates.size()>>> date_counts[0:10]Completion Date01/03/2011 401/03/2012 12501/04/2011 5401/04/2012 3801/05/2011 7801/05/2012 10001/06/2011 10001/06/2012 5801/07/2011 101/09/2012 12>>>
>>> # Sort the counts>>> date_counts.sort()>>> date_counts[-10:]Completion Date10/12/2012 31310/21/2011 31409/20/2011 31610/26/2011 31902/22/2011 325
6.13. Summarizing Data and Performing Statistics | 215
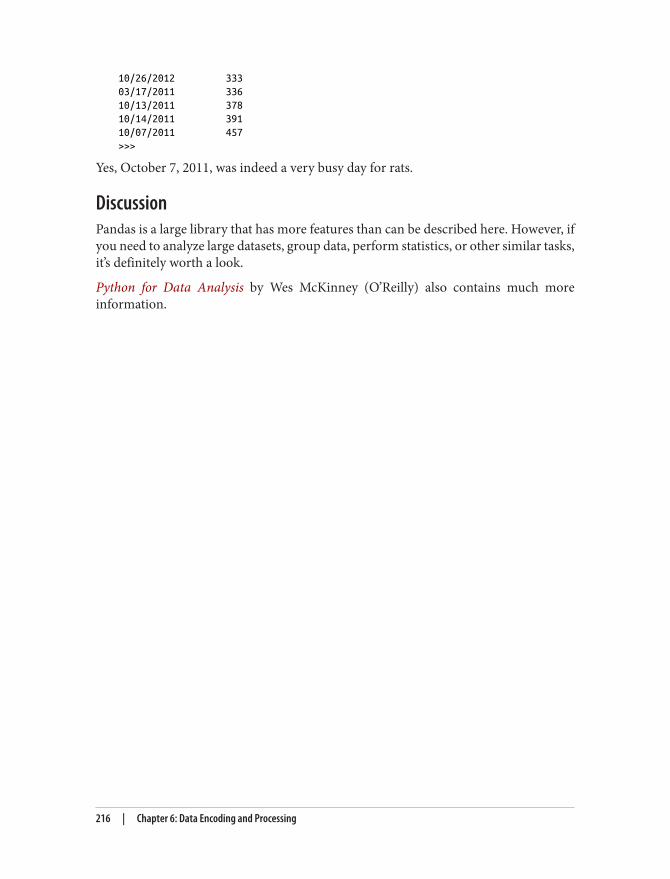
10/26/2012 33303/17/2011 33610/13/2011 37810/14/2011 39110/07/2011 457>>>
Yes, October 7, 2011, was indeed a very busy day for rats.
DiscussionPandas is a large library that has more features than can be described here. However, ifyou need to analyze large datasets, group data, perform statistics, or other similar tasks,it’s definitely worth a look.
Python for Data Analysis by Wes McKinney (O’Reilly) also contains much moreinformation.
216 | Chapter 6: Data Encoding and Processing
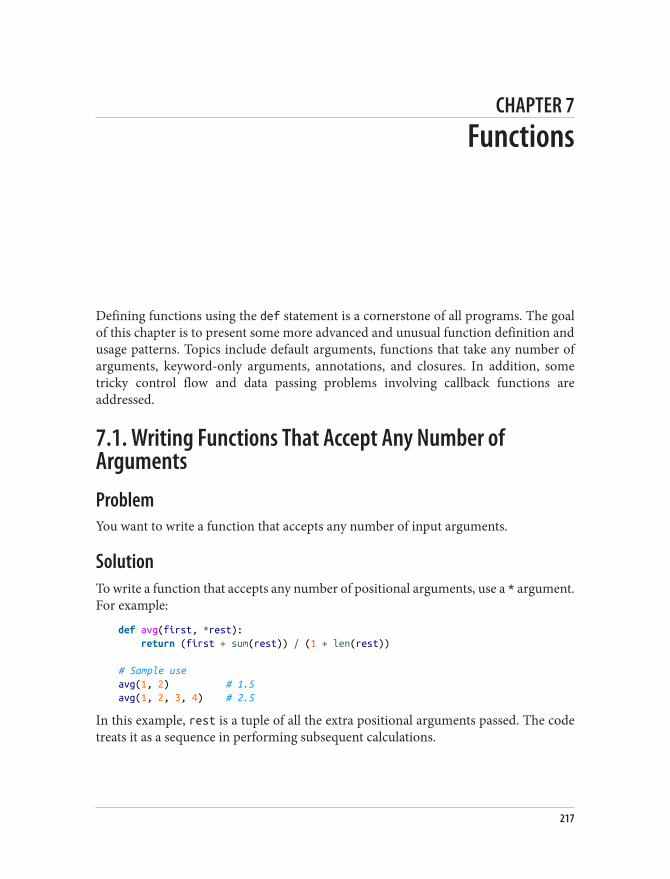
CHAPTER 7
Functions
Defining functions using the def statement is a cornerstone of all programs. The goalof this chapter is to present some more advanced and unusual function definition andusage patterns. Topics include default arguments, functions that take any number ofarguments, keyword-only arguments, annotations, and closures. In addition, sometricky control flow and data passing problems involving callback functions areaddressed.
7.1. Writing Functions That Accept Any Number ofArgumentsProblemYou want to write a function that accepts any number of input arguments.
SolutionTo write a function that accepts any number of positional arguments, use a * argument.For example:
def avg(first, *rest): return (first + sum(rest)) / (1 + len(rest))
# Sample useavg(1, 2) # 1.5avg(1, 2, 3, 4) # 2.5
In this example, rest is a tuple of all the extra positional arguments passed. The codetreats it as a sequence in performing subsequent calculations.
217
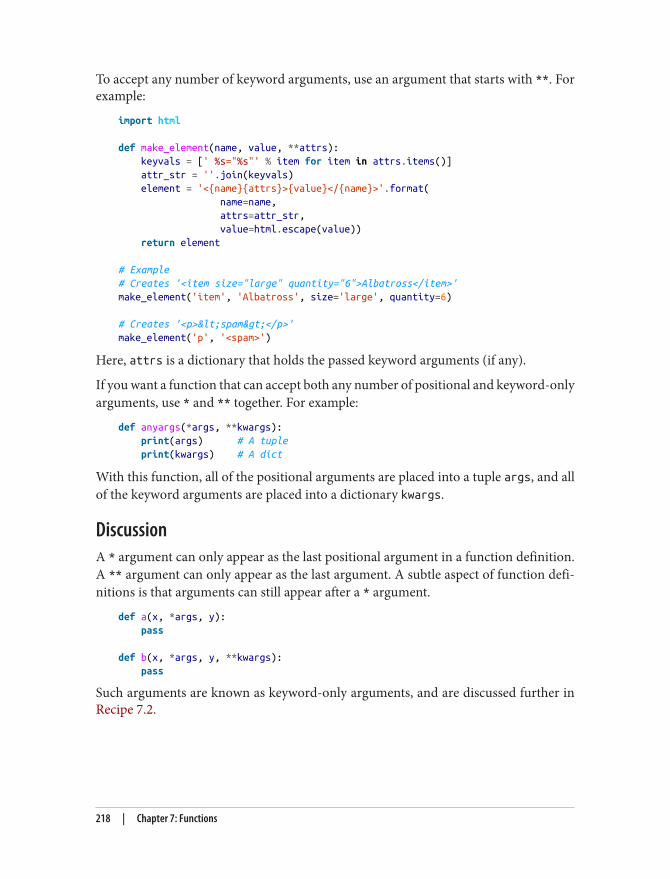
To accept any number of keyword arguments, use an argument that starts with **. Forexample:
import html
def make_element(name, value, **attrs): keyvals = [' %s="%s"' % item for item in attrs.items()] attr_str = ''.join(keyvals) element = '<{name}{attrs}>{value}</{name}>'.format( name=name, attrs=attr_str, value=html.escape(value)) return element
# Example# Creates '<item size="large" quantity="6">Albatross</item>'make_element('item', 'Albatross', size='large', quantity=6)
# Creates '<p><spam></p>'make_element('p', '<spam>')
Here, attrs is a dictionary that holds the passed keyword arguments (if any).
If you want a function that can accept both any number of positional and keyword-onlyarguments, use * and ** together. For example:
def anyargs(*args, **kwargs): print(args) # A tuple print(kwargs) # A dict
With this function, all of the positional arguments are placed into a tuple args, and allof the keyword arguments are placed into a dictionary kwargs.
DiscussionA * argument can only appear as the last positional argument in a function definition.A ** argument can only appear as the last argument. A subtle aspect of function defi‐nitions is that arguments can still appear after a * argument.
def a(x, *args, y): pass
def b(x, *args, y, **kwargs): pass
Such arguments are known as keyword-only arguments, and are discussed further inRecipe 7.2.
218 | Chapter 7: Functions
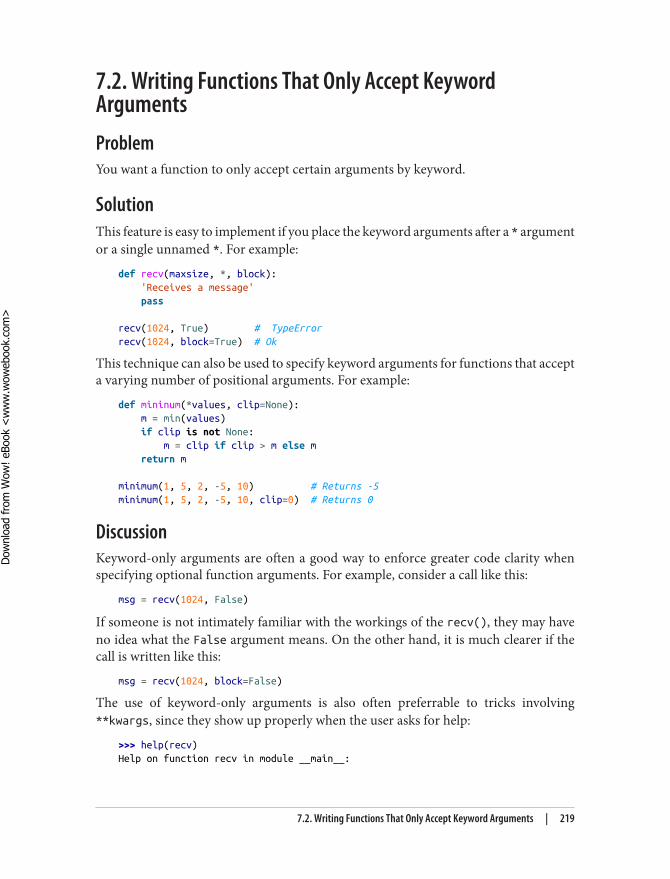
7.2. Writing Functions That Only Accept KeywordArgumentsProblemYou want a function to only accept certain arguments by keyword.
SolutionThis feature is easy to implement if you place the keyword arguments after a * argumentor a single unnamed *. For example:
def recv(maxsize, *, block): 'Receives a message' pass
recv(1024, True) # TypeErrorrecv(1024, block=True) # Ok
This technique can also be used to specify keyword arguments for functions that accepta varying number of positional arguments. For example:
def mininum(*values, clip=None): m = min(values) if clip is not None: m = clip if clip > m else m return m
minimum(1, 5, 2, -5, 10) # Returns -5minimum(1, 5, 2, -5, 10, clip=0) # Returns 0
DiscussionKeyword-only arguments are often a good way to enforce greater code clarity whenspecifying optional function arguments. For example, consider a call like this:
msg = recv(1024, False)
If someone is not intimately familiar with the workings of the recv(), they may haveno idea what the False argument means. On the other hand, it is much clearer if thecall is written like this:
msg = recv(1024, block=False)
The use of keyword-only arguments is also often preferrable to tricks involving**kwargs, since they show up properly when the user asks for help:
>>> help(recv)Help on function recv in module __main__:
7.2. Writing Functions That Only Accept Keyword Arguments | 219
Dow
nlo
ad fro
m W
ow
! eBook
<w
ww
.wow
ebook.
com
>
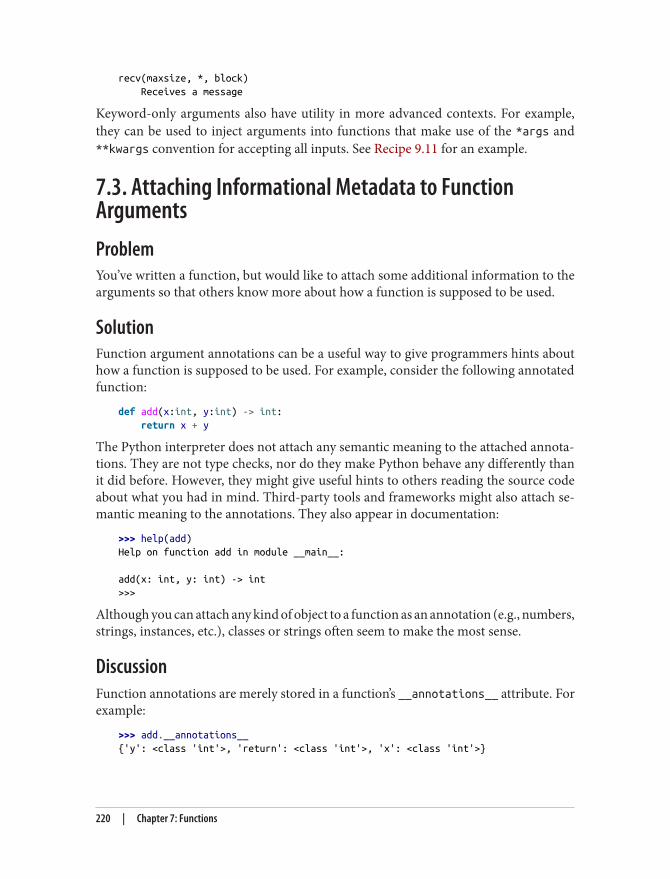
recv(maxsize, *, block) Receives a message
Keyword-only arguments also have utility in more advanced contexts. For example,they can be used to inject arguments into functions that make use of the *args and**kwargs convention for accepting all inputs. See Recipe 9.11 for an example.
7.3. Attaching Informational Metadata to FunctionArgumentsProblemYou’ve written a function, but would like to attach some additional information to thearguments so that others know more about how a function is supposed to be used.
SolutionFunction argument annotations can be a useful way to give programmers hints abouthow a function is supposed to be used. For example, consider the following annotatedfunction:
def add(x:int, y:int) -> int: return x + y
The Python interpreter does not attach any semantic meaning to the attached annota‐tions. They are not type checks, nor do they make Python behave any differently thanit did before. However, they might give useful hints to others reading the source codeabout what you had in mind. Third-party tools and frameworks might also attach se‐mantic meaning to the annotations. They also appear in documentation:
>>> help(add)Help on function add in module __main__:
add(x: int, y: int) -> int>>>
Although you can attach any kind of object to a function as an annotation (e.g., numbers,strings, instances, etc.), classes or strings often seem to make the most sense.
DiscussionFunction annotations are merely stored in a function’s __annotations__ attribute. Forexample:
>>> add.__annotations__{'y': <class 'int'>, 'return': <class 'int'>, 'x': <class 'int'>}
220 | Chapter 7: Functions
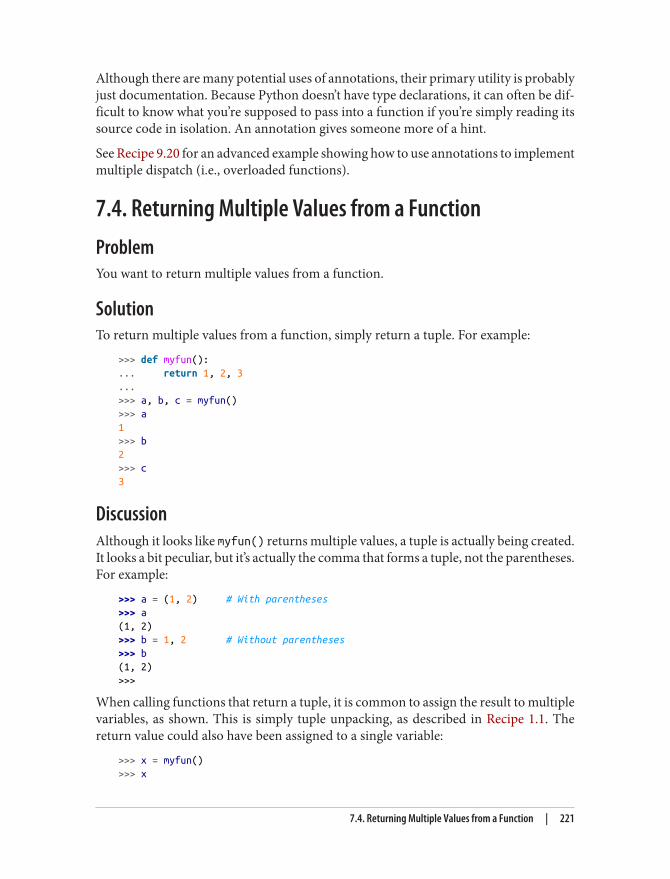
Although there are many potential uses of annotations, their primary utility is probablyjust documentation. Because Python doesn’t have type declarations, it can often be dif‐ficult to know what you’re supposed to pass into a function if you’re simply reading itssource code in isolation. An annotation gives someone more of a hint.
See Recipe 9.20 for an advanced example showing how to use annotations to implementmultiple dispatch (i.e., overloaded functions).
7.4. Returning Multiple Values from a FunctionProblemYou want to return multiple values from a function.
SolutionTo return multiple values from a function, simply return a tuple. For example:
>>> def myfun():... return 1, 2, 3...>>> a, b, c = myfun()>>> a1>>> b2>>> c3
DiscussionAlthough it looks like myfun() returns multiple values, a tuple is actually being created.It looks a bit peculiar, but it’s actually the comma that forms a tuple, not the parentheses.For example:
>>> a = (1, 2) # With parentheses>>> a(1, 2)>>> b = 1, 2 # Without parentheses>>> b(1, 2)>>>
When calling functions that return a tuple, it is common to assign the result to multiplevariables, as shown. This is simply tuple unpacking, as described in Recipe 1.1. Thereturn value could also have been assigned to a single variable:
>>> x = myfun()>>> x
7.4. Returning Multiple Values from a Function | 221
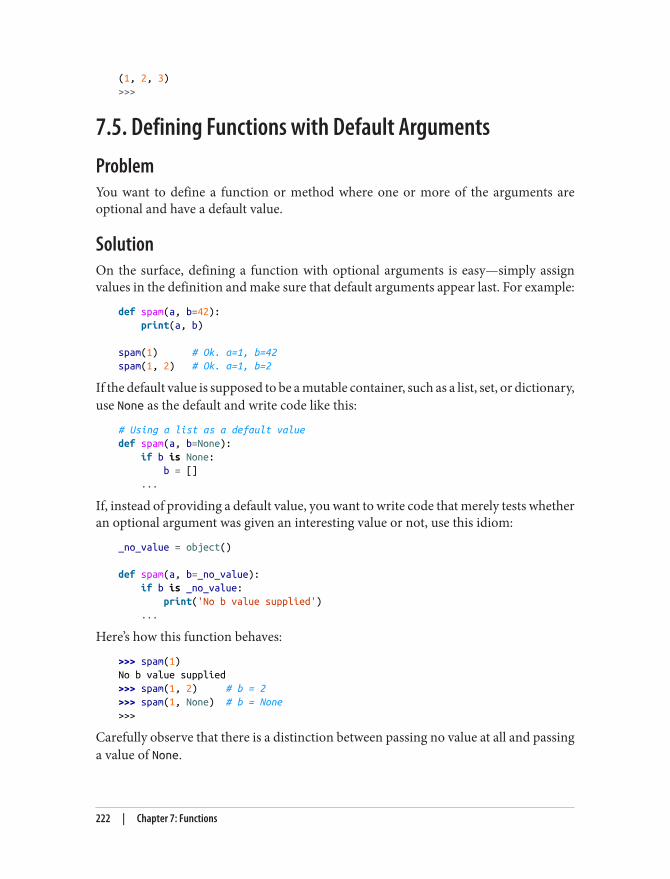
(1, 2, 3)>>>
7.5. Defining Functions with Default ArgumentsProblemYou want to define a function or method where one or more of the arguments areoptional and have a default value.
SolutionOn the surface, defining a function with optional arguments is easy—simply assignvalues in the definition and make sure that default arguments appear last. For example:
def spam(a, b=42): print(a, b)
spam(1) # Ok. a=1, b=42spam(1, 2) # Ok. a=1, b=2
If the default value is supposed to be a mutable container, such as a list, set, or dictionary,use None as the default and write code like this:
# Using a list as a default valuedef spam(a, b=None): if b is None: b = [] ...
If, instead of providing a default value, you want to write code that merely tests whetheran optional argument was given an interesting value or not, use this idiom:
_no_value = object()
def spam(a, b=_no_value): if b is _no_value: print('No b value supplied') ...
Here’s how this function behaves:
>>> spam(1)No b value supplied>>> spam(1, 2) # b = 2>>> spam(1, None) # b = None>>>
Carefully observe that there is a distinction between passing no value at all and passinga value of None.
222 | Chapter 7: Functions
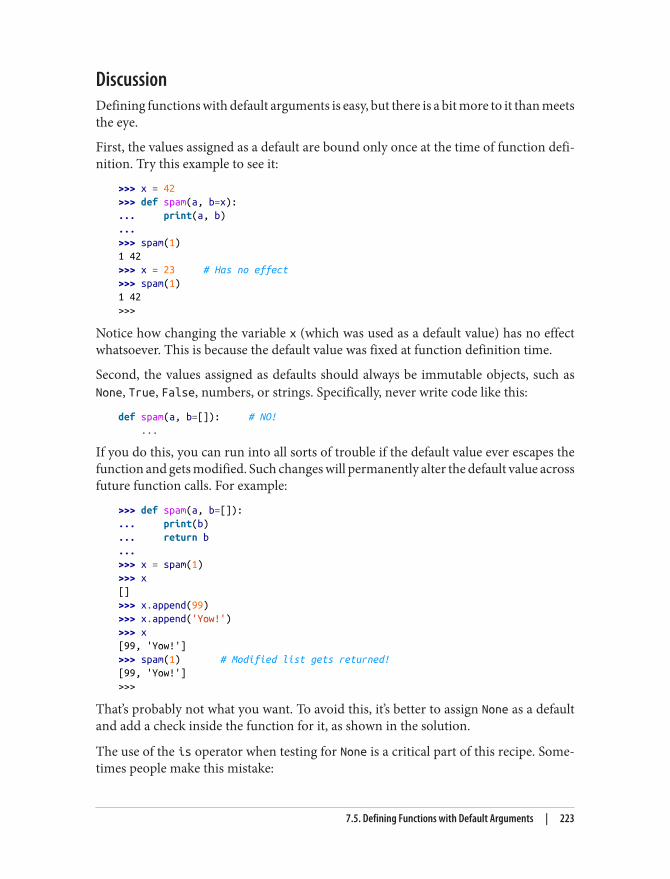
DiscussionDefining functions with default arguments is easy, but there is a bit more to it than meetsthe eye.
First, the values assigned as a default are bound only once at the time of function defi‐nition. Try this example to see it:
>>> x = 42>>> def spam(a, b=x):... print(a, b)...>>> spam(1)1 42>>> x = 23 # Has no effect>>> spam(1)1 42>>>
Notice how changing the variable x (which was used as a default value) has no effectwhatsoever. This is because the default value was fixed at function definition time.
Second, the values assigned as defaults should always be immutable objects, such asNone, True, False, numbers, or strings. Specifically, never write code like this:
def spam(a, b=[]): # NO! ...
If you do this, you can run into all sorts of trouble if the default value ever escapes thefunction and gets modified. Such changes will permanently alter the default value acrossfuture function calls. For example:
>>> def spam(a, b=[]):... print(b)... return b...>>> x = spam(1)>>> x[]>>> x.append(99)>>> x.append('Yow!')>>> x[99, 'Yow!']>>> spam(1) # Modified list gets returned![99, 'Yow!']>>>
That’s probably not what you want. To avoid this, it’s better to assign None as a defaultand add a check inside the function for it, as shown in the solution.
The use of the is operator when testing for None is a critical part of this recipe. Some‐times people make this mistake:
7.5. Defining Functions with Default Arguments | 223
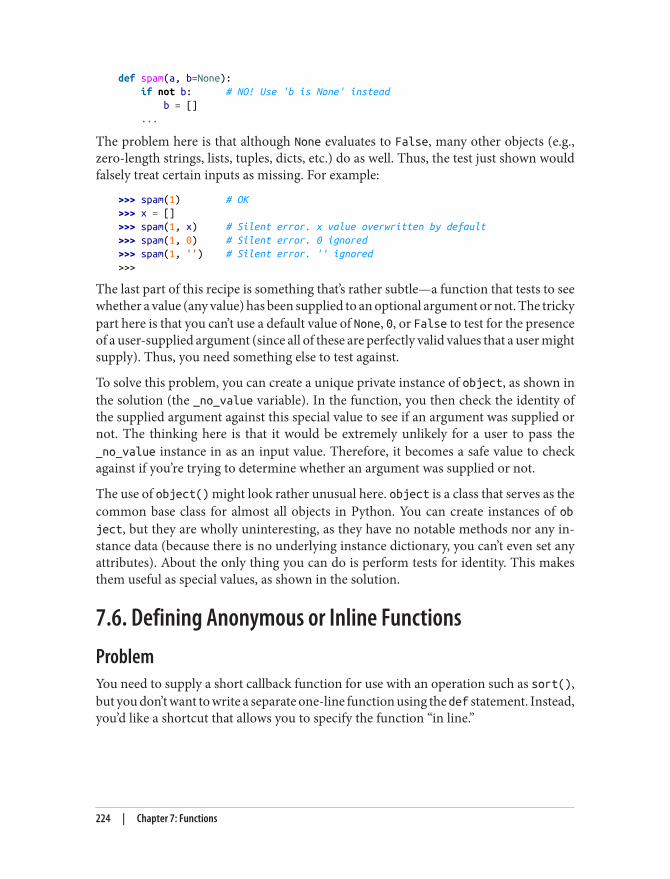
def spam(a, b=None): if not b: # NO! Use 'b is None' instead b = [] ...
The problem here is that although None evaluates to False, many other objects (e.g.,zero-length strings, lists, tuples, dicts, etc.) do as well. Thus, the test just shown wouldfalsely treat certain inputs as missing. For example:
>>> spam(1) # OK>>> x = []>>> spam(1, x) # Silent error. x value overwritten by default>>> spam(1, 0) # Silent error. 0 ignored>>> spam(1, '') # Silent error. '' ignored>>>
The last part of this recipe is something that’s rather subtle—a function that tests to seewhether a value (any value) has been supplied to an optional argument or not. The trickypart here is that you can’t use a default value of None, 0, or False to test for the presenceof a user-supplied argument (since all of these are perfectly valid values that a user mightsupply). Thus, you need something else to test against.
To solve this problem, you can create a unique private instance of object, as shown inthe solution (the _no_value variable). In the function, you then check the identity ofthe supplied argument against this special value to see if an argument was supplied ornot. The thinking here is that it would be extremely unlikely for a user to pass the_no_value instance in as an input value. Therefore, it becomes a safe value to checkagainst if you’re trying to determine whether an argument was supplied or not.
The use of object() might look rather unusual here. object is a class that serves as thecommon base class for almost all objects in Python. You can create instances of object, but they are wholly uninteresting, as they have no notable methods nor any in‐stance data (because there is no underlying instance dictionary, you can’t even set anyattributes). About the only thing you can do is perform tests for identity. This makesthem useful as special values, as shown in the solution.
7.6. Defining Anonymous or Inline FunctionsProblemYou need to supply a short callback function for use with an operation such as sort(),but you don’t want to write a separate one-line function using the def statement. Instead,you’d like a shortcut that allows you to specify the function “in line.”
224 | Chapter 7: Functions
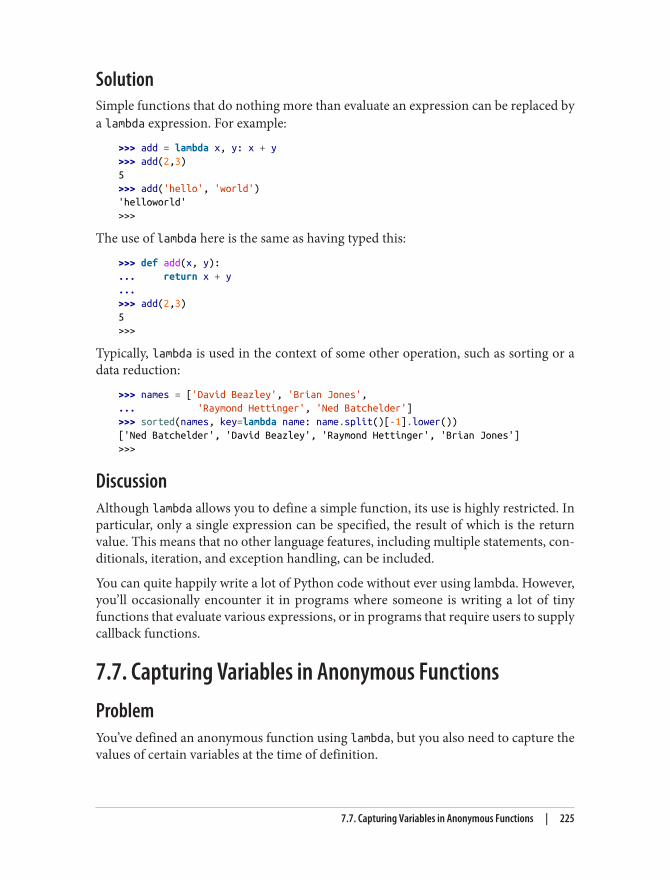
SolutionSimple functions that do nothing more than evaluate an expression can be replaced bya lambda expression. For example:
>>> add = lambda x, y: x + y>>> add(2,3)5>>> add('hello', 'world')'helloworld'>>>
The use of lambda here is the same as having typed this:
>>> def add(x, y):... return x + y...>>> add(2,3)5>>>
Typically, lambda is used in the context of some other operation, such as sorting or adata reduction:
>>> names = ['David Beazley', 'Brian Jones',... 'Raymond Hettinger', 'Ned Batchelder']>>> sorted(names, key=lambda name: name.split()[-1].lower())['Ned Batchelder', 'David Beazley', 'Raymond Hettinger', 'Brian Jones']>>>
DiscussionAlthough lambda allows you to define a simple function, its use is highly restricted. Inparticular, only a single expression can be specified, the result of which is the returnvalue. This means that no other language features, including multiple statements, con‐ditionals, iteration, and exception handling, can be included.
You can quite happily write a lot of Python code without ever using lambda. However,you’ll occasionally encounter it in programs where someone is writing a lot of tinyfunctions that evaluate various expressions, or in programs that require users to supplycallback functions.
7.7. Capturing Variables in Anonymous FunctionsProblemYou’ve defined an anonymous function using lambda, but you also need to capture thevalues of certain variables at the time of definition.
7.7. Capturing Variables in Anonymous Functions | 225
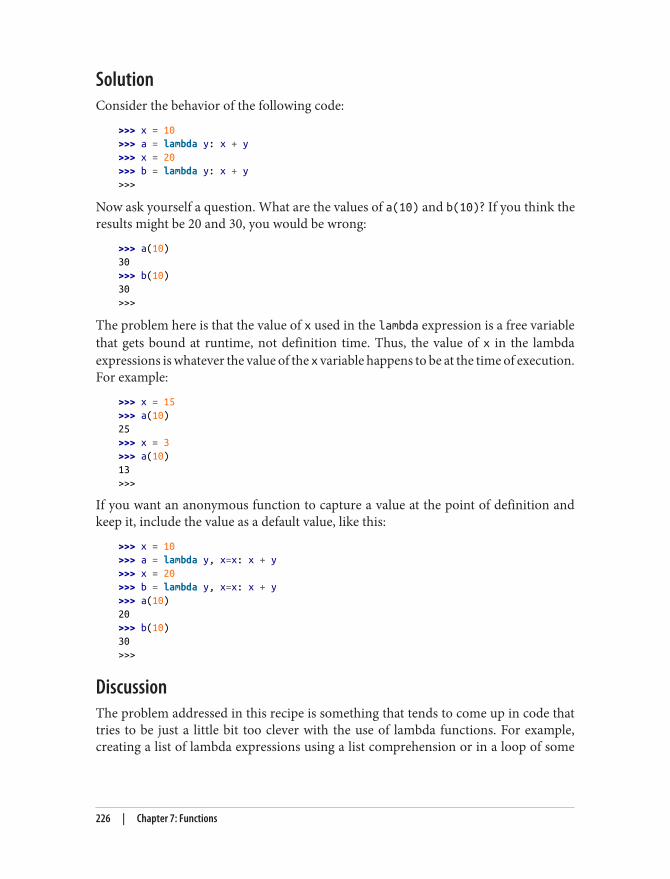
SolutionConsider the behavior of the following code:
>>> x = 10>>> a = lambda y: x + y>>> x = 20>>> b = lambda y: x + y>>>
Now ask yourself a question. What are the values of a(10) and b(10)? If you think theresults might be 20 and 30, you would be wrong:
>>> a(10)30>>> b(10)30>>>
The problem here is that the value of x used in the lambda expression is a free variablethat gets bound at runtime, not definition time. Thus, the value of x in the lambdaexpressions is whatever the value of the x variable happens to be at the time of execution.For example:
>>> x = 15>>> a(10)25>>> x = 3>>> a(10)13>>>
If you want an anonymous function to capture a value at the point of definition andkeep it, include the value as a default value, like this:
>>> x = 10>>> a = lambda y, x=x: x + y>>> x = 20>>> b = lambda y, x=x: x + y>>> a(10)20>>> b(10)30>>>
DiscussionThe problem addressed in this recipe is something that tends to come up in code thattries to be just a little bit too clever with the use of lambda functions. For example,creating a list of lambda expressions using a list comprehension or in a loop of some
226 | Chapter 7: Functions
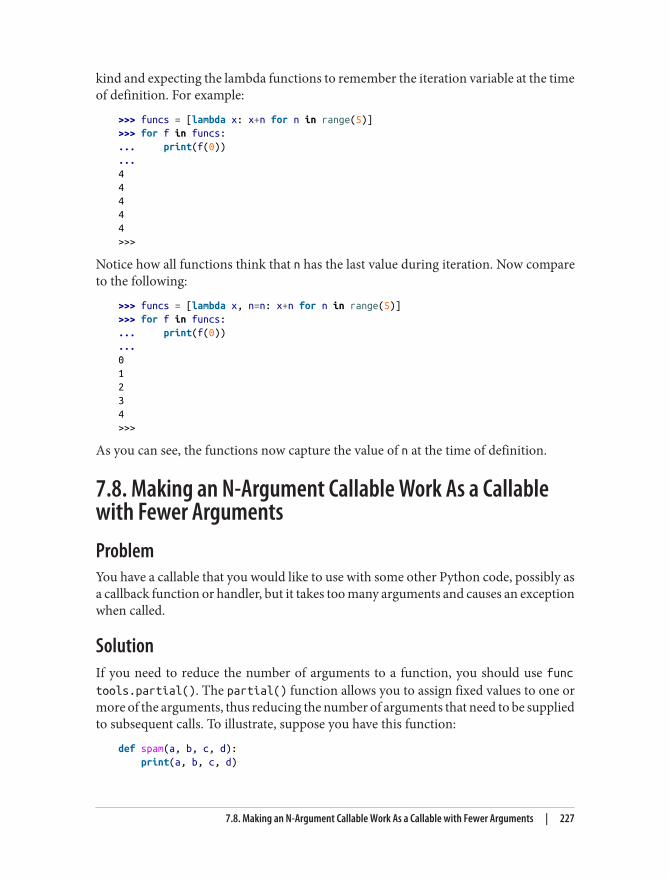
kind and expecting the lambda functions to remember the iteration variable at the timeof definition. For example:
>>> funcs = [lambda x: x+n for n in range(5)]>>> for f in funcs:... print(f(0))...44444>>>
Notice how all functions think that n has the last value during iteration. Now compareto the following:
>>> funcs = [lambda x, n=n: x+n for n in range(5)]>>> for f in funcs:... print(f(0))...01234>>>
As you can see, the functions now capture the value of n at the time of definition.
7.8. Making an N-Argument Callable Work As a Callablewith Fewer ArgumentsProblemYou have a callable that you would like to use with some other Python code, possibly asa callback function or handler, but it takes too many arguments and causes an exceptionwhen called.
SolutionIf you need to reduce the number of arguments to a function, you should use functools.partial(). The partial() function allows you to assign fixed values to one ormore of the arguments, thus reducing the number of arguments that need to be suppliedto subsequent calls. To illustrate, suppose you have this function:
def spam(a, b, c, d): print(a, b, c, d)
7.8. Making an N-Argument Callable Work As a Callable with Fewer Arguments | 227
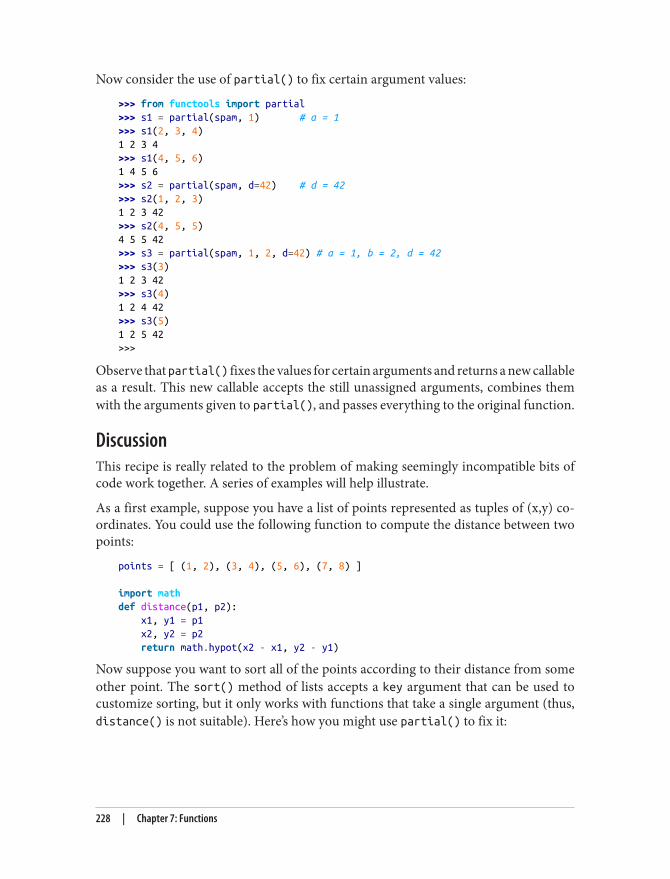
Now consider the use of partial() to fix certain argument values:
>>> from functools import partial>>> s1 = partial(spam, 1) # a = 1>>> s1(2, 3, 4)1 2 3 4>>> s1(4, 5, 6)1 4 5 6>>> s2 = partial(spam, d=42) # d = 42>>> s2(1, 2, 3)1 2 3 42>>> s2(4, 5, 5)4 5 5 42>>> s3 = partial(spam, 1, 2, d=42) # a = 1, b = 2, d = 42>>> s3(3)1 2 3 42>>> s3(4)1 2 4 42>>> s3(5)1 2 5 42>>>
Observe that partial() fixes the values for certain arguments and returns a new callableas a result. This new callable accepts the still unassigned arguments, combines themwith the arguments given to partial(), and passes everything to the original function.
DiscussionThis recipe is really related to the problem of making seemingly incompatible bits ofcode work together. A series of examples will help illustrate.
As a first example, suppose you have a list of points represented as tuples of (x,y) co‐ordinates. You could use the following function to compute the distance between twopoints:
points = [ (1, 2), (3, 4), (5, 6), (7, 8) ]
import mathdef distance(p1, p2): x1, y1 = p1 x2, y2 = p2 return math.hypot(x2 - x1, y2 - y1)
Now suppose you want to sort all of the points according to their distance from someother point. The sort() method of lists accepts a key argument that can be used tocustomize sorting, but it only works with functions that take a single argument (thus,distance() is not suitable). Here’s how you might use partial() to fix it:
228 | Chapter 7: Functions
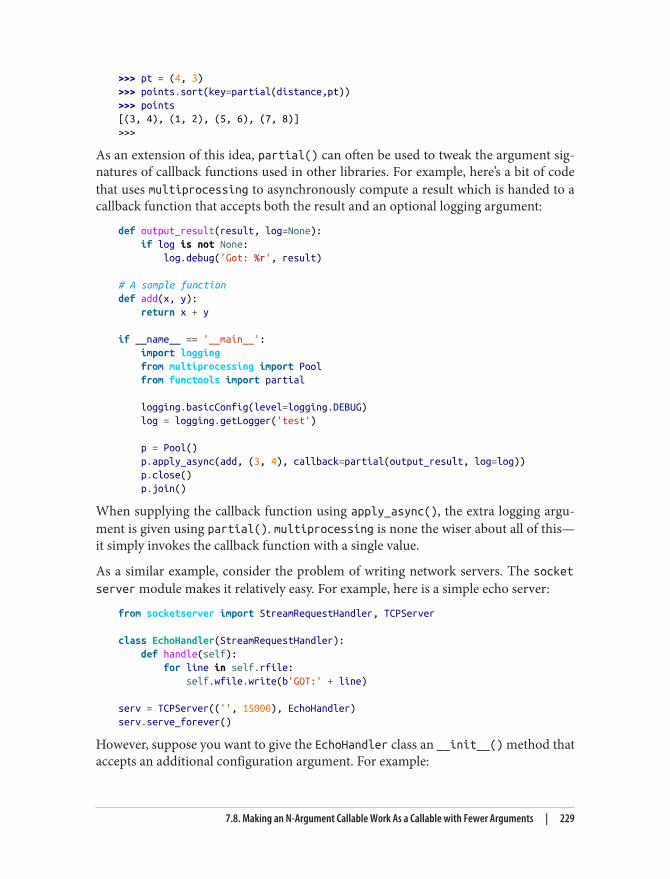
>>> pt = (4, 3)>>> points.sort(key=partial(distance,pt))>>> points[(3, 4), (1, 2), (5, 6), (7, 8)]>>>
As an extension of this idea, partial() can often be used to tweak the argument sig‐natures of callback functions used in other libraries. For example, here’s a bit of codethat uses multiprocessing to asynchronously compute a result which is handed to acallback function that accepts both the result and an optional logging argument:
def output_result(result, log=None): if log is not None: log.debug('Got: %r', result)
# A sample functiondef add(x, y): return x + y
if __name__ == '__main__': import logging from multiprocessing import Pool from functools import partial
logging.basicConfig(level=logging.DEBUG) log = logging.getLogger('test')
p = Pool() p.apply_async(add, (3, 4), callback=partial(output_result, log=log)) p.close() p.join()
When supplying the callback function using apply_async(), the extra logging argu‐ment is given using partial(). multiprocessing is none the wiser about all of this—it simply invokes the callback function with a single value.
As a similar example, consider the problem of writing network servers. The socketserver module makes it relatively easy. For example, here is a simple echo server:
from socketserver import StreamRequestHandler, TCPServer
class EchoHandler(StreamRequestHandler): def handle(self): for line in self.rfile: self.wfile.write(b'GOT:' + line)
serv = TCPServer(('', 15000), EchoHandler)serv.serve_forever()
However, suppose you want to give the EchoHandler class an __init__() method thataccepts an additional configuration argument. For example:
7.8. Making an N-Argument Callable Work As a Callable with Fewer Arguments | 229
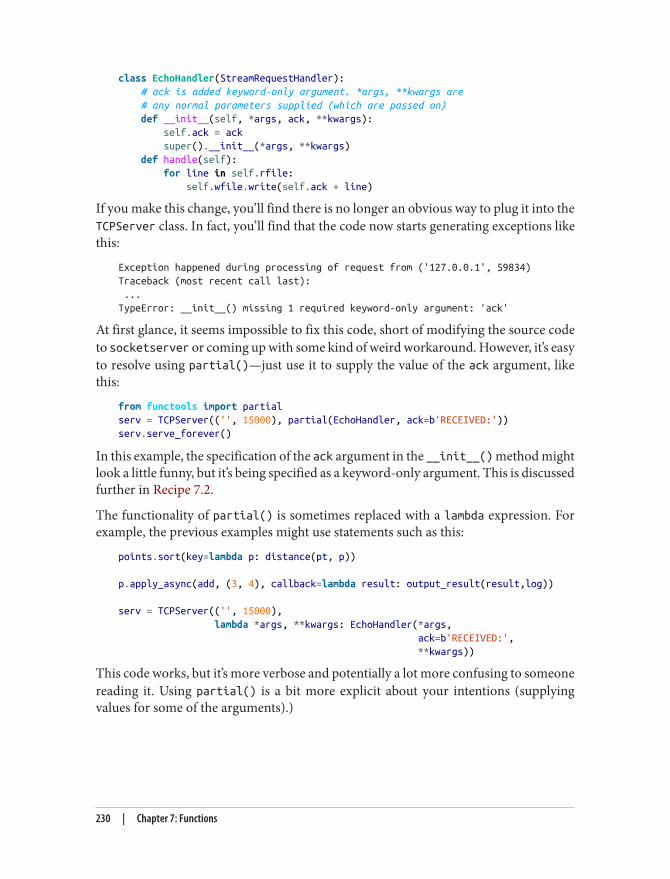
class EchoHandler(StreamRequestHandler): # ack is added keyword-only argument. *args, **kwargs are # any normal parameters supplied (which are passed on) def __init__(self, *args, ack, **kwargs): self.ack = ack super().__init__(*args, **kwargs) def handle(self): for line in self.rfile: self.wfile.write(self.ack + line)
If you make this change, you’ll find there is no longer an obvious way to plug it into theTCPServer class. In fact, you’ll find that the code now starts generating exceptions likethis:
Exception happened during processing of request from ('127.0.0.1', 59834)Traceback (most recent call last): ...TypeError: __init__() missing 1 required keyword-only argument: 'ack'
At first glance, it seems impossible to fix this code, short of modifying the source codeto socketserver or coming up with some kind of weird workaround. However, it’s easyto resolve using partial()—just use it to supply the value of the ack argument, likethis:
from functools import partialserv = TCPServer(('', 15000), partial(EchoHandler, ack=b'RECEIVED:'))serv.serve_forever()
In this example, the specification of the ack argument in the __init__() method mightlook a little funny, but it’s being specified as a keyword-only argument. This is discussedfurther in Recipe 7.2.
The functionality of partial() is sometimes replaced with a lambda expression. Forexample, the previous examples might use statements such as this:
points.sort(key=lambda p: distance(pt, p))
p.apply_async(add, (3, 4), callback=lambda result: output_result(result,log))
serv = TCPServer(('', 15000), lambda *args, **kwargs: EchoHandler(*args, ack=b'RECEIVED:', **kwargs))
This code works, but it’s more verbose and potentially a lot more confusing to someonereading it. Using partial() is a bit more explicit about your intentions (supplyingvalues for some of the arguments).)
230 | Chapter 7: Functions
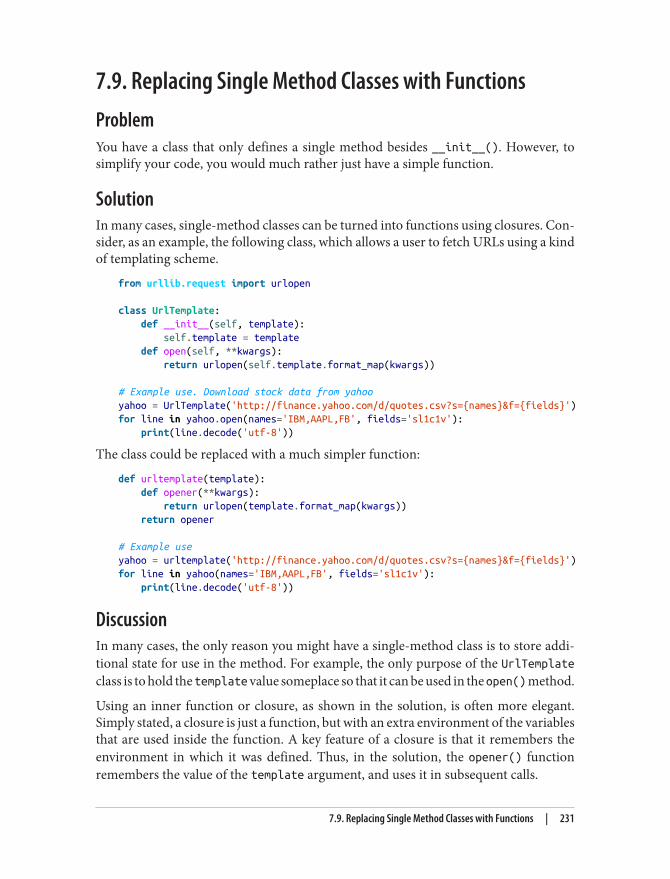
7.9. Replacing Single Method Classes with FunctionsProblemYou have a class that only defines a single method besides __init__(). However, tosimplify your code, you would much rather just have a simple function.
SolutionIn many cases, single-method classes can be turned into functions using closures. Con‐sider, as an example, the following class, which allows a user to fetch URLs using a kindof templating scheme.
from urllib.request import urlopen
class UrlTemplate: def __init__(self, template): self.template = template def open(self, **kwargs): return urlopen(self.template.format_map(kwargs))
# Example use. Download stock data from yahooyahoo = UrlTemplate('http://finance.yahoo.com/d/quotes.csv?s={names}&f={fields}')for line in yahoo.open(names='IBM,AAPL,FB', fields='sl1c1v'): print(line.decode('utf-8'))
The class could be replaced with a much simpler function:
def urltemplate(template): def opener(**kwargs): return urlopen(template.format_map(kwargs)) return opener
# Example useyahoo = urltemplate('http://finance.yahoo.com/d/quotes.csv?s={names}&f={fields}')for line in yahoo(names='IBM,AAPL,FB', fields='sl1c1v'): print(line.decode('utf-8'))
DiscussionIn many cases, the only reason you might have a single-method class is to store addi‐tional state for use in the method. For example, the only purpose of the UrlTemplateclass is to hold the template value someplace so that it can be used in the open() method.
Using an inner function or closure, as shown in the solution, is often more elegant.Simply stated, a closure is just a function, but with an extra environment of the variablesthat are used inside the function. A key feature of a closure is that it remembers theenvironment in which it was defined. Thus, in the solution, the opener() functionremembers the value of the template argument, and uses it in subsequent calls.
7.9. Replacing Single Method Classes with Functions | 231
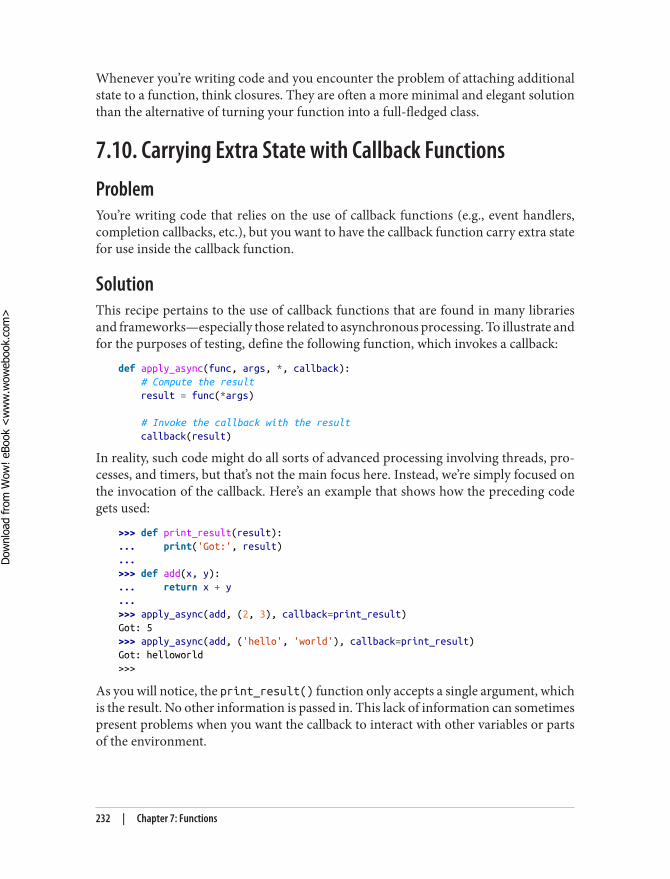
Whenever you’re writing code and you encounter the problem of attaching additionalstate to a function, think closures. They are often a more minimal and elegant solutionthan the alternative of turning your function into a full-fledged class.
7.10. Carrying Extra State with Callback FunctionsProblemYou’re writing code that relies on the use of callback functions (e.g., event handlers,completion callbacks, etc.), but you want to have the callback function carry extra statefor use inside the callback function.
SolutionThis recipe pertains to the use of callback functions that are found in many librariesand frameworks—especially those related to asynchronous processing. To illustrate andfor the purposes of testing, define the following function, which invokes a callback:
def apply_async(func, args, *, callback): # Compute the result result = func(*args)
# Invoke the callback with the result callback(result)
In reality, such code might do all sorts of advanced processing involving threads, pro‐cesses, and timers, but that’s not the main focus here. Instead, we’re simply focused onthe invocation of the callback. Here’s an example that shows how the preceding codegets used:
>>> def print_result(result):... print('Got:', result)...>>> def add(x, y):... return x + y...>>> apply_async(add, (2, 3), callback=print_result)Got: 5>>> apply_async(add, ('hello', 'world'), callback=print_result)Got: helloworld>>>
As you will notice, the print_result() function only accepts a single argument, whichis the result. No other information is passed in. This lack of information can sometimespresent problems when you want the callback to interact with other variables or partsof the environment.
232 | Chapter 7: Functions
Dow
nlo
ad fro
m W
ow
! eBook
<w
ww
.wow
ebook.
com
>
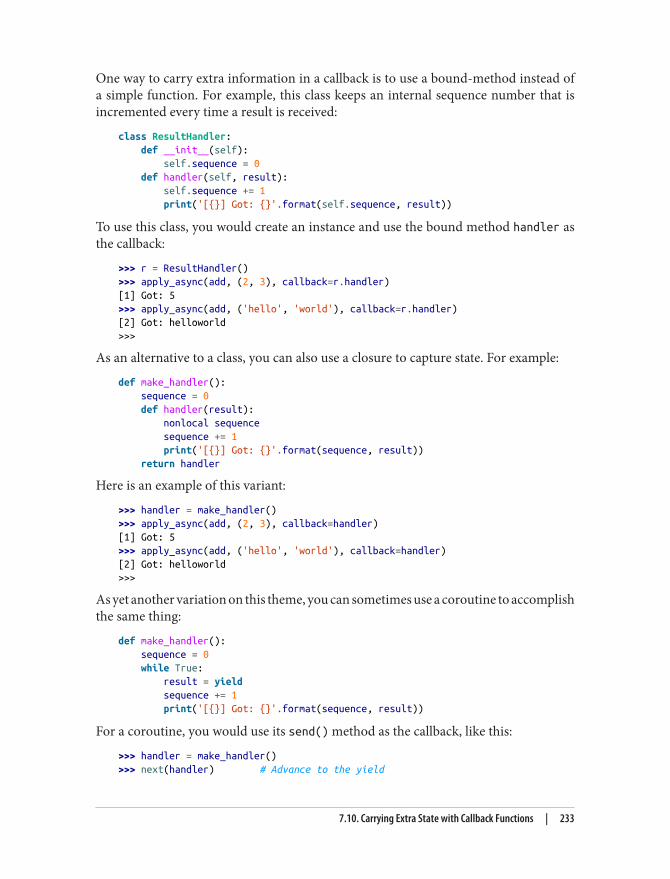
One way to carry extra information in a callback is to use a bound-method instead ofa simple function. For example, this class keeps an internal sequence number that isincremented every time a result is received:
class ResultHandler: def __init__(self): self.sequence = 0 def handler(self, result): self.sequence += 1 print('[{}] Got: {}'.format(self.sequence, result))
To use this class, you would create an instance and use the bound method handler asthe callback:
>>> r = ResultHandler()>>> apply_async(add, (2, 3), callback=r.handler)[1] Got: 5>>> apply_async(add, ('hello', 'world'), callback=r.handler)[2] Got: helloworld>>>
As an alternative to a class, you can also use a closure to capture state. For example:
def make_handler(): sequence = 0 def handler(result): nonlocal sequence sequence += 1 print('[{}] Got: {}'.format(sequence, result)) return handler
Here is an example of this variant:
>>> handler = make_handler()>>> apply_async(add, (2, 3), callback=handler)[1] Got: 5>>> apply_async(add, ('hello', 'world'), callback=handler)[2] Got: helloworld>>>
As yet another variation on this theme, you can sometimes use a coroutine to accomplishthe same thing:
def make_handler(): sequence = 0 while True: result = yield sequence += 1 print('[{}] Got: {}'.format(sequence, result))
For a coroutine, you would use its send() method as the callback, like this:
>>> handler = make_handler()>>> next(handler) # Advance to the yield
7.10. Carrying Extra State with Callback Functions | 233
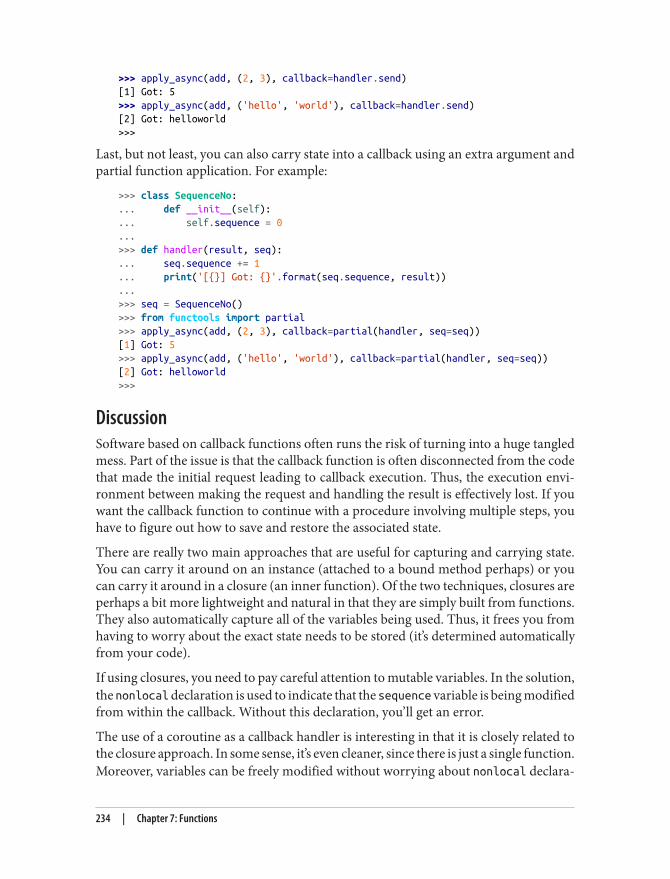
>>> apply_async(add, (2, 3), callback=handler.send)[1] Got: 5>>> apply_async(add, ('hello', 'world'), callback=handler.send)[2] Got: helloworld>>>
Last, but not least, you can also carry state into a callback using an extra argument andpartial function application. For example:
>>> class SequenceNo:... def __init__(self):... self.sequence = 0...>>> def handler(result, seq):... seq.sequence += 1... print('[{}] Got: {}'.format(seq.sequence, result))...>>> seq = SequenceNo()>>> from functools import partial>>> apply_async(add, (2, 3), callback=partial(handler, seq=seq))[1] Got: 5>>> apply_async(add, ('hello', 'world'), callback=partial(handler, seq=seq))[2] Got: helloworld>>>
DiscussionSoftware based on callback functions often runs the risk of turning into a huge tangledmess. Part of the issue is that the callback function is often disconnected from the codethat made the initial request leading to callback execution. Thus, the execution envi‐ronment between making the request and handling the result is effectively lost. If youwant the callback function to continue with a procedure involving multiple steps, youhave to figure out how to save and restore the associated state.
There are really two main approaches that are useful for capturing and carrying state.You can carry it around on an instance (attached to a bound method perhaps) or youcan carry it around in a closure (an inner function). Of the two techniques, closures areperhaps a bit more lightweight and natural in that they are simply built from functions.They also automatically capture all of the variables being used. Thus, it frees you fromhaving to worry about the exact state needs to be stored (it’s determined automaticallyfrom your code).
If using closures, you need to pay careful attention to mutable variables. In the solution,the nonlocal declaration is used to indicate that the sequence variable is being modifiedfrom within the callback. Without this declaration, you’ll get an error.
The use of a coroutine as a callback handler is interesting in that it is closely related tothe closure approach. In some sense, it’s even cleaner, since there is just a single function.Moreover, variables can be freely modified without worrying about nonlocal declara‐
234 | Chapter 7: Functions
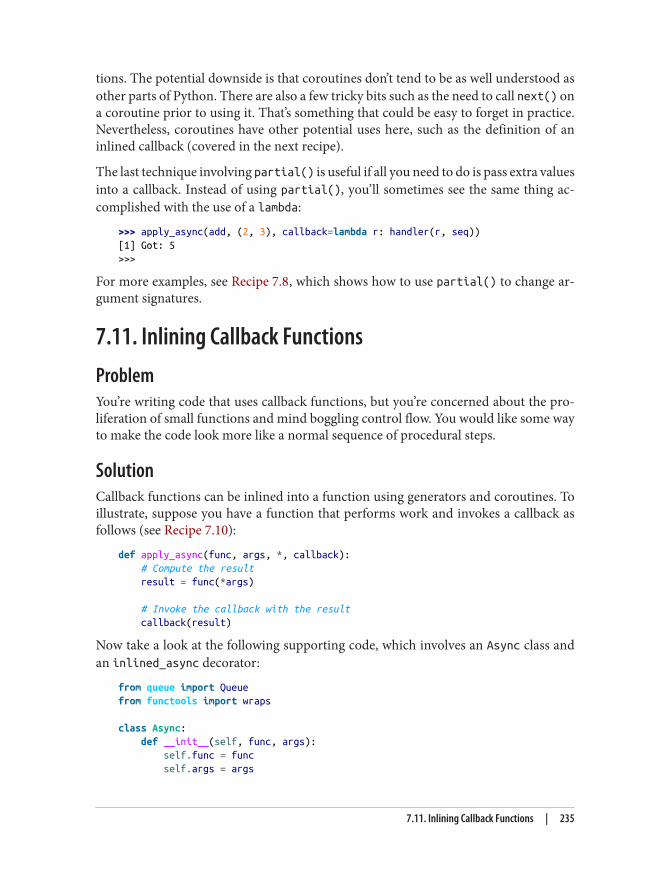
tions. The potential downside is that coroutines don’t tend to be as well understood asother parts of Python. There are also a few tricky bits such as the need to call next() ona coroutine prior to using it. That’s something that could be easy to forget in practice.Nevertheless, coroutines have other potential uses here, such as the definition of aninlined callback (covered in the next recipe).
The last technique involving partial() is useful if all you need to do is pass extra valuesinto a callback. Instead of using partial(), you’ll sometimes see the same thing ac‐complished with the use of a lambda:
>>> apply_async(add, (2, 3), callback=lambda r: handler(r, seq))[1] Got: 5>>>
For more examples, see Recipe 7.8, which shows how to use partial() to change ar‐gument signatures.
7.11. Inlining Callback FunctionsProblemYou’re writing code that uses callback functions, but you’re concerned about the pro‐liferation of small functions and mind boggling control flow. You would like some wayto make the code look more like a normal sequence of procedural steps.
SolutionCallback functions can be inlined into a function using generators and coroutines. Toillustrate, suppose you have a function that performs work and invokes a callback asfollows (see Recipe 7.10):
def apply_async(func, args, *, callback): # Compute the result result = func(*args)
# Invoke the callback with the result callback(result)
Now take a look at the following supporting code, which involves an Async class andan inlined_async decorator:
from queue import Queuefrom functools import wraps
class Async: def __init__(self, func, args): self.func = func self.args = args
7.11. Inlining Callback Functions | 235
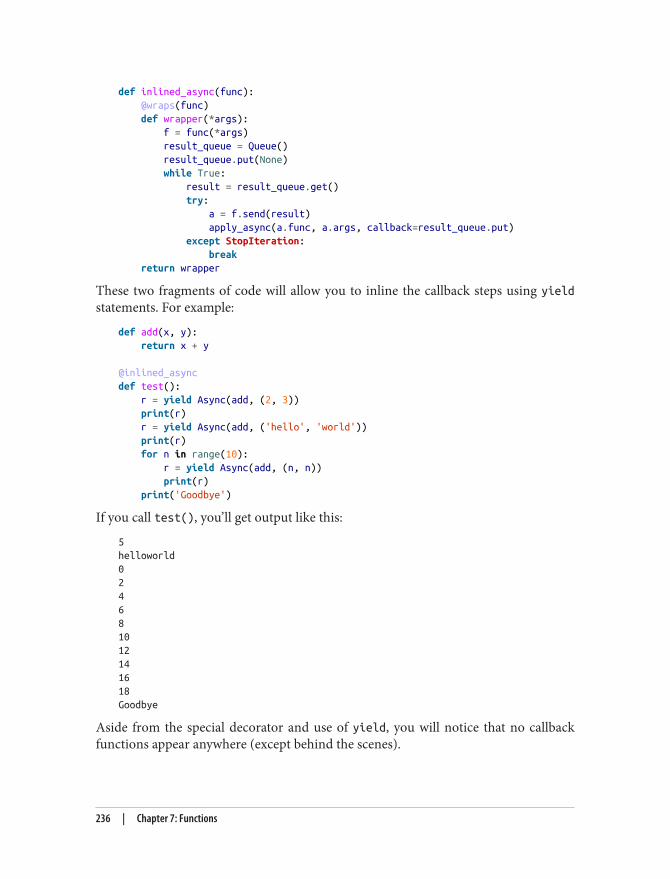
def inlined_async(func): @wraps(func) def wrapper(*args): f = func(*args) result_queue = Queue() result_queue.put(None) while True: result = result_queue.get() try: a = f.send(result) apply_async(a.func, a.args, callback=result_queue.put) except StopIteration: break return wrapper
These two fragments of code will allow you to inline the callback steps using yieldstatements. For example:
def add(x, y): return x + y
@inlined_asyncdef test(): r = yield Async(add, (2, 3)) print(r) r = yield Async(add, ('hello', 'world')) print(r) for n in range(10): r = yield Async(add, (n, n)) print(r) print('Goodbye')
If you call test(), you’ll get output like this:
5helloworld024681012141618Goodbye
Aside from the special decorator and use of yield, you will notice that no callbackfunctions appear anywhere (except behind the scenes).
236 | Chapter 7: Functions
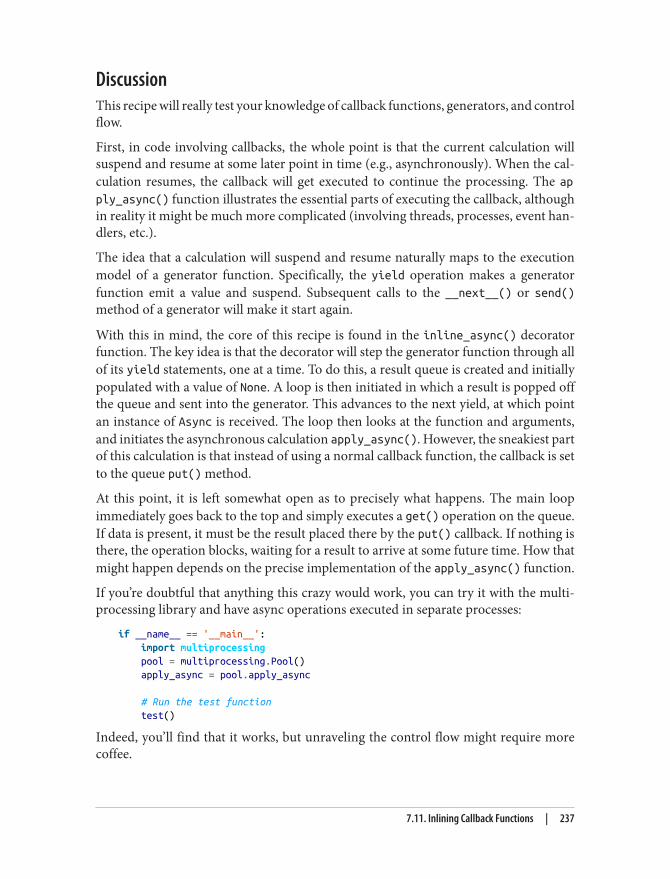
DiscussionThis recipe will really test your knowledge of callback functions, generators, and controlflow.
First, in code involving callbacks, the whole point is that the current calculation willsuspend and resume at some later point in time (e.g., asynchronously). When the cal‐culation resumes, the callback will get executed to continue the processing. The apply_async() function illustrates the essential parts of executing the callback, althoughin reality it might be much more complicated (involving threads, processes, event han‐dlers, etc.).
The idea that a calculation will suspend and resume naturally maps to the executionmodel of a generator function. Specifically, the yield operation makes a generatorfunction emit a value and suspend. Subsequent calls to the __next__() or send()method of a generator will make it start again.
With this in mind, the core of this recipe is found in the inline_async() decoratorfunction. The key idea is that the decorator will step the generator function through allof its yield statements, one at a time. To do this, a result queue is created and initiallypopulated with a value of None. A loop is then initiated in which a result is popped offthe queue and sent into the generator. This advances to the next yield, at which pointan instance of Async is received. The loop then looks at the function and arguments,and initiates the asynchronous calculation apply_async(). However, the sneakiest partof this calculation is that instead of using a normal callback function, the callback is setto the queue put() method.
At this point, it is left somewhat open as to precisely what happens. The main loopimmediately goes back to the top and simply executes a get() operation on the queue.If data is present, it must be the result placed there by the put() callback. If nothing isthere, the operation blocks, waiting for a result to arrive at some future time. How thatmight happen depends on the precise implementation of the apply_async() function.
If you’re doubtful that anything this crazy would work, you can try it with the multi‐processing library and have async operations executed in separate processes:
if __name__ == '__main__': import multiprocessing pool = multiprocessing.Pool() apply_async = pool.apply_async
# Run the test function test()
Indeed, you’ll find that it works, but unraveling the control flow might require morecoffee.
7.11. Inlining Callback Functions | 237
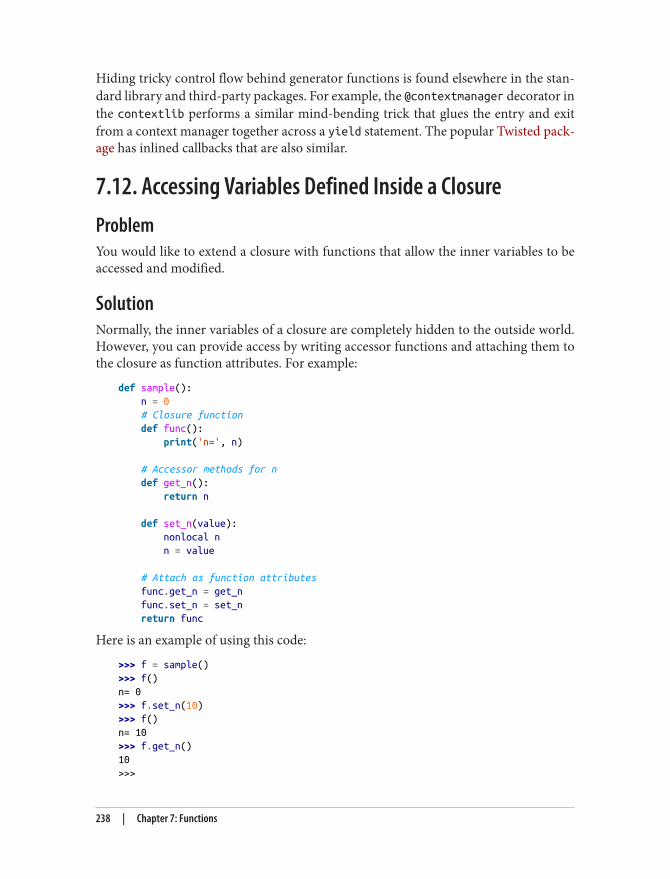
Hiding tricky control flow behind generator functions is found elsewhere in the stan‐dard library and third-party packages. For example, the @contextmanager decorator inthe contextlib performs a similar mind-bending trick that glues the entry and exitfrom a context manager together across a yield statement. The popular Twisted pack‐age has inlined callbacks that are also similar.
7.12. Accessing Variables Defined Inside a ClosureProblemYou would like to extend a closure with functions that allow the inner variables to beaccessed and modified.
SolutionNormally, the inner variables of a closure are completely hidden to the outside world.However, you can provide access by writing accessor functions and attaching them tothe closure as function attributes. For example:
def sample(): n = 0 # Closure function def func(): print('n=', n)
# Accessor methods for n def get_n(): return n
def set_n(value): nonlocal n n = value
# Attach as function attributes func.get_n = get_n func.set_n = set_n return func
Here is an example of using this code:
>>> f = sample()>>> f()n= 0>>> f.set_n(10)>>> f()n= 10>>> f.get_n()10>>>
238 | Chapter 7: Functions
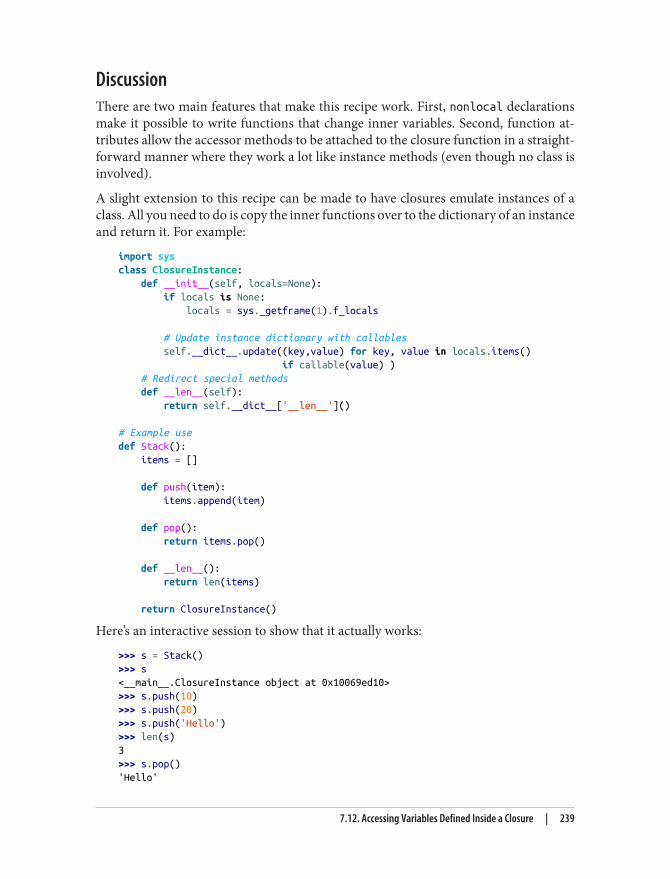
DiscussionThere are two main features that make this recipe work. First, nonlocal declarationsmake it possible to write functions that change inner variables. Second, function at‐tributes allow the accessor methods to be attached to the closure function in a straight‐forward manner where they work a lot like instance methods (even though no class isinvolved).
A slight extension to this recipe can be made to have closures emulate instances of aclass. All you need to do is copy the inner functions over to the dictionary of an instanceand return it. For example:
import sysclass ClosureInstance: def __init__(self, locals=None): if locals is None: locals = sys._getframe(1).f_locals
# Update instance dictionary with callables self.__dict__.update((key,value) for key, value in locals.items() if callable(value) ) # Redirect special methods def __len__(self): return self.__dict__['__len__']()
# Example usedef Stack(): items = []
def push(item): items.append(item)
def pop(): return items.pop()
def __len__(): return len(items)
return ClosureInstance()
Here’s an interactive session to show that it actually works:
>>> s = Stack()>>> s<__main__.ClosureInstance object at 0x10069ed10>>>> s.push(10)>>> s.push(20)>>> s.push('Hello')>>> len(s)3>>> s.pop()'Hello'
7.12. Accessing Variables Defined Inside a Closure | 239
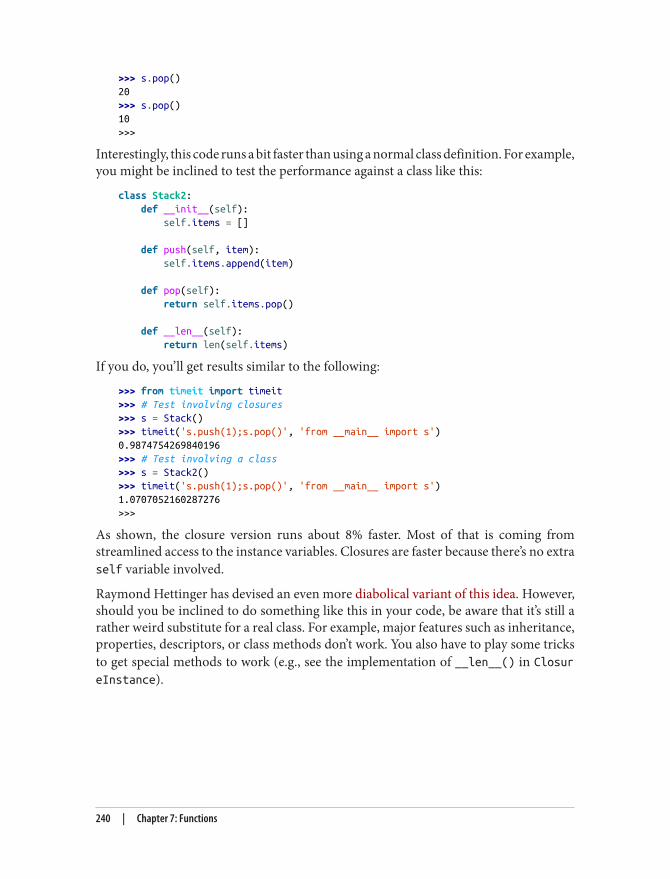
>>> s.pop()20>>> s.pop()10>>>
Interestingly, this code runs a bit faster than using a normal class definition. For example,you might be inclined to test the performance against a class like this:
class Stack2: def __init__(self): self.items = []
def push(self, item): self.items.append(item)
def pop(self): return self.items.pop()
def __len__(self): return len(self.items)
If you do, you’ll get results similar to the following:
>>> from timeit import timeit>>> # Test involving closures>>> s = Stack()>>> timeit('s.push(1);s.pop()', 'from __main__ import s')0.9874754269840196>>> # Test involving a class>>> s = Stack2()>>> timeit('s.push(1);s.pop()', 'from __main__ import s')1.0707052160287276>>>
As shown, the closure version runs about 8% faster. Most of that is coming fromstreamlined access to the instance variables. Closures are faster because there’s no extraself variable involved.
Raymond Hettinger has devised an even more diabolical variant of this idea. However,should you be inclined to do something like this in your code, be aware that it’s still arather weird substitute for a real class. For example, major features such as inheritance,properties, descriptors, or class methods don’t work. You also have to play some tricksto get special methods to work (e.g., see the implementation of __len__() in ClosureInstance).
240 | Chapter 7: Functions

Lastly, you’ll run the risk of confusing people who read your code and wonder why itdoesn’t look anything like a normal class definition (of course, they’ll also wonder whyit’s faster). Nevertheless, it’s an interesting example of what can be done by providingaccess to the internals of a closure.
In the big picture, adding methods to closures might have more utility in settings whereyou want to do things like reset the internal state, flush buffers, clear caches, or havesome kind of feedback mechanism.
7.12. Accessing Variables Defined Inside a Closure | 241

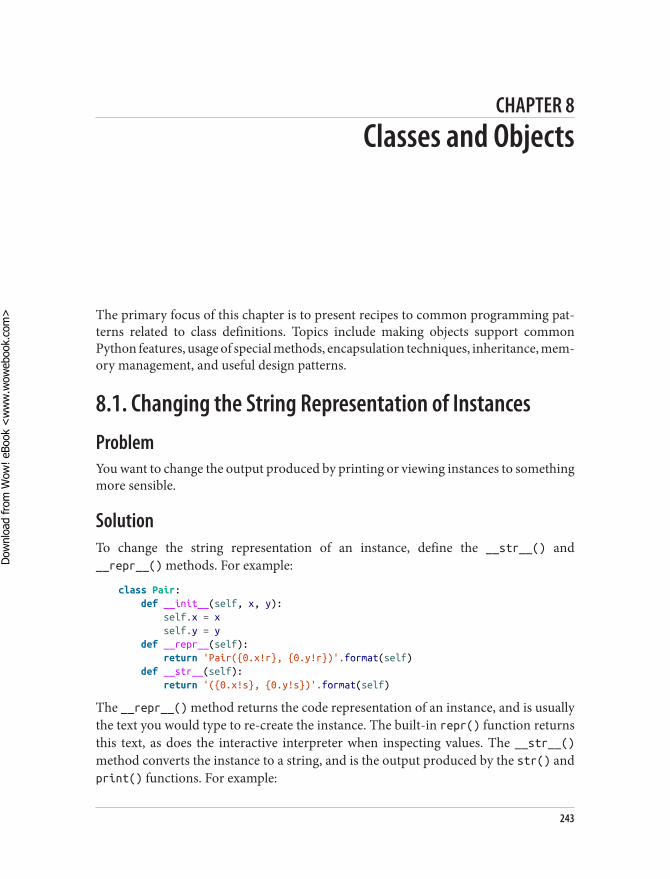
CHAPTER 8
Classes and Objects
The primary focus of this chapter is to present recipes to common programming pat‐terns related to class definitions. Topics include making objects support commonPython features, usage of special methods, encapsulation techniques, inheritance, mem‐ory management, and useful design patterns.
8.1. Changing the String Representation of InstancesProblemYou want to change the output produced by printing or viewing instances to somethingmore sensible.
SolutionTo change the string representation of an instance, define the __str__() and__repr__() methods. For example:
class Pair: def __init__(self, x, y): self.x = x self.y = y def __repr__(self): return 'Pair({0.x!r}, {0.y!r})'.format(self) def __str__(self): return '({0.x!s}, {0.y!s})'.format(self)
The __repr__() method returns the code representation of an instance, and is usuallythe text you would type to re-create the instance. The built-in repr() function returnsthis text, as does the interactive interpreter when inspecting values. The __str__()method converts the instance to a string, and is the output produced by the str() andprint() functions. For example:
243
Dow
nlo
ad fro
m W
ow
! eBook
<w
ww
.wow
ebook.
com
>
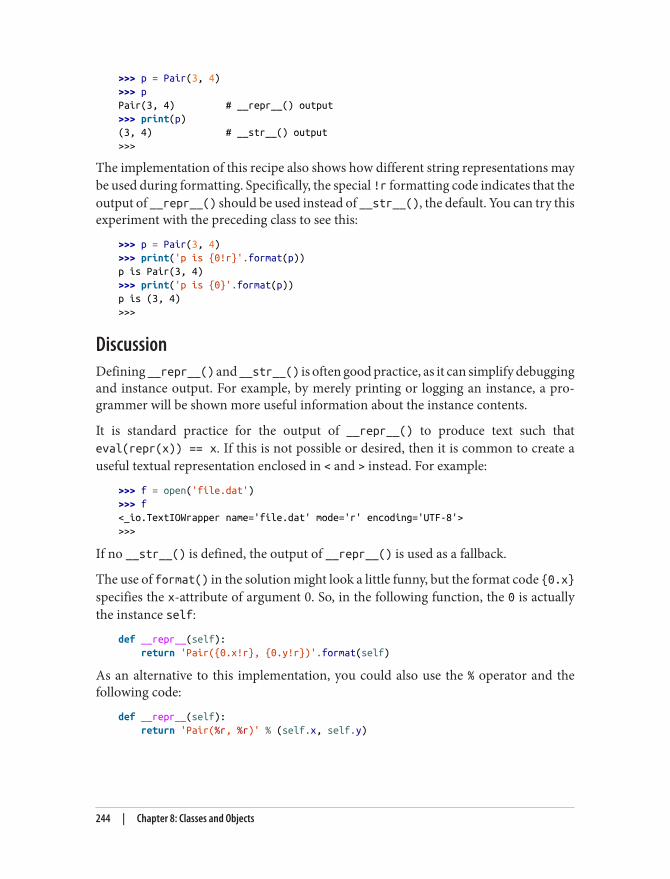
>>> p = Pair(3, 4)>>> pPair(3, 4) # __repr__() output>>> print(p)(3, 4) # __str__() output>>>
The implementation of this recipe also shows how different string representations maybe used during formatting. Specifically, the special !r formatting code indicates that theoutput of __repr__() should be used instead of __str__(), the default. You can try thisexperiment with the preceding class to see this:
>>> p = Pair(3, 4)>>> print('p is {0!r}'.format(p))p is Pair(3, 4)>>> print('p is {0}'.format(p))p is (3, 4)>>>
DiscussionDefining __repr__() and __str__() is often good practice, as it can simplify debuggingand instance output. For example, by merely printing or logging an instance, a pro‐grammer will be shown more useful information about the instance contents.
It is standard practice for the output of __repr__() to produce text such thateval(repr(x)) == x. If this is not possible or desired, then it is common to create auseful textual representation enclosed in < and > instead. For example:
>>> f = open('file.dat')>>> f<_io.TextIOWrapper name='file.dat' mode='r' encoding='UTF-8'>>>>
If no __str__() is defined, the output of __repr__() is used as a fallback.
The use of format() in the solution might look a little funny, but the format code {0.x}specifies the x-attribute of argument 0. So, in the following function, the 0 is actuallythe instance self:
def __repr__(self): return 'Pair({0.x!r}, {0.y!r})'.format(self)
As an alternative to this implementation, you could also use the % operator and thefollowing code:
def __repr__(self): return 'Pair(%r, %r)' % (self.x, self.y)
244 | Chapter 8: Classes and Objects
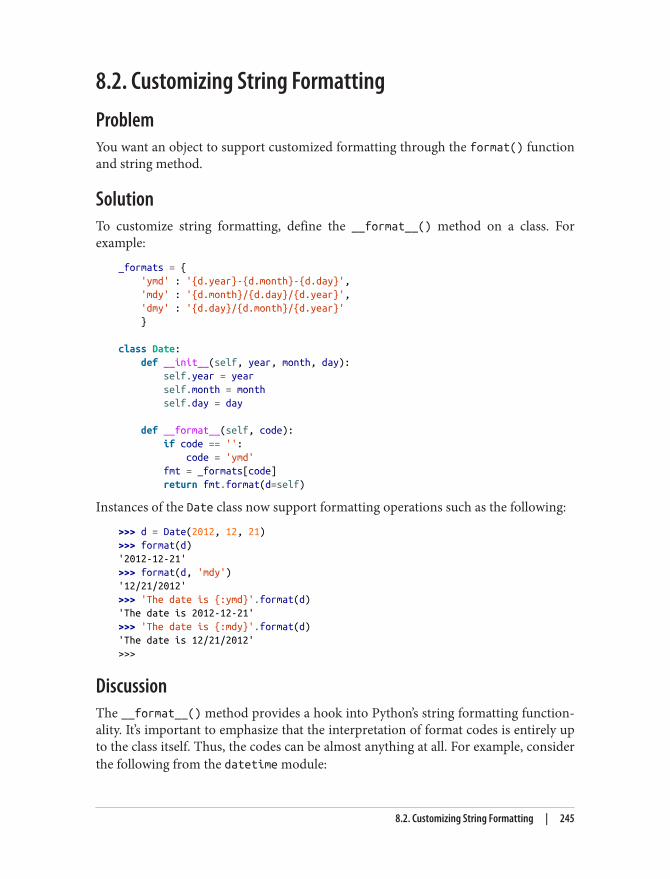
8.2. Customizing String FormattingProblemYou want an object to support customized formatting through the format() functionand string method.
SolutionTo customize string formatting, define the __format__() method on a class. Forexample:
_formats = { 'ymd' : '{d.year}-{d.month}-{d.day}', 'mdy' : '{d.month}/{d.day}/{d.year}', 'dmy' : '{d.day}/{d.month}/{d.year}' }
class Date: def __init__(self, year, month, day): self.year = year self.month = month self.day = day
def __format__(self, code): if code == '': code = 'ymd' fmt = _formats[code] return fmt.format(d=self)
Instances of the Date class now support formatting operations such as the following:
>>> d = Date(2012, 12, 21)>>> format(d)'2012-12-21'>>> format(d, 'mdy')'12/21/2012'>>> 'The date is {:ymd}'.format(d)'The date is 2012-12-21'>>> 'The date is {:mdy}'.format(d)'The date is 12/21/2012'>>>
DiscussionThe __format__() method provides a hook into Python’s string formatting function‐ality. It’s important to emphasize that the interpretation of format codes is entirely upto the class itself. Thus, the codes can be almost anything at all. For example, considerthe following from the datetime module:
8.2. Customizing String Formatting | 245
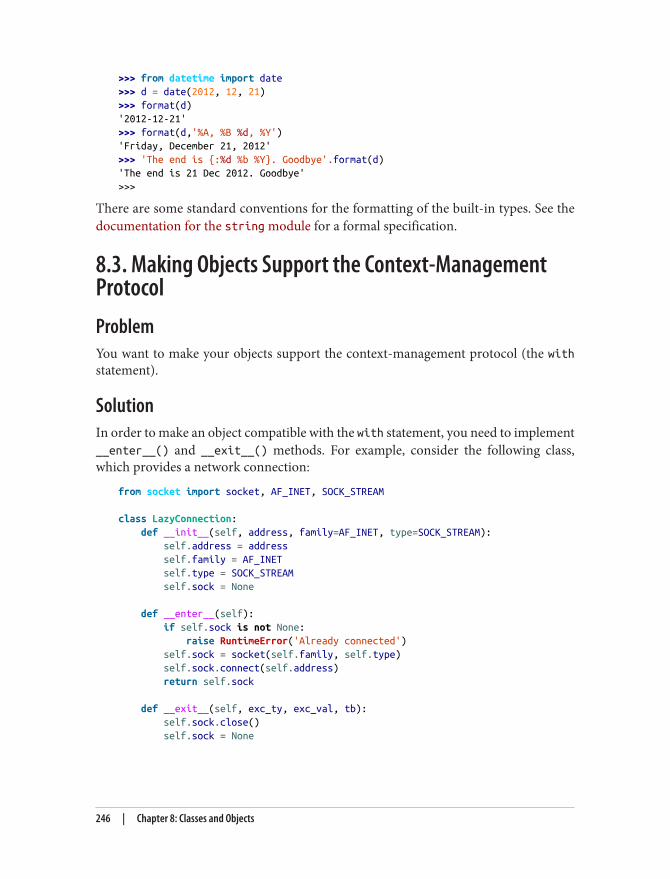
>>> from datetime import date>>> d = date(2012, 12, 21)>>> format(d)'2012-12-21'>>> format(d,'%A, %B %d, %Y')'Friday, December 21, 2012'>>> 'The end is {:%d %b %Y}. Goodbye'.format(d)'The end is 21 Dec 2012. Goodbye'>>>
There are some standard conventions for the formatting of the built-in types. See thedocumentation for the string module for a formal specification.
8.3. Making Objects Support the Context-ManagementProtocolProblemYou want to make your objects support the context-management protocol (the withstatement).
SolutionIn order to make an object compatible with the with statement, you need to implement__enter__() and __exit__() methods. For example, consider the following class,which provides a network connection:
from socket import socket, AF_INET, SOCK_STREAM
class LazyConnection: def __init__(self, address, family=AF_INET, type=SOCK_STREAM): self.address = address self.family = AF_INET self.type = SOCK_STREAM self.sock = None
def __enter__(self): if self.sock is not None: raise RuntimeError('Already connected') self.sock = socket(self.family, self.type) self.sock.connect(self.address) return self.sock
def __exit__(self, exc_ty, exc_val, tb): self.sock.close() self.sock = None
246 | Chapter 8: Classes and Objects
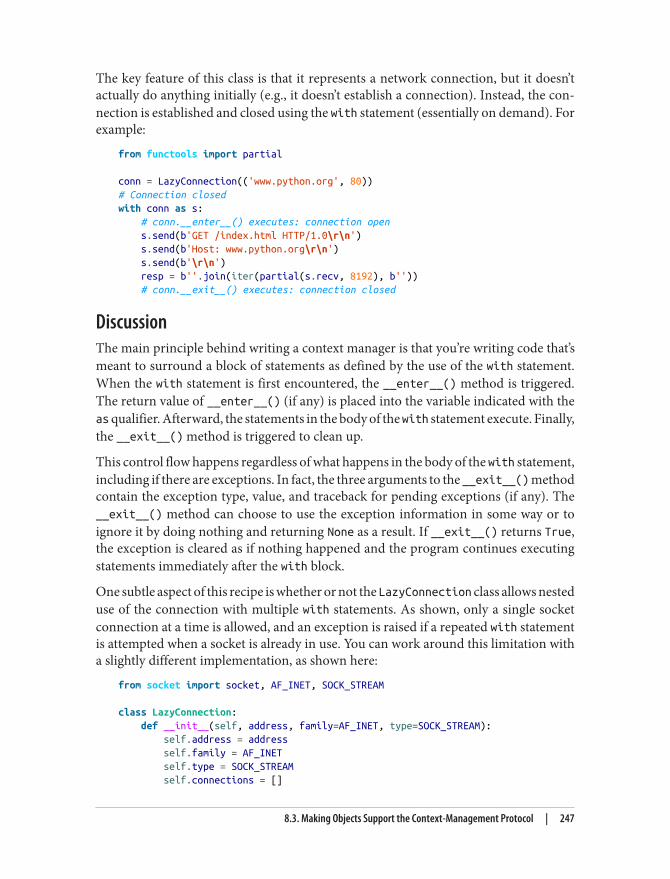
The key feature of this class is that it represents a network connection, but it doesn’tactually do anything initially (e.g., it doesn’t establish a connection). Instead, the con‐nection is established and closed using the with statement (essentially on demand). Forexample:
from functools import partial
conn = LazyConnection(('www.python.org', 80))# Connection closedwith conn as s: # conn.__enter__() executes: connection open s.send(b'GET /index.html HTTP/1.0\r\n') s.send(b'Host: www.python.org\r\n') s.send(b'\r\n') resp = b''.join(iter(partial(s.recv, 8192), b'')) # conn.__exit__() executes: connection closed
DiscussionThe main principle behind writing a context manager is that you’re writing code that’smeant to surround a block of statements as defined by the use of the with statement.When the with statement is first encountered, the __enter__() method is triggered.The return value of __enter__() (if any) is placed into the variable indicated with theas qualifier. Afterward, the statements in the body of the with statement execute. Finally,the __exit__() method is triggered to clean up.
This control flow happens regardless of what happens in the body of the with statement,including if there are exceptions. In fact, the three arguments to the __exit__() methodcontain the exception type, value, and traceback for pending exceptions (if any). The__exit__() method can choose to use the exception information in some way or toignore it by doing nothing and returning None as a result. If __exit__() returns True,the exception is cleared as if nothing happened and the program continues executingstatements immediately after the with block.
One subtle aspect of this recipe is whether or not the LazyConnection class allows nesteduse of the connection with multiple with statements. As shown, only a single socketconnection at a time is allowed, and an exception is raised if a repeated with statementis attempted when a socket is already in use. You can work around this limitation witha slightly different implementation, as shown here:
from socket import socket, AF_INET, SOCK_STREAM
class LazyConnection: def __init__(self, address, family=AF_INET, type=SOCK_STREAM): self.address = address self.family = AF_INET self.type = SOCK_STREAM self.connections = []
8.3. Making Objects Support the Context-Management Protocol | 247
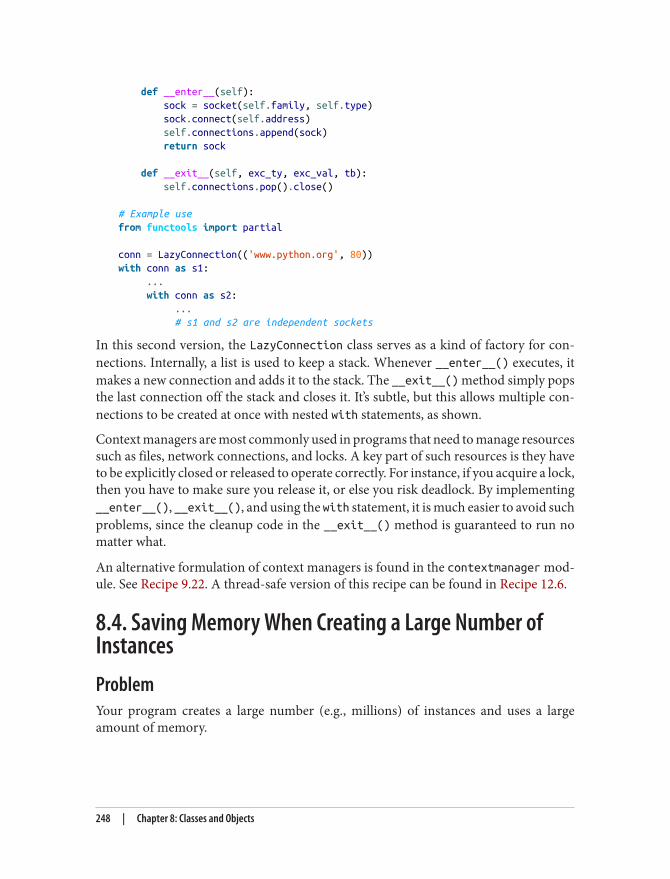
def __enter__(self): sock = socket(self.family, self.type) sock.connect(self.address) self.connections.append(sock) return sock
def __exit__(self, exc_ty, exc_val, tb): self.connections.pop().close()
# Example usefrom functools import partial
conn = LazyConnection(('www.python.org', 80))with conn as s1: ... with conn as s2: ... # s1 and s2 are independent sockets
In this second version, the LazyConnection class serves as a kind of factory for con‐nections. Internally, a list is used to keep a stack. Whenever __enter__() executes, itmakes a new connection and adds it to the stack. The __exit__() method simply popsthe last connection off the stack and closes it. It’s subtle, but this allows multiple con‐nections to be created at once with nested with statements, as shown.
Context managers are most commonly used in programs that need to manage resourcessuch as files, network connections, and locks. A key part of such resources is they haveto be explicitly closed or released to operate correctly. For instance, if you acquire a lock,then you have to make sure you release it, or else you risk deadlock. By implementing__enter__(), __exit__(), and using the with statement, it is much easier to avoid suchproblems, since the cleanup code in the __exit__() method is guaranteed to run nomatter what.
An alternative formulation of context managers is found in the contextmanager mod‐ule. See Recipe 9.22. A thread-safe version of this recipe can be found in Recipe 12.6.
8.4. Saving Memory When Creating a Large Number ofInstancesProblemYour program creates a large number (e.g., millions) of instances and uses a largeamount of memory.
248 | Chapter 8: Classes and Objects
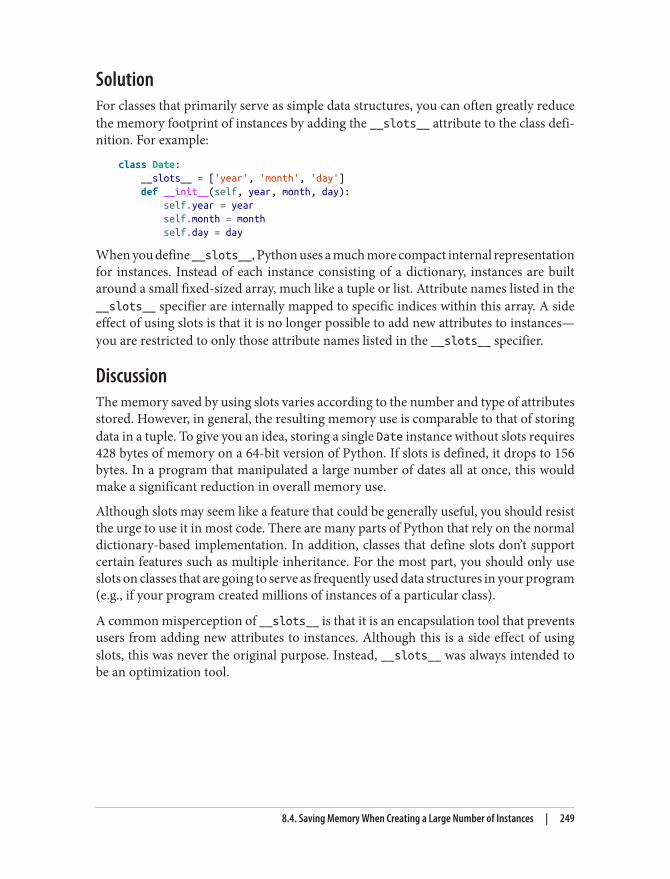
SolutionFor classes that primarily serve as simple data structures, you can often greatly reducethe memory footprint of instances by adding the __slots__ attribute to the class defi‐nition. For example:
class Date: __slots__ = ['year', 'month', 'day'] def __init__(self, year, month, day): self.year = year self.month = month self.day = day
When you define __slots__, Python uses a much more compact internal representationfor instances. Instead of each instance consisting of a dictionary, instances are builtaround a small fixed-sized array, much like a tuple or list. Attribute names listed in the__slots__ specifier are internally mapped to specific indices within this array. A sideeffect of using slots is that it is no longer possible to add new attributes to instances—you are restricted to only those attribute names listed in the __slots__ specifier.
DiscussionThe memory saved by using slots varies according to the number and type of attributesstored. However, in general, the resulting memory use is comparable to that of storingdata in a tuple. To give you an idea, storing a single Date instance without slots requires428 bytes of memory on a 64-bit version of Python. If slots is defined, it drops to 156bytes. In a program that manipulated a large number of dates all at once, this wouldmake a significant reduction in overall memory use.
Although slots may seem like a feature that could be generally useful, you should resistthe urge to use it in most code. There are many parts of Python that rely on the normaldictionary-based implementation. In addition, classes that define slots don’t supportcertain features such as multiple inheritance. For the most part, you should only useslots on classes that are going to serve as frequently used data structures in your program(e.g., if your program created millions of instances of a particular class).
A common misperception of __slots__ is that it is an encapsulation tool that preventsusers from adding new attributes to instances. Although this is a side effect of usingslots, this was never the original purpose. Instead, __slots__ was always intended tobe an optimization tool.
8.4. Saving Memory When Creating a Large Number of Instances | 249
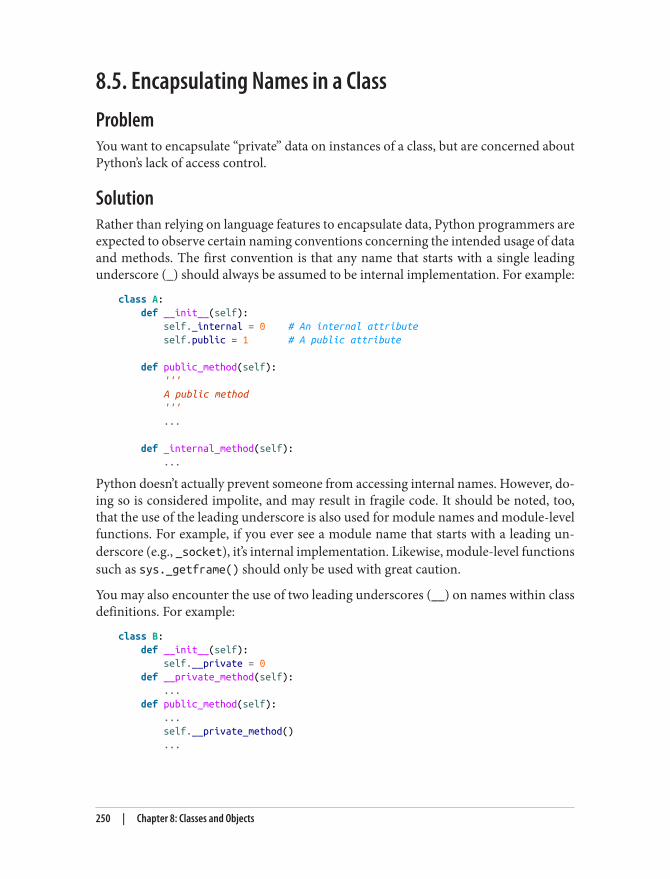
8.5. Encapsulating Names in a ClassProblemYou want to encapsulate “private” data on instances of a class, but are concerned aboutPython’s lack of access control.
SolutionRather than relying on language features to encapsulate data, Python programmers areexpected to observe certain naming conventions concerning the intended usage of dataand methods. The first convention is that any name that starts with a single leadingunderscore (_) should always be assumed to be internal implementation. For example:
class A: def __init__(self): self._internal = 0 # An internal attribute self.public = 1 # A public attribute
def public_method(self): ''' A public method ''' ...
def _internal_method(self): ...
Python doesn’t actually prevent someone from accessing internal names. However, do‐ing so is considered impolite, and may result in fragile code. It should be noted, too,that the use of the leading underscore is also used for module names and module-levelfunctions. For example, if you ever see a module name that starts with a leading un‐derscore (e.g., _socket), it’s internal implementation. Likewise, module-level functionssuch as sys._getframe() should only be used with great caution.
You may also encounter the use of two leading underscores (__) on names within classdefinitions. For example:
class B: def __init__(self): self.__private = 0 def __private_method(self): ... def public_method(self): ... self.__private_method() ...
250 | Chapter 8: Classes and Objects
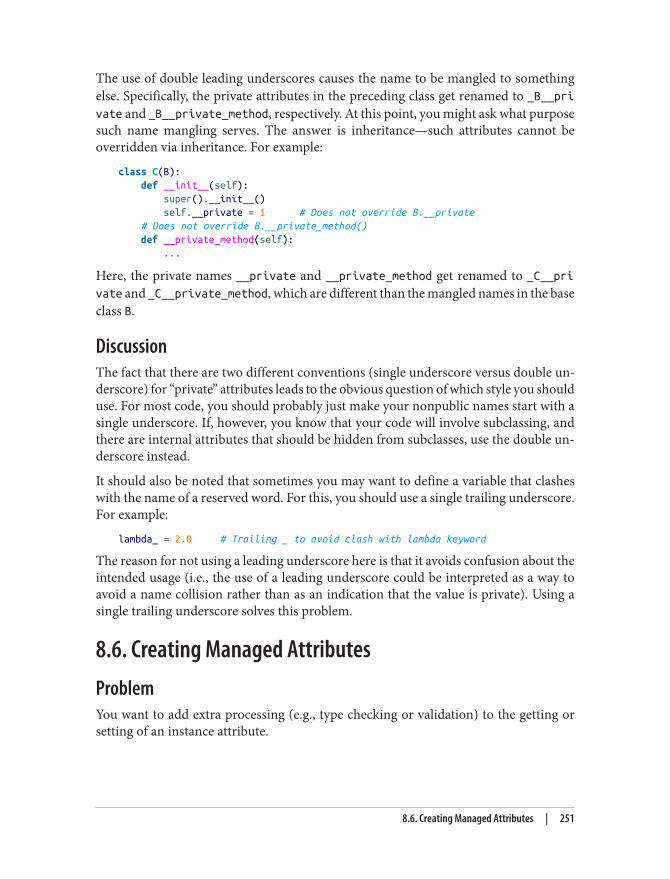
The use of double leading underscores causes the name to be mangled to somethingelse. Specifically, the private attributes in the preceding class get renamed to _B__private and _B__private_method, respectively. At this point, you might ask what purposesuch name mangling serves. The answer is inheritance—such attributes cannot beoverridden via inheritance. For example:
class C(B): def __init__(self): super().__init__() self.__private = 1 # Does not override B.__private # Does not override B.__private_method() def __private_method(self): ...
Here, the private names __private and __private_method get renamed to _C__private and _C__private_method, which are different than the mangled names in the baseclass B.
DiscussionThe fact that there are two different conventions (single underscore versus double un‐derscore) for “private” attributes leads to the obvious question of which style you shoulduse. For most code, you should probably just make your nonpublic names start with asingle underscore. If, however, you know that your code will involve subclassing, andthere are internal attributes that should be hidden from subclasses, use the double un‐derscore instead.
It should also be noted that sometimes you may want to define a variable that clasheswith the name of a reserved word. For this, you should use a single trailing underscore.For example:
lambda_ = 2.0 # Trailing _ to avoid clash with lambda keyword
The reason for not using a leading underscore here is that it avoids confusion about theintended usage (i.e., the use of a leading underscore could be interpreted as a way toavoid a name collision rather than as an indication that the value is private). Using asingle trailing underscore solves this problem.
8.6. Creating Managed AttributesProblemYou want to add extra processing (e.g., type checking or validation) to the getting orsetting of an instance attribute.
8.6. Creating Managed Attributes | 251
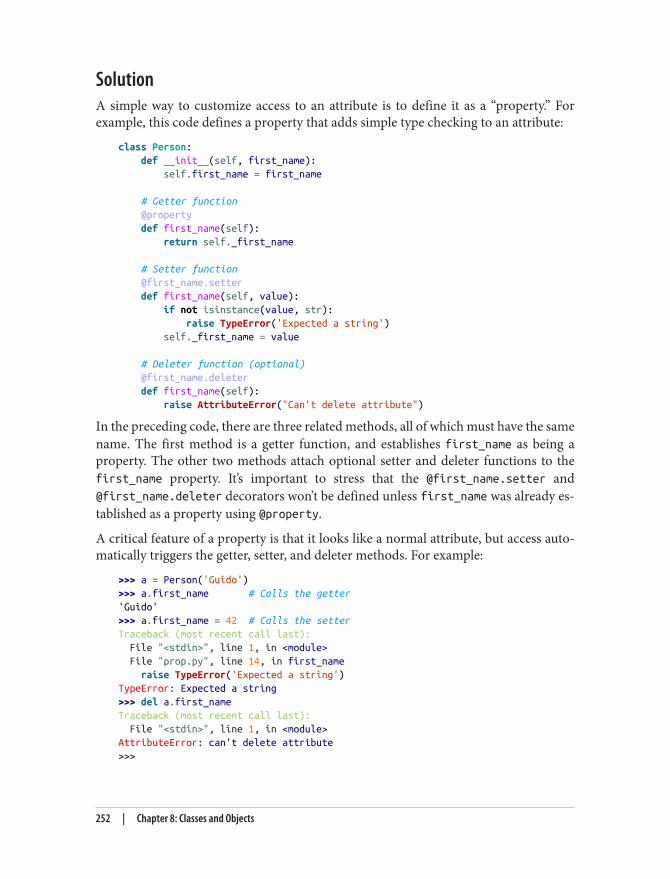
SolutionA simple way to customize access to an attribute is to define it as a “property.” Forexample, this code defines a property that adds simple type checking to an attribute:
class Person: def __init__(self, first_name): self.first_name = first_name
# Getter function @property def first_name(self): return self._first_name
# Setter function @first_name.setter def first_name(self, value): if not isinstance(value, str): raise TypeError('Expected a string') self._first_name = value
# Deleter function (optional) @first_name.deleter def first_name(self): raise AttributeError("Can't delete attribute")
In the preceding code, there are three related methods, all of which must have the samename. The first method is a getter function, and establishes first_name as being aproperty. The other two methods attach optional setter and deleter functions to thefirst_name property. It’s important to stress that the @first_name.setter and@first_name.deleter decorators won’t be defined unless first_name was already es‐tablished as a property using @property.
A critical feature of a property is that it looks like a normal attribute, but access auto‐matically triggers the getter, setter, and deleter methods. For example:
>>> a = Person('Guido')>>> a.first_name # Calls the getter'Guido'>>> a.first_name = 42 # Calls the setterTraceback (most recent call last): File "<stdin>", line 1, in <module> File "prop.py", line 14, in first_name raise TypeError('Expected a string')TypeError: Expected a string>>> del a.first_nameTraceback (most recent call last): File "<stdin>", line 1, in <module>AttributeError: can't delete attribute>>>
252 | Chapter 8: Classes and Objects
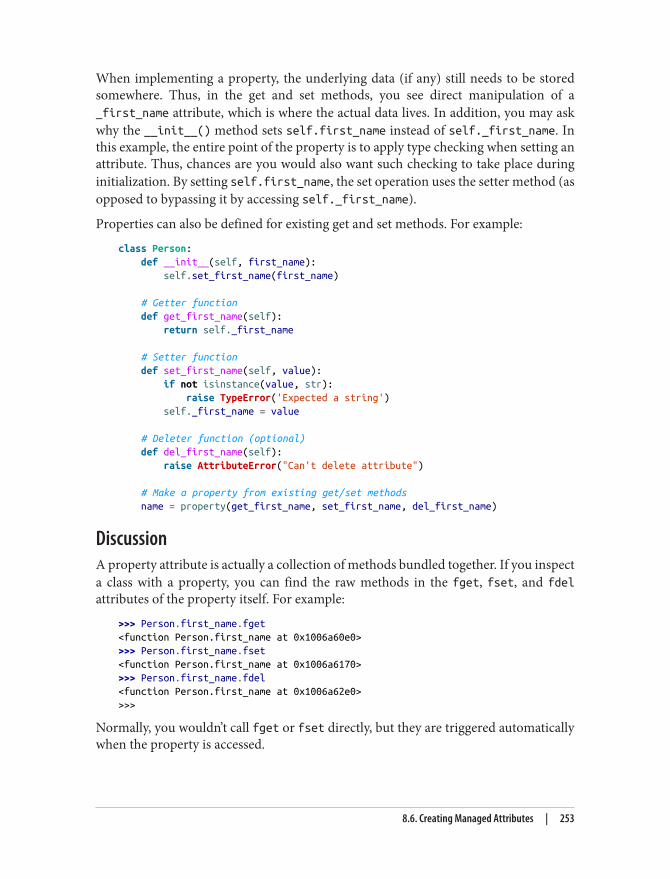
When implementing a property, the underlying data (if any) still needs to be storedsomewhere. Thus, in the get and set methods, you see direct manipulation of a_first_name attribute, which is where the actual data lives. In addition, you may askwhy the __init__() method sets self.first_name instead of self._first_name. Inthis example, the entire point of the property is to apply type checking when setting anattribute. Thus, chances are you would also want such checking to take place duringinitialization. By setting self.first_name, the set operation uses the setter method (asopposed to bypassing it by accessing self._first_name).
Properties can also be defined for existing get and set methods. For example:
class Person: def __init__(self, first_name): self.set_first_name(first_name)
# Getter function def get_first_name(self): return self._first_name
# Setter function def set_first_name(self, value): if not isinstance(value, str): raise TypeError('Expected a string') self._first_name = value
# Deleter function (optional) def del_first_name(self): raise AttributeError("Can't delete attribute")
# Make a property from existing get/set methods name = property(get_first_name, set_first_name, del_first_name)
DiscussionA property attribute is actually a collection of methods bundled together. If you inspecta class with a property, you can find the raw methods in the fget, fset, and fdelattributes of the property itself. For example:
>>> Person.first_name.fget<function Person.first_name at 0x1006a60e0>>>> Person.first_name.fset<function Person.first_name at 0x1006a6170>>>> Person.first_name.fdel<function Person.first_name at 0x1006a62e0>>>>
Normally, you wouldn’t call fget or fset directly, but they are triggered automaticallywhen the property is accessed.
8.6. Creating Managed Attributes | 253
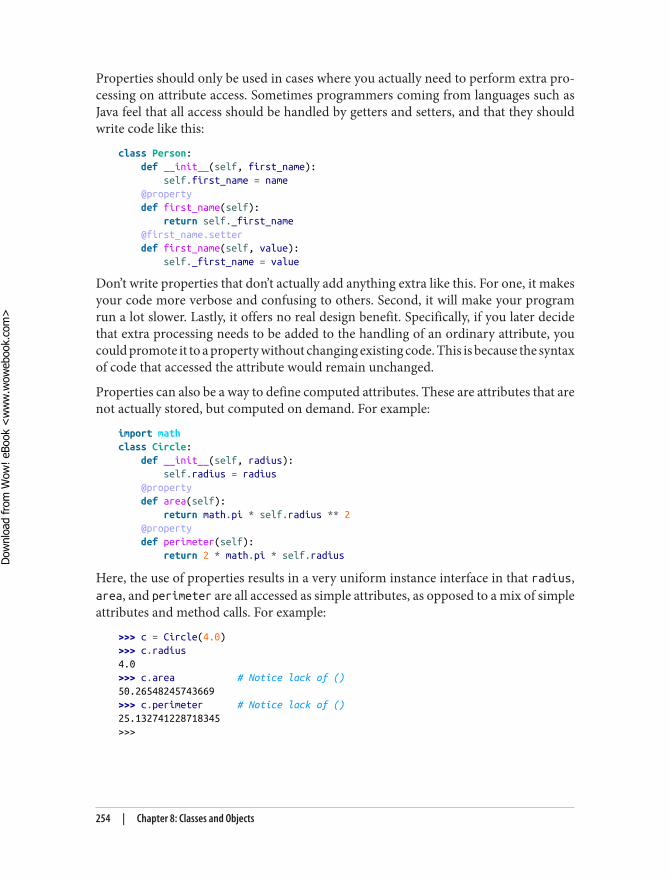
Properties should only be used in cases where you actually need to perform extra pro‐cessing on attribute access. Sometimes programmers coming from languages such asJava feel that all access should be handled by getters and setters, and that they shouldwrite code like this:
class Person: def __init__(self, first_name): self.first_name = name @property def first_name(self): return self._first_name @first_name.setter def first_name(self, value): self._first_name = value
Don’t write properties that don’t actually add anything extra like this. For one, it makesyour code more verbose and confusing to others. Second, it will make your programrun a lot slower. Lastly, it offers no real design benefit. Specifically, if you later decidethat extra processing needs to be added to the handling of an ordinary attribute, youcould promote it to a property without changing existing code. This is because the syntaxof code that accessed the attribute would remain unchanged.
Properties can also be a way to define computed attributes. These are attributes that arenot actually stored, but computed on demand. For example:
import mathclass Circle: def __init__(self, radius): self.radius = radius @property def area(self): return math.pi * self.radius ** 2 @property def perimeter(self): return 2 * math.pi * self.radius
Here, the use of properties results in a very uniform instance interface in that radius,area, and perimeter are all accessed as simple attributes, as opposed to a mix of simpleattributes and method calls. For example:
>>> c = Circle(4.0)>>> c.radius4.0>>> c.area # Notice lack of ()50.26548245743669>>> c.perimeter # Notice lack of ()25.132741228718345>>>
254 | Chapter 8: Classes and Objects
Dow
nlo
ad fro
m W
ow
! eBook
<w
ww
.wow
ebook.
com
>
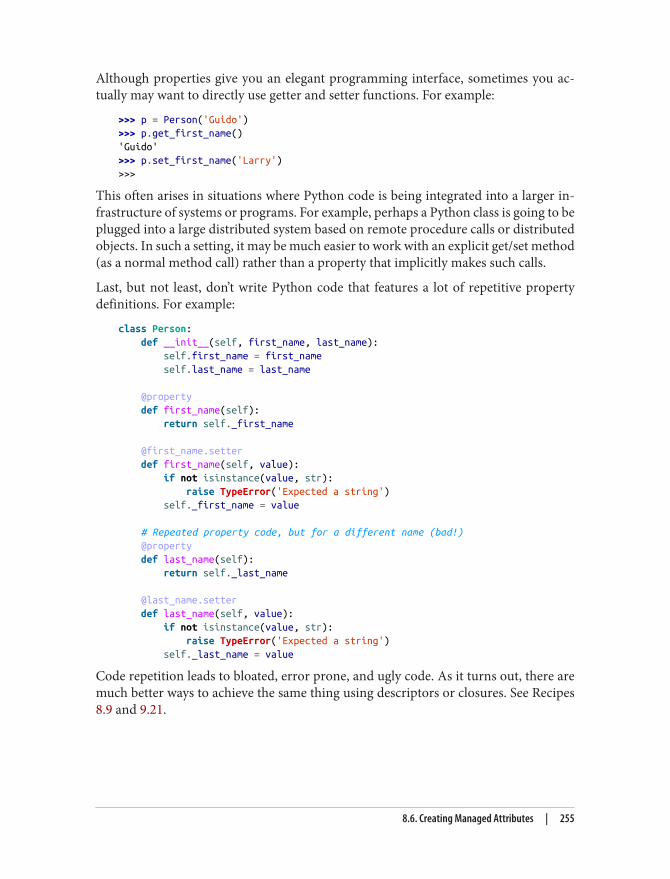
Although properties give you an elegant programming interface, sometimes you ac‐tually may want to directly use getter and setter functions. For example:
>>> p = Person('Guido')>>> p.get_first_name()'Guido'>>> p.set_first_name('Larry')>>>
This often arises in situations where Python code is being integrated into a larger in‐frastructure of systems or programs. For example, perhaps a Python class is going to beplugged into a large distributed system based on remote procedure calls or distributedobjects. In such a setting, it may be much easier to work with an explicit get/set method(as a normal method call) rather than a property that implicitly makes such calls.
Last, but not least, don’t write Python code that features a lot of repetitive propertydefinitions. For example:
class Person: def __init__(self, first_name, last_name): self.first_name = first_name self.last_name = last_name
@property def first_name(self): return self._first_name
@first_name.setter def first_name(self, value): if not isinstance(value, str): raise TypeError('Expected a string') self._first_name = value
# Repeated property code, but for a different name (bad!) @property def last_name(self): return self._last_name
@last_name.setter def last_name(self, value): if not isinstance(value, str): raise TypeError('Expected a string') self._last_name = value
Code repetition leads to bloated, error prone, and ugly code. As it turns out, there aremuch better ways to achieve the same thing using descriptors or closures. See Recipes8.9 and 9.21.
8.6. Creating Managed Attributes | 255
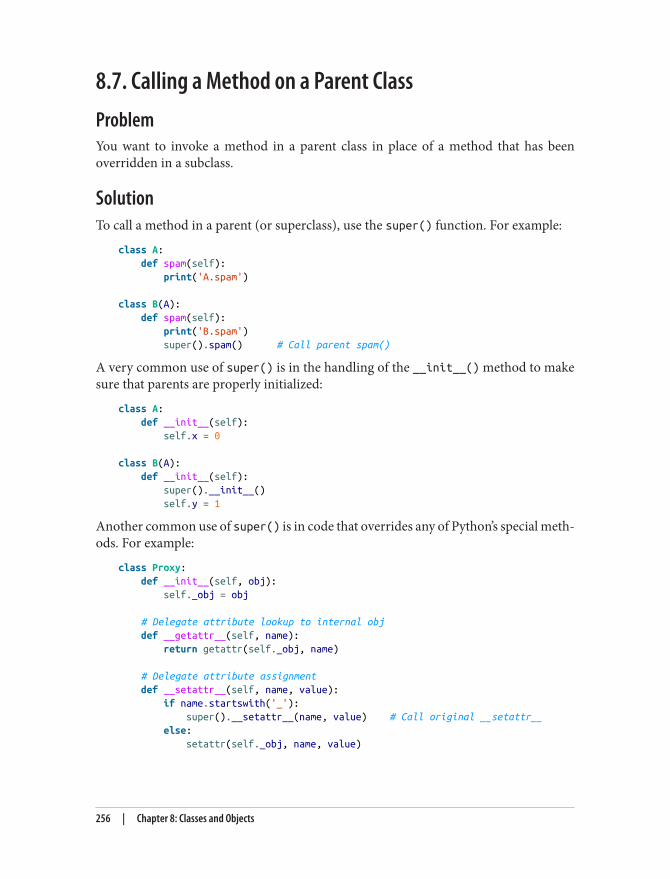
8.7. Calling a Method on a Parent ClassProblemYou want to invoke a method in a parent class in place of a method that has beenoverridden in a subclass.
SolutionTo call a method in a parent (or superclass), use the super() function. For example:
class A: def spam(self): print('A.spam')
class B(A): def spam(self): print('B.spam') super().spam() # Call parent spam()
A very common use of super() is in the handling of the __init__() method to makesure that parents are properly initialized:
class A: def __init__(self): self.x = 0
class B(A): def __init__(self): super().__init__() self.y = 1
Another common use of super() is in code that overrides any of Python’s special meth‐ods. For example:
class Proxy: def __init__(self, obj): self._obj = obj
# Delegate attribute lookup to internal obj def __getattr__(self, name): return getattr(self._obj, name)
# Delegate attribute assignment def __setattr__(self, name, value): if name.startswith('_'): super().__setattr__(name, value) # Call original __setattr__ else: setattr(self._obj, name, value)
256 | Chapter 8: Classes and Objects
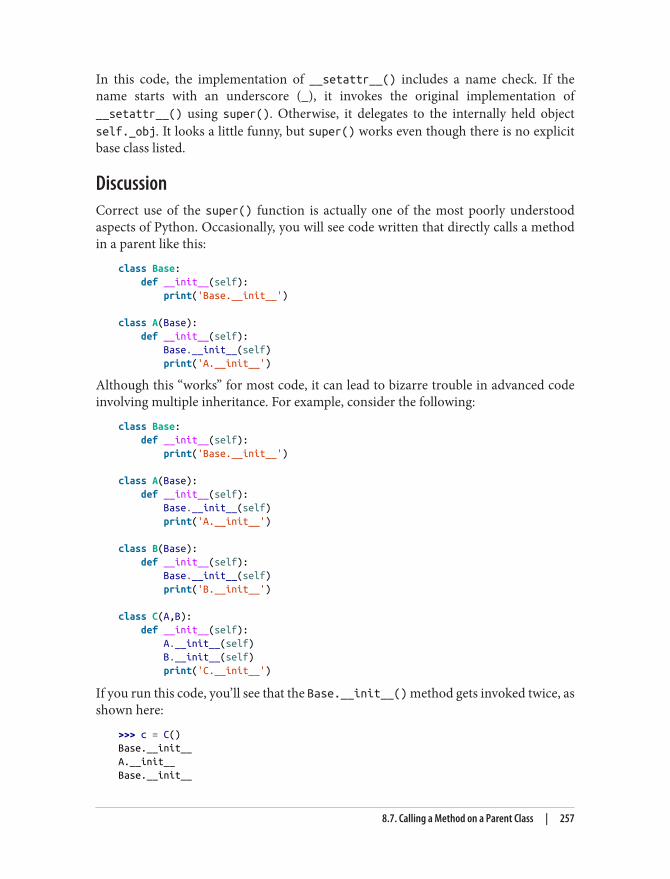
In this code, the implementation of __setattr__() includes a name check. If thename starts with an underscore (_), it invokes the original implementation of__setattr__() using super(). Otherwise, it delegates to the internally held objectself._obj. It looks a little funny, but super() works even though there is no explicitbase class listed.
DiscussionCorrect use of the super() function is actually one of the most poorly understoodaspects of Python. Occasionally, you will see code written that directly calls a methodin a parent like this:
class Base: def __init__(self): print('Base.__init__')
class A(Base): def __init__(self): Base.__init__(self) print('A.__init__')
Although this “works” for most code, it can lead to bizarre trouble in advanced codeinvolving multiple inheritance. For example, consider the following:
class Base: def __init__(self): print('Base.__init__')
class A(Base): def __init__(self): Base.__init__(self) print('A.__init__')
class B(Base): def __init__(self): Base.__init__(self) print('B.__init__')
class C(A,B): def __init__(self): A.__init__(self) B.__init__(self) print('C.__init__')
If you run this code, you’ll see that the Base.__init__() method gets invoked twice, asshown here:
>>> c = C()Base.__init__A.__init__Base.__init__
8.7. Calling a Method on a Parent Class | 257
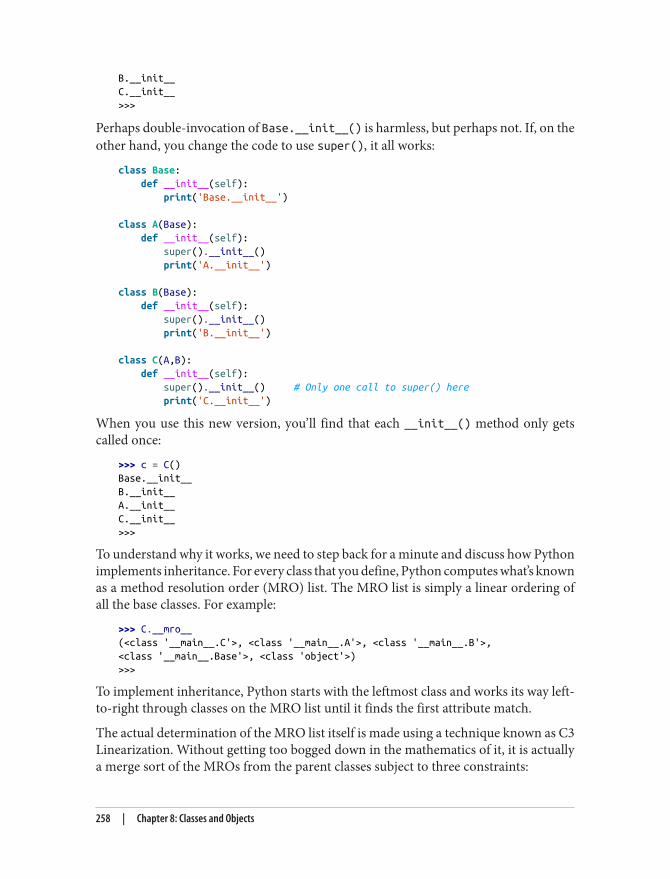
B.__init__C.__init__>>>
Perhaps double-invocation of Base.__init__() is harmless, but perhaps not. If, on theother hand, you change the code to use super(), it all works:
class Base: def __init__(self): print('Base.__init__')
class A(Base): def __init__(self): super().__init__() print('A.__init__')
class B(Base): def __init__(self): super().__init__() print('B.__init__')
class C(A,B): def __init__(self): super().__init__() # Only one call to super() here print('C.__init__')
When you use this new version, you’ll find that each __init__() method only getscalled once:
>>> c = C()Base.__init__B.__init__A.__init__C.__init__>>>
To understand why it works, we need to step back for a minute and discuss how Pythonimplements inheritance. For every class that you define, Python computes what’s knownas a method resolution order (MRO) list. The MRO list is simply a linear ordering ofall the base classes. For example:
>>> C.__mro__(<class '__main__.C'>, <class '__main__.A'>, <class '__main__.B'>,<class '__main__.Base'>, <class 'object'>)>>>
To implement inheritance, Python starts with the leftmost class and works its way left-to-right through classes on the MRO list until it finds the first attribute match.
The actual determination of the MRO list itself is made using a technique known as C3Linearization. Without getting too bogged down in the mathematics of it, it is actuallya merge sort of the MROs from the parent classes subject to three constraints:
258 | Chapter 8: Classes and Objects
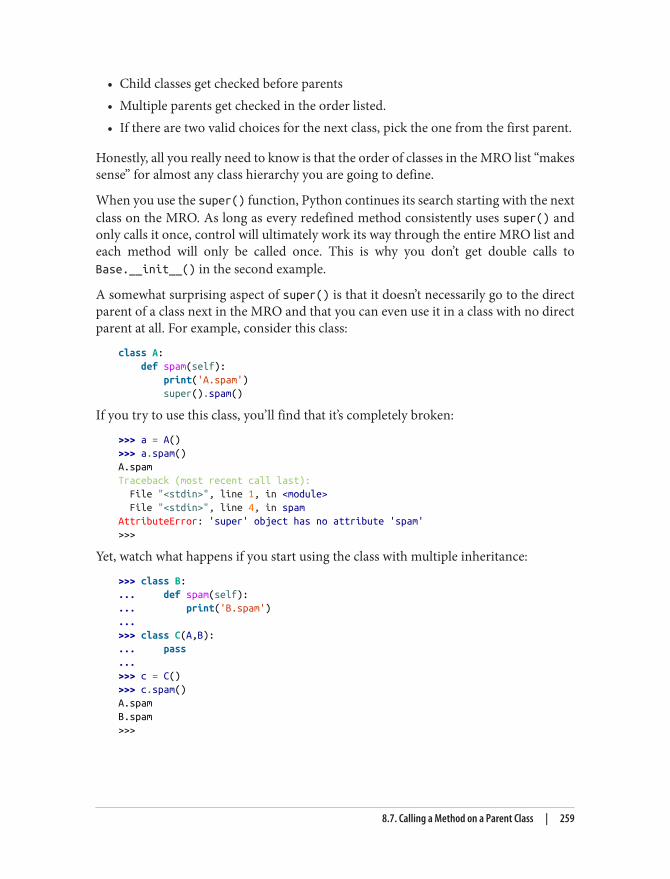
• Child classes get checked before parents• Multiple parents get checked in the order listed.• If there are two valid choices for the next class, pick the one from the first parent.
Honestly, all you really need to know is that the order of classes in the MRO list “makessense” for almost any class hierarchy you are going to define.
When you use the super() function, Python continues its search starting with the nextclass on the MRO. As long as every redefined method consistently uses super() andonly calls it once, control will ultimately work its way through the entire MRO list andeach method will only be called once. This is why you don’t get double calls toBase.__init__() in the second example.
A somewhat surprising aspect of super() is that it doesn’t necessarily go to the directparent of a class next in the MRO and that you can even use it in a class with no directparent at all. For example, consider this class:
class A: def spam(self): print('A.spam') super().spam()
If you try to use this class, you’ll find that it’s completely broken:
>>> a = A()>>> a.spam()A.spamTraceback (most recent call last): File "<stdin>", line 1, in <module> File "<stdin>", line 4, in spamAttributeError: 'super' object has no attribute 'spam'>>>
Yet, watch what happens if you start using the class with multiple inheritance:
>>> class B:... def spam(self):... print('B.spam')...>>> class C(A,B):... pass...>>> c = C()>>> c.spam()A.spamB.spam>>>
8.7. Calling a Method on a Parent Class | 259
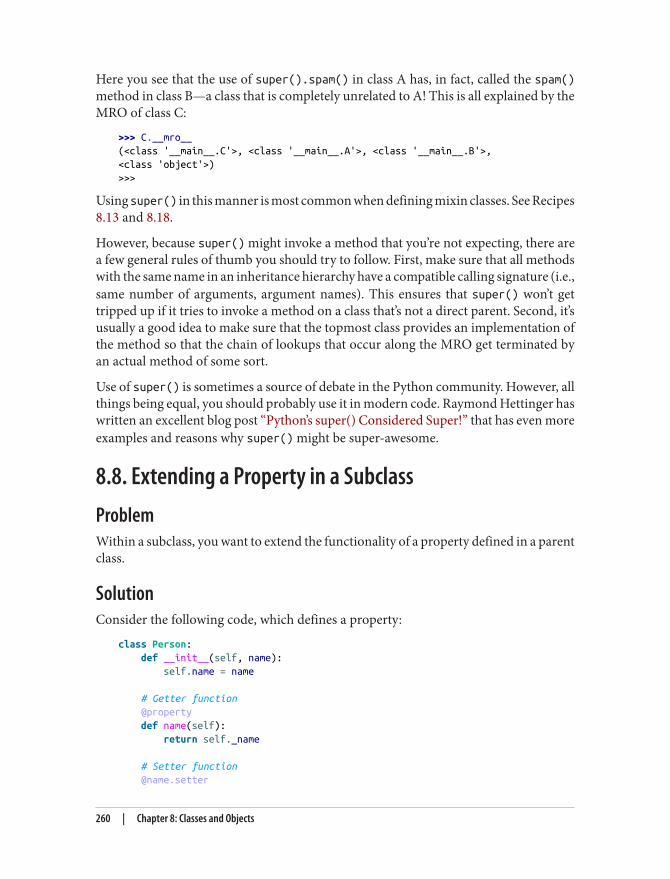
Here you see that the use of super().spam() in class A has, in fact, called the spam()method in class B—a class that is completely unrelated to A! This is all explained by theMRO of class C:
>>> C.__mro__(<class '__main__.C'>, <class '__main__.A'>, <class '__main__.B'>,<class 'object'>)>>>
Using super() in this manner is most common when defining mixin classes. See Recipes8.13 and 8.18.
However, because super() might invoke a method that you’re not expecting, there area few general rules of thumb you should try to follow. First, make sure that all methodswith the same name in an inheritance hierarchy have a compatible calling signature (i.e.,same number of arguments, argument names). This ensures that super() won’t gettripped up if it tries to invoke a method on a class that’s not a direct parent. Second, it’susually a good idea to make sure that the topmost class provides an implementation ofthe method so that the chain of lookups that occur along the MRO get terminated byan actual method of some sort.
Use of super() is sometimes a source of debate in the Python community. However, allthings being equal, you should probably use it in modern code. Raymond Hettinger haswritten an excellent blog post “Python’s super() Considered Super!” that has even moreexamples and reasons why super() might be super-awesome.
8.8. Extending a Property in a SubclassProblemWithin a subclass, you want to extend the functionality of a property defined in a parentclass.
SolutionConsider the following code, which defines a property:
class Person: def __init__(self, name): self.name = name
# Getter function @property def name(self): return self._name
# Setter function @name.setter
260 | Chapter 8: Classes and Objects

def name(self, value): if not isinstance(value, str): raise TypeError('Expected a string') self._name = value
# Deleter function @name.deleter def name(self): raise AttributeError("Can't delete attribute")
Here is an example of a class that inherits from Person and extends the name propertywith new functionality:
class SubPerson(Person): @property def name(self): print('Getting name') return super().name
@name.setter def name(self, value): print('Setting name to', value) super(SubPerson, SubPerson).name.__set__(self, value)
@name.deleter def name(self): print('Deleting name') super(SubPerson, SubPerson).name.__delete__(self)
Here is an example of the new class in use:
>>> s = SubPerson('Guido')Setting name to Guido>>> s.nameGetting name'Guido'>>> s.name = 'Larry'Setting name to Larry>>> s.name = 42Traceback (most recent call last): File "<stdin>", line 1, in <module> File "example.py", line 16, in name raise TypeError('Expected a string')TypeError: Expected a string>>>
If you only want to extend one of the methods of a property, use code such as thefollowing:
class SubPerson(Person): @Person.name.getter def name(self): print('Getting name') return super().name
8.8. Extending a Property in a Subclass | 261
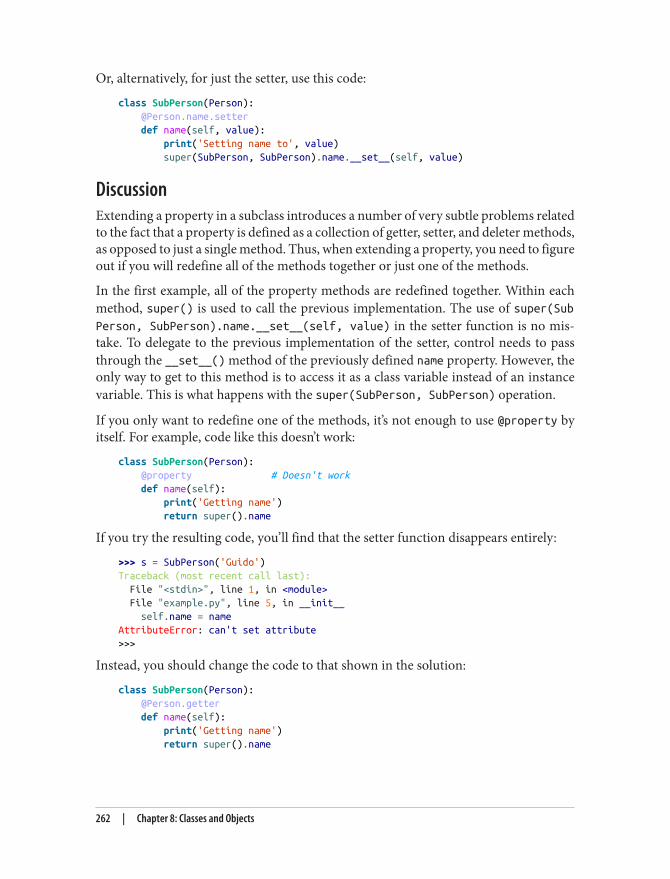
Or, alternatively, for just the setter, use this code:
class SubPerson(Person): @Person.name.setter def name(self, value): print('Setting name to', value) super(SubPerson, SubPerson).name.__set__(self, value)
DiscussionExtending a property in a subclass introduces a number of very subtle problems relatedto the fact that a property is defined as a collection of getter, setter, and deleter methods,as opposed to just a single method. Thus, when extending a property, you need to figureout if you will redefine all of the methods together or just one of the methods.
In the first example, all of the property methods are redefined together. Within eachmethod, super() is used to call the previous implementation. The use of super(SubPerson, SubPerson).name.__set__(self, value) in the setter function is no mis‐take. To delegate to the previous implementation of the setter, control needs to passthrough the __set__() method of the previously defined name property. However, theonly way to get to this method is to access it as a class variable instead of an instancevariable. This is what happens with the super(SubPerson, SubPerson) operation.
If you only want to redefine one of the methods, it’s not enough to use @property byitself. For example, code like this doesn’t work:
class SubPerson(Person): @property # Doesn't work def name(self): print('Getting name') return super().name
If you try the resulting code, you’ll find that the setter function disappears entirely:
>>> s = SubPerson('Guido')Traceback (most recent call last): File "<stdin>", line 1, in <module> File "example.py", line 5, in __init__ self.name = nameAttributeError: can't set attribute>>>
Instead, you should change the code to that shown in the solution:
class SubPerson(Person): @Person.getter def name(self): print('Getting name') return super().name
262 | Chapter 8: Classes and Objects
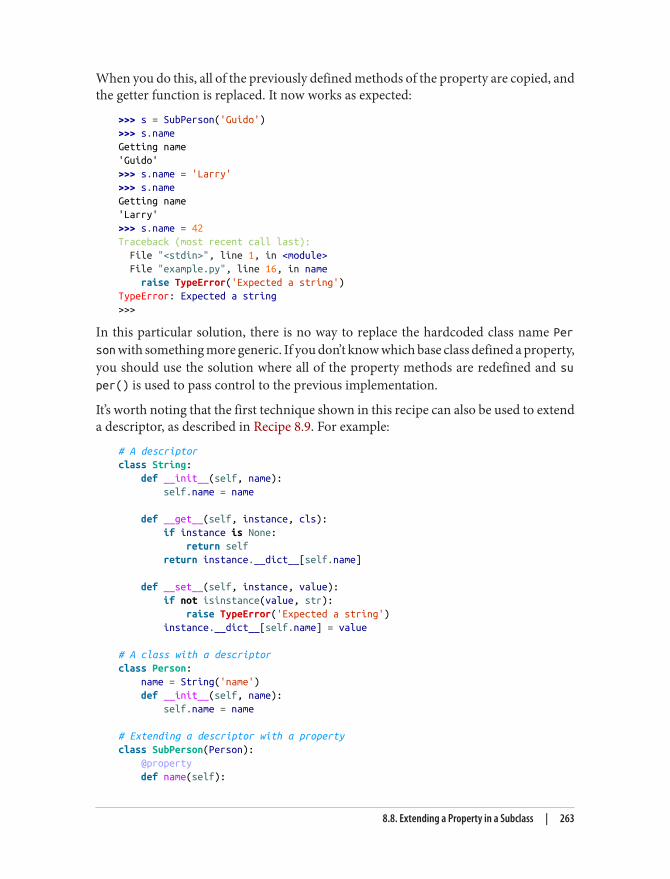
When you do this, all of the previously defined methods of the property are copied, andthe getter function is replaced. It now works as expected:
>>> s = SubPerson('Guido')>>> s.nameGetting name'Guido'>>> s.name = 'Larry'>>> s.nameGetting name'Larry'>>> s.name = 42Traceback (most recent call last): File "<stdin>", line 1, in <module> File "example.py", line 16, in name raise TypeError('Expected a string')TypeError: Expected a string>>>
In this particular solution, there is no way to replace the hardcoded class name Person with something more generic. If you don’t know which base class defined a property,you should use the solution where all of the property methods are redefined and super() is used to pass control to the previous implementation.
It’s worth noting that the first technique shown in this recipe can also be used to extenda descriptor, as described in Recipe 8.9. For example:
# A descriptorclass String: def __init__(self, name): self.name = name
def __get__(self, instance, cls): if instance is None: return self return instance.__dict__[self.name]
def __set__(self, instance, value): if not isinstance(value, str): raise TypeError('Expected a string') instance.__dict__[self.name] = value
# A class with a descriptorclass Person: name = String('name') def __init__(self, name): self.name = name
# Extending a descriptor with a propertyclass SubPerson(Person): @property def name(self):
8.8. Extending a Property in a Subclass | 263
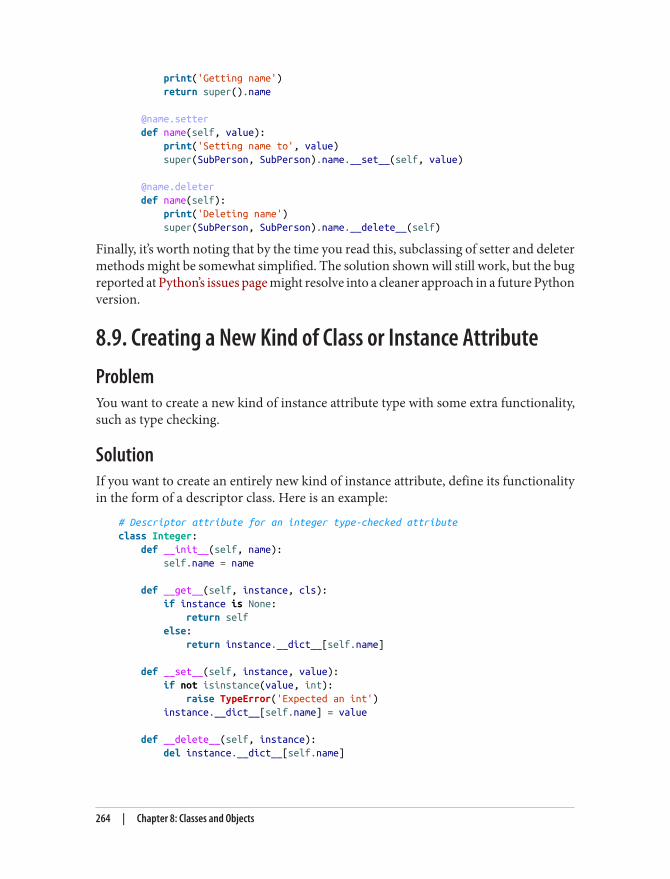
print('Getting name') return super().name
@name.setter def name(self, value): print('Setting name to', value) super(SubPerson, SubPerson).name.__set__(self, value)
@name.deleter def name(self): print('Deleting name') super(SubPerson, SubPerson).name.__delete__(self)
Finally, it’s worth noting that by the time you read this, subclassing of setter and deletermethods might be somewhat simplified. The solution shown will still work, but the bugreported at Python’s issues page might resolve into a cleaner approach in a future Pythonversion.
8.9. Creating a New Kind of Class or Instance AttributeProblemYou want to create a new kind of instance attribute type with some extra functionality,such as type checking.
SolutionIf you want to create an entirely new kind of instance attribute, define its functionalityin the form of a descriptor class. Here is an example:
# Descriptor attribute for an integer type-checked attributeclass Integer: def __init__(self, name): self.name = name
def __get__(self, instance, cls): if instance is None: return self else: return instance.__dict__[self.name]
def __set__(self, instance, value): if not isinstance(value, int): raise TypeError('Expected an int') instance.__dict__[self.name] = value
def __delete__(self, instance): del instance.__dict__[self.name]
264 | Chapter 8: Classes and Objects
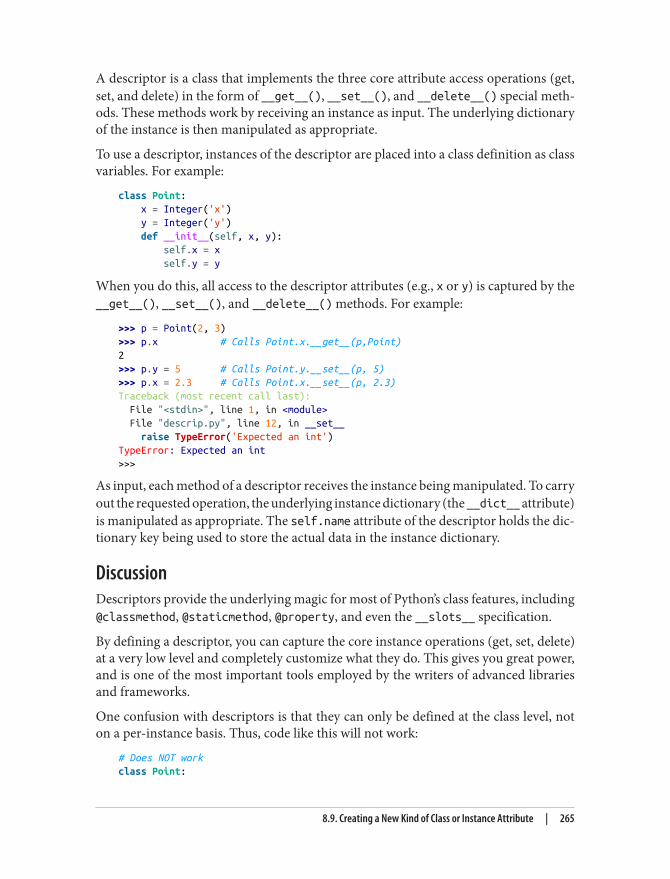
A descriptor is a class that implements the three core attribute access operations (get,set, and delete) in the form of __get__(), __set__(), and __delete__() special meth‐ods. These methods work by receiving an instance as input. The underlying dictionaryof the instance is then manipulated as appropriate.
To use a descriptor, instances of the descriptor are placed into a class definition as classvariables. For example:
class Point: x = Integer('x') y = Integer('y') def __init__(self, x, y): self.x = x self.y = y
When you do this, all access to the descriptor attributes (e.g., x or y) is captured by the__get__(), __set__(), and __delete__() methods. For example:
>>> p = Point(2, 3)>>> p.x # Calls Point.x.__get__(p,Point)2>>> p.y = 5 # Calls Point.y.__set__(p, 5)>>> p.x = 2.3 # Calls Point.x.__set__(p, 2.3)Traceback (most recent call last): File "<stdin>", line 1, in <module> File "descrip.py", line 12, in __set__ raise TypeError('Expected an int')TypeError: Expected an int>>>
As input, each method of a descriptor receives the instance being manipulated. To carryout the requested operation, the underlying instance dictionary (the __dict__ attribute)is manipulated as appropriate. The self.name attribute of the descriptor holds the dic‐tionary key being used to store the actual data in the instance dictionary.
DiscussionDescriptors provide the underlying magic for most of Python’s class features, including@classmethod, @staticmethod, @property, and even the __slots__ specification.
By defining a descriptor, you can capture the core instance operations (get, set, delete)at a very low level and completely customize what they do. This gives you great power,and is one of the most important tools employed by the writers of advanced librariesand frameworks.
One confusion with descriptors is that they can only be defined at the class level, noton a per-instance basis. Thus, code like this will not work:
# Does NOT workclass Point:
8.9. Creating a New Kind of Class or Instance Attribute | 265
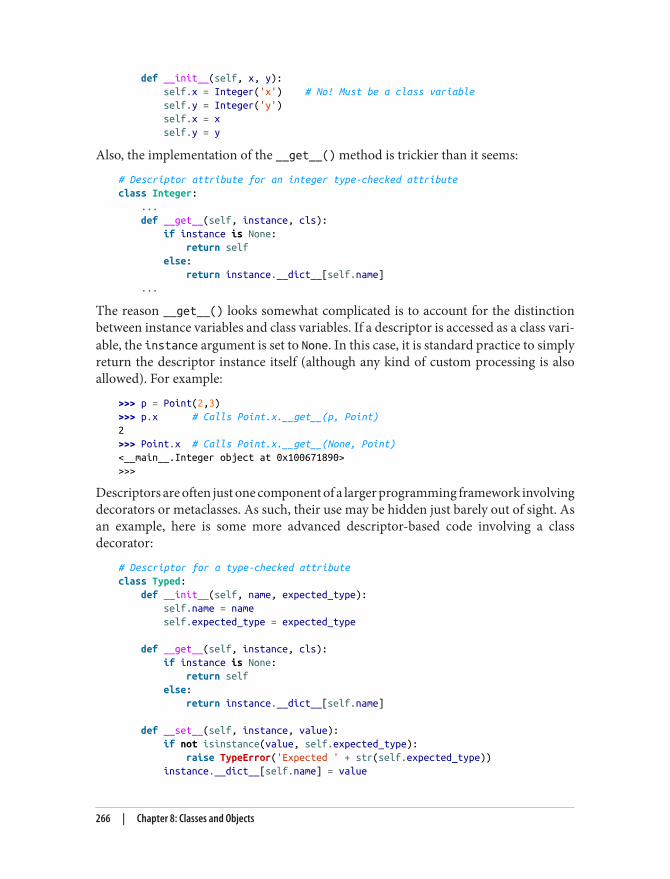
def __init__(self, x, y): self.x = Integer('x') # No! Must be a class variable self.y = Integer('y') self.x = x self.y = y
Also, the implementation of the __get__() method is trickier than it seems:
# Descriptor attribute for an integer type-checked attributeclass Integer: ... def __get__(self, instance, cls): if instance is None: return self else: return instance.__dict__[self.name] ...
The reason __get__() looks somewhat complicated is to account for the distinctionbetween instance variables and class variables. If a descriptor is accessed as a class vari‐able, the instance argument is set to None. In this case, it is standard practice to simplyreturn the descriptor instance itself (although any kind of custom processing is alsoallowed). For example:
>>> p = Point(2,3)>>> p.x # Calls Point.x.__get__(p, Point)2>>> Point.x # Calls Point.x.__get__(None, Point)<__main__.Integer object at 0x100671890>>>>
Descriptors are often just one component of a larger programming framework involvingdecorators or metaclasses. As such, their use may be hidden just barely out of sight. Asan example, here is some more advanced descriptor-based code involving a classdecorator:
# Descriptor for a type-checked attributeclass Typed: def __init__(self, name, expected_type): self.name = name self.expected_type = expected_type
def __get__(self, instance, cls): if instance is None: return self else: return instance.__dict__[self.name]
def __set__(self, instance, value): if not isinstance(value, self.expected_type): raise TypeError('Expected ' + str(self.expected_type)) instance.__dict__[self.name] = value
266 | Chapter 8: Classes and Objects
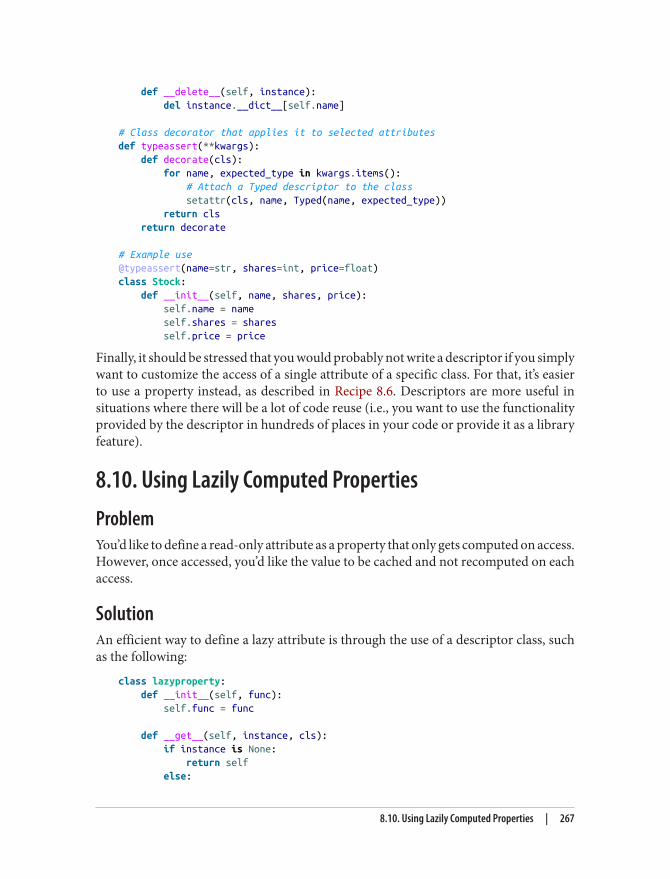
def __delete__(self, instance): del instance.__dict__[self.name]
# Class decorator that applies it to selected attributesdef typeassert(**kwargs): def decorate(cls): for name, expected_type in kwargs.items(): # Attach a Typed descriptor to the class setattr(cls, name, Typed(name, expected_type)) return cls return decorate
# Example use@typeassert(name=str, shares=int, price=float)class Stock: def __init__(self, name, shares, price): self.name = name self.shares = shares self.price = price
Finally, it should be stressed that you would probably not write a descriptor if you simplywant to customize the access of a single attribute of a specific class. For that, it’s easierto use a property instead, as described in Recipe 8.6. Descriptors are more useful insituations where there will be a lot of code reuse (i.e., you want to use the functionalityprovided by the descriptor in hundreds of places in your code or provide it as a libraryfeature).
8.10. Using Lazily Computed PropertiesProblemYou’d like to define a read-only attribute as a property that only gets computed on access.However, once accessed, you’d like the value to be cached and not recomputed on eachaccess.
SolutionAn efficient way to define a lazy attribute is through the use of a descriptor class, suchas the following:
class lazyproperty: def __init__(self, func): self.func = func
def __get__(self, instance, cls): if instance is None: return self else:
8.10. Using Lazily Computed Properties | 267

value = self.func(instance) setattr(instance, self.func.__name__, value) return value
To utilize this code, you would use it in a class such as the following:
import math
class Circle: def __init__(self, radius): self.radius = radius
@lazyproperty def area(self): print('Computing area') return math.pi * self.radius ** 2
@lazyproperty def perimeter(self): print('Computing perimeter') return 2 * math.pi * self.radius
Here is an interactive session that illustrates how it works:
>>> c = Circle(4.0)>>> c.radius4.0>>> c.areaComputing area50.26548245743669>>> c.area50.26548245743669>>> c.perimeterComputing perimeter25.132741228718345>>> c.perimeter25.132741228718345>>>
Carefully observe that the messages “Computing area” and “Computing perimeter” onlyappear once.
DiscussionIn many cases, the whole point of having a lazily computed attribute is to improveperformance. For example, you avoid computing values unless you actually need themsomewhere. The solution shown does just this, but it exploits a subtle feature of de‐scriptors to do it in a highly efficient way.
As shown in other recipes (e.g., Recipe 8.9), when a descriptor is placed into a classdefinition, its __get__(), __set__(), and __delete__() methods get triggered on at‐tribute access. However, if a descriptor only defines a __get__() method, it has a much
268 | Chapter 8: Classes and Objects
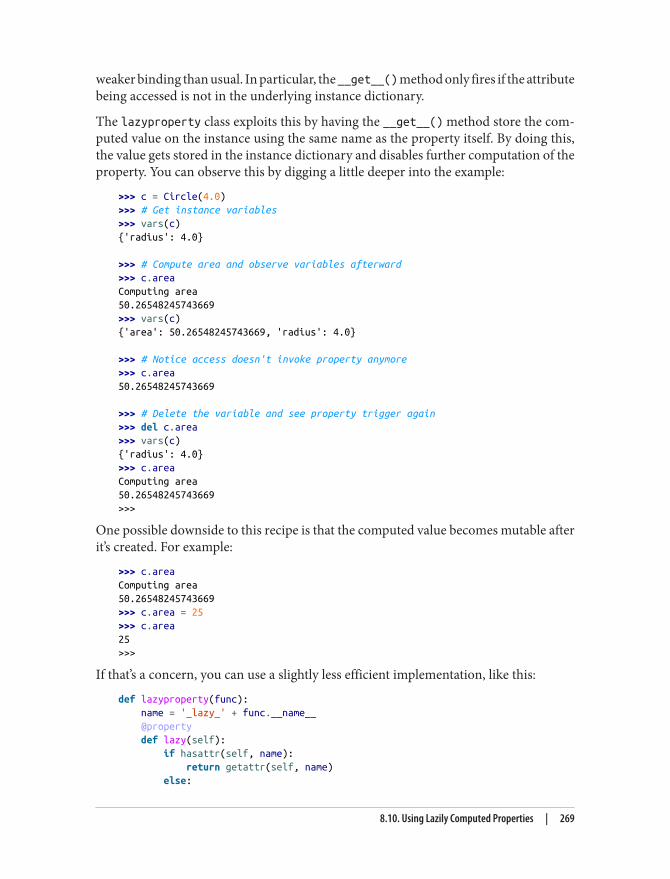
weaker binding than usual. In particular, the __get__() method only fires if the attributebeing accessed is not in the underlying instance dictionary.
The lazyproperty class exploits this by having the __get__() method store the com‐puted value on the instance using the same name as the property itself. By doing this,the value gets stored in the instance dictionary and disables further computation of theproperty. You can observe this by digging a little deeper into the example:
>>> c = Circle(4.0)>>> # Get instance variables>>> vars(c){'radius': 4.0}
>>> # Compute area and observe variables afterward>>> c.areaComputing area50.26548245743669>>> vars(c){'area': 50.26548245743669, 'radius': 4.0}
>>> # Notice access doesn't invoke property anymore>>> c.area50.26548245743669
>>> # Delete the variable and see property trigger again>>> del c.area>>> vars(c){'radius': 4.0}>>> c.areaComputing area50.26548245743669>>>
One possible downside to this recipe is that the computed value becomes mutable afterit’s created. For example:
>>> c.areaComputing area50.26548245743669>>> c.area = 25>>> c.area25>>>
If that’s a concern, you can use a slightly less efficient implementation, like this:
def lazyproperty(func): name = '_lazy_' + func.__name__ @property def lazy(self): if hasattr(self, name): return getattr(self, name) else:
8.10. Using Lazily Computed Properties | 269
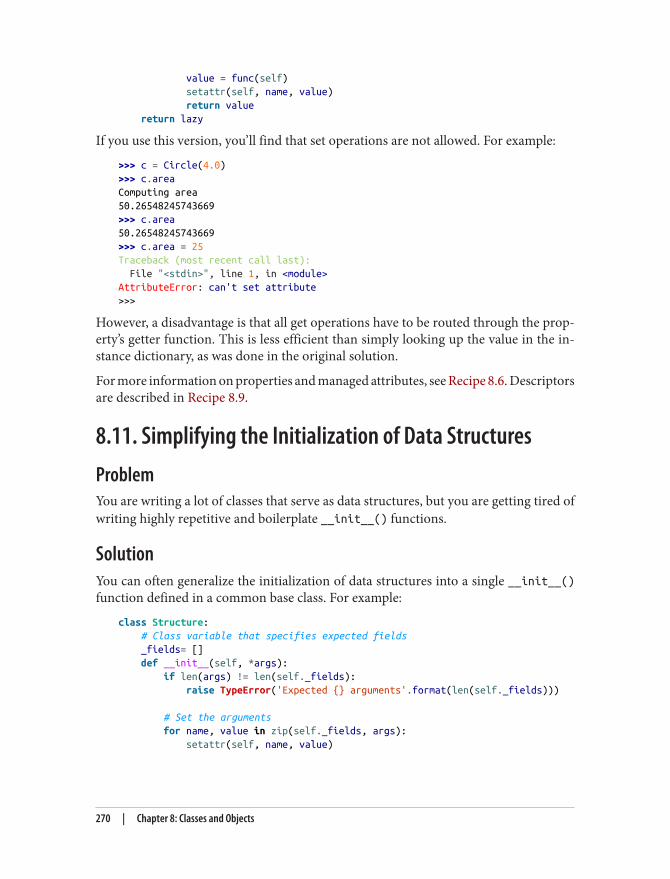
value = func(self) setattr(self, name, value) return value return lazy
If you use this version, you’ll find that set operations are not allowed. For example:
>>> c = Circle(4.0)>>> c.areaComputing area50.26548245743669>>> c.area50.26548245743669>>> c.area = 25Traceback (most recent call last): File "<stdin>", line 1, in <module>AttributeError: can't set attribute>>>
However, a disadvantage is that all get operations have to be routed through the prop‐erty’s getter function. This is less efficient than simply looking up the value in the in‐stance dictionary, as was done in the original solution.
For more information on properties and managed attributes, see Recipe 8.6. Descriptorsare described in Recipe 8.9.
8.11. Simplifying the Initialization of Data StructuresProblemYou are writing a lot of classes that serve as data structures, but you are getting tired ofwriting highly repetitive and boilerplate __init__() functions.
SolutionYou can often generalize the initialization of data structures into a single __init__()function defined in a common base class. For example:
class Structure: # Class variable that specifies expected fields _fields= [] def __init__(self, *args): if len(args) != len(self._fields): raise TypeError('Expected {} arguments'.format(len(self._fields)))
# Set the arguments for name, value in zip(self._fields, args): setattr(self, name, value)
270 | Chapter 8: Classes and Objects
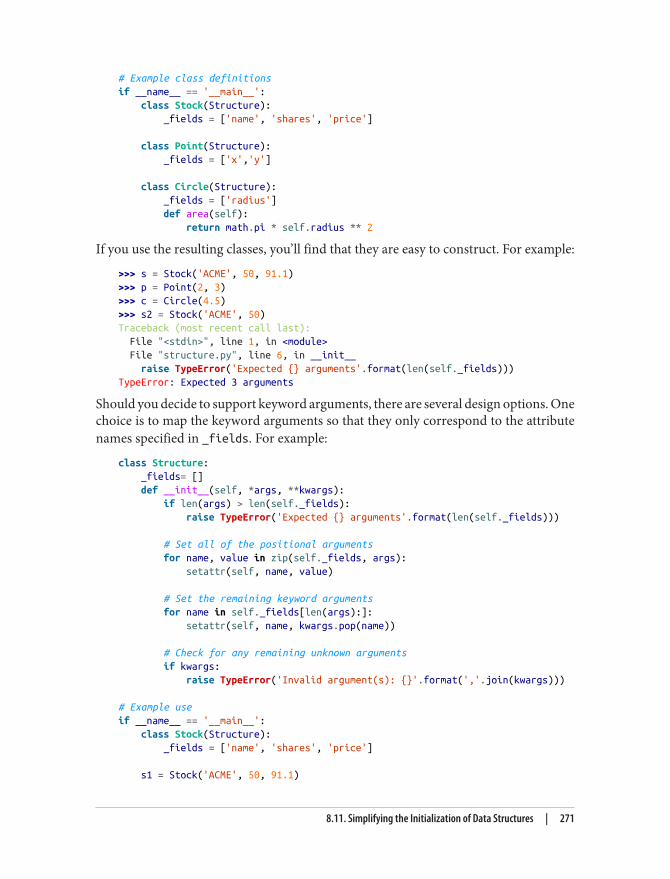
# Example class definitionsif __name__ == '__main__': class Stock(Structure): _fields = ['name', 'shares', 'price']
class Point(Structure): _fields = ['x','y']
class Circle(Structure): _fields = ['radius'] def area(self): return math.pi * self.radius ** 2
If you use the resulting classes, you’ll find that they are easy to construct. For example:
>>> s = Stock('ACME', 50, 91.1)>>> p = Point(2, 3)>>> c = Circle(4.5)>>> s2 = Stock('ACME', 50)Traceback (most recent call last): File "<stdin>", line 1, in <module> File "structure.py", line 6, in __init__ raise TypeError('Expected {} arguments'.format(len(self._fields)))TypeError: Expected 3 arguments
Should you decide to support keyword arguments, there are several design options. Onechoice is to map the keyword arguments so that they only correspond to the attributenames specified in _fields. For example:
class Structure: _fields= [] def __init__(self, *args, **kwargs): if len(args) > len(self._fields): raise TypeError('Expected {} arguments'.format(len(self._fields)))
# Set all of the positional arguments for name, value in zip(self._fields, args): setattr(self, name, value)
# Set the remaining keyword arguments for name in self._fields[len(args):]: setattr(self, name, kwargs.pop(name))
# Check for any remaining unknown arguments if kwargs: raise TypeError('Invalid argument(s): {}'.format(','.join(kwargs)))
# Example useif __name__ == '__main__': class Stock(Structure): _fields = ['name', 'shares', 'price']
s1 = Stock('ACME', 50, 91.1)
8.11. Simplifying the Initialization of Data Structures | 271
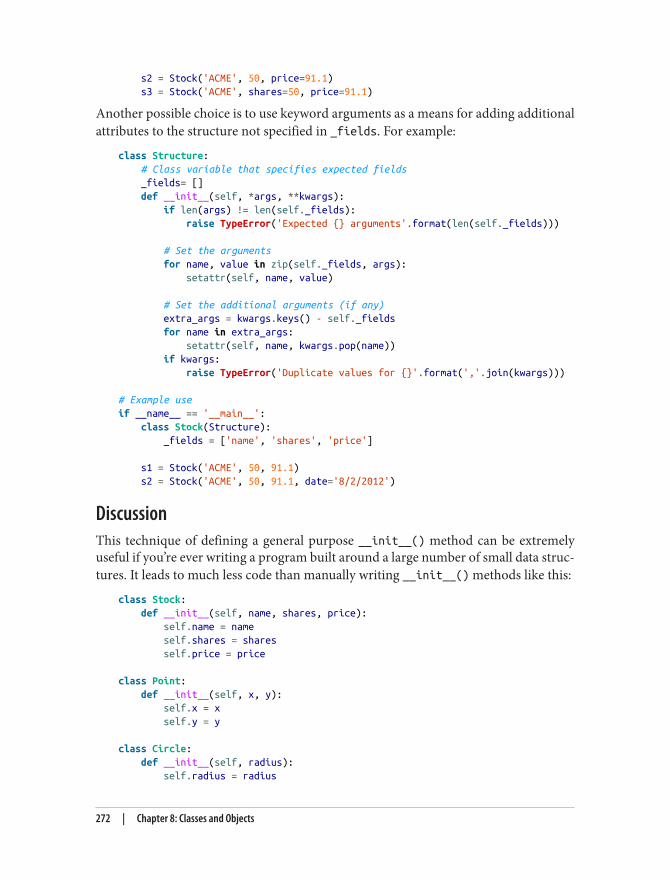
s2 = Stock('ACME', 50, price=91.1) s3 = Stock('ACME', shares=50, price=91.1)
Another possible choice is to use keyword arguments as a means for adding additionalattributes to the structure not specified in _fields. For example:
class Structure: # Class variable that specifies expected fields _fields= [] def __init__(self, *args, **kwargs): if len(args) != len(self._fields): raise TypeError('Expected {} arguments'.format(len(self._fields)))
# Set the arguments for name, value in zip(self._fields, args): setattr(self, name, value)
# Set the additional arguments (if any) extra_args = kwargs.keys() - self._fields for name in extra_args: setattr(self, name, kwargs.pop(name)) if kwargs: raise TypeError('Duplicate values for {}'.format(','.join(kwargs)))
# Example useif __name__ == '__main__': class Stock(Structure): _fields = ['name', 'shares', 'price']
s1 = Stock('ACME', 50, 91.1) s2 = Stock('ACME', 50, 91.1, date='8/2/2012')
DiscussionThis technique of defining a general purpose __init__() method can be extremelyuseful if you’re ever writing a program built around a large number of small data struc‐tures. It leads to much less code than manually writing __init__() methods like this:
class Stock: def __init__(self, name, shares, price): self.name = name self.shares = shares self.price = price
class Point: def __init__(self, x, y): self.x = x self.y = y
class Circle: def __init__(self, radius): self.radius = radius
272 | Chapter 8: Classes and Objects
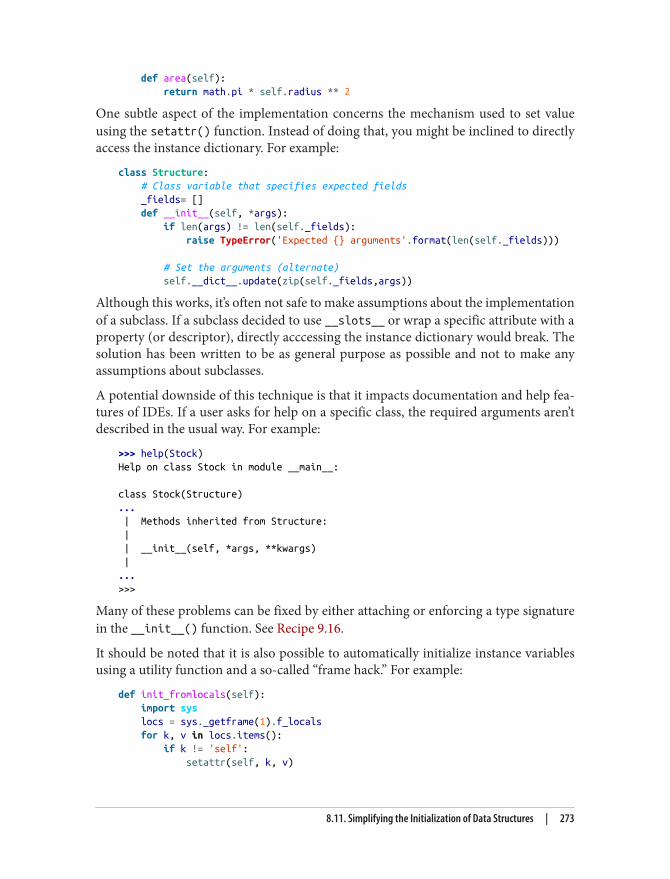
def area(self): return math.pi * self.radius ** 2
One subtle aspect of the implementation concerns the mechanism used to set valueusing the setattr() function. Instead of doing that, you might be inclined to directlyaccess the instance dictionary. For example:
class Structure: # Class variable that specifies expected fields _fields= [] def __init__(self, *args): if len(args) != len(self._fields): raise TypeError('Expected {} arguments'.format(len(self._fields)))
# Set the arguments (alternate) self.__dict__.update(zip(self._fields,args))
Although this works, it’s often not safe to make assumptions about the implementationof a subclass. If a subclass decided to use __slots__ or wrap a specific attribute with aproperty (or descriptor), directly acccessing the instance dictionary would break. Thesolution has been written to be as general purpose as possible and not to make anyassumptions about subclasses.
A potential downside of this technique is that it impacts documentation and help fea‐tures of IDEs. If a user asks for help on a specific class, the required arguments aren’tdescribed in the usual way. For example:
>>> help(Stock)Help on class Stock in module __main__:
class Stock(Structure)... | Methods inherited from Structure: | | __init__(self, *args, **kwargs) |...>>>
Many of these problems can be fixed by either attaching or enforcing a type signaturein the __init__() function. See Recipe 9.16.
It should be noted that it is also possible to automatically initialize instance variablesusing a utility function and a so-called “frame hack.” For example:
def init_fromlocals(self): import sys locs = sys._getframe(1).f_locals for k, v in locs.items(): if k != 'self': setattr(self, k, v)
8.11. Simplifying the Initialization of Data Structures | 273
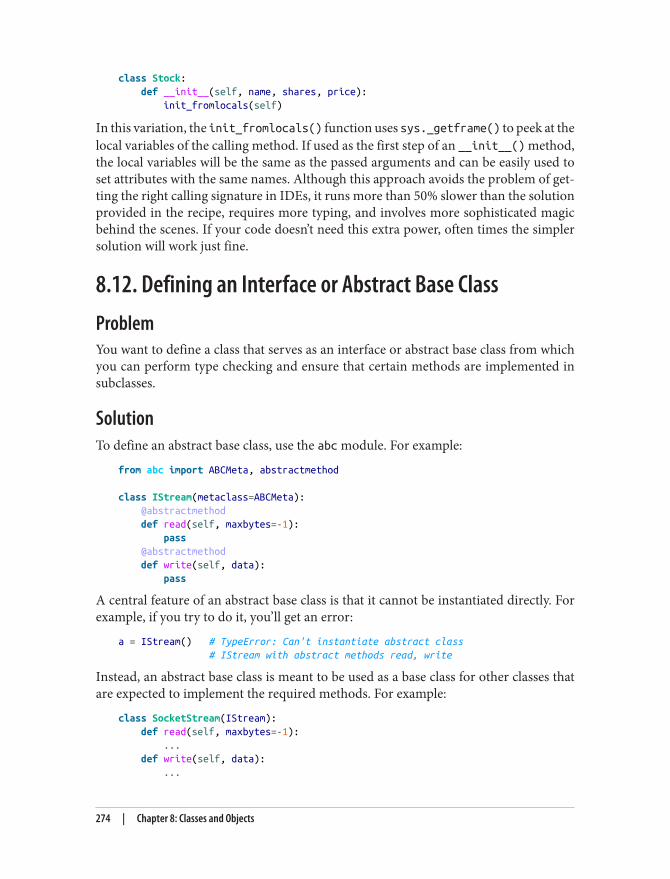
class Stock: def __init__(self, name, shares, price): init_fromlocals(self)
In this variation, the init_fromlocals() function uses sys._getframe() to peek at thelocal variables of the calling method. If used as the first step of an __init__() method,the local variables will be the same as the passed arguments and can be easily used toset attributes with the same names. Although this approach avoids the problem of get‐ting the right calling signature in IDEs, it runs more than 50% slower than the solutionprovided in the recipe, requires more typing, and involves more sophisticated magicbehind the scenes. If your code doesn’t need this extra power, often times the simplersolution will work just fine.
8.12. Defining an Interface or Abstract Base ClassProblemYou want to define a class that serves as an interface or abstract base class from whichyou can perform type checking and ensure that certain methods are implemented insubclasses.
SolutionTo define an abstract base class, use the abc module. For example:
from abc import ABCMeta, abstractmethod
class IStream(metaclass=ABCMeta): @abstractmethod def read(self, maxbytes=-1): pass @abstractmethod def write(self, data): pass
A central feature of an abstract base class is that it cannot be instantiated directly. Forexample, if you try to do it, you’ll get an error:
a = IStream() # TypeError: Can't instantiate abstract class # IStream with abstract methods read, write
Instead, an abstract base class is meant to be used as a base class for other classes thatare expected to implement the required methods. For example:
class SocketStream(IStream): def read(self, maxbytes=-1): ... def write(self, data): ...
274 | Chapter 8: Classes and Objects
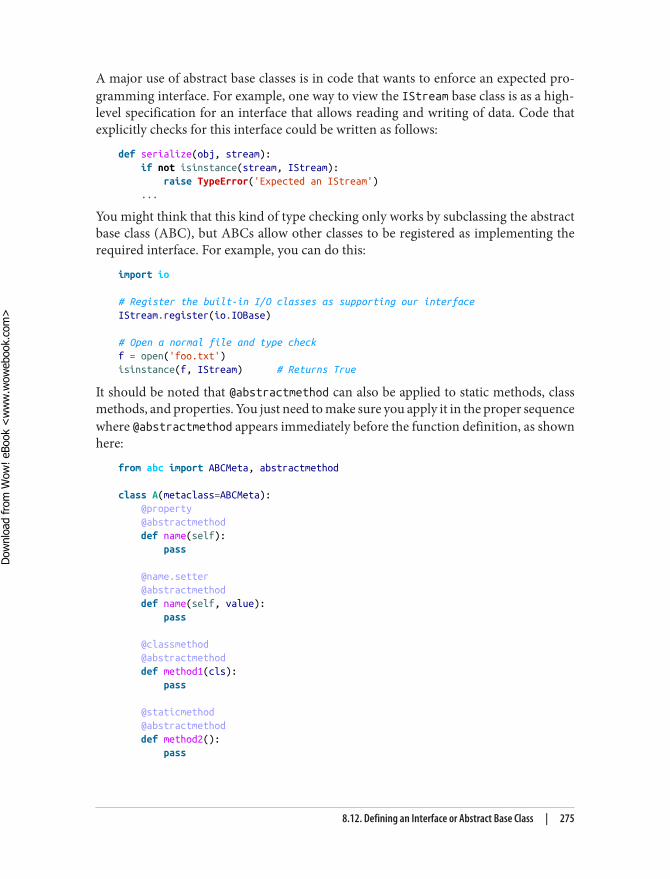
A major use of abstract base classes is in code that wants to enforce an expected pro‐gramming interface. For example, one way to view the IStream base class is as a high-level specification for an interface that allows reading and writing of data. Code thatexplicitly checks for this interface could be written as follows:
def serialize(obj, stream): if not isinstance(stream, IStream): raise TypeError('Expected an IStream') ...
You might think that this kind of type checking only works by subclassing the abstractbase class (ABC), but ABCs allow other classes to be registered as implementing therequired interface. For example, you can do this:
import io
# Register the built-in I/O classes as supporting our interfaceIStream.register(io.IOBase)
# Open a normal file and type checkf = open('foo.txt')isinstance(f, IStream) # Returns True
It should be noted that @abstractmethod can also be applied to static methods, classmethods, and properties. You just need to make sure you apply it in the proper sequencewhere @abstractmethod appears immediately before the function definition, as shownhere:
from abc import ABCMeta, abstractmethod
class A(metaclass=ABCMeta): @property @abstractmethod def name(self): pass
@name.setter @abstractmethod def name(self, value): pass
@classmethod @abstractmethod def method1(cls): pass
@staticmethod @abstractmethod def method2(): pass
8.12. Defining an Interface or Abstract Base Class | 275
Dow
nlo
ad fro
m W
ow
! eBook
<w
ww
.wow
ebook.
com
>
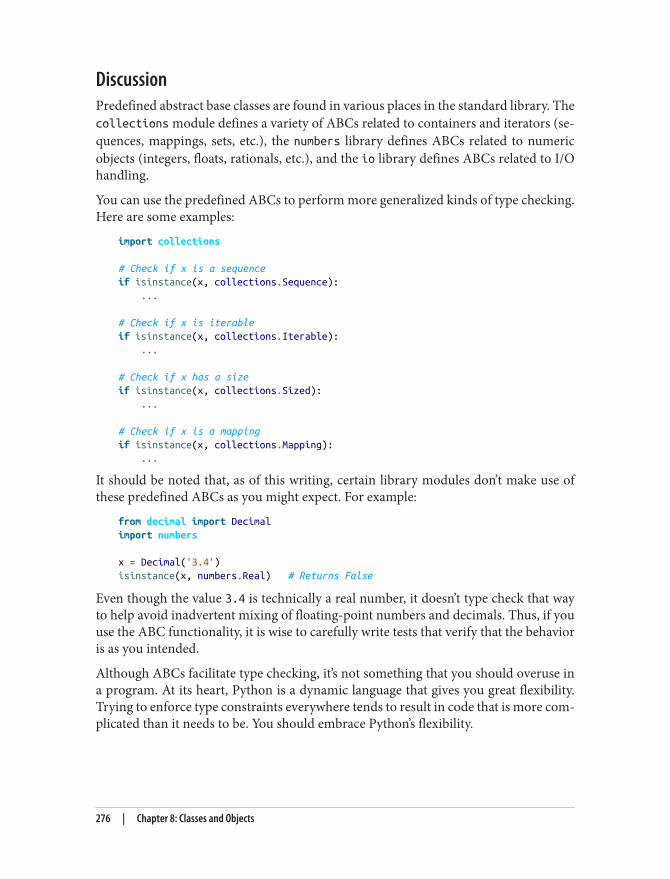
DiscussionPredefined abstract base classes are found in various places in the standard library. Thecollections module defines a variety of ABCs related to containers and iterators (se‐quences, mappings, sets, etc.), the numbers library defines ABCs related to numericobjects (integers, floats, rationals, etc.), and the io library defines ABCs related to I/Ohandling.
You can use the predefined ABCs to perform more generalized kinds of type checking.Here are some examples:
import collections
# Check if x is a sequenceif isinstance(x, collections.Sequence): ...
# Check if x is iterableif isinstance(x, collections.Iterable): ...
# Check if x has a sizeif isinstance(x, collections.Sized): ...
# Check if x is a mappingif isinstance(x, collections.Mapping): ...
It should be noted that, as of this writing, certain library modules don’t make use ofthese predefined ABCs as you might expect. For example:
from decimal import Decimalimport numbers
x = Decimal('3.4')isinstance(x, numbers.Real) # Returns False
Even though the value 3.4 is technically a real number, it doesn’t type check that wayto help avoid inadvertent mixing of floating-point numbers and decimals. Thus, if youuse the ABC functionality, it is wise to carefully write tests that verify that the behavioris as you intended.
Although ABCs facilitate type checking, it’s not something that you should overuse ina program. At its heart, Python is a dynamic language that gives you great flexibility.Trying to enforce type constraints everywhere tends to result in code that is more com‐plicated than it needs to be. You should embrace Python’s flexibility.
276 | Chapter 8: Classes and Objects
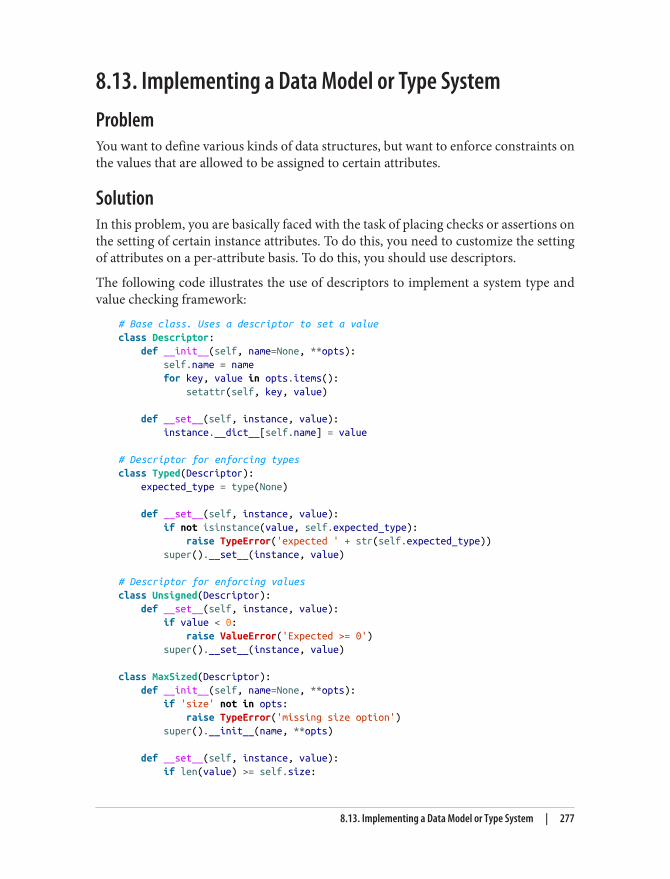
8.13. Implementing a Data Model or Type SystemProblemYou want to define various kinds of data structures, but want to enforce constraints onthe values that are allowed to be assigned to certain attributes.
SolutionIn this problem, you are basically faced with the task of placing checks or assertions onthe setting of certain instance attributes. To do this, you need to customize the settingof attributes on a per-attribute basis. To do this, you should use descriptors.
The following code illustrates the use of descriptors to implement a system type andvalue checking framework:
# Base class. Uses a descriptor to set a valueclass Descriptor: def __init__(self, name=None, **opts): self.name = name for key, value in opts.items(): setattr(self, key, value)
def __set__(self, instance, value): instance.__dict__[self.name] = value
# Descriptor for enforcing typesclass Typed(Descriptor): expected_type = type(None)
def __set__(self, instance, value): if not isinstance(value, self.expected_type): raise TypeError('expected ' + str(self.expected_type)) super().__set__(instance, value)
# Descriptor for enforcing valuesclass Unsigned(Descriptor): def __set__(self, instance, value): if value < 0: raise ValueError('Expected >= 0') super().__set__(instance, value)
class MaxSized(Descriptor): def __init__(self, name=None, **opts): if 'size' not in opts: raise TypeError('missing size option') super().__init__(name, **opts)
def __set__(self, instance, value): if len(value) >= self.size:
8.13. Implementing a Data Model or Type System | 277
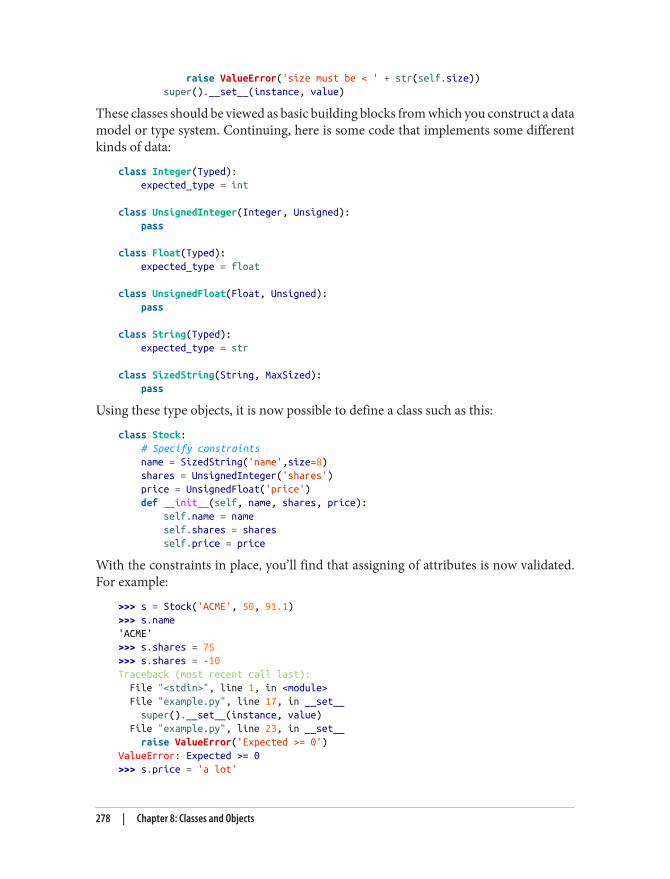
raise ValueError('size must be < ' + str(self.size)) super().__set__(instance, value)
These classes should be viewed as basic building blocks from which you construct a datamodel or type system. Continuing, here is some code that implements some differentkinds of data:
class Integer(Typed): expected_type = int
class UnsignedInteger(Integer, Unsigned): pass
class Float(Typed): expected_type = float
class UnsignedFloat(Float, Unsigned): pass
class String(Typed): expected_type = str
class SizedString(String, MaxSized): pass
Using these type objects, it is now possible to define a class such as this:
class Stock: # Specify constraints name = SizedString('name',size=8) shares = UnsignedInteger('shares') price = UnsignedFloat('price') def __init__(self, name, shares, price): self.name = name self.shares = shares self.price = price
With the constraints in place, you’ll find that assigning of attributes is now validated.For example:
>>> s = Stock('ACME', 50, 91.1)>>> s.name'ACME'>>> s.shares = 75>>> s.shares = -10Traceback (most recent call last): File "<stdin>", line 1, in <module> File "example.py", line 17, in __set__ super().__set__(instance, value) File "example.py", line 23, in __set__ raise ValueError('Expected >= 0')ValueError: Expected >= 0>>> s.price = 'a lot'
278 | Chapter 8: Classes and Objects
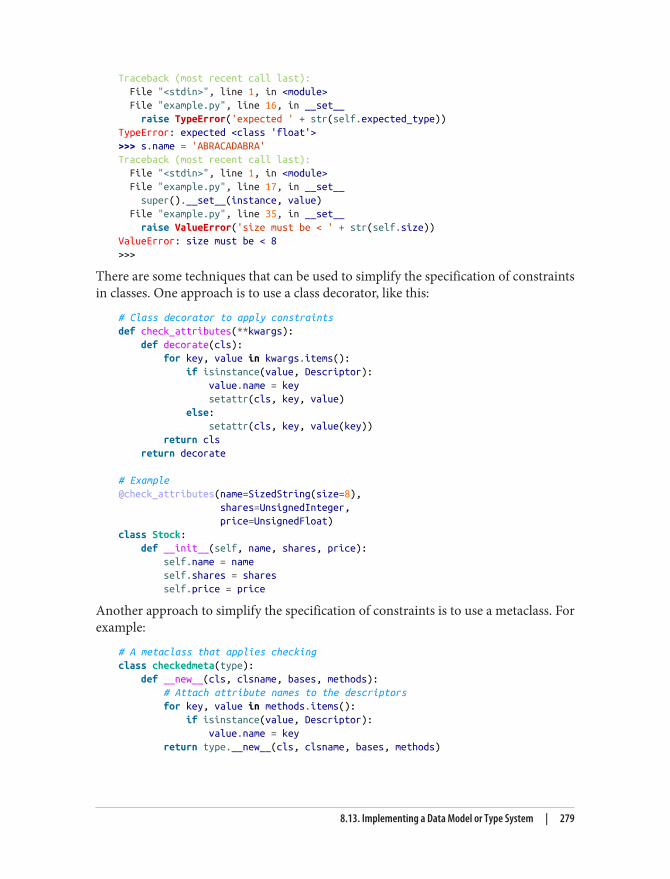
Traceback (most recent call last): File "<stdin>", line 1, in <module> File "example.py", line 16, in __set__ raise TypeError('expected ' + str(self.expected_type))TypeError: expected <class 'float'>>>> s.name = 'ABRACADABRA'Traceback (most recent call last): File "<stdin>", line 1, in <module> File "example.py", line 17, in __set__ super().__set__(instance, value) File "example.py", line 35, in __set__ raise ValueError('size must be < ' + str(self.size))ValueError: size must be < 8>>>
There are some techniques that can be used to simplify the specification of constraintsin classes. One approach is to use a class decorator, like this:
# Class decorator to apply constraintsdef check_attributes(**kwargs): def decorate(cls): for key, value in kwargs.items(): if isinstance(value, Descriptor): value.name = key setattr(cls, key, value) else: setattr(cls, key, value(key)) return cls return decorate
# Example@check_attributes(name=SizedString(size=8), shares=UnsignedInteger, price=UnsignedFloat)class Stock: def __init__(self, name, shares, price): self.name = name self.shares = shares self.price = price
Another approach to simplify the specification of constraints is to use a metaclass. Forexample:
# A metaclass that applies checkingclass checkedmeta(type): def __new__(cls, clsname, bases, methods): # Attach attribute names to the descriptors for key, value in methods.items(): if isinstance(value, Descriptor): value.name = key return type.__new__(cls, clsname, bases, methods)
8.13. Implementing a Data Model or Type System | 279
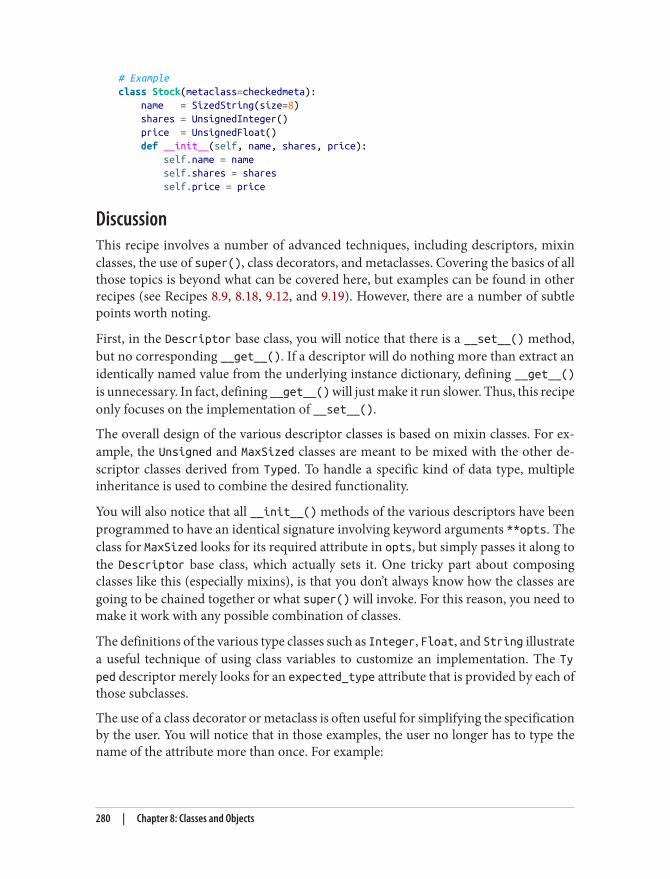
# Exampleclass Stock(metaclass=checkedmeta): name = SizedString(size=8) shares = UnsignedInteger() price = UnsignedFloat() def __init__(self, name, shares, price): self.name = name self.shares = shares self.price = price
DiscussionThis recipe involves a number of advanced techniques, including descriptors, mixinclasses, the use of super(), class decorators, and metaclasses. Covering the basics of allthose topics is beyond what can be covered here, but examples can be found in otherrecipes (see Recipes 8.9, 8.18, 9.12, and 9.19). However, there are a number of subtlepoints worth noting.
First, in the Descriptor base class, you will notice that there is a __set__() method,but no corresponding __get__(). If a descriptor will do nothing more than extract anidentically named value from the underlying instance dictionary, defining __get__()is unnecessary. In fact, defining __get__() will just make it run slower. Thus, this recipeonly focuses on the implementation of __set__().
The overall design of the various descriptor classes is based on mixin classes. For ex‐ample, the Unsigned and MaxSized classes are meant to be mixed with the other de‐scriptor classes derived from Typed. To handle a specific kind of data type, multipleinheritance is used to combine the desired functionality.
You will also notice that all __init__() methods of the various descriptors have beenprogrammed to have an identical signature involving keyword arguments **opts. Theclass for MaxSized looks for its required attribute in opts, but simply passes it along tothe Descriptor base class, which actually sets it. One tricky part about composingclasses like this (especially mixins), is that you don’t always know how the classes aregoing to be chained together or what super() will invoke. For this reason, you need tomake it work with any possible combination of classes.
The definitions of the various type classes such as Integer, Float, and String illustratea useful technique of using class variables to customize an implementation. The Typed descriptor merely looks for an expected_type attribute that is provided by each ofthose subclasses.
The use of a class decorator or metaclass is often useful for simplifying the specificationby the user. You will notice that in those examples, the user no longer has to type thename of the attribute more than once. For example:
280 | Chapter 8: Classes and Objects
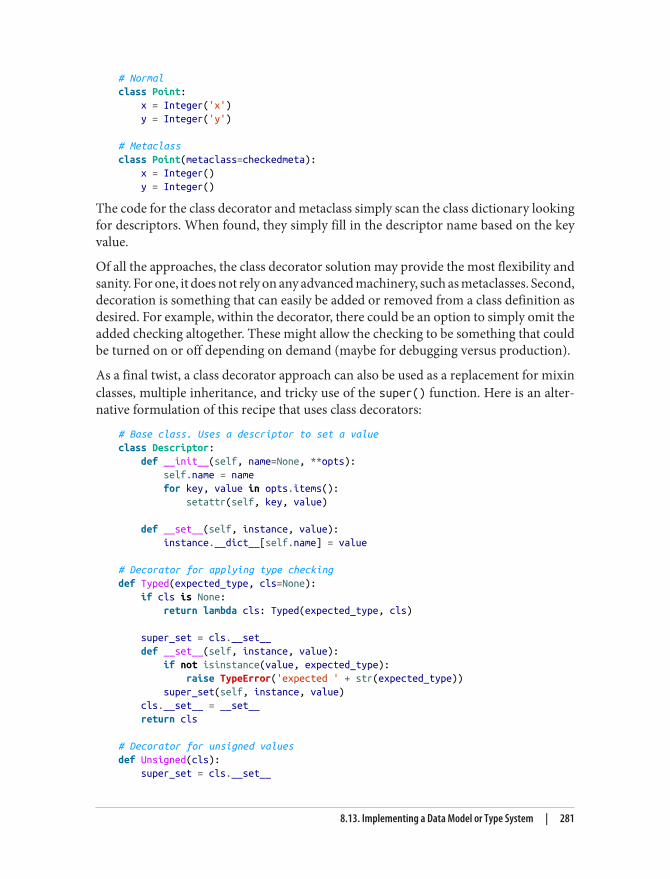
# Normalclass Point: x = Integer('x') y = Integer('y')
# Metaclassclass Point(metaclass=checkedmeta): x = Integer() y = Integer()
The code for the class decorator and metaclass simply scan the class dictionary lookingfor descriptors. When found, they simply fill in the descriptor name based on the keyvalue.
Of all the approaches, the class decorator solution may provide the most flexibility andsanity. For one, it does not rely on any advanced machinery, such as metaclasses. Second,decoration is something that can easily be added or removed from a class definition asdesired. For example, within the decorator, there could be an option to simply omit theadded checking altogether. These might allow the checking to be something that couldbe turned on or off depending on demand (maybe for debugging versus production).
As a final twist, a class decorator approach can also be used as a replacement for mixinclasses, multiple inheritance, and tricky use of the super() function. Here is an alter‐native formulation of this recipe that uses class decorators:
# Base class. Uses a descriptor to set a valueclass Descriptor: def __init__(self, name=None, **opts): self.name = name for key, value in opts.items(): setattr(self, key, value)
def __set__(self, instance, value): instance.__dict__[self.name] = value
# Decorator for applying type checkingdef Typed(expected_type, cls=None): if cls is None: return lambda cls: Typed(expected_type, cls)
super_set = cls.__set__ def __set__(self, instance, value): if not isinstance(value, expected_type): raise TypeError('expected ' + str(expected_type)) super_set(self, instance, value) cls.__set__ = __set__ return cls
# Decorator for unsigned valuesdef Unsigned(cls): super_set = cls.__set__
8.13. Implementing a Data Model or Type System | 281
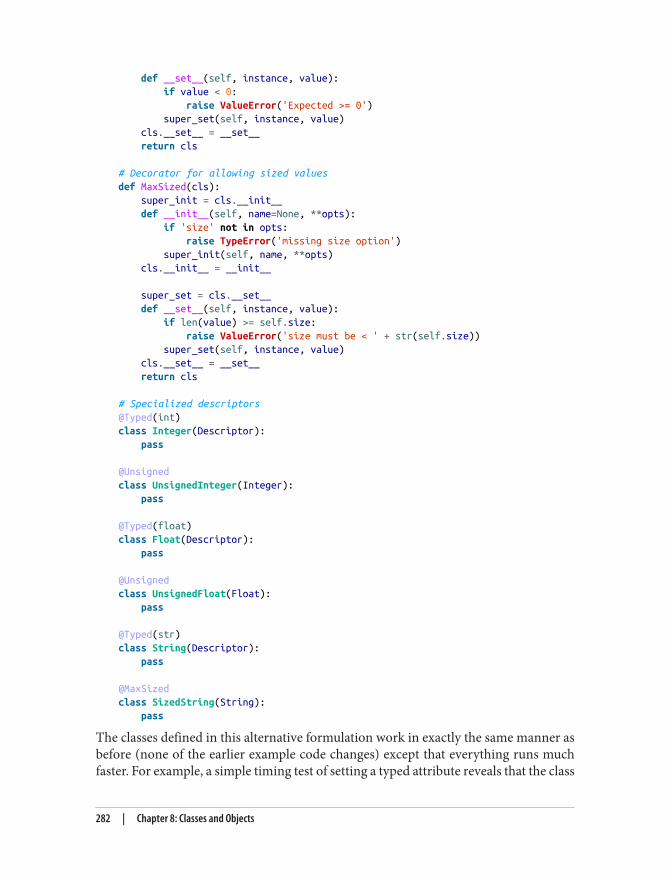
def __set__(self, instance, value): if value < 0: raise ValueError('Expected >= 0') super_set(self, instance, value) cls.__set__ = __set__ return cls
# Decorator for allowing sized valuesdef MaxSized(cls): super_init = cls.__init__ def __init__(self, name=None, **opts): if 'size' not in opts: raise TypeError('missing size option') super_init(self, name, **opts) cls.__init__ = __init__
super_set = cls.__set__ def __set__(self, instance, value): if len(value) >= self.size: raise ValueError('size must be < ' + str(self.size)) super_set(self, instance, value) cls.__set__ = __set__ return cls
# Specialized descriptors@Typed(int)class Integer(Descriptor): pass
@Unsignedclass UnsignedInteger(Integer): pass
@Typed(float)class Float(Descriptor): pass
@Unsignedclass UnsignedFloat(Float): pass
@Typed(str)class String(Descriptor): pass
@MaxSizedclass SizedString(String): pass
The classes defined in this alternative formulation work in exactly the same manner asbefore (none of the earlier example code changes) except that everything runs muchfaster. For example, a simple timing test of setting a typed attribute reveals that the class
282 | Chapter 8: Classes and Objects
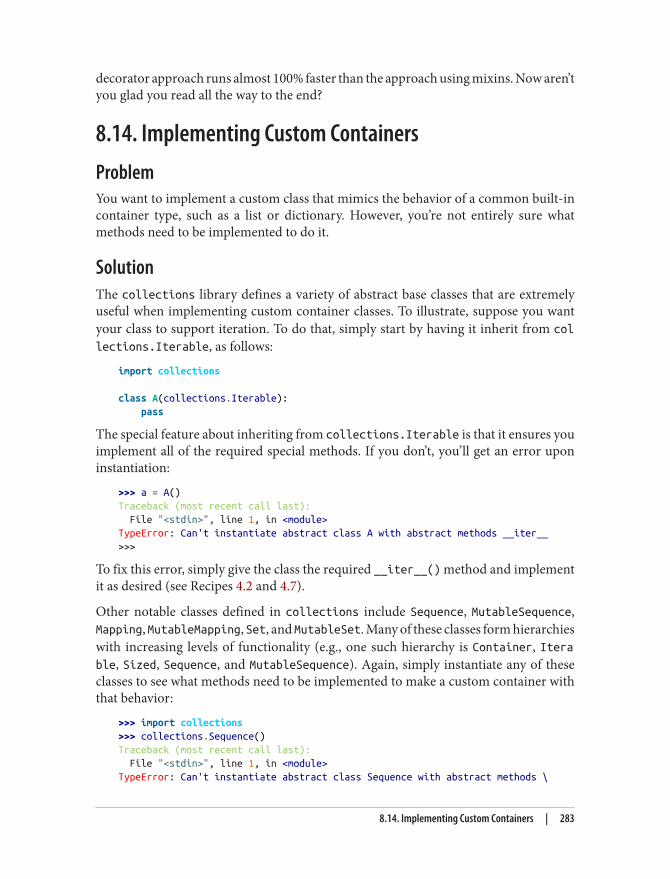
decorator approach runs almost 100% faster than the approach using mixins. Now aren’tyou glad you read all the way to the end?
8.14. Implementing Custom ContainersProblemYou want to implement a custom class that mimics the behavior of a common built-incontainer type, such as a list or dictionary. However, you’re not entirely sure whatmethods need to be implemented to do it.
SolutionThe collections library defines a variety of abstract base classes that are extremelyuseful when implementing custom container classes. To illustrate, suppose you wantyour class to support iteration. To do that, simply start by having it inherit from collections.Iterable, as follows:
import collections
class A(collections.Iterable): pass
The special feature about inheriting from collections.Iterable is that it ensures youimplement all of the required special methods. If you don’t, you’ll get an error uponinstantiation:
>>> a = A()Traceback (most recent call last): File "<stdin>", line 1, in <module>TypeError: Can't instantiate abstract class A with abstract methods __iter__>>>
To fix this error, simply give the class the required __iter__() method and implementit as desired (see Recipes 4.2 and 4.7).
Other notable classes defined in collections include Sequence, MutableSequence,Mapping, MutableMapping, Set, and MutableSet. Many of these classes form hierarchieswith increasing levels of functionality (e.g., one such hierarchy is Container, Iterable, Sized, Sequence, and MutableSequence). Again, simply instantiate any of theseclasses to see what methods need to be implemented to make a custom container withthat behavior:
>>> import collections>>> collections.Sequence()Traceback (most recent call last): File "<stdin>", line 1, in <module>TypeError: Can't instantiate abstract class Sequence with abstract methods \
8.14. Implementing Custom Containers | 283
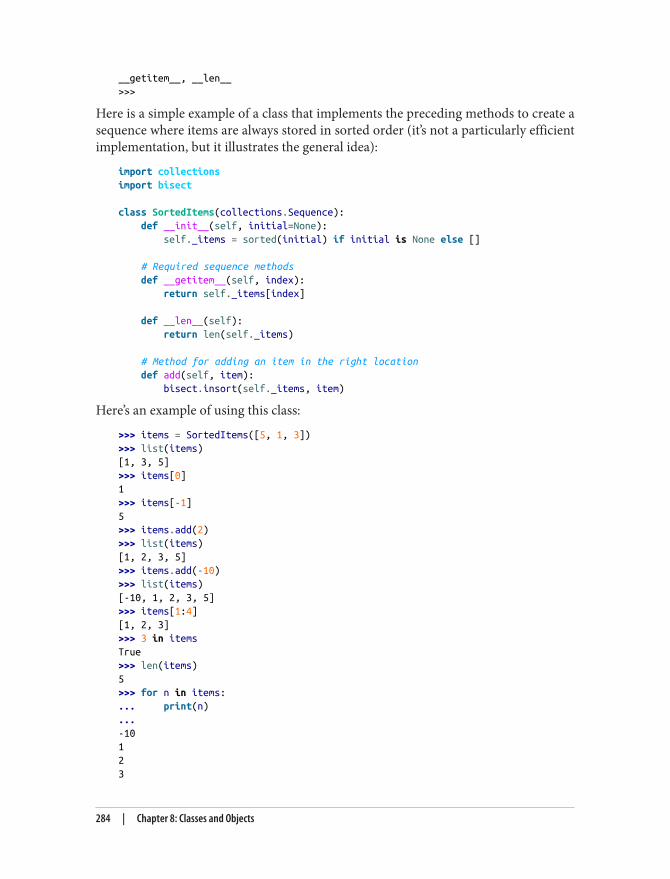
__getitem__, __len__>>>
Here is a simple example of a class that implements the preceding methods to create asequence where items are always stored in sorted order (it’s not a particularly efficientimplementation, but it illustrates the general idea):
import collectionsimport bisect
class SortedItems(collections.Sequence): def __init__(self, initial=None): self._items = sorted(initial) if initial is None else []
# Required sequence methods def __getitem__(self, index): return self._items[index]
def __len__(self): return len(self._items)
# Method for adding an item in the right location def add(self, item): bisect.insort(self._items, item)
Here’s an example of using this class:
>>> items = SortedItems([5, 1, 3])>>> list(items)[1, 3, 5]>>> items[0]1>>> items[-1]5>>> items.add(2)>>> list(items)[1, 2, 3, 5]>>> items.add(-10)>>> list(items)[-10, 1, 2, 3, 5]>>> items[1:4][1, 2, 3]>>> 3 in itemsTrue>>> len(items)5>>> for n in items:... print(n)...-10123
284 | Chapter 8: Classes and Objects
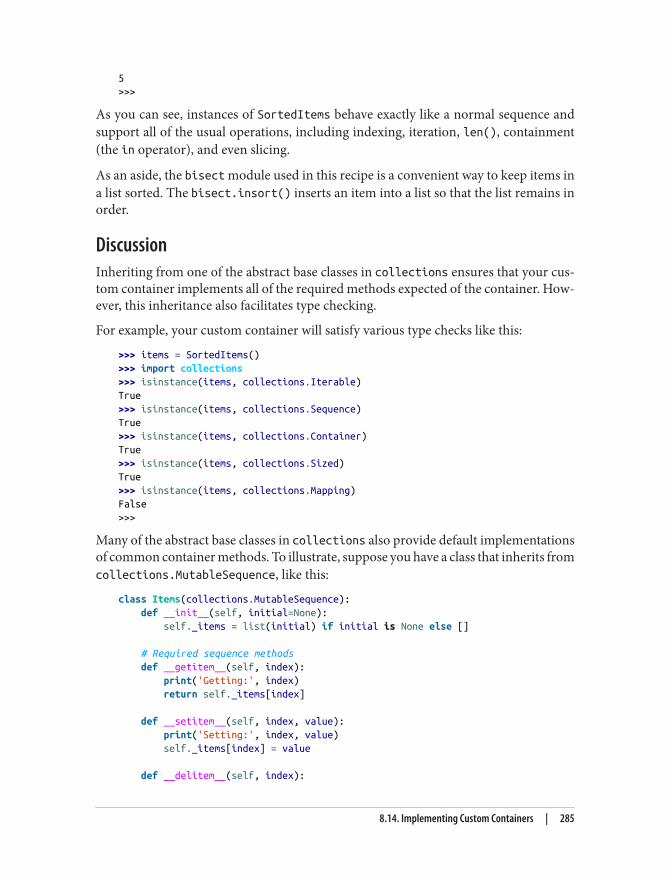
5>>>
As you can see, instances of SortedItems behave exactly like a normal sequence andsupport all of the usual operations, including indexing, iteration, len(), containment(the in operator), and even slicing.
As an aside, the bisect module used in this recipe is a convenient way to keep items ina list sorted. The bisect.insort() inserts an item into a list so that the list remains inorder.
DiscussionInheriting from one of the abstract base classes in collections ensures that your cus‐tom container implements all of the required methods expected of the container. How‐ever, this inheritance also facilitates type checking.
For example, your custom container will satisfy various type checks like this:
>>> items = SortedItems()>>> import collections>>> isinstance(items, collections.Iterable)True>>> isinstance(items, collections.Sequence)True>>> isinstance(items, collections.Container)True>>> isinstance(items, collections.Sized)True>>> isinstance(items, collections.Mapping)False>>>
Many of the abstract base classes in collections also provide default implementationsof common container methods. To illustrate, suppose you have a class that inherits fromcollections.MutableSequence, like this:
class Items(collections.MutableSequence): def __init__(self, initial=None): self._items = list(initial) if initial is None else []
# Required sequence methods def __getitem__(self, index): print('Getting:', index) return self._items[index]
def __setitem__(self, index, value): print('Setting:', index, value) self._items[index] = value
def __delitem__(self, index):
8.14. Implementing Custom Containers | 285
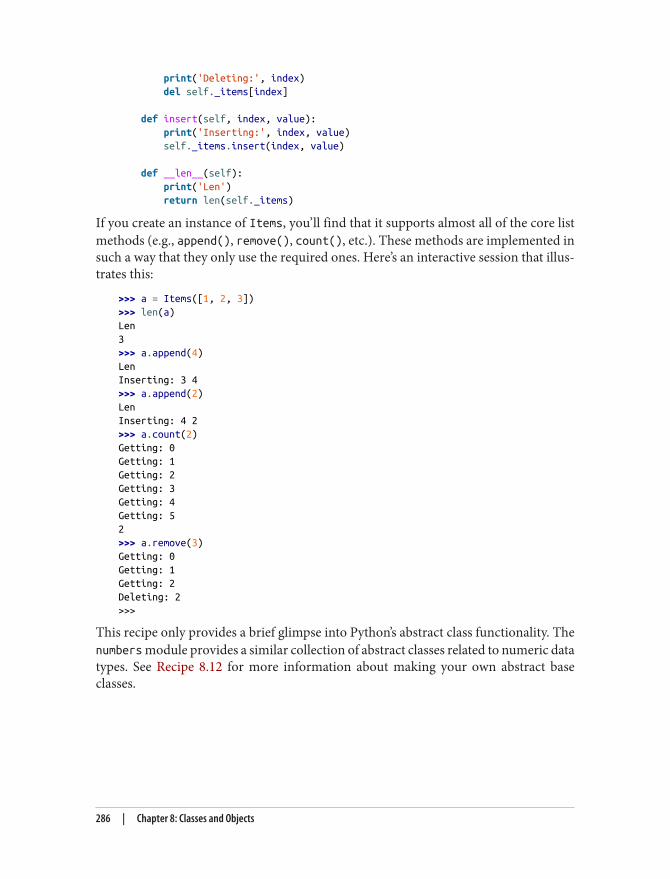
print('Deleting:', index) del self._items[index]
def insert(self, index, value): print('Inserting:', index, value) self._items.insert(index, value)
def __len__(self): print('Len') return len(self._items)
If you create an instance of Items, you’ll find that it supports almost all of the core listmethods (e.g., append(), remove(), count(), etc.). These methods are implemented insuch a way that they only use the required ones. Here’s an interactive session that illus‐trates this:
>>> a = Items([1, 2, 3])>>> len(a)Len3>>> a.append(4)LenInserting: 3 4>>> a.append(2)LenInserting: 4 2>>> a.count(2)Getting: 0Getting: 1Getting: 2Getting: 3Getting: 4Getting: 52>>> a.remove(3)Getting: 0Getting: 1Getting: 2Deleting: 2>>>
This recipe only provides a brief glimpse into Python’s abstract class functionality. Thenumbers module provides a similar collection of abstract classes related to numeric datatypes. See Recipe 8.12 for more information about making your own abstract baseclasses.
286 | Chapter 8: Classes and Objects
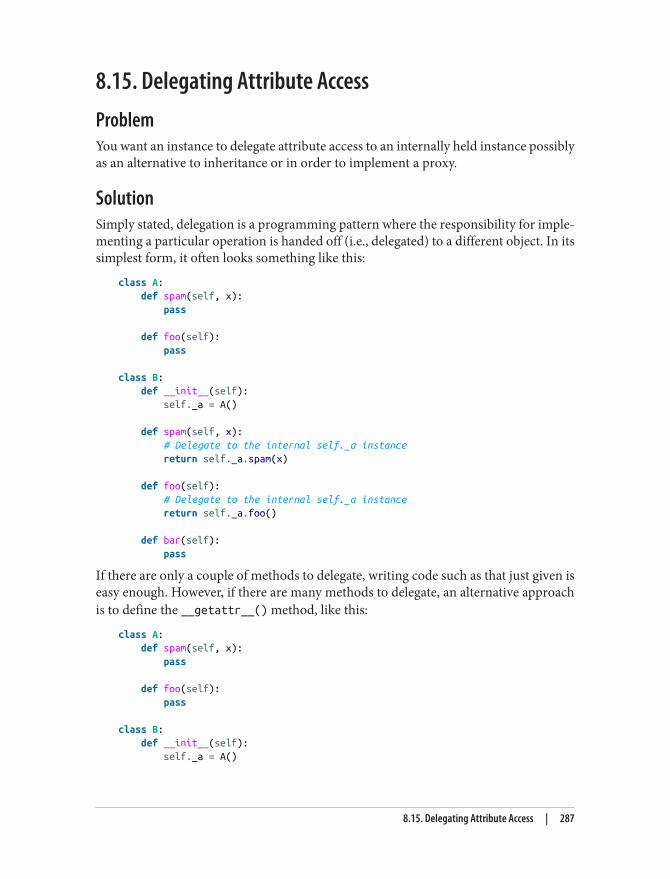
8.15. Delegating Attribute AccessProblemYou want an instance to delegate attribute access to an internally held instance possiblyas an alternative to inheritance or in order to implement a proxy.
SolutionSimply stated, delegation is a programming pattern where the responsibility for imple‐menting a particular operation is handed off (i.e., delegated) to a different object. In itssimplest form, it often looks something like this:
class A: def spam(self, x): pass
def foo(self): pass
class B: def __init__(self): self._a = A()
def spam(self, x): # Delegate to the internal self._a instance return self._a.spam(x)
def foo(self): # Delegate to the internal self._a instance return self._a.foo()
def bar(self): pass
If there are only a couple of methods to delegate, writing code such as that just given iseasy enough. However, if there are many methods to delegate, an alternative approachis to define the __getattr__() method, like this:
class A: def spam(self, x): pass
def foo(self): pass
class B: def __init__(self): self._a = A()
8.15. Delegating Attribute Access | 287
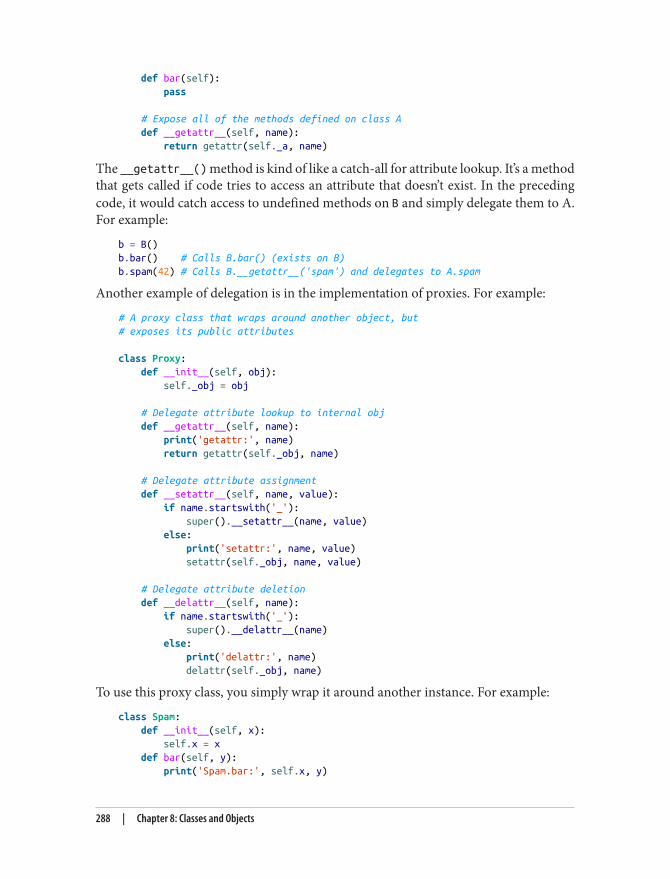
def bar(self): pass
# Expose all of the methods defined on class A def __getattr__(self, name): return getattr(self._a, name)
The __getattr__() method is kind of like a catch-all for attribute lookup. It’s a methodthat gets called if code tries to access an attribute that doesn’t exist. In the precedingcode, it would catch access to undefined methods on B and simply delegate them to A.For example:
b = B()b.bar() # Calls B.bar() (exists on B)b.spam(42) # Calls B.__getattr__('spam') and delegates to A.spam
Another example of delegation is in the implementation of proxies. For example:
# A proxy class that wraps around another object, but# exposes its public attributes
class Proxy: def __init__(self, obj): self._obj = obj
# Delegate attribute lookup to internal obj def __getattr__(self, name): print('getattr:', name) return getattr(self._obj, name)
# Delegate attribute assignment def __setattr__(self, name, value): if name.startswith('_'): super().__setattr__(name, value) else: print('setattr:', name, value) setattr(self._obj, name, value)
# Delegate attribute deletion def __delattr__(self, name): if name.startswith('_'): super().__delattr__(name) else: print('delattr:', name) delattr(self._obj, name)
To use this proxy class, you simply wrap it around another instance. For example:
class Spam: def __init__(self, x): self.x = x def bar(self, y): print('Spam.bar:', self.x, y)
288 | Chapter 8: Classes and Objects
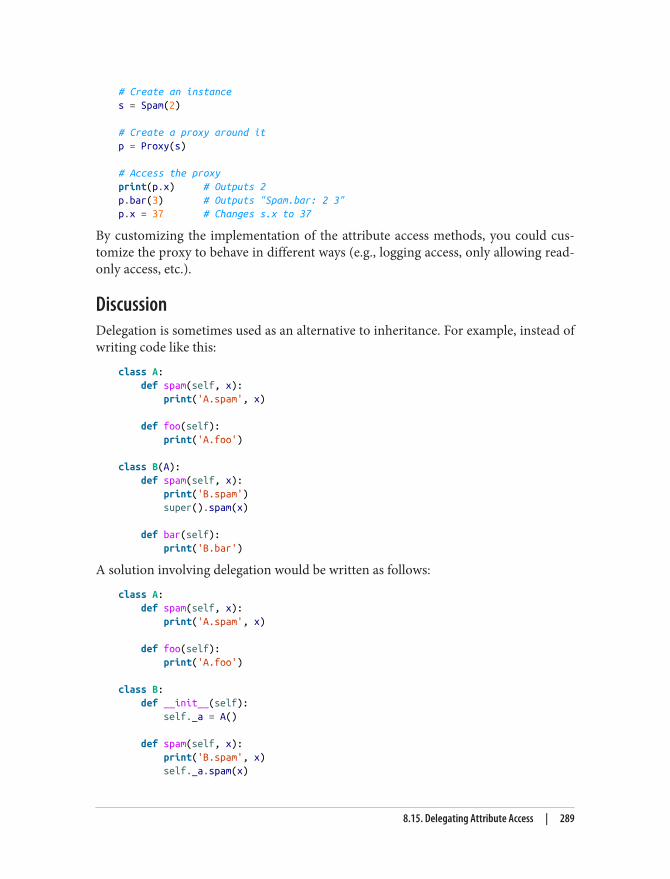
# Create an instances = Spam(2)
# Create a proxy around itp = Proxy(s)
# Access the proxyprint(p.x) # Outputs 2p.bar(3) # Outputs "Spam.bar: 2 3"p.x = 37 # Changes s.x to 37
By customizing the implementation of the attribute access methods, you could cus‐tomize the proxy to behave in different ways (e.g., logging access, only allowing read-only access, etc.).
DiscussionDelegation is sometimes used as an alternative to inheritance. For example, instead ofwriting code like this:
class A: def spam(self, x): print('A.spam', x)
def foo(self): print('A.foo')
class B(A): def spam(self, x): print('B.spam') super().spam(x)
def bar(self): print('B.bar')
A solution involving delegation would be written as follows:
class A: def spam(self, x): print('A.spam', x)
def foo(self): print('A.foo')
class B: def __init__(self): self._a = A()
def spam(self, x): print('B.spam', x) self._a.spam(x)
8.15. Delegating Attribute Access | 289
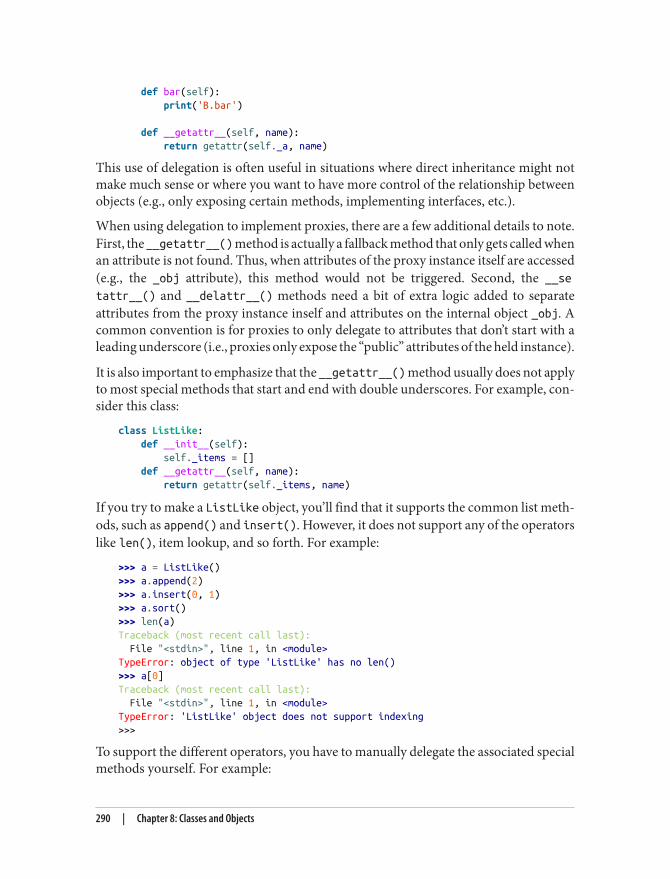
def bar(self): print('B.bar')
def __getattr__(self, name): return getattr(self._a, name)
This use of delegation is often useful in situations where direct inheritance might notmake much sense or where you want to have more control of the relationship betweenobjects (e.g., only exposing certain methods, implementing interfaces, etc.).
When using delegation to implement proxies, there are a few additional details to note.First, the __getattr__() method is actually a fallback method that only gets called whenan attribute is not found. Thus, when attributes of the proxy instance itself are accessed(e.g., the _obj attribute), this method would not be triggered. Second, the __setattr__() and __delattr__() methods need a bit of extra logic added to separateattributes from the proxy instance inself and attributes on the internal object _obj. Acommon convention is for proxies to only delegate to attributes that don’t start with aleading underscore (i.e., proxies only expose the “public” attributes of the held instance).
It is also important to emphasize that the __getattr__() method usually does not applyto most special methods that start and end with double underscores. For example, con‐sider this class:
class ListLike: def __init__(self): self._items = [] def __getattr__(self, name): return getattr(self._items, name)
If you try to make a ListLike object, you’ll find that it supports the common list meth‐ods, such as append() and insert(). However, it does not support any of the operatorslike len(), item lookup, and so forth. For example:
>>> a = ListLike()>>> a.append(2)>>> a.insert(0, 1)>>> a.sort()>>> len(a)Traceback (most recent call last): File "<stdin>", line 1, in <module>TypeError: object of type 'ListLike' has no len()>>> a[0]Traceback (most recent call last): File "<stdin>", line 1, in <module>TypeError: 'ListLike' object does not support indexing>>>
To support the different operators, you have to manually delegate the associated specialmethods yourself. For example:
290 | Chapter 8: Classes and Objects
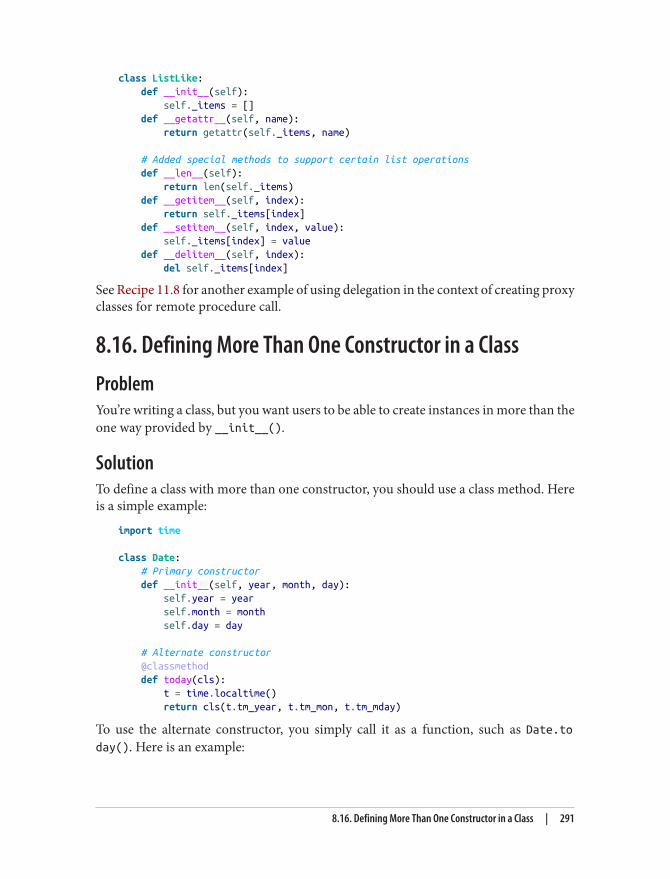
class ListLike: def __init__(self): self._items = [] def __getattr__(self, name): return getattr(self._items, name)
# Added special methods to support certain list operations def __len__(self): return len(self._items) def __getitem__(self, index): return self._items[index] def __setitem__(self, index, value): self._items[index] = value def __delitem__(self, index): del self._items[index]
See Recipe 11.8 for another example of using delegation in the context of creating proxyclasses for remote procedure call.
8.16. Defining More Than One Constructor in a ClassProblemYou’re writing a class, but you want users to be able to create instances in more than theone way provided by __init__().
SolutionTo define a class with more than one constructor, you should use a class method. Hereis a simple example:
import time
class Date: # Primary constructor def __init__(self, year, month, day): self.year = year self.month = month self.day = day
# Alternate constructor @classmethod def today(cls): t = time.localtime() return cls(t.tm_year, t.tm_mon, t.tm_mday)
To use the alternate constructor, you simply call it as a function, such as Date.today(). Here is an example:
8.16. Defining More Than One Constructor in a Class | 291
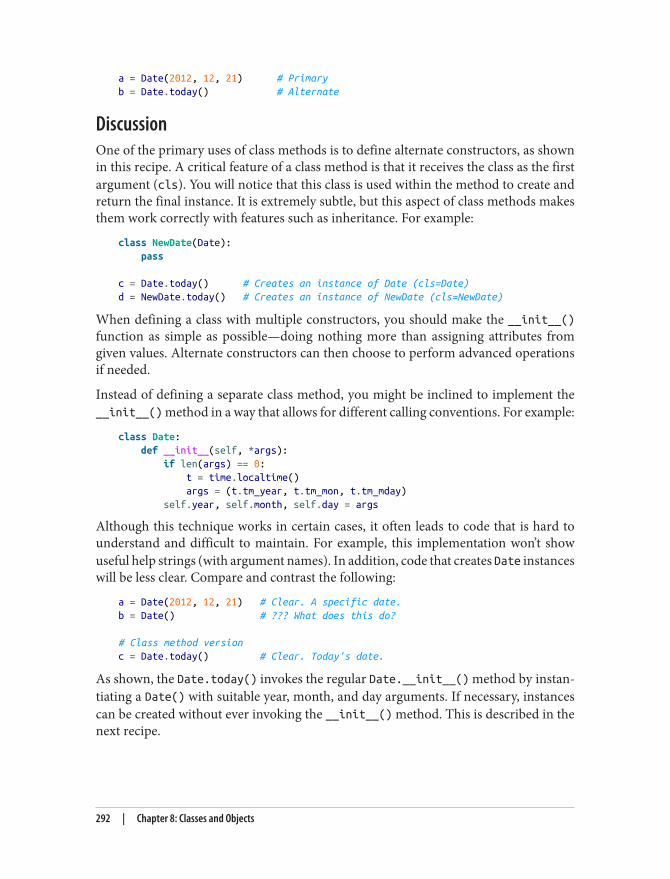
a = Date(2012, 12, 21) # Primaryb = Date.today() # Alternate
DiscussionOne of the primary uses of class methods is to define alternate constructors, as shownin this recipe. A critical feature of a class method is that it receives the class as the firstargument (cls). You will notice that this class is used within the method to create andreturn the final instance. It is extremely subtle, but this aspect of class methods makesthem work correctly with features such as inheritance. For example:
class NewDate(Date): pass
c = Date.today() # Creates an instance of Date (cls=Date)d = NewDate.today() # Creates an instance of NewDate (cls=NewDate)
When defining a class with multiple constructors, you should make the __init__()function as simple as possible—doing nothing more than assigning attributes fromgiven values. Alternate constructors can then choose to perform advanced operationsif needed.
Instead of defining a separate class method, you might be inclined to implement the__init__() method in a way that allows for different calling conventions. For example:
class Date: def __init__(self, *args): if len(args) == 0: t = time.localtime() args = (t.tm_year, t.tm_mon, t.tm_mday) self.year, self.month, self.day = args
Although this technique works in certain cases, it often leads to code that is hard tounderstand and difficult to maintain. For example, this implementation won’t showuseful help strings (with argument names). In addition, code that creates Date instanceswill be less clear. Compare and contrast the following:
a = Date(2012, 12, 21) # Clear. A specific date.b = Date() # ??? What does this do?
# Class method versionc = Date.today() # Clear. Today's date.
As shown, the Date.today() invokes the regular Date.__init__() method by instan‐tiating a Date() with suitable year, month, and day arguments. If necessary, instancescan be created without ever invoking the __init__() method. This is described in thenext recipe.
292 | Chapter 8: Classes and Objects
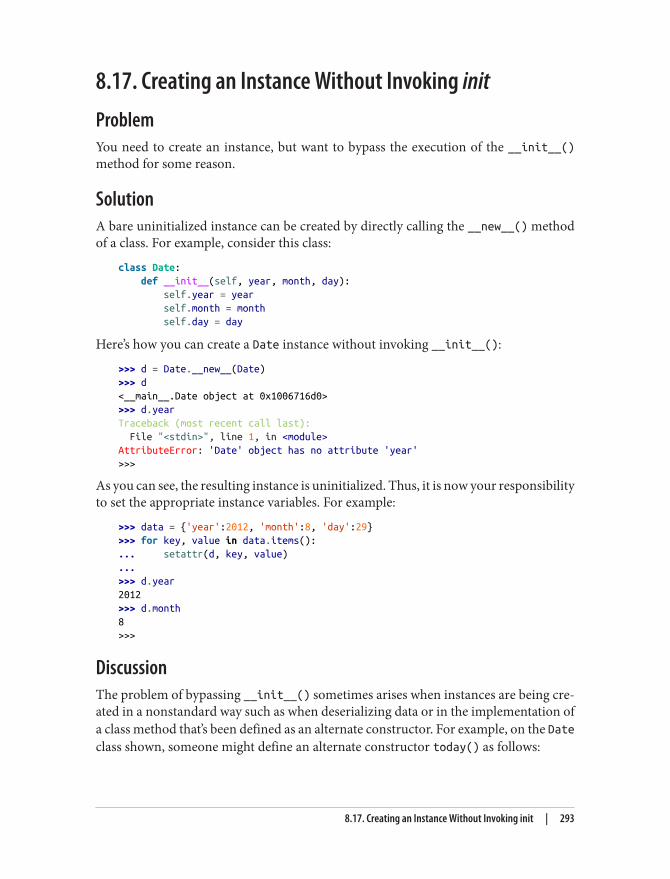
8.17. Creating an Instance Without Invoking initProblemYou need to create an instance, but want to bypass the execution of the __init__()method for some reason.
SolutionA bare uninitialized instance can be created by directly calling the __new__() methodof a class. For example, consider this class:
class Date: def __init__(self, year, month, day): self.year = year self.month = month self.day = day
Here’s how you can create a Date instance without invoking __init__():
>>> d = Date.__new__(Date)>>> d<__main__.Date object at 0x1006716d0>>>> d.yearTraceback (most recent call last): File "<stdin>", line 1, in <module>AttributeError: 'Date' object has no attribute 'year'>>>
As you can see, the resulting instance is uninitialized. Thus, it is now your responsibilityto set the appropriate instance variables. For example:
>>> data = {'year':2012, 'month':8, 'day':29}>>> for key, value in data.items():... setattr(d, key, value)...>>> d.year2012>>> d.month8>>>
DiscussionThe problem of bypassing __init__() sometimes arises when instances are being cre‐ated in a nonstandard way such as when deserializing data or in the implementation ofa class method that’s been defined as an alternate constructor. For example, on the Dateclass shown, someone might define an alternate constructor today() as follows:
8.17. Creating an Instance Without Invoking init | 293
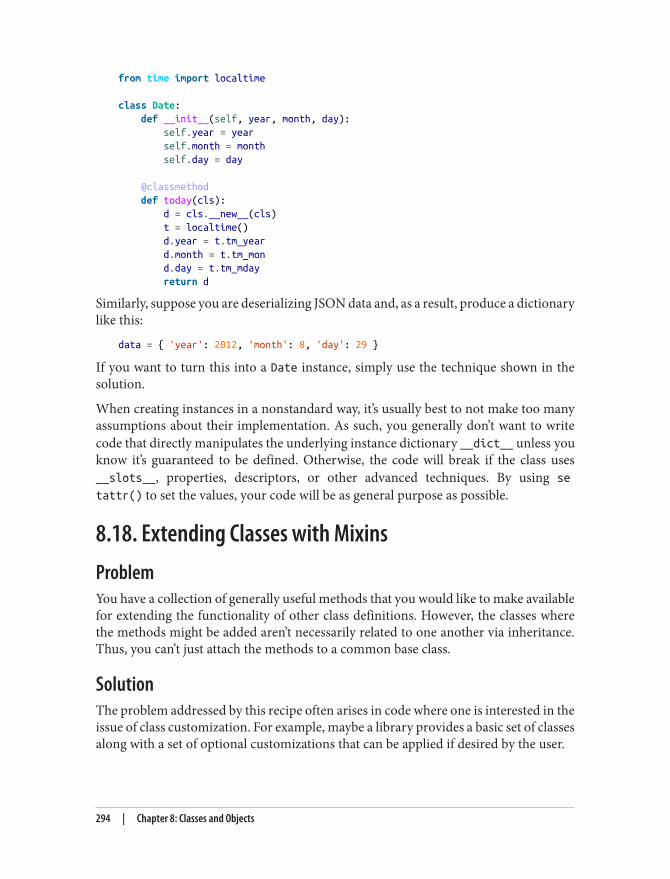
from time import localtime
class Date: def __init__(self, year, month, day): self.year = year self.month = month self.day = day
@classmethod def today(cls): d = cls.__new__(cls) t = localtime() d.year = t.tm_year d.month = t.tm_mon d.day = t.tm_mday return d
Similarly, suppose you are deserializing JSON data and, as a result, produce a dictionarylike this:
data = { 'year': 2012, 'month': 8, 'day': 29 }
If you want to turn this into a Date instance, simply use the technique shown in thesolution.
When creating instances in a nonstandard way, it’s usually best to not make too manyassumptions about their implementation. As such, you generally don’t want to writecode that directly manipulates the underlying instance dictionary __dict__ unless youknow it’s guaranteed to be defined. Otherwise, the code will break if the class uses__slots__, properties, descriptors, or other advanced techniques. By using setattr() to set the values, your code will be as general purpose as possible.
8.18. Extending Classes with MixinsProblemYou have a collection of generally useful methods that you would like to make availablefor extending the functionality of other class definitions. However, the classes wherethe methods might be added aren’t necessarily related to one another via inheritance.Thus, you can’t just attach the methods to a common base class.
SolutionThe problem addressed by this recipe often arises in code where one is interested in theissue of class customization. For example, maybe a library provides a basic set of classesalong with a set of optional customizations that can be applied if desired by the user.
294 | Chapter 8: Classes and Objects
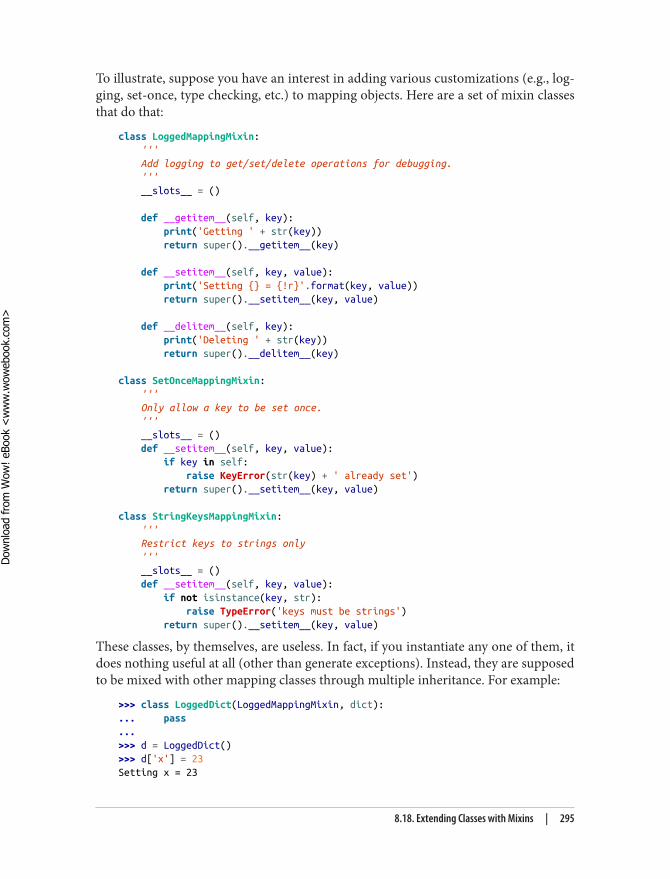
To illustrate, suppose you have an interest in adding various customizations (e.g., log‐ging, set-once, type checking, etc.) to mapping objects. Here are a set of mixin classesthat do that:
class LoggedMappingMixin: ''' Add logging to get/set/delete operations for debugging. ''' __slots__ = ()
def __getitem__(self, key): print('Getting ' + str(key)) return super().__getitem__(key)
def __setitem__(self, key, value): print('Setting {} = {!r}'.format(key, value)) return super().__setitem__(key, value)
def __delitem__(self, key): print('Deleting ' + str(key)) return super().__delitem__(key)
class SetOnceMappingMixin: ''' Only allow a key to be set once. ''' __slots__ = () def __setitem__(self, key, value): if key in self: raise KeyError(str(key) + ' already set') return super().__setitem__(key, value)
class StringKeysMappingMixin: ''' Restrict keys to strings only ''' __slots__ = () def __setitem__(self, key, value): if not isinstance(key, str): raise TypeError('keys must be strings') return super().__setitem__(key, value)
These classes, by themselves, are useless. In fact, if you instantiate any one of them, itdoes nothing useful at all (other than generate exceptions). Instead, they are supposedto be mixed with other mapping classes through multiple inheritance. For example:
>>> class LoggedDict(LoggedMappingMixin, dict):... pass...>>> d = LoggedDict()>>> d['x'] = 23Setting x = 23
8.18. Extending Classes with Mixins | 295
Dow
nlo
ad fro
m W
ow
! eBook
<w
ww
.wow
ebook.
com
>
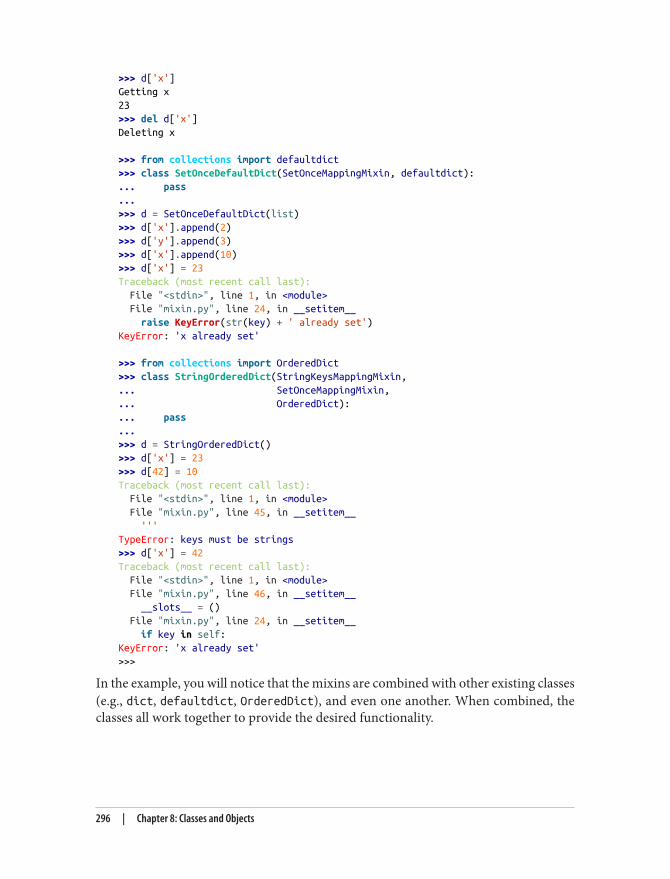
>>> d['x']Getting x23>>> del d['x']Deleting x
>>> from collections import defaultdict>>> class SetOnceDefaultDict(SetOnceMappingMixin, defaultdict):... pass...>>> d = SetOnceDefaultDict(list)>>> d['x'].append(2)>>> d['y'].append(3)>>> d['x'].append(10)>>> d['x'] = 23Traceback (most recent call last): File "<stdin>", line 1, in <module> File "mixin.py", line 24, in __setitem__ raise KeyError(str(key) + ' already set')KeyError: 'x already set'
>>> from collections import OrderedDict>>> class StringOrderedDict(StringKeysMappingMixin,... SetOnceMappingMixin,... OrderedDict):... pass...>>> d = StringOrderedDict()>>> d['x'] = 23>>> d[42] = 10Traceback (most recent call last): File "<stdin>", line 1, in <module> File "mixin.py", line 45, in __setitem__ '''TypeError: keys must be strings>>> d['x'] = 42Traceback (most recent call last): File "<stdin>", line 1, in <module> File "mixin.py", line 46, in __setitem__ __slots__ = () File "mixin.py", line 24, in __setitem__ if key in self:KeyError: 'x already set'>>>
In the example, you will notice that the mixins are combined with other existing classes(e.g., dict, defaultdict, OrderedDict), and even one another. When combined, theclasses all work together to provide the desired functionality.
296 | Chapter 8: Classes and Objects
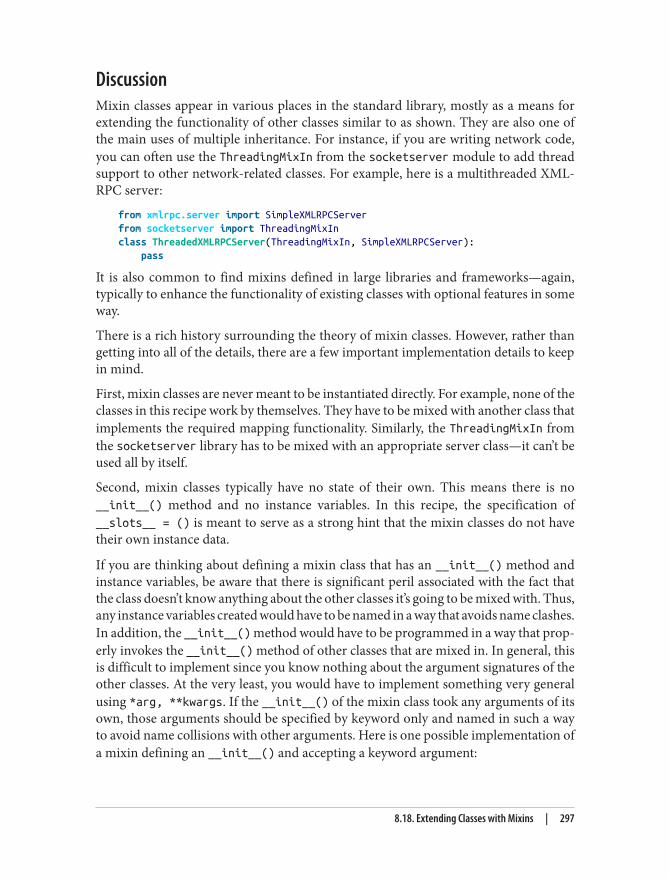
DiscussionMixin classes appear in various places in the standard library, mostly as a means forextending the functionality of other classes similar to as shown. They are also one ofthe main uses of multiple inheritance. For instance, if you are writing network code,you can often use the ThreadingMixIn from the socketserver module to add threadsupport to other network-related classes. For example, here is a multithreaded XML-RPC server:
from xmlrpc.server import SimpleXMLRPCServerfrom socketserver import ThreadingMixInclass ThreadedXMLRPCServer(ThreadingMixIn, SimpleXMLRPCServer): pass
It is also common to find mixins defined in large libraries and frameworks—again,typically to enhance the functionality of existing classes with optional features in someway.
There is a rich history surrounding the theory of mixin classes. However, rather thangetting into all of the details, there are a few important implementation details to keepin mind.
First, mixin classes are never meant to be instantiated directly. For example, none of theclasses in this recipe work by themselves. They have to be mixed with another class thatimplements the required mapping functionality. Similarly, the ThreadingMixIn fromthe socketserver library has to be mixed with an appropriate server class—it can’t beused all by itself.
Second, mixin classes typically have no state of their own. This means there is no__init__() method and no instance variables. In this recipe, the specification of__slots__ = () is meant to serve as a strong hint that the mixin classes do not havetheir own instance data.
If you are thinking about defining a mixin class that has an __init__() method andinstance variables, be aware that there is significant peril associated with the fact thatthe class doesn’t know anything about the other classes it’s going to be mixed with. Thus,any instance variables created would have to be named in a way that avoids name clashes.In addition, the __init__() method would have to be programmed in a way that prop‐erly invokes the __init__() method of other classes that are mixed in. In general, thisis difficult to implement since you know nothing about the argument signatures of theother classes. At the very least, you would have to implement something very generalusing *arg, **kwargs. If the __init__() of the mixin class took any arguments of itsown, those arguments should be specified by keyword only and named in such a wayto avoid name collisions with other arguments. Here is one possible implementation ofa mixin defining an __init__() and accepting a keyword argument:
8.18. Extending Classes with Mixins | 297
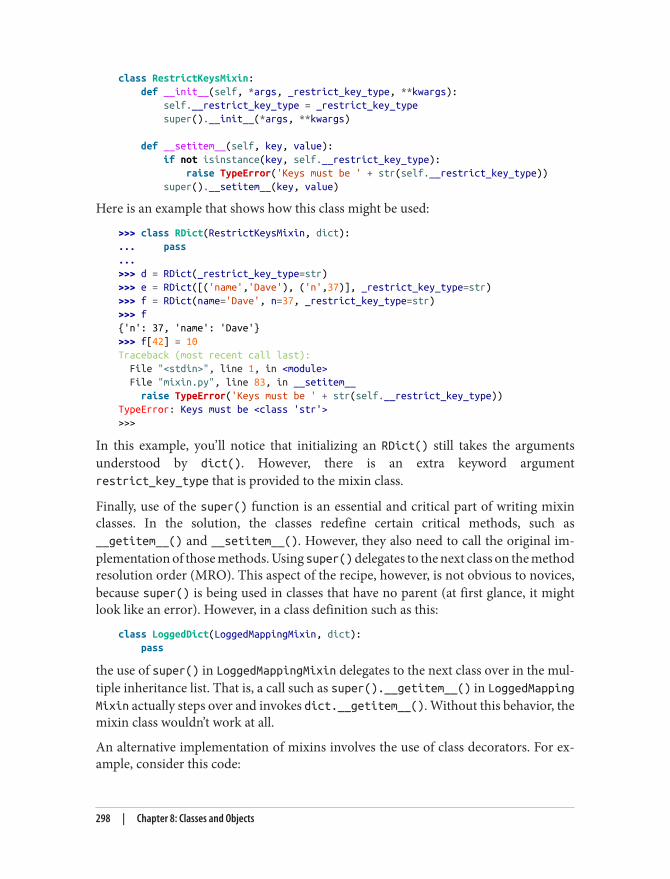
class RestrictKeysMixin: def __init__(self, *args, _restrict_key_type, **kwargs): self.__restrict_key_type = _restrict_key_type super().__init__(*args, **kwargs)
def __setitem__(self, key, value): if not isinstance(key, self.__restrict_key_type): raise TypeError('Keys must be ' + str(self.__restrict_key_type)) super().__setitem__(key, value)
Here is an example that shows how this class might be used:
>>> class RDict(RestrictKeysMixin, dict):... pass...>>> d = RDict(_restrict_key_type=str)>>> e = RDict([('name','Dave'), ('n',37)], _restrict_key_type=str)>>> f = RDict(name='Dave', n=37, _restrict_key_type=str)>>> f{'n': 37, 'name': 'Dave'}>>> f[42] = 10Traceback (most recent call last): File "<stdin>", line 1, in <module> File "mixin.py", line 83, in __setitem__ raise TypeError('Keys must be ' + str(self.__restrict_key_type))TypeError: Keys must be <class 'str'>>>>
In this example, you’ll notice that initializing an RDict() still takes the argumentsunderstood by dict(). However, there is an extra keyword argumentrestrict_key_type that is provided to the mixin class.
Finally, use of the super() function is an essential and critical part of writing mixinclasses. In the solution, the classes redefine certain critical methods, such as__getitem__() and __setitem__(). However, they also need to call the original im‐plementation of those methods. Using super() delegates to the next class on the methodresolution order (MRO). This aspect of the recipe, however, is not obvious to novices,because super() is being used in classes that have no parent (at first glance, it mightlook like an error). However, in a class definition such as this:
class LoggedDict(LoggedMappingMixin, dict): pass
the use of super() in LoggedMappingMixin delegates to the next class over in the mul‐tiple inheritance list. That is, a call such as super().__getitem__() in LoggedMappingMixin actually steps over and invokes dict.__getitem__(). Without this behavior, themixin class wouldn’t work at all.
An alternative implementation of mixins involves the use of class decorators. For ex‐ample, consider this code:
298 | Chapter 8: Classes and Objects
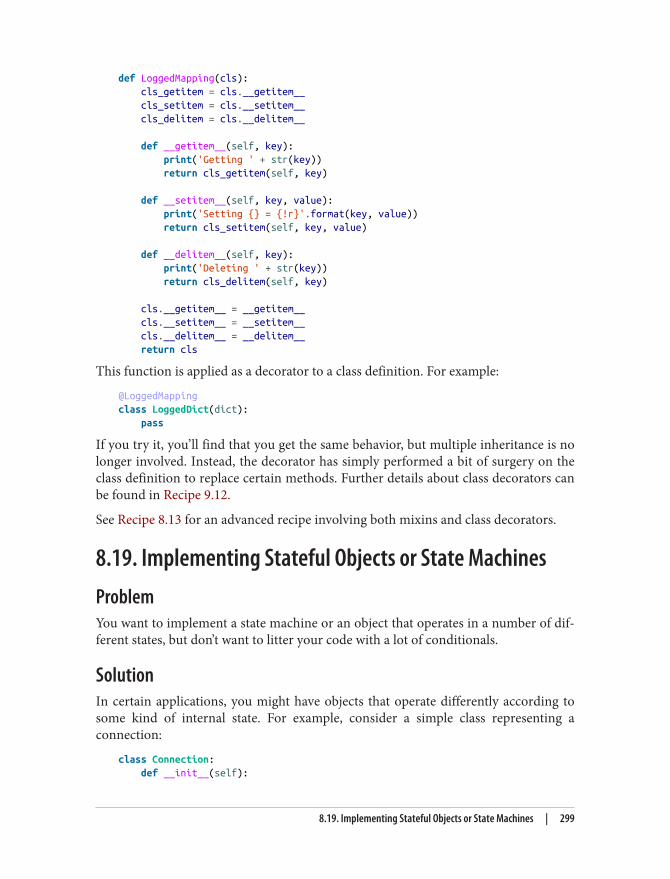
def LoggedMapping(cls): cls_getitem = cls.__getitem__ cls_setitem = cls.__setitem__ cls_delitem = cls.__delitem__
def __getitem__(self, key): print('Getting ' + str(key)) return cls_getitem(self, key)
def __setitem__(self, key, value): print('Setting {} = {!r}'.format(key, value)) return cls_setitem(self, key, value)
def __delitem__(self, key): print('Deleting ' + str(key)) return cls_delitem(self, key)
cls.__getitem__ = __getitem__ cls.__setitem__ = __setitem__ cls.__delitem__ = __delitem__ return cls
This function is applied as a decorator to a class definition. For example:
@LoggedMappingclass LoggedDict(dict): pass
If you try it, you’ll find that you get the same behavior, but multiple inheritance is nolonger involved. Instead, the decorator has simply performed a bit of surgery on theclass definition to replace certain methods. Further details about class decorators canbe found in Recipe 9.12.
See Recipe 8.13 for an advanced recipe involving both mixins and class decorators.
8.19. Implementing Stateful Objects or State MachinesProblemYou want to implement a state machine or an object that operates in a number of dif‐ferent states, but don’t want to litter your code with a lot of conditionals.
SolutionIn certain applications, you might have objects that operate differently according tosome kind of internal state. For example, consider a simple class representing aconnection:
class Connection: def __init__(self):
8.19. Implementing Stateful Objects or State Machines | 299
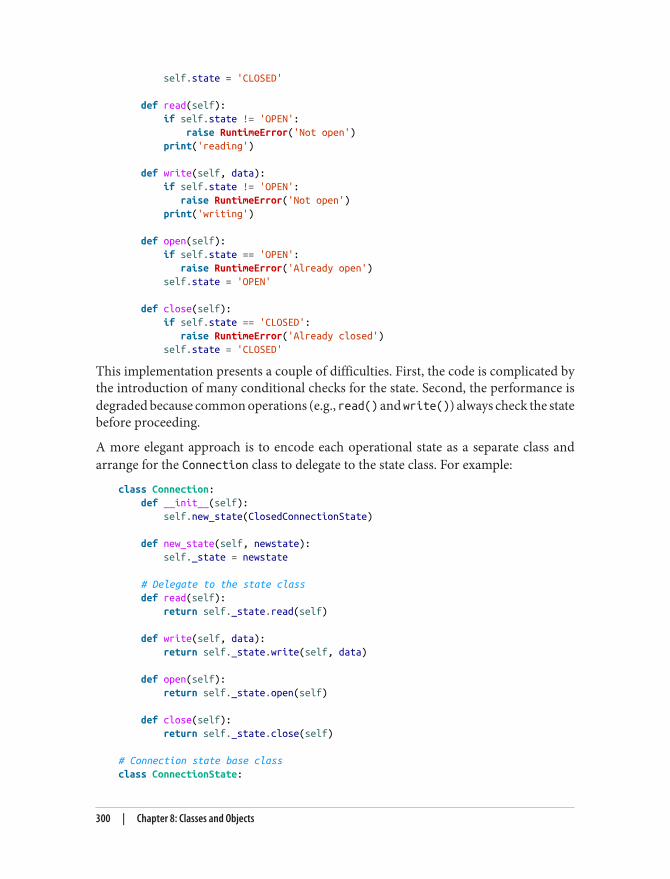
self.state = 'CLOSED'
def read(self): if self.state != 'OPEN': raise RuntimeError('Not open') print('reading')
def write(self, data): if self.state != 'OPEN': raise RuntimeError('Not open') print('writing')
def open(self): if self.state == 'OPEN': raise RuntimeError('Already open') self.state = 'OPEN'
def close(self): if self.state == 'CLOSED': raise RuntimeError('Already closed') self.state = 'CLOSED'
This implementation presents a couple of difficulties. First, the code is complicated bythe introduction of many conditional checks for the state. Second, the performance isdegraded because common operations (e.g., read() and write()) always check the statebefore proceeding.
A more elegant approach is to encode each operational state as a separate class andarrange for the Connection class to delegate to the state class. For example:
class Connection: def __init__(self): self.new_state(ClosedConnectionState)
def new_state(self, newstate): self._state = newstate
# Delegate to the state class def read(self): return self._state.read(self)
def write(self, data): return self._state.write(self, data)
def open(self): return self._state.open(self)
def close(self): return self._state.close(self)
# Connection state base classclass ConnectionState:
300 | Chapter 8: Classes and Objects
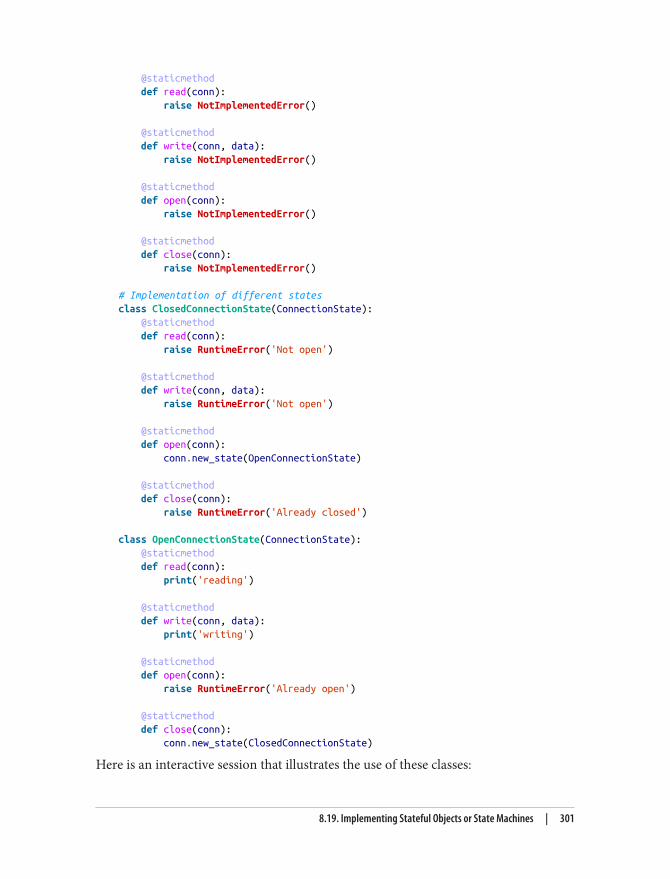
@staticmethod def read(conn): raise NotImplementedError()
@staticmethod def write(conn, data): raise NotImplementedError()
@staticmethod def open(conn): raise NotImplementedError()
@staticmethod def close(conn): raise NotImplementedError()
# Implementation of different statesclass ClosedConnectionState(ConnectionState): @staticmethod def read(conn): raise RuntimeError('Not open')
@staticmethod def write(conn, data): raise RuntimeError('Not open')
@staticmethod def open(conn): conn.new_state(OpenConnectionState)
@staticmethod def close(conn): raise RuntimeError('Already closed')
class OpenConnectionState(ConnectionState): @staticmethod def read(conn): print('reading')
@staticmethod def write(conn, data): print('writing')
@staticmethod def open(conn): raise RuntimeError('Already open')
@staticmethod def close(conn): conn.new_state(ClosedConnectionState)
Here is an interactive session that illustrates the use of these classes:
8.19. Implementing Stateful Objects or State Machines | 301
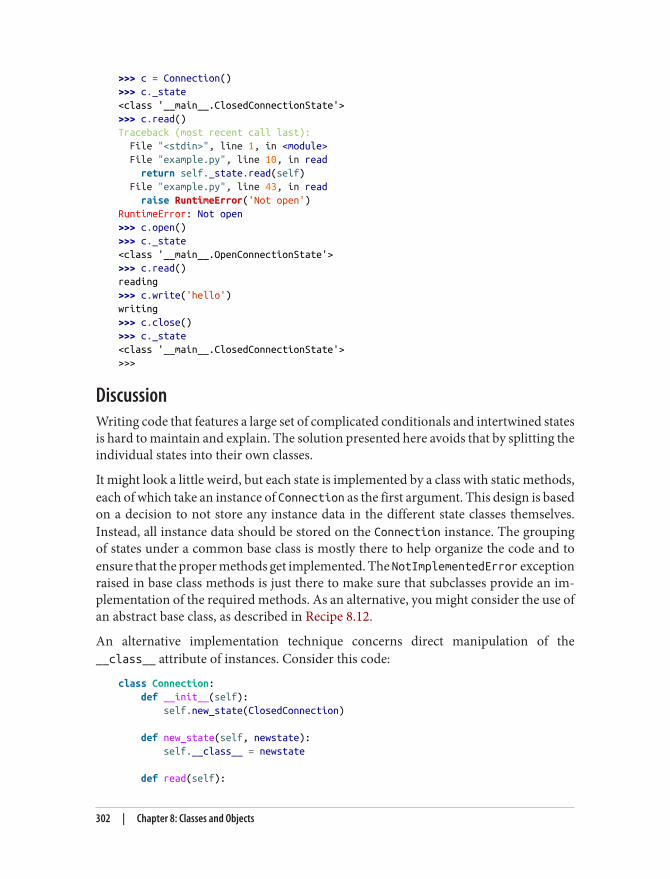
>>> c = Connection()>>> c._state<class '__main__.ClosedConnectionState'>>>> c.read()Traceback (most recent call last): File "<stdin>", line 1, in <module> File "example.py", line 10, in read return self._state.read(self) File "example.py", line 43, in read raise RuntimeError('Not open')RuntimeError: Not open>>> c.open()>>> c._state<class '__main__.OpenConnectionState'>>>> c.read()reading>>> c.write('hello')writing>>> c.close()>>> c._state<class '__main__.ClosedConnectionState'>>>>
DiscussionWriting code that features a large set of complicated conditionals and intertwined statesis hard to maintain and explain. The solution presented here avoids that by splitting theindividual states into their own classes.
It might look a little weird, but each state is implemented by a class with static methods,each of which take an instance of Connection as the first argument. This design is basedon a decision to not store any instance data in the different state classes themselves.Instead, all instance data should be stored on the Connection instance. The groupingof states under a common base class is mostly there to help organize the code and toensure that the proper methods get implemented. The NotImplementedError exceptionraised in base class methods is just there to make sure that subclasses provide an im‐plementation of the required methods. As an alternative, you might consider the use ofan abstract base class, as described in Recipe 8.12.
An alternative implementation technique concerns direct manipulation of the__class__ attribute of instances. Consider this code:
class Connection: def __init__(self): self.new_state(ClosedConnection)
def new_state(self, newstate): self.__class__ = newstate
def read(self):
302 | Chapter 8: Classes and Objects
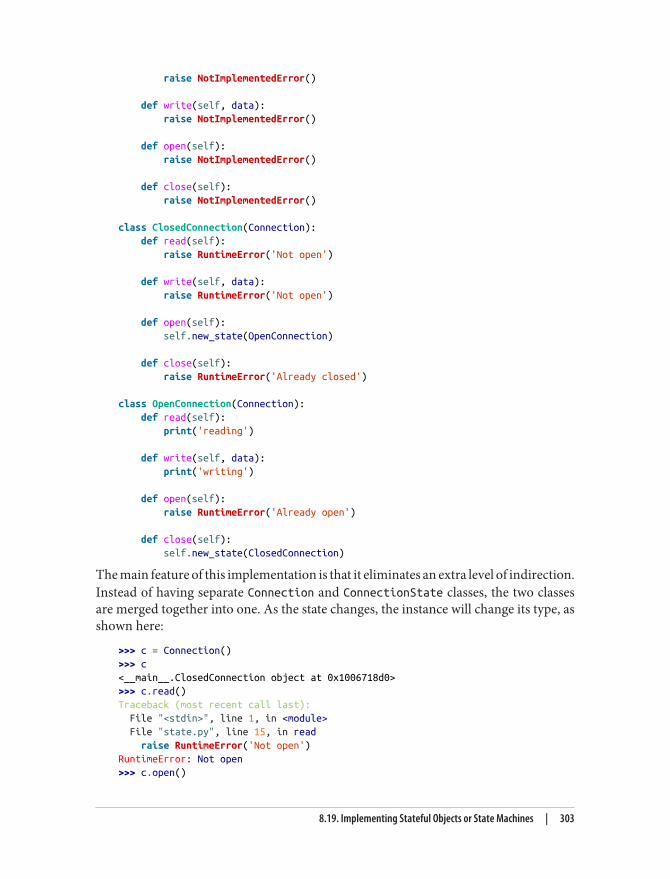
raise NotImplementedError()
def write(self, data): raise NotImplementedError()
def open(self): raise NotImplementedError()
def close(self): raise NotImplementedError()
class ClosedConnection(Connection): def read(self): raise RuntimeError('Not open')
def write(self, data): raise RuntimeError('Not open')
def open(self): self.new_state(OpenConnection)
def close(self): raise RuntimeError('Already closed')
class OpenConnection(Connection): def read(self): print('reading')
def write(self, data): print('writing')
def open(self): raise RuntimeError('Already open')
def close(self): self.new_state(ClosedConnection)
The main feature of this implementation is that it eliminates an extra level of indirection.Instead of having separate Connection and ConnectionState classes, the two classesare merged together into one. As the state changes, the instance will change its type, asshown here:
>>> c = Connection()>>> c<__main__.ClosedConnection object at 0x1006718d0>>>> c.read()Traceback (most recent call last): File "<stdin>", line 1, in <module> File "state.py", line 15, in read raise RuntimeError('Not open')RuntimeError: Not open>>> c.open()
8.19. Implementing Stateful Objects or State Machines | 303
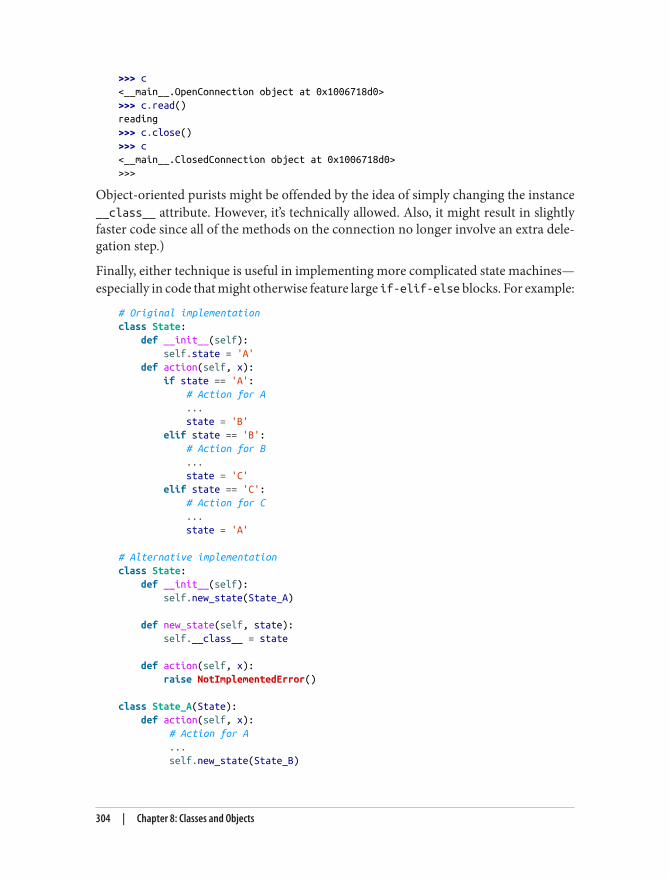
>>> c<__main__.OpenConnection object at 0x1006718d0>>>> c.read()reading>>> c.close()>>> c<__main__.ClosedConnection object at 0x1006718d0>>>>
Object-oriented purists might be offended by the idea of simply changing the instance__class__ attribute. However, it’s technically allowed. Also, it might result in slightlyfaster code since all of the methods on the connection no longer involve an extra dele‐gation step.)
Finally, either technique is useful in implementing more complicated state machines—especially in code that might otherwise feature large if-elif-else blocks. For example:
# Original implementationclass State: def __init__(self): self.state = 'A' def action(self, x): if state == 'A': # Action for A ... state = 'B' elif state == 'B': # Action for B ... state = 'C' elif state == 'C': # Action for C ... state = 'A'
# Alternative implementationclass State: def __init__(self): self.new_state(State_A)
def new_state(self, state): self.__class__ = state
def action(self, x): raise NotImplementedError()
class State_A(State): def action(self, x): # Action for A ... self.new_state(State_B)
304 | Chapter 8: Classes and Objects
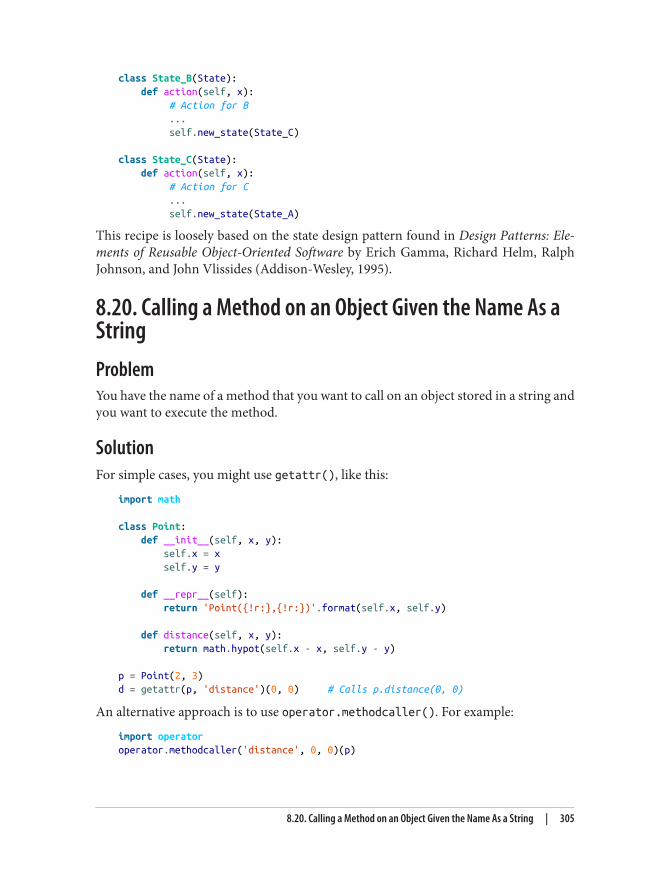
class State_B(State): def action(self, x): # Action for B ... self.new_state(State_C)
class State_C(State): def action(self, x): # Action for C ... self.new_state(State_A)
This recipe is loosely based on the state design pattern found in Design Patterns: Ele‐ments of Reusable Object-Oriented Software by Erich Gamma, Richard Helm, RalphJohnson, and John Vlissides (Addison-Wesley, 1995).
8.20. Calling a Method on an Object Given the Name As aStringProblemYou have the name of a method that you want to call on an object stored in a string andyou want to execute the method.
SolutionFor simple cases, you might use getattr(), like this:
import math
class Point: def __init__(self, x, y): self.x = x self.y = y
def __repr__(self): return 'Point({!r:},{!r:})'.format(self.x, self.y)
def distance(self, x, y): return math.hypot(self.x - x, self.y - y)
p = Point(2, 3)d = getattr(p, 'distance')(0, 0) # Calls p.distance(0, 0)
An alternative approach is to use operator.methodcaller(). For example:
import operatoroperator.methodcaller('distance', 0, 0)(p)
8.20. Calling a Method on an Object Given the Name As a String | 305

operator.methodcaller() may be useful if you want to look up a method by name andsupply the same arguments over and over again. For instance, if you need to sort anentire list of points:
points = [ Point(1, 2), Point(3, 0), Point(10, -3), Point(-5, -7), Point(-1, 8), Point(3, 2)]
# Sort by distance from origin (0, 0)points.sort(key=operator.methodcaller('distance', 0, 0))
DiscussionCalling a method is actually two separate steps involving an attribute lookup and afunction call. Therefore, to call a method, you simply look up the attribute using getattr(), as for any other attribute. To invoke the result as a method, simply treat theresult of the lookup as a function.
operator.methodcaller() creates a callable object, but also fixes any arguments thatare going to be supplied to the method. All that you need to do is provide the appropriateself argument. For example:
>>> p = Point(3, 4)>>> d = operator.methodcaller('distance', 0, 0)>>> d(p)5.0>>>
Invoking methods using names contained in strings is somewhat common in code thatemulates case statements or variants of the visitor pattern. See the next recipe for a moreadvanced example.
8.21. Implementing the Visitor PatternProblemYou need to write code that processes or navigates through a complicated data structureconsisting of many different kinds of objects, each of which needs to be handled in adifferent way. For example, walking through a tree structure and performing differentactions depending on what kind of tree nodes are encountered.
306 | Chapter 8: Classes and Objects
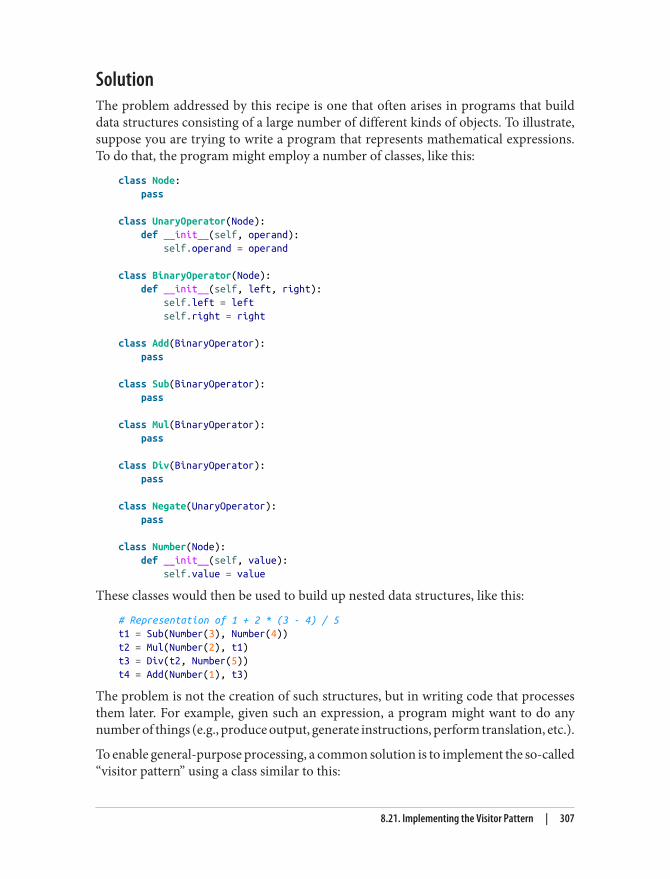
SolutionThe problem addressed by this recipe is one that often arises in programs that builddata structures consisting of a large number of different kinds of objects. To illustrate,suppose you are trying to write a program that represents mathematical expressions.To do that, the program might employ a number of classes, like this:
class Node: pass
class UnaryOperator(Node): def __init__(self, operand): self.operand = operand
class BinaryOperator(Node): def __init__(self, left, right): self.left = left self.right = right
class Add(BinaryOperator): pass
class Sub(BinaryOperator): pass
class Mul(BinaryOperator): pass
class Div(BinaryOperator): pass
class Negate(UnaryOperator): pass
class Number(Node): def __init__(self, value): self.value = value
These classes would then be used to build up nested data structures, like this:
# Representation of 1 + 2 * (3 - 4) / 5t1 = Sub(Number(3), Number(4))t2 = Mul(Number(2), t1)t3 = Div(t2, Number(5))t4 = Add(Number(1), t3)
The problem is not the creation of such structures, but in writing code that processesthem later. For example, given such an expression, a program might want to do anynumber of things (e.g., produce output, generate instructions, perform translation, etc.).
To enable general-purpose processing, a common solution is to implement the so-called“visitor pattern” using a class similar to this:
8.21. Implementing the Visitor Pattern | 307
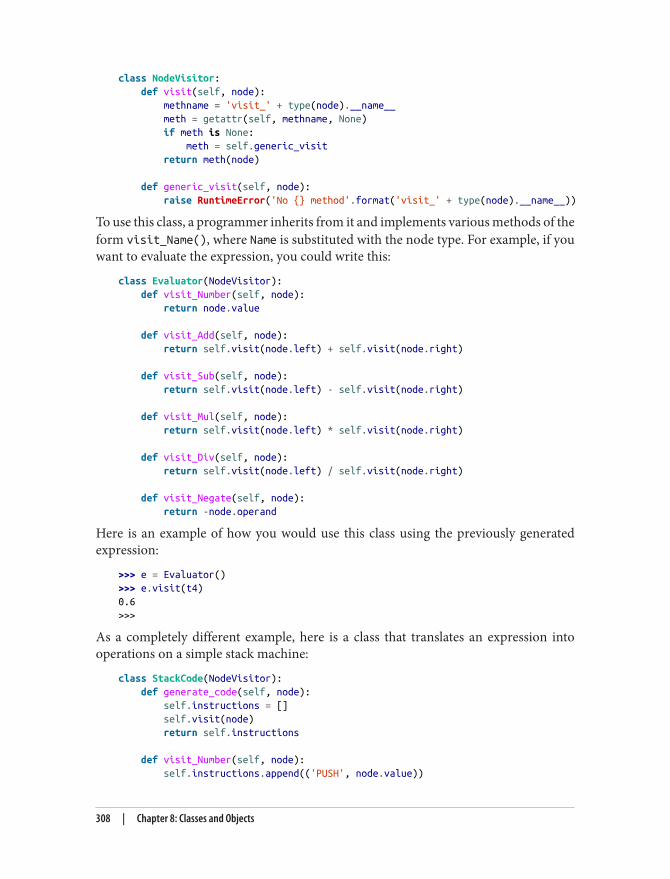
class NodeVisitor: def visit(self, node): methname = 'visit_' + type(node).__name__ meth = getattr(self, methname, None) if meth is None: meth = self.generic_visit return meth(node)
def generic_visit(self, node): raise RuntimeError('No {} method'.format('visit_' + type(node).__name__))
To use this class, a programmer inherits from it and implements various methods of theform visit_Name(), where Name is substituted with the node type. For example, if youwant to evaluate the expression, you could write this:
class Evaluator(NodeVisitor): def visit_Number(self, node): return node.value
def visit_Add(self, node): return self.visit(node.left) + self.visit(node.right)
def visit_Sub(self, node): return self.visit(node.left) - self.visit(node.right)
def visit_Mul(self, node): return self.visit(node.left) * self.visit(node.right)
def visit_Div(self, node): return self.visit(node.left) / self.visit(node.right)
def visit_Negate(self, node): return -node.operand
Here is an example of how you would use this class using the previously generatedexpression:
>>> e = Evaluator()>>> e.visit(t4)0.6>>>
As a completely different example, here is a class that translates an expression intooperations on a simple stack machine:
class StackCode(NodeVisitor): def generate_code(self, node): self.instructions = [] self.visit(node) return self.instructions
def visit_Number(self, node): self.instructions.append(('PUSH', node.value))
308 | Chapter 8: Classes and Objects
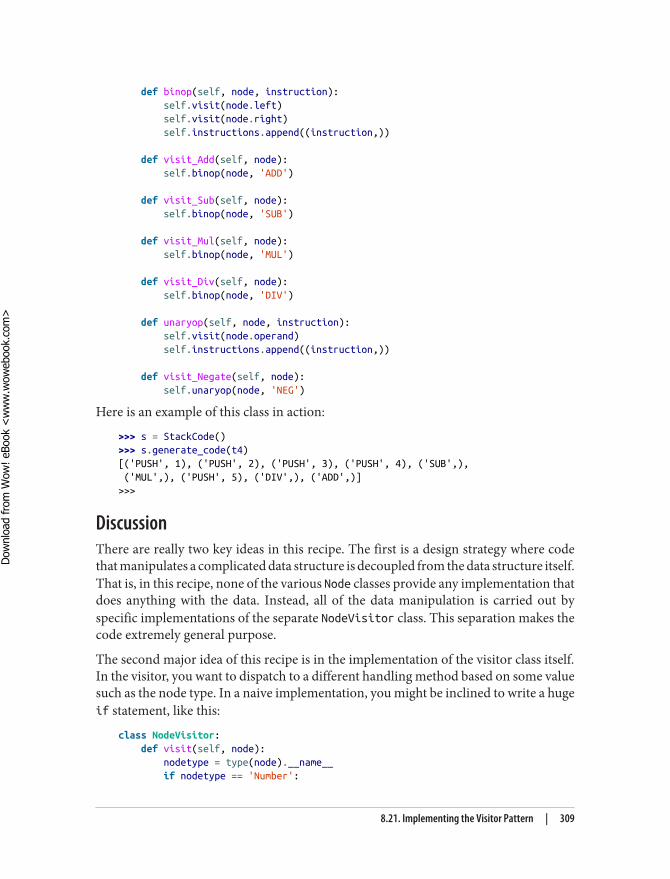
def binop(self, node, instruction): self.visit(node.left) self.visit(node.right) self.instructions.append((instruction,))
def visit_Add(self, node): self.binop(node, 'ADD')
def visit_Sub(self, node): self.binop(node, 'SUB')
def visit_Mul(self, node): self.binop(node, 'MUL')
def visit_Div(self, node): self.binop(node, 'DIV')
def unaryop(self, node, instruction): self.visit(node.operand) self.instructions.append((instruction,))
def visit_Negate(self, node): self.unaryop(node, 'NEG')
Here is an example of this class in action:
>>> s = StackCode()>>> s.generate_code(t4)[('PUSH', 1), ('PUSH', 2), ('PUSH', 3), ('PUSH', 4), ('SUB',), ('MUL',), ('PUSH', 5), ('DIV',), ('ADD',)]>>>
DiscussionThere are really two key ideas in this recipe. The first is a design strategy where codethat manipulates a complicated data structure is decoupled from the data structure itself.That is, in this recipe, none of the various Node classes provide any implementation thatdoes anything with the data. Instead, all of the data manipulation is carried out byspecific implementations of the separate NodeVisitor class. This separation makes thecode extremely general purpose.
The second major idea of this recipe is in the implementation of the visitor class itself.In the visitor, you want to dispatch to a different handling method based on some valuesuch as the node type. In a naive implementation, you might be inclined to write a hugeif statement, like this:
class NodeVisitor: def visit(self, node): nodetype = type(node).__name__ if nodetype == 'Number':
8.21. Implementing the Visitor Pattern | 309
Dow
nlo
ad fro
m W
ow
! eBook
<w
ww
.wow
ebook.
com
>
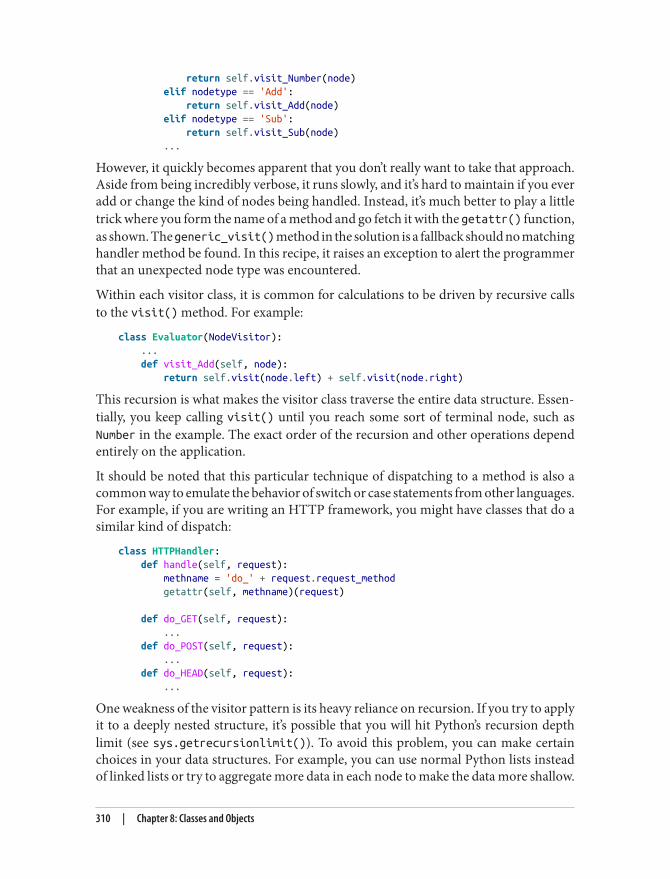
return self.visit_Number(node) elif nodetype == 'Add': return self.visit_Add(node) elif nodetype == 'Sub': return self.visit_Sub(node) ...
However, it quickly becomes apparent that you don’t really want to take that approach.Aside from being incredibly verbose, it runs slowly, and it’s hard to maintain if you everadd or change the kind of nodes being handled. Instead, it’s much better to play a littletrick where you form the name of a method and go fetch it with the getattr() function,as shown. The generic_visit() method in the solution is a fallback should no matchinghandler method be found. In this recipe, it raises an exception to alert the programmerthat an unexpected node type was encountered.
Within each visitor class, it is common for calculations to be driven by recursive callsto the visit() method. For example:
class Evaluator(NodeVisitor): ... def visit_Add(self, node): return self.visit(node.left) + self.visit(node.right)
This recursion is what makes the visitor class traverse the entire data structure. Essen‐tially, you keep calling visit() until you reach some sort of terminal node, such asNumber in the example. The exact order of the recursion and other operations dependentirely on the application.
It should be noted that this particular technique of dispatching to a method is also acommon way to emulate the behavior of switch or case statements from other languages.For example, if you are writing an HTTP framework, you might have classes that do asimilar kind of dispatch:
class HTTPHandler: def handle(self, request): methname = 'do_' + request.request_method getattr(self, methname)(request)
def do_GET(self, request): ... def do_POST(self, request): ... def do_HEAD(self, request): ...
One weakness of the visitor pattern is its heavy reliance on recursion. If you try to applyit to a deeply nested structure, it’s possible that you will hit Python’s recursion depthlimit (see sys.getrecursionlimit()). To avoid this problem, you can make certainchoices in your data structures. For example, you can use normal Python lists insteadof linked lists or try to aggregate more data in each node to make the data more shallow.
310 | Chapter 8: Classes and Objects
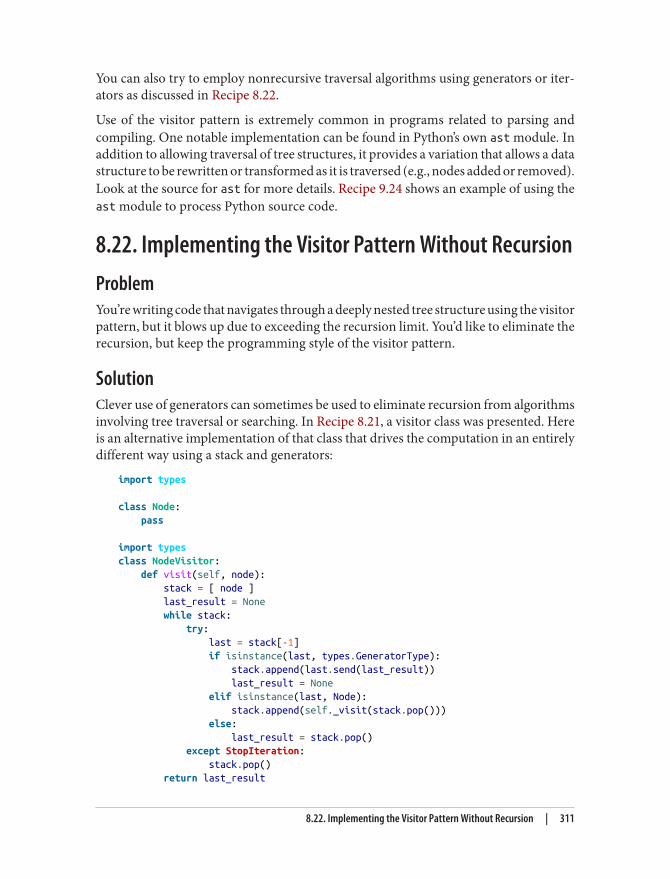
You can also try to employ nonrecursive traversal algorithms using generators or iter‐ators as discussed in Recipe 8.22.
Use of the visitor pattern is extremely common in programs related to parsing andcompiling. One notable implementation can be found in Python’s own ast module. Inaddition to allowing traversal of tree structures, it provides a variation that allows a datastructure to be rewritten or transformed as it is traversed (e.g., nodes added or removed).Look at the source for ast for more details. Recipe 9.24 shows an example of using theast module to process Python source code.
8.22. Implementing the Visitor Pattern Without RecursionProblemYou’re writing code that navigates through a deeply nested tree structure using the visitorpattern, but it blows up due to exceeding the recursion limit. You’d like to eliminate therecursion, but keep the programming style of the visitor pattern.
SolutionClever use of generators can sometimes be used to eliminate recursion from algorithmsinvolving tree traversal or searching. In Recipe 8.21, a visitor class was presented. Hereis an alternative implementation of that class that drives the computation in an entirelydifferent way using a stack and generators:
import types
class Node: pass
import typesclass NodeVisitor: def visit(self, node): stack = [ node ] last_result = None while stack: try: last = stack[-1] if isinstance(last, types.GeneratorType): stack.append(last.send(last_result)) last_result = None elif isinstance(last, Node): stack.append(self._visit(stack.pop())) else: last_result = stack.pop() except StopIteration: stack.pop() return last_result
8.22. Implementing the Visitor Pattern Without Recursion | 311
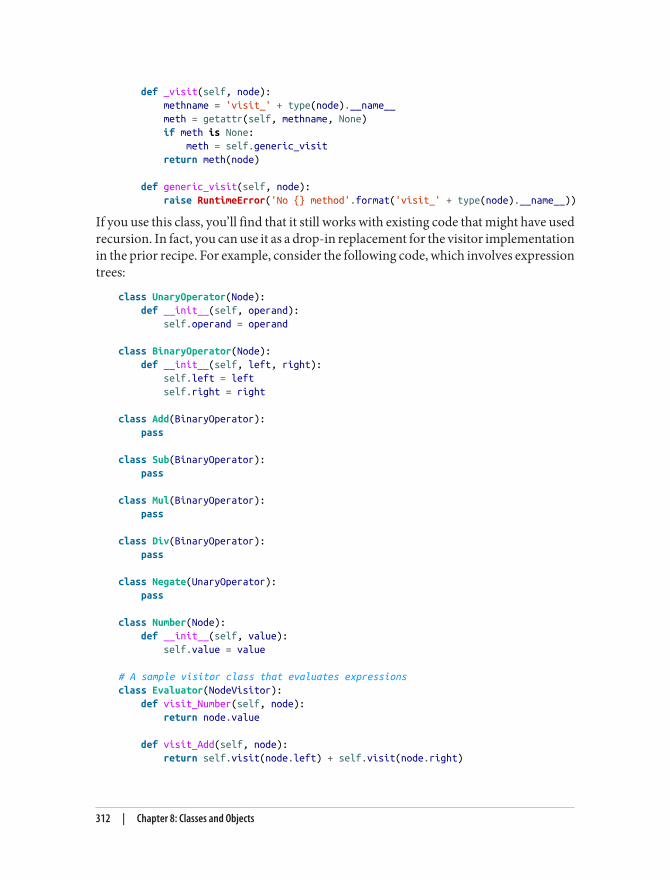
def _visit(self, node): methname = 'visit_' + type(node).__name__ meth = getattr(self, methname, None) if meth is None: meth = self.generic_visit return meth(node)
def generic_visit(self, node): raise RuntimeError('No {} method'.format('visit_' + type(node).__name__))
If you use this class, you’ll find that it still works with existing code that might have usedrecursion. In fact, you can use it as a drop-in replacement for the visitor implementationin the prior recipe. For example, consider the following code, which involves expressiontrees:
class UnaryOperator(Node): def __init__(self, operand): self.operand = operand
class BinaryOperator(Node): def __init__(self, left, right): self.left = left self.right = right
class Add(BinaryOperator): pass
class Sub(BinaryOperator): pass
class Mul(BinaryOperator): pass
class Div(BinaryOperator): pass
class Negate(UnaryOperator): pass
class Number(Node): def __init__(self, value): self.value = value
# A sample visitor class that evaluates expressionsclass Evaluator(NodeVisitor): def visit_Number(self, node): return node.value
def visit_Add(self, node): return self.visit(node.left) + self.visit(node.right)
312 | Chapter 8: Classes and Objects
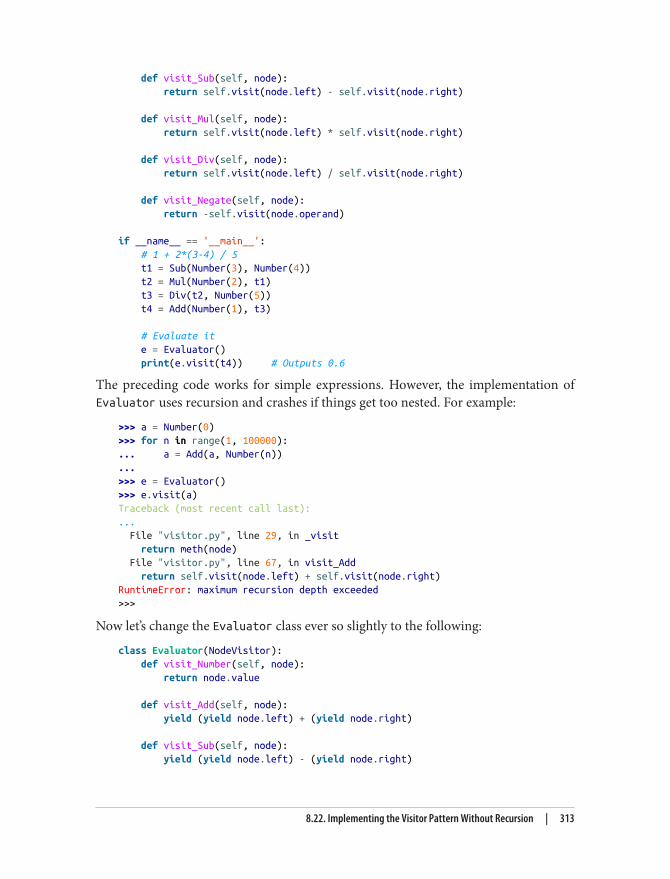
def visit_Sub(self, node): return self.visit(node.left) - self.visit(node.right)
def visit_Mul(self, node): return self.visit(node.left) * self.visit(node.right)
def visit_Div(self, node): return self.visit(node.left) / self.visit(node.right)
def visit_Negate(self, node): return -self.visit(node.operand)
if __name__ == '__main__': # 1 + 2*(3-4) / 5 t1 = Sub(Number(3), Number(4)) t2 = Mul(Number(2), t1) t3 = Div(t2, Number(5)) t4 = Add(Number(1), t3)
# Evaluate it e = Evaluator() print(e.visit(t4)) # Outputs 0.6
The preceding code works for simple expressions. However, the implementation ofEvaluator uses recursion and crashes if things get too nested. For example:
>>> a = Number(0)>>> for n in range(1, 100000):... a = Add(a, Number(n))...>>> e = Evaluator()>>> e.visit(a)Traceback (most recent call last):... File "visitor.py", line 29, in _visit return meth(node) File "visitor.py", line 67, in visit_Add return self.visit(node.left) + self.visit(node.right)RuntimeError: maximum recursion depth exceeded>>>
Now let’s change the Evaluator class ever so slightly to the following:
class Evaluator(NodeVisitor): def visit_Number(self, node): return node.value
def visit_Add(self, node): yield (yield node.left) + (yield node.right)
def visit_Sub(self, node): yield (yield node.left) - (yield node.right)
8.22. Implementing the Visitor Pattern Without Recursion | 313
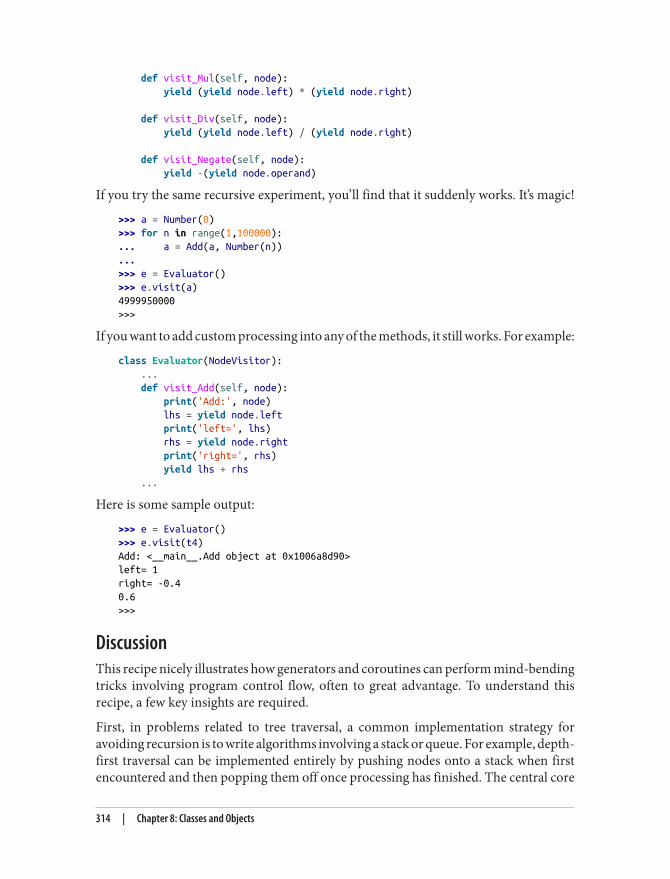
def visit_Mul(self, node): yield (yield node.left) * (yield node.right)
def visit_Div(self, node): yield (yield node.left) / (yield node.right)
def visit_Negate(self, node): yield -(yield node.operand)
If you try the same recursive experiment, you’ll find that it suddenly works. It’s magic!
>>> a = Number(0)>>> for n in range(1,100000):... a = Add(a, Number(n))...>>> e = Evaluator()>>> e.visit(a)4999950000>>>
If you want to add custom processing into any of the methods, it still works. For example:
class Evaluator(NodeVisitor): ... def visit_Add(self, node): print('Add:', node) lhs = yield node.left print('left=', lhs) rhs = yield node.right print('right=', rhs) yield lhs + rhs ...
Here is some sample output:
>>> e = Evaluator()>>> e.visit(t4)Add: <__main__.Add object at 0x1006a8d90>left= 1right= -0.40.6>>>
DiscussionThis recipe nicely illustrates how generators and coroutines can perform mind-bendingtricks involving program control flow, often to great advantage. To understand thisrecipe, a few key insights are required.
First, in problems related to tree traversal, a common implementation strategy foravoiding recursion is to write algorithms involving a stack or queue. For example, depth-first traversal can be implemented entirely by pushing nodes onto a stack when firstencountered and then popping them off once processing has finished. The central core
314 | Chapter 8: Classes and Objects
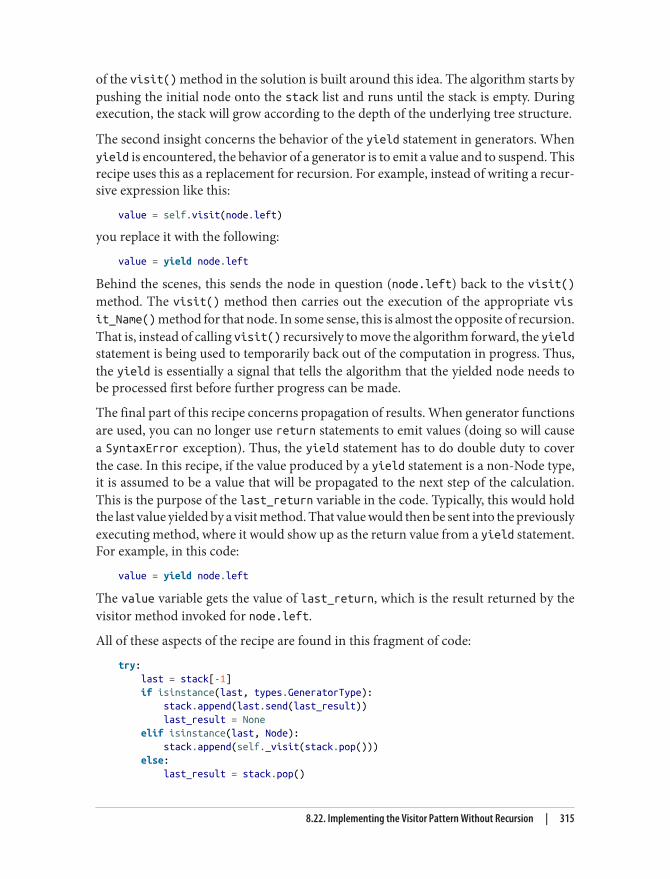
of the visit() method in the solution is built around this idea. The algorithm starts bypushing the initial node onto the stack list and runs until the stack is empty. Duringexecution, the stack will grow according to the depth of the underlying tree structure.
The second insight concerns the behavior of the yield statement in generators. Whenyield is encountered, the behavior of a generator is to emit a value and to suspend. Thisrecipe uses this as a replacement for recursion. For example, instead of writing a recur‐sive expression like this:
value = self.visit(node.left)
you replace it with the following:
value = yield node.left
Behind the scenes, this sends the node in question (node.left) back to the visit()method. The visit() method then carries out the execution of the appropriate visit_Name() method for that node. In some sense, this is almost the opposite of recursion.That is, instead of calling visit() recursively to move the algorithm forward, the yieldstatement is being used to temporarily back out of the computation in progress. Thus,the yield is essentially a signal that tells the algorithm that the yielded node needs tobe processed first before further progress can be made.
The final part of this recipe concerns propagation of results. When generator functionsare used, you can no longer use return statements to emit values (doing so will causea SyntaxError exception). Thus, the yield statement has to do double duty to coverthe case. In this recipe, if the value produced by a yield statement is a non-Node type,it is assumed to be a value that will be propagated to the next step of the calculation.This is the purpose of the last_return variable in the code. Typically, this would holdthe last value yielded by a visit method. That value would then be sent into the previouslyexecuting method, where it would show up as the return value from a yield statement.For example, in this code:
value = yield node.left
The value variable gets the value of last_return, which is the result returned by thevisitor method invoked for node.left.
All of these aspects of the recipe are found in this fragment of code:
try: last = stack[-1] if isinstance(last, types.GeneratorType): stack.append(last.send(last_result)) last_result = None elif isinstance(last, Node): stack.append(self._visit(stack.pop())) else: last_result = stack.pop()
8.22. Implementing the Visitor Pattern Without Recursion | 315
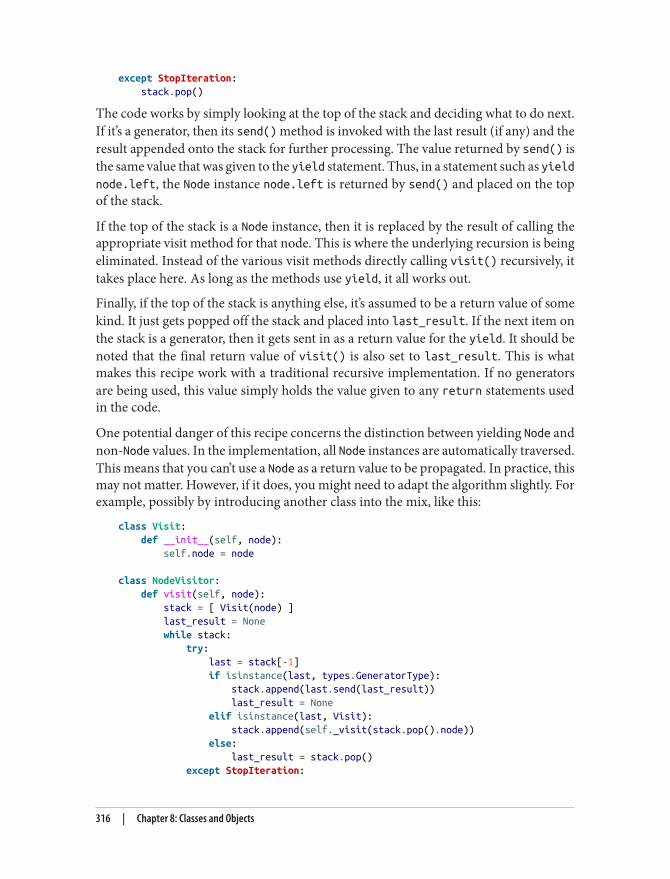
except StopIteration: stack.pop()
The code works by simply looking at the top of the stack and deciding what to do next.If it’s a generator, then its send() method is invoked with the last result (if any) and theresult appended onto the stack for further processing. The value returned by send() isthe same value that was given to the yield statement. Thus, in a statement such as yieldnode.left, the Node instance node.left is returned by send() and placed on the topof the stack.
If the top of the stack is a Node instance, then it is replaced by the result of calling theappropriate visit method for that node. This is where the underlying recursion is beingeliminated. Instead of the various visit methods directly calling visit() recursively, ittakes place here. As long as the methods use yield, it all works out.
Finally, if the top of the stack is anything else, it’s assumed to be a return value of somekind. It just gets popped off the stack and placed into last_result. If the next item onthe stack is a generator, then it gets sent in as a return value for the yield. It should benoted that the final return value of visit() is also set to last_result. This is whatmakes this recipe work with a traditional recursive implementation. If no generatorsare being used, this value simply holds the value given to any return statements usedin the code.
One potential danger of this recipe concerns the distinction between yielding Node andnon-Node values. In the implementation, all Node instances are automatically traversed.This means that you can’t use a Node as a return value to be propagated. In practice, thismay not matter. However, if it does, you might need to adapt the algorithm slightly. Forexample, possibly by introducing another class into the mix, like this:
class Visit: def __init__(self, node): self.node = node
class NodeVisitor: def visit(self, node): stack = [ Visit(node) ] last_result = None while stack: try: last = stack[-1] if isinstance(last, types.GeneratorType): stack.append(last.send(last_result)) last_result = None elif isinstance(last, Visit): stack.append(self._visit(stack.pop().node)) else: last_result = stack.pop() except StopIteration:
316 | Chapter 8: Classes and Objects
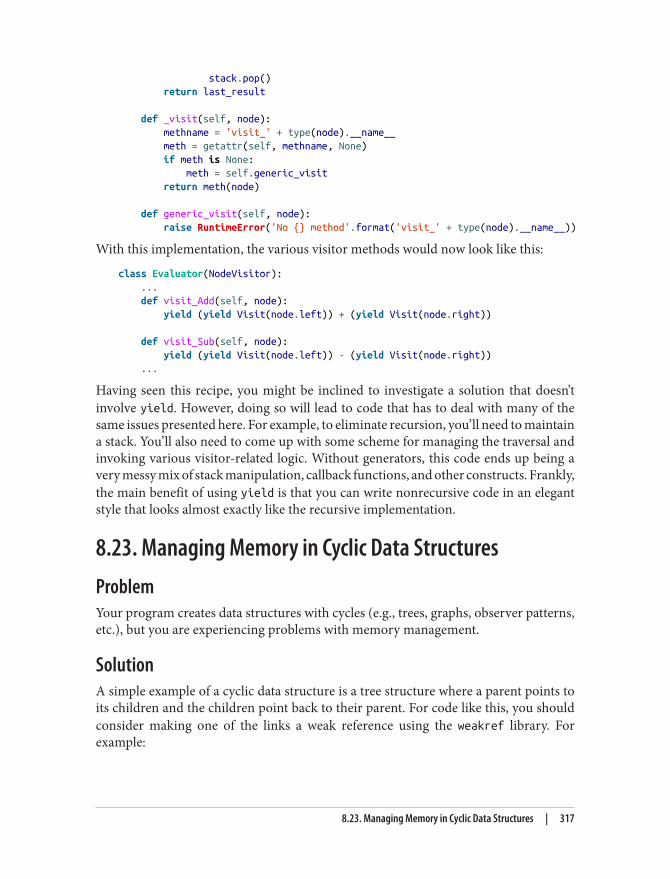
stack.pop() return last_result
def _visit(self, node): methname = 'visit_' + type(node).__name__ meth = getattr(self, methname, None) if meth is None: meth = self.generic_visit return meth(node)
def generic_visit(self, node): raise RuntimeError('No {} method'.format('visit_' + type(node).__name__))
With this implementation, the various visitor methods would now look like this:
class Evaluator(NodeVisitor): ... def visit_Add(self, node): yield (yield Visit(node.left)) + (yield Visit(node.right))
def visit_Sub(self, node): yield (yield Visit(node.left)) - (yield Visit(node.right)) ...
Having seen this recipe, you might be inclined to investigate a solution that doesn’tinvolve yield. However, doing so will lead to code that has to deal with many of thesame issues presented here. For example, to eliminate recursion, you’ll need to maintaina stack. You’ll also need to come up with some scheme for managing the traversal andinvoking various visitor-related logic. Without generators, this code ends up being avery messy mix of stack manipulation, callback functions, and other constructs. Frankly,the main benefit of using yield is that you can write nonrecursive code in an elegantstyle that looks almost exactly like the recursive implementation.
8.23. Managing Memory in Cyclic Data StructuresProblemYour program creates data structures with cycles (e.g., trees, graphs, observer patterns,etc.), but you are experiencing problems with memory management.
SolutionA simple example of a cyclic data structure is a tree structure where a parent points toits children and the children point back to their parent. For code like this, you shouldconsider making one of the links a weak reference using the weakref library. Forexample:
8.23. Managing Memory in Cyclic Data Structures | 317

import weakref
class Node: def __init__(self, value): self.value = value self._parent = None self.children = []
def __repr__(self): return 'Node({!r:})'.format(self.value)
# property that manages the parent as a weak-reference @property def parent(self): return self._parent if self._parent is None else self._parent()
@parent.setter def parent(self, node): self._parent = weakref.ref(node)
def add_child(self, child): self.children.append(child) child.parent = self
This implementation allows the parent to quietly die. For example:
>>> root = Node('parent')>>> c1 = Node('child')>>> root.add_child(c1)>>> print(c1.parent)Node('parent')>>> del root>>> print(c1.parent)None>>>
DiscussionCyclic data structures are a somewhat tricky aspect of Python that require careful studybecause the usual rules of garbage collection often don’t apply. For example, considerthis code:
# Class just to illustrate when deletion occursclass Data: def __del__(self): print('Data.__del__')
# Node class involving a cycleclass Node: def __init__(self): self.data = Data() self.parent = None
318 | Chapter 8: Classes and Objects
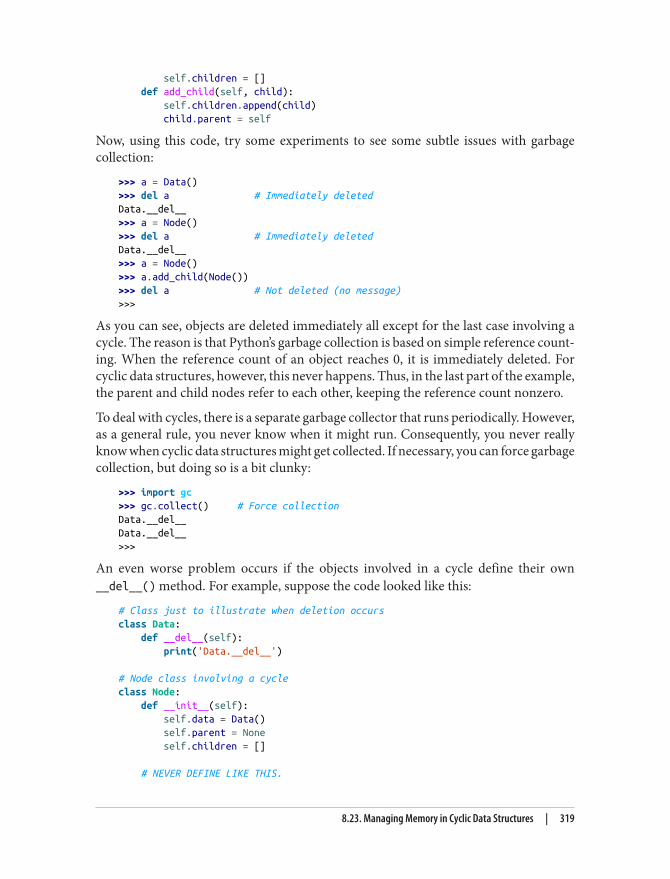
self.children = [] def add_child(self, child): self.children.append(child) child.parent = self
Now, using this code, try some experiments to see some subtle issues with garbagecollection:
>>> a = Data()>>> del a # Immediately deletedData.__del__>>> a = Node()>>> del a # Immediately deletedData.__del__>>> a = Node()>>> a.add_child(Node())>>> del a # Not deleted (no message)>>>
As you can see, objects are deleted immediately all except for the last case involving acycle. The reason is that Python’s garbage collection is based on simple reference count‐ing. When the reference count of an object reaches 0, it is immediately deleted. Forcyclic data structures, however, this never happens. Thus, in the last part of the example,the parent and child nodes refer to each other, keeping the reference count nonzero.
To deal with cycles, there is a separate garbage collector that runs periodically. However,as a general rule, you never know when it might run. Consequently, you never reallyknow when cyclic data structures might get collected. If necessary, you can force garbagecollection, but doing so is a bit clunky:
>>> import gc>>> gc.collect() # Force collectionData.__del__Data.__del__>>>
An even worse problem occurs if the objects involved in a cycle define their own__del__() method. For example, suppose the code looked like this:
# Class just to illustrate when deletion occursclass Data: def __del__(self): print('Data.__del__')
# Node class involving a cycleclass Node: def __init__(self): self.data = Data() self.parent = None self.children = []
# NEVER DEFINE LIKE THIS.
8.23. Managing Memory in Cyclic Data Structures | 319
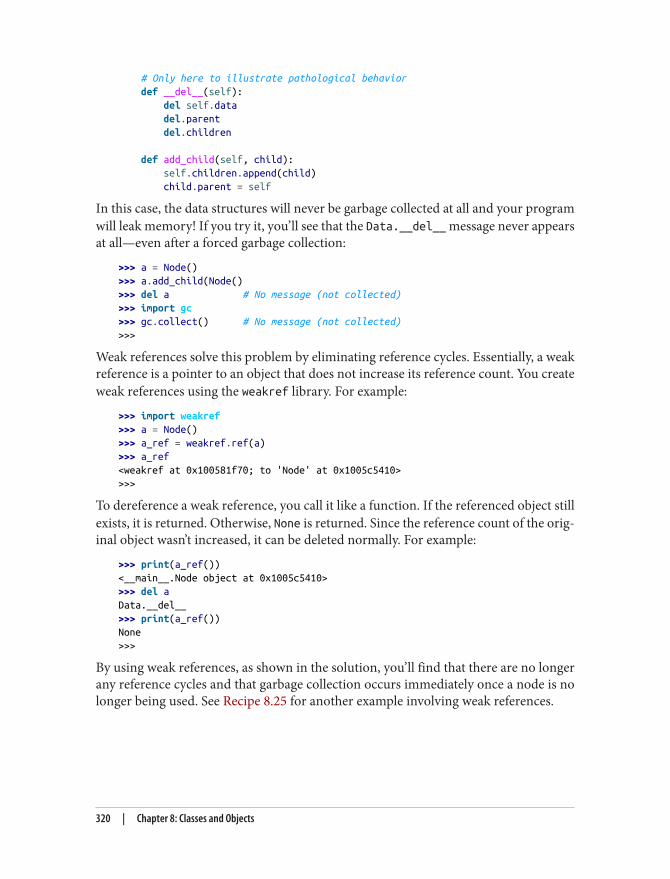
# Only here to illustrate pathological behavior def __del__(self): del self.data del.parent del.children
def add_child(self, child): self.children.append(child) child.parent = self
In this case, the data structures will never be garbage collected at all and your programwill leak memory! If you try it, you’ll see that the Data.__del__ message never appearsat all—even after a forced garbage collection:
>>> a = Node()>>> a.add_child(Node()>>> del a # No message (not collected)>>> import gc>>> gc.collect() # No message (not collected)>>>
Weak references solve this problem by eliminating reference cycles. Essentially, a weakreference is a pointer to an object that does not increase its reference count. You createweak references using the weakref library. For example:
>>> import weakref>>> a = Node()>>> a_ref = weakref.ref(a)>>> a_ref<weakref at 0x100581f70; to 'Node' at 0x1005c5410>>>>
To dereference a weak reference, you call it like a function. If the referenced object stillexists, it is returned. Otherwise, None is returned. Since the reference count of the orig‐inal object wasn’t increased, it can be deleted normally. For example:
>>> print(a_ref())<__main__.Node object at 0x1005c5410>>>> del aData.__del__>>> print(a_ref())None>>>
By using weak references, as shown in the solution, you’ll find that there are no longerany reference cycles and that garbage collection occurs immediately once a node is nolonger being used. See Recipe 8.25 for another example involving weak references.
320 | Chapter 8: Classes and Objects
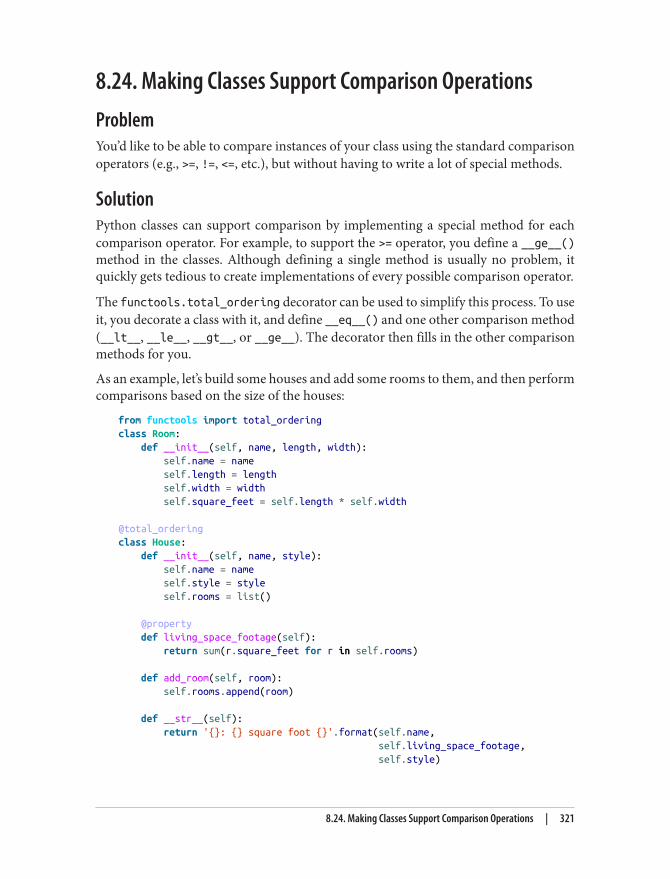
8.24. Making Classes Support Comparison OperationsProblemYou’d like to be able to compare instances of your class using the standard comparisonoperators (e.g., >=, !=, <=, etc.), but without having to write a lot of special methods.
SolutionPython classes can support comparison by implementing a special method for eachcomparison operator. For example, to support the >= operator, you define a __ge__()method in the classes. Although defining a single method is usually no problem, itquickly gets tedious to create implementations of every possible comparison operator.
The functools.total_ordering decorator can be used to simplify this process. To useit, you decorate a class with it, and define __eq__() and one other comparison method(__lt__, __le__, __gt__, or __ge__). The decorator then fills in the other comparisonmethods for you.
As an example, let’s build some houses and add some rooms to them, and then performcomparisons based on the size of the houses:
from functools import total_orderingclass Room: def __init__(self, name, length, width): self.name = name self.length = length self.width = width self.square_feet = self.length * self.width
@total_orderingclass House: def __init__(self, name, style): self.name = name self.style = style self.rooms = list()
@property def living_space_footage(self): return sum(r.square_feet for r in self.rooms)
def add_room(self, room): self.rooms.append(room)
def __str__(self): return '{}: {} square foot {}'.format(self.name, self.living_space_footage, self.style)
8.24. Making Classes Support Comparison Operations | 321
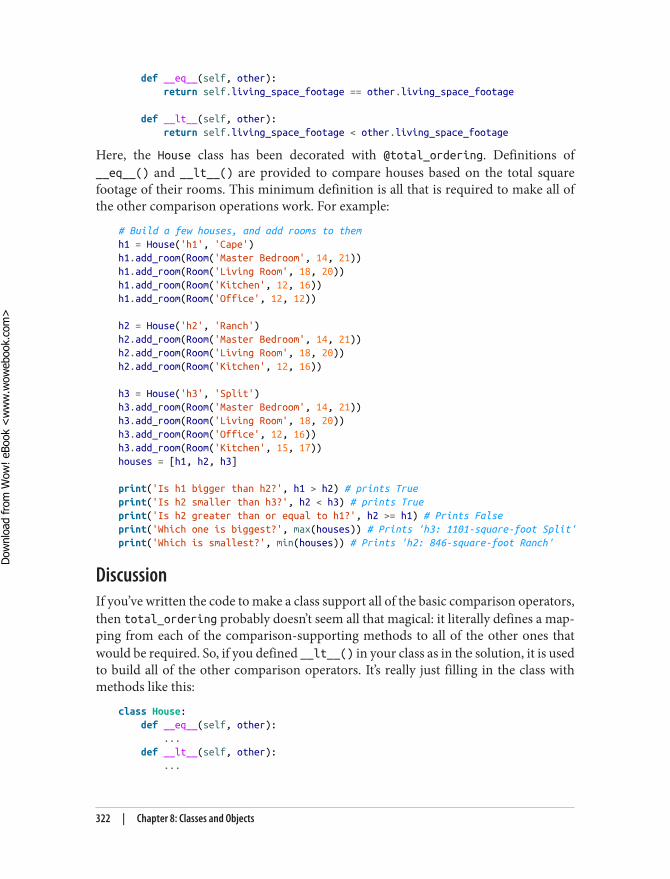
def __eq__(self, other): return self.living_space_footage == other.living_space_footage
def __lt__(self, other): return self.living_space_footage < other.living_space_footage
Here, the House class has been decorated with @total_ordering. Definitions of__eq__() and __lt__() are provided to compare houses based on the total squarefootage of their rooms. This minimum definition is all that is required to make all ofthe other comparison operations work. For example:
# Build a few houses, and add rooms to themh1 = House('h1', 'Cape')h1.add_room(Room('Master Bedroom', 14, 21))h1.add_room(Room('Living Room', 18, 20))h1.add_room(Room('Kitchen', 12, 16))h1.add_room(Room('Office', 12, 12))
h2 = House('h2', 'Ranch')h2.add_room(Room('Master Bedroom', 14, 21))h2.add_room(Room('Living Room', 18, 20))h2.add_room(Room('Kitchen', 12, 16))
h3 = House('h3', 'Split')h3.add_room(Room('Master Bedroom', 14, 21))h3.add_room(Room('Living Room', 18, 20))h3.add_room(Room('Office', 12, 16))h3.add_room(Room('Kitchen', 15, 17))houses = [h1, h2, h3]
print('Is h1 bigger than h2?', h1 > h2) # prints Trueprint('Is h2 smaller than h3?', h2 < h3) # prints Trueprint('Is h2 greater than or equal to h1?', h2 >= h1) # Prints Falseprint('Which one is biggest?', max(houses)) # Prints 'h3: 1101-square-foot Split'print('Which is smallest?', min(houses)) # Prints 'h2: 846-square-foot Ranch'
DiscussionIf you’ve written the code to make a class support all of the basic comparison operators,then total_ordering probably doesn’t seem all that magical: it literally defines a map‐ping from each of the comparison-supporting methods to all of the other ones thatwould be required. So, if you defined __lt__() in your class as in the solution, it is usedto build all of the other comparison operators. It’s really just filling in the class withmethods like this:
class House: def __eq__(self, other): ... def __lt__(self, other): ...
322 | Chapter 8: Classes and Objects
Dow
nlo
ad fro
m W
ow
! eBook
<w
ww
.wow
ebook.
com
>
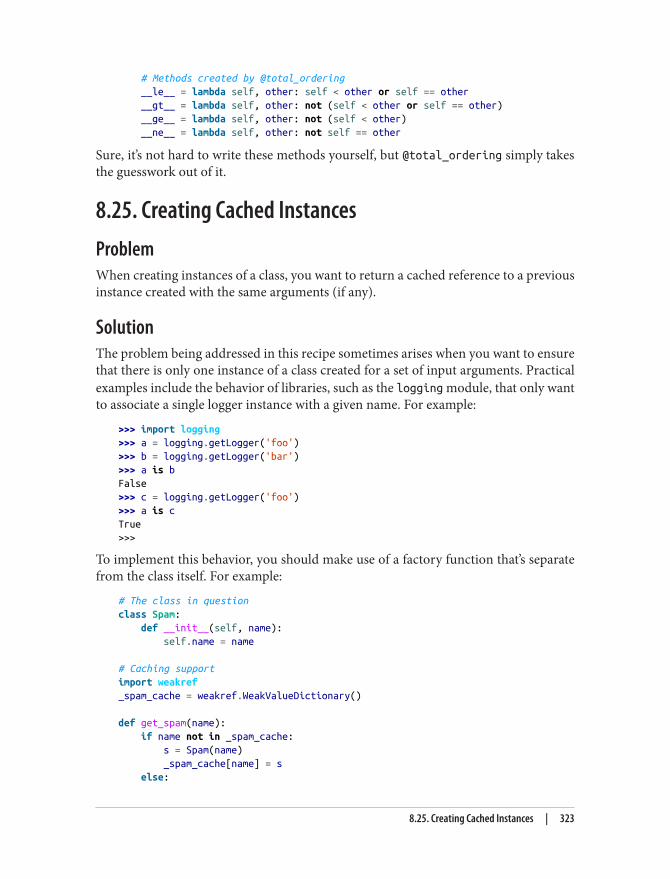
# Methods created by @total_ordering __le__ = lambda self, other: self < other or self == other __gt__ = lambda self, other: not (self < other or self == other) __ge__ = lambda self, other: not (self < other) __ne__ = lambda self, other: not self == other
Sure, it’s not hard to write these methods yourself, but @total_ordering simply takesthe guesswork out of it.
8.25. Creating Cached InstancesProblemWhen creating instances of a class, you want to return a cached reference to a previousinstance created with the same arguments (if any).
SolutionThe problem being addressed in this recipe sometimes arises when you want to ensurethat there is only one instance of a class created for a set of input arguments. Practicalexamples include the behavior of libraries, such as the logging module, that only wantto associate a single logger instance with a given name. For example:
>>> import logging>>> a = logging.getLogger('foo')>>> b = logging.getLogger('bar')>>> a is bFalse>>> c = logging.getLogger('foo')>>> a is cTrue>>>
To implement this behavior, you should make use of a factory function that’s separatefrom the class itself. For example:
# The class in questionclass Spam: def __init__(self, name): self.name = name
# Caching supportimport weakref_spam_cache = weakref.WeakValueDictionary()
def get_spam(name): if name not in _spam_cache: s = Spam(name) _spam_cache[name] = s else:
8.25. Creating Cached Instances | 323
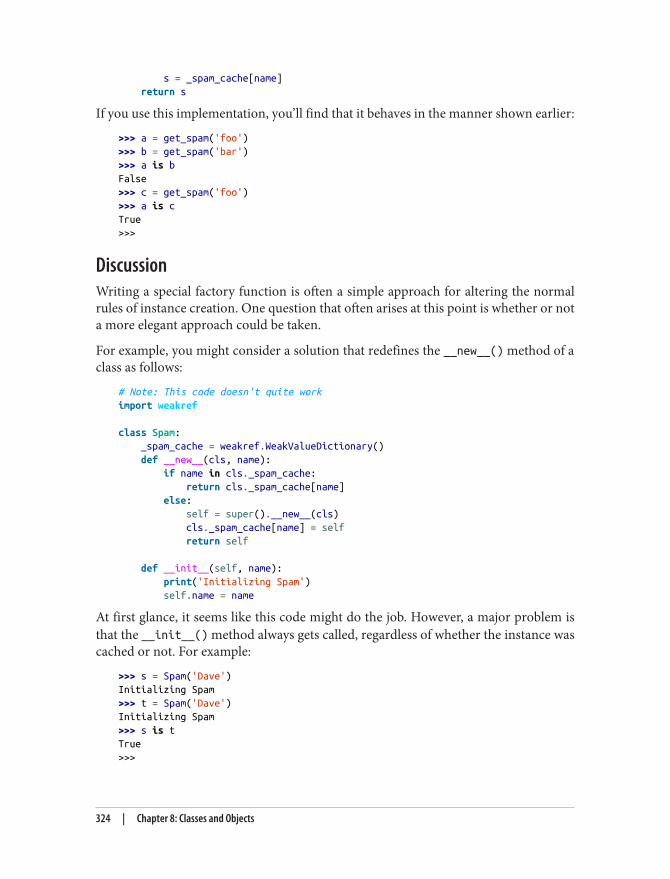
s = _spam_cache[name] return s
If you use this implementation, you’ll find that it behaves in the manner shown earlier:
>>> a = get_spam('foo')>>> b = get_spam('bar')>>> a is bFalse>>> c = get_spam('foo')>>> a is cTrue>>>
DiscussionWriting a special factory function is often a simple approach for altering the normalrules of instance creation. One question that often arises at this point is whether or nota more elegant approach could be taken.
For example, you might consider a solution that redefines the __new__() method of aclass as follows:
# Note: This code doesn't quite workimport weakref
class Spam: _spam_cache = weakref.WeakValueDictionary() def __new__(cls, name): if name in cls._spam_cache: return cls._spam_cache[name] else: self = super().__new__(cls) cls._spam_cache[name] = self return self
def __init__(self, name): print('Initializing Spam') self.name = name
At first glance, it seems like this code might do the job. However, a major problem isthat the __init__() method always gets called, regardless of whether the instance wascached or not. For example:
>>> s = Spam('Dave')Initializing Spam>>> t = Spam('Dave')Initializing Spam>>> s is tTrue>>>
324 | Chapter 8: Classes and Objects

That behavior is probably not what you want. So, to solve the problem of caching withoutreinitialization, you need to take a slightly different approach.
The use of weak references in this recipe serves an important purpose related to garbagecollection, as described in Recipe 8.23. When maintaining a cache of instances, youoften only want to keep items in the cache as long as they’re actually being used some‐where in the program. A WeakValueDictionary instance only holds onto the referenceditems as long as they exist somewhere else. Otherwise, the dictionary keys disappearwhen instances are no longer being used. Observe:
>>> a = get_spam('foo')>>> b = get_spam('bar')>>> c = get_spam('foo')>>> list(_spam_cache)['foo', 'bar']>>> del a>>> del c>>> list(_spam_cache)['bar']>>> del b>>> list(_spam_cache)[]>>>
For many programs, the bare-bones code shown in this recipe will often suffice. How‐ever, there are a number of more advanced implementation techniques that can beconsidered.
One immediate concern with this recipe might be its reliance on global variables and afactory function that’s decoupled from the original class definition. One way to cleanthis up is to put the caching code into a separate manager class and glue things togetherlike this:
import weakref
class CachedSpamManager: def __init__(self): self._cache = weakref.WeakValueDictionary() def get_spam(self, name): if name not in self._cache: s = Spam(name) self._cache[name] = s else: s = self._cache[name] return s
def clear(self): self._cache.clear()
class Spam: manager = CachedSpamManager()
8.25. Creating Cached Instances | 325
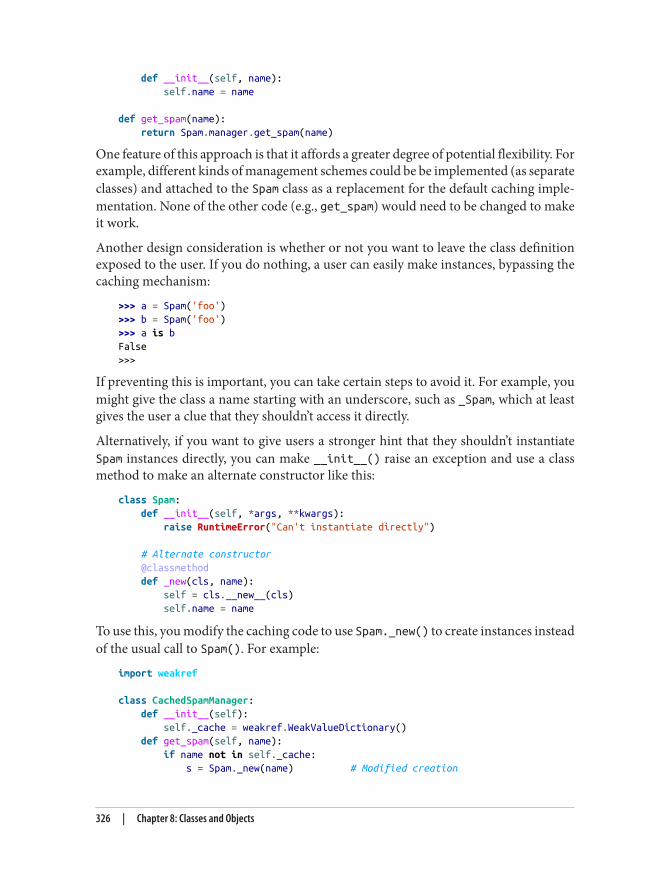
def __init__(self, name): self.name = name
def get_spam(name): return Spam.manager.get_spam(name)
One feature of this approach is that it affords a greater degree of potential flexibility. Forexample, different kinds of management schemes could be be implemented (as separateclasses) and attached to the Spam class as a replacement for the default caching imple‐mentation. None of the other code (e.g., get_spam) would need to be changed to makeit work.
Another design consideration is whether or not you want to leave the class definitionexposed to the user. If you do nothing, a user can easily make instances, bypassing thecaching mechanism:
>>> a = Spam('foo')>>> b = Spam('foo')>>> a is bFalse>>>
If preventing this is important, you can take certain steps to avoid it. For example, youmight give the class a name starting with an underscore, such as _Spam, which at leastgives the user a clue that they shouldn’t access it directly.
Alternatively, if you want to give users a stronger hint that they shouldn’t instantiateSpam instances directly, you can make __init__() raise an exception and use a classmethod to make an alternate constructor like this:
class Spam: def __init__(self, *args, **kwargs): raise RuntimeError("Can't instantiate directly")
# Alternate constructor @classmethod def _new(cls, name): self = cls.__new__(cls) self.name = name
To use this, you modify the caching code to use Spam._new() to create instances insteadof the usual call to Spam(). For example:
import weakref
class CachedSpamManager: def __init__(self): self._cache = weakref.WeakValueDictionary() def get_spam(self, name): if name not in self._cache: s = Spam._new(name) # Modified creation
326 | Chapter 8: Classes and Objects
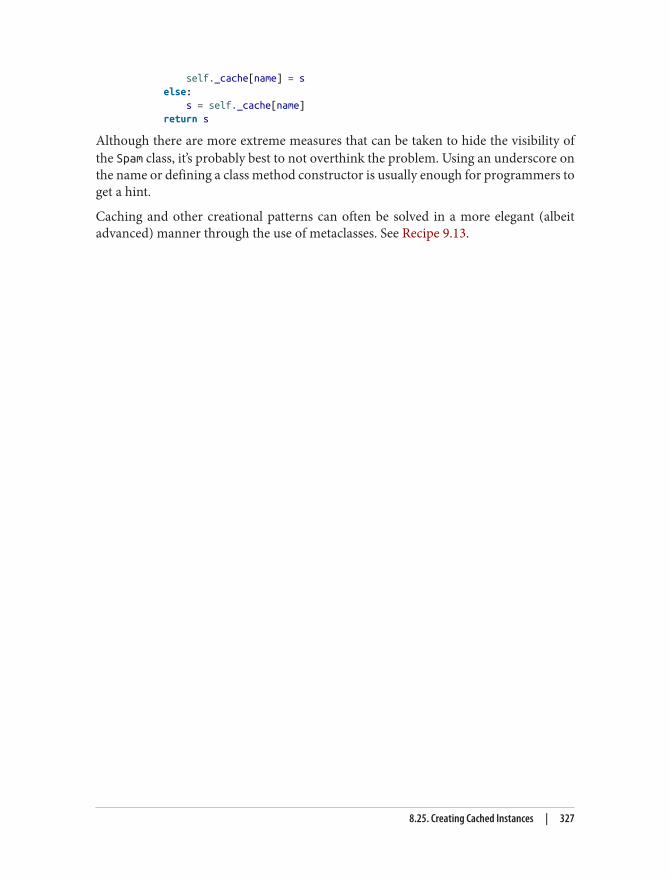
self._cache[name] = s else: s = self._cache[name] return s
Although there are more extreme measures that can be taken to hide the visibility ofthe Spam class, it’s probably best to not overthink the problem. Using an underscore onthe name or defining a class method constructor is usually enough for programmers toget a hint.
Caching and other creational patterns can often be solved in a more elegant (albeitadvanced) manner through the use of metaclasses. See Recipe 9.13.
8.25. Creating Cached Instances | 327

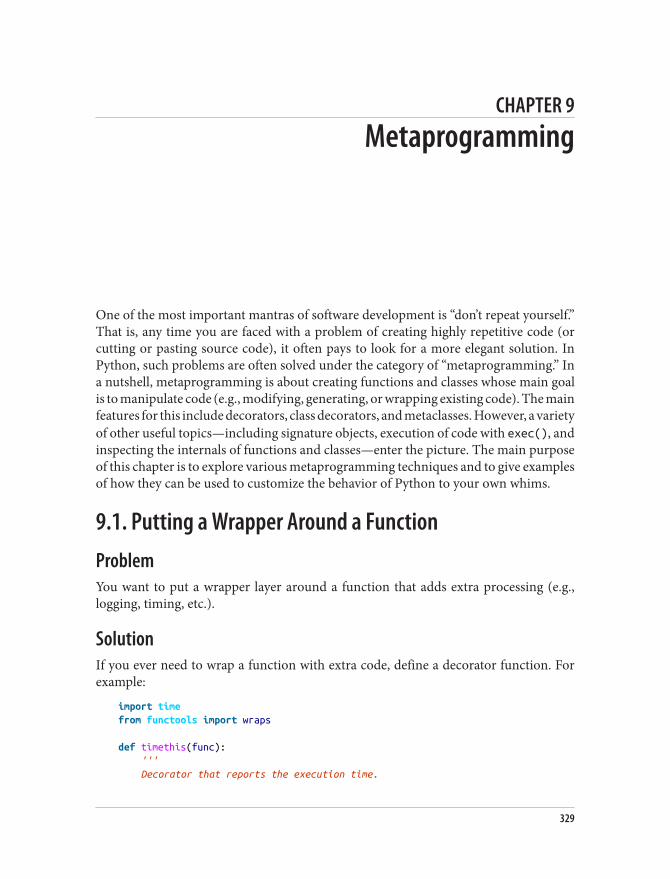
CHAPTER 9
Metaprogramming
One of the most important mantras of software development is “don’t repeat yourself.”That is, any time you are faced with a problem of creating highly repetitive code (orcutting or pasting source code), it often pays to look for a more elegant solution. InPython, such problems are often solved under the category of “metaprogramming.” Ina nutshell, metaprogramming is about creating functions and classes whose main goalis to manipulate code (e.g., modifying, generating, or wrapping existing code). The mainfeatures for this include decorators, class decorators, and metaclasses. However, a varietyof other useful topics—including signature objects, execution of code with exec(), andinspecting the internals of functions and classes—enter the picture. The main purposeof this chapter is to explore various metaprogramming techniques and to give examplesof how they can be used to customize the behavior of Python to your own whims.
9.1. Putting a Wrapper Around a FunctionProblemYou want to put a wrapper layer around a function that adds extra processing (e.g.,logging, timing, etc.).
SolutionIf you ever need to wrap a function with extra code, define a decorator function. Forexample:
import timefrom functools import wraps
def timethis(func): ''' Decorator that reports the execution time.
329
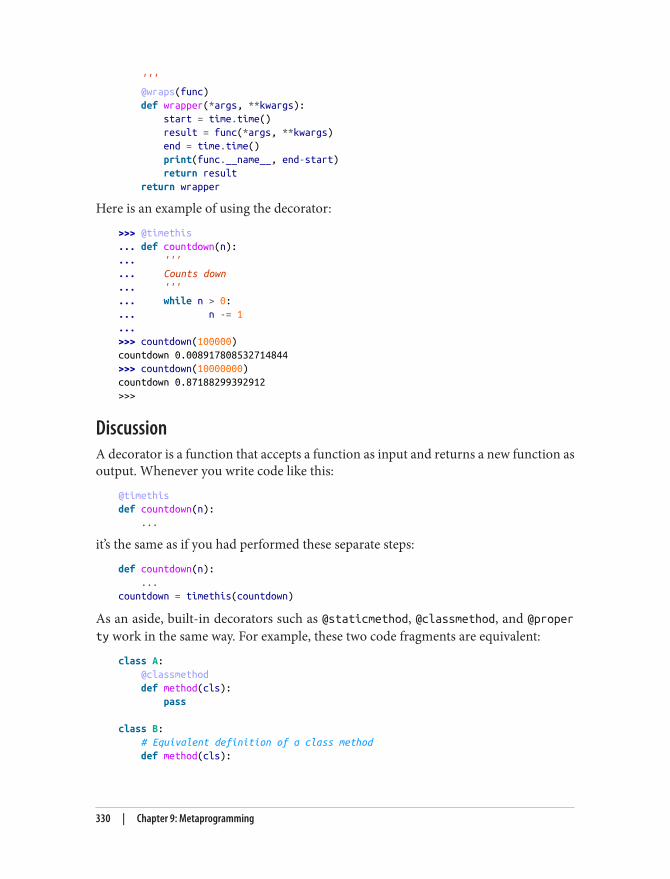
''' @wraps(func) def wrapper(*args, **kwargs): start = time.time() result = func(*args, **kwargs) end = time.time() print(func.__name__, end-start) return result return wrapper
Here is an example of using the decorator:
>>> @timethis... def countdown(n):... '''... Counts down... '''... while n > 0:... n -= 1...>>> countdown(100000)countdown 0.008917808532714844>>> countdown(10000000)countdown 0.87188299392912>>>
DiscussionA decorator is a function that accepts a function as input and returns a new function asoutput. Whenever you write code like this:
@timethisdef countdown(n): ...
it’s the same as if you had performed these separate steps:
def countdown(n): ...countdown = timethis(countdown)
As an aside, built-in decorators such as @staticmethod, @classmethod, and @property work in the same way. For example, these two code fragments are equivalent:
class A: @classmethod def method(cls): pass
class B: # Equivalent definition of a class method def method(cls):
330 | Chapter 9: Metaprogramming
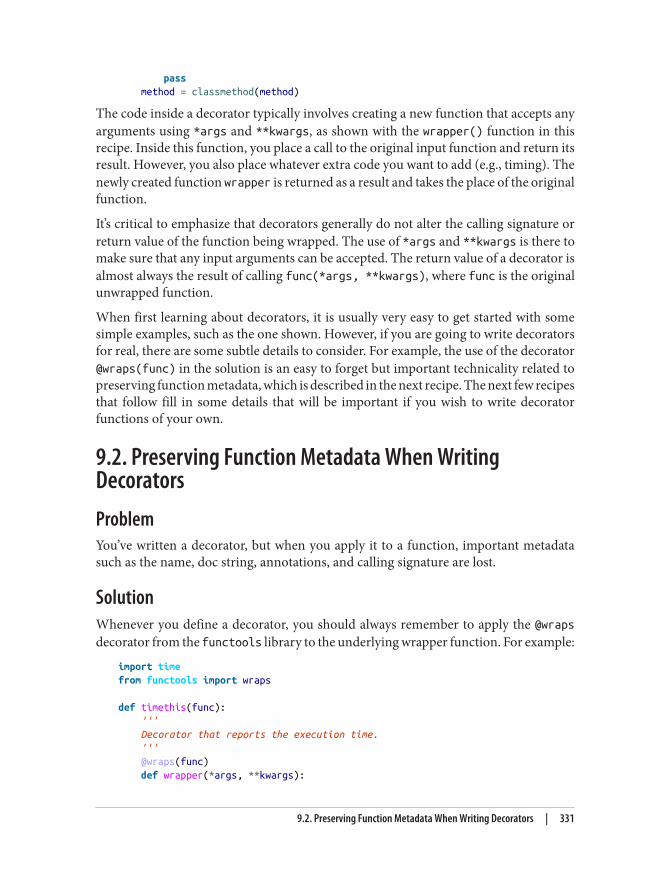
pass method = classmethod(method)
The code inside a decorator typically involves creating a new function that accepts anyarguments using *args and **kwargs, as shown with the wrapper() function in thisrecipe. Inside this function, you place a call to the original input function and return itsresult. However, you also place whatever extra code you want to add (e.g., timing). Thenewly created function wrapper is returned as a result and takes the place of the originalfunction.
It’s critical to emphasize that decorators generally do not alter the calling signature orreturn value of the function being wrapped. The use of *args and **kwargs is there tomake sure that any input arguments can be accepted. The return value of a decorator isalmost always the result of calling func(*args, **kwargs), where func is the originalunwrapped function.
When first learning about decorators, it is usually very easy to get started with somesimple examples, such as the one shown. However, if you are going to write decoratorsfor real, there are some subtle details to consider. For example, the use of the decorator@wraps(func) in the solution is an easy to forget but important technicality related topreserving function metadata, which is described in the next recipe. The next few recipesthat follow fill in some details that will be important if you wish to write decoratorfunctions of your own.
9.2. Preserving Function Metadata When WritingDecoratorsProblemYou’ve written a decorator, but when you apply it to a function, important metadatasuch as the name, doc string, annotations, and calling signature are lost.
SolutionWhenever you define a decorator, you should always remember to apply the @wrapsdecorator from the functools library to the underlying wrapper function. For example:
import timefrom functools import wraps
def timethis(func): ''' Decorator that reports the execution time. ''' @wraps(func) def wrapper(*args, **kwargs):
9.2. Preserving Function Metadata When Writing Decorators | 331

start = time.time() result = func(*args, **kwargs) end = time.time() print(func.__name__, end-start) return result return wrapper
Here is an example of using the decorator and examining the resulting function meta‐data:
>>> @timethis... def countdown(n:int):... '''... Counts down... '''... while n > 0:... n -= 1...>>> countdown(100000)countdown 0.008917808532714844>>> countdown.__name__'countdown'>>> countdown.__doc__'\n\tCounts down\n\t'>>> countdown.__annotations__{'n': <class 'int'>}>>>
DiscussionCopying decorator metadata is an important part of writing decorators. If you forget touse @wraps, you’ll find that the decorated function loses all sorts of useful information.For instance, if omitted, the metadata in the last example would look like this:
>>> countdown.__name__'wrapper'>>> countdown.__doc__>>> countdown.__annotations__{}>>>
An important feature of the @wraps decorator is that it makes the wrapped functionavailable to you in the __wrapped__ attribute. For example, if you want to access thewrapped function directly, you could do this:
>>> countdown.__wrapped__(100000)>>>
The presence of the __wrapped__ attribute also makes decorated functions properlyexpose the underlying signature of the wrapped function. For example:
332 | Chapter 9: Metaprogramming
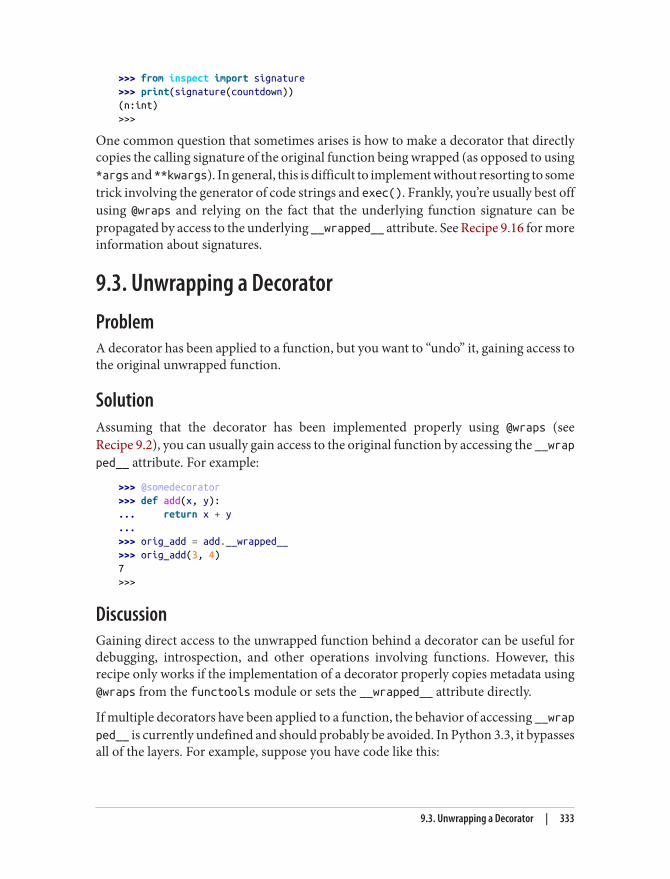
>>> from inspect import signature>>> print(signature(countdown))(n:int)>>>
One common question that sometimes arises is how to make a decorator that directlycopies the calling signature of the original function being wrapped (as opposed to using*args and **kwargs). In general, this is difficult to implement without resorting to sometrick involving the generator of code strings and exec(). Frankly, you’re usually best offusing @wraps and relying on the fact that the underlying function signature can bepropagated by access to the underlying __wrapped__ attribute. See Recipe 9.16 for moreinformation about signatures.
9.3. Unwrapping a DecoratorProblemA decorator has been applied to a function, but you want to “undo” it, gaining access tothe original unwrapped function.
SolutionAssuming that the decorator has been implemented properly using @wraps (seeRecipe 9.2), you can usually gain access to the original function by accessing the __wrapped__ attribute. For example:
>>> @somedecorator>>> def add(x, y):... return x + y...>>> orig_add = add.__wrapped__>>> orig_add(3, 4)7>>>
DiscussionGaining direct access to the unwrapped function behind a decorator can be useful fordebugging, introspection, and other operations involving functions. However, thisrecipe only works if the implementation of a decorator properly copies metadata using@wraps from the functools module or sets the __wrapped__ attribute directly.
If multiple decorators have been applied to a function, the behavior of accessing __wrapped__ is currently undefined and should probably be avoided. In Python 3.3, it bypassesall of the layers. For example, suppose you have code like this:
9.3. Unwrapping a Decorator | 333
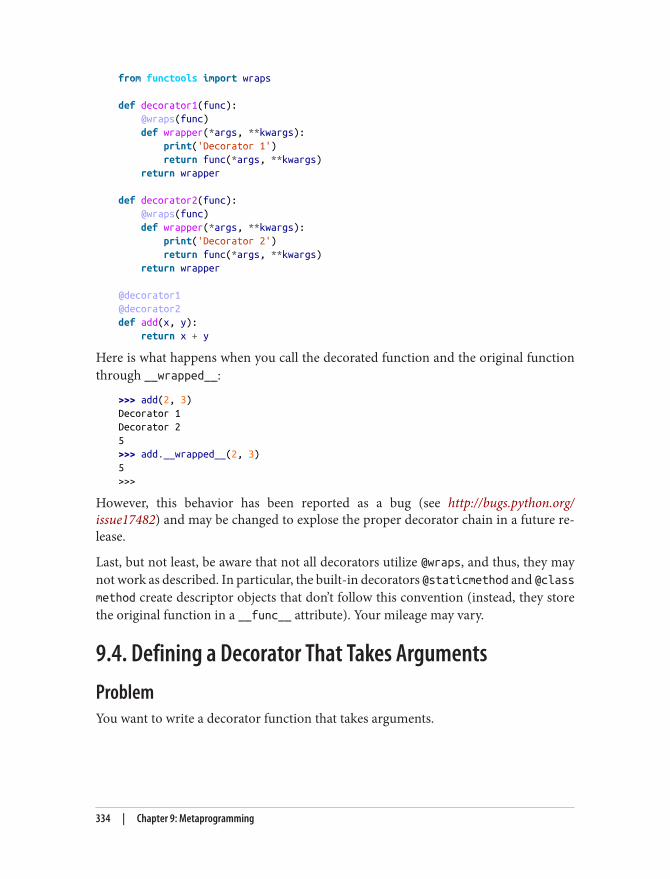
from functools import wraps
def decorator1(func): @wraps(func) def wrapper(*args, **kwargs): print('Decorator 1') return func(*args, **kwargs) return wrapper
def decorator2(func): @wraps(func) def wrapper(*args, **kwargs): print('Decorator 2') return func(*args, **kwargs) return wrapper
@decorator1@decorator2def add(x, y): return x + y
Here is what happens when you call the decorated function and the original functionthrough __wrapped__:
>>> add(2, 3)Decorator 1Decorator 25>>> add.__wrapped__(2, 3)5>>>
However, this behavior has been reported as a bug (see http://bugs.python.org/issue17482) and may be changed to explose the proper decorator chain in a future re‐lease.
Last, but not least, be aware that not all decorators utilize @wraps, and thus, they maynot work as described. In particular, the built-in decorators @staticmethod and @classmethod create descriptor objects that don’t follow this convention (instead, they storethe original function in a __func__ attribute). Your mileage may vary.
9.4. Defining a Decorator That Takes ArgumentsProblemYou want to write a decorator function that takes arguments.
334 | Chapter 9: Metaprogramming
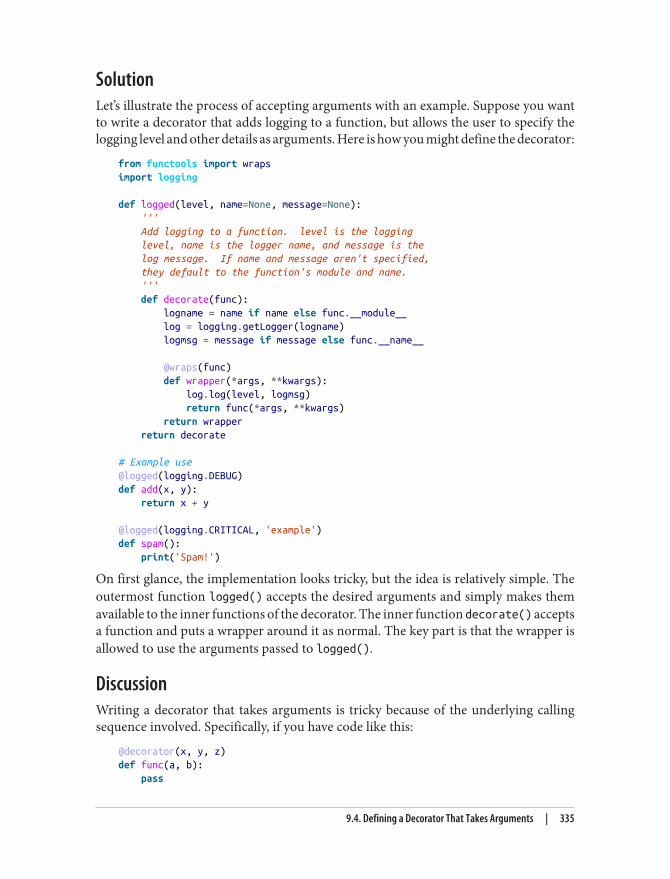
SolutionLet’s illustrate the process of accepting arguments with an example. Suppose you wantto write a decorator that adds logging to a function, but allows the user to specify thelogging level and other details as arguments. Here is how you might define the decorator:
from functools import wrapsimport logging
def logged(level, name=None, message=None): ''' Add logging to a function. level is the logging level, name is the logger name, and message is the log message. If name and message aren't specified, they default to the function's module and name. ''' def decorate(func): logname = name if name else func.__module__ log = logging.getLogger(logname) logmsg = message if message else func.__name__
@wraps(func) def wrapper(*args, **kwargs): log.log(level, logmsg) return func(*args, **kwargs) return wrapper return decorate
# Example use@logged(logging.DEBUG)def add(x, y): return x + y
@logged(logging.CRITICAL, 'example')def spam(): print('Spam!')
On first glance, the implementation looks tricky, but the idea is relatively simple. Theoutermost function logged() accepts the desired arguments and simply makes themavailable to the inner functions of the decorator. The inner function decorate() acceptsa function and puts a wrapper around it as normal. The key part is that the wrapper isallowed to use the arguments passed to logged().
DiscussionWriting a decorator that takes arguments is tricky because of the underlying callingsequence involved. Specifically, if you have code like this:
@decorator(x, y, z)def func(a, b): pass
9.4. Defining a Decorator That Takes Arguments | 335
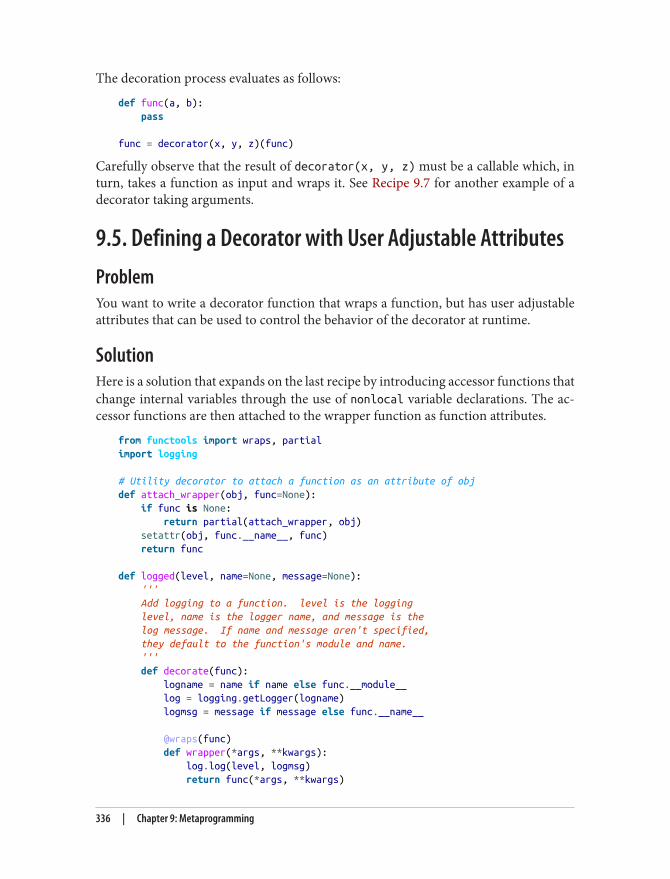
The decoration process evaluates as follows:
def func(a, b): pass
func = decorator(x, y, z)(func)
Carefully observe that the result of decorator(x, y, z) must be a callable which, inturn, takes a function as input and wraps it. See Recipe 9.7 for another example of adecorator taking arguments.
9.5. Defining a Decorator with User Adjustable AttributesProblemYou want to write a decorator function that wraps a function, but has user adjustableattributes that can be used to control the behavior of the decorator at runtime.
SolutionHere is a solution that expands on the last recipe by introducing accessor functions thatchange internal variables through the use of nonlocal variable declarations. The ac‐cessor functions are then attached to the wrapper function as function attributes.
from functools import wraps, partialimport logging
# Utility decorator to attach a function as an attribute of objdef attach_wrapper(obj, func=None): if func is None: return partial(attach_wrapper, obj) setattr(obj, func.__name__, func) return func
def logged(level, name=None, message=None): ''' Add logging to a function. level is the logging level, name is the logger name, and message is the log message. If name and message aren't specified, they default to the function's module and name. ''' def decorate(func): logname = name if name else func.__module__ log = logging.getLogger(logname) logmsg = message if message else func.__name__
@wraps(func) def wrapper(*args, **kwargs): log.log(level, logmsg) return func(*args, **kwargs)
336 | Chapter 9: Metaprogramming
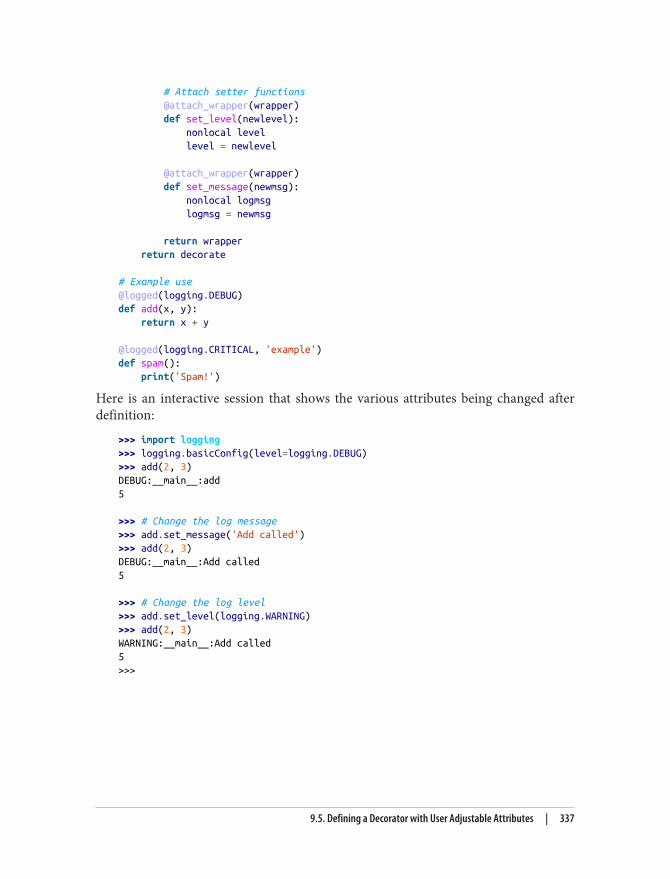
# Attach setter functions @attach_wrapper(wrapper) def set_level(newlevel): nonlocal level level = newlevel
@attach_wrapper(wrapper) def set_message(newmsg): nonlocal logmsg logmsg = newmsg
return wrapper return decorate
# Example use@logged(logging.DEBUG)def add(x, y): return x + y
@logged(logging.CRITICAL, 'example')def spam(): print('Spam!')
Here is an interactive session that shows the various attributes being changed afterdefinition:
>>> import logging>>> logging.basicConfig(level=logging.DEBUG)>>> add(2, 3)DEBUG:__main__:add5
>>> # Change the log message>>> add.set_message('Add called')>>> add(2, 3)DEBUG:__main__:Add called5
>>> # Change the log level>>> add.set_level(logging.WARNING)>>> add(2, 3)WARNING:__main__:Add called5>>>
9.5. Defining a Decorator with User Adjustable Attributes | 337
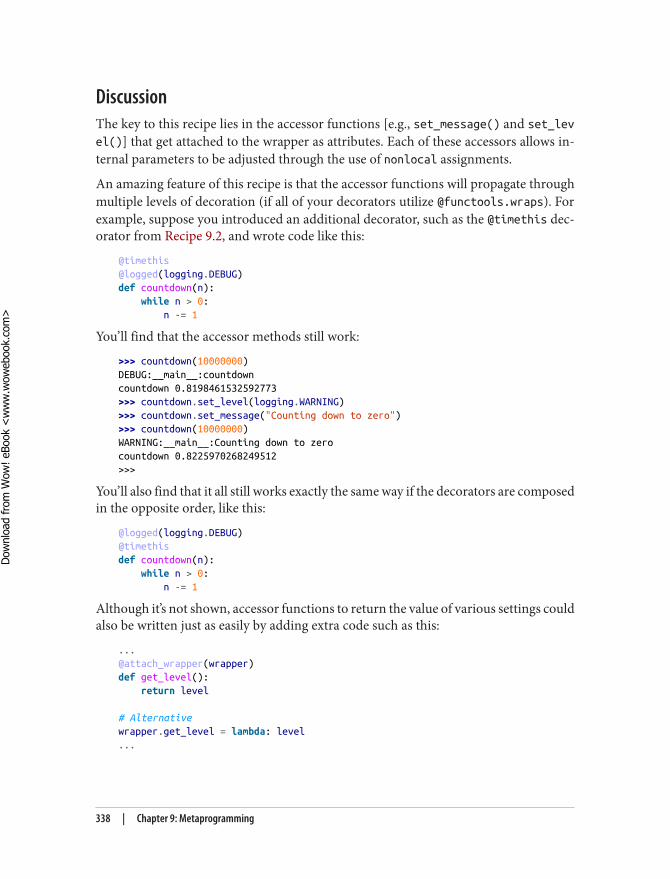
DiscussionThe key to this recipe lies in the accessor functions [e.g., set_message() and set_level()] that get attached to the wrapper as attributes. Each of these accessors allows in‐ternal parameters to be adjusted through the use of nonlocal assignments.
An amazing feature of this recipe is that the accessor functions will propagate throughmultiple levels of decoration (if all of your decorators utilize @functools.wraps). Forexample, suppose you introduced an additional decorator, such as the @timethis dec‐orator from Recipe 9.2, and wrote code like this:
@timethis@logged(logging.DEBUG)def countdown(n): while n > 0: n -= 1
You’ll find that the accessor methods still work:
>>> countdown(10000000)DEBUG:__main__:countdowncountdown 0.8198461532592773>>> countdown.set_level(logging.WARNING)>>> countdown.set_message("Counting down to zero")>>> countdown(10000000)WARNING:__main__:Counting down to zerocountdown 0.8225970268249512>>>
You’ll also find that it all still works exactly the same way if the decorators are composedin the opposite order, like this:
@logged(logging.DEBUG)@timethisdef countdown(n): while n > 0: n -= 1
Although it’s not shown, accessor functions to return the value of various settings couldalso be written just as easily by adding extra code such as this:
...@attach_wrapper(wrapper)def get_level(): return level
# Alternativewrapper.get_level = lambda: level...
338 | Chapter 9: Metaprogramming
Dow
nlo
ad fro
m W
ow
! eBook
<w
ww
.wow
ebook.
com
>
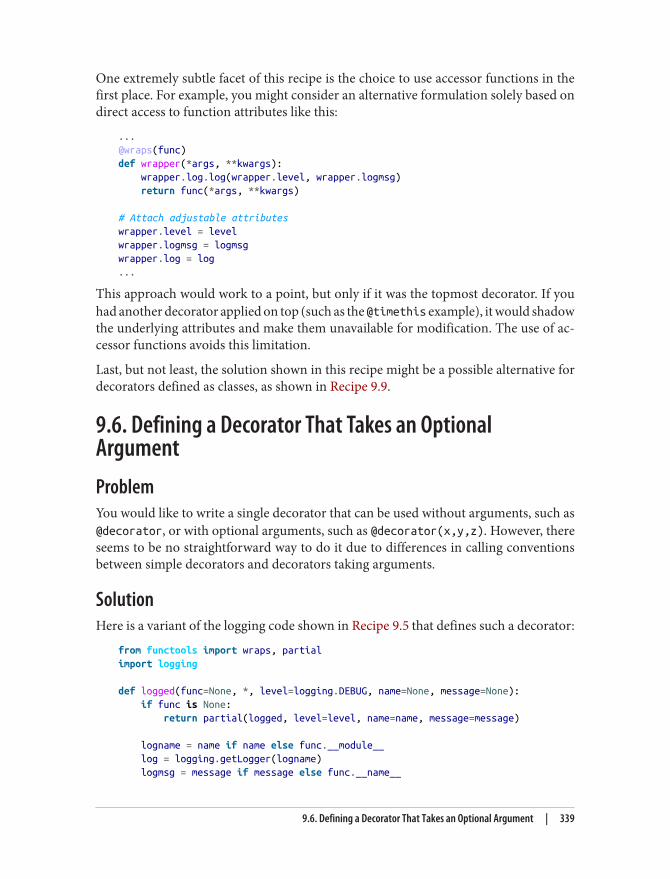
One extremely subtle facet of this recipe is the choice to use accessor functions in thefirst place. For example, you might consider an alternative formulation solely based ondirect access to function attributes like this:
...@wraps(func)def wrapper(*args, **kwargs): wrapper.log.log(wrapper.level, wrapper.logmsg) return func(*args, **kwargs)
# Attach adjustable attributeswrapper.level = levelwrapper.logmsg = logmsgwrapper.log = log...
This approach would work to a point, but only if it was the topmost decorator. If youhad another decorator applied on top (such as the @timethis example), it would shadowthe underlying attributes and make them unavailable for modification. The use of ac‐cessor functions avoids this limitation.
Last, but not least, the solution shown in this recipe might be a possible alternative fordecorators defined as classes, as shown in Recipe 9.9.
9.6. Defining a Decorator That Takes an OptionalArgumentProblemYou would like to write a single decorator that can be used without arguments, such as@decorator, or with optional arguments, such as @decorator(x,y,z). However, thereseems to be no straightforward way to do it due to differences in calling conventionsbetween simple decorators and decorators taking arguments.
SolutionHere is a variant of the logging code shown in Recipe 9.5 that defines such a decorator:
from functools import wraps, partialimport logging
def logged(func=None, *, level=logging.DEBUG, name=None, message=None): if func is None: return partial(logged, level=level, name=name, message=message)
logname = name if name else func.__module__ log = logging.getLogger(logname) logmsg = message if message else func.__name__
9.6. Defining a Decorator That Takes an Optional Argument | 339
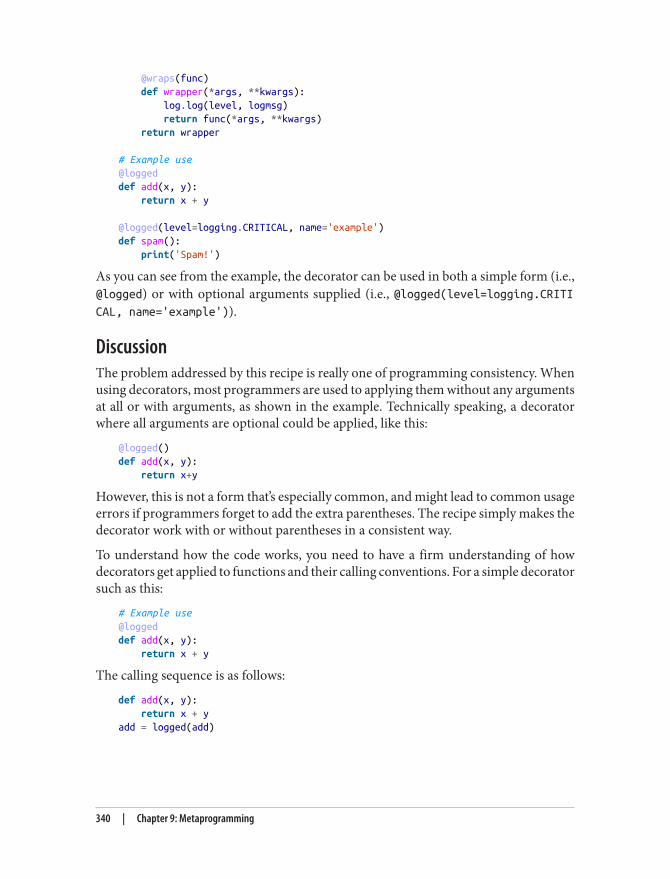
@wraps(func) def wrapper(*args, **kwargs): log.log(level, logmsg) return func(*args, **kwargs) return wrapper
# Example use@loggeddef add(x, y): return x + y
@logged(level=logging.CRITICAL, name='example')def spam(): print('Spam!')
As you can see from the example, the decorator can be used in both a simple form (i.e.,@logged) or with optional arguments supplied (i.e., @logged(level=logging.CRITICAL, name='example')).
DiscussionThe problem addressed by this recipe is really one of programming consistency. Whenusing decorators, most programmers are used to applying them without any argumentsat all or with arguments, as shown in the example. Technically speaking, a decoratorwhere all arguments are optional could be applied, like this:
@logged()def add(x, y): return x+y
However, this is not a form that’s especially common, and might lead to common usageerrors if programmers forget to add the extra parentheses. The recipe simply makes thedecorator work with or without parentheses in a consistent way.
To understand how the code works, you need to have a firm understanding of howdecorators get applied to functions and their calling conventions. For a simple decoratorsuch as this:
# Example use@loggeddef add(x, y): return x + y
The calling sequence is as follows:
def add(x, y): return x + yadd = logged(add)
340 | Chapter 9: Metaprogramming
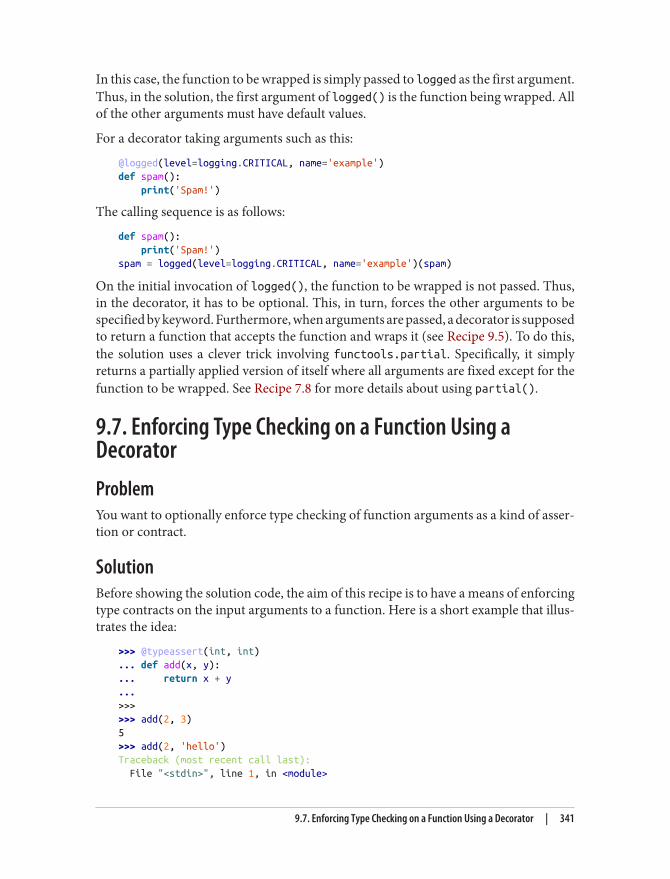
In this case, the function to be wrapped is simply passed to logged as the first argument.Thus, in the solution, the first argument of logged() is the function being wrapped. Allof the other arguments must have default values.
For a decorator taking arguments such as this:
@logged(level=logging.CRITICAL, name='example')def spam(): print('Spam!')
The calling sequence is as follows:
def spam(): print('Spam!')spam = logged(level=logging.CRITICAL, name='example')(spam)
On the initial invocation of logged(), the function to be wrapped is not passed. Thus,in the decorator, it has to be optional. This, in turn, forces the other arguments to bespecified by keyword. Furthermore, when arguments are passed, a decorator is supposedto return a function that accepts the function and wraps it (see Recipe 9.5). To do this,the solution uses a clever trick involving functools.partial. Specifically, it simplyreturns a partially applied version of itself where all arguments are fixed except for thefunction to be wrapped. See Recipe 7.8 for more details about using partial().
9.7. Enforcing Type Checking on a Function Using aDecoratorProblemYou want to optionally enforce type checking of function arguments as a kind of asser‐tion or contract.
SolutionBefore showing the solution code, the aim of this recipe is to have a means of enforcingtype contracts on the input arguments to a function. Here is a short example that illus‐trates the idea:
>>> @typeassert(int, int)... def add(x, y):... return x + y...>>>>>> add(2, 3)5>>> add(2, 'hello')Traceback (most recent call last): File "<stdin>", line 1, in <module>
9.7. Enforcing Type Checking on a Function Using a Decorator | 341

File "contract.py", line 33, in wrapperTypeError: Argument y must be <class 'int'>>>>
Now, here is an implementation of the @typeassert decorator:
from inspect import signaturefrom functools import wraps
def typeassert(*ty_args, **ty_kwargs): def decorate(func): # If in optimized mode, disable type checking if not __debug__: return func
# Map function argument names to supplied types sig = signature(func) bound_types = sig.bind_partial(*ty_args, **ty_kwargs).arguments
@wraps(func) def wrapper(*args, **kwargs): bound_values = sig.bind(*args, **kwargs) # Enforce type assertions across supplied arguments for name, value in bound_values.arguments.items(): if name in bound_types: if not isinstance(value, bound_types[name]): raise TypeError( 'Argument {} must be {}'.format(name, bound_types[name]) ) return func(*args, **kwargs) return wrapper return decorate
You will find that this decorator is rather flexible, allowing types to be specified for allor a subset of a function’s arguments. Moreover, types can be specified by position orby keyword. Here is an example:
>>> @typeassert(int, z=int)... def spam(x, y, z=42):... print(x, y, z)...>>> spam(1, 2, 3)1 2 3>>> spam(1, 'hello', 3)1 hello 3>>> spam(1, 'hello', 'world')Traceback (most recent call last): File "<stdin>", line 1, in <module> File "contract.py", line 33, in wrapperTypeError: Argument z must be <class 'int'>>>>
342 | Chapter 9: Metaprogramming
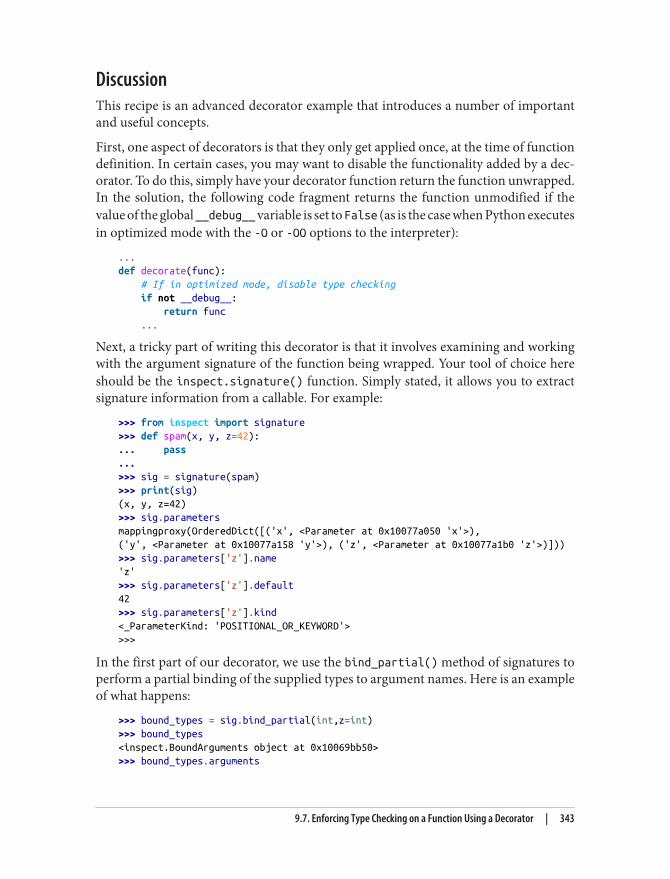
DiscussionThis recipe is an advanced decorator example that introduces a number of importantand useful concepts.
First, one aspect of decorators is that they only get applied once, at the time of functiondefinition. In certain cases, you may want to disable the functionality added by a dec‐orator. To do this, simply have your decorator function return the function unwrapped.In the solution, the following code fragment returns the function unmodified if thevalue of the global __debug__ variable is set to False (as is the case when Python executesin optimized mode with the -O or -OO options to the interpreter):
...def decorate(func): # If in optimized mode, disable type checking if not __debug__: return func ...
Next, a tricky part of writing this decorator is that it involves examining and workingwith the argument signature of the function being wrapped. Your tool of choice hereshould be the inspect.signature() function. Simply stated, it allows you to extractsignature information from a callable. For example:
>>> from inspect import signature>>> def spam(x, y, z=42):... pass...>>> sig = signature(spam)>>> print(sig)(x, y, z=42)>>> sig.parametersmappingproxy(OrderedDict([('x', <Parameter at 0x10077a050 'x'>),('y', <Parameter at 0x10077a158 'y'>), ('z', <Parameter at 0x10077a1b0 'z'>)]))>>> sig.parameters['z'].name'z'>>> sig.parameters['z'].default42>>> sig.parameters['z'].kind<_ParameterKind: 'POSITIONAL_OR_KEYWORD'>>>>
In the first part of our decorator, we use the bind_partial() method of signatures toperform a partial binding of the supplied types to argument names. Here is an exampleof what happens:
>>> bound_types = sig.bind_partial(int,z=int)>>> bound_types<inspect.BoundArguments object at 0x10069bb50>>>> bound_types.arguments
9.7. Enforcing Type Checking on a Function Using a Decorator | 343
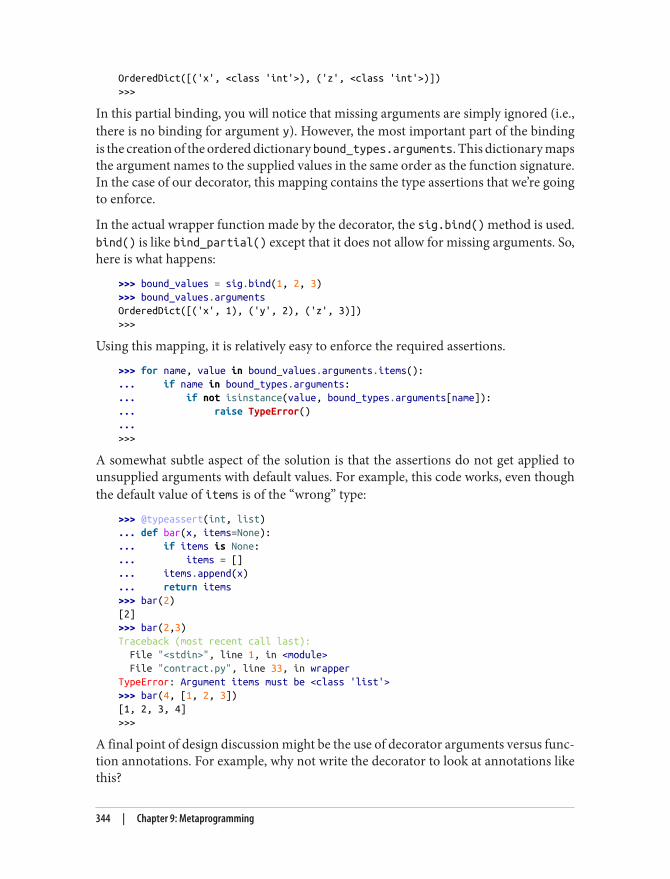
OrderedDict([('x', <class 'int'>), ('z', <class 'int'>)])>>>
In this partial binding, you will notice that missing arguments are simply ignored (i.e.,there is no binding for argument y). However, the most important part of the bindingis the creation of the ordered dictionary bound_types.arguments. This dictionary mapsthe argument names to the supplied values in the same order as the function signature.In the case of our decorator, this mapping contains the type assertions that we’re goingto enforce.
In the actual wrapper function made by the decorator, the sig.bind() method is used.bind() is like bind_partial() except that it does not allow for missing arguments. So,here is what happens:
>>> bound_values = sig.bind(1, 2, 3)>>> bound_values.argumentsOrderedDict([('x', 1), ('y', 2), ('z', 3)])>>>
Using this mapping, it is relatively easy to enforce the required assertions.
>>> for name, value in bound_values.arguments.items():... if name in bound_types.arguments:... if not isinstance(value, bound_types.arguments[name]):... raise TypeError()...>>>
A somewhat subtle aspect of the solution is that the assertions do not get applied tounsupplied arguments with default values. For example, this code works, even thoughthe default value of items is of the “wrong” type:
>>> @typeassert(int, list)... def bar(x, items=None):... if items is None:... items = []... items.append(x)... return items>>> bar(2)[2]>>> bar(2,3)Traceback (most recent call last): File "<stdin>", line 1, in <module> File "contract.py", line 33, in wrapperTypeError: Argument items must be <class 'list'>>>> bar(4, [1, 2, 3])[1, 2, 3, 4]>>>
A final point of design discussion might be the use of decorator arguments versus func‐tion annotations. For example, why not write the decorator to look at annotations likethis?
344 | Chapter 9: Metaprogramming
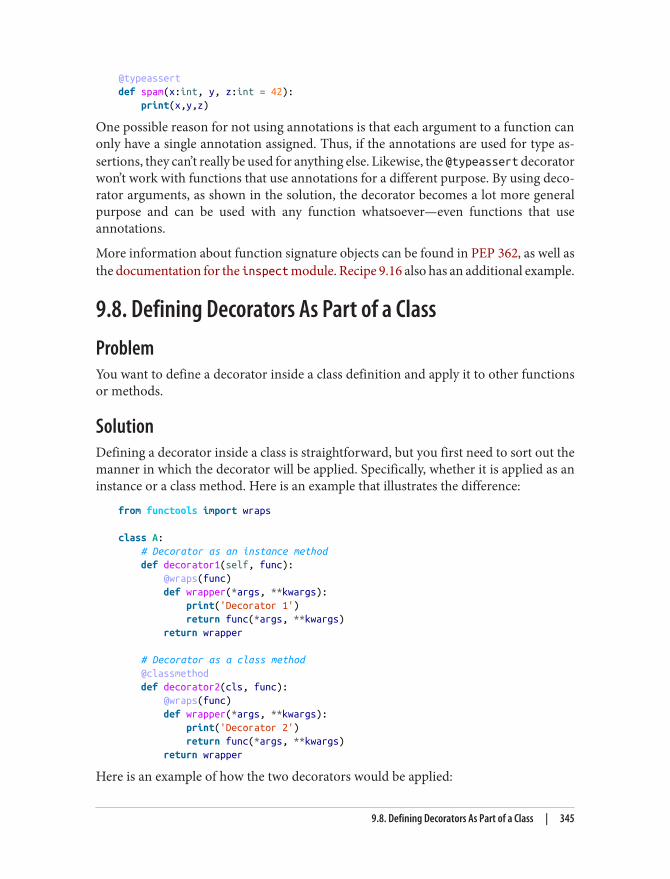
@typeassertdef spam(x:int, y, z:int = 42): print(x,y,z)
One possible reason for not using annotations is that each argument to a function canonly have a single annotation assigned. Thus, if the annotations are used for type as‐sertions, they can’t really be used for anything else. Likewise, the @typeassert decoratorwon’t work with functions that use annotations for a different purpose. By using deco‐rator arguments, as shown in the solution, the decorator becomes a lot more generalpurpose and can be used with any function whatsoever—even functions that useannotations.
More information about function signature objects can be found in PEP 362, as well asthe documentation for the inspect module. Recipe 9.16 also has an additional example.
9.8. Defining Decorators As Part of a ClassProblemYou want to define a decorator inside a class definition and apply it to other functionsor methods.
SolutionDefining a decorator inside a class is straightforward, but you first need to sort out themanner in which the decorator will be applied. Specifically, whether it is applied as aninstance or a class method. Here is an example that illustrates the difference:
from functools import wraps
class A: # Decorator as an instance method def decorator1(self, func): @wraps(func) def wrapper(*args, **kwargs): print('Decorator 1') return func(*args, **kwargs) return wrapper
# Decorator as a class method @classmethod def decorator2(cls, func): @wraps(func) def wrapper(*args, **kwargs): print('Decorator 2') return func(*args, **kwargs) return wrapper
Here is an example of how the two decorators would be applied:
9.8. Defining Decorators As Part of a Class | 345
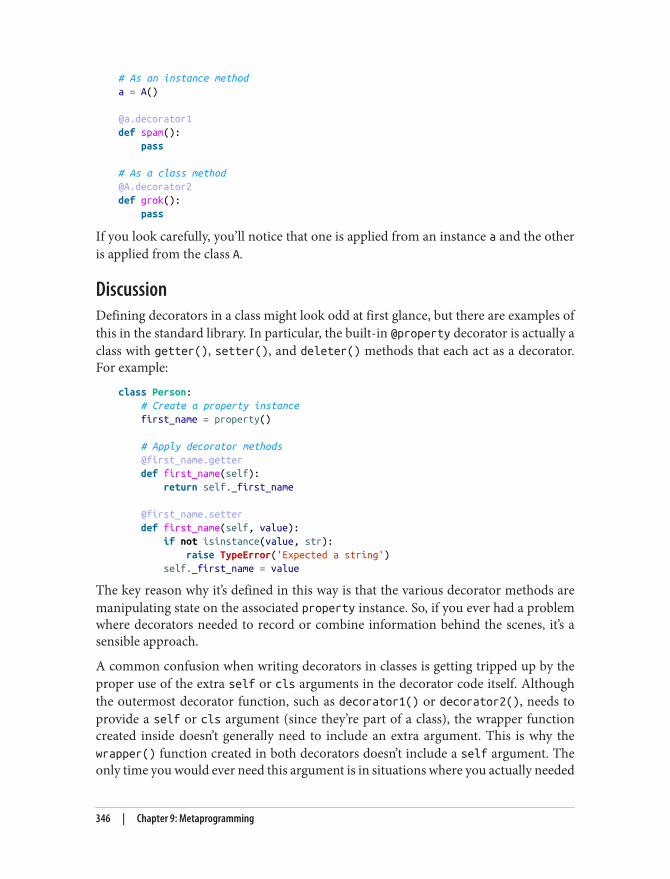
# As an instance methoda = A()
@a.decorator1def spam(): pass
# As a class [email protected] grok(): pass
If you look carefully, you’ll notice that one is applied from an instance a and the otheris applied from the class A.
DiscussionDefining decorators in a class might look odd at first glance, but there are examples ofthis in the standard library. In particular, the built-in @property decorator is actually aclass with getter(), setter(), and deleter() methods that each act as a decorator.For example:
class Person: # Create a property instance first_name = property()
# Apply decorator methods @first_name.getter def first_name(self): return self._first_name
@first_name.setter def first_name(self, value): if not isinstance(value, str): raise TypeError('Expected a string') self._first_name = value
The key reason why it’s defined in this way is that the various decorator methods aremanipulating state on the associated property instance. So, if you ever had a problemwhere decorators needed to record or combine information behind the scenes, it’s asensible approach.
A common confusion when writing decorators in classes is getting tripped up by theproper use of the extra self or cls arguments in the decorator code itself. Althoughthe outermost decorator function, such as decorator1() or decorator2(), needs toprovide a self or cls argument (since they’re part of a class), the wrapper functioncreated inside doesn’t generally need to include an extra argument. This is why thewrapper() function created in both decorators doesn’t include a self argument. Theonly time you would ever need this argument is in situations where you actually needed
346 | Chapter 9: Metaprogramming
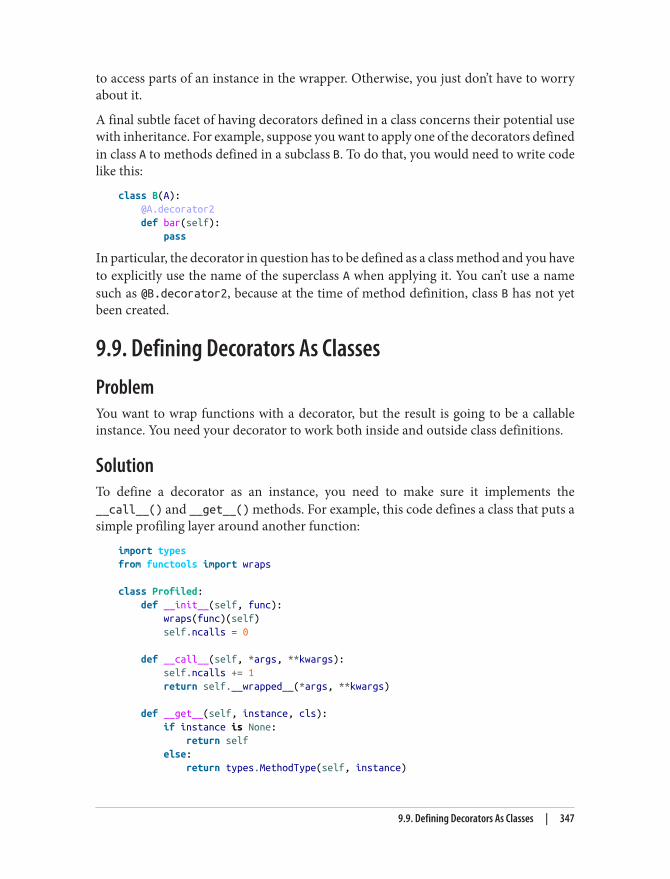
to access parts of an instance in the wrapper. Otherwise, you just don’t have to worryabout it.
A final subtle facet of having decorators defined in a class concerns their potential usewith inheritance. For example, suppose you want to apply one of the decorators definedin class A to methods defined in a subclass B. To do that, you would need to write codelike this:
class B(A): @A.decorator2 def bar(self): pass
In particular, the decorator in question has to be defined as a class method and you haveto explicitly use the name of the superclass A when applying it. You can’t use a namesuch as @B.decorator2, because at the time of method definition, class B has not yetbeen created.
9.9. Defining Decorators As ClassesProblemYou want to wrap functions with a decorator, but the result is going to be a callableinstance. You need your decorator to work both inside and outside class definitions.
SolutionTo define a decorator as an instance, you need to make sure it implements the__call__() and __get__() methods. For example, this code defines a class that puts asimple profiling layer around another function:
import typesfrom functools import wraps
class Profiled: def __init__(self, func): wraps(func)(self) self.ncalls = 0
def __call__(self, *args, **kwargs): self.ncalls += 1 return self.__wrapped__(*args, **kwargs)
def __get__(self, instance, cls): if instance is None: return self else: return types.MethodType(self, instance)
9.9. Defining Decorators As Classes | 347
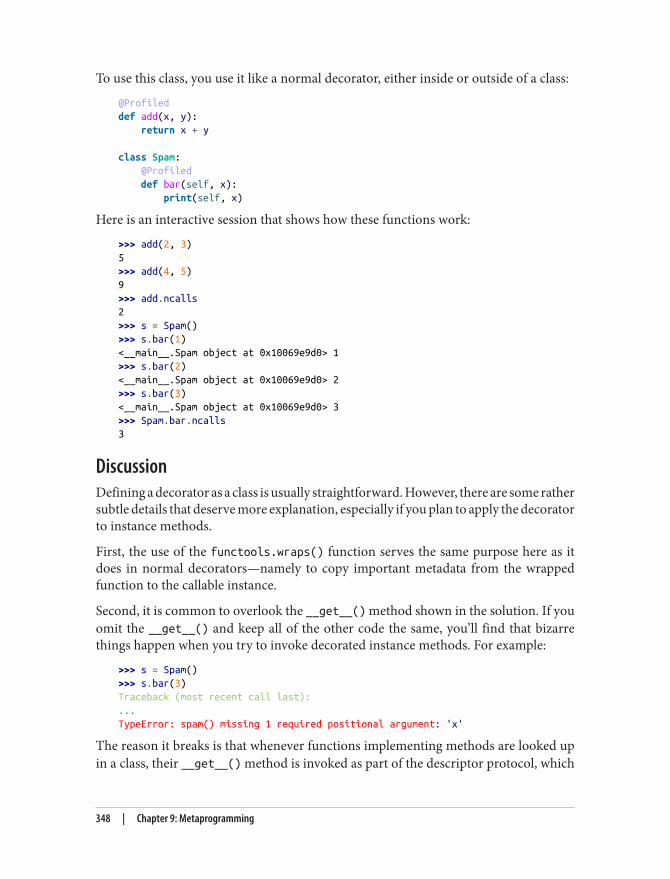
To use this class, you use it like a normal decorator, either inside or outside of a class:
@Profileddef add(x, y): return x + y
class Spam: @Profiled def bar(self, x): print(self, x)
Here is an interactive session that shows how these functions work:
>>> add(2, 3)5>>> add(4, 5)9>>> add.ncalls2>>> s = Spam()>>> s.bar(1)<__main__.Spam object at 0x10069e9d0> 1>>> s.bar(2)<__main__.Spam object at 0x10069e9d0> 2>>> s.bar(3)<__main__.Spam object at 0x10069e9d0> 3>>> Spam.bar.ncalls3
DiscussionDefining a decorator as a class is usually straightforward. However, there are some rathersubtle details that deserve more explanation, especially if you plan to apply the decoratorto instance methods.
First, the use of the functools.wraps() function serves the same purpose here as itdoes in normal decorators—namely to copy important metadata from the wrappedfunction to the callable instance.
Second, it is common to overlook the __get__() method shown in the solution. If youomit the __get__() and keep all of the other code the same, you’ll find that bizarrethings happen when you try to invoke decorated instance methods. For example:
>>> s = Spam()>>> s.bar(3)Traceback (most recent call last):...TypeError: spam() missing 1 required positional argument: 'x'
The reason it breaks is that whenever functions implementing methods are looked upin a class, their __get__() method is invoked as part of the descriptor protocol, which
348 | Chapter 9: Metaprogramming
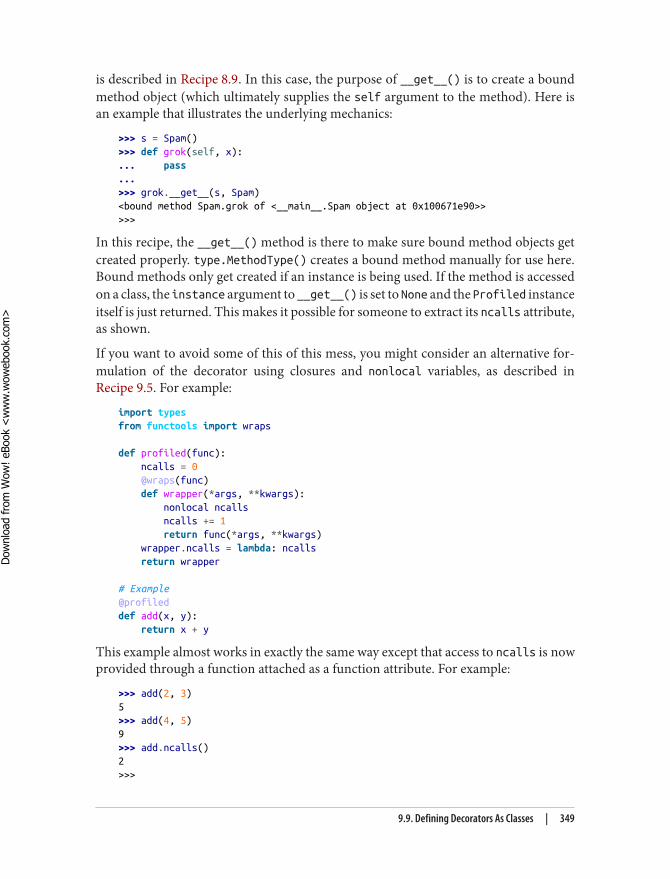
is described in Recipe 8.9. In this case, the purpose of __get__() is to create a boundmethod object (which ultimately supplies the self argument to the method). Here isan example that illustrates the underlying mechanics:
>>> s = Spam()>>> def grok(self, x):... pass...>>> grok.__get__(s, Spam)<bound method Spam.grok of <__main__.Spam object at 0x100671e90>>>>>
In this recipe, the __get__() method is there to make sure bound method objects getcreated properly. type.MethodType() creates a bound method manually for use here.Bound methods only get created if an instance is being used. If the method is accessedon a class, the instance argument to __get__() is set to None and the Profiled instanceitself is just returned. This makes it possible for someone to extract its ncalls attribute,as shown.
If you want to avoid some of this of this mess, you might consider an alternative for‐mulation of the decorator using closures and nonlocal variables, as described inRecipe 9.5. For example:
import typesfrom functools import wraps
def profiled(func): ncalls = 0 @wraps(func) def wrapper(*args, **kwargs): nonlocal ncalls ncalls += 1 return func(*args, **kwargs) wrapper.ncalls = lambda: ncalls return wrapper
# Example@profileddef add(x, y): return x + y
This example almost works in exactly the same way except that access to ncalls is nowprovided through a function attached as a function attribute. For example:
>>> add(2, 3)5>>> add(4, 5)9>>> add.ncalls()2>>>
9.9. Defining Decorators As Classes | 349
Dow
nlo
ad fro
m W
ow
! eBook
<w
ww
.wow
ebook.
com
>
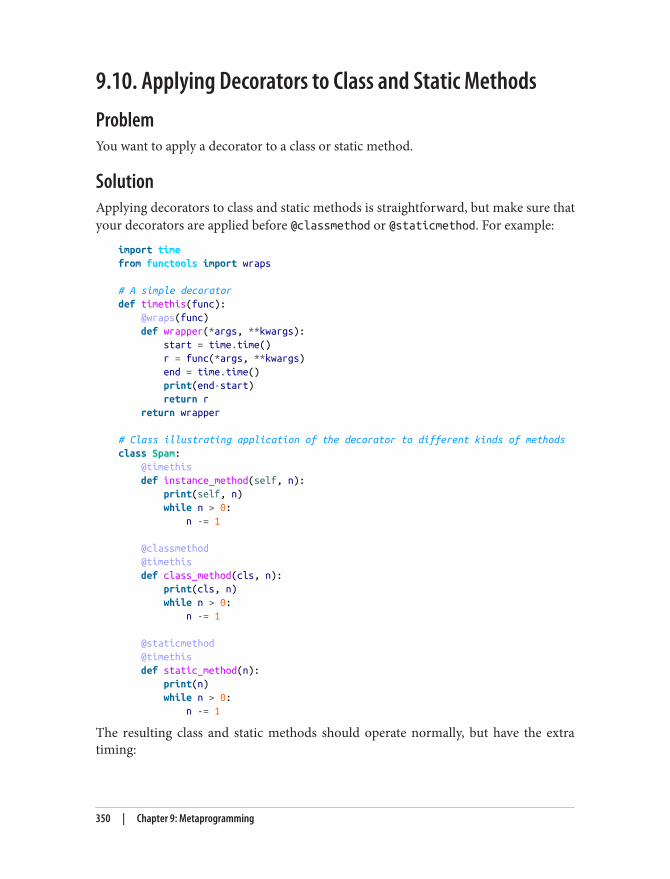
9.10. Applying Decorators to Class and Static MethodsProblemYou want to apply a decorator to a class or static method.
SolutionApplying decorators to class and static methods is straightforward, but make sure thatyour decorators are applied before @classmethod or @staticmethod. For example:
import timefrom functools import wraps
# A simple decoratordef timethis(func): @wraps(func) def wrapper(*args, **kwargs): start = time.time() r = func(*args, **kwargs) end = time.time() print(end-start) return r return wrapper
# Class illustrating application of the decorator to different kinds of methodsclass Spam: @timethis def instance_method(self, n): print(self, n) while n > 0: n -= 1
@classmethod @timethis def class_method(cls, n): print(cls, n) while n > 0: n -= 1
@staticmethod @timethis def static_method(n): print(n) while n > 0: n -= 1
The resulting class and static methods should operate normally, but have the extratiming:
350 | Chapter 9: Metaprogramming
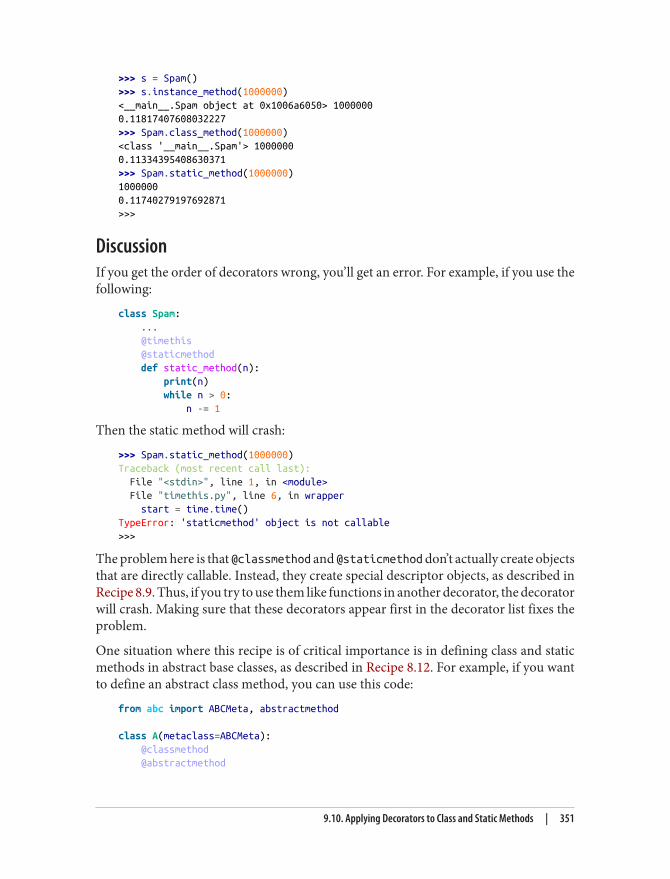
>>> s = Spam()>>> s.instance_method(1000000)<__main__.Spam object at 0x1006a6050> 10000000.11817407608032227>>> Spam.class_method(1000000)<class '__main__.Spam'> 10000000.11334395408630371>>> Spam.static_method(1000000)10000000.11740279197692871>>>
DiscussionIf you get the order of decorators wrong, you’ll get an error. For example, if you use thefollowing:
class Spam: ... @timethis @staticmethod def static_method(n): print(n) while n > 0: n -= 1
Then the static method will crash:
>>> Spam.static_method(1000000)Traceback (most recent call last): File "<stdin>", line 1, in <module> File "timethis.py", line 6, in wrapper start = time.time()TypeError: 'staticmethod' object is not callable>>>
The problem here is that @classmethod and @staticmethod don’t actually create objectsthat are directly callable. Instead, they create special descriptor objects, as described inRecipe 8.9. Thus, if you try to use them like functions in another decorator, the decoratorwill crash. Making sure that these decorators appear first in the decorator list fixes theproblem.
One situation where this recipe is of critical importance is in defining class and staticmethods in abstract base classes, as described in Recipe 8.12. For example, if you wantto define an abstract class method, you can use this code:
from abc import ABCMeta, abstractmethod
class A(metaclass=ABCMeta): @classmethod @abstractmethod
9.10. Applying Decorators to Class and Static Methods | 351
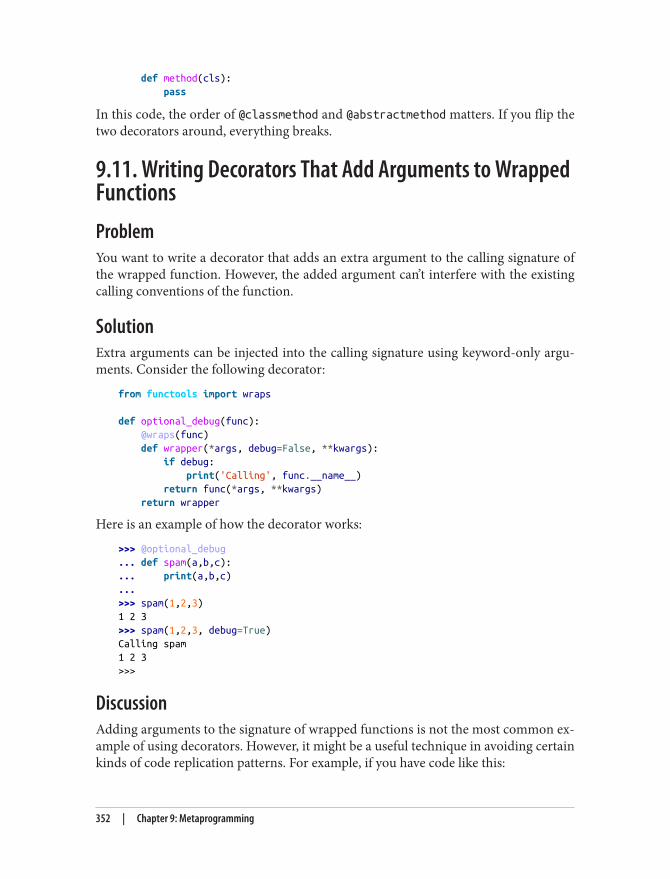
def method(cls): pass
In this code, the order of @classmethod and @abstractmethod matters. If you flip thetwo decorators around, everything breaks.
9.11. Writing Decorators That Add Arguments to WrappedFunctionsProblemYou want to write a decorator that adds an extra argument to the calling signature ofthe wrapped function. However, the added argument can’t interfere with the existingcalling conventions of the function.
SolutionExtra arguments can be injected into the calling signature using keyword-only argu‐ments. Consider the following decorator:
from functools import wraps
def optional_debug(func): @wraps(func) def wrapper(*args, debug=False, **kwargs): if debug: print('Calling', func.__name__) return func(*args, **kwargs) return wrapper
Here is an example of how the decorator works:
>>> @optional_debug... def spam(a,b,c):... print(a,b,c)...>>> spam(1,2,3)1 2 3>>> spam(1,2,3, debug=True)Calling spam1 2 3>>>
DiscussionAdding arguments to the signature of wrapped functions is not the most common ex‐ample of using decorators. However, it might be a useful technique in avoiding certainkinds of code replication patterns. For example, if you have code like this:
352 | Chapter 9: Metaprogramming
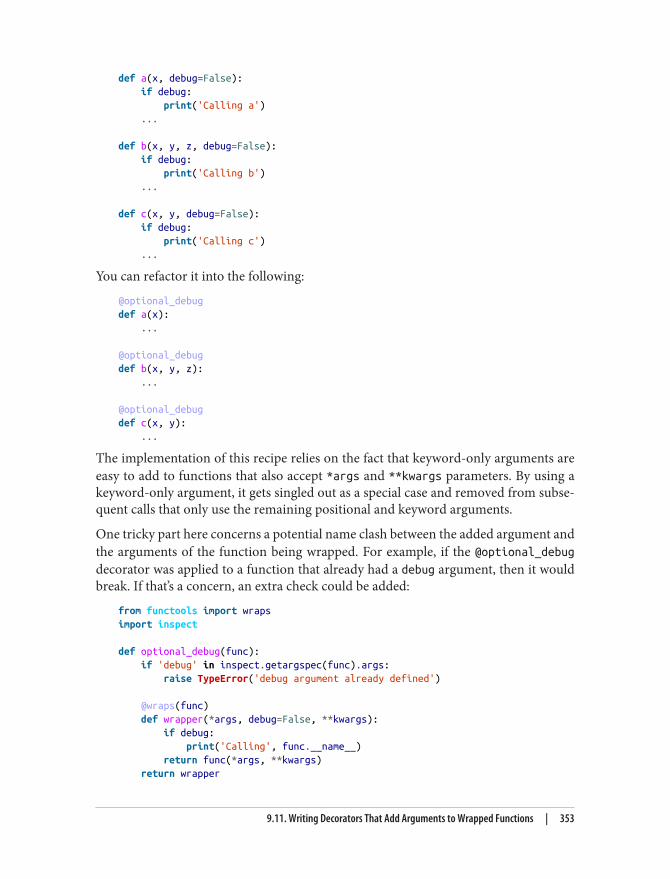
def a(x, debug=False): if debug: print('Calling a') ...
def b(x, y, z, debug=False): if debug: print('Calling b') ...
def c(x, y, debug=False): if debug: print('Calling c') ...
You can refactor it into the following:
@optional_debugdef a(x): ...
@optional_debugdef b(x, y, z): ...
@optional_debugdef c(x, y): ...
The implementation of this recipe relies on the fact that keyword-only arguments areeasy to add to functions that also accept *args and **kwargs parameters. By using akeyword-only argument, it gets singled out as a special case and removed from subse‐quent calls that only use the remaining positional and keyword arguments.
One tricky part here concerns a potential name clash between the added argument andthe arguments of the function being wrapped. For example, if the @optional_debugdecorator was applied to a function that already had a debug argument, then it wouldbreak. If that’s a concern, an extra check could be added:
from functools import wrapsimport inspect
def optional_debug(func): if 'debug' in inspect.getargspec(func).args: raise TypeError('debug argument already defined')
@wraps(func) def wrapper(*args, debug=False, **kwargs): if debug: print('Calling', func.__name__) return func(*args, **kwargs) return wrapper
9.11. Writing Decorators That Add Arguments to Wrapped Functions | 353
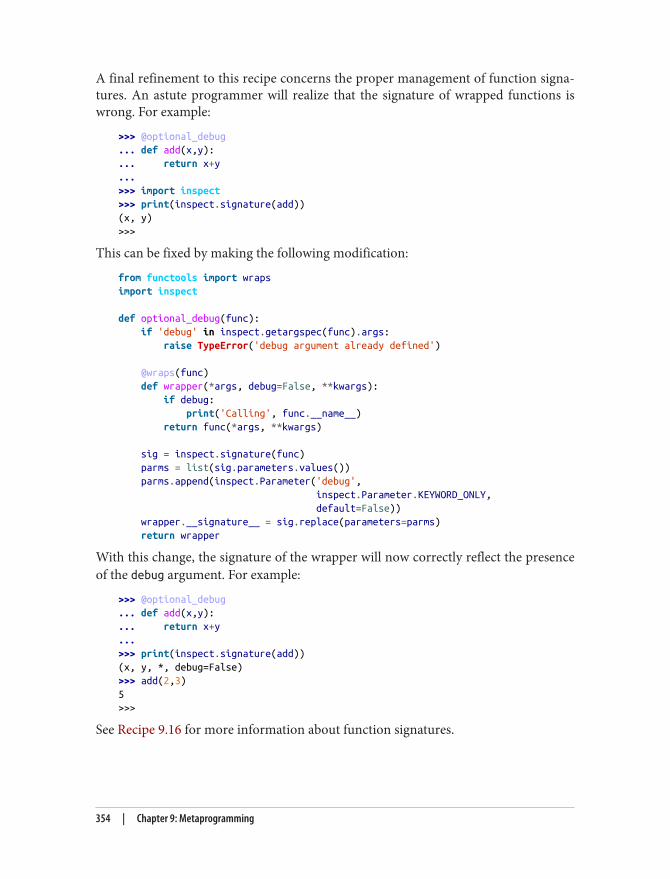
A final refinement to this recipe concerns the proper management of function signa‐tures. An astute programmer will realize that the signature of wrapped functions iswrong. For example:
>>> @optional_debug... def add(x,y):... return x+y...>>> import inspect>>> print(inspect.signature(add))(x, y)>>>
This can be fixed by making the following modification:
from functools import wrapsimport inspect
def optional_debug(func): if 'debug' in inspect.getargspec(func).args: raise TypeError('debug argument already defined')
@wraps(func) def wrapper(*args, debug=False, **kwargs): if debug: print('Calling', func.__name__) return func(*args, **kwargs)
sig = inspect.signature(func) parms = list(sig.parameters.values()) parms.append(inspect.Parameter('debug', inspect.Parameter.KEYWORD_ONLY, default=False)) wrapper.__signature__ = sig.replace(parameters=parms) return wrapper
With this change, the signature of the wrapper will now correctly reflect the presenceof the debug argument. For example:
>>> @optional_debug... def add(x,y):... return x+y...>>> print(inspect.signature(add))(x, y, *, debug=False)>>> add(2,3)5>>>
See Recipe 9.16 for more information about function signatures.
354 | Chapter 9: Metaprogramming
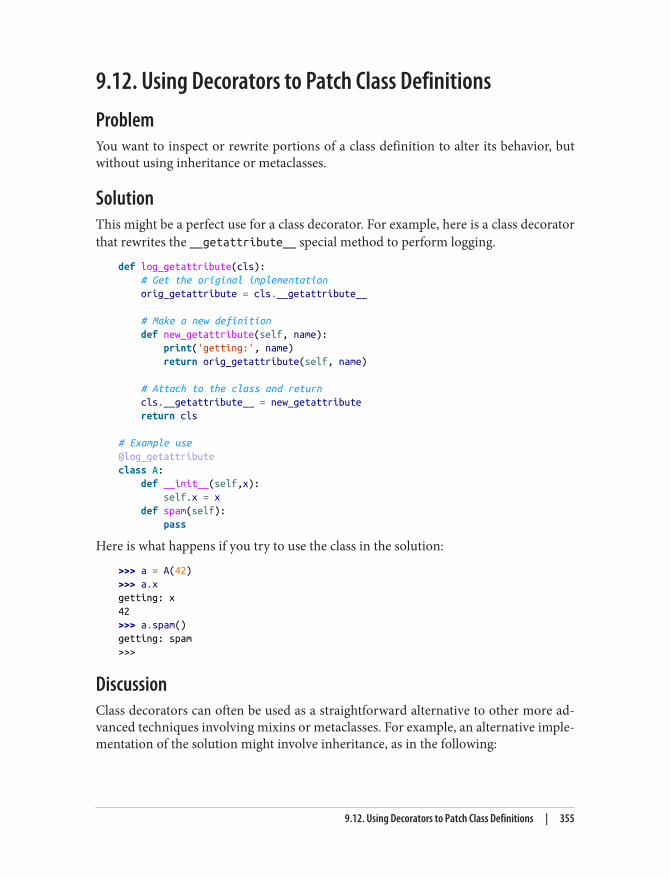
9.12. Using Decorators to Patch Class DefinitionsProblemYou want to inspect or rewrite portions of a class definition to alter its behavior, butwithout using inheritance or metaclasses.
SolutionThis might be a perfect use for a class decorator. For example, here is a class decoratorthat rewrites the __getattribute__ special method to perform logging.
def log_getattribute(cls): # Get the original implementation orig_getattribute = cls.__getattribute__
# Make a new definition def new_getattribute(self, name): print('getting:', name) return orig_getattribute(self, name)
# Attach to the class and return cls.__getattribute__ = new_getattribute return cls
# Example use@log_getattributeclass A: def __init__(self,x): self.x = x def spam(self): pass
Here is what happens if you try to use the class in the solution:
>>> a = A(42)>>> a.xgetting: x42>>> a.spam()getting: spam>>>
DiscussionClass decorators can often be used as a straightforward alternative to other more ad‐vanced techniques involving mixins or metaclasses. For example, an alternative imple‐mentation of the solution might involve inheritance, as in the following:
9.12. Using Decorators to Patch Class Definitions | 355
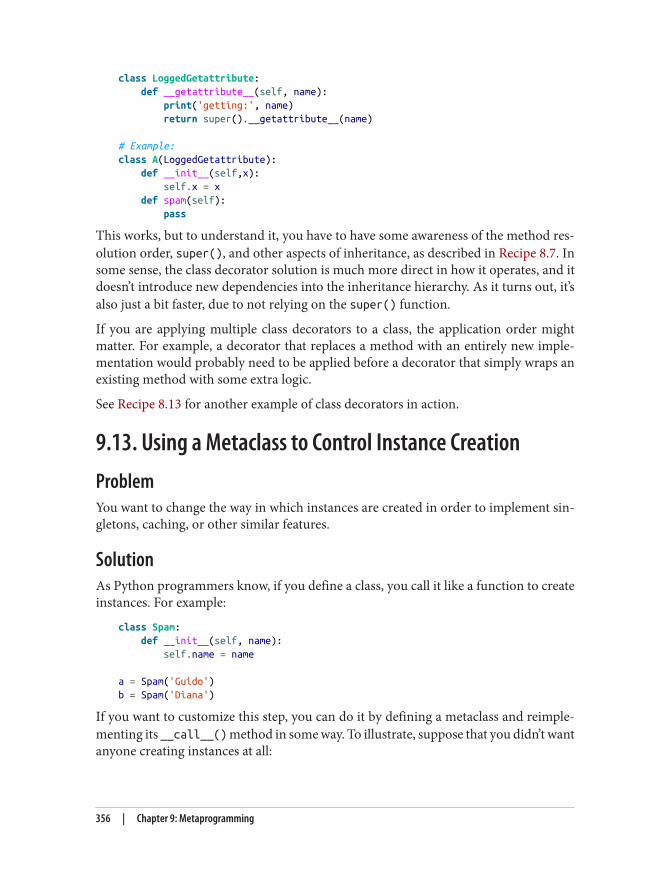
class LoggedGetattribute: def __getattribute__(self, name): print('getting:', name) return super().__getattribute__(name)
# Example:class A(LoggedGetattribute): def __init__(self,x): self.x = x def spam(self): pass
This works, but to understand it, you have to have some awareness of the method res‐olution order, super(), and other aspects of inheritance, as described in Recipe 8.7. Insome sense, the class decorator solution is much more direct in how it operates, and itdoesn’t introduce new dependencies into the inheritance hierarchy. As it turns out, it’salso just a bit faster, due to not relying on the super() function.
If you are applying multiple class decorators to a class, the application order mightmatter. For example, a decorator that replaces a method with an entirely new imple‐mentation would probably need to be applied before a decorator that simply wraps anexisting method with some extra logic.
See Recipe 8.13 for another example of class decorators in action.
9.13. Using a Metaclass to Control Instance CreationProblemYou want to change the way in which instances are created in order to implement sin‐gletons, caching, or other similar features.
SolutionAs Python programmers know, if you define a class, you call it like a function to createinstances. For example:
class Spam: def __init__(self, name): self.name = name
a = Spam('Guido')b = Spam('Diana')
If you want to customize this step, you can do it by defining a metaclass and reimple‐menting its __call__() method in some way. To illustrate, suppose that you didn’t wantanyone creating instances at all:
356 | Chapter 9: Metaprogramming
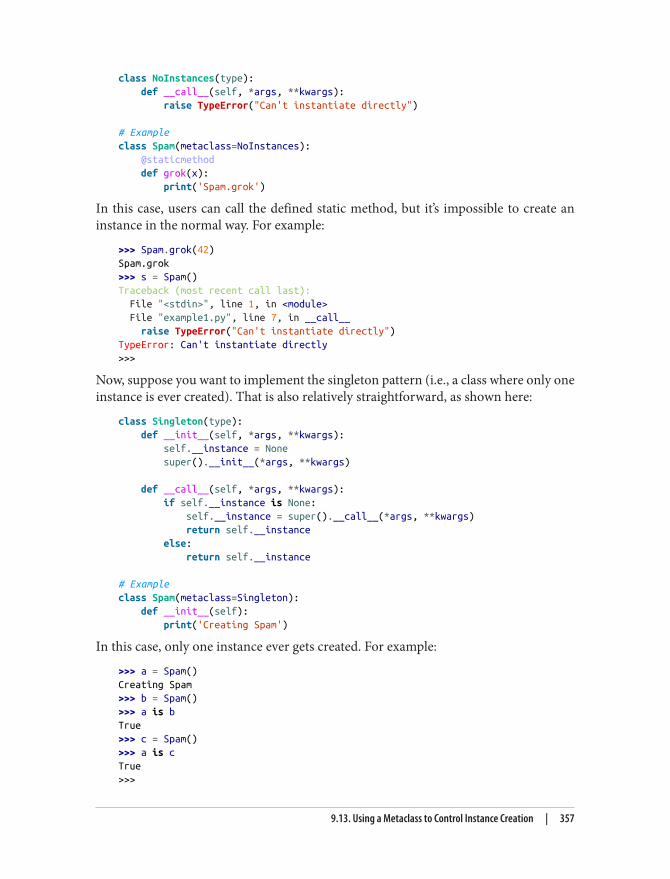
class NoInstances(type): def __call__(self, *args, **kwargs): raise TypeError("Can't instantiate directly")
# Exampleclass Spam(metaclass=NoInstances): @staticmethod def grok(x): print('Spam.grok')
In this case, users can call the defined static method, but it’s impossible to create aninstance in the normal way. For example:
>>> Spam.grok(42)Spam.grok>>> s = Spam()Traceback (most recent call last): File "<stdin>", line 1, in <module> File "example1.py", line 7, in __call__ raise TypeError("Can't instantiate directly")TypeError: Can't instantiate directly>>>
Now, suppose you want to implement the singleton pattern (i.e., a class where only oneinstance is ever created). That is also relatively straightforward, as shown here:
class Singleton(type): def __init__(self, *args, **kwargs): self.__instance = None super().__init__(*args, **kwargs)
def __call__(self, *args, **kwargs): if self.__instance is None: self.__instance = super().__call__(*args, **kwargs) return self.__instance else: return self.__instance
# Exampleclass Spam(metaclass=Singleton): def __init__(self): print('Creating Spam')
In this case, only one instance ever gets created. For example:
>>> a = Spam()Creating Spam>>> b = Spam()>>> a is bTrue>>> c = Spam()>>> a is cTrue>>>
9.13. Using a Metaclass to Control Instance Creation | 357
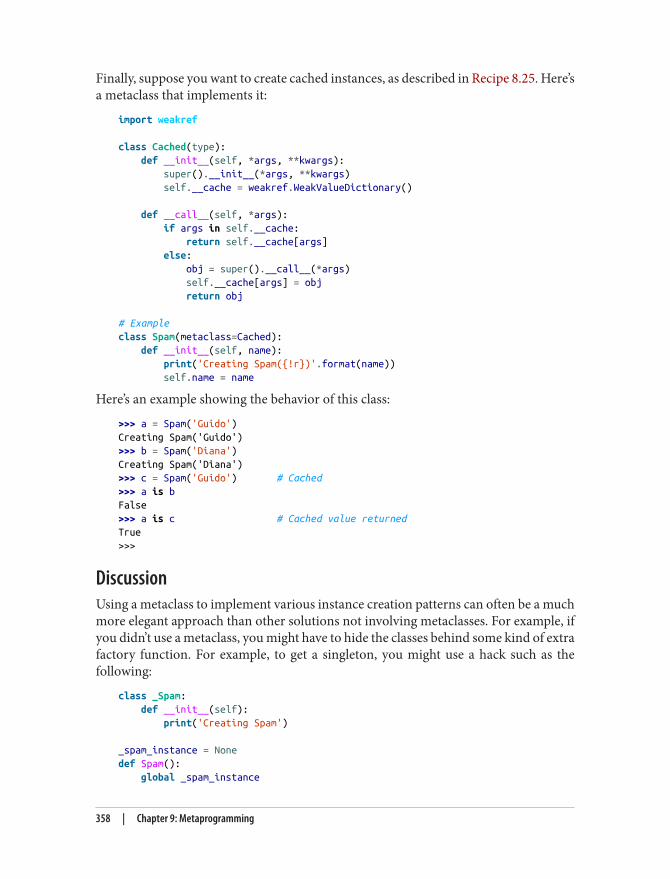
Finally, suppose you want to create cached instances, as described in Recipe 8.25. Here’sa metaclass that implements it:
import weakref
class Cached(type): def __init__(self, *args, **kwargs): super().__init__(*args, **kwargs) self.__cache = weakref.WeakValueDictionary()
def __call__(self, *args): if args in self.__cache: return self.__cache[args] else: obj = super().__call__(*args) self.__cache[args] = obj return obj
# Exampleclass Spam(metaclass=Cached): def __init__(self, name): print('Creating Spam({!r})'.format(name)) self.name = name
Here’s an example showing the behavior of this class:
>>> a = Spam('Guido')Creating Spam('Guido')>>> b = Spam('Diana')Creating Spam('Diana')>>> c = Spam('Guido') # Cached>>> a is bFalse>>> a is c # Cached value returnedTrue>>>
DiscussionUsing a metaclass to implement various instance creation patterns can often be a muchmore elegant approach than other solutions not involving metaclasses. For example, ifyou didn’t use a metaclass, you might have to hide the classes behind some kind of extrafactory function. For example, to get a singleton, you might use a hack such as thefollowing:
class _Spam: def __init__(self): print('Creating Spam')
_spam_instance = Nonedef Spam(): global _spam_instance
358 | Chapter 9: Metaprogramming
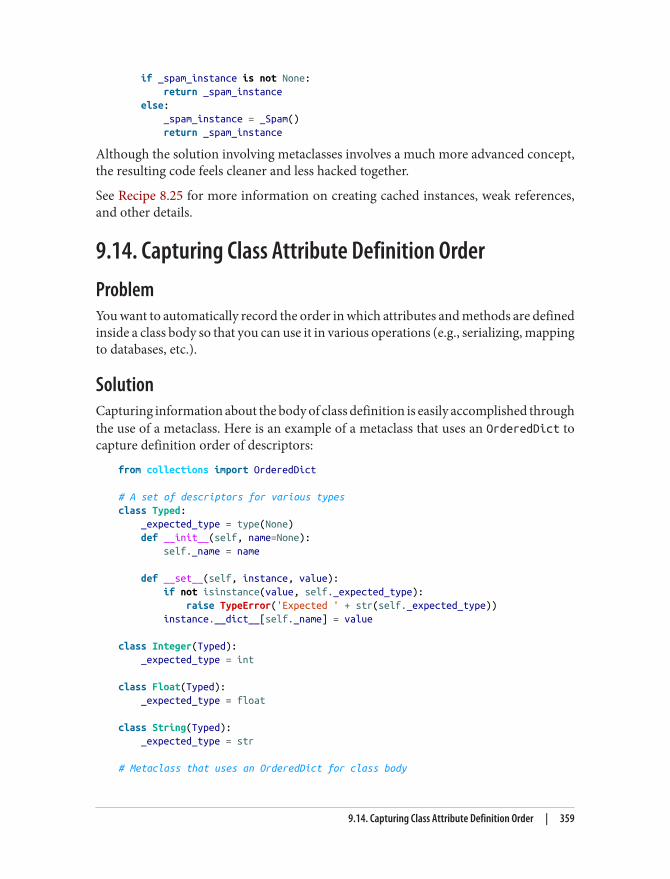
if _spam_instance is not None: return _spam_instance else: _spam_instance = _Spam() return _spam_instance
Although the solution involving metaclasses involves a much more advanced concept,the resulting code feels cleaner and less hacked together.
See Recipe 8.25 for more information on creating cached instances, weak references,and other details.
9.14. Capturing Class Attribute Definition OrderProblemYou want to automatically record the order in which attributes and methods are definedinside a class body so that you can use it in various operations (e.g., serializing, mappingto databases, etc.).
SolutionCapturing information about the body of class definition is easily accomplished throughthe use of a metaclass. Here is an example of a metaclass that uses an OrderedDict tocapture definition order of descriptors:
from collections import OrderedDict
# A set of descriptors for various typesclass Typed: _expected_type = type(None) def __init__(self, name=None): self._name = name
def __set__(self, instance, value): if not isinstance(value, self._expected_type): raise TypeError('Expected ' + str(self._expected_type)) instance.__dict__[self._name] = value
class Integer(Typed): _expected_type = int
class Float(Typed): _expected_type = float
class String(Typed): _expected_type = str
# Metaclass that uses an OrderedDict for class body
9.14. Capturing Class Attribute Definition Order | 359
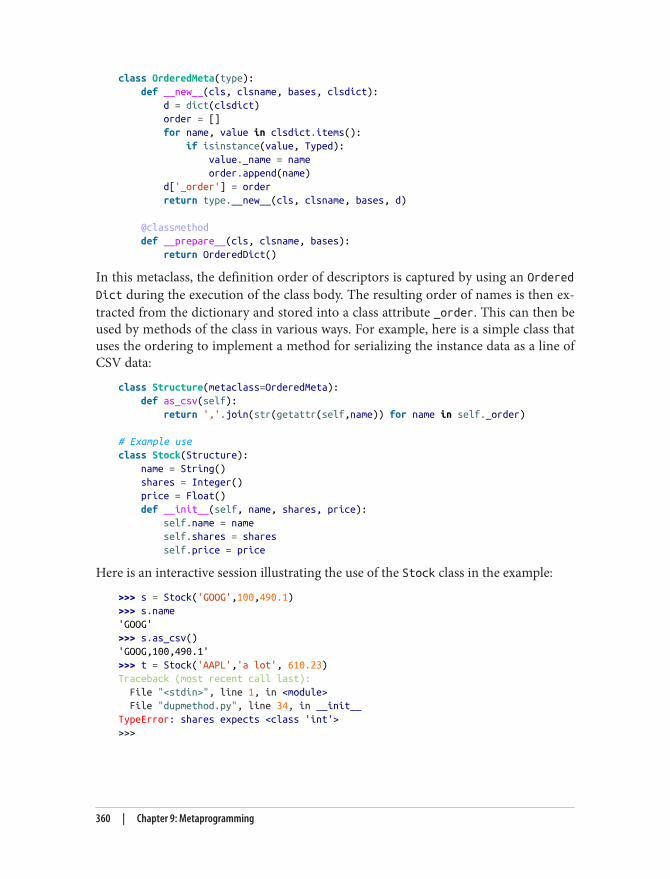
class OrderedMeta(type): def __new__(cls, clsname, bases, clsdict): d = dict(clsdict) order = [] for name, value in clsdict.items(): if isinstance(value, Typed): value._name = name order.append(name) d['_order'] = order return type.__new__(cls, clsname, bases, d)
@classmethod def __prepare__(cls, clsname, bases): return OrderedDict()
In this metaclass, the definition order of descriptors is captured by using an OrderedDict during the execution of the class body. The resulting order of names is then ex‐tracted from the dictionary and stored into a class attribute _order. This can then beused by methods of the class in various ways. For example, here is a simple class thatuses the ordering to implement a method for serializing the instance data as a line ofCSV data:
class Structure(metaclass=OrderedMeta): def as_csv(self): return ','.join(str(getattr(self,name)) for name in self._order)
# Example useclass Stock(Structure): name = String() shares = Integer() price = Float() def __init__(self, name, shares, price): self.name = name self.shares = shares self.price = price
Here is an interactive session illustrating the use of the Stock class in the example:
>>> s = Stock('GOOG',100,490.1)>>> s.name'GOOG'>>> s.as_csv()'GOOG,100,490.1'>>> t = Stock('AAPL','a lot', 610.23)Traceback (most recent call last): File "<stdin>", line 1, in <module> File "dupmethod.py", line 34, in __init__TypeError: shares expects <class 'int'>>>>
360 | Chapter 9: Metaprogramming
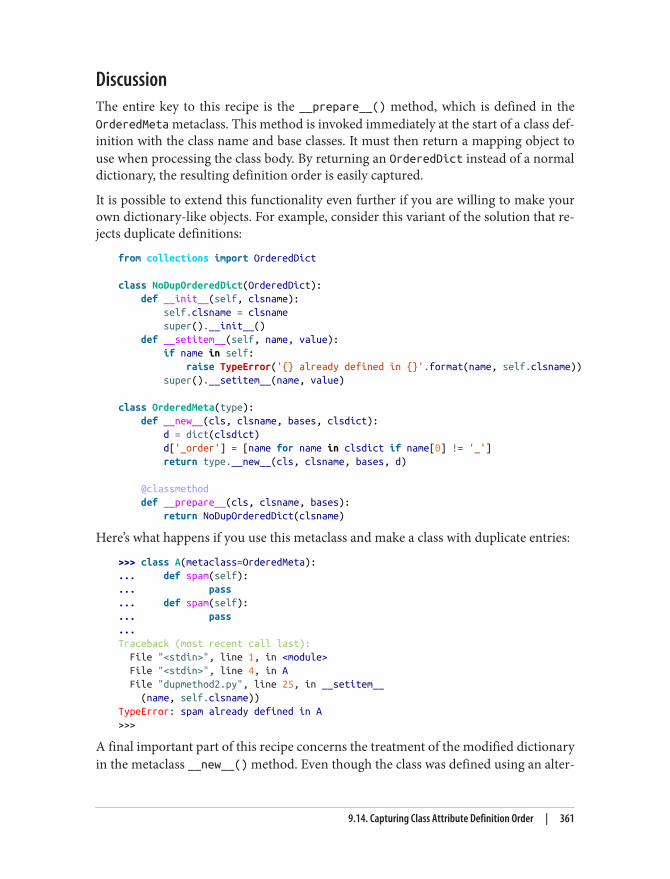
DiscussionThe entire key to this recipe is the __prepare__() method, which is defined in theOrderedMeta metaclass. This method is invoked immediately at the start of a class def‐inition with the class name and base classes. It must then return a mapping object touse when processing the class body. By returning an OrderedDict instead of a normaldictionary, the resulting definition order is easily captured.
It is possible to extend this functionality even further if you are willing to make yourown dictionary-like objects. For example, consider this variant of the solution that re‐jects duplicate definitions:
from collections import OrderedDict
class NoDupOrderedDict(OrderedDict): def __init__(self, clsname): self.clsname = clsname super().__init__() def __setitem__(self, name, value): if name in self: raise TypeError('{} already defined in {}'.format(name, self.clsname)) super().__setitem__(name, value)
class OrderedMeta(type): def __new__(cls, clsname, bases, clsdict): d = dict(clsdict) d['_order'] = [name for name in clsdict if name[0] != '_'] return type.__new__(cls, clsname, bases, d)
@classmethod def __prepare__(cls, clsname, bases): return NoDupOrderedDict(clsname)
Here’s what happens if you use this metaclass and make a class with duplicate entries:
>>> class A(metaclass=OrderedMeta):... def spam(self):... pass... def spam(self):... pass...Traceback (most recent call last): File "<stdin>", line 1, in <module> File "<stdin>", line 4, in A File "dupmethod2.py", line 25, in __setitem__ (name, self.clsname))TypeError: spam already defined in A>>>
A final important part of this recipe concerns the treatment of the modified dictionaryin the metaclass __new__() method. Even though the class was defined using an alter‐
9.14. Capturing Class Attribute Definition Order | 361
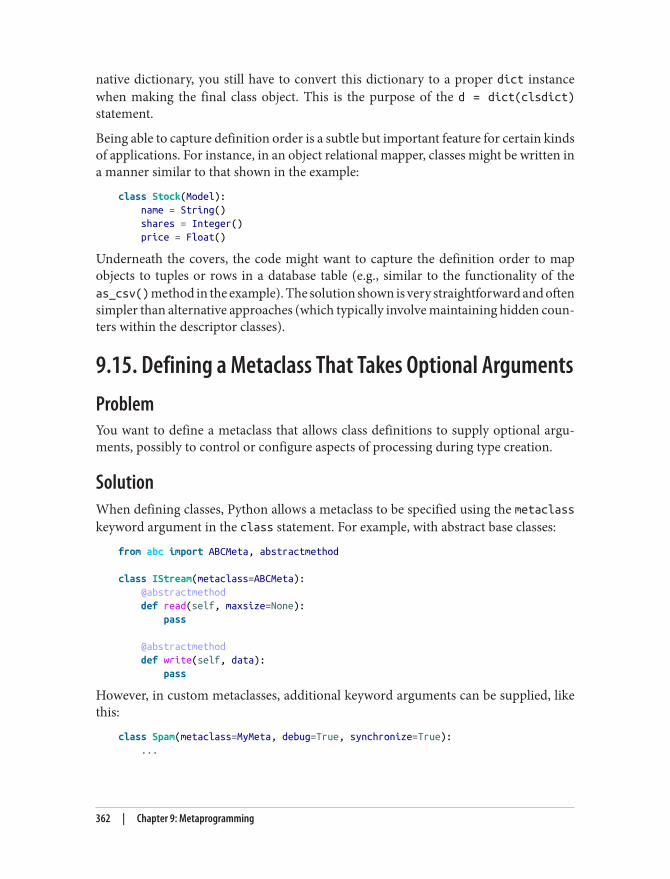
native dictionary, you still have to convert this dictionary to a proper dict instancewhen making the final class object. This is the purpose of the d = dict(clsdict)statement.
Being able to capture definition order is a subtle but important feature for certain kindsof applications. For instance, in an object relational mapper, classes might be written ina manner similar to that shown in the example:
class Stock(Model): name = String() shares = Integer() price = Float()
Underneath the covers, the code might want to capture the definition order to mapobjects to tuples or rows in a database table (e.g., similar to the functionality of theas_csv() method in the example). The solution shown is very straightforward and oftensimpler than alternative approaches (which typically involve maintaining hidden coun‐ters within the descriptor classes).
9.15. Defining a Metaclass That Takes Optional ArgumentsProblemYou want to define a metaclass that allows class definitions to supply optional argu‐ments, possibly to control or configure aspects of processing during type creation.
SolutionWhen defining classes, Python allows a metaclass to be specified using the metaclasskeyword argument in the class statement. For example, with abstract base classes:
from abc import ABCMeta, abstractmethod
class IStream(metaclass=ABCMeta): @abstractmethod def read(self, maxsize=None): pass
@abstractmethod def write(self, data): pass
However, in custom metaclasses, additional keyword arguments can be supplied, likethis:
class Spam(metaclass=MyMeta, debug=True, synchronize=True): ...
362 | Chapter 9: Metaprogramming

To support such keyword arguments in a metaclass, make sure you define them on the__prepare__(), __new__(), and __init__() methods using keyword-only arguments,like this:
class MyMeta(type): # Optional @classmethod def __prepare__(cls, name, bases, *, debug=False, synchronize=False): # Custom processing ... return super().__prepare__(name, bases)
# Required def __new__(cls, name, bases, ns, *, debug=False, synchronize=False): # Custom processing ... return super().__new__(cls, name, bases, ns)
# Required def __init__(self, name, bases, ns, *, debug=False, synchronize=False): # Custom processing ... super().__init__(name, bases, ns)
DiscussionAdding optional keyword arguments to a metaclass requires that you understand all ofthe steps involved in class creation, because the extra arguments are passed to everymethod involved. The __prepare__() method is called first and used to create the classnamespace prior to the body of any class definition being processed. Normally, thismethod simply returns a dictionary or other mapping object. The __new__() methodis used to instantiate the resulting type object. It is called after the class body has beenfully executed. The __init__() method is called last and used to perform any additionalinitialization steps.
When writing metaclasses, it is somewhat common to only define a __new__() or__init__() method, but not both. However, if extra keyword arguments are going tobe accepted, then both methods must be provided and given compatible signatures. Thedefault __prepare__() method accepts any set of keyword arguments, but ignores them.You only need to define it yourself if the extra arguments would somehow affect man‐agement of the class namespace creation.
The use of keyword-only arguments in this recipe reflects the fact that such argumentswill only be supplied by keyword during class creation.
The specification of keyword arguments to configure a metaclass might be viewed asan alternative to using class variables for a similar purpose. For example:
9.15. Defining a Metaclass That Takes Optional Arguments | 363
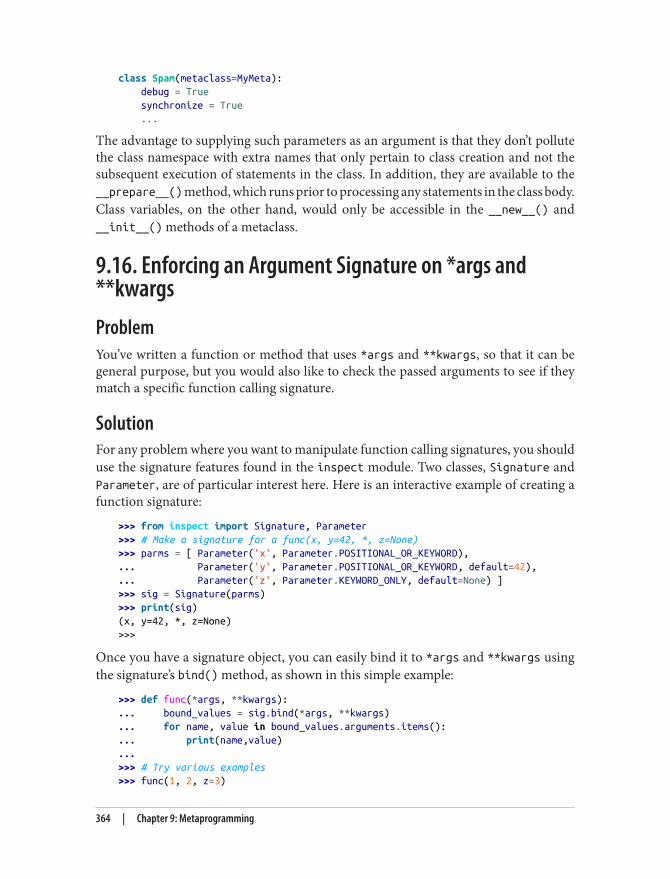
class Spam(metaclass=MyMeta): debug = True synchronize = True ...
The advantage to supplying such parameters as an argument is that they don’t pollutethe class namespace with extra names that only pertain to class creation and not thesubsequent execution of statements in the class. In addition, they are available to the__prepare__() method, which runs prior to processing any statements in the class body.Class variables, on the other hand, would only be accessible in the __new__() and__init__() methods of a metaclass.
9.16. Enforcing an Argument Signature on *args and**kwargsProblemYou’ve written a function or method that uses *args and **kwargs, so that it can begeneral purpose, but you would also like to check the passed arguments to see if theymatch a specific function calling signature.
SolutionFor any problem where you want to manipulate function calling signatures, you shoulduse the signature features found in the inspect module. Two classes, Signature andParameter, are of particular interest here. Here is an interactive example of creating afunction signature:
>>> from inspect import Signature, Parameter>>> # Make a signature for a func(x, y=42, *, z=None)>>> parms = [ Parameter('x', Parameter.POSITIONAL_OR_KEYWORD),... Parameter('y', Parameter.POSITIONAL_OR_KEYWORD, default=42),... Parameter('z', Parameter.KEYWORD_ONLY, default=None) ]>>> sig = Signature(parms)>>> print(sig)(x, y=42, *, z=None)>>>
Once you have a signature object, you can easily bind it to *args and **kwargs usingthe signature’s bind() method, as shown in this simple example:
>>> def func(*args, **kwargs):... bound_values = sig.bind(*args, **kwargs)... for name, value in bound_values.arguments.items():... print(name,value)...>>> # Try various examples>>> func(1, 2, z=3)
364 | Chapter 9: Metaprogramming
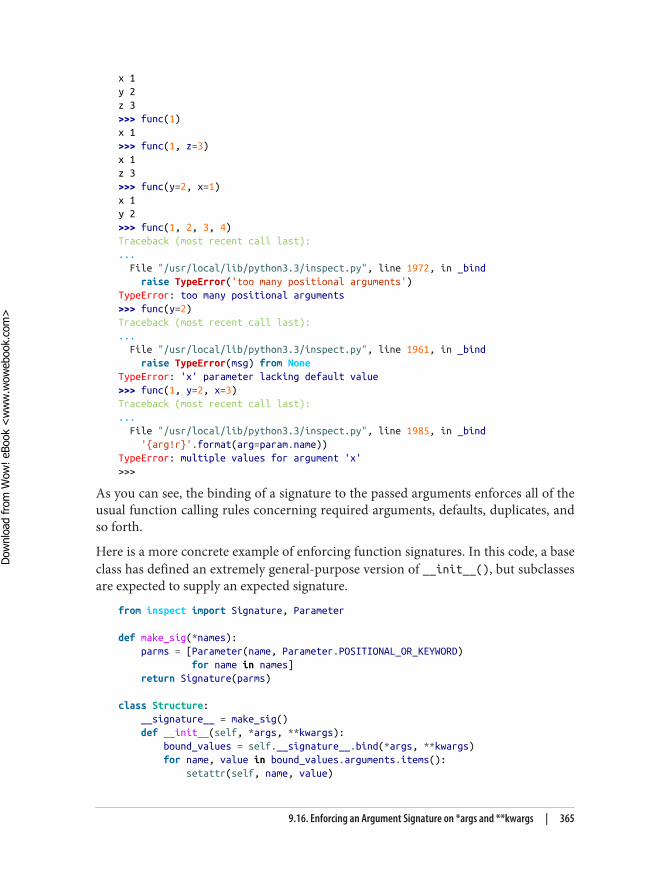
x 1y 2z 3>>> func(1)x 1>>> func(1, z=3)x 1z 3>>> func(y=2, x=1)x 1y 2>>> func(1, 2, 3, 4)Traceback (most recent call last):... File "/usr/local/lib/python3.3/inspect.py", line 1972, in _bind raise TypeError('too many positional arguments')TypeError: too many positional arguments>>> func(y=2)Traceback (most recent call last):... File "/usr/local/lib/python3.3/inspect.py", line 1961, in _bind raise TypeError(msg) from NoneTypeError: 'x' parameter lacking default value>>> func(1, y=2, x=3)Traceback (most recent call last):... File "/usr/local/lib/python3.3/inspect.py", line 1985, in _bind '{arg!r}'.format(arg=param.name))TypeError: multiple values for argument 'x'>>>
As you can see, the binding of a signature to the passed arguments enforces all of theusual function calling rules concerning required arguments, defaults, duplicates, andso forth.
Here is a more concrete example of enforcing function signatures. In this code, a baseclass has defined an extremely general-purpose version of __init__(), but subclassesare expected to supply an expected signature.
from inspect import Signature, Parameter
def make_sig(*names): parms = [Parameter(name, Parameter.POSITIONAL_OR_KEYWORD) for name in names] return Signature(parms)
class Structure: __signature__ = make_sig() def __init__(self, *args, **kwargs): bound_values = self.__signature__.bind(*args, **kwargs) for name, value in bound_values.arguments.items(): setattr(self, name, value)
9.16. Enforcing an Argument Signature on *args and **kwargs | 365
Dow
nlo
ad fro
m W
ow
! eBook
<w
ww
.wow
ebook.
com
>
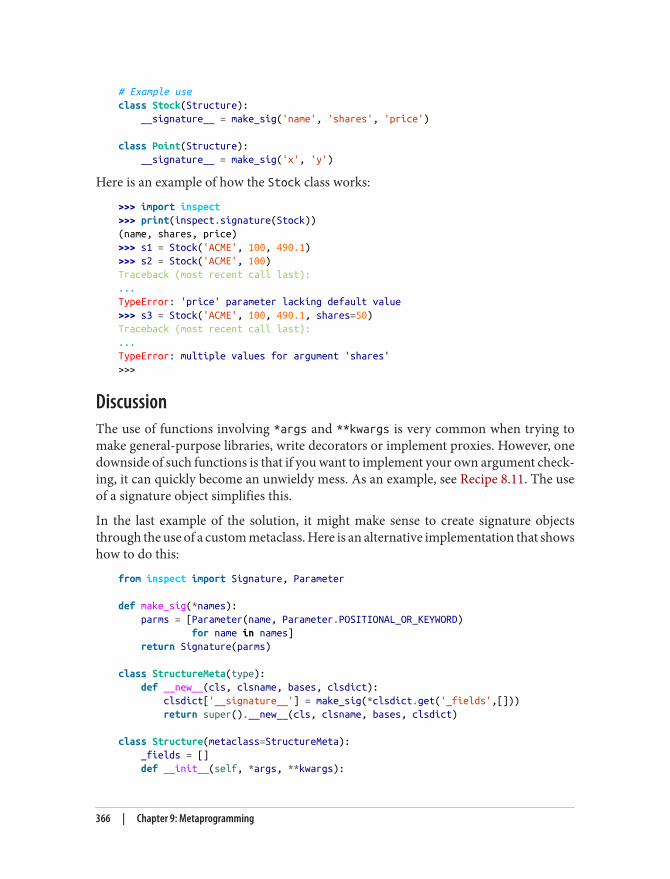
# Example useclass Stock(Structure): __signature__ = make_sig('name', 'shares', 'price')
class Point(Structure): __signature__ = make_sig('x', 'y')
Here is an example of how the Stock class works:
>>> import inspect>>> print(inspect.signature(Stock))(name, shares, price)>>> s1 = Stock('ACME', 100, 490.1)>>> s2 = Stock('ACME', 100)Traceback (most recent call last):...TypeError: 'price' parameter lacking default value>>> s3 = Stock('ACME', 100, 490.1, shares=50)Traceback (most recent call last):...TypeError: multiple values for argument 'shares'>>>
DiscussionThe use of functions involving *args and **kwargs is very common when trying tomake general-purpose libraries, write decorators or implement proxies. However, onedownside of such functions is that if you want to implement your own argument check‐ing, it can quickly become an unwieldy mess. As an example, see Recipe 8.11. The useof a signature object simplifies this.
In the last example of the solution, it might make sense to create signature objectsthrough the use of a custom metaclass. Here is an alternative implementation that showshow to do this:
from inspect import Signature, Parameter
def make_sig(*names): parms = [Parameter(name, Parameter.POSITIONAL_OR_KEYWORD) for name in names] return Signature(parms)
class StructureMeta(type): def __new__(cls, clsname, bases, clsdict): clsdict['__signature__'] = make_sig(*clsdict.get('_fields',[])) return super().__new__(cls, clsname, bases, clsdict)
class Structure(metaclass=StructureMeta): _fields = [] def __init__(self, *args, **kwargs):
366 | Chapter 9: Metaprogramming
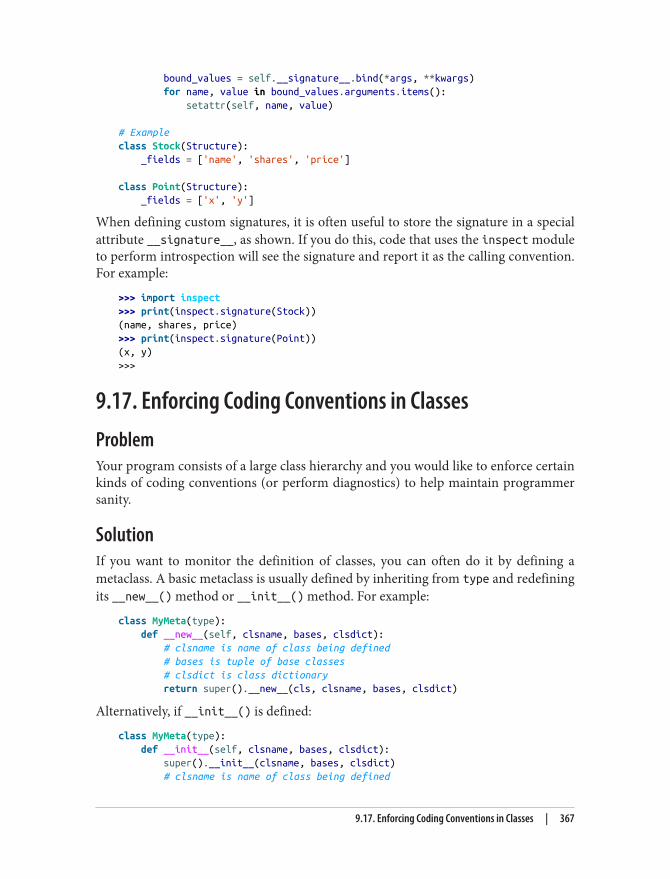
bound_values = self.__signature__.bind(*args, **kwargs) for name, value in bound_values.arguments.items(): setattr(self, name, value)
# Exampleclass Stock(Structure): _fields = ['name', 'shares', 'price']
class Point(Structure): _fields = ['x', 'y']
When defining custom signatures, it is often useful to store the signature in a specialattribute __signature__, as shown. If you do this, code that uses the inspect moduleto perform introspection will see the signature and report it as the calling convention.For example:
>>> import inspect>>> print(inspect.signature(Stock))(name, shares, price)>>> print(inspect.signature(Point))(x, y)>>>
9.17. Enforcing Coding Conventions in ClassesProblemYour program consists of a large class hierarchy and you would like to enforce certainkinds of coding conventions (or perform diagnostics) to help maintain programmersanity.
SolutionIf you want to monitor the definition of classes, you can often do it by defining ametaclass. A basic metaclass is usually defined by inheriting from type and redefiningits __new__() method or __init__() method. For example:
class MyMeta(type): def __new__(self, clsname, bases, clsdict): # clsname is name of class being defined # bases is tuple of base classes # clsdict is class dictionary return super().__new__(cls, clsname, bases, clsdict)
Alternatively, if __init__() is defined:
class MyMeta(type): def __init__(self, clsname, bases, clsdict): super().__init__(clsname, bases, clsdict) # clsname is name of class being defined
9.17. Enforcing Coding Conventions in Classes | 367
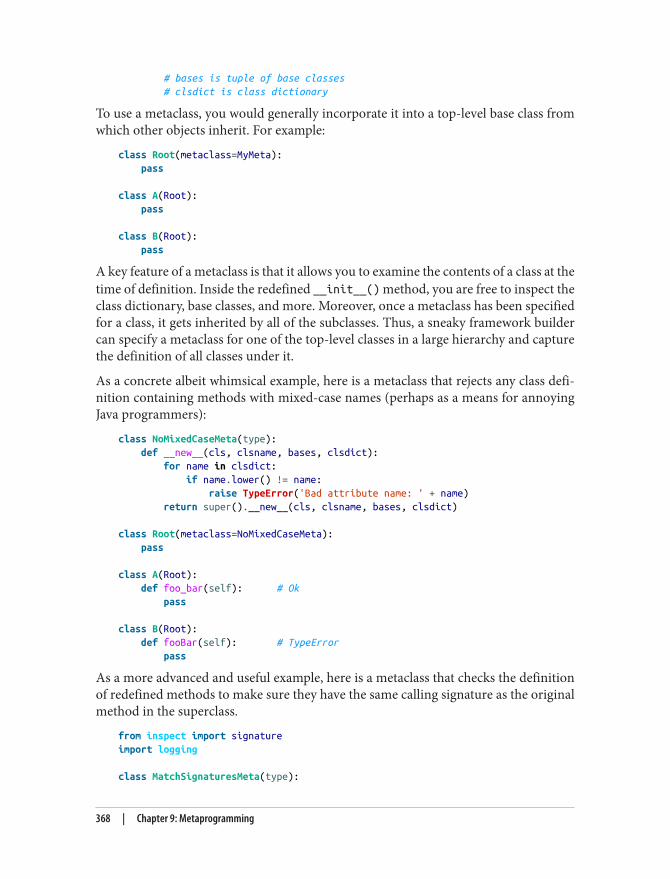
# bases is tuple of base classes # clsdict is class dictionary
To use a metaclass, you would generally incorporate it into a top-level base class fromwhich other objects inherit. For example:
class Root(metaclass=MyMeta): pass
class A(Root): pass
class B(Root): pass
A key feature of a metaclass is that it allows you to examine the contents of a class at thetime of definition. Inside the redefined __init__() method, you are free to inspect theclass dictionary, base classes, and more. Moreover, once a metaclass has been specifiedfor a class, it gets inherited by all of the subclasses. Thus, a sneaky framework buildercan specify a metaclass for one of the top-level classes in a large hierarchy and capturethe definition of all classes under it.
As a concrete albeit whimsical example, here is a metaclass that rejects any class defi‐nition containing methods with mixed-case names (perhaps as a means for annoyingJava programmers):
class NoMixedCaseMeta(type): def __new__(cls, clsname, bases, clsdict): for name in clsdict: if name.lower() != name: raise TypeError('Bad attribute name: ' + name) return super().__new__(cls, clsname, bases, clsdict)
class Root(metaclass=NoMixedCaseMeta): pass
class A(Root): def foo_bar(self): # Ok pass
class B(Root): def fooBar(self): # TypeError pass
As a more advanced and useful example, here is a metaclass that checks the definitionof redefined methods to make sure they have the same calling signature as the originalmethod in the superclass.
from inspect import signatureimport logging
class MatchSignaturesMeta(type):
368 | Chapter 9: Metaprogramming
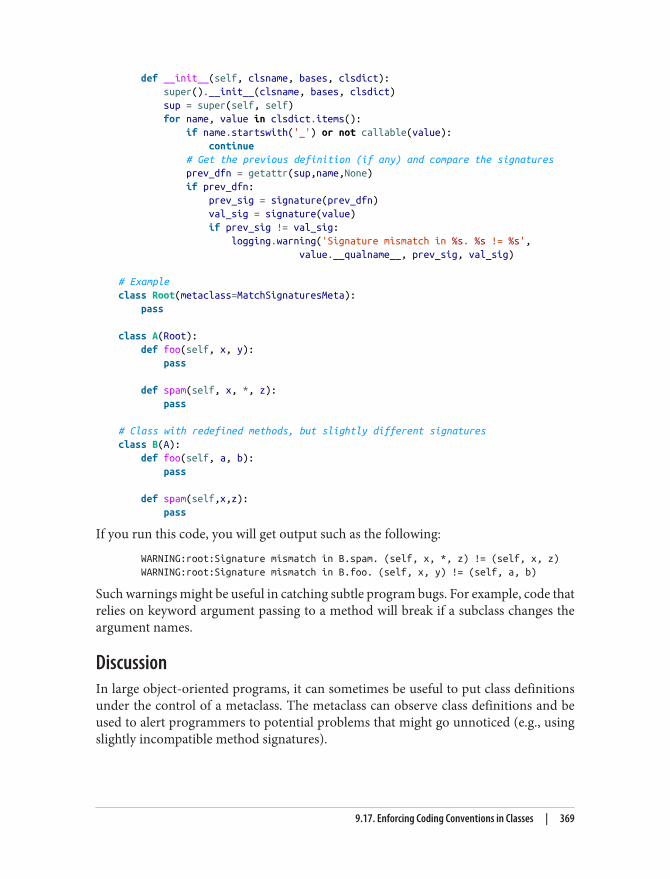
def __init__(self, clsname, bases, clsdict): super().__init__(clsname, bases, clsdict) sup = super(self, self) for name, value in clsdict.items(): if name.startswith('_') or not callable(value): continue # Get the previous definition (if any) and compare the signatures prev_dfn = getattr(sup,name,None) if prev_dfn: prev_sig = signature(prev_dfn) val_sig = signature(value) if prev_sig != val_sig: logging.warning('Signature mismatch in %s. %s != %s', value.__qualname__, prev_sig, val_sig)
# Exampleclass Root(metaclass=MatchSignaturesMeta): pass
class A(Root): def foo(self, x, y): pass
def spam(self, x, *, z): pass
# Class with redefined methods, but slightly different signaturesclass B(A): def foo(self, a, b): pass
def spam(self,x,z): pass
If you run this code, you will get output such as the following:
WARNING:root:Signature mismatch in B.spam. (self, x, *, z) != (self, x, z) WARNING:root:Signature mismatch in B.foo. (self, x, y) != (self, a, b)
Such warnings might be useful in catching subtle program bugs. For example, code thatrelies on keyword argument passing to a method will break if a subclass changes theargument names.
DiscussionIn large object-oriented programs, it can sometimes be useful to put class definitionsunder the control of a metaclass. The metaclass can observe class definitions and beused to alert programmers to potential problems that might go unnoticed (e.g., usingslightly incompatible method signatures).
9.17. Enforcing Coding Conventions in Classes | 369

One might argue that such errors would be better caught by program analysis tools orIDEs. To be sure, such tools are useful. However, if you’re creating a framework or librarythat’s going to be used by others, you often don’t have any control over the rigor of theirdevelopment practices. Thus, for certain kinds of applications, it might make sense toput a bit of extra checking in a metaclass if such checking would result in a better userexperience.
The choice of redefining __new__() or __init__() in a metaclass depends on how youwant to work with the resulting class. __new__() is invoked prior to class creation andis typically used when a metaclass wants to alter the class definition in some way (bychanging the contents of the class dictionary). The __init__() method is invoked aftera class has been created, and is useful if you want to write code that works with the fullyformed class object. In the last example, this is essential since it is using the super()function to search for prior definitions. This only works once the class instance has beencreated and the underlying method resolution order has been set.
The last example also illustrates the use of Python’s function signature objects. Essen‐tially, the metaclass takes each callable definition in a class, searches for a prior definition(if any), and then simply compares their calling signatures using inspect.signature().
Last, but not least, the line of code that uses super(self, self) is not a typo. Whenworking with a metaclass, it’s important to realize that the self is actually a class object.So, that statement is actually being used to find definitions located further up the classhierarchy that make up the parents of self.
9.18. Defining Classes ProgrammaticallyProblemYou’re writing code that ultimately needs to create a new class object. You’ve thoughtabout emitting emit class source code to a string and using a function such as exec()to evaluate it, but you’d prefer a more elegant solution.
SolutionYou can use the function types.new_class() to instantiate new class objects. All youneed to do is provide the name of the class, tuple of parent classes, keyword arguments,and a callback that populates the class dictionary with members. For example:
# stock.py# Example of making a class manually from parts
# Methodsdef __init__(self, name, shares, price): self.name = name
370 | Chapter 9: Metaprogramming
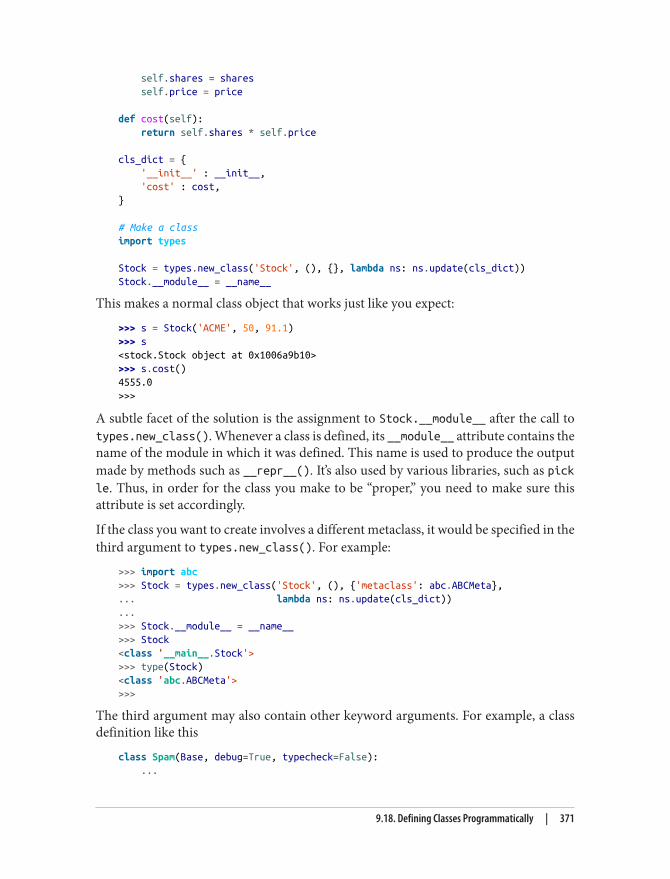
self.shares = shares self.price = price
def cost(self): return self.shares * self.price
cls_dict = { '__init__' : __init__, 'cost' : cost,}
# Make a classimport types
Stock = types.new_class('Stock', (), {}, lambda ns: ns.update(cls_dict))Stock.__module__ = __name__
This makes a normal class object that works just like you expect:
>>> s = Stock('ACME', 50, 91.1)>>> s<stock.Stock object at 0x1006a9b10>>>> s.cost()4555.0>>>
A subtle facet of the solution is the assignment to Stock.__module__ after the call totypes.new_class(). Whenever a class is defined, its __module__ attribute contains thename of the module in which it was defined. This name is used to produce the outputmade by methods such as __repr__(). It’s also used by various libraries, such as pickle. Thus, in order for the class you make to be “proper,” you need to make sure thisattribute is set accordingly.
If the class you want to create involves a different metaclass, it would be specified in thethird argument to types.new_class(). For example:
>>> import abc>>> Stock = types.new_class('Stock', (), {'metaclass': abc.ABCMeta},... lambda ns: ns.update(cls_dict))...>>> Stock.__module__ = __name__>>> Stock<class '__main__.Stock'>>>> type(Stock)<class 'abc.ABCMeta'>>>>
The third argument may also contain other keyword arguments. For example, a classdefinition like this
class Spam(Base, debug=True, typecheck=False): ...
9.18. Defining Classes Programmatically | 371
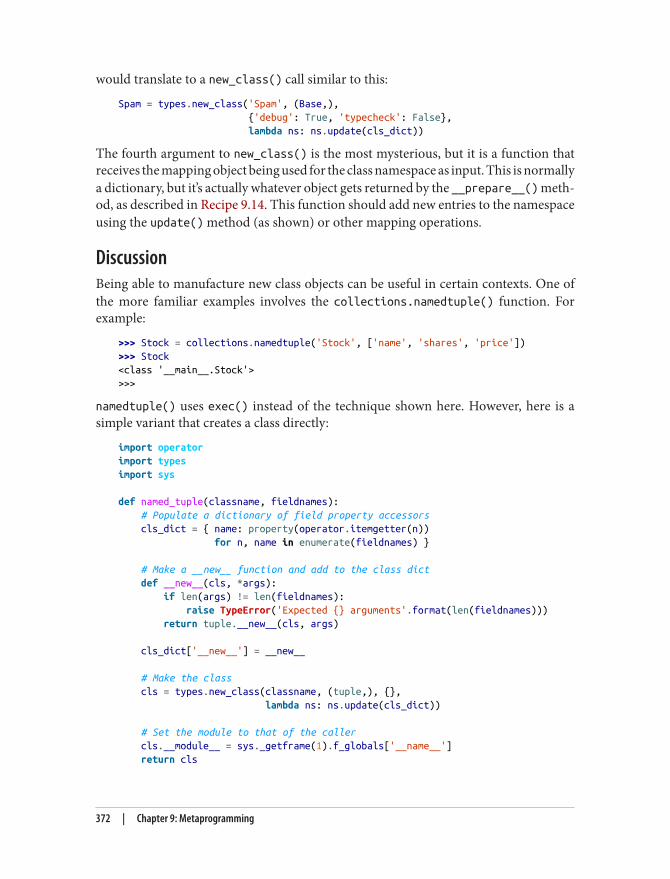
would translate to a new_class() call similar to this:
Spam = types.new_class('Spam', (Base,), {'debug': True, 'typecheck': False}, lambda ns: ns.update(cls_dict))
The fourth argument to new_class() is the most mysterious, but it is a function thatreceives the mapping object being used for the class namespace as input. This is normallya dictionary, but it’s actually whatever object gets returned by the __prepare__() meth‐od, as described in Recipe 9.14. This function should add new entries to the namespaceusing the update() method (as shown) or other mapping operations.
DiscussionBeing able to manufacture new class objects can be useful in certain contexts. One ofthe more familiar examples involves the collections.namedtuple() function. Forexample:
>>> Stock = collections.namedtuple('Stock', ['name', 'shares', 'price'])>>> Stock<class '__main__.Stock'>>>>
namedtuple() uses exec() instead of the technique shown here. However, here is asimple variant that creates a class directly:
import operatorimport typesimport sys
def named_tuple(classname, fieldnames): # Populate a dictionary of field property accessors cls_dict = { name: property(operator.itemgetter(n)) for n, name in enumerate(fieldnames) }
# Make a __new__ function and add to the class dict def __new__(cls, *args): if len(args) != len(fieldnames): raise TypeError('Expected {} arguments'.format(len(fieldnames))) return tuple.__new__(cls, args)
cls_dict['__new__'] = __new__
# Make the class cls = types.new_class(classname, (tuple,), {}, lambda ns: ns.update(cls_dict))
# Set the module to that of the caller cls.__module__ = sys._getframe(1).f_globals['__name__'] return cls
372 | Chapter 9: Metaprogramming
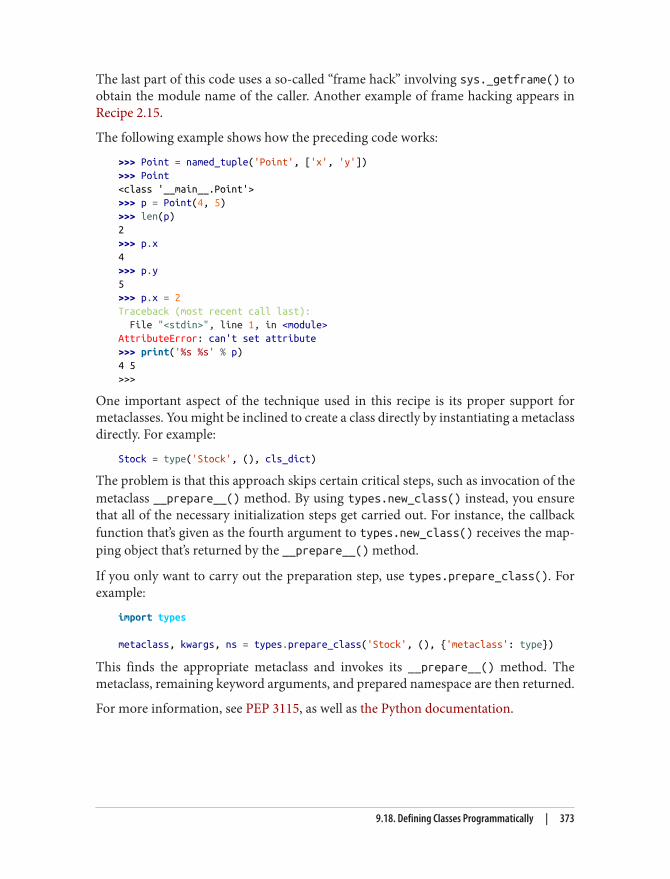
The last part of this code uses a so-called “frame hack” involving sys._getframe() toobtain the module name of the caller. Another example of frame hacking appears inRecipe 2.15.
The following example shows how the preceding code works:
>>> Point = named_tuple('Point', ['x', 'y'])>>> Point<class '__main__.Point'>>>> p = Point(4, 5)>>> len(p)2>>> p.x4>>> p.y5>>> p.x = 2Traceback (most recent call last): File "<stdin>", line 1, in <module>AttributeError: can't set attribute>>> print('%s %s' % p)4 5>>>
One important aspect of the technique used in this recipe is its proper support formetaclasses. You might be inclined to create a class directly by instantiating a metaclassdirectly. For example:
Stock = type('Stock', (), cls_dict)
The problem is that this approach skips certain critical steps, such as invocation of themetaclass __prepare__() method. By using types.new_class() instead, you ensurethat all of the necessary initialization steps get carried out. For instance, the callbackfunction that’s given as the fourth argument to types.new_class() receives the map‐ping object that’s returned by the __prepare__() method.
If you only want to carry out the preparation step, use types.prepare_class(). Forexample:
import types
metaclass, kwargs, ns = types.prepare_class('Stock', (), {'metaclass': type})
This finds the appropriate metaclass and invokes its __prepare__() method. Themetaclass, remaining keyword arguments, and prepared namespace are then returned.
For more information, see PEP 3115, as well as the Python documentation.
9.18. Defining Classes Programmatically | 373
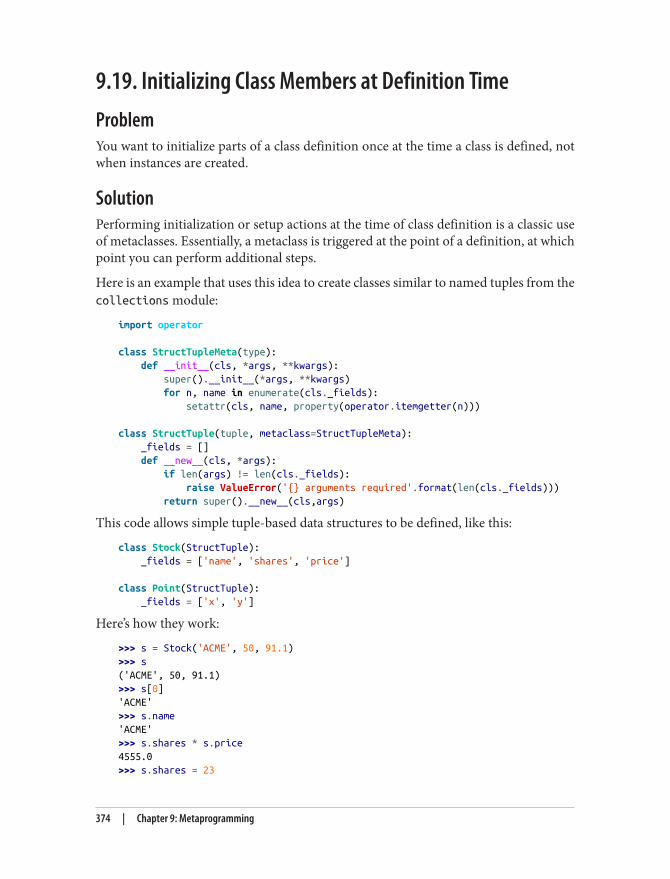
9.19. Initializing Class Members at Definition TimeProblemYou want to initialize parts of a class definition once at the time a class is defined, notwhen instances are created.
SolutionPerforming initialization or setup actions at the time of class definition is a classic useof metaclasses. Essentially, a metaclass is triggered at the point of a definition, at whichpoint you can perform additional steps.
Here is an example that uses this idea to create classes similar to named tuples from thecollections module:
import operator
class StructTupleMeta(type): def __init__(cls, *args, **kwargs): super().__init__(*args, **kwargs) for n, name in enumerate(cls._fields): setattr(cls, name, property(operator.itemgetter(n)))
class StructTuple(tuple, metaclass=StructTupleMeta): _fields = [] def __new__(cls, *args): if len(args) != len(cls._fields): raise ValueError('{} arguments required'.format(len(cls._fields))) return super().__new__(cls,args)
This code allows simple tuple-based data structures to be defined, like this:
class Stock(StructTuple): _fields = ['name', 'shares', 'price']
class Point(StructTuple): _fields = ['x', 'y']
Here’s how they work:
>>> s = Stock('ACME', 50, 91.1)>>> s('ACME', 50, 91.1)>>> s[0]'ACME'>>> s.name'ACME'>>> s.shares * s.price4555.0>>> s.shares = 23
374 | Chapter 9: Metaprogramming
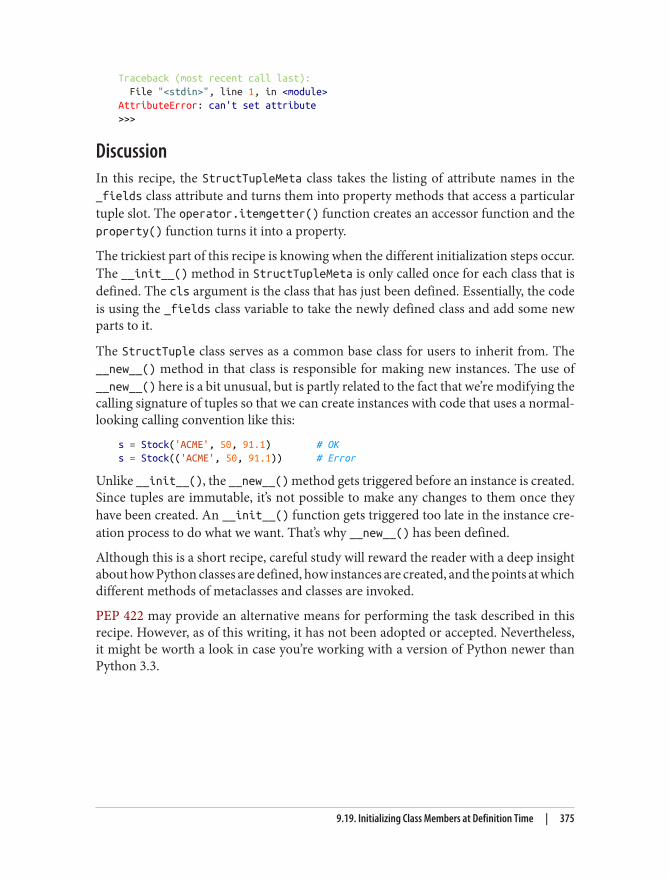
Traceback (most recent call last): File "<stdin>", line 1, in <module>AttributeError: can't set attribute>>>
DiscussionIn this recipe, the StructTupleMeta class takes the listing of attribute names in the_fields class attribute and turns them into property methods that access a particulartuple slot. The operator.itemgetter() function creates an accessor function and theproperty() function turns it into a property.
The trickiest part of this recipe is knowing when the different initialization steps occur.The __init__() method in StructTupleMeta is only called once for each class that isdefined. The cls argument is the class that has just been defined. Essentially, the codeis using the _fields class variable to take the newly defined class and add some newparts to it.
The StructTuple class serves as a common base class for users to inherit from. The__new__() method in that class is responsible for making new instances. The use of__new__() here is a bit unusual, but is partly related to the fact that we’re modifying thecalling signature of tuples so that we can create instances with code that uses a normal-looking calling convention like this:
s = Stock('ACME', 50, 91.1) # OKs = Stock(('ACME', 50, 91.1)) # Error
Unlike __init__(), the __new__() method gets triggered before an instance is created.Since tuples are immutable, it’s not possible to make any changes to them once theyhave been created. An __init__() function gets triggered too late in the instance cre‐ation process to do what we want. That’s why __new__() has been defined.
Although this is a short recipe, careful study will reward the reader with a deep insightabout how Python classes are defined, how instances are created, and the points at whichdifferent methods of metaclasses and classes are invoked.
PEP 422 may provide an alternative means for performing the task described in thisrecipe. However, as of this writing, it has not been adopted or accepted. Nevertheless,it might be worth a look in case you’re working with a version of Python newer thanPython 3.3.
9.19. Initializing Class Members at Definition Time | 375
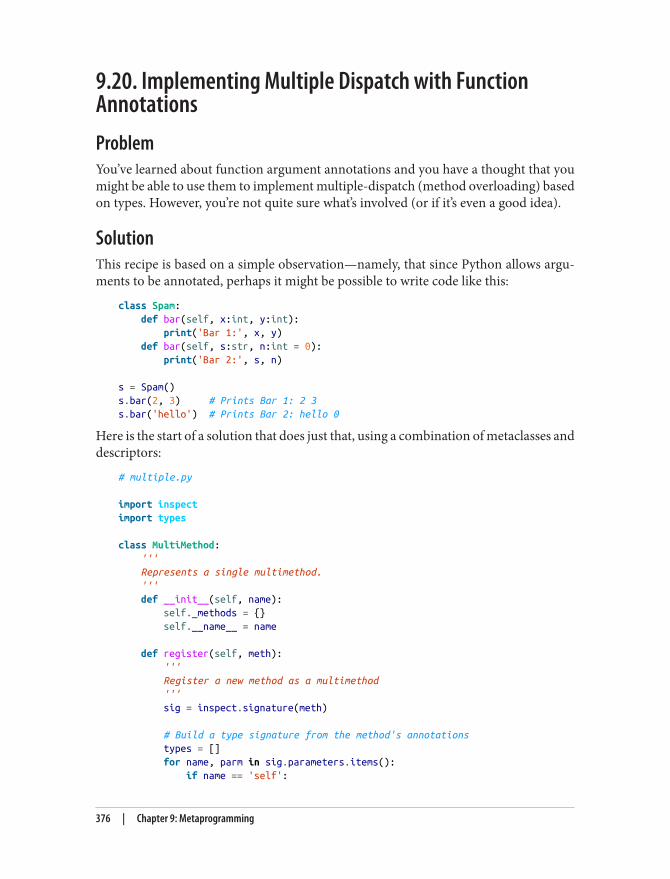
9.20. Implementing Multiple Dispatch with FunctionAnnotationsProblemYou’ve learned about function argument annotations and you have a thought that youmight be able to use them to implement multiple-dispatch (method overloading) basedon types. However, you’re not quite sure what’s involved (or if it’s even a good idea).
SolutionThis recipe is based on a simple observation—namely, that since Python allows argu‐ments to be annotated, perhaps it might be possible to write code like this:
class Spam: def bar(self, x:int, y:int): print('Bar 1:', x, y) def bar(self, s:str, n:int = 0): print('Bar 2:', s, n)
s = Spam()s.bar(2, 3) # Prints Bar 1: 2 3s.bar('hello') # Prints Bar 2: hello 0
Here is the start of a solution that does just that, using a combination of metaclasses anddescriptors:
# multiple.py
import inspectimport types
class MultiMethod: ''' Represents a single multimethod. ''' def __init__(self, name): self._methods = {} self.__name__ = name
def register(self, meth): ''' Register a new method as a multimethod ''' sig = inspect.signature(meth)
# Build a type signature from the method's annotations types = [] for name, parm in sig.parameters.items(): if name == 'self':
376 | Chapter 9: Metaprogramming
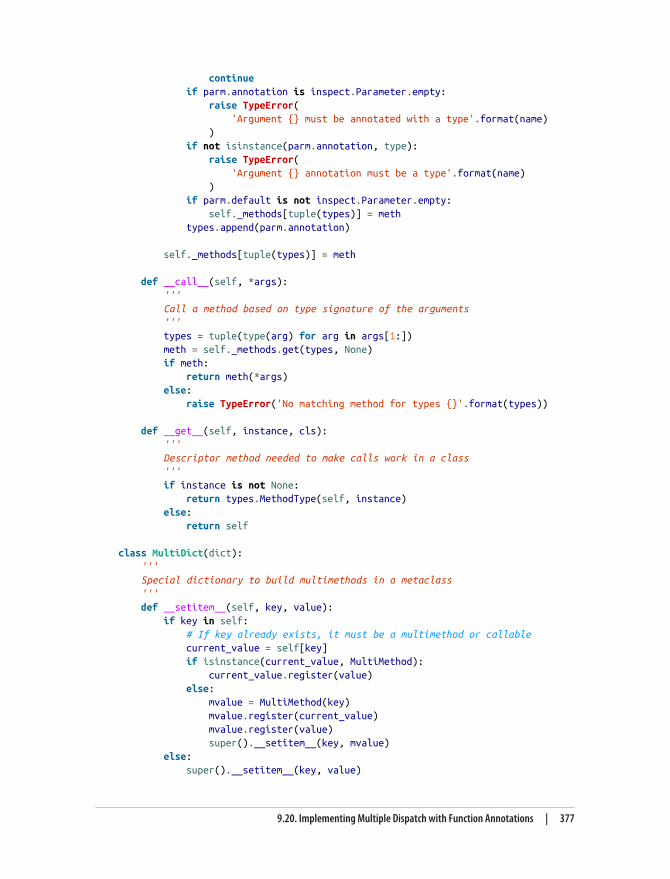
continue if parm.annotation is inspect.Parameter.empty: raise TypeError( 'Argument {} must be annotated with a type'.format(name) ) if not isinstance(parm.annotation, type): raise TypeError( 'Argument {} annotation must be a type'.format(name) ) if parm.default is not inspect.Parameter.empty: self._methods[tuple(types)] = meth types.append(parm.annotation)
self._methods[tuple(types)] = meth
def __call__(self, *args): ''' Call a method based on type signature of the arguments ''' types = tuple(type(arg) for arg in args[1:]) meth = self._methods.get(types, None) if meth: return meth(*args) else: raise TypeError('No matching method for types {}'.format(types))
def __get__(self, instance, cls): ''' Descriptor method needed to make calls work in a class ''' if instance is not None: return types.MethodType(self, instance) else: return self
class MultiDict(dict): ''' Special dictionary to build multimethods in a metaclass ''' def __setitem__(self, key, value): if key in self: # If key already exists, it must be a multimethod or callable current_value = self[key] if isinstance(current_value, MultiMethod): current_value.register(value) else: mvalue = MultiMethod(key) mvalue.register(current_value) mvalue.register(value) super().__setitem__(key, mvalue) else: super().__setitem__(key, value)
9.20. Implementing Multiple Dispatch with Function Annotations | 377
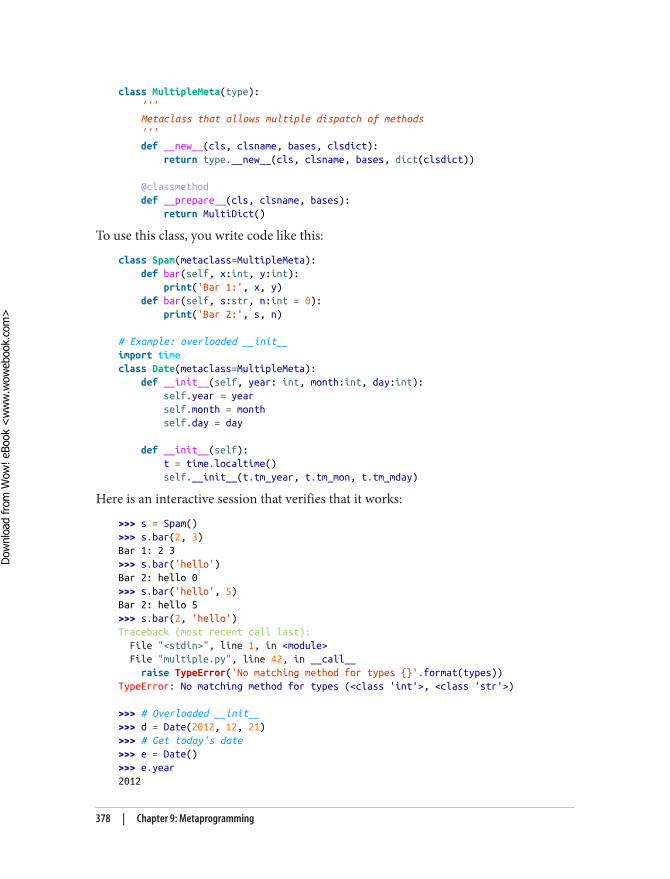
class MultipleMeta(type): ''' Metaclass that allows multiple dispatch of methods ''' def __new__(cls, clsname, bases, clsdict): return type.__new__(cls, clsname, bases, dict(clsdict))
@classmethod def __prepare__(cls, clsname, bases): return MultiDict()
To use this class, you write code like this:
class Spam(metaclass=MultipleMeta): def bar(self, x:int, y:int): print('Bar 1:', x, y) def bar(self, s:str, n:int = 0): print('Bar 2:', s, n)
# Example: overloaded __init__import timeclass Date(metaclass=MultipleMeta): def __init__(self, year: int, month:int, day:int): self.year = year self.month = month self.day = day
def __init__(self): t = time.localtime() self.__init__(t.tm_year, t.tm_mon, t.tm_mday)
Here is an interactive session that verifies that it works:
>>> s = Spam()>>> s.bar(2, 3)Bar 1: 2 3>>> s.bar('hello')Bar 2: hello 0>>> s.bar('hello', 5)Bar 2: hello 5>>> s.bar(2, 'hello')Traceback (most recent call last): File "<stdin>", line 1, in <module> File "multiple.py", line 42, in __call__ raise TypeError('No matching method for types {}'.format(types))TypeError: No matching method for types (<class 'int'>, <class 'str'>)
>>> # Overloaded __init__>>> d = Date(2012, 12, 21)>>> # Get today's date>>> e = Date()>>> e.year2012
378 | Chapter 9: Metaprogramming
Dow
nlo
ad fro
m W
ow
! eBook
<w
ww
.wow
ebook.
com
>
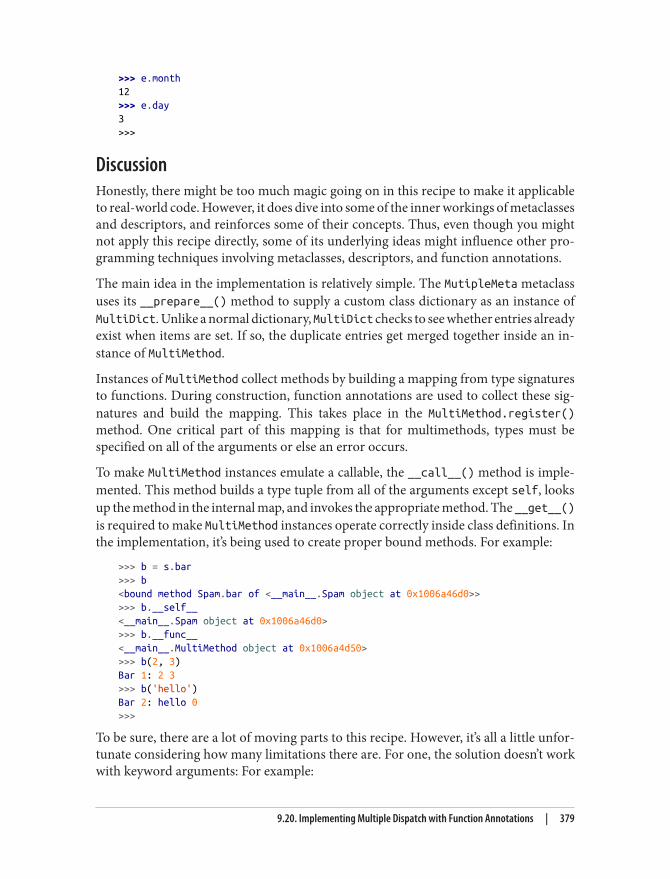
>>> e.month12>>> e.day3>>>
DiscussionHonestly, there might be too much magic going on in this recipe to make it applicableto real-world code. However, it does dive into some of the inner workings of metaclassesand descriptors, and reinforces some of their concepts. Thus, even though you mightnot apply this recipe directly, some of its underlying ideas might influence other pro‐gramming techniques involving metaclasses, descriptors, and function annotations.
The main idea in the implementation is relatively simple. The MutipleMeta metaclassuses its __prepare__() method to supply a custom class dictionary as an instance ofMultiDict. Unlike a normal dictionary, MultiDict checks to see whether entries alreadyexist when items are set. If so, the duplicate entries get merged together inside an in‐stance of MultiMethod.
Instances of MultiMethod collect methods by building a mapping from type signaturesto functions. During construction, function annotations are used to collect these sig‐natures and build the mapping. This takes place in the MultiMethod.register()method. One critical part of this mapping is that for multimethods, types must bespecified on all of the arguments or else an error occurs.
To make MultiMethod instances emulate a callable, the __call__() method is imple‐mented. This method builds a type tuple from all of the arguments except self, looksup the method in the internal map, and invokes the appropriate method. The __get__()is required to make MultiMethod instances operate correctly inside class definitions. Inthe implementation, it’s being used to create proper bound methods. For example:
>>> b = s.bar>>> b<bound method Spam.bar of <__main__.Spam object at 0x1006a46d0>>>>> b.__self__<__main__.Spam object at 0x1006a46d0>>>> b.__func__<__main__.MultiMethod object at 0x1006a4d50>>>> b(2, 3)Bar 1: 2 3>>> b('hello')Bar 2: hello 0>>>
To be sure, there are a lot of moving parts to this recipe. However, it’s all a little unfor‐tunate considering how many limitations there are. For one, the solution doesn’t workwith keyword arguments: For example:
9.20. Implementing Multiple Dispatch with Function Annotations | 379
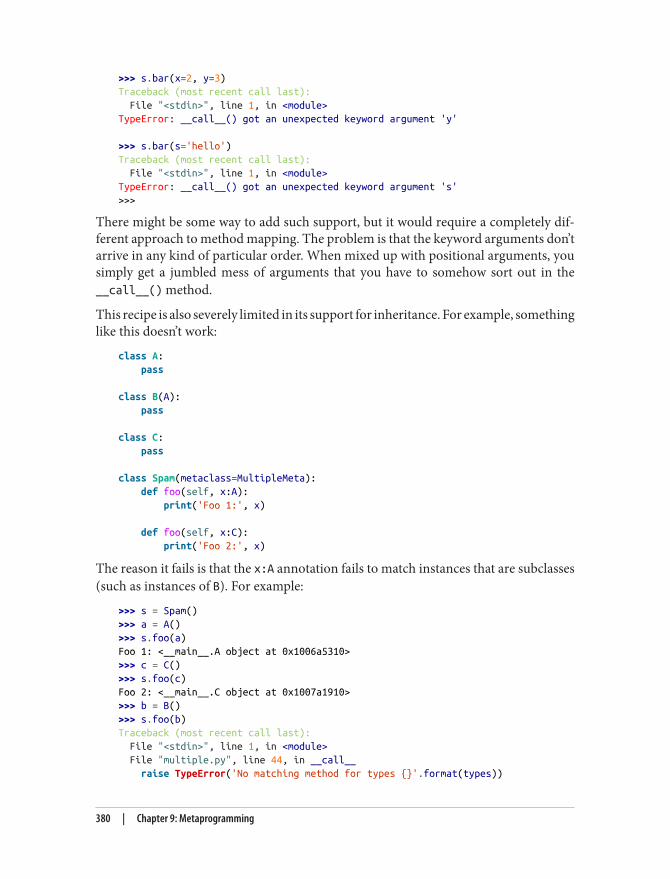
>>> s.bar(x=2, y=3)Traceback (most recent call last): File "<stdin>", line 1, in <module>TypeError: __call__() got an unexpected keyword argument 'y'
>>> s.bar(s='hello')Traceback (most recent call last): File "<stdin>", line 1, in <module>TypeError: __call__() got an unexpected keyword argument 's'>>>
There might be some way to add such support, but it would require a completely dif‐ferent approach to method mapping. The problem is that the keyword arguments don’tarrive in any kind of particular order. When mixed up with positional arguments, yousimply get a jumbled mess of arguments that you have to somehow sort out in the__call__() method.
This recipe is also severely limited in its support for inheritance. For example, somethinglike this doesn’t work:
class A: pass
class B(A): pass
class C: pass
class Spam(metaclass=MultipleMeta): def foo(self, x:A): print('Foo 1:', x)
def foo(self, x:C): print('Foo 2:', x)
The reason it fails is that the x:A annotation fails to match instances that are subclasses(such as instances of B). For example:
>>> s = Spam()>>> a = A()>>> s.foo(a)Foo 1: <__main__.A object at 0x1006a5310>>>> c = C()>>> s.foo(c)Foo 2: <__main__.C object at 0x1007a1910>>>> b = B()>>> s.foo(b)Traceback (most recent call last): File "<stdin>", line 1, in <module> File "multiple.py", line 44, in __call__ raise TypeError('No matching method for types {}'.format(types))
380 | Chapter 9: Metaprogramming
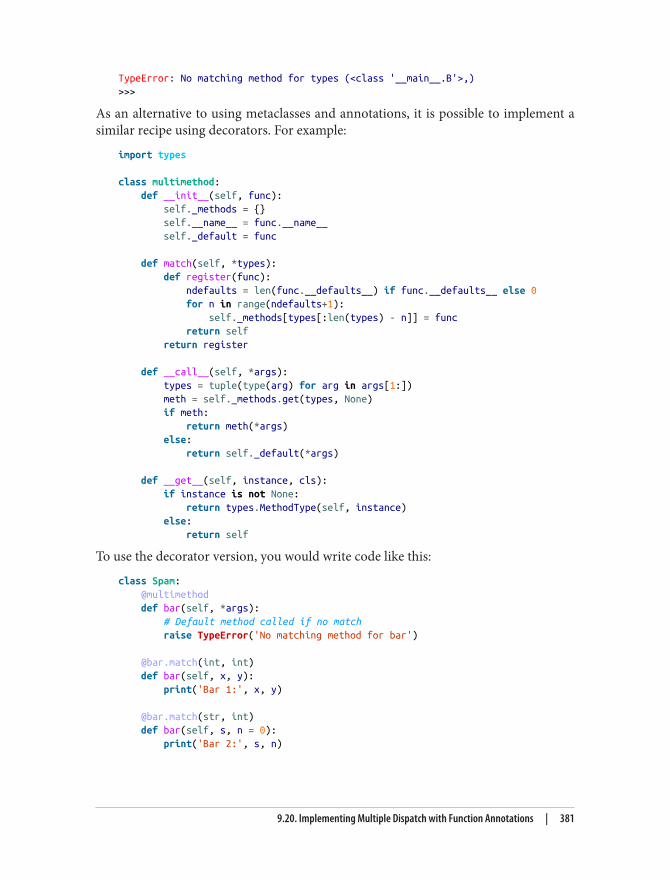
TypeError: No matching method for types (<class '__main__.B'>,)>>>
As an alternative to using metaclasses and annotations, it is possible to implement asimilar recipe using decorators. For example:
import types
class multimethod: def __init__(self, func): self._methods = {} self.__name__ = func.__name__ self._default = func
def match(self, *types): def register(func): ndefaults = len(func.__defaults__) if func.__defaults__ else 0 for n in range(ndefaults+1): self._methods[types[:len(types) - n]] = func return self return register
def __call__(self, *args): types = tuple(type(arg) for arg in args[1:]) meth = self._methods.get(types, None) if meth: return meth(*args) else: return self._default(*args)
def __get__(self, instance, cls): if instance is not None: return types.MethodType(self, instance) else: return self
To use the decorator version, you would write code like this:
class Spam: @multimethod def bar(self, *args): # Default method called if no match raise TypeError('No matching method for bar')
@bar.match(int, int) def bar(self, x, y): print('Bar 1:', x, y)
@bar.match(str, int) def bar(self, s, n = 0): print('Bar 2:', s, n)
9.20. Implementing Multiple Dispatch with Function Annotations | 381
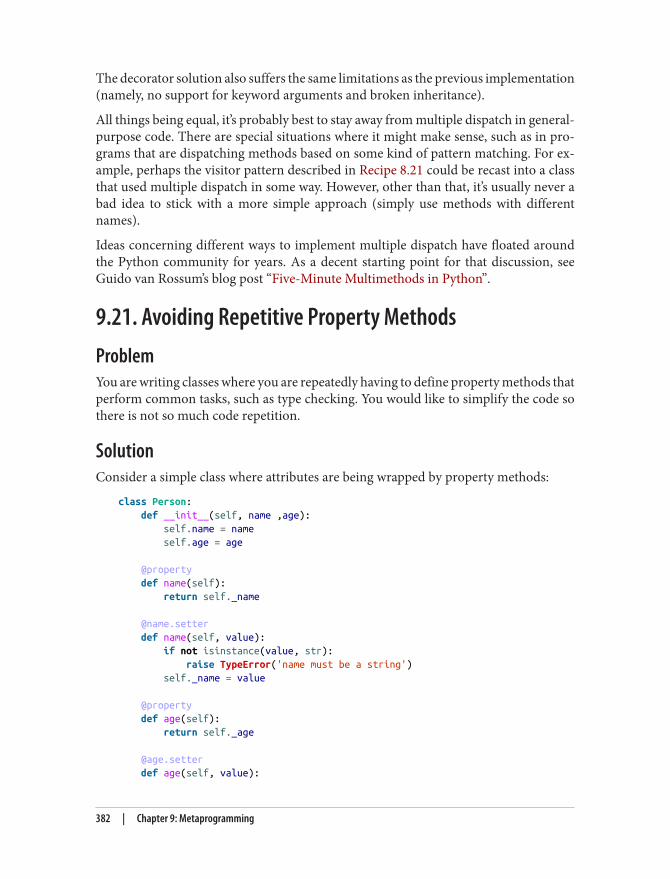
The decorator solution also suffers the same limitations as the previous implementation(namely, no support for keyword arguments and broken inheritance).
All things being equal, it’s probably best to stay away from multiple dispatch in general-purpose code. There are special situations where it might make sense, such as in pro‐grams that are dispatching methods based on some kind of pattern matching. For ex‐ample, perhaps the visitor pattern described in Recipe 8.21 could be recast into a classthat used multiple dispatch in some way. However, other than that, it’s usually never abad idea to stick with a more simple approach (simply use methods with differentnames).
Ideas concerning different ways to implement multiple dispatch have floated aroundthe Python community for years. As a decent starting point for that discussion, seeGuido van Rossum’s blog post “Five-Minute Multimethods in Python”.
9.21. Avoiding Repetitive Property MethodsProblemYou are writing classes where you are repeatedly having to define property methods thatperform common tasks, such as type checking. You would like to simplify the code sothere is not so much code repetition.
SolutionConsider a simple class where attributes are being wrapped by property methods:
class Person: def __init__(self, name ,age): self.name = name self.age = age
@property def name(self): return self._name
@name.setter def name(self, value): if not isinstance(value, str): raise TypeError('name must be a string') self._name = value
@property def age(self): return self._age
@age.setter def age(self, value):
382 | Chapter 9: Metaprogramming
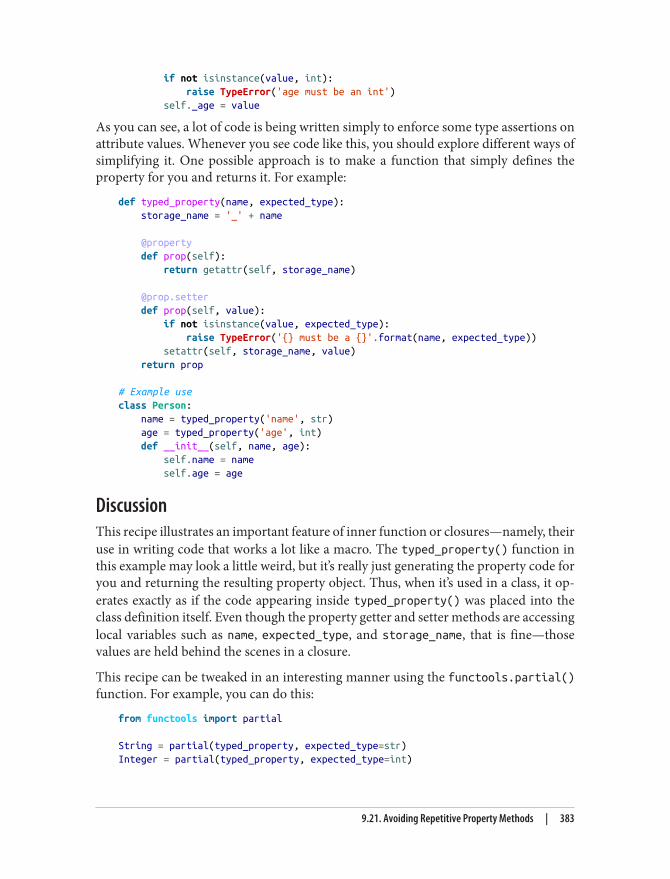
if not isinstance(value, int): raise TypeError('age must be an int') self._age = value
As you can see, a lot of code is being written simply to enforce some type assertions onattribute values. Whenever you see code like this, you should explore different ways ofsimplifying it. One possible approach is to make a function that simply defines theproperty for you and returns it. For example:
def typed_property(name, expected_type): storage_name = '_' + name
@property def prop(self): return getattr(self, storage_name)
@prop.setter def prop(self, value): if not isinstance(value, expected_type): raise TypeError('{} must be a {}'.format(name, expected_type)) setattr(self, storage_name, value) return prop
# Example useclass Person: name = typed_property('name', str) age = typed_property('age', int) def __init__(self, name, age): self.name = name self.age = age
DiscussionThis recipe illustrates an important feature of inner function or closures—namely, theiruse in writing code that works a lot like a macro. The typed_property() function inthis example may look a little weird, but it’s really just generating the property code foryou and returning the resulting property object. Thus, when it’s used in a class, it op‐erates exactly as if the code appearing inside typed_property() was placed into theclass definition itself. Even though the property getter and setter methods are accessinglocal variables such as name, expected_type, and storage_name, that is fine—thosevalues are held behind the scenes in a closure.
This recipe can be tweaked in an interesting manner using the functools.partial()function. For example, you can do this:
from functools import partial
String = partial(typed_property, expected_type=str)Integer = partial(typed_property, expected_type=int)
9.21. Avoiding Repetitive Property Methods | 383
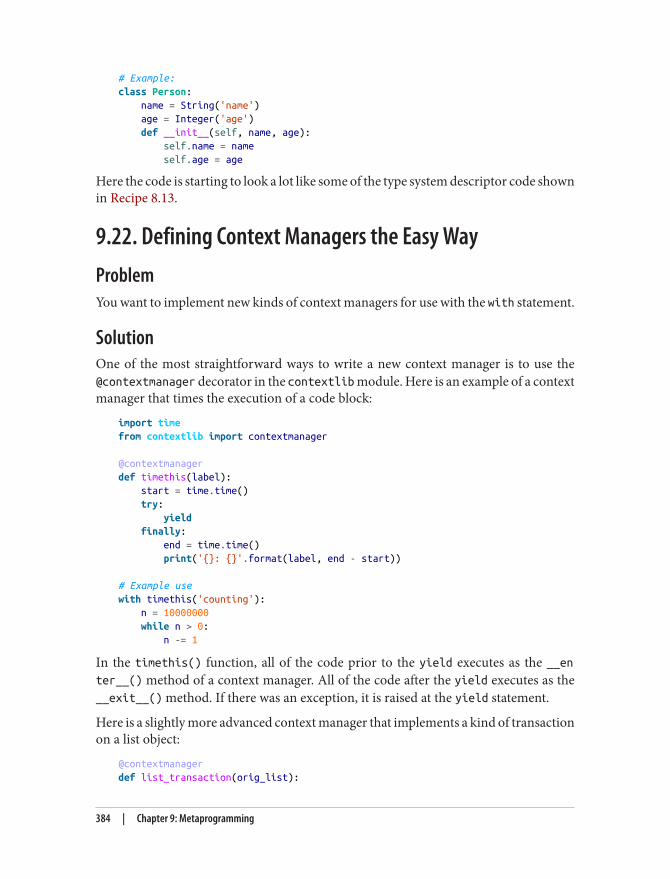
# Example:class Person: name = String('name') age = Integer('age') def __init__(self, name, age): self.name = name self.age = age
Here the code is starting to look a lot like some of the type system descriptor code shownin Recipe 8.13.
9.22. Defining Context Managers the Easy WayProblemYou want to implement new kinds of context managers for use with the with statement.
SolutionOne of the most straightforward ways to write a new context manager is to use the@contextmanager decorator in the contextlib module. Here is an example of a contextmanager that times the execution of a code block:
import timefrom contextlib import contextmanager
@contextmanagerdef timethis(label): start = time.time() try: yield finally: end = time.time() print('{}: {}'.format(label, end - start))
# Example usewith timethis('counting'): n = 10000000 while n > 0: n -= 1
In the timethis() function, all of the code prior to the yield executes as the __enter__() method of a context manager. All of the code after the yield executes as the__exit__() method. If there was an exception, it is raised at the yield statement.
Here is a slightly more advanced context manager that implements a kind of transactionon a list object:
@contextmanagerdef list_transaction(orig_list):
384 | Chapter 9: Metaprogramming
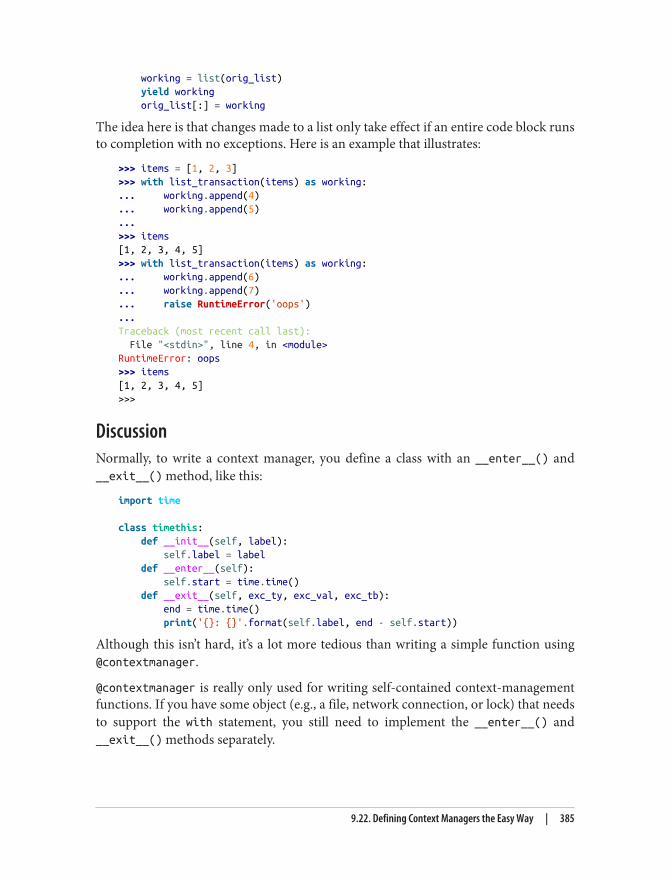
working = list(orig_list) yield working orig_list[:] = working
The idea here is that changes made to a list only take effect if an entire code block runsto completion with no exceptions. Here is an example that illustrates:
>>> items = [1, 2, 3]>>> with list_transaction(items) as working:... working.append(4)... working.append(5)...>>> items[1, 2, 3, 4, 5]>>> with list_transaction(items) as working:... working.append(6)... working.append(7)... raise RuntimeError('oops')...Traceback (most recent call last): File "<stdin>", line 4, in <module>RuntimeError: oops>>> items[1, 2, 3, 4, 5]>>>
DiscussionNormally, to write a context manager, you define a class with an __enter__() and__exit__() method, like this:
import time
class timethis: def __init__(self, label): self.label = label def __enter__(self): self.start = time.time() def __exit__(self, exc_ty, exc_val, exc_tb): end = time.time() print('{}: {}'.format(self.label, end - self.start))
Although this isn’t hard, it’s a lot more tedious than writing a simple function using@contextmanager.
@contextmanager is really only used for writing self-contained context-managementfunctions. If you have some object (e.g., a file, network connection, or lock) that needsto support the with statement, you still need to implement the __enter__() and__exit__() methods separately.
9.22. Defining Context Managers the Easy Way | 385
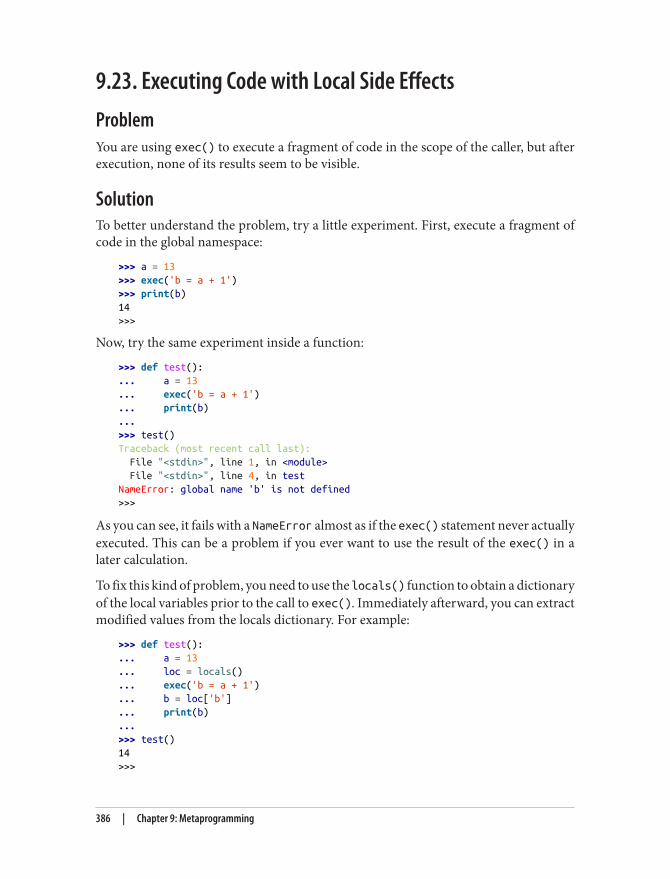
9.23. Executing Code with Local Side EffectsProblemYou are using exec() to execute a fragment of code in the scope of the caller, but afterexecution, none of its results seem to be visible.
SolutionTo better understand the problem, try a little experiment. First, execute a fragment ofcode in the global namespace:
>>> a = 13>>> exec('b = a + 1')>>> print(b)14>>>
Now, try the same experiment inside a function:
>>> def test():... a = 13... exec('b = a + 1')... print(b)...>>> test()Traceback (most recent call last): File "<stdin>", line 1, in <module> File "<stdin>", line 4, in testNameError: global name 'b' is not defined>>>
As you can see, it fails with a NameError almost as if the exec() statement never actuallyexecuted. This can be a problem if you ever want to use the result of the exec() in alater calculation.
To fix this kind of problem, you need to use the locals() function to obtain a dictionaryof the local variables prior to the call to exec(). Immediately afterward, you can extractmodified values from the locals dictionary. For example:
>>> def test():... a = 13... loc = locals()... exec('b = a + 1')... b = loc['b']... print(b)...>>> test()14>>>
386 | Chapter 9: Metaprogramming
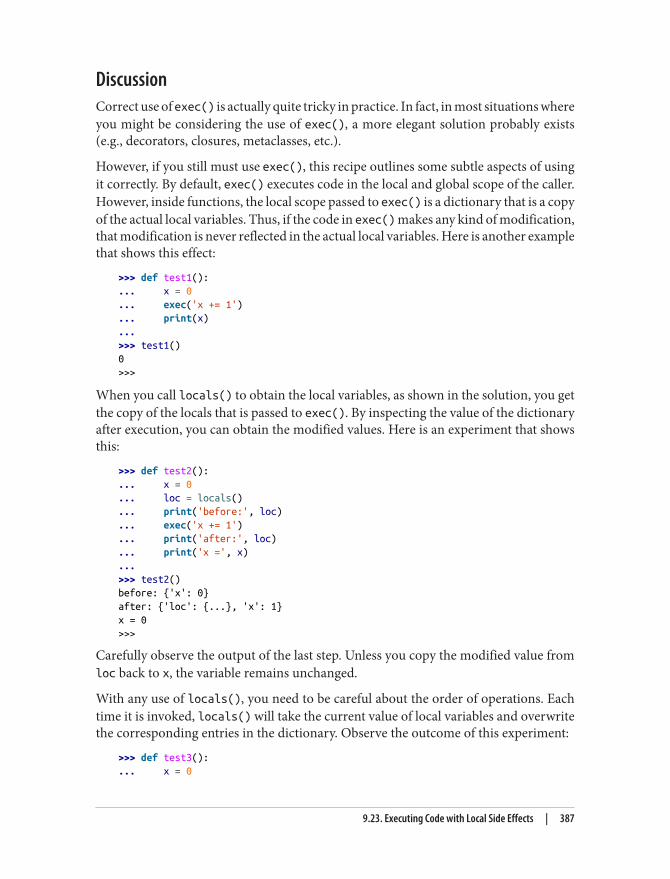
DiscussionCorrect use of exec() is actually quite tricky in practice. In fact, in most situations whereyou might be considering the use of exec(), a more elegant solution probably exists(e.g., decorators, closures, metaclasses, etc.).
However, if you still must use exec(), this recipe outlines some subtle aspects of usingit correctly. By default, exec() executes code in the local and global scope of the caller.However, inside functions, the local scope passed to exec() is a dictionary that is a copyof the actual local variables. Thus, if the code in exec() makes any kind of modification,that modification is never reflected in the actual local variables. Here is another examplethat shows this effect:
>>> def test1():... x = 0... exec('x += 1')... print(x)...>>> test1()0>>>
When you call locals() to obtain the local variables, as shown in the solution, you getthe copy of the locals that is passed to exec(). By inspecting the value of the dictionaryafter execution, you can obtain the modified values. Here is an experiment that showsthis:
>>> def test2():... x = 0... loc = locals()... print('before:', loc)... exec('x += 1')... print('after:', loc)... print('x =', x)...>>> test2()before: {'x': 0}after: {'loc': {...}, 'x': 1}x = 0>>>
Carefully observe the output of the last step. Unless you copy the modified value fromloc back to x, the variable remains unchanged.
With any use of locals(), you need to be careful about the order of operations. Eachtime it is invoked, locals() will take the current value of local variables and overwritethe corresponding entries in the dictionary. Observe the outcome of this experiment:
>>> def test3():... x = 0
9.23. Executing Code with Local Side Effects | 387
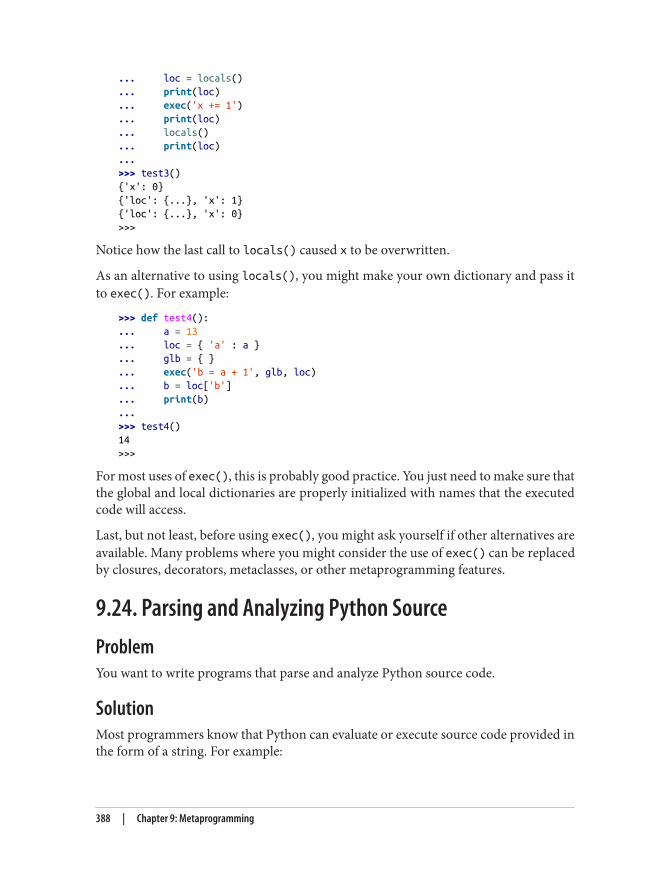
... loc = locals()
... print(loc)
... exec('x += 1')
... print(loc)
... locals()
... print(loc)
...>>> test3(){'x': 0}{'loc': {...}, 'x': 1}{'loc': {...}, 'x': 0}>>>
Notice how the last call to locals() caused x to be overwritten.
As an alternative to using locals(), you might make your own dictionary and pass itto exec(). For example:
>>> def test4():... a = 13... loc = { 'a' : a }... glb = { }... exec('b = a + 1', glb, loc)... b = loc['b']... print(b)...>>> test4()14>>>
For most uses of exec(), this is probably good practice. You just need to make sure thatthe global and local dictionaries are properly initialized with names that the executedcode will access.
Last, but not least, before using exec(), you might ask yourself if other alternatives areavailable. Many problems where you might consider the use of exec() can be replacedby closures, decorators, metaclasses, or other metaprogramming features.
9.24. Parsing and Analyzing Python SourceProblemYou want to write programs that parse and analyze Python source code.
SolutionMost programmers know that Python can evaluate or execute source code provided inthe form of a string. For example:
388 | Chapter 9: Metaprogramming
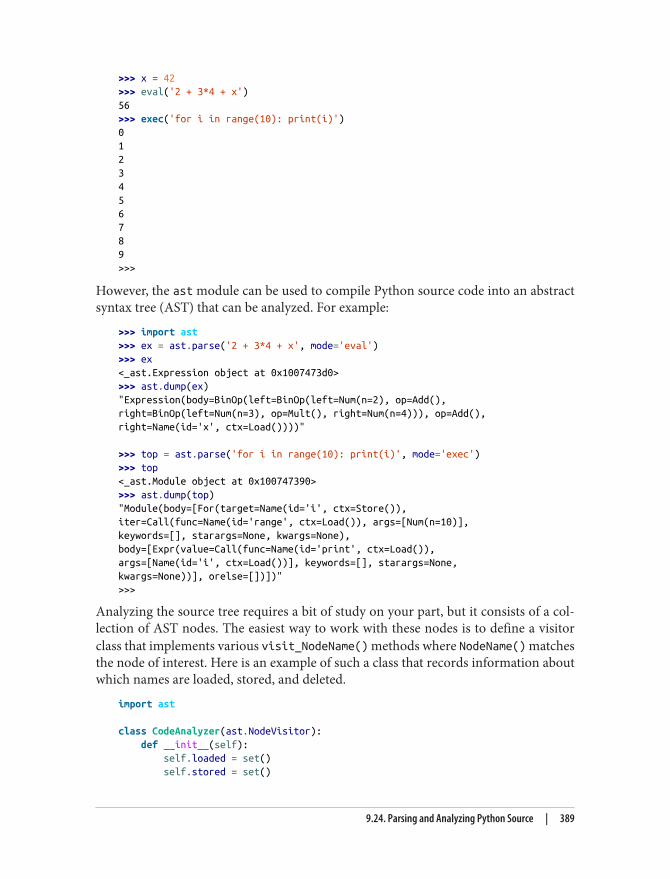
>>> x = 42>>> eval('2 + 3*4 + x')56>>> exec('for i in range(10): print(i)')0123456789>>>
However, the ast module can be used to compile Python source code into an abstractsyntax tree (AST) that can be analyzed. For example:
>>> import ast>>> ex = ast.parse('2 + 3*4 + x', mode='eval')>>> ex<_ast.Expression object at 0x1007473d0>>>> ast.dump(ex)"Expression(body=BinOp(left=BinOp(left=Num(n=2), op=Add(),right=BinOp(left=Num(n=3), op=Mult(), right=Num(n=4))), op=Add(),right=Name(id='x', ctx=Load())))"
>>> top = ast.parse('for i in range(10): print(i)', mode='exec')>>> top<_ast.Module object at 0x100747390>>>> ast.dump(top)"Module(body=[For(target=Name(id='i', ctx=Store()),iter=Call(func=Name(id='range', ctx=Load()), args=[Num(n=10)],keywords=[], starargs=None, kwargs=None),body=[Expr(value=Call(func=Name(id='print', ctx=Load()),args=[Name(id='i', ctx=Load())], keywords=[], starargs=None,kwargs=None))], orelse=[])])">>>
Analyzing the source tree requires a bit of study on your part, but it consists of a col‐lection of AST nodes. The easiest way to work with these nodes is to define a visitorclass that implements various visit_NodeName() methods where NodeName() matchesthe node of interest. Here is an example of such a class that records information aboutwhich names are loaded, stored, and deleted.
import ast
class CodeAnalyzer(ast.NodeVisitor): def __init__(self): self.loaded = set() self.stored = set()
9.24. Parsing and Analyzing Python Source | 389
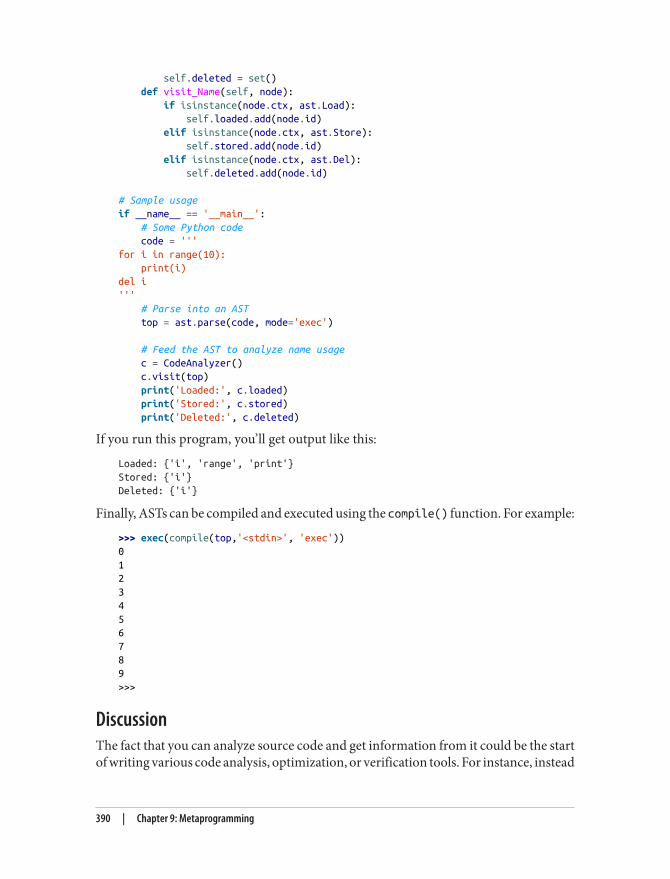
self.deleted = set() def visit_Name(self, node): if isinstance(node.ctx, ast.Load): self.loaded.add(node.id) elif isinstance(node.ctx, ast.Store): self.stored.add(node.id) elif isinstance(node.ctx, ast.Del): self.deleted.add(node.id)
# Sample usageif __name__ == '__main__': # Some Python code code = '''for i in range(10): print(i)del i''' # Parse into an AST top = ast.parse(code, mode='exec')
# Feed the AST to analyze name usage c = CodeAnalyzer() c.visit(top) print('Loaded:', c.loaded) print('Stored:', c.stored) print('Deleted:', c.deleted)
If you run this program, you’ll get output like this:
Loaded: {'i', 'range', 'print'}Stored: {'i'}Deleted: {'i'}
Finally, ASTs can be compiled and executed using the compile() function. For example:
>>> exec(compile(top,'<stdin>', 'exec'))0123456789>>>
DiscussionThe fact that you can analyze source code and get information from it could be the startof writing various code analysis, optimization, or verification tools. For instance, instead
390 | Chapter 9: Metaprogramming
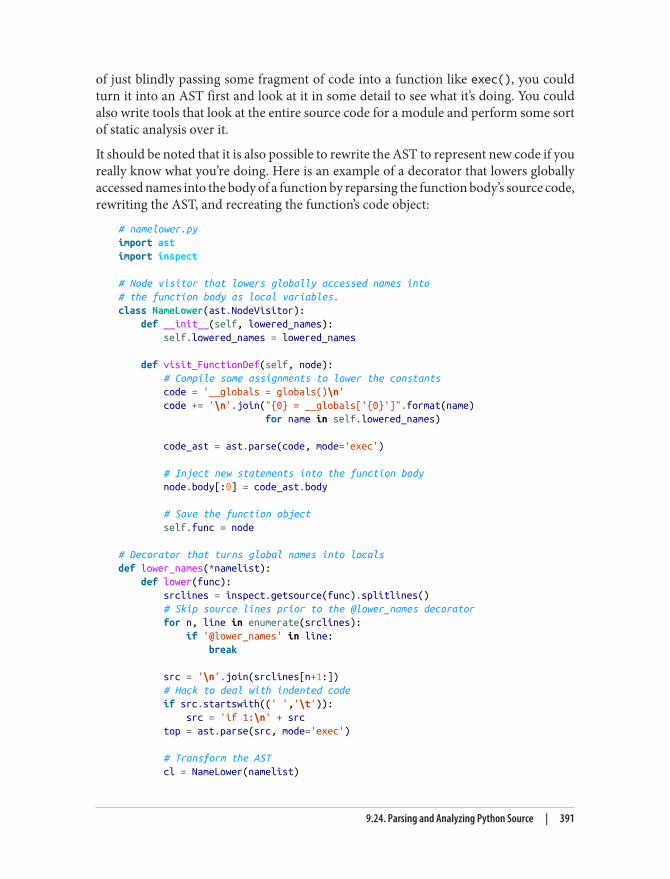
of just blindly passing some fragment of code into a function like exec(), you couldturn it into an AST first and look at it in some detail to see what it’s doing. You couldalso write tools that look at the entire source code for a module and perform some sortof static analysis over it.
It should be noted that it is also possible to rewrite the AST to represent new code if youreally know what you’re doing. Here is an example of a decorator that lowers globallyaccessed names into the body of a function by reparsing the function body’s source code,rewriting the AST, and recreating the function’s code object:
# namelower.pyimport astimport inspect
# Node visitor that lowers globally accessed names into# the function body as local variables.class NameLower(ast.NodeVisitor): def __init__(self, lowered_names): self.lowered_names = lowered_names
def visit_FunctionDef(self, node): # Compile some assignments to lower the constants code = '__globals = globals()\n' code += '\n'.join("{0} = __globals['{0}']".format(name) for name in self.lowered_names)
code_ast = ast.parse(code, mode='exec')
# Inject new statements into the function body node.body[:0] = code_ast.body
# Save the function object self.func = node
# Decorator that turns global names into localsdef lower_names(*namelist): def lower(func): srclines = inspect.getsource(func).splitlines() # Skip source lines prior to the @lower_names decorator for n, line in enumerate(srclines): if '@lower_names' in line: break
src = '\n'.join(srclines[n+1:]) # Hack to deal with indented code if src.startswith((' ','\t')): src = 'if 1:\n' + src top = ast.parse(src, mode='exec')
# Transform the AST cl = NameLower(namelist)
9.24. Parsing and Analyzing Python Source | 391
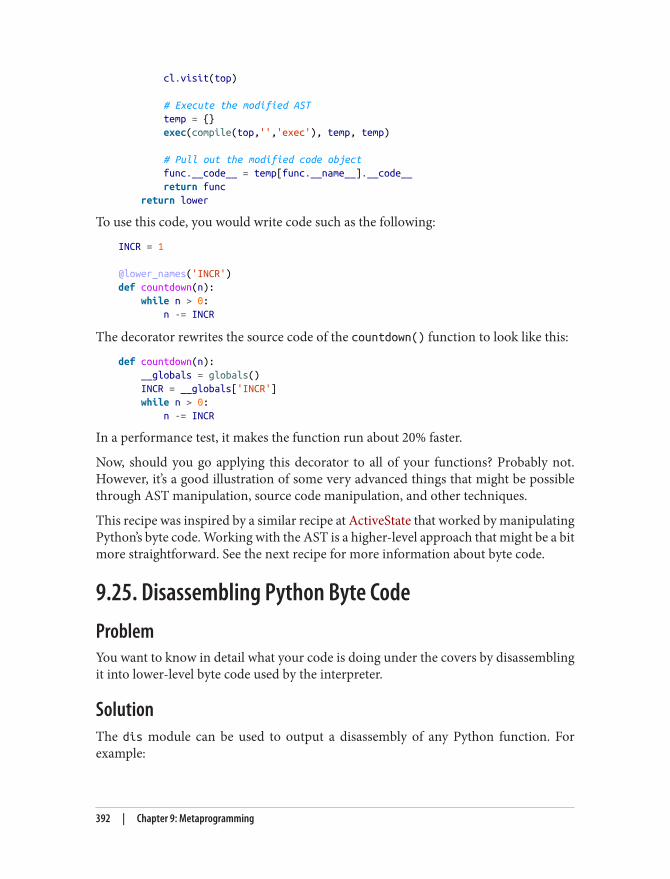
cl.visit(top)
# Execute the modified AST temp = {} exec(compile(top,'','exec'), temp, temp)
# Pull out the modified code object func.__code__ = temp[func.__name__].__code__ return func return lower
To use this code, you would write code such as the following:
INCR = 1
@lower_names('INCR')def countdown(n): while n > 0: n -= INCR
The decorator rewrites the source code of the countdown() function to look like this:
def countdown(n): __globals = globals() INCR = __globals['INCR'] while n > 0: n -= INCR
In a performance test, it makes the function run about 20% faster.
Now, should you go applying this decorator to all of your functions? Probably not.However, it’s a good illustration of some very advanced things that might be possiblethrough AST manipulation, source code manipulation, and other techniques.
This recipe was inspired by a similar recipe at ActiveState that worked by manipulatingPython’s byte code. Working with the AST is a higher-level approach that might be a bitmore straightforward. See the next recipe for more information about byte code.
9.25. Disassembling Python Byte CodeProblemYou want to know in detail what your code is doing under the covers by disassemblingit into lower-level byte code used by the interpreter.
SolutionThe dis module can be used to output a disassembly of any Python function. Forexample:
392 | Chapter 9: Metaprogramming
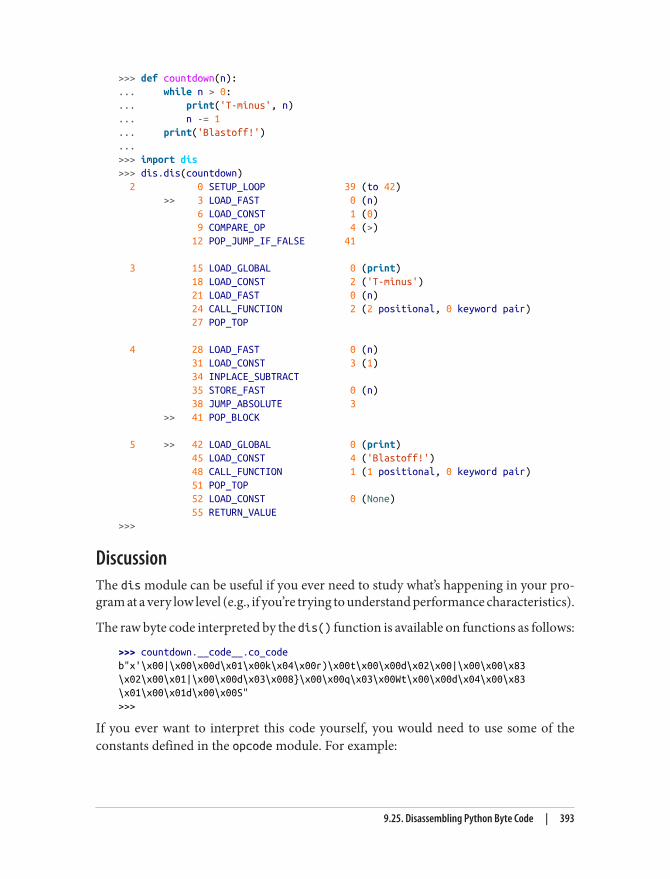
>>> def countdown(n):... while n > 0:... print('T-minus', n)... n -= 1... print('Blastoff!')...>>> import dis>>> dis.dis(countdown) 2 0 SETUP_LOOP 39 (to 42) >> 3 LOAD_FAST 0 (n) 6 LOAD_CONST 1 (0) 9 COMPARE_OP 4 (>) 12 POP_JUMP_IF_FALSE 41
3 15 LOAD_GLOBAL 0 (print) 18 LOAD_CONST 2 ('T-minus') 21 LOAD_FAST 0 (n) 24 CALL_FUNCTION 2 (2 positional, 0 keyword pair) 27 POP_TOP
4 28 LOAD_FAST 0 (n) 31 LOAD_CONST 3 (1) 34 INPLACE_SUBTRACT 35 STORE_FAST 0 (n) 38 JUMP_ABSOLUTE 3 >> 41 POP_BLOCK
5 >> 42 LOAD_GLOBAL 0 (print) 45 LOAD_CONST 4 ('Blastoff!') 48 CALL_FUNCTION 1 (1 positional, 0 keyword pair) 51 POP_TOP 52 LOAD_CONST 0 (None) 55 RETURN_VALUE>>>
DiscussionThe dis module can be useful if you ever need to study what’s happening in your pro‐gram at a very low level (e.g., if you’re trying to understand performance characteristics).
The raw byte code interpreted by the dis() function is available on functions as follows:
>>> countdown.__code__.co_codeb"x'\x00|\x00\x00d\x01\x00k\x04\x00r)\x00t\x00\x00d\x02\x00|\x00\x00\x83\x02\x00\x01|\x00\x00d\x03\x008}\x00\x00q\x03\x00Wt\x00\x00d\x04\x00\x83\x01\x00\x01d\x00\x00S">>>
If you ever want to interpret this code yourself, you would need to use some of theconstants defined in the opcode module. For example:
9.25. Disassembling Python Byte Code | 393
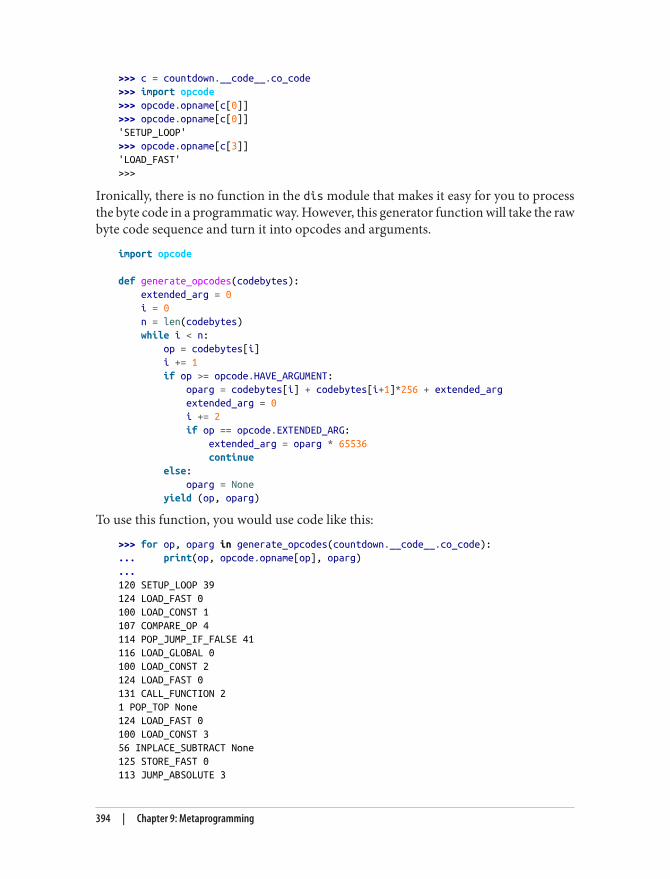
>>> c = countdown.__code__.co_code>>> import opcode>>> opcode.opname[c[0]]>>> opcode.opname[c[0]]'SETUP_LOOP'>>> opcode.opname[c[3]]'LOAD_FAST'>>>
Ironically, there is no function in the dis module that makes it easy for you to processthe byte code in a programmatic way. However, this generator function will take the rawbyte code sequence and turn it into opcodes and arguments.
import opcode
def generate_opcodes(codebytes): extended_arg = 0 i = 0 n = len(codebytes) while i < n: op = codebytes[i] i += 1 if op >= opcode.HAVE_ARGUMENT: oparg = codebytes[i] + codebytes[i+1]*256 + extended_arg extended_arg = 0 i += 2 if op == opcode.EXTENDED_ARG: extended_arg = oparg * 65536 continue else: oparg = None yield (op, oparg)
To use this function, you would use code like this:
>>> for op, oparg in generate_opcodes(countdown.__code__.co_code):... print(op, opcode.opname[op], oparg)...120 SETUP_LOOP 39124 LOAD_FAST 0100 LOAD_CONST 1107 COMPARE_OP 4114 POP_JUMP_IF_FALSE 41116 LOAD_GLOBAL 0100 LOAD_CONST 2124 LOAD_FAST 0131 CALL_FUNCTION 21 POP_TOP None124 LOAD_FAST 0100 LOAD_CONST 356 INPLACE_SUBTRACT None125 STORE_FAST 0113 JUMP_ABSOLUTE 3
394 | Chapter 9: Metaprogramming
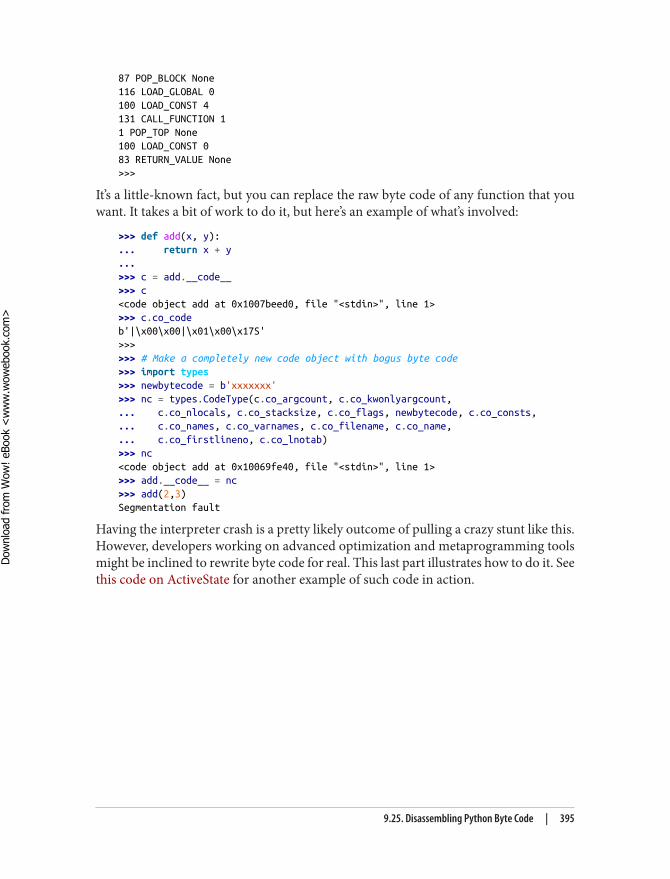
87 POP_BLOCK None116 LOAD_GLOBAL 0100 LOAD_CONST 4131 CALL_FUNCTION 11 POP_TOP None100 LOAD_CONST 083 RETURN_VALUE None>>>
It’s a little-known fact, but you can replace the raw byte code of any function that youwant. It takes a bit of work to do it, but here’s an example of what’s involved:
>>> def add(x, y):... return x + y...>>> c = add.__code__>>> c<code object add at 0x1007beed0, file "<stdin>", line 1>>>> c.co_codeb'|\x00\x00|\x01\x00\x17S'>>>>>> # Make a completely new code object with bogus byte code>>> import types>>> newbytecode = b'xxxxxxx'>>> nc = types.CodeType(c.co_argcount, c.co_kwonlyargcount,... c.co_nlocals, c.co_stacksize, c.co_flags, newbytecode, c.co_consts,... c.co_names, c.co_varnames, c.co_filename, c.co_name,... c.co_firstlineno, c.co_lnotab)>>> nc<code object add at 0x10069fe40, file "<stdin>", line 1>>>> add.__code__ = nc>>> add(2,3)Segmentation fault
Having the interpreter crash is a pretty likely outcome of pulling a crazy stunt like this.However, developers working on advanced optimization and metaprogramming toolsmight be inclined to rewrite byte code for real. This last part illustrates how to do it. Seethis code on ActiveState for another example of such code in action.
9.25. Disassembling Python Byte Code | 395
Dow
nlo
ad fro
m W
ow
! eBook
<w
ww
.wow
ebook.
com
>

CHAPTER 10
Modules and Packages
Modules and packages are the core of any large project, and the Python installationitself. This chapter focuses on common programming techniques involving modulesand packages, such as how to organize packages, splitting large modules into multiplefiles, and creating namespace packages. Recipes that allow you to customize the oper‐ation of the import statement itself are also given.
10.1. Making a Hierarchical Package of ModulesProblemYou want to organize your code into a package consisting of a hierarchical collection ofmodules.
SolutionMaking a package structure is simple. Just organize your code as you wish on the file-system and make sure that every directory defines an __init__.py file. For example:
graphics/ __init__.py primitive/ __init__.py line.py fill.py text.py formats/ __init__.py png.py jpg.py
397

Once you have done this, you should be able to perform various import statements,such as the following:
import graphics.primitive.linefrom graphics.primitive import lineimport graphics.formats.jpg as jpg
DiscussionDefining a hierarchy of modules is as easy as making a directory structure on the file‐system. The purpose of the __init__.py files is to include optional initialization codethat runs as different levels of a package are encountered. For example, if you have thestatement import graphics, the file graphics/__init__.py will be imported and formthe contents of the graphics namespace. For an import such as import graphics.formats.jpg, the files graphics/__init__.py and graphics/formats/__init__.py will both beimported prior to the final import of the graphics/formats/jpg.py file.
More often that not, it’s fine to just leave the __init__.py files empty. However, there arecertain situations where they might include code. For example, an __init__.py file canbe used to automatically load submodules like this:
# graphics/formats/__init__.py
from . import jpgfrom . import png
For such a file, a user merely has to use a single import graphics.formats instead ofa separate import for graphics.formats.jpg and graphics.formats.png.
Other common uses of __init__.py include consolidating definitions from multiple filesinto a single logical namespace, as is sometimes done when splitting modules. This isdiscussed in Recipe 10.4.
Astute programmers will notice that Python 3.3 still seems to perform package importseven if no __init__.py files are present. If you don’t define __init__.py, you actuallycreate what’s known as a “namespace package,” which is described in Recipe 10.5. Allthings being equal, include the __init__.py files if you’re just starting out with the cre‐ation of a new package.
10.2. Controlling the Import of EverythingProblemYou want precise control over the symbols that are exported from a module or packagewhen a user uses the from module import * statement.
398 | Chapter 10: Modules and Packages
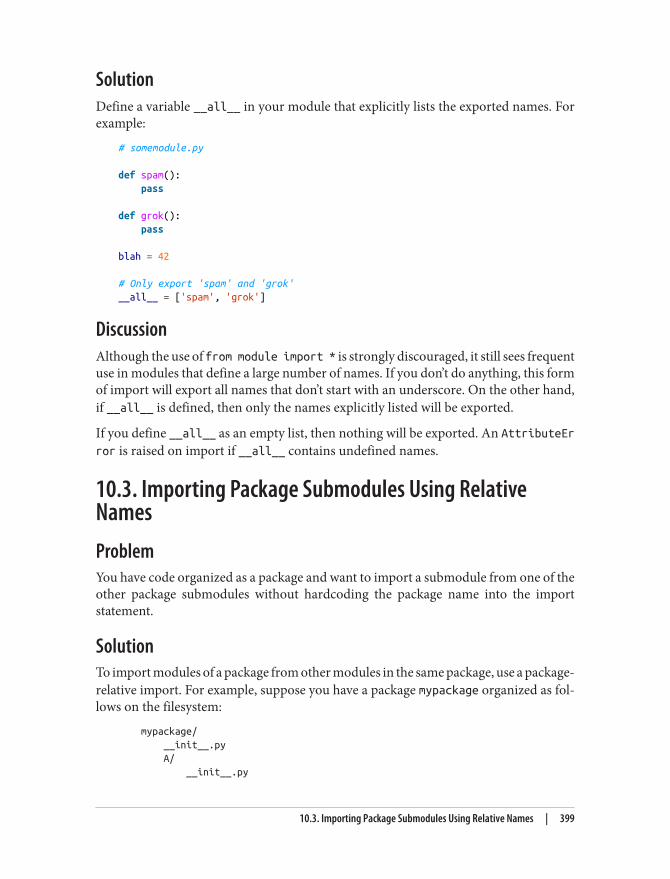
SolutionDefine a variable __all__ in your module that explicitly lists the exported names. Forexample:
# somemodule.py
def spam(): pass
def grok(): pass
blah = 42
# Only export 'spam' and 'grok'__all__ = ['spam', 'grok']
DiscussionAlthough the use of from module import * is strongly discouraged, it still sees frequentuse in modules that define a large number of names. If you don’t do anything, this formof import will export all names that don’t start with an underscore. On the other hand,if __all__ is defined, then only the names explicitly listed will be exported.
If you define __all__ as an empty list, then nothing will be exported. An AttributeError is raised on import if __all__ contains undefined names.
10.3. Importing Package Submodules Using RelativeNamesProblemYou have code organized as a package and want to import a submodule from one of theother package submodules without hardcoding the package name into the importstatement.
SolutionTo import modules of a package from other modules in the same package, use a package-relative import. For example, suppose you have a package mypackage organized as fol‐lows on the filesystem:
mypackage/ __init__.py A/ __init__.py
10.3. Importing Package Submodules Using Relative Names | 399
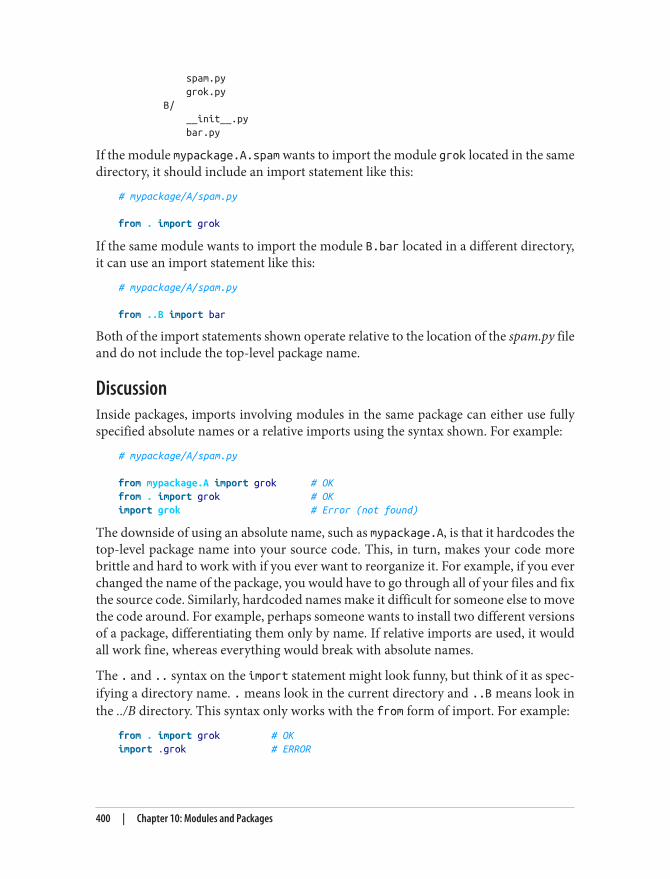
spam.py grok.py B/ __init__.py bar.py
If the module mypackage.A.spam wants to import the module grok located in the samedirectory, it should include an import statement like this:
# mypackage/A/spam.py
from . import grok
If the same module wants to import the module B.bar located in a different directory,it can use an import statement like this:
# mypackage/A/spam.py
from ..B import bar
Both of the import statements shown operate relative to the location of the spam.py fileand do not include the top-level package name.
DiscussionInside packages, imports involving modules in the same package can either use fullyspecified absolute names or a relative imports using the syntax shown. For example:
# mypackage/A/spam.py
from mypackage.A import grok # OKfrom . import grok # OKimport grok # Error (not found)
The downside of using an absolute name, such as mypackage.A, is that it hardcodes thetop-level package name into your source code. This, in turn, makes your code morebrittle and hard to work with if you ever want to reorganize it. For example, if you everchanged the name of the package, you would have to go through all of your files and fixthe source code. Similarly, hardcoded names make it difficult for someone else to movethe code around. For example, perhaps someone wants to install two different versionsof a package, differentiating them only by name. If relative imports are used, it wouldall work fine, whereas everything would break with absolute names.
The . and .. syntax on the import statement might look funny, but think of it as spec‐ifying a directory name. . means look in the current directory and ..B means look inthe ../B directory. This syntax only works with the from form of import. For example:
from . import grok # OKimport .grok # ERROR
400 | Chapter 10: Modules and Packages
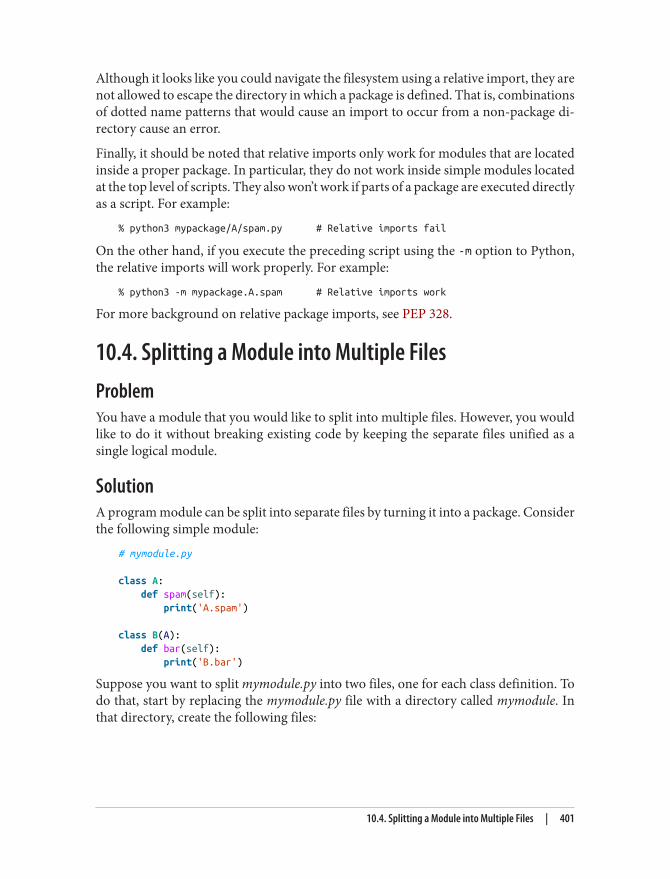
Although it looks like you could navigate the filesystem using a relative import, they arenot allowed to escape the directory in which a package is defined. That is, combinationsof dotted name patterns that would cause an import to occur from a non-package di‐rectory cause an error.
Finally, it should be noted that relative imports only work for modules that are locatedinside a proper package. In particular, they do not work inside simple modules locatedat the top level of scripts. They also won’t work if parts of a package are executed directlyas a script. For example:
% python3 mypackage/A/spam.py # Relative imports fail
On the other hand, if you execute the preceding script using the -m option to Python,the relative imports will work properly. For example:
% python3 -m mypackage.A.spam # Relative imports work
For more background on relative package imports, see PEP 328.
10.4. Splitting a Module into Multiple FilesProblemYou have a module that you would like to split into multiple files. However, you wouldlike to do it without breaking existing code by keeping the separate files unified as asingle logical module.
SolutionA program module can be split into separate files by turning it into a package. Considerthe following simple module:
# mymodule.py
class A: def spam(self): print('A.spam')
class B(A): def bar(self): print('B.bar')
Suppose you want to split mymodule.py into two files, one for each class definition. Todo that, start by replacing the mymodule.py file with a directory called mymodule. Inthat directory, create the following files:
10.4. Splitting a Module into Multiple Files | 401
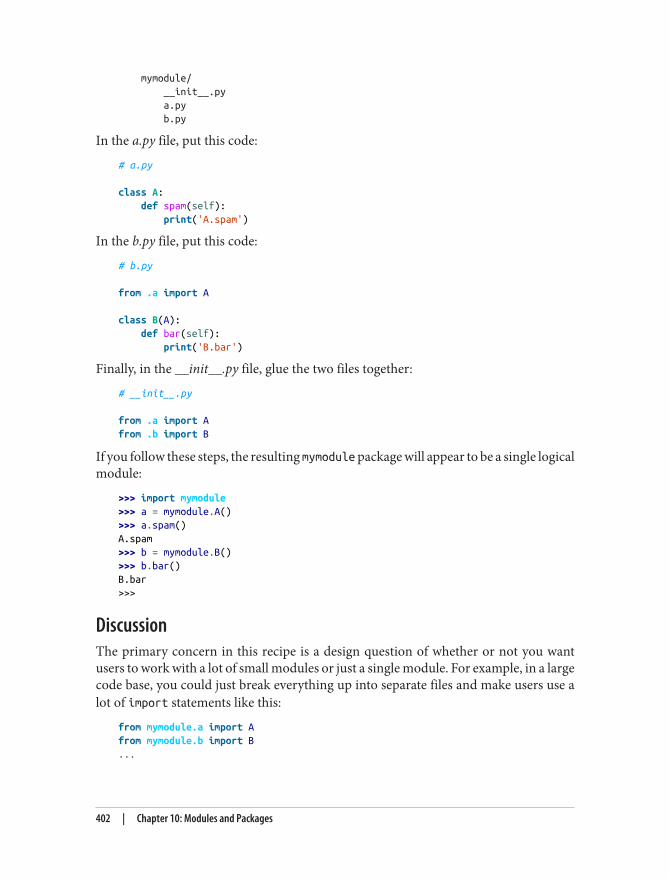
mymodule/ __init__.py a.py b.py
In the a.py file, put this code:
# a.py
class A: def spam(self): print('A.spam')
In the b.py file, put this code:
# b.py
from .a import A
class B(A): def bar(self): print('B.bar')
Finally, in the __init__.py file, glue the two files together:
# __init__.py
from .a import Afrom .b import B
If you follow these steps, the resulting mymodule package will appear to be a single logicalmodule:
>>> import mymodule>>> a = mymodule.A()>>> a.spam()A.spam>>> b = mymodule.B()>>> b.bar()B.bar>>>
DiscussionThe primary concern in this recipe is a design question of whether or not you wantusers to work with a lot of small modules or just a single module. For example, in a largecode base, you could just break everything up into separate files and make users use alot of import statements like this:
from mymodule.a import Afrom mymodule.b import B...
402 | Chapter 10: Modules and Packages
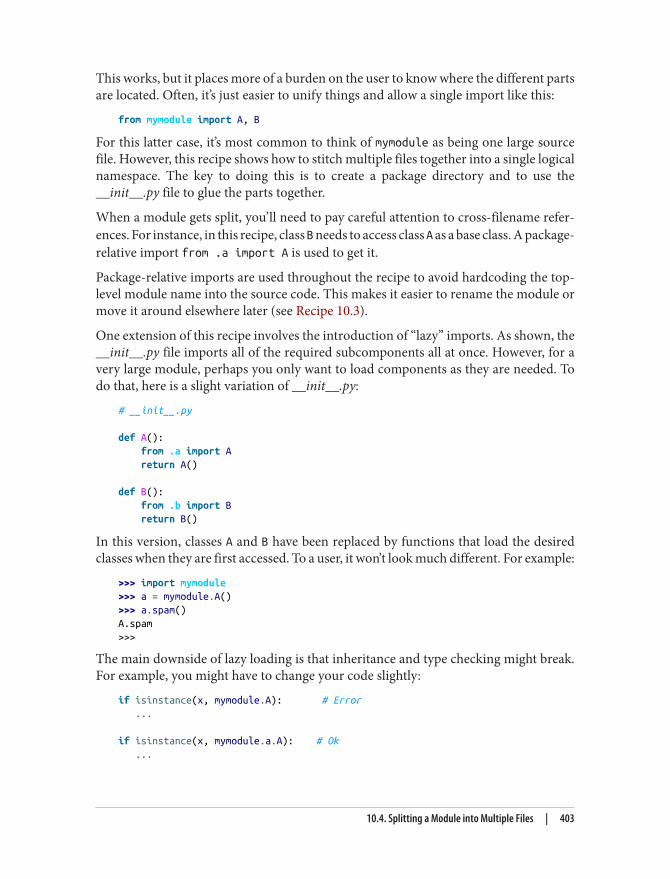
This works, but it places more of a burden on the user to know where the different partsare located. Often, it’s just easier to unify things and allow a single import like this:
from mymodule import A, B
For this latter case, it’s most common to think of mymodule as being one large sourcefile. However, this recipe shows how to stitch multiple files together into a single logicalnamespace. The key to doing this is to create a package directory and to use the__init__.py file to glue the parts together.
When a module gets split, you’ll need to pay careful attention to cross-filename refer‐ences. For instance, in this recipe, class B needs to access class A as a base class. A package-relative import from .a import A is used to get it.
Package-relative imports are used throughout the recipe to avoid hardcoding the top-level module name into the source code. This makes it easier to rename the module ormove it around elsewhere later (see Recipe 10.3).
One extension of this recipe involves the introduction of “lazy” imports. As shown, the__init__.py file imports all of the required subcomponents all at once. However, for avery large module, perhaps you only want to load components as they are needed. Todo that, here is a slight variation of __init__.py:
# __init__.py
def A(): from .a import A return A()
def B(): from .b import B return B()
In this version, classes A and B have been replaced by functions that load the desiredclasses when they are first accessed. To a user, it won’t look much different. For example:
>>> import mymodule>>> a = mymodule.A()>>> a.spam()A.spam>>>
The main downside of lazy loading is that inheritance and type checking might break.For example, you might have to change your code slightly:
if isinstance(x, mymodule.A): # Error ...
if isinstance(x, mymodule.a.A): # Ok ...
10.4. Splitting a Module into Multiple Files | 403
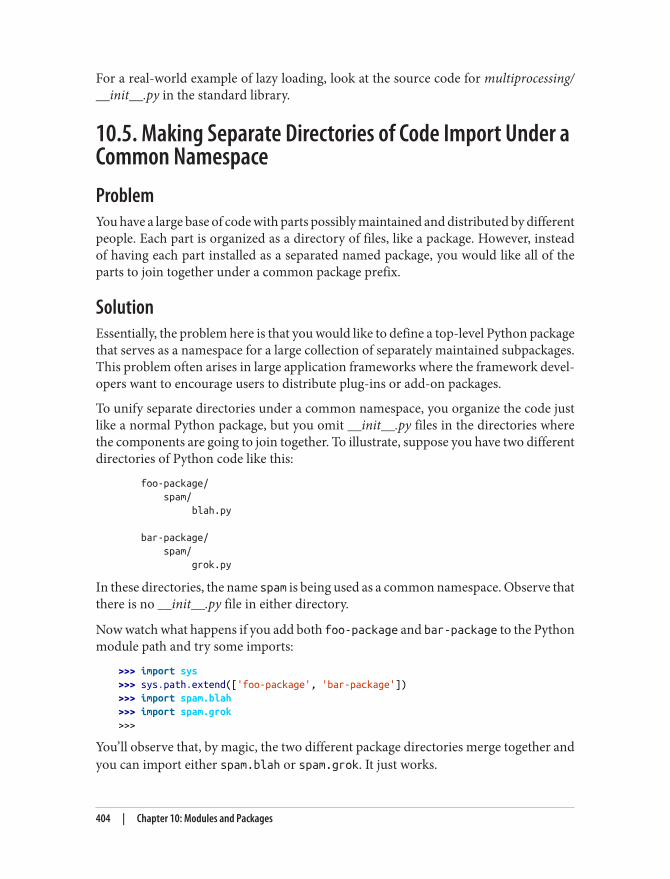
For a real-world example of lazy loading, look at the source code for multiprocessing/__init__.py in the standard library.
10.5. Making Separate Directories of Code Import Under aCommon NamespaceProblemYou have a large base of code with parts possibly maintained and distributed by differentpeople. Each part is organized as a directory of files, like a package. However, insteadof having each part installed as a separated named package, you would like all of theparts to join together under a common package prefix.
SolutionEssentially, the problem here is that you would like to define a top-level Python packagethat serves as a namespace for a large collection of separately maintained subpackages.This problem often arises in large application frameworks where the framework devel‐opers want to encourage users to distribute plug-ins or add-on packages.
To unify separate directories under a common namespace, you organize the code justlike a normal Python package, but you omit __init__.py files in the directories wherethe components are going to join together. To illustrate, suppose you have two differentdirectories of Python code like this:
foo-package/ spam/ blah.py
bar-package/ spam/ grok.py
In these directories, the name spam is being used as a common namespace. Observe thatthere is no __init__.py file in either directory.
Now watch what happens if you add both foo-package and bar-package to the Pythonmodule path and try some imports:
>>> import sys>>> sys.path.extend(['foo-package', 'bar-package'])>>> import spam.blah>>> import spam.grok>>>
You’ll observe that, by magic, the two different package directories merge together andyou can import either spam.blah or spam.grok. It just works.
404 | Chapter 10: Modules and Packages
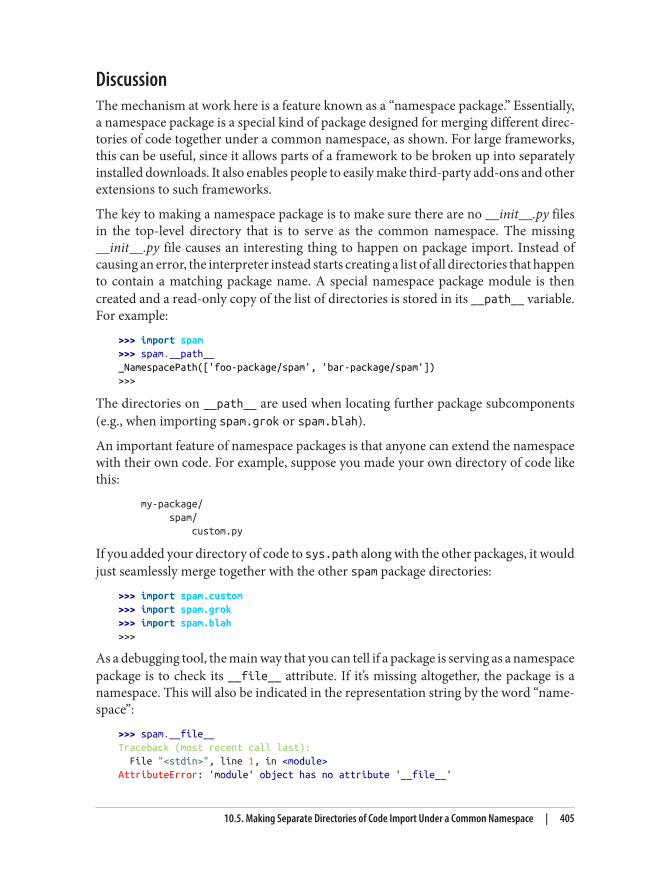
DiscussionThe mechanism at work here is a feature known as a “namespace package.” Essentially,a namespace package is a special kind of package designed for merging different direc‐tories of code together under a common namespace, as shown. For large frameworks,this can be useful, since it allows parts of a framework to be broken up into separatelyinstalled downloads. It also enables people to easily make third-party add-ons and otherextensions to such frameworks.
The key to making a namespace package is to make sure there are no __init__.py filesin the top-level directory that is to serve as the common namespace. The missing__init__.py file causes an interesting thing to happen on package import. Instead ofcausing an error, the interpreter instead starts creating a list of all directories that happento contain a matching package name. A special namespace package module is thencreated and a read-only copy of the list of directories is stored in its __path__ variable.For example:
>>> import spam>>> spam.__path___NamespacePath(['foo-package/spam', 'bar-package/spam'])>>>
The directories on __path__ are used when locating further package subcomponents(e.g., when importing spam.grok or spam.blah).
An important feature of namespace packages is that anyone can extend the namespacewith their own code. For example, suppose you made your own directory of code likethis:
my-package/ spam/ custom.py
If you added your directory of code to sys.path along with the other packages, it wouldjust seamlessly merge together with the other spam package directories:
>>> import spam.custom>>> import spam.grok>>> import spam.blah>>>
As a debugging tool, the main way that you can tell if a package is serving as a namespacepackage is to check its __file__ attribute. If it’s missing altogether, the package is anamespace. This will also be indicated in the representation string by the word “name‐space”:
>>> spam.__file__Traceback (most recent call last): File "<stdin>", line 1, in <module>AttributeError: 'module' object has no attribute '__file__'
10.5. Making Separate Directories of Code Import Under a Common Namespace | 405
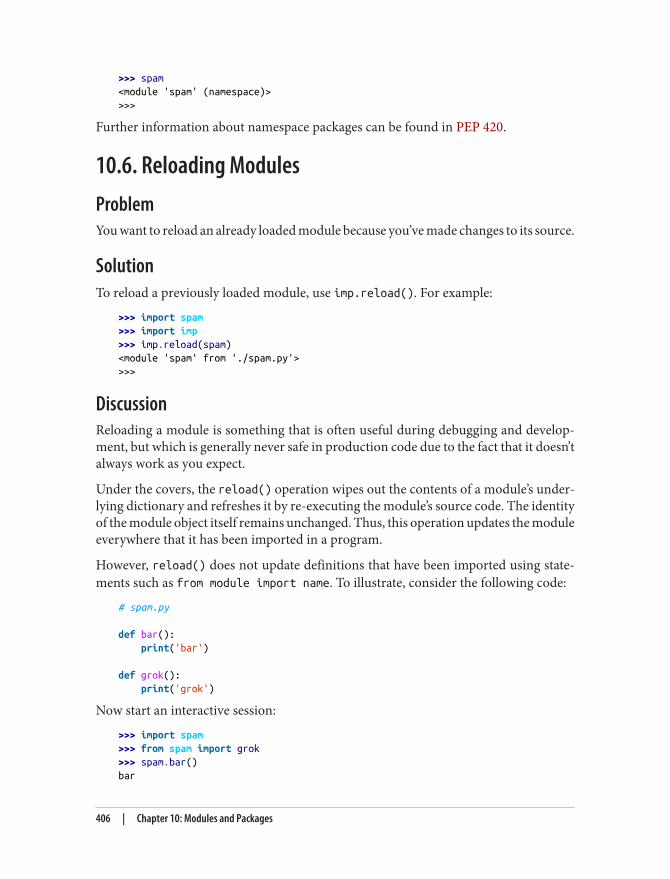
>>> spam<module 'spam' (namespace)>>>>
Further information about namespace packages can be found in PEP 420.
10.6. Reloading ModulesProblemYou want to reload an already loaded module because you’ve made changes to its source.
SolutionTo reload a previously loaded module, use imp.reload(). For example:
>>> import spam>>> import imp>>> imp.reload(spam)<module 'spam' from './spam.py'>>>>
DiscussionReloading a module is something that is often useful during debugging and develop‐ment, but which is generally never safe in production code due to the fact that it doesn’talways work as you expect.
Under the covers, the reload() operation wipes out the contents of a module’s under‐lying dictionary and refreshes it by re-executing the module’s source code. The identityof the module object itself remains unchanged. Thus, this operation updates the moduleeverywhere that it has been imported in a program.
However, reload() does not update definitions that have been imported using state‐ments such as from module import name. To illustrate, consider the following code:
# spam.py
def bar(): print('bar')
def grok(): print('grok')
Now start an interactive session:
>>> import spam>>> from spam import grok>>> spam.bar()bar
406 | Chapter 10: Modules and Packages
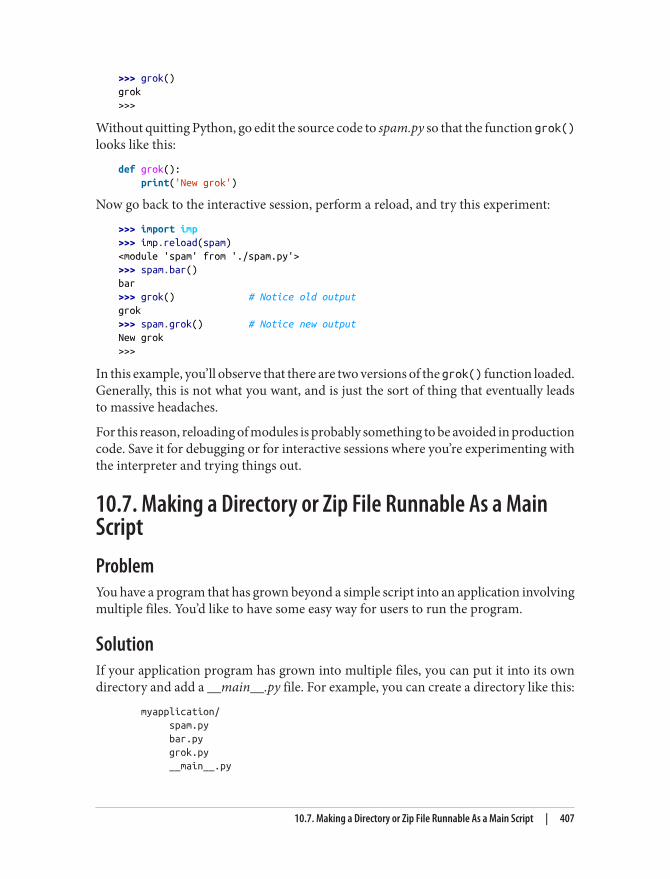
>>> grok()grok>>>
Without quitting Python, go edit the source code to spam.py so that the function grok()looks like this:
def grok(): print('New grok')
Now go back to the interactive session, perform a reload, and try this experiment:
>>> import imp>>> imp.reload(spam)<module 'spam' from './spam.py'>>>> spam.bar()bar>>> grok() # Notice old outputgrok>>> spam.grok() # Notice new outputNew grok>>>
In this example, you’ll observe that there are two versions of the grok() function loaded.Generally, this is not what you want, and is just the sort of thing that eventually leadsto massive headaches.
For this reason, reloading of modules is probably something to be avoided in productioncode. Save it for debugging or for interactive sessions where you’re experimenting withthe interpreter and trying things out.
10.7. Making a Directory or Zip File Runnable As a MainScriptProblemYou have a program that has grown beyond a simple script into an application involvingmultiple files. You’d like to have some easy way for users to run the program.
SolutionIf your application program has grown into multiple files, you can put it into its owndirectory and add a __main__.py file. For example, you can create a directory like this:
myapplication/ spam.py bar.py grok.py __main__.py
10.7. Making a Directory or Zip File Runnable As a Main Script | 407
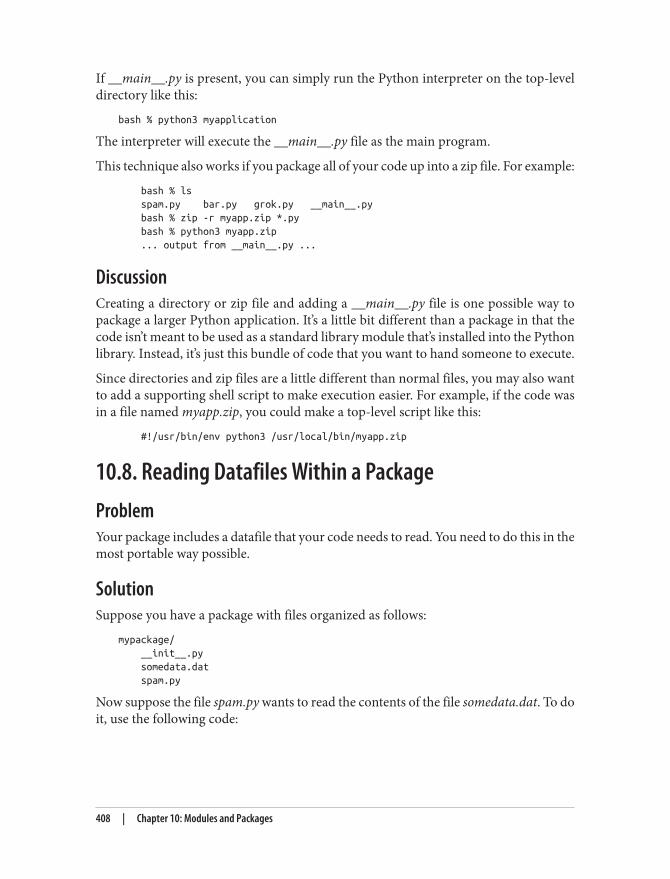
If __main__.py is present, you can simply run the Python interpreter on the top-leveldirectory like this:
bash % python3 myapplication
The interpreter will execute the __main__.py file as the main program.
This technique also works if you package all of your code up into a zip file. For example:
bash % ls spam.py bar.py grok.py __main__.py bash % zip -r myapp.zip *.py bash % python3 myapp.zip ... output from __main__.py ...
DiscussionCreating a directory or zip file and adding a __main__.py file is one possible way topackage a larger Python application. It’s a little bit different than a package in that thecode isn’t meant to be used as a standard library module that’s installed into the Pythonlibrary. Instead, it’s just this bundle of code that you want to hand someone to execute.
Since directories and zip files are a little different than normal files, you may also wantto add a supporting shell script to make execution easier. For example, if the code wasin a file named myapp.zip, you could make a top-level script like this:
#!/usr/bin/env python3 /usr/local/bin/myapp.zip
10.8. Reading Datafiles Within a PackageProblemYour package includes a datafile that your code needs to read. You need to do this in themost portable way possible.
SolutionSuppose you have a package with files organized as follows:
mypackage/ __init__.py somedata.dat spam.py
Now suppose the file spam.py wants to read the contents of the file somedata.dat. To doit, use the following code:
408 | Chapter 10: Modules and Packages
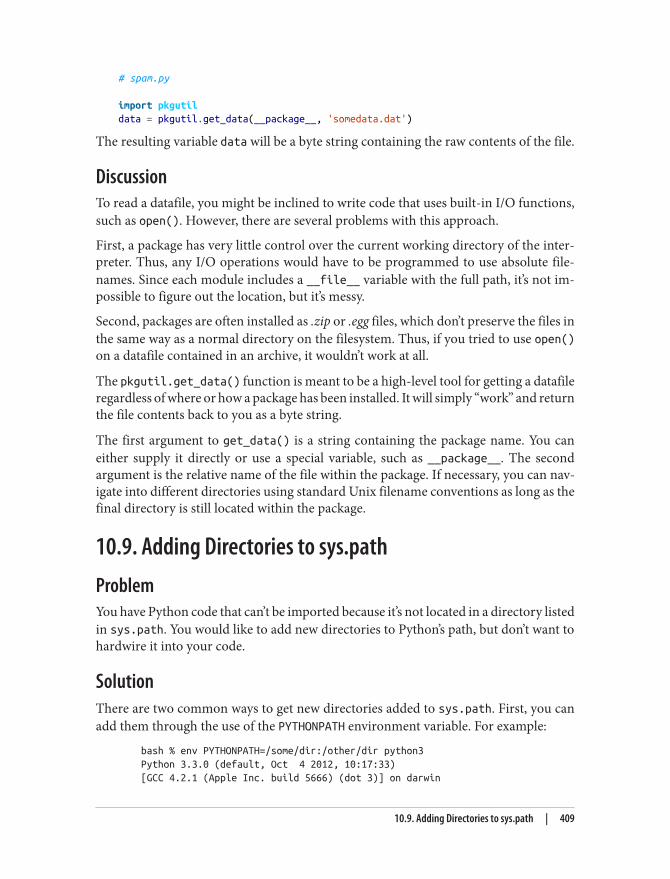
# spam.py
import pkgutildata = pkgutil.get_data(__package__, 'somedata.dat')
The resulting variable data will be a byte string containing the raw contents of the file.
DiscussionTo read a datafile, you might be inclined to write code that uses built-in I/O functions,such as open(). However, there are several problems with this approach.
First, a package has very little control over the current working directory of the inter‐preter. Thus, any I/O operations would have to be programmed to use absolute file‐names. Since each module includes a __file__ variable with the full path, it’s not im‐possible to figure out the location, but it’s messy.
Second, packages are often installed as .zip or .egg files, which don’t preserve the files inthe same way as a normal directory on the filesystem. Thus, if you tried to use open()on a datafile contained in an archive, it wouldn’t work at all.
The pkgutil.get_data() function is meant to be a high-level tool for getting a datafileregardless of where or how a package has been installed. It will simply “work” and returnthe file contents back to you as a byte string.
The first argument to get_data() is a string containing the package name. You caneither supply it directly or use a special variable, such as __package__. The secondargument is the relative name of the file within the package. If necessary, you can nav‐igate into different directories using standard Unix filename conventions as long as thefinal directory is still located within the package.
10.9. Adding Directories to sys.pathProblemYou have Python code that can’t be imported because it’s not located in a directory listedin sys.path. You would like to add new directories to Python’s path, but don’t want tohardwire it into your code.
SolutionThere are two common ways to get new directories added to sys.path. First, you canadd them through the use of the PYTHONPATH environment variable. For example:
bash % env PYTHONPATH=/some/dir:/other/dir python3 Python 3.3.0 (default, Oct 4 2012, 10:17:33) [GCC 4.2.1 (Apple Inc. build 5666) (dot 3)] on darwin
10.9. Adding Directories to sys.path | 409
Type "help", "copyright", "credits" or "license" for more information. >>> import sys >>> sys.path ['', '/some/dir', '/other/dir', ...] >>>
In a custom application, this environment variable could be set at program startup orthrough a shell script of some kind.
The second approach is to create a .pth file that lists the directories like this:
# myapplication.pth /some/dir /other/dir
This .pth file needs to be placed into one of Python’s site-packages directories, which aretypically located at /usr/local/lib/python3.3/site-packages or ~/.local/lib/python3.3/site-packages. On interpreter startup, the directories listed in the .pth file will be added tosys.path as long as they exist on the filesystem. Installation of a .pth file might requireadministrator access if it’s being added to the system-wide Python interpreter.
DiscussionFaced with trouble locating files, you might be inclined to write code that manuallyadjusts the value of sys.path. For example:
import syssys.path.insert(0, '/some/dir')sys.path.insert(0, '/other/dir')
Although this “works,” it is extremely fragile in practice and should be avoided if pos‐sible. Part of the problem with this approach is that it adds hardcoded directory namesto your source. This can cause maintenance problems if your code ever gets movedaround to a new location. It’s usually much better to configure the path elsewhere in amanner that can be adjusted without making source code edits.
You can sometimes work around the problem of hardcoded directories if you carefullyconstruct an appropriate absolute path using module-level variables, such as__file__. For example:
import sysfrom os.path import abspath, join, dirnamesys.path.insert(0, abspath(dirname('__file__'), 'src'))
This adds an src directory to the path where that directory is located in the same direc‐tory as the code that’s executing the insertion step.
The site-packages directories are the locations where third-party modules and packagesnormally get installed. If your code was installed in that manner, that’s where it wouldbe placed. Although .pth files for configuring the path must appear in site-packages, they
410 | Chapter 10: Modules and Packages
can refer to any directories on the system that you wish. Thus, you can elect to haveyour code in a completely different set of directories as long as those directories areincluded in a .pth file.
10.10. Importing Modules Using a Name Given in a StringProblemYou have the name of a module that you would like to import, but it’s being held in astring. You would like to invoke the import command on the string.
SolutionUse the importlib.import_module() function to manually import a module or part ofa package where the name is given as a string. For example:
>>> import importlib>>> math = importlib.import_module('math')>>> math.sin(2)0.9092974268256817>>> mod = importlib.import_module('urllib.request')>>> u = mod.urlopen('http://www.python.org')>>>
import_module simply performs the same steps as import, but returns the resultingmodule object back to you as a result. You just need to store it in a variable and use itlike a normal module afterward.
If you are working with packages, import_module() can also be used to perform relativeimports. However, you need to give it an extra argument. For example:
import importlib
# Same as 'from . import b'b = importlib.import_module('.b', __package__)
DiscussionThe problem of manually importing modules with import_module() most commonlyarises when writing code that manipulates or wraps around modules in some way. Forexample, perhaps you’re implementing a customized importing mechanism of somekind where you need to load a module by name and perform patches to the loaded code.
In older code, you will sometimes see the built-in __import__() function used to per‐form imports. Although this works, importlib.import_module() is usually easier touse.
See Recipe 10.11 for an advanced example of customizing the import process.
10.10. Importing Modules Using a Name Given in a String | 411
10.11. Loading Modules from a Remote Machine UsingImport HooksProblemYou would like to customize Python’s import statement so that it can transparently loadmodules from a remote machine.
SolutionFirst, a serious disclaimer about security. The idea discussed in this recipe would bewholly bad without some kind of extra security and authentication layer. That said, themain goal is actually to take a deep dive into the inner workings of Python’s importstatement. If you get this recipe to work and understand the inner workings, you’ll havea solid foundation of customizing import for almost any other purpose. With that outof the way, let’s carry on.
At the core of this recipe is a desire to extend the functionality of the import statement.There are several approaches for doing this, but for the purposes of illustration, start bymaking the following directory of Python code:
testcode/ spam.py fib.py grok/ __init__.py blah.py
The content of these files doesn’t matter, but put a few simple statements and functionsin each file so you can test them and see output when they’re imported. For example:
# spam.pyprint("I'm spam")
def hello(name): print('Hello %s' % name)
# fib.pyprint("I'm fib")
def fib(n): if n < 2: return 1 else: return fib(n-1) + fib(n-2)
# grok/__init__.pyprint("I'm grok.__init__")
412 | Chapter 10: Modules and Packages
# grok/blah.pyprint("I'm grok.blah")
The goal here is to allow remote access to these files as modules. Perhaps the easiest wayto do this is to publish them on a web server. Simply go to the testcode directory andrun Python like this:
bash % cd testcodebash % python3 -m http.server 15000Serving HTTP on 0.0.0.0 port 15000 ...
Leave that server running and start up a separate Python interpreter. Make sure you canaccess the remote files using urllib. For example:
>>> from urllib.request import urlopen>>> u = urlopen('http://localhost:15000/fib.py')>>> data = u.read().decode('utf-8')>>> print(data)# fib.pyprint("I'm fib")
def fib(n): if n < 2: return 1 else: return fib(n-1) + fib(n-2)
>>>
Loading source code from this server is going to form the basis for the remainder ofthis recipe. Specifically, instead of manually grabbing a file of source code using urlopen(), the import statement will be customized to do it transparently behind the scenes.
The first approach to loading a remote module is to create an explicit loading functionfor doing it. For example:
import impimport urllib.requestimport sys
def load_module(url): u = urllib.request.urlopen(url) source = u.read().decode('utf-8') mod = sys.modules.setdefault(url, imp.new_module(url)) code = compile(source, url, 'exec') mod.__file__ = url mod.__package__ = '' exec(code, mod.__dict__) return mod
10.11. Loading Modules from a Remote Machine Using Import Hooks | 413
Dow
nlo
ad fro
m W
ow
! eBook
<w
ww
.wow
ebook.
com
>
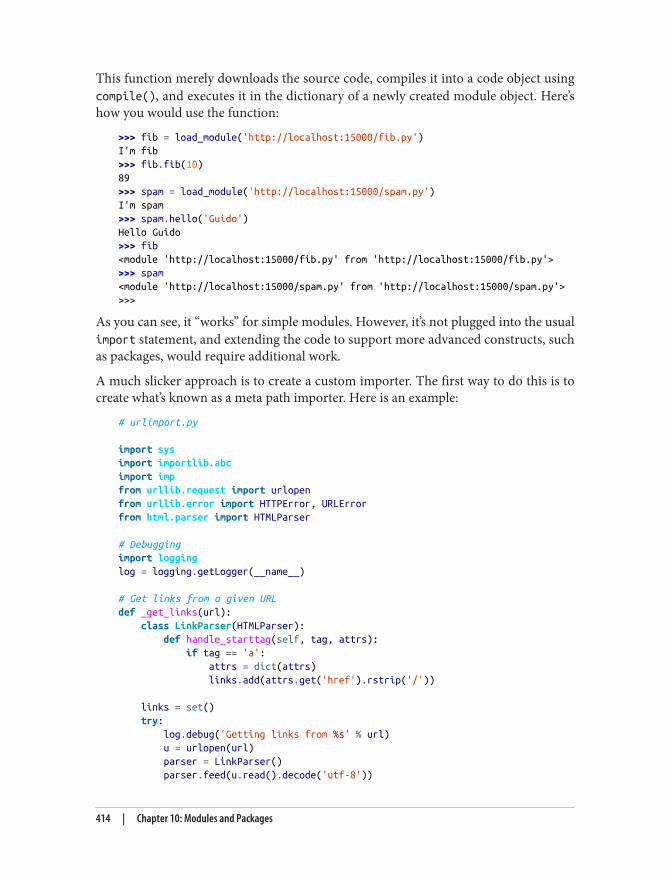
This function merely downloads the source code, compiles it into a code object usingcompile(), and executes it in the dictionary of a newly created module object. Here’show you would use the function:
>>> fib = load_module('http://localhost:15000/fib.py')I'm fib>>> fib.fib(10)89>>> spam = load_module('http://localhost:15000/spam.py')I'm spam>>> spam.hello('Guido')Hello Guido>>> fib<module 'http://localhost:15000/fib.py' from 'http://localhost:15000/fib.py'>>>> spam<module 'http://localhost:15000/spam.py' from 'http://localhost:15000/spam.py'>>>>
As you can see, it “works” for simple modules. However, it’s not plugged into the usualimport statement, and extending the code to support more advanced constructs, suchas packages, would require additional work.
A much slicker approach is to create a custom importer. The first way to do this is tocreate what’s known as a meta path importer. Here is an example:
# urlimport.py
import sysimport importlib.abcimport impfrom urllib.request import urlopenfrom urllib.error import HTTPError, URLErrorfrom html.parser import HTMLParser
# Debuggingimport logginglog = logging.getLogger(__name__)
# Get links from a given URLdef _get_links(url): class LinkParser(HTMLParser): def handle_starttag(self, tag, attrs): if tag == 'a': attrs = dict(attrs) links.add(attrs.get('href').rstrip('/'))
links = set() try: log.debug('Getting links from %s' % url) u = urlopen(url) parser = LinkParser() parser.feed(u.read().decode('utf-8'))
414 | Chapter 10: Modules and Packages
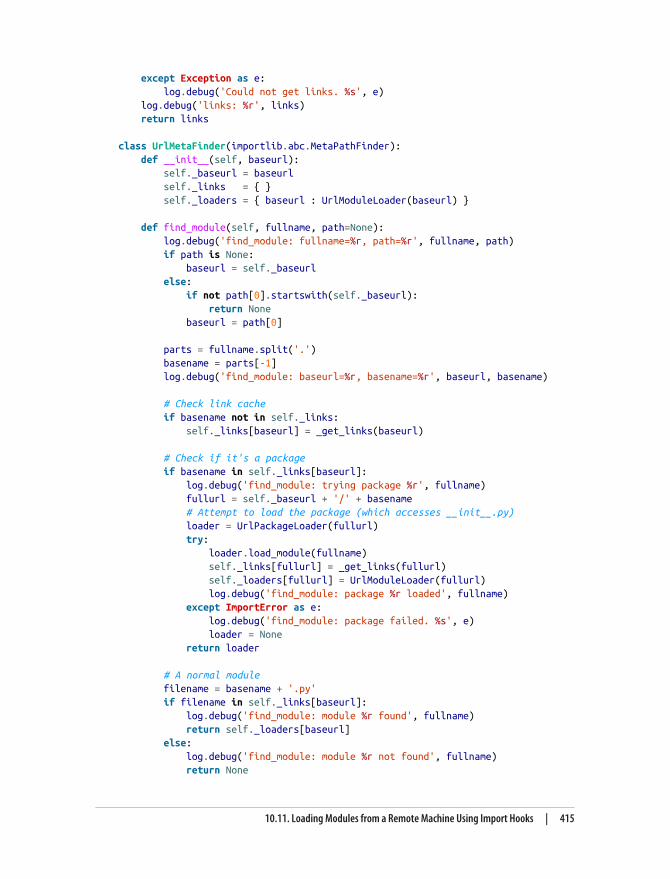
except Exception as e: log.debug('Could not get links. %s', e) log.debug('links: %r', links) return links
class UrlMetaFinder(importlib.abc.MetaPathFinder): def __init__(self, baseurl): self._baseurl = baseurl self._links = { } self._loaders = { baseurl : UrlModuleLoader(baseurl) }
def find_module(self, fullname, path=None): log.debug('find_module: fullname=%r, path=%r', fullname, path) if path is None: baseurl = self._baseurl else: if not path[0].startswith(self._baseurl): return None baseurl = path[0]
parts = fullname.split('.') basename = parts[-1] log.debug('find_module: baseurl=%r, basename=%r', baseurl, basename)
# Check link cache if basename not in self._links: self._links[baseurl] = _get_links(baseurl)
# Check if it's a package if basename in self._links[baseurl]: log.debug('find_module: trying package %r', fullname) fullurl = self._baseurl + '/' + basename # Attempt to load the package (which accesses __init__.py) loader = UrlPackageLoader(fullurl) try: loader.load_module(fullname) self._links[fullurl] = _get_links(fullurl) self._loaders[fullurl] = UrlModuleLoader(fullurl) log.debug('find_module: package %r loaded', fullname) except ImportError as e: log.debug('find_module: package failed. %s', e) loader = None return loader
# A normal module filename = basename + '.py' if filename in self._links[baseurl]: log.debug('find_module: module %r found', fullname) return self._loaders[baseurl] else: log.debug('find_module: module %r not found', fullname) return None
10.11. Loading Modules from a Remote Machine Using Import Hooks | 415
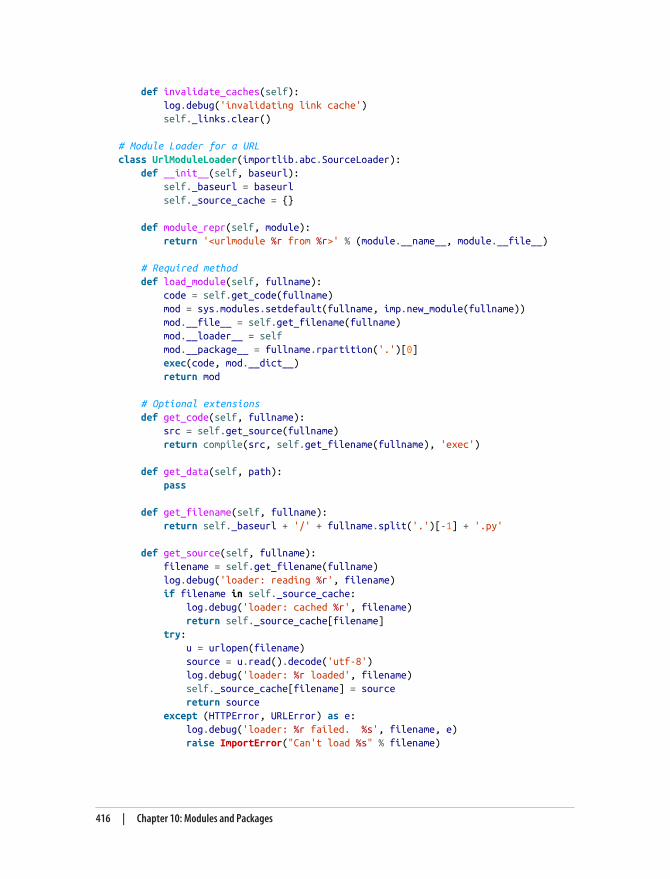
def invalidate_caches(self): log.debug('invalidating link cache') self._links.clear()
# Module Loader for a URLclass UrlModuleLoader(importlib.abc.SourceLoader): def __init__(self, baseurl): self._baseurl = baseurl self._source_cache = {}
def module_repr(self, module): return '<urlmodule %r from %r>' % (module.__name__, module.__file__)
# Required method def load_module(self, fullname): code = self.get_code(fullname) mod = sys.modules.setdefault(fullname, imp.new_module(fullname)) mod.__file__ = self.get_filename(fullname) mod.__loader__ = self mod.__package__ = fullname.rpartition('.')[0] exec(code, mod.__dict__) return mod
# Optional extensions def get_code(self, fullname): src = self.get_source(fullname) return compile(src, self.get_filename(fullname), 'exec')
def get_data(self, path): pass
def get_filename(self, fullname): return self._baseurl + '/' + fullname.split('.')[-1] + '.py'
def get_source(self, fullname): filename = self.get_filename(fullname) log.debug('loader: reading %r', filename) if filename in self._source_cache: log.debug('loader: cached %r', filename) return self._source_cache[filename] try: u = urlopen(filename) source = u.read().decode('utf-8') log.debug('loader: %r loaded', filename) self._source_cache[filename] = source return source except (HTTPError, URLError) as e: log.debug('loader: %r failed. %s', filename, e) raise ImportError("Can't load %s" % filename)
416 | Chapter 10: Modules and Packages
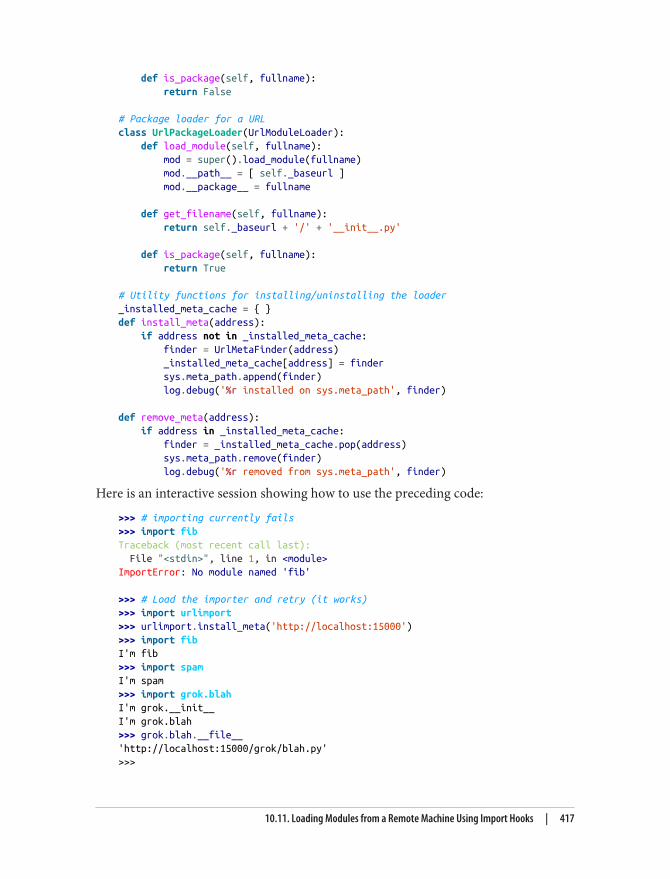
def is_package(self, fullname): return False
# Package loader for a URLclass UrlPackageLoader(UrlModuleLoader): def load_module(self, fullname): mod = super().load_module(fullname) mod.__path__ = [ self._baseurl ] mod.__package__ = fullname
def get_filename(self, fullname): return self._baseurl + '/' + '__init__.py'
def is_package(self, fullname): return True
# Utility functions for installing/uninstalling the loader_installed_meta_cache = { }def install_meta(address): if address not in _installed_meta_cache: finder = UrlMetaFinder(address) _installed_meta_cache[address] = finder sys.meta_path.append(finder) log.debug('%r installed on sys.meta_path', finder)
def remove_meta(address): if address in _installed_meta_cache: finder = _installed_meta_cache.pop(address) sys.meta_path.remove(finder) log.debug('%r removed from sys.meta_path', finder)
Here is an interactive session showing how to use the preceding code:
>>> # importing currently fails>>> import fibTraceback (most recent call last): File "<stdin>", line 1, in <module>ImportError: No module named 'fib'
>>> # Load the importer and retry (it works)>>> import urlimport>>> urlimport.install_meta('http://localhost:15000')>>> import fibI'm fib>>> import spamI'm spam>>> import grok.blahI'm grok.__init__I'm grok.blah>>> grok.blah.__file__'http://localhost:15000/grok/blah.py'>>>
10.11. Loading Modules from a Remote Machine Using Import Hooks | 417
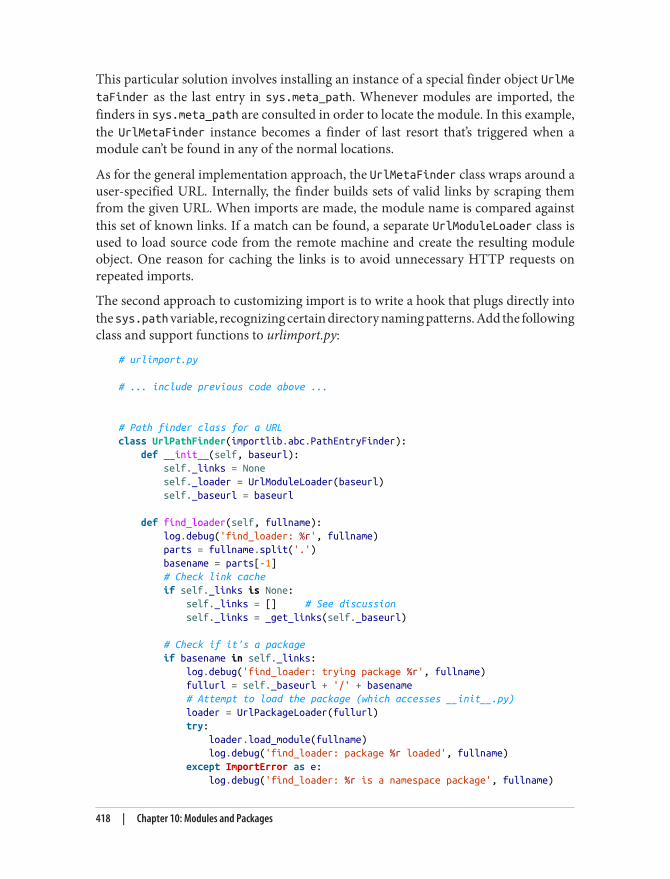
This particular solution involves installing an instance of a special finder object UrlMetaFinder as the last entry in sys.meta_path. Whenever modules are imported, thefinders in sys.meta_path are consulted in order to locate the module. In this example,the UrlMetaFinder instance becomes a finder of last resort that’s triggered when amodule can’t be found in any of the normal locations.
As for the general implementation approach, the UrlMetaFinder class wraps around auser-specified URL. Internally, the finder builds sets of valid links by scraping themfrom the given URL. When imports are made, the module name is compared againstthis set of known links. If a match can be found, a separate UrlModuleLoader class isused to load source code from the remote machine and create the resulting moduleobject. One reason for caching the links is to avoid unnecessary HTTP requests onrepeated imports.
The second approach to customizing import is to write a hook that plugs directly intothe sys.path variable, recognizing certain directory naming patterns. Add the followingclass and support functions to urlimport.py:
# urlimport.py
# ... include previous code above ...
# Path finder class for a URLclass UrlPathFinder(importlib.abc.PathEntryFinder): def __init__(self, baseurl): self._links = None self._loader = UrlModuleLoader(baseurl) self._baseurl = baseurl
def find_loader(self, fullname): log.debug('find_loader: %r', fullname) parts = fullname.split('.') basename = parts[-1] # Check link cache if self._links is None: self._links = [] # See discussion self._links = _get_links(self._baseurl)
# Check if it's a package if basename in self._links: log.debug('find_loader: trying package %r', fullname) fullurl = self._baseurl + '/' + basename # Attempt to load the package (which accesses __init__.py) loader = UrlPackageLoader(fullurl) try: loader.load_module(fullname) log.debug('find_loader: package %r loaded', fullname) except ImportError as e: log.debug('find_loader: %r is a namespace package', fullname)
418 | Chapter 10: Modules and Packages
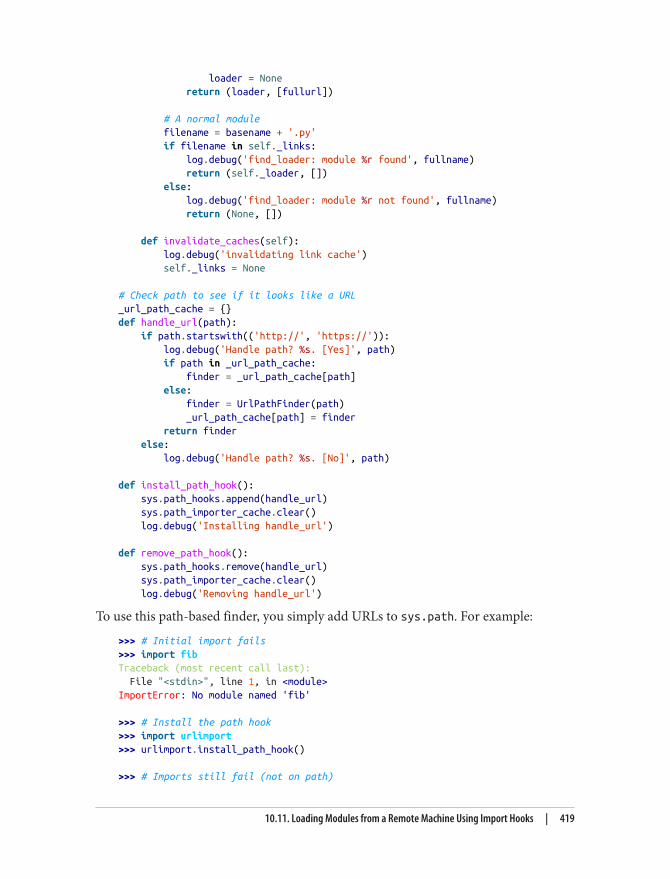
loader = None return (loader, [fullurl])
# A normal module filename = basename + '.py' if filename in self._links: log.debug('find_loader: module %r found', fullname) return (self._loader, []) else: log.debug('find_loader: module %r not found', fullname) return (None, [])
def invalidate_caches(self): log.debug('invalidating link cache') self._links = None
# Check path to see if it looks like a URL_url_path_cache = {}def handle_url(path): if path.startswith(('http://', 'https://')): log.debug('Handle path? %s. [Yes]', path) if path in _url_path_cache: finder = _url_path_cache[path] else: finder = UrlPathFinder(path) _url_path_cache[path] = finder return finder else: log.debug('Handle path? %s. [No]', path)
def install_path_hook(): sys.path_hooks.append(handle_url) sys.path_importer_cache.clear() log.debug('Installing handle_url')
def remove_path_hook(): sys.path_hooks.remove(handle_url) sys.path_importer_cache.clear() log.debug('Removing handle_url')
To use this path-based finder, you simply add URLs to sys.path. For example:
>>> # Initial import fails>>> import fibTraceback (most recent call last): File "<stdin>", line 1, in <module>ImportError: No module named 'fib'
>>> # Install the path hook>>> import urlimport>>> urlimport.install_path_hook()
>>> # Imports still fail (not on path)
10.11. Loading Modules from a Remote Machine Using Import Hooks | 419
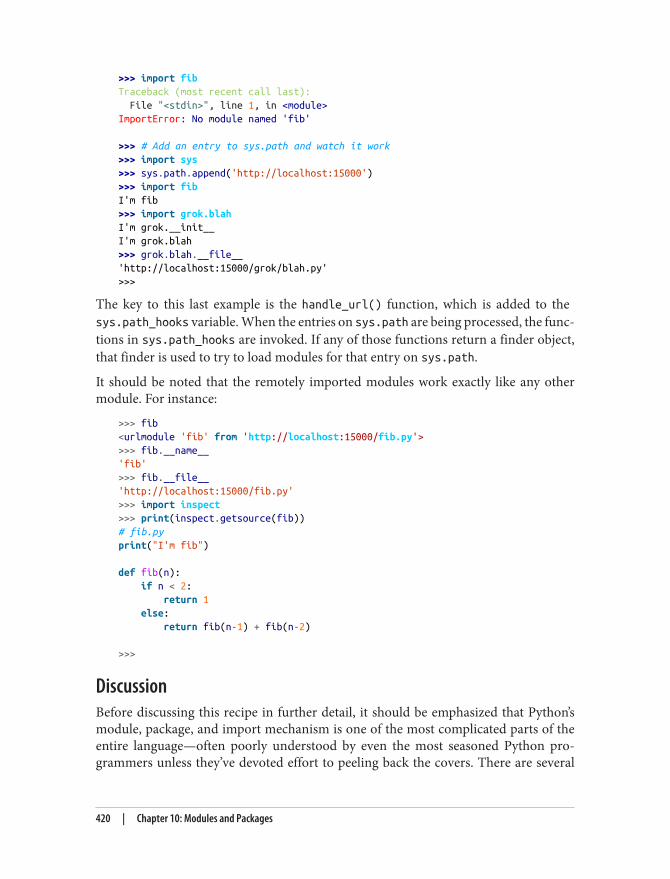
>>> import fibTraceback (most recent call last): File "<stdin>", line 1, in <module>ImportError: No module named 'fib'
>>> # Add an entry to sys.path and watch it work>>> import sys>>> sys.path.append('http://localhost:15000')>>> import fibI'm fib>>> import grok.blahI'm grok.__init__I'm grok.blah>>> grok.blah.__file__'http://localhost:15000/grok/blah.py'>>>
The key to this last example is the handle_url() function, which is added to the sys.path_hooks variable. When the entries on sys.path are being processed, the func‐tions in sys.path_hooks are invoked. If any of those functions return a finder object,that finder is used to try to load modules for that entry on sys.path.
It should be noted that the remotely imported modules work exactly like any othermodule. For instance:
>>> fib<urlmodule 'fib' from 'http://localhost:15000/fib.py'>>>> fib.__name__'fib'>>> fib.__file__'http://localhost:15000/fib.py'>>> import inspect>>> print(inspect.getsource(fib))# fib.pyprint("I'm fib")
def fib(n): if n < 2: return 1 else: return fib(n-1) + fib(n-2)
>>>
DiscussionBefore discussing this recipe in further detail, it should be emphasized that Python’smodule, package, and import mechanism is one of the most complicated parts of theentire language—often poorly understood by even the most seasoned Python pro‐grammers unless they’ve devoted effort to peeling back the covers. There are several
420 | Chapter 10: Modules and Packages
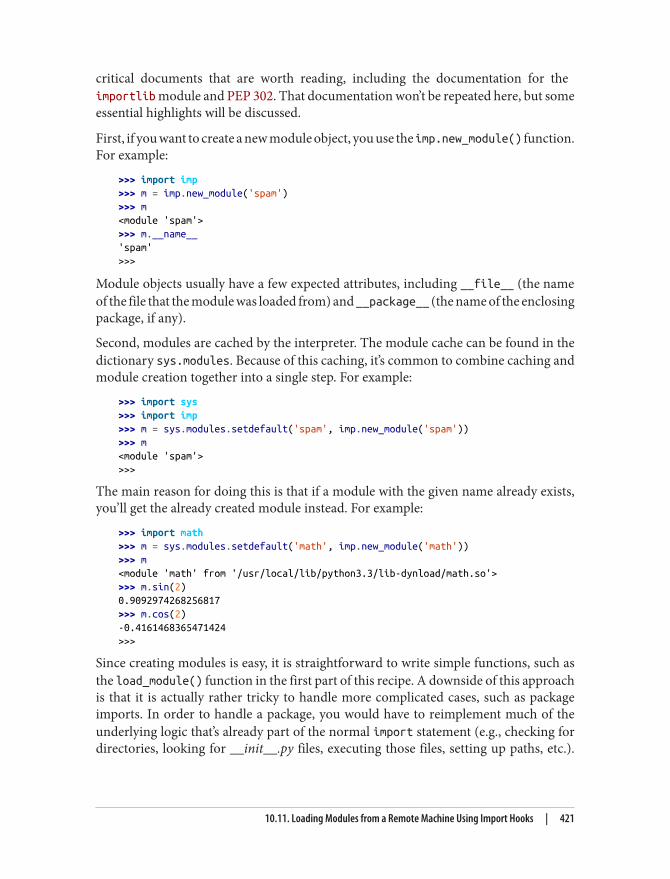
critical documents that are worth reading, including the documentation for the importlib module and PEP 302. That documentation won’t be repeated here, but someessential highlights will be discussed.
First, if you want to create a new module object, you use the imp.new_module() function.For example:
>>> import imp>>> m = imp.new_module('spam')>>> m<module 'spam'>>>> m.__name__'spam'>>>
Module objects usually have a few expected attributes, including __file__ (the nameof the file that the module was loaded from) and __package__ (the name of the enclosingpackage, if any).
Second, modules are cached by the interpreter. The module cache can be found in thedictionary sys.modules. Because of this caching, it’s common to combine caching andmodule creation together into a single step. For example:
>>> import sys>>> import imp>>> m = sys.modules.setdefault('spam', imp.new_module('spam'))>>> m<module 'spam'>>>>
The main reason for doing this is that if a module with the given name already exists,you’ll get the already created module instead. For example:
>>> import math>>> m = sys.modules.setdefault('math', imp.new_module('math'))>>> m<module 'math' from '/usr/local/lib/python3.3/lib-dynload/math.so'>>>> m.sin(2)0.9092974268256817>>> m.cos(2)-0.4161468365471424>>>
Since creating modules is easy, it is straightforward to write simple functions, such asthe load_module() function in the first part of this recipe. A downside of this approachis that it is actually rather tricky to handle more complicated cases, such as packageimports. In order to handle a package, you would have to reimplement much of theunderlying logic that’s already part of the normal import statement (e.g., checking fordirectories, looking for __init__.py files, executing those files, setting up paths, etc.).
10.11. Loading Modules from a Remote Machine Using Import Hooks | 421
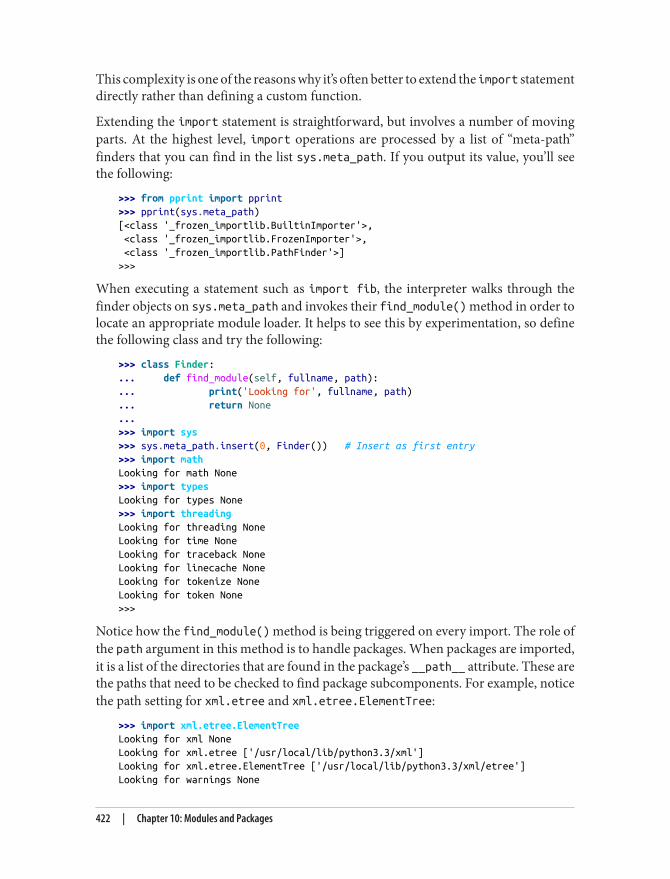
This complexity is one of the reasons why it’s often better to extend the import statementdirectly rather than defining a custom function.
Extending the import statement is straightforward, but involves a number of movingparts. At the highest level, import operations are processed by a list of “meta-path”finders that you can find in the list sys.meta_path. If you output its value, you’ll seethe following:
>>> from pprint import pprint>>> pprint(sys.meta_path)[<class '_frozen_importlib.BuiltinImporter'>, <class '_frozen_importlib.FrozenImporter'>, <class '_frozen_importlib.PathFinder'>]>>>
When executing a statement such as import fib, the interpreter walks through thefinder objects on sys.meta_path and invokes their find_module() method in order tolocate an appropriate module loader. It helps to see this by experimentation, so definethe following class and try the following:
>>> class Finder:... def find_module(self, fullname, path):... print('Looking for', fullname, path)... return None...>>> import sys>>> sys.meta_path.insert(0, Finder()) # Insert as first entry>>> import mathLooking for math None>>> import typesLooking for types None>>> import threadingLooking for threading NoneLooking for time NoneLooking for traceback NoneLooking for linecache NoneLooking for tokenize NoneLooking for token None>>>
Notice how the find_module() method is being triggered on every import. The role ofthe path argument in this method is to handle packages. When packages are imported,it is a list of the directories that are found in the package’s __path__ attribute. These arethe paths that need to be checked to find package subcomponents. For example, noticethe path setting for xml.etree and xml.etree.ElementTree:
>>> import xml.etree.ElementTreeLooking for xml NoneLooking for xml.etree ['/usr/local/lib/python3.3/xml']Looking for xml.etree.ElementTree ['/usr/local/lib/python3.3/xml/etree']Looking for warnings None
422 | Chapter 10: Modules and Packages
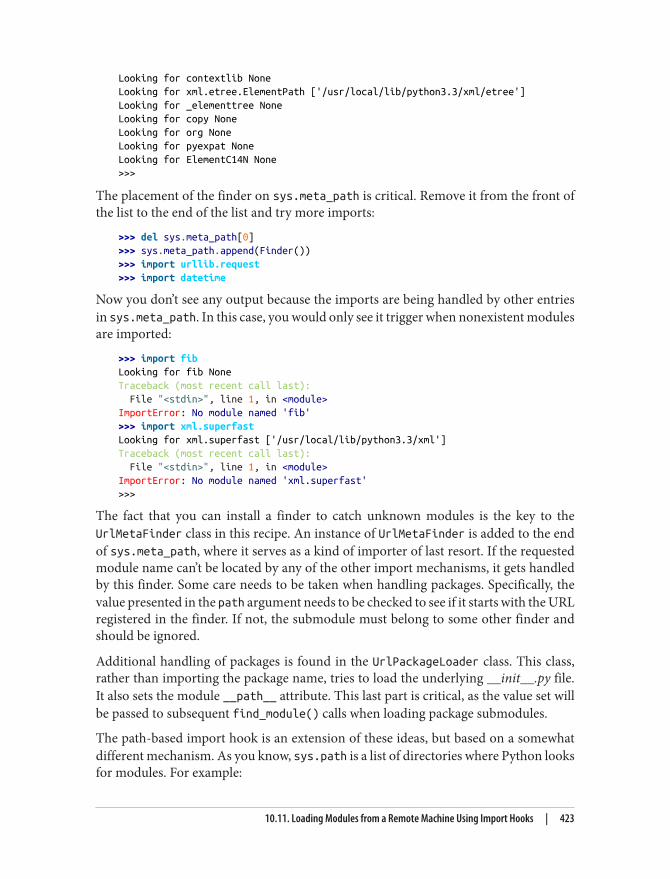
Looking for contextlib NoneLooking for xml.etree.ElementPath ['/usr/local/lib/python3.3/xml/etree']Looking for _elementtree NoneLooking for copy NoneLooking for org NoneLooking for pyexpat NoneLooking for ElementC14N None>>>
The placement of the finder on sys.meta_path is critical. Remove it from the front ofthe list to the end of the list and try more imports:
>>> del sys.meta_path[0]>>> sys.meta_path.append(Finder())>>> import urllib.request>>> import datetime
Now you don’t see any output because the imports are being handled by other entriesin sys.meta_path. In this case, you would only see it trigger when nonexistent modulesare imported:
>>> import fibLooking for fib NoneTraceback (most recent call last): File "<stdin>", line 1, in <module>ImportError: No module named 'fib'>>> import xml.superfastLooking for xml.superfast ['/usr/local/lib/python3.3/xml']Traceback (most recent call last): File "<stdin>", line 1, in <module>ImportError: No module named 'xml.superfast'>>>
The fact that you can install a finder to catch unknown modules is the key to theUrlMetaFinder class in this recipe. An instance of UrlMetaFinder is added to the endof sys.meta_path, where it serves as a kind of importer of last resort. If the requestedmodule name can’t be located by any of the other import mechanisms, it gets handledby this finder. Some care needs to be taken when handling packages. Specifically, thevalue presented in the path argument needs to be checked to see if it starts with the URLregistered in the finder. If not, the submodule must belong to some other finder andshould be ignored.
Additional handling of packages is found in the UrlPackageLoader class. This class,rather than importing the package name, tries to load the underlying __init__.py file.It also sets the module __path__ attribute. This last part is critical, as the value set willbe passed to subsequent find_module() calls when loading package submodules.
The path-based import hook is an extension of these ideas, but based on a somewhatdifferent mechanism. As you know, sys.path is a list of directories where Python looksfor modules. For example:
10.11. Loading Modules from a Remote Machine Using Import Hooks | 423
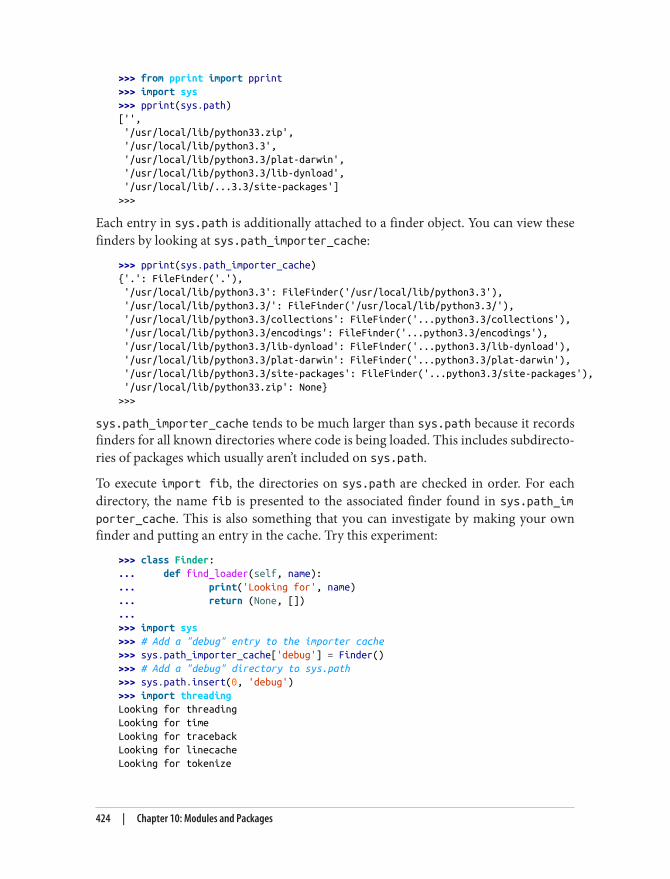
>>> from pprint import pprint>>> import sys>>> pprint(sys.path)['', '/usr/local/lib/python33.zip', '/usr/local/lib/python3.3', '/usr/local/lib/python3.3/plat-darwin', '/usr/local/lib/python3.3/lib-dynload', '/usr/local/lib/...3.3/site-packages']>>>
Each entry in sys.path is additionally attached to a finder object. You can view thesefinders by looking at sys.path_importer_cache:
>>> pprint(sys.path_importer_cache){'.': FileFinder('.'), '/usr/local/lib/python3.3': FileFinder('/usr/local/lib/python3.3'), '/usr/local/lib/python3.3/': FileFinder('/usr/local/lib/python3.3/'), '/usr/local/lib/python3.3/collections': FileFinder('...python3.3/collections'), '/usr/local/lib/python3.3/encodings': FileFinder('...python3.3/encodings'), '/usr/local/lib/python3.3/lib-dynload': FileFinder('...python3.3/lib-dynload'), '/usr/local/lib/python3.3/plat-darwin': FileFinder('...python3.3/plat-darwin'), '/usr/local/lib/python3.3/site-packages': FileFinder('...python3.3/site-packages'), '/usr/local/lib/python33.zip': None}>>>
sys.path_importer_cache tends to be much larger than sys.path because it recordsfinders for all known directories where code is being loaded. This includes subdirecto‐ries of packages which usually aren’t included on sys.path.
To execute import fib, the directories on sys.path are checked in order. For eachdirectory, the name fib is presented to the associated finder found in sys.path_importer_cache. This is also something that you can investigate by making your ownfinder and putting an entry in the cache. Try this experiment:
>>> class Finder:... def find_loader(self, name):... print('Looking for', name)... return (None, [])...>>> import sys>>> # Add a "debug" entry to the importer cache>>> sys.path_importer_cache['debug'] = Finder()>>> # Add a "debug" directory to sys.path>>> sys.path.insert(0, 'debug')>>> import threadingLooking for threadingLooking for timeLooking for tracebackLooking for linecacheLooking for tokenize
424 | Chapter 10: Modules and Packages
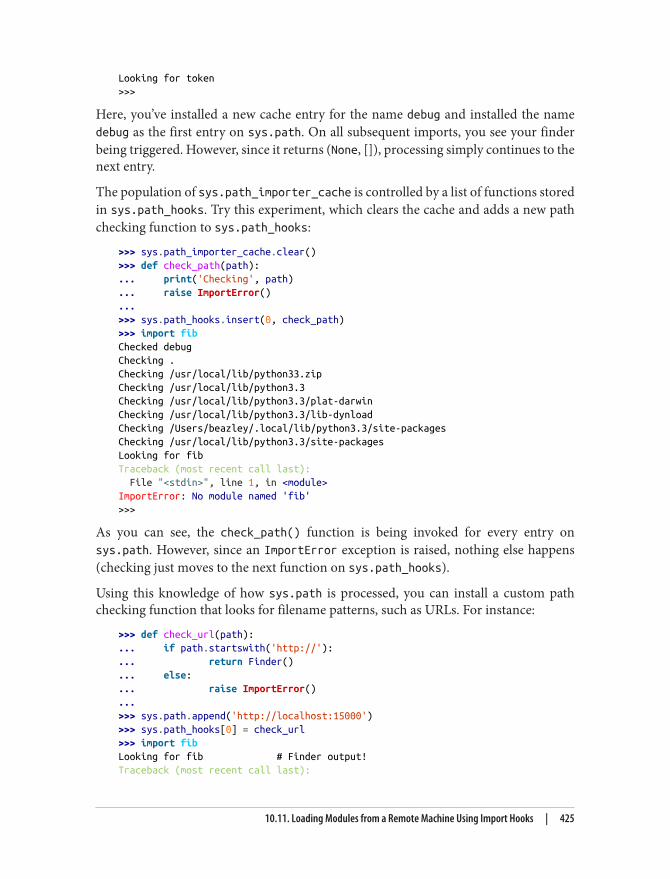
Looking for token>>>
Here, you’ve installed a new cache entry for the name debug and installed the namedebug as the first entry on sys.path. On all subsequent imports, you see your finderbeing triggered. However, since it returns (None, []), processing simply continues to thenext entry.
The population of sys.path_importer_cache is controlled by a list of functions storedin sys.path_hooks. Try this experiment, which clears the cache and adds a new pathchecking function to sys.path_hooks:
>>> sys.path_importer_cache.clear()>>> def check_path(path):... print('Checking', path)... raise ImportError()...>>> sys.path_hooks.insert(0, check_path)>>> import fibChecked debugChecking .Checking /usr/local/lib/python33.zipChecking /usr/local/lib/python3.3Checking /usr/local/lib/python3.3/plat-darwinChecking /usr/local/lib/python3.3/lib-dynloadChecking /Users/beazley/.local/lib/python3.3/site-packagesChecking /usr/local/lib/python3.3/site-packagesLooking for fibTraceback (most recent call last): File "<stdin>", line 1, in <module>ImportError: No module named 'fib'>>>
As you can see, the check_path() function is being invoked for every entry onsys.path. However, since an ImportError exception is raised, nothing else happens(checking just moves to the next function on sys.path_hooks).
Using this knowledge of how sys.path is processed, you can install a custom pathchecking function that looks for filename patterns, such as URLs. For instance:
>>> def check_url(path):... if path.startswith('http://'):... return Finder()... else:... raise ImportError()...>>> sys.path.append('http://localhost:15000')>>> sys.path_hooks[0] = check_url>>> import fibLooking for fib # Finder output!Traceback (most recent call last):
10.11. Loading Modules from a Remote Machine Using Import Hooks | 425
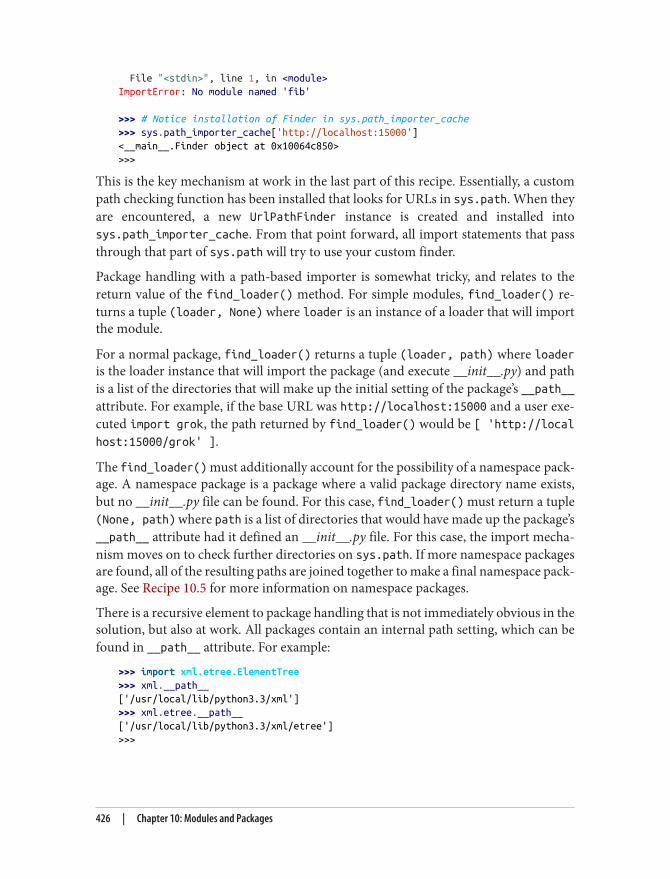
File "<stdin>", line 1, in <module>ImportError: No module named 'fib'
>>> # Notice installation of Finder in sys.path_importer_cache>>> sys.path_importer_cache['http://localhost:15000']<__main__.Finder object at 0x10064c850>>>>
This is the key mechanism at work in the last part of this recipe. Essentially, a custompath checking function has been installed that looks for URLs in sys.path. When theyare encountered, a new UrlPathFinder instance is created and installed intosys.path_importer_cache. From that point forward, all import statements that passthrough that part of sys.path will try to use your custom finder.
Package handling with a path-based importer is somewhat tricky, and relates to thereturn value of the find_loader() method. For simple modules, find_loader() re‐turns a tuple (loader, None) where loader is an instance of a loader that will importthe module.
For a normal package, find_loader() returns a tuple (loader, path) where loaderis the loader instance that will import the package (and execute __init__.py) and pathis a list of the directories that will make up the initial setting of the package’s __path__attribute. For example, if the base URL was http://localhost:15000 and a user exe‐cuted import grok, the path returned by find_loader() would be [ 'http://localhost:15000/grok' ].
The find_loader() must additionally account for the possibility of a namespace pack‐age. A namespace package is a package where a valid package directory name exists,but no __init__.py file can be found. For this case, find_loader() must return a tuple(None, path) where path is a list of directories that would have made up the package’s__path__ attribute had it defined an __init__.py file. For this case, the import mecha‐nism moves on to check further directories on sys.path. If more namespace packagesare found, all of the resulting paths are joined together to make a final namespace pack‐age. See Recipe 10.5 for more information on namespace packages.
There is a recursive element to package handling that is not immediately obvious in thesolution, but also at work. All packages contain an internal path setting, which can befound in __path__ attribute. For example:
>>> import xml.etree.ElementTree>>> xml.__path__['/usr/local/lib/python3.3/xml']>>> xml.etree.__path__['/usr/local/lib/python3.3/xml/etree']>>>
426 | Chapter 10: Modules and Packages
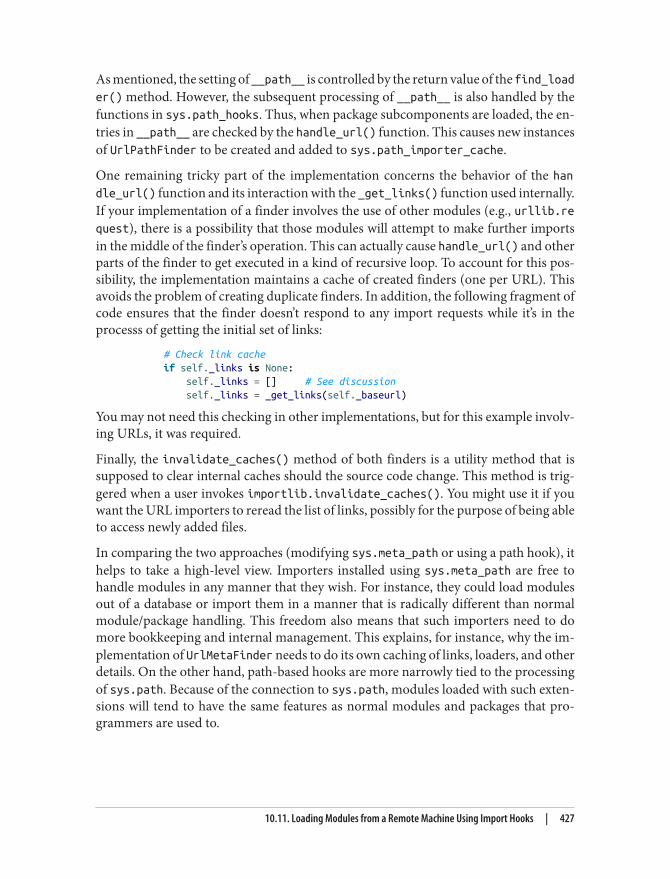
As mentioned, the setting of __path__ is controlled by the return value of the find_loader() method. However, the subsequent processing of __path__ is also handled by thefunctions in sys.path_hooks. Thus, when package subcomponents are loaded, the en‐tries in __path__ are checked by the handle_url() function. This causes new instancesof UrlPathFinder to be created and added to sys.path_importer_cache.
One remaining tricky part of the implementation concerns the behavior of the handle_url() function and its interaction with the _get_links() function used internally.If your implementation of a finder involves the use of other modules (e.g., urllib.request), there is a possibility that those modules will attempt to make further importsin the middle of the finder’s operation. This can actually cause handle_url() and otherparts of the finder to get executed in a kind of recursive loop. To account for this pos‐sibility, the implementation maintains a cache of created finders (one per URL). Thisavoids the problem of creating duplicate finders. In addition, the following fragment ofcode ensures that the finder doesn’t respond to any import requests while it’s in theprocesss of getting the initial set of links:
# Check link cache if self._links is None: self._links = [] # See discussion self._links = _get_links(self._baseurl)
You may not need this checking in other implementations, but for this example involv‐ing URLs, it was required.
Finally, the invalidate_caches() method of both finders is a utility method that issupposed to clear internal caches should the source code change. This method is trig‐gered when a user invokes importlib.invalidate_caches(). You might use it if youwant the URL importers to reread the list of links, possibly for the purpose of being ableto access newly added files.
In comparing the two approaches (modifying sys.meta_path or using a path hook), ithelps to take a high-level view. Importers installed using sys.meta_path are free tohandle modules in any manner that they wish. For instance, they could load modulesout of a database or import them in a manner that is radically different than normalmodule/package handling. This freedom also means that such importers need to domore bookkeeping and internal management. This explains, for instance, why the im‐plementation of UrlMetaFinder needs to do its own caching of links, loaders, and otherdetails. On the other hand, path-based hooks are more narrowly tied to the processingof sys.path. Because of the connection to sys.path, modules loaded with such exten‐sions will tend to have the same features as normal modules and packages that pro‐grammers are used to.
10.11. Loading Modules from a Remote Machine Using Import Hooks | 427

Assuming that your head hasn’t completely exploded at this point, a key to understand‐ing and experimenting with this recipe may be the added logging calls. You can enablelogging and try experiments such as this:
>>> import logging>>> logging.basicConfig(level=logging.DEBUG)>>> import urlimport>>> urlimport.install_path_hook()DEBUG:urlimport:Installing handle_url>>> import fibDEBUG:urlimport:Handle path? /usr/local/lib/python33.zip. [No]Traceback (most recent call last): File "<stdin>", line 1, in <module>ImportError: No module named 'fib'>>> import sys>>> sys.path.append('http://localhost:15000')>>> import fibDEBUG:urlimport:Handle path? http://localhost:15000. [Yes]DEBUG:urlimport:Getting links from http://localhost:15000DEBUG:urlimport:links: {'spam.py', 'fib.py', 'grok'}DEBUG:urlimport:find_loader: 'fib'DEBUG:urlimport:find_loader: module 'fib' foundDEBUG:urlimport:loader: reading 'http://localhost:15000/fib.py'DEBUG:urlimport:loader: 'http://localhost:15000/fib.py' loadedI'm fib>>>
Last, but not least, spending some time sleeping with PEP 302 and the documentationfor importlib under your pillow may be advisable.
10.12. Patching Modules on ImportProblemYou want to patch or apply decorators to functions in an existing module. However, youonly want to do it if the module actually gets imported and used elsewhere.
SolutionThe essential problem here is that you would like to carry out actions in response to amodule being loaded. Perhaps you want to trigger some kind of callback function thatwould notify you when a module was loaded.
This problem can be solved using the same import hook machinery discussed inRecipe 10.11. Here is a possible solution:
428 | Chapter 10: Modules and Packages
Dow
nlo
ad fro
m W
ow
! eBook
<w
ww
.wow
ebook.
com
>
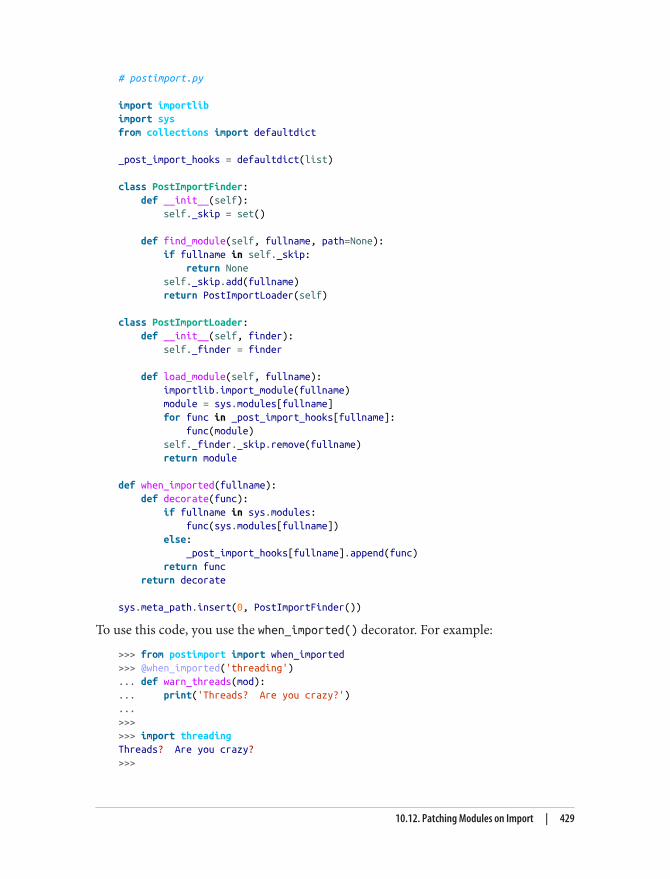
# postimport.py
import importlibimport sysfrom collections import defaultdict
_post_import_hooks = defaultdict(list)
class PostImportFinder: def __init__(self): self._skip = set()
def find_module(self, fullname, path=None): if fullname in self._skip: return None self._skip.add(fullname) return PostImportLoader(self)
class PostImportLoader: def __init__(self, finder): self._finder = finder
def load_module(self, fullname): importlib.import_module(fullname) module = sys.modules[fullname] for func in _post_import_hooks[fullname]: func(module) self._finder._skip.remove(fullname) return module
def when_imported(fullname): def decorate(func): if fullname in sys.modules: func(sys.modules[fullname]) else: _post_import_hooks[fullname].append(func) return func return decorate
sys.meta_path.insert(0, PostImportFinder())
To use this code, you use the when_imported() decorator. For example:
>>> from postimport import when_imported>>> @when_imported('threading')... def warn_threads(mod):... print('Threads? Are you crazy?')...>>>>>> import threadingThreads? Are you crazy?>>>
10.12. Patching Modules on Import | 429
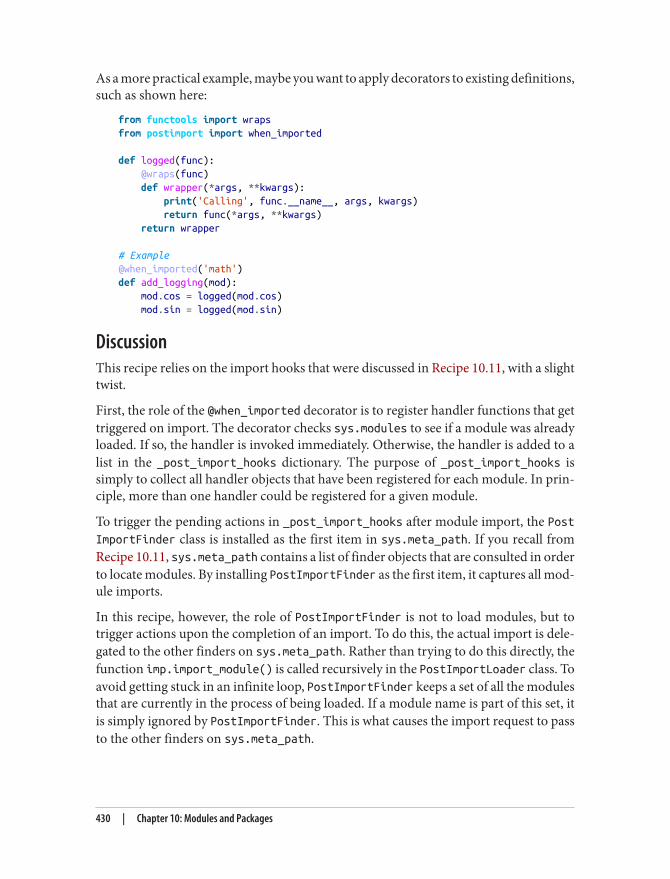
As a more practical example, maybe you want to apply decorators to existing definitions,such as shown here:
from functools import wrapsfrom postimport import when_imported
def logged(func): @wraps(func) def wrapper(*args, **kwargs): print('Calling', func.__name__, args, kwargs) return func(*args, **kwargs) return wrapper
# Example@when_imported('math')def add_logging(mod): mod.cos = logged(mod.cos) mod.sin = logged(mod.sin)
DiscussionThis recipe relies on the import hooks that were discussed in Recipe 10.11, with a slighttwist.
First, the role of the @when_imported decorator is to register handler functions that gettriggered on import. The decorator checks sys.modules to see if a module was alreadyloaded. If so, the handler is invoked immediately. Otherwise, the handler is added to alist in the _post_import_hooks dictionary. The purpose of _post_import_hooks issimply to collect all handler objects that have been registered for each module. In prin‐ciple, more than one handler could be registered for a given module.
To trigger the pending actions in _post_import_hooks after module import, the PostImportFinder class is installed as the first item in sys.meta_path. If you recall fromRecipe 10.11, sys.meta_path contains a list of finder objects that are consulted in orderto locate modules. By installing PostImportFinder as the first item, it captures all mod‐ule imports.
In this recipe, however, the role of PostImportFinder is not to load modules, but totrigger actions upon the completion of an import. To do this, the actual import is dele‐gated to the other finders on sys.meta_path. Rather than trying to do this directly, thefunction imp.import_module() is called recursively in the PostImportLoader class. Toavoid getting stuck in an infinite loop, PostImportFinder keeps a set of all the modulesthat are currently in the process of being loaded. If a module name is part of this set, itis simply ignored by PostImportFinder. This is what causes the import request to passto the other finders on sys.meta_path.
430 | Chapter 10: Modules and Packages
After a module has been loaded with imp.import_module(), all handlers currently reg‐istered in _post_import_hooks are called with the newly loaded module as an argument.From this point forward, the handlers are free to do what they want with the module.
A major feature of the approach shown in this recipe is that the patching of a moduleoccurs in a seamless fashion, regardless of where or how a module of interest is actuallyloaded. You simply write a handler function that’s decorated with @when_imported()and it all just magically works from that point forward.
One caution about this recipe is that it does not work for modules that have been ex‐plicitly reloaded using imp.reload(). That is, if you reload a previously loaded module,the post import handler function doesn’t get triggered again (all the more reason to notuse reload() in production code). On the other hand, if you delete the module fromsys.modules and redo the import, you’ll see the handler trigger again.
More information about post-import hooks can be found in PEP 369 . As of this writing,the PEP has been withdrawn by the author due to it being out of date with the currentimplementation of the importlib module. However, it is easy enough to implementyour own solution using this recipe.
10.13. Installing Packages Just for YourselfProblemYou want to install a third-party package, but you don’t have permission to install pack‐ages into the system Python. Alternatively, perhaps you just want to install a packagefor your own use, not all users on the system.
SolutionPython has a per-user installation directory that’s typically located in a directory suchas ~/.local/lib/python3.3/site-packages. To force packages to install in this directory, givethe --user option to the installation command. For example:
python3 setup.py install --user
or
pip install --user packagename
The user site-packages directory normally appears before the system site-packages di‐rectory on sys.path. Thus, packages you install using this technique take priority overthe packages already installed on the system (although this is not always the case de‐pending on the behavior of third-party package managers, such as distribute or pip).
10.13. Installing Packages Just for Yourself | 431
DiscussionNormally, packages get installed into the system-wide site-packages directory, which isfound in a location such as /usr/local/lib/python3.3/site-packages. However, doing sotypically requires administrator permissions and use of the sudo command. Even if youhave permission to execute such a command, using sudo to install a new, possibly un‐proven, package might give you some pause.
Installing packages into the per-user directory is often an effective workaround thatallows you to create a custom installation.
As an alternative, you can also create a virtual environment, which is discussed in thenext recipe.
10.14. Creating a New Python EnvironmentProblemYou want to create a new Python environment in which you can install modules andpackages. However, you want to do this without installing a new copy of Python ormaking changes that might affect the system Python installation.
SolutionYou can make a new “virtual” environment using the pyvenv command. This commandis installed in the same directory as the Python interpreter or possibly in the Scriptsdirectory on Windows. Here is an example:
bash % pyvenv Spam bash %
The name supplied to pyvenv is the name of a directory that will be created. Uponcreation, the Spam directory will look something like this:
bash % cd Spam bash % ls bin include lib pyvenv.cfg bash %
In the bin directory, you’ll find a Python interpreter that you can use. For example:
bash % Spam/bin/python3 Python 3.3.0 (default, Oct 6 2012, 15:45:22) [GCC 4.2.1 (Apple Inc. build 5666) (dot 3)] on darwin Type "help", "copyright", "credits" or "license" for more information. >>> from pprint import pprint >>> import sys >>> pprint(sys.path) ['',
432 | Chapter 10: Modules and Packages
'/usr/local/lib/python33.zip', '/usr/local/lib/python3.3', '/usr/local/lib/python3.3/plat-darwin', '/usr/local/lib/python3.3/lib-dynload', '/Users/beazley/Spam/lib/python3.3/site-packages'] >>>
A key feature of this interpreter is that its site-packages directory has been set to thenewly created environment. Should you decide to install third-party packages, they willbe installed here, not in the normal system site-packages directory.
DiscussionThe creation of a virtual environment mostly pertains to the installation and manage‐ment of third-party packages. As you can see in the example, the sys.path variablecontains directories from the normal system Python, but the site-packages directory hasbeen relocated to a new directory.
With a new virtual environment, the next step is often to install a package manager,such as distribute or pip. When installing such tools and subsequent packages, youjust need to make sure you use the interpreter that’s part of the virtual environment.This should install the packages into the newly created site-packages directory.
Although a virtual environment might look like a copy of the Python installation, itreally only consists of a few files and symbolic links. All of the standard library files andinterpreter executables come from the original Python installation. Thus, creating suchenvironments is easy, and takes almost no machine resources.
By default, virtual environments are completely clean and contain no third-party add-ons. If you would like to include already installed packages as part of a virtual environ‐ment, create the environment using the --system-site-packages option. For example:
bash % pyvenv --system-site-packages Spam bash %
More information about pyvenv and virtual environments can be found in PEP 405.
10.15. Distributing PackagesProblemYou’ve written a useful library, and you want to be able to give it away to others.
10.15. Distributing Packages | 433
SolutionIf you’re going to start giving code away, the first thing to do is to give it a unique nameand clean up its directory structure. For example, a typical library package might looksomething like this:
projectname/ README.txt Doc/ documentation.txt projectname/ __init__.py foo.py bar.py utils/ __init__.py spam.py grok.py examples/ helloworld.py ...
To make the package something that you can distribute, first write a setup.py file thatlooks like this:
# setup.pyfrom distutils.core import setup
setup(name='projectname', version='1.0', author='Your Name', author_email='[email protected]', url='http://www.you.com/projectname', packages=['projectname', 'projectname.utils'],)
Next, make a file MANIFEST.in that lists various nonsource files that you want to in‐clude in your package:
# MANIFEST.in include *.txt recursive-include examples * recursive-include Doc *
Make sure the setup.py and MANIFEST.in files appear in the top-level directory of yourpackage. Once you have done this, you should be able to make a source distribution bytyping a command such as this:
% bash python3 setup.py sdist
This will create a file such as projectname-1.0.zip or projectname-1.0.tar.gz, dependingon the platform. If it all works, this file is suitable for giving to others or uploading tothe Python Package Index.
434 | Chapter 10: Modules and Packages
DiscussionFor pure Python code, writing a plain setup.py file is usually straightforward. One po‐tential gotcha is that you have to manually list every subdirectory that makes up thepackages source code. A common mistake is to only list the top-level directory of apackage and to forget to include package subcomponents. This is why the specificationfor packages in setup.py includes the list packages=['projectname', 'projectname.utils'].
As most Python programmers know, there are many third-party packaging options,including setuptools, distribute, and so forth. Some of these are replacements for thedistutils library found in the standard library. Be aware that if you rely on thesepackages, users may not be able to install your software unless they also install therequired package manager first. Because of this, you can almost never go wrong bykeeping things as simple as possible. At a bare minimum, make sure your code can beinstalled using a standard Python 3 installation. Additional features can be supportedas an option if additional packages are available.
Packaging and distribution of code involving C extensions can get considerably morecomplicated. Chapter 15 on C extensions has a few details on this. In particular, seeRecipe 15.2.
10.15. Distributing Packages | 435

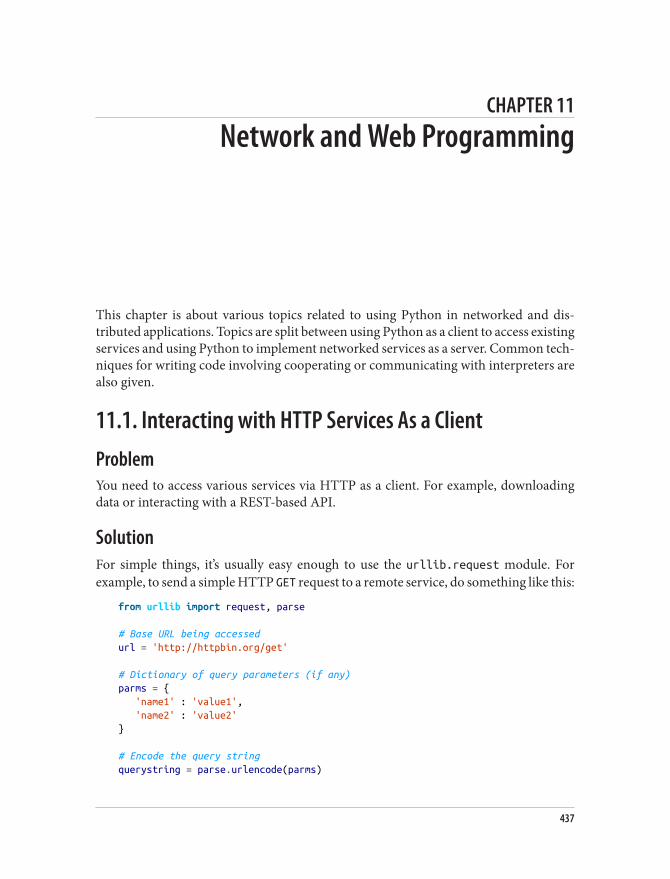
CHAPTER 11
Network and Web Programming
This chapter is about various topics related to using Python in networked and dis‐tributed applications. Topics are split between using Python as a client to access existingservices and using Python to implement networked services as a server. Common tech‐niques for writing code involving cooperating or communicating with interpreters arealso given.
11.1. Interacting with HTTP Services As a ClientProblemYou need to access various services via HTTP as a client. For example, downloadingdata or interacting with a REST-based API.
SolutionFor simple things, it’s usually easy enough to use the urllib.request module. Forexample, to send a simple HTTP GET request to a remote service, do something like this:
from urllib import request, parse
# Base URL being accessedurl = 'http://httpbin.org/get'
# Dictionary of query parameters (if any)parms = { 'name1' : 'value1', 'name2' : 'value2'}
# Encode the query stringquerystring = parse.urlencode(parms)
437
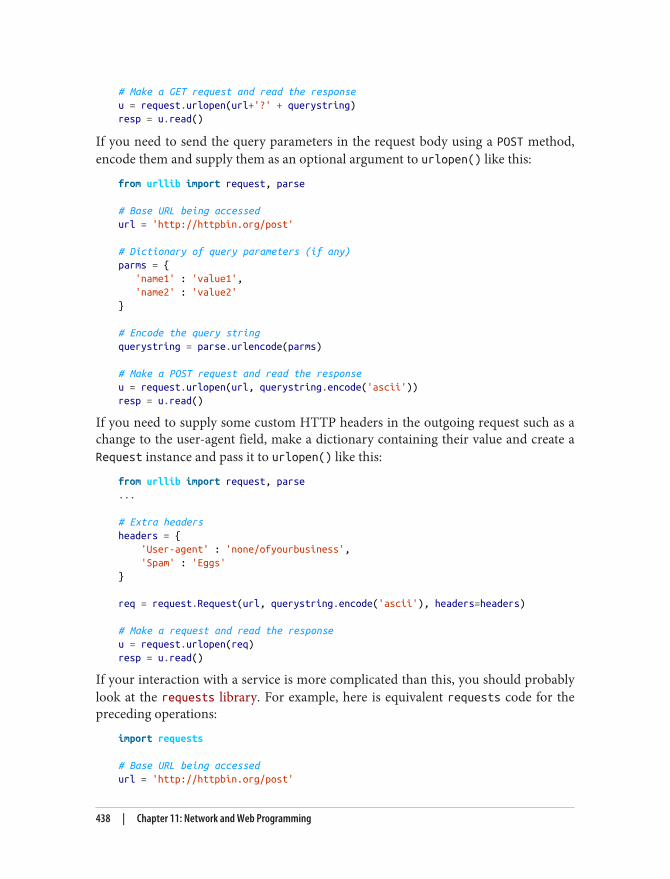
# Make a GET request and read the responseu = request.urlopen(url+'?' + querystring)resp = u.read()
If you need to send the query parameters in the request body using a POST method,encode them and supply them as an optional argument to urlopen() like this:
from urllib import request, parse
# Base URL being accessedurl = 'http://httpbin.org/post'
# Dictionary of query parameters (if any)parms = { 'name1' : 'value1', 'name2' : 'value2'}
# Encode the query stringquerystring = parse.urlencode(parms)
# Make a POST request and read the responseu = request.urlopen(url, querystring.encode('ascii'))resp = u.read()
If you need to supply some custom HTTP headers in the outgoing request such as achange to the user-agent field, make a dictionary containing their value and create aRequest instance and pass it to urlopen() like this:
from urllib import request, parse...
# Extra headersheaders = { 'User-agent' : 'none/ofyourbusiness', 'Spam' : 'Eggs'}
req = request.Request(url, querystring.encode('ascii'), headers=headers)
# Make a request and read the responseu = request.urlopen(req)resp = u.read()
If your interaction with a service is more complicated than this, you should probablylook at the requests library. For example, here is equivalent requests code for thepreceding operations:
import requests
# Base URL being accessedurl = 'http://httpbin.org/post'
438 | Chapter 11: Network and Web Programming
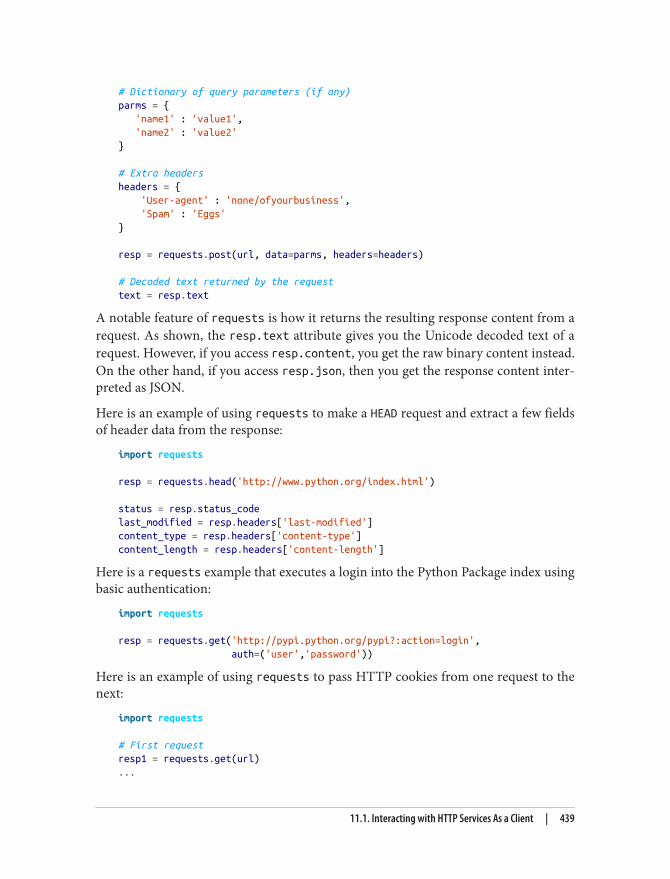
# Dictionary of query parameters (if any)parms = { 'name1' : 'value1', 'name2' : 'value2'}
# Extra headersheaders = { 'User-agent' : 'none/ofyourbusiness', 'Spam' : 'Eggs'}
resp = requests.post(url, data=parms, headers=headers)
# Decoded text returned by the requesttext = resp.text
A notable feature of requests is how it returns the resulting response content from arequest. As shown, the resp.text attribute gives you the Unicode decoded text of arequest. However, if you access resp.content, you get the raw binary content instead.On the other hand, if you access resp.json, then you get the response content inter‐preted as JSON.
Here is an example of using requests to make a HEAD request and extract a few fieldsof header data from the response:
import requests
resp = requests.head('http://www.python.org/index.html')
status = resp.status_codelast_modified = resp.headers['last-modified']content_type = resp.headers['content-type']content_length = resp.headers['content-length']
Here is a requests example that executes a login into the Python Package index usingbasic authentication:
import requests
resp = requests.get('http://pypi.python.org/pypi?:action=login', auth=('user','password'))
Here is an example of using requests to pass HTTP cookies from one request to thenext:
import requests
# First requestresp1 = requests.get(url)...
11.1. Interacting with HTTP Services As a Client | 439
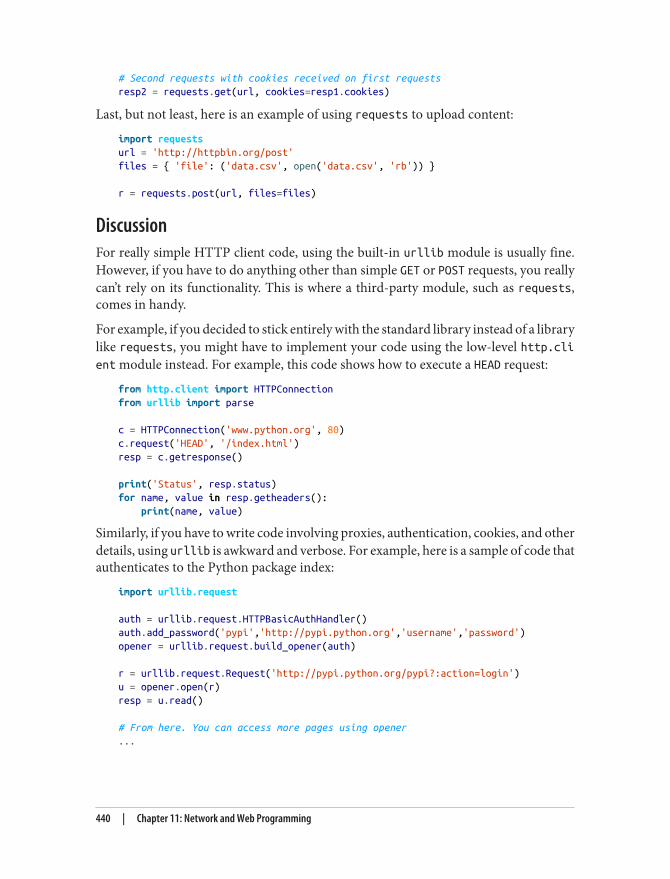
# Second requests with cookies received on first requestsresp2 = requests.get(url, cookies=resp1.cookies)
Last, but not least, here is an example of using requests to upload content:
import requestsurl = 'http://httpbin.org/post'files = { 'file': ('data.csv', open('data.csv', 'rb')) }
r = requests.post(url, files=files)
DiscussionFor really simple HTTP client code, using the built-in urllib module is usually fine.However, if you have to do anything other than simple GET or POST requests, you reallycan’t rely on its functionality. This is where a third-party module, such as requests,comes in handy.
For example, if you decided to stick entirely with the standard library instead of a librarylike requests, you might have to implement your code using the low-level http.client module instead. For example, this code shows how to execute a HEAD request:
from http.client import HTTPConnectionfrom urllib import parse
c = HTTPConnection('www.python.org', 80)c.request('HEAD', '/index.html')resp = c.getresponse()
print('Status', resp.status)for name, value in resp.getheaders(): print(name, value)
Similarly, if you have to write code involving proxies, authentication, cookies, and otherdetails, using urllib is awkward and verbose. For example, here is a sample of code thatauthenticates to the Python package index:
import urllib.request
auth = urllib.request.HTTPBasicAuthHandler()auth.add_password('pypi','http://pypi.python.org','username','password')opener = urllib.request.build_opener(auth)
r = urllib.request.Request('http://pypi.python.org/pypi?:action=login')u = opener.open(r)resp = u.read()
# From here. You can access more pages using opener...
440 | Chapter 11: Network and Web Programming
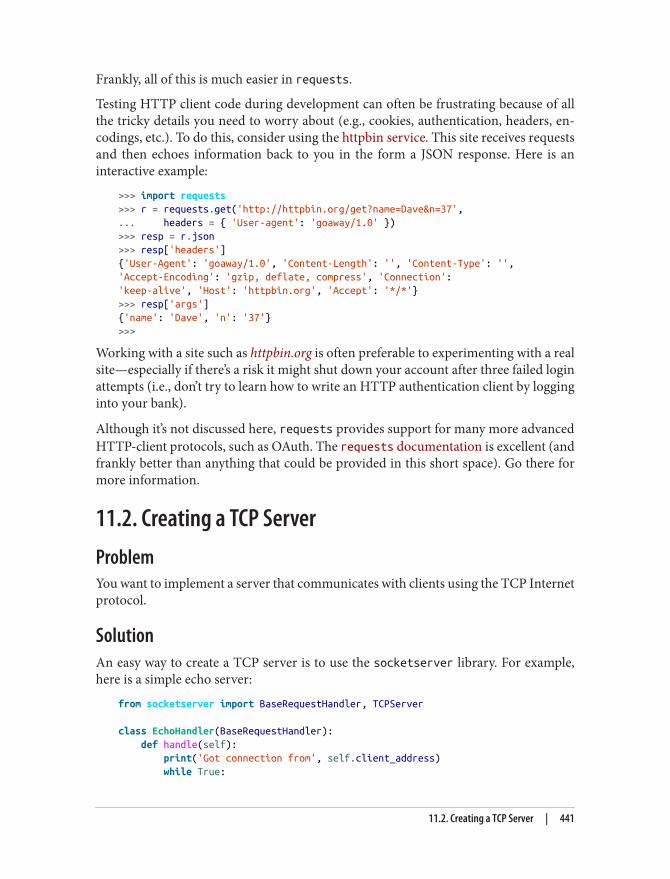
Frankly, all of this is much easier in requests.
Testing HTTP client code during development can often be frustrating because of allthe tricky details you need to worry about (e.g., cookies, authentication, headers, en‐codings, etc.). To do this, consider using the httpbin service. This site receives requestsand then echoes information back to you in the form a JSON response. Here is aninteractive example:
>>> import requests>>> r = requests.get('http://httpbin.org/get?name=Dave&n=37',... headers = { 'User-agent': 'goaway/1.0' })>>> resp = r.json>>> resp['headers']{'User-Agent': 'goaway/1.0', 'Content-Length': '', 'Content-Type': '','Accept-Encoding': 'gzip, deflate, compress', 'Connection':'keep-alive', 'Host': 'httpbin.org', 'Accept': '*/*'}>>> resp['args']{'name': 'Dave', 'n': '37'}>>>
Working with a site such as httpbin.org is often preferable to experimenting with a realsite—especially if there’s a risk it might shut down your account after three failed loginattempts (i.e., don’t try to learn how to write an HTTP authentication client by logginginto your bank).
Although it’s not discussed here, requests provides support for many more advancedHTTP-client protocols, such as OAuth. The requests documentation is excellent (andfrankly better than anything that could be provided in this short space). Go there formore information.
11.2. Creating a TCP ServerProblemYou want to implement a server that communicates with clients using the TCP Internetprotocol.
SolutionAn easy way to create a TCP server is to use the socketserver library. For example,here is a simple echo server:
from socketserver import BaseRequestHandler, TCPServer
class EchoHandler(BaseRequestHandler): def handle(self): print('Got connection from', self.client_address) while True:
11.2. Creating a TCP Server | 441
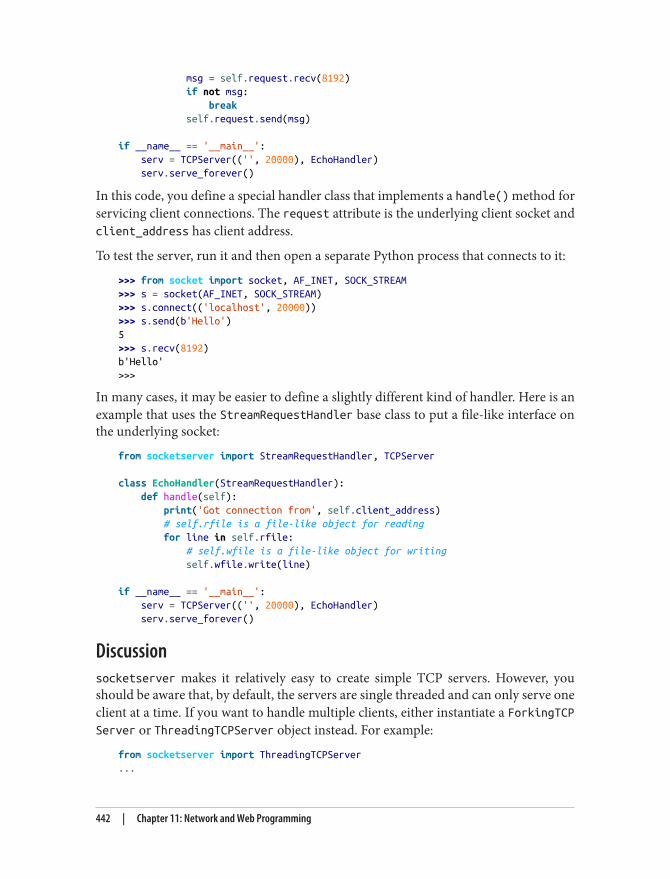
msg = self.request.recv(8192) if not msg: break self.request.send(msg)
if __name__ == '__main__': serv = TCPServer(('', 20000), EchoHandler) serv.serve_forever()
In this code, you define a special handler class that implements a handle() method forservicing client connections. The request attribute is the underlying client socket andclient_address has client address.
To test the server, run it and then open a separate Python process that connects to it:
>>> from socket import socket, AF_INET, SOCK_STREAM>>> s = socket(AF_INET, SOCK_STREAM)>>> s.connect(('localhost', 20000))>>> s.send(b'Hello')5>>> s.recv(8192)b'Hello'>>>
In many cases, it may be easier to define a slightly different kind of handler. Here is anexample that uses the StreamRequestHandler base class to put a file-like interface onthe underlying socket:
from socketserver import StreamRequestHandler, TCPServer
class EchoHandler(StreamRequestHandler): def handle(self): print('Got connection from', self.client_address) # self.rfile is a file-like object for reading for line in self.rfile: # self.wfile is a file-like object for writing self.wfile.write(line)
if __name__ == '__main__': serv = TCPServer(('', 20000), EchoHandler) serv.serve_forever()
Discussionsocketserver makes it relatively easy to create simple TCP servers. However, youshould be aware that, by default, the servers are single threaded and can only serve oneclient at a time. If you want to handle multiple clients, either instantiate a ForkingTCPServer or ThreadingTCPServer object instead. For example:
from socketserver import ThreadingTCPServer...
442 | Chapter 11: Network and Web Programming
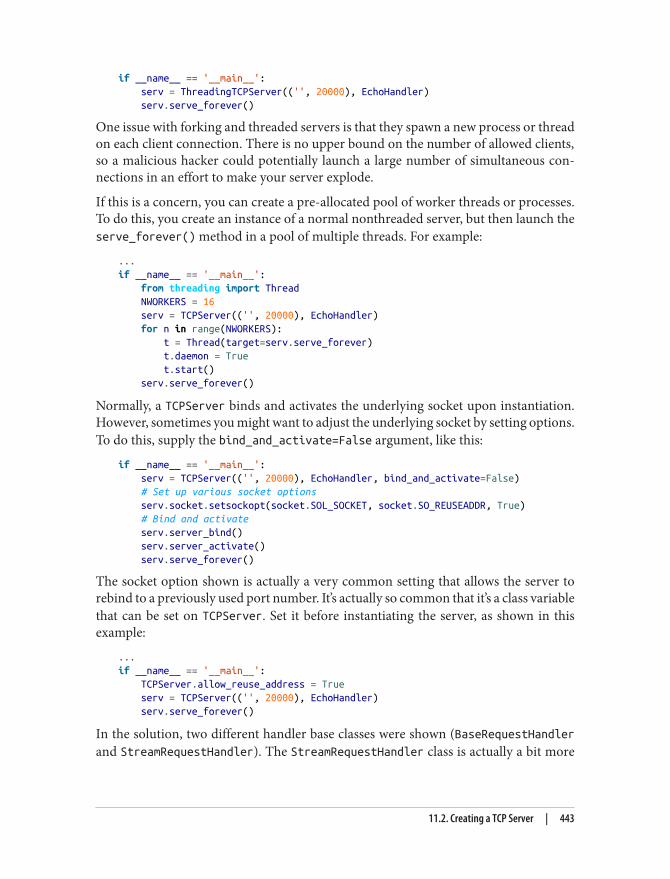
if __name__ == '__main__': serv = ThreadingTCPServer(('', 20000), EchoHandler) serv.serve_forever()
One issue with forking and threaded servers is that they spawn a new process or threadon each client connection. There is no upper bound on the number of allowed clients,so a malicious hacker could potentially launch a large number of simultaneous con‐nections in an effort to make your server explode.
If this is a concern, you can create a pre-allocated pool of worker threads or processes.To do this, you create an instance of a normal nonthreaded server, but then launch theserve_forever() method in a pool of multiple threads. For example:
...if __name__ == '__main__': from threading import Thread NWORKERS = 16 serv = TCPServer(('', 20000), EchoHandler) for n in range(NWORKERS): t = Thread(target=serv.serve_forever) t.daemon = True t.start() serv.serve_forever()
Normally, a TCPServer binds and activates the underlying socket upon instantiation.However, sometimes you might want to adjust the underlying socket by setting options.To do this, supply the bind_and_activate=False argument, like this:
if __name__ == '__main__': serv = TCPServer(('', 20000), EchoHandler, bind_and_activate=False) # Set up various socket options serv.socket.setsockopt(socket.SOL_SOCKET, socket.SO_REUSEADDR, True) # Bind and activate serv.server_bind() serv.server_activate() serv.serve_forever()
The socket option shown is actually a very common setting that allows the server torebind to a previously used port number. It’s actually so common that it’s a class variablethat can be set on TCPServer. Set it before instantiating the server, as shown in thisexample:
...if __name__ == '__main__': TCPServer.allow_reuse_address = True serv = TCPServer(('', 20000), EchoHandler) serv.serve_forever()
In the solution, two different handler base classes were shown (BaseRequestHandlerand StreamRequestHandler). The StreamRequestHandler class is actually a bit more
11.2. Creating a TCP Server | 443
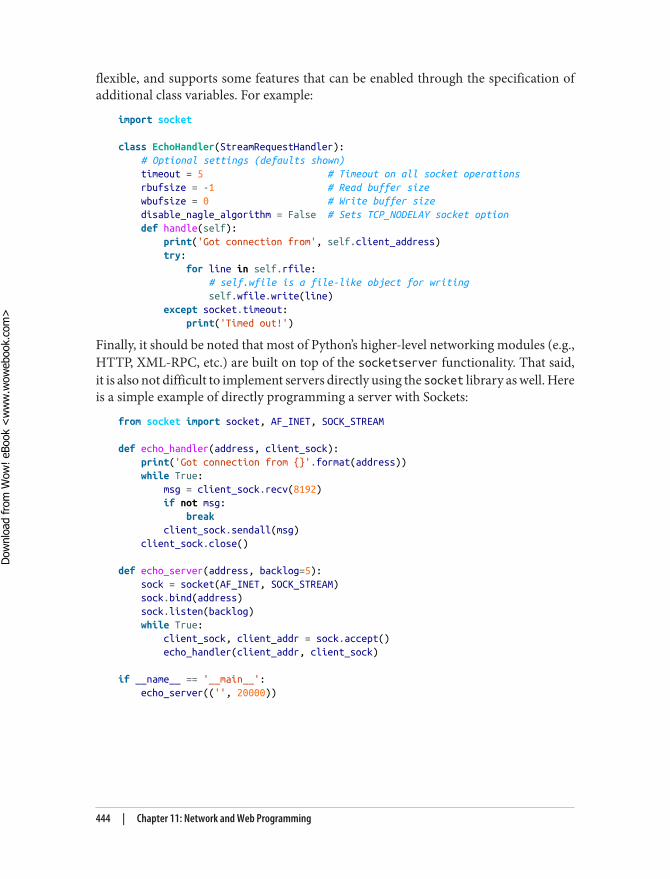
flexible, and supports some features that can be enabled through the specification ofadditional class variables. For example:
import socket
class EchoHandler(StreamRequestHandler): # Optional settings (defaults shown) timeout = 5 # Timeout on all socket operations rbufsize = -1 # Read buffer size wbufsize = 0 # Write buffer size disable_nagle_algorithm = False # Sets TCP_NODELAY socket option def handle(self): print('Got connection from', self.client_address) try: for line in self.rfile: # self.wfile is a file-like object for writing self.wfile.write(line) except socket.timeout: print('Timed out!')
Finally, it should be noted that most of Python’s higher-level networking modules (e.g.,HTTP, XML-RPC, etc.) are built on top of the socketserver functionality. That said,it is also not difficult to implement servers directly using the socket library as well. Hereis a simple example of directly programming a server with Sockets:
from socket import socket, AF_INET, SOCK_STREAM
def echo_handler(address, client_sock): print('Got connection from {}'.format(address)) while True: msg = client_sock.recv(8192) if not msg: break client_sock.sendall(msg) client_sock.close()
def echo_server(address, backlog=5): sock = socket(AF_INET, SOCK_STREAM) sock.bind(address) sock.listen(backlog) while True: client_sock, client_addr = sock.accept() echo_handler(client_addr, client_sock)
if __name__ == '__main__': echo_server(('', 20000))
444 | Chapter 11: Network and Web Programming
Dow
nlo
ad fro
m W
ow
! eBook
<w
ww
.wow
ebook.
com
>
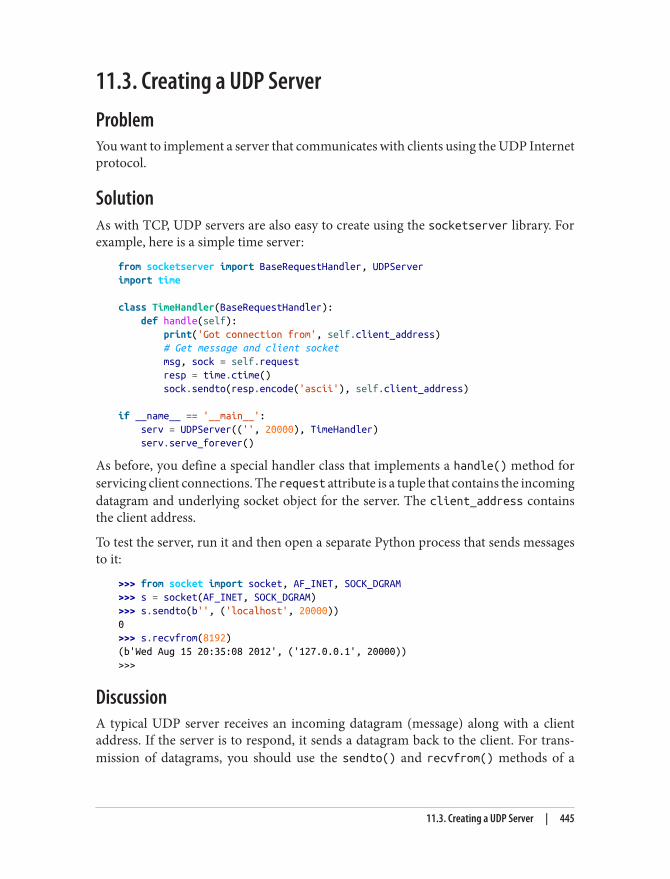
11.3. Creating a UDP ServerProblemYou want to implement a server that communicates with clients using the UDP Internetprotocol.
SolutionAs with TCP, UDP servers are also easy to create using the socketserver library. Forexample, here is a simple time server:
from socketserver import BaseRequestHandler, UDPServerimport time
class TimeHandler(BaseRequestHandler): def handle(self): print('Got connection from', self.client_address) # Get message and client socket msg, sock = self.request resp = time.ctime() sock.sendto(resp.encode('ascii'), self.client_address)
if __name__ == '__main__': serv = UDPServer(('', 20000), TimeHandler) serv.serve_forever()
As before, you define a special handler class that implements a handle() method forservicing client connections. The request attribute is a tuple that contains the incomingdatagram and underlying socket object for the server. The client_address containsthe client address.
To test the server, run it and then open a separate Python process that sends messagesto it:
>>> from socket import socket, AF_INET, SOCK_DGRAM>>> s = socket(AF_INET, SOCK_DGRAM)>>> s.sendto(b'', ('localhost', 20000))0>>> s.recvfrom(8192)(b'Wed Aug 15 20:35:08 2012', ('127.0.0.1', 20000))>>>
DiscussionA typical UDP server receives an incoming datagram (message) along with a clientaddress. If the server is to respond, it sends a datagram back to the client. For trans‐mission of datagrams, you should use the sendto() and recvfrom() methods of a
11.3. Creating a UDP Server | 445
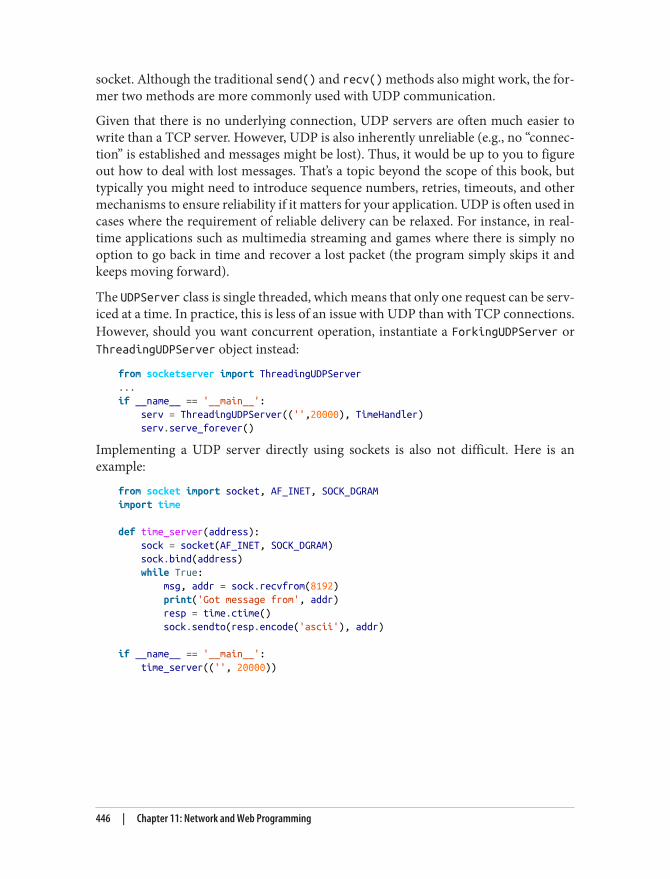
socket. Although the traditional send() and recv() methods also might work, the for‐mer two methods are more commonly used with UDP communication.
Given that there is no underlying connection, UDP servers are often much easier towrite than a TCP server. However, UDP is also inherently unreliable (e.g., no “connec‐tion” is established and messages might be lost). Thus, it would be up to you to figureout how to deal with lost messages. That’s a topic beyond the scope of this book, buttypically you might need to introduce sequence numbers, retries, timeouts, and othermechanisms to ensure reliability if it matters for your application. UDP is often used incases where the requirement of reliable delivery can be relaxed. For instance, in real-time applications such as multimedia streaming and games where there is simply nooption to go back in time and recover a lost packet (the program simply skips it andkeeps moving forward).
The UDPServer class is single threaded, which means that only one request can be serv‐iced at a time. In practice, this is less of an issue with UDP than with TCP connections.However, should you want concurrent operation, instantiate a ForkingUDPServer orThreadingUDPServer object instead:
from socketserver import ThreadingUDPServer...if __name__ == '__main__': serv = ThreadingUDPServer(('',20000), TimeHandler) serv.serve_forever()
Implementing a UDP server directly using sockets is also not difficult. Here is anexample:
from socket import socket, AF_INET, SOCK_DGRAMimport time
def time_server(address): sock = socket(AF_INET, SOCK_DGRAM) sock.bind(address) while True: msg, addr = sock.recvfrom(8192) print('Got message from', addr) resp = time.ctime() sock.sendto(resp.encode('ascii'), addr)
if __name__ == '__main__': time_server(('', 20000))
446 | Chapter 11: Network and Web Programming
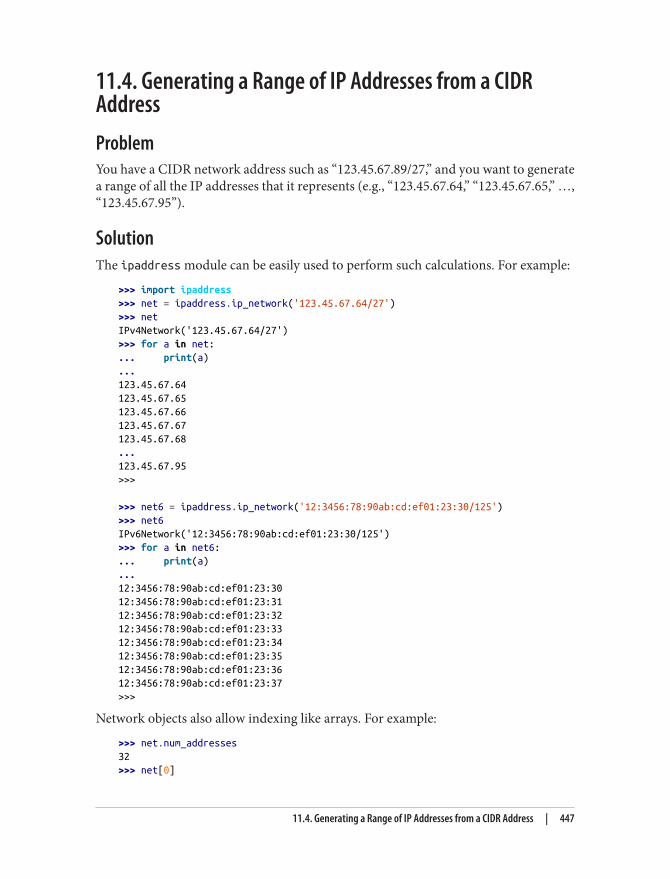
11.4. Generating a Range of IP Addresses from a CIDRAddressProblemYou have a CIDR network address such as “123.45.67.89/27,” and you want to generatea range of all the IP addresses that it represents (e.g., “123.45.67.64,” “123.45.67.65,” …,“123.45.67.95”).
SolutionThe ipaddress module can be easily used to perform such calculations. For example:
>>> import ipaddress>>> net = ipaddress.ip_network('123.45.67.64/27')>>> netIPv4Network('123.45.67.64/27')>>> for a in net:... print(a)...123.45.67.64123.45.67.65123.45.67.66123.45.67.67123.45.67.68...123.45.67.95>>>
>>> net6 = ipaddress.ip_network('12:3456:78:90ab:cd:ef01:23:30/125')>>> net6IPv6Network('12:3456:78:90ab:cd:ef01:23:30/125')>>> for a in net6:... print(a)...12:3456:78:90ab:cd:ef01:23:3012:3456:78:90ab:cd:ef01:23:3112:3456:78:90ab:cd:ef01:23:3212:3456:78:90ab:cd:ef01:23:3312:3456:78:90ab:cd:ef01:23:3412:3456:78:90ab:cd:ef01:23:3512:3456:78:90ab:cd:ef01:23:3612:3456:78:90ab:cd:ef01:23:37>>>
Network objects also allow indexing like arrays. For example:
>>> net.num_addresses32>>> net[0]
11.4. Generating a Range of IP Addresses from a CIDR Address | 447
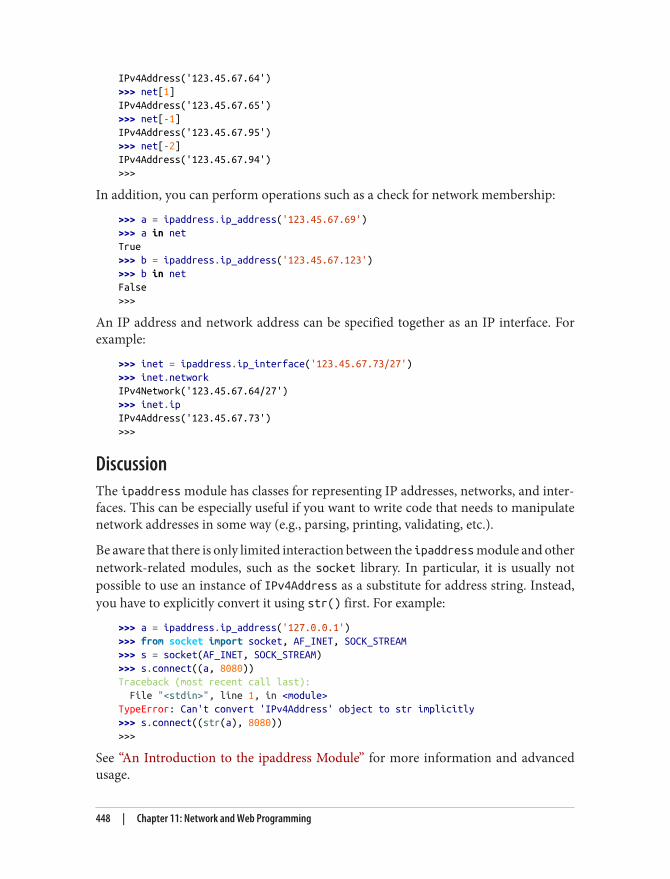
IPv4Address('123.45.67.64')>>> net[1]IPv4Address('123.45.67.65')>>> net[-1]IPv4Address('123.45.67.95')>>> net[-2]IPv4Address('123.45.67.94')>>>
In addition, you can perform operations such as a check for network membership:
>>> a = ipaddress.ip_address('123.45.67.69')>>> a in netTrue>>> b = ipaddress.ip_address('123.45.67.123')>>> b in netFalse>>>
An IP address and network address can be specified together as an IP interface. Forexample:
>>> inet = ipaddress.ip_interface('123.45.67.73/27')>>> inet.networkIPv4Network('123.45.67.64/27')>>> inet.ipIPv4Address('123.45.67.73')>>>
DiscussionThe ipaddress module has classes for representing IP addresses, networks, and inter‐faces. This can be especially useful if you want to write code that needs to manipulatenetwork addresses in some way (e.g., parsing, printing, validating, etc.).
Be aware that there is only limited interaction between the ipaddress module and othernetwork-related modules, such as the socket library. In particular, it is usually notpossible to use an instance of IPv4Address as a substitute for address string. Instead,you have to explicitly convert it using str() first. For example:
>>> a = ipaddress.ip_address('127.0.0.1')>>> from socket import socket, AF_INET, SOCK_STREAM>>> s = socket(AF_INET, SOCK_STREAM)>>> s.connect((a, 8080))Traceback (most recent call last): File "<stdin>", line 1, in <module>TypeError: Can't convert 'IPv4Address' object to str implicitly>>> s.connect((str(a), 8080))>>>
See “An Introduction to the ipaddress Module” for more information and advancedusage.
448 | Chapter 11: Network and Web Programming
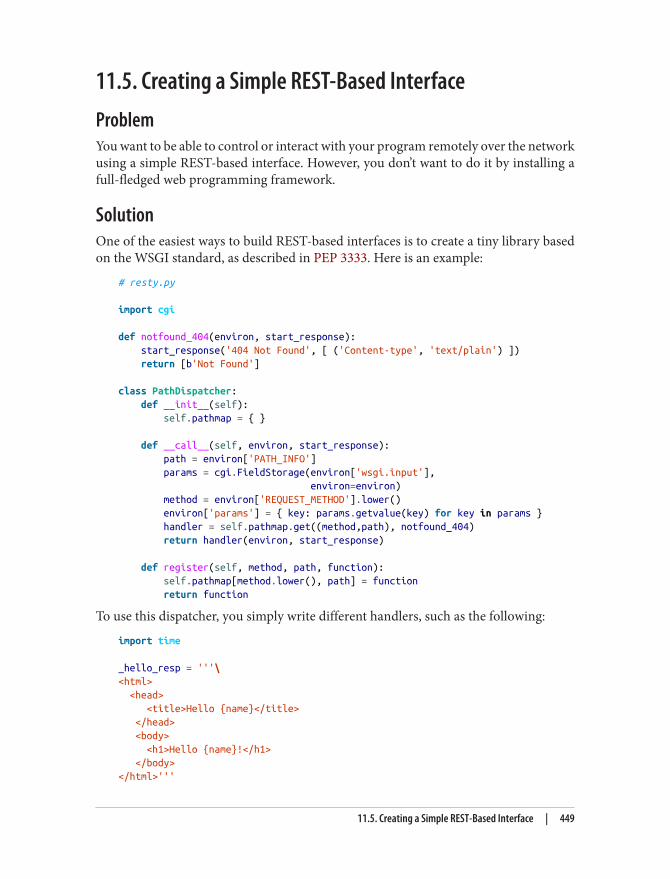
11.5. Creating a Simple REST-Based InterfaceProblemYou want to be able to control or interact with your program remotely over the networkusing a simple REST-based interface. However, you don’t want to do it by installing afull-fledged web programming framework.
SolutionOne of the easiest ways to build REST-based interfaces is to create a tiny library basedon the WSGI standard, as described in PEP 3333. Here is an example:
# resty.py
import cgi
def notfound_404(environ, start_response): start_response('404 Not Found', [ ('Content-type', 'text/plain') ]) return [b'Not Found']
class PathDispatcher: def __init__(self): self.pathmap = { }
def __call__(self, environ, start_response): path = environ['PATH_INFO'] params = cgi.FieldStorage(environ['wsgi.input'], environ=environ) method = environ['REQUEST_METHOD'].lower() environ['params'] = { key: params.getvalue(key) for key in params } handler = self.pathmap.get((method,path), notfound_404) return handler(environ, start_response)
def register(self, method, path, function): self.pathmap[method.lower(), path] = function return function
To use this dispatcher, you simply write different handlers, such as the following:
import time
_hello_resp = '''\<html> <head> <title>Hello {name}</title> </head> <body> <h1>Hello {name}!</h1> </body></html>'''
11.5. Creating a Simple REST-Based Interface | 449
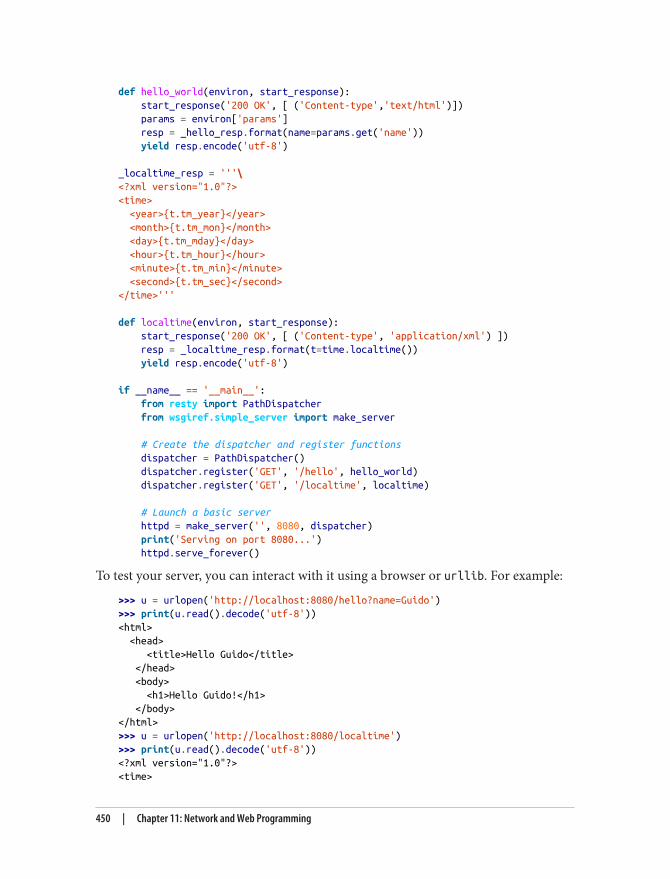
def hello_world(environ, start_response): start_response('200 OK', [ ('Content-type','text/html')]) params = environ['params'] resp = _hello_resp.format(name=params.get('name')) yield resp.encode('utf-8')
_localtime_resp = '''\<?xml version="1.0"?><time> <year>{t.tm_year}</year> <month>{t.tm_mon}</month> <day>{t.tm_mday}</day> <hour>{t.tm_hour}</hour> <minute>{t.tm_min}</minute> <second>{t.tm_sec}</second></time>'''
def localtime(environ, start_response): start_response('200 OK', [ ('Content-type', 'application/xml') ]) resp = _localtime_resp.format(t=time.localtime()) yield resp.encode('utf-8')
if __name__ == '__main__': from resty import PathDispatcher from wsgiref.simple_server import make_server
# Create the dispatcher and register functions dispatcher = PathDispatcher() dispatcher.register('GET', '/hello', hello_world) dispatcher.register('GET', '/localtime', localtime)
# Launch a basic server httpd = make_server('', 8080, dispatcher) print('Serving on port 8080...') httpd.serve_forever()
To test your server, you can interact with it using a browser or urllib. For example:
>>> u = urlopen('http://localhost:8080/hello?name=Guido')>>> print(u.read().decode('utf-8'))<html> <head> <title>Hello Guido</title> </head> <body> <h1>Hello Guido!</h1> </body></html>>>> u = urlopen('http://localhost:8080/localtime')>>> print(u.read().decode('utf-8'))<?xml version="1.0"?><time>
450 | Chapter 11: Network and Web Programming
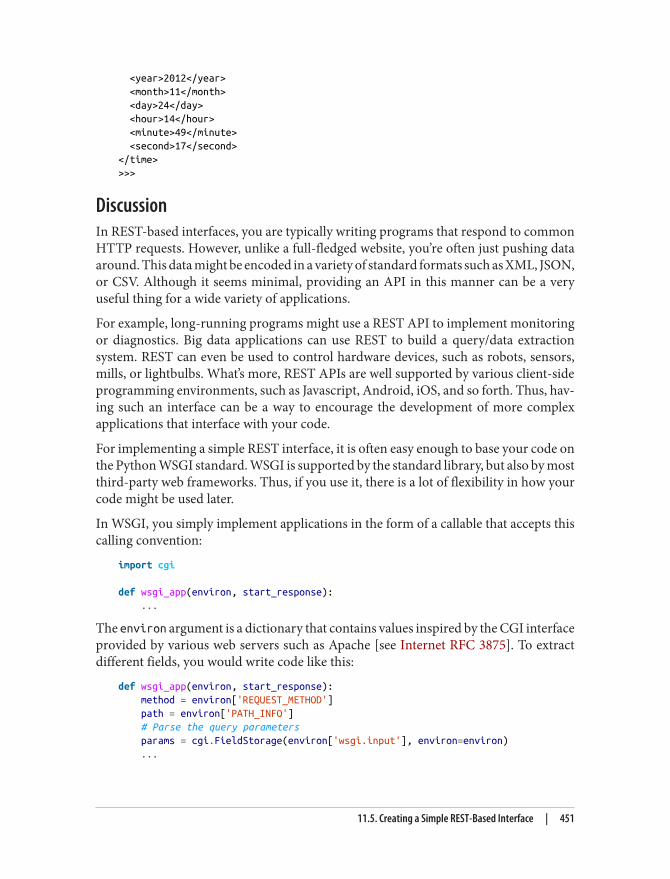
<year>2012</year> <month>11</month> <day>24</day> <hour>14</hour> <minute>49</minute> <second>17</second></time>>>>
DiscussionIn REST-based interfaces, you are typically writing programs that respond to commonHTTP requests. However, unlike a full-fledged website, you’re often just pushing dataaround. This data might be encoded in a variety of standard formats such as XML, JSON,or CSV. Although it seems minimal, providing an API in this manner can be a veryuseful thing for a wide variety of applications.
For example, long-running programs might use a REST API to implement monitoringor diagnostics. Big data applications can use REST to build a query/data extractionsystem. REST can even be used to control hardware devices, such as robots, sensors,mills, or lightbulbs. What’s more, REST APIs are well supported by various client-sideprogramming environments, such as Javascript, Android, iOS, and so forth. Thus, hav‐ing such an interface can be a way to encourage the development of more complexapplications that interface with your code.
For implementing a simple REST interface, it is often easy enough to base your code onthe Python WSGI standard. WSGI is supported by the standard library, but also by mostthird-party web frameworks. Thus, if you use it, there is a lot of flexibility in how yourcode might be used later.
In WSGI, you simply implement applications in the form of a callable that accepts thiscalling convention:
import cgi
def wsgi_app(environ, start_response): ...
The environ argument is a dictionary that contains values inspired by the CGI interfaceprovided by various web servers such as Apache [see Internet RFC 3875]. To extractdifferent fields, you would write code like this:
def wsgi_app(environ, start_response): method = environ['REQUEST_METHOD'] path = environ['PATH_INFO'] # Parse the query parameters params = cgi.FieldStorage(environ['wsgi.input'], environ=environ) ...
11.5. Creating a Simple REST-Based Interface | 451
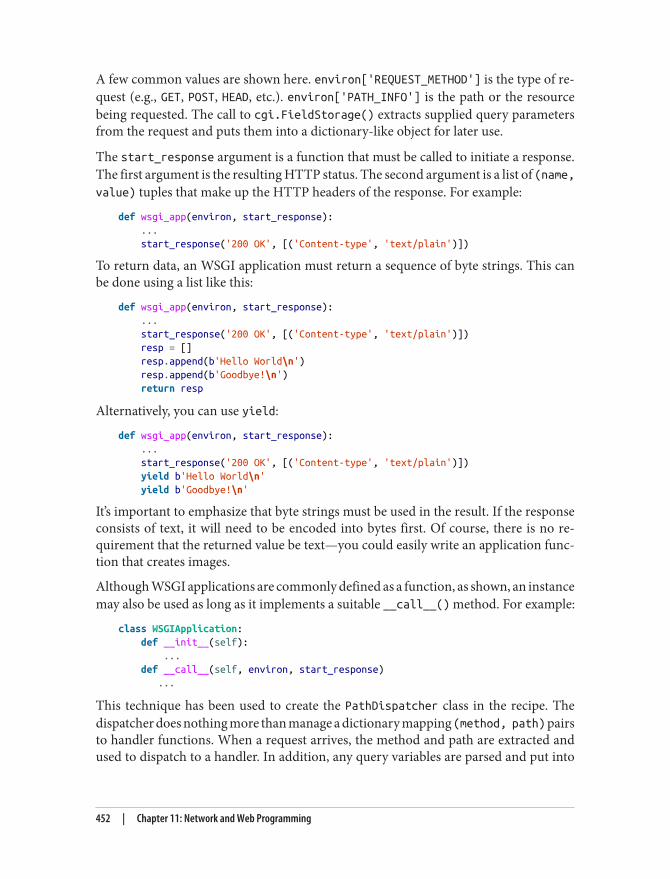
A few common values are shown here. environ['REQUEST_METHOD'] is the type of re‐quest (e.g., GET, POST, HEAD, etc.). environ['PATH_INFO'] is the path or the resourcebeing requested. The call to cgi.FieldStorage() extracts supplied query parametersfrom the request and puts them into a dictionary-like object for later use.
The start_response argument is a function that must be called to initiate a response.The first argument is the resulting HTTP status. The second argument is a list of (name,value) tuples that make up the HTTP headers of the response. For example:
def wsgi_app(environ, start_response): ... start_response('200 OK', [('Content-type', 'text/plain')])
To return data, an WSGI application must return a sequence of byte strings. This canbe done using a list like this:
def wsgi_app(environ, start_response): ... start_response('200 OK', [('Content-type', 'text/plain')]) resp = [] resp.append(b'Hello World\n') resp.append(b'Goodbye!\n') return resp
Alternatively, you can use yield:
def wsgi_app(environ, start_response): ... start_response('200 OK', [('Content-type', 'text/plain')]) yield b'Hello World\n' yield b'Goodbye!\n'
It’s important to emphasize that byte strings must be used in the result. If the responseconsists of text, it will need to be encoded into bytes first. Of course, there is no re‐quirement that the returned value be text—you could easily write an application func‐tion that creates images.
Although WSGI applications are commonly defined as a function, as shown, an instancemay also be used as long as it implements a suitable __call__() method. For example:
class WSGIApplication: def __init__(self): ... def __call__(self, environ, start_response) ...
This technique has been used to create the PathDispatcher class in the recipe. Thedispatcher does nothing more than manage a dictionary mapping (method, path) pairsto handler functions. When a request arrives, the method and path are extracted andused to dispatch to a handler. In addition, any query variables are parsed and put into
452 | Chapter 11: Network and Web Programming
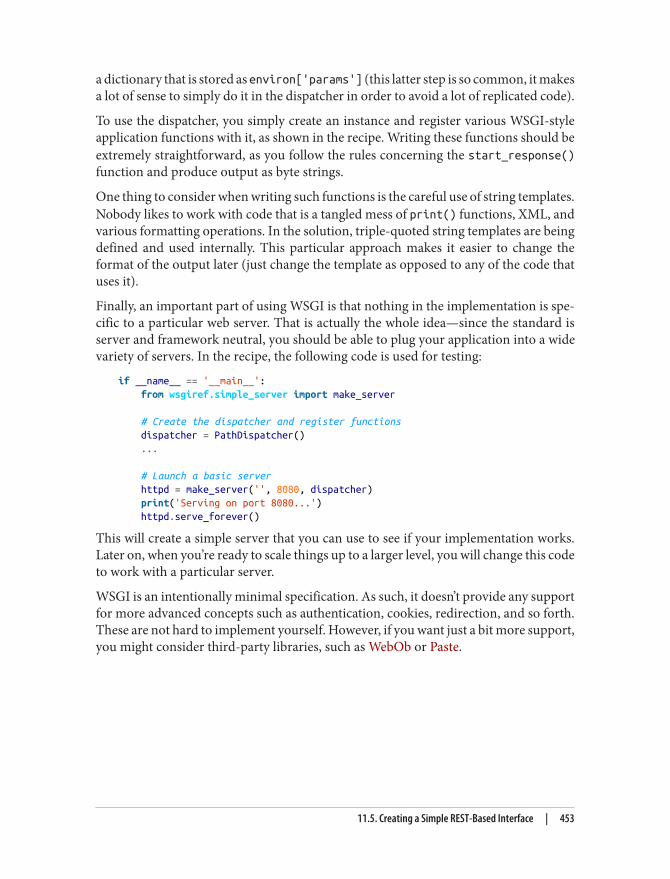
a dictionary that is stored as environ['params'] (this latter step is so common, it makesa lot of sense to simply do it in the dispatcher in order to avoid a lot of replicated code).
To use the dispatcher, you simply create an instance and register various WSGI-styleapplication functions with it, as shown in the recipe. Writing these functions should beextremely straightforward, as you follow the rules concerning the start_response()function and produce output as byte strings.
One thing to consider when writing such functions is the careful use of string templates.Nobody likes to work with code that is a tangled mess of print() functions, XML, andvarious formatting operations. In the solution, triple-quoted string templates are beingdefined and used internally. This particular approach makes it easier to change theformat of the output later (just change the template as opposed to any of the code thatuses it).
Finally, an important part of using WSGI is that nothing in the implementation is spe‐cific to a particular web server. That is actually the whole idea—since the standard isserver and framework neutral, you should be able to plug your application into a widevariety of servers. In the recipe, the following code is used for testing:
if __name__ == '__main__': from wsgiref.simple_server import make_server
# Create the dispatcher and register functions dispatcher = PathDispatcher() ...
# Launch a basic server httpd = make_server('', 8080, dispatcher) print('Serving on port 8080...') httpd.serve_forever()
This will create a simple server that you can use to see if your implementation works.Later on, when you’re ready to scale things up to a larger level, you will change this codeto work with a particular server.
WSGI is an intentionally minimal specification. As such, it doesn’t provide any supportfor more advanced concepts such as authentication, cookies, redirection, and so forth.These are not hard to implement yourself. However, if you want just a bit more support,you might consider third-party libraries, such as WebOb or Paste.
11.5. Creating a Simple REST-Based Interface | 453
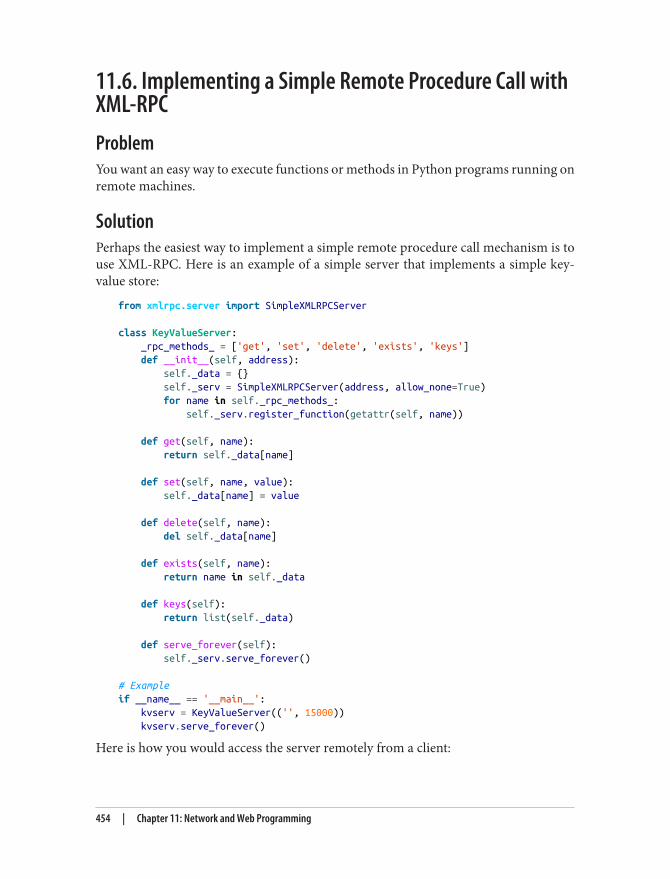
11.6. Implementing a Simple Remote Procedure Call withXML-RPCProblemYou want an easy way to execute functions or methods in Python programs running onremote machines.
SolutionPerhaps the easiest way to implement a simple remote procedure call mechanism is touse XML-RPC. Here is an example of a simple server that implements a simple key-value store:
from xmlrpc.server import SimpleXMLRPCServer
class KeyValueServer: _rpc_methods_ = ['get', 'set', 'delete', 'exists', 'keys'] def __init__(self, address): self._data = {} self._serv = SimpleXMLRPCServer(address, allow_none=True) for name in self._rpc_methods_: self._serv.register_function(getattr(self, name))
def get(self, name): return self._data[name]
def set(self, name, value): self._data[name] = value
def delete(self, name): del self._data[name]
def exists(self, name): return name in self._data
def keys(self): return list(self._data)
def serve_forever(self): self._serv.serve_forever()
# Exampleif __name__ == '__main__': kvserv = KeyValueServer(('', 15000)) kvserv.serve_forever()
Here is how you would access the server remotely from a client:
454 | Chapter 11: Network and Web Programming
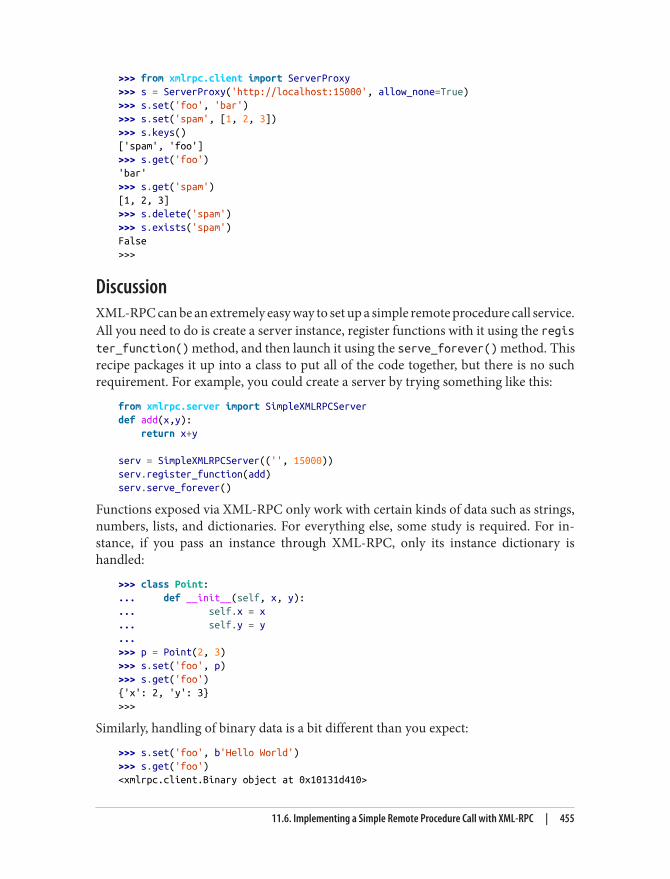
>>> from xmlrpc.client import ServerProxy>>> s = ServerProxy('http://localhost:15000', allow_none=True)>>> s.set('foo', 'bar')>>> s.set('spam', [1, 2, 3])>>> s.keys()['spam', 'foo']>>> s.get('foo')'bar'>>> s.get('spam')[1, 2, 3]>>> s.delete('spam')>>> s.exists('spam')False>>>
DiscussionXML-RPC can be an extremely easy way to set up a simple remote procedure call service.All you need to do is create a server instance, register functions with it using the register_function() method, and then launch it using the serve_forever() method. Thisrecipe packages it up into a class to put all of the code together, but there is no suchrequirement. For example, you could create a server by trying something like this:
from xmlrpc.server import SimpleXMLRPCServerdef add(x,y): return x+y
serv = SimpleXMLRPCServer(('', 15000))serv.register_function(add)serv.serve_forever()
Functions exposed via XML-RPC only work with certain kinds of data such as strings,numbers, lists, and dictionaries. For everything else, some study is required. For in‐stance, if you pass an instance through XML-RPC, only its instance dictionary ishandled:
>>> class Point:... def __init__(self, x, y):... self.x = x... self.y = y...>>> p = Point(2, 3)>>> s.set('foo', p)>>> s.get('foo'){'x': 2, 'y': 3}>>>
Similarly, handling of binary data is a bit different than you expect:
>>> s.set('foo', b'Hello World')>>> s.get('foo')<xmlrpc.client.Binary object at 0x10131d410>
11.6. Implementing a Simple Remote Procedure Call with XML-RPC | 455
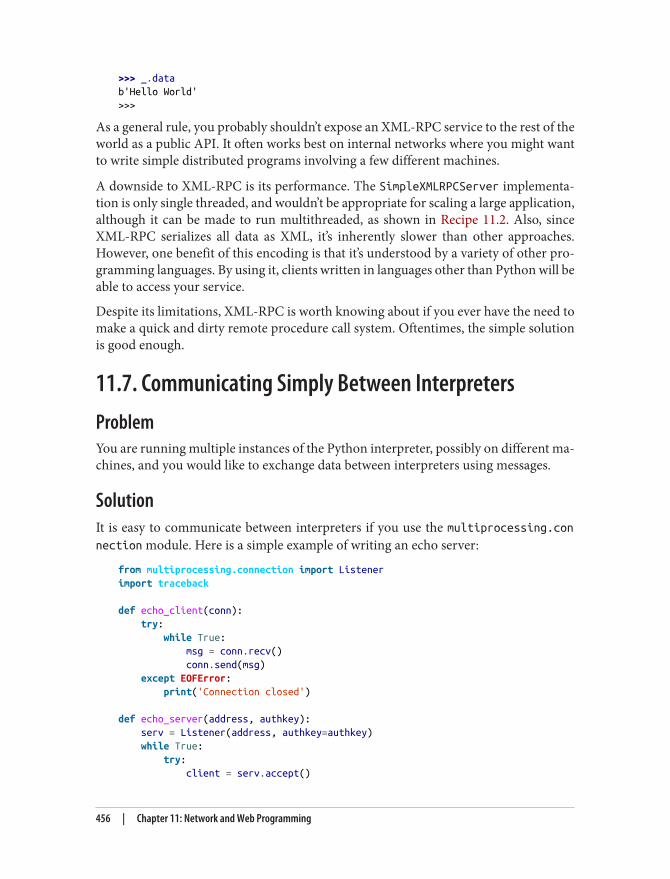
>>> _.datab'Hello World'>>>
As a general rule, you probably shouldn’t expose an XML-RPC service to the rest of theworld as a public API. It often works best on internal networks where you might wantto write simple distributed programs involving a few different machines.
A downside to XML-RPC is its performance. The SimpleXMLRPCServer implementa‐tion is only single threaded, and wouldn’t be appropriate for scaling a large application,although it can be made to run multithreaded, as shown in Recipe 11.2. Also, sinceXML-RPC serializes all data as XML, it’s inherently slower than other approaches.However, one benefit of this encoding is that it’s understood by a variety of other pro‐gramming languages. By using it, clients written in languages other than Python will beable to access your service.
Despite its limitations, XML-RPC is worth knowing about if you ever have the need tomake a quick and dirty remote procedure call system. Oftentimes, the simple solutionis good enough.
11.7. Communicating Simply Between InterpretersProblemYou are running multiple instances of the Python interpreter, possibly on different ma‐chines, and you would like to exchange data between interpreters using messages.
SolutionIt is easy to communicate between interpreters if you use the multiprocessing.connection module. Here is a simple example of writing an echo server:
from multiprocessing.connection import Listenerimport traceback
def echo_client(conn): try: while True: msg = conn.recv() conn.send(msg) except EOFError: print('Connection closed')
def echo_server(address, authkey): serv = Listener(address, authkey=authkey) while True: try: client = serv.accept()
456 | Chapter 11: Network and Web Programming
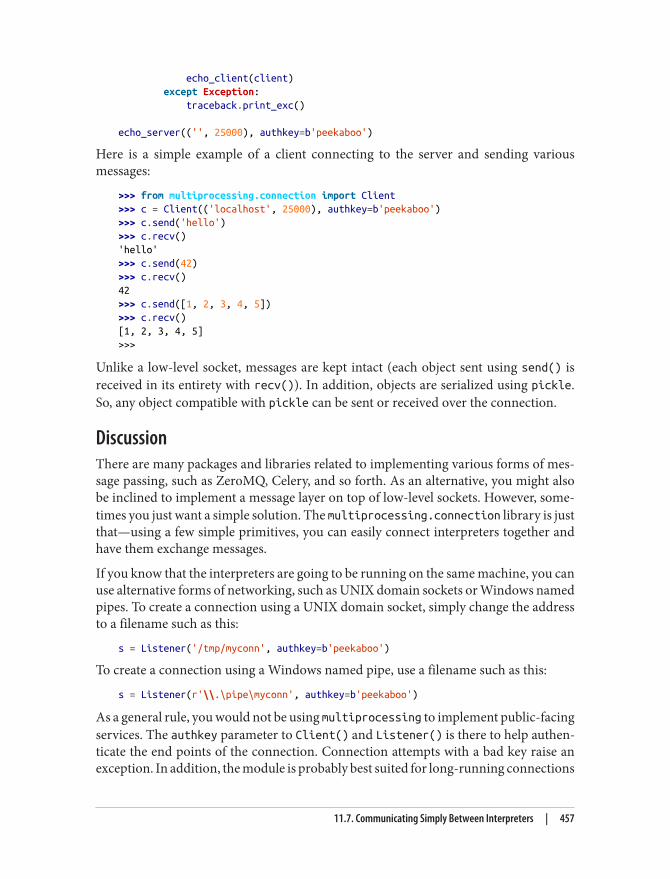
echo_client(client) except Exception: traceback.print_exc()
echo_server(('', 25000), authkey=b'peekaboo')
Here is a simple example of a client connecting to the server and sending variousmessages:
>>> from multiprocessing.connection import Client>>> c = Client(('localhost', 25000), authkey=b'peekaboo')>>> c.send('hello')>>> c.recv()'hello'>>> c.send(42)>>> c.recv()42>>> c.send([1, 2, 3, 4, 5])>>> c.recv()[1, 2, 3, 4, 5]>>>
Unlike a low-level socket, messages are kept intact (each object sent using send() isreceived in its entirety with recv()). In addition, objects are serialized using pickle.So, any object compatible with pickle can be sent or received over the connection.
DiscussionThere are many packages and libraries related to implementing various forms of mes‐sage passing, such as ZeroMQ, Celery, and so forth. As an alternative, you might alsobe inclined to implement a message layer on top of low-level sockets. However, some‐times you just want a simple solution. The multiprocessing.connection library is justthat—using a few simple primitives, you can easily connect interpreters together andhave them exchange messages.
If you know that the interpreters are going to be running on the same machine, you canuse alternative forms of networking, such as UNIX domain sockets or Windows namedpipes. To create a connection using a UNIX domain socket, simply change the addressto a filename such as this:
s = Listener('/tmp/myconn', authkey=b'peekaboo')
To create a connection using a Windows named pipe, use a filename such as this:
s = Listener(r'\\.\pipe\myconn', authkey=b'peekaboo')
As a general rule, you would not be using multiprocessing to implement public-facingservices. The authkey parameter to Client() and Listener() is there to help authen‐ticate the end points of the connection. Connection attempts with a bad key raise anexception. In addition, the module is probably best suited for long-running connections
11.7. Communicating Simply Between Interpreters | 457
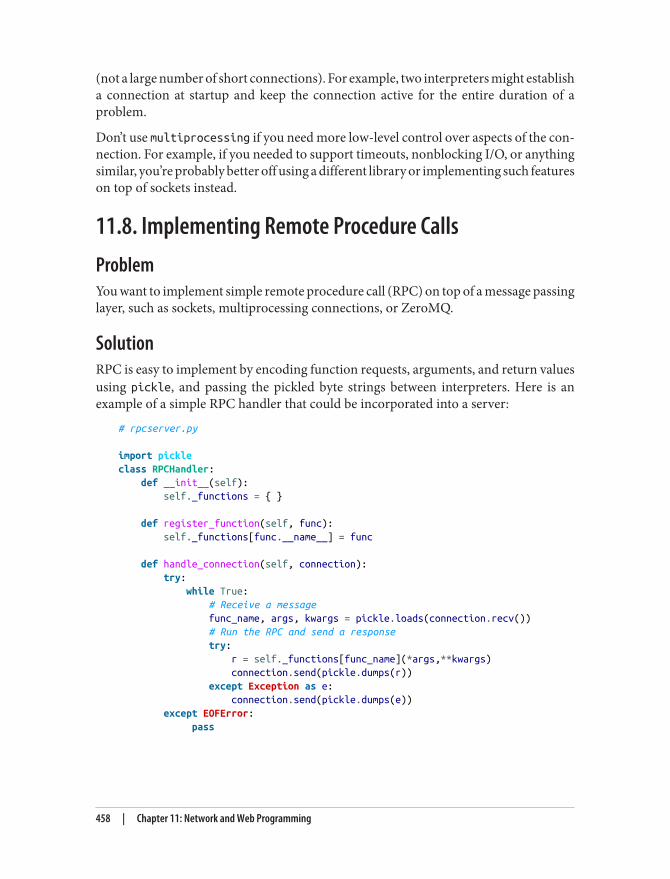
(not a large number of short connections). For example, two interpreters might establisha connection at startup and keep the connection active for the entire duration of aproblem.
Don’t use multiprocessing if you need more low-level control over aspects of the con‐nection. For example, if you needed to support timeouts, nonblocking I/O, or anythingsimilar, you’re probably better off using a different library or implementing such featureson top of sockets instead.
11.8. Implementing Remote Procedure CallsProblemYou want to implement simple remote procedure call (RPC) on top of a message passinglayer, such as sockets, multiprocessing connections, or ZeroMQ.
SolutionRPC is easy to implement by encoding function requests, arguments, and return valuesusing pickle, and passing the pickled byte strings between interpreters. Here is anexample of a simple RPC handler that could be incorporated into a server:
# rpcserver.py
import pickleclass RPCHandler: def __init__(self): self._functions = { }
def register_function(self, func): self._functions[func.__name__] = func
def handle_connection(self, connection): try: while True: # Receive a message func_name, args, kwargs = pickle.loads(connection.recv()) # Run the RPC and send a response try: r = self._functions[func_name](*args,**kwargs) connection.send(pickle.dumps(r)) except Exception as e: connection.send(pickle.dumps(e)) except EOFError: pass
458 | Chapter 11: Network and Web Programming
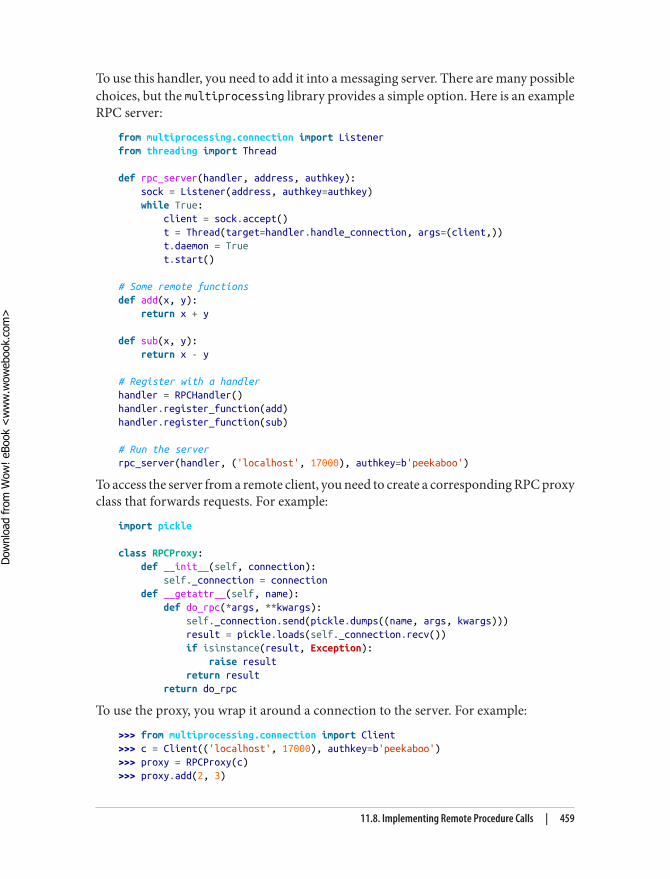
To use this handler, you need to add it into a messaging server. There are many possiblechoices, but the multiprocessing library provides a simple option. Here is an exampleRPC server:
from multiprocessing.connection import Listenerfrom threading import Thread
def rpc_server(handler, address, authkey): sock = Listener(address, authkey=authkey) while True: client = sock.accept() t = Thread(target=handler.handle_connection, args=(client,)) t.daemon = True t.start()
# Some remote functionsdef add(x, y): return x + y
def sub(x, y): return x - y
# Register with a handlerhandler = RPCHandler()handler.register_function(add)handler.register_function(sub)
# Run the serverrpc_server(handler, ('localhost', 17000), authkey=b'peekaboo')
To access the server from a remote client, you need to create a corresponding RPC proxyclass that forwards requests. For example:
import pickle
class RPCProxy: def __init__(self, connection): self._connection = connection def __getattr__(self, name): def do_rpc(*args, **kwargs): self._connection.send(pickle.dumps((name, args, kwargs))) result = pickle.loads(self._connection.recv()) if isinstance(result, Exception): raise result return result return do_rpc
To use the proxy, you wrap it around a connection to the server. For example:
>>> from multiprocessing.connection import Client>>> c = Client(('localhost', 17000), authkey=b'peekaboo')>>> proxy = RPCProxy(c)>>> proxy.add(2, 3)
11.8. Implementing Remote Procedure Calls | 459
Dow
nlo
ad fro
m W
ow
! eBook
<w
ww
.wow
ebook.
com
>
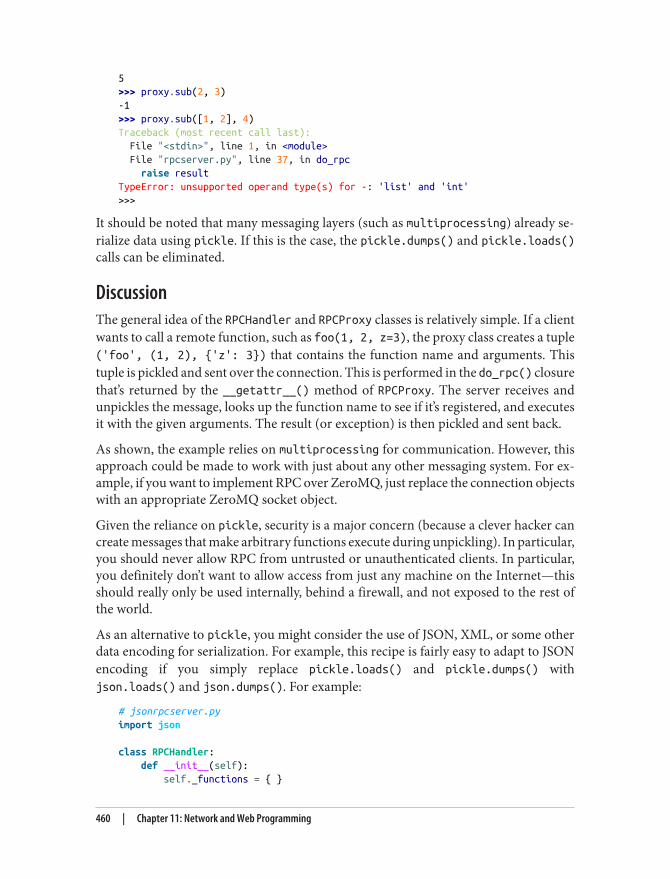
5>>> proxy.sub(2, 3)-1>>> proxy.sub([1, 2], 4)Traceback (most recent call last): File "<stdin>", line 1, in <module> File "rpcserver.py", line 37, in do_rpc raise resultTypeError: unsupported operand type(s) for -: 'list' and 'int'>>>
It should be noted that many messaging layers (such as multiprocessing) already se‐rialize data using pickle. If this is the case, the pickle.dumps() and pickle.loads()calls can be eliminated.
DiscussionThe general idea of the RPCHandler and RPCProxy classes is relatively simple. If a clientwants to call a remote function, such as foo(1, 2, z=3), the proxy class creates a tuple('foo', (1, 2), {'z': 3}) that contains the function name and arguments. Thistuple is pickled and sent over the connection. This is performed in the do_rpc() closurethat’s returned by the __getattr__() method of RPCProxy. The server receives andunpickles the message, looks up the function name to see if it’s registered, and executesit with the given arguments. The result (or exception) is then pickled and sent back.
As shown, the example relies on multiprocessing for communication. However, thisapproach could be made to work with just about any other messaging system. For ex‐ample, if you want to implement RPC over ZeroMQ, just replace the connection objectswith an appropriate ZeroMQ socket object.
Given the reliance on pickle, security is a major concern (because a clever hacker cancreate messages that make arbitrary functions execute during unpickling). In particular,you should never allow RPC from untrusted or unauthenticated clients. In particular,you definitely don’t want to allow access from just any machine on the Internet—thisshould really only be used internally, behind a firewall, and not exposed to the rest ofthe world.
As an alternative to pickle, you might consider the use of JSON, XML, or some otherdata encoding for serialization. For example, this recipe is fairly easy to adapt to JSONencoding if you simply replace pickle.loads() and pickle.dumps() withjson.loads() and json.dumps(). For example:
# jsonrpcserver.pyimport json
class RPCHandler: def __init__(self): self._functions = { }
460 | Chapter 11: Network and Web Programming
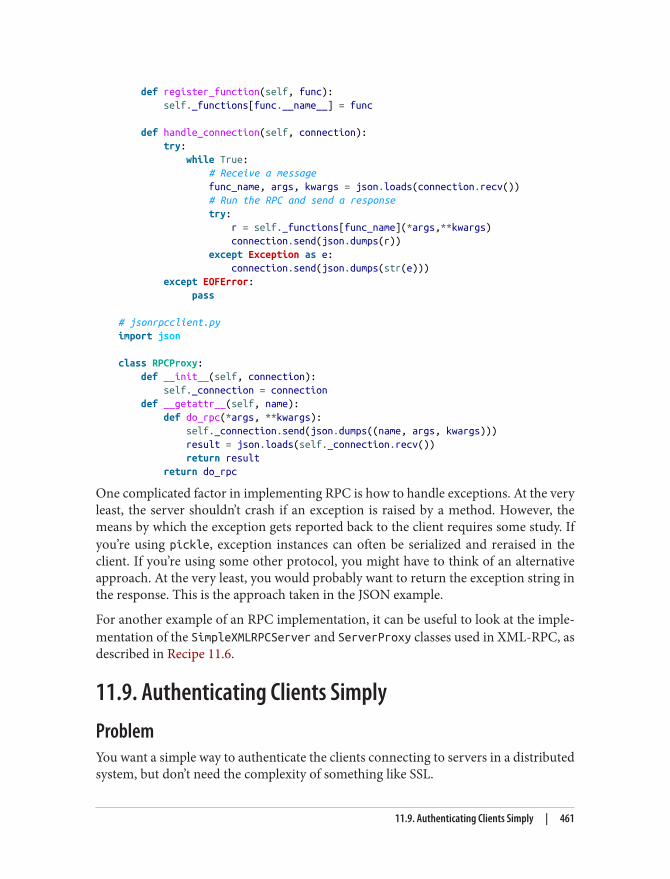
def register_function(self, func): self._functions[func.__name__] = func
def handle_connection(self, connection): try: while True: # Receive a message func_name, args, kwargs = json.loads(connection.recv()) # Run the RPC and send a response try: r = self._functions[func_name](*args,**kwargs) connection.send(json.dumps(r)) except Exception as e: connection.send(json.dumps(str(e))) except EOFError: pass
# jsonrpcclient.pyimport json
class RPCProxy: def __init__(self, connection): self._connection = connection def __getattr__(self, name): def do_rpc(*args, **kwargs): self._connection.send(json.dumps((name, args, kwargs))) result = json.loads(self._connection.recv()) return result return do_rpc
One complicated factor in implementing RPC is how to handle exceptions. At the veryleast, the server shouldn’t crash if an exception is raised by a method. However, themeans by which the exception gets reported back to the client requires some study. Ifyou’re using pickle, exception instances can often be serialized and reraised in theclient. If you’re using some other protocol, you might have to think of an alternativeapproach. At the very least, you would probably want to return the exception string inthe response. This is the approach taken in the JSON example.
For another example of an RPC implementation, it can be useful to look at the imple‐mentation of the SimpleXMLRPCServer and ServerProxy classes used in XML-RPC, asdescribed in Recipe 11.6.
11.9. Authenticating Clients SimplyProblemYou want a simple way to authenticate the clients connecting to servers in a distributedsystem, but don’t need the complexity of something like SSL.
11.9. Authenticating Clients Simply | 461
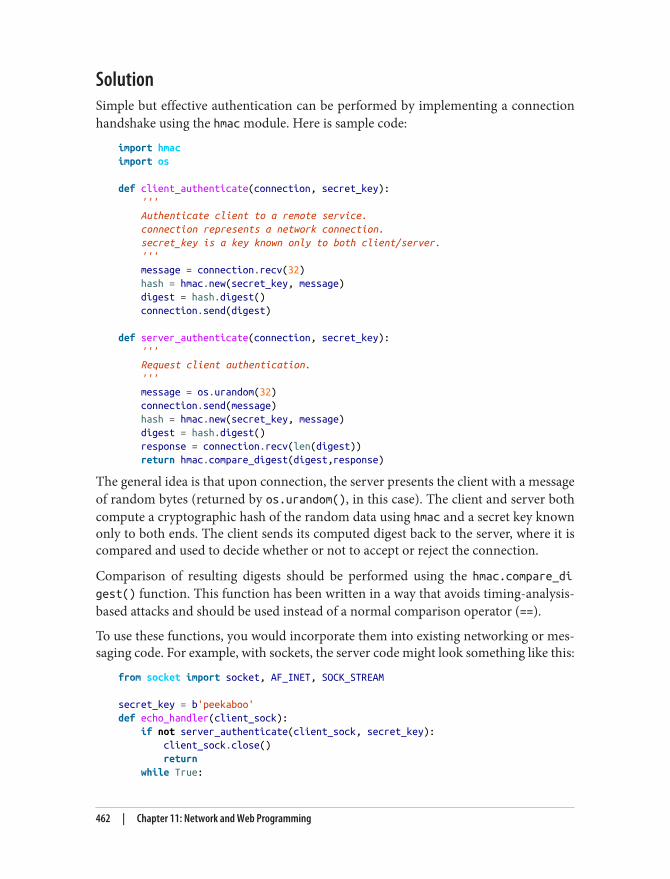
SolutionSimple but effective authentication can be performed by implementing a connectionhandshake using the hmac module. Here is sample code:
import hmacimport os
def client_authenticate(connection, secret_key): ''' Authenticate client to a remote service. connection represents a network connection. secret_key is a key known only to both client/server. ''' message = connection.recv(32) hash = hmac.new(secret_key, message) digest = hash.digest() connection.send(digest)
def server_authenticate(connection, secret_key): ''' Request client authentication. ''' message = os.urandom(32) connection.send(message) hash = hmac.new(secret_key, message) digest = hash.digest() response = connection.recv(len(digest)) return hmac.compare_digest(digest,response)
The general idea is that upon connection, the server presents the client with a messageof random bytes (returned by os.urandom(), in this case). The client and server bothcompute a cryptographic hash of the random data using hmac and a secret key knownonly to both ends. The client sends its computed digest back to the server, where it iscompared and used to decide whether or not to accept or reject the connection.
Comparison of resulting digests should be performed using the hmac.compare_digest() function. This function has been written in a way that avoids timing-analysis-based attacks and should be used instead of a normal comparison operator (==).
To use these functions, you would incorporate them into existing networking or mes‐saging code. For example, with sockets, the server code might look something like this:
from socket import socket, AF_INET, SOCK_STREAM
secret_key = b'peekaboo'def echo_handler(client_sock): if not server_authenticate(client_sock, secret_key): client_sock.close() return while True:
462 | Chapter 11: Network and Web Programming
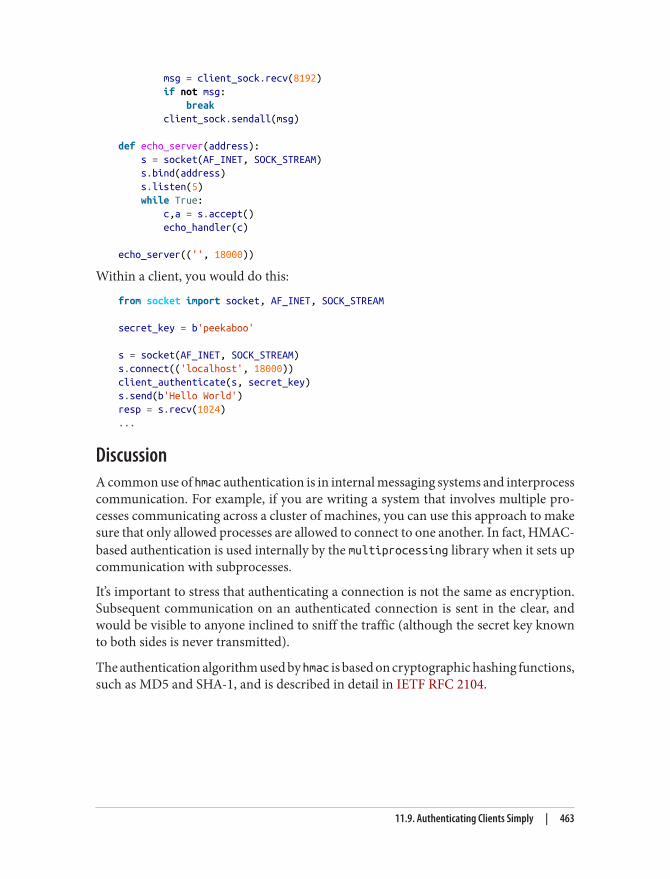
msg = client_sock.recv(8192) if not msg: break client_sock.sendall(msg)
def echo_server(address): s = socket(AF_INET, SOCK_STREAM) s.bind(address) s.listen(5) while True: c,a = s.accept() echo_handler(c)
echo_server(('', 18000))
Within a client, you would do this:
from socket import socket, AF_INET, SOCK_STREAM
secret_key = b'peekaboo'
s = socket(AF_INET, SOCK_STREAM)s.connect(('localhost', 18000))client_authenticate(s, secret_key)s.send(b'Hello World')resp = s.recv(1024)...
DiscussionA common use of hmac authentication is in internal messaging systems and interprocesscommunication. For example, if you are writing a system that involves multiple pro‐cesses communicating across a cluster of machines, you can use this approach to makesure that only allowed processes are allowed to connect to one another. In fact, HMAC-based authentication is used internally by the multiprocessing library when it sets upcommunication with subprocesses.
It’s important to stress that authenticating a connection is not the same as encryption.Subsequent communication on an authenticated connection is sent in the clear, andwould be visible to anyone inclined to sniff the traffic (although the secret key knownto both sides is never transmitted).
The authentication algorithm used by hmac is based on cryptographic hashing functions,such as MD5 and SHA-1, and is described in detail in IETF RFC 2104.
11.9. Authenticating Clients Simply | 463
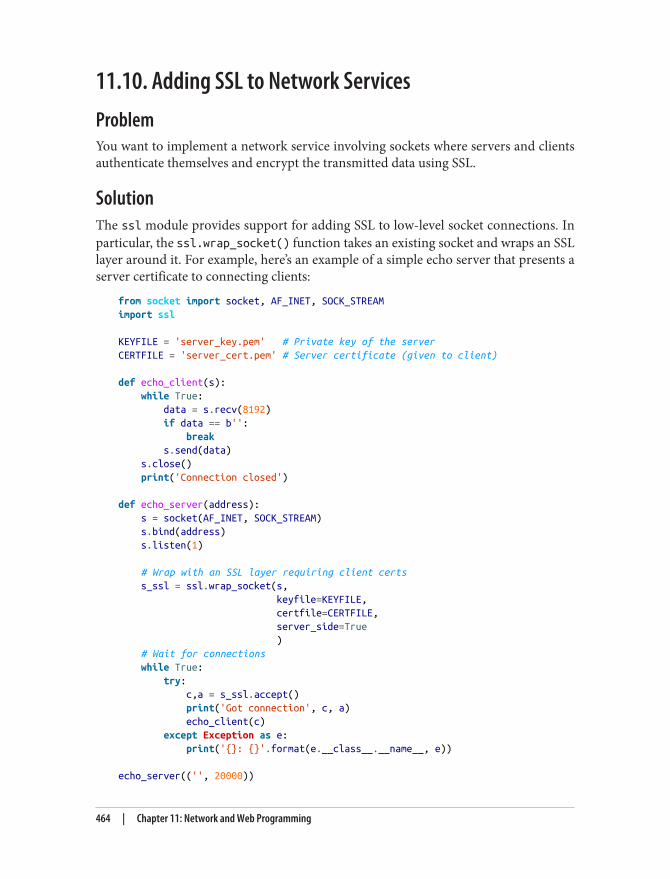
11.10. Adding SSL to Network ServicesProblemYou want to implement a network service involving sockets where servers and clientsauthenticate themselves and encrypt the transmitted data using SSL.
SolutionThe ssl module provides support for adding SSL to low-level socket connections. Inparticular, the ssl.wrap_socket() function takes an existing socket and wraps an SSLlayer around it. For example, here’s an example of a simple echo server that presents aserver certificate to connecting clients:
from socket import socket, AF_INET, SOCK_STREAMimport ssl
KEYFILE = 'server_key.pem' # Private key of the serverCERTFILE = 'server_cert.pem' # Server certificate (given to client)
def echo_client(s): while True: data = s.recv(8192) if data == b'': break s.send(data) s.close() print('Connection closed')
def echo_server(address): s = socket(AF_INET, SOCK_STREAM) s.bind(address) s.listen(1)
# Wrap with an SSL layer requiring client certs s_ssl = ssl.wrap_socket(s, keyfile=KEYFILE, certfile=CERTFILE, server_side=True ) # Wait for connections while True: try: c,a = s_ssl.accept() print('Got connection', c, a) echo_client(c) except Exception as e: print('{}: {}'.format(e.__class__.__name__, e))
echo_server(('', 20000))
464 | Chapter 11: Network and Web Programming
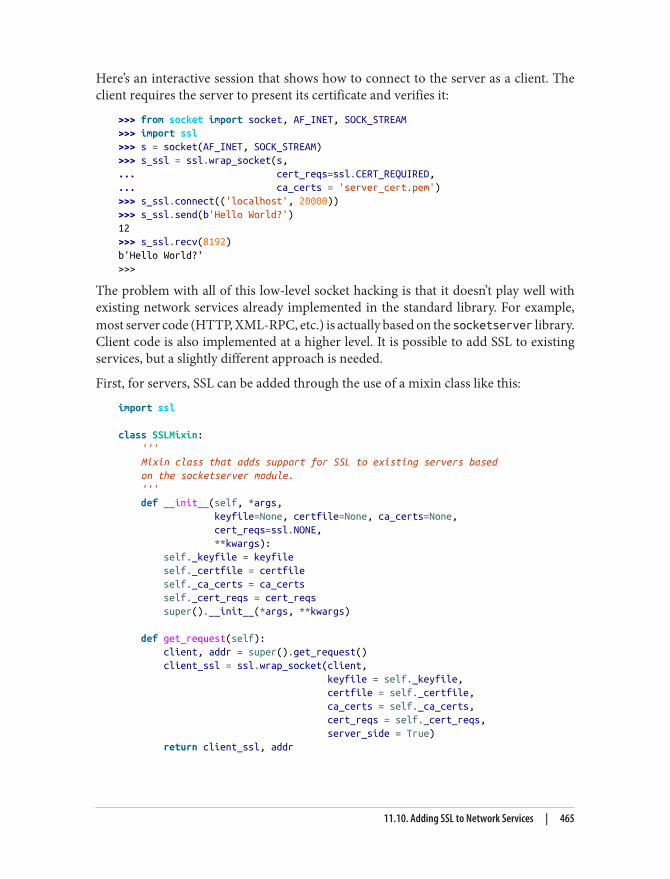
Here’s an interactive session that shows how to connect to the server as a client. Theclient requires the server to present its certificate and verifies it:
>>> from socket import socket, AF_INET, SOCK_STREAM>>> import ssl>>> s = socket(AF_INET, SOCK_STREAM)>>> s_ssl = ssl.wrap_socket(s,... cert_reqs=ssl.CERT_REQUIRED,... ca_certs = 'server_cert.pem')>>> s_ssl.connect(('localhost', 20000))>>> s_ssl.send(b'Hello World?')12>>> s_ssl.recv(8192)b'Hello World?'>>>
The problem with all of this low-level socket hacking is that it doesn’t play well withexisting network services already implemented in the standard library. For example,most server code (HTTP, XML-RPC, etc.) is actually based on the socketserver library.Client code is also implemented at a higher level. It is possible to add SSL to existingservices, but a slightly different approach is needed.
First, for servers, SSL can be added through the use of a mixin class like this:
import ssl
class SSLMixin: ''' Mixin class that adds support for SSL to existing servers based on the socketserver module. ''' def __init__(self, *args, keyfile=None, certfile=None, ca_certs=None, cert_reqs=ssl.NONE, **kwargs): self._keyfile = keyfile self._certfile = certfile self._ca_certs = ca_certs self._cert_reqs = cert_reqs super().__init__(*args, **kwargs)
def get_request(self): client, addr = super().get_request() client_ssl = ssl.wrap_socket(client, keyfile = self._keyfile, certfile = self._certfile, ca_certs = self._ca_certs, cert_reqs = self._cert_reqs, server_side = True) return client_ssl, addr
11.10. Adding SSL to Network Services | 465
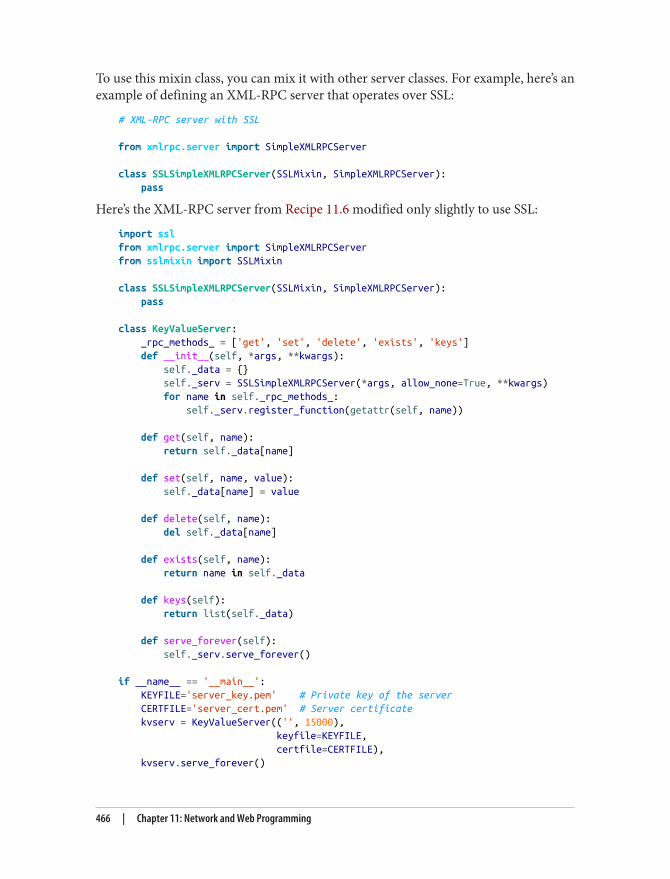
To use this mixin class, you can mix it with other server classes. For example, here’s anexample of defining an XML-RPC server that operates over SSL:
# XML-RPC server with SSL
from xmlrpc.server import SimpleXMLRPCServer
class SSLSimpleXMLRPCServer(SSLMixin, SimpleXMLRPCServer): pass
Here’s the XML-RPC server from Recipe 11.6 modified only slightly to use SSL:
import sslfrom xmlrpc.server import SimpleXMLRPCServerfrom sslmixin import SSLMixin
class SSLSimpleXMLRPCServer(SSLMixin, SimpleXMLRPCServer): pass
class KeyValueServer: _rpc_methods_ = ['get', 'set', 'delete', 'exists', 'keys'] def __init__(self, *args, **kwargs): self._data = {} self._serv = SSLSimpleXMLRPCServer(*args, allow_none=True, **kwargs) for name in self._rpc_methods_: self._serv.register_function(getattr(self, name))
def get(self, name): return self._data[name]
def set(self, name, value): self._data[name] = value
def delete(self, name): del self._data[name]
def exists(self, name): return name in self._data
def keys(self): return list(self._data)
def serve_forever(self): self._serv.serve_forever()
if __name__ == '__main__': KEYFILE='server_key.pem' # Private key of the server CERTFILE='server_cert.pem' # Server certificate kvserv = KeyValueServer(('', 15000), keyfile=KEYFILE, certfile=CERTFILE), kvserv.serve_forever()
466 | Chapter 11: Network and Web Programming
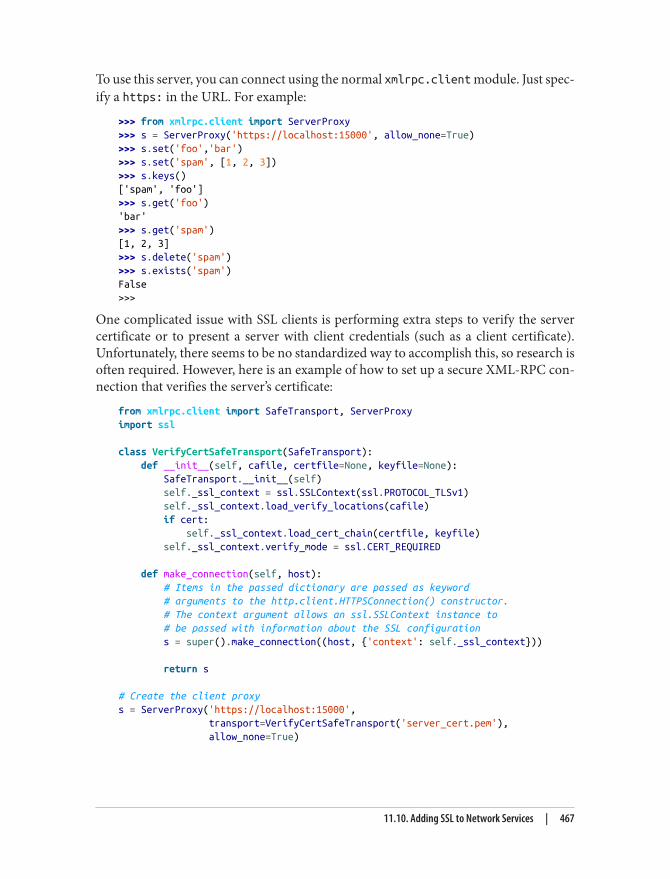
To use this server, you can connect using the normal xmlrpc.client module. Just spec‐ify a https: in the URL. For example:
>>> from xmlrpc.client import ServerProxy>>> s = ServerProxy('https://localhost:15000', allow_none=True)>>> s.set('foo','bar')>>> s.set('spam', [1, 2, 3])>>> s.keys()['spam', 'foo']>>> s.get('foo')'bar'>>> s.get('spam')[1, 2, 3]>>> s.delete('spam')>>> s.exists('spam')False>>>
One complicated issue with SSL clients is performing extra steps to verify the servercertificate or to present a server with client credentials (such as a client certificate).Unfortunately, there seems to be no standardized way to accomplish this, so research isoften required. However, here is an example of how to set up a secure XML-RPC con‐nection that verifies the server’s certificate:
from xmlrpc.client import SafeTransport, ServerProxyimport ssl
class VerifyCertSafeTransport(SafeTransport): def __init__(self, cafile, certfile=None, keyfile=None): SafeTransport.__init__(self) self._ssl_context = ssl.SSLContext(ssl.PROTOCOL_TLSv1) self._ssl_context.load_verify_locations(cafile) if cert: self._ssl_context.load_cert_chain(certfile, keyfile) self._ssl_context.verify_mode = ssl.CERT_REQUIRED
def make_connection(self, host): # Items in the passed dictionary are passed as keyword # arguments to the http.client.HTTPSConnection() constructor. # The context argument allows an ssl.SSLContext instance to # be passed with information about the SSL configuration s = super().make_connection((host, {'context': self._ssl_context}))
return s
# Create the client proxys = ServerProxy('https://localhost:15000', transport=VerifyCertSafeTransport('server_cert.pem'), allow_none=True)
11.10. Adding SSL to Network Services | 467
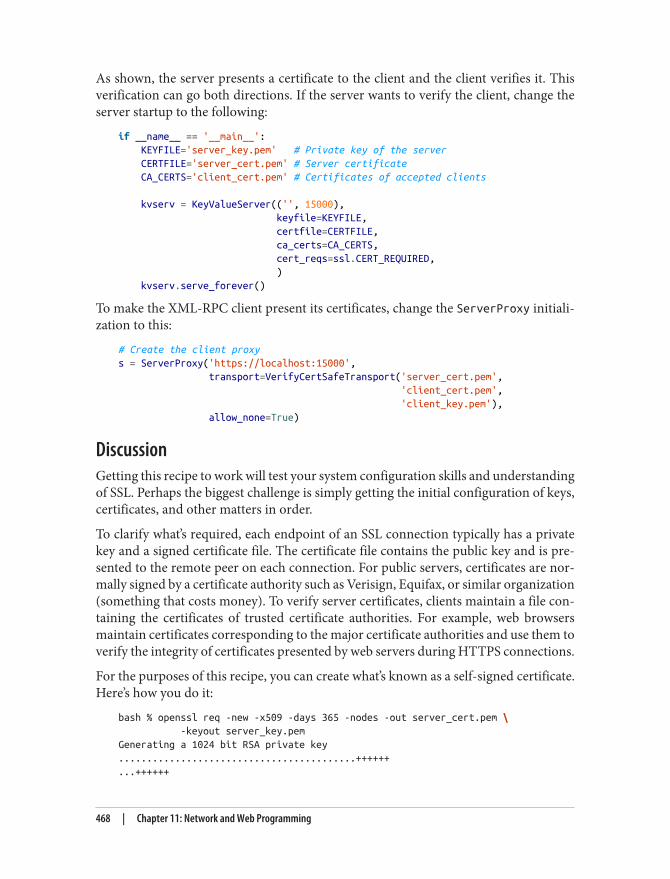
As shown, the server presents a certificate to the client and the client verifies it. Thisverification can go both directions. If the server wants to verify the client, change theserver startup to the following:
if __name__ == '__main__': KEYFILE='server_key.pem' # Private key of the server CERTFILE='server_cert.pem' # Server certificate CA_CERTS='client_cert.pem' # Certificates of accepted clients
kvserv = KeyValueServer(('', 15000), keyfile=KEYFILE, certfile=CERTFILE, ca_certs=CA_CERTS, cert_reqs=ssl.CERT_REQUIRED, ) kvserv.serve_forever()
To make the XML-RPC client present its certificates, change the ServerProxy initiali‐zation to this:
# Create the client proxys = ServerProxy('https://localhost:15000', transport=VerifyCertSafeTransport('server_cert.pem', 'client_cert.pem', 'client_key.pem'), allow_none=True)
DiscussionGetting this recipe to work will test your system configuration skills and understandingof SSL. Perhaps the biggest challenge is simply getting the initial configuration of keys,certificates, and other matters in order.
To clarify what’s required, each endpoint of an SSL connection typically has a privatekey and a signed certificate file. The certificate file contains the public key and is pre‐sented to the remote peer on each connection. For public servers, certificates are nor‐mally signed by a certificate authority such as Verisign, Equifax, or similar organization(something that costs money). To verify server certificates, clients maintain a file con‐taining the certificates of trusted certificate authorities. For example, web browsersmaintain certificates corresponding to the major certificate authorities and use them toverify the integrity of certificates presented by web servers during HTTPS connections.
For the purposes of this recipe, you can create what’s known as a self-signed certificate.Here’s how you do it:
bash % openssl req -new -x509 -days 365 -nodes -out server_cert.pem \ -keyout server_key.pemGenerating a 1024 bit RSA private key..........................................++++++...++++++
468 | Chapter 11: Network and Web Programming
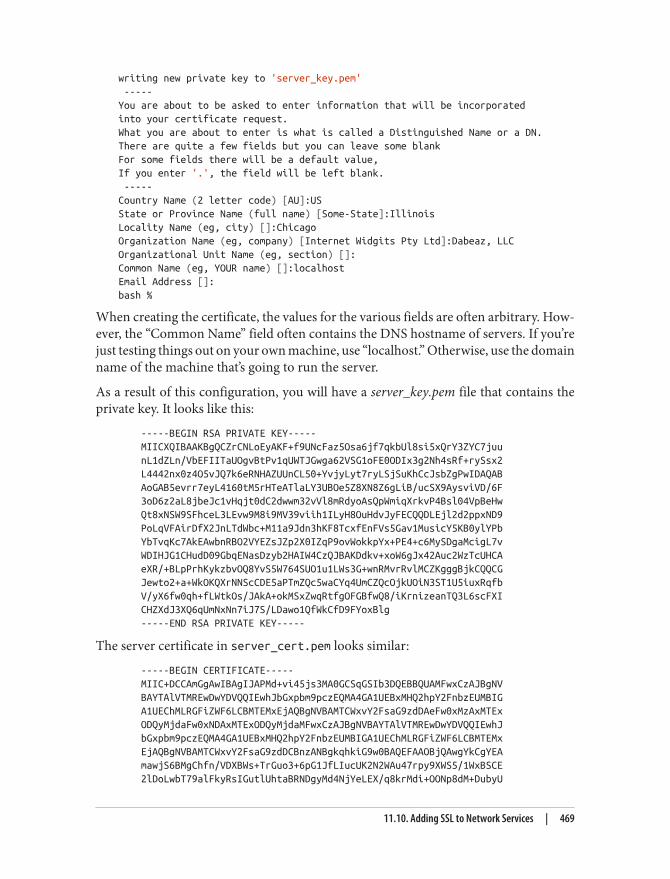
writing new private key to 'server_key.pem' -----You are about to be asked to enter information that will be incorporatedinto your certificate request.What you are about to enter is what is called a Distinguished Name or a DN.There are quite a few fields but you can leave some blankFor some fields there will be a default value,If you enter '.', the field will be left blank. -----Country Name (2 letter code) [AU]:USState or Province Name (full name) [Some-State]:IllinoisLocality Name (eg, city) []:ChicagoOrganization Name (eg, company) [Internet Widgits Pty Ltd]:Dabeaz, LLCOrganizational Unit Name (eg, section) []:Common Name (eg, YOUR name) []:localhostEmail Address []:bash %
When creating the certificate, the values for the various fields are often arbitrary. How‐ever, the “Common Name” field often contains the DNS hostname of servers. If you’rejust testing things out on your own machine, use “localhost.” Otherwise, use the domainname of the machine that’s going to run the server.
As a result of this configuration, you will have a server_key.pem file that contains theprivate key. It looks like this:
-----BEGIN RSA PRIVATE KEY----- MIICXQIBAAKBgQCZrCNLoEyAKF+f9UNcFaz5Osa6jf7qkbUl8si5xQrY3ZYC7juu nL1dZLn/VbEFIITaUOgvBtPv1qUWTJGwga62VSG1oFE0ODIx3g2Nh4sRf+rySsx2 L4442nx0z4O5vJQ7k6eRNHAZUUnCL50+YvjyLyt7ryLSjSuKhCcJsbZgPwIDAQAB AoGAB5evrr7eyL4160tM5rHTeATlaLY3UBOe5Z8XN8Z6gLiB/ucSX9AysviVD/6F 3oD6z2aL8jbeJc1vHqjt0dC2dwwm32vVl8mRdyoAsQpWmiqXrkvP4Bsl04VpBeHw Qt8xNSW9SFhceL3LEvw9M8i9MV39viih1ILyH8OuHdvJyFECQQDLEjl2d2ppxND9 PoLqVFAirDfX2JnLTdWbc+M11a9Jdn3hKF8TcxfEnFVs5Gav1MusicY5KB0ylYPb YbTvqKc7AkEAwbnRBO2VYEZsJZp2X0IZqP9ovWokkpYx+PE4+c6MySDgaMcigL7v WDIHJG1CHudD09GbqENasDzyb2HAIW4CzQJBAKDdkv+xoW6gJx42Auc2WzTcUHCA eXR/+BLpPrhKykzbvOQ8YvS5W764SUO1u1LWs3G+wnRMvrRvlMCZKgggBjkCQQCG Jewto2+a+WkOKQXrNNScCDE5aPTmZQc5waCYq4UmCZQcOjkUOiN3ST1U5iuxRqfb V/yX6fw0qh+fLWtkOs/JAkA+okMSxZwqRtfgOFGBfwQ8/iKrnizeanTQ3L6scFXI CHZXdJ3XQ6qUmNxNn7iJ7S/LDawo1QfWkCfD9FYoxBlg -----END RSA PRIVATE KEY-----
The server certificate in server_cert.pem looks similar:
-----BEGIN CERTIFICATE----- MIIC+DCCAmGgAwIBAgIJAPMd+vi45js3MA0GCSqGSIb3DQEBBQUAMFwxCzAJBgNV BAYTAlVTMREwDwYDVQQIEwhJbGxpbm9pczEQMA4GA1UEBxMHQ2hpY2FnbzEUMBIG A1UEChMLRGFiZWF6LCBMTEMxEjAQBgNVBAMTCWxvY2FsaG9zdDAeFw0xMzAxMTEx ODQyMjdaFw0xNDAxMTExODQyMjdaMFwxCzAJBgNVBAYTAlVTMREwDwYDVQQIEwhJ bGxpbm9pczEQMA4GA1UEBxMHQ2hpY2FnbzEUMBIGA1UEChMLRGFiZWF6LCBMTEMx EjAQBgNVBAMTCWxvY2FsaG9zdDCBnzANBgkqhkiG9w0BAQEFAAOBjQAwgYkCgYEA mawjS6BMgChfn/VDXBWs+TrGuo3+6pG1JfLIucUK2N2WAu47rpy9XWS5/1WxBSCE 2lDoLwbT79alFkyRsIGutlUhtaBRNDgyMd4NjYeLEX/q8krMdi+OONp8dM+DubyU
11.10. Adding SSL to Network Services | 469
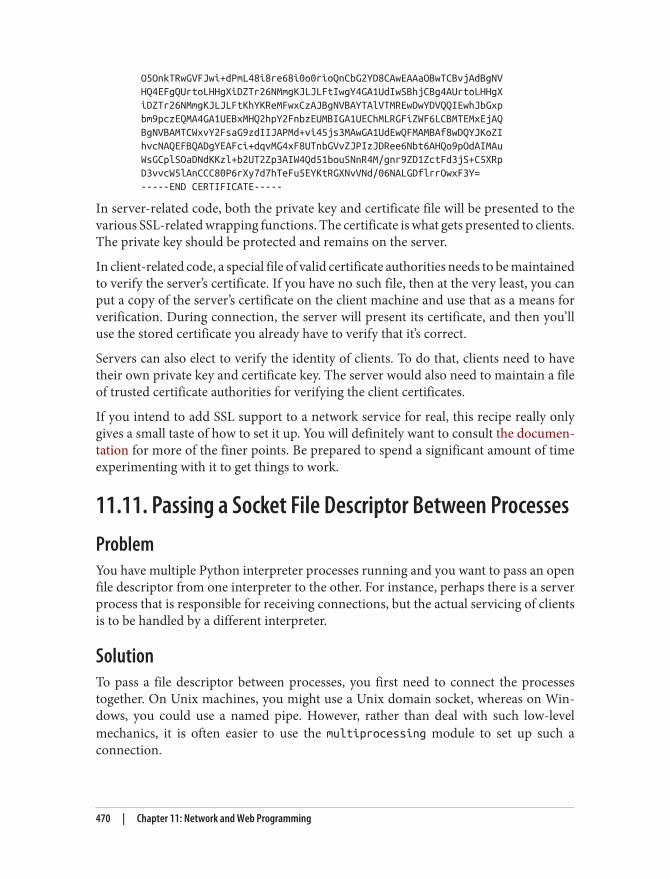
O5OnkTRwGVFJwi+dPmL48i8re68i0o0rioQnCbG2YD8CAwEAAaOBwTCBvjAdBgNV HQ4EFgQUrtoLHHgXiDZTr26NMmgKJLJLFtIwgY4GA1UdIwSBhjCBg4AUrtoLHHgX iDZTr26NMmgKJLJLFtKhYKReMFwxCzAJBgNVBAYTAlVTMREwDwYDVQQIEwhJbGxp bm9pczEQMA4GA1UEBxMHQ2hpY2FnbzEUMBIGA1UEChMLRGFiZWF6LCBMTEMxEjAQ BgNVBAMTCWxvY2FsaG9zdIIJAPMd+vi45js3MAwGA1UdEwQFMAMBAf8wDQYJKoZI hvcNAQEFBQADgYEAFci+dqvMG4xF8UTnbGVvZJPIzJDRee6Nbt6AHQo9pOdAIMAu WsGCplSOaDNdKKzl+b2UT2Zp3AIW4Qd51bouSNnR4M/gnr9ZD1ZctFd3jS+C5XRp D3vvcW5lAnCCC80P6rXy7d7hTeFu5EYKtRGXNvVNd/06NALGDflrrOwxF3Y= -----END CERTIFICATE-----
In server-related code, both the private key and certificate file will be presented to thevarious SSL-related wrapping functions. The certificate is what gets presented to clients.The private key should be protected and remains on the server.
In client-related code, a special file of valid certificate authorities needs to be maintainedto verify the server’s certificate. If you have no such file, then at the very least, you canput a copy of the server’s certificate on the client machine and use that as a means forverification. During connection, the server will present its certificate, and then you’lluse the stored certificate you already have to verify that it’s correct.
Servers can also elect to verify the identity of clients. To do that, clients need to havetheir own private key and certificate key. The server would also need to maintain a fileof trusted certificate authorities for verifying the client certificates.
If you intend to add SSL support to a network service for real, this recipe really onlygives a small taste of how to set it up. You will definitely want to consult the documen‐tation for more of the finer points. Be prepared to spend a significant amount of timeexperimenting with it to get things to work.
11.11. Passing a Socket File Descriptor Between ProcessesProblemYou have multiple Python interpreter processes running and you want to pass an openfile descriptor from one interpreter to the other. For instance, perhaps there is a serverprocess that is responsible for receiving connections, but the actual servicing of clientsis to be handled by a different interpreter.
SolutionTo pass a file descriptor between processes, you first need to connect the processestogether. On Unix machines, you might use a Unix domain socket, whereas on Win‐dows, you could use a named pipe. However, rather than deal with such low-levelmechanics, it is often easier to use the multiprocessing module to set up such aconnection.
470 | Chapter 11: Network and Web Programming
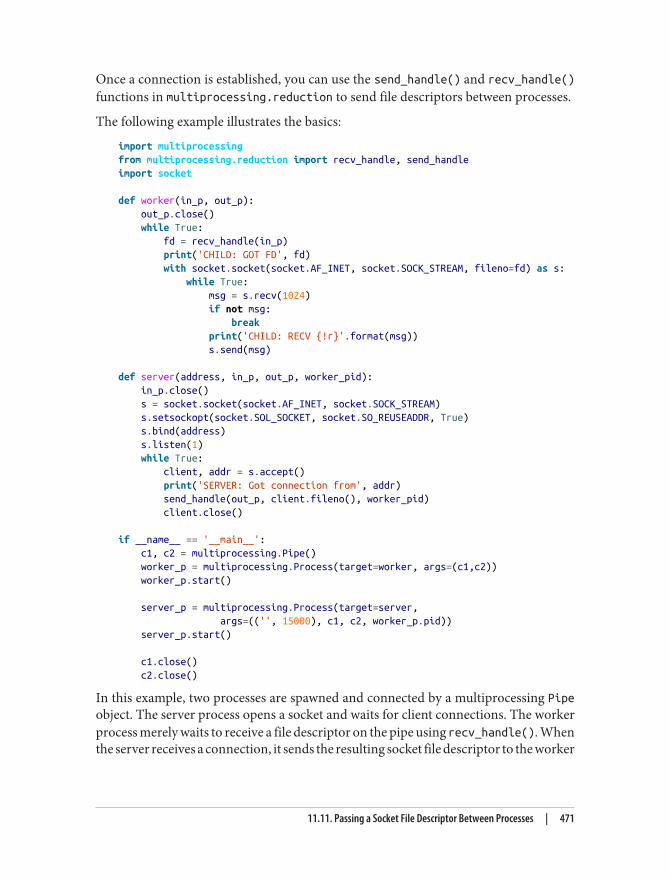
Once a connection is established, you can use the send_handle() and recv_handle()functions in multiprocessing.reduction to send file descriptors between processes.
The following example illustrates the basics:
import multiprocessingfrom multiprocessing.reduction import recv_handle, send_handleimport socket
def worker(in_p, out_p): out_p.close() while True: fd = recv_handle(in_p) print('CHILD: GOT FD', fd) with socket.socket(socket.AF_INET, socket.SOCK_STREAM, fileno=fd) as s: while True: msg = s.recv(1024) if not msg: break print('CHILD: RECV {!r}'.format(msg)) s.send(msg)
def server(address, in_p, out_p, worker_pid): in_p.close() s = socket.socket(socket.AF_INET, socket.SOCK_STREAM) s.setsockopt(socket.SOL_SOCKET, socket.SO_REUSEADDR, True) s.bind(address) s.listen(1) while True: client, addr = s.accept() print('SERVER: Got connection from', addr) send_handle(out_p, client.fileno(), worker_pid) client.close()
if __name__ == '__main__': c1, c2 = multiprocessing.Pipe() worker_p = multiprocessing.Process(target=worker, args=(c1,c2)) worker_p.start()
server_p = multiprocessing.Process(target=server, args=(('', 15000), c1, c2, worker_p.pid)) server_p.start()
c1.close() c2.close()
In this example, two processes are spawned and connected by a multiprocessing Pipeobject. The server process opens a socket and waits for client connections. The workerprocess merely waits to receive a file descriptor on the pipe using recv_handle(). Whenthe server receives a connection, it sends the resulting socket file descriptor to the worker
11.11. Passing a Socket File Descriptor Between Processes | 471
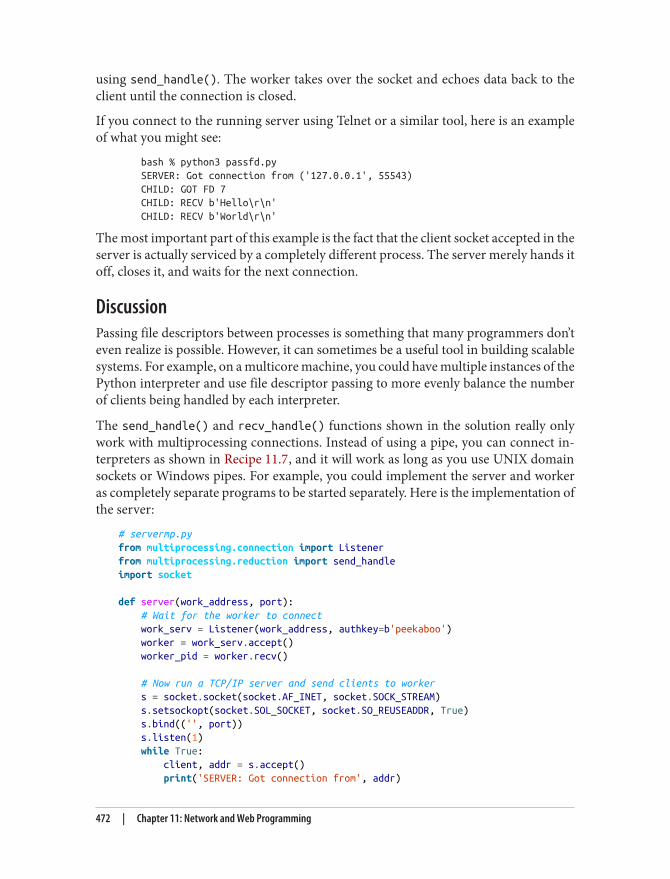
using send_handle(). The worker takes over the socket and echoes data back to theclient until the connection is closed.
If you connect to the running server using Telnet or a similar tool, here is an exampleof what you might see:
bash % python3 passfd.py SERVER: Got connection from ('127.0.0.1', 55543) CHILD: GOT FD 7 CHILD: RECV b'Hello\r\n' CHILD: RECV b'World\r\n'
The most important part of this example is the fact that the client socket accepted in theserver is actually serviced by a completely different process. The server merely hands itoff, closes it, and waits for the next connection.
DiscussionPassing file descriptors between processes is something that many programmers don’teven realize is possible. However, it can sometimes be a useful tool in building scalablesystems. For example, on a multicore machine, you could have multiple instances of thePython interpreter and use file descriptor passing to more evenly balance the numberof clients being handled by each interpreter.
The send_handle() and recv_handle() functions shown in the solution really onlywork with multiprocessing connections. Instead of using a pipe, you can connect in‐terpreters as shown in Recipe 11.7, and it will work as long as you use UNIX domainsockets or Windows pipes. For example, you could implement the server and workeras completely separate programs to be started separately. Here is the implementation ofthe server:
# servermp.pyfrom multiprocessing.connection import Listenerfrom multiprocessing.reduction import send_handleimport socket
def server(work_address, port): # Wait for the worker to connect work_serv = Listener(work_address, authkey=b'peekaboo') worker = work_serv.accept() worker_pid = worker.recv()
# Now run a TCP/IP server and send clients to worker s = socket.socket(socket.AF_INET, socket.SOCK_STREAM) s.setsockopt(socket.SOL_SOCKET, socket.SO_REUSEADDR, True) s.bind(('', port)) s.listen(1) while True: client, addr = s.accept() print('SERVER: Got connection from', addr)
472 | Chapter 11: Network and Web Programming
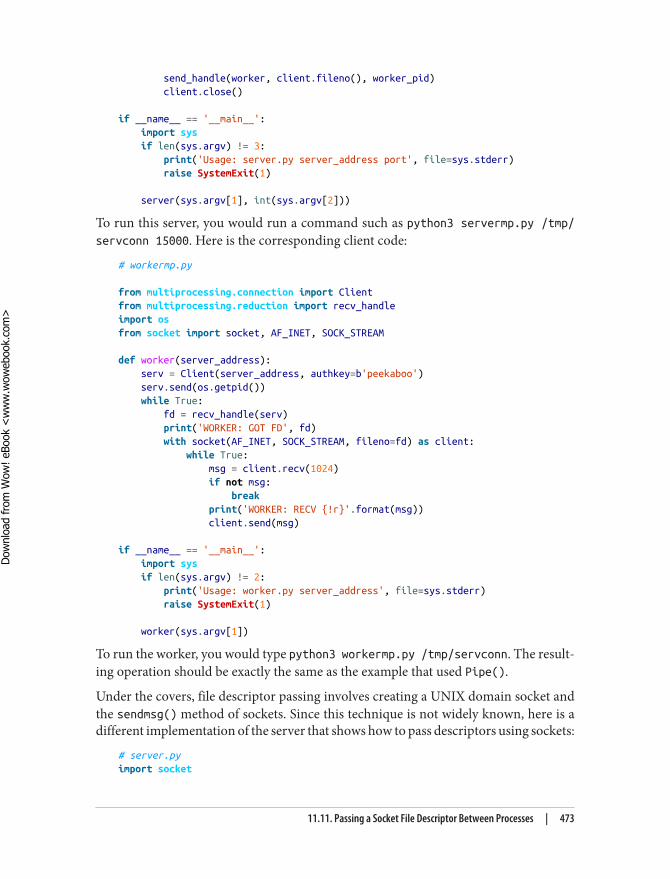
send_handle(worker, client.fileno(), worker_pid) client.close()
if __name__ == '__main__': import sys if len(sys.argv) != 3: print('Usage: server.py server_address port', file=sys.stderr) raise SystemExit(1)
server(sys.argv[1], int(sys.argv[2]))
To run this server, you would run a command such as python3 servermp.py /tmp/servconn 15000. Here is the corresponding client code:
# workermp.py
from multiprocessing.connection import Clientfrom multiprocessing.reduction import recv_handleimport osfrom socket import socket, AF_INET, SOCK_STREAM
def worker(server_address): serv = Client(server_address, authkey=b'peekaboo') serv.send(os.getpid()) while True: fd = recv_handle(serv) print('WORKER: GOT FD', fd) with socket(AF_INET, SOCK_STREAM, fileno=fd) as client: while True: msg = client.recv(1024) if not msg: break print('WORKER: RECV {!r}'.format(msg)) client.send(msg)
if __name__ == '__main__': import sys if len(sys.argv) != 2: print('Usage: worker.py server_address', file=sys.stderr) raise SystemExit(1)
worker(sys.argv[1])
To run the worker, you would type python3 workermp.py /tmp/servconn. The result‐ing operation should be exactly the same as the example that used Pipe().
Under the covers, file descriptor passing involves creating a UNIX domain socket andthe sendmsg() method of sockets. Since this technique is not widely known, here is adifferent implementation of the server that shows how to pass descriptors using sockets:
# server.pyimport socket
11.11. Passing a Socket File Descriptor Between Processes | 473
Dow
nlo
ad fro
m W
ow
! eBook
<w
ww
.wow
ebook.
com
>
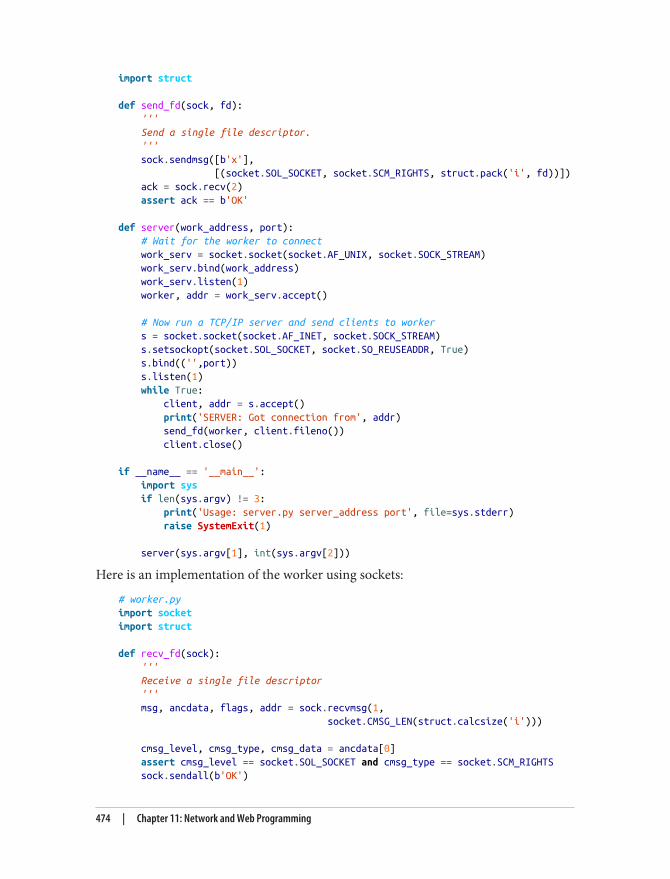
import struct
def send_fd(sock, fd): ''' Send a single file descriptor. ''' sock.sendmsg([b'x'], [(socket.SOL_SOCKET, socket.SCM_RIGHTS, struct.pack('i', fd))]) ack = sock.recv(2) assert ack == b'OK'
def server(work_address, port): # Wait for the worker to connect work_serv = socket.socket(socket.AF_UNIX, socket.SOCK_STREAM) work_serv.bind(work_address) work_serv.listen(1) worker, addr = work_serv.accept()
# Now run a TCP/IP server and send clients to worker s = socket.socket(socket.AF_INET, socket.SOCK_STREAM) s.setsockopt(socket.SOL_SOCKET, socket.SO_REUSEADDR, True) s.bind(('',port)) s.listen(1) while True: client, addr = s.accept() print('SERVER: Got connection from', addr) send_fd(worker, client.fileno()) client.close()
if __name__ == '__main__': import sys if len(sys.argv) != 3: print('Usage: server.py server_address port', file=sys.stderr) raise SystemExit(1)
server(sys.argv[1], int(sys.argv[2]))
Here is an implementation of the worker using sockets:
# worker.pyimport socketimport struct
def recv_fd(sock): ''' Receive a single file descriptor ''' msg, ancdata, flags, addr = sock.recvmsg(1, socket.CMSG_LEN(struct.calcsize('i')))
cmsg_level, cmsg_type, cmsg_data = ancdata[0] assert cmsg_level == socket.SOL_SOCKET and cmsg_type == socket.SCM_RIGHTS sock.sendall(b'OK')
474 | Chapter 11: Network and Web Programming
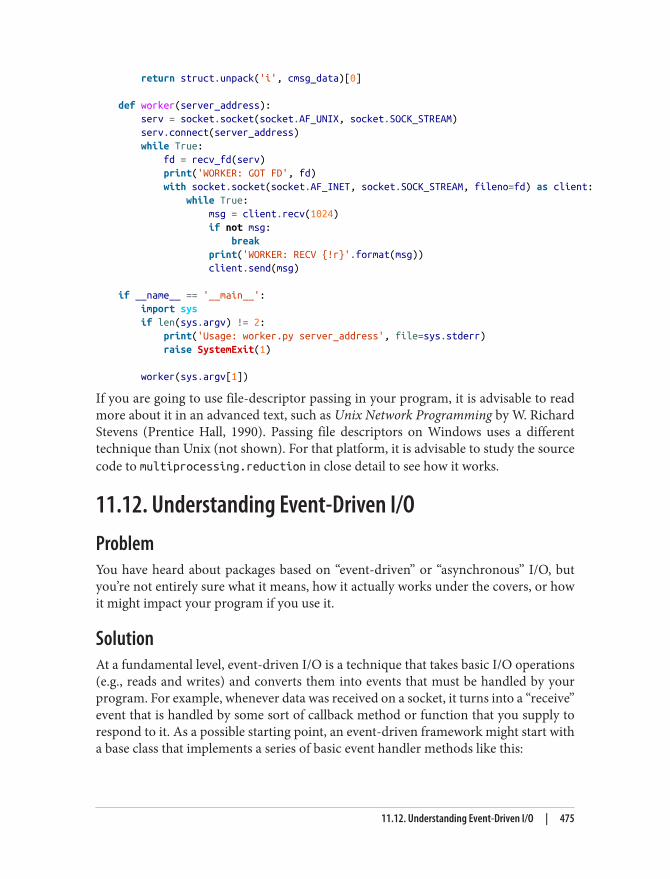
return struct.unpack('i', cmsg_data)[0]
def worker(server_address): serv = socket.socket(socket.AF_UNIX, socket.SOCK_STREAM) serv.connect(server_address) while True: fd = recv_fd(serv) print('WORKER: GOT FD', fd) with socket.socket(socket.AF_INET, socket.SOCK_STREAM, fileno=fd) as client: while True: msg = client.recv(1024) if not msg: break print('WORKER: RECV {!r}'.format(msg)) client.send(msg)
if __name__ == '__main__': import sys if len(sys.argv) != 2: print('Usage: worker.py server_address', file=sys.stderr) raise SystemExit(1)
worker(sys.argv[1])
If you are going to use file-descriptor passing in your program, it is advisable to readmore about it in an advanced text, such as Unix Network Programming by W. RichardStevens (Prentice Hall, 1990). Passing file descriptors on Windows uses a differenttechnique than Unix (not shown). For that platform, it is advisable to study the sourcecode to multiprocessing.reduction in close detail to see how it works.
11.12. Understanding Event-Driven I/OProblemYou have heard about packages based on “event-driven” or “asynchronous” I/O, butyou’re not entirely sure what it means, how it actually works under the covers, or howit might impact your program if you use it.
SolutionAt a fundamental level, event-driven I/O is a technique that takes basic I/O operations(e.g., reads and writes) and converts them into events that must be handled by yourprogram. For example, whenever data was received on a socket, it turns into a “receive”event that is handled by some sort of callback method or function that you supply torespond to it. As a possible starting point, an event-driven framework might start witha base class that implements a series of basic event handler methods like this:
11.12. Understanding Event-Driven I/O | 475
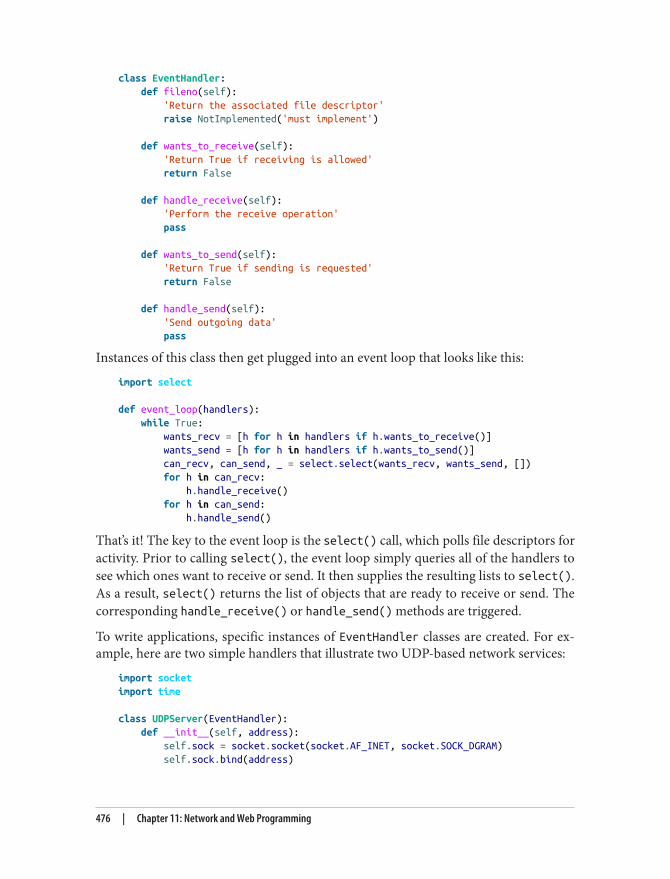
class EventHandler: def fileno(self): 'Return the associated file descriptor' raise NotImplemented('must implement')
def wants_to_receive(self): 'Return True if receiving is allowed' return False
def handle_receive(self): 'Perform the receive operation' pass
def wants_to_send(self): 'Return True if sending is requested' return False
def handle_send(self): 'Send outgoing data' pass
Instances of this class then get plugged into an event loop that looks like this:
import select
def event_loop(handlers): while True: wants_recv = [h for h in handlers if h.wants_to_receive()] wants_send = [h for h in handlers if h.wants_to_send()] can_recv, can_send, _ = select.select(wants_recv, wants_send, []) for h in can_recv: h.handle_receive() for h in can_send: h.handle_send()
That’s it! The key to the event loop is the select() call, which polls file descriptors foractivity. Prior to calling select(), the event loop simply queries all of the handlers tosee which ones want to receive or send. It then supplies the resulting lists to select().As a result, select() returns the list of objects that are ready to receive or send. Thecorresponding handle_receive() or handle_send() methods are triggered.
To write applications, specific instances of EventHandler classes are created. For ex‐ample, here are two simple handlers that illustrate two UDP-based network services:
import socketimport time
class UDPServer(EventHandler): def __init__(self, address): self.sock = socket.socket(socket.AF_INET, socket.SOCK_DGRAM) self.sock.bind(address)
476 | Chapter 11: Network and Web Programming
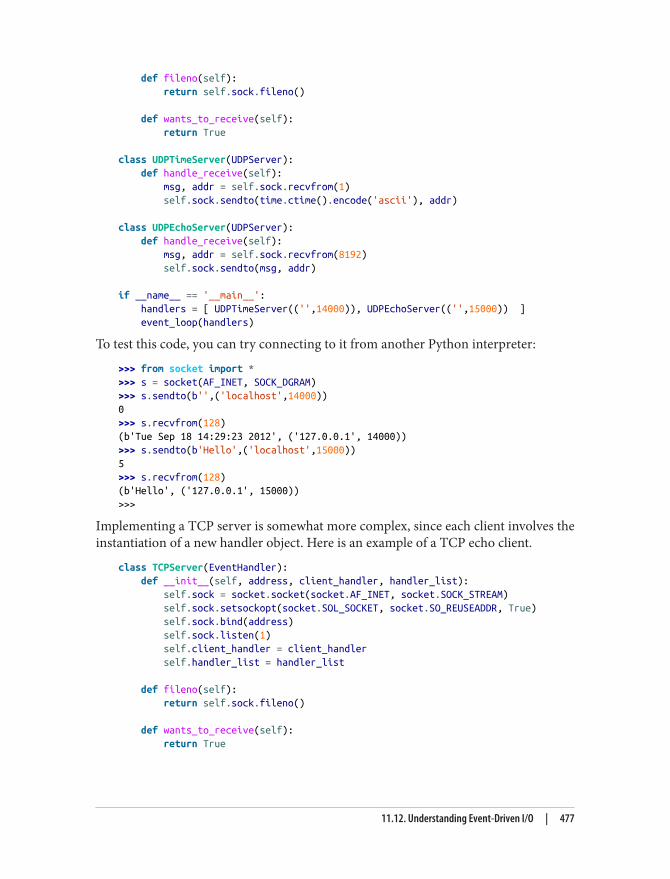
def fileno(self): return self.sock.fileno()
def wants_to_receive(self): return True
class UDPTimeServer(UDPServer): def handle_receive(self): msg, addr = self.sock.recvfrom(1) self.sock.sendto(time.ctime().encode('ascii'), addr)
class UDPEchoServer(UDPServer): def handle_receive(self): msg, addr = self.sock.recvfrom(8192) self.sock.sendto(msg, addr)
if __name__ == '__main__': handlers = [ UDPTimeServer(('',14000)), UDPEchoServer(('',15000)) ] event_loop(handlers)
To test this code, you can try connecting to it from another Python interpreter:
>>> from socket import *>>> s = socket(AF_INET, SOCK_DGRAM)>>> s.sendto(b'',('localhost',14000))0>>> s.recvfrom(128)(b'Tue Sep 18 14:29:23 2012', ('127.0.0.1', 14000))>>> s.sendto(b'Hello',('localhost',15000))5>>> s.recvfrom(128)(b'Hello', ('127.0.0.1', 15000))>>>
Implementing a TCP server is somewhat more complex, since each client involves theinstantiation of a new handler object. Here is an example of a TCP echo client.
class TCPServer(EventHandler): def __init__(self, address, client_handler, handler_list): self.sock = socket.socket(socket.AF_INET, socket.SOCK_STREAM) self.sock.setsockopt(socket.SOL_SOCKET, socket.SO_REUSEADDR, True) self.sock.bind(address) self.sock.listen(1) self.client_handler = client_handler self.handler_list = handler_list
def fileno(self): return self.sock.fileno()
def wants_to_receive(self): return True
11.12. Understanding Event-Driven I/O | 477
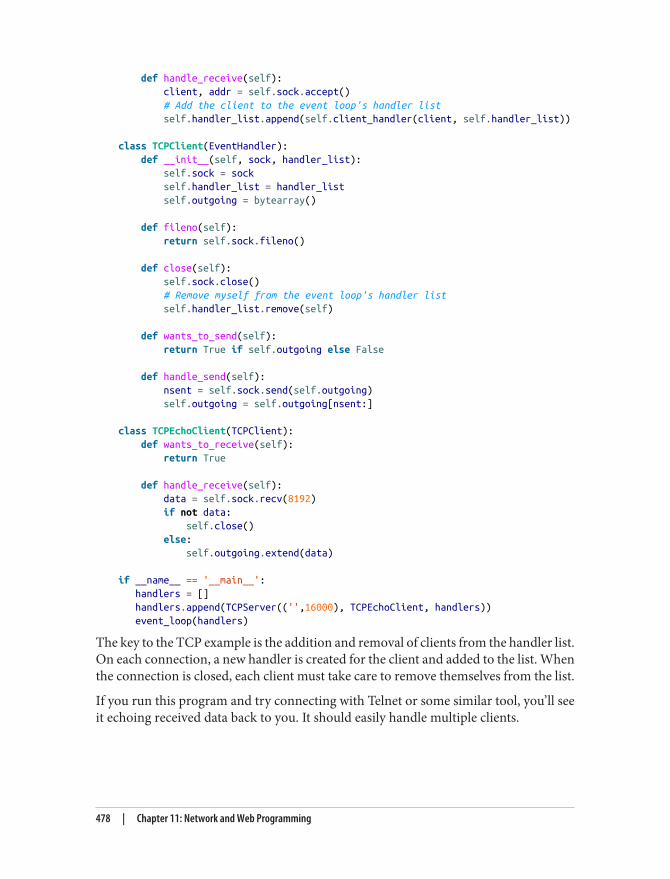
def handle_receive(self): client, addr = self.sock.accept() # Add the client to the event loop's handler list self.handler_list.append(self.client_handler(client, self.handler_list))
class TCPClient(EventHandler): def __init__(self, sock, handler_list): self.sock = sock self.handler_list = handler_list self.outgoing = bytearray()
def fileno(self): return self.sock.fileno()
def close(self): self.sock.close() # Remove myself from the event loop's handler list self.handler_list.remove(self)
def wants_to_send(self): return True if self.outgoing else False
def handle_send(self): nsent = self.sock.send(self.outgoing) self.outgoing = self.outgoing[nsent:]
class TCPEchoClient(TCPClient): def wants_to_receive(self): return True
def handle_receive(self): data = self.sock.recv(8192) if not data: self.close() else: self.outgoing.extend(data)
if __name__ == '__main__': handlers = [] handlers.append(TCPServer(('',16000), TCPEchoClient, handlers)) event_loop(handlers)
The key to the TCP example is the addition and removal of clients from the handler list.On each connection, a new handler is created for the client and added to the list. Whenthe connection is closed, each client must take care to remove themselves from the list.
If you run this program and try connecting with Telnet or some similar tool, you’ll seeit echoing received data back to you. It should easily handle multiple clients.
478 | Chapter 11: Network and Web Programming
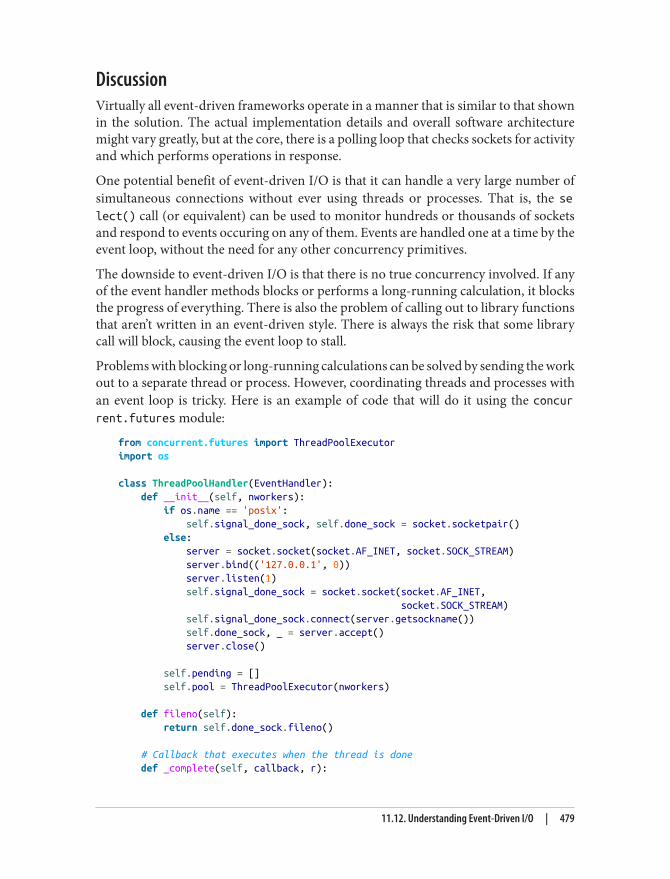
DiscussionVirtually all event-driven frameworks operate in a manner that is similar to that shownin the solution. The actual implementation details and overall software architecturemight vary greatly, but at the core, there is a polling loop that checks sockets for activityand which performs operations in response.
One potential benefit of event-driven I/O is that it can handle a very large number ofsimultaneous connections without ever using threads or processes. That is, the select() call (or equivalent) can be used to monitor hundreds or thousands of socketsand respond to events occuring on any of them. Events are handled one at a time by theevent loop, without the need for any other concurrency primitives.
The downside to event-driven I/O is that there is no true concurrency involved. If anyof the event handler methods blocks or performs a long-running calculation, it blocksthe progress of everything. There is also the problem of calling out to library functionsthat aren’t written in an event-driven style. There is always the risk that some librarycall will block, causing the event loop to stall.
Problems with blocking or long-running calculations can be solved by sending the workout to a separate thread or process. However, coordinating threads and processes withan event loop is tricky. Here is an example of code that will do it using the concurrent.futures module:
from concurrent.futures import ThreadPoolExecutorimport os
class ThreadPoolHandler(EventHandler): def __init__(self, nworkers): if os.name == 'posix': self.signal_done_sock, self.done_sock = socket.socketpair() else: server = socket.socket(socket.AF_INET, socket.SOCK_STREAM) server.bind(('127.0.0.1', 0)) server.listen(1) self.signal_done_sock = socket.socket(socket.AF_INET, socket.SOCK_STREAM) self.signal_done_sock.connect(server.getsockname()) self.done_sock, _ = server.accept() server.close()
self.pending = [] self.pool = ThreadPoolExecutor(nworkers)
def fileno(self): return self.done_sock.fileno()
# Callback that executes when the thread is done def _complete(self, callback, r):
11.12. Understanding Event-Driven I/O | 479
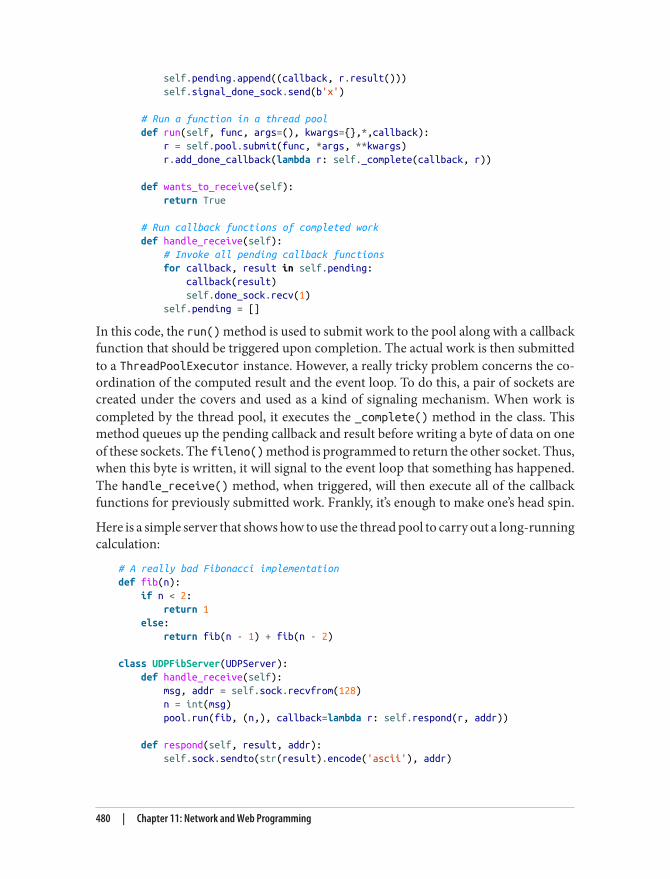
self.pending.append((callback, r.result())) self.signal_done_sock.send(b'x')
# Run a function in a thread pool def run(self, func, args=(), kwargs={},*,callback): r = self.pool.submit(func, *args, **kwargs) r.add_done_callback(lambda r: self._complete(callback, r))
def wants_to_receive(self): return True
# Run callback functions of completed work def handle_receive(self): # Invoke all pending callback functions for callback, result in self.pending: callback(result) self.done_sock.recv(1) self.pending = []
In this code, the run() method is used to submit work to the pool along with a callbackfunction that should be triggered upon completion. The actual work is then submittedto a ThreadPoolExecutor instance. However, a really tricky problem concerns the co‐ordination of the computed result and the event loop. To do this, a pair of sockets arecreated under the covers and used as a kind of signaling mechanism. When work iscompleted by the thread pool, it executes the _complete() method in the class. Thismethod queues up the pending callback and result before writing a byte of data on oneof these sockets. The fileno() method is programmed to return the other socket. Thus,when this byte is written, it will signal to the event loop that something has happened.The handle_receive() method, when triggered, will then execute all of the callbackfunctions for previously submitted work. Frankly, it’s enough to make one’s head spin.
Here is a simple server that shows how to use the thread pool to carry out a long-runningcalculation:
# A really bad Fibonacci implementationdef fib(n): if n < 2: return 1 else: return fib(n - 1) + fib(n - 2)
class UDPFibServer(UDPServer): def handle_receive(self): msg, addr = self.sock.recvfrom(128) n = int(msg) pool.run(fib, (n,), callback=lambda r: self.respond(r, addr))
def respond(self, result, addr): self.sock.sendto(str(result).encode('ascii'), addr)
480 | Chapter 11: Network and Web Programming
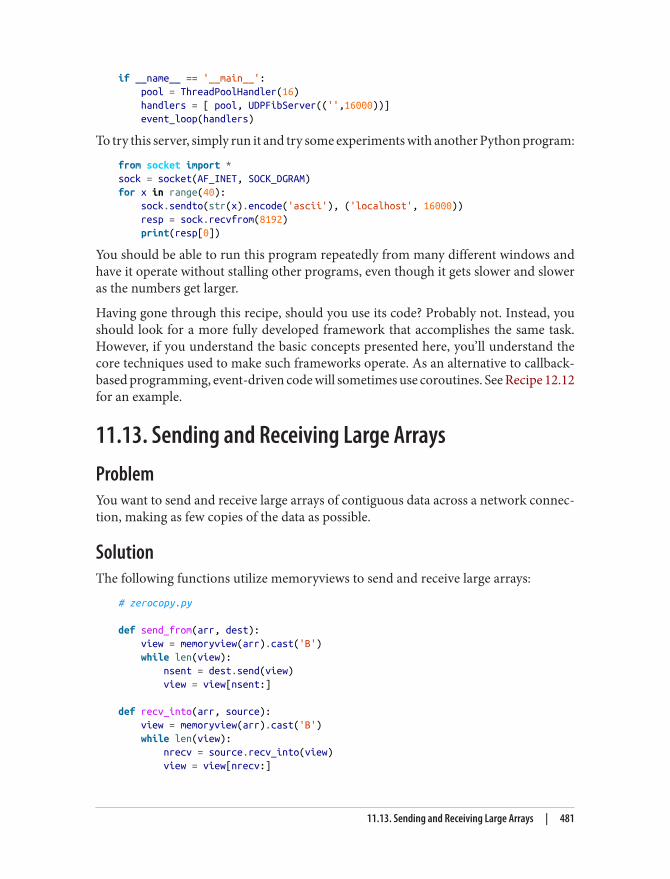
if __name__ == '__main__': pool = ThreadPoolHandler(16) handlers = [ pool, UDPFibServer(('',16000))] event_loop(handlers)
To try this server, simply run it and try some experiments with another Python program:
from socket import *sock = socket(AF_INET, SOCK_DGRAM)for x in range(40): sock.sendto(str(x).encode('ascii'), ('localhost', 16000)) resp = sock.recvfrom(8192) print(resp[0])
You should be able to run this program repeatedly from many different windows andhave it operate without stalling other programs, even though it gets slower and sloweras the numbers get larger.
Having gone through this recipe, should you use its code? Probably not. Instead, youshould look for a more fully developed framework that accomplishes the same task.However, if you understand the basic concepts presented here, you’ll understand thecore techniques used to make such frameworks operate. As an alternative to callback-based programming, event-driven code will sometimes use coroutines. See Recipe 12.12for an example.
11.13. Sending and Receiving Large ArraysProblemYou want to send and receive large arrays of contiguous data across a network connec‐tion, making as few copies of the data as possible.
SolutionThe following functions utilize memoryviews to send and receive large arrays:
# zerocopy.py
def send_from(arr, dest): view = memoryview(arr).cast('B') while len(view): nsent = dest.send(view) view = view[nsent:]
def recv_into(arr, source): view = memoryview(arr).cast('B') while len(view): nrecv = source.recv_into(view) view = view[nrecv:]
11.13. Sending and Receiving Large Arrays | 481
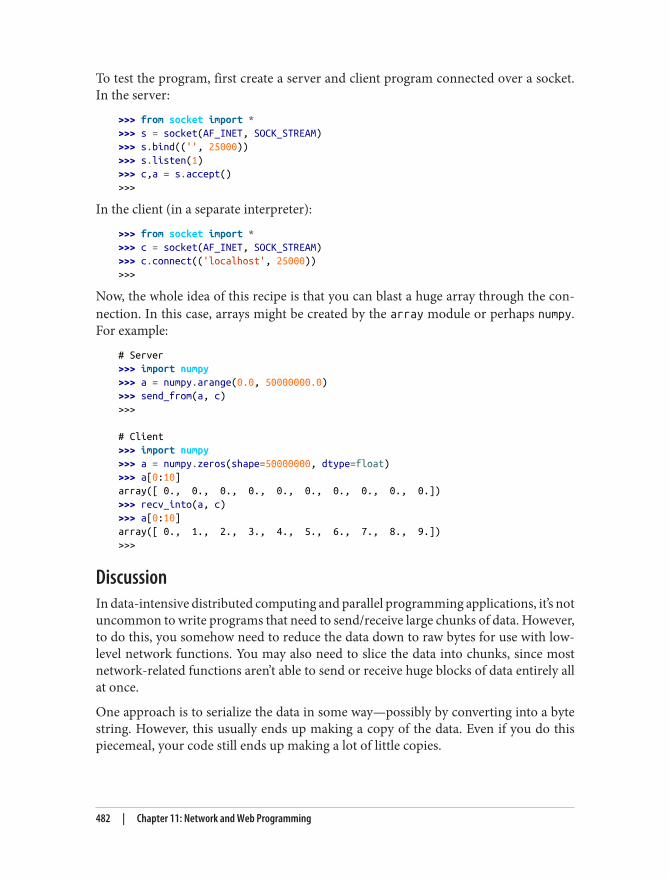
To test the program, first create a server and client program connected over a socket.In the server:
>>> from socket import *>>> s = socket(AF_INET, SOCK_STREAM)>>> s.bind(('', 25000))>>> s.listen(1)>>> c,a = s.accept()>>>
In the client (in a separate interpreter):
>>> from socket import *>>> c = socket(AF_INET, SOCK_STREAM)>>> c.connect(('localhost', 25000))>>>
Now, the whole idea of this recipe is that you can blast a huge array through the con‐nection. In this case, arrays might be created by the array module or perhaps numpy.For example:
# Server>>> import numpy>>> a = numpy.arange(0.0, 50000000.0)>>> send_from(a, c)>>>
# Client>>> import numpy>>> a = numpy.zeros(shape=50000000, dtype=float)>>> a[0:10]array([ 0., 0., 0., 0., 0., 0., 0., 0., 0., 0.])>>> recv_into(a, c)>>> a[0:10]array([ 0., 1., 2., 3., 4., 5., 6., 7., 8., 9.])>>>
DiscussionIn data-intensive distributed computing and parallel programming applications, it’s notuncommon to write programs that need to send/receive large chunks of data. However,to do this, you somehow need to reduce the data down to raw bytes for use with low-level network functions. You may also need to slice the data into chunks, since mostnetwork-related functions aren’t able to send or receive huge blocks of data entirely allat once.
One approach is to serialize the data in some way—possibly by converting into a bytestring. However, this usually ends up making a copy of the data. Even if you do thispiecemeal, your code still ends up making a lot of little copies.
482 | Chapter 11: Network and Web Programming
This recipe gets around this by playing a sneaky trick with memoryviews. Essentially, amemoryview is an overlay of an existing array. Not only that, memoryviews can be castto different types to allow interpretation of the data in a different manner. This is thepurpose of the following statement:
view = memoryview(arr).cast('B')
It takes an array arr and casts into a memoryview of unsigned bytes.
In this form, the view can be passed to socket-related functions, such as sock.send()or send.recv_into(). Under the covers, those methods are able to work directly withthe memory region. For example, sock.send() sends data directly from memorywithout a copy. send.recv_into() uses the memoryview as the input buffer for thereceive operation.
The remaining complication is the fact that the socket functions may only work withpartial data. In general, it will take many different send() and recv_into() calls totransmit the entire array. Not to worry. After each operation, the view is sliced by thenumber of sent or received bytes to produce a new view. The new view is also a memoryoverlay. Thus, no copies are made.
One issue here is that the receiver has to know in advance how much data will be sentso that it can either preallocate an array or verify that it can receive the data into anexisting array. If this is a problem, the sender could always arrange to send the size first,followed by the array data.
11.13. Sending and Receiving Large Arrays | 483

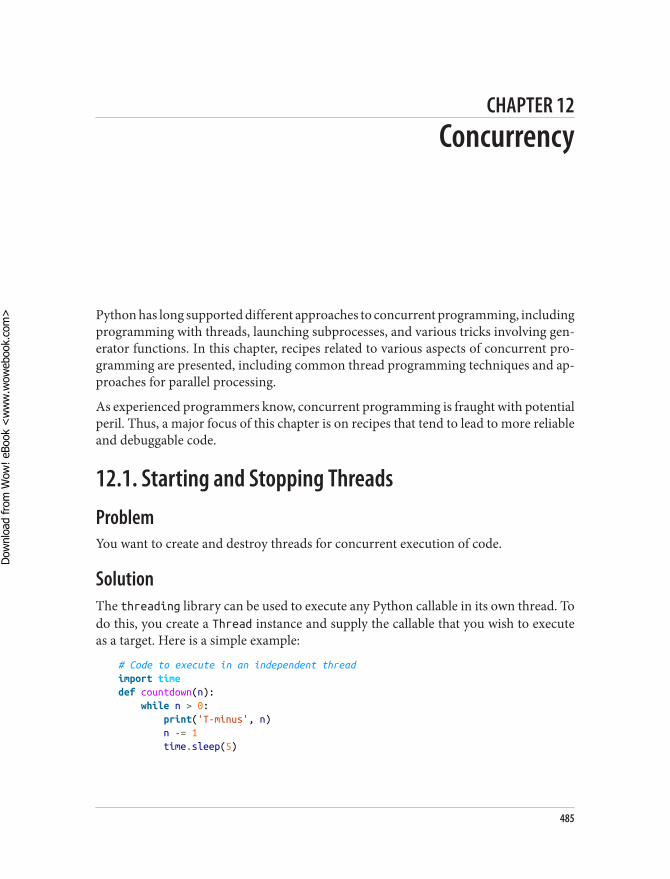
CHAPTER 12
Concurrency
Python has long supported different approaches to concurrent programming, includingprogramming with threads, launching subprocesses, and various tricks involving gen‐erator functions. In this chapter, recipes related to various aspects of concurrent pro‐gramming are presented, including common thread programming techniques and ap‐proaches for parallel processing.
As experienced programmers know, concurrent programming is fraught with potentialperil. Thus, a major focus of this chapter is on recipes that tend to lead to more reliableand debuggable code.
12.1. Starting and Stopping ThreadsProblemYou want to create and destroy threads for concurrent execution of code.
SolutionThe threading library can be used to execute any Python callable in its own thread. Todo this, you create a Thread instance and supply the callable that you wish to executeas a target. Here is a simple example:
# Code to execute in an independent threadimport timedef countdown(n): while n > 0: print('T-minus', n) n -= 1 time.sleep(5)
485
Dow
nlo
ad fro
m W
ow
! eBook
<w
ww
.wow
ebook.
com
>
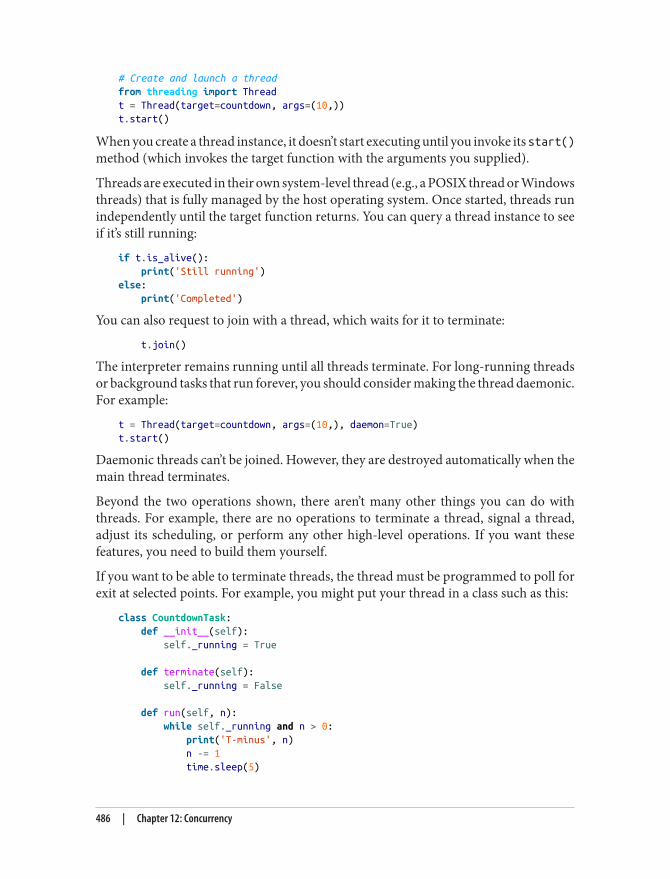
# Create and launch a threadfrom threading import Threadt = Thread(target=countdown, args=(10,))t.start()
When you create a thread instance, it doesn’t start executing until you invoke its start()method (which invokes the target function with the arguments you supplied).
Threads are executed in their own system-level thread (e.g., a POSIX thread or Windowsthreads) that is fully managed by the host operating system. Once started, threads runindependently until the target function returns. You can query a thread instance to seeif it’s still running:
if t.is_alive(): print('Still running')else: print('Completed')
You can also request to join with a thread, which waits for it to terminate:
t.join()
The interpreter remains running until all threads terminate. For long-running threadsor background tasks that run forever, you should consider making the thread daemonic.For example:
t = Thread(target=countdown, args=(10,), daemon=True)t.start()
Daemonic threads can’t be joined. However, they are destroyed automatically when themain thread terminates.
Beyond the two operations shown, there aren’t many other things you can do withthreads. For example, there are no operations to terminate a thread, signal a thread,adjust its scheduling, or perform any other high-level operations. If you want thesefeatures, you need to build them yourself.
If you want to be able to terminate threads, the thread must be programmed to poll forexit at selected points. For example, you might put your thread in a class such as this:
class CountdownTask: def __init__(self): self._running = True
def terminate(self): self._running = False
def run(self, n): while self._running and n > 0: print('T-minus', n) n -= 1 time.sleep(5)
486 | Chapter 12: Concurrency
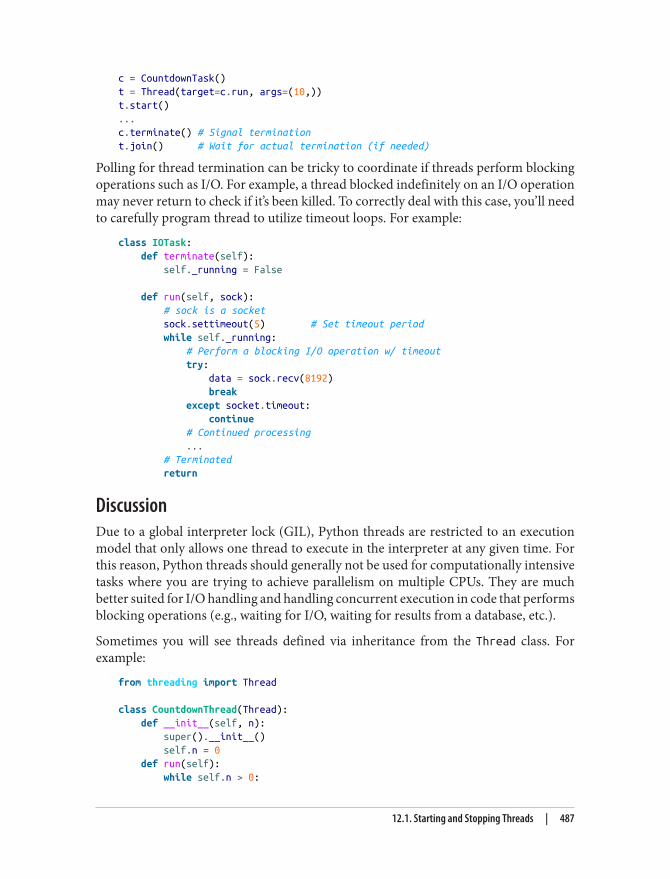
c = CountdownTask()t = Thread(target=c.run, args=(10,))t.start()...c.terminate() # Signal terminationt.join() # Wait for actual termination (if needed)
Polling for thread termination can be tricky to coordinate if threads perform blockingoperations such as I/O. For example, a thread blocked indefinitely on an I/O operationmay never return to check if it’s been killed. To correctly deal with this case, you’ll needto carefully program thread to utilize timeout loops. For example:
class IOTask: def terminate(self): self._running = False
def run(self, sock): # sock is a socket sock.settimeout(5) # Set timeout period while self._running: # Perform a blocking I/O operation w/ timeout try: data = sock.recv(8192) break except socket.timeout: continue # Continued processing ... # Terminated return
DiscussionDue to a global interpreter lock (GIL), Python threads are restricted to an executionmodel that only allows one thread to execute in the interpreter at any given time. Forthis reason, Python threads should generally not be used for computationally intensivetasks where you are trying to achieve parallelism on multiple CPUs. They are muchbetter suited for I/O handling and handling concurrent execution in code that performsblocking operations (e.g., waiting for I/O, waiting for results from a database, etc.).
Sometimes you will see threads defined via inheritance from the Thread class. Forexample:
from threading import Thread
class CountdownThread(Thread): def __init__(self, n): super().__init__() self.n = 0 def run(self): while self.n > 0:
12.1. Starting and Stopping Threads | 487
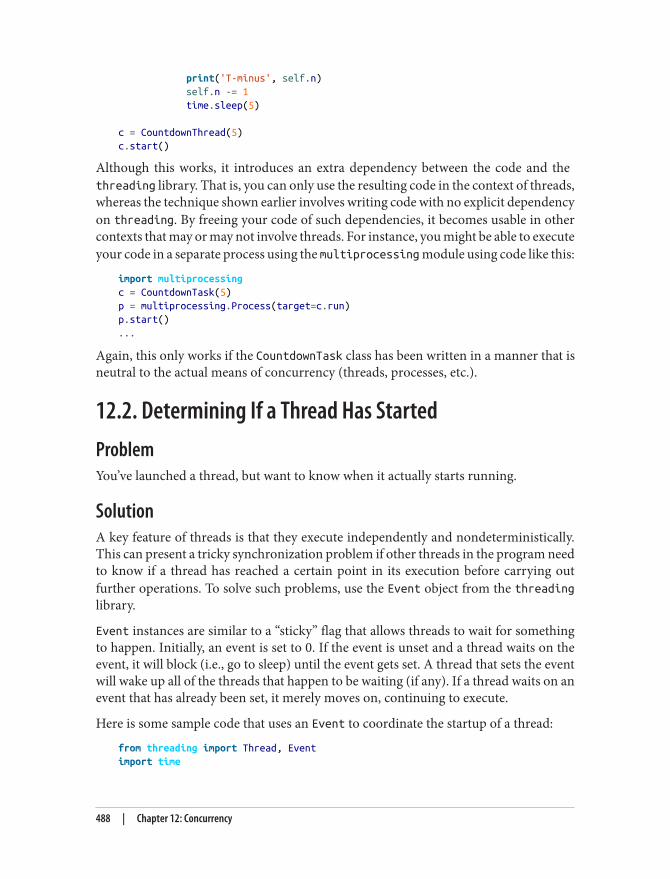
print('T-minus', self.n) self.n -= 1 time.sleep(5)
c = CountdownThread(5)c.start()
Although this works, it introduces an extra dependency between the code and the threading library. That is, you can only use the resulting code in the context of threads,whereas the technique shown earlier involves writing code with no explicit dependencyon threading. By freeing your code of such dependencies, it becomes usable in othercontexts that may or may not involve threads. For instance, you might be able to executeyour code in a separate process using the multiprocessing module using code like this:
import multiprocessingc = CountdownTask(5)p = multiprocessing.Process(target=c.run)p.start()...
Again, this only works if the CountdownTask class has been written in a manner that isneutral to the actual means of concurrency (threads, processes, etc.).
12.2. Determining If a Thread Has StartedProblemYou’ve launched a thread, but want to know when it actually starts running.
SolutionA key feature of threads is that they execute independently and nondeterministically.This can present a tricky synchronization problem if other threads in the program needto know if a thread has reached a certain point in its execution before carrying outfurther operations. To solve such problems, use the Event object from the threadinglibrary.
Event instances are similar to a “sticky” flag that allows threads to wait for somethingto happen. Initially, an event is set to 0. If the event is unset and a thread waits on theevent, it will block (i.e., go to sleep) until the event gets set. A thread that sets the eventwill wake up all of the threads that happen to be waiting (if any). If a thread waits on anevent that has already been set, it merely moves on, continuing to execute.
Here is some sample code that uses an Event to coordinate the startup of a thread:
from threading import Thread, Eventimport time
488 | Chapter 12: Concurrency
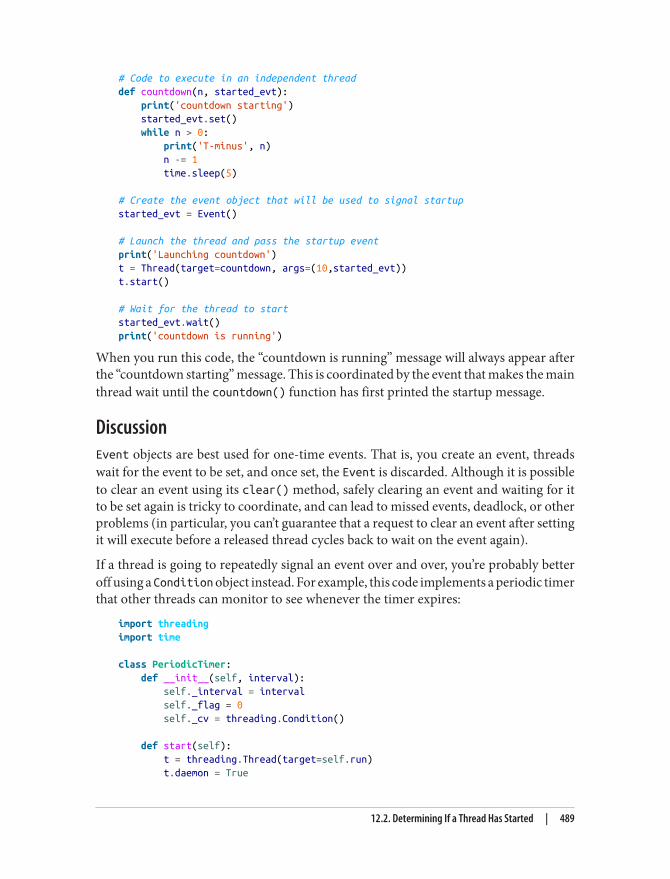
# Code to execute in an independent threaddef countdown(n, started_evt): print('countdown starting') started_evt.set() while n > 0: print('T-minus', n) n -= 1 time.sleep(5)
# Create the event object that will be used to signal startupstarted_evt = Event()
# Launch the thread and pass the startup eventprint('Launching countdown')t = Thread(target=countdown, args=(10,started_evt))t.start()
# Wait for the thread to startstarted_evt.wait()print('countdown is running')
When you run this code, the “countdown is running” message will always appear afterthe “countdown starting” message. This is coordinated by the event that makes the mainthread wait until the countdown() function has first printed the startup message.
DiscussionEvent objects are best used for one-time events. That is, you create an event, threadswait for the event to be set, and once set, the Event is discarded. Although it is possibleto clear an event using its clear() method, safely clearing an event and waiting for itto be set again is tricky to coordinate, and can lead to missed events, deadlock, or otherproblems (in particular, you can’t guarantee that a request to clear an event after settingit will execute before a released thread cycles back to wait on the event again).
If a thread is going to repeatedly signal an event over and over, you’re probably betteroff using a Condition object instead. For example, this code implements a periodic timerthat other threads can monitor to see whenever the timer expires:
import threadingimport time
class PeriodicTimer: def __init__(self, interval): self._interval = interval self._flag = 0 self._cv = threading.Condition()
def start(self): t = threading.Thread(target=self.run) t.daemon = True
12.2. Determining If a Thread Has Started | 489
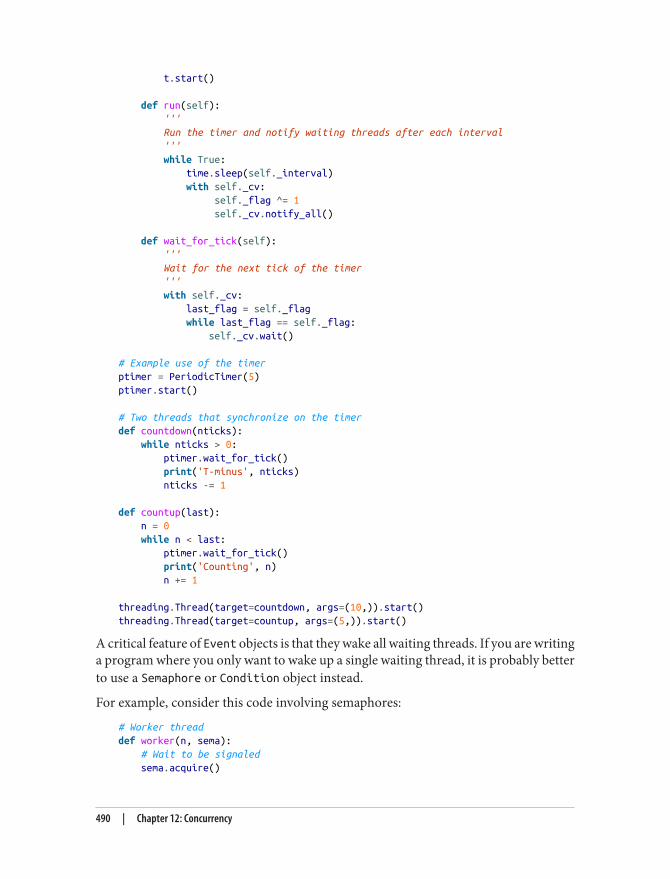
t.start()
def run(self): ''' Run the timer and notify waiting threads after each interval ''' while True: time.sleep(self._interval) with self._cv: self._flag ^= 1 self._cv.notify_all()
def wait_for_tick(self): ''' Wait for the next tick of the timer ''' with self._cv: last_flag = self._flag while last_flag == self._flag: self._cv.wait()
# Example use of the timerptimer = PeriodicTimer(5)ptimer.start()
# Two threads that synchronize on the timerdef countdown(nticks): while nticks > 0: ptimer.wait_for_tick() print('T-minus', nticks) nticks -= 1
def countup(last): n = 0 while n < last: ptimer.wait_for_tick() print('Counting', n) n += 1
threading.Thread(target=countdown, args=(10,)).start()threading.Thread(target=countup, args=(5,)).start()
A critical feature of Event objects is that they wake all waiting threads. If you are writinga program where you only want to wake up a single waiting thread, it is probably betterto use a Semaphore or Condition object instead.
For example, consider this code involving semaphores:
# Worker threaddef worker(n, sema): # Wait to be signaled sema.acquire()
490 | Chapter 12: Concurrency
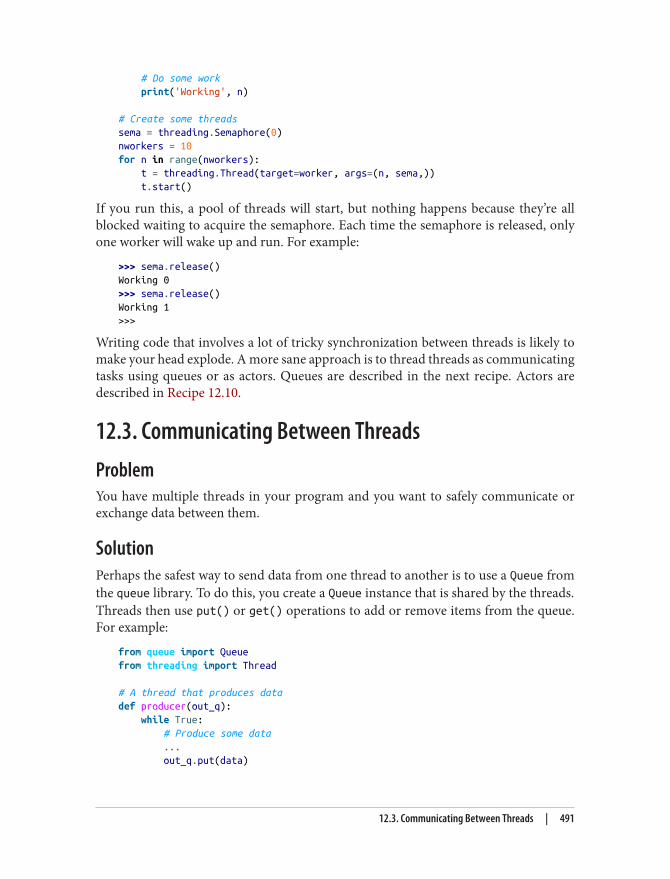
# Do some work print('Working', n)
# Create some threadssema = threading.Semaphore(0)nworkers = 10for n in range(nworkers): t = threading.Thread(target=worker, args=(n, sema,)) t.start()
If you run this, a pool of threads will start, but nothing happens because they’re allblocked waiting to acquire the semaphore. Each time the semaphore is released, onlyone worker will wake up and run. For example:
>>> sema.release()Working 0>>> sema.release()Working 1>>>
Writing code that involves a lot of tricky synchronization between threads is likely tomake your head explode. A more sane approach is to thread threads as communicatingtasks using queues or as actors. Queues are described in the next recipe. Actors aredescribed in Recipe 12.10.
12.3. Communicating Between ThreadsProblemYou have multiple threads in your program and you want to safely communicate orexchange data between them.
SolutionPerhaps the safest way to send data from one thread to another is to use a Queue fromthe queue library. To do this, you create a Queue instance that is shared by the threads.Threads then use put() or get() operations to add or remove items from the queue.For example:
from queue import Queuefrom threading import Thread
# A thread that produces datadef producer(out_q): while True: # Produce some data ... out_q.put(data)
12.3. Communicating Between Threads | 491
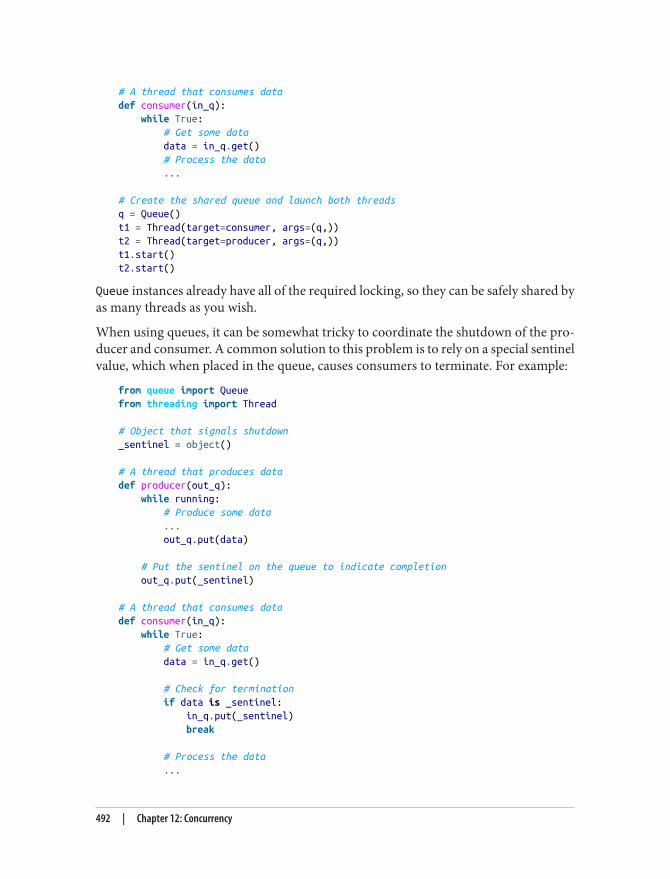
# A thread that consumes datadef consumer(in_q): while True: # Get some data data = in_q.get() # Process the data ...
# Create the shared queue and launch both threadsq = Queue()t1 = Thread(target=consumer, args=(q,))t2 = Thread(target=producer, args=(q,))t1.start()t2.start()
Queue instances already have all of the required locking, so they can be safely shared byas many threads as you wish.
When using queues, it can be somewhat tricky to coordinate the shutdown of the pro‐ducer and consumer. A common solution to this problem is to rely on a special sentinelvalue, which when placed in the queue, causes consumers to terminate. For example:
from queue import Queuefrom threading import Thread
# Object that signals shutdown_sentinel = object()
# A thread that produces datadef producer(out_q): while running: # Produce some data ... out_q.put(data)
# Put the sentinel on the queue to indicate completion out_q.put(_sentinel)
# A thread that consumes datadef consumer(in_q): while True: # Get some data data = in_q.get()
# Check for termination if data is _sentinel: in_q.put(_sentinel) break
# Process the data ...
492 | Chapter 12: Concurrency
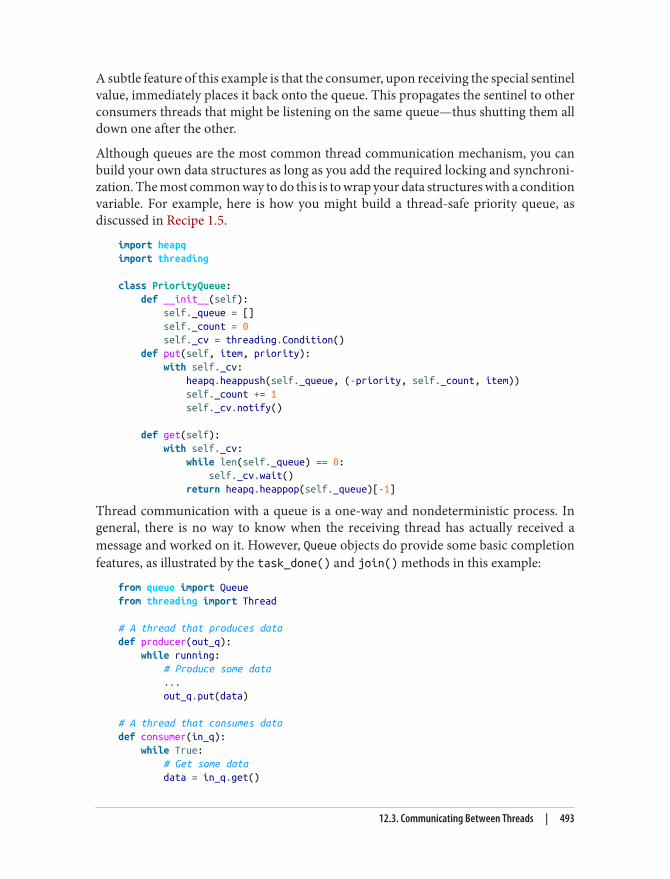
A subtle feature of this example is that the consumer, upon receiving the special sentinelvalue, immediately places it back onto the queue. This propagates the sentinel to otherconsumers threads that might be listening on the same queue—thus shutting them alldown one after the other.
Although queues are the most common thread communication mechanism, you canbuild your own data structures as long as you add the required locking and synchroni‐zation. The most common way to do this is to wrap your data structures with a conditionvariable. For example, here is how you might build a thread-safe priority queue, asdiscussed in Recipe 1.5.
import heapqimport threading
class PriorityQueue: def __init__(self): self._queue = [] self._count = 0 self._cv = threading.Condition() def put(self, item, priority): with self._cv: heapq.heappush(self._queue, (-priority, self._count, item)) self._count += 1 self._cv.notify()
def get(self): with self._cv: while len(self._queue) == 0: self._cv.wait() return heapq.heappop(self._queue)[-1]
Thread communication with a queue is a one-way and nondeterministic process. Ingeneral, there is no way to know when the receiving thread has actually received amessage and worked on it. However, Queue objects do provide some basic completionfeatures, as illustrated by the task_done() and join() methods in this example:
from queue import Queuefrom threading import Thread
# A thread that produces datadef producer(out_q): while running: # Produce some data ... out_q.put(data)
# A thread that consumes datadef consumer(in_q): while True: # Get some data data = in_q.get()
12.3. Communicating Between Threads | 493
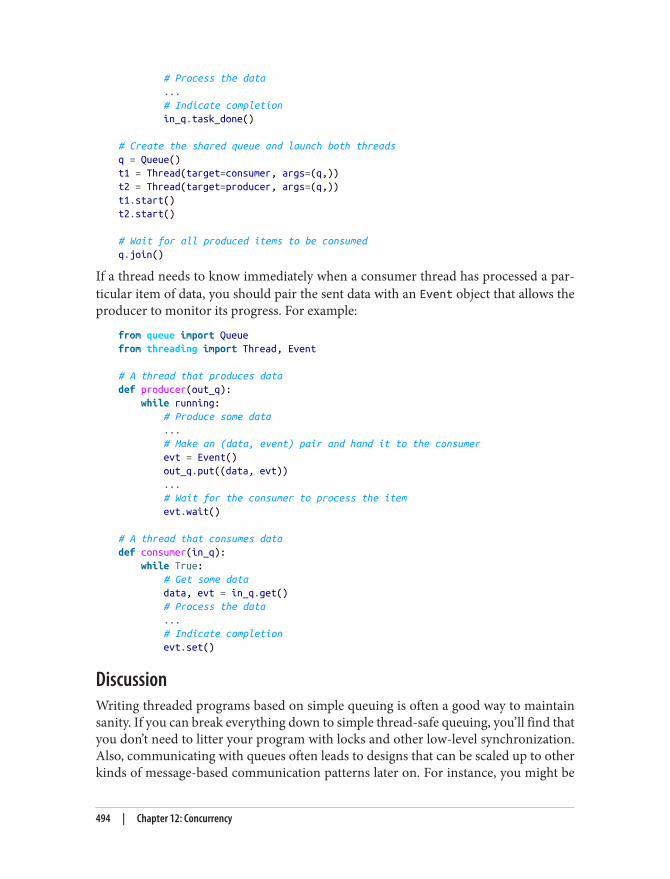
# Process the data ... # Indicate completion in_q.task_done()
# Create the shared queue and launch both threadsq = Queue()t1 = Thread(target=consumer, args=(q,))t2 = Thread(target=producer, args=(q,))t1.start()t2.start()
# Wait for all produced items to be consumedq.join()
If a thread needs to know immediately when a consumer thread has processed a par‐ticular item of data, you should pair the sent data with an Event object that allows theproducer to monitor its progress. For example:
from queue import Queuefrom threading import Thread, Event
# A thread that produces datadef producer(out_q): while running: # Produce some data ... # Make an (data, event) pair and hand it to the consumer evt = Event() out_q.put((data, evt)) ... # Wait for the consumer to process the item evt.wait()
# A thread that consumes datadef consumer(in_q): while True: # Get some data data, evt = in_q.get() # Process the data ... # Indicate completion evt.set()
DiscussionWriting threaded programs based on simple queuing is often a good way to maintainsanity. If you can break everything down to simple thread-safe queuing, you’ll find thatyou don’t need to litter your program with locks and other low-level synchronization.Also, communicating with queues often leads to designs that can be scaled up to otherkinds of message-based communication patterns later on. For instance, you might be
494 | Chapter 12: Concurrency
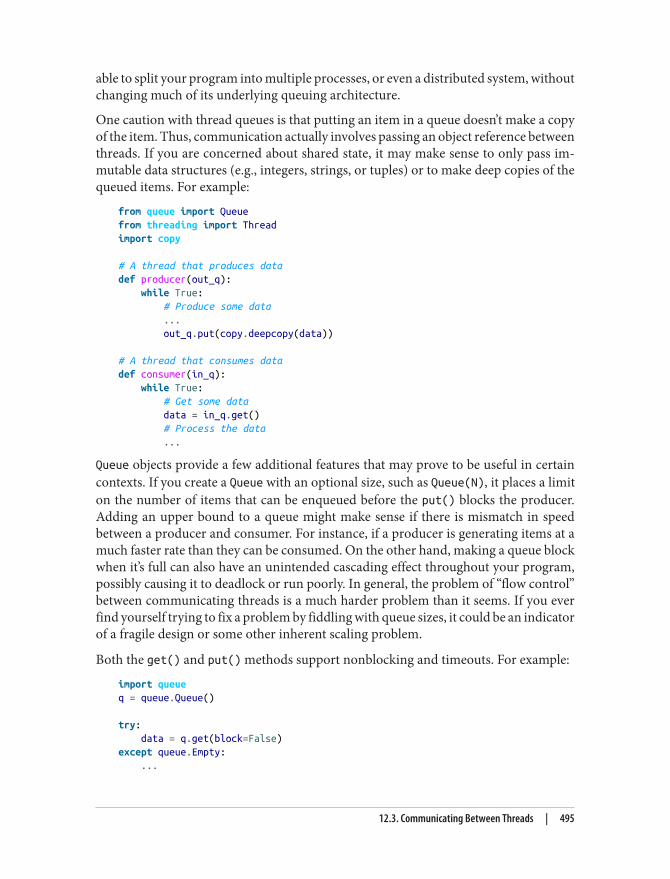
able to split your program into multiple processes, or even a distributed system, withoutchanging much of its underlying queuing architecture.
One caution with thread queues is that putting an item in a queue doesn’t make a copyof the item. Thus, communication actually involves passing an object reference betweenthreads. If you are concerned about shared state, it may make sense to only pass im‐mutable data structures (e.g., integers, strings, or tuples) or to make deep copies of thequeued items. For example:
from queue import Queuefrom threading import Threadimport copy
# A thread that produces datadef producer(out_q): while True: # Produce some data ... out_q.put(copy.deepcopy(data))
# A thread that consumes datadef consumer(in_q): while True: # Get some data data = in_q.get() # Process the data ...
Queue objects provide a few additional features that may prove to be useful in certaincontexts. If you create a Queue with an optional size, such as Queue(N), it places a limiton the number of items that can be enqueued before the put() blocks the producer.Adding an upper bound to a queue might make sense if there is mismatch in speedbetween a producer and consumer. For instance, if a producer is generating items at amuch faster rate than they can be consumed. On the other hand, making a queue blockwhen it’s full can also have an unintended cascading effect throughout your program,possibly causing it to deadlock or run poorly. In general, the problem of “flow control”between communicating threads is a much harder problem than it seems. If you everfind yourself trying to fix a problem by fiddling with queue sizes, it could be an indicatorof a fragile design or some other inherent scaling problem.
Both the get() and put() methods support nonblocking and timeouts. For example:
import queueq = queue.Queue()
try: data = q.get(block=False)except queue.Empty: ...
12.3. Communicating Between Threads | 495
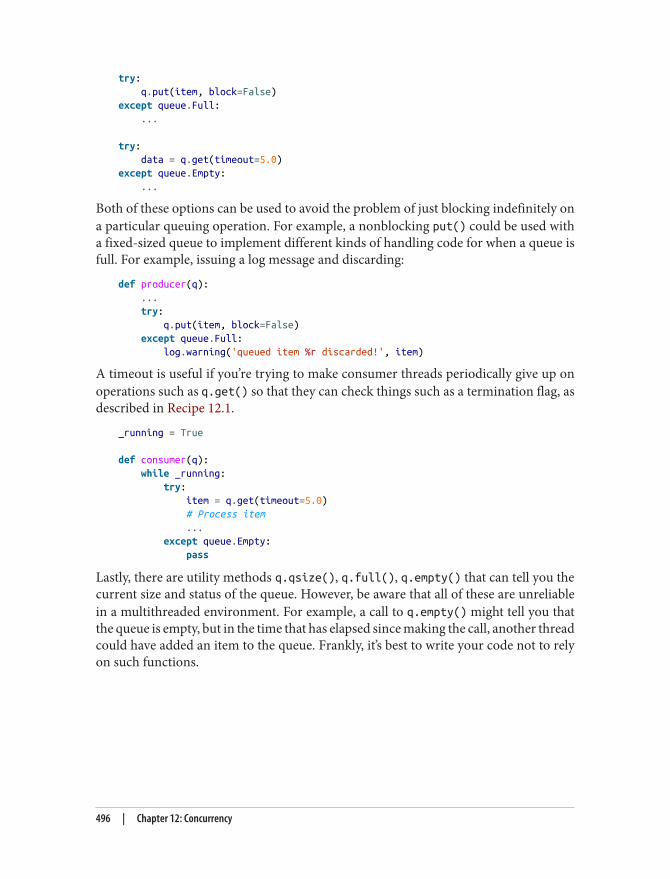
try: q.put(item, block=False)except queue.Full: ...
try: data = q.get(timeout=5.0)except queue.Empty: ...
Both of these options can be used to avoid the problem of just blocking indefinitely ona particular queuing operation. For example, a nonblocking put() could be used witha fixed-sized queue to implement different kinds of handling code for when a queue isfull. For example, issuing a log message and discarding:
def producer(q): ... try: q.put(item, block=False) except queue.Full: log.warning('queued item %r discarded!', item)
A timeout is useful if you’re trying to make consumer threads periodically give up onoperations such as q.get() so that they can check things such as a termination flag, asdescribed in Recipe 12.1.
_running = True
def consumer(q): while _running: try: item = q.get(timeout=5.0) # Process item ... except queue.Empty: pass
Lastly, there are utility methods q.qsize(), q.full(), q.empty() that can tell you thecurrent size and status of the queue. However, be aware that all of these are unreliablein a multithreaded environment. For example, a call to q.empty() might tell you thatthe queue is empty, but in the time that has elapsed since making the call, another threadcould have added an item to the queue. Frankly, it’s best to write your code not to relyon such functions.
496 | Chapter 12: Concurrency
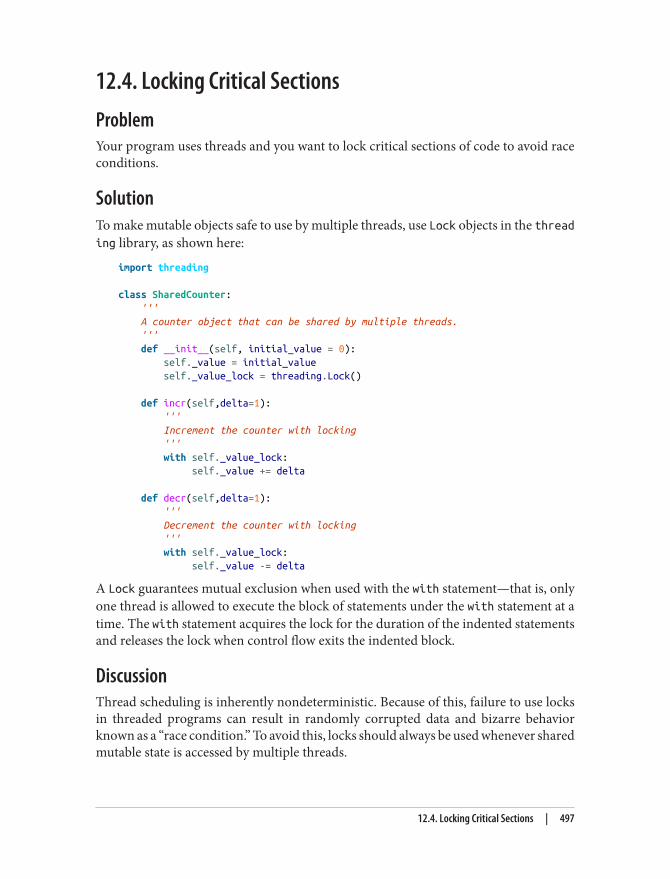
12.4. Locking Critical SectionsProblemYour program uses threads and you want to lock critical sections of code to avoid raceconditions.
SolutionTo make mutable objects safe to use by multiple threads, use Lock objects in the threading library, as shown here:
import threading
class SharedCounter: ''' A counter object that can be shared by multiple threads. ''' def __init__(self, initial_value = 0): self._value = initial_value self._value_lock = threading.Lock()
def incr(self,delta=1): ''' Increment the counter with locking ''' with self._value_lock: self._value += delta
def decr(self,delta=1): ''' Decrement the counter with locking ''' with self._value_lock: self._value -= delta
A Lock guarantees mutual exclusion when used with the with statement—that is, onlyone thread is allowed to execute the block of statements under the with statement at atime. The with statement acquires the lock for the duration of the indented statementsand releases the lock when control flow exits the indented block.
DiscussionThread scheduling is inherently nondeterministic. Because of this, failure to use locksin threaded programs can result in randomly corrupted data and bizarre behaviorknown as a “race condition.” To avoid this, locks should always be used whenever sharedmutable state is accessed by multiple threads.
12.4. Locking Critical Sections | 497
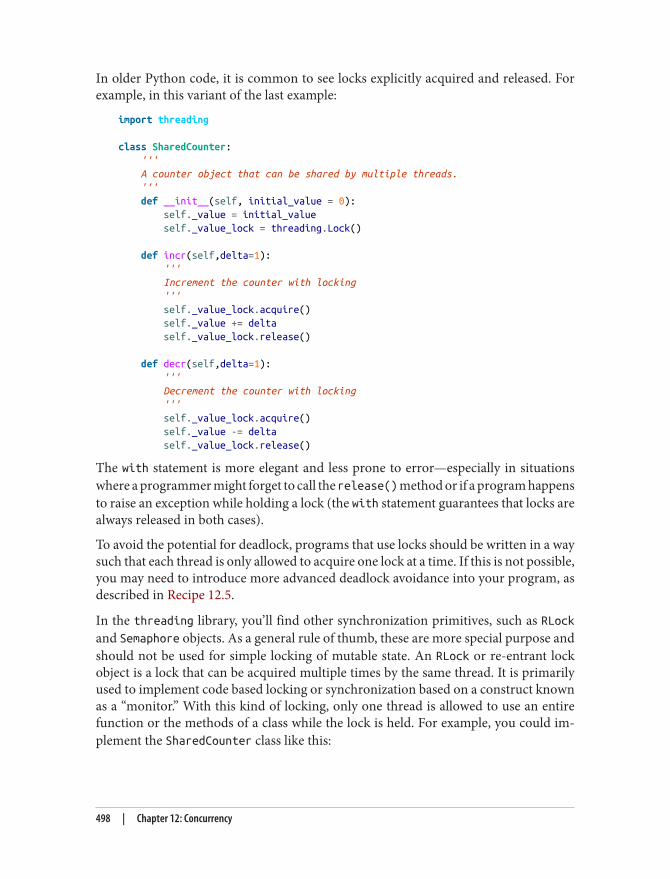
In older Python code, it is common to see locks explicitly acquired and released. Forexample, in this variant of the last example:
import threading
class SharedCounter: ''' A counter object that can be shared by multiple threads. ''' def __init__(self, initial_value = 0): self._value = initial_value self._value_lock = threading.Lock()
def incr(self,delta=1): ''' Increment the counter with locking ''' self._value_lock.acquire() self._value += delta self._value_lock.release()
def decr(self,delta=1): ''' Decrement the counter with locking ''' self._value_lock.acquire() self._value -= delta self._value_lock.release()
The with statement is more elegant and less prone to error—especially in situationswhere a programmer might forget to call the release() method or if a program happensto raise an exception while holding a lock (the with statement guarantees that locks arealways released in both cases).
To avoid the potential for deadlock, programs that use locks should be written in a waysuch that each thread is only allowed to acquire one lock at a time. If this is not possible,you may need to introduce more advanced deadlock avoidance into your program, asdescribed in Recipe 12.5.
In the threading library, you’ll find other synchronization primitives, such as RLockand Semaphore objects. As a general rule of thumb, these are more special purpose andshould not be used for simple locking of mutable state. An RLock or re-entrant lockobject is a lock that can be acquired multiple times by the same thread. It is primarilyused to implement code based locking or synchronization based on a construct knownas a “monitor.” With this kind of locking, only one thread is allowed to use an entirefunction or the methods of a class while the lock is held. For example, you could im‐plement the SharedCounter class like this:
498 | Chapter 12: Concurrency
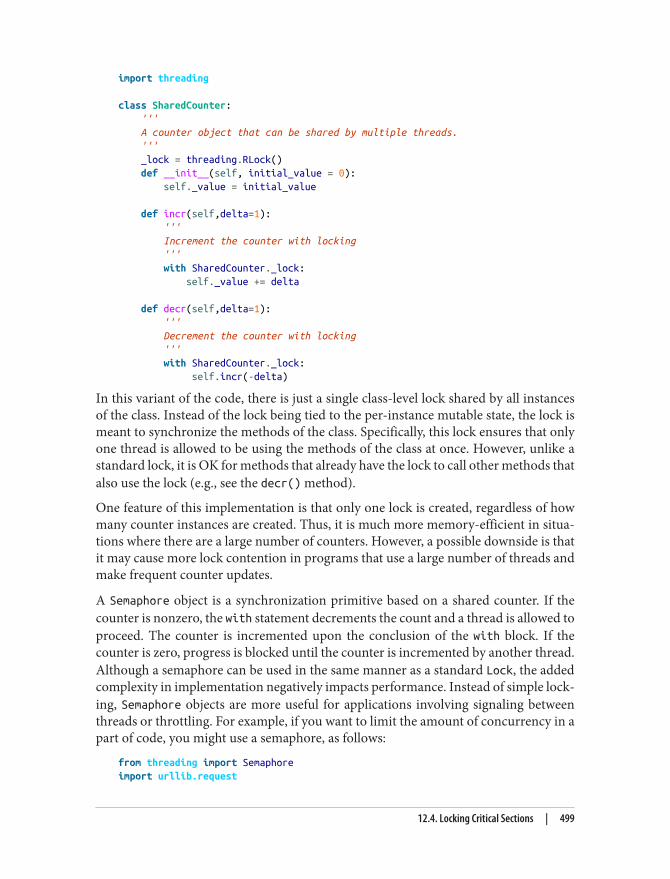
import threading
class SharedCounter: ''' A counter object that can be shared by multiple threads. ''' _lock = threading.RLock() def __init__(self, initial_value = 0): self._value = initial_value
def incr(self,delta=1): ''' Increment the counter with locking ''' with SharedCounter._lock: self._value += delta
def decr(self,delta=1): ''' Decrement the counter with locking ''' with SharedCounter._lock: self.incr(-delta)
In this variant of the code, there is just a single class-level lock shared by all instancesof the class. Instead of the lock being tied to the per-instance mutable state, the lock ismeant to synchronize the methods of the class. Specifically, this lock ensures that onlyone thread is allowed to be using the methods of the class at once. However, unlike astandard lock, it is OK for methods that already have the lock to call other methods thatalso use the lock (e.g., see the decr() method).
One feature of this implementation is that only one lock is created, regardless of howmany counter instances are created. Thus, it is much more memory-efficient in situa‐tions where there are a large number of counters. However, a possible downside is thatit may cause more lock contention in programs that use a large number of threads andmake frequent counter updates.
A Semaphore object is a synchronization primitive based on a shared counter. If thecounter is nonzero, the with statement decrements the count and a thread is allowed toproceed. The counter is incremented upon the conclusion of the with block. If thecounter is zero, progress is blocked until the counter is incremented by another thread.Although a semaphore can be used in the same manner as a standard Lock, the addedcomplexity in implementation negatively impacts performance. Instead of simple lock‐ing, Semaphore objects are more useful for applications involving signaling betweenthreads or throttling. For example, if you want to limit the amount of concurrency in apart of code, you might use a semaphore, as follows:
from threading import Semaphoreimport urllib.request
12.4. Locking Critical Sections | 499
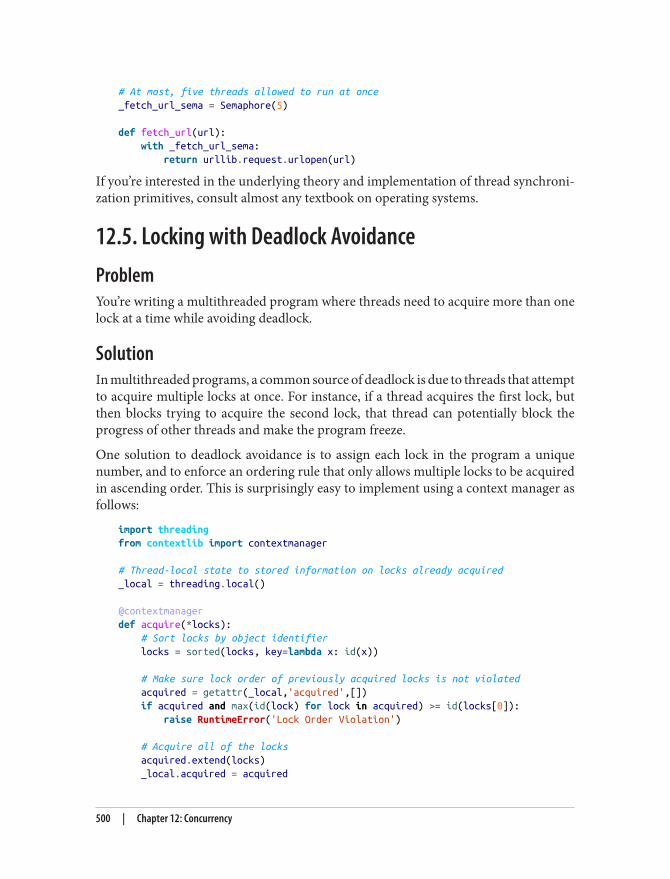
# At most, five threads allowed to run at once_fetch_url_sema = Semaphore(5)
def fetch_url(url): with _fetch_url_sema: return urllib.request.urlopen(url)
If you’re interested in the underlying theory and implementation of thread synchroni‐zation primitives, consult almost any textbook on operating systems.
12.5. Locking with Deadlock AvoidanceProblemYou’re writing a multithreaded program where threads need to acquire more than onelock at a time while avoiding deadlock.
SolutionIn multithreaded programs, a common source of deadlock is due to threads that attemptto acquire multiple locks at once. For instance, if a thread acquires the first lock, butthen blocks trying to acquire the second lock, that thread can potentially block theprogress of other threads and make the program freeze.
One solution to deadlock avoidance is to assign each lock in the program a uniquenumber, and to enforce an ordering rule that only allows multiple locks to be acquiredin ascending order. This is surprisingly easy to implement using a context manager asfollows:
import threadingfrom contextlib import contextmanager
# Thread-local state to stored information on locks already acquired_local = threading.local()
@contextmanagerdef acquire(*locks): # Sort locks by object identifier locks = sorted(locks, key=lambda x: id(x))
# Make sure lock order of previously acquired locks is not violated acquired = getattr(_local,'acquired',[]) if acquired and max(id(lock) for lock in acquired) >= id(locks[0]): raise RuntimeError('Lock Order Violation')
# Acquire all of the locks acquired.extend(locks) _local.acquired = acquired
500 | Chapter 12: Concurrency
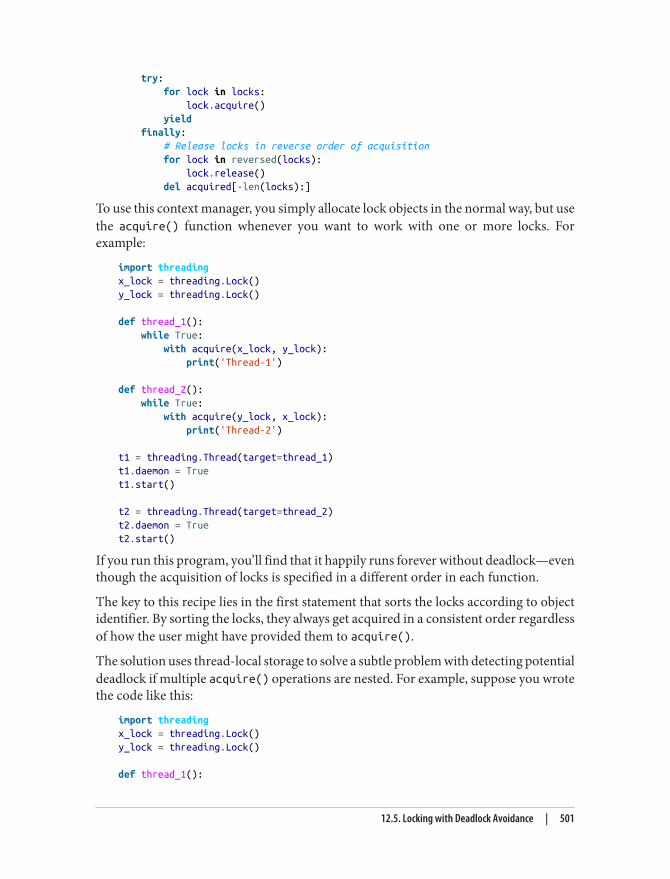
try: for lock in locks: lock.acquire() yield finally: # Release locks in reverse order of acquisition for lock in reversed(locks): lock.release() del acquired[-len(locks):]
To use this context manager, you simply allocate lock objects in the normal way, but usethe acquire() function whenever you want to work with one or more locks. Forexample:
import threadingx_lock = threading.Lock()y_lock = threading.Lock()
def thread_1(): while True: with acquire(x_lock, y_lock): print('Thread-1')
def thread_2(): while True: with acquire(y_lock, x_lock): print('Thread-2')
t1 = threading.Thread(target=thread_1)t1.daemon = Truet1.start()
t2 = threading.Thread(target=thread_2)t2.daemon = Truet2.start()
If you run this program, you’ll find that it happily runs forever without deadlock—eventhough the acquisition of locks is specified in a different order in each function.
The key to this recipe lies in the first statement that sorts the locks according to objectidentifier. By sorting the locks, they always get acquired in a consistent order regardlessof how the user might have provided them to acquire().
The solution uses thread-local storage to solve a subtle problem with detecting potentialdeadlock if multiple acquire() operations are nested. For example, suppose you wrotethe code like this:
import threadingx_lock = threading.Lock()y_lock = threading.Lock()
def thread_1():
12.5. Locking with Deadlock Avoidance | 501
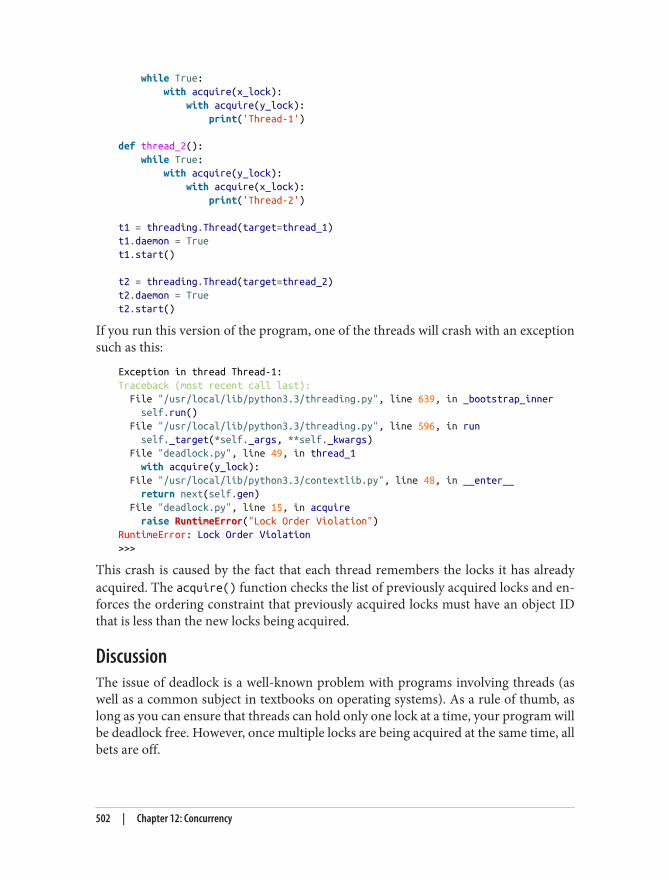
while True: with acquire(x_lock): with acquire(y_lock): print('Thread-1')
def thread_2(): while True: with acquire(y_lock): with acquire(x_lock): print('Thread-2')
t1 = threading.Thread(target=thread_1)t1.daemon = Truet1.start()
t2 = threading.Thread(target=thread_2)t2.daemon = Truet2.start()
If you run this version of the program, one of the threads will crash with an exceptionsuch as this:
Exception in thread Thread-1:Traceback (most recent call last): File "/usr/local/lib/python3.3/threading.py", line 639, in _bootstrap_inner self.run() File "/usr/local/lib/python3.3/threading.py", line 596, in run self._target(*self._args, **self._kwargs) File "deadlock.py", line 49, in thread_1 with acquire(y_lock): File "/usr/local/lib/python3.3/contextlib.py", line 48, in __enter__ return next(self.gen) File "deadlock.py", line 15, in acquire raise RuntimeError("Lock Order Violation")RuntimeError: Lock Order Violation>>>
This crash is caused by the fact that each thread remembers the locks it has alreadyacquired. The acquire() function checks the list of previously acquired locks and en‐forces the ordering constraint that previously acquired locks must have an object IDthat is less than the new locks being acquired.
DiscussionThe issue of deadlock is a well-known problem with programs involving threads (aswell as a common subject in textbooks on operating systems). As a rule of thumb, aslong as you can ensure that threads can hold only one lock at a time, your program willbe deadlock free. However, once multiple locks are being acquired at the same time, allbets are off.
502 | Chapter 12: Concurrency
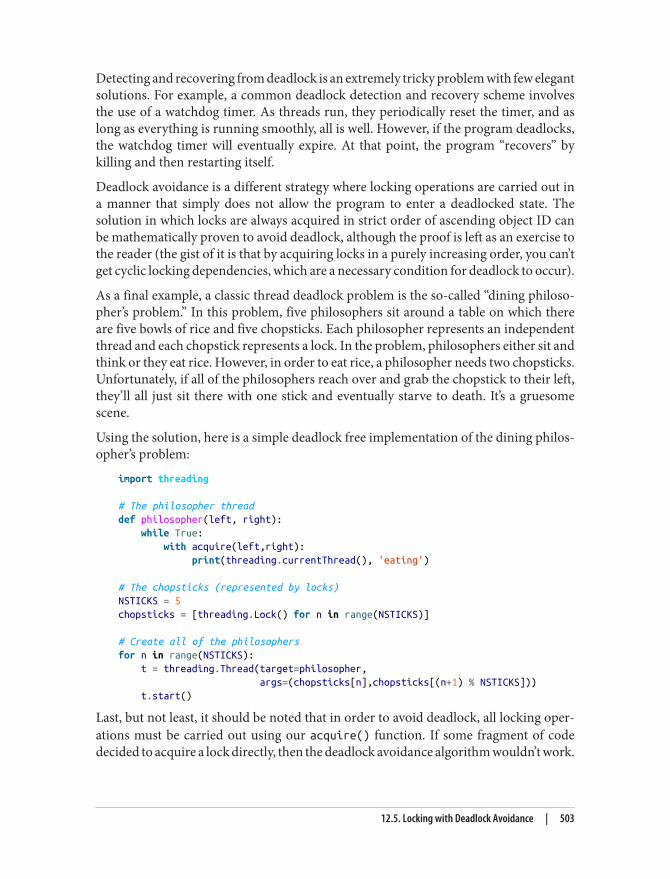
Detecting and recovering from deadlock is an extremely tricky problem with few elegantsolutions. For example, a common deadlock detection and recovery scheme involvesthe use of a watchdog timer. As threads run, they periodically reset the timer, and aslong as everything is running smoothly, all is well. However, if the program deadlocks,the watchdog timer will eventually expire. At that point, the program “recovers” bykilling and then restarting itself.
Deadlock avoidance is a different strategy where locking operations are carried out ina manner that simply does not allow the program to enter a deadlocked state. Thesolution in which locks are always acquired in strict order of ascending object ID canbe mathematically proven to avoid deadlock, although the proof is left as an exercise tothe reader (the gist of it is that by acquiring locks in a purely increasing order, you can’tget cyclic locking dependencies, which are a necessary condition for deadlock to occur).
As a final example, a classic thread deadlock problem is the so-called “dining philoso‐pher’s problem.” In this problem, five philosophers sit around a table on which thereare five bowls of rice and five chopsticks. Each philosopher represents an independentthread and each chopstick represents a lock. In the problem, philosophers either sit andthink or they eat rice. However, in order to eat rice, a philosopher needs two chopsticks.Unfortunately, if all of the philosophers reach over and grab the chopstick to their left,they’ll all just sit there with one stick and eventually starve to death. It’s a gruesomescene.
Using the solution, here is a simple deadlock free implementation of the dining philos‐opher’s problem:
import threading
# The philosopher threaddef philosopher(left, right): while True: with acquire(left,right): print(threading.currentThread(), 'eating')
# The chopsticks (represented by locks)NSTICKS = 5chopsticks = [threading.Lock() for n in range(NSTICKS)]
# Create all of the philosophersfor n in range(NSTICKS): t = threading.Thread(target=philosopher, args=(chopsticks[n],chopsticks[(n+1) % NSTICKS])) t.start()
Last, but not least, it should be noted that in order to avoid deadlock, all locking oper‐ations must be carried out using our acquire() function. If some fragment of codedecided to acquire a lock directly, then the deadlock avoidance algorithm wouldn’t work.
12.5. Locking with Deadlock Avoidance | 503
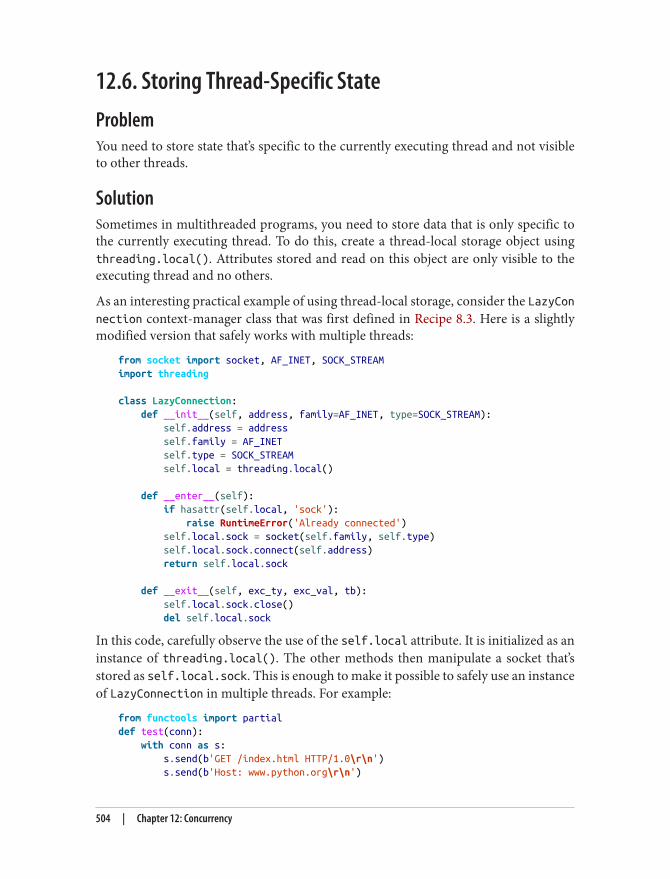
12.6. Storing Thread-Specific StateProblemYou need to store state that’s specific to the currently executing thread and not visibleto other threads.
SolutionSometimes in multithreaded programs, you need to store data that is only specific tothe currently executing thread. To do this, create a thread-local storage object usingthreading.local(). Attributes stored and read on this object are only visible to theexecuting thread and no others.
As an interesting practical example of using thread-local storage, consider the LazyConnection context-manager class that was first defined in Recipe 8.3. Here is a slightlymodified version that safely works with multiple threads:
from socket import socket, AF_INET, SOCK_STREAMimport threading
class LazyConnection: def __init__(self, address, family=AF_INET, type=SOCK_STREAM): self.address = address self.family = AF_INET self.type = SOCK_STREAM self.local = threading.local()
def __enter__(self): if hasattr(self.local, 'sock'): raise RuntimeError('Already connected') self.local.sock = socket(self.family, self.type) self.local.sock.connect(self.address) return self.local.sock
def __exit__(self, exc_ty, exc_val, tb): self.local.sock.close() del self.local.sock
In this code, carefully observe the use of the self.local attribute. It is initialized as aninstance of threading.local(). The other methods then manipulate a socket that’sstored as self.local.sock. This is enough to make it possible to safely use an instanceof LazyConnection in multiple threads. For example:
from functools import partialdef test(conn): with conn as s: s.send(b'GET /index.html HTTP/1.0\r\n') s.send(b'Host: www.python.org\r\n')
504 | Chapter 12: Concurrency
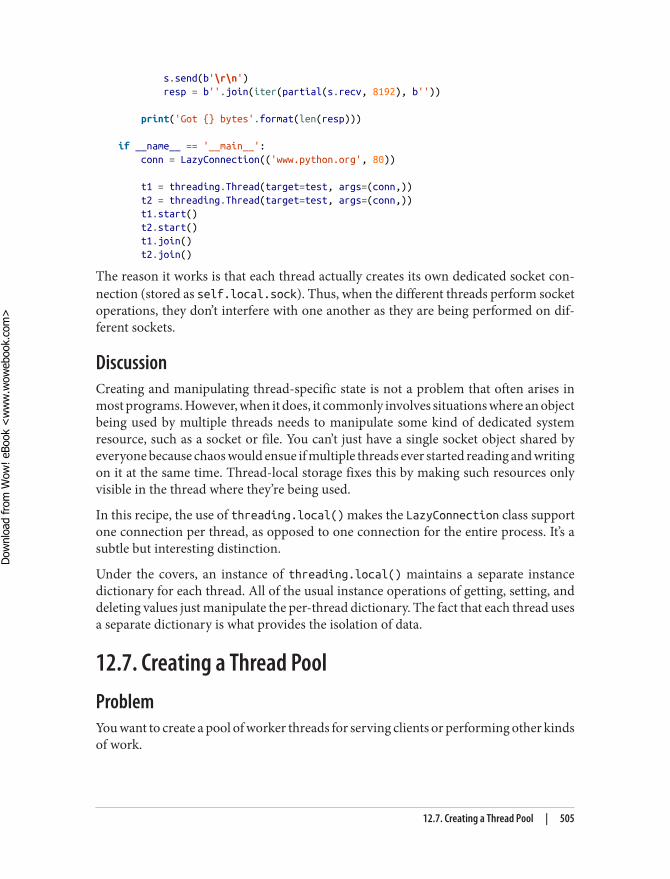
s.send(b'\r\n') resp = b''.join(iter(partial(s.recv, 8192), b''))
print('Got {} bytes'.format(len(resp)))
if __name__ == '__main__': conn = LazyConnection(('www.python.org', 80))
t1 = threading.Thread(target=test, args=(conn,)) t2 = threading.Thread(target=test, args=(conn,)) t1.start() t2.start() t1.join() t2.join()
The reason it works is that each thread actually creates its own dedicated socket con‐nection (stored as self.local.sock). Thus, when the different threads perform socketoperations, they don’t interfere with one another as they are being performed on dif‐ferent sockets.
DiscussionCreating and manipulating thread-specific state is not a problem that often arises inmost programs. However, when it does, it commonly involves situations where an objectbeing used by multiple threads needs to manipulate some kind of dedicated systemresource, such as a socket or file. You can’t just have a single socket object shared byeveryone because chaos would ensue if multiple threads ever started reading and writingon it at the same time. Thread-local storage fixes this by making such resources onlyvisible in the thread where they’re being used.
In this recipe, the use of threading.local() makes the LazyConnection class supportone connection per thread, as opposed to one connection for the entire process. It’s asubtle but interesting distinction.
Under the covers, an instance of threading.local() maintains a separate instancedictionary for each thread. All of the usual instance operations of getting, setting, anddeleting values just manipulate the per-thread dictionary. The fact that each thread usesa separate dictionary is what provides the isolation of data.
12.7. Creating a Thread PoolProblemYou want to create a pool of worker threads for serving clients or performing other kindsof work.
12.7. Creating a Thread Pool | 505
Dow
nlo
ad fro
m W
ow
! eBook
<w
ww
.wow
ebook.
com
>
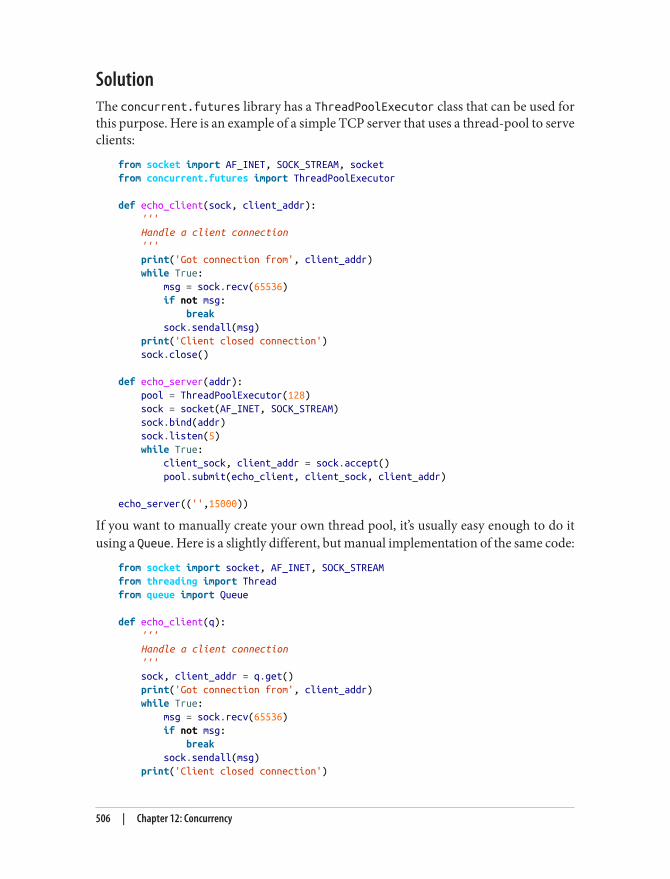
SolutionThe concurrent.futures library has a ThreadPoolExecutor class that can be used forthis purpose. Here is an example of a simple TCP server that uses a thread-pool to serveclients:
from socket import AF_INET, SOCK_STREAM, socketfrom concurrent.futures import ThreadPoolExecutor
def echo_client(sock, client_addr): ''' Handle a client connection ''' print('Got connection from', client_addr) while True: msg = sock.recv(65536) if not msg: break sock.sendall(msg) print('Client closed connection') sock.close()
def echo_server(addr): pool = ThreadPoolExecutor(128) sock = socket(AF_INET, SOCK_STREAM) sock.bind(addr) sock.listen(5) while True: client_sock, client_addr = sock.accept() pool.submit(echo_client, client_sock, client_addr)
echo_server(('',15000))
If you want to manually create your own thread pool, it’s usually easy enough to do itusing a Queue. Here is a slightly different, but manual implementation of the same code:
from socket import socket, AF_INET, SOCK_STREAMfrom threading import Threadfrom queue import Queue
def echo_client(q): ''' Handle a client connection ''' sock, client_addr = q.get() print('Got connection from', client_addr) while True: msg = sock.recv(65536) if not msg: break sock.sendall(msg) print('Client closed connection')
506 | Chapter 12: Concurrency
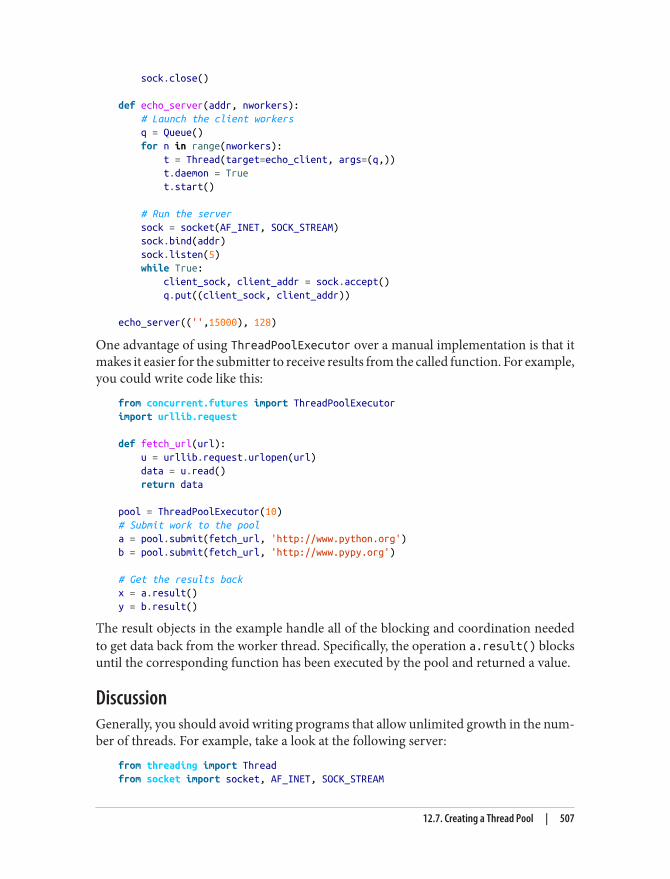
sock.close()
def echo_server(addr, nworkers): # Launch the client workers q = Queue() for n in range(nworkers): t = Thread(target=echo_client, args=(q,)) t.daemon = True t.start()
# Run the server sock = socket(AF_INET, SOCK_STREAM) sock.bind(addr) sock.listen(5) while True: client_sock, client_addr = sock.accept() q.put((client_sock, client_addr))
echo_server(('',15000), 128)
One advantage of using ThreadPoolExecutor over a manual implementation is that itmakes it easier for the submitter to receive results from the called function. For example,you could write code like this:
from concurrent.futures import ThreadPoolExecutorimport urllib.request
def fetch_url(url): u = urllib.request.urlopen(url) data = u.read() return data
pool = ThreadPoolExecutor(10)# Submit work to the poola = pool.submit(fetch_url, 'http://www.python.org')b = pool.submit(fetch_url, 'http://www.pypy.org')
# Get the results backx = a.result()y = b.result()
The result objects in the example handle all of the blocking and coordination neededto get data back from the worker thread. Specifically, the operation a.result() blocksuntil the corresponding function has been executed by the pool and returned a value.
DiscussionGenerally, you should avoid writing programs that allow unlimited growth in the num‐ber of threads. For example, take a look at the following server:
from threading import Threadfrom socket import socket, AF_INET, SOCK_STREAM
12.7. Creating a Thread Pool | 507
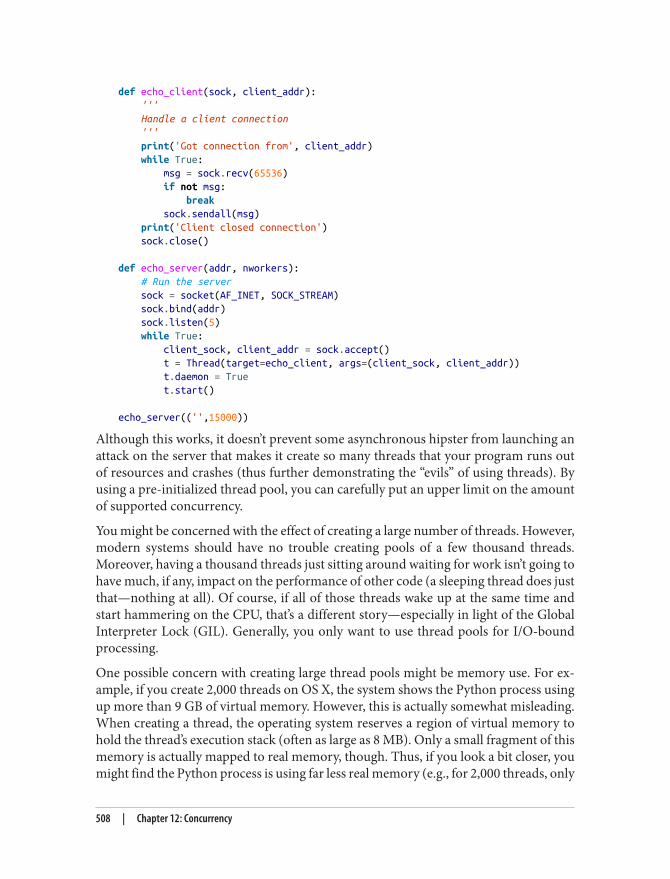
def echo_client(sock, client_addr): ''' Handle a client connection ''' print('Got connection from', client_addr) while True: msg = sock.recv(65536) if not msg: break sock.sendall(msg) print('Client closed connection') sock.close()
def echo_server(addr, nworkers): # Run the server sock = socket(AF_INET, SOCK_STREAM) sock.bind(addr) sock.listen(5) while True: client_sock, client_addr = sock.accept() t = Thread(target=echo_client, args=(client_sock, client_addr)) t.daemon = True t.start()
echo_server(('',15000))
Although this works, it doesn’t prevent some asynchronous hipster from launching anattack on the server that makes it create so many threads that your program runs outof resources and crashes (thus further demonstrating the “evils” of using threads). Byusing a pre-initialized thread pool, you can carefully put an upper limit on the amountof supported concurrency.
You might be concerned with the effect of creating a large number of threads. However,modern systems should have no trouble creating pools of a few thousand threads.Moreover, having a thousand threads just sitting around waiting for work isn’t going tohave much, if any, impact on the performance of other code (a sleeping thread does justthat—nothing at all). Of course, if all of those threads wake up at the same time andstart hammering on the CPU, that’s a different story—especially in light of the GlobalInterpreter Lock (GIL). Generally, you only want to use thread pools for I/O-boundprocessing.
One possible concern with creating large thread pools might be memory use. For ex‐ample, if you create 2,000 threads on OS X, the system shows the Python process usingup more than 9 GB of virtual memory. However, this is actually somewhat misleading.When creating a thread, the operating system reserves a region of virtual memory tohold the thread’s execution stack (often as large as 8 MB). Only a small fragment of thismemory is actually mapped to real memory, though. Thus, if you look a bit closer, youmight find the Python process is using far less real memory (e.g., for 2,000 threads, only
508 | Chapter 12: Concurrency
70 MB of real memory is used, not 9 GB). If the size of the virtual memory is a concern,you can dial it down using the threading.stack_size() function. For example:
import threadingthreading.stack_size(65536)
If you add this call and repeat the experiment of creating 2,000 threads, you’ll find thatthe Python process is now only using about 210 MB of virtual memory, although theamount of real memory in use remains about the same. Note that the thread stack sizemust be at least 32,768 bytes, and is usually restricted to be a multiple of the systemmemory page size (4096, 8192, etc.).
12.8. Performing Simple Parallel ProgrammingProblemYou have a program that performs a lot of CPU-intensive work, and you want to makeit run faster by having it take advantage of multiple CPUs.
SolutionThe concurrent.futures library provides a ProcessPoolExecutor class that can beused to execute computationally intensive functions in a separately running instance ofthe Python interpreter. However, in order to use it, you first need to have some com‐putationally intensive work. Let’s illustrate with a simple yet practical example.
Suppose you have an entire directory of gzip-compressed Apache web server logs:
logs/ 20120701.log.gz 20120702.log.gz 20120703.log.gz 20120704.log.gz 20120705.log.gz 20120706.log.gz ...
Further suppose each log file contains lines like this:
124.115.6.12 - - [10/Jul/2012:00:18:50 -0500] "GET /robots.txt ..." 200 71210.212.209.67 - - [10/Jul/2012:00:18:51 -0500] "GET /ply/ ..." 200 11875210.212.209.67 - - [10/Jul/2012:00:18:51 -0500] "GET /favicon.ico ..." 404 36961.135.216.105 - - [10/Jul/2012:00:20:04 -0500] "GET /blog/atom.xml ..." 304 -...
Here is a simple script that takes this data and identifies all hosts that have accessed therobots.txt file:
12.8. Performing Simple Parallel Programming | 509
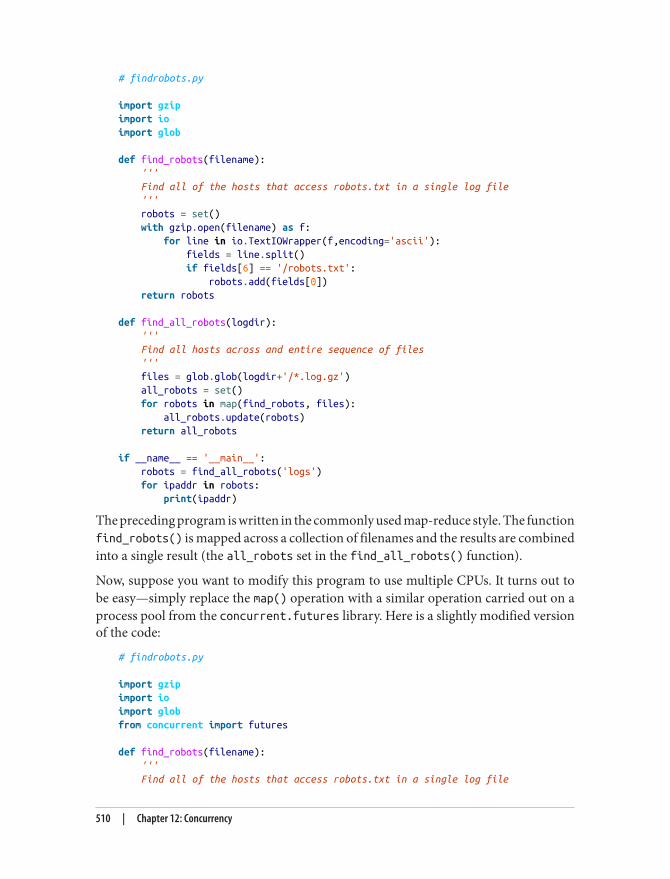
# findrobots.py
import gzipimport ioimport glob
def find_robots(filename): ''' Find all of the hosts that access robots.txt in a single log file ''' robots = set() with gzip.open(filename) as f: for line in io.TextIOWrapper(f,encoding='ascii'): fields = line.split() if fields[6] == '/robots.txt': robots.add(fields[0]) return robots
def find_all_robots(logdir): ''' Find all hosts across and entire sequence of files ''' files = glob.glob(logdir+'/*.log.gz') all_robots = set() for robots in map(find_robots, files): all_robots.update(robots) return all_robots
if __name__ == '__main__': robots = find_all_robots('logs') for ipaddr in robots: print(ipaddr)
The preceding program is written in the commonly used map-reduce style. The functionfind_robots() is mapped across a collection of filenames and the results are combinedinto a single result (the all_robots set in the find_all_robots() function).
Now, suppose you want to modify this program to use multiple CPUs. It turns out tobe easy—simply replace the map() operation with a similar operation carried out on aprocess pool from the concurrent.futures library. Here is a slightly modified versionof the code:
# findrobots.py
import gzipimport ioimport globfrom concurrent import futures
def find_robots(filename): ''' Find all of the hosts that access robots.txt in a single log file
510 | Chapter 12: Concurrency
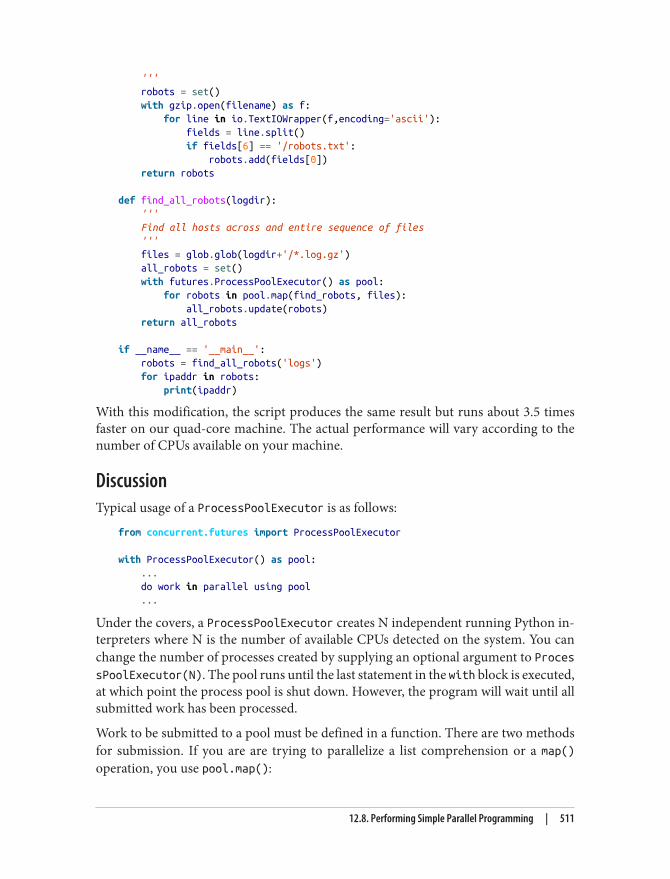
''' robots = set() with gzip.open(filename) as f: for line in io.TextIOWrapper(f,encoding='ascii'): fields = line.split() if fields[6] == '/robots.txt': robots.add(fields[0]) return robots
def find_all_robots(logdir): ''' Find all hosts across and entire sequence of files ''' files = glob.glob(logdir+'/*.log.gz') all_robots = set() with futures.ProcessPoolExecutor() as pool: for robots in pool.map(find_robots, files): all_robots.update(robots) return all_robots
if __name__ == '__main__': robots = find_all_robots('logs') for ipaddr in robots: print(ipaddr)
With this modification, the script produces the same result but runs about 3.5 timesfaster on our quad-core machine. The actual performance will vary according to thenumber of CPUs available on your machine.
DiscussionTypical usage of a ProcessPoolExecutor is as follows:
from concurrent.futures import ProcessPoolExecutor
with ProcessPoolExecutor() as pool: ... do work in parallel using pool ...
Under the covers, a ProcessPoolExecutor creates N independent running Python in‐terpreters where N is the number of available CPUs detected on the system. You canchange the number of processes created by supplying an optional argument to ProcessPoolExecutor(N). The pool runs until the last statement in the with block is executed,at which point the process pool is shut down. However, the program will wait until allsubmitted work has been processed.
Work to be submitted to a pool must be defined in a function. There are two methodsfor submission. If you are are trying to parallelize a list comprehension or a map()operation, you use pool.map():
12.8. Performing Simple Parallel Programming | 511
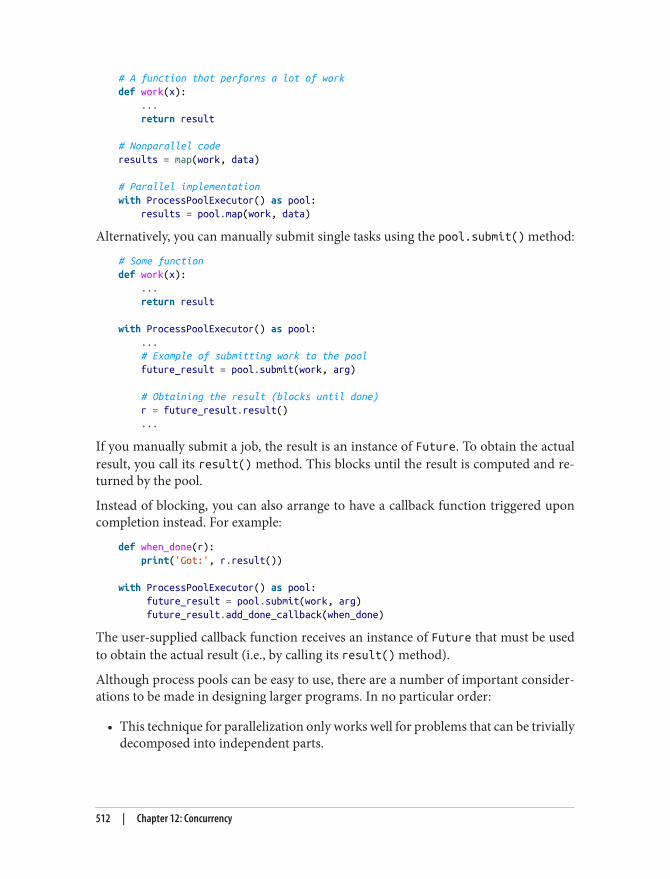
# A function that performs a lot of workdef work(x): ... return result
# Nonparallel coderesults = map(work, data)
# Parallel implementationwith ProcessPoolExecutor() as pool: results = pool.map(work, data)
Alternatively, you can manually submit single tasks using the pool.submit() method:
# Some functiondef work(x): ... return result
with ProcessPoolExecutor() as pool: ... # Example of submitting work to the pool future_result = pool.submit(work, arg)
# Obtaining the result (blocks until done) r = future_result.result() ...
If you manually submit a job, the result is an instance of Future. To obtain the actualresult, you call its result() method. This blocks until the result is computed and re‐turned by the pool.
Instead of blocking, you can also arrange to have a callback function triggered uponcompletion instead. For example:
def when_done(r): print('Got:', r.result())
with ProcessPoolExecutor() as pool: future_result = pool.submit(work, arg) future_result.add_done_callback(when_done)
The user-supplied callback function receives an instance of Future that must be usedto obtain the actual result (i.e., by calling its result() method).
Although process pools can be easy to use, there are a number of important consider‐ations to be made in designing larger programs. In no particular order:
• This technique for parallelization only works well for problems that can be triviallydecomposed into independent parts.
512 | Chapter 12: Concurrency
• Work must be submitted in the form of simple functions. Parallel execution ofinstance methods, closures, or other kinds of constructs are not supported.
• Function arguments and return values must be compatible with pickle. Work iscarried out in a separate interpreter using interprocess communication. Thus, dataexchanged between interpreters has to be serialized.
• Functions submitted for work should not maintain persistent state or have sideeffects. With the exception of simple things such as logging, you don’t really haveany control over the behavior of child processes once started. Thus, to preserve yoursanity, it is probably best to keep things simple and carry out work in pure-functionsthat don’t alter their environment.
• Process pools are created by calling the fork() system call on Unix. This makes aclone of the Python interpreter, including all of the program state at the time of thefork. On Windows, an independent copy of the interpreter that does not clone stateis launched. The actual forking process does not occur until the first pool.map()or pool.submit() method is called.
• Great care should be made when combining process pools and programs that usethreads. In particular, you should probably create and launch process pools priorto the creation of any threads (e.g., create the pool in the main thread at programstartup).
12.9. Dealing with the GIL (and How to Stop WorryingAbout It)ProblemYou’ve heard about the Global Interpreter Lock (GIL), and are worried that it might beaffecting the performance of your multithreaded program.
SolutionAlthough Python fully supports thread programming, parts of the C implementationof the interpreter are not entirely thread safe to a level of allowing fully concurrentexecution. In fact, the interpreter is protected by a so-called Global Interpreter Lock(GIL) that only allows one Python thread to execute at any given time. The most no‐ticeable effect of the GIL is that multithreaded Python programs are not able to fullytake advantage of multiple CPU cores (e.g., a computationally intensive applicationusing more than one thread only runs on a single CPU).
12.9. Dealing with the GIL (and How to Stop Worrying About It) | 513

Before discussing common GIL workarounds, it is important to emphasize that the GILtends to only affect programs that are heavily CPU bound (i.e., dominated by compu‐tation). If your program is mostly doing I/O, such as network communication, threadsare often a sensible choice because they’re mostly going to spend their time sittingaround waiting. In fact, you can create thousands of Python threads with barely a con‐cern. Modern operating systems have no trouble running with that many threads, soit’s simply not something you should worry much about.
For CPU-bound programs, you really need to study the nature of the computation beingperformed. For instance, careful choice of the underlying algorithm may produce a fargreater speedup than trying to parallelize an unoptimal algorithm with threads. Simi‐larly, given that Python is interpreted, you might get a far greater speedup simply bymoving performance-critical code into a C extension module. Extensions such as NumPy are also highly effective at speeding up certain kinds of calculations involvingarray data. Last, but not least, you might investigate alternative implementations, suchas PyPy, which features optimizations such as a JIT compiler (although, as of this writing,it does not yet support Python 3).
It’s also worth noting that threads are not necessarily used exclusively for performance.A CPU-bound program might be using threads to manage a graphical user interface, anetwork connection, or provide some other kind of service. In this case, the GIL canactually present more of a problem, since code that holds it for an excessively long periodwill cause annoying stalls in the non-CPU-bound threads. In fact, a poorly written Cextension can actually make this problem worse, even though the computation part ofthe code might run faster than before.
Having said all of this, there are two common strategies for working around the limi‐tations of the GIL. First, if you are working entirely in Python, you can use the multiprocessing module to create a process pool and use it like a co-processor. For example,suppose you have the following thread code:
# Performs a large calculation (CPU bound)def some_work(args): ... return result
# A thread that calls the above functiondef some_thread(): while True: ... r = some_work(args) ...
Here’s how you would modify the code to use a pool:
# Processing pool (see below for initiazation)pool = None
514 | Chapter 12: Concurrency
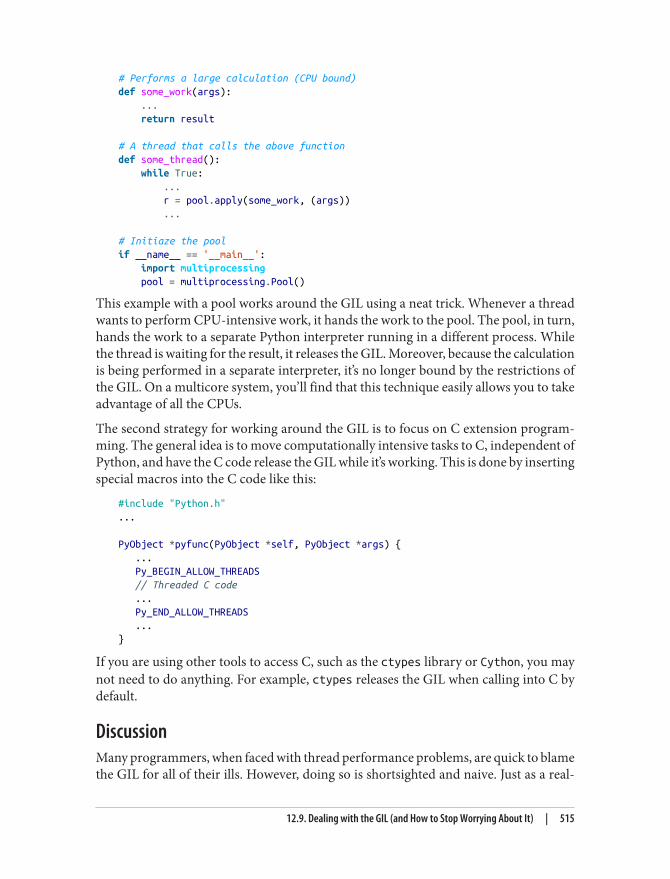
# Performs a large calculation (CPU bound)def some_work(args): ... return result
# A thread that calls the above functiondef some_thread(): while True: ... r = pool.apply(some_work, (args)) ...
# Initiaze the poolif __name__ == '__main__': import multiprocessing pool = multiprocessing.Pool()
This example with a pool works around the GIL using a neat trick. Whenever a threadwants to perform CPU-intensive work, it hands the work to the pool. The pool, in turn,hands the work to a separate Python interpreter running in a different process. Whilethe thread is waiting for the result, it releases the GIL. Moreover, because the calculationis being performed in a separate interpreter, it’s no longer bound by the restrictions ofthe GIL. On a multicore system, you’ll find that this technique easily allows you to takeadvantage of all the CPUs.
The second strategy for working around the GIL is to focus on C extension program‐ming. The general idea is to move computationally intensive tasks to C, independent ofPython, and have the C code release the GIL while it’s working. This is done by insertingspecial macros into the C code like this:
#include "Python.h"...
PyObject *pyfunc(PyObject *self, PyObject *args) { ... Py_BEGIN_ALLOW_THREADS // Threaded C code ... Py_END_ALLOW_THREADS ...}
If you are using other tools to access C, such as the ctypes library or Cython, you maynot need to do anything. For example, ctypes releases the GIL when calling into C bydefault.
DiscussionMany programmers, when faced with thread performance problems, are quick to blamethe GIL for all of their ills. However, doing so is shortsighted and naive. Just as a real-
12.9. Dealing with the GIL (and How to Stop Worrying About It) | 515
world example, mysterious “stalls” in a multithreaded network program might be causedby something entirely different (e.g., a stalled DNS lookup) rather than anything relatedto the GIL. The bottom line is that you really need to study your code to know if theGIL is an issue or not. Again, realize that the GIL is mostly concerned with CPU-boundprocessing, not I/O.
If you are going to use a process pool as a workaround, be aware that doing so involvesdata serialization and communication with a different Python interpreter. For this towork, the operation to be performed needs to be contained within a Python functiondefined by the def statement (i.e., no lambdas, closures, callable instances, etc.), and thefunction arguments and return value must be compatible with pickle. Also, the amountof work to be performed must be sufficiently large to make up for the extra communi‐cation overhead.
Another subtle aspect of pools is that mixing threads and process pools together can bea good way to make your head explode. If you are going to use both of these featurestogether, it is often best to create the process pool as a singleton at program startup,prior to the creation of any threads. Threads will then use the same process pool for allof their computationally intensive work.
For C extensions, the most important feature is maintaining isolation from the Pythoninterpreter process. That is, if you’re going to offload work from Python to C, you needto make sure the C code operates independently of Python. This means using no Pythondata structures and making no calls to Python’s C API. Another consideration is thatyou want to make sure your C extension does enough work to make it all worthwhile.That is, it’s much better if the extension can perform millions of calculations as opposedto just a few small calculations.
Needless to say, these solutions to working around the GIL don’t apply to all possibleproblems. For instance, certain kinds of applications don’t work well if separated intomultiple processes, nor may you want to code parts in C. For these kinds of applications,you may have to come up with your own solution (e.g., multiple processes accessingshared memory regions, multiple interpreters running in the same process, etc.). Al‐ternatively, you might look at some other implementations of the interpreter, such asPyPy.
See Recipes 15.7 and 15.10 for additional information on releasing the GIL in Cextensions.
12.10. Defining an Actor TaskProblemYou’d like to define tasks with behavior similar to “actors” in the so-called “actor model.”
516 | Chapter 12: Concurrency
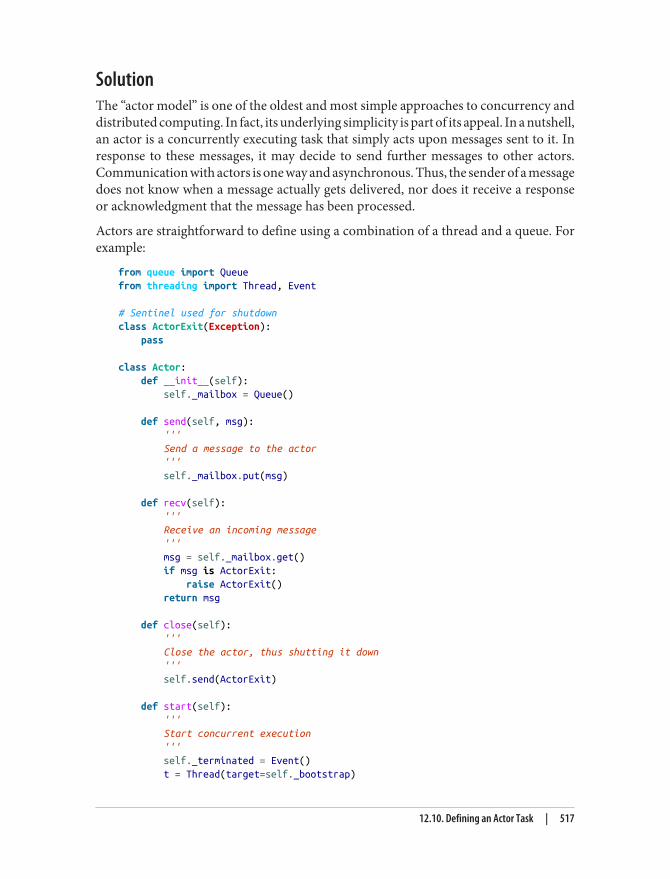
SolutionThe “actor model” is one of the oldest and most simple approaches to concurrency anddistributed computing. In fact, its underlying simplicity is part of its appeal. In a nutshell,an actor is a concurrently executing task that simply acts upon messages sent to it. Inresponse to these messages, it may decide to send further messages to other actors.Communication with actors is one way and asynchronous. Thus, the sender of a messagedoes not know when a message actually gets delivered, nor does it receive a responseor acknowledgment that the message has been processed.
Actors are straightforward to define using a combination of a thread and a queue. Forexample:
from queue import Queuefrom threading import Thread, Event
# Sentinel used for shutdownclass ActorExit(Exception): pass
class Actor: def __init__(self): self._mailbox = Queue()
def send(self, msg): ''' Send a message to the actor ''' self._mailbox.put(msg)
def recv(self): ''' Receive an incoming message ''' msg = self._mailbox.get() if msg is ActorExit: raise ActorExit() return msg
def close(self): ''' Close the actor, thus shutting it down ''' self.send(ActorExit)
def start(self): ''' Start concurrent execution ''' self._terminated = Event() t = Thread(target=self._bootstrap)
12.10. Defining an Actor Task | 517
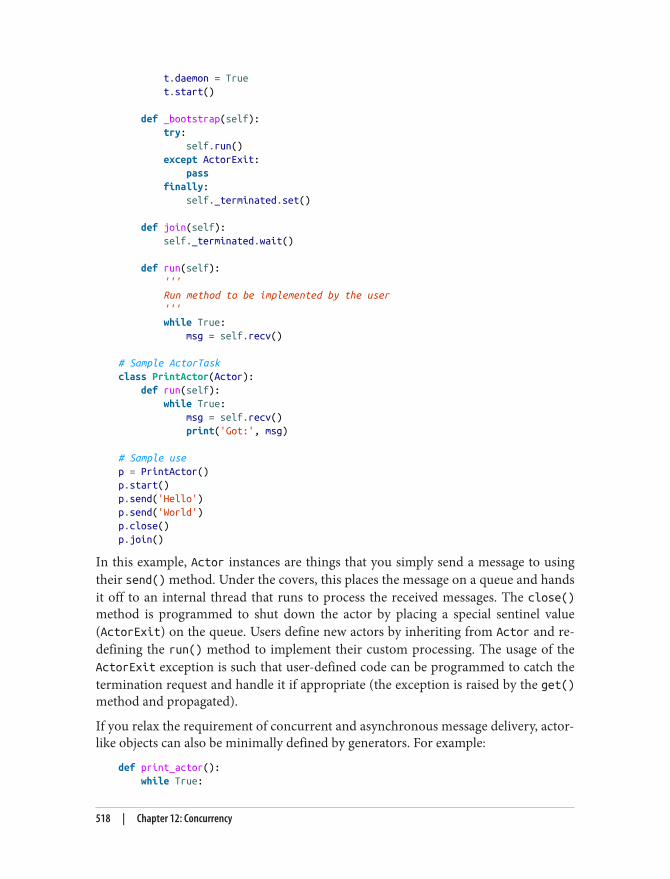
t.daemon = True t.start()
def _bootstrap(self): try: self.run() except ActorExit: pass finally: self._terminated.set()
def join(self): self._terminated.wait()
def run(self): ''' Run method to be implemented by the user ''' while True: msg = self.recv()
# Sample ActorTaskclass PrintActor(Actor): def run(self): while True: msg = self.recv() print('Got:', msg)
# Sample usep = PrintActor()p.start()p.send('Hello')p.send('World')p.close()p.join()
In this example, Actor instances are things that you simply send a message to usingtheir send() method. Under the covers, this places the message on a queue and handsit off to an internal thread that runs to process the received messages. The close()method is programmed to shut down the actor by placing a special sentinel value(ActorExit) on the queue. Users define new actors by inheriting from Actor and re‐defining the run() method to implement their custom processing. The usage of theActorExit exception is such that user-defined code can be programmed to catch thetermination request and handle it if appropriate (the exception is raised by the get()method and propagated).
If you relax the requirement of concurrent and asynchronous message delivery, actor-like objects can also be minimally defined by generators. For example:
def print_actor(): while True:
518 | Chapter 12: Concurrency
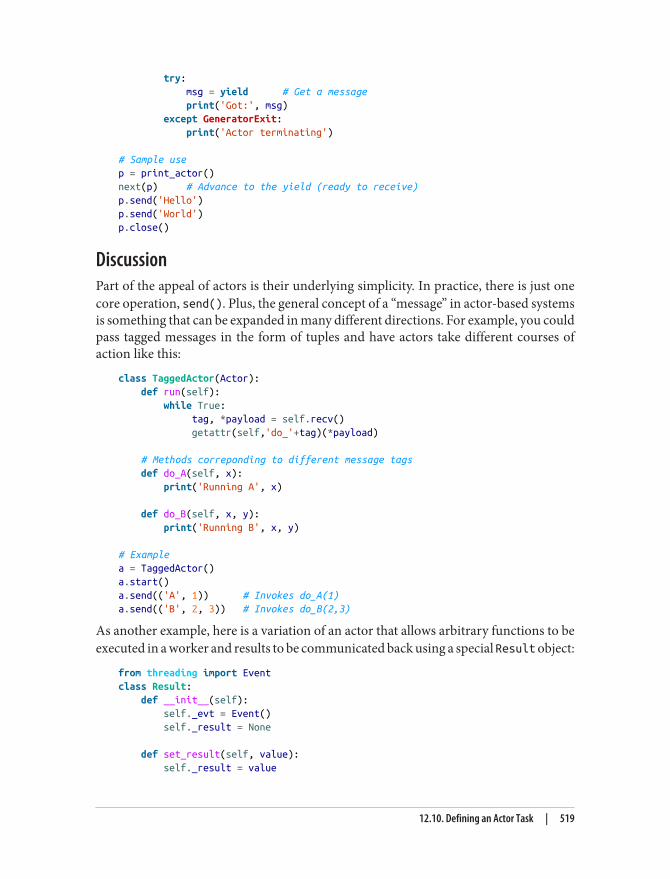
try: msg = yield # Get a message print('Got:', msg) except GeneratorExit: print('Actor terminating')
# Sample usep = print_actor()next(p) # Advance to the yield (ready to receive)p.send('Hello')p.send('World')p.close()
DiscussionPart of the appeal of actors is their underlying simplicity. In practice, there is just onecore operation, send(). Plus, the general concept of a “message” in actor-based systemsis something that can be expanded in many different directions. For example, you couldpass tagged messages in the form of tuples and have actors take different courses ofaction like this:
class TaggedActor(Actor): def run(self): while True: tag, *payload = self.recv() getattr(self,'do_'+tag)(*payload)
# Methods correponding to different message tags def do_A(self, x): print('Running A', x)
def do_B(self, x, y): print('Running B', x, y)
# Examplea = TaggedActor()a.start()a.send(('A', 1)) # Invokes do_A(1)a.send(('B', 2, 3)) # Invokes do_B(2,3)
As another example, here is a variation of an actor that allows arbitrary functions to beexecuted in a worker and results to be communicated back using a special Result object:
from threading import Eventclass Result: def __init__(self): self._evt = Event() self._result = None
def set_result(self, value): self._result = value
12.10. Defining an Actor Task | 519
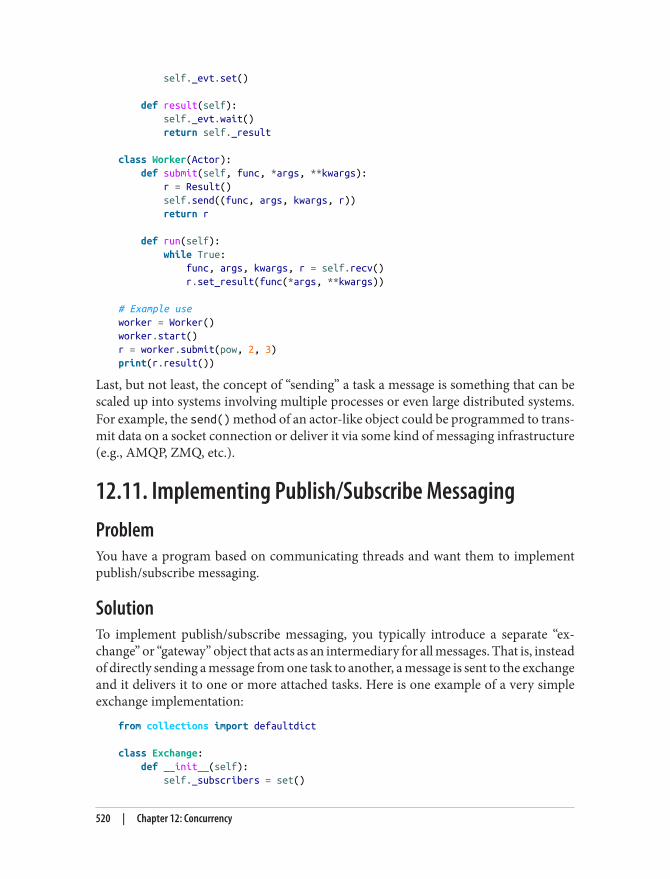
self._evt.set()
def result(self): self._evt.wait() return self._result
class Worker(Actor): def submit(self, func, *args, **kwargs): r = Result() self.send((func, args, kwargs, r)) return r
def run(self): while True: func, args, kwargs, r = self.recv() r.set_result(func(*args, **kwargs))
# Example useworker = Worker()worker.start()r = worker.submit(pow, 2, 3)print(r.result())
Last, but not least, the concept of “sending” a task a message is something that can bescaled up into systems involving multiple processes or even large distributed systems.For example, the send() method of an actor-like object could be programmed to trans‐mit data on a socket connection or deliver it via some kind of messaging infrastructure(e.g., AMQP, ZMQ, etc.).
12.11. Implementing Publish/Subscribe MessagingProblemYou have a program based on communicating threads and want them to implementpublish/subscribe messaging.
SolutionTo implement publish/subscribe messaging, you typically introduce a separate “ex‐change” or “gateway” object that acts as an intermediary for all messages. That is, insteadof directly sending a message from one task to another, a message is sent to the exchangeand it delivers it to one or more attached tasks. Here is one example of a very simpleexchange implementation:
from collections import defaultdict
class Exchange: def __init__(self): self._subscribers = set()
520 | Chapter 12: Concurrency
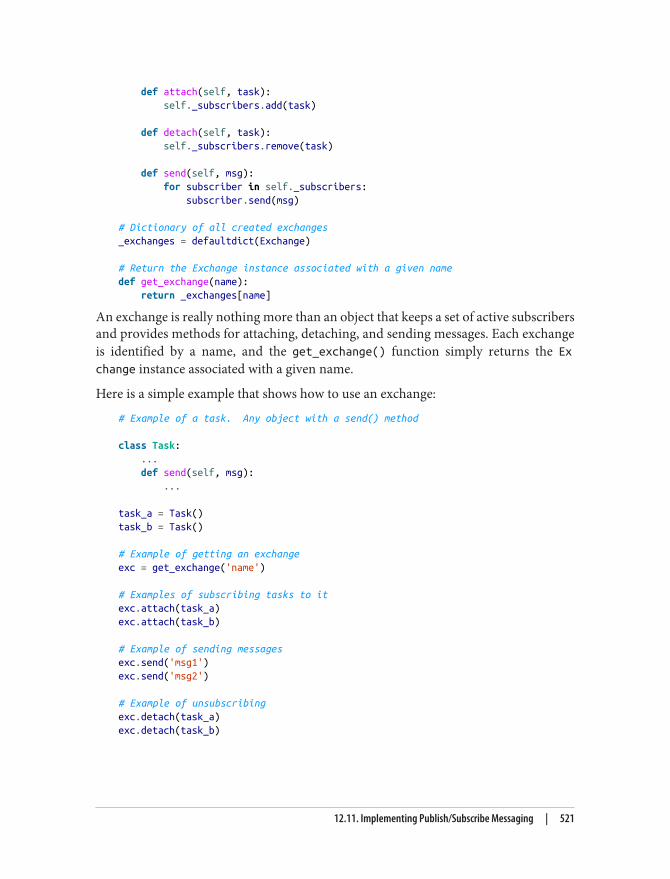
def attach(self, task): self._subscribers.add(task)
def detach(self, task): self._subscribers.remove(task)
def send(self, msg): for subscriber in self._subscribers: subscriber.send(msg)
# Dictionary of all created exchanges_exchanges = defaultdict(Exchange)
# Return the Exchange instance associated with a given namedef get_exchange(name): return _exchanges[name]
An exchange is really nothing more than an object that keeps a set of active subscribersand provides methods for attaching, detaching, and sending messages. Each exchangeis identified by a name, and the get_exchange() function simply returns the Exchange instance associated with a given name.
Here is a simple example that shows how to use an exchange:
# Example of a task. Any object with a send() method
class Task: ... def send(self, msg): ...
task_a = Task()task_b = Task()
# Example of getting an exchangeexc = get_exchange('name')
# Examples of subscribing tasks to itexc.attach(task_a)exc.attach(task_b)
# Example of sending messagesexc.send('msg1')exc.send('msg2')
# Example of unsubscribingexc.detach(task_a)exc.detach(task_b)
12.11. Implementing Publish/Subscribe Messaging | 521
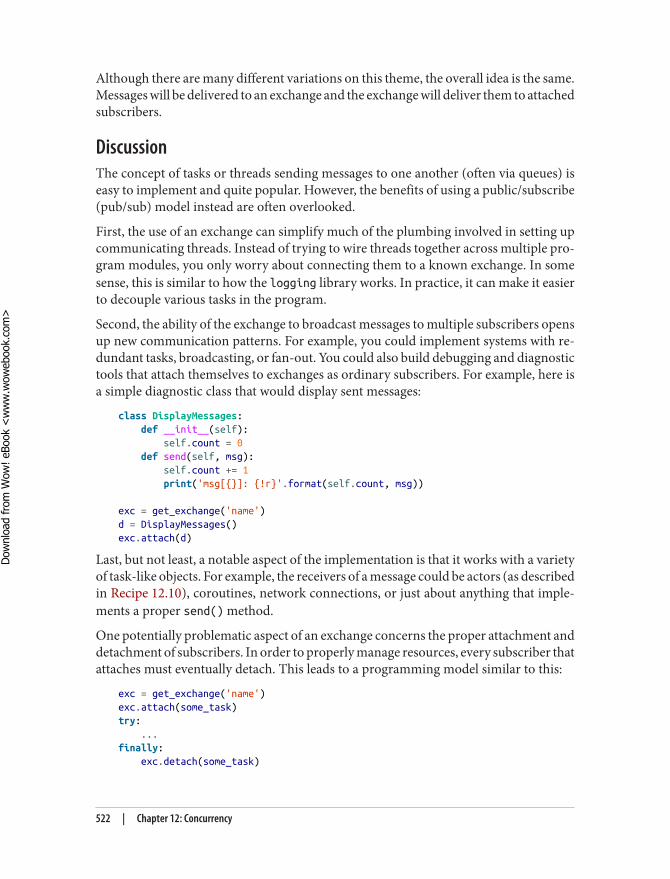
Although there are many different variations on this theme, the overall idea is the same.Messages will be delivered to an exchange and the exchange will deliver them to attachedsubscribers.
DiscussionThe concept of tasks or threads sending messages to one another (often via queues) iseasy to implement and quite popular. However, the benefits of using a public/subscribe(pub/sub) model instead are often overlooked.
First, the use of an exchange can simplify much of the plumbing involved in setting upcommunicating threads. Instead of trying to wire threads together across multiple pro‐gram modules, you only worry about connecting them to a known exchange. In somesense, this is similar to how the logging library works. In practice, it can make it easierto decouple various tasks in the program.
Second, the ability of the exchange to broadcast messages to multiple subscribers opensup new communication patterns. For example, you could implement systems with re‐dundant tasks, broadcasting, or fan-out. You could also build debugging and diagnostictools that attach themselves to exchanges as ordinary subscribers. For example, here isa simple diagnostic class that would display sent messages:
class DisplayMessages: def __init__(self): self.count = 0 def send(self, msg): self.count += 1 print('msg[{}]: {!r}'.format(self.count, msg))
exc = get_exchange('name')d = DisplayMessages()exc.attach(d)
Last, but not least, a notable aspect of the implementation is that it works with a varietyof task-like objects. For example, the receivers of a message could be actors (as describedin Recipe 12.10), coroutines, network connections, or just about anything that imple‐ments a proper send() method.
One potentially problematic aspect of an exchange concerns the proper attachment anddetachment of subscribers. In order to properly manage resources, every subscriber thatattaches must eventually detach. This leads to a programming model similar to this:
exc = get_exchange('name')exc.attach(some_task)try: ...finally: exc.detach(some_task)
522 | Chapter 12: Concurrency
Dow
nlo
ad fro
m W
ow
! eBook
<w
ww
.wow
ebook.
com
>
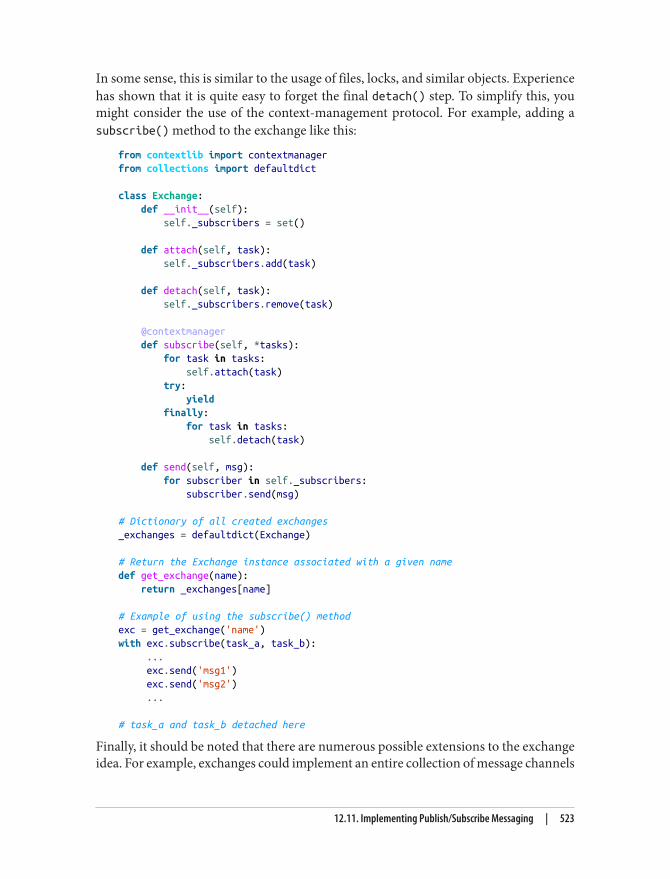
In some sense, this is similar to the usage of files, locks, and similar objects. Experiencehas shown that it is quite easy to forget the final detach() step. To simplify this, youmight consider the use of the context-management protocol. For example, adding asubscribe() method to the exchange like this:
from contextlib import contextmanagerfrom collections import defaultdict
class Exchange: def __init__(self): self._subscribers = set()
def attach(self, task): self._subscribers.add(task)
def detach(self, task): self._subscribers.remove(task)
@contextmanager def subscribe(self, *tasks): for task in tasks: self.attach(task) try: yield finally: for task in tasks: self.detach(task)
def send(self, msg): for subscriber in self._subscribers: subscriber.send(msg)
# Dictionary of all created exchanges_exchanges = defaultdict(Exchange)
# Return the Exchange instance associated with a given namedef get_exchange(name): return _exchanges[name]
# Example of using the subscribe() methodexc = get_exchange('name')with exc.subscribe(task_a, task_b): ... exc.send('msg1') exc.send('msg2') ...
# task_a and task_b detached here
Finally, it should be noted that there are numerous possible extensions to the exchangeidea. For example, exchanges could implement an entire collection of message channels
12.11. Implementing Publish/Subscribe Messaging | 523
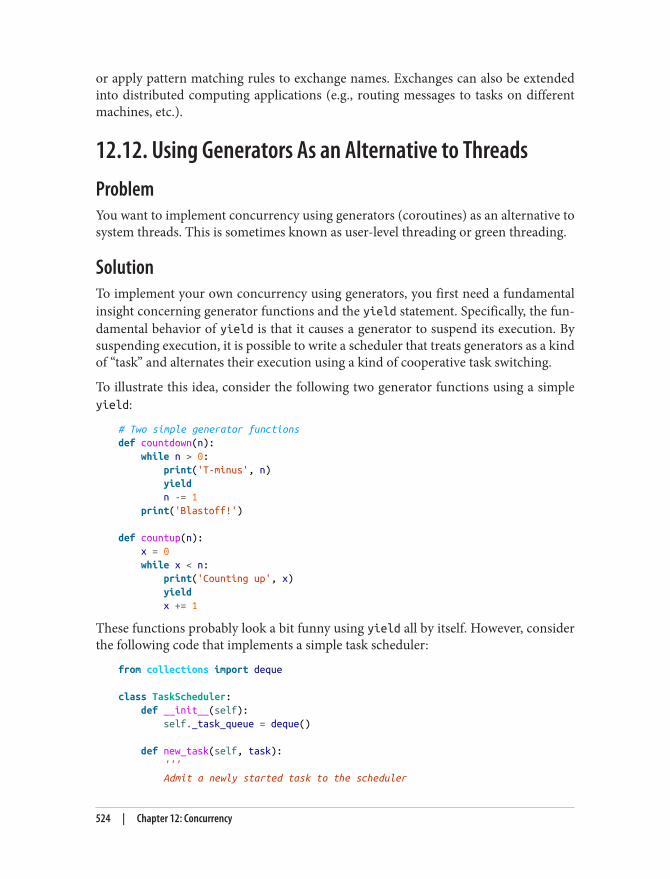
or apply pattern matching rules to exchange names. Exchanges can also be extendedinto distributed computing applications (e.g., routing messages to tasks on differentmachines, etc.).
12.12. Using Generators As an Alternative to ThreadsProblemYou want to implement concurrency using generators (coroutines) as an alternative tosystem threads. This is sometimes known as user-level threading or green threading.
SolutionTo implement your own concurrency using generators, you first need a fundamentalinsight concerning generator functions and the yield statement. Specifically, the fun‐damental behavior of yield is that it causes a generator to suspend its execution. Bysuspending execution, it is possible to write a scheduler that treats generators as a kindof “task” and alternates their execution using a kind of cooperative task switching.
To illustrate this idea, consider the following two generator functions using a simpleyield:
# Two simple generator functionsdef countdown(n): while n > 0: print('T-minus', n) yield n -= 1 print('Blastoff!')
def countup(n): x = 0 while x < n: print('Counting up', x) yield x += 1
These functions probably look a bit funny using yield all by itself. However, considerthe following code that implements a simple task scheduler:
from collections import deque
class TaskScheduler: def __init__(self): self._task_queue = deque()
def new_task(self, task): ''' Admit a newly started task to the scheduler
524 | Chapter 12: Concurrency
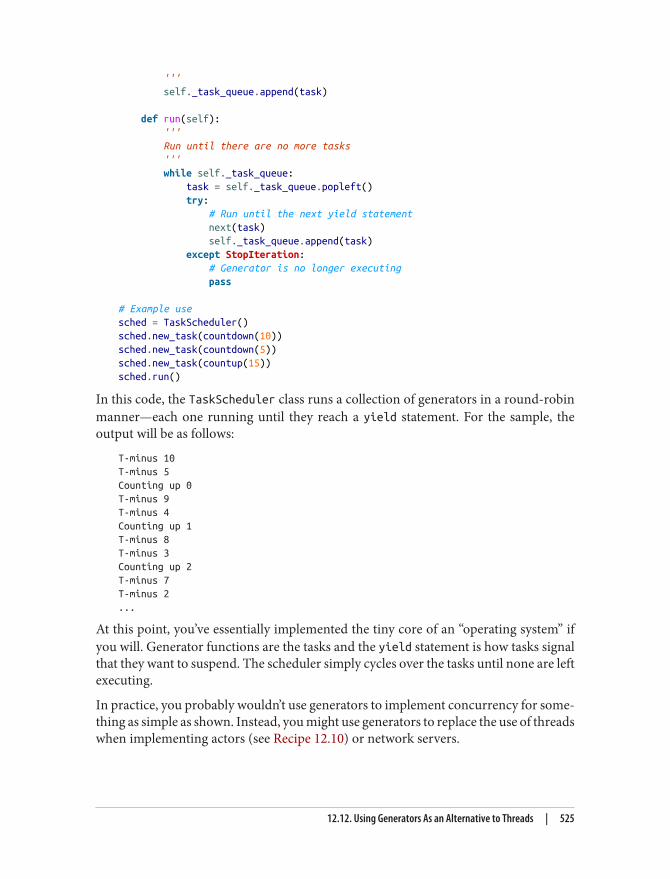
''' self._task_queue.append(task)
def run(self): ''' Run until there are no more tasks ''' while self._task_queue: task = self._task_queue.popleft() try: # Run until the next yield statement next(task) self._task_queue.append(task) except StopIteration: # Generator is no longer executing pass
# Example usesched = TaskScheduler()sched.new_task(countdown(10))sched.new_task(countdown(5))sched.new_task(countup(15))sched.run()
In this code, the TaskScheduler class runs a collection of generators in a round-robinmanner—each one running until they reach a yield statement. For the sample, theoutput will be as follows:
T-minus 10T-minus 5Counting up 0T-minus 9T-minus 4Counting up 1T-minus 8T-minus 3Counting up 2T-minus 7T-minus 2...
At this point, you’ve essentially implemented the tiny core of an “operating system” ifyou will. Generator functions are the tasks and the yield statement is how tasks signalthat they want to suspend. The scheduler simply cycles over the tasks until none are leftexecuting.
In practice, you probably wouldn’t use generators to implement concurrency for some‐thing as simple as shown. Instead, you might use generators to replace the use of threadswhen implementing actors (see Recipe 12.10) or network servers.
12.12. Using Generators As an Alternative to Threads | 525
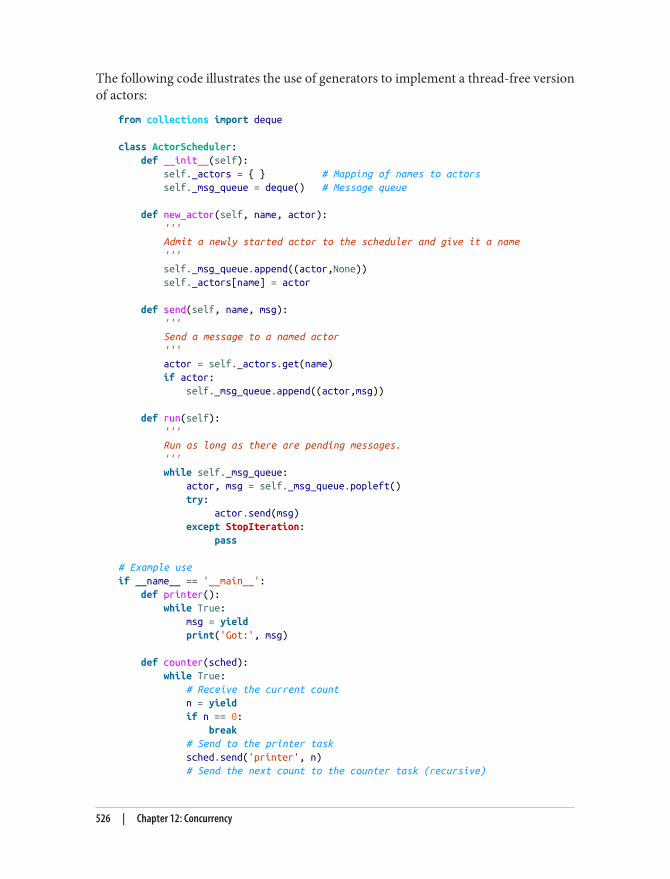
The following code illustrates the use of generators to implement a thread-free versionof actors:
from collections import deque
class ActorScheduler: def __init__(self): self._actors = { } # Mapping of names to actors self._msg_queue = deque() # Message queue
def new_actor(self, name, actor): ''' Admit a newly started actor to the scheduler and give it a name ''' self._msg_queue.append((actor,None)) self._actors[name] = actor
def send(self, name, msg): ''' Send a message to a named actor ''' actor = self._actors.get(name) if actor: self._msg_queue.append((actor,msg))
def run(self): ''' Run as long as there are pending messages. ''' while self._msg_queue: actor, msg = self._msg_queue.popleft() try: actor.send(msg) except StopIteration: pass
# Example useif __name__ == '__main__': def printer(): while True: msg = yield print('Got:', msg)
def counter(sched): while True: # Receive the current count n = yield if n == 0: break # Send to the printer task sched.send('printer', n) # Send the next count to the counter task (recursive)
526 | Chapter 12: Concurrency
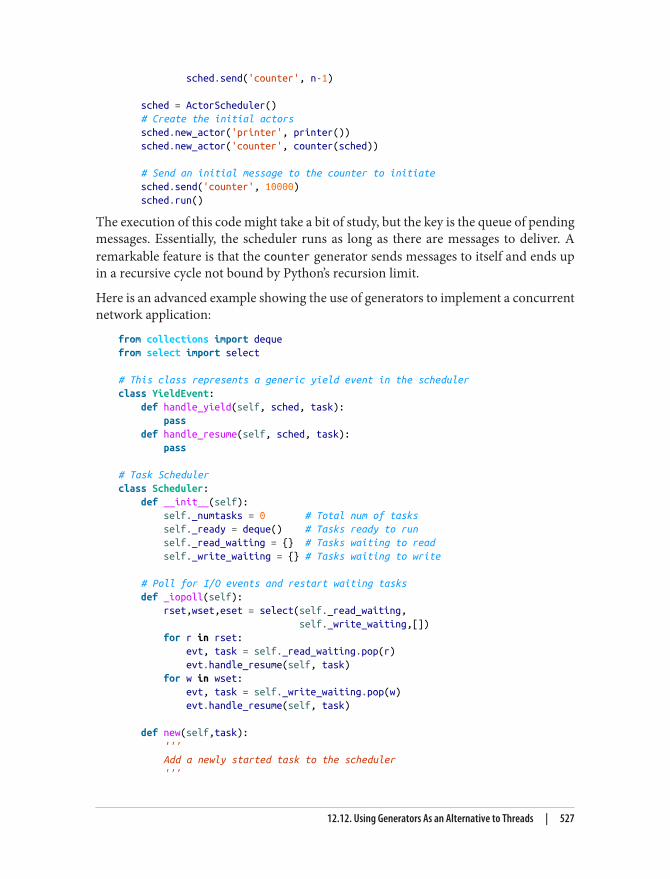
sched.send('counter', n-1)
sched = ActorScheduler() # Create the initial actors sched.new_actor('printer', printer()) sched.new_actor('counter', counter(sched))
# Send an initial message to the counter to initiate sched.send('counter', 10000) sched.run()
The execution of this code might take a bit of study, but the key is the queue of pendingmessages. Essentially, the scheduler runs as long as there are messages to deliver. Aremarkable feature is that the counter generator sends messages to itself and ends upin a recursive cycle not bound by Python’s recursion limit.
Here is an advanced example showing the use of generators to implement a concurrentnetwork application:
from collections import dequefrom select import select
# This class represents a generic yield event in the schedulerclass YieldEvent: def handle_yield(self, sched, task): pass def handle_resume(self, sched, task): pass
# Task Schedulerclass Scheduler: def __init__(self): self._numtasks = 0 # Total num of tasks self._ready = deque() # Tasks ready to run self._read_waiting = {} # Tasks waiting to read self._write_waiting = {} # Tasks waiting to write
# Poll for I/O events and restart waiting tasks def _iopoll(self): rset,wset,eset = select(self._read_waiting, self._write_waiting,[]) for r in rset: evt, task = self._read_waiting.pop(r) evt.handle_resume(self, task) for w in wset: evt, task = self._write_waiting.pop(w) evt.handle_resume(self, task)
def new(self,task): ''' Add a newly started task to the scheduler '''
12.12. Using Generators As an Alternative to Threads | 527
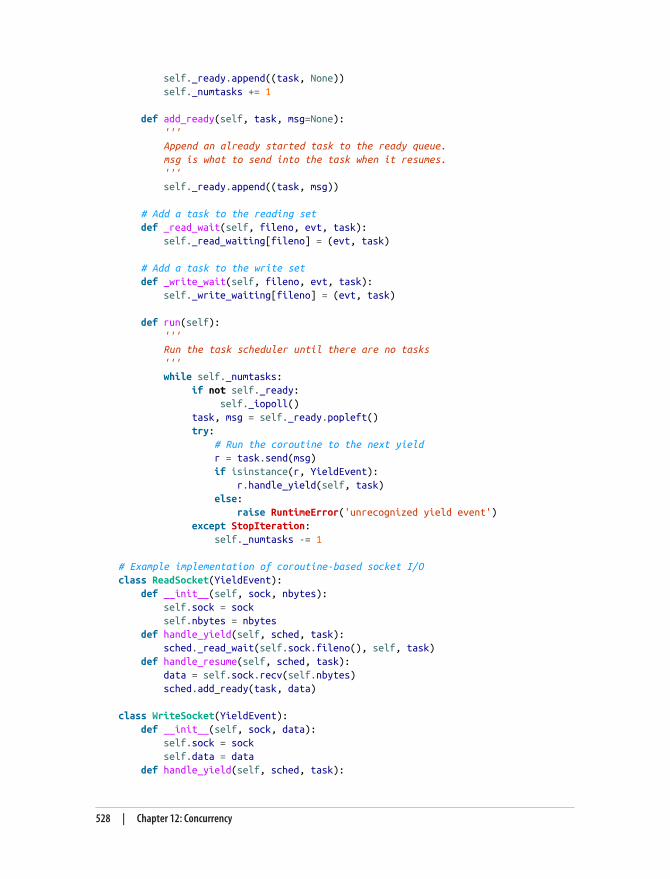
self._ready.append((task, None)) self._numtasks += 1
def add_ready(self, task, msg=None): ''' Append an already started task to the ready queue. msg is what to send into the task when it resumes. ''' self._ready.append((task, msg))
# Add a task to the reading set def _read_wait(self, fileno, evt, task): self._read_waiting[fileno] = (evt, task)
# Add a task to the write set def _write_wait(self, fileno, evt, task): self._write_waiting[fileno] = (evt, task)
def run(self): ''' Run the task scheduler until there are no tasks ''' while self._numtasks: if not self._ready: self._iopoll() task, msg = self._ready.popleft() try: # Run the coroutine to the next yield r = task.send(msg) if isinstance(r, YieldEvent): r.handle_yield(self, task) else: raise RuntimeError('unrecognized yield event') except StopIteration: self._numtasks -= 1
# Example implementation of coroutine-based socket I/Oclass ReadSocket(YieldEvent): def __init__(self, sock, nbytes): self.sock = sock self.nbytes = nbytes def handle_yield(self, sched, task): sched._read_wait(self.sock.fileno(), self, task) def handle_resume(self, sched, task): data = self.sock.recv(self.nbytes) sched.add_ready(task, data)
class WriteSocket(YieldEvent): def __init__(self, sock, data): self.sock = sock self.data = data def handle_yield(self, sched, task):
528 | Chapter 12: Concurrency
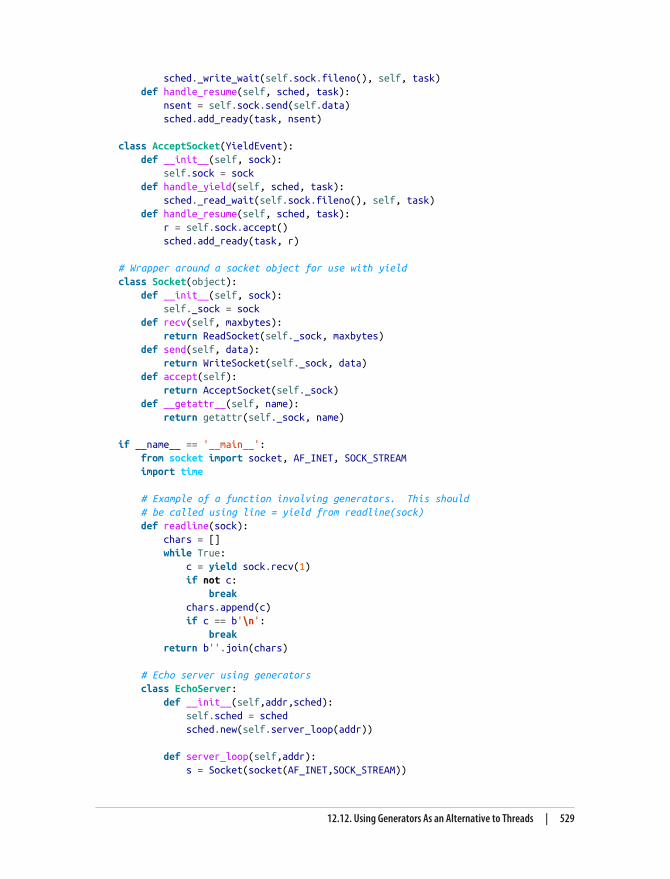
sched._write_wait(self.sock.fileno(), self, task) def handle_resume(self, sched, task): nsent = self.sock.send(self.data) sched.add_ready(task, nsent)
class AcceptSocket(YieldEvent): def __init__(self, sock): self.sock = sock def handle_yield(self, sched, task): sched._read_wait(self.sock.fileno(), self, task) def handle_resume(self, sched, task): r = self.sock.accept() sched.add_ready(task, r)
# Wrapper around a socket object for use with yieldclass Socket(object): def __init__(self, sock): self._sock = sock def recv(self, maxbytes): return ReadSocket(self._sock, maxbytes) def send(self, data): return WriteSocket(self._sock, data) def accept(self): return AcceptSocket(self._sock) def __getattr__(self, name): return getattr(self._sock, name)
if __name__ == '__main__': from socket import socket, AF_INET, SOCK_STREAM import time
# Example of a function involving generators. This should # be called using line = yield from readline(sock) def readline(sock): chars = [] while True: c = yield sock.recv(1) if not c: break chars.append(c) if c == b'\n': break return b''.join(chars)
# Echo server using generators class EchoServer: def __init__(self,addr,sched): self.sched = sched sched.new(self.server_loop(addr))
def server_loop(self,addr): s = Socket(socket(AF_INET,SOCK_STREAM))
12.12. Using Generators As an Alternative to Threads | 529
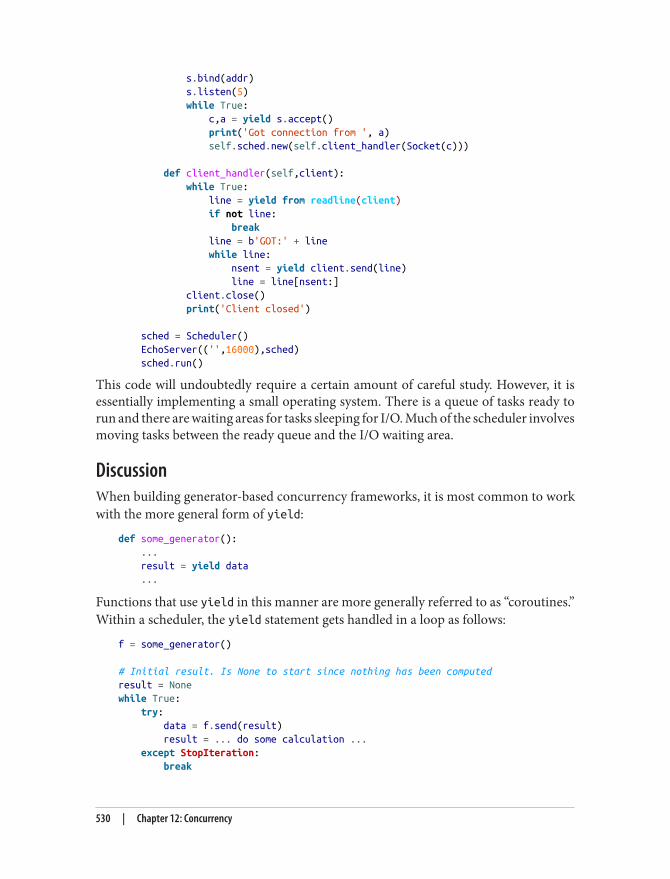
s.bind(addr) s.listen(5) while True: c,a = yield s.accept() print('Got connection from ', a) self.sched.new(self.client_handler(Socket(c)))
def client_handler(self,client): while True: line = yield from readline(client) if not line: break line = b'GOT:' + line while line: nsent = yield client.send(line) line = line[nsent:] client.close() print('Client closed')
sched = Scheduler() EchoServer(('',16000),sched) sched.run()
This code will undoubtedly require a certain amount of careful study. However, it isessentially implementing a small operating system. There is a queue of tasks ready torun and there are waiting areas for tasks sleeping for I/O. Much of the scheduler involvesmoving tasks between the ready queue and the I/O waiting area.
DiscussionWhen building generator-based concurrency frameworks, it is most common to workwith the more general form of yield:
def some_generator(): ... result = yield data ...
Functions that use yield in this manner are more generally referred to as “coroutines.”Within a scheduler, the yield statement gets handled in a loop as follows:
f = some_generator()
# Initial result. Is None to start since nothing has been computedresult = Nonewhile True: try: data = f.send(result) result = ... do some calculation ... except StopIteration: break
530 | Chapter 12: Concurrency
The logic concerning the result is a bit convoluted. However, the value passed to send()defines what gets returned when the yield statement wakes back up. So, if a yield isgoing to return a result in response to data that was previously yielded, it gets returnedon the next send() operation. If a generator function has just started, sending in a valueof None simply makes it advance to the first yield statement.
In addition to sending in values, it is also possible to execute a close() method on agenerator. This causes a silent GeneratorExit exception to be raised at the yield state‐ment, which stops execution. If desired, a generator can catch this exception and per‐form cleanup actions. It’s also possible to use the throw() method of a generator to raisean arbitrary execution at the yield statement. A task scheduler might use this to com‐municate errors into running generators.
The yield from statement used in the last example is used to implement coroutinesthat serve as subroutines or procedures to be called from other generators. Essentially,control transparently transfers to the new function. Unlike normal generators, a func‐tion that is called using yield from can return a value that becomes the result of theyield from statement. More information about yield from can be found in PEP 380.
Finally, if programming with generators, it is important to stress that there are somemajor limitations. In particular, you get none of the benefits that threads provide. Forinstance, if you execute any code that is CPU bound or which blocks for I/O, it willsuspend the entire task scheduler until the completion of that operation. To work aroundthis, your only real option is to delegate the operation to a separate thread or processwhere it can run independently. Another limitation is that most Python libraries havenot been written to work well with generator-based threading. If you take this approach,you may find that you need to write replacements for many standard library functions.
As basic background on coroutines and the techniques utilized in this recipe, see PEP342 and “A Curious Course on Coroutines and Concurrency”.
PEP 3156 also has a modern take on asynchronous I/O involving coroutines. In practice,it is extremelyunlikely that you will write a low-level coroutine scheduler yourself.However, ideas surrounding coroutines are the basis for many popular libraries, in‐cluding gevent, greenlet, Stackless Python, and similar projects.
12.13. Polling Multiple Thread QueuesProblemYou have a collection of thread queues, and you would like to be able to poll them forincoming items, much in the same way as you might poll a collection of network con‐nections for incoming data.
12.13. Polling Multiple Thread Queues | 531
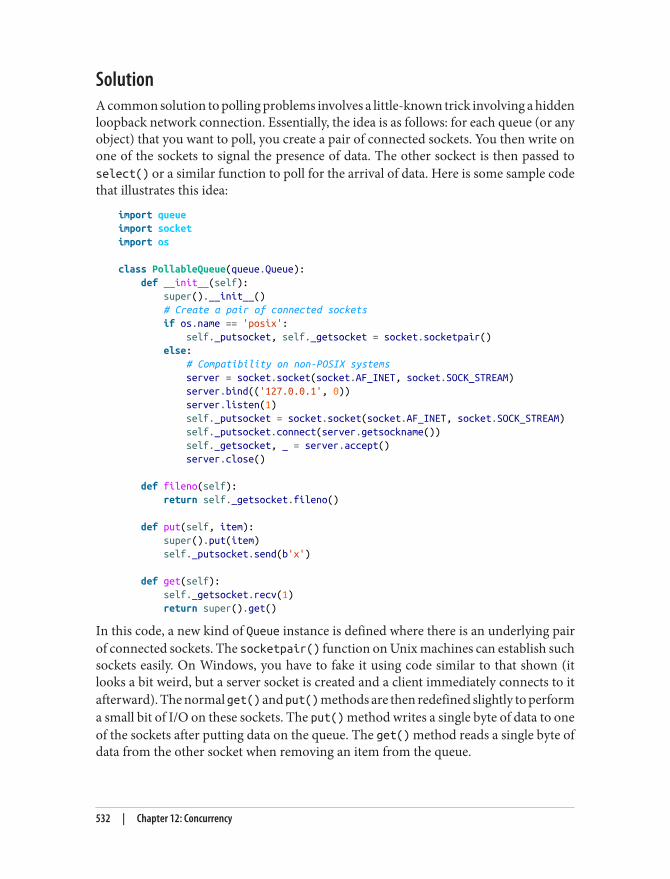
SolutionA common solution to polling problems involves a little-known trick involving a hiddenloopback network connection. Essentially, the idea is as follows: for each queue (or anyobject) that you want to poll, you create a pair of connected sockets. You then write onone of the sockets to signal the presence of data. The other sockect is then passed toselect() or a similar function to poll for the arrival of data. Here is some sample codethat illustrates this idea:
import queueimport socketimport os
class PollableQueue(queue.Queue): def __init__(self): super().__init__() # Create a pair of connected sockets if os.name == 'posix': self._putsocket, self._getsocket = socket.socketpair() else: # Compatibility on non-POSIX systems server = socket.socket(socket.AF_INET, socket.SOCK_STREAM) server.bind(('127.0.0.1', 0)) server.listen(1) self._putsocket = socket.socket(socket.AF_INET, socket.SOCK_STREAM) self._putsocket.connect(server.getsockname()) self._getsocket, _ = server.accept() server.close()
def fileno(self): return self._getsocket.fileno()
def put(self, item): super().put(item) self._putsocket.send(b'x')
def get(self): self._getsocket.recv(1) return super().get()
In this code, a new kind of Queue instance is defined where there is an underlying pairof connected sockets. The socketpair() function on Unix machines can establish suchsockets easily. On Windows, you have to fake it using code similar to that shown (itlooks a bit weird, but a server socket is created and a client immediately connects to itafterward). The normal get() and put() methods are then redefined slightly to performa small bit of I/O on these sockets. The put() method writes a single byte of data to oneof the sockets after putting data on the queue. The get() method reads a single byte ofdata from the other socket when removing an item from the queue.
532 | Chapter 12: Concurrency
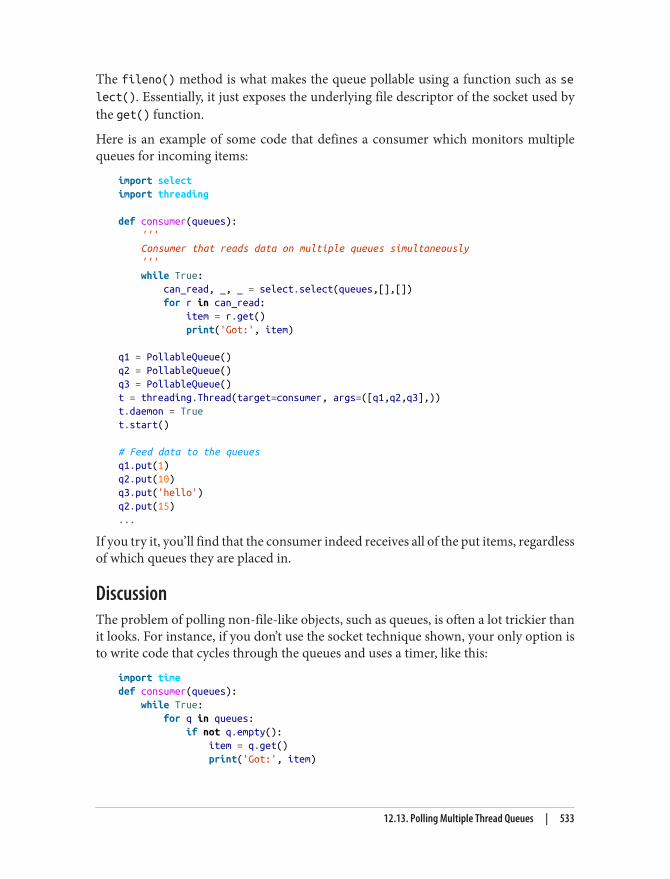
The fileno() method is what makes the queue pollable using a function such as select(). Essentially, it just exposes the underlying file descriptor of the socket used bythe get() function.
Here is an example of some code that defines a consumer which monitors multiplequeues for incoming items:
import selectimport threading
def consumer(queues): ''' Consumer that reads data on multiple queues simultaneously ''' while True: can_read, _, _ = select.select(queues,[],[]) for r in can_read: item = r.get() print('Got:', item)
q1 = PollableQueue()q2 = PollableQueue()q3 = PollableQueue()t = threading.Thread(target=consumer, args=([q1,q2,q3],))t.daemon = Truet.start()
# Feed data to the queuesq1.put(1)q2.put(10)q3.put('hello')q2.put(15)...
If you try it, you’ll find that the consumer indeed receives all of the put items, regardlessof which queues they are placed in.
DiscussionThe problem of polling non-file-like objects, such as queues, is often a lot trickier thanit looks. For instance, if you don’t use the socket technique shown, your only option isto write code that cycles through the queues and uses a timer, like this:
import timedef consumer(queues): while True: for q in queues: if not q.empty(): item = q.get() print('Got:', item)
12.13. Polling Multiple Thread Queues | 533
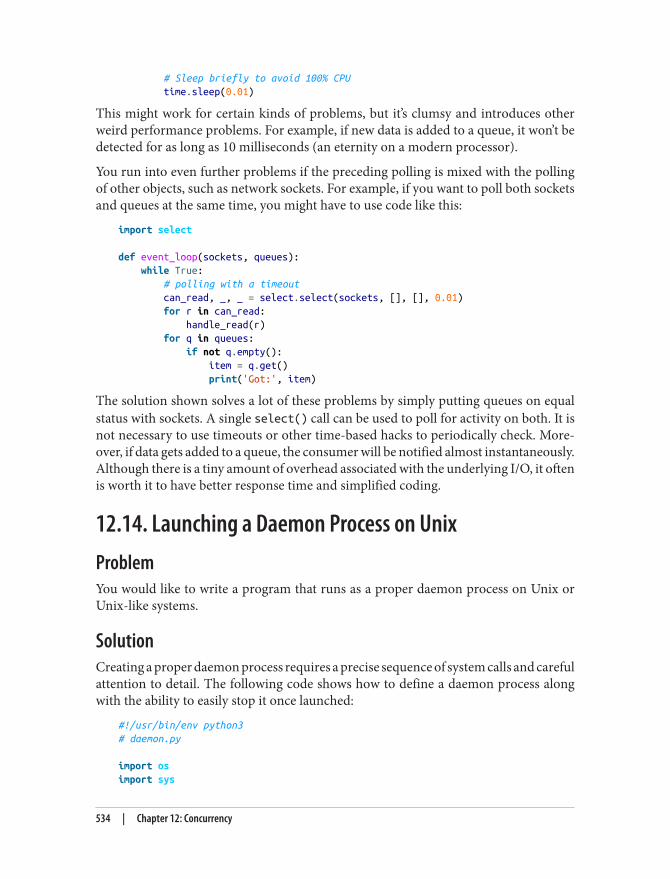
# Sleep briefly to avoid 100% CPU time.sleep(0.01)
This might work for certain kinds of problems, but it’s clumsy and introduces otherweird performance problems. For example, if new data is added to a queue, it won’t bedetected for as long as 10 milliseconds (an eternity on a modern processor).
You run into even further problems if the preceding polling is mixed with the pollingof other objects, such as network sockets. For example, if you want to poll both socketsand queues at the same time, you might have to use code like this:
import select
def event_loop(sockets, queues): while True: # polling with a timeout can_read, _, _ = select.select(sockets, [], [], 0.01) for r in can_read: handle_read(r) for q in queues: if not q.empty(): item = q.get() print('Got:', item)
The solution shown solves a lot of these problems by simply putting queues on equalstatus with sockets. A single select() call can be used to poll for activity on both. It isnot necessary to use timeouts or other time-based hacks to periodically check. More‐over, if data gets added to a queue, the consumer will be notified almost instantaneously.Although there is a tiny amount of overhead associated with the underlying I/O, it oftenis worth it to have better response time and simplified coding.
12.14. Launching a Daemon Process on UnixProblemYou would like to write a program that runs as a proper daemon process on Unix orUnix-like systems.
SolutionCreating a proper daemon process requires a precise sequence of system calls and carefulattention to detail. The following code shows how to define a daemon process alongwith the ability to easily stop it once launched:
#!/usr/bin/env python3# daemon.py
import osimport sys
534 | Chapter 12: Concurrency
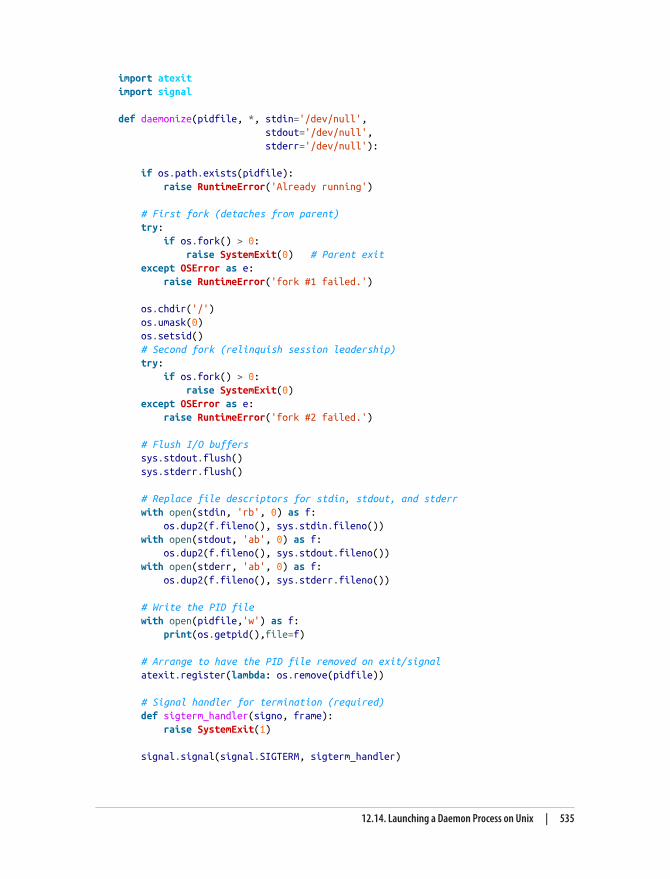
import atexitimport signal
def daemonize(pidfile, *, stdin='/dev/null', stdout='/dev/null', stderr='/dev/null'):
if os.path.exists(pidfile): raise RuntimeError('Already running')
# First fork (detaches from parent) try: if os.fork() > 0: raise SystemExit(0) # Parent exit except OSError as e: raise RuntimeError('fork #1 failed.')
os.chdir('/') os.umask(0) os.setsid() # Second fork (relinquish session leadership) try: if os.fork() > 0: raise SystemExit(0) except OSError as e: raise RuntimeError('fork #2 failed.')
# Flush I/O buffers sys.stdout.flush() sys.stderr.flush()
# Replace file descriptors for stdin, stdout, and stderr with open(stdin, 'rb', 0) as f: os.dup2(f.fileno(), sys.stdin.fileno()) with open(stdout, 'ab', 0) as f: os.dup2(f.fileno(), sys.stdout.fileno()) with open(stderr, 'ab', 0) as f: os.dup2(f.fileno(), sys.stderr.fileno())
# Write the PID file with open(pidfile,'w') as f: print(os.getpid(),file=f)
# Arrange to have the PID file removed on exit/signal atexit.register(lambda: os.remove(pidfile))
# Signal handler for termination (required) def sigterm_handler(signo, frame): raise SystemExit(1)
signal.signal(signal.SIGTERM, sigterm_handler)
12.14. Launching a Daemon Process on Unix | 535
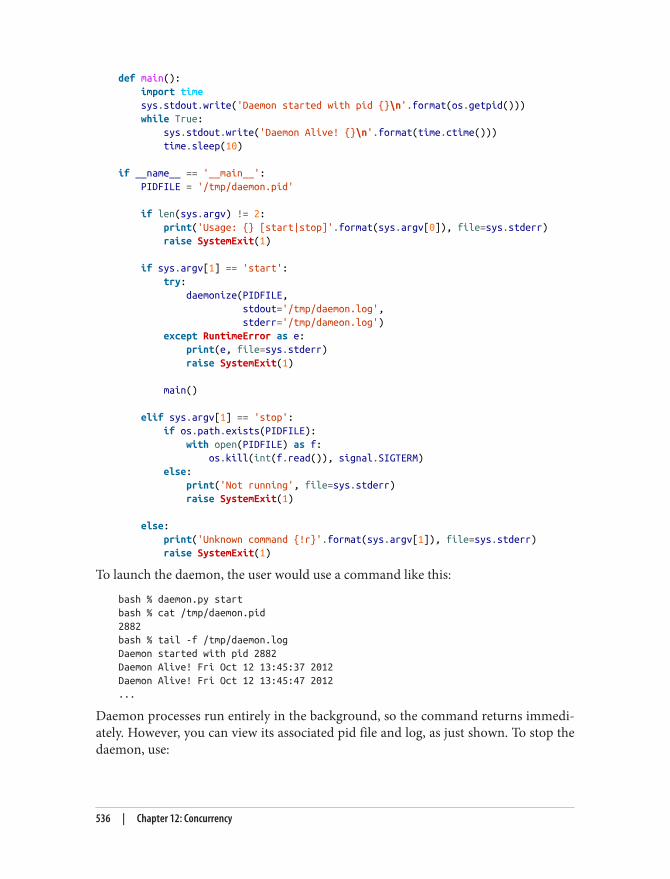
def main(): import time sys.stdout.write('Daemon started with pid {}\n'.format(os.getpid())) while True: sys.stdout.write('Daemon Alive! {}\n'.format(time.ctime())) time.sleep(10)
if __name__ == '__main__': PIDFILE = '/tmp/daemon.pid'
if len(sys.argv) != 2: print('Usage: {} [start|stop]'.format(sys.argv[0]), file=sys.stderr) raise SystemExit(1)
if sys.argv[1] == 'start': try: daemonize(PIDFILE, stdout='/tmp/daemon.log', stderr='/tmp/dameon.log') except RuntimeError as e: print(e, file=sys.stderr) raise SystemExit(1)
main()
elif sys.argv[1] == 'stop': if os.path.exists(PIDFILE): with open(PIDFILE) as f: os.kill(int(f.read()), signal.SIGTERM) else: print('Not running', file=sys.stderr) raise SystemExit(1)
else: print('Unknown command {!r}'.format(sys.argv[1]), file=sys.stderr) raise SystemExit(1)
To launch the daemon, the user would use a command like this:
bash % daemon.py startbash % cat /tmp/daemon.pid2882bash % tail -f /tmp/daemon.logDaemon started with pid 2882Daemon Alive! Fri Oct 12 13:45:37 2012Daemon Alive! Fri Oct 12 13:45:47 2012...
Daemon processes run entirely in the background, so the command returns immedi‐ately. However, you can view its associated pid file and log, as just shown. To stop thedaemon, use:
536 | Chapter 12: Concurrency

bash % daemon.py stopbash %
DiscussionThis recipe defines a function daemonize() that should be called at program startup tomake the program run as a daemon. The signature to daemonize() is using keyword-only arguments to make the purpose of the optional arguments more clear when used.This forces the user to use a call such as this:
daemonize('daemon.pid', stdin='/dev/null, stdout='/tmp/daemon.log', stderr='/tmp/daemon.log')
As opposed to a more cryptic call such as:
# Illegal. Must use keyword argumentsdaemonize('daemon.pid', '/dev/null', '/tmp/daemon.log','/tmp/daemon.log')
The steps involved in creating a daemon are fairly cryptic, but the general idea is asfollows. First, a daemon has to detach itself from its parent process. This is the purposeof the first os.fork() operation and immediate termination by the parent.
After the child has been orphaned, the call to os.setsid() creates an entirely newprocess session and sets the child as the leader. This also sets the child as the leader ofa new process group and makes sure there is no controlling terminal. If this all soundsa bit too magical, it has to do with getting the daemon to detach properly from theterminal and making sure that things like signals don’t interfere with its operation.
The calls to os.chdir() and os.umask(0) change the current working directory andreset the file mode mask. Changing the directory is usually a good idea so that thedaemon is no longer working in the directory from which it was launched.
The second call to os.fork() is by far the more mysterious operation here. This stepmakes the daemon process give up the ability to acquire a new controlling terminal andprovides even more isolation (essentially, the daemon gives up its session leadershipand thus no longer has the permission to open controlling terminals). Although youcould probably omit this step, it’s typically recommended.
Once the daemon process has been properly detached, it performs steps to reinitializethe standard I/O streams to point at files specified by the user. This part is actuallysomewhat tricky. References to file objects associated with the standard I/O streams arefound in multiple places in the interpreter (sys.stdout, sys.__stdout__, etc.). Simplyclosing sys.stdout and reassigning it is not likely to work correctly, because there’s noway to know if it will fix all uses of sys.stdout. Instead, a separate file object is opened,and the os.dup2() call is used to have it replace the file descriptor currently being used
12.14. Launching a Daemon Process on Unix | 537
by sys.stdout. When this happens, the original file for sys.stdout will be closed andthe new one takes its place. It must be emphasized that any file encoding or text handlingalready applied to the standard I/O streams will remain in place.
A common practice with daemon processes is to write the process ID of the daemon ina file for later use by other programs. The last part of the daemonize() function writesthis file, but also arranges to have the file removed on program termination. The atexit.register() function registers a function to execute when the Python interpreterterminates. The definition of a signal handler for SIGTERM is also required for a gracefultermination. The signal handler merely raises SystemExit() and nothing more. Thismight look unnecessary, but without it, termination signals kill the interpreter withoutperforming the cleanup actions registered with atexit.register(). An example ofcode that kills the daemon can be found in the handling of the stop command at theend of the program.
More information about writing daemon processes can be found in Advanced Pro‐gramming in the UNIX Environment, 2nd Edition, by W. Richard Stevens and StephenA. Rago (Addison-Wesley, 2005). Although focused on C programming, all of the ma‐terial is easily adapted to Python, since all of the required POSIX functions are availablein the standard library.
538 | Chapter 12: Concurrency
CHAPTER 13
Utility Scripting and System Administration
A lot of people use Python as a replacement for shell scripts, using it to automate com‐mon system tasks, such as manipulating files, configuring systems, and so forth. Themain goal of this chapter is to describe features related to common tasks encounteredwhen writing scripts. For example, parsing command-line options, manipulating fileson the filesystem, getting useful system configuration data, and so forth. Chapter 5 alsocontains general information related to files and directories.
13.1. Accepting Script Input via Redirection, Pipes, orInput FilesProblemYou want a script you’ve written to be able to accept input using whatever mechanismis easiest for the user. This should include piping output from a command to the script,redirecting a file into the script, or just passing a filename, or list of filenames, to thescript on the command line.
SolutionPython’s built-in fileinput module makes this very simple and concise. If you have ascript that looks like this:
#!/usr/bin/env python3import fileinput
with fileinput.input() as f_input: for line in f_input: print(line, end='')
539
Dow
nlo
ad fro
m W
ow
! eBook
<w
ww
.wow
ebook.
com
>
Then you can already accept input to the script in all of the previously mentioned ways.If you save this script as filein.py and make it executable, you can do all of the followingand get the expected output:
$ ls | ./filein.py # Prints a directory listing to stdout.$ ./filein.py /etc/passwd # Reads /etc/passwd to stdout.$ ./filein.py < /etc/passwd # Reads /etc/passwd to stdout.
DiscussionThe fileinput.input() function creates and returns an instance of the FileInputclass. In addition to containing a few handy helper methods, the instance can also beused as a context manager. So, to put all of this together, if we wrote a script that expectedto be printing output from several files at once, we might have it include the filenameand line number in the output, like this:
>>> import fileinput>>> with fileinput.input('/etc/passwd') as f:>>> for line in f:... print(f.filename(), f.lineno(), line, end='').../etc/passwd 1 ##/etc/passwd 2 # User Database/etc/passwd 3 #
<other output omitted>
Using it as a context manager ensures that the file is closed when it’s no longer beingused, and we leveraged a few handy FileInput helper methods here to get some extrainformation in the output.
13.2. Terminating a Program with an Error MessageProblemYou want your program to terminate by printing a message to standard error and re‐turning a nonzero status code.
SolutionTo have a program terminate in this manner, raise a SystemExit exception, but supplythe error message as an argument. For example:
raise SystemExit('It failed!')
This will cause the supplied message to be printed to sys.stderr and the program toexit with a status code of 1.
540 | Chapter 13: Utility Scripting and System Administration
DiscussionThis is a small recipe, but it solves a common problem that arises when writing scripts.Namely, to terminate a program, you might be inclined to write code like this:
import syssys.stderr.write('It failed!\n')raise SystemExit(1)
None of the extra steps involving import or writing to sys.stderr are neccessary if yousimply supply the message to SystemExit() instead.
13.3. Parsing Command-Line OptionsProblemYou want to write a program that parses options supplied on the command line (foundin sys.argv).
SolutionThe argparse module can be used to parse command-line options. A simple examplewill help to illustrate the essential features:
# search.py'''Hypothetical command-line tool for searching a collection offiles for one or more text patterns.'''import argparseparser = argparse.ArgumentParser(description='Search some files')
parser.add_argument(dest='filenames',metavar='filename', nargs='*')
parser.add_argument('-p', '--pat',metavar='pattern', required=True, dest='patterns', action='append', help='text pattern to search for')
parser.add_argument('-v', dest='verbose', action='store_true', help='verbose mode')
parser.add_argument('-o', dest='outfile', action='store', help='output file')
parser.add_argument('--speed', dest='speed', action='store', choices={'slow','fast'}, default='slow', help='search speed')
args = parser.parse_args()
13.3. Parsing Command-Line Options | 541
# Output the collected argumentsprint(args.filenames)print(args.patterns)print(args.verbose)print(args.outfile)print(args.speed)
This program defines a command-line parser with the following usage:
bash % python3 search.py -husage: search.py [-h] [-p pattern] [-v] [-o OUTFILE] [--speed {slow,fast}] [filename [filename ...]]
Search some files
positional arguments: filename
optional arguments: -h, --help show this help message and exit -p pattern, --pat pattern text pattern to search for -v verbose mode -o OUTFILE output file --speed {slow,fast} search speed
The following session shows how data shows up in the program. Carefully observe theoutput of the print() statements.
bash % python3 search.py foo.txt bar.txtusage: search.py [-h] -p pattern [-v] [-o OUTFILE] [--speed {fast,slow}] [filename [filename ...]]search.py: error: the following arguments are required: -p/--pat
bash % python3 search.py -v -p spam --pat=eggs foo.txt bar.txtfilenames = ['foo.txt', 'bar.txt']patterns = ['spam', 'eggs']verbose = Trueoutfile = Nonespeed = slow
bash % python3 search.py -v -p spam --pat=eggs foo.txt bar.txt -o resultsfilenames = ['foo.txt', 'bar.txt']patterns = ['spam', 'eggs']verbose = Trueoutfile = resultsspeed = slow
bash % python3 search.py -v -p spam --pat=eggs foo.txt bar.txt -o results \ --speed=fastfilenames = ['foo.txt', 'bar.txt']patterns = ['spam', 'eggs']verbose = Trueoutfile = resultsspeed = fast
542 | Chapter 13: Utility Scripting and System Administration
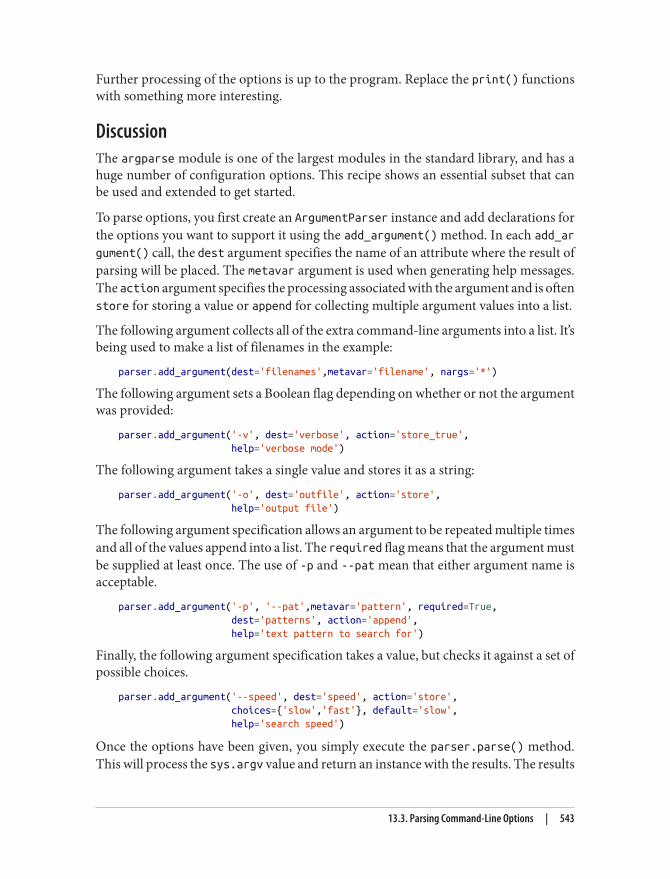
Further processing of the options is up to the program. Replace the print() functionswith something more interesting.
DiscussionThe argparse module is one of the largest modules in the standard library, and has ahuge number of configuration options. This recipe shows an essential subset that canbe used and extended to get started.
To parse options, you first create an ArgumentParser instance and add declarations forthe options you want to support it using the add_argument() method. In each add_argument() call, the dest argument specifies the name of an attribute where the result ofparsing will be placed. The metavar argument is used when generating help messages.The action argument specifies the processing associated with the argument and is oftenstore for storing a value or append for collecting multiple argument values into a list.
The following argument collects all of the extra command-line arguments into a list. It’sbeing used to make a list of filenames in the example:
parser.add_argument(dest='filenames',metavar='filename', nargs='*')
The following argument sets a Boolean flag depending on whether or not the argumentwas provided:
parser.add_argument('-v', dest='verbose', action='store_true', help='verbose mode')
The following argument takes a single value and stores it as a string:
parser.add_argument('-o', dest='outfile', action='store', help='output file')
The following argument specification allows an argument to be repeated multiple timesand all of the values append into a list. The required flag means that the argument mustbe supplied at least once. The use of -p and --pat mean that either argument name isacceptable.
parser.add_argument('-p', '--pat',metavar='pattern', required=True, dest='patterns', action='append', help='text pattern to search for')
Finally, the following argument specification takes a value, but checks it against a set ofpossible choices.
parser.add_argument('--speed', dest='speed', action='store', choices={'slow','fast'}, default='slow', help='search speed')
Once the options have been given, you simply execute the parser.parse() method.This will process the sys.argv value and return an instance with the results. The results
13.3. Parsing Command-Line Options | 543
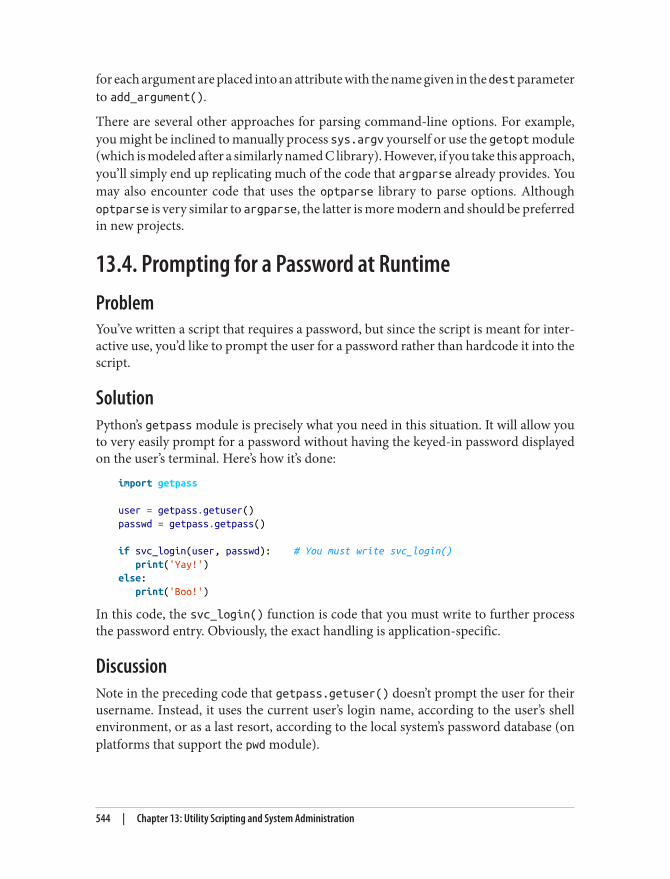
for each argument are placed into an attribute with the name given in the dest parameterto add_argument().
There are several other approaches for parsing command-line options. For example,you might be inclined to manually process sys.argv yourself or use the getopt module(which is modeled after a similarly named C library). However, if you take this approach,you’ll simply end up replicating much of the code that argparse already provides. Youmay also encounter code that uses the optparse library to parse options. Althoughoptparse is very similar to argparse, the latter is more modern and should be preferredin new projects.
13.4. Prompting for a Password at RuntimeProblemYou’ve written a script that requires a password, but since the script is meant for inter‐active use, you’d like to prompt the user for a password rather than hardcode it into thescript.
SolutionPython’s getpass module is precisely what you need in this situation. It will allow youto very easily prompt for a password without having the keyed-in password displayedon the user’s terminal. Here’s how it’s done:
import getpass
user = getpass.getuser()passwd = getpass.getpass()
if svc_login(user, passwd): # You must write svc_login() print('Yay!')else: print('Boo!')
In this code, the svc_login() function is code that you must write to further processthe password entry. Obviously, the exact handling is application-specific.
DiscussionNote in the preceding code that getpass.getuser() doesn’t prompt the user for theirusername. Instead, it uses the current user’s login name, according to the user’s shellenvironment, or as a last resort, according to the local system’s password database (onplatforms that support the pwd module).
544 | Chapter 13: Utility Scripting and System Administration
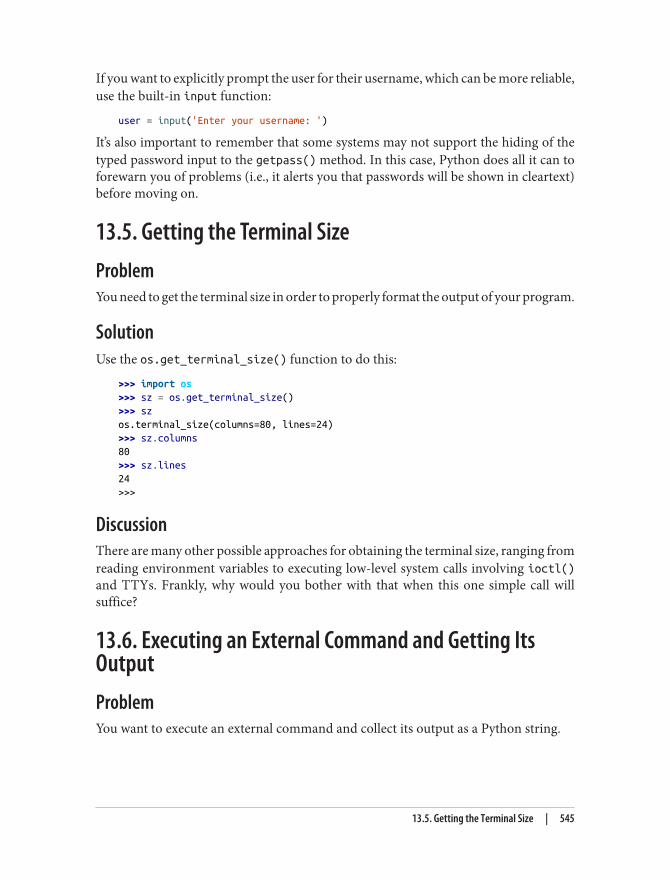
If you want to explicitly prompt the user for their username, which can be more reliable,use the built-in input function:
user = input('Enter your username: ')
It’s also important to remember that some systems may not support the hiding of thetyped password input to the getpass() method. In this case, Python does all it can toforewarn you of problems (i.e., it alerts you that passwords will be shown in cleartext)before moving on.
13.5. Getting the Terminal SizeProblemYou need to get the terminal size in order to properly format the output of your program.
SolutionUse the os.get_terminal_size() function to do this:
>>> import os>>> sz = os.get_terminal_size()>>> szos.terminal_size(columns=80, lines=24)>>> sz.columns80>>> sz.lines24>>>
DiscussionThere are many other possible approaches for obtaining the terminal size, ranging fromreading environment variables to executing low-level system calls involving ioctl()and TTYs. Frankly, why would you bother with that when this one simple call willsuffice?
13.6. Executing an External Command and Getting ItsOutputProblemYou want to execute an external command and collect its output as a Python string.
13.5. Getting the Terminal Size | 545
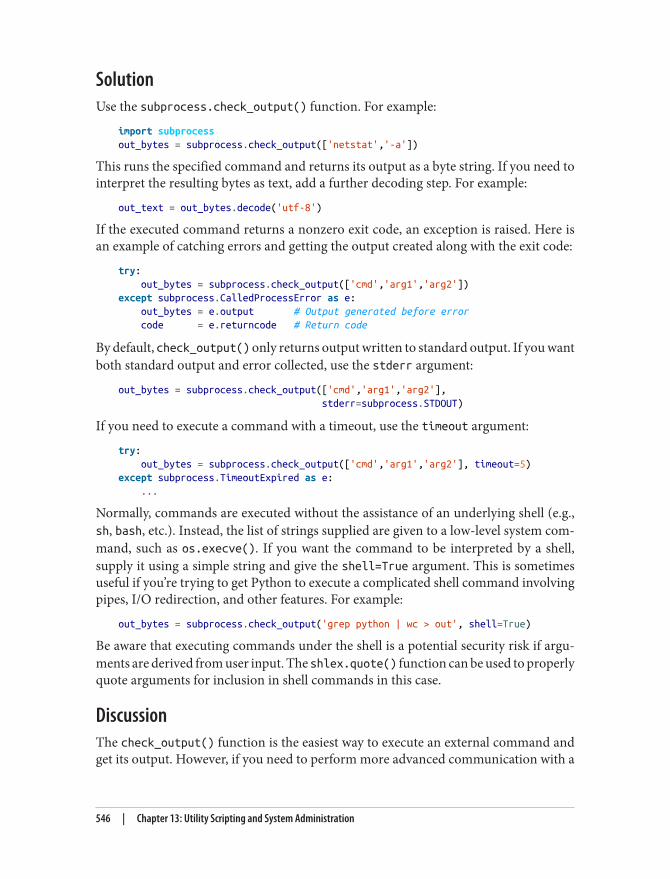
SolutionUse the subprocess.check_output() function. For example:
import subprocessout_bytes = subprocess.check_output(['netstat','-a'])
This runs the specified command and returns its output as a byte string. If you need tointerpret the resulting bytes as text, add a further decoding step. For example:
out_text = out_bytes.decode('utf-8')
If the executed command returns a nonzero exit code, an exception is raised. Here isan example of catching errors and getting the output created along with the exit code:
try: out_bytes = subprocess.check_output(['cmd','arg1','arg2'])except subprocess.CalledProcessError as e: out_bytes = e.output # Output generated before error code = e.returncode # Return code
By default, check_output() only returns output written to standard output. If you wantboth standard output and error collected, use the stderr argument:
out_bytes = subprocess.check_output(['cmd','arg1','arg2'], stderr=subprocess.STDOUT)
If you need to execute a command with a timeout, use the timeout argument:
try: out_bytes = subprocess.check_output(['cmd','arg1','arg2'], timeout=5)except subprocess.TimeoutExpired as e: ...
Normally, commands are executed without the assistance of an underlying shell (e.g.,sh, bash, etc.). Instead, the list of strings supplied are given to a low-level system com‐mand, such as os.execve(). If you want the command to be interpreted by a shell,supply it using a simple string and give the shell=True argument. This is sometimesuseful if you’re trying to get Python to execute a complicated shell command involvingpipes, I/O redirection, and other features. For example:
out_bytes = subprocess.check_output('grep python | wc > out', shell=True)
Be aware that executing commands under the shell is a potential security risk if argu‐ments are derived from user input. The shlex.quote() function can be used to properlyquote arguments for inclusion in shell commands in this case.
DiscussionThe check_output() function is the easiest way to execute an external command andget its output. However, if you need to perform more advanced communication with a
546 | Chapter 13: Utility Scripting and System Administration

subprocess, such as sending it input, you’ll need to take a difference approach. For that,use the subprocess.Popen class directly. For example:
import subprocess
# Some text to sendtext = b'''hello worldthis is a testgoodbye'''
# Launch a command with pipesp = subprocess.Popen(['wc'], stdout = subprocess.PIPE, stdin = subprocess.PIPE)
# Send the data and get the outputstdout, stderr = p.communicate(text)
# To interpret as text, decodeout = stdout.decode('utf-8')err = stderr.decode('utf-8')
The subprocess module is not suitable for communicating with external commandsthat expect to interact with a proper TTY. For example, you can’t use it to automate tasksthat ask the user to enter a password (e.g., a ssh session). For that, you would need toturn to a third-party module, such as those based on the popular “expect” family of tools(e.g., pexpect or similar).
13.7. Copying or Moving Files and DirectoriesProblemYou need to copy or move files and directories around, but you don’t want to do it bycalling out to shell commands.
SolutionThe shutil module has portable implementations of functions for copying files anddirectories. The usage is extremely straightforward. For example:
import shutil
# Copy src to dst. (cp src dst)shutil.copy(src, dst)
# Copy files, but preserve metadata (cp -p src dst)shutil.copy2(src, dst)
13.7. Copying or Moving Files and Directories | 547
# Copy directory tree (cp -R src dst)shutil.copytree(src, dst)
# Move src to dst (mv src dst)shutil.move(src, dst)
The arguments to these functions are all strings supplying file or directory names. Theunderlying semantics try to emulate that of similar Unix commands, as shown in thecomments.
By default, symbolic links are followed by these commands. For example, if the sourcefile is a symbolic link, then the destination file will be a copy of the file the link pointsto. If you want to copy the symbolic link instead, supply the follow_symlinks keywordargument like this:
shutil.copy2(src, dst, follow_symlinks=False)
If you want to preserve symbolic links in copied directories, do this:
shutil.copytree(src, dst, symlinks=True)
The copytree() optionally allows you to ignore certain files and directories during thecopy process. To do this, you supply an ignore function that takes a directory nameand filename listing as input, and returns a list of names to ignore as a result. For ex‐ample:
def ignore_pyc_files(dirname, filenames): return [name in filenames if name.endswith('.pyc')]
shutil.copytree(src, dst, ignore=ignore_pyc_files)
Since ignoring filename patterns is common, a utility function ignore_patterns() hasalready been provided to do it. For example:
shutil.copytree(src, dst, ignore=shutil.ignore_patterns('*~','*.pyc'))
DiscussionUsing shutil to copy files and directories is mostly straightforward. However, onecaution concerning file metadata is that functions such as copy2() only make a besteffort in preserving this data. Basic information, such as access times, creation times,and permissions, will always be preserved, but preservation of owners, ACLs, resourceforks, and other extended file metadata may or may not work depending on the un‐derlying operating system and the user’s own access permissions. You probably wouldn’twant to use a function like shutil.copytree() to perform system backups.
When working with filenames, make sure you use the functions in os.path for thegreatest portability (especially if working with both Unix and Windows). For example:
548 | Chapter 13: Utility Scripting and System Administration
>>> filename = '/Users/guido/programs/spam.py'>>> import os.path>>> os.path.basename(filename)'spam.py'>>> os.path.dirname(filename)'/Users/guido/programs'>>> os.path.split(filename)('/Users/guido/programs', 'spam.py')>>> os.path.join('/new/dir', os.path.basename(filename))'/new/dir/spam.py'>>> os.path.expanduser('~/guido/programs/spam.py')'/Users/guido/programs/spam.py'>>>
One tricky bit about copying directories with copytree() is the handling of errors. Forexample, in the process of copying, the function might encounter broken symbolic links,files that can’t be accessed due to permission problems, and so on. To deal with this, allexceptions encountered are collected into a list and grouped into a single exception thatgets raised at the end of the operation. Here is how you would handle it:
try: shutil.copytree(src, dst)except shutil.Error as e: for src, dst, msg in e.args[0]: # src is source name # dst is destination name # msg is error message from exception print(dst, src, msg)
If you supply the ignore_dangling_symlinks=True keyword argument, then copytree() will ignore dangling symlinks.
The functions shown in this recipe are probably the most commonly used. However,shutil has many more operations related to copying data. The documentation is def‐initely worth a further look. See the Python documentation.
13.8. Creating and Unpacking ArchivesProblemYou need to create or unpack archives in common formats (e.g., .tar, .tgz, or .zip).
SolutionThe shutil module has two functions—make_archive() and unpack_archive()—thatdo exactly what you want. For example:
>>> import shutil>>> shutil.unpack_archive('Python-3.3.0.tgz')
13.8. Creating and Unpacking Archives | 549
>>> shutil.make_archive('py33','zip','Python-3.3.0')'/Users/beazley/Downloads/py33.zip'>>>
The second argument to make_archive() is the desired output format. To get a list ofsupported archive formats, use get_archive_formats(). For example:
>>> shutil.get_archive_formats()[('bztar', "bzip2'ed tar-file"), ('gztar', "gzip'ed tar-file"), ('tar', 'uncompressed tar file'), ('zip', 'ZIP file')]>>>
DiscussionPython has other library modules for dealing with the low-level details of various archiveformats (e.g., tarfile, zipfile, gzip, bz2, etc.). However, if all you’re trying to do ismake or extract an archive, there’s really no need to go so low level. You can just usethese high-level functions in shutil instead.
The functions have a variety of additional options for logging, dryruns, file permissions,and so forth. Consult the shutil library documentation for further details.
13.9. Finding Files by NameProblemYou need to write a script that involves finding files, like a file renaming script or a logarchiver utility, but you’d rather not have to call shell utilities from within your Pythonscript, or you want to provide specialized behavior not easily available by “shelling out.”
SolutionTo search for files, use the os.walk() function, supplying it with the top-level directory.Here is an example of a function that finds a specific filename and prints out the fullpath of all matches:
#!/usr/bin/env python3.3import os
def findfile(start, name): for relpath, dirs, files in os.walk(start): if name in files: full_path = os.path.join(start, relpath, name) print(os.path.normpath(os.path.abspath(full_path)))
if __name__ == '__main__': findfile(sys.argv[1], sys.argv[2])
550 | Chapter 13: Utility Scripting and System Administration

Save this script as findfile.py and run it from the command line, feeding in the startingpoint and the name as positional arguments, like this:
bash % ./findfile.py . myfile.txt
DiscussionThe os.walk() method traverses the directory hierarchy for us, and for each directoryit enters, it returns a 3-tuple, containing the relative path to the directory it’s inspecting,a list containing all of the directory names in that directory, and a list of filenames inthat directory.
For each tuple, you simply check if the target filename is in the files list. If it is,os.path.join() is used to put together a path. To avoid the possibility of weird lookingpaths like ././foo//bar, two additional functions are used to fix the result. The first isos.path.abspath(), which takes a path that might be relative and forms the absolutepath, and the second is os.path.normpath(), which will normalize the path, therebyresolving issues with double slashes, multiple references to the current directory, and so on.
Although this script is pretty simple compared to the features of the find utility foundon UNIX platforms, it has the benefit of being cross-platform. Furthermore, a lot ofadditional functionality can be added in a portable manner without much more work.To illustrate, here is a function that prints out all of the files that have a recent modifi‐cation time:
#!/usr/bin/env python3.3
import osimport time
def modified_within(top, seconds): now = time.time() for path, dirs, files in os.walk(top): for name in files: fullpath = os.path.join(path, name) if os.path.exists(fullpath): mtime = os.path.getmtime(fullpath) if mtime > (now - seconds): print(fullpath)
if __name__ == '__main__': import sys if len(sys.argv) != 3: print('Usage: {} dir seconds'.format(sys.argv[0])) raise SystemExit(1)
modified_within(sys.argv[1], float(sys.argv[2]))
13.9. Finding Files by Name | 551
It wouldn’t take long for you to build far more complex operations on top of this littlefunction using various features of the os, os.path, glob, and similar modules. See Rec‐ipes 5.11 and 5.13 for related recipes.
13.10. Reading Configuration FilesProblemYou want to read configuration files written in the common .ini configuration fileformat.
SolutionThe configparser module can be used to read configuration files. For example, supposeyou have this configuration file:
; config.ini; Sample configuration file
[installation]library=%(prefix)s/libinclude=%(prefix)s/includebin=%(prefix)s/binprefix=/usr/local
# Setting related to debug configuration[debug]log_errors=trueshow_warnings=False
[server]port: 8080nworkers: 32pid-file=/tmp/spam.pidroot=/www/rootsignature: ================================= Brought to you by the Python Cookbook =================================
Here is an example of how to read it and extract values:
>>> from configparser import ConfigParser>>> cfg = ConfigParser()>>> cfg.read('config.ini')['config.ini']>>> cfg.sections()['installation', 'debug', 'server']>>> cfg.get('installation','library')'/usr/local/lib'>>> cfg.getboolean('debug','log_errors')
552 | Chapter 13: Utility Scripting and System Administration
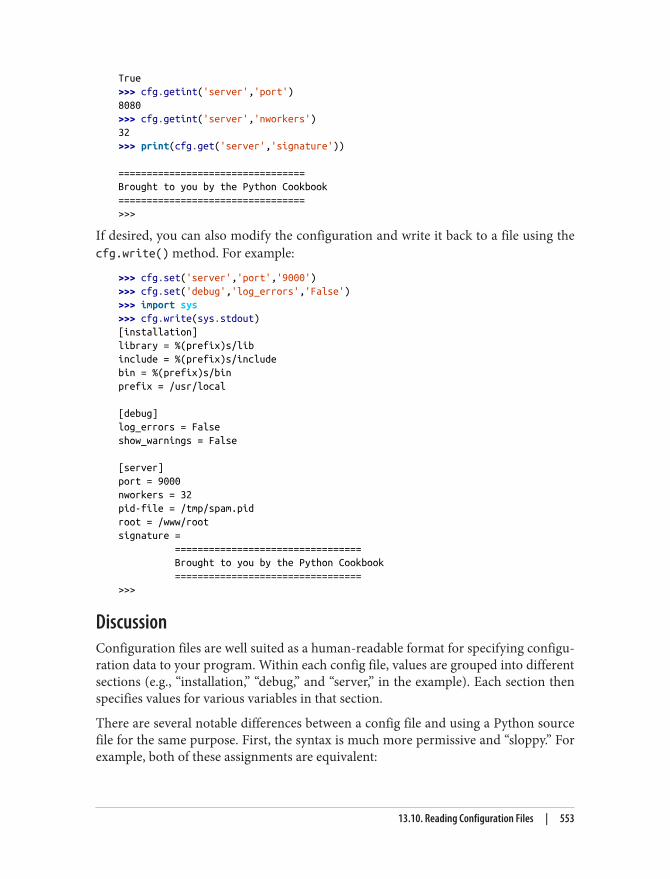
True>>> cfg.getint('server','port')8080>>> cfg.getint('server','nworkers')32>>> print(cfg.get('server','signature'))
=================================Brought to you by the Python Cookbook=================================>>>
If desired, you can also modify the configuration and write it back to a file using thecfg.write() method. For example:
>>> cfg.set('server','port','9000')>>> cfg.set('debug','log_errors','False')>>> import sys>>> cfg.write(sys.stdout)[installation]library = %(prefix)s/libinclude = %(prefix)s/includebin = %(prefix)s/binprefix = /usr/local
[debug]log_errors = Falseshow_warnings = False
[server]port = 9000nworkers = 32pid-file = /tmp/spam.pidroot = /www/rootsignature = ================================= Brought to you by the Python Cookbook =================================>>>
DiscussionConfiguration files are well suited as a human-readable format for specifying configu‐ration data to your program. Within each config file, values are grouped into differentsections (e.g., “installation,” “debug,” and “server,” in the example). Each section thenspecifies values for various variables in that section.
There are several notable differences between a config file and using a Python sourcefile for the same purpose. First, the syntax is much more permissive and “sloppy.” Forexample, both of these assignments are equivalent:
13.10. Reading Configuration Files | 553
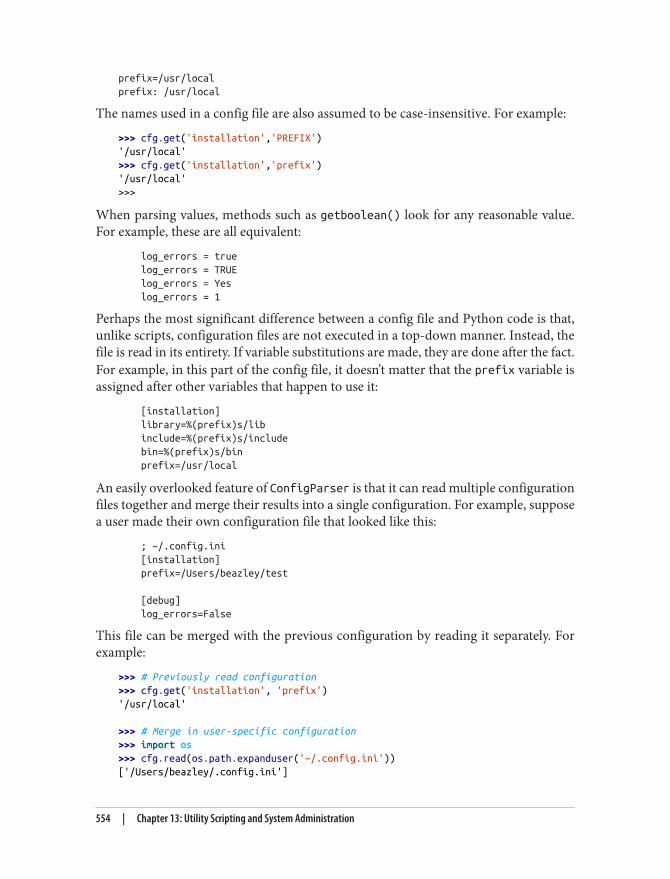
prefix=/usr/localprefix: /usr/local
The names used in a config file are also assumed to be case-insensitive. For example:
>>> cfg.get('installation','PREFIX')'/usr/local'>>> cfg.get('installation','prefix')'/usr/local'>>>
When parsing values, methods such as getboolean() look for any reasonable value.For example, these are all equivalent:
log_errors = true log_errors = TRUE log_errors = Yes log_errors = 1
Perhaps the most significant difference between a config file and Python code is that,unlike scripts, configuration files are not executed in a top-down manner. Instead, thefile is read in its entirety. If variable substitutions are made, they are done after the fact.For example, in this part of the config file, it doesn’t matter that the prefix variable isassigned after other variables that happen to use it:
[installation] library=%(prefix)s/lib include=%(prefix)s/include bin=%(prefix)s/bin prefix=/usr/local
An easily overlooked feature of ConfigParser is that it can read multiple configurationfiles together and merge their results into a single configuration. For example, supposea user made their own configuration file that looked like this:
; ~/.config.ini [installation] prefix=/Users/beazley/test
[debug] log_errors=False
This file can be merged with the previous configuration by reading it separately. Forexample:
>>> # Previously read configuration>>> cfg.get('installation', 'prefix')'/usr/local'
>>> # Merge in user-specific configuration>>> import os>>> cfg.read(os.path.expanduser('~/.config.ini'))['/Users/beazley/.config.ini']
554 | Chapter 13: Utility Scripting and System Administration
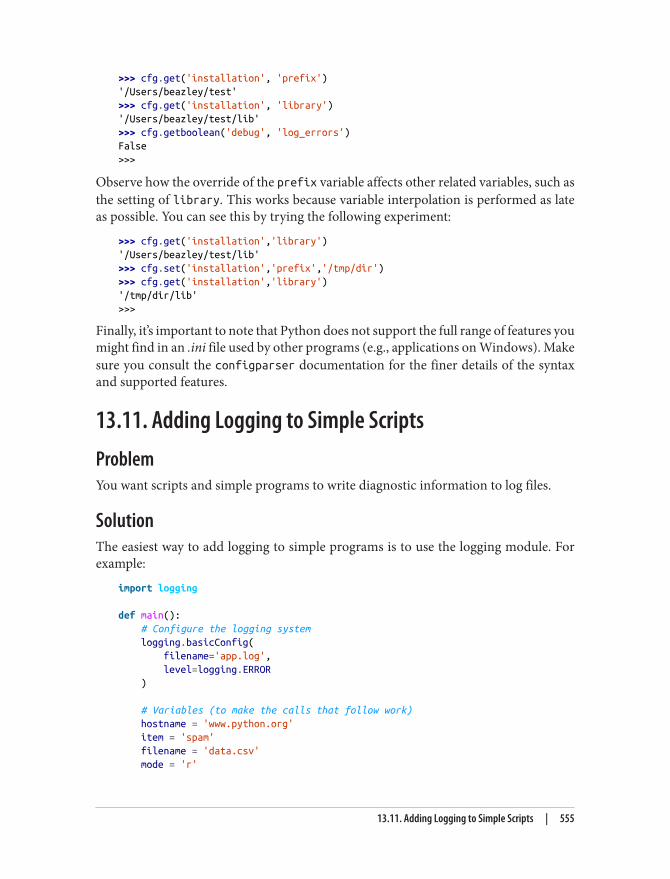
>>> cfg.get('installation', 'prefix')'/Users/beazley/test'>>> cfg.get('installation', 'library')'/Users/beazley/test/lib'>>> cfg.getboolean('debug', 'log_errors')False>>>
Observe how the override of the prefix variable affects other related variables, such asthe setting of library. This works because variable interpolation is performed as lateas possible. You can see this by trying the following experiment:
>>> cfg.get('installation','library')'/Users/beazley/test/lib'>>> cfg.set('installation','prefix','/tmp/dir')>>> cfg.get('installation','library')'/tmp/dir/lib'>>>
Finally, it’s important to note that Python does not support the full range of features youmight find in an .ini file used by other programs (e.g., applications on Windows). Makesure you consult the configparser documentation for the finer details of the syntaxand supported features.
13.11. Adding Logging to Simple ScriptsProblemYou want scripts and simple programs to write diagnostic information to log files.
SolutionThe easiest way to add logging to simple programs is to use the logging module. Forexample:
import logging
def main(): # Configure the logging system logging.basicConfig( filename='app.log', level=logging.ERROR )
# Variables (to make the calls that follow work) hostname = 'www.python.org' item = 'spam' filename = 'data.csv' mode = 'r'
13.11. Adding Logging to Simple Scripts | 555
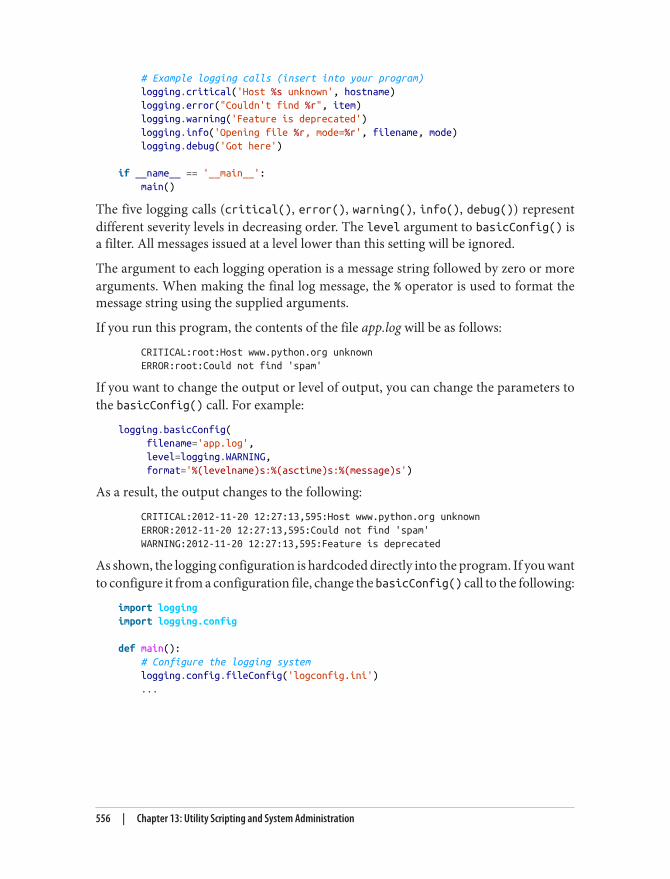
# Example logging calls (insert into your program) logging.critical('Host %s unknown', hostname) logging.error("Couldn't find %r", item) logging.warning('Feature is deprecated') logging.info('Opening file %r, mode=%r', filename, mode) logging.debug('Got here')
if __name__ == '__main__': main()
The five logging calls (critical(), error(), warning(), info(), debug()) representdifferent severity levels in decreasing order. The level argument to basicConfig() isa filter. All messages issued at a level lower than this setting will be ignored.
The argument to each logging operation is a message string followed by zero or morearguments. When making the final log message, the % operator is used to format themessage string using the supplied arguments.
If you run this program, the contents of the file app.log will be as follows:
CRITICAL:root:Host www.python.org unknown ERROR:root:Could not find 'spam'
If you want to change the output or level of output, you can change the parameters tothe basicConfig() call. For example:
logging.basicConfig( filename='app.log', level=logging.WARNING, format='%(levelname)s:%(asctime)s:%(message)s')
As a result, the output changes to the following:
CRITICAL:2012-11-20 12:27:13,595:Host www.python.org unknown ERROR:2012-11-20 12:27:13,595:Could not find 'spam' WARNING:2012-11-20 12:27:13,595:Feature is deprecated
As shown, the logging configuration is hardcoded directly into the program. If you wantto configure it from a configuration file, change the basicConfig() call to the following:
import loggingimport logging.config
def main(): # Configure the logging system logging.config.fileConfig('logconfig.ini') ...
556 | Chapter 13: Utility Scripting and System Administration
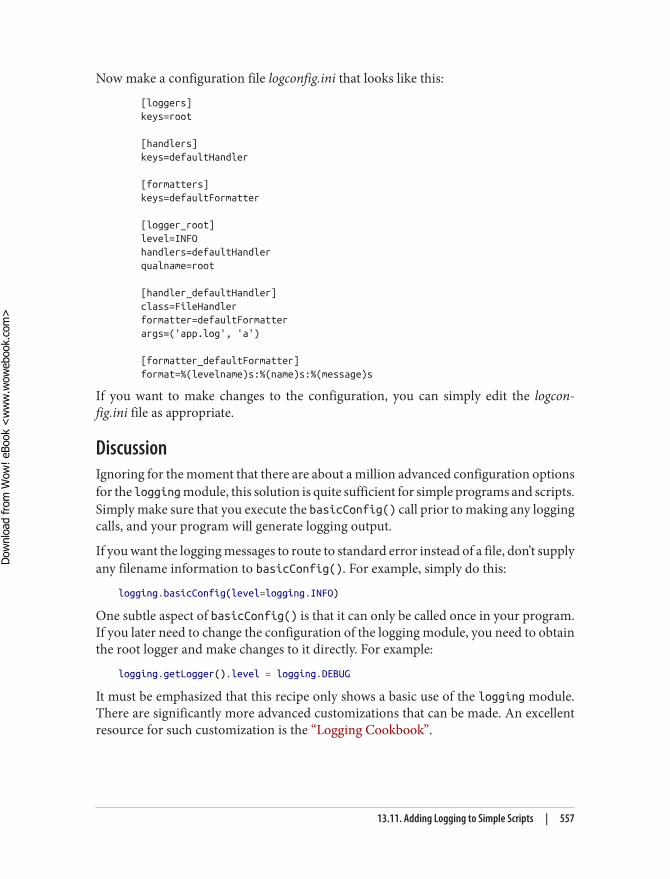
Now make a configuration file logconfig.ini that looks like this:
[loggers] keys=root
[handlers] keys=defaultHandler
[formatters] keys=defaultFormatter
[logger_root] level=INFO handlers=defaultHandler qualname=root
[handler_defaultHandler] class=FileHandler formatter=defaultFormatter args=('app.log', 'a')
[formatter_defaultFormatter] format=%(levelname)s:%(name)s:%(message)s
If you want to make changes to the configuration, you can simply edit the logcon‐fig.ini file as appropriate.
DiscussionIgnoring for the moment that there are about a million advanced configuration optionsfor the logging module, this solution is quite sufficient for simple programs and scripts.Simply make sure that you execute the basicConfig() call prior to making any loggingcalls, and your program will generate logging output.
If you want the logging messages to route to standard error instead of a file, don’t supplyany filename information to basicConfig(). For example, simply do this:
logging.basicConfig(level=logging.INFO)
One subtle aspect of basicConfig() is that it can only be called once in your program.If you later need to change the configuration of the logging module, you need to obtainthe root logger and make changes to it directly. For example:
logging.getLogger().level = logging.DEBUG
It must be emphasized that this recipe only shows a basic use of the logging module.There are significantly more advanced customizations that can be made. An excellentresource for such customization is the “Logging Cookbook”.
13.11. Adding Logging to Simple Scripts | 557
Dow
nlo
ad fro
m W
ow
! eBook
<w
ww
.wow
ebook.
com
>
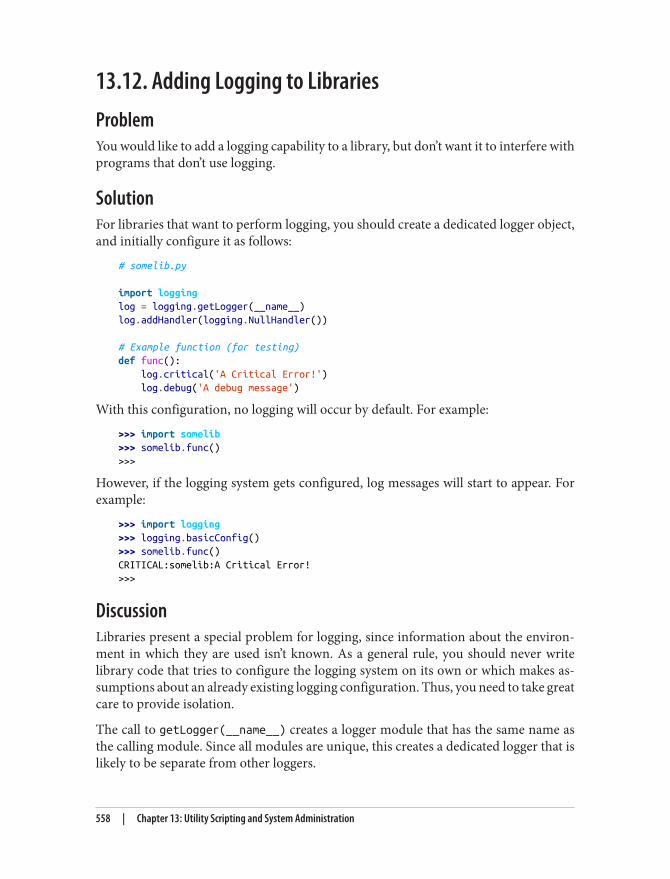
13.12. Adding Logging to LibrariesProblemYou would like to add a logging capability to a library, but don’t want it to interfere withprograms that don’t use logging.
SolutionFor libraries that want to perform logging, you should create a dedicated logger object,and initially configure it as follows:
# somelib.py
import logginglog = logging.getLogger(__name__)log.addHandler(logging.NullHandler())
# Example function (for testing)def func(): log.critical('A Critical Error!') log.debug('A debug message')
With this configuration, no logging will occur by default. For example:
>>> import somelib>>> somelib.func()>>>
However, if the logging system gets configured, log messages will start to appear. Forexample:
>>> import logging>>> logging.basicConfig()>>> somelib.func()CRITICAL:somelib:A Critical Error!>>>
DiscussionLibraries present a special problem for logging, since information about the environ‐ment in which they are used isn’t known. As a general rule, you should never writelibrary code that tries to configure the logging system on its own or which makes as‐sumptions about an already existing logging configuration. Thus, you need to take greatcare to provide isolation.
The call to getLogger(__name__) creates a logger module that has the same name asthe calling module. Since all modules are unique, this creates a dedicated logger that islikely to be separate from other loggers.
558 | Chapter 13: Utility Scripting and System Administration

The log.addHandler(logging.NullHandler()) operation attaches a null handler tothe just created logger object. A null handler ignores all logging messages by default.Thus, if the library is used and logging is never configured, no messages or warningswill appear.
One subtle feature of this recipe is that the logging of individual libraries can be inde‐pendently configured, regardless of other logging settings. For example, consider thefollowing code:
>>> import logging>>> logging.basicConfig(level=logging.ERROR)>>> import somelib>>> somelib.func()CRITICAL:somelib:A Critical Error!
>>> # Change the logging level for 'somelib' only>>> logging.getLogger('somelib').level=logging.DEBUG>>> somelib.func()CRITICAL:somelib:A Critical Error!DEBUG:somelib:A debug message>>>
Here, the root logger has been configured to only output messages at the ERROR level orhigher. However, the level of the logger for somelib has been separately configured tooutput debugging messages. That setting takes precedence over the global setting.
The ability to change the logging settings for a single module like this can be a usefuldebugging tool, since you don’t have to change any of the global logging settings—simplychange the level for the one module where you want more output.
The “Logging HOWTO” has more information about configuring the logging moduleand other useful tips.
13.13. Making a Stopwatch TimerProblemYou want to be able to record the time it takes to perform various tasks.
SolutionThe time module contains various functions for performing timing-related functions.However, it’s often useful to put a higher-level interface on them that mimics a stopwatch. For example:
13.13. Making a Stopwatch Timer | 559
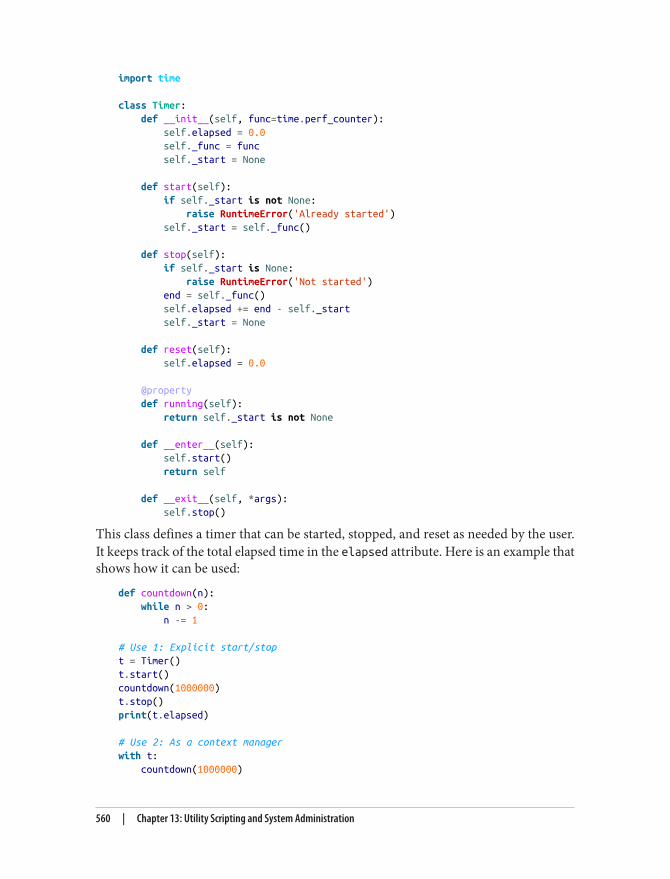
import time
class Timer: def __init__(self, func=time.perf_counter): self.elapsed = 0.0 self._func = func self._start = None
def start(self): if self._start is not None: raise RuntimeError('Already started') self._start = self._func()
def stop(self): if self._start is None: raise RuntimeError('Not started') end = self._func() self.elapsed += end - self._start self._start = None
def reset(self): self.elapsed = 0.0
@property def running(self): return self._start is not None
def __enter__(self): self.start() return self
def __exit__(self, *args): self.stop()
This class defines a timer that can be started, stopped, and reset as needed by the user.It keeps track of the total elapsed time in the elapsed attribute. Here is an example thatshows how it can be used:
def countdown(n): while n > 0: n -= 1
# Use 1: Explicit start/stopt = Timer()t.start()countdown(1000000)t.stop()print(t.elapsed)
# Use 2: As a context managerwith t: countdown(1000000)
560 | Chapter 13: Utility Scripting and System Administration

print(t.elapsed)
with Timer() as t2: countdown(1000000)print(t2.elapsed)
DiscussionThis recipe provides a simple yet very useful class for making timing measurements andtracking elapsed time. It’s also a nice illustration of how to support the context-management protocol and the with statement.
One issue in making timing measurements concerns the underlying time function usedto do it. As a general rule, the accuracy of timing measurements made with functionssuch as time.time() or time.clock() varies according to the operating system. Incontrast, the time.perf_counter() function always uses the highest-resolution timeravailable on the system.
As shown, the time recorded by the Timer class is made according to wall-clock time,and includes all time spent sleeping. If you only want the amount of CPU time used bythe process, use time.process_time() instead. For example:
t = Timer(time.process_time)with t: countdown(1000000)print(t.elapsed)
Both the time.perf_counter() and time.process_time() return a “time” in fractionalseconds. However, the actual value of the time doesn’t have any particular meaning. Tomake sense of the results, you have to call the functions twice and compute a timedifference.
More examples of timing and profiling are given in Recipe 14.13.
13.14. Putting Limits on Memory and CPU UsageProblemYou want to place some limits on the memory or CPU use of a program running onUnix system.
SolutionThe resource module can be used to perform both tasks. For example, to restrict CPUtime, do the following:
13.14. Putting Limits on Memory and CPU Usage | 561
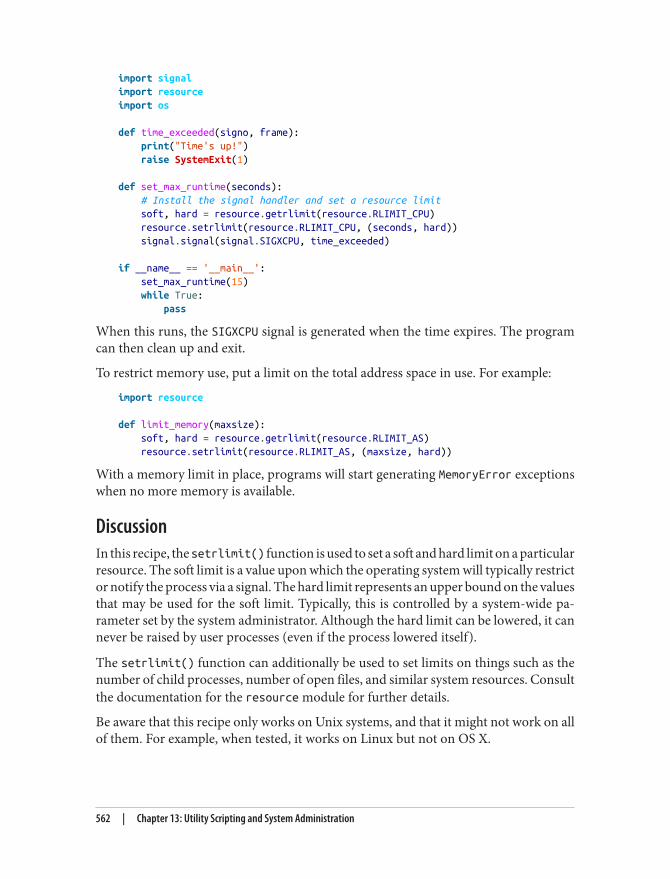
import signalimport resourceimport os
def time_exceeded(signo, frame): print("Time's up!") raise SystemExit(1)
def set_max_runtime(seconds): # Install the signal handler and set a resource limit soft, hard = resource.getrlimit(resource.RLIMIT_CPU) resource.setrlimit(resource.RLIMIT_CPU, (seconds, hard)) signal.signal(signal.SIGXCPU, time_exceeded)
if __name__ == '__main__': set_max_runtime(15) while True: pass
When this runs, the SIGXCPU signal is generated when the time expires. The programcan then clean up and exit.
To restrict memory use, put a limit on the total address space in use. For example:
import resource
def limit_memory(maxsize): soft, hard = resource.getrlimit(resource.RLIMIT_AS) resource.setrlimit(resource.RLIMIT_AS, (maxsize, hard))
With a memory limit in place, programs will start generating MemoryError exceptionswhen no more memory is available.
DiscussionIn this recipe, the setrlimit() function is used to set a soft and hard limit on a particularresource. The soft limit is a value upon which the operating system will typically restrictor notify the process via a signal. The hard limit represents an upper bound on the valuesthat may be used for the soft limit. Typically, this is controlled by a system-wide pa‐rameter set by the system administrator. Although the hard limit can be lowered, it cannever be raised by user processes (even if the process lowered itself).
The setrlimit() function can additionally be used to set limits on things such as thenumber of child processes, number of open files, and similar system resources. Consultthe documentation for the resource module for further details.
Be aware that this recipe only works on Unix systems, and that it might not work on allof them. For example, when tested, it works on Linux but not on OS X.
562 | Chapter 13: Utility Scripting and System Administration
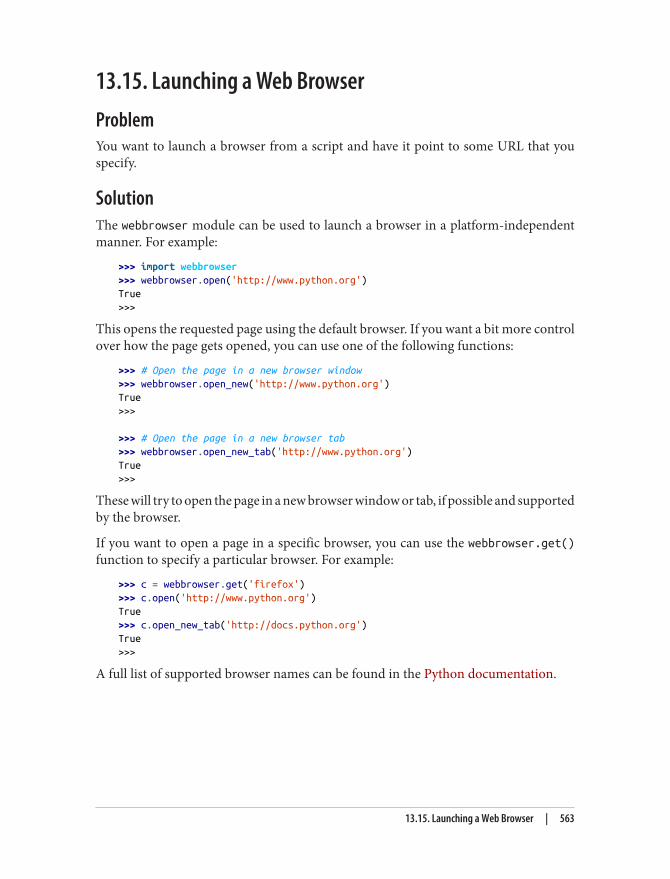
13.15. Launching a Web BrowserProblemYou want to launch a browser from a script and have it point to some URL that youspecify.
SolutionThe webbrowser module can be used to launch a browser in a platform-independentmanner. For example:
>>> import webbrowser>>> webbrowser.open('http://www.python.org')True>>>
This opens the requested page using the default browser. If you want a bit more controlover how the page gets opened, you can use one of the following functions:
>>> # Open the page in a new browser window>>> webbrowser.open_new('http://www.python.org')True>>>
>>> # Open the page in a new browser tab>>> webbrowser.open_new_tab('http://www.python.org')True>>>
These will try to open the page in a new browser window or tab, if possible and supportedby the browser.
If you want to open a page in a specific browser, you can use the webbrowser.get()function to specify a particular browser. For example:
>>> c = webbrowser.get('firefox')>>> c.open('http://www.python.org')True>>> c.open_new_tab('http://docs.python.org')True>>>
A full list of supported browser names can be found in the Python documentation.
13.15. Launching a Web Browser | 563
DiscussionBeing able to easily launch a browser can be a useful operation in many scripts. Forexample, maybe a script performs some kind of deployment to a server and you’d liketo have it quickly launch a browser so you can verify that it’s working. Or maybe aprogram writes data out in the form of HTML pages and you’d just like to fire up abrowser to see the result. Either way, the webbrowser module is a simple solution.
564 | Chapter 13: Utility Scripting and System Administration
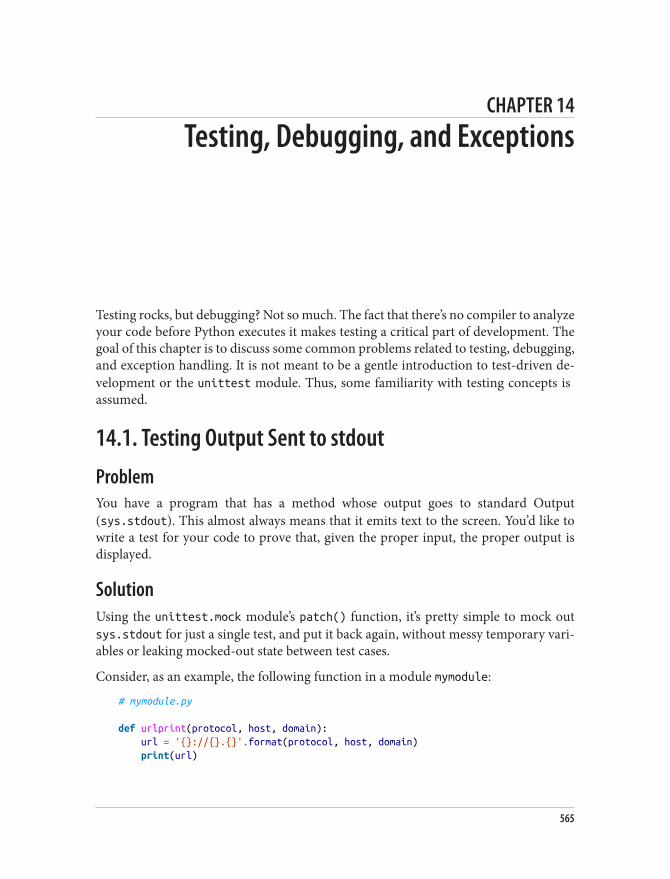
CHAPTER 14
Testing, Debugging, and Exceptions
Testing rocks, but debugging? Not so much. The fact that there’s no compiler to analyzeyour code before Python executes it makes testing a critical part of development. Thegoal of this chapter is to discuss some common problems related to testing, debugging,and exception handling. It is not meant to be a gentle introduction to test-driven de‐velopment or the unittest module. Thus, some familiarity with testing concepts is assumed.
14.1. Testing Output Sent to stdoutProblemYou have a program that has a method whose output goes to standard Output(sys.stdout). This almost always means that it emits text to the screen. You’d like towrite a test for your code to prove that, given the proper input, the proper output isdisplayed.
SolutionUsing the unittest.mock module’s patch() function, it’s pretty simple to mock outsys.stdout for just a single test, and put it back again, without messy temporary vari‐ables or leaking mocked-out state between test cases.
Consider, as an example, the following function in a module mymodule:
# mymodule.py
def urlprint(protocol, host, domain): url = '{}://{}.{}'.format(protocol, host, domain) print(url)
565

The built-in print function, by default, sends output to sys.stdout. In order to testthat output is actually getting there, you can mock it out using a stand-in object, andthen make assertions about what happened. Using the unittest.mock module’s patch()method makes it convenient to replace objects only within the context of a running test,returning things to their original state immediately after the test is complete. Here’s thetest code for mymodule:
from io import StringIOfrom unittest import TestCasefrom unittest.mock import patchimport mymodule
class TestURLPrint(TestCase): def test_url_gets_to_stdout(self): protocol = 'http' host = 'www' domain = 'example.com' expected_url = '{}://{}.{}\n'.format(protocol, host, domain)
with patch('sys.stdout', new=StringIO()) as fake_out: mymodule.urlprint(protocol, host, domain) self.assertEqual(fake_out.getvalue(), expected_url)
DiscussionThe urlprint() function takes three arguments, and the test starts by setting up dummyarguments for each one. The expected_url variable is set to a string containing theexpected output.
To run the test, the unittest.mock.patch() function is used as a context manager toreplace the value of sys.stdout with a StringIO object as a substitute. The fake_outvariable is the mock object that’s created in this process. This can be used inside thebody of the with statement to perform various checks. When the with statement com‐pletes, patch conveniently puts everything back the way it was before the test ever ran.
It’s worth noting that certain C extensions to Python may write directly to standardoutput, bypassing the setting of sys.stdout. This recipe won’t help with that scenario,but it should work fine with pure Python code (if you need to capture I/O from such Cextensions, you can do it by opening a temporary file and performing various tricksinvolving file descriptors to have standard output temporarily redirected to that file).
More information about capturing IO in a string and StringIO objects can be found inRecipe 5.6.
566 | Chapter 14: Testing, Debugging, and Exceptions
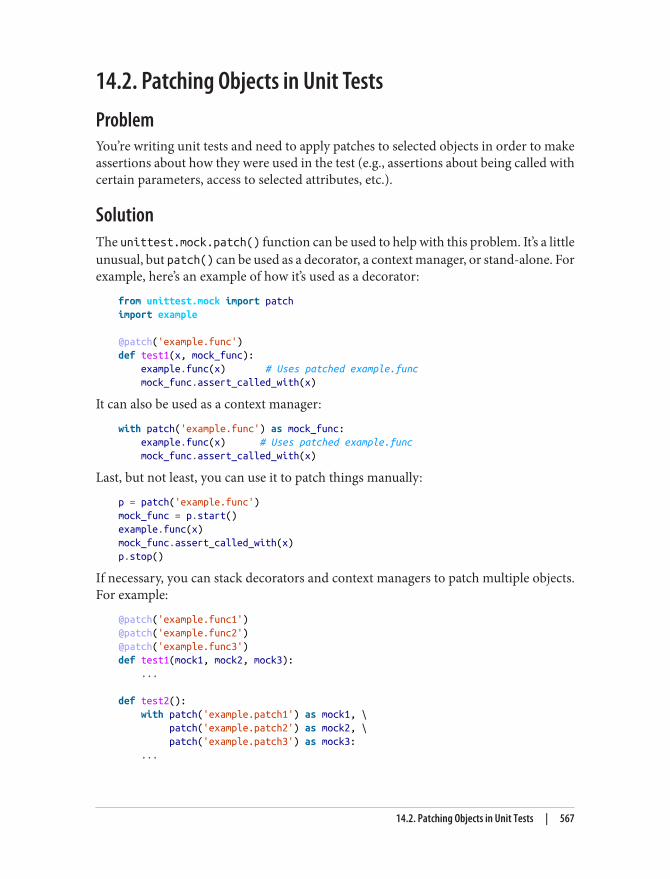
14.2. Patching Objects in Unit TestsProblemYou’re writing unit tests and need to apply patches to selected objects in order to makeassertions about how they were used in the test (e.g., assertions about being called withcertain parameters, access to selected attributes, etc.).
SolutionThe unittest.mock.patch() function can be used to help with this problem. It’s a littleunusual, but patch() can be used as a decorator, a context manager, or stand-alone. Forexample, here’s an example of how it’s used as a decorator:
from unittest.mock import patchimport example
@patch('example.func')def test1(x, mock_func): example.func(x) # Uses patched example.func mock_func.assert_called_with(x)
It can also be used as a context manager:
with patch('example.func') as mock_func: example.func(x) # Uses patched example.func mock_func.assert_called_with(x)
Last, but not least, you can use it to patch things manually:
p = patch('example.func')mock_func = p.start()example.func(x)mock_func.assert_called_with(x)p.stop()
If necessary, you can stack decorators and context managers to patch multiple objects.For example:
@patch('example.func1')@patch('example.func2')@patch('example.func3')def test1(mock1, mock2, mock3): ...
def test2(): with patch('example.patch1') as mock1, \ patch('example.patch2') as mock2, \ patch('example.patch3') as mock3: ...
14.2. Patching Objects in Unit Tests | 567
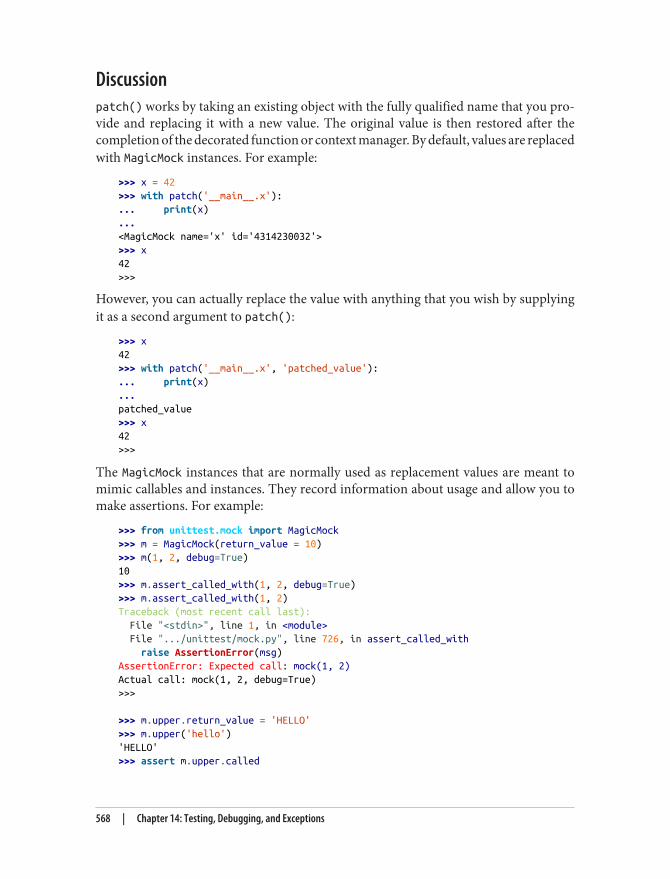
Discussionpatch() works by taking an existing object with the fully qualified name that you pro‐vide and replacing it with a new value. The original value is then restored after thecompletion of the decorated function or context manager. By default, values are replacedwith MagicMock instances. For example:
>>> x = 42>>> with patch('__main__.x'):... print(x)...<MagicMock name='x' id='4314230032'>>>> x42>>>
However, you can actually replace the value with anything that you wish by supplyingit as a second argument to patch():
>>> x42>>> with patch('__main__.x', 'patched_value'):... print(x)...patched_value>>> x42>>>
The MagicMock instances that are normally used as replacement values are meant tomimic callables and instances. They record information about usage and allow you tomake assertions. For example:
>>> from unittest.mock import MagicMock>>> m = MagicMock(return_value = 10)>>> m(1, 2, debug=True)10>>> m.assert_called_with(1, 2, debug=True)>>> m.assert_called_with(1, 2)Traceback (most recent call last): File "<stdin>", line 1, in <module> File ".../unittest/mock.py", line 726, in assert_called_with raise AssertionError(msg)AssertionError: Expected call: mock(1, 2)Actual call: mock(1, 2, debug=True)>>>
>>> m.upper.return_value = 'HELLO'>>> m.upper('hello')'HELLO'>>> assert m.upper.called
568 | Chapter 14: Testing, Debugging, and Exceptions
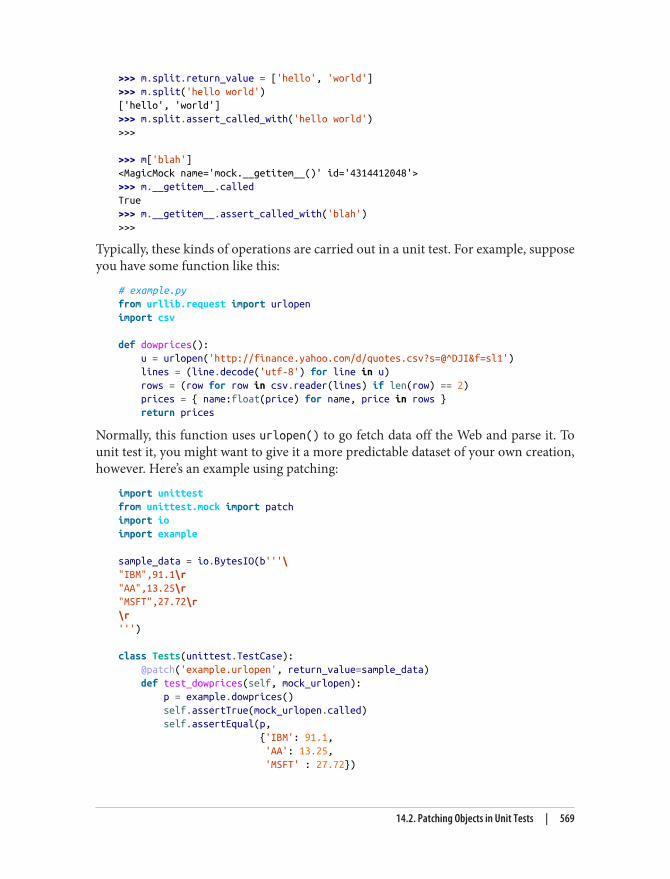
>>> m.split.return_value = ['hello', 'world']>>> m.split('hello world')['hello', 'world']>>> m.split.assert_called_with('hello world')>>>
>>> m['blah']<MagicMock name='mock.__getitem__()' id='4314412048'>>>> m.__getitem__.calledTrue>>> m.__getitem__.assert_called_with('blah')>>>
Typically, these kinds of operations are carried out in a unit test. For example, supposeyou have some function like this:
# example.pyfrom urllib.request import urlopenimport csv
def dowprices(): u = urlopen('http://finance.yahoo.com/d/quotes.csv?s=@^DJI&f=sl1') lines = (line.decode('utf-8') for line in u) rows = (row for row in csv.reader(lines) if len(row) == 2) prices = { name:float(price) for name, price in rows } return prices
Normally, this function uses urlopen() to go fetch data off the Web and parse it. Tounit test it, you might want to give it a more predictable dataset of your own creation,however. Here’s an example using patching:
import unittestfrom unittest.mock import patchimport ioimport example
sample_data = io.BytesIO(b'''\"IBM",91.1\r"AA",13.25\r"MSFT",27.72\r\r''')
class Tests(unittest.TestCase): @patch('example.urlopen', return_value=sample_data) def test_dowprices(self, mock_urlopen): p = example.dowprices() self.assertTrue(mock_urlopen.called) self.assertEqual(p, {'IBM': 91.1, 'AA': 13.25, 'MSFT' : 27.72})
14.2. Patching Objects in Unit Tests | 569
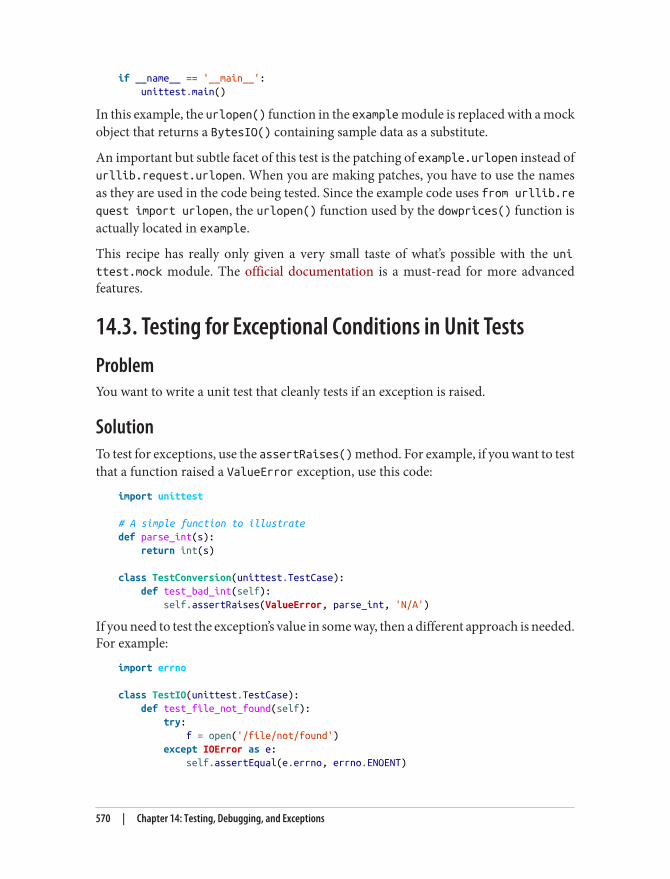
if __name__ == '__main__': unittest.main()
In this example, the urlopen() function in the example module is replaced with a mockobject that returns a BytesIO() containing sample data as a substitute.
An important but subtle facet of this test is the patching of example.urlopen instead ofurllib.request.urlopen. When you are making patches, you have to use the namesas they are used in the code being tested. Since the example code uses from urllib.request import urlopen, the urlopen() function used by the dowprices() function isactually located in example.
This recipe has really only given a very small taste of what’s possible with the unittest.mock module. The official documentation is a must-read for more advancedfeatures.
14.3. Testing for Exceptional Conditions in Unit TestsProblemYou want to write a unit test that cleanly tests if an exception is raised.
SolutionTo test for exceptions, use the assertRaises() method. For example, if you want to testthat a function raised a ValueError exception, use this code:
import unittest
# A simple function to illustratedef parse_int(s): return int(s)
class TestConversion(unittest.TestCase): def test_bad_int(self): self.assertRaises(ValueError, parse_int, 'N/A')
If you need to test the exception’s value in some way, then a different approach is needed.For example:
import errno
class TestIO(unittest.TestCase): def test_file_not_found(self): try: f = open('/file/not/found') except IOError as e: self.assertEqual(e.errno, errno.ENOENT)
570 | Chapter 14: Testing, Debugging, and Exceptions
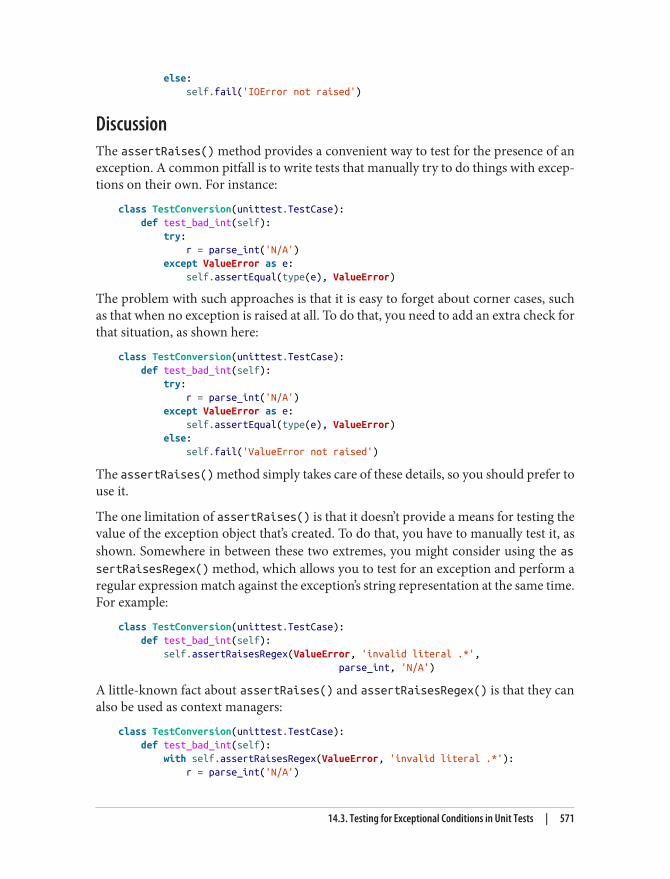
else: self.fail('IOError not raised')
DiscussionThe assertRaises() method provides a convenient way to test for the presence of anexception. A common pitfall is to write tests that manually try to do things with excep‐tions on their own. For instance:
class TestConversion(unittest.TestCase): def test_bad_int(self): try: r = parse_int('N/A') except ValueError as e: self.assertEqual(type(e), ValueError)
The problem with such approaches is that it is easy to forget about corner cases, suchas that when no exception is raised at all. To do that, you need to add an extra check forthat situation, as shown here:
class TestConversion(unittest.TestCase): def test_bad_int(self): try: r = parse_int('N/A') except ValueError as e: self.assertEqual(type(e), ValueError) else: self.fail('ValueError not raised')
The assertRaises() method simply takes care of these details, so you should prefer touse it.
The one limitation of assertRaises() is that it doesn’t provide a means for testing thevalue of the exception object that’s created. To do that, you have to manually test it, asshown. Somewhere in between these two extremes, you might consider using the assertRaisesRegex() method, which allows you to test for an exception and perform aregular expression match against the exception’s string representation at the same time.For example:
class TestConversion(unittest.TestCase): def test_bad_int(self): self.assertRaisesRegex(ValueError, 'invalid literal .*', parse_int, 'N/A')
A little-known fact about assertRaises() and assertRaisesRegex() is that they canalso be used as context managers:
class TestConversion(unittest.TestCase): def test_bad_int(self): with self.assertRaisesRegex(ValueError, 'invalid literal .*'): r = parse_int('N/A')
14.3. Testing for Exceptional Conditions in Unit Tests | 571
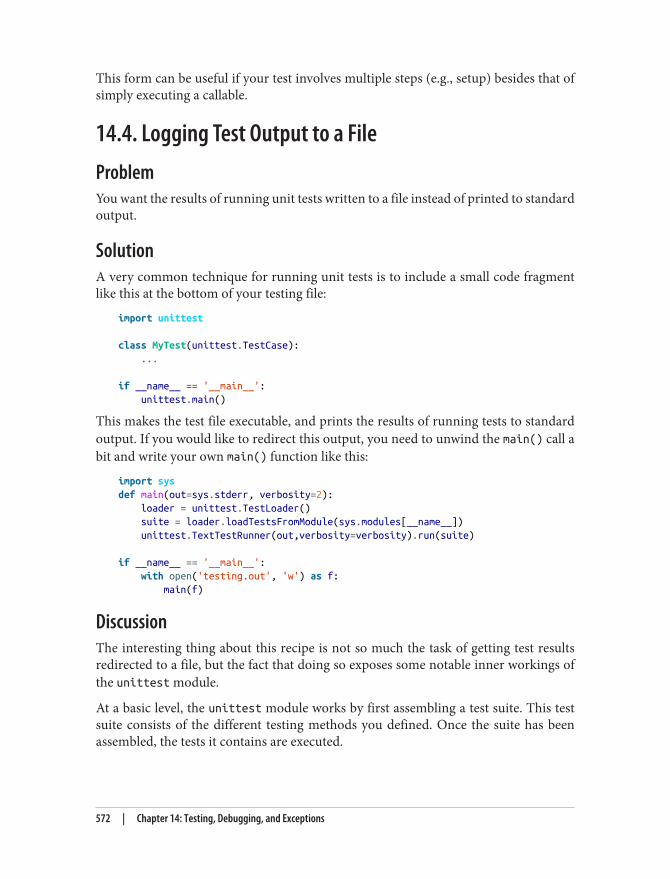
This form can be useful if your test involves multiple steps (e.g., setup) besides that ofsimply executing a callable.
14.4. Logging Test Output to a FileProblemYou want the results of running unit tests written to a file instead of printed to standardoutput.
SolutionA very common technique for running unit tests is to include a small code fragmentlike this at the bottom of your testing file:
import unittest
class MyTest(unittest.TestCase): ...
if __name__ == '__main__': unittest.main()
This makes the test file executable, and prints the results of running tests to standardoutput. If you would like to redirect this output, you need to unwind the main() call abit and write your own main() function like this:
import sysdef main(out=sys.stderr, verbosity=2): loader = unittest.TestLoader() suite = loader.loadTestsFromModule(sys.modules[__name__]) unittest.TextTestRunner(out,verbosity=verbosity).run(suite)
if __name__ == '__main__': with open('testing.out', 'w') as f: main(f)
DiscussionThe interesting thing about this recipe is not so much the task of getting test resultsredirected to a file, but the fact that doing so exposes some notable inner workings ofthe unittest module.
At a basic level, the unittest module works by first assembling a test suite. This testsuite consists of the different testing methods you defined. Once the suite has beenassembled, the tests it contains are executed.
572 | Chapter 14: Testing, Debugging, and Exceptions

These two parts of unit testing are separate from each other. The unittest.TestLoader instance created in the solution is used to assemble a test suite. The loadTestsFromModule() is one of several methods it defines to gather tests. In this case, it scans amodule for TestCase classes and extracts test methods from them. If you want some‐thing more fine-grained, the loadTestsFromTestCase() method (not shown) can beused to pull test methods from an individual class that inherits from TestCase.
The TextTestRunner class is an example of a test runner class. The main purpose ofthis class is to execute the tests contained in a test suite. This class is the same test runnerthat sits behind the unittest.main() function. However, here we’re giving it a bit oflow-level configuration, including an output file and an elevated verbosity level.
Although this recipe only consists of a few lines of code, it gives a hint as to how youmight further customize the unittest framework. To customize how test suites areassembled, you would perform various operations using the TestLoader class. To cus‐tomize how tests execute, you could make custom test runner classes that emulate thefunctionality of TextTestRunner. Both topics are beyond the scope of what can be cov‐ered here. However, documentation for the unittest module has extensive coverageof the underlying protocols.
14.5. Skipping or Anticipating Test FailuresProblemYou want to skip or mark selected tests as an anticipated failure in your unit tests.
SolutionThe unittest module has decorators that can be applied to selected test methods tocontrol their handling. For example:
import unittestimport osimport platform
class Tests(unittest.TestCase): def test_0(self): self.assertTrue(True)
@unittest.skip('skipped test') def test_1(self): self.fail('should have failed!')
@unittest.skipIf(os.name=='posix', 'Not supported on Unix') def test_2(self): import winreg
14.5. Skipping or Anticipating Test Failures | 573
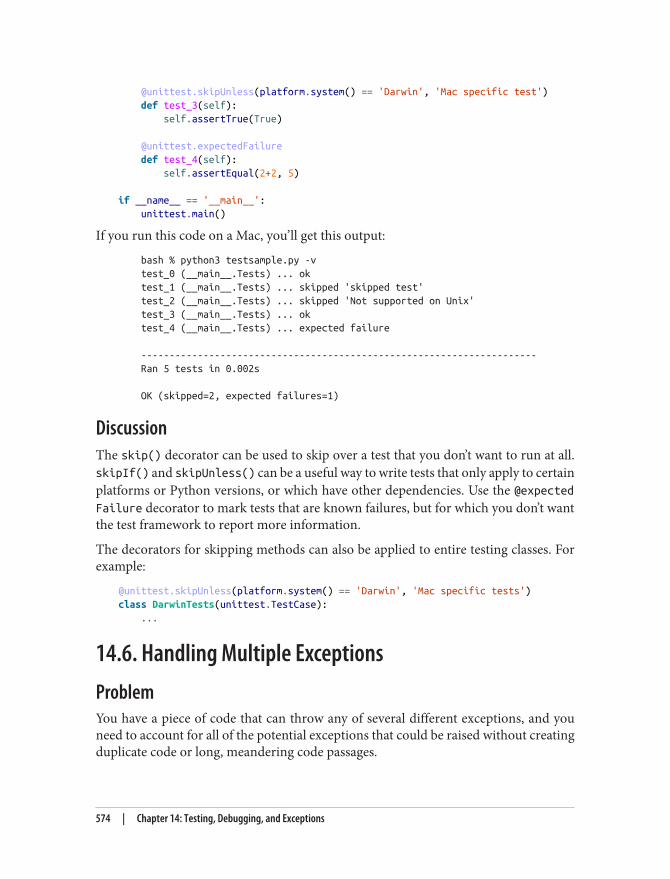
@unittest.skipUnless(platform.system() == 'Darwin', 'Mac specific test') def test_3(self): self.assertTrue(True)
@unittest.expectedFailure def test_4(self): self.assertEqual(2+2, 5)
if __name__ == '__main__': unittest.main()
If you run this code on a Mac, you’ll get this output:
bash % python3 testsample.py -v test_0 (__main__.Tests) ... ok test_1 (__main__.Tests) ... skipped 'skipped test' test_2 (__main__.Tests) ... skipped 'Not supported on Unix' test_3 (__main__.Tests) ... ok test_4 (__main__.Tests) ... expected failure
---------------------------------------------------------------------- Ran 5 tests in 0.002s
OK (skipped=2, expected failures=1)
DiscussionThe skip() decorator can be used to skip over a test that you don’t want to run at all.skipIf() and skipUnless() can be a useful way to write tests that only apply to certainplatforms or Python versions, or which have other dependencies. Use the @expectedFailure decorator to mark tests that are known failures, but for which you don’t wantthe test framework to report more information.
The decorators for skipping methods can also be applied to entire testing classes. Forexample:
@unittest.skipUnless(platform.system() == 'Darwin', 'Mac specific tests')class DarwinTests(unittest.TestCase): ...
14.6. Handling Multiple ExceptionsProblemYou have a piece of code that can throw any of several different exceptions, and youneed to account for all of the potential exceptions that could be raised without creatingduplicate code or long, meandering code passages.
574 | Chapter 14: Testing, Debugging, and Exceptions
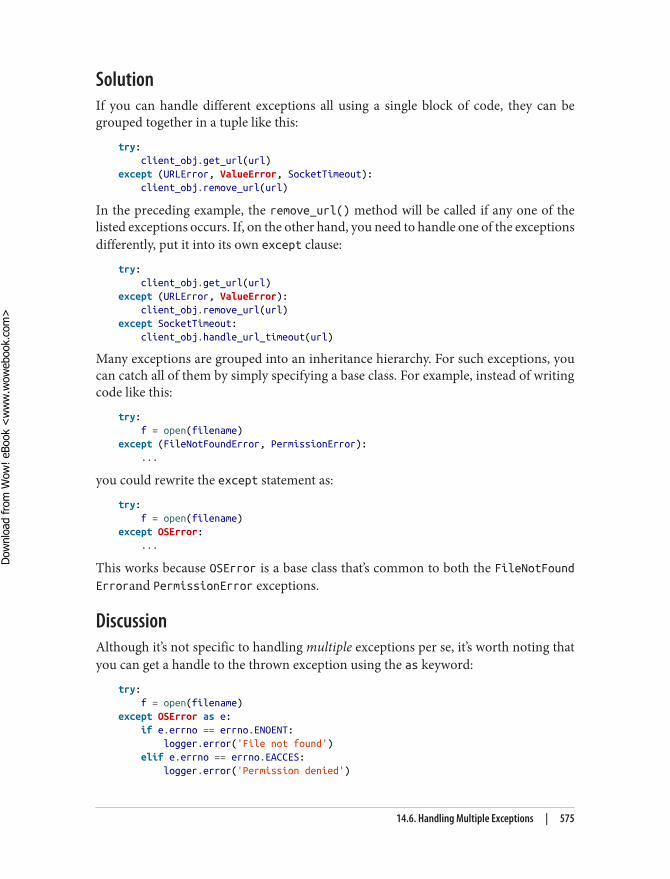
SolutionIf you can handle different exceptions all using a single block of code, they can begrouped together in a tuple like this:
try: client_obj.get_url(url)except (URLError, ValueError, SocketTimeout): client_obj.remove_url(url)
In the preceding example, the remove_url() method will be called if any one of thelisted exceptions occurs. If, on the other hand, you need to handle one of the exceptionsdifferently, put it into its own except clause:
try: client_obj.get_url(url)except (URLError, ValueError): client_obj.remove_url(url)except SocketTimeout: client_obj.handle_url_timeout(url)
Many exceptions are grouped into an inheritance hierarchy. For such exceptions, youcan catch all of them by simply specifying a base class. For example, instead of writingcode like this:
try: f = open(filename)except (FileNotFoundError, PermissionError): ...
you could rewrite the except statement as:
try: f = open(filename)except OSError: ...
This works because OSError is a base class that’s common to both the FileNotFoundErrorand PermissionError exceptions.
DiscussionAlthough it’s not specific to handling multiple exceptions per se, it’s worth noting thatyou can get a handle to the thrown exception using the as keyword:
try: f = open(filename)except OSError as e: if e.errno == errno.ENOENT: logger.error('File not found') elif e.errno == errno.EACCES: logger.error('Permission denied')
14.6. Handling Multiple Exceptions | 575
Dow
nlo
ad fro
m W
ow
! eBook
<w
ww
.wow
ebook.
com
>
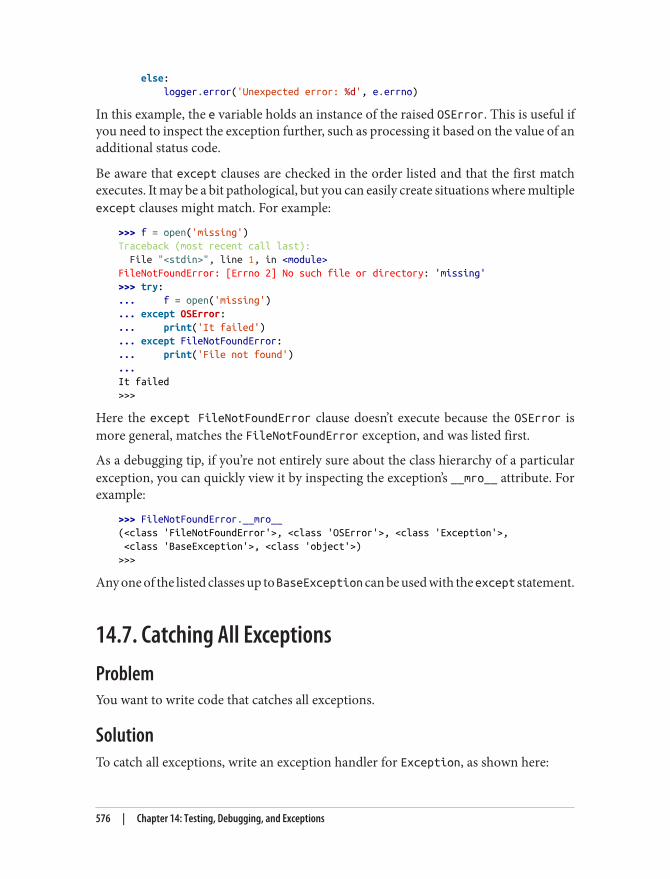
else: logger.error('Unexpected error: %d', e.errno)
In this example, the e variable holds an instance of the raised OSError. This is useful ifyou need to inspect the exception further, such as processing it based on the value of anadditional status code.
Be aware that except clauses are checked in the order listed and that the first matchexecutes. It may be a bit pathological, but you can easily create situations where multipleexcept clauses might match. For example:
>>> f = open('missing')Traceback (most recent call last): File "<stdin>", line 1, in <module>FileNotFoundError: [Errno 2] No such file or directory: 'missing'>>> try:... f = open('missing')... except OSError:... print('It failed')... except FileNotFoundError:... print('File not found')...It failed>>>
Here the except FileNotFoundError clause doesn’t execute because the OSError ismore general, matches the FileNotFoundError exception, and was listed first.
As a debugging tip, if you’re not entirely sure about the class hierarchy of a particularexception, you can quickly view it by inspecting the exception’s __mro__ attribute. Forexample:
>>> FileNotFoundError.__mro__(<class 'FileNotFoundError'>, <class 'OSError'>, <class 'Exception'>, <class 'BaseException'>, <class 'object'>)>>>
Any one of the listed classes up to BaseException can be used with the except statement.
14.7. Catching All ExceptionsProblemYou want to write code that catches all exceptions.
SolutionTo catch all exceptions, write an exception handler for Exception, as shown here:
576 | Chapter 14: Testing, Debugging, and Exceptions

try: ...except Exception as e: ... log('Reason:', e) # Important!
This will catch all exceptions save SystemExit, KeyboardInterrupt, and GeneratorExit. If you also want to catch those exceptions, change Exception to BaseException.
DiscussionCatching all exceptions is sometimes used as a crutch by programmers who can’t re‐member all of the possible exceptions that might occur in complicated operations. Assuch, it is also a very good way to write undebuggable code if you are not careful.
Because of this, if you choose to catch all exceptions, it is absolutely critical to log orreport the actual reason for the exception somewhere (e.g., log file, error message print‐ed to screen, etc.). If you don’t do this, your head will likely explode at some point.Consider this example:
def parse_int(s): try: n = int(v) except Exception: print("Couldn't parse")
If you try this function, it behaves like this:
>>> parse_int('n/a')Couldn't parse>>> parse_int('42')Couldn't parse>>>
At this point, you might be left scratching your head as to why it doesn’t work. Nowsuppose the function had been written like this:
def parse_int(s): try: n = int(v) except Exception as e: print("Couldn't parse") print('Reason:', e)
In this case, you get the following output, which indicates that a programming mistakehas been made:
>>> parse_int('42')Couldn't parseReason: global name 'v' is not defined>>>
14.7. Catching All Exceptions | 577
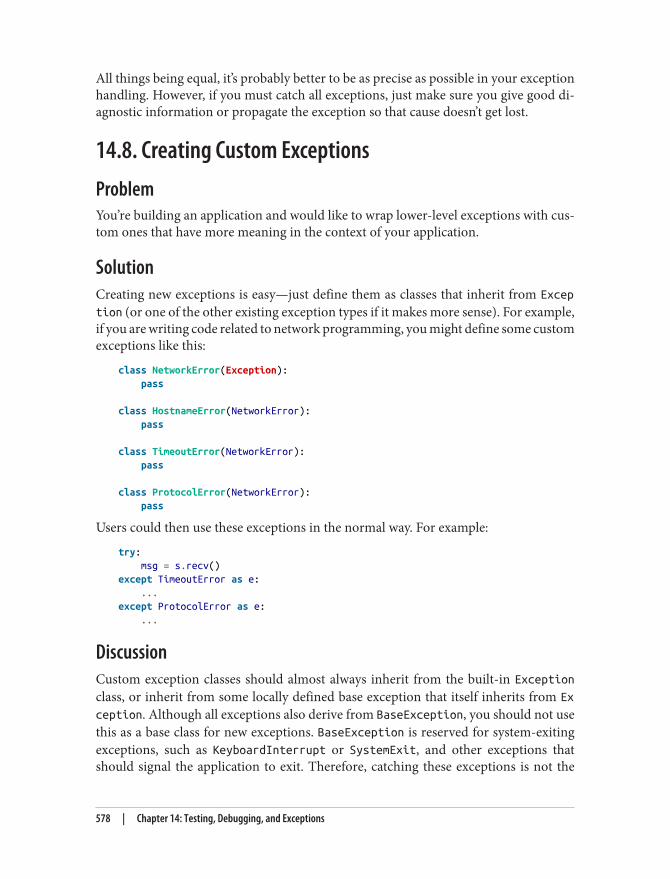
All things being equal, it’s probably better to be as precise as possible in your exceptionhandling. However, if you must catch all exceptions, just make sure you give good di‐agnostic information or propagate the exception so that cause doesn’t get lost.
14.8. Creating Custom ExceptionsProblemYou’re building an application and would like to wrap lower-level exceptions with cus‐tom ones that have more meaning in the context of your application.
SolutionCreating new exceptions is easy—just define them as classes that inherit from Exception (or one of the other existing exception types if it makes more sense). For example,if you are writing code related to network programming, you might define some customexceptions like this:
class NetworkError(Exception): pass
class HostnameError(NetworkError): pass
class TimeoutError(NetworkError): pass
class ProtocolError(NetworkError): pass
Users could then use these exceptions in the normal way. For example:
try: msg = s.recv()except TimeoutError as e: ...except ProtocolError as e: ...
DiscussionCustom exception classes should almost always inherit from the built-in Exceptionclass, or inherit from some locally defined base exception that itself inherits from Exception. Although all exceptions also derive from BaseException, you should not usethis as a base class for new exceptions. BaseException is reserved for system-exitingexceptions, such as KeyboardInterrupt or SystemExit, and other exceptions thatshould signal the application to exit. Therefore, catching these exceptions is not the
578 | Chapter 14: Testing, Debugging, and Exceptions
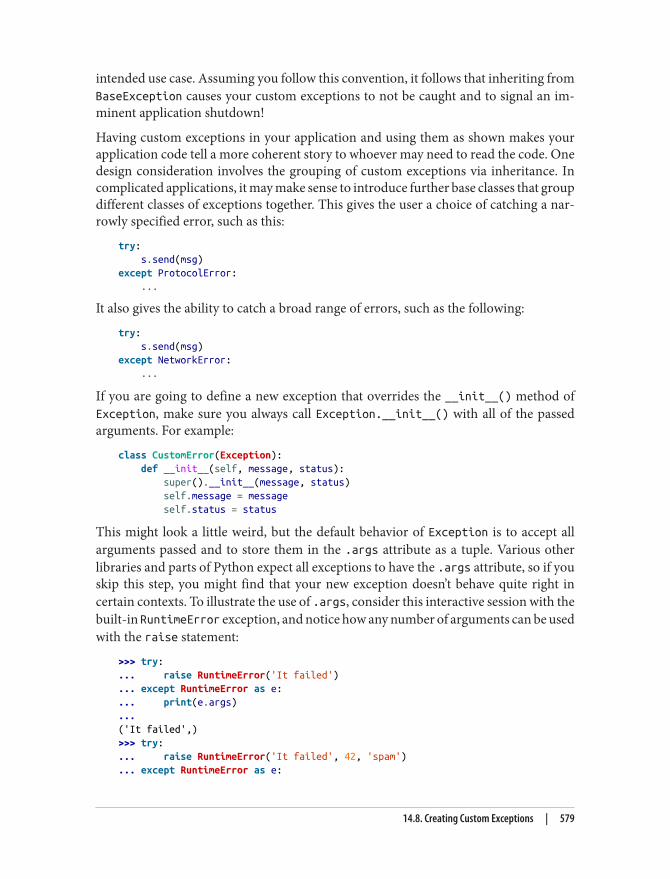
intended use case. Assuming you follow this convention, it follows that inheriting fromBaseException causes your custom exceptions to not be caught and to signal an im‐minent application shutdown!
Having custom exceptions in your application and using them as shown makes yourapplication code tell a more coherent story to whoever may need to read the code. Onedesign consideration involves the grouping of custom exceptions via inheritance. Incomplicated applications, it may make sense to introduce further base classes that groupdifferent classes of exceptions together. This gives the user a choice of catching a nar‐rowly specified error, such as this:
try: s.send(msg)except ProtocolError: ...
It also gives the ability to catch a broad range of errors, such as the following:
try: s.send(msg)except NetworkError: ...
If you are going to define a new exception that overrides the __init__() method ofException, make sure you always call Exception.__init__() with all of the passedarguments. For example:
class CustomError(Exception): def __init__(self, message, status): super().__init__(message, status) self.message = message self.status = status
This might look a little weird, but the default behavior of Exception is to accept allarguments passed and to store them in the .args attribute as a tuple. Various otherlibraries and parts of Python expect all exceptions to have the .args attribute, so if youskip this step, you might find that your new exception doesn’t behave quite right incertain contexts. To illustrate the use of .args, consider this interactive session with thebuilt-in RuntimeError exception, and notice how any number of arguments can be usedwith the raise statement:
>>> try:... raise RuntimeError('It failed')... except RuntimeError as e:... print(e.args)...('It failed',)>>> try:... raise RuntimeError('It failed', 42, 'spam')... except RuntimeError as e:
14.8. Creating Custom Exceptions | 579
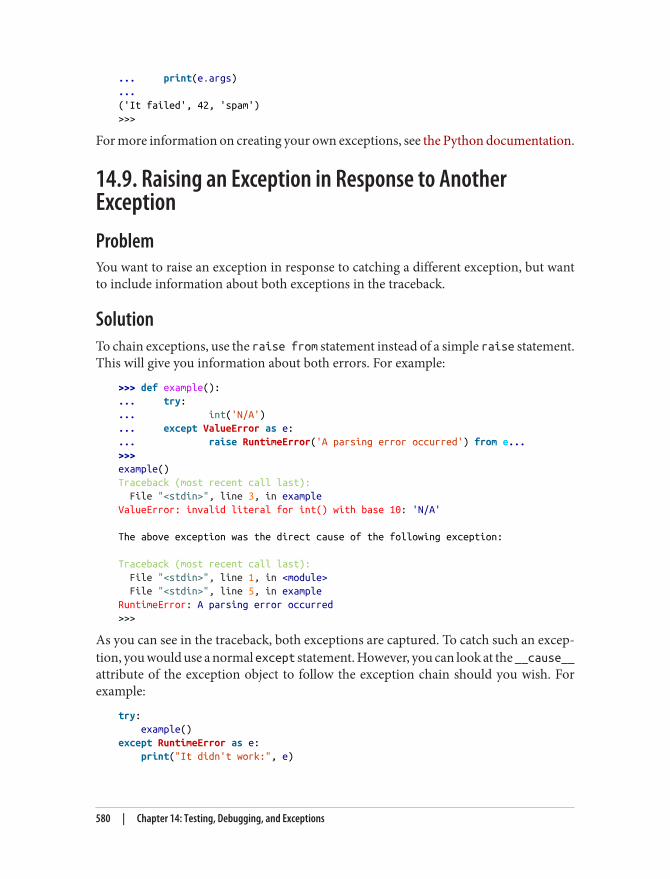
... print(e.args)
...('It failed', 42, 'spam')>>>
For more information on creating your own exceptions, see the Python documentation.
14.9. Raising an Exception in Response to AnotherExceptionProblemYou want to raise an exception in response to catching a different exception, but wantto include information about both exceptions in the traceback.
SolutionTo chain exceptions, use the raise from statement instead of a simple raise statement.This will give you information about both errors. For example:
>>> def example():... try:... int('N/A')... except ValueError as e:... raise RuntimeError('A parsing error occurred') from e...>>> example()Traceback (most recent call last): File "<stdin>", line 3, in exampleValueError: invalid literal for int() with base 10: 'N/A'
The above exception was the direct cause of the following exception:
Traceback (most recent call last): File "<stdin>", line 1, in <module> File "<stdin>", line 5, in exampleRuntimeError: A parsing error occurred>>>
As you can see in the traceback, both exceptions are captured. To catch such an excep‐tion, you would use a normal except statement. However, you can look at the __cause__attribute of the exception object to follow the exception chain should you wish. Forexample:
try: example()except RuntimeError as e: print("It didn't work:", e)
580 | Chapter 14: Testing, Debugging, and Exceptions
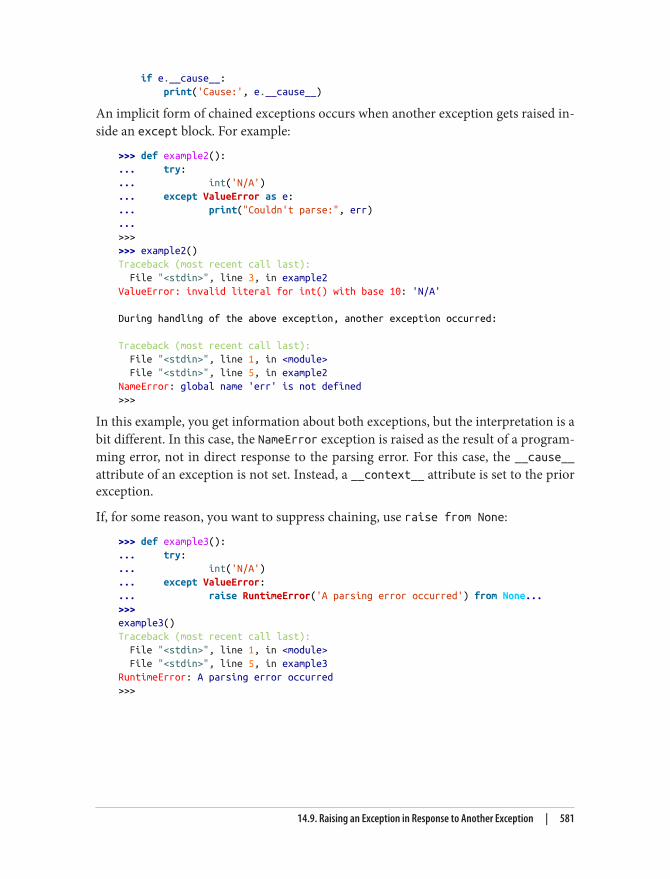
if e.__cause__: print('Cause:', e.__cause__)
An implicit form of chained exceptions occurs when another exception gets raised in‐side an except block. For example:
>>> def example2():... try:... int('N/A')... except ValueError as e:... print("Couldn't parse:", err)...>>>>>> example2()Traceback (most recent call last): File "<stdin>", line 3, in example2ValueError: invalid literal for int() with base 10: 'N/A'
During handling of the above exception, another exception occurred:
Traceback (most recent call last): File "<stdin>", line 1, in <module> File "<stdin>", line 5, in example2NameError: global name 'err' is not defined>>>
In this example, you get information about both exceptions, but the interpretation is abit different. In this case, the NameError exception is raised as the result of a program‐ming error, not in direct response to the parsing error. For this case, the __cause__attribute of an exception is not set. Instead, a __context__ attribute is set to the priorexception.
If, for some reason, you want to suppress chaining, use raise from None:
>>> def example3():... try:... int('N/A')... except ValueError:... raise RuntimeError('A parsing error occurred') from None...>>> example3()Traceback (most recent call last): File "<stdin>", line 1, in <module> File "<stdin>", line 5, in example3RuntimeError: A parsing error occurred>>>
14.9. Raising an Exception in Response to Another Exception | 581
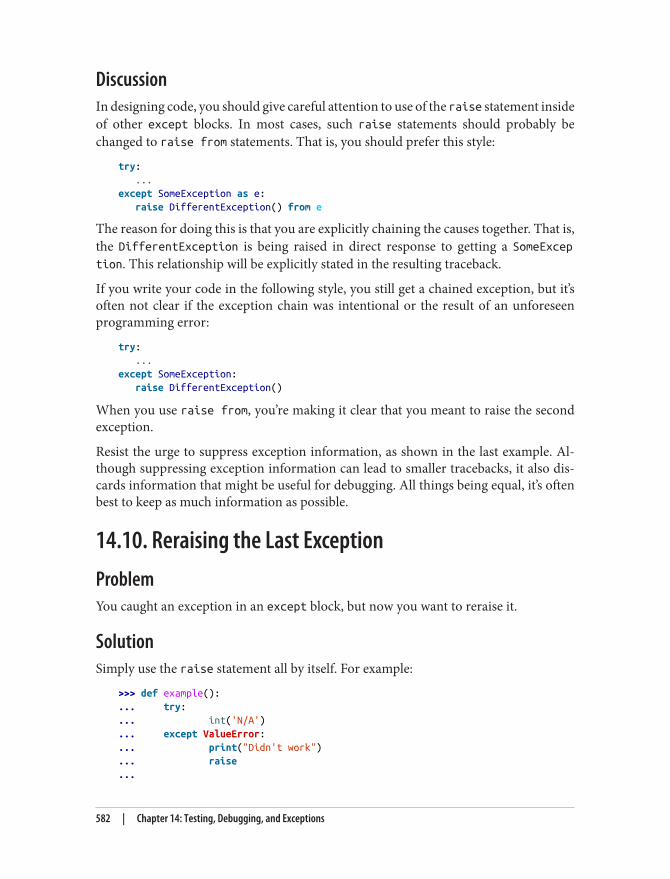
DiscussionIn designing code, you should give careful attention to use of the raise statement insideof other except blocks. In most cases, such raise statements should probably bechanged to raise from statements. That is, you should prefer this style:
try: ...except SomeException as e: raise DifferentException() from e
The reason for doing this is that you are explicitly chaining the causes together. That is,the DifferentException is being raised in direct response to getting a SomeException. This relationship will be explicitly stated in the resulting traceback.
If you write your code in the following style, you still get a chained exception, but it’soften not clear if the exception chain was intentional or the result of an unforeseenprogramming error:
try: ...except SomeException: raise DifferentException()
When you use raise from, you’re making it clear that you meant to raise the secondexception.
Resist the urge to suppress exception information, as shown in the last example. Al‐though suppressing exception information can lead to smaller tracebacks, it also dis‐cards information that might be useful for debugging. All things being equal, it’s oftenbest to keep as much information as possible.
14.10. Reraising the Last ExceptionProblemYou caught an exception in an except block, but now you want to reraise it.
SolutionSimply use the raise statement all by itself. For example:
>>> def example():... try:... int('N/A')... except ValueError:... print("Didn't work")... raise...
582 | Chapter 14: Testing, Debugging, and Exceptions
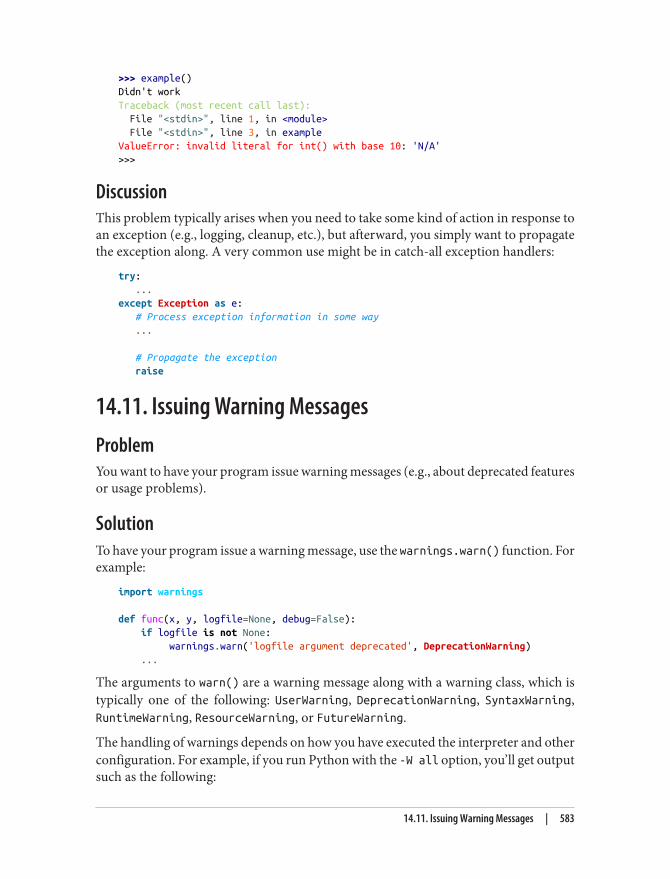
>>> example()Didn't workTraceback (most recent call last): File "<stdin>", line 1, in <module> File "<stdin>", line 3, in exampleValueError: invalid literal for int() with base 10: 'N/A'>>>
DiscussionThis problem typically arises when you need to take some kind of action in response toan exception (e.g., logging, cleanup, etc.), but afterward, you simply want to propagatethe exception along. A very common use might be in catch-all exception handlers:
try: ...except Exception as e: # Process exception information in some way ...
# Propagate the exception raise
14.11. Issuing Warning MessagesProblemYou want to have your program issue warning messages (e.g., about deprecated featuresor usage problems).
SolutionTo have your program issue a warning message, use the warnings.warn() function. Forexample:
import warnings
def func(x, y, logfile=None, debug=False): if logfile is not None: warnings.warn('logfile argument deprecated', DeprecationWarning) ...
The arguments to warn() are a warning message along with a warning class, which istypically one of the following: UserWarning, DeprecationWarning, SyntaxWarning,RuntimeWarning, ResourceWarning, or FutureWarning.
The handling of warnings depends on how you have executed the interpreter and otherconfiguration. For example, if you run Python with the -W all option, you’ll get outputsuch as the following:
14.11. Issuing Warning Messages | 583
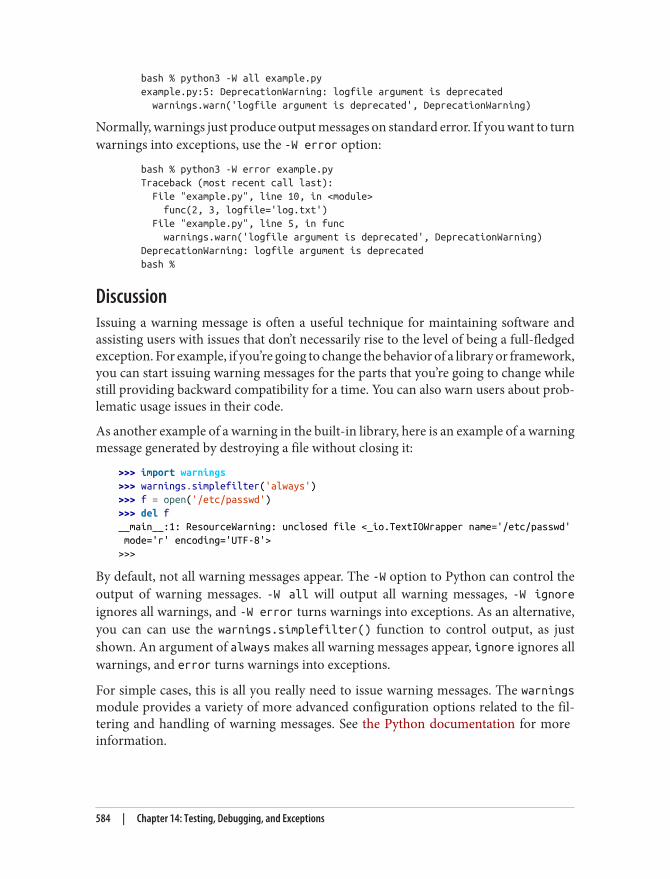
bash % python3 -W all example.py example.py:5: DeprecationWarning: logfile argument is deprecated warnings.warn('logfile argument is deprecated', DeprecationWarning)
Normally, warnings just produce output messages on standard error. If you want to turnwarnings into exceptions, use the -W error option:
bash % python3 -W error example.py Traceback (most recent call last): File "example.py", line 10, in <module> func(2, 3, logfile='log.txt') File "example.py", line 5, in func warnings.warn('logfile argument is deprecated', DeprecationWarning) DeprecationWarning: logfile argument is deprecated bash %
DiscussionIssuing a warning message is often a useful technique for maintaining software andassisting users with issues that don’t necessarily rise to the level of being a full-fledgedexception. For example, if you’re going to change the behavior of a library or framework,you can start issuing warning messages for the parts that you’re going to change whilestill providing backward compatibility for a time. You can also warn users about prob‐lematic usage issues in their code.
As another example of a warning in the built-in library, here is an example of a warningmessage generated by destroying a file without closing it:
>>> import warnings>>> warnings.simplefilter('always')>>> f = open('/etc/passwd')>>> del f__main__:1: ResourceWarning: unclosed file <_io.TextIOWrapper name='/etc/passwd' mode='r' encoding='UTF-8'>>>>
By default, not all warning messages appear. The -W option to Python can control theoutput of warning messages. -W all will output all warning messages, -W ignoreignores all warnings, and -W error turns warnings into exceptions. As an alternative,you can can use the warnings.simplefilter() function to control output, as justshown. An argument of always makes all warning messages appear, ignore ignores allwarnings, and error turns warnings into exceptions.
For simple cases, this is all you really need to issue warning messages. The warningsmodule provides a variety of more advanced configuration options related to the fil‐tering and handling of warning messages. See the Python documentation for more information.
584 | Chapter 14: Testing, Debugging, and Exceptions
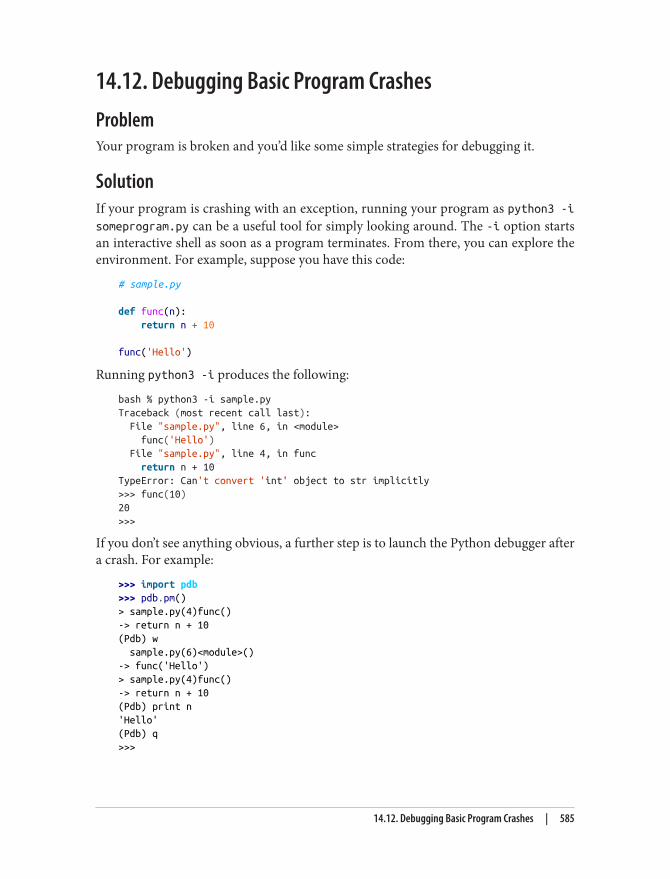
14.12. Debugging Basic Program CrashesProblemYour program is broken and you’d like some simple strategies for debugging it.
SolutionIf your program is crashing with an exception, running your program as python3 -isomeprogram.py can be a useful tool for simply looking around. The -i option startsan interactive shell as soon as a program terminates. From there, you can explore theenvironment. For example, suppose you have this code:
# sample.py
def func(n): return n + 10
func('Hello')
Running python3 -i produces the following:
bash % python3 -i sample.pyTraceback (most recent call last): File "sample.py", line 6, in <module> func('Hello') File "sample.py", line 4, in func return n + 10TypeError: Can't convert 'int' object to str implicitly>>> func(10)20>>>
If you don’t see anything obvious, a further step is to launch the Python debugger aftera crash. For example:
>>> import pdb>>> pdb.pm()> sample.py(4)func()-> return n + 10(Pdb) w sample.py(6)<module>()-> func('Hello')> sample.py(4)func()-> return n + 10(Pdb) print n'Hello'(Pdb) q>>>
14.12. Debugging Basic Program Crashes | 585
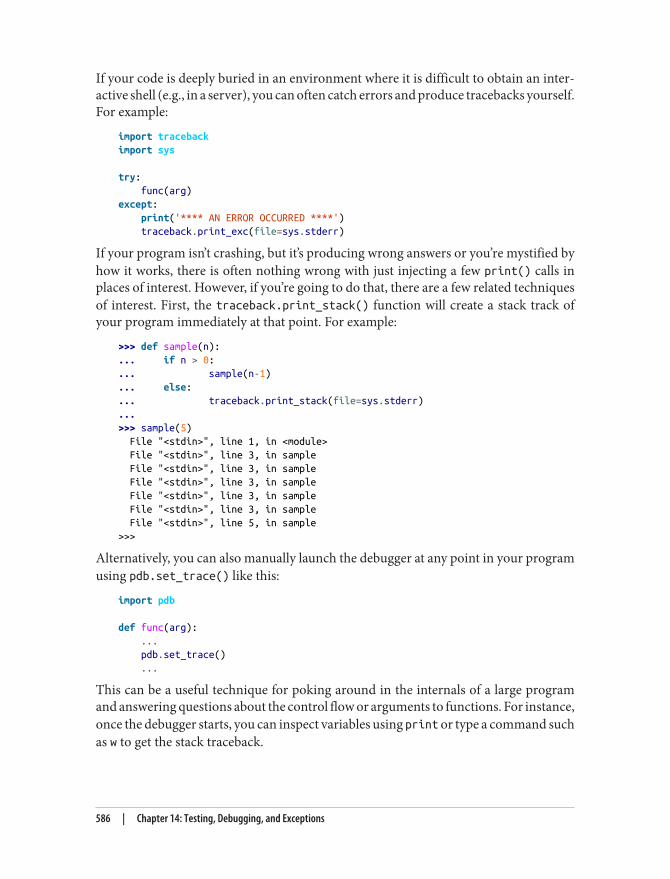
If your code is deeply buried in an environment where it is difficult to obtain an inter‐active shell (e.g., in a server), you can often catch errors and produce tracebacks yourself.For example:
import tracebackimport sys
try: func(arg)except: print('**** AN ERROR OCCURRED ****') traceback.print_exc(file=sys.stderr)
If your program isn’t crashing, but it’s producing wrong answers or you’re mystified byhow it works, there is often nothing wrong with just injecting a few print() calls inplaces of interest. However, if you’re going to do that, there are a few related techniquesof interest. First, the traceback.print_stack() function will create a stack track ofyour program immediately at that point. For example:
>>> def sample(n):... if n > 0:... sample(n-1)... else:... traceback.print_stack(file=sys.stderr)...>>> sample(5) File "<stdin>", line 1, in <module> File "<stdin>", line 3, in sample File "<stdin>", line 3, in sample File "<stdin>", line 3, in sample File "<stdin>", line 3, in sample File "<stdin>", line 3, in sample File "<stdin>", line 5, in sample>>>
Alternatively, you can also manually launch the debugger at any point in your programusing pdb.set_trace() like this:
import pdb
def func(arg): ... pdb.set_trace() ...
This can be a useful technique for poking around in the internals of a large programand answering questions about the control flow or arguments to functions. For instance,once the debugger starts, you can inspect variables using print or type a command suchas w to get the stack traceback.
586 | Chapter 14: Testing, Debugging, and Exceptions
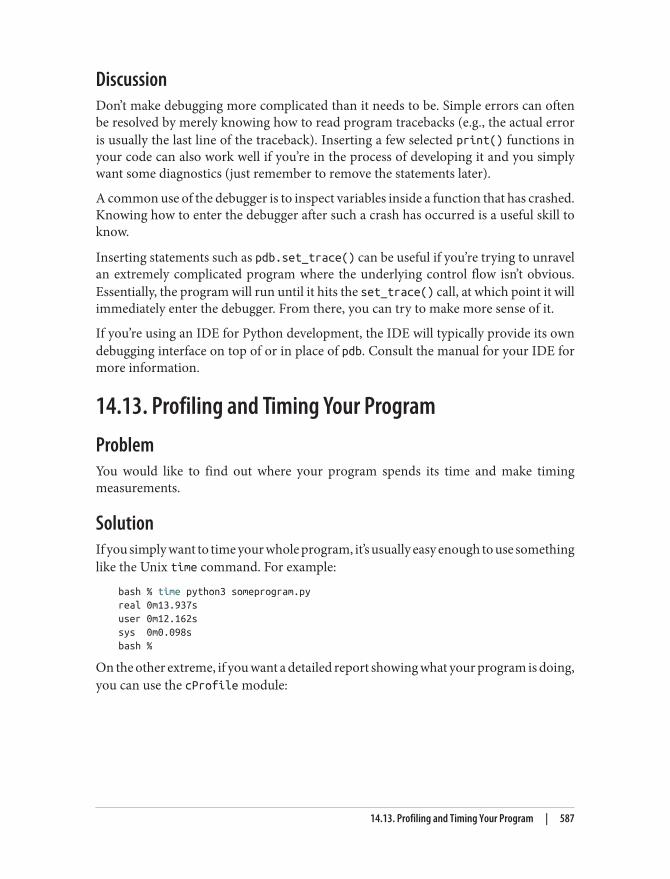
DiscussionDon’t make debugging more complicated than it needs to be. Simple errors can oftenbe resolved by merely knowing how to read program tracebacks (e.g., the actual erroris usually the last line of the traceback). Inserting a few selected print() functions inyour code can also work well if you’re in the process of developing it and you simplywant some diagnostics (just remember to remove the statements later).
A common use of the debugger is to inspect variables inside a function that has crashed.Knowing how to enter the debugger after such a crash has occurred is a useful skill toknow.
Inserting statements such as pdb.set_trace() can be useful if you’re trying to unravelan extremely complicated program where the underlying control flow isn’t obvious.Essentially, the program will run until it hits the set_trace() call, at which point it willimmediately enter the debugger. From there, you can try to make more sense of it.
If you’re using an IDE for Python development, the IDE will typically provide its owndebugging interface on top of or in place of pdb. Consult the manual for your IDE formore information.
14.13. Profiling and Timing Your ProgramProblemYou would like to find out where your program spends its time and make timingmeasurements.
SolutionIf you simply want to time your whole program, it’s usually easy enough to use somethinglike the Unix time command. For example:
bash % time python3 someprogram.pyreal 0m13.937suser 0m12.162ssys 0m0.098sbash %
On the other extreme, if you want a detailed report showing what your program is doing,you can use the cProfile module:
14.13. Profiling and Timing Your Program | 587
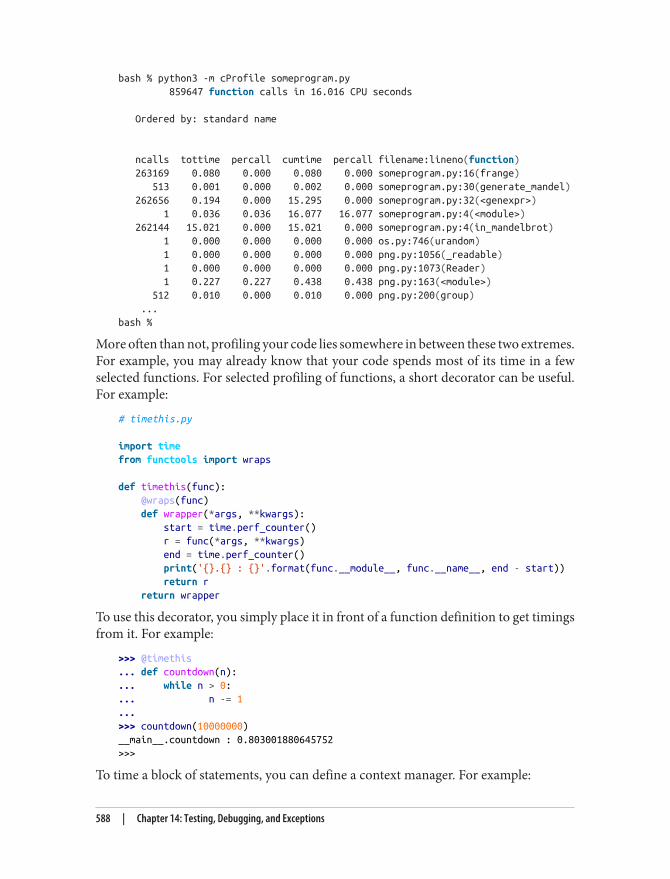
bash % python3 -m cProfile someprogram.py 859647 function calls in 16.016 CPU seconds
Ordered by: standard name
ncalls tottime percall cumtime percall filename:lineno(function) 263169 0.080 0.000 0.080 0.000 someprogram.py:16(frange) 513 0.001 0.000 0.002 0.000 someprogram.py:30(generate_mandel) 262656 0.194 0.000 15.295 0.000 someprogram.py:32(<genexpr>) 1 0.036 0.036 16.077 16.077 someprogram.py:4(<module>) 262144 15.021 0.000 15.021 0.000 someprogram.py:4(in_mandelbrot) 1 0.000 0.000 0.000 0.000 os.py:746(urandom) 1 0.000 0.000 0.000 0.000 png.py:1056(_readable) 1 0.000 0.000 0.000 0.000 png.py:1073(Reader) 1 0.227 0.227 0.438 0.438 png.py:163(<module>) 512 0.010 0.000 0.010 0.000 png.py:200(group) ...bash %
More often than not, profiling your code lies somewhere in between these two extremes.For example, you may already know that your code spends most of its time in a fewselected functions. For selected profiling of functions, a short decorator can be useful.For example:
# timethis.py
import timefrom functools import wraps
def timethis(func): @wraps(func) def wrapper(*args, **kwargs): start = time.perf_counter() r = func(*args, **kwargs) end = time.perf_counter() print('{}.{} : {}'.format(func.__module__, func.__name__, end - start)) return r return wrapper
To use this decorator, you simply place it in front of a function definition to get timingsfrom it. For example:
>>> @timethis... def countdown(n):... while n > 0:... n -= 1...>>> countdown(10000000)__main__.countdown : 0.803001880645752>>>
To time a block of statements, you can define a context manager. For example:
588 | Chapter 14: Testing, Debugging, and Exceptions
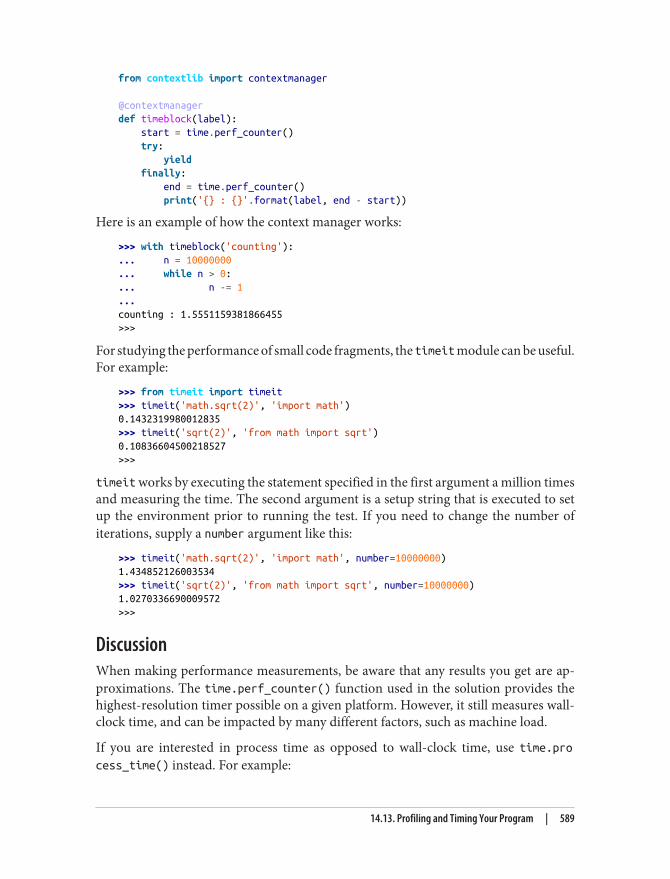
from contextlib import contextmanager
@contextmanagerdef timeblock(label): start = time.perf_counter() try: yield finally: end = time.perf_counter() print('{} : {}'.format(label, end - start))
Here is an example of how the context manager works:
>>> with timeblock('counting'):... n = 10000000... while n > 0:... n -= 1...counting : 1.5551159381866455>>>
For studying the performance of small code fragments, the timeit module can be useful.For example:
>>> from timeit import timeit>>> timeit('math.sqrt(2)', 'import math')0.1432319980012835>>> timeit('sqrt(2)', 'from math import sqrt')0.10836604500218527>>>
timeit works by executing the statement specified in the first argument a million timesand measuring the time. The second argument is a setup string that is executed to setup the environment prior to running the test. If you need to change the number ofiterations, supply a number argument like this:
>>> timeit('math.sqrt(2)', 'import math', number=10000000)1.434852126003534>>> timeit('sqrt(2)', 'from math import sqrt', number=10000000)1.0270336690009572>>>
DiscussionWhen making performance measurements, be aware that any results you get are ap‐proximations. The time.perf_counter() function used in the solution provides thehighest-resolution timer possible on a given platform. However, it still measures wall-clock time, and can be impacted by many different factors, such as machine load.
If you are interested in process time as opposed to wall-clock time, use time.process_time() instead. For example:
14.13. Profiling and Timing Your Program | 589
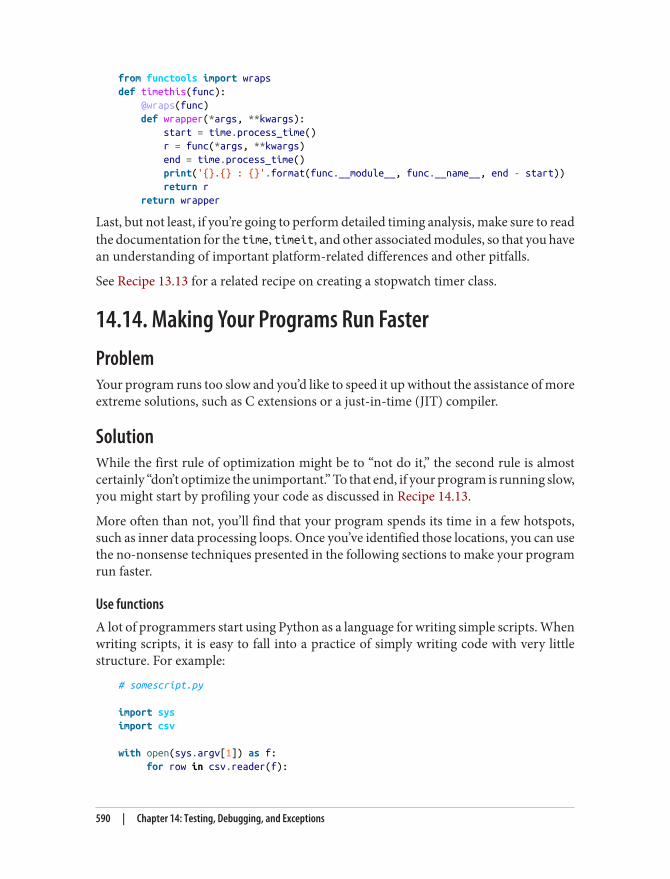
from functools import wrapsdef timethis(func): @wraps(func) def wrapper(*args, **kwargs): start = time.process_time() r = func(*args, **kwargs) end = time.process_time() print('{}.{} : {}'.format(func.__module__, func.__name__, end - start)) return r return wrapper
Last, but not least, if you’re going to perform detailed timing analysis, make sure to readthe documentation for the time, timeit, and other associated modules, so that you havean understanding of important platform-related differences and other pitfalls.
See Recipe 13.13 for a related recipe on creating a stopwatch timer class.
14.14. Making Your Programs Run FasterProblemYour program runs too slow and you’d like to speed it up without the assistance of moreextreme solutions, such as C extensions or a just-in-time (JIT) compiler.
SolutionWhile the first rule of optimization might be to “not do it,” the second rule is almostcertainly “don’t optimize the unimportant.” To that end, if your program is running slow,you might start by profiling your code as discussed in Recipe 14.13.
More often than not, you’ll find that your program spends its time in a few hotspots,such as inner data processing loops. Once you’ve identified those locations, you can usethe no-nonsense techniques presented in the following sections to make your programrun faster.
Use functionsA lot of programmers start using Python as a language for writing simple scripts. Whenwriting scripts, it is easy to fall into a practice of simply writing code with very littlestructure. For example:
# somescript.py
import sysimport csv
with open(sys.argv[1]) as f: for row in csv.reader(f):
590 | Chapter 14: Testing, Debugging, and Exceptions
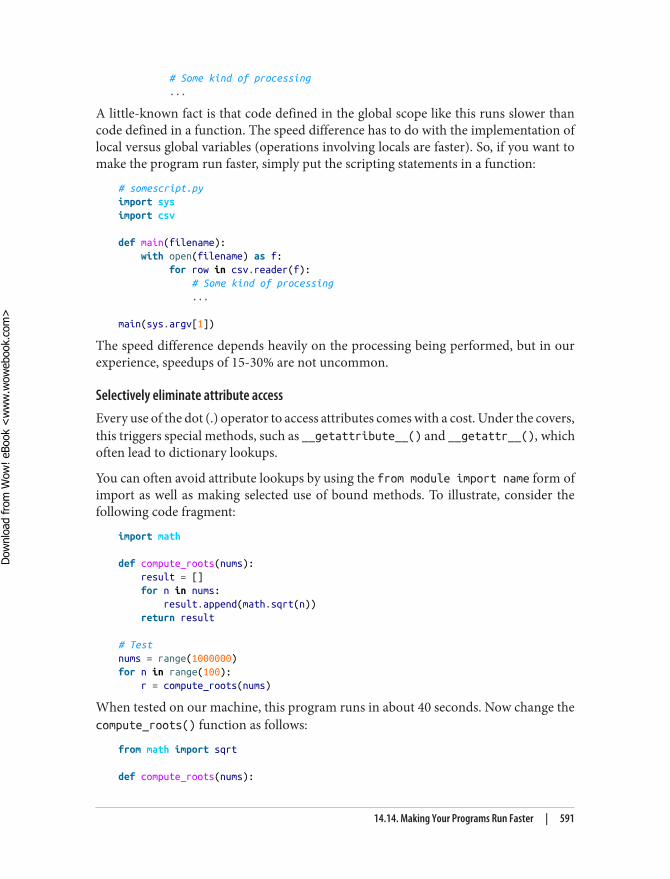
# Some kind of processing ...
A little-known fact is that code defined in the global scope like this runs slower thancode defined in a function. The speed difference has to do with the implementation oflocal versus global variables (operations involving locals are faster). So, if you want tomake the program run faster, simply put the scripting statements in a function:
# somescript.pyimport sysimport csv
def main(filename): with open(filename) as f: for row in csv.reader(f): # Some kind of processing ...
main(sys.argv[1])
The speed difference depends heavily on the processing being performed, but in ourexperience, speedups of 15-30% are not uncommon.
Selectively eliminate attribute accessEvery use of the dot (.) operator to access attributes comes with a cost. Under the covers,this triggers special methods, such as __getattribute__() and __getattr__(), whichoften lead to dictionary lookups.
You can often avoid attribute lookups by using the from module import name form ofimport as well as making selected use of bound methods. To illustrate, consider thefollowing code fragment:
import math
def compute_roots(nums): result = [] for n in nums: result.append(math.sqrt(n)) return result
# Testnums = range(1000000)for n in range(100): r = compute_roots(nums)
When tested on our machine, this program runs in about 40 seconds. Now change thecompute_roots() function as follows:
from math import sqrt
def compute_roots(nums):
14.14. Making Your Programs Run Faster | 591
Dow
nlo
ad fro
m W
ow
! eBook
<w
ww
.wow
ebook.
com
>
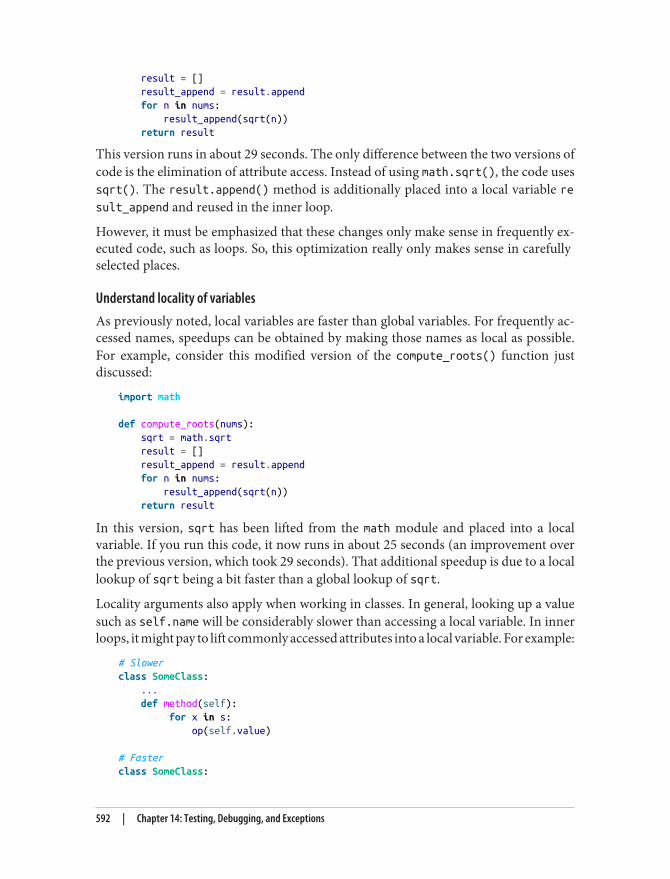
result = [] result_append = result.append for n in nums: result_append(sqrt(n)) return result
This version runs in about 29 seconds. The only difference between the two versions ofcode is the elimination of attribute access. Instead of using math.sqrt(), the code usessqrt(). The result.append() method is additionally placed into a local variable result_append and reused in the inner loop.
However, it must be emphasized that these changes only make sense in frequently ex‐ecuted code, such as loops. So, this optimization really only makes sense in carefully selected places.
Understand locality of variablesAs previously noted, local variables are faster than global variables. For frequently ac‐cessed names, speedups can be obtained by making those names as local as possible.For example, consider this modified version of the compute_roots() function justdiscussed:
import math
def compute_roots(nums): sqrt = math.sqrt result = [] result_append = result.append for n in nums: result_append(sqrt(n)) return result
In this version, sqrt has been lifted from the math module and placed into a localvariable. If you run this code, it now runs in about 25 seconds (an improvement overthe previous version, which took 29 seconds). That additional speedup is due to a locallookup of sqrt being a bit faster than a global lookup of sqrt.
Locality arguments also apply when working in classes. In general, looking up a valuesuch as self.name will be considerably slower than accessing a local variable. In innerloops, it might pay to lift commonly accessed attributes into a local variable. For example:
# Slowerclass SomeClass: ... def method(self): for x in s: op(self.value)
# Fasterclass SomeClass:
592 | Chapter 14: Testing, Debugging, and Exceptions

... def method(self): value = self.value for x in s: op(value)
Avoid gratuitous abstractionAny time you wrap up code with extra layers of processing, such as decorators, prop‐erties, or descriptors, you’re going to make it slower. As an example, consider this class:
class A: def __init__(self, x, y): self.x = x self.y = y @property def y(self): return self._y @y.setter def y(self, value): self._y = value
Now, try a simple timing test:
>>> from timeit import timeit>>> a = A(1,2)>>> timeit('a.x', 'from __main__ import a')0.07817923510447145>>> timeit('a.y', 'from __main__ import a')0.35766440676525235>>>
As you can observe, accessing the property y is not just slightly slower than a simpleattribute x, it’s about 4.5 times slower. If this difference matters, you should ask yourselfif the definition of y as a property was really necessary. If not, simply get rid of it andgo back to using a simple attribute instead. Just because it might be common for pro‐grams in another programming language to use getter/setter functions, that doesn’tmean you should adopt that programming style for Python.
Use the built-in containersBuilt-in data types such as strings, tuples, lists, sets, and dicts are all implemented in C,and are rather fast. If you’re inclined to make your own data structures as a replacement(e.g., linked lists, balanced trees, etc.), it may be rather difficult if not impossible to matchthe speed of the built-ins. Thus, you’re often better off just using them.
Avoid making unnecessary data structures or copiesSometimes programmers get carried away with making unnecessary data structureswhen they just don’t have to. For example, someone might write code like this:
14.14. Making Your Programs Run Faster | 593
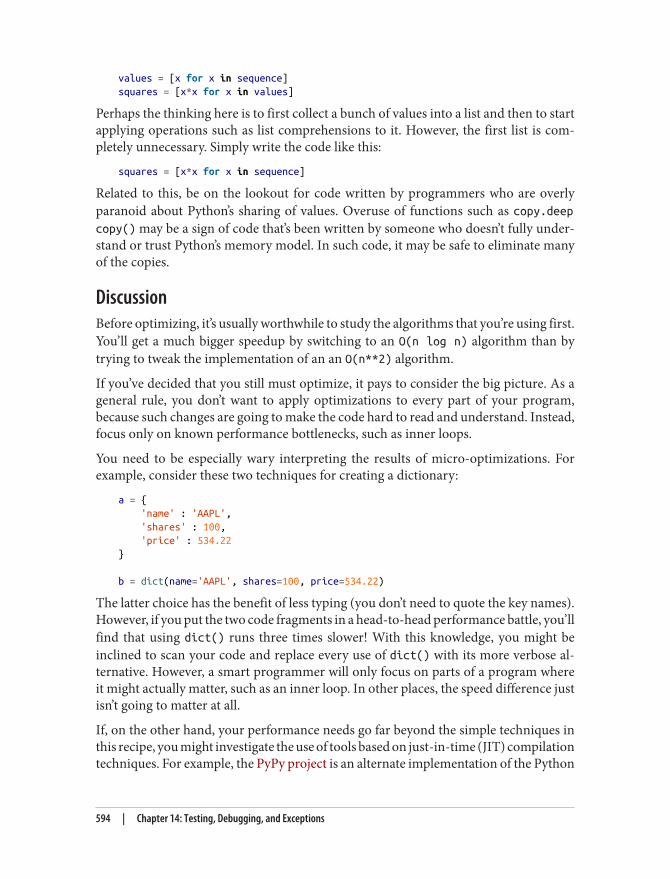
values = [x for x in sequence]squares = [x*x for x in values]
Perhaps the thinking here is to first collect a bunch of values into a list and then to startapplying operations such as list comprehensions to it. However, the first list is com‐pletely unnecessary. Simply write the code like this:
squares = [x*x for x in sequence]
Related to this, be on the lookout for code written by programmers who are overlyparanoid about Python’s sharing of values. Overuse of functions such as copy.deepcopy() may be a sign of code that’s been written by someone who doesn’t fully under‐stand or trust Python’s memory model. In such code, it may be safe to eliminate manyof the copies.
DiscussionBefore optimizing, it’s usually worthwhile to study the algorithms that you’re using first.You’ll get a much bigger speedup by switching to an O(n log n) algorithm than bytrying to tweak the implementation of an an O(n**2) algorithm.
If you’ve decided that you still must optimize, it pays to consider the big picture. As ageneral rule, you don’t want to apply optimizations to every part of your program,because such changes are going to make the code hard to read and understand. Instead,focus only on known performance bottlenecks, such as inner loops.
You need to be especially wary interpreting the results of micro-optimizations. Forexample, consider these two techniques for creating a dictionary:
a = { 'name' : 'AAPL', 'shares' : 100, 'price' : 534.22}
b = dict(name='AAPL', shares=100, price=534.22)
The latter choice has the benefit of less typing (you don’t need to quote the key names).However, if you put the two code fragments in a head-to-head performance battle, you’llfind that using dict() runs three times slower! With this knowledge, you might beinclined to scan your code and replace every use of dict() with its more verbose al‐ternative. However, a smart programmer will only focus on parts of a program whereit might actually matter, such as an inner loop. In other places, the speed difference justisn’t going to matter at all.
If, on the other hand, your performance needs go far beyond the simple techniques inthis recipe, you might investigate the use of tools based on just-in-time (JIT) compilationtechniques. For example, the PyPy project is an alternate implementation of the Python
594 | Chapter 14: Testing, Debugging, and Exceptions
interpreter that analyzes the execution of your program and generates native machinecode for frequently executed parts. It can sometimes make Python programs run anorder of magnitude faster, often approaching (or even exceeding) the speed of codewritten in C. Unfortunately, as of this writing, PyPy does not yet fully support Python3. So, that is something to look for in the future. You might also consider the Numbaproject. Numba is a dynamic compiler where you annotate selected Python functionsthat you want to optimize with a decorator. Those functions are then compiled intonative machine code through the use of LLVM. It too can produce signficant perfor‐mance gains. However, like PyPy, support for Python 3 should be viewed as somewhatexperimental.
Last, but not least, the words of John Ousterhout come to mind: “The best performanceimprovement is the transition from the nonworking to the working state.” Don’t worryabout optimization until you need to. Making sure your program works correctly isusually more important than making it run fast (at least initially).
14.14. Making Your Programs Run Faster | 595

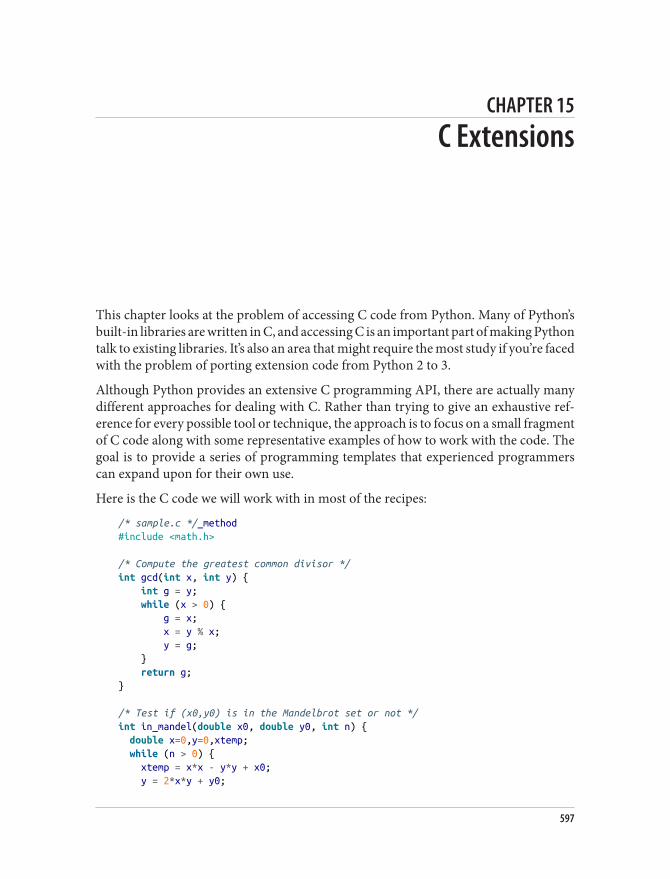
CHAPTER 15
C Extensions
This chapter looks at the problem of accessing C code from Python. Many of Python’sbuilt-in libraries are written in C, and accessing C is an important part of making Pythontalk to existing libraries. It’s also an area that might require the most study if you’re facedwith the problem of porting extension code from Python 2 to 3.
Although Python provides an extensive C programming API, there are actually manydifferent approaches for dealing with C. Rather than trying to give an exhaustive ref‐erence for every possible tool or technique, the approach is to focus on a small fragmentof C code along with some representative examples of how to work with the code. Thegoal is to provide a series of programming templates that experienced programmerscan expand upon for their own use.
Here is the C code we will work with in most of the recipes:
/* sample.c */_method#include <math.h>
/* Compute the greatest common divisor */int gcd(int x, int y) { int g = y; while (x > 0) { g = x; x = y % x; y = g; } return g;}
/* Test if (x0,y0) is in the Mandelbrot set or not */int in_mandel(double x0, double y0, int n) { double x=0,y=0,xtemp; while (n > 0) { xtemp = x*x - y*y + x0; y = 2*x*y + y0;
597
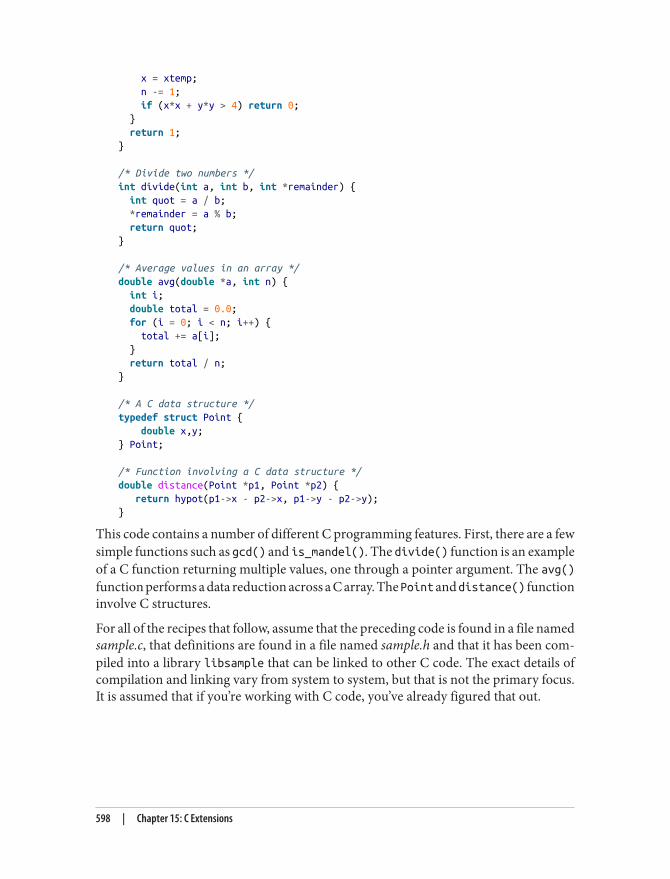
x = xtemp; n -= 1; if (x*x + y*y > 4) return 0; } return 1;}
/* Divide two numbers */int divide(int a, int b, int *remainder) { int quot = a / b; *remainder = a % b; return quot;}
/* Average values in an array */double avg(double *a, int n) { int i; double total = 0.0; for (i = 0; i < n; i++) { total += a[i]; } return total / n;}
/* A C data structure */typedef struct Point { double x,y;} Point;
/* Function involving a C data structure */double distance(Point *p1, Point *p2) { return hypot(p1->x - p2->x, p1->y - p2->y);}
This code contains a number of different C programming features. First, there are a fewsimple functions such as gcd() and is_mandel(). The divide() function is an exampleof a C function returning multiple values, one through a pointer argument. The avg()function performs a data reduction across a C array. The Point and distance() functioninvolve C structures.
For all of the recipes that follow, assume that the preceding code is found in a file namedsample.c, that definitions are found in a file named sample.h and that it has been com‐piled into a library libsample that can be linked to other C code. The exact details ofcompilation and linking vary from system to system, but that is not the primary focus.It is assumed that if you’re working with C code, you’ve already figured that out.
598 | Chapter 15: C Extensions
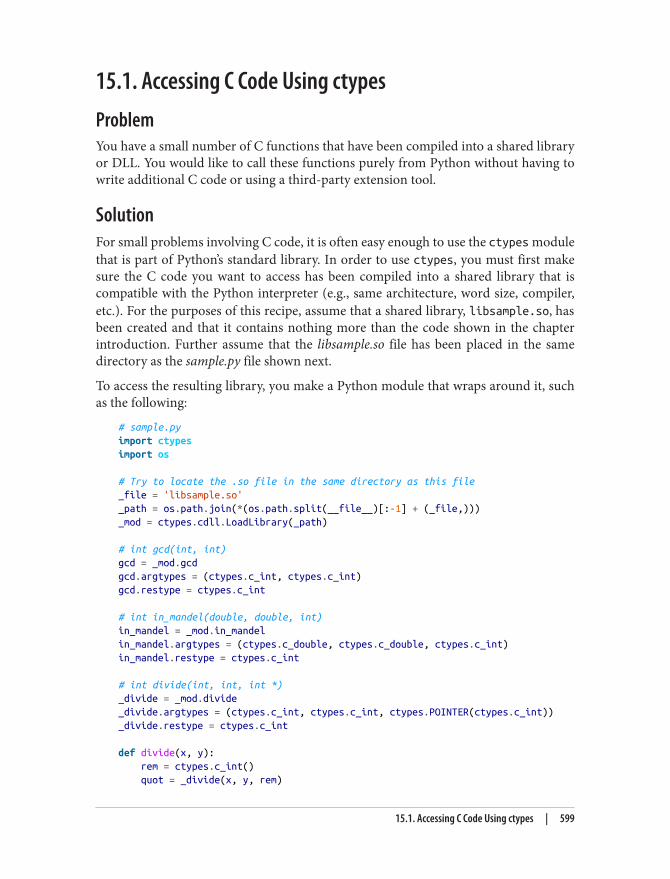
15.1. Accessing C Code Using ctypesProblemYou have a small number of C functions that have been compiled into a shared libraryor DLL. You would like to call these functions purely from Python without having towrite additional C code or using a third-party extension tool.
SolutionFor small problems involving C code, it is often easy enough to use the ctypes modulethat is part of Python’s standard library. In order to use ctypes, you must first makesure the C code you want to access has been compiled into a shared library that iscompatible with the Python interpreter (e.g., same architecture, word size, compiler,etc.). For the purposes of this recipe, assume that a shared library, libsample.so, hasbeen created and that it contains nothing more than the code shown in the chapterintroduction. Further assume that the libsample.so file has been placed in the samedirectory as the sample.py file shown next.
To access the resulting library, you make a Python module that wraps around it, suchas the following:
# sample.pyimport ctypesimport os
# Try to locate the .so file in the same directory as this file_file = 'libsample.so'_path = os.path.join(*(os.path.split(__file__)[:-1] + (_file,)))_mod = ctypes.cdll.LoadLibrary(_path)
# int gcd(int, int)gcd = _mod.gcdgcd.argtypes = (ctypes.c_int, ctypes.c_int)gcd.restype = ctypes.c_int
# int in_mandel(double, double, int)in_mandel = _mod.in_mandelin_mandel.argtypes = (ctypes.c_double, ctypes.c_double, ctypes.c_int)in_mandel.restype = ctypes.c_int
# int divide(int, int, int *)_divide = _mod.divide_divide.argtypes = (ctypes.c_int, ctypes.c_int, ctypes.POINTER(ctypes.c_int))_divide.restype = ctypes.c_int
def divide(x, y): rem = ctypes.c_int() quot = _divide(x, y, rem)
15.1. Accessing C Code Using ctypes | 599
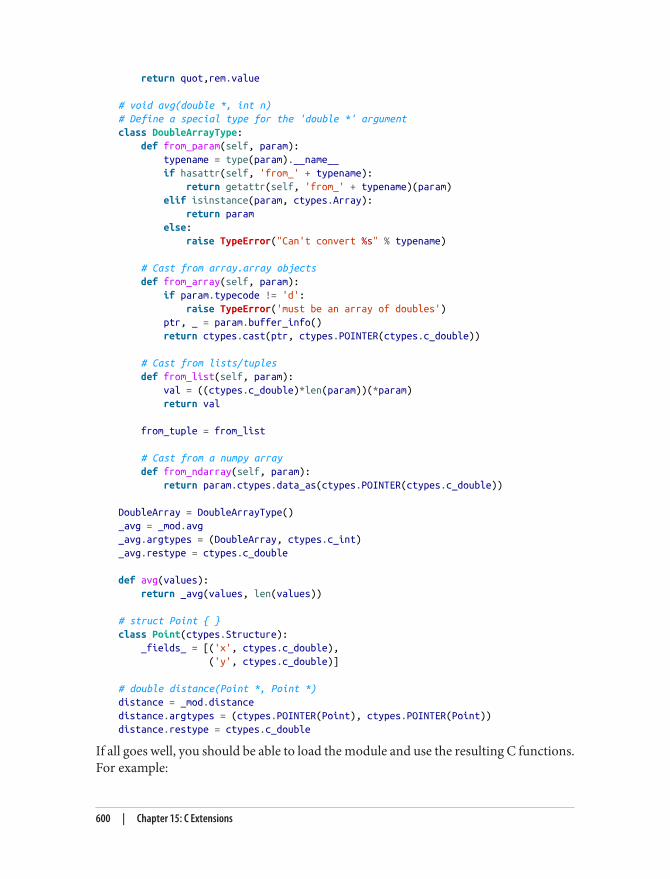
return quot,rem.value
# void avg(double *, int n)# Define a special type for the 'double *' argumentclass DoubleArrayType: def from_param(self, param): typename = type(param).__name__ if hasattr(self, 'from_' + typename): return getattr(self, 'from_' + typename)(param) elif isinstance(param, ctypes.Array): return param else: raise TypeError("Can't convert %s" % typename)
# Cast from array.array objects def from_array(self, param): if param.typecode != 'd': raise TypeError('must be an array of doubles') ptr, _ = param.buffer_info() return ctypes.cast(ptr, ctypes.POINTER(ctypes.c_double))
# Cast from lists/tuples def from_list(self, param): val = ((ctypes.c_double)*len(param))(*param) return val
from_tuple = from_list
# Cast from a numpy array def from_ndarray(self, param): return param.ctypes.data_as(ctypes.POINTER(ctypes.c_double))
DoubleArray = DoubleArrayType()_avg = _mod.avg_avg.argtypes = (DoubleArray, ctypes.c_int)_avg.restype = ctypes.c_double
def avg(values): return _avg(values, len(values))
# struct Point { }class Point(ctypes.Structure): _fields_ = [('x', ctypes.c_double), ('y', ctypes.c_double)]
# double distance(Point *, Point *)distance = _mod.distancedistance.argtypes = (ctypes.POINTER(Point), ctypes.POINTER(Point))distance.restype = ctypes.c_double
If all goes well, you should be able to load the module and use the resulting C functions.For example:
600 | Chapter 15: C Extensions
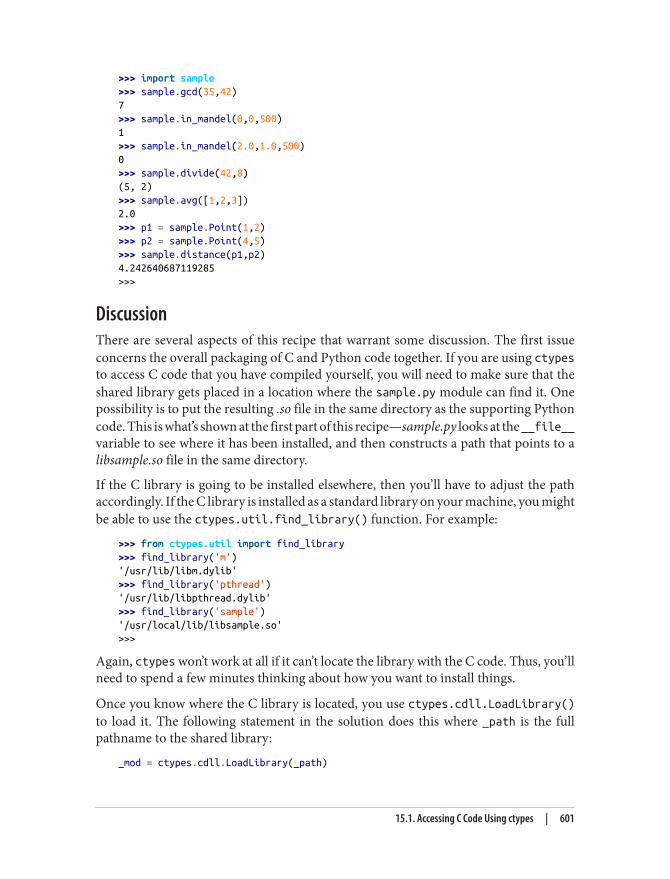
>>> import sample>>> sample.gcd(35,42)7>>> sample.in_mandel(0,0,500)1>>> sample.in_mandel(2.0,1.0,500)0>>> sample.divide(42,8)(5, 2)>>> sample.avg([1,2,3])2.0>>> p1 = sample.Point(1,2)>>> p2 = sample.Point(4,5)>>> sample.distance(p1,p2)4.242640687119285>>>
DiscussionThere are several aspects of this recipe that warrant some discussion. The first issueconcerns the overall packaging of C and Python code together. If you are using ctypesto access C code that you have compiled yourself, you will need to make sure that theshared library gets placed in a location where the sample.py module can find it. Onepossibility is to put the resulting .so file in the same directory as the supporting Pythoncode. This is what’s shown at the first part of this recipe—sample.py looks at the __file__variable to see where it has been installed, and then constructs a path that points to alibsample.so file in the same directory.
If the C library is going to be installed elsewhere, then you’ll have to adjust the pathaccordingly. If the C library is installed as a standard library on your machine, you mightbe able to use the ctypes.util.find_library() function. For example:
>>> from ctypes.util import find_library>>> find_library('m')'/usr/lib/libm.dylib'>>> find_library('pthread')'/usr/lib/libpthread.dylib'>>> find_library('sample')'/usr/local/lib/libsample.so'>>>
Again, ctypes won’t work at all if it can’t locate the library with the C code. Thus, you’llneed to spend a few minutes thinking about how you want to install things.
Once you know where the C library is located, you use ctypes.cdll.LoadLibrary()to load it. The following statement in the solution does this where _path is the fullpathname to the shared library:
_mod = ctypes.cdll.LoadLibrary(_path)
15.1. Accessing C Code Using ctypes | 601
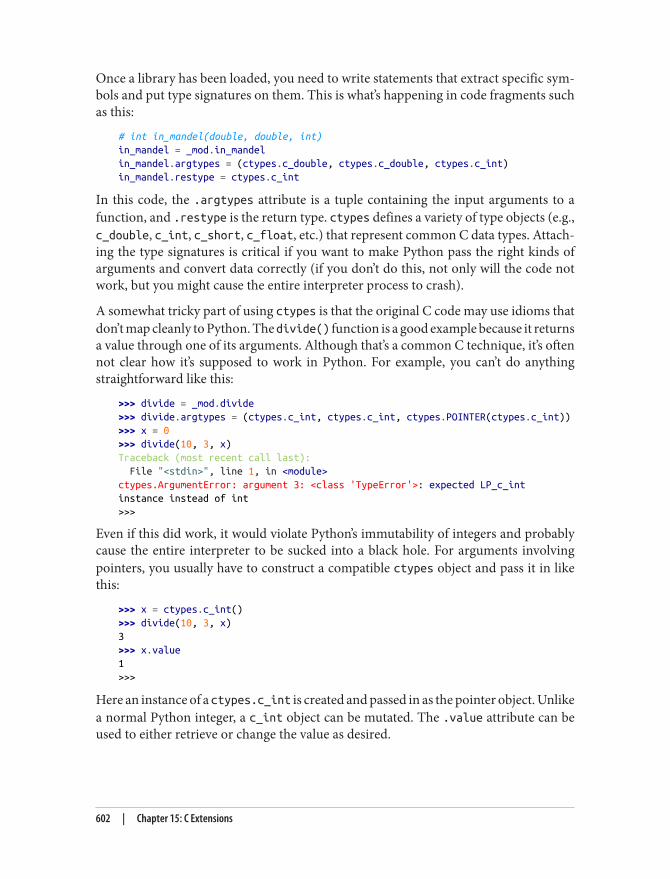
Once a library has been loaded, you need to write statements that extract specific sym‐bols and put type signatures on them. This is what’s happening in code fragments suchas this:
# int in_mandel(double, double, int)in_mandel = _mod.in_mandelin_mandel.argtypes = (ctypes.c_double, ctypes.c_double, ctypes.c_int)in_mandel.restype = ctypes.c_int
In this code, the .argtypes attribute is a tuple containing the input arguments to afunction, and .restype is the return type. ctypes defines a variety of type objects (e.g.,c_double, c_int, c_short, c_float, etc.) that represent common C data types. Attach‐ing the type signatures is critical if you want to make Python pass the right kinds ofarguments and convert data correctly (if you don’t do this, not only will the code notwork, but you might cause the entire interpreter process to crash).
A somewhat tricky part of using ctypes is that the original C code may use idioms thatdon’t map cleanly to Python. The divide() function is a good example because it returnsa value through one of its arguments. Although that’s a common C technique, it’s oftennot clear how it’s supposed to work in Python. For example, you can’t do anythingstraightforward like this:
>>> divide = _mod.divide>>> divide.argtypes = (ctypes.c_int, ctypes.c_int, ctypes.POINTER(ctypes.c_int))>>> x = 0>>> divide(10, 3, x)Traceback (most recent call last): File "<stdin>", line 1, in <module>ctypes.ArgumentError: argument 3: <class 'TypeError'>: expected LP_c_intinstance instead of int>>>
Even if this did work, it would violate Python’s immutability of integers and probablycause the entire interpreter to be sucked into a black hole. For arguments involvingpointers, you usually have to construct a compatible ctypes object and pass it in likethis:
>>> x = ctypes.c_int()>>> divide(10, 3, x)3>>> x.value1>>>
Here an instance of a ctypes.c_int is created and passed in as the pointer object. Unlikea normal Python integer, a c_int object can be mutated. The .value attribute can beused to either retrieve or change the value as desired.
602 | Chapter 15: C Extensions
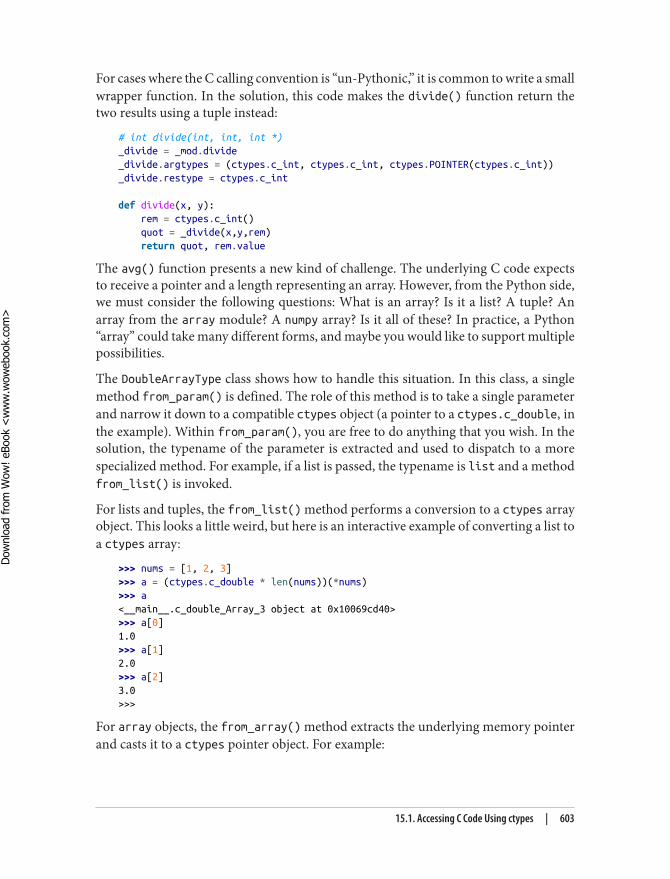
For cases where the C calling convention is “un-Pythonic,” it is common to write a smallwrapper function. In the solution, this code makes the divide() function return thetwo results using a tuple instead:
# int divide(int, int, int *)_divide = _mod.divide_divide.argtypes = (ctypes.c_int, ctypes.c_int, ctypes.POINTER(ctypes.c_int))_divide.restype = ctypes.c_int
def divide(x, y): rem = ctypes.c_int() quot = _divide(x,y,rem) return quot, rem.value
The avg() function presents a new kind of challenge. The underlying C code expectsto receive a pointer and a length representing an array. However, from the Python side,we must consider the following questions: What is an array? Is it a list? A tuple? Anarray from the array module? A numpy array? Is it all of these? In practice, a Python“array” could take many different forms, and maybe you would like to support multiplepossibilities.
The DoubleArrayType class shows how to handle this situation. In this class, a singlemethod from_param() is defined. The role of this method is to take a single parameterand narrow it down to a compatible ctypes object (a pointer to a ctypes.c_double, inthe example). Within from_param(), you are free to do anything that you wish. In thesolution, the typename of the parameter is extracted and used to dispatch to a morespecialized method. For example, if a list is passed, the typename is list and a methodfrom_list() is invoked.
For lists and tuples, the from_list() method performs a conversion to a ctypes arrayobject. This looks a little weird, but here is an interactive example of converting a list toa ctypes array:
>>> nums = [1, 2, 3]>>> a = (ctypes.c_double * len(nums))(*nums)>>> a<__main__.c_double_Array_3 object at 0x10069cd40>>>> a[0]1.0>>> a[1]2.0>>> a[2]3.0>>>
For array objects, the from_array() method extracts the underlying memory pointerand casts it to a ctypes pointer object. For example:
15.1. Accessing C Code Using ctypes | 603
Dow
nlo
ad fro
m W
ow
! eBook
<w
ww
.wow
ebook.
com
>
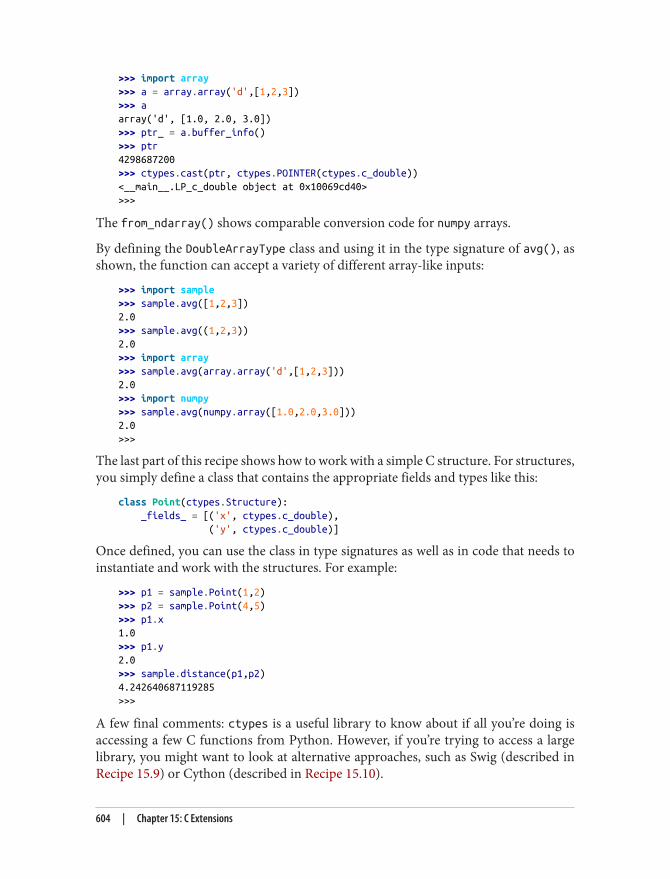
>>> import array>>> a = array.array('d',[1,2,3])>>> aarray('d', [1.0, 2.0, 3.0])>>> ptr_ = a.buffer_info()>>> ptr4298687200>>> ctypes.cast(ptr, ctypes.POINTER(ctypes.c_double))<__main__.LP_c_double object at 0x10069cd40>>>>
The from_ndarray() shows comparable conversion code for numpy arrays.
By defining the DoubleArrayType class and using it in the type signature of avg(), asshown, the function can accept a variety of different array-like inputs:
>>> import sample>>> sample.avg([1,2,3])2.0>>> sample.avg((1,2,3))2.0>>> import array>>> sample.avg(array.array('d',[1,2,3]))2.0>>> import numpy>>> sample.avg(numpy.array([1.0,2.0,3.0]))2.0>>>
The last part of this recipe shows how to work with a simple C structure. For structures,you simply define a class that contains the appropriate fields and types like this:
class Point(ctypes.Structure): _fields_ = [('x', ctypes.c_double), ('y', ctypes.c_double)]
Once defined, you can use the class in type signatures as well as in code that needs toinstantiate and work with the structures. For example:
>>> p1 = sample.Point(1,2)>>> p2 = sample.Point(4,5)>>> p1.x1.0>>> p1.y2.0>>> sample.distance(p1,p2)4.242640687119285>>>
A few final comments: ctypes is a useful library to know about if all you’re doing isaccessing a few C functions from Python. However, if you’re trying to access a largelibrary, you might want to look at alternative approaches, such as Swig (described inRecipe 15.9) or Cython (described in Recipe 15.10).
604 | Chapter 15: C Extensions
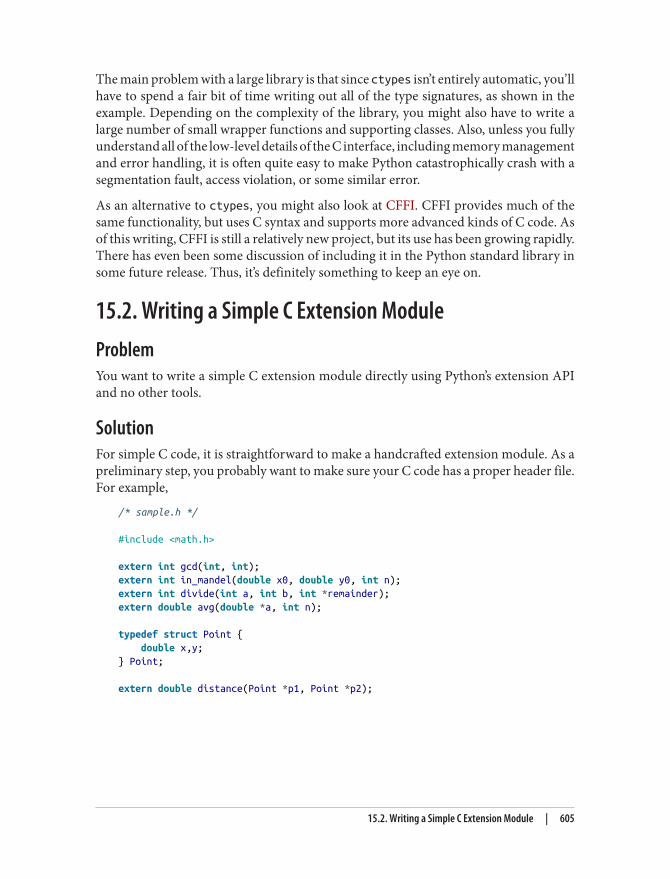
The main problem with a large library is that since ctypes isn’t entirely automatic, you’llhave to spend a fair bit of time writing out all of the type signatures, as shown in theexample. Depending on the complexity of the library, you might also have to write alarge number of small wrapper functions and supporting classes. Also, unless you fullyunderstand all of the low-level details of the C interface, including memory managementand error handling, it is often quite easy to make Python catastrophically crash with asegmentation fault, access violation, or some similar error.
As an alternative to ctypes, you might also look at CFFI. CFFI provides much of thesame functionality, but uses C syntax and supports more advanced kinds of C code. Asof this writing, CFFI is still a relatively new project, but its use has been growing rapidly.There has even been some discussion of including it in the Python standard library insome future release. Thus, it’s definitely something to keep an eye on.
15.2. Writing a Simple C Extension ModuleProblemYou want to write a simple C extension module directly using Python’s extension APIand no other tools.
SolutionFor simple C code, it is straightforward to make a handcrafted extension module. As apreliminary step, you probably want to make sure your C code has a proper header file.For example,
/* sample.h */
#include <math.h>
extern int gcd(int, int);extern int in_mandel(double x0, double y0, int n);extern int divide(int a, int b, int *remainder);extern double avg(double *a, int n);
typedef struct Point { double x,y;} Point;
extern double distance(Point *p1, Point *p2);
15.2. Writing a Simple C Extension Module | 605
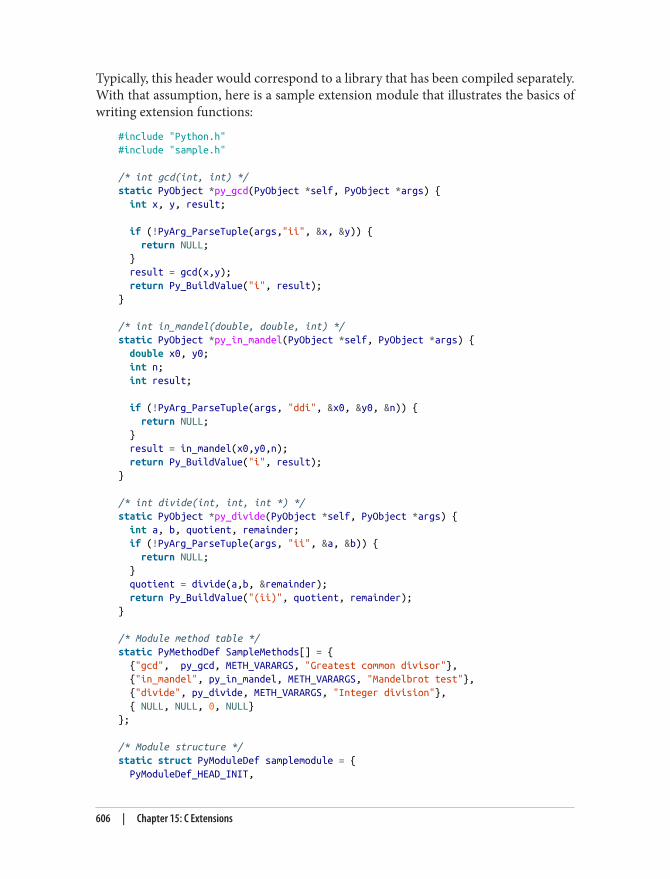
Typically, this header would correspond to a library that has been compiled separately.With that assumption, here is a sample extension module that illustrates the basics ofwriting extension functions:
#include "Python.h"#include "sample.h"
/* int gcd(int, int) */static PyObject *py_gcd(PyObject *self, PyObject *args) { int x, y, result;
if (!PyArg_ParseTuple(args,"ii", &x, &y)) { return NULL; } result = gcd(x,y); return Py_BuildValue("i", result);}
/* int in_mandel(double, double, int) */static PyObject *py_in_mandel(PyObject *self, PyObject *args) { double x0, y0; int n; int result;
if (!PyArg_ParseTuple(args, "ddi", &x0, &y0, &n)) { return NULL; } result = in_mandel(x0,y0,n); return Py_BuildValue("i", result);}
/* int divide(int, int, int *) */static PyObject *py_divide(PyObject *self, PyObject *args) { int a, b, quotient, remainder; if (!PyArg_ParseTuple(args, "ii", &a, &b)) { return NULL; } quotient = divide(a,b, &remainder); return Py_BuildValue("(ii)", quotient, remainder);}
/* Module method table */static PyMethodDef SampleMethods[] = { {"gcd", py_gcd, METH_VARARGS, "Greatest common divisor"}, {"in_mandel", py_in_mandel, METH_VARARGS, "Mandelbrot test"}, {"divide", py_divide, METH_VARARGS, "Integer division"}, { NULL, NULL, 0, NULL}};
/* Module structure */static struct PyModuleDef samplemodule = { PyModuleDef_HEAD_INIT,
606 | Chapter 15: C Extensions
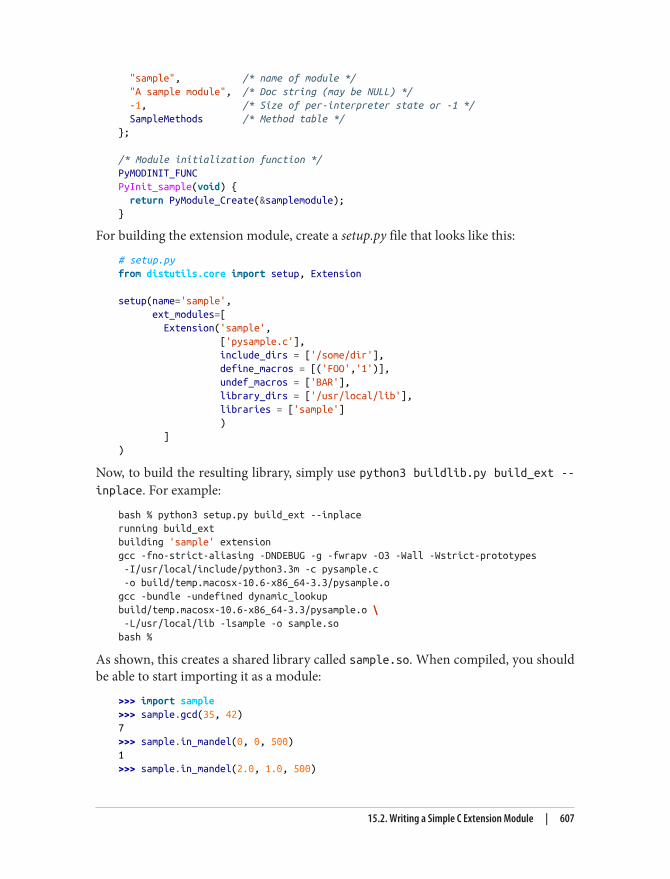
"sample", /* name of module */ "A sample module", /* Doc string (may be NULL) */ -1, /* Size of per-interpreter state or -1 */ SampleMethods /* Method table */};
/* Module initialization function */PyMODINIT_FUNCPyInit_sample(void) { return PyModule_Create(&samplemodule);}
For building the extension module, create a setup.py file that looks like this:
# setup.pyfrom distutils.core import setup, Extension
setup(name='sample', ext_modules=[ Extension('sample', ['pysample.c'], include_dirs = ['/some/dir'], define_macros = [('FOO','1')], undef_macros = ['BAR'], library_dirs = ['/usr/local/lib'], libraries = ['sample'] ) ])
Now, to build the resulting library, simply use python3 buildlib.py build_ext --inplace. For example:
bash % python3 setup.py build_ext --inplacerunning build_extbuilding 'sample' extensiongcc -fno-strict-aliasing -DNDEBUG -g -fwrapv -O3 -Wall -Wstrict-prototypes -I/usr/local/include/python3.3m -c pysample.c -o build/temp.macosx-10.6-x86_64-3.3/pysample.ogcc -bundle -undefined dynamic_lookupbuild/temp.macosx-10.6-x86_64-3.3/pysample.o \ -L/usr/local/lib -lsample -o sample.sobash %
As shown, this creates a shared library called sample.so. When compiled, you shouldbe able to start importing it as a module:
>>> import sample>>> sample.gcd(35, 42)7>>> sample.in_mandel(0, 0, 500)1>>> sample.in_mandel(2.0, 1.0, 500)
15.2. Writing a Simple C Extension Module | 607
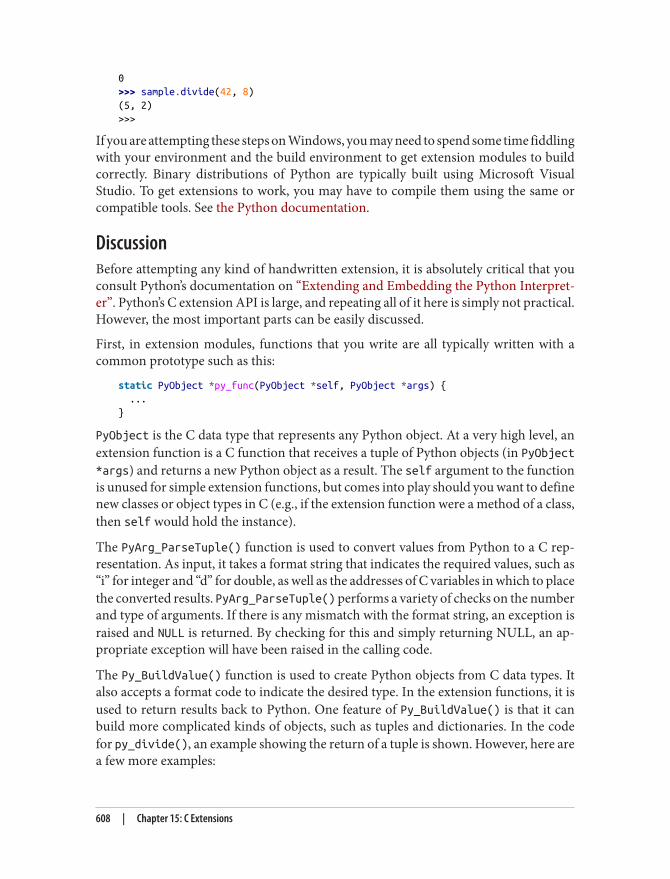
0>>> sample.divide(42, 8)(5, 2)>>>
If you are attempting these steps on Windows, you may need to spend some time fiddlingwith your environment and the build environment to get extension modules to buildcorrectly. Binary distributions of Python are typically built using Microsoft VisualStudio. To get extensions to work, you may have to compile them using the same orcompatible tools. See the Python documentation.
DiscussionBefore attempting any kind of handwritten extension, it is absolutely critical that youconsult Python’s documentation on “Extending and Embedding the Python Interpret‐er”. Python’s C extension API is large, and repeating all of it here is simply not practical.However, the most important parts can be easily discussed.
First, in extension modules, functions that you write are all typically written with acommon prototype such as this:
static PyObject *py_func(PyObject *self, PyObject *args) { ...}
PyObject is the C data type that represents any Python object. At a very high level, anextension function is a C function that receives a tuple of Python objects (in PyObject*args) and returns a new Python object as a result. The self argument to the functionis unused for simple extension functions, but comes into play should you want to definenew classes or object types in C (e.g., if the extension function were a method of a class,then self would hold the instance).
The PyArg_ParseTuple() function is used to convert values from Python to a C rep‐resentation. As input, it takes a format string that indicates the required values, such as“i” for integer and “d” for double, as well as the addresses of C variables in which to placethe converted results. PyArg_ParseTuple() performs a variety of checks on the numberand type of arguments. If there is any mismatch with the format string, an exception israised and NULL is returned. By checking for this and simply returning NULL, an ap‐propriate exception will have been raised in the calling code.
The Py_BuildValue() function is used to create Python objects from C data types. Italso accepts a format code to indicate the desired type. In the extension functions, it isused to return results back to Python. One feature of Py_BuildValue() is that it canbuild more complicated kinds of objects, such as tuples and dictionaries. In the codefor py_divide(), an example showing the return of a tuple is shown. However, here area few more examples:
608 | Chapter 15: C Extensions
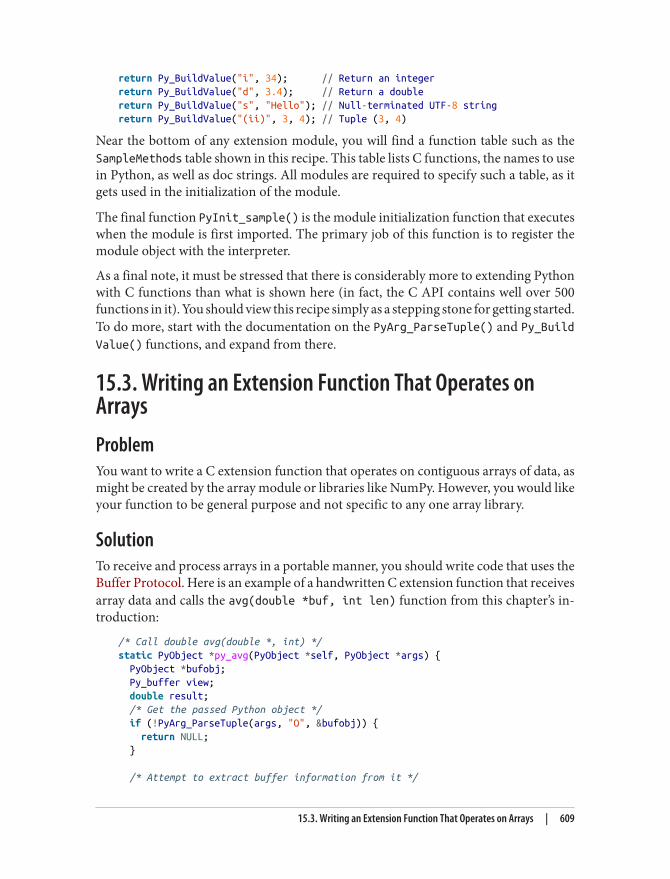
return Py_BuildValue("i", 34); // Return an integerreturn Py_BuildValue("d", 3.4); // Return a doublereturn Py_BuildValue("s", "Hello"); // Null-terminated UTF-8 stringreturn Py_BuildValue("(ii)", 3, 4); // Tuple (3, 4)
Near the bottom of any extension module, you will find a function table such as theSampleMethods table shown in this recipe. This table lists C functions, the names to usein Python, as well as doc strings. All modules are required to specify such a table, as itgets used in the initialization of the module.
The final function PyInit_sample() is the module initialization function that executeswhen the module is first imported. The primary job of this function is to register themodule object with the interpreter.
As a final note, it must be stressed that there is considerably more to extending Pythonwith C functions than what is shown here (in fact, the C API contains well over 500functions in it). You should view this recipe simply as a stepping stone for getting started.To do more, start with the documentation on the PyArg_ParseTuple() and Py_BuildValue() functions, and expand from there.
15.3. Writing an Extension Function That Operates onArraysProblemYou want to write a C extension function that operates on contiguous arrays of data, asmight be created by the array module or libraries like NumPy. However, you would likeyour function to be general purpose and not specific to any one array library.
SolutionTo receive and process arrays in a portable manner, you should write code that uses theBuffer Protocol. Here is an example of a handwritten C extension function that receivesarray data and calls the avg(double *buf, int len) function from this chapter’s in‐troduction:
/* Call double avg(double *, int) */static PyObject *py_avg(PyObject *self, PyObject *args) { PyObject *bufobj; Py_buffer view; double result; /* Get the passed Python object */ if (!PyArg_ParseTuple(args, "O", &bufobj)) { return NULL; }
/* Attempt to extract buffer information from it */
15.3. Writing an Extension Function That Operates on Arrays | 609
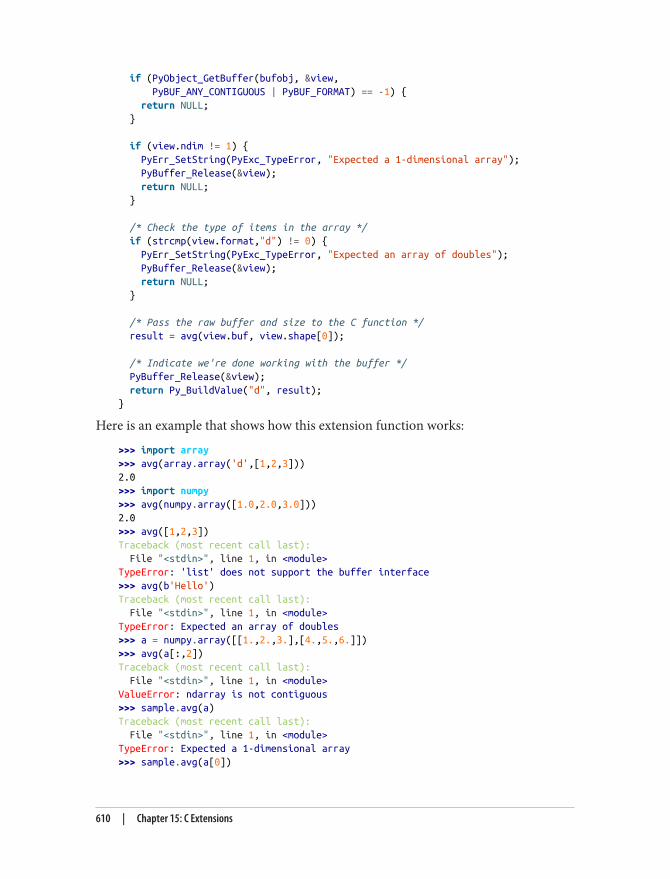
if (PyObject_GetBuffer(bufobj, &view, PyBUF_ANY_CONTIGUOUS | PyBUF_FORMAT) == -1) { return NULL; }
if (view.ndim != 1) { PyErr_SetString(PyExc_TypeError, "Expected a 1-dimensional array"); PyBuffer_Release(&view); return NULL; }
/* Check the type of items in the array */ if (strcmp(view.format,"d") != 0) { PyErr_SetString(PyExc_TypeError, "Expected an array of doubles"); PyBuffer_Release(&view); return NULL; }
/* Pass the raw buffer and size to the C function */ result = avg(view.buf, view.shape[0]);
/* Indicate we're done working with the buffer */ PyBuffer_Release(&view); return Py_BuildValue("d", result);}
Here is an example that shows how this extension function works:
>>> import array>>> avg(array.array('d',[1,2,3]))2.0>>> import numpy>>> avg(numpy.array([1.0,2.0,3.0]))2.0>>> avg([1,2,3])Traceback (most recent call last): File "<stdin>", line 1, in <module>TypeError: 'list' does not support the buffer interface>>> avg(b'Hello')Traceback (most recent call last): File "<stdin>", line 1, in <module>TypeError: Expected an array of doubles>>> a = numpy.array([[1.,2.,3.],[4.,5.,6.]])>>> avg(a[:,2])Traceback (most recent call last): File "<stdin>", line 1, in <module>ValueError: ndarray is not contiguous>>> sample.avg(a)Traceback (most recent call last): File "<stdin>", line 1, in <module>TypeError: Expected a 1-dimensional array>>> sample.avg(a[0])
610 | Chapter 15: C Extensions
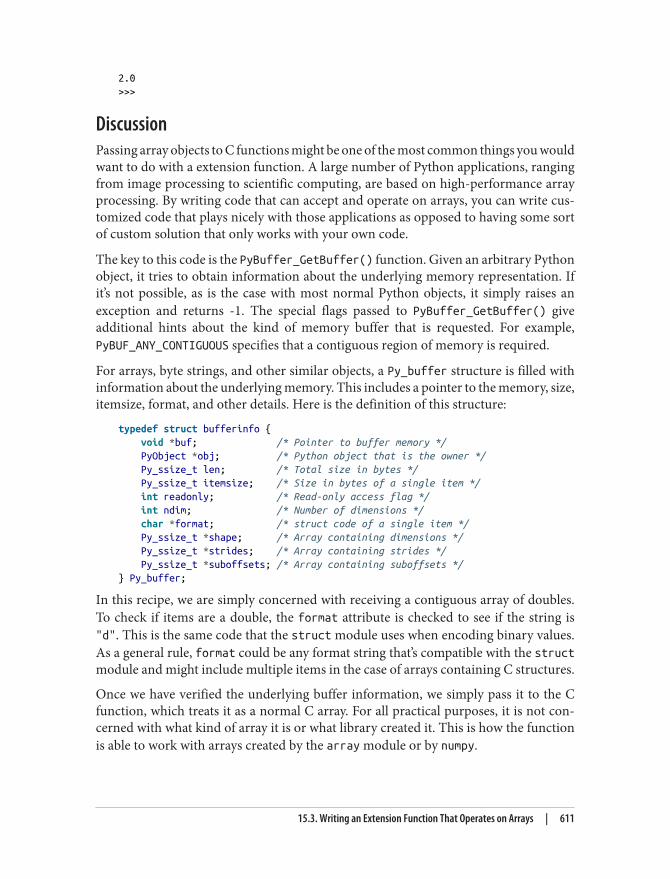
2.0>>>
DiscussionPassing array objects to C functions might be one of the most common things you wouldwant to do with a extension function. A large number of Python applications, rangingfrom image processing to scientific computing, are based on high-performance arrayprocessing. By writing code that can accept and operate on arrays, you can write cus‐tomized code that plays nicely with those applications as opposed to having some sortof custom solution that only works with your own code.
The key to this code is the PyBuffer_GetBuffer() function. Given an arbitrary Pythonobject, it tries to obtain information about the underlying memory representation. Ifit’s not possible, as is the case with most normal Python objects, it simply raises anexception and returns -1. The special flags passed to PyBuffer_GetBuffer() giveadditional hints about the kind of memory buffer that is requested. For example,PyBUF_ANY_CONTIGUOUS specifies that a contiguous region of memory is required.
For arrays, byte strings, and other similar objects, a Py_buffer structure is filled withinformation about the underlying memory. This includes a pointer to the memory, size,itemsize, format, and other details. Here is the definition of this structure:
typedef struct bufferinfo { void *buf; /* Pointer to buffer memory */ PyObject *obj; /* Python object that is the owner */ Py_ssize_t len; /* Total size in bytes */ Py_ssize_t itemsize; /* Size in bytes of a single item */ int readonly; /* Read-only access flag */ int ndim; /* Number of dimensions */ char *format; /* struct code of a single item */ Py_ssize_t *shape; /* Array containing dimensions */ Py_ssize_t *strides; /* Array containing strides */ Py_ssize_t *suboffsets; /* Array containing suboffsets */} Py_buffer;
In this recipe, we are simply concerned with receiving a contiguous array of doubles.To check if items are a double, the format attribute is checked to see if the string is"d". This is the same code that the struct module uses when encoding binary values.As a general rule, format could be any format string that’s compatible with the structmodule and might include multiple items in the case of arrays containing C structures.
Once we have verified the underlying buffer information, we simply pass it to the Cfunction, which treats it as a normal C array. For all practical purposes, it is not con‐cerned with what kind of array it is or what library created it. This is how the functionis able to work with arrays created by the array module or by numpy.
15.3. Writing an Extension Function That Operates on Arrays | 611

Before returning a final result, the underlying buffer view must be released using PyBuffer_Release(). This step is required to properly manage reference counts ofobjects.
Again, this recipe only shows a tiny fragment of code that receives an array. If workingwith arrays, you might run into issues with multidimensional data, strided data, differentdata types, and more that will require study. Make sure you consult the official docu‐mentation to get more details.
If you need to write many extensions involving array handling, you may find it easierto implement the code in Cython. See Recipe 15.11.
15.4. Managing Opaque Pointers in C Extension ModulesProblemYou have an extension module that needs to handle a pointer to a C data structure, butyou don’t want to expose any internal details of the structure to Python.
SolutionOpaque data structures are easily handled by wrapping them inside capsule objects.Consider this fragment of C code from our sample code:
typedef struct Point { double x,y;} Point;
extern double distance(Point *p1, Point *p2);
Here is an example of extension code that wraps the Point structure and distance()function using capsules:
/* Destructor function for points */static void del_Point(PyObject *obj) { free(PyCapsule_GetPointer(obj,"Point"));}
/* Utility functions */static Point *PyPoint_AsPoint(PyObject *obj) { return (Point *) PyCapsule_GetPointer(obj, "Point");}
static PyObject *PyPoint_FromPoint(Point *p, int must_free) { return PyCapsule_New(p, "Point", must_free ? del_Point : NULL);}
/* Create a new Point object */static PyObject *py_Point(PyObject *self, PyObject *args) {
612 | Chapter 15: C Extensions
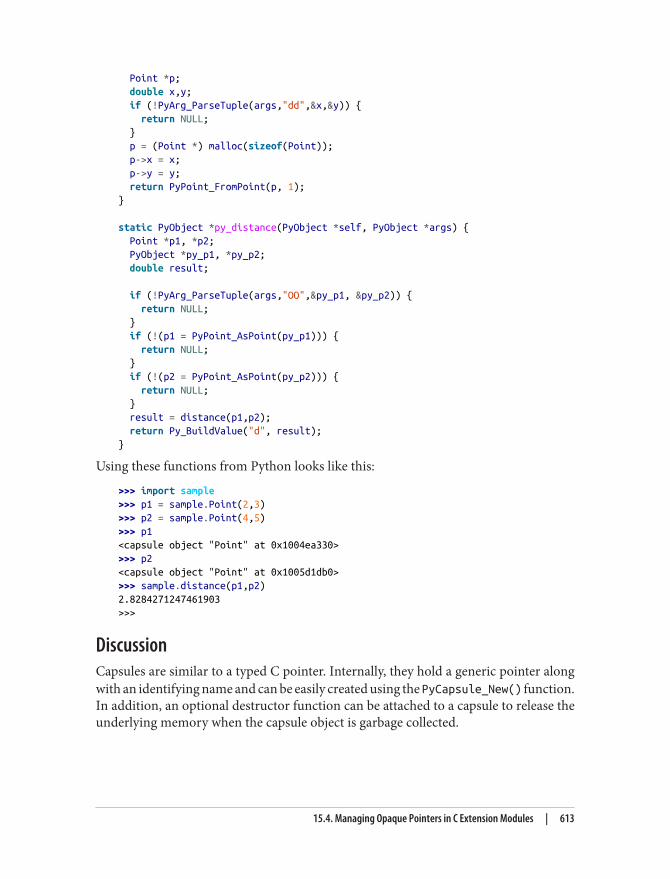
Point *p; double x,y; if (!PyArg_ParseTuple(args,"dd",&x,&y)) { return NULL; } p = (Point *) malloc(sizeof(Point)); p->x = x; p->y = y; return PyPoint_FromPoint(p, 1);}
static PyObject *py_distance(PyObject *self, PyObject *args) { Point *p1, *p2; PyObject *py_p1, *py_p2; double result;
if (!PyArg_ParseTuple(args,"OO",&py_p1, &py_p2)) { return NULL; } if (!(p1 = PyPoint_AsPoint(py_p1))) { return NULL; } if (!(p2 = PyPoint_AsPoint(py_p2))) { return NULL; } result = distance(p1,p2); return Py_BuildValue("d", result);}
Using these functions from Python looks like this:
>>> import sample>>> p1 = sample.Point(2,3)>>> p2 = sample.Point(4,5)>>> p1<capsule object "Point" at 0x1004ea330>>>> p2<capsule object "Point" at 0x1005d1db0>>>> sample.distance(p1,p2)2.8284271247461903>>>
DiscussionCapsules are similar to a typed C pointer. Internally, they hold a generic pointer alongwith an identifying name and can be easily created using the PyCapsule_New() function.In addition, an optional destructor function can be attached to a capsule to release theunderlying memory when the capsule object is garbage collected.
15.4. Managing Opaque Pointers in C Extension Modules | 613
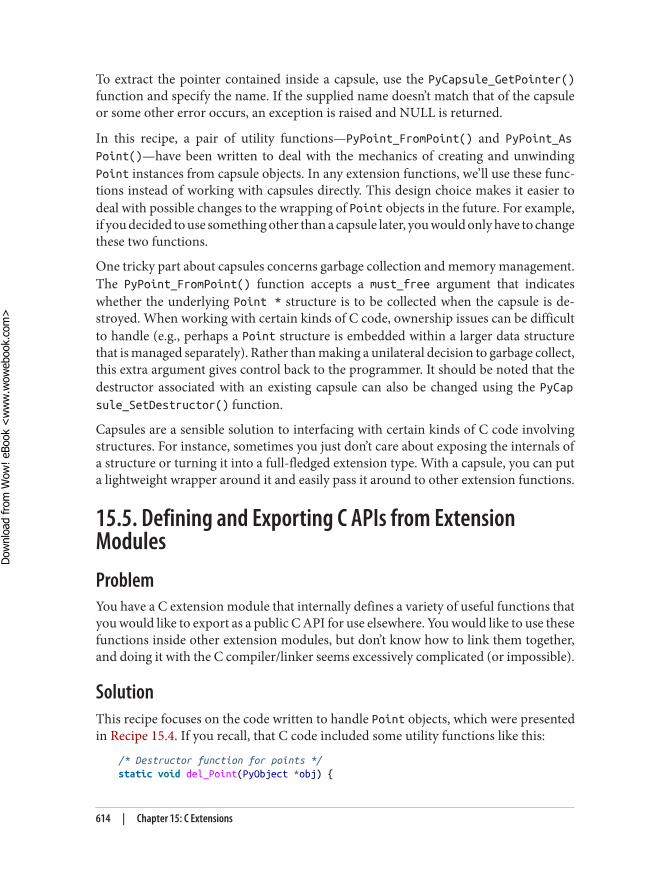
To extract the pointer contained inside a capsule, use the PyCapsule_GetPointer()function and specify the name. If the supplied name doesn’t match that of the capsuleor some other error occurs, an exception is raised and NULL is returned.
In this recipe, a pair of utility functions—PyPoint_FromPoint() and PyPoint_AsPoint()—have been written to deal with the mechanics of creating and unwindingPoint instances from capsule objects. In any extension functions, we’ll use these func‐tions instead of working with capsules directly. This design choice makes it easier todeal with possible changes to the wrapping of Point objects in the future. For example,if you decided to use something other than a capsule later, you would only have to changethese two functions.
One tricky part about capsules concerns garbage collection and memory management.The PyPoint_FromPoint() function accepts a must_free argument that indicateswhether the underlying Point * structure is to be collected when the capsule is de‐stroyed. When working with certain kinds of C code, ownership issues can be difficultto handle (e.g., perhaps a Point structure is embedded within a larger data structurethat is managed separately). Rather than making a unilateral decision to garbage collect,this extra argument gives control back to the programmer. It should be noted that thedestructor associated with an existing capsule can also be changed using the PyCapsule_SetDestructor() function.
Capsules are a sensible solution to interfacing with certain kinds of C code involvingstructures. For instance, sometimes you just don’t care about exposing the internals ofa structure or turning it into a full-fledged extension type. With a capsule, you can puta lightweight wrapper around it and easily pass it around to other extension functions.
15.5. Defining and Exporting C APIs from ExtensionModulesProblemYou have a C extension module that internally defines a variety of useful functions thatyou would like to export as a public C API for use elsewhere. You would like to use thesefunctions inside other extension modules, but don’t know how to link them together,and doing it with the C compiler/linker seems excessively complicated (or impossible).
SolutionThis recipe focuses on the code written to handle Point objects, which were presentedin Recipe 15.4. If you recall, that C code included some utility functions like this:
/* Destructor function for points */static void del_Point(PyObject *obj) {
614 | Chapter 15: C Extensions
Dow
nlo
ad fro
m W
ow
! eBook
<w
ww
.wow
ebook.
com
>
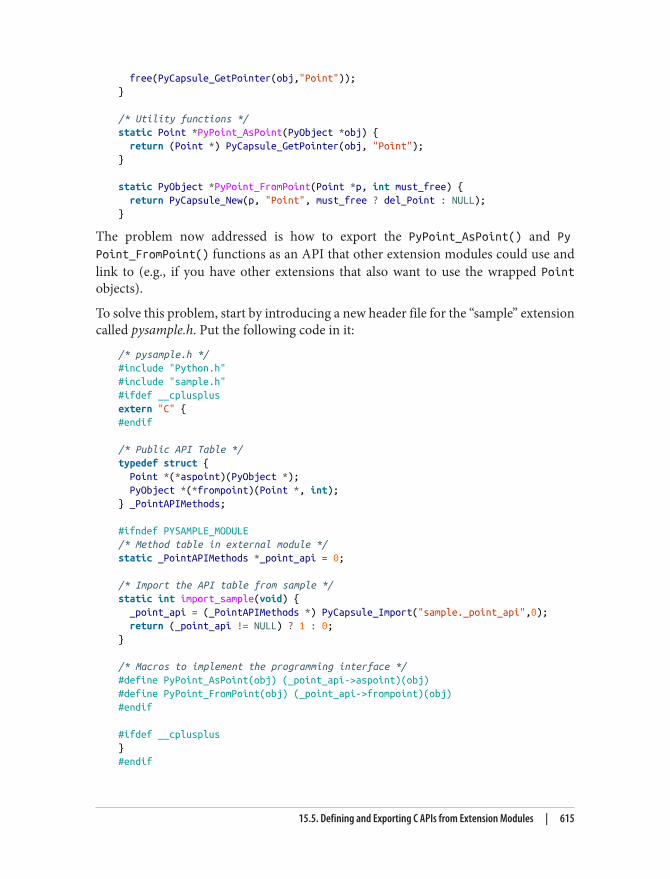
free(PyCapsule_GetPointer(obj,"Point"));}
/* Utility functions */static Point *PyPoint_AsPoint(PyObject *obj) { return (Point *) PyCapsule_GetPointer(obj, "Point");}
static PyObject *PyPoint_FromPoint(Point *p, int must_free) { return PyCapsule_New(p, "Point", must_free ? del_Point : NULL);}
The problem now addressed is how to export the PyPoint_AsPoint() and PyPoint_FromPoint() functions as an API that other extension modules could use andlink to (e.g., if you have other extensions that also want to use the wrapped Pointobjects).
To solve this problem, start by introducing a new header file for the “sample” extensioncalled pysample.h. Put the following code in it:
/* pysample.h */#include "Python.h"#include "sample.h"#ifdef __cplusplusextern "C" {#endif
/* Public API Table */typedef struct { Point *(*aspoint)(PyObject *); PyObject *(*frompoint)(Point *, int);} _PointAPIMethods;
#ifndef PYSAMPLE_MODULE/* Method table in external module */static _PointAPIMethods *_point_api = 0;
/* Import the API table from sample */static int import_sample(void) { _point_api = (_PointAPIMethods *) PyCapsule_Import("sample._point_api",0); return (_point_api != NULL) ? 1 : 0;}
/* Macros to implement the programming interface */#define PyPoint_AsPoint(obj) (_point_api->aspoint)(obj)#define PyPoint_FromPoint(obj) (_point_api->frompoint)(obj)#endif
#ifdef __cplusplus}#endif
15.5. Defining and Exporting C APIs from Extension Modules | 615
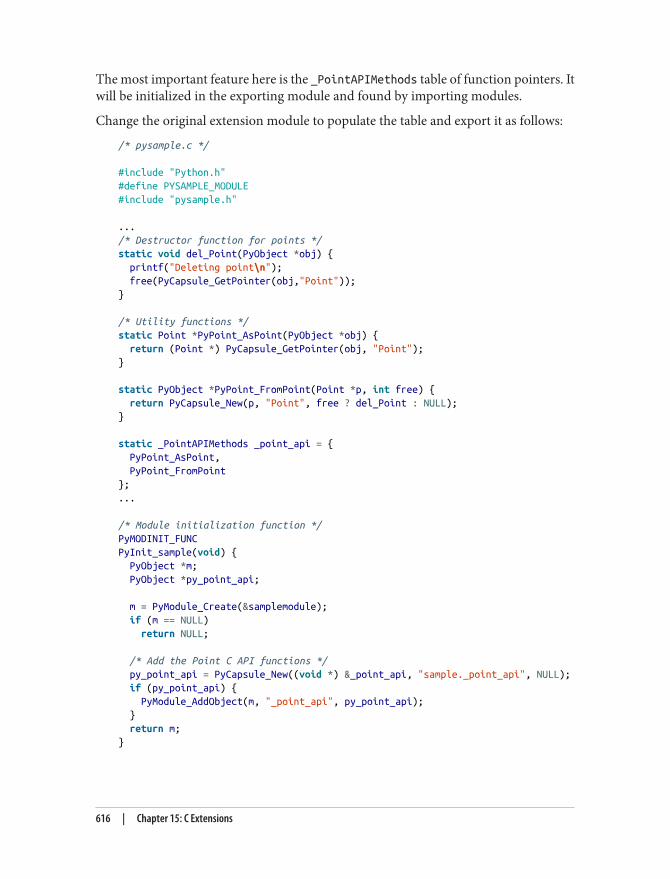
The most important feature here is the _PointAPIMethods table of function pointers. Itwill be initialized in the exporting module and found by importing modules.
Change the original extension module to populate the table and export it as follows:
/* pysample.c */
#include "Python.h"#define PYSAMPLE_MODULE#include "pysample.h"
.../* Destructor function for points */static void del_Point(PyObject *obj) { printf("Deleting point\n"); free(PyCapsule_GetPointer(obj,"Point"));}
/* Utility functions */static Point *PyPoint_AsPoint(PyObject *obj) { return (Point *) PyCapsule_GetPointer(obj, "Point");}
static PyObject *PyPoint_FromPoint(Point *p, int free) { return PyCapsule_New(p, "Point", free ? del_Point : NULL);}
static _PointAPIMethods _point_api = { PyPoint_AsPoint, PyPoint_FromPoint};...
/* Module initialization function */PyMODINIT_FUNCPyInit_sample(void) { PyObject *m; PyObject *py_point_api;
m = PyModule_Create(&samplemodule); if (m == NULL) return NULL;
/* Add the Point C API functions */ py_point_api = PyCapsule_New((void *) &_point_api, "sample._point_api", NULL); if (py_point_api) { PyModule_AddObject(m, "_point_api", py_point_api); } return m;}
616 | Chapter 15: C Extensions
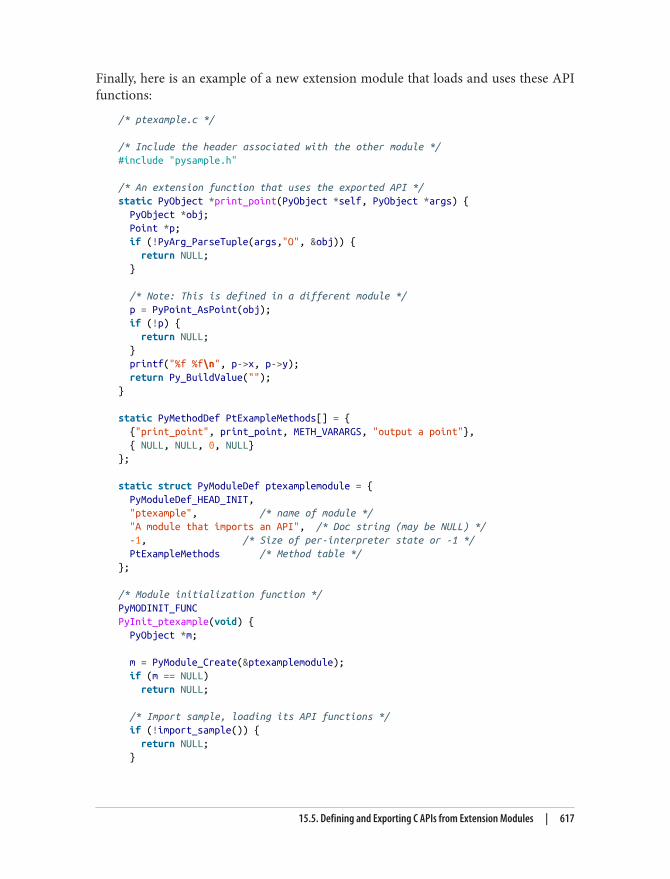
Finally, here is an example of a new extension module that loads and uses these APIfunctions:
/* ptexample.c */
/* Include the header associated with the other module */#include "pysample.h"
/* An extension function that uses the exported API */static PyObject *print_point(PyObject *self, PyObject *args) { PyObject *obj; Point *p; if (!PyArg_ParseTuple(args,"O", &obj)) { return NULL; }
/* Note: This is defined in a different module */ p = PyPoint_AsPoint(obj); if (!p) { return NULL; } printf("%f %f\n", p->x, p->y); return Py_BuildValue("");}
static PyMethodDef PtExampleMethods[] = { {"print_point", print_point, METH_VARARGS, "output a point"}, { NULL, NULL, 0, NULL}};
static struct PyModuleDef ptexamplemodule = { PyModuleDef_HEAD_INIT, "ptexample", /* name of module */ "A module that imports an API", /* Doc string (may be NULL) */ -1, /* Size of per-interpreter state or -1 */ PtExampleMethods /* Method table */};
/* Module initialization function */PyMODINIT_FUNCPyInit_ptexample(void) { PyObject *m;
m = PyModule_Create(&ptexamplemodule); if (m == NULL) return NULL;
/* Import sample, loading its API functions */ if (!import_sample()) { return NULL; }
15.5. Defining and Exporting C APIs from Extension Modules | 617
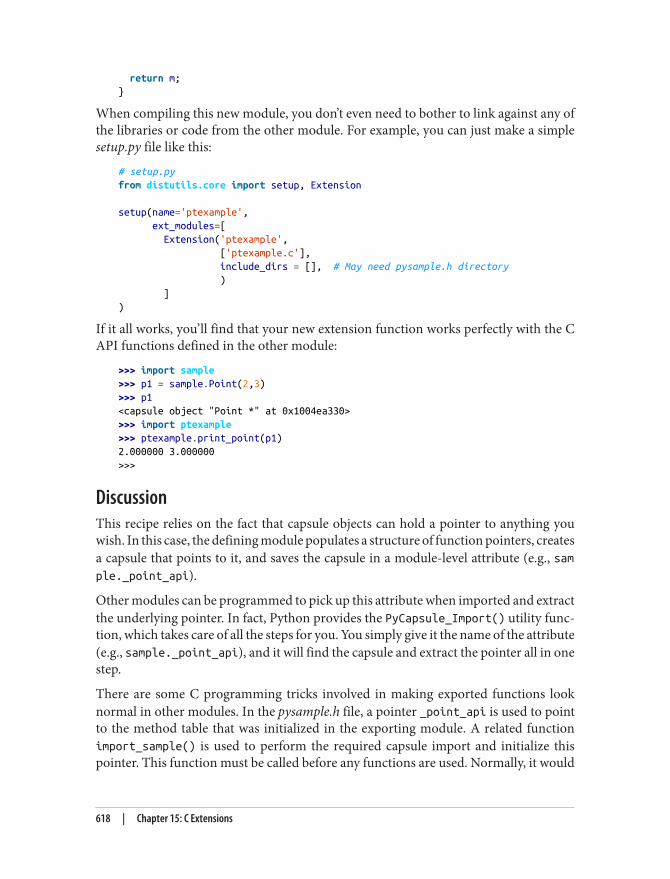
return m;}
When compiling this new module, you don’t even need to bother to link against any ofthe libraries or code from the other module. For example, you can just make a simplesetup.py file like this:
# setup.pyfrom distutils.core import setup, Extension
setup(name='ptexample', ext_modules=[ Extension('ptexample', ['ptexample.c'], include_dirs = [], # May need pysample.h directory ) ])
If it all works, you’ll find that your new extension function works perfectly with the CAPI functions defined in the other module:
>>> import sample>>> p1 = sample.Point(2,3)>>> p1<capsule object "Point *" at 0x1004ea330>>>> import ptexample>>> ptexample.print_point(p1)2.000000 3.000000>>>
DiscussionThis recipe relies on the fact that capsule objects can hold a pointer to anything youwish. In this case, the defining module populates a structure of function pointers, createsa capsule that points to it, and saves the capsule in a module-level attribute (e.g., sample._point_api).
Other modules can be programmed to pick up this attribute when imported and extractthe underlying pointer. In fact, Python provides the PyCapsule_Import() utility func‐tion, which takes care of all the steps for you. You simply give it the name of the attribute(e.g., sample._point_api), and it will find the capsule and extract the pointer all in onestep.
There are some C programming tricks involved in making exported functions looknormal in other modules. In the pysample.h file, a pointer _point_api is used to pointto the method table that was initialized in the exporting module. A related functionimport_sample() is used to perform the required capsule import and initialize thispointer. This function must be called before any functions are used. Normally, it would
618 | Chapter 15: C Extensions
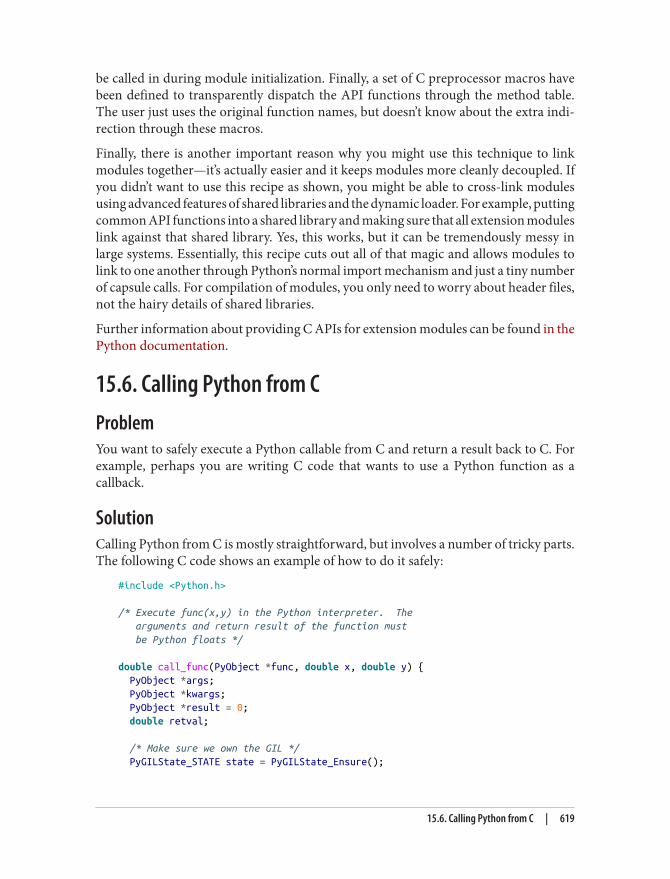
be called in during module initialization. Finally, a set of C preprocessor macros havebeen defined to transparently dispatch the API functions through the method table.The user just uses the original function names, but doesn’t know about the extra indi‐rection through these macros.
Finally, there is another important reason why you might use this technique to linkmodules together—it’s actually easier and it keeps modules more cleanly decoupled. Ifyou didn’t want to use this recipe as shown, you might be able to cross-link modulesusing advanced features of shared libraries and the dynamic loader. For example, puttingcommon API functions into a shared library and making sure that all extension moduleslink against that shared library. Yes, this works, but it can be tremendously messy inlarge systems. Essentially, this recipe cuts out all of that magic and allows modules tolink to one another through Python’s normal import mechanism and just a tiny numberof capsule calls. For compilation of modules, you only need to worry about header files,not the hairy details of shared libraries.
Further information about providing C APIs for extension modules can be found in thePython documentation.
15.6. Calling Python from CProblemYou want to safely execute a Python callable from C and return a result back to C. Forexample, perhaps you are writing C code that wants to use a Python function as acallback.
SolutionCalling Python from C is mostly straightforward, but involves a number of tricky parts.The following C code shows an example of how to do it safely:
#include <Python.h>
/* Execute func(x,y) in the Python interpreter. The arguments and return result of the function must be Python floats */
double call_func(PyObject *func, double x, double y) { PyObject *args; PyObject *kwargs; PyObject *result = 0; double retval;
/* Make sure we own the GIL */ PyGILState_STATE state = PyGILState_Ensure();
15.6. Calling Python from C | 619
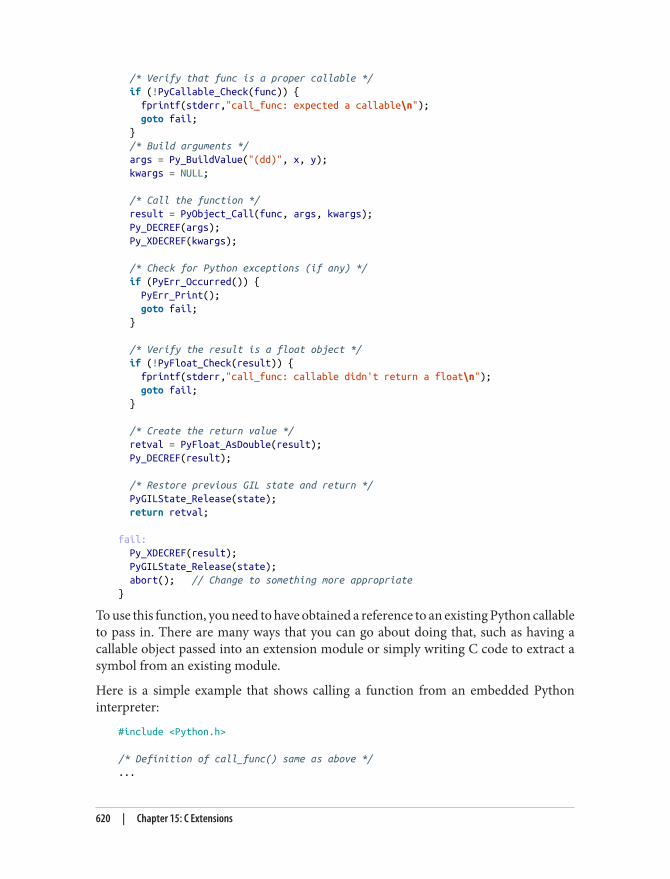
/* Verify that func is a proper callable */ if (!PyCallable_Check(func)) { fprintf(stderr,"call_func: expected a callable\n"); goto fail; } /* Build arguments */ args = Py_BuildValue("(dd)", x, y); kwargs = NULL;
/* Call the function */ result = PyObject_Call(func, args, kwargs); Py_DECREF(args); Py_XDECREF(kwargs);
/* Check for Python exceptions (if any) */ if (PyErr_Occurred()) { PyErr_Print(); goto fail; }
/* Verify the result is a float object */ if (!PyFloat_Check(result)) { fprintf(stderr,"call_func: callable didn't return a float\n"); goto fail; }
/* Create the return value */ retval = PyFloat_AsDouble(result); Py_DECREF(result);
/* Restore previous GIL state and return */ PyGILState_Release(state); return retval;
fail: Py_XDECREF(result); PyGILState_Release(state); abort(); // Change to something more appropriate}
To use this function, you need to have obtained a reference to an existing Python callableto pass in. There are many ways that you can go about doing that, such as having acallable object passed into an extension module or simply writing C code to extract asymbol from an existing module.
Here is a simple example that shows calling a function from an embedded Pythoninterpreter:
#include <Python.h>
/* Definition of call_func() same as above */...
620 | Chapter 15: C Extensions
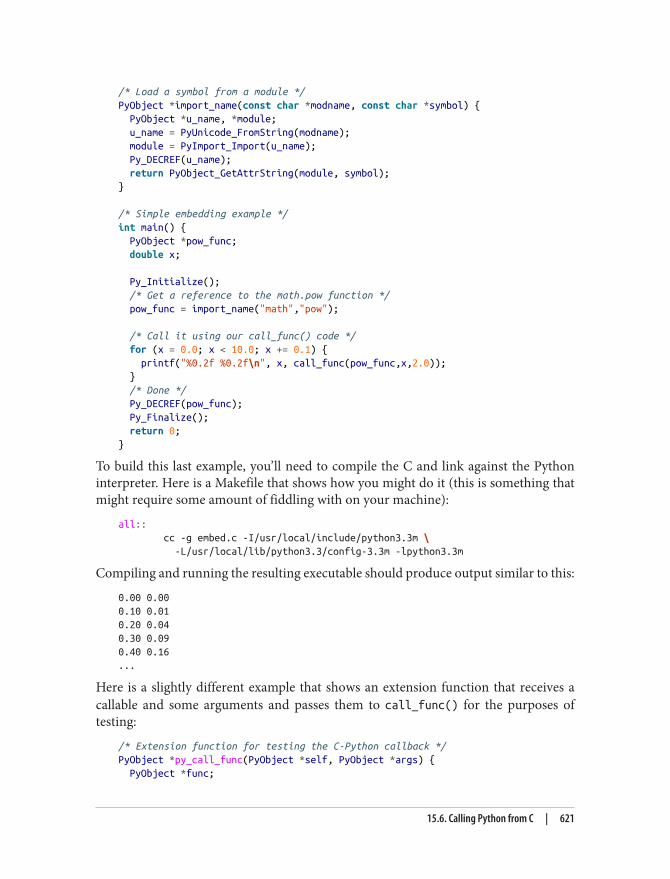
/* Load a symbol from a module */PyObject *import_name(const char *modname, const char *symbol) { PyObject *u_name, *module; u_name = PyUnicode_FromString(modname); module = PyImport_Import(u_name); Py_DECREF(u_name); return PyObject_GetAttrString(module, symbol);}
/* Simple embedding example */int main() { PyObject *pow_func; double x;
Py_Initialize(); /* Get a reference to the math.pow function */ pow_func = import_name("math","pow");
/* Call it using our call_func() code */ for (x = 0.0; x < 10.0; x += 0.1) { printf("%0.2f %0.2f\n", x, call_func(pow_func,x,2.0)); } /* Done */ Py_DECREF(pow_func); Py_Finalize(); return 0;}
To build this last example, you’ll need to compile the C and link against the Pythoninterpreter. Here is a Makefile that shows how you might do it (this is something thatmight require some amount of fiddling with on your machine):
all:: cc -g embed.c -I/usr/local/include/python3.3m \ -L/usr/local/lib/python3.3/config-3.3m -lpython3.3m
Compiling and running the resulting executable should produce output similar to this:
0.00 0.000.10 0.010.20 0.040.30 0.090.40 0.16...
Here is a slightly different example that shows an extension function that receives acallable and some arguments and passes them to call_func() for the purposes oftesting:
/* Extension function for testing the C-Python callback */PyObject *py_call_func(PyObject *self, PyObject *args) { PyObject *func;
15.6. Calling Python from C | 621
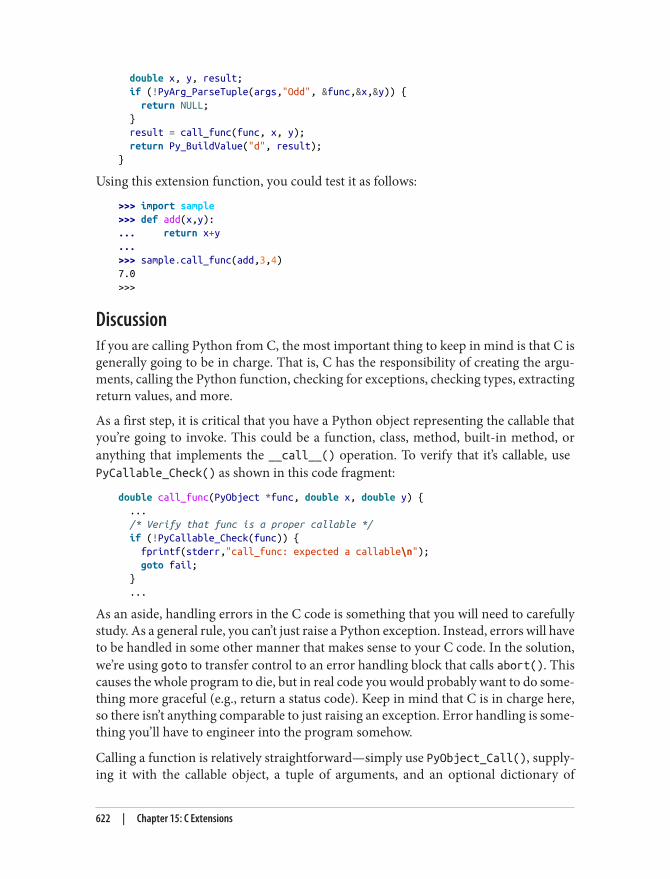
double x, y, result; if (!PyArg_ParseTuple(args,"Odd", &func,&x,&y)) { return NULL; } result = call_func(func, x, y); return Py_BuildValue("d", result);}
Using this extension function, you could test it as follows:
>>> import sample>>> def add(x,y):... return x+y...>>> sample.call_func(add,3,4)7.0>>>
DiscussionIf you are calling Python from C, the most important thing to keep in mind is that C isgenerally going to be in charge. That is, C has the responsibility of creating the argu‐ments, calling the Python function, checking for exceptions, checking types, extractingreturn values, and more.
As a first step, it is critical that you have a Python object representing the callable thatyou’re going to invoke. This could be a function, class, method, built-in method, oranything that implements the __call__() operation. To verify that it’s callable, use PyCallable_Check() as shown in this code fragment:
double call_func(PyObject *func, double x, double y) { ... /* Verify that func is a proper callable */ if (!PyCallable_Check(func)) { fprintf(stderr,"call_func: expected a callable\n"); goto fail; } ...
As an aside, handling errors in the C code is something that you will need to carefullystudy. As a general rule, you can’t just raise a Python exception. Instead, errors will haveto be handled in some other manner that makes sense to your C code. In the solution,we’re using goto to transfer control to an error handling block that calls abort(). Thiscauses the whole program to die, but in real code you would probably want to do some‐thing more graceful (e.g., return a status code). Keep in mind that C is in charge here,so there isn’t anything comparable to just raising an exception. Error handling is some‐thing you’ll have to engineer into the program somehow.
Calling a function is relatively straightforward—simply use PyObject_Call(), supply‐ing it with the callable object, a tuple of arguments, and an optional dictionary of
622 | Chapter 15: C Extensions
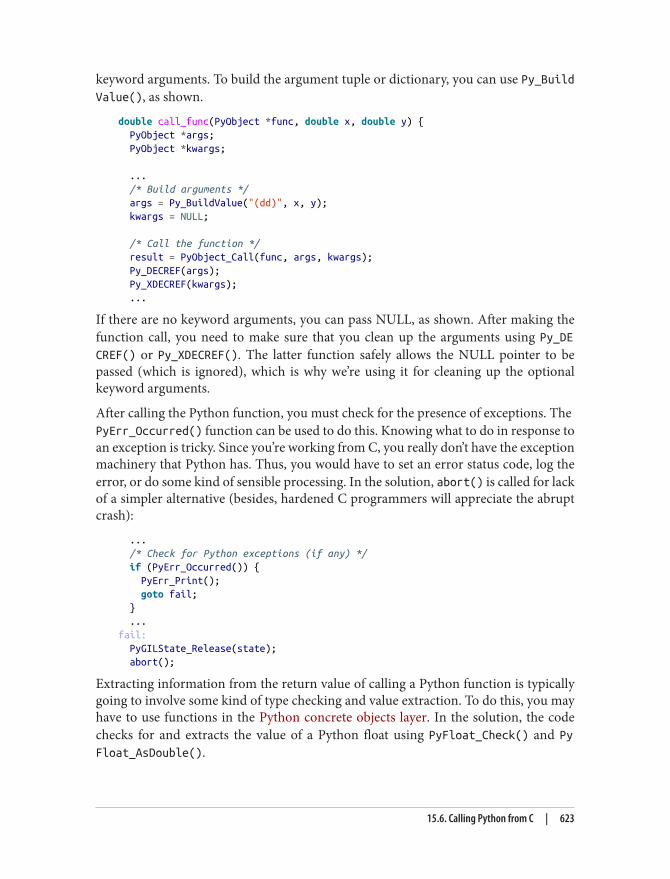
keyword arguments. To build the argument tuple or dictionary, you can use Py_BuildValue(), as shown.
double call_func(PyObject *func, double x, double y) { PyObject *args; PyObject *kwargs;
... /* Build arguments */ args = Py_BuildValue("(dd)", x, y); kwargs = NULL;
/* Call the function */ result = PyObject_Call(func, args, kwargs); Py_DECREF(args); Py_XDECREF(kwargs); ...
If there are no keyword arguments, you can pass NULL, as shown. After making thefunction call, you need to make sure that you clean up the arguments using Py_DECREF() or Py_XDECREF(). The latter function safely allows the NULL pointer to bepassed (which is ignored), which is why we’re using it for cleaning up the optionalkeyword arguments.
After calling the Python function, you must check for the presence of exceptions. The PyErr_Occurred() function can be used to do this. Knowing what to do in response toan exception is tricky. Since you’re working from C, you really don’t have the exceptionmachinery that Python has. Thus, you would have to set an error status code, log theerror, or do some kind of sensible processing. In the solution, abort() is called for lackof a simpler alternative (besides, hardened C programmers will appreciate the abruptcrash):
... /* Check for Python exceptions (if any) */ if (PyErr_Occurred()) { PyErr_Print(); goto fail; } ...fail: PyGILState_Release(state); abort();
Extracting information from the return value of calling a Python function is typicallygoing to involve some kind of type checking and value extraction. To do this, you mayhave to use functions in the Python concrete objects layer. In the solution, the codechecks for and extracts the value of a Python float using PyFloat_Check() and PyFloat_AsDouble().
15.6. Calling Python from C | 623
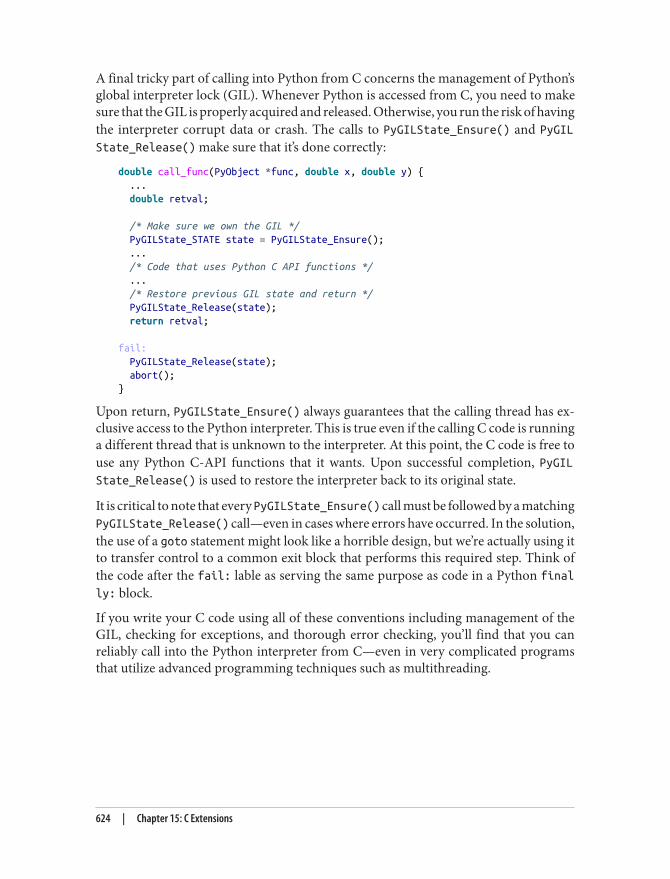
A final tricky part of calling into Python from C concerns the management of Python’sglobal interpreter lock (GIL). Whenever Python is accessed from C, you need to makesure that the GIL is properly acquired and released. Otherwise, you run the risk of havingthe interpreter corrupt data or crash. The calls to PyGILState_Ensure() and PyGILState_Release() make sure that it’s done correctly:
double call_func(PyObject *func, double x, double y) { ... double retval;
/* Make sure we own the GIL */ PyGILState_STATE state = PyGILState_Ensure(); ... /* Code that uses Python C API functions */ ... /* Restore previous GIL state and return */ PyGILState_Release(state); return retval;
fail: PyGILState_Release(state); abort();}
Upon return, PyGILState_Ensure() always guarantees that the calling thread has ex‐clusive access to the Python interpreter. This is true even if the calling C code is runninga different thread that is unknown to the interpreter. At this point, the C code is free touse any Python C-API functions that it wants. Upon successful completion, PyGILState_Release() is used to restore the interpreter back to its original state.
It is critical to note that every PyGILState_Ensure() call must be followed by a matchingPyGILState_Release() call—even in cases where errors have occurred. In the solution,the use of a goto statement might look like a horrible design, but we’re actually using itto transfer control to a common exit block that performs this required step. Think ofthe code after the fail: lable as serving the same purpose as code in a Python finally: block.
If you write your C code using all of these conventions including management of theGIL, checking for exceptions, and thorough error checking, you’ll find that you canreliably call into the Python interpreter from C—even in very complicated programsthat utilize advanced programming techniques such as multithreading.
624 | Chapter 15: C Extensions
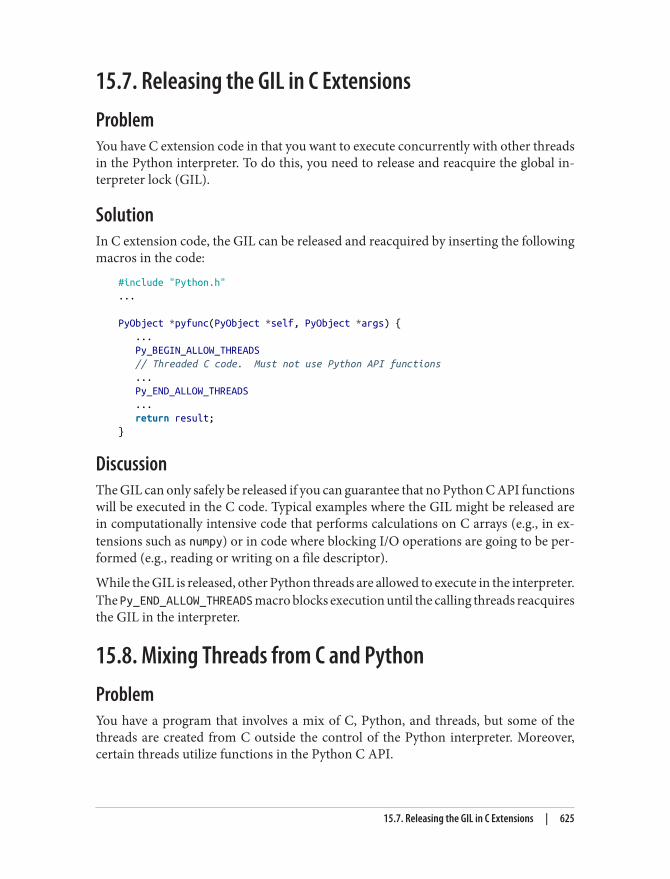
15.7. Releasing the GIL in C ExtensionsProblemYou have C extension code in that you want to execute concurrently with other threadsin the Python interpreter. To do this, you need to release and reacquire the global in‐terpreter lock (GIL).
SolutionIn C extension code, the GIL can be released and reacquired by inserting the followingmacros in the code:
#include "Python.h"...
PyObject *pyfunc(PyObject *self, PyObject *args) { ... Py_BEGIN_ALLOW_THREADS // Threaded C code. Must not use Python API functions ... Py_END_ALLOW_THREADS ... return result;}
DiscussionThe GIL can only safely be released if you can guarantee that no Python C API functionswill be executed in the C code. Typical examples where the GIL might be released arein computationally intensive code that performs calculations on C arrays (e.g., in ex‐tensions such as numpy) or in code where blocking I/O operations are going to be per‐formed (e.g., reading or writing on a file descriptor).
While the GIL is released, other Python threads are allowed to execute in the interpreter.The Py_END_ALLOW_THREADS macro blocks execution until the calling threads reacquiresthe GIL in the interpreter.
15.8. Mixing Threads from C and PythonProblemYou have a program that involves a mix of C, Python, and threads, but some of thethreads are created from C outside the control of the Python interpreter. Moreover,certain threads utilize functions in the Python C API.
15.7. Releasing the GIL in C Extensions | 625
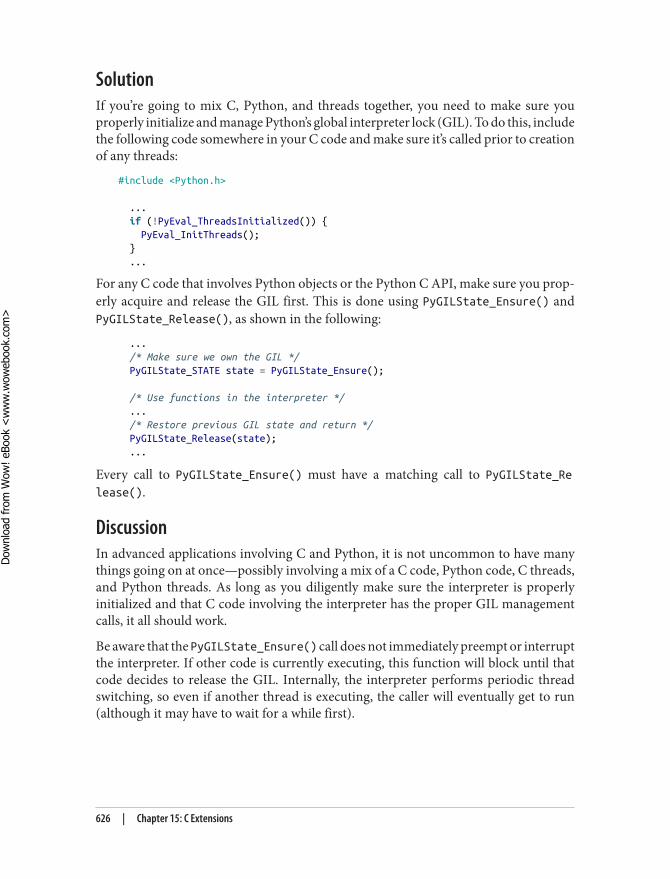
SolutionIf you’re going to mix C, Python, and threads together, you need to make sure youproperly initialize and manage Python’s global interpreter lock (GIL). To do this, includethe following code somewhere in your C code and make sure it’s called prior to creationof any threads:
#include <Python.h>
... if (!PyEval_ThreadsInitialized()) { PyEval_InitThreads(); } ...
For any C code that involves Python objects or the Python C API, make sure you prop‐erly acquire and release the GIL first. This is done using PyGILState_Ensure() andPyGILState_Release(), as shown in the following:
... /* Make sure we own the GIL */ PyGILState_STATE state = PyGILState_Ensure();
/* Use functions in the interpreter */ ... /* Restore previous GIL state and return */ PyGILState_Release(state); ...
Every call to PyGILState_Ensure() must have a matching call to PyGILState_Release().
DiscussionIn advanced applications involving C and Python, it is not uncommon to have manythings going on at once—possibly involving a mix of a C code, Python code, C threads,and Python threads. As long as you diligently make sure the interpreter is properlyinitialized and that C code involving the interpreter has the proper GIL managementcalls, it all should work.
Be aware that the PyGILState_Ensure() call does not immediately preempt or interruptthe interpreter. If other code is currently executing, this function will block until thatcode decides to release the GIL. Internally, the interpreter performs periodic threadswitching, so even if another thread is executing, the caller will eventually get to run(although it may have to wait for a while first).
626 | Chapter 15: C Extensions
Dow
nlo
ad fro
m W
ow
! eBook
<w
ww
.wow
ebook.
com
>
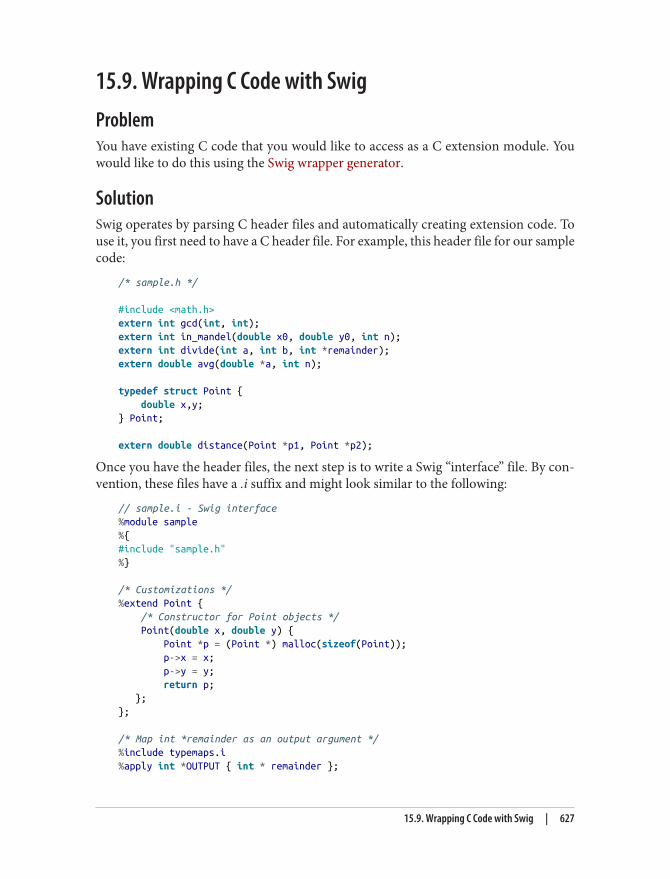
15.9. Wrapping C Code with SwigProblemYou have existing C code that you would like to access as a C extension module. Youwould like to do this using the Swig wrapper generator.
SolutionSwig operates by parsing C header files and automatically creating extension code. Touse it, you first need to have a C header file. For example, this header file for our samplecode:
/* sample.h */
#include <math.h>extern int gcd(int, int);extern int in_mandel(double x0, double y0, int n);extern int divide(int a, int b, int *remainder);extern double avg(double *a, int n);
typedef struct Point { double x,y;} Point;
extern double distance(Point *p1, Point *p2);
Once you have the header files, the next step is to write a Swig “interface” file. By con‐vention, these files have a .i suffix and might look similar to the following:
// sample.i - Swig interface%module sample%{#include "sample.h"%}
/* Customizations */%extend Point { /* Constructor for Point objects */ Point(double x, double y) { Point *p = (Point *) malloc(sizeof(Point)); p->x = x; p->y = y; return p; };};
/* Map int *remainder as an output argument */%include typemaps.i%apply int *OUTPUT { int * remainder };
15.9. Wrapping C Code with Swig | 627
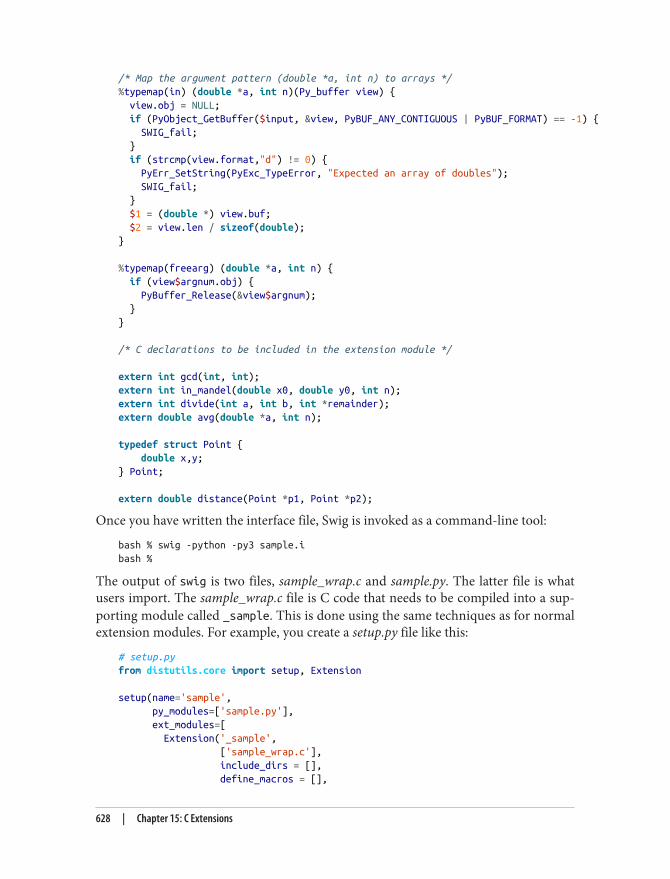
/* Map the argument pattern (double *a, int n) to arrays */%typemap(in) (double *a, int n)(Py_buffer view) { view.obj = NULL; if (PyObject_GetBuffer($input, &view, PyBUF_ANY_CONTIGUOUS | PyBUF_FORMAT) == -1) { SWIG_fail; } if (strcmp(view.format,"d") != 0) { PyErr_SetString(PyExc_TypeError, "Expected an array of doubles"); SWIG_fail; } $1 = (double *) view.buf; $2 = view.len / sizeof(double);}
%typemap(freearg) (double *a, int n) { if (view$argnum.obj) { PyBuffer_Release(&view$argnum); }}
/* C declarations to be included in the extension module */
extern int gcd(int, int);extern int in_mandel(double x0, double y0, int n);extern int divide(int a, int b, int *remainder);extern double avg(double *a, int n);
typedef struct Point { double x,y;} Point;
extern double distance(Point *p1, Point *p2);
Once you have written the interface file, Swig is invoked as a command-line tool:
bash % swig -python -py3 sample.ibash %
The output of swig is two files, sample_wrap.c and sample.py. The latter file is whatusers import. The sample_wrap.c file is C code that needs to be compiled into a sup‐porting module called _sample. This is done using the same techniques as for normalextension modules. For example, you create a setup.py file like this:
# setup.pyfrom distutils.core import setup, Extension
setup(name='sample', py_modules=['sample.py'], ext_modules=[ Extension('_sample', ['sample_wrap.c'], include_dirs = [], define_macros = [],
628 | Chapter 15: C Extensions
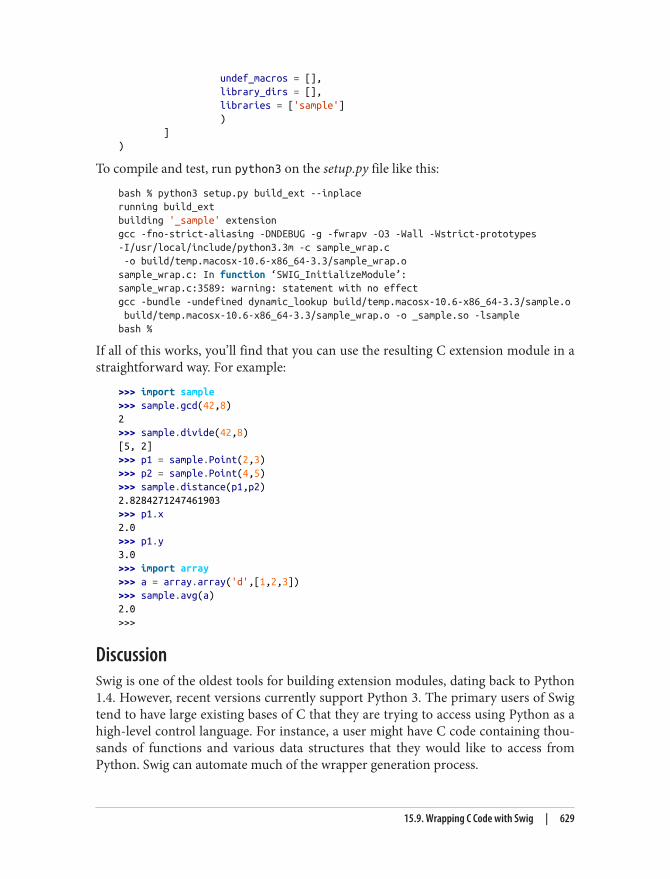
undef_macros = [], library_dirs = [], libraries = ['sample'] ) ])
To compile and test, run python3 on the setup.py file like this:
bash % python3 setup.py build_ext --inplacerunning build_extbuilding '_sample' extensiongcc -fno-strict-aliasing -DNDEBUG -g -fwrapv -O3 -Wall -Wstrict-prototypes-I/usr/local/include/python3.3m -c sample_wrap.c -o build/temp.macosx-10.6-x86_64-3.3/sample_wrap.osample_wrap.c: In function ‘SWIG_InitializeModule’:sample_wrap.c:3589: warning: statement with no effectgcc -bundle -undefined dynamic_lookup build/temp.macosx-10.6-x86_64-3.3/sample.o build/temp.macosx-10.6-x86_64-3.3/sample_wrap.o -o _sample.so -lsamplebash %
If all of this works, you’ll find that you can use the resulting C extension module in astraightforward way. For example:
>>> import sample>>> sample.gcd(42,8)2>>> sample.divide(42,8)[5, 2]>>> p1 = sample.Point(2,3)>>> p2 = sample.Point(4,5)>>> sample.distance(p1,p2)2.8284271247461903>>> p1.x2.0>>> p1.y3.0>>> import array>>> a = array.array('d',[1,2,3])>>> sample.avg(a)2.0>>>
DiscussionSwig is one of the oldest tools for building extension modules, dating back to Python1.4. However, recent versions currently support Python 3. The primary users of Swigtend to have large existing bases of C that they are trying to access using Python as ahigh-level control language. For instance, a user might have C code containing thou‐sands of functions and various data structures that they would like to access fromPython. Swig can automate much of the wrapper generation process.
15.9. Wrapping C Code with Swig | 629

All Swig interfaces tend to start with a short preamble like this:
%module sample%{#include "sample.h"%}
This merely declares the name of the extension module and specifies C header files thatmust be included to make everything compile (the code enclosed in %{ and %} is pasteddirectly into the output code so this is where you put all included files and other defi‐nitions needed for compilation).
The bottom part of a Swig interface is a listing of C declarations that you want to beincluded in the extension. This is often just copied from the header files. In our example,we just pasted in the header file directly like this:
%module sample%{#include "sample.h"%}...extern int gcd(int, int);extern int in_mandel(double x0, double y0, int n);extern int divide(int a, int b, int *remainder);extern double avg(double *a, int n);
typedef struct Point { double x,y;} Point;
extern double distance(Point *p1, Point *p2);
It is important to stress that these declarations are telling Swig what you want to includein the Python module. It is quite common to edit the list of declarations or to makemodifications as appropriate. For example, if you didn’t want certain declarations to beincluded, you would remove them from the declaration list.
The most complicated part of using Swig is the various customizations that it can applyto the C code. This is a huge topic that can’t be covered in great detail here, but a numberof such customizations are shown in this recipe.
The first customization involving the %extend directive allows methods to be attachedto existing structure and class definitions. In the example, this is used to add a con‐structor method to the Point structure. This customization makes it possible to use thestructure like this:
>>> p1 = sample.Point(2,3)>>>
If omitted, then Point objects would have to be created in a much more clumsy mannerlike this:
630 | Chapter 15: C Extensions
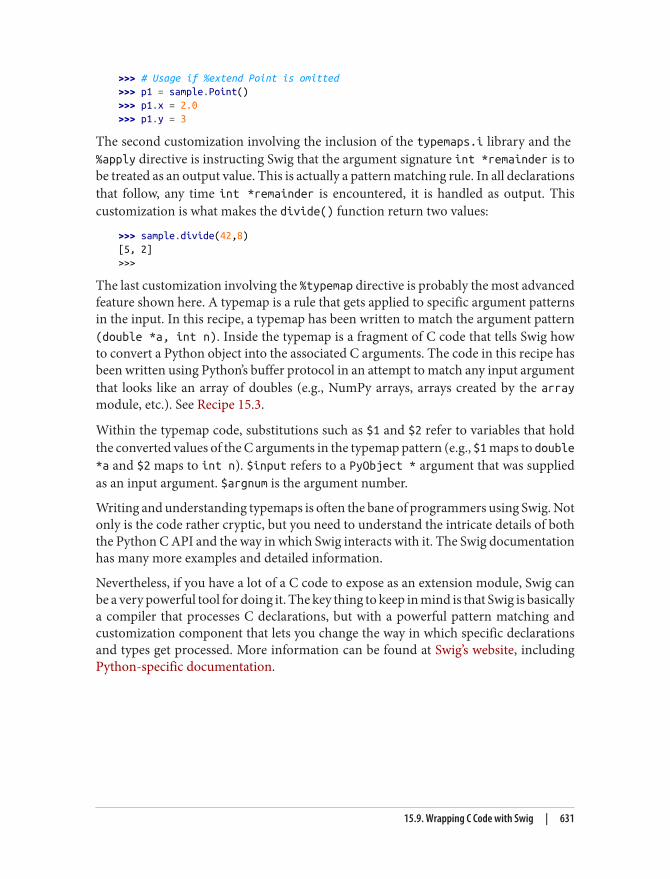
>>> # Usage if %extend Point is omitted>>> p1 = sample.Point()>>> p1.x = 2.0>>> p1.y = 3
The second customization involving the inclusion of the typemaps.i library and the %apply directive is instructing Swig that the argument signature int *remainder is tobe treated as an output value. This is actually a pattern matching rule. In all declarationsthat follow, any time int *remainder is encountered, it is handled as output. Thiscustomization is what makes the divide() function return two values:
>>> sample.divide(42,8)[5, 2]>>>
The last customization involving the %typemap directive is probably the most advancedfeature shown here. A typemap is a rule that gets applied to specific argument patternsin the input. In this recipe, a typemap has been written to match the argument pattern(double *a, int n). Inside the typemap is a fragment of C code that tells Swig howto convert a Python object into the associated C arguments. The code in this recipe hasbeen written using Python’s buffer protocol in an attempt to match any input argumentthat looks like an array of doubles (e.g., NumPy arrays, arrays created by the arraymodule, etc.). See Recipe 15.3.
Within the typemap code, substitutions such as $1 and $2 refer to variables that holdthe converted values of the C arguments in the typemap pattern (e.g., $1 maps to double*a and $2 maps to int n). $input refers to a PyObject * argument that was suppliedas an input argument. $argnum is the argument number.
Writing and understanding typemaps is often the bane of programmers using Swig. Notonly is the code rather cryptic, but you need to understand the intricate details of boththe Python C API and the way in which Swig interacts with it. The Swig documentationhas many more examples and detailed information.
Nevertheless, if you have a lot of a C code to expose as an extension module, Swig canbe a very powerful tool for doing it. The key thing to keep in mind is that Swig is basicallya compiler that processes C declarations, but with a powerful pattern matching andcustomization component that lets you change the way in which specific declarationsand types get processed. More information can be found at Swig’s website, includingPython-specific documentation.
15.9. Wrapping C Code with Swig | 631
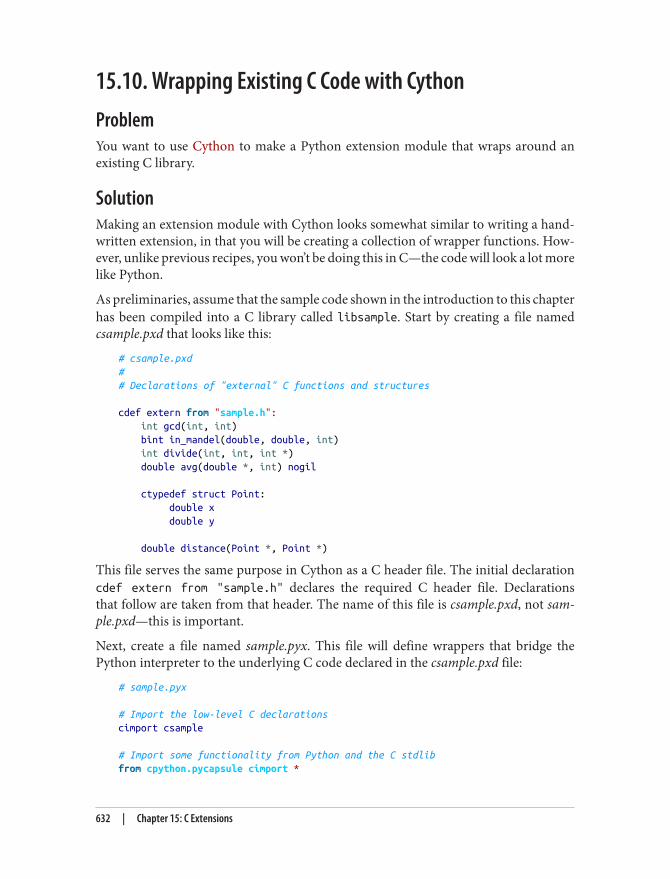
15.10. Wrapping Existing C Code with CythonProblemYou want to use Cython to make a Python extension module that wraps around anexisting C library.
SolutionMaking an extension module with Cython looks somewhat similar to writing a hand‐written extension, in that you will be creating a collection of wrapper functions. How‐ever, unlike previous recipes, you won’t be doing this in C—the code will look a lot morelike Python.
As preliminaries, assume that the sample code shown in the introduction to this chapterhas been compiled into a C library called libsample. Start by creating a file namedcsample.pxd that looks like this:
# csample.pxd## Declarations of "external" C functions and structures
cdef extern from "sample.h": int gcd(int, int) bint in_mandel(double, double, int) int divide(int, int, int *) double avg(double *, int) nogil
ctypedef struct Point: double x double y
double distance(Point *, Point *)
This file serves the same purpose in Cython as a C header file. The initial declarationcdef extern from "sample.h" declares the required C header file. Declarationsthat follow are taken from that header. The name of this file is csample.pxd, not sam‐ple.pxd—this is important.
Next, create a file named sample.pyx. This file will define wrappers that bridge thePython interpreter to the underlying C code declared in the csample.pxd file:
# sample.pyx
# Import the low-level C declarationscimport csample
# Import some functionality from Python and the C stdlibfrom cpython.pycapsule cimport *
632 | Chapter 15: C Extensions
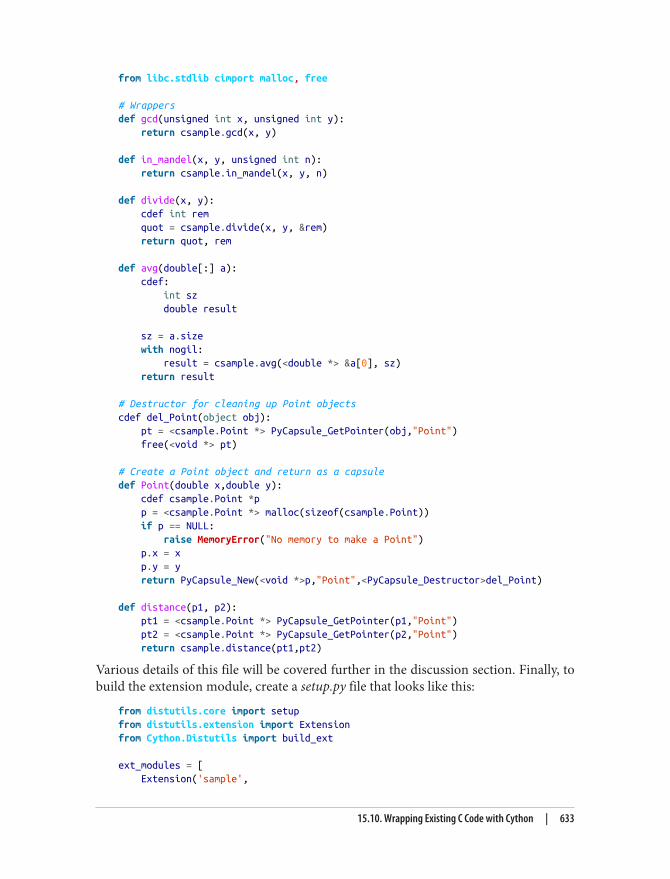
from libc.stdlib cimport malloc, free
# Wrappersdef gcd(unsigned int x, unsigned int y): return csample.gcd(x, y)
def in_mandel(x, y, unsigned int n): return csample.in_mandel(x, y, n)
def divide(x, y): cdef int rem quot = csample.divide(x, y, &rem) return quot, rem
def avg(double[:] a): cdef: int sz double result
sz = a.size with nogil: result = csample.avg(<double *> &a[0], sz) return result
# Destructor for cleaning up Point objectscdef del_Point(object obj): pt = <csample.Point *> PyCapsule_GetPointer(obj,"Point") free(<void *> pt)
# Create a Point object and return as a capsuledef Point(double x,double y): cdef csample.Point *p p = <csample.Point *> malloc(sizeof(csample.Point)) if p == NULL: raise MemoryError("No memory to make a Point") p.x = x p.y = y return PyCapsule_New(<void *>p,"Point",<PyCapsule_Destructor>del_Point)
def distance(p1, p2): pt1 = <csample.Point *> PyCapsule_GetPointer(p1,"Point") pt2 = <csample.Point *> PyCapsule_GetPointer(p2,"Point") return csample.distance(pt1,pt2)
Various details of this file will be covered further in the discussion section. Finally, tobuild the extension module, create a setup.py file that looks like this:
from distutils.core import setupfrom distutils.extension import Extensionfrom Cython.Distutils import build_ext
ext_modules = [ Extension('sample',
15.10. Wrapping Existing C Code with Cython | 633
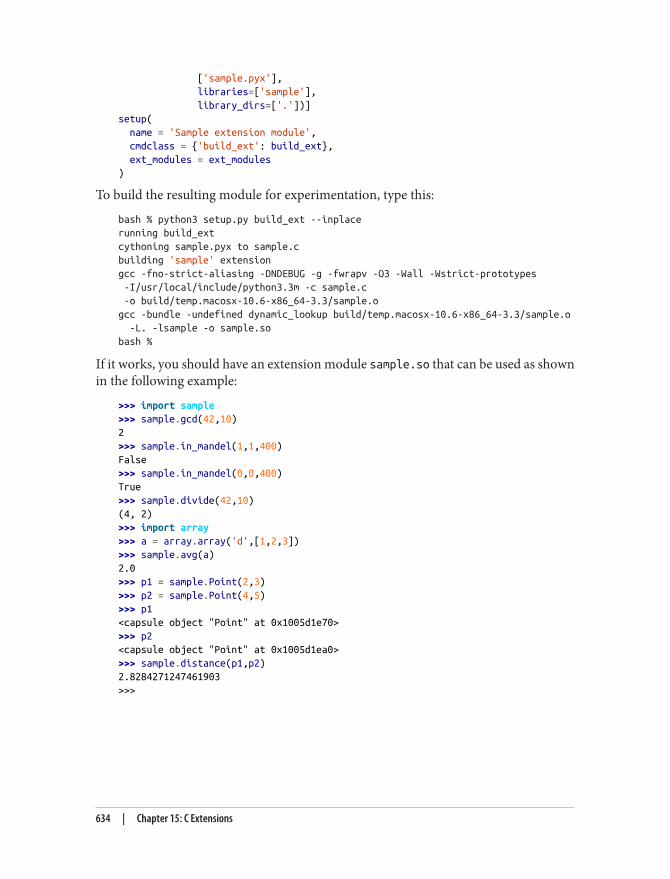
['sample.pyx'], libraries=['sample'], library_dirs=['.'])]setup( name = 'Sample extension module', cmdclass = {'build_ext': build_ext}, ext_modules = ext_modules)
To build the resulting module for experimentation, type this:
bash % python3 setup.py build_ext --inplacerunning build_extcythoning sample.pyx to sample.cbuilding 'sample' extensiongcc -fno-strict-aliasing -DNDEBUG -g -fwrapv -O3 -Wall -Wstrict-prototypes -I/usr/local/include/python3.3m -c sample.c -o build/temp.macosx-10.6-x86_64-3.3/sample.ogcc -bundle -undefined dynamic_lookup build/temp.macosx-10.6-x86_64-3.3/sample.o -L. -lsample -o sample.sobash %
If it works, you should have an extension module sample.so that can be used as shownin the following example:
>>> import sample>>> sample.gcd(42,10)2>>> sample.in_mandel(1,1,400)False>>> sample.in_mandel(0,0,400)True>>> sample.divide(42,10)(4, 2)>>> import array>>> a = array.array('d',[1,2,3])>>> sample.avg(a)2.0>>> p1 = sample.Point(2,3)>>> p2 = sample.Point(4,5)>>> p1<capsule object "Point" at 0x1005d1e70>>>> p2<capsule object "Point" at 0x1005d1ea0>>>> sample.distance(p1,p2)2.8284271247461903>>>
634 | Chapter 15: C Extensions
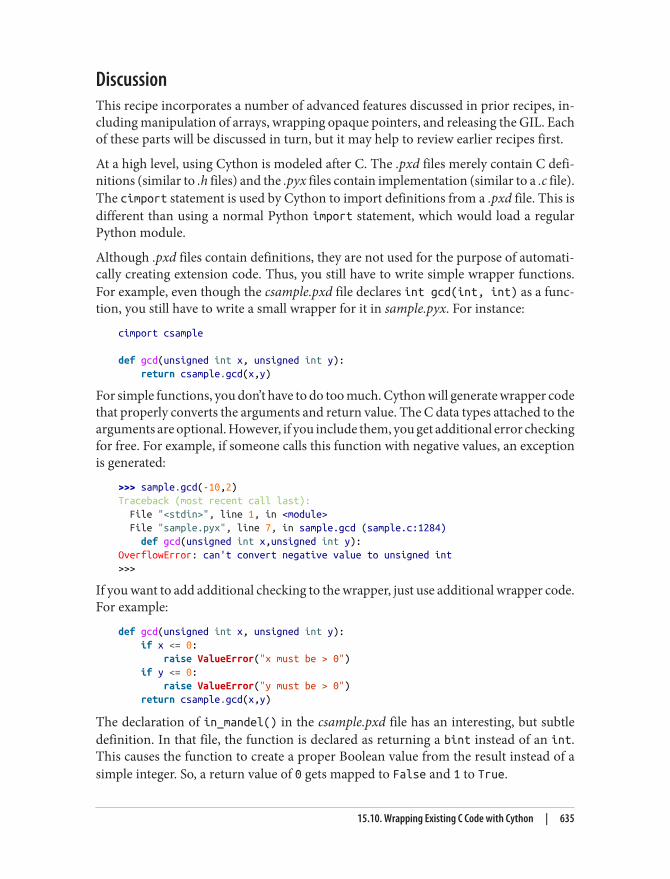
DiscussionThis recipe incorporates a number of advanced features discussed in prior recipes, in‐cluding manipulation of arrays, wrapping opaque pointers, and releasing the GIL. Eachof these parts will be discussed in turn, but it may help to review earlier recipes first.
At a high level, using Cython is modeled after C. The .pxd files merely contain C defi‐nitions (similar to .h files) and the .pyx files contain implementation (similar to a .c file).The cimport statement is used by Cython to import definitions from a .pxd file. This isdifferent than using a normal Python import statement, which would load a regularPython module.
Although .pxd files contain definitions, they are not used for the purpose of automati‐cally creating extension code. Thus, you still have to write simple wrapper functions.For example, even though the csample.pxd file declares int gcd(int, int) as a func‐tion, you still have to write a small wrapper for it in sample.pyx. For instance:
cimport csample
def gcd(unsigned int x, unsigned int y): return csample.gcd(x,y)
For simple functions, you don’t have to do too much. Cython will generate wrapper codethat properly converts the arguments and return value. The C data types attached to thearguments are optional. However, if you include them, you get additional error checkingfor free. For example, if someone calls this function with negative values, an exceptionis generated:
>>> sample.gcd(-10,2)Traceback (most recent call last): File "<stdin>", line 1, in <module> File "sample.pyx", line 7, in sample.gcd (sample.c:1284) def gcd(unsigned int x,unsigned int y):OverflowError: can't convert negative value to unsigned int>>>
If you want to add additional checking to the wrapper, just use additional wrapper code.For example:
def gcd(unsigned int x, unsigned int y): if x <= 0: raise ValueError("x must be > 0") if y <= 0: raise ValueError("y must be > 0") return csample.gcd(x,y)
The declaration of in_mandel() in the csample.pxd file has an interesting, but subtledefinition. In that file, the function is declared as returning a bint instead of an int.This causes the function to create a proper Boolean value from the result instead of asimple integer. So, a return value of 0 gets mapped to False and 1 to True.
15.10. Wrapping Existing C Code with Cython | 635
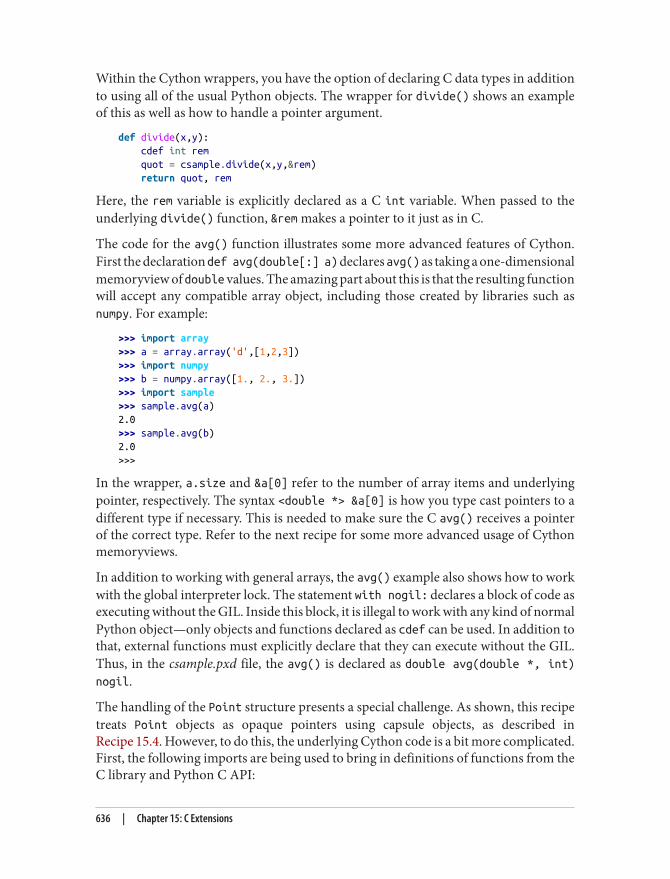
Within the Cython wrappers, you have the option of declaring C data types in additionto using all of the usual Python objects. The wrapper for divide() shows an exampleof this as well as how to handle a pointer argument.
def divide(x,y): cdef int rem quot = csample.divide(x,y,&rem) return quot, rem
Here, the rem variable is explicitly declared as a C int variable. When passed to theunderlying divide() function, &rem makes a pointer to it just as in C.
The code for the avg() function illustrates some more advanced features of Cython.First the declaration def avg(double[:] a) declares avg() as taking a one-dimensionalmemoryview of double values. The amazing part about this is that the resulting functionwill accept any compatible array object, including those created by libraries such asnumpy. For example:
>>> import array>>> a = array.array('d',[1,2,3])>>> import numpy>>> b = numpy.array([1., 2., 3.])>>> import sample>>> sample.avg(a)2.0>>> sample.avg(b)2.0>>>
In the wrapper, a.size and &a[0] refer to the number of array items and underlyingpointer, respectively. The syntax <double *> &a[0] is how you type cast pointers to adifferent type if necessary. This is needed to make sure the C avg() receives a pointerof the correct type. Refer to the next recipe for some more advanced usage of Cythonmemoryviews.
In addition to working with general arrays, the avg() example also shows how to workwith the global interpreter lock. The statement with nogil: declares a block of code asexecuting without the GIL. Inside this block, it is illegal to work with any kind of normalPython object—only objects and functions declared as cdef can be used. In addition tothat, external functions must explicitly declare that they can execute without the GIL.Thus, in the csample.pxd file, the avg() is declared as double avg(double *, int)nogil.
The handling of the Point structure presents a special challenge. As shown, this recipetreats Point objects as opaque pointers using capsule objects, as described inRecipe 15.4. However, to do this, the underlying Cython code is a bit more complicated.First, the following imports are being used to bring in definitions of functions from theC library and Python C API:
636 | Chapter 15: C Extensions
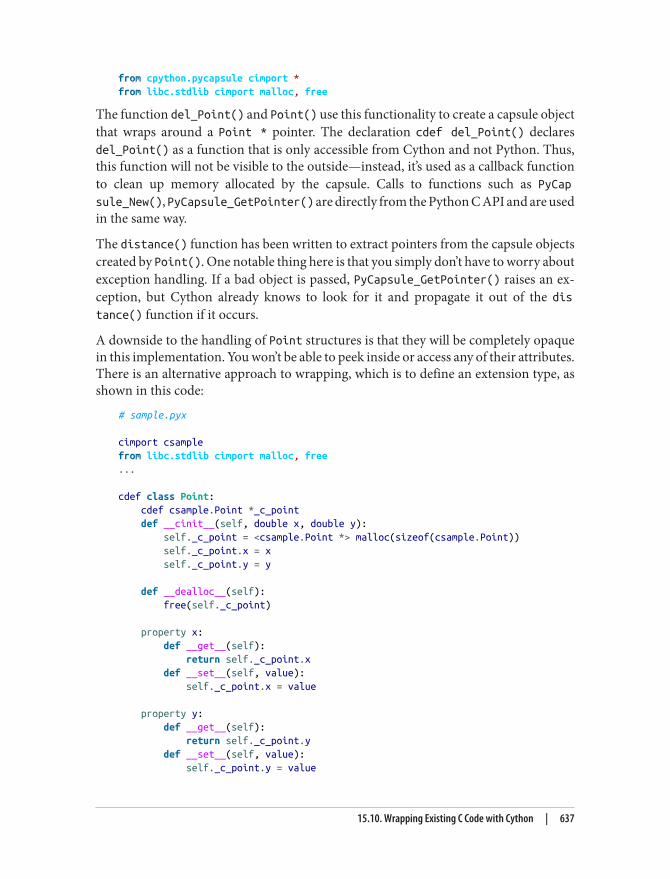
from cpython.pycapsule cimport *from libc.stdlib cimport malloc, free
The function del_Point() and Point() use this functionality to create a capsule objectthat wraps around a Point * pointer. The declaration cdef del_Point() declaresdel_Point() as a function that is only accessible from Cython and not Python. Thus,this function will not be visible to the outside—instead, it’s used as a callback functionto clean up memory allocated by the capsule. Calls to functions such as PyCapsule_New(), PyCapsule_GetPointer() are directly from the Python C API and are usedin the same way.
The distance() function has been written to extract pointers from the capsule objectscreated by Point(). One notable thing here is that you simply don’t have to worry aboutexception handling. If a bad object is passed, PyCapsule_GetPointer() raises an ex‐ception, but Cython already knows to look for it and propagate it out of the distance() function if it occurs.
A downside to the handling of Point structures is that they will be completely opaquein this implementation. You won’t be able to peek inside or access any of their attributes.There is an alternative approach to wrapping, which is to define an extension type, asshown in this code:
# sample.pyx
cimport csamplefrom libc.stdlib cimport malloc, free...
cdef class Point: cdef csample.Point *_c_point def __cinit__(self, double x, double y): self._c_point = <csample.Point *> malloc(sizeof(csample.Point)) self._c_point.x = x self._c_point.y = y
def __dealloc__(self): free(self._c_point)
property x: def __get__(self): return self._c_point.x def __set__(self, value): self._c_point.x = value
property y: def __get__(self): return self._c_point.y def __set__(self, value): self._c_point.y = value
15.10. Wrapping Existing C Code with Cython | 637
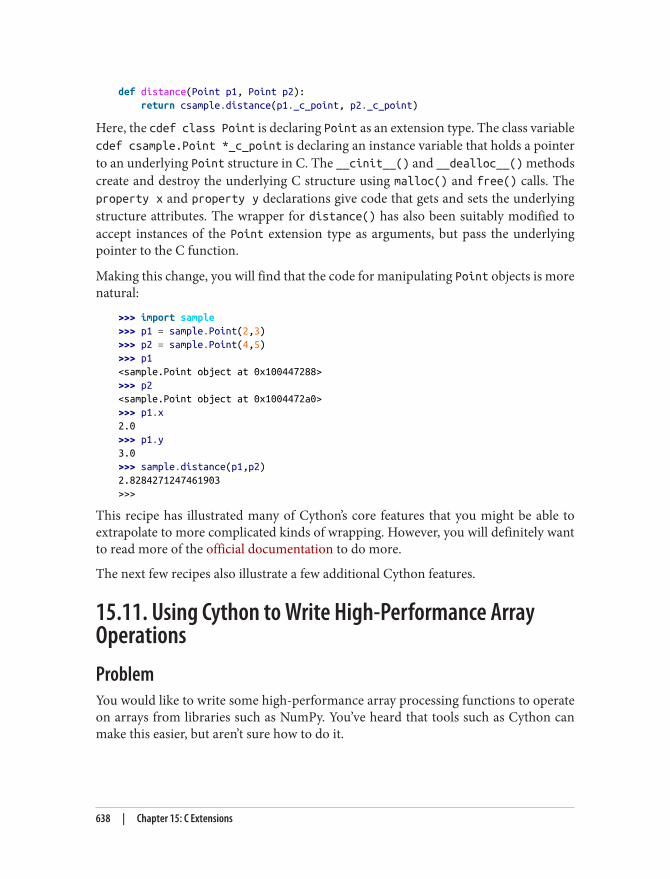
def distance(Point p1, Point p2): return csample.distance(p1._c_point, p2._c_point)
Here, the cdef class Point is declaring Point as an extension type. The class variablecdef csample.Point *_c_point is declaring an instance variable that holds a pointerto an underlying Point structure in C. The __cinit__() and __dealloc__() methodscreate and destroy the underlying C structure using malloc() and free() calls. Theproperty x and property y declarations give code that gets and sets the underlyingstructure attributes. The wrapper for distance() has also been suitably modified toaccept instances of the Point extension type as arguments, but pass the underlyingpointer to the C function.
Making this change, you will find that the code for manipulating Point objects is morenatural:
>>> import sample>>> p1 = sample.Point(2,3)>>> p2 = sample.Point(4,5)>>> p1<sample.Point object at 0x100447288>>>> p2<sample.Point object at 0x1004472a0>>>> p1.x2.0>>> p1.y3.0>>> sample.distance(p1,p2)2.8284271247461903>>>
This recipe has illustrated many of Cython’s core features that you might be able toextrapolate to more complicated kinds of wrapping. However, you will definitely wantto read more of the official documentation to do more.
The next few recipes also illustrate a few additional Cython features.
15.11. Using Cython to Write High-Performance ArrayOperationsProblemYou would like to write some high-performance array processing functions to operateon arrays from libraries such as NumPy. You’ve heard that tools such as Cython canmake this easier, but aren’t sure how to do it.
638 | Chapter 15: C Extensions
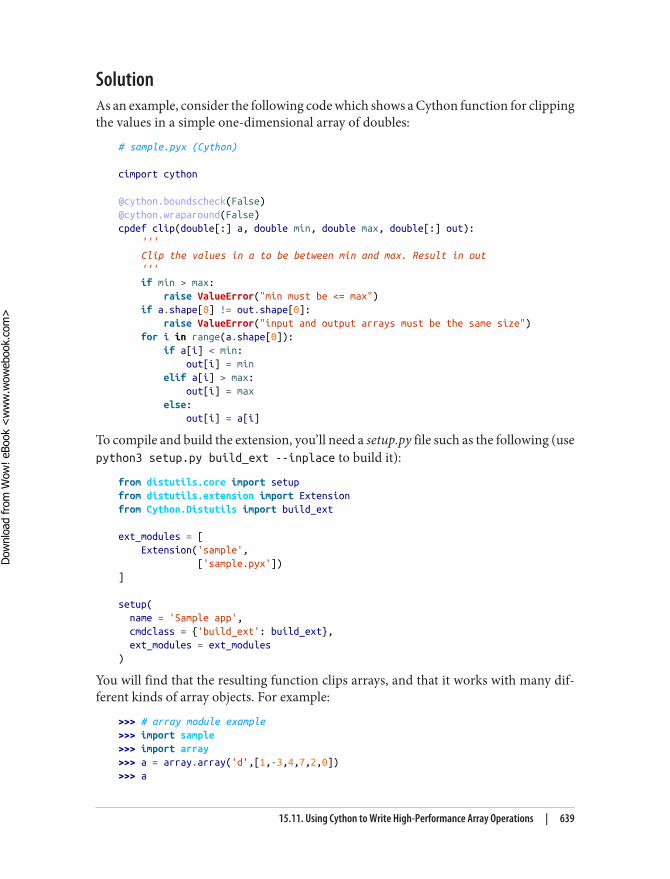
SolutionAs an example, consider the following code which shows a Cython function for clippingthe values in a simple one-dimensional array of doubles:
# sample.pyx (Cython)
cimport cython
@cython.boundscheck(False)@cython.wraparound(False)cpdef clip(double[:] a, double min, double max, double[:] out): ''' Clip the values in a to be between min and max. Result in out ''' if min > max: raise ValueError("min must be <= max") if a.shape[0] != out.shape[0]: raise ValueError("input and output arrays must be the same size") for i in range(a.shape[0]): if a[i] < min: out[i] = min elif a[i] > max: out[i] = max else: out[i] = a[i]
To compile and build the extension, you’ll need a setup.py file such as the following (usepython3 setup.py build_ext --inplace to build it):
from distutils.core import setupfrom distutils.extension import Extensionfrom Cython.Distutils import build_ext
ext_modules = [ Extension('sample', ['sample.pyx'])]
setup( name = 'Sample app', cmdclass = {'build_ext': build_ext}, ext_modules = ext_modules)
You will find that the resulting function clips arrays, and that it works with many dif‐ferent kinds of array objects. For example:
>>> # array module example>>> import sample>>> import array>>> a = array.array('d',[1,-3,4,7,2,0])>>> a
15.11. Using Cython to Write High-Performance Array Operations | 639
Dow
nlo
ad fro
m W
ow
! eBook
<w
ww
.wow
ebook.
com
>
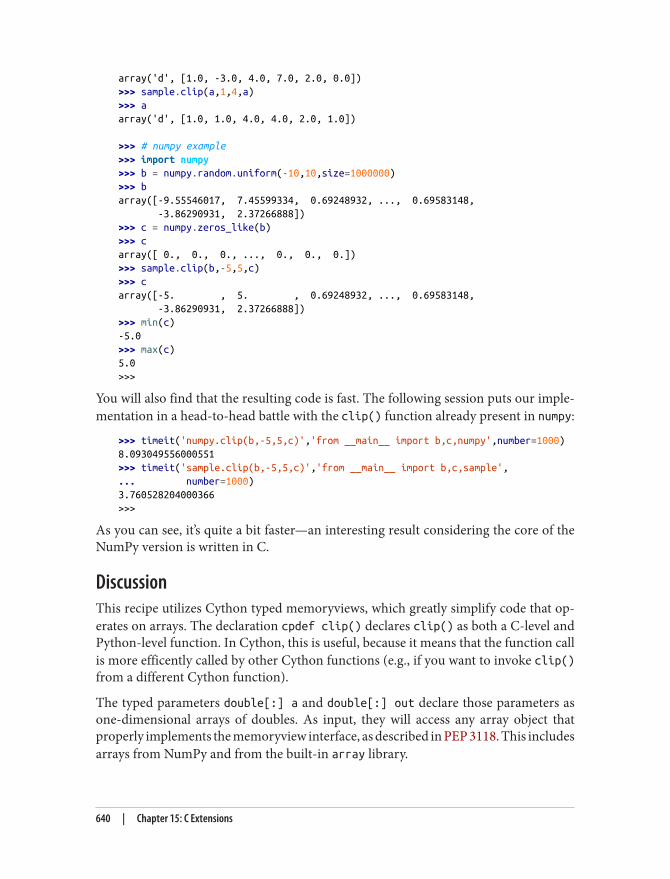
array('d', [1.0, -3.0, 4.0, 7.0, 2.0, 0.0])>>> sample.clip(a,1,4,a)>>> aarray('d', [1.0, 1.0, 4.0, 4.0, 2.0, 1.0])
>>> # numpy example>>> import numpy>>> b = numpy.random.uniform(-10,10,size=1000000)>>> barray([-9.55546017, 7.45599334, 0.69248932, ..., 0.69583148, -3.86290931, 2.37266888])>>> c = numpy.zeros_like(b)>>> carray([ 0., 0., 0., ..., 0., 0., 0.])>>> sample.clip(b,-5,5,c)>>> carray([-5. , 5. , 0.69248932, ..., 0.69583148, -3.86290931, 2.37266888])>>> min(c)-5.0>>> max(c)5.0>>>
You will also find that the resulting code is fast. The following session puts our imple‐mentation in a head-to-head battle with the clip() function already present in numpy:
>>> timeit('numpy.clip(b,-5,5,c)','from __main__ import b,c,numpy',number=1000)8.093049556000551>>> timeit('sample.clip(b,-5,5,c)','from __main__ import b,c,sample',... number=1000)3.760528204000366>>>
As you can see, it’s quite a bit faster—an interesting result considering the core of theNumPy version is written in C.
DiscussionThis recipe utilizes Cython typed memoryviews, which greatly simplify code that op‐erates on arrays. The declaration cpdef clip() declares clip() as both a C-level andPython-level function. In Cython, this is useful, because it means that the function callis more efficently called by other Cython functions (e.g., if you want to invoke clip()from a different Cython function).
The typed parameters double[:] a and double[:] out declare those parameters asone-dimensional arrays of doubles. As input, they will access any array object thatproperly implements the memoryview interface, as described in PEP 3118. This includesarrays from NumPy and from the built-in array library.
640 | Chapter 15: C Extensions
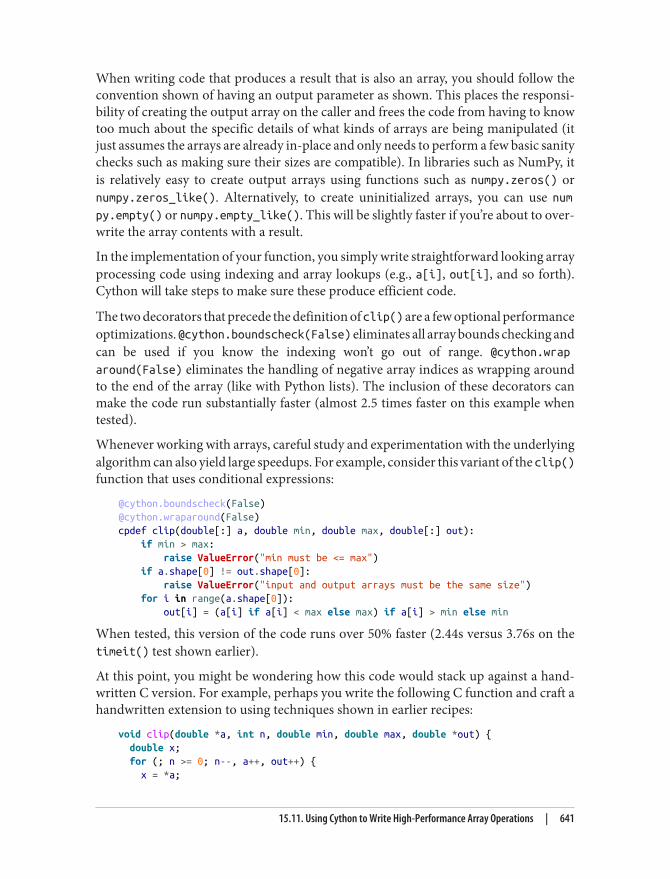
When writing code that produces a result that is also an array, you should follow theconvention shown of having an output parameter as shown. This places the responsi‐bility of creating the output array on the caller and frees the code from having to knowtoo much about the specific details of what kinds of arrays are being manipulated (itjust assumes the arrays are already in-place and only needs to perform a few basic sanitychecks such as making sure their sizes are compatible). In libraries such as NumPy, itis relatively easy to create output arrays using functions such as numpy.zeros() ornumpy.zeros_like(). Alternatively, to create uninitialized arrays, you can use numpy.empty() or numpy.empty_like(). This will be slightly faster if you’re about to over‐write the array contents with a result.
In the implementation of your function, you simply write straightforward looking arrayprocessing code using indexing and array lookups (e.g., a[i], out[i], and so forth).Cython will take steps to make sure these produce efficient code.
The two decorators that precede the definition of clip() are a few optional performanceoptimizations. @cython.boundscheck(False) eliminates all array bounds checking andcan be used if you know the indexing won’t go out of range. @cython.wraparound(False) eliminates the handling of negative array indices as wrapping aroundto the end of the array (like with Python lists). The inclusion of these decorators canmake the code run substantially faster (almost 2.5 times faster on this example whentested).
Whenever working with arrays, careful study and experimentation with the underlyingalgorithm can also yield large speedups. For example, consider this variant of the clip()function that uses conditional expressions:
@cython.boundscheck(False)@cython.wraparound(False)cpdef clip(double[:] a, double min, double max, double[:] out): if min > max: raise ValueError("min must be <= max") if a.shape[0] != out.shape[0]: raise ValueError("input and output arrays must be the same size") for i in range(a.shape[0]): out[i] = (a[i] if a[i] < max else max) if a[i] > min else min
When tested, this version of the code runs over 50% faster (2.44s versus 3.76s on thetimeit() test shown earlier).
At this point, you might be wondering how this code would stack up against a hand‐written C version. For example, perhaps you write the following C function and craft ahandwritten extension to using techniques shown in earlier recipes:
void clip(double *a, int n, double min, double max, double *out) { double x; for (; n >= 0; n--, a++, out++) { x = *a;
15.11. Using Cython to Write High-Performance Array Operations | 641
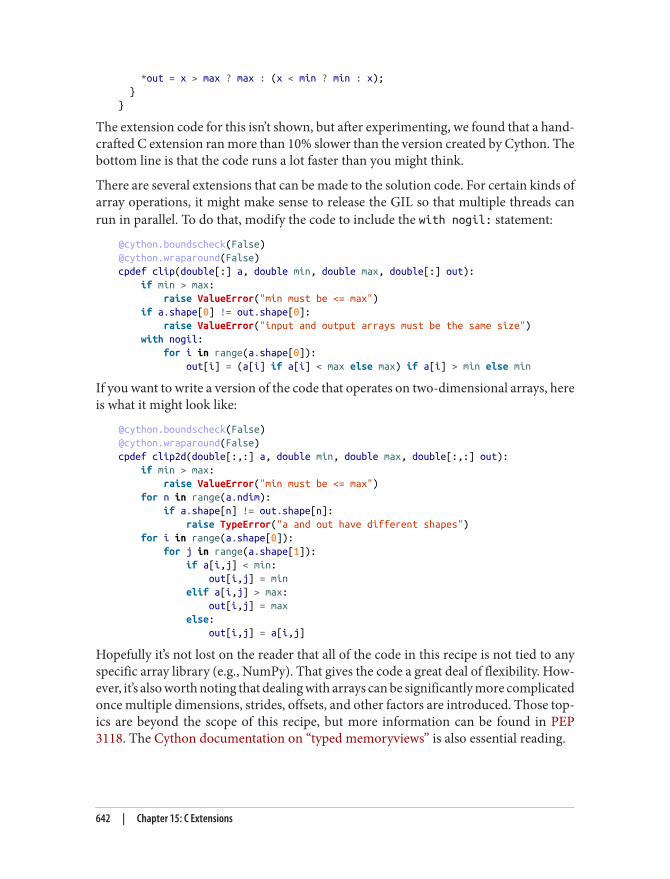
*out = x > max ? max : (x < min ? min : x); }}
The extension code for this isn’t shown, but after experimenting, we found that a hand‐crafted C extension ran more than 10% slower than the version created by Cython. Thebottom line is that the code runs a lot faster than you might think.
There are several extensions that can be made to the solution code. For certain kinds ofarray operations, it might make sense to release the GIL so that multiple threads canrun in parallel. To do that, modify the code to include the with nogil: statement:
@cython.boundscheck(False)@cython.wraparound(False)cpdef clip(double[:] a, double min, double max, double[:] out): if min > max: raise ValueError("min must be <= max") if a.shape[0] != out.shape[0]: raise ValueError("input and output arrays must be the same size") with nogil: for i in range(a.shape[0]): out[i] = (a[i] if a[i] < max else max) if a[i] > min else min
If you want to write a version of the code that operates on two-dimensional arrays, hereis what it might look like:
@cython.boundscheck(False)@cython.wraparound(False)cpdef clip2d(double[:,:] a, double min, double max, double[:,:] out): if min > max: raise ValueError("min must be <= max") for n in range(a.ndim): if a.shape[n] != out.shape[n]: raise TypeError("a and out have different shapes") for i in range(a.shape[0]): for j in range(a.shape[1]): if a[i,j] < min: out[i,j] = min elif a[i,j] > max: out[i,j] = max else: out[i,j] = a[i,j]
Hopefully it’s not lost on the reader that all of the code in this recipe is not tied to anyspecific array library (e.g., NumPy). That gives the code a great deal of flexibility. How‐ever, it’s also worth noting that dealing with arrays can be significantly more complicatedonce multiple dimensions, strides, offsets, and other factors are introduced. Those top‐ics are beyond the scope of this recipe, but more information can be found in PEP3118. The Cython documentation on “typed memoryviews” is also essential reading.
642 | Chapter 15: C Extensions
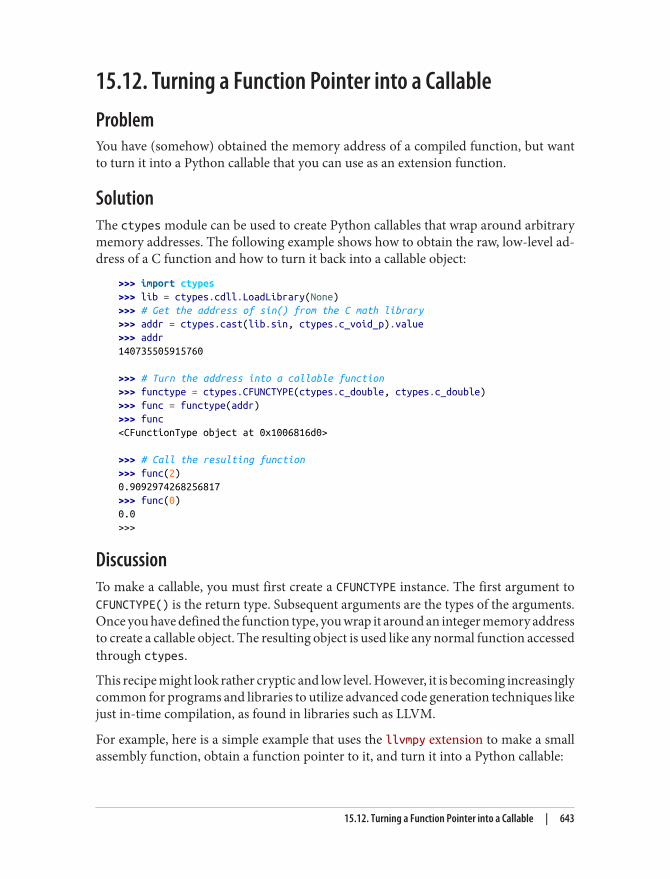
15.12. Turning a Function Pointer into a CallableProblemYou have (somehow) obtained the memory address of a compiled function, but wantto turn it into a Python callable that you can use as an extension function.
SolutionThe ctypes module can be used to create Python callables that wrap around arbitrarymemory addresses. The following example shows how to obtain the raw, low-level ad‐dress of a C function and how to turn it back into a callable object:
>>> import ctypes>>> lib = ctypes.cdll.LoadLibrary(None)>>> # Get the address of sin() from the C math library>>> addr = ctypes.cast(lib.sin, ctypes.c_void_p).value>>> addr140735505915760
>>> # Turn the address into a callable function>>> functype = ctypes.CFUNCTYPE(ctypes.c_double, ctypes.c_double)>>> func = functype(addr)>>> func<CFunctionType object at 0x1006816d0>
>>> # Call the resulting function>>> func(2)0.9092974268256817>>> func(0)0.0>>>
DiscussionTo make a callable, you must first create a CFUNCTYPE instance. The first argument toCFUNCTYPE() is the return type. Subsequent arguments are the types of the arguments.Once you have defined the function type, you wrap it around an integer memory addressto create a callable object. The resulting object is used like any normal function accessedthrough ctypes.
This recipe might look rather cryptic and low level. However, it is becoming increasinglycommon for programs and libraries to utilize advanced code generation techniques likejust in-time compilation, as found in libraries such as LLVM.
For example, here is a simple example that uses the llvmpy extension to make a smallassembly function, obtain a function pointer to it, and turn it into a Python callable:
15.12. Turning a Function Pointer into a Callable | 643

>>> from llvm.core import Module, Function, Type, Builder>>> mod = Module.new('example')>>> f = Function.new(mod,Type.function(Type.double(), \ [Type.double(), Type.double()], False), 'foo')>>> block = f.append_basic_block('entry')>>> builder = Builder.new(block)>>> x2 = builder.fmul(f.args[0],f.args[0])>>> y2 = builder.fmul(f.args[1],f.args[1])>>> r = builder.fadd(x2,y2)>>> builder.ret(r)<llvm.core.Instruction object at 0x10078e990>>>> from llvm.ee import ExecutionEngine>>> engine = ExecutionEngine.new(mod)>>> ptr = engine.get_pointer_to_function(f)>>> ptr4325863440>>> foo = ctypes.CFUNCTYPE(ctypes.c_double, ctypes.c_double, ctypes.c_double)(ptr)
>>> # Call the resulting function>>> foo(2,3)13.0>>> foo(4,5)41.0>>> foo(1,2)5.0>>>
It goes without saying that doing anything wrong at this level will probably cause thePython interpreter to die a horrible death. Keep in mind that you’re directly workingwith machine-level memory addresses and native machine code—not Pythonfunctions.
15.13. Passing NULL-Terminated Strings to C LibrariesProblemYou are writing an extension module that needs to pass a NULL-terminated string to aC library. However, you’re not entirely sure how to do it with Python’s Unicode stringimplementation.
SolutionMany C libraries include functions that operate on NULL-terminated strings declaredas type char *. Consider the following C function that we will use for the purposes ofillustration and testing:
void print_chars(char *s) { while (*s) { printf("%2x ", (unsigned char) *s);
644 | Chapter 15: C Extensions
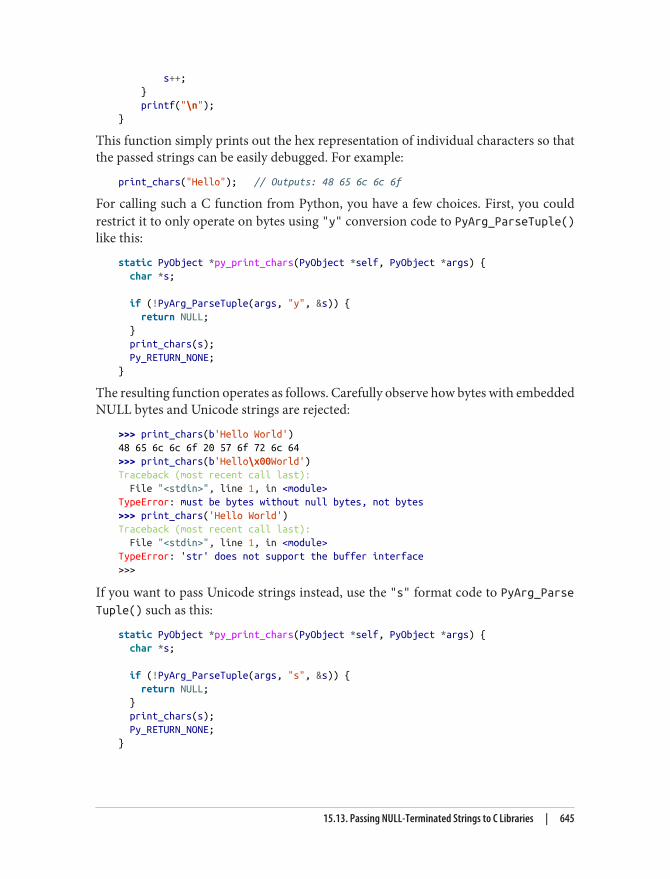
s++; } printf("\n");}
This function simply prints out the hex representation of individual characters so thatthe passed strings can be easily debugged. For example:
print_chars("Hello"); // Outputs: 48 65 6c 6c 6f
For calling such a C function from Python, you have a few choices. First, you couldrestrict it to only operate on bytes using "y" conversion code to PyArg_ParseTuple()like this:
static PyObject *py_print_chars(PyObject *self, PyObject *args) { char *s;
if (!PyArg_ParseTuple(args, "y", &s)) { return NULL; } print_chars(s); Py_RETURN_NONE;}
The resulting function operates as follows. Carefully observe how bytes with embeddedNULL bytes and Unicode strings are rejected:
>>> print_chars(b'Hello World')48 65 6c 6c 6f 20 57 6f 72 6c 64>>> print_chars(b'Hello\x00World')Traceback (most recent call last): File "<stdin>", line 1, in <module>TypeError: must be bytes without null bytes, not bytes>>> print_chars('Hello World')Traceback (most recent call last): File "<stdin>", line 1, in <module>TypeError: 'str' does not support the buffer interface>>>
If you want to pass Unicode strings instead, use the "s" format code to PyArg_ParseTuple() such as this:
static PyObject *py_print_chars(PyObject *self, PyObject *args) { char *s;
if (!PyArg_ParseTuple(args, "s", &s)) { return NULL; } print_chars(s); Py_RETURN_NONE;}
15.13. Passing NULL-Terminated Strings to C Libraries | 645
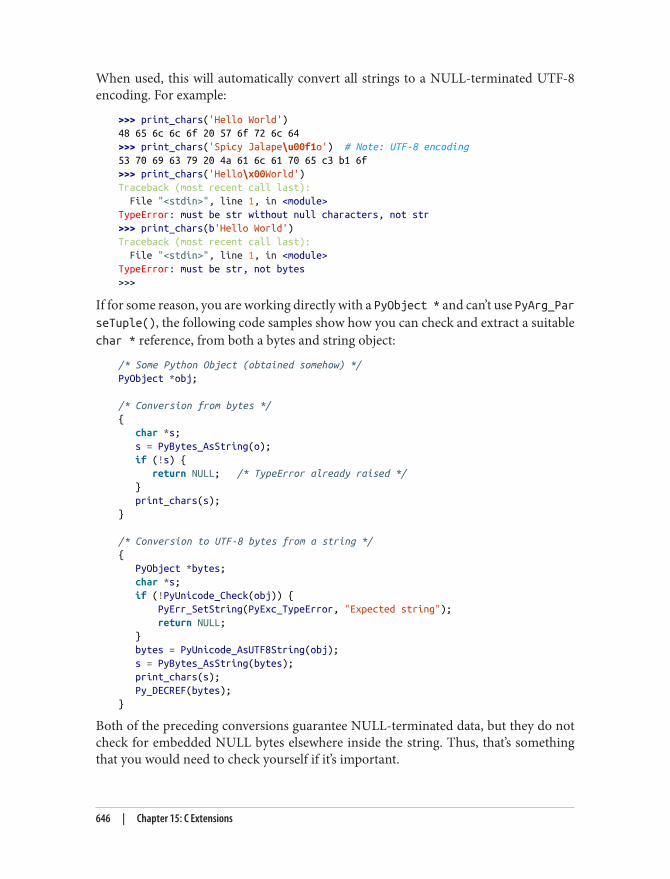
When used, this will automatically convert all strings to a NULL-terminated UTF-8encoding. For example:
>>> print_chars('Hello World')48 65 6c 6c 6f 20 57 6f 72 6c 64>>> print_chars('Spicy Jalape\u00f1o') # Note: UTF-8 encoding53 70 69 63 79 20 4a 61 6c 61 70 65 c3 b1 6f>>> print_chars('Hello\x00World')Traceback (most recent call last): File "<stdin>", line 1, in <module>TypeError: must be str without null characters, not str>>> print_chars(b'Hello World')Traceback (most recent call last): File "<stdin>", line 1, in <module>TypeError: must be str, not bytes>>>
If for some reason, you are working directly with a PyObject * and can’t use PyArg_ParseTuple(), the following code samples show how you can check and extract a suitablechar * reference, from both a bytes and string object:
/* Some Python Object (obtained somehow) */PyObject *obj;
/* Conversion from bytes */{ char *s; s = PyBytes_AsString(o); if (!s) { return NULL; /* TypeError already raised */ } print_chars(s);}
/* Conversion to UTF-8 bytes from a string */{ PyObject *bytes; char *s; if (!PyUnicode_Check(obj)) { PyErr_SetString(PyExc_TypeError, "Expected string"); return NULL; } bytes = PyUnicode_AsUTF8String(obj); s = PyBytes_AsString(bytes); print_chars(s); Py_DECREF(bytes);}
Both of the preceding conversions guarantee NULL-terminated data, but they do notcheck for embedded NULL bytes elsewhere inside the string. Thus, that’s somethingthat you would need to check yourself if it’s important.
646 | Chapter 15: C Extensions
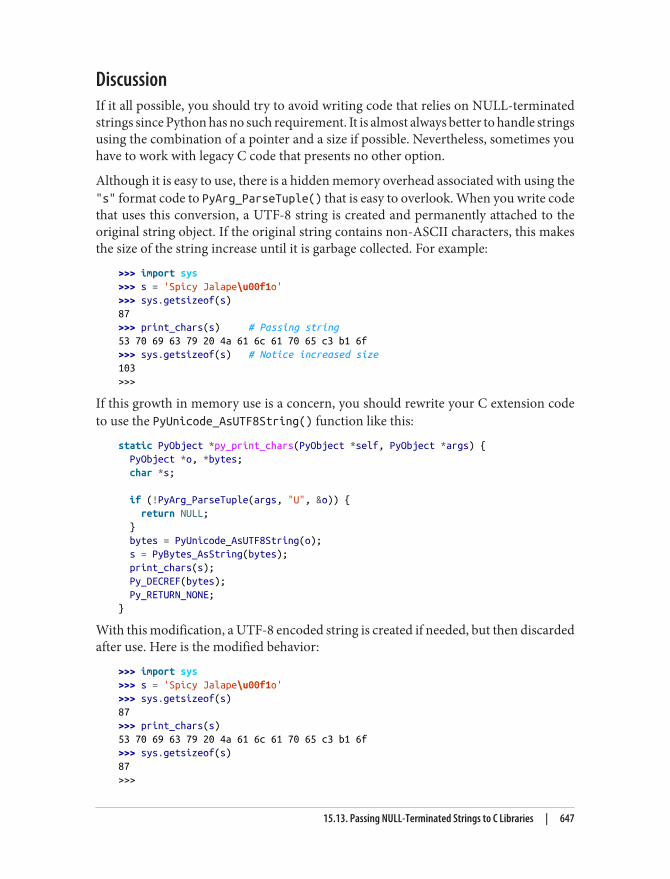
DiscussionIf it all possible, you should try to avoid writing code that relies on NULL-terminatedstrings since Python has no such requirement. It is almost always better to handle stringsusing the combination of a pointer and a size if possible. Nevertheless, sometimes youhave to work with legacy C code that presents no other option.
Although it is easy to use, there is a hidden memory overhead associated with using the"s" format code to PyArg_ParseTuple() that is easy to overlook. When you write codethat uses this conversion, a UTF-8 string is created and permanently attached to theoriginal string object. If the original string contains non-ASCII characters, this makesthe size of the string increase until it is garbage collected. For example:
>>> import sys>>> s = 'Spicy Jalape\u00f1o'>>> sys.getsizeof(s)87>>> print_chars(s) # Passing string53 70 69 63 79 20 4a 61 6c 61 70 65 c3 b1 6f>>> sys.getsizeof(s) # Notice increased size103>>>
If this growth in memory use is a concern, you should rewrite your C extension codeto use the PyUnicode_AsUTF8String() function like this:
static PyObject *py_print_chars(PyObject *self, PyObject *args) { PyObject *o, *bytes; char *s;
if (!PyArg_ParseTuple(args, "U", &o)) { return NULL; } bytes = PyUnicode_AsUTF8String(o); s = PyBytes_AsString(bytes); print_chars(s); Py_DECREF(bytes); Py_RETURN_NONE;}
With this modification, a UTF-8 encoded string is created if needed, but then discardedafter use. Here is the modified behavior:
>>> import sys>>> s = 'Spicy Jalape\u00f1o'>>> sys.getsizeof(s)87>>> print_chars(s)53 70 69 63 79 20 4a 61 6c 61 70 65 c3 b1 6f>>> sys.getsizeof(s)87>>>
15.13. Passing NULL-Terminated Strings to C Libraries | 647
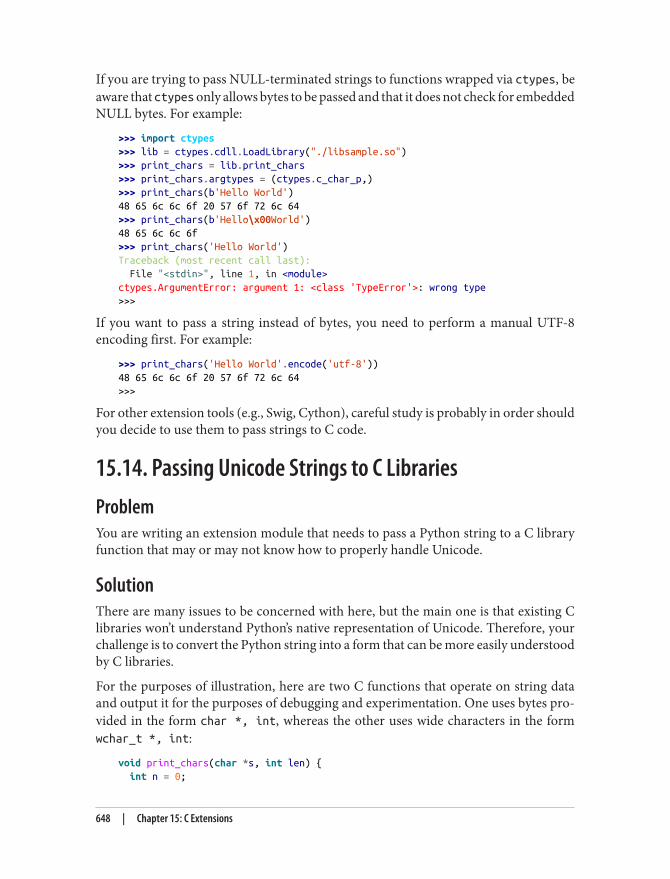
If you are trying to pass NULL-terminated strings to functions wrapped via ctypes, beaware that ctypes only allows bytes to be passed and that it does not check for embeddedNULL bytes. For example:
>>> import ctypes>>> lib = ctypes.cdll.LoadLibrary("./libsample.so")>>> print_chars = lib.print_chars>>> print_chars.argtypes = (ctypes.c_char_p,)>>> print_chars(b'Hello World')48 65 6c 6c 6f 20 57 6f 72 6c 64>>> print_chars(b'Hello\x00World')48 65 6c 6c 6f>>> print_chars('Hello World')Traceback (most recent call last): File "<stdin>", line 1, in <module>ctypes.ArgumentError: argument 1: <class 'TypeError'>: wrong type>>>
If you want to pass a string instead of bytes, you need to perform a manual UTF-8encoding first. For example:
>>> print_chars('Hello World'.encode('utf-8'))48 65 6c 6c 6f 20 57 6f 72 6c 64>>>
For other extension tools (e.g., Swig, Cython), careful study is probably in order shouldyou decide to use them to pass strings to C code.
15.14. Passing Unicode Strings to C LibrariesProblemYou are writing an extension module that needs to pass a Python string to a C libraryfunction that may or may not know how to properly handle Unicode.
SolutionThere are many issues to be concerned with here, but the main one is that existing Clibraries won’t understand Python’s native representation of Unicode. Therefore, yourchallenge is to convert the Python string into a form that can be more easily understoodby C libraries.
For the purposes of illustration, here are two C functions that operate on string dataand output it for the purposes of debugging and experimentation. One uses bytes pro‐vided in the form char *, int, whereas the other uses wide characters in the formwchar_t *, int:
void print_chars(char *s, int len) { int n = 0;
648 | Chapter 15: C Extensions
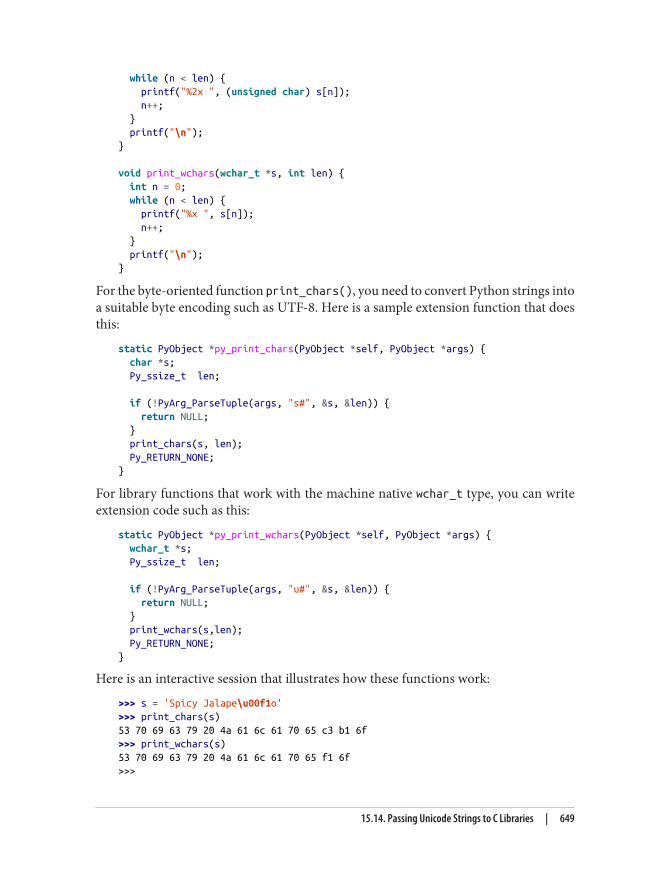
while (n < len) { printf("%2x ", (unsigned char) s[n]); n++; } printf("\n");}
void print_wchars(wchar_t *s, int len) { int n = 0; while (n < len) { printf("%x ", s[n]); n++; } printf("\n");}
For the byte-oriented function print_chars(), you need to convert Python strings intoa suitable byte encoding such as UTF-8. Here is a sample extension function that doesthis:
static PyObject *py_print_chars(PyObject *self, PyObject *args) { char *s; Py_ssize_t len;
if (!PyArg_ParseTuple(args, "s#", &s, &len)) { return NULL; } print_chars(s, len); Py_RETURN_NONE;}
For library functions that work with the machine native wchar_t type, you can writeextension code such as this:
static PyObject *py_print_wchars(PyObject *self, PyObject *args) { wchar_t *s; Py_ssize_t len;
if (!PyArg_ParseTuple(args, "u#", &s, &len)) { return NULL; } print_wchars(s,len); Py_RETURN_NONE;}
Here is an interactive session that illustrates how these functions work:
>>> s = 'Spicy Jalape\u00f1o'>>> print_chars(s)53 70 69 63 79 20 4a 61 6c 61 70 65 c3 b1 6f>>> print_wchars(s)53 70 69 63 79 20 4a 61 6c 61 70 65 f1 6f>>>
15.14. Passing Unicode Strings to C Libraries | 649
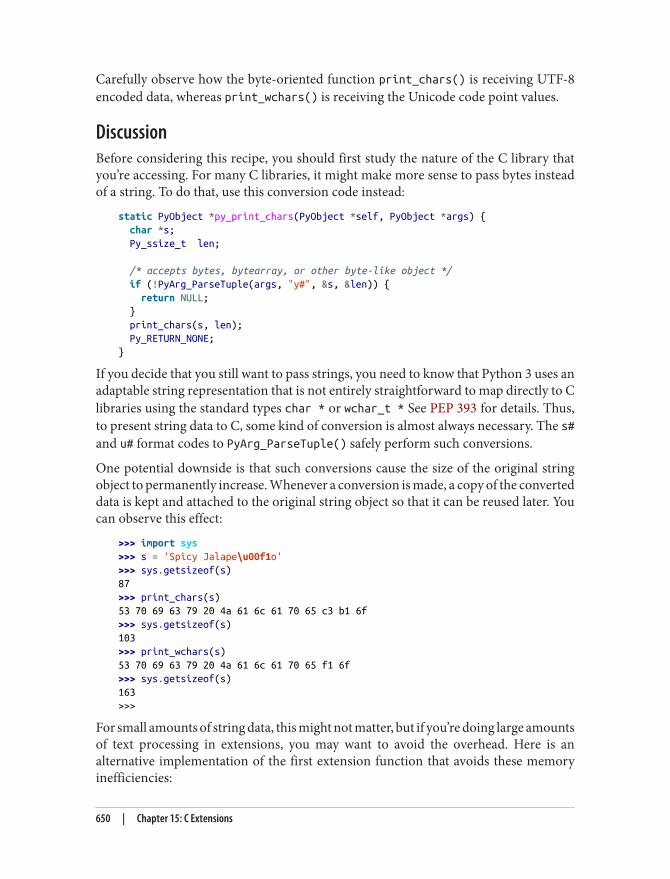
Carefully observe how the byte-oriented function print_chars() is receiving UTF-8encoded data, whereas print_wchars() is receiving the Unicode code point values.
DiscussionBefore considering this recipe, you should first study the nature of the C library thatyou’re accessing. For many C libraries, it might make more sense to pass bytes insteadof a string. To do that, use this conversion code instead:
static PyObject *py_print_chars(PyObject *self, PyObject *args) { char *s; Py_ssize_t len;
/* accepts bytes, bytearray, or other byte-like object */ if (!PyArg_ParseTuple(args, "y#", &s, &len)) { return NULL; } print_chars(s, len); Py_RETURN_NONE;}
If you decide that you still want to pass strings, you need to know that Python 3 uses anadaptable string representation that is not entirely straightforward to map directly to Clibraries using the standard types char * or wchar_t * See PEP 393 for details. Thus,to present string data to C, some kind of conversion is almost always necessary. The s#and u# format codes to PyArg_ParseTuple() safely perform such conversions.
One potential downside is that such conversions cause the size of the original stringobject to permanently increase. Whenever a conversion is made, a copy of the converteddata is kept and attached to the original string object so that it can be reused later. Youcan observe this effect:
>>> import sys>>> s = 'Spicy Jalape\u00f1o'>>> sys.getsizeof(s)87>>> print_chars(s)53 70 69 63 79 20 4a 61 6c 61 70 65 c3 b1 6f>>> sys.getsizeof(s)103>>> print_wchars(s)53 70 69 63 79 20 4a 61 6c 61 70 65 f1 6f>>> sys.getsizeof(s)163>>>
For small amounts of string data, this might not matter, but if you’re doing large amountsof text processing in extensions, you may want to avoid the overhead. Here is analternative implementation of the first extension function that avoids these memoryinefficiencies:
650 | Chapter 15: C Extensions
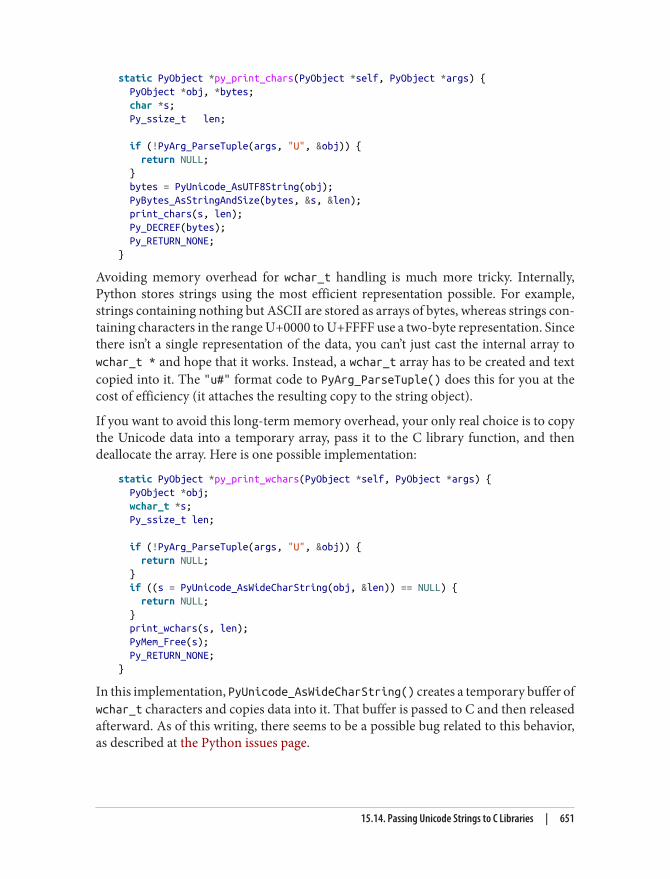
static PyObject *py_print_chars(PyObject *self, PyObject *args) { PyObject *obj, *bytes; char *s; Py_ssize_t len;
if (!PyArg_ParseTuple(args, "U", &obj)) { return NULL; } bytes = PyUnicode_AsUTF8String(obj); PyBytes_AsStringAndSize(bytes, &s, &len); print_chars(s, len); Py_DECREF(bytes); Py_RETURN_NONE;}
Avoiding memory overhead for wchar_t handling is much more tricky. Internally,Python stores strings using the most efficient representation possible. For example,strings containing nothing but ASCII are stored as arrays of bytes, whereas strings con‐taining characters in the range U+0000 to U+FFFF use a two-byte representation. Sincethere isn’t a single representation of the data, you can’t just cast the internal array towchar_t * and hope that it works. Instead, a wchar_t array has to be created and textcopied into it. The "u#" format code to PyArg_ParseTuple() does this for you at thecost of efficiency (it attaches the resulting copy to the string object).
If you want to avoid this long-term memory overhead, your only real choice is to copythe Unicode data into a temporary array, pass it to the C library function, and thendeallocate the array. Here is one possible implementation:
static PyObject *py_print_wchars(PyObject *self, PyObject *args) { PyObject *obj; wchar_t *s; Py_ssize_t len;
if (!PyArg_ParseTuple(args, "U", &obj)) { return NULL; } if ((s = PyUnicode_AsWideCharString(obj, &len)) == NULL) { return NULL; } print_wchars(s, len); PyMem_Free(s); Py_RETURN_NONE;}
In this implementation, PyUnicode_AsWideCharString() creates a temporary buffer ofwchar_t characters and copies data into it. That buffer is passed to C and then releasedafterward. As of this writing, there seems to be a possible bug related to this behavior,as described at the Python issues page.
15.14. Passing Unicode Strings to C Libraries | 651
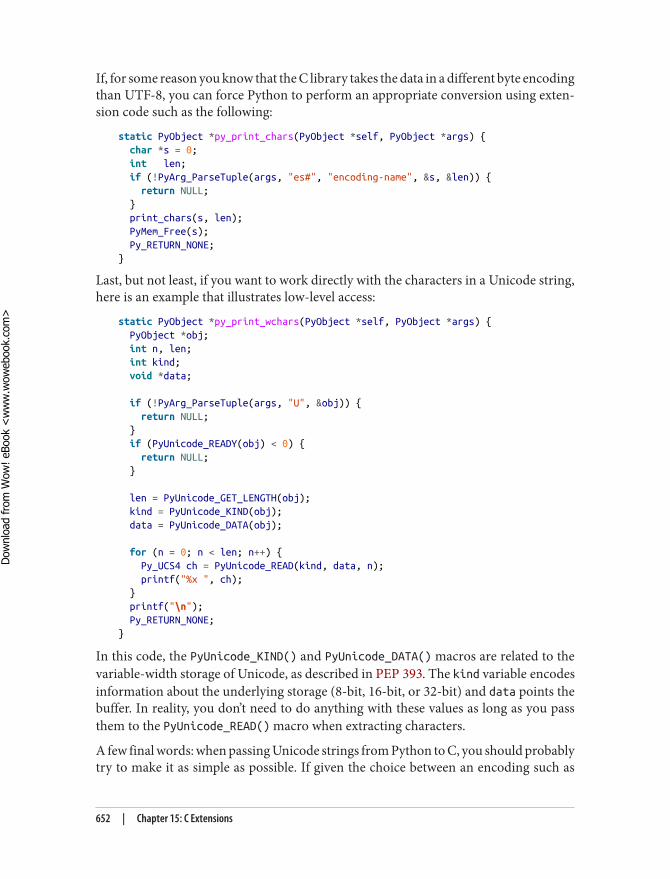
If, for some reason you know that the C library takes the data in a different byte encodingthan UTF-8, you can force Python to perform an appropriate conversion using exten‐sion code such as the following:
static PyObject *py_print_chars(PyObject *self, PyObject *args) { char *s = 0; int len; if (!PyArg_ParseTuple(args, "es#", "encoding-name", &s, &len)) { return NULL; } print_chars(s, len); PyMem_Free(s); Py_RETURN_NONE;}
Last, but not least, if you want to work directly with the characters in a Unicode string,here is an example that illustrates low-level access:
static PyObject *py_print_wchars(PyObject *self, PyObject *args) { PyObject *obj; int n, len; int kind; void *data;
if (!PyArg_ParseTuple(args, "U", &obj)) { return NULL; } if (PyUnicode_READY(obj) < 0) { return NULL; }
len = PyUnicode_GET_LENGTH(obj); kind = PyUnicode_KIND(obj); data = PyUnicode_DATA(obj);
for (n = 0; n < len; n++) { Py_UCS4 ch = PyUnicode_READ(kind, data, n); printf("%x ", ch); } printf("\n"); Py_RETURN_NONE;}
In this code, the PyUnicode_KIND() and PyUnicode_DATA() macros are related to thevariable-width storage of Unicode, as described in PEP 393. The kind variable encodesinformation about the underlying storage (8-bit, 16-bit, or 32-bit) and data points thebuffer. In reality, you don’t need to do anything with these values as long as you passthem to the PyUnicode_READ() macro when extracting characters.
A few final words: when passing Unicode strings from Python to C, you should probablytry to make it as simple as possible. If given the choice between an encoding such as
652 | Chapter 15: C Extensions
Dow
nlo
ad fro
m W
ow
! eBook
<w
ww
.wow
ebook.
com
>
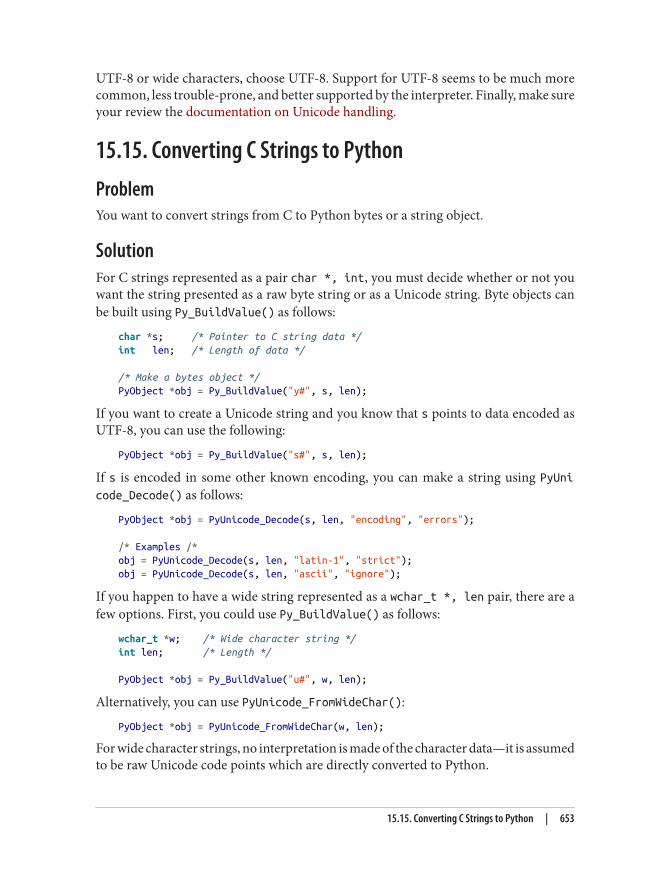
UTF-8 or wide characters, choose UTF-8. Support for UTF-8 seems to be much morecommon, less trouble-prone, and better supported by the interpreter. Finally, make sureyour review the documentation on Unicode handling.
15.15. Converting C Strings to PythonProblemYou want to convert strings from C to Python bytes or a string object.
SolutionFor C strings represented as a pair char *, int, you must decide whether or not youwant the string presented as a raw byte string or as a Unicode string. Byte objects canbe built using Py_BuildValue() as follows:
char *s; /* Pointer to C string data */int len; /* Length of data */
/* Make a bytes object */PyObject *obj = Py_BuildValue("y#", s, len);
If you want to create a Unicode string and you know that s points to data encoded asUTF-8, you can use the following:
PyObject *obj = Py_BuildValue("s#", s, len);
If s is encoded in some other known encoding, you can make a string using PyUnicode_Decode() as follows:
PyObject *obj = PyUnicode_Decode(s, len, "encoding", "errors");
/* Examples /*obj = PyUnicode_Decode(s, len, "latin-1", "strict");obj = PyUnicode_Decode(s, len, "ascii", "ignore");
If you happen to have a wide string represented as a wchar_t *, len pair, there are afew options. First, you could use Py_BuildValue() as follows:
wchar_t *w; /* Wide character string */int len; /* Length */
PyObject *obj = Py_BuildValue("u#", w, len);
Alternatively, you can use PyUnicode_FromWideChar():
PyObject *obj = PyUnicode_FromWideChar(w, len);
For wide character strings, no interpretation is made of the character data—it is assumedto be raw Unicode code points which are directly converted to Python.
15.15. Converting C Strings to Python | 653
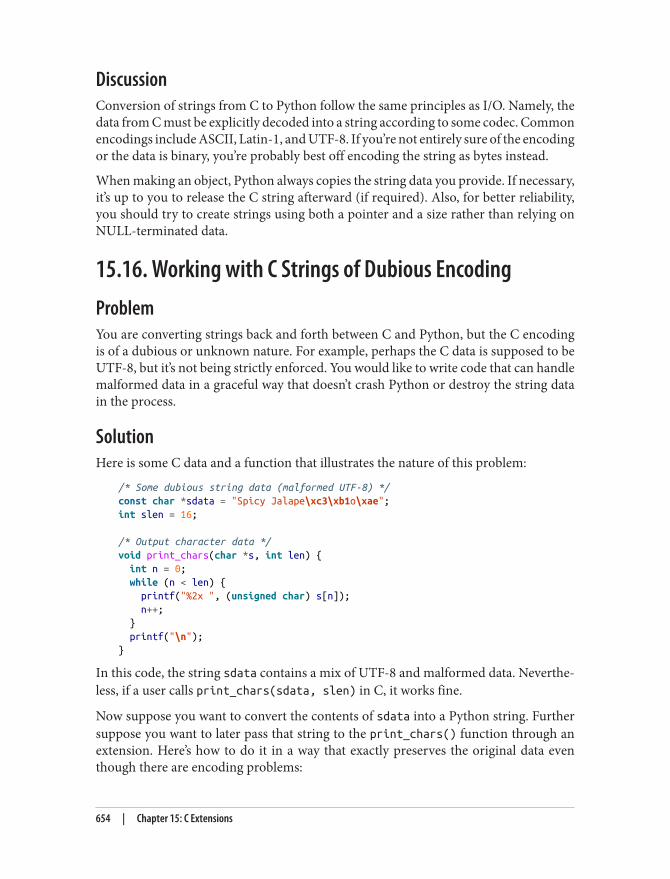
DiscussionConversion of strings from C to Python follow the same principles as I/O. Namely, thedata from C must be explicitly decoded into a string according to some codec. Commonencodings include ASCII, Latin-1, and UTF-8. If you’re not entirely sure of the encodingor the data is binary, you’re probably best off encoding the string as bytes instead.
When making an object, Python always copies the string data you provide. If necessary,it’s up to you to release the C string afterward (if required). Also, for better reliability,you should try to create strings using both a pointer and a size rather than relying onNULL-terminated data.
15.16. Working with C Strings of Dubious EncodingProblemYou are converting strings back and forth between C and Python, but the C encodingis of a dubious or unknown nature. For example, perhaps the C data is supposed to beUTF-8, but it’s not being strictly enforced. You would like to write code that can handlemalformed data in a graceful way that doesn’t crash Python or destroy the string datain the process.
SolutionHere is some C data and a function that illustrates the nature of this problem:
/* Some dubious string data (malformed UTF-8) */const char *sdata = "Spicy Jalape\xc3\xb1o\xae";int slen = 16;
/* Output character data */void print_chars(char *s, int len) { int n = 0; while (n < len) { printf("%2x ", (unsigned char) s[n]); n++; } printf("\n");}
In this code, the string sdata contains a mix of UTF-8 and malformed data. Neverthe‐less, if a user calls print_chars(sdata, slen) in C, it works fine.
Now suppose you want to convert the contents of sdata into a Python string. Furthersuppose you want to later pass that string to the print_chars() function through anextension. Here’s how to do it in a way that exactly preserves the original data eventhough there are encoding problems:
654 | Chapter 15: C Extensions
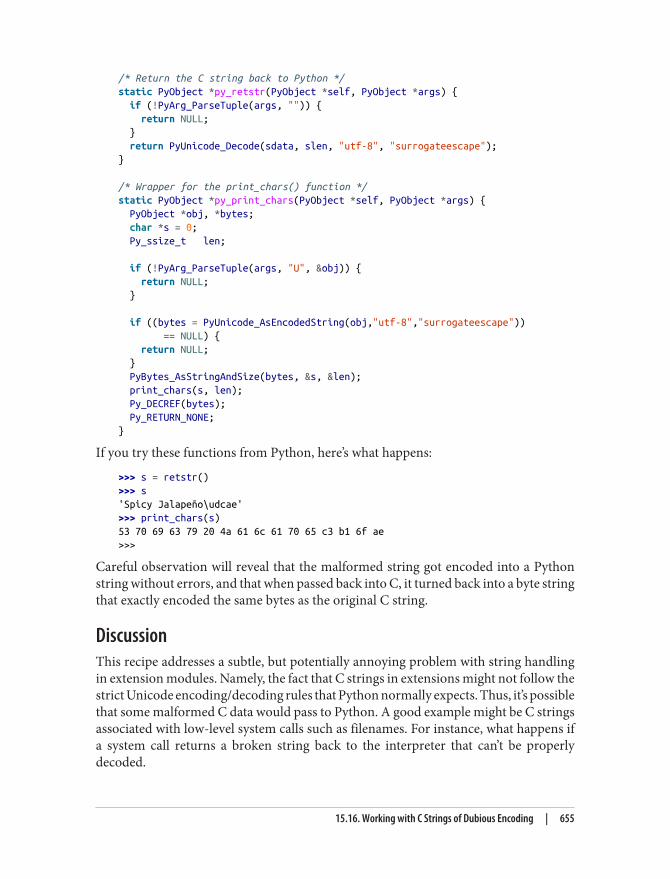
/* Return the C string back to Python */static PyObject *py_retstr(PyObject *self, PyObject *args) { if (!PyArg_ParseTuple(args, "")) { return NULL; } return PyUnicode_Decode(sdata, slen, "utf-8", "surrogateescape");}
/* Wrapper for the print_chars() function */static PyObject *py_print_chars(PyObject *self, PyObject *args) { PyObject *obj, *bytes; char *s = 0; Py_ssize_t len;
if (!PyArg_ParseTuple(args, "U", &obj)) { return NULL; }
if ((bytes = PyUnicode_AsEncodedString(obj,"utf-8","surrogateescape")) == NULL) { return NULL; } PyBytes_AsStringAndSize(bytes, &s, &len); print_chars(s, len); Py_DECREF(bytes); Py_RETURN_NONE;}
If you try these functions from Python, here’s what happens:
>>> s = retstr()>>> s'Spicy Jalapeño\udcae'>>> print_chars(s)53 70 69 63 79 20 4a 61 6c 61 70 65 c3 b1 6f ae>>>
Careful observation will reveal that the malformed string got encoded into a Pythonstring without errors, and that when passed back into C, it turned back into a byte stringthat exactly encoded the same bytes as the original C string.
DiscussionThis recipe addresses a subtle, but potentially annoying problem with string handlingin extension modules. Namely, the fact that C strings in extensions might not follow thestrict Unicode encoding/decoding rules that Python normally expects. Thus, it’s possiblethat some malformed C data would pass to Python. A good example might be C stringsassociated with low-level system calls such as filenames. For instance, what happens ifa system call returns a broken string back to the interpreter that can’t be properlydecoded.
15.16. Working with C Strings of Dubious Encoding | 655

Normally, Unicode errors are often handled by specifying some sort of error policy, suchas strict, ignore, replace, or something similar. However, a downside of these policiesis that they irreparably destroy the original string content. For example, if the malformeddata in the example was decoded using one of these polices, you would get results suchas this:
>>> raw = b'Spicy Jalape\xc3\xb1o\xae'>>> raw.decode('utf-8','ignore')'Spicy Jalapeño'>>> raw.decode('utf-8','replace')'Spicy Jalapeño?'>>>
The surrogateescape error handling policies takes all nondecodable bytes and turnsthem into the low-half of a surrogate pair (\udcXX where XX is the raw byte value). Forexample:
>>> raw.decode('utf-8','surrogateescape')'Spicy Jalapeño\udcae'>>>
Isolated low surrogate characters such as \udcae never appear in valid Unicode. Thus,this string is technically an illegal representation. In fact, if you ever try to pass it tofunctions that perform output, you’ll get encoding errors:
>>> s = raw.decode('utf-8', 'surrogateescape')>>> print(s)Traceback (most recent call last): File "<stdin>", line 1, in <module>UnicodeEncodeError: 'utf-8' codec can't encode character '\udcae'in position 14: surrogates not allowed>>>
However, the main point of allowing the surrogate escapes is to allow malformed stringsto pass from C to Python and back into C without any data loss. When the string isencoded using surrogateescape again, the surrogate characters are turned back intotheir original bytes. For example:
>>> s'Spicy Jalapeño\udcae'>>> s.encode('utf-8','surrogateescape')b'Spicy Jalape\xc3\xb1o\xae'>>>
As a general rule, it’s probably best to avoid surrogate encoding whenever possible—your code will be much more reliable if it uses proper encodings. However, sometimesthere are situations where you simply don’t have control over the data encoding andyou aren’t free to ignore or replace the bad data because other functions may need touse it. This recipe shows how to do it.
656 | Chapter 15: C Extensions
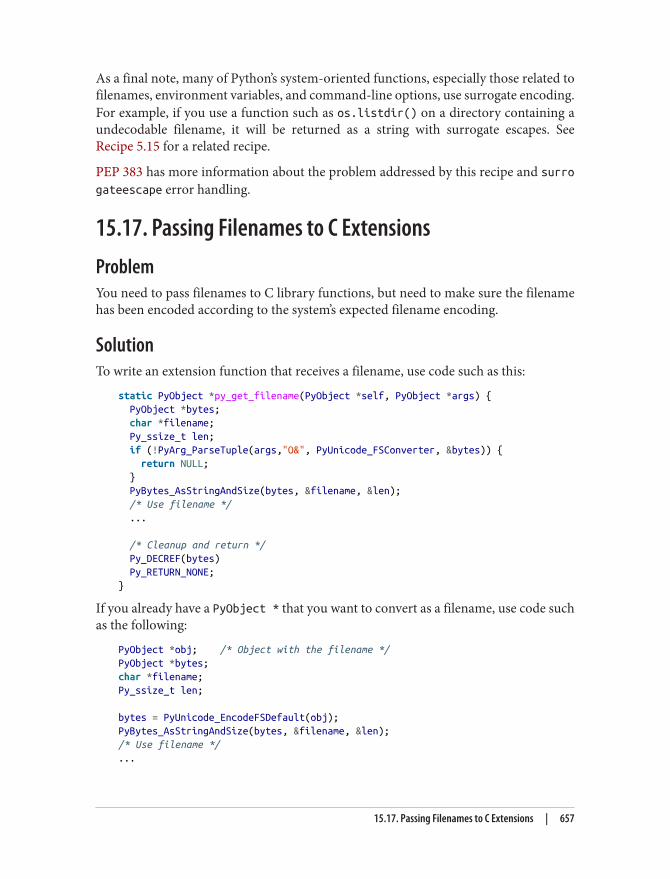
As a final note, many of Python’s system-oriented functions, especially those related tofilenames, environment variables, and command-line options, use surrogate encoding.For example, if you use a function such as os.listdir() on a directory containing aundecodable filename, it will be returned as a string with surrogate escapes. SeeRecipe 5.15 for a related recipe.
PEP 383 has more information about the problem addressed by this recipe and surrogateescape error handling.
15.17. Passing Filenames to C ExtensionsProblemYou need to pass filenames to C library functions, but need to make sure the filenamehas been encoded according to the system’s expected filename encoding.
SolutionTo write an extension function that receives a filename, use code such as this:
static PyObject *py_get_filename(PyObject *self, PyObject *args) { PyObject *bytes; char *filename; Py_ssize_t len; if (!PyArg_ParseTuple(args,"O&", PyUnicode_FSConverter, &bytes)) { return NULL; } PyBytes_AsStringAndSize(bytes, &filename, &len); /* Use filename */ ...
/* Cleanup and return */ Py_DECREF(bytes) Py_RETURN_NONE;}
If you already have a PyObject * that you want to convert as a filename, use code suchas the following:
PyObject *obj; /* Object with the filename */PyObject *bytes;char *filename;Py_ssize_t len;
bytes = PyUnicode_EncodeFSDefault(obj);PyBytes_AsStringAndSize(bytes, &filename, &len);/* Use filename */...
15.17. Passing Filenames to C Extensions | 657
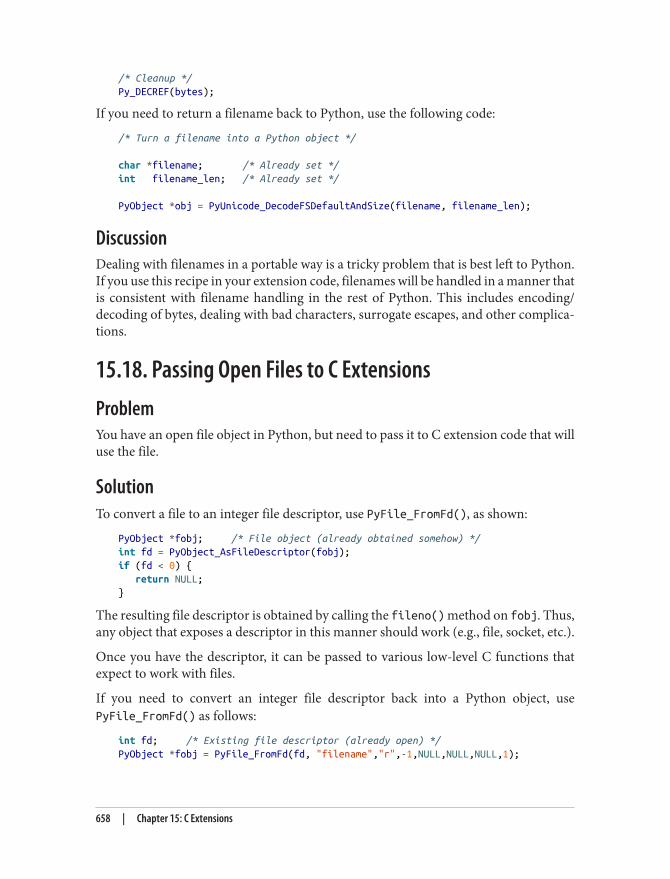
/* Cleanup */Py_DECREF(bytes);
If you need to return a filename back to Python, use the following code:
/* Turn a filename into a Python object */
char *filename; /* Already set */int filename_len; /* Already set */
PyObject *obj = PyUnicode_DecodeFSDefaultAndSize(filename, filename_len);
DiscussionDealing with filenames in a portable way is a tricky problem that is best left to Python.If you use this recipe in your extension code, filenames will be handled in a manner thatis consistent with filename handling in the rest of Python. This includes encoding/decoding of bytes, dealing with bad characters, surrogate escapes, and other complica‐tions.
15.18. Passing Open Files to C ExtensionsProblemYou have an open file object in Python, but need to pass it to C extension code that willuse the file.
SolutionTo convert a file to an integer file descriptor, use PyFile_FromFd(), as shown:
PyObject *fobj; /* File object (already obtained somehow) */int fd = PyObject_AsFileDescriptor(fobj);if (fd < 0) { return NULL;}
The resulting file descriptor is obtained by calling the fileno() method on fobj. Thus,any object that exposes a descriptor in this manner should work (e.g., file, socket, etc.).
Once you have the descriptor, it can be passed to various low-level C functions thatexpect to work with files.
If you need to convert an integer file descriptor back into a Python object, usePyFile_FromFd() as follows:
int fd; /* Existing file descriptor (already open) */PyObject *fobj = PyFile_FromFd(fd, "filename","r",-1,NULL,NULL,NULL,1);
658 | Chapter 15: C Extensions
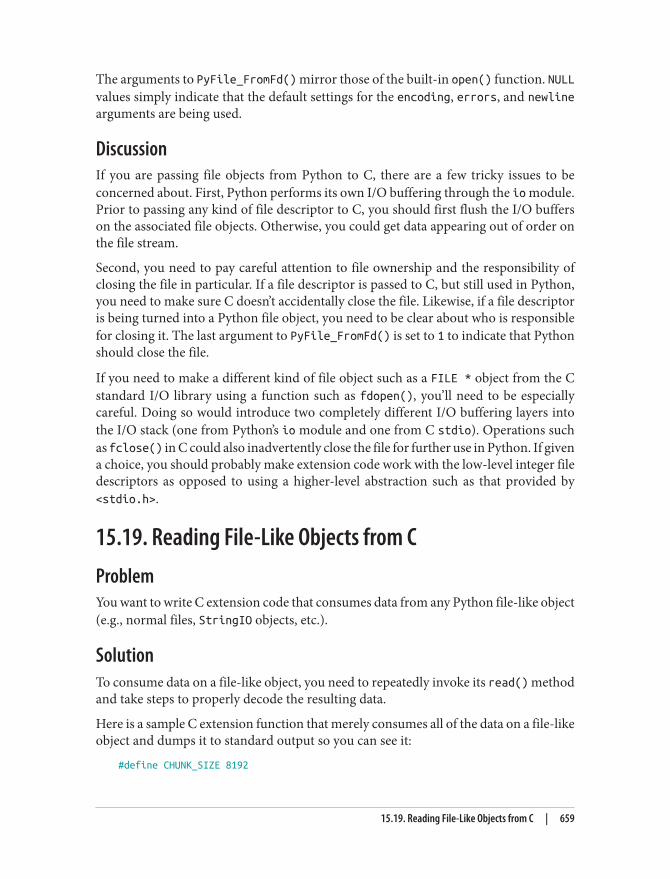
The arguments to PyFile_FromFd() mirror those of the built-in open() function. NULLvalues simply indicate that the default settings for the encoding, errors, and newlinearguments are being used.
DiscussionIf you are passing file objects from Python to C, there are a few tricky issues to beconcerned about. First, Python performs its own I/O buffering through the io module.Prior to passing any kind of file descriptor to C, you should first flush the I/O bufferson the associated file objects. Otherwise, you could get data appearing out of order onthe file stream.
Second, you need to pay careful attention to file ownership and the responsibility ofclosing the file in particular. If a file descriptor is passed to C, but still used in Python,you need to make sure C doesn’t accidentally close the file. Likewise, if a file descriptoris being turned into a Python file object, you need to be clear about who is responsiblefor closing it. The last argument to PyFile_FromFd() is set to 1 to indicate that Pythonshould close the file.
If you need to make a different kind of file object such as a FILE * object from the Cstandard I/O library using a function such as fdopen(), you’ll need to be especiallycareful. Doing so would introduce two completely different I/O buffering layers intothe I/O stack (one from Python’s io module and one from C stdio). Operations suchas fclose() in C could also inadvertently close the file for further use in Python. If givena choice, you should probably make extension code work with the low-level integer filedescriptors as opposed to using a higher-level abstraction such as that provided by<stdio.h>.
15.19. Reading File-Like Objects from CProblemYou want to write C extension code that consumes data from any Python file-like object(e.g., normal files, StringIO objects, etc.).
SolutionTo consume data on a file-like object, you need to repeatedly invoke its read() methodand take steps to properly decode the resulting data.
Here is a sample C extension function that merely consumes all of the data on a file-likeobject and dumps it to standard output so you can see it:
#define CHUNK_SIZE 8192
15.19. Reading File-Like Objects from C | 659
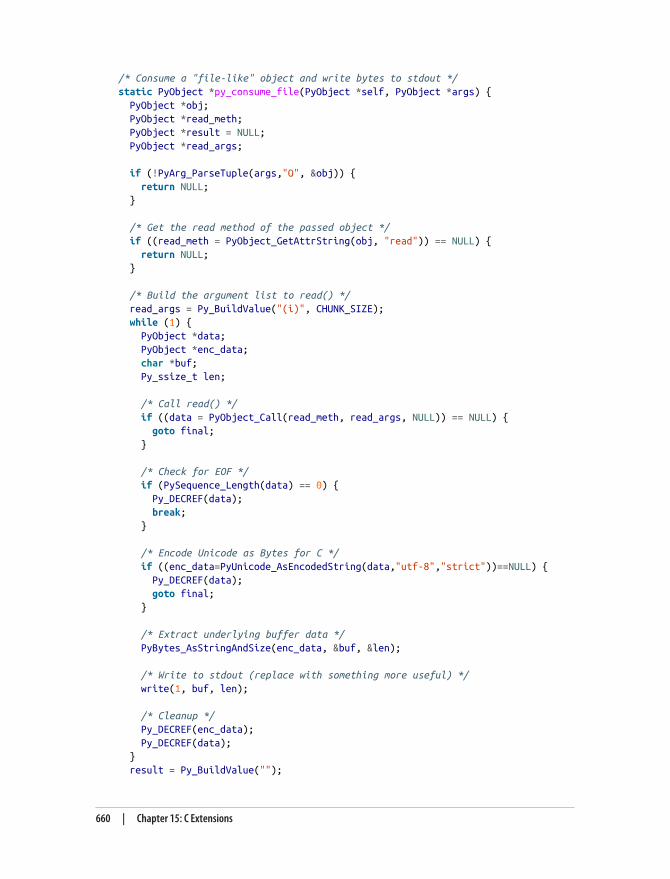
/* Consume a "file-like" object and write bytes to stdout */static PyObject *py_consume_file(PyObject *self, PyObject *args) { PyObject *obj; PyObject *read_meth; PyObject *result = NULL; PyObject *read_args;
if (!PyArg_ParseTuple(args,"O", &obj)) { return NULL; }
/* Get the read method of the passed object */ if ((read_meth = PyObject_GetAttrString(obj, "read")) == NULL) { return NULL; }
/* Build the argument list to read() */ read_args = Py_BuildValue("(i)", CHUNK_SIZE); while (1) { PyObject *data; PyObject *enc_data; char *buf; Py_ssize_t len;
/* Call read() */ if ((data = PyObject_Call(read_meth, read_args, NULL)) == NULL) { goto final; }
/* Check for EOF */ if (PySequence_Length(data) == 0) { Py_DECREF(data); break; }
/* Encode Unicode as Bytes for C */ if ((enc_data=PyUnicode_AsEncodedString(data,"utf-8","strict"))==NULL) { Py_DECREF(data); goto final; }
/* Extract underlying buffer data */ PyBytes_AsStringAndSize(enc_data, &buf, &len);
/* Write to stdout (replace with something more useful) */ write(1, buf, len);
/* Cleanup */ Py_DECREF(enc_data); Py_DECREF(data); } result = Py_BuildValue("");
660 | Chapter 15: C Extensions
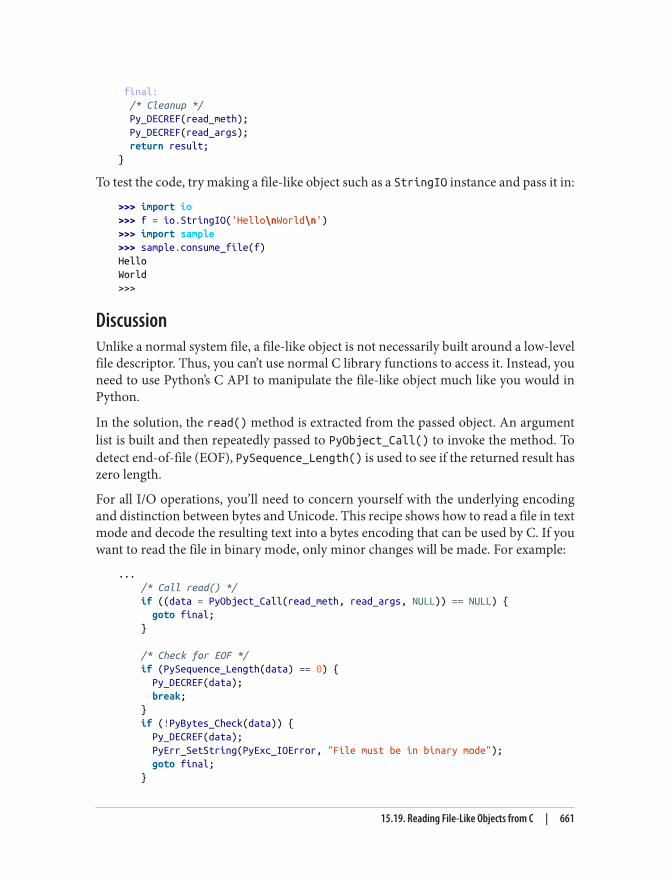
final: /* Cleanup */ Py_DECREF(read_meth); Py_DECREF(read_args); return result;}
To test the code, try making a file-like object such as a StringIO instance and pass it in:
>>> import io>>> f = io.StringIO('Hello\nWorld\n')>>> import sample>>> sample.consume_file(f)HelloWorld>>>
DiscussionUnlike a normal system file, a file-like object is not necessarily built around a low-levelfile descriptor. Thus, you can’t use normal C library functions to access it. Instead, youneed to use Python’s C API to manipulate the file-like object much like you would inPython.
In the solution, the read() method is extracted from the passed object. An argumentlist is built and then repeatedly passed to PyObject_Call() to invoke the method. Todetect end-of-file (EOF), PySequence_Length() is used to see if the returned result haszero length.
For all I/O operations, you’ll need to concern yourself with the underlying encodingand distinction between bytes and Unicode. This recipe shows how to read a file in textmode and decode the resulting text into a bytes encoding that can be used by C. If youwant to read the file in binary mode, only minor changes will be made. For example:
... /* Call read() */ if ((data = PyObject_Call(read_meth, read_args, NULL)) == NULL) { goto final; }
/* Check for EOF */ if (PySequence_Length(data) == 0) { Py_DECREF(data); break; } if (!PyBytes_Check(data)) { Py_DECREF(data); PyErr_SetString(PyExc_IOError, "File must be in binary mode"); goto final; }
15.19. Reading File-Like Objects from C | 661
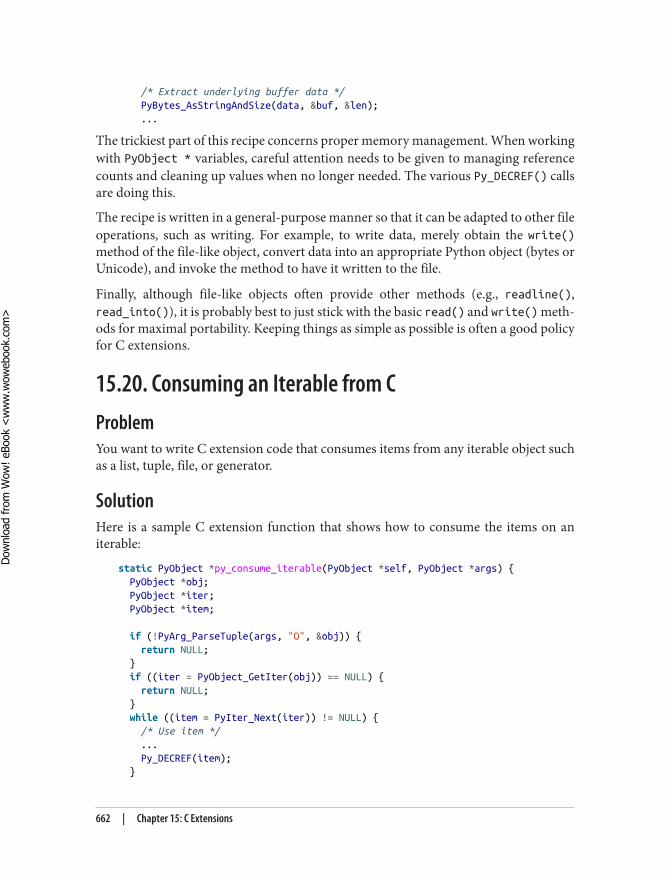
/* Extract underlying buffer data */ PyBytes_AsStringAndSize(data, &buf, &len); ...
The trickiest part of this recipe concerns proper memory management. When workingwith PyObject * variables, careful attention needs to be given to managing referencecounts and cleaning up values when no longer needed. The various Py_DECREF() callsare doing this.
The recipe is written in a general-purpose manner so that it can be adapted to other fileoperations, such as writing. For example, to write data, merely obtain the write()method of the file-like object, convert data into an appropriate Python object (bytes orUnicode), and invoke the method to have it written to the file.
Finally, although file-like objects often provide other methods (e.g., readline(),read_into()), it is probably best to just stick with the basic read() and write() meth‐ods for maximal portability. Keeping things as simple as possible is often a good policyfor C extensions.
15.20. Consuming an Iterable from CProblemYou want to write C extension code that consumes items from any iterable object suchas a list, tuple, file, or generator.
SolutionHere is a sample C extension function that shows how to consume the items on aniterable:
static PyObject *py_consume_iterable(PyObject *self, PyObject *args) { PyObject *obj; PyObject *iter; PyObject *item;
if (!PyArg_ParseTuple(args, "O", &obj)) { return NULL; } if ((iter = PyObject_GetIter(obj)) == NULL) { return NULL; } while ((item = PyIter_Next(iter)) != NULL) { /* Use item */ ... Py_DECREF(item); }
662 | Chapter 15: C Extensions
Dow
nlo
ad fro
m W
ow
! eBook
<w
ww
.wow
ebook.
com
>

Py_DECREF(iter); return Py_BuildValue("");}
DiscussionThe code in this recipe mirrors similar code in Python. The PyObject_GetIter() callis the same as calling iter() to get an iterator. The PyIter_Next() function invokesthe next method on the iterator returning the next item or NULL if there are no moreitems. Make sure you’re careful with memory management—Py_DECREF() needs to becalled on both the produced items and the iterator object itself to avoid leaking memory.
15.21. Diagnosing Segmentation FaultsProblemThe interpreter violently crashes with a segmentation fault, bus error, access violation,or other fatal error. You would like to get a Python traceback that shows you where yourprogram was running at the point of failure.
SolutionThe faulthandler module can be used to help you solve this problem. Include thefollowing code in your program:
import faulthandlerfaulthandler.enable()
Alternatively, run Python with the -Xfaulthandler option such as this:
bash % python3 -Xfaulthandler program.py
Last, but not least, you can set the PYTHONFAULTHANDLER environment variable.
With faulthandler enabled, fatal errors in C extensions will result in a Python trace‐back being printed on failures. For example:
Fatal Python error: Segmentation fault
Current thread 0x00007fff71106cc0: File "example.py", line 6 in foo File "example.py", line 10 in bar File "example.py", line 14 in spam File "example.py", line 19 in <module> Segmentation fault
Although this won’t tell you where in the C code things went awry, at least it can tell youhow it got there from Python.
15.21. Diagnosing Segmentation Faults | 663
DiscussionThe faulthandler will show you the stack traceback of the Python code executing atthe time of failure. At the very least, this will show you the top-level extension functionthat was invoked. With the aid of pdb or other Python debugger, you can investigate theflow of the Python code leading to the error.
faulthandler will not tell you anything about the failure from C. For that, you willneed to use a traditional C debugger, such as gdb. However, the information from thefaulthandler traceback may give you a better idea of where to direct your attention.
It should be noted that certain kinds of errors in C may not be easily recoverable. Forexample, if a C extension trashes the stack or program heap, it may render faulthandler inoperable and you’ll simply get no output at all (other than a crash). Obviously,your mileage may vary.
664 | Chapter 15: C Extensions
APPENDIX A
Further Reading
There are a large number of books and online resources available for learning andprogramming Python. However, if like this book, your focus is on the use of Python 3,finding reliable information is made a bit more difficult simply due to the sheer volumeof existing material written for earlier Python versions.
In this appendix, we provide a few selected links to material that may be particularlyuseful in the context of Python 3 programming and the recipes contained in this book.This is by no means an exhaustive list of resources, so you should definitely check tosee if new titles or more up-to-date editions of these books have been published.
Online Resourceshttp://docs.python.org
It goes without saying that Python’s own online documentation is an excellent re‐source if you need to delve into the finer details of the language and modules. Justmake sure you’re looking at the documentation for Python 3 and not earlier ver‐sions.
http://www.python.org/dev/pepsPython Enhancement Proposals (PEPs) are invaluable if you want to understandthe motivation for adding new features to the Python language as well as subtleimplementation details. This is especially true for some of the more advanced lan‐guage features. In writing this book, the PEPs were often more useful than theofficial documentation.
http://pyvideo.orgThis is a large collection of video presentations and tutorials from past PyCon con‐ferences, user group meetings, and more. It can be an invaluable resource for learn‐ing about modern Python development. Many of the videos feature Python coredevelopers talking about the new features being added in Python 3.
665
http://code.activestate.com/recipes/langs/pythonThe ActiveState Python recipes site has long been a resource for finding the solutionto thousands of specific programming problems. As of this writing, it containsapproximately 300 recipes specific to Python 3. You’ll find that many of its recipeseither expand upon topics covered in this book or focus on more narrowly definedtasks. As such, it’s a good companion.
http://stackoverflow.com/questions/tagged/pythonStack Overflow currently has more than 175,000 questions tagged as Python-related(and almost 5000 questions specific to Python 3). Although the quality of the ques‐tions and answers varies, there is a lot of good material to be found.
Books for Learning PythonThe following books provide an introduction to Python with a focus on Python 3:
• Learning Python, 4th Edition, by Mark Lutz, O’Reilly & Associates (2009).• The Quick Python Book, 2nd Edition, by Vernon Ceder, Manning (2010).• Python Programming for the Absolute Beginner, 3rd Edition, by Michael Dawson,
Course Technology PTR (2010).• Beginning Python: From Novice to Professional, 2nd Edition, by Magnus Lie Het‐
land, Apress (2008).• Programming in Python 3, 2nd Edition, by Mark Summerfield, Addison-Wesley
(2010).
Advanced BooksThe following books provide more advanced coverage and include Python 3 topics:
• Programming Python, 4th Edition, by Mark Lutz, O’Reilly & Associates (2010).• Python Essential Reference, 4th Edition, by David Beazley, Addison-Wesley (2009).• Core Python Applications Programming, 3rd Edition, by Wesley Chun, Prentice Hall
(2012).• The Python Standard Library by Example, by Doug Hellmann, Addison-Wesley
(2011).• Python 3 Object Oriented Programming, by Dusty Phillips, Packt Publishing (2010).• Porting to Python 3, by Lennart Regebro, CreateSpace (2011), http://python3port
ing.com.
666 | Appendix A: Further Reading
We’d like to hear your suggestions for improving our indexes. Send email to [email protected].
Index
Symbols!r formatting code, 244% (percent) operator, 58, 556
format() function vs., 88* (star) operator
EBNFs and, 70**kwargs, 218
decorators and, 331enforcing signature on, 364–367help function and, 219wrapped functions and, 353
*args, 217decorators and, 331enforcing signature on, 364–367wrapped functions and, 353
+ (plus) operator, 48, 59-O option (interpreter), 343-OO option (interpreter), 343-W (warnings), 584
all option, 583error option, 584ignore option, 584
. (dot) operator, 49, 591< (less than) operator, date comparisons with,
108== operator, 462? (question mark) modifier in regular expres‐
sions, 48\$ (end-marker) in regular expressions, 44
_ (single underscore)avoiding clashes with reserved words, 251naming convention and, 250
__ (double underscore), naming conventionsand, 250
Aabc module, 274abspath() (os.path module), 551abstract base classes, 274–276
collections module and, 283–286predefined, 276
abstract syntax tree, 388–392abstraction, gratuitous, 593@abstractmethod decorator (abc module), 275accepting script via input files, 539accessor functions, 238–241
adjusting decorators with, 336–339ACCESS_COPY (mmap module), 155ACLs, 548actor model, 516–520addHandler() operation (logging module), 559add_argument() method (ArgumentParser
module), 543, 544Advanced Programming in the Unix Environ‐
ment, 2e (Stevens, Rago), 538algorithms, 1–35
filtering sequence elements, 26–28
667
finding most frequent item (sequences), 20–21
limited history, keeping, 5–7sorting for largest/smallest N items, 7–8unpacking, 1–5
anonymous functionsdefining, 224–225variables, capturing, 225–227
Apache web server, 451append() method (ElementTree module), 193%apply directive (Swig), 631archives
creating, 549formats of, 550unpacking, 549
argparse module, 541, 543, 544.args attribute (Exceptions), 579ArgumentParser instance, 543arguments
annotations, 220cleaning up in C extensions, 623multiple-dispatch, implementing with, 376–
382arrays
calculating with large numerical, 97–100high-performance with Cython, 638–642in C extensions, 603large, sending/receiving, 481–483NumPy and, 97–100operating on, with extension functions, 609–
612readinto() method and, 152writing to files from, 147
assertRaises() method (unittest module), 570,571
assertRaisesRegex() method (unittest module),571
ast module, 78, 311, 388–392asynchronous processing, 232–235attrgetter() function (operator module), 24authentication
encryption vs., 463hmac module, 461–463passwords, prompting at runtime, 544requests package and, 439simple, 461–463testing with httpbin.org, 441
Bb16decode() function (base64 module), 199
binascii functions vs., 198b16encode() function (base64 module), 199
binascii functions vs., 198base64 module, 199
binascii module vs., 198BaseException class, 577–579
except statements and, 576BaseRequestHandler (socketserver module),
443basicConfig() function (logging module), 556–
557bin() function, 89–90binary data
arrays of structures, reading/writing, 199–203
encoding with base64 module, 199memory mapping, 153–156nested records, reading, 203–213reading into mutable buffers, 152–153reading/writing, 145–147unpack_from() method and, 202variable-sized records, reading, 203–213
binary integers, 89–90binascii module, 197–198bind() method (Signature objects), 344, 364bind_partial() method (Signature objects), 343bit_length() method (int type), 92BNF, 69boundscheck() decorator (Cython), 641buffer attribute (files), 165Buffer Protocol, 147, 609BufferedWriter object (io module), 164built-ins
containers, 593exception class, 578methods, overriding, 256
byte stringsas return value of read(), 146encoding with base64, 199indexing of, 79performing text operations on, 78–81printing, 80writing to text files, 165
bytes, interpreting as text, 546BytesIO() class (io module), 148–149, 570bz2 compression format, 550
668 | Index
bz2 module, 149–151compresslevel keyword, 150
CC APIs, 612–614C extension programming, 566, 597
APIs, defining/exporting, 612–614aquiring GIL in, 624capsule objects in, 612–614ctypes module and, 599–605Cython, wrapping code in, 632–638file-like objects, reading, 659–662filenames, passing to, 657–658function pointers, converting to callables,
643–644GIL and, 515–516GIL, releasing in, 625iterables from C, consuming, 662–663loading modules, 601modules, building, 607null-terminated strings, passing, 644–648opaque pointers in, 612–614open files, passing to, 658–659operating on arrays with, 609–612Python callables in, 619–624Python/C threads, mixing, 625–626segmentation faults and, 663–664strings, converting to Python objects, 653–
654Swig, wrapping with, 627–631Unicode strings, passing, 648–653unknown string type and, 654–657writing, modules, 605–609
C structures, 147calendar module, 108__call__() method (metaclasses), 347–349, 356callback functions
carrying extra state with, 232–235inlining, 235–238
capsule objects, 612–614C APIs, defining/exporting with, 612–614
Celery, 457center() method (str type), 57certificate authorities, 468CFFI, 605CFUNCTYPE instances (ctypes module), 643chain() method (itertools module), 131–132chained exceptions, 581, 582
ChainMap class (collections module), 33–35update() method vs., 35
chdir() function (os module), 537check_output() function (subprocess class), 546Chicago, Illinois, 186, 214choice() function (random module), 102__class__ attribute, 302–304class decorators, 279, 355–356
data models and, 281mixin classes vs., 281mixins and, 298
classes, 243–327abstract base classes, 274–276attribute definition order, 359–362caching instances of, 323closures vs., 238–241coding conventions in, 367–370constructors, multiple, 291–292containers, custom, 283–286data models, implementing, 277–283decorators, 279decorators, defining in, 345–347defining decorators as, 347–349delegating attributes, 287–291descriptors and, 264–267extending properties in subclasses, 260–264extending with mixins, 294–299implementing state for objects/machines,
299–305inheritance, implementation of, 258initializing members at definition time, 374–
375initializing of data structures in, 270–274lazy attributes and, 267mixins, 260, 294–299private data in, 250–251replacing with functions, 231–232statements, metaclass keyword in, 362–364super() function and, 256–260supporting comparison operations, 321–323type system, implementing, 277–283__init__() method, bypassing, 293–294
@classmethod decorator, 330decorating class methods with, 350–352__func__ attribute and, 334
client module (http package), 440clock() function (time class), 561close() method (generators), 531closefd argument (open() function), 166
Index | 669
closuresaccessing variables inside, 238–241capturing state with, 233–234classes vs., 238–241converting classes to functions with, 231nonlocal declarations and, 239
cmath module, 93code readability and string templates, 453coding conventions, 367–370collections module
ChainMap class, 33–35Counter class, 20–21defaultdict class, 11deque class, 5–7implementing custom containers with, 283–
286namedtuple() function, 30OrderedDict class, 12–13
combinations() function (itertools module), 126combinations_with_replacement() function
(itertools module), 126combining() function (unicodedata module), 51command-line options, parsing, 539, 541, 542compare_digest() function (hmac module), 462comparison operations, 321–323compile() function (ast module), 390compile() function (re module), 49complex() function, 92complex-valued math, 92–94compress() function (itertools module), 28compressed files, reading/writing, 149–151
specifying level of, 150concurrency, 485–538
actor model and, 516–520coroutines, 524–531event-driven I/O and, 479GIL, 513–516parallel programming, 509–513polling thread queues, 531–534threads, 485–488with generators, 524–531
Condition object (threading module), 489conditionals and NaN values, 95config file
Python code vs., 554Python source file vs., 553
ConfigParser module, 552–555configuration files, 552connect() function (sqlite3 module), 196
connection (multiprocessing module), 456–458constructors, defining multiple, 291–292containers, custom, 283–286
iterating over items in separate, 131–132__iter__() method and, 114–115
context managersdefining, 384–385use instance as, 540
context-management protocols, 246–248contextlib module, 238@contextmanager decorator (contextlib mod‐
ule), 238, 385contextmanager module, 248cookies, 439copy2() function (shutil module), 548copying directories/files, 547copytree() function (shutil class), 548–549coroutines, 524–531
capturing state with, 233inlining callback functions with, 235
Counter objects (collections module), 20–21country_timezones dictionary (pytz module),
112cProfile module, 587CPU-bound programs, 514CPUs, restricting use of, 561critical() function (logging module), 556cryptography, 103CSV files, reading/writing, 175–179csv module, 175–179ctypes module, 599–605
alternatives to, 604memory addresses, wrapping, 643–644
custom exceptions, 578Cython, 604
array handling with, 612high-performance arrays with, 638–642memoryviews in, 640releasing the GIL, 636setup.py file, 633, 639wrapping existing code in, 632–638
Ddaemon processes (Unix), 534–538daemonic threads, 486data
pickle module and, 171–174serializing, 171–174
670 | Index
Dow
nlo
ad fro
m W
ow
! eBook
<w
ww
.wow
ebook.
com
>
transforming/reducing simultaneously, 32–33
data analysis, 178data encapsulation, 250–251data encoding
CSV files, reading/writing, 175–179for RPCs, 460hexadecimal digits, 197–198JSON, reading/writing, 179–183with base64 module, 199XML, extracting data from, 183–186
data models, 277–283data processing
dictionaries, converting to XML, 189–191nested binary records, reading, 203–213parsing large XML files, 186–189relational databases and, 195–197statistics, 214–216summarizing, 214–216variable-sized binary records, reading, 203–
213XML namespaces, 193–195XML, parsing/modifying/rewriting, 191–193
data structures, 1–35, 593cyclic, managing memory in, 317–320dictionaries
grouping records by field, 24–26sorting by common keys, 21–23
heaps, 7–11initializations of, simplifying, 270–274multidicts, 11–12
database API (Python), 195–197strings and, 197
datagrams, 445date calculations, 106–107datetime module, 104–112
databases and, 197date calculations with, 106–107replace() method, 108strptime() method, 109time conversions, 104–105time zones and, 110timedelta object, 104
dateutil module, 105deadlock avoidance, 503deadlocks, 500–503
dining philosophers problem, 503watchdog timers and, 503
__debug__ variable, 343
debug() function (logging module), 556debugger, launching, 585debugging, 584decimal module, 84–86
databases and, 197formatting output of, 88
decode() method (str type), 56decorators, 329–356
adding function arguments with, 352–354adjustable attributes for, 336–339class methods, applying to, 350–352defining as class, 347–349defining in classes, 345–347forcing type checking with, 341–345multiple-dispatch, implementing with, 381optional arguments for, 339–341patching classes with, 355–356preserving function metadata in, 331–333static methods, applying to, 350–352unwrapping, 333–334with arguments, 334–336wrappers as, 329–331__wrapped__ attribute, 332
deepcopy() function (copy module), 594defaultdict object (collections module), 11
groupby() function vs., 26ordinary dictionary vs., 12
__delattr__() method (delegation), 290delegation
inheritance vs., 289of attributes, 287–291
__delete__() method (descriptors), 265DeprecationWarning argument (warn() func‐
tion), 583deque class (collections module), 5–7
appending, 6popping, 6
descriptorscreating, 264–267data models, implementing, 277–283extending, 263lazy attributes and, 267–270type system, implementing, 277–283
deserializing data, 293–294Design Patterns: Elements of Reusable Object-
Oriented Software (Gamma, Helm, Johnson,and Vlissides), 305
dest argument (add_argument() method), 544detach() method, 164
Index | 671
dict() function, 29, 594dictionaries
comparing, 15–16converting to XML, 189–191Counter objects and, 21defaultdict vs., 12grouping records based on field, 24–26JSON support for, 179keeping in order, 12–13multiple values for a single key in, 11–12removing duplicates from, 17sorting, 13–15sorting list of, by common key, 21–23subsets, extracting, 28–29
dictionary comprehension, 29dining philosophers problem (deadlocks), 503directories
as runnable scripts, 407–408copying, 547moving, 547temporary, 167–170
directory listings, 158–159dis module, 392–395discarding vs. filtering iterables, 124distributed systems and property calls, 255domain sockets (Unix), 457, 470
connecting interpreters with, 472DOTALL flag (re module), 49dropwhile() function (itertools module), 123dump() function (pickle module), 171dumps() function (json module), 179
indent argument, 181sort_keys argument, 182
dumps() function (pickle module), 171dup2() function (os module), 537
EEBNF, 69ElementTree module (xml.etree), 66, 183–186
creating XML documents with, 189–191iterparse() function, 188parse() function, 185parse_and_remove() function, 189parsing namespaces and, 194parsing/modifying/rewriting files with, 191–
193empty() method (queue module), 496encode() method (str type), 56
encoding text data, 141–144changing in open files, 163–165passing to C libraries, 648–653pickling and, 174
encryption vs. authentication, 463end argument (print() function), 144endswith() method (str type), 38
pattern matching with, 42__enter__() method (with statements), 246–248enumerate() function, 127–128environ argument (WSGI), 451error messages, terminating program with, 540error() function (logging module), 556escape() function (html module), 65escape() function (xml.sax.saxutils module), 191Event object (threading module), 488–491event-driven I/O, 475–481except statement, 576, 580
chained exceptions and, 581reraising exceptions caught by, 582
Exception class, 579handler for, 576
exceptionscatching all, 576creating custom, 578handling multiple, 574raising in response to another exception, 580reraising, 582SystemExit, 540testing for, 570with statements and, 247
exec() function, 386–388execve() function (os module), 546__exit__() method (with statements), 246–248@expectedFailure decorator, 574exponential notation, 87%extend directive (Swig), 630external command
executing, 545getting output, 545
Ffactory functions, 323faulthandler module, 663–664fdel attribute (properties), 253fget attribute (properties), 253FieldStorage() class (cgi module), 452file descriptor
passing between processes, 470–475
672 | Index
wrapping in object, 166file-like objects, reading from C, 659–662FileInput class, 540
helper methods, 540fileinput module (built-in), 539FileIO class (io module), 164FileNotFoundError exception, 575files, 141–174
accepting scripts via, 539binary data, reading/writing, 145–147bypassing name encoding, 160–161bytes, writing to text, 165changing encoding in open, 163–165compressed, reading/writing, 149–151copying, 547creating new, 147–148defining modules in multiple, 401–404detach() method, 164directory listings, getting, 158–159finding by name, 550getfilesystemencoding() function (sys mod‐
ule), 160–161headers, unpacking, 205iterating over fixed-sized records in, 151line ending, changing, 144–145manipulating pathnames of, 156–157memory mapping, 153–156moving, 547mutable buffers, reading into, 152–153names, passing to C extensions, 657–658newlines, 142open() function, 141–144open, passing to C extensions, 658–659path module (os), 156–157printing bad filenames for, 161–163printing to, 144reading, 408–409readinto() method of, 147saving objects to, 171–174separator character, changing, 144–145temporary, 167–170testing for existence of, 157–158text data from, 141–144unpacking, 2wrapping descriptors in objects, 166x mode of open() function, 147–148
files list, 551filesystem, byte strings and, 80fill() function (textwrap module), 65
filter() function, 27filtering
discarding iterables vs., 124normalization of Unicode text and, 51sequence elements, 26–28token streams, 68
find Unix utility, 551find() method (str type)
pattern matching with, 42search/replace text and, 46
findall() method (re module), 43finditer() method (re module), 44find_library() function (ctypes.util module),
601float()
decimal arithmetic and, 84–86format() function (built-in), 87–88j suffix for, 92
fnmatch module, 40–42fnmatch() function (fnmatch module), 40–42fnmatchcase() function (fnmatch module), 40–
42for loops
consuming iterators manually vs., 113–114generators and, 115–117
fork() function (os module), 537ForkingTCPServer objects (socketserver mod‐
ule), 442ForkingUDPServer objects (socketserver mod‐
ule), 446format() function (built-in )
and non-decimal integers, 89floats, specifying precision with, 84formatting output with, 244
format() function (built-in), 87–88format() method (str type), 57
customizing string, 245–246interpolating variables, 61–64
__format__() method, 245–246format_map() method (str type), 62fpectl module, 95fractions module, 96–96frame hacking, 373from module import * statement (modules), 398
reload() function and, 406from module import name, 591fromkeys() method (dict type), 55from_bytes() method (int type), 91fset attribute (properties), 253
Index | 673
fsum() function (math module), 86full() method (queue module), 496functions, 217–241
accepting arbitrary arguments for, 217–218accessor functions as attributes of, 238–241anonymous/inline, defining, 224–225argument annotations, 220calling with fewer arguments, 227–230closures, accessing variables inside, 238–241default arguments for, 222–224disassembling, 392–395inlining callbacks, 235–238keyword arguments only, 219–220multiple return values for, 221partial() function and, 227–230pointers, converting to callables, 643–644replacing classes with, 231–232state, carrying, 232–235wrapper layers for, 329–331wrapping with Cython, 632–638
futures module (concurrent module), 479, 505–509ProcessPoolExecutor class, 509–513
FutureWarning argument (warn() function),583
Ggarbage collection
caching instances and, 325cyclic data structures and, 318
gauss() function (random module), 103gdb debugger, 663–664General Decimal Arithmetic Specification
(IBM), 86generator expressions
concatenating/combining strings and, 60filtering sequence elements with, 26flattening nested sequences with, 135–136recursive algorithms vs., 311–317transforming/reducing data with, 32–33
Generator Tricks for Systems Programmers(Beazley), 135
generator-expression argument, 32GeneratorExit exception, 577generators, 113–139
concurrency with, 524–531creating iterator patterns with, 115–117defining with extra states, 120inlining callback functions with, 235
islice() function and, 122–123iterator protocol, implementing, 117–119pipelines, creating with, 132–135search functions and, 6slicing, 122–123unpacking, 2
GET requests (HTTP), 437get() function (webbrowser class), 563get() method (ElementTree module), 185get() method (queue module), 491, 495__get__() method, 347–349
descriptors, 265–266getattr() function, 305
visitor patterns and, 310__getattr__() method (delegation), 287, 290getboolean() method (ConfigParser module),
554getdefaultencoding() function (sys module), 142getfilesystemencoding() function (sys module),
160–161getframe() (sys module), 63
frame hacking with, 373__getitem__() method, 23getLogger() function (logging module), 558getpass module, 544getpass() method (getpass module), 545getrandbits() function (random module), 103getrecursionlimit() function (sys module), 310gettempdir() function (tempfile module), 169getuser() (getpass module), 544get_archive_formats() function (shutil module),
550get_data() function (pkgutil module), 409get_terminal_size() function (os module), 65,
545gevent module, 531glob module, 42Global Interpreter Lock (GIL), 487, 513–516
C, calling Python from, 624C/Python threads, mixing, 625–626releasing in C extensions, 625releasing in Cython, 636thread pools and, 508
grammar rules, for parsers, 69–78greenlets, 531.group() method (re module), 46groupby() function (itertools module), 24–26grouping records, in dictionaries, 12gzip compression format, 550
674 | Index
gzip module, 149–151compresslevel keyword, 150
Hhard limit on resources, 562hashes, 17heappop() method (heapq module), 8
priority queues and, 9heapq module, 7–8
merge() function, 136–137heaps, 7–11
nlargest()/nsmallest() functions and, 8reversing order of, 10
help functionkeyword arguments and, 219metadata for arguments and, 220
hex() function, 89–90hexadecimal digits, encoding, 197–198hexadecimal integers, 89–90hmac module, 461–463HTML entities
handling in text, 65–66replacing, 66
html module, 65HTTP services
clients, 437–441headers, custom, 438testing client code, 441
httpbin.org service, 441
II/O, 141–174
decoding/encoding functions for, 56event-driven, 475–481iter() function and, 139objects, serializing, 171–174operations on strings, 148–149passing open files and, 659serial ports, communicating with, 170–171thread termination and, 487
IDEs for Python development, 587__init__() method, data structures and, 273
if-elif-else blocks, 304IGNORECASE flag (re module), 47ignore_patterns() function (shutil module), 548ignore_types argument (isinstance() function),
135
import hooks, 418–420patching modules on import, 428–431sys.path_hooks variable and, 420
import statement, 412–428ImportError exceptions, 425importlib module, 421import_module() function (importlib module),
411, 430index-value pairs, iterating over, 127–128IndexError exception, 19indexing in CSV files, 175–179indices() method (slice), 19infinite values, 94–95info() function (logging module), 556inheritance
class decorators and, 356class defined decorators and, 347delegation vs., 289implementation of, 258
.ini file features, 555__init__() method (classes), 579
bypassing, 293–294coding conventions and, 367–370data structure initialization and, 270–274mixins and, 297multiple constructors and, 291–292optional arguments and, 363super() function and, 256–260
inline functionscallbacks, 235–238defining, 224–225
input files, 539input() function (fileinput), 540insert() method (ElementTree module), 193inspect() module, 364–367instances
cached, metaclasses and, 358creation, controlling with metaclasses, 356–
359descriptors and, 264–267saving memory when creating, 248–249serializing with JSON, 182WSGI applications as, 452
int type, 90–92int() function, 90interface files (Swig), 627interpreters, communication between, 456–458invalidate_caches() function (importlib mod‐
ule), 427
Index | 675
io module, 148–149, 163–165ioctl(), 545IPv4Address objects (ipaddress module), 448is operator, 223isinf() function (math module), 94isinstance() function, 135islice() function (itertools module), 122–123,
124isnan() function (math module), 94issuing warning messages, 583is_alive() method (Thread class), 486itemgetter function (operator module), 22items() method (dictionaries), 16iter() function
fixed size records and, 151while loops vs., 138–139
__iter__() method (iterators), 114–115generators with extra states and, 121
iterablescustom containers for, 283–286discarding parts of, 123–125from C, consuming, 662–663sorted/merged, iterating over, 136–137unpacking, 1–2
iteratingall possible combinations/permutations,
125–127chain() method (itertools module), 131–132iter() function vs. while loops, 138–139merge() function (heapq module), 136–137over fixed-sized records, 151over index-value pairs, 127–128over separate containers, 131–132over sorted/merged iterables, 136–137reverse, 119zip() function and, 129–130
iterators, 113–139consuming manually, 113–114creating patterns with generators, 115–117delegating, 114–115islice() function (itertools module), 122–123protocol, implementing, 117–119slicing, 122–123
iterparse() function (ElementTree module), 188iterparse() method (ElementTree module), 194itertools module, 123–125, 125–127
compress() function, 28groupby() function, 24–26
iter_as() function, 211
Jjoin() method (str type), 58–61
changing single characters with, 145join() method (Thread class), 486JSON (JavaScript Object Notation)
reading/writing, 179–183types supported by, 179
json module, 179–183just-in-time (JIT) compiling, 590, 594
Kkey argument (sorted() function), 23KeyboardInterrupt exception, 577, 578keys() method (dictionaries), 16keyword arguments, 218
annotations, 220for metaclasses, 362–364functions that only accept, 219–220help function and, 219
Llambda expressions, 24, 225
variables, capturing, 225–227launching
Python debugger, 585web browsers, 562
lazy imports, 403lazy unpacking, 212leap years, datetime module and, 104libraries, adding logging to, 558limited history, 5–7linalg subpackage (NumPy module), 101linear algebra, 100–101list comprehension, 26listdir() function (os module), 158–159
bad filenames, printing, 161–163lists
NumPy vs., 99processing and star unpacking, 5unpacking, 2
ljust() method (str type), 57llvmpy extension module, 643load() function (pickle module), 171
untrusted data and, 172LoadLibrary() function (ctypes.cdll module),
601loads() function (json module), 179
676 | Index
loads() function (pickle module), 171loadTestsFromModule() method (TestLoader
module), 573loadTestsFromTestCase() method (TestCase
module), 573local() method (threading module), 504–505locale module, 88locals() function and exec() function, 386–388Lock objects (threading module), 497–500logging
adding to libraries, 558adding to simple scripts, 555output of, 557test output to file, 572
logging module, 557, 559critical(), 556debug(), 556error(), 556info(), 556warning(), 556
lower() method (str type), 54lstrip() method (str type), 53lxml module, 195
MMagicMock instances, 568makefile() method (socket module), 167make_archive() function (shutil module), 549MANIFEST.in file, 434manipulating pathnames, 156–157map() operation (ProcessPoolExecutor class),
511Mapping class (collections module), 283mappings
class definition order and, 362consolidating multiple, 33–35
match() method (re module), 43search/replace text and, 46
math() module, 94matrix calculations, 100–101matrix object (NumPy module), 100max() function, 8, 15
attrgetter() function and, 24generator expressions and, 33itemgetter() function, 23
memorymanagement in cyclic data structures, 317–
320mapping, 153–156
OrderedDict objects and, 13parsing XML and, 186–189restricting use of, 561wchar_t strings and, 651__slots__ attribute and, 248–249
memory mapping, 153–156MemoryError exceptions, 562memoryview() object (struct module), 153, 206,
213Cython-typed, 640large arrays and, 481–483
memory_map() function (mmap module), 154merge() function (heapq module), 136–137Mersenne Twister algorithm, 103meta path importer, 414–418
sys.metapath object, 418metaclass keyword (class statement), 362–364metaclasses, 279
capturing attribute definition order, 359–362controlling instance creation, 356–359enforcing coding conventions, 367–370initializing members at definition time, 374–
375non-standardized binary files and, 207optional arguments for, 362–364__prepare__() method and, 361
metaprogramming, 329–395adjustable attributes, 336–339decorators, 329–356decorators with arguments, 334–336dis module, 392–395exec() function vs., 386–388function metadata in decorators, 331–333function wrappers, 329–331repetitive property methods and, 382–384unwrapping decorators, 333–334
method overloading, 376–382methodcaller() function (operator module), 305Microsoft Excel, CSV encoding rules of, 177Microsoft Visual Studio, 608min() function, 8, 15
attrgetter() function and, 24generator expressions and, 33itemgetter() function, 23
__missing__() method (dict module), 62mixin classes, 260
extending unrelated classes with, 294–299in descriptors of data models, 280
mkdtemp() function (tempfile module), 169
Index | 677
Dow
nlo
ad fro
m W
ow
! eBook
<w
ww
.wow
ebook.
com
>

mkstemp() function (tempfile module), 169mmap module, 153–156mock module (unittest module), 565, 570module import * statement, 398–399modules, 397–435
controlling import of, 398–399from module import * statement, 398hierarchical packages of, 397–398import hooks, using, 412–428importing with relative names, 399–401importing, using string as name, 411importlib module, 421import_module() function (importlib mod‐
ule), 411invalidate_caches() function (importlib
module), 427meta path importer, 414–418new_module() function (imp module), 421objects, creating, 421patching on import, 428–431relative imports vs. absolute names, 400reloading, 406–407remote machines, loading from, 412–428splitting into multiple files, 401–404sys.path, adding directories to, 409–411sys.path_importer_cache object, 424virtual environments and, 432–433__all__ variable in, 398–399__init__.py file, 397__main__.py files, 407–408
monthrange() function (calendar module), 108months, finding date ranges of, 107–109moving directories/files, 547__mro__ attribute, 576multidicts, 11–12multiple-dispatch, 376–382multiprocessing module, 488
GIL and, 514passing file descriptors with, 470–475reduction module, 470–475RPCs and, 459
mutable buffers, reading into, 152–153MutableMapping class (collections module),
283MutableSequence class (collections module),
283MutableSet class (collections module), 283
Nnamed pipes (Windows), 457, 470, 472NamedTemporaryFile() function (tempfile
module), 169namedtuple() function (collections module), 30namedtuple() method (collections module)
new_class() function and, 372unpacking binary data and, 203
NameError exception, 581namespace package, checking for, 426namespaces (XML), parsing, 193–195namespaces, multiple directories in, 404–406naming conventions
for private data, 250–251__ (double underscore) and, 250
NaN (not a number) values, 94–95in JSON, 183isnan() function and, 95
nested sequences, flattening, 135–136network programming, 437–483
connection (multiprocessing module), 456–458
event-driven I/O, 475–481hmac module, 461–463interpreters, communication between, 456–
458large arrays, sending/receiving, 481–483passing file descriptors, 470–475remote procedure calls, 454–456, 458–461simple authentication, 461–463socketserver module, 441–444SSL, implementing, 464–470TCP servers, 441–444UDP server, implementing, 445–446UDPServer class, 446XML-RPC, 454–456
__new__() method (classes)coding conventions and, 367–370optional arguments and, 363
newlines, 142new_class() function (types module), 370–373new_module() function (imp module), 421next() function (iterators), 113nlargest() function (heapq module), 7–8nonblocking, supporting with queues, 495noncapture groups (regular expressions), 49nonlocal declarations, 239
adjusting decorators with, 336–339
678 | Index
normalize() function (unicodedata module), 51,55
normalize() method (pytz module), 111normalizing Unicode, 50–51
supported forms in Python, 51normpath() (os.path module), 551nsmallest() function (heapq module), 7–8null-terminated strings, passing to C, 644–648NullHandler() class (logging module), 559numerical operations, 83–112
complex-valued math, 92–94decimal calculations, 84–86formating for output, 87–88infinity and, 94–95linear algebra calculations, 100–101matrix calculations, 100–101NaNs and, 94–95NumPy and, 97–100on fractions, 96–96packing/unpacking integers from byte
string, 90–92random number generators, 102–103rounding, 83–84time, 104–112time conversions, 104–105with binary integers, 89–90with hexadecimal integers, 89–90with octal integers, 89–90
NumPy module, 97–100, 640complex math and, 93CPU-bound programs and, 514linear algebra and, 100–101matrix calculations and, 100–101unpacking binary data with, 203
Oobjects, 243–327
and context-management protocols, 246–248
calling methods on, when named in strings,305–306
creating large numbers of, 248–249defining default arguments and, 224format() function and, 245–246formatting output of, 243–244implementing states for, 299–305iterator protocol, implementing, 117–119JSON dictionary, decoding to, 181memory management, 317–320
representing in C, 608serializing, 171–174visitor pattern, implementing, 306–311visitor patterns without recursion, 311–317with statement and, 246–248
object_hook (json.loads() function), 181object_pairs_hook (json.loads() function), 181oct() function, 89–90octal integers, 89–90Olson time zone database, 110opaque pointers, 612–614open() function, 141–144
binary data, reading/writing, 145–147closefd argument, 166file descriptors and, 166on non-Unix systems, 167rb/wb modes of, 145–147rt/wt mode, 141–144x mode of, 147–148
optimizating your programs, 590optparse vs. argparse, 544OrderedDict object (collections module), 12–13
decoding JSON data into, 181os module
listdir() function, 158–159path module in, 156–157
OSError exception, 575–576ouput sent to stdout, 565
Ppack() function (structs), 201packages, 397–435
datafiles, reading, 408–409directories/zip files, running, 407–408distributing, 433–435hierarchical, of modules, 397–398MANIFEST.in file, 434namespaces, multiple directories in, 404–406per-user directory, installing, 431–432submodules, importing with relative names,
399–401sys.path, adding directories to, 409–411third-party options for, 435virtual environments and, 432–433__init__.py file, 397__path__ variable and, 405
pack_into() function (struct module), 153Pandas package, 178, 214–216parallel programming, 509–513
Index | 679
parse tree, 73parse() function (ElementTree module), 185parser (html), 66parser, recursive descent, 69–78parse_and_remove() function (ElementTree
module), 189parsing command-line options, 539, 541partial() function (functools module), 227–230
defining property methods and, 383fixed size records and, 151optional arguments for decorators and, 341state, carrying with, 234, 235
Paste, 453patch() function (unittest.mock class)
testing output with, 565unit tests with, 567
patching objects, 567path module (os), 156–157
testing for existing files with, 157–158pathnames, manipulating, 156–157pattern matching, 42–45pattern object (regular expressions), 43pdb debugger, 663–664per-user directory, 431–432performance
ast manipulation and, 392attrgetter() function and, 24Cython and, 638–642dictionary comprehension vs. dict() type, 29join() method vs. + operator, 60keeping limited history and, 6lazy attributes and, 267–270nlargest()/nsmallest() functions and, 7NumPy module and, 97–100of byte vs. text strings, 81pattern objects and, 45profiling/timing, 587sanitizing strings and, 56strptime() method and, 110
perf_counter() function (time class), 561, 589PermissionError exception, 575permutations() function (itertools module), 125pexpect, 547pickle module, 171–174
limits on, 172multiprocessing.connection functions and,
457RPCs and, 458–461
Pipe object (multiprocessing module), 471
pipelines, creating, 132–135pipes
accepting script via, 539mimicking, 132–135
PLY, 69, 76polling thread queues, 531–534Popen class (subprocess module), 547POST method (HTTP), 438pprint() function (pprint module), 180predefined abstract base classes, 276prefix variable, 554, 555__prepare__() method (classes), 361
new_class() function and, 372optional arguments and, 363
prepare_class() function (types module), 373print() function, 243, 542, 586
end argument, 144line ending, changing, 144–145redirecting to files, 144separator character, changing, 144–145
private data/methodscaching instances within, 326naming conventions for, 250–251
probability distributions (random module), 103process pools, GIL and, 514, 516ProcessPoolExecutor class (futures module),
509–513process_time() function (time class), 561, 589program crashes, debugging, 584program profiling, 587property attributes (classes)
delegating, 287–291extending in subclasses, 260–264repetitive definitions for, 382–384
@property decorator, 330, 346proxies, delegating attributes with, 288, 290public-facing services, 457put() method (queue module), 491, 495pwd module, 544PyArg_ParseTuple() function (C extensions),
609converting string encoding with, 650
PyBuffer_GetBuffer() method (Py_buffer ob‐ject), 611
PyBuffer_Release() method (Py_buffer object),612
PyCallable_Check() function (C extensions),622
680 | Index
PyCapsule_GetPointer() function (C exten‐sions), 614
PyCapsule_Import() function (C extensions),618
PyCapsule_New() function (C extensions), 613PyCapsule_SetDestructor() function (C exten‐
sions), 614PyErr_Occurred() function (C extensions), 623PyFile_FromFd() function (C extensions), 658–
659PyFloat_AsDouble() function (C extensions),
623PyFloat_Check() function (C extensions), 623PyGILState_Ensure() function (C extensions),
624, 626PyGILState_Release() function (C extensions),
624, 626PyIter_Next() function (C extensions), 662–663PyObject data type (C extension)
filenames, passing with, 657–658PyObject_BuildValue function (C extensions),
623PyObject_Call() function (C extensions), 622
file-like objects and, 661PyObject_GetIter() function (C extensions),
662–663PyParsing, 69, 76PyPy, 514PySequence_Length() function (C extensions),
661pySerial package, 170–171Python for Data Analysis (McKinney), 216Python Package Index, 434Python syntax vs. JSON, 180PYTHONPATH environment variable, 409pytz module, 110–112PyUnicode_FromWideChar() function (C ex‐
tensions)C strings, converting to Python objects, 653–
654pyvenv command, 432–433Py_BEGIN_ALLOW_THREADS (Py objects),
625Py_BuildValue() function (C extensions), 609
C strings, converting to Python objects, 653–654
Py_DECREF() function (C extensions), 623Py_END_ALLOW_THREADS (Py objects), 625Py_XDECREF() function (C extensions), 623
Qqsize() method (queue module), 496queue module, 491–496queues
bounding, 495structures, deque() and, 6
quote() function (shlex class), 546
Rrace conditions, avoiding, 497–500raise from statement, 580, 582
None modifier, 581raise statement, 580, 582randint() function (random module), 102random module, 102–103random() function (random module), 103re module
compile() function, 49DOTALL flag, 49IGNORECASE flag, 47pattern matching and, 42–45patterns, naming, 67scanner() method, 67search/replace text and, 45–46split() method, 37–38sub() function, 54Unicode text and, 52–53
read() function, 139file-like C objects and, 659–662
readability, naming slices for, 18–19readinto() method (files), 147
reading into mutable buffers with, 152–153recursion, 5
getrecursionlimit() function (sys module),310
recursive descent parsers, 69–78limitations on, 76
recvfrom() method (socket module), 445recv_handle() function (reduction module),
470–475recv_into() function (socket module), 153, 483redirection, 539regex module, 53register() function (atexit module), 538register_function() method (XML-RPC), 455regular expressions
* (star) operator and, 48? (question mark) modifier and, 48
Index | 681
Dow
nlo
ad fro
m W
ow
! eBook
<w
ww
.wow
ebook.
com
>
greedy vs. nongreedy, 47–48matching multiple lines, 48–49newline support in, 48–49on byte strings, 79order of tokens in, 68pattern matching and, 42–45re.split() method and, 38regex module for, 53shortest match with, 47–48stripping characters with, 54Unicode and, 52–53
relational databases, 195–197connecting to, 196cursors, creating, 196
relative imports vs. absolute names (modules),400
relativedelta() function (dateutil module), 105reload() function (imp module), 406–407, 431remote machines
loading modules from, 412–428XML-RPC, 454–456
remote procedure calls (RPC), 458–461exception handling with, 461
remove() method (ElementTree module), 193replace() method (date module), 108replace() method (datetime module), 108_replace() method (namedtuple object), 31replace() method (str type), 54, 54
performance and, 56search/replace text and, 45
repr() function (built-in), 243request module (urllib module), 438–441
client package vs., 440requests package (urllib module)
return values of, 439reraising exceptions, 582reserved words, clashing with, 251resource forks, 548resource management, 248resource module, 561ResourceWarning argument (warn() function),
583REST-base interface, 449–453
testing, 450restricting CPU time, 561result() method (ProcessPoolExecutor class),
512reverse iteration, 119–120reversed() function, 119–120
rjust() method (str type), 57RLock objects (threading module), 498round() function, 83–84rounding numbers, 83–84RSS feeds, parsing, 183rstrip() method (str type), 53RTS-CTS handshaking, 170RuntimeWarning argument (warn() function),
583
Ssample() function (random module), 102sanitizing text, 54–57scanner() method (re module), 67search
for shortest match with regular expressions,47–48
matching multiple lines, 48–49nlargest()/nsmallest() functions (heapq
module), 7–8noncapture groups, 49normalization of Unicode text and, 51visitor pattern and, 311
search/replace text, 45–46case insensitive, 46–47
securityimport statement and, 412pickle and, 172RPCs and, 460SSL certificates and, 466
seed() function (random module), 103segmentation faults, 663–664select() function (event driven I/O), 476self-signed certificates (SSL), 468Semaphore objects (threading module), 490,
498send() function (socket module), 483send() method (generators), 316sendmsg() method (socket module), 473sendto() method (socket module), 445send_handle() function (reduction module),
470–475Sequence class (collections module), 283sequences
filtering elements of, 26–28flattening nested, 135–136iterating over multiple, simultaneously, 129–
130mapping names to elements of, 29–32
682 | Index
most frequently occurring item in, 20–21removing duplicates from, 17–18unpacking, 1–2
serial ports, communicating with, 170–171serve_forever() method (XML-RPC), 455Set class (collections module), 283__set__() method (descriptors), 265
in data models, 280setattr() method, 294__setattr__() method (delegation), 290setrlimit() function, 562setsid() function (os module), 537setup.py file, 633, 639
distributing packages and, 434set_trace() function (pdb module), 586–587shell, 546shell scripts, 539shelling out, 550shuffle() function (random module), 102shutil module
archives and, 549copying files/directories with, 547
sig module, 343–345signature objects, 364–367signature() function (inspect), 343SIGXCPU signal, 562simple scripts, 555simplefilter() function (warnings class), 584SimpleXMLRPCServer (XML-RPC), 456site-packages directories, 410
virtual environments vs., 432–433skip() decorator, 574skipIf() function (unittest module), 574skipping test failures, 573skipUnless() function (unittest module), 574slice() object, 19slices, naming, 18–19__slots__ attribute
classes with, 32memory management and, 249
socket module, 444ipaddress module and, 448sending datagrams with, 445
socketpair() function (Unix), 532sockets
large arrays, sending/receiving, 483setting options on, 443threads and, 532
socketserver moduleimplementing TCP servers with, 441–444UDP server, implementing, 445–446
sorted() functionand objects without comparison support,
23–24itemgetter() function, 22
sortingdictionaries, 13–15dictionaries by common key, 21–23finding largest/smallest N items, 7–8groupby() function and, 25itemgetter function (operator module), 22objects without comparison support, 23–24
sort_keys argument (json.dumps() function),182
source file vs. config file, 553special characters, escaping, 66split() method (re object), 37–38split() method (str type), 37–38SQLAlchemy, 197sqlite3 module, 195sqrt() function (math module), 592ssh session, 547SSL, 464–470
certificate authorities, 468self-signed certificates, 468
ssl module, 464–470random module vs., 103
Stackless Python, 531stack_size() function (threading module), 509star expressions
discarding values from, 4unpacking iterables and, 3
start attribute (slice), 19start() method (Thread class), 486startswith() method (str type), 38
pattern matching with, 42start_response argument (WSGI), 452state
capturing with closures, 233–234carrying with callback functions, 232–235implementing for objects/machines, 299–
305of mixins, 297thread-specific, storing, 504–505
states, generators with extra, 120–121static methods, applying decorators to, 350–352
Index | 683
@staticmethod decorator, 330decorating class methods with, 350–352__func__ attribute and, 334
stdout object (sys), changing encoding on, 163step attribute (slice), 19stop attribute (slice), 19StopIteration exception, 113str type
converting to datetime objects, 109–110decode() method, 56encode() method, 56endswith() method, 38format() function, 57join() method, 58–61lower() method, 54pattern matching with, 42replace() method, 54sanitizing text with, 54–57split() method, 37–38startswith() method, 38stripping unwanted characters from, 53–54translate() method, 55upper() method, 54
str() function, 243StreamRequestHandler (socketserver module),
442–444string module, 246string templates and code readability, 453StringIO object (io module), 566StringIO() object (io module), 148–149strings, 37–81
aligning, 57–58bad encoding in C/Python extensions, 654–
657C, converting to Python objects, 653–654calling object methods when named in, 305–
306combining, 58–61concatenating, 58–61converting to dates/times, 109–110database API and, 197I/O operations, performing on, 148–149interpolating variables in, 61–64matching start/end text of, 38–40null-terminated, passing to C, 644–648splitting on delimiters, 37–38stripping unwanted characters from, 53–54Unicode, passing to C modules, 648–653unpacking, 2
strip() method (str type), 53–54strptime() method (datetime module), 109struct module, 199–203
nested binary records, reading, 203–213packing/unpacking integers from byte
strings and, 91structure codes for, 201variable-sized binary records, reading, 203–
213structures (data type), 612–614sub() function (re module), 54, 63
search/replace text and, 45submit() operation (ProcessPoolExecutor class),
512subn() method (re module), 46subprocess module, 547subsitution callback functions, 46super() function, 256–260
class decorators and, 356coding conventions and, 370extending properties in subclasses and, 262mixin classes and, 298
surrogate encoding, 654–657Swig, 604, 627–631
headers and, 630symbolic links, 548
broken, 549SyntaxWarning argument (warn() function),
583sys.arg value, 543sys.argv (commaand line arguments), 544sys.metapath object, 418, 430
extending import operations and, 422sys.modules dictionary, 421sys.path
adding directories to, 409–411site-packages directories, 410
sys.path_hooks variable (importers), 420sys.path_importer_cache object, 424sys.stderr, 540sys.stdout, 565–566system-exiting exceptions, 578SystemExit exception, 540, 577–580
Ttag attribute (ElementTree module), 185tarfile compression format, 550TCP servers, 441–444
event-driven I/O implementation, 477
684 | Index
tempfile module, 167–170temporary files, 167–170TemporaryDirectory() method (tempfile mod‐
ule), 169TemporaryFile (tempfile module), 168terminal, finding size of, 65, 545test failures, 573TestCase classes (TestLoader module), 573testing
ouput sent to stdout, 565output, logging to file, 572unit tests for exceptions, 570
TestLoader class (unitest module), 573text attribute (ElementTree module), 185text data
encoding, 141–144reading/writing, 141–144
text manipulation, 37–81aligning strings, 57–58case insensitive search/replace, 46–47combining/concatenating, 58–61HTML entities, handling in text, 65–66interpolating variables, 61–64matching start/end of strings, 38–40of Unicode with regular expressions, 52–53on byte strings, 78–81parsers, implementing, 69–78pattern matching, 42–45reformatting into columns, 64–65sanitizing, 54–57search/replace, 45–46stripping unwanted characters, 53–54tokenizing, 66–69wildcard matcing, 40–42XML entities, handling in text, 65–66
TextIOWrapper object (io module), 163–165textwrap module, 64–65Thread class (threading module), 485–488thread pools
GIL and, 508queues and, 506
threading module, 488Condition object, 489Event object, 488–491local() method, 504–505Lock objects, 497–500Semaphore objects, 490stack_size() function, 509
ThreadingMixIn class (socketserver module),297
ThreadingTCPServer objects (socketservermodule), 442
ThreadingUDPServer objects (socketservermodule), 446
ThreadPoolExecutor class (futures module),505–509
threadsactor model and, 516–520C/Python, mixing, 625–626communication between, 491–496creating/destroying, 485–488daemonic, 486deadlocks between, 500–503generators as alternative to, 524–531locking critical sections, 497–500nonblocking, supporting with queues, 495polling multiple queues, 531–534pools of, 505–509priority queues and, 11queue module and, 491–496race conditions, avoiding, 497–500status of, finding, 488–491storing state of, 504–505timeouts, supporting with queues, 495
throw() method (generators), 531time command, 587time module, 590time zones, 110–112
country_timezones dictionary (pytz mod‐ule), 112
UTC time, 111time() function (time class), 561time, operations on, 104–112
converting strings for, 109–110date calculations, 106–107date ranges, finding, 107–109pytz module, 110–112time conversions, 104–105time zones, manipulating, 110–112UTC time, 111
timedelta object (datetime module), 104, 107–109
timeit module, 589, 590timeouts, supporting with queues, 495Timer class, 561tokenizing and DOTALL flag (re module), 49tokens streams, filtering, 68
Index | 685
Dow
nlo
ad fro
m W
ow
! eBook
<w
ww
.wow
ebook.
com
>
tostring() function (ElementTree module), 190total_ordering decorator (functools module),
321–323to_bytes() method (int module), 91traceback, segmentation faults and, 663–664traceback.print_stack() function, 586translate() method (str type), 54, 55
numerical output and, 88performance and, 56
transmitting data, 155tree structures, memory management of, 317–
320tree traversal, 311, 314TTYs, 545, 547tuples
and endswith()/startswith() methods, 39as return values, 221relational databases and, 195–197unpacking, 2
Twisted package, 238type checking (data)
abstract base classes and, 274–276forcing with decorator functions, 341–345
type systems, 277–283%typemap directive (Swig), 631types module, 370–373
UUDP server, 445–446
event-driven I/O implementation, 476UDPServer class, 446umask() function (os module), 537unescape() function (xml.sax.saxutils module),
191Unicode, 50–53
bad encoding in C/Python extensions, 654–657
IGNORECASE flag and matching, 47regular expressions and, 52–53strings, passing to C modules, 648–653
unicodedata module, 55uniform() function (random module), 103unittest module, 565, 572–573Unix, 548
commands, 548find utility, 551
unpack() function (struct module), 201binary data and, 205
unpackingarchives, 549discarding values while, 2enumerate() function and, 128integers from byte string, 90–92iterables into separate variables, 1–2iterables of arbitrary length, 3–5sequences into separate variables, 1–2star expressions and, 3
unpack_archive() function (shutil module), 549unpack_from() method (struct module), 202uploading using requests module, 440upper() method (str type), 54urllib module, 413, 437–441urlopen() function (urllib module), 569–570
import statements vs., 413sending query parameters with, 438
UserWarning argument (warn() function), 583UTC time, 111
Vvalidation of data, abstract base classes and,
274–276ValueError, 570
unpacking and, 2values() method (dictionaries), 14, 16variables
interpolating, in strings, 61–64understand locality of, 592
vars() method, 62virtual environments, 432–433visitor pattern
implementing with recursion, 306–311implementing without recursion, 311–317
Wwalk() function (os module), 550warn() function (warning class), 583warning messages, issuing, 583warning module, 584warning() function (logging module), 556watchdog timers, 503wchar_t * declarations (C), 648–653
converting to Python objects, 653weak references and caching instances, 325weakref module, 317, 320web browsers, launching, 562
686 | Index
web programming, 437–483HTTP service clients, 437–441REST-base interface, 449–453urllib module and, 437–441
webbrowser module, 563WebOb, 453while loops vs. iter() function, 138–139wildcard matcing, strings, 40–42Windows, 548
C extension modules and, 608with nogil: statement (Cython), 636with statement, 246–248, 561, 566
contextmanager decorator and, 385Lock objects and, 497–500Semaphore objects and, 499
wraparound() decorator (Cython), 641__wrapped__ attribute, 332@wraps decorator (functools)
function metadata and, 331–333unwrapping, 333–334
WSGI standard, 449–453return value for apps based on, 452
XXML entities
handling in text, 65–66replacing, 66
XML filesdictionaries, converting to, 189–191
extracting data from, 183–186modifying, 191–193parsing, 191–193
incrementally, 186–189with namespaces, 193–195
rewriting, 191–193tags, specifying, 185
XML-RPC, 454–456adding SSL to, 466data types handled by, 455
xml.etree.ElementTree module (see Element‐Tree module)
xml.sax.saxutils module, 191XMLNamespaces class, 194
Yyield from statement, 135–136yield statement, 60, 134
behavior in generators, 315concurrency implementations and, 524–531generators and, 116search functions and, 6
ZZeroMQ, 457zip files as runnable scripts, 407–408zip() method (dictionaries), 13–15, 129–130zipfile compression format, 550
Index | 687
About the AuthorsDavid Beazley is an independent software developer and book author living in the cityof Chicago. He primarily works on programming tools, providing custom softwaredevelopment, and teaching practical programming courses for software developers,scientists, and engineers. He is best known for his work with the Python programminglanguage, for which he has created several open source packages (e.g., Swig and PLY)and authored the acclaimed Python Essential Reference. He also has significant experi‐ence with systems programming in C, C++, and assembly language.
Brian K. Jones is a system administrator in the department of computer science atPrinceton University.
ColophonThe animal on the cover of Python Cookbook, Third Edition is a springhaas (Pedetescapensis), also known as a spring hare. Springhaas are not hares at all, but rather theonly member of the family Pedetidae in the order Rodentia. They are not marsupials,but they are vaguely kangaroo-like, with small front legs, powerful hind legs designedfor hopping, jumping, and leaping, and long, strong, bushy (but not prehensile) tailsused for balance and as a brace when sitting. They grow to be about 14 to 18 incheslong, with tails as long as their bodies, and can weigh approximately eight pounds.Springhaas have rich, glossy, tawny, or golden-reddish coats with long, soft fur and whiteunderbellies. Their heads are disproportionately large, and they have long ears (with aflap of skin at the base they can close to prevent sand from getting inside while they aredigging) and large, dark brown eyes.
Springhaas mate throughout the year and have a gestation period of about 78 to 82 days.Females generally give birth to only one baby (which stays with its mother until it isapproximately seven weeks old) per litter but have three or four litters each year. Babiesare born with teeth and are fully furred, with their eyes closed and ears open.
Springhaas are terrestrial and well-adapted for digging, and they tend to spend theirdays in the small networks of their burrows and tunnels. They are nocturnal and pri‐marily herbivorous, feeding on bulbs, roots, grains, and occasionally insects. While theyare foraging, they move about on all fours, but they are able to move 10 to 25 feet in asingle horizontal leap and are capable of quick getaways when frightened. Although theyare often seen foraging in groups in the wild, they do not form an organized social unitand usually nest alone or in breeding pairs. Springhaas can live up to 15 years in captivity.They are found in Zaire, Kenya, and South Africa, in dry, desert, or semiarid areas, andthey are a favorite and important food source in South Africa.
The cover image is from Animal Creation: Mammalia. The cover font is Adobe ITCGaramond. The text font is Adobe Minion Pro; the heading font is Adobe Myriad Con‐densed; and the code font is Dalton Maag’s Ubuntu Mono.
Dow
nlo
ad fro
m W
ow
! eBook
<w
ww
.wow
ebook.
com
>
Related Documents