Ch. 1 Installing Ubuntu Server and FOG The simple method! By Ian Carey (TN - smashedbotatos) Preface About six months ago I wanted to find an easier way to deploy Windows, Linux, and all my diagnostic disks and tools. My first thought was a 16GB USB drive with pretty much everything I needed and more on it. So I went scouring forums, how-to guides, and trying many programs and solutions. I spent a good week fooling around with it just to end up back at square one. Only being able to have one Windows Installer on a USB stick turns out killed the project. After that entire debacle with very little forward progress made, I decided to tackle PXE booting. There seemed to be very few limitations to what I could do with it, and again I took to the forums scouring for hours on end and lots of out of date how-to guides that didn’t work. Then I found the “holy grail”, the amazing FOGproject and this guide is how I implemented it in to my network and daily repair tasks. So let’s get to guide, and get this train a runnin’! Prerequisites 1. A server to install the software to! (Pretty much anything will work here, 32bit or 64bit, or in Oracle VM) 2. A client machine that has a NIC that supports PXE Booting. (Enabled in the BIOS, for VM must have Bridged network selected not NAT which is the default setting.) 3. A Separate Windows PC on the same network to do some of the work on. (You will download the images to this computer, and use WinSCP or PSCP to transfer them to the server.) 4. Ubuntu Server 11.10 (Burnt to CD or on a USB drive ) 5. WinSCP , or PSCP (Info on how to use them WinSCP , PSCP on your Windows PC) 6. PuTTy (On your Windows PC)

PXE
Nov 02, 2014
pxe description
Welcome message from author
This document is posted to help you gain knowledge. Please leave a comment to let me know what you think about it! Share it to your friends and learn new things together.
Transcript

Ch. 1 Installing Ubuntu Server and FOGThe simple method! By Ian Carey (TN - smashedbotatos)
Preface
About six months ago I wanted to find an easier way to deploy Windows, Linux, and all my diagnostic disks and tools. My first thought was a 16GB USB drive with pretty much everything I needed and more on it. So I went scouring forums, how-to guides, and trying many programs and solutions. I spent a good week fooling around with it just to end up back at square one. Only being able to have one Windows Installer on a USB stick turns out killed the project.
After that entire debacle with very little forward progress made, I decided to tackle PXE booting. There seemed to be very few limitations to what I could do with it, and again I took to the forums scouring for hours on end and lots of out of date how-to guides that didn’t work. Then I found the “holy grail”, the amazing FOGproject and this guide is how I implemented it in to my network and daily repair tasks. So let’s get to guide, and get this train a runnin’!
Prerequisites
1. A server to install the software to! (Pretty much anything will work here, 32bit or 64bit, or in Oracle VM)
2. A client machine that has a NIC that supports PXE Booting. (Enabled in the BIOS, for VM must have Bridged network selected not NAT which is the default setting.)
3. A Separate Windows PC on the same network to do some of the work on. (You will download the images to this computer, and use WinSCP or PSCP to transfer them to the server.)
4. Ubuntu Server 11.10 (Burnt to CD or on a USB drive)5. WinSCP , or PSCP (Info on how to use them WinSCP, PSCP on your Windows PC)6. PuTTy (On your Windows PC)7. 7zip (On your Windows PC)8. A small amount of Linux knowledge. (I make this simple enough it’s not really necessary)9. Network Link Aggregation IEEE 802.3ad (optional, but helpful network usage can be extreme)10. Either 100MBPS or 1000MBPS (1000MBPS recommended, but 100MBPS will work just fine)
Ubuntu Server Install
This should be pretty straight forward to most of you. It’s a matter of boot from the CD/USB and the onscreen instructions should guide you. (I can almost do this part in my sleep!)
1. This part should be done with a mouse/keyboard/monitor connected to the server. a. Afterwards we can physically place the server elsewhere and just use PuTTY and
WinSCP to access it.2. Install as normal until you get to package selection.3. We are only going to install base packages here.
a. Select the OpenSSH Server package and SAMBA File Server package using the space bar to select them.
i. This is all we will install for now. (I have had a hard time adding anything that interferes with MySQL)
4. Now let the install finish, restart5. Once you are restarted log in as the user you created and you now have a server OS!
a. We need to run ifconfig and write down our ip address. b. At this point you may also setup your router to give this server a static IP
(Makes life easier)6. You are now ready to unplug the mouse/keyboard/monitor and put the desktop
anywhere you like, all it needs is a power cable and a network cable. Installing FOG v0.32
Installing FOG shouldn’t be too difficult if you follow my guidance. I use the text editor Nano if you already accustom another feel free to use it in its place. If you are not familiar with Nano, please familiarize yourself with the keyboard controls.
Nano1. To exit press Ctrl+X, when you do so it will prompt you to save the file you are editing.2. To quit quickly without saving Ctrl+Z.
Let’s get started with the FOG Installation1. Log in to your server with PuTTy (with the IP address we wrote down a few steps ago)2. Create a temporary directory to download and install FOG from.
a. sudo mkdir –p /opt/setupfogb. cd /opt/setupfog/
1. Get the FOGproject package with the command below
a. If you do it this way afterwards skip to step 5
sudo wget http://sourceforge.net/projects/freeghost/files/FOG/fog_0.32/fog_0.32.tar.gz -O /opt/fog-setup/fog.tar.gz
2. To manually download the latest version of fog here (v 0.32 is current)
a. Open WinSCP and log in to your server.b. Place fog_0.32.tar.gz in /home/<yourusername>/
i. This will be the only place you are allowed to place it, because WinSCP doesn’t allow you to use sudo commands.
c. sudo mv /home/<yourusername>/fog* /opt/setupfog/
3. Change directory to the /opt/setupfog/ folder and unzip
a. cd /opt/setupfogb. sudo tar –xvzf fog*c. cd fog*d. cd bine. sudo ./installfog.sh
You will be prompted with a few questions regarding the installation
1. What version of Linux would you like to run the installation for. 2 Ubuntu – Press Enter
2. What type of installation would you like to do? [N] Normal – Press Enter3. What is the IP address to be used by this FOG Server? [server-IP-detected-on-
eth0] – Press Enter4. Would you like to setup a router address for the DHCP server? [Y/n]
1. If you are using a DD-WRT router then Yes2. If not and you have a separate DHCP server then No
a. Or if you are going to use this server as a DHCP server then No5. Would you like to setup a DNS address for the DHCP server and client boot image?
[Y/n] – Press Enter6. Would you like to change the default network interface from eth0? If you are not
sure, select No. [y/N] N – Press Enter7. Would you like to use the FOG server for dhcp service? [Y/n] – *Enter
1. If you are using a DD-WRT router then No2. If not and you have a separate DHCP server then No
a. If you are going to use this server as a DHCP server then Yes8. This version of FOG has internationalization support, would you like to install the
additional language packs? [Y/n] – n.9. Are you sure you wish to continue (Y/N) – Y.10. Follow the on screen instructions for MySQL.11. Leave the password blank for MySQL root account. <- very important12. Would you like to notify the FOG group about this installation? – Y
Let’s check to see if FOG is running.1. Open a browser to your server’s ip address and follow the instructions.

Setting up your DHCP server.
1. This is FOGproject’s guide to configuring an existing DHCP Server
2. If you have a DD-WRT capable router I suggest using DD-WRT on it.
a. If you are already using a DD-WRT router for DHCP click here.b. If you need to install DD-WRT….That is a different guide!
3. If you are already using a DHCP Server or want to use this server as a DHCP Server
a. ISC DHCP or DHCPd (How to configure your server’s DHCP Client also)b. Microsoft DHCP Server
That should be it for the install of FOG. You should now be able to PXE boot to the FOG Menu
Learn about the FOGproject and what you can do with it here!
Familiarize yourself with how it works, and what it can do for you.
Next up…….Making a custom boot menu Chapter 2
Ch. 2 Menu Customization….and adding your first bootable item.
What are we going to do?
I am not going to get in to deep details about how PXE booting works, but basically you are served a menu file from /tftpboot/pxelinux.cfg/ its name it default, and that will always be the first menu served to you. So we need to back it up, edit it, and create new submenus. We can even configure colors and the background image. Editing the menu’s will be done with either notepad or notepad++ on a windows based computer then WinSCP will move them to /home/<youruser>/menu/ on the server and we will then manually move them to where they need to go.
We also need to create folders for where our programs will reside or images will be mounted. It must be done within the /tftpboot/ folder or our menus won’t work. I am just going to use my locations as an example. You can create your own folder structure in any way you like.
Let’s start with making the folder structure.
On your Ubuntu Server you need to create the following folders.
1. sudo mkdir –p /tftpboot/av (for antivirus)2. sudo mkdir –p /tftpboot/diag (for diagnostic tools)3. sudo mkdir –p /tftpboot/imaging (for imaging tools)4. sudo mkdir –p /tftpboot/linux (for linux distros)5. sudo mkdir –p /tftpboot/menu (for our menus)6. sudo mkdir –p /tftpboot/winpe (for WindowsPE Disks)7. sudo mkdir –p /tftpboot/winre (for WindowsRE Disks)8. sudo mkdir –p /tftpboot/util (for misc utilities)
All of these folders will end up having subfolders except the menu folder. We will add them later when adding software.
Now we move on to menu preparation.
First we are going to create a copy of our existing menu and modify the default menu.
1. sudo cp /tftpboot/pxelinux.cfg/default /tftpboot/menu/fog.cfg
Now we modify the default menu2. sudo nano /tftpboot/pxelinux.cfg/default (or use notepad++ and
save to a folder called menu on your desktop)a. empty the contents and paste these contents (see next page)

#Start Code
DEFAULT vesamenu.c32
MENU TITLE PXE Network Boot MenuMENU INCLUDE /pxelinux.cfg/theme.cfgmenu color title 1;36;44 #ff8c00 #00000000 std
LABEL AVMENU LABEL Anti-Virus and Malware ScannersKERNEL vesamenu.c32APPEND menu/av.cfg
LABEL Diagnostic MENU LABEL Hardware Diagnostic Tools KERNEL vesamenu.c32 APPEND menu/diag.cfg
LABEL Linux MENU LABEL Linux Live Distro KERNEL vesamenu.c32 APPEND menu/linux.cfg
LABEL Recovery Consoles kernel vesamenu.c32 append menu/winre.cfg MENU Windows Recovery Consoles
LABEL WinPEkernel vesamenu.c32append menu/winpe.cfgMENU LABEL Windows Pre-Install Environment
LABEL IMAGINGkernel vesamenu.c32append menu/img.cfgMENU LABEL Hard Drive Imaging Tools
LABEL UTILKERNEL vesamenu.c32APPEND menu/util.cfgMENU LABEL Misc Utilities
LABEL FOGKERNEL vesamenu.c32append menu/fog.cfgMENU LABEL FOGProject Network HDD Imaging
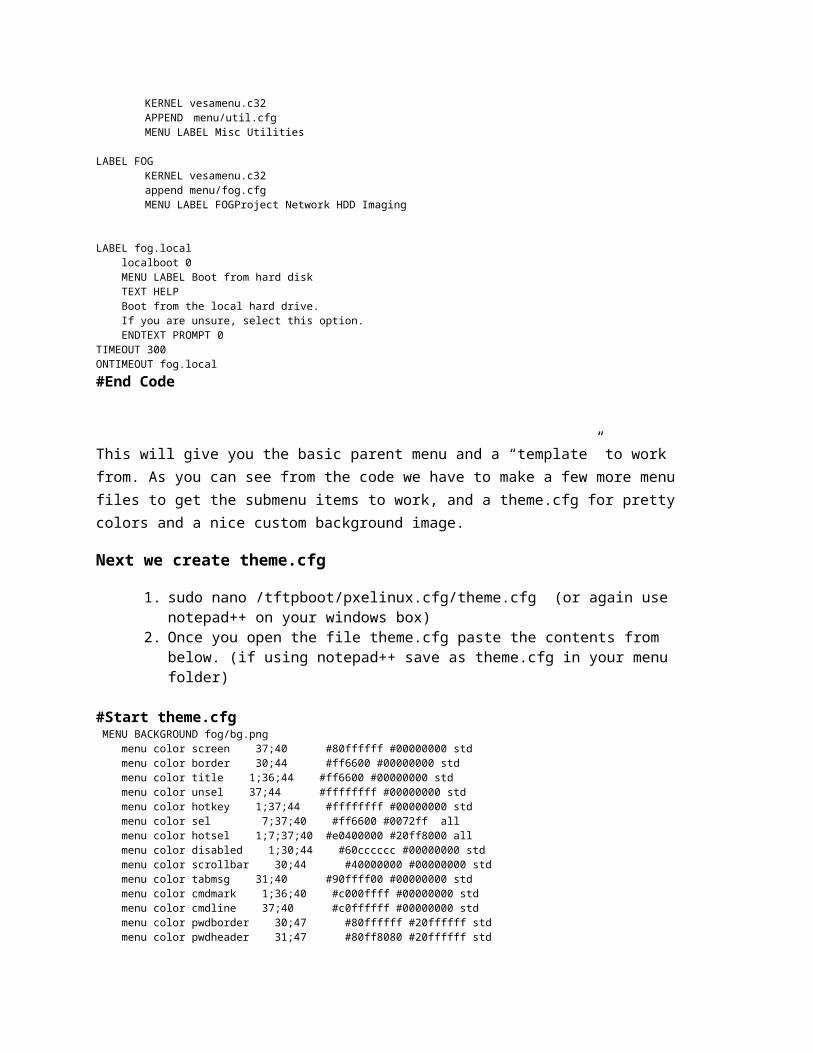
LABEL fog.local localboot 0 MENU LABEL Boot from hard disk TEXT HELP Boot from the local hard drive. If you are unsure, select this option. ENDTEXT PROMPT 0TIMEOUT 300ONTIMEOUT fog.local
#End Code
This will give you the basic parent menu and a “template” to work from. As you can see from the code we have to make a few more menu files to get the submenu items to work, and a theme.cfg for pretty colors and a nice custom background image.
Next we create theme.cfg
1. sudo nano /tftpboot/pxelinux.cfg/theme.cfg (or again use notepad++ on your windows box)
2. Once you open the file theme.cfg paste the contents from below. (if using notepad++ save as theme.cfg in your menu folder)
#Start theme.cfg MENU BACKGROUND fog/bg.png menu color screen 37;40 #80ffffff #00000000 std menu color border 30;44 #ff6600 #00000000 std menu color title 1;36;44 #ff6600 #00000000 std menu color unsel 37;44 #ffffffff #00000000 std menu color hotkey 1;37;44 #ffffffff #00000000 std menu color sel 7;37;40 #ff6600 #0072ff all menu color hotsel 1;7;37;40 #e0400000 #20ff8000 all menu color disabled 1;30;44 #60cccccc #00000000 std menu color scrollbar 30;44 #40000000 #00000000 std menu color tabmsg 31;40 #90ffff00 #00000000 std menu color cmdmark 1;36;40 #c000ffff #00000000 std menu color cmdline 37;40 #c0ffffff #00000000 std menu color pwdborder 30;47 #80ffffff #20ffffff std menu color pwdheader 31;47 #80ff8080 #20ffffff std menu color pwdentry 30;47 #80ffffff #20ffffff std menu color timeout_msg 37;40 #80ffffff #00000000 std menu color timeout 1;37;40 #c0ffffff #00000000 std menu color help 37;40 #c0ffffff #00000000 std menu color msg07 37;40 #90ffffff #00000000 std
MENU MARGIN 0MENU PASSWORDMARGIN 3MENU ROWS 15MENU TABMSGROW 21MENU CMDLINEROW 20MENU PASSWORDROW 11MENU TIMEOUTROW 20MENU HSHIFT 0MENU VSHIFT 0
#End theme.cfg
You can customize theme.cfg with your own colors if you like. Next we have to fix the fog.cfg, and add a back button. Then create a template.cfg for creating our other submenus.
1. sudo nano /tftpboot/menu/fog.cfg
Please add the entry below after the words MENU COLOR TITLE
LABEL backMENU LABEL ..KERNEL vesamenu.c32APPEND pxelinux.cfg/default
Now we can navigate to the “FOGProject Network HDD Imaging” and back to the main menu.

Now we create a template.cfg for easily creating our other submenus
1. sudo nano /tftpboot/menu/template.cfga. paste the code below in that file
#Start CodeMENU INCLUDE /pxelinux.cfg/theme.cfg#MENU BACKGROUND /menu/pics/sub.png LABEL back MENU LABEL .. KERNEL vesamenu.c32 APPEND pxelinux.cfg/default
#End Code
As you can see here if we uncomment #MENU BACKGROUND then it will look for a background image in /tftpboot/menu/pics/sub.png
If we leave it excluded with the # tag it will just use the one from theme.cfg in /tftpboot/fog/bg.png
Putting the finishing touch on the menu
At this point we need to create seven submenus from the template
1. If using Nanoa. We will create the 7 submenus and manually.
i. cd /tftpboot/menu/
1. sudo nano cp template.cfg ./av.cfg2. sudo nano cp template.cfg ./diag.cfg3. sudo nano cp template.cfg ./linux.cfg4. sudo nano cp template.cfg ./winre.cfg5. sudo nano cp template.cfg ./winpe.cfg6. sudo nano cp template.cfg ./img.cfg7. sudo nano cp template.cfg ./util.cfg
2. If using Notepad ++ a. Start by creating 7 copys of the template.cfg in the menu folder you created and
naming each one the following.i. av.cfg
ii. diag.cfgiii. linux.cfgiv. winre.cfgv. winpe.cfg
vi. img.cfgvii. util.cfg
b. Once you are done then you must move all the files to the server.i. On the server run the command
1. sudo mkdir –p /home/<yourusername>/menu
ii. using WinSCP copy the contents of the menu folder on your desktop to the folder we just created on the server.
iii. Back on the server run these commands1. sudo cp –R /home/<yourusername>/menu /tftpboot/
2. Lastly move theme.cfg in to place by doing the following
3. sudo cp /tftpboot/menu/theme.cfg /tftpboot/pxelinux.cfg/theme.cfg
That should be it, you should have a functioning PXE menu with empty submenus to fill with entries for programs!
Next Chapter Adding Antivirus Rescue Disks

Ch. 3 Antivirus Rescue DisksBitdefender, AVG, Trinity Rescue Kit
What are we going to do?
The short answer is we are going to add a folder and fill it with the contents of the iso or CD. Also as an alternative you can mount the iso directly to the folder we create. We will also make the folder and its contents available on the network with NFS. Then finally create a Menu Item in our av.cfg submenu.
I have found that this method works flawlessly, but using AV over PXE it will not automatically update the definitions or scanner, and Bitdefender after loaded needs a little poke to get the network interface started. We will learn more about this when we add bitdefender , our Live Linux distros.
Even though you have to update these each time you run them they are still very useful to have for that computer that just won’t boot form USB or CDROM.
Trinity Rescue Kit on the other hand can be manually updated by copying the contents from an updated USB flash drive. I will explain how to do this when we get to it.
What do we need?
1. BitDefender Rescue Disk a. I would recommend getting a new image for this every other week.
2. AVG Rescue Disk a. Either the ISO or the .zip will be fine.b. Also check this for updates every other week or so.c. This one also might be able to be manually updated as TRK is.
3. Trinity Rescue Kit a. Command line AV Scanner and a bunch of tools.b. Very useful AV and Rescue Disk
i. Pain to setup, but after that you are golden. c. If you decide to use this in a commercial environment please Donate!
4. If you are going to SSH to your server then you need PuTTy also
Download these images to a separate computer not directly to the server.a. Use 7zip to extract each iso to its own separate folder on the desktop.
i. Folder names as follows1. bitdefender, avg, trinity (all lowercase)

ii. use WinSCP to move to the server’s /home/<youruser>/Adding BitDefender Rescue Disk
We are going to start off by moving the bitdefender folder to the correct location and adding it to /etc/exports so it is a NFS share.
1. sudo mv –R /home/<yourusername>/bitdefender /tftpboot/av/a. cd /b. cd /tftpboot/av/bitdefender/ (check to see if it worked)c. ls
i. you should see the contents of the extracted ISO here2. cd /3. sudo nano /etc/exports (create NFS share)
a. Add the following to /etc/exports
#Start Code/tftpboot/av/bitdefender/ *(ro,sync,no_wdelay,insecure_locks,no_root_squash,insecure)
#End Code
4. sudo /etc/init.d/nfs-kernel-server restart (restart the NFS server)
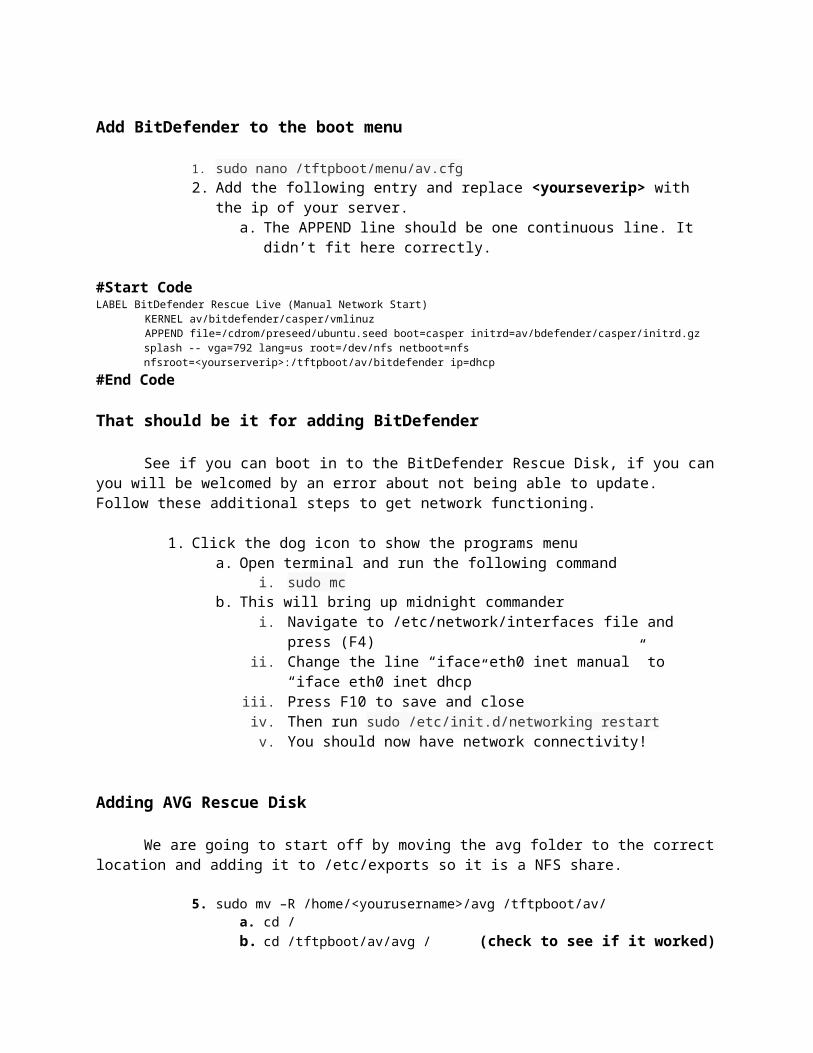
Add BitDefender to the boot menu
1. sudo nano /tftpboot/menu/av.cfg2. Add the following entry and replace <yourseverip> with the ip of your server.
a. The APPEND line should be one continuous line. It didn’t fit here correctly.
#Start CodeLABEL BitDefender Rescue Live (Manual Network Start)
KERNEL av/bitdefender/casper/vmlinuzAPPEND file=/cdrom/preseed/ubuntu.seed boot=casper initrd=av/bdefender/casper/initrd.gz splash -- vga=792 lang=us root=/dev/nfs netboot=nfs nfsroot=<yourserverip>:/tftpboot/av/bitdefender ip=dhcp
#End Code
That should be it for adding BitDefender
See if you can boot in to the BitDefender Rescue Disk, if you can you will be welcomed by an error about not being able to update. Follow these additional steps to get network functioning.
1. Click the dog icon to show the programs menua. Open terminal and run the following command
i. sudo mcb. This will bring up midnight commander
i. Navigate to /etc/network/interfaces file and press (F4)ii. Change the line “iface eth0 inet manual” to “iface eth0 inet dhcp”
iii. Press F10 to save and closeiv. Then run sudo /etc/init.d/networking restartv. You should now have network connectivity!

Adding AVG Rescue Disk
We are going to start off by moving the avg folder to the correct location and adding it to /etc/exports so it is a NFS share.
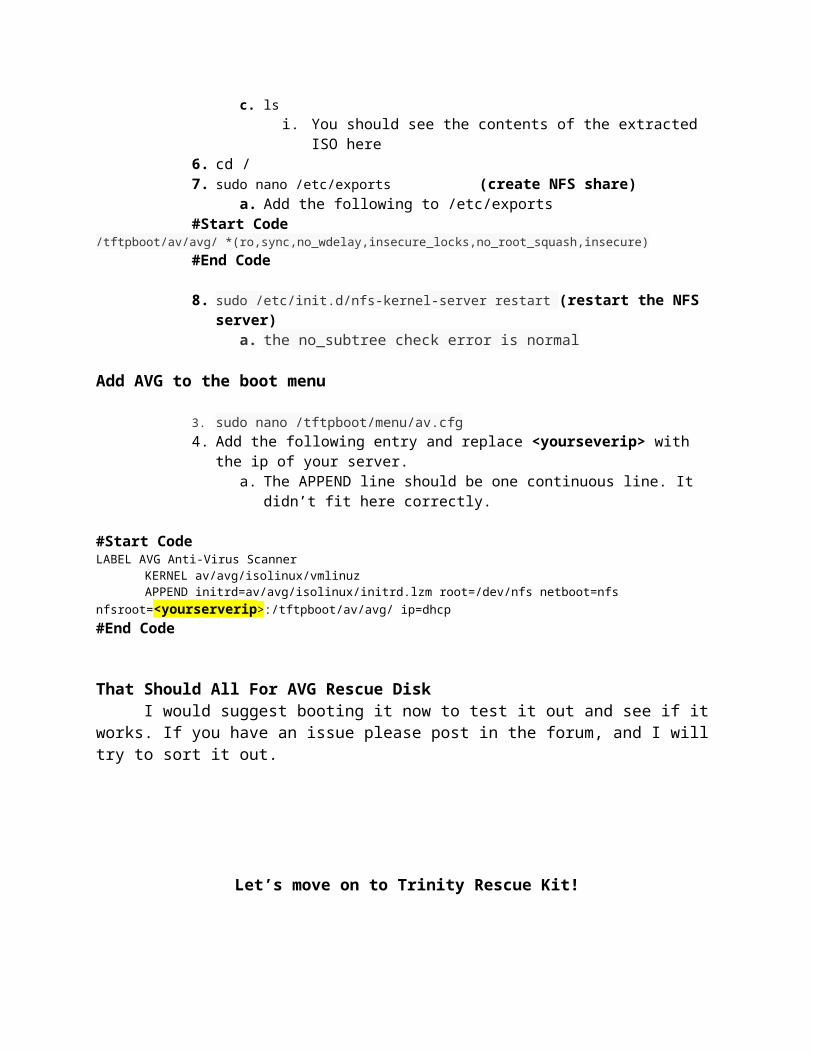
5. sudo mv –R /home/<yourusername>/avg /tftpboot/av/a. cd /b. cd /tftpboot/av/avg / (check to see if it worked)c. ls
i. You should see the contents of the extracted ISO here6. cd /7. sudo nano /etc/exports (create NFS share)
a. Add the following to /etc/exports#Start Code
/tftpboot/av/avg/ *(ro,sync,no_wdelay,insecure_locks,no_root_squash,insecure)
#End Code
8. sudo /etc/init.d/nfs-kernel-server restart (restart the NFS server)a. the no_subtree check error is normal
Add AVG to the boot menu
3. sudo nano /tftpboot/menu/av.cfg4. Add the following entry and replace <yourseverip> with the ip of your server.
a. The APPEND line should be one continuous line. It didn’t fit here correctly.
#Start CodeLABEL AVG Anti-Virus Scanner KERNEL av/avg/isolinux/vmlinuz
APPEND initrd=av/avg/isolinux/initrd.lzm root=/dev/nfs netboot=nfs nfsroot=<yourserverip>:/tftpboot/av/avg/ ip=dhcp#End Code
That Should All For AVG Rescue DiskI would suggest booting it now to test it out and see if it works. If you have an issue
please post in the forum, and I will try to sort it out.
Let’s move on to Trinity Rescue Kit!
Adding Trinity Rescue Disk
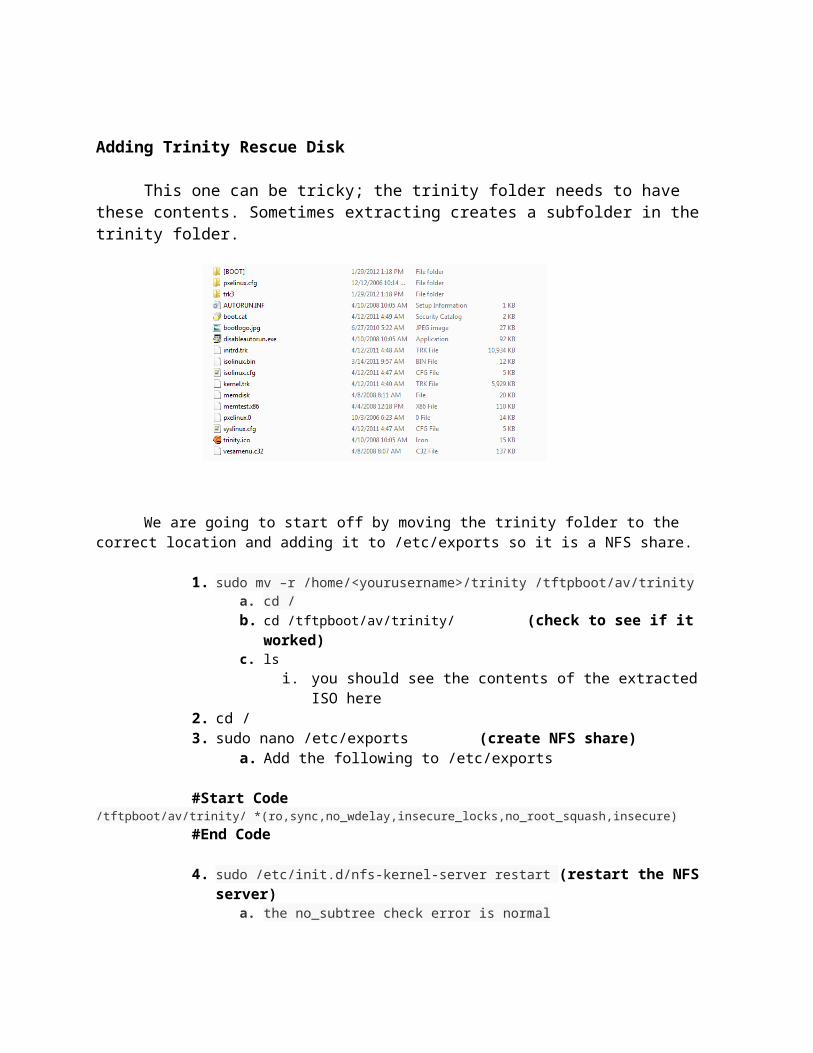
This one can be tricky; the trinity folder needs to have these contents. Sometimes extracting creates a subfolder in the trinity folder.
We are going to start off by moving the trinity folder to the correct location and adding it to /etc/exports so it is a NFS share.
1. sudo mv –r /home/<yourusername>/trinity /tftpboot/av/trinity a. cd / b. cd /tftpboot/av/trinity/ (check to see if it worked)c. ls
i. you should see the contents of the extracted ISO here2. cd /3. sudo nano /etc/exports (create NFS share)
a. Add the following to /etc/exports
#Start Code/tftpboot/av/trinity/ *(ro,sync,no_wdelay,insecure_locks,no_root_squash,insecure)
#End Code
4. sudo /etc/init.d/nfs-kernel-server restart (restart the NFS server)a. the no_subtree check error is normal
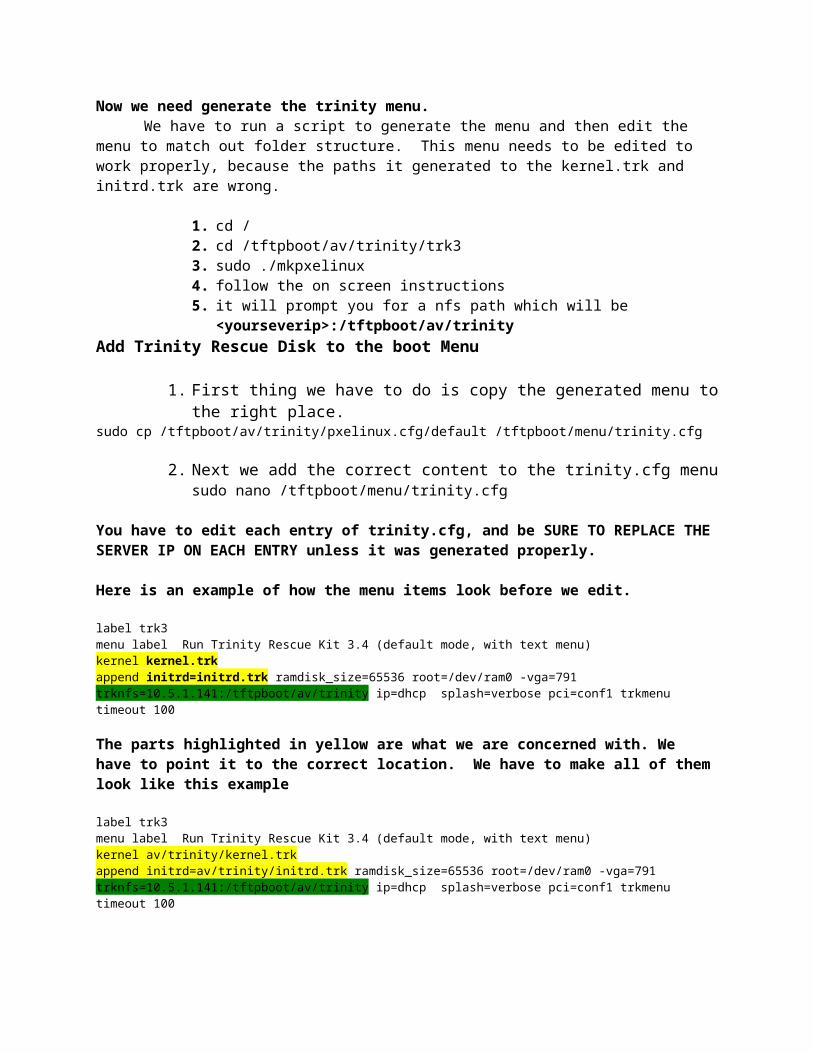
Now we need generate the trinity menu.We have to run a script to generate the menu and then edit the menu to match out folder
structure. This menu needs to be edited to work properly, because the paths it generated to the kernel.trk and initrd.trk are wrong.
1. cd /2. cd /tftpboot/av/trinity/trk33. sudo ./mkpxelinux4. follow the on screen instructions

5. it will prompt you for a nfs path which will be <yourseverip>:/tftpboot/av/trinityAdd Trinity Rescue Disk to the boot Menu
1. First thing we have to do is copy the generated menu to the right place.sudo cp /tftpboot/av/trinity/pxelinux.cfg/default /tftpboot/menu/trinity.cfg
2. Next we add the correct content to the trinity.cfg menusudo nano /tftpboot/menu/trinity.cfg
You have to edit each entry of trinity.cfg, and be SURE TO REPLACE THE SERVER IP ON EACH ENTRY unless it was generated properly.
Here is an example of how the menu items look before we edit.
label trk3menu label Run Trinity Rescue Kit 3.4 (default mode, with text menu)kernel kernel.trkappend initrd=initrd.trk ramdisk_size=65536 root=/dev/ram0 -vga=791 trknfs=10.5.1.141:/tftpboot/av/trinity ip=dhcp splash=verbose pci=conf1 trkmenutimeout 100
The parts highlighted in yellow are what we are concerned with. We have to point it to the correct location. We have to make all of them look like this example
label trk3menu label Run Trinity Rescue Kit 3.4 (default mode, with text menu)kernel av/trinity/kernel.trkappend initrd=av/trinity/initrd.trk ramdisk_size=65536 root=/dev/ram0 -vga=791 trknfs=10.5.1.141:/tftpboot/av/trinity ip=dhcp splash=verbose pci=conf1 trkmenutimeout 100
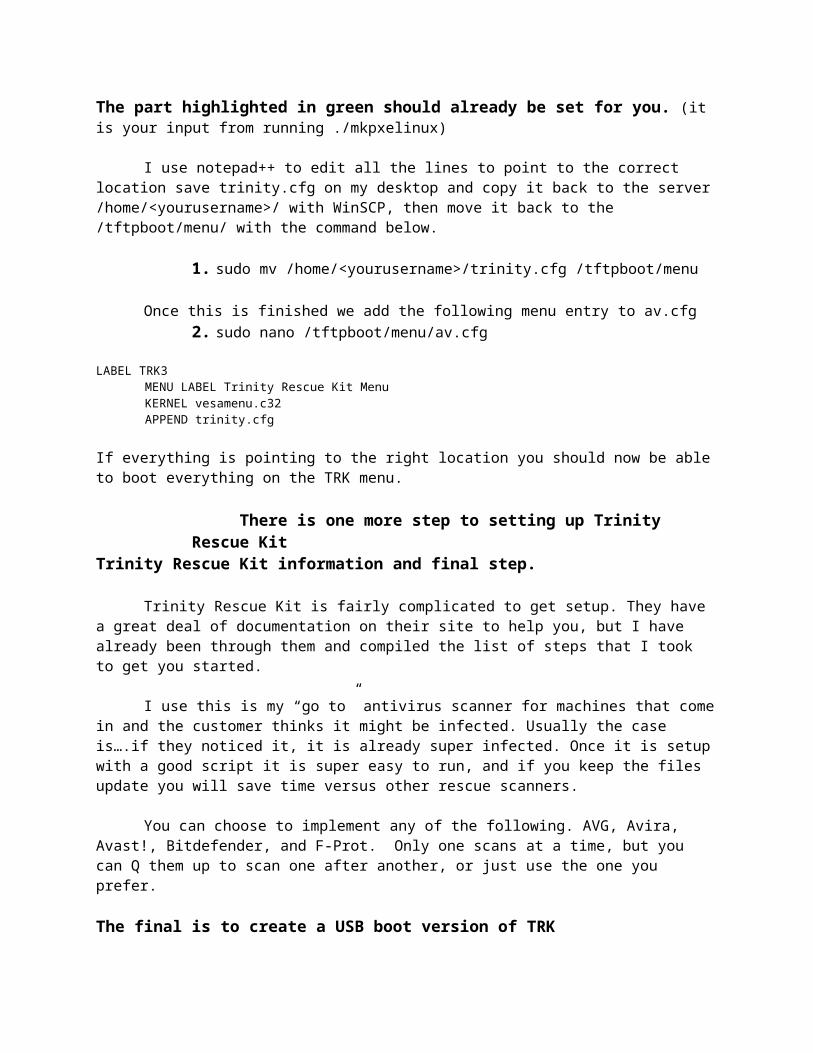
The part highlighted in green should already be set for you. (it is your input from running ./mkpxelinux)
I use notepad++ to edit all the lines to point to the correct location save trinity.cfg on my desktop and copy it back to the server /home/<yourusername>/ with WinSCP, then move it back to the /tftpboot/menu/ with the command below.
1. sudo mv /home/<yourusername>/trinity.cfg /tftpboot/menu
Once this is finished we add the following menu entry to av.cfg2. sudo nano /tftpboot/menu/av.cfg
LABEL TRK3MENU LABEL Trinity Rescue Kit MenuKERNEL vesamenu.c32APPEND trinity.cfg
If everything is pointing to the right location you should now be able to boot everything on the TRK menu.
There is one more step to setting up Trinity Rescue Kit
Trinity Rescue Kit information and final step.
Trinity Rescue Kit is fairly complicated to get setup. They have a great deal of documentation on their site to help you, but I have already been through them and compiled the list of steps that I took to get you started.
I use this is my “go to” antivirus scanner for machines that come in and the customer thinks it might be infected. Usually the case is….if they noticed it, it is already super infected. Once it is setup with a good script it is super easy to run, and if you keep the files update you will save time versus other rescue scanners.
You can choose to implement any of the following. AVG, Avira, Avast!, Bitdefender, and F-Prot. Only one scans at a time, but you can Q them up to scan one after another, or just use the one you prefer.
The final is to create a USB boot version of TRKThis will be used for updating the virus scanners and definitions in TRK
1. Create the TRK USB a. Boot form the USB when finishedb. Update TRK make sure you allow it to write the update back to the
USB with the –u option. i. Follow the prompts on screen.
c. Copy the trk3 folder from the USB stick to the /tftpboot/av/trinity/ folder
d. This is how we manually update the server files also. Since step b. doesn’t work over PXE.
This is the best way I could come up with for updating the PXE server’s files. I tried a writeable SAMBA share, ./updatetrk when booted form PXE, and same with a NFS share with no success.
If anyone finds a way to do this so I can host a set of updated TRK program files and virus defs for all the clients that boot PXE. Please SHARE!
Next Chapter is Adding Some Diagnostic Tools!
Ch. 4 Adding Diagnostic ToolsMemtest86+ 4.20, Hitachi Drive Fitness, Inquisitor, and #1 TuFFTest
What are we adding now?
In this section we will be adding a couple bootable diagnostic tools. My goal is to edit this section and add stuff for the community, the tools you use. I have found I can boot the pc-doctor disk. I left it out for now, because I do not know if anyone uses it or cares about it. Feel free to request programs that you want added!
What is the Process for adding and booting these tools?
The process is way less complicated than you would assume. We are going to be using memdisk and loading the iso files to RAM on the client machine. This is the lazy way to do it with the larger iso file, but is very effective with smaller iso images. When booting anything larger than a 200MB image I recommend having more than 512 RAM in the client machine. Small .iso images <200 MB will load pretty damn quick even on a 100MBPS network, and will be fine on machines with a smaller amount of RAM, I wouldn’t recommend less than 512MB on the client machine period…..even for everyday use! This becomes a moot point when dealing with newer machines, as most of them don’t have less than 2GB of RAM.
What do we need and where can we get it?
1. We need the images of the software we will be using.
a. Memtest86+ .iso here
b. Hitachi DFT .img here (don’t download this one we will use wget)
c. Inquisitor .iso here
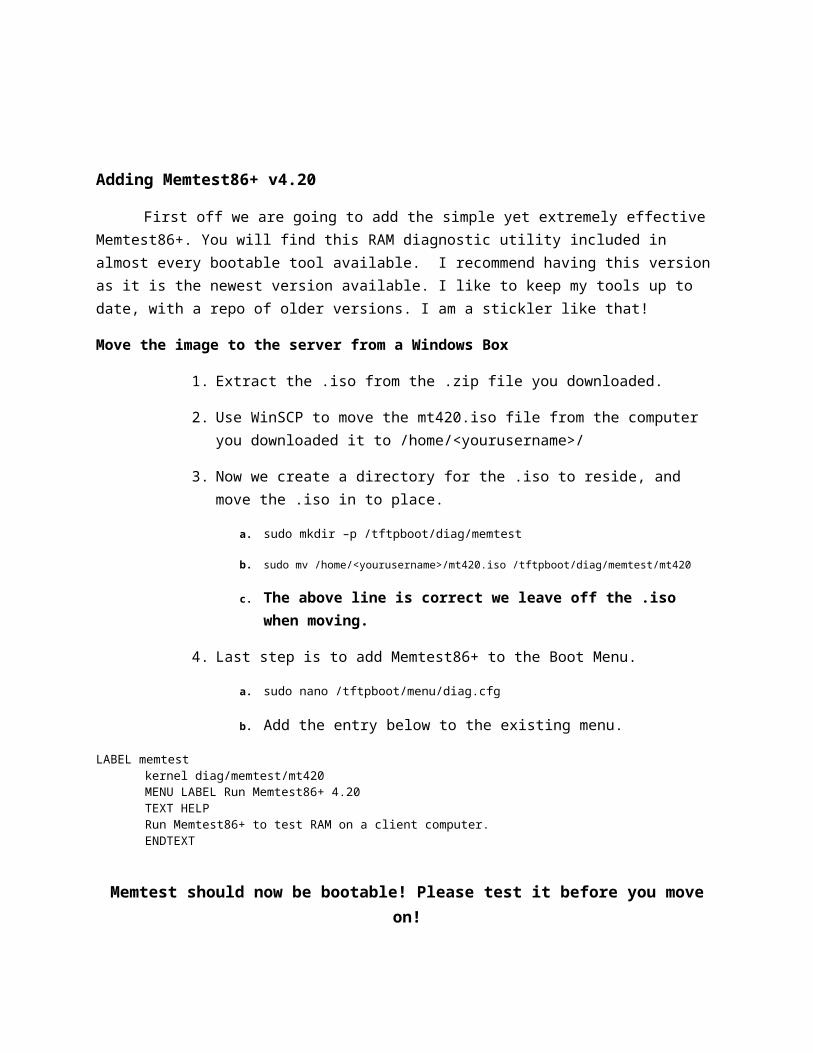
Adding Memtest86+ v4.20
First off we are going to add the simple yet extremely effective Memtest86+. You will find this RAM diagnostic utility included in almost every bootable tool available. I recommend having this version as it is the newest version available. I like to keep my tools up to date, with a repo of older versions. I am a stickler like that!
Move the image to the server from a Windows Box
1. Extract the .iso from the .zip file you downloaded.
2. Use WinSCP to move the mt420.iso file from the computer you downloaded it to /home/<yourusername>/
3. Now we create a directory for the .iso to reside, and move the .iso in to place.
a. sudo mkdir –p /tftpboot/diag/memtest
b. sudo mv /home/<yourusername>/mt420.iso /tftpboot/diag/memtest/mt420
c. The above line is correct we leave off the .iso when moving.
4. Last step is to add Memtest86+ to the Boot Menu.
a. sudo nano /tftpboot/menu/diag.cfg
b. Add the entry below to the existing menu.
LABEL memtestkernel diag/memtest/mt420MENU LABEL Run Memtest86+ 4.20TEXT HELPRun Memtest86+ to test RAM on a client computer.ENDTEXT
Memtest should now be bootable! Please test it before you move on!
Next in Line is Hitachi Drive Fitness Test
Adding Hitachi’s Drive Fitness Test
I hear a lot of folks use this to test drives including non-hitachi drives, and a lot of folks swear by this program, so I added it for you all.
We are going to do it the simple and quick way. Using wget and the download url, we won’t have to transfer the image using WinSCP.
Let’s add it!
1. Create the folder in which it will reside
a. sudo mkdir –p /tftpboot/diag/drivefitness
2. Copy this and run it on your sever in the terminal
sudo wget http://www.hitachigst.com/hdd/support/downloads/dft32_v416_b00_install.IMG -O /tftpboot/diag/drivefitness/hitachi_dft.img
3. Now we add Drive fitness test to the boot menu below the memtest entry. One space below the words ENDTEXT of the memtest86+ entry
a. sudo nano /tftpboot/menu/diag.cfg
b. Add this entry after the memtest entry.
LABEL HDTFKERNEL memdiskAPPEND append initrd=diag/drivefitness/hitachi_dtf.imgMENU LABEL Hitachi's Drive Fitness Test TEXT HELPUse to test Hitachi Hard Drives ENDTEXT
4. And that should be it for this entry, easy as cake…..unless it is a lie!
Next we move on to Inquisitor
Adding Inquisitor
I decided to add a how to here for the Linux based Inquisitor. I don’t use it myself, but thought it would be a good tool to add.
Let’s get started1. Extract the ISO image.
a. Inside the folder it created take the live folder and put it on your Desktop.b. Rename the folder from live to inqdiag32
2. Now upload the file to /home/<yourusername>/ on your server with WinSCPa. Next we move the folder and files in to place.
i. sudo mv /home/<yourusername>/inqdiag32 /tftpboot/diag/ii. cd /
iii. cd /tftpboot/diag/inq32iv. ls (make sure the correct contents are listed)v. sudo mv intrd.img-* initrd.imgvi. sudo mv vmlinuz-* vmlinuz
vii. sudo mkdir /var/www/inqdiag32b. sudo mv /tftpboot/diag/inqdiag32/filesystem.squashfs /var/www/inqdiag32
c. Now we add the menu entryi. Copy the menu entry below, and paste it one line below the END TEXT for
Hitachi DFT, change the MENU LABEL and TEXT HELP parameters to your liking
LABEL INQLIVEKERNEL diag/inqdiag32/vmlinuzAPPEND append initrd=diag/inqdiag32/initrd.img boot=live config union=aufs noswap
noprompt vga=788 fetch=http://<yourserverip>/inqdiag32/filesystem.squashfsMENU LABEL Inquisitor Live x86 v3TEXT HELPLive Linux Hardware Testing SuiteENDTEXT
3. Now we fire up a client and test it!a. If you would like to add the x64 version follow the same steps, but use the inqdiag64
folder name instead of inqdiag32
If it works let’s move on to Chapter 5 Adding Imaging Tools!

Ch. 5 Adding Imaging ToolsClonezilla, and Acronis True Image
What are these tools good for?
These tools allow you to clone a HDD to an image and also restore an image that you have already made. Clonezilla will do it over a network from the HDD of a client computer to an image on a SAMBA or windows share. Acronis requires you have the image on an external HDD or a series of DVD’s.
Why didn’t I add Ghost?
I don’t personally have a copy of Ghost, and have not tried adding it to PXE. I have seen videos of it working via PXE, so it does work.
Let’s Get Started
You need to have an image of the Acronis bootable disk if you are adding it. Other than that we will use wget to get Clonezilla x86 and x64. The process of adding Clonezilla is identical to Inquisitor and GParted. So let’s do this!
Adding Clonezilla!
This will be the steps for adding Clonezilla x86. To add x64 follow the same directions, but use x64 version, and naming scheme instead of x86, and start at step 1b.
1. Start by logging in to your server and creating the directory where Clonezilla will reside.
a. Sudo mkdir –p /tftpboot/imaging/clonezilla
b. Sudo mkdir –p /tftpboot/imaging/clonezilla/x86
c. Cd /tftpboot/imaging/clonezilla/x86
1.Next we get the .zip of the i686 version of clonezilla
wget http://sourceforge.net/projects/clonezilla/files/clonezilla_live_stable/1.2.12-10/clonezilla-live-1.2.12-10-i686-pae.zip -O /tftpboot/imaging/clonezilla/x86/

d. Now we unzip the files we need
1. unzip -j clonezilla-live-*.zip live/vmlinuz live/initrd.img live/filesystem.squashfs -d /tftpboot/clonezilla/x86/
e. Make the folder where the filesystem will reside on the http server.
1. sudo mkdir –p /var/www/czillax86
f. Now move the filesystem to the folder we created.
1. sudo mv filesystem.squashfs /var/www/czillax86/
2. Let’s make the menu entry!
a. sudo nano /tftpboot/menu/img.cfg
b. Now append the correct server ip to <yourserverip> below
c. Copy and paste the entry below to img.cfg below the top entry for the back page.
LABEL Clonezilla LiveMENU LABEL Clonezilla Live x86KERNEL imaging/clonezilla/x86/vmlinuzAPPEND initrd=imaging/clonezilla/x86/initrd.img boot=live live-config noswap
nolocales edd=on nomodeset ocs_live_run="ocs-live-general" ocs_live_extra_param="" ocs_live_keymap="" ocs_live_batch="no" ocs_lang="" vga=788 nosplash fetch=http://<yourserverip>/czillax86/filesystem.squashfs
You should now be able to boot to Clonezilla x86 over PXE!
Continue to the next page to add Acronis
Adding Acronis True Image 2011
I am assuming the follow will work for versions 2010 and 2012 this is a simple iso load to memory over the network. It is the simple and dirty method to getting an iso to boot.
Let’s Get Started
Log in to Ubuntu Server create the folder where the iso will reside.
1. sudo mkdir –p /tfptboot/imaging/acronis
2. Use WinSCP to copy the acronis iso to /home/<yoursusername>/ on the Ubuntu Server
a. Then move it to the folder where it will reside
b. sudo mv /home/<yourusername>/acronisth.iso /tftpboot/imaging/acronis/
3. That is pretty much it except for adding the menu entry.
a. Sudo nano /tftpboot/menu/img.cfg
b. Append the follow entry after the Clonezilla entry
LABEL ACTHMENU LABEL Acronis True Image 2011
KERNEL memdisk APPEND iso initrd=imaging/acronis/acronisth.iso raw
That is it for adding Acronis True Image 2011
Last thing we need to do is add a FOGproject menu entry to the img.cfg menu
So let’s copy the code below and append it to the img.cfg menu.
1. sudo nano /tftpboot/menu/img.cfg
LABEL FOG
MENU LABEL FOGProject MenuKERNEL vesamenu.c32APPEND menu/fog.cfg
Once you add that you should be able to boot in to the FOGproject Menu
Now we move on to Chapter 6 Adding Live Linux Distros
Related Documents


